Ellie_
-
Posts
27 -
Joined
Recent Profile Visitors
145 profile views


-
 GrandpaPhil reacted to a post in a topic:
Endeavour by Ellie_ - Amati - 1:80
GrandpaPhil reacted to a post in a topic:
Endeavour by Ellie_ - Amati - 1:80
-
GrandpaPhil reacted to a post in a topic:
Endeavour by Ellie_ - Amati - 1:80
-
GrandpaPhil reacted to a post in a topic:
Endeavour by Ellie_ - Amati - 1:80
-
Admiral Rick reacted to a post in a topic:
Endeavour by Ellie_ - Amati - 1:80
-
Admiral Rick reacted to a post in a topic:
Endeavour by Ellie_ - Amati - 1:80
-
Admiral Rick reacted to a post in a topic:
Endeavour by Ellie_ - Amati - 1:80
-
Admiral Rick reacted to a post in a topic:
Endeavour by Ellie_ - Amati - 1:80
-
Admiral Rick reacted to a post in a topic:
Endeavour by Ellie_ - Amati - 1:80
-
Ellie_ reacted to a post in a topic:
Endeavour by Ellie_ - Amati - 1:80
-
SaltyScot reacted to a post in a topic:
Endeavour by Ellie_ - Amati - 1:80
-
SaltyScot reacted to a post in a topic:
Endeavour by Ellie_ - Amati - 1:80
-
 Ellie_ reacted to a post in a topic:
Endeavour J class by TerryPat - Amati - 1:80
Ellie_ reacted to a post in a topic:
Endeavour J class by TerryPat - Amati - 1:80
-
 First planking is done! Still need to sand and use wood filler. I may not get time to work on this again until next weekend. In the meantime I'll be mentally preparing for the second planking
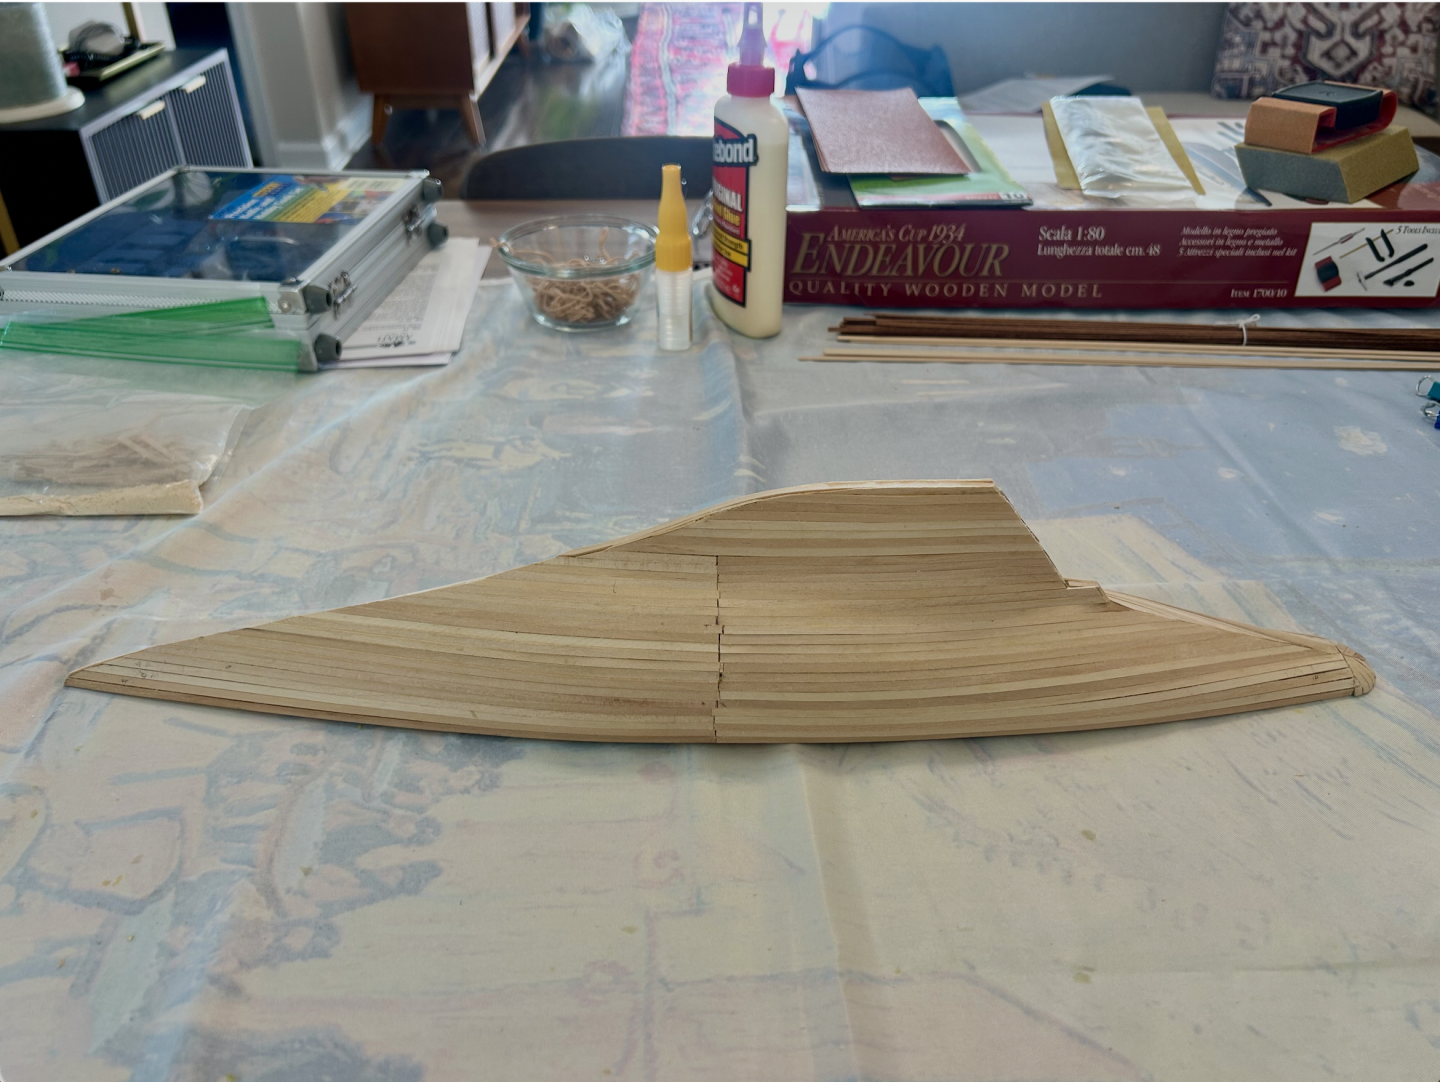


-
I remember reading how you approached this section and I didn't realize you super glued the planks down first before taping! I considered trying the taping-while-wet method but didn't think they would stay in place. Good to know!
-
Hi Mark! Thank you so much for the kind words. I recognized your screen name right away because I've visited your Endeavour build log multiple times, and will continue to do so This forum is filled with wonderful people. Thank you for the visit and the encouragement!
-
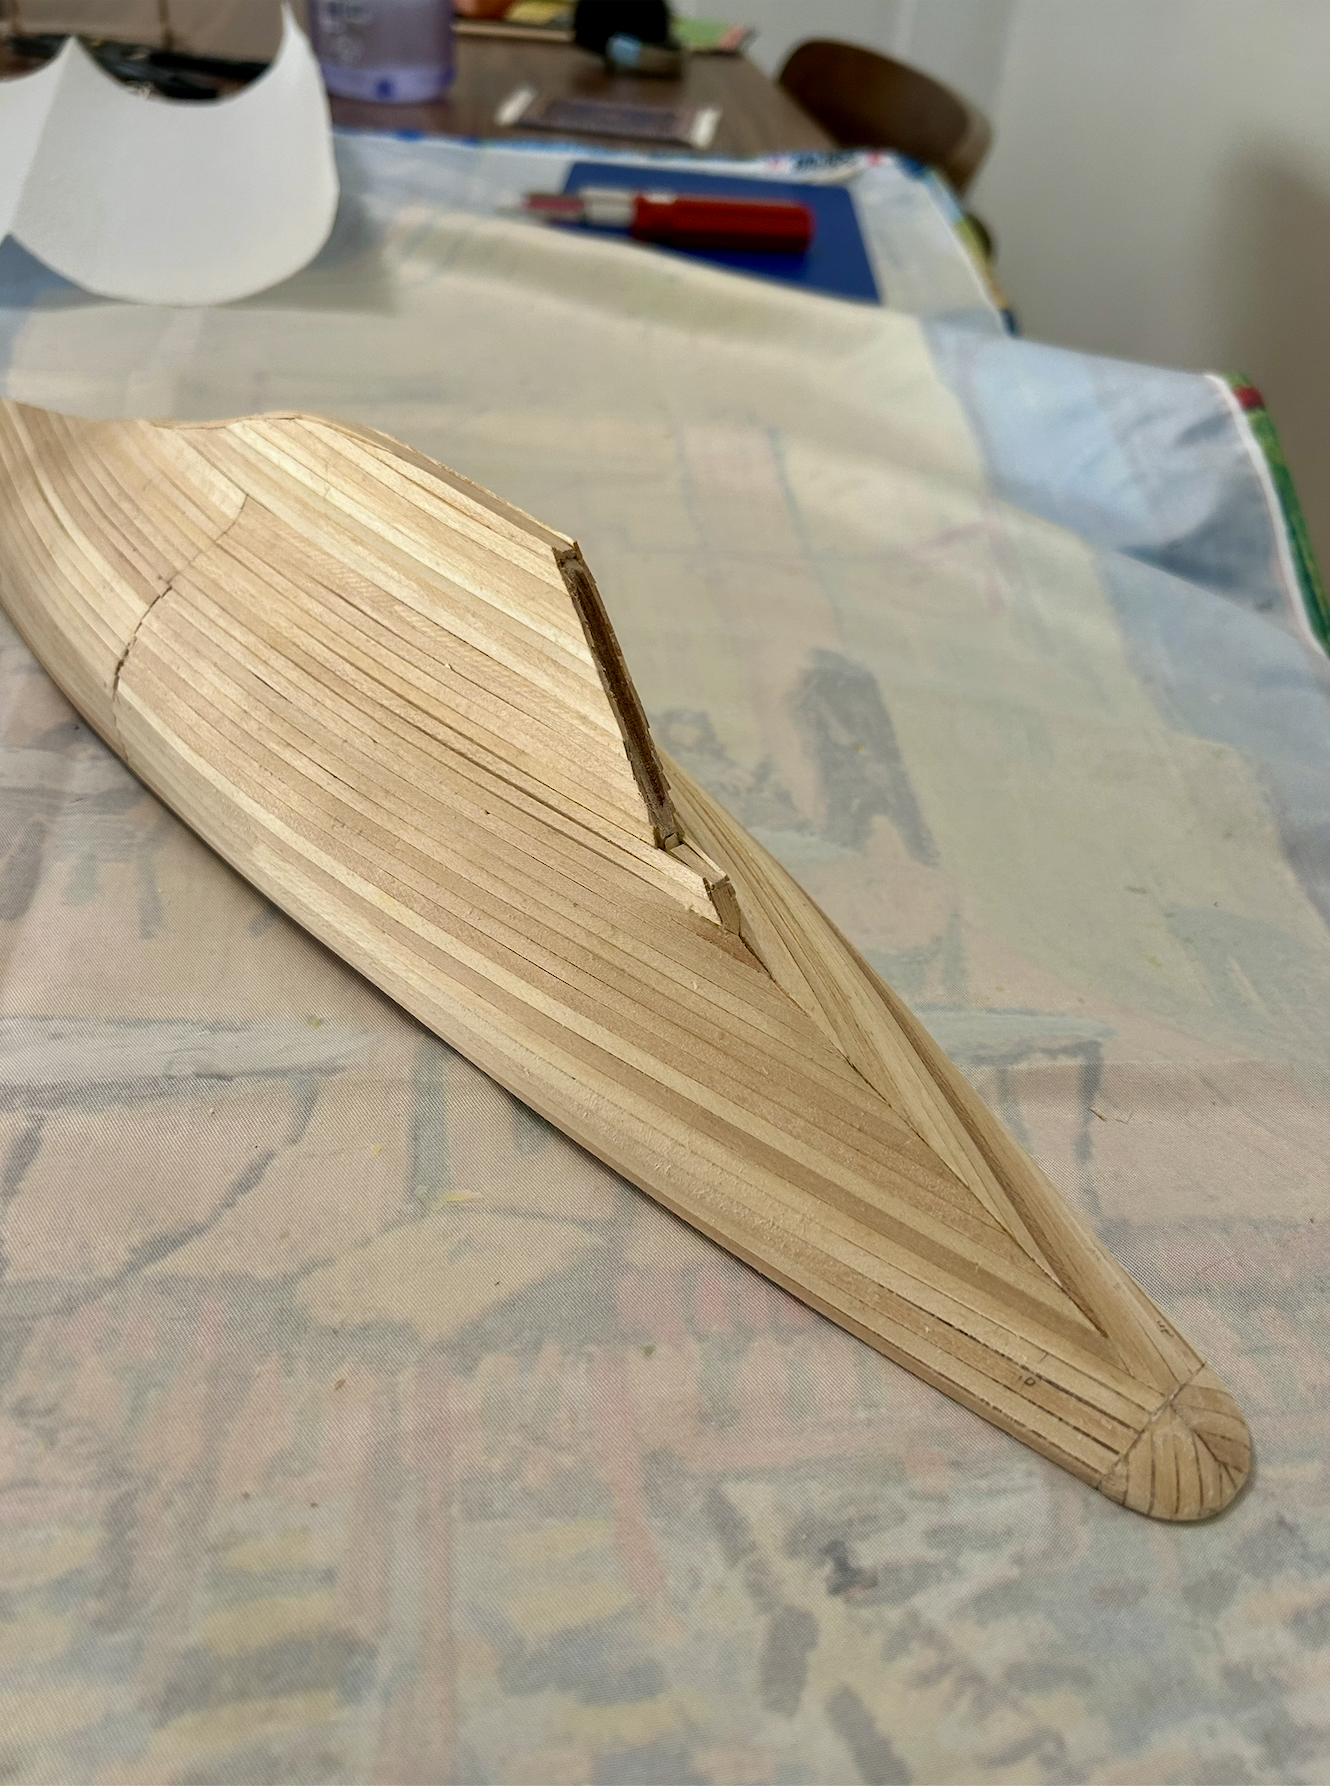
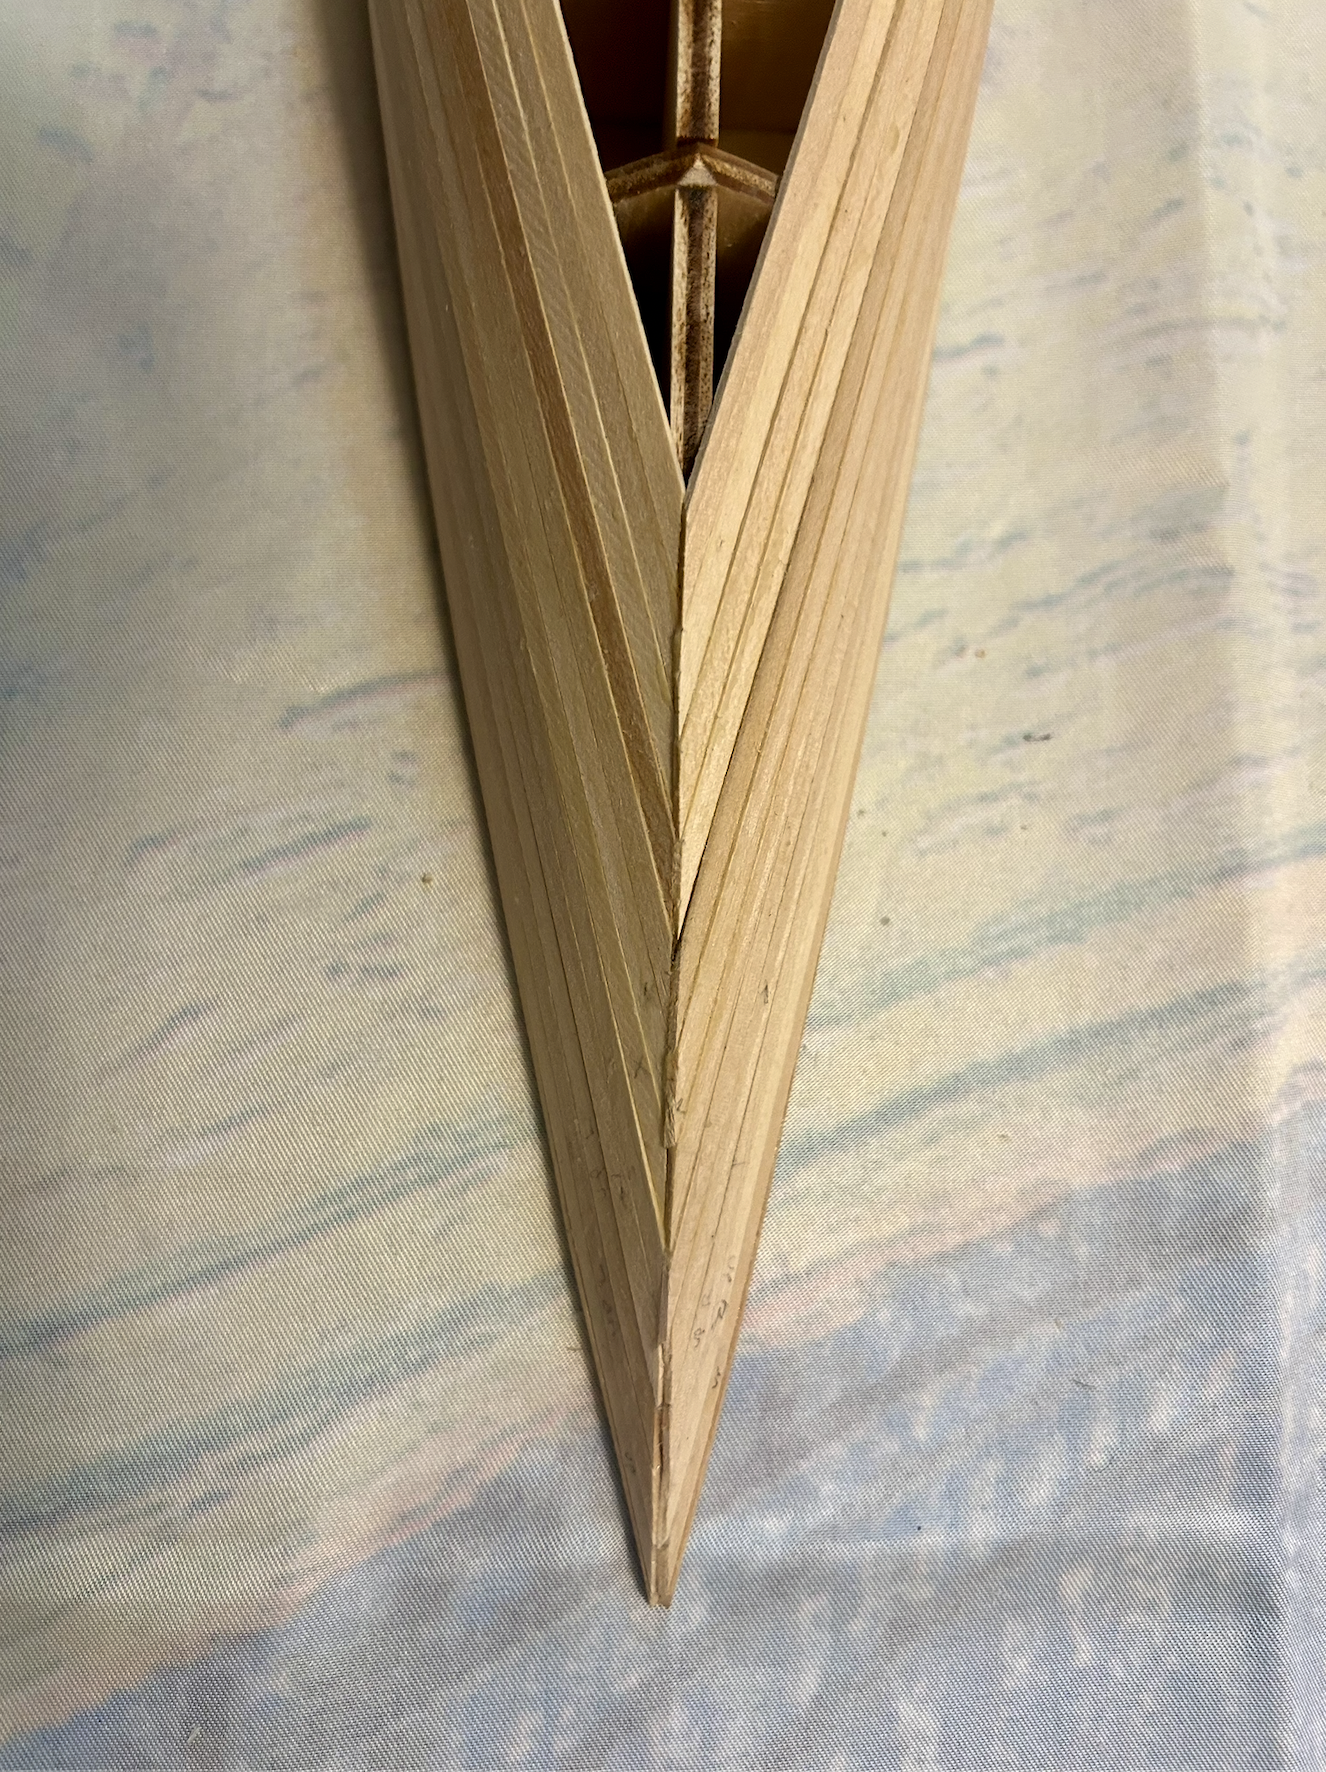
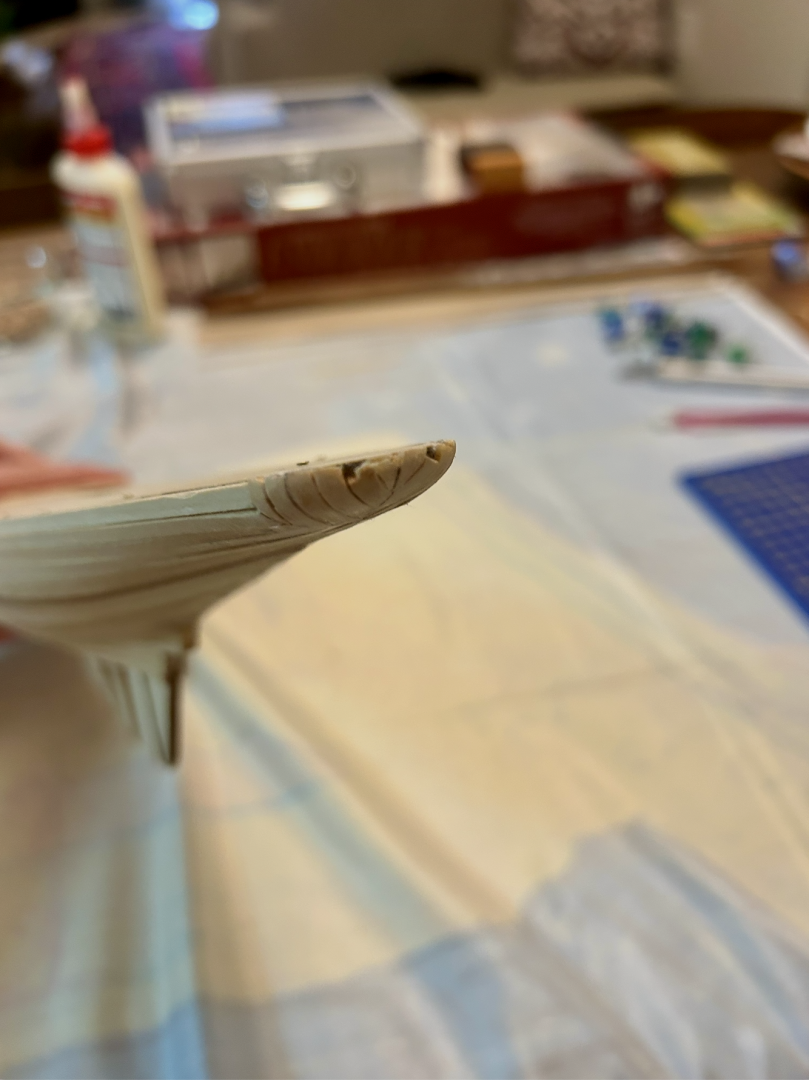
Thanks Terry! I filled the gaps with scrap wood then painted over the whole stern section with superglue so it would soak into the cracks and (hopefully) prevent the planks from budging. I waited about 20 minutes until the superglue was dry but not rock hard and sanded the whole section. Smooth and more secure now.

-
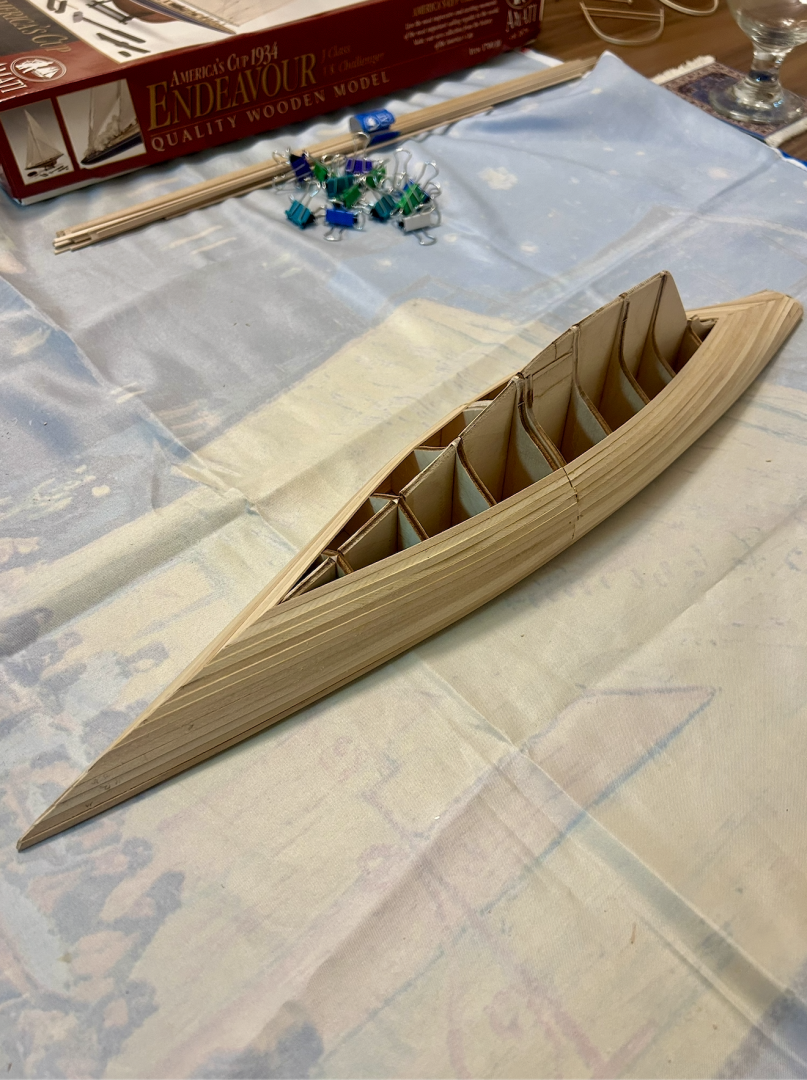
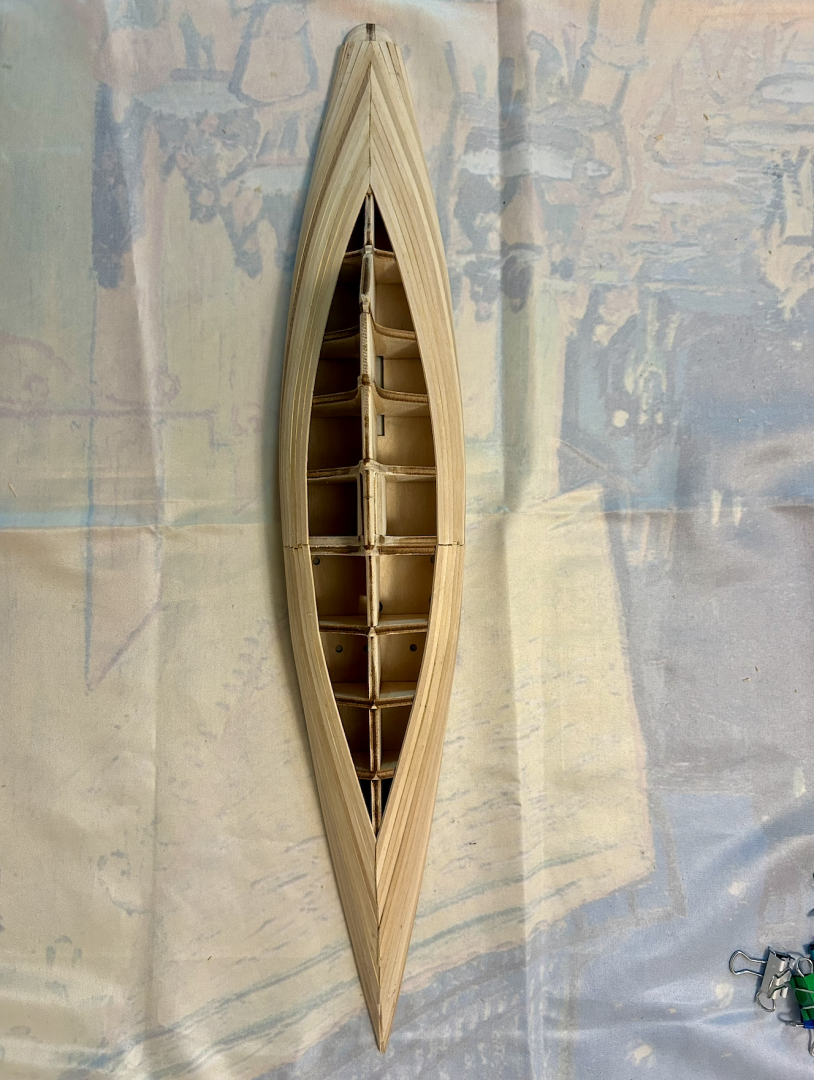
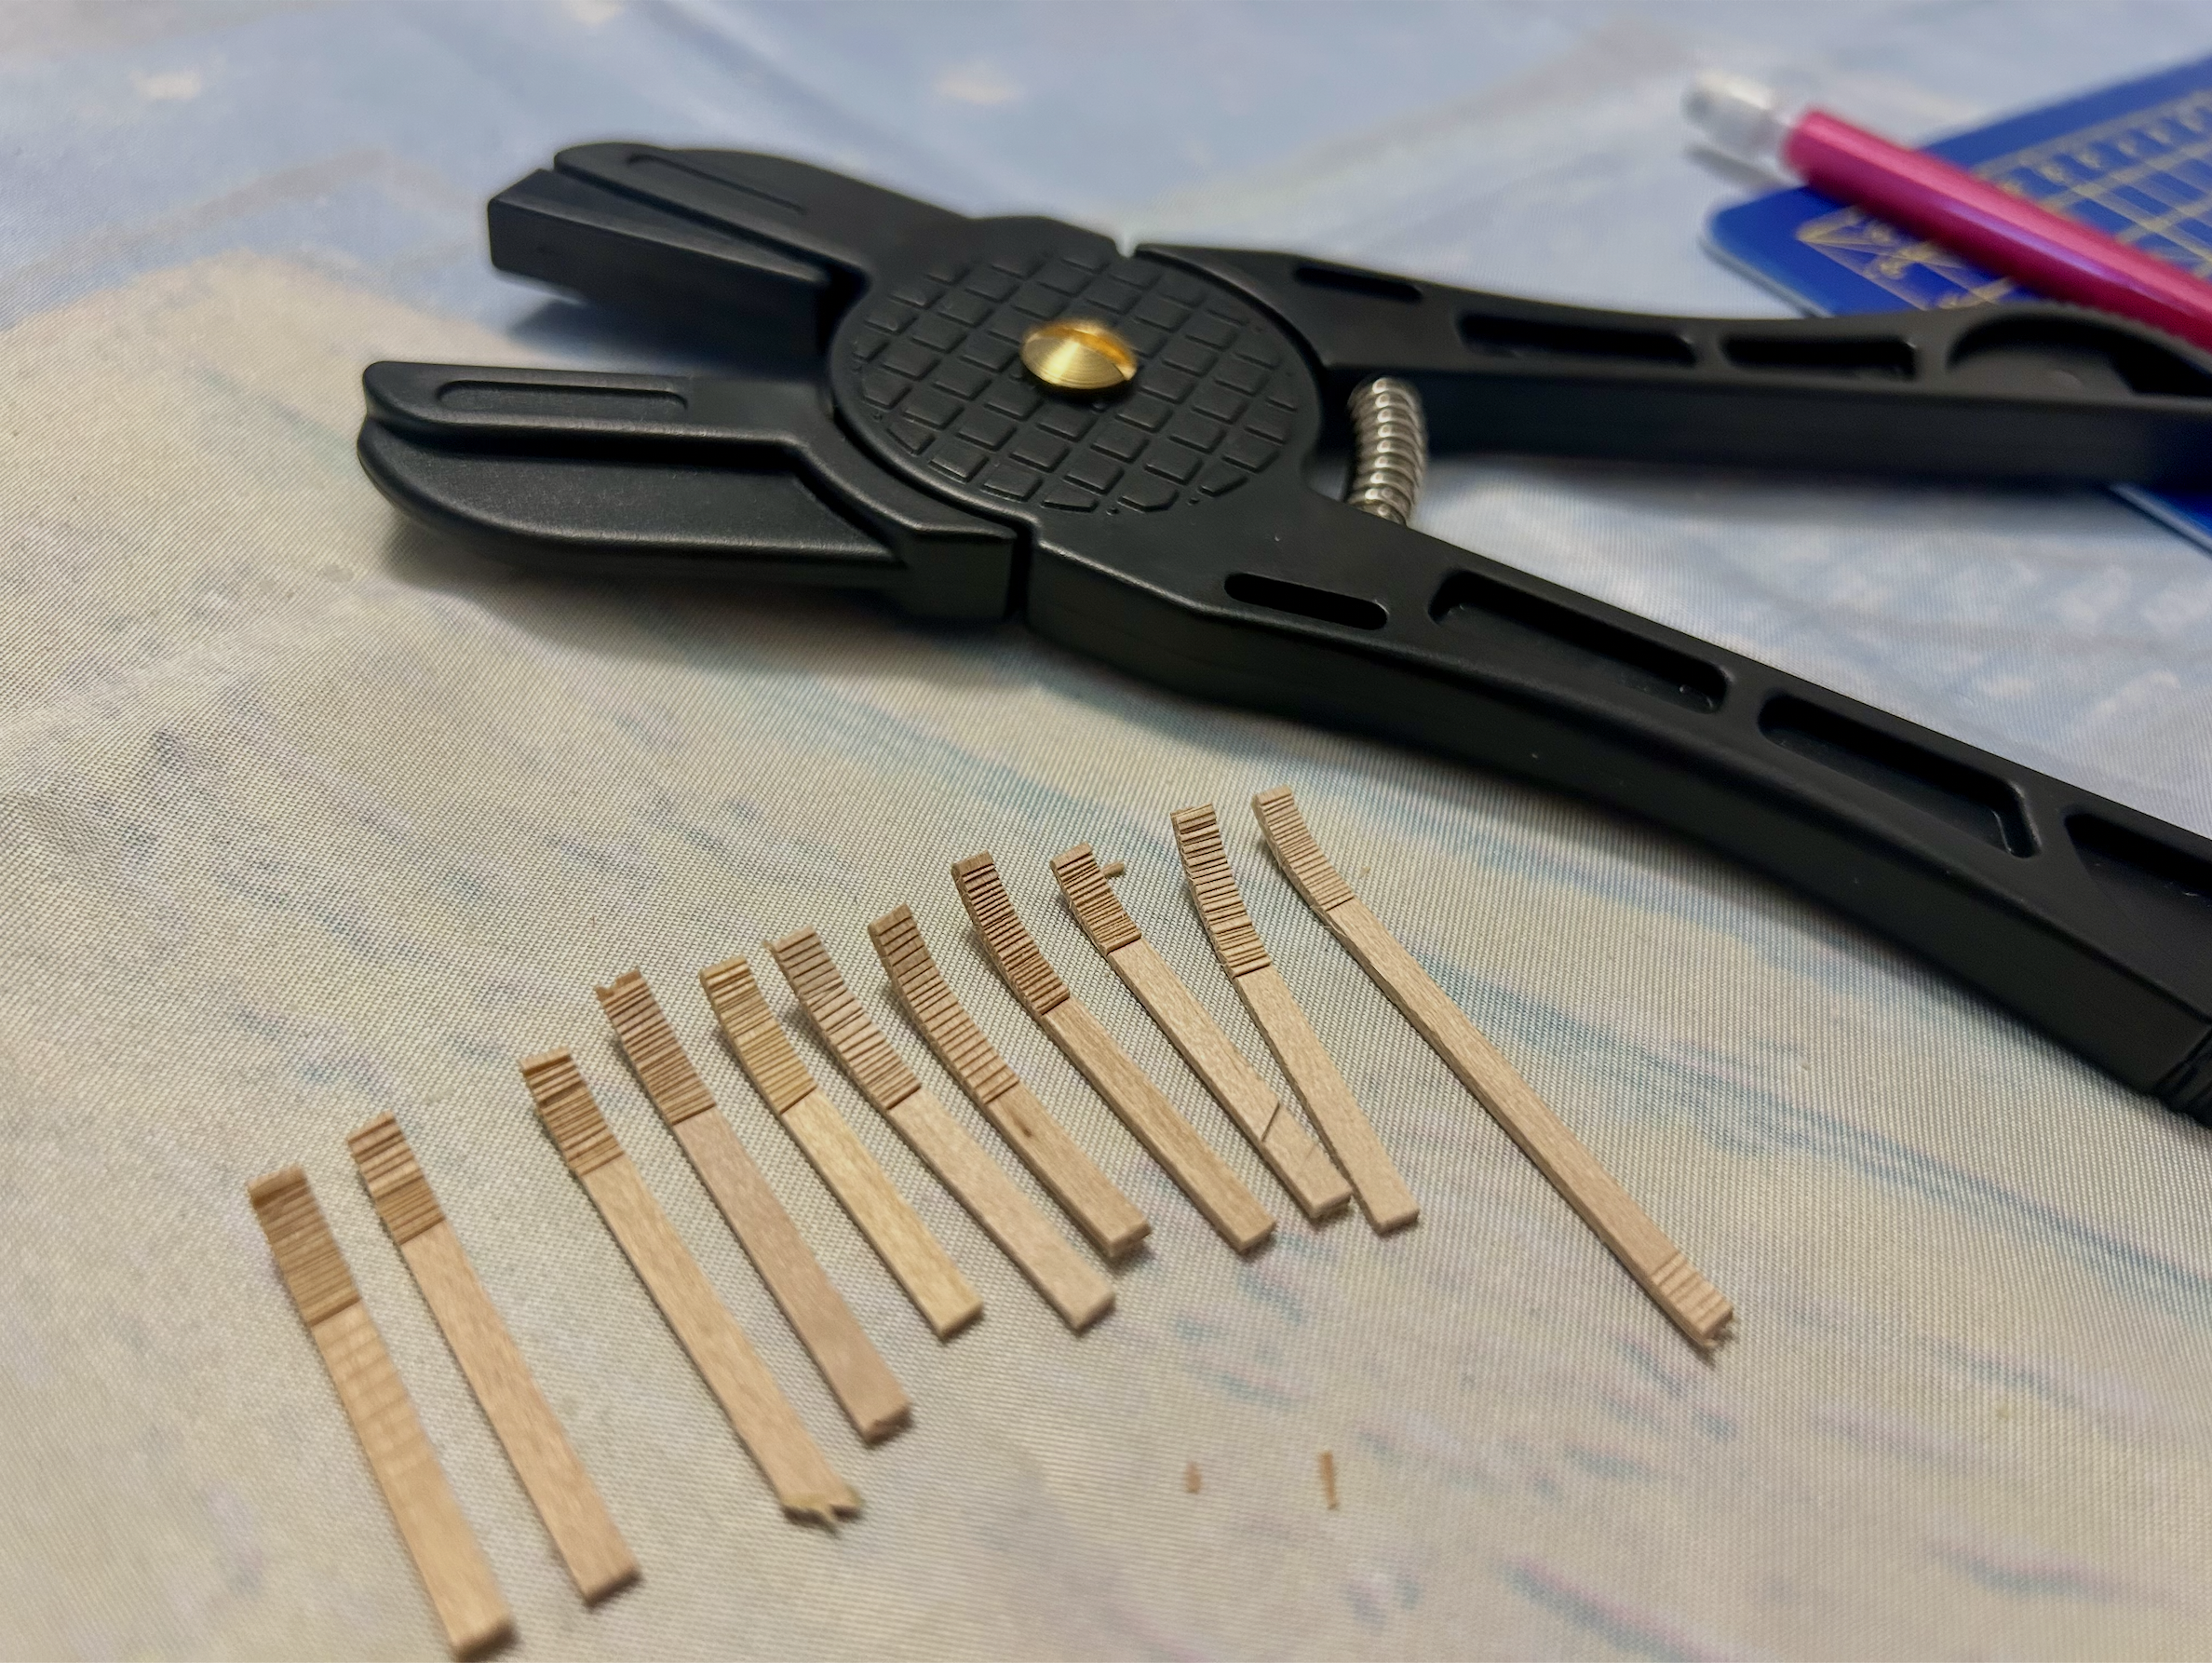
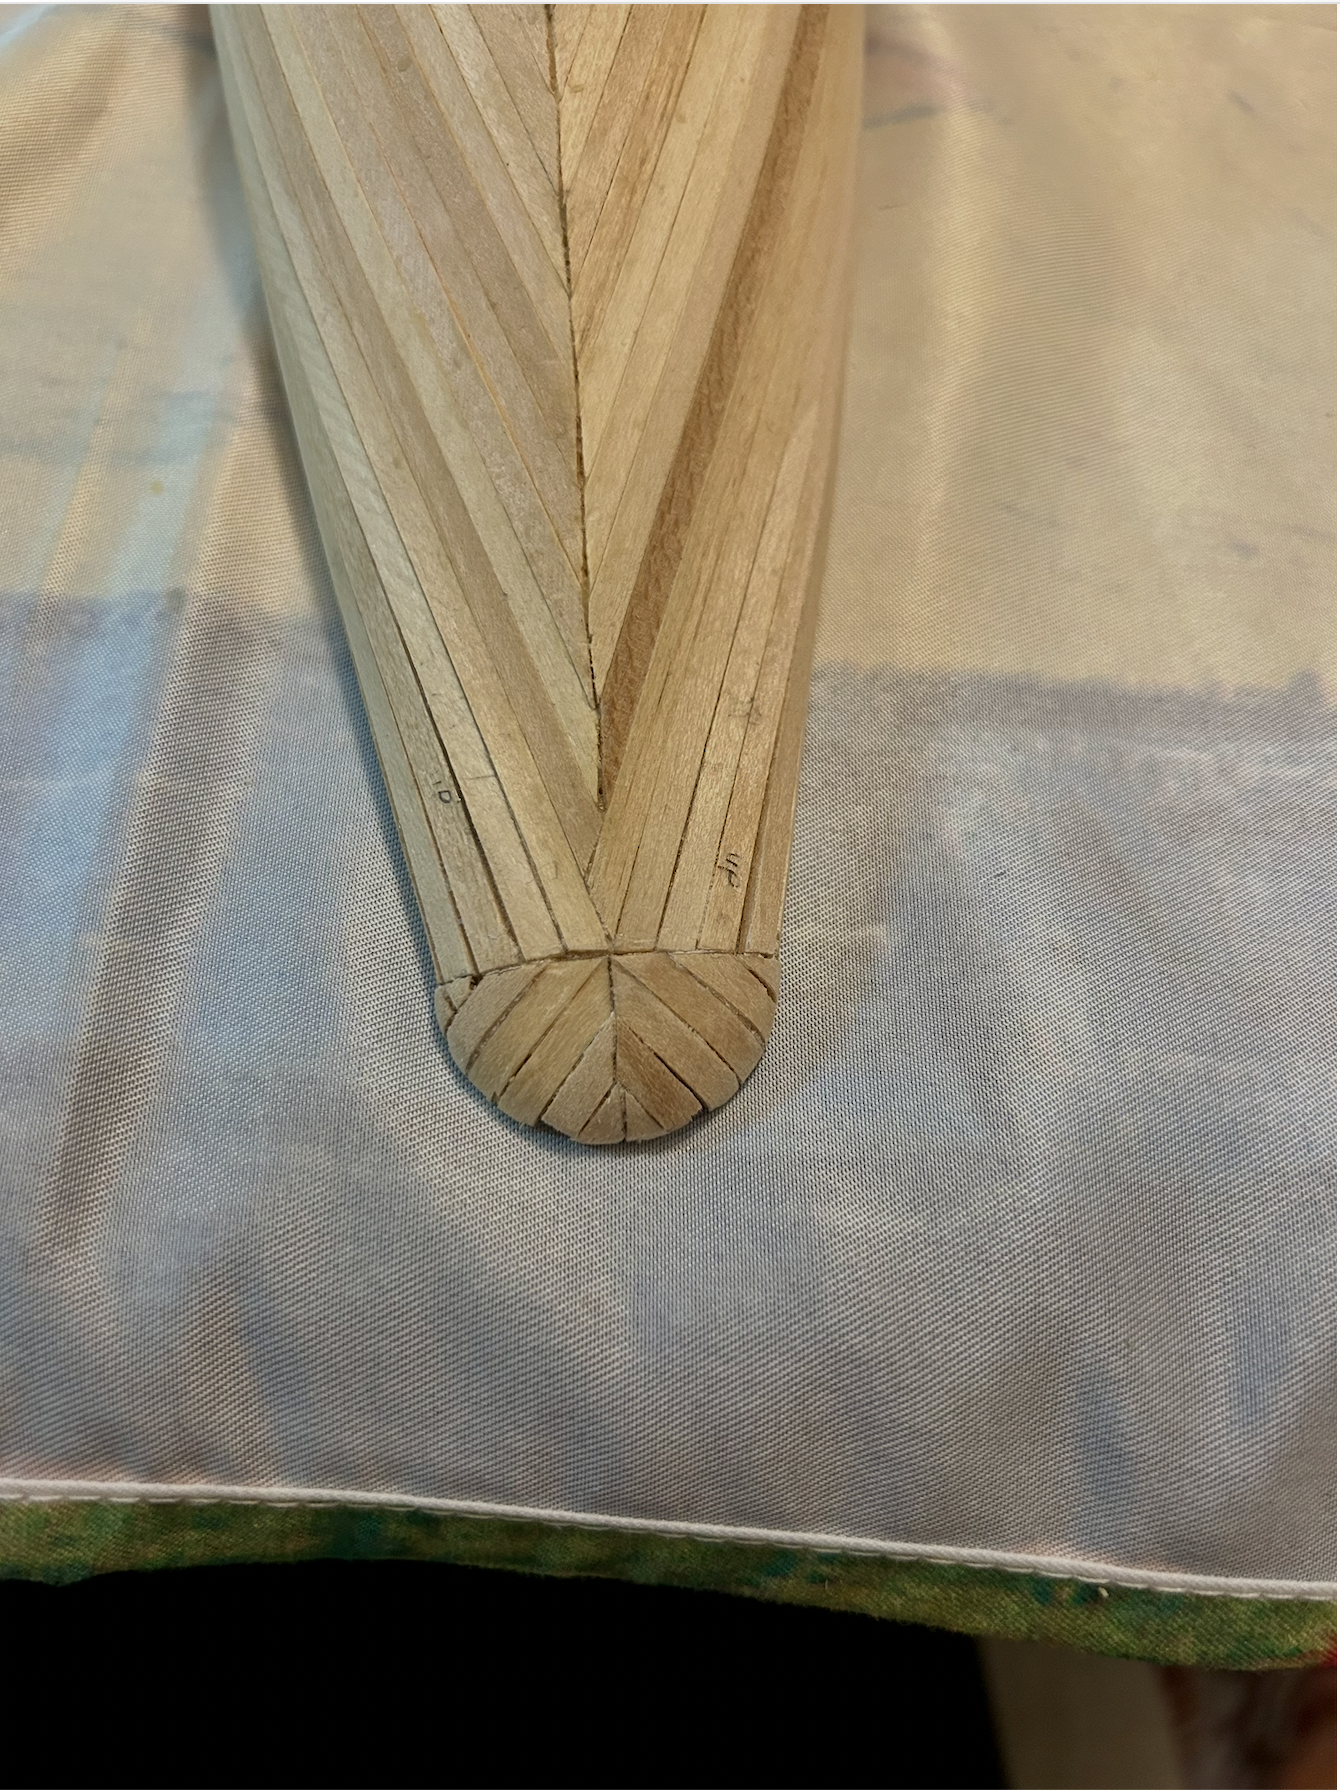
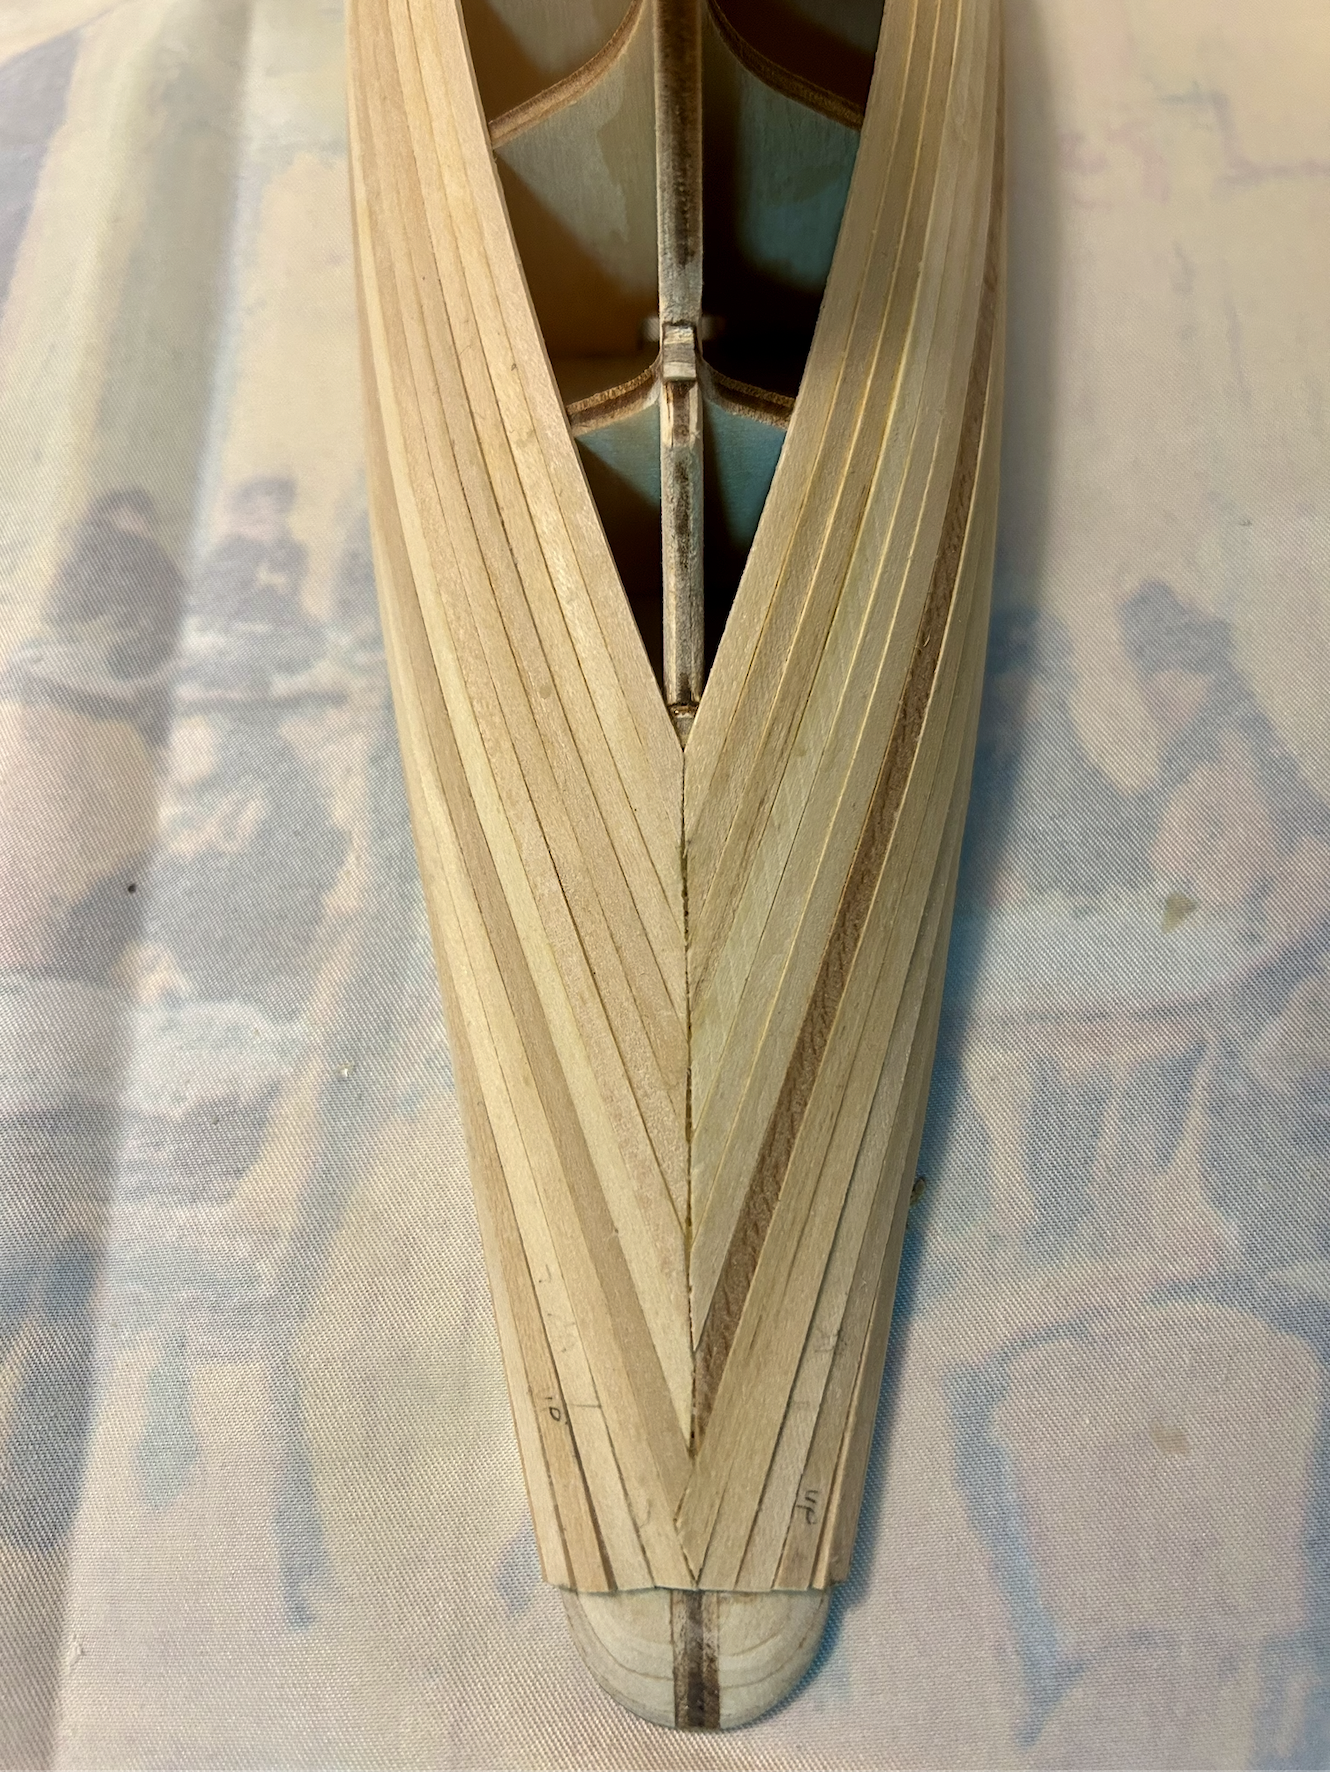
I finished the stern section in the fan pattern suggested by the manual. As a newbie it wasn't obvious to me how to bend the wood around the edges to make them flush with the deck, so I'm making a note of what I tried in case it helps others. I experimented with soaking planks in water and with steaming them, but I still couldn't get the wood to bend as much as it needed to curl around the edges. What seemed to work the best was using the wood bender that came with my intro kit. This got the job done for most of the planks, but some of them still snapped while glueing, leaving two gaps I'll have to fix. On some of the planks, the wood started to pull away from itself because of the micro cuts the bender made, making me nervous some of these planks could chip over time. Altogether not sure I would recommend this approach unless someone offers advice to make this strategy go smoother SO CLOSE to finishing the first planking. My next update will be when it's done!

-
Ellie_ reacted to a post in a topic:
Endeavour J class by TerryPat - Amati - 1:80
-
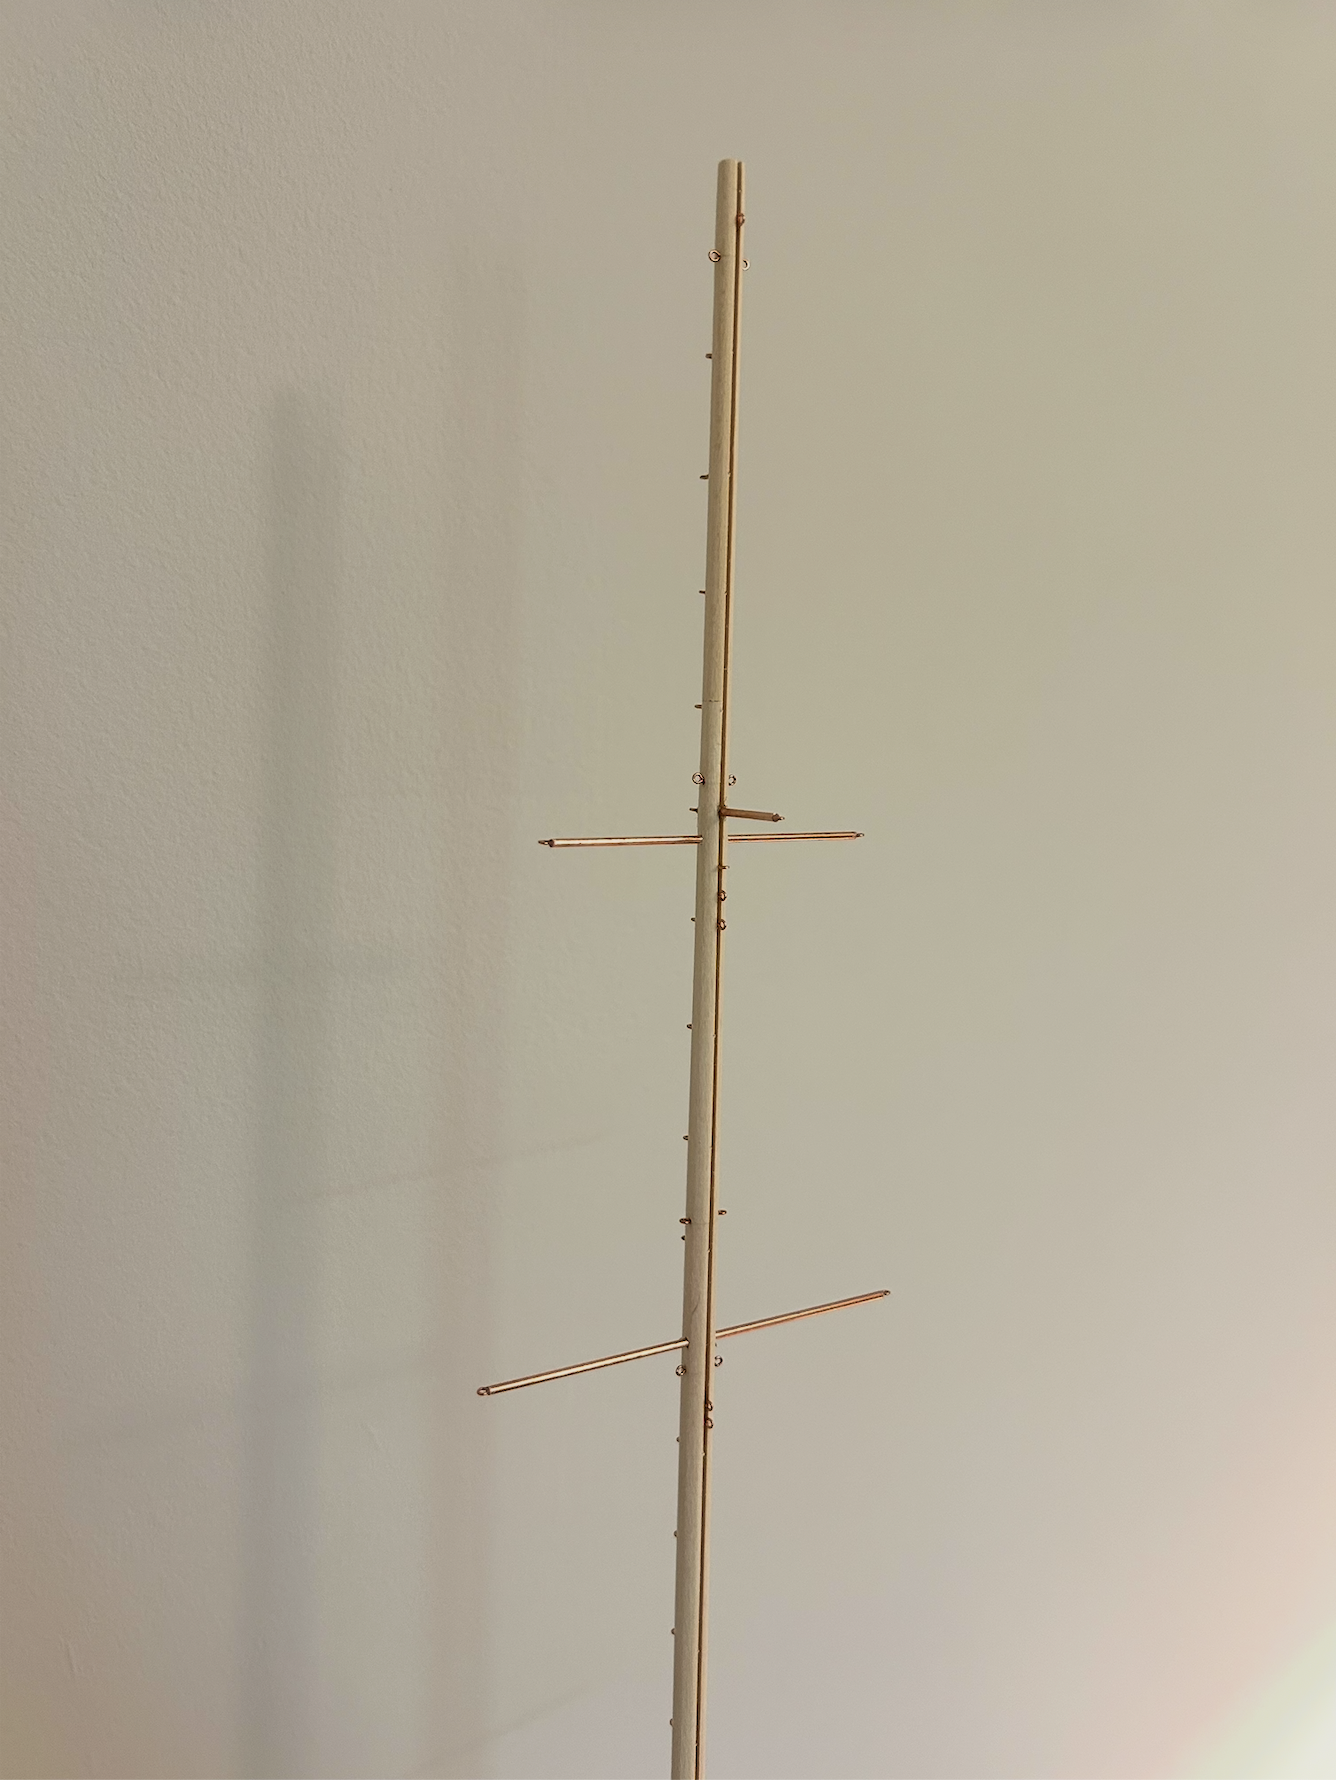
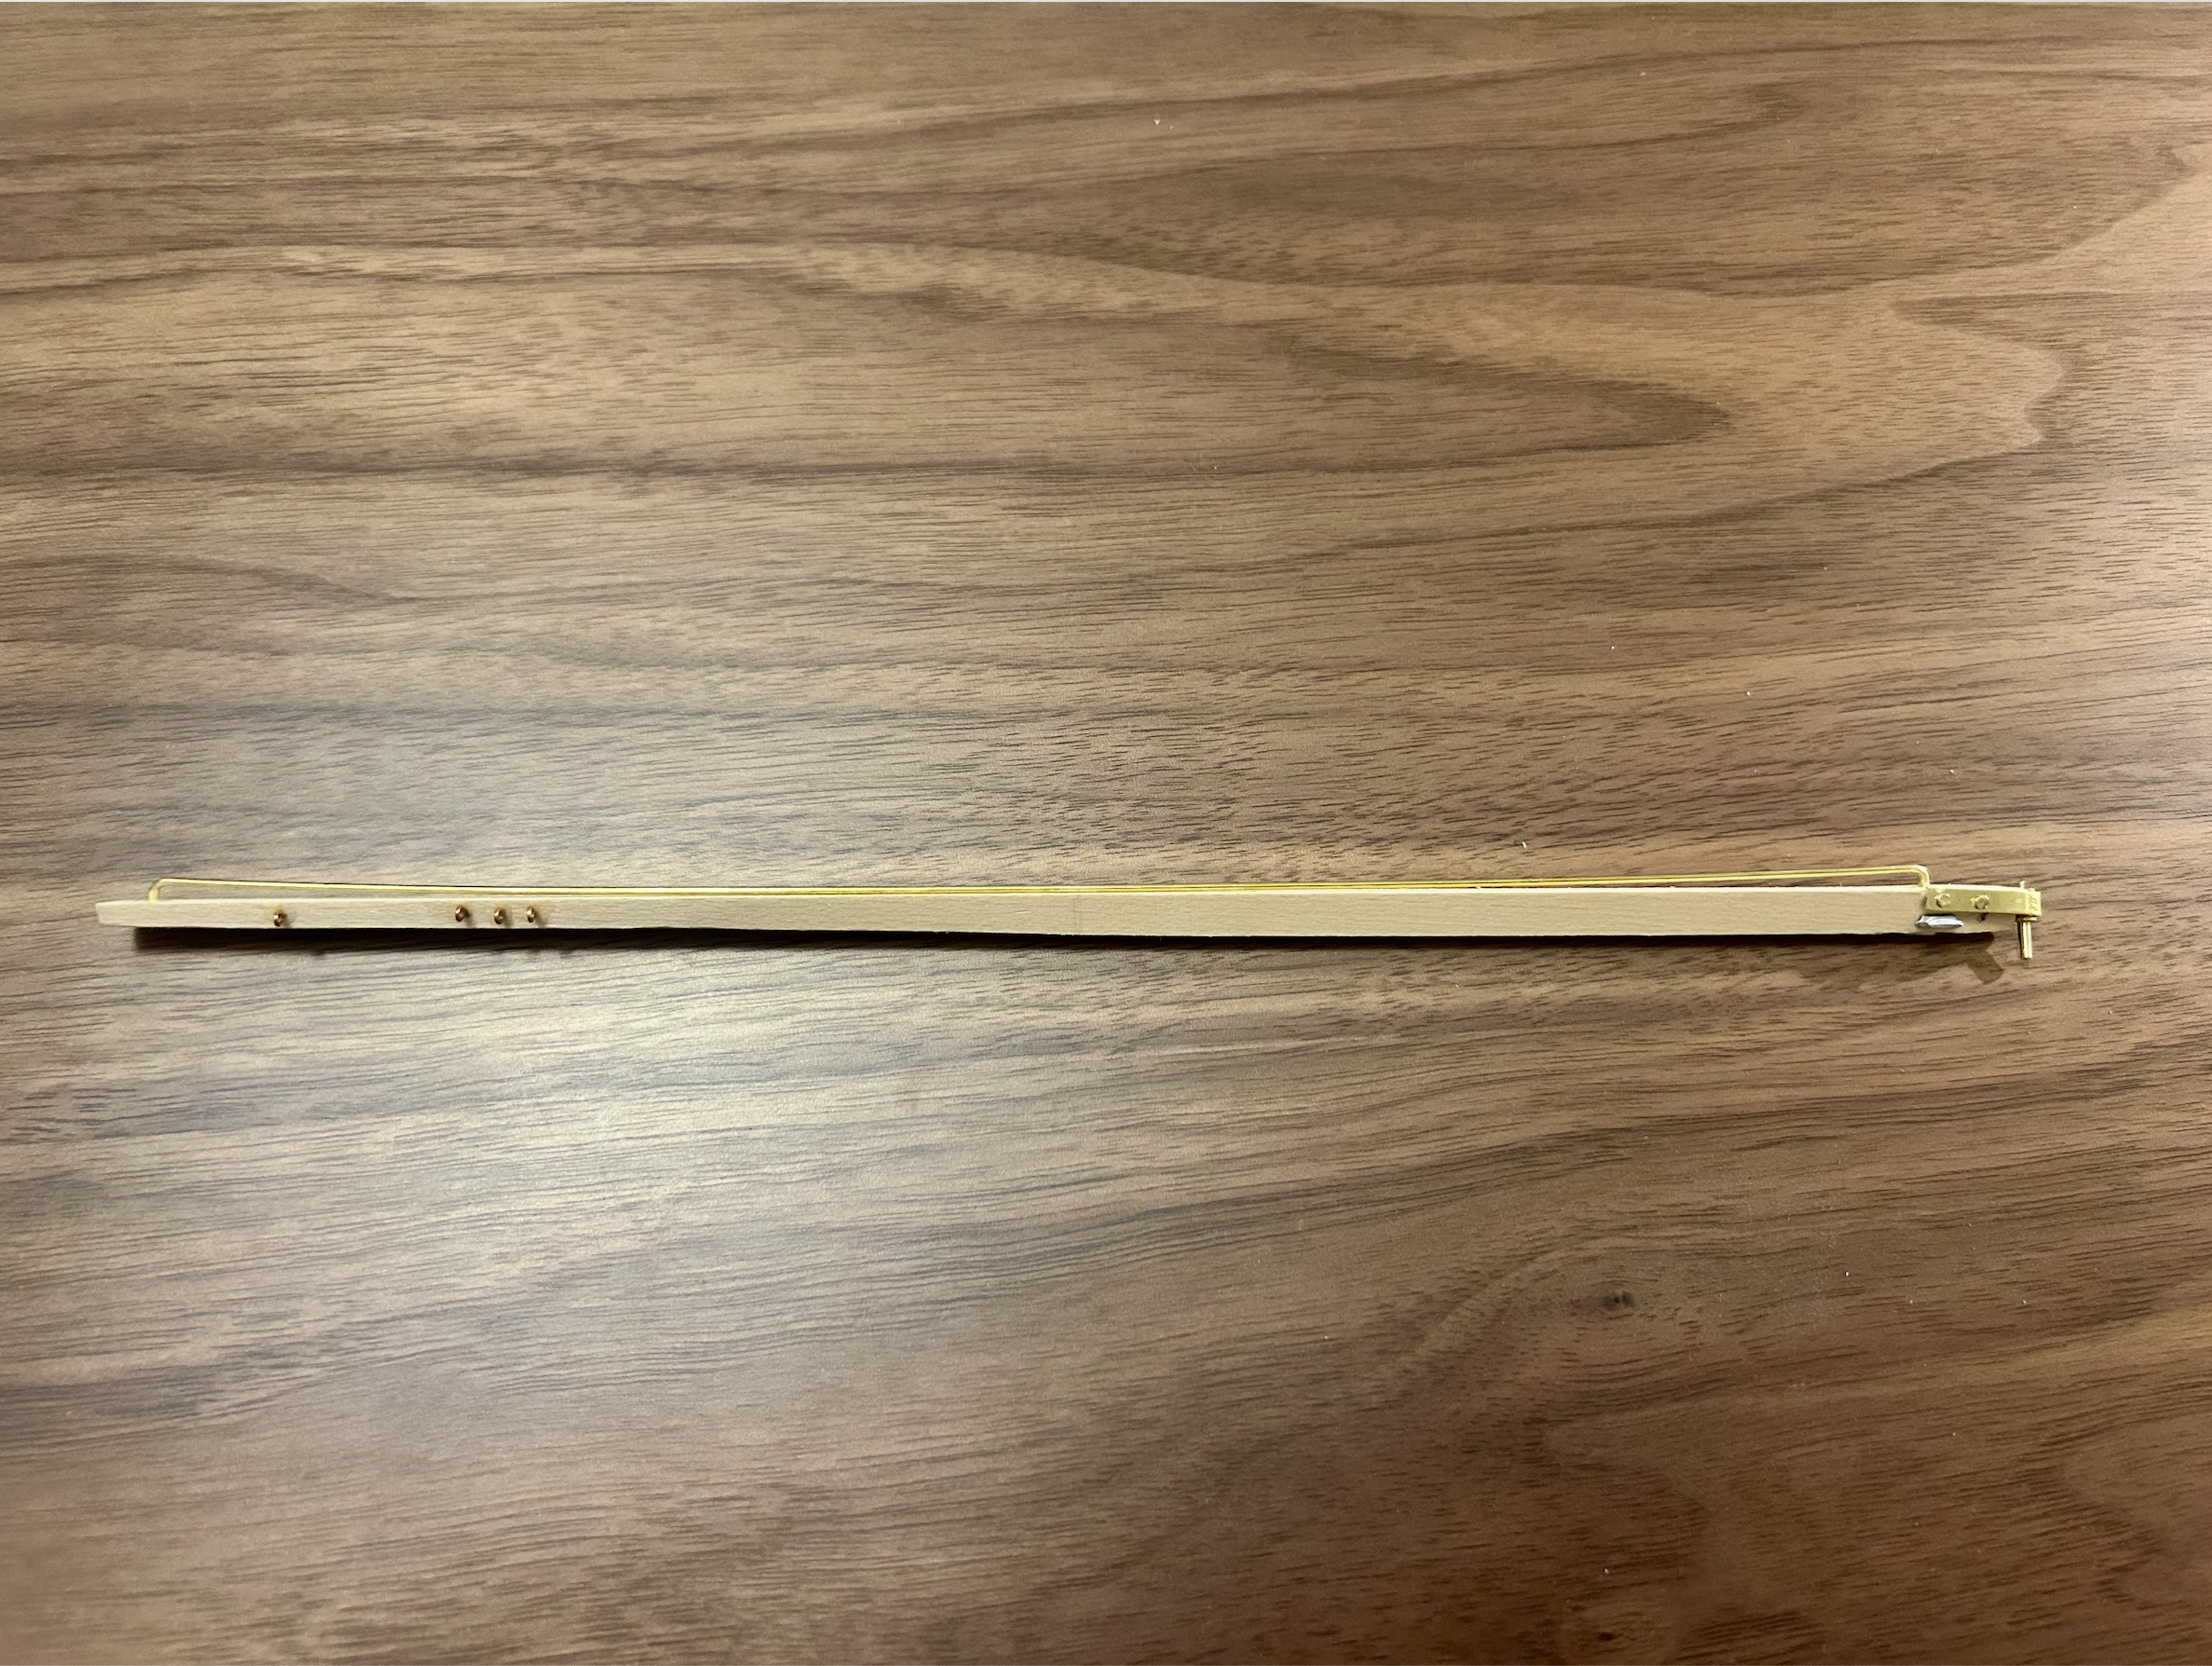
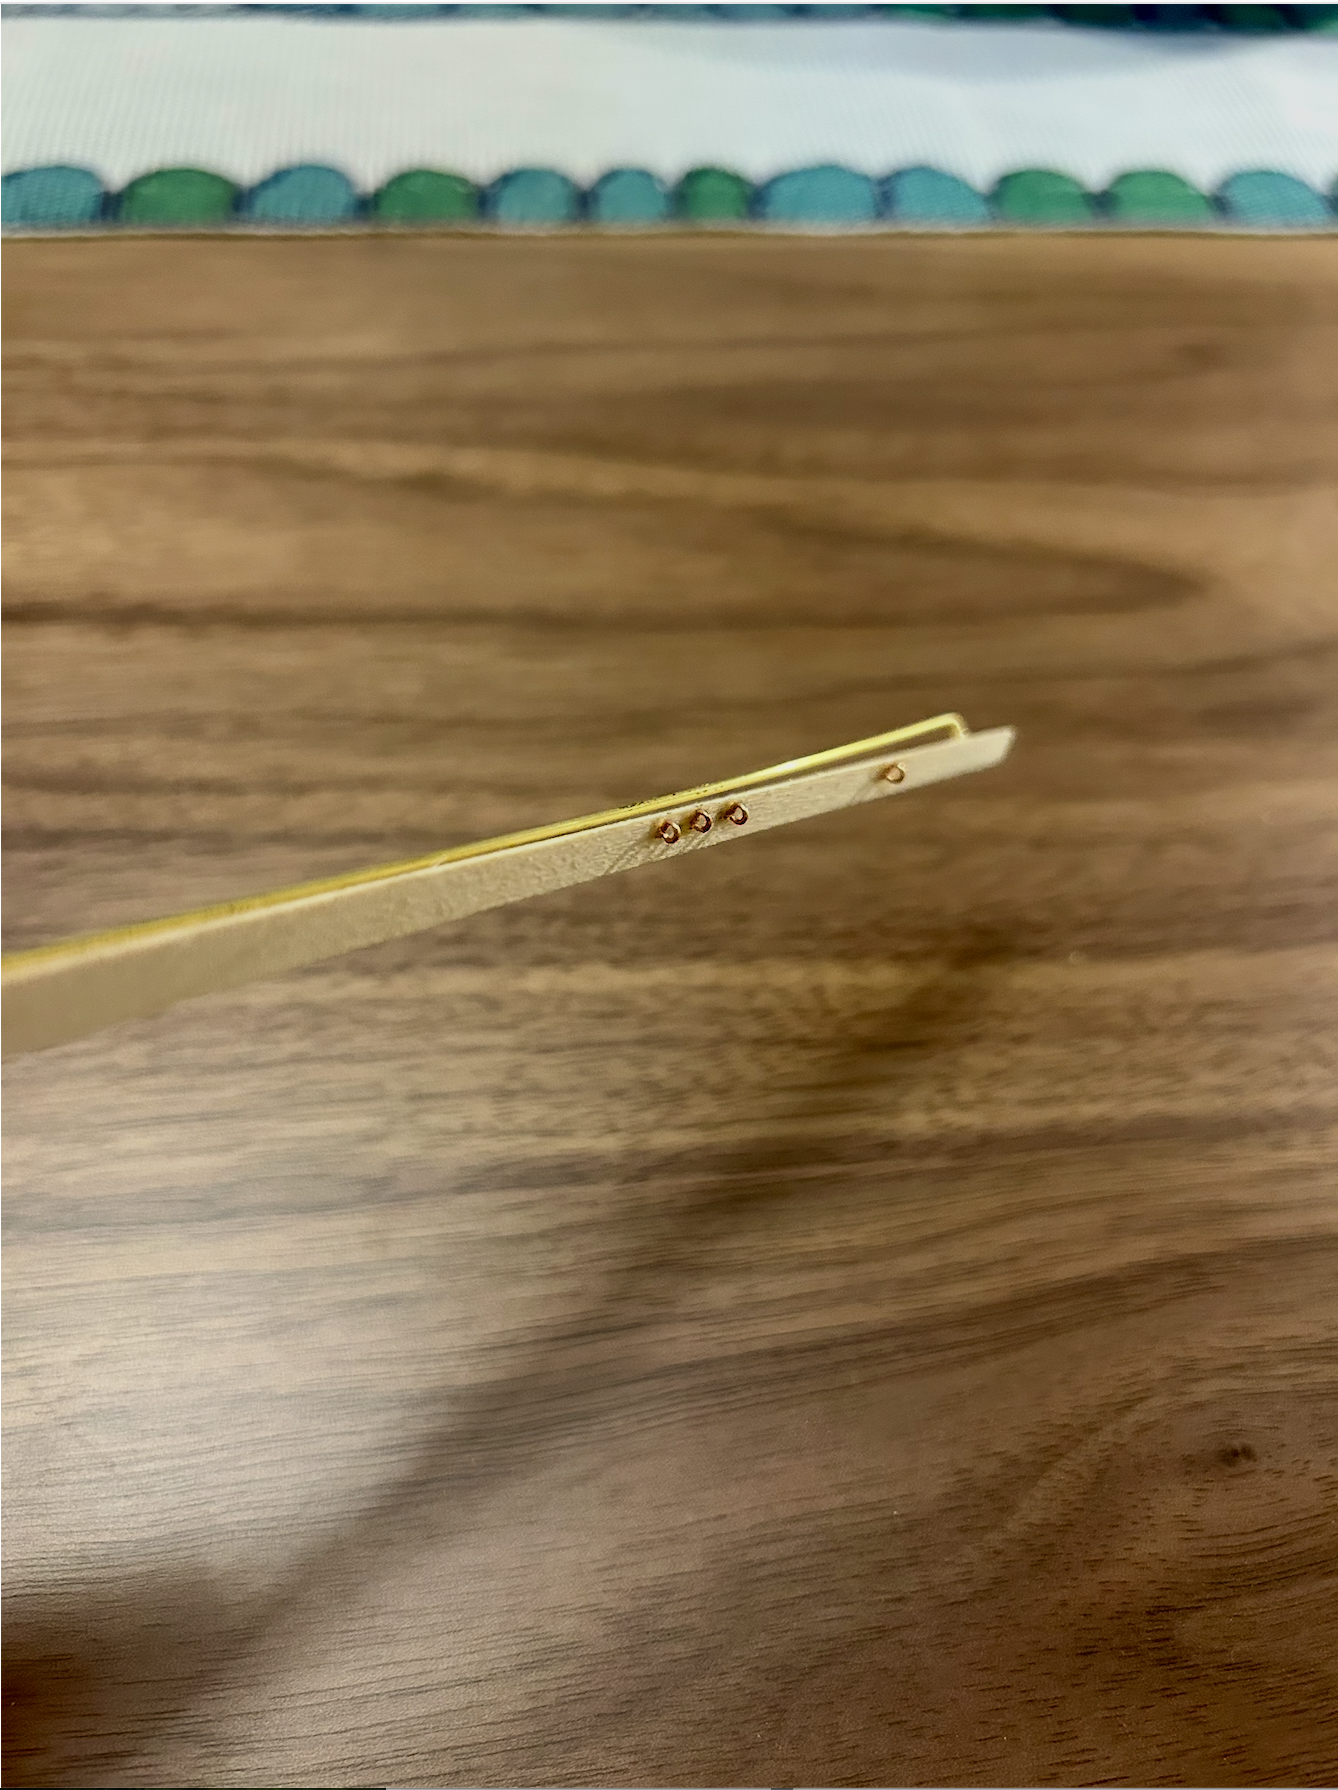
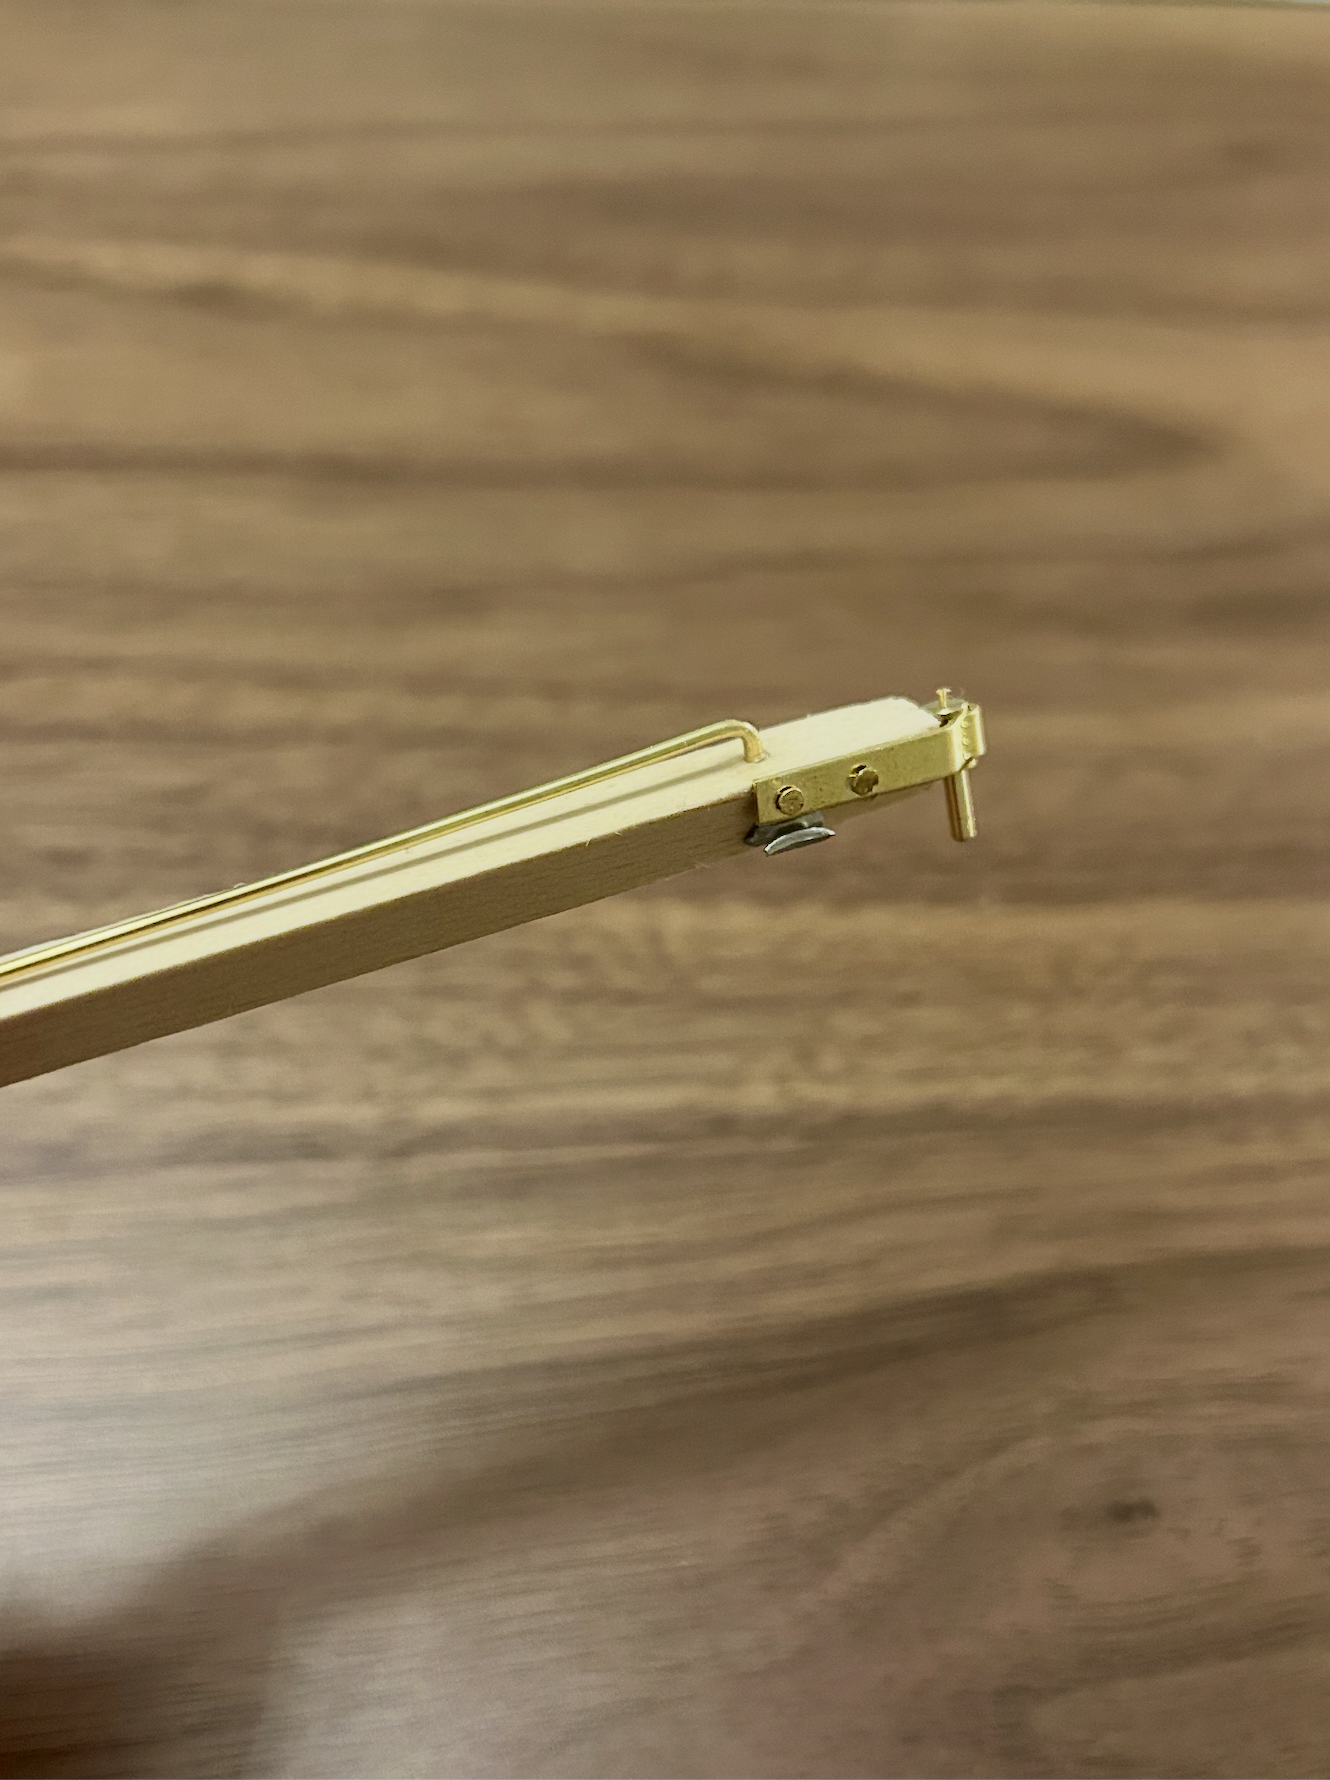
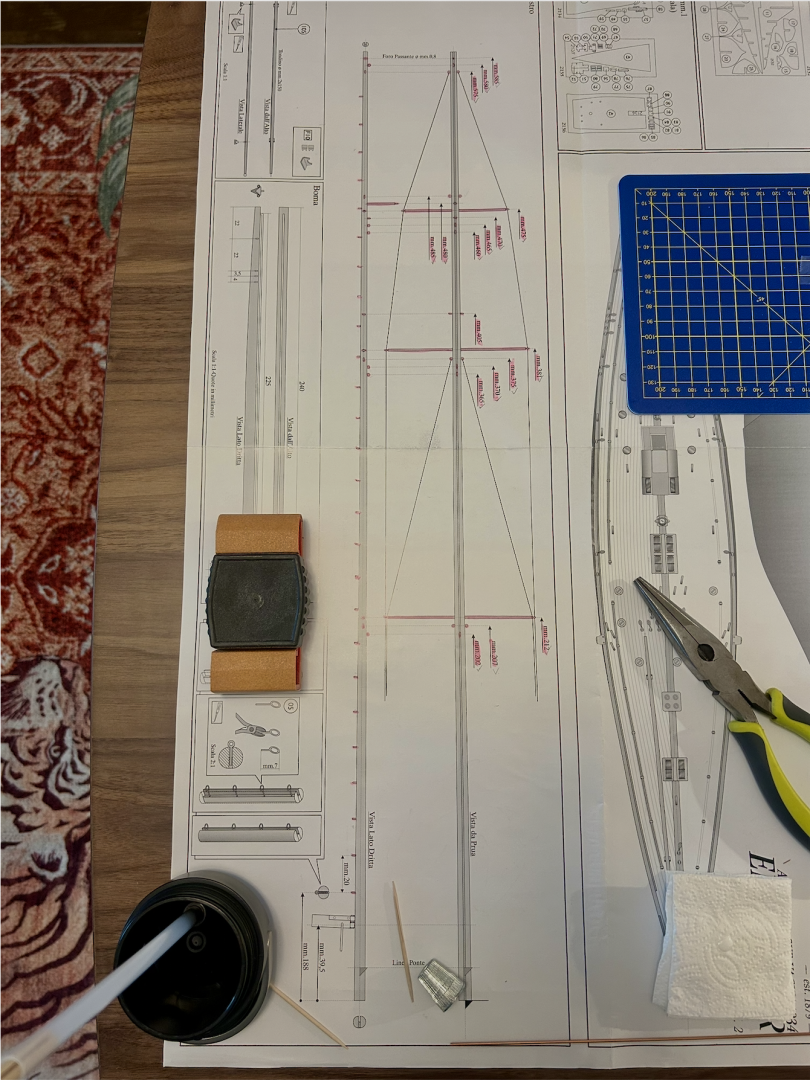
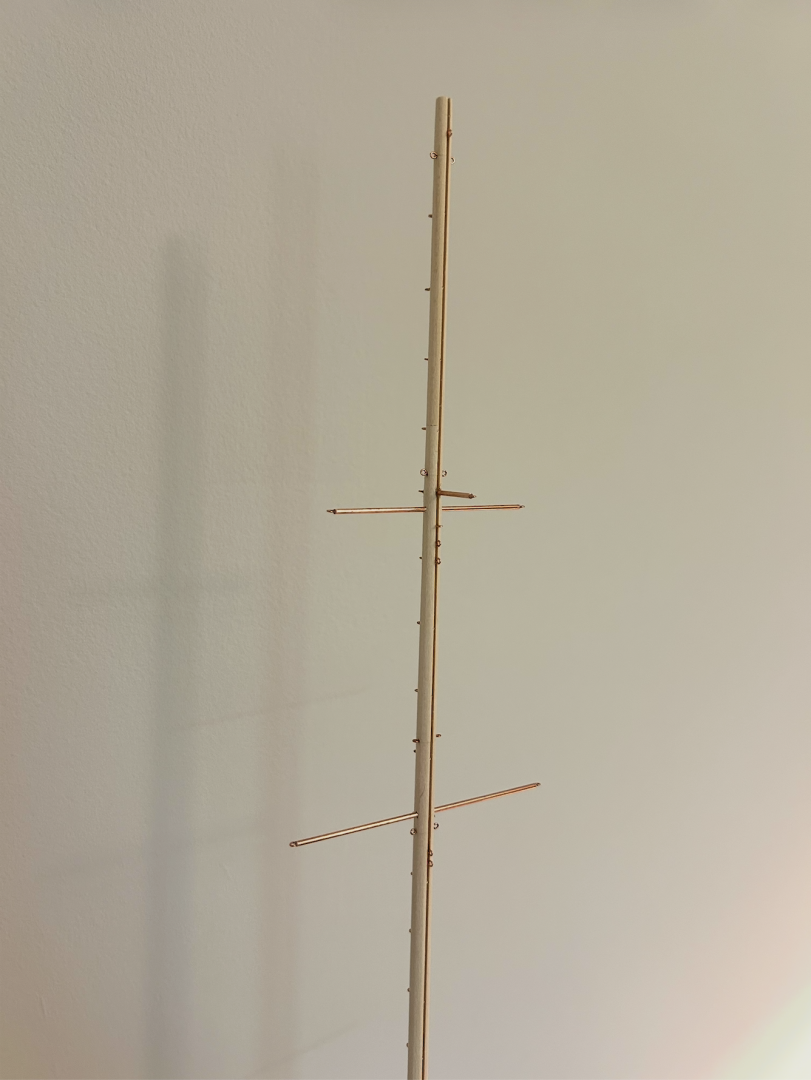
I'm on the home stretch with the first planking! Hope to finish it soon. In the meantime, here are some updates on the mast and boom: The mast came in 9 pieces, glued together and sanded to taper it at the top. I bought a dremel tool to be able to drill the 0.5mm holes for the eyelets. Trimmed the eyelets before placing them because they were a little too long. I'm happy with how the mast turned out because before starting I was worried about drilling straight. The boom required a little sanding. Adapting the hinge to the boom's pyramid shape gave me more trouble than it should have, but it's attached and functioning. I plan to paint the mast and boom white, but could change my mind as the project progresses. I'll keep working on the first planking and hope to add an update soon!


-
Ellie_ reacted to a post in a topic:
Endeavour J class by TerryPat - Amati - 1:80
-
Ellie_ reacted to a post in a topic:
Endeavour J class by TerryPat - Amati - 1:80
-
Thank you so much Geordie
-
Ellie_ reacted to a post in a topic:
Endeavour by Ellie_ - Amati - 1:80
-
Thank you Terry!!
-
Ellie_ reacted to a post in a topic:
Endeavour by Ellie_ - Amati - 1:80
-
Rick, thank you so much for the confidence!!
-
Ellie_ reacted to a post in a topic:
Endeavour by Ellie_ - Amati - 1:80
-
This is stunning! You've done such a gorgeous job! Looking forward to seeing the rest Haven't been on since before the holidays and I'm happy to come back to such great inspiration to continue.
- 53 replies
-
- 1
-
-
- Endeavour
- j-class yacht
- (and 1 more)
-
I made progress on the first planking. I was able to go faster with the Titebond glue (thank you @TerryPat!) Happy to be making progress. Before I started I was really nervous about the first planking, so I'm glad it's been going relatively smoothly so far. For the bow, I started overlapping the planks at the end instead of what I was doing before. I still don't quite have the technique down, so I'm glad the first planking is forgiving and issues can be sanded and fixed with filler/modeling paste. I'll be traveling for the holidays so will have to take a pause for about a week. Merry Christmas and happy holidays everyone! Thanks again for your comments!