HOLIDAY DONATION DRIVE - SUPPORT MSW - DO YOUR PART TO KEEP THIS GREAT FORUM GOING! (Only 36 donations so far out of 49,000 members - C'mon guys!)
×

Padeen
-
Posts
181 -
Joined
-
Last visited
Content Type
Profiles
Forums
Gallery
Events
Everything posted by Padeen
-
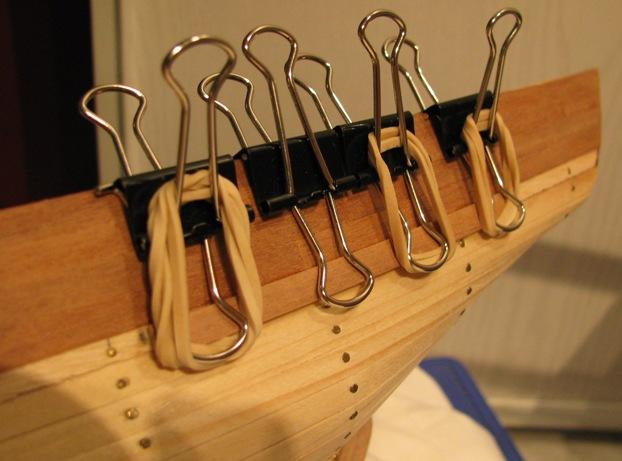
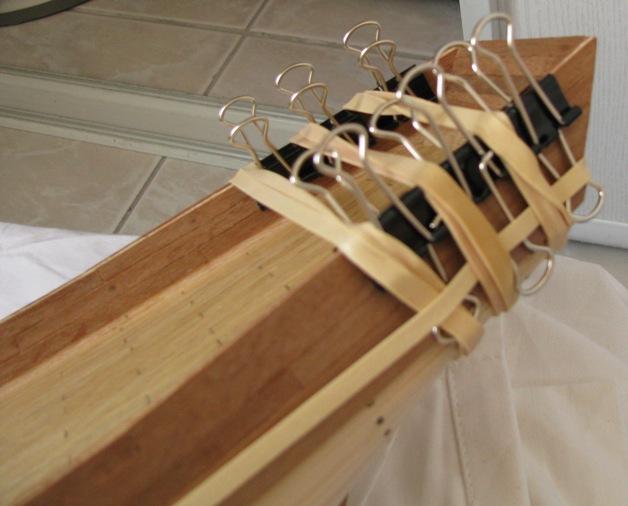
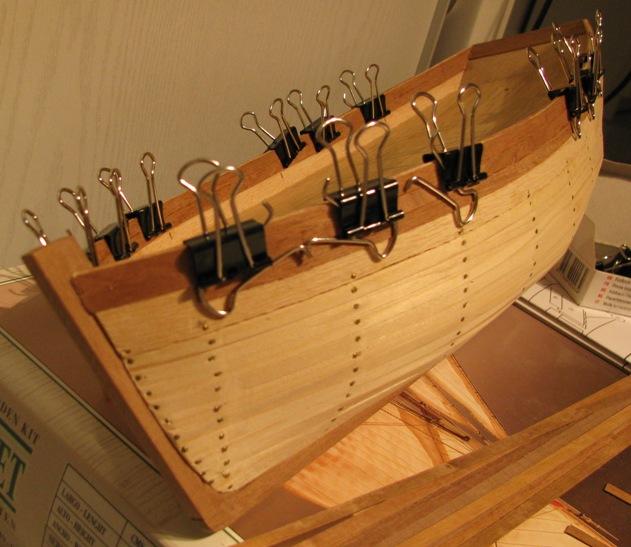
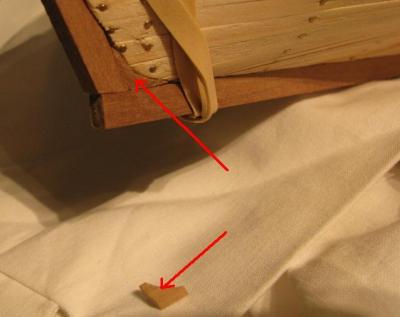
18/12/2010 O.K., never ever say "nearly"! I'll have to ban the words "nearly", "quite", "almost" or "soon" from my ship modeling vocabulary... So, hum I did progress a little since early october (two months!) that I'll describe here before forgetting all about it... First of all, I now understand why the stemson reinforcement hooks was not the right colour: manzonia wood goes from a very pale bistre to a very dark sepia... What gave me trouble is first that manzonia is not as soft as pine and second that 1.5 mm is not at all the same story as 0.5 mm when it comes to bend it, whatever the wood! I first did it brute force with only white glue (that's why the rubber bands were involved) and I then decided to get smarter about it... I first bent the planks in water vapor above the kettle exit before laying them on the hull with white glue everywhere and three drops of CA to clamp them. This kind of worked but it is a good thing I bought a "slowly" drying CA glue which allowed a few seconds to remove unfortunate fingers... Otherwise I would not be able to write this because my hands would have been part of the model now... As for the last line of the interior bulwark planking, it is not hard to achieve but it requires carefull sanding/cutting of planks which I can't do properly without daylight.


-
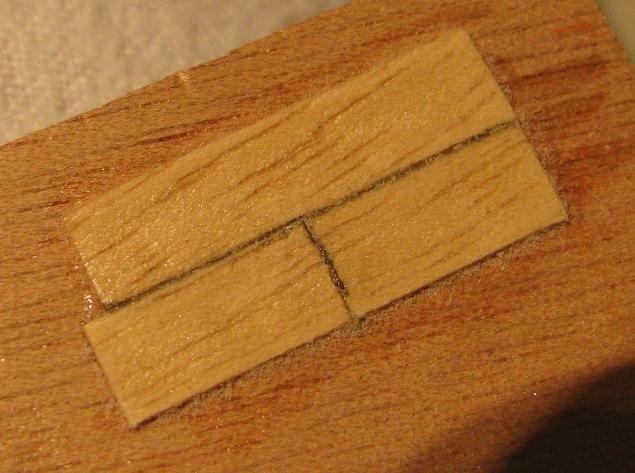
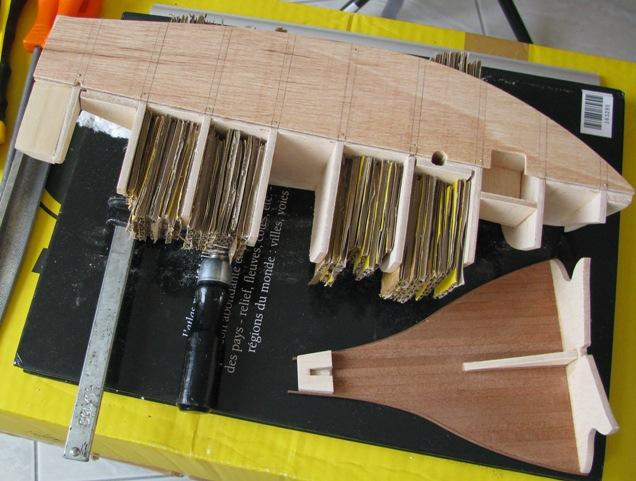
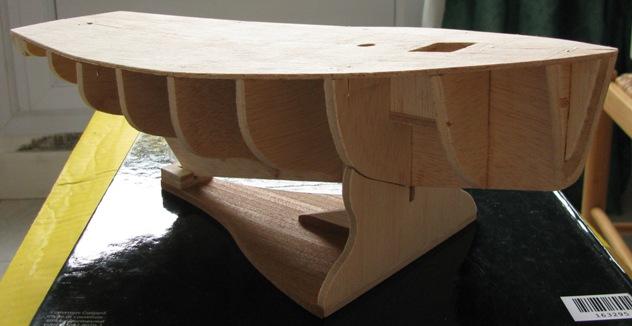
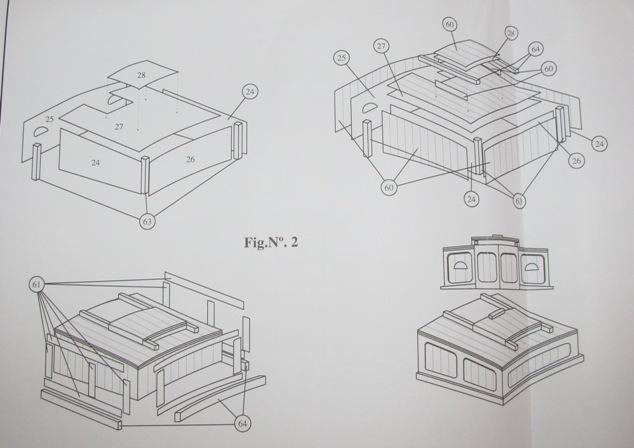
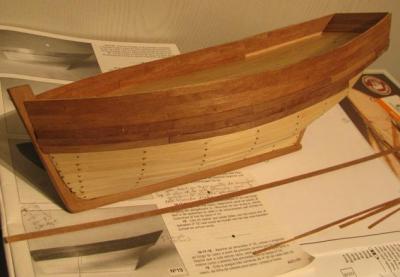
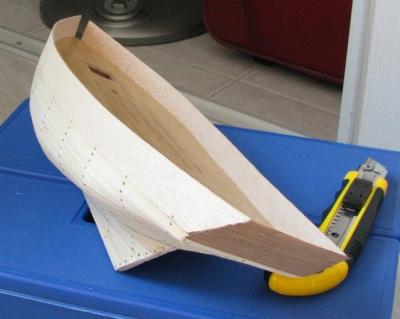
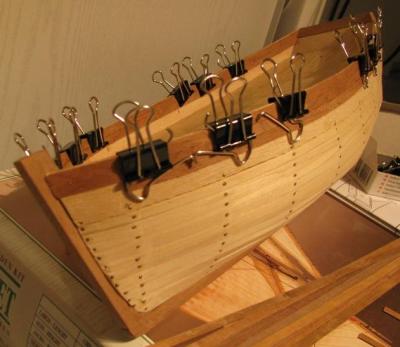
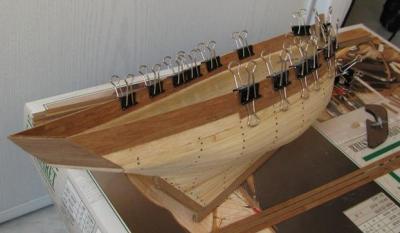
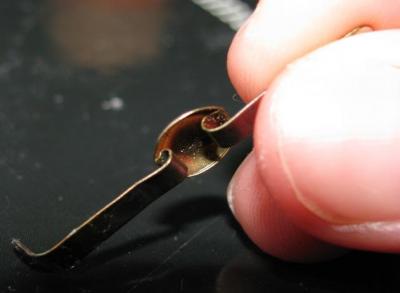
26/09/2010 I put the bulwarks in place and began planking them. It went OK except that I had again to do some major sanding... The bulwarks were supposed to sit on the first hull plank which I had placed 3 mm below the deck, as instructed. It did but around the second and third bulkheads where the deck was too wide : I think Constructo either misshaped the false deck or these bulkheads... Anyway, I have now more planking ahead... Yesterday, I bought a very nice book about traditional French boats (mostly Breton boats, of course...) where I learned a bit more about those lobsters fishing boats. In fact, there were at least three harbours specialised in lobster fishing: Camaret, Audierne and Douarnenez. Their fishermen would sail to the British coasts and even Portugal and Marocco. This explains why they needed a fish well: they had to keep the lobsters alive all those months the expeditions lasted. As for their caracteristic shape, with their hen-rump-like aft, it was designed so that they could luff or change tack quick and in close radius to take back up the lobster pots. They also sailed extremely well, which was appreciated on the journey back home, I imagine! I also discovered that there exist several replicas of those boats: one in Camaret, le Belle Etoile, is a 18 m yawl, while the one in Audierne, le Cap Sizun, is a 14.8 m cutter (pics can be found on the Cap Sizun website...). I guess Constructo's Le Camaret is in fact closer to the Cap Sizun... Anyway, I will need a Brittany flag when I get to rig mine... and decide in which harbour to register her! 09/10/2010 A little more progress... I put the stern, stem, stemson and false keel pieces on. This involved a lot of sanding so that they lay flat on the plank ends. I had to make a new stemson reinforcement hooks (the little piece between the stem, the keel and the hull) because Constructo provided a so-called "prefabricated" one which was neither the right shape nor shade... Fortunately, there was a little spare wood left on the manzonia beam containing the stem, stemson, false keel and stern... I begin to guess that one has to love scratch building and sanding to complete a Constructo kit... I am also nearly finished with bulwark planking. I love those foldback clips! Next come the scuppers.
-
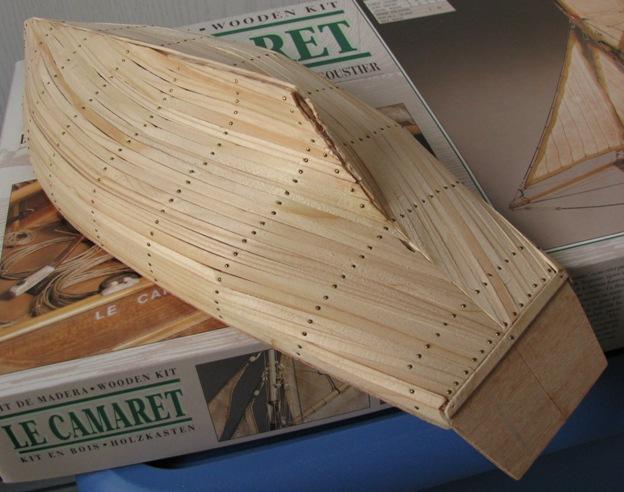
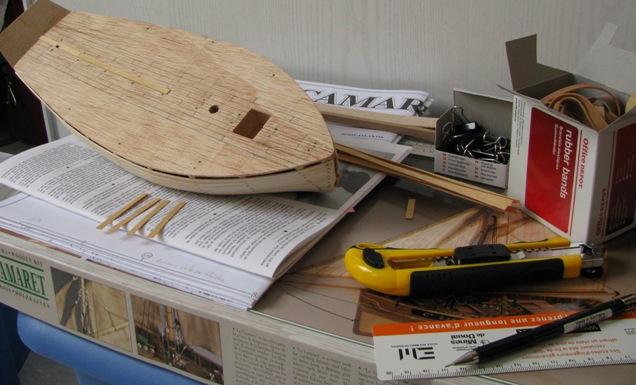
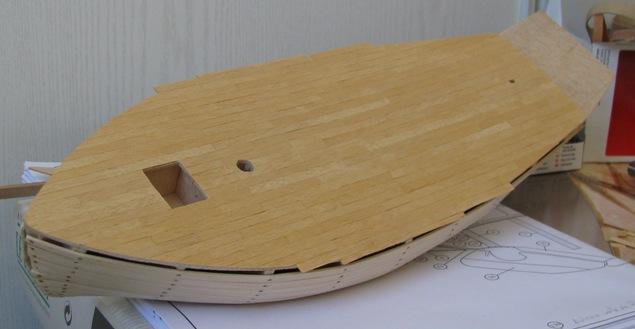
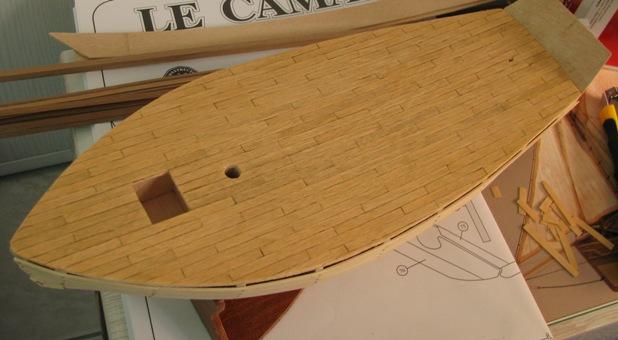
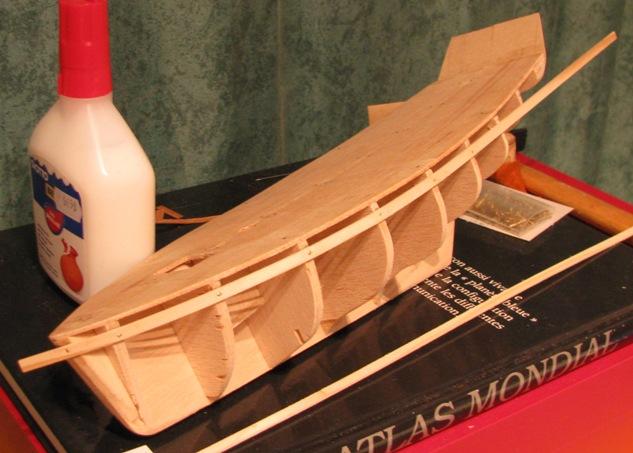
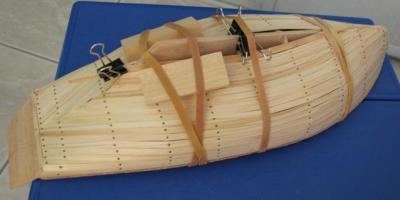
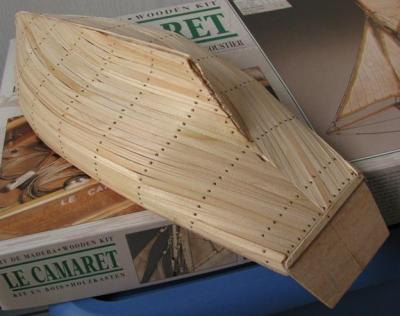
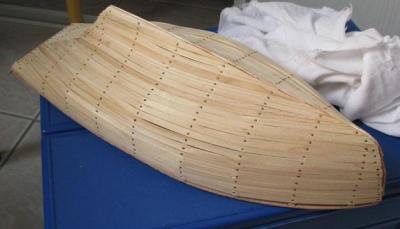
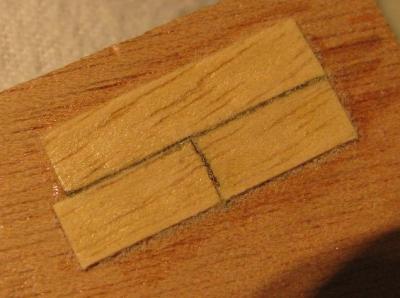
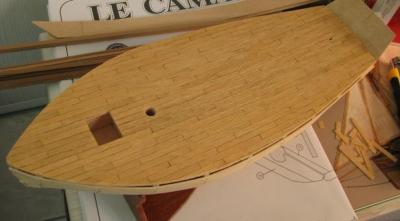
13/09/2010 There! I finally completed the hull planking. It took me two full months! I now have to sand it and put on the keel, stem and sternpost so that it looks respectable... Well I'm not ashamed of my result even if I did some mistakes. First of all, I'll try and remember to taper planks at the bow next time I plank a hull. I said before that the instructions in Constructo's booklet were good and I should have paid more attention to the pics: you can clearly see that they tapered their planks so that there are as many on the bow as on the main frame... As Kester wisely foresaw, you can avoid tricky strong plank bends at the bottom of the hull if you taper the planks all the way. I'll know for the next one. Since my last entry, I discovered paper clips and strong rubber bands which I now find invaluable: no plank can have the last word when tied up with a solid rubber band ... nor can any hopping clip! They say "practice makes perfect", (I prefer the French version: it is by forging that one becomes a blacksmith (that does not mean the blacksmith is perfect!!!)... I now manage to knock brass nails properly! There are also a few bumps here and there, mainly due to a bad clamping during drying time, I guess. And the hull would definitely need some caulking if it were to float because of the few gaps between planks below the water line!!! I decided on planking the deck before I get carried along and forget to do it before glueing the bulwarks... The instructions said to do it before hull planking but I was concerned about spoiling it with glue stains from my fingers while maintaining planks for the first minutes of glue drying... I decided on a three plank pattern with 5 x 60 mm planks which seem reasonable at this scale. Here are the first three planks laid down. I also tried a caulking technique: I used a brown pencil (Faber-Castell Dark Sepia #175) between the planks after glueing and sanding them and applied one layer of varnish. I find the result satisfying though I should put a bit more (the sanding between varnish layers removes it a little). 19/09/2010 I completed my deck planking today. It went all right even if I realized it was a good thing not to spoil any plank, considering what I am left with... I said there were plenty of planks provided but if it was true for the hull (eight full length planks left plus a huge amount of big pieces) it was not for the deck: just enough of it. I also owe an apology to Constructo: reading the instructions again, I found that they tell us to use 8 cm long planks and to use a two-plank pattern... Next step: finish the hull!


-
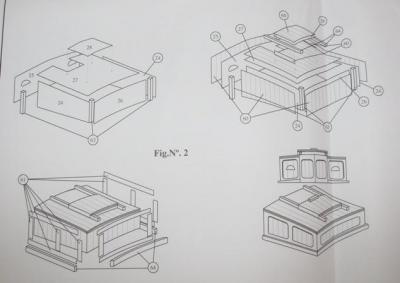
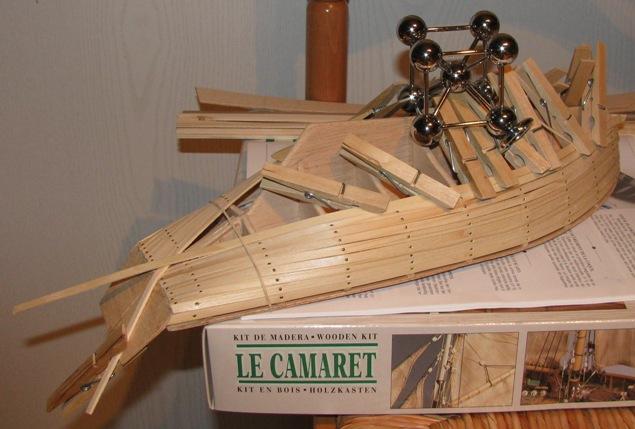
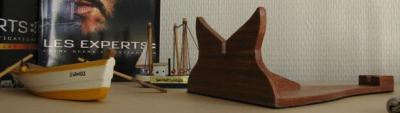
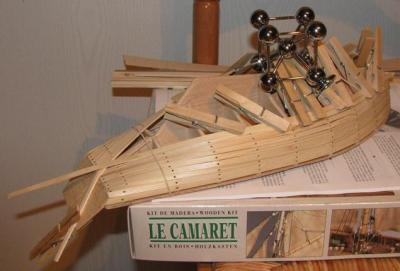
14/08/2010 Before moving to the planking (I needed pliers to hold the brass nail while knocking them into the planks, otherwise they bend under the hammer... ), I finished planking and polishing the stand which is now ready on my cupboard, waiting for me to complete the rigging. Oups! there will be a thick layer of dust on it before that happens! By the way, I found some here use syringes among other things to apply carpenter glue. I use a "paper fastener" (we call that a "attache parisienne" in French...): it's rather ridgid, I can choose the angle I want for the tip and it's easy to remove the remaining glue when it is dry (just pull it away!). Pliers do help maintain the nails straight when knocking them, ...most of the time. I find it really great that there is more than plenty of those nails in the kit because my success rate is not so high! Anyway, I laid on my first plank last month and proceeded without too much difficulty untill now. It is really easy to work with these pine wood planks: it is a very soft and flexible wood. I had hardly anything to do but simply hold them in place while the glue dried for the first four lines... ...well, still, it is not so flexible if you does not help it a bit when you want to twist it at 90°! That was my conclusion when a plank cracked. Again there are many techniques for bending wood in DDM. I decided for a mix between several of them that seems to work well so far: 1/ Put water in a kettle and wait till it boils. 2/ Pour the water in a bowl. 3/ Plunge the planks in the water for around five minutes (it's rather like for spaghetti actually ). 4/ Mop up the excess water from the planks and put them on the hull where they belong. 5/ Hold everything in place with clothes pins, rubber bands and (possibly ) a model Atomium. 6/ Glue and nail in place when dry.


-
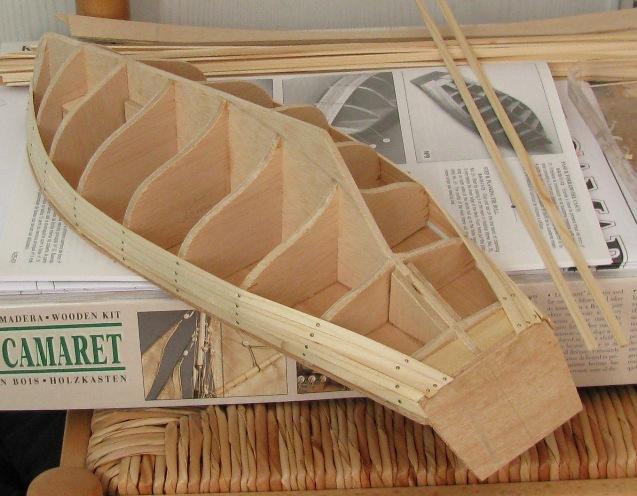
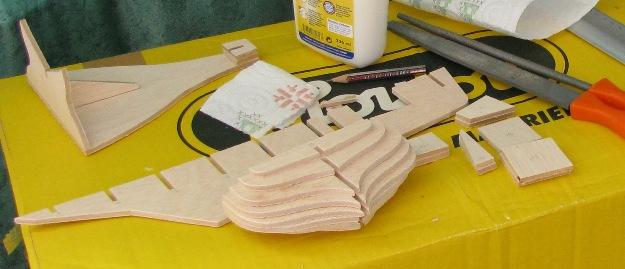
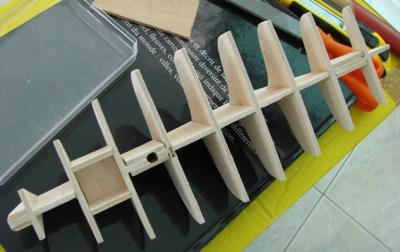
14/08/2010 OK, so let's begin! I numbered all the frames and knightheads and began following the instructions to glue the knightheads on the false keel and place the frames. My first problem was: would it be best to cut square the mast bottom part to fit between the knightheads or rather drill these and leave the mast have its circular section... I decided for the second solution after discussing that with some of you here. Meanwhile, I put the stand parts together. After a great lot of patient sanding I got all the frames glued on the false keel. I don't know how it is with other kits but not a single piece fitted at first because they cut 4 mm wide holes when the plywood sheet was closer to 5 mm thick . But, perhaps it is better than the other way round: it is still easier to remove wood than add some... I used some cardboard pieces to equally space the frames while glueing the false deck (a 2 mm thick plywood sheet). It did the trick .


-
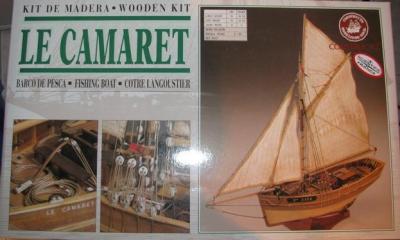
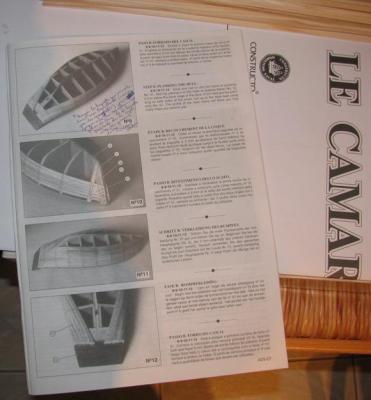
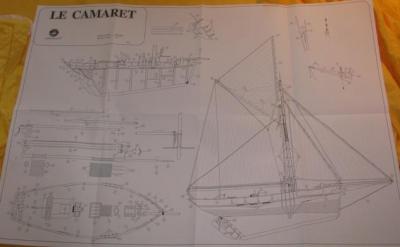
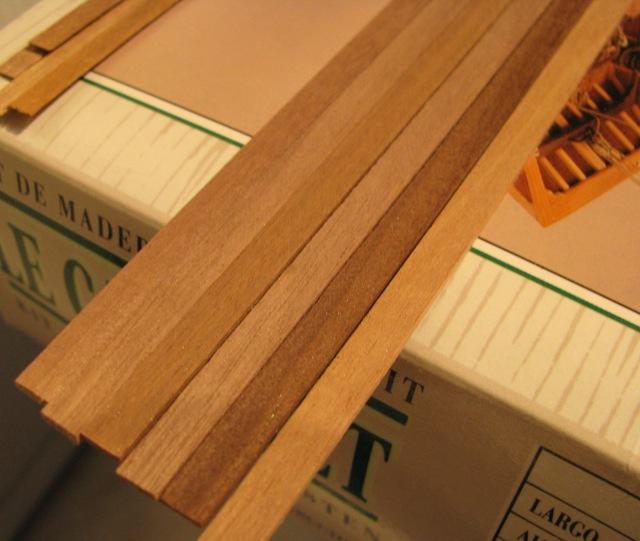
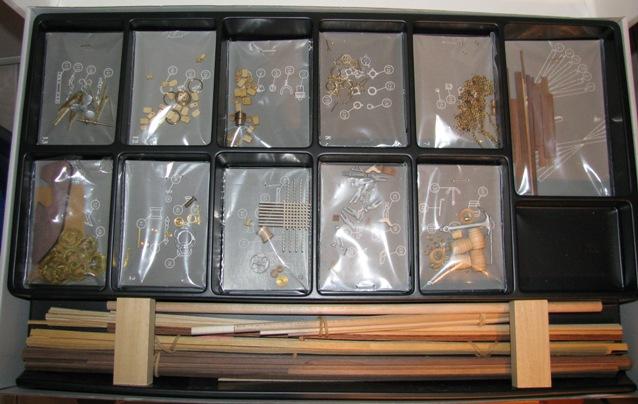
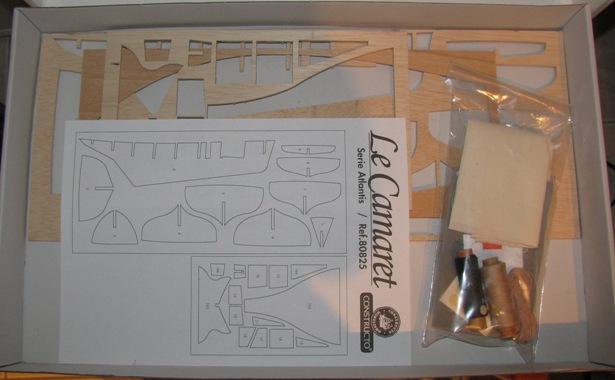
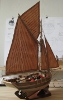
Here is the build log of my first model ship. This build, now completed, was started in June 2010 and the first part of the build log (untill June 2011) was done on DDM. After DDM was lost in Jullly 2011, I started this log again on MSW and ended it there in March 2012. I will put the date of the original posts as I go along. So here we are: 14/08/2010 Welcome aboard my first command, a 1:35 model of the French cutter Le Camaret ! Here is part of the description given by Constructo about this ship: "At one time lobsters were plentiful along the West coast of Brittany. In the early part of the 20th century the Camaret fishermen used several different types of boats to catch these crustaceans: luggers with vertical stems, sloops with elegant sheers and sterns and cutters such as the one you have here. All the Camaret lobsters boats had a characteristic type of upperworks, but the feature wich really distinguished them were the fish tanks wich communicated with the sea by means of openings under the hull called the fish tank ports. The key task was to bring the precious cargo home alive." So, there will be no guns on this cutter but rather fish boxes intended to catch lobsters... Let's open the box: all the small parts come in little plastic bags, everything is numbered and referenced on a list at the end of the instruction booklet as well as on the three ~A1 sheets of plans. There is plenty of everything, more planking material than needed so you can experiment. There are different kinds of wood: manzonia, sapele, boxwood, pine... (As is usual with Constructo apparently, there will be no paint so they play with several shades of wood). My first concern was to identify those woods as I did not know their respective colors, except for pine. There is also a great sheet of cloth for the sails and two colors of threads: one for the hauling part and the other for the standing part. The instructions are rather clear (in particular they lead you by the hand for the hull planking) and many photos help clarify the text. Most details on complex parts are explained with sketchs on the plans, as well as the rigging which is well documented. You have a choice among seven languages. The French is very good and as far as I can tell the English is good too (it does make my life easy to translate and explain all this here anyway ).