HOLIDAY DONATION DRIVE - SUPPORT MSW - DO YOUR PART TO KEEP THIS GREAT FORUM GOING! (Only 27 donations so far out of 49,000 members - C'mon guys!)
×

Padeen
-
Posts
181 -
Joined
-
Last visited
Content Type
Profiles
Forums
Gallery
Events
Everything posted by Padeen
-
From personal experience, it is neither hard nor to costly to order Seawatch Books books from Europe. I bought my 4 copies of David Antsherl's Swan Class books through an English bookshop in Paris for a reasonable price (and no paperwork...). Internet ordering is not the only option... And ordering a few books at the same time helps reduce the shipping costs, that's for sure.
-
Hi Elia, Nice to see your Arethusa back on. It strucks me every time I look at her: what fine lines! And I did not remember those deck items were such tiny parts : you are a master. I am eager to seeing more progress on her. Cheers,
-
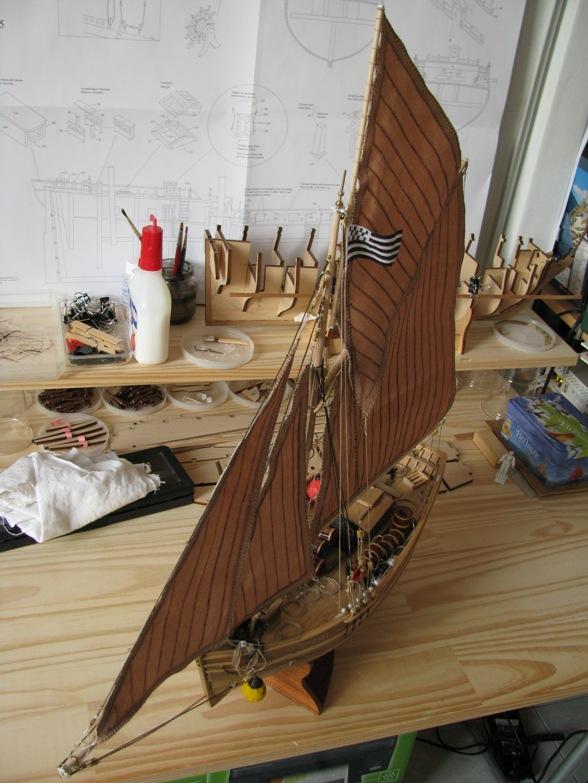
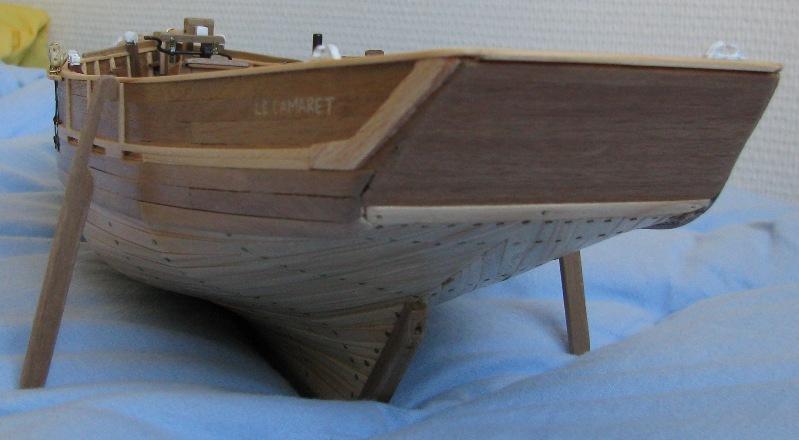
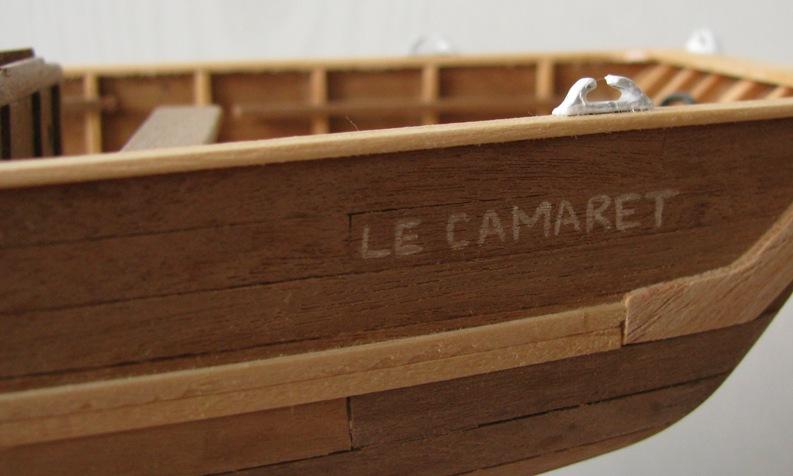
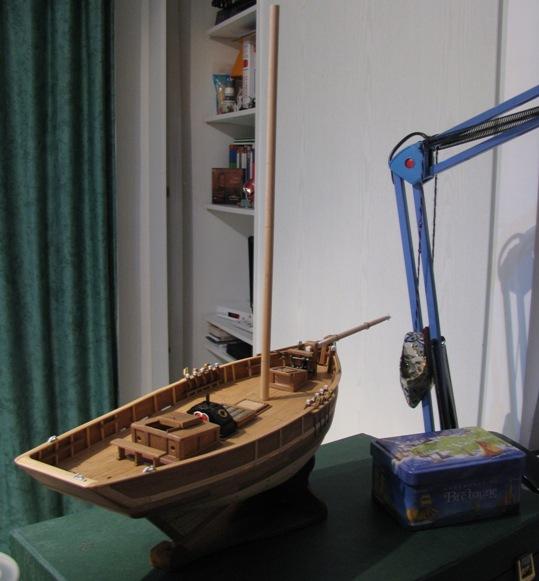
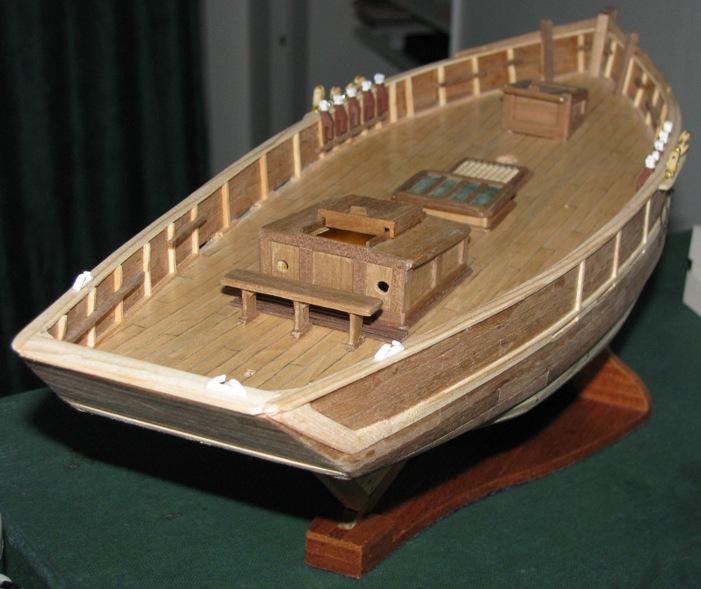
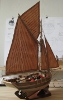
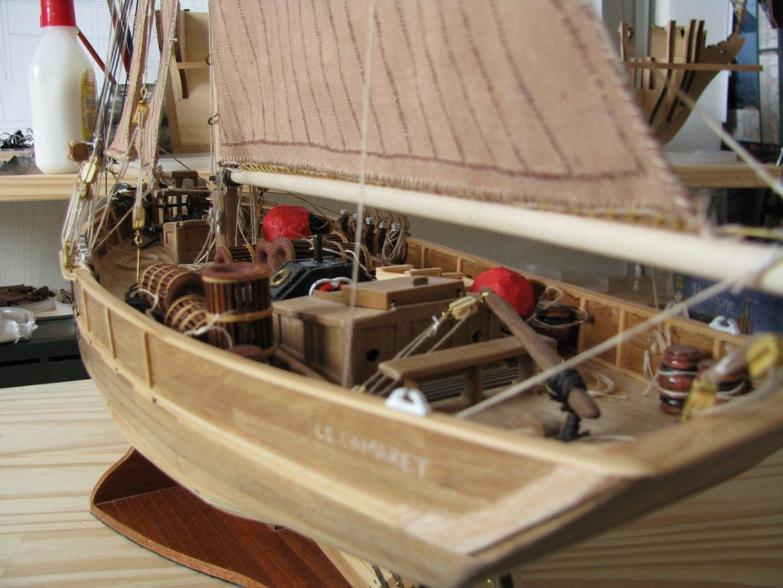
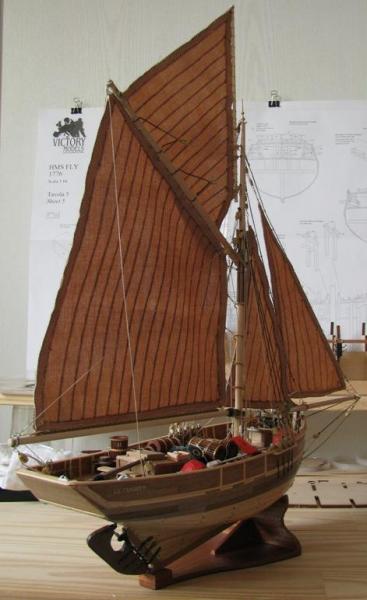
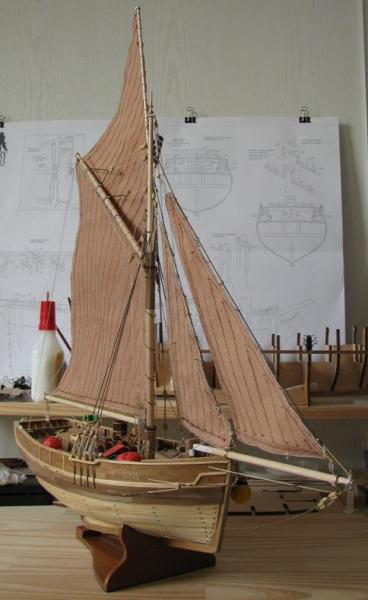
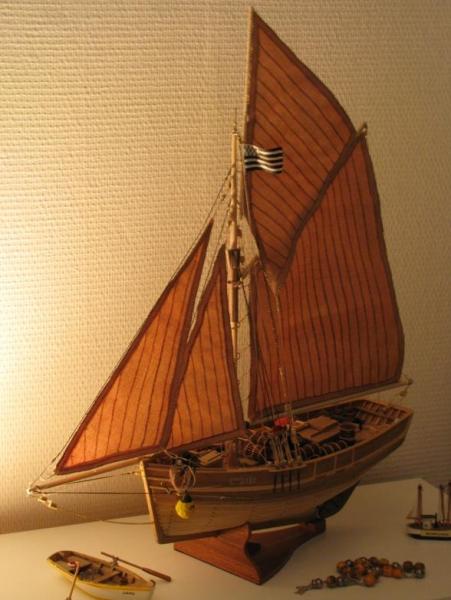
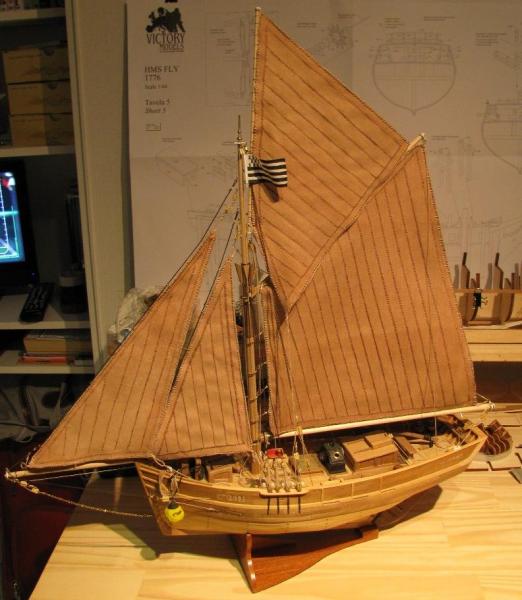
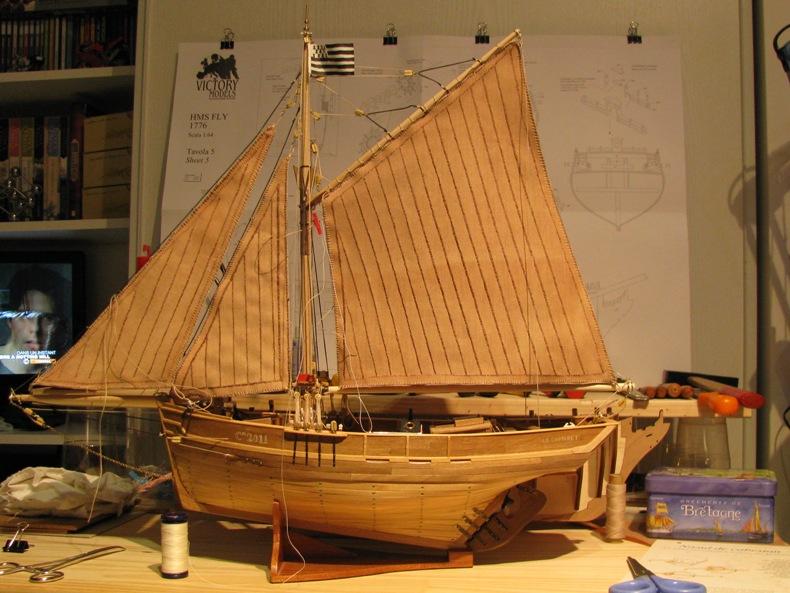
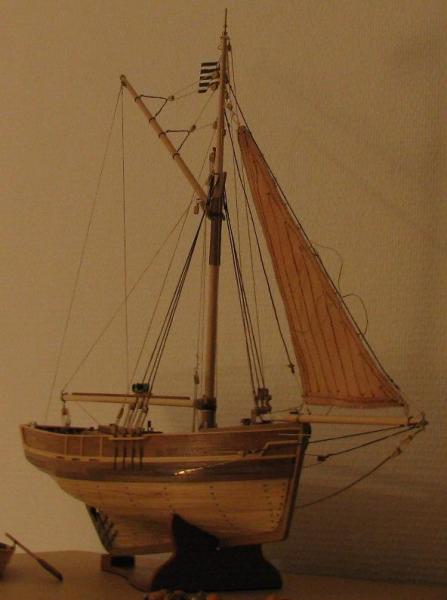
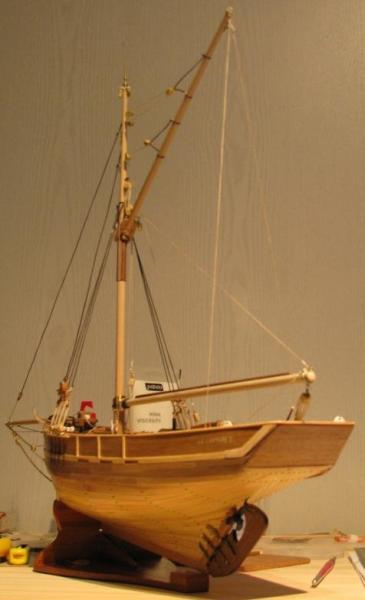
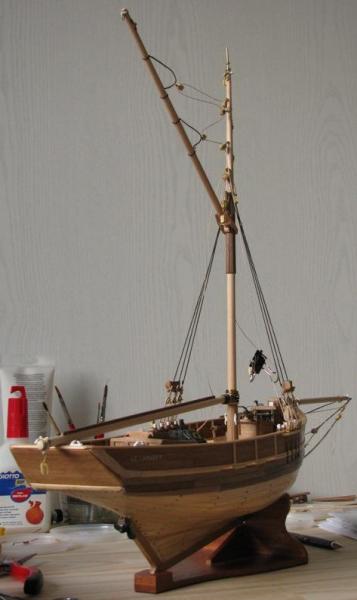
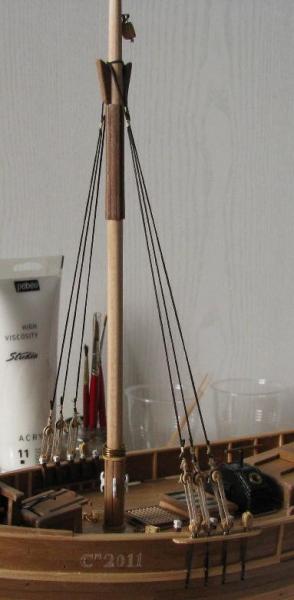
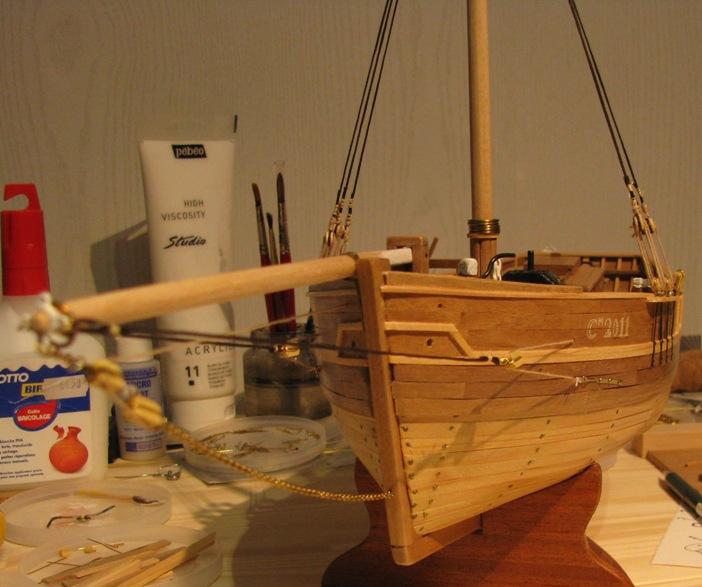
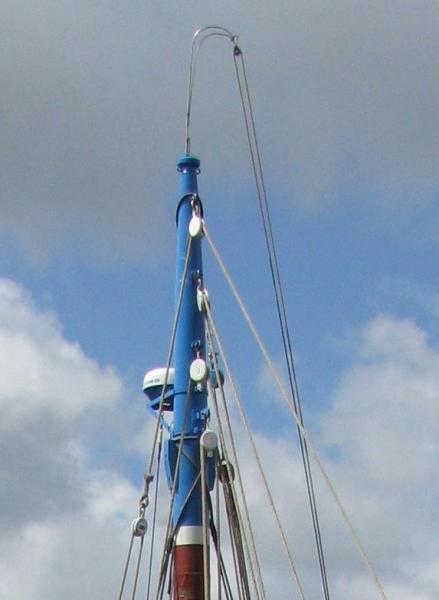
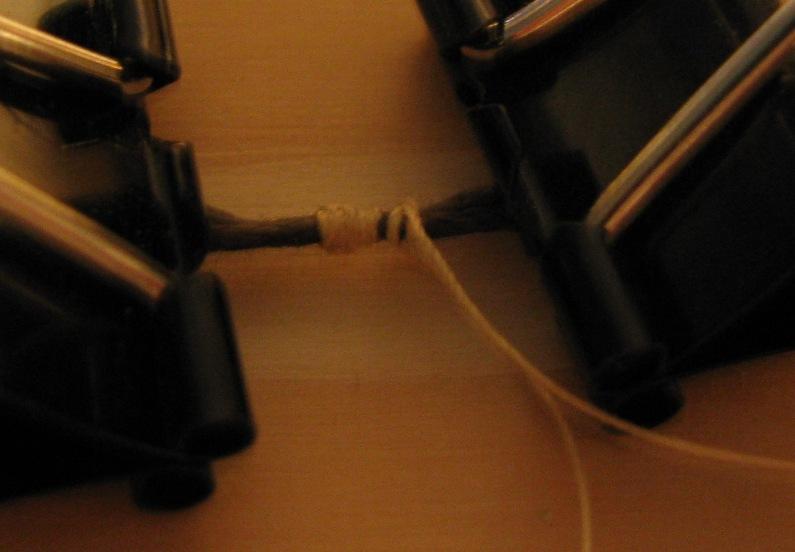
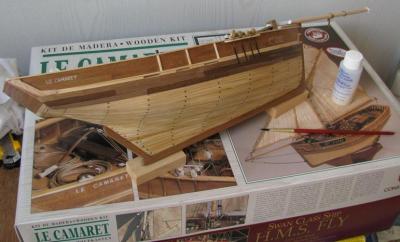
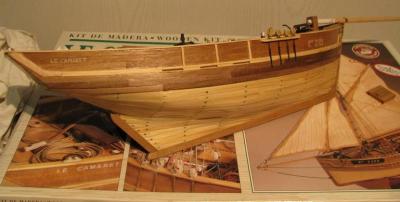
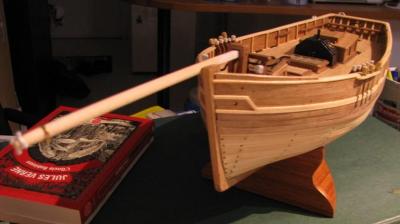
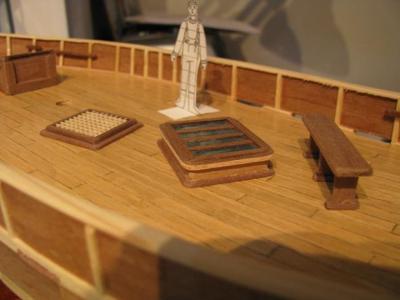
18/03/2012 Well, I've not opened a bottle yet: maybe when I will have a case done for Le Camaret... And as I don't have a clear idea on how to rig the legs yet, I leave that for when I have a chance to go back to the seacoast (Remark 2013: not done yet...) and I give you a few more shots of my now finished model: --- (Remark 2013: more pics in the completed model gallery...) 24/02/2013 She does not have a case yet but she is now at my parents', having survived a three-hour train trip in an overcrowded wagon last Christmas with only one wound: a ring connecting the "upper gaff?" to the upper part of the mast broke. It was easily repaired with a new brass ring and she now stands proudly in my parents' bedroom waiting for me to come back and fetch her!

-
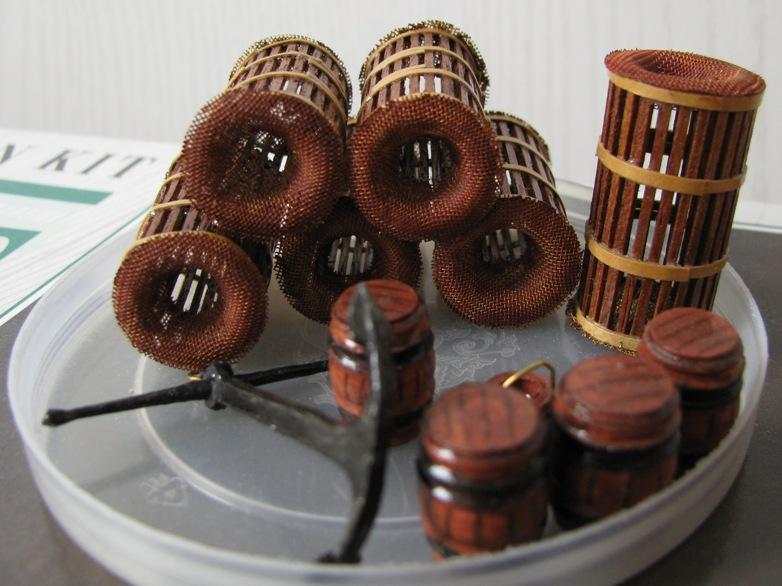
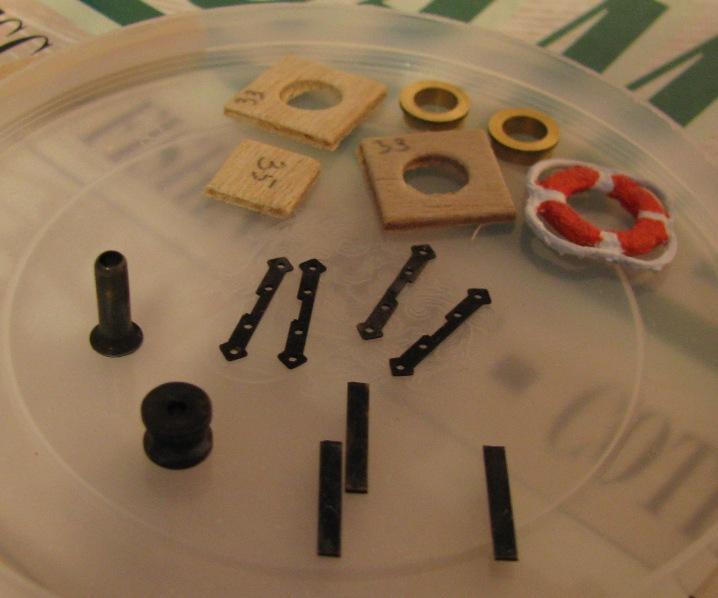
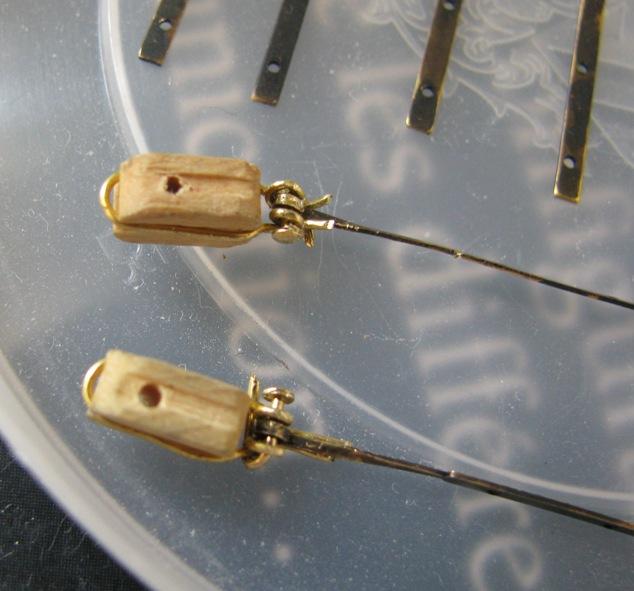
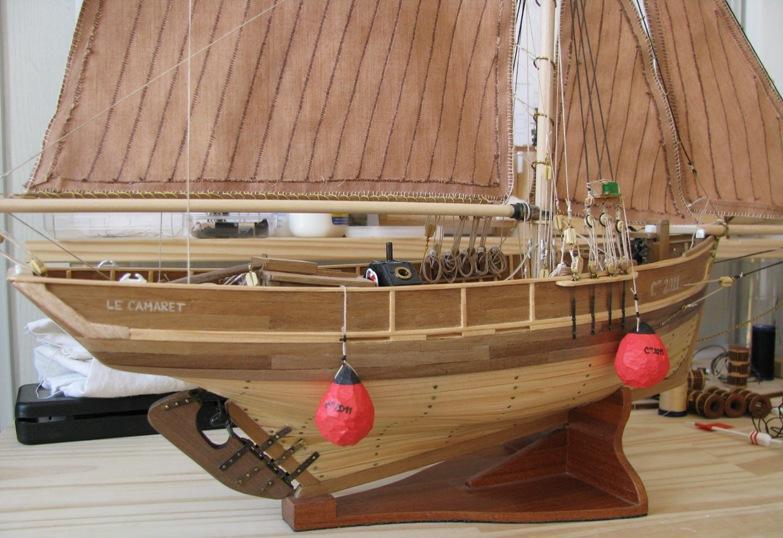
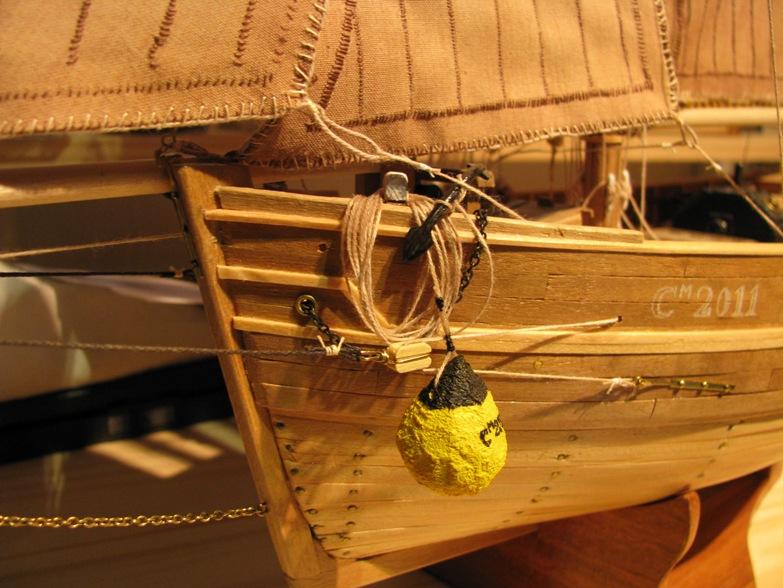
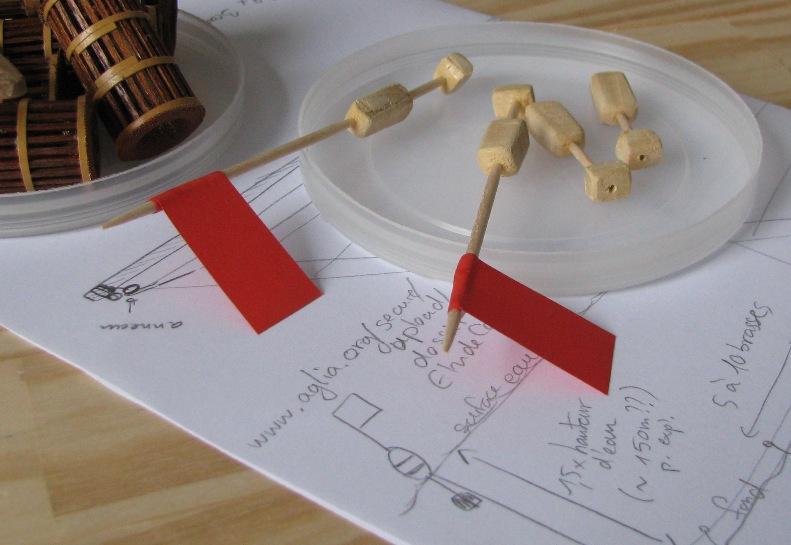
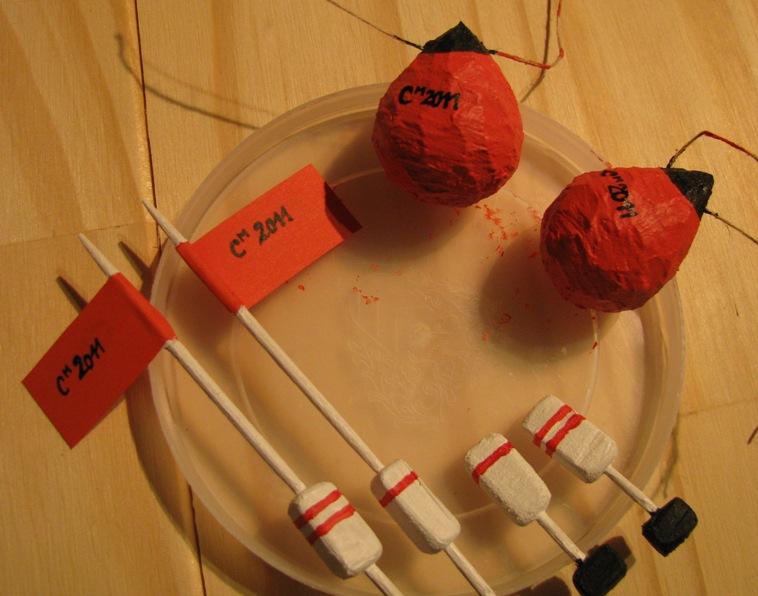
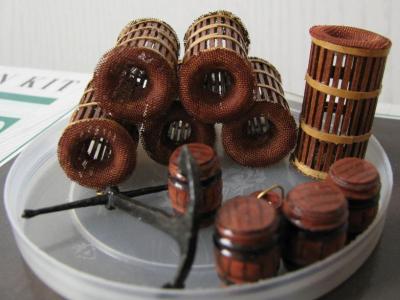
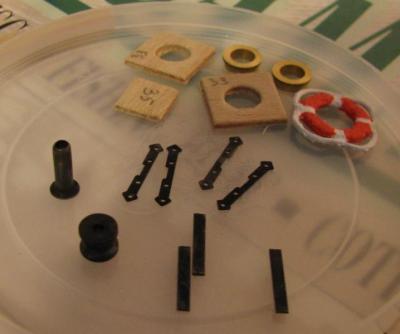
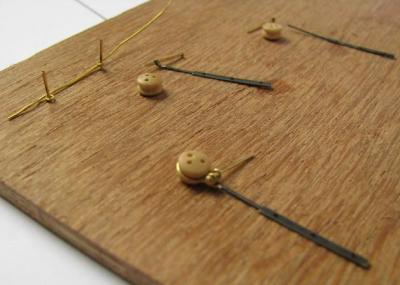
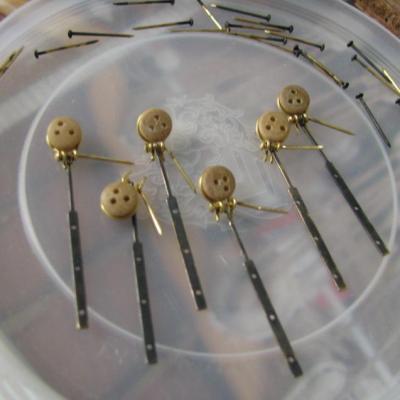
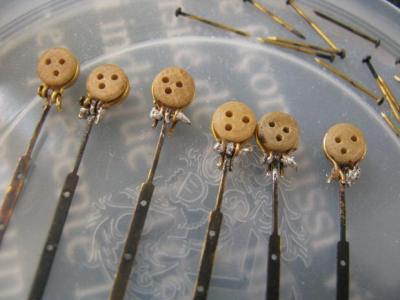
11/02/2012 Well, well, well... finally some progress on Le Camaret: we are close to completion. I finished the forth and last sail , the anchor buoy (not sure if it is supposed to look like this but why not?...) and two lines of lobster pots with their flag buoys. I also made two buoys (the pink ones) that could be used if the boat was to moor along the quay. To make the flag buoys, I used two blocks of wood were I drilled two holes and then inserted and glued a toothpick. The flag is paper and the colours are acrylics. The mooring buoys were made from the cork of a Champagne bottle (I finally found a reason why I was right to keep these corks ) and painted with acrylics. The buoys were all marked with the boat number, which I thought appropriate. Just the legs to try and we can fly!


-
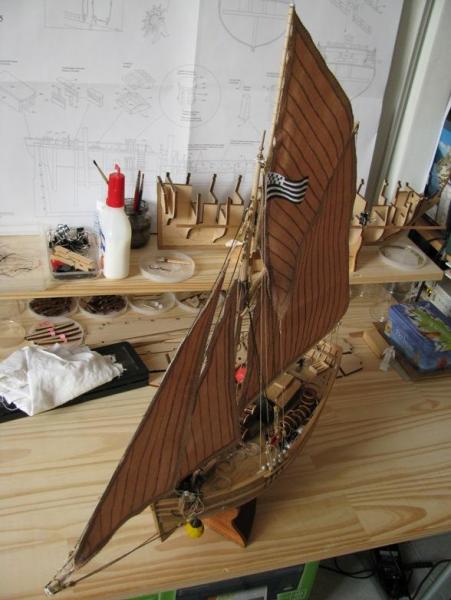
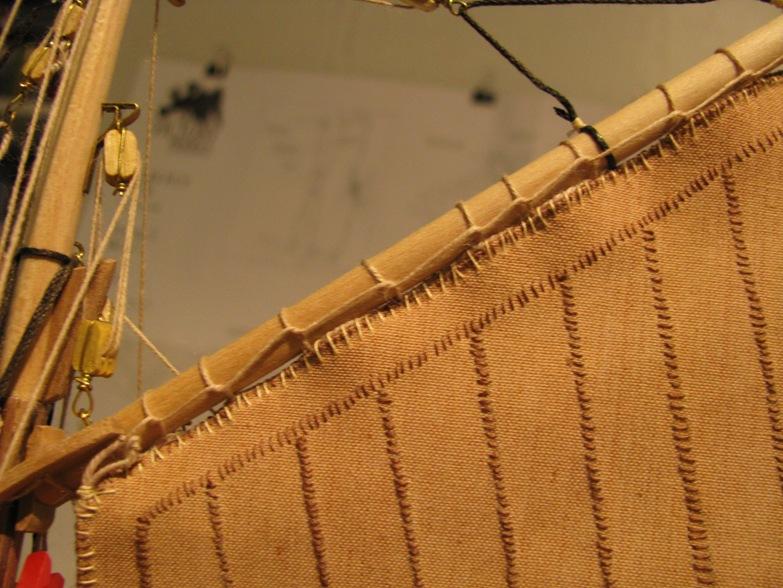
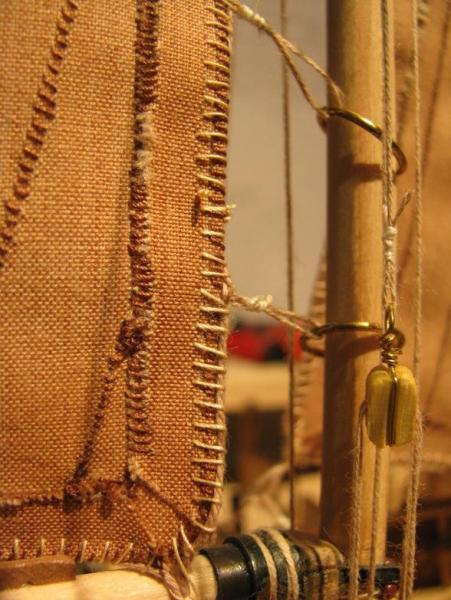
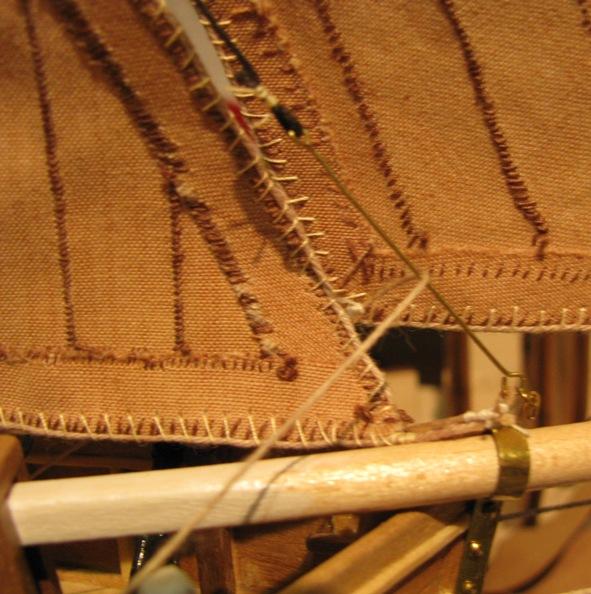
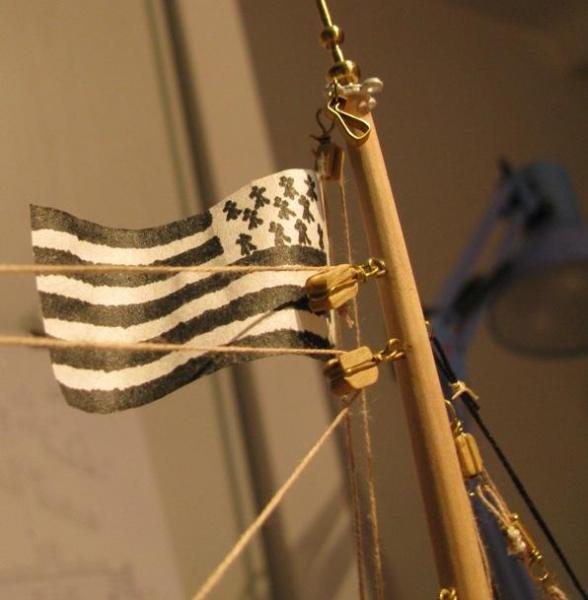
13/12/2011 Well, I finally got to complete the main sail! It was rather easy to fit directly on the model: I started by the upper end of the gaff, then all the way down the gaff with lacing (as per one of the options described in Zu Mondfeld's book): ... and then with the five mast rings (I tried with brass wire first but it was a pain so rope it is! ): I'm currently attaching the lower part to the boom. I also corrected my jib mistake by having the sheet go over the stay. I can now change tack properly: And I tried a small improvement on the rudder by cutting the nails shorter. I find it much better and that's a good thing as I don't have the nerves to unmount it and do rivets instead: that will be for Fly! Oh, and here is a better view of the flag:

-
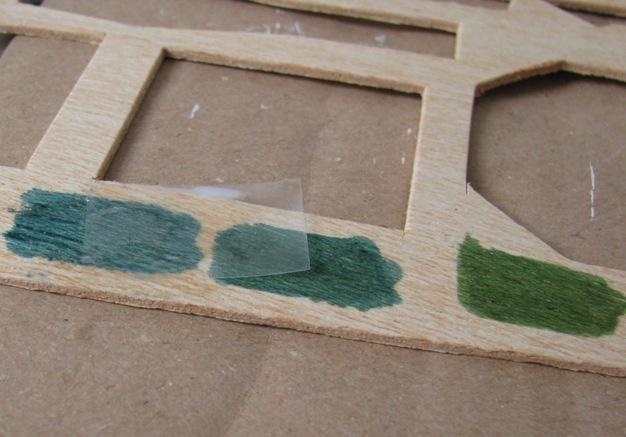
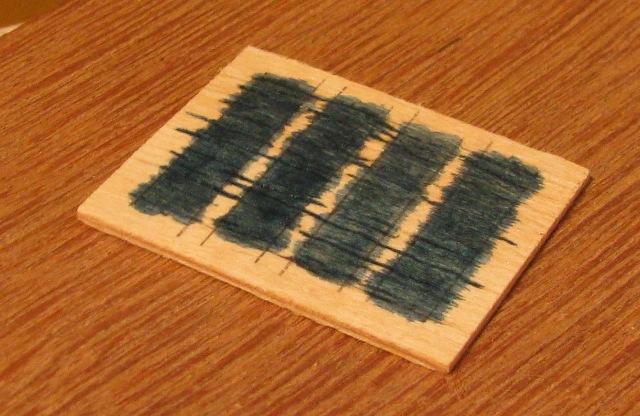
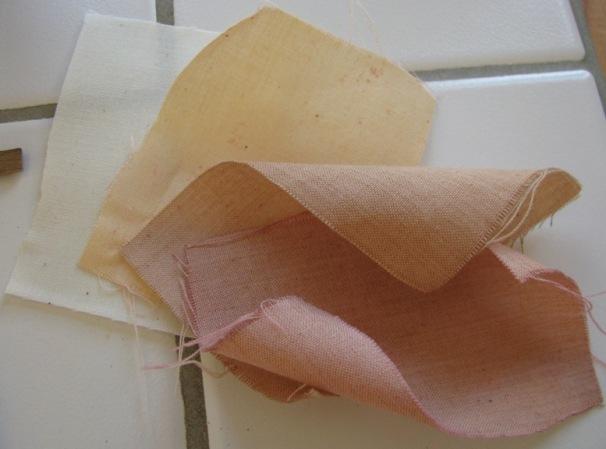
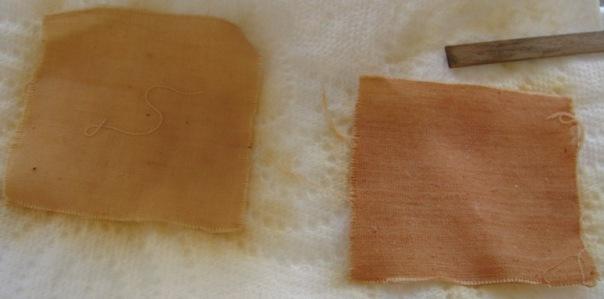
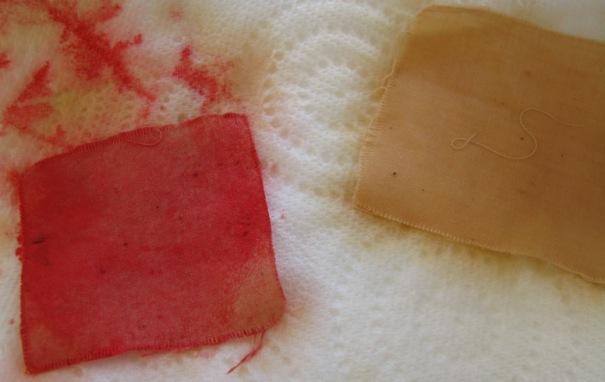
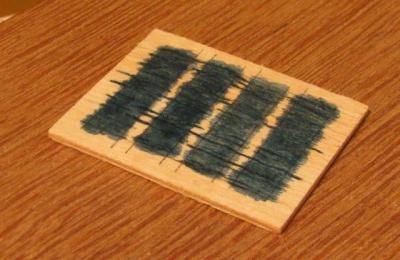
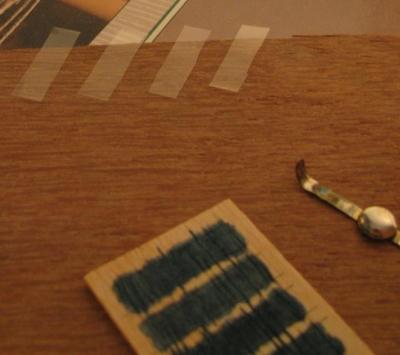
01/11/2011 Wow! I can't believe it has been nearly a month since my last posting here... I still did not tried anything on the rudder as I have to buy tools and copper nails (thanks for the lecture on riveting, gentlemen, this video does make it look easy! (Remark 2013: I don't have the link to the video anymore and don't remember who posted it...)). I did progress on the built, nevertheless. After some colouring experiments (Remark 2013: originally posted in the sails & rigging tips... I reproduce those tests here: --- sails colouring I wanted to have my fishing cutter sails coloured in a brownish red. I first tried to stain a piece of the kit sail cloth with tea but it resulted in a very light ochre. There were two problems (as Sailcat helped me understand): the sail cloth had not been washed prior to dying which meant that there might be some chemicals remaining on the fabric that prevented the tea to fix on it; second my tea brew was probably not concentrated enough... Ulises Victoria also suggested using fabric specific dyes which I did not try but that Uinsin used with success for his model of Le Camaret. Here are the experiments I did: In the first pic, we have (from left to right) one square of plain fabric, one with ink only, one with a light brew of Darjeeling tea and one with both tea and ink. There was not enough ink to colour much the fabric but it did left some deeply coloured spots on defects, so I discarded the ink. In the second picture, I tried a strong brew of Earl Grey tea (left) and a strong one of Darjeeling (right). This last one is not as red as I would have liked but it looks good and it is the one I chose for Le Camaret. In the third and last pic, I tried to mix some red paint with Earl Grey tea (left) : the resulting colour is far too deep to my liking. ---) So, after those colouring experiments, I finally started with the sails. They took a bath in a strong brew of Darjeeling tea before being ironed and sewn. There are four of them and the jib is already set: I also made the flag: I used a black Faber Castell artist pen on a paper intended for Chinese calligraphy.
-
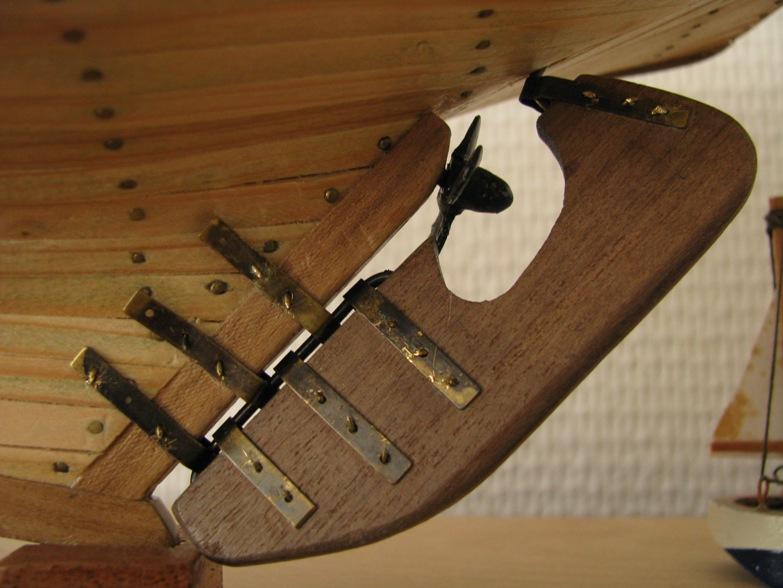
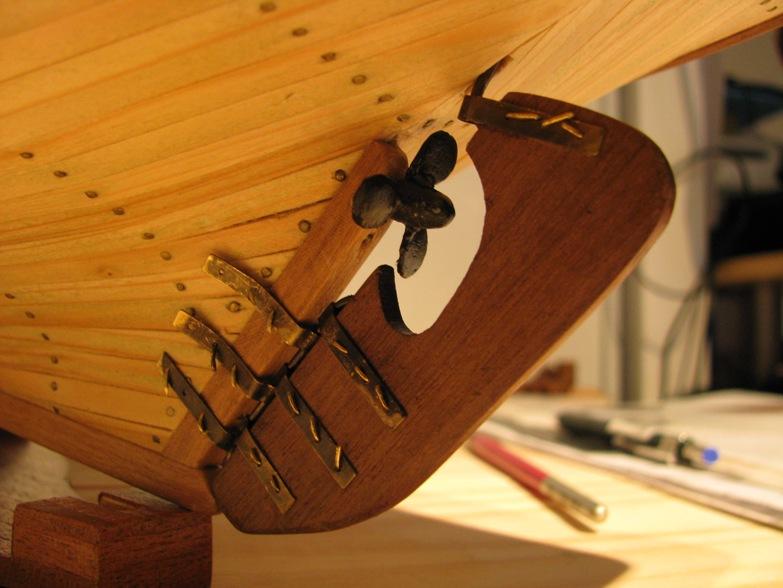
08/10/2011 I finally made the rudder (should have done that before starting the rigging! ). I wanted to have a working rudder and came up with this assembly: The two brass axles are angled and fitted in holes in the rudder so that the rudder accompanies the rotation of the shaft. They are mounted on the rudder thanks to hinges, the latter being fixed with nails passing through pre-drilled holes. I know they might look strange on the port side but this was the easiest method I saw that did not involve soldering! And the rudder is supposed to be under water anyway! I will have to modify the stand as the keel cannot rest in the rear notch anymore with the rudder in place (maybe I placed it too low )...


-
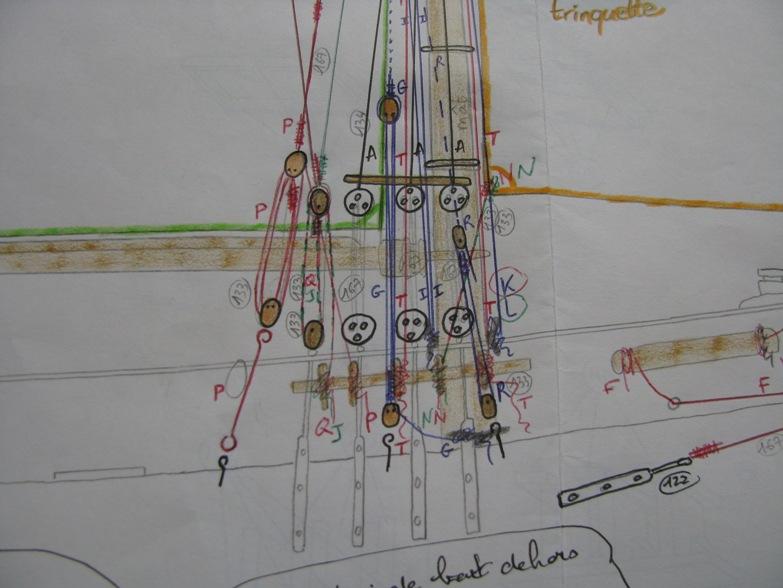
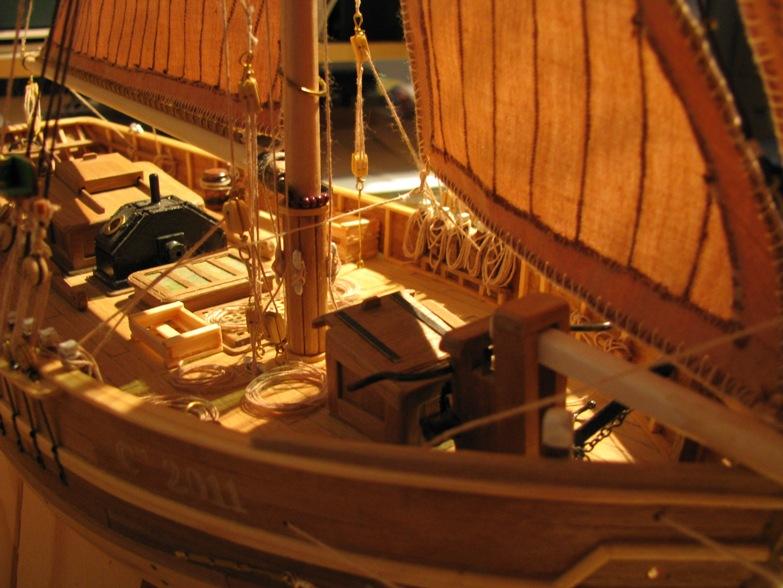
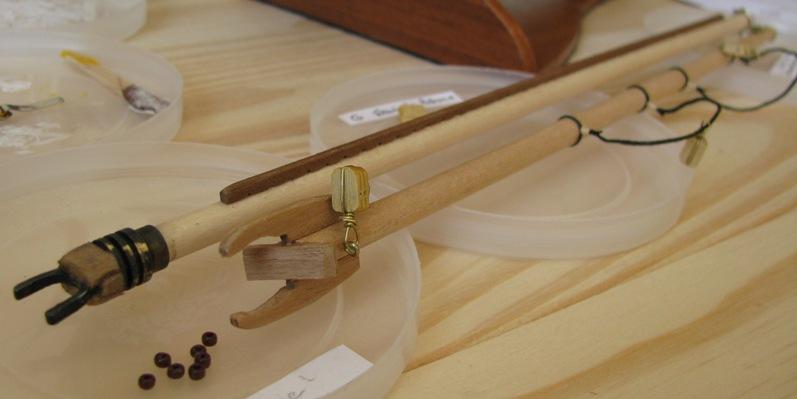
25/09/2011 More rigging. This is very instructive: I now understand which is which and what is the function of every single line! I will not see the rigging as a pack of spaghetti anymore! First, the side lights (red on lardboard, green on starboard): Then the spanker boom and gaff (the manzonia wood pieces on the mast side of the boom are a home-made reinforcement piece I made because the metal jaw broke when I handled the boom and glue was not enough to make me comfortable about it (if it broke once... )): A general view of the present state: And my first rope coils on bitts and lugs... This is easier than I thought but it still requires a lot of patience!


-
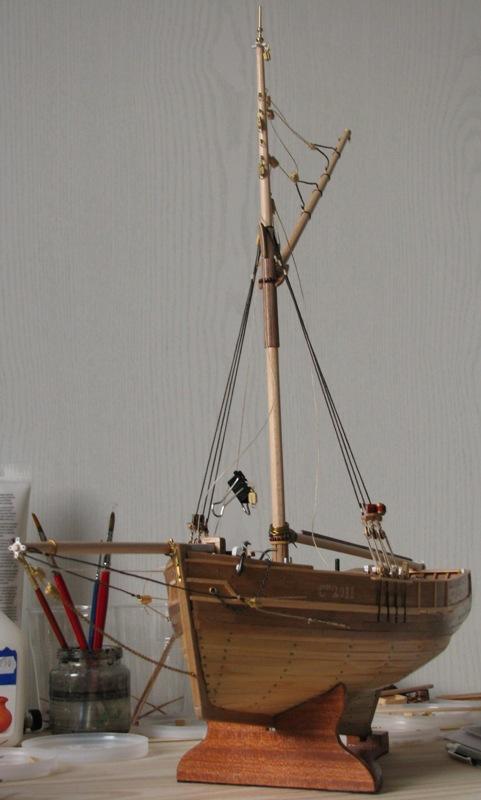
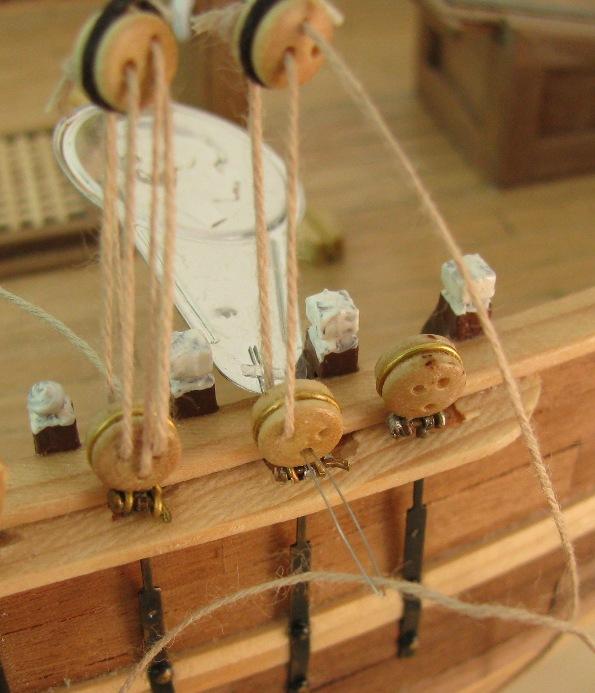
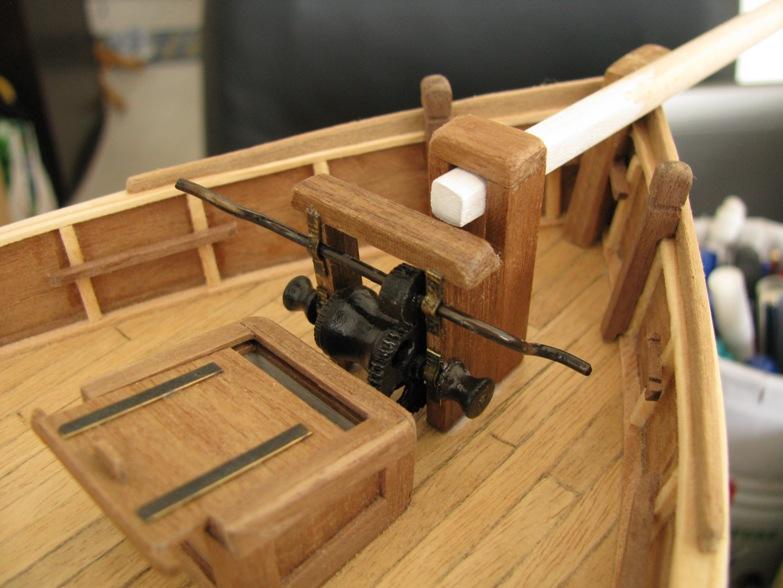
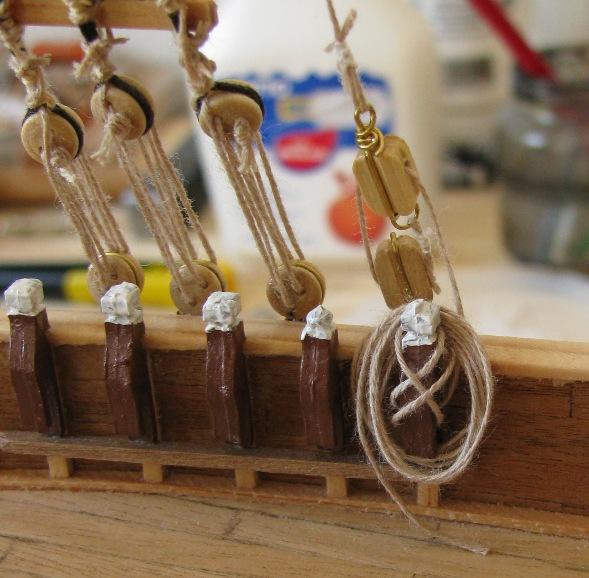
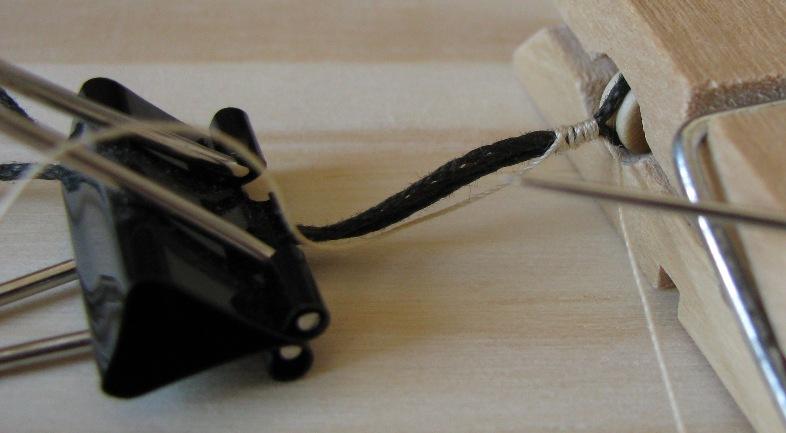
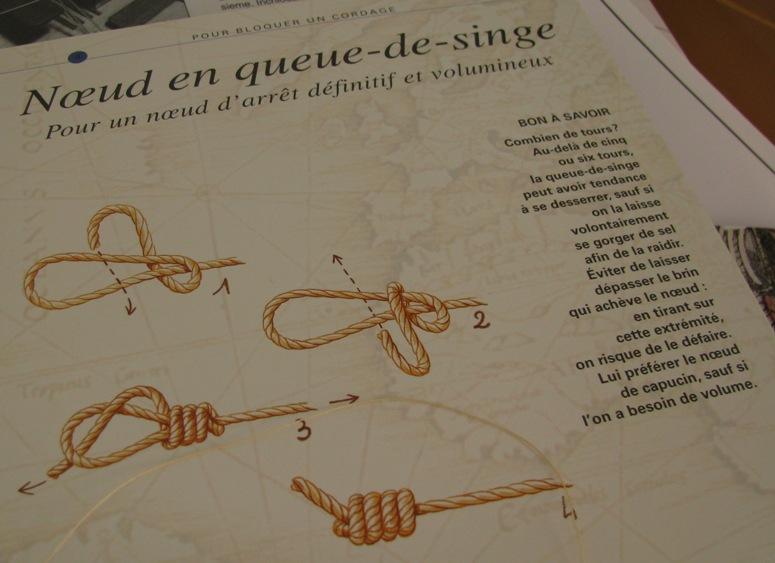
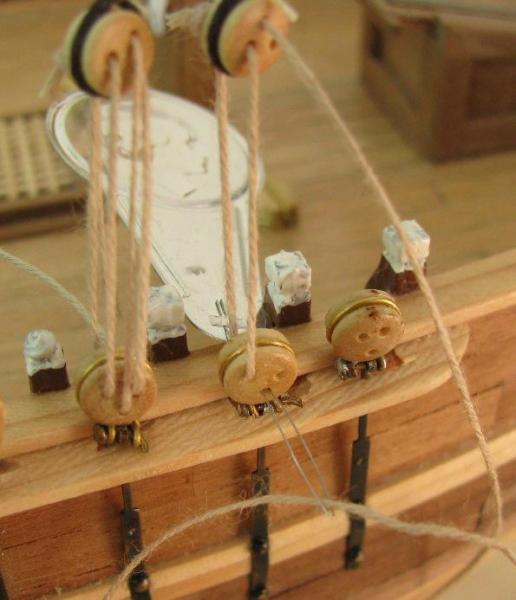
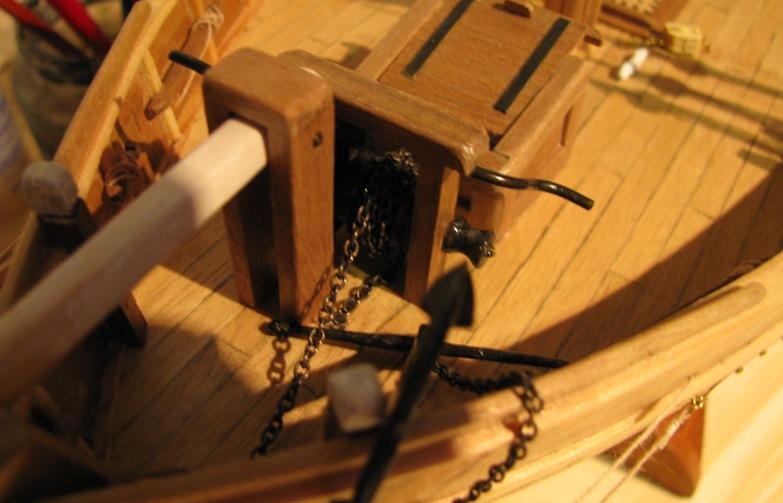
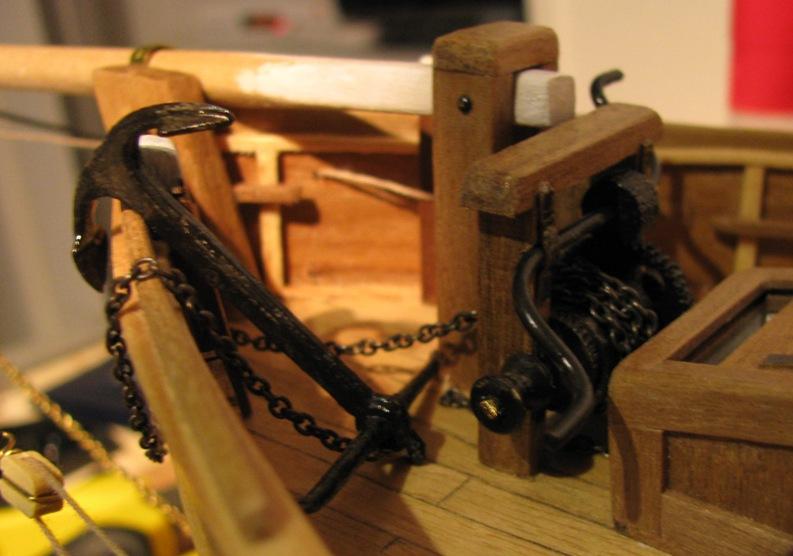
22/09/2011 Thank you for the advice, gentlemen! (Remark 2013: hum, it must have been something to get all the shrouds at the same level... Don't remember who helped there (you were a few) nor what exactly was the tip but it involved temporarily putting the shrouds under tension and fixing all but one while attaching the dead-eyes one by one, but I may be mistaken...) I began with the single pair of shrouds and had them the same lenght without too much trouble and then used them as a reference for the four other shrouds. Many paper clips and cloth pins were involved to mark the measurement and hold the cords while seizing the deadeyes in place. They are not perfectly aligned (the fore one on the starboard side is way to low...). I think it is mainly due to the fact that I thought it would be easier to seize things with the shrouds not on the mast: I suppose some of my cloth pins have moved a bit during the process... Next time, I'll try and do everything directly on the model. The lanyards were not a problem, that is when I was focused enough: I did have to do some several times having passed the cord in the wrong hole or even the wrong lower deadeye! I used a "monkey tail"? knot (could not find a translation for this one) for the dead end of the lanyard. I also made the bowsprit stays: And the anchor is in place, though not properly attached yet. The working windlass was greatly apreciated to get the anchor chain around it! I wonder where the end of the chain is supposed to be fixed, though... There is no indication for that on my plans.
-
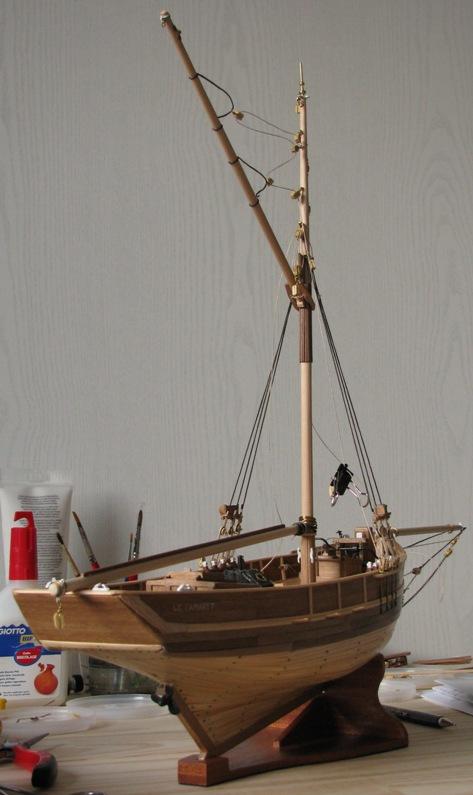
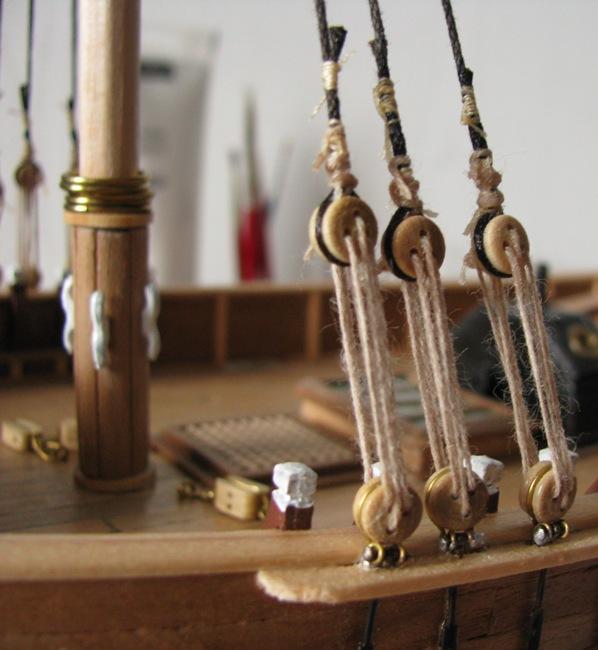
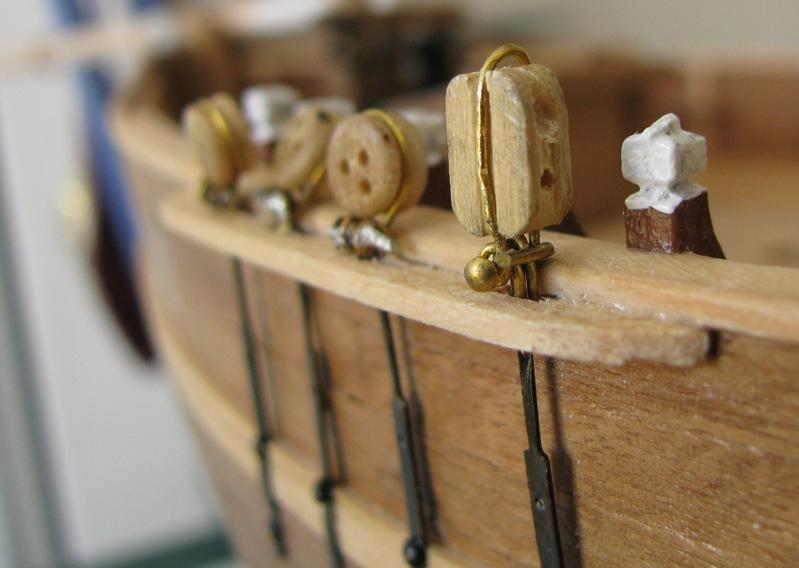
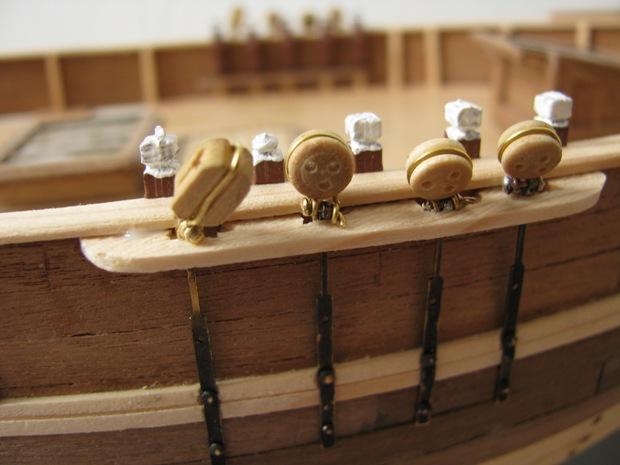
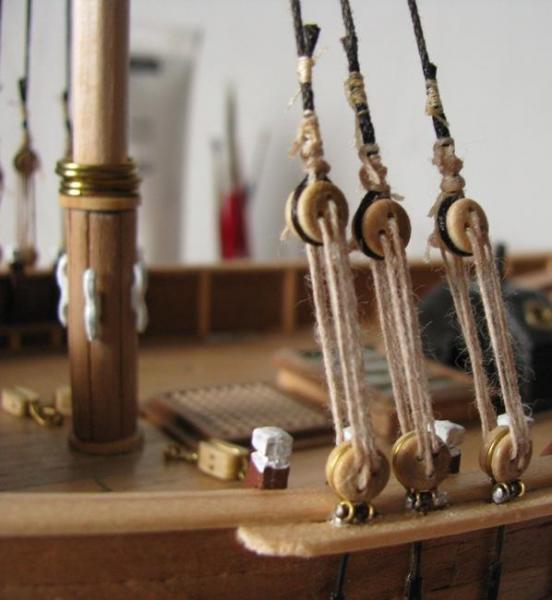
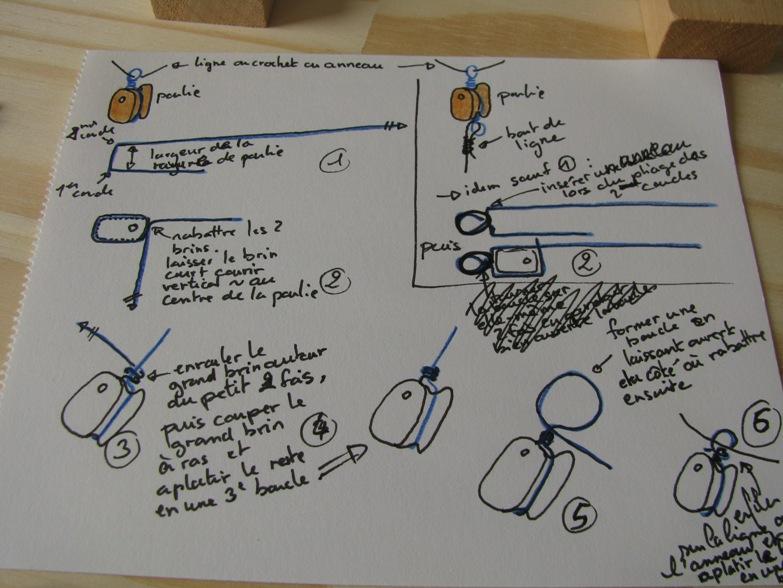
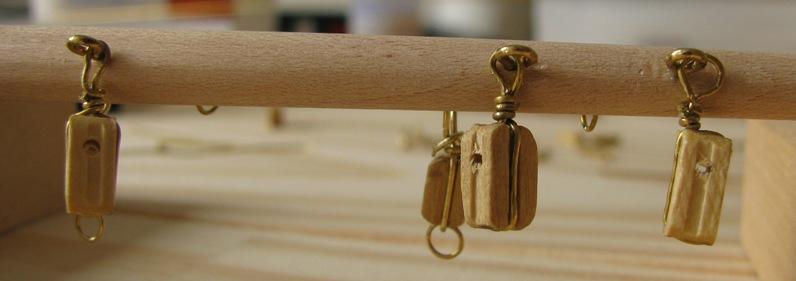
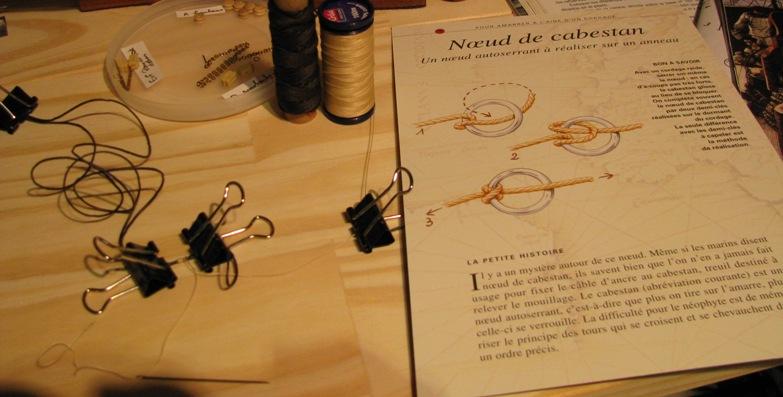
17/09/2011 Dan, thanks for the pics! This seems a very simple method indeed. I'll keep them in mind for Fly. (Remark 2013: I don't have the picture anymore but it was a great "how-to" for attaching blocks to the mast or spars with rope... I think I will ask again sooner or later for Fly.) The thing is I want to use brass wire, not rope (mad I know but I don't like to give up!) so let's fight... Indeed, on the Notre-Dame de Rumengol (pic bellow) which is from the same period and area, the blocks are provided with metal hooks that are then fixed on metal rings, no rope there. Uinsin, you are probably wiser than I am, deciding to use rope instead of brass wire! I also had a look at Arthur's Gulnara. It gave me inspiration and I made my blocks rigging afresh this morning: They look far much better for me, though the loops are still a bit too wide... But I'm not making them a third time! --- Thank you, Uinsin! I don't know about patience... but I am not to be stopped trying when a block rigging wire breaks for the second time at the very end of the last loop The third works! Good thing I bought more brass wire than needed... I finally put all the necesary blocks to the mast, glued it in place and varnished it. During drying time, I began making the shrouds. There are three of them on each side so I made two double shrouds and one single shroud. To close the loop that goes around the mast, I followed my "nautical knots learning kit" when they suggest to use clove hitches to whip a rope. It is a easily done knot and it seems to be rather strong for this job. I made 5 or 6 clove hitches per loop end and then fixed the knots and ropes ends with varnish. Here is the process and result in pics: This was the easy part! I now have to end up with six shrouds of the same length...

-
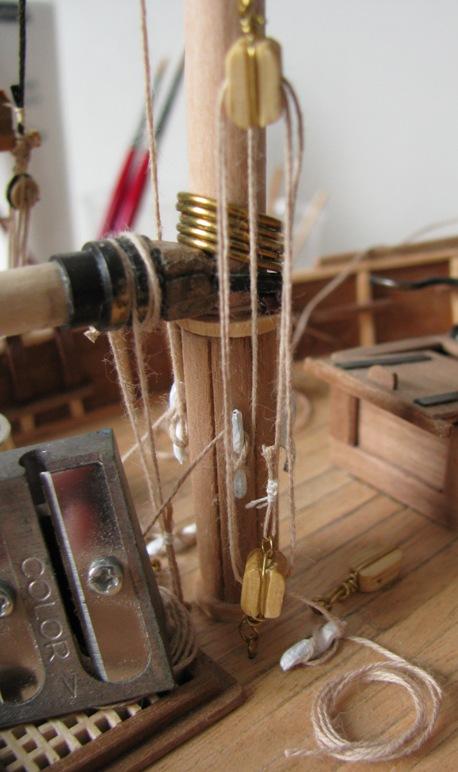
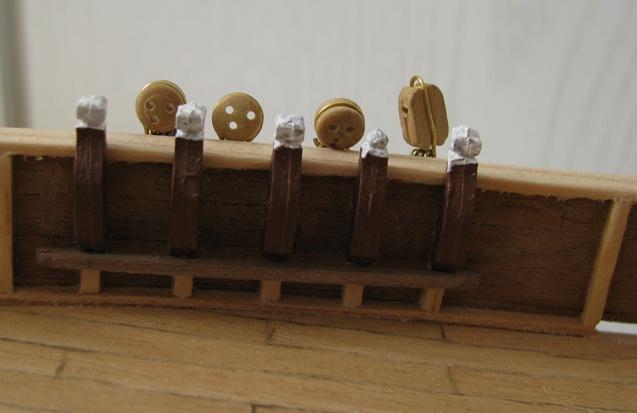
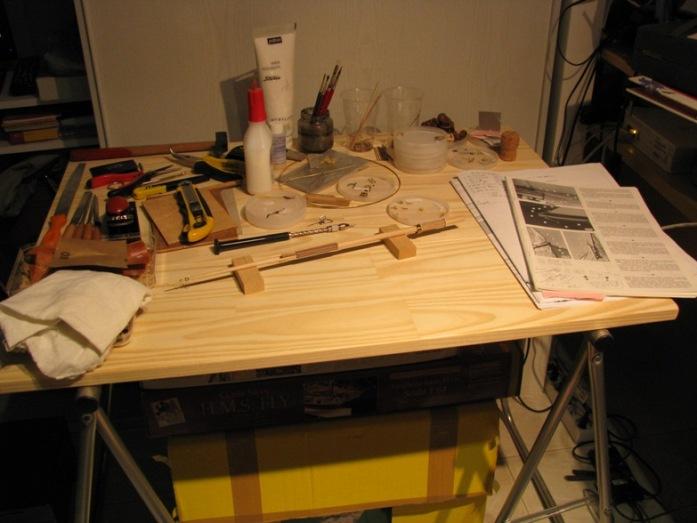
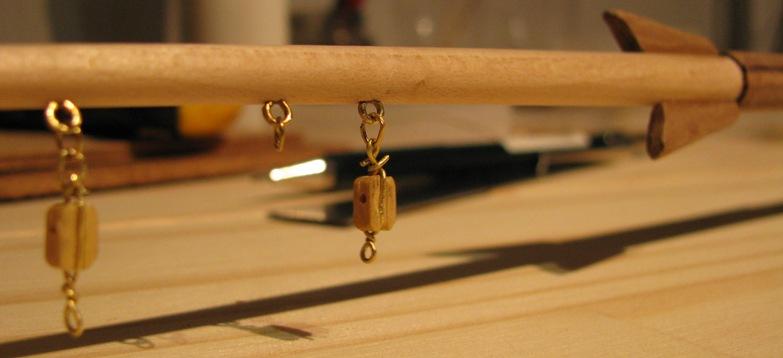
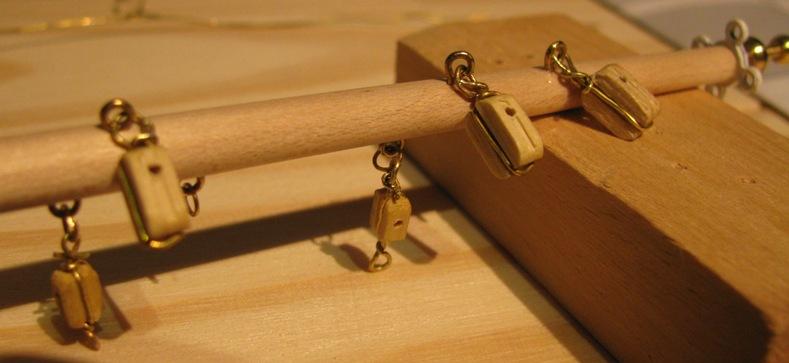
05/09/2011 My mast is taking shape rather fast. A plane really is the thing! I never used one before but it is just an amazing tool! (and much less messier than a file: rolls of wood rather than saw dust ) Thanks for the advice, guys! (Remark 2013: was it Arthur or Kester... I think you both contributed. I hope I am not forgetting someone, if so tell me!) The mast had four sections that required a separate shaping: two tapered ones (one on the top with a strong tapering and one along the main sail height with a lighter tapering) and two straight ones where manzonia planks would be glued. I made the tapering with a plane and the straight sections with a file and simply finished everything with a go of sand paper. The mast is only dry fitted (I still have a lot of job to do on it such as all the eyebolts positioning...) 16/09/2011 Some progress on the mast (and my brand new work table! ). To install an eyebolt, I premade a hole with a nail and then knocked the eyebolt in it. Then it's all brass wire twisting! I am so glad I bought "self-blocking tweezers": they are unvaluable to hold the standing part of a wire or rope while making a knot. I am not sure about the way I am attaching the blocks (not very nice looking I fear...) but I could not conclude anything usefull by staring at the pics on the kit box... and the computer was off! Any comment / suggestion will be most welcome!


-
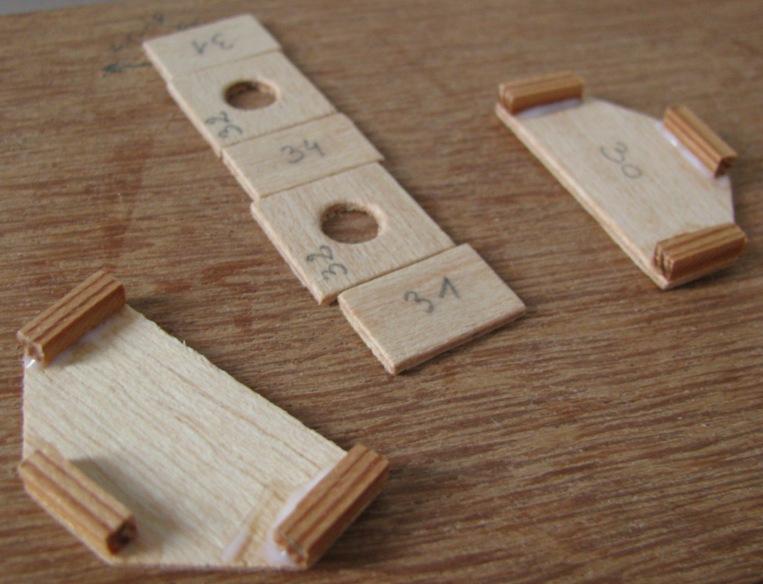
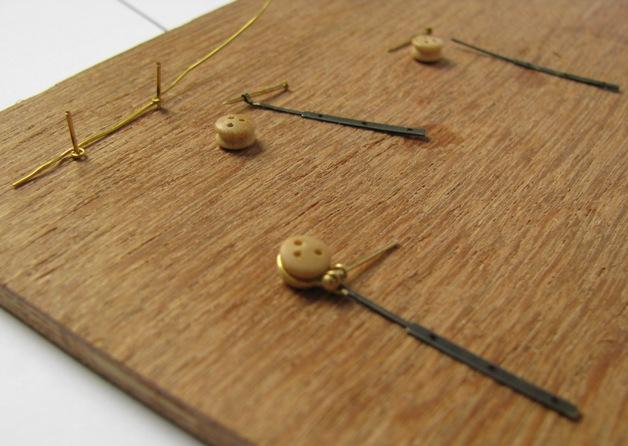
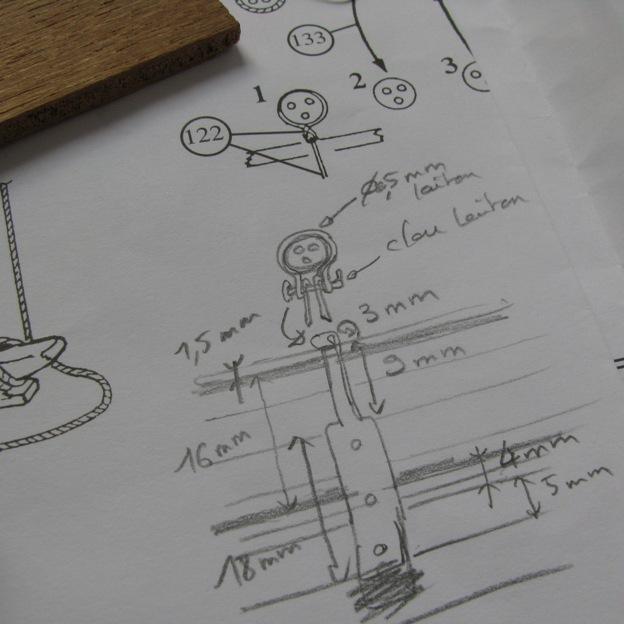
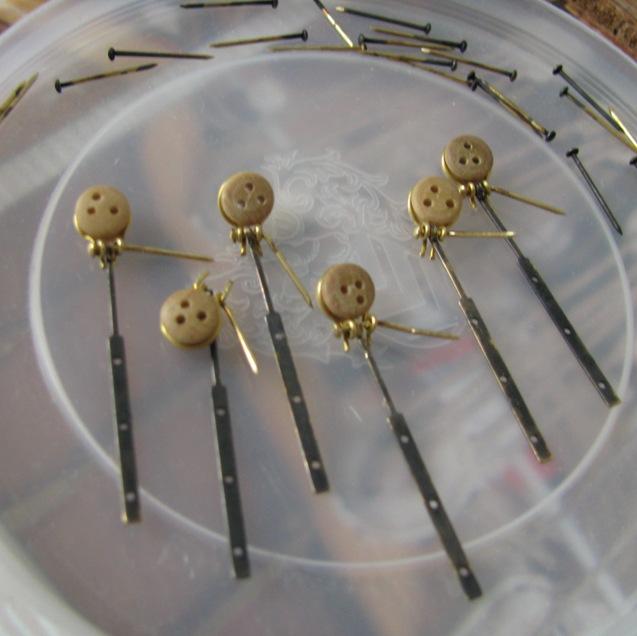
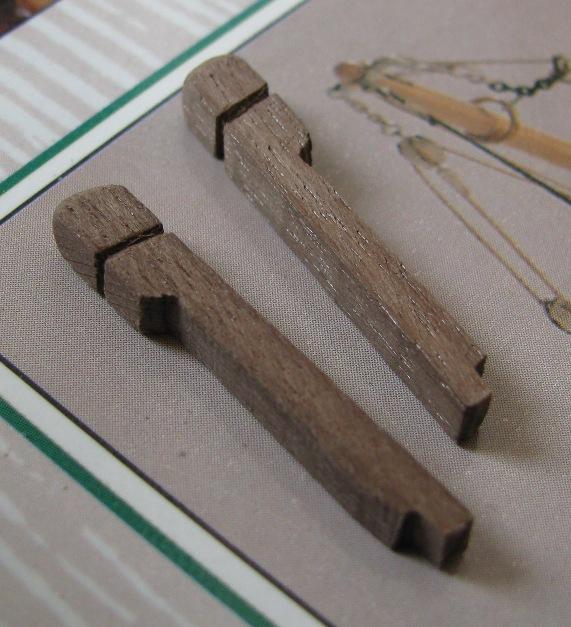
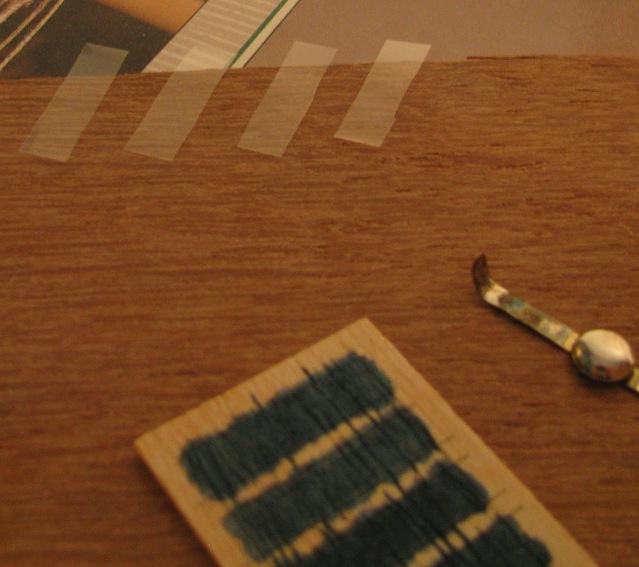
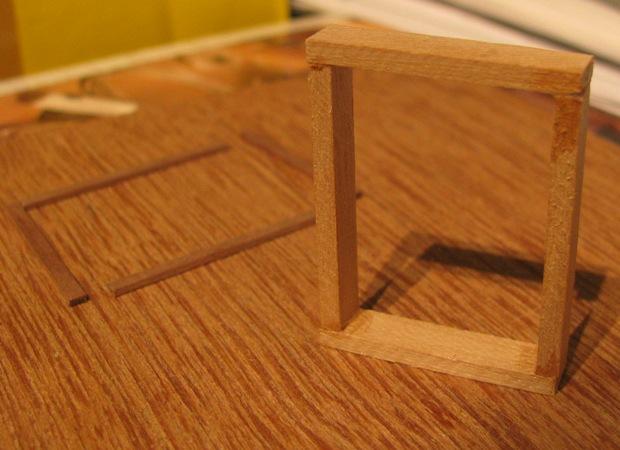
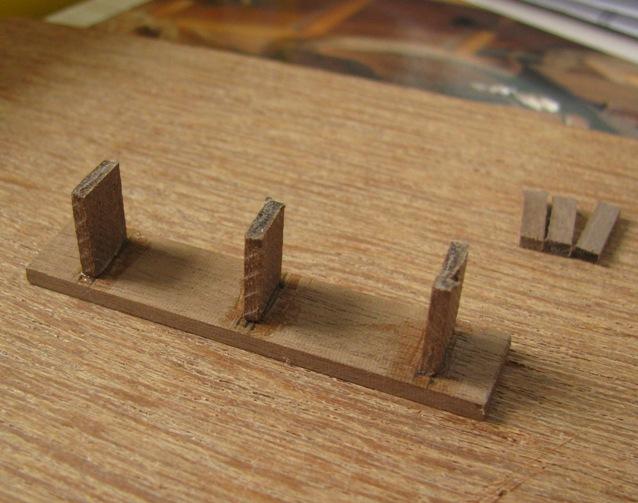
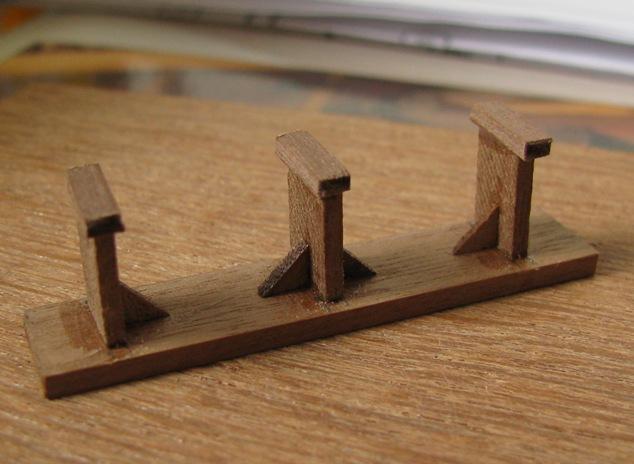
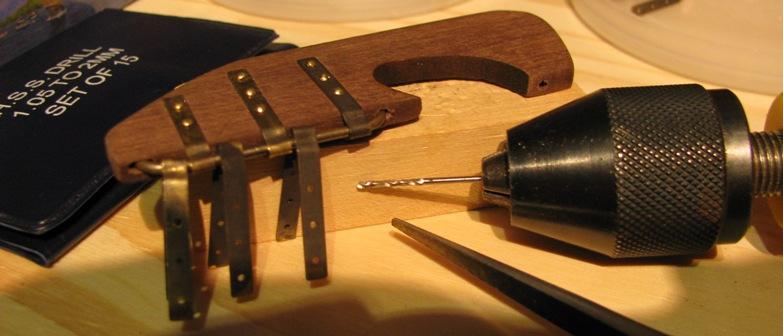
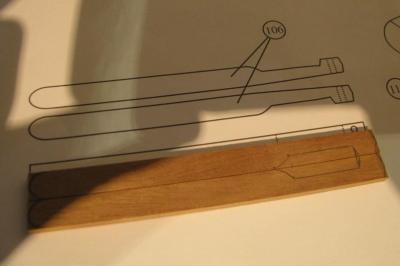
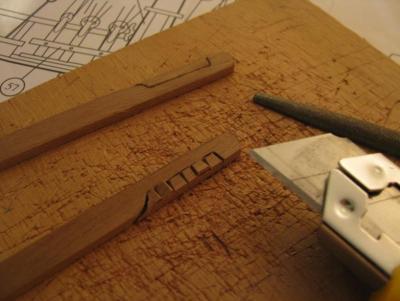
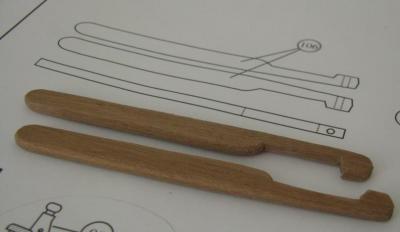
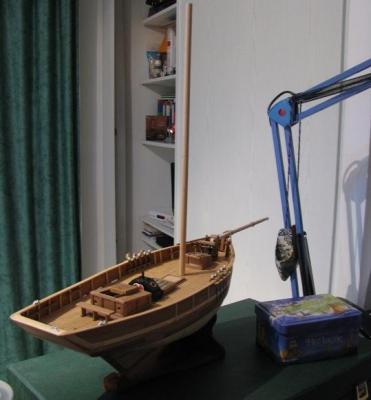
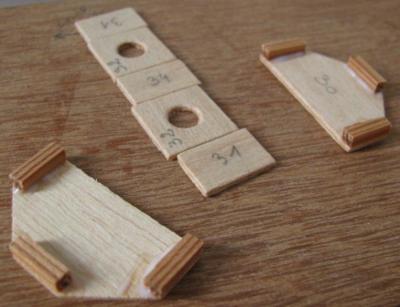
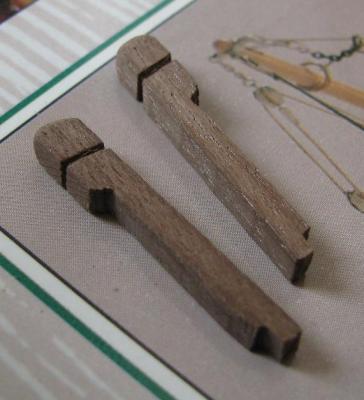
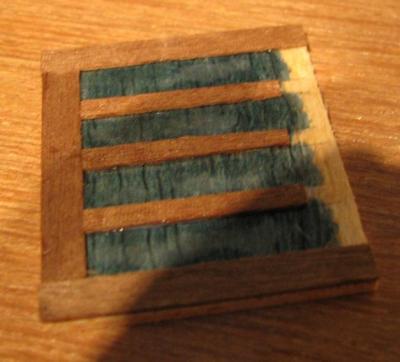
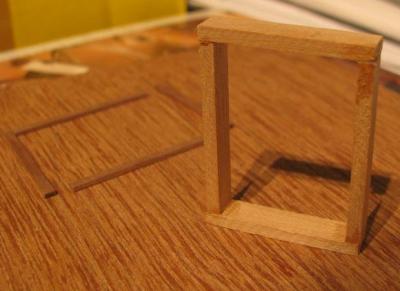
25/07/2011 I am now making the "legs and support": I can't figure out the use of these. Is it to maintain the ship straight when in drydock? But where do they go and how do they keep their equilibrium? 03/09/2011 More on the legs: (a bit of PVA and nobody will know... ) I warmed the credit card this morning: I will now practice a bit with the plane and the push drill before going on with the build. Next on the "to be bought list" are 2 or 3 volumes of David Antscherl's Swann Class books (#2 and 4 for sure!)...


-
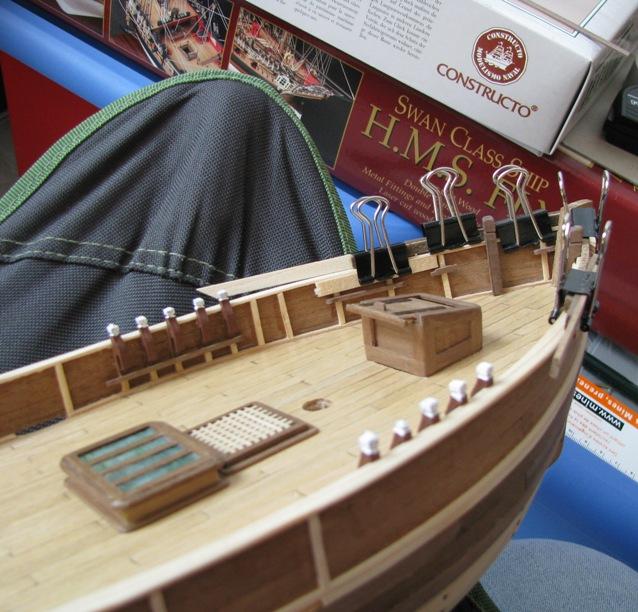
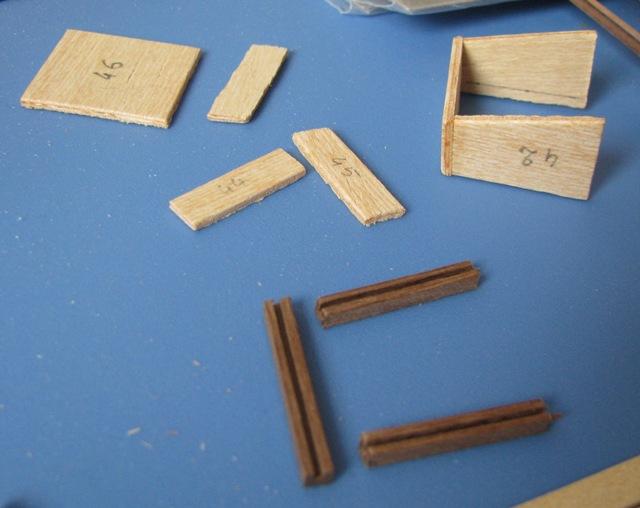
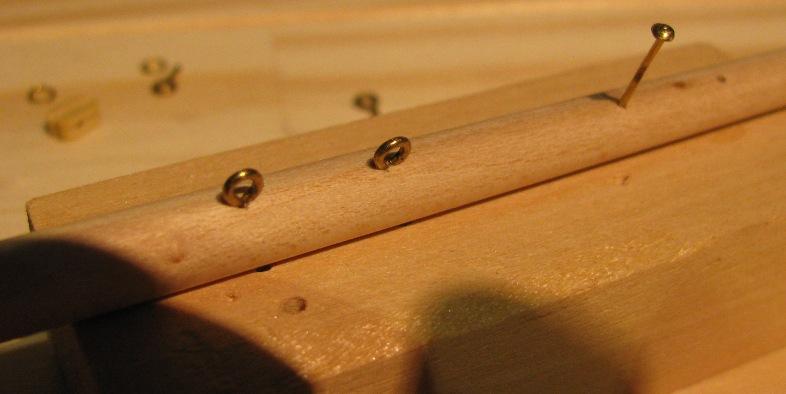
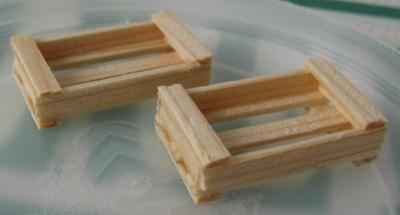
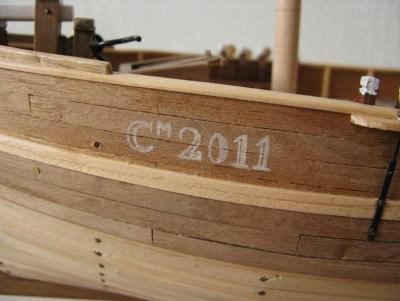
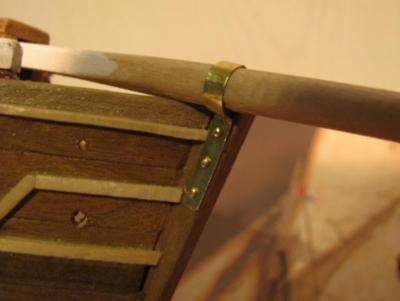
25/07/2011 I did not began my main mast shaping yet but I found I still had plenty to do before that. Here it goes: Before the holidays, I completed the fishing equipment with boxes (I would never have imagined making miniatures of those before! ): And last weekend, I decided to put the name and registers on the hull and varnish it as I won't have anything more to glue on it. I used a Faber&Castell ivory pencil to write the name and registers (which is not the one chosen by Constructo but will help me remember my first model birthday ). I then put three coats of clear finish with a light sanding after coat #2 and coat #3. The hull is now smooth and shiny when enlighted and I find it brought out the wood colours, making them warmer. While varnishing, I also decided to fix the bowsprit parrel lashing. I did not do it before because I could not decide on darkening or not darkening... but plain brass looks good here so plain brass it is! Those three nails where a bit of a pain to knock but they ended in their right place anyway... without too much damage to the hull nearby ! Oh, and I also got the upside down blocks fixed! At first, I tried to drill new holes as some of you suggested but I could not get a proper hole with my current tools. I then tried flipping them by spacing the brass wire around them with tweezers and tightening them again after the flip. Fortunately there was enough brass wire around to do that. Pfff... Done! I'll try not to misplace other blocks in the future.

-
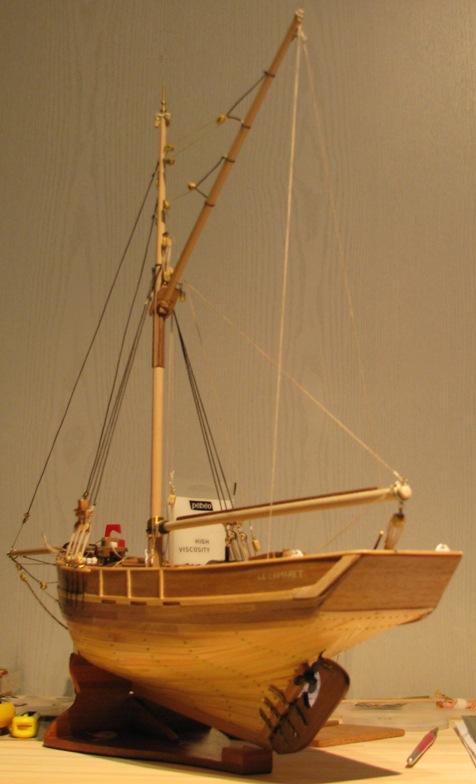
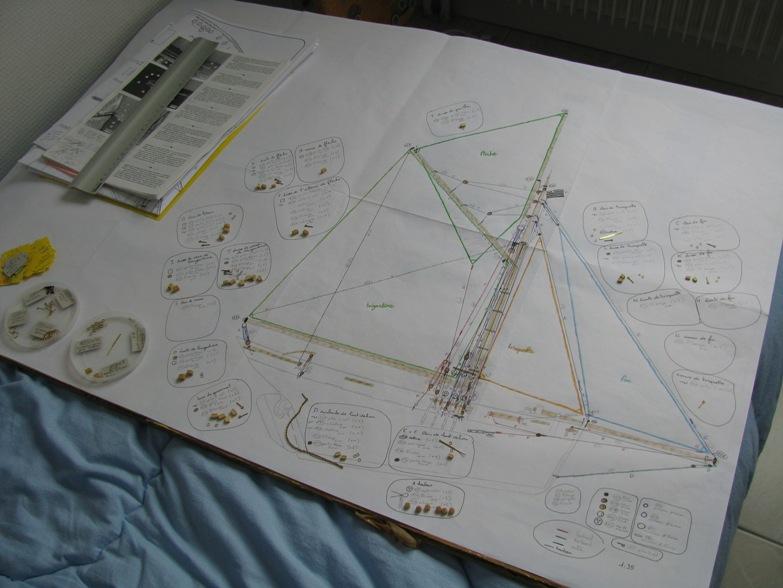
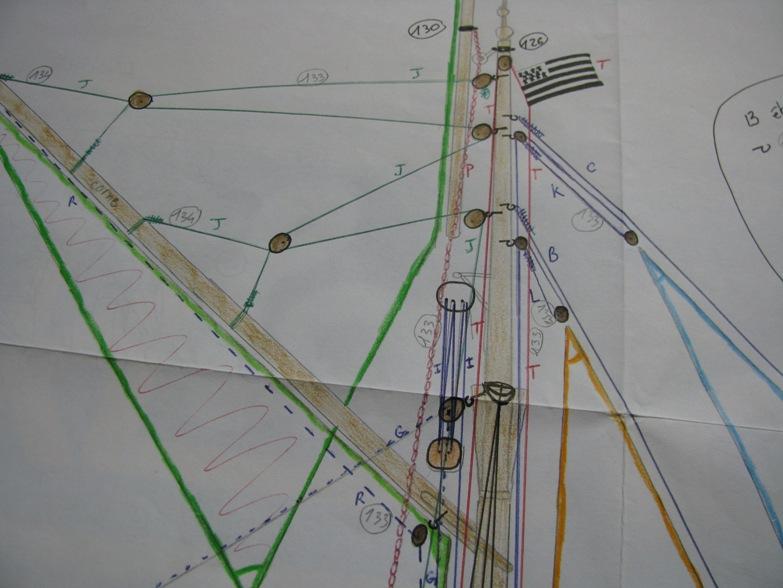
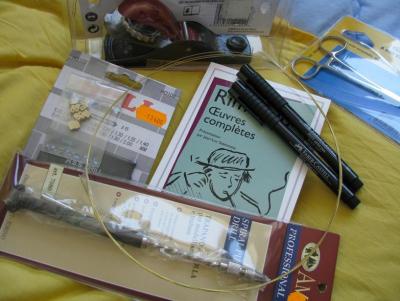
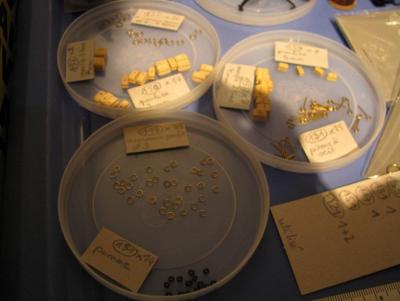
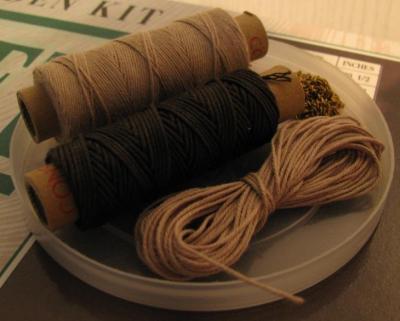
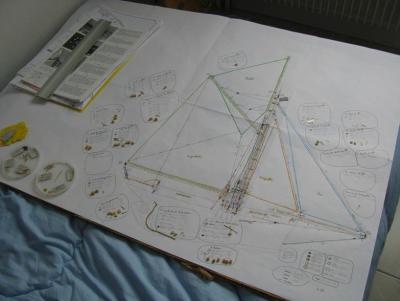
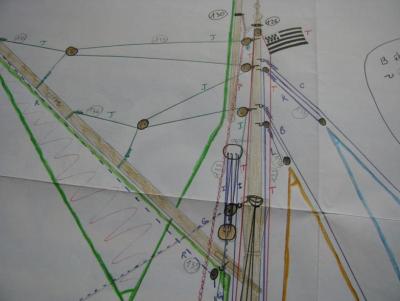
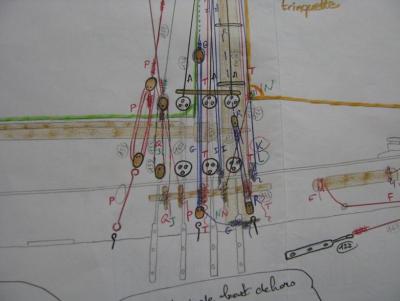
25/07/2011 (my rigging material) (my resumé of the different rigging plans) And a final view: The mast is simply dry fitted. I think shaping it will be my next task. I will at least be able to make the shrouds as a starting point. Although I need to attach all the necessary eyebolts in the mast before gluing it in place.
-
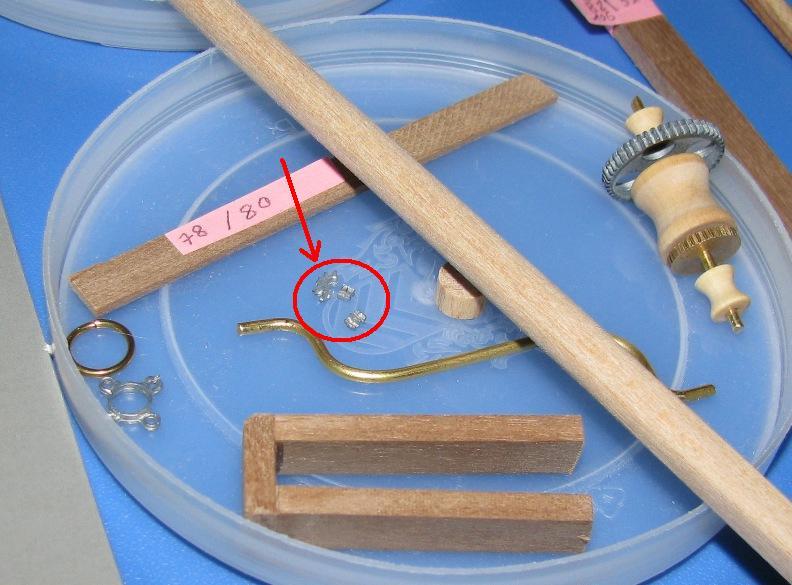
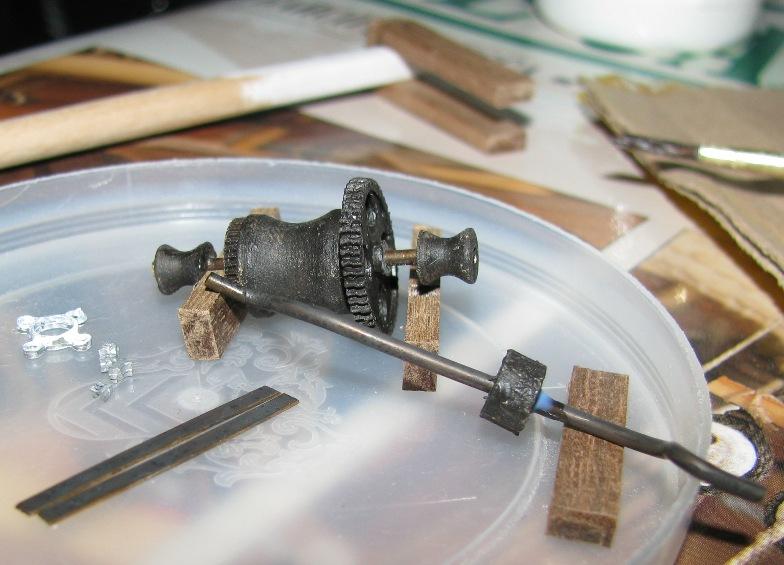
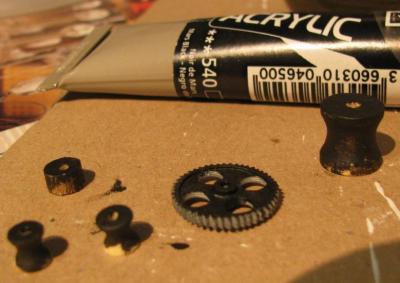
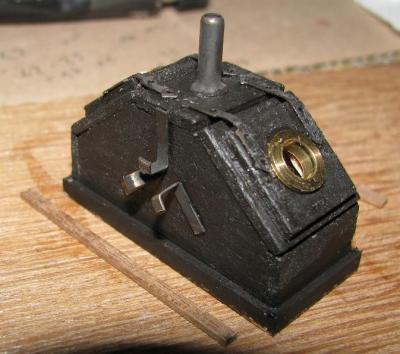
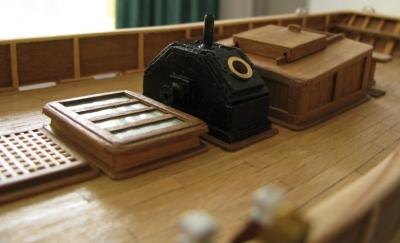
25/07/2011 The next victim was the windlass. No big difficulty even if I managed to break one of the gears while dry fitting it on the shaft . But the bowspritt roller being of no use at its intended location (no the right dimension for the bowspritt! ...but exactly the right diameter for the gear ) I drilled a hole in it and it made a suitable replacement for the lost part . As for the engine room, I used my blue chemics and acrylics to make everyone dark and metal shining! (The gear actually works! Yeah! I'll be able to move the anchor! ) And at the moment, I am trying to decipher the rigging instructions, that is to say plans and black&white pics: no instructions whatsoever as to how to rig! Either Constructo decided we did that since babyhood or they run out of paper for their booklet. Here are views of what I have been playing with this month: (this is O.K. ...)


-
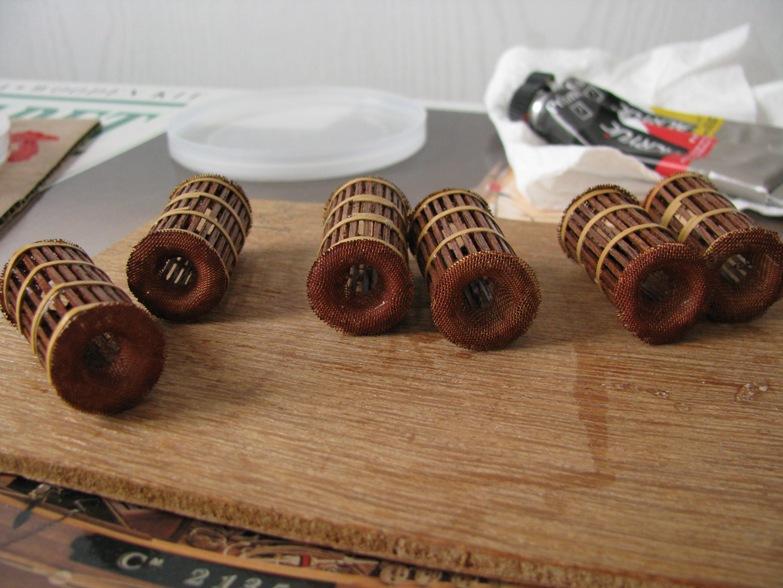
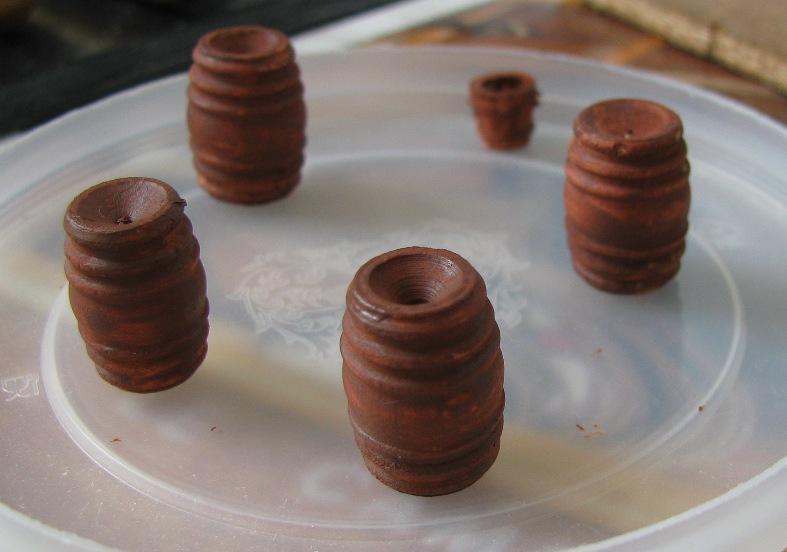
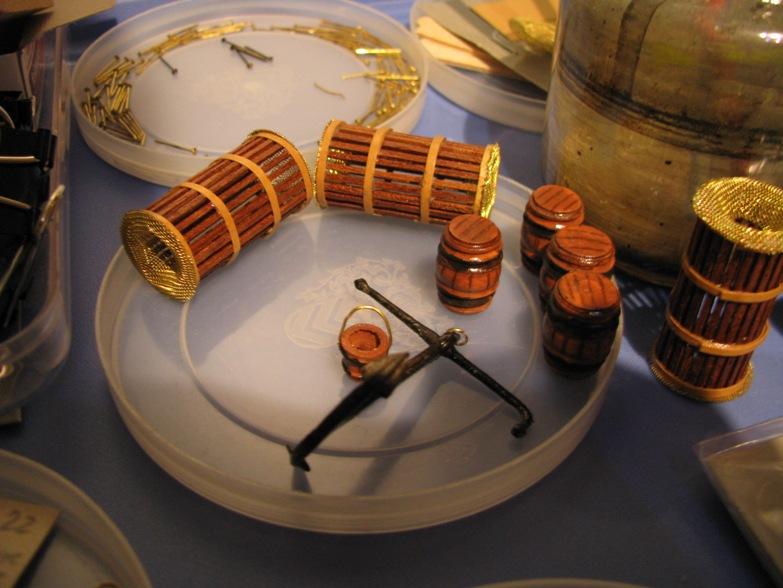
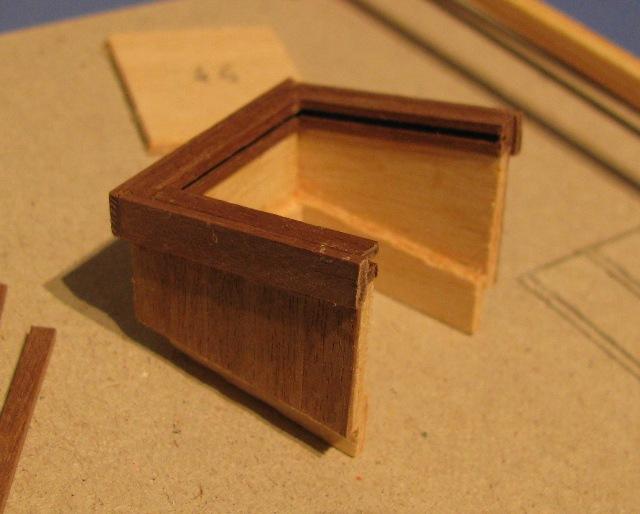
Hi Elia! Good to see you again here... and Arethusa of course! I will have to dive and rejoice in a fair lot of build logs when mine are restorded... --- 25/07/2011 Let's go on with my build, shall we? So, I was at the chain plates and I still have to correct my block orientation mistake... (Remark 2013: I think it was Dan Vad who kindly made me see that the block on the left of the previous pic was upside-down (as well as its counterpart on the port side of course!)... Obviously the hole should be on the bottom, the rope going round the block. There are two solutions: either drill another hole (a priori the least demanding) or remove the block, turn it upside-up and put it back in place. We will see the correction in a few entries...) In June, I made a few more of the deck furniture: - the wardroom: - the engine room: I used "black of Mars" acrylics to paint the wood and selenium dioxide on the brass parts. Then (or before, for some parts: who knows? ), I painted the barrels and the bucket: they were prefabricated boxwood parts which I painted with acrylics. I used a Faber&Castell brown pencil to simulate the joints between planks. I also made the anchor (black painted castings) and I finished making the lobster pots: I was not satisfied with the yellow plastic nettings but did not want to make replacements so I tried painting them and I like the results!


-
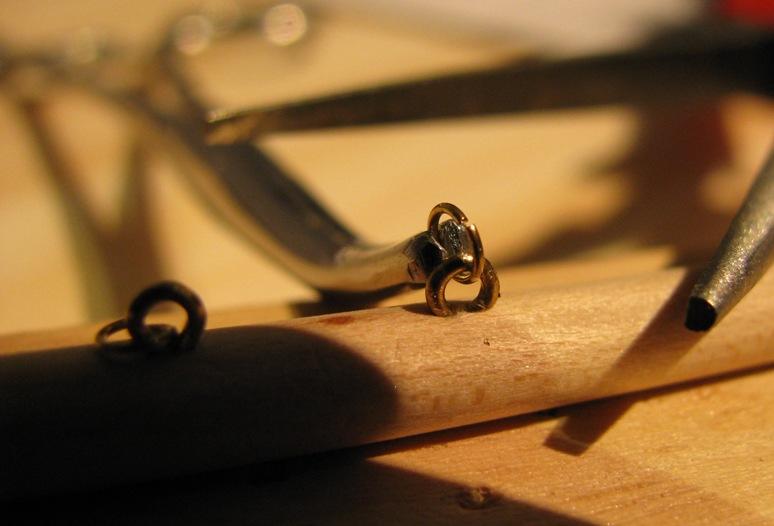
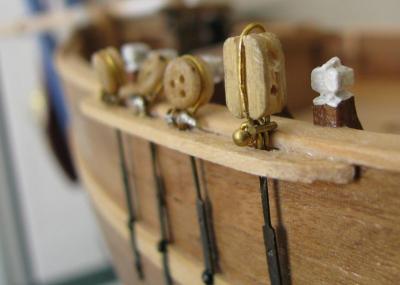
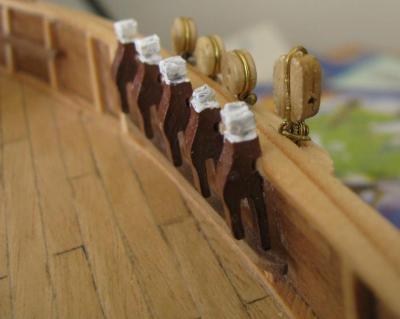
01/05/2011 And finally I began making the chain plates / deadeye assembly, getting my inspiration from Arthur's technique for his Gulnara. (Constructo's instruction here are nearly non-existent...) So I used some diameter 0.5 mm brass wire to make the part that goes round the deadeye, forming two circles at each end for a nail to go through. I also curved the end of the chain plate into a tube for the same nail to go through. And here I am, waiting for a soldering iron to complete the assembly. 12/06/2011 There. I finally managed to complete those chain plates after a month lost to modeling. I learned at least one thing making them: I'm lousy at soldering! I ended just bending the nail around the whole thing for the last two chains (pic. #2) without soldering anything . Well, they are all in place now, nailed to the hull and I am rather happy with them even if they are not so good-looking... I also made two pieces of wood from remains of hull planking with four notches to hold the chain plates close to the rail. I can now move on and finish putting all the deck items before starting the rigging. --- ...which ends the DDM build log. Episode MSW on your screen soon...


-
Trufo, No problem... I beneficiated so much from MSW, it is only fair that I do what little I can for MSW 2.0! Uinsin, Well, as I wanted to be able to look at my log without needing to connect to the Internet, I thought a copy & paste in MS word was a good idea... And after what happened with DDM, I was not going to stop this habit! But that does not mean we don't need YOUR log back! You built her differently and beautifully so... may we induce you to consider? But no pressure... it's up to you of course.
-
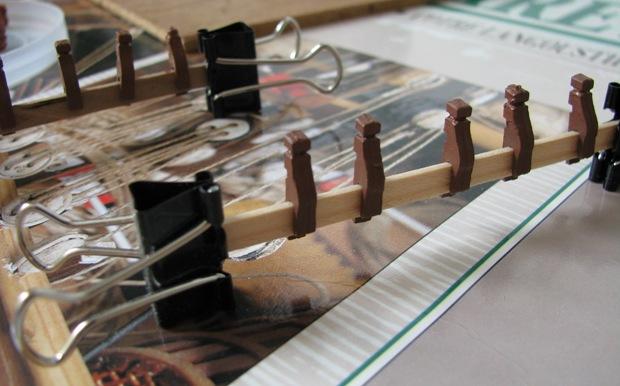
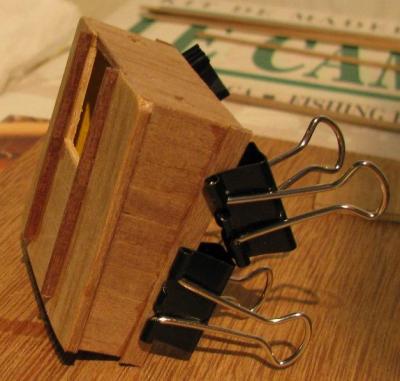
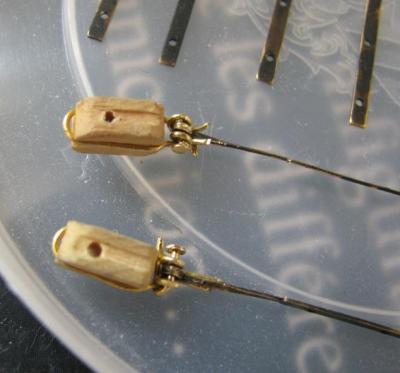
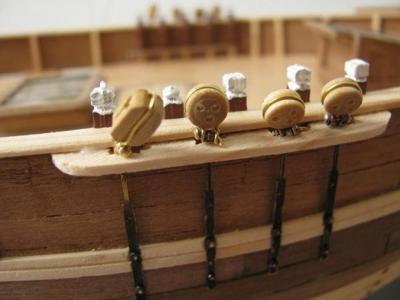
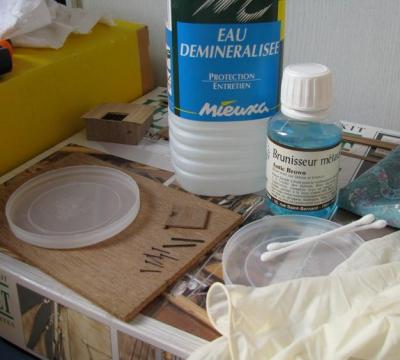
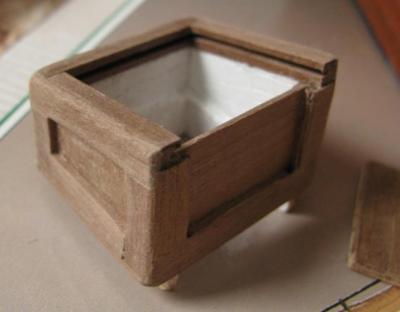
01/05/2011 A few updates on what kept me busy these last two months... First, I made the stem bitts from 4 mm x 4 mm manzonia strips: This was quite easy and very enjoyable! Then, I painted the cast iron reeeving bitts so that they look like wood and put them in place: I also had a go with the brass blackening product I bought: I tried it on the two brass strips wich go on the fish tank cover (simulating hinges). To use this selenium dioxide based product, I followed these steps: - put gloves on - rince the brass parts in demineralized water and dry them with a piece of cloth - apply some blackening product on the brass surface with a cotton wool stick (don't know the proper name for "coton-tige" in English...) - when the darkening is satisfying, rince the brass part in demineralized water again and dry them with a piec of cloth - remove your gloves I am quite happy with the result even if I could have let the acid act a bit longer.


-
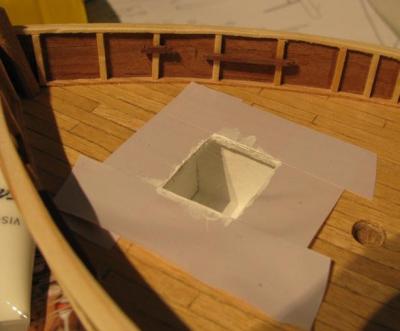
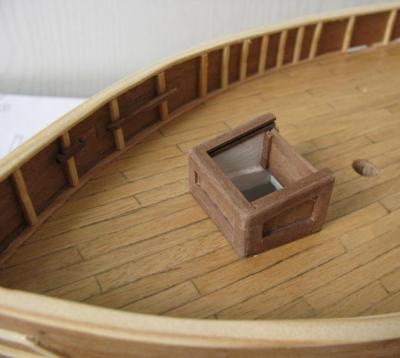
19/02/2011 And, finally, the hatchway. Here, I decided for China ink and plastic strips (from the kit plastic bags... ) to simulate glass. It is hard to make a good picture of this but I find the result not too bad. It looks good when light reflect on it, a little worse when in the shadow. And a final view of my progress so far... I still need to put some manzonia strip on the hatchway side to cover the plywood.

-
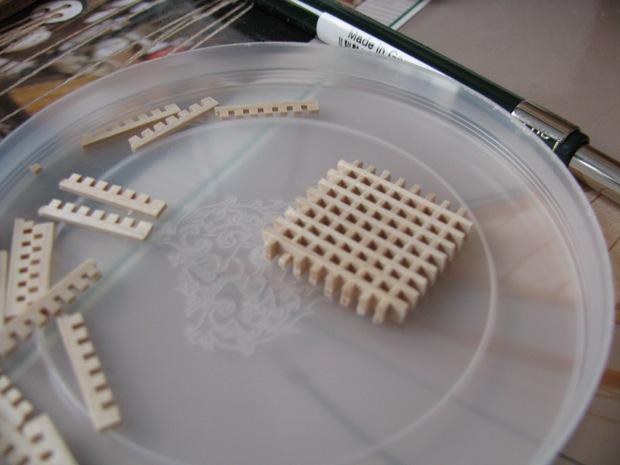
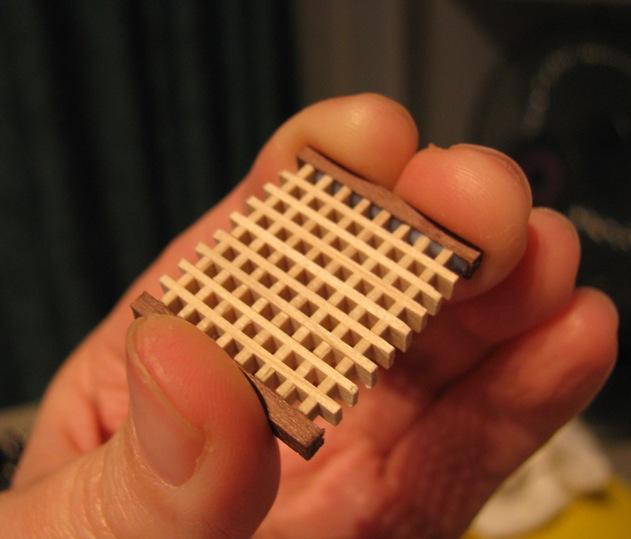
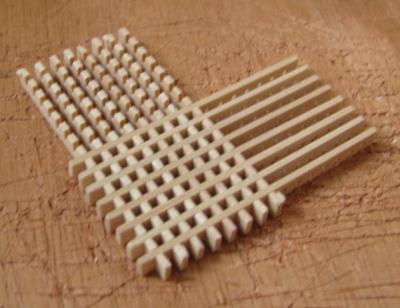
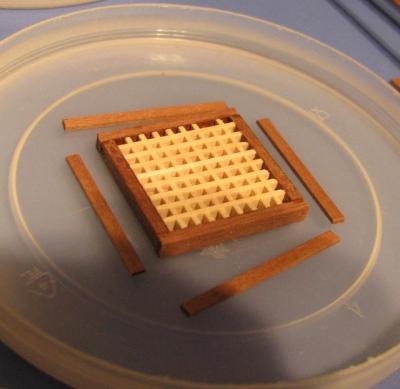
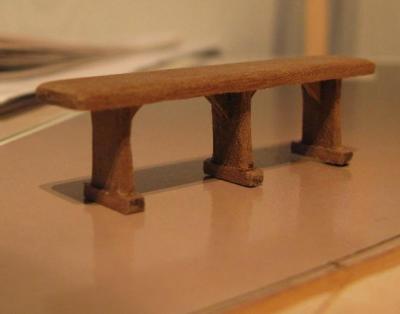
19/02/2011 Next step was the grating: (fingers are the best clamps I know! ) The helmsman's bench:


-
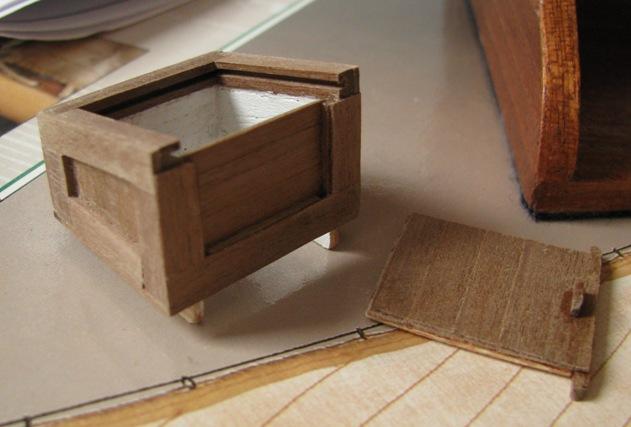
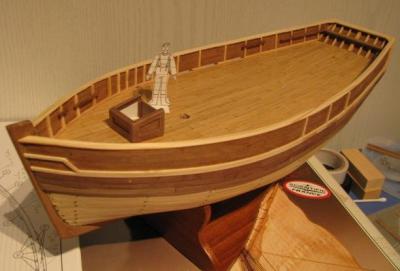
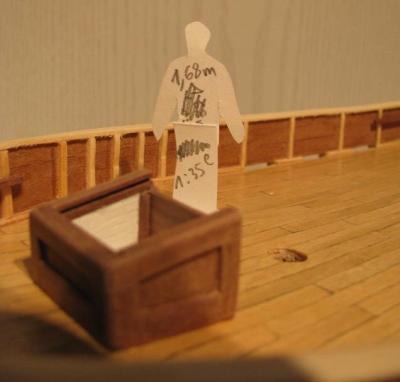
19/02/2011 A few february updates: The rail (which is made from two pieces of 1.5x5mm hull planking as I broke the original 2x5mm rail planks while trying to bend them... ): The fish tank: Some precut plywood bits covered with manzonia strips. Rather easy to do. The interior was not supposed to be planked but I didn't want to leave the plywood visible so I painted it white. I still have to add two blackened brass strips on the cover to complete it. At this point, I had trouble figuring out how big these deck furnitures were... So I made a little paper&glue fisherman at 1:35 scale to help:


-
Aldo, Thank you. I am not so satisfied with this planking now but it was a first and I have learnt from my mistakes... More is coming soon! I will be following your Peggy again! Andy, Thanks. Well it is not so tedious after all and as I don't have the TV here in Rome... nor my HMS Fly either (she would not have survived a trip by plane in the luggage )... Nope, contributing to MSW will be all my modelling activity for the months to come! And it's not so bad reviving all the build of my little cutter.
-
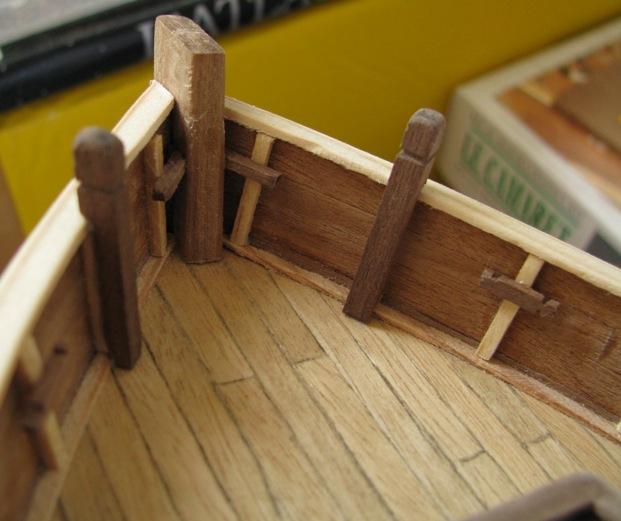
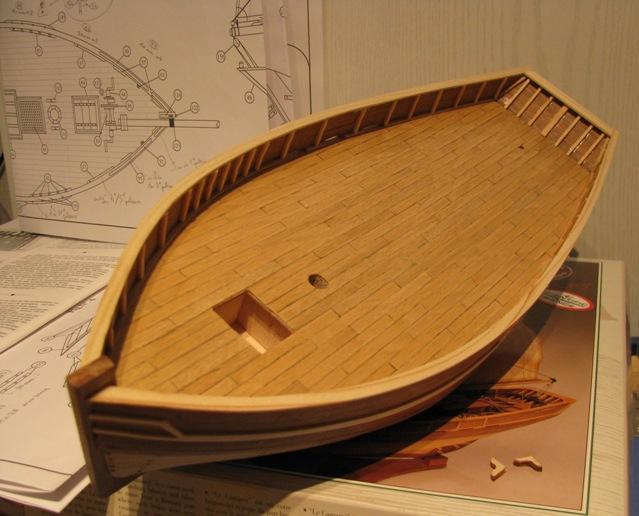
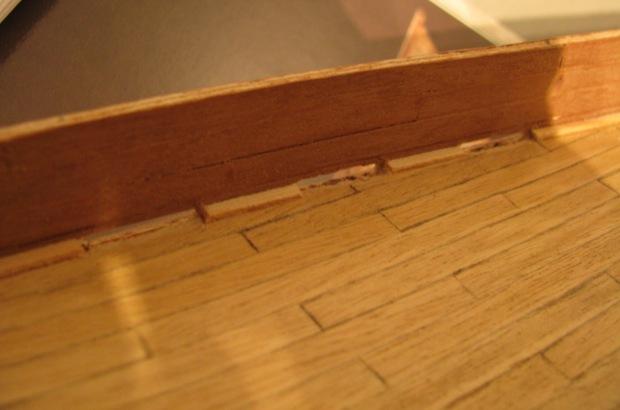
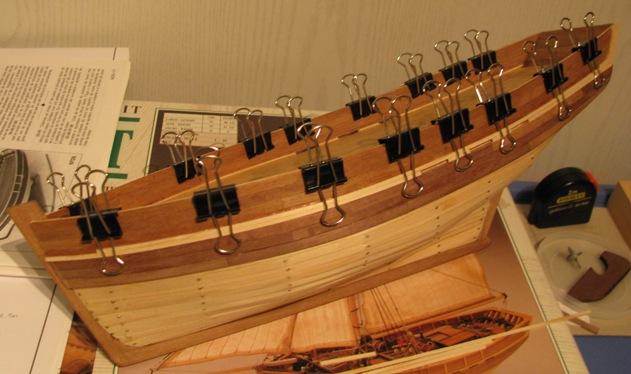
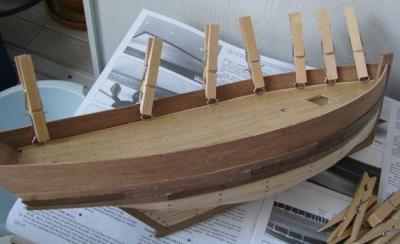
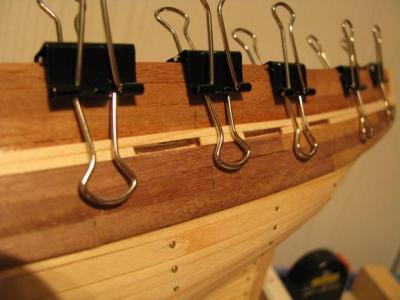
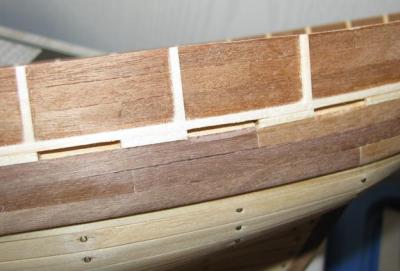
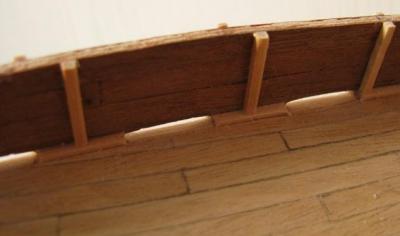
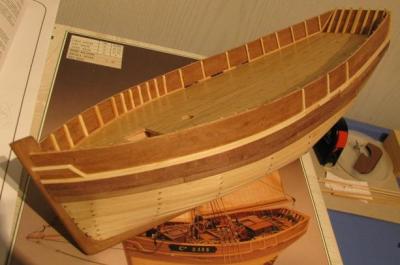
25/01/2011 O.K.! So, after 4 months... I finally got the scuppers done! My double planking on the bulwarks is done. After all, I did not need to scrap them: a big file did the rough work easily and sand paper did the rest... The scuppers were a bit tricky to do and I'm not so pleased with the result. The booklet suggested the use of a 2 mm drill to open each scupper and then finish with a knife. If I had to do it again, I would use the knife only. First because I managed to break my 2 mm drill ("Et M...e !") and second because my drilling is not so clean as gently cutting: I find it harder to control. Well, it is done however. Maybe I can fix that a bit later when I get an idea... I am now in the process of gluing all those little pinewood bits (the stanchions?) outside and inside the bulwarks.That's easy! It is so pleasing to work with pine wood! The only tricky thing maybe is that clamps leave marks on it. Next step? The rail and the chains hopefully... 30/01/2011 After a very helpful suggestion from Elia (thank you!!!), I tried and fix my scuppers. I first cut out more of the wood from the deck and the plywood sheets that were still rough in the openings of the scuppers. I then used six planks from the remains of the deck planking material to cover the bottom of each scupper. I now have neat openings and a better looking deck. (The pics make them look a bit worse than with bare eyes... they enhance quite a lot the defects! ) I also finished placing the stanchions.


-
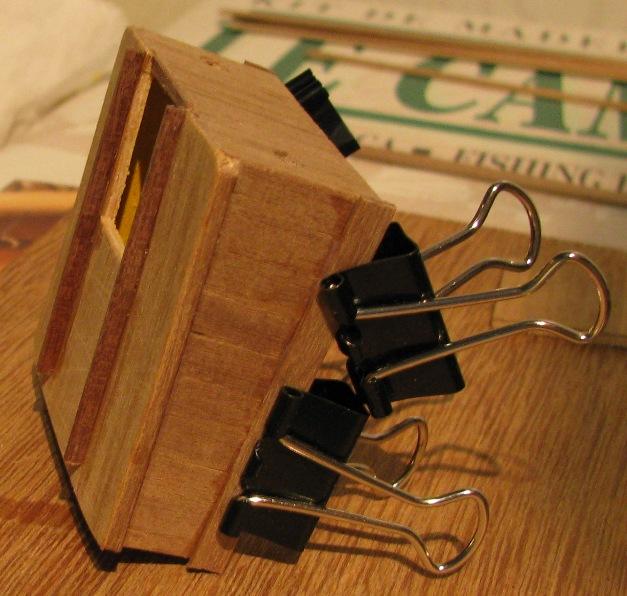
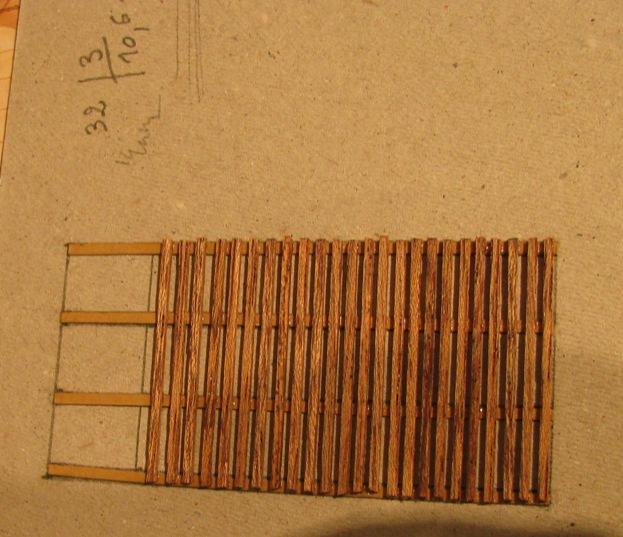
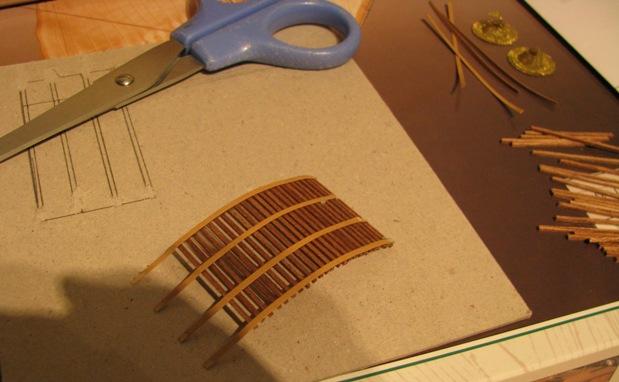
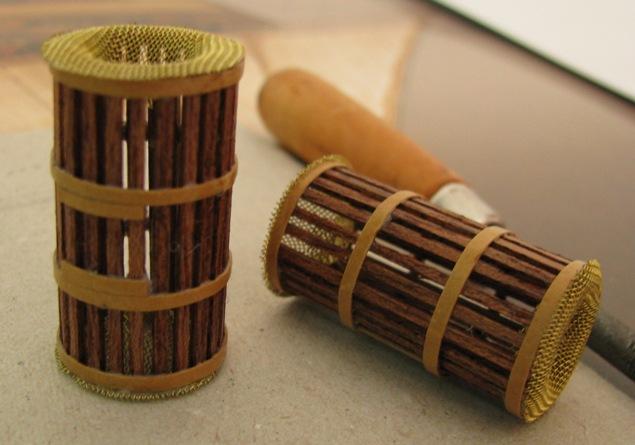
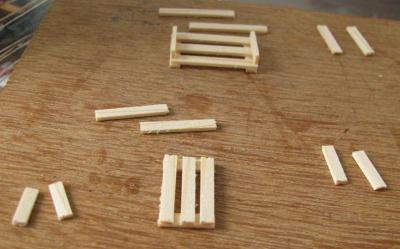
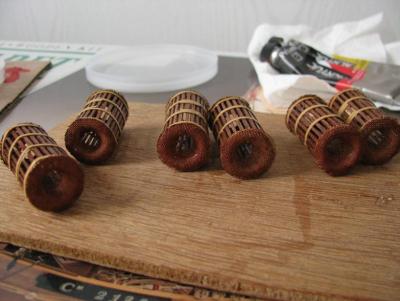
18/12/2010 While waiting for the glue to dry and to figure out how to get this double planking done, I began making the fish boxes. They are made of four cardboard strips on which are glued 24 1 mm x 1 mm sapelly strips. Then you just have to roll them on a cylinder and close them with a grille at each end. And there you are : The only tricky thing is that the box tends to stick to the gray cardoard jig!!!