HOLIDAY DONATION DRIVE - SUPPORT MSW - DO YOUR PART TO KEEP THIS GREAT FORUM GOING! (Only 27 donations so far out of 49,000 members - C'mon guys!)
×

Padeen
-
Posts
181 -
Joined
-
Last visited
Content Type
Profiles
Forums
Gallery
Events
Everything posted by Padeen
-
Hi Scott, I guess it also depends on your dexterity... I have not built much yet but I use PVA as much as possible: with my few CA attempts (I don't know which type of CA exactly) I ended up with fingers glued together or to the ship! And PVA can actually be removed with water which comes in handy when some mistake happens... This being said, it's just my two cents'...
-
I have only one word that comes to mind: waw! Is this even possible? Well done Danny... The chains were there so that the bar pins would not be lost, right? Will you make a working rudder assembly? (trying to contribute to the "druxey challenge cup" )
-
Congratulation Sarah, both on the completion or your model (you can be proud of her, she is a beauty!) and on your appointment as a mod! Will you next project be at a larger scale?
-
Great Danny! It turned out very well indeed and we would not have known that one of the rings is a jigsaw puzzle if you had not told us. This proves that even the more fragile woods like ebony can be forgivable with the help of a few drops of glue... and an expert hand. Those bars are also very well done (they look much more like capstan bars than my poor try with tooth picks... ).
-
Thanks Andy, Rewriting this log made want to fly back to Fly... but I'll enjoy it all the more when I finally have some modelling time! Robert, Thank you for the encouragement. In fact I'm in Rome for work but fortunately it is also a lot of fun: this is a wonderful city and spring here is greatly enjoyable.
-
Robert, I re-descover your log with much pleasure. This is a master build! May I ask when HMS Mars was launched?
-
Danny, These capstans are very well done! I understand why you want to use ebony, it indeed looks well like iron... If this ring can be sanded whitout breaking, it should do. I can't see the five pieces in the ring: good repair! Are there other blackish woods less fragile than ebony?
-
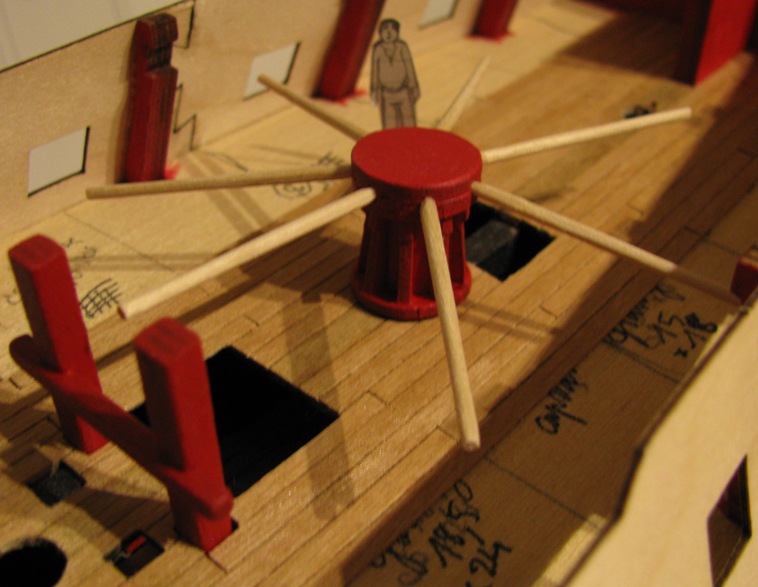
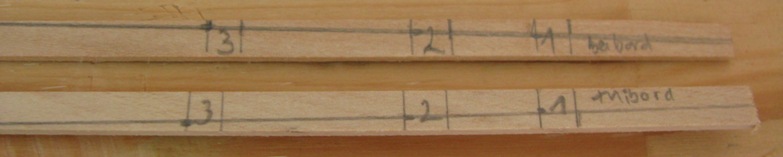
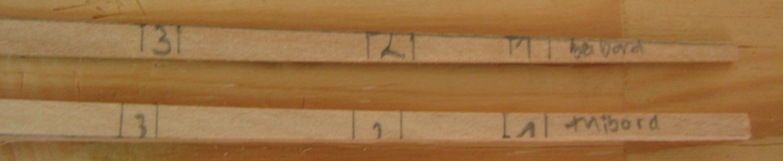
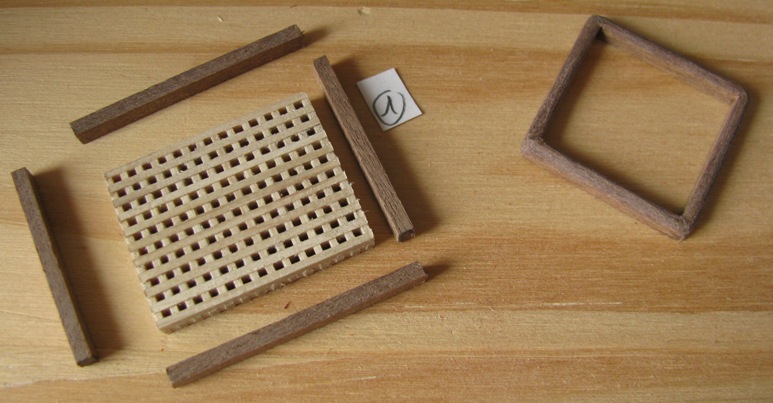
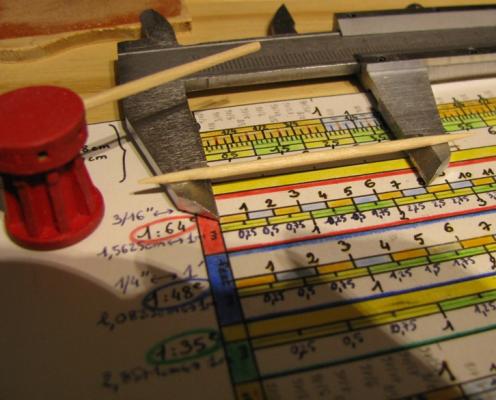
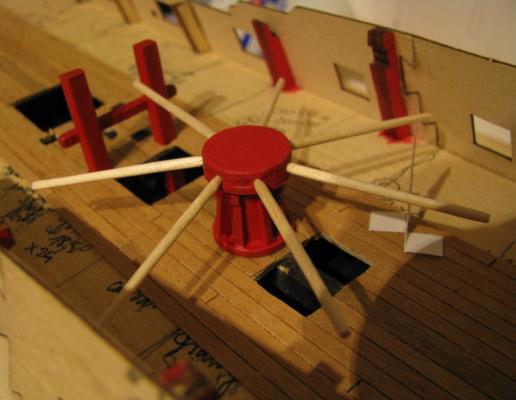
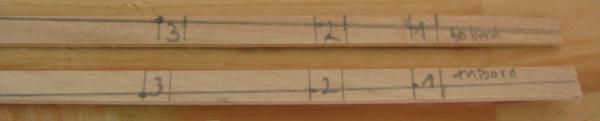
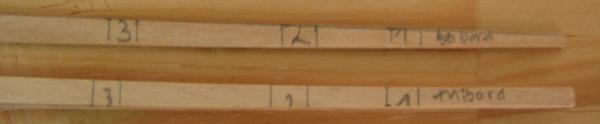
02/08/2012 As the hull planking is slow (only two planks at a time + drying times...), I continued with the deck fittings and made some capstan bars out of tooth picks, using David Antscherl's book as a reference and my home made conversion ruler for peace of mind (Mr Antscherl and other maritime authorities unfortunately speak in inches and feets while I speak in metrics and have already enough trouble with scale conversion... ): I'm not sure exactly where the bars will be stored but we will see to that later... 13/04/2013 As I did not brought my tools nor HMS Fly with me in Rome, I'm not going to update this log before the summer when I get a chance to finish the first planking (hopefully). But of course questions, comments and/or suggestions are welcome anytime.

-
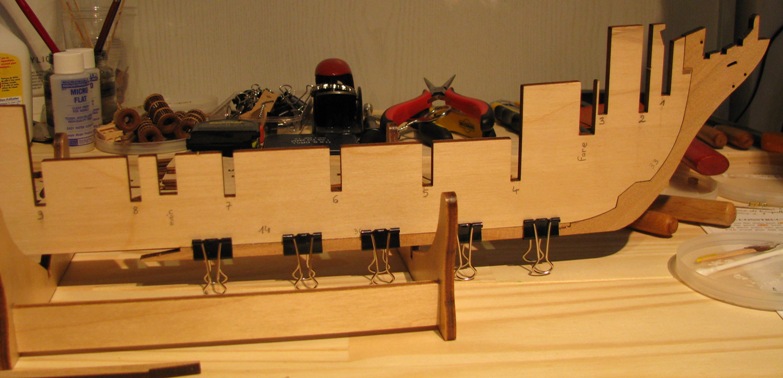
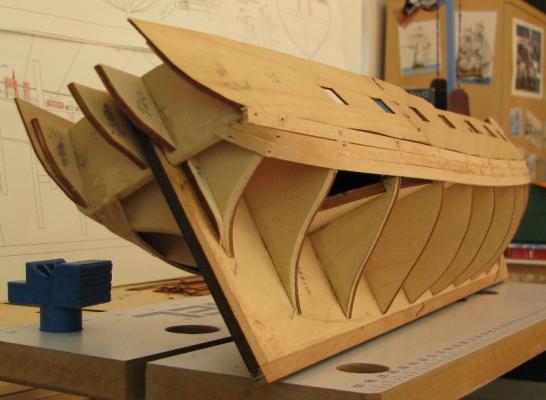
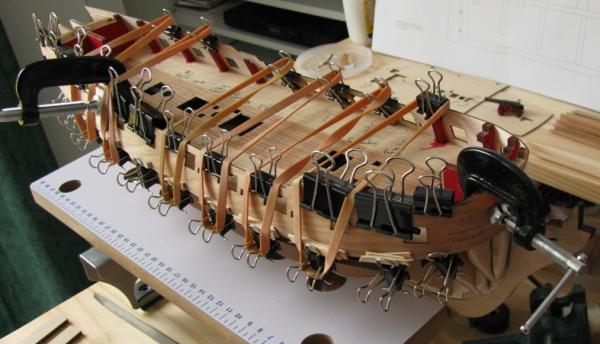
28/06/2012 The hull planking (first layer) began. This time I decided to think before diving in: I measured the surface length of each bulkhead from the bottom of the gunport pattern to the keel and calculated the required plank width at each bulkhead, with full width planks (5 mm) at the main bulkhead (#6). I found thus that I had to reduce the width of each plank on bulkheads #1 to 4. I proceed in the following manner, one plank each side at a time: - mark the emplacement of each bulkhead on the planking strip, butting it in the rabbet at the prow, - shape the plank to the required width profile, - soak the plank in hot water for ten minutes (the first planking is 1.5 mm thick lime wood) and "dry" fit it at its place on the hull, - when it has dried, glue it in place with PVA.

-
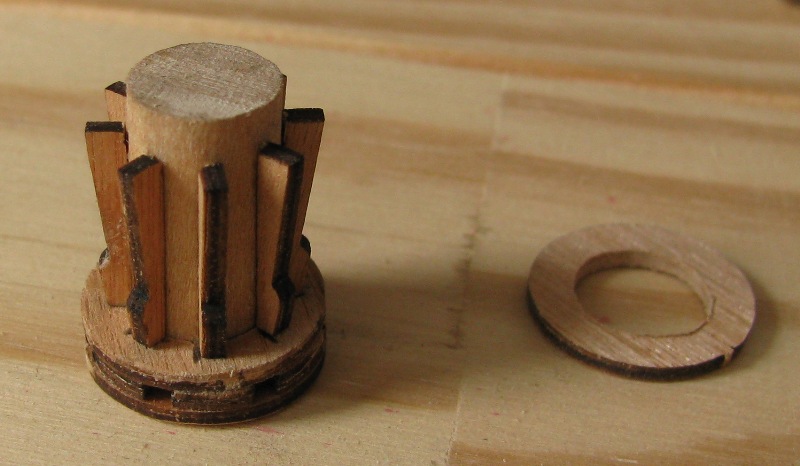
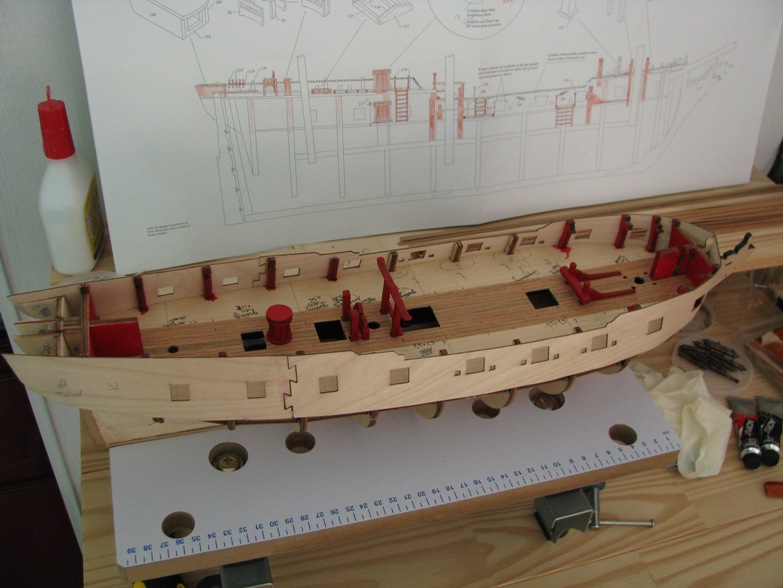
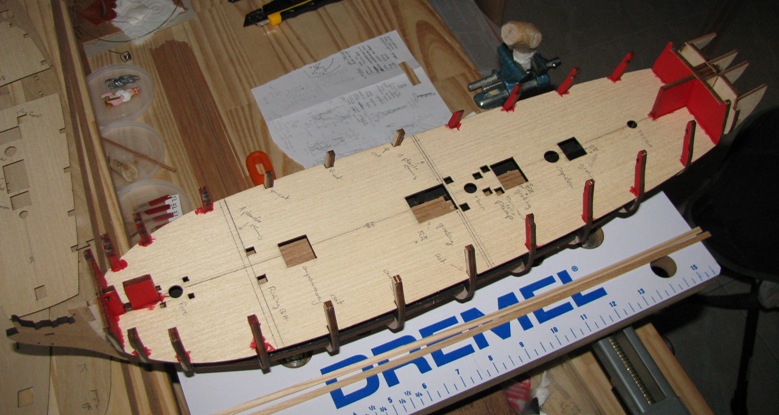
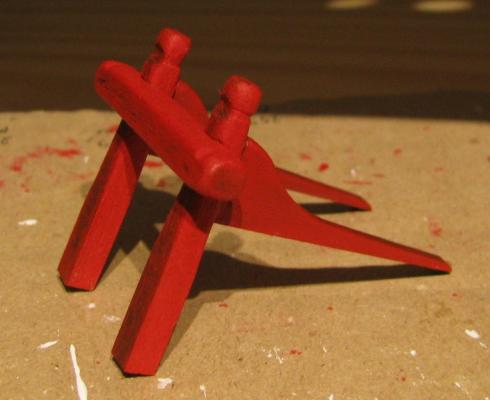
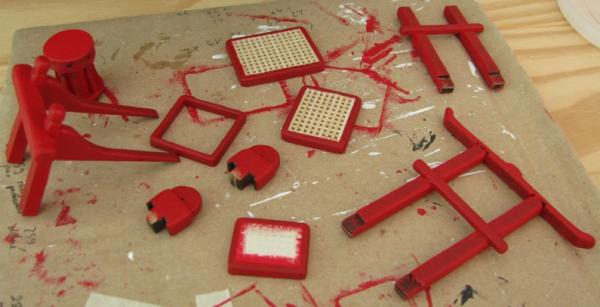
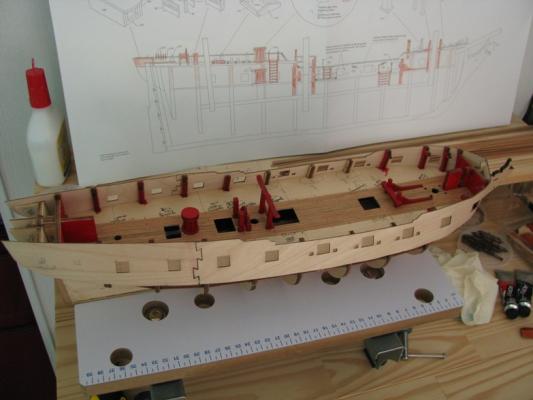
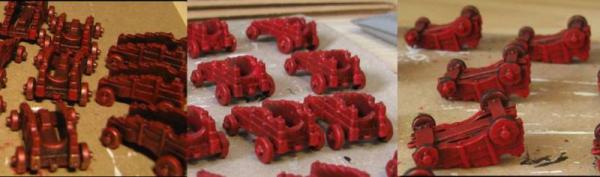
20/05/2012 I began putting together the deck fittings: they are made from laser cut walnut ply and/or walnut beams and I painted them with the same vermillion red acrylics paint as the bulkheads. I only dry fitted them on the deck: they will not be glued before the planking is finished.

-
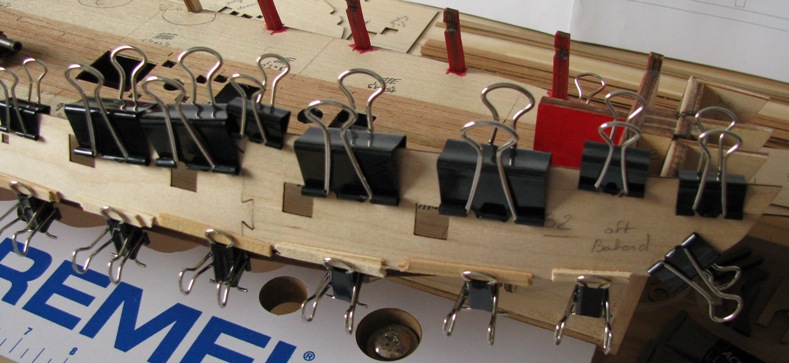
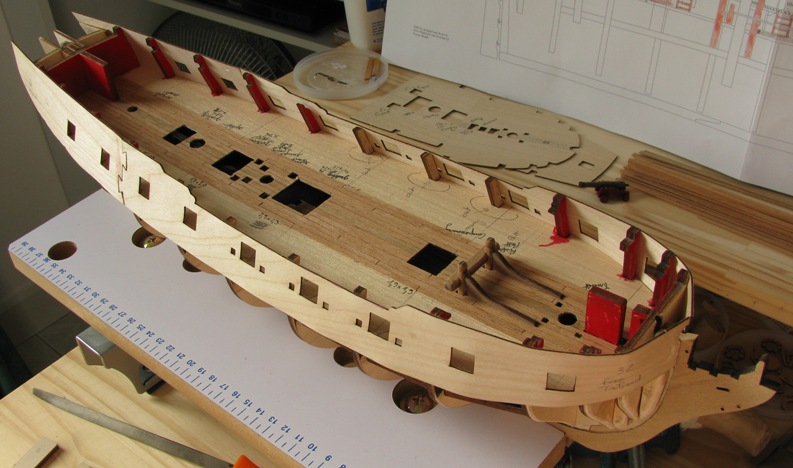
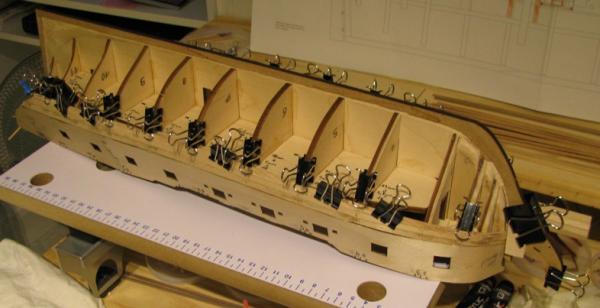
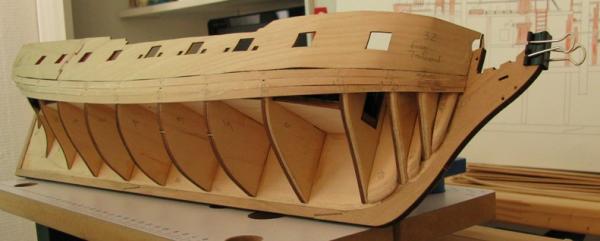
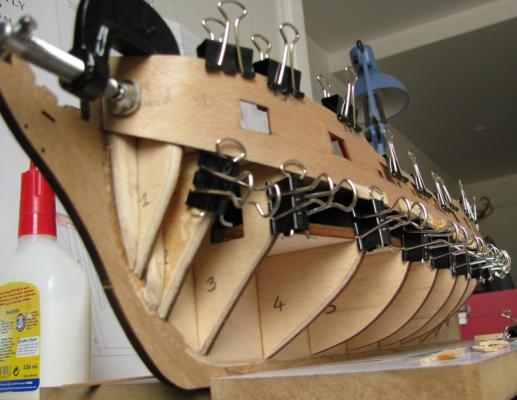
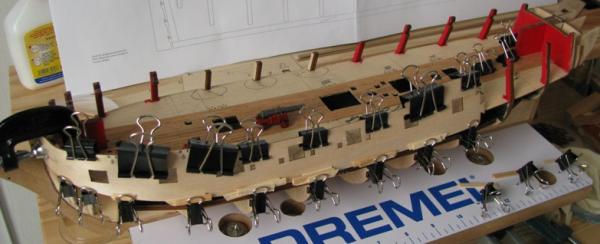
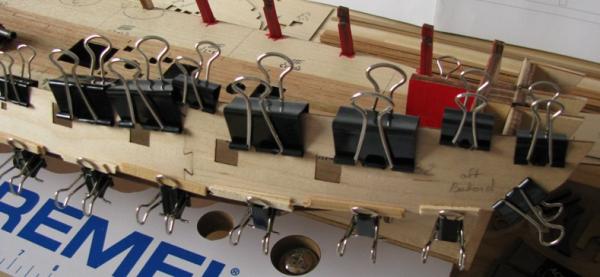
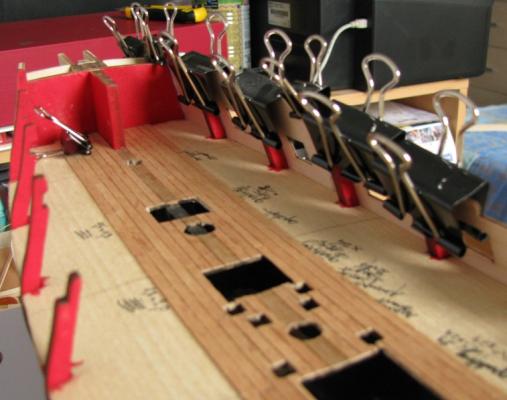
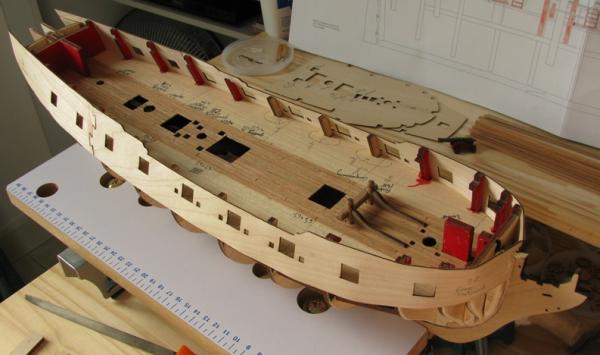
17/05/2012 My trip to the US last week prevented me to do it before but I've now begun fitting the gunport patterns. I've soaked them around half an hour in hot water and "dry"-fitted them with plenty of clamps (you can never have too much of them!). After a few hours, the ply had dried and shaped to the ship and could be glued and clamped again. Larboard is done, starboard to go soon (I don't possess enough clamps to do both sides at the same time). The alignment is quite easy: the wood must be level with all bulkhead tops and the fore rest on the foremost filling piece #18. I think there will be some minor waves along the bottom edge but nothing a fine sanding won't erase. The bulkhead tops of the waist (bulkheads #5, 6 and 7) are just there to help have the right shape for the hull ("S" shape) and will then be removed. I precut them a little to hopefully guide their breaking later and I'll also try not to overglue the gun port pattern on them. My first dry fittings puts the jigsaw just behind bulkhead #9 which seems to be the case for most Fly/Pegasus kit builders... I'll have to glue some false bulkhead there. 20/05/2012 The gunport pattern has been glued successfully and the "S" shape of the hull is indeed visible:
-
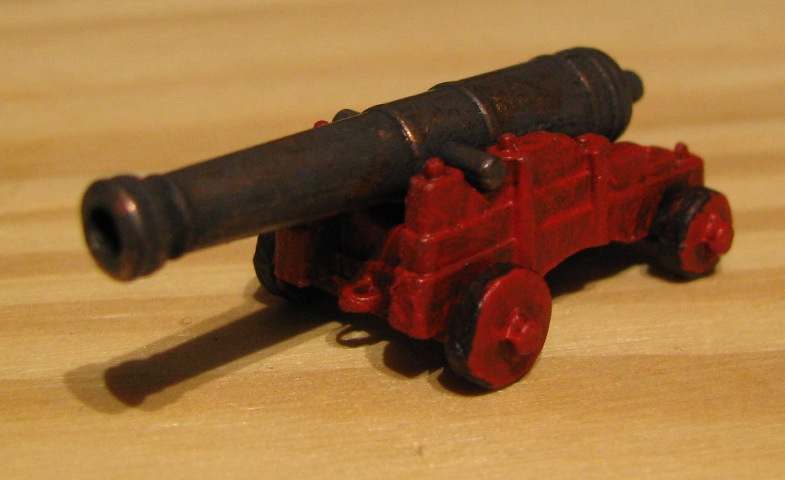
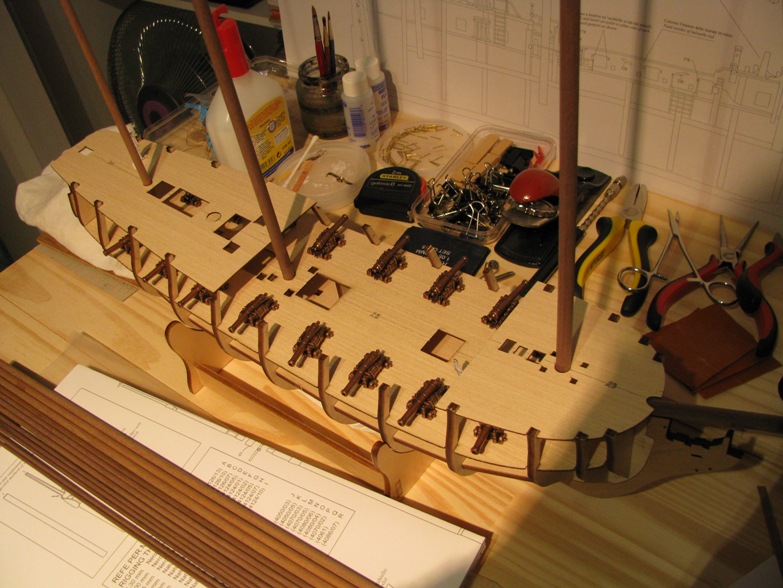
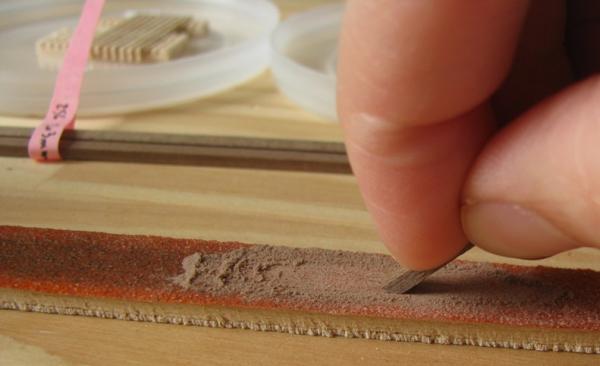
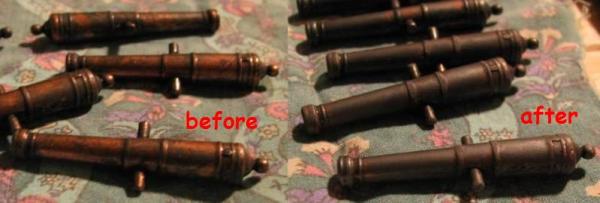
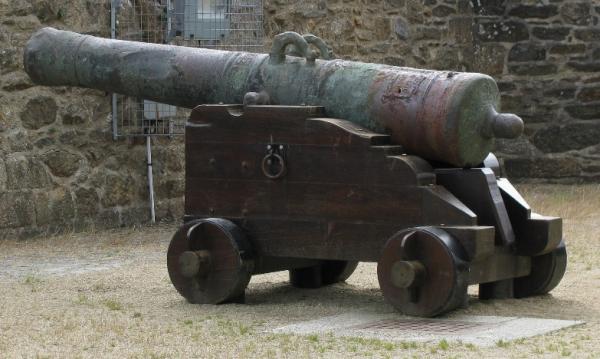
02/05/2012 I painted the copper gun carriages with two coats of vermilion and a mars black acrylic addition on the wheels (the carriages are not so shiny nor the red so light in reality... must be a bad combination of CCD sensibility + artificial light): My first attempt at blackening the barrels was a fiasco: only maybe one third of the surface was blackened... It does not look so bad after all but they will turn green in time and I'm not sure I want that happening! I guess water cleaning is not enough because of copper oxide. I'll have to try again after sanding. I blackened again my gun barrels after scratching them with fine sand paper (Arthur suggested using a fiber glass pen but I have no such thing) and then cleaning them in water: it works! The main problem is that the paper dies very rapidly in the process... There are no caps to secure the barrel "arms" on the carriages... I search for them in vain and will have to make some myself it seems!... or maybe there were no such caps on Fly... I also wondered at the tips that emerge on the top of the carriages... looking at a picture I had taken of a gun from Brest castle: they look like bolts to me, to secure the different wood parts that make the carriage flanks. (...and there are no caps...)

-
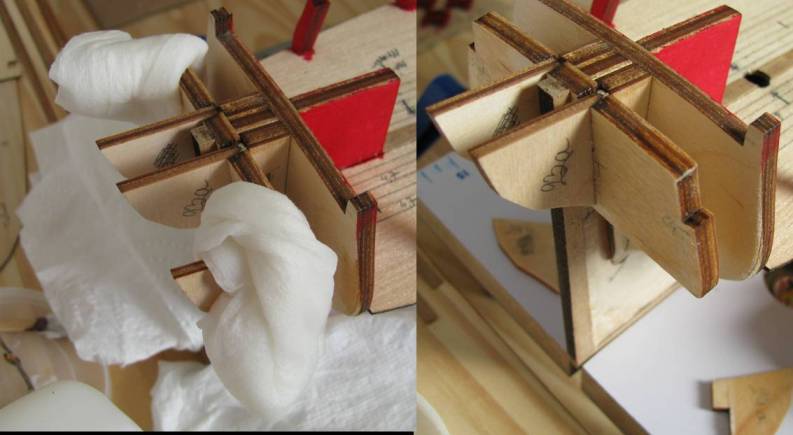
29/04/2012 I've just spotted a problem (that Arthur also experienced with his HMS Vanguard and was kind enough to point out to me...): dry fitting the quarter deck I realized that the two outer pieces of the stern counter patterns were misaligned! I did not see any word of caution in the instructions and glued them square to the bulkhead last winter! But of course they must be glued with an angle to follow the line of the quarter deck... I had to remove them and glue them again with the proper angle! I managed to fix this stern counter problem using the quater deck as a guide. It turned out easier than I feared... - Before: - After bandaging the joints with paper soaked in water for half an hour, the culprits came off gently (I am using PVA glue...): - After (I waited for the wood to dry before gluing them again...): I also began planking the gun deck. I actually changed my mind about the three planking areas on the gun deck that are proposed in the instruction booklet: at first I thought it was related to cabin bulkheads position but it seems not. A look in the Swan Class books comforted me: there is no reason to have three distinct sections other than prevent ruining the planking when tearing off the three bulkhead tops in the waist. I will simply not complete planking on the "cut" areas before the gunport pattern is in place but all the rest can be done now on the whole length of the deck. I love this construction step! I chose to put a master plank (although I am not sure there should be one on this deck) as I thought it would help secure the joint between the two sides of the ply false deck... I find it adds to the symmetry too and I might do the same on the quarter deck and forecastle. This plank is a left over Manzonia 5 mm wide plank from Le Camaret...


-
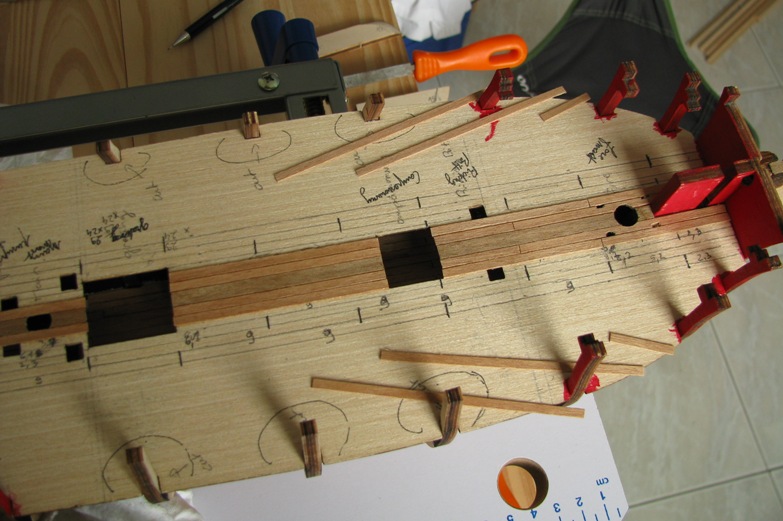
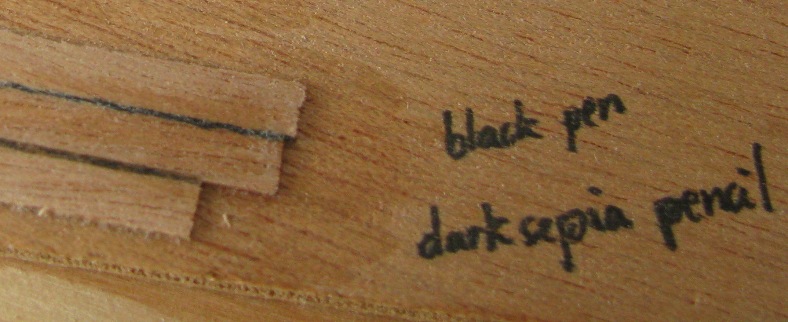
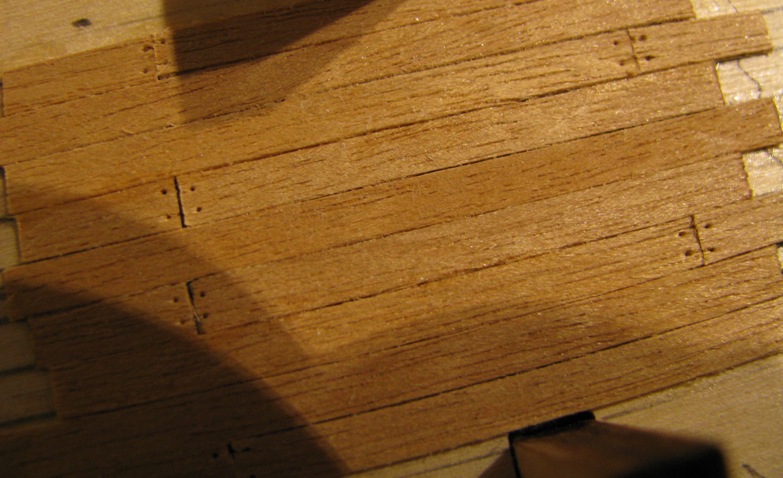
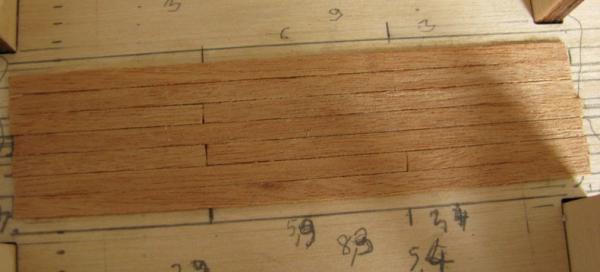
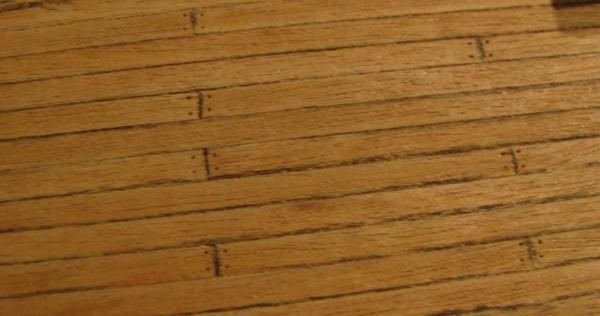
28/04/2012 I've made a little progress: the lower deck has been planked under the openings where it will be visible. The planking material in the kit consists of 3 mm wide Tanganyika strips which I find a bit more fragile than the Mukaly I had for Le Camaret. I decided for 9 cm long planks and a three planks pattern. (I did not plank the entire lower deck: only the three areas where it might be visible under the gun deck. After measuring my planking material, I saw that I had more than enough of it to plank the three main decks so I thought a little practice on the lower deck would do no harm! ) For caulking, any method involving gluing paper or thread would drive me crazy so I tried to run a black pen on the planks edges but I found it hard not to deviate and not to mark the plank surface as well... plus, it's too black and cold to my liking. (As Dan Vadas suggested, I could also have tried using the pen from the back side of the planks, before gluing them: thus there would have been no risk of staining the visible surface of the plank... Maybe I'll try this another time.) So I came back to what I did with Le Camaret: I draw a dark brown pencil along the plank edges when the planks are glued and then sand and varnish. It is not that regular but I like it. I will just try to leave a slightly larger spacing between planks on the other decks so as to better guide the pencil motion. I've also had a go at faking treenails: according to David Antscherl, the treenails at the butts of planks would be 7/8" which is 0.35 mm at 1:64 so I decided to just drill such small holes with the tip of a safety pin. One will have to look close to see them but I don't want to have them show up too much anyway. And last, I've glued the gun deck into place and painted the bulkheads above deck (vermillion acrylics). I still have to finish fairing the bulkheads and false keel.


-
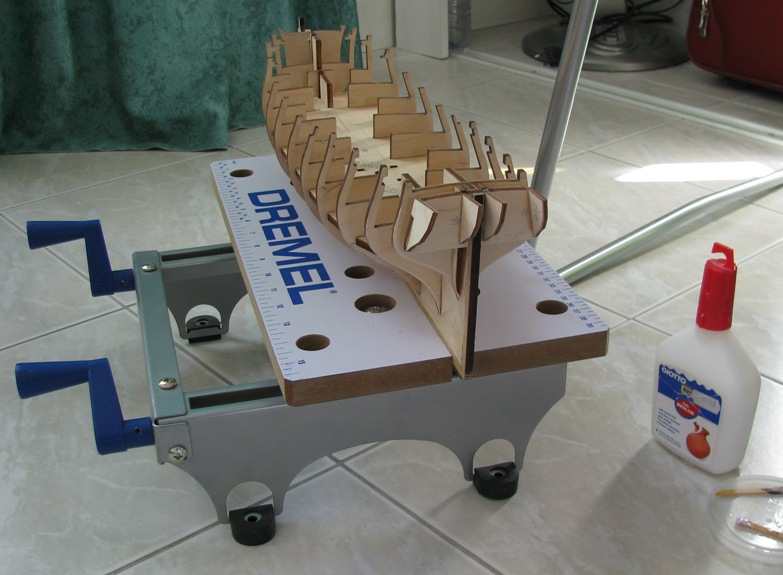
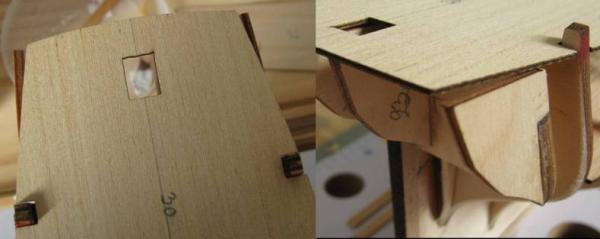
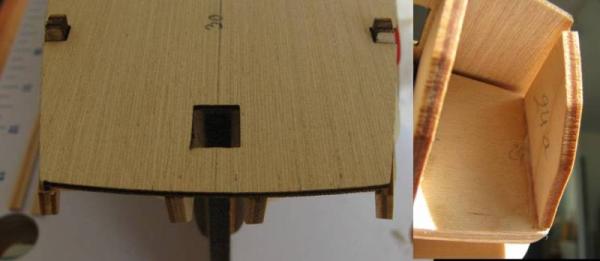
19/03/2012 I bought the box about a year ago, put the stand together almost at once and began gluing the prow, keel and rudder post, dry fitting the bulkheads and decks, and playing with the cannons during last winter to escape from the boring sail making step on Le Camaret... Trying the bowsprit, I noticed that the hole in the foremost bulkhead was not wide enough so I corrected it with a file: I also cut a rabbet all along the false keel edge. I hope it will help me fit the planking more easily: For the moment, I am bevelling the bulkheads before gluing them on the keel. It is rather a long job with a file but I am not confident enough with the Dremel I got for Christmas to use it on the model yet. I only roughly bevelled the three aft and the three foremost bulkheads off keel as it was easier seeing the amount of angle needed there (with Le Camaret, I sanded everything after gluing and I found it quite difficult, plus I've already glued the stem and stern posts and I might have damaged them with the file). I first thought everything could be done off keel but the bulkheads had too lose a fit in the keel slots to have accurate squaring. So I am now gluing them all to the keel and I will then improve the bevelling with the help of some plank strips to check the curves. 01/04/2012 All the bulkheads are glued, together with the lower deck. This deck is a nice feature when it comes to square the bulkheads... Next step: finish bevelling the bulkhead and plank the lower deck under the companionway and hatchways openings of the gun deck (and try a caulking method...).


-
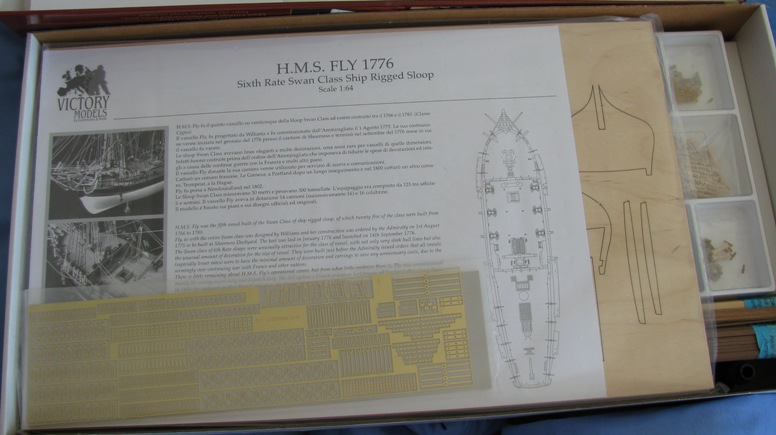
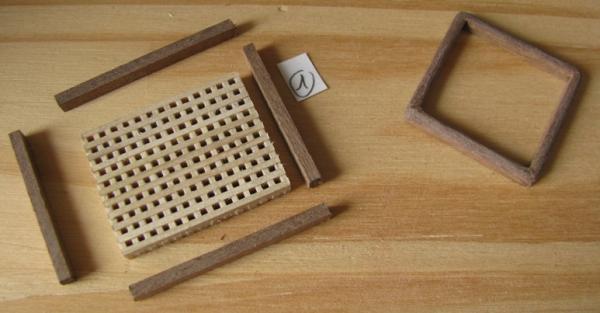
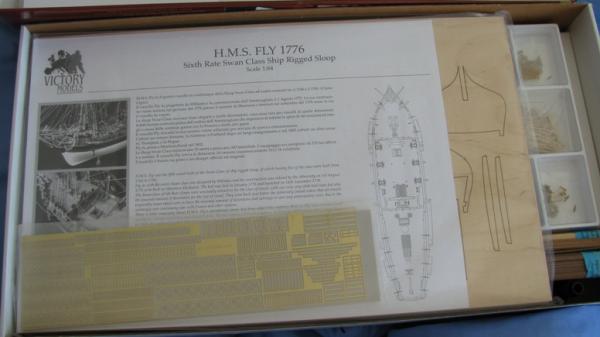
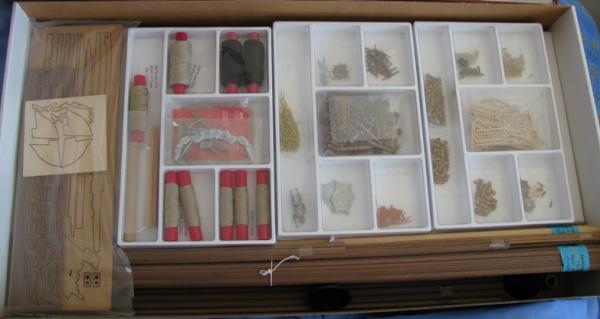
Here is the build log of my second model ship. This build was started in winter 2011 during the sail-making of Le Camaret... and may take a few years till completion as my building time is quite reduced for the moment. The first part of the build log (until August 2012) was done on the old MSW: I recreate it here more or less as it was then, hopefully with some improvements, putting the date of the original posts as I go along. 18/03/2012 I have been talking of a build log coming soon for months now but here it is at last. Welcome to my second build and first attempt at a Man-of-War from the late 18th century! My motivation for this built is that I love ships from this period more than any others and it was the desire to have such a ship at home rather than in the museums that brought me to model ship building two years ago. As I particularly like the lines of small ships like cutters, sloops and frigates compared to ships of the line (and as it is still hard to find a three-decker at 1:64 scale...), I decided for HMS Fly. I hesitated a while with HMS Pegasus but my local modelling shop had only HMS Fly available and I did not want to copper the hull. This will be a fully rigged model with sails hopefully: they are not included with the kit but I think that with the help of David Antscherl's 4th volume on the Sawn class it will be feasible... and that's not for the near future anyway! There are already many kits and scratch build logs about the Swan class sloops here so I will have plenty of information to help me on this particular build. I also have the four volumes of the Swan class books by David Antscherl and Greg Herbert which may come in handy. So, now for the kit itself: the box was heavy! There are about ten A1 sheets of plans at 1:64 (half of which are about the rigging: good point!), an instruction booklet with a list of parts and some additional lower scale plans to explain planking and deck fittings in more details. Everything is written both in English and in Italian. Most wood parts are made from very clean laser cut plywood or walnut sheets. There is lime and walnut for the hull planking, tanganyka for the deck planking and ramin for the masts. The rest of the kit is made of brass photo-etched parts, copper gun barrels and carriages, castings for the decorations and an impressive number of wooden blocks of different size. (Well, I guess three masts are three masts, whatever the number of guns!) The thread for the rigging is also provided in different size and colour. I look forward to the rigging: this will be fun!
-
HMS Victory by Sven - FINISHED - 1:600 scale
Padeen replied to Sven's topic in - Build logs for subjects built 1751 - 1800
Sven, I wondered if I had seen right: 1:600? Does he mean 1:60?... But no! Waw! This is great work! And I thought that my rigging material at 1:64 looked small... Keep up amazing us, -
Hi Danny, This is impressive indeed! Great job! I have to remember your blackening procedure... Looking at these last pictures, a question rised to my mind: was there actually enough space between the pumps so that both could be operated at the same time? The pump crews must have been facing each other obviously... maybe they launched some challenge between them so as to motivate themselves for this tedious job...
-
Kester, I am one of your fans here! Indeed, there seems to be no dedicated forum area... maybe something to ask in the site pb/suggestion area? Well, we wait for your stories in the General discussion anyway...
-
What is your favorite hand tool(s)??
Padeen replied to Modeler12's topic in Modeling tools and Workshop Equipment
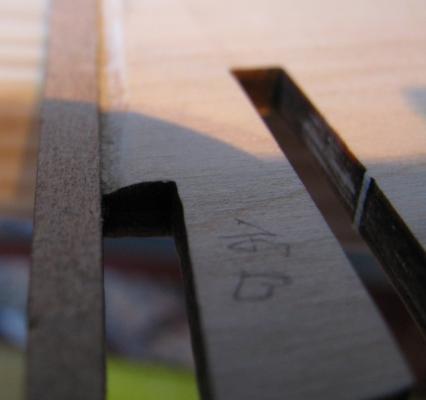
My favorite tools are a plane and a small file (round on one side, straight on the other). They are the one that give the final shape to the wood parts which is what I find the most satisfying. -
Well, it looks much better indeed and you are very welcome! Your work and detail on the rail is really nice and your explaination regarding the reasons behind are very apreciated. Happy painting!
-
Jan, I guess I was lucky with my choice of a bookshop then... I don't think there is a way to avoid paying taxes on goods from the US in Europe: they are not in the Schengen area... For Amazon, I can't see the point: rather order directly on Seawatch Books website...
-
Thank you Sarah, Yes the windlass was provided with the kit; I only had to make a replacement for one of the small gears which was a very fragile metal casting. My only additions to the kit were the buoys and the flag...
-
Hi Sarah, Nice little build! I do not think I saw her before on MSW... All the deck items do bring her to life. I guess I'll have to take a look at your other builds.
-
Elia, If you want to insert a picture in the text, you have to first upload the picture and then click on the "add to post" button under the uploaded picture: this adds a link to the picture in the text that you can then cut&past at the right place in the text (if the text cursor was not at the right place before clicking on the "add to post" button...). I always do this in the "More Reply Options" window but I don't know if it's necessary... 'hope this helps. There is also the tutorial by Dan Vad: http://modelshipworld.com/index.php?/topic/540-how-to-add-pictures-in-your-posts-and-pms/