MORE HANDBOOKS ARE ON THEIR WAY! We will let you know when they get here.
×


Planet_Jupiter
-
Posts
25 -
Joined
Content Type
Profiles
Forums
Gallery
Events
Everything posted by Planet_Jupiter
-
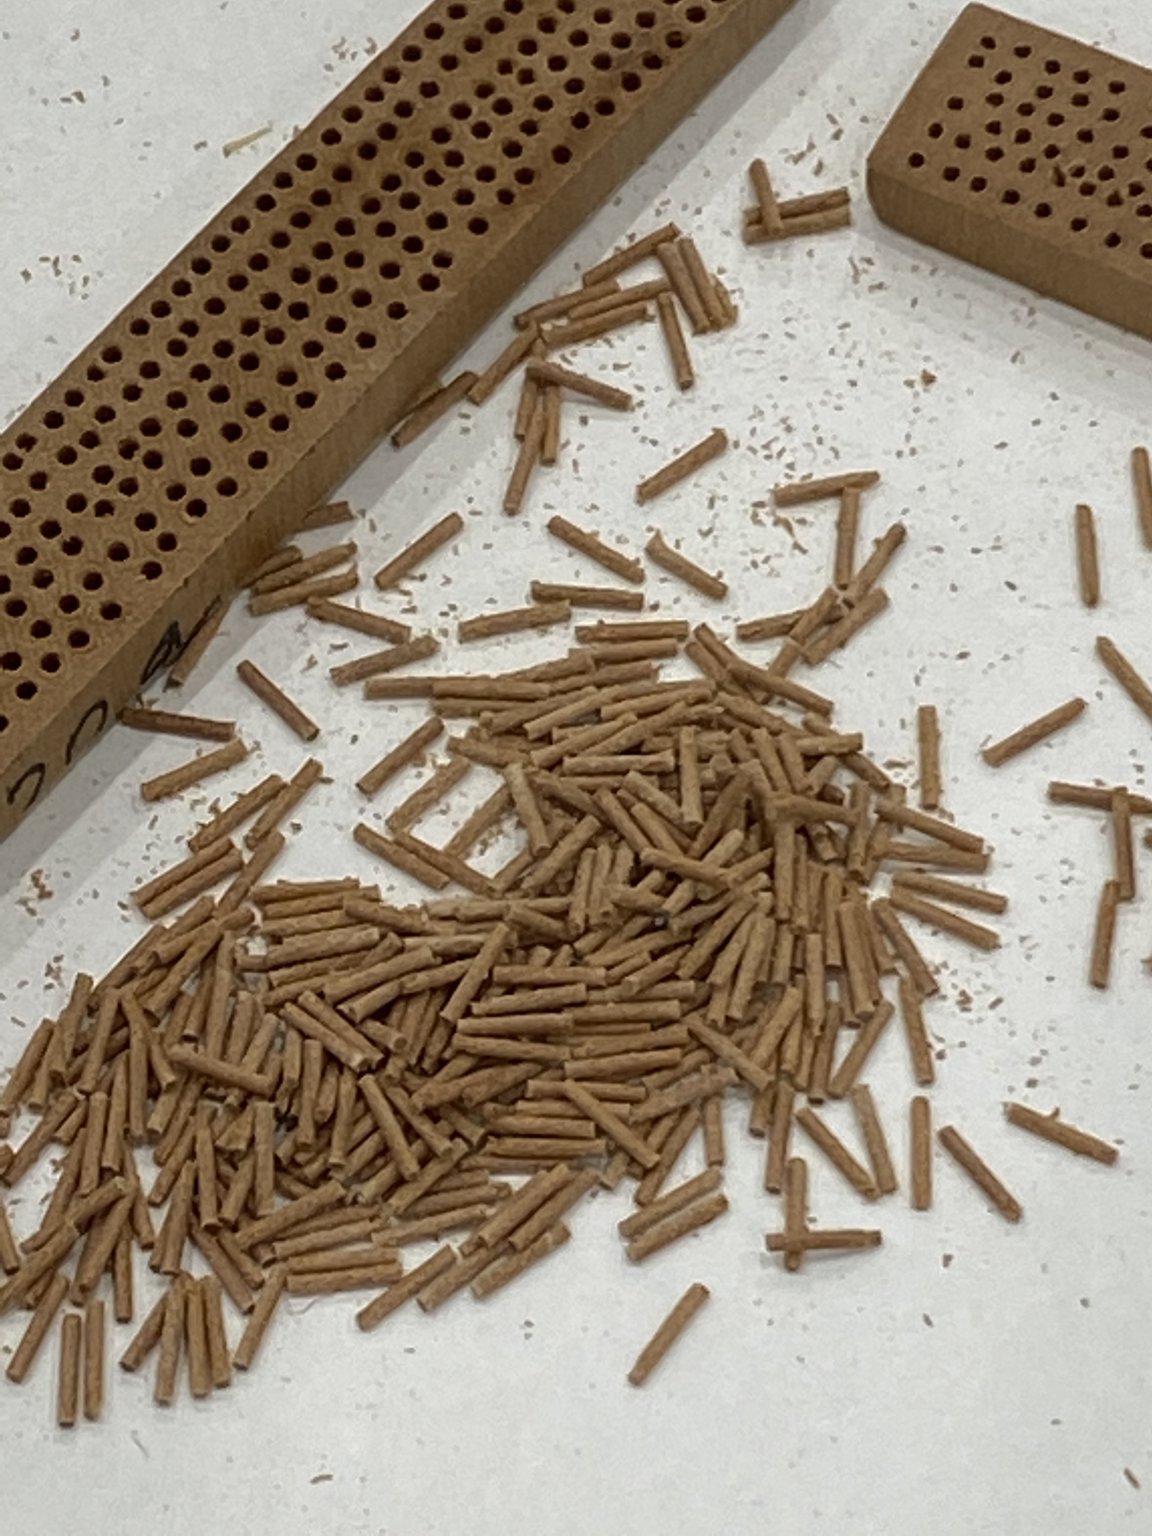
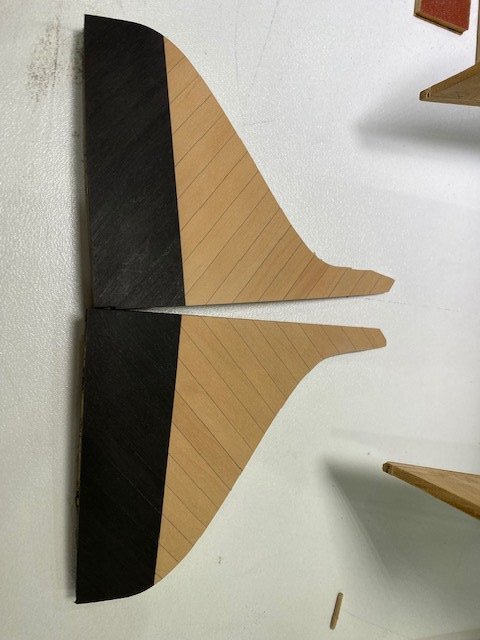
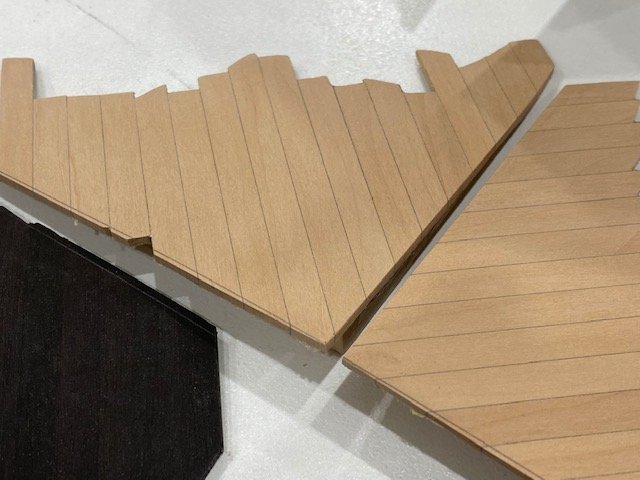
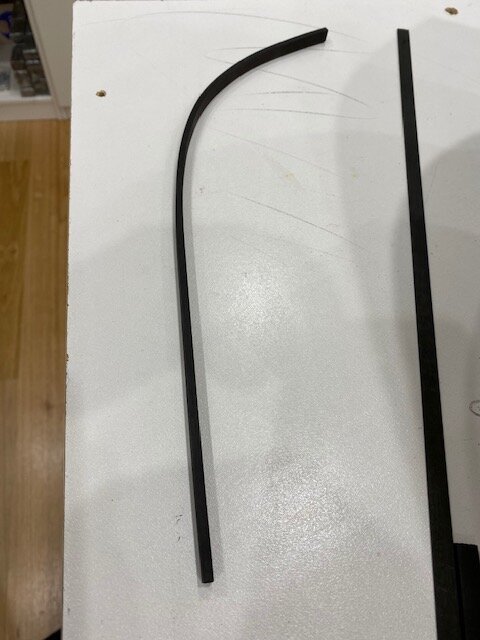
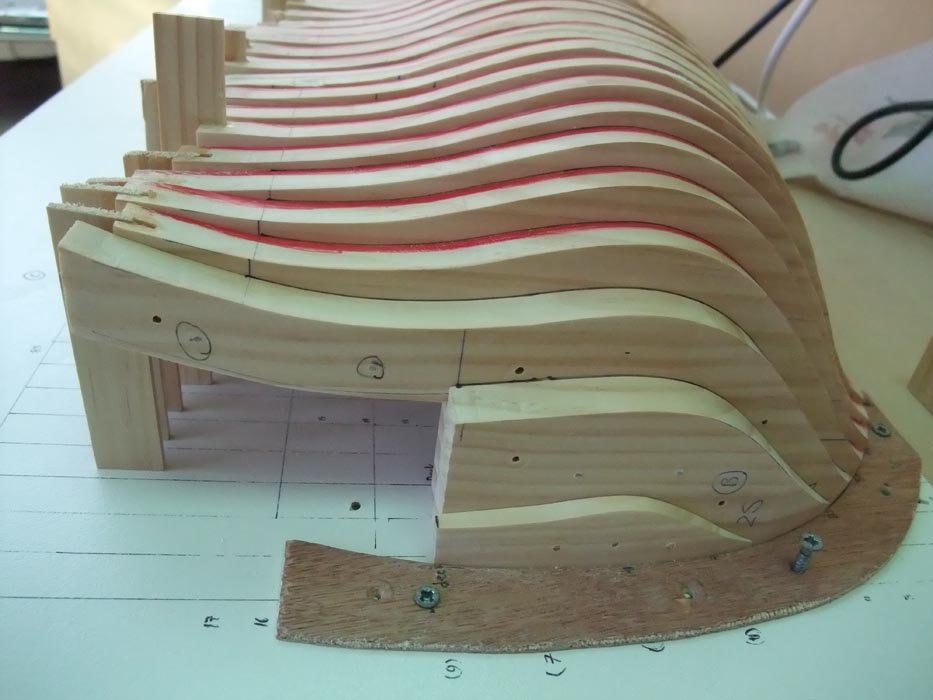
And some more minor progress. The pieces aren't finished yet. They need a bit more trimming and sanding.
-
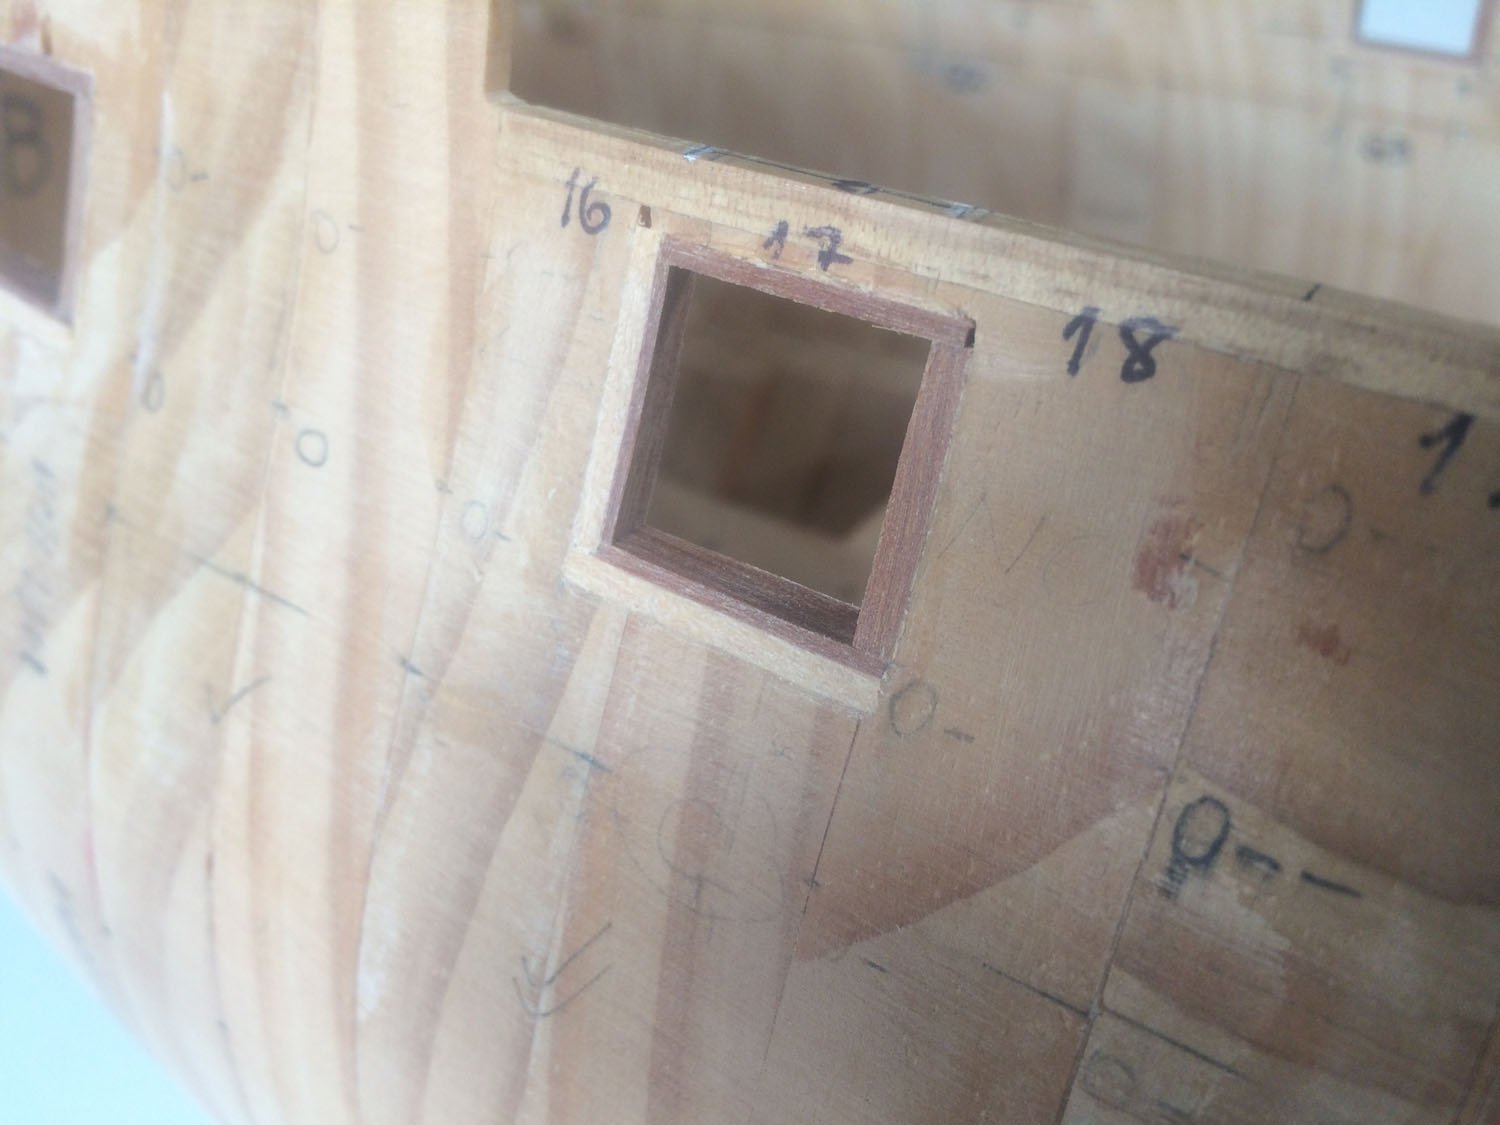
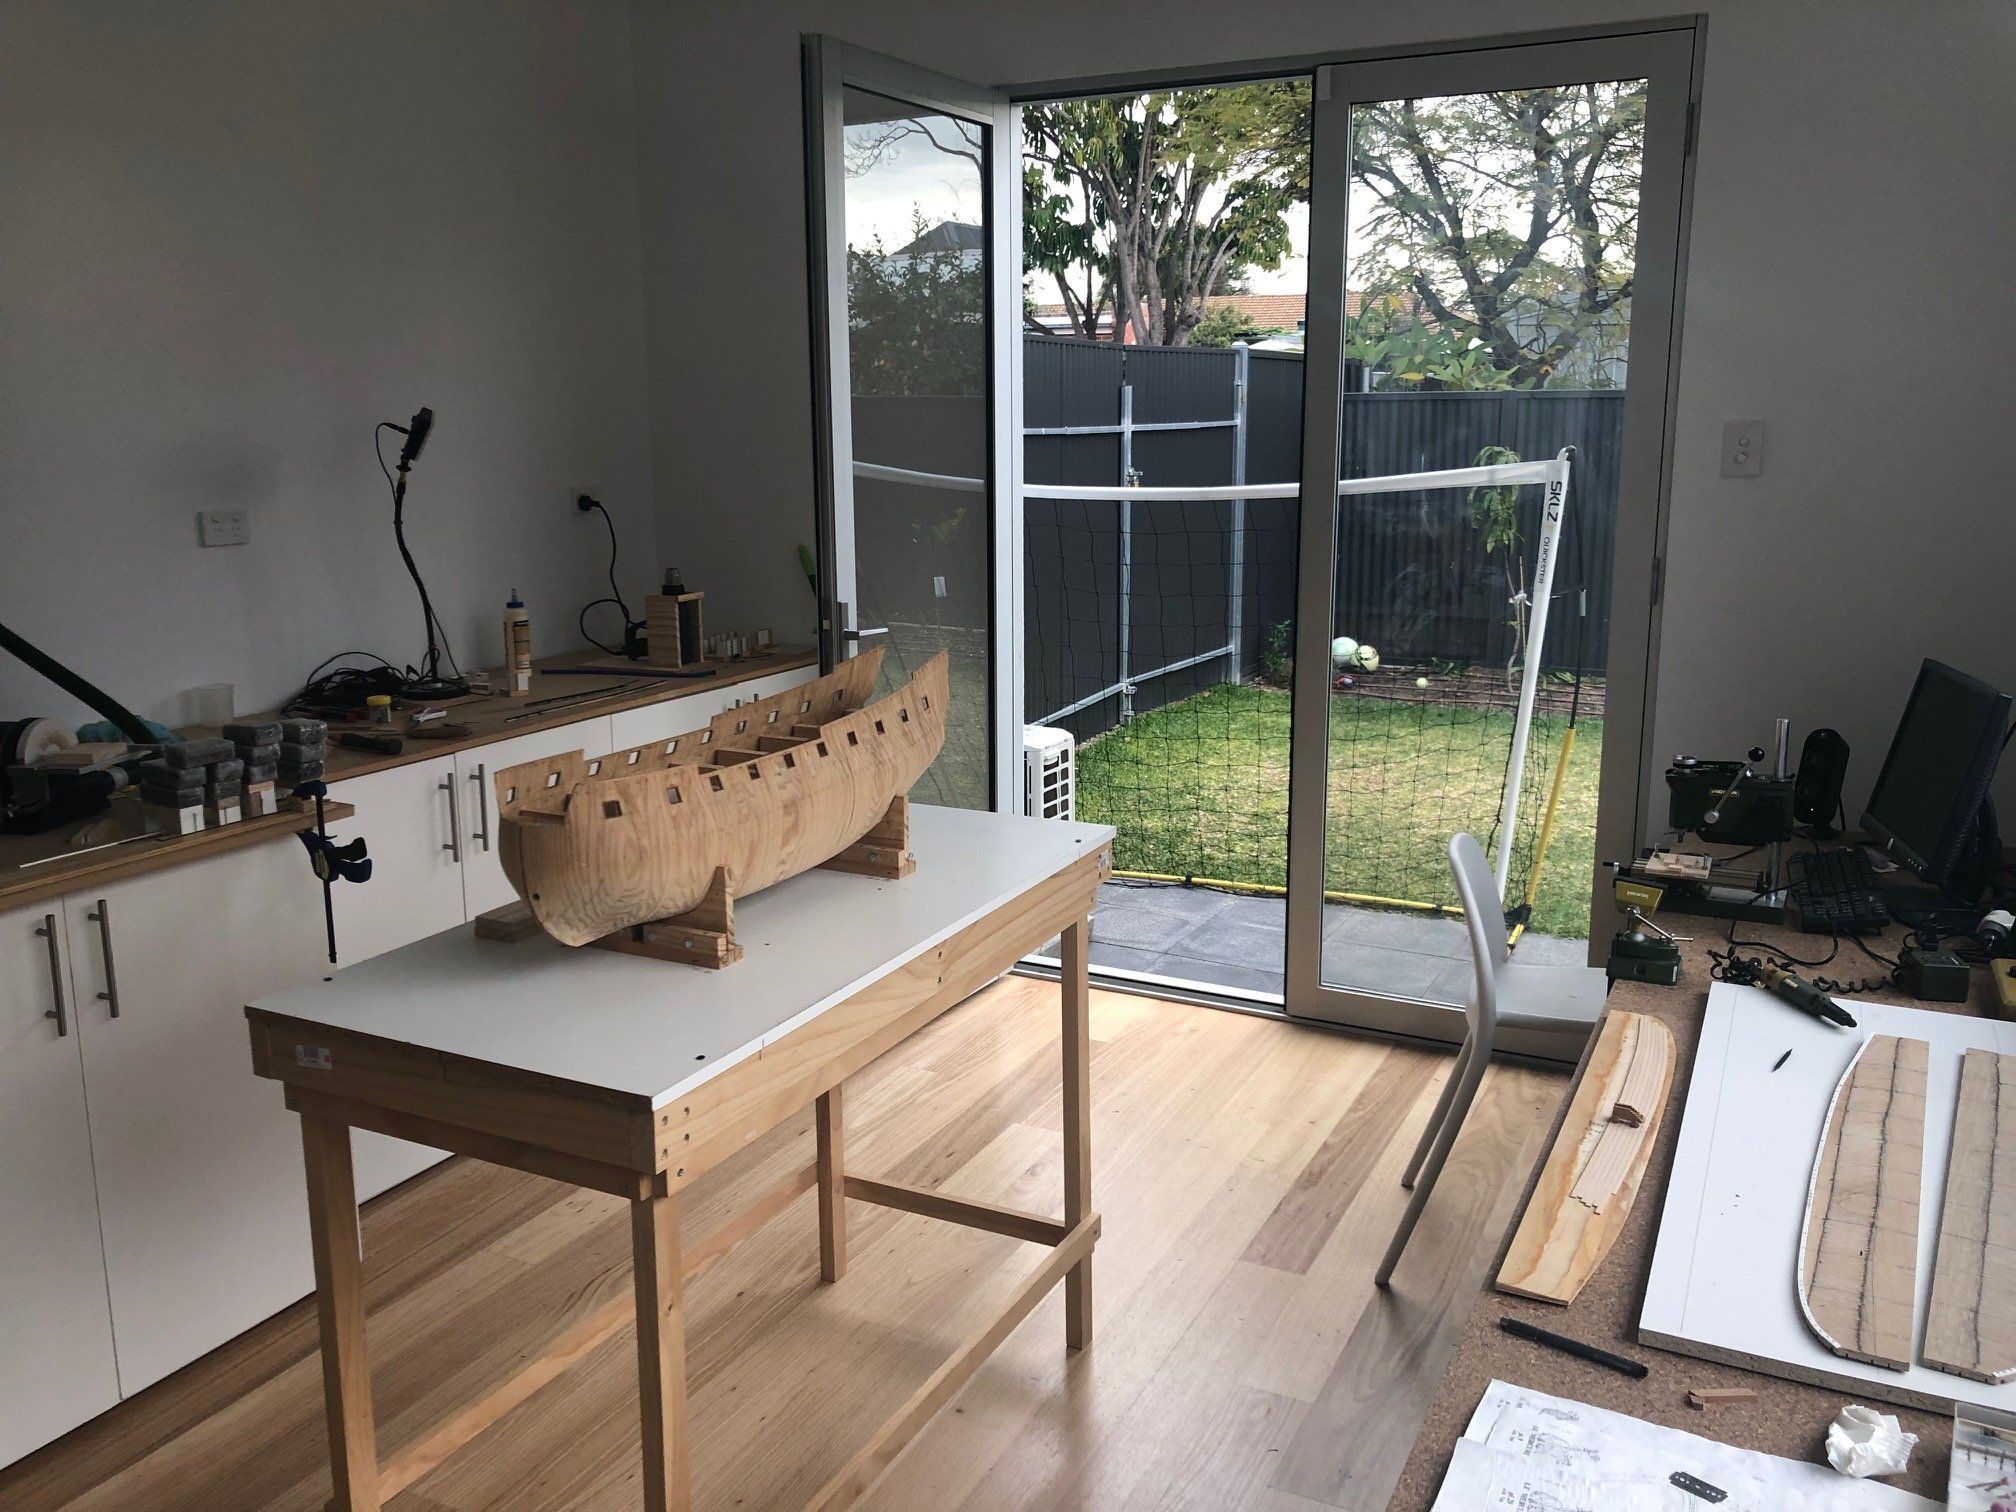
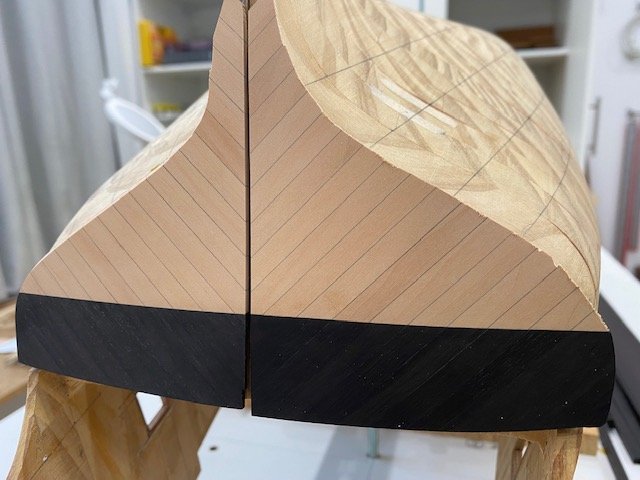
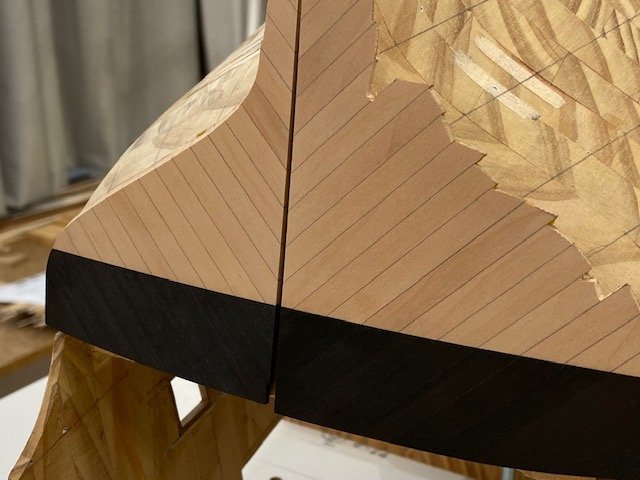
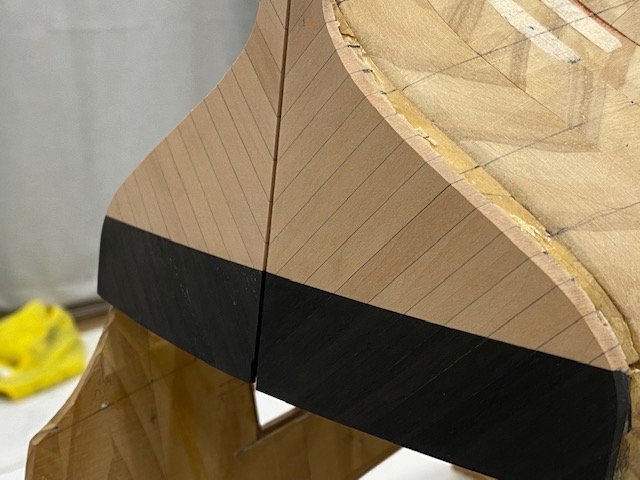
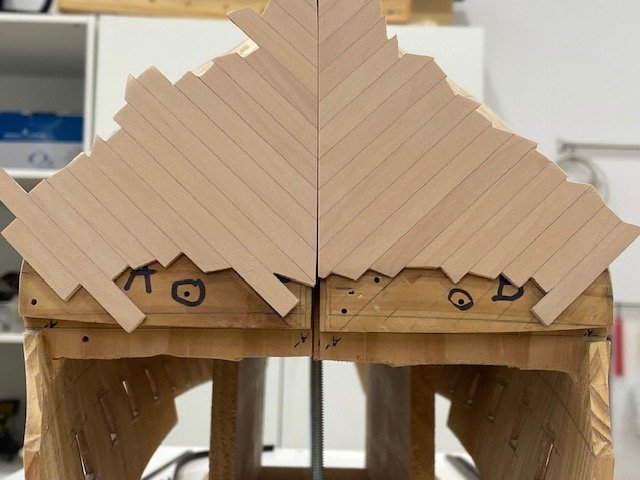
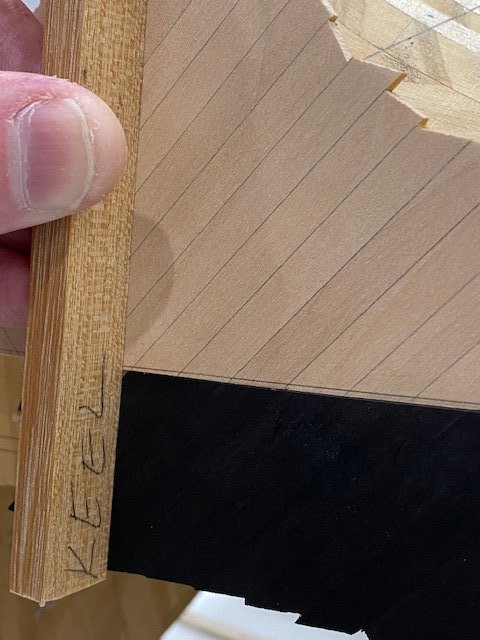
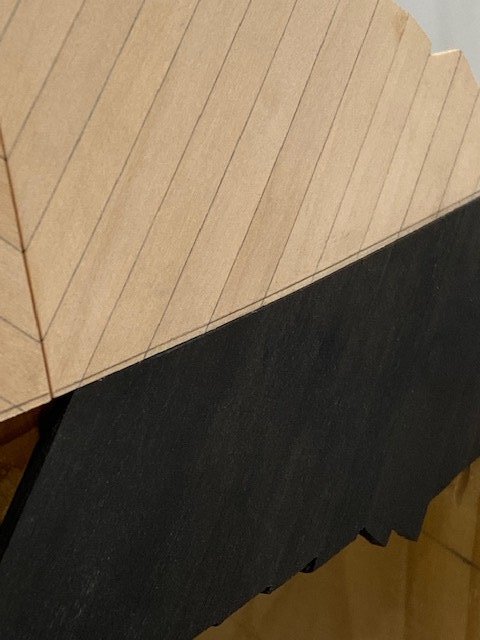
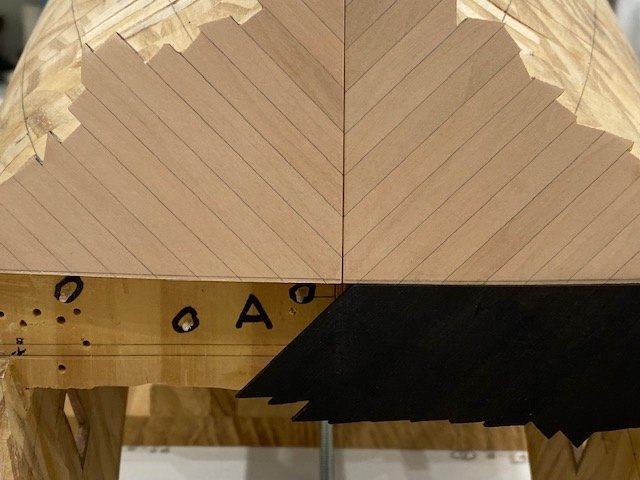
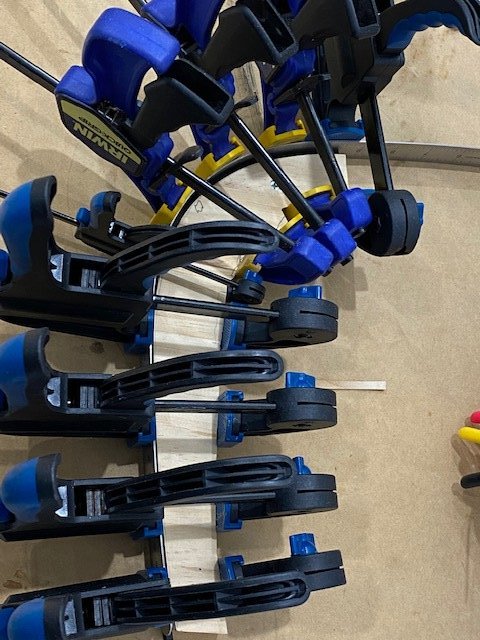
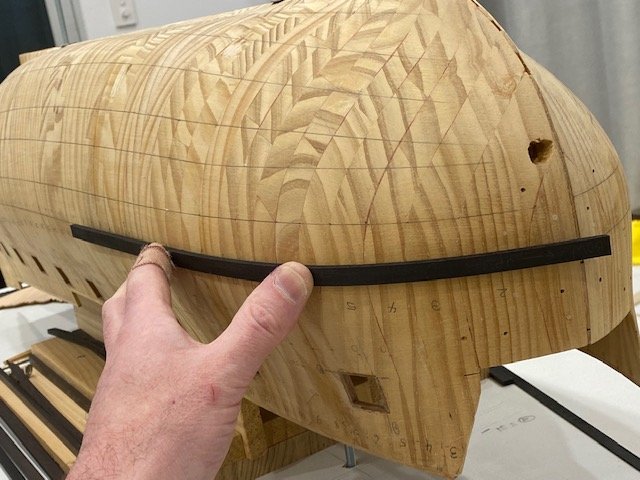
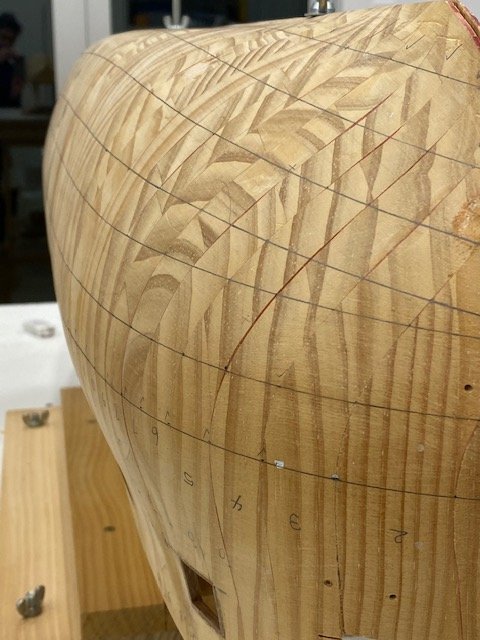
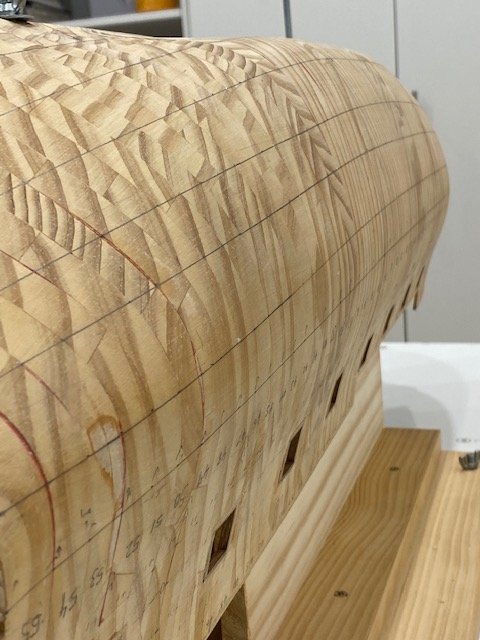
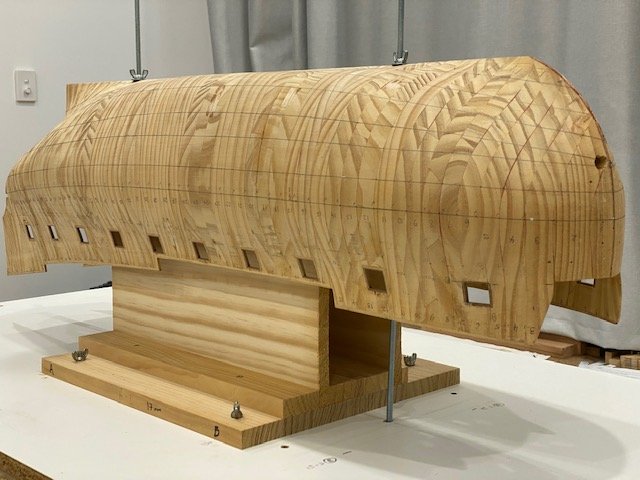
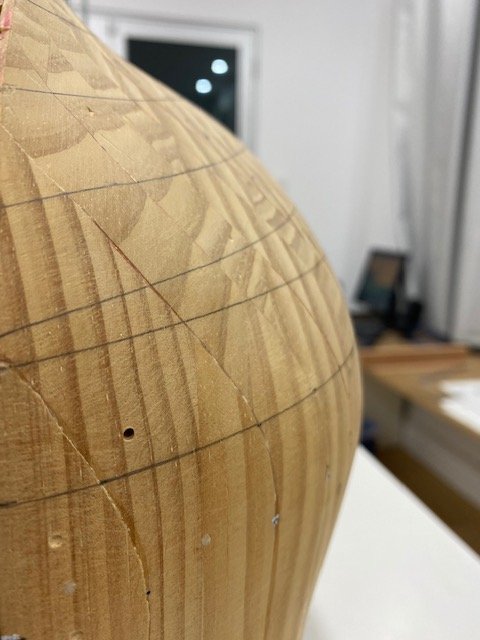
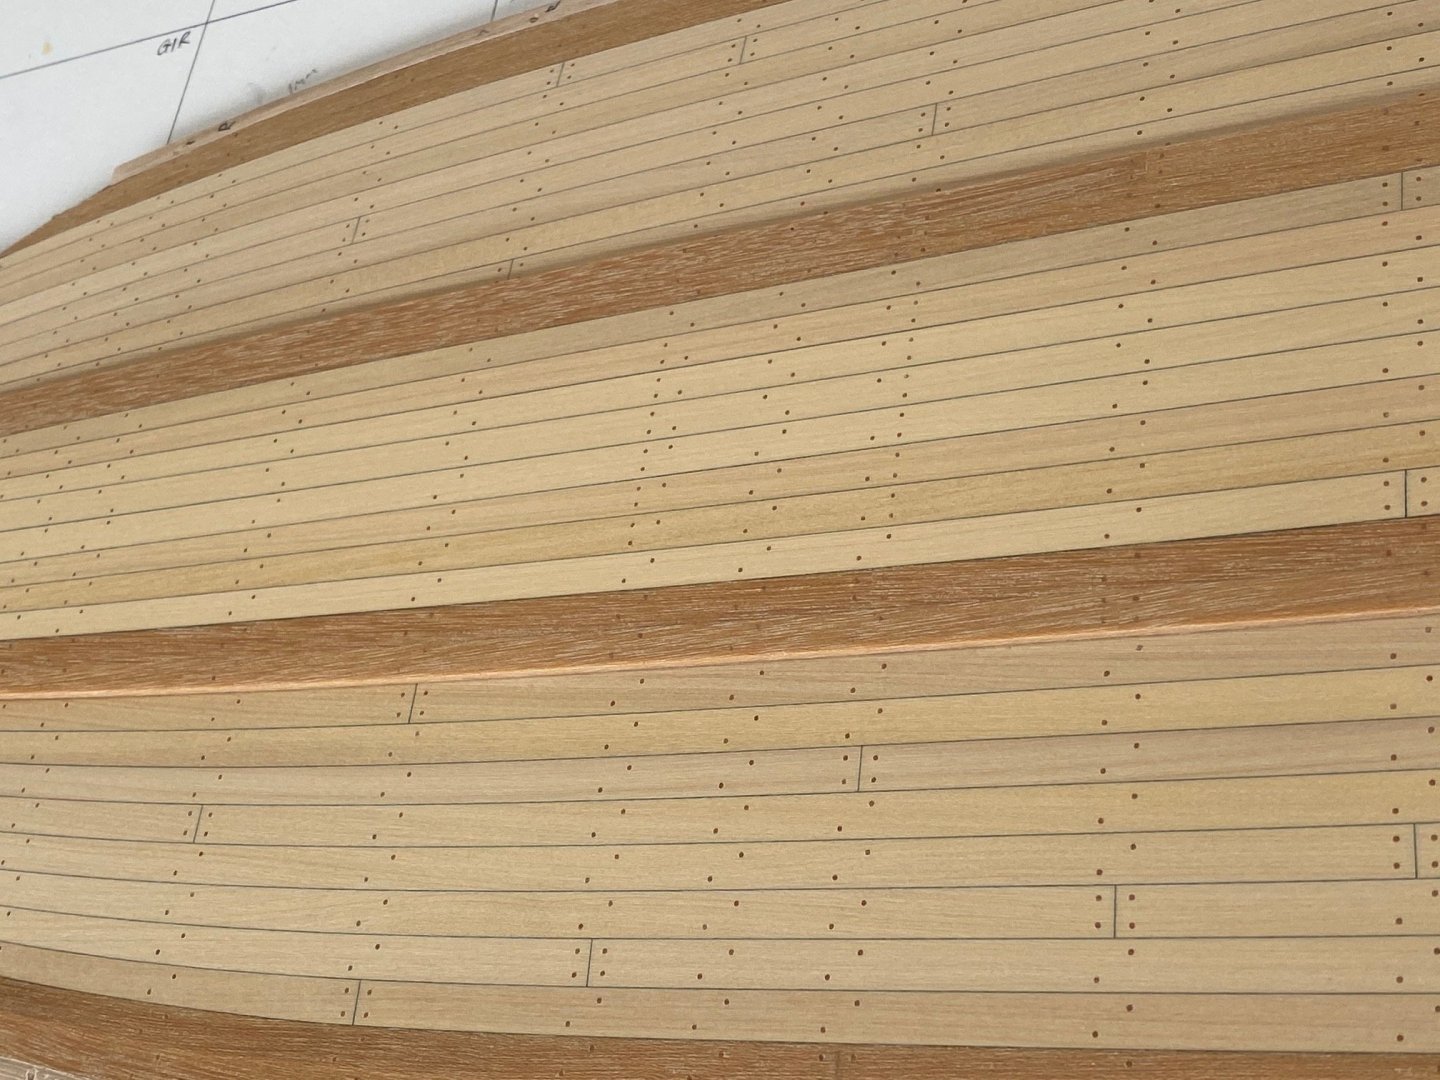
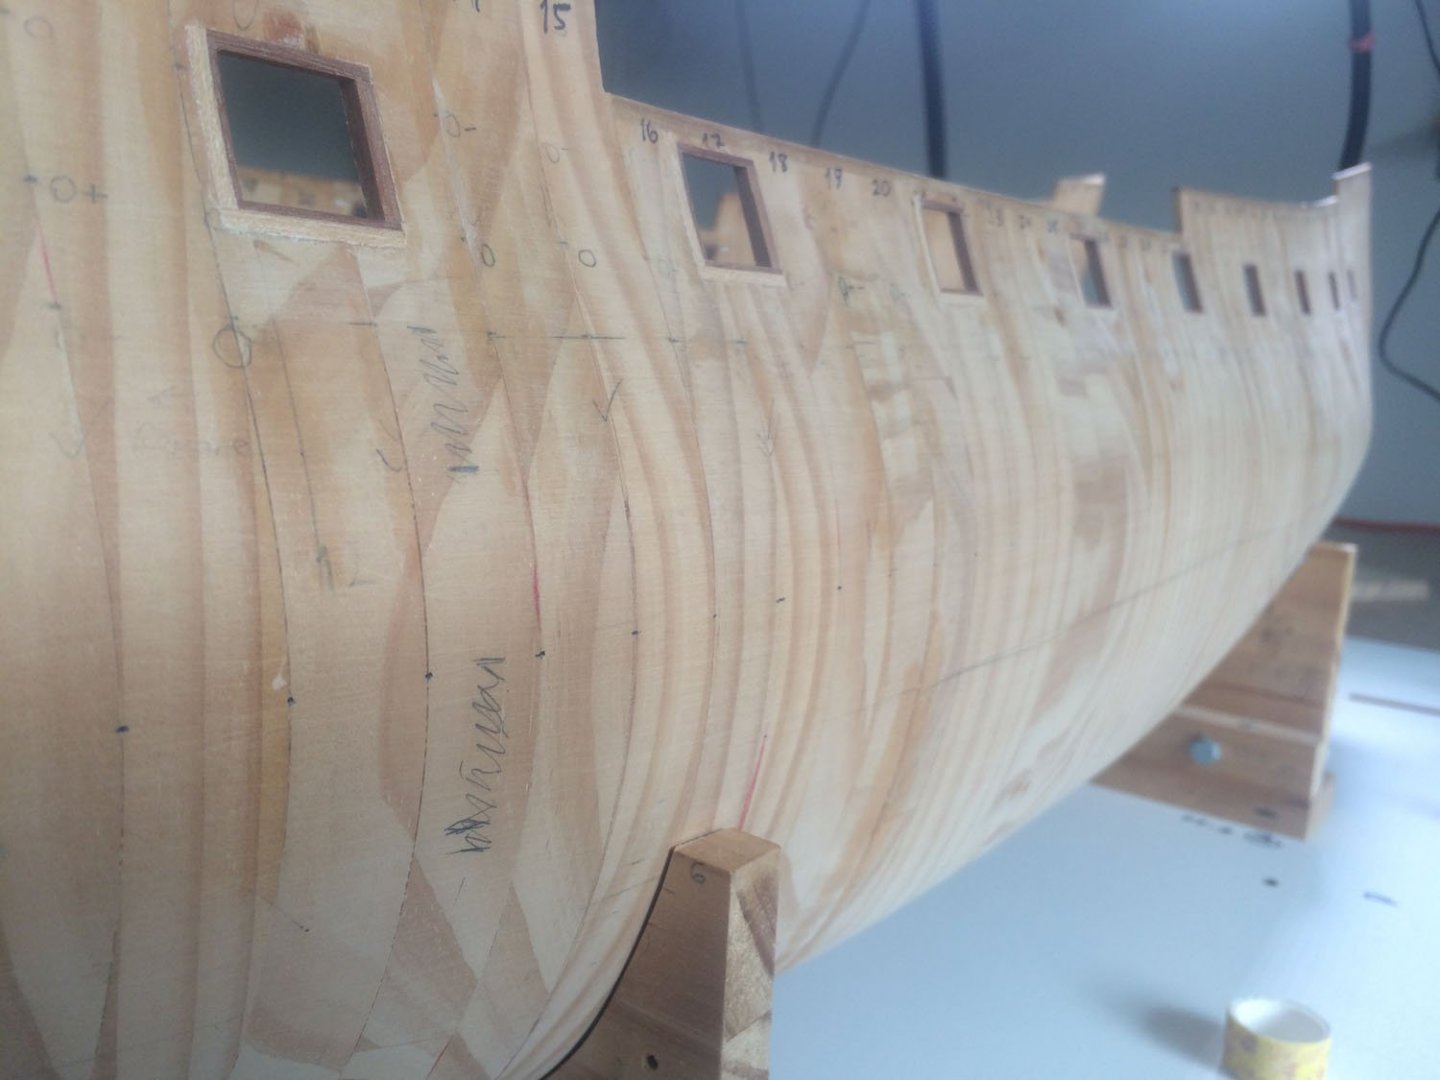
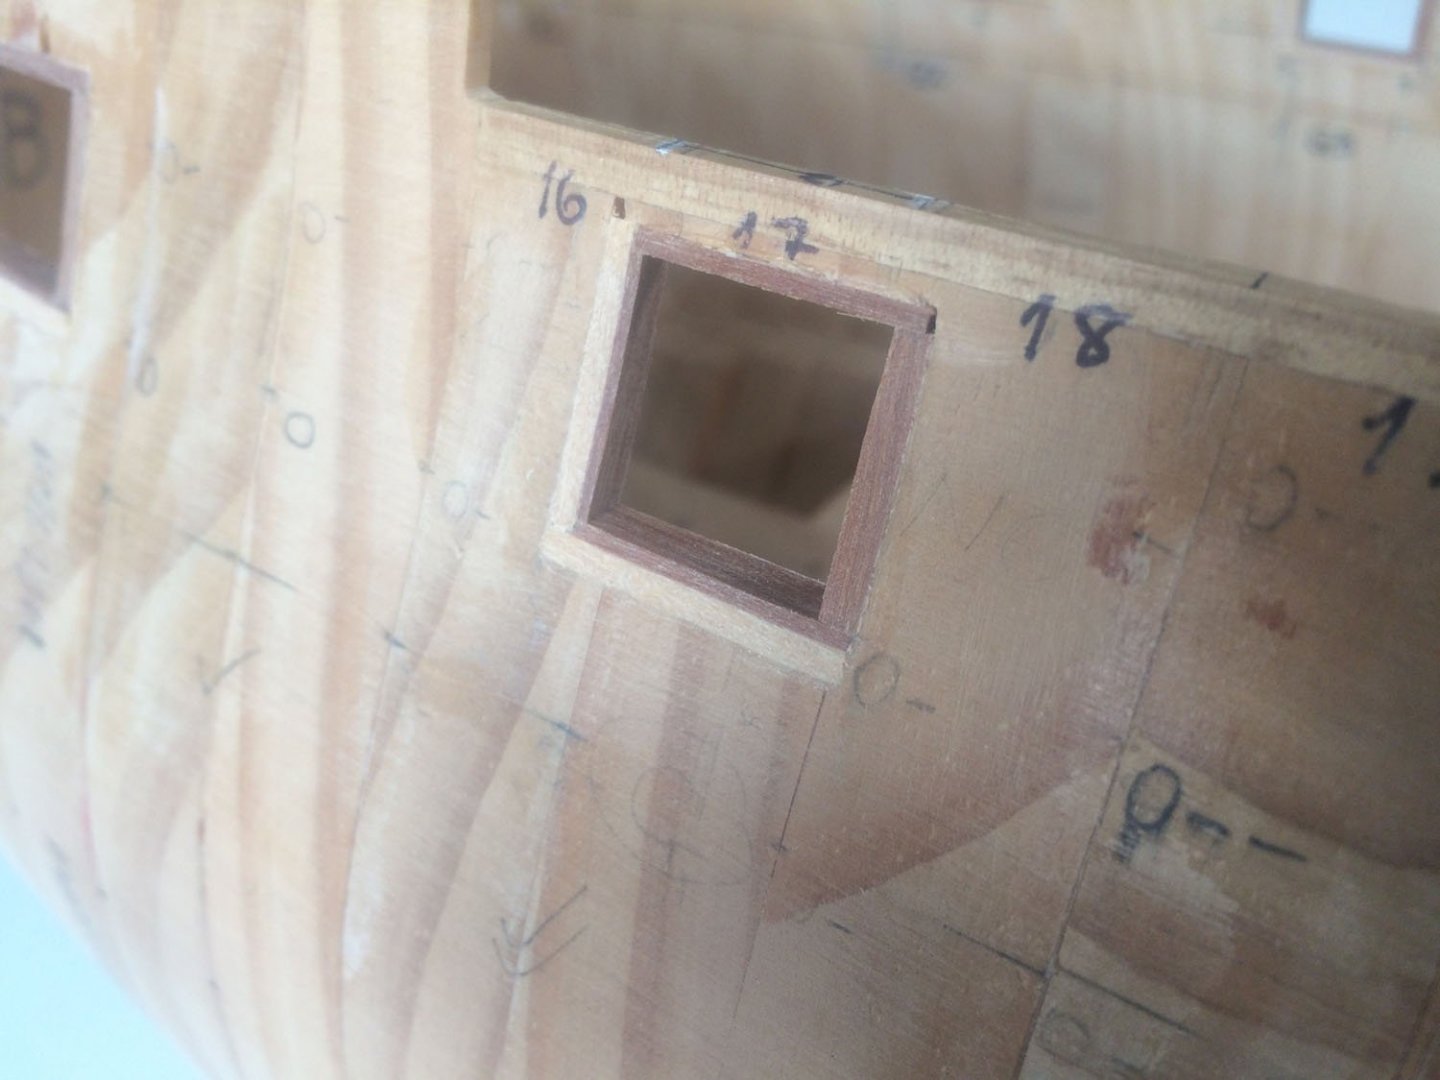
Hi all. It has been a while but I am now resuming my build. I plan to have my hull planked below the waterline in the next 4 months. The hull planking will commence very shortly but before it does I am making the stern piece. This needs to be in place before the hull planking is attached because these hull planks must sit on top of the stern piece. I assemble the stern off of the model which gives me a lot of flexibility. I only glue it at the very last moment when it is absolutely necessary. The pear meets black hornbeam on the stern at a 45 degree angle (as per the plans) and I am focussing on a perfectly straight line as the join between them. Everything in the photos is detachable at this stage. Also shown is my first piece of black hornbeam bent to almost 90 degrees in my jig after steaming. You will notice the bands of planking drawn on my hull in pencil in one of the photos.
-
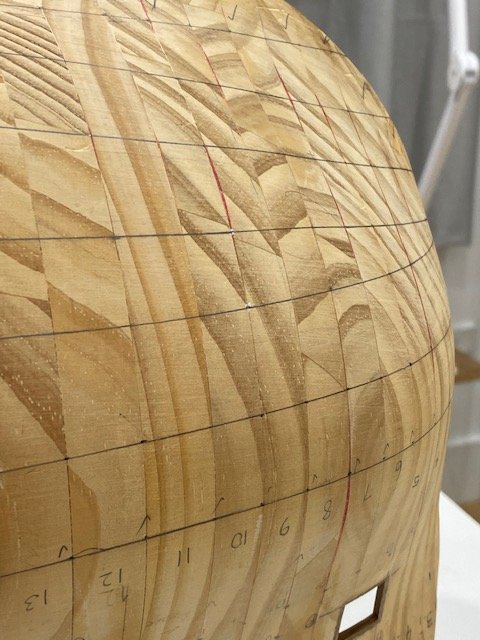
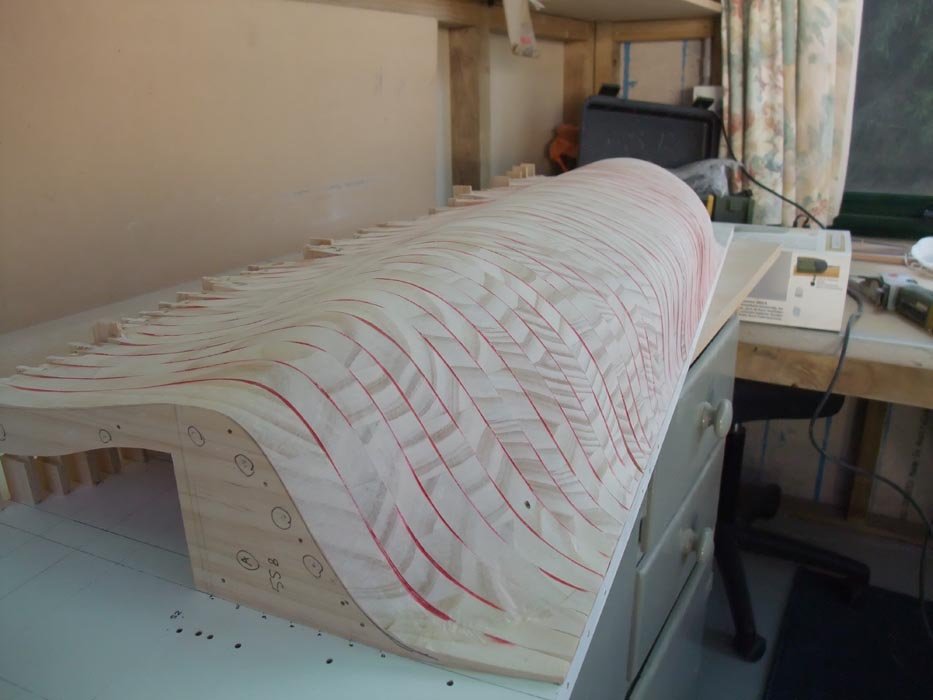
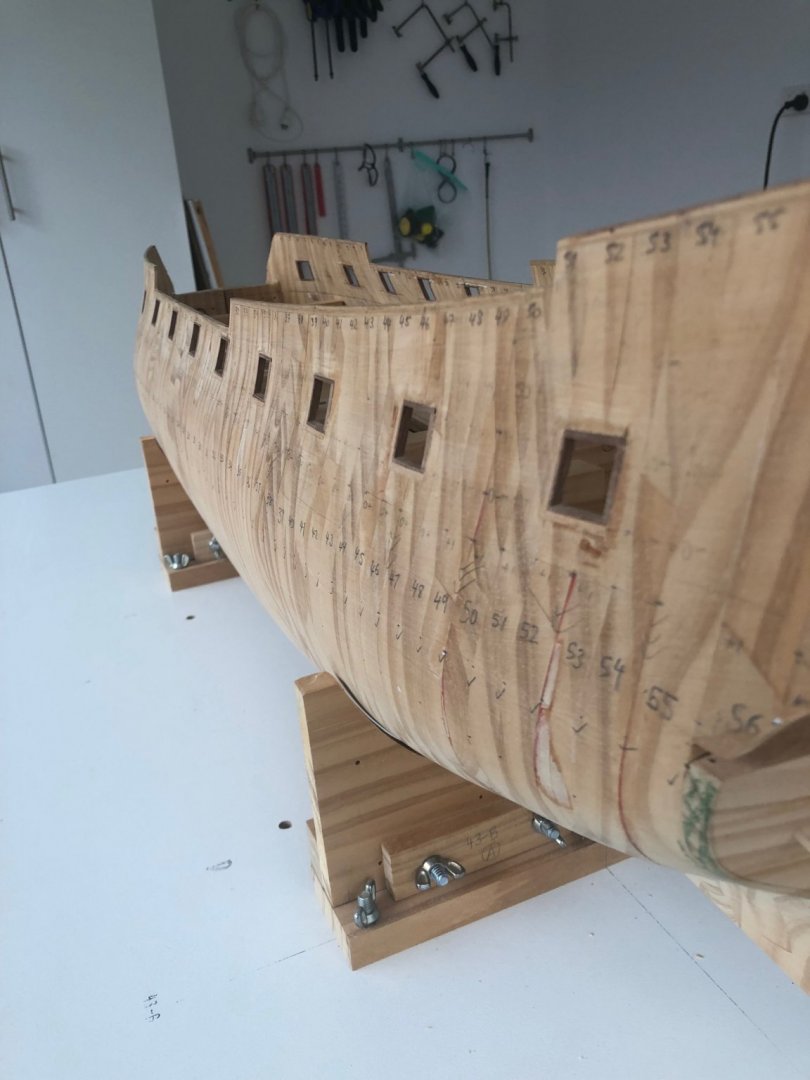
The exact position of planking bands have been very carefully calculated and drawn on both sides of the hull.
-
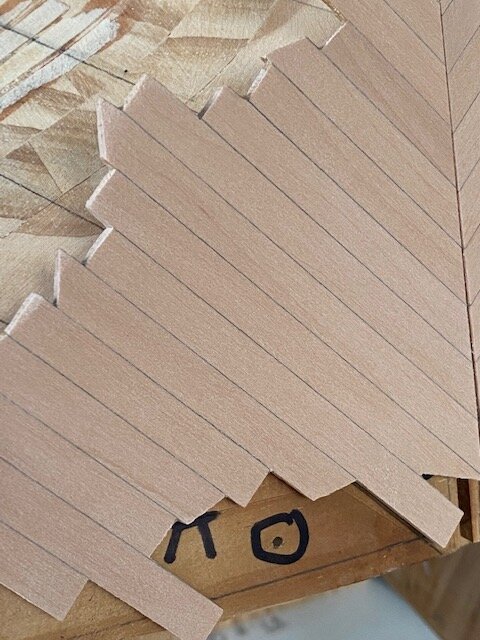
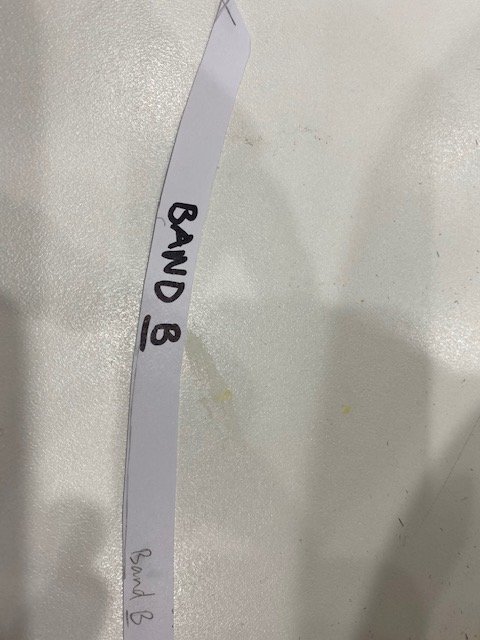
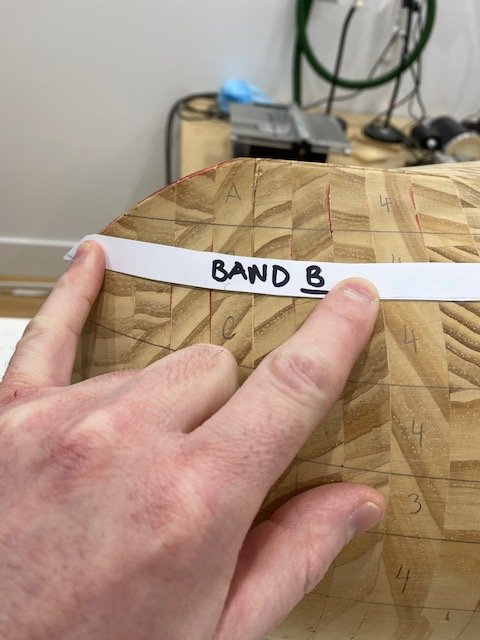
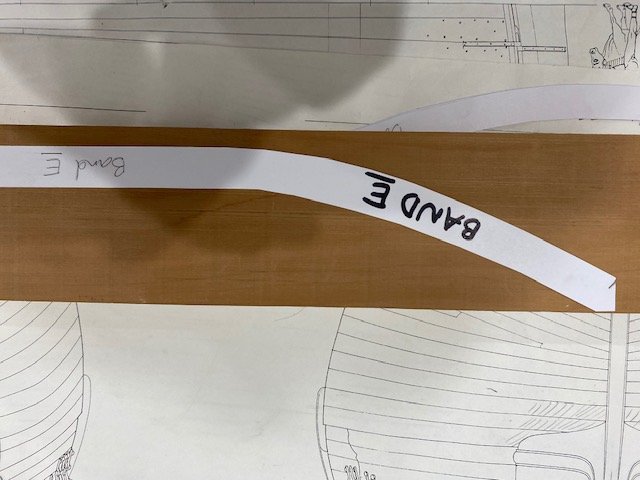
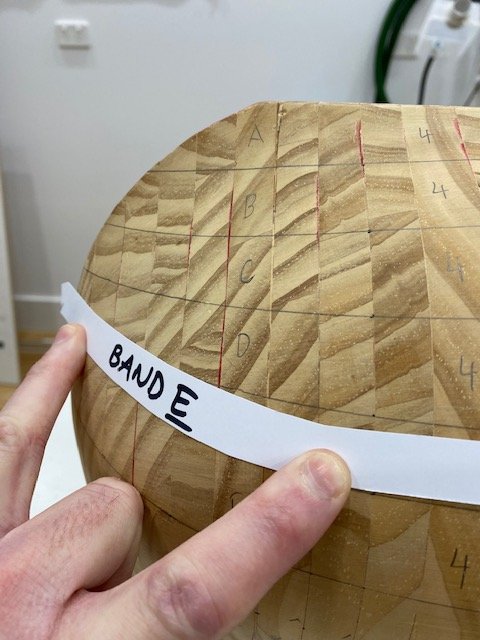
After a few weeks away (thinking about the next steps...) I have been able to start the next phase which is the hull planking. I spent most of yesterday and today dividing the planking into bands which I have drawn on the hull and labelled as: A, B, C , D , E and F. Each of these bands will have 4 planks (except for band E which will have 3 planks for reasons that will become obvious later). Le Mercure has a relatively blunt bow and therefore quite a bit of spiling will be required on each and every plank at the bow. I use paper templates and cut them with scissors so that when they are laid flat on the bow (exactly where the plank would sit) they follow the pencil line exactly. Then when the paper is laid flat on a table it shows the amount of "curve" that needs to be cut in to the plank. Band E has the most significant amount.

-
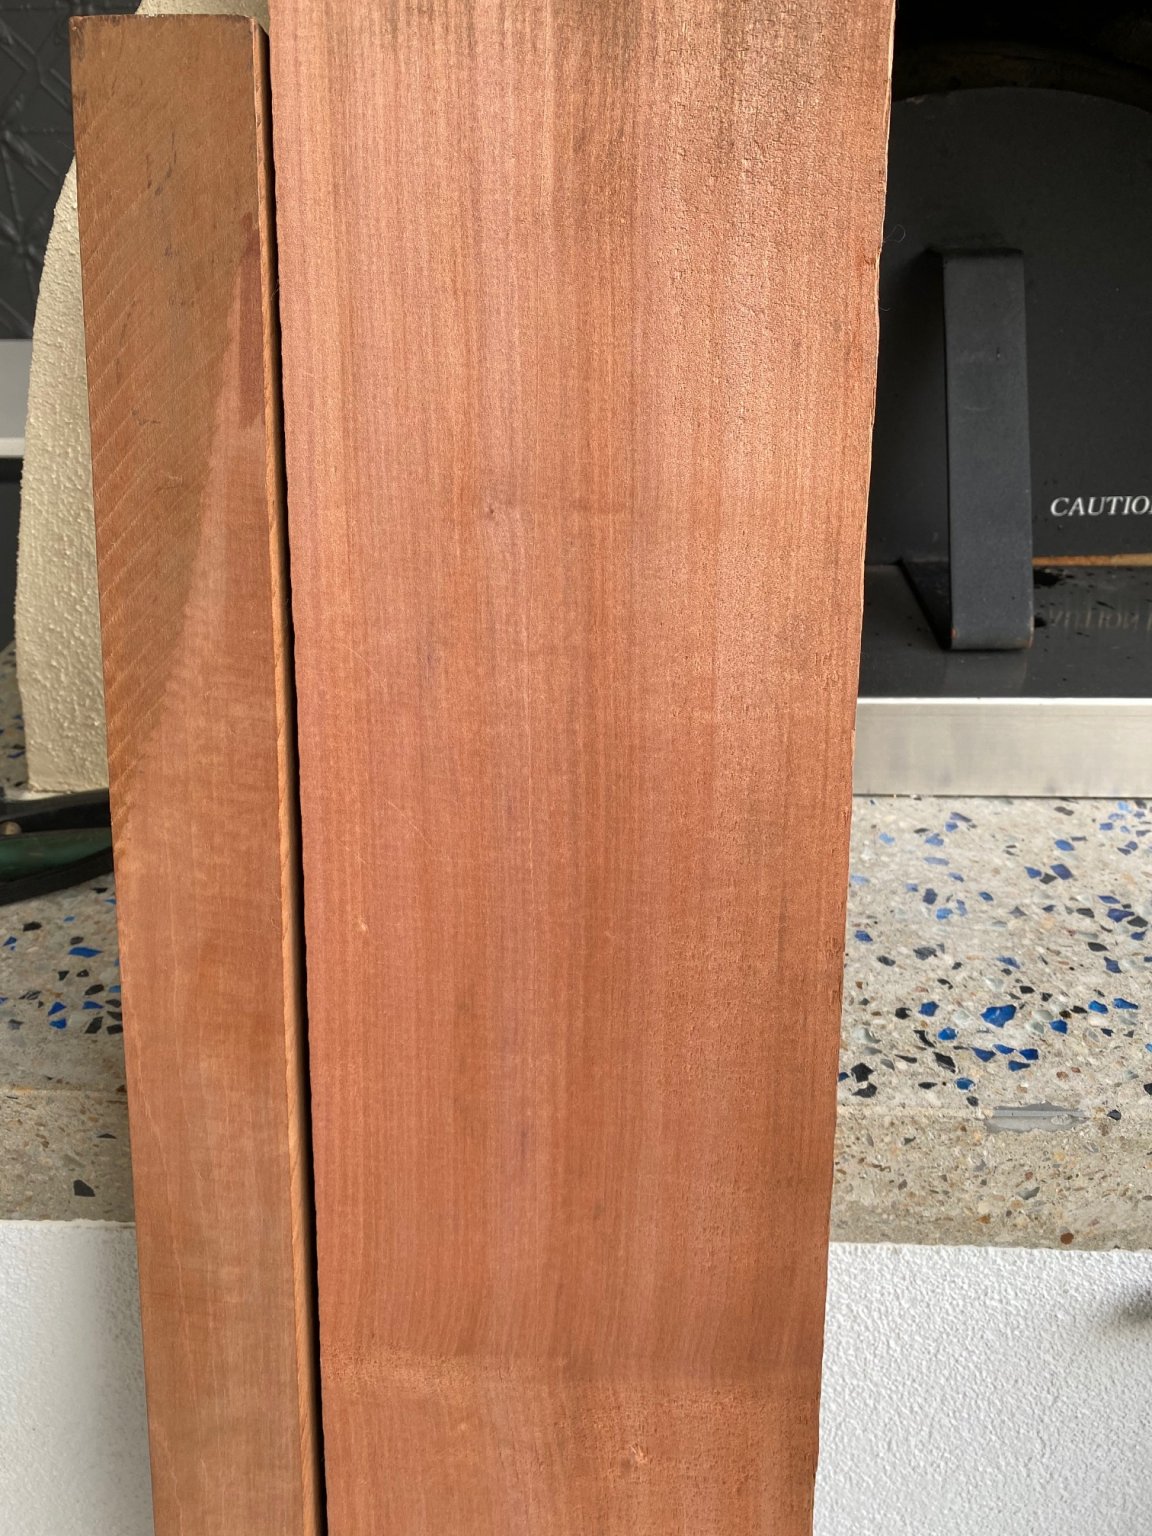
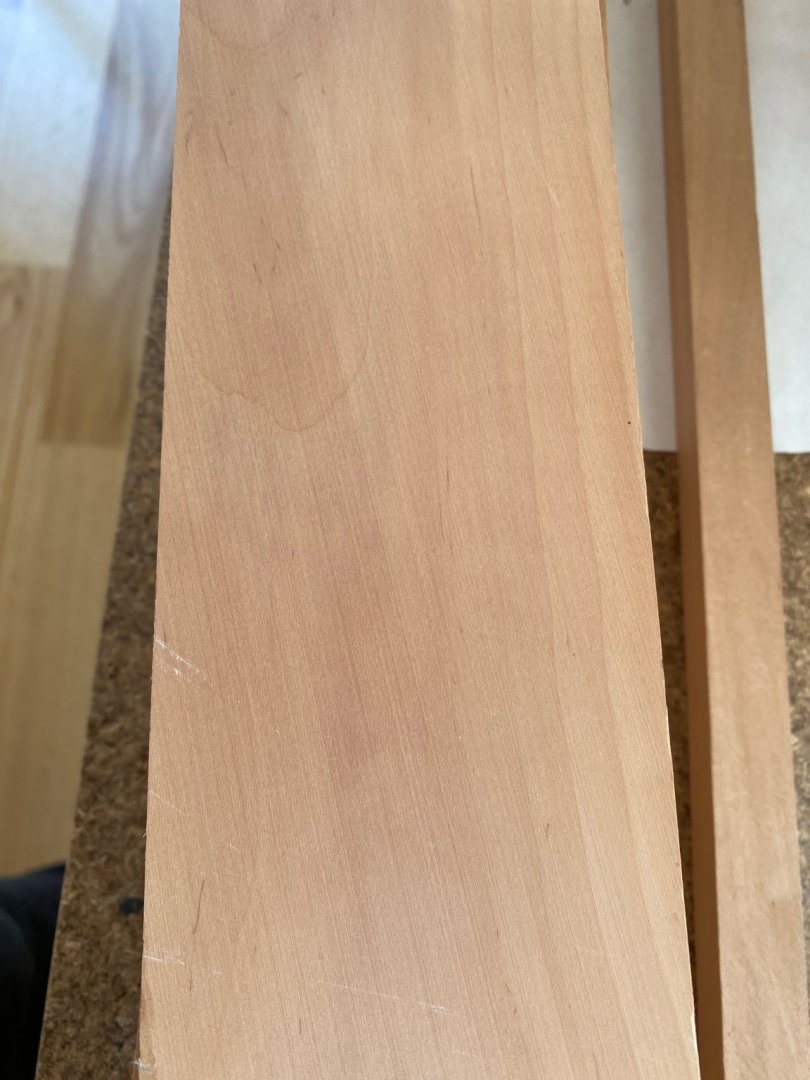
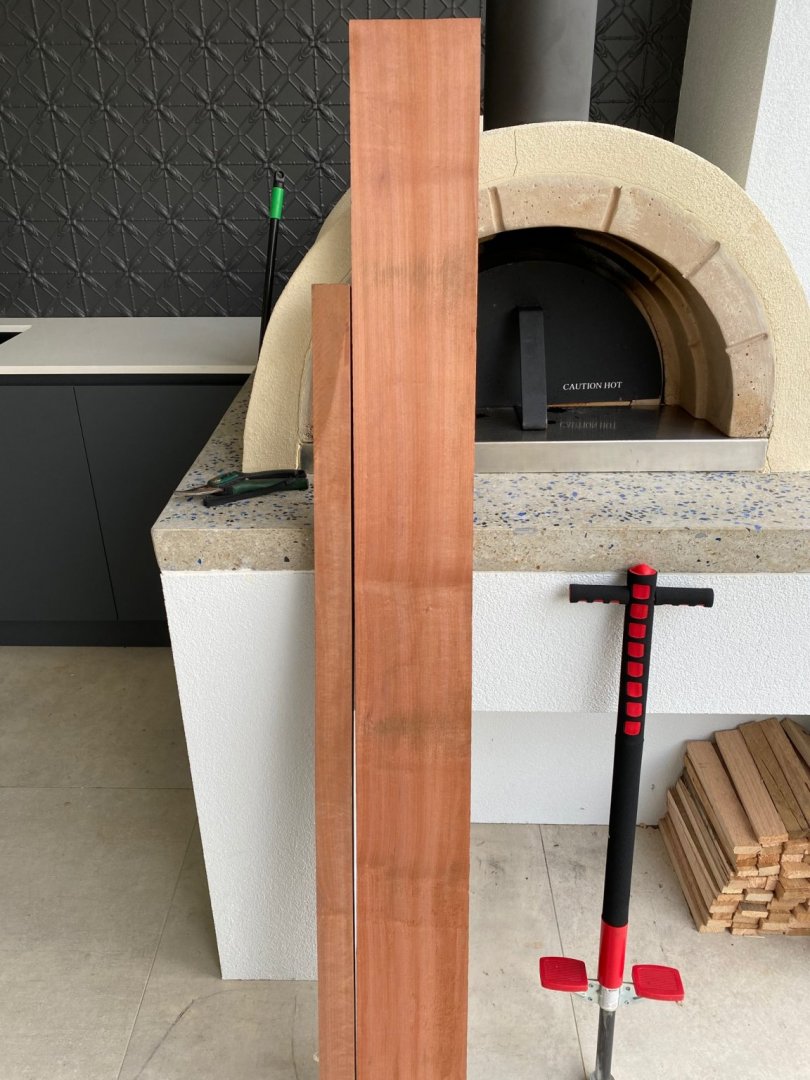
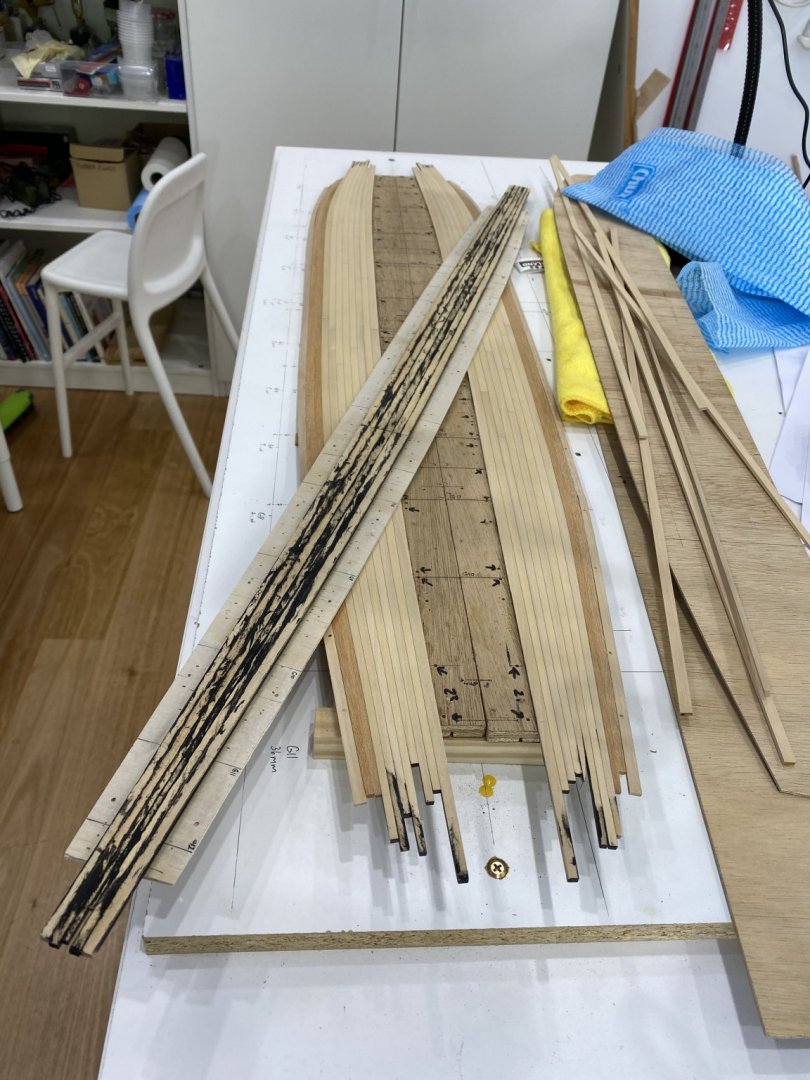
Thank you all for your replies. In the photo of the Sikta Spruce the colour and lack of figure looked very appealing but it sounds like its softness is an issue. For that reason I'll give it a miss. It caught my eye initially as in the photo it very closely resembled my very limited supplies of Swiss pear (photo attached) which I will use for my hull planking (under the waterline) very shortly. Unfortunately, I have not been able to find an Australian species of wood that very closely resembles pear.
-
Hi all, Does anyone have any experience with the use of Sitka Spruce for ship modelling? I have the opportunity to buy the attached pieces but according to the Janka Hardness Scale it appears to be only slightly harder than Pine and possibly too soft for ship modelling: https://www.wood-database.com/sitka-spruce/ I have not been able to see the pieces in person as they are interstate.
-
Hi Mugje, Thanks. The scale is 1:36
-
Thanks for the reply. I am trying to visualise this: I can see long chains of plastics coming off of each surface of timber and intertwining with one another which forms the bond.....
-
He he he, well noticed with the pogo stick! I'm looking forward to cutting down some planks to see what they look like. I'll try some waxes. I don't have a large saw so a friend of mine has kindly allowed me to use hers.
-
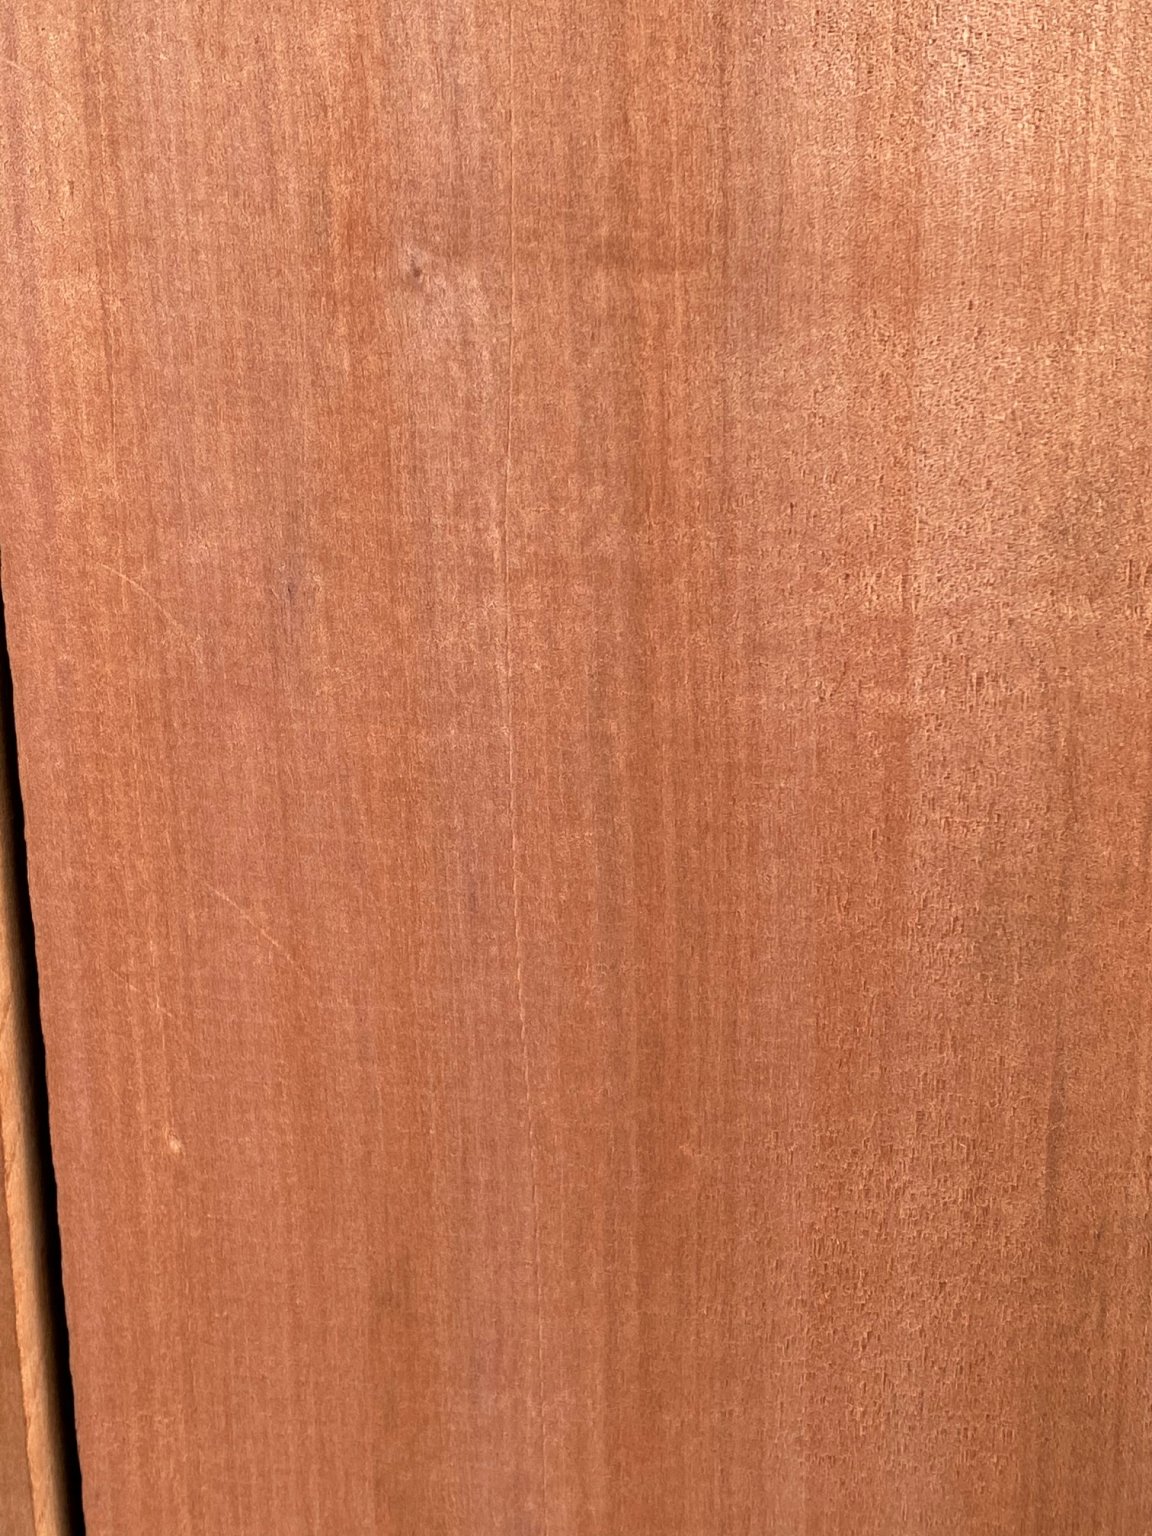
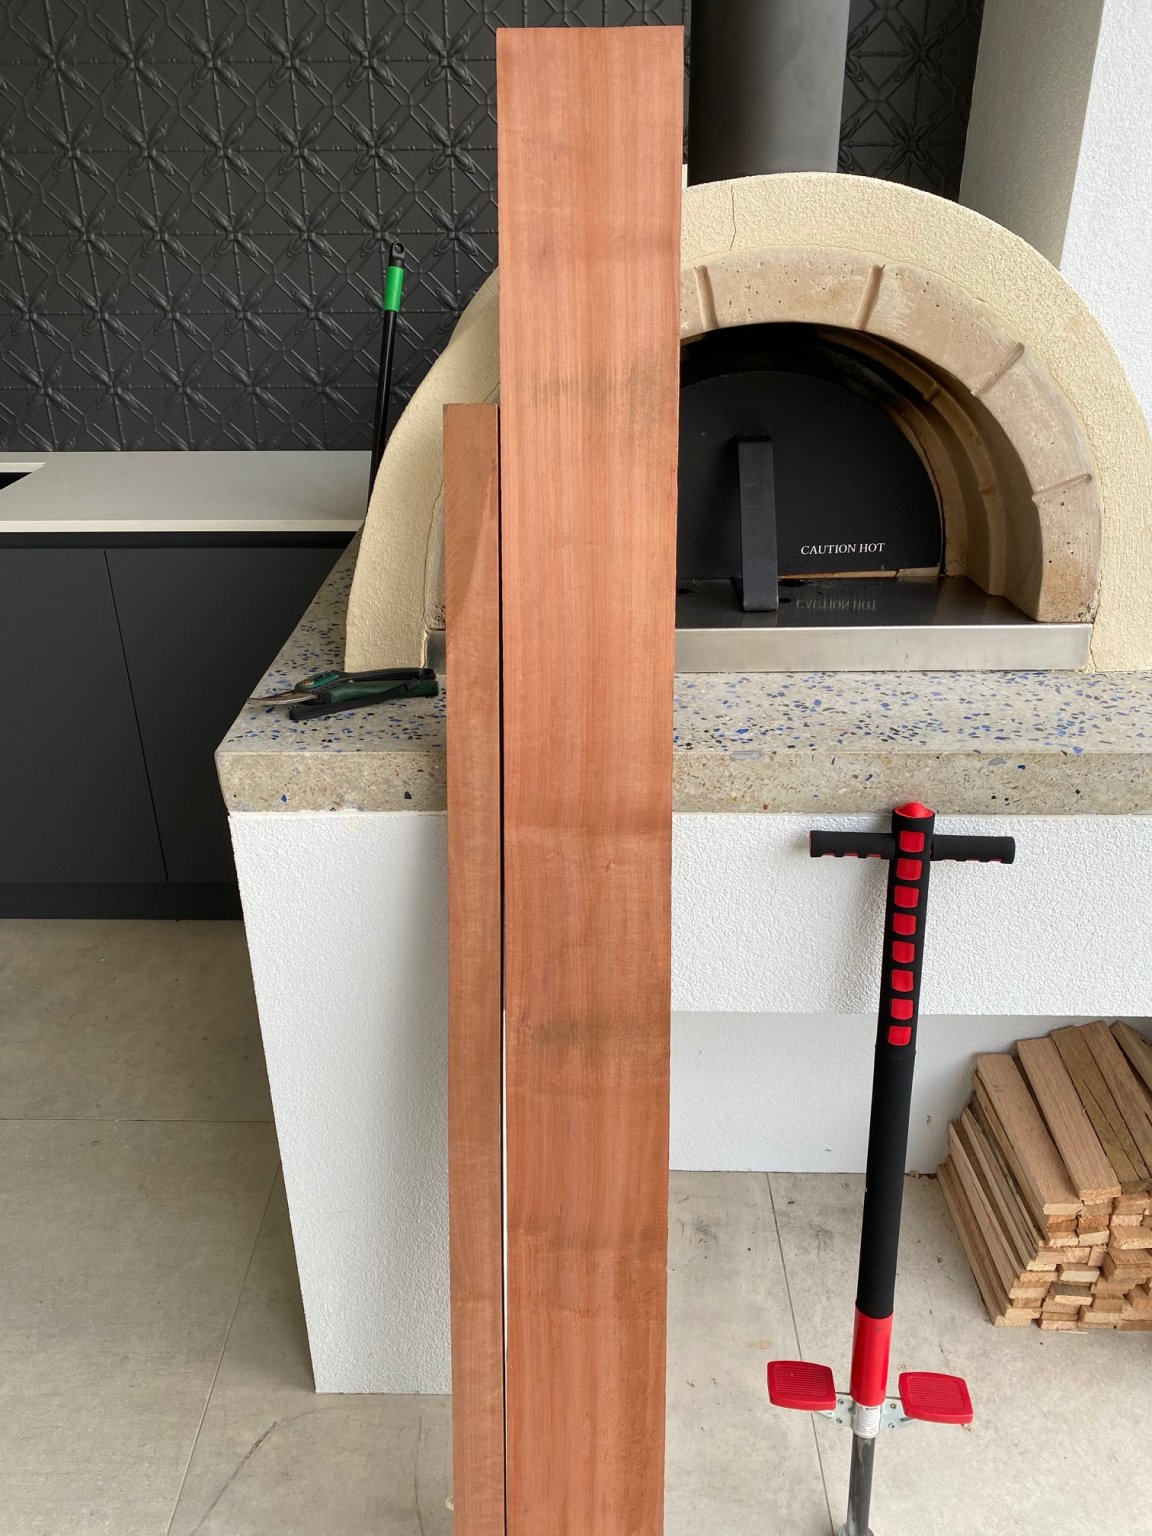
Thank you both for your replies. Yes, I am familiar with Swiss Pear and I do have some. I intend to build deck furniture from this. Unfortunately Swiss Pear seems to be impossible to find in Australia. I purchased some from my friends in Russia some years ago. The closest I have found in Australia to Swiss Pear is Myrtle and I managed to buy a long piece today (photo attached).

-
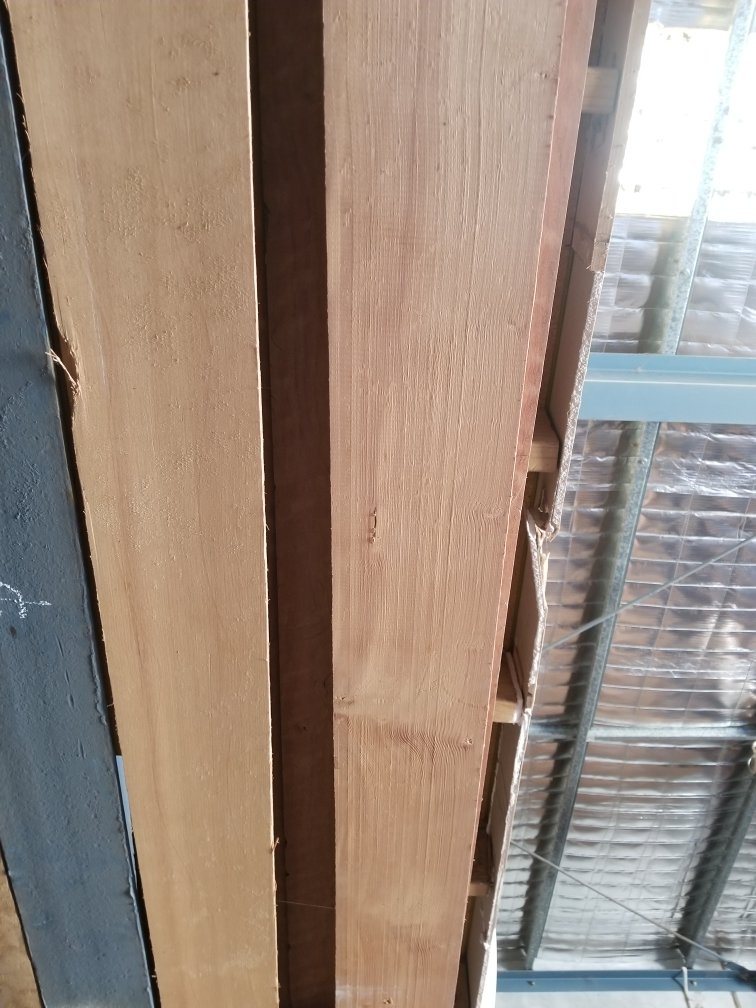
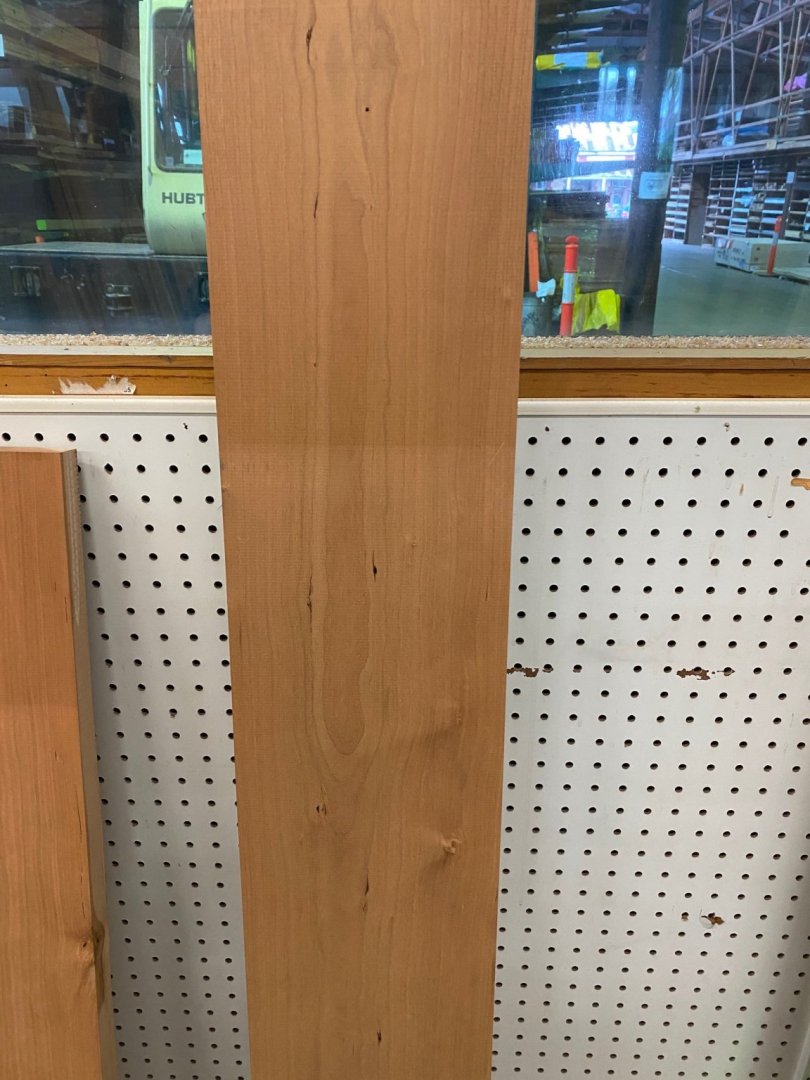
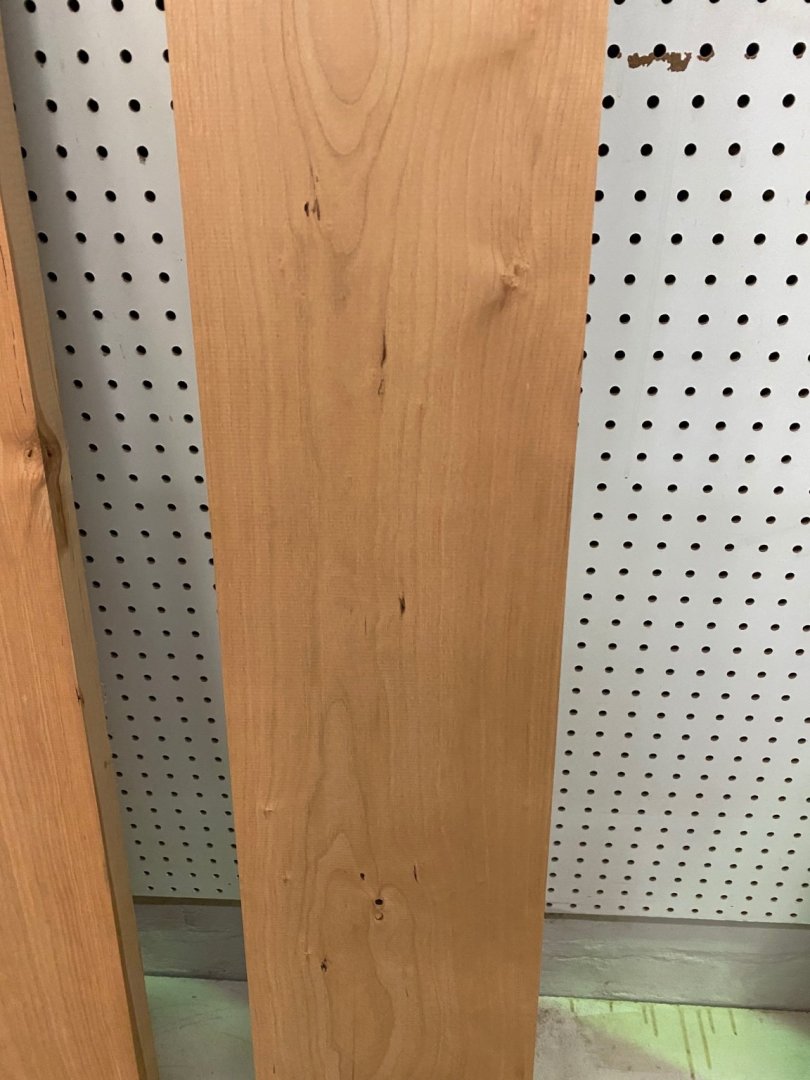
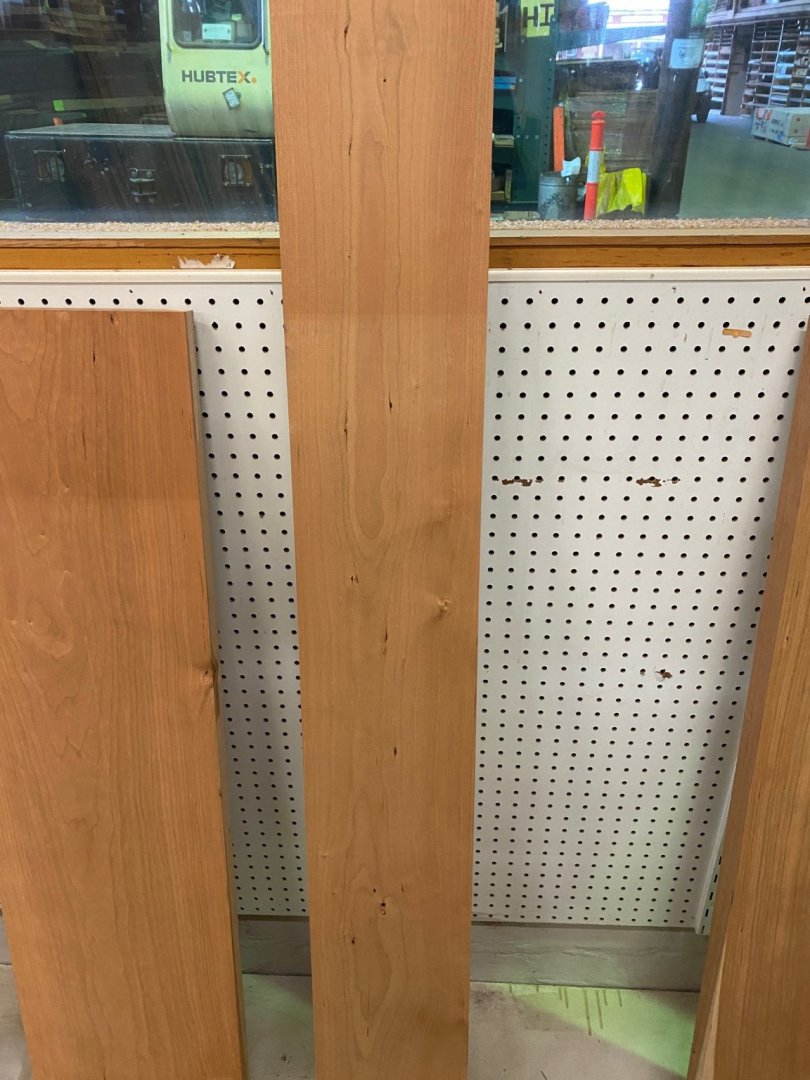
Perhaps this is best addressed to our American friends: I have a timber source in Adelaide (Australia) that stocks American Cherry (among other rare woods) but I notice that all of their pieces of Cherry tend to have noticeable figure in them. Given that I have very limited experience with Cherry, what is your opinion of the attached piece (which was the best one I could see in their shop)? Would this piece be considered too figured or would it actually be considered a good quality piece? I'd be very interested to know what it would look like cut down in to planks.
-
Hi all, I was not sure where exactly to post this as there wasn't a category that seemed to fit so please feel free to move this post as needed. I am wanting to understand exactly how aliphatic resins actually work at an atomic level - that is, how do they result in a force of attraction between two pieces of wood? My neighbour (who happens to be a retried biology/chemistry teacher) told me he thought it had something to do with electron clouds but really wasn't sure and couldn't go any further. Surprisingly, I have Googled around and can't find a suitable explanation. Perhaps there is a chemist (or other) on board who understands this at an atomic level and would be happy to give an overview?
-
Thanks for your comments. My apologies for a slow reply - I have had a few very stressful and busy weeks at work. Unfortunately, I don't have the ability to do multiple things at once 🙂 @Louie da fly: Yes, the pear in your photos looks like the pear I recall seeing many years ago (Australian grown) that had more of a grey colour than a red colour. There is no doubt this might even be more suitable for certain applications. I have also been stalling because I have been looking and looking for a suitable wood to use under the waterline. I managed to buy the attached Myrtle today in Adelaide which is similar to the Pear I have from Europe. It is actually an extremely clean piece with little to no blemishes or fiddleback. It is a little pinker than I would ideally like, but I will experiment with a few different waxes. I'll use this under the waterline.


-
Thanks and yes, I like my work to finish as if the ship has just come out of the ship yard. I pay very careful attention to every join, nail and fine detail and the techniques used. I work slowly and not as often as I'd like (I have 3 very young children and a job often involving long hours). This is my first model (aside from half finishing a kit when I was in my early 20's - which isn't actually all that long ago) so I am getting familiar with my own style of building. Now my attention will turn to the hull planking and I need to decide on what timber to use below the waterline. I am giving serious thought to using Myrtle but welcome suggestions. I don't want a wood that is too dark so that excludes Walnut. My inclination is not to stain. I would like to use Daru (which I used as the edge planking on my deck) but unfortunately I don't have enough left. I can visualise my ideal coloured wood but unfortunately that wood doesn't exist 🙂 I am keen to know about your neighbour's Pear. Is it red/pink like European pear? The couple of samples I have had of Australian Pear were very grey. Are you able to share a photo?
-
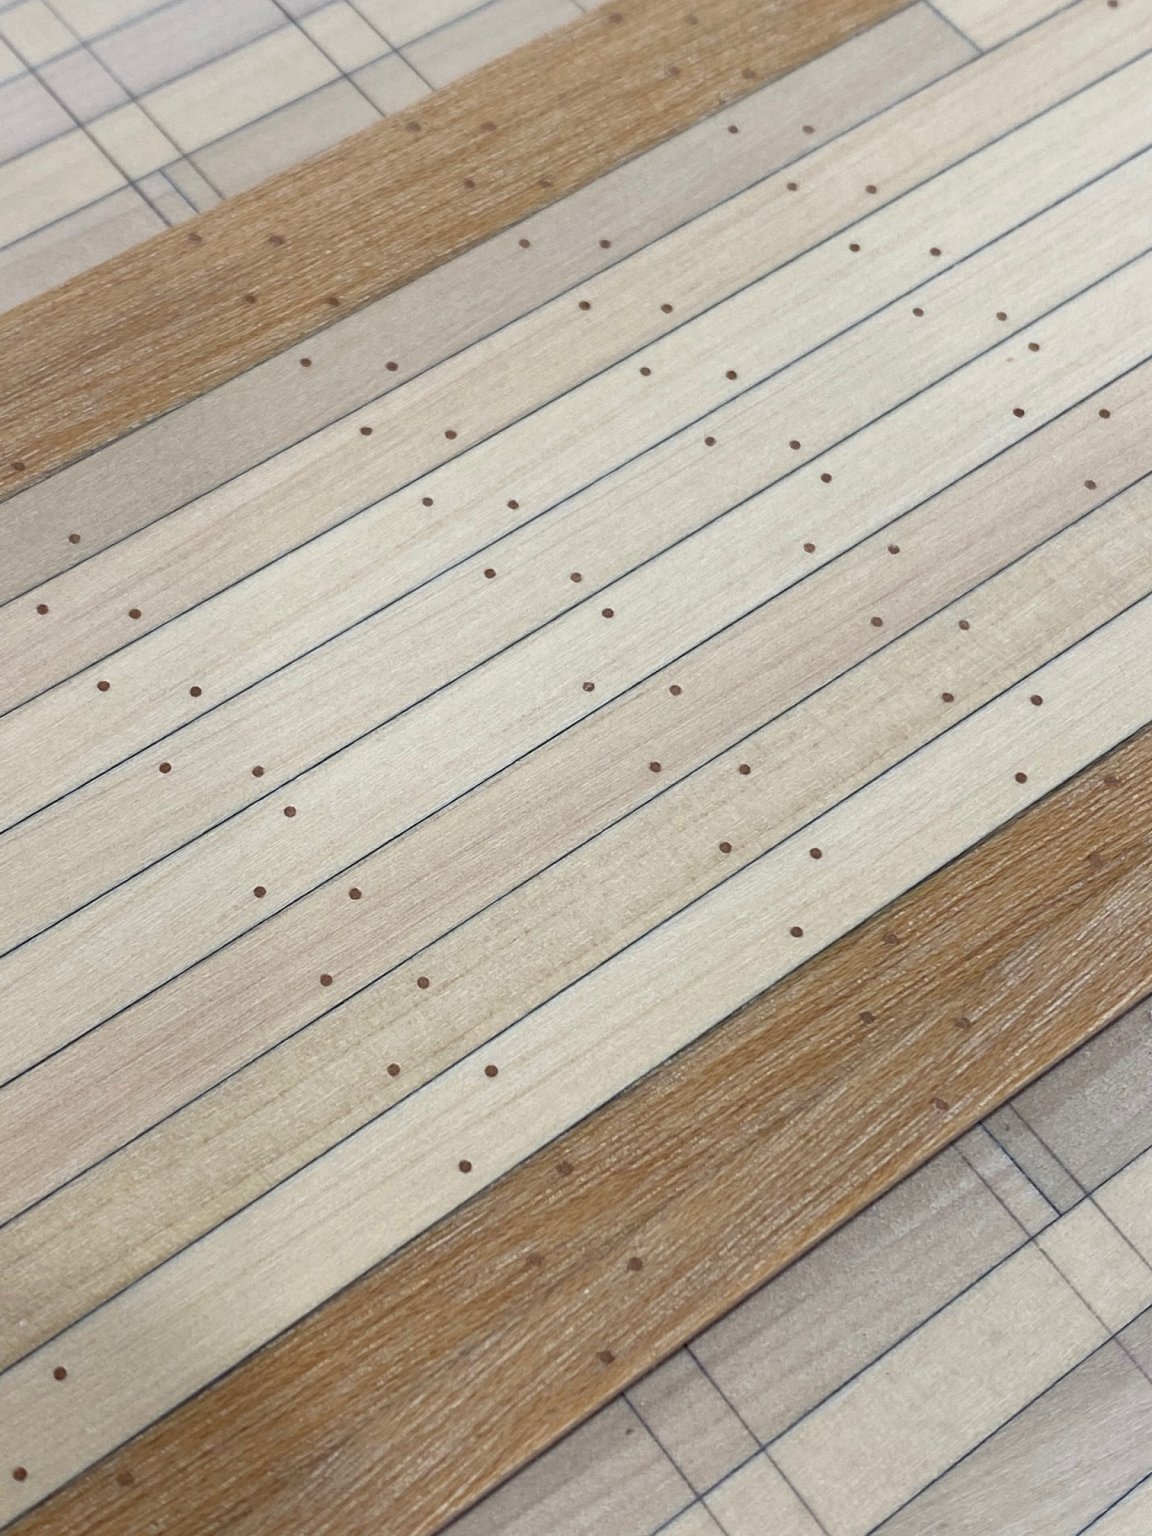
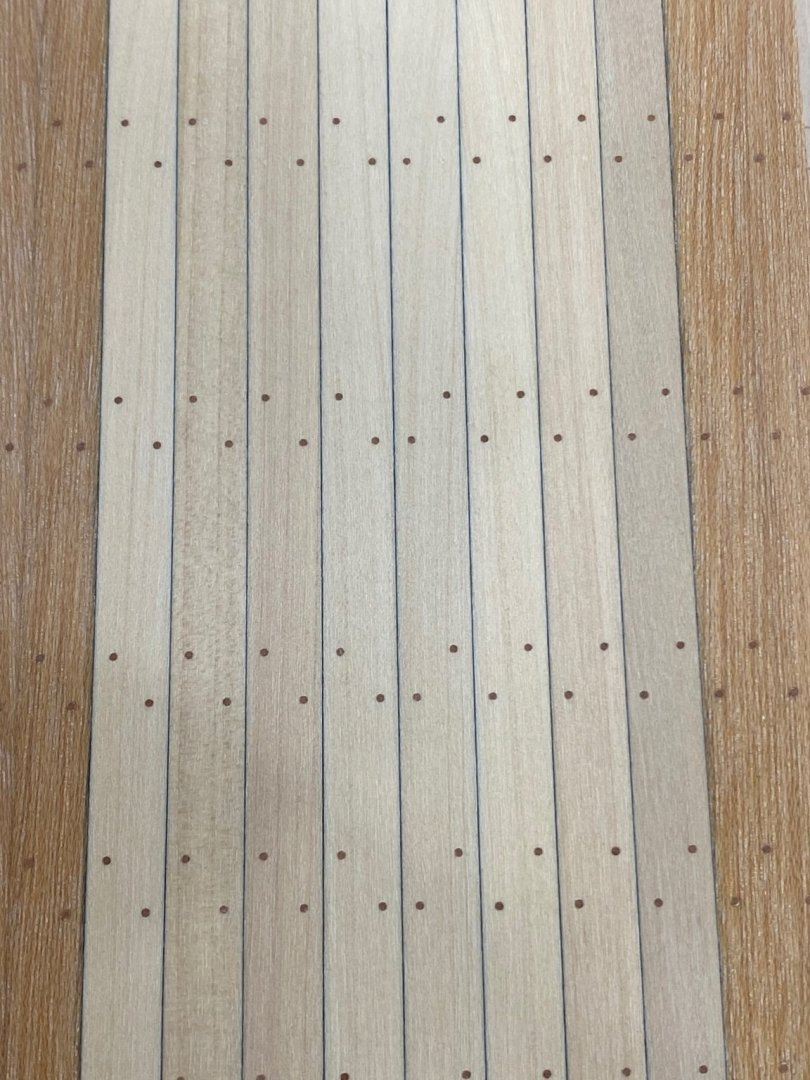
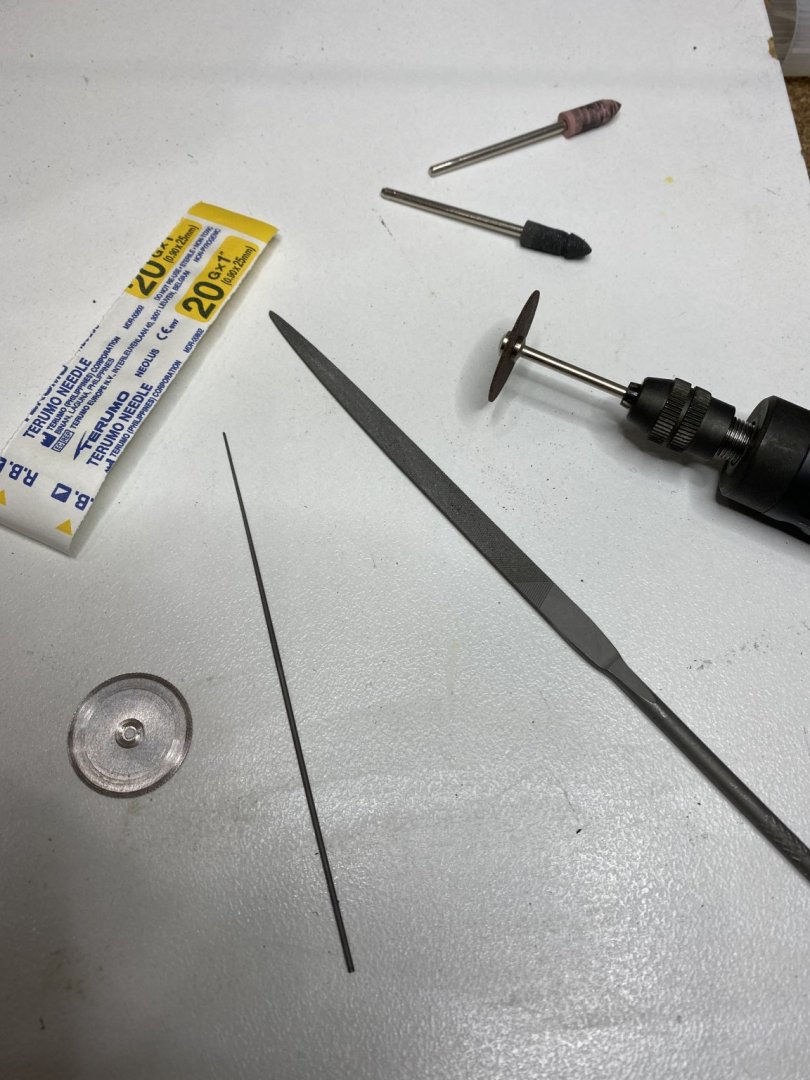
Thank you for your kind comments. @captain_hook: Yes, I use a syringe that has had its tip cut to a specific profile and is then polished. A syringe out of the packet won't work effectively. I have experimented with syringes of various gauges and for my scale I use a g20 sized syringe. I find that a 0.7mm drill hole accommodates this nail size perfectly. The Birmingham Gauge provides your requested information about the internal diameter of syringes: https://en.wikipedia.org/wiki/Birmingham_gauge The photos were taken with a 2 or 3 x zoom. In reality, standing back from the deck and at eye height, the nails are only very subtly visible which is the effect I was trying to achieve. My nails are made from Pear. I have experimented with various timbers and I like the effect of Pear on Castello.
-
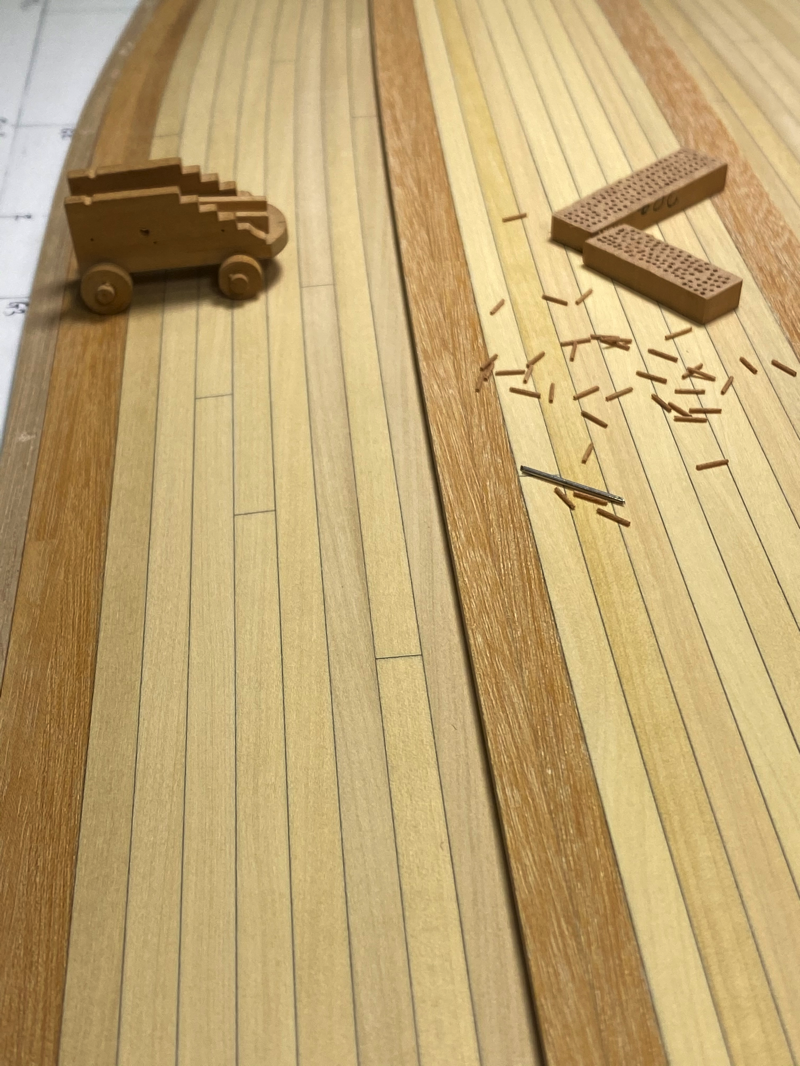
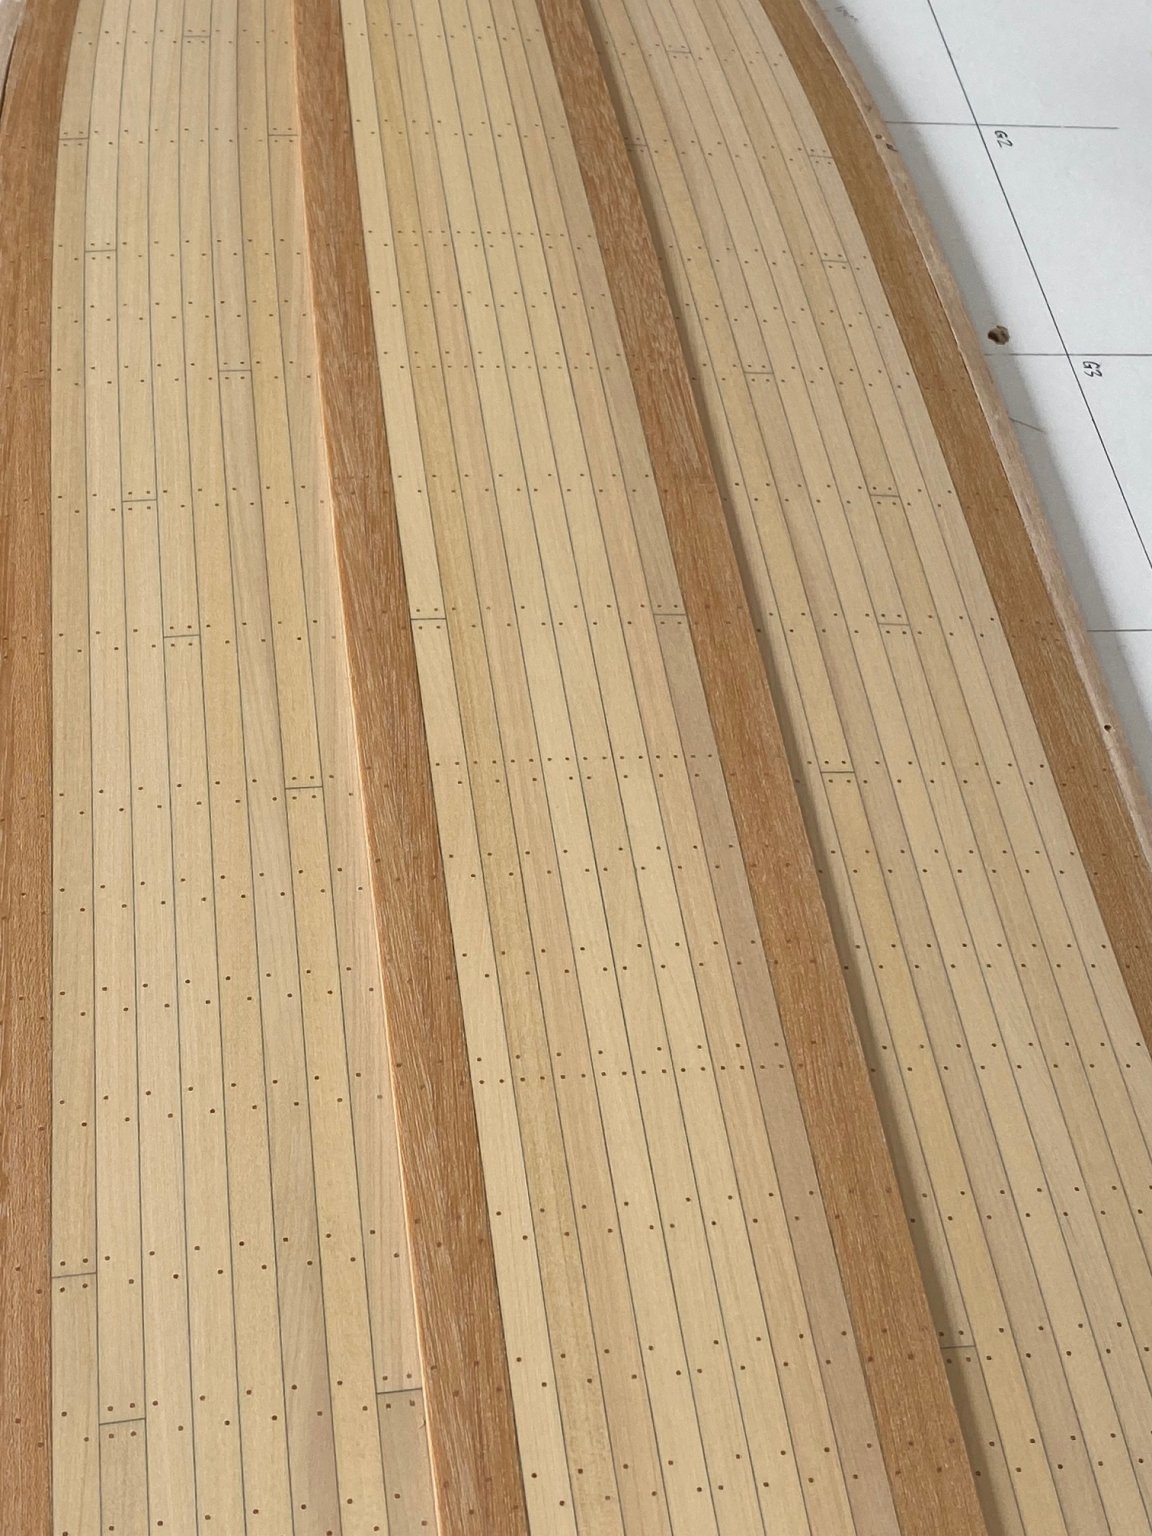
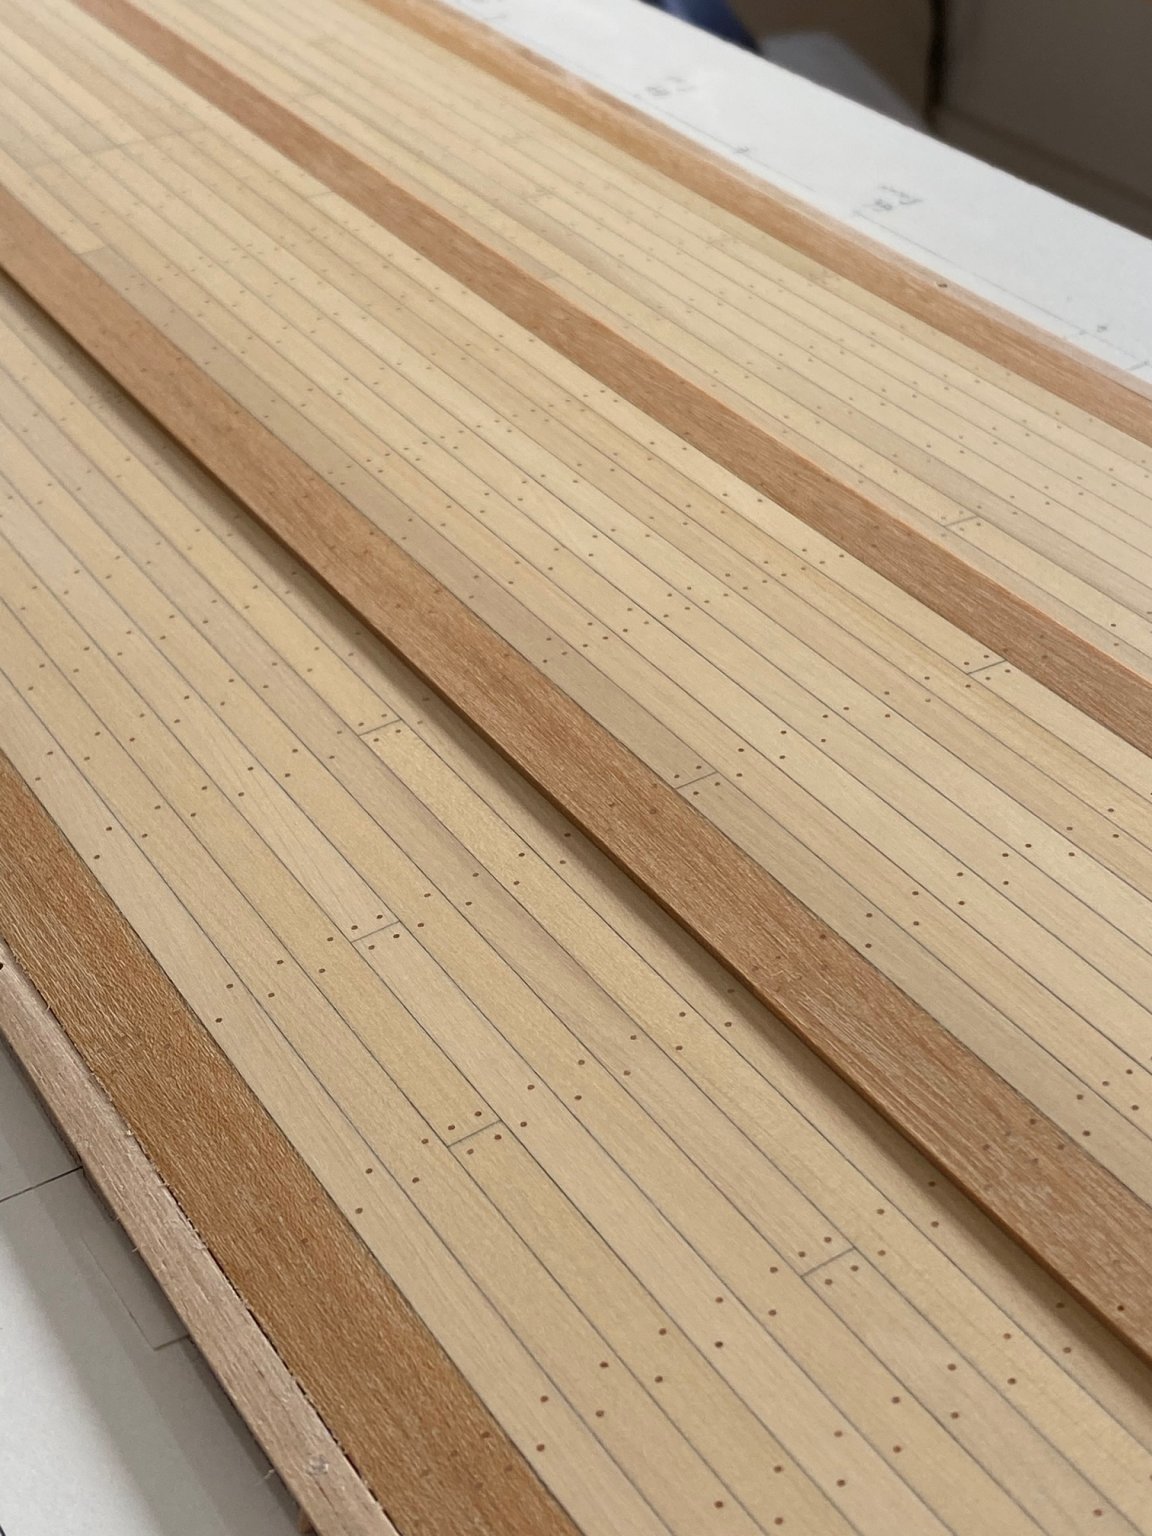
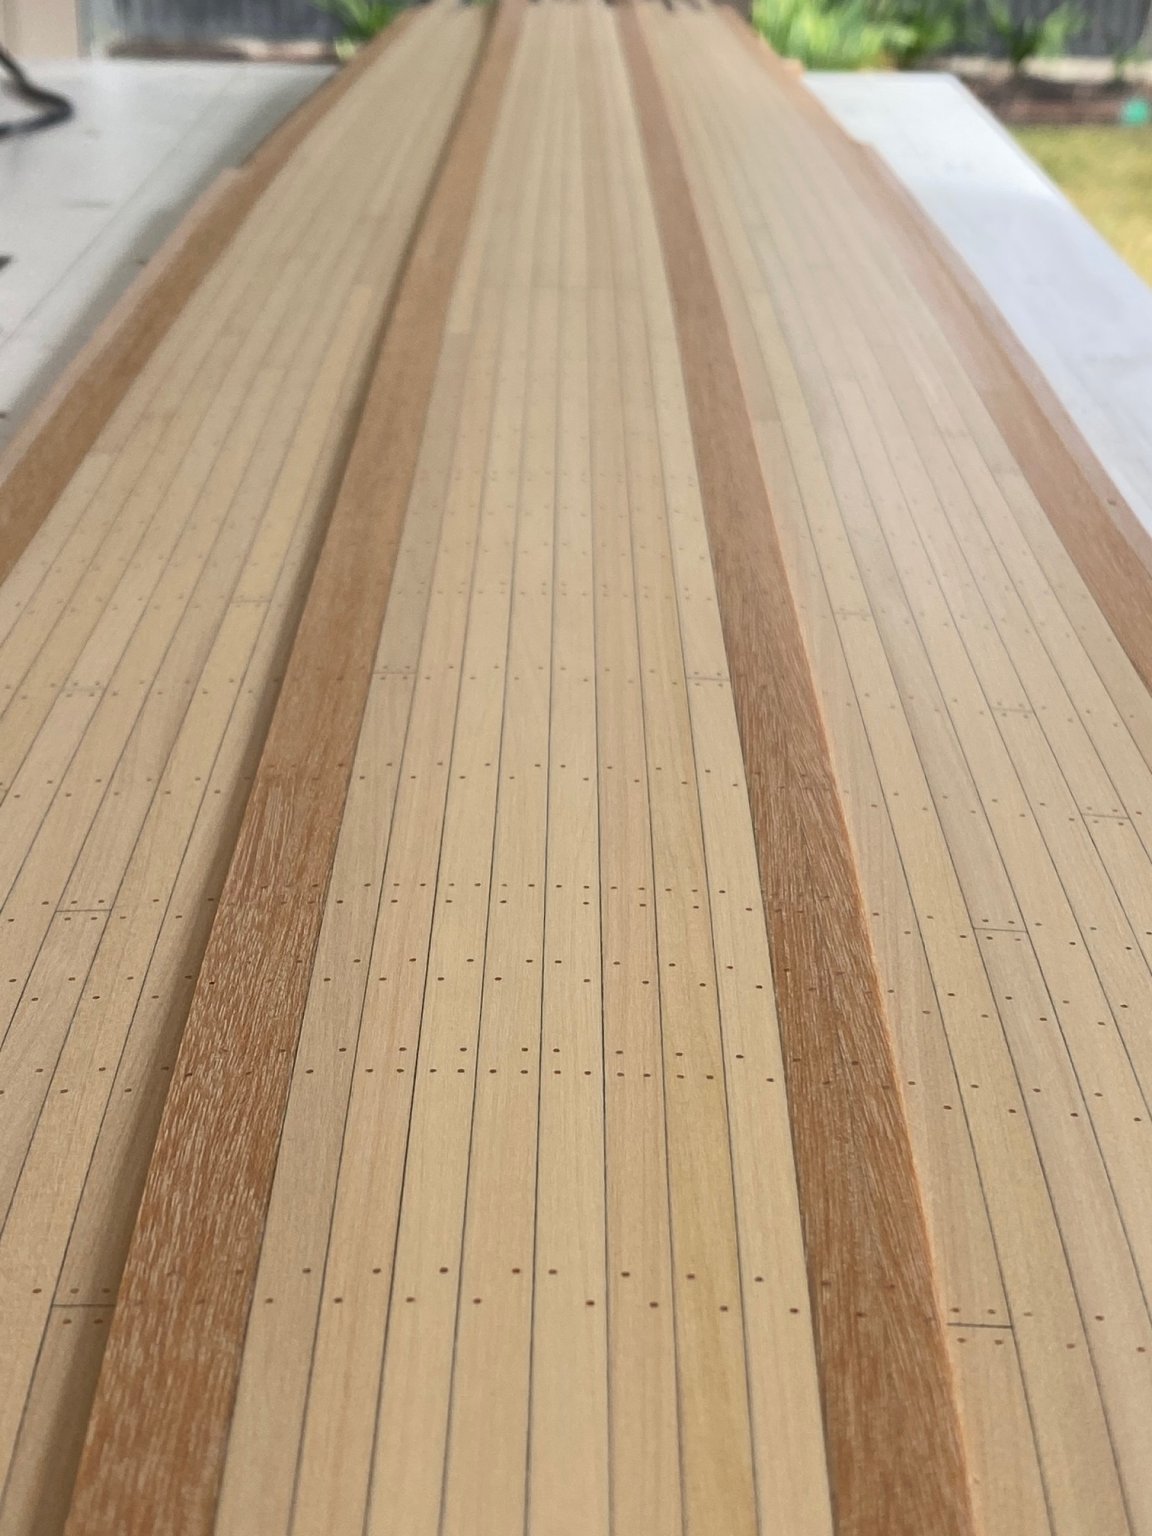
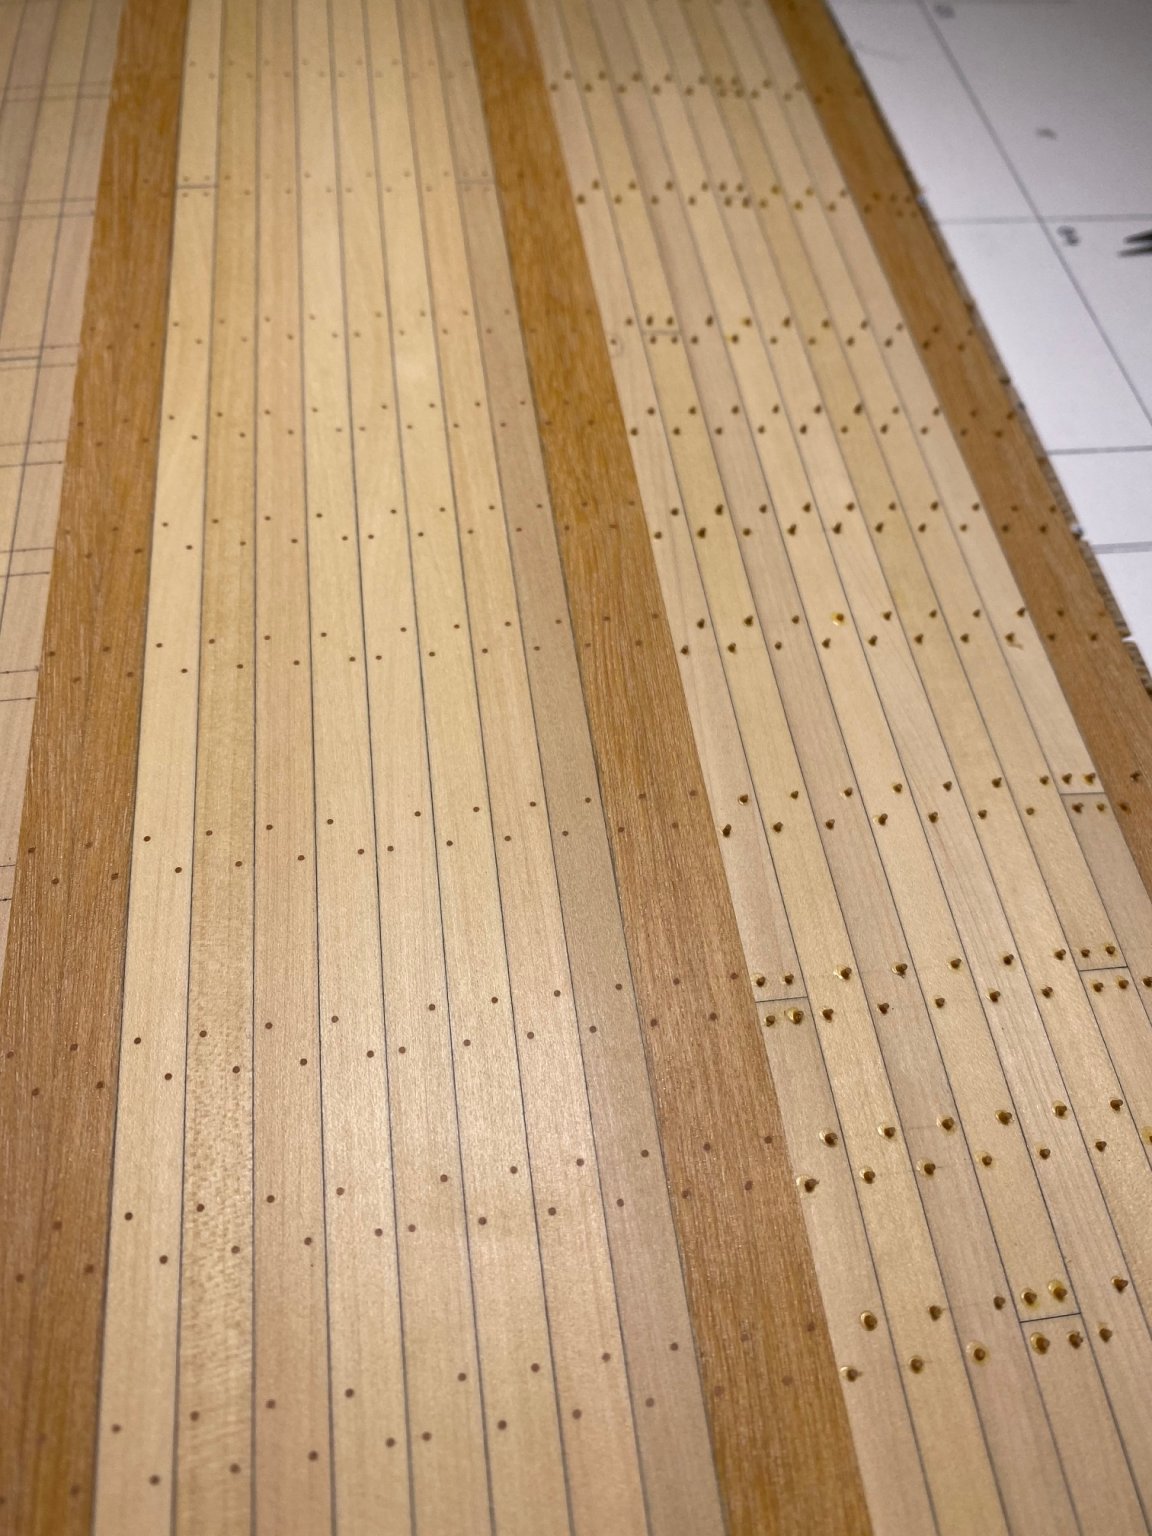
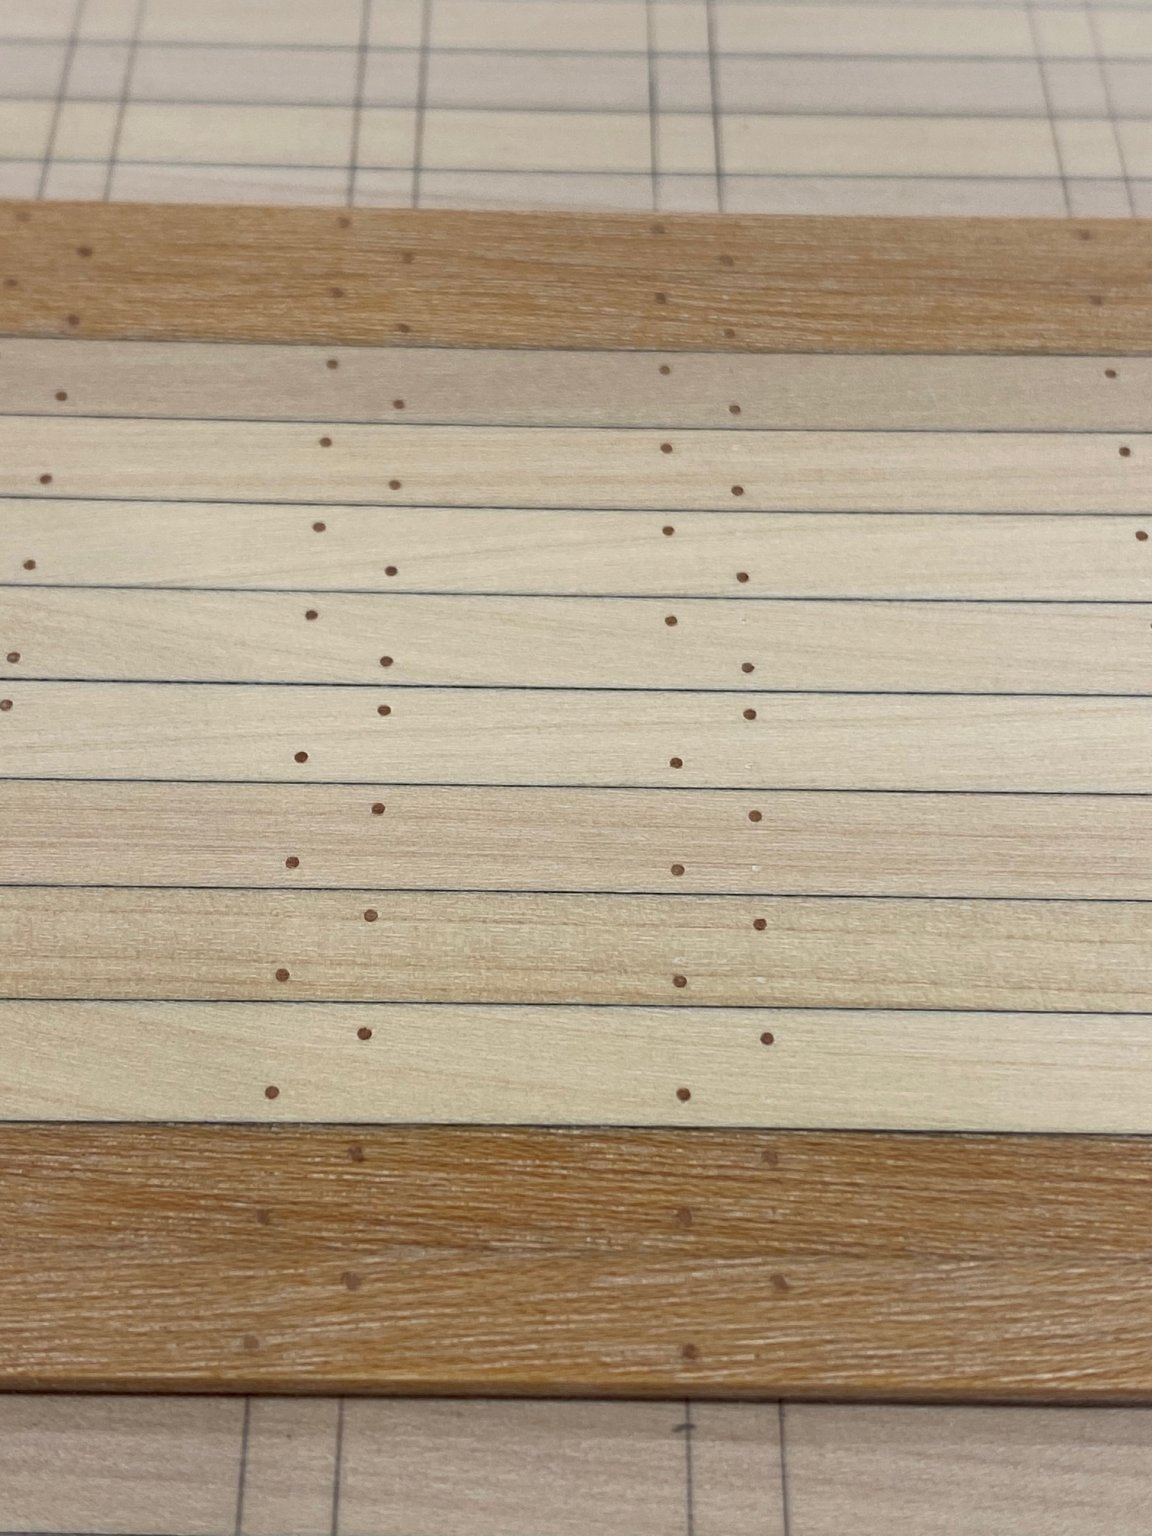
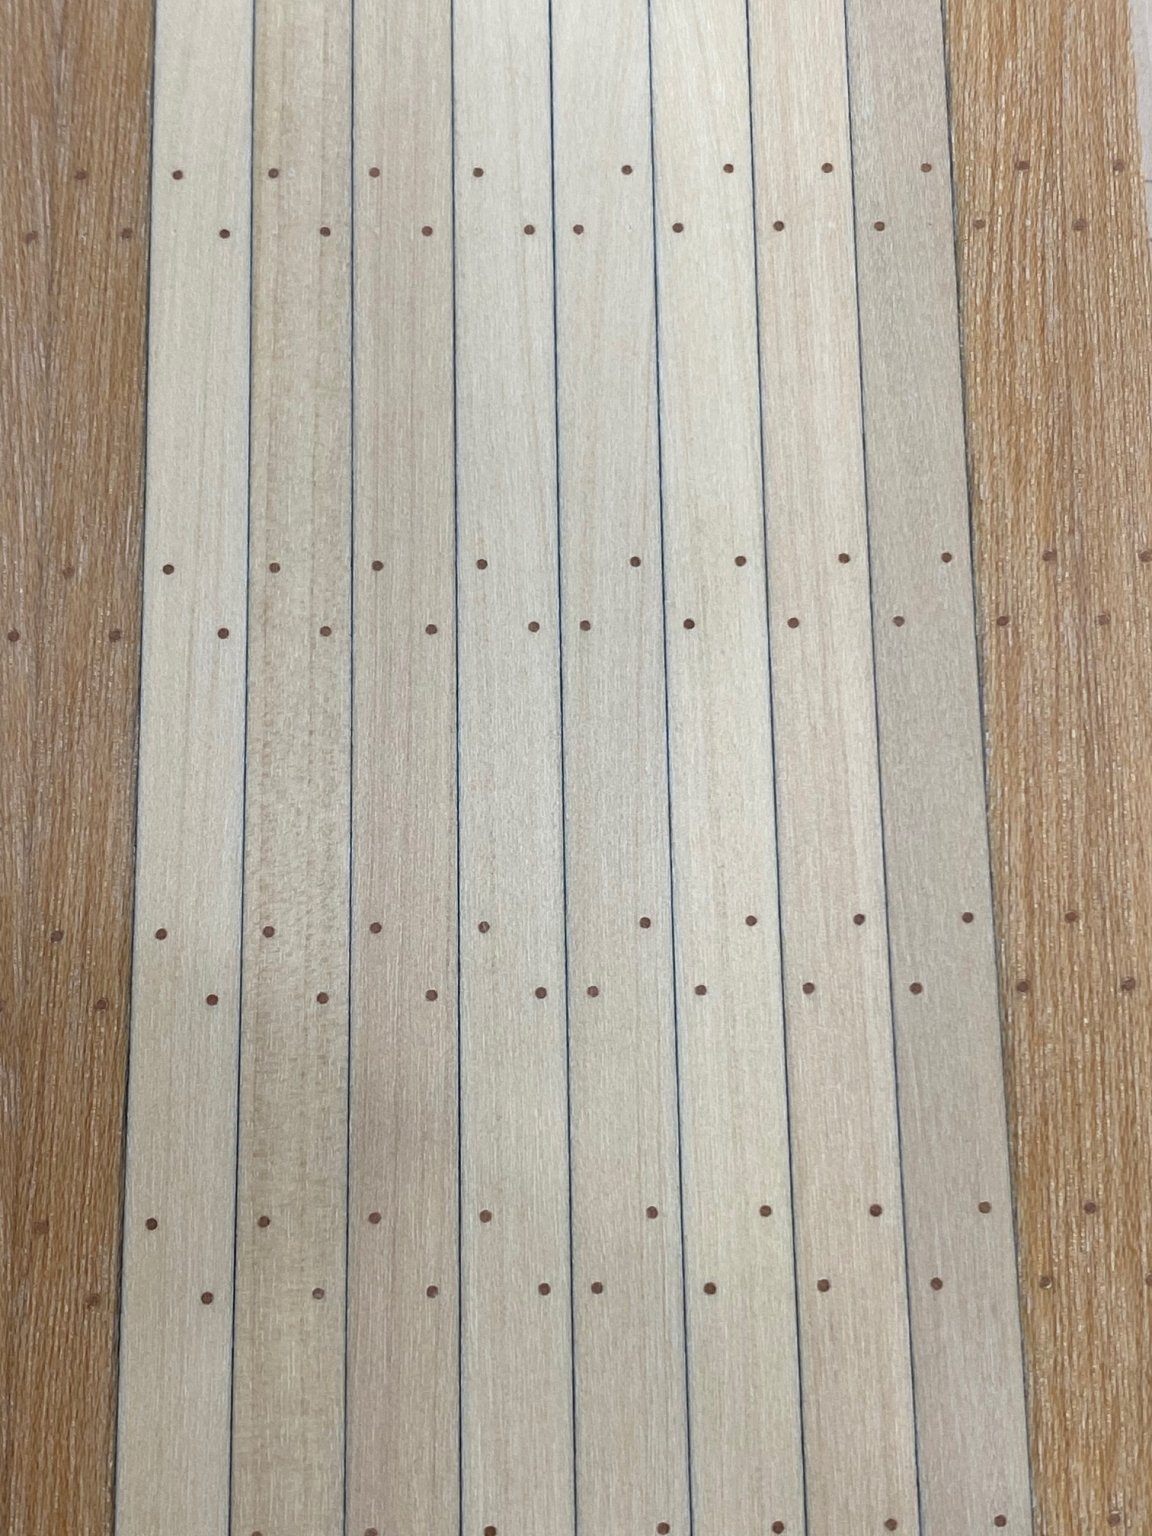
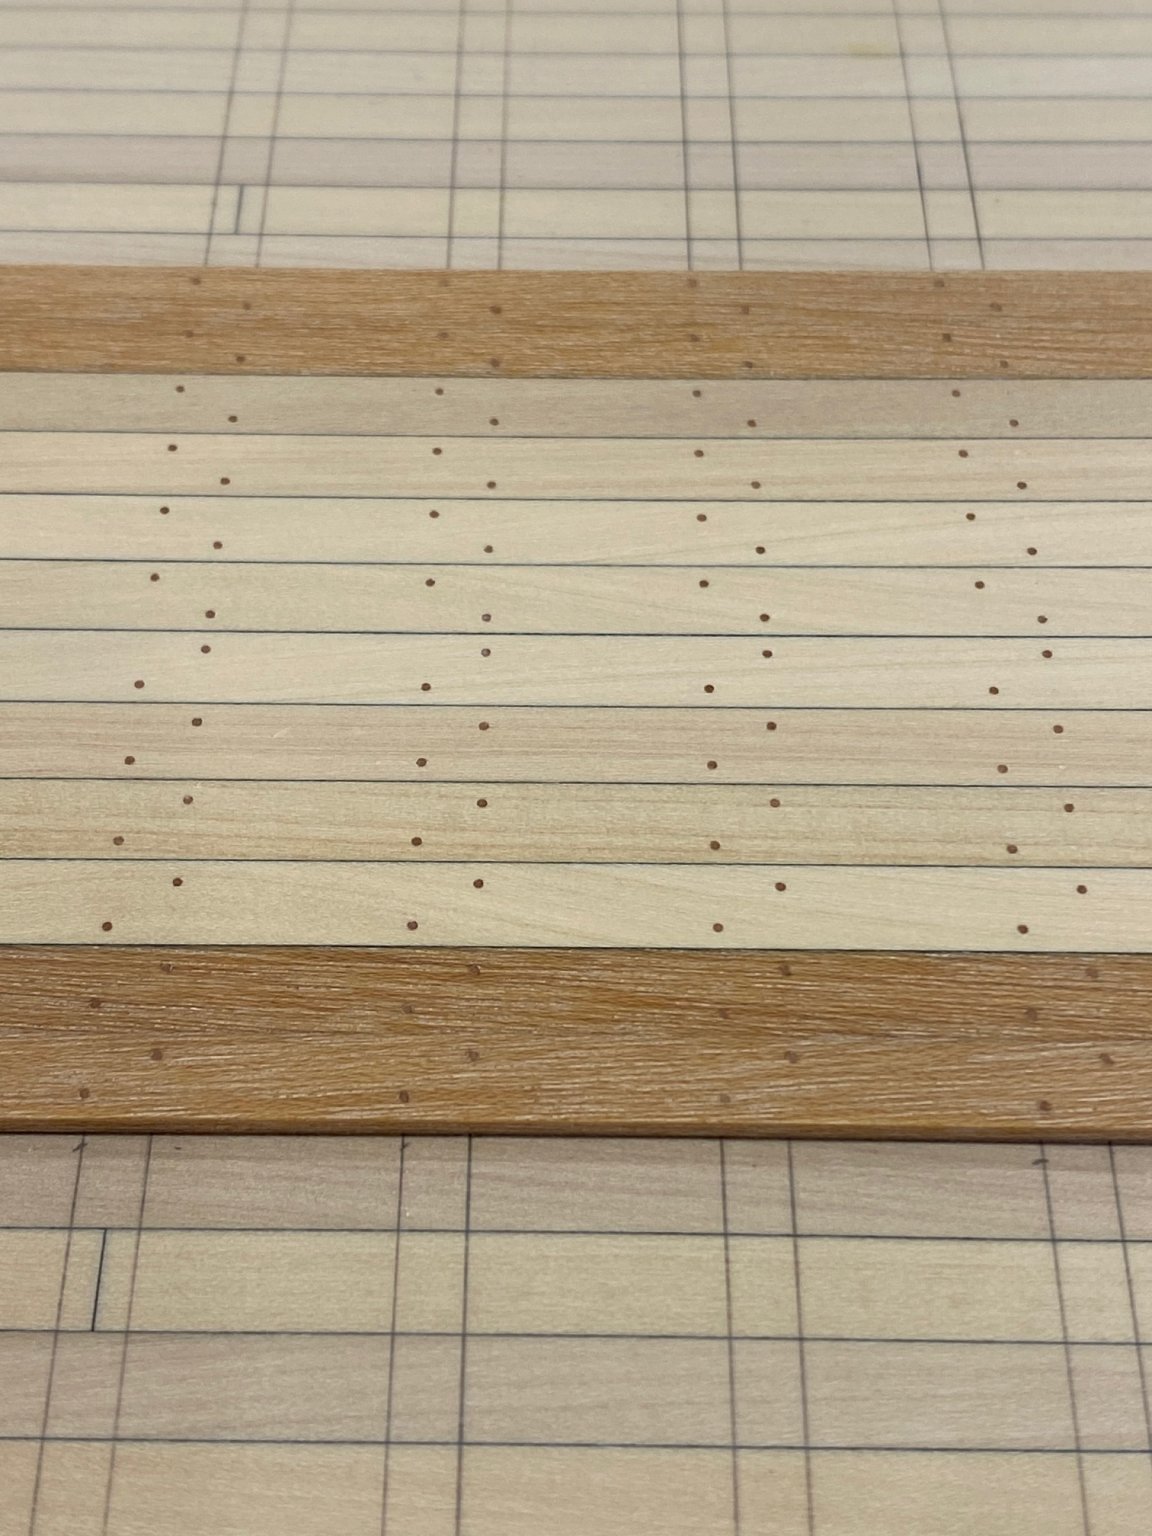
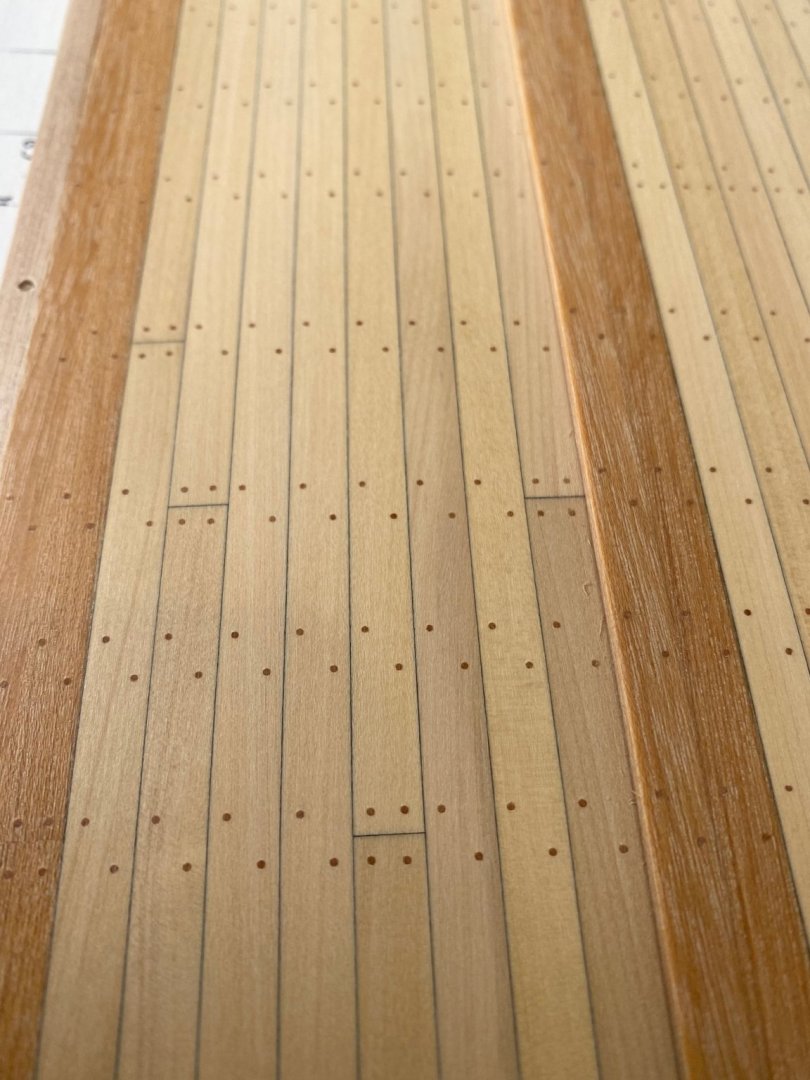
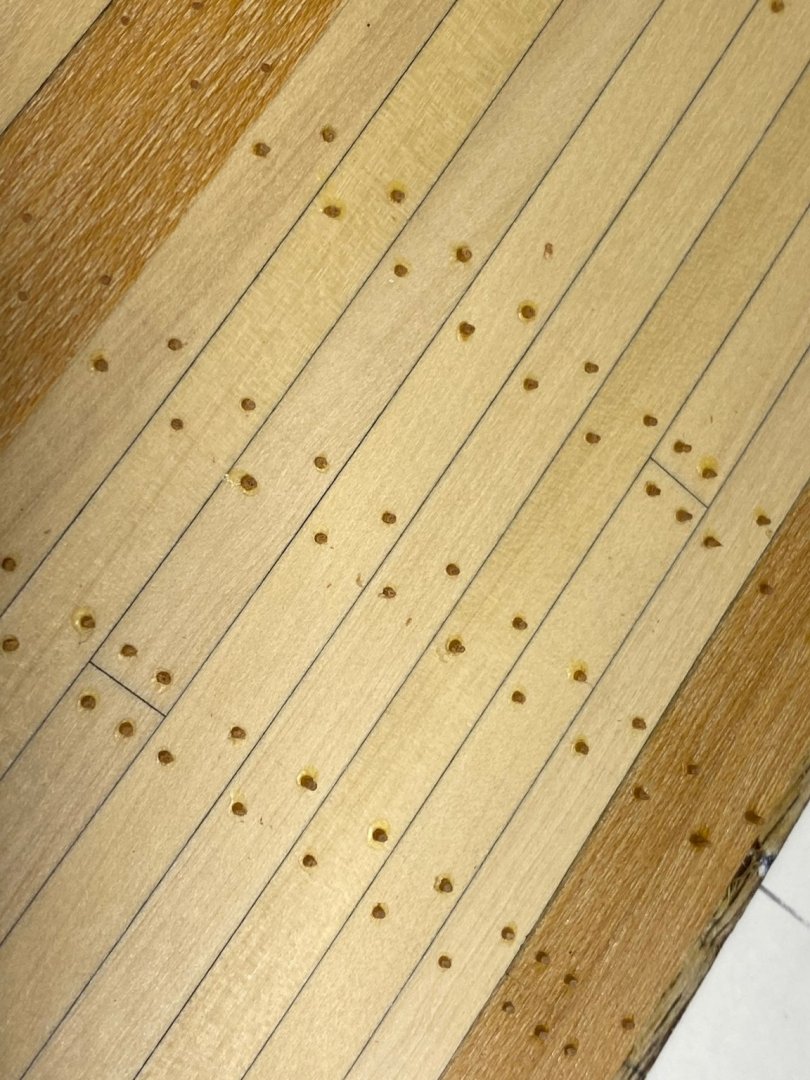
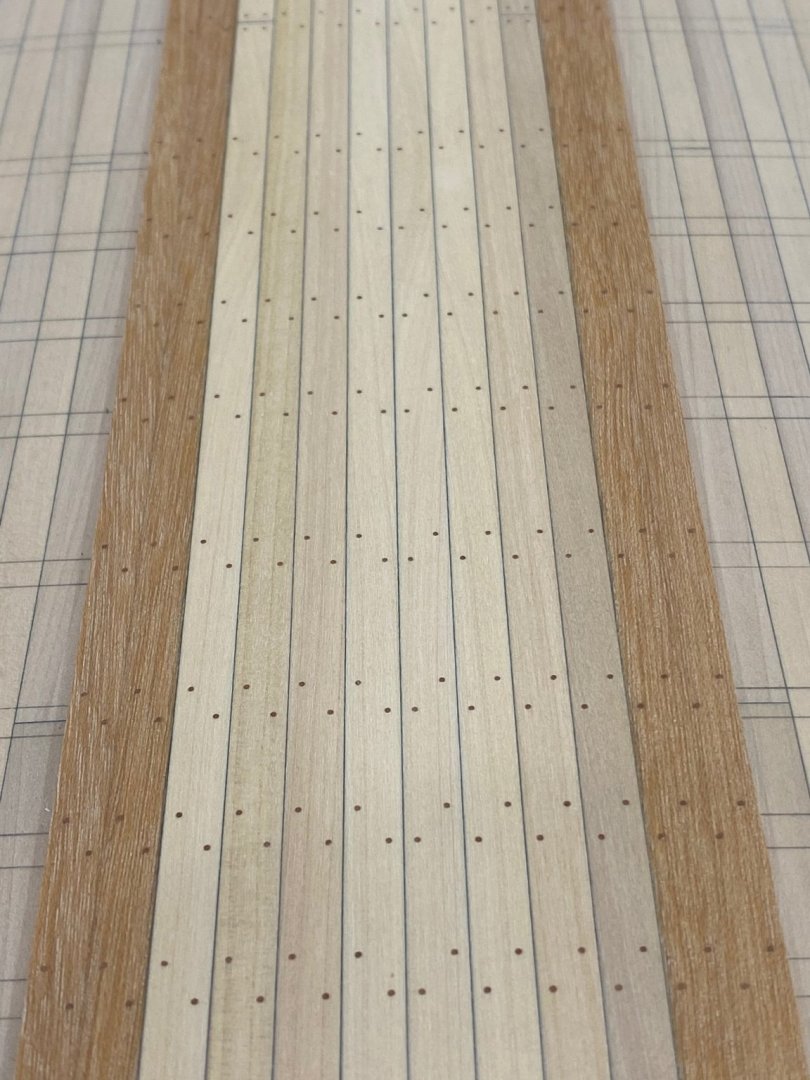
All the nails have been inserted in the main deck which is now more or less finished (aside from a sand with very fine paper and a waxing prior to insertion in to the model). The waterway is missing. This will be inserted only after the main deck goes in to the model which is unlikely to happen very soon. The photos I attach are zoomed in 2x and make the nails a little more noticeable than they actually are. Standing back from the model, at eye height the nails are only very subtly visible which was the effect I was trying to achieve. After a waxing they will get slightly darker. You will notice double nails on some planks. Hatches will be cut at these locations shortly. The irony is, the majority of this deck will be covered up. Only about 1/3 of it will be visible on the final model.


-
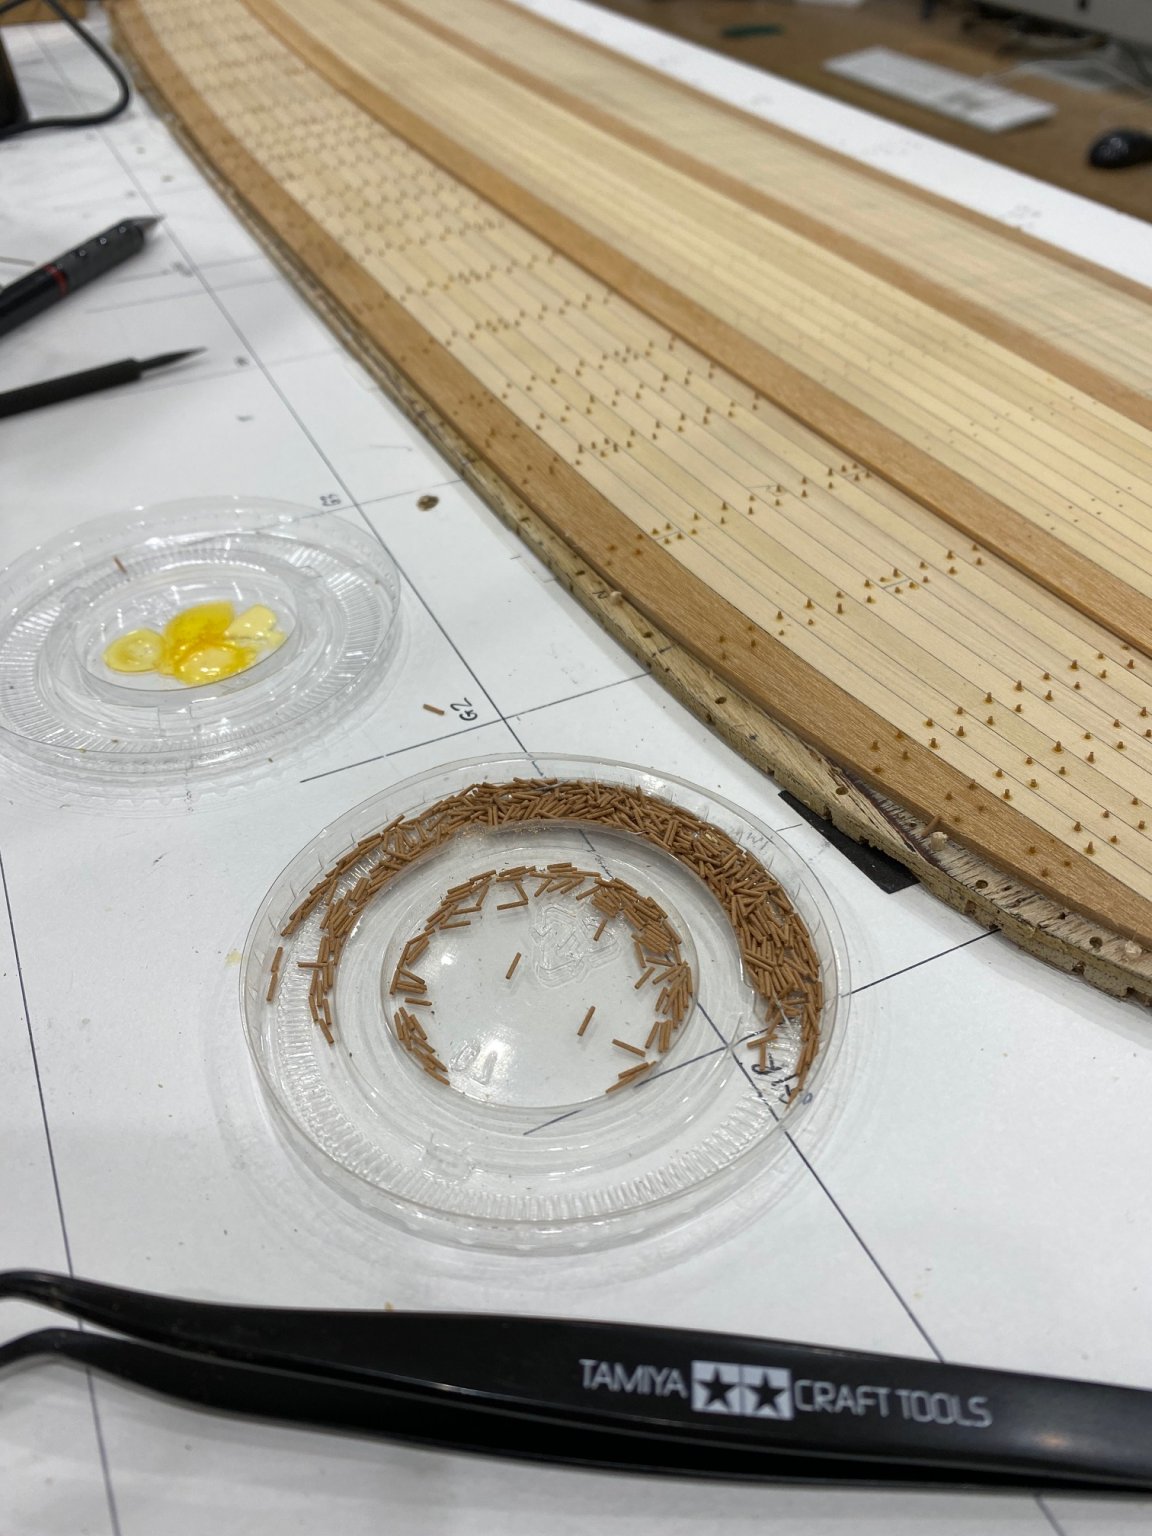
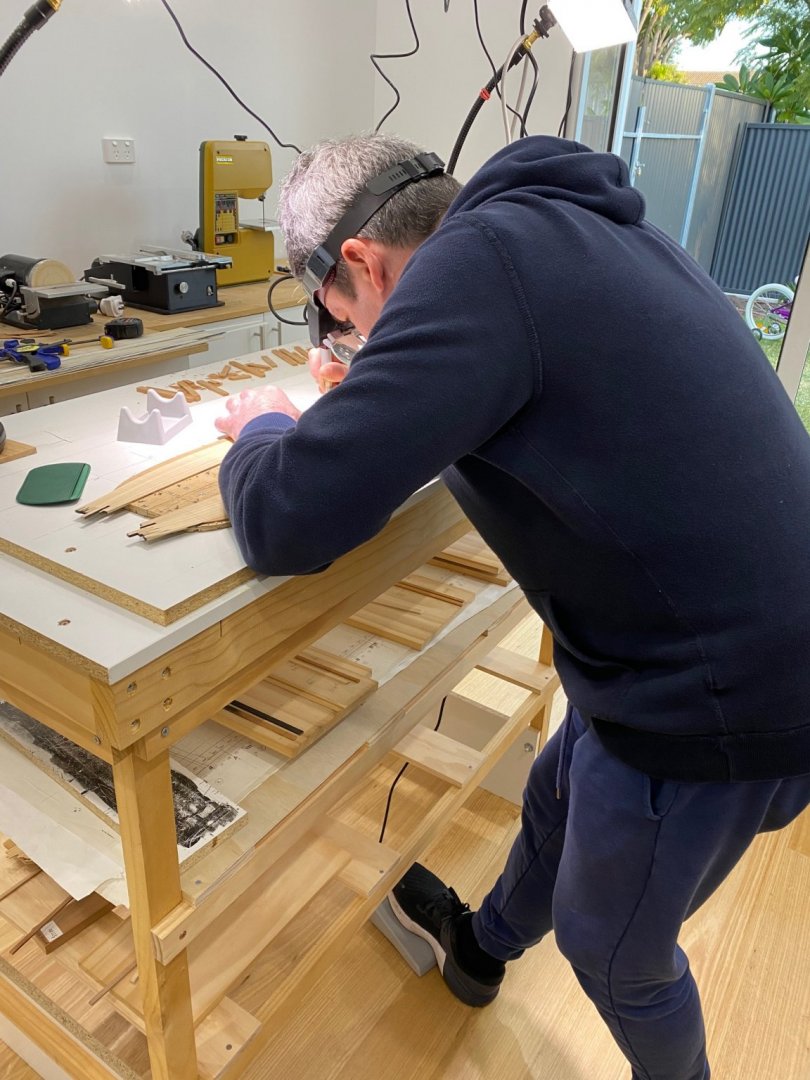
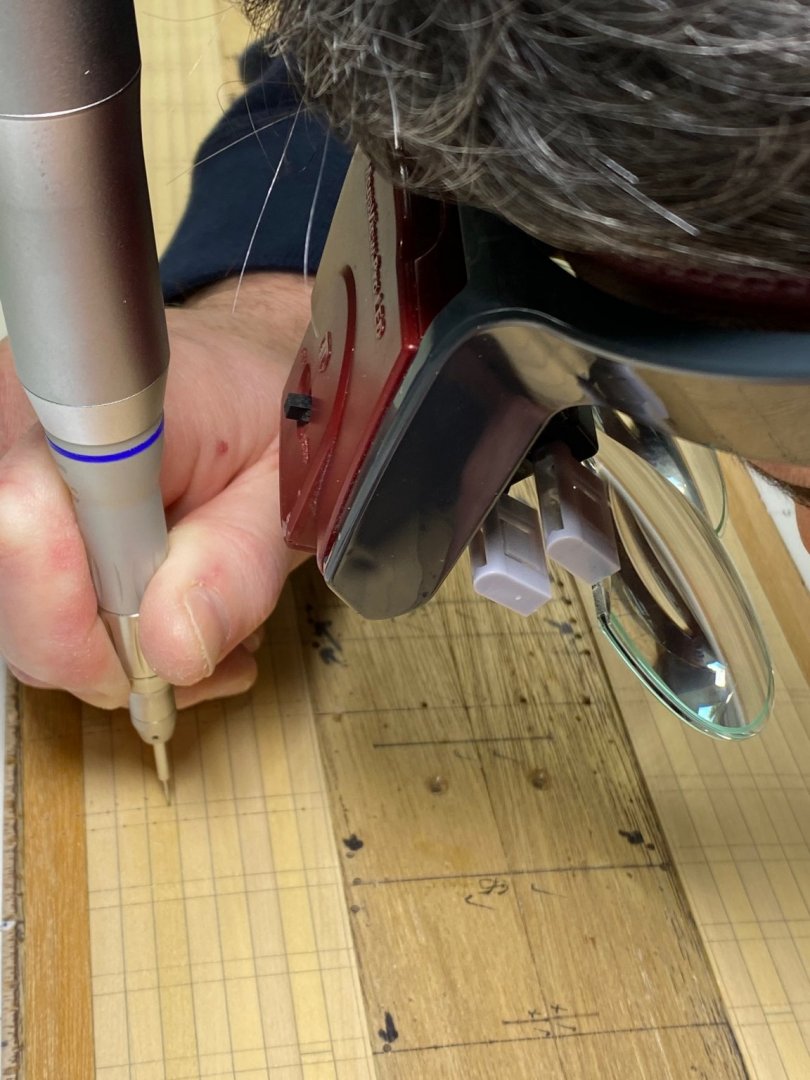
More progress on one side of my main deck with the nails being inserted with tweezers and a touch of aliphatic resin. My jeweller's drill has a pedal similar to a sewing machine which makes drilling holes very easy.


-
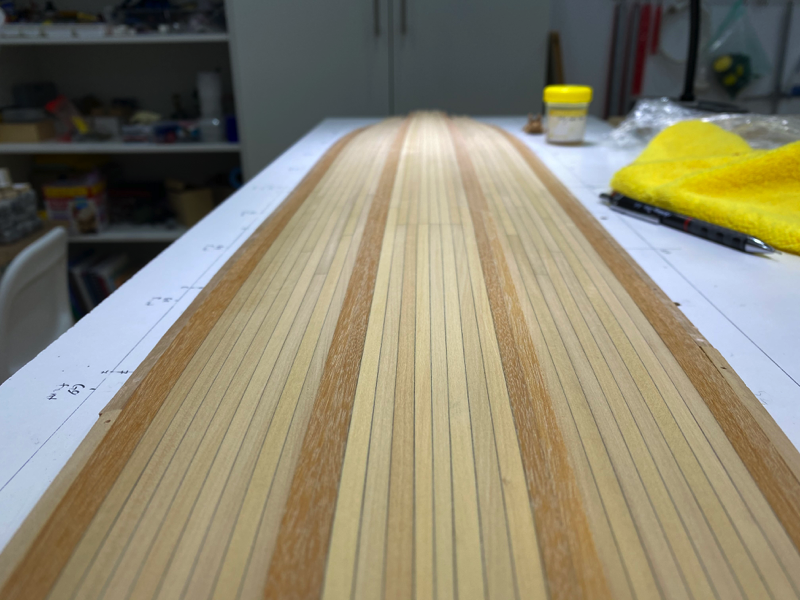
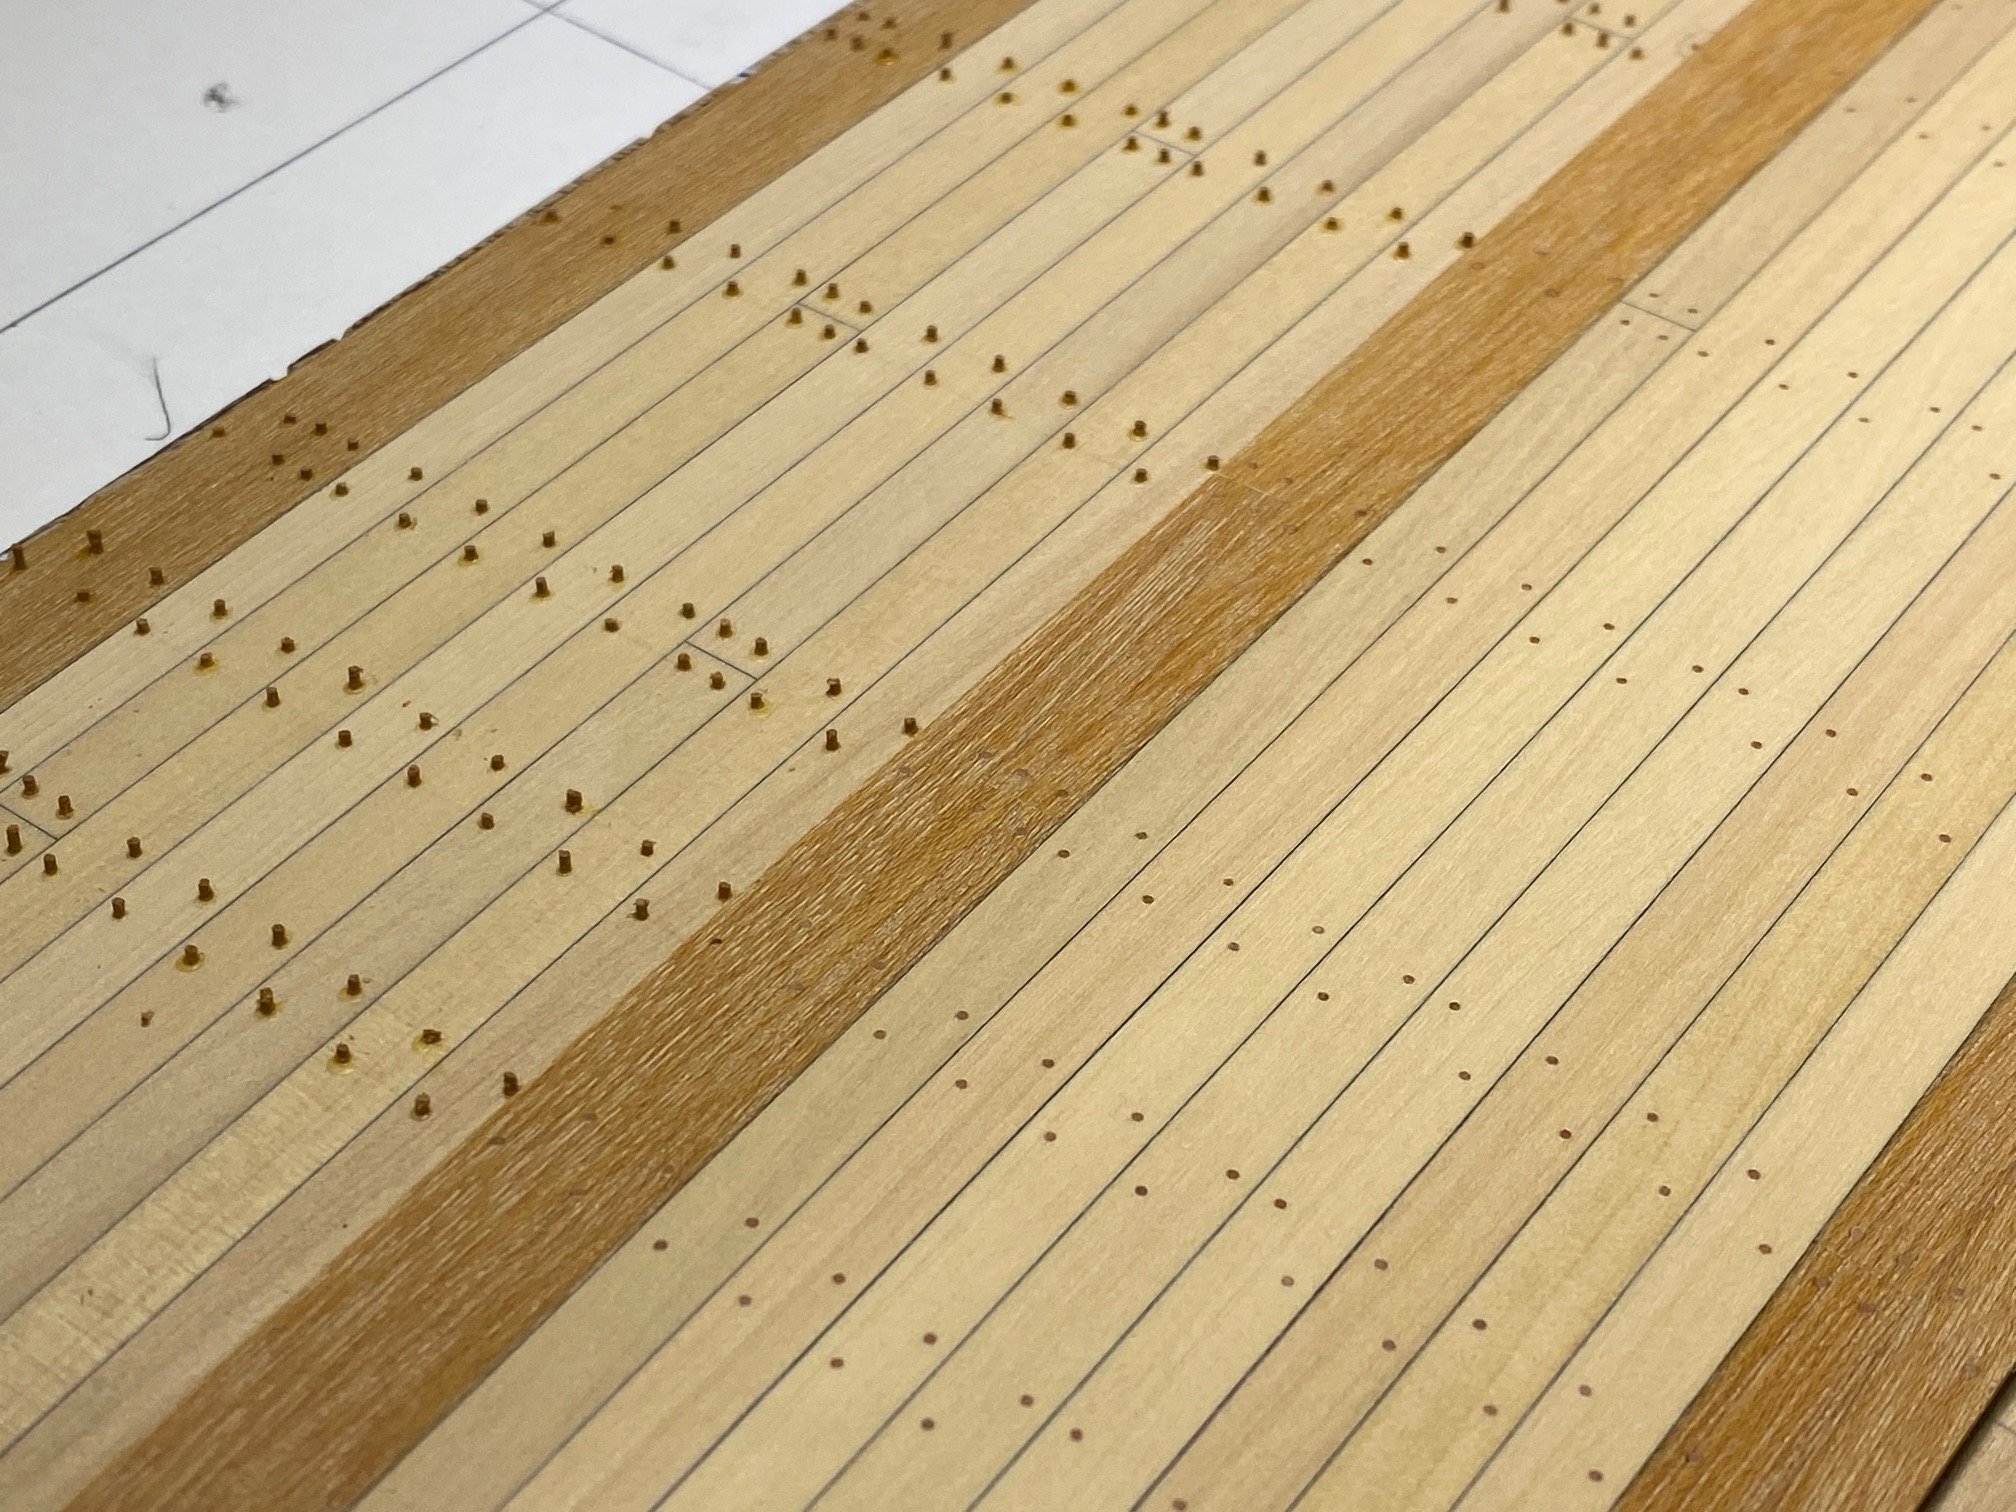
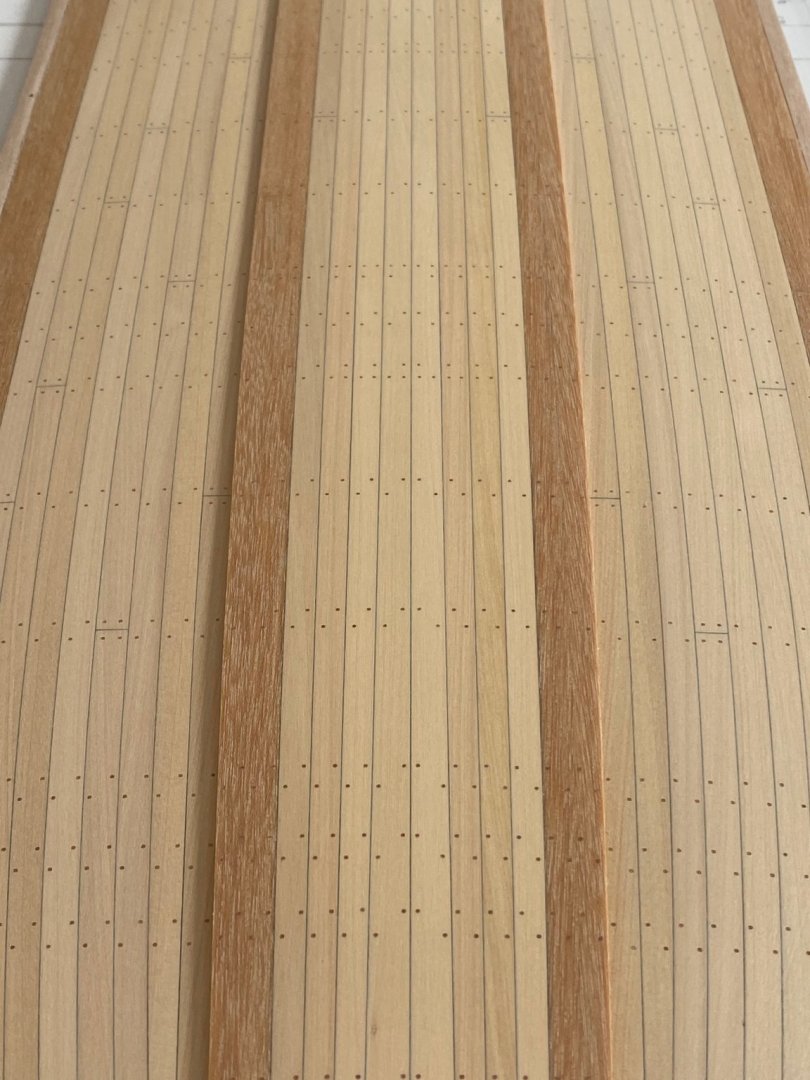
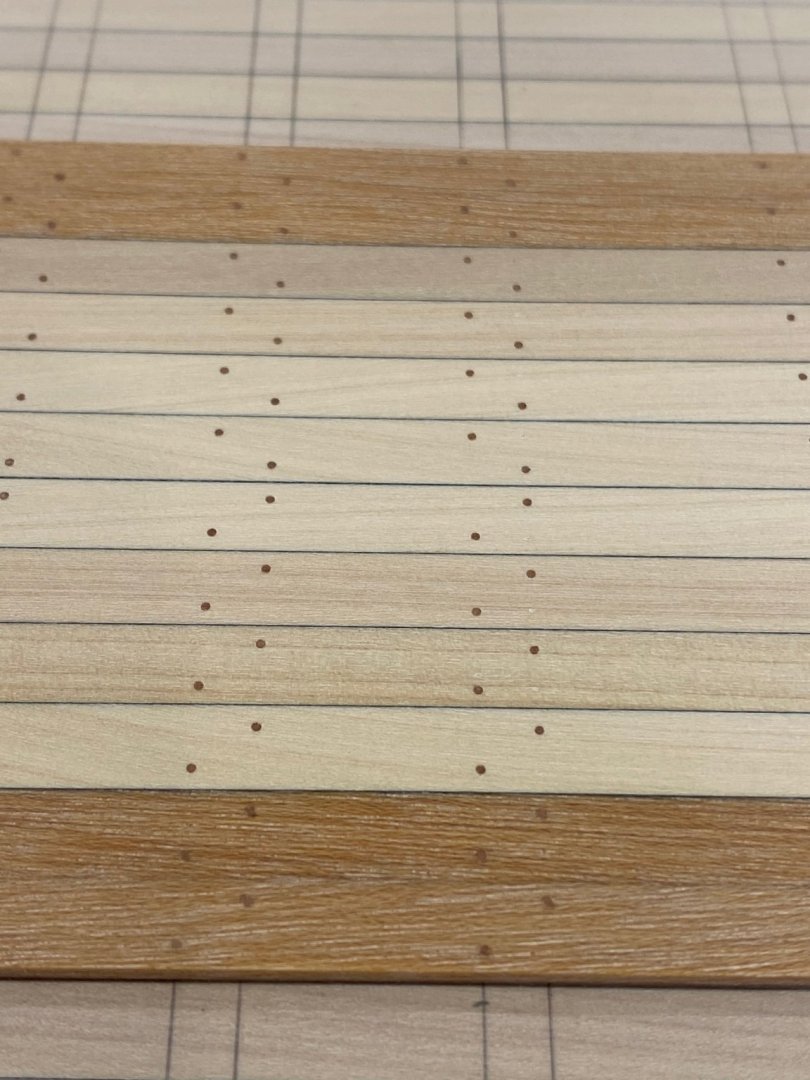
I attach photos of the completed centre deck with nails inserted. The deck has been sanded and scraped. It is not 100% finished as I have not sanded it with a finer grade sandpaper nor waxed it. This will occur much later when it is inserted in to the model. Now I must turn my attention to drilling the holes on the left and right parts of the main deck and inserting nails in to those. I do this manually with my jewellers drill.


-
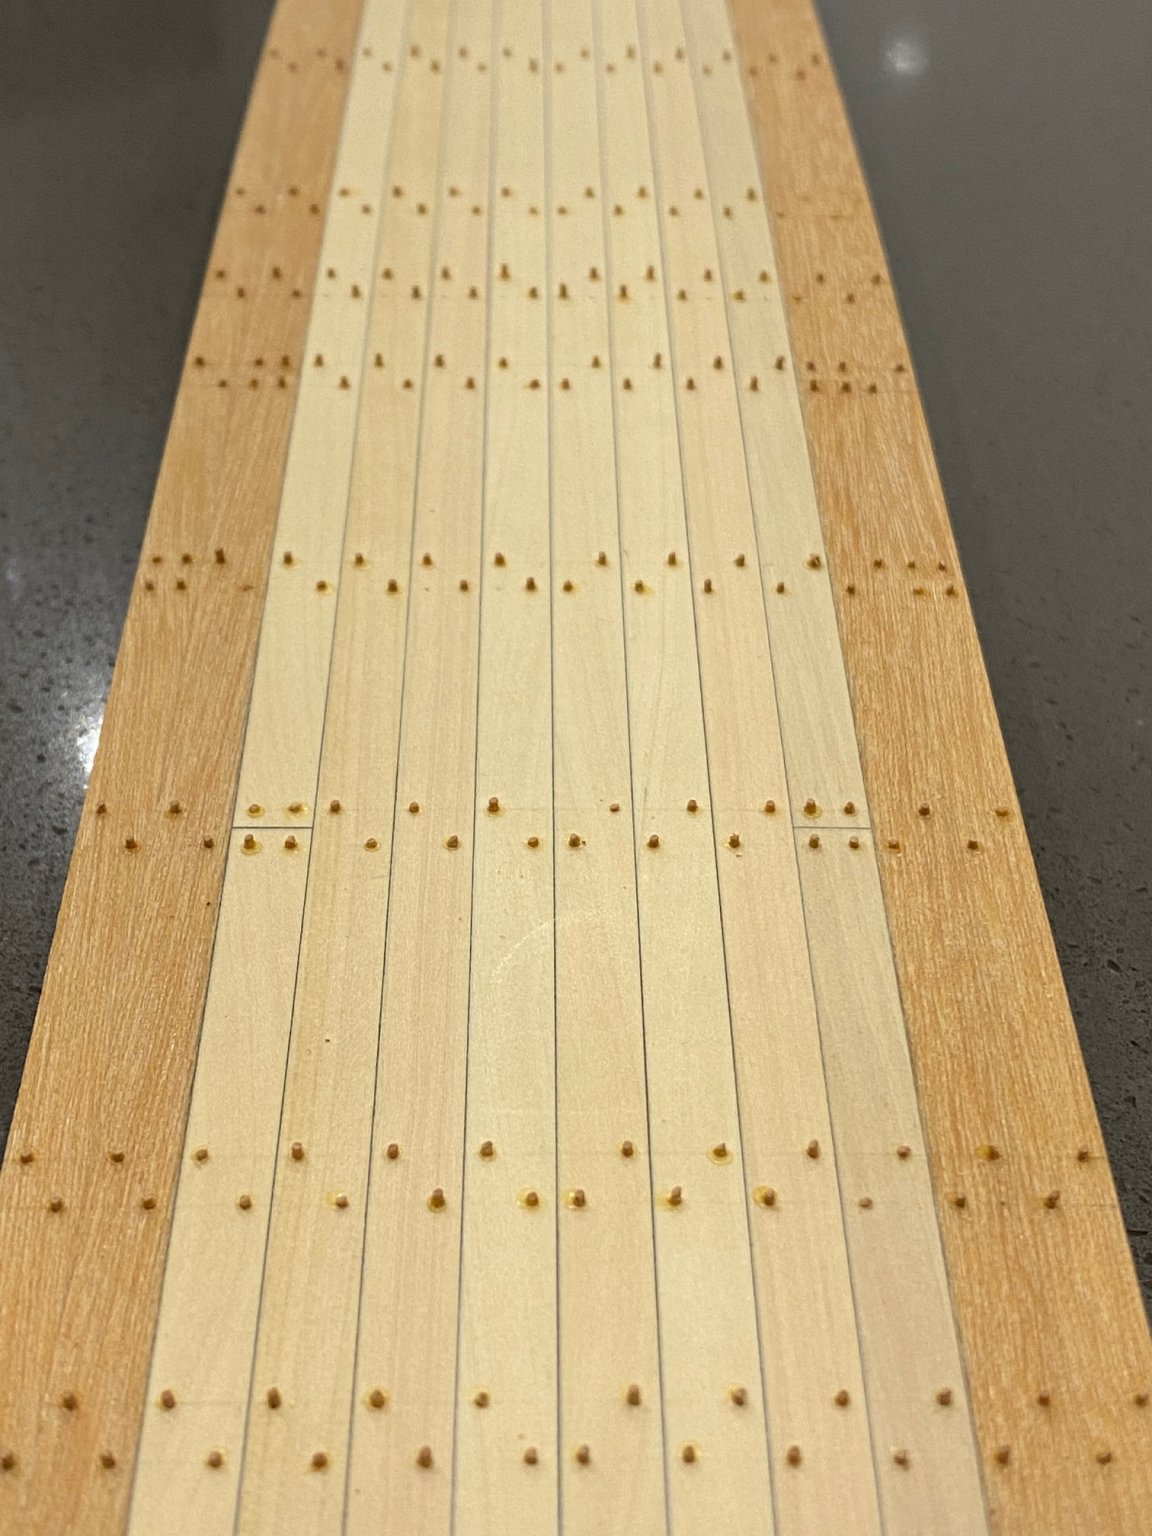
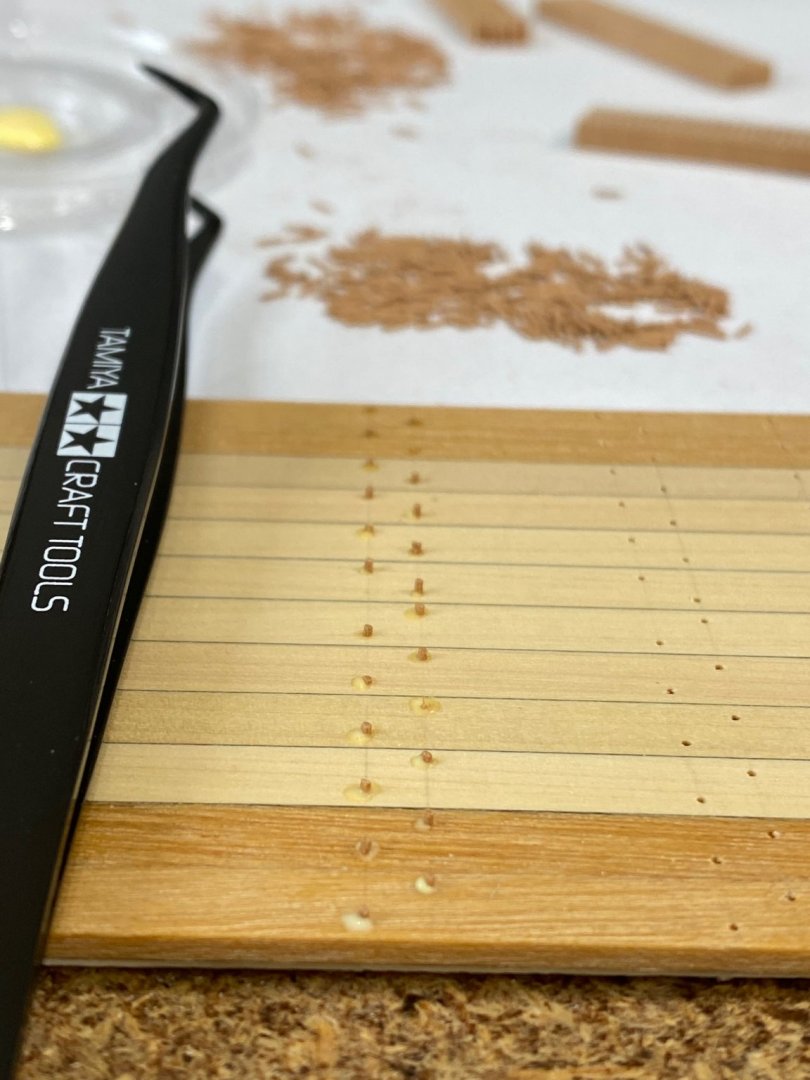
Nails being inserted in to the centre deck. Tomorrow I will cut them flush with the deck and then sand the deck using 250 grit sand paper which will leave a perfectly round nail hole.


-
Thanks Steven, I am in Adelaide - just East of the CBD. Please let me know if you are ever in the area.
-
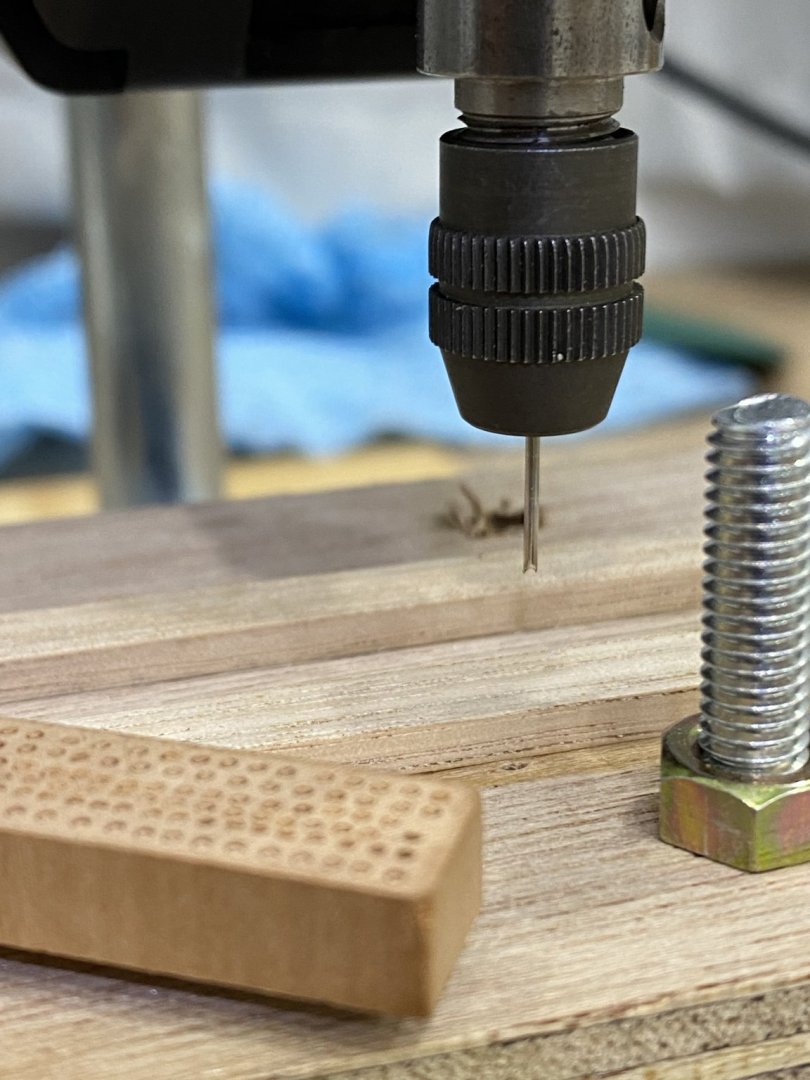
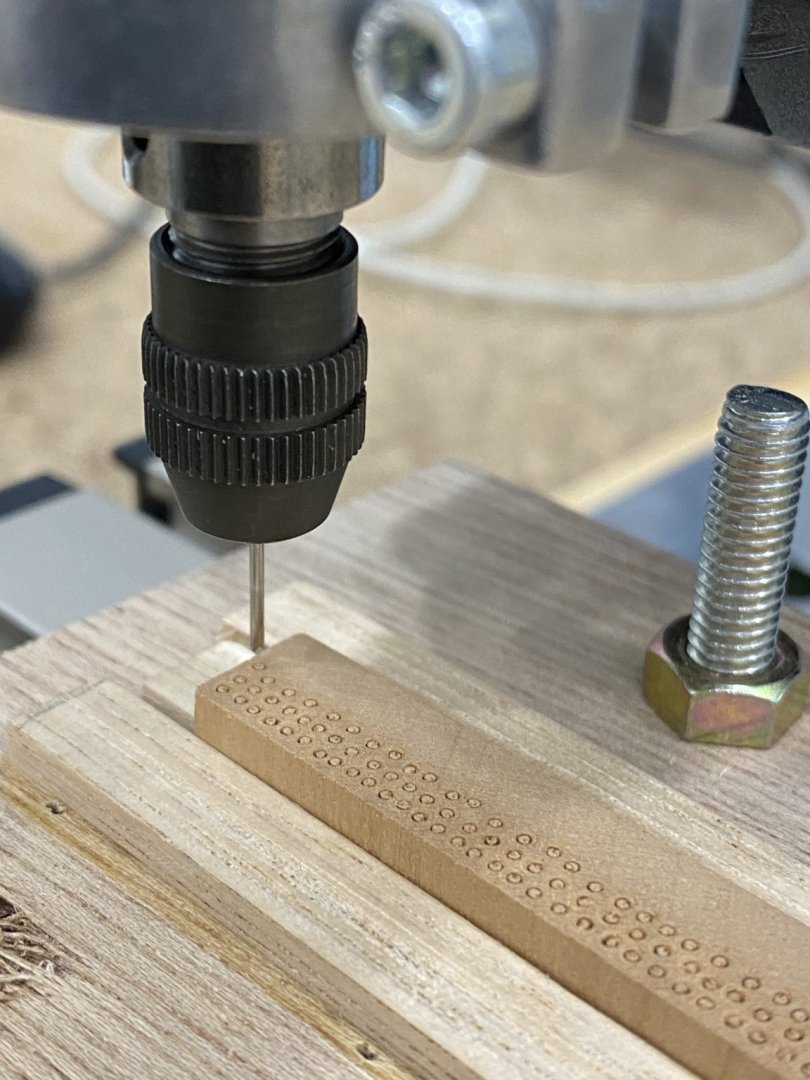
I have spent the last couple of days making nails (using a syringe tip and drill press) and I attach some photos including: > The tools used to fashion the syringe tip (this is the trickiest part) > The Drill press and jig setup > The final result (this photo was zoomed in 5.5 times) 2020-06-13 18.10.38.mov


-
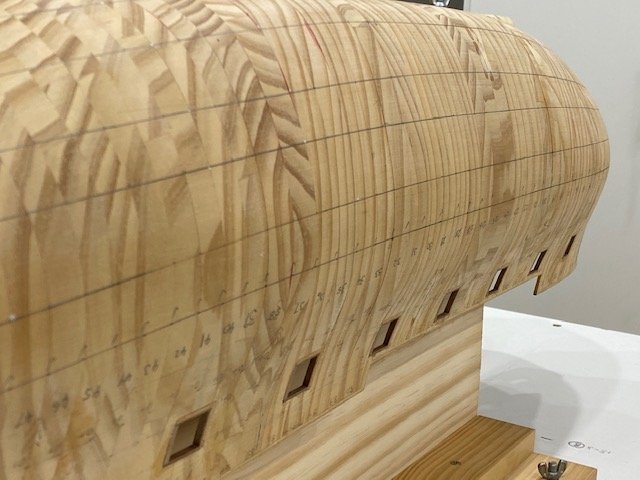
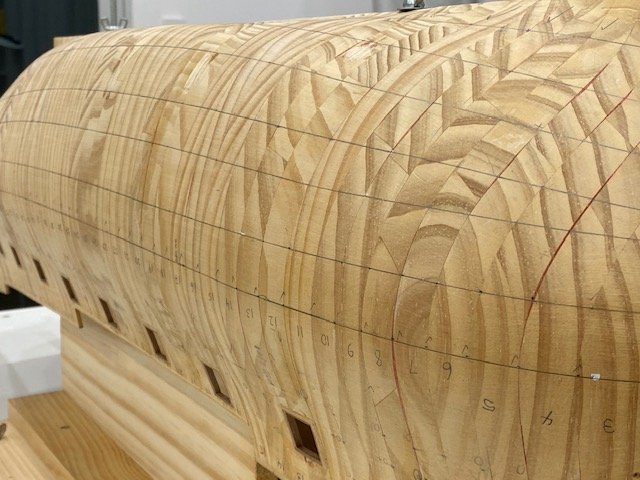
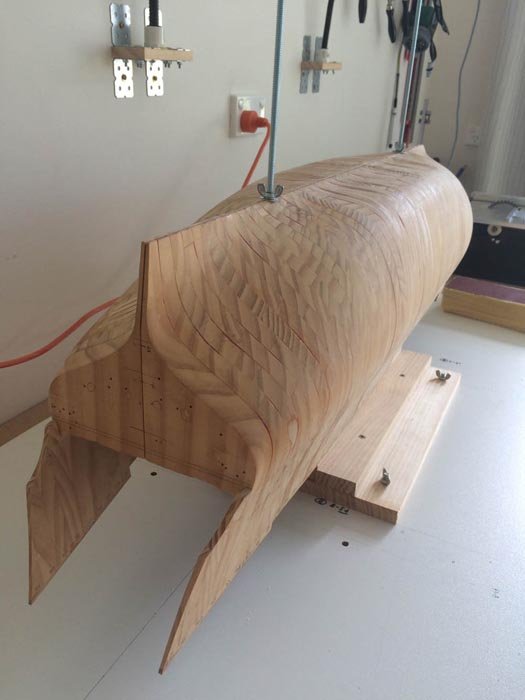
And some photos of my hull which is built in two halves.


-
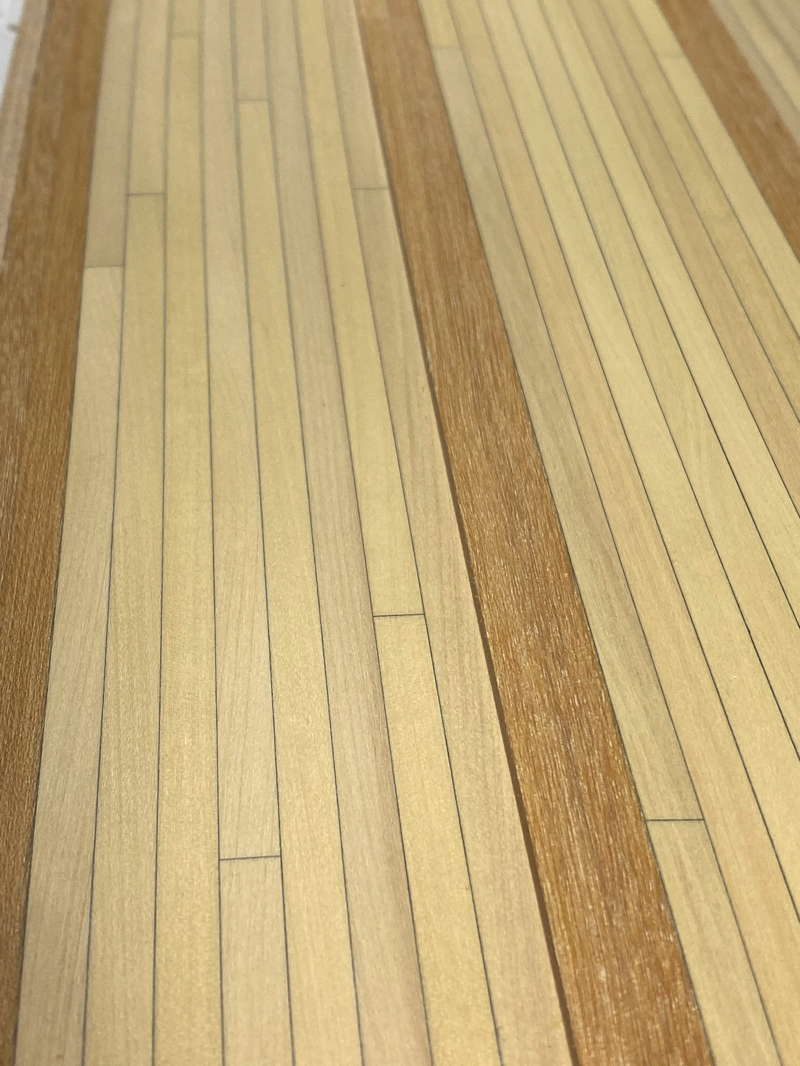
I use auto air colours - specifically their Black sealer which is water based. I have used modelling enamels and had equal success although water based solutions are easier to work with and won't react with the wax that I will finish the deck with down the track. I have experimented with black paper for caulking and the result was also very, very clean however I find paint gives a thinner line (which I prefer) and is easier to work with. I think the art actually lies elsewhere - that is the thickness of the plank (mine start at 2,8mm), how the plank is prepared and the way they are attached to one another to ensure absolutely no gap between them along their length.
-
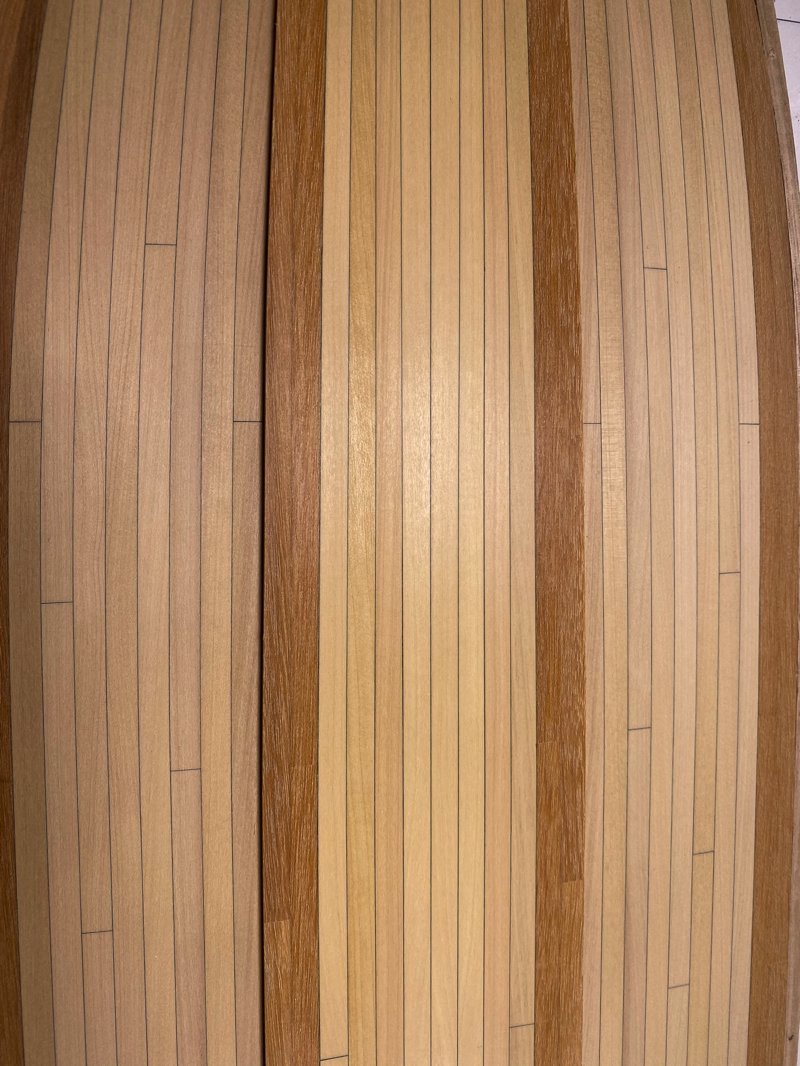
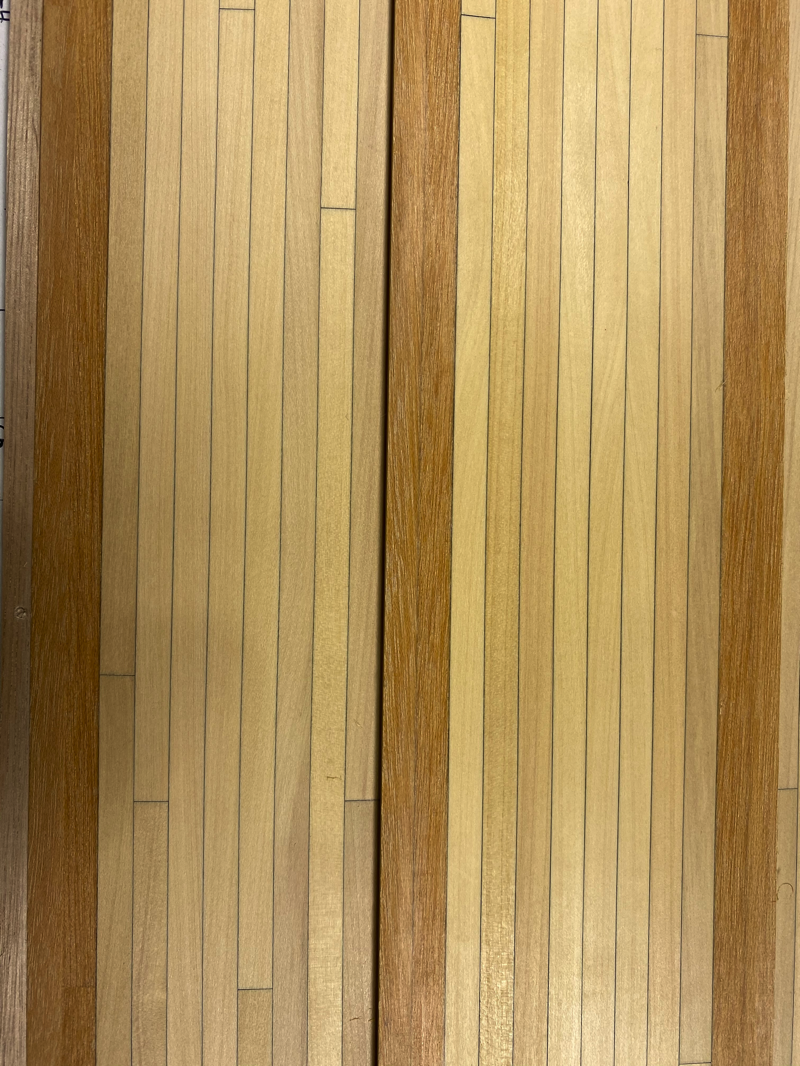
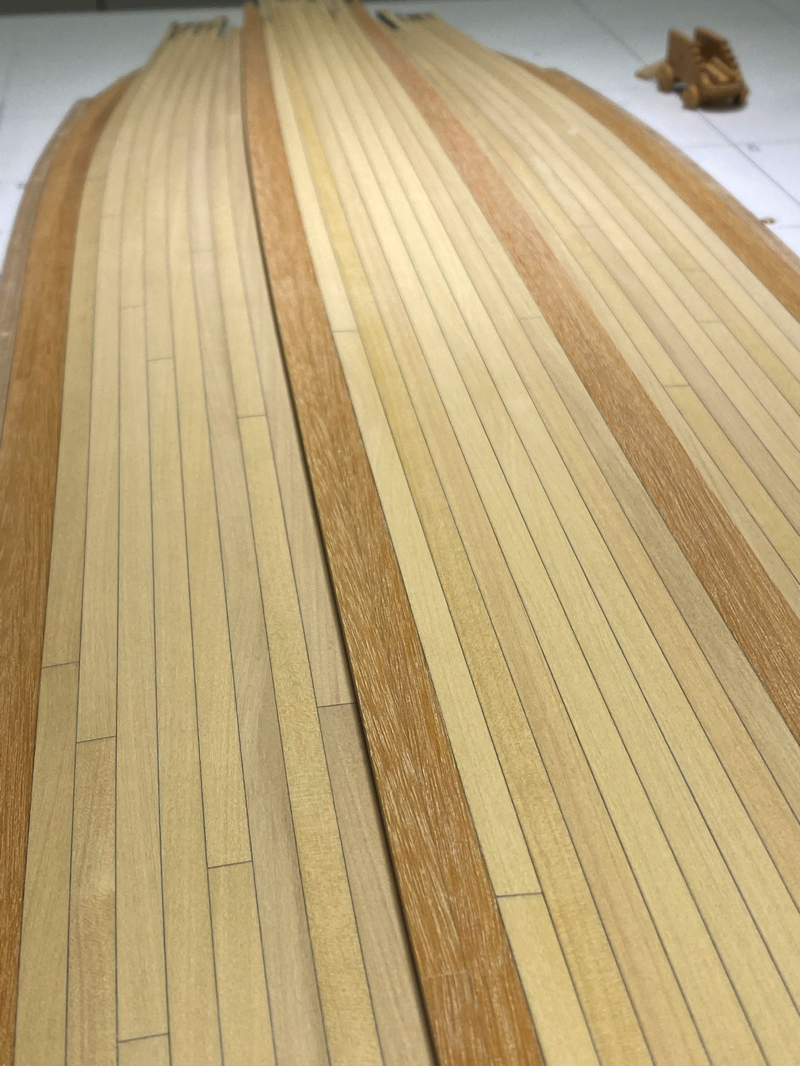
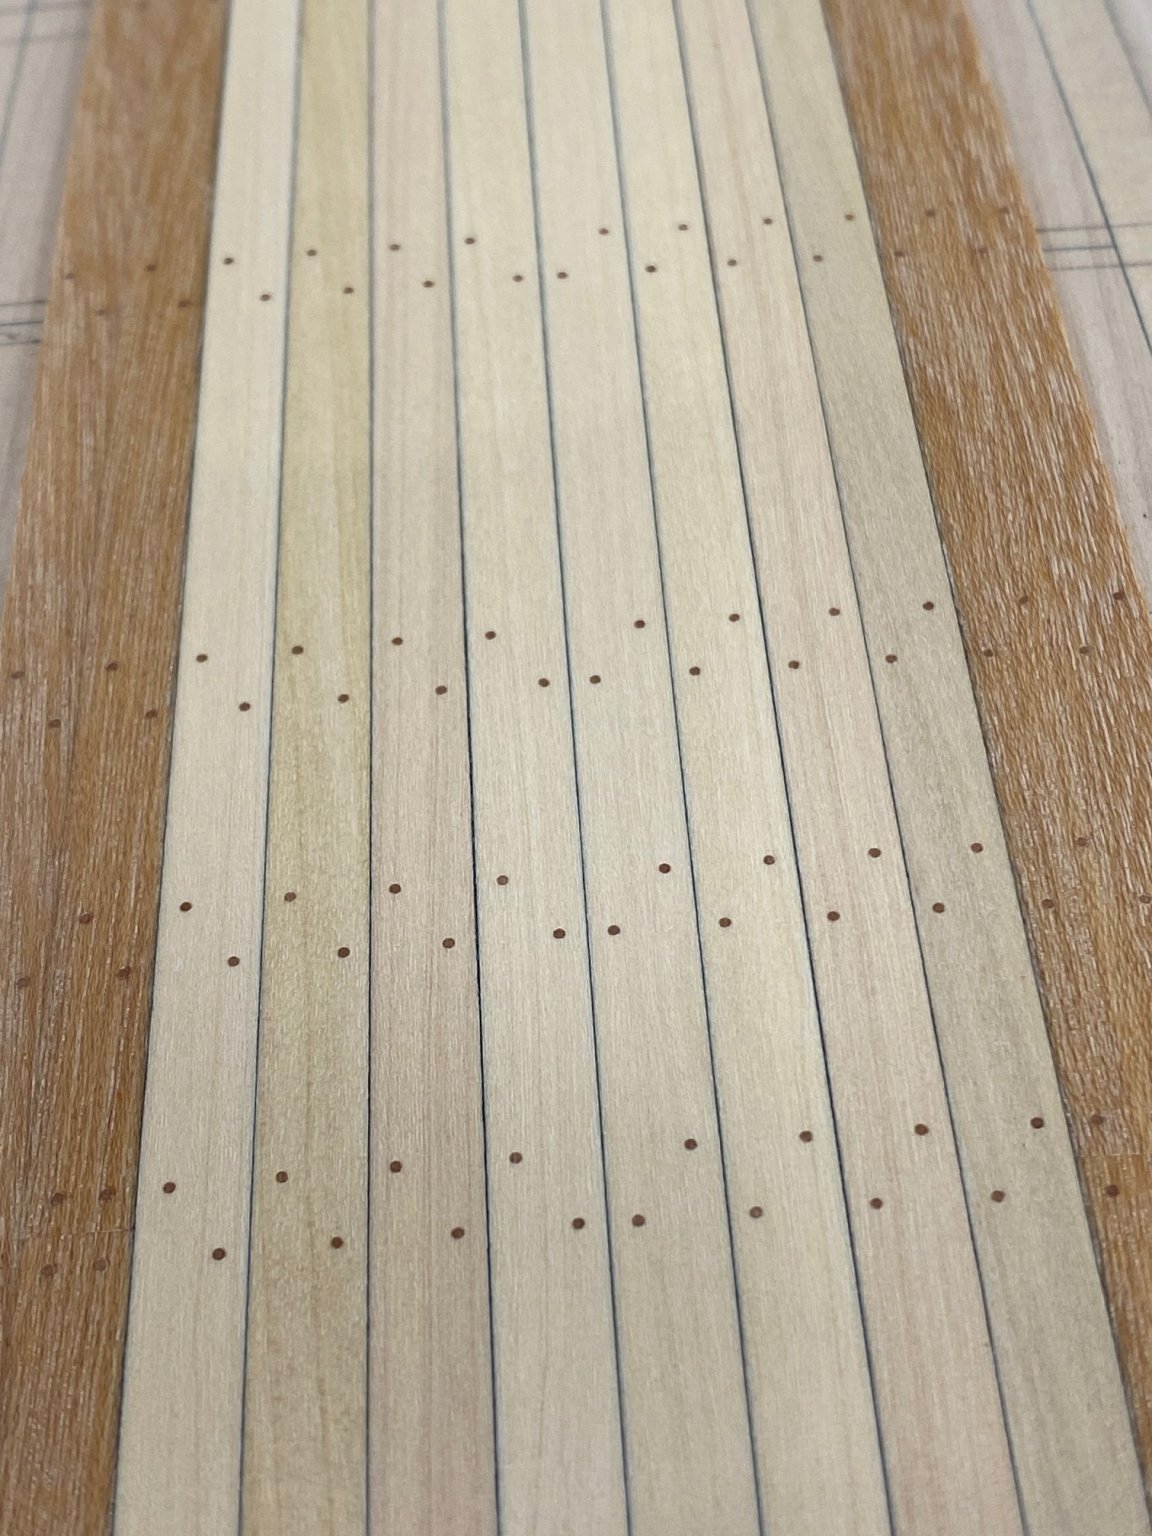
Thank you for your comments. @bruce d: The caulking is achieved with a thin layer of paint applied to the edge of the plank. The attached photo shows my centre deck detached and not yet scraped or sanded. It looks like a complete mess. @Jaager: The outer edge planks are a timber called Daru which is, in fact, floor boarding that I sourced when I was in Russia from my colleagues Dr Mike and Alex Dobrenko. It has exceptional properties to the extent that it is very, very hard and stable. However, it is much harder to bend and has a more noticeable grain. I can only use about 30% of the planks I cut from this wood as I have to choose the best planks that have a suitable grain. Pear nails on this deck work (in my opinion) very well despite the difference in colour. I have performed many experiments off of the model with various sized treenails (achieved with different gauged syringes) and different woods. I never do anything on my model unless I have experimented off of it first.
-
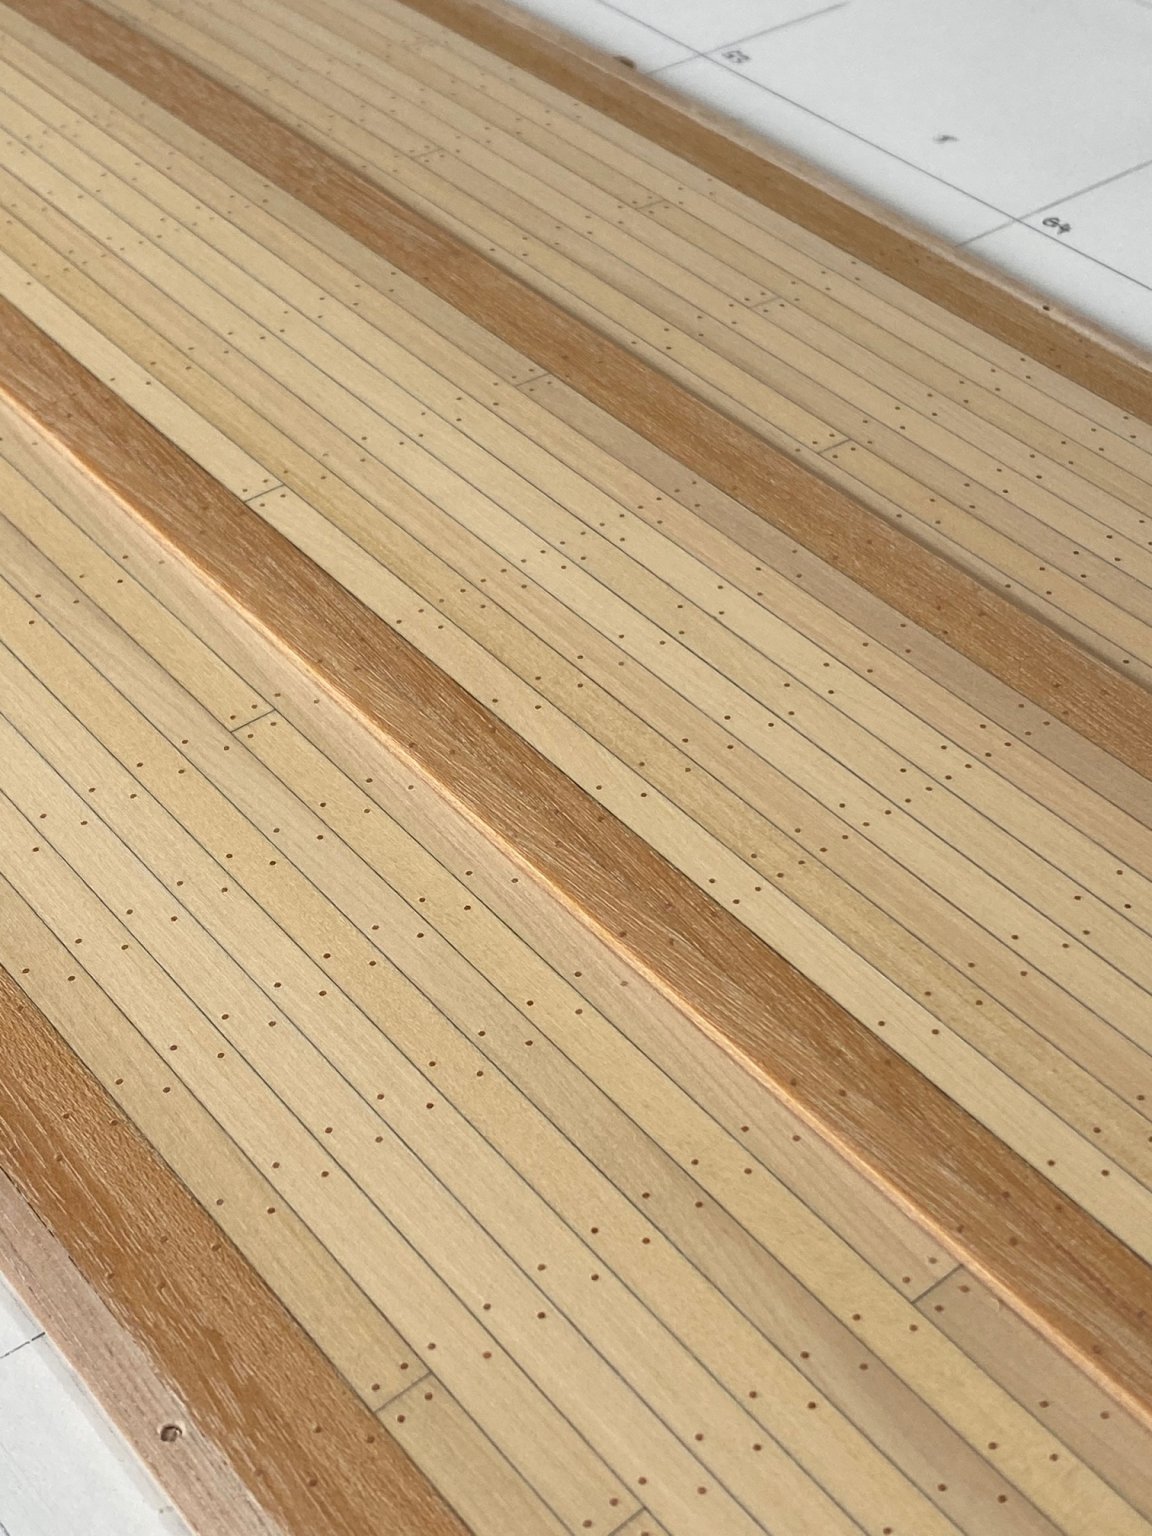
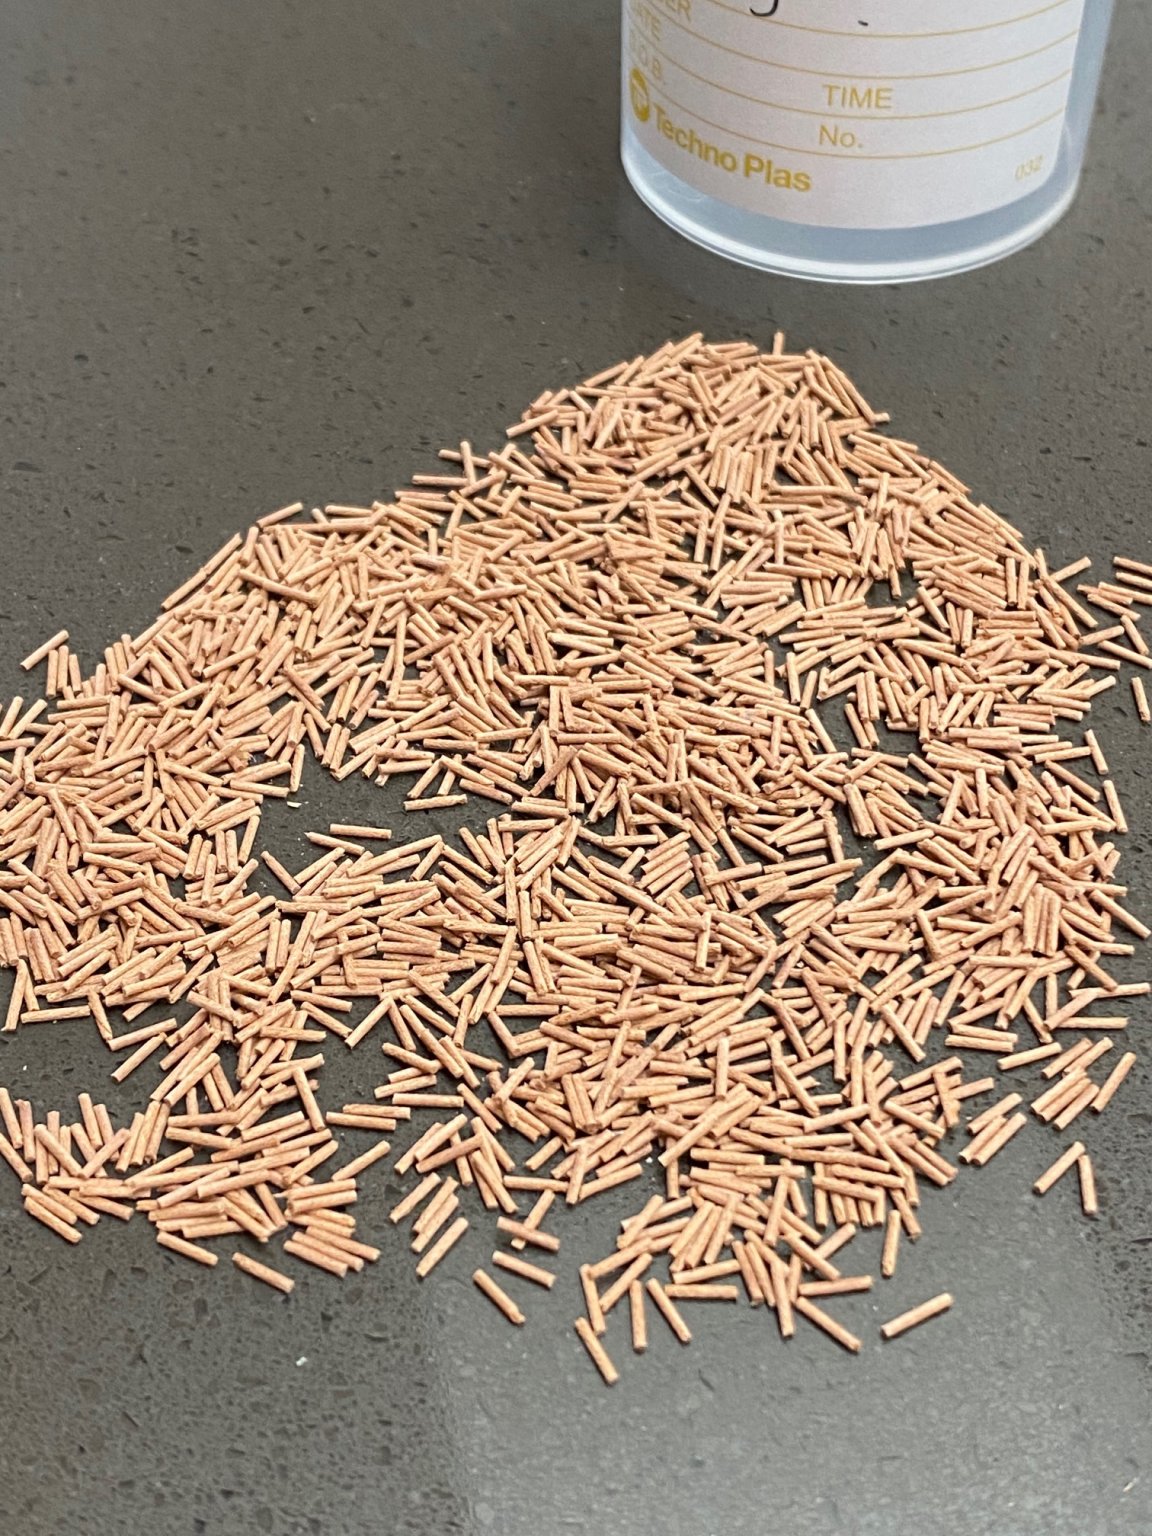
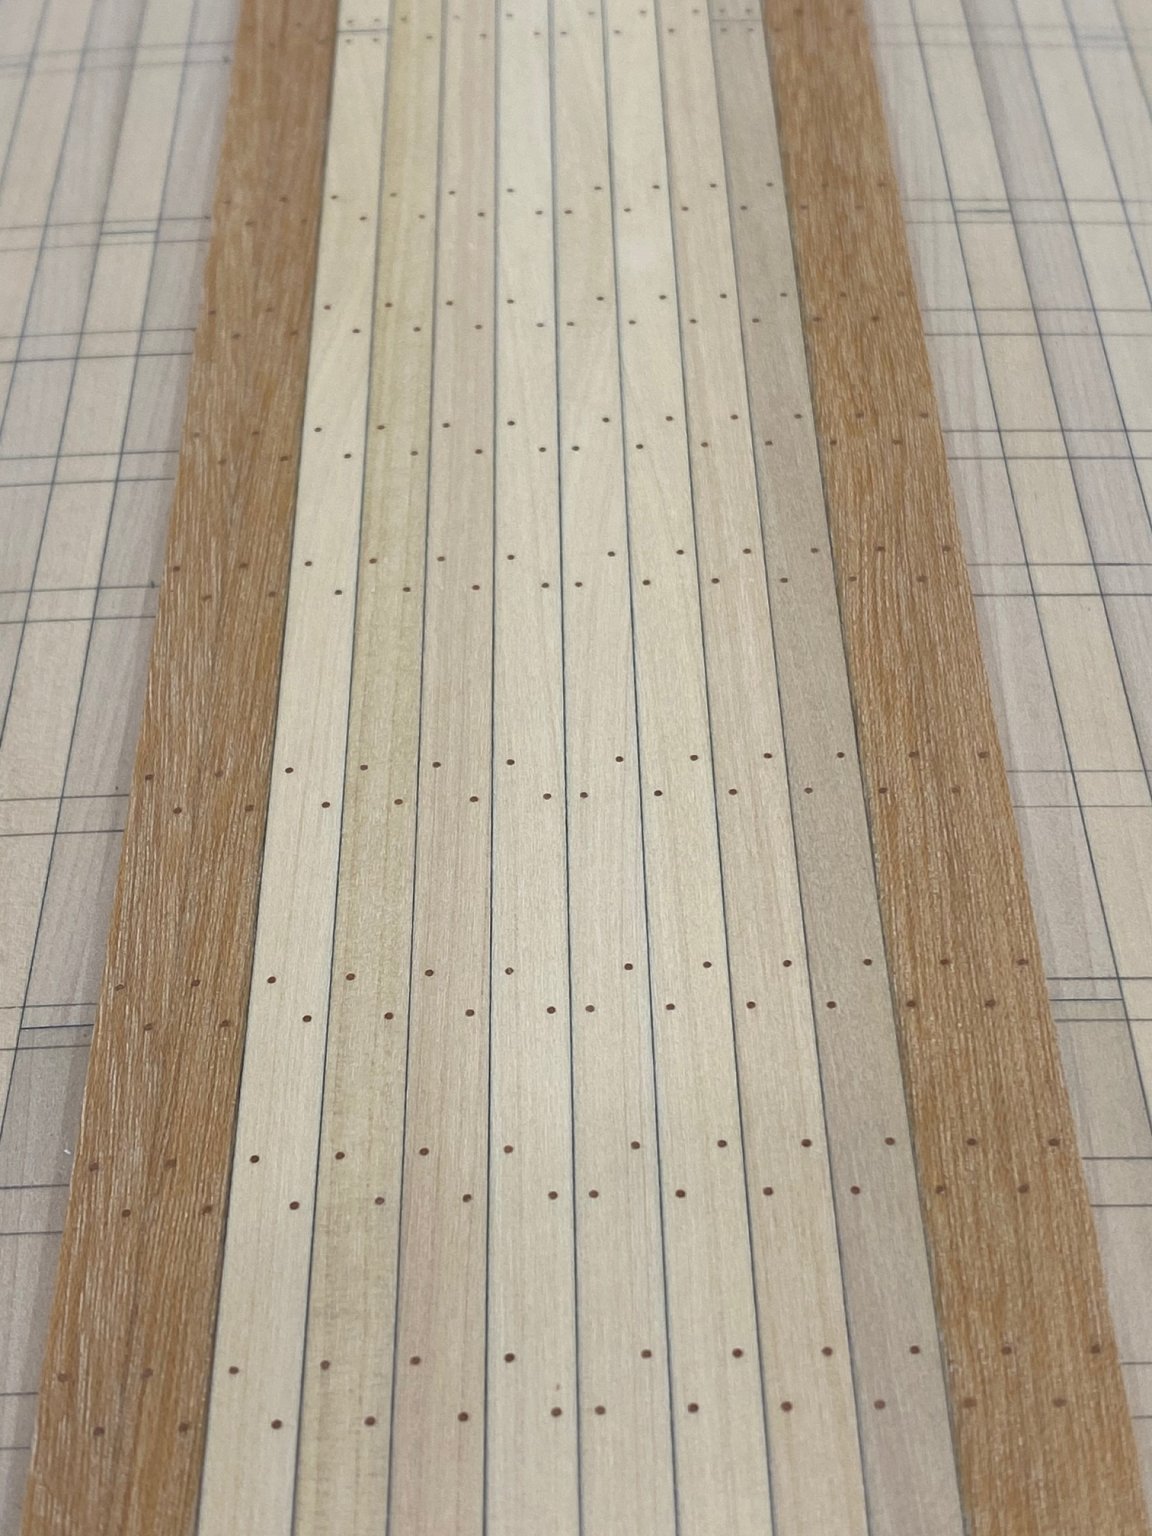
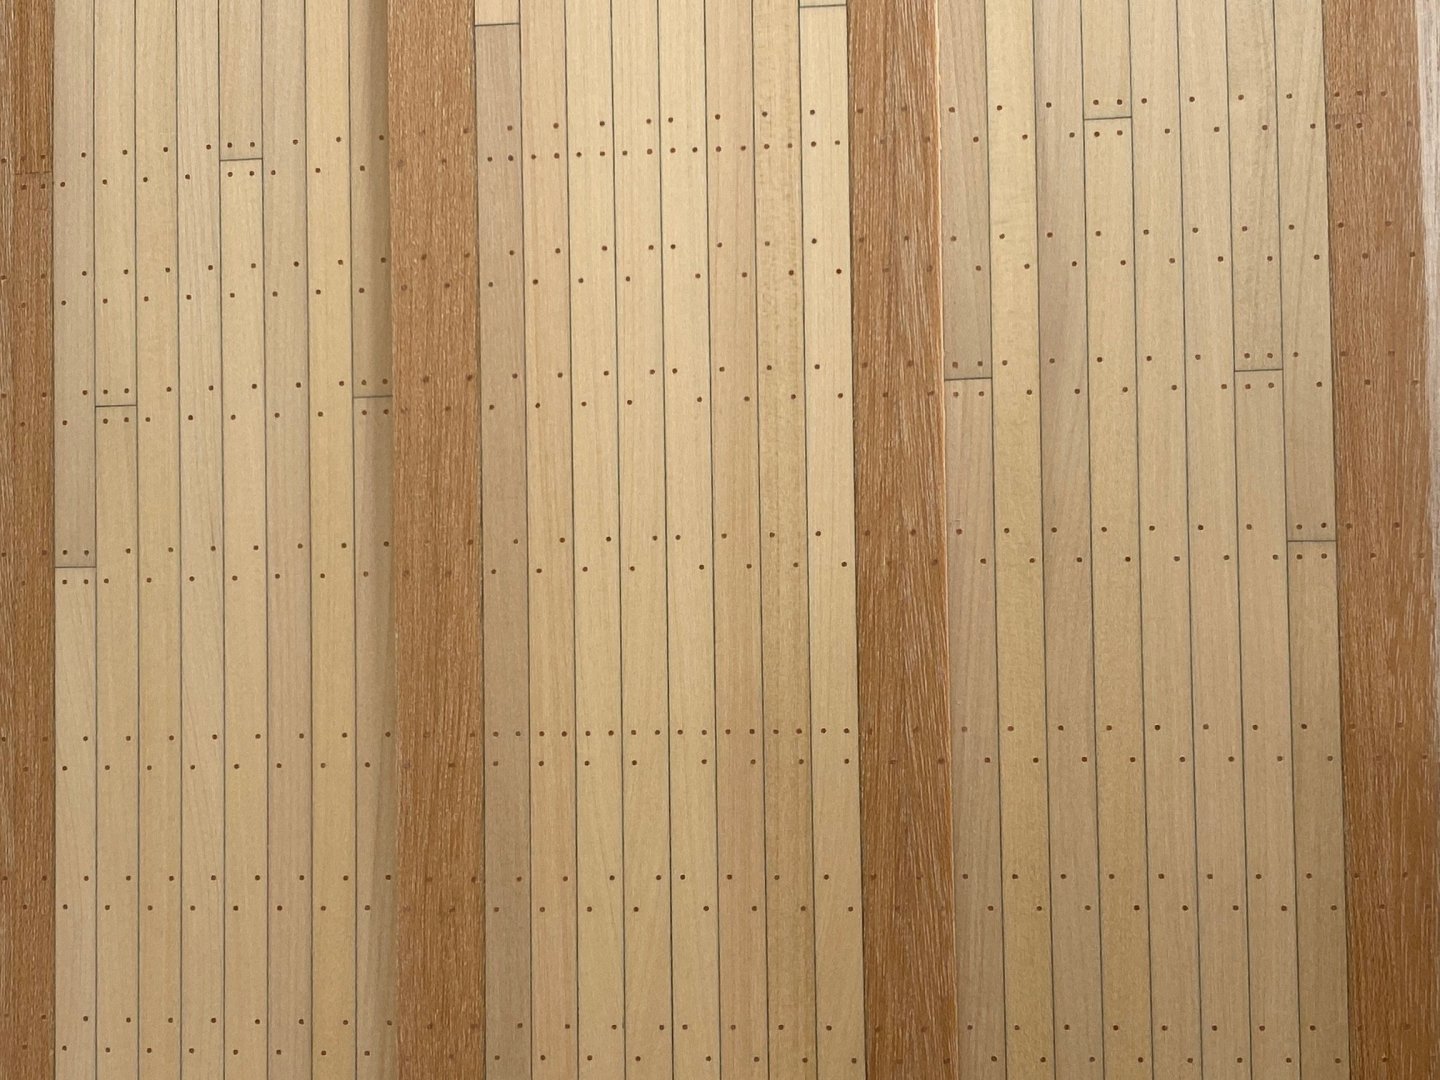
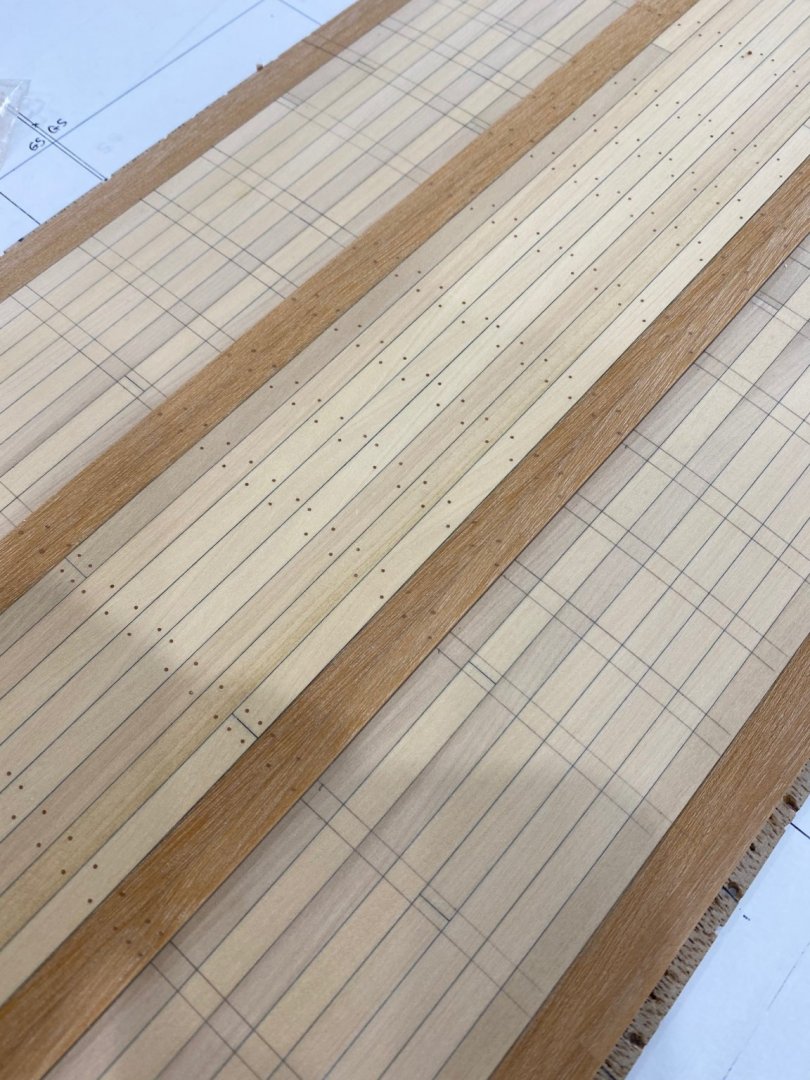
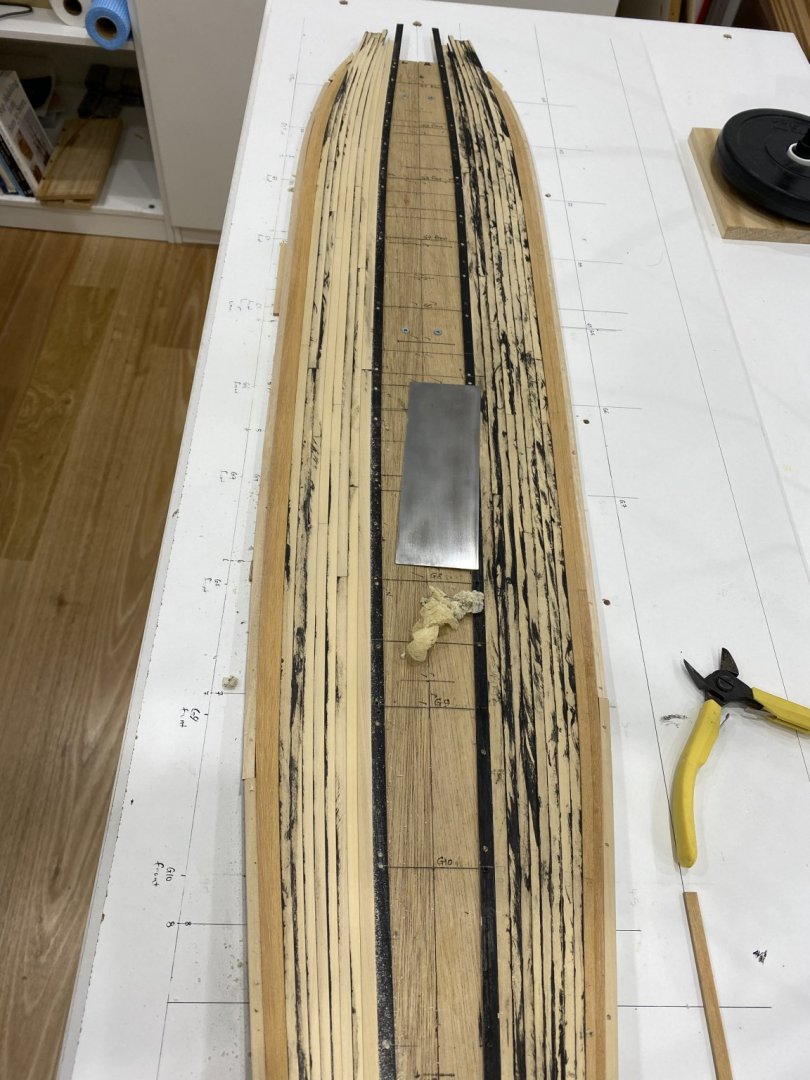
Hi all, I am scratch building Le Mercure from ANCRE plans. I post some photos of my main deck. This is built off of the model and inserted later which makes working with the deck much easier. I still have further scraping and sanding of the deck - this is only rough at this stage. The centre strip (which will remain raised by about 1mm) is only temporarily held in place with toothpicks (which are not visible). Again, the ability to detach parts as needed (and not applying glue until the very end) makes working with these items far easier. My main deck is built in 3 separate parts but when joined appears as one. You will also see nails which I make with a syringe and Pear wood. I have several thousand of these which I will insert in to the deck in the coming days.