HOLIDAY DONATION DRIVE - SUPPORT MSW - DO YOUR PART TO KEEP THIS GREAT FORUM GOING! (Only 75 donations so far out of 49,000 members - C'mon guys!)
×

scratch
-
Posts
86 -
Joined
-
Last visited
Content Type
Profiles
Forums
Gallery
Events
Everything posted by scratch
-
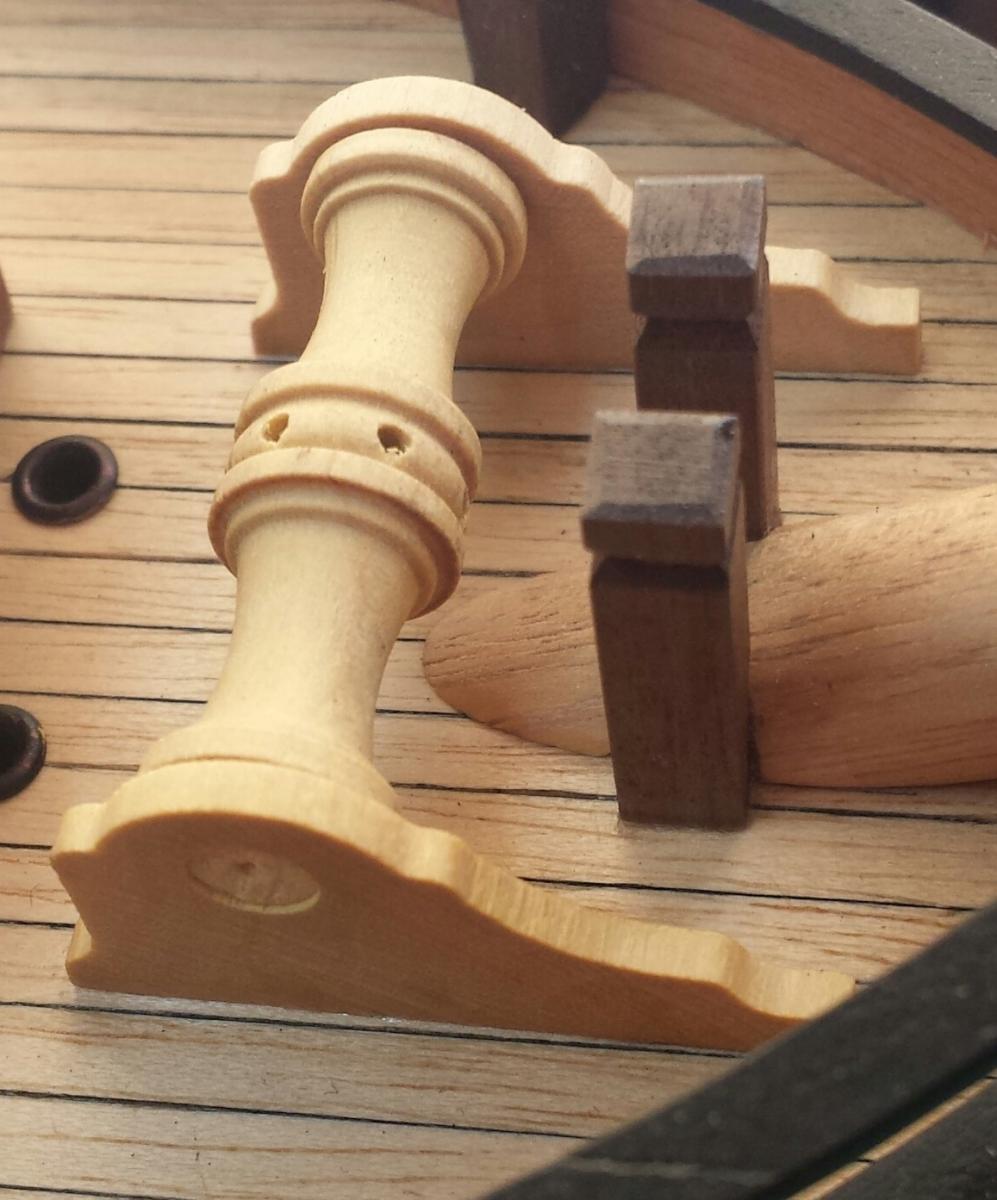
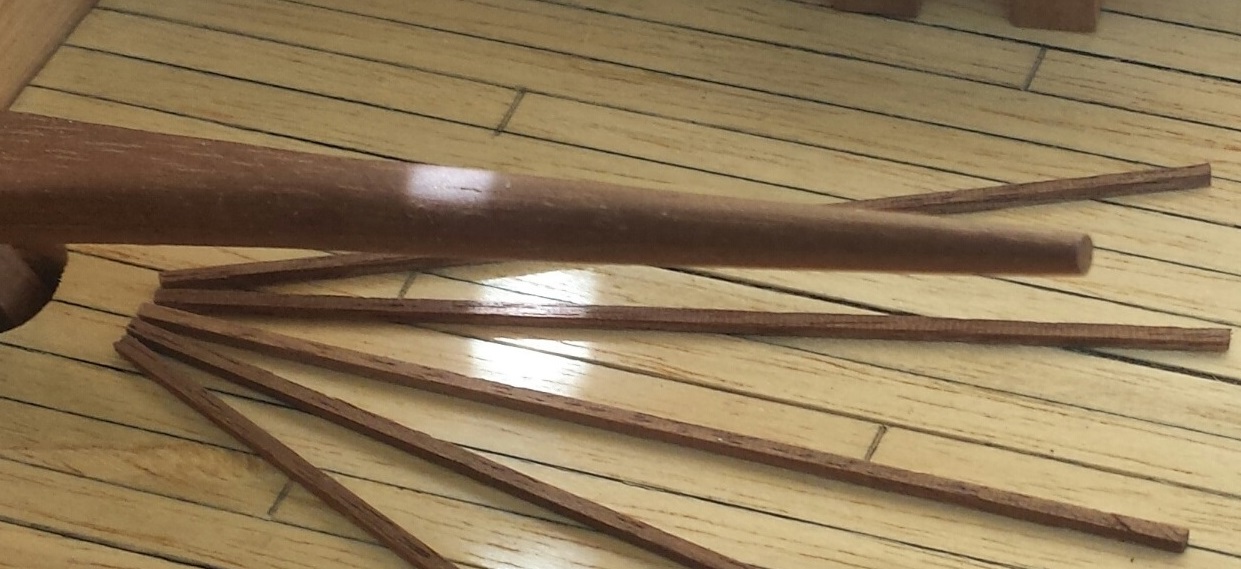
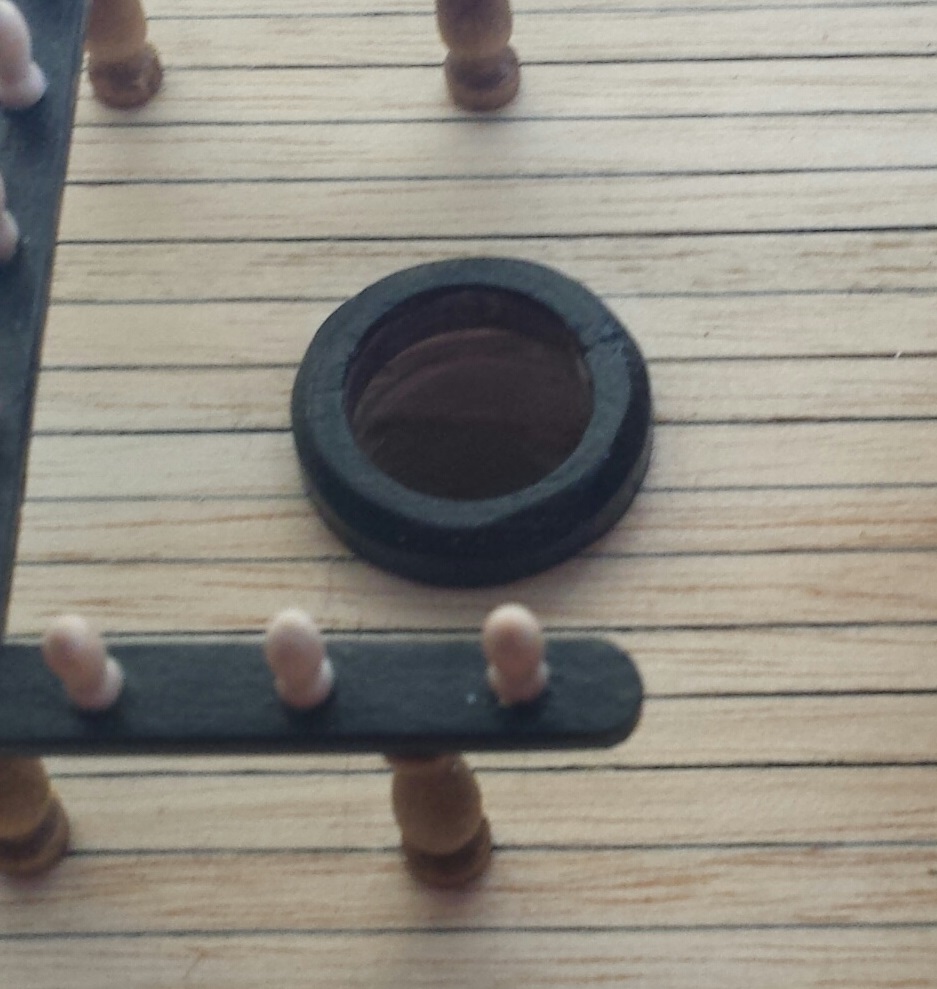
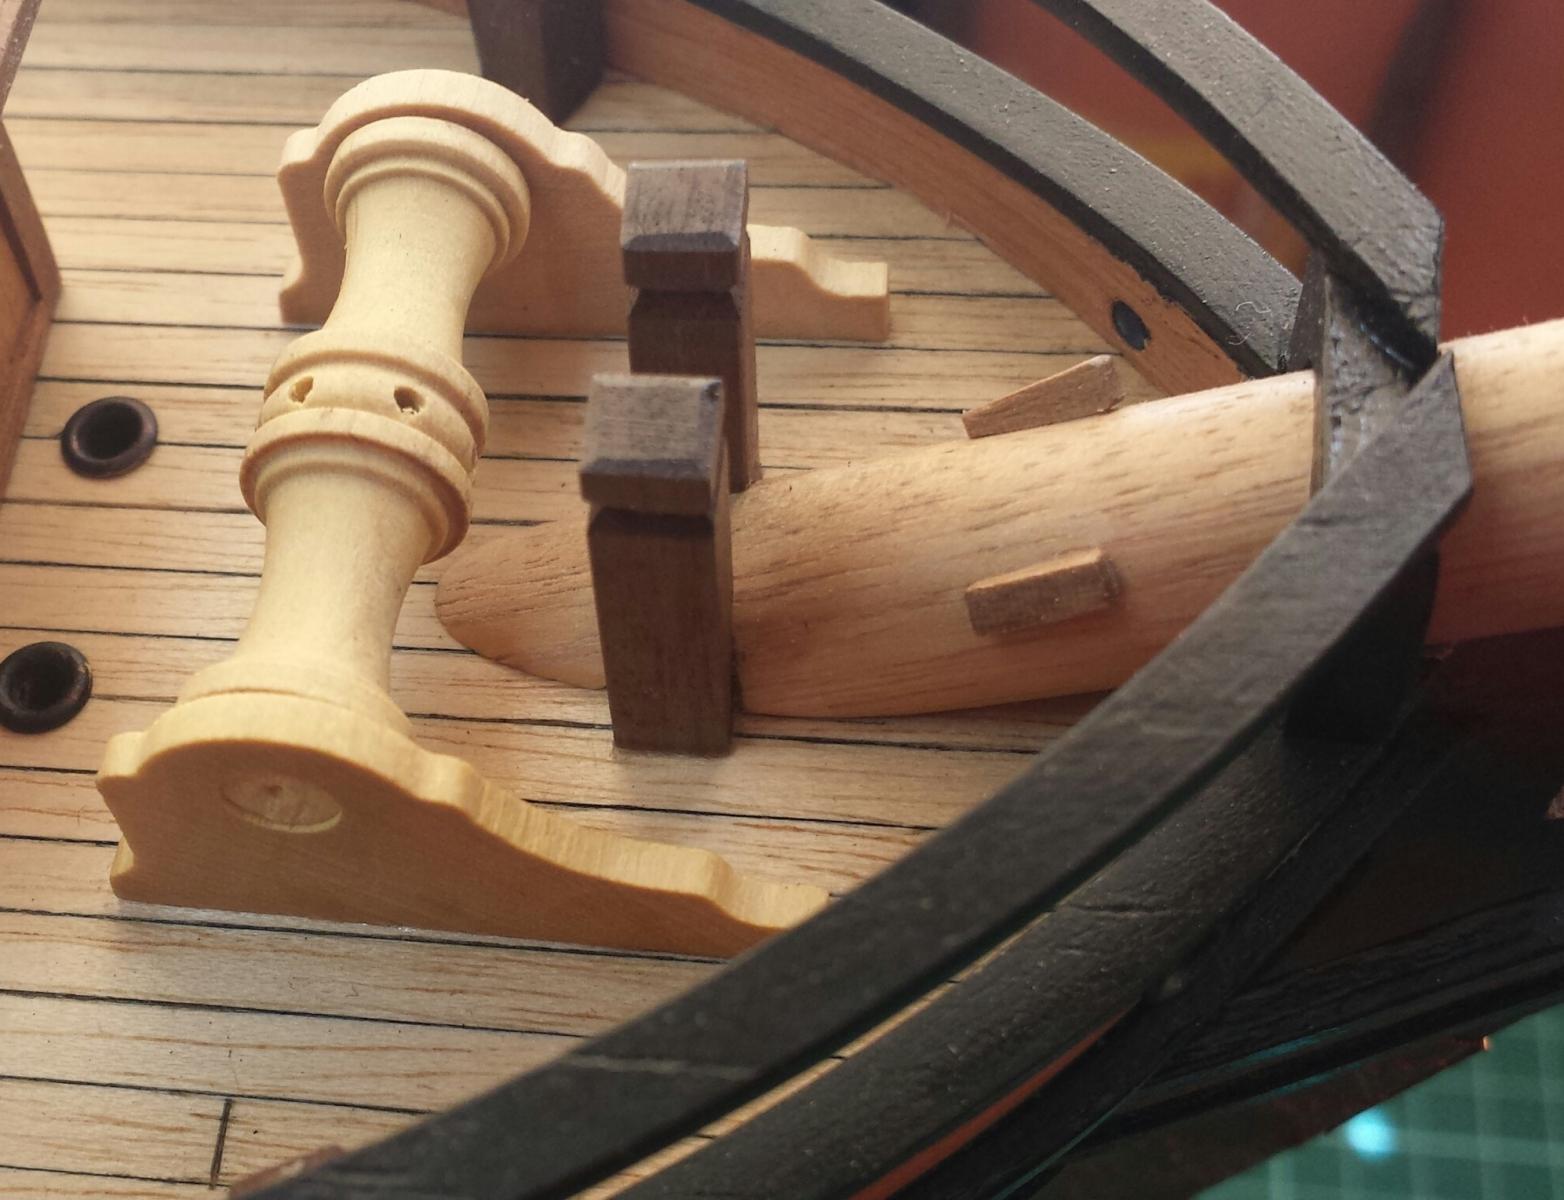
 Hello every-one I made my main cargo hatch and forward cargo hatch out of lime wood and stained Baltic . The gratings are from the kit ..I haven't shown it but i also painted under the gratings black The ring bolts were blackened . The winch is from the kit . Nothing hard here , just glue on the ends. The tiller was out of walnut , shaped and installed . The catheads are straight forward . Made out of 5x5 walnut .The cat head knees needed some shaping around the cap rail . I should say at this point all the deck fittings have had pins install in the bases to give them more strength when glue to the deck . David
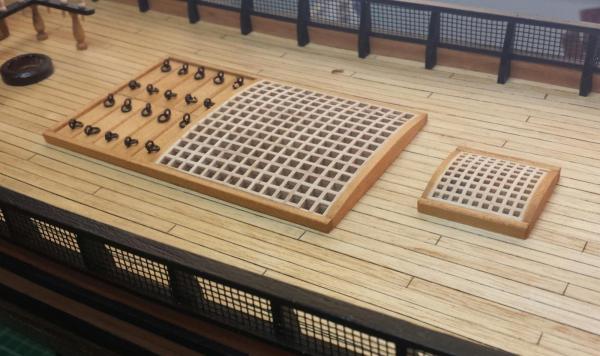


-
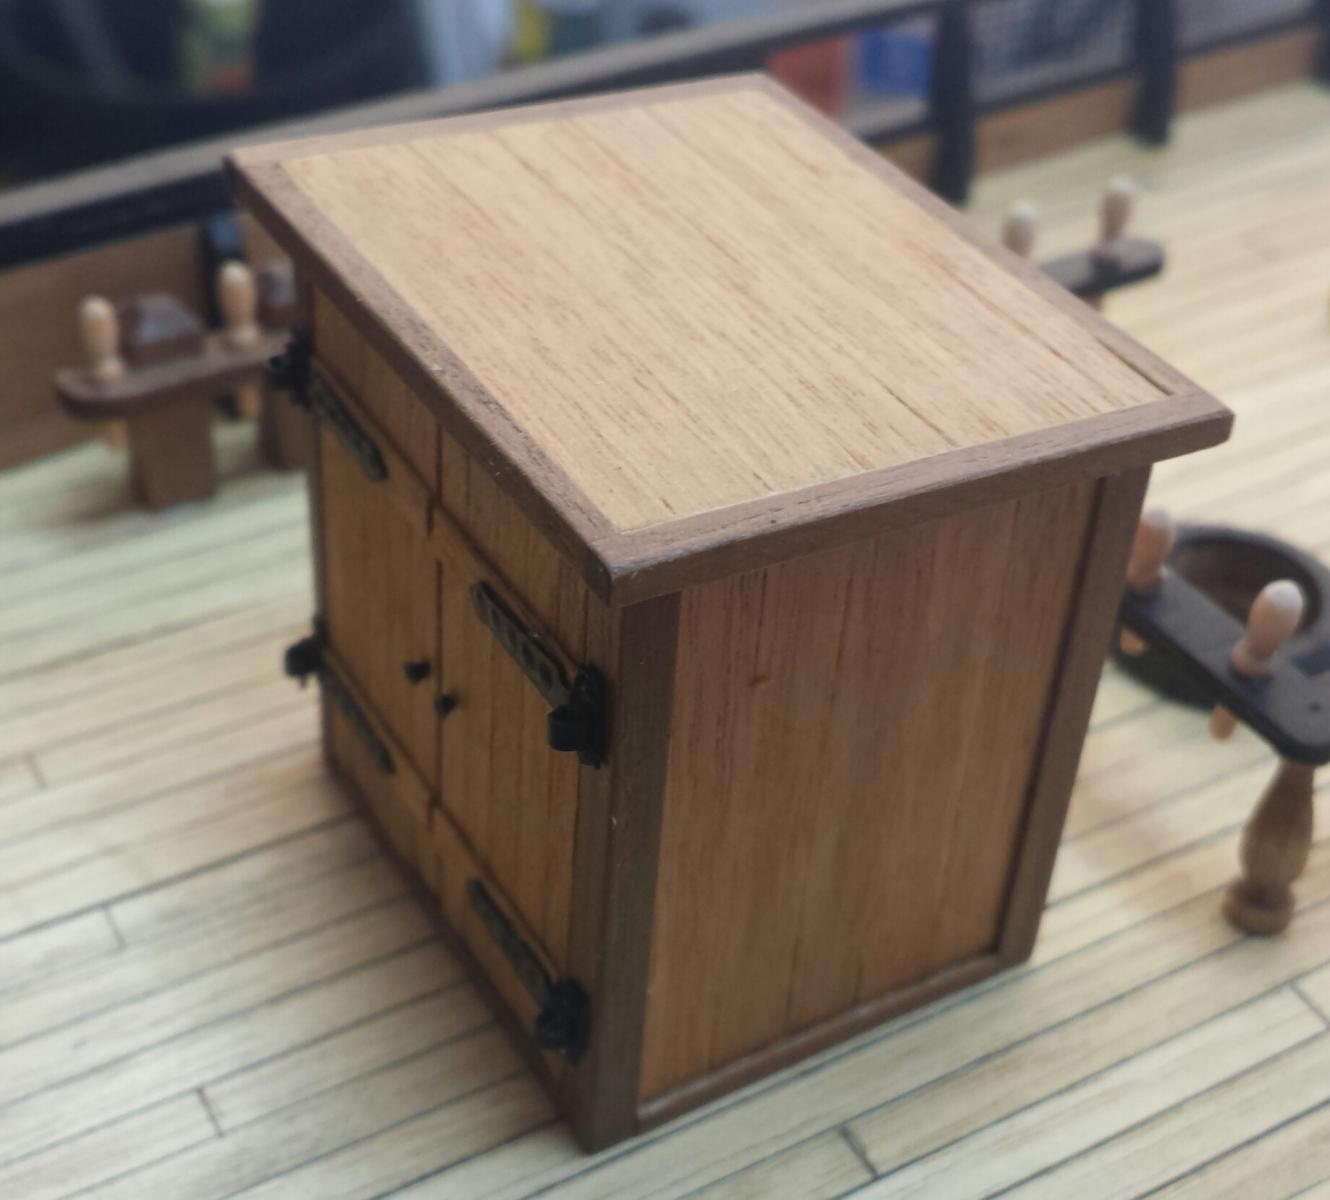
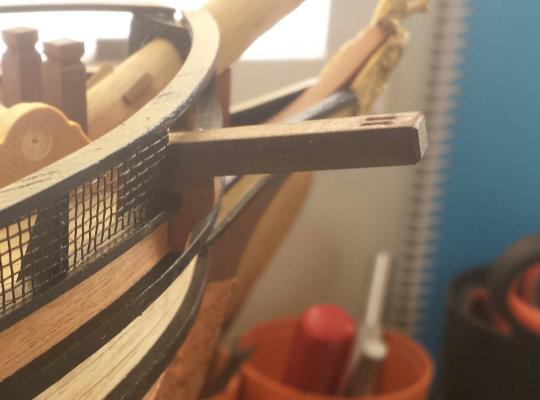
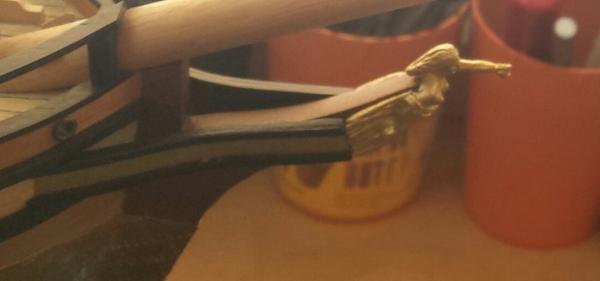
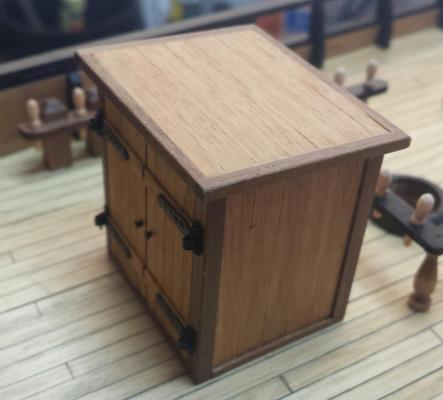
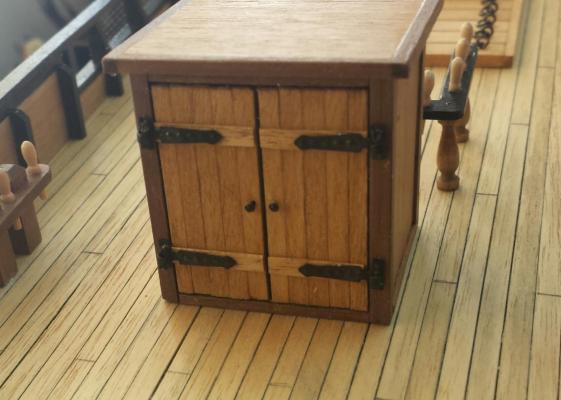
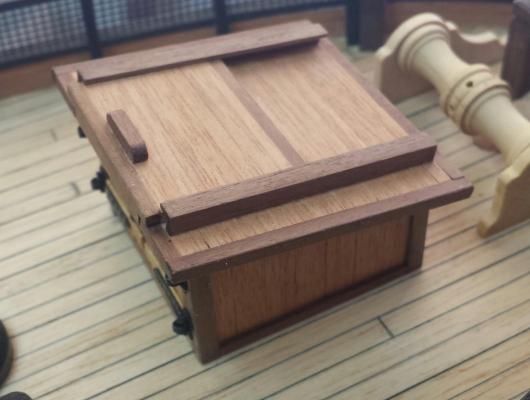
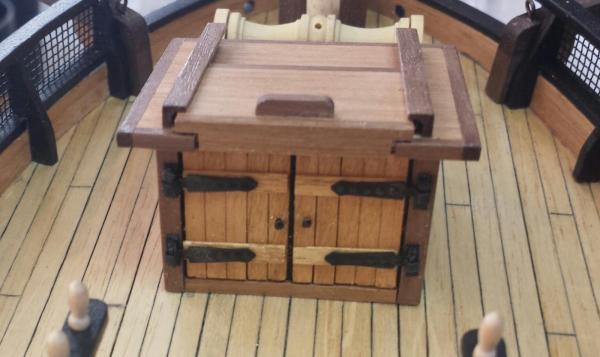
Hello every-one Now onto the Figure head and head rails . I had a lot of cutting to get the figure head to sit properly (she was painted with a gold leaf and attached with 5 minute epoxy ) . I set my figure head more horizontal than what it shows so the gown flows better with the heads rails . The head rails need to have a curve in them so some soaking and drying is needed . The channels were next on . I wanted to put these on now so i could get a coat of vanish on the hull . Now i can tackle all of the deck furniture . The main companionway was assemble with the kit parts and then planked in the Tanganika on the sides , rear and top(i planked the top even tho they say to leave it ) . A strip of 2x2 walnut was placed around the edge of the roof . 2X2 shaped walnut was glued on the vertical edges and some 2x1 around the base . I changed the way the doors were to be done from the instructions because i couldn't see how they would function , especially the Forward companionway . I used some strips of 1 mm thick lime wood stained a Baltic stain . The part of the hinges that bolt to the frames are made out of black card . Once finished a coat of Matt varnish was applied . The Forward companionway was done the same way . Again i strayed from the plans here . Especially how the hatch cover was done . They have the front trim running all the way across the front . David
-
Thank you very much Brian I'm now on my third build . David
-
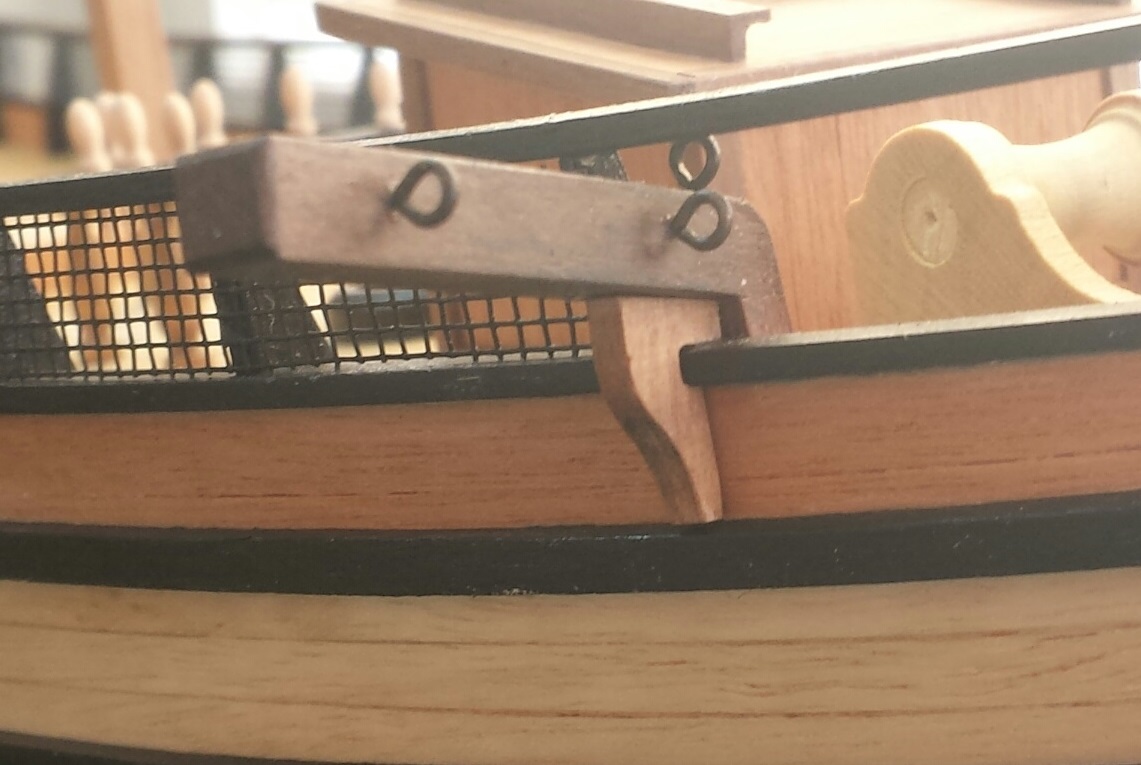
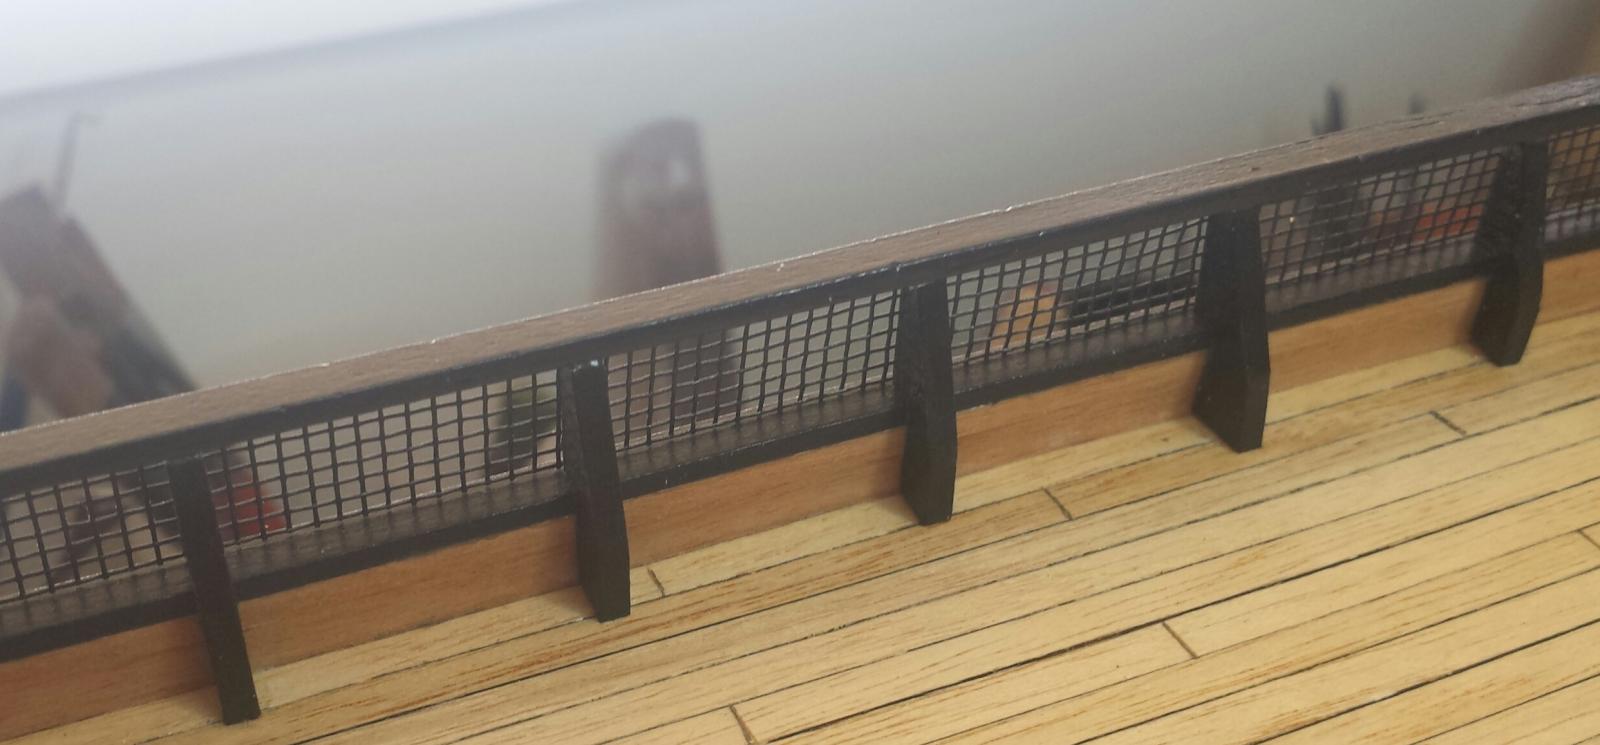
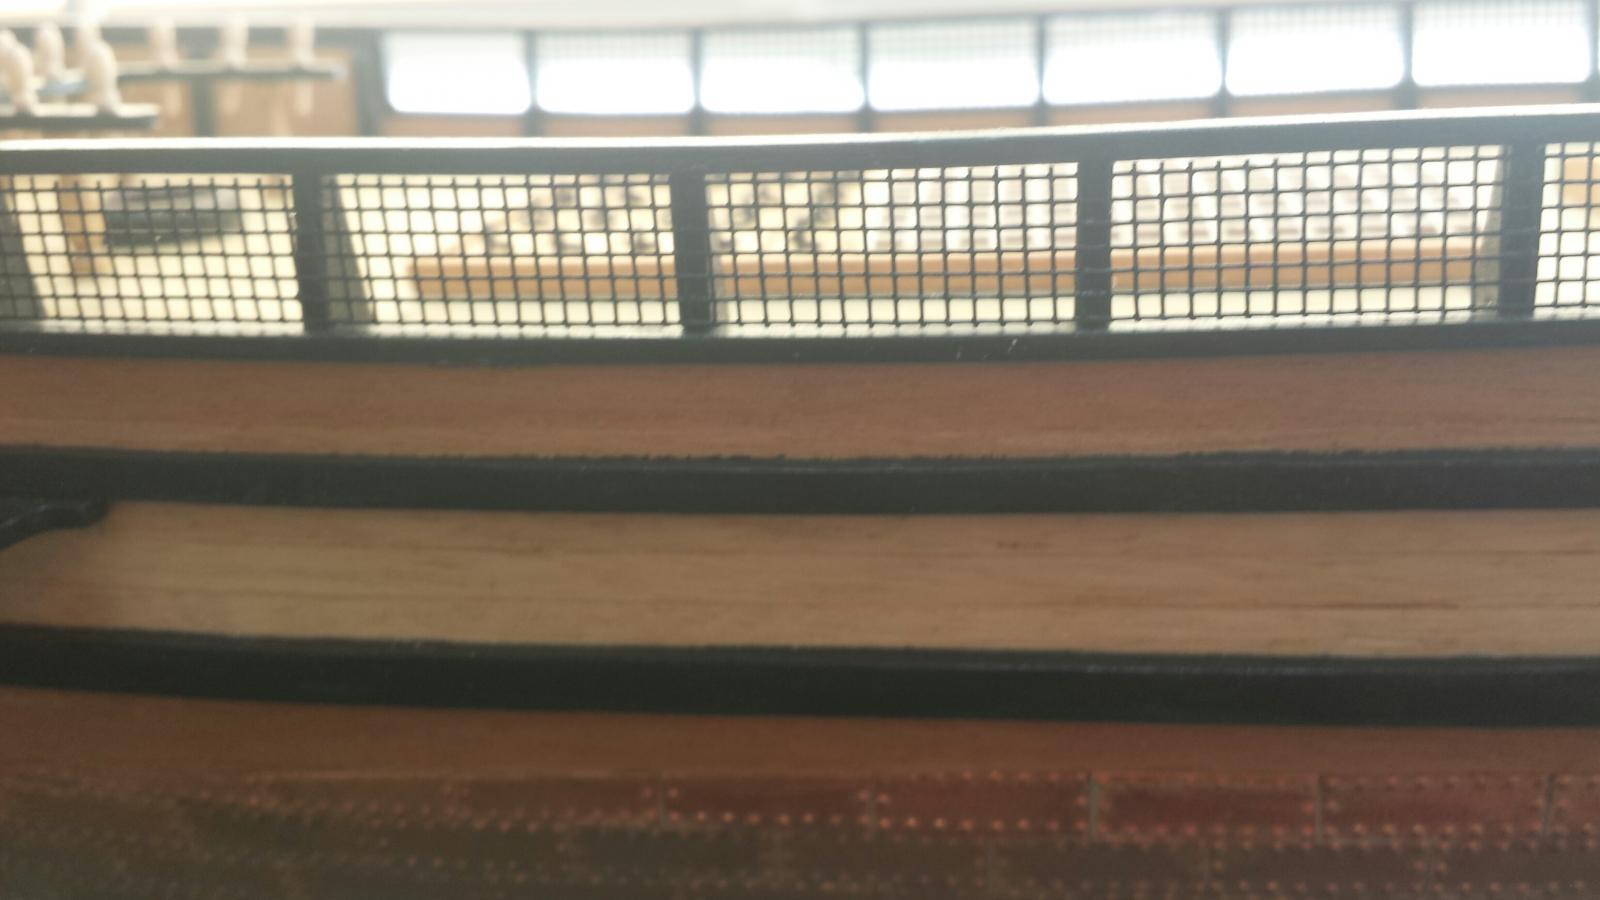
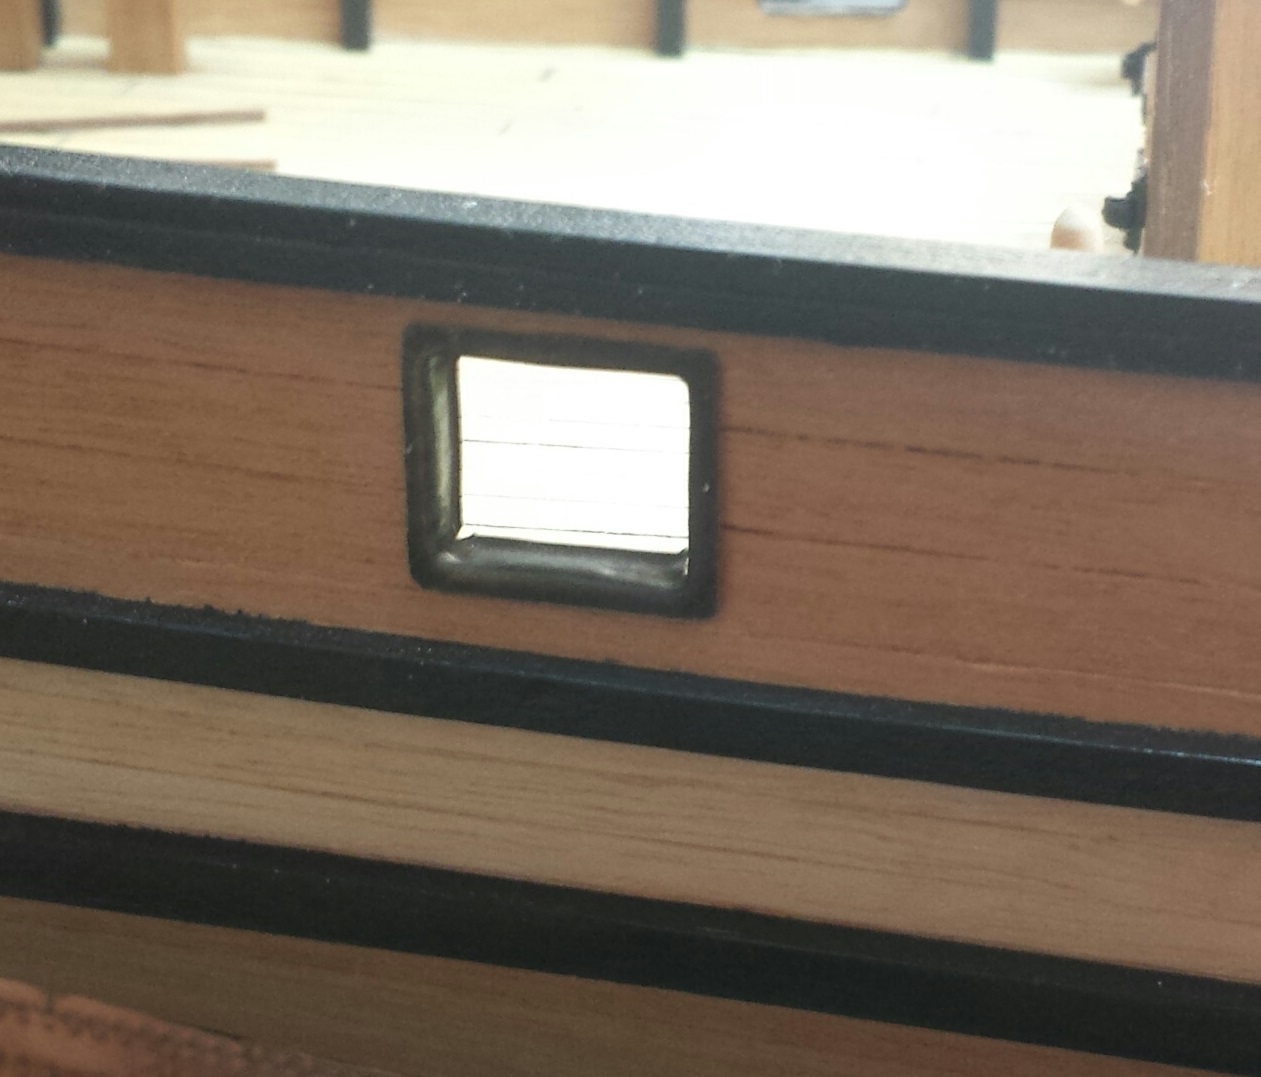
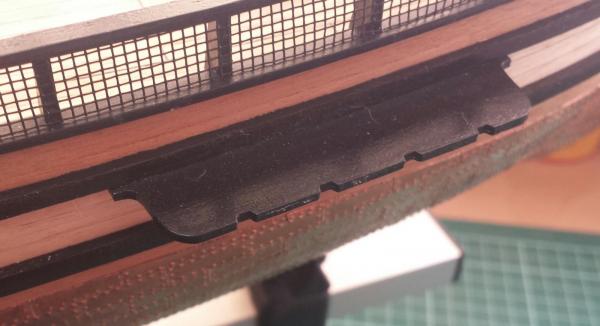
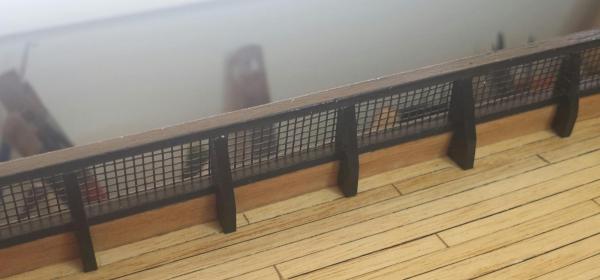
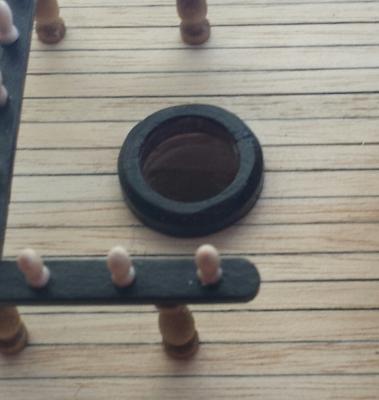
Hello every-one The banister stanchions were on the laser ply sheet . Even tho i painted these black , i still replaced them as i didn't like the shape of them . And they weren't very uniform . I made new ones out of some lime wood . I made one master , then made all the others from this one . No special way of doing this , i just used a razer saw , sand paper and a file , taking a little bit off at a time and checking them with the master . Banister rail installed next . I went my own way on how they finished up on the bow . It said to cut them at 45 , but they weren't long enough to make this possible so i made them to sit flush with the front of the bowsprit cradle . The upper and lower gunwales were next and these were soaked in water then clamped on the hull to dry over night . A paint then glued and clamped on . Now the transom can be fitted . The ply transom is soaked in water and then i used 2 pieces of 4 mm square timber placed under each end with a clamp down the middle to get the right curviture that i needed Lined the inside and out side of the transom in the tanganika , sanding flush when dry .Here it says to use strips of veneer over the tuck of the transom to build it up then paint it . To me that would look shocking . So i used some 4x2 lime wood . the usual soaking and clamping for the night .. After my sand and paint routine , it was glued then clamped , then the transom was fixed on . I fitted the netting next . So far it's just sitting there with a couple of daubs of CA . I would assume it would have to be tied to the banister rail and staunchions . Any ideas anyone ? Mast heals were shaped around the edge , painted and glued on . I blackened the cargo ports . In fact all the brass fittings have been blackened except for the ships bell .( I use a blackening agent called Birchwood Casey's Berma blue . It's a blueing agent for firearms and can be found at any local gun shop . I use a 50/50 mix of the berma blue and water . First i put the parts in the mixture for about 20 seconds , then i rinse them in water and give them a wipe . I do this about 3 or 4 times untill I'm satisfied of the finish ). I drilled holes where the ports had to be then used a file and sanding sticks to get the correct opening . David


-
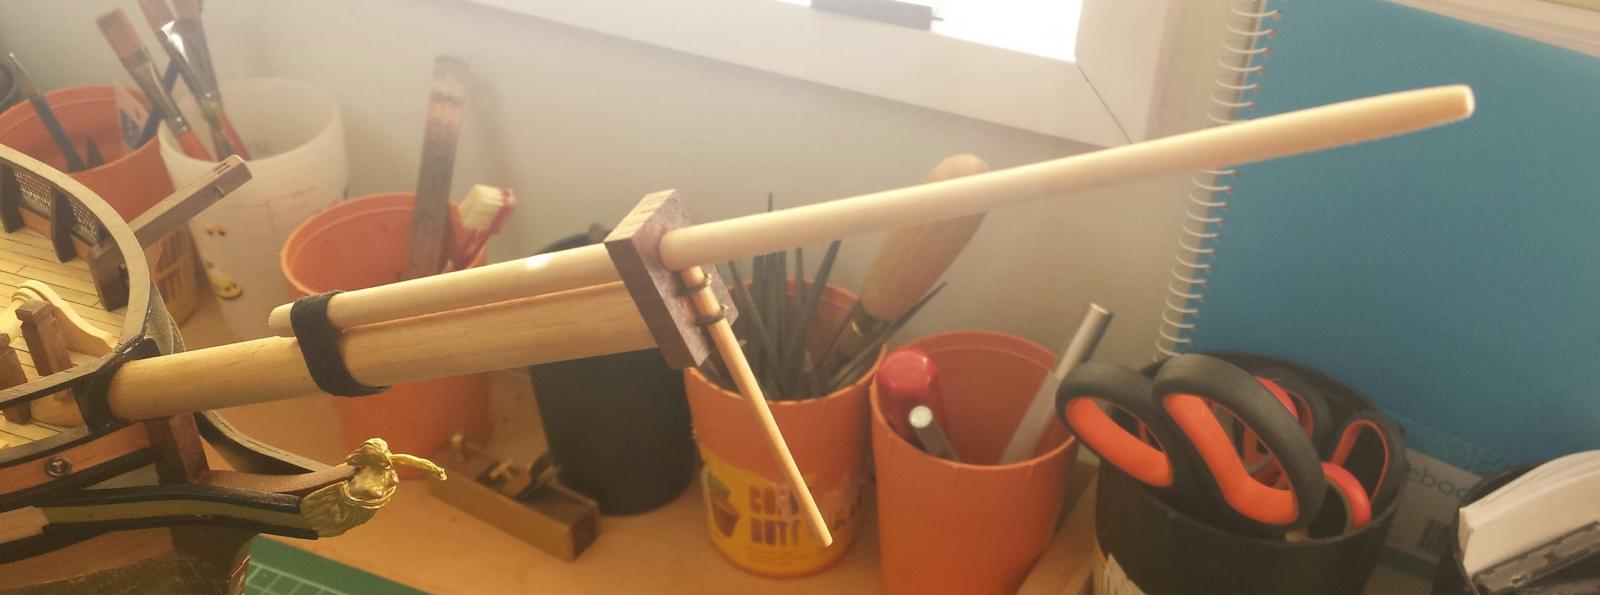
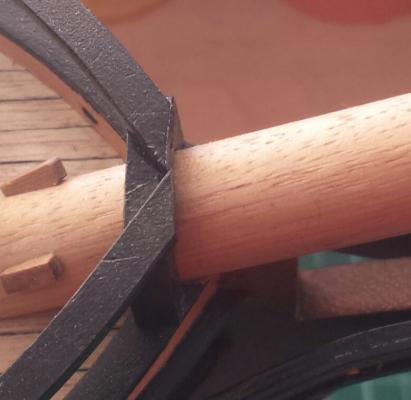
Hello every-one The coppering of the hull was next . I have never attempted to copper plate a hull before and wanted to try it at least once , so i thought why not on this model . I think i need a lot more pratice . Not to bad but not good either . I didn't get the kit that came with copper plates , i thought they looked way to big for the scale so i got some from some where else . Next time i might try the copper tape with the adhesive backing , might be less messy and a bit thinner to be able to over lap . The rudder post was also redone in the walnut , dry fitted , coppered , then placed on .This might seem obvious to every-one (but me it seems ) but make sure you mount it with the 4 rudder hinges and not 3 like i did . A big miss by me but whats done is done . Those that do build this model will also noticed i haven't glued the transom on yet as it says to in the instructions . I decided to leave this untill i had put in place the aft deck cap rail and banister rails. The forward deck cap rail , cap rail upright and aft deck cap rail were next to install . These came in the laser cut ply wood which i left as is because they are to be painted anyway . Make sure these sit flush with the inner side of the bulwark as you have to fit the banister stanchions later. Dry fitted first to make sure every thing sits well , then paint (a fine grade sand paper then an under coat then another light sand then a top coat then another fine sand and then the final top coat ) , then glue into place . The bowsprit and jib boom were shaped and assembled then installed . The instructions have the bowsprit stopping at the knight heads but i ran mine all the way down on the deck to give the illusion it was coming out of the deck . The knight heads were shaped and fitted . I had to remake the bow sprit cradle , the one that came with the kit wasn't even close . I used some limewood i had and painted it black before installing .The height of the bowsprit cradle has to end up the same height of the aft deck cap rail . David


-
Hello every-one .Now onto the build . I'm sorry there are no photo's with the first few stages as i didn't take any , but even tho i explain how i did things , it's all pretty straight forward and the photo's i have taken are only taken by a phone camera , sorry , it's all i have .. I started by dry fitting all the bulkheads to the slots on the keel .Most were a perfect fit but some needed a strip of veneer glued on top to make them level .Using lego blocks to keep things nice and square , i glued all the bulkheads on and the bow filler blocks on and left to dry . Here the instructions say to start the fairing process but i glued on the false deck first to give the bulk heads more strength for fairing and so i didn't fair to much off and have them sitting to far under the false deck . For this i used different shape sanding sticks i made up .Transom filler blocks were shaped and then glued on . Take your time with this . I shaped the blocks before fitting by doing a bit at a time them placing them on for checking , then shaping them more untill i was happy then glued them into place .The instructions are pretty good at explaining this process. Next was to tackle the first layer of planking . Again this is pretty straight forward but for those that might find this task a bit daunting (i know i still do ) i highly recommend the planking tutorial here on MSW . I used an Amati crimper to get the planks around the bend onto the transom filler blocks .This is the only time i use the crimpers . All other shaping was done by soaking the timber in water then clamping over night . The bulwark planks were fitted next but don't forget to place some tape over the bulwarks so the planks aren't glued to them . I gave the hull a slight sand then filled any lows i had with filler then sanded again . I kept doing this until i was happy with the shape . It said to plank the inside of the bulwark next but i skipped this and planked the deck first for reason that if i have a slight gap on the decking then the bulwark planking will hide it . Or you can even plank the false deck before putting it on . On to the second layer of planking . Here is where i replaced the laser cut parts of the stem post, false keel and stern post with some walnut , not a great timber for modeling , but better than ply wood . i shaped these to fit then glued on before i did the second planking . I was quite happy with how the second planking went even tho most of it is covered by the copper plates. David
-
Hello every-one I'm nearly halfway through my build of the Colonial Brig Perseverance but i thought i would try to put up a rough log up to where i am now . This is a slow build as i have been building it now for close to 2 and a half years . I chose this model because i really liked the look of it and not being very experienced thought i shouldn't have to jump to many hurdles . The kit contents .Not to much to add here . The normal cast parts and laser cut ply pieces . The kit normally comes with mahogany for the second planking but i was able to get the mohogany swapped with Tanganika (the timber used for the prototype) after speaking to Modelers shipyard , the supplier of the kit . I will just add that i found i was some parts short last week and e-mail Modelers Shipyard about this so i could order more and they replaced them at no charge . I know the cost was minimal but to replace the parts after nearly 2 and a half years from purchasing the kit was very pleasing . Thumbs up guys . I have replaced a lot of the ply parts to where i am now but i will mention where as the log progresses . Instructions and plans are pretty straight forward although nothing is to scale on the plans . The deck arrangement says it's to scale but i wouldn't rely on it as i found mine to be out . I have no problem with the supplied timber or the fittings , very happy . Although i am disappointed in the ships boats . Not to sure what I'll do there . The plans very detailed except for the rigging configuration . Looks a bit confusing to me . Next up I'll get into the start of the build . David