Walter Biles Posted October 24, 2014 Share #1 Posted October 24, 2014 I recently acquired a kit for each of the above named tools. I built each one from the kit, making minor modifications which I hope will make each a little better, or easier to use. I have not used any of them yet, but am familiar with their purpose, and wanted to see how difficult they would be to make and use. I am using this site as a comparison of build, as well as an information source for any upcoming builders who would like to see what each kit is like, and offer some suggestions on how to make them better or easier to use. I am only a builder of mostly scratch models, and have only gotten them because I came into a great deal on them. I inherited them. So what's not to like? First I will describe each in it's turn of the build. Then I will describe what I felt could be better about them. mtaylor 1 Quote Current: America Schooner https://modelshipworld.com/index.php?/topic/10887-america-schooner-pof-by-walter-biles-radio-pof-scale-148-from-blue-jacket-plan/ Prior: MERIDEA https://modelshipworld.com/index.php?/topic/140-meridea-by-walter-biles-radio-34-scratch-cad-of-boat-at-usn-severn-river-repair-station-ca-1969/ SAMSON First build: Scratch POF Spanish Galleon Link to comment Share on other sites More sharing options...
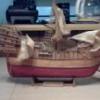
Walter Biles Posted October 24, 2014 Author Share #2 Posted October 24, 2014 (edited) First of all, I apologize that all my pix did not come out. I will try retaking some different views and add them to this site as I get some worth using. I found the kits to be easy to understand, and the instructions to be reasonably arranged for understanding. I found that they went together fairly easily and had fairly little to give me problems in assembly. So much so, that I forgot to take pictures until they were all together on the earlier kits. These kits have laser cut part sheets with plywood being the sheets they were cut from. They had bolts, pins, gears, etc. that made it easy to put them together. Fair-A Frame: First off, I found two different spacings for the cross supports. One set was spaced on 6" intervals, and the set for the other side had a different spacing. After contemplating on any justifiable reason for the difference, I could find none. In fact, I reasoned that if they came together on the same spacings they could probably grip the keel better. So I made all of them on 3" intervals so the fixed rail was glued every 3", and in addition to making them line up better, I tested one of my hulls on it and found it had a better grip than I felt it would have had the other way. It provided more evenly spaced support for the keel as well. Please note. I put the guide slides onto the bolt system and used a metal ruler between them for alignment of the fixed side, so it was straight. Then, as I started figuring the other side, I really felt that the two holding bars should be on the same level for uniform grip. Yes the plan did call for the slip rails to hold the model to have one of them glued to the bottom adjuster guide, and the other one was shown to be mounted higher on top of the slip adjuster on the other side. I checked the travel slots for the bolts, and found that a quite thick keel would still fit within them, so I glued the movable rail so it held the strip on the end of the slider. I used the steel ruler between them as the glue was setting. I used epoxy with wax paper below to keep things from getting stuck in the wrong places. The grip rails for the keel were straight, and held well. Next the upright guides for the stern and bow went together as the plans showed. Also the center upright guide went pretty much as it was supposed to go. Now, as I was bolting the keel uprights into their slots, I noticed some spreading of the slots. I decided that if that slot had a stringer in an upright accross the bolt slots, that it should keep any spreading from occurring thereby making the whole system stronger and more accurate. In one of the following pictures, You should be able to see the light color strip I put on both plates across the slots of the bolts. Since the after end of the upright of any keel needs to be straight I felt this would be better. I did the same for each end. There was one more thing I did not do on the adjustment slots of the bolts which I found out about on the Waterline tool which I would recommend for each of these slots. Please see the waterline marker tool for that suggestion. Further information will be added for each of the other kits along with some more views as I can get them taken and entered. I thank you for your patience. Walter Biles Edited October 24, 2014 by Walter Biles mtaylor 1 Quote Current: America Schooner https://modelshipworld.com/index.php?/topic/10887-america-schooner-pof-by-walter-biles-radio-pof-scale-148-from-blue-jacket-plan/ Prior: MERIDEA https://modelshipworld.com/index.php?/topic/140-meridea-by-walter-biles-radio-34-scratch-cad-of-boat-at-usn-severn-river-repair-station-ca-1969/ SAMSON First build: Scratch POF Spanish Galleon Link to comment Share on other sites More sharing options...
Walter Biles Posted October 24, 2014 Author Share #3 Posted October 24, 2014 MS Rope Walk: This kit was fairly easy to understand from the drawings and the step by step descriptions, from cutting the parts free of the lazer cut sheets, and putting the frame parts together, to assembling the arms and the assembly of the gears. Each end was done before I noticed from the picture that I did not get one corner of the upright fully seated in the base slot. I deemed it not worth the effort of trying to get them back apart. Otherwise, everything came out as expected. The only thing I did was find some tygon tubing to slip over the thread over the Crank handles to make them smoother on the fingers. I tried to leave the tubing a bit loose so the shaft could turn inside it for a good handle. mtaylor 1 Quote Current: America Schooner https://modelshipworld.com/index.php?/topic/10887-america-schooner-pof-by-walter-biles-radio-pof-scale-148-from-blue-jacket-plan/ Prior: MERIDEA https://modelshipworld.com/index.php?/topic/140-meridea-by-walter-biles-radio-34-scratch-cad-of-boat-at-usn-severn-river-repair-station-ca-1969/ SAMSON First build: Scratch POF Spanish Galleon Link to comment Share on other sites More sharing options...
Walter Biles Posted October 24, 2014 Author Share #4 Posted October 24, 2014 MS Waterline Marking Tool: This tool was also very easy to put together. I did discover that once I had it together, the pencil arm wanted to rotate on the bolt, so it would not have maintained it's setting well. I considered this awhile, and decided it needed a key in the slot to help keep the arm in its set position without rotation. I took a piece of the burned out plywood and cut it to the width of the box holder for the pencil so it could act as my key. You should be able to see the key in the slot in the first few pictures. I had previously drilled the bolt hole for the bolt to go through, so I got some wax paper and epoxied the key to the box holder, so it would hold it square to the upright slot. I used the wax paper over the key, and slipped the key into the slot with the glue held away from the slot. Once that set up, I removed the key and pencil holder box from the slot, and re-drilled the hole back through the key. I had previously noticed that the screw head of the bolt always wanted to slip when the wing nut was being tightened. I had a T-washer nut and since it had 3 lock pins, I bent 2 of them flat with the washer, and left one pin extended. Then I screwed the bolt through the nut threading from the washer end leaving the remaining pin to seat into the key wood I had glued to the box. I tightened the bolt down into the T-washer nut, and then tightened the wing nut until the remaining pin was seated into the key in the slot. Then I could tighten the wing nut down without the bolt turning and keeping it loose. You can see how the key was set across the box holder in the last few pictures. mtaylor 1 Quote Current: America Schooner https://modelshipworld.com/index.php?/topic/10887-america-schooner-pof-by-walter-biles-radio-pof-scale-148-from-blue-jacket-plan/ Prior: MERIDEA https://modelshipworld.com/index.php?/topic/140-meridea-by-walter-biles-radio-34-scratch-cad-of-boat-at-usn-severn-river-repair-station-ca-1969/ SAMSON First build: Scratch POF Spanish Galleon Link to comment Share on other sites More sharing options...
Walter Biles Posted October 24, 2014 Author Share #5 Posted October 24, 2014 (edited) The last part about creating the key for the slot, and the locking pin from the T-washer nut, is the thing I learned from this device that I wish I had used on the first Fair A Frame project. The hold on the keel would be better if the bolt did not slip as you tighten down the settings on the keel clamp. I may go back and remove the bolts and apply the lock key and pin on those. Now I will have to drill out through the base to get the bolts out to make them work right. I want to comment that although these kits only provide the simplest of tools, I believe that each one of them can be useful for the purpose they were designed. They are kind of pricey if they are not on sale, but if you have low funding like many of us, and catch them on sale, they should work for you. They may not be the very top of the line tools, but they are kind of fun to build, and solve the problems that were overlooked. Walter Biles I will be adding more pix to improve the illustrations for this topic. If anything is not clear please feel free to ask, and I will try to provide any answers that I can. Edited October 24, 2014 by Walter Biles mtaylor 1 Quote Current: America Schooner https://modelshipworld.com/index.php?/topic/10887-america-schooner-pof-by-walter-biles-radio-pof-scale-148-from-blue-jacket-plan/ Prior: MERIDEA https://modelshipworld.com/index.php?/topic/140-meridea-by-walter-biles-radio-34-scratch-cad-of-boat-at-usn-severn-river-repair-station-ca-1969/ SAMSON First build: Scratch POF Spanish Galleon Link to comment Share on other sites More sharing options...

Recommended Posts
Join the conversation
You can post now and register later. If you have an account, sign in now to post with your account.