moha81
-
Posts
23 -
Joined
-
Last visited
Content Type
Profiles
Forums
Gallery
Events
Everything posted by moha81
-
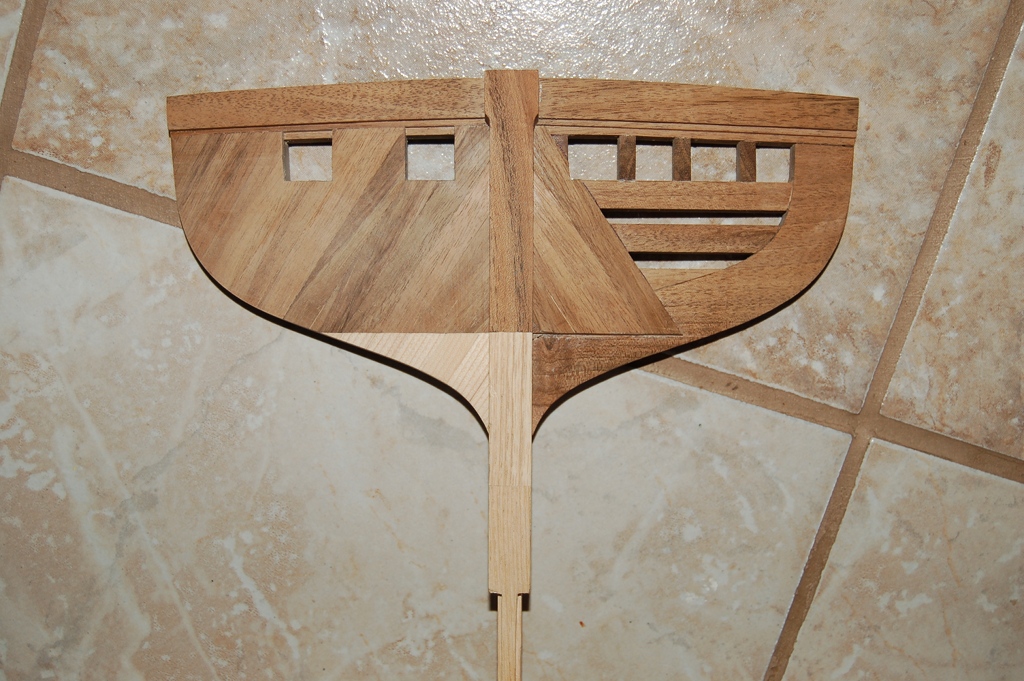
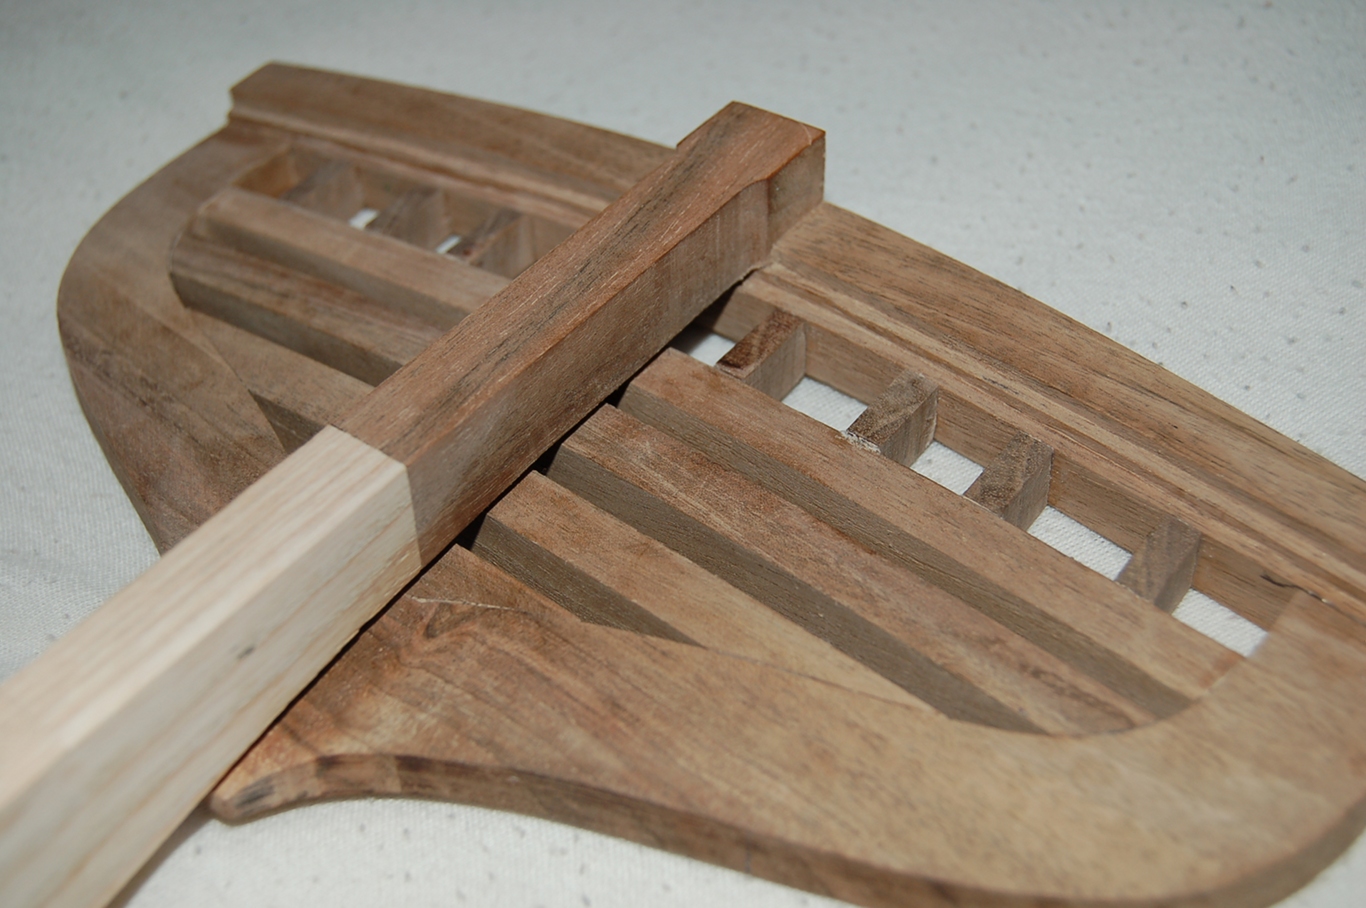
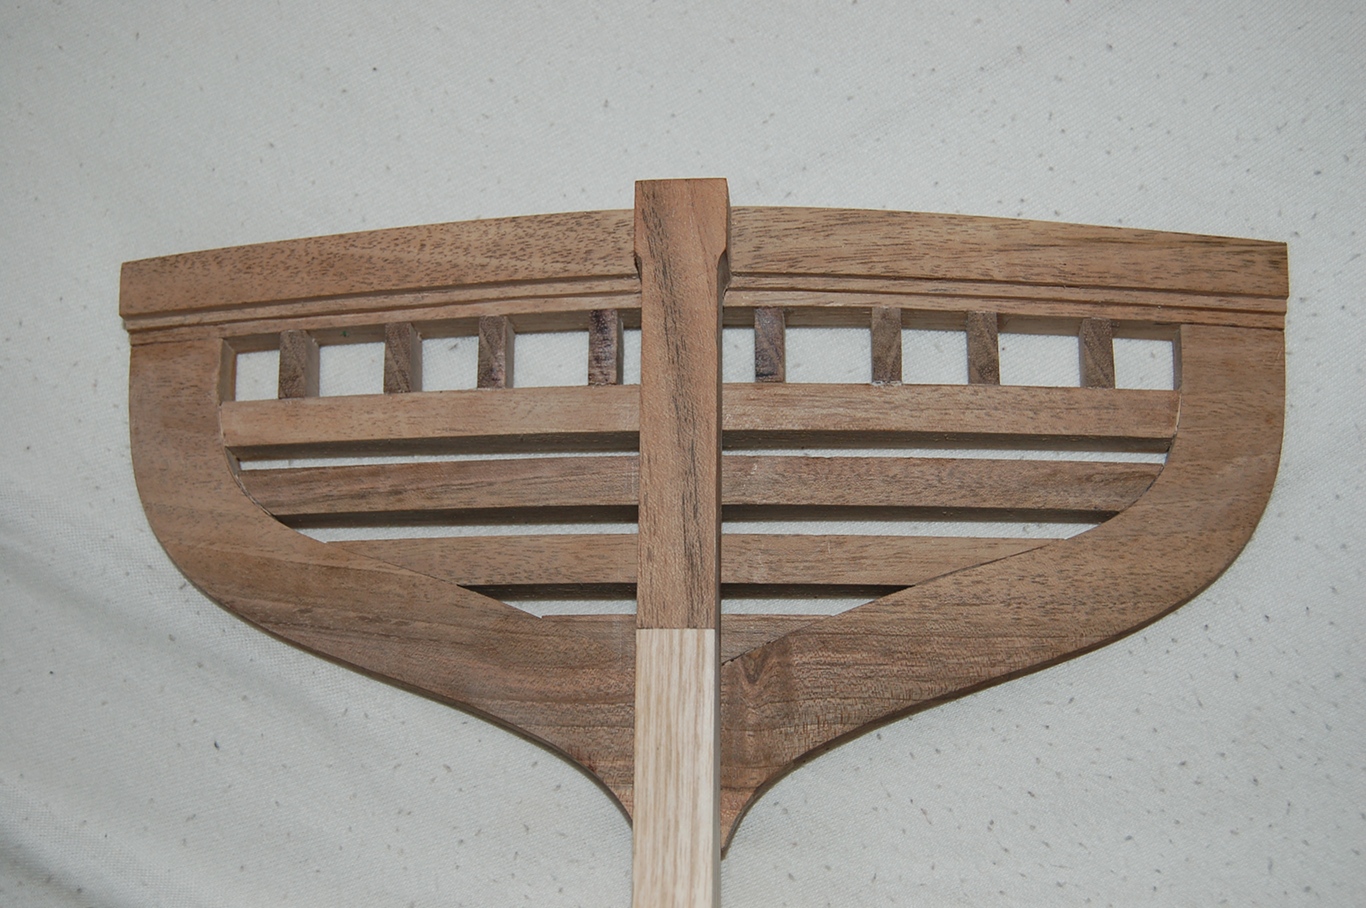
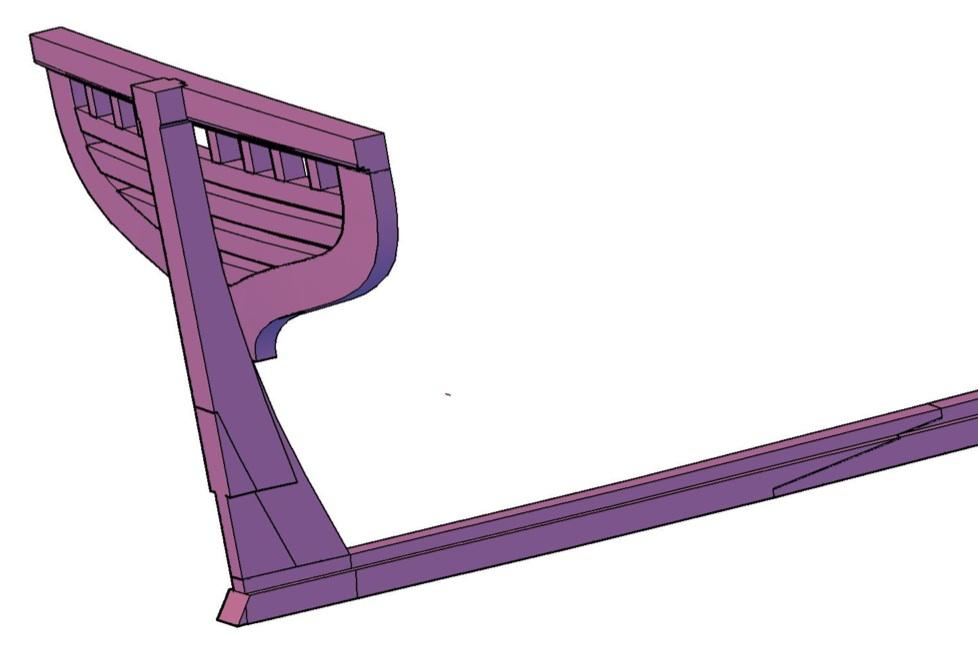
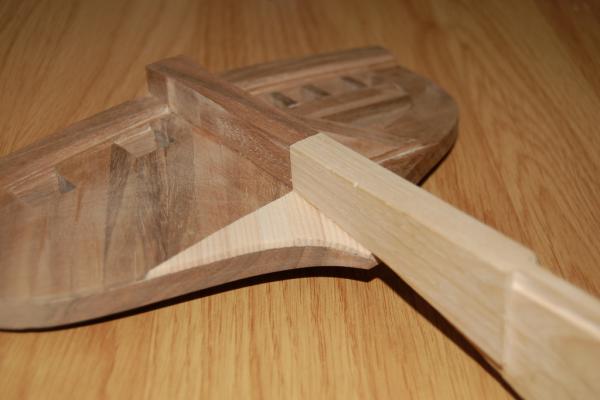
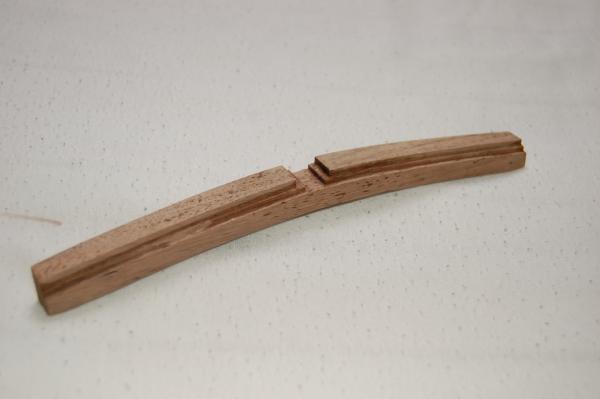
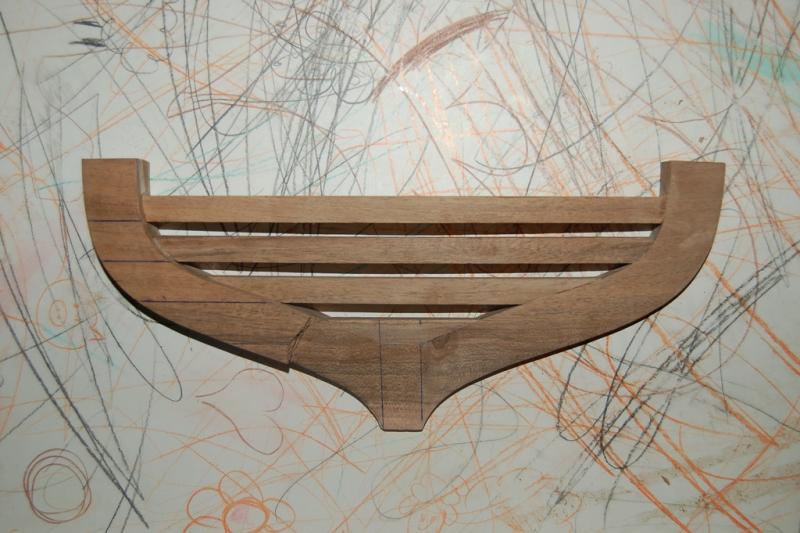
 Hello guys, Here are some new pictures. Now You can see how the planks fit into the rabbets of the sternpost and the transom. The gun ports are still incomplete. I cannot decide whether I should leave the other side just as it is or not. It would be great to show the structure too, or? Any recommendations?
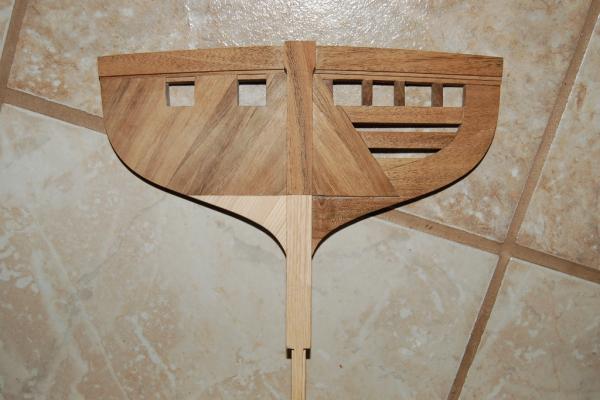
-
Thanks a lot, Jan, This definitely helps. What happened is that I totally forgot the location of these in van Yk's book. Moreover, I forgot that these informations were in Yk's book! I have the dimensions and some notes about the rules in the log file on my PC, but I could not remember the source of them. Yes, I translated these part of the book earlier, having the same result, and now I know that it is . Thanks again! Cheers, Gyula
-
Hello guys, I need help. I've checked my resources and I cannot find informations about the dimensions of the gunports. Only 2 examples are in the book of Yk, on page 61, but I hardly find anything else, just 2-3 sentences on page 65 (Vande Spiegels Poorten), which I absolutely don't understand. It is the 5-6th time I'm trying to figure out this thing, but it's completely hopeless. What are the rules for the dimensions (height, width) of the gunports on different decks? Cheers, Gyula
-
Hello Johann, Your model is just astonishing. Apparently, one of my favorite ships is the Creole, so I'm definitely going to follow the log. Cheers, Gyula
-
Hi, I agree. I draw the ship basically from the original contract of the 7P and the book of Cornelis van Yk as a reference. The rules presented there are quite useful and I can check the dimensions in the contract. A note: I always laugh at a quite frequent sentence of the book: the rules are these and those, BUT the implementation depends on the dimensions of the wood we have. Congratulation, so the guys could plan a ship "theoretically", then happened what happened. Freedom rulez! The dutch ships were not standardized at all, there exists several answers for the question, depending on the possibilities. That's why we have the freedom.
-
Hello, The hungarian ash is a really nice wood for furnitures. It's a hardwood, the texture is various, depending on the cutting direction, but it is not good for carving even in full size, since the cell structure is big and not homogeneous. In case of furnitures the surface has to be sanded, polished and varnished several times. I use this wood because I want to paint the model under the waterline, but I want to use only white lazure (I don't know the english name), which lightens the wood but the texture remains completely visible. Cheers, Gyula
-
Hello Piet, Thanks a lot and also good to see You again. Besides the crash of the former page other things also happened: we sold our flat in the capital and moved to another town close to Budapest. It was necessary because of the bank loan on the one hand, on the other hand the main reason was the birth of our second child. Now we rent a flat which is still smaller than 50 square meters and we're going to have the 3rd baby in a week! It is a little bit crowded now, but my family completely supports my hobby, and this is more important than anything else, I think. Anyway, I do not have too much time to work on the model, so I don't need the big workshop at the moment. Apparently it seems that I can move to the garage of the house where we rent the flat, and also my combo machines is under construction. The reason why I always write these down is simple: my general experience is that people usually refer to the lack of space as a main reason of not modeling. But it is not true, as You can see. Everything's can be solved. So modeling is far more than having several complex and expensive machines.
-
Hello János, It is also good to 'see' You again! I'm quite sad about the crash of the former page, especially as the long discussions about the plans, because I did not make a copy of those and some informations are just lost.
-
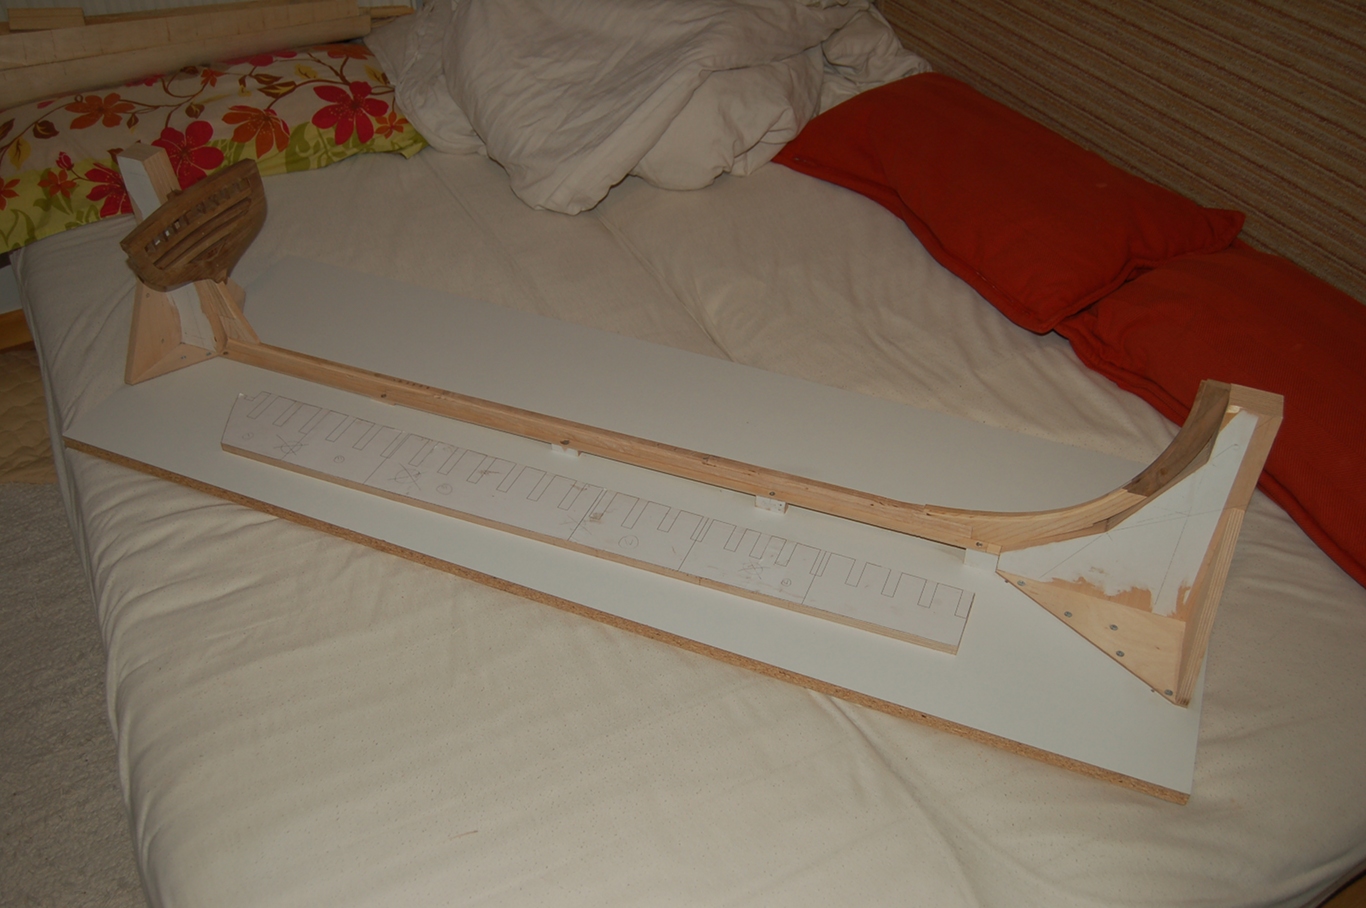
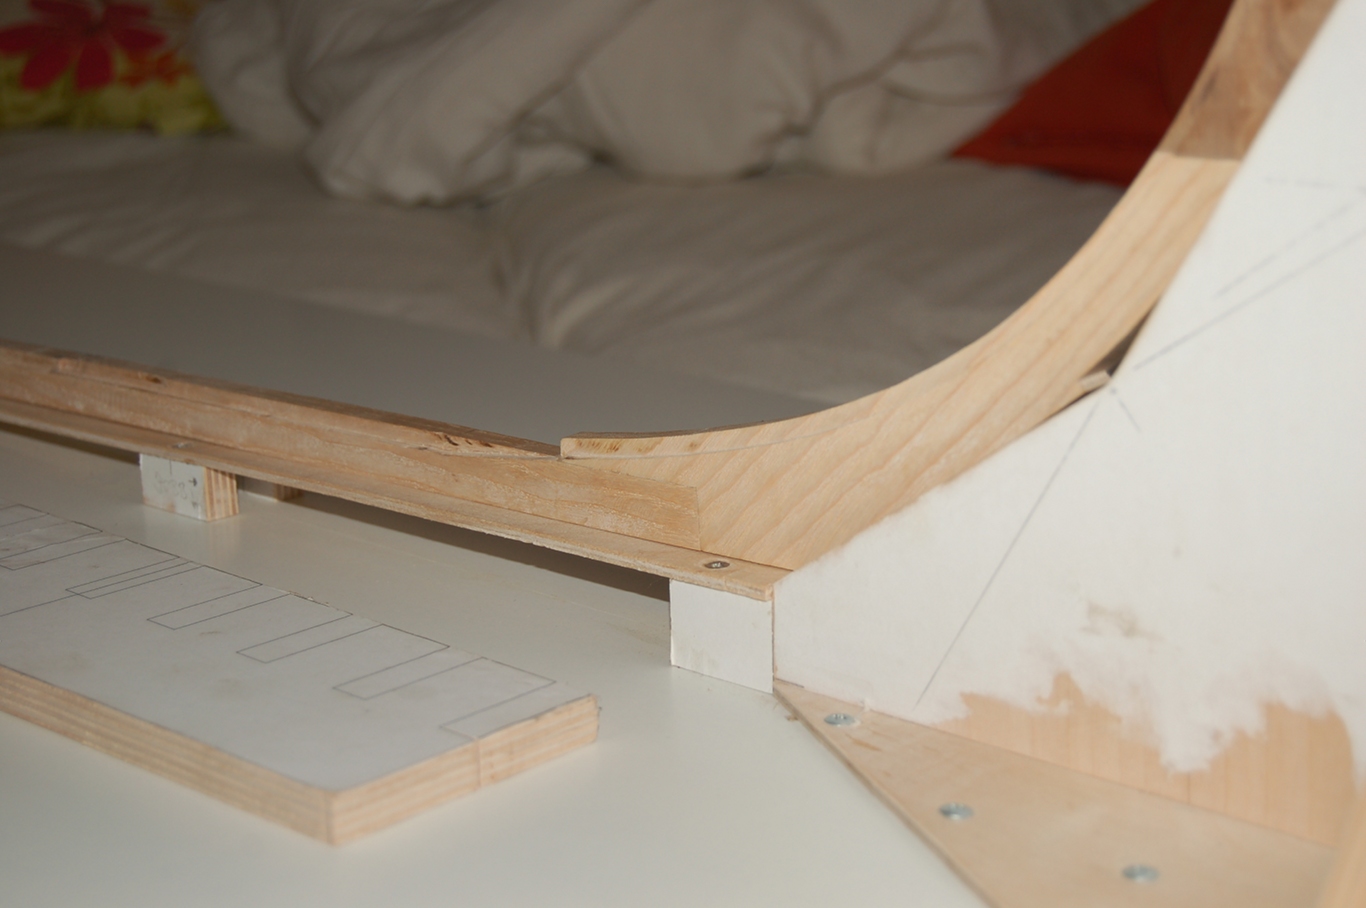
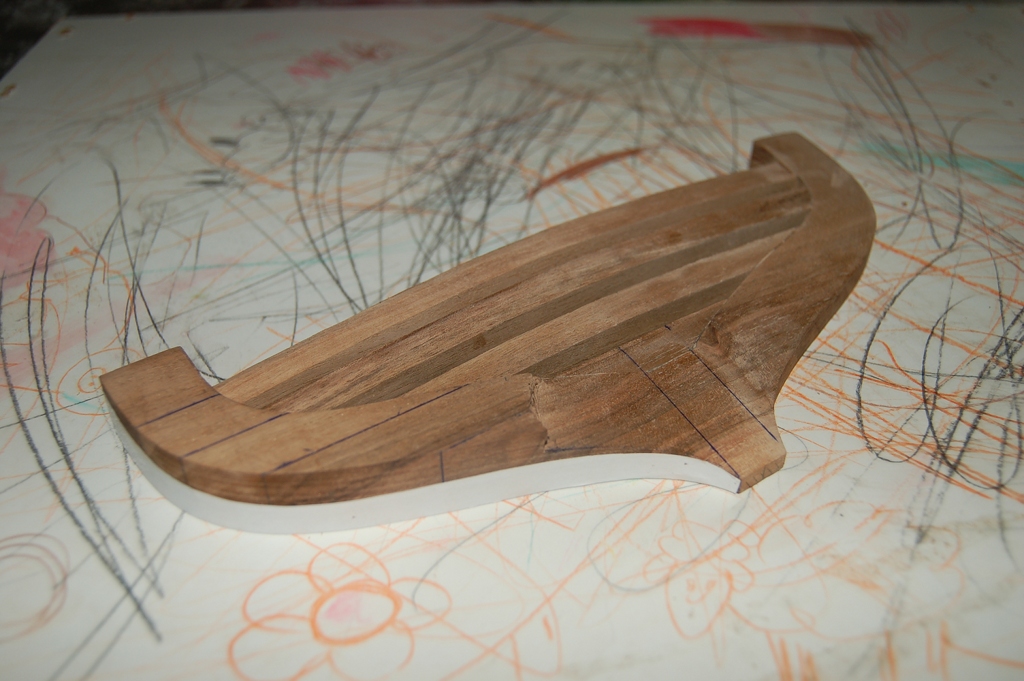
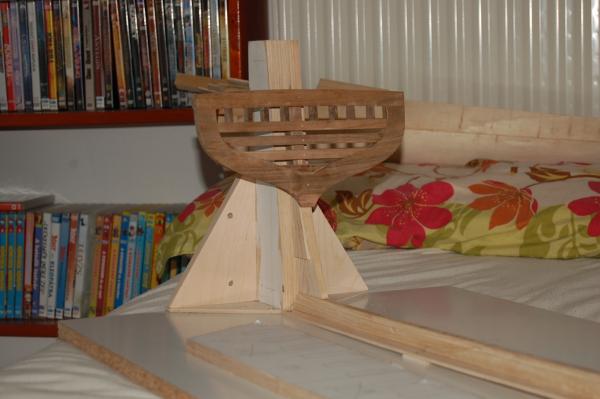
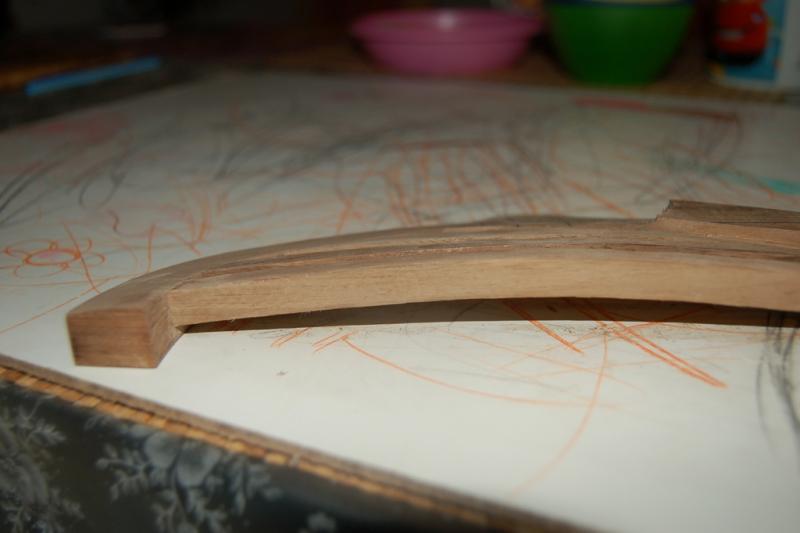
Hi all, Some additional pictures. The keel is set. It thickens to the middle from the stem and the stern. Naturally the keel is not horizontal and also it has a really small curvature. That's why it was really tricky to form its 3 individual parts. Below the main deck I don't want to work out anything, so it is going to be a POB. Sorry for the bed, apparently it was the only place in the flat where this monster could take place. Usually it wastes time on the top of the bookshelf. So what I do not have at the moment is: place. I work on the plans at home, on the parts at the workshop of my friend, and I finalize and put the parts together at home again, on the dinner table... I can sand outside the flat on a really small entrance terrace, so on. But works, that's the point Gyula


-
Yes-yes, this is wood! . Fortunately I have my own resources, the wood comes from my carpenter friend. The wood I use is quite dry, it spent 10-15 years on the loft of the workshop. Ok, I did not want to be wiseguy, I just worry. Wouldn't have it been possible to cut the beams from the dry wood "as they are"? This is what I want to do.
-
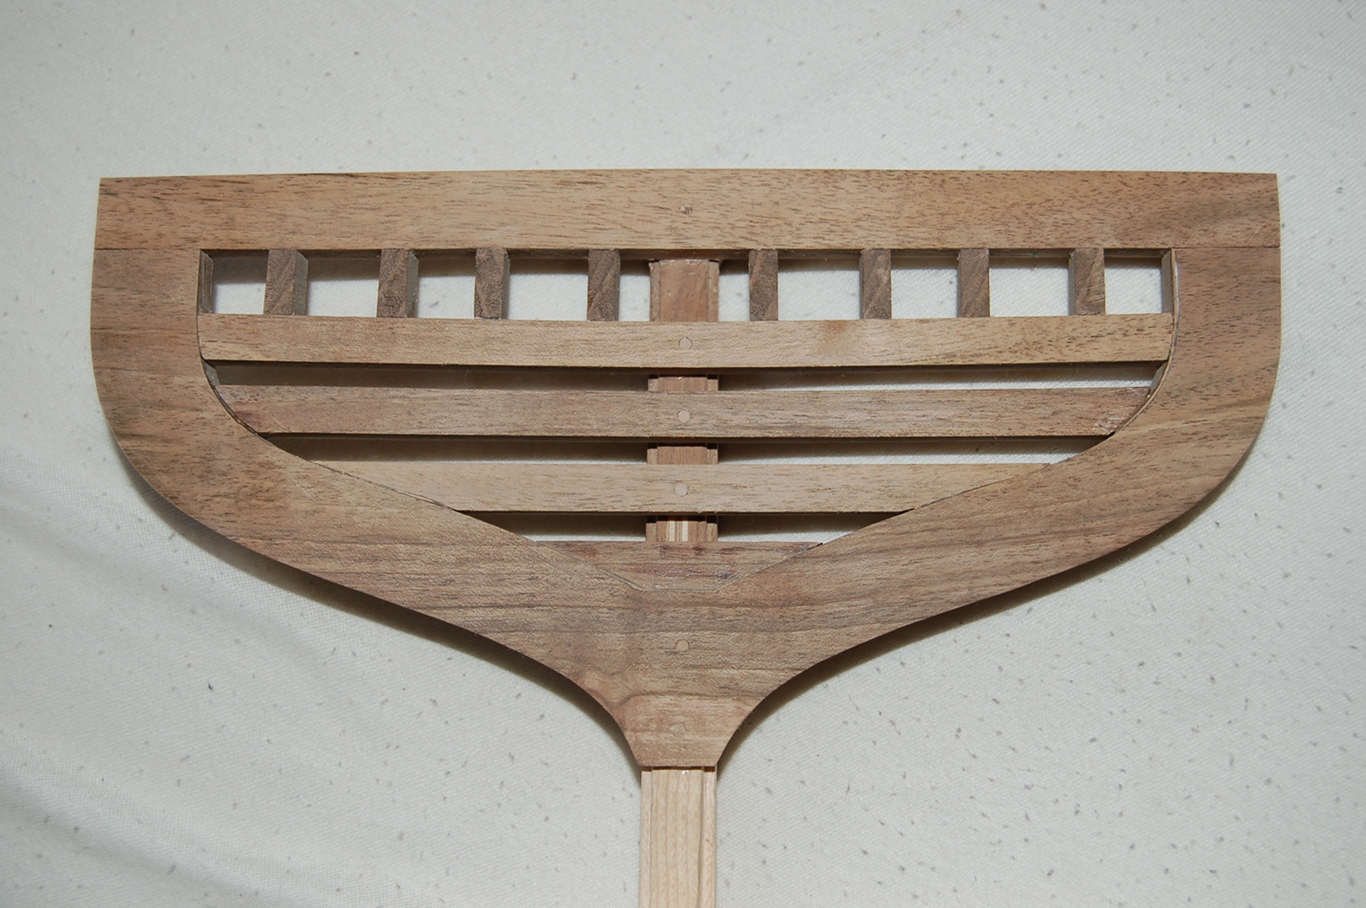
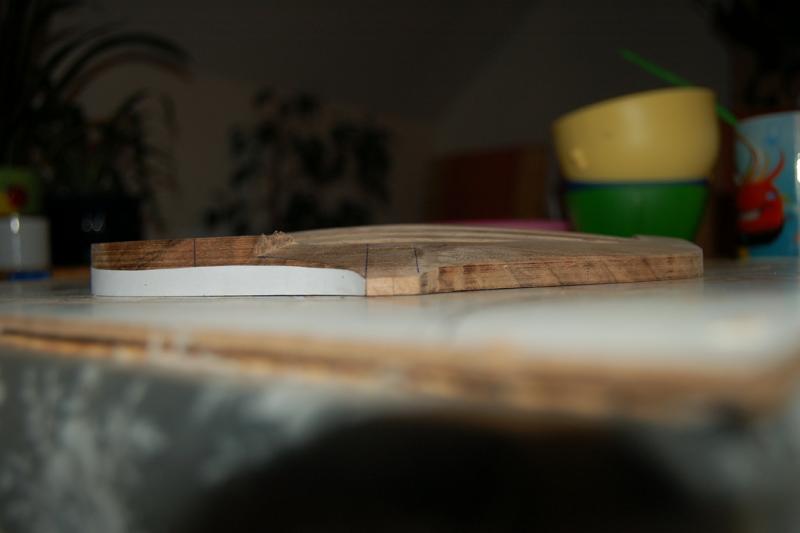
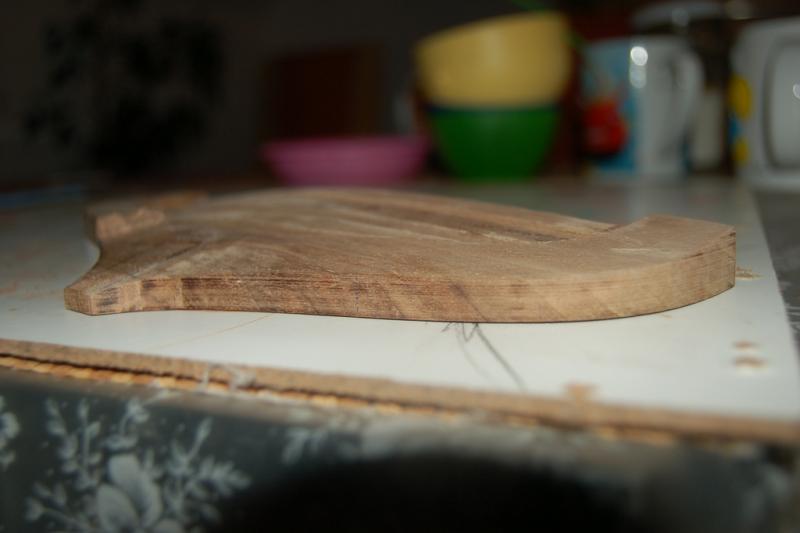
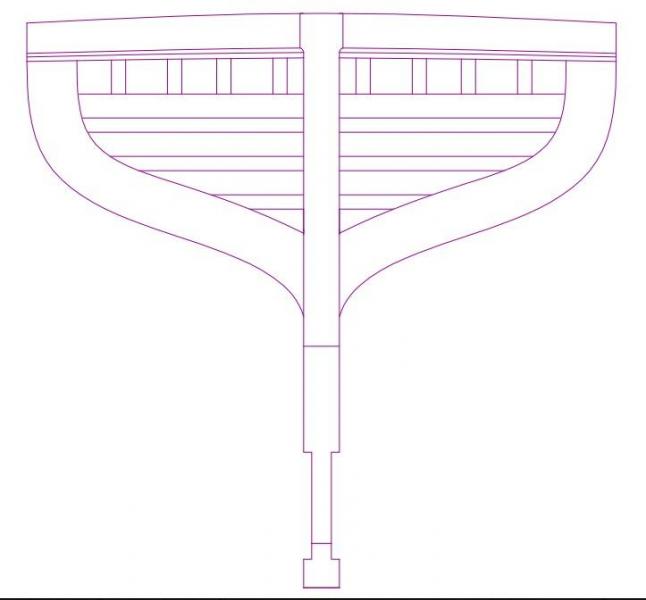
The scale is 1:38, so the transom is 22.5 cm wide . The dark wood is walnut, I'm going to use it basically for planking above the waterline. The light is hungarian ash, it will be used below the waterline. The inner structure and everything else is going to be made from pear, apple, cherry and plum. I like vary the woods and leave them in their original form. Many-many other woods exist besides pear, ebony and boxwood... and they are far more not as good as preferred, I think.
-
If you ask a carpenter about this method, he would say that it doesn't work . Well, I'm not a carpenter, I'm a physicist, and I know why. I saw many home-made tools such as the one presented here, I also tried them and nowadays I always use to say that they are almost completely inefficient, because the key factor of the process is not present. Yes, we need the steam in order to make the deformation easier. The problem is, in general, that the deformation itself doesn't change the cell structure of the wood, nor does drying out the wood at room temperature for days or weeks. It's just wasting time, since the strain won't relax, the wood tries to recover its original shape, independently from whether you apply a fixation method or not during drying. The problem may appear even YEARS later, if the curvature of the part is not fixed, sooner or later it shall go wrong. The old shipmasters knew this and they made the shaping over open fire! Why? The thing that can reorganize the cell structure at the deformed state is basically HEAT. The key point is to fix deformed shape by removing the strain (and not the water!) from the material. I usually take a pan of (cold) water and an old iron (which is fixed), plunge the wood into the water frequently then shape it on the surface of the hot iron. The ideal temperature of the iron is slightly over 100 C. It is cheap, fast, efficient and safe.
-
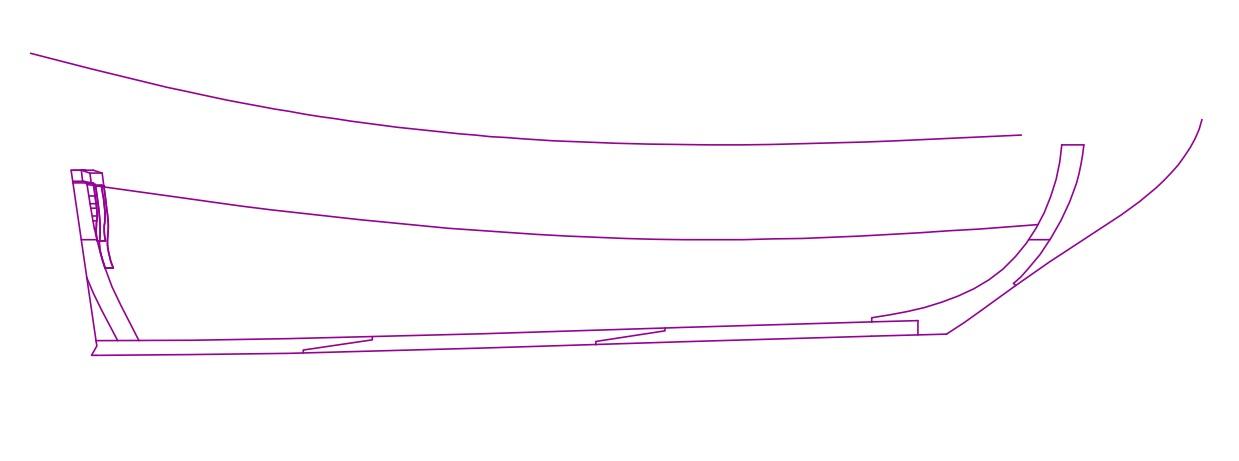
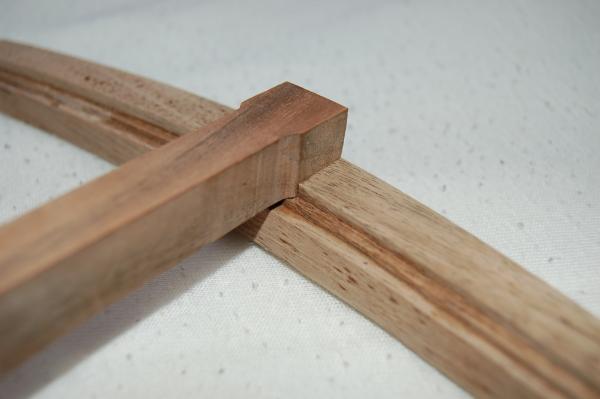
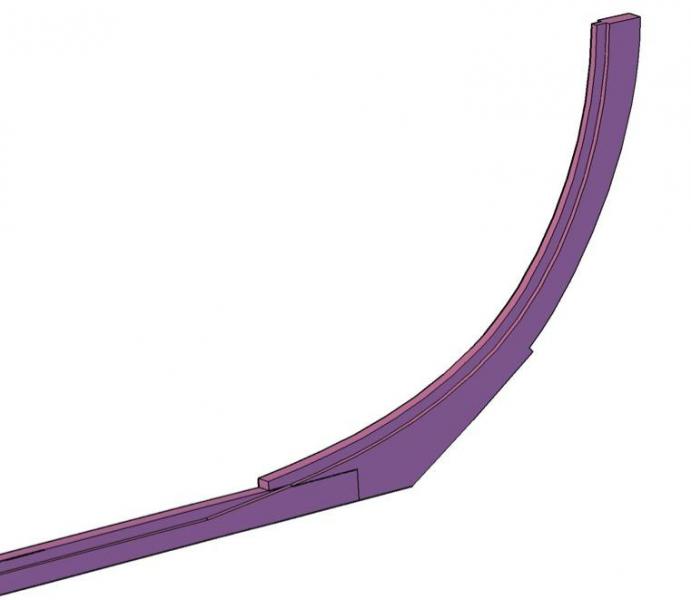
Hello guys, New pictures of the transom:

-
Hello Drazen, I also follow your log, I'm really interested in! Thank for the wishes. Anyway, sorry for not writing so frequently and not answering right on time, but I have bunch of other things to do I'm always searching for the possibility how to steal a little bit of time. I wish all the best for You too.
-
Yes, yes, there are no rules, just 1-2 examples. I know that it is somewhat artificial, so I tried to use Emke's drawing as a "guide to the eye".
-
Thanks. "By hand" I meant that first I used power tools to cut and sand the rough shape of the parts. Then I carved the ends of the beams to fit into the rounded wood and then also carved the rounded wood to the correct shape. I use power tools when it is possible and reasonable, but there are two things: The flat we rent is really small (something like 49 square meters and I have 3 small kids ) so it is not possible to store and work with power tools making large noise and dust. I can do those jobs in my friend's workshop in another town... what I can do at home is final hand carvings, sawing and sanding, fitting and gluing the parts together, and, naturally, drawing the plans. And, moreover, in some cases (especially as making curved surfaces) I trust more in my hands than a power tool, so I rather take my time.
-
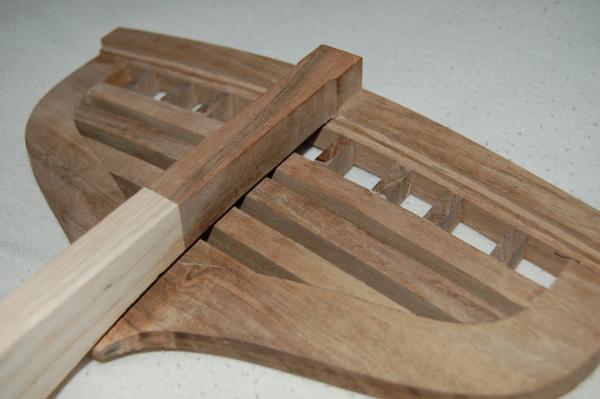
Here are some new pictures of the 'Rondsomhouten' and the 'Wrangens'. I'm done with the half of the rounded wood, I did it by hand with a sharp knife. Now it can be seen the difference between a usual, simplified planar mirror and this one. Do not pay attention to the blue lines drown on the lower part of the rounded wood, those are just signs for where I should not go with the knife.

-
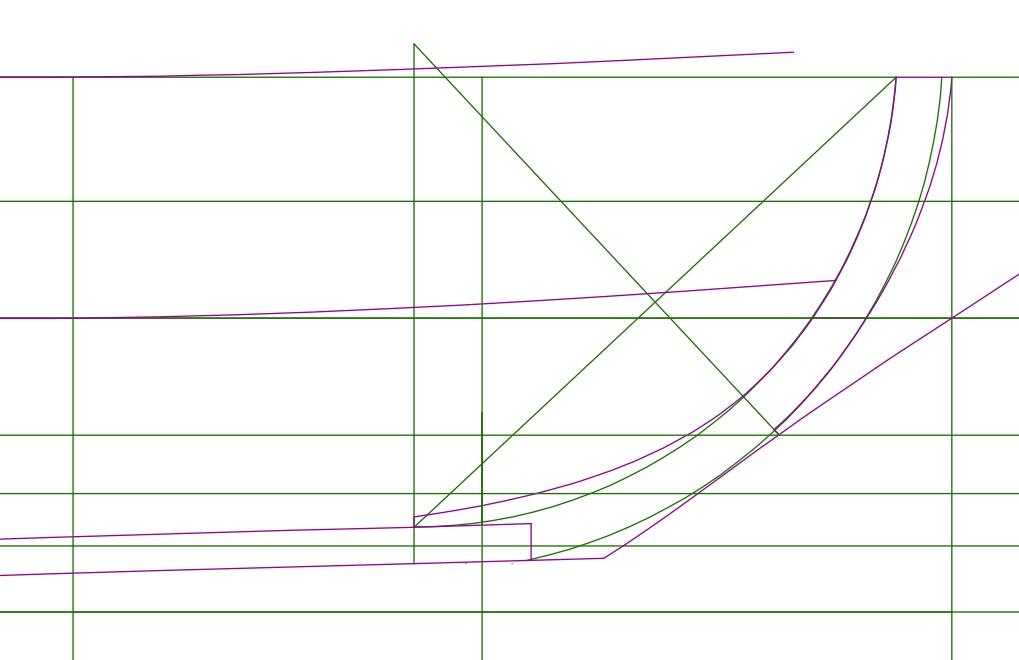
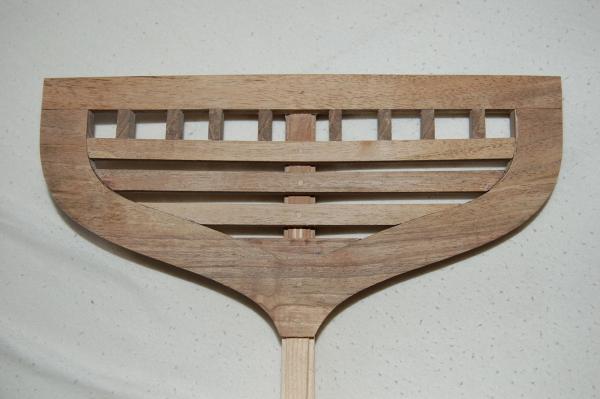
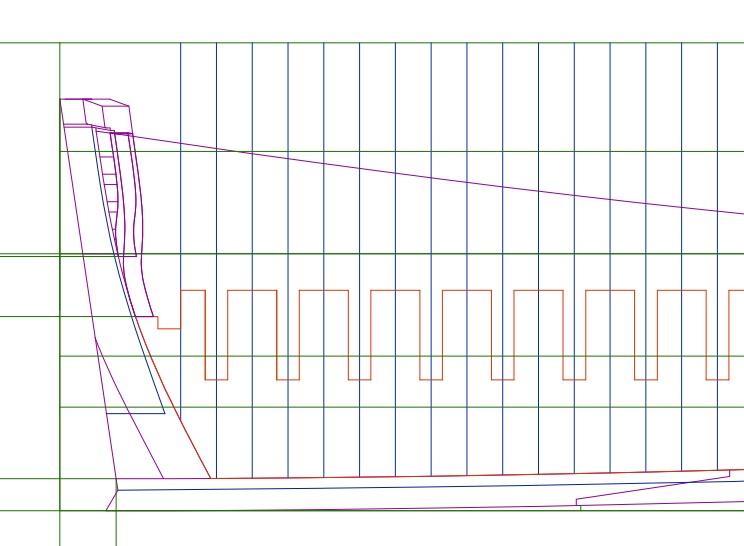
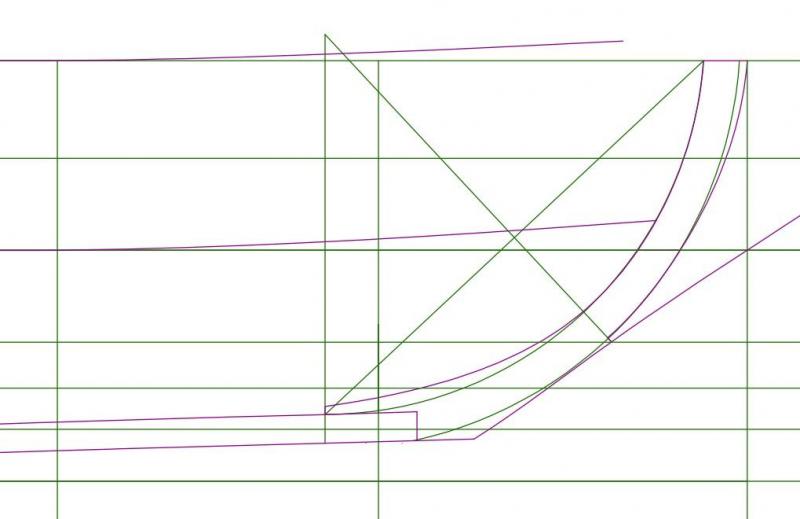
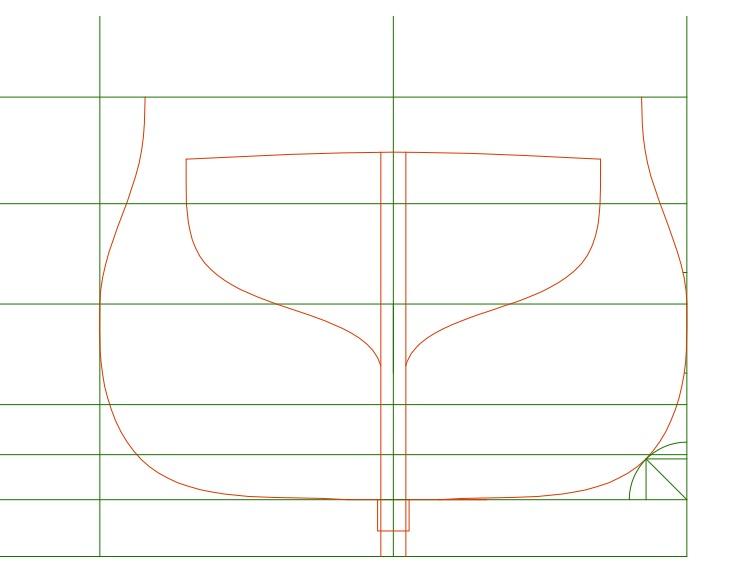
Hi, I hope You remember that we had long-long discussions before on the dimensions. Unfortunately, I did not made a copy of those, so they are lost... . Jan, the radius of the little quarter circle together with other lengths denoted by little green lines in the drawing were taken from one of the examples of Yk's book, scaled to the present width and height of the ship. I don't remember the exact location in the book, but I did a lot of drawings before, if You can remember. The dimensions of the gunports were taken also from the book of Yk, page 61 and 65: they were chosen to be square-shaped WITH the rabbet of the transom, so the "holes" are a little bit wider than high. The lids're going to lay on the lower rabbet of the transom, while the upper rabbet establish a place for mounting the hinges and opening the lids. This is quite similar to the solution can be seen on the 7P replica.
-
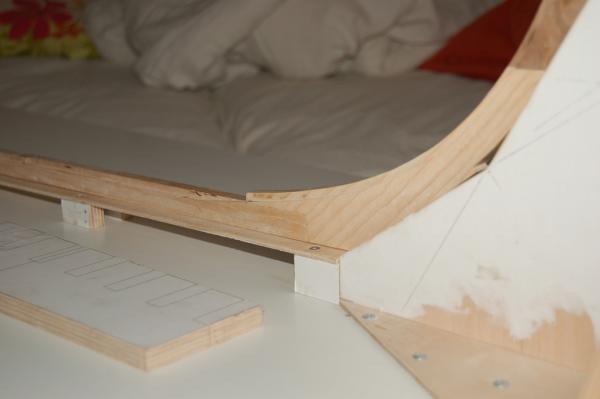
OK, here are some pictures from the current stage.

-
Ok, how can I insert a picture here (not just as an attachment)?
-
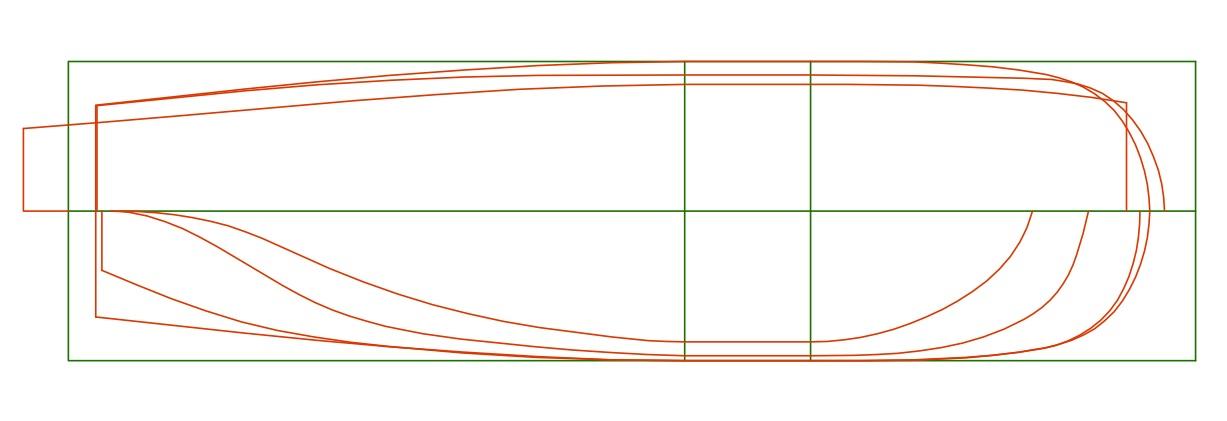
Hello amazone, good to hear from You. I could download the drawings from the book of Dik and it helps a looooot in identifying old dutch expressions. So far it will be really helpful, and thank You again for your help. I'm drawing the waterlines now from the drawings of Emke and Dik, and they serve perfectly. I had to re-draw and re-make the Rondsomhouten, but now it is fine. Pictures coming soon...
-
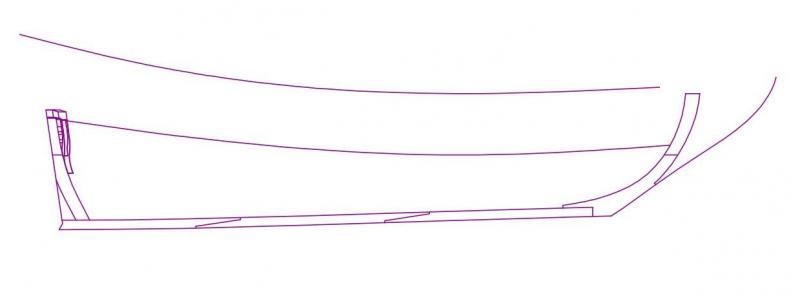
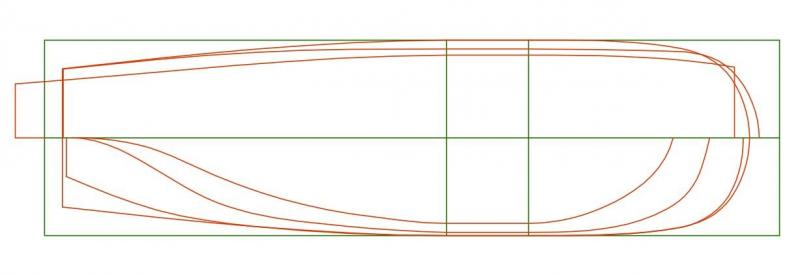
Hi all, Thanks for the wishes. Anja, a lot of ships named Eendracht existed, this one is the sister of the Zeven Provincien from 1666. Concerning the dimensions, it is quite similar to the 7P, it is 160 feet long 42.5 feet wide (for the 7P the corresponding dimensions are 165 and 43 feet, respectively). According to these, I can use several sources: - original contract of the Zeven Provincien - G. C. Dik: De Zeven Provincien - the line drawings of the Zeven Provincien by Cor Emke - Werner Bruns: Geschichte und Rekonstruktion der Eendracht von 1654, Das Logbuch, 2005-2006 (two parts, this is about the former Eendracht) - drawings of Willem van de Velde (from the NMM Greenwich) - Cornelis van Yk: De Nederlandsche scheepsbouw-konst open Gestelt, originally published in 1697 (I have the facsimile edition No. 26) - Kroum Nocolaev Batchvarov: The framing of seventeeth-century man-of-war in England an other northern european countries (master of arts thesis, Texas A&M University, 2002) Other resources, which discuss mainly the northerd dutch building style: - Nicolaes Witsen: Aeloude en hedendaegsche scheepsbouw en bestier (1671) - Herman Ketting: Prins Willem (Hinstorff Verlag, 1979) - Heinrich Winter: Der holländische Zweidecker von 1660/1670 (Hinstorff Verlag, 1978) - A. J. Hoving: A Pinasship of 134 feet, published in The Model Shipwright No. 60 (1987) Maybe some other things that help me to compare and consider the dimensions. There were a lot of informations and a long discussion about the ship with Jan and Amazone before the former site disappeared Cheers, Gyula
-
Hello guys, After a big skip I returned to ship modeling and I continue the drawing and building the 1666 Eendracht, the last flagship of admiral de Ruyter. With my friend we built some machines and soon I'm going to have the plan of the hull. Cheers, Gyula