


Ray
-
Posts
404 -
Joined
-
Last visited
Content Type
Profiles
Forums
Gallery
Events
Posts posted by Ray
-
-
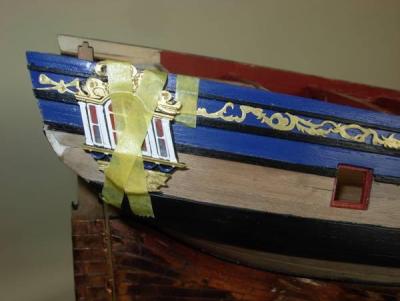
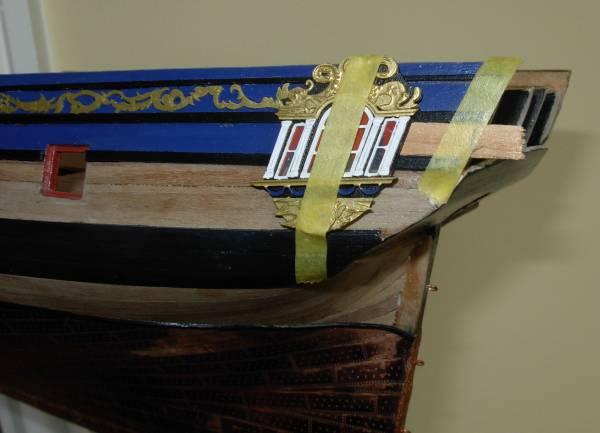
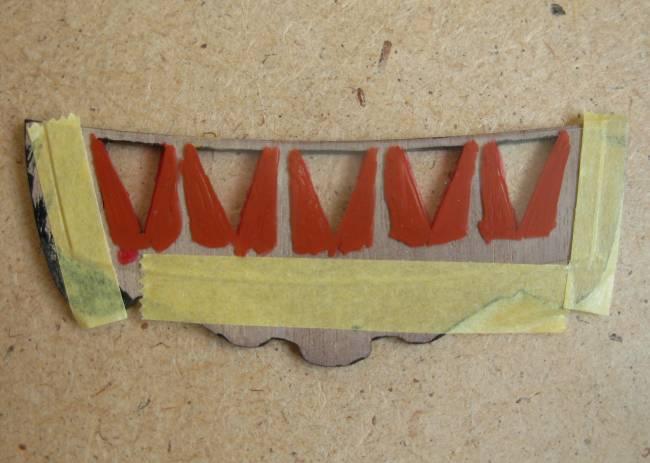
Quarter windows fitted
Once the windows were made they and the decoration were fitted, firstly they were taped in position and the decoration dry fitted, next the rails were cut and the portion under the widows removed, and the same area under the windows painted, the windows were glued in place, and the decoration fitted to about the end of the quarter deck, the decoration went on ok with just the slightest trimming
Ray


-
Quarter windows & stern fascia
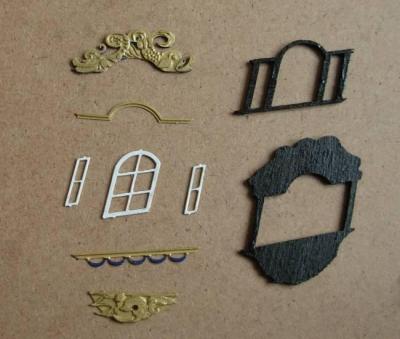
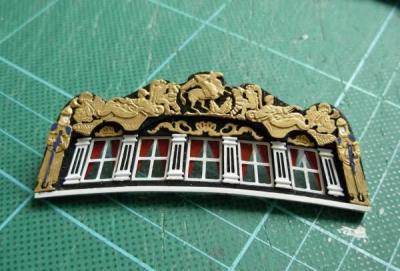
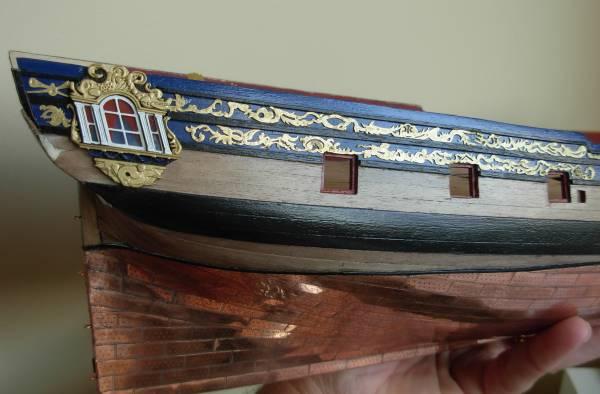
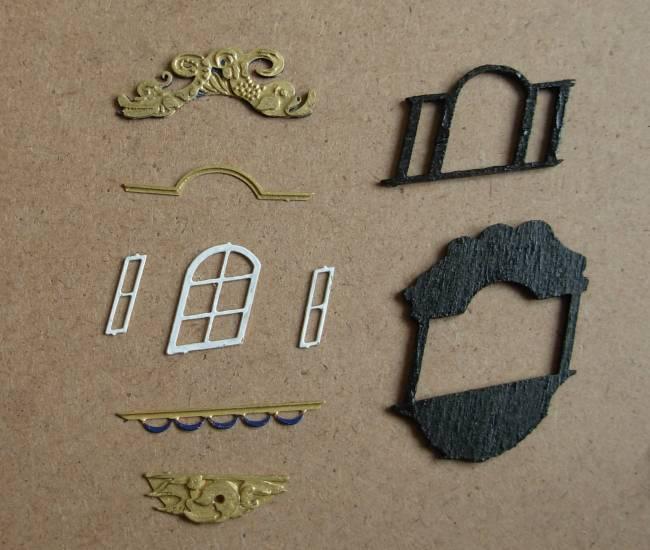
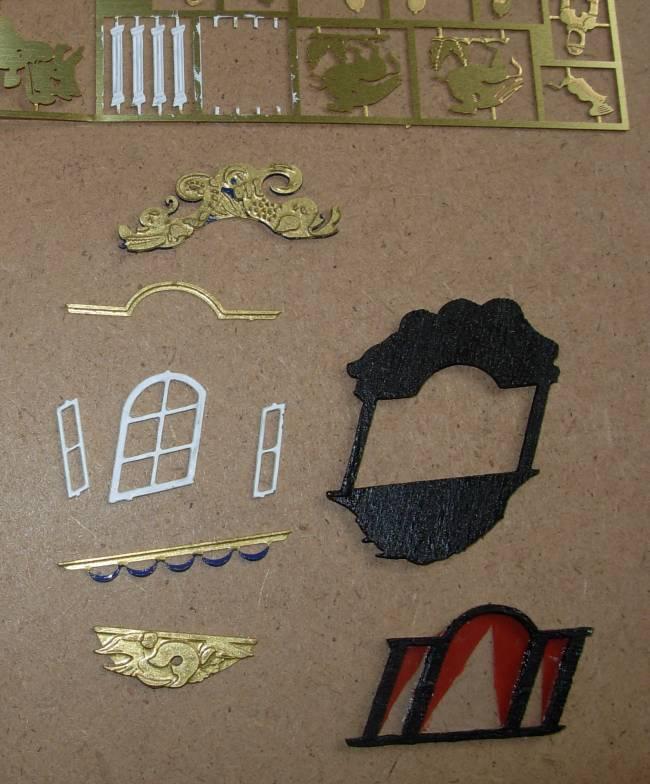
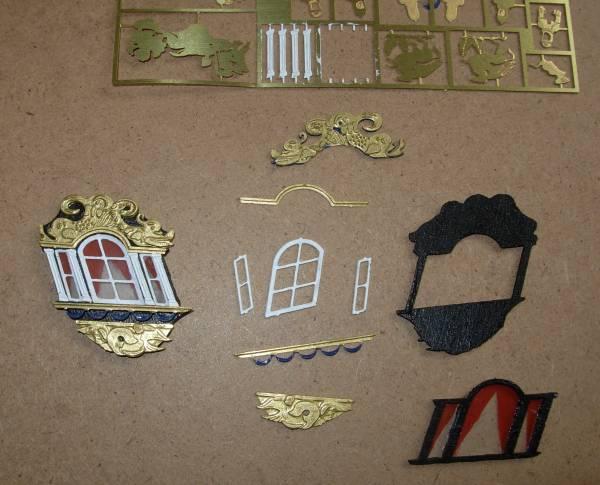
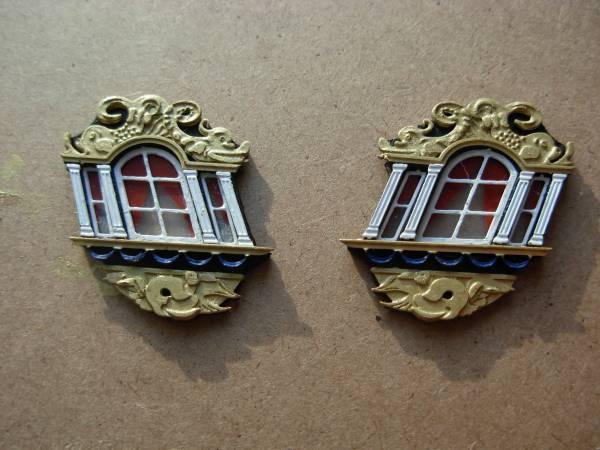
Before starting to build up the quarter windows I had to make the big decision as to the colour of the decoration around the windows the stern fascia and the decoration along the hull side, I tried yellow ochre and gold, I preferred the gold by a large margin, perhaps the commander of the Pegasus had come into a goodly amount of prize monies or was the younger son from a wealthy family anyway gold it will be.
I really enjoyed making up the windows, I painted the components first and also decided to add curtains to the windows, they were painted onto the back of the glass in a dull red, red is a good colour as it catches the eye, and most artist try and add a bit of red somewhere, the windows really did make up well, and as parts were added built up a nice depth.
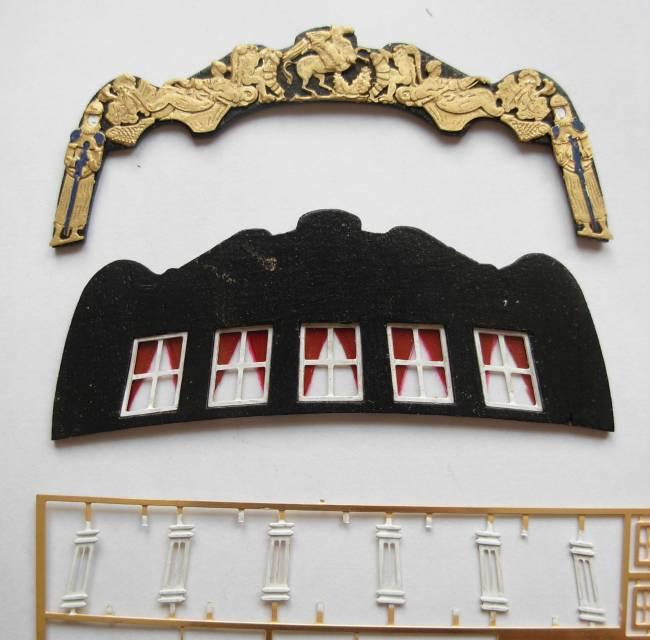
The Stern fascia made up the same as the windows and painted the same black background with the decoration in gold, I added a white sill under the fascia window, which I think improves it.
Ray


-
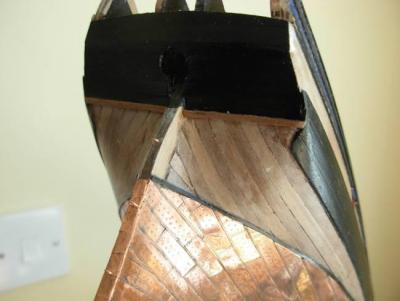
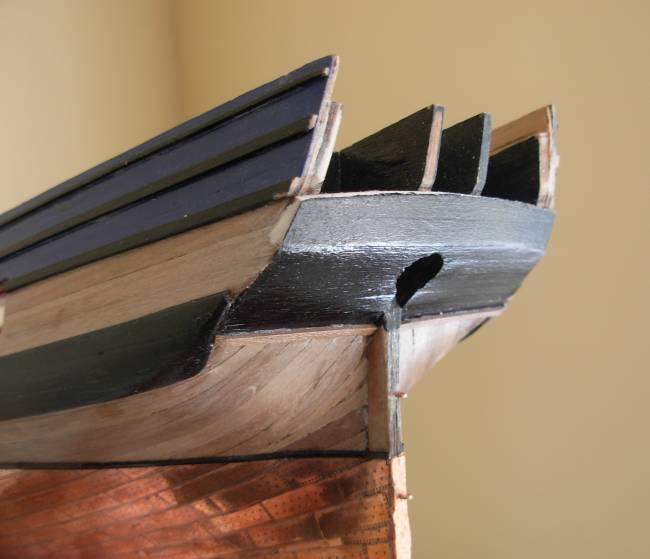
The Stern
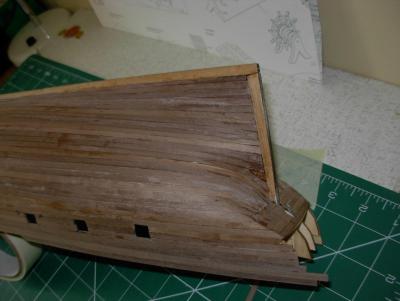
I decided to tidy up and finish the stern now the rudder is completed and then the stern fascia can then be built up, I added a couple of rows of planking to the level where the fascia ends, they were sanded down and painted black, I added an extra plank across over the edge of the painted boards to where the hull planking ends, to me this gives a nice finish.
Ray


-
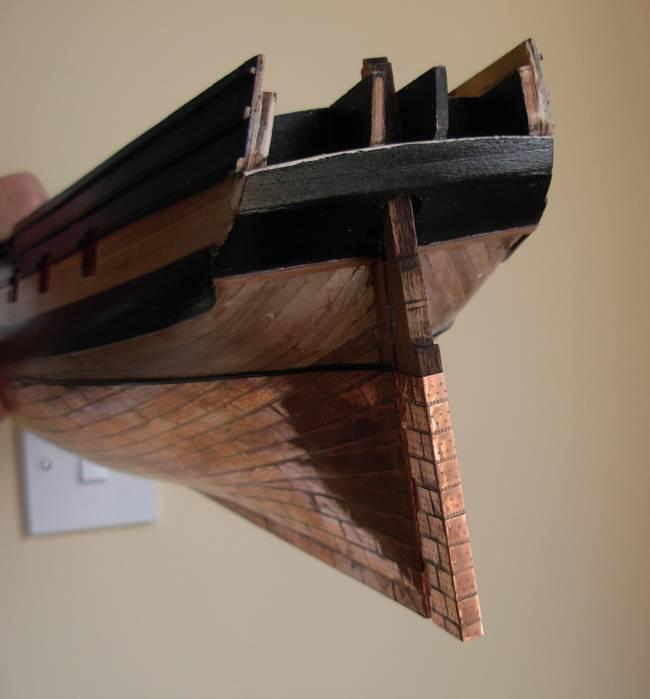
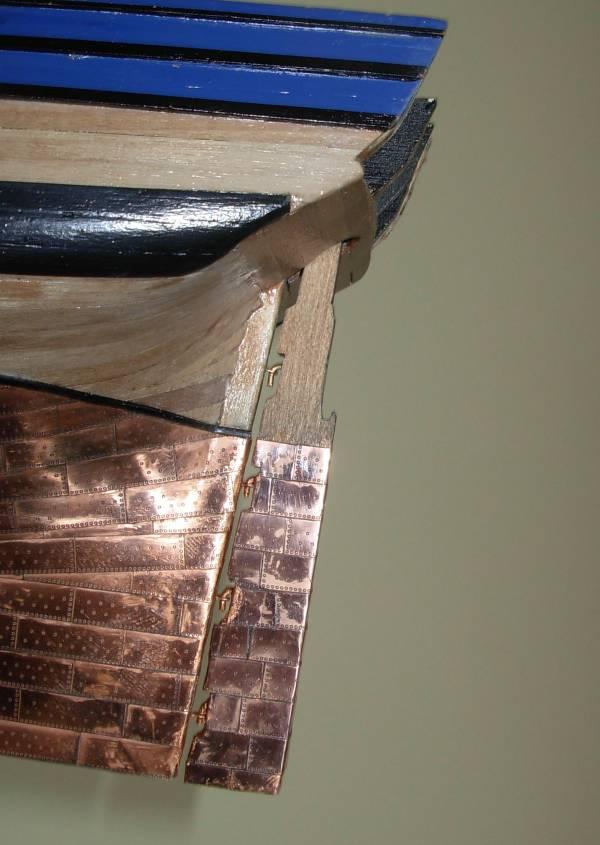
I thought I had better sort the rudder out and fit it or allow it to be fitted and removed, I first fitted the hinges made from bent wire and fixed into the rudder and copper eyelets fixed into the hull, and fitted so the rudder can be lifted on and off, so back to the copper tiles they were glued on as they were to the hull and polished to match, job done except for the hinges across the hull and rudder I will most likely used card and add them later.


-
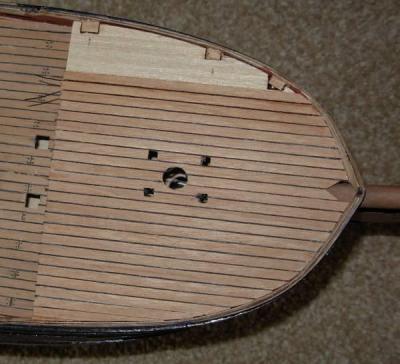
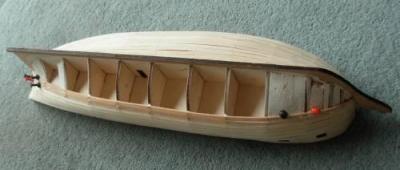
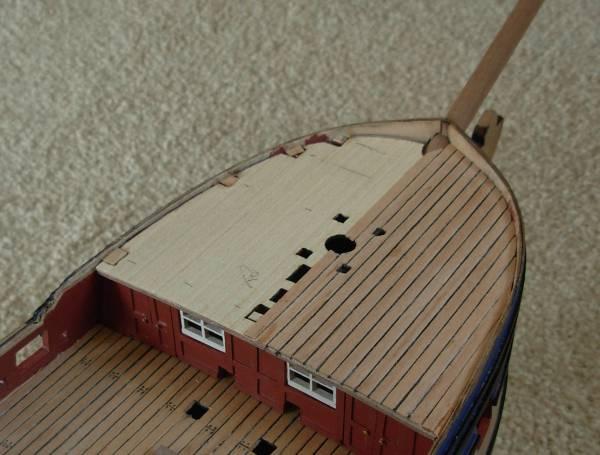
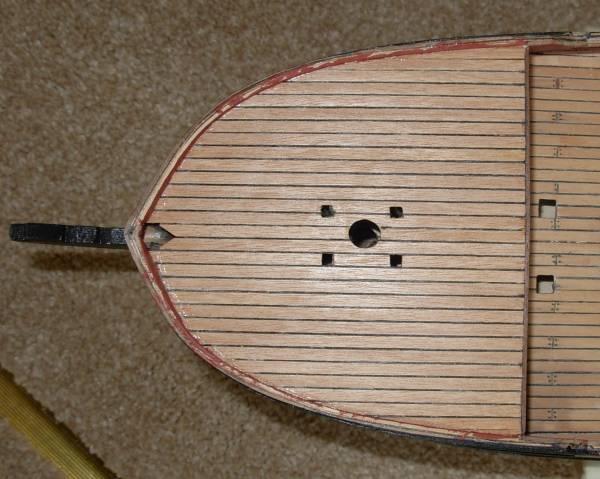
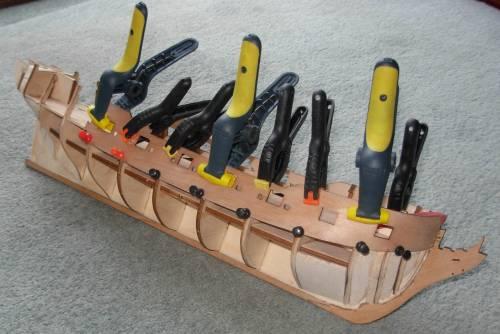
The forward bulkhead was fitted after the final trimming to get a tight fit, and slots cut to allow the bit supports to fit.
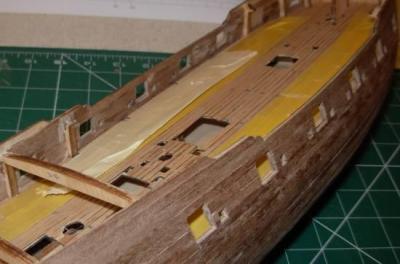
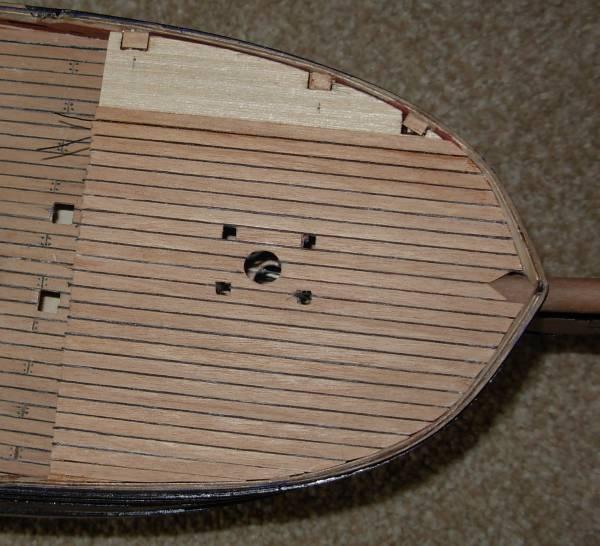
The ply deck was then pined and glued on, I then planked the deck in my normal way using thick cyno glue and black .25mm thread between each plank you can see them in one photo before they were trimmed off and when finished the deck was varnished with a water based satin varnish.
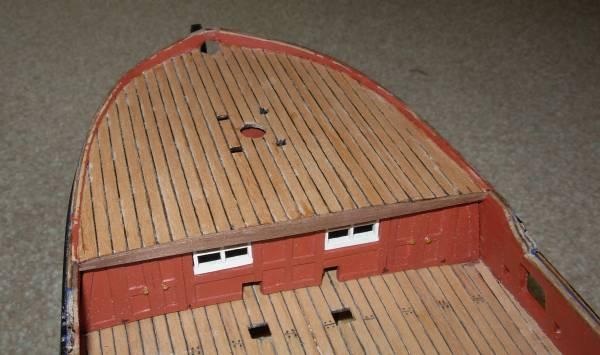
The bulwark was then fitted and painted red ochre this was a bit of a pain as it tapers down to virtually nothing, lastly a cross piece added to edge the planks.
Ray


-
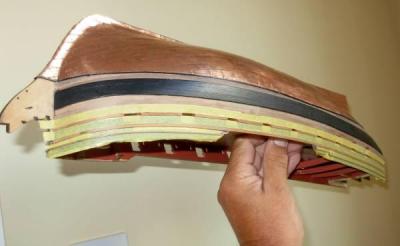
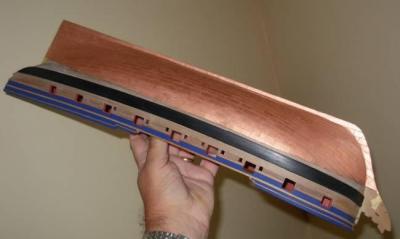
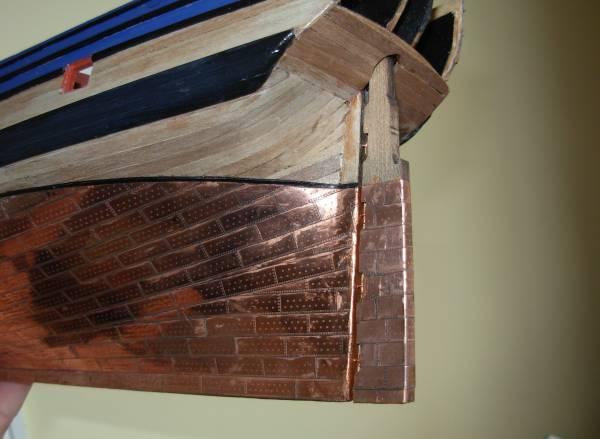
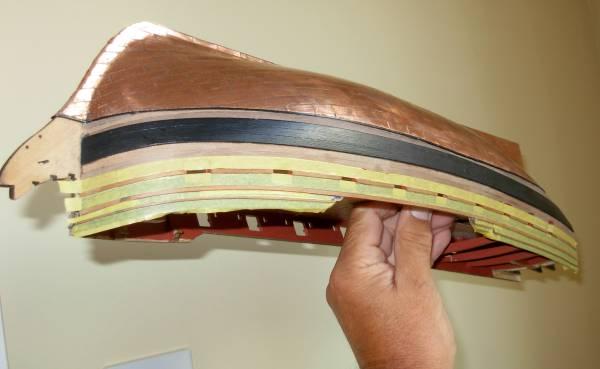
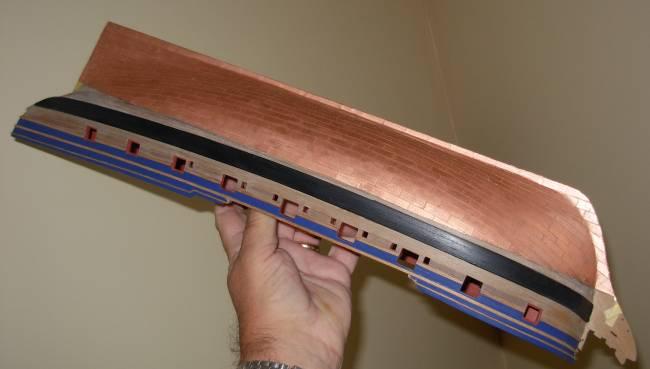
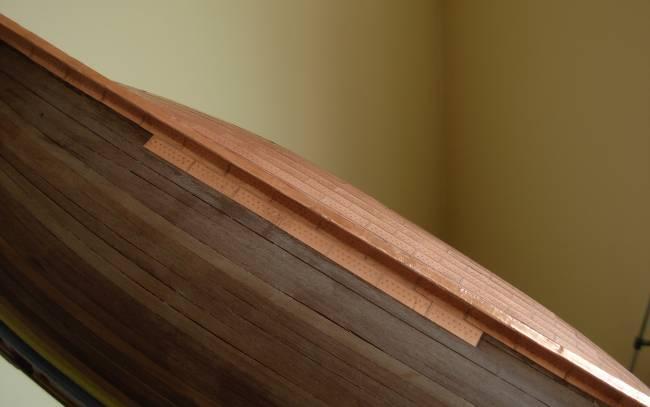
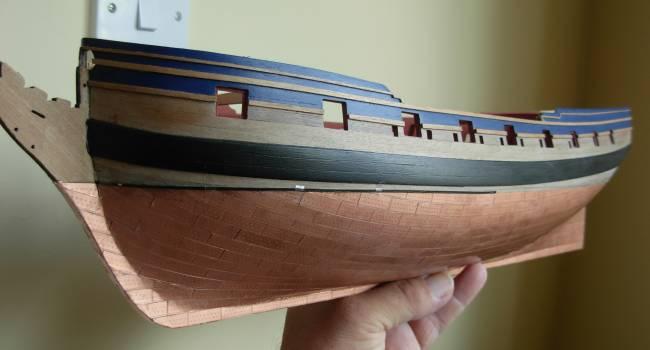
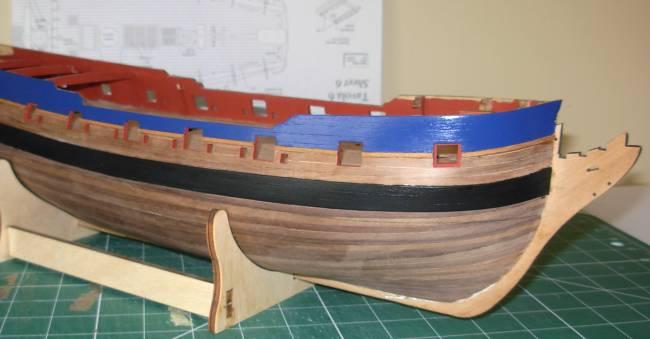
I decided to fit the batten to the edge to the copper plating as per the test piece shown on previous photos the batten was made from strips .75mm wide cut from .5mm sheet and painted before fitting all the strips went on well with thick cyno.
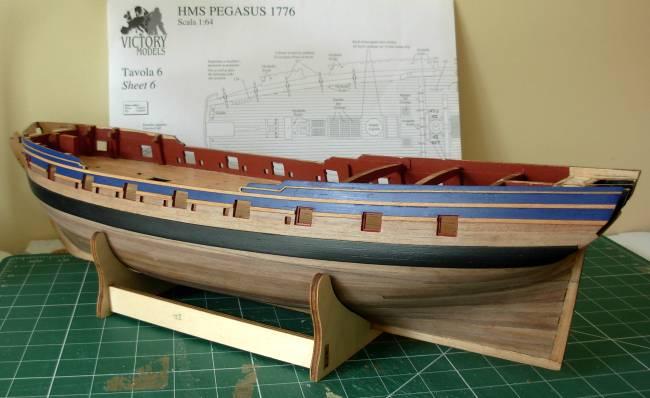
Next all the rails were masked and painted, I think the black against the blue looks better than the wood finish, and will look better still when the decoration has been added, in either yellow ochre or gold, the last photos shows that I have added the gun carriages that will be under the fore deck, these were selected, as they are the worst ones,( they have the worst wheels), and under the foredeck they will not be seen as I have made the screen.
I think also the photos show the plating has started to lose its shine thank goodness and by the time the model is completed will be ok, I think I will do some of the deck fittings next something different from the hull.
Ray


-
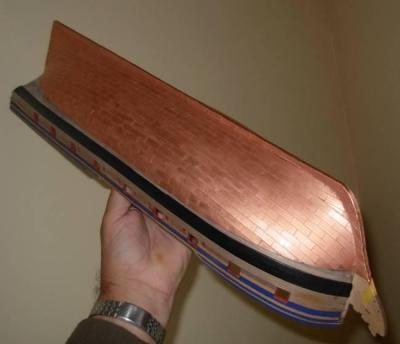
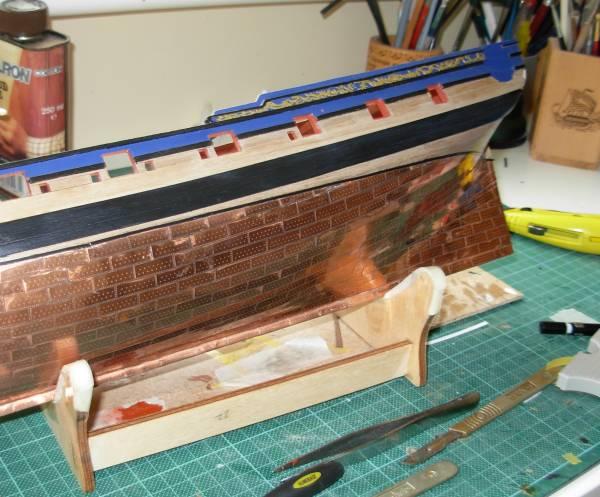
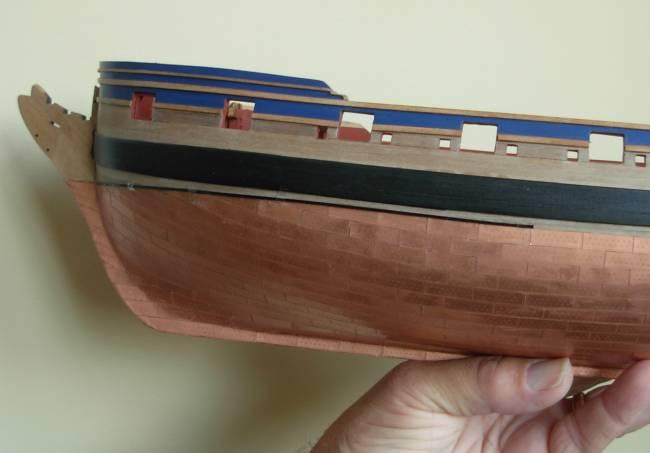
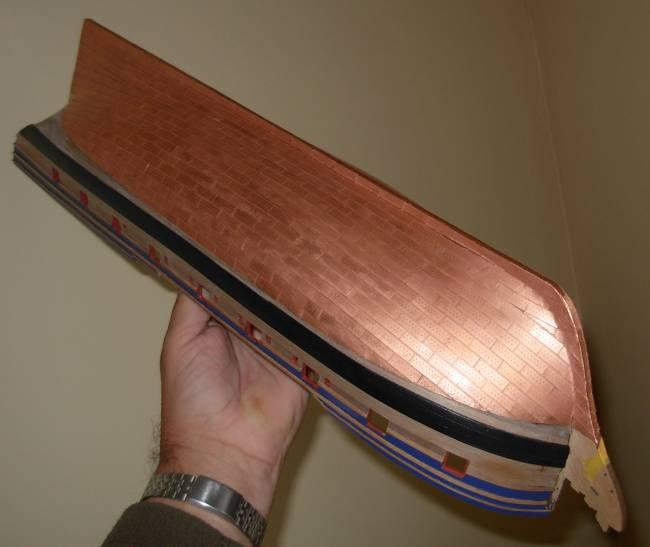
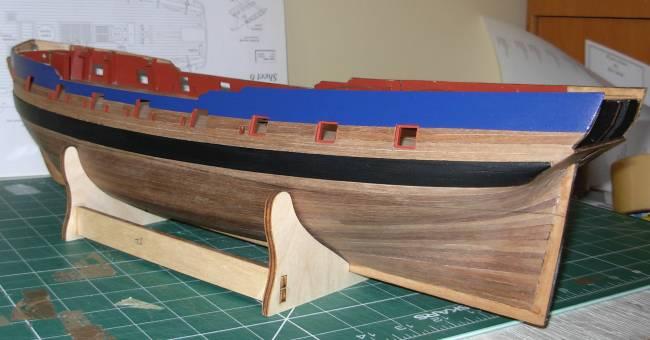
After the plating was completed I decided to clean it.
This was in hindsight a big mistake and caused major problems and some naughty words and quite a few hours extra work.
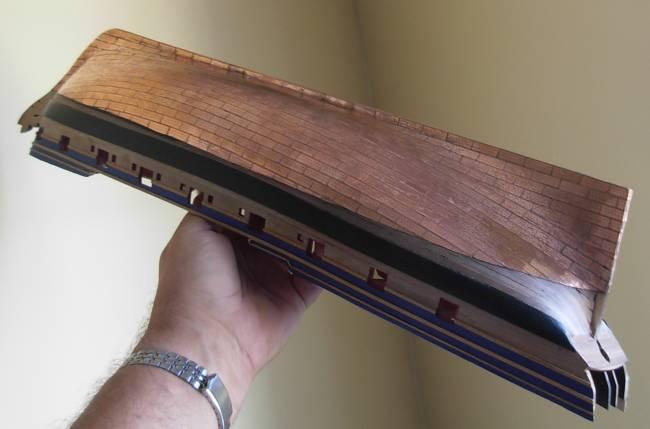
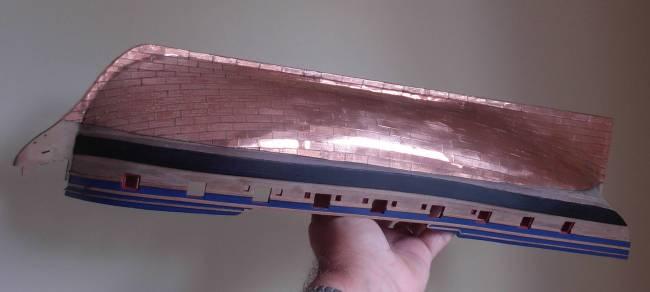
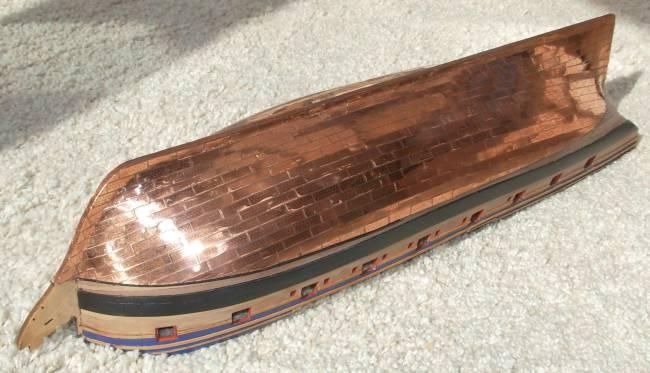
I decided to clean the plating to remove some cyno residue plus bits off fingertips and to try and obtain a uniform finish over the entire hull. I used a square of unused plates to test clean first, I cleaned it with a car paint/alloy/chrome cleaning cream, and the test plates cleaned up great, but a much different result occurred on the hull, it ended up extremely patchy and I decided I could not leave it as it was. I decided the only way forward was to polish the whole hull to obtain a uniform finish, I did this with a bench-polishing /buffing wheel, it has given a highly polished finish, which I do not like very much, but in time I hope will patina down, (this has started even after a few days) the polishing also through off some plates which had to be refitted a real pain.
The photos do not show up, the now even, finish that well, mainly due to so many reflections from the flash or anything else near it.
I have cut out and started to fit the batten above the plating and will paint all the other rails black.
Ray


-
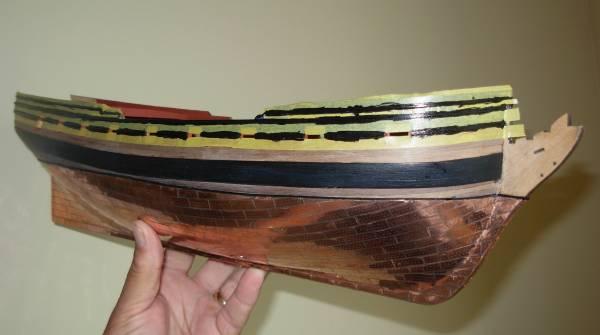
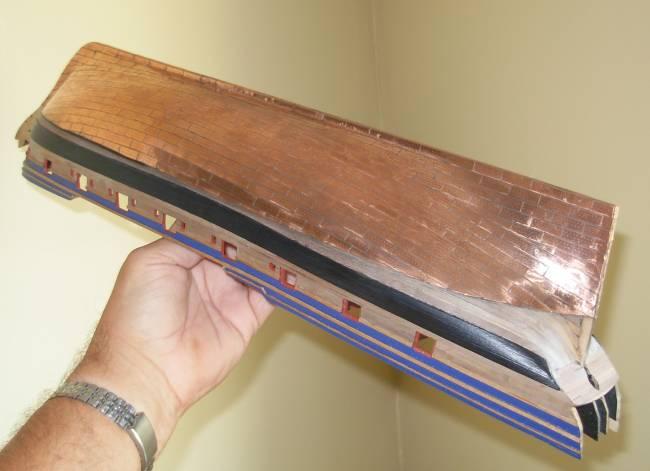
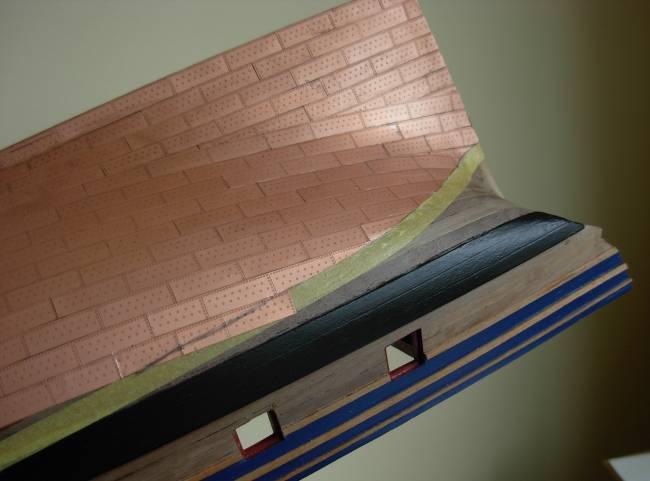
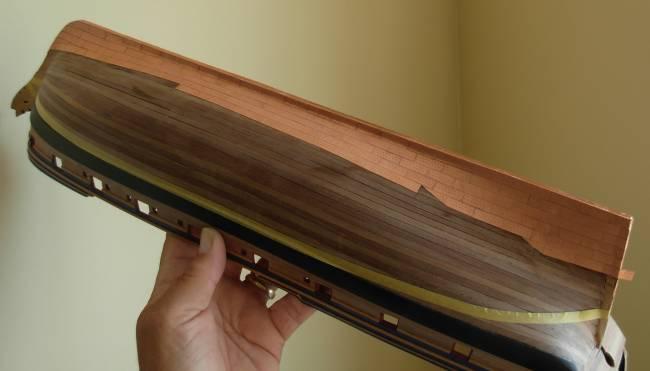
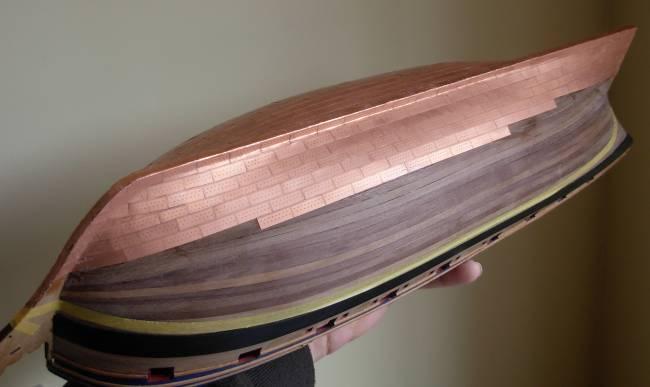
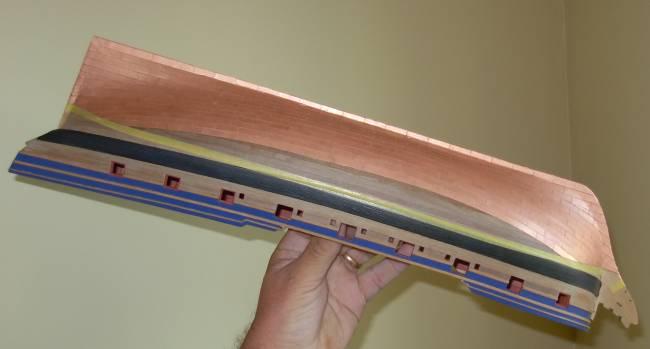
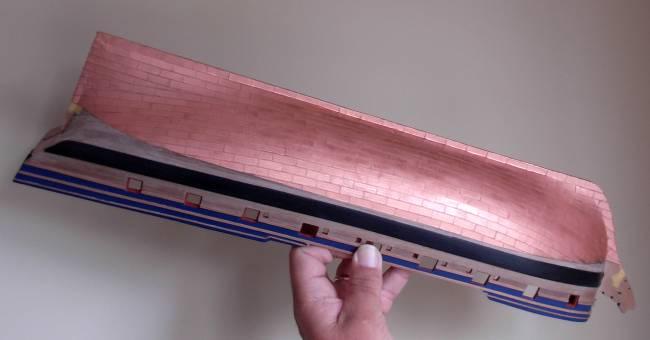
The Second side has now been finished I overlapped the plates on this side completely, it worked better than cutting and fitting in wedge shaped bits, I have added some pics to show how I masked and cut to the water line.


-
Second side plating is well under way, I have been trying to find a way of making a batten to finish the plating off, I have cut and painted a .5 X .75mm strip of plastic from a .5mm sheet and painted it black and have trial fixed it with sellotape, above the plating where the batten should be, I think it looks better than the cut edge of the plates, although that line is pretty good, and as I have decided that I will most likely paint the rest of the upper rails black I think is the answer.
Ray


-
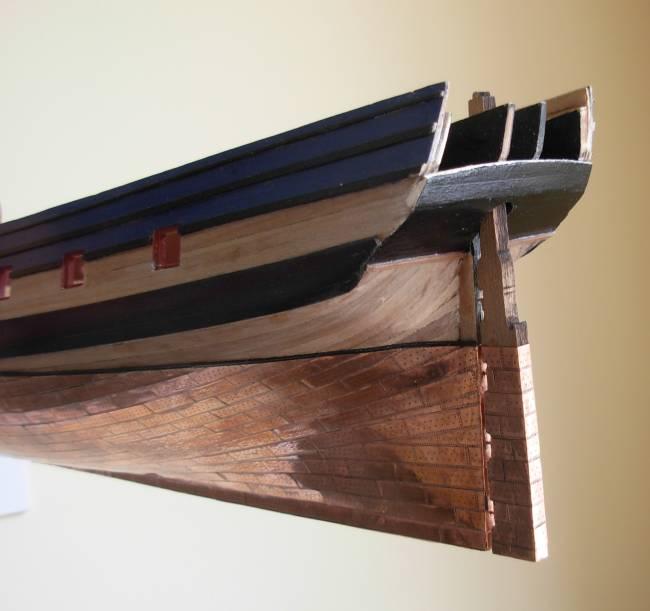
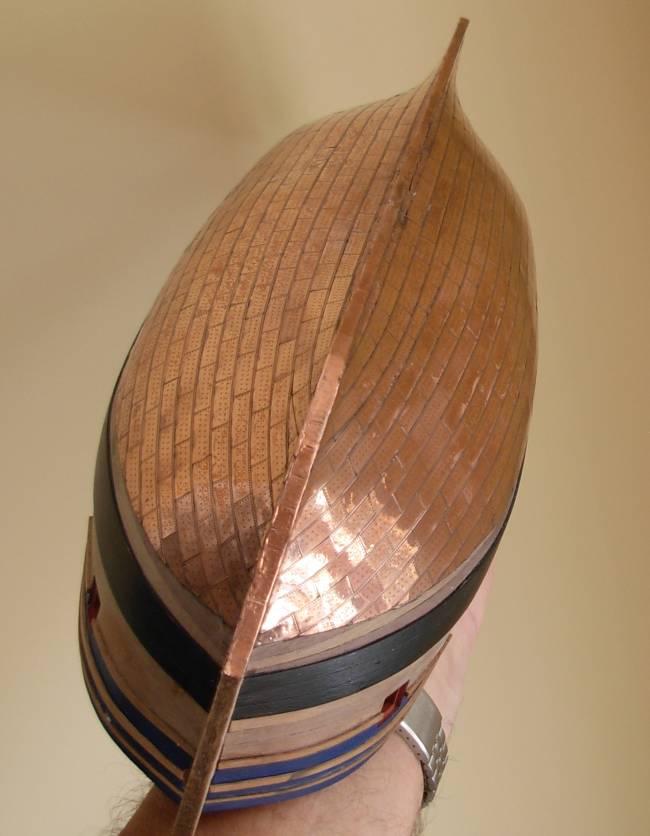
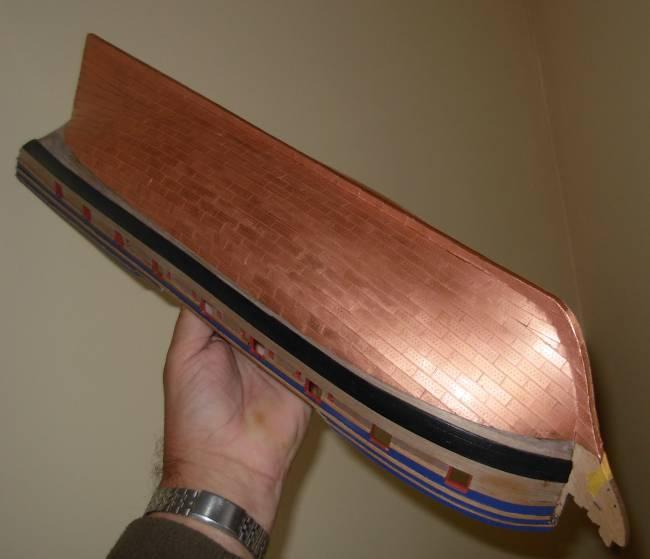
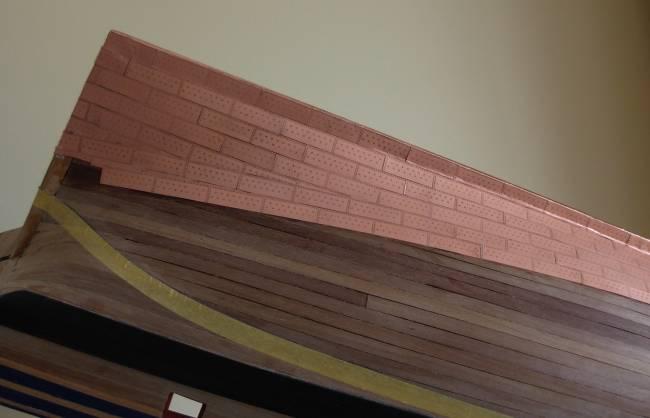
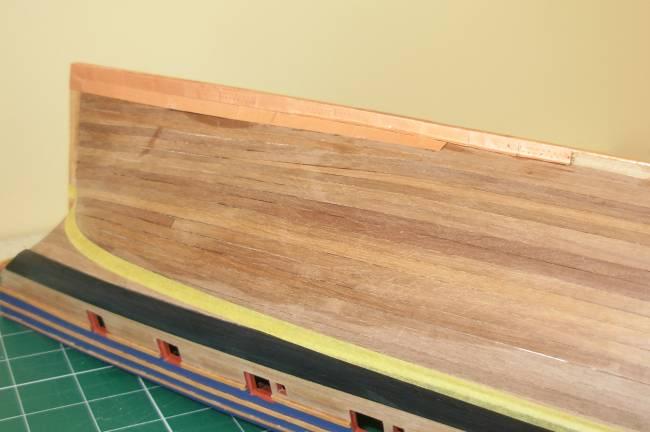
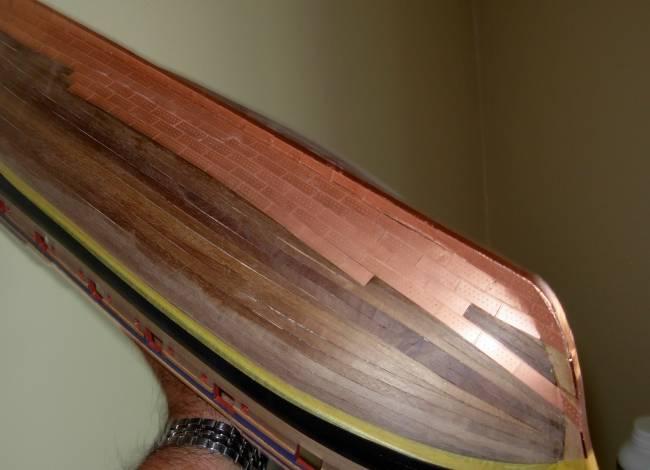
I have started the copper plating from the keel upwards, learning as I go along as this is my first attempt at plating its going fairly well, before I started laying the tiles/plates I marked the end of the plating line with masking tape, and I laid a strip of copper tape along the edge of the keel, this will I think need another layer when both sides are done, I did learn on this first side that it is easier to over lap tiles than to cut small triangular ones to fit into gaps, you can see in the photos both ways, on the second side I will just over lap. I will continue to plate up to the masking tape and use that as a guide for cutting the last plates.
Ray


-
One side is now fully plated, I plated up to the waterline which was defined by using masking tape, I overlapped plates onto the tape and then cut them to that line with a scalpel, the finished edge is good, but I am still working on a way to fit a batten to the edge the 1x1mm material the smallest I have looks way over scale.
Ray


-
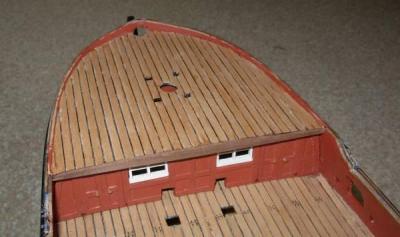
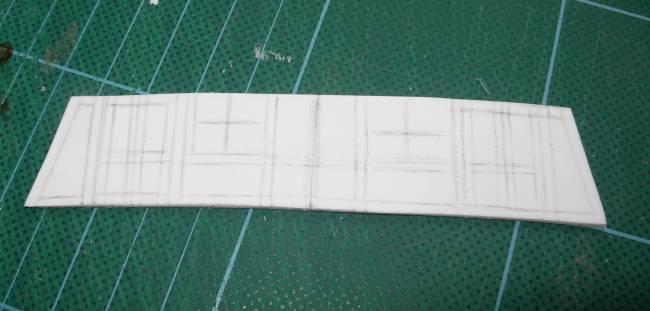
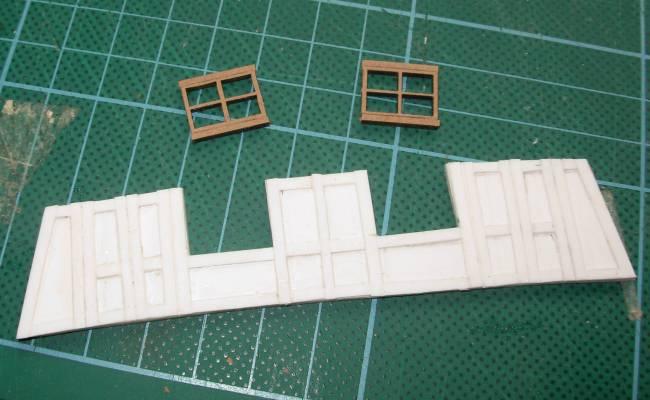
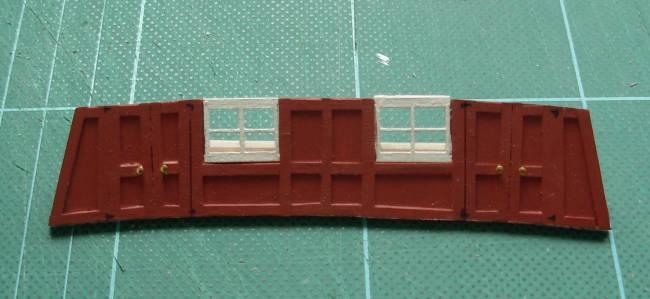
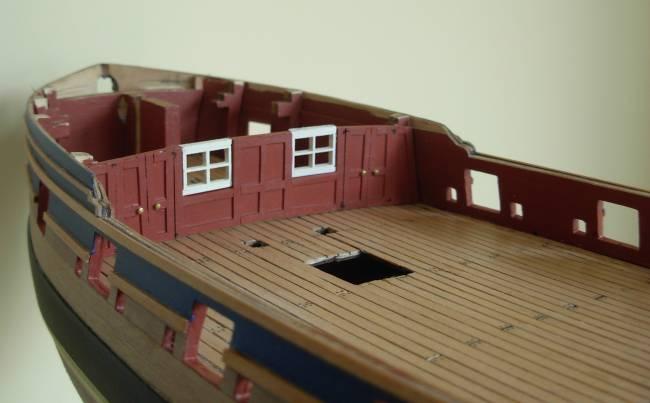
I started the forward bulkhead whilst copper plating the hull, to give me a break from all those tiles, I decided to make it out of plastic sheet, the same as the gun port frames, I started by making a card template to get the deck cambers right, then from the template cut the bulkhead out of 2mm sheet then overlaid thin strips for the doors and frames, then cut out the window holes, and made up the window frames, painted and then fitted the window frames and lastly added the door knobs, I could not find a better way for the hinges than to paint them on everything else looked so over scale, again I think the plastic option works well, you do not get oversize wood grain, now back to the copper plating, a bit more than a few evenings work unless your evenings are very long ones an update on plating progress soon.
Ray


-
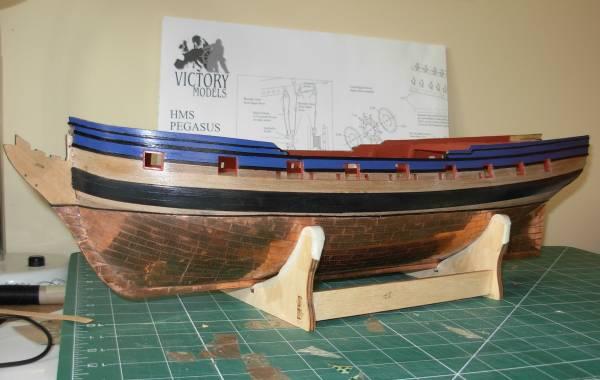
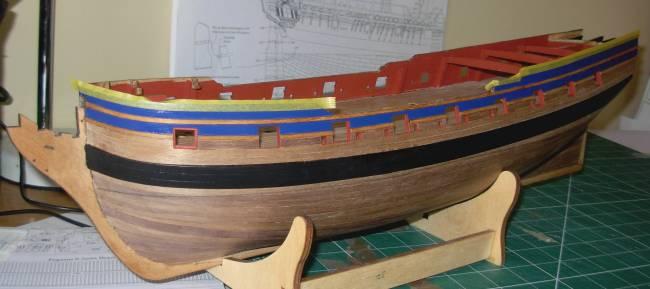
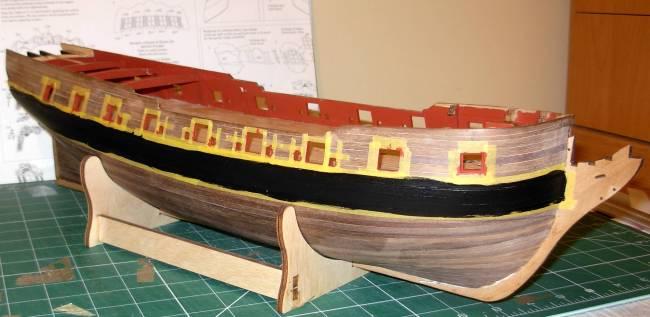
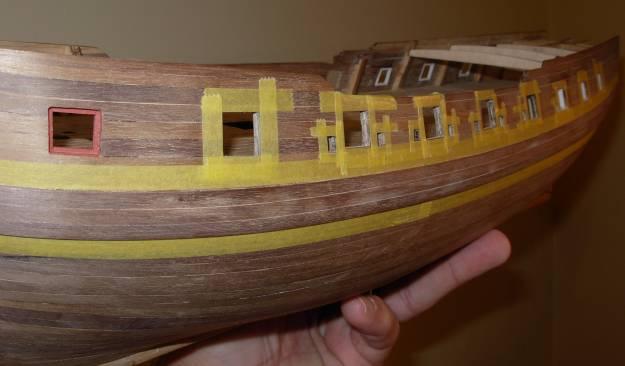
I decided to paint before fitting the upper rails, firstly its easier to touch up later if necessary than to paint between the rails, after they are fixed, also I masked up, so that the first rail lined up to the edge of the painted section, I took a great deal of time to get the right gap between the rails right, so the decorative frieze would fit between them, and used the excellent tamiya masking tape to define the line of the rails, and fitted the rails up to the tape, I Carried the rails right along the length of the hull, and will cut away as necessary for the galleries I did not apply glue under the rails where they will come, and lastly matt varnished the top half down to the water line which I have also marked up.
Ray


-
I first painted the main wale it was given three coats of paint and lightly rubbed down after each of the first two coats, and then given a coat of matt varnish, the inner bulwarks were also painted, lastly the main deck planking was completed.
Now is decision time do add a few deck fittings make the bulkheads or copper the hull!!
Ray


-
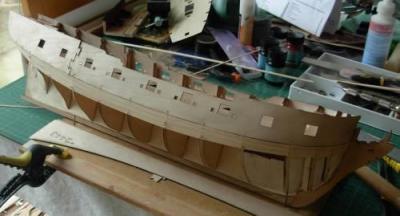
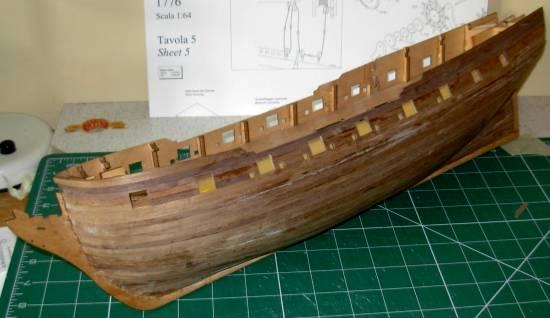
I added the frames to the gun ports using strips cut from a 2 mm plastic/styrene sheet, I found it easier to do them with this material than wood scraps, and when they are painted you cannot see that they are made from plastic, I think I might also make the fore bulkhead out of the same stuff in fact the lack of grain may well be an advantage. The main wale was fitted using 3 1x4mm walnut strips and sanded down. I then masked all the gun & sweep ports, and the main wale with Tamiya masking tape, after a trailing it on one port, the trial was a great success this tape is easy to fit, and has absolutely no seepage under the tape at all, ready to paint.


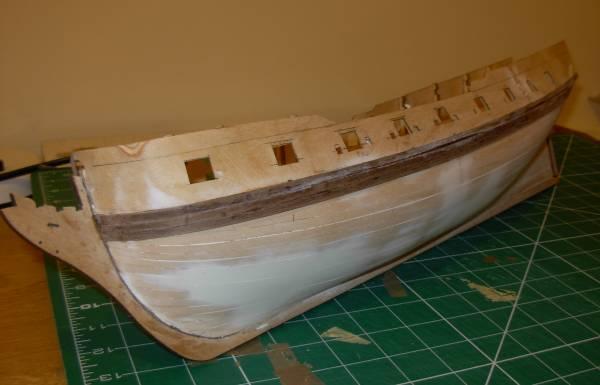
-
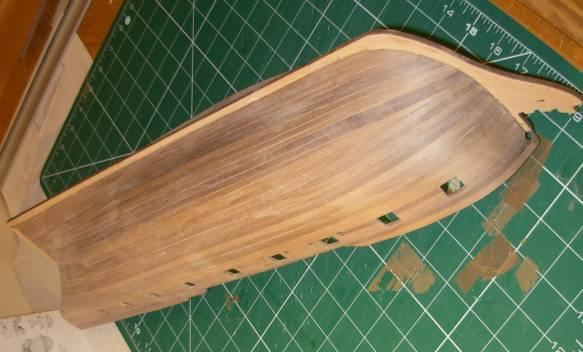
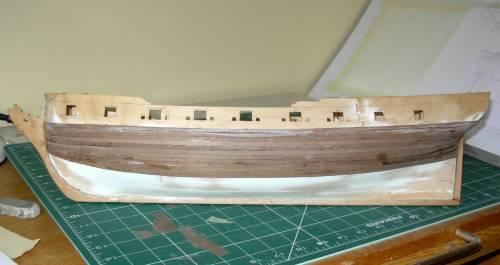
The hull has now been sanded down, not to bad a job, but I did have to wait for a fine day as the shipyard superintendent said it must be done outside (she had just dusted and vacuumed). There are a few very slight gaps plank to plank and if you were to paint the hull they would best be filled and sanded but as the hull will be copper plated there is no need, I also chipped a bit off a plank at the top at the stern you can just see it in the photo, I will sort it later. Planks are in soak for the main wale, after the main wale is on and has been painted, and the insides of the gun ports framed, those that will have lids that is, are done, inside of the bulwarks can be painted and the planking finished up to the bulwark.


-
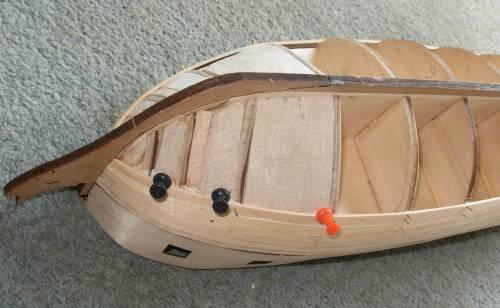
Firstly I broke of the frame tabs, I then planked the inside of the bulwarks, some of this planking is more fiddly that the hull, I then redressed all the gun and sweep ports, one thing you need to do if you have planked the deck is to mask the planking to stop it getting damaged whilst dressing the ports, I then trimmed and filed the top of the planking to the correct rail height, I next fitted most of the quarter deck beams, and its now ready for sanding.


-
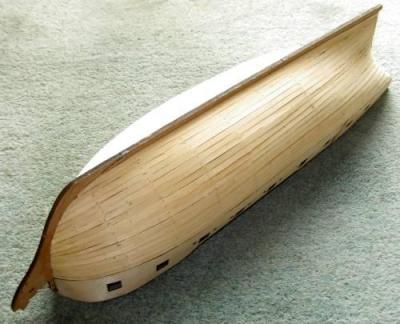
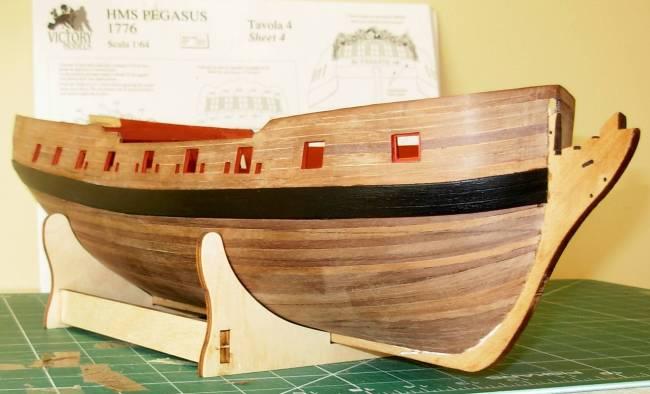
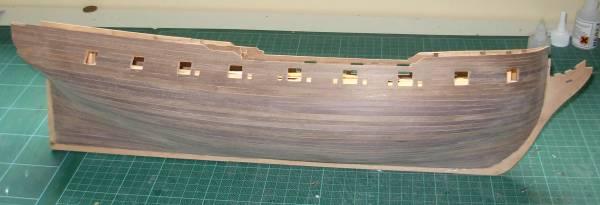
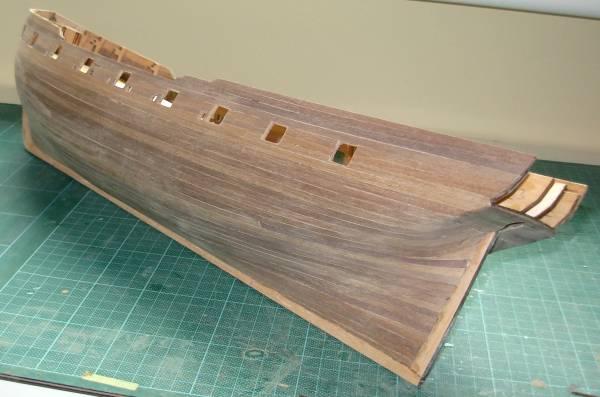
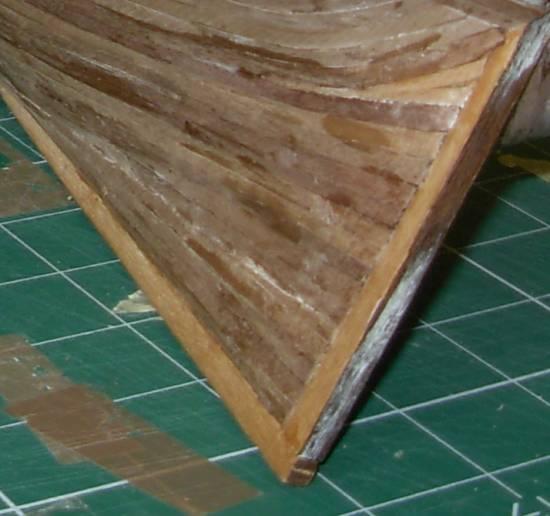
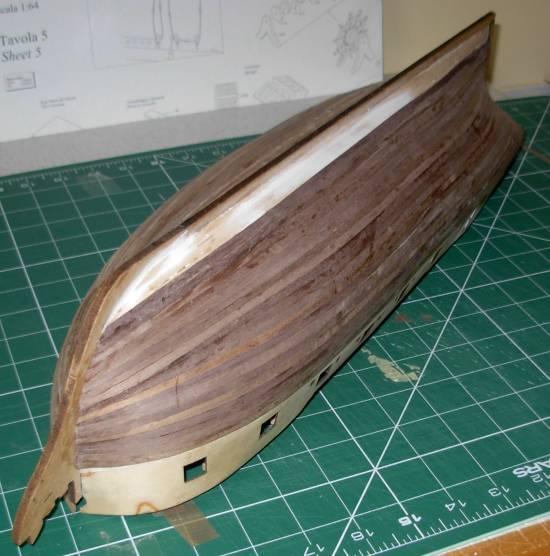
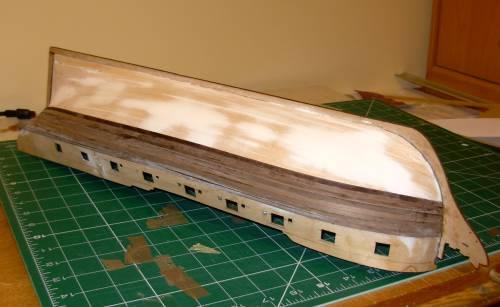
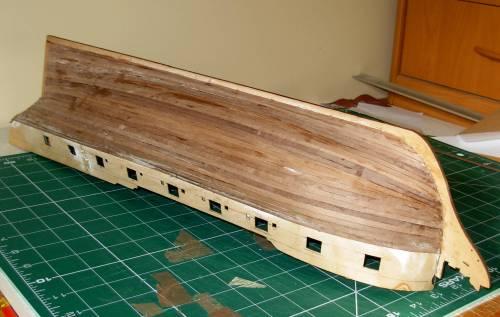
The second planking has now been completed and it went fairly well, one good decision was to cut the second rabbet it did allow the planking to fit right into the keel as shown in the photos, I strongly other builders to consider this option.
I tend to do my planking by eye with regards how much to taper each plank I still do an occasional measurement, to see how much more, or less the taper needs to be and I did sometimes fit the plank, and whilst still damp (at the bow) cut the tapered piece off. On one side I have taken down the planking to the top of the rail, and dressed up the sweep and gun ports, I use needle files for that job, and I find they file the hard wood easily and keeps the corners sharp, I do the out side of the hull before planking the inner bulwarks which will be the next job and will then sand down the hull and the inner bulwarks.
Ray


-
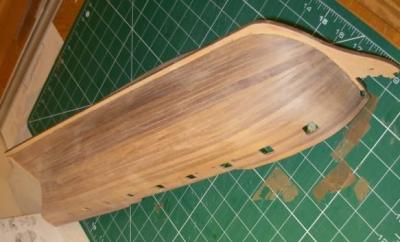
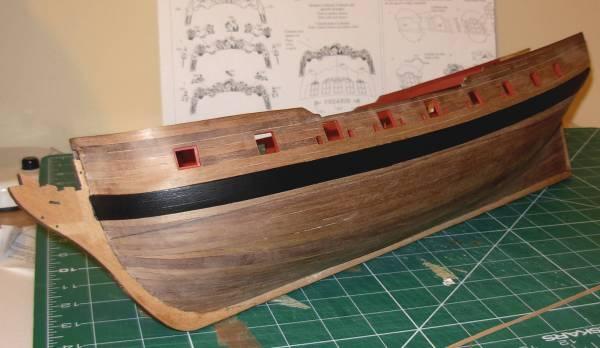
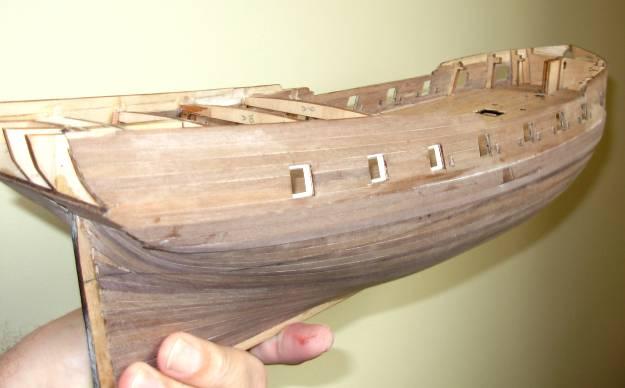
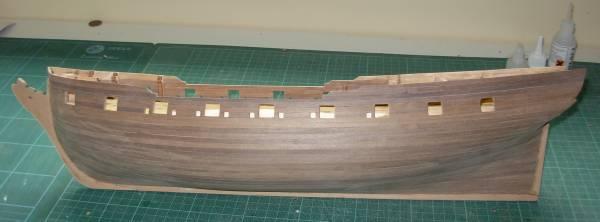
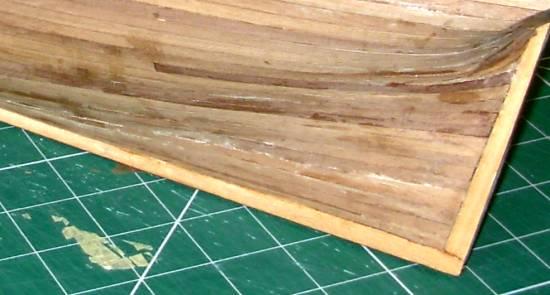
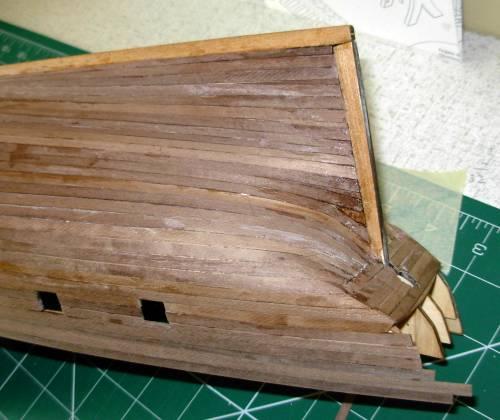
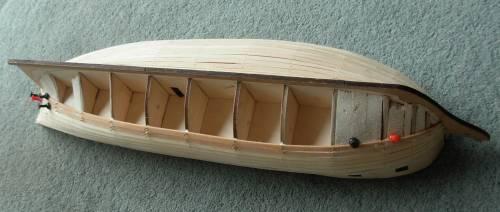
Just a quick update from the Pegasus broken tab club we have all done it, plus a photo of the stern second planked, it does plank easier and better the second time around, full update on the second planking soon.


-
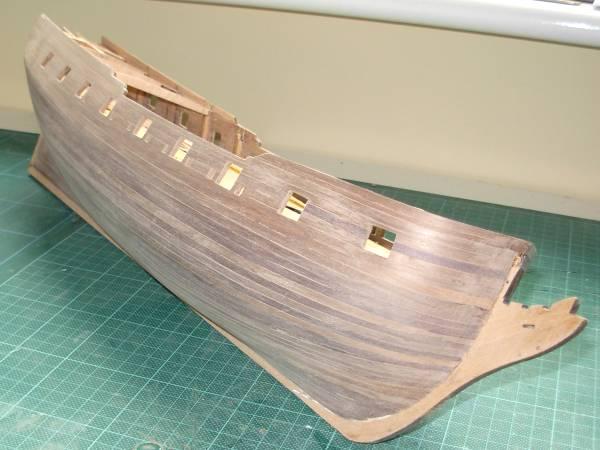
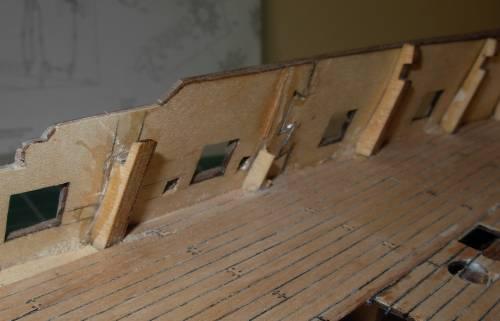
The second planking well under way it has not gone to badly a few stealers needed but they will be under the copper tiles, I will also start planking above the wale line and alter the gun ports as necessary they will need altering so that the cannons come out of them at the same height which they would not have done if left alone as can be seen in the photo. I have been tempted to start bulkhead and some deck fittings but I feel I must get the planking done first, if I have any finger tips left as they are either rock hard with cyno gel or have been glued to the hull that stuff really does stick.
Ray


-
Before I started the second planking I did cut another rabbet but only at the stern more this was difficult to do than the first one, with out cutting into the keel. I then fixed the sternpost part of the keel. I will use thick/gel cyno (and have found in the past not all gel is really gel just thicker than normal runny cyno and branded names for 3ml gel is very expensive) to fix the second planks, this works well if not better on wet/damp planks and it will require a fair amount so I bought a 20ml bottle on ebay only £1.45 + .49p postage with very fast delivery and it IS thick gel with a very good grab and fix time I ordered 2 more bottles with reduced postage I could post the name of the supplier if that is ok to do so Moderators please let me know.
I filled up my soaking tube put in some planks and made a start.


-
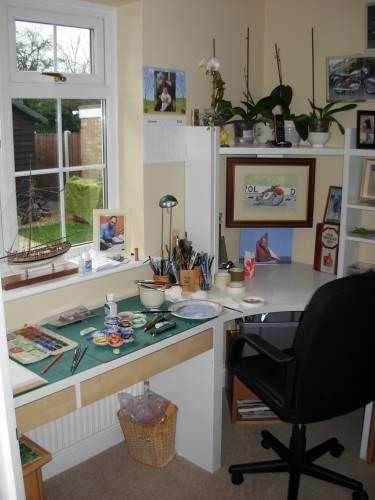
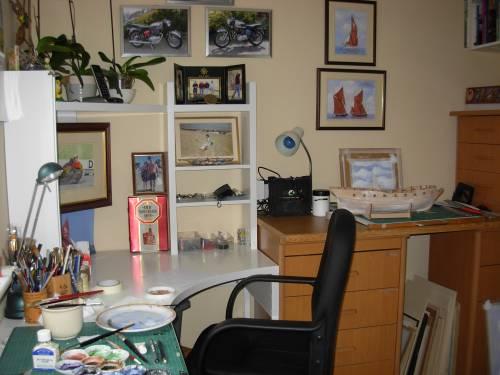
Hi all my Pegasus build has been restarted after a lay of due to moving house at the end August 2010, to Burnham on Crouch still in Essex UK, I have also moved of the dining room table, I now have a study of the lounge, which has been fitted out from my modelling and painting needs, setting the study up has been worth the wait, and it is also reasonably sociable, with the door opening onto the lounge, plus I can leave it without having to tidy up to much, it also keeps the model and tools out of reach of the little granddaughters fingers.
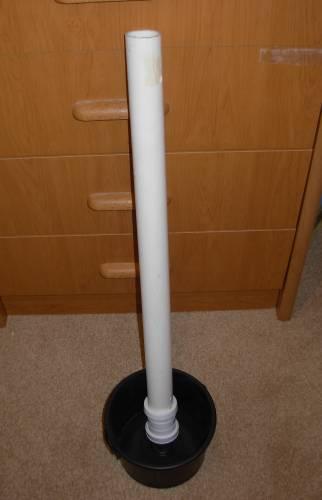
So at long last the second planking is about to start, but where to start it! I decided to start from the top of the main wale. I measured down from the bottom of the rail heights taken from the drawings and marked in many places along the side as shown in the pics and taping on an old piece of deck planking used it as a guide to draw the top of the wale position. I then began a hunt for my plank soaking tool, it is just a length of pvc pipe with an end blanked, filled with water it works well, problem was where did I put it when we moved in, after some searching and naughty words it was located fallen down behind some fishing tackle.
I think I will also cut a second rabbet into the first planking, to set the planks into and at the same time remove some thickness from the first planking at the stern or it will be to thick at the keel and the stern.
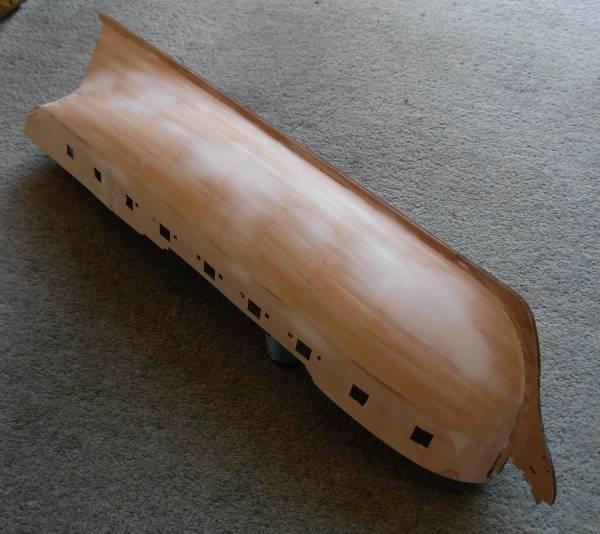
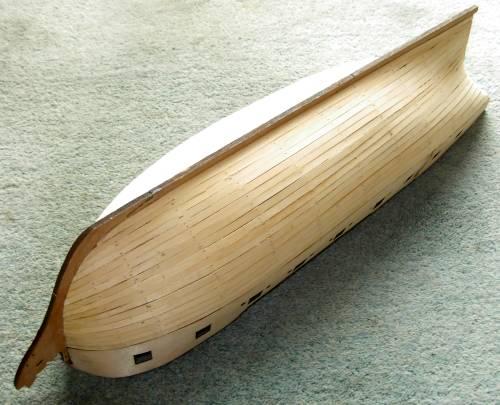
I will also take inspiration from Glens finished Pegasus it is truly magnificent. The hull was now sanded down, after a bit of a break, as now the weather is better my other pastimes golf and fishing kick in so the build will be progressed in bits and pieces until the late autumn. I was quite pleased with the sanded down hull it lost the clinker effect and I only felt a few low areas, I did however give the whole hull a light coat of filler and again sand it down so its ready for the second planking.
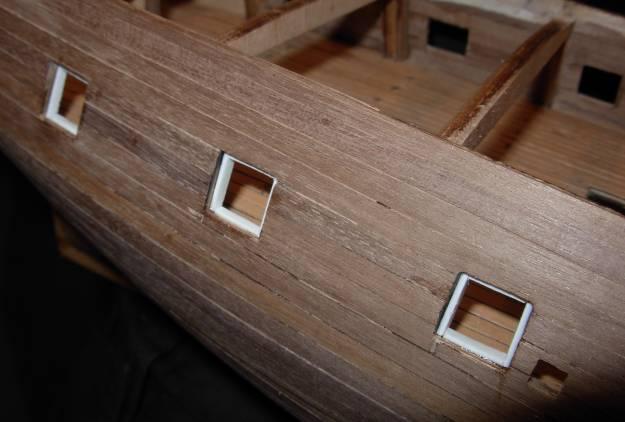
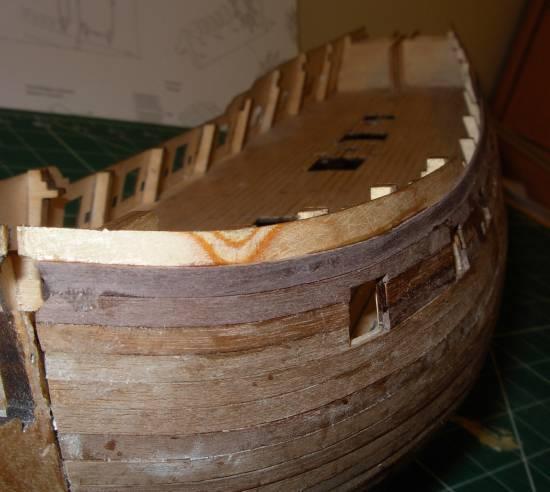
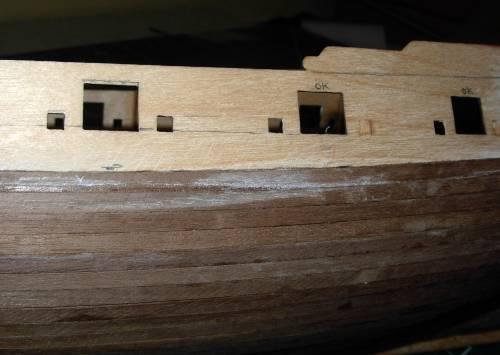
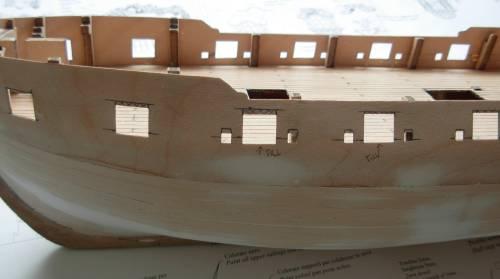
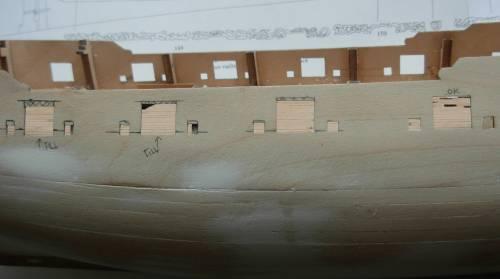
I decided to mark out the top of the main wale as the starting point for the second planking, whilst doing this I remembered noticing that the bottom of the gun ports were not all the same height from the deck which cannot be correct so I placed a cannon up to them and took the port that looks ok as the datum, I then marked out the others to be trimmed and filled to that height (see photo) I am not sure if this is correct but at least all the cannons will be at the same height as they protrude from the ports, this now asks the question do I now change the line of the main wale to one measured from the bottom of the repositioned gun ports ?? Any thoughts welcome.
RAY


-
The hull was now sanded down, after a bit of a break, as now the weather is better my other pastimes golf and fishing kick in so the build will be progressed in bits and pieces until the late autumn. I was quite pleased with the sanded down hull it lost the clinker effect and I only felt a few low areas, I did however give the whole hull a light coat of filler and again sand it down so its ready for the second planking.
I decided to mark out the top of the main wale as the starting point for the second planking, whilst doing this I remembered noticing that the bottom of the gun ports were not all the same height from the deck which cannot be correct so I placed a cannon up to them and took the port that looks ok as the datum, I then marked out the others to be trimmed and filled to that height (see photo) I am not sure if this is correct but at least all the cannons will be at the same height as they protrude from the ports, this now asks the question do I now change the line of the main wale to one measured from the bottom of the repositioned gun ports ?? Any thoughts welcome.
Ray


-
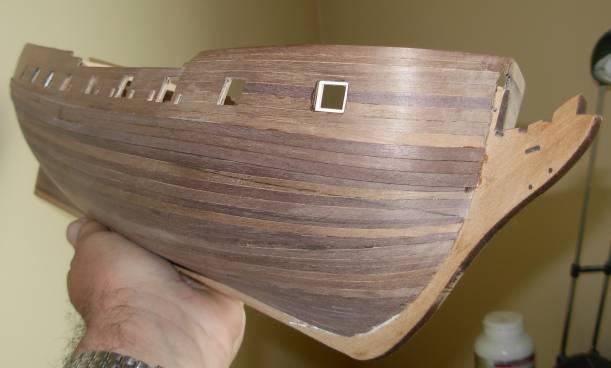
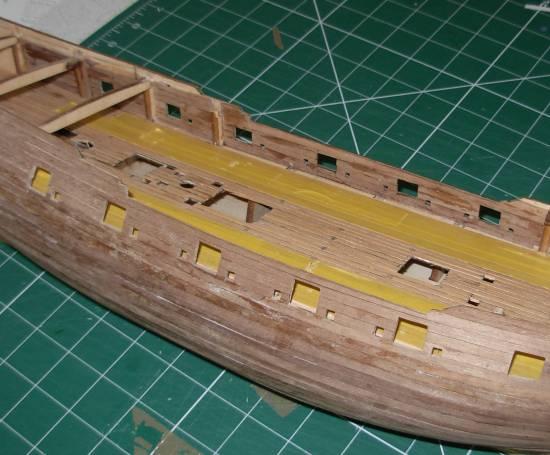
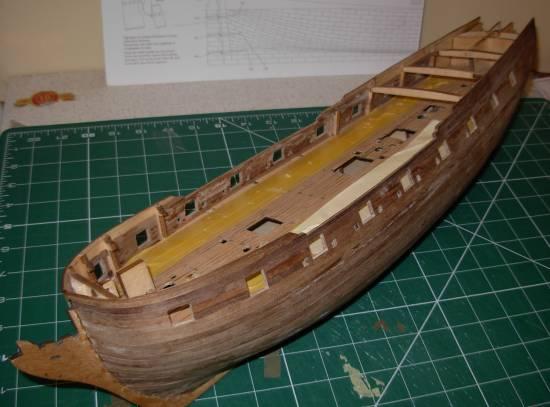
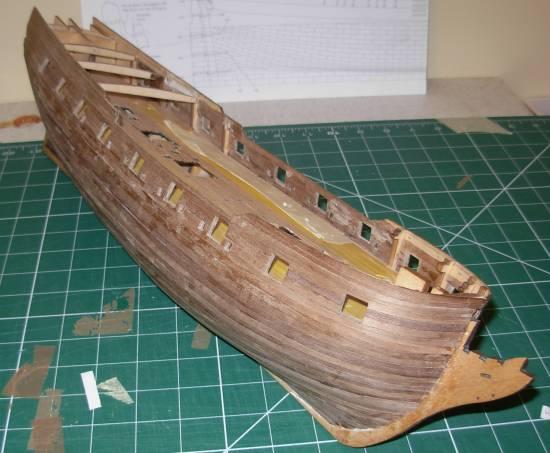
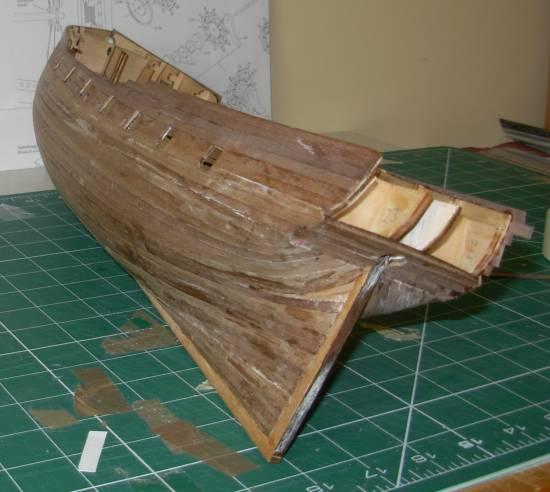
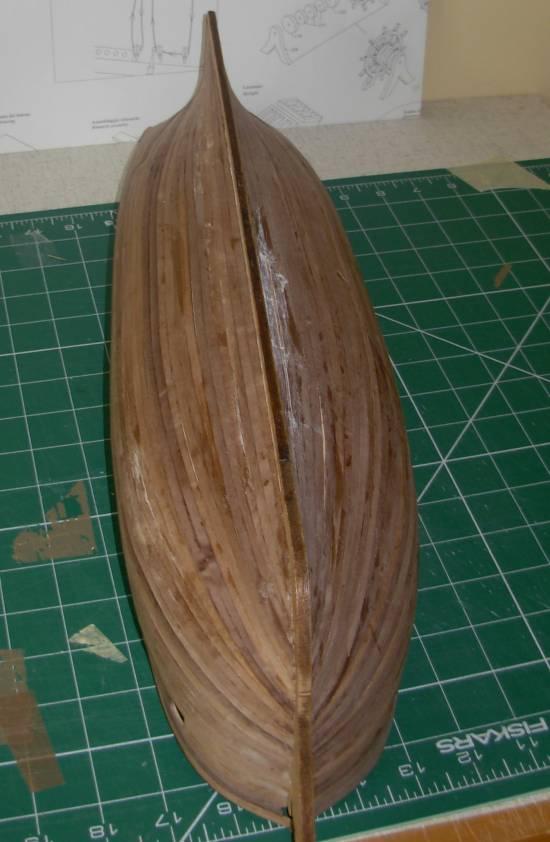
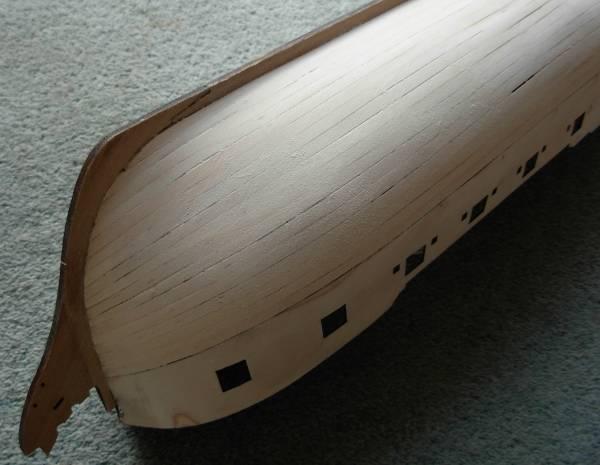
First planking
Firstly the two ply parts the gun port strips forming the gun port planking where fitted, after soaking and with a wee bit of difficulty getting them aligned, I ended up with a small gap in the jigsaw type joint. The rest of the hull was then planked using fast cure pva on the frames and edge to edge, and medium super glue right at the bow, I try to do as neat a job with the first planking as possible, so when doing the second planking you already have a good feel for the amount off tapering and just how the planks run down the hull, again I work a lot by eye on the amount of taper and where to start tapering the only real measuring I do is at the widest frame no 6 and then the shortest, and say the total difference is a third less then you must lose around third in the taper on each plank check it every four or five planks and adjust the amount as necessary. It has taken a bit longer than I would have liked but other things come along in life that need to be sorted out, I have developed type two diabetes (no wonder I felt crap), so I have been getting that under control. Next job sand the first planking down and getting rid of the clinker look I hope.
Ray


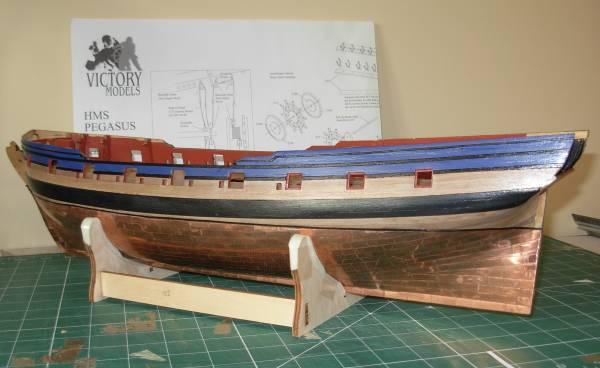


HMS Pegasus by Ray - FINISHED - Victory Models - Build started Jan 2010
in - Kit build logs for subjects built from 1751 - 1800
Posted
Fascia fitted
The stern fascia was added after the Pegasus name letters and trim, then the last trim around the windows was fixed in place, and lastly the side decoration under the fascia at the side between it and the main wale, which needed a fair, bit off reworking, I think the whole window-fascia in the black/gold and the blue/gold looks extremely good and justifies the black painting of the rails as well.
Ray