


Ray
-
Posts
404 -
Joined
-
Last visited
Content Type
Profiles
Forums
Gallery
Events
Posts posted by Ray
-
-
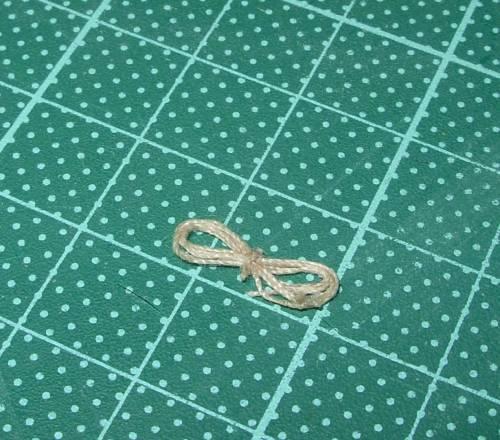
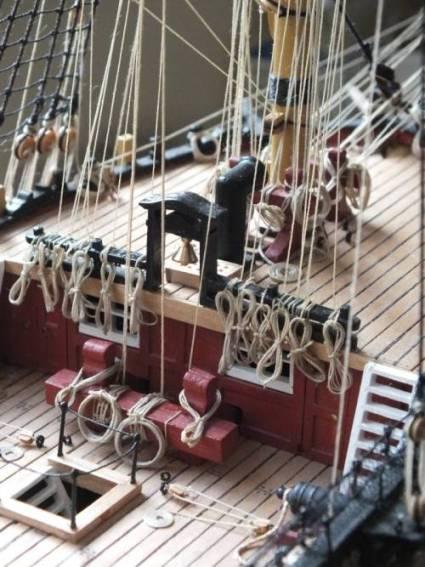
Rope coils
A few photos showing how the coilis of rope were made.


-
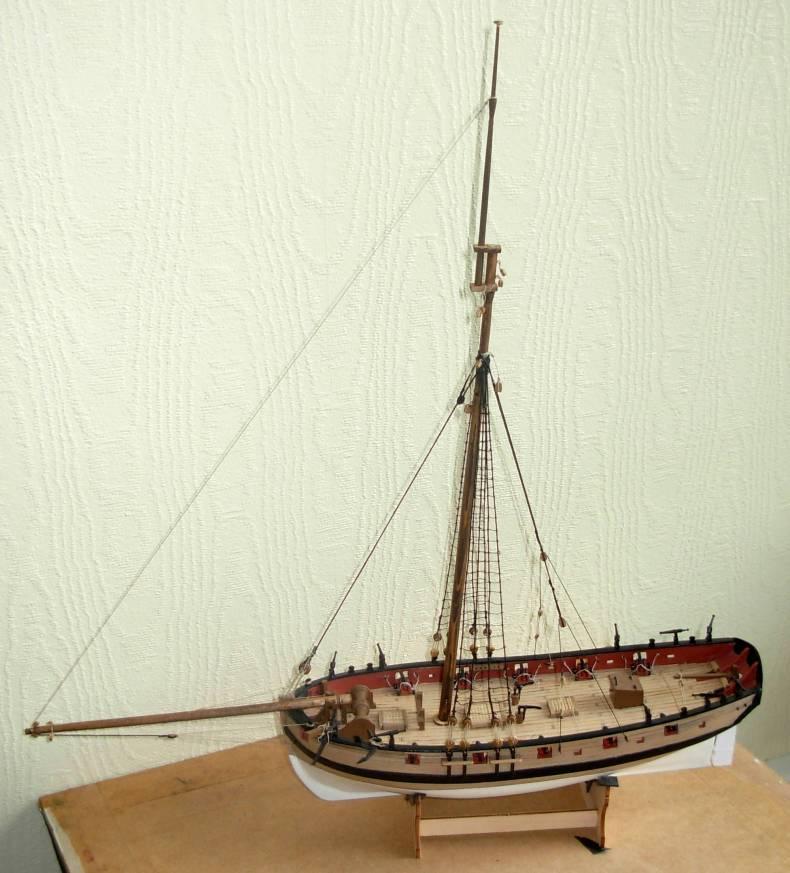
Standing rigging
The next job was to complete the remainder of the standing rigging with the new topmast; I have noticed that will most likely not be sufficient 3mm single blocks? To complete the running rigging, I will have to order some extras; also there is a shortage of eyelets a bit disappointing in a quality kit as both items are small and cheap.
I also found the rigging diagram differs from the photos on the box around the bowsprit I think I will rig as per the photos on the box as these looks right, and I can also see where it goes from the box photos. The remainder of the standing rigging was completed, and the photos without further mishap. I also ordered more blocks eyelets thread in various sizes which will carry over for other models plus some rigging hooks, and extra hands tool with double clip.


-
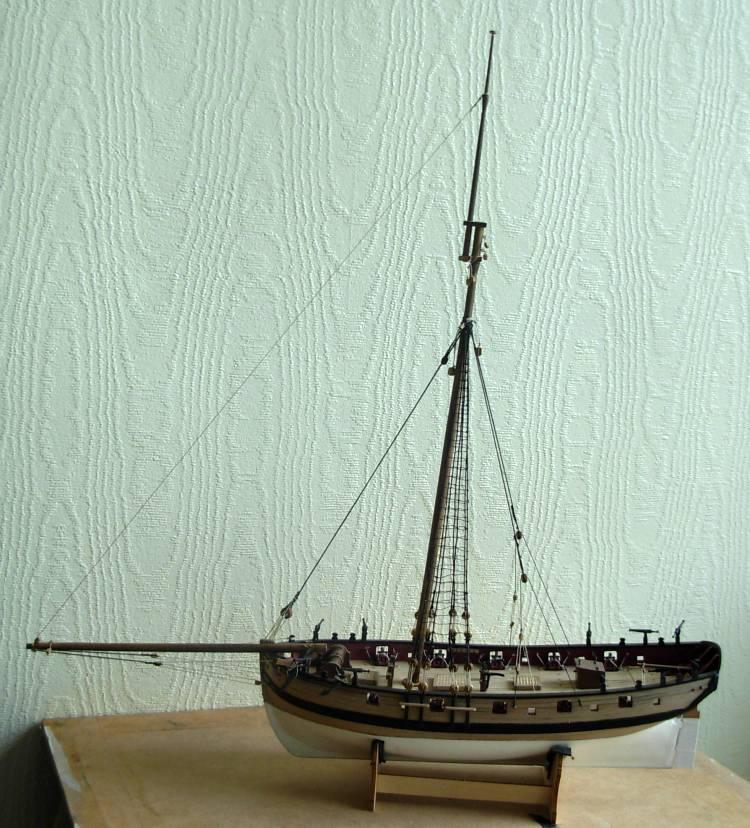
Mishaps will happen
A delay will now take place in finishing the standing rigging due to a mishap, perhaps a warning to all, holding the model in the building cradle to take some photos I managed to DROP IT the bowsprit came away, luckily it only needed the rigging untangling and refitting, the topmast however was a different story snapped in three bits, I must admit to muttering some naughty words in fact a lot of naughty words, out with the unimat, luckily there was enough dowel to remake the top mast, back to the rigging.


-
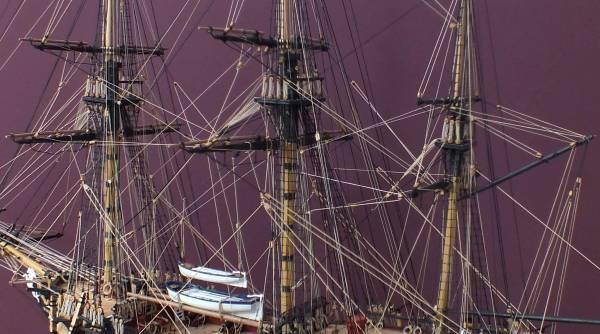
The final rigging has been completed this was all the rigging left off to give access to the centre of the ship, a bit of a sence of relief that its all done, only the final photots to sort out and post.
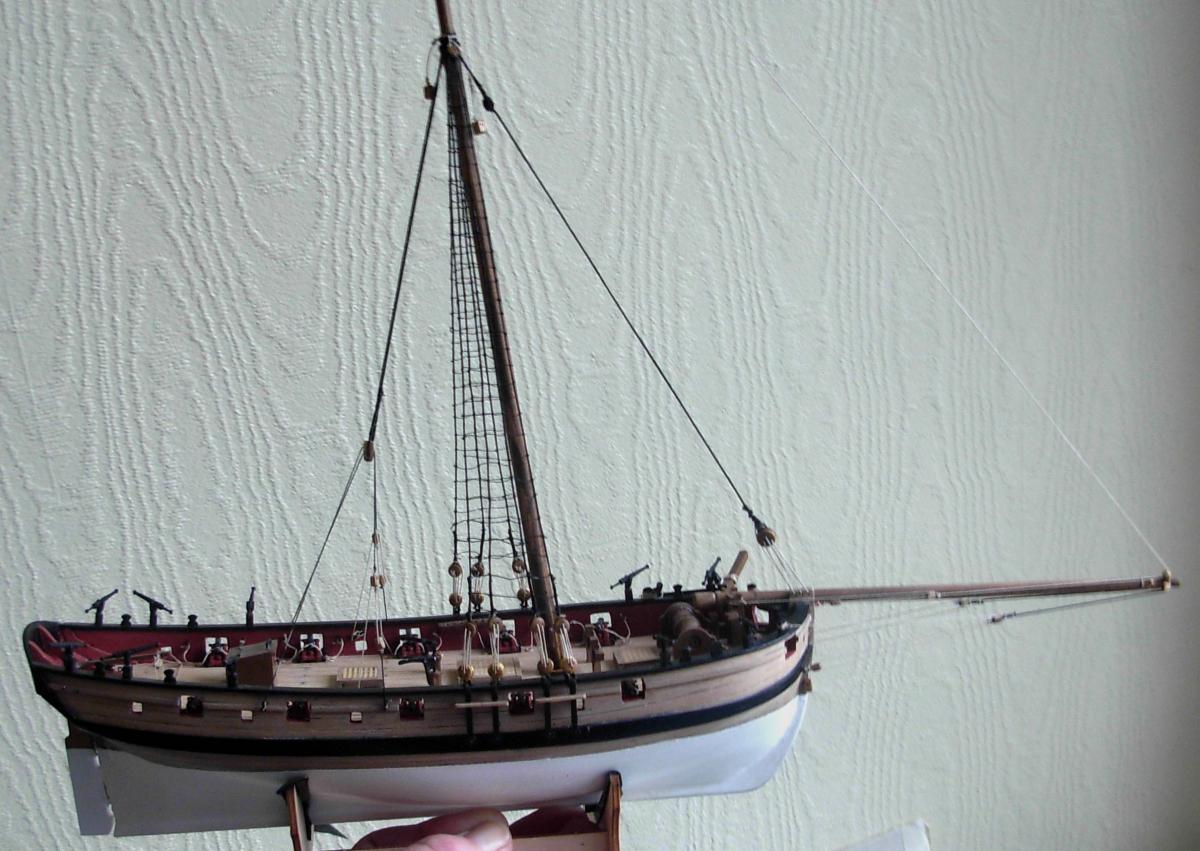
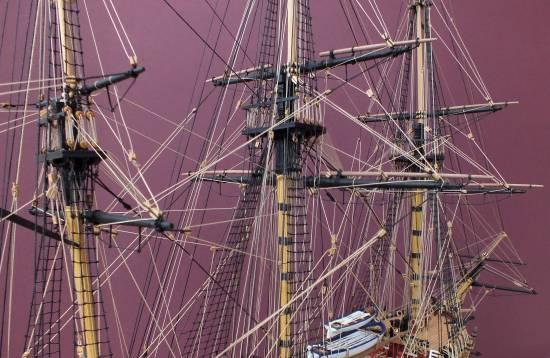
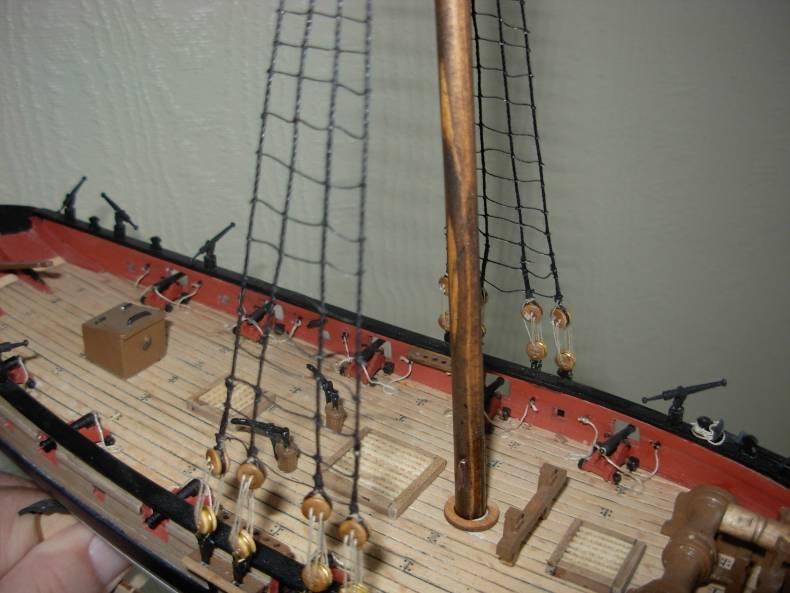
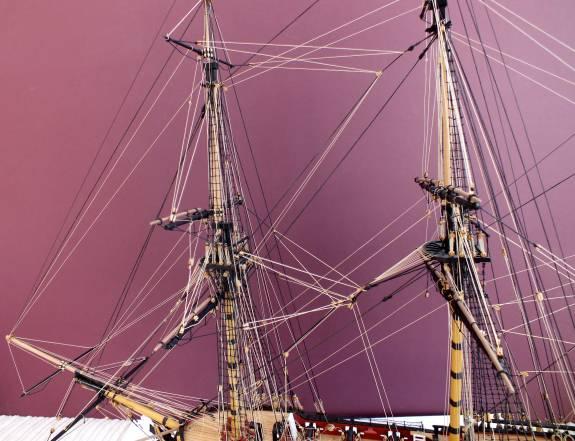
Top masts

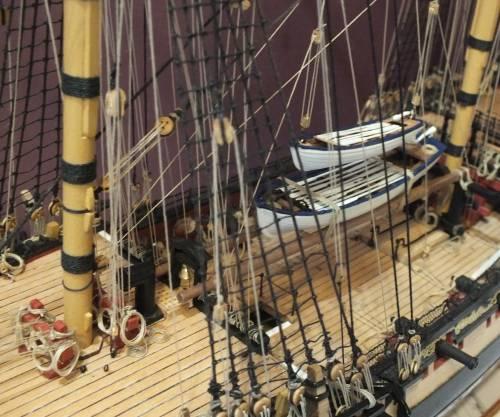
Rigging around the centre it shows how it would have interfeared with access to the boats.


There is a lot off it


-
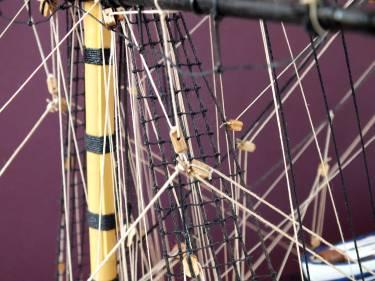
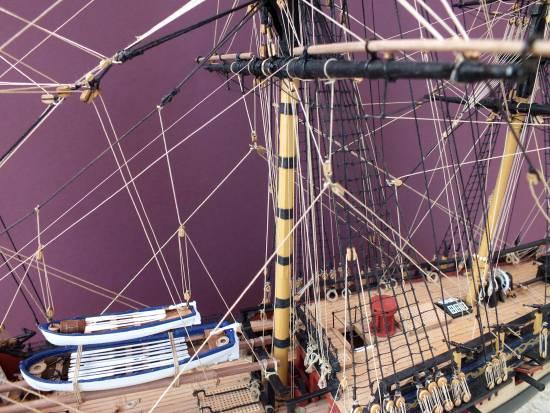
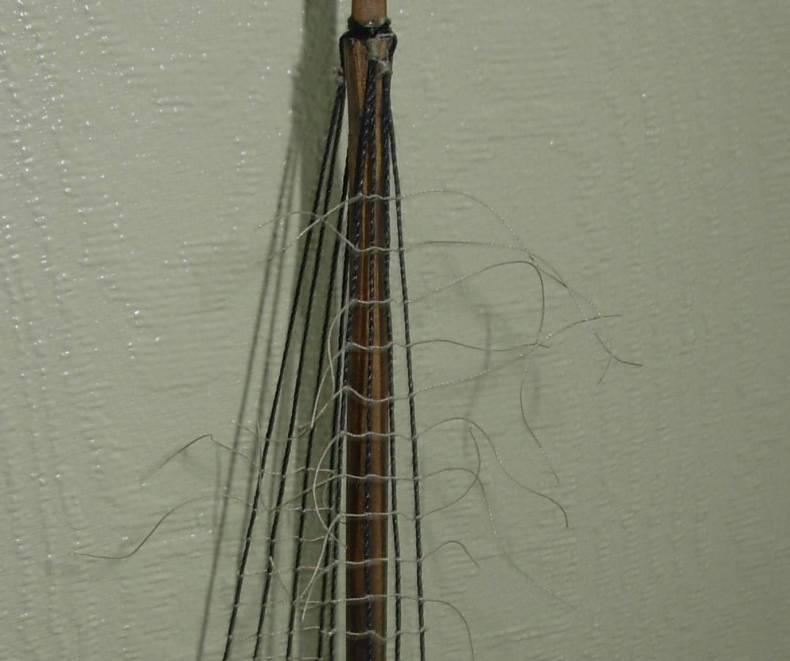
Shrouds & Ratlines
As the weather in the UK has been so bad it has been an ideal time to have a big push at the rigging. I started with the shrouds I decided to tie the deadeyes to the cord at each end and make four all the same length then passed them around the mast and tied the loops, at this point I also made the decision to use watered down quick drying PVA and a small paint brush to cover all my knots with this solution and trim excess cord when dry, this seems to have worked well, stops knots slipping or coming undone.
The ratlines were tied next, I started with a simple slip knot at one end and tried clove hitches across, but soon gave them up as way to fiddly (difficult and time consuming) and ended up using a simple overhand knot which I then found it very easy to adjust the tension between each shroud and once glue dobbed strong, after tying the hundreds of knots they were all glued and trimmed. The instructions tell you to use black ink to colour the ratline I used black acrylic artist paint watered down as I already had some, this I think has worked extremely well and would recommend it, note when painting the ratlines remember to mask the deck or you will splatter it with paint or ink.
Next job will be to tie all the standing rigging blocks to the mast.
Also I must finalise my choice of next model HMS Pegasus is the front runner.
Starting the ratlines


Tied before trimming

Completed shrouds & ratlines


-
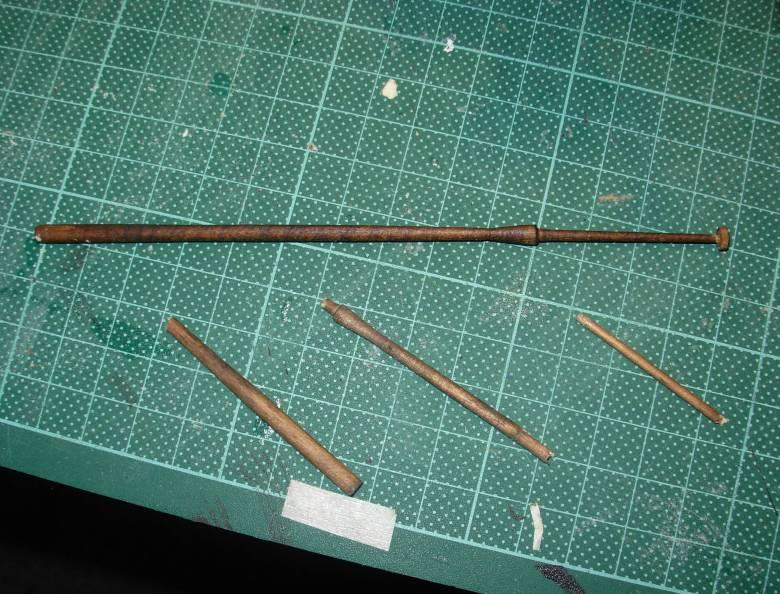
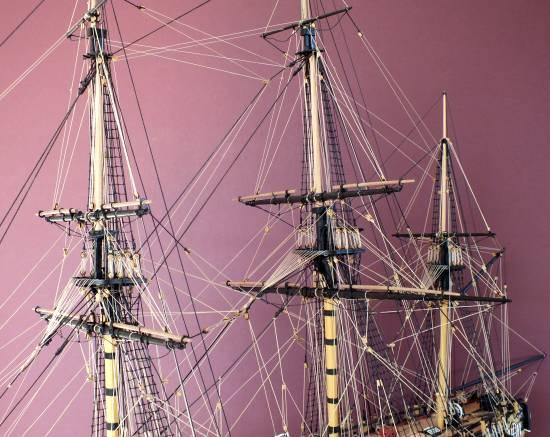
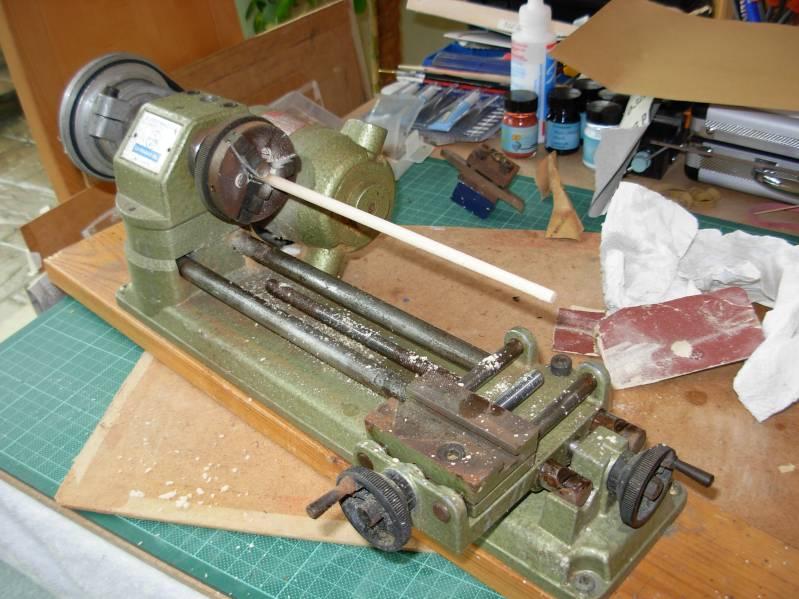
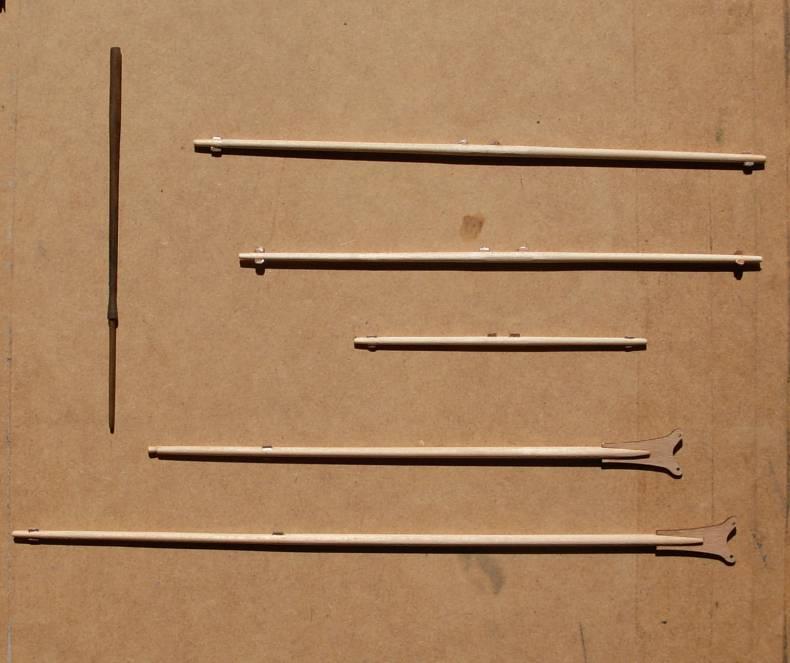
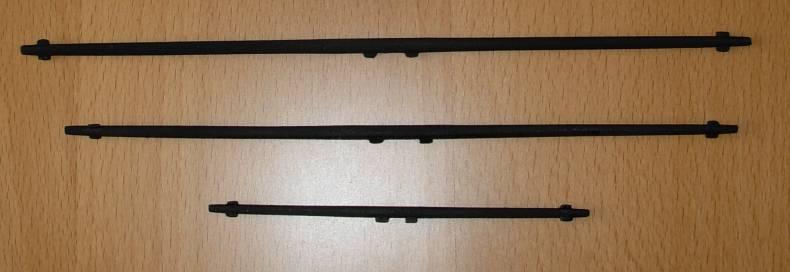
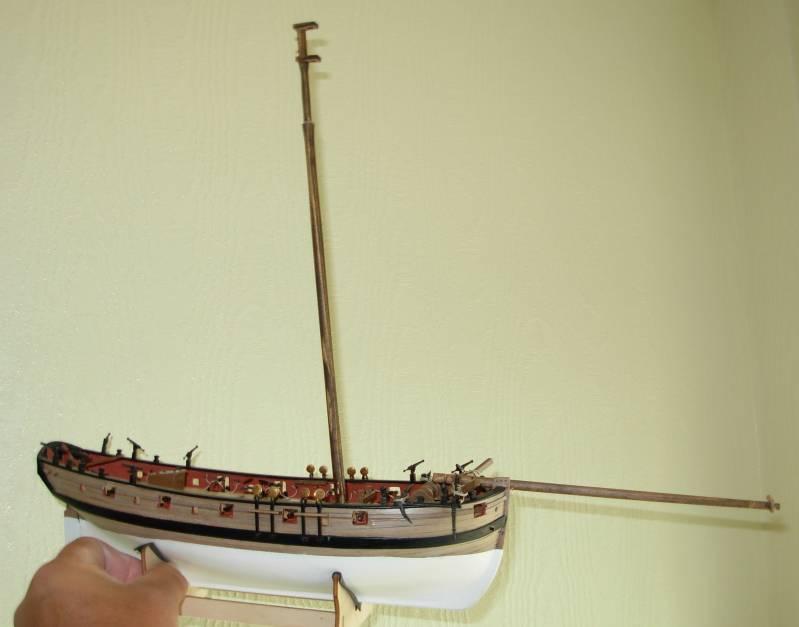
Masts & Yards
After a lay off during the summer and autumn, it was now time to continue and hopefully complete this build as its now to cold for fishing and golf, with our sub zero temps and snow. Time to make the spars, and then to rig the Lady Nelson I must admit I think the rigging for me will be the least enjoyable part of the build.
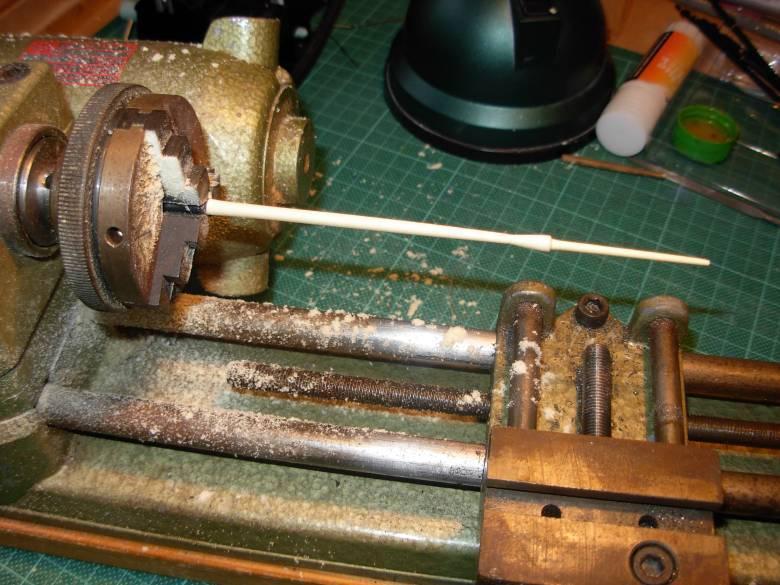
The spars were turned by clamping the dowel blanks in my unimat and where the dowel is clamped in the chuck wrapping insulation tape around that part, and then just sanding and shaping with various grades of sandpaper using a micrometer to check the diameter at various points. When all shaped and small wooden blocks (cleats?) added and the pre-cut parts. They were then all spray painted in matt black.
The dreaded rigging is next still there are worst things to do whilst there is 6-8 inches off snow outside.
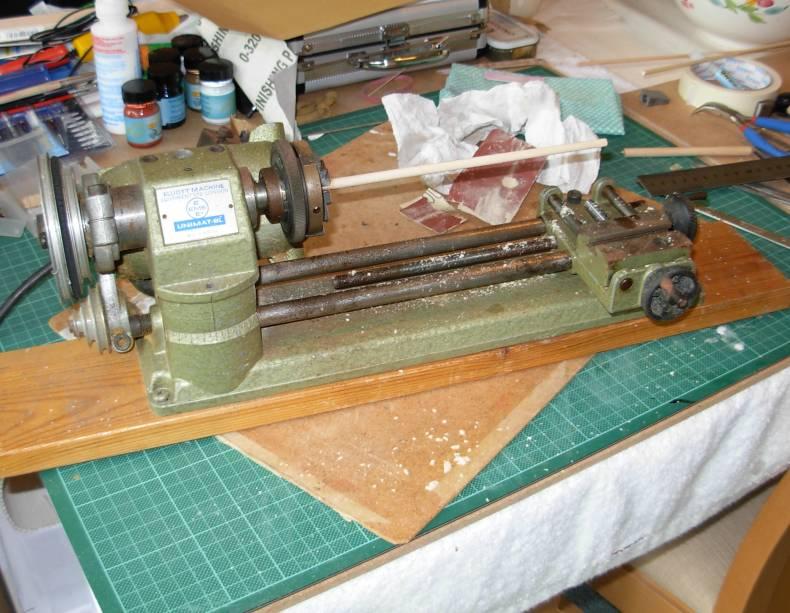
Unimat Lathe


The masts and yards were the next part of the build the mast and bowsprit first. I am fortunate enough to have a Unimat-sl lathe from years ago, so cleaned up and oiled ready to go, I did also have to order some new drive belts as the old ones were perished, bowsprit first this turned down fairly easily just a taper with a bit reversed at the end, I held the dowel in the three jaw chuck and used sandpaper to taper the dowel checking the diameter with a 0-25mm micrometer. The mast was a lot more difficult firstly I snapped the dowel and had to buy some 9mm, which meant the whole length of the mast had to be reduced, I marked out the mast masking taped
Mast detail


-
Hi Holty
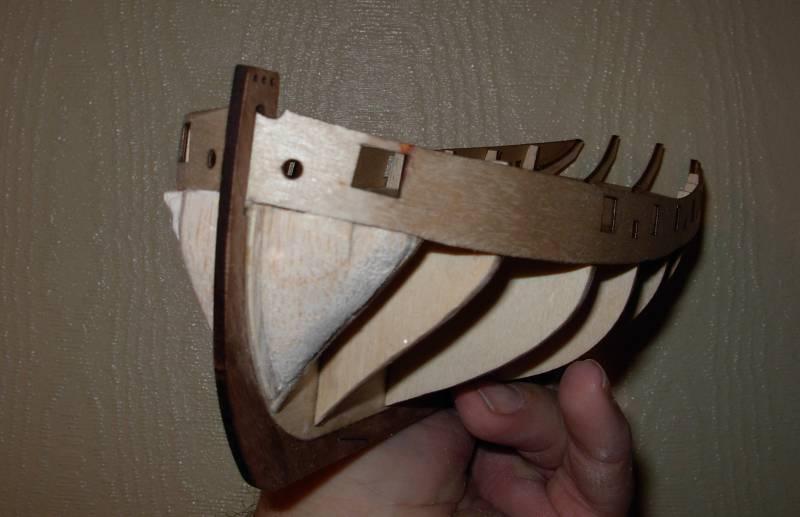
Stern post It was a while ago now, but i think I did not fit the stern post untill after the first planking, I would have sanded the first planking down (tappered it ) so when the stern post was fitted it would have been like a rabbet which the second planking would have ended up in to give a nice neat termination point, hope this helps.
Regards
-
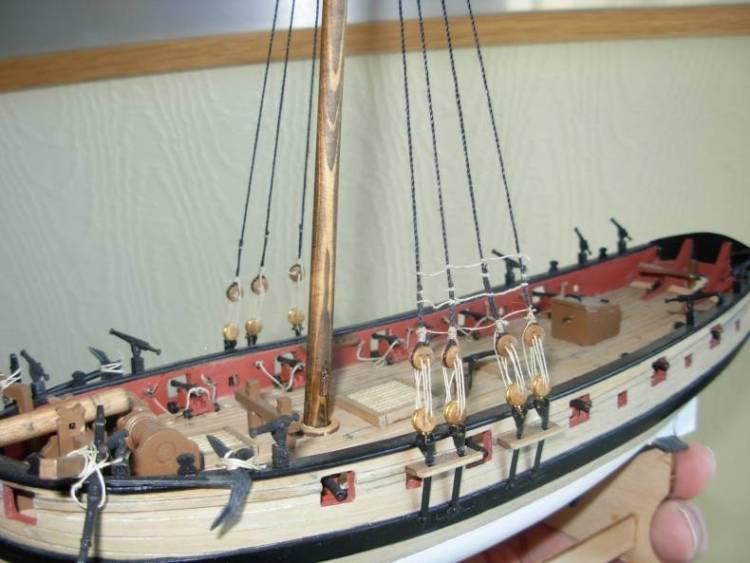
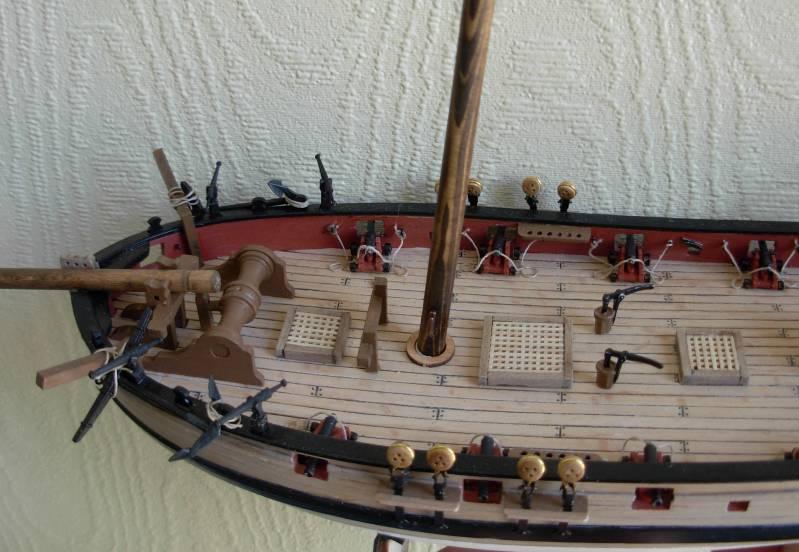
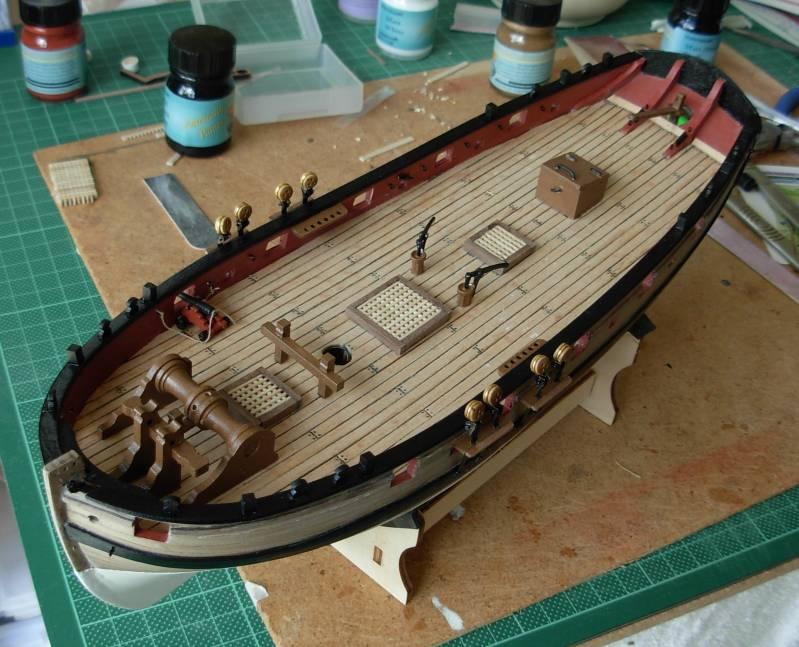
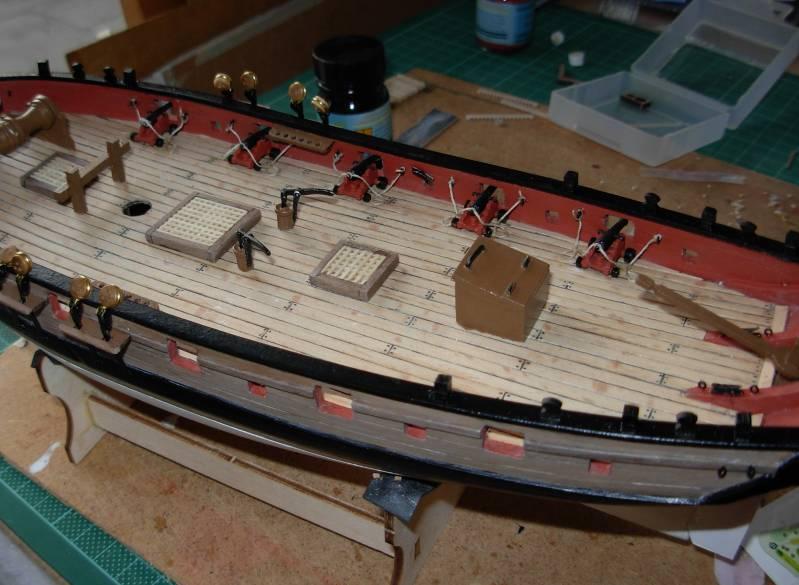
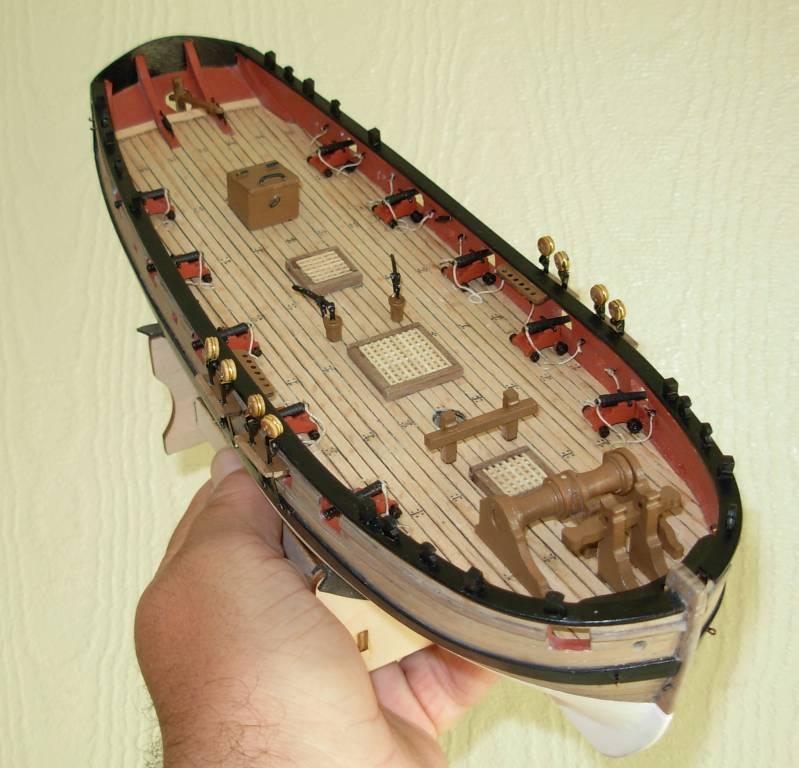
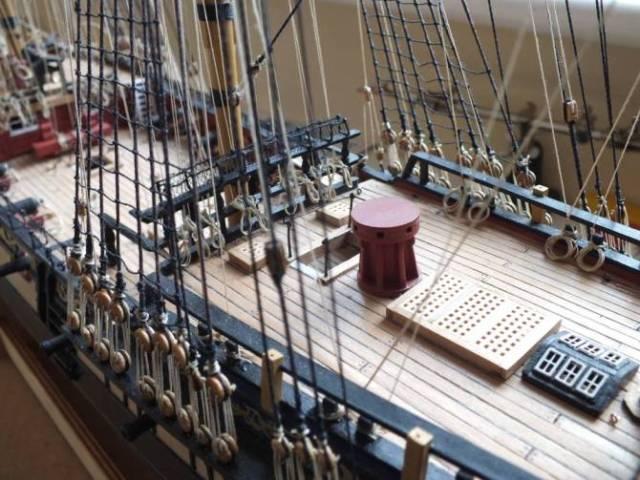
Deck fittings
The rudder and tiller were fitted completing the hull.
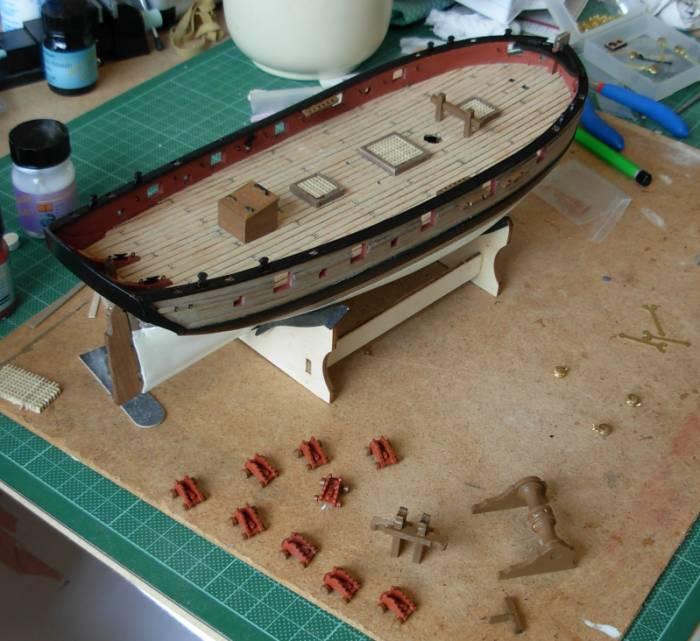
All the cannons and deck fittings were my next job spread over quite a long time; now the better weather is here (this always was a winter and bad weather project)
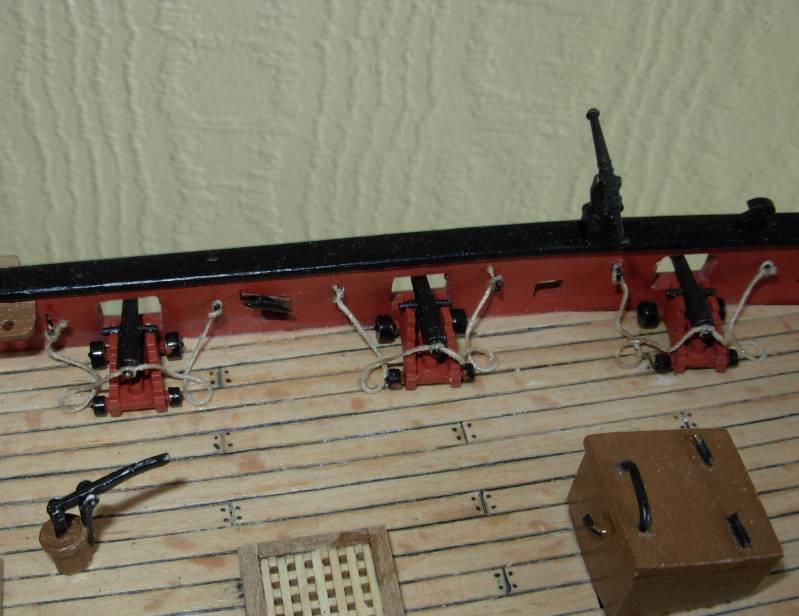
The cannons were painted, the trucks hand painted and the barrels sprayed with several coats of matt black and then glued together. I would have liked to have rigged the cannons fully but found at this scale it was just not possible so had to settle for just the recoil rig.
The gratings, belaying racks, winch, hand pumps, companionway, swivel guns, timberheads, channels and chain plates were all made with not problems and fitted. Most of the wooden fittings were painted walnut to give them a uniform colour I think this gives the best finish.
Next most of the cleats and eye bolts were fixed although not all as there are not enough in the kit so I will either leave off the ones that are not used when the rigging is started, or buy more and fit them when the rigging is done.


-
A toggle in action
The anchors added
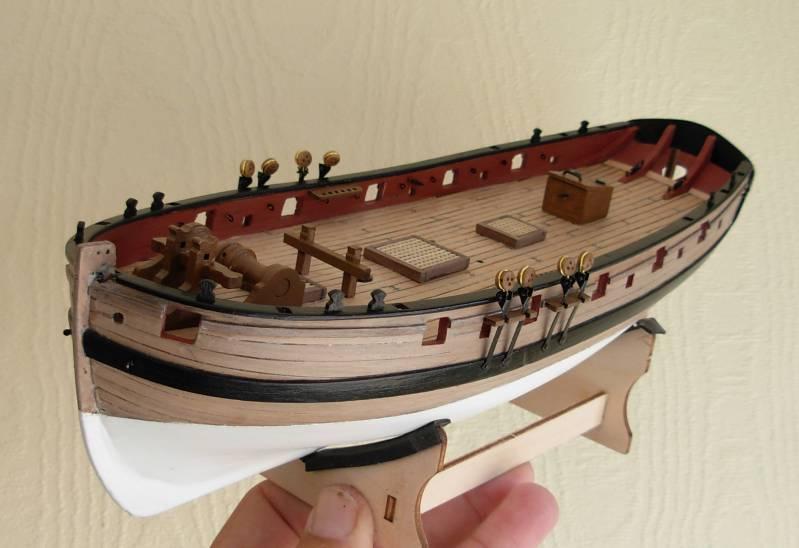
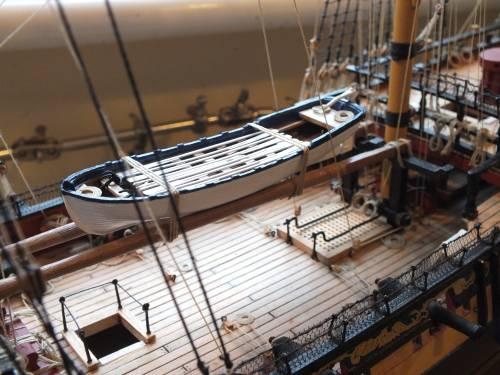
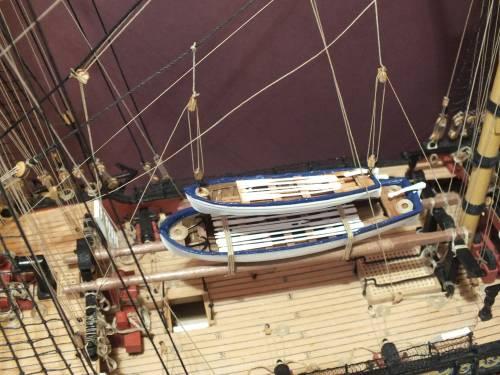
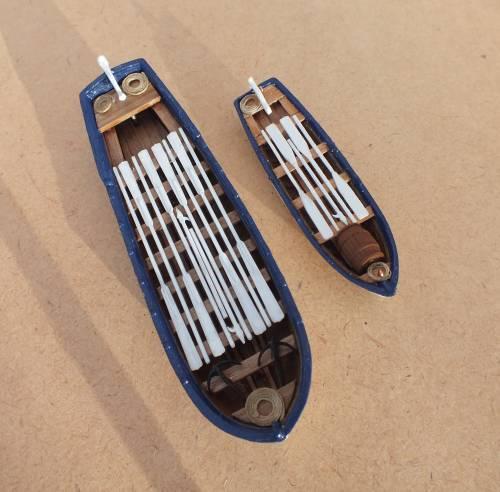
The ships boats stowed
The two ships boats have now been stowed and lashed down. The anchors were also added, only the rigging left of for access still to do, and the swivel guns to be mounted, the finishing line is just ahead.
The Pinace stowed
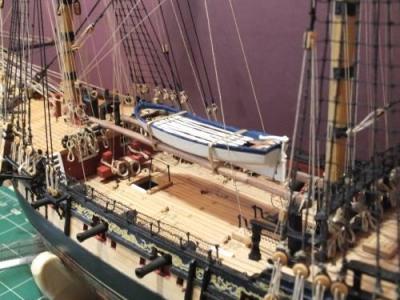

Both boats stowed


-
Hi Holty
Great that the logs helps, in reloading it I am finding my way around the new sites features its taking me a while but I think I am getting there.
-
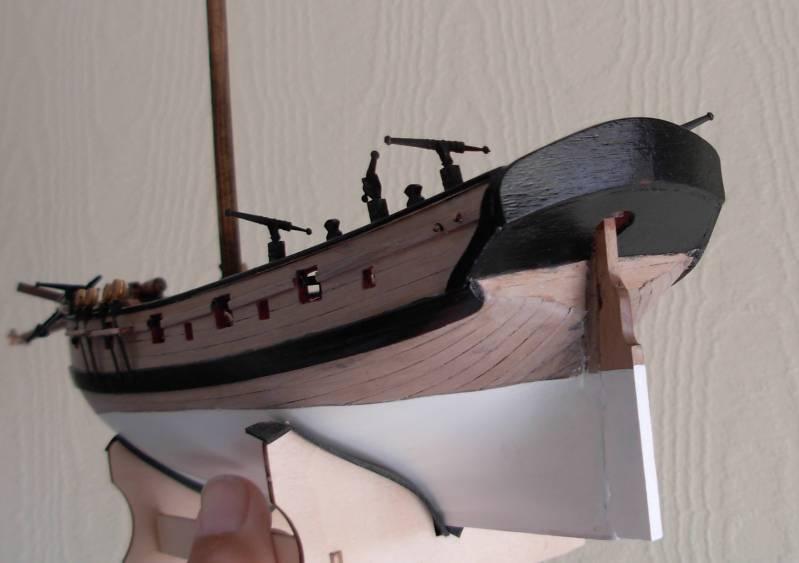
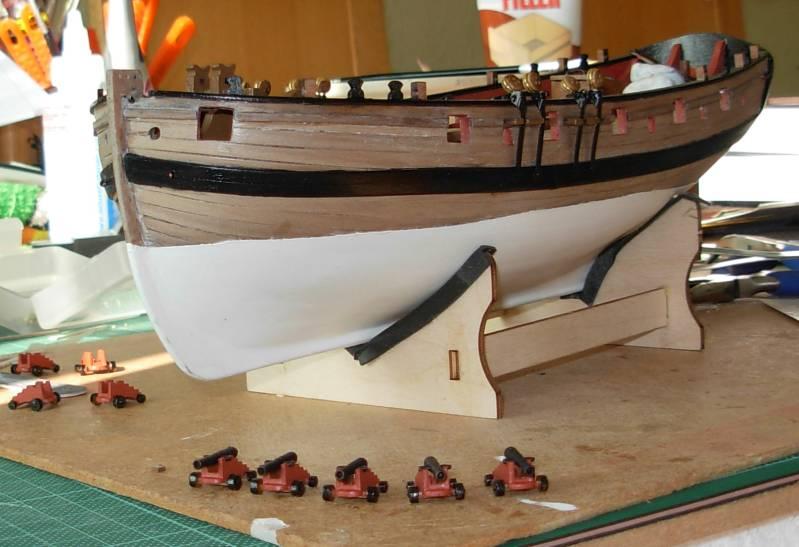
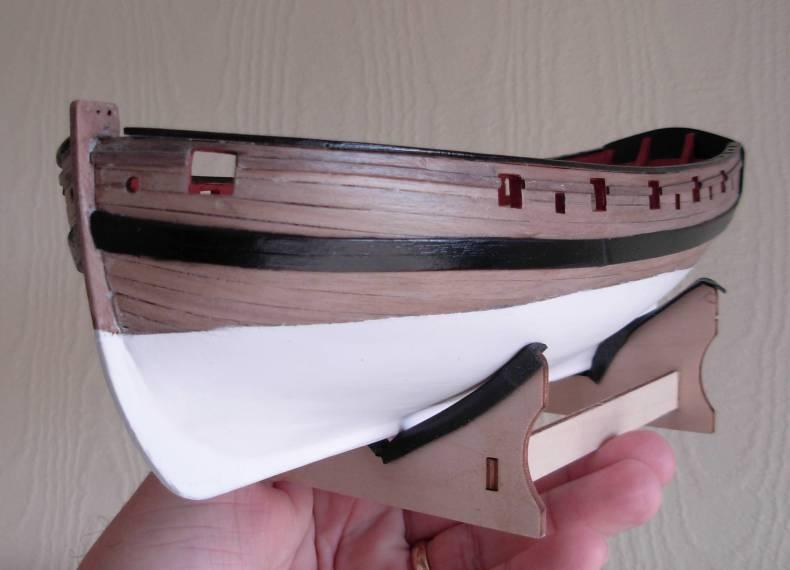
HULL PAINTED
The capping rail and the main wale were painted and the inside of the bulwark touched up.
Capping rails painted

 Hull painting
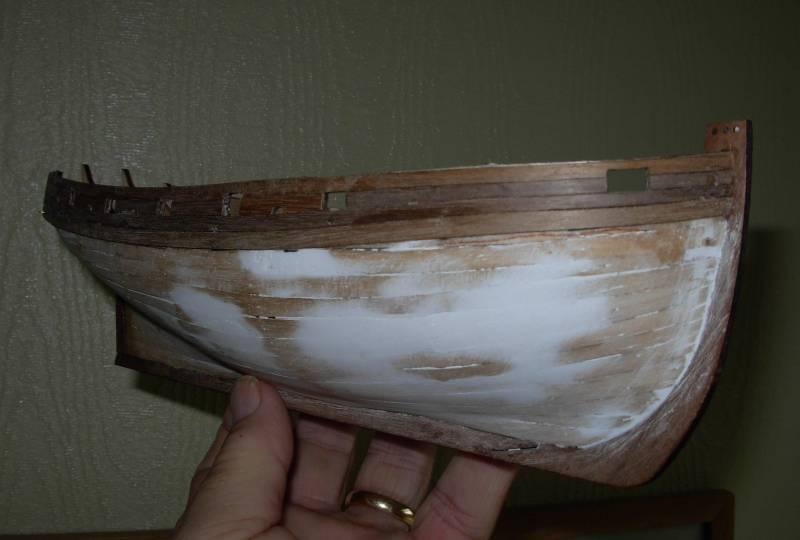
After marking out the water line the next decision was how to paint the white part of the hull, spray or hand paint, I decided to spray. I filled and sanded and filled and sanded, until I was happy with the surface, the paint used, again after a test piece was fast drying enamel, the first layers were a matt white primer about 5 coats rubbed down with fine wet and dry in between coats, the top coats were then applied, and to get the matt-ish look I was after, I was going to matt varnish the whole hull when all the painting was completed. The masking tape was removed, there was a very slight creep age under the tape, but on the whole it was not to bad, the only disappointing part was that the overall edge of the paint finish is a bit thick.
To finish off the whole hull was give a coat of the Caldercrafts water based varnish this I personally think will help protect the model and help with cleaning if it does not end up in a display case.
Masked and painted

Hull Painted


-
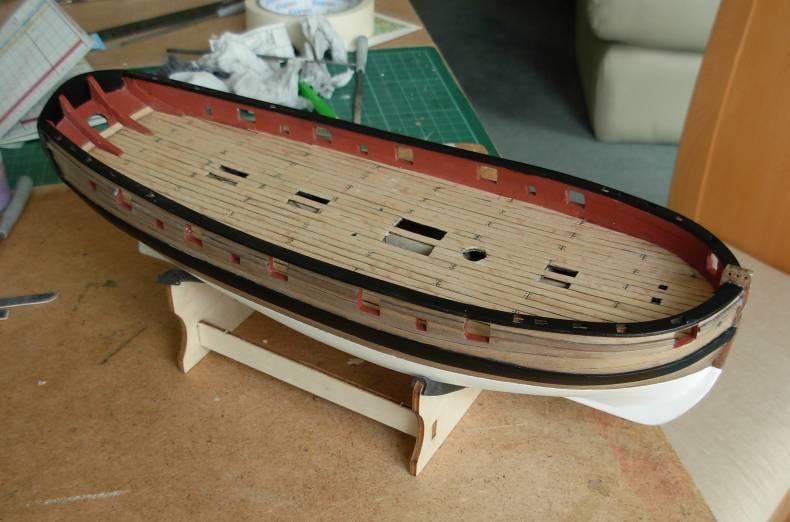
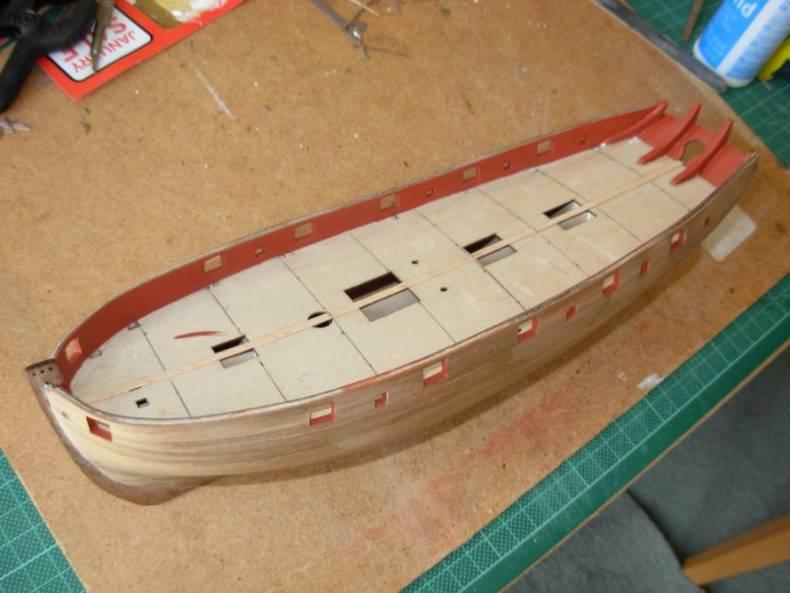
The inner bulwarks were planked and the gun and oar ports trimmed and filed square. The inner bulwarks were then painted red ochre, Caldercrafts historical authentic paint, the acrylic version was used.


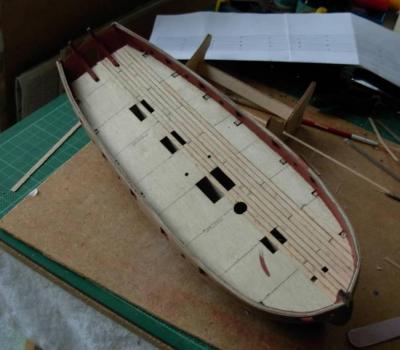
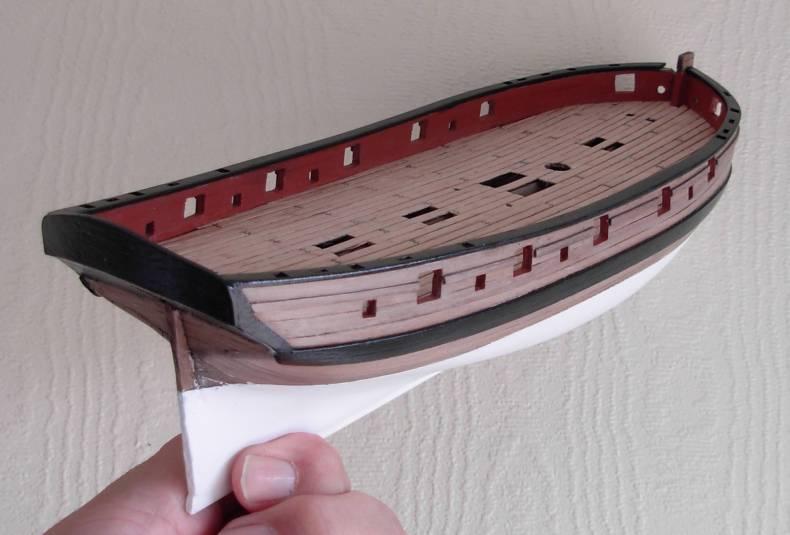
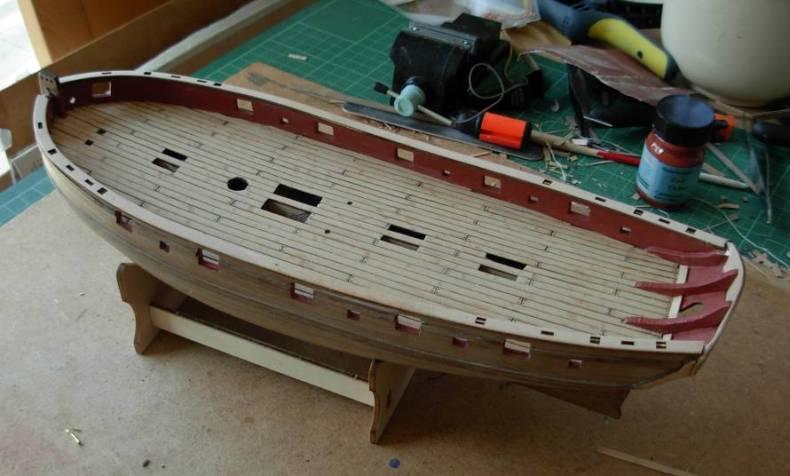
Deck Planking
I decided to use a three plank-repeating pattern with a nominal plank length of 20 feet, I drew this out on paper first and tried some others before settling on this one, and although it might not be totally authentic it looked good. The deck was marked to help with the jointing positions, and the centre plank laid,black cotton was laid between each plank to represent the caulking (really fiddly but worth the effort) the planks were fixed with super glue and the cotton wetted and laid next to the last plank, and then tacked with super glue, also each plank was sanded before fitting I did not want to clog up the caulking with sanding dust. Once all the planking was laid (I was surprised wow long it took), the nail fixings were simulated using a .005 black Stadler pen and to finish the whole deck was given two coats of water based matt varnish and I am pleased with the end result .


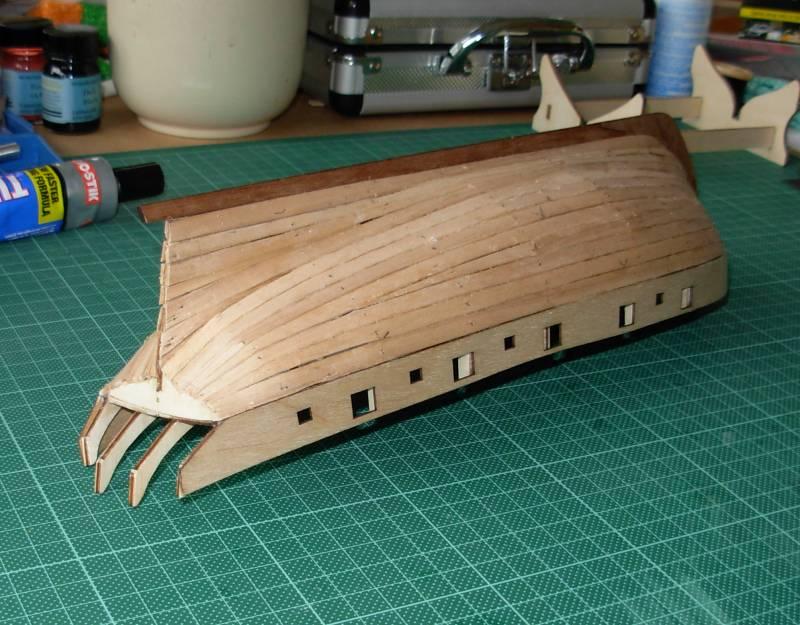
The main and upper wales were then fitted and the bulwark capping rail as well.
I made up a dummy gun port as I was keen to rig the cannons fully, but found after many attempts (and according to my wife much huffing and puffing and some naughty words) that they are just too small to do it. So I moved on, to make a jig and mark out the water line, painting the white part of the hull and the wale and capping rail will be the next jobs, and as the weather improves and more days spent on the golf course and around the fishing lakes progress will naturally slow down.


-
Hi how can you add text to a picture to describe it have tried but failed so far.
Ray
-
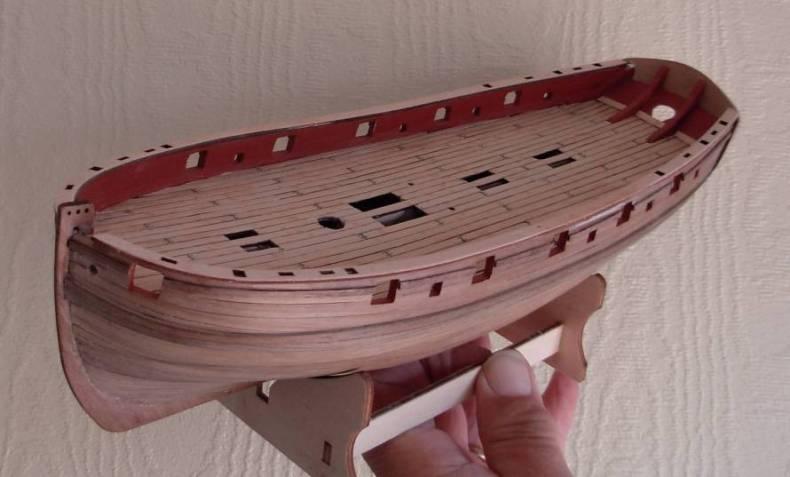
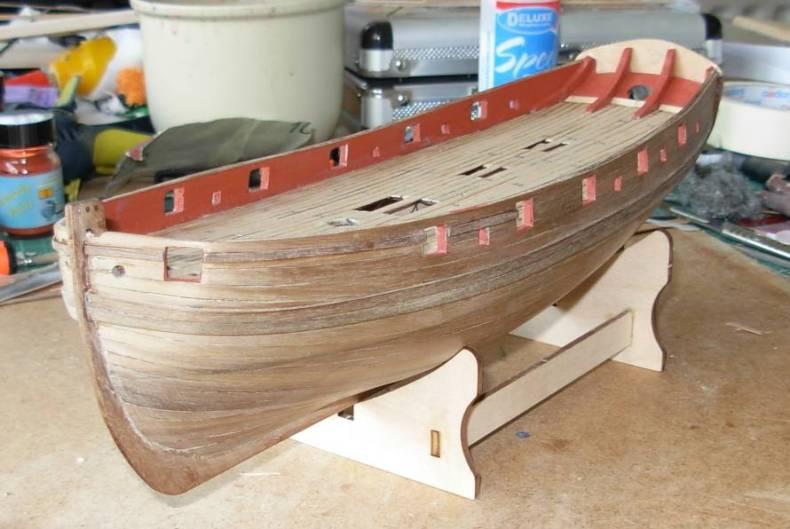
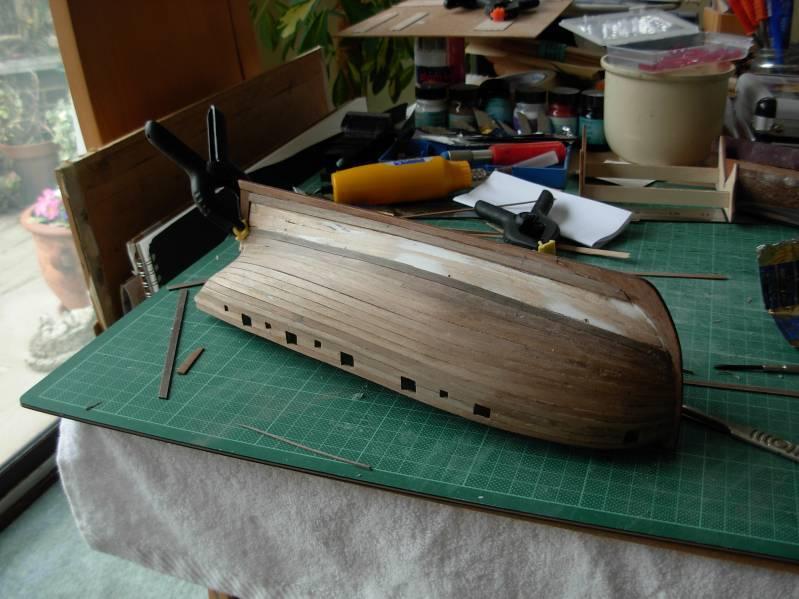
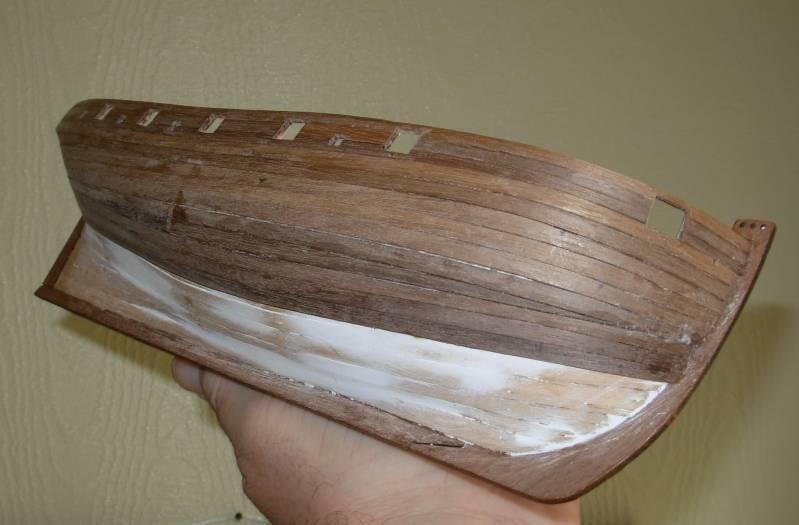
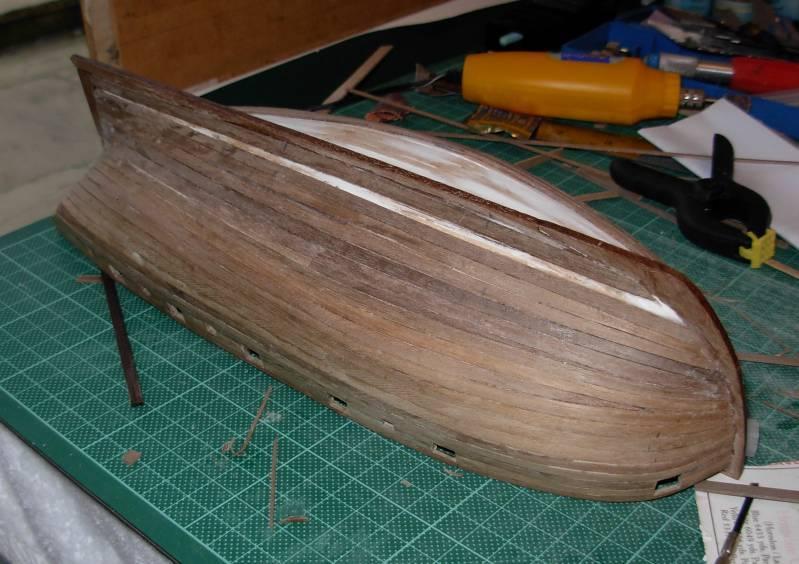
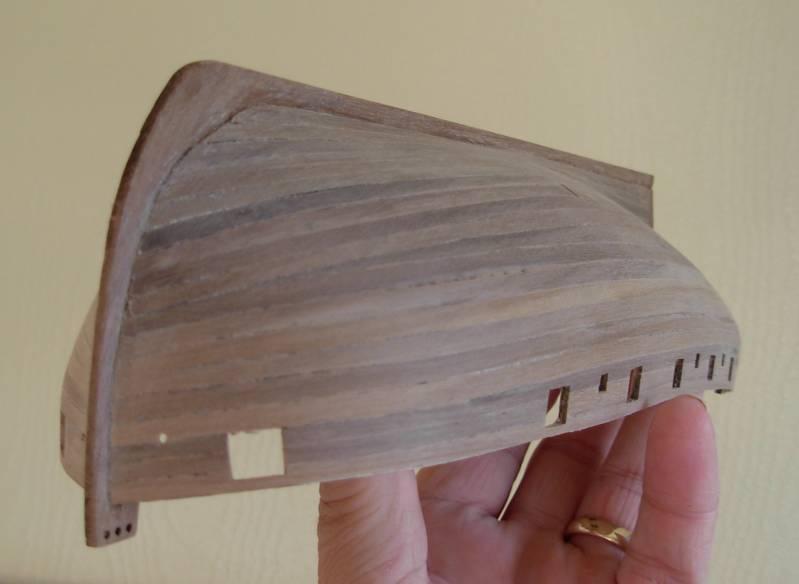
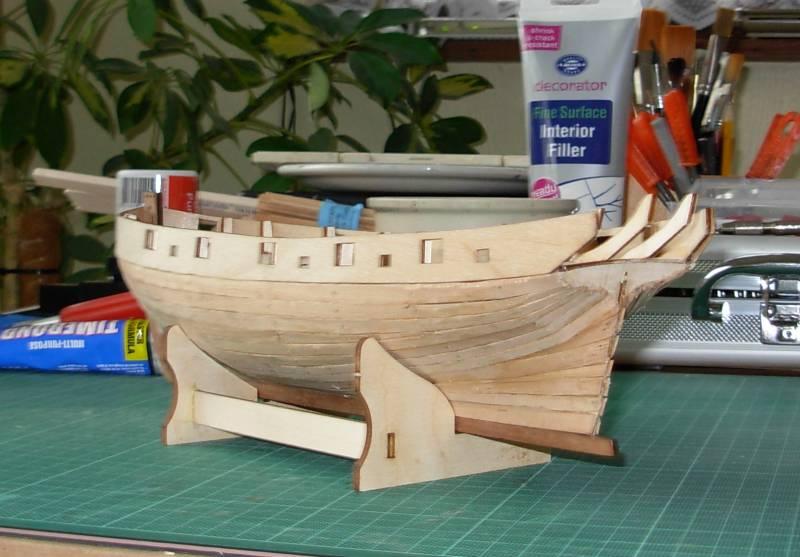
The 2nd planking went fairly well, I did soak the walnut planking well, actually I left them in a container of water and topped it up with half a dozen strips at a time, (I did a test piece and found no shrinkage problem fitting them wet-ish) I also found the walnut trimmed and sanded well in the soaked but drying out as state. The planking followed the first layer tapering towards the bow and I re-cut the rabbit before gluing the last part of the keel. I used the gel type super glue to fix the planks which worked well, on the, after working, damp planks, the only down side is it works out quite expensive, and only two drop planks per side were needed and one of those half width. The only bad bit, was some small gaps between planks, due I think to not chamfering the edges to much, but most of these will be on the white painted part of the hull so will be filled and will not notice, the few gaps above I filled using a mix of pva and sawdust this worked well, and in some of the very small gaps just squeezed in the pva and lightly sanded over and the dust filled in the gaps!
I now decided to cut and file the outer planking around the gun and oar ports as I could use the unplanked inner bulwark side to see the whole sizes and when that’s planked reverse the procedure. The hull was sanded next I found finishing with wire wool gave a better finish that fine paper.
The next bits planking and trimming the inner bulwarks should be no problem.
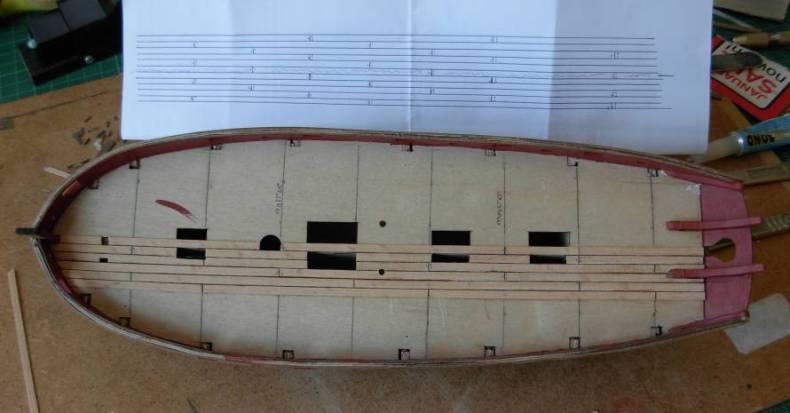
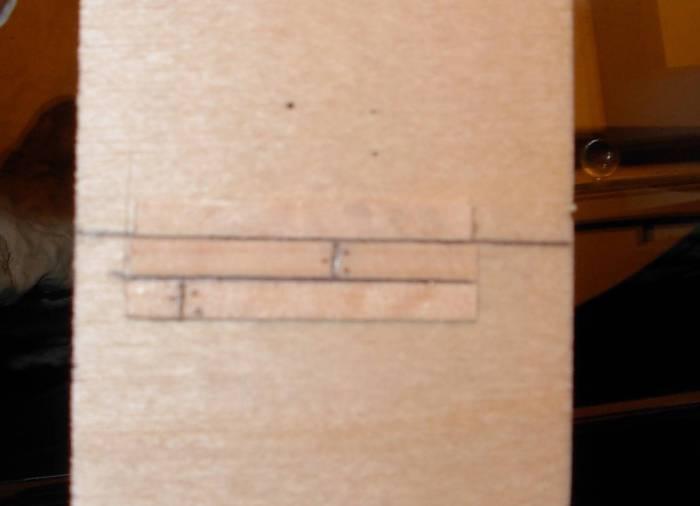
Deck planking?
The material seems a bit rough and after a trial, I think sanding in down first with the nail emery boards will work best. Caulking another test piece using black cotton between the planks looks ok, and by sanding the planks first should stop the cotton being clogged up or pulled out from between the planks, how does this sound?
One thing I have not yet researched or worked out is how long should each deck plank be and what pattern ??
Planking test

Second planking started


-
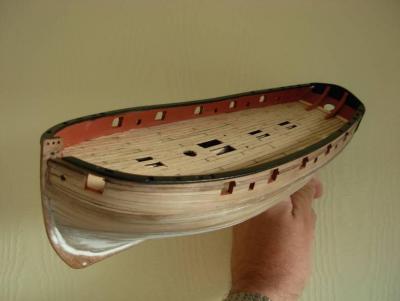
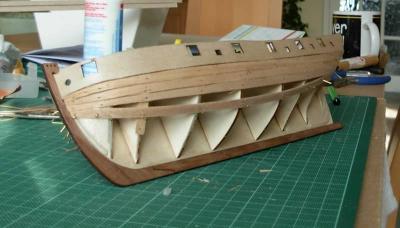
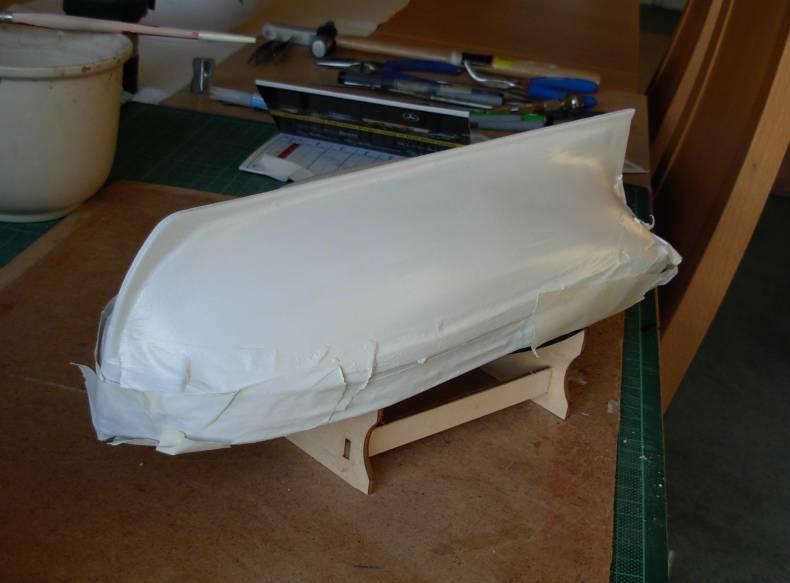
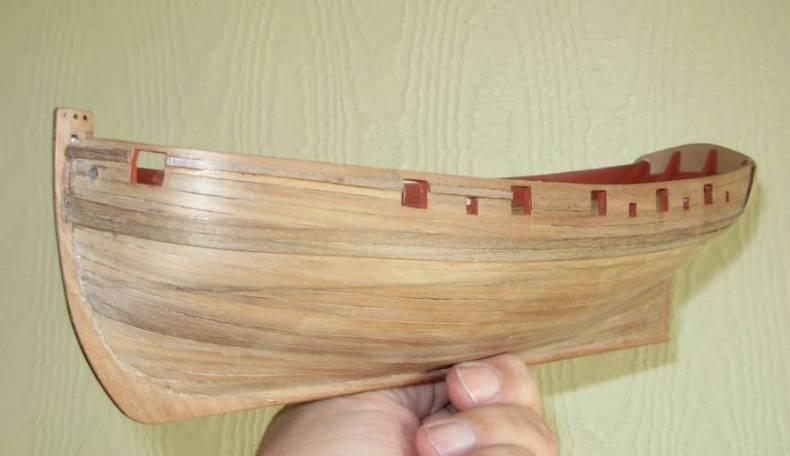
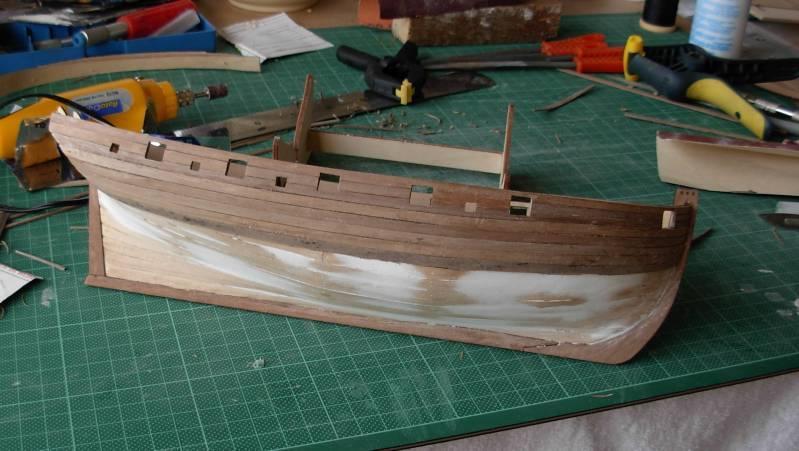
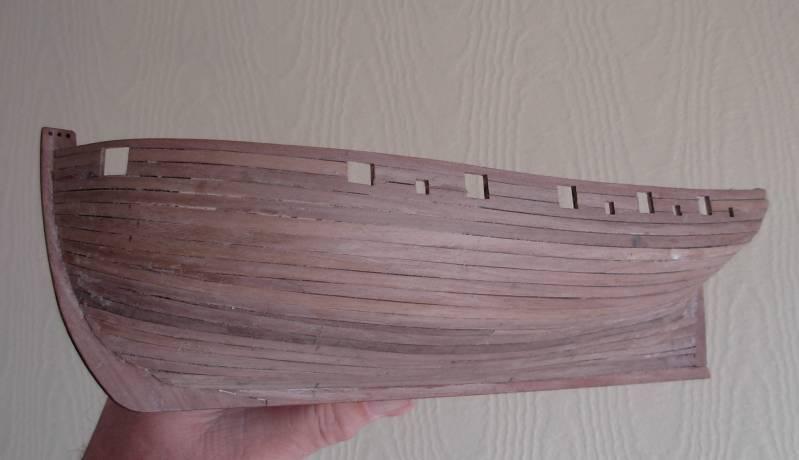
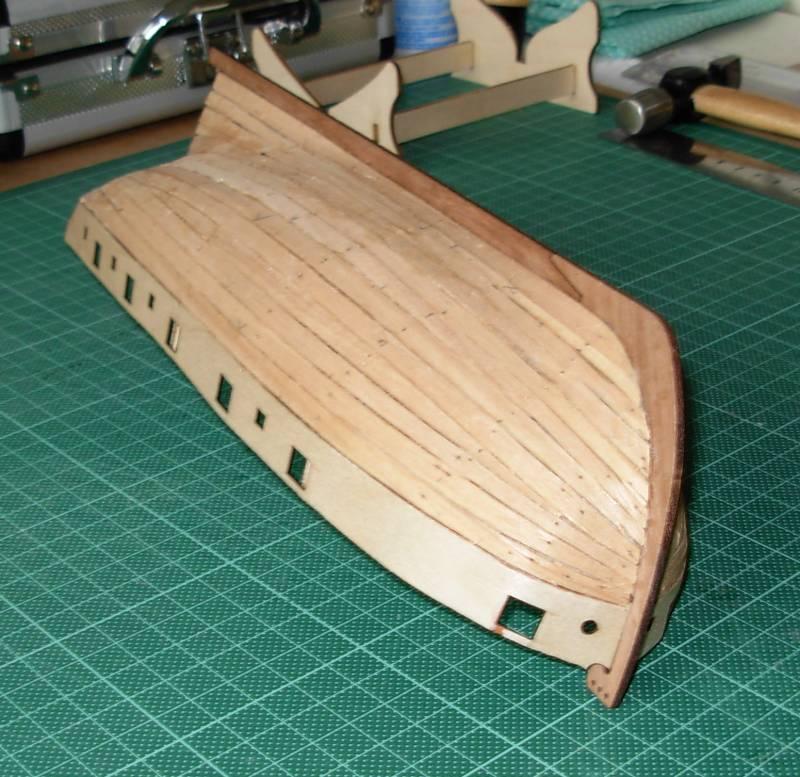
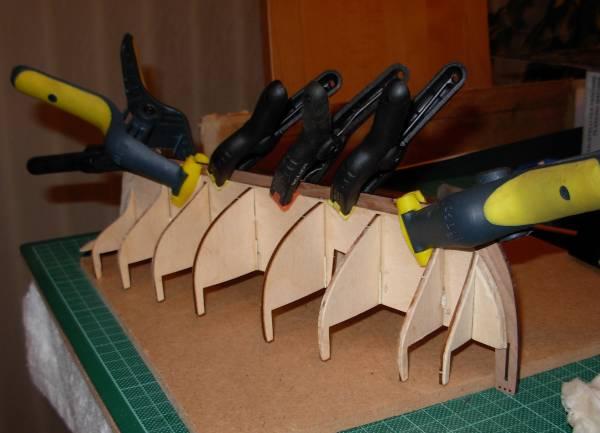
First planking
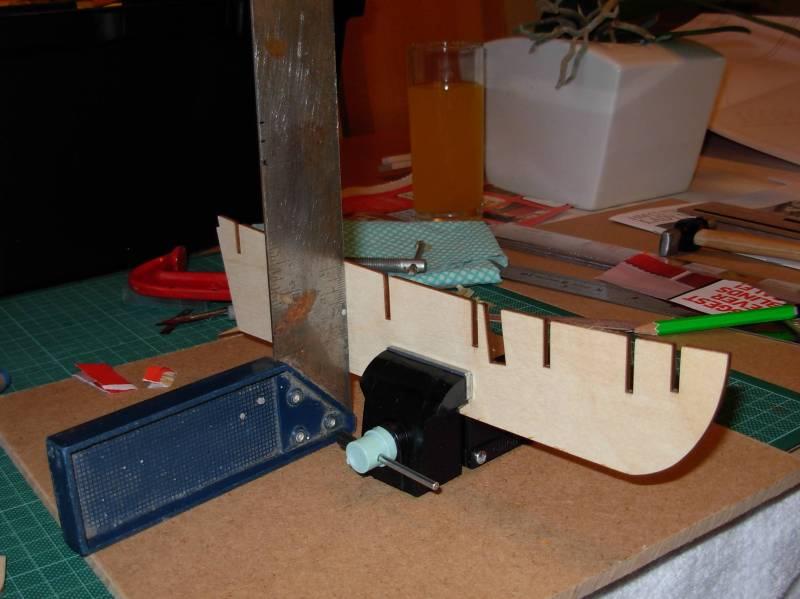
I started off by soaking the lime planking over night (I take note on the warning about shrinkage, but as is it the first layer I will see if it does give me a problem). I also decided to use the quick dry PVA and pins. Firstly using a piece of card took a measurement on the two middle frames and then at the bow, and found I would need to reduce the planking by around 50% and around 30% at the stern until you get past the counter, each plank was shaped and cut wet. I do confess a lot of the tapering and the amount each planks width was reduced was done by eye, not maybe the purest method but it worked for me. I attached about three planks alternately each side gluing the edges as well. I found the best way for me was to lay the soaked plank against the last one fitted, allowing the natural run to occur as far as possible, and then taper mostly removing wood from the top edge reducing the plank width between about 40 & 50 %, I also chamfered the end of each plank at the bow, and left a small overhang at the stern, I then held the plank right into the bow, and with the other hand held it to a middle frame and marked it at each frame, put it on the cutting mat and with long nosed pliers pushed pins in ( see photo ) then glued up.Then fitted the plank some pins just pushed in with the pliers and some hammered with a small hammer( 99 pence in QD). This method was used to complete both sides I did stop about two thirds of the way down and fit the garboard plank, and only needed one drop plank each side when the natural run seemed to need it. Stealers were use towards the stern as required. I did regularly trim off the overhanging planks at the stern as I found they got in my way.
On reflection I am fairly happy with the first planking I tried to do it so I can follow it with the second layer and think I have achieved that, the disappointing bits - however hard I tried I could not stop a slight clinker effect towards the bow !!! And secondly a few lows/hollows, I expect some filler will cure them.
Sanding the hull is the next job, and I think I will mock up some planking (I have loads left over did not mess up one length) to test out the gel super glue, will it work on damp/soaked planks?
Will I hand paint the hull or spray it .


-
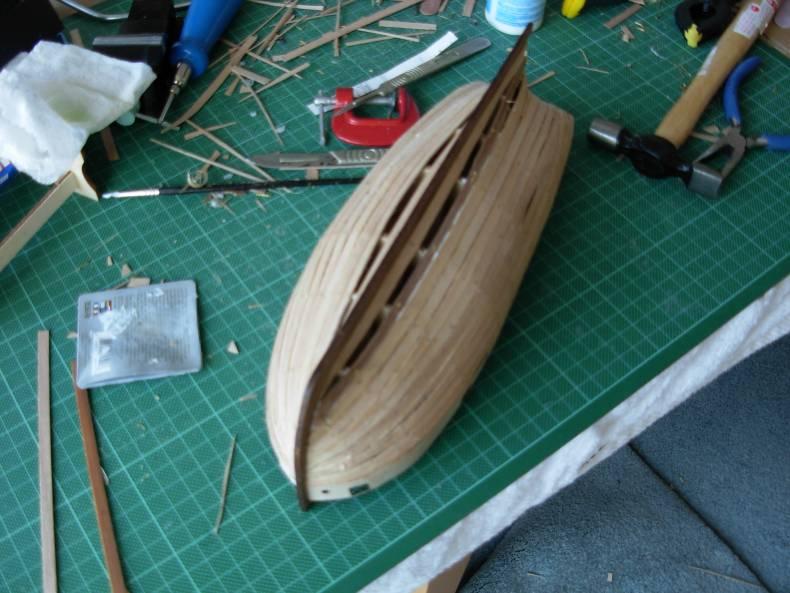
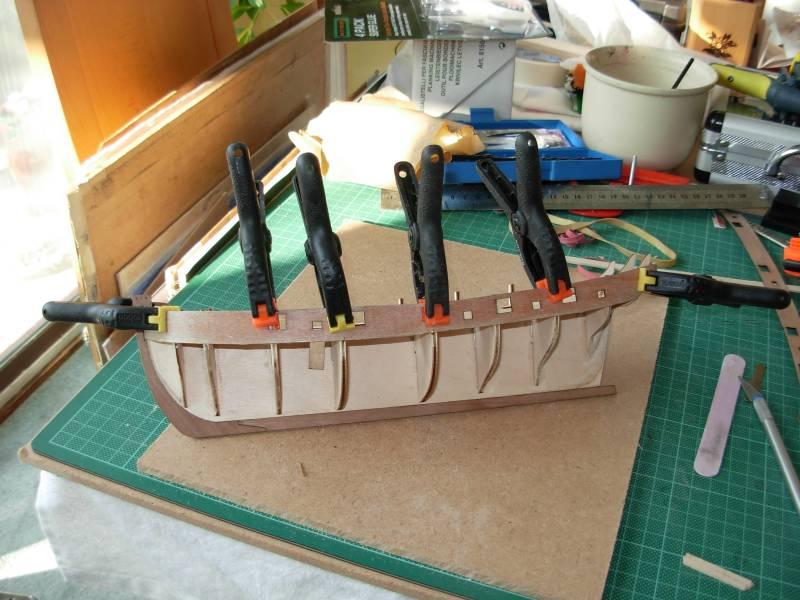
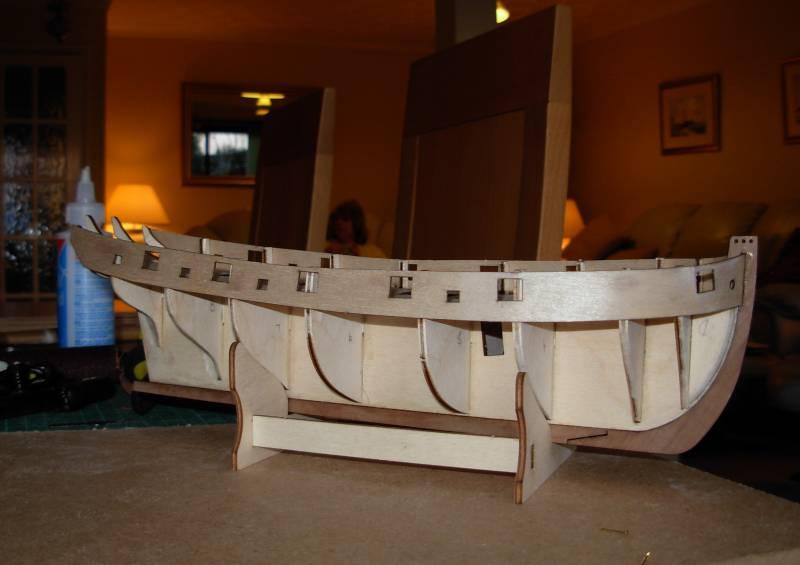
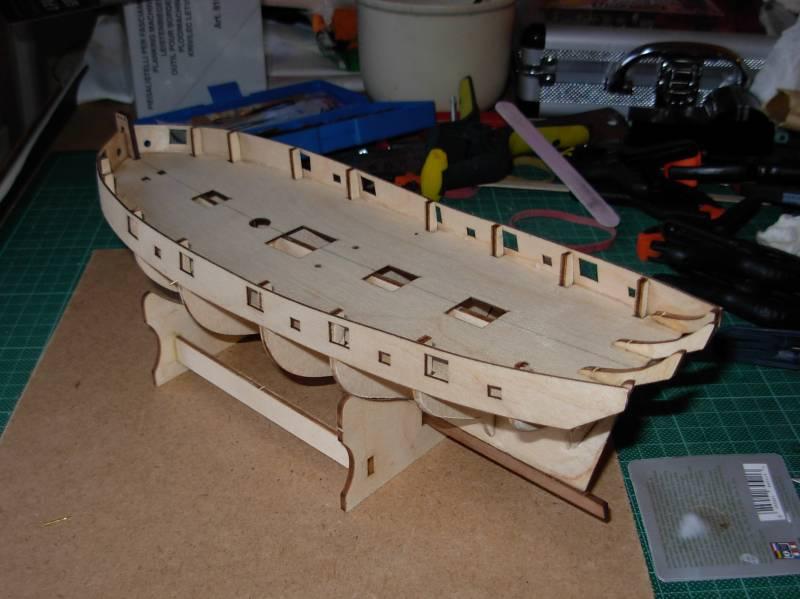
The next job was to sand down the high frame I did this by eye, as I said it now looks right. Ladies nail emery boards this is what I used to sanded it down with, I thinks these are a very cheap must have items, I can see lots of times they will be used does any one else use them.
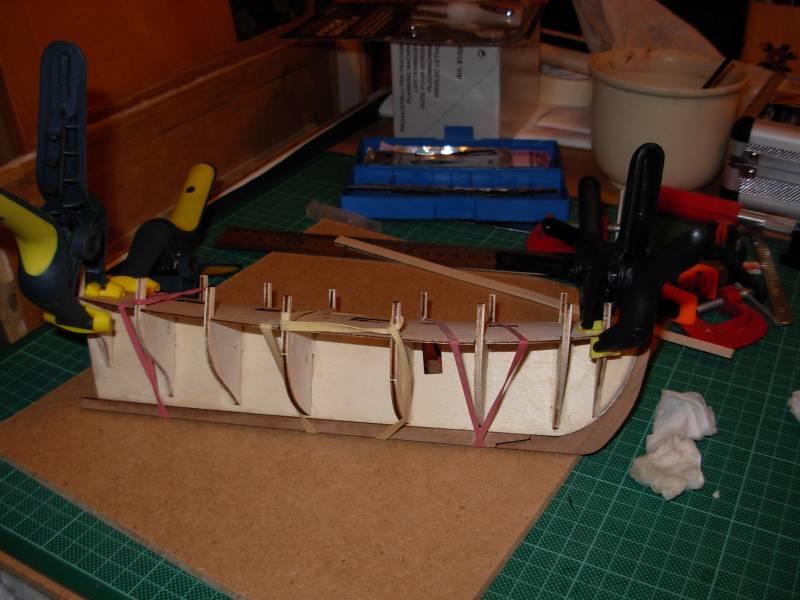
Now using a drum sander with the multi tool and finishing with the emery boards tapered the frames/ bulkheads, bending a length of planking as a guide. I also tapered the bow and stern blocks before gluing them into place, another decision was to draw in a beading line and chamfer the keel down to a third of its thickness but not to do a rabbit line. The keel went on next but leaving the stern piece of until after at least the first planking, the deck was then glued in place, I found clamps and rubber bands better than pins!
Planking pleasure or curse I suspect some of both. I remembered soaking and being the best way to prepare the wood, so I found a container and filled with water and put in a dozen or so first planking strips and the two bulwarks and left them to soak over night. The bulwarks bent easily wet, and were glued using pva; after they were dry I decided to add filler blocks to the bow using balsa I think this will make planking easier.


-
PLEASE NOTE
ORIGINAL BUILD WAS FROM JAN 2009 & COMPLETED IN JAN 2010
Lady Nelson Build Log
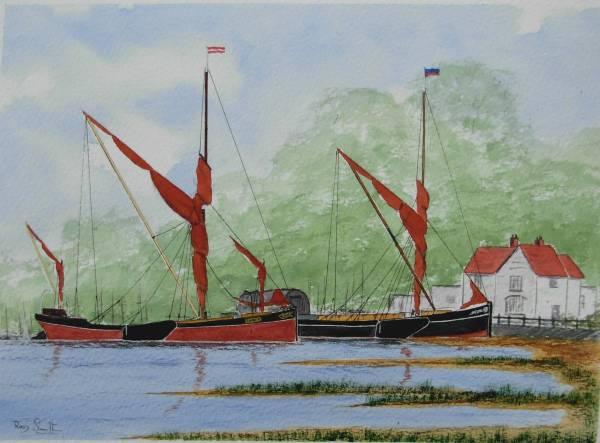
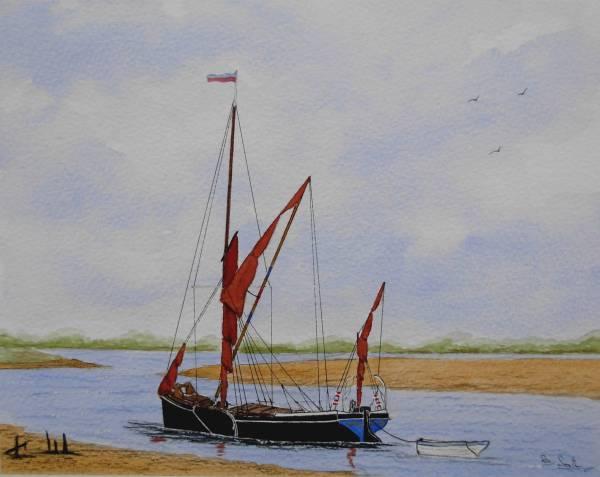
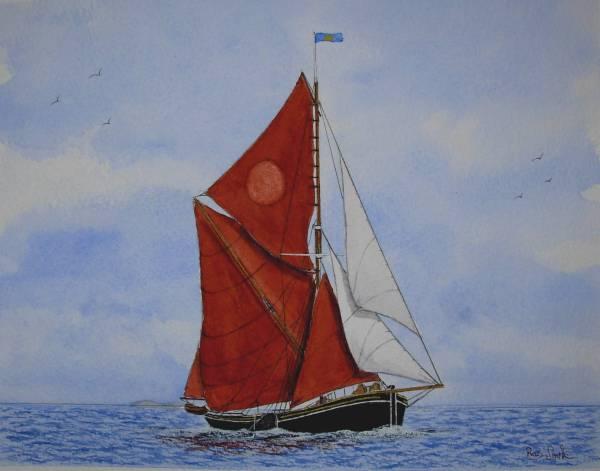
Hi all this will be my first model ship build for over 20 years so I am a sort of beginner, I decided to build a model as I find its to cold to go carp fishing in the winter and can only play golf weather and arthritis permitting, so I sold a few watercolours of Thames Sailing Barges (another hobby) on Embay to pay for the project, the Lady Nelson looked to be just the model to build.
I sent off for the kit plus some tools a plank bender, plastic vice, pin pusher, pin vice and some quick set PVA back in the old days I used cascamite a powder glue you mixed with water from watery thin to porridge thick, no super glue in them days how things have moved on, plus a roto electric multi tool. While waiting for these to come I set up the workstation, the end of the lounge table, (I also paint there my wife thinks its more sociable), a sheet of mdf and a cutting mat. Then read all the build logs and tutorials.
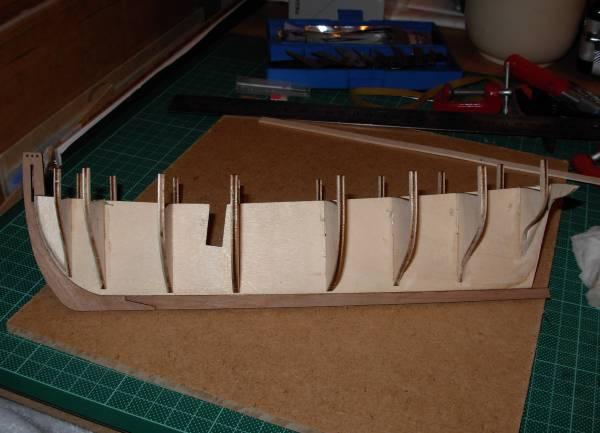
The kit arrived 25th Jan and the contents checked all seemed to be good quality, another read of the tutorial. I cut out the frames/bulkheads and dry fitted to the keel, found they were a sloppy fit so packed the out with card, glued the frames to the keel making sure they were square, and the same height at both sides, plus the outside length the same from the centre line on the keel. Fist problem the second frame from the bow had the deck level higher one side hard to measure just looked wrong I find if it looks right it usually is.
That’s it for now I will add some pics


-
Hi Aldo
I have finished Pegasus just reloading it thanks for your comments.
-
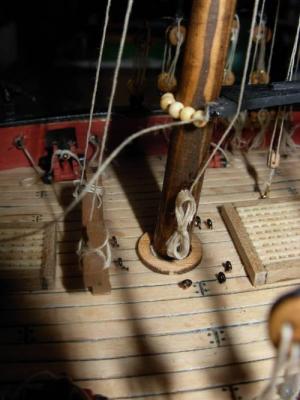
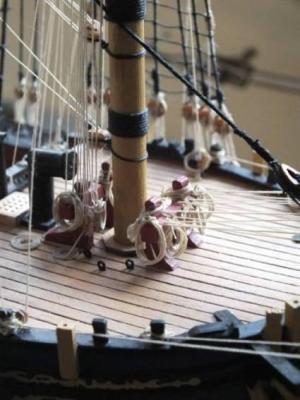
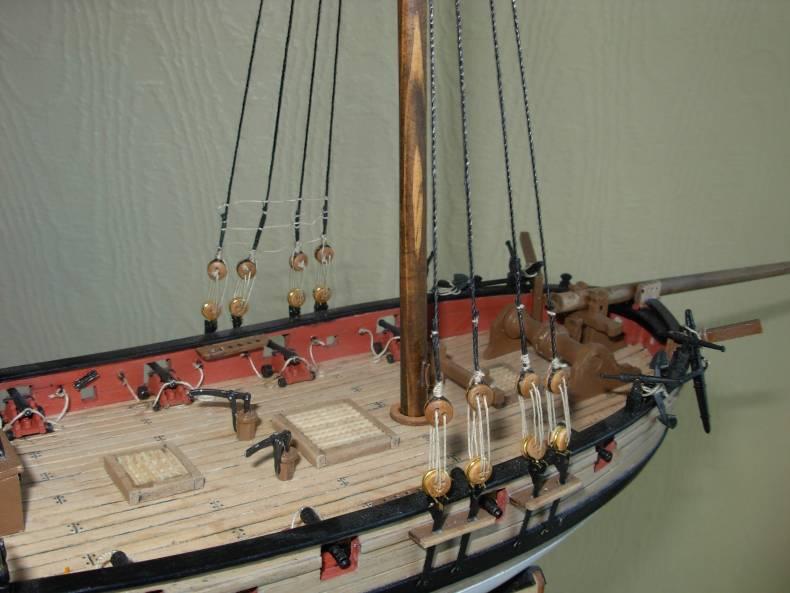
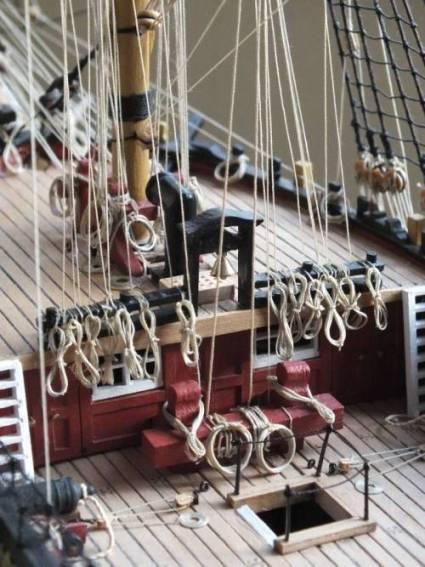
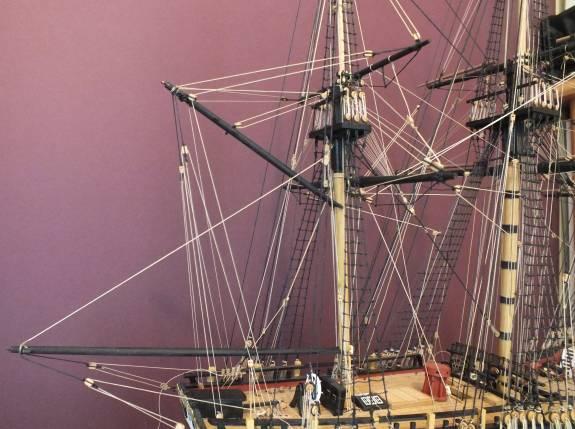
Rigging rope endings belaying points
I have now made and added most of the rope coils, there still might be a few more to add once the rigging is complete, I think they give a fair representation of the rigging endings you cannot add a coil for every rope ending there just is not room, a bit like in a painting you cannot paint every tree in a landscape just enough to look right.


-
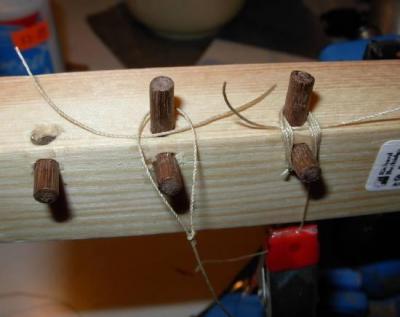
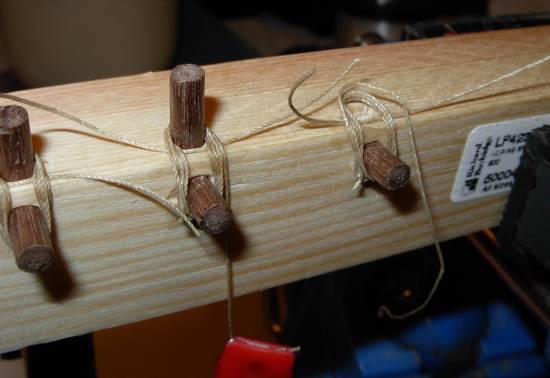
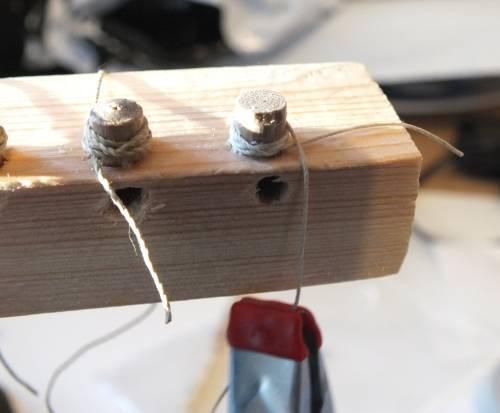
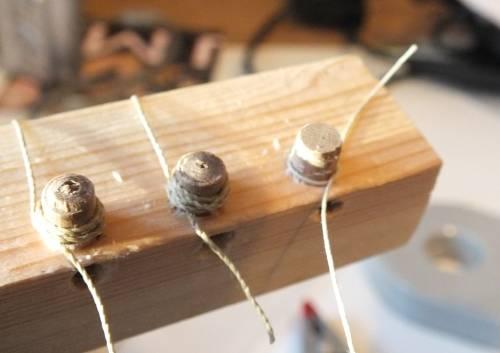
Rope coils
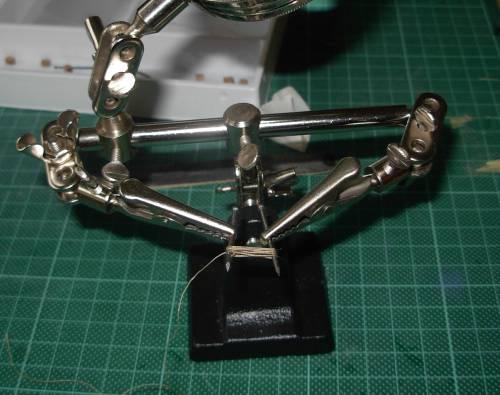
Three types of coiled rope were needed to be simulated at the end of rope runs the first set of photos shows them in hanks larger coils tied in the centre, I saw a similar jig somewhere so its not all my idear the photos explain how its done, after the cord is wrapped around the pegs it was washed in diluted pva and left to dry before the top peg was removed and the centre tied off.
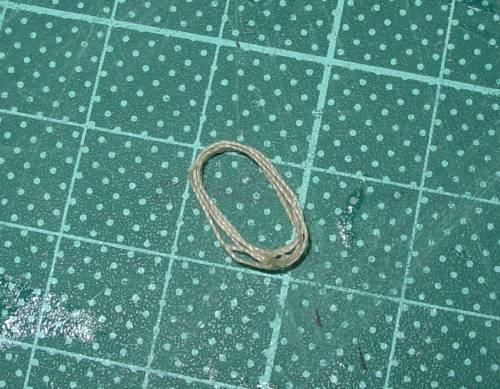
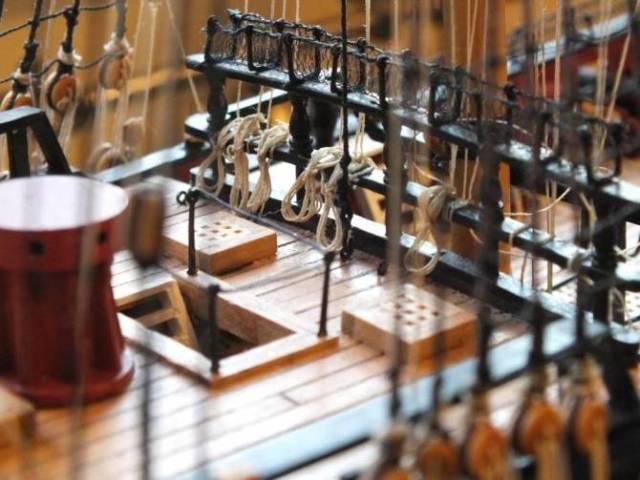
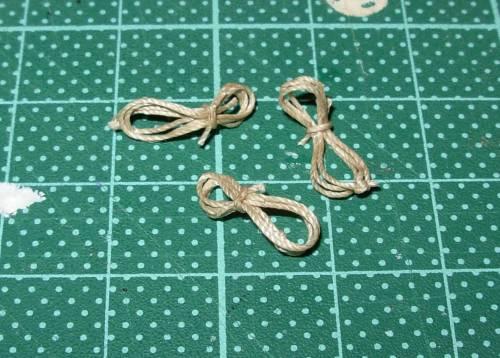
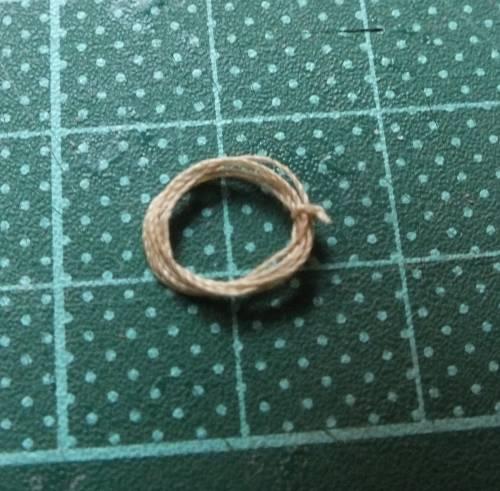
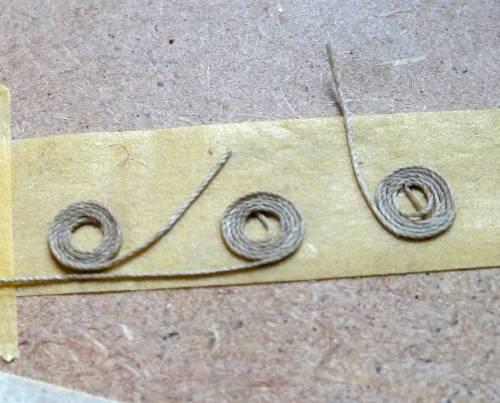
Rope coils two
The second coils type to be laid flat on a deck were as per the photo just coiled round on a length of tape and PVA washed, the third type as the photos were done several sizes using larger or smaller dowel, again PVA washed all were done in batches.


-
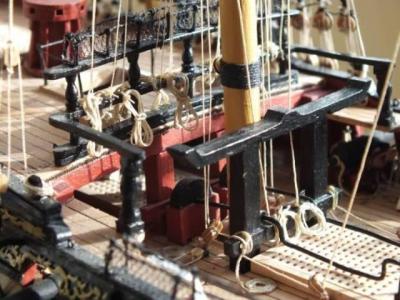
Bowline rigging
All the bowline rigging as on plan 12 (bottom half) has been added minus the rigging on the main and fore mast lower yard, to continue leaving access to the middle of the deck and belaying points, again no real problems were encountered other than that the congestion keeps increasing. One thing to be aware of, is that I found it best to add both the port and starboard rope runs at the same time, so they can be tensioned and tied off together that way they have the same tension both sides, I did have to re-tie or re-tension a few previously rigged runs at this point.
I next, very nearly added all the rigging that I had left off for access, but a good job I did not for, whilst having a rigging break making up the ships boats I also making up some rope coils and hanks, and I decided to offer up a few of these to see how they looked, and it soon became apparent that they needed to be added next while there was still access, so that will be the next job.


-
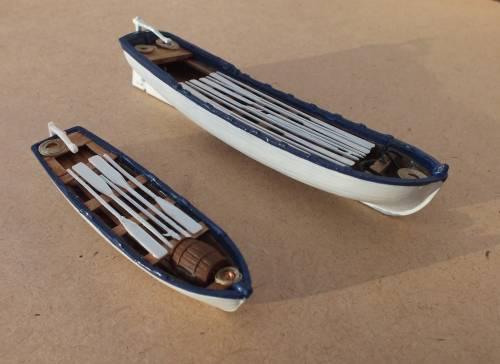
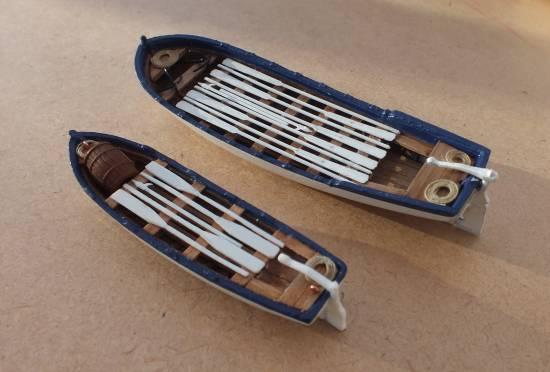
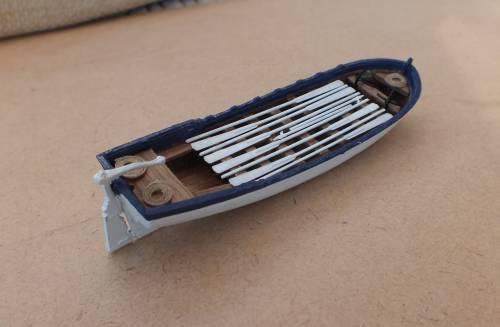
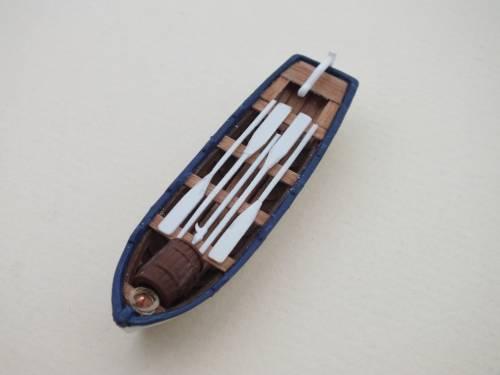
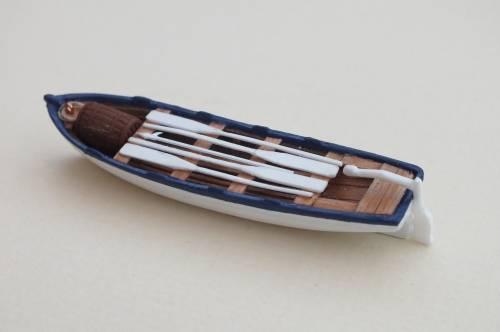
Both ships boats fitted out back to the rigging


-
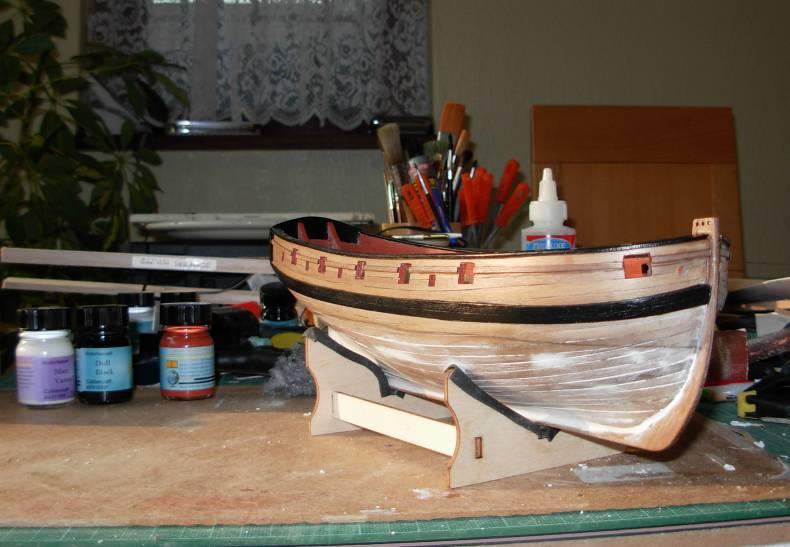
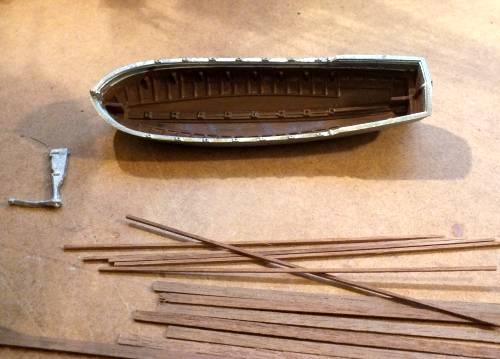
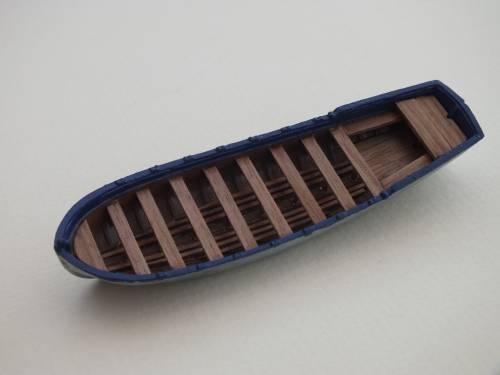
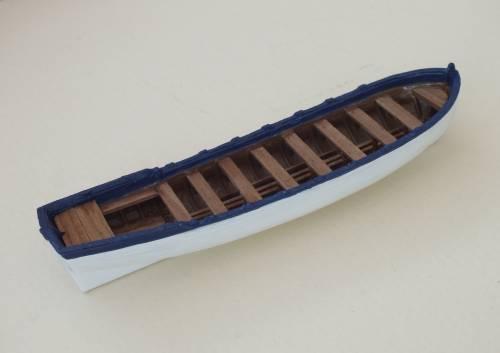
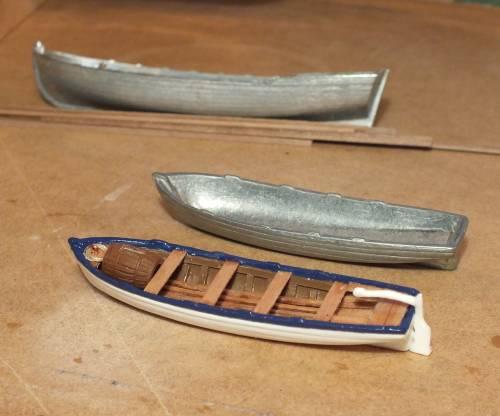
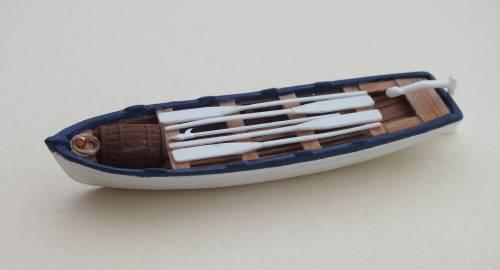
Pegasus 26ft Pinnace
The pinnace was fitted out in the same way as the longboat, and I think makes up into a very nice model, now it back to the rigging as on plan 13.


-
Small boat update before and after and the boat kitted out with oars boat hook and rope


Lady Nelson By Ray - FINISHED - Amati/Victory Models
in - Kit build logs for subjects built from 1801 - 1850
Posted
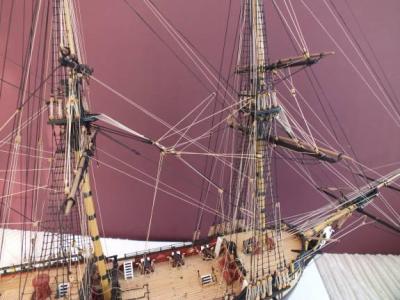
Running rigging so far
The running rigging came next and its not going to bad so far, if fact better than I expected, in fact the most difficult part has been threading the cord through blocks, my eyes are not as good, and my hands not as steady as they were years ago. All the knots were sealed with dilute PVA before trimming. The only other problem I found was the belaying pins were small and very difficult to show the coil of rope that would be coiled around them (don’t know the correct term) so I tied the end of the running rope tight to them and other termination points and made cup dummy coils and glued them on after I have posted the photos of the various stages. I now must get back to finishing the rigging, as I have made the decision on the next model, it was ordered a couple of days ago and has just arrived HMS Pegasus, I have just opened the box for a quick look, it looks fantastic quality, rigging her will definitely test the old eyes and nimbleness of the fingers.