DONATION DRIVE - SUPPORT MSW - DO YOUR PART TO KEEP THIS GREAT FORUM GOING!
×

owend
-
Posts
51 -
Joined
-
Last visited
Content Type
Profiles
Forums
Gallery
Events
Everything posted by owend
-
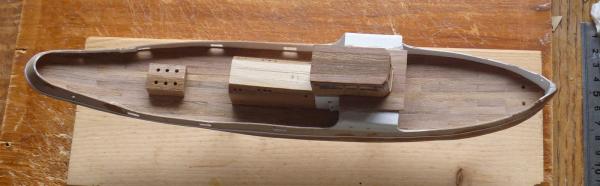
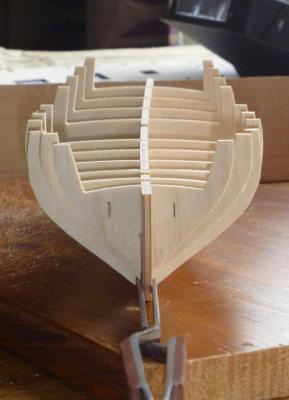
 Louise is a smart-looking Victorian river steam launch, the type used by elegant (and rich) Victorians and Edwardians for leisurely days on the Thames. She is 46cm/18 inches long. The kit comes with many smaller items well-labelled in neat plastic bags, and seemingly good documentation - rather brief instructions but a full-colour book of photographs. The wood is a nightmare though - firstly some sizes don't correspond exactly with the sizes given in the contents list, so identifying them is difficult as they come in several rubber-banded bundled and several different sizes in each bundle. Then sometimes a length is used by three, four or more different part numbers - obviously the long piece has to be cut to different lengths, but it looks complex! Anyway, I've spent a while identifying the first pieces and hoping things get clearer when I can see how things go together. Also reading the instructions and Mike Dowling's excellent log (hopefully the link is: http://modelshipworld.com/index.php/topic/8900-louise-by-mike-dowling-constructo/?hl=louise). I've cut out the false keel, attached the ribs and deck with no great problems, except the deck is bigger than the rest, it sticks outside the line of the ribs and it's too long at the sternpost. Not a big deal, I think, it's trimmable and it'll be hidden by planking but a bit worrying for quality down the line. The photo shows the progress so far, with the bow and stern filler blocks.
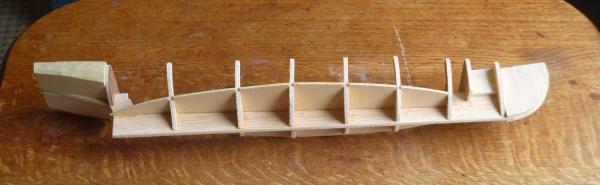
- 28 replies
-
- 6
-

-
- louise
- constructo
- (and 1 more)
-
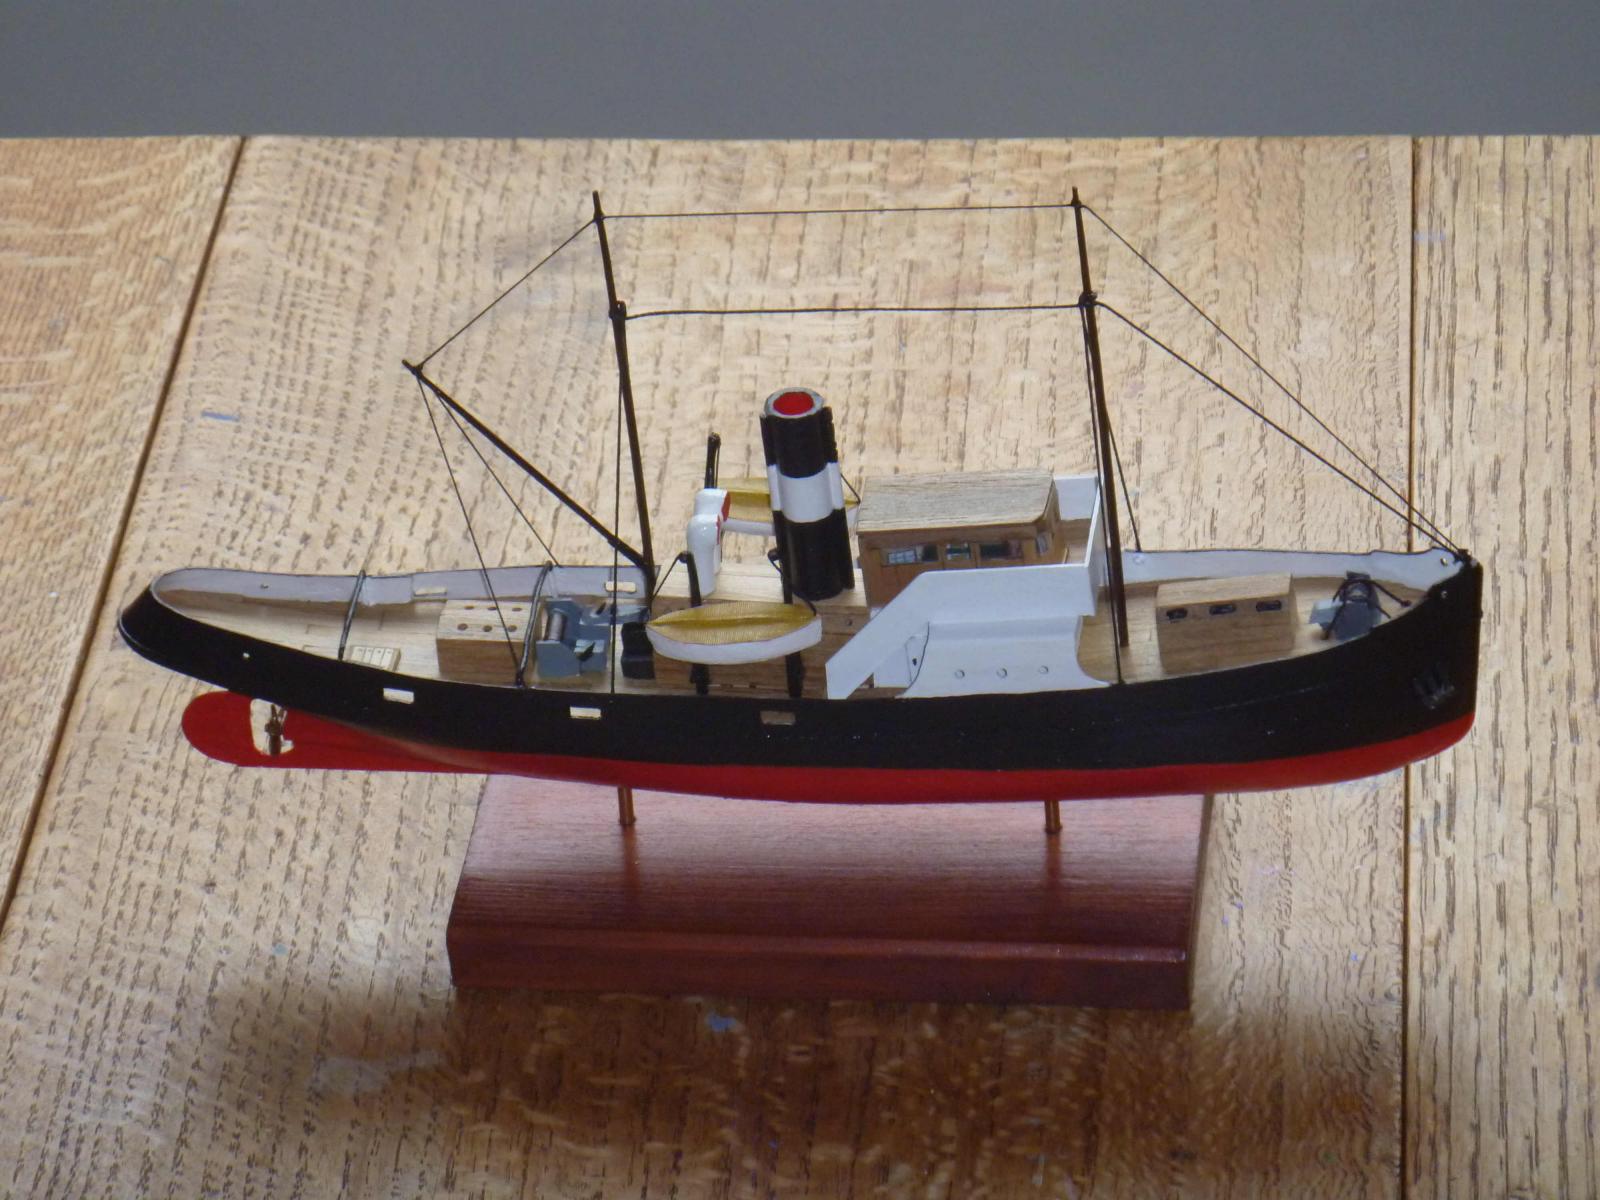
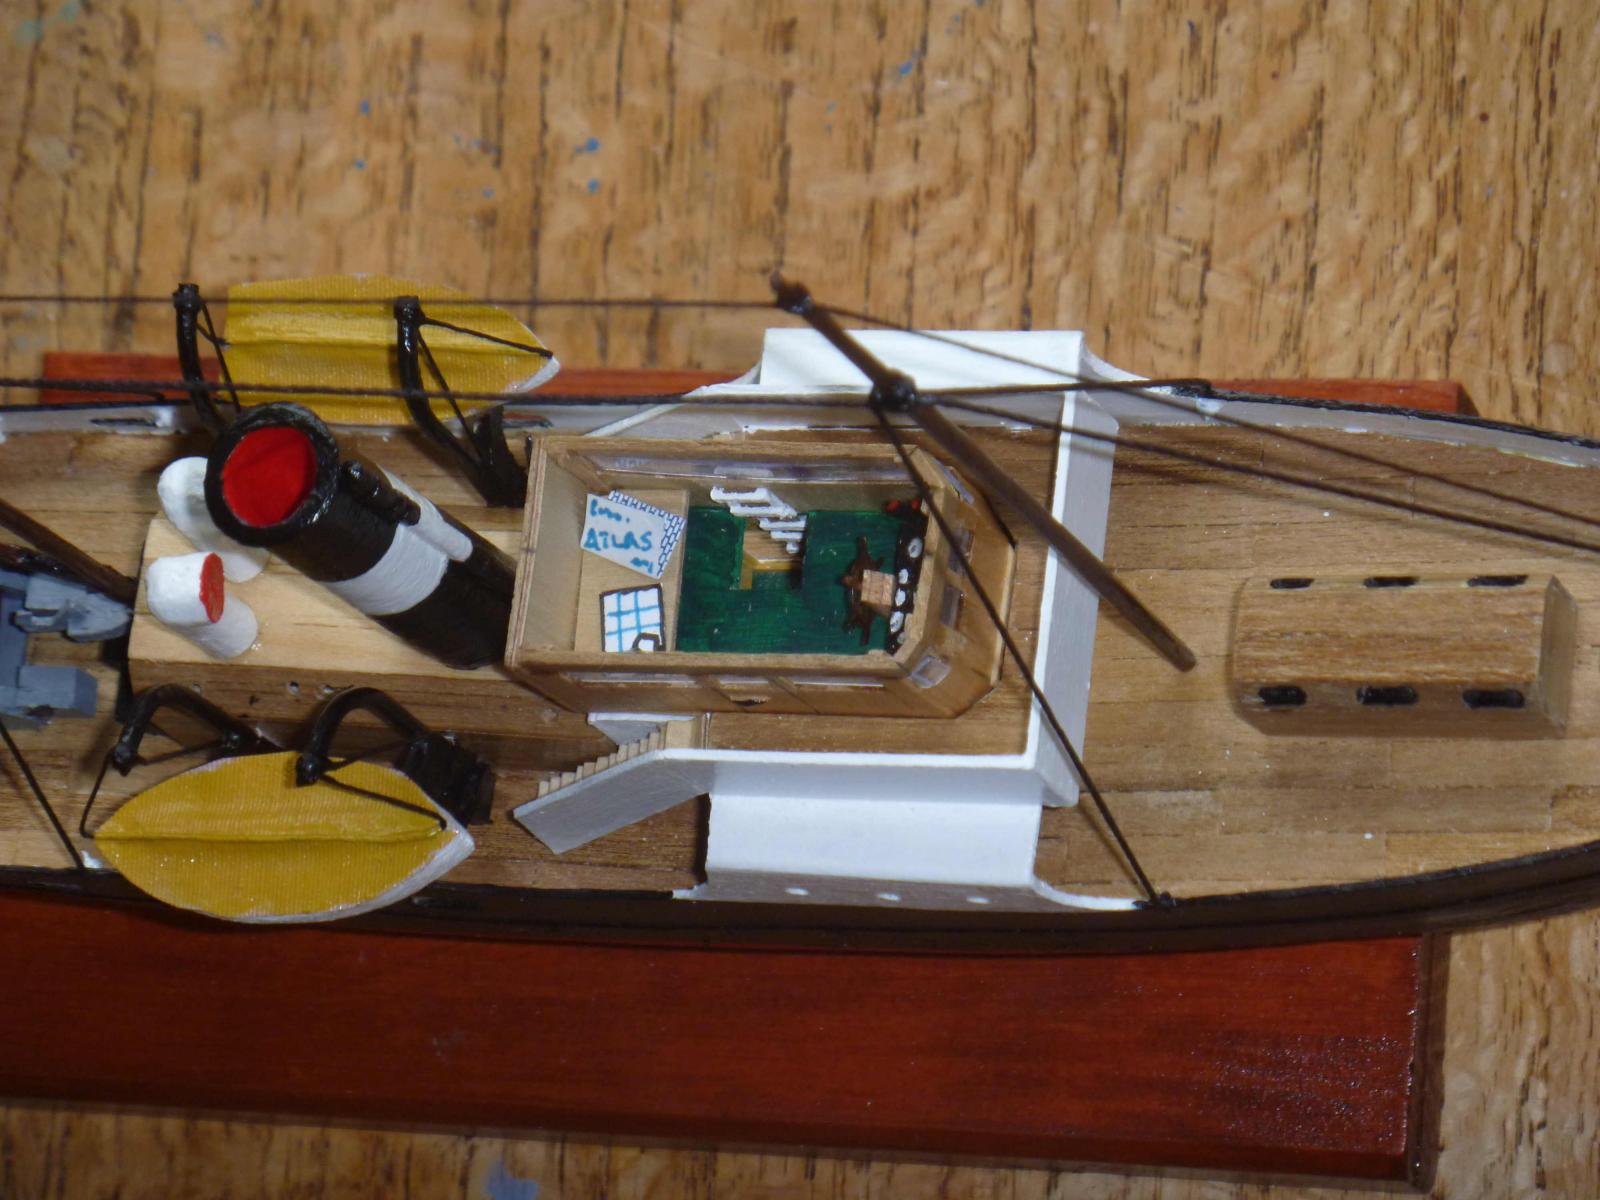
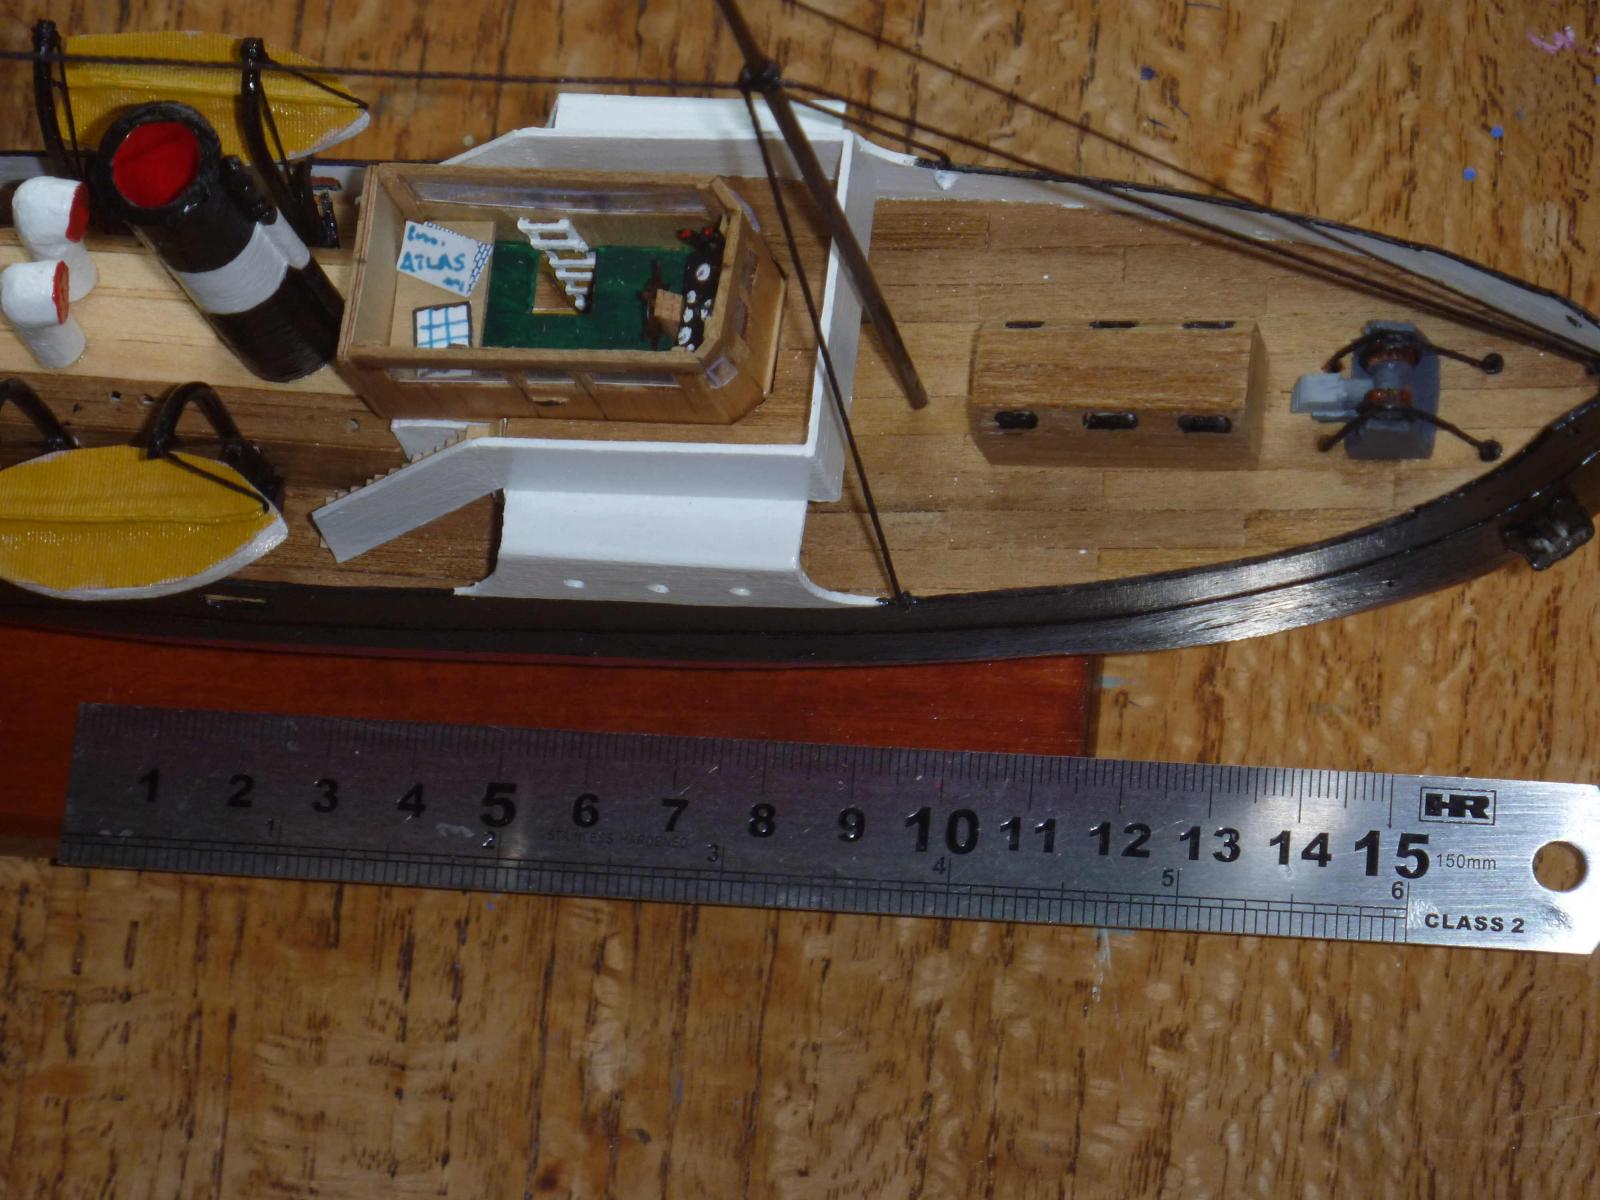
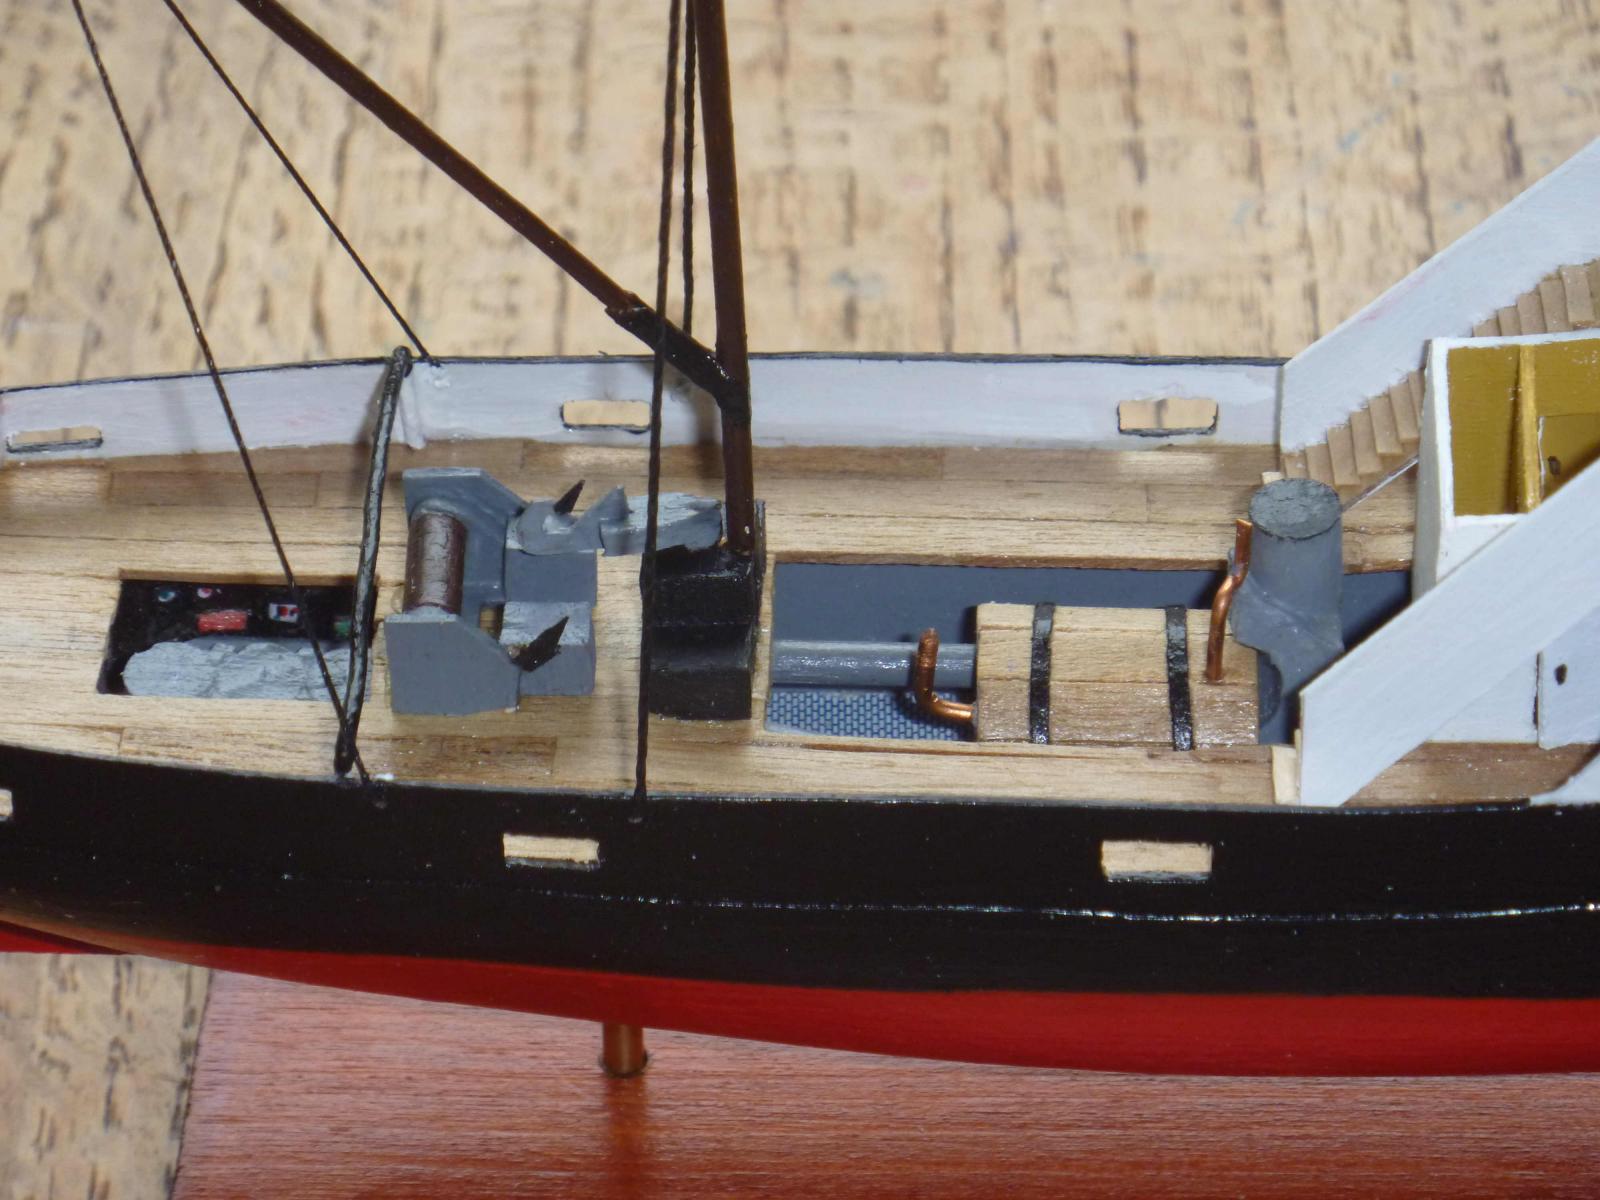
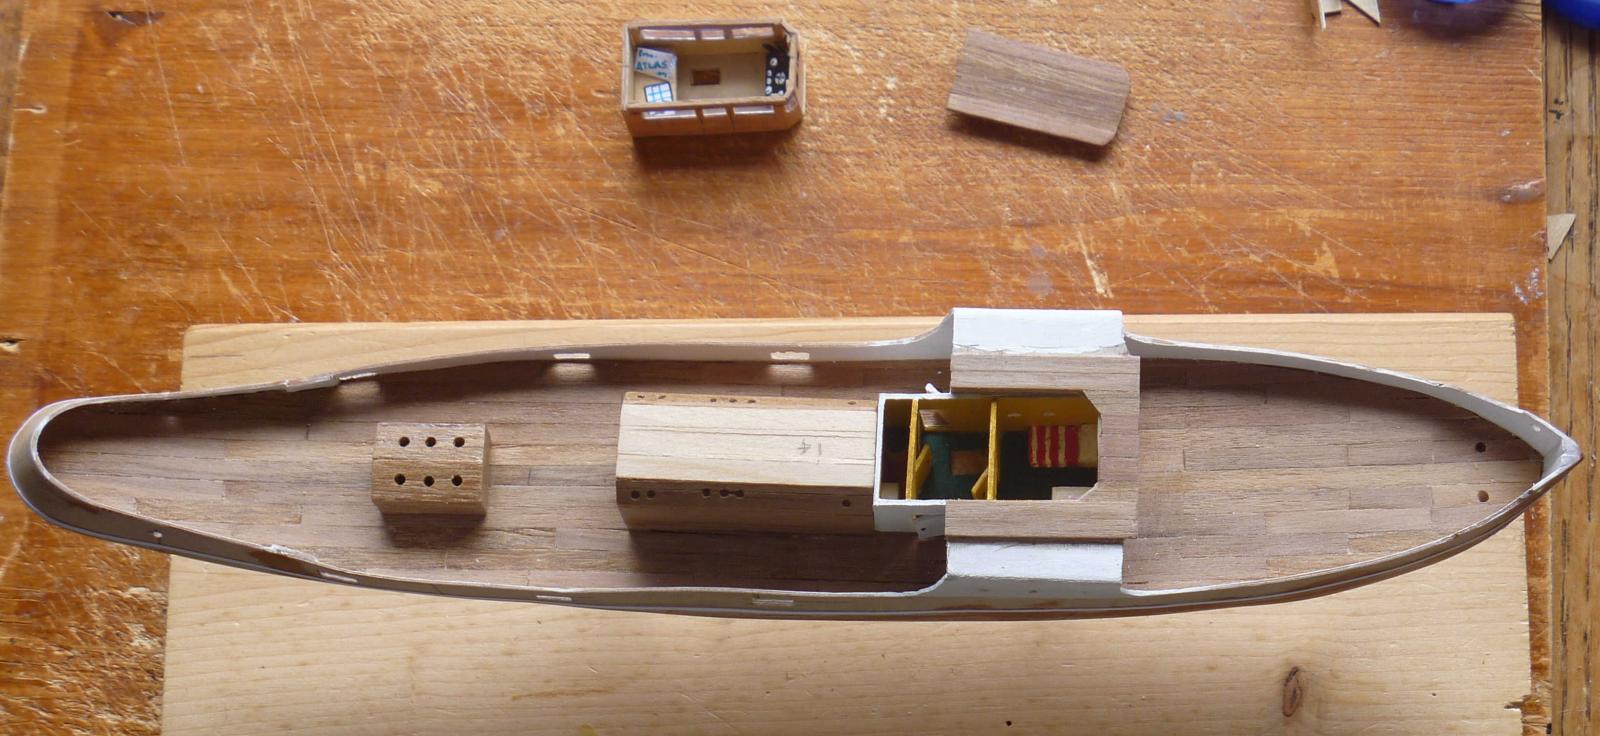
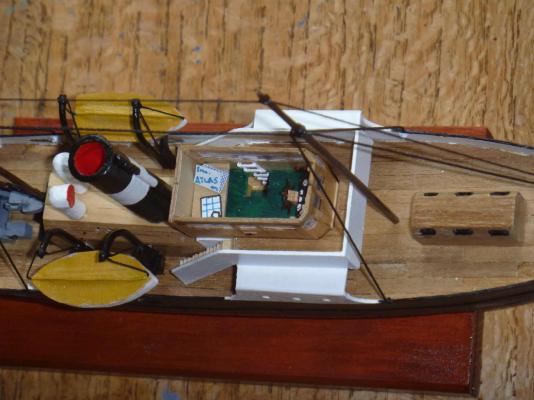
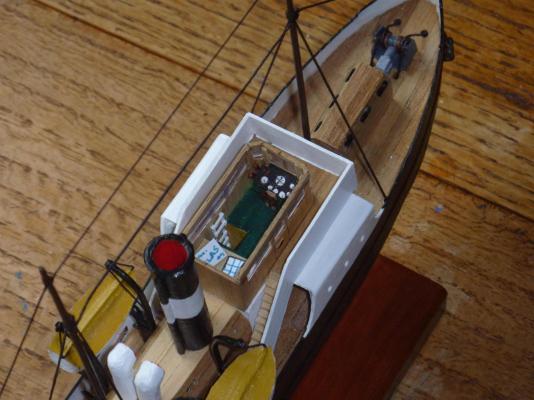
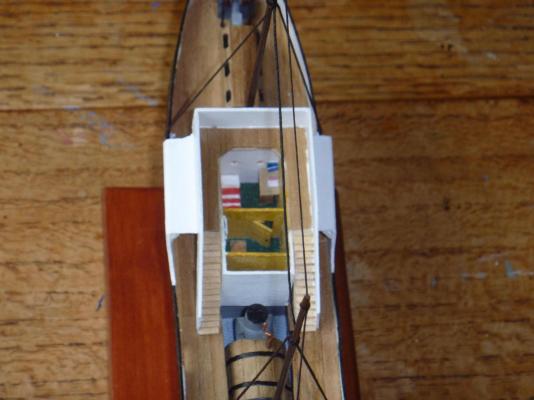
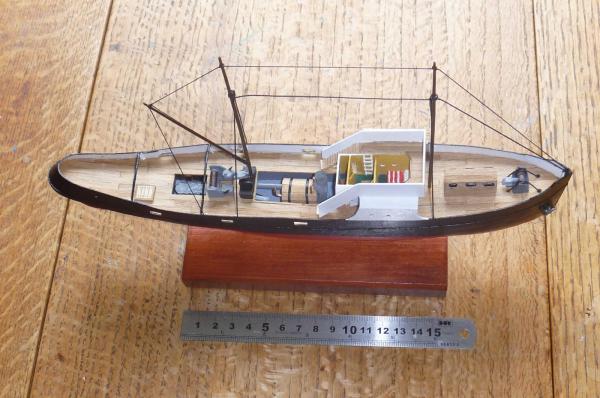
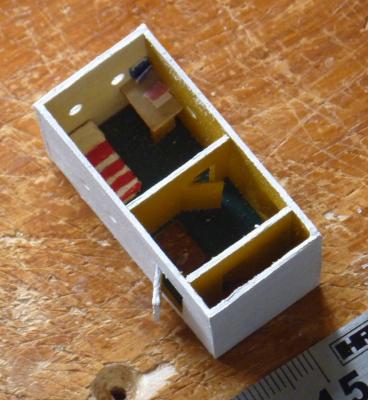
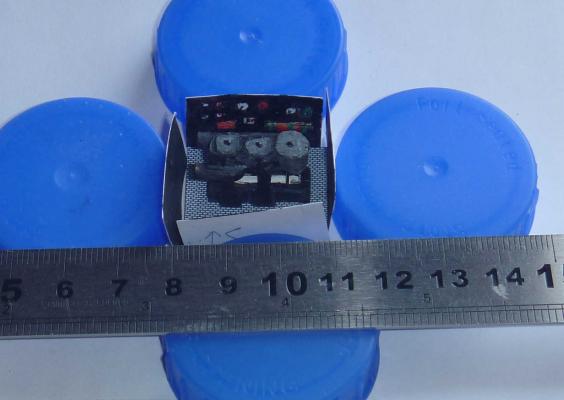
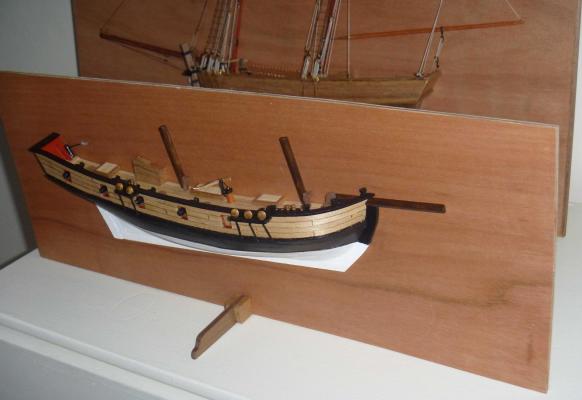
I've been remiss at posting updates, sorry for the lack of continuity - it's been due to a bit of ill-health, several family visits where everything had to be tidied away, holidays (it IS the British summer, or rather it was although it's chilly and pouring with rain today) and generally just pottering. It's been fiddly towards the end, with many short efforts which never seemed to be worth photographing. I've finished now, I think. As I said, I've adapted the plan to make her steam single screw rather than diesel twinscrew, and I've simplified some bits to allow for the dismantling, notably the rigging and aerials. I'm attaching a strip show! In the third photo, note the atlas on the chart table, so the captain doesn't get lost. On the fifth photo, note the captain's sea cabin with dainty red-and-white eiderdown on the bed, and his desk. The room at the aft of this deck is the cabin and bridge stores, for essential items such as maps and the captain's grog. On the sixth, if you look carefully into the engineroom you can see the control panel on the port side. I enjoyed the build, working out the mechanics for opening it up, and it was nice and cheap - the only expense was for a propellor and two anchors, everything else was from the scrap box plus a lump of door-frame for the main hull! My next project is the Constructo Louise, which has been waiting patiently under the bed. I'll try to keep up a log more regularly. Owen Edit: I've made a mess of the photo order - rats. The chart table and atlas is the 5th not 3rd, sea cabin is 3rd not 5th and engineroom is 2nd not 6th. Oh, well....


-
Update: I've been doing bits on the bridge superstructure, more dolls-house than marine engineering and slooooow! The bridge is done; the glazing was a pain. I can't find any glue that holds the acetate securely, so I ended up using glazing bars to hold it in place - and with the windows 4mm high that was time-consuming. I've also added a rubbing strake and surround for the hawse hole, and scuppers. The bridge interior needs some finishing - I have to make a wheel, for instance. The boiler and engine appear to be at an angle; I don't understand enough about photography, because they don't look like that in real life! Next major items are the two ladders from the maindeck to the bridge, with treads 5mm wide and 2mm deep. Then to finish and paint the bridge deck railings and start on the deck furniture. I'm glad I've got a loupe! Owen


-
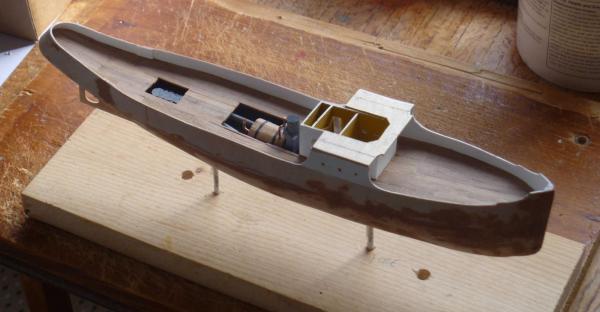
She's progressing slowly; I'm finding it more difficult than I expected to keep things neat at such a small scale. The deck is planked with about 15 foot (scale) lengths, but my skill isn't up to doing scale width, so the planks are 4mm which is about 24 inches scale. There's still a lot of sanding and finishing to do, but I've started on the bridge superstructure. I'm disappointed that the engineroom is almost invisible under the decking when the deckhouse is removed - for any future work, I would make the deckhouse larger area to show more detail inside. The boilerroom is very stylised, but there's a front-fed boiler with a rear smokebox and exhaust, a safety valve, whistle pipe, and on the starboard side a condenser. I'm going to complete the bridge next; as it is intended to be removable, I can get it as right as my skills allow, then remove it for safekeeping while I finish first the hull then the deck fittings. The cut-off exhaust from the boiler and the whistle pipe should line up with the funnel when that's fitted to the deckhouse.
-
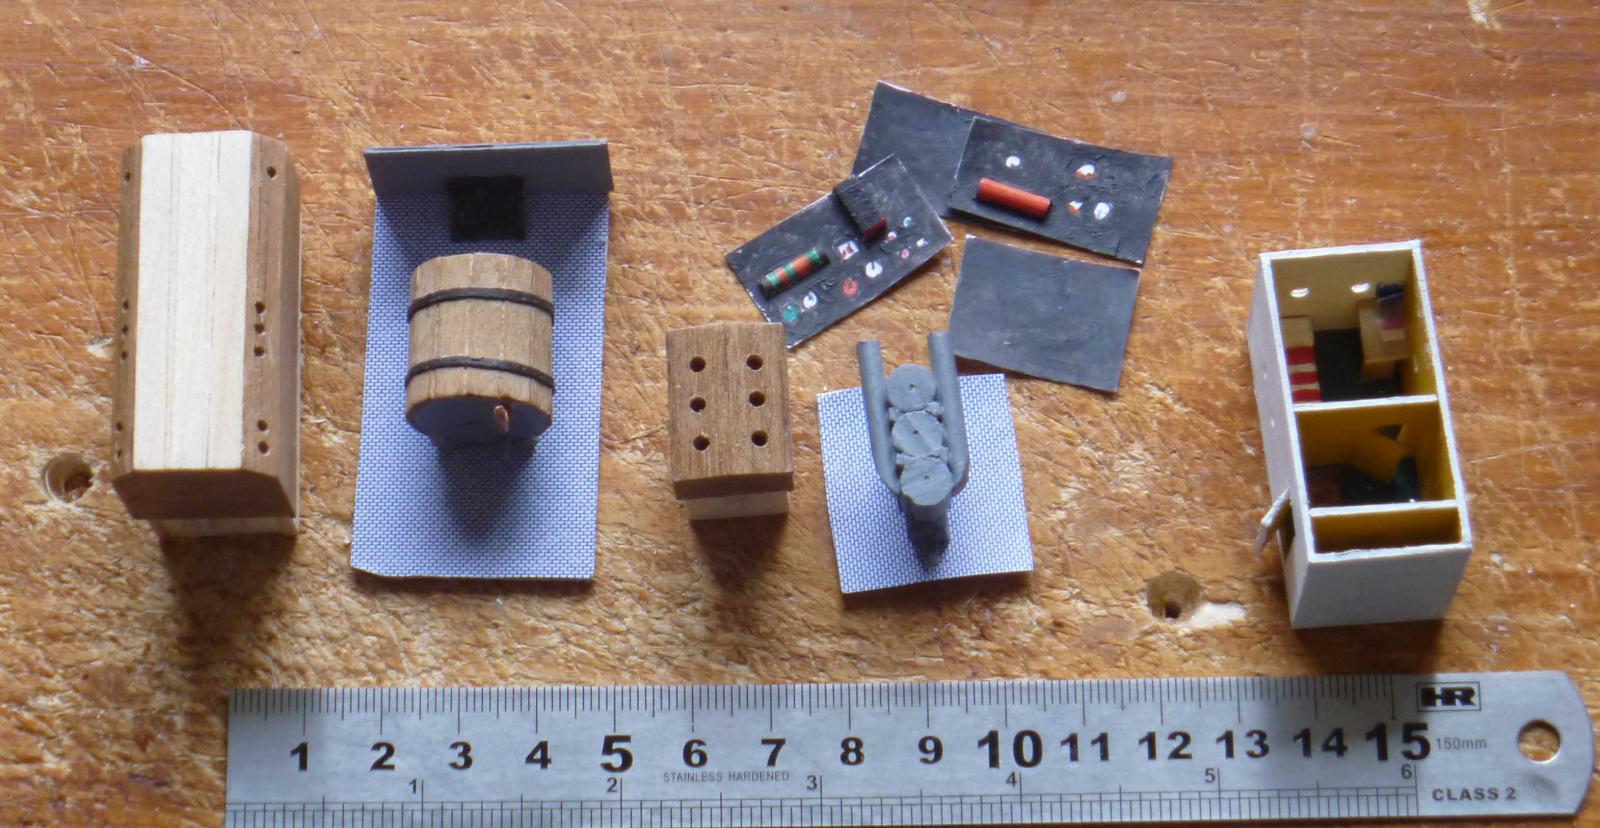
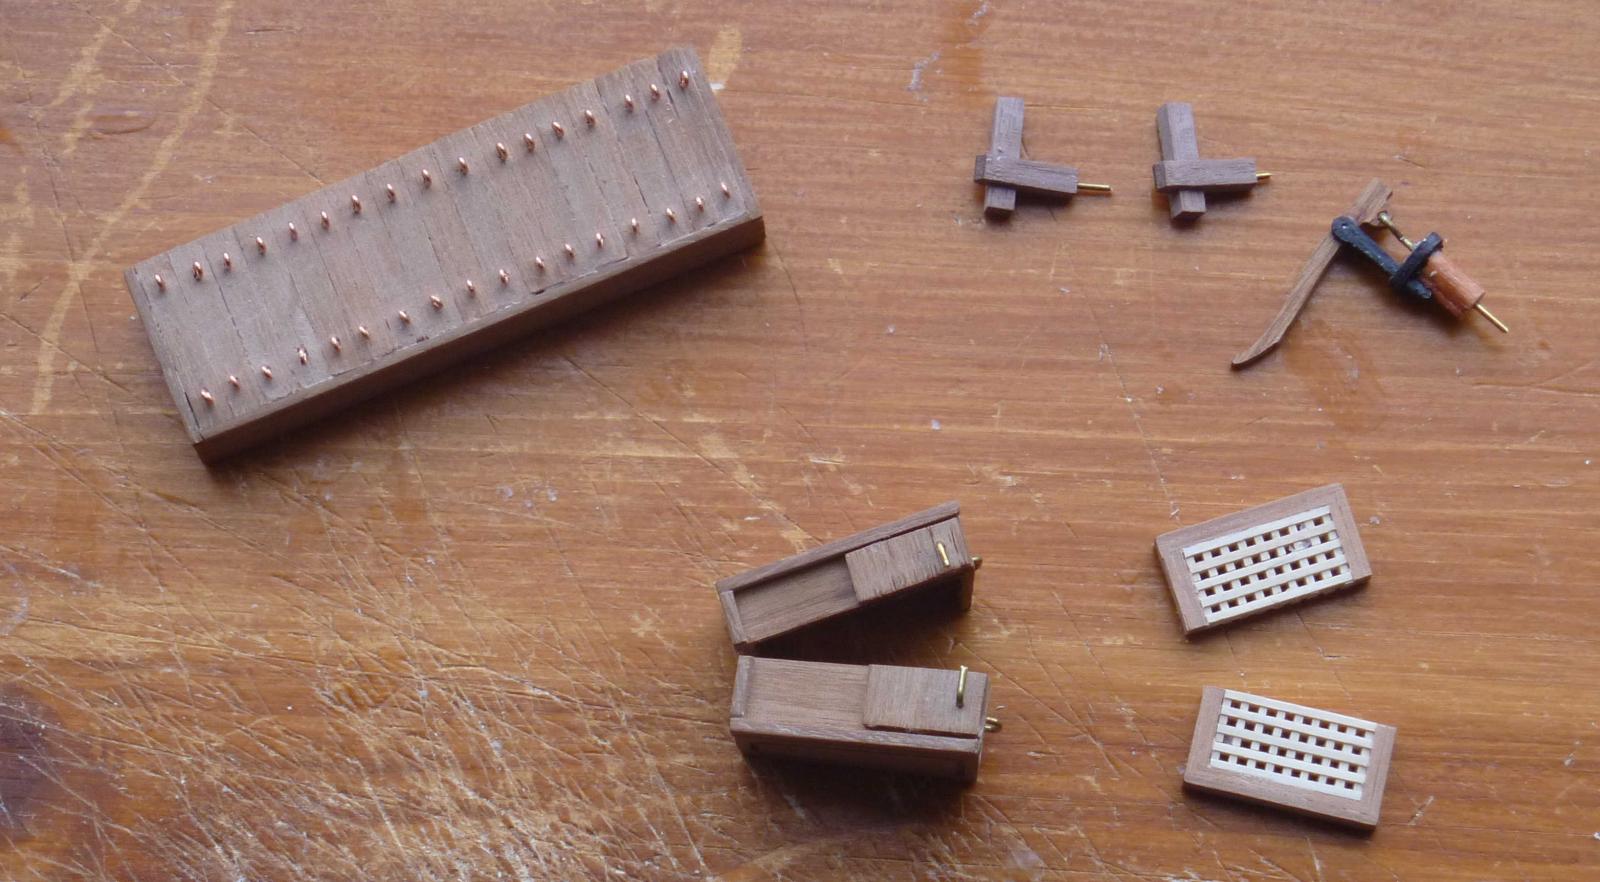
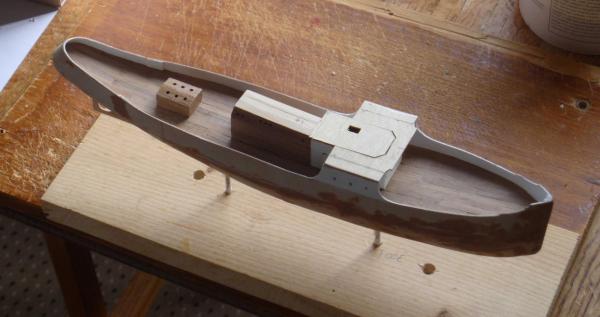
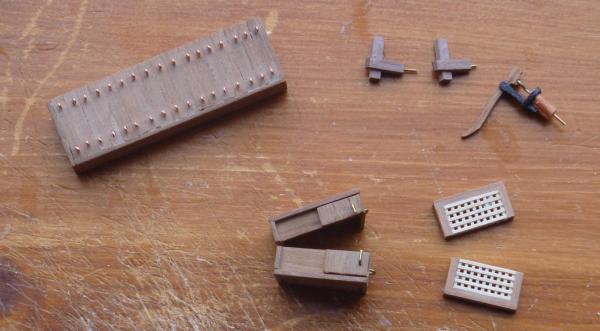
Bulwarks cut and fitted. I was quite pleased with the sharp end. And I was quite pleased with the blunt end. I'm not pleased with how they join up: somewhere I've got the profile wrong, not absolutely sure, but I think it may have been the "tumblehome" of the rebate I cut for the bulwarks. I ought to redo them, but the error is symetrical and doesn't show too much, and I'm afraid I'll make things worse if I try to repair it. First two photos show the hull and the problem area towards the stern. The next two are the near-finished boiler-room components which need pipework which I can't fit until the boiler-room is fitted out; the engine room; and the lower bridge - note the Captain's day-cabin with bed, and books on the desk! The rear compartment is supposed to be a Bo'sun's Store, but it's too small to show the cans of paint in there (only white, buff and green so far, plus some paintbrushes ). Next job is to paint the insides of the bulwarks and start the decking, which needs to be integrated with the bridge, boiler-room and engine-room and is likely to be slow going. I'm planning to fit a centre (king) plank first, then carefully cut away to fit, then add side-planks and cut/trim as I go. I'll fit the bridge and boiler- and engine-rooms after the kingplank is down, once the centreline is solid.


-
Things got delayed: I didn't have any thin ply for bulwarks, and the model shop was out of stock. I couldn't do the decking until the bulwarks were in; I couldn't finalise engine-room and boiler-room and their deckhouses until the decking was in, I couldn't start on the bridge until the boiler-room deckhouse was set in the decking. I did a bit on the engine-room, and started on the boiler-room, and now I can check the thickness of the bulwarks ply I can cut a "shelf" to inset the bulwarks into the hull for a few millimetres to give some stability, as I hope you can see (yes, the hull needs cleaning up). Next is to tidy the hull, and cut and fix bulwarks. I'm not sure about the reverse camber of the poop area, so I'm going to do a section at the stern first, about 40mm long each side probably, then the rest of the bulwarks. There are some complex curves, so probably several attempts with card profiles etc! I got some today so we're off again.

-
Eamonn: the scratchbuild went live at 2.26pm; this should be the link (but I've never tried posting a link before): http://modelshipworld.com/index.php/topic/10045-tug-hermes-1150/ Mike: you're welcome to try the ideas, but bear in mind they may not work - as the financial adverts say, you may get back less than you put in!
- 28 replies
-
- 2
-
-
- ballahoo
- caldercraft
- (and 2 more)
-
Thanks, Eamonn! Not up to your standard I'm afraid, but I enjoyed it. I've carved a couple of scale figures to represent the grandchildren, and I'm really surprised to see how small the Ballahoo is compared to them- try a couple of quick paper figures, 27mm high is 5 feet 8 inches at 1/64. They make Ballahoo look like a rowing boat. If I was doing it again, I'd do her full-hull and painted. I'm pleased to have tried half-hull though. Next one is a scratch 1/150 tug which I've just started (with a buildlog in the scratchbuilt forum, if I'm allowed entry, having seen some of the amazing work there!). Owen
-
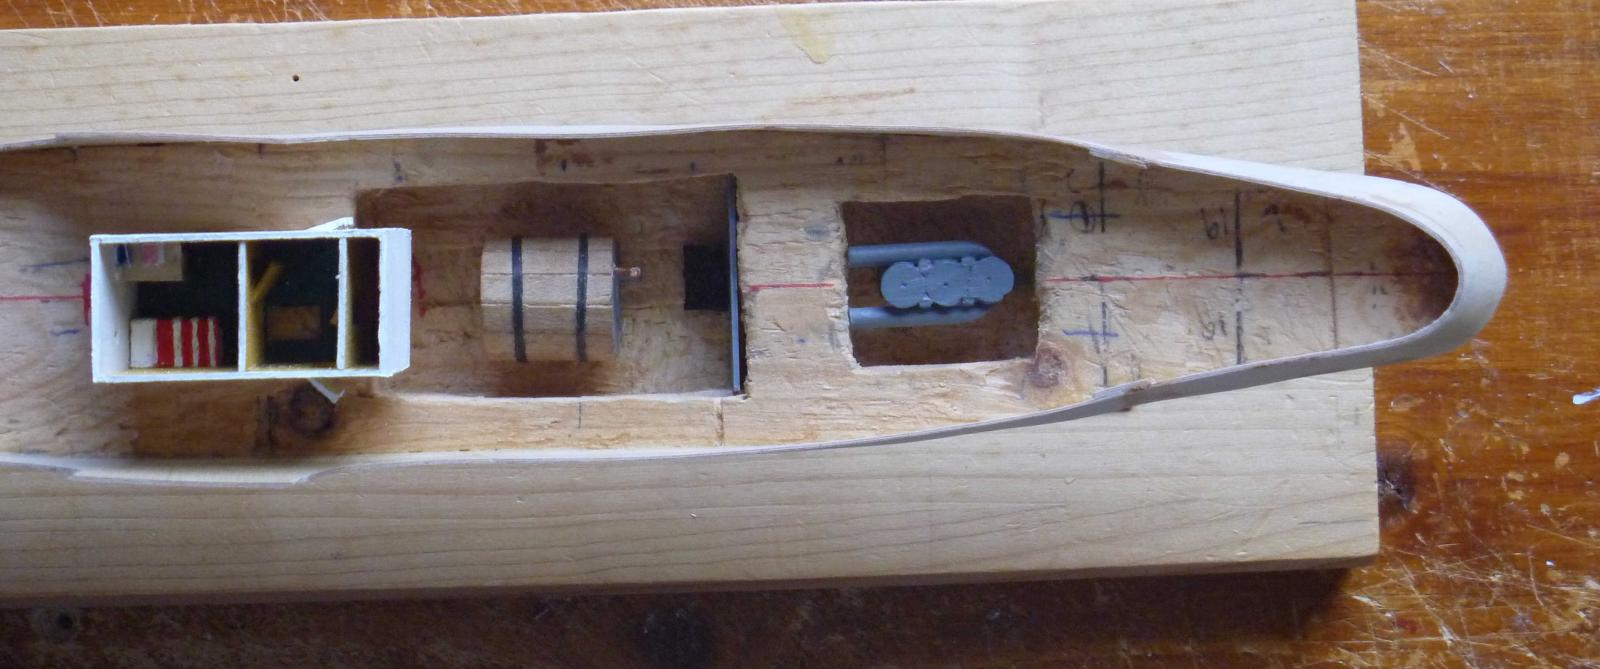
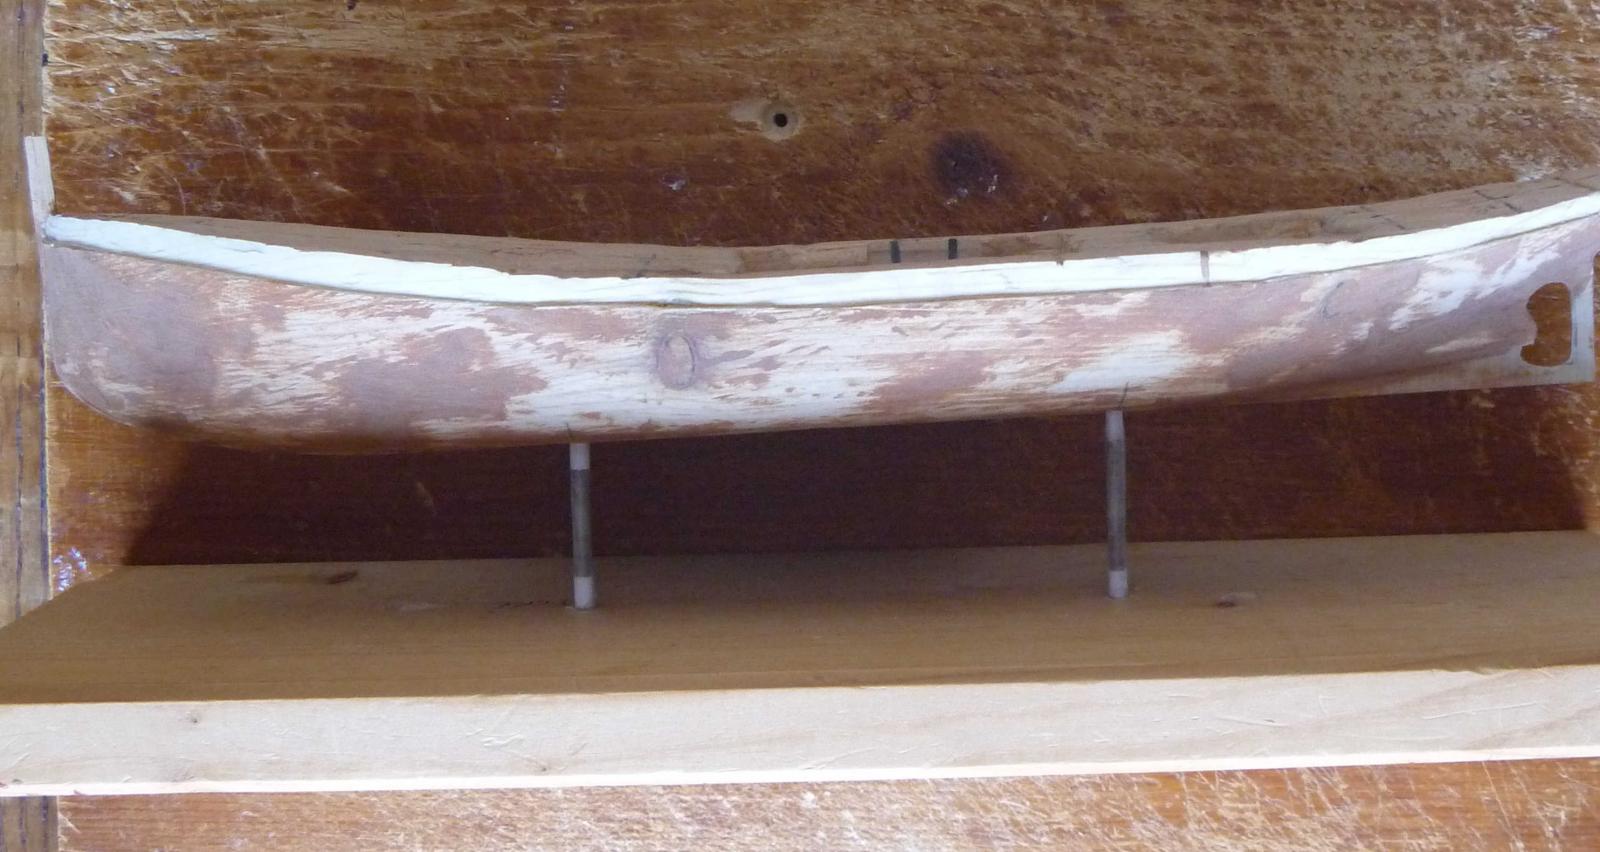
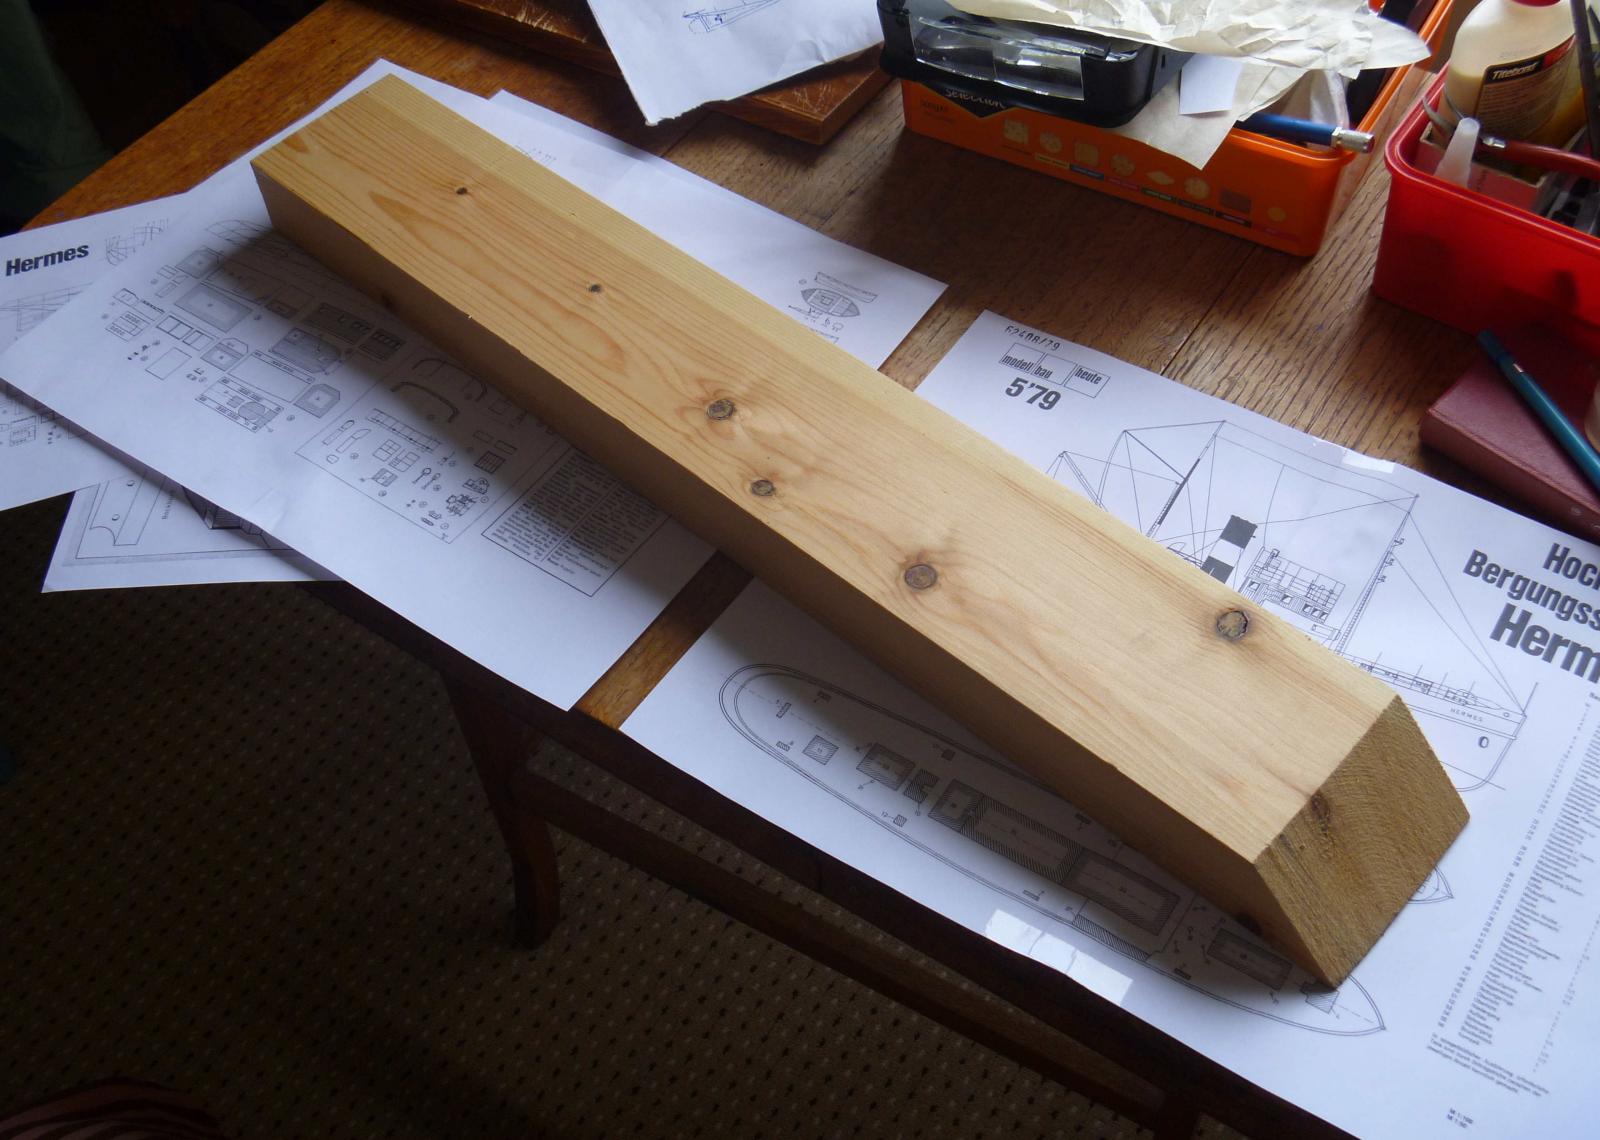
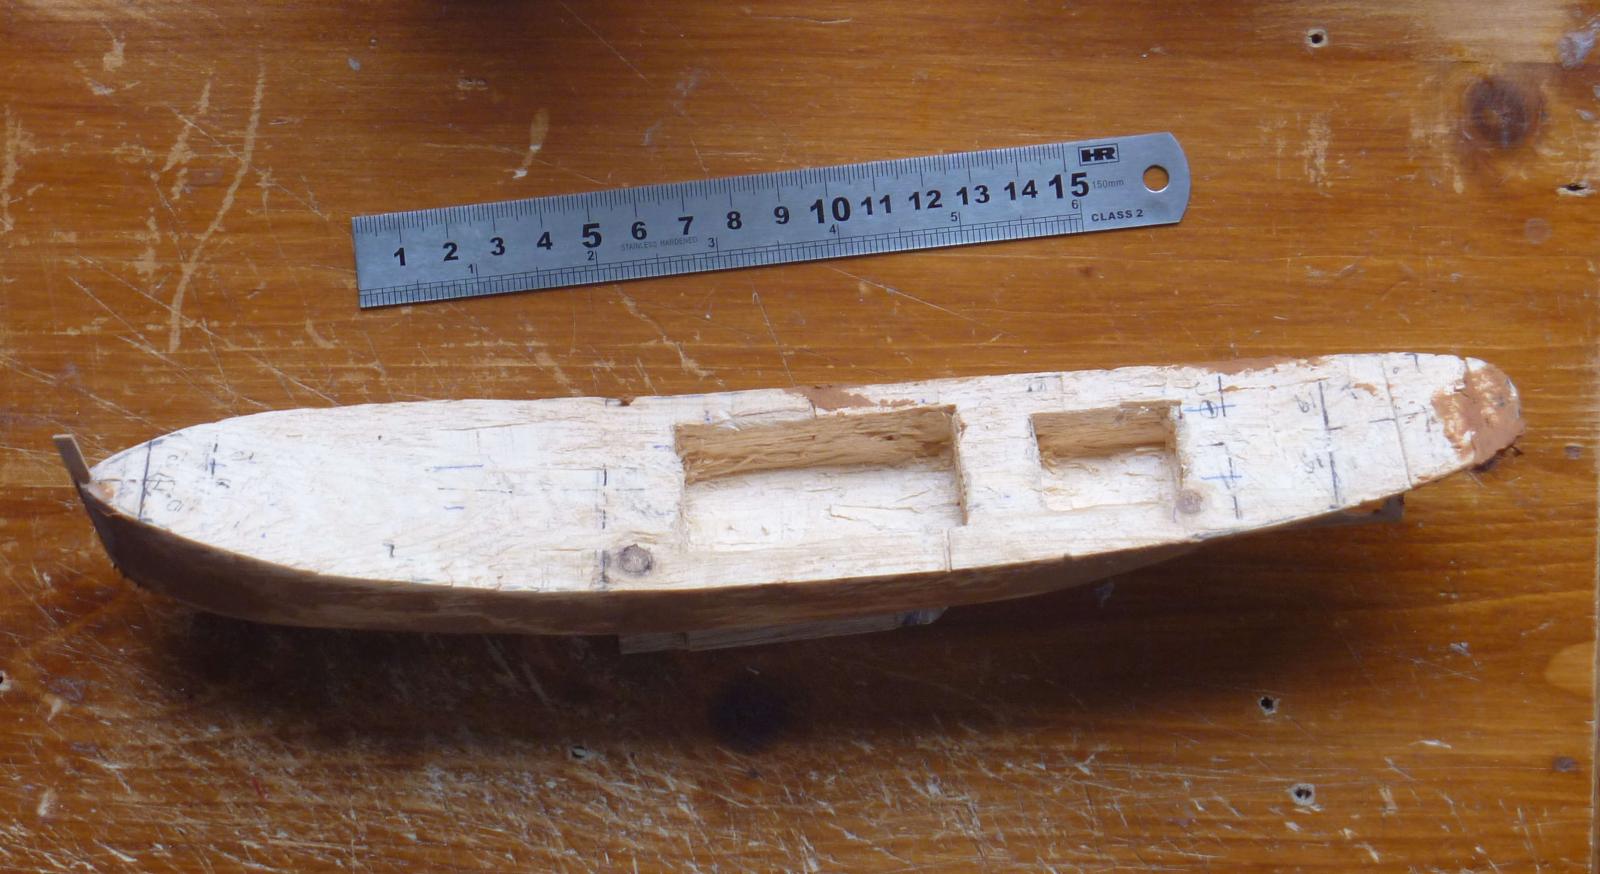
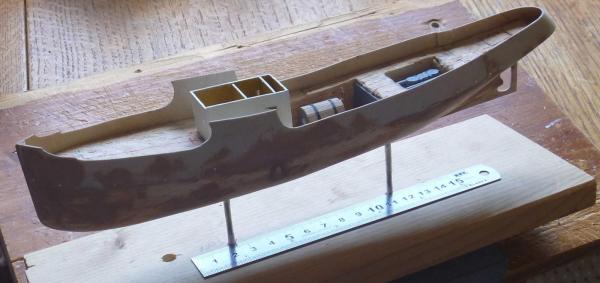
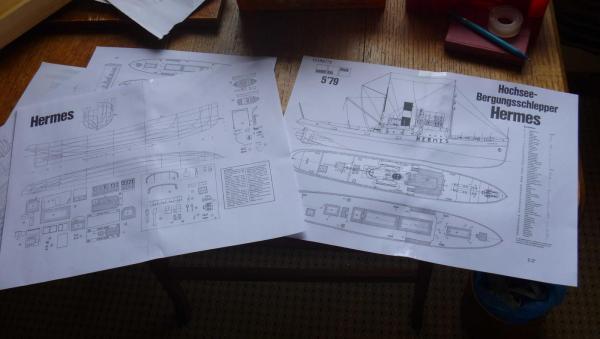
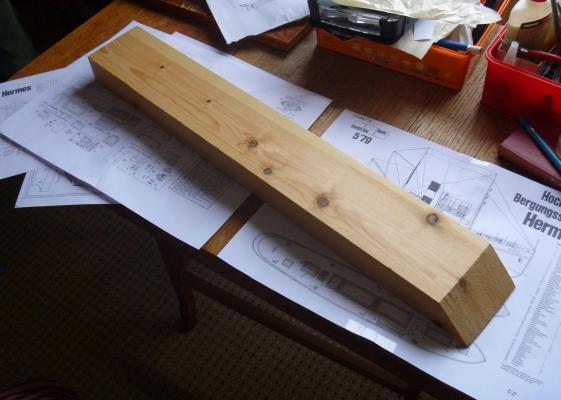
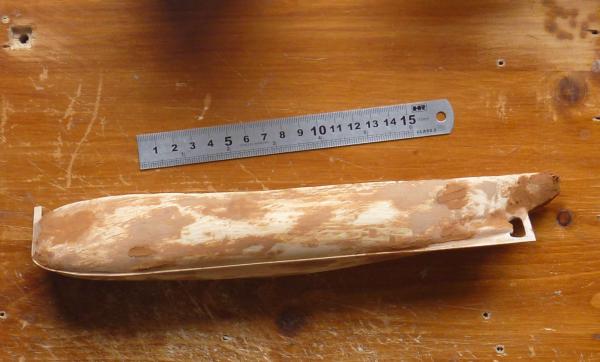
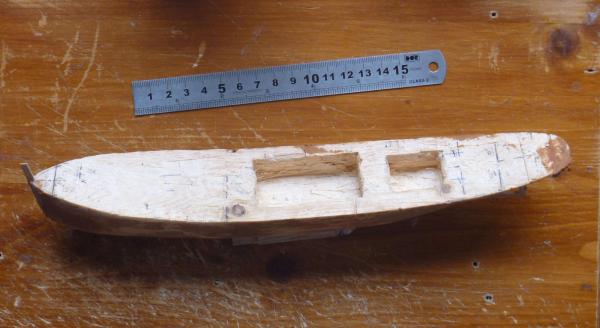
I wanted to try a tug, but smaller than the 800mm or so of the kits I could find - I like the look of the Occre Ulises, but not the size! I found some plans for the Hermes, a German tug of 1923. I've reduced them to 1/150 approx, which gives a length of 285mm. There will be some modifications: She'll be single-screw not twin, for a couple of reasons: I just think it looks better, and for the machinery space. Which leads to the second mod: she has two cutouts on deck as you can see, and she'll have lift-off deckhouses to show interior detail. The aft space is for a single reciprocating engine (hence single-screw) and the fore space for boilers; I think the original was diesel, but steam will give more scope for details. Also, the compass platform is to be removable, to show the bridge interior. Also, I may build more in timber rather than steel plate, which I think may be more in keeping, but this is open to revision. The attached pictures show the plans; the raw material (a piece of left-over building timber); and the hull as at present, part-way through filling/sanding. The deck openings will be lined, probably in card, so the unfinished interior sides aren't very important although I will tidy them up; the openings are about 5mm larger than the opening in the deck planking will be, to give the impression of depth. Note the German dictionary in the first two pics: I need help identifying the Pilzkopflufter (9 of them) and the single Verspannung Schornstein.
-
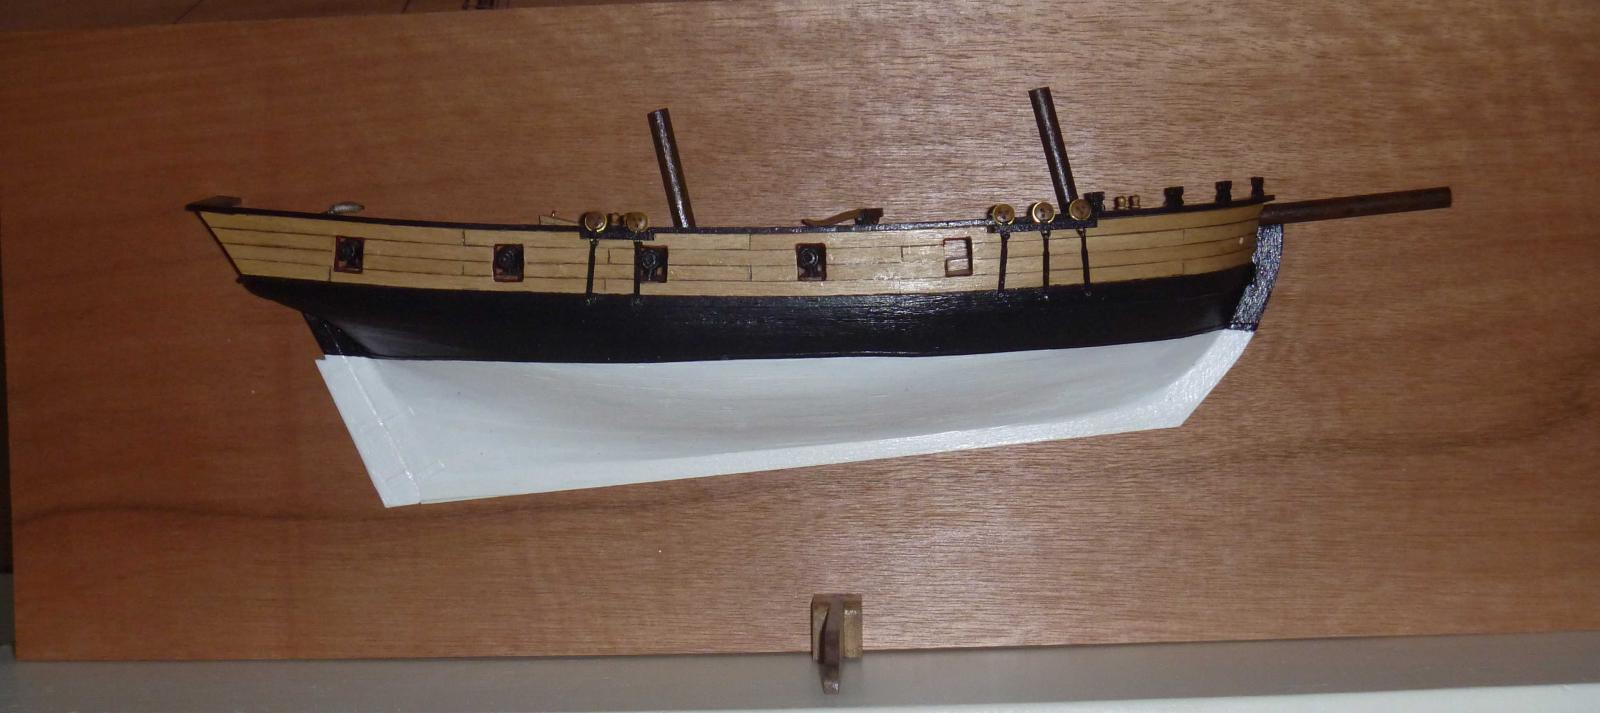
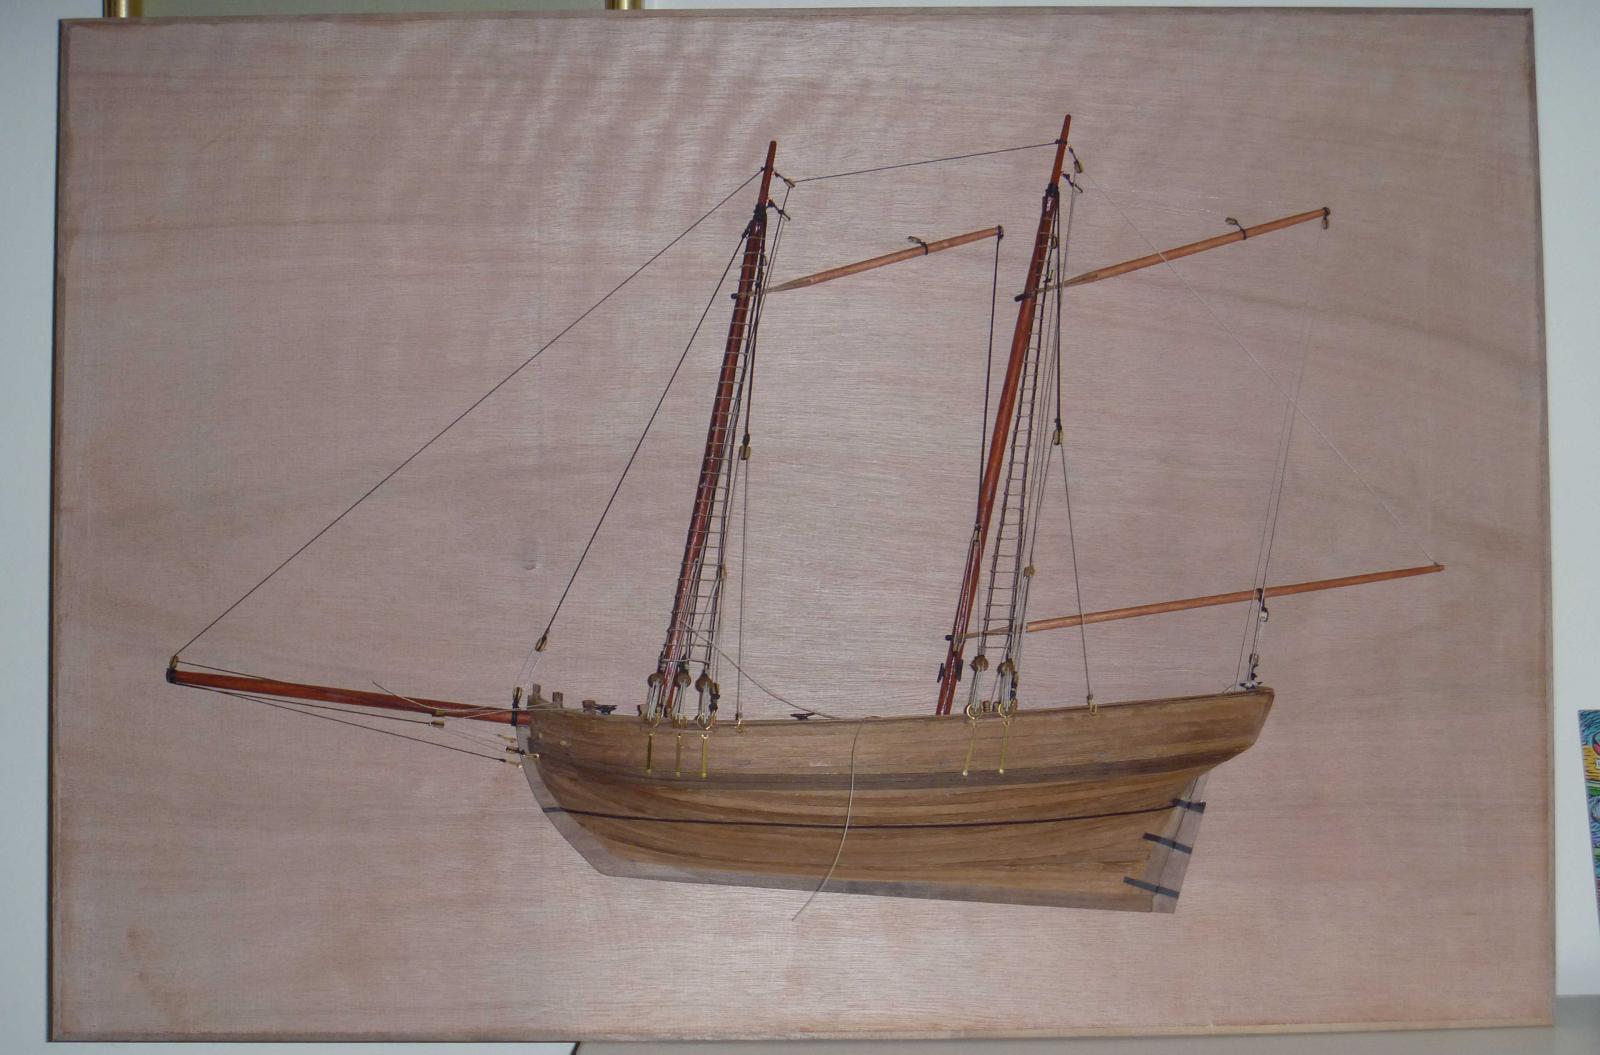
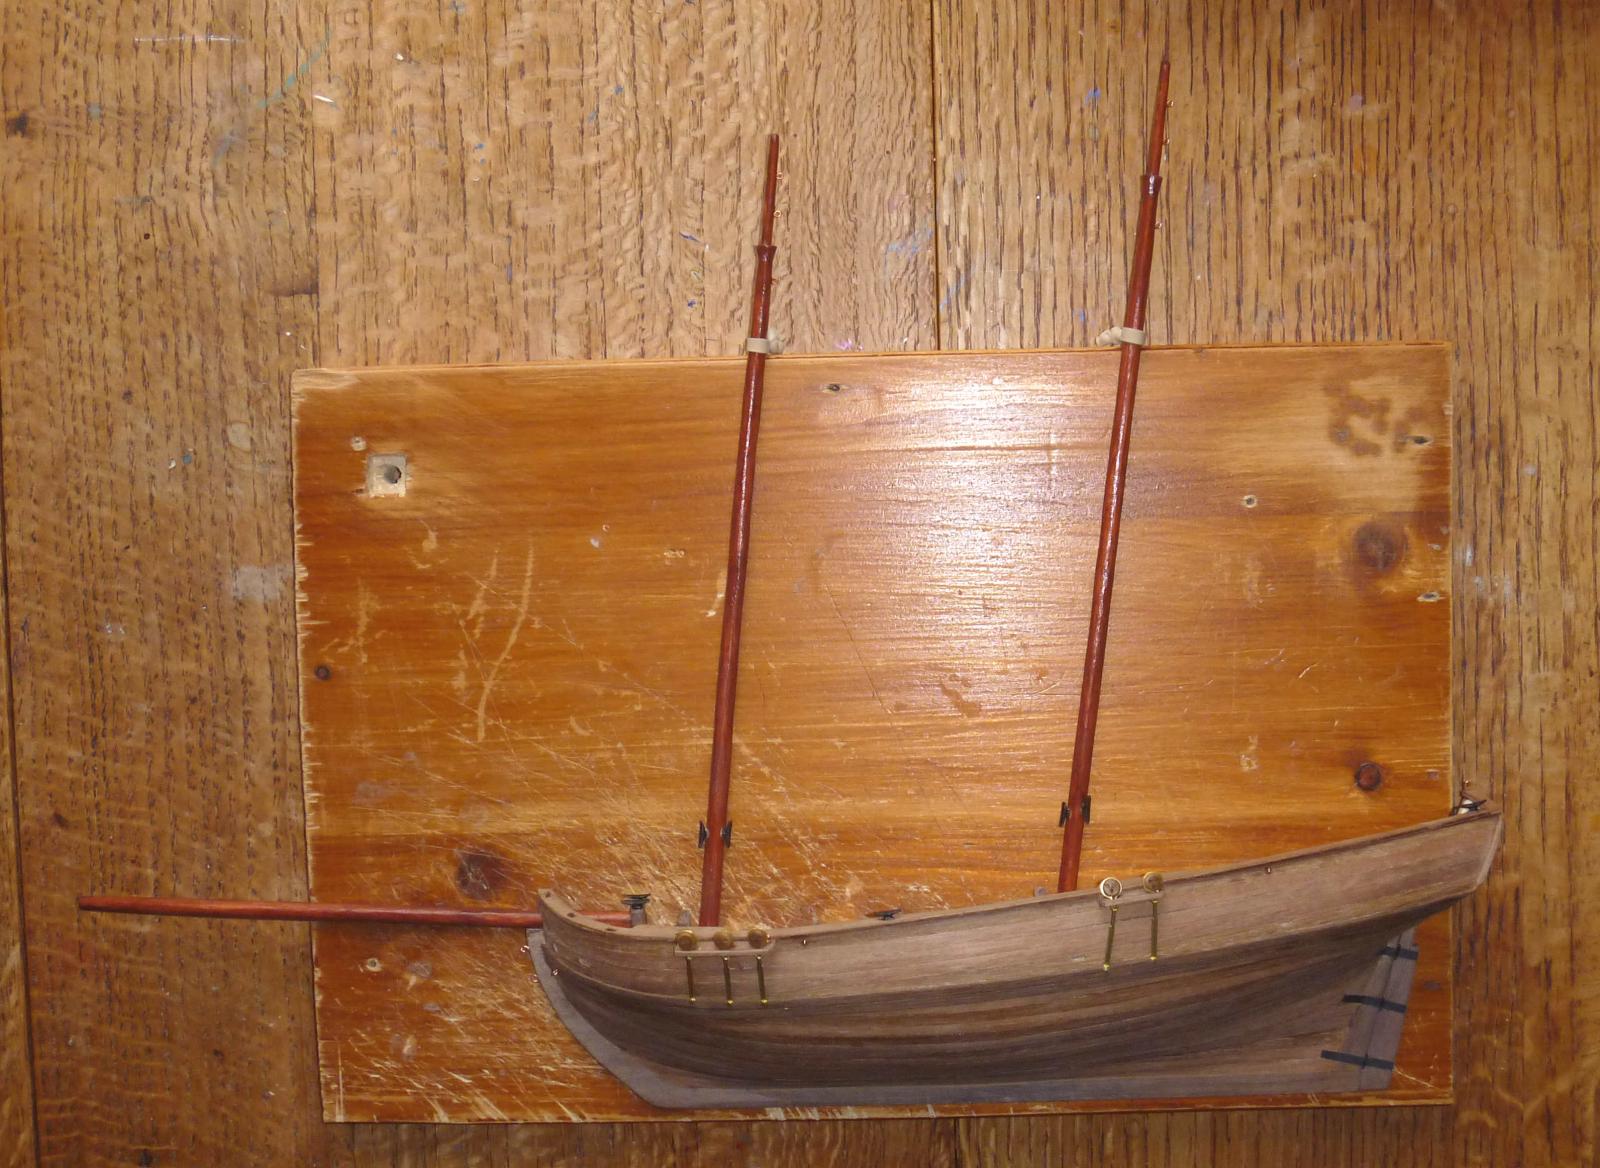
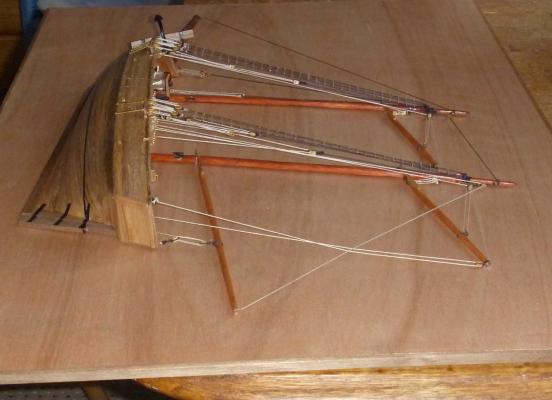
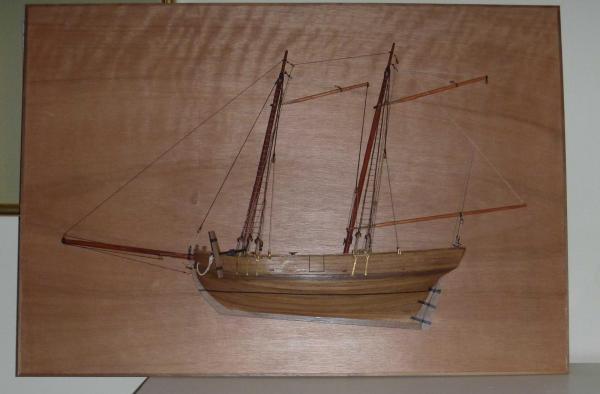
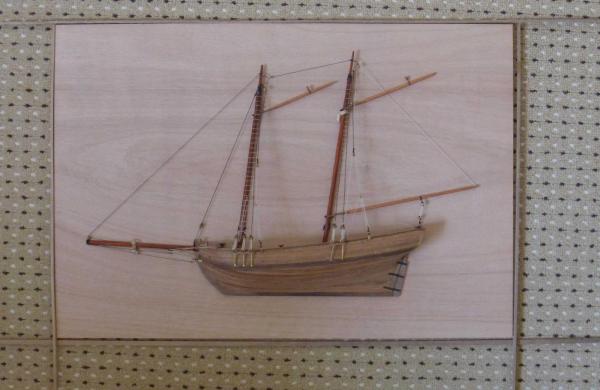
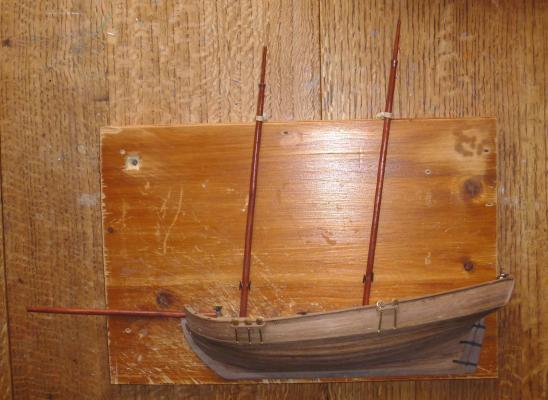
Bit of a delay! I finished the starboard side, and pinned down the masts of the port side (which were being pulled away from the board by the tensioned ratlines etc). I'm fairly happy with the result, although in retrospect I might have painted the port (rigged) side, as I like the ppearance of the painted starboard side. I added a waterline, from a strip of black-painted paper. The painted, starboard, half has a strut sticking out, which makes it free-standing; teh port side will have to be hung like a painting.

- 28 replies
-
- 3
-
-
- ballahoo
- caldercraft
- (and 2 more)
-
Clarification: that's seven-year-old twin boys, not seven year-old twin boys, which is at least biologically intriguing.
-
Thanks both; good point, Jan, I hadn't thought of the different angle of rake; I've gone with a thin line for the waterline and mounted her waterline-horizontal. I've now mounted deck furniture (anchor to go - interesting that it's catted up in a different place on the plans and on the box photo!), marked the entry port, varnished board and Ballahoo, and mounted the hull. As expected, the masts are being pulled slightly proud of the board; after the anchor I'll pin the masts to the board, and possibly the gaffs and boom also. I'm making a start on the starboard side - it's going to be a bare hull with "broken" 3 - 4 cm of mast and bowsprit, and with all four carronades. I'm thinking of giving it to a relative who has seven year old twin boys, who'll no doubt be more impressed with guns than rigging! I'm mulling over the next project : I quite like the look of the Constructo Louise, those old steam river cruisers were elegant - anyone know of any other kits? Alternatively, a Bluenose kit: there are several Bluenose and Bluenose II kits, can anyone help with choosing a good version? Or a similar type of racing yacht, preferably two-masted?


- 28 replies
-
- 3
-
-
- ballahoo
- caldercraft
- (and 2 more)
-
I know what you mean Eamonn - I was intending to mount her with the waterline level, but she does look attractive with the keel level! If she was mounted waterline-levelled, I'd mark the waterline with a black line (two millimetre?) on the wood before varnishing.
- 28 replies
-
- 1
-
-
- ballahoo
- caldercraft
- (and 2 more)
-
Flying Fish by Reuben - Corel
owend replied to Reuben's topic in - Kit build logs for subjects built from 1851 - 1900
It looks good so far. Don't worry about skin and flesh glued to the ship, it sands off, and at least from your photo you're separated now. It wasn't normal practice in real shipyards for the builders to attach themselves to their work, but I think most modellers have done so from time to time. -
It may be a bit late, but the recommended way is to plank both sides at the same time, so do the top plank port then top starboard etc.; if you only do one side you CAN (not always!) give the keel + bulkheads framework a bit of twist. Doing both sides lets the two lots of planking even themselves out.
-
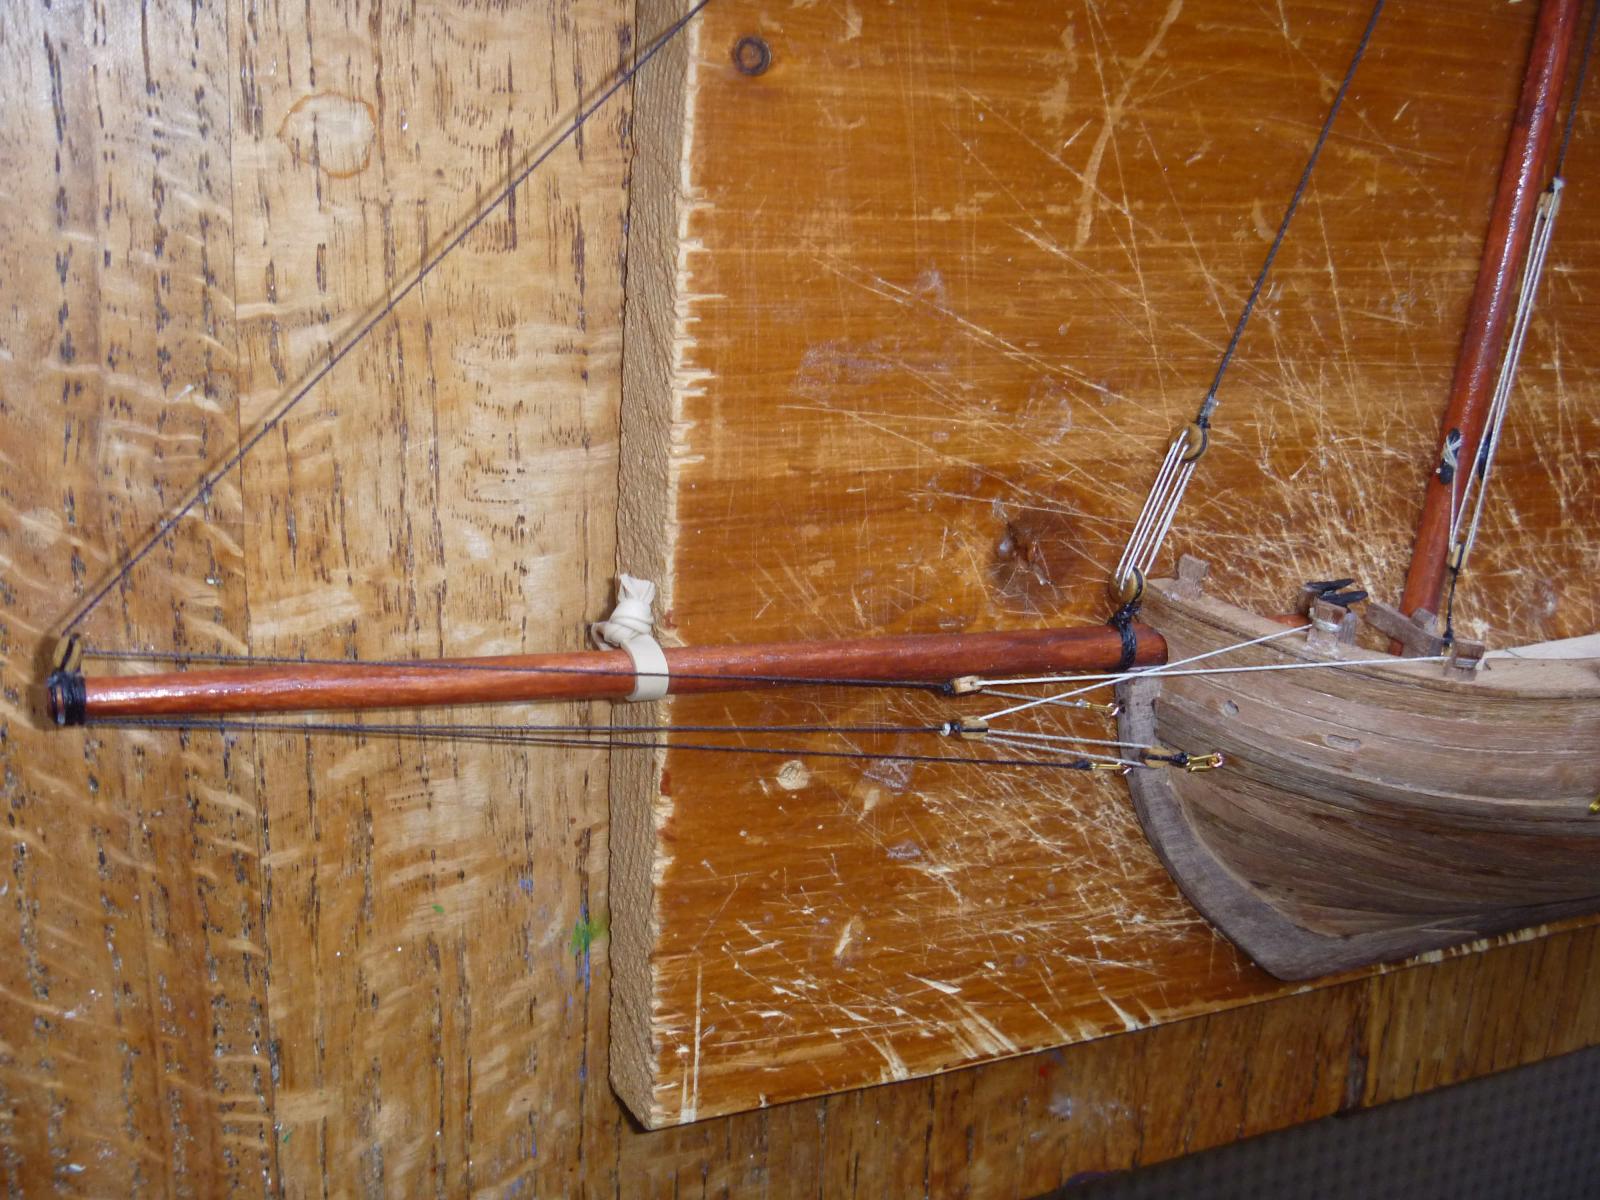
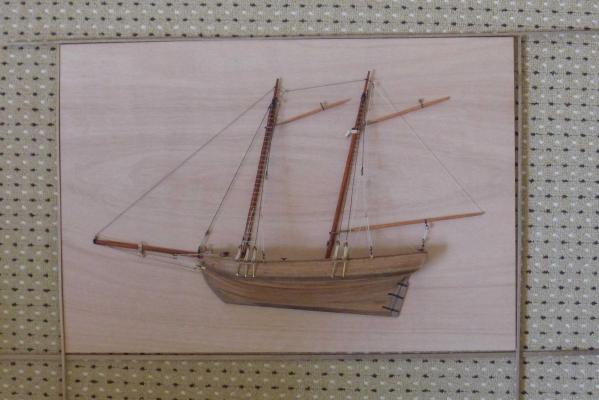
Progress is steady but fiddly - it's proving difficult to make, for example, half a parrel collar, and some of the rigging runs to different tie-offs, as there's only one side. One error I've found: the line from the end of the main gaff to the deck isn't on the plan at all, although it's on the box photograph. There are some other minor differences between the box photo and the plans, but nothing a bit of thought can't overcome, I think. I've found, as I'd expected, that the masts are lifting from the board, as the shrouds (and other rigging) exert an upward force. that would be to port if the ship was upright, abut balanced by the same forces on the starboard side. If I was doing this again I would use something stronger than rubber bands, perhaps some string? Wide and soft to avoid marking the masts? I went with a sheet of ply for the mounting board, with some walnut for a frame. The ply was completely flat in the shop (I checked several before buying, which made the shop assistant worry, I don't think he's seen so much fussing for a 610mm square piece of plywood), then after getting it home it was more Pringle than mirror-smooth, I think the cold carrying it to the car and different moisture levels at my house caused some warping, I was surprised how much. Anyway, a week lying flat on the floor and it's back to smooth. I think the colour sets off the Ballahoo's woods well. Advice appreciated: the two photos are on the finished size of the ply, with about 45mm all round. Which angle should I mount it - keel horizontal which gives the stern a pronounced sweep up, or waterline horizontal which gives the keel an upward slope to the stem?
- 28 replies
-
- 4
-
-
- ballahoo
- caldercraft
- (and 2 more)
-
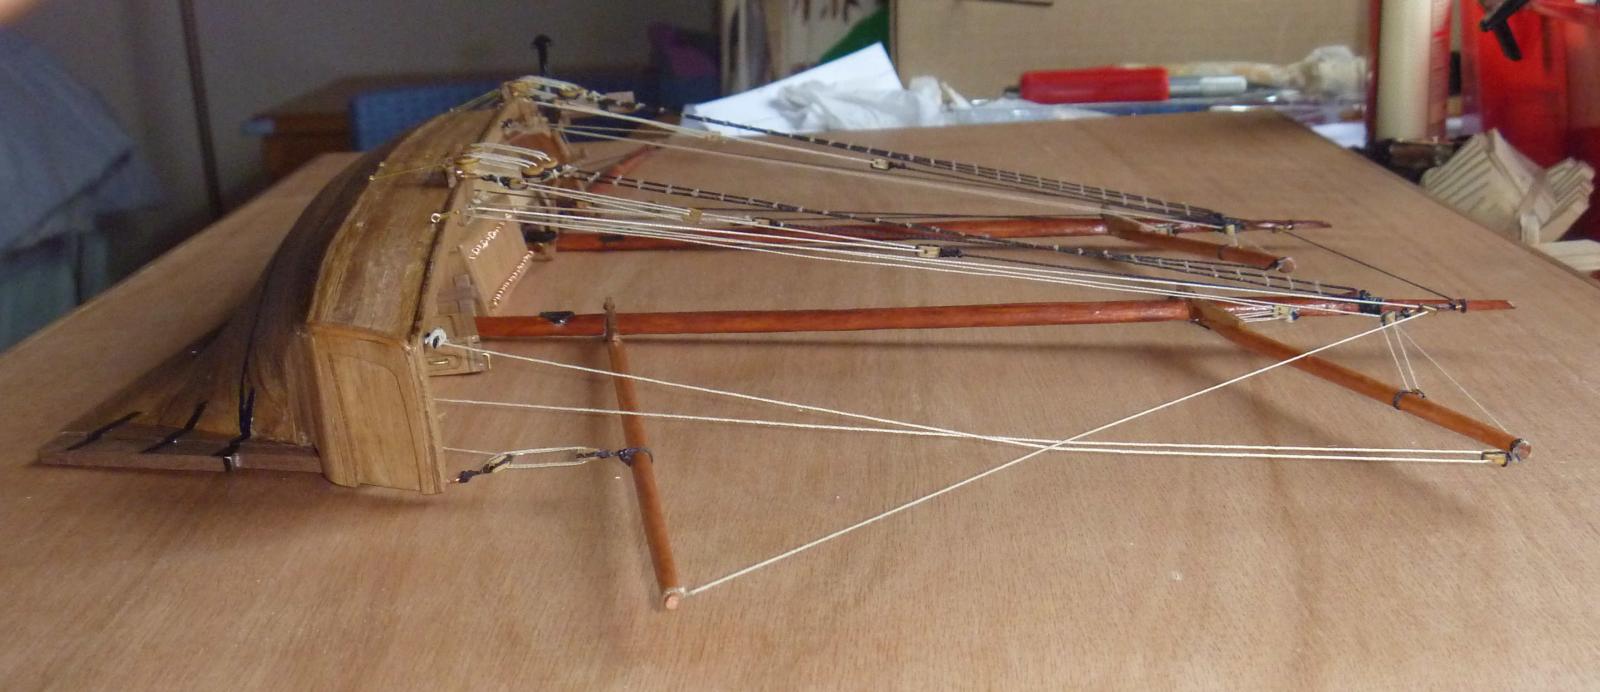
I've started the standing rigging. First major change is at the bow: the line from the foremast to the block on the end of the bowsprit (sorry, not sure of the name) is shown just being connected by a rigging hook to an eyelet on the stem, with no adjustment, which seems both wrong and strange - why use a block if the line doesn't move? I've adapted it to include a block and hemp line to allow for adjustment. With the masts held flat to the building board, I've put up shrouds, and put ratlines on the shrouds, although there are none on the plans - it would be more typical of actual operating practice, and they look good on jim_smits' build (thanks for the inspiration!). That's fairly standard I think. Specific to the half-hull, if I remove my tie-down rubber bands the masts each lift about 2mm from the edge of the building board, about 75% length. The shrouds are not tight, so the lesson is to keep masts and bowsprit firmly pinioned. I'll be pinning them down to the display board, probably with a brass pin through to the back of the board and clinched over.

- 28 replies
-
- 5
-
-
- ballahoo
- caldercraft
- (and 2 more)
-
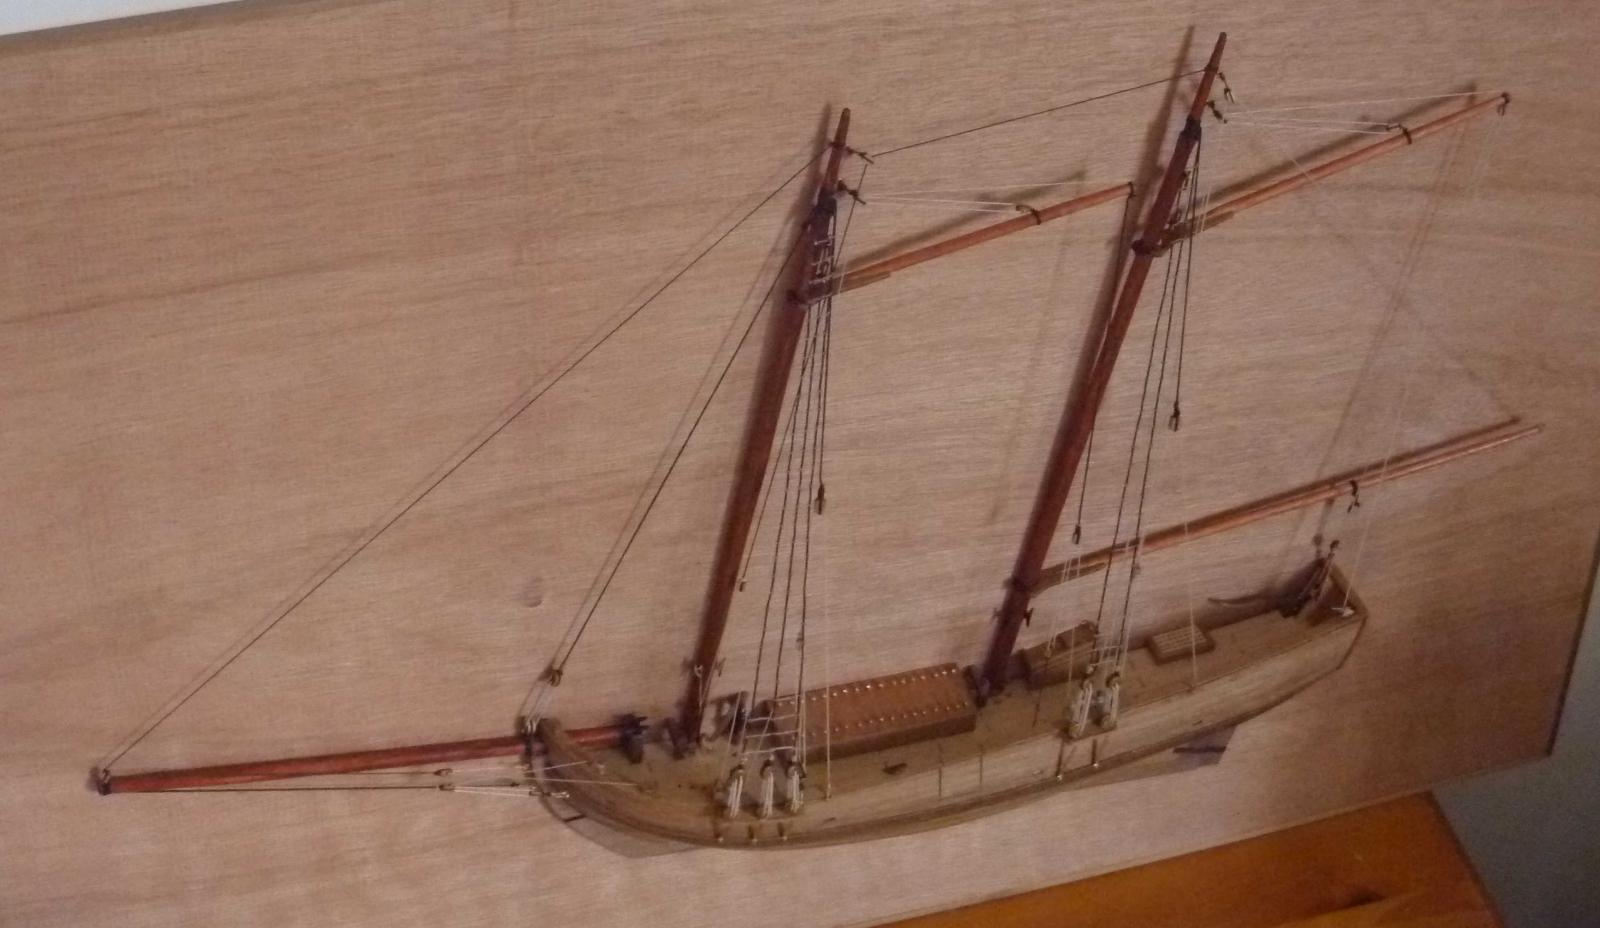
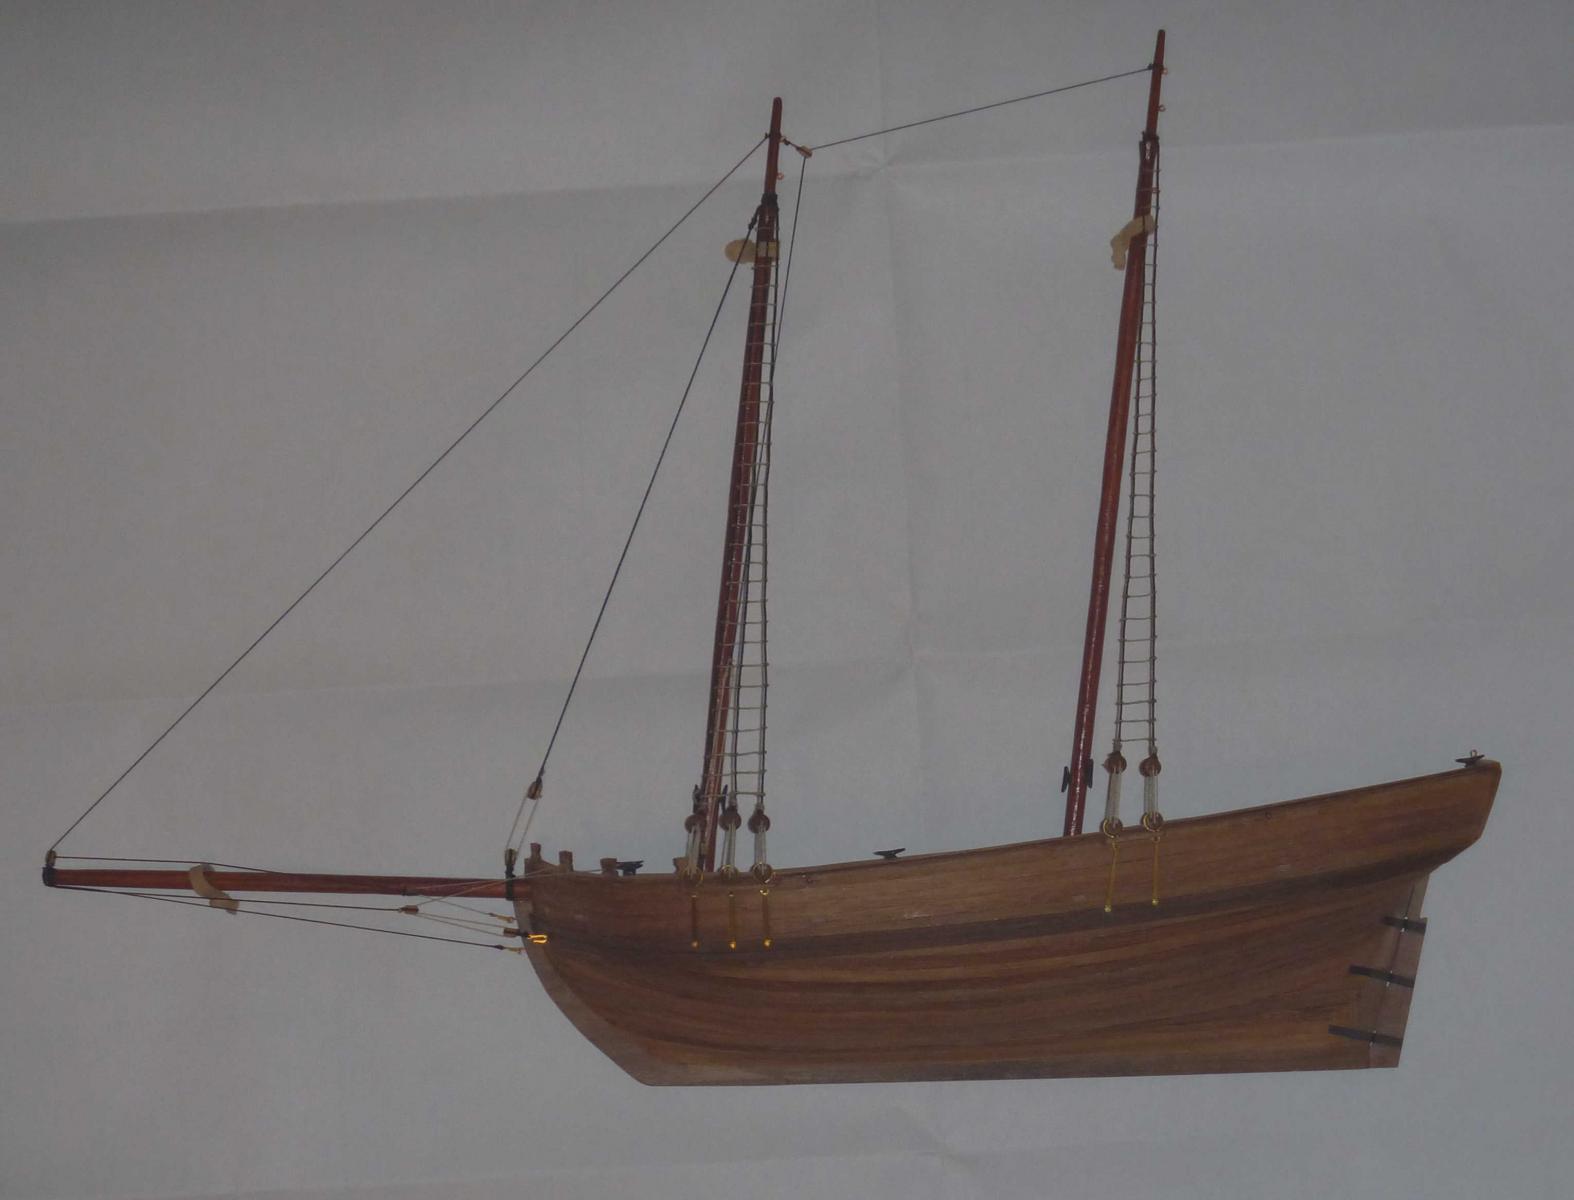
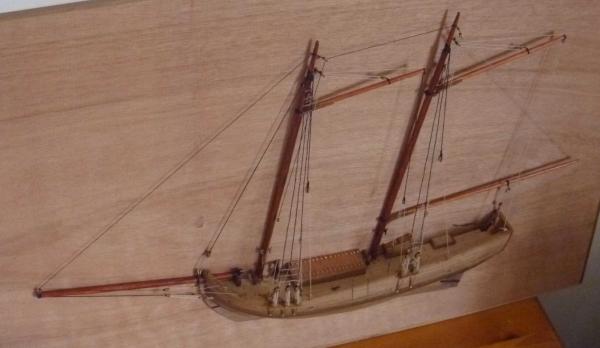
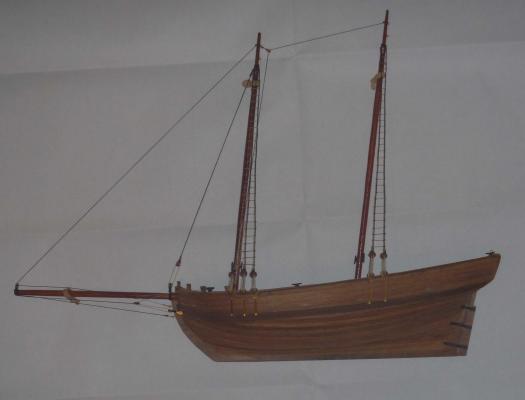
After a delay (the New Year bug, family visits etc), an update. I seem to spend hours and achieve very little that's visible! She's had a lot of small work done: the deck has been scribed, eyelets and cleats attached, the half-length bitts attached. Channels and chains were fitted, which caused slight problems, as I didn't think to check the height between the mainwale and the capping rail, and with one-piece straps I found I'd made the gap too great, so the straps are attached to the very top of the wale. Annoying, but I don't think it's too obvious. I haven't fixed the timberheads yet, nothing is attache to the at this stage and they're one less thing to get in the way and broken! I shaped the masts and they've had a coat of stain. They look very brown, which is partly the photograph, they're not quite as brown as that, and when the whole ship is varnished (clear satin acrylic) the hull will go browner on my experience. She's mounted on a larger board now that she's masted. The rubber band looking attachments to the mast ARE rubber bands, to keep the masts flat on the workboard.As there is only one side's shrouds, there's going to be a tendency to pull the masts to port; when it's finished, I'll mount it permanently and I'm planning to pin the masts and bowsprit to the board. Next is the fore-and-aft standing rigging then probably the booms and then the shrouds. The photos show the split deck fittings - I'm putting the companionway fore-and-aft, so it's been cut, slightly off-centre as the dividing line is slightly to starboard as I've explained.
- 28 replies
-
- 3
-
-
- ballahoo
- caldercraft
- (and 2 more)
-
I've added the main wales, and cut some scuppers to avoid a floating swimming pool. Also the counter, which took a bit of fiddling. I think it would have been easy if it was going to have a painted finish, but as I intend to varnish it, the joints show up a bit. The capping rail was marginally short, meaning the stern counter didn't project far enough to go over the counter, meaning a slightly cobbled finish; probably no-one else will notice but it's annoying to me! Again, Jotika's quality control is a bit disappointing - my gripes so far are bulwarks too long (easily remedied), walnut planking variable in colour and some easily splinter and now the capping rail is short by about 3mm. Eamonn, you were right, even if my capping rail seemed to be OK dry-fitting earlier! I'm going to scribe in joints for the deck planking, and an opening gate in the bulwark and capping rail, but as I'm giving her a cargo hatch between the masts, I'm having to relocate the pump and possibly other deck furniture, so I'll do that next, then do the scribing. As she's going to be mounted on a board, I've glued the rudder in place, and made up some "ironwork" rudder hinges. As you can see, the centreline is actually slightly to starboard of the true centre, just to the side of the keel. The masts and bowsprit need 1.5mm shaving off one side, to allow them to fit, as you can see from the shape of the holes in the decking. That will actually help them lie flat on the board - I'll probably glue or pin them to the board for stability before tightening up any rigging. I need to decide what colour and substance for the final mounting board - solid wood may be heavy unless it's thin enough to risk warping; a sanded/polished plywood would need edging. And would a dark wood look too heavy? Decisions, decisions!
- 28 replies
-
- 3
-
-
- ballahoo
- caldercraft
- (and 2 more)
-
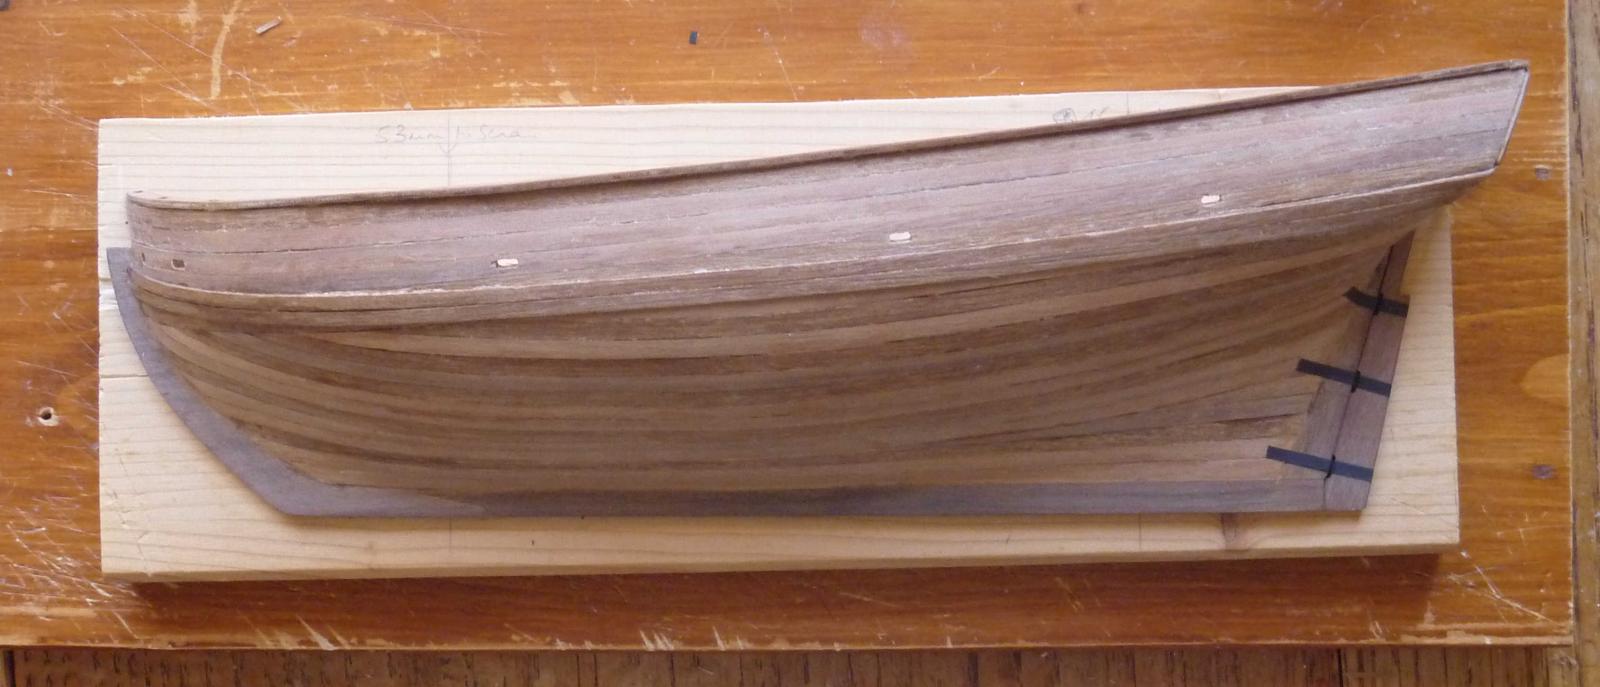
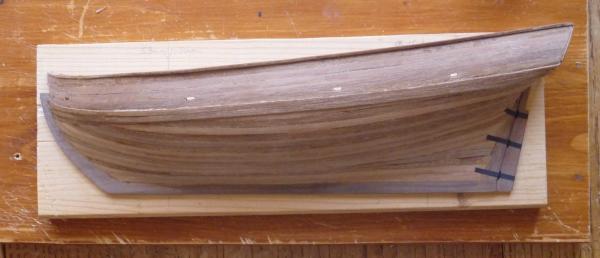
Slow progress, but planked - the picture is before the second planking is completely finished (main wale and counter not yet done, hawse hole and bowsprit hole not opened out, not sanded). The varied shades of the walnut planking is (are?) deliberate, to give some "texture". No major issues, but there is a fair amount of variation in the walnut second planking supplied, which was a bit disappointing - the darker pieces in particular are a coarser grain and are prone to splintering if I try to bend them too much. It worked out OK but JoTiKa's quality control seems a bit lax. I also found it challenging as the hull needed smaller-radius bends than my Cruiser, and perhaps surprisingly I found the shorter hull, and hence shorter planks, more difficult than the Cruiser. Next is the counter, then plank inside bulwark, then decking, in order to strengthen the hull; I'm bearing in mind that the half-hull doesn't have the strengthening effect of full bulkheads and the starboard side planking.
- 28 replies
-
- 2
-
-
- ballahoo
- caldercraft
- (and 2 more)
-
Jan, no, I don't think she's realised yet, and thankfully she doesn't read this forum!
-
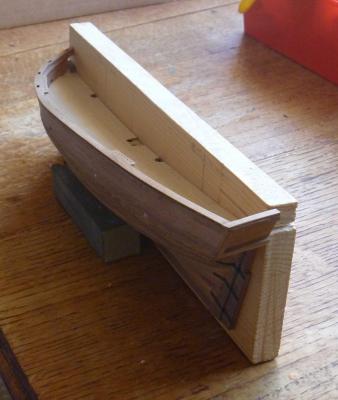
Well, I've attached the bulkhead, but it wasn't a good fit. I started at the bow and got the bowsprit hole lined up OK, but it's too shallow at the stern - to get the top of the bulkhead level with the top of the counter, it ends up not in good contact with the deck. It's OK now, as it's attached to the bulkhead extensions, but they have to be removed later! I'd already decided to do what Eamonn suggested, fit the bulkhead as-is then cut off the 5mm overhang when it's all set solid. Also, because it's not firmly attached at deck level, I'm going to put a small triangular reinforcement timber between the counter and the bulkhead. Hopefully, that plus the laminate of first and second planking and deck planking will keep it all solid. After your warning I checked: my capping rail fits perfectly!
- 28 replies
-
- 1
-
-
- ballahoo
- caldercraft
- (and 2 more)
-
Thanks, latestarter: and egkb - your Ballahoo log was one of the research subjects during the whisky phase! I'm finding the bulwark awkward to fit, like others have, but mine looks to be about 5mm longer than the ship (dry fitting only so far). If I hold it in place at the bow it extends beyond the counter: I don't see this as a major problem as I can trim off the excess, but has anyone else seen this?
- 28 replies
-
- 1
-
-
- ballahoo
- caldercraft
- (and 2 more)
-
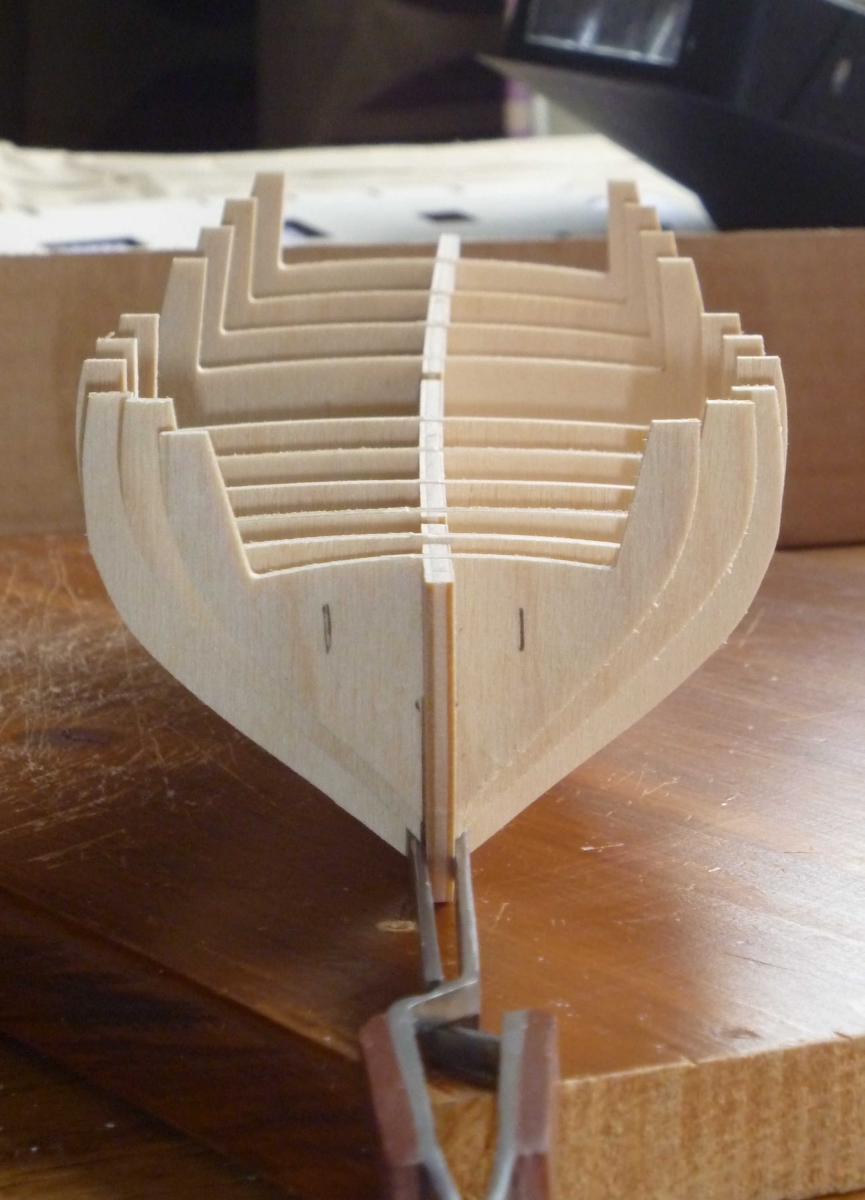
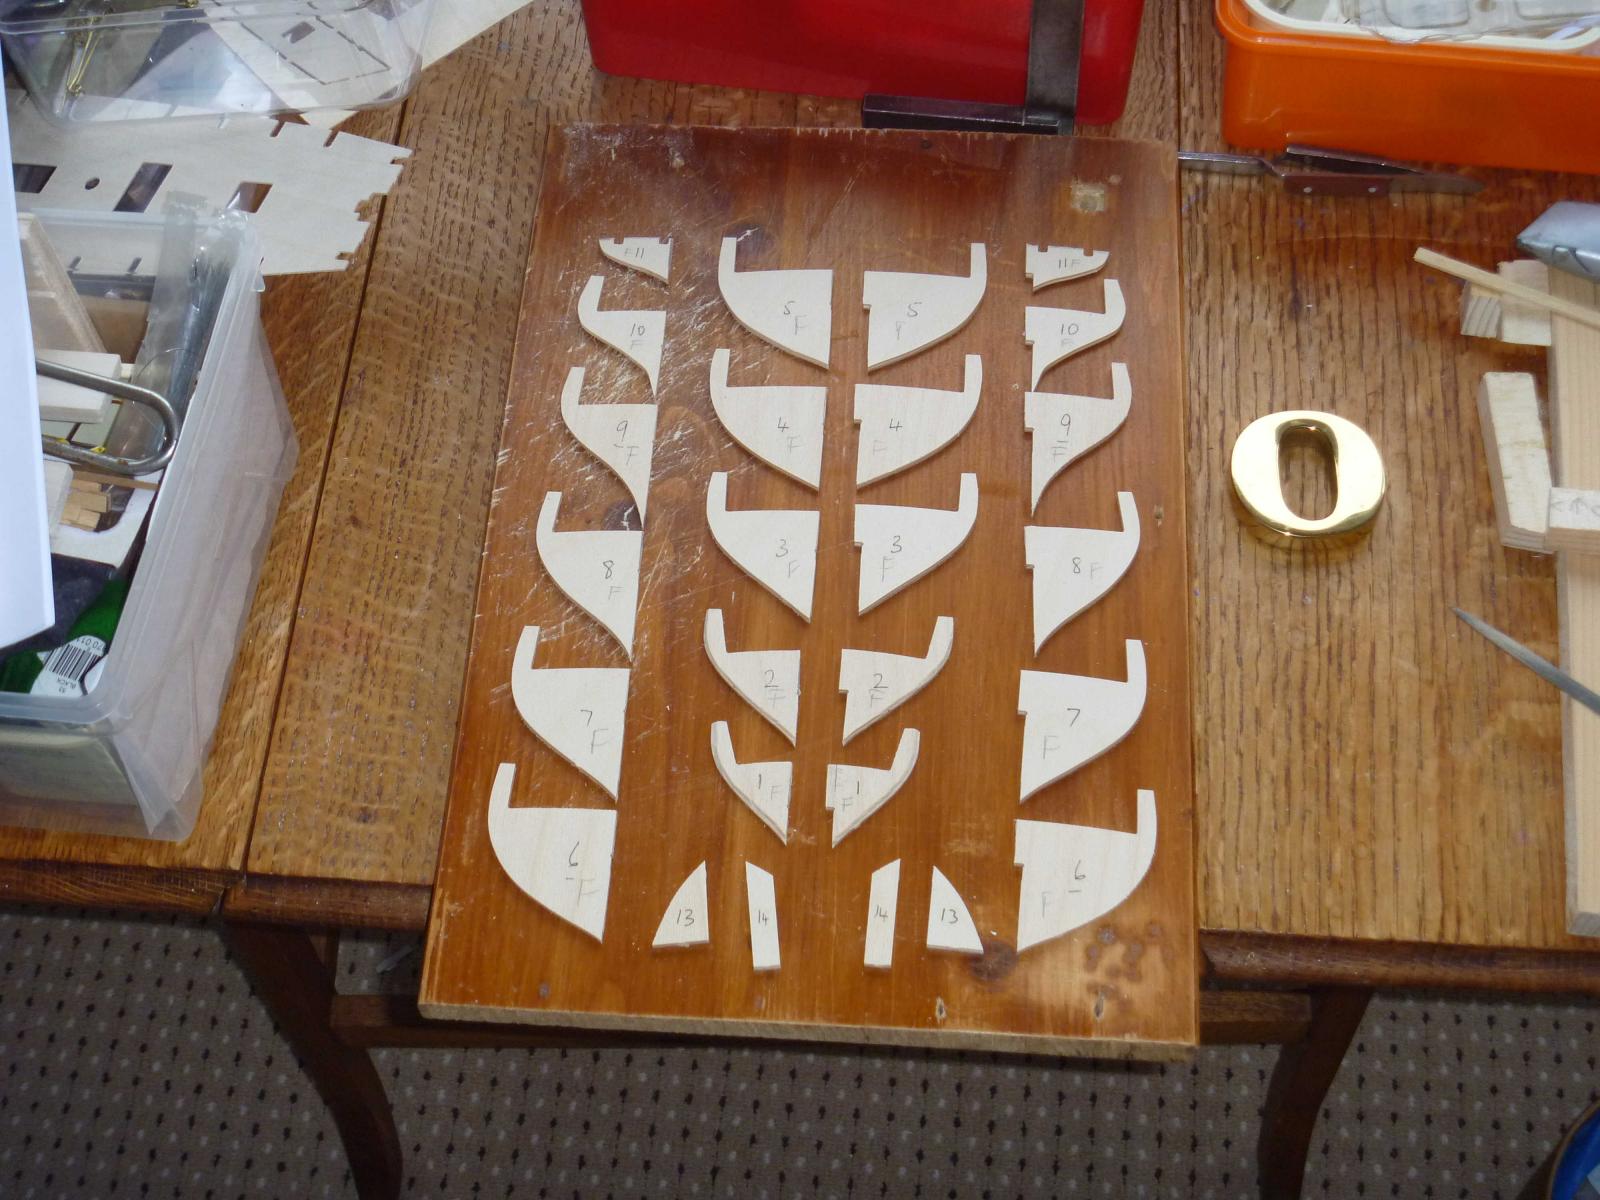
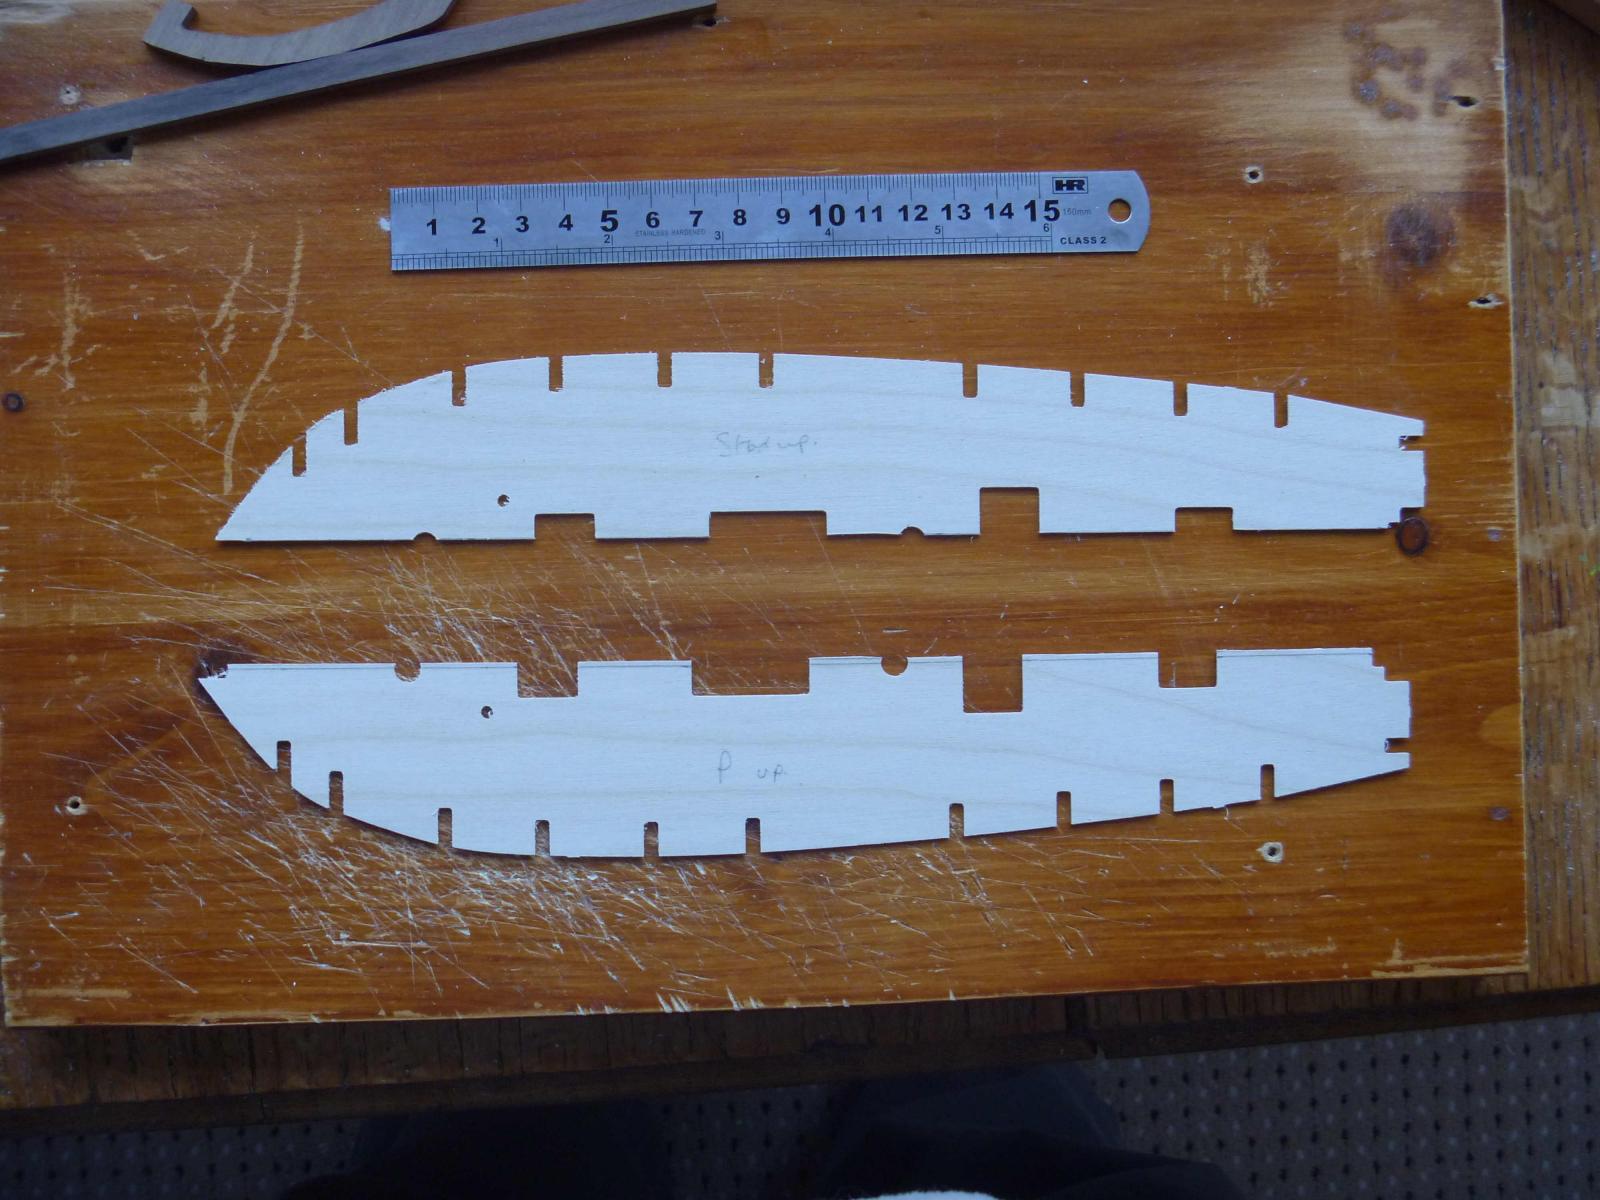
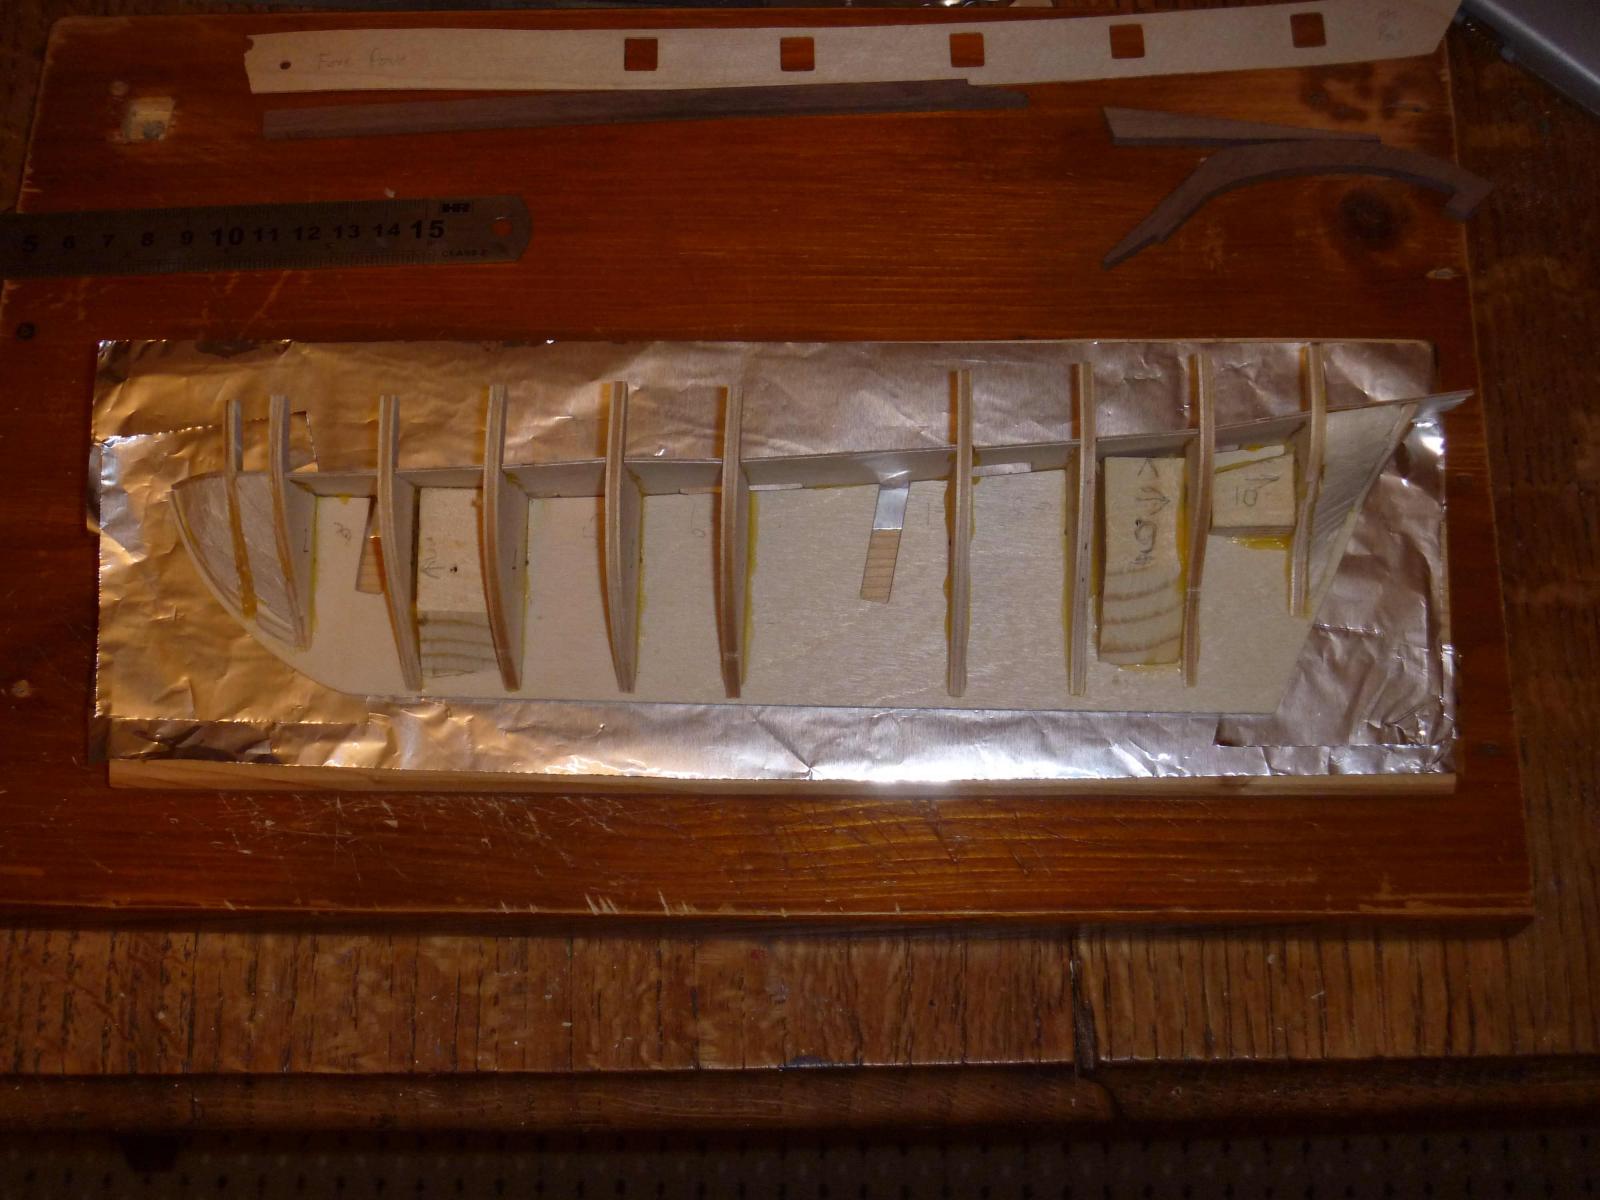
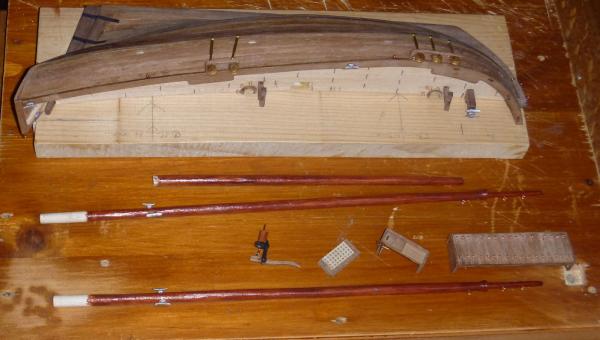
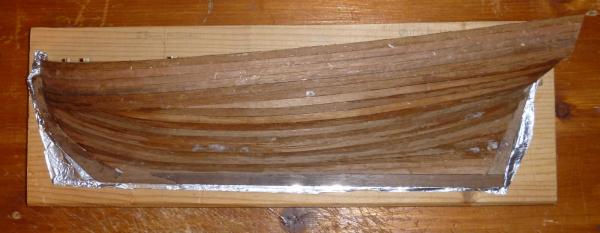
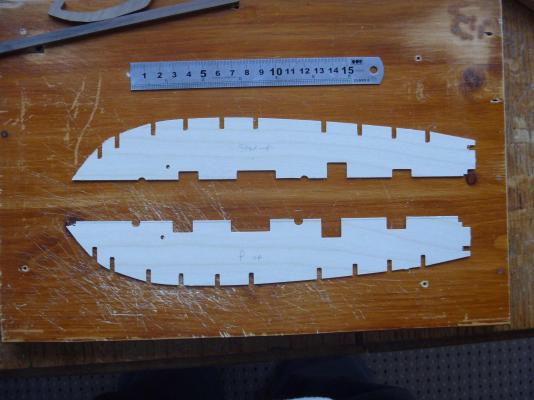
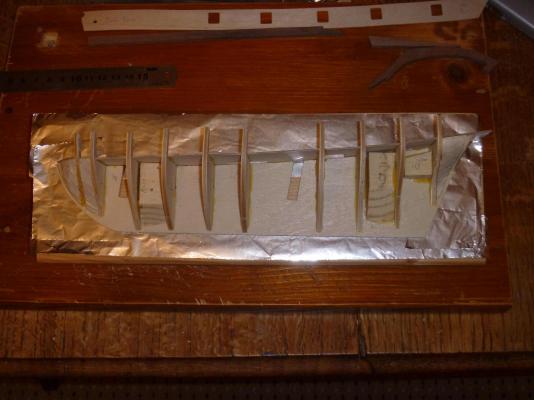
I've had the kit for some weeks, sitting with a whisky and planning (the whisky worked, not sure about the planning yet), checking everything's there (it is), separating and dry-fitting (with one hitch, the keel is curved). Straightened with steam and patience, and as a half-hull it's less critical, as the keel will be flat on a board - fitting the false deck helped too. The two blocks of wood between bulkheads 3 & 4, and 8 & 9 are for the screws from the rear holding the ship down on its working board, and eventually onto the mounting board. You can see the bulkheads cut off level with the starboard side of the keel; this makes the port side 1.5mm wider on the starboard side than the true centreline, as you can see from the divided false deck. The working board is wood not metal, it's covered in aluminium foil because it's not actually oven-ready, it's so that the keel and other pieces that'll have to be glued up to the centreline don't glue themselves to the workboard and the hull should come free cleanly, which may be necessary from time to time. Next is the outer keel etc, and the counter pieces. I'm not cutting the keel, which means it'll be too thick, but I don't think it'll be noticeable. The counter will need carefull cutting though.
- 28 replies
-
- 3
-
-
- ballahoo
- caldercraft
- (and 2 more)