.jpg.17d00fb493c609fc3685df038e605d8c.jpg)
CIWS01
-
Posts
25 -
Joined
-
Last visited
Content Type
Profiles
Forums
Gallery
Events
Everything posted by CIWS01
-
.thumb.jpg.ad2478a8fc78865f0504cc609074bce8.jpg) That is a work of art, I can not wait to see how this fits in!
That is a work of art, I can not wait to see how this fits in!- 601 replies
-
- 2
-

-
- constitution
- revell
- (and 1 more)
-
Yes I'm seeing this approach more and more here. And you bring up a really good point about the age of the plastic being an issue. The wood is an interesting idea and I am very much interesting in this idea. I'm not a long time wood worker but I'm definitely going to give it a go.
- 29 replies
-
- 1
-
-
- revell
- constitution
- (and 2 more)
-
Thanks Force9, that sounded like a great conversation to have! Living history is an amazing experience. Wish I could have made it to Gettysburg this year but there is always next year! Things have been a bit slow lately, we are preparing to move and this will mean that I will finally have a better place to work on Connie! Historyguysteve Thank you very much for the welcome! I've been browsing the forums over the past few months and definitely taking notes. This kit is amazing with the detail but yeah the short falls of mass produced plastic kits are not lost. My original approach has actually been completely altered thanks to the wonderful build logs on this site! Such an awesome challenge they will provide but I can not wait to tackle each one. I really like the idea of using real wood for the masts and spars, I had been considering replacing the Sails as it is but never thought about the masts being on the weak side. I will have to keep that in mind and perhaps see where else to possibly replace or re-manufacture. So far I have gone back and I am removing the original plastic the was used for the glass in the gallery. I had been careless back when I put it in years ago and it had been smudged with glue and looked awful. I want to repaint the hulls now that I have the airbrush and hope to do it soon as long as I can squeeze it in around moving boxes. If I get the chance to do it I will certainly pull out the camera and snap my progress! Looking forward to feedback!
- 29 replies
-
- 1
-
-
- revell
- constitution
- (and 2 more)
-
Wow it's been awhile. Winter took a lot of time off of me and With going into Civil War reenacting I've found my time got jumbled up. As soon as it's warmer out I will haul out the Connie and get her back underway! I'm seeing some fantastic ideas on this site and I can't wait to try them out myself and share my experiences!
-
Thanks for sharing the details of the carriage wheels, I was also wondering what you used.
-
I also can not wait to see how your guns turn out, so many great from this site and they just keep coming. I wanted to say I really enjoy and appreciate your shared research here. Your attention to detail is very educational and makes these projects that much more interesting. I'm very interested in what you have done with the wheel's, they do not please me much OOB. They do seem a bit undersized (incredible considering how small they are as it is!)
-
When looking at how incredibly small these Cannon and Carriages are, it is amazing the level of detail you achieve. The hard effort is paying huge dividends. The ropes look so natural in your set up, amazing.
- 601 replies
-
- 1
-
-
- constitution
- revell
- (and 1 more)
-
Fantastic thank you Scott. I'm really looking forward to playing with the Evergreen. The possibilities are impressive! Dave: Yes the calipers are a really good idea and are now on my supplies list. The results I see on your build certainly show that it is worth the extra effort!
-
So I have not had much time on the model as of late due to getting kids back to school and all that stuff, not to mention the drain back to school shopping has on my wallet! But Getting on here and seeing the different projects gets me pumped to be back at it! I'm going to be ordering some different paints so I can shoot the model. I had already joined the hull halves long ago and wish I had not. Too bad it isn't' easier to find another kit or I wouldn't' even worry about it. So much I want to do but can only do what I can right? So here is a question, I have been wanting to get into crafting some of my own components for my kit and i see Evergreen mentioned in many of the posts here. How is it to work with? Is it something that is pliable? How does it usually come? Anything I should know about working with it? Also getting additional fittings such as brass ect... I know there are companies that make parts that can be used. This is the most ambitious project I have ever gotten into and it is only getting worse lol.
-
Wonderful pictures in all! Looks like a fun trip over all. The Guns are most certainly a project all to themselves. I've had to take a few weeks off my build but not that I'm back again it's back to the armory. I agree about the material of the guns and carriages being some what soft. It has been a difficulty prepping them on my own build. Keep up with the work here! It is motivating to see what is possible with some excellent research and creativity that you have here! PS!! I wanted to say, I love the yellow line concept. It looks fantastic and your hull isn't even black yet. Something I will most certainly try myself!
-
Sorry for the silence, Had a family vacation and thought about bringing some of my ship to work on but with 2 kids and a packed car I thought better of it! I'm still working on cleaning up the cannon and want to shoot paint on the gun deck soon. I think I may use my airbrush just for larger area's as I think a super fine finish is not needed with this ship, I normally avoid using paint brushes but with the decking and bulkheads I think it will be just right! I removed the plastic insert for the cabin windows as they were damaged and discolored so I will have to find an alternative to that for the glass itself.
-
Yes, for reasons I cannot completely understand when I got back I decided to break the kit into multiple kits. So the Cannon, the Launches, ect... Maybe it is due to the fact that I had read that the cannon and their carriages take a long time to do. It is just like me to tackle the more of a grind projects first to make the rest easier. I am charging my good digital camera now so I can get some better images up of what i'm actually accomplishing with these guns and my old worn out Gerber.
-
*edited because I was blind and didn't see the other tree* Ok So yeah I missed the bow chaser carriage. That was embarrassing! I'm continuing to clean the guns, they do look so much better with the flash and glue cleaned up!
-
Got home from work today and though I didn't intend to do anything I ended up taking up the Gerber and cleaning the seams on the barrels of the 32 pounders. Started just doing one then refused to stop till I had done all but 4 of them and even did one 24 pounder. I wanted to take pictures but alas it is so dark in here and this cheap phone is without a flash so I will have to wait until I find my digital camera or when it is still daylight out. This kit is truly many projects all in one! I love it!
-
Alright so after a crazy week at work and then a very much needed month of vacation I'm finally able to get back to the Connie! I decided to hold off on the hull components for the moment as doing lighting is something I very much want to do yet have to wait on funds to be free to buy the supplies for. In the mean time I'm planning on doing the various sub assemblies while I wait. Today I began on the Guns. I had read a few posts on here about the marathon that they tend to be and I can see clearly why. They got old very quickly. The moulding issues with the gun carriages was pretty substantial and I had a deal to clean them up. Still working at it, tomorrow I will have to dive into my tool chest and pull out my jewelers files. Once used in my trade to repair aircraft now used to clean up Connie's guns. The long guns went together with not much trouble but the short barrels gave more of a fight and a few caused a bit of a mess with the cement and didn't want to fit for anything. I find it easiest to apply the cement with a toothpick rather than the nozzle that comes with the tube. Barrel halves mated and ready for cement. I didn't have anything to mount them with so It was all by hand. Time to peel the cement off my fingers! The left line are the carriages that I have not touched anymore than removing them from the trees. They are in bad need of cleaning. I couldn't find my Xacto knife so it was off to the races with my Gerber. The center line I had cleaned up more with the knife. They are in dire need of further work to clean up but they are better at this point. One of the carriages is missing the bottom half of a wheel and I seem to be missing one carriage all together, that or I have an extra barrel you can see at the end of the right line. I will not be placing guns at the forward most positions per some of the research I've seen here and that should make the extras irrelevant. I just wanted some closer pictures, I laughed that they would set back on the carriages but one at the end of the line. Sorry for the poor image quality, my samsung is out of order and i'm using my old LG cell to take the pictures, Maybe I will pull out the Sony Handycam HD for my next pictures. Here is the Armory! lol. Good image for scale for anyone who is looking but doesn't have this kit themselves. I had to hold the barrel in place as it kept trying to pitch forward. I want to do a good deal more detail than the kit calls for, but I will take my time as this is the most ambitious kit I've ever done as far as detail I want to achieve. Thank you everyone who peeks in and drops a line, I'm very excited that I will finally be able to complete this kit after staring at the box for over 15 years!
- 29 replies
-
- 1
-
-
- revell
- constitution
- (and 2 more)
-
Ok good deal, I have been thinking of various ways I could solve this creatively, but I think I will go with separate parts. So I bit the bullet and used my cheap filler from Testors. I will begin sanding and smoothing but first I will have to get some new Sanding gear. My old set fell apart . Pictures soon!
-
Yes, definitely want to prime this. That should hide the white stripe I already did too. I just need to carefully remove the gallery window plastic before I do it. I would as how that stuff holds up as far as color change over the years but it is how old and still clear..... lol. I love the way your planking looked, Impressive results! With the Deck itself, should I finish them and fit them individually or secure them together and reinforce them as one assembly? I'm seeing a good number of gap prevention techniques on the forums.
-
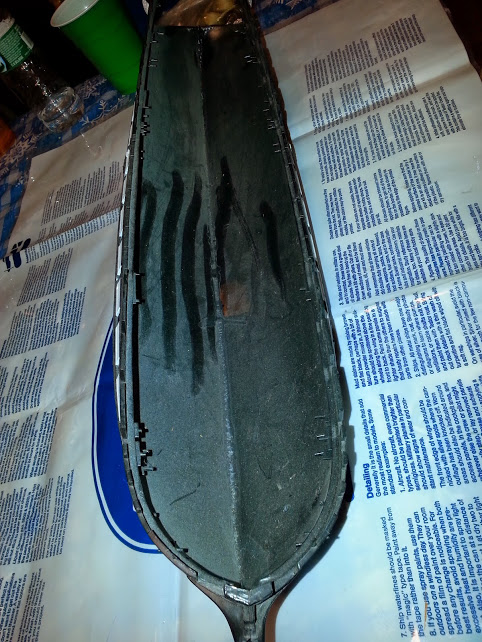
Alright, I cleaned off the hull halves and inspected them for damage. That was A LOT of dust. Had to take it outside to keep the dust from bothering my wife. The right half of the hull has some molding issues just above the captains cabin windows. A few other area's as well as the issue with the bow I already posted about. I went ahead and pulled out the gun decks and spar decks to clean them up and remove the molding mess. Not as bad as I thought however after reading about the issues other people have had with the decks mating I decided to go ahead and dry fit the decks. I was a bit nervous fitting the aft gun deck in as it took the most hull flex to get in place. The forward gun deck retainer pins were gone so fitting the forward gun deck was... interesting. I fitted the Spar deck as well just for laughs. Again here I noticed that the forward deck had a noticeable gap on the port side that can be seen in the pictures. I don't think that when the time comes for fitting the Spar deck that squeezing the hull in will close that so I will have to pursue other fixes.
-
Thank you, I browsed some of the other builds here and I am amazed at how well this kit can look when completed! It was not till I had come on this site that I allowed myself to consider creating my own sails but now I'm fairly set on the idea. I know they are far away but still can't help me self being excited about em'.
-
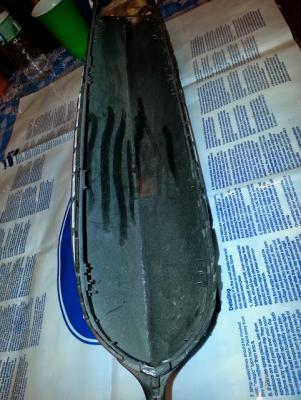
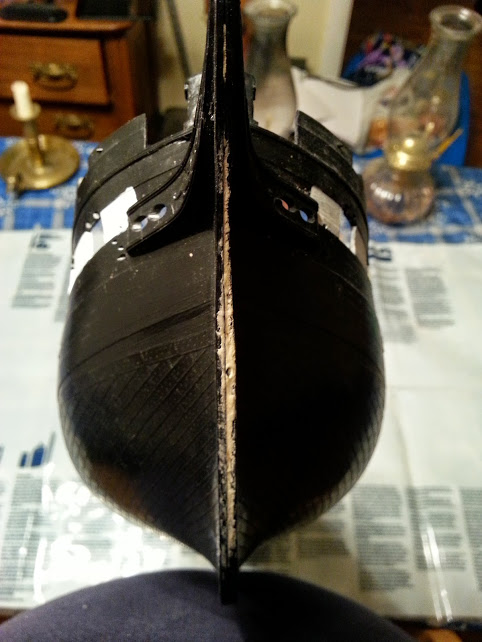
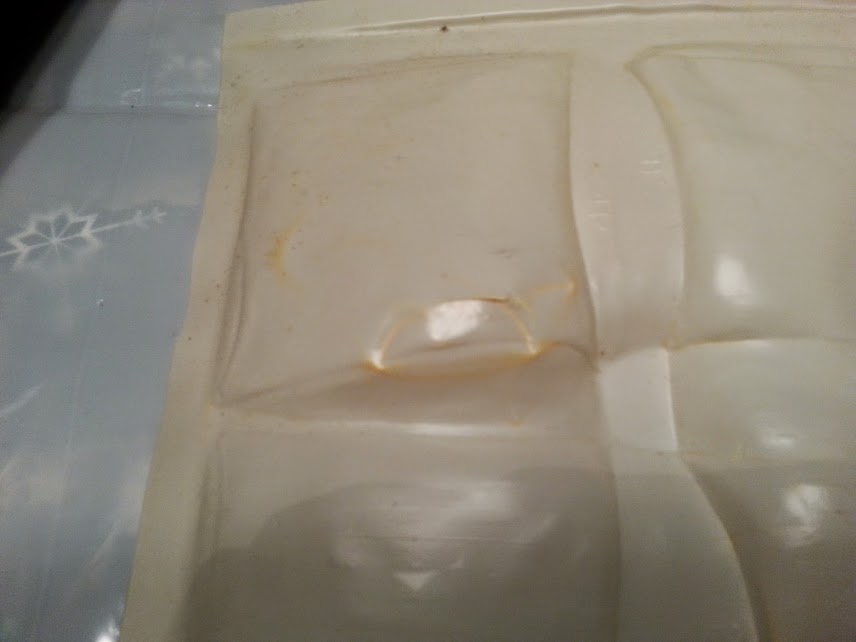
Thank you for the greetings and for the advice! Taking it slow is a concept that I am working on, its a big weakness for me though money requirements of the project should help keep my pace down some. My box of fresh paints and thinner had arrived (It seems that most hobby shops in my area have gone away) and I had thoughts of surface prep of the hull and masking. I have a brand new airbrush from my Mother-in-law and I'm excited to use it. However as I was looking over the hull my attention was again brought back to the seam at the bow. The mating seam was very bad, the halves did not match up nice at all and I had at the time attempted to use Testors Contour putty to fill the seam. It was not a success as the photo below will illustrate. I still have the same tube of putty and it seems to still be solvent. So my issue now is do I bother to attempt to complete the filling and sanding with this less than helpful substance or do I wait and purchase a different brand of filler? In aviation I was often painting, filling and doing composites so I am familiar and comfortable with multi-part chemicals so this is not a fear for me. What is the suggestion of the builders here? Should I risk trying to remove the filler that is already applied? I am not happy the Hull detail was lost to this stuff as it is. Until I am confident I will at the very least begin to clean the hull for eventual work. There is a good 10 years or so of dust build up on this poor thing that I must clean. I'm fairly embarrassed by my attempt at painting the white line at the gun ports however I was still pretty new to the task back then. I think it is something I can work with still. I rarely use the paint brushes anymore in my work. I did a P-51D Mustang last year and used toothpicks and Q-tips to paint it since I did not yet have the airbrush. The results were not bad at all and I will more than likely bring these uses over to this build. I will look to some other parts of this model to see if there is anything that I can get started on without having to wait for additional supplies. Cheers!
-
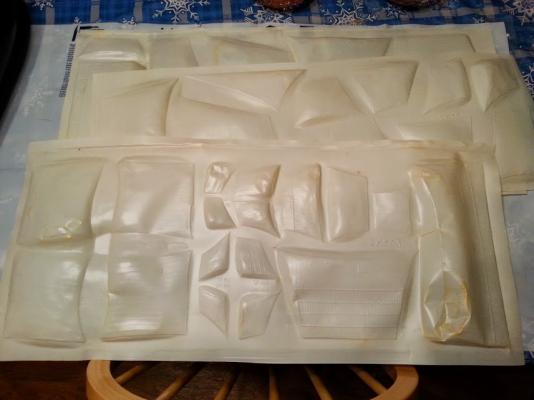
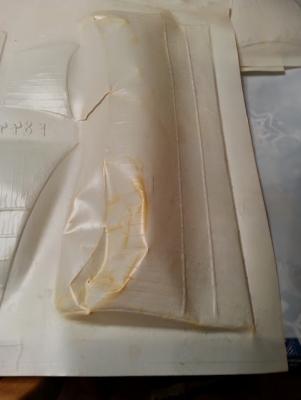
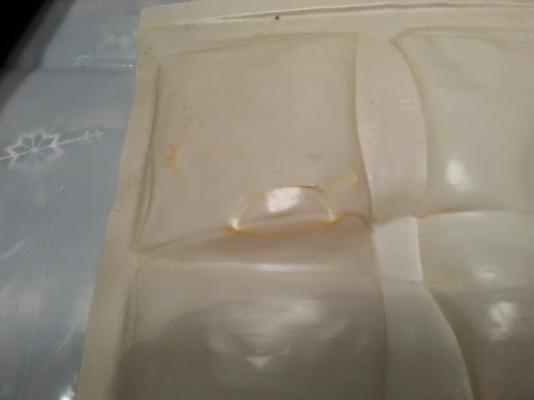
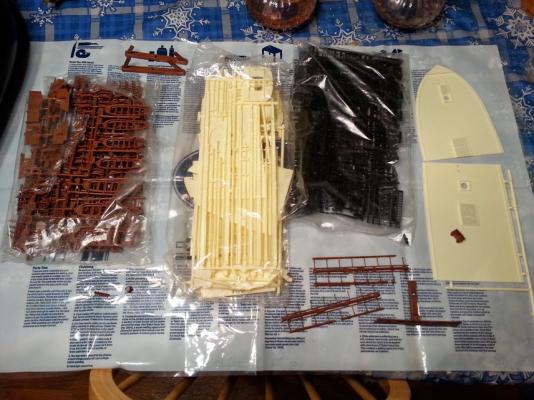
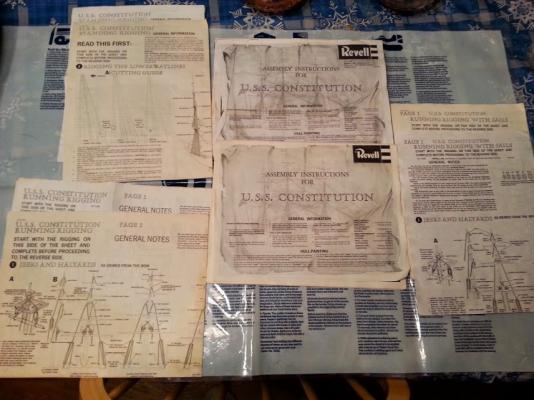
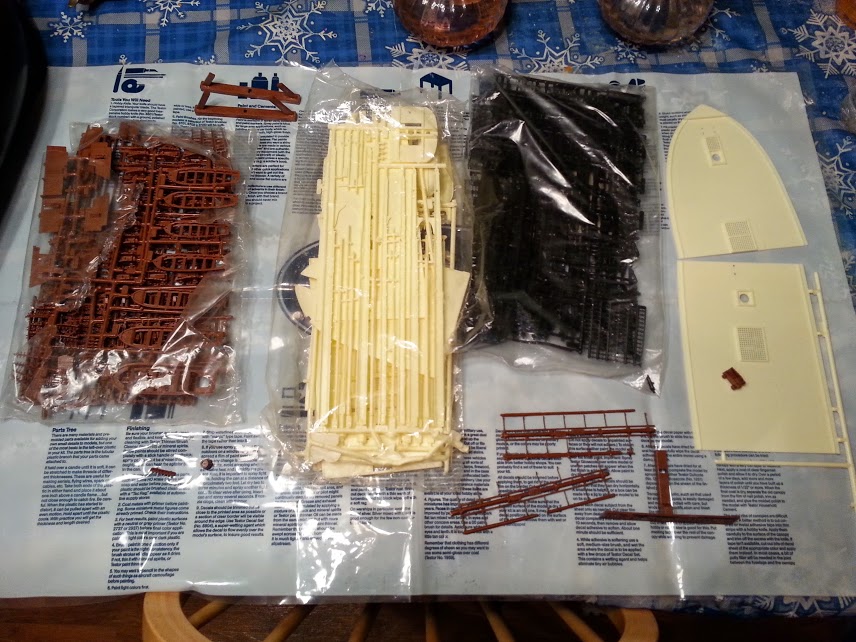
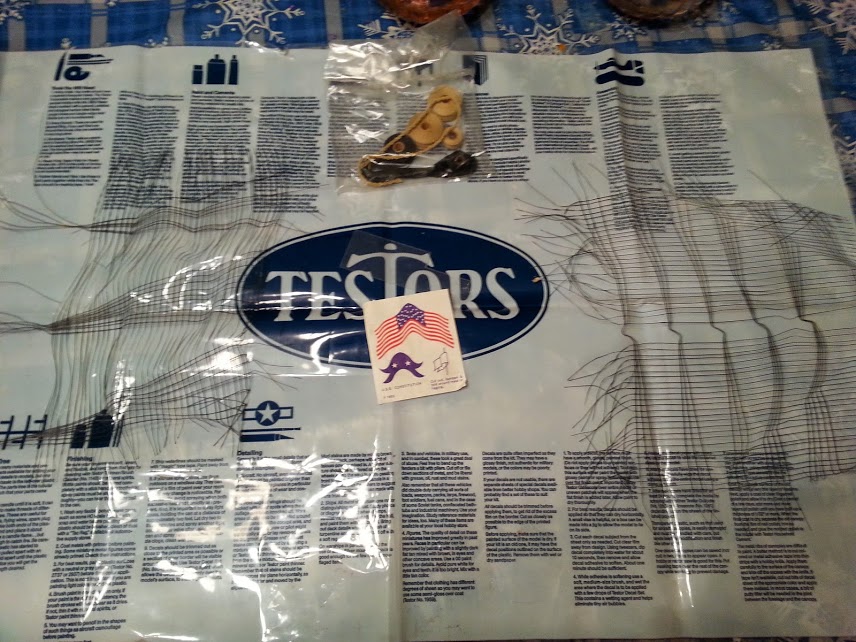
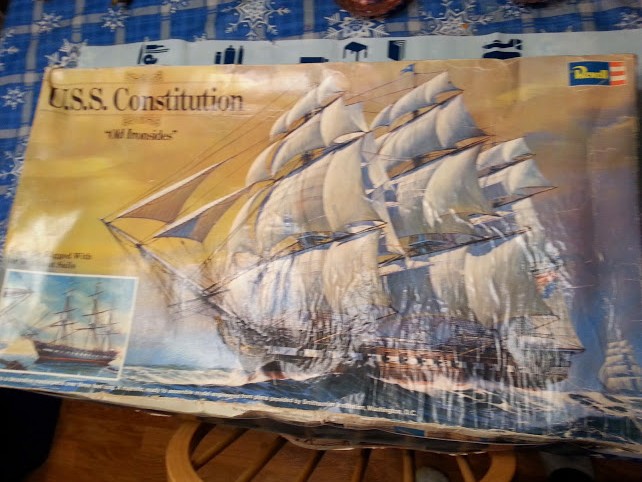
Hello and welcome to my build log for my 1/96 Revell USS Constitution kit. This kit is going to be a slew of firsts for me. This is the first 'Age of Sail' ship for me. As well as my first build-log. I have also thought about adding lights where I can. I will do my best to keep this log up to date and look forward to learning from the builders here. A bit of background on my kit, I got it when I was in middle school and was too afraid to put it together for fear of messing it up. I now know better how old this kit is and I'm glad that I did not try it before I was ready too! The first images are of the kit it'self showing the general condition of the kit. She has a good deal of dust on the hull halves that I had actually started to mate together about 10 years ago. I also began painting the white stripe at the gun ports level but at this point I may redo the paint. I've also found a nasty miss-match at the bow. They do not mate well and for yet another first I've gone and added some filler back when I first glued the hull. I admit the Cement job isn't pretty in there but I wasn't that experienced yet at the time My sail sheets are not too bad though 2 of the sails are damaged. I will be modeling the ship with sails so I'm looking at possible ways to repair the sheets however I'm tempted to find another material to make the sails out of rather than use the old plastic ones. I had wanted to try to add lights inside the ship at the gun deck and Captains cabin, perhaps any topside lanterns, this will be a new challenge for me as I've never worked with lighting on a model before. Right now I am waiting for my supplies to come in and once they do I'm going to begin on this beast!