
Hostez
-
Posts
35 -
Joined
-
Last visited
Recent Profile Visitors


-
 aaronc reacted to a post in a topic:
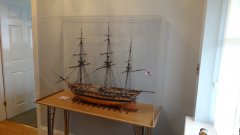
CUTTY SARK by Hostez - Sergal - 1:78
aaronc reacted to a post in a topic:
CUTTY SARK by Hostez - Sergal - 1:78
-

CUTTY SARK by Hostez - Sergal - 1:78
Hostez replied to Hostez's topic in - Kit build logs for subjects built from 1851 - 1900
I also uploaded a compilation video, on the progress of my cutty sark. https://www.youtube.com/channel/UCCQaWPmASMGVXQIBkXrfEXw -
berhard reacted to a post in a topic:
CUTTY SARK by Hostez - Sergal - 1:78
-
berhard reacted to a post in a topic:
CUTTY SARK by Hostez - Sergal - 1:78
-
schooner reacted to a post in a topic:
CUTTY SARK by Hostez - Sergal - 1:78
-
schooner reacted to a post in a topic:
CUTTY SARK by Hostez - Sergal - 1:78
-
schooner reacted to a post in a topic:
CUTTY SARK by Hostez - Sergal - 1:78
-
SiriusVoyager reacted to a post in a topic:
CUTTY SARK by Hostez - Sergal - 1:78
-
SiriusVoyager reacted to a post in a topic:
CUTTY SARK by Hostez - Sergal - 1:78
-
Snug Harbor Johnny reacted to a post in a topic:
CUTTY SARK by Hostez - Sergal - 1:78
-
CUTTY SARK by Hostez - Sergal - 1:78
Hostez replied to Hostez's topic in - Kit build logs for subjects built from 1851 - 1900
- 44 replies
-
- 4
-
-
- Cutty Sark
- Sergal
- (and 1 more)
-
CUTTY SARK by Hostez - Sergal - 1:78
Hostez replied to Hostez's topic in - Kit build logs for subjects built from 1851 - 1900
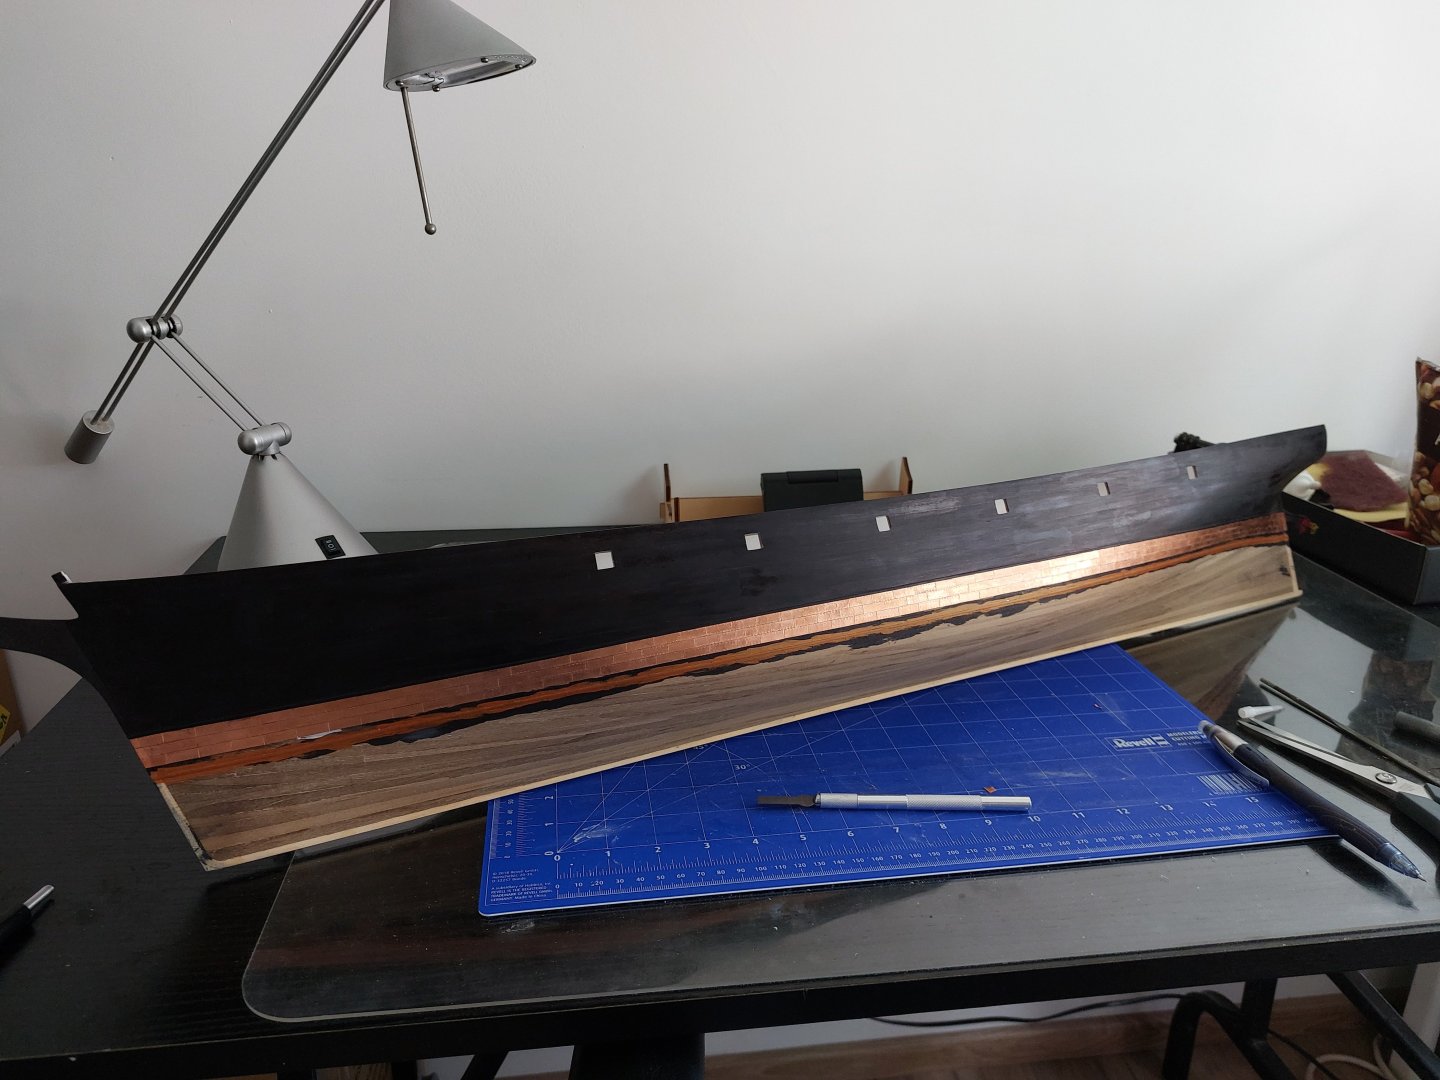
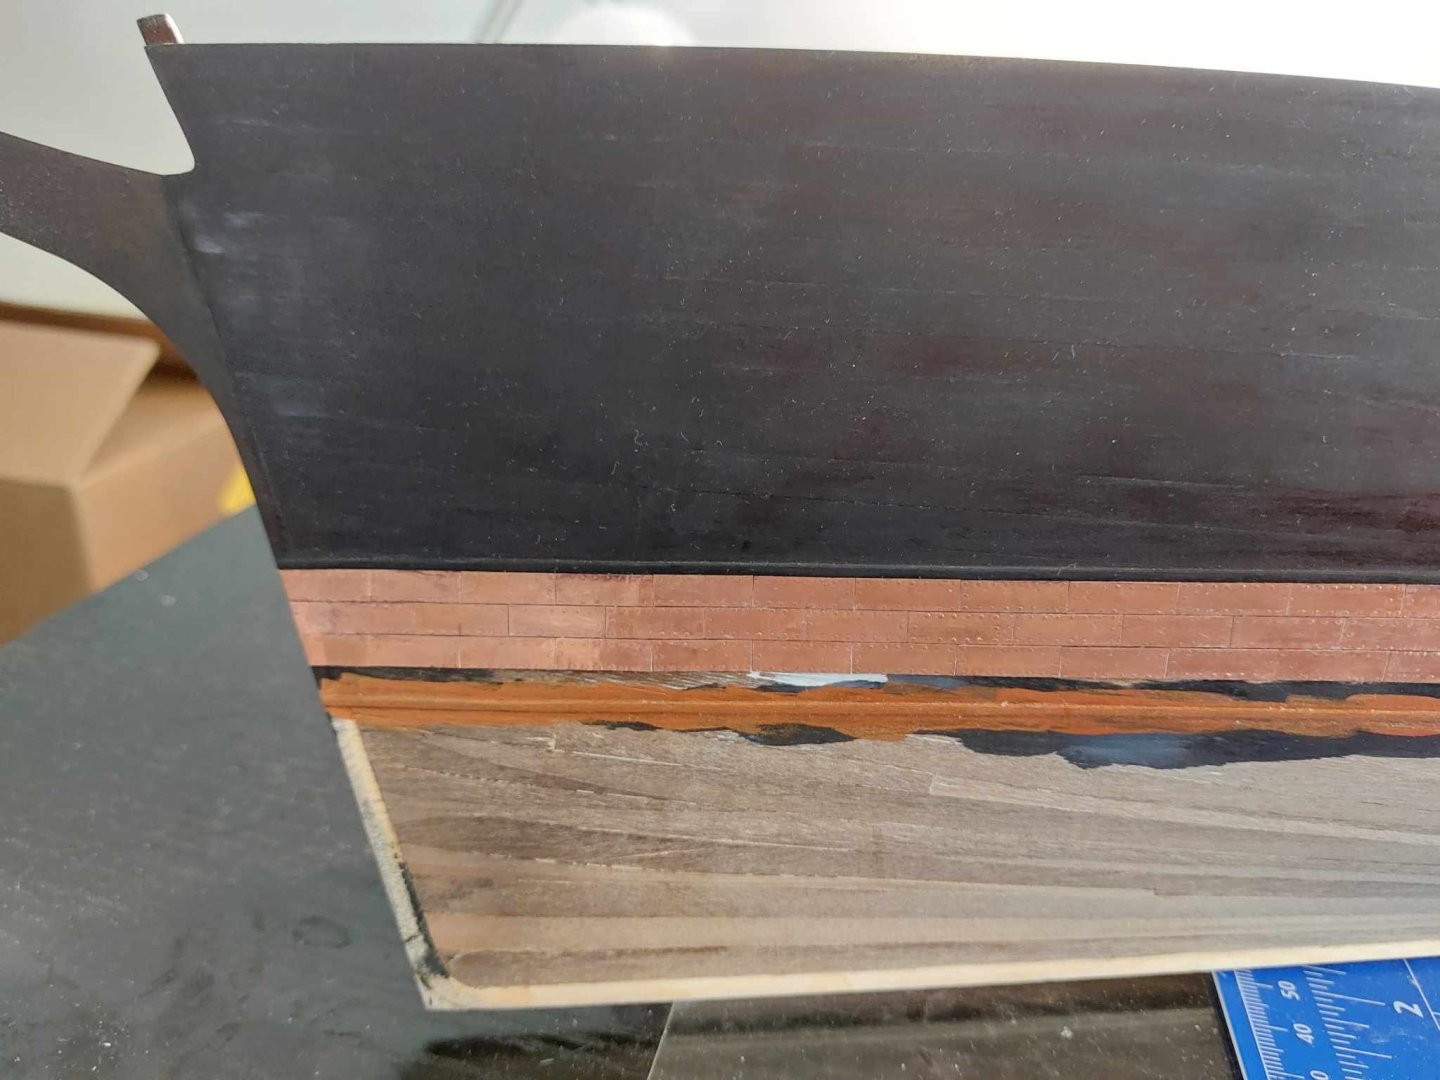
Coppering in progress, i quite like the process. Its not tape, I'm laying one tile after the other. Using the plates delivered with the kit.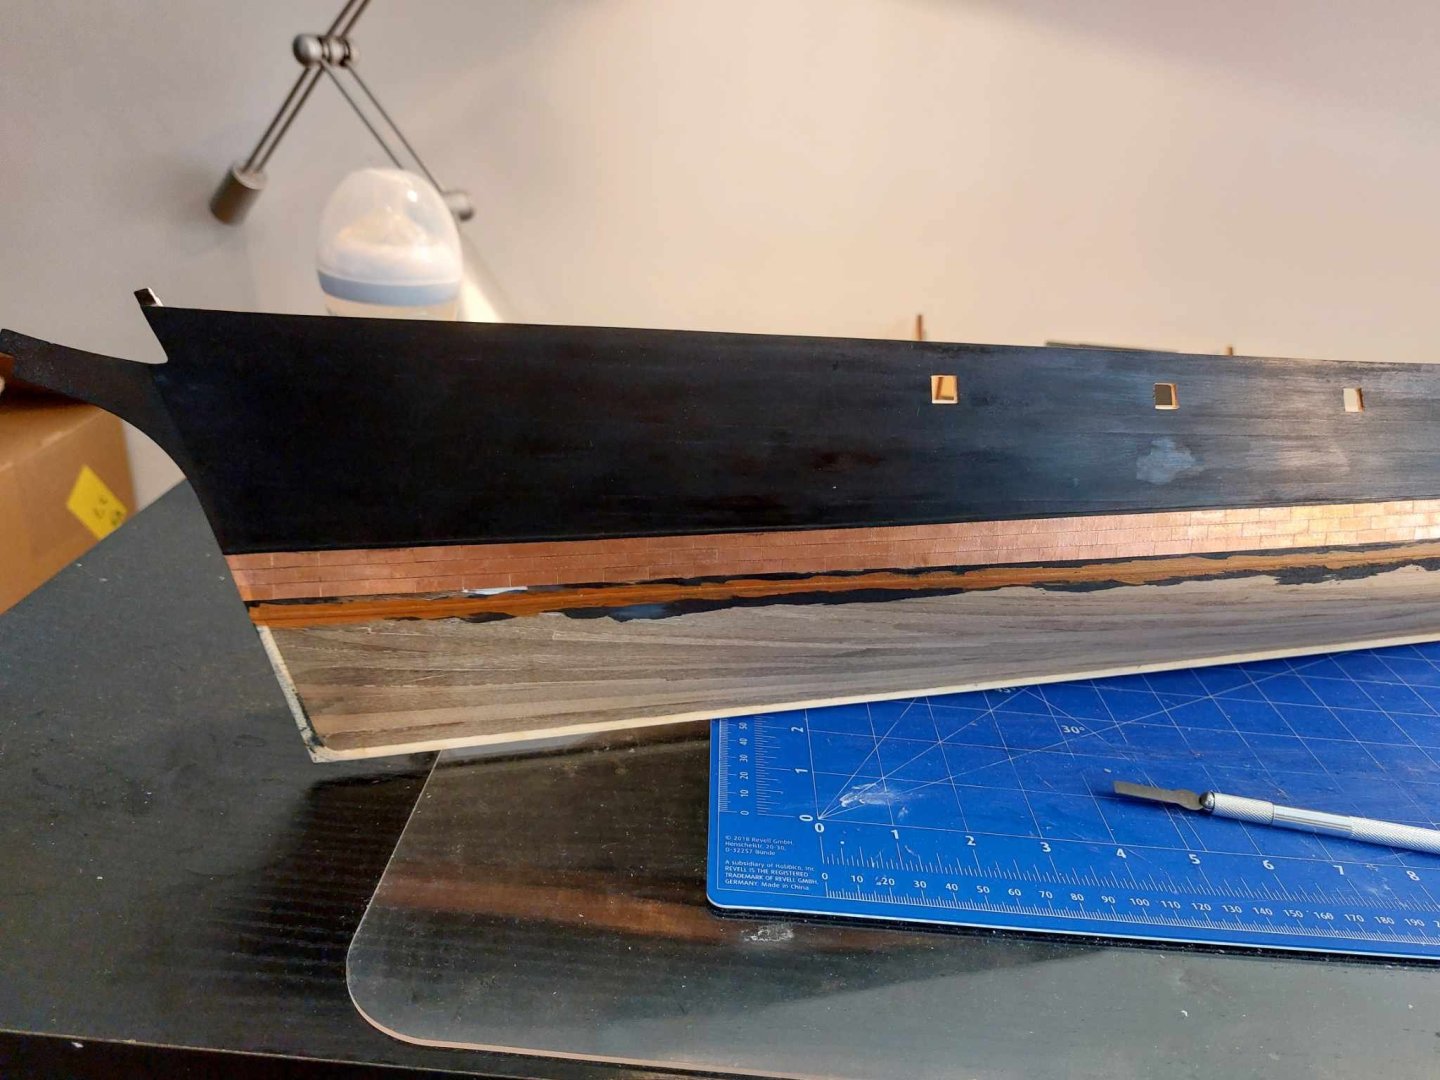
- 44 replies
-
- 3
-
-
- Cutty Sark
- Sergal
- (and 1 more)
-
berhard reacted to a post in a topic:
CUTTY SARK by Hostez - Sergal - 1:78
-
Hostez reacted to a post in a topic:
Glory of the Seas 1869 by rwiederrich - FINISHED - 1/96 - medium clipper
-
Hostez reacted to a post in a topic:
Cangarda 1901 by KeithAug - Scale 1:24 - Steam Yacht
-
CUTTY SARK by Hostez - Sergal - 1:78
Hostez replied to Hostez's topic in - Kit build logs for subjects built from 1851 - 1900
This is one side done.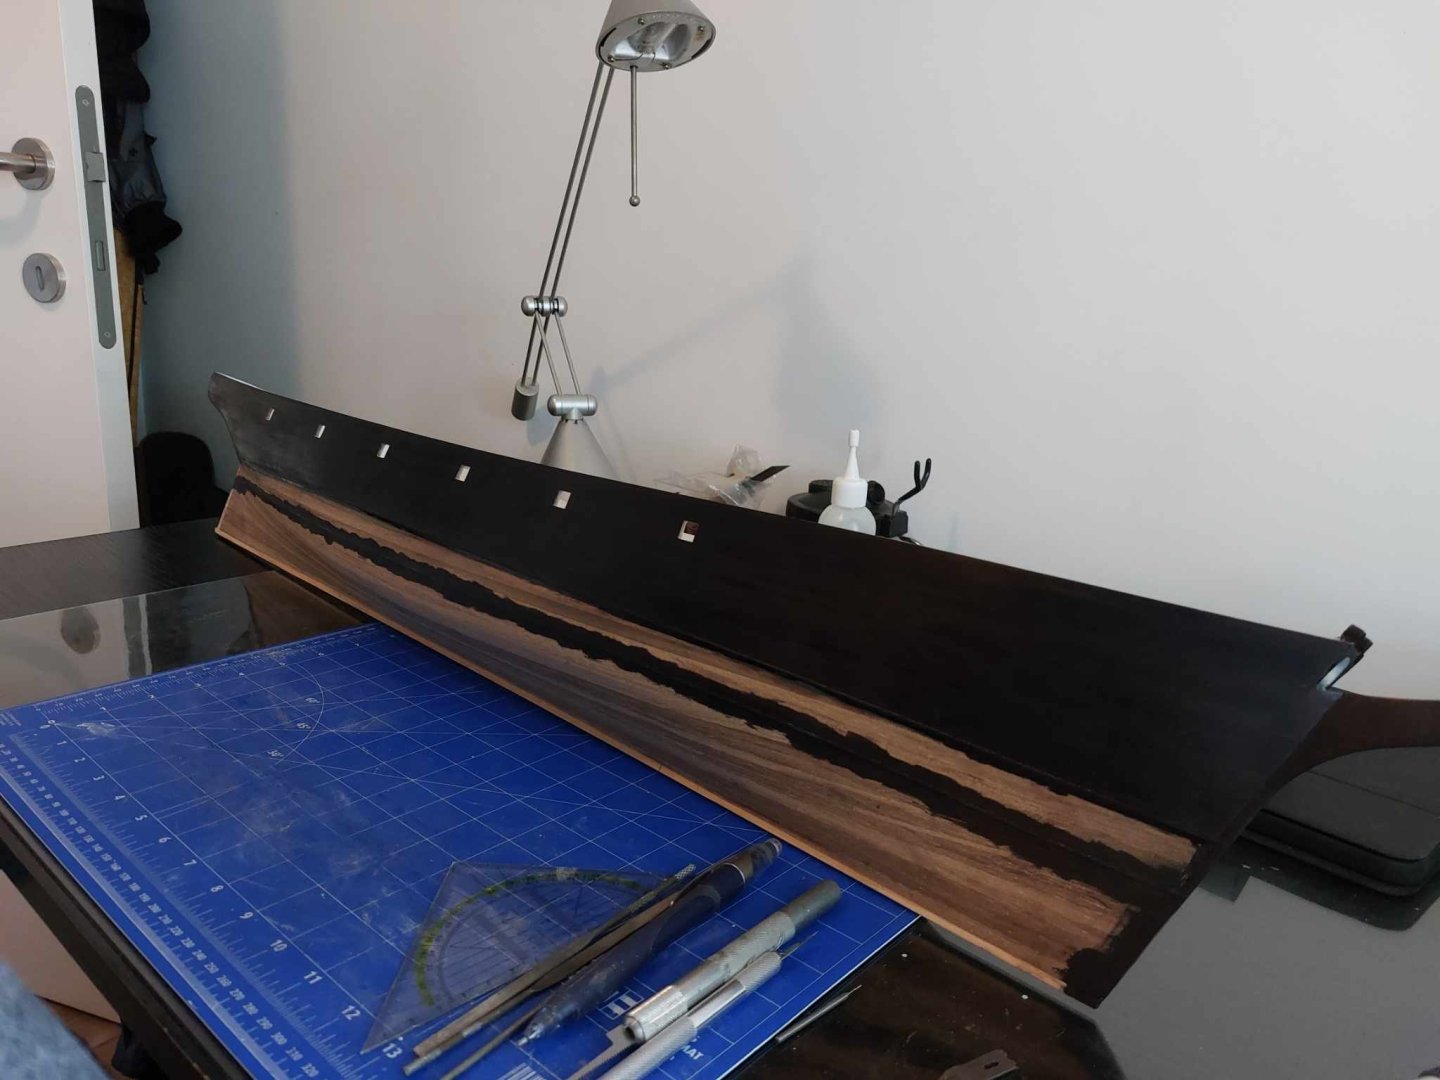
- 44 replies
-
- 3
-
-
- Cutty Sark
- Sergal
- (and 1 more)
-
CUTTY SARK by Hostez - Sergal - 1:78
Hostez replied to Hostez's topic in - Kit build logs for subjects built from 1851 - 1900
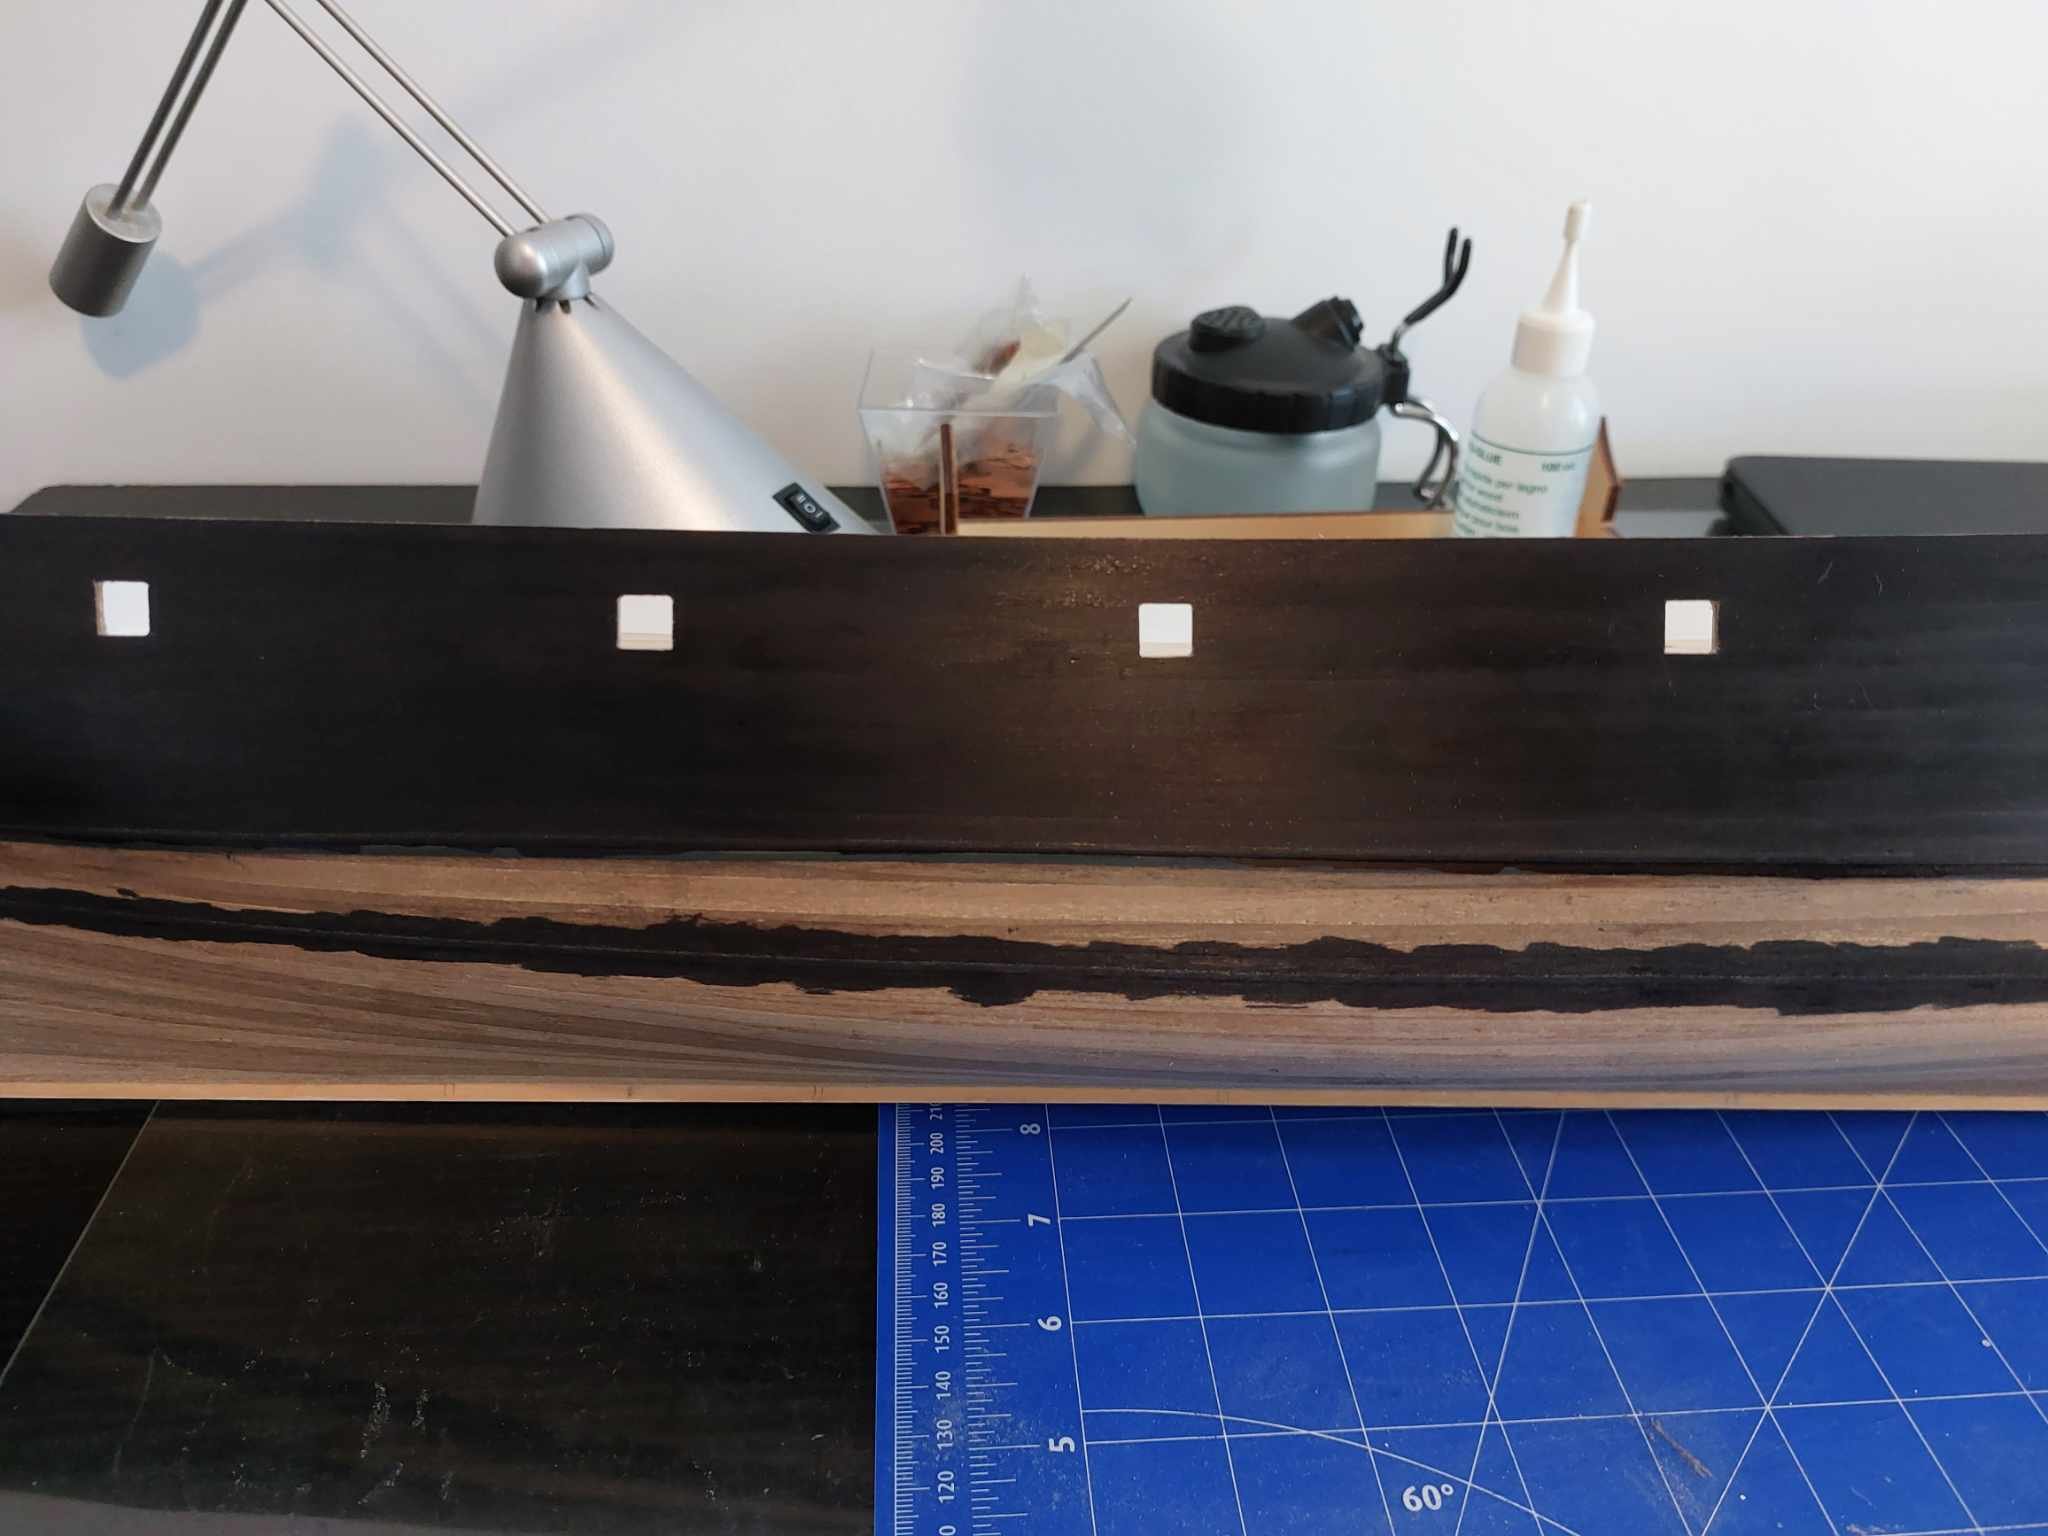
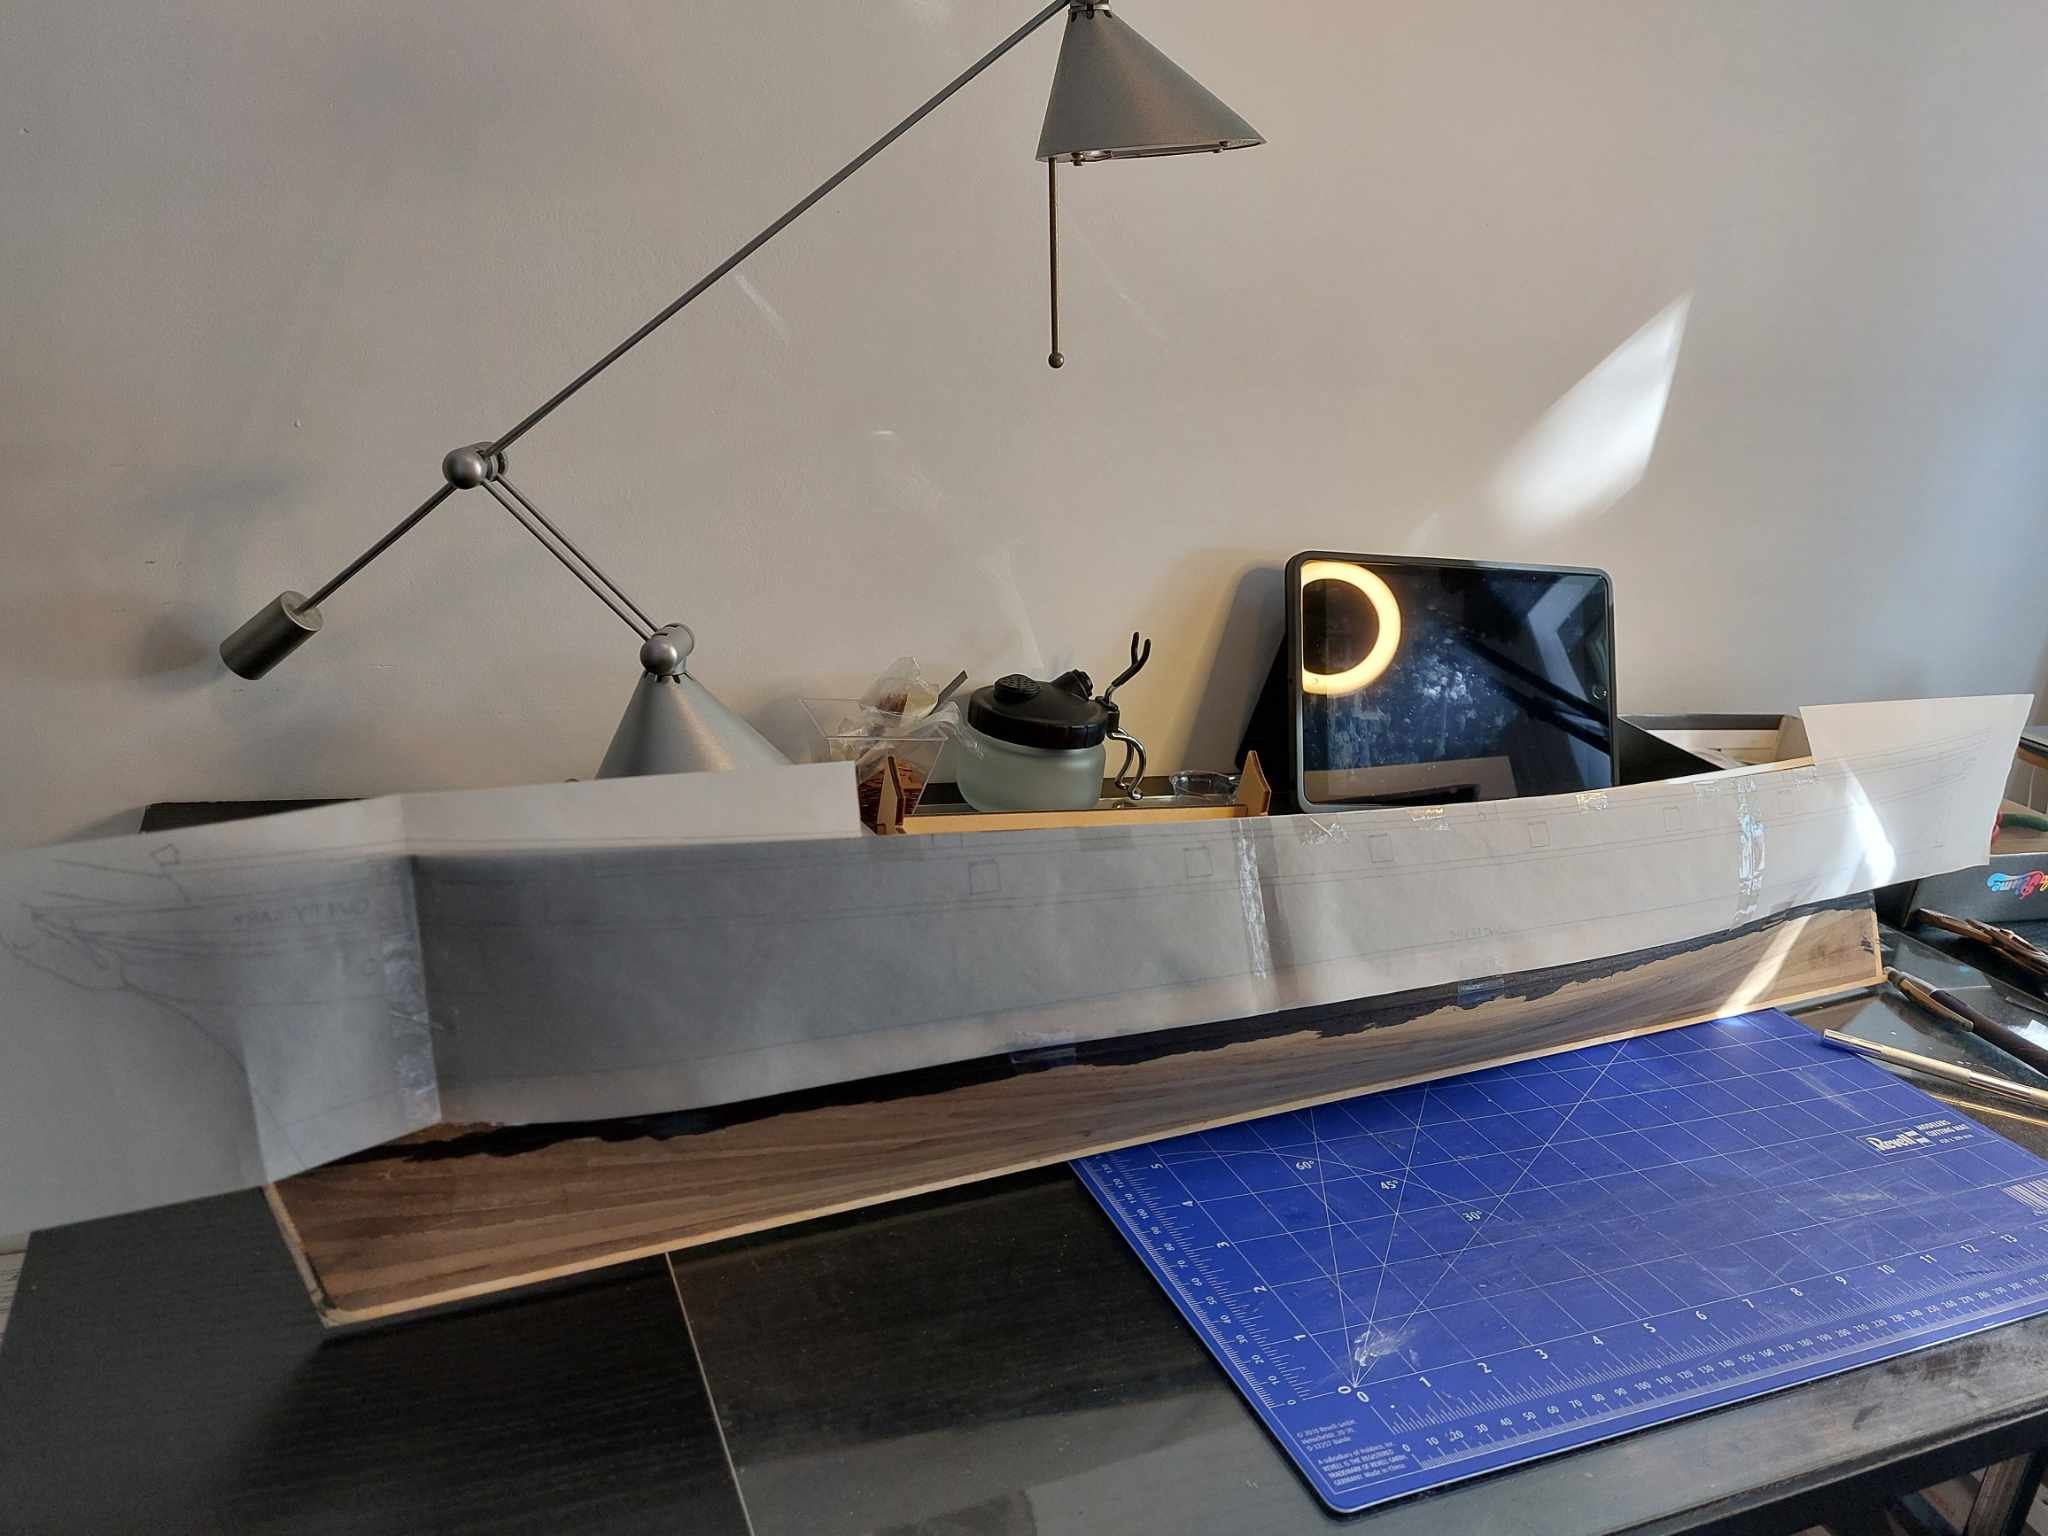
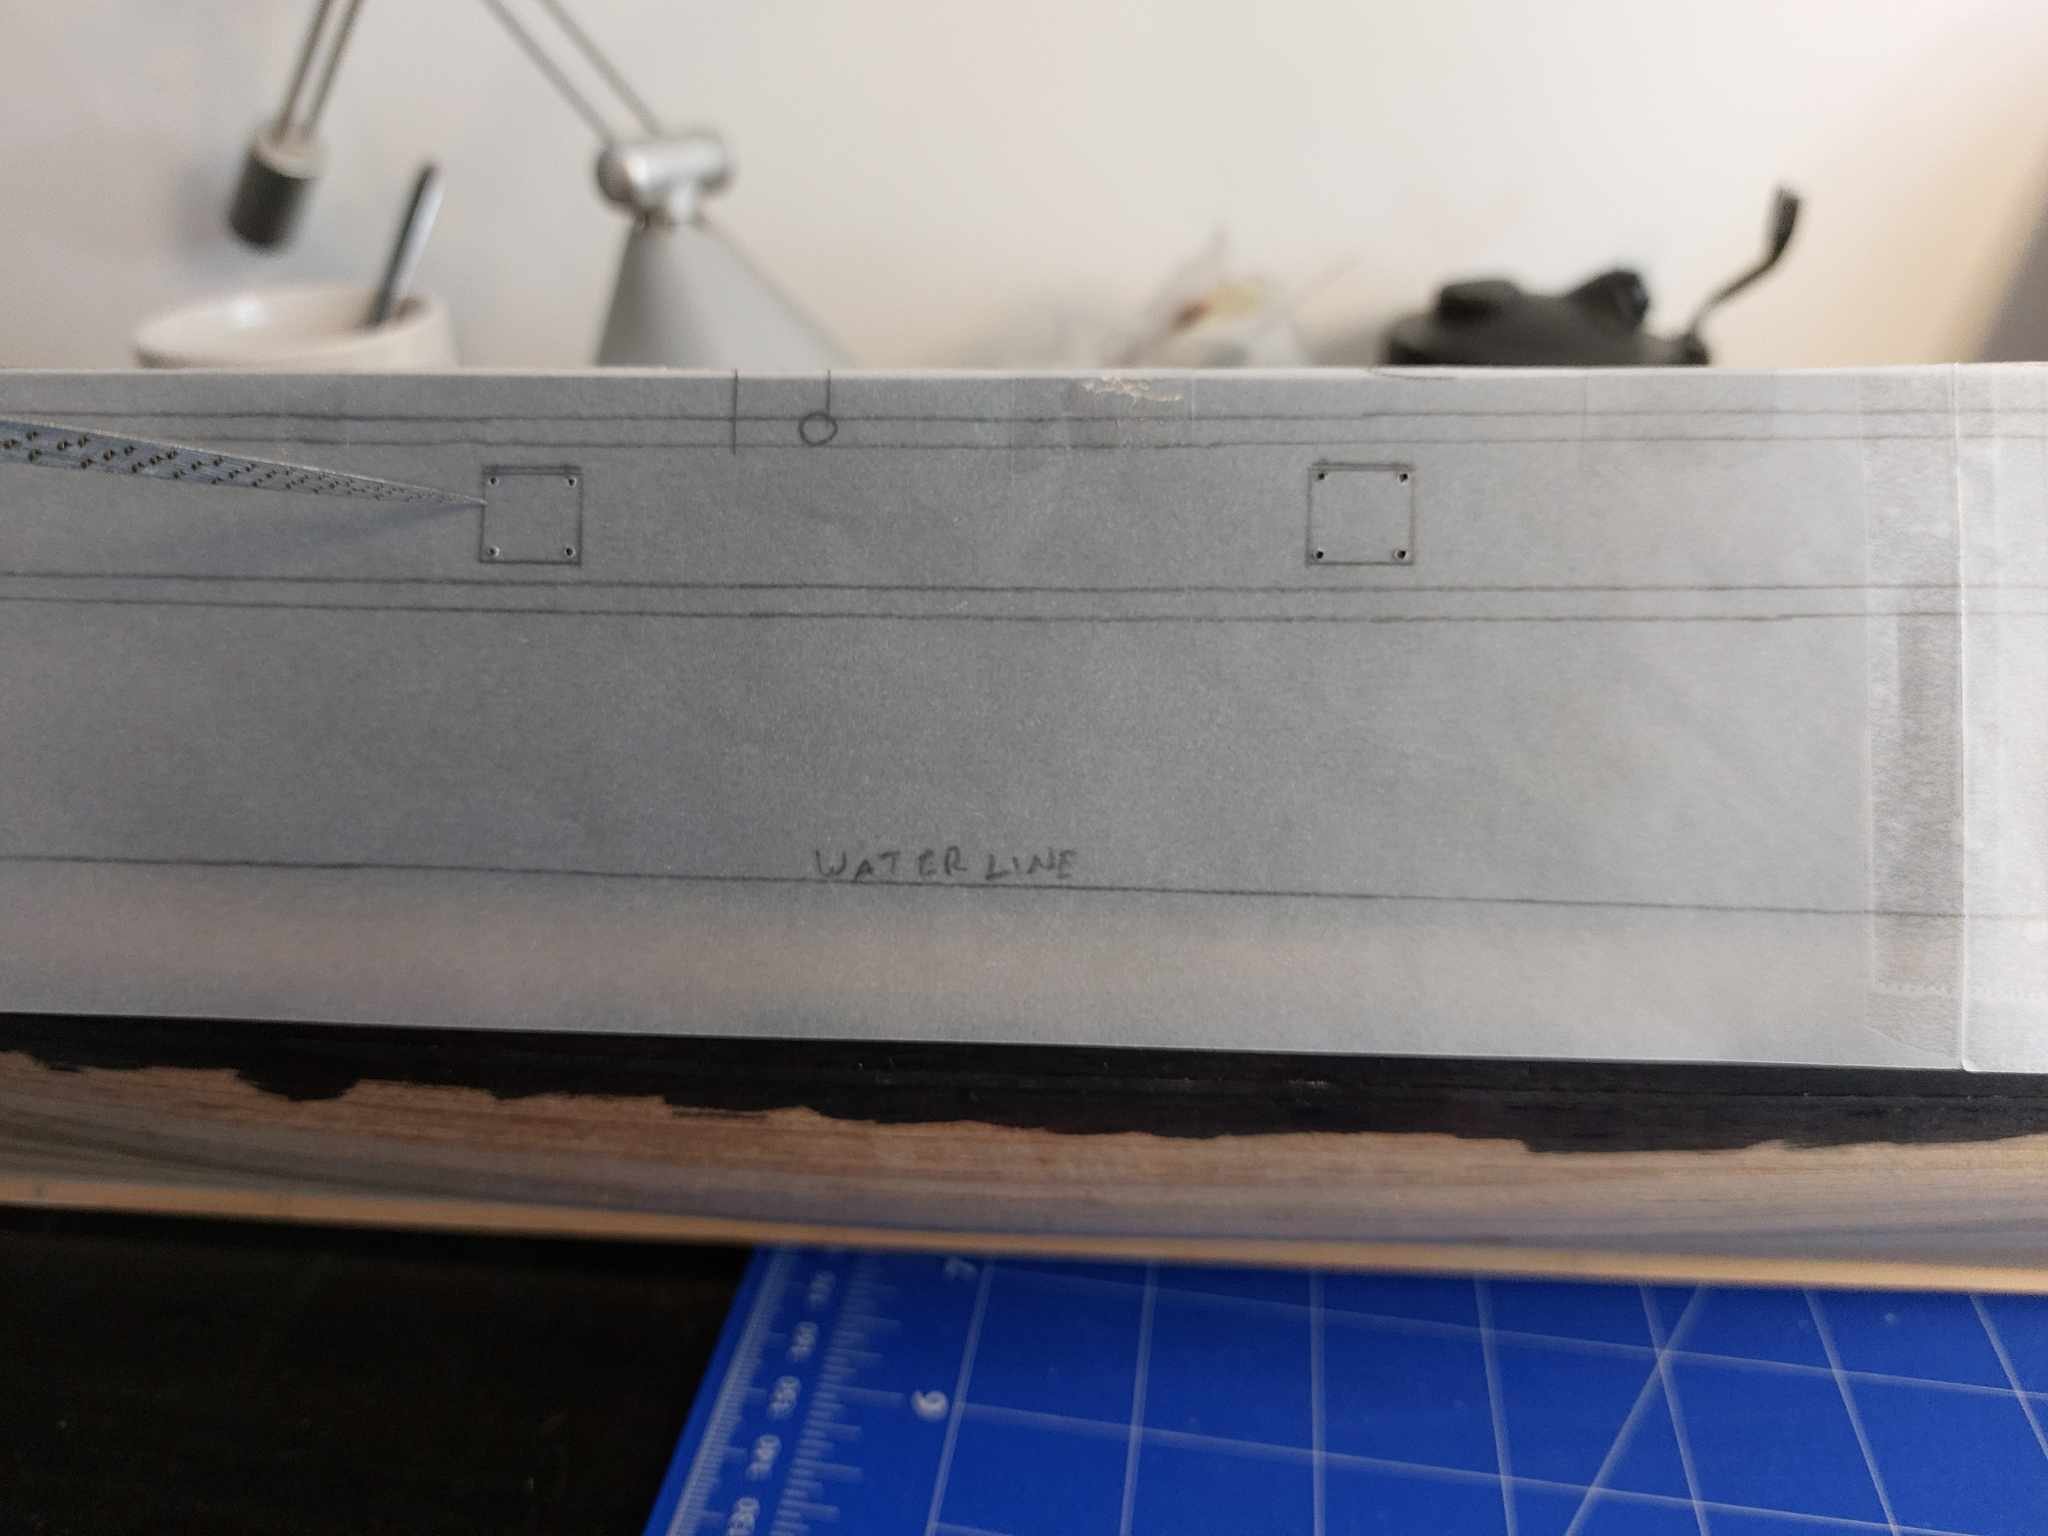
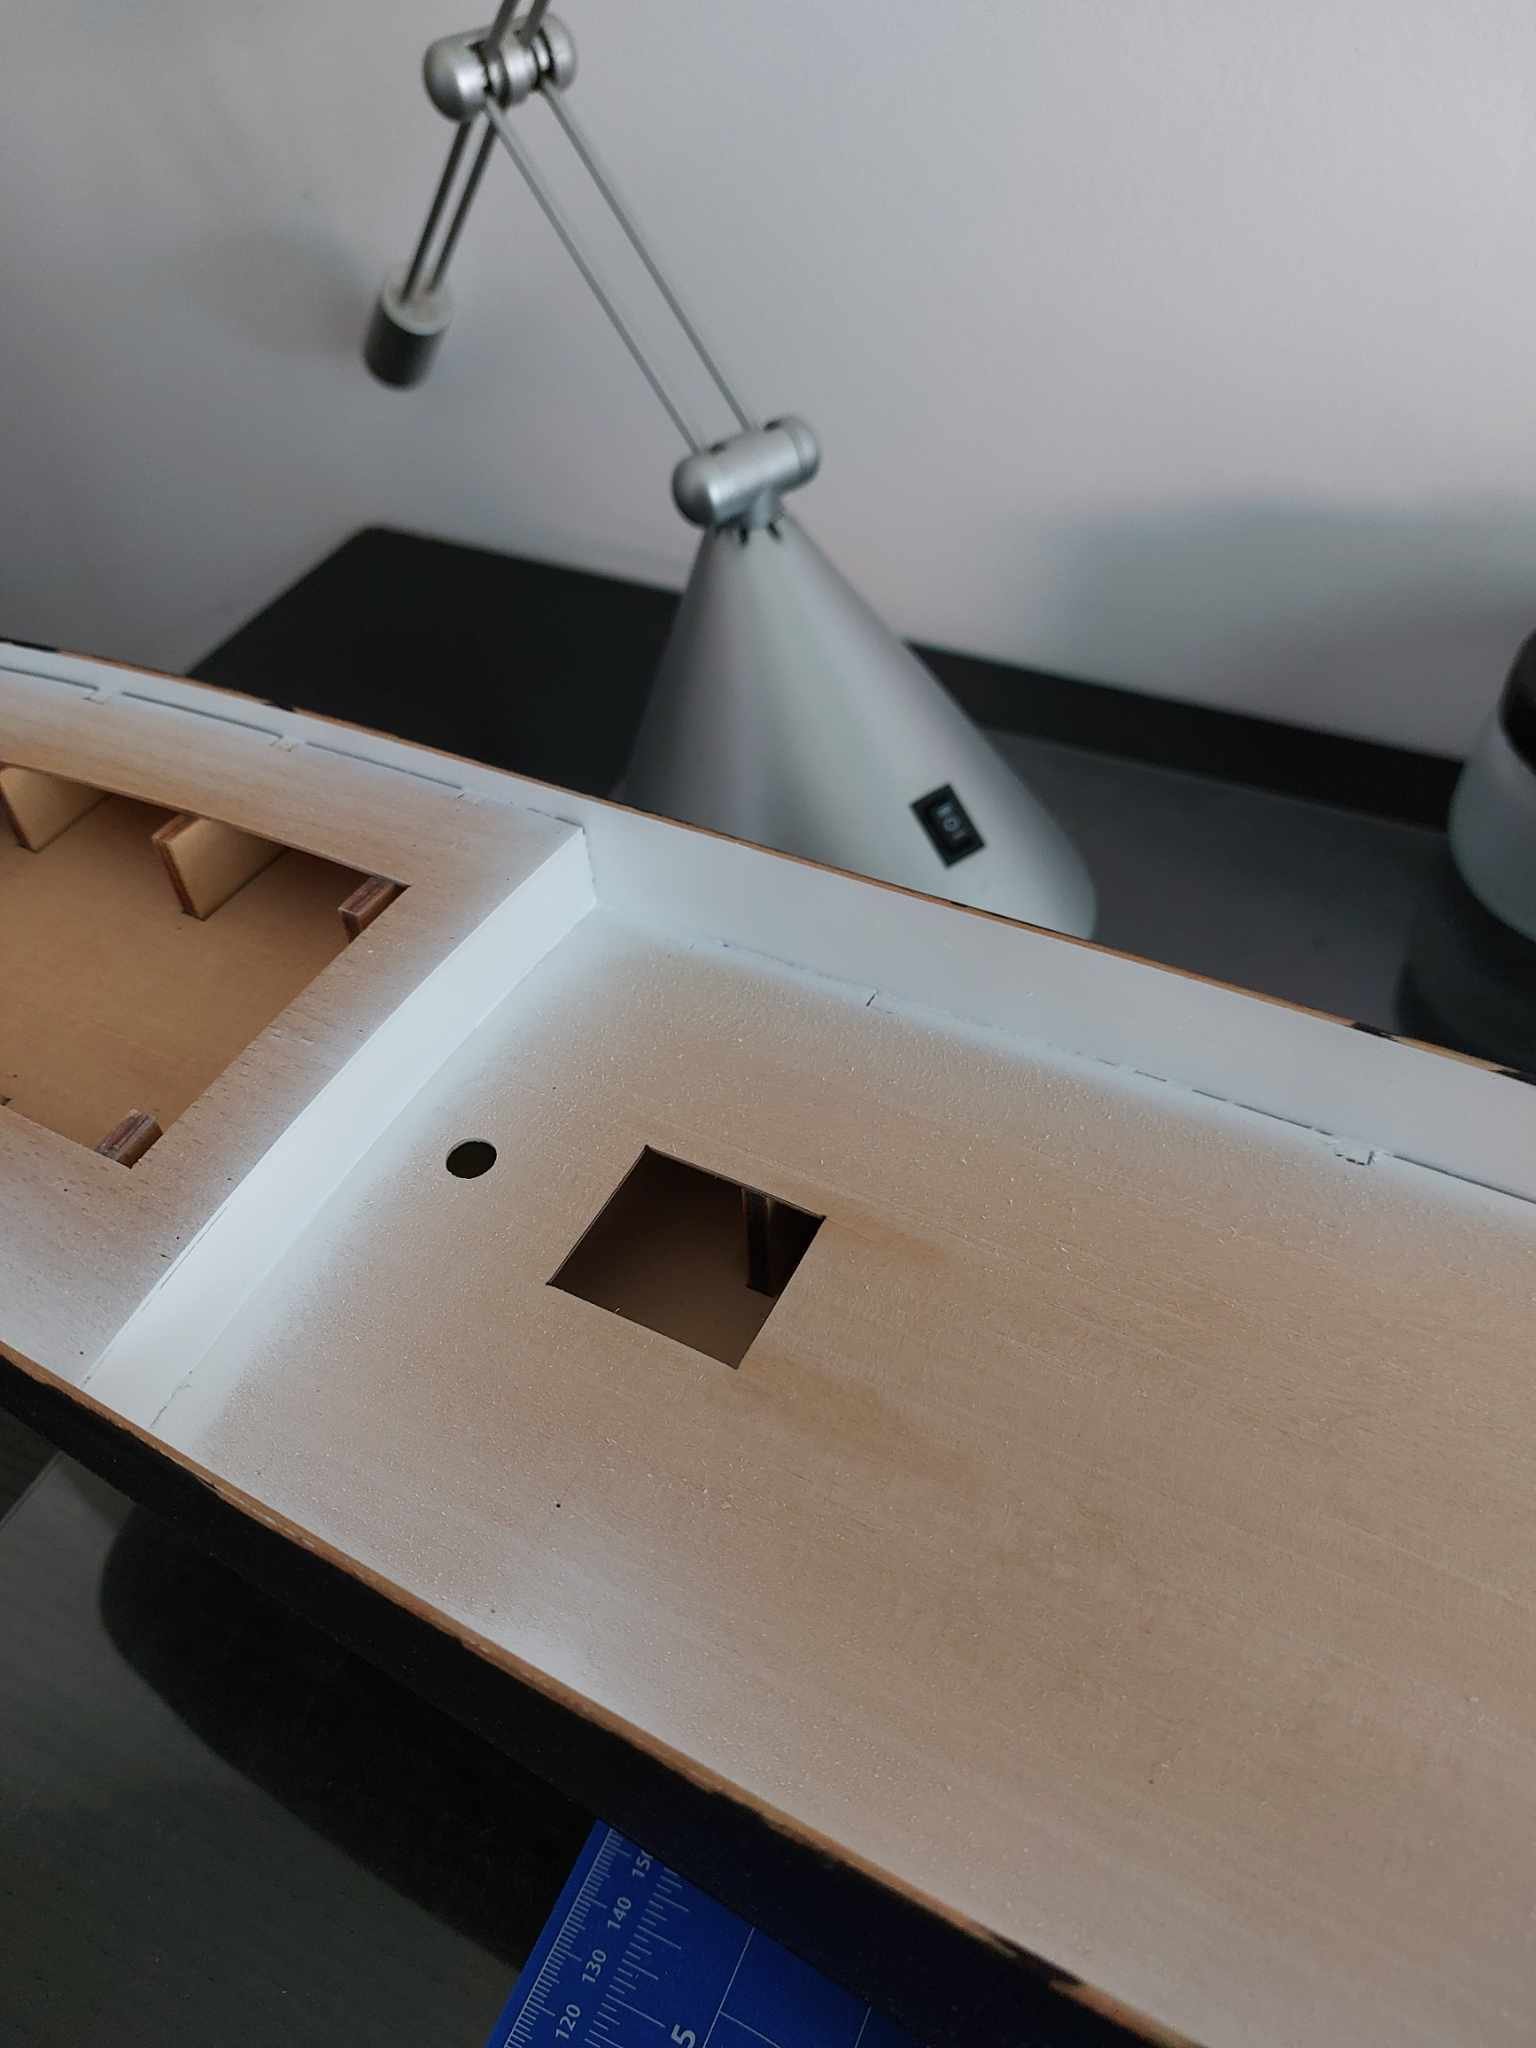
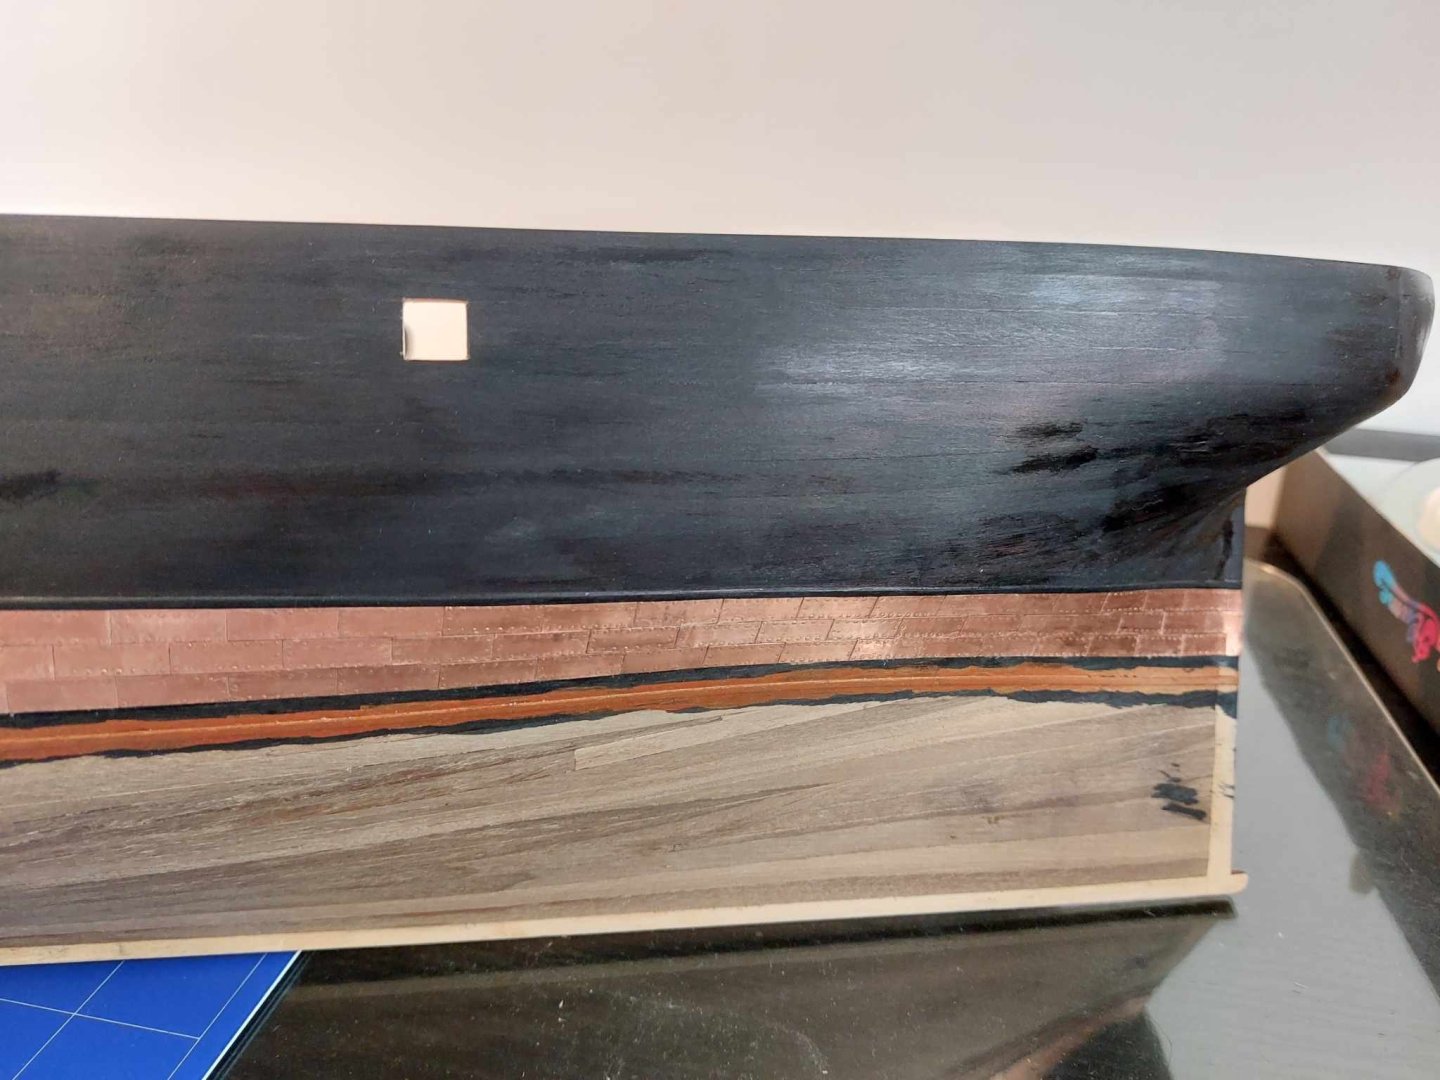
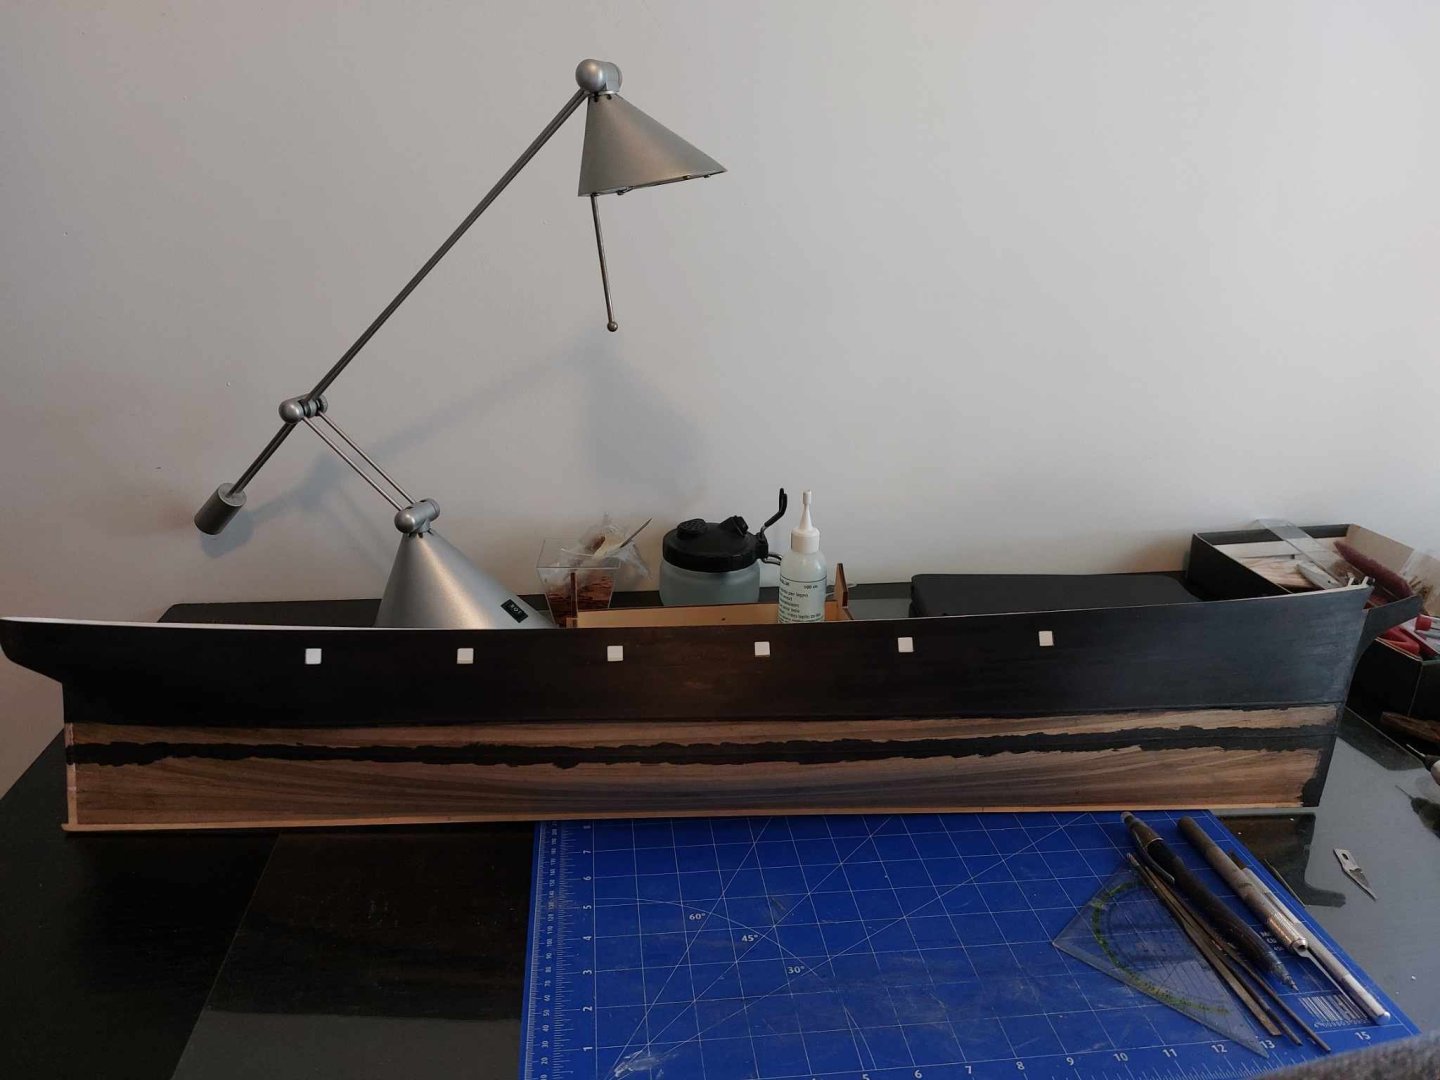
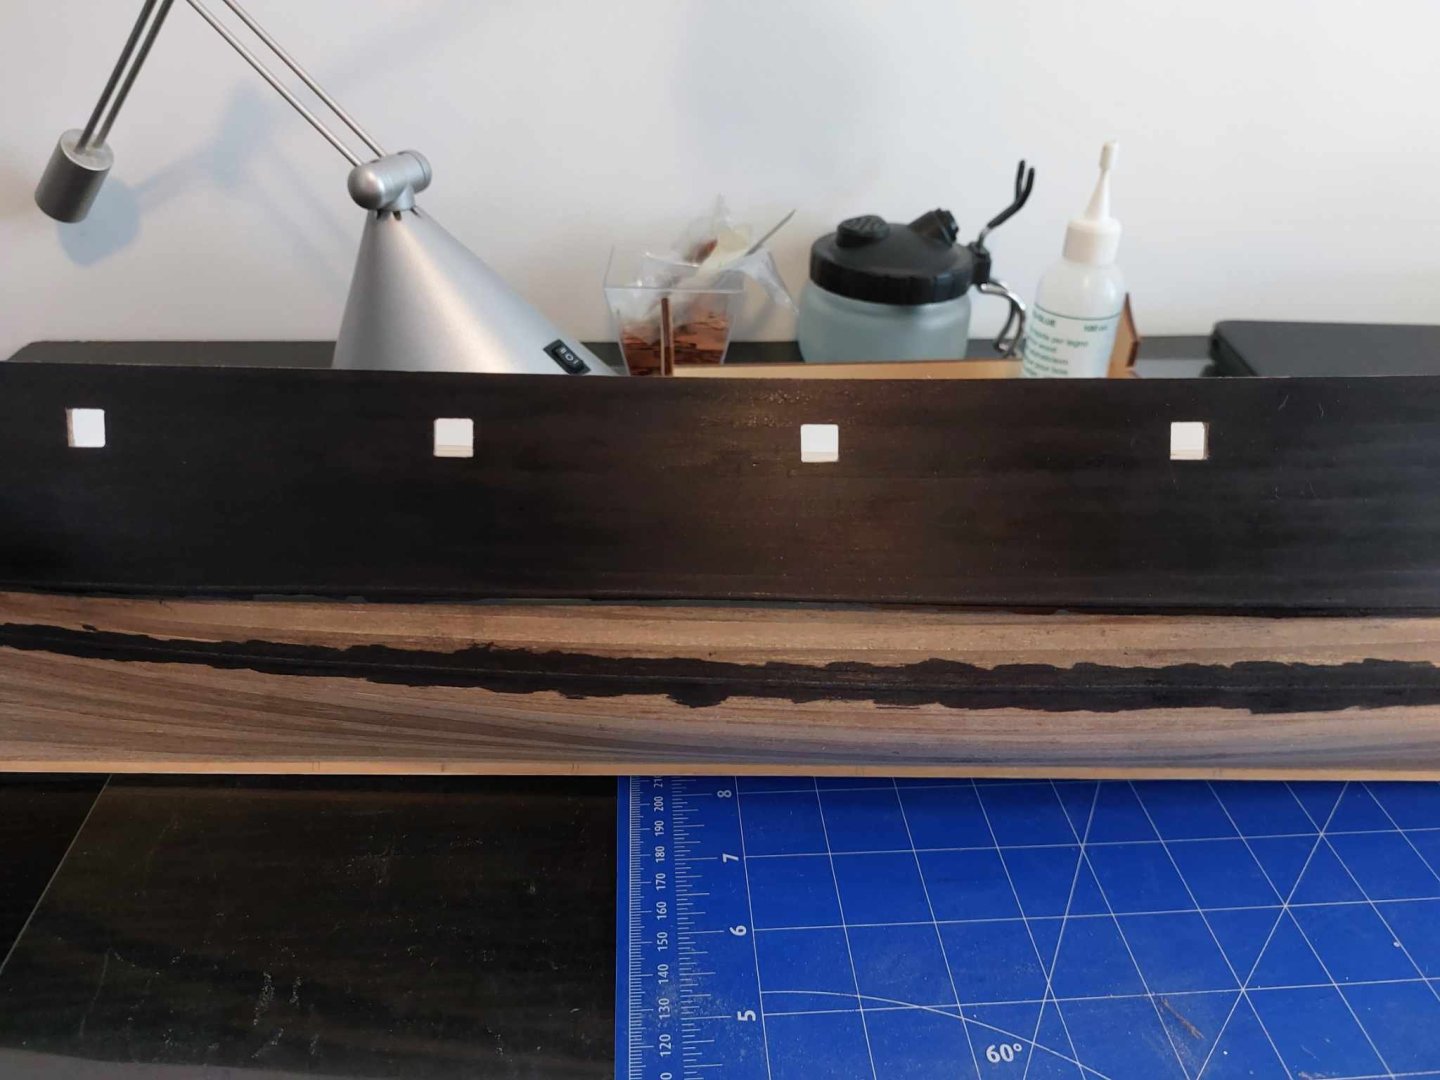
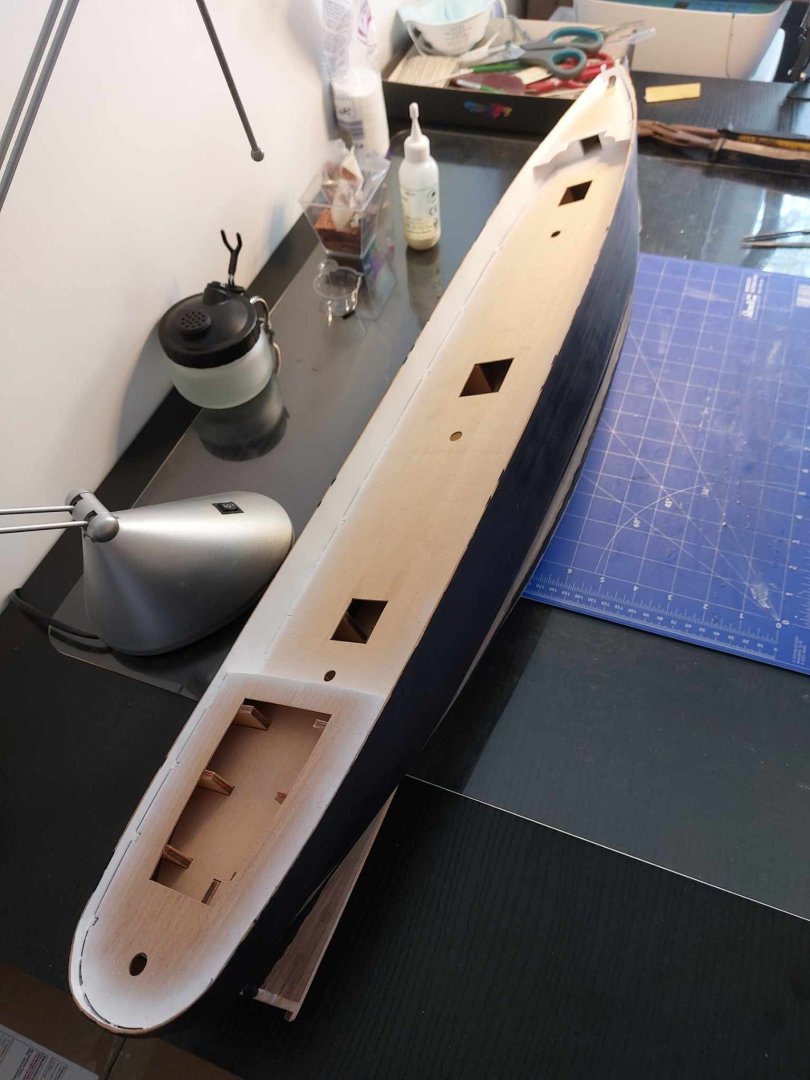
Next i cut out the water hatches. To determine the exact location on the hull i drew a side view of the hull on see trough paper and held it against the ship. then i marked the four corners of every hatch and drilled out most of the wood. making the frames square with a file.

- 44 replies
-
- 1
-
-
- Cutty Sark
- Sergal
- (and 1 more)
-
CUTTY SARK by Hostez - Sergal - 1:78
Hostez replied to Hostez's topic in - Kit build logs for subjects built from 1851 - 1900
Yes makes sense Rob 👍 -
Hostez reacted to a post in a topic:
CUTTY SARK by Hostez - Sergal - 1:78
-
CUTTY SARK by Hostez - Sergal - 1:78
Hostez replied to Hostez's topic in - Kit build logs for subjects built from 1851 - 1900
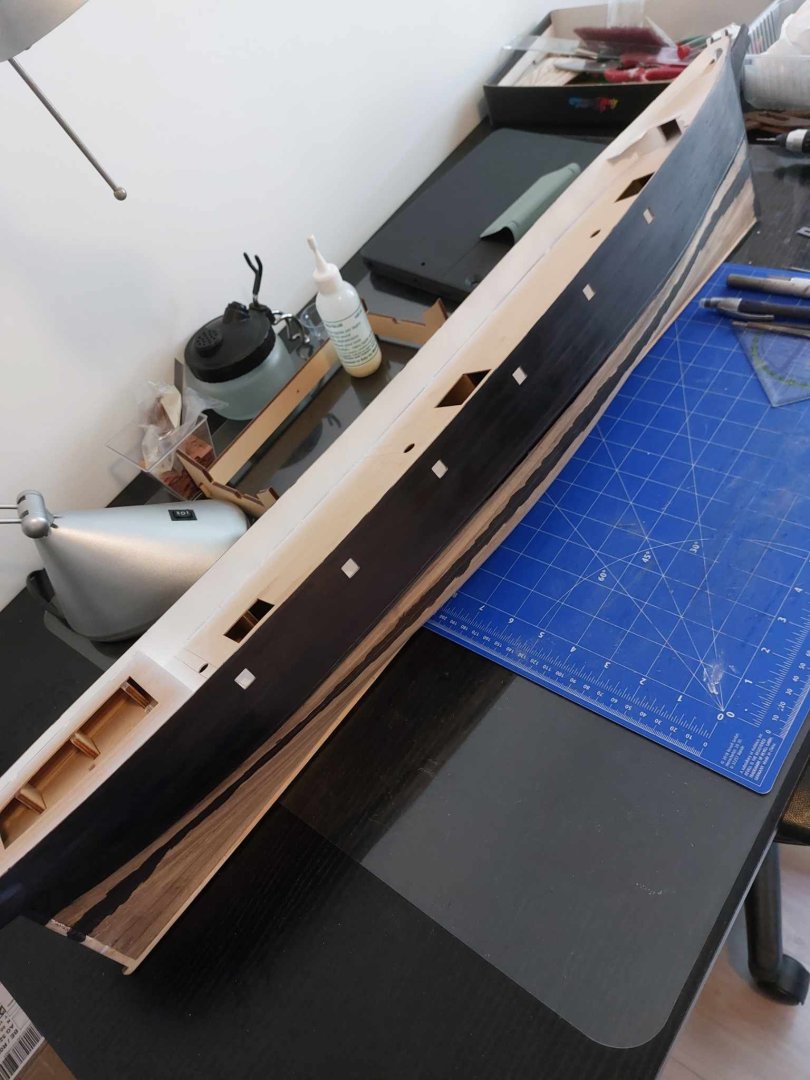
Next i painted the inboard side of the bulwarks in mat white. I painted this first before laying the deck planks, that way i dont damage the planks with tape. Also i wanted to paint first before cutting out the water escape hatches again to avoid having to apply masking tape to the outer black hull. Its the first time i used an airbrush for painting, it was getting used to to control the correct flow but it turned out quite well. So next i will cut out the hatches. While im still pressing down those rivets in the copper plates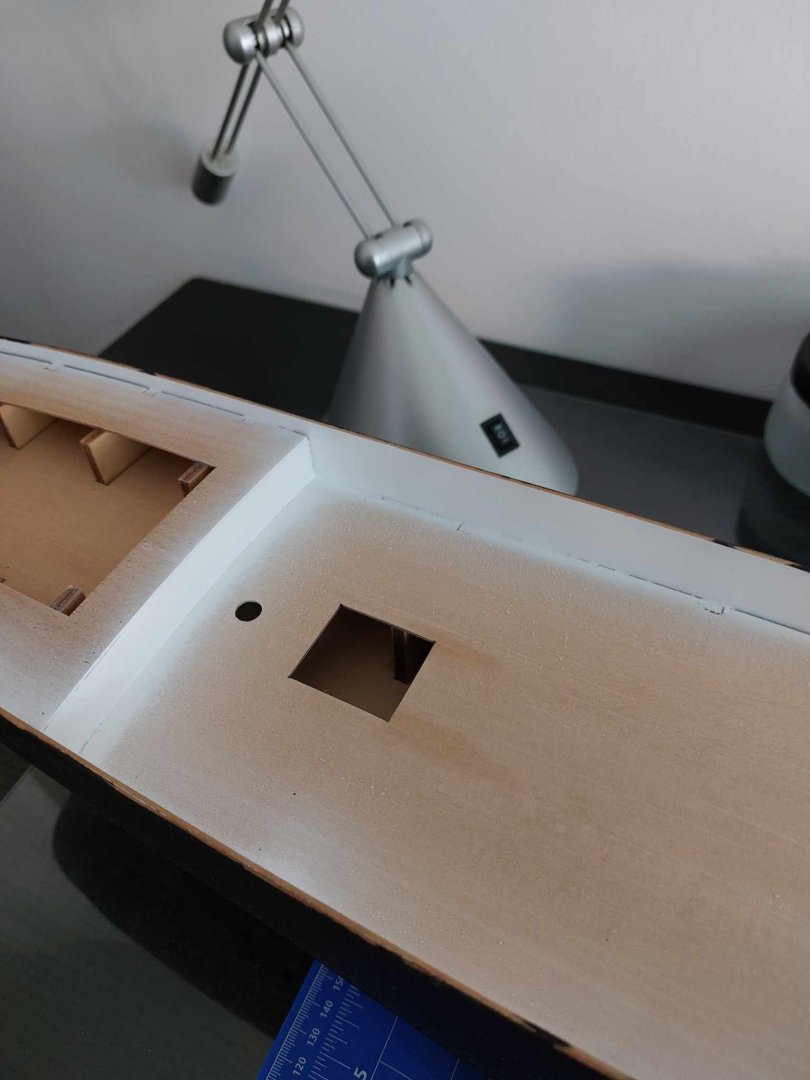

- 44 replies
-
- 1
-
-
- Cutty Sark
- Sergal
- (and 1 more)
-
CUTTY SARK by Hostez - Sergal - 1:78
Hostez replied to Hostez's topic in - Kit build logs for subjects built from 1851 - 1900
Your copper tape looks good Rob! And indeed much faster. Maybe for a next build in the future I was not such a fan of tape because most of the time you can see its tape and not real plates. Tape tends to rinkle. But your method seems to work out just fine. I guess your tape is thicker than what some other people use. -
Hostez reacted to a post in a topic:
CUTTY SARK by Hostez - Sergal - 1:78
-
CUTTY SARK by Hostez - Sergal - 1:78
Hostez replied to Hostez's topic in - Kit build logs for subjects built from 1851 - 1900
I Hammered some copper plates, now they look more like imprinted nails. The tiles on the left are pre hammering, the ones on the right post hammering. Looks more like the real thing that way.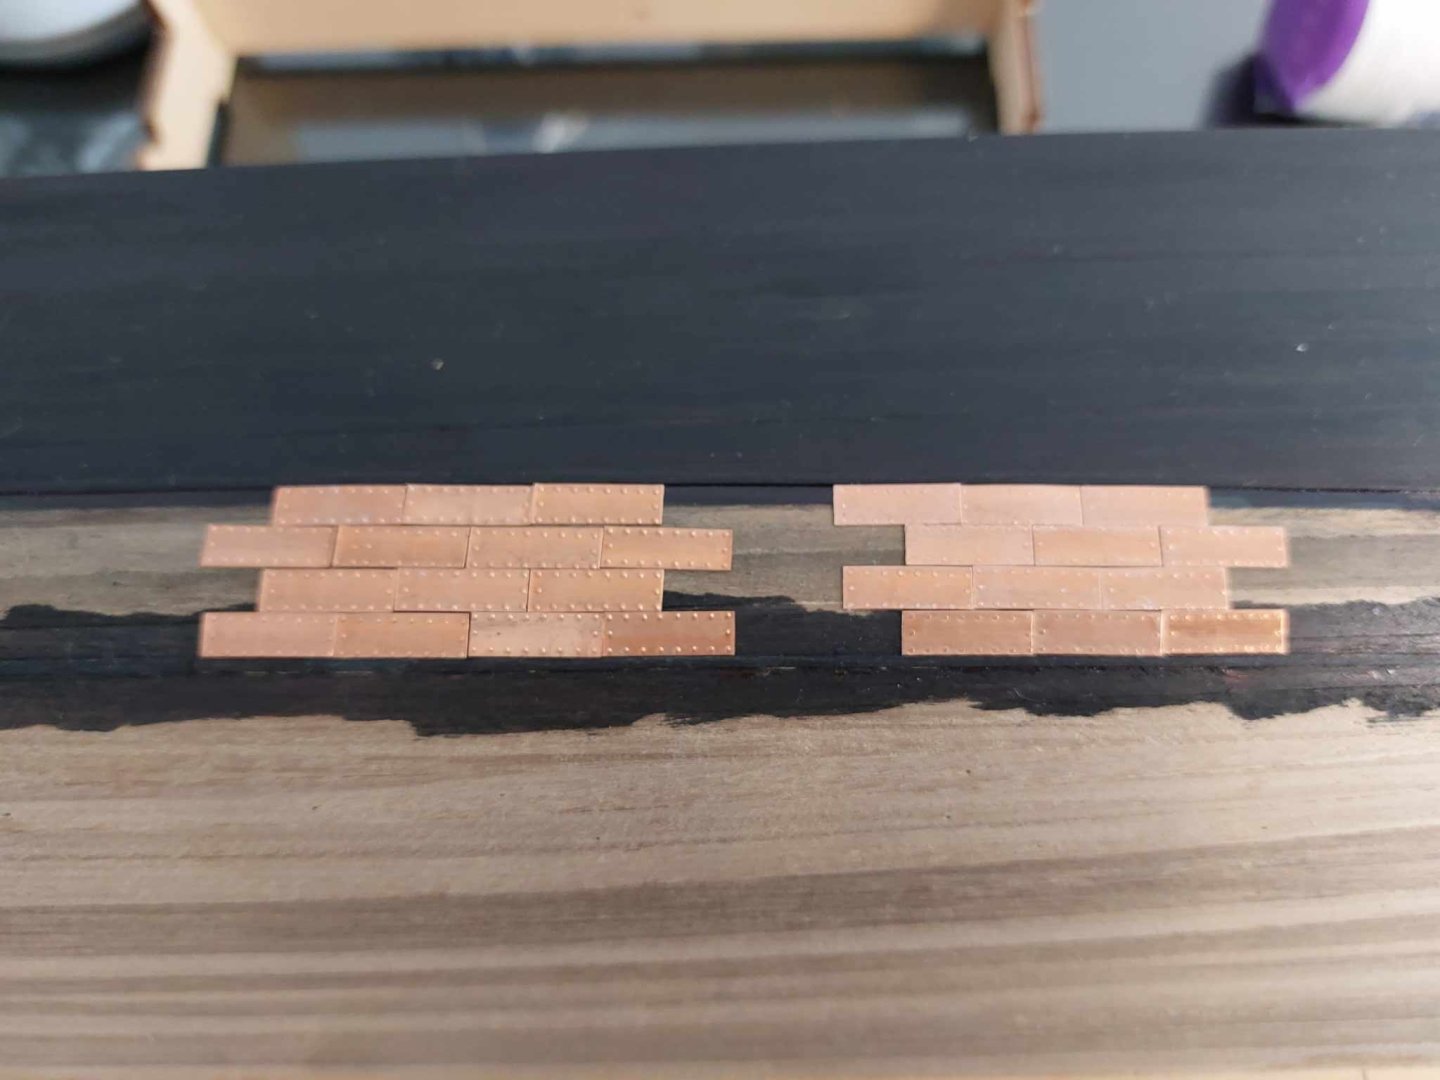
- 44 replies
-
- 1
-
-
- Cutty Sark
- Sergal
- (and 1 more)
-
 Hostez reacted to a post in a topic:
CUTTY SARK by Hostez - Sergal - 1:78
Hostez reacted to a post in a topic:
CUTTY SARK by Hostez - Sergal - 1:78
-
CUTTY SARK by Hostez - Sergal - 1:78
Hostez replied to Hostez's topic in - Kit build logs for subjects built from 1851 - 1900
Im glad you told me before i glued them on, indeed lets make it look more like the real ship- 44 replies
-
- 1
-
-
- Cutty Sark
- Sergal
- (and 1 more)
-
CUTTY SARK by Hostez - Sergal - 1:78
Hostez replied to Hostez's topic in - Kit build logs for subjects built from 1851 - 1900
Thank you for your advice Rob, I will see if i can hammer those rivet heads down in between two metal plates, so they look more like nails. -
CUTTY SARK by Hostez - Sergal - 1:78
Hostez replied to Hostez's topic in - Kit build logs for subjects built from 1851 - 1900
These are the copper plates im going to use, im going to test some tiles with burnishing fluid to see how it looks good with some weathering. How would you guys prefer it? Clean polished copper or weathered?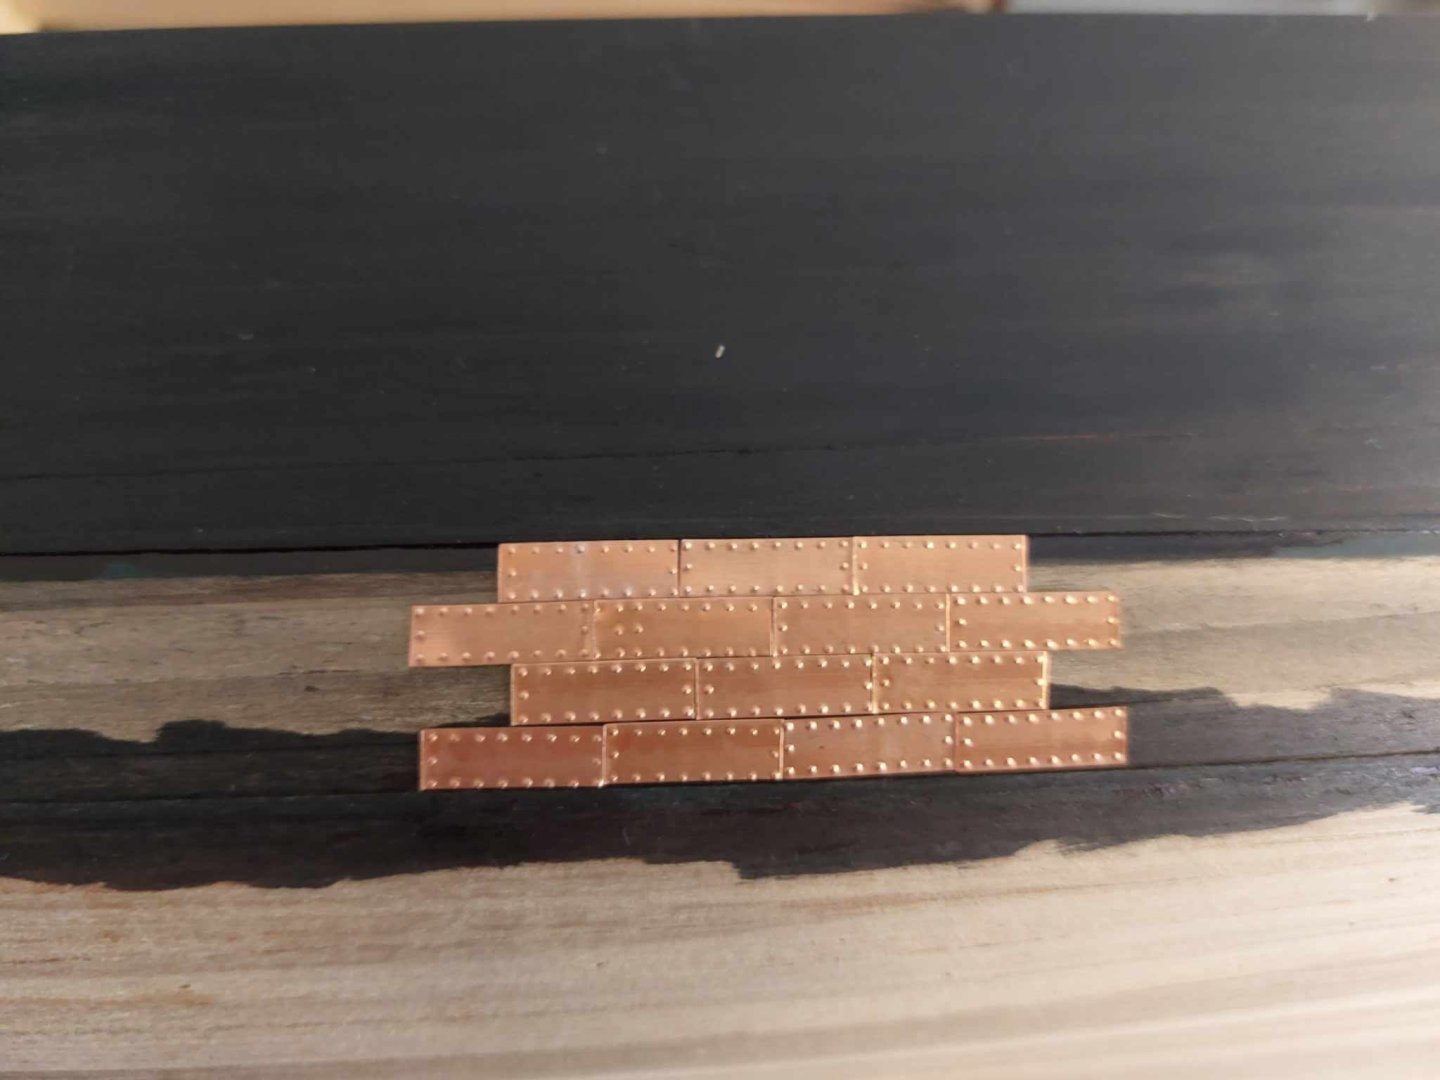
- 44 replies
-
- 1
-
-
- Cutty Sark
- Sergal
- (and 1 more)
-
CUTTY SARK by Hostez - Sergal - 1:78
Hostez replied to Hostez's topic in - Kit build logs for subjects built from 1851 - 1900
Hi Johnny, in this picture you see more in detail the copper plates after polishing where the nails are visible. I got a full set of clinkered pre cut copper plates with my kit. They look realistic so im going to use those.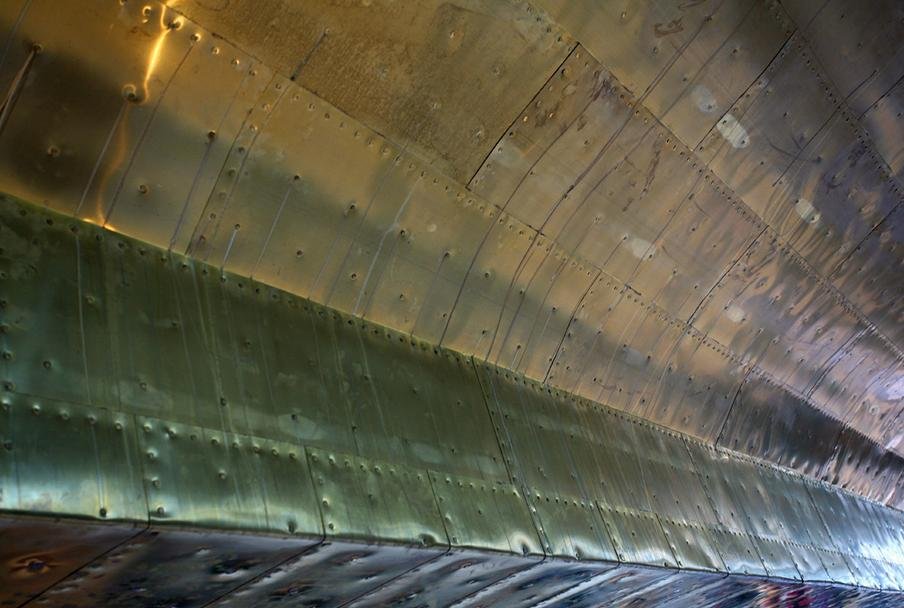
- 44 replies
-
- 2
-
-
- Cutty Sark
- Sergal
- (and 1 more)
-
CUTTY SARK by Hostez - Sergal - 1:78
Hostez replied to Hostez's topic in - Kit build logs for subjects built from 1851 - 1900
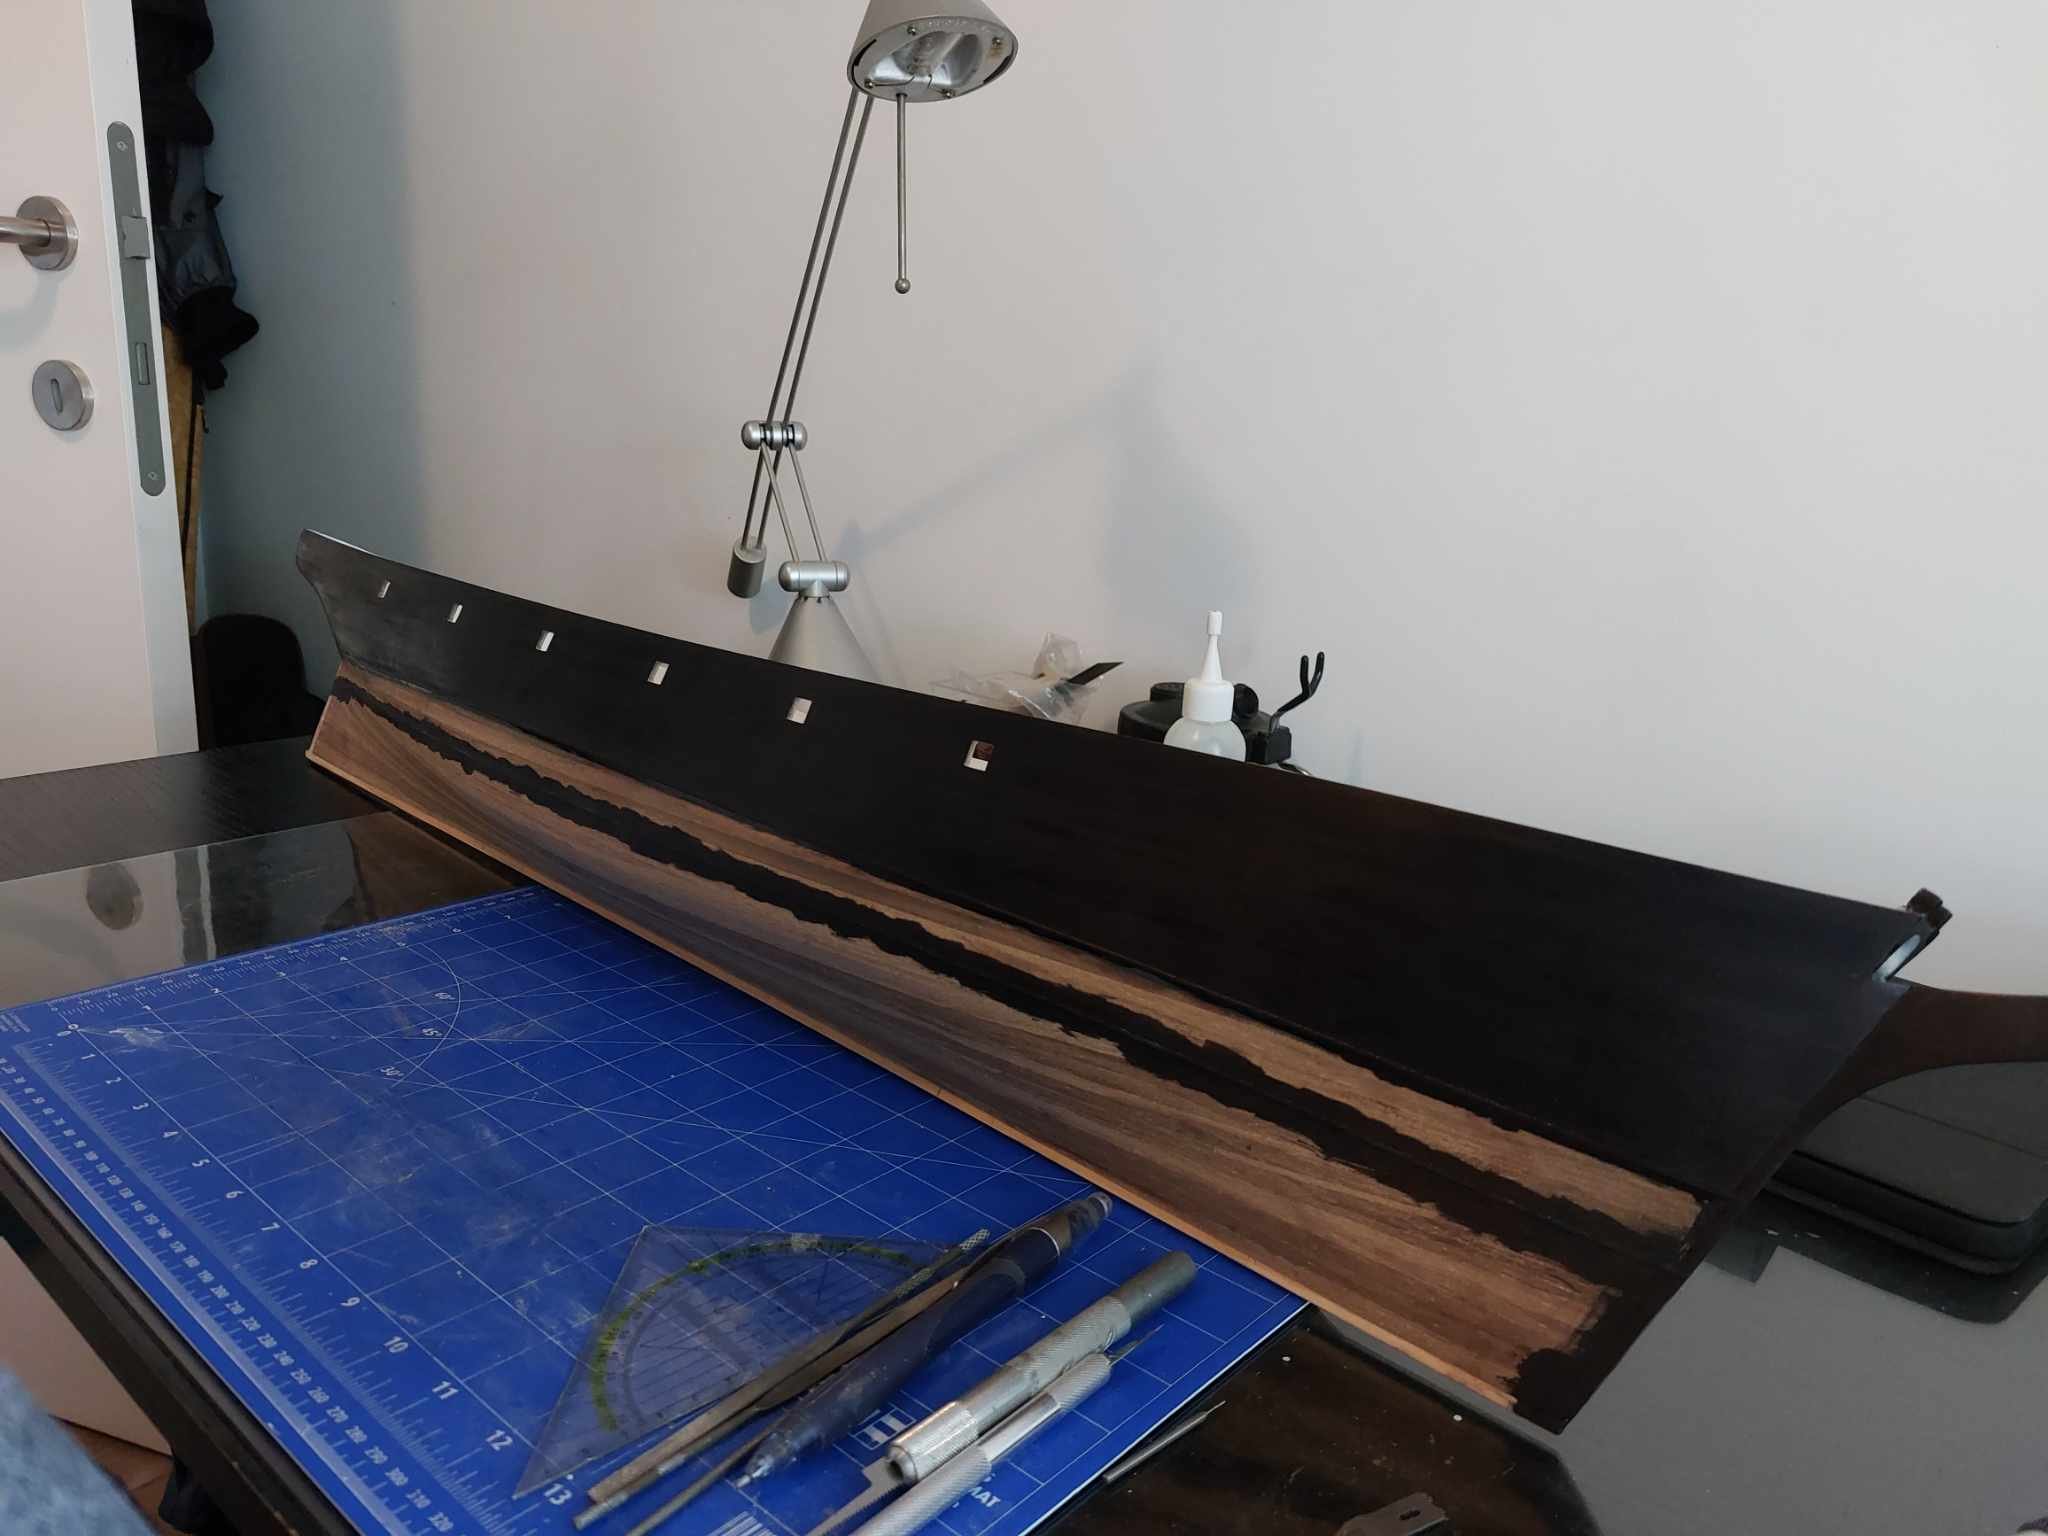
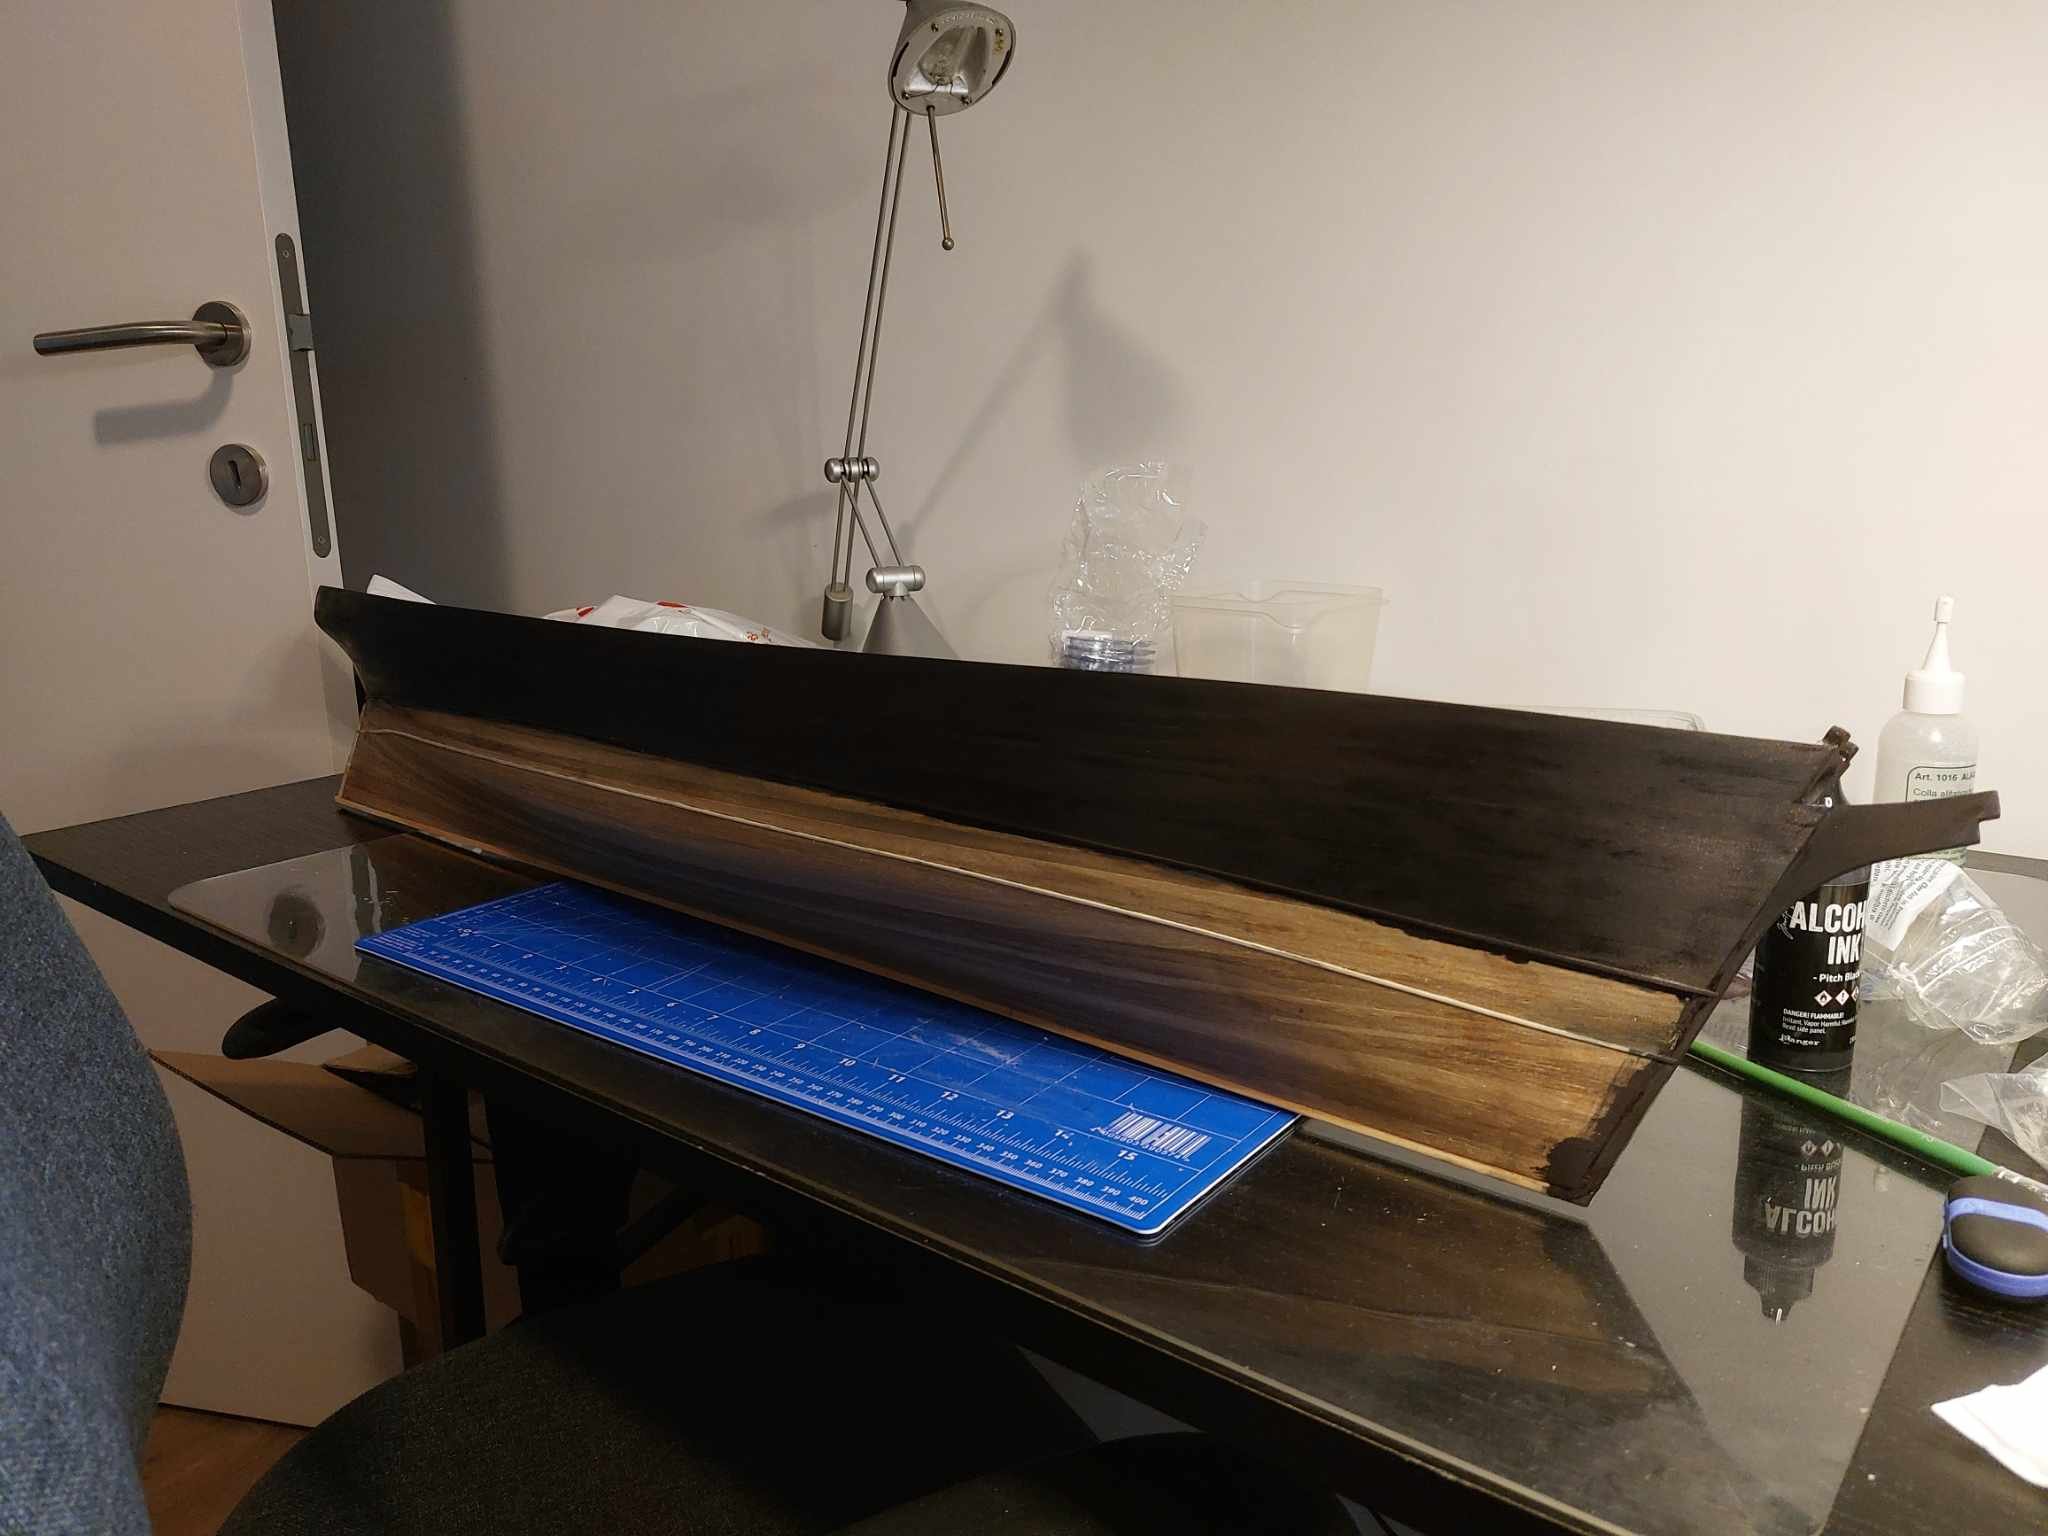
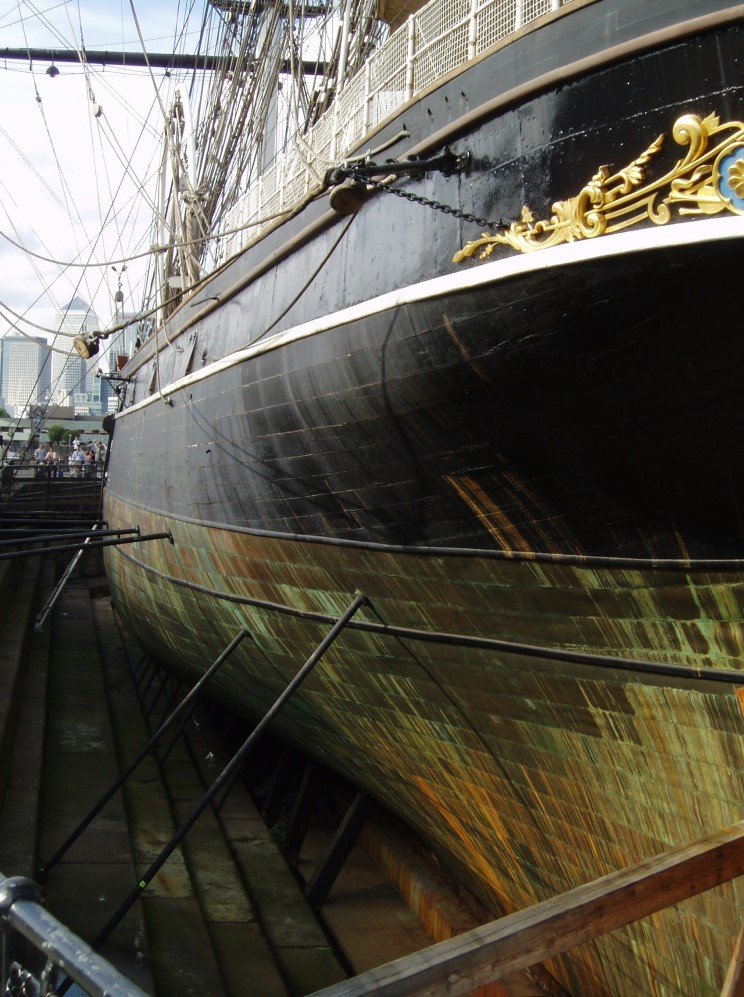
So! Time for another update. When i looked at old pictures of the real ship when she was still in service i saw that on the waterline and below it there were two strips guiding the copper plates. So i added those too after marking the waterline. These strips were cut from strips of deck planking and cut to shape. After having a final check on the hull i applied pitch black alcohol ink to paint the hull black instead of real paint. That way the wooden planking is still visible. This i will protect with shellac later on. Nxt step is installing the copper plates. That will be a new adventure Just doubting if i will weather the copper plates using burnishing fluid or leave them fresh.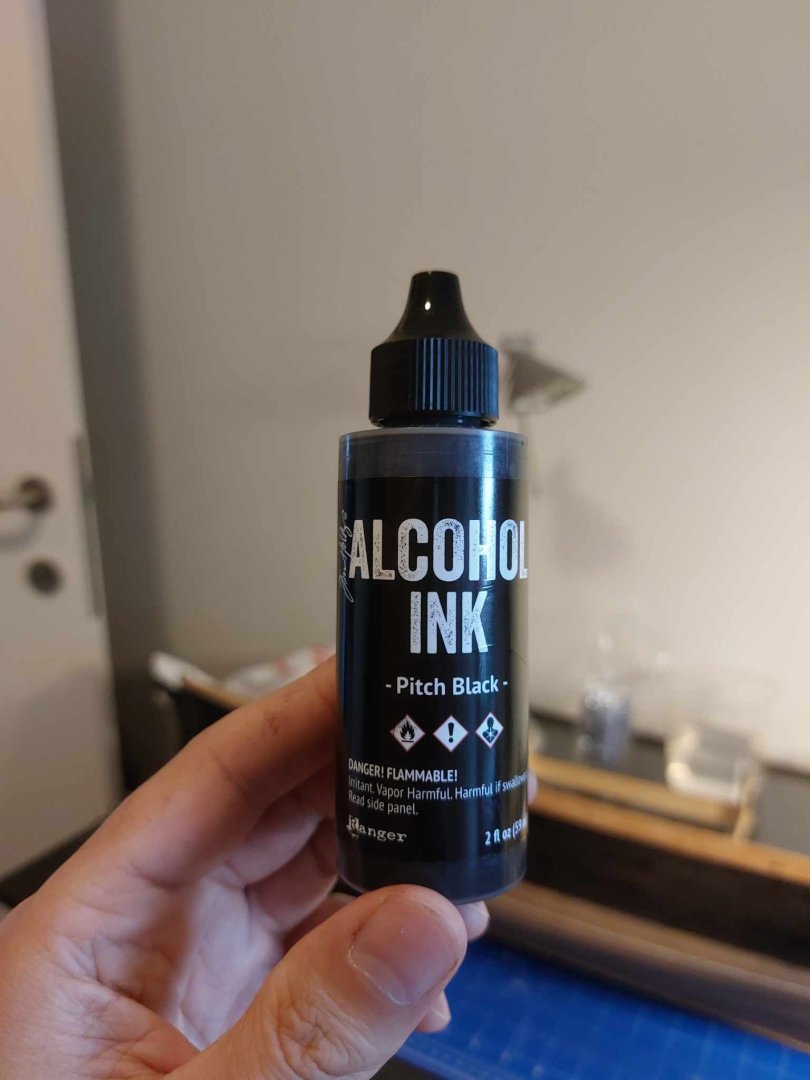

- 44 replies
-
- 2
-
-
- Cutty Sark
- Sergal
- (and 1 more)
-
CUTTY SARK by Hostez - Sergal - 1:78
Hostez replied to Hostez's topic in - Kit build logs for subjects built from 1851 - 1900
Thanks Rick!