frankwil
-
Posts
42 -
Joined
-
Last visited
Content Type
Profiles
Forums
Gallery
Events
Everything posted by frankwil
-
 Thomas, Thank you for the info. The jig is brilliant. I would make this one, but I have no way of cutting the diagonal cleanly. I think I can make something that will do the same thing though. I like the idea of using a plane to shape the two planks together. This cuts the work by half and I'm all for that. An X-acto never leaves anything close to a smooth edge either, and my scroll saw skills make it look a landscape horizon. F.
 -
Spiled my first plank and got it glued on. Very happy with how it turned out. I tried to use the compass/card stock strip method for the spiling, but didn't have the dexterity to make it work, so I used the tape method that Chuck Passaro suggests in the tutorial. Only tape that I had that was wide enough was shipping tape - which doesn't take pencil markings too well. With some repetitive r ubbing of the pencil, I was able to get a clear mark on the tape. Tried cutting out on a scroll saw, but I'm just not that talented with it yet, so I reverted to an X-acto knife. A lot of effort for one plank, but I think it will be worth it.

-
Thanks Spyglass. I've moved on to spiling the whole ship, so I won't need it this time - I hope.
-
Spyglass, The pic you posted is exactly what I had originally wanted to do and, I'm sure, what Mamoli had in mind when stating simply to taper the planks from the wale down. I just couldn't wrap my head around how to get there. My problem was seeing that massive sweep running fore and aft and having it propagate, if not get exaggerated, as I planked downward.
-
Spyglass, What I meant by hourglass is that the widths for the planks at bulkheads 2, 3, and 4 were going to be wider than what they would be amidships. So with the larger widths that typically go to toward the stern, it was somewhat hourglass shaped. This is the first layer of planking so I realize it's not a big deal. I just wanted to make sure I knew what I was doing before I got to the second layer.
-
I guess what I implied, and what the word means to me from reading different things on this site, is using a plank width wider than what you have in the kit. I totally understand the shaping and tapering aspect of it, and would never try planking anything (except a wall) without using these in some form. I was just hesitant to go outside my comfort zone on my first big ship build. But, fear not, for I have taken a trip to the local hobby store and purchased some sheets of 1/16" basswood that are very close in thickness to the 1.5 mm thick planks that are in the Mamoli kit, and am in the process of lining out the hull using Chuck Passaro's tutorial/pictorial. After druxey's encouragement, and I started to actually grasp the whole concept, I decided to take the plunge - because I don't want a crappy looking hull. I'll post some pics of the progress as I go along.
-
Svein.erik The instructions about lining off the hull by Chuck Passaro require spiling planks - which I'm unable to do at the present time. I would really just rather use the kit planking. Thanks for you suggestion though.
-
The kit is the HMS Beagle (the ship Darwin used for his exploration) made by Mamoli - now manufactured by Dusek. Are stealers typically used in the bow section? I got the impression they weren't. I'm pouring over the tutorial now to try and get a clearer picture. As for the directions, they really give no guidance in planking other than a general statement to taper the planks below the wale.
-
I'm going directly by "Simple Planking Techniques for Beginners" from this site. I'm majorly confused.
-
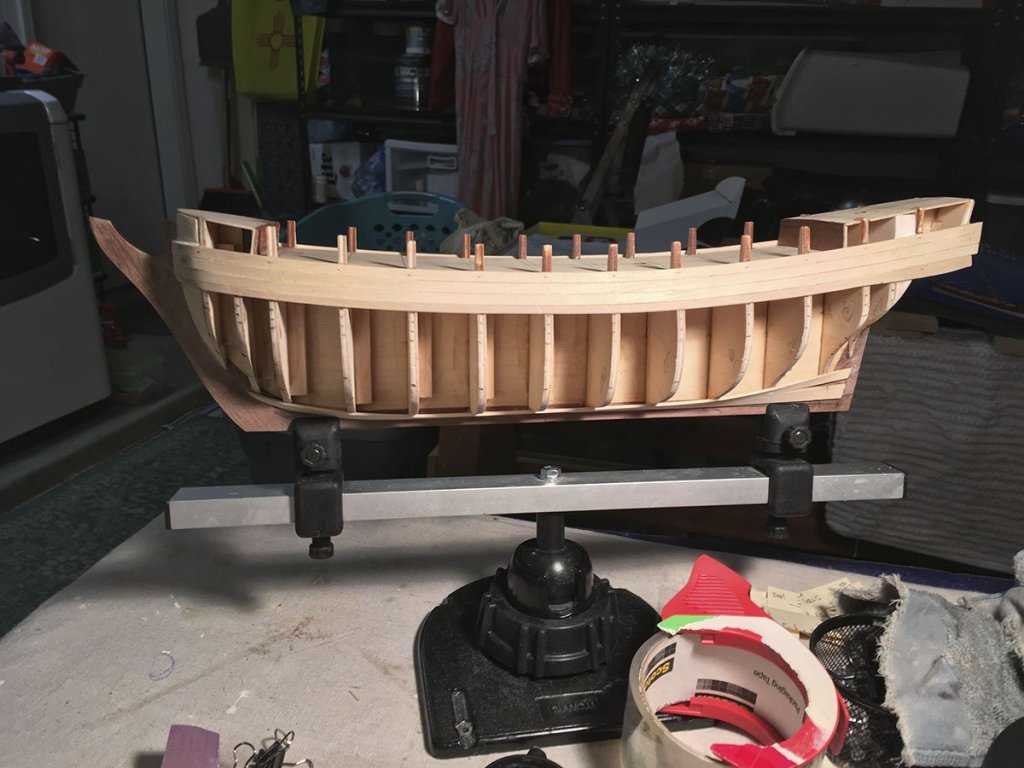
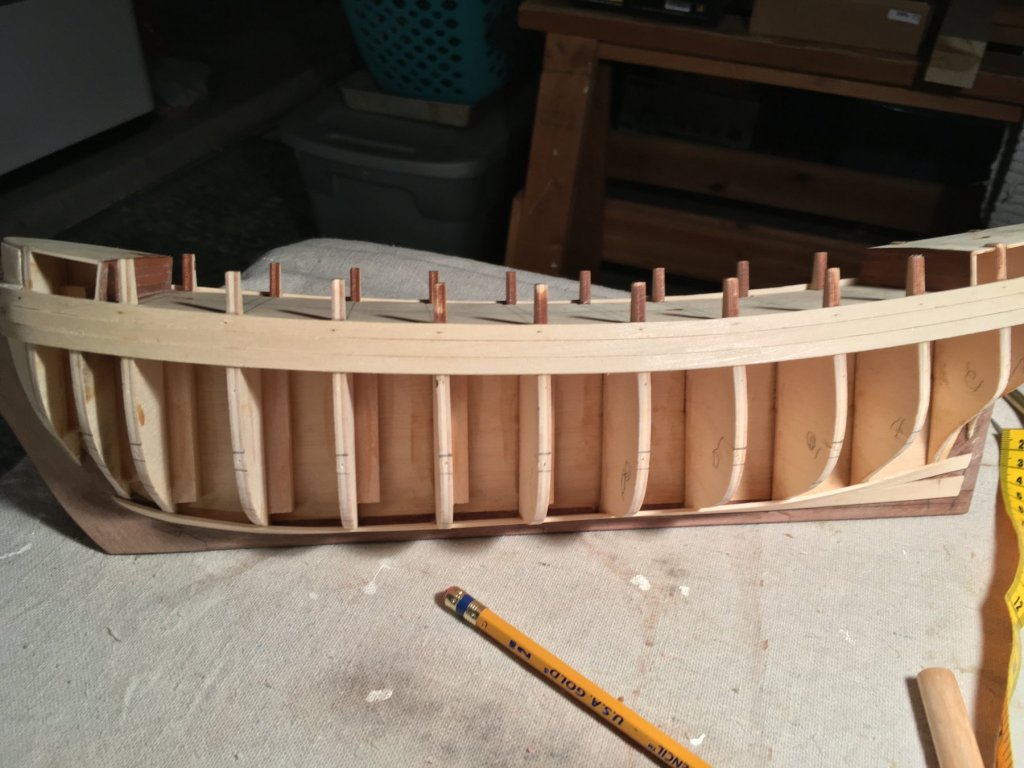
In the picture, you'll see that the three planks that make up the wale have a serious lateral bow to them along the length of the ship. The kit instructions specified that the top of the first plank be laid down even with the outboard bulwark step and the subsequent two planks be laid in line with the first. There was to be no tapering or shaping of these planks. After marking off the first temporary batten below these planks, I noticed an hourglass shape to the top band. When taking measurements of each bulkhead in this band, it quickly became clear that the width required for the allotted 5 planks per band would exceed the 5mm of the kit planks for bulkheads 2, 3, and 4. From reading/watching many planking tutorials, I was expecting to have to taper the planks in this part of band. How do others compensate for the bow and not make it ugly? Any help will be appreciated, Frank
-
So I think I got this. Took all night but I'm fairly happy with the results. I guess it's standard practice to place a steeler at the stern where the GB would have met the rabbett/bearding line had I had one. I did try and carve one, but ruined a keel doing so. I will just have to live with the "ridge" along the keel and sternpost on this model. I will attempt it on my next. Please let me know if this looks ok. Thanks again to everyone, F.
-
I did read the primer and I know why it needs to be that way. It's just that the method I'm using seems to prohibit it.
-
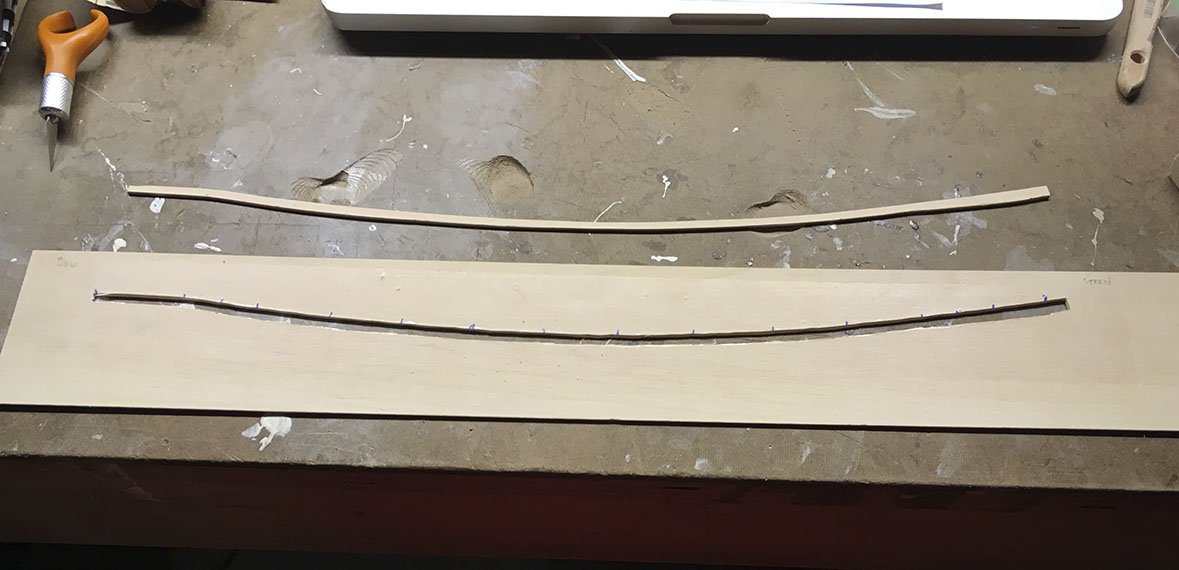
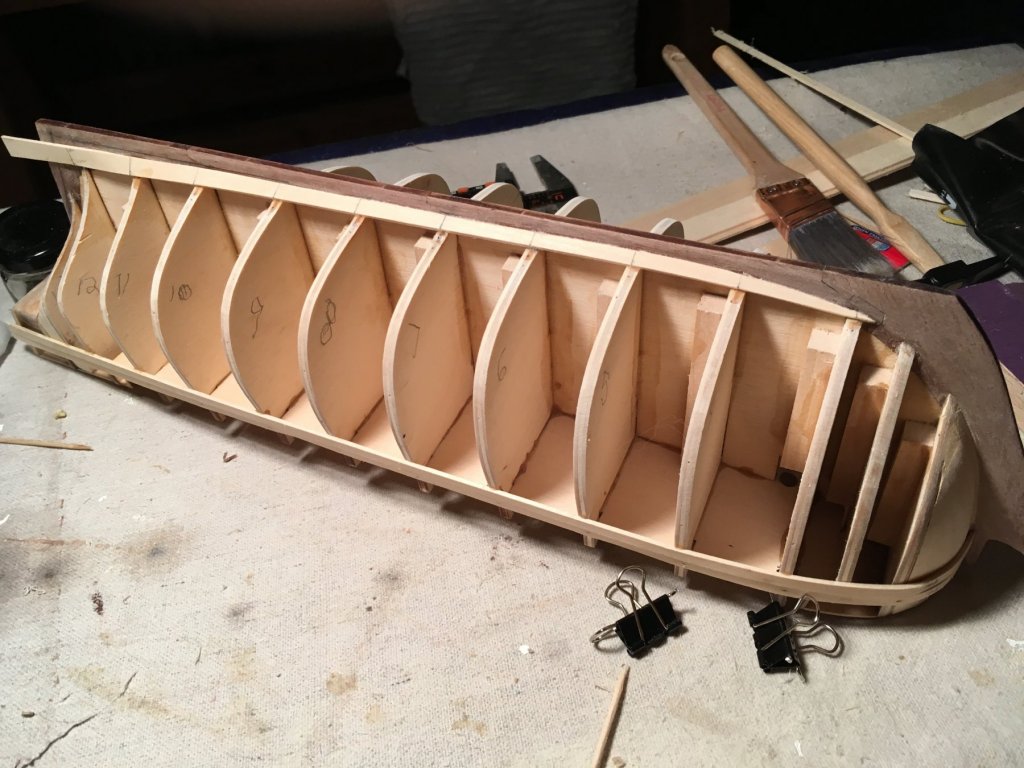
Thanks everyone for the encouragement. I've removed all planks in order to reshape the bulkheads as druxey suggested. I feel much better about how it flows now. I'm still perplexed with the GB though. In most places I've read - including the "Simple Planking Techniques for Beginners" - that the garboard strake is to be shaped from placing a batten the distance away from the keel the width you want your GB to be. With this method, I'm still seeing it run up the stem somewhat. With a 10 mm wide GB, it runs even further. Is there an alternate method for doing this, or am I just interpreting this wrong? Frank
-
Thanks Russ. I have temporary battens on both sides to measure for the GB, so it should be easy enough to verify. Frank
-
Is it an acceptable practice to make a garboard strake for one side, and trace/duplicate the same to flip over and use on the other side of the keel?
-
Anyone ever tried using contact cement for finish (second) planking? I tried it recently and was pleased with the results. I know it wouldn't work for many other modeling applications, but it seems more forgiving for any thin type of planking.