DONATION DRIVE - SUPPORT MSW - DO YOUR PART TO KEEP THIS GREAT FORUM GOING! (91 donations so far out of 49,000 members - C'mon guys!)
×

SteveM
-
Posts
74 -
Joined
-
Last visited
Content Type
Profiles
Forums
Gallery
Events
Everything posted by SteveM
-
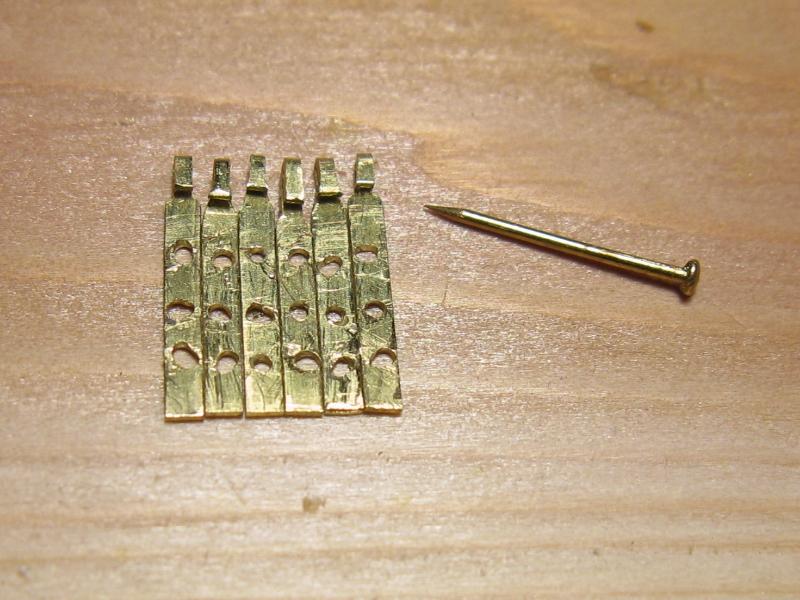
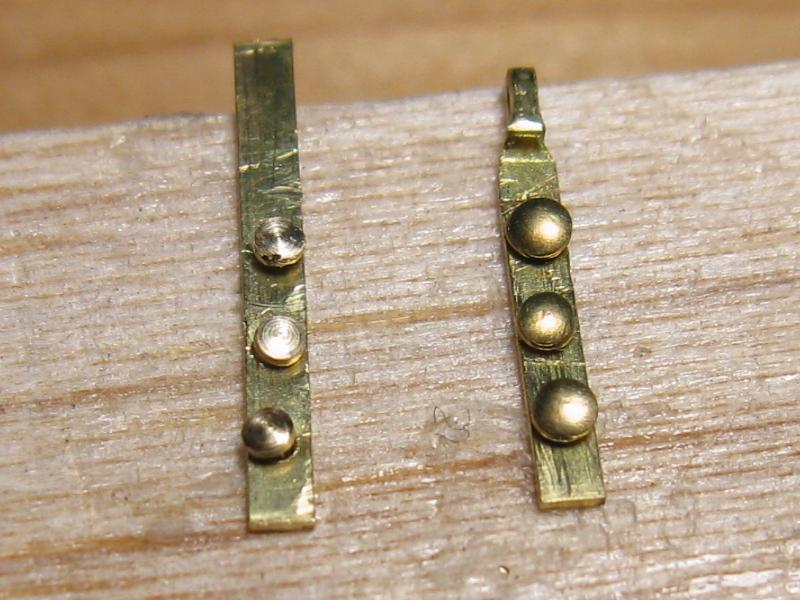
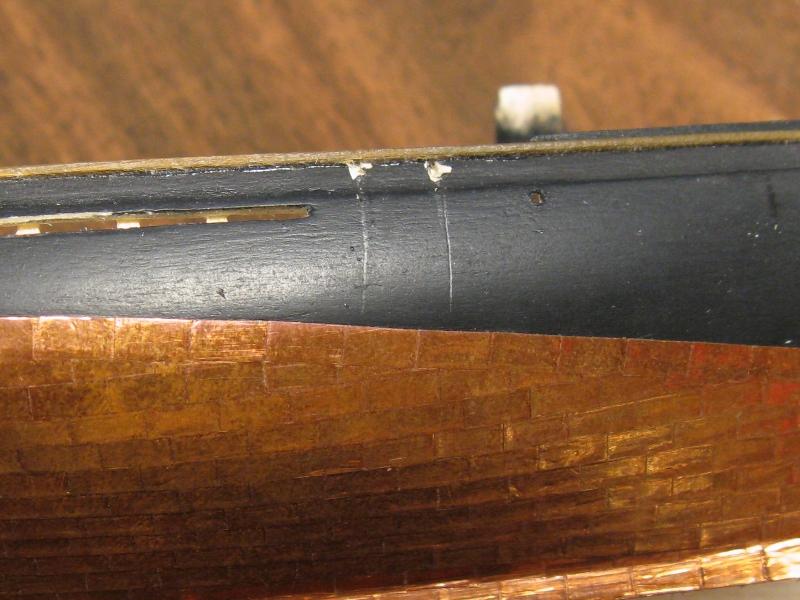
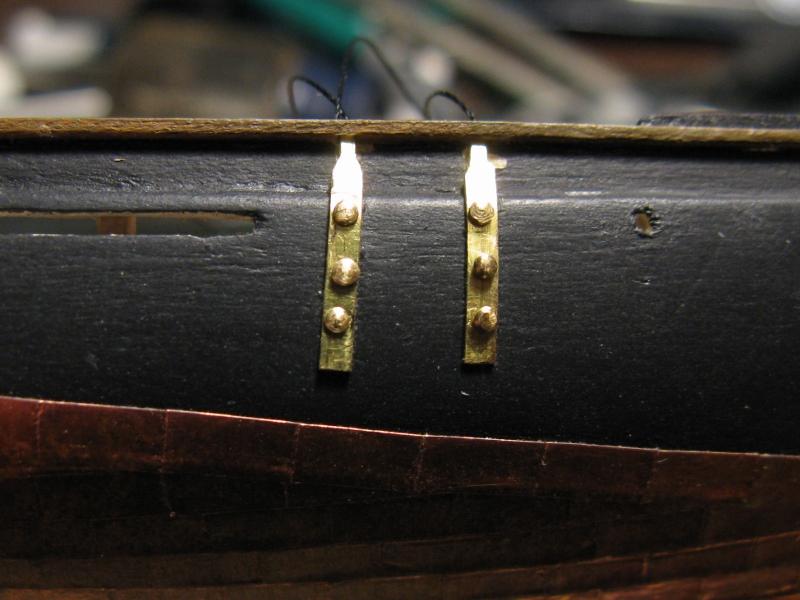
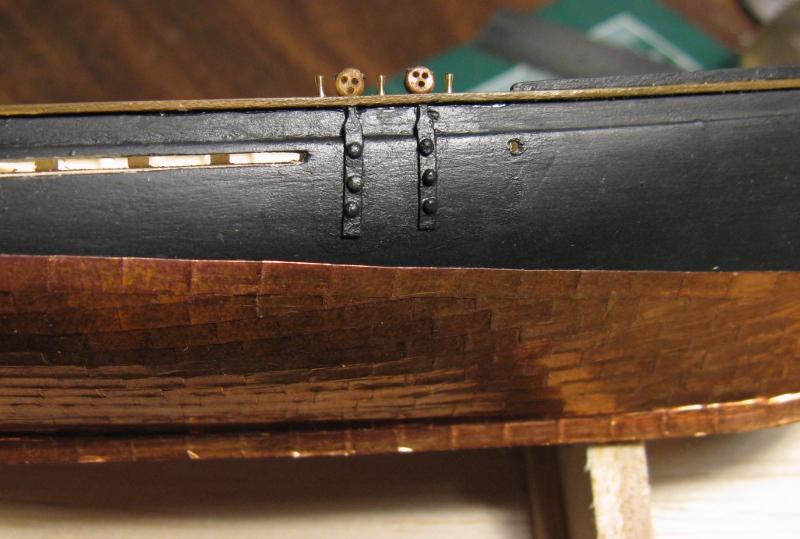
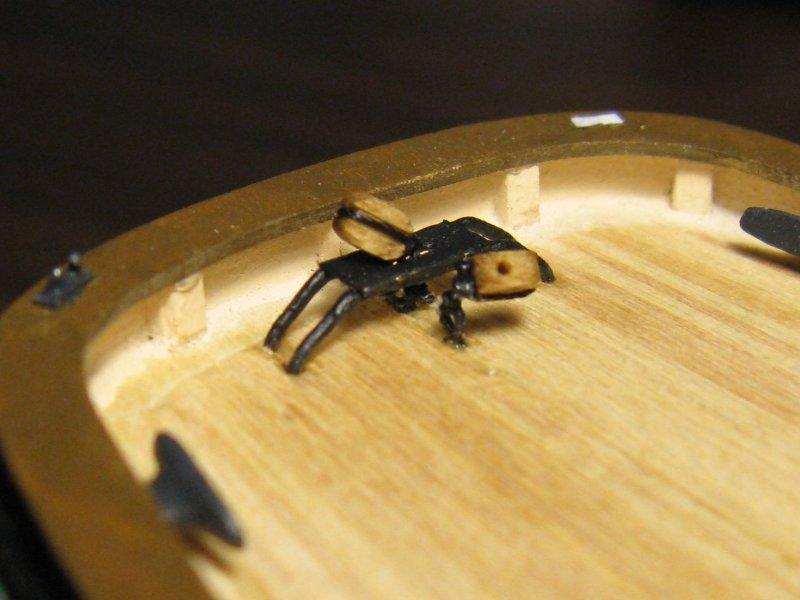
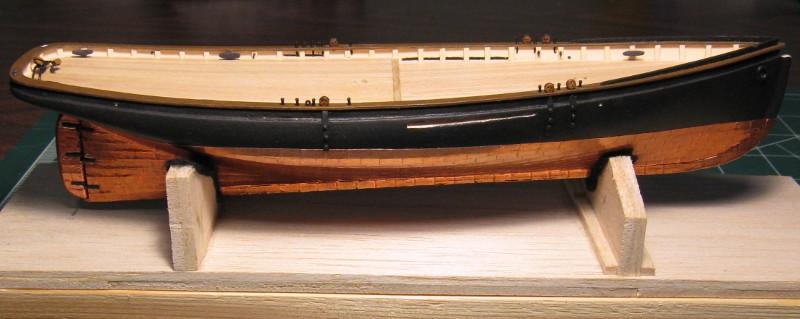
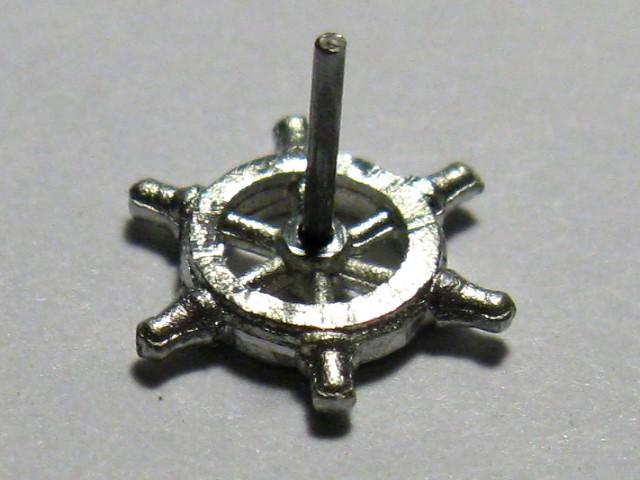
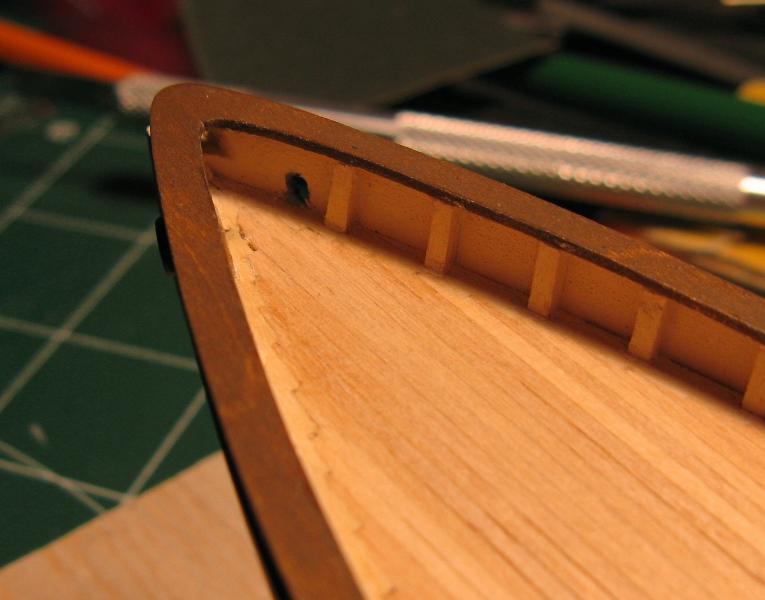
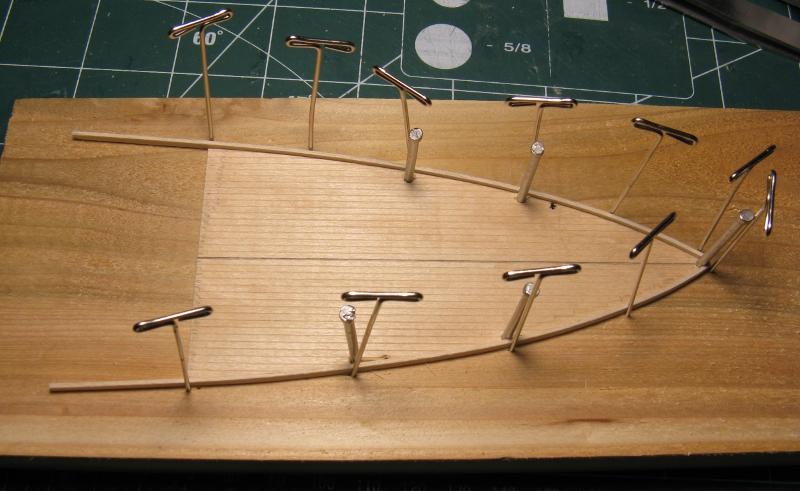
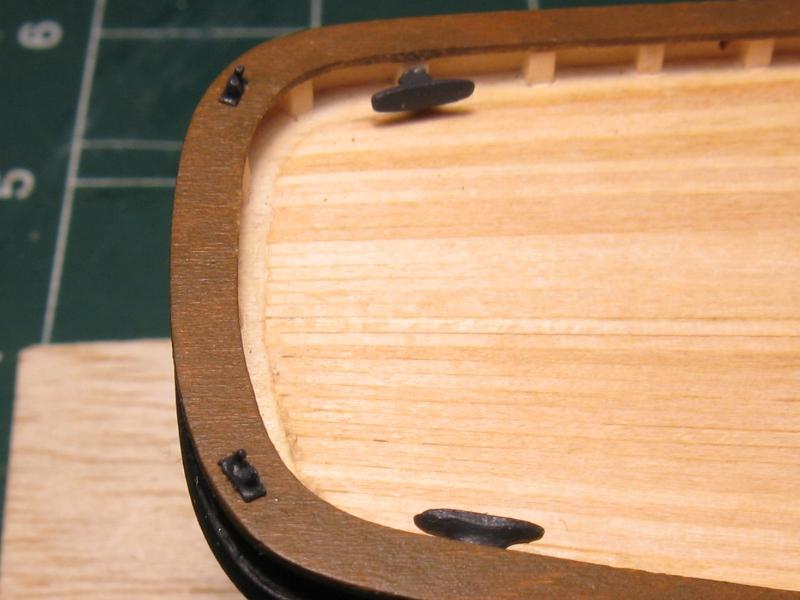
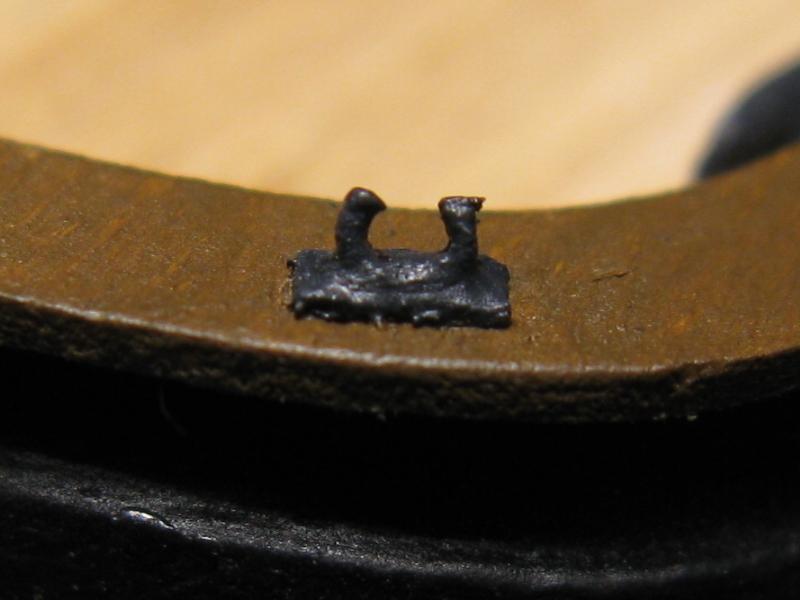
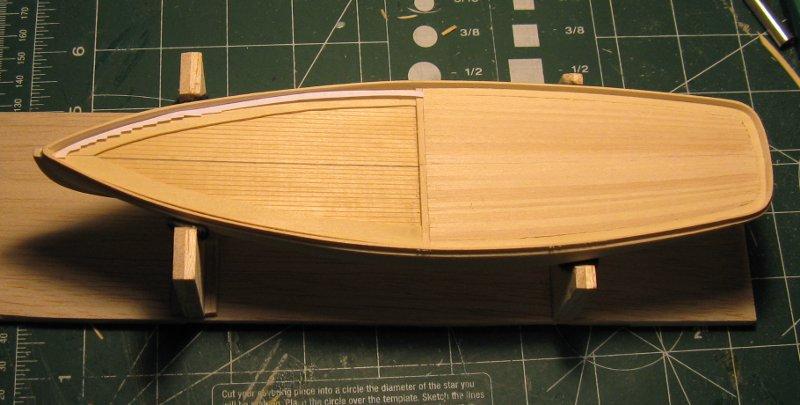
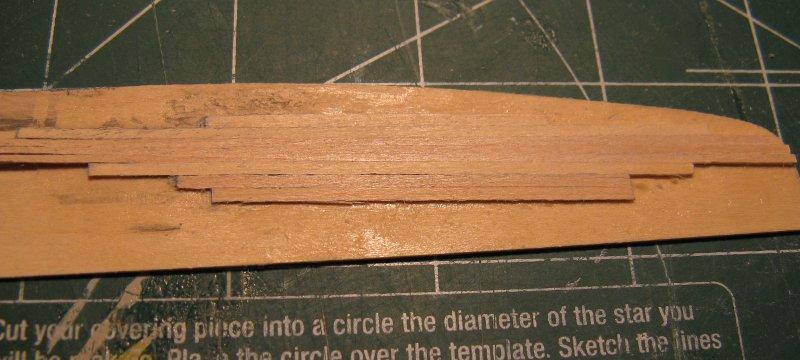
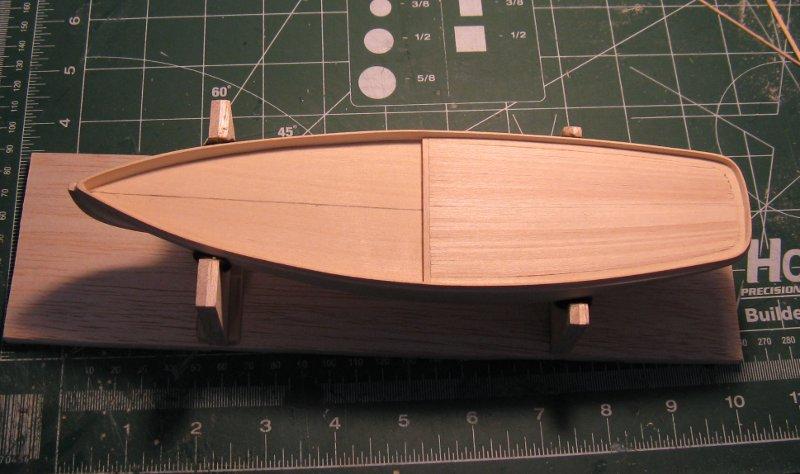
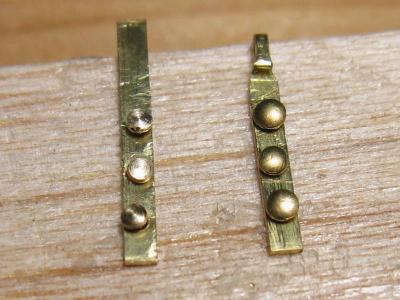
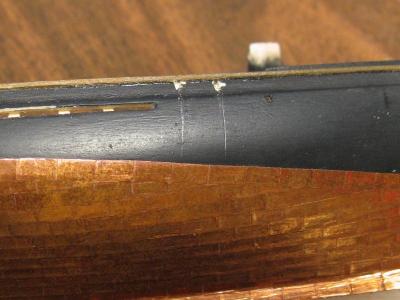
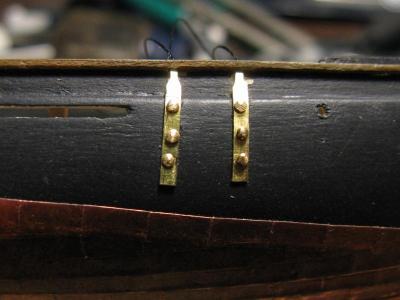
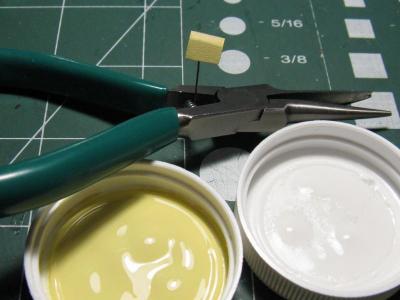
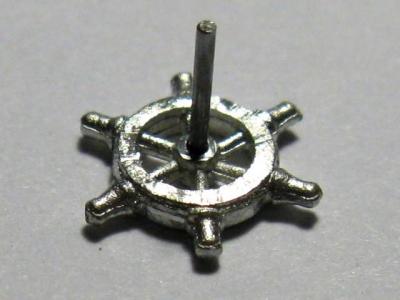
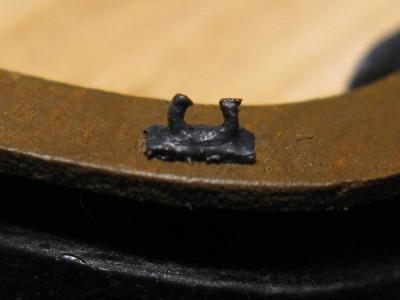
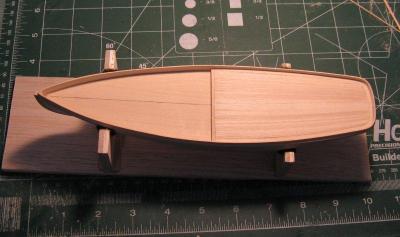
 Having trouble getting good chainplates Nail heads on the right are as-is and the ones on the left I ground down to an appropriate size I decided to make a new chainplate using a center punch to mark the holes, the result is much better so I made all new chainplates Marking the locations of the chainplates Chainplates installed Chainplates finished Traveler An overview of what the top side looks like to date (9 Sept 2011) The house painted cream Wheel


-
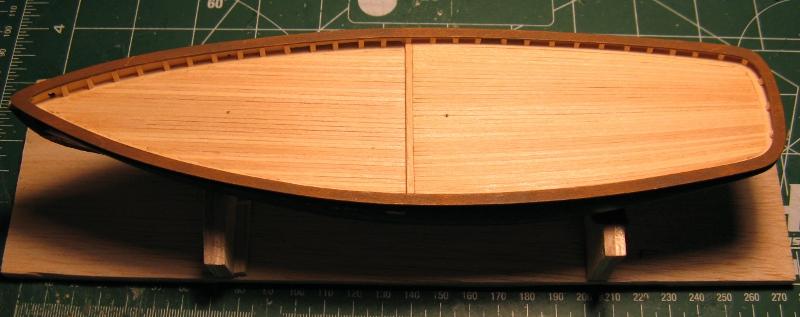
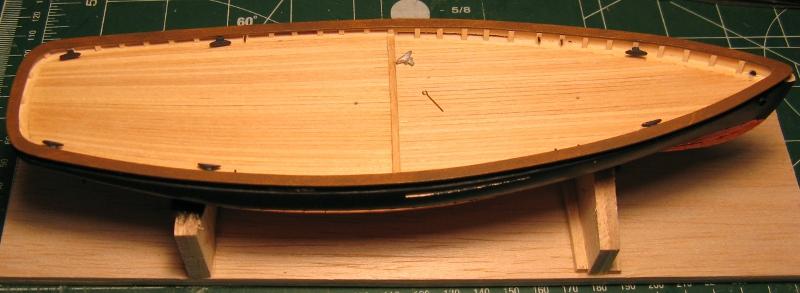
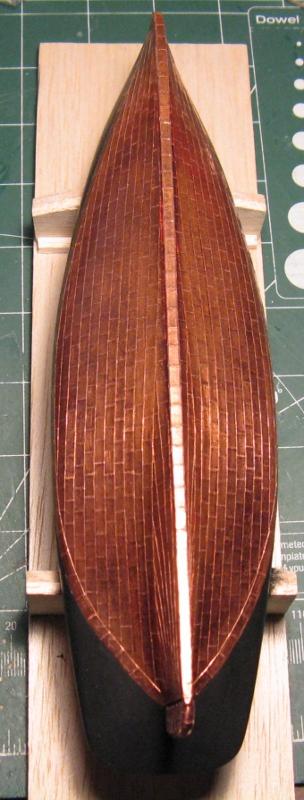
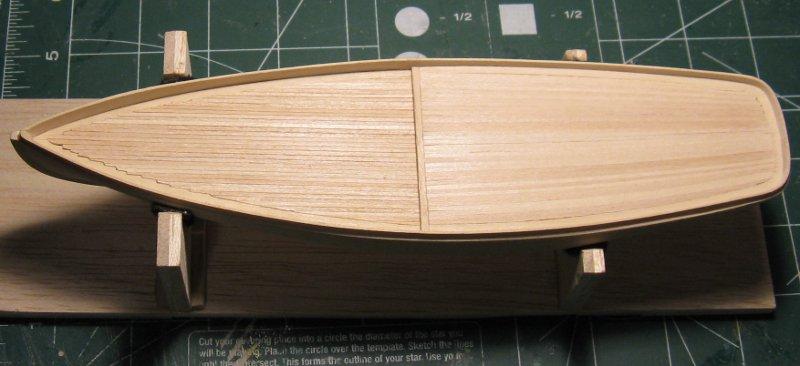
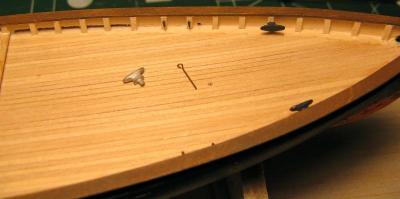
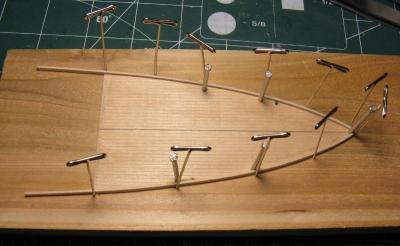
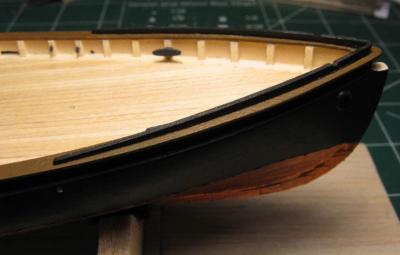
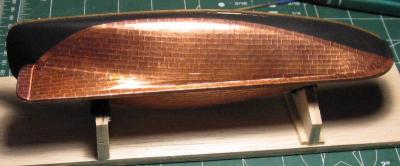
With copper plating completed I moved on to the top side. Deck coated with satin poly Cleats and eye-bolts Bending the splash rail Splash rail installed Fairleads Mast holes


-
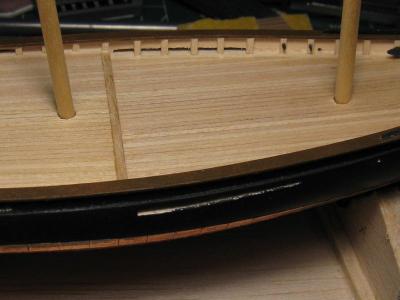
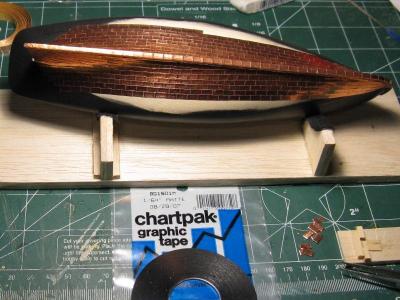
That's the last of the archived text for a while. For the next little bit it'll just be pictures and maybe an odd comment here or there. Using graphic tape to line up the plates and make sure they are fair.


-
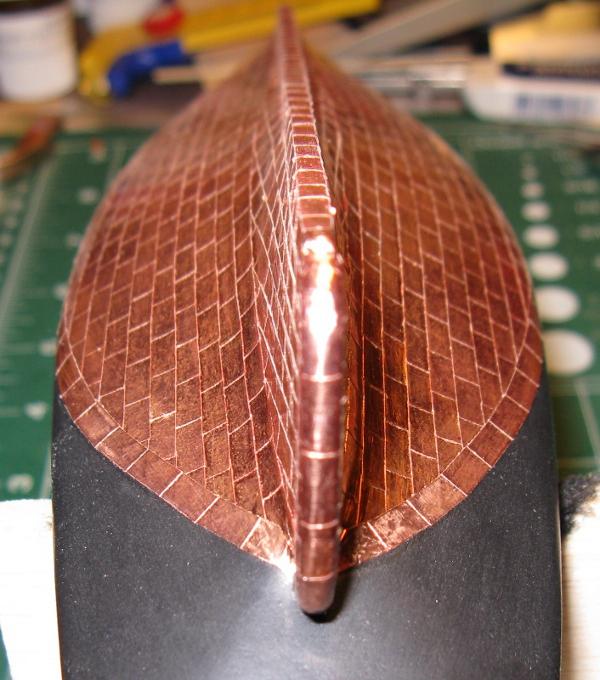
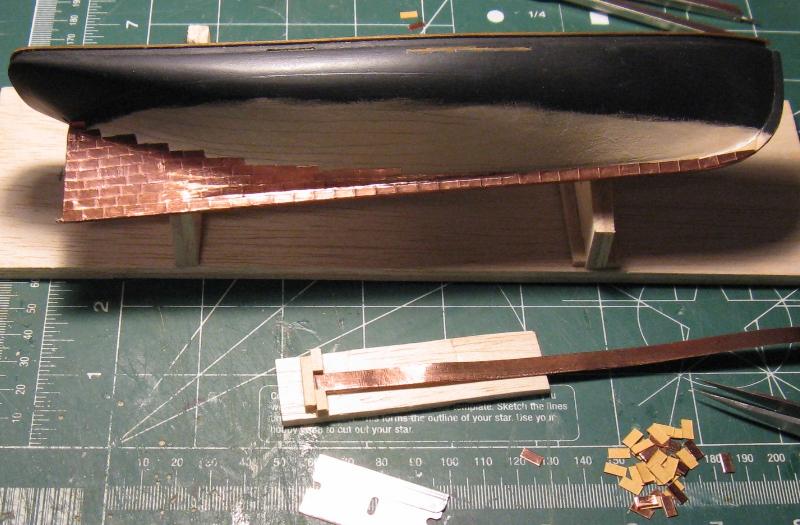
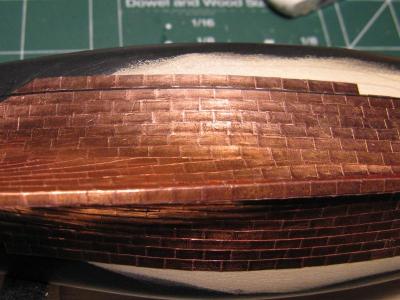
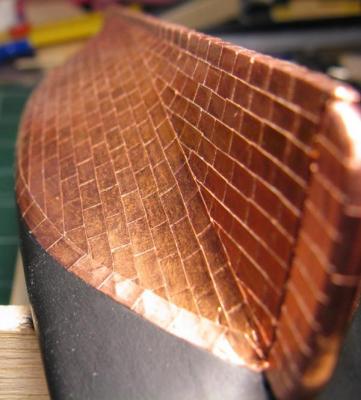
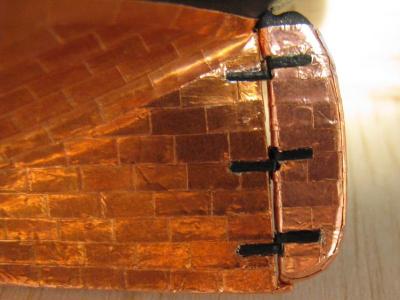
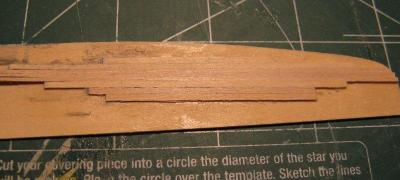
Thu Jun 30, 2011: 999 copper plates on the hull, 999 copper plates... The port side is also plated, but with a few less rows in the stern area. The jig to cut the plates was taken from another build thread and is a great idea. The plates need to be about 1/8" x 1/4" so the practicum says to split the 1/4" wide tape into 1/8" wide pieces then cut into 1/4" lengths. I actually did several that way some time ago and was not happy with the results so I'm glad I came across what really seems like an obvious solution in hind sight, cut the 1/4" wide tape into 1/8" lengths. Getting started on copper plating the hull.

- 41 replies
-
- 1
-

-
- model shipways
- phantom
- (and 1 more)
-
Mon Jun 27, 2011: The bulwark stanchions and top rail have been installed. As mentioned previously, the kit supplied material for the bulwark stanchions, but I found the 12" length insufficient and of poor quality. The would often split apart as I was working with it. I ended up using some wood from the LHS that was of far better quality, too bad I hadn't used it from the get go. The top rail was cut from 1/32" sheet material per the instructions in the practicum. The "cream" paint in the bulwarks is the kit supplied white paint with a touch of the "Bulwarks Brown". The top rail paint is Liquitex Raw Umber with some of the "Bulwarks Brown" mixed in. Bulkwark stanchions and top rail installed.
-
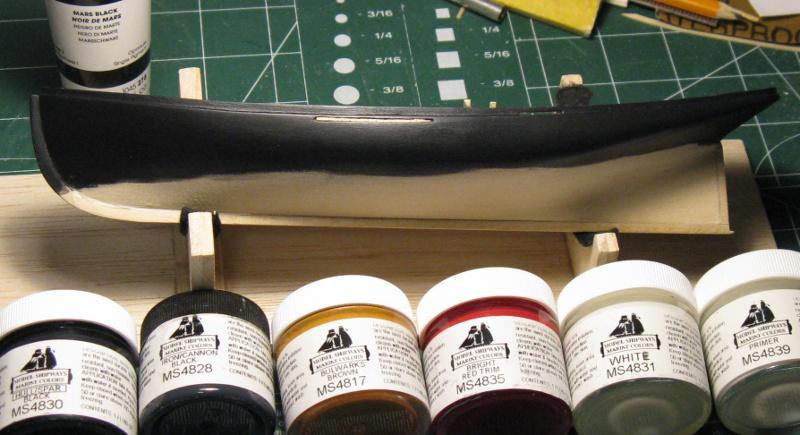
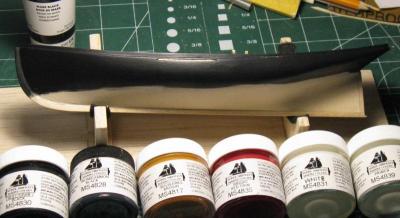
Fri Jun 24, 2011: Two coats of primer and about 5 coats of black with sanding between each coat. I used the kit supplied MS primer and Hull/Spar Black paint, even though I do have Mars Black like Chuck uses I wanted to go with what was in the kit. The primer stayed tacky, even 24 hours after application. I'm not sure if it was too humid or too old or what, but it was next to impossible to sand as it just gummed up and wouldn't sand smooth. The black seemed to dry just fine and thinned nicely with water, no complaints there. The kits comes with 6 jars of paint; 1 each/MS4839 Primer, MS4830 Hull/Spar Black, MS4831 White, MS4817 Bulwarks Brown, MS4835 Bright Red Trim, MS4830 Iron/Cannon Black. What gets me is that the colors used per the plans are black, white, cream, brown, and a stain for the spars. Instead I get two shades of black, red, and a light orange-brown color that doesn't seem suitable for the cream or the brown unless I start mixing paints. I'd love to hear an explanation of the color selection if anyone has one, but I think I'll email or call MS and ask them what they were thinking. I stopped by the LHS for a jar of MS "Deck House Cream" to use on the bulwarks, but all three jars were dried up with a little hockey puck in the bottom. Guess I'll just go Liquitex from here on out. Meanwhile, bulwark stanchions are starting to go in. Chuck's kit was missing the material for this, but mine had 1/16"x1/16" (1.6mm x 1.6mm) stock and it is on the materials list for this use. Hull painted black above the copper plating. Also showing the selection of paints that came in the kit.
- 41 replies
-
- 1
-
-
- model shipways
- phantom
- (and 1 more)
-
Tue Jun 21, 2011: The scuppers have been drilled and cut out. I'm finding it easier to stay motivated now that it is starting to look more like a boat.

-
Tue Jun 21, 2011: Russ, thanks for the kind words and tip. I removed the bulk of the excess plank thickness with some sandpaper then scraped. The area next to the deck step can't be reached with sandpaper so scraping was the only way to go in that area. It is difficult to see in the photo, but the planks are nice and smooth and level with the waterways. Up next is cutting out the scuppers. All the planks are sanded then scraped.
-
Posted by Russ on Tue Jun 21, 2011: Steve: The deck planking looks really good. Consider using a flat bladed knife or a single edged razor to scrape the deck rather than sanding. I have used single edged razors for scrapers and they do a nice job of getting a really smooth surface. Keep the sharp edge nearly perpendicular to the deck surface as you scrape. A slight tilt is okay. Russ
-
Mon Jun 20, 2011: Installing the forward deck planks took longer than I had anticipated, but was enjoyable. They still need sanded, the shadow lines given by the rough boards show that caulking lines would in fact be good to have. Deck planks installed.
-
Fri Jun 17, 2011: I tried using a sharp #2 pencil and straight edge to guide it and found the results on my test piece satisfactory. The only problem is if I'm not very careful doing it the sharp point can ride up out of the groove between the planks and start making a new groove. After much head scratching and comparing the plans to the wood I finally adhered the paper patter to the waterway pieces and cut them to shape. Once they were firmly glued into place I started to lay planks two at a time, gluing as I go. In this photo the outer two planks haven't been glued yet which is why they have a larger shadow line. This felt like a risky way to go, but so far I am very pleased with the results and how easy it is to cut the planks to fit. Forward deck planking is underway.
-
Posted by Russ on Thu Jun 16, 2011: Steve: Nice work on the hull so far. I have been using a regular number 2 pencil on plank seams for years now with no problems. Russ
-
Thu Jun 16, 2011: Chuck, thanks for the suggestion, I'll give it a try. I had been staying away from pencil markings as I read that the graphite can float up when applying the finish, but it is something I can try on my test piece.
-
Posted by Chuck on Thu Jun 16, 2011: She's coming along just great. A very neat and crisp job. Have you tried using a sharpened pencil to simulate the seams? It works the best in my opinion. Chuck
-
Thu Jun 16, 2011: Using the kit supplied sheet planking and a pattern from the plans to get a feel for the plank joggling. Here the size of the planks on the sheet wood is very similar to what is on the plans so I may be able to use it as a pattern to help me cut out the waterways. I've also been testing ways to simulate caulking after the planks are glued together. For some reason I thought I had read about applying paint or other medium after the planks are on then sanding/scraping off the excess, but my planks are so close together that the paint could not penetrate evenly and it doesn't look very good. If I can't find a method that works well I think I'll just fore go the calking considering the small scale of this model and coloration differences which already help differentiate the planks. Using the kit supplied sheet planking and a pattern form the plans to get a feel for the plank joggling. Testing methods to simulate caulking after the planks are put down. So far nothing has worked.

-
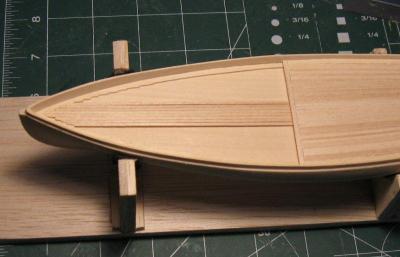
Wed Jun 15, 2011: Port side of the aft decking is now installed and holystoned. The forward decking won't need tapered, but I expect the joggling will create some new challenges. Aft deck planked.
-
Mon May 16, 2011: This weekend I made some progress on the aft deck planking. I'm using 1/32" x 1/16" (0.8mm x 1.6mm) Basswood strips from MS sanded thinner and skinnier then tapered. I'm not pleased with the strip wood as some pieces have the grain direction running at such an angle that the piece has jagged edges and non-uniform width and is all but useless. The "good" pieces tend to have a very course gain to it and splinters very easily which can ruin a piece that was nearly finished. In the future if I can't find better strip wood than this I'll buy a small table saw and cut my own. In the picture below you have the stbd side planked with 17 individual strips on the port side has a piece of the scored sheet material that comes with the kit. It has 16 simulated planks, but only 11 of those run the full length. The plans appear to show 18 pieces, so I'm not exactly to the plans, but I prefer the look. The stbd side is made of 17 shaped planks while the port side is a piece of the scored sheet material that came with the kit.

-
Posted by enemeink on Fri May 13, 2011: just to add a suggestion that i did on my phantom. i applied a thinned mixture of wood glue to the thinned bulwarks to add some strength to the soft thin wood. this will also come in handle when you carve out the scuppers. your build looks good. keep the pictures coming
-
Fri May 13, 2011: For the waterways I've mixed a few ideas from the instructions and some from the practicum. I started by holding a sheet of 1/32" (0.8mm) Basswood to the top of the bulwarks then tracing out the shape of the hull onto the Basswood sheet. Then I cut out the piece and cut it into halves then quarters. After that it was an easy process to sand and trim the pieces to fit. For now I've only glued down the aft waterways and deck edge at the step with Weldbond glue. Next I'll try my hand at shaping and installing the after decking using Basswood strips. Shape of the hull at the bulwarks was traced onto 1/32" (0.8mm) Basswood then cut in half then later into quarters. All four waterways rough shaped and being test fit. The fore waterways are being left quite over-sized for now till I figure out how to notch them. Aft waterways and deck step edge glued into place.
-
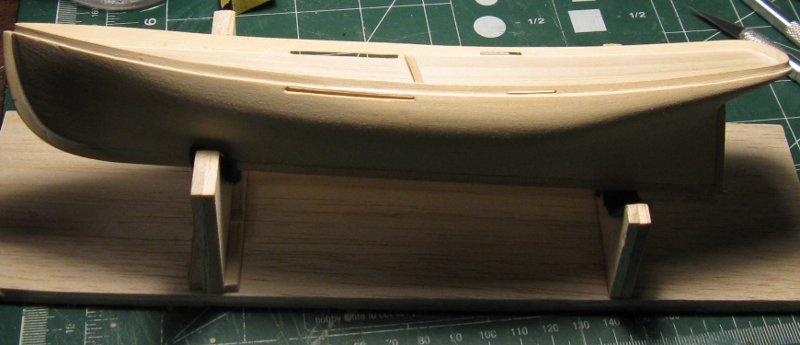
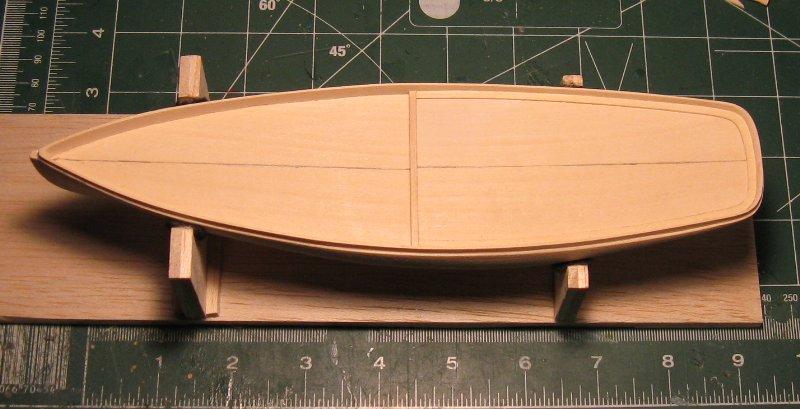
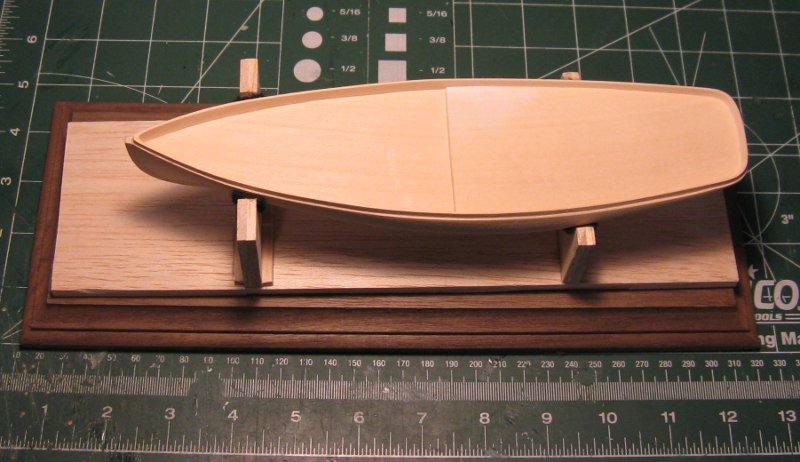
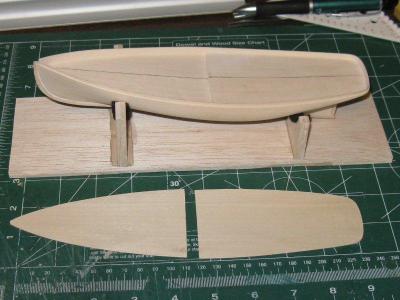
Mon May 09, 2011: I've decided to leave the copper plating of the hull for later as Peter did with his Newsboy. The thinning of the bulwarks was actually accomplished about a month ago, but I was slow to post my progress then a back injury (deranged disk) kept me from doing any sitting and I'm just now getting back towards normal again. The thinning still isn't as even in thickness around the perimeter as I would like so I plan to spend a little more time fine tuning it before moving on. I believe the next step is deck planking. I've purchased individual planks so I'll give that a go and fall back on the kit supplied sheet material if need be. Bulwarks thinned and a cradle for the hull.

-
Posted by Peter Jaquith on Thu Mar 24, 2011: Steve, You might check out my construction sequence (re: coppering) for the Brigantine "Newsboy" here on this forum. I delayed coppering until the decks, inner bulwarks, and upper hull painting was complete. "Phantom is a good starter kit and with Chuck's practicum it should be a great learning experience. Note that Dennison J. Lawlor of Chelsea, MA was the designer of both "Phantom" and "Newsboy. Regards and welcome to the hobby, Pete
-
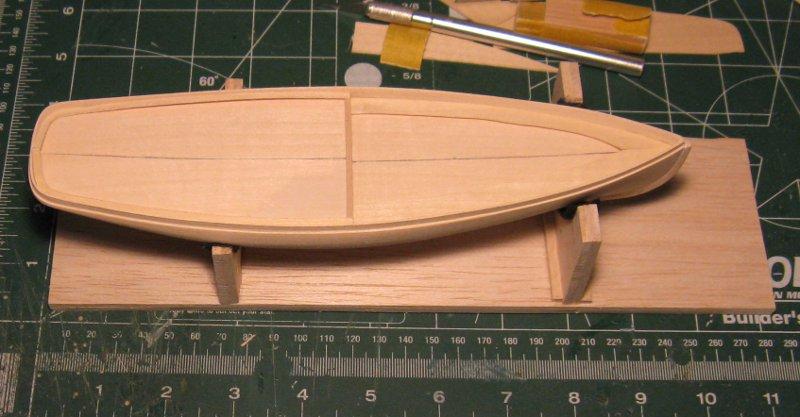
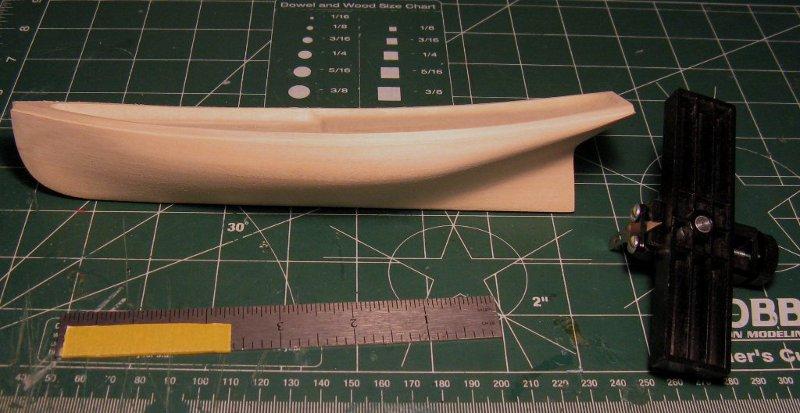
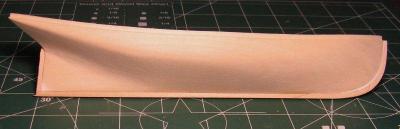
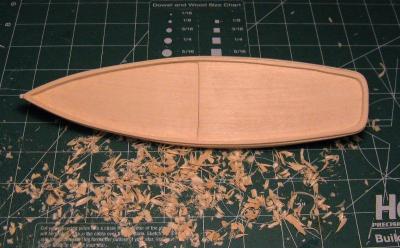
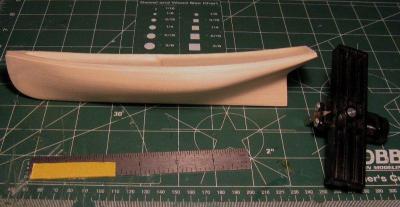
Thu Mar 24, 2011: Next step was to install the keel, stem, and sternpost. The kit directions don't say what size of wood to use so I went with 1/8" sq. basswood per the practicum. However, if you measure the plans you'll notice the keel is slightly taller than 1/8" at the sternpost. I didn't notice this difference till I was trying to fit the rudder and found it was too big. This is one place I am just going to leave good enough alone due to time pressures, if not under time constraints I would have make a new keel. The white stuff here and there is wood filler. The next step in the practicum is to install the copper hull plating, this is where I disagree. Chuck makes a point of diverging from the kit's directions in putting off thinning of the bulwarks as long as possible since this makes them very fragile. I do agree to a point. My concern is that a lot of wood remained to be removed and I was afraid I would tear up the soft copper plates while doing the cleanup. In the second photo you can see that I've left 1/16" to 1/8" of thickness to the bulwarks while cleaning out the excess wood. I've still got a lot of cleanup work to do, but I'm off to a good start. Once I'm happy with the cleanup and height of the bulwarks I'll copper the hull then thin the bulwarks to 1/32". Keel, stem, and sternpost installed. Cleaning up the curves and rounded corners left by the machining.
-
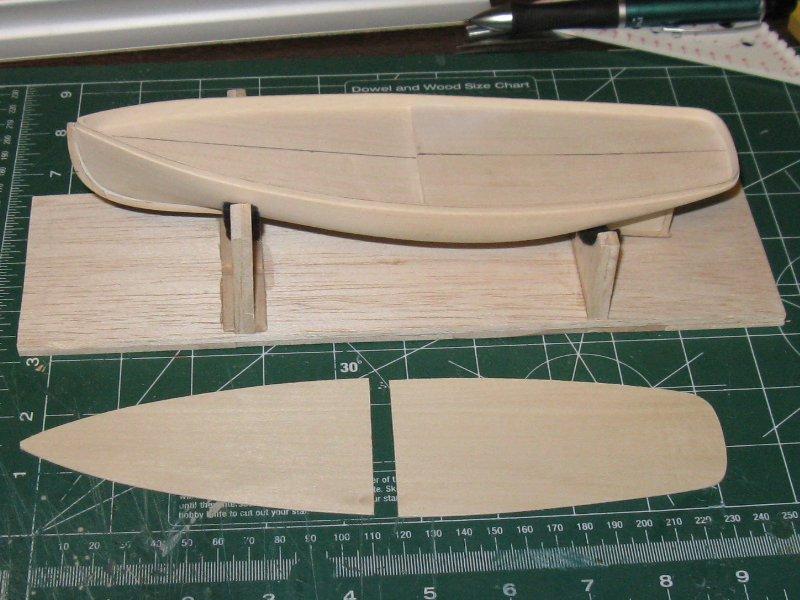
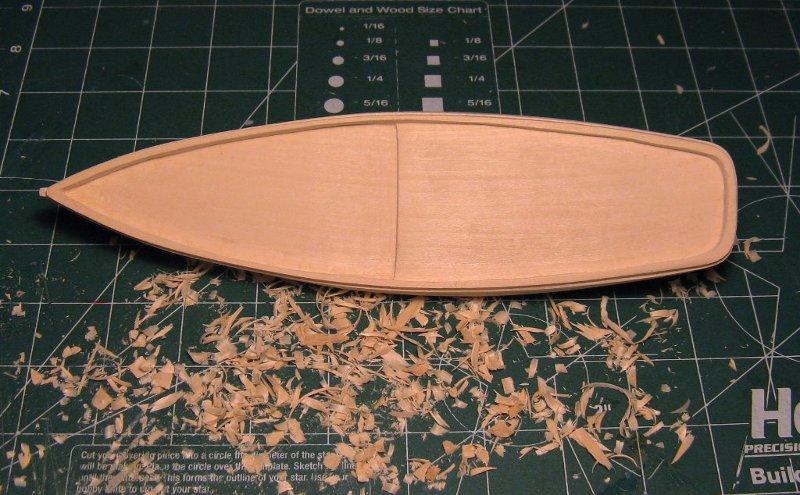
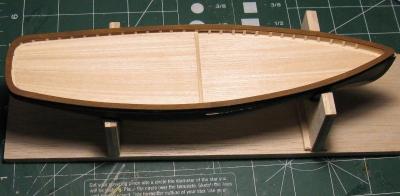
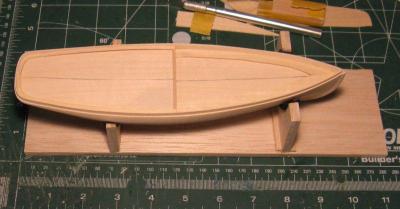
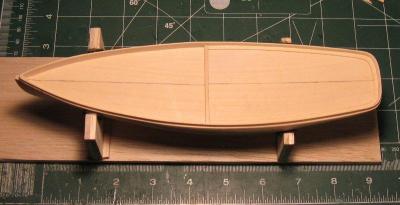
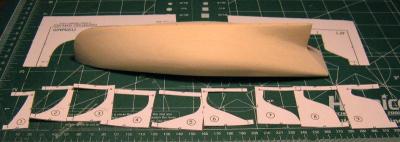
Wed Mar 23, 2011: I got off to a slow start due to the bad weather and my need to be outside while shaping the hull. Right away I was very thankful for Chuck's practicum and a bit miffed that Model Shipways/Model Expo would provide such pitiful instructions in a kit targeted towards beginners. If it were not for the practicum I'd be in trouble already. Maybe I shouldn't complain too much considering the directions and plans are not poor translations from another language. Chuck's method of carving the bulwarks step is to measure down 1/8" every 3/4" or so along the bulwarks then connect the dots with a piece of flexible stripwood. My line was fairly straight, but my ability to score the wood freehand with a #11 blade was not. Then I had an "ah hah!" moment and broke out my balsa stripping tool. I set the blade to 1/8" and slid the tool around the top of the bulwarks a few times to make a score I could easily follow free hand. To clean up the knife marks I tightly wrapped some sticky backed sandpaper around a rigid machinist's scale. Later on I realized the stern needed to be more rounded so I got another chance to practice the technique. Hull carved and sanded to shape. Carving the bulwarks step.
-
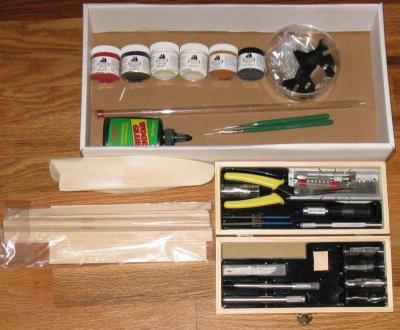
Wed Mar 23, 2011: Here's what you get in the "build for free" version of the kit. There's no telling how long this kit has been on the shelves at the LHS, but it was long enough for the bottle of glue to dry up. This tool kits sells on Model Expo for $65, but I'd not pay more than $20 for it. All of the tools are low quality and most of it will end up in the trash. I tried to cut 1/8" sq. basswood strip in the miter box but could only cut halfway through before the saw bottomed out. The set of gouge tips are too dull to be of any use and not worth sharpening. My advise would be never buy this tool set as most of it is trash. Everything checked against the inventory sheet so we'll see if anything is missing like Chuck mentions in a few places in the practicum.
-
What follows is a recontruction of my MS Phantom build log using the photos that I still have and where possible the text from the Internet archives. In general I'll only re-post what others posted when I feel doing so will contribute to the reconstruction. Wed Mar 23, 2011: This is my first wood ship model, though I have built several stick and tissue static and RC aircraft and a few plastic kits when I was younger. this kit is the "Build for free" offer through my LHS for the bargain price of $75. As such I have motivation to finish within 6 months (purchased 2/9/11). It is good to be motivated, but I also don't like exploring a new area of my modeling hobby while under time pressure. Other than the draw of "build for free" potentially getting me this kit for free, the other draw was the free practicum by Chuck Passaro. This may not be the best kit or best practicum out there, but it did require a minimum outlay of cash to get started (I already have many of the tools needed).