Johnny Mike
-
Posts
62 -
Joined
-
Last visited
Content Type
Profiles
Forums
Gallery
Events
Everything posted by Johnny Mike
-
Help to assemble AMATI chain plate 4090/05
Johnny Mike replied to Johnny Mike's topic in Masting, rigging and sails
Thanks I think I will just use something else. I thought there was some trick but the trick was on me. -
Help to assemble AMATI chain plate 4090/05
Johnny Mike replied to Johnny Mike's topic in Masting, rigging and sails
I did try anneling. But now it is still so tight a fit it not realistic to assemble without building a fixture for assembly. I just went with another design. Building myself and soldering the assembly -
Cant find this simple chainplate
Johnny Mike replied to Johnny Mike's topic in Masting, rigging and sails
Thanks guys I cant believe I missed this I have ordered from Model Expo before. -
Help to assemble AMATI chain plate 4090/05
Johnny Mike replied to Johnny Mike's topic in Masting, rigging and sails
Thanks guys. I can tell you I tried everything, everwich way and it cant be done. At this point I am convinced it was to be sold as an assembly and something happened. The only way was to spread both ears of the mount and force them back together but with this already formed from half hard brass they just break. I give up and went to making chainplates them myself. -
Some time in the past I aquired the simple chain plate shown here. It is what I need. Cant find them anywhere. Can anyone help.

-
Help to assemble AMATI chain plate 4090/05
Johnny Mike replied to Johnny Mike's topic in Masting, rigging and sails
This is my problem. How do you put this together? Some where in the past I got the assembled unit. I cant rember where. Now when I order the part I get the pieces. Even the picture on the web site I ordered from shows the assembled piece.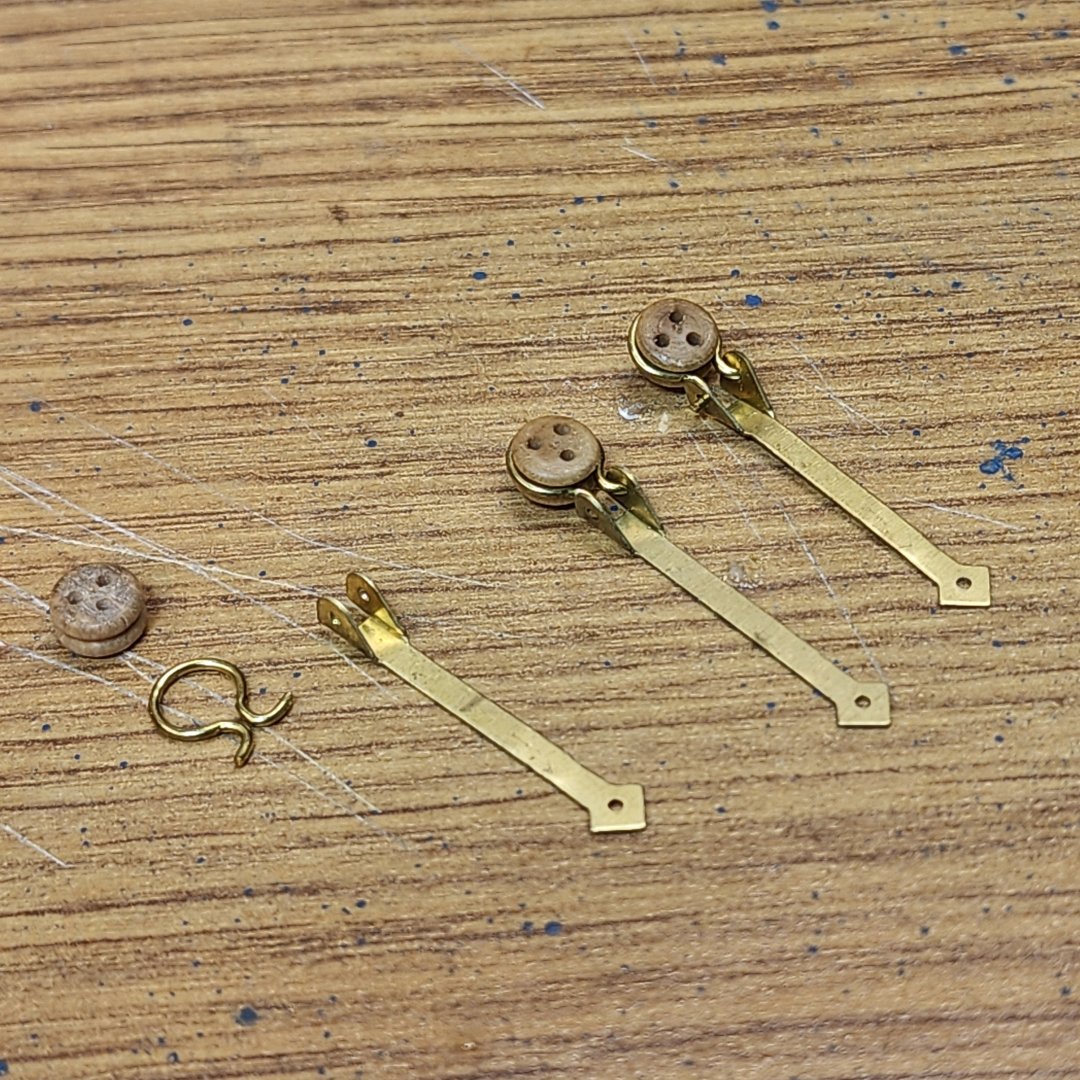
-
I am trying to figure out how to assemble the Amati chainplate assembly #4090/05. I am stumped can any one help? I can not figure out how to get the dead eye into the loop and then into the mount.
-
Surprisingly good and cheap mini tools
Johnny Mike replied to Johnny Mike's topic in Modeling tools and Workshop Equipment
Kurt I want to make sure everyone knows I do not promote or represent these tools and just stumbled across them on the internet and was impressed with their simplicity and quality. The small horizontal disc sander was purchased on line. MXBAOHENG I was surfing around on Amazon and just typed in mini power tools and started looking. I am sure these are Chinese manufactured units so I didn't expect much for $70 but was really quite impressed. They are listed by multiple vendors but search MXBAOHENG as that seems to be the manufacturer or importer. All of mine are this brand. I see you are from the far west Chicago suburbs. I am too.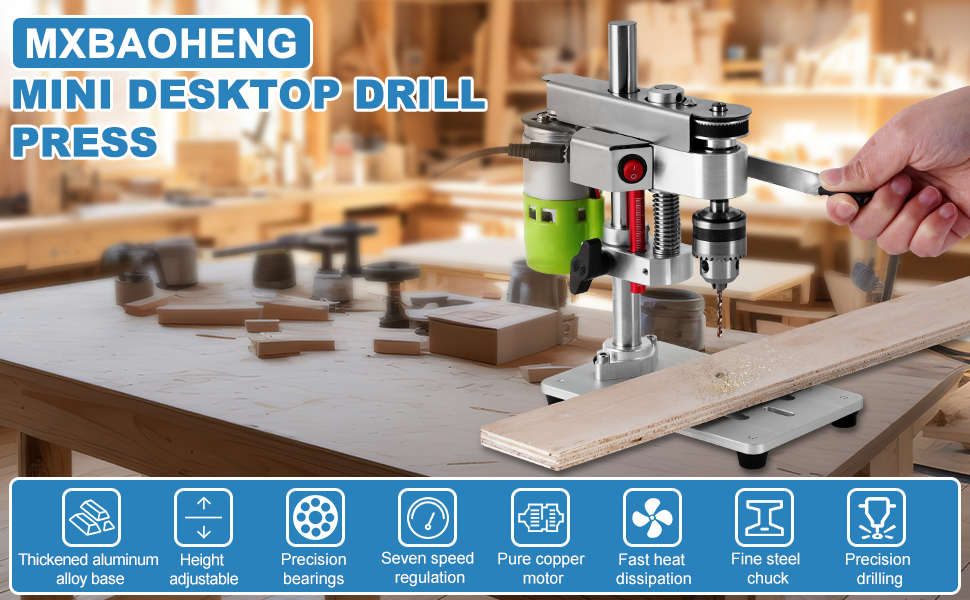
-
Surprisingly good and cheap mini tools
Johnny Mike replied to Johnny Mike's topic in Modeling tools and Workshop Equipment
Ronald-V You did not miss it. I can build almost anything but I am no good at electronic communication. -
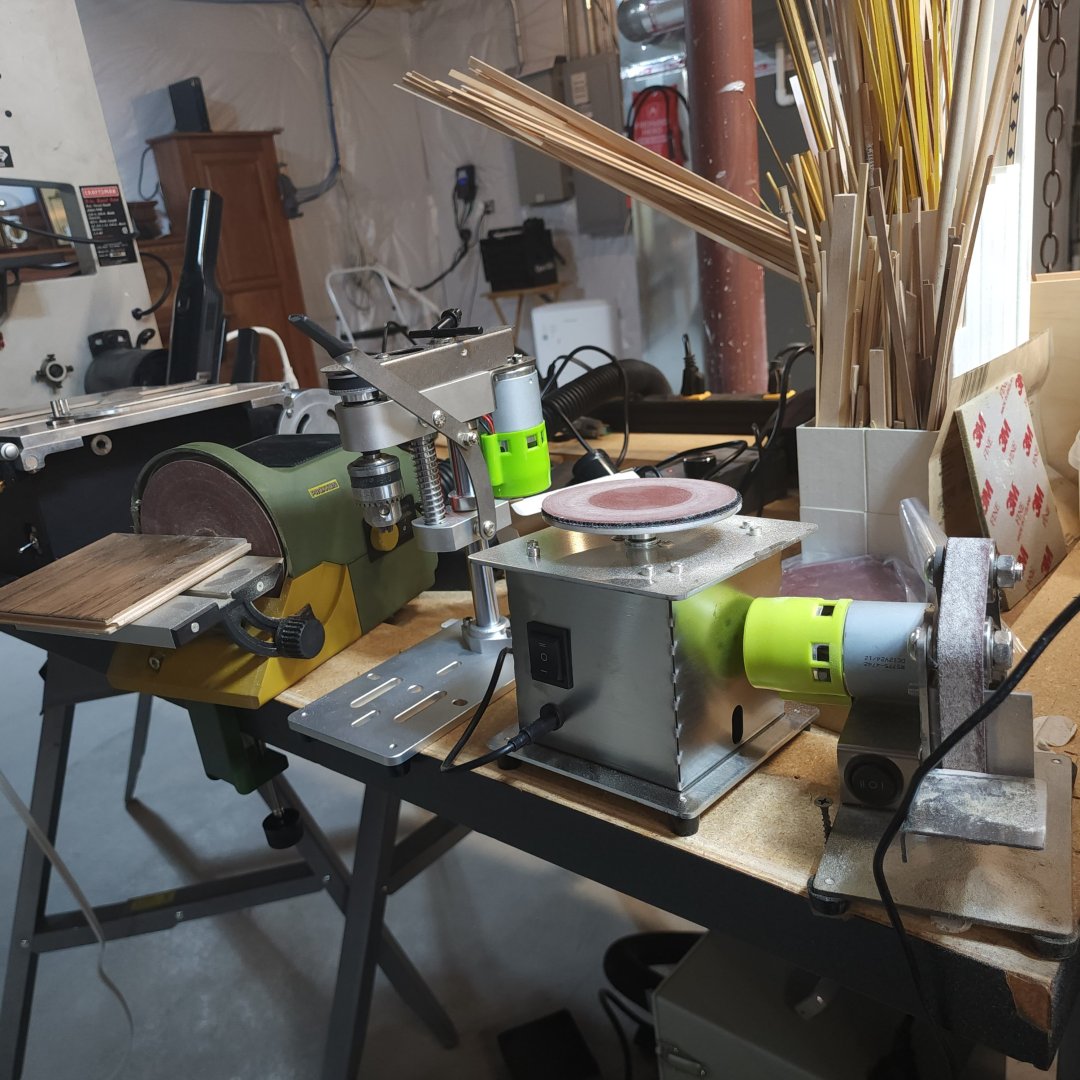
In searching around I can across a mini power sanders that was so cheap it caught my attention. I thought they were probably low quality, poorly made and pretty much worthless to use. As I have a few of these type's of tools. But the belt sander was so cheap, I think about $35, it sucked me in and I bought one. I was surprised at the high quality and fit and finish of the little sander. There are no plastic parts and most parts are high quality aluminum fitted together very well. Good bearings that track the belt and it has a forward and reverse DC motor that is smooth and quiet. I now use it all the time and put my larger sander away. I was so impressed I found and ordered the same type of disc sander and drill press that have the same motor with variable speeds. These are not toys but real work tools. Along side my Byrnes saw they are my go to tools. Hoping Byrnes will be able to start producing their disc sander again is all I need now. In the picture you will also notice a gray box under the bench that is a Dental vacuum that works quite well. It is powerful, quiet and has a variable speed motor. For small dust loads it is perfect and my old shop vack's are in the same place my old belt sander is.
-
Work area pictures only
Johnny Mike replied to Johnny Mike's topic in Modeling tools and Workshop Equipment
Thanks to all who have shared their work space pictures. I check-in occasionally and see new additions. This is exactly what I was hoping for. So many different work areas and tools are really interesting to see. I can see many similarities to mine but also new ideas for me. A picture is worth more than a thousand words. -
Gregory I found it on Amazon. I was just looking for mini sanders or hobby sanders and came across it. Mini reciprocating sander DSPIAE. Found it by accident.
-
Ronald I have the Proxxon sanders also and only use occasionally on a hull if needed. This is much smaller and is used where you would use sanding sticks and very easy to control.
-
I have so many different type of sanders my wife makes fun of me. But I just found one that is different and is great for specific jobs I have other sanders but none are straight in and out motion. I just started seeing them on the internet, and while I was skeptical about them because they were so inexpensive, I bought on. I was happily surprised. It is very light duty but exactly what I was looking for. Rechargeable on my computer with many sanding blocks for getting into very fine detailing. The sanding motion is exactly the plunge motion I wanted. Squaring up and finishing gun ports is just one ideal use for this sander. It also came with sanding paper that is pre cut to fit the different tips. .

-
Tapering Masts and Arms the easy way
Johnny Mike replied to Johnny Mike's topic in Masting, rigging and sails
Jan Thank you so much for taking the time to show me the details on this. I am surprised buy the complexity of the mast design to require this complexity. I can guess the reason is that strength is required in a certain direction. To design and make this ellipse shape on the long taper is truly masterful. -
Tapering Masts and Arms the easy way
Johnny Mike replied to Johnny Mike's topic in Masting, rigging and sails
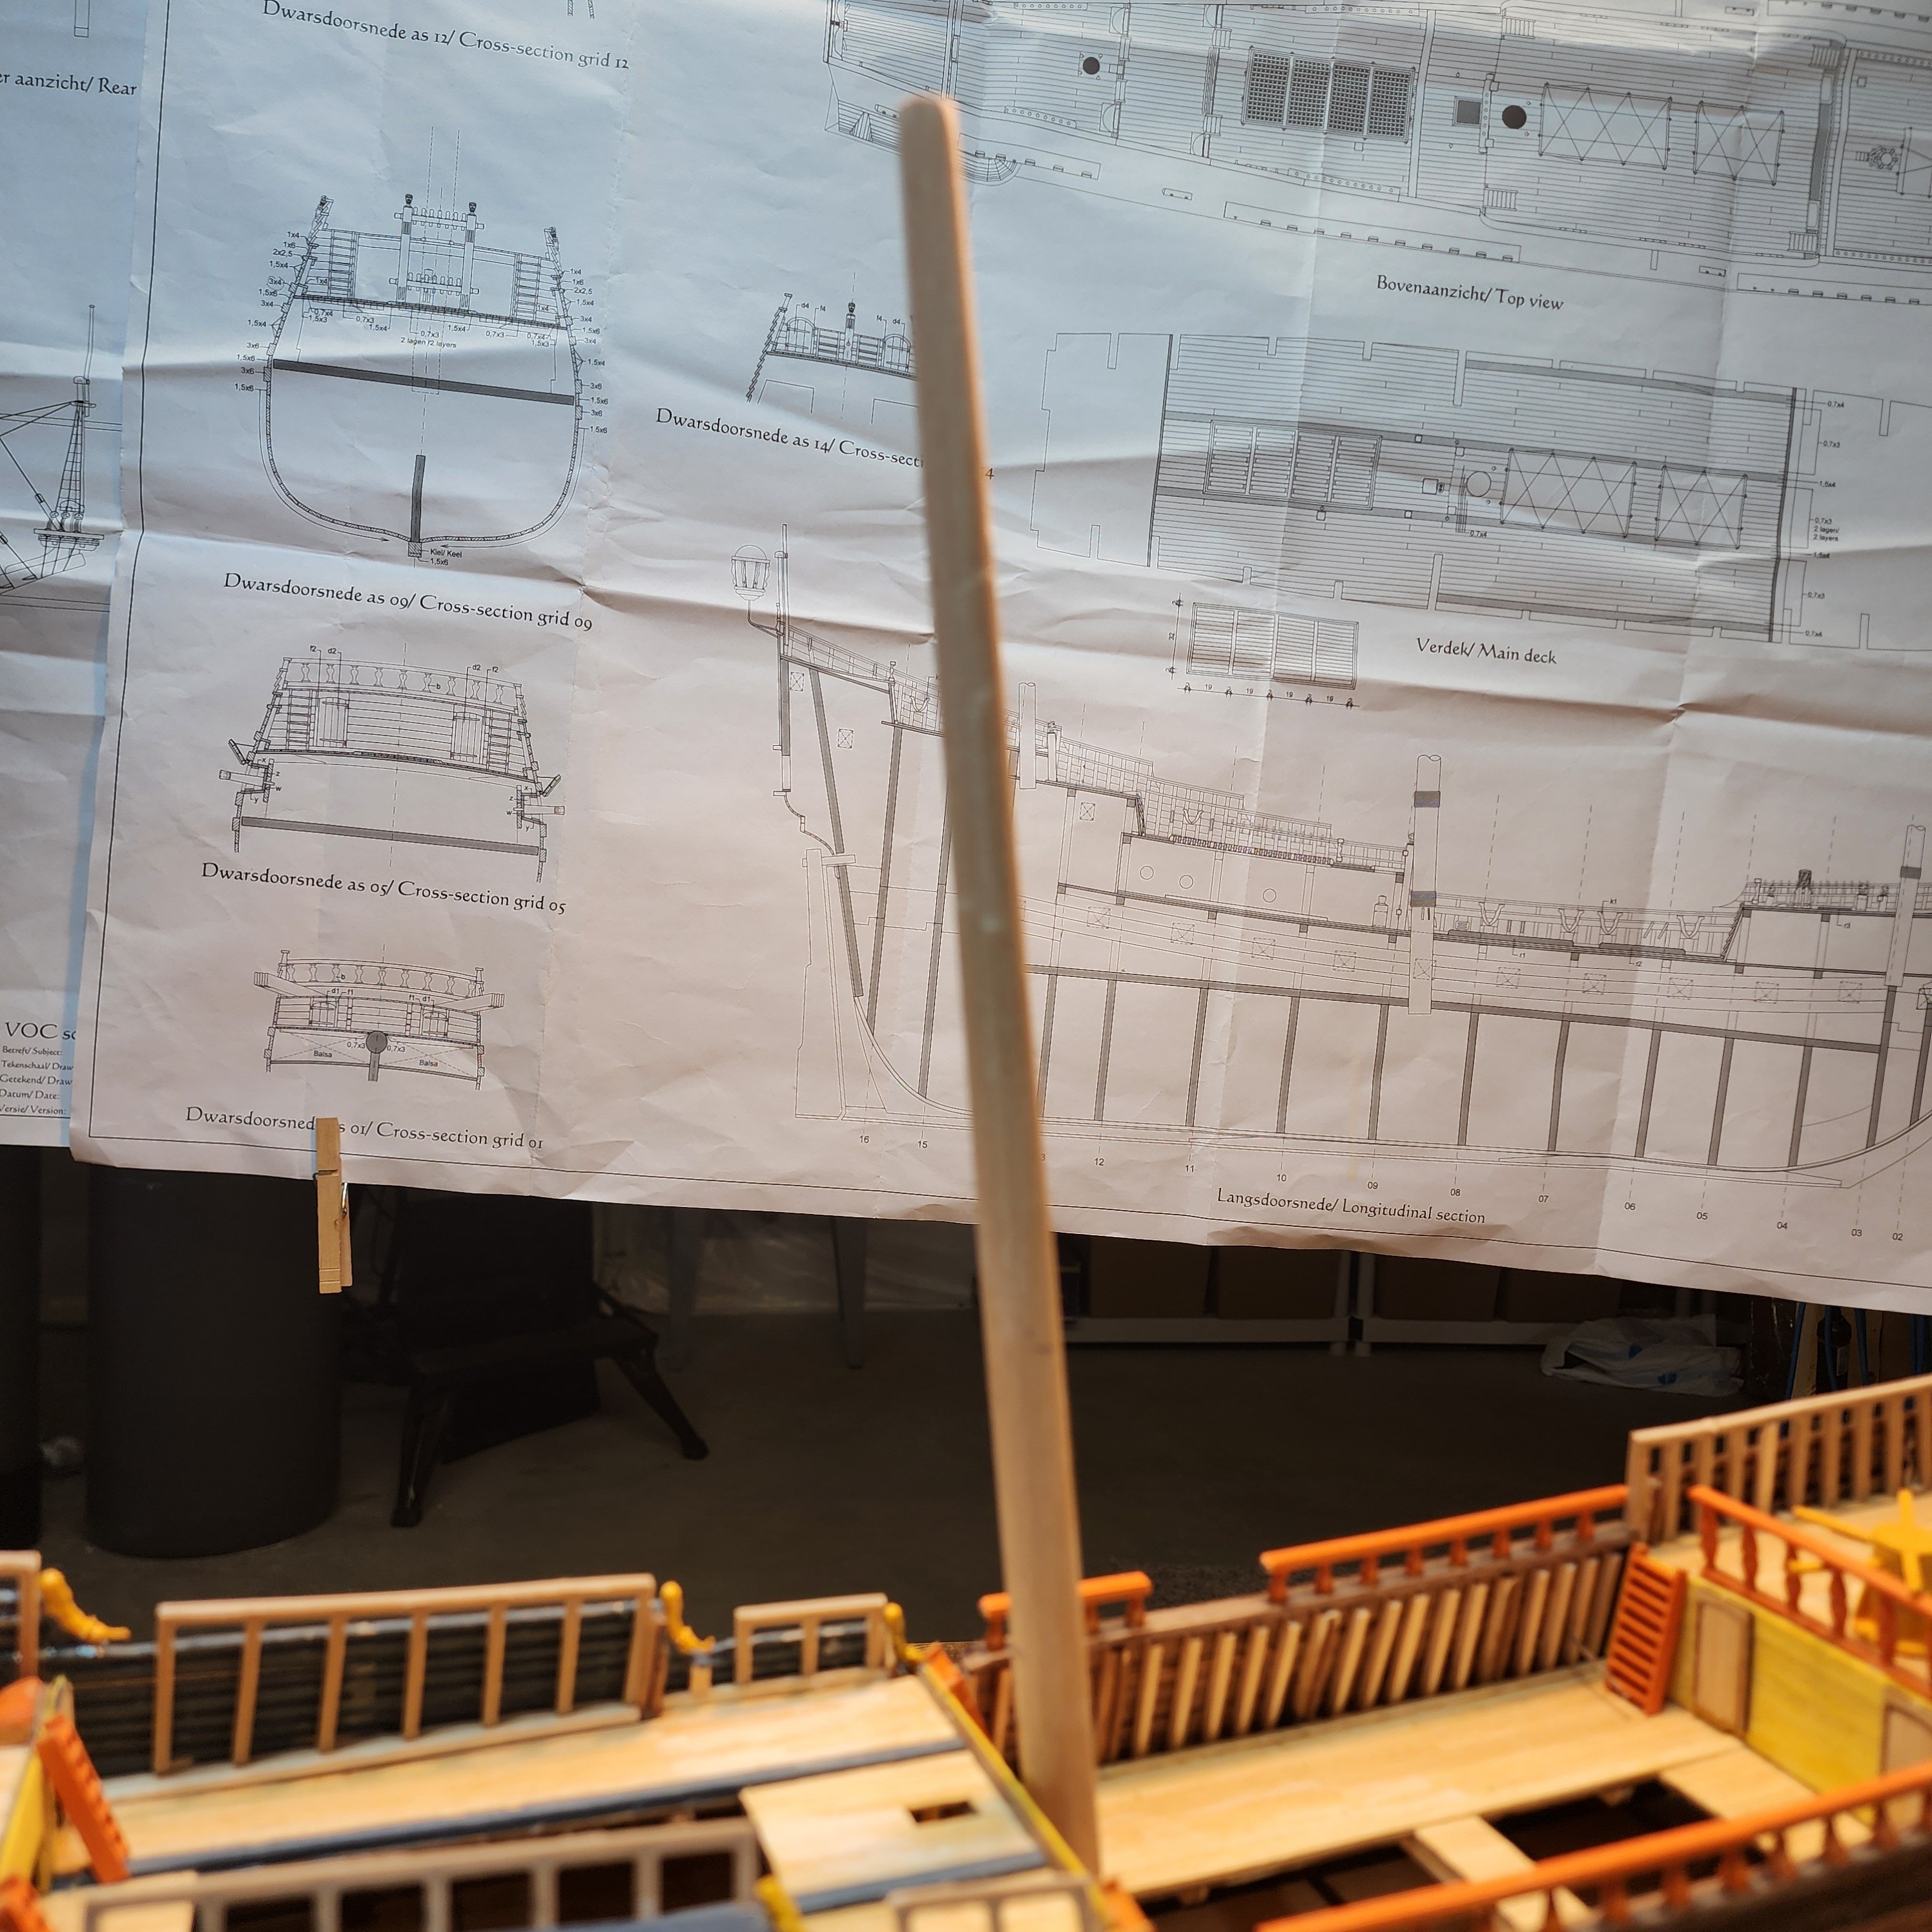
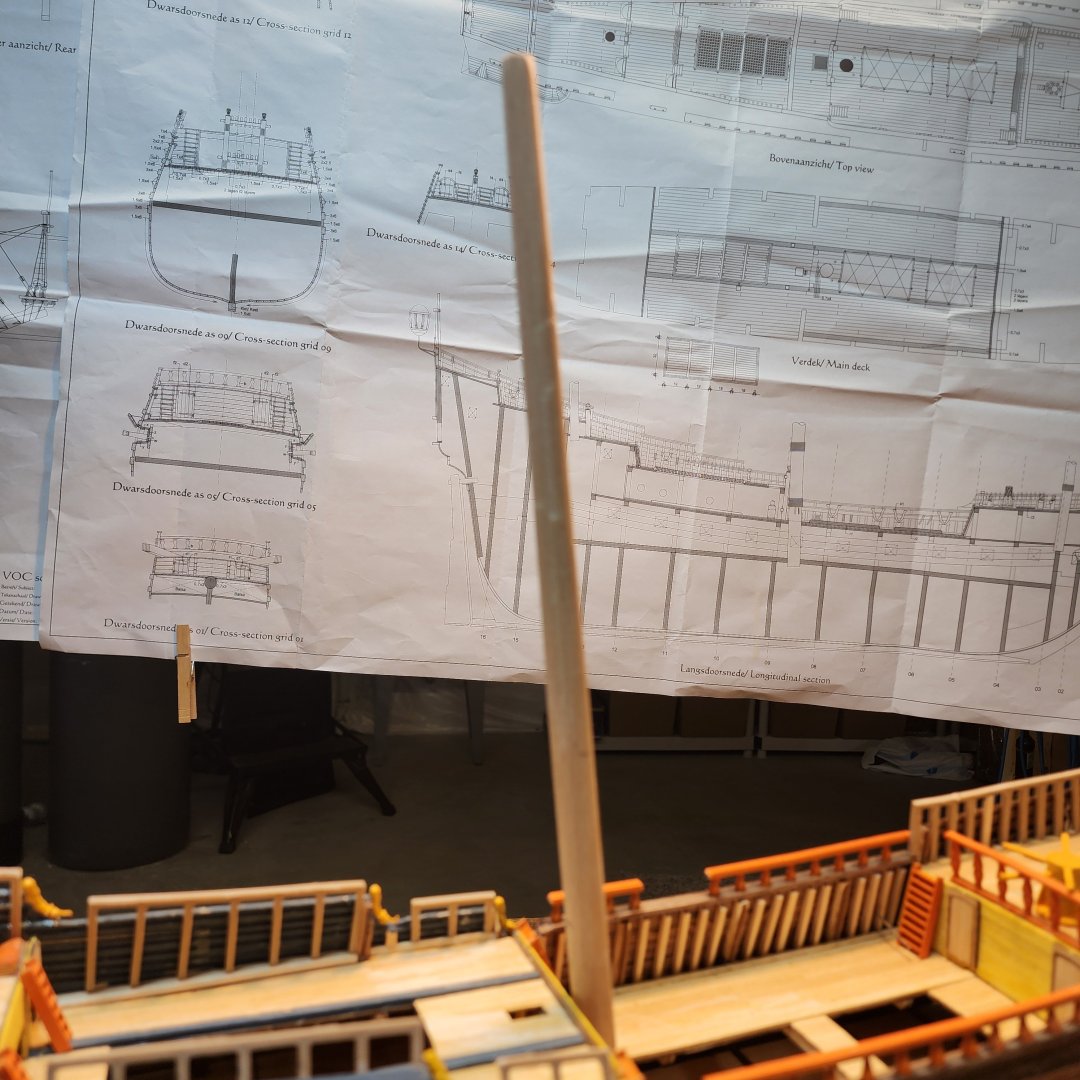
Jan Attached is a screen shot of my PC. I do an Auto cad or Solid works drawing of some components on my builds. I do this so I can capture more detail than is on the original plan. Doing this on a 1/1 build scale is very helpful. I also use the 3D STL files to 3D print parts if needed. I did this with the turnstile ladders and some hatch covers. I found a wood infused filament that is very authentic looking. I want to understand the taper you described. In the lower left, in blue, is the basic shape of the Batavia main mast. The top one is straight sided as I have now and the lower one is the taper I believe you describe. Is that correct? Thanks again for your input.
-
Work area pictures only
Johnny Mike replied to Johnny Mike's topic in Modeling tools and Workshop Equipment
Thanks to all. This is exactly what I was interested to see. I review the pictures occasionally and seem to see new ideas every time I do. Thank you for inviting me into your work area. -
Tapering Masts and Arms the easy way
Johnny Mike replied to Johnny Mike's topic in Masting, rigging and sails
Jan Thanks for the information. I wish I had someone to translate Kettnigs book into English. I refer to this book often. His book has a lot of detailed info. And yes the mast head is quite a work of art. My plan is to shape the head piece separately to get it proportioned then position it on top of the tapered mast with a pin and glue. A tight joint should make it look like one piece. I may do the same for the spars. I built the Prins Willem a few years ago and followed your build. It was very informative. I am now building the Batavia. The Kolderstok plans are quite accurate. YT Great idea. I have an Enco lathe. I can fashion a sanding block and bolt it to the tool holder to sand tapers. Have the block pivot to change angles for all small arms. -
Tapering Masts and Arms the easy way
Johnny Mike replied to Johnny Mike's topic in Masting, rigging and sails
I will keep that in mind as I go to smaller yard arms. The spacer is a good idea also. I found using 80 grit works well to get good stock removal on larger diameters and using 120 grit on small diameters gives finer control. -
Tapering Masts and Arms the easy way
Johnny Mike replied to Johnny Mike's topic in Masting, rigging and sails
Dr PR In theory you are correct but in reality you can use the whole wheel. I started out with a short taper and needed a little longer one, gave it a try and it worked. Working the dowel back and forth gently past center smoothed everything out perfectly. I was a bit skeptical at first but found a perfectly consistent taper, 8 inches on a 9 inch wheel. This may not work for every one but it did for me. I started building tall wooden ships at 16, I am now 77 .My advice to younger builders is "You don't know what you can't do until you can't do it". My builds are usually Dutch East India Company ships so my masts and arms have single tapers from the research I have done. I have a few books on Dutch ship building from the VOC period illustrating masts and arms in detail. The book 'Prins Willem' by Herman Ketting goes into detail about this subject and shows a single taper as does A B Hoving's books. I had the privilege of traveling to the Netherlands a few times visiting the Maritime Museum, the Reichmuseum and the Bataviawerf, having a chance to visit a few recreations of Dutch ships and meet the historians giving the tours. One thing that is most interesting to me is the construction details at the time the original ships were built. I was told some exact detailed are not known because records have not survived. So we may really not know all the exact details of how ships of this period are built. -
Tapering Masts and Arms the easy way
Johnny Mike replied to Johnny Mike's topic in Masting, rigging and sails
The first taper I did was 8" long. I use the complete wheel face. I just did a 5 mm yard arm. I put piece sheet of thin wood on the table up against the wheel so no gap. Of coarse everything has limitation. -
Tapering Masts and Arms the easy way
Johnny Mike replied to Johnny Mike's topic in Masting, rigging and sails
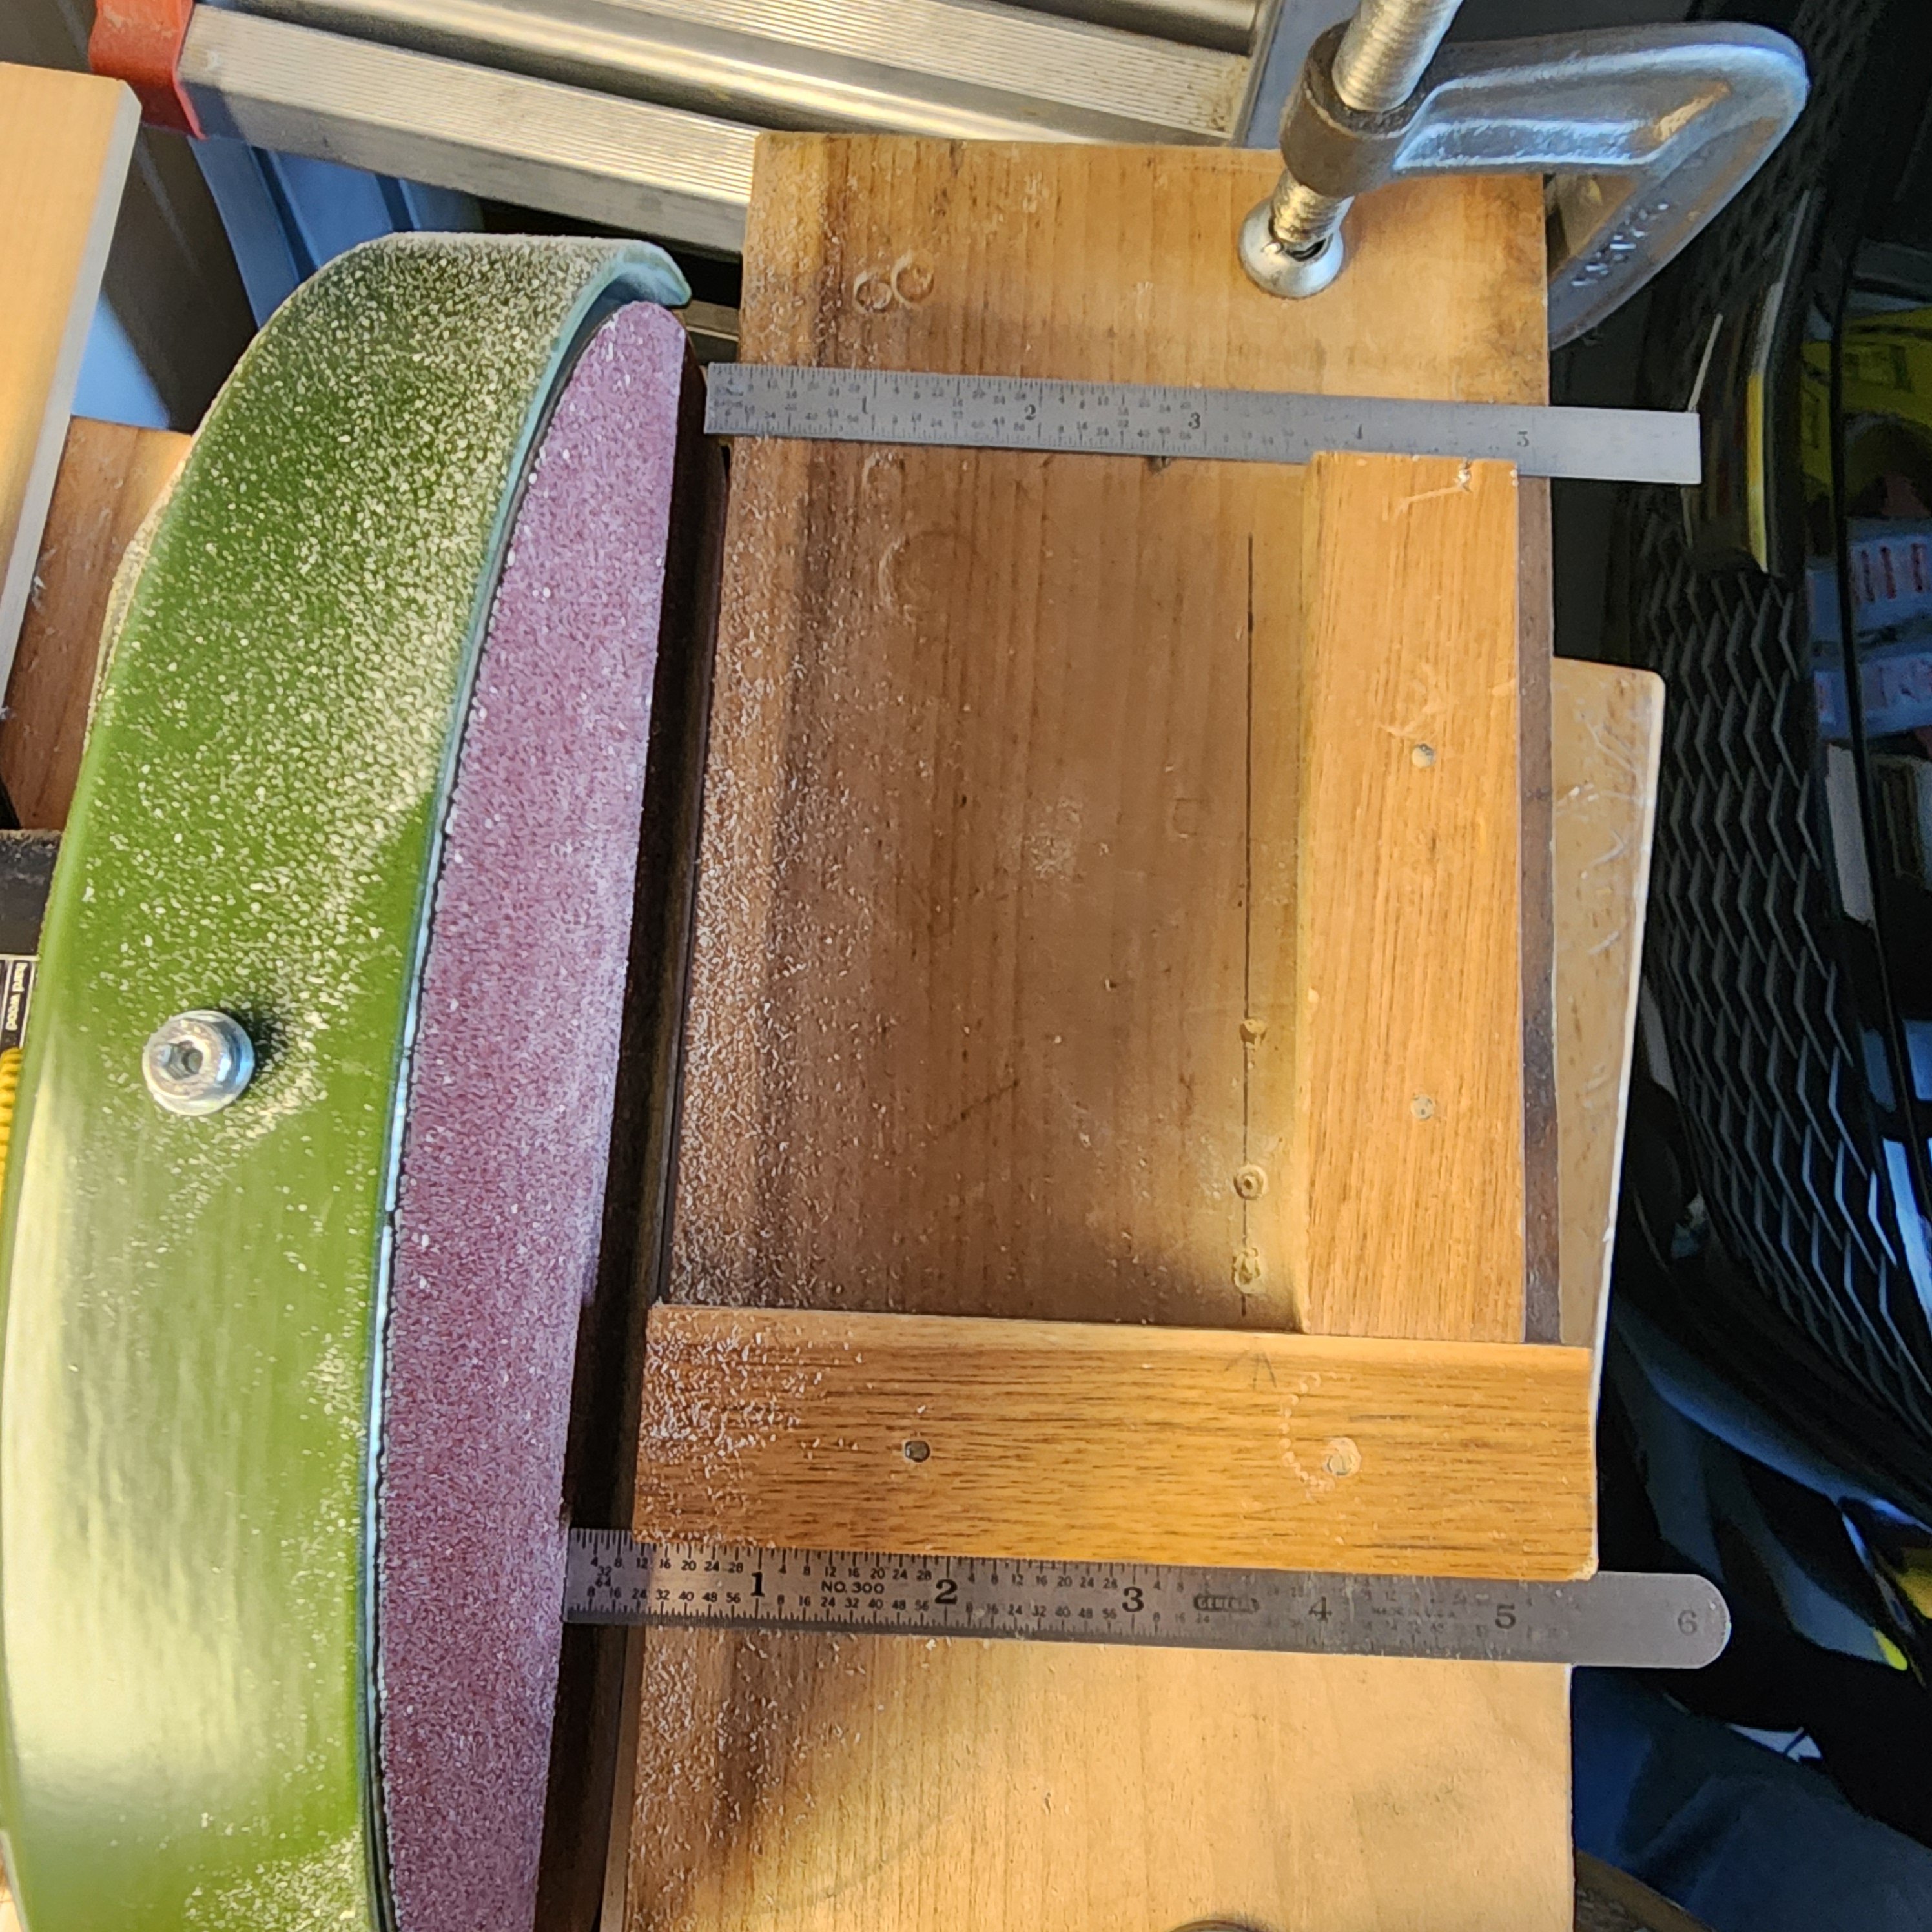
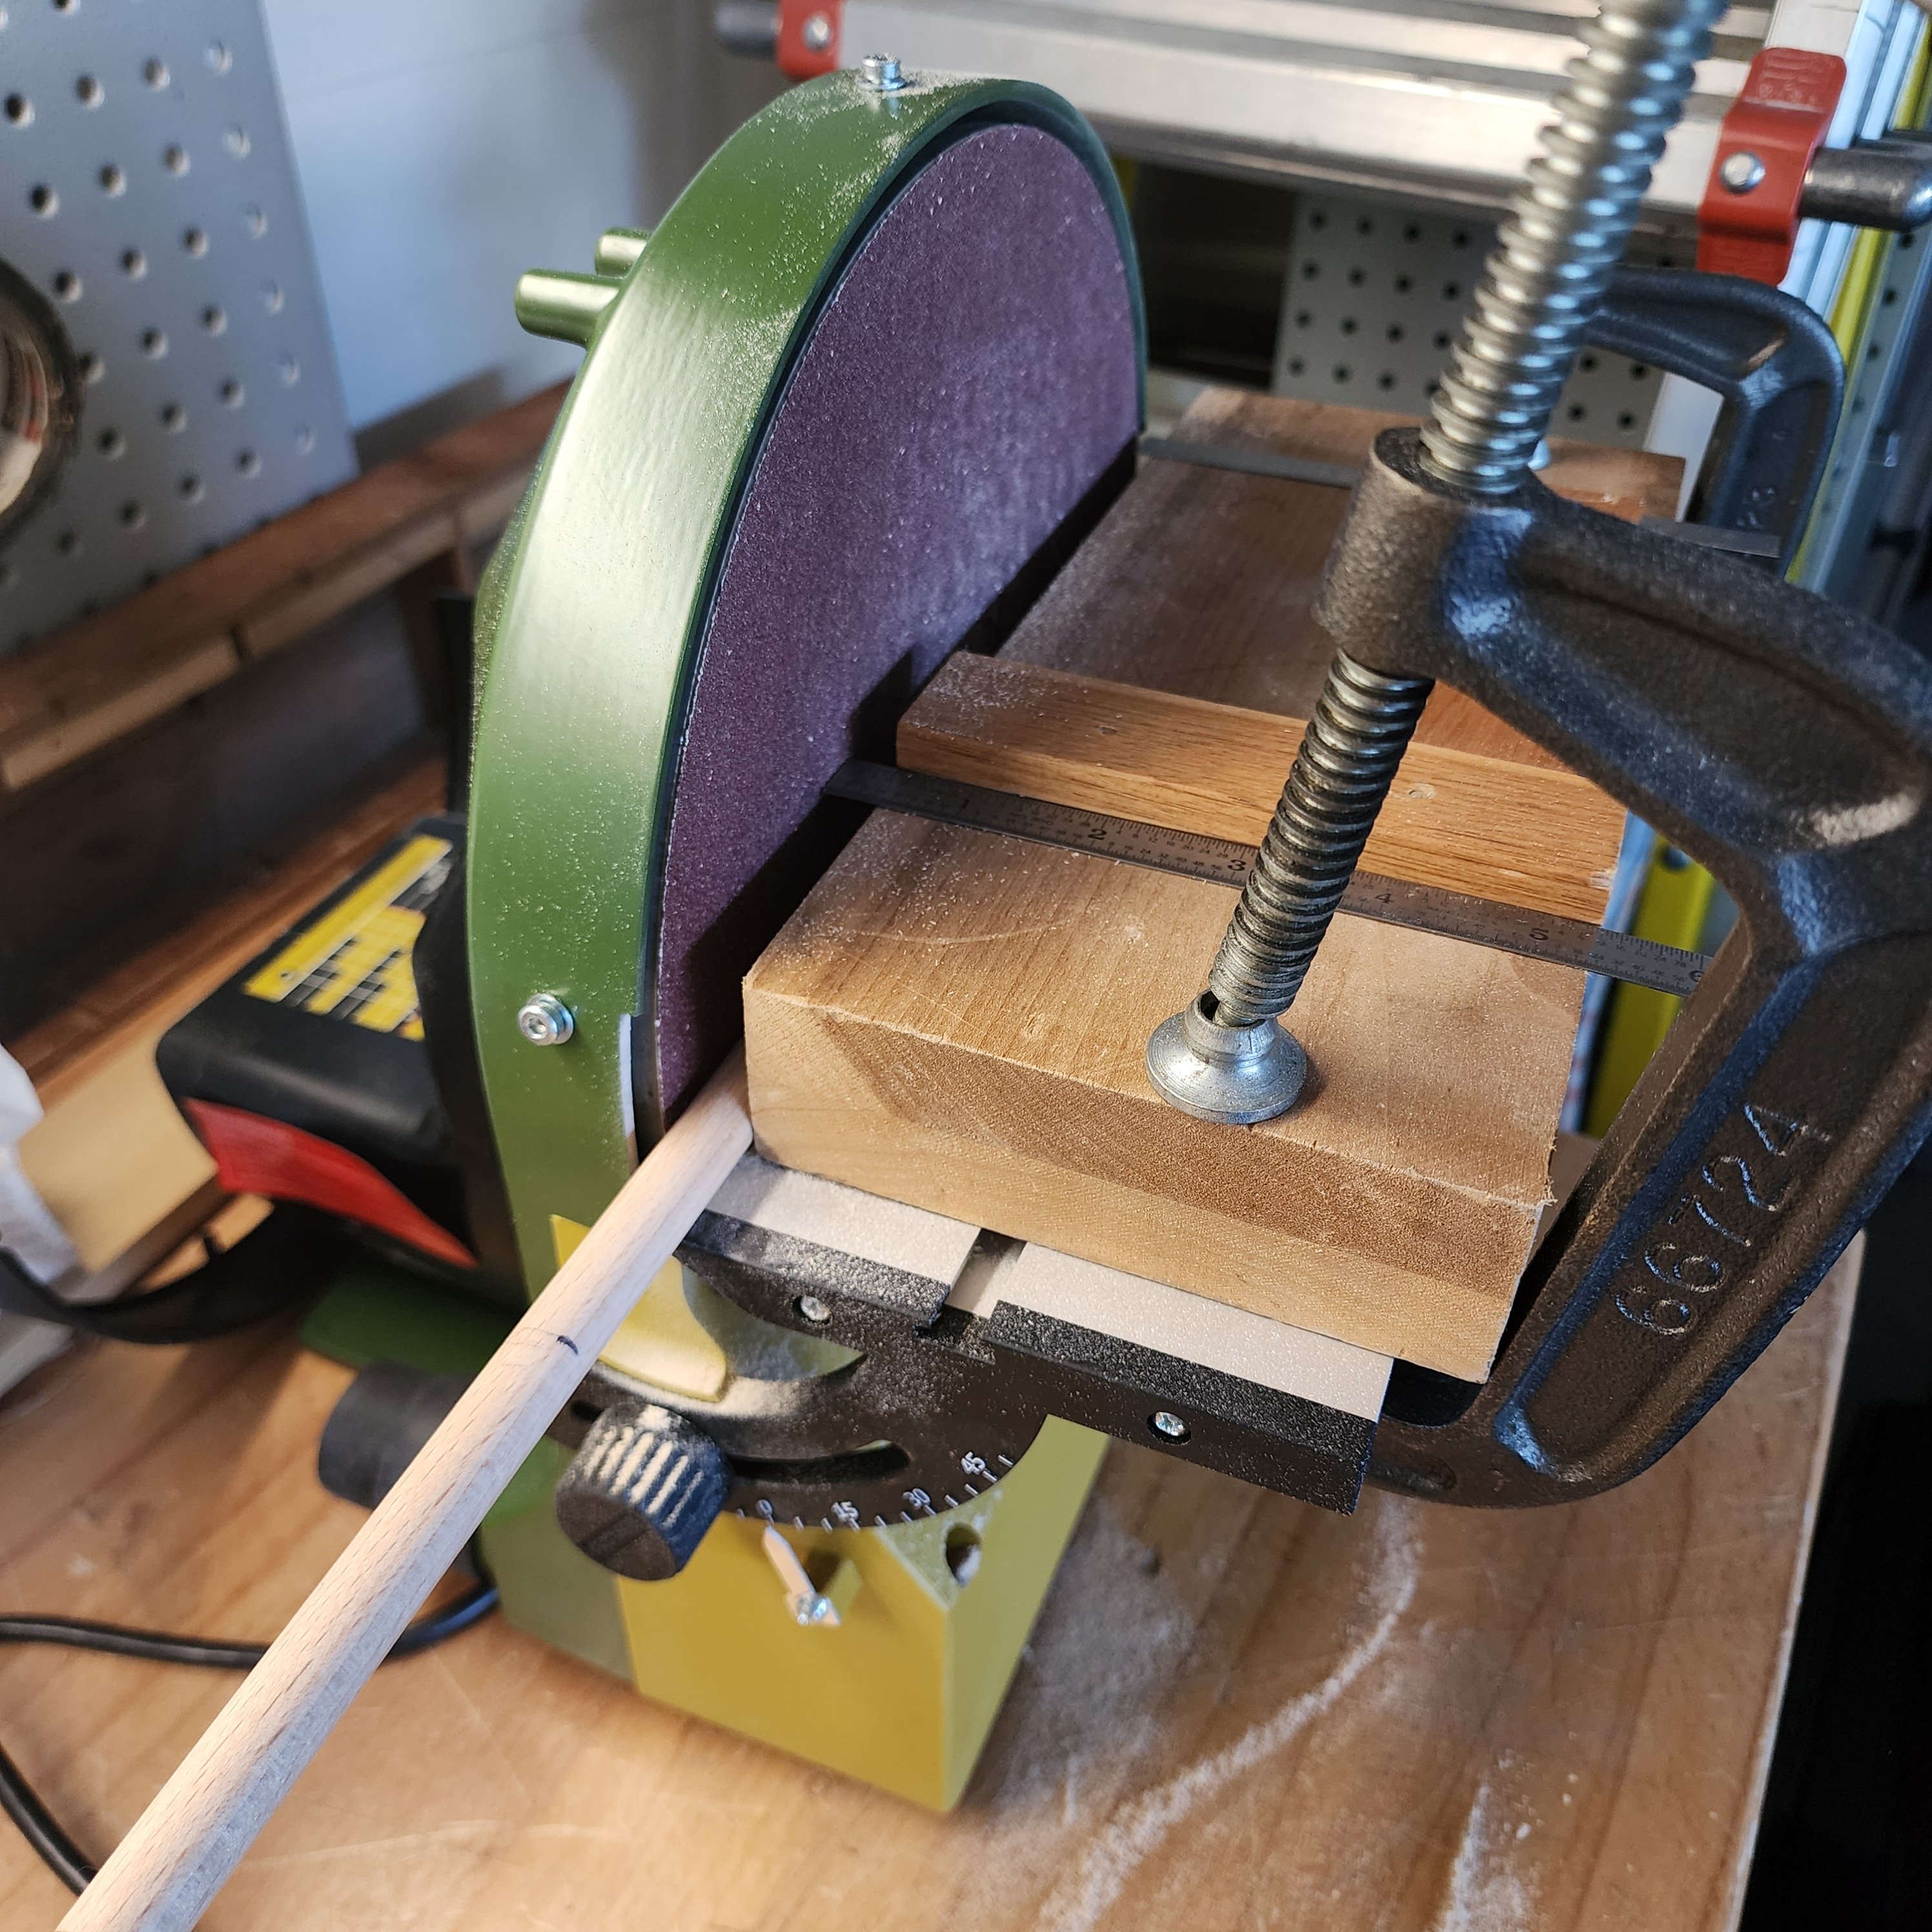
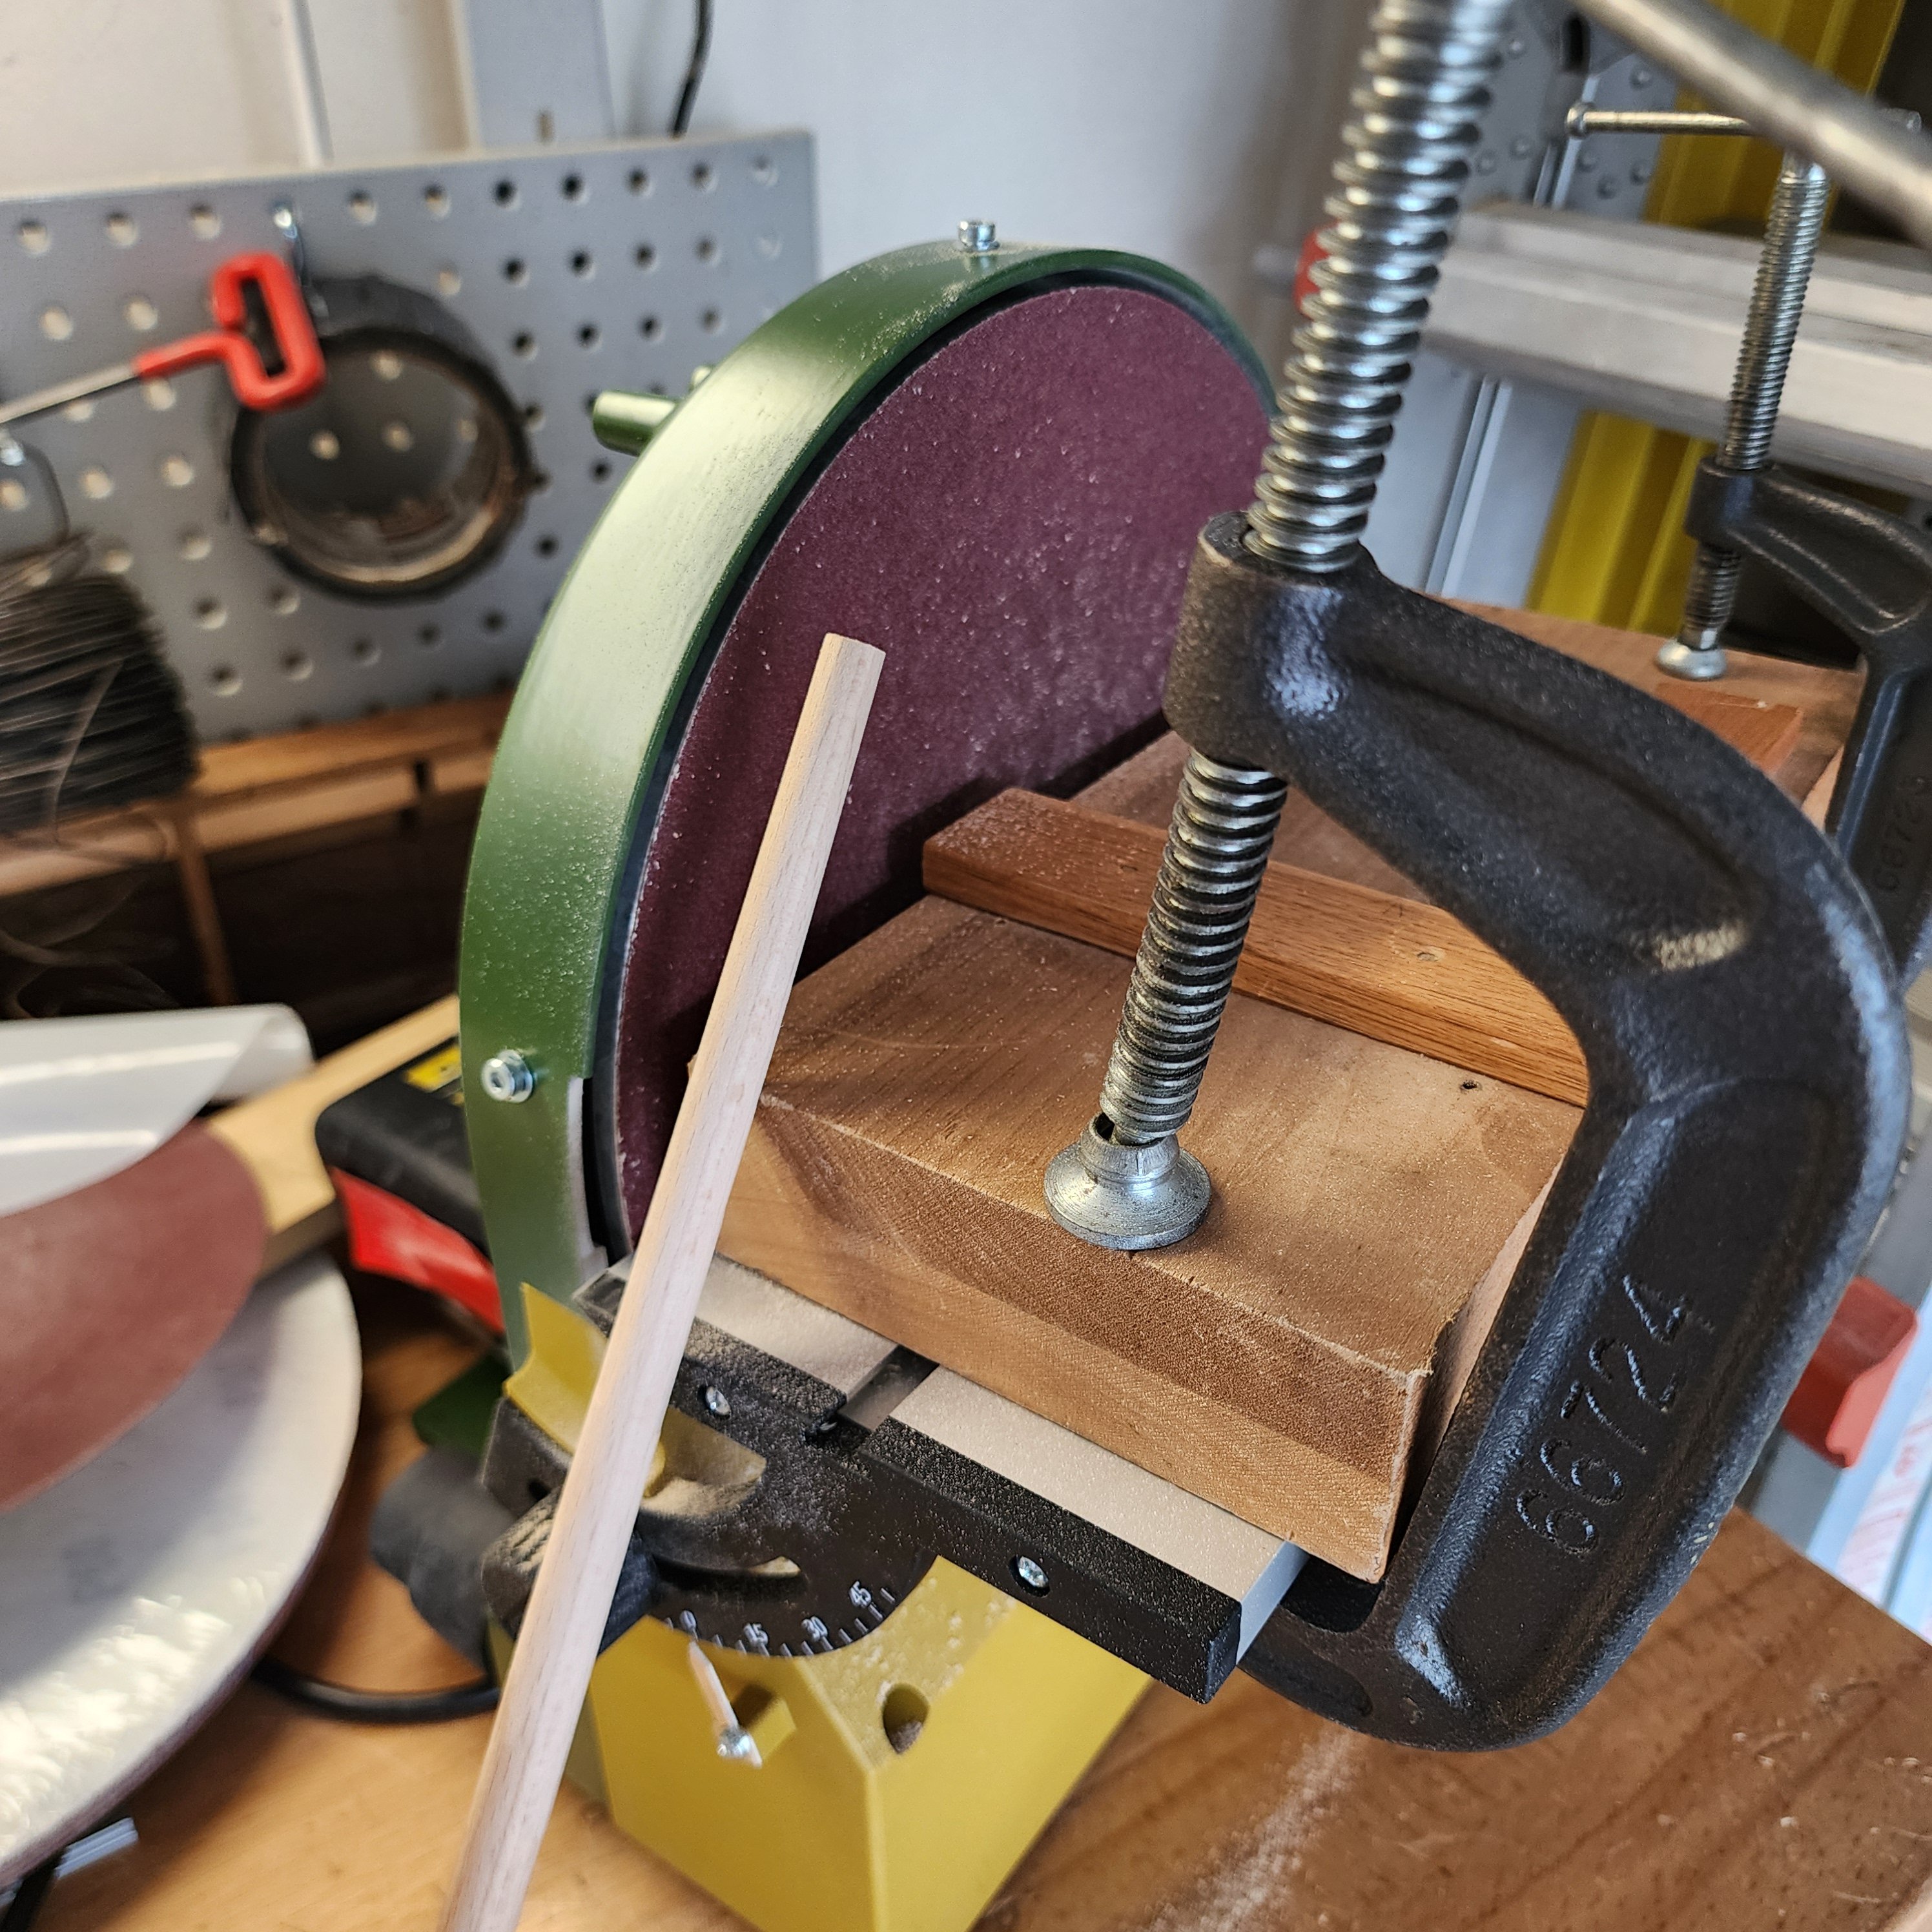
Thanks for all the comments. To answer a few questions. The block I was using is just a start to try. More defining will be done. I think this is even simpler and better than you might think and if you try it you will see how easy it is to get really professional results. Attached is a picture with two scales. If you measure the gap between the block and wheel you can set up for the exact finished diameter and it exact every time. It is easy to change angles by simply repositioning the block. It is east to repeat angles and for yard arms both ends are exactly the same. For pros this may be easy but a novice like me has a difficult time getting matching angles sometimes, and it is time consuming. Another picture shows the mast in the sanding position. I thought I might have a feed problem doing it by hand while turning the mast but it was surprisingly easy and was no problem. You just have to be firm and steady with your grip and feed and have the sanding disk do the work. Don't force it. I was thinking I might have to add something to help turn the mast while I fed but found I did not need to. The first mast I ever tried is in the picture and did 3 more yesterday. All are spot on. I found it best to use 80 grit paper. That sounds aggressive but needed to get the job done. It is easy to use 220 by hand to finish.

-
All the information I have seen on tapering dowels for masts and arms is by a lot of hand sanding or turning. I have done it this way myself and it was time consuming and I had to guess at the taper for continuity. And being a novice it was difficult to get matching results. I tried something that works to get a consistent taper quick and easy. I took my disc sander and clamped on a guide to the angle I wanted and simply hand fed the dowel in while rotating it by hand. I had a perfect taper from 12mm diameter to 9mm in diameter in 8". Exactly what I wanted in just a few minutes. Maybe this is common practice for the expert builders but being a novice builder is was an amazing discovery for me.

- 26 replies
-
- 15
-

-

-

-
To E Sounds like you have me beat with bad luck. I agree the brain is rebuilding but it is slow and you have to force it to work. I continue to improve even after three years. I plan to continue to build ships and encourage you to do so the same.
-
Work area pictures only
Johnny Mike replied to Johnny Mike's topic in Modeling tools and Workshop Equipment
Thanks everyone. I like to see what others are using and especially the tools they use and the layout. Very informative.