DJPurney
-
Posts
21 -
Joined
-
Last visited
Content Type
Profiles
Forums
Gallery
Events
Everything posted by DJPurney
-
Would a British cutter such as the Alert or Diligence display a commissioning pennant at the topmast?
-
Thank You.
-
The only problem with the French forums is they are in French! This presents a problem in the midwestern United States. Trying to recall my high school French language classes I can make out maybe one word in ten and those classes did not cover nautical terms. I think I am going to go down to my workbench and follow the instructions and photos. Thank You to all for your comments and suggestions.
-
The more information we get the confusder I become. Thank you Tony for the history. At least we know it was a real ship.
-
Amazon offers it for $322.00 (shipped from France) or 95 euros straight from the museum. Yikes.
-
All I can find is that according to Corel it is taken from a model in the French National Maritime Museum.
-
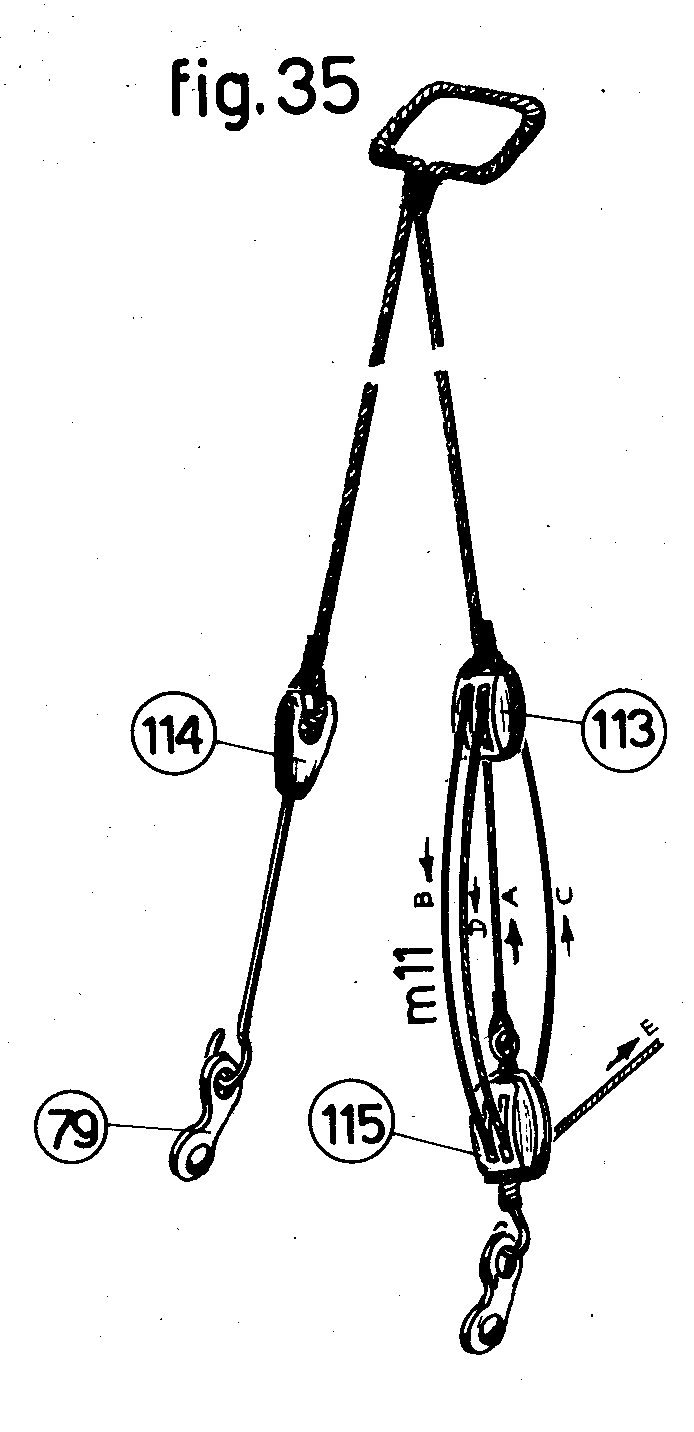
I too have wondered how some of these lines would be adjusted. I wonder if the stretchers are supposed to be some sort of turnbuckle, just poorly modeled. As for the rigging of line 113, for the couple that I did before I posted my question I did reverse the line and put the hauling end at the top. How else could it be secured to a belaying pin without chafing on the rail? Either that or as I suggested earlier it should be hooked to an eyebolt in the deck then belayed. Confusing.
-
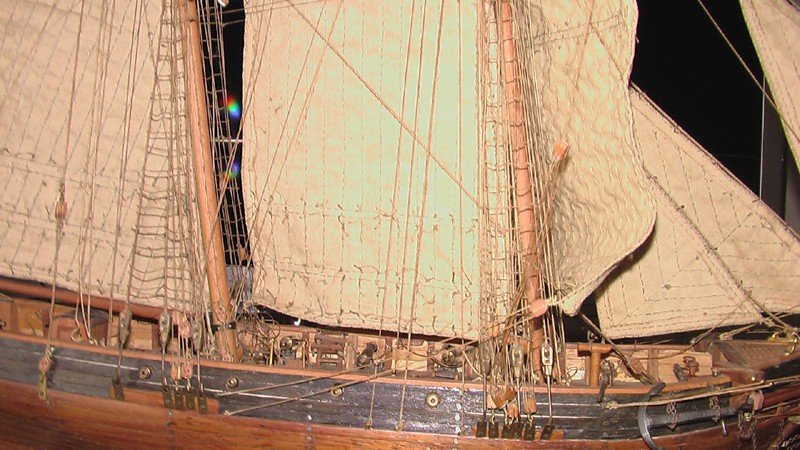
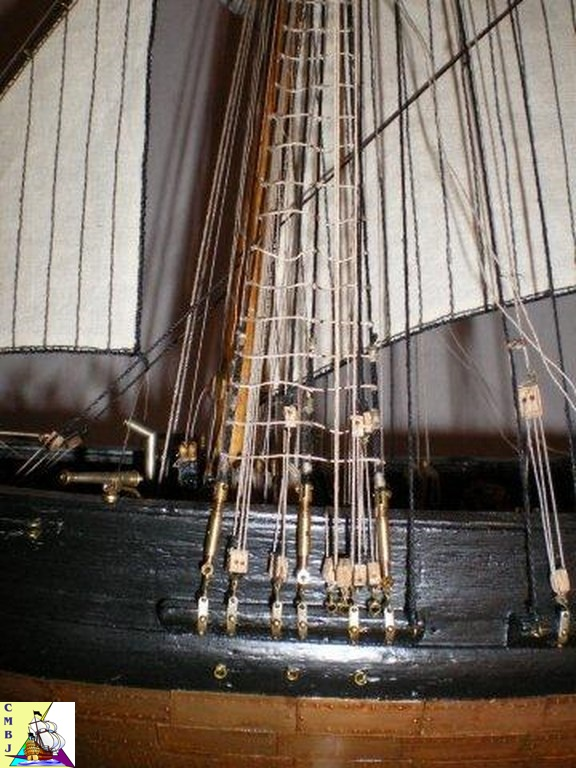
This makes a lot of sense. If the blocks are secured to the pin rails those lines would be inside the fixed shrouds and not fouling the ratlines. Is the instruction diagram wrong? It is confusing as is the textual instruction. Thanks. I found several internet photos of completed La Toulonnaise models and it does appear that the modelers attached the blocks to the outside of the hull. One fellow substituted turnbuckles for the stretchers.
-
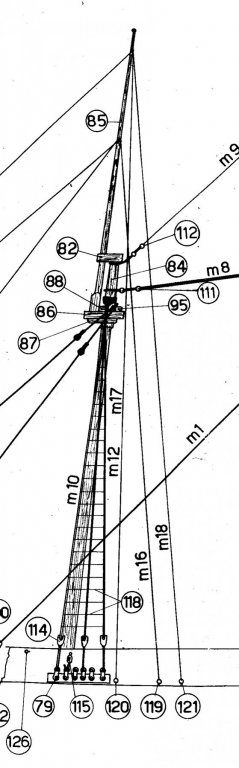
Corel calls part #114 stretchers, deadeyes are not used on this ship. The stretchers are in turn attached to what Corel calls links, part #79, that apparently do the same job that chain plates would if deadeyes were used. The block, part #115, is attached to another link and the free end of the line goes over the rail then to a belaying pin? Doesn't this give me what amounts to two shrouds? The instructions indicate that the second shroud is set up in an identical way to the first but the pulley is attached to the third link and the other end is attached to a stretcher which is in turn attached to the sixth link. Wouldn't this give me a total of four shrouds? Or does a pulley get attached to one side of the ship and the line get attached to a stretcher on the other side?
-
I am baffled. This is Corel’s La Toulonnaise. The instructions for the shrouds are about as clear as mud. Figure 35 shows how the shrouds are attached to the ship. The second pair of shrouds attaches to the third and sixth link. Where does the middle shroud go? It is not mentioned in the instructions. If I understand the instructions each side of the lower mast will have what amounts to six shrouds. Or do the pulleys attach to some point inside the bulwarks or to a belaying pin? Can anyone help clear this up? Don Purney


-
I have treated individual copper plates by holding each plate with tweezers and holding it for just a couple of seconds in a flame then tossing it in a pie tin to cool. You could try quenching in water for a different effect. Tedious but it works. You can't do this with copper tape because of the adhesive backing. The plates come out a variety of darks that looks attractive but not realistic. In sea water the copper plates turned green, much as a copper roof looks. Best of luck Don
-
Paper shrinks and expands with temperature, humidity and so on. As long as the laser cut parts fit I think you will be ok. Use the scale printed on the plans to measure off of the paper and a real ruler to measure the laser cut parts
-
Archival means PH neutral or at least no acids. Over time (years) acid will attack the surface that was treated. Artists use archival papers, mat board etc. so their paintings will last. It is the ink that you use that should be archival or there are archival markers available at art supply stores and web sites. I think you would be fine with a good quality ink. I used magic marker on deckboards 30 years ago and there is no sign of failure of the materials or glue. Try an art supplies store if there is one in your area or try the www.DickBlick.com art supplies web site or www.Jerrysartarama.com They both cater to artists. www.dickblick.com/markers/archival
-
Amati Riva
DJPurney replied to lambrakos's topic in Building, Framing, Planking and plating a ships hull and deck
Perhaps water based contact cement or cyanoacrylate (crazy glue), epoxy -
Glueing problems.
DJPurney replied to iceblue's topic in Building, Framing, Planking and plating a ships hull and deck
Have you tried contact cement? You have about 10 minutes working time. Humidity doesn't affect it. Elmers and Weldwood are two brand names. -
Planking adhesives
DJPurney replied to acrodave's topic in Building, Framing, Planking and plating a ships hull and deck
P.S. I apply glue to an area that I can plank with 5 strips or so as well as applying glue to the back of the planks. Working time is 20 minutes or so. This allows lots of time to get an area done and "painting" on glue for the next 5 planks takes only a few seconds. Perhaps you could buy a small jar or two and experiment until you find something you like and can develop your technique. Keep the lid closed when not actually dipping the brush. The problem with this stuff is that the bottom 1/4 or so of the jar starts to gel and can't be used anymore. I buy small jars and they last quite a while. -
Planking adhesives
DJPurney replied to acrodave's topic in Building, Framing, Planking and plating a ships hull and deck
I have used Weldwood contact glue (available in hardware stores) to plank a solid hull model and a plank on bulkhead second layer. The first is now 25 years old and the second about 12. Nothing has shifted or come loose. I have also used Weldwood to glue on individual copper plates on two models and only two or three out of hundreds of plates have come off after 25 years. I have also used other brands of contact cement (that's what it is called on the jar) over the years for other applications and am convinced that the wood will break before the joint will fail. Elmers makes a contact cement that is water based. I have not tried this. The stuff I am talking about comes out of the jar as a yellowish syrup that is applied to both surfaces with a brush and allowed to sit for 10 minutes or so. Take care to align the parts correctly from the start. You will never get them apart later for a re-do. Clean up is with mineral spirits. -
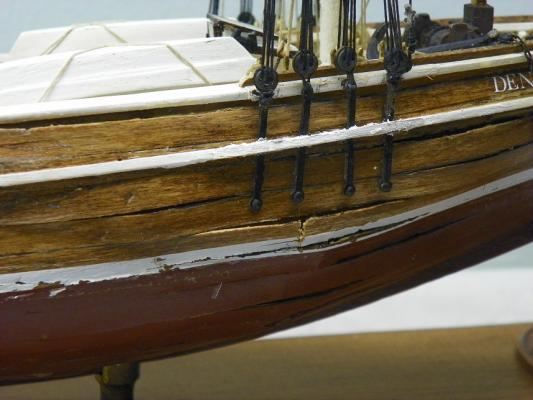
One of my planked, solid hull models is a fishing schooner built 25 years ago from plans in an issue of "Wooden Boat" magazine. I carved the hull from (and here is where I screwed up monumentally) a piece of treated 4x4 lumber left over from a fence post. The model turned out well but in time (10 years?) the planking began to separate from the hull. I don't know if the problem was that the wood was treated or still too "green". This sort of delamination is in several spots on the boat.

-
I can understand why we would want to build a plank on frame model. In some ways it might feel as if we were building a 1:1 scale ship. We can leave portions un-decked or un-planked to show the interior detail that we worked so hard on. Plank on bulkhead though makes me wonder. Once the first layer of planking is on what we have is almost the same as a solid hull though lighter in weight. Yes you have to do some final shaping to the pre-carved hull but is that really any different than gluing up the bulkheads. Neither is realistic. You can plank a solid hull model if you wish; witness Chuck Passaro's Sultana practicum. I read somewhere that Model Expo is transitioning its kits to POB and in the process upgrading the kits and in some cases changing the scale. What they wind up with is a brand new model I have built POB and solid hull and have planked two solid hull models. I am just curious.