-
Posts
727 -
Joined
-
Last visited
Content Type
Profiles
Forums
Gallery
Events
Everything posted by gak1965
-
Thank you! I have a small lathe so that should be doable, albeit with a lot of practice. As a general note, I've looked through your Tennessee build, which is amazing. I have learned that when I hear someone here say my "humble", "okay", "acceptable", etc. around here that I should expect to be astonished!
-
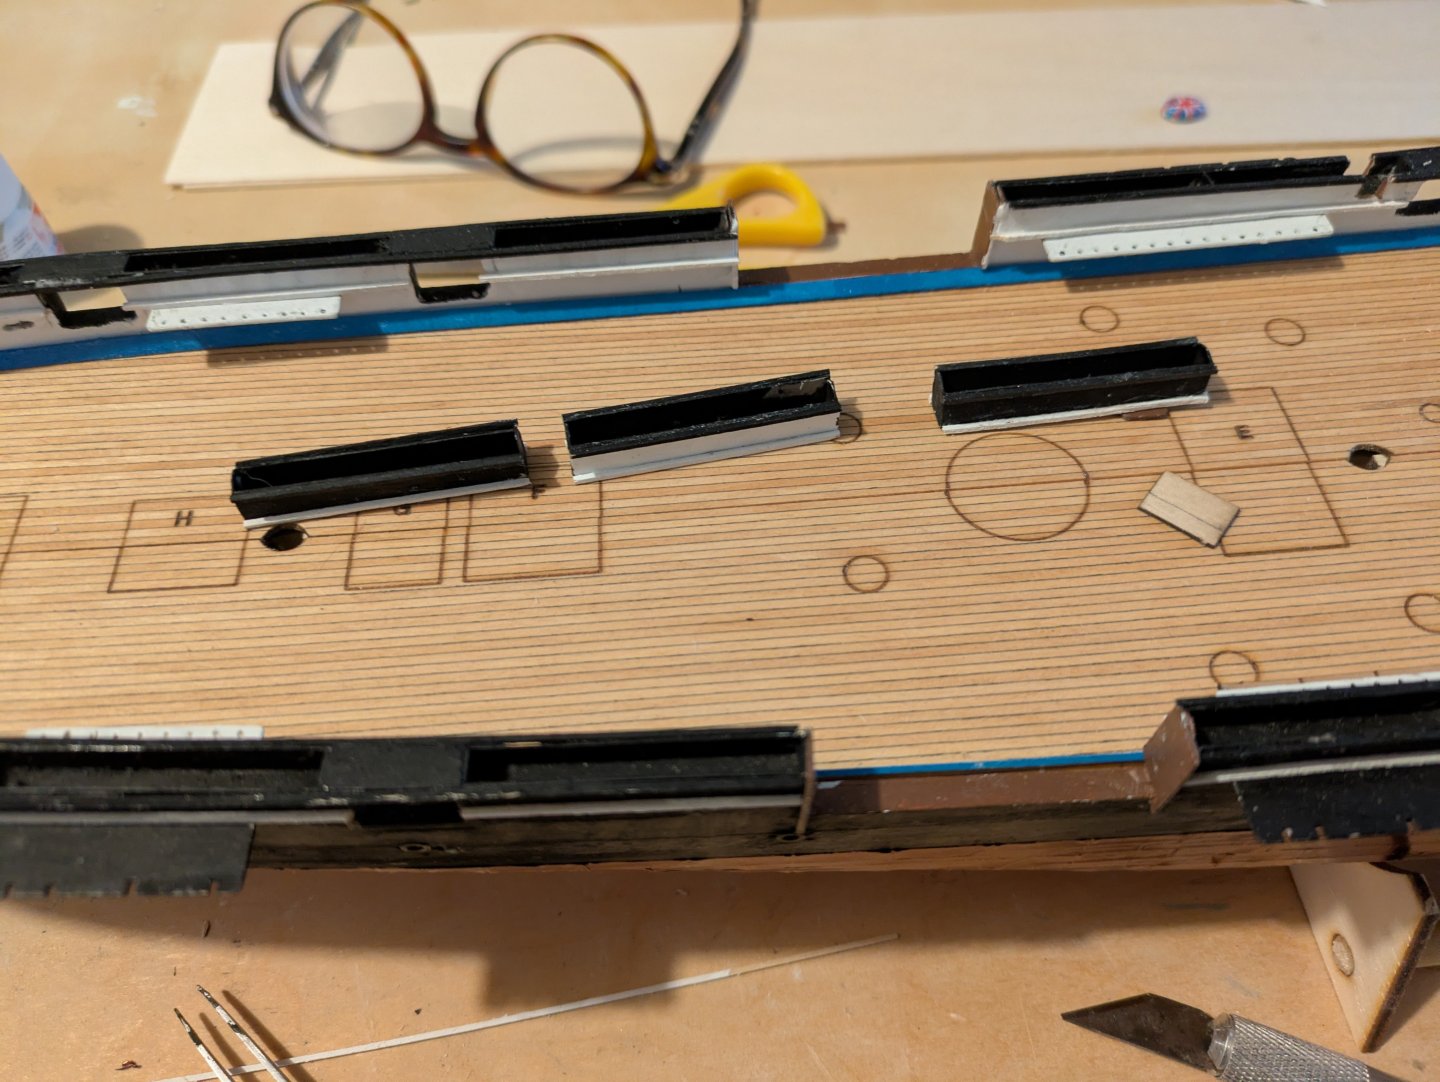
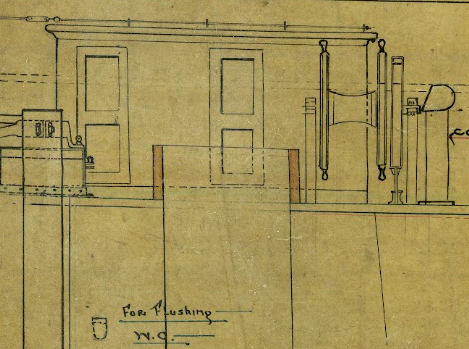
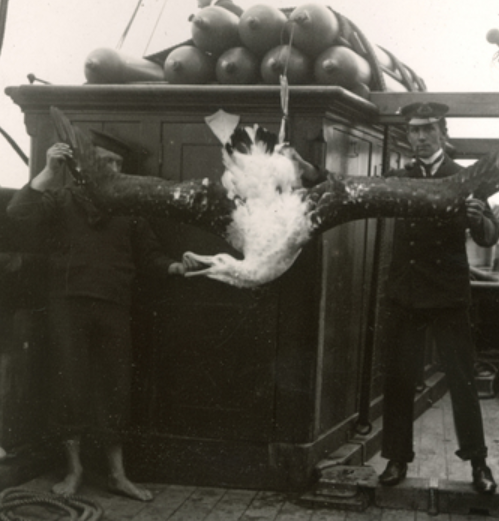
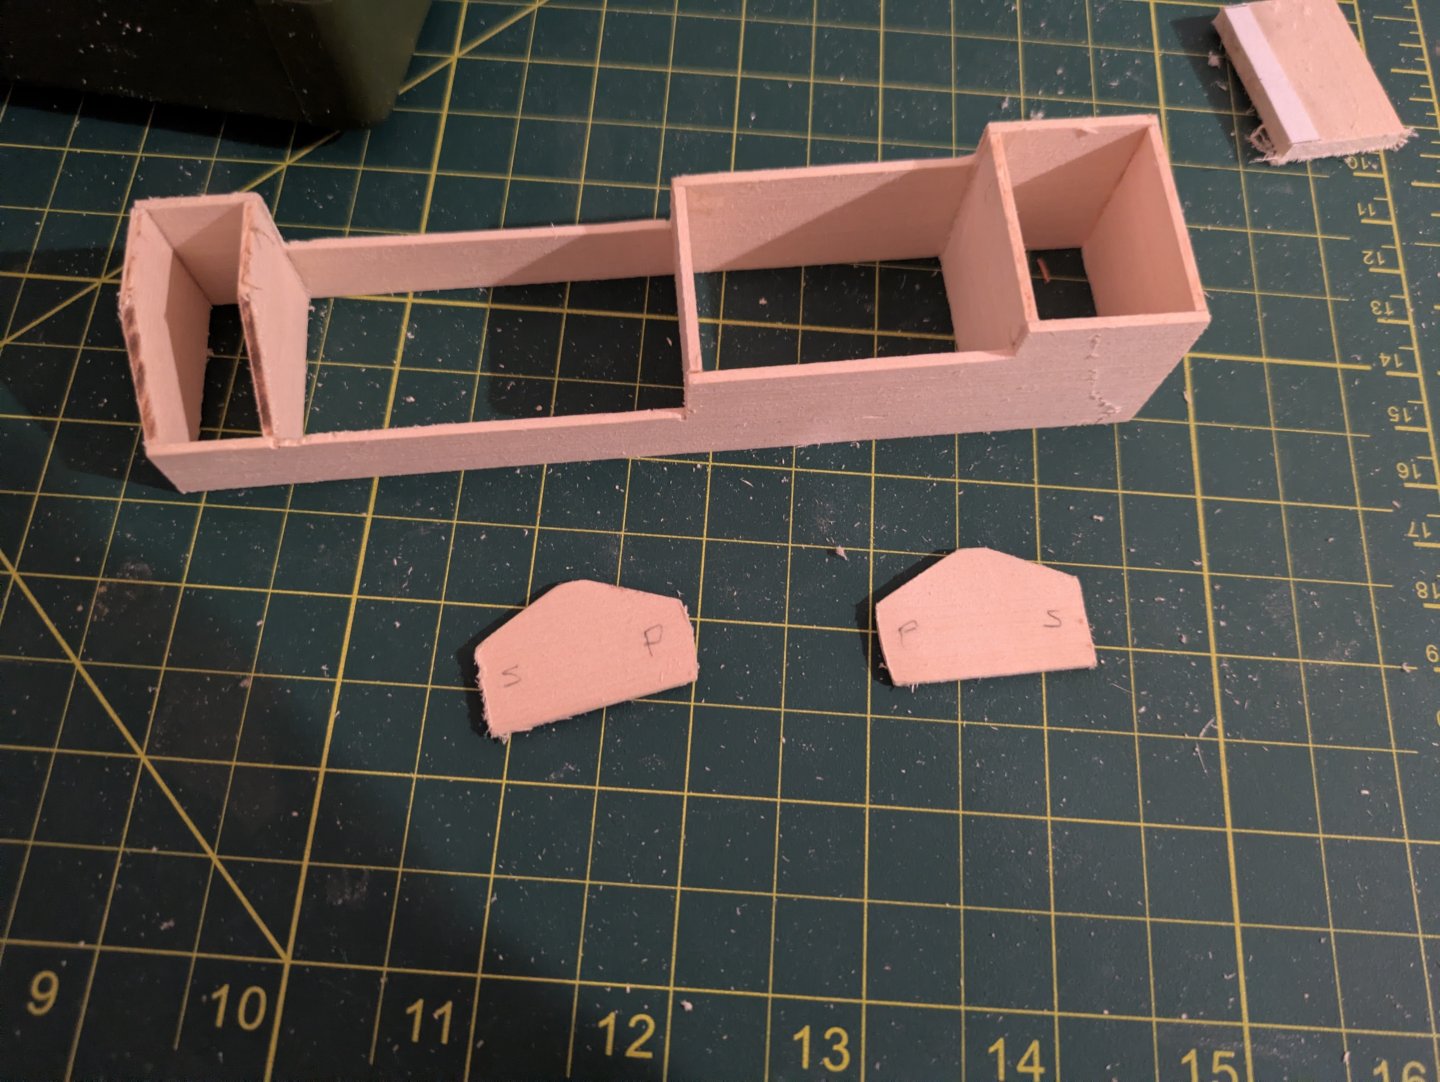
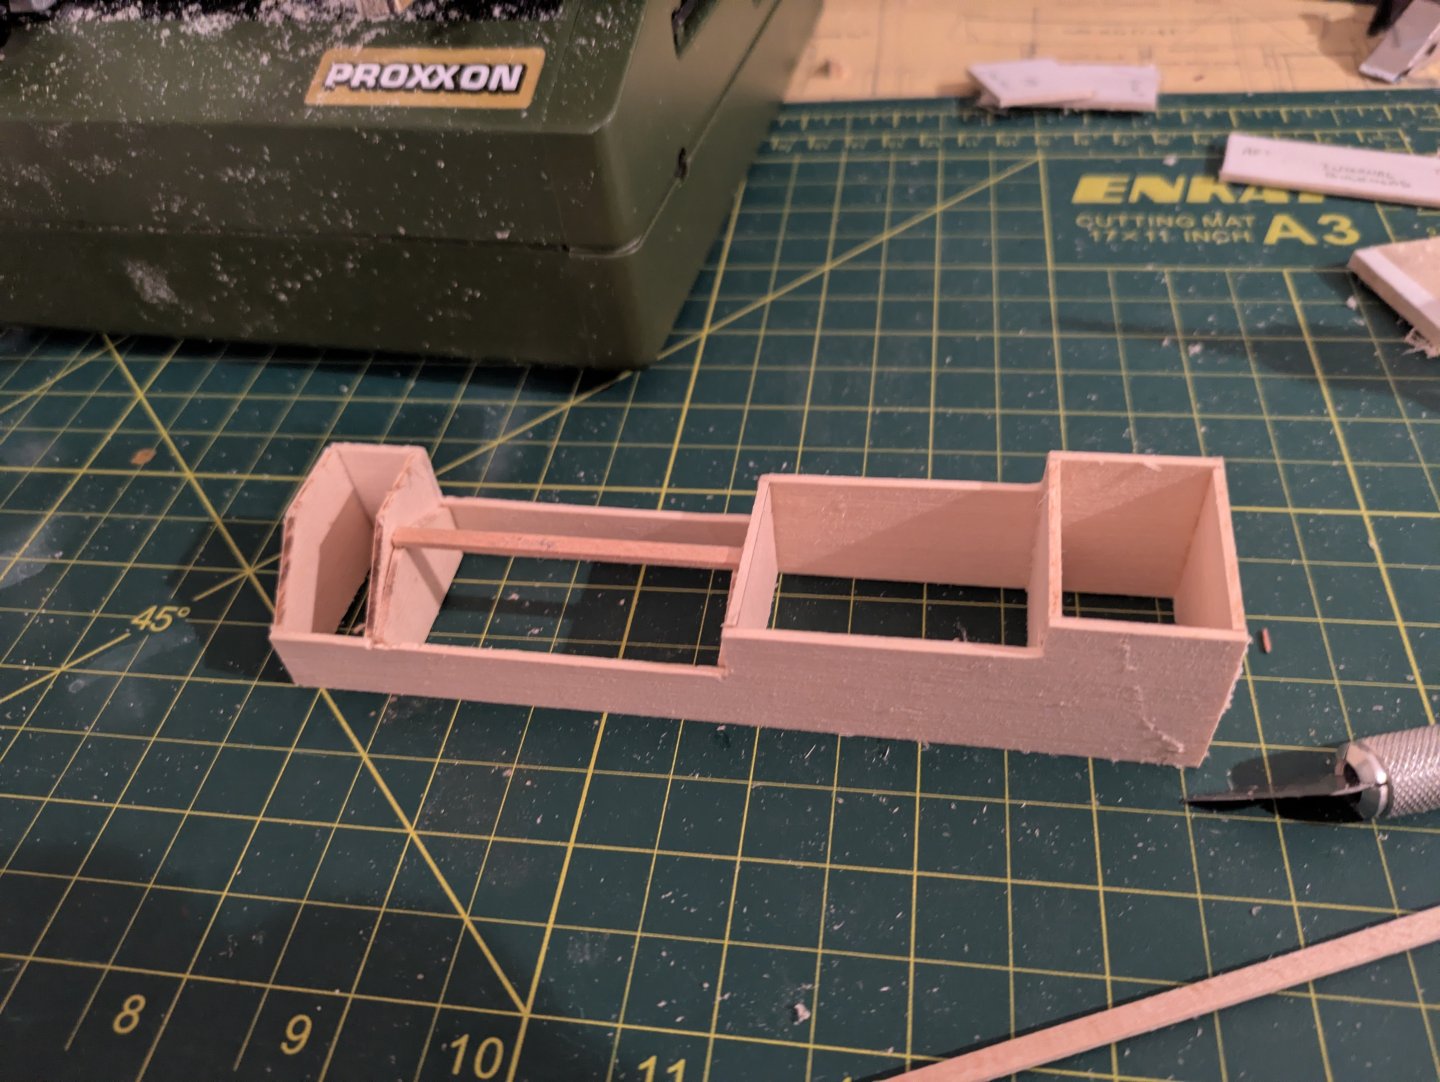
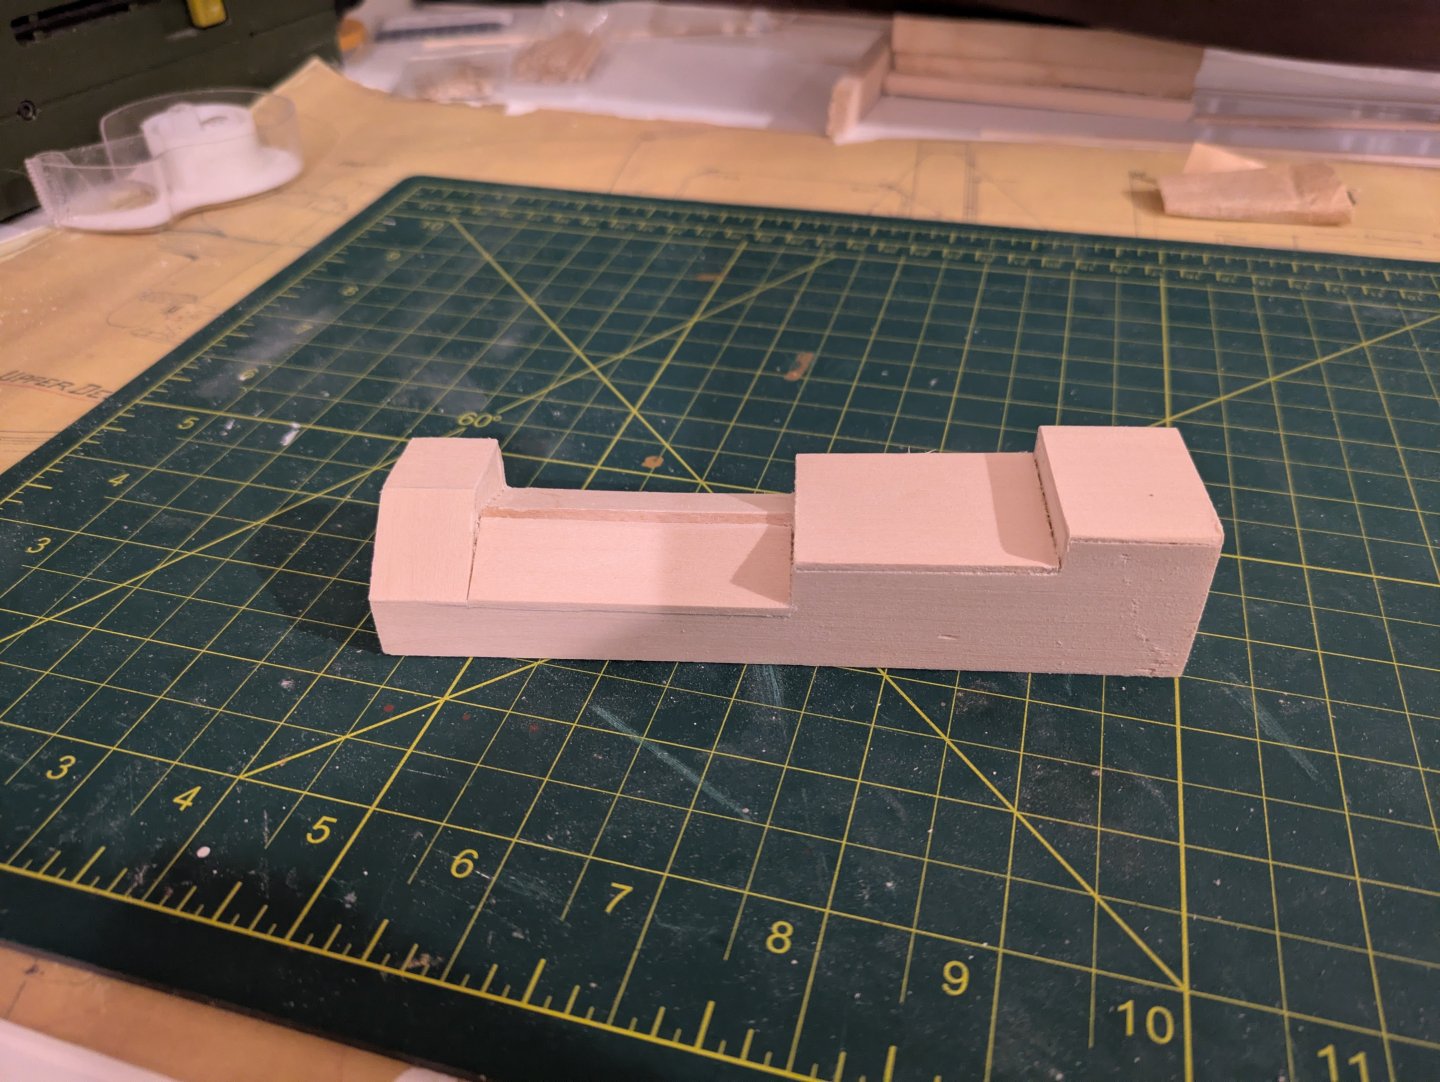
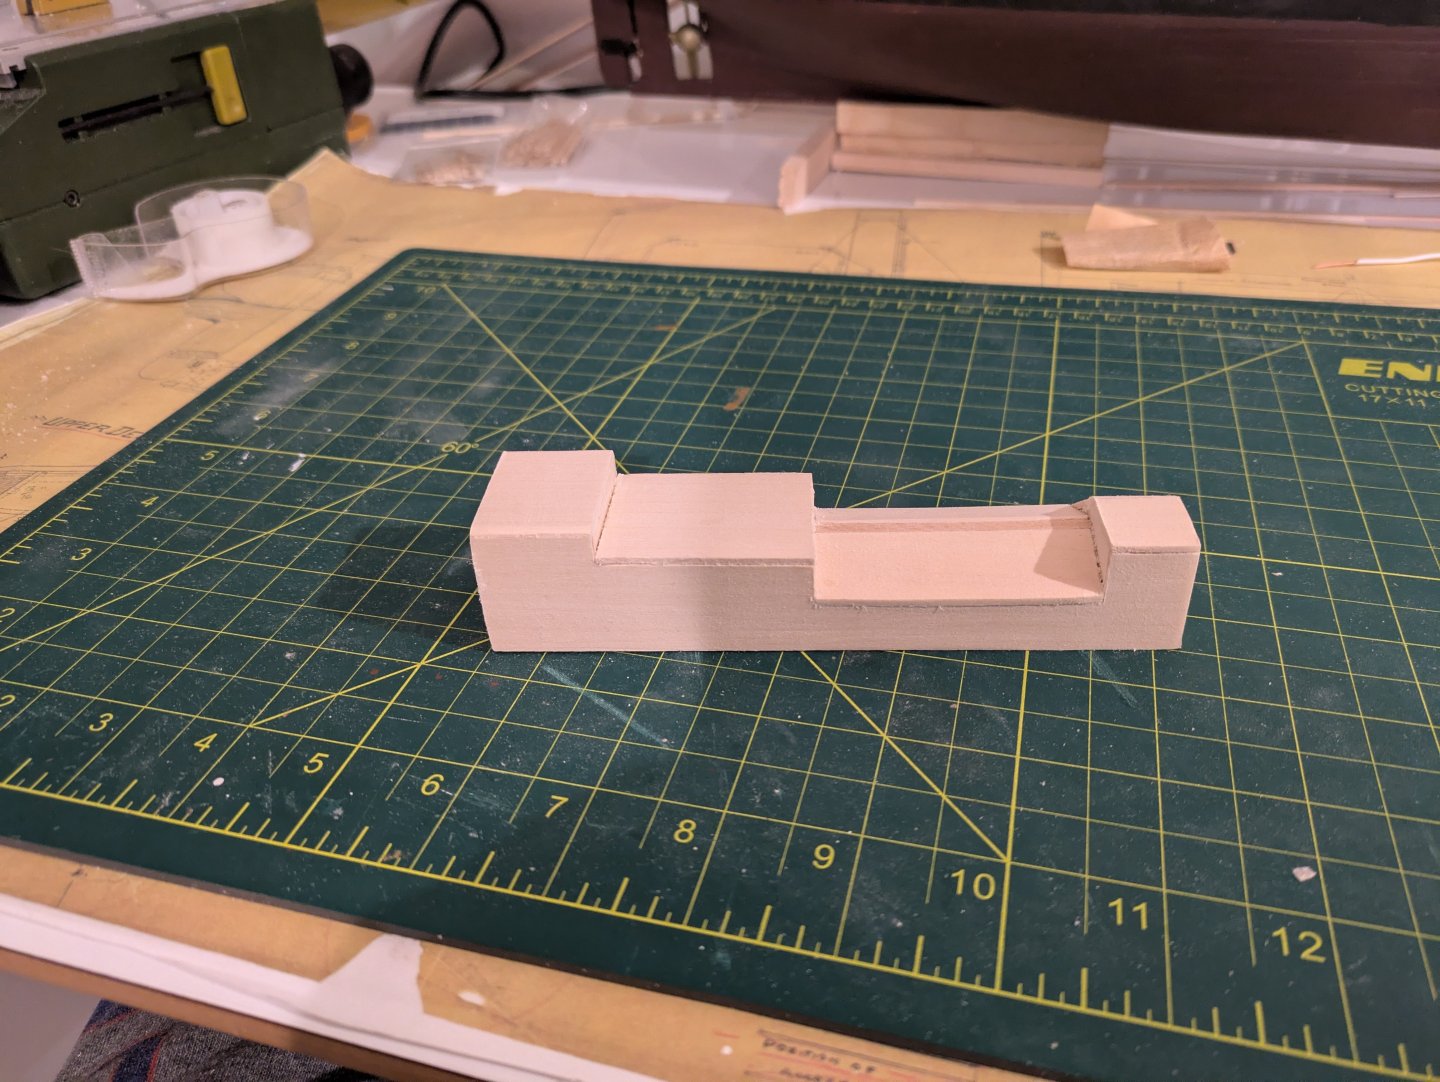
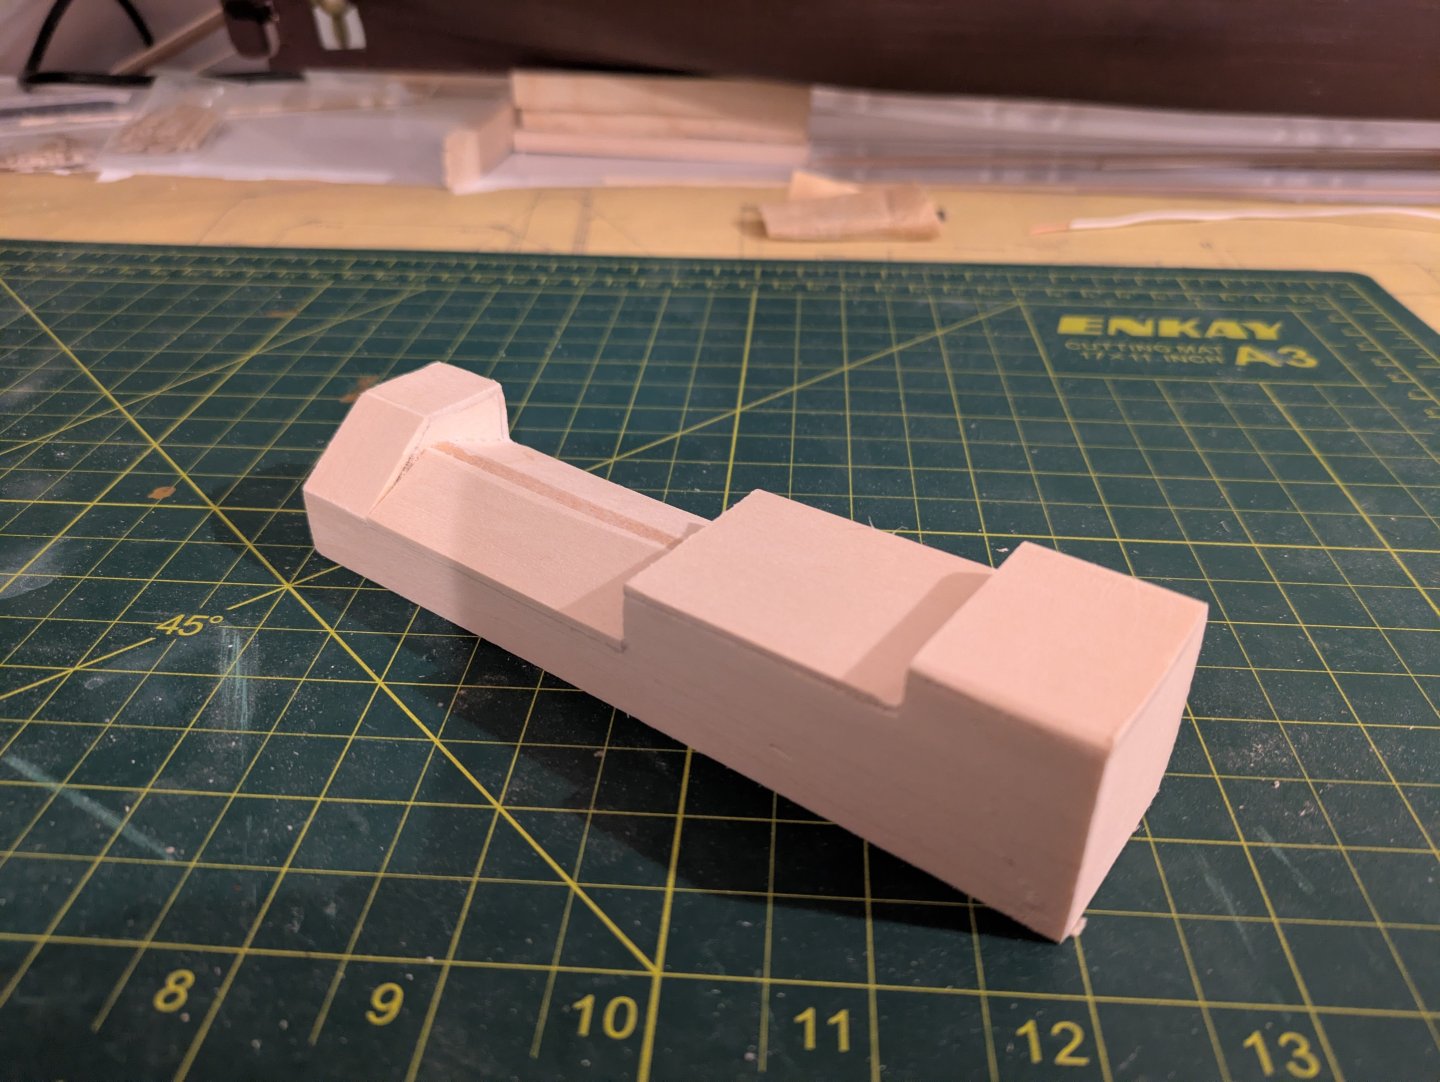
Back and forth to DC once since my last update, so some work on the Kearsarge but mostly in Cleveland so more to show on the Discovery. But first, it's been an interesting re-introduction to Lake Effect snow and temperatures north of the Mason Dixon Line: Supposedly this has been the coldest, snowiest winter in Cleveland since the '50's (first snow was Nov 10, and we've only had a handful of days where I could see the grass since). I have spent years ignoring my wife's entreaties to save my back and buy a snow blower, but I finally caved on Friday, primarily because there is no where to shovel the snow between the houses where our driveway is, and so I've been forced to pick up a shovelful, walk to the front yard, dump. Rinse and repeat. It takes a 20-40 minute job (if there had been someplace to toss it) and makes it 60-90. Oh well. Back to the ship. I was working on the cover for the engine room. Just a couple of quick pics to remind you of what it looks like. Here are the plans: And here is a picture of the modern ship that had the front section removed: I cut out the pieces that were shown in the previous entry. Here is a brief overview of the construction process so far. And the basic structure completed. From the port side left is forward): Starboard side (right is forward): And looking from the starboard quarter: This still requires a ton of work. I have to make the 7 iron skylights (6 with 4 ports and 1 with 2 ports), the forward bulkhead has some kind of ports in it as well. It needs a bit of putty, and then sand and carefully prime before painting, b/c the real structure is made of iron and I don't want any wood grain showing through. I need to frame two hatches (one port side aft, the other port side in the second section from the front, build and put on the winches, make 4 mushroom vents, and the stack, and two cowl vents, etc., etc. But I think that the bones of the structure turned out okay. Speaking of which, I've been wondering how the heck to fabricate the cowl ventilators. The only example I can recall seeing is from @Valeriy V using electroplating, but I have neither the equipment nor the skill. I've searched MSW, but haven't found anything obvious. Any thoughts? I mean, I could buy them premade, but I'm trying to fabricate as much as I can, and if anyone knows a good method, I'd love to hear it. Thanks for looking in! Regards, George
-
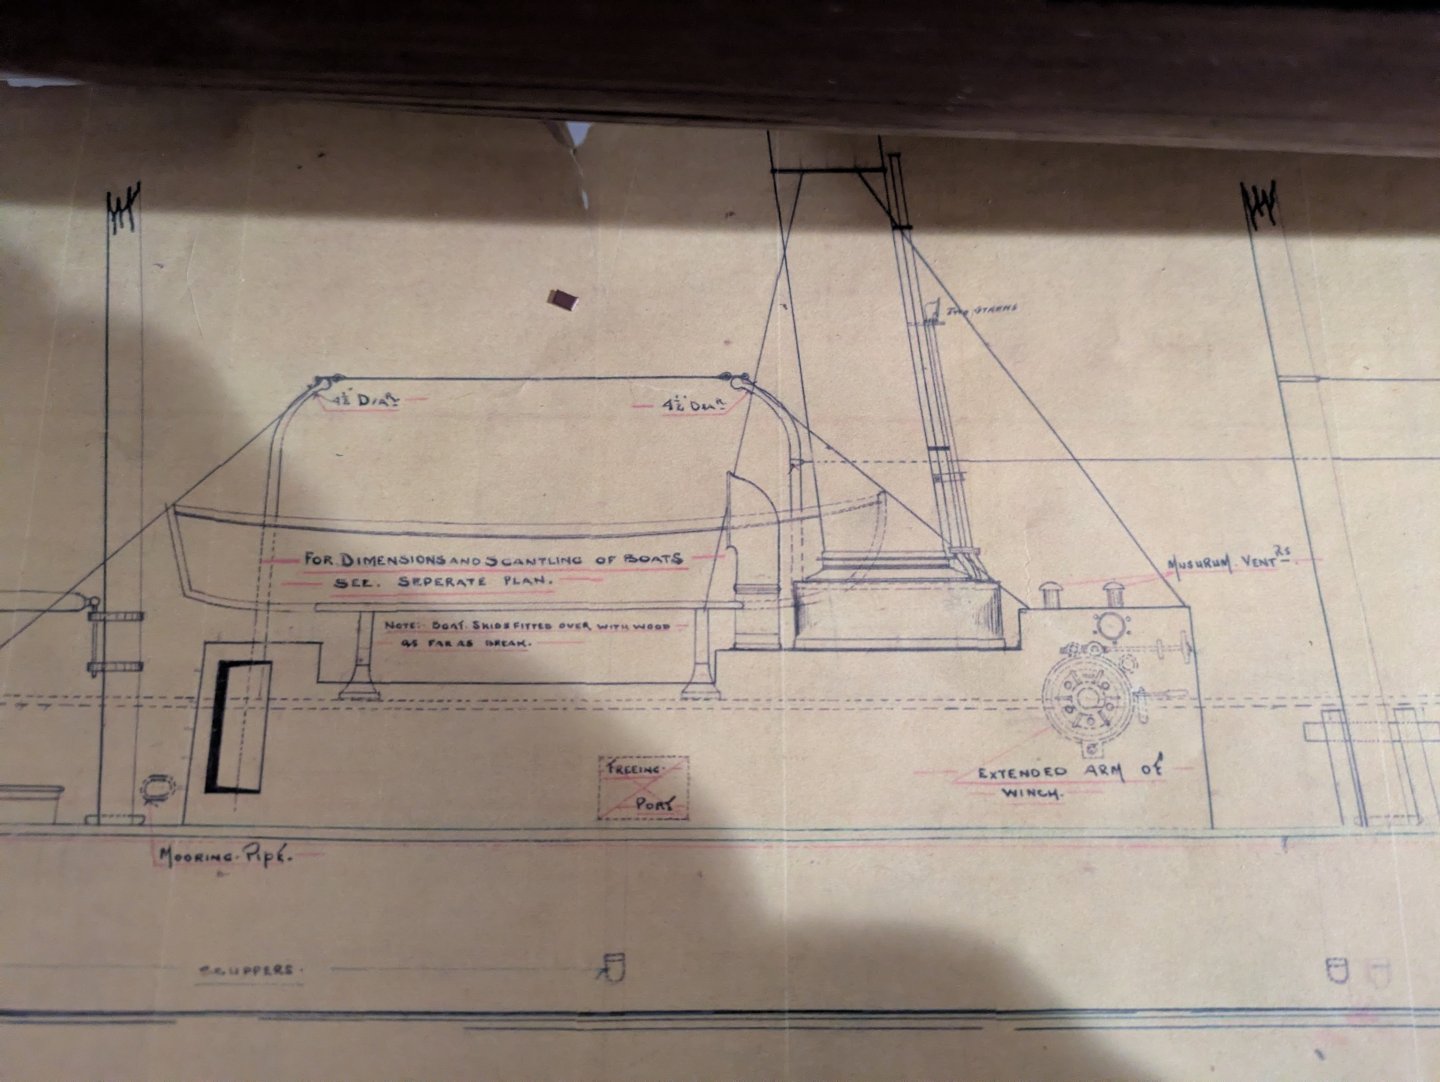
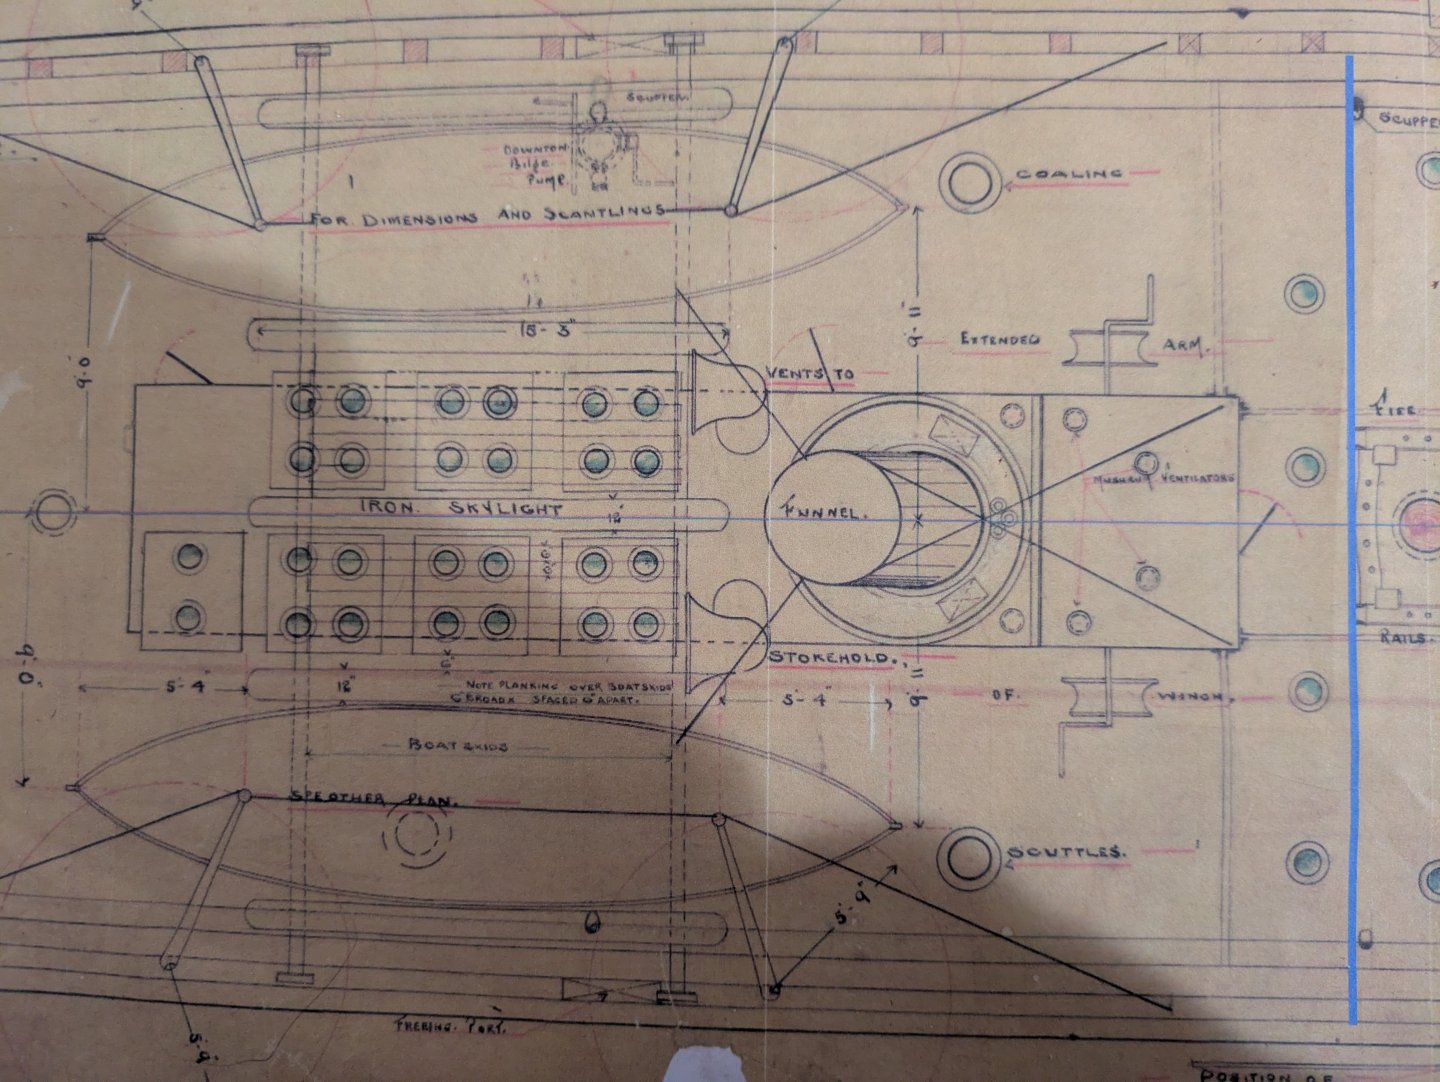
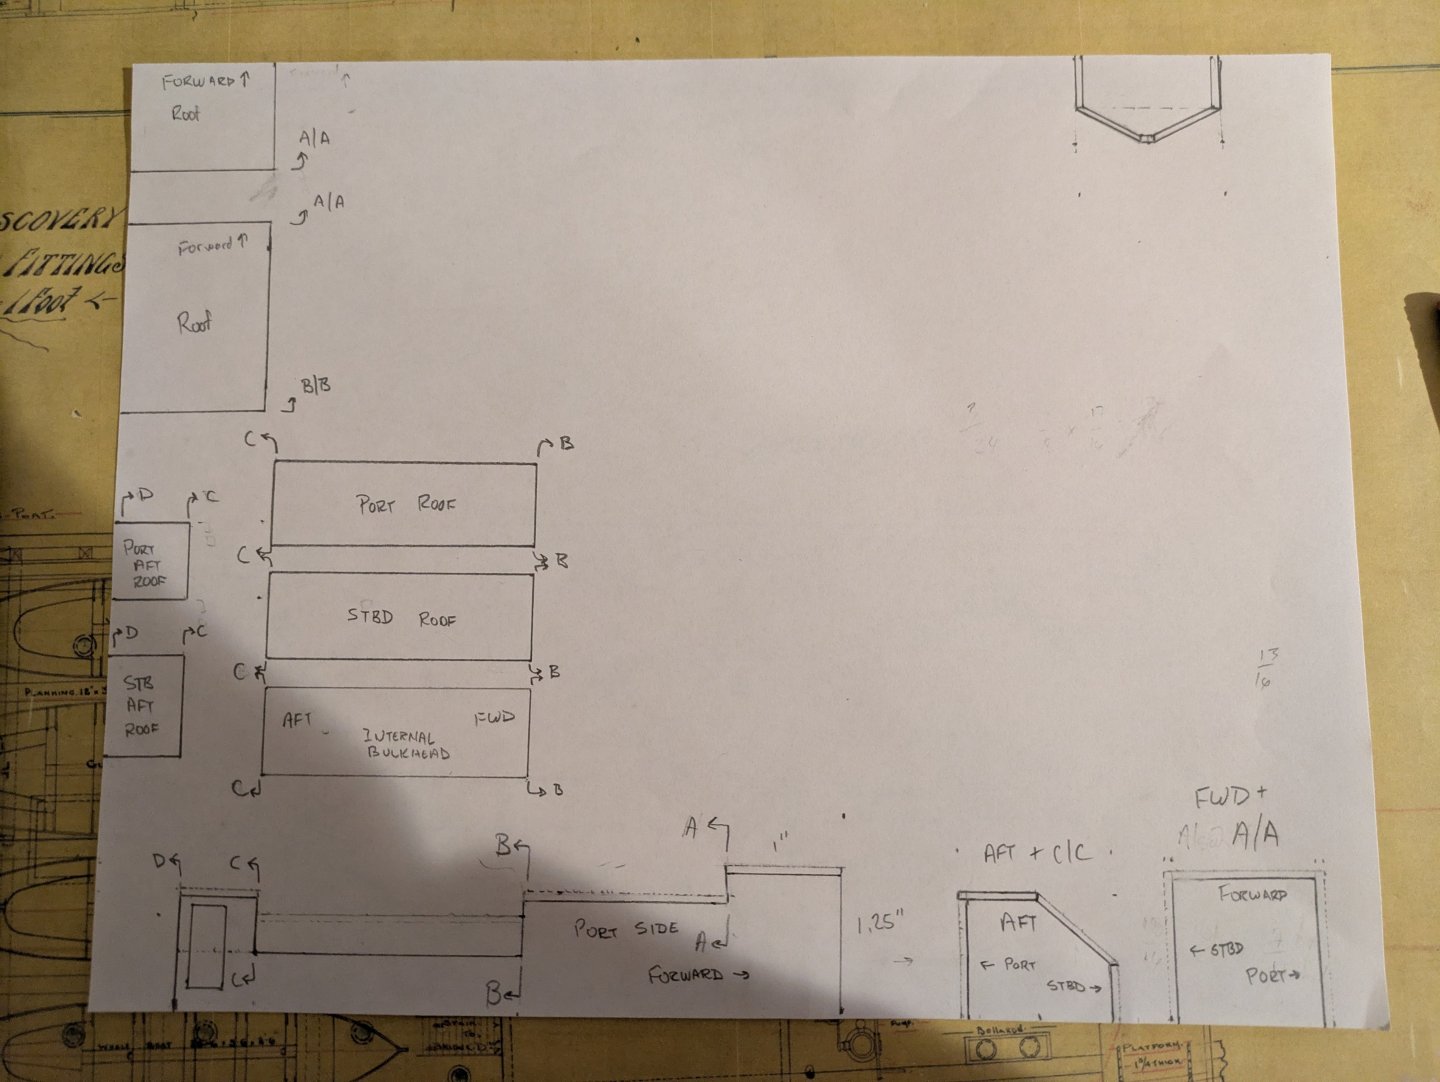
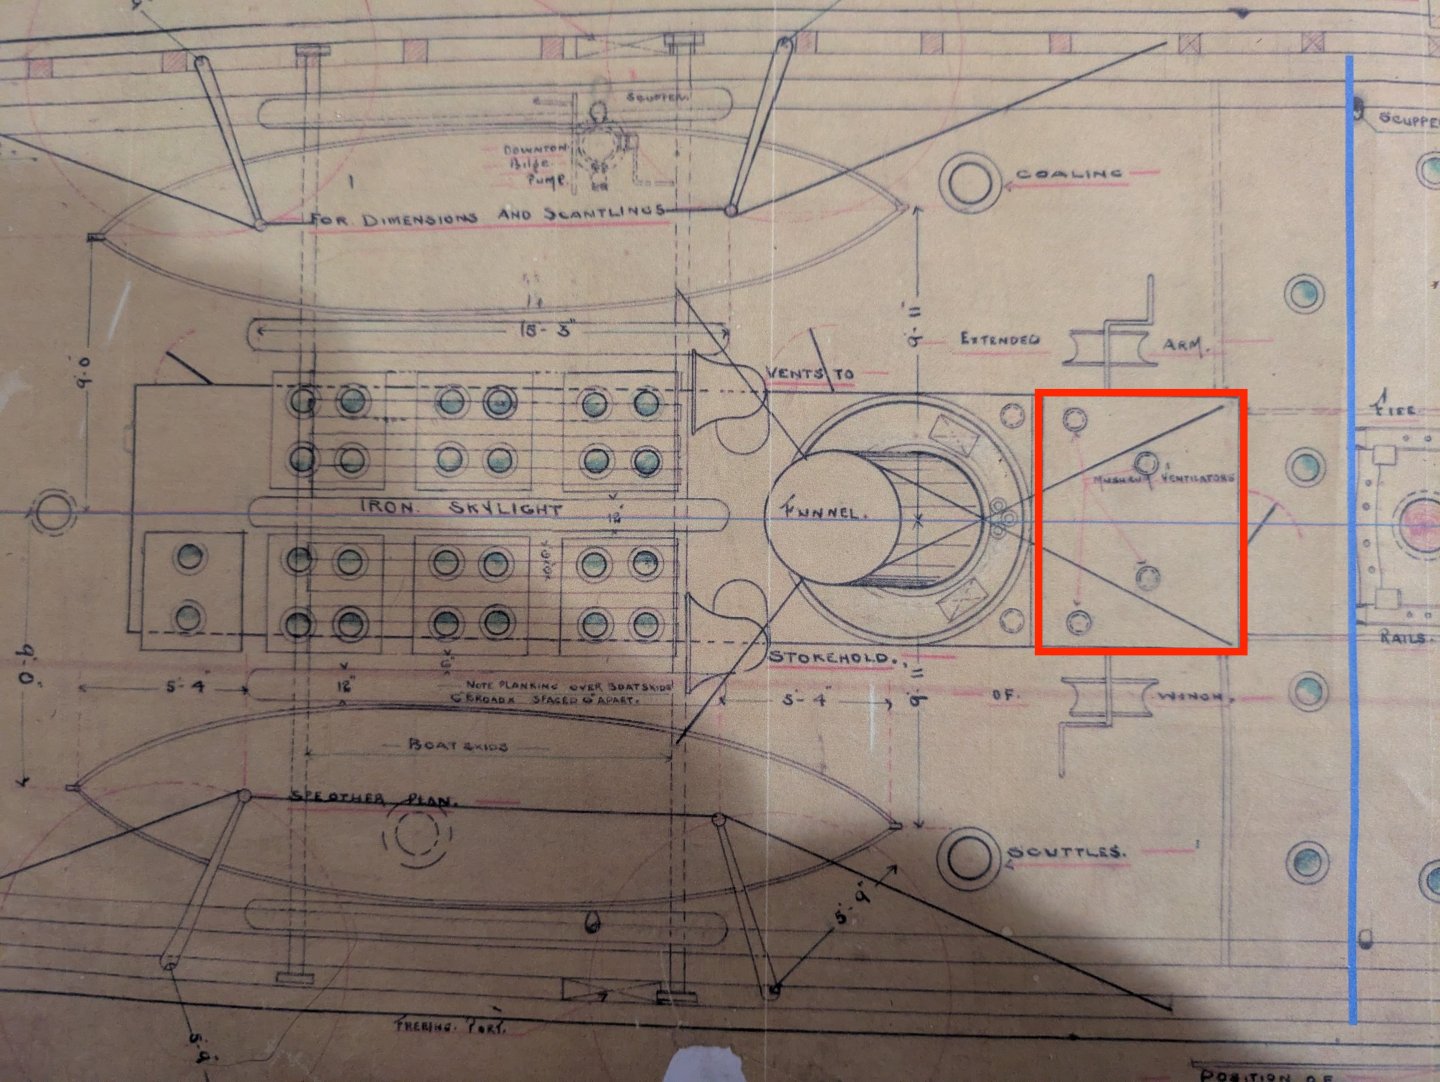
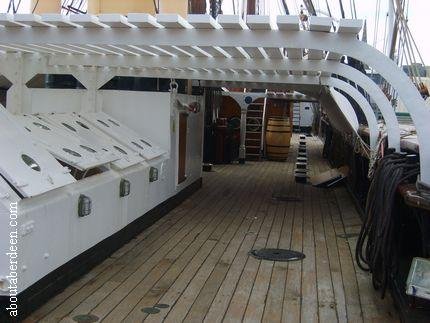
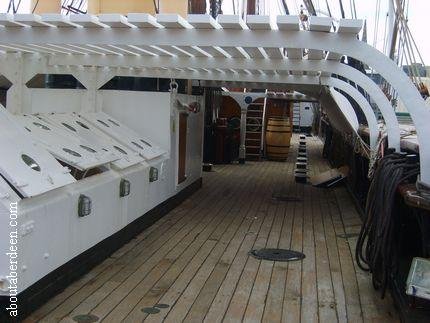
Happy New Year everyone. Back in Cleveland since Monday, so a bit of time to work on the Discovery. Thanks to everyone for the best wishes for our pup. She is doing quite well, despite actually needing to have 3 tumors removed rather than one. She is back to being the scourge of small woodland creatures and I think I may be able to take her for a run soon. I've started working on the shell over the engine room. This is a very complicated structure. Here are a couple of views from the plans. The first is a side view that is pretty much port side only: and from above: Something to understand about this structure is that it is not symmetrical. The starboard side is not the same as the port. The aft port side has a stair down to the engine room from the deck and aft starboard side has an angled surface with a vent (here is a photo from https://aboutaberdeen.com😞 or you can take a look at this video tour (https://www.youtube.com/watch?v=VsotxBpE0Mg). The aftmost vent is different from the other 3 on the starboard side because it goes up to the higher roofline. I should also point out that when the ship was refitted in 1923, it the structure on the ship in 1901 was substantially shortened. Basically, the section shown outlined in red was removed: Presumably this is why the reels are gone. The plans show doors only on the port side, the current ship has doors in the forward (middle on the original) section, apparently both port and starboard, but the plans only show an entrance on the port side, so that's how I'm going to make it. I'm going to keep the knee knocker door in place, presumably that was to prevent cold seawater from getting in and spilling on the engine which would be, bad, I imagine. So, here are the cut patterns for the structure: On the side structure at the lower left, you will notice (a) faintly drawn lines between B|B and C|C that represent the height at the centerline (which will be held up with the internal bulkhead in the drawing), and a line across the hatch between C|C and D|D which is for the starboard side. It's going to be important for those two pieces to be the same. I may try to join two pieces of wood and cut them out together so they match. Once I have two cut like the starboard side, I will cut the port side down to size. The two pieces on the lower right are also being duplicated. The rectangular one will fit at both the forward end of the structure and A|A and the irregular pentagon at C|C and D|D. There is a door in the forward most bulkhead, which isn't shown on these drawings, but which I will add. So, plans made, now time to execute them. As always, thanks for looking in. Regards, George
-
Oof. I'll take your word on the placement, but my observation was that the things were a pain to try and rig to under the best of circumstances. I tried rigging the falls ahead of time, but found that when I tried to tighten them down they wound up getting in a serious twist (I assume because of the roll the line was on). FWIW, the easiest I had rigging the things was when a couple of them popped out. I had the holes in place, re-rigged the falls (removing the worst of the twist, put some glue on the eyebolt and then stuck the whole contraption into the hole in the deck. Sorry to hear about this, but I'm sure you will make it look awesome in the end! Regards, George
- 360 replies
-
- Flying Fish
- Model Shipways
-
(and 1 more)
Tagged with:
-
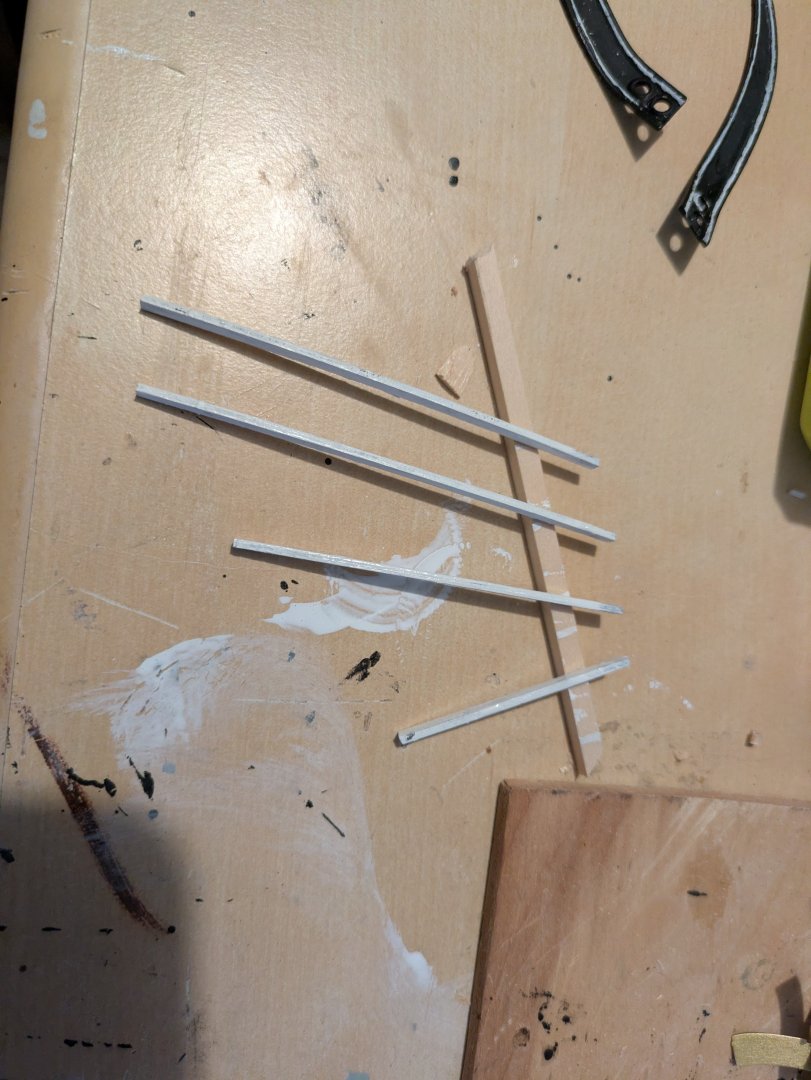
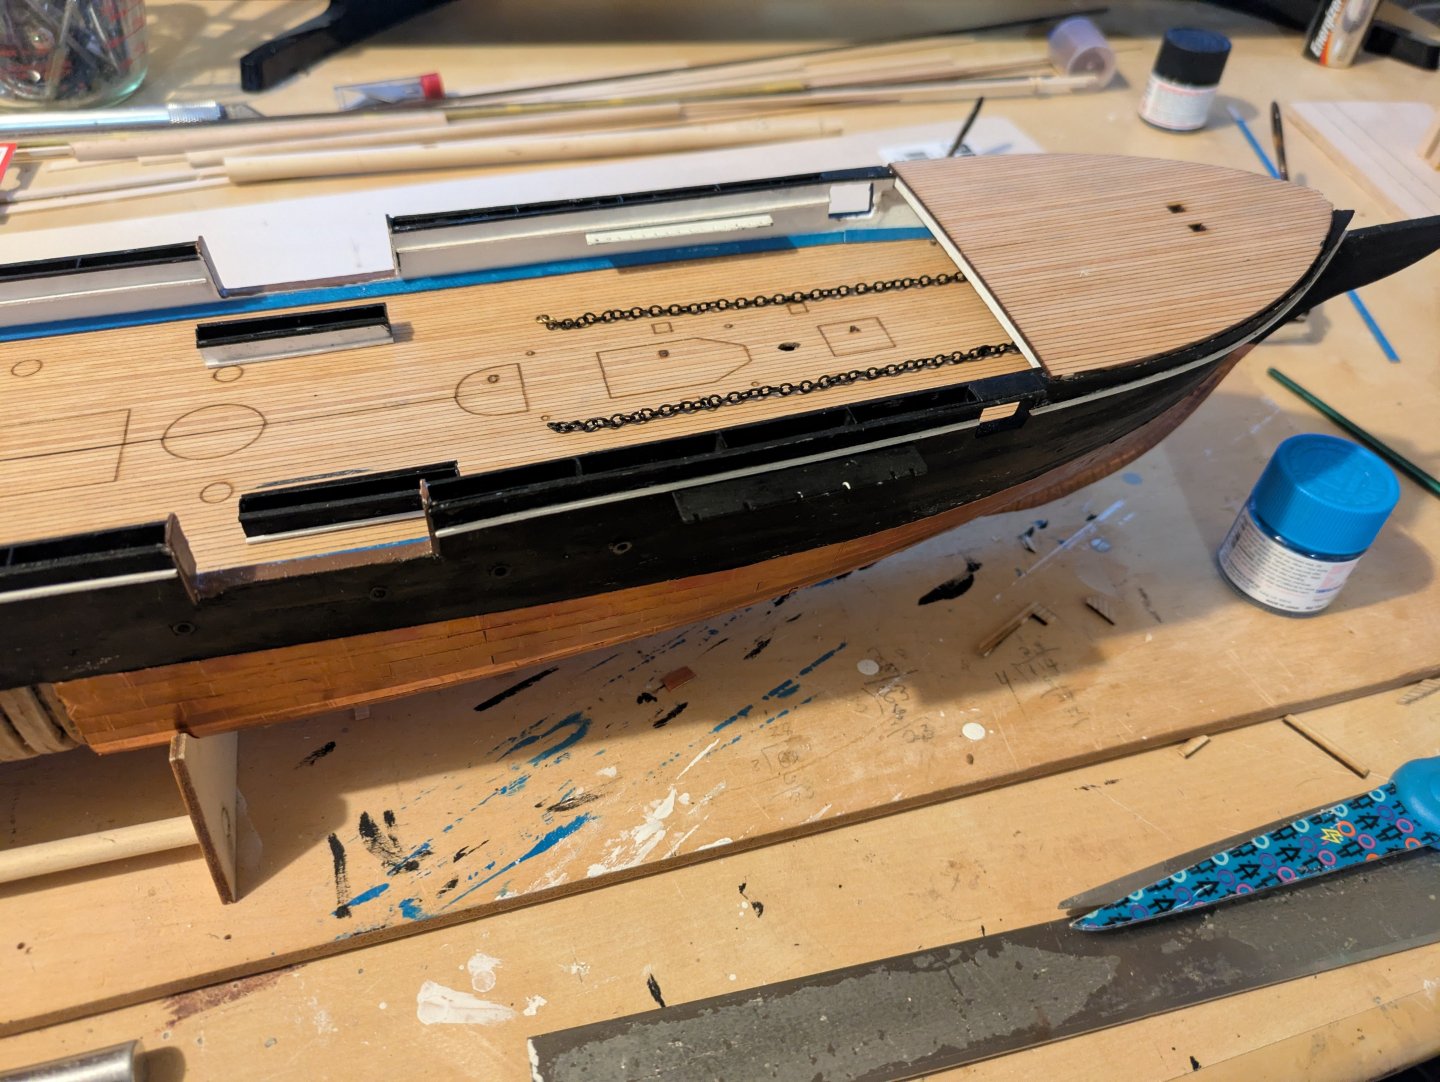
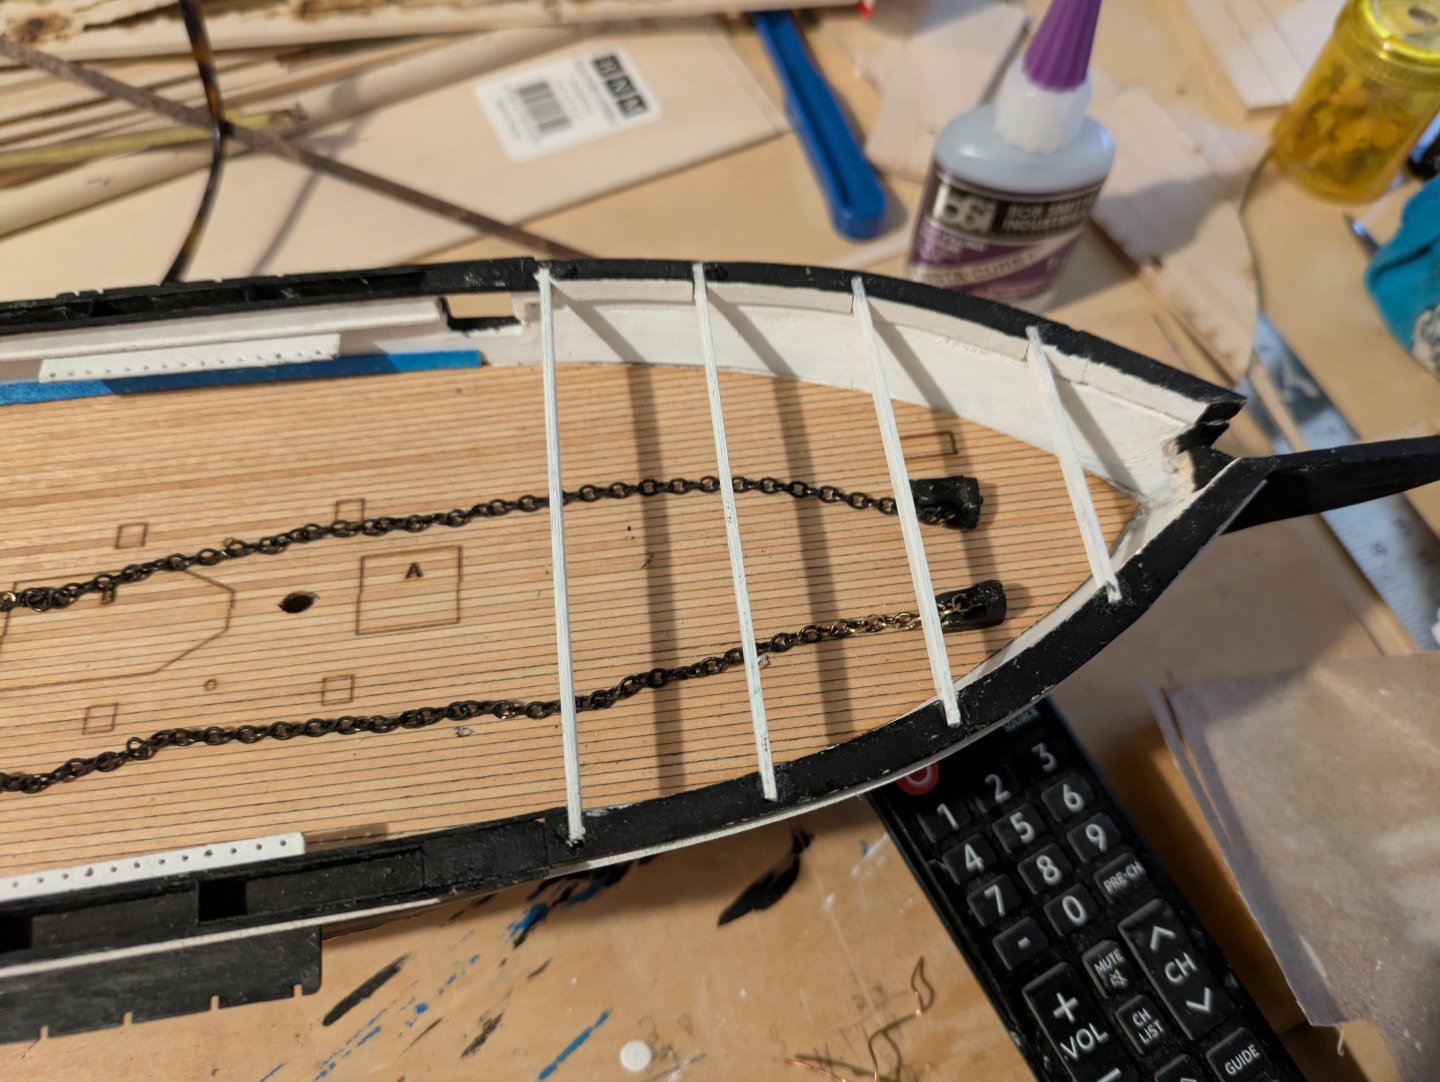
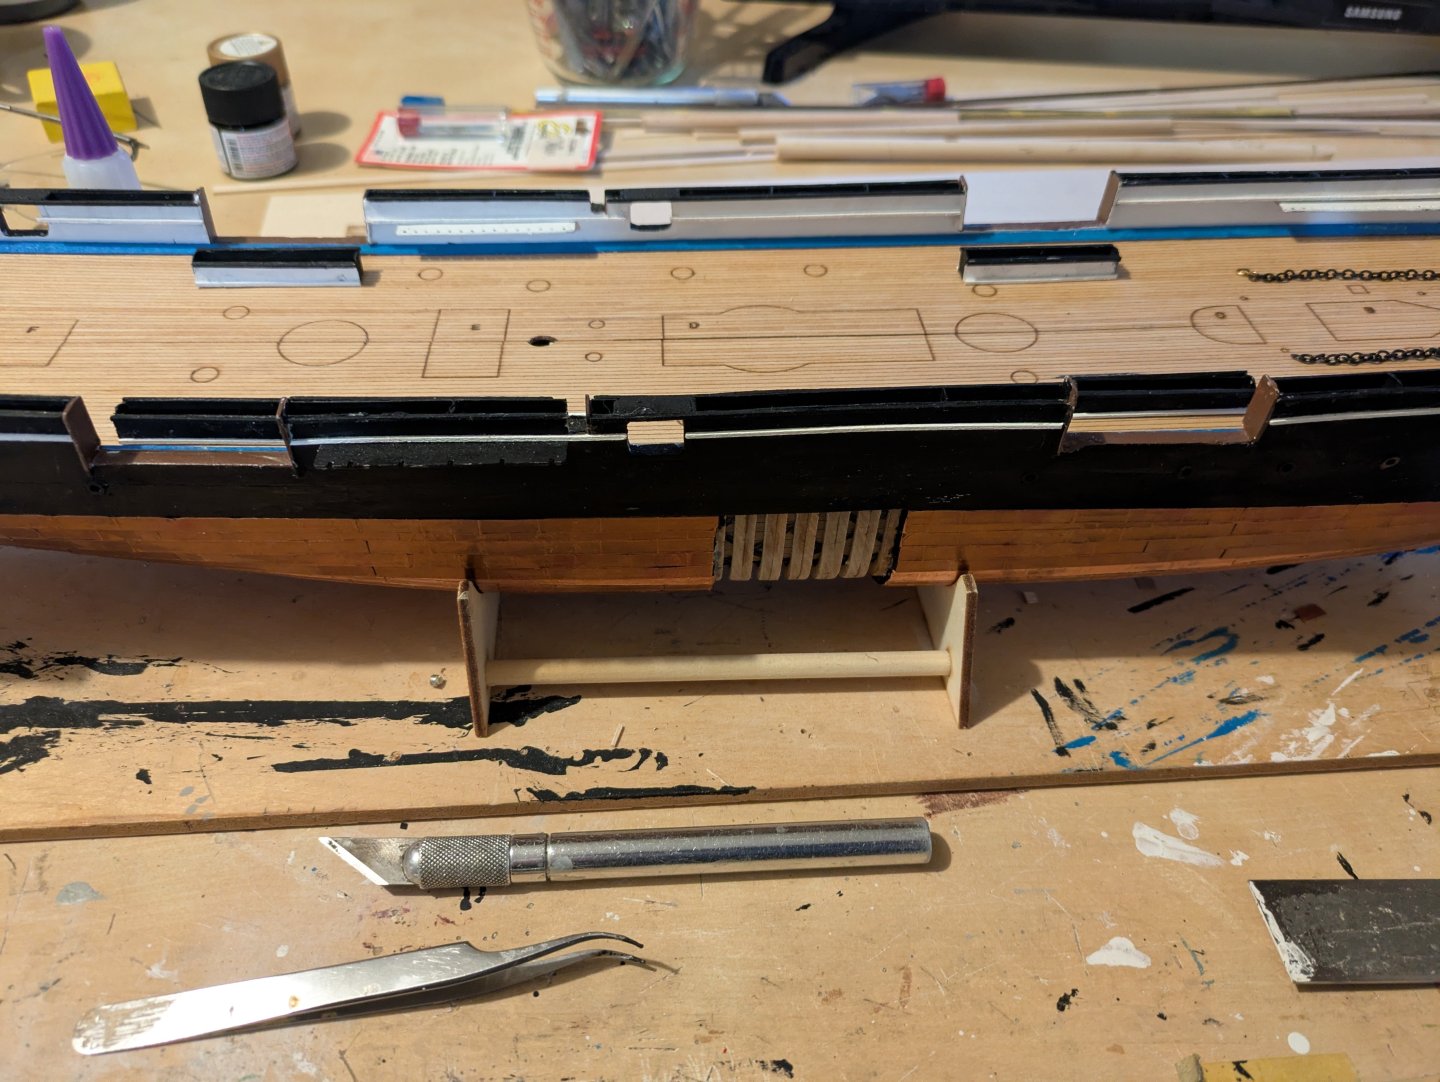
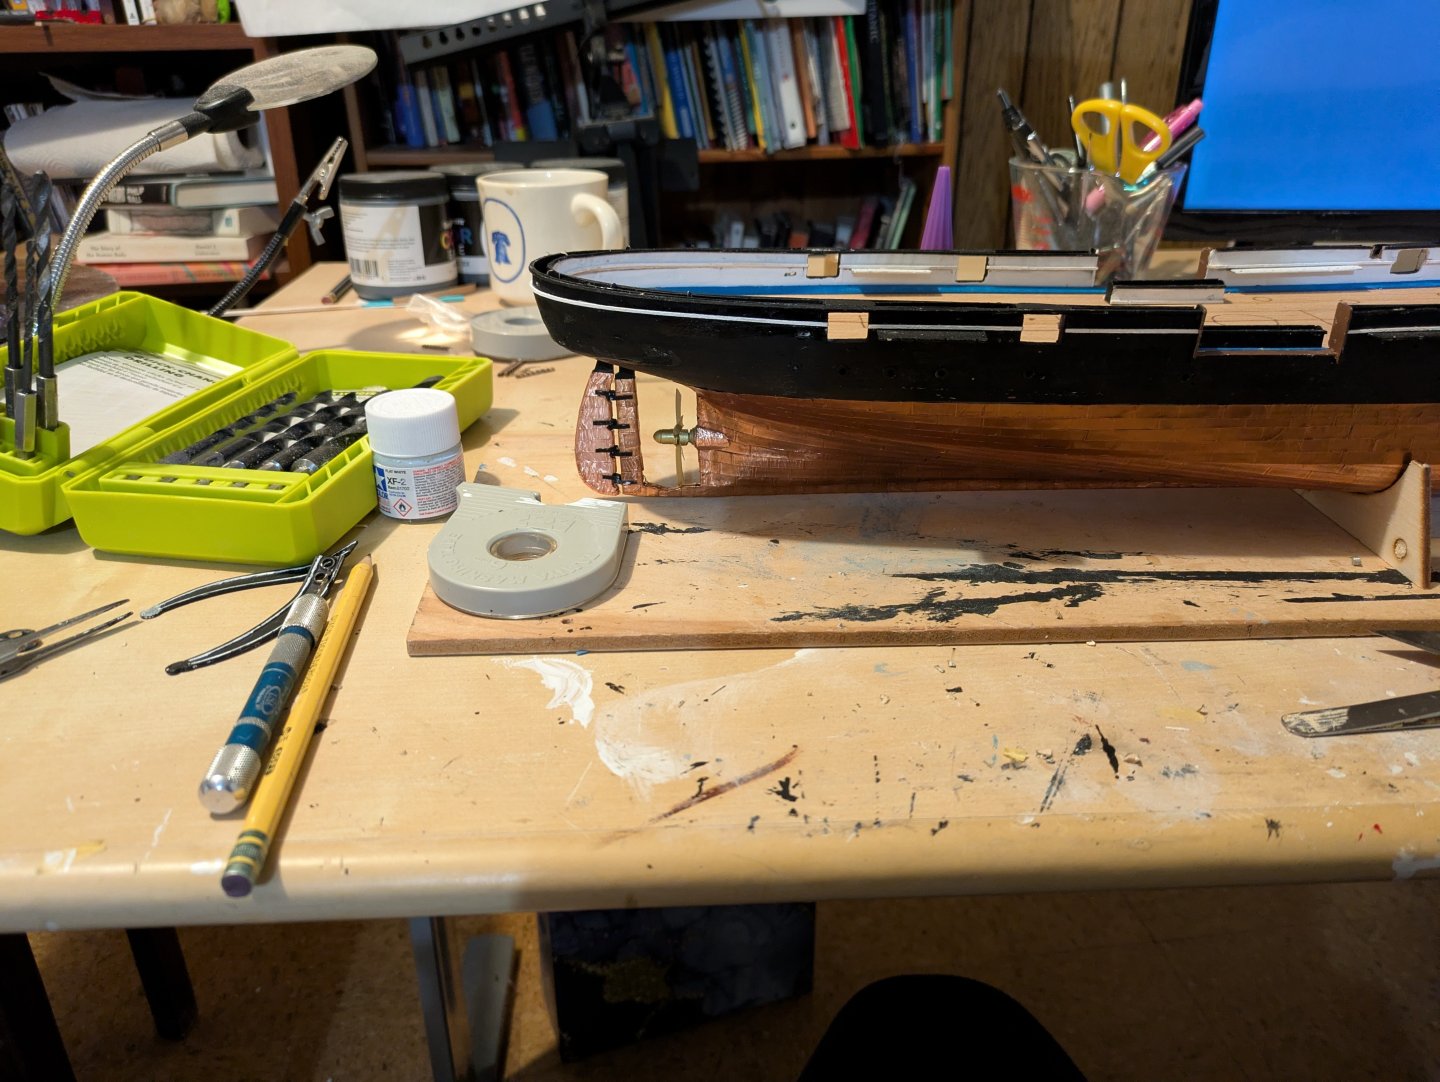
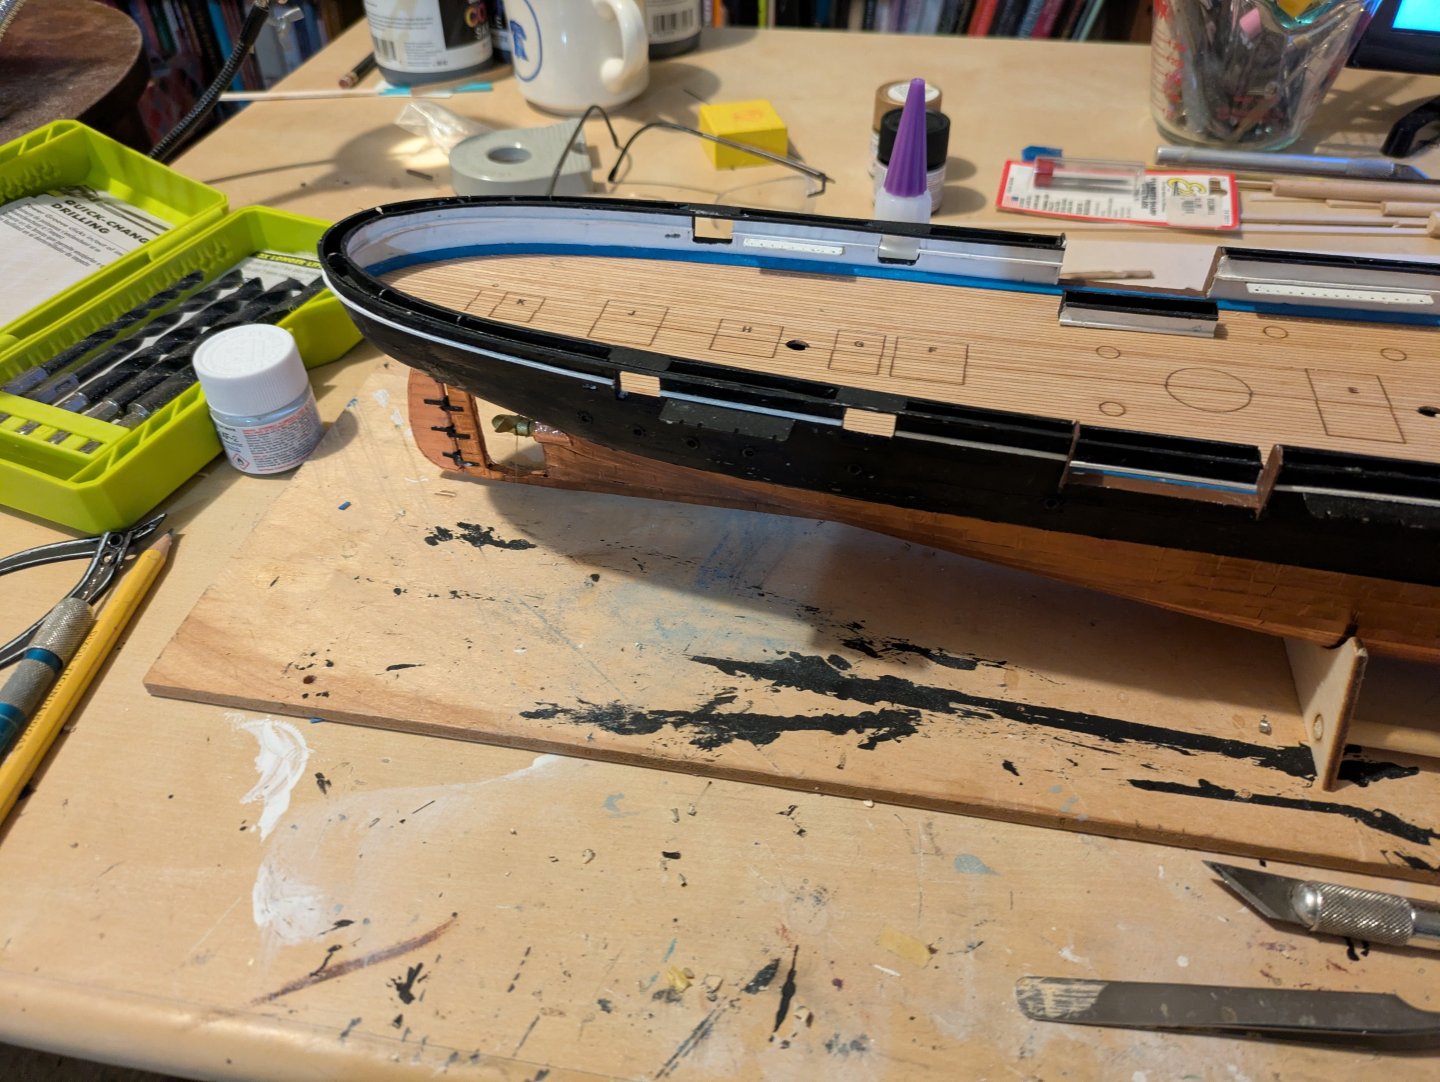
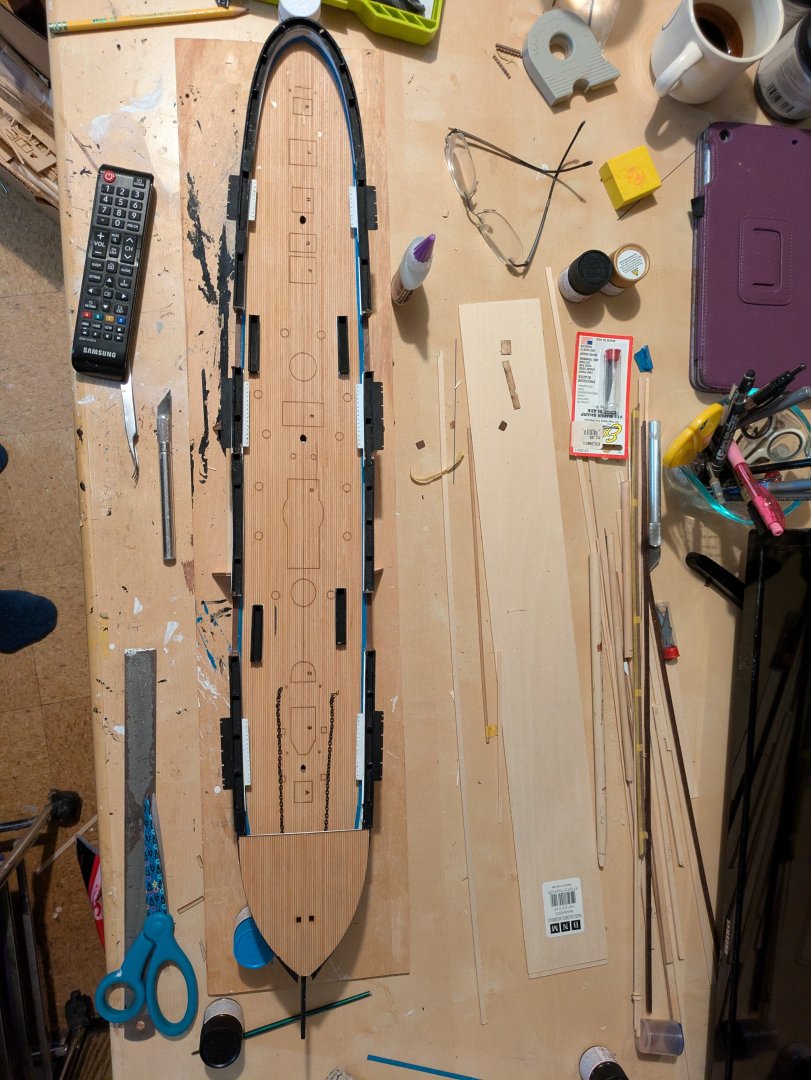
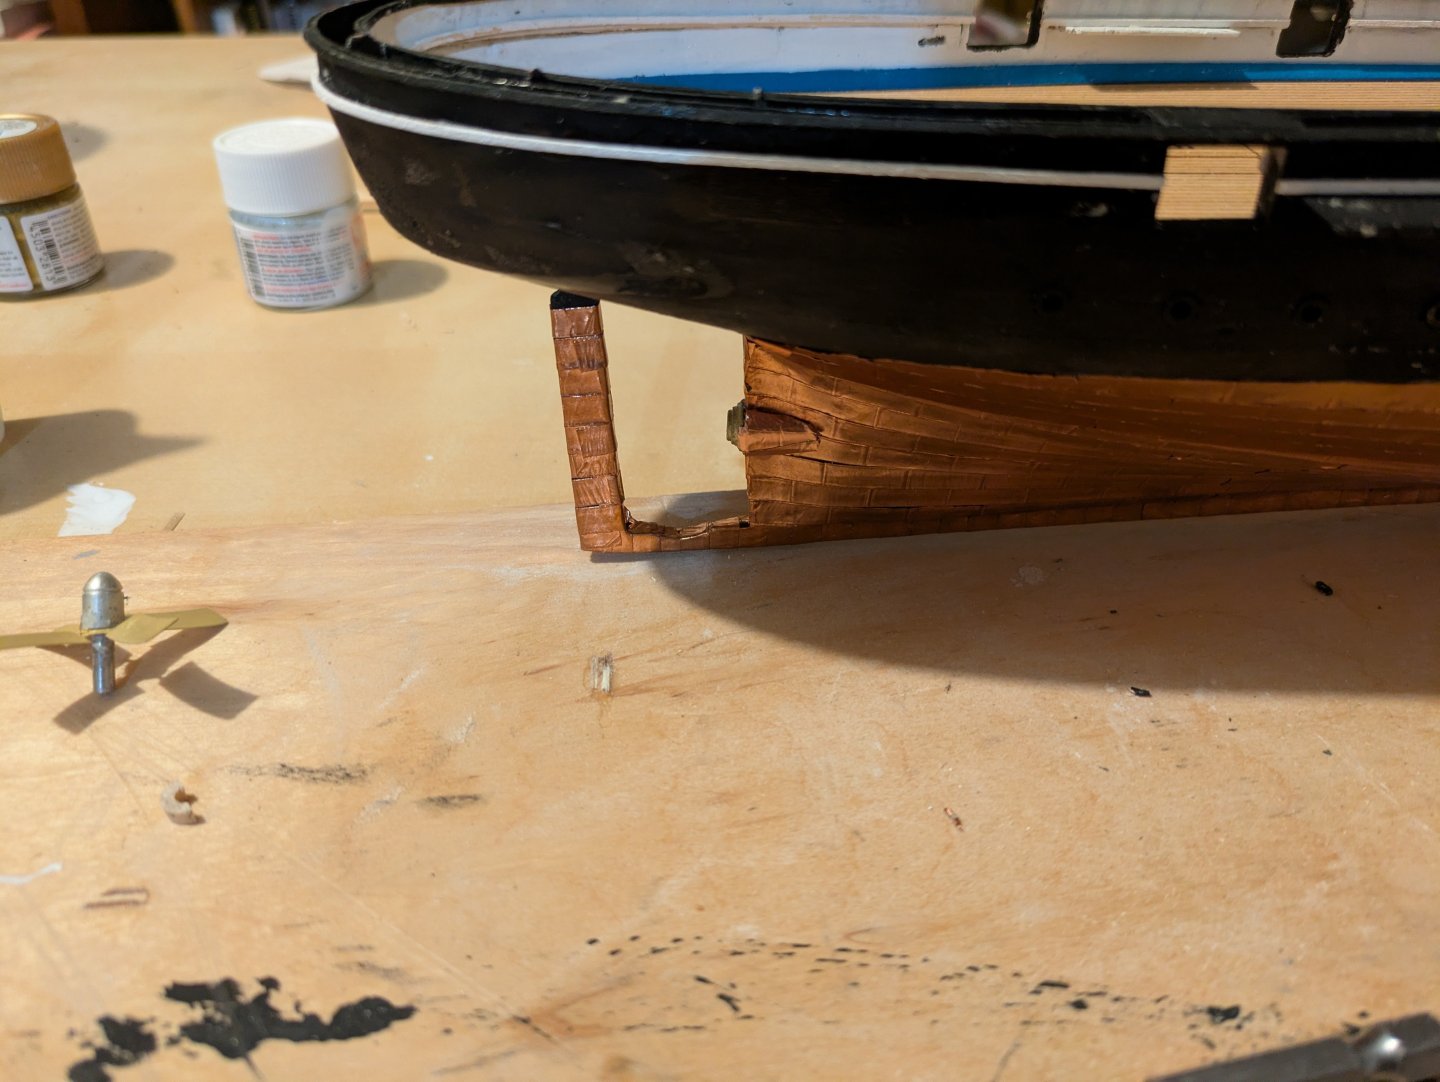
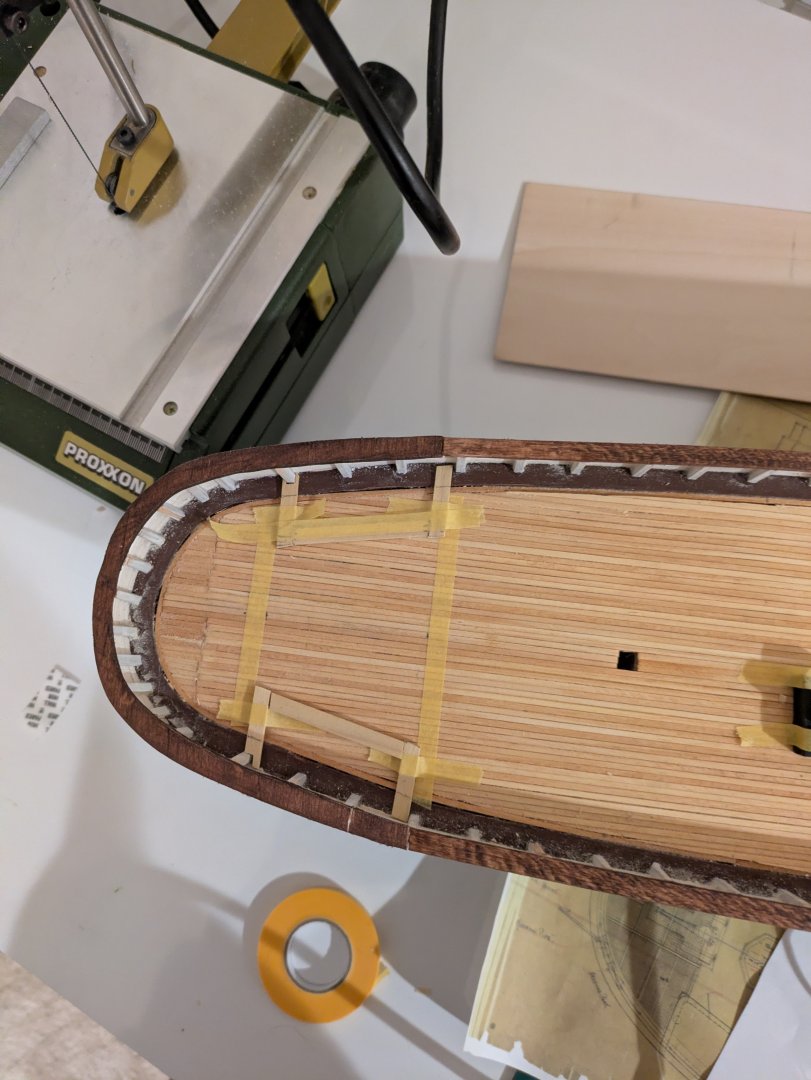
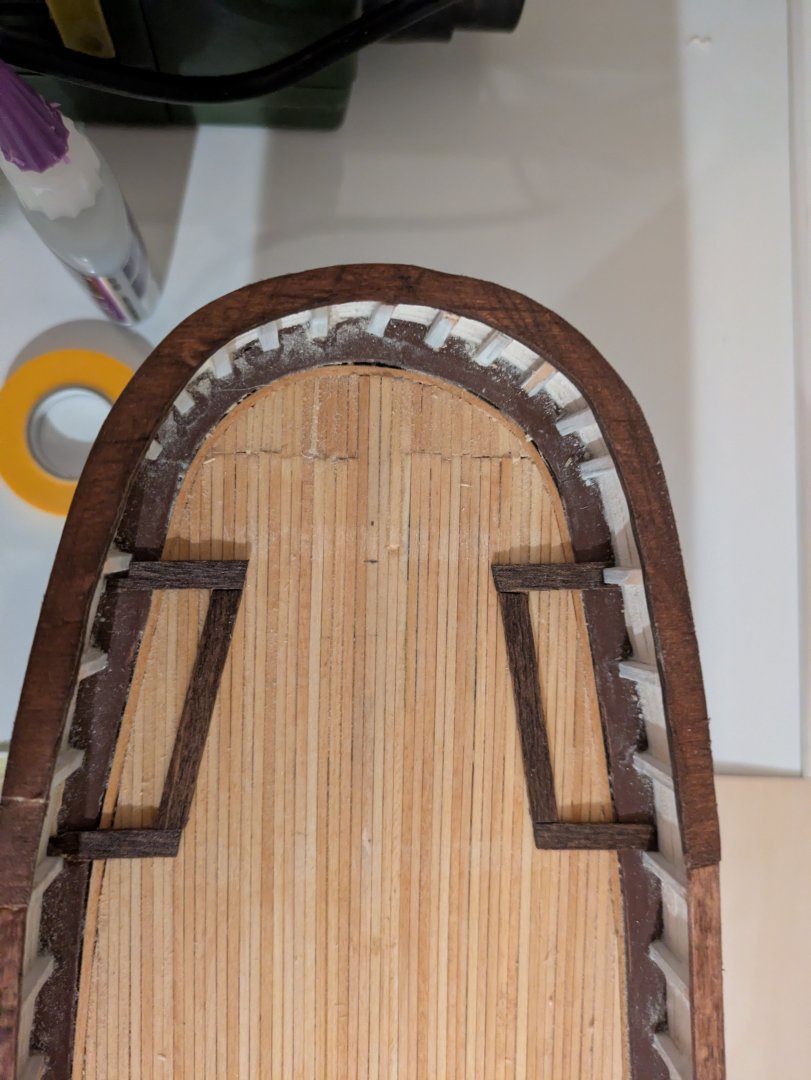
I hope everyone had a great holiday season, however you celebrate! We returned to Rockville for the holidays and were able to see both of our children as well as other friends and relatives, so definitely a success. Return to Rockville also means shifting from working on the RRS Discovery and moving back to the USS Kearsarge. So, updates during the holidays: Forecastle: I built out the forecastle, cut the beams to length, painted and installed them: The waterways did not completely run to the bow, so that needed fixing before the deck was added: And finally, the deck was sanded and jointed so that the seam was hidden, and attached to over the deck beams: Rudder and propeller: The rudder is laser cut, but needs to be shaped somewhat and painted black. I then used some spare copper tape that I had previously marked into plates to cover the rudder until it would match the coverage on the hull. The hinges are made from styrene strip and dowels. They were glued to the rudder and then I trimmed the rudder stem so that it would (a) fit into the slot in the hull, and (b) sit with the bottom of the rudder even with the bottom of the keel. I glued it in place, followed by the gudgeon portions of the hinges. Next, I installed the propeller into the boss I added in the last update. So a couple of views of the ship as she is currently. Aft: Center: and from overhead: As always, thanks for looking in! Regards, George
-
Looking great Rick! You do really awesome iron work and it really shows in these parts. Regards, George
- 360 replies
-
- Flying Fish
- Model Shipways
-
(and 1 more)
Tagged with:
-
Sorry I missed the completion! Fantastic job! George
- 206 replies
-
- Endurance
- Shackleton
-
(and 2 more)
Tagged with:
-
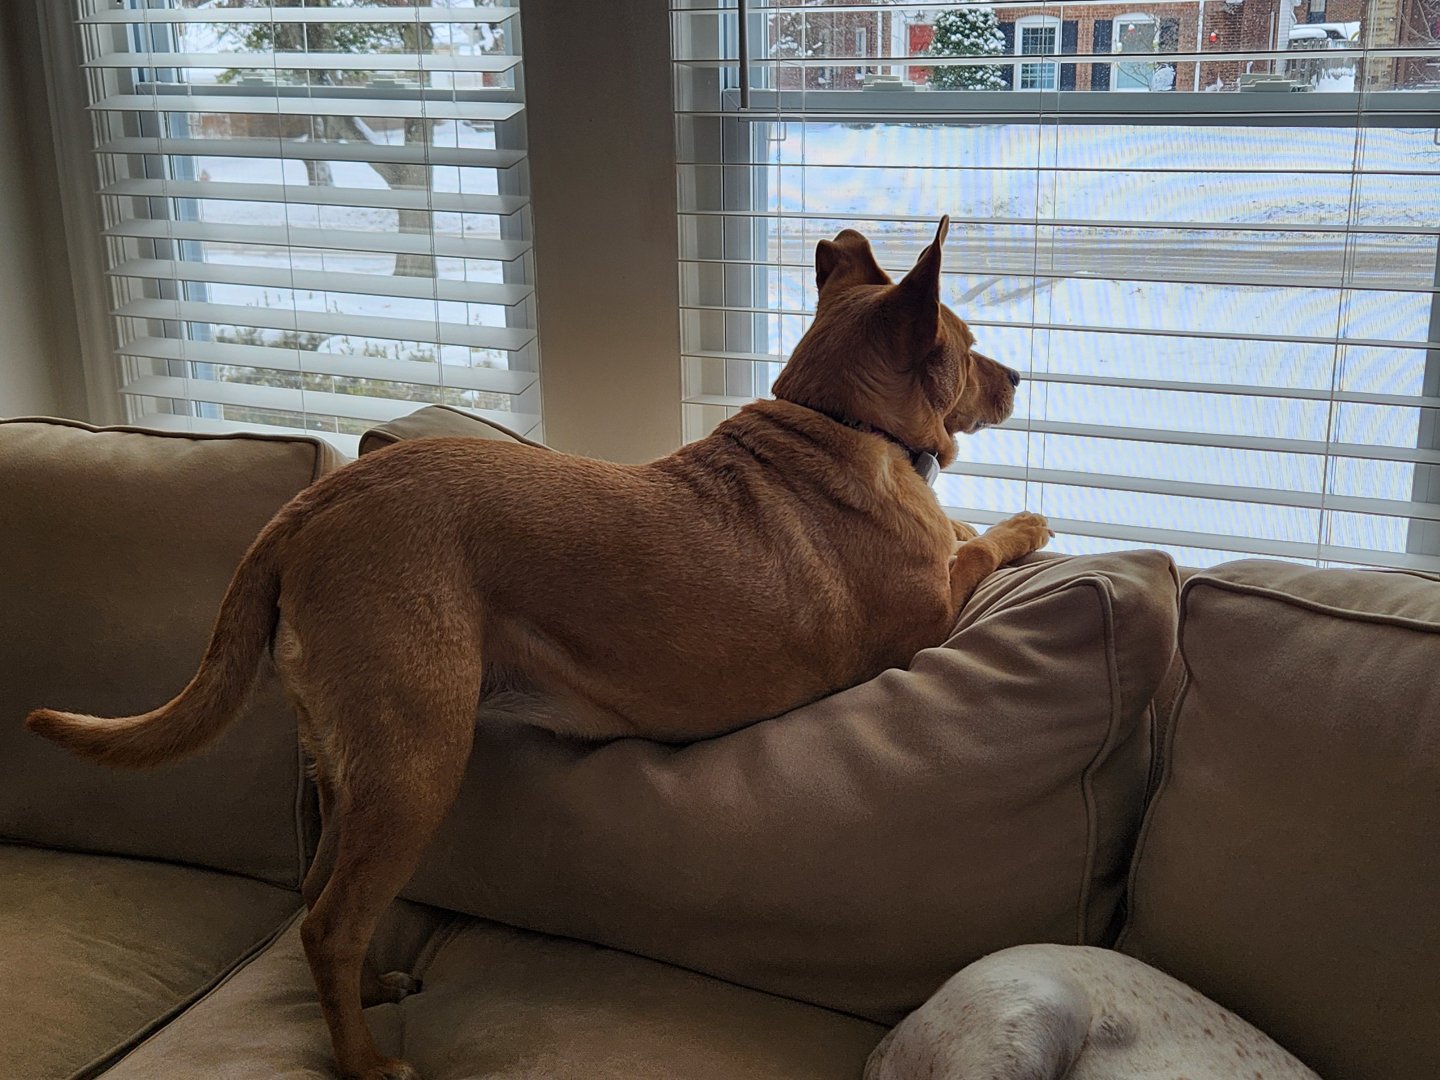
The tumor is in our (apparently) Carolina Dog, Annie (seen here guarding (?) the house in Cleveland. Her brother Hobbes the coonhound is partially visible is in his characteristic pose as well, which is to say, sleeping. They are both 11. So far the prognosis is good and surgery is usually curative on cutaneous mast cell tumors. Since she will be sedated the vet is going to remove a stye and clean her teeth. Suggesting this was quite reassuring to us since we trust our vet and can't quite imagine her doing the other treatments if she thought the prognosis was poor. Regards, George
-
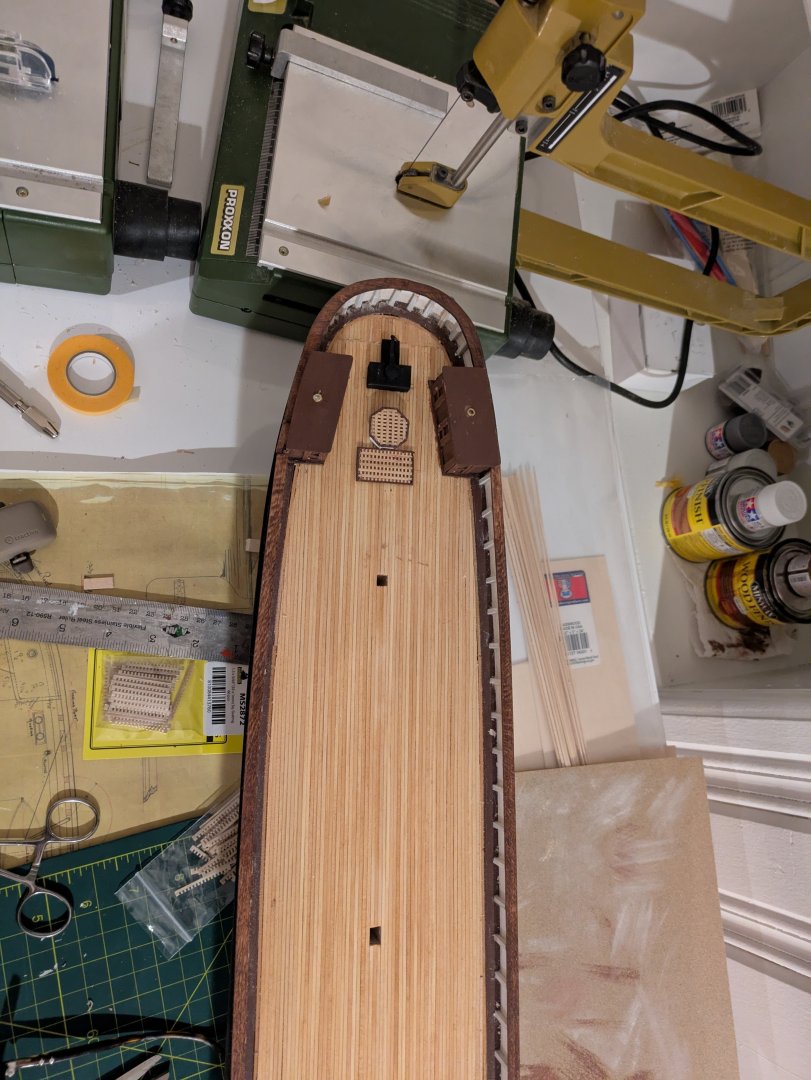
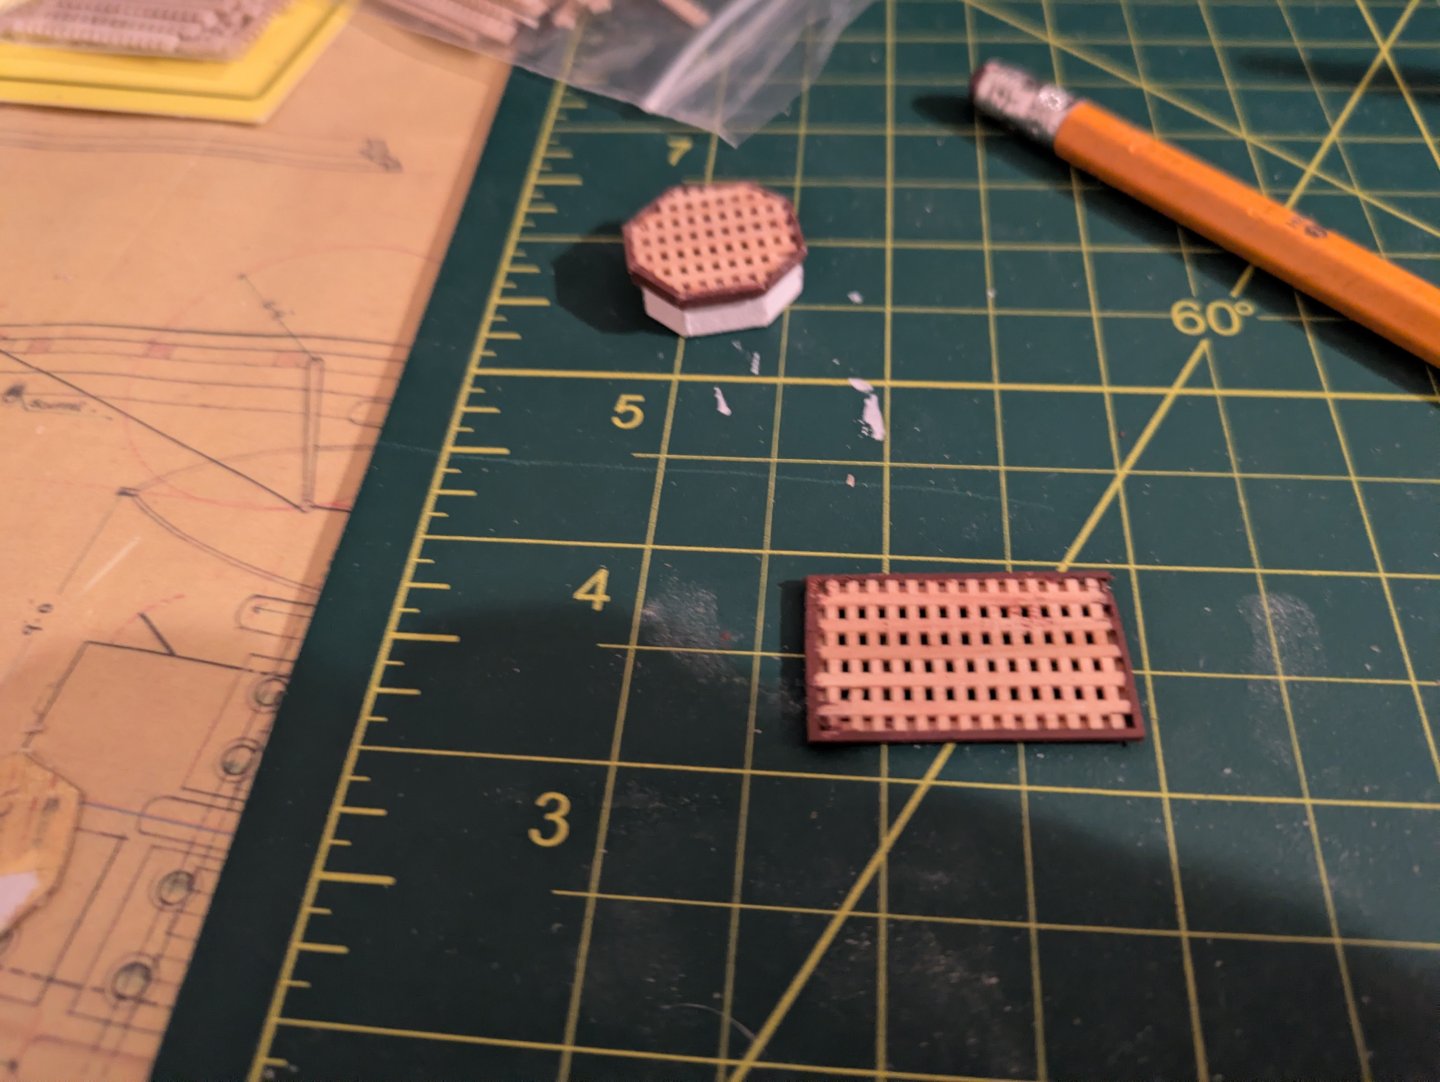
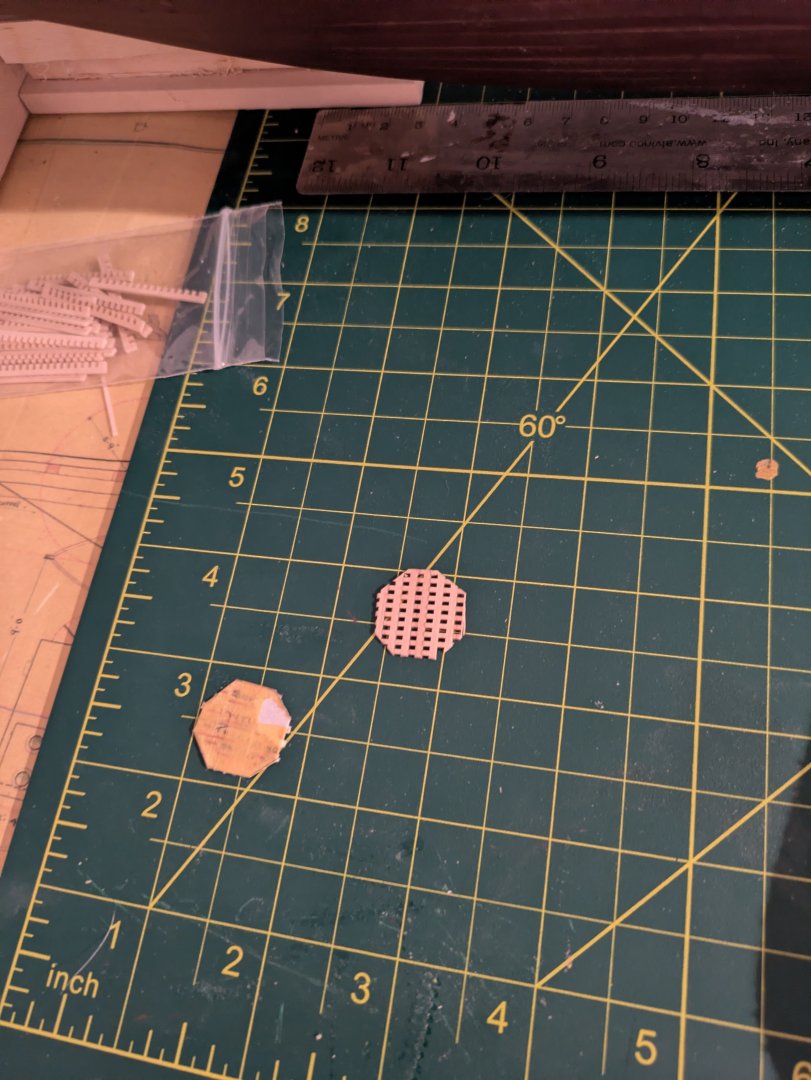
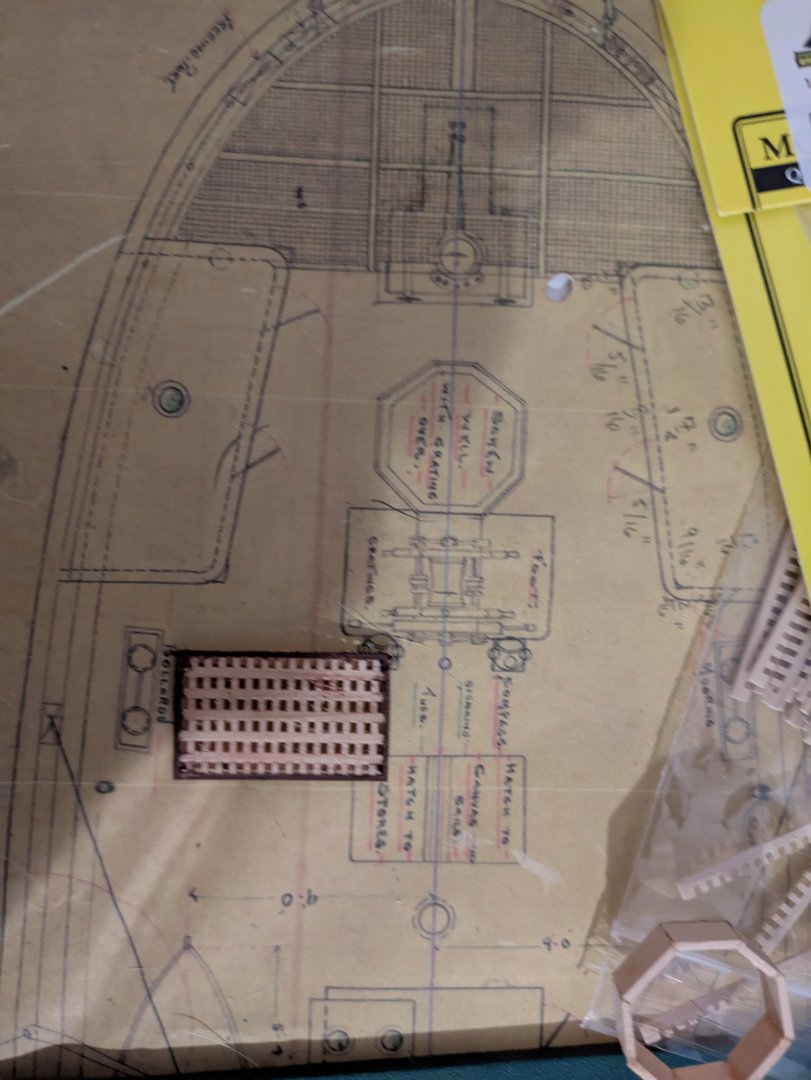
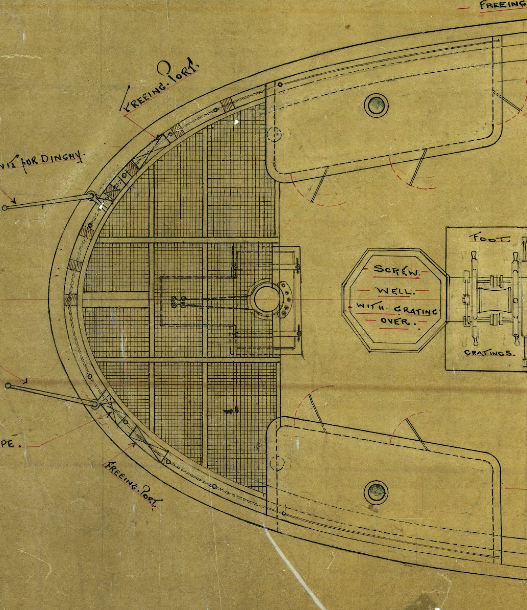
@Canute that makes as much sense as anything I've ever heard, which seems all over the place. I've seen people say that hatches are only on horizontal surfaces and doors on vertical, but in my own experience I've heard people say to "shut the hatch" when referring to a door on a vertical bulkhead. The items on the deck houses open out and are vertical so "door" it is. @KeithAug, thanks! @Rick310, that must've been pretty weird. I wonder if the sailors were creeped out, or if they had the attitude almost everyone does of "well, it couldn't happen to me." Last update on the Discovery for 2025 as we are headed back to DC for the last 2 weeks of the year tomorrow (a little early, as one of our dogs is getting surgery Thursday morning to remove a mast cell tumor). Before turning to the monkey poop, I decided to do some of the deck furniture in the after part of the ship. The two items I worked on were the gratings that the ship's wheel is mounted on, and the well that allowed access to the propeller. The latter is an interesting feature, which in theory meant that they could pull the prop out of the way to prevent damage, and I suppose repair/replace it if damaged. I tried many different ways to make scratch gratings. I can see how to do so, but don't have the tools, and in the end, just broke down and bought the grating strips from ModelExpo. The wheel gratings are just a rectangle sitting on a very thin platform around the edges. It's shown in the photo below. The well is more complicated. If you look closely at the plans, you will see that it is an irregular octagon with 5 identical sides and one shorter and two longer sides. The shortest side is the aftmost face of the octagon. Ultimately, I built out a rectangular grating using the ModelExpo strips, cut out the octagon, centering it as best I could and stained it as per below: I then took a 1/32" by 3/64" square piece of painted basswood, and wrapped it around the octagonal grating. The painted piece became the part of the lid that fits over the octagonal well. The rest of the well was made for 1/16" by 1/4" basswood, painted white. I cut out each of the well's sides to fit, trimmed the edges to approximately the correct angle to fit, and glued it onto the underside of the well grating, until I had the full octagon. A little touchup and you get the following: I then mounted the steering box (black), the well, and the wheel gratings onto the deck. Here are two views. The first from above: And the second oblique from the starboard side: As always, thanks for looking in. Everyone have a safe holiday season, and a Happy New Year. Regards, George
-
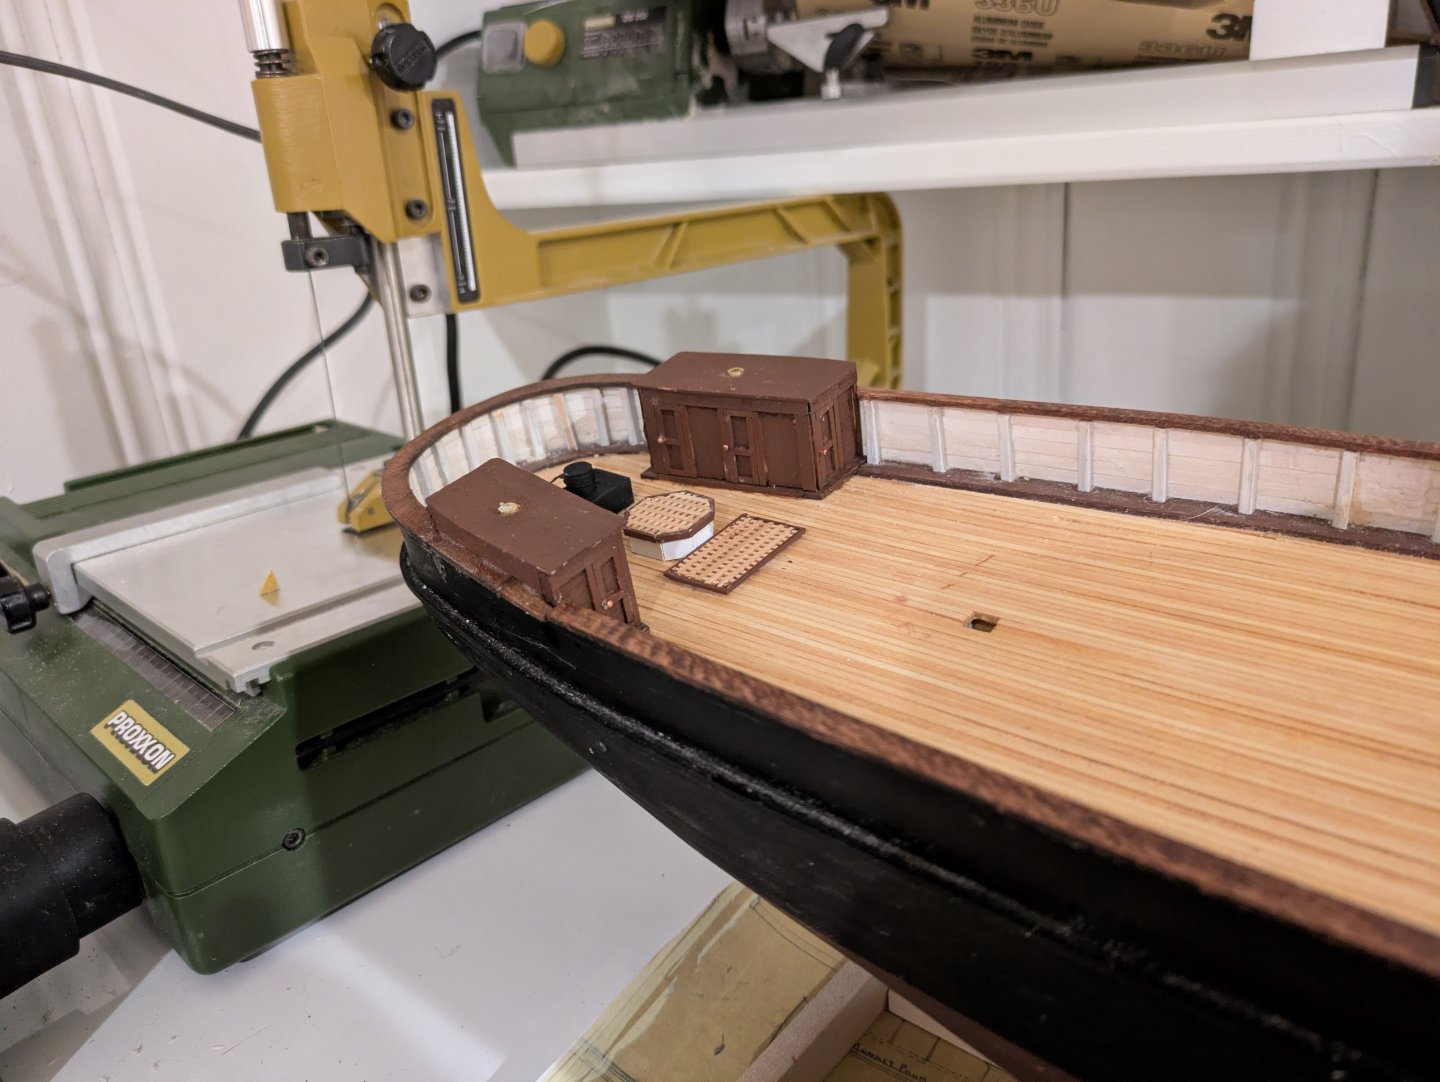
Back in Cleveland, so that means work on the Discovery continues. So here are a couple of pictures of the painted and installed after deck houses, minus the overhead which needs painting and a few details. The doors (hatches seems wrong somehow) will eventually get knobs, but probably not until the new year as my stash of tiny nails I tend to use for such things is in Rockville. The steering box (black) is not yet set, I want to make sure that I didn't make a mistake that will cause it to interfere with the monkey poop before I glue it down. The overheads have a skylight. I made the skylights out of 4 mm styrene tube, painted and then filled with CA glue. Here they are on the plans with just the drilled hole: And then installed on the deckhouses: And two of the ship with the deckhouses in place. One looking aft from amidships: And one showing the whole ship from the waterline: As always, thanks for looking in! Regards, George
-
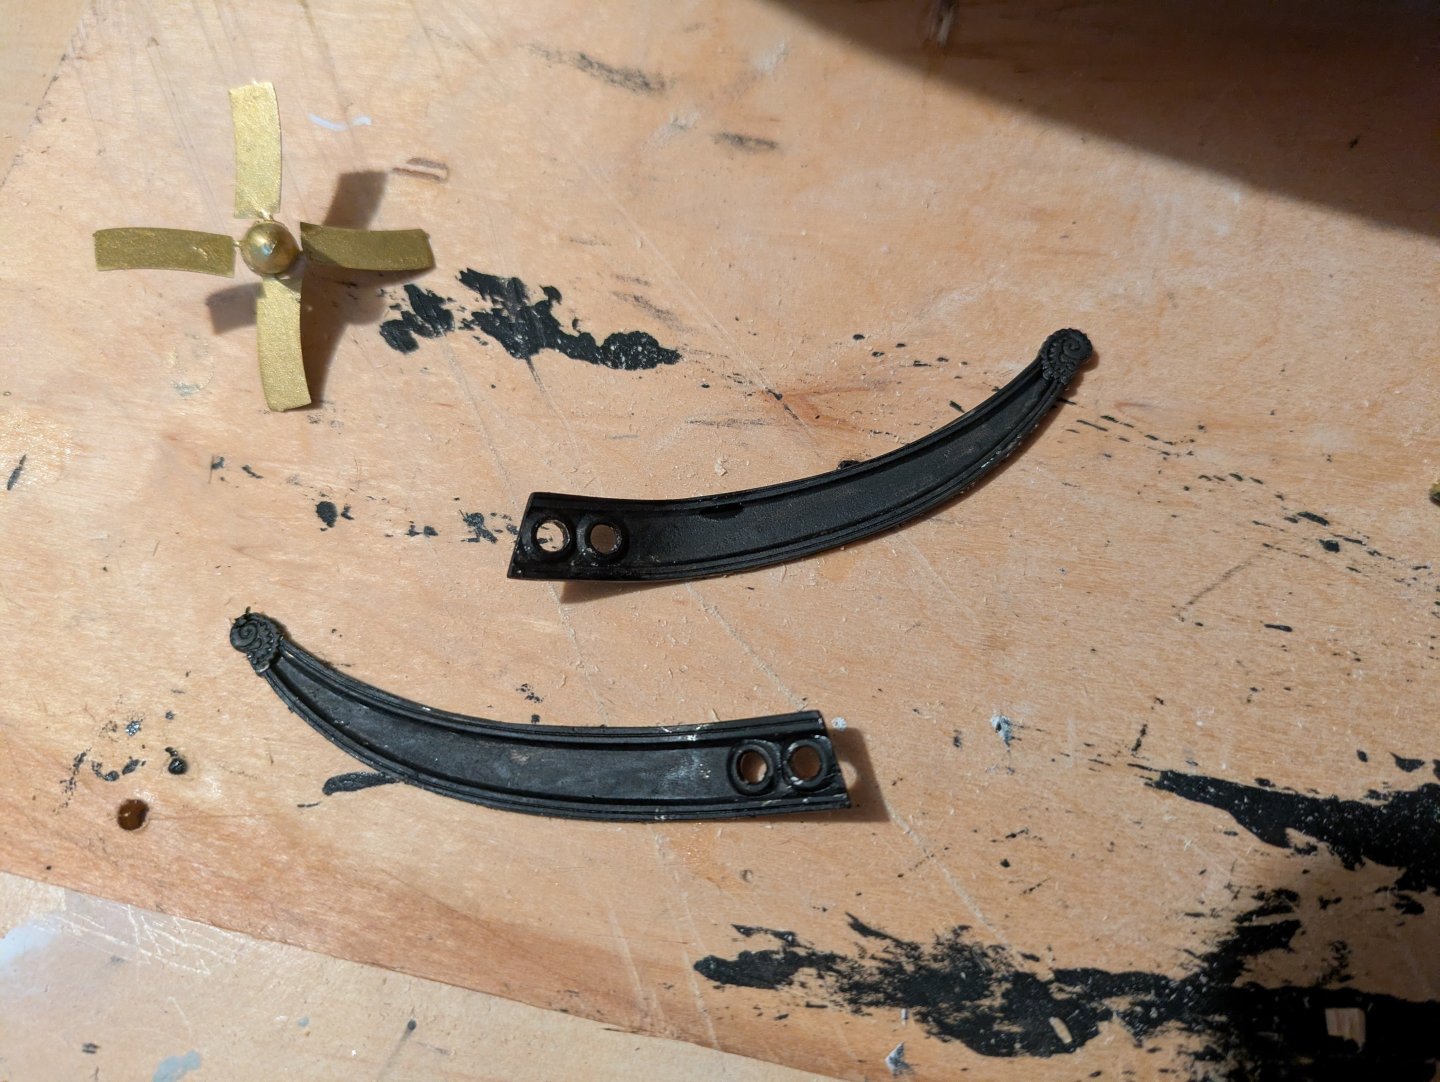
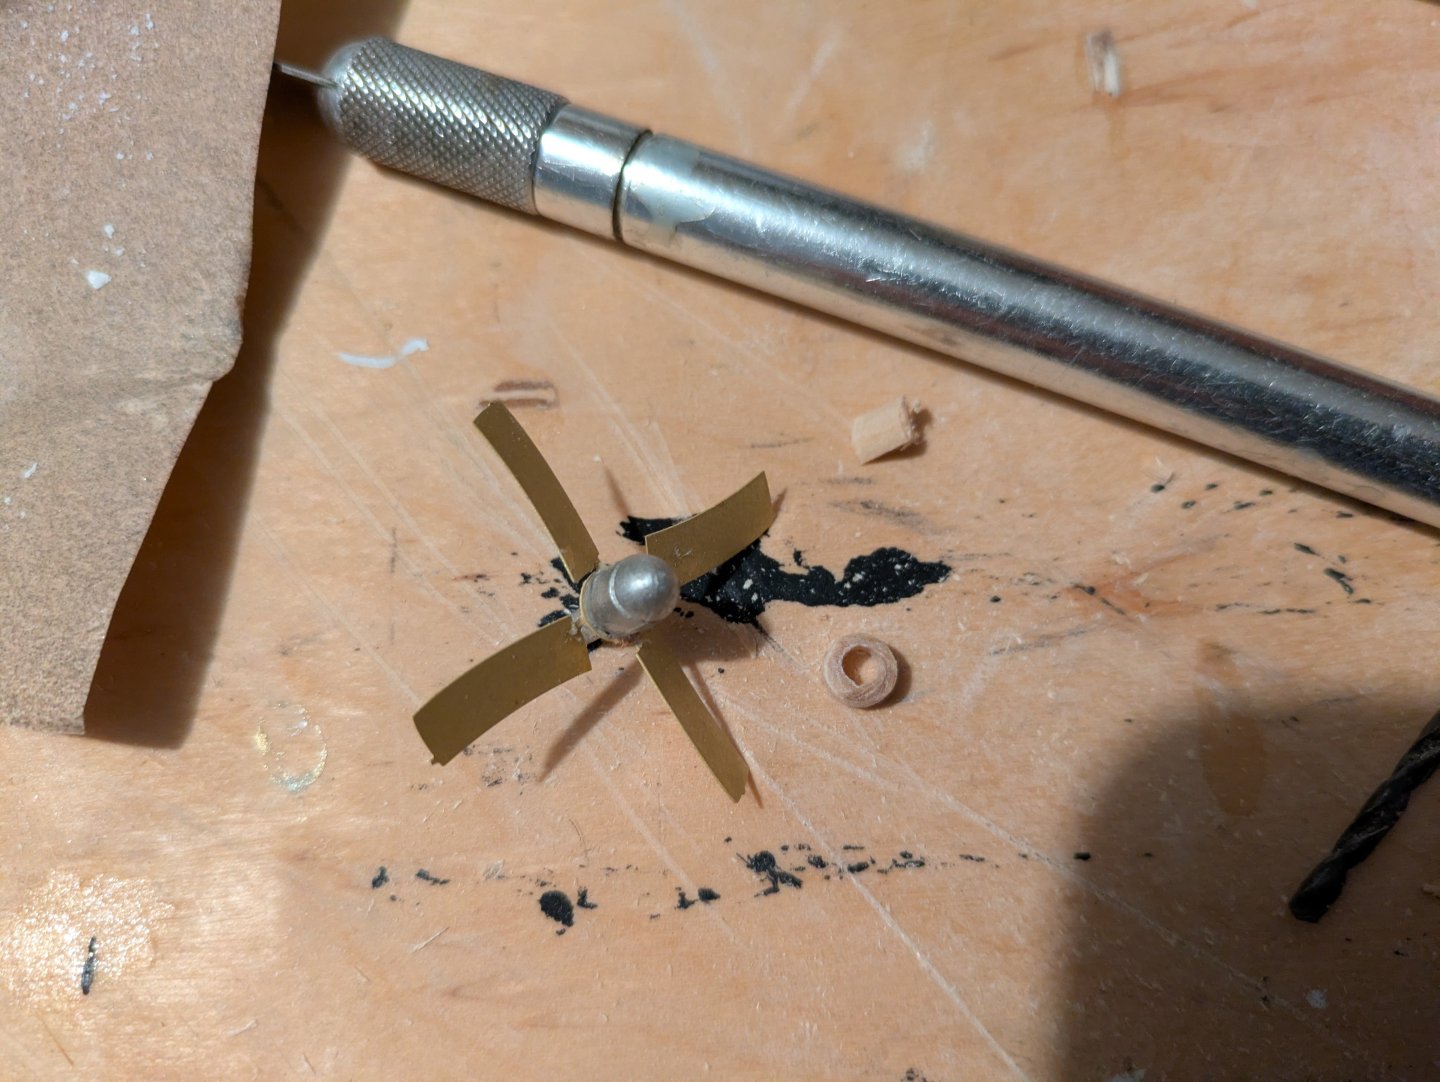
One last update until mid-December when we return to Rockville. The missing piece that I needed to make was a ring that wraps around the cast fitting that is the prop. That's the small wooden ring that is on the right side of the image below. I assembled the prop (now that I have the ring) and painted it brass so that it should be ready to fit when I return. In addition, I fitted the trailboards to the hull, opened the hawse holes, and gave them their first coat of black paint. And finally, I manufactured, copper plated, and mounted the stern tube? shaft alley? propeller shaft boss? Perhaps someone can provide me with the correct term. As always, thanks for looking in. Next update will likely be sometime the week before Christmas. Regards, George
-
Looks great Jared, and I loved the Boston Harbor photos!
- 434 replies
-
- Flying Fish
- Model Shipways
-
(and 2 more)
Tagged with:
-
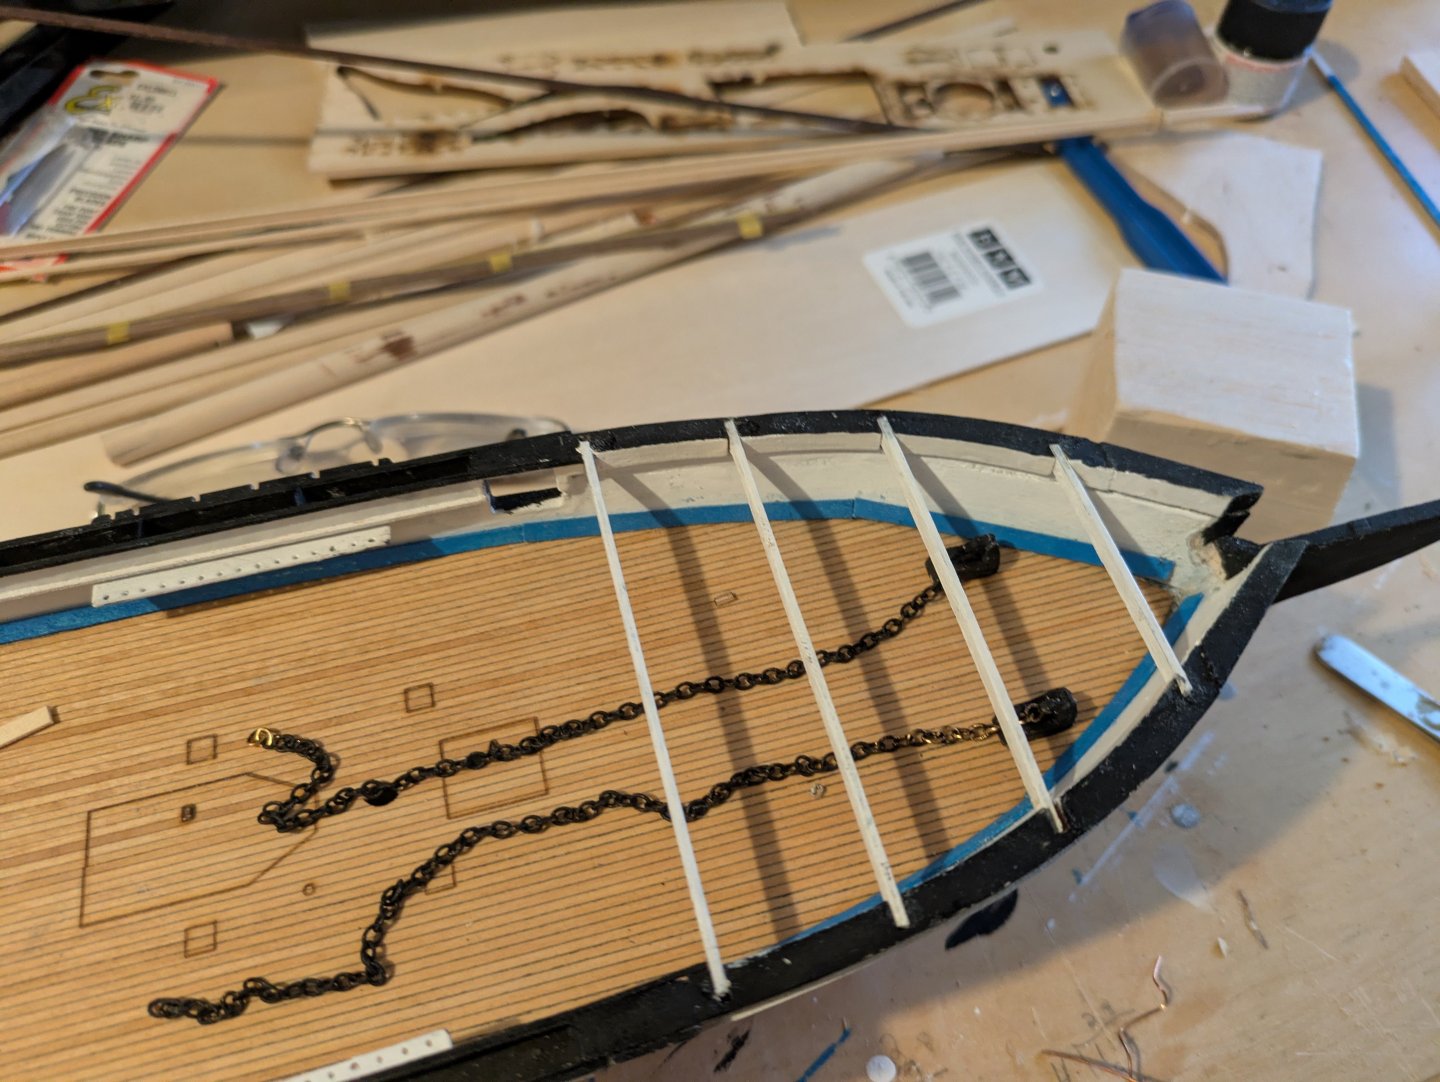
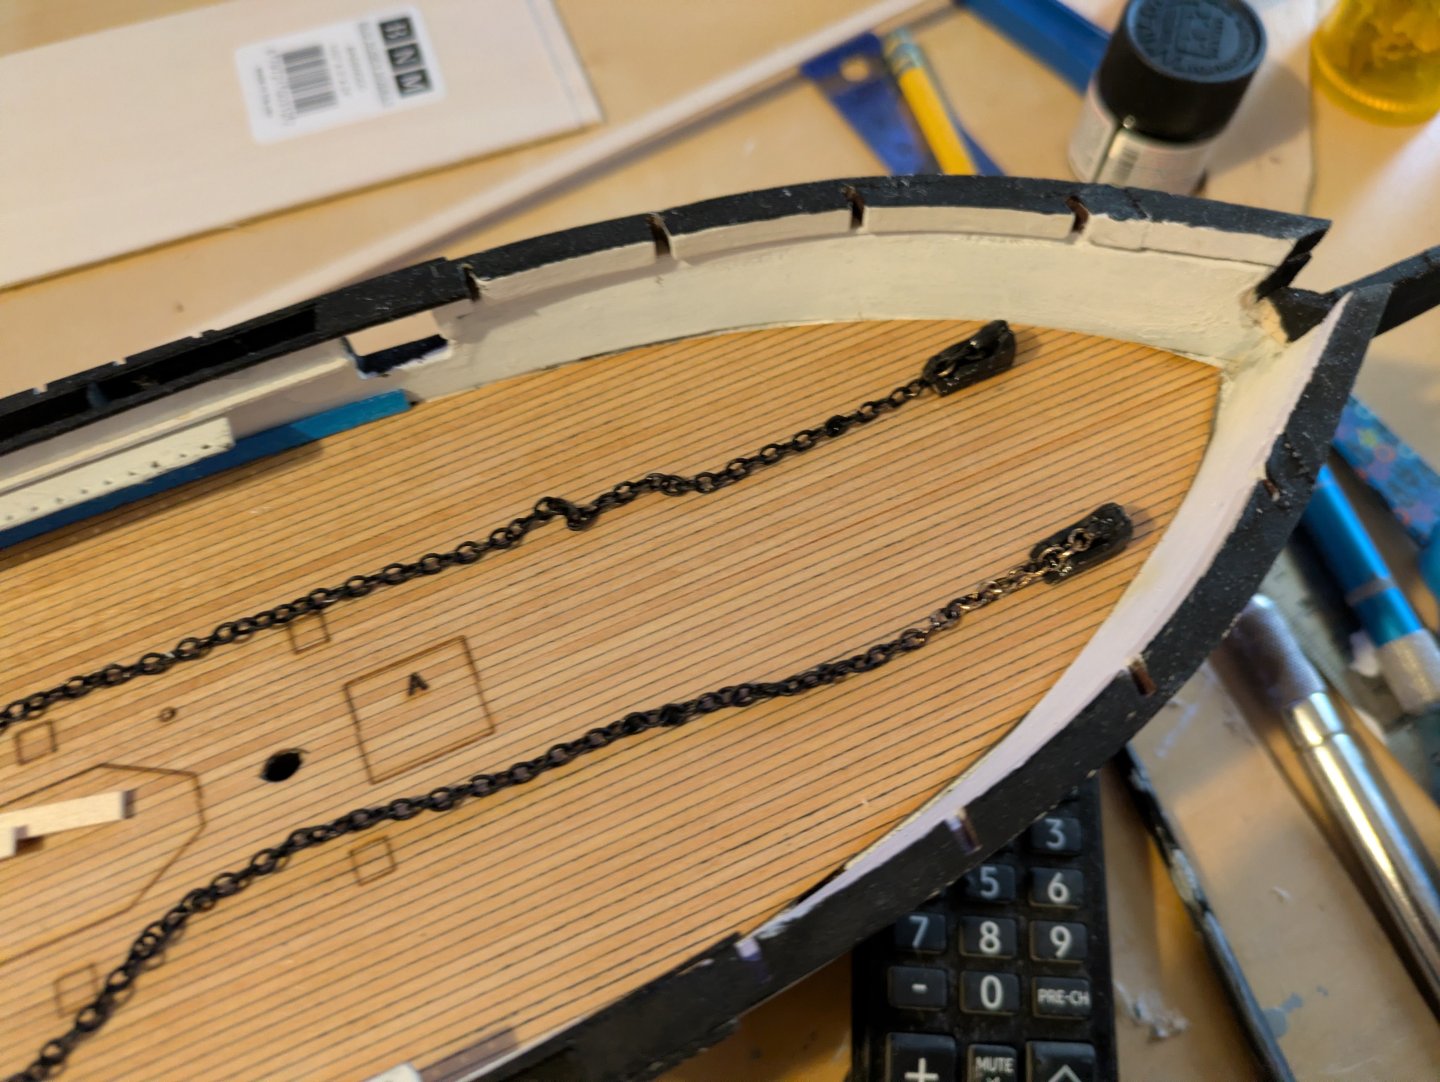
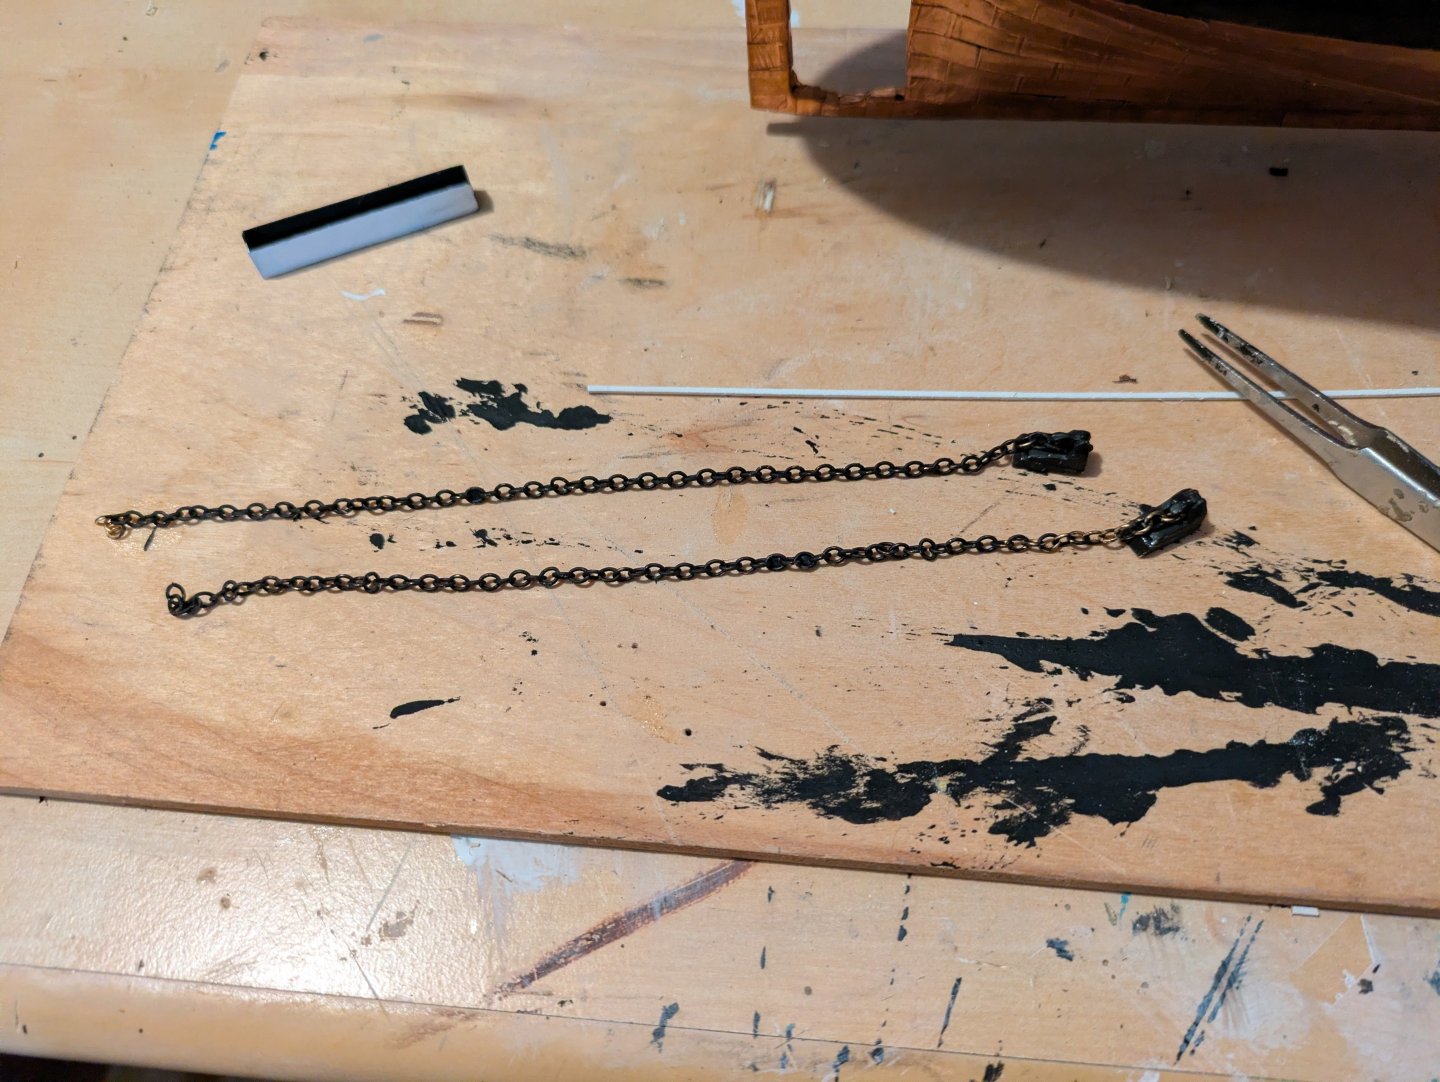
So, it's been a few months since I last posted on this. Those that are following my Discovery build will be aware that in July, I accepted a new job in Cleveland, and my wife and I moved there in September, both age 60. Since then, we have spent about every other weekend in our old place in Rockville, MD due to a combination of elderly parents and some business commitments that my wife has. For obvious reasons, my building during that period was not significant. I split the two builds between the two houses, the Discovery in Ohio and the Kearsarge in Maryland. Things have finally stabilized enough (and we were back on MD for a week) so that I have made some progress. First, the four hammock net boxes that fit in the gunports for the 11 inch Dahlgren guns were constructed per the instructions, and trimmed with 1/32 inch white and black painted stock. Three of the are shown here: Next, I painted the anchor chains and chain stoppers, and glued them , again, as per instructions. ...and installed them on the deck. I was going to mount the prop, but the laser cut spacer part has apparently come loose and vanished somewhere. I will need to construct a replacement with some of my Ohio tools before installing, and, in any case, I think I will wait until I've mounted it on the board I just ordered. I needed to paint some more blue waterways before closing off the forecastle, but it appears that is in Ohio as well, so, that is for the next trip. If I have some time tomorrow, I will mount the trailboards and open the hawse holes and do another entry, otherwise, I won't have anything to add until mid-December when we return to Rockville. Thanks for looking in! Regards, George
-
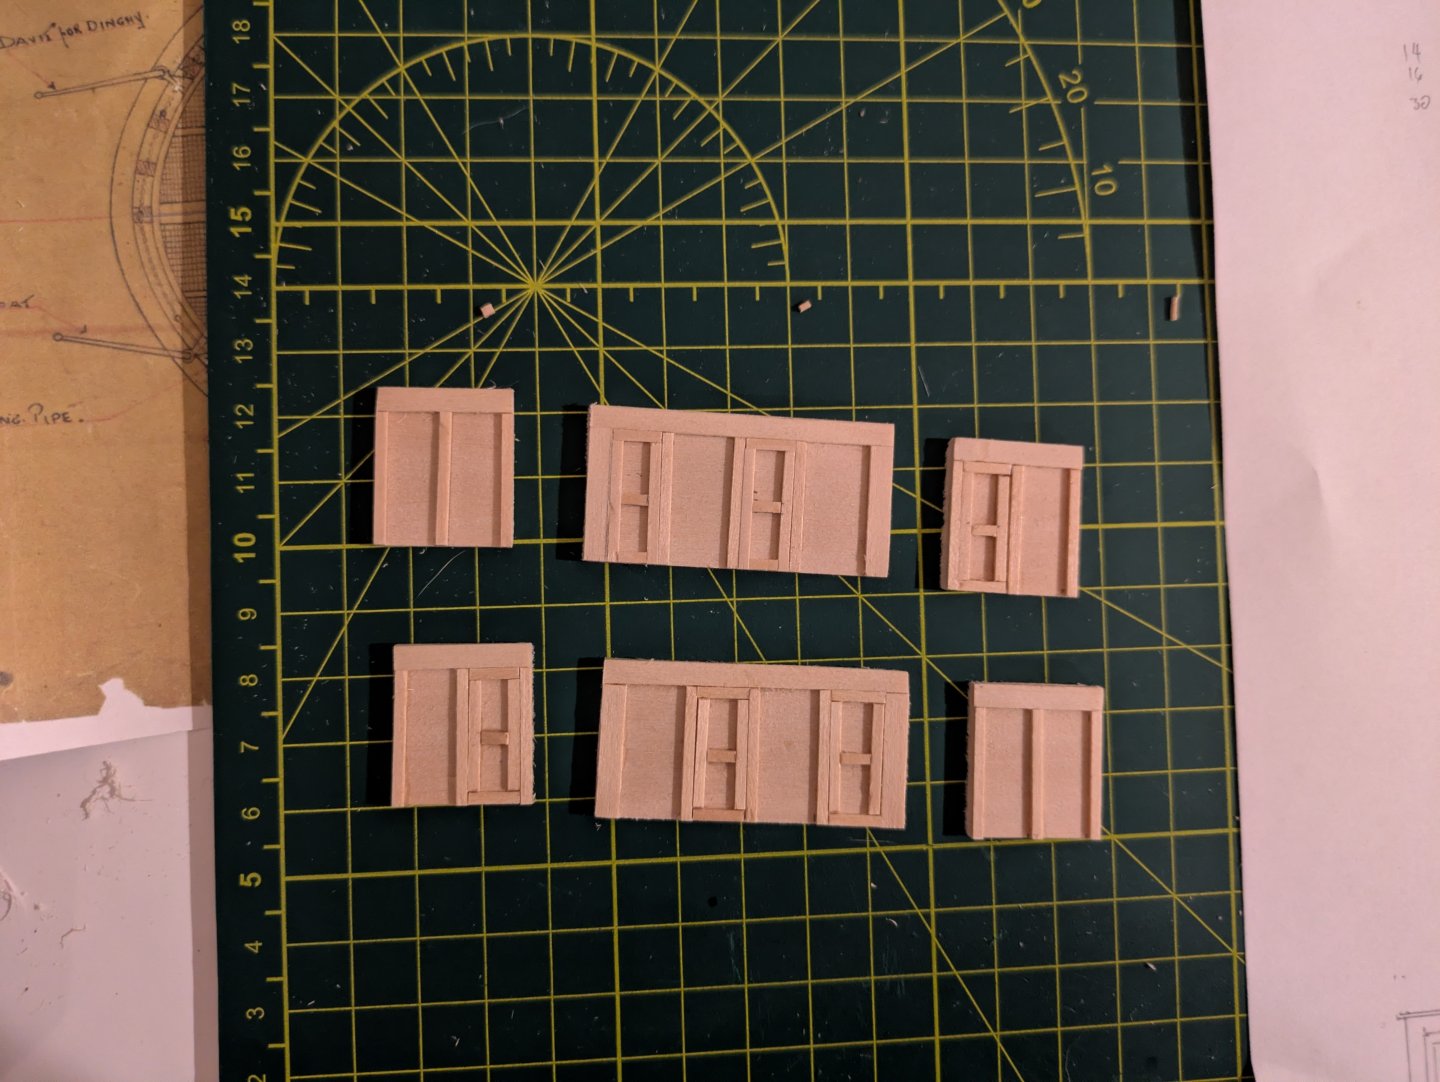
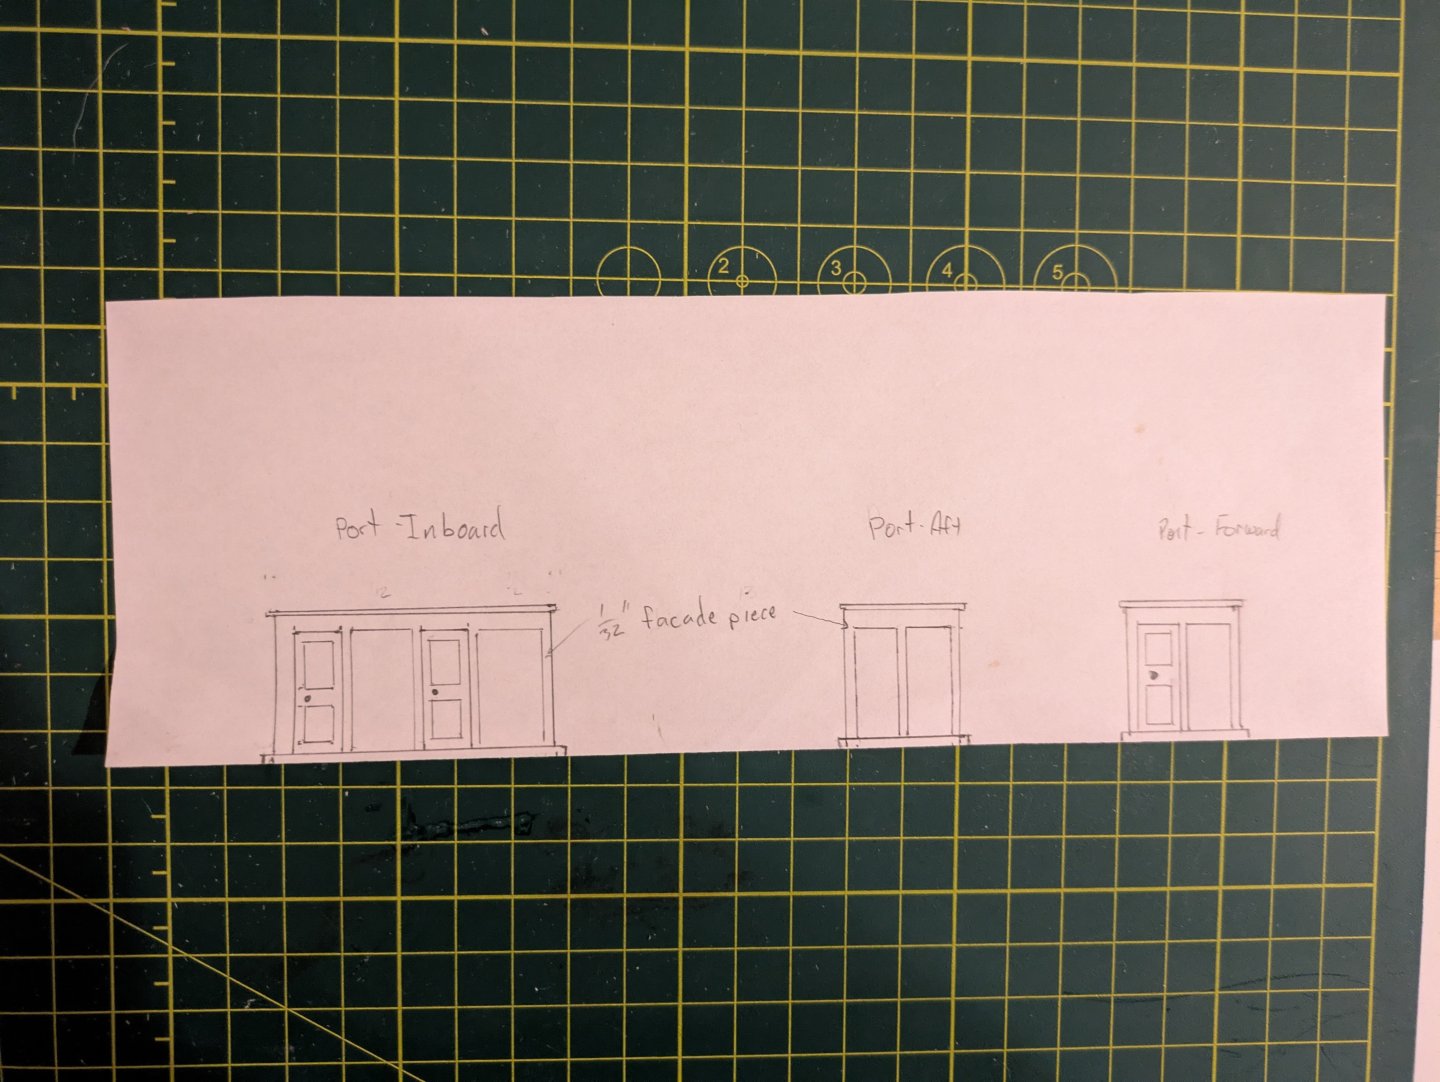
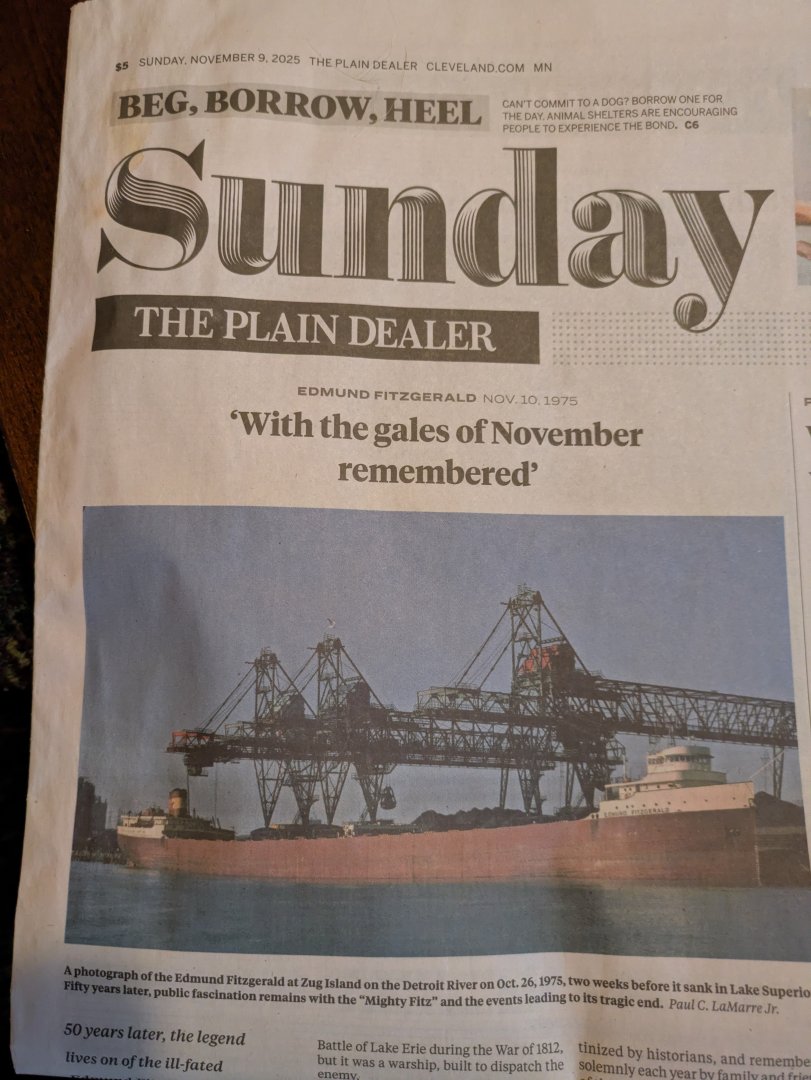
Thank you. And your wish is my command! First, being on the Great Lakes we find things in the paper that would not appear in the Washington Post: But back to the Discovery, which has two deck houses on the stern that abut the monkey poop and that form the outer edge of a section of deck that includes the wheel, the propeller well and the steering gear (the latter two having been built earlier. Here are the plans from above. You can see three doors per structure, two on the inner side and one on the forward side. There is nothing aft because the monkey poop blocks it. Here is the side view. You'll note that it's asymmetric, and you could basically split it into two, each with a smaller section that is the door, and a larger section (forward) that has no doors. Here is it on the voyage (photo from Scott Polar Research Institute): You will notice that there is some trim that isn't shown in the plans. So, I redrew the plans as below: So, construction began by laying out where the forward and aft bases are going to sit with Tamiya tape. The bases (at this point not painted) are 1/16" by 3/16" bass, trimmed so that they fit evenly over the waterway. Here they are stained and glued into place: And here are the bulkheads. Each is a 1/16" thick piece of bass with 1/32" bass detail trims. Port on top, and starboard on the bottom. They are different because of the asymmetry, and the doors need to be in the after part of the structure. So right to left, top to bottom it's: port aft, port inner, port forward, and starboard forward, starboard inner, starboard aft. So, next steps are to stain or paint them, put in a small nail to make the door handles, create an angle at the joints, and install them. One thing I will need to do is to remove the bulwark stanchions at the point where the aft bulkheads hit the bulwarks. They will make fitting it a pain, and they shouldn't be there anyway - it was just sort of how it worked out. They are taller than the bulwark, so the outer wall will be installed on the cap rail once they are in place. That's it for now. To those who celebrate, have a great Thanksgiving. Ann and I will be going to my sister's house in Alexandria, VA (we are doing Christmas this year). Both of our kids and my sister's husband and daughter, along with my 89 year old father and his companion will be there. For whatever reason, probably some combination of my mother in law's recent injury and surgery, the unsettled nature of our lives, and/or this is the first time we've done this with both of us in our sixties, it is hitting somewhat harder this year. We are by any measure extremely fortunate and it's important to occasionally spend some time reflecting on that. Regards, George
-
That's quite clear, thank you! And sorry for my late reaction. Life changes, etc... George
- 360 replies
-
- Flying Fish
- Model Shipways
-
(and 1 more)
Tagged with:
-
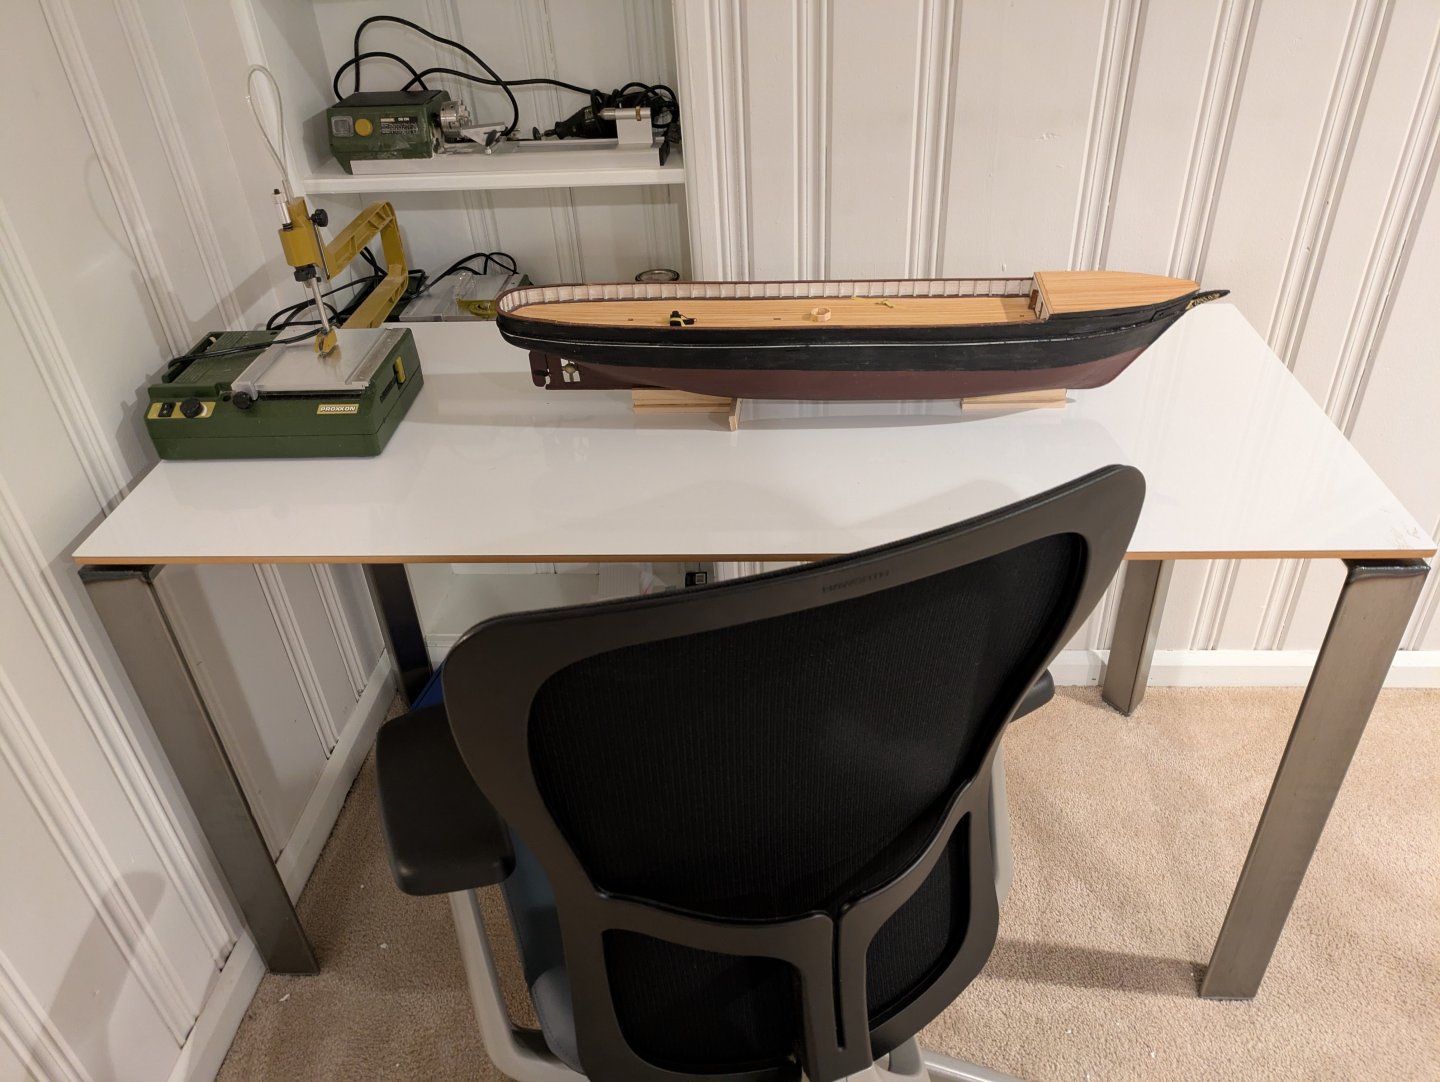
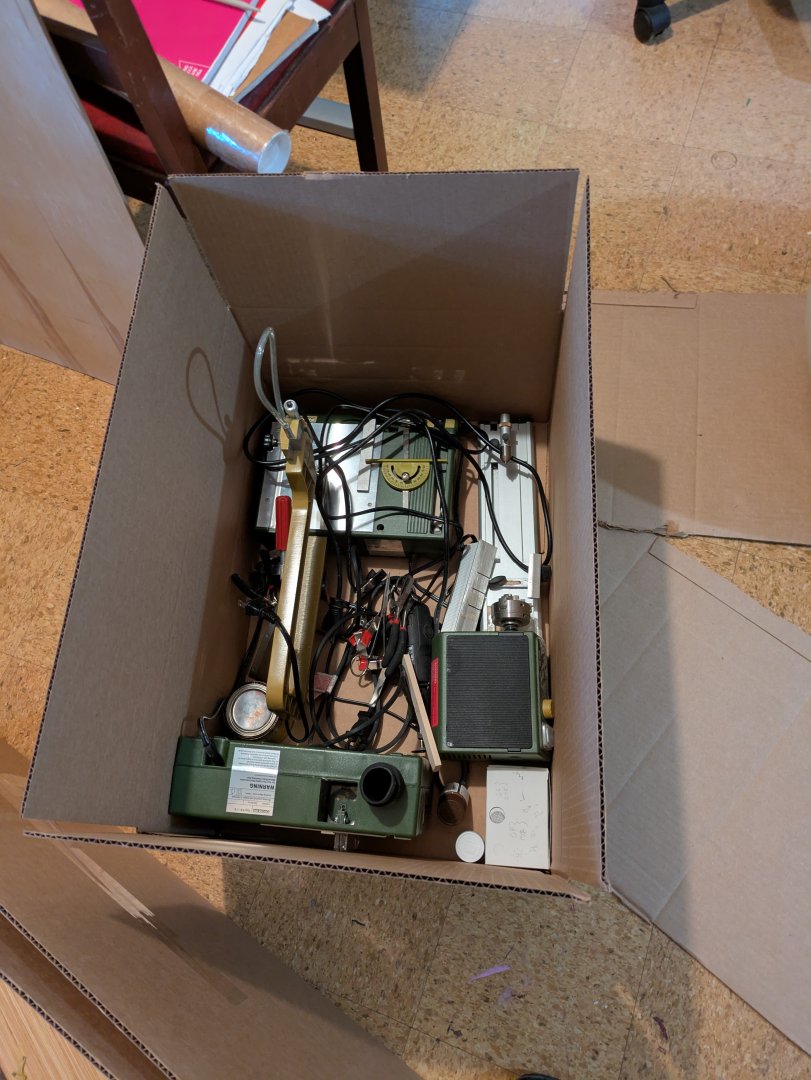
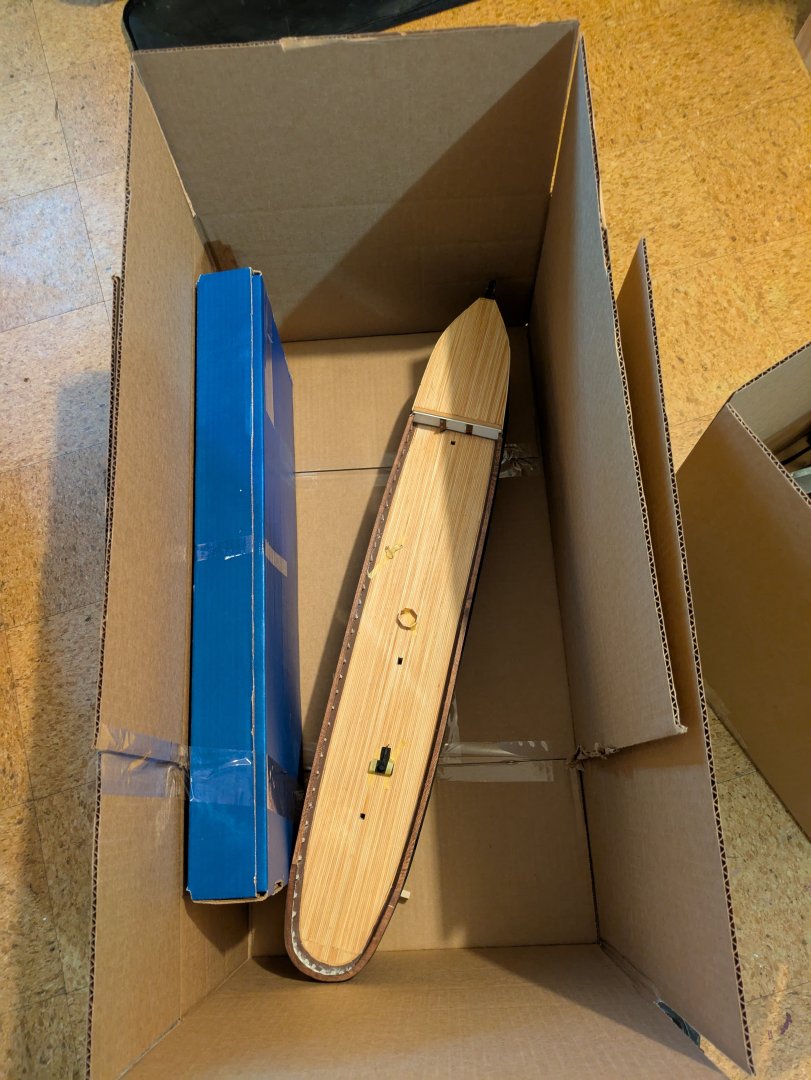
Well, I've been pretty MIA on the forums for almost two months now. The reason is obvious, but I have the following to show. The Discovery packed for moving (in my car): Many of my tools, similarly packed: And my new Ohio worktable which I bought from a used office furniture place in Cleveland: Not shown is a cutting pad I bought, because the table top is a white board! So, I can do my calculations on the table as I work. We'll see if that is just a gimmick, but it's a nice solid table and I'm pleased with it. Alas, my plans are still in DC, so I won't be back to work on the ship until after this coming weekend, but I feel like I'm pretty close to ready. Regards, George
-
Really nice looking Rick! I know this is a small detail, but how did you get the fairleads on the shrouds so neat? It was a perpetual source of frustration trying to get them to stay in place. Regards, Geirge
- 360 replies
-
- Flying Fish
- Model Shipways
-
(and 1 more)
Tagged with:
-
Congratulations Jared, this is fantastic. My apologies for the delayed response, I've been AWOL on the forums as we began our move. Regards, George
- 434 replies
-
- Flying Fish
- Model Shipways
-
(and 2 more)
Tagged with:
-
Congratulations Jared! She looks really great! A long, difficult job that is paying off! Regards, George
- 434 replies
-
- Flying Fish
- Model Shipways
-
(and 2 more)
Tagged with:
-
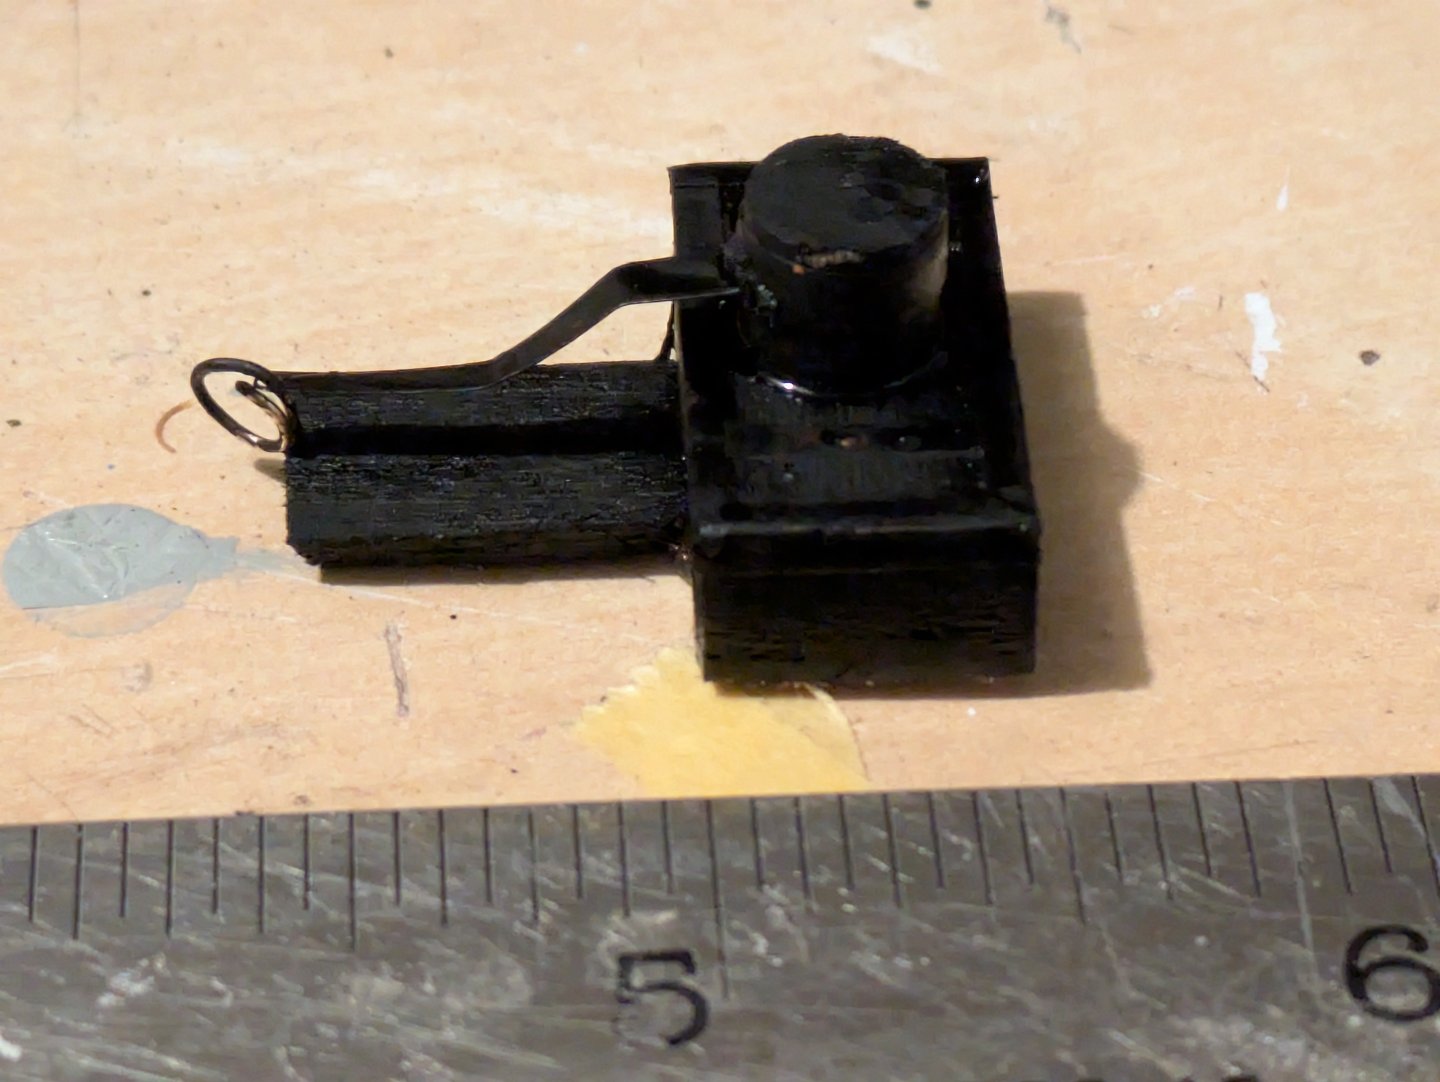
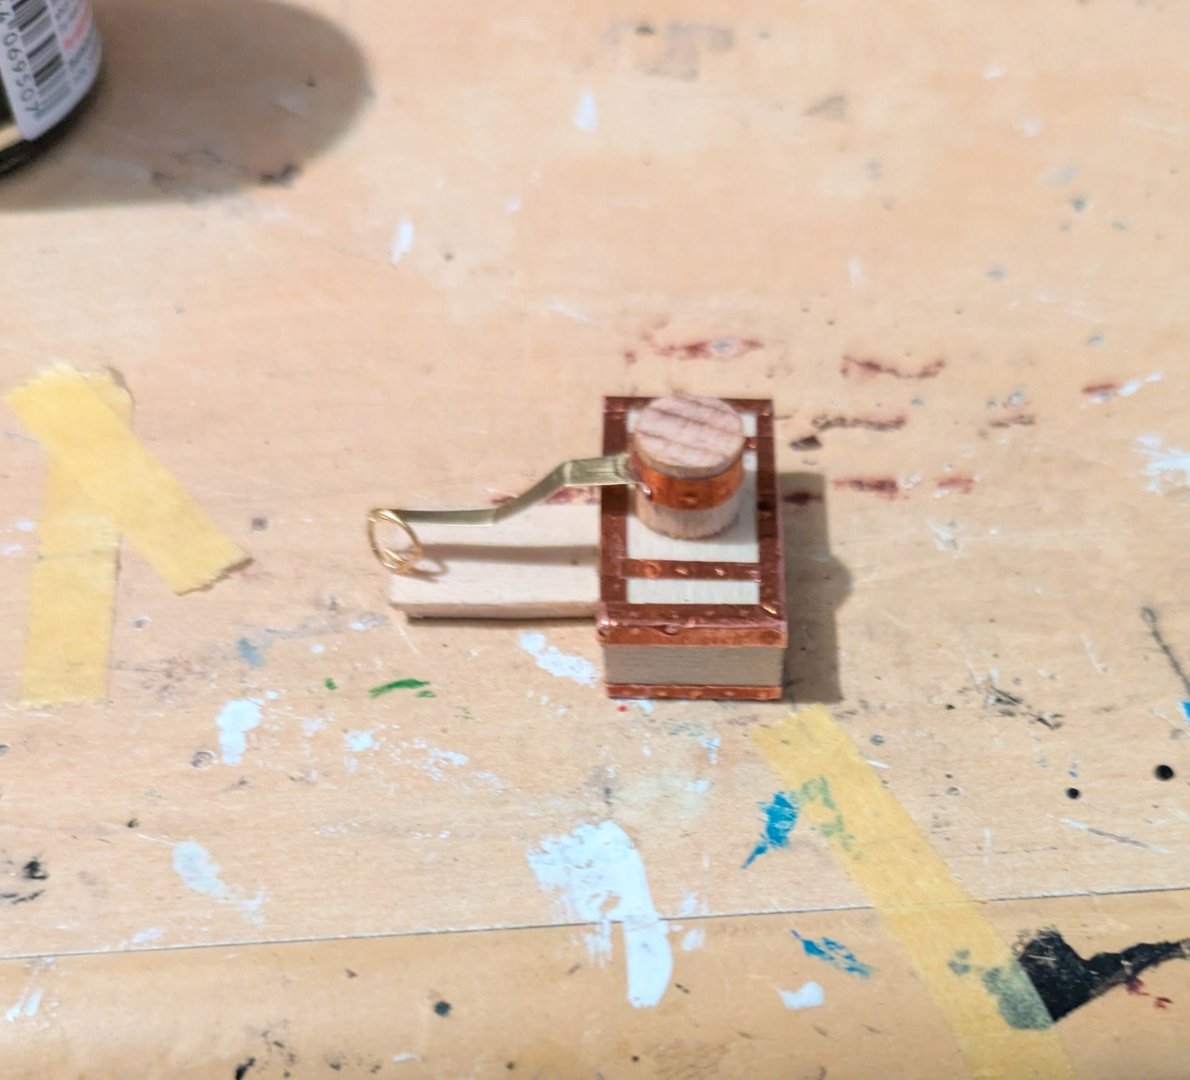
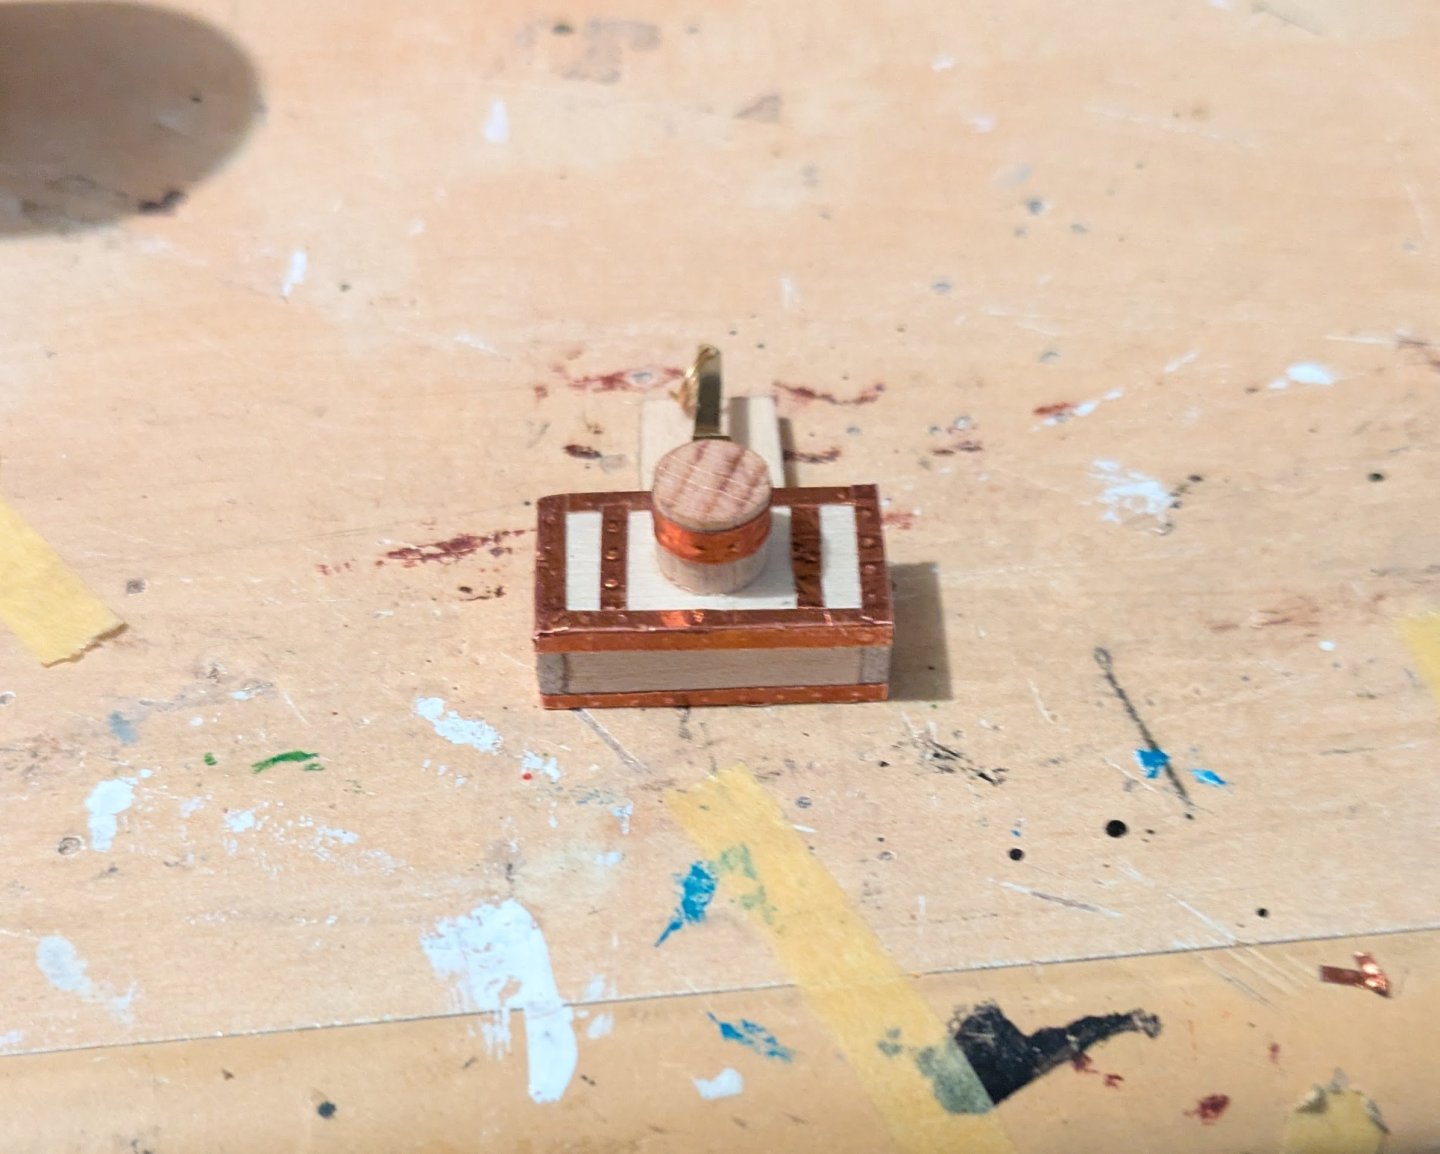
Not as much progress as I would have liked. The management company for the house we were trying to lease refused to budge on the extension cord/adapter issue so we told them to pound sand, and I had to make another trip to find an alternative residence. Fortunately, we found an equally nice place about 0.3 miles away, and the lease is acceptable. Expecting the DocuSign Monday, at which point, thankfully, we can start actually planning the move. In the interim, I finished up the tiller box and tiller. To make the metal parts (except the actual tiller), I took 3/16" wide copper tape, made 3 rows of dots for the bolts, and either cut them 1/16" inch thick (the bottom, the iron around the rudder post, and the two straps on the top) or, I cut a 1/8 strip and applied 1/16" to the top of the box and 1/16" on the side. The tiller is brass with a hole cut into it at the end for a wire loop that will be the attachment point for the chains. View from the front: and the side: Then, paint the whole thing black (as on the current ship): To some extent, I don't know why I'm bothering. It will be mostly hidden under the monkey poop, although maybe I'll leave one of the grates off so that it is visible. Thanks for looking in! Regards, George
-
So it seems! Once we settle down I expect us to subscribe to the Symphony and a local baroque group called Apollo's Fire. Sports are potentially more complicated. My wife grew up in Baltimore (where the rest of her family live), meaning that visibly rooting for the Guardians could be problematic (they are rabid Orioles fans). And, well, considering that the Baltimore Ravens were the artist formerly known as the Cleveland Browns and are in the same AFC Division... I grew up with the Washington Senators and then the Orioles, and then the Dodgers while we were in LA. I've been to a few Nats games, but I've never really connected with them, and they are NL anyway. I also grew up with what are now the Washington Commanders, but again, NFC, not AFC, so no problem. Regards, George
About us
Modelshipworld - Advancing Ship Modeling through Research
SSL Secured
Your security is important for us so this Website is SSL-Secured
NRG Mailing Address
Nautical Research Guild
237 South Lincoln Street
Westmont IL, 60559-1917
Model Ship World ® and the MSW logo are Registered Trademarks, and belong to the Nautical Research Guild (United States Patent and Trademark Office: No. 6,929,264 & No. 6,929,274, registered Dec. 20, 2022)
Helpful Links
About the NRG
If you enjoy building ship models that are historically accurate as well as beautiful, then The Nautical Research Guild (NRG) is just right for you.
The Guild is a non-profit educational organization whose mission is to “Advance Ship Modeling Through Research”. We provide support to our members in their efforts to raise the quality of their model ships.
The Nautical Research Guild has published our world-renowned quarterly magazine, The Nautical Research Journal, since 1955. The pages of the Journal are full of articles by accomplished ship modelers who show you how they create those exquisite details on their models, and by maritime historians who show you the correct details to build. The Journal is available in both print and digital editions. Go to the NRG web site (www.thenrg.org) to download a complimentary digital copy of the Journal. The NRG also publishes plan sets, books and compilations of back issues of the Journal and the former Ships in Scale and Model Ship Builder magazines.


.thumb.jpg.0825d1f503bc314934dfa71f4d3d42d6.jpg)

.thumb.jpg.6c605344dfd62479036718a7f0210552.jpg)
