spongbob
-
Posts
53 -
Joined
-
Last visited
Content Type
Profiles
Forums
Gallery
Events
Everything posted by spongbob
-
makeing sense of rigging plan abbreviations ?
spongbob replied to spongbob's topic in Masting, rigging and sails
Any body use aluminum to make those couple-rs that connect the different sections of mast" together seem's like ply would snap it the ever got bumped (hypothetical) not if you used like a bunch of 1/16 ply sandwiched 6 times ,ect. with super glue you know the pieces that are rectangular with 2 holes and offset the mast sections .il check later gotta get some rest... -
makeing sense of rigging plan abbreviations ?
spongbob replied to spongbob's topic in Masting, rigging and sails
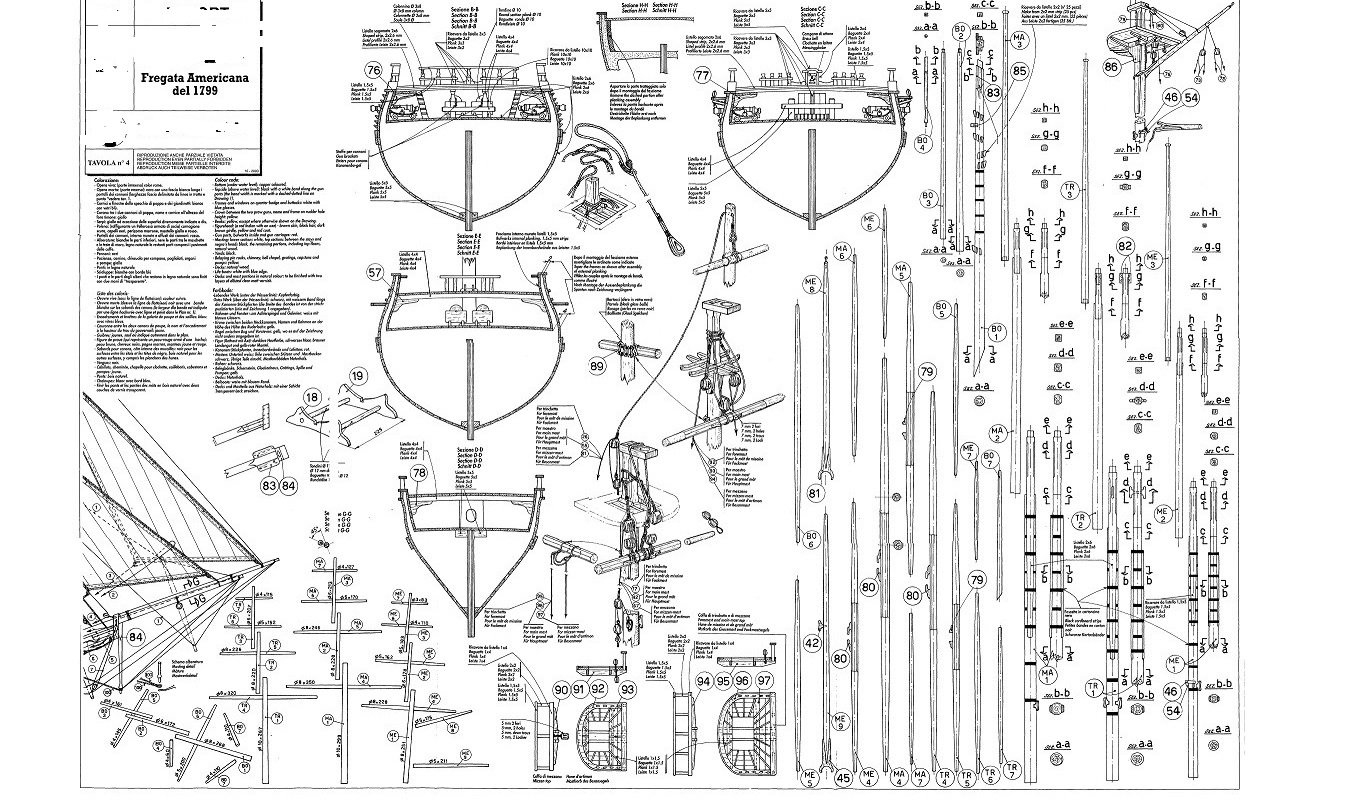
the TR designated mast and yards i take it now after looking again must certainly be the back mitzen for certain ? that is the iffy one of the three thanks for help and info what plans i have are printed off and hard to see the small numbers im thinking the 80 1 80 2 80 3 80 4 are the jibb spare or whatever its called this isnt that easy some of my plans are tracings from pc screen, some where pdf print-offs so minimally effective .some where lost some are scattered long story shot planning same problem in different ways .Speaking of witch my plans probably are in english the same picture i snaged to use hear (to facilitate) is tuthfuly italian or such and yes this does partially ex plane half of what i can gather . thanks for taking a look and maybe i can get a concept to start somewhere.I haven't worked much on ship this past year as i have been real busy -
Ive been trying to figgure out plan designations and i suppose there are varied and unique but i haven't followed several plans so my question henceforth"? Trying to make sense or main mast mitzen mast and rear mast as possibly abbreviated on a set of plans . there are designations like MA 5, MA 4, MA7, & MA 1 i take to be the main mast Next i see TR 1 i think is the formast bottom section with TR 2 nd TR 3 being the top 2 sections of what probably the front mast on frigate essex plan . a three section mast designated ME1, ME2 and ME3 may be the yards for the main mast ME may be the rear mast. Has any one had such designations on a plan that would agree with my believe "?...this leaves me the conclusion that TR is formast but it could be mitzen any one certain could answer possibly thanks ..

-
USS Essex by spongbob - American Frigate
spongbob replied to spongbob's topic in - Build logs for subjects built 1751 - 1800
WOrking a little this evening scale is off on several pieces .somthings may change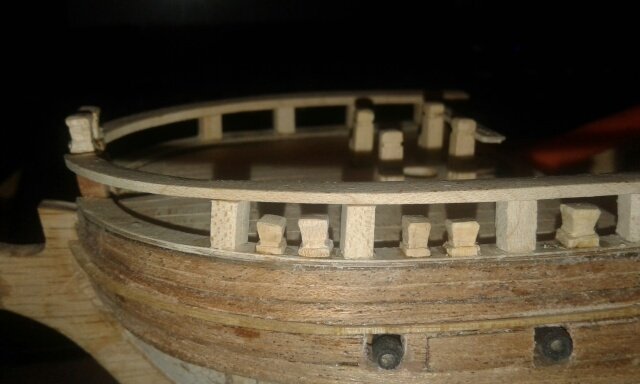
-
USS Essex by spongbob - American Frigate
spongbob replied to spongbob's topic in - Build logs for subjects built 1751 - 1800
Back to day with rails il have to extend the knighthead/s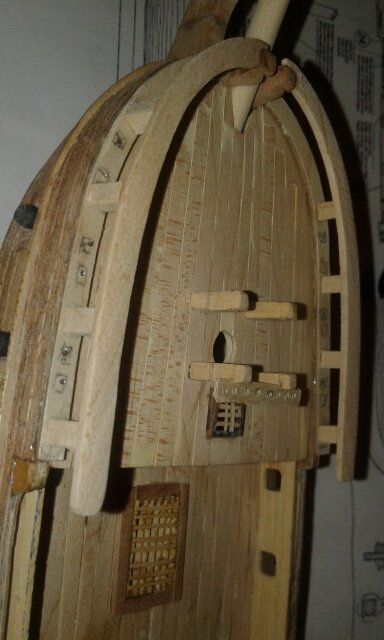
-
USS Essex by spongbob - American Frigate
spongbob replied to spongbob's topic in - Build logs for subjects built 1751 - 1800
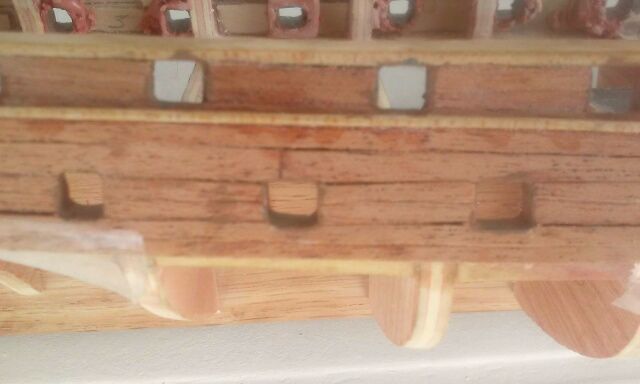
Worked on model made four posts these extend to the gun deck might have to move the hatch different models show it at diffent places some in front of mast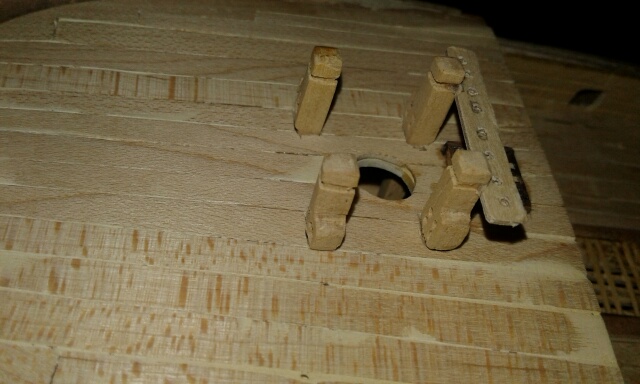
-
USS Essex by spongbob - American Frigate
spongbob replied to spongbob's topic in - Build logs for subjects built 1751 - 1800
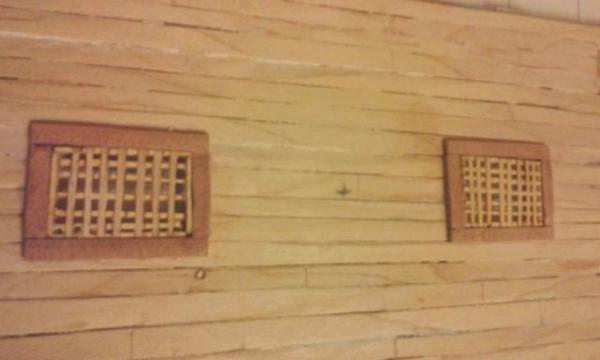
A few hours make 2 carriages and that little wood grate checking plans and pics deciding positions of several components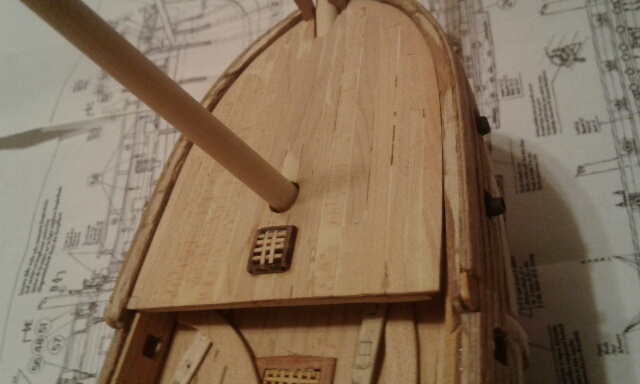
-
USS Essex by spongbob - American Frigate
spongbob replied to spongbob's topic in - Build logs for subjects built 1751 - 1800
Trying to get pic to upload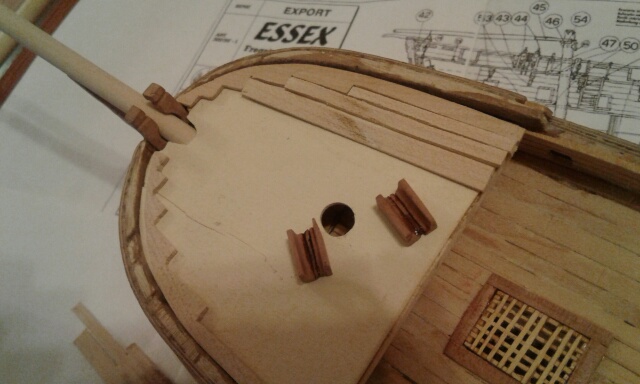
-
USS Essex by spongbob - American Frigate
spongbob replied to spongbob's topic in - Build logs for subjects built 1751 - 1800
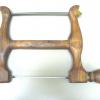
Worked on essex this evening made main spar ithen a couple days later added the work ive done to for deck and what you see .Im going to fill the cracks with somthing and resand aagain maybe some color for joints .Il have to see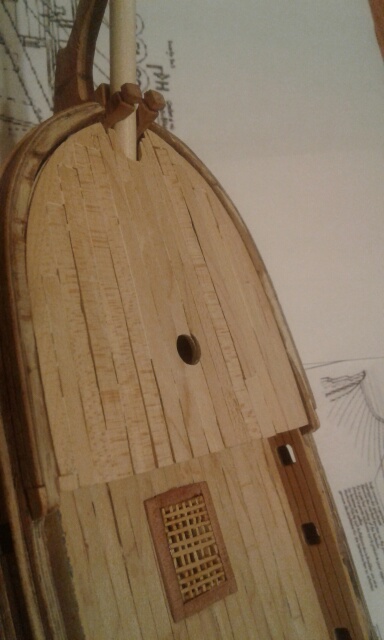
-
USS Essex by spongbob - American Frigate
spongbob replied to spongbob's topic in - Build logs for subjects built 1751 - 1800
Have been to busy to build i did mount 2 cannons these are out of site and have no wheels but there will be wheel's where needed if and when lol"...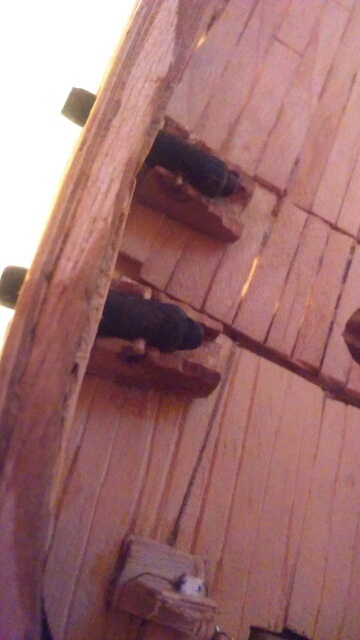
-
USS Essex by spongbob - American Frigate
spongbob replied to spongbob's topic in - Build logs for subjects built 1751 - 1800
i have got to have 4 cannon to put under (befor deck) forcastle deck ,i made 4 cannons no carriages yet!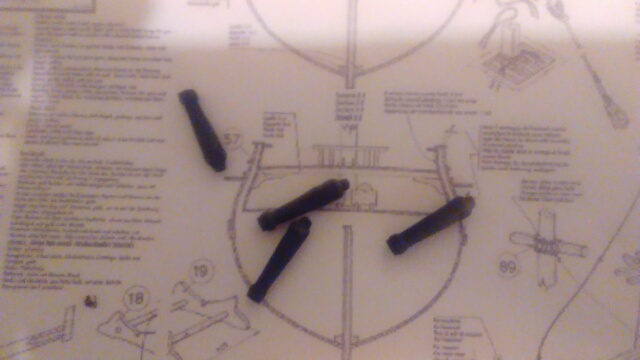
-
USS Essex by spongbob - American Frigate
spongbob replied to spongbob's topic in - Build logs for subjects built 1751 - 1800
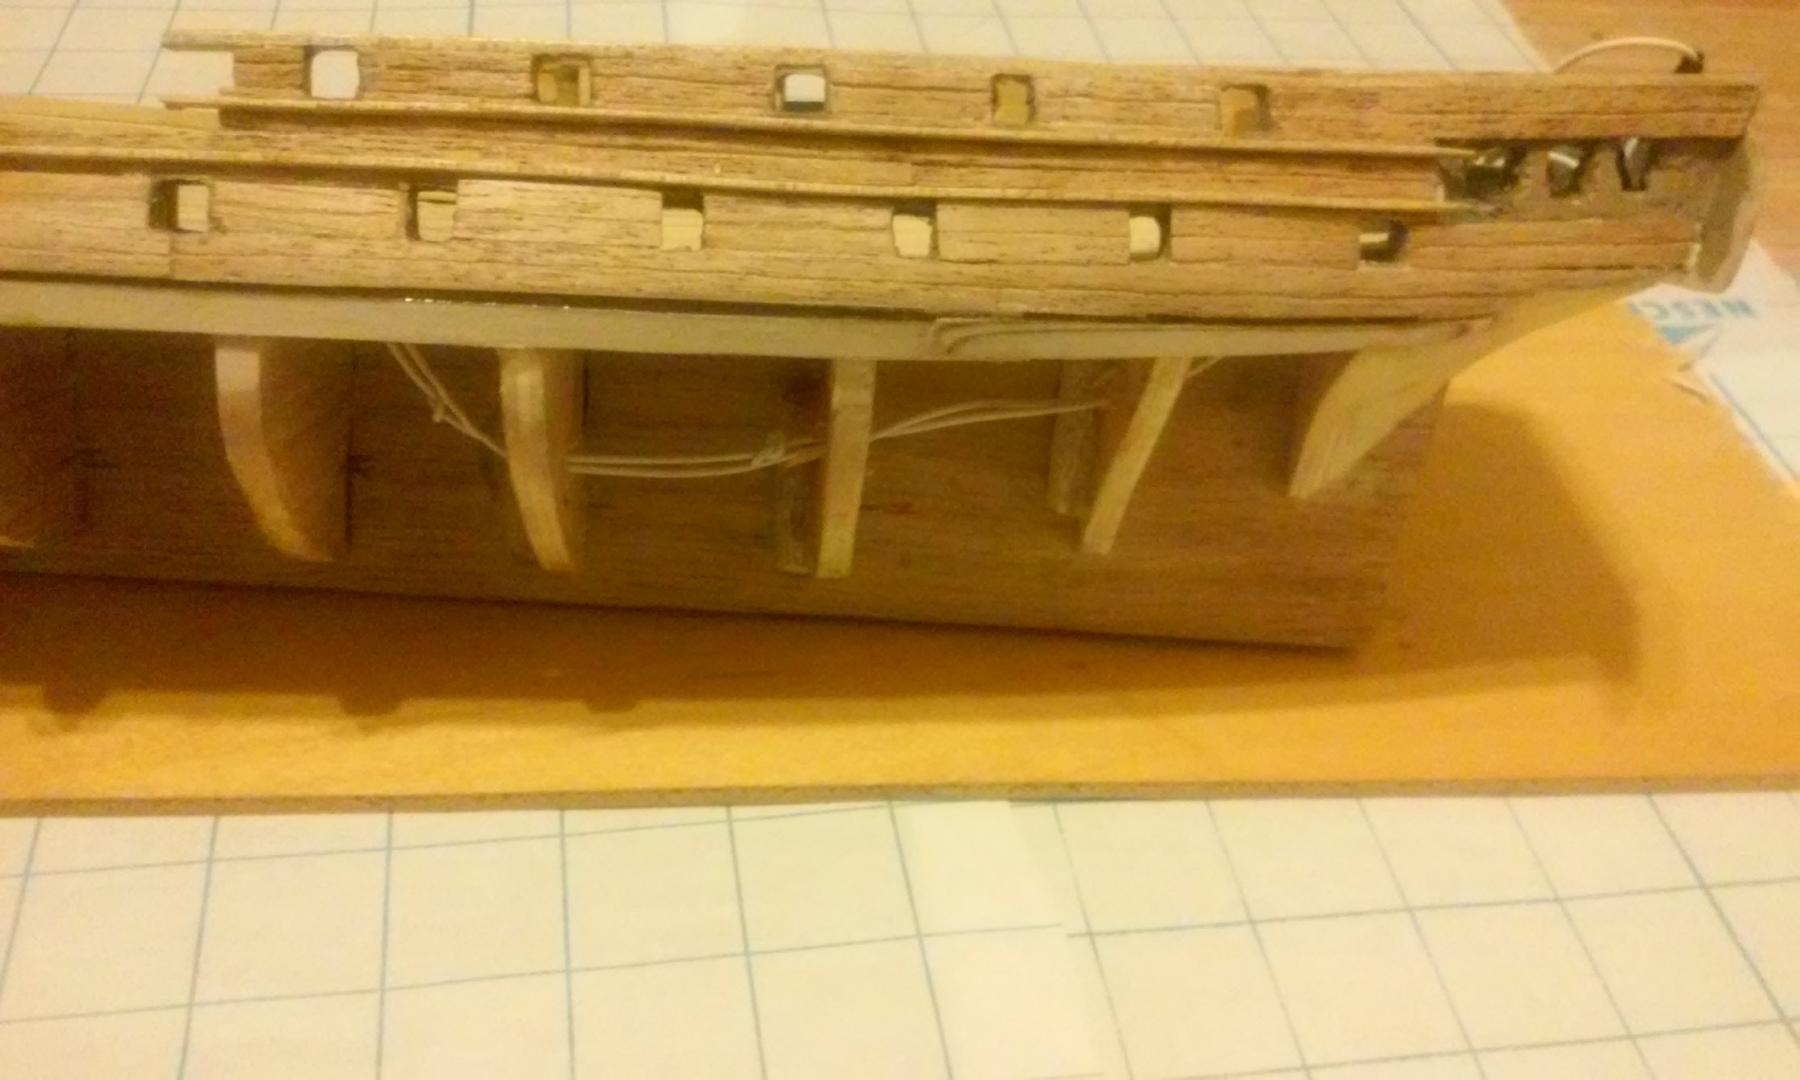
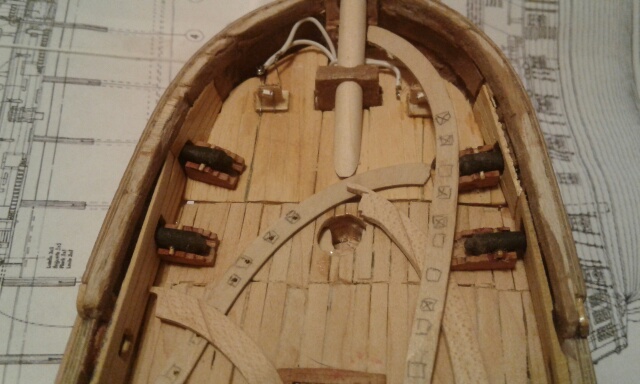
okay im back: at least i should be"..... better phone.. ,internet ..,and rehashed some plans.. and../ pics . This evening (today !) i made some wood to size, to make the rail support, around the for deck' . It was then that i took note of (too) the height" of the deck itself , as i had made a piece' of ply to fit already, excepting not actually positioning for (glue) .It remained first some comparison / with a couple models" and what little i could see from plans . Long story short it appears to me sometime's i overlook what i must realize in time lol.The wood i sized may be to small, ifso ?..il have to redo it over before fabbing anything .Of course i have to fit some deck planks", and yes that is a finished half of the lower foremast lying inside "...Im simply glad to have gotten a start' and finally having got to a position to where i hope to be able to accomplish something "!..thanks for any interest... 11.30 gotta hit the hay here ! good nite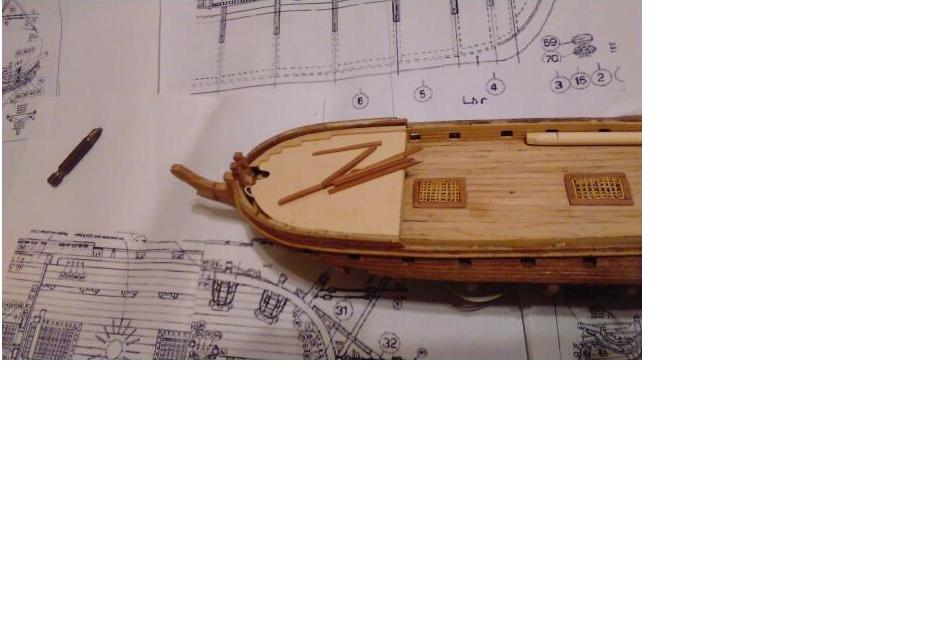
-
USS Essex by spongbob - American Frigate
spongbob replied to spongbob's topic in - Build logs for subjects built 1751 - 1800
project time this evening readying deck area made a mast blank .Sanded cannon ports ,etc. Decided to put lite ply 1/32" under planks as a measure to improve leveling and strength in one step! ... took about 1hour to cut some oak wood to rough size to be used as I'm still playing with the possibilities". further considerations are required to assemble ship hardware ,checking plans installing cannon to mention for most in mind thanks and happy modeling ! I suppose I have to turn photo's to the left' there standing on end I'll try to tighten the fit little if I can..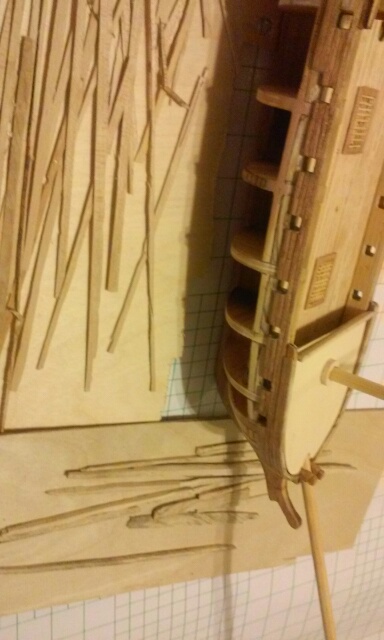
-
USS Essex by spongbob - American Frigate
spongbob replied to spongbob's topic in - Build logs for subjects built 1751 - 1800
to say that i' lost about 200 photos of Essex models .Because hard drive crashed on the laptop and I hadn't backed up any I'm waiting on replacement pc work in shop .Past few posts have from Mobil android (not my bag)makes it hard to like your likes .working more hour's so slow to little progress" -
USS Essex by spongbob - American Frigate
spongbob replied to spongbob's topic in - Build logs for subjects built 1751 - 1800
made the planked right rear section haven't sanded ports to size yet" rear led's face forward one led for cabin area have tested wire's getting ready for upper deck hopefully better care to detail Will show later just how bright they are" !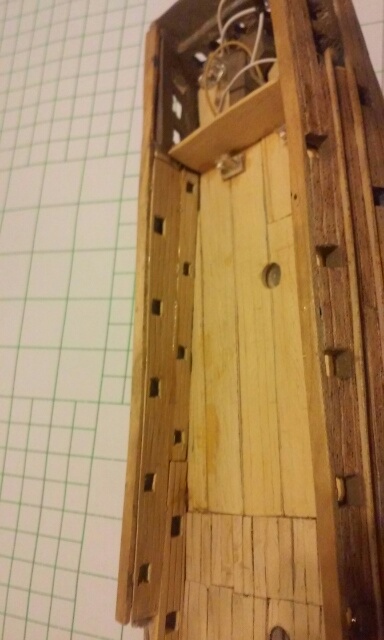
-
USS Essex by spongbob - American Frigate
spongbob replied to spongbob's topic in - Build logs for subjects built 1751 - 1800
put some brackets for led's on deck now be for upper deck go's on !
-
USS Essex by spongbob - American Frigate
spongbob replied to spongbob's topic in - Build logs for subjects built 1751 - 1800
Made inside hull plank panel left rear upping photo last port will need sanded to size sitting low but will be sized up lol"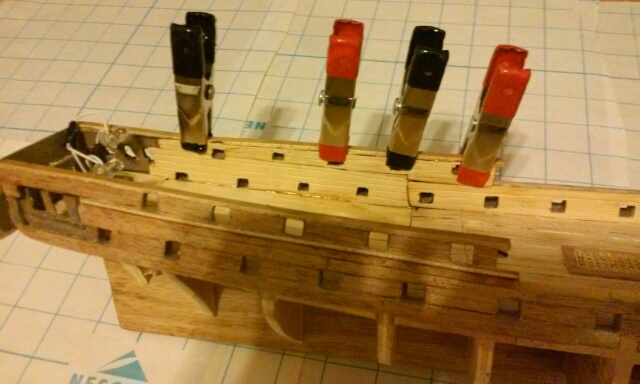
-
USS Essex by spongbob - American Frigate
spongbob replied to spongbob's topic in - Build logs for subjects built 1751 - 1800
The last two days work looks much better side profile was out by 1sixteenth over 4" adding second layer of ply fixed now will need to refill and sand surface I put another plank after this pic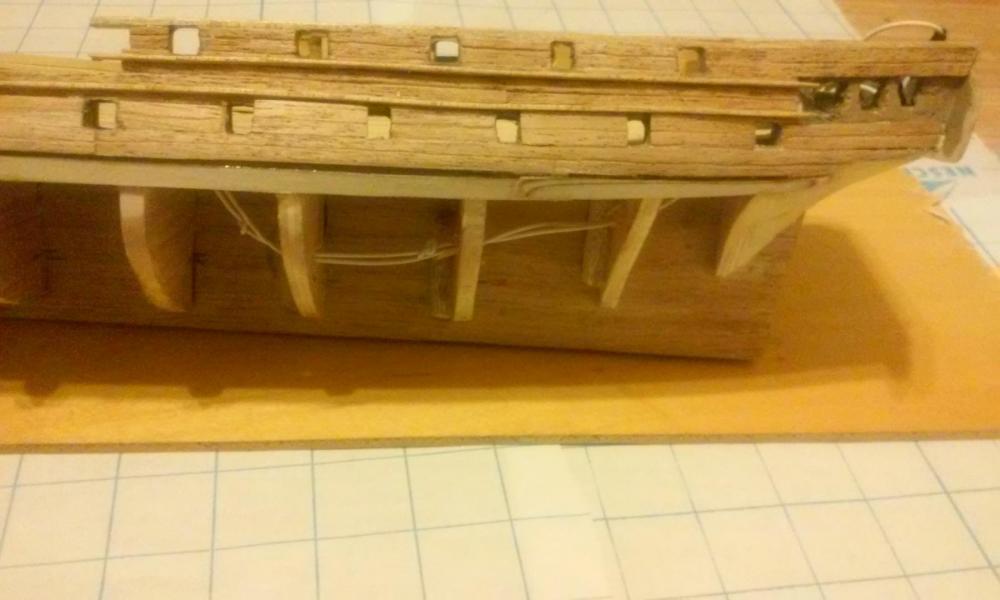
-
USS Essex by spongbob - American Frigate
spongbob replied to spongbob's topic in - Build logs for subjects built 1751 - 1800
some leds wont work series already the ones im removing wont... Using resistance calculator it might be 22 ohms at .25 watt but that is an individual value rate so it could be between 22 and less for parallel with single dropping aside from multi dropping : i will experiment and edit post ....thanks. What im considering useing is the regulater circuit from an old defunct solar hedge lite that should solve everything voltage wise or s pair of regulator circuits agreed ?!they just had one battery and one led each might pull 2 of the little leds . -
USS Essex by spongbob - American Frigate
spongbob replied to spongbob's topic in - Build logs for subjects built 1751 - 1800
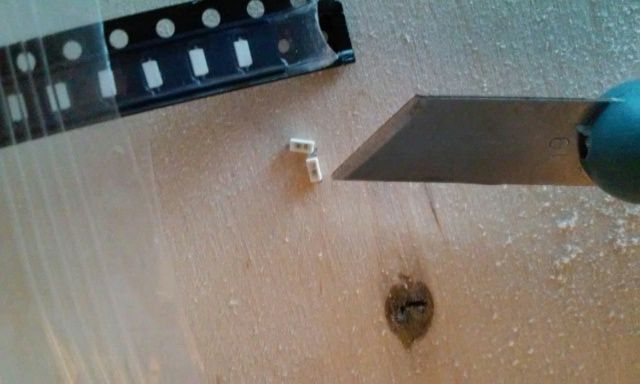
Finally found the mini leds i intended to use for ship light's, so the bad choice ones are out! . It took me 2 hours to figure out how to solder the things to wire inadvertently cooking" 4 of them . After that i decided on wire wrapping a pin onto my soldering iron as too much heat was ruining the led's . Also downsized the attachment wire to a single strand of lamp wire (works) . i superlued the side of the led to a little stick ,as to allow me to maneuver the tiny lamp into a quick kiss with the (now) solder pin....lol there would be other ways to do this slick but it worked out(as method test). Power came from two AA cells im shure a resister is nessesary the one im useing is to high a resistance probably need a 10 ohm 0.25 watt depending on how many in parallel" you wire them? they will light very bright without it but probably get to much current so: These things are easily small enough" to fit in a ship lantern, dont yah think" ? If yer thinking you mite be wanting some the details on sticker and ebay's the source .osram LO Y876 Their are 25 lights (minus 4) on each one of those strips Im getting a good idea about battery placement put the battery case into the bottom of the mount plack then connect throuh switch on back (routed)thenconnct to the center screws that mount to (spindles) bottom of keel" from there any on board micro switches or straight to leds this idea seems best.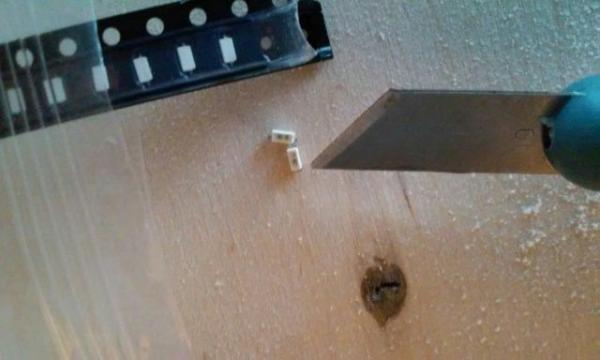

-
just to have some closure subject being was hoping that rigging meant rat lines and ropes tied to spars tackles and rungs on bungs i scarcely see one line drawn.. Athough very helpful for making masts and spars ..i guess to find rig tyeing would be a hassle to depict also a line by line add by process order would be luxury to be be leaved !thanks....
-
USS Essex by spongbob - American Frigate
spongbob replied to spongbob's topic in - Build logs for subjects built 1751 - 1800
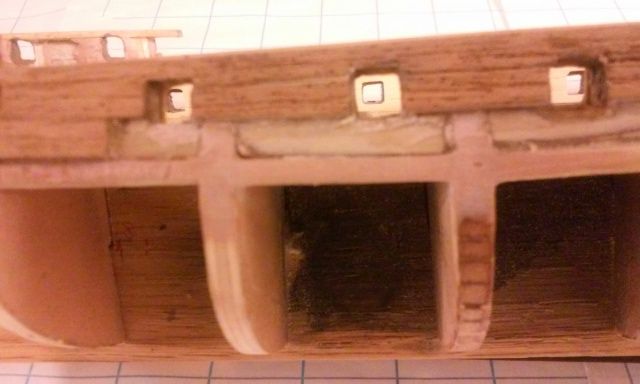
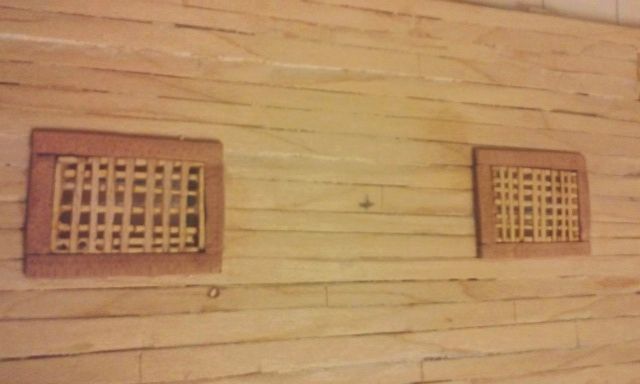
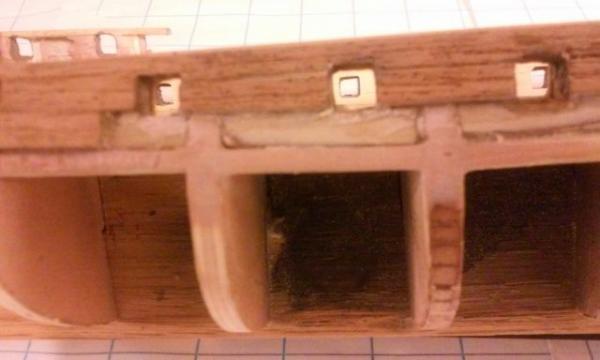
Took several hours to match both of the fabricated' gun wall plank panels "too ports ... Next to come", more gun wall' plank panels /more matching ,..as the rear section remains ...ports visible through ports are the opposite" side'. Just previous: have fastened deck sections",..and touched up port paint ,..and cleaned up some spots. Please stay optimistic "..as progressing slowly" thanks everyone for like's and views"! Will have to decide when to poly the deck'... keyword 5 minit Epoxy.....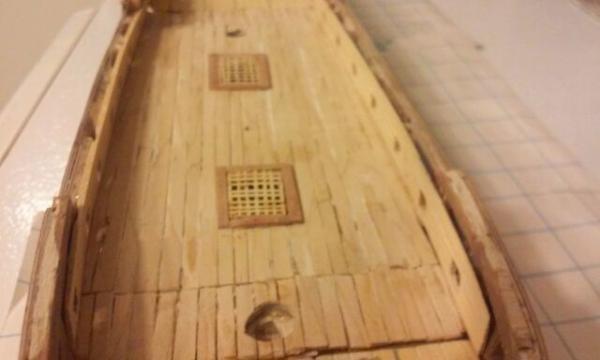
-
USS Essex by spongbob - American Frigate
spongbob replied to spongbob's topic in - Build logs for subjects built 1751 - 1800
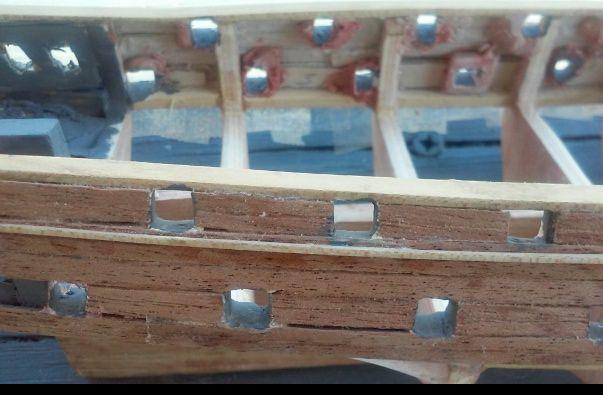
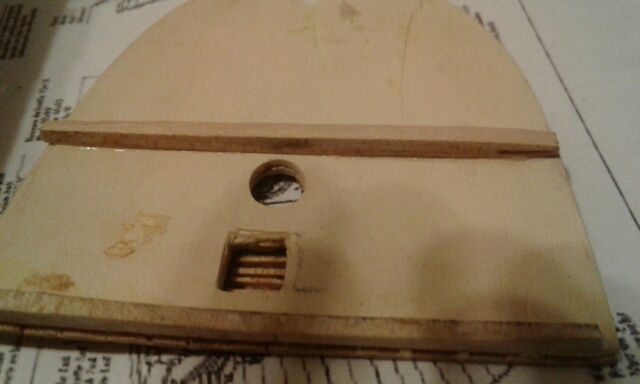
A couple hour's , and final fitting" and adjustment's to the 3 Gun deck panel's ,including making rear mast boss/ dead wood, and deck hole'... Also checking for the led wire routing (drilling ect) into cabin area" there is still a final plank attached with tape as i am holding off gluing the panels fast until i route led wires to front bow gun deck facing rearward .When on they should light gun port's" slightly ... soon will install the inside hull planking panel's ,then upper deck's.... I have got some chain" i think' i can make rat line' chain's with,.... and cannon tie ring's both"! Leds " the color you ask"..?.. orange '......
-
USS Essex by spongbob - American Frigate
spongbob replied to spongbob's topic in - Build logs for subjects built 1751 - 1800
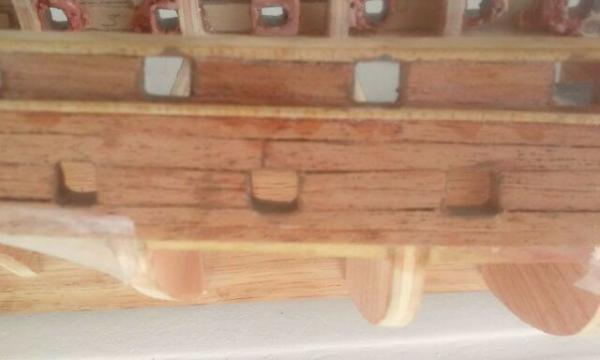
Finished with the cannon port fill and sand so i painted it with primer then top coated it with some nutmeg paint i had (needs some clean up). Scotch tape for mask can see run under for paint at least !...Later " i played with positioning some orange led's ,stay tuned more to come....yess im going to get rid of that crack between bottom plank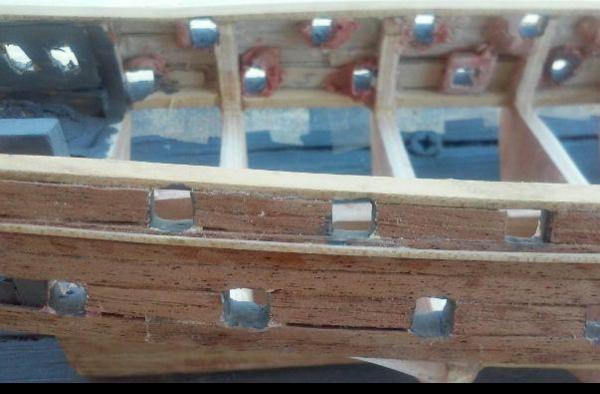
-
USS Essex by spongbob - American Frigate
spongbob replied to spongbob's topic in - Build logs for subjects built 1751 - 1800
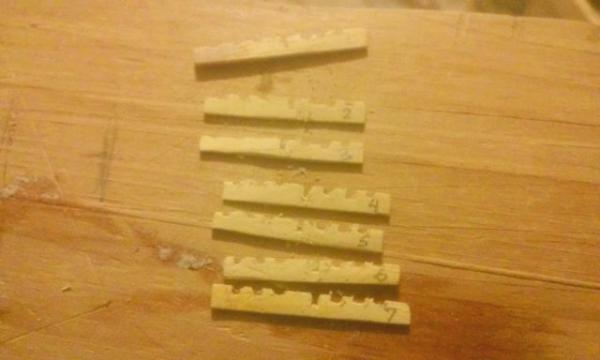
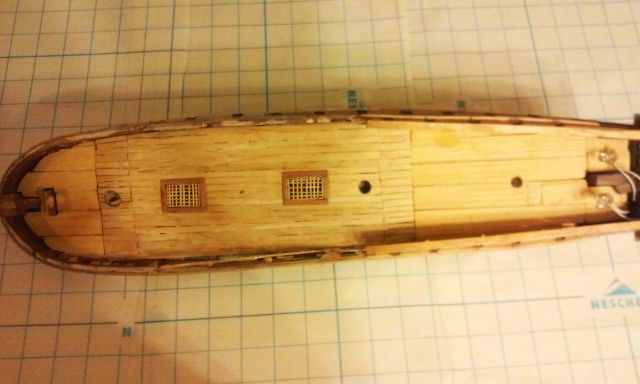
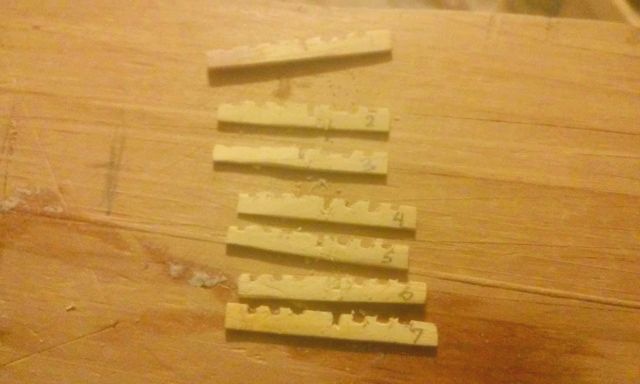
i did get to second hatch(grate ?) this afternoon', just measured opening cut pieces for a frame and 5 more longer pieces then the 9 center cross /short pieces i tried sawing the interval relief's (notches ) by stacking the long pieces then marking the interval of cross pieces but the saw was raking wrong. There occurred" some drift ect ,so i finally" ended up gluing 4 outer piece's together to form the outer frame. Then glued the long center piece's in, then had to try and clean up the cross groove's with razor blade, and sandpaper' edge ...after i glued 9 cross piece's that i marked from long ones spaces onto side of short piece's...and sanded flush all cemented with super glue of course..To say" the least: enough time for nominal results and i doubt if my current post will impress many here" .....ect ect...ps: i cleaned some excess glue off the deck '...