spongbob
-
Posts
53 -
Joined
-
Last visited
Content Type
Profiles
Forums
Gallery
Events
Everything posted by spongbob
-
USS Essex by spongbob - American Frigate
spongbob replied to spongbob's topic in - Build logs for subjects built 1751 - 1800
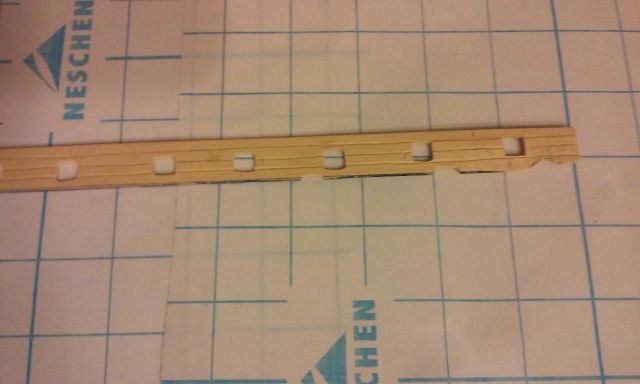
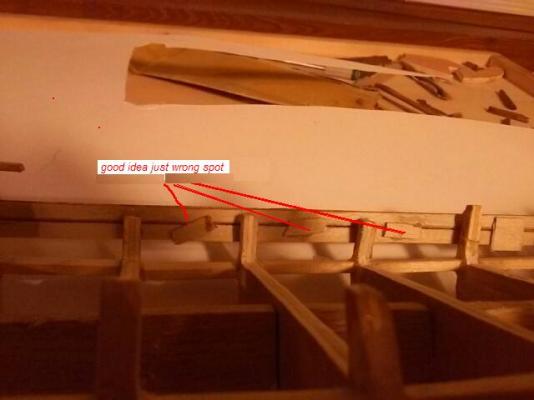
Hatches in process ',...one more photo later tonight.... a thought if i were to paint the deck i could use bondo" to bend the deck extensions and align the planks to appear no longer butted maybe solve a little of the roughness . Ive got to say these parts are small and hand made , if the hatches look mis-skewed " ? it only makes it easier for crew to see through lol" ...If your sawing the thin stacked hatch strips cut to length align pieces, then use a fine hack saw blade to cut all cross slots at the same time .I did it the wrong way . The hatch is maple with cedar frame maybe i should loose the cedar me thinks".
-
USS Essex by spongbob - American Frigate
spongbob replied to spongbob's topic in - Build logs for subjects built 1751 - 1800
Trying fillers to fill the deck wall gun port's with bondo and wood filler. Neither one is faster no im not applying them over each other its rough looking but it will be between planks and i have to sand it down yet .I cant find the piece of balsa i used to began making spacers with its late again singing off for today. Ive got to get a nail spike to grind down into a mini wood chisel if im" going to make plywood spacer,s"
-
USS Essex by spongbob - American Frigate
spongbob replied to spongbob's topic in - Build logs for subjects built 1751 - 1800
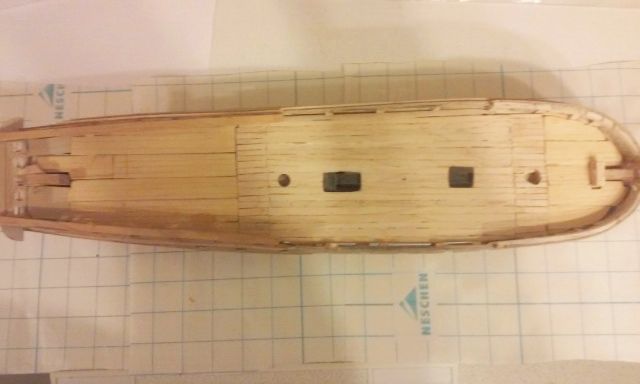
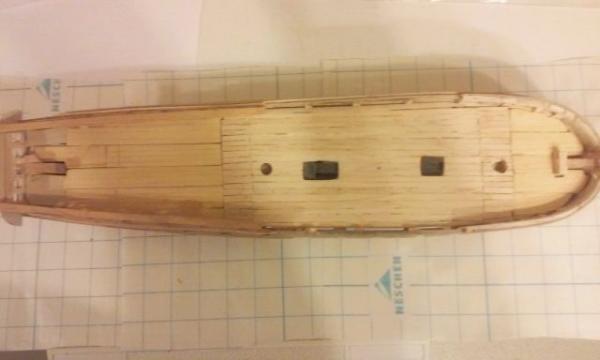
Making the gun deck areas used a softer wood and simulated the planks with line cuts .They are simply pear wood panel's cross biased"glued to strips of plywood', attached a little lap piece of ply to edge of front and rear section for level. Type of wood ? (for the covered' part of gun deck) im' going to guess" might be pear", its very light easy to cut or sand" but hold's a good shape' when working "..... I can see into / through the cannon port's and the deck/ panels seem to be the right height just sitting on frames .Il" put some poplar joist's when i get to upper main deck and rear quarter deck...even though you can see some difference from the top those differences visible though ports /levels are minimized... You can see Ive' cut the main mast' deck hole precisely so not as to seem sloppy. this post finds some compromises present so that i can hopefully get on to some better external details " If i had to do this over i would make the center deck panel longer by 20% and stagger the planks to interface the two end deck sections .feel free to learn from my mistakes" lol. If my ship 'had been to dry dock with 2 broken mast it might have resembled this, i said might have lol..............that front hatch port had to be lengthened" after pic. going to mention that i have found tif diagram plan sheets since i started even though custom is ok!
-
USS Essex by spongbob - American Frigate
spongbob replied to spongbob's topic in - Build logs for subjects built 1751 - 1800
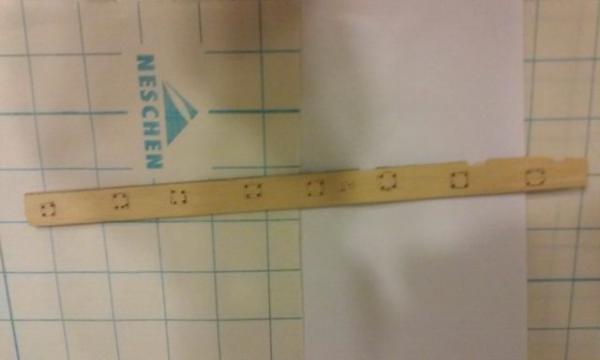
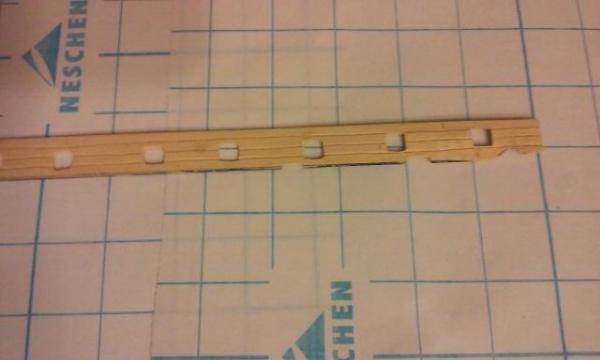
Today i made some more planks that still need sanded but i had found a pliable type of wood that looked like maple .I made a false plank panel to mount inside hull ,level with the gun deck" .I traced the cannon port's to the sized piece" of wood after which i drilled small holes at the traced gun port's corners" then i cut between the drilled holes"from both side's and sanded the gun port's to size with a scrap piece of wood just smaller than the ports ,.. i had super glued a strip" of 100 sandpaper to. Added some length to the center gun deck and cut the square grate holes . Debating what to do with the deck area not readily visible under the top fore and aft decks" i could use a softer wood 'and make them soon... as an option ..Its march and the weathers breaking will try and keep something coming !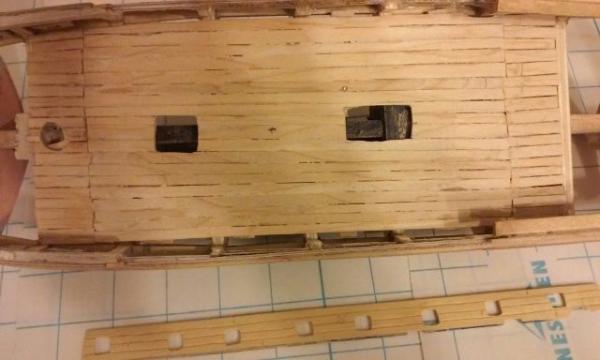
-
USS Essex by spongbob - American Frigate
spongbob replied to spongbob's topic in - Build logs for subjects built 1751 - 1800
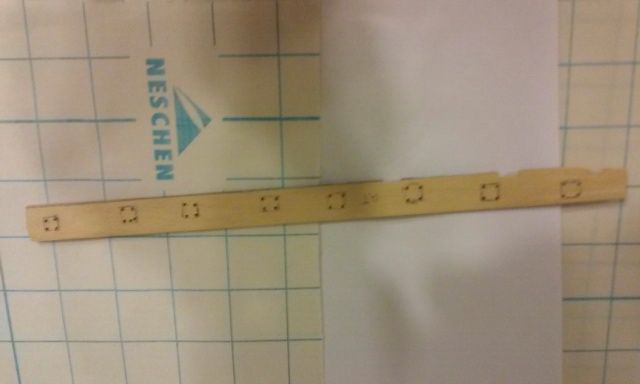
Back tonight with a couple hours worth of crafting top deck' indexed plank pieces ? maple wood" a little thicker then the planks .Il need to put a little strip of lite ply under these to lay the plank glue " on .(later) .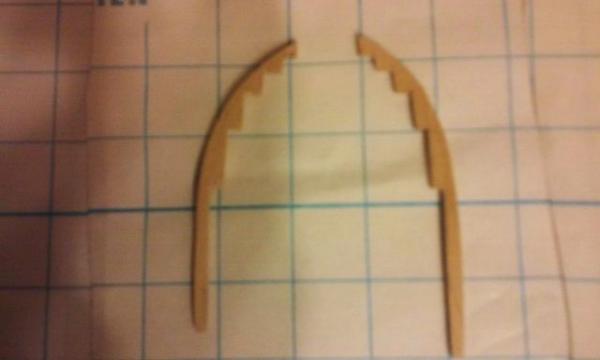
-
USS Essex by spongbob - American Frigate
spongbob replied to spongbob's topic in - Build logs for subjects built 1751 - 1800
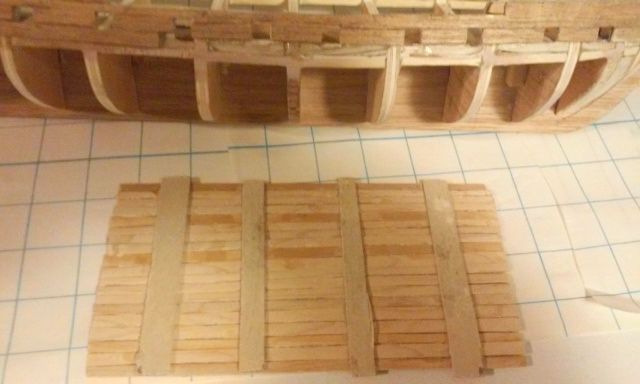
Simple idea' center deck section: Put together with some maple planks glued cross ways" to some plywood strip's ...on what is the underside ,...plywood centering in the area between /on the frames so planks will rest on top of the floor frame's . The decks not perfect ,some defects visible", but making the planks was taking day's of time ...just what you see" dune .I have to cut hatches" out ', and make a mast hole',...as i have reinforced the mast mount boss" from 1/8" ply' ...not putting the last plank in until its glued in ...might' cut a little false stagger' pattern' ,have to decide".. LOL..so much for now ...BBL...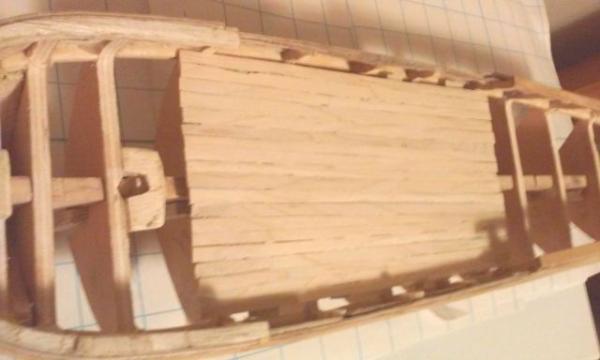


-
USS Essex by spongbob - American Frigate
spongbob replied to spongbob's topic in - Build logs for subjects built 1751 - 1800
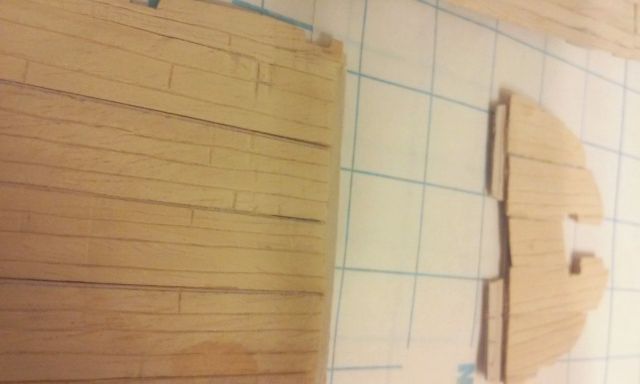
while again i found myself pondering the curvature of the bow and the simplicity of my options i had already thought that i needed to allow for lateral (isnt it) curviture Well whatever it is to get my plywood planks to flex in at the bottom more then the top edges (actually vise versa) i decided" relief's where the option. Especially using epoxy under the strips," but still using white glue", to mount the veneer or remount > at least the bow area' < as the side shan't" require such a twist', neither do (would) regular wood solid wood strakes .Using the lite ply requested whats in picture 19.....BOW PLY PLANK PREP....lol i guess you can see why my saw is a hak !......... at least il know tomorrow going to bed its 12:30 AM I had better say after the first strip you had better' start crowding the front bow planks, i mean make the front smaller" either sand the sides or cut planks slimmer at front near total bow area now much skinnier 25%off should do it at bow end the same will be said with stern bowed area (not ther yet) also maybe leave the veneer unglued and work with the ply strip its self until you manage the sharp bend twist and glue you can always forget the plywood', and just use natural wood strips much easier to sand to shape after shape the ply's great for the sides though"!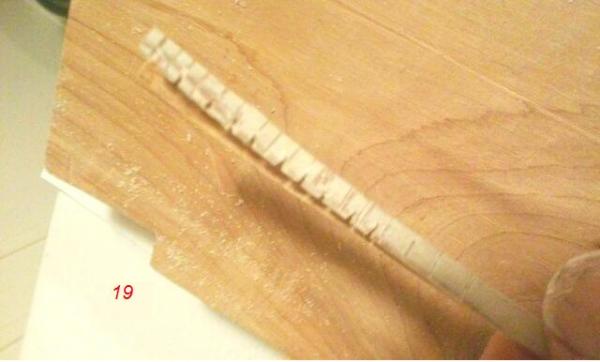
-
USS Essex by spongbob - American Frigate
spongbob replied to spongbob's topic in - Build logs for subjects built 1751 - 1800
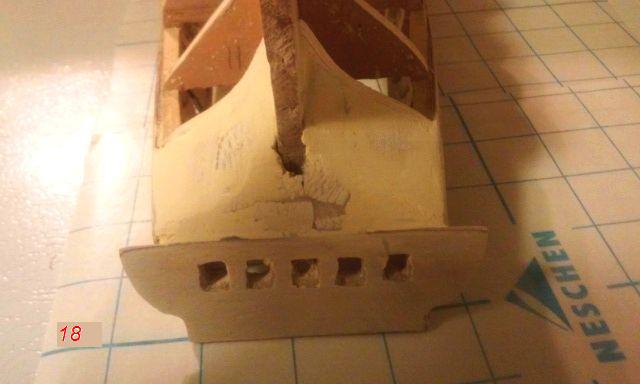
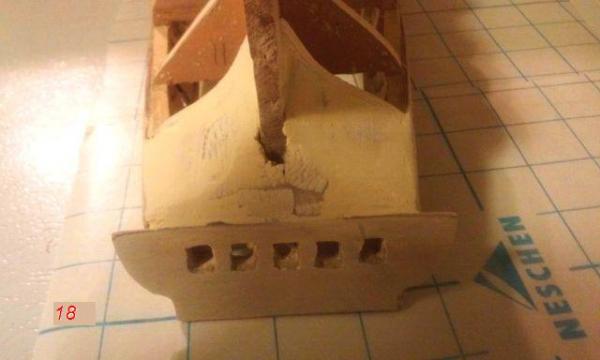
2 pics top bow plank ...but the plank below it' that has the little groove to simulate 2planks. Stern dead with wood filler over it" 18 ..its probably good enough to glue to. this' may seem like small changes .."but you should try the work..lol" .... Im going to say something about this one plank ply with veneer over it ".. since im faking 2 planks on one ',and at this scale one should sand the ply to some convex or con cave in other words for that plank below i should have took the corner of a sanding block and sanded long lengthwise to form a dent shaped center there (prior to veneer")for allowing the plank veneer to seem to follow the roll (bend)of the hull.(i didn't its a little flat as a result')..hopefully il get a little roll on the next plank down especially if i sand the center of plank (siight crease )
-
USS Essex by spongbob - American Frigate
spongbob replied to spongbob's topic in - Build logs for subjects built 1751 - 1800
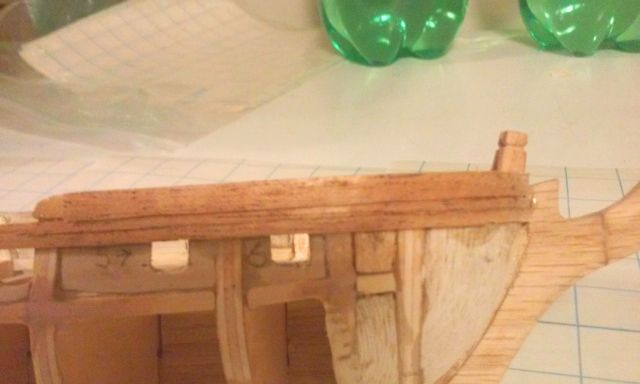
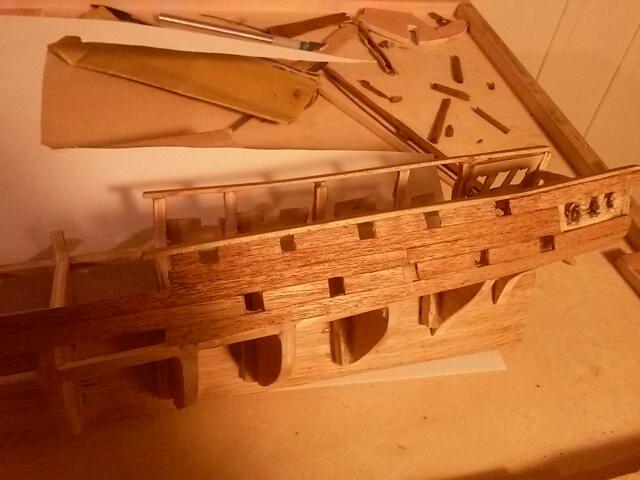
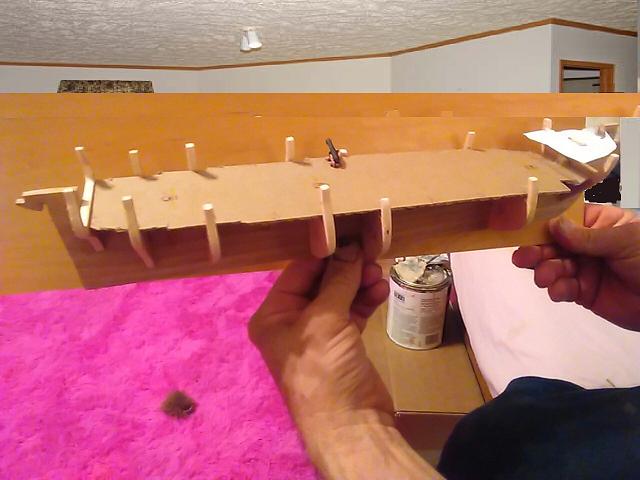
A few days since i posted what ive been doing '!...well the front bow area i have sawed the bulwark stubs off in favor of making my own safety handrail"?.. I had to add some dead wood to achieve what looks like the correct top deck hull height' .This after much measuring" and comparing photos of various essex models " found online "... I used (made)paper templates throughout various part making most from my plans plans didnt include modified deadwood shown,lol"...Those two handrails in front are maple the cap plate is ply....no staunchen rails yet or tie off stubs.. some rough areas will clean up", some unfinished areas will be hidden", some few estimated parts seem to be working as hoped ! .what more can i say"...il have some more(pics) in a couple days.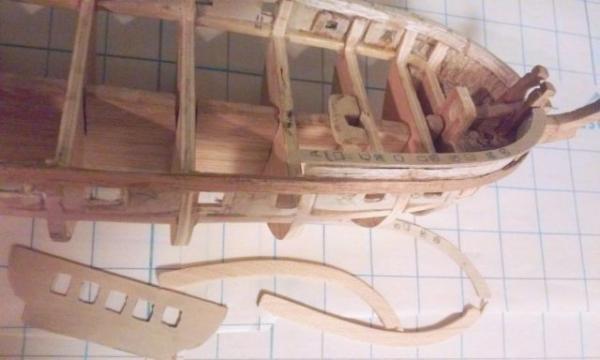
-
USS Essex by spongbob - American Frigate
spongbob replied to spongbob's topic in - Build logs for subjects built 1751 - 1800
this evening found me planking a few strakes "is it ?.....pictures a little rough but im satisfied with progress .A few days ago i notice the topographical deck plan did not match the side views or frame bulwarks ect ,im puzzled "... makes me hope my model isn't grossly out of scale .The in conclusion" i was presented with, seemed to show a 20% longer deck with same width and that isn't likely , i see some epoxy cracks that look bad i think i can match paint them thanks for views have a great day"... "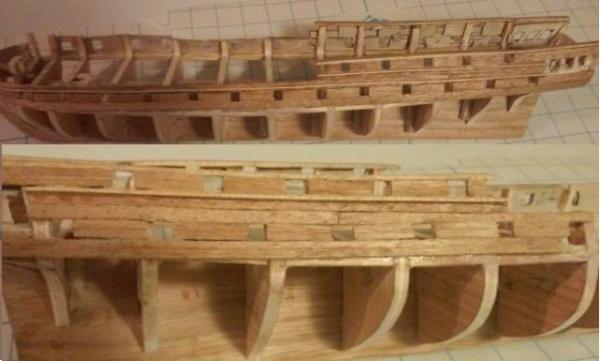
-
USS Essex by spongbob - American Frigate
spongbob replied to spongbob's topic in - Build logs for subjects built 1751 - 1800
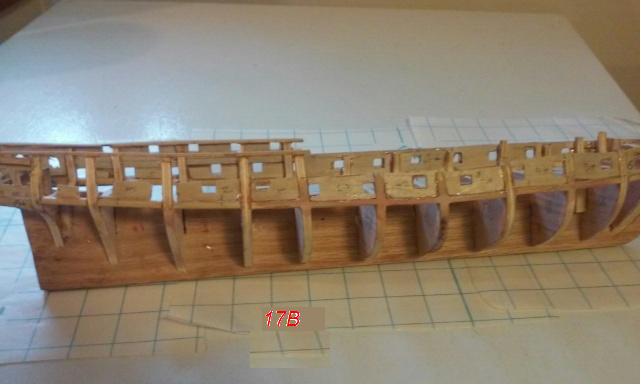
last night ' i got busy did some more planking but after gluing dead wood here is the dead wood before planks 17B.plank picture coming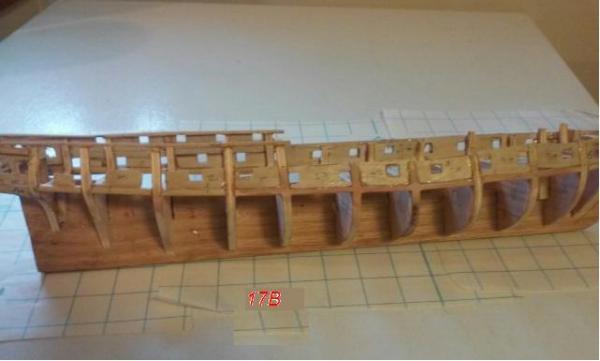
-
USS Essex by spongbob - American Frigate
spongbob replied to spongbob's topic in - Build logs for subjects built 1751 - 1800
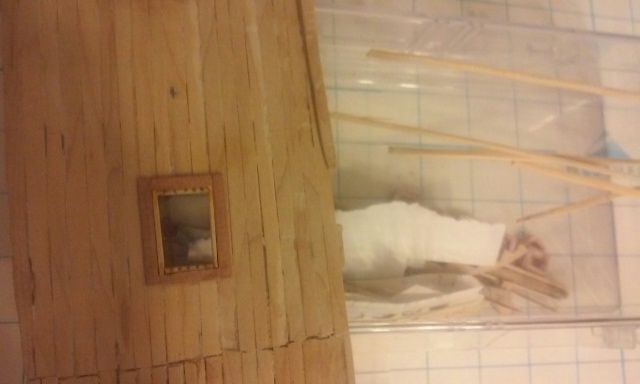
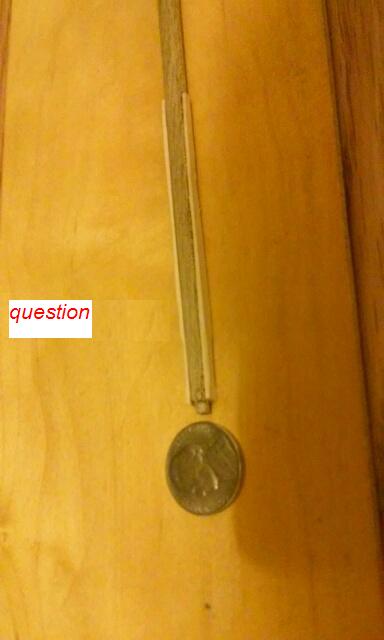
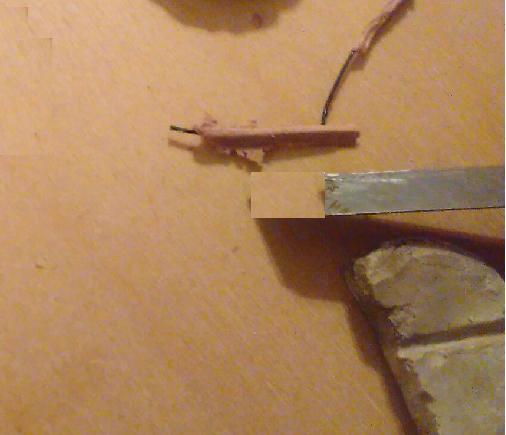
Can anyone here tell me if thare is something wrong with the mast pictured,In pic labeled Question? ..I have never built a frigate mast ,...my plans seem to show 2 board's, are attached to the top half of the mast', in this case: under the first crows nest . Plans being what they are im wondering if i need to flatten the round sides not under the boards for the last inch or so or should the mast remain rounded? > i flattened the mast under the boards only.< plans call for some bands ect in not worried about that but haveing a hard time finding a picture that follows what i have dune on mainmast so far>>>>thanks for any info
-
USS Essex by spongbob - American Frigate
spongbob replied to spongbob's topic in - Build logs for subjects built 1751 - 1800
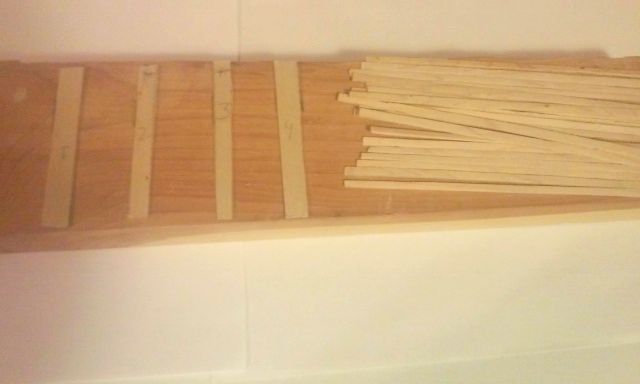
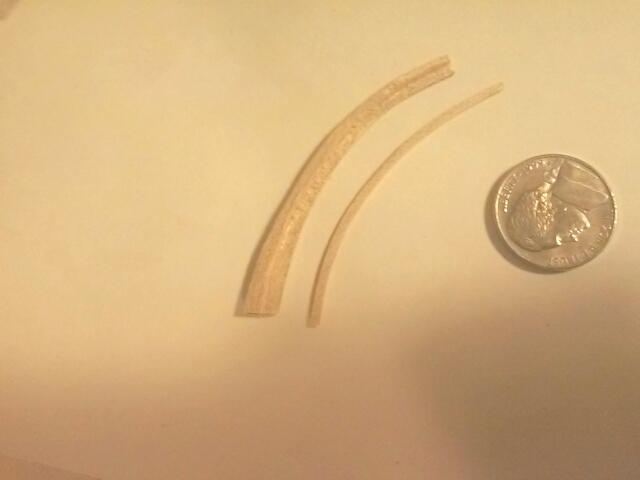
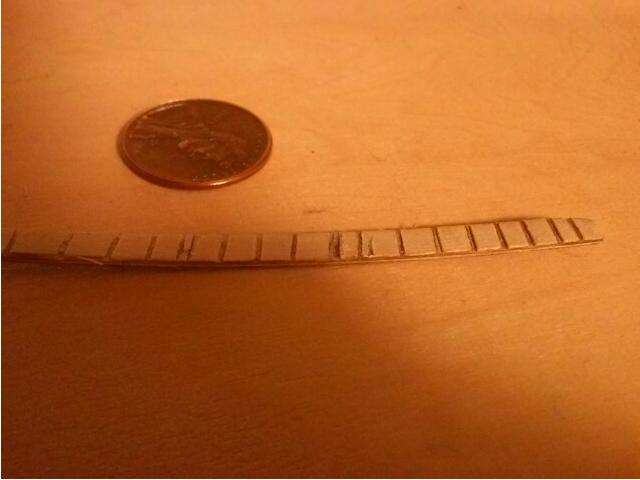
working on sides makes for many measurements . Im telling anyone who uses the lite ply as planking befor glueing veneer to the ply sand the bow planks inside top', and outside bottom or you will have a clapboard effect thats going to cause yer veneer" its self "to have to be sanded to thin".. This bow sanding of bow' areas of ply strips only necessary in the bow bends area, and is a good suggestion, and fit improvementresulting ",.. before gluing to frames or dead wood . Actually the whole plywood process may be less then simple 'at this stage"...i picked ply because this scale is small top picture of trim piece made from maple and long trim pieces (TO THIN TO BE BENT) also for sides ...Made the round piece using strip of maple sawed from no#1 maple sawed in pieces 3/4" x 20" then lengthwise ect ...Used only a drill ''drum sander and hand sanding ,&cope saw. The rest of the maple im trying to make deck planks with!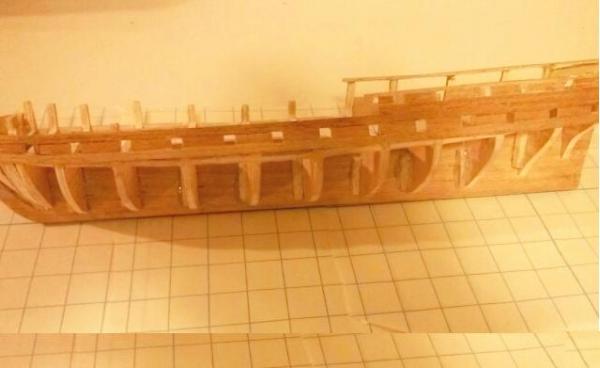

-
USS Essex by spongbob - American Frigate
spongbob replied to spongbob's topic in - Build logs for subjects built 1751 - 1800
Planking bends : at bow or any tight curvature planking', especially glued with > epoxy < it is possible to cut relief cuts across planks grain as to physically improve flexibility; results" conformity ! (bends easier) . Cut too deep /bend to much ? it will cause cracks" . Im going to suggest circular bends of say imagined perimeter 3.75 to 4 i would use 1/4" cut spacing then open the cut a smidgen on the inside by turning the saw to 70 degrees .Still not flexible enough ? simply make more relief cuts. No steam is required thereby leaving a dry surface to apply glue.Make sure glue' gets into the cut's you made ...allow surface for re-sanding to round ...as you can get micro flats lol. a coping saw "makes proper width cut ', it can be managed with a razor 'also... PS: i had some of my laminate veneer to loosen up after bending the plank i simply reglued with wood glue while strip positioned partially bent as it would be on model
-
USS Essex by spongbob - American Frigate
spongbob replied to spongbob's topic in - Build logs for subjects built 1751 - 1800
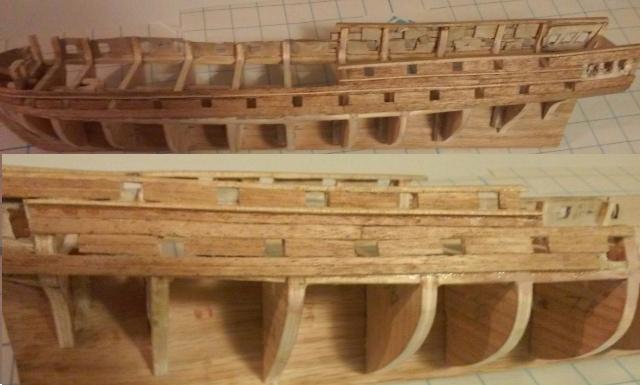
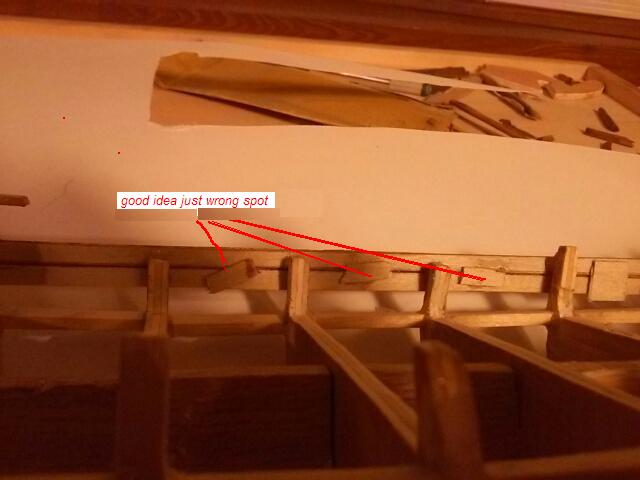
building with epoxy has its drawbacks but much of the time allows for several small items to be applied or one item to be glued and dry enough in say 7 minits to be stuck safely together , On the other hand it seems like when you mix a tiny dab like 4 to 8 drops it may take longer to harden then you expect therefor the epoxy creep sets in,...>parts you thought were set" have sprung loose <.then this is NOT"GOOD!... You may be able to re position' them in time other wise" you may just as well get an Exacto knife' and cut the glue out ,and away from the part, for re gluing " wasting" more time then using slower drying glues some time i put white wood glue in the middle and epoxy at ends but this you have to leave space between the two glues. Either way clamps or some pressure at points is necessary. i put a picture of the planking from inside ",where i put small 1/32" plywood scabs as the old creep was playing with my position i can tell you i super glued them for fast support just common sense as they will be invisible and provide a lot of strength, you may have better idea's but for speed it works for me ... Tried" splitting a plank to get it to contour to a tight turn this will not work for more then say a 30 degree bend it seems fine at shallow contours'.. I am happy with the result of the veneer planking the photo makes it look bad but it really is fine'. Its taking a lot of time and if you' See anything" in the wrong place.. it presently may be moved"....thanks for sharing' after thought maybe i should be cutting the veneer in two to place on one strip for better scale effect instead", of the grooving il try a couple planks that way next"!

-
USS Essex by spongbob - American Frigate
spongbob replied to spongbob's topic in - Build logs for subjects built 1751 - 1800
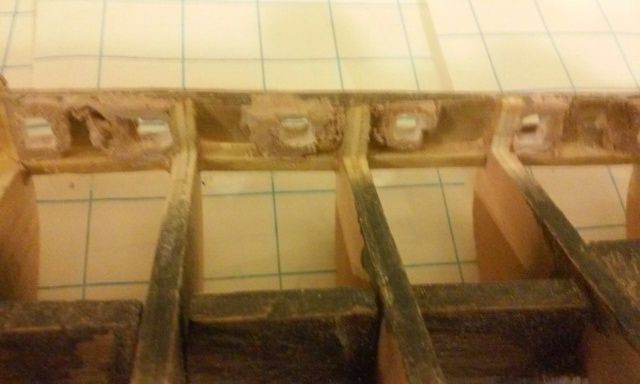
working at back While my title states" with plan's ...it dosnt always mean there will be no revisions . Currently cut strips of 1/32 plywood and strips of the mentioned veneer"(mahogany) & laminated (wood glue),only thing is scale to cut them down to scale may be tedious,maybe grooving' each plank' strip to appear to be 2 il' have to decide! I cut the strips easily with a frame square and a box knife after marking width with paper jig.....3 to 4 passes.. Cut and attached some deadwood for cannon ports ,added some balsa filler in cabin area .The rudiment square window ports(may need elongating) along cabin area are for the led light's i intend to wire in cabin they are orange",.. hope to install at later stage.. stay tuned nothings in chiseled in stone" at current.This part should be more interesting . To mention a few thought the scale ect has some basis for concerns like slight cracks between planks wherewith it may be i can paint some wood glue to the inside, and coat it with black paint. For cabin lighting whether to place some tiny mirrors inside to throw light out windows .locating the ships lantern anyone who knows where lanterns were placed please inform me.... as i haven't locations of such . Should i make a mix match template dummy" sheet to find out a good plank pattern or simply place them for least material loss with simple staggering ignoring any copper clad effects"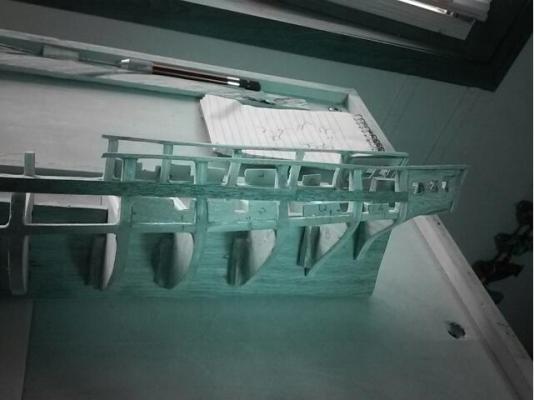

-
USS Essex by spongbob - American Frigate
spongbob replied to spongbob's topic in - Build logs for subjects built 1751 - 1800
filled the space in between 1 and 2 with balsa wood surface to bond planks ignoring the fact that the keel is out of scale...camera is takeing fuzzi pics other cam was better but needs google fixed ...oh well"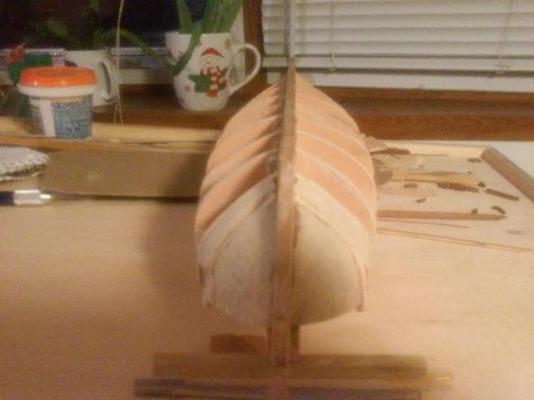
-
USS Essex by spongbob - American Frigate
spongbob replied to spongbob's topic in - Build logs for subjects built 1751 - 1800
filled the space in between 1 and 2 with balsa wood surface to bond planks -
USS Essex by spongbob - American Frigate
spongbob replied to spongbob's topic in - Build logs for subjects built 1751 - 1800
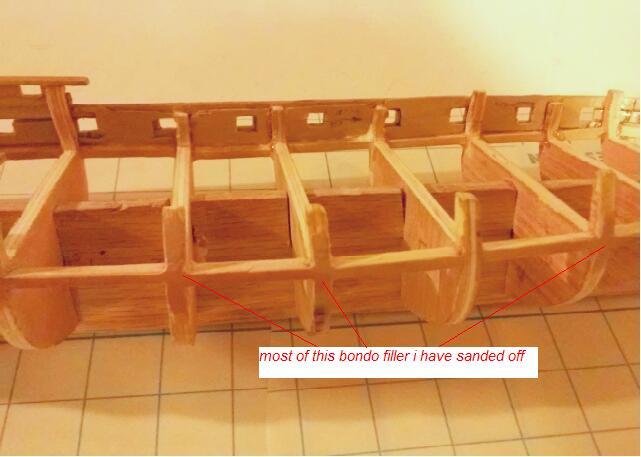
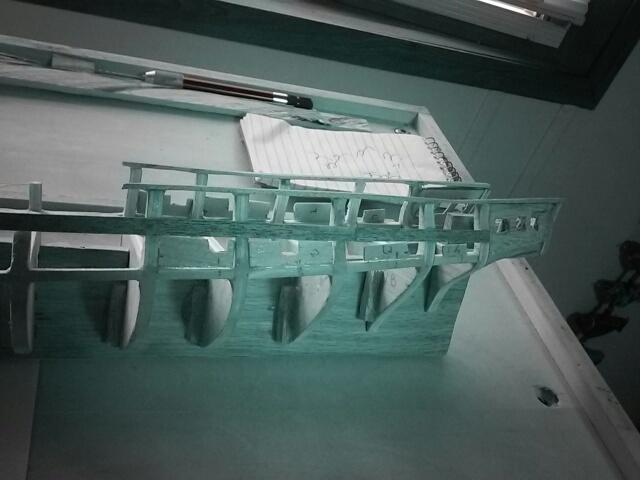
hello and good day or afternoon " some things about scratch buildin can make one scratch his head never mind a workaround can be had .... After adding some piece' to the side of my project " Obviously" that there where low areas that had to be filled and the high areas just sanding . I had been considering using bondo," sparingly on the side if necessary ,...of course it will hinder the epoxy bond and prohibit water wood glues . im" using "it anyways , as to much wood filler "isnt to good either ... Posting some pics of the results ..Thanks"' for reads and posts!. Further more" I sanded bottom' of frame,...I found some more sanding needed to be dune ,.... applied" a little bondo on the side's ! ..Top picture has the bondo the lower picture has the (on) bottom side already" sanded / bondo-ed and its true-er then the unfinished half'...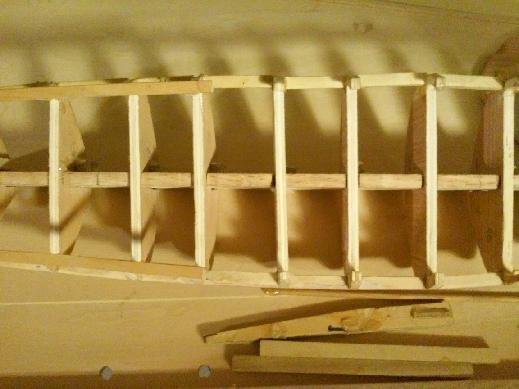
-
Thanks", for sharing keeping up with your pics helps me ....
-
USS Essex by spongbob - American Frigate
spongbob replied to spongbob's topic in - Build logs for subjects built 1751 - 1800
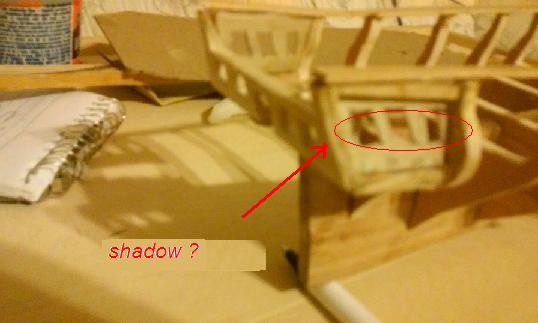
Back with a with a couple pic's of what little i have accomplished'. Comparing with other Essex" build's ,and "add libbing" a little .The windows are supposed to be inner shadow windows will have to have opening in plank also! And hopefully will put tiny led lights in ",and on ship' with switch, and small battery/circuit somewhere eventually " I noticed spots will need a little adjustment here and thar '....
-
USS Essex by spongbob - American Frigate
spongbob replied to spongbob's topic in - Build logs for subjects built 1751 - 1800
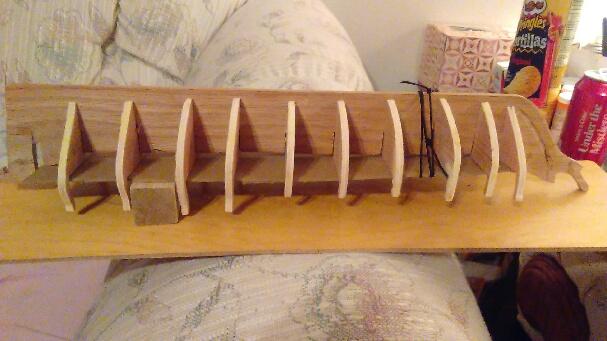
Spent all day on Essex sanding /glueing "culmination of questions and careful fitting of parts everything is twice as hard as i thought it might be .... Plans proved to be off im certain if anyone' see's any thing out... it may be that i will have to adjust it presently . In order or work 0.determined most frame alignment and maked side for glue' 1. Rough leveled frames to keel piece . 2. Cemented frames to keel with one peice of balsa 3. Sanded high spots 4. found low spots on frames and built them up then re sanded" 5. Replace a couple frames that were to out of shape 6. cut /shaped balsa wood to make filler for front planking assembly 7. made some more template's for deck sections" 8. triangulated mast positions and double checked Overall" a lot or eyeballing of outlines plenty of sanding and checking fit of each part. making templates " helped to get feel for the layout .Frames 2 is not in the picture below it fell off (so little epoxy. Thanks to the other posted ,projects for some helpful ', posts getting some ideas is about where im at."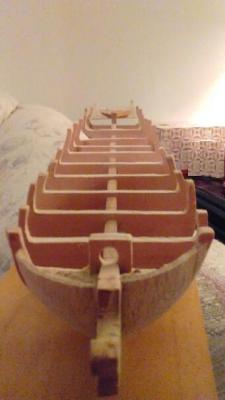
-
USS Essex by spongbob - American Frigate
spongbob replied to spongbob's topic in - Build logs for subjects built 1751 - 1800
first time to build a scratch ship and taking sometime to follow plans .will line up frames to bottom cement with balsa wood on one side', if some prove to be misaligned i can get them cut loose later ...Floor seems to be the spot to deck it from .Trying to keep a straight piece underside then scrouge frames to depth stick the balsa shim
-
USS Essex by spongbob - American Frigate
spongbob replied to spongbob's topic in - Build logs for subjects built 1751 - 1800
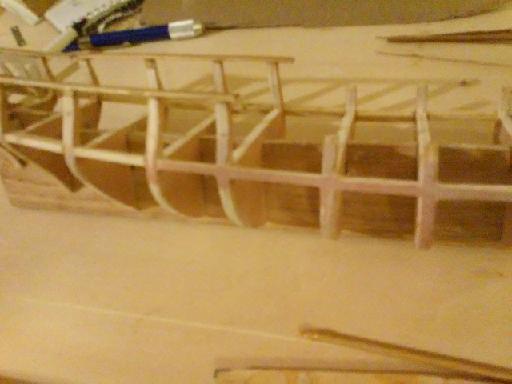
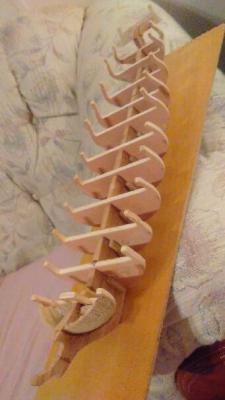
almost dune cuttin frames will try to stack them on keel upside down and compare the level of the deck to pics of models .I think thare's some concavitie to it(2 degrees ?). Must decide precise position before gluing frames to keel. Then on to final sand and plank steps "plans show frame bottoms 3 to 10 are parallel to each other at keel (need pic later)the end frames to trail deck ward dirctn.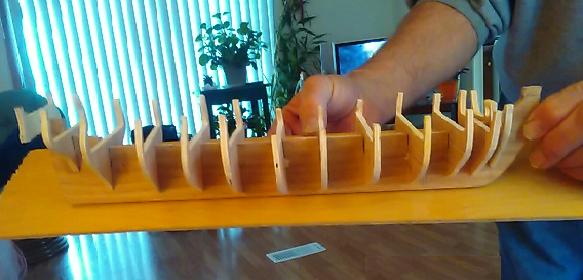
-
USS Essex by spongbob - American Frigate
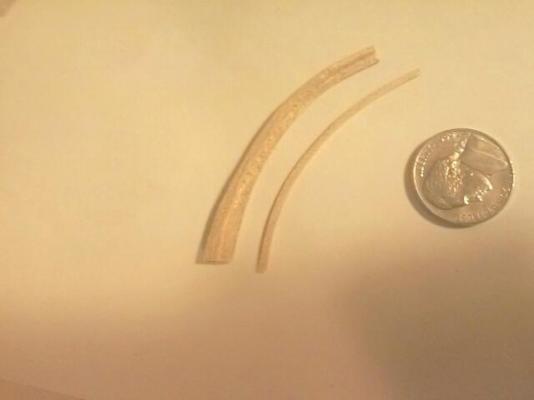
spongbob replied to spongbob's topic in - Build logs for subjects built 1751 - 1800
building some on project ".... have mockup of cannon close to scale made with simple plaster mold and auto bondo .Made the tiny wheel by sliceing off a little roll The cannon is bondo also just make one make it then cut flash off and sand to size i glued the pinion's onto the cannon. and paint ! a picture with a cardboard deck template might prove necessary' to figure deck / galley and hardware" positions also determining plank length /width mark's for mast position ect Obviously il put some small piece of wood under deck side tmast hole soon...no glue yet to many alignments left more frames to cut & sand