WoodButcher
-
Posts
30 -
Joined
-
Last visited
Content Type
Profiles
Forums
Gallery
Events
Everything posted by WoodButcher
-
Thanks - I'll give them a go. And if they don't ship I'm going to the UK for 3 months next week!
-
Anyone know of an online shop (that ships overseas) that sells (non-functional) model steering wheels?
-
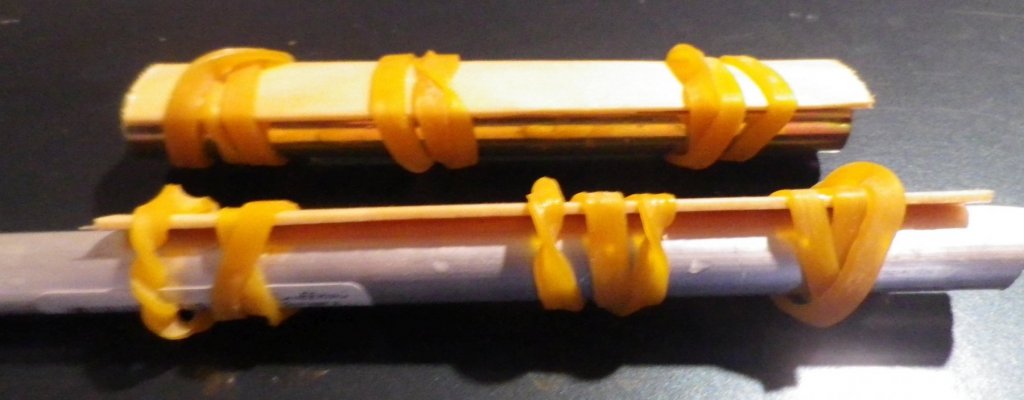
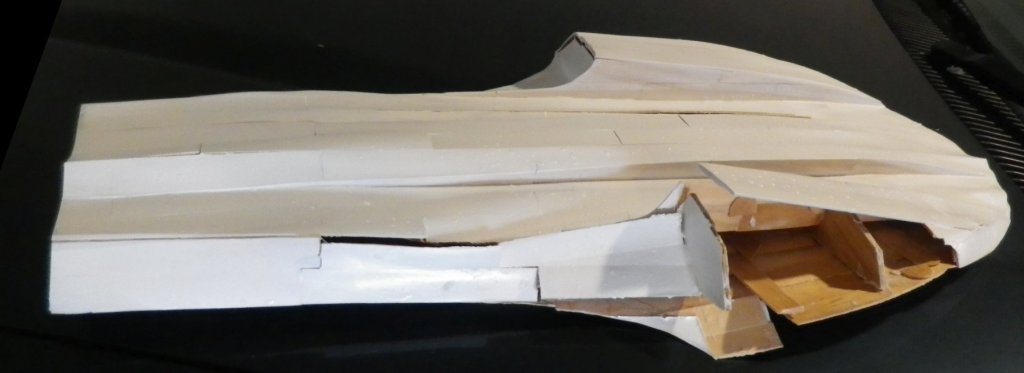
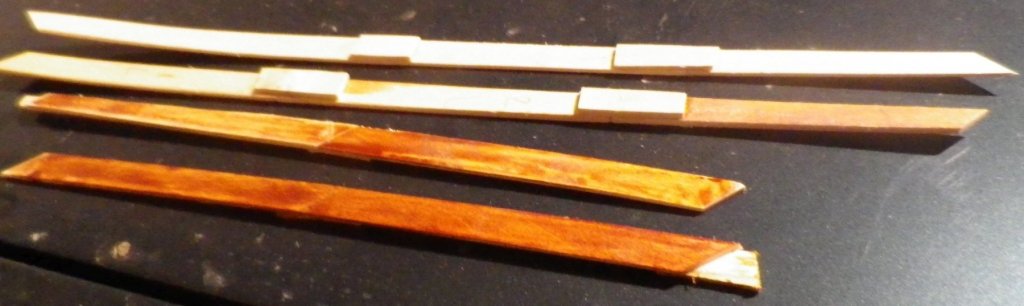
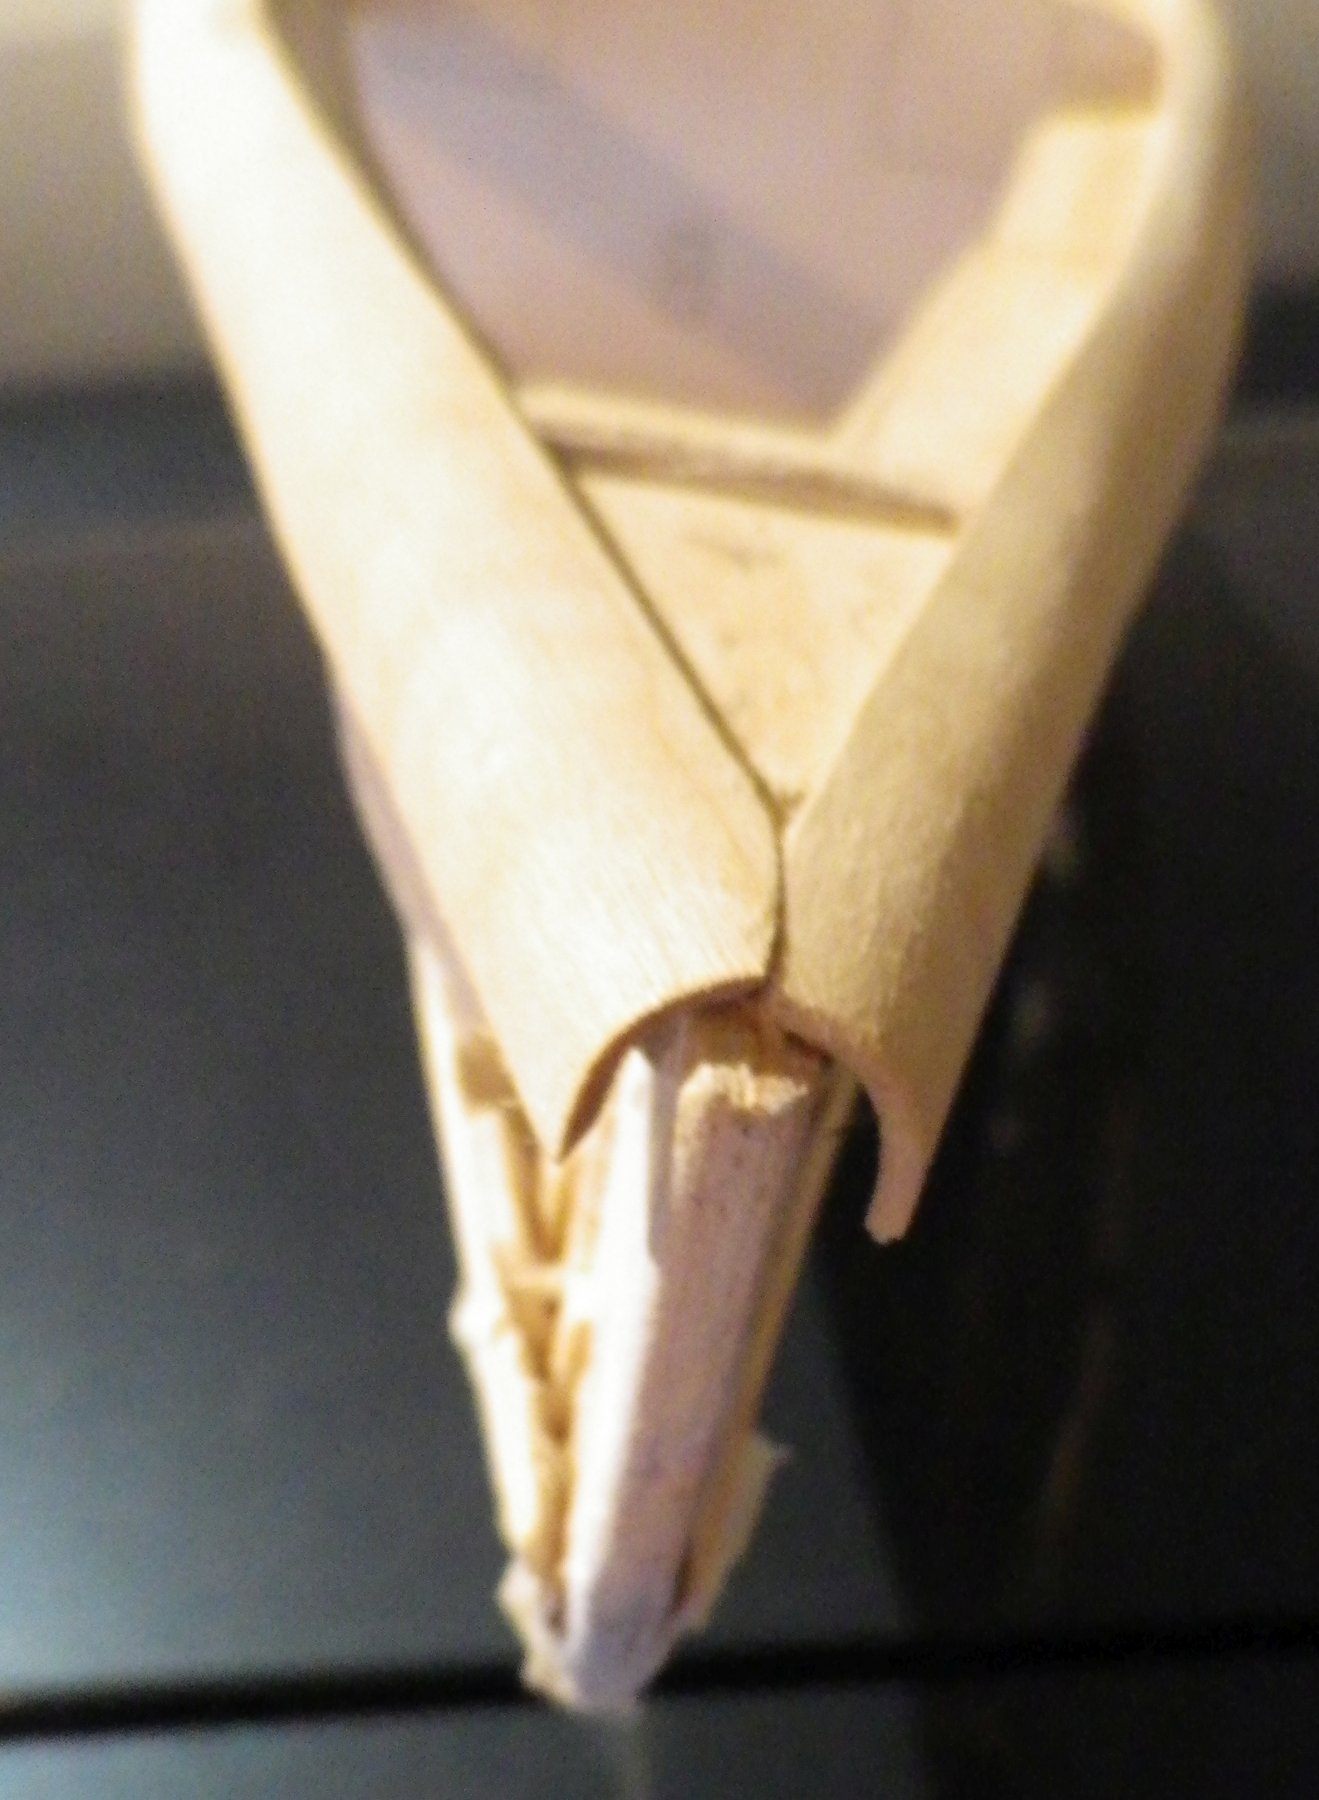
So I cut half-depth slots on the keel and bulkheads and the result seems OK. Certainly the bottom of the hull went on without much in the way of unevenness. The double curves (bow and stern) of the hull bottom gave me less trouble than I thought - the trick seemed to be "glue one end onto place and then - once dry - glue and clamp the other". The real problem was always the curved pieces on the edge of the deck. It took me numerous trials and broken sticks before I got something that looked reasonable. I tried soaking the sticks and rubber-banding them into place to dry but they often wound up cracked or not having sufficient curves (couldn't get the rubber bands tight enough) or curves that matched their neighbors. I finally settled for mass-producing curved sticks (as in "wrapped around a pipe") and using those that survived and touched where they fitted. The hardest part was the edges of the bow, which had acute angles. It took me three months and dozens of cracked sticks to get the effect I wanted. Even so I had to sand the angles of the top of the A bulkhead a bit to reduce the angle. But in the end I achieved something that might do the job. Hopefully with a bit of sanding it'll look creditable.


-
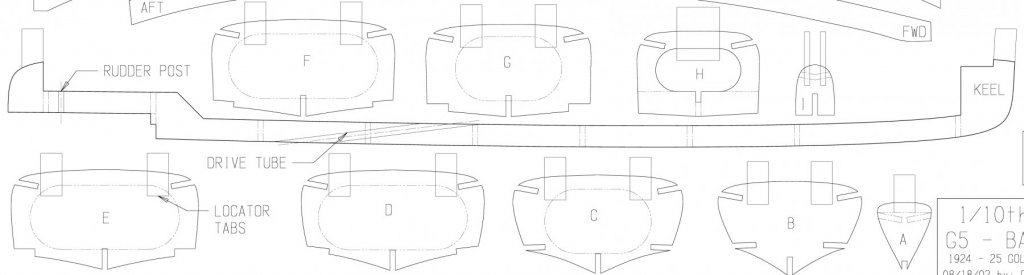
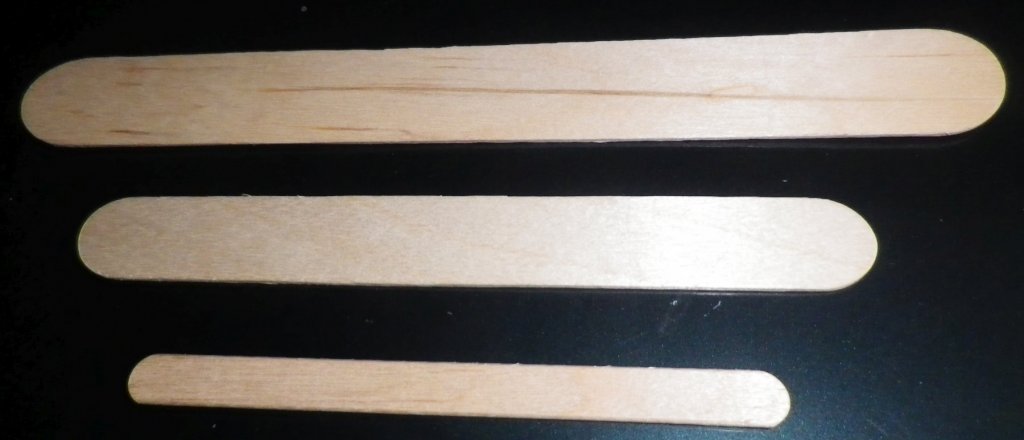
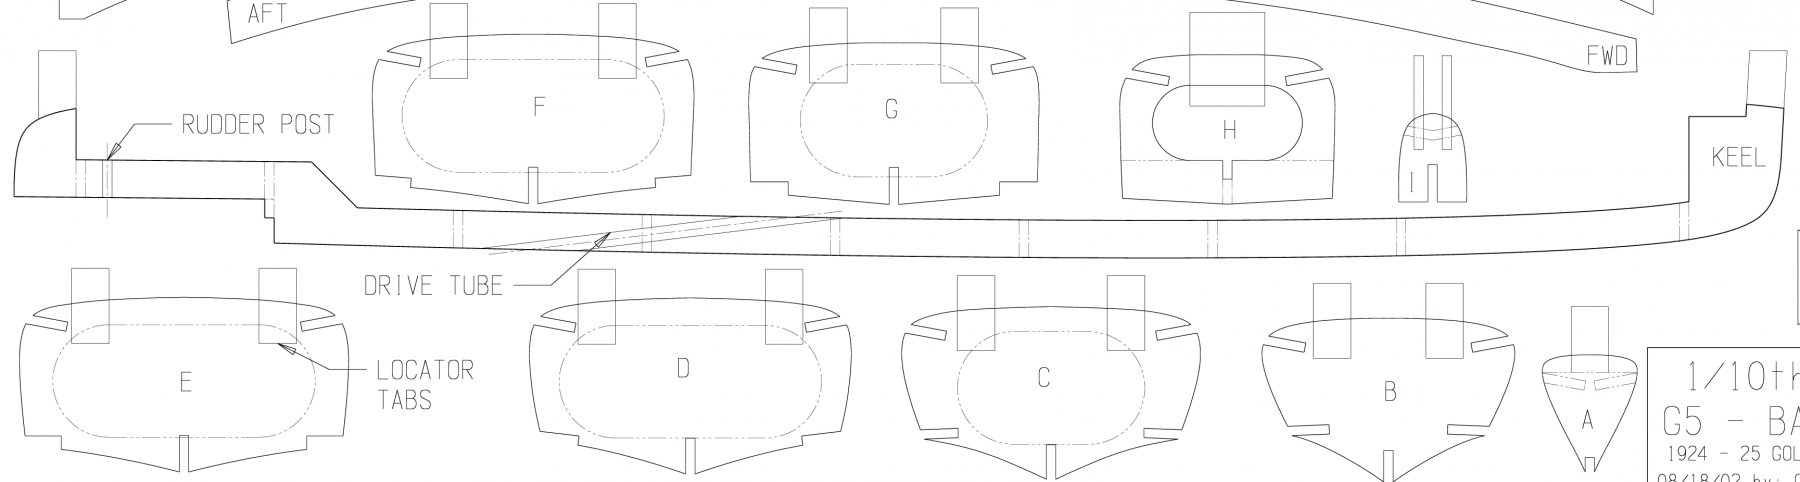
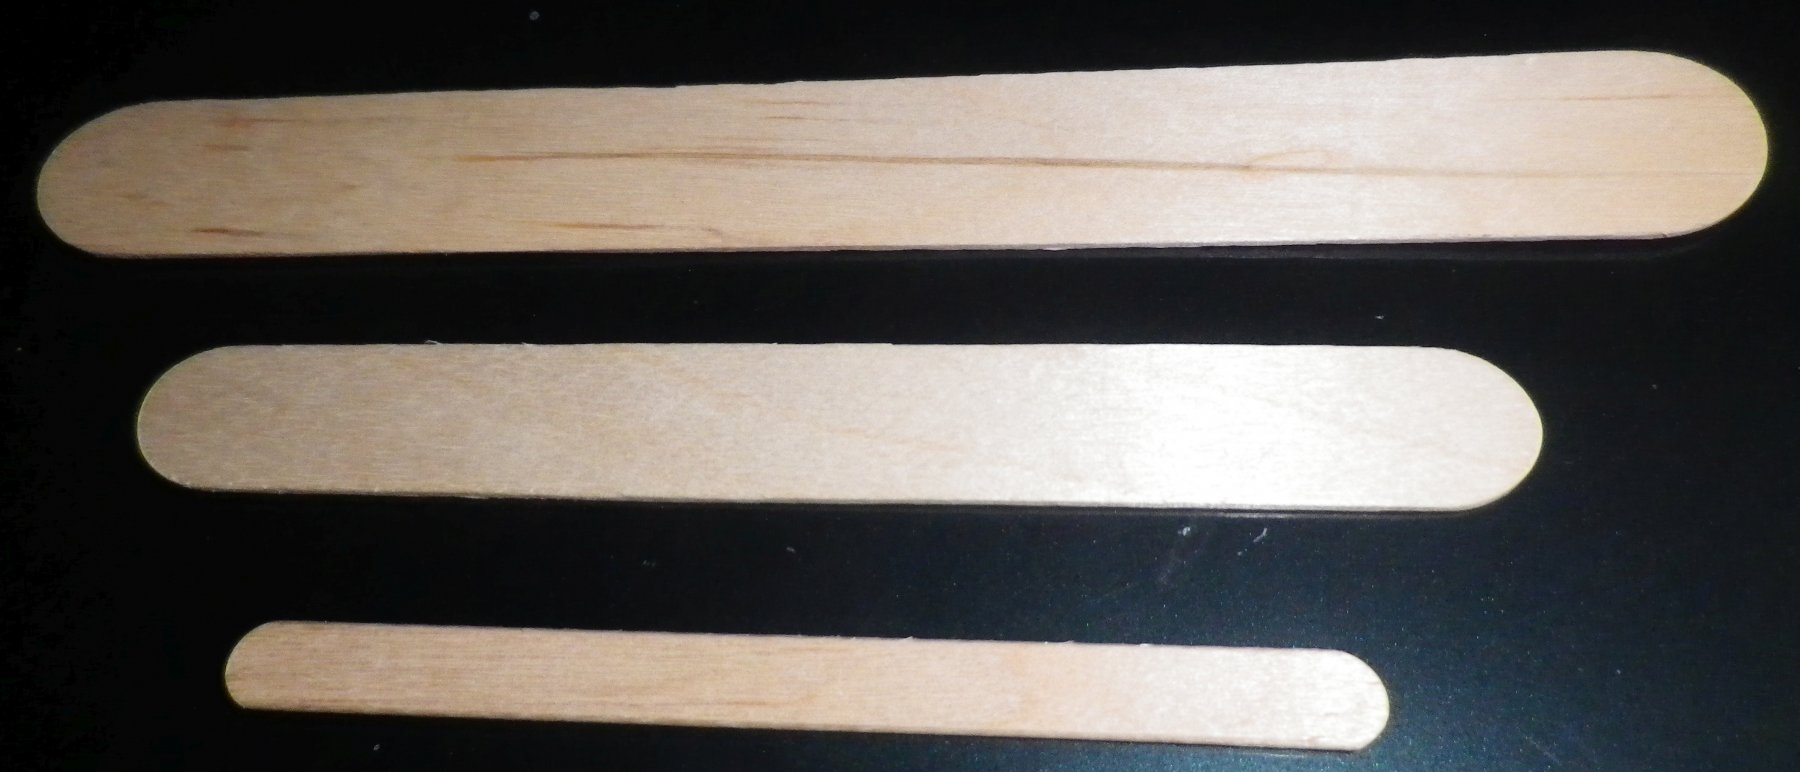
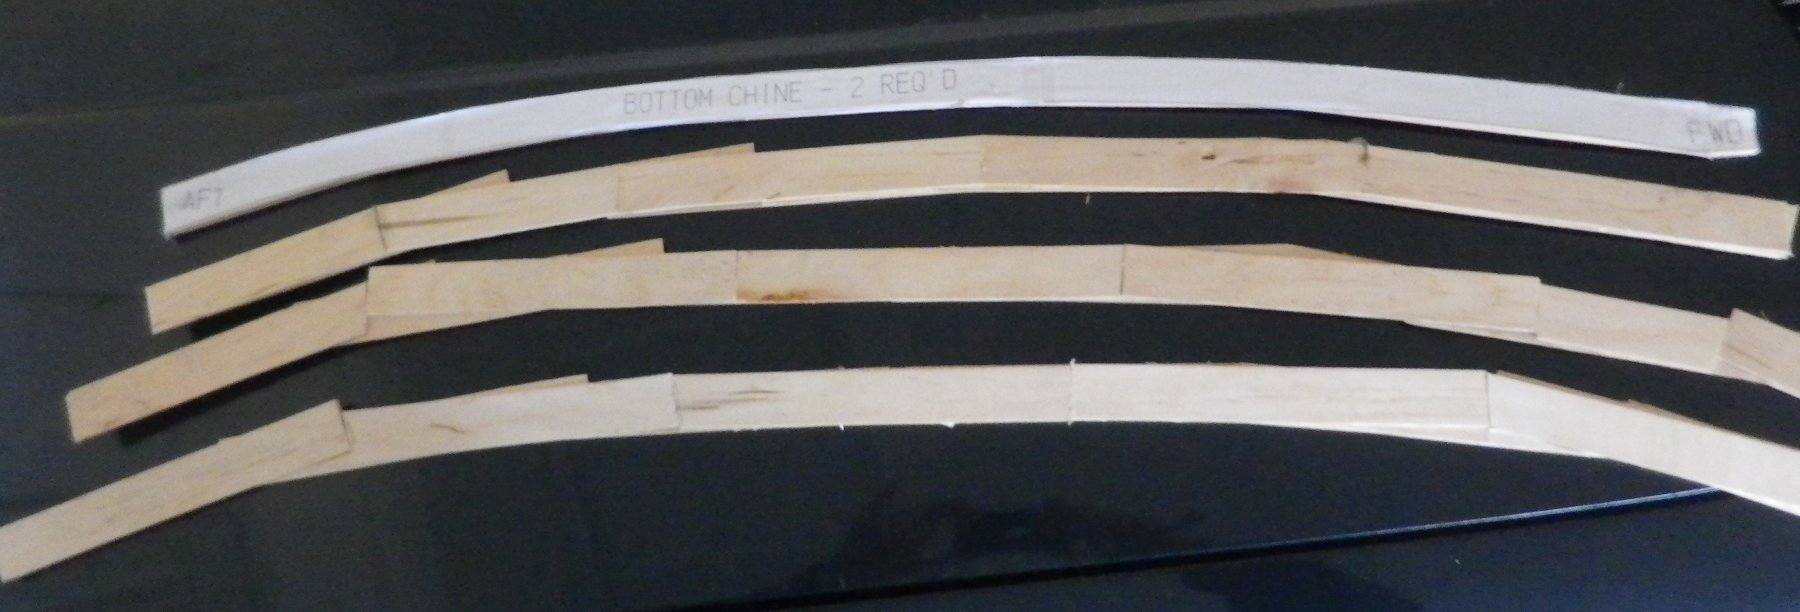
I thought this time I'd try something which had a chance of perfection. From the plans BB looks fairly straightforward (I'm using Garry Findlay's plans) and my previous project has taught me some patience and the fact that redoing work can pay off. I needed to stock up on my stick collection, so I went to my usual site, grabbed the page with large sticks and ordered 500. They seemed a bit expensive this time and I was taken aback when they arrived to see they were larger than the previous bunch - real tongue depressors. So now I have 3 sizes. However this turned out to be an unexpected benefit as they are just large enough to build the bulkheads. Since my reason for using Popsicle sticks is to increase difficulty, I'm happy to abandon plywood bulkheads for this project. BB is nearly 3' long and the width of the large sticks also makes it reasonable to build deck shear, chine and keel with some chance of getting a good result. There is one complexity to this model which is going to give me grief - the deck edge is curved and obviously a double-curve of varying degrees stem to stern. I've noted previously that Popsicle sticks don't like curves and double curves especially. (In fact I have no idea how real model makers do double curves, apart from carving them from solid blocks. Maybe balsa wood is more forgiving with double-bending - anyone care to advise?) The brief assembly instruction are not helpful - they assume the modeller knows what he is doing. After numerous failed experiments and cracked sticks I've begun mass-producing (well, two at a time because that's all the pipes I have lying around) curves for the fore-part where the hull curve is fairly straight and I've kicked the problem of the tighter curves near the cockpit into touch at the moment. But I've run into a problem and I'd like advice. Garry's plan appears to show that, although the positions of the bulkheads are marked on the keel, there are no positioning slots cut in it. All the slots are only cut into the bulkheads and the depth of cut in most (C - E etc) appears to cut the bulkhead in half (at the bottom anyway). This seems to me to weaken the frame and possibly introduce distortions. I have enough trouble with self-induced distortion without planned ones. The instructions are silent. Can anyone suggestion why someone as obviously competent as Garry would do this, and should I follow? It is more of an intellectual problem because I know how to solve it - cut half-depth slots in both the keel and bulkheads. Unless someone can tell me why I should follow the plans.


-
Thank you all for your kind words, likes and suggestions. I'll have a further poke around my local model shop for things I never knew existed.
- 22 replies
-
- 3
-

-
- notre dame
- hydroplane
- (and 1 more)
-
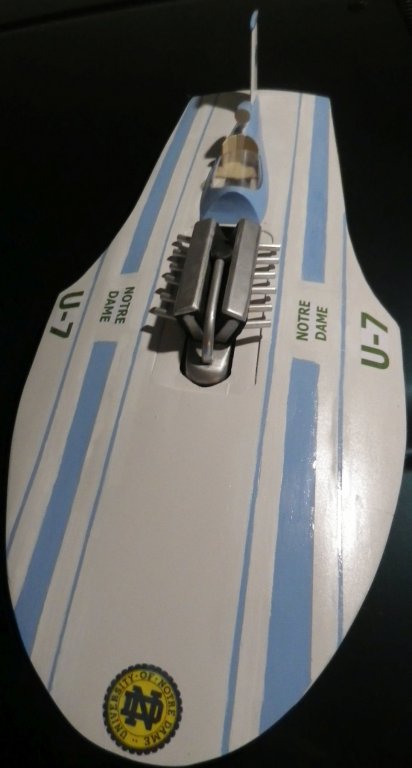
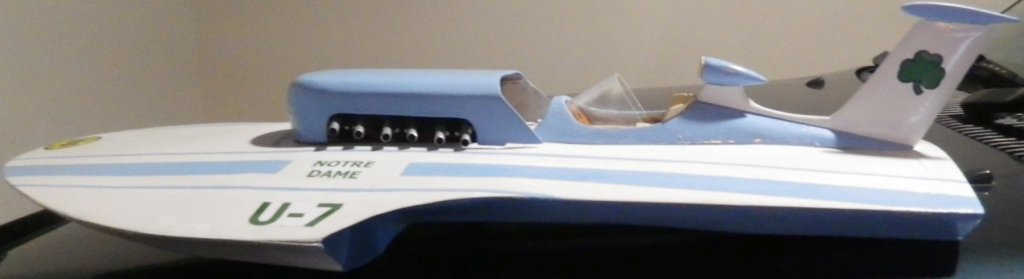
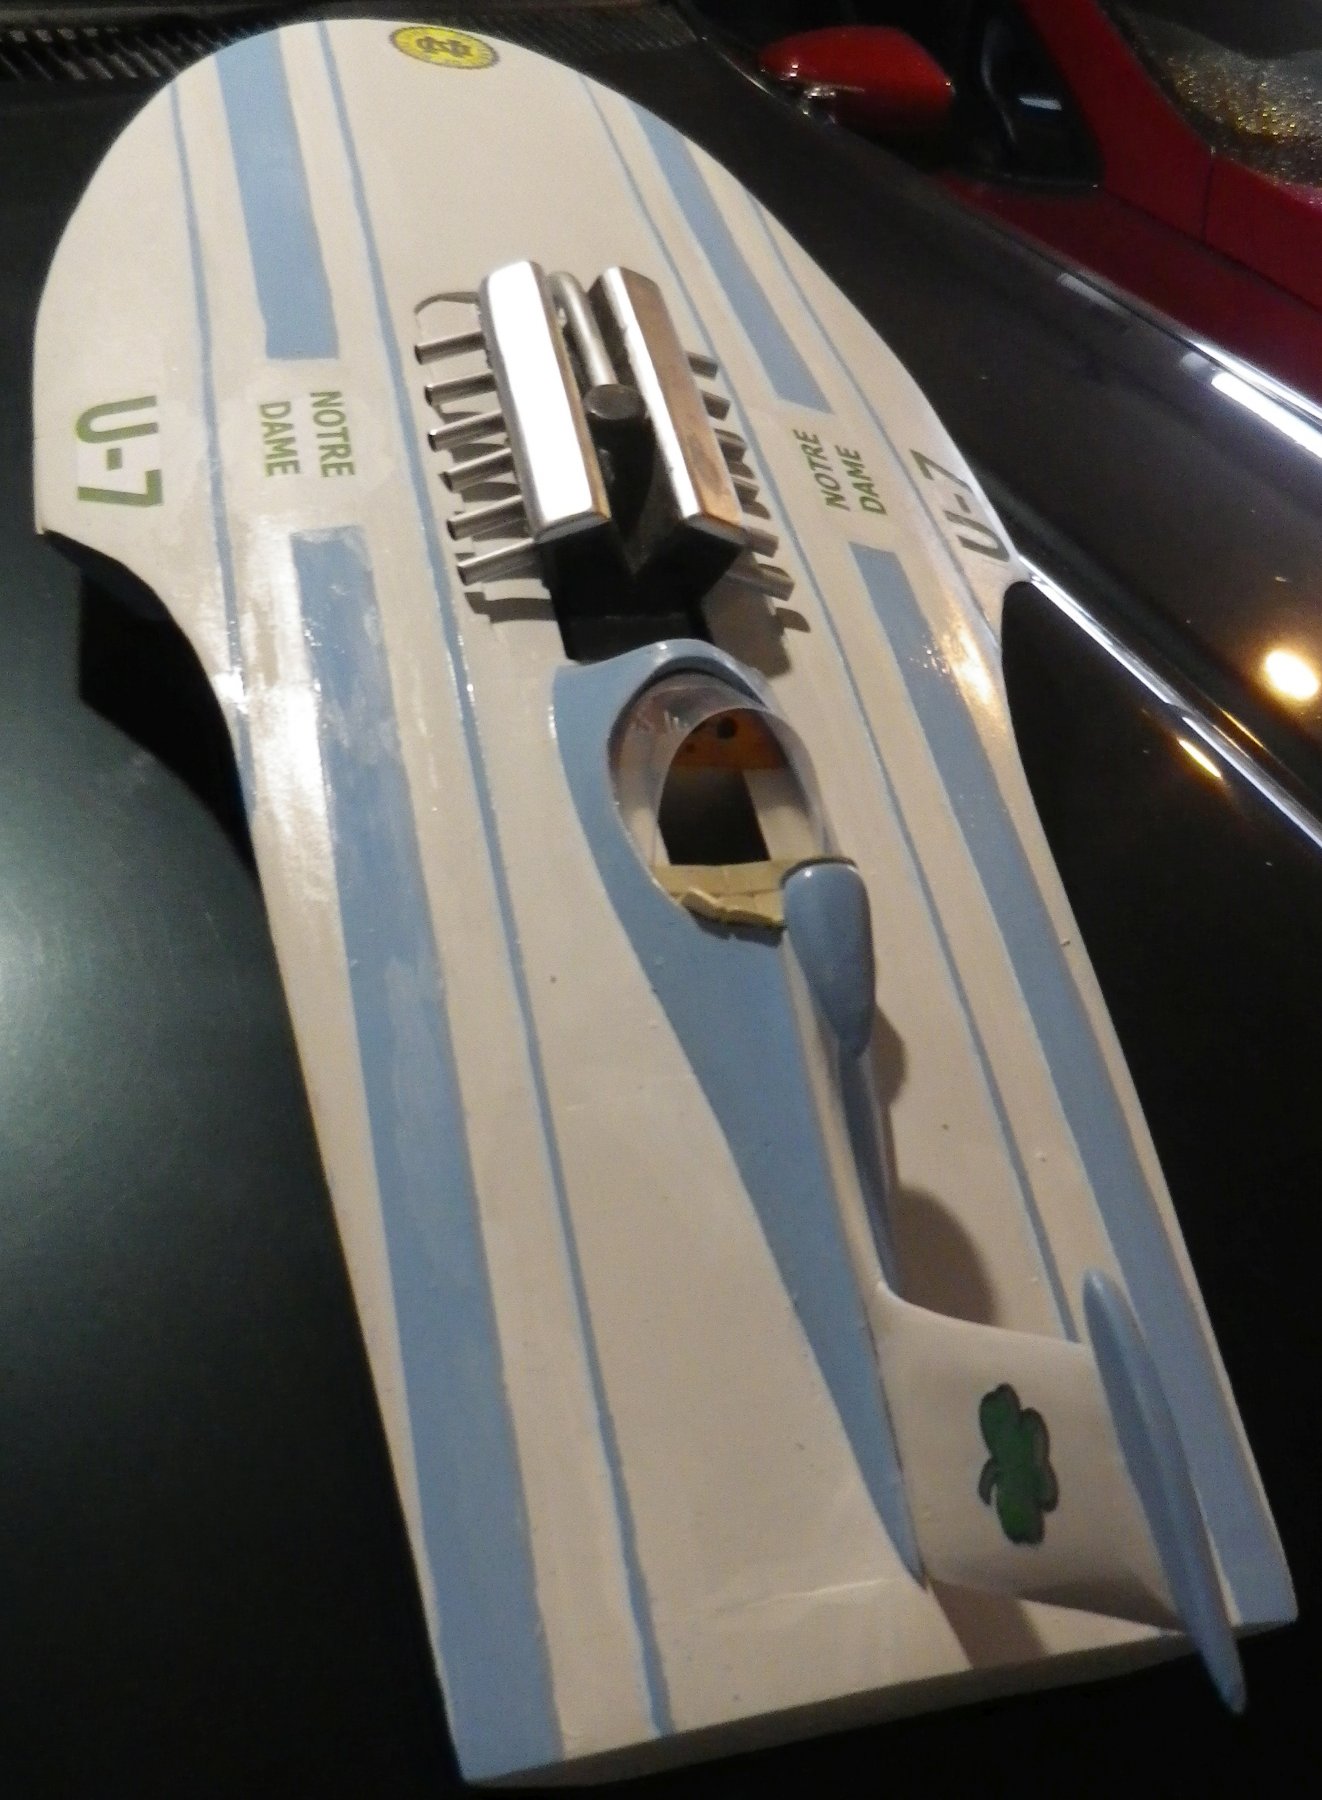
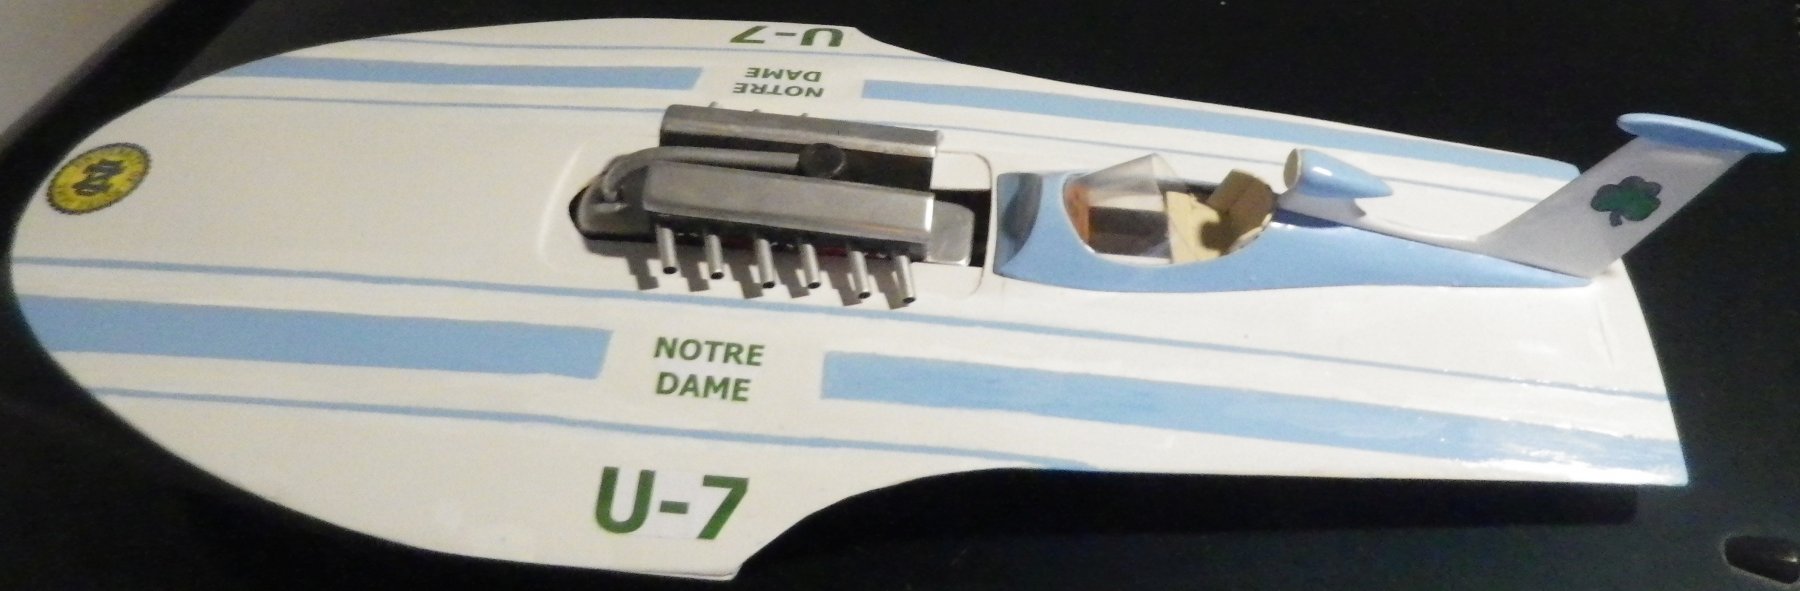
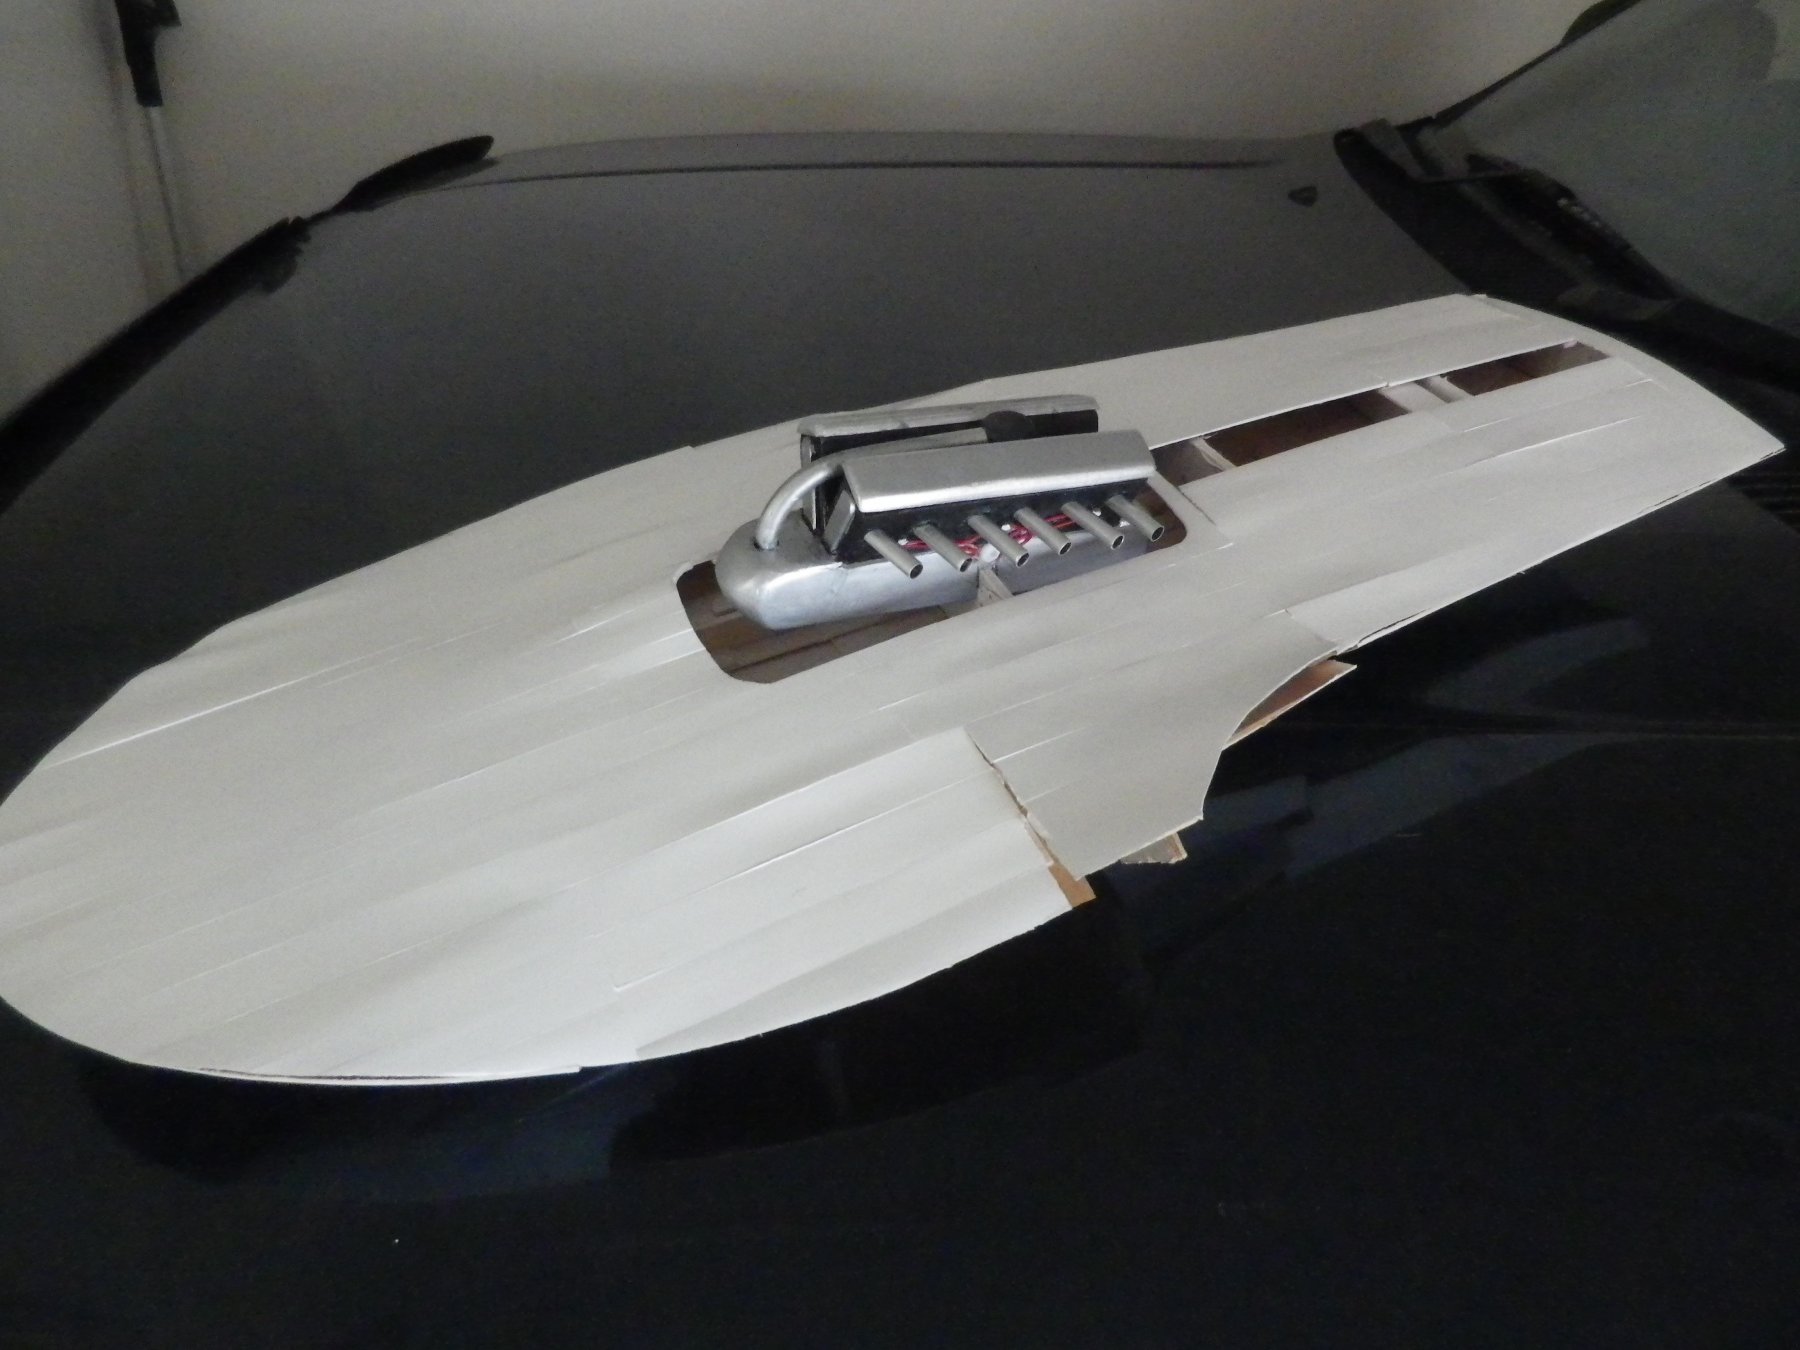
Finished at last. I'm sick of it! It looks OK in the photos but the finish is terrible up close, and I gave up trying to rescue it. The white paint is uneven probably because the deck is uneven from the rain damage. Popsicle construction is not suited to large expanses such as the deck. The hand painting (blue) doesn't come out well and the pinstripes are awful. I used sticky tape for masking and the uneven white paint cause the blue to leak under the tape. So various corrections tried with sandpaper and white paint and the corrections with blue paint. And so on - I'll never do pinstripes again! The paper labels look like paper labels. As noted I spent weeks building the engine cover, but I think it looks better without it - I'm reasonably pleased with the engine and (in the absence of the cover) it draws the eye away from the numerous decorative defects. The irony is that the plans didn't have an engine cover at all and I had to make it from photos. Never mind! It is the build that is the important thing and I have learned a lot (mostly what not to do).


- 22 replies
-
- 6
-
-
- notre dame
- hydroplane
- (and 1 more)
-
Thank you for the thought. I think its going to be OK,
- 22 replies
-
- 4
-
-
- notre dame
- hydroplane
- (and 1 more)
-
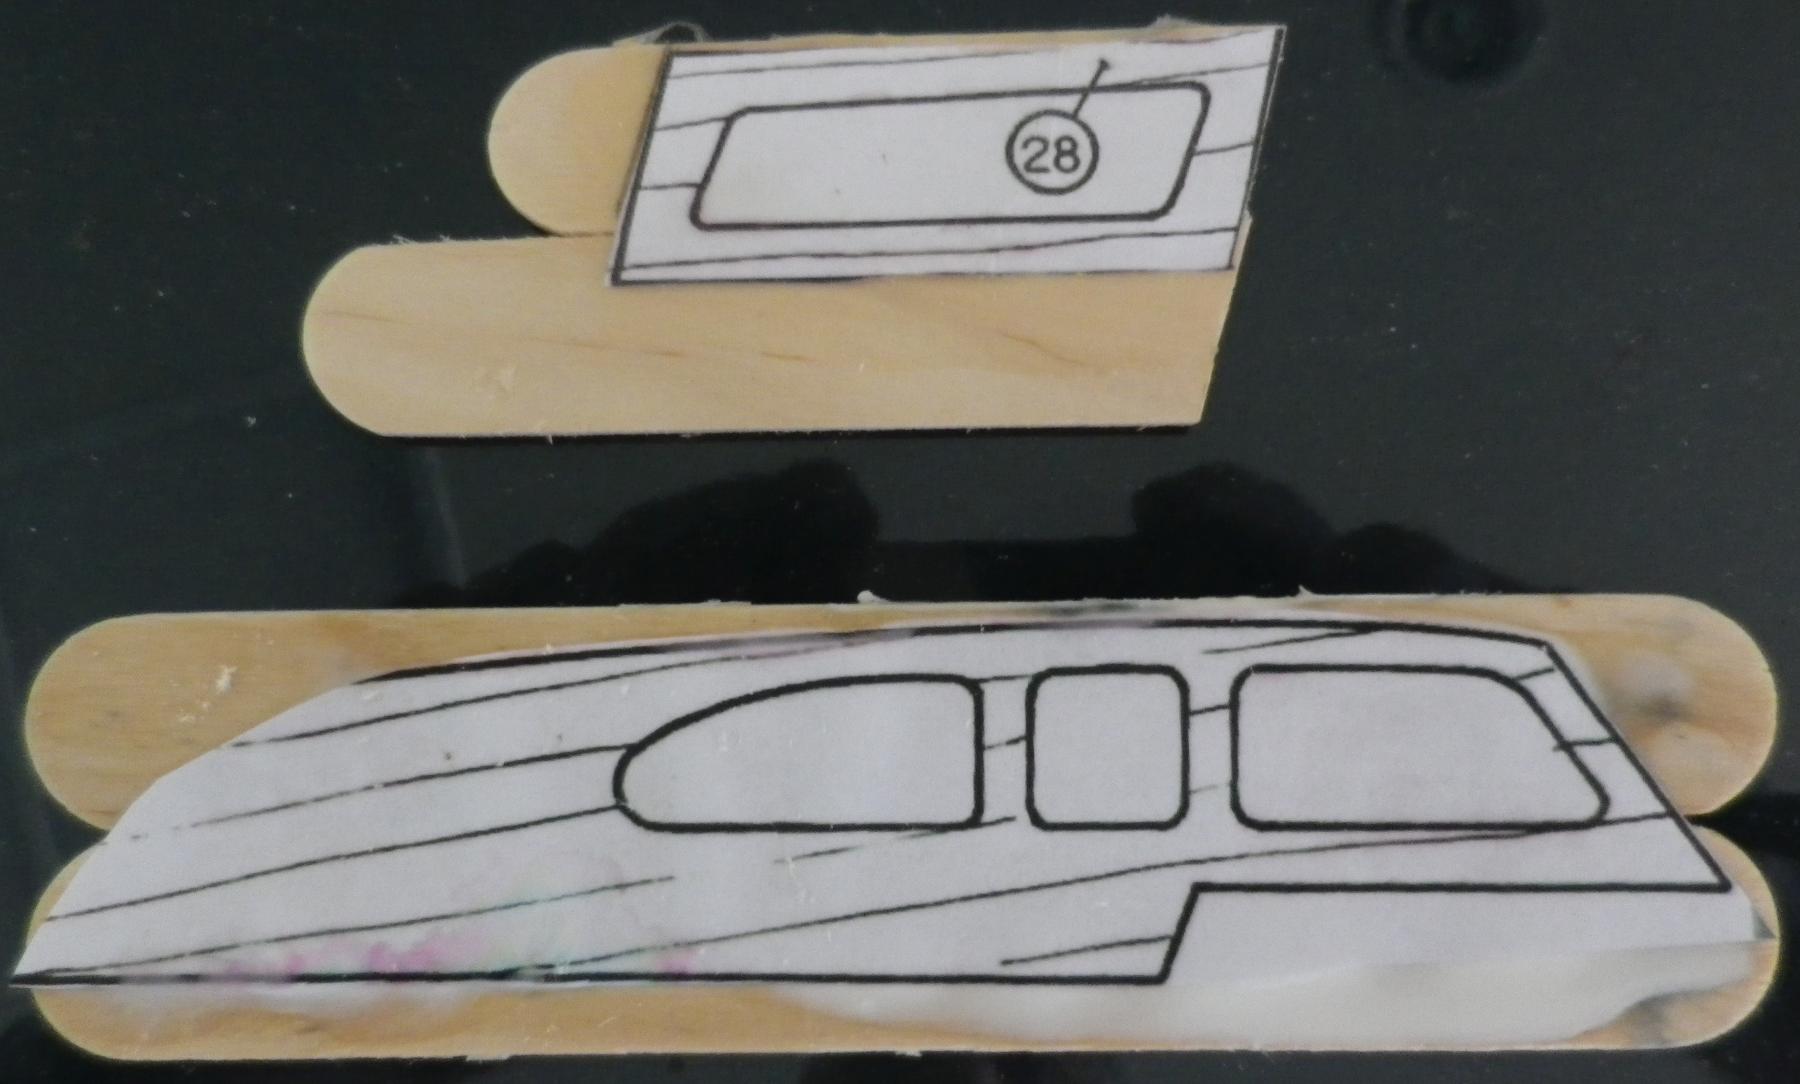
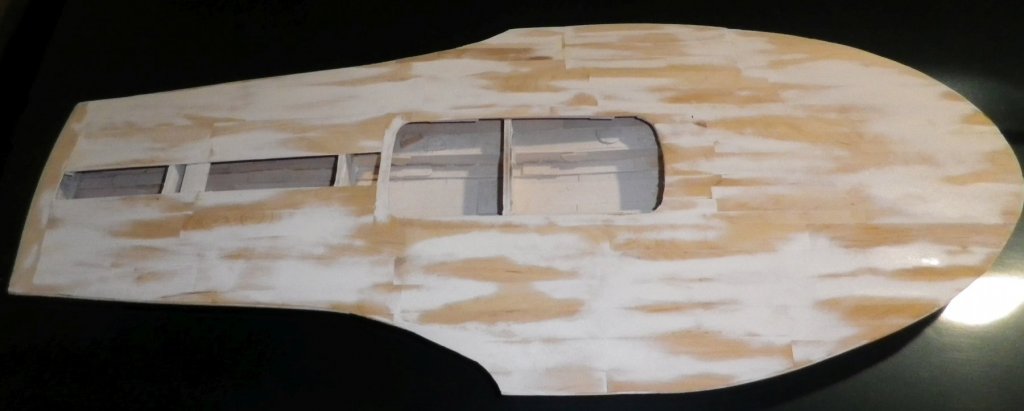
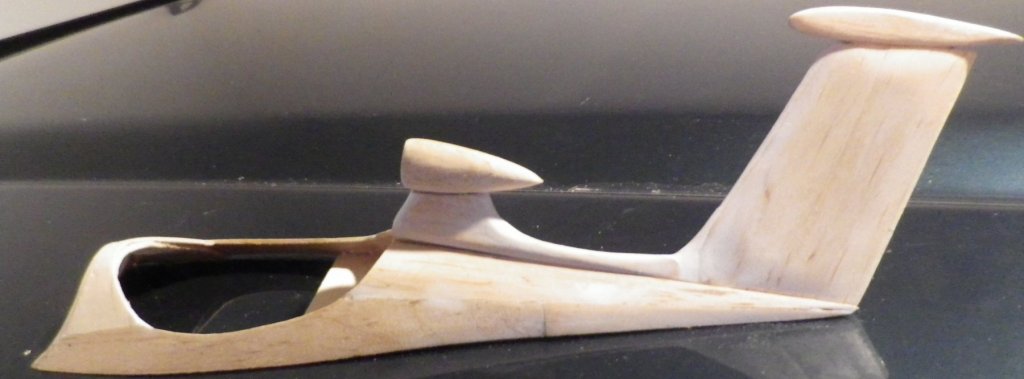
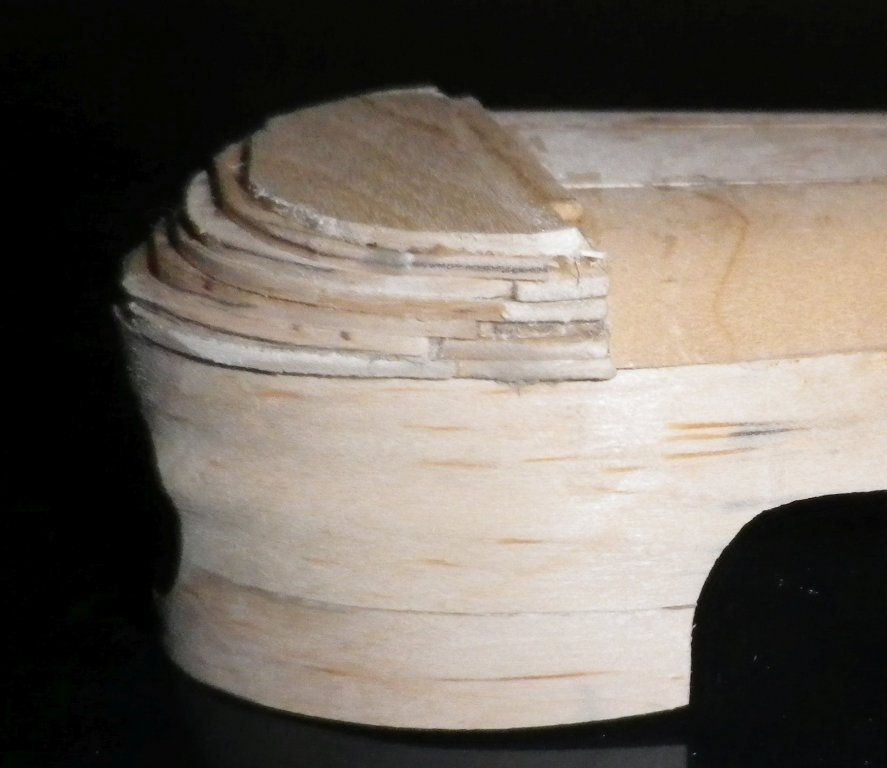
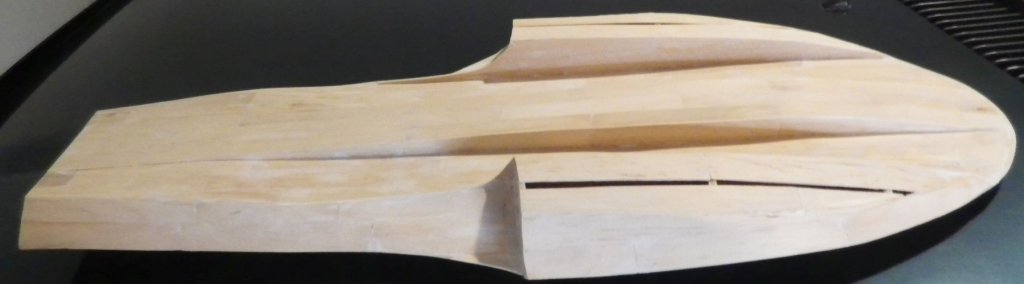
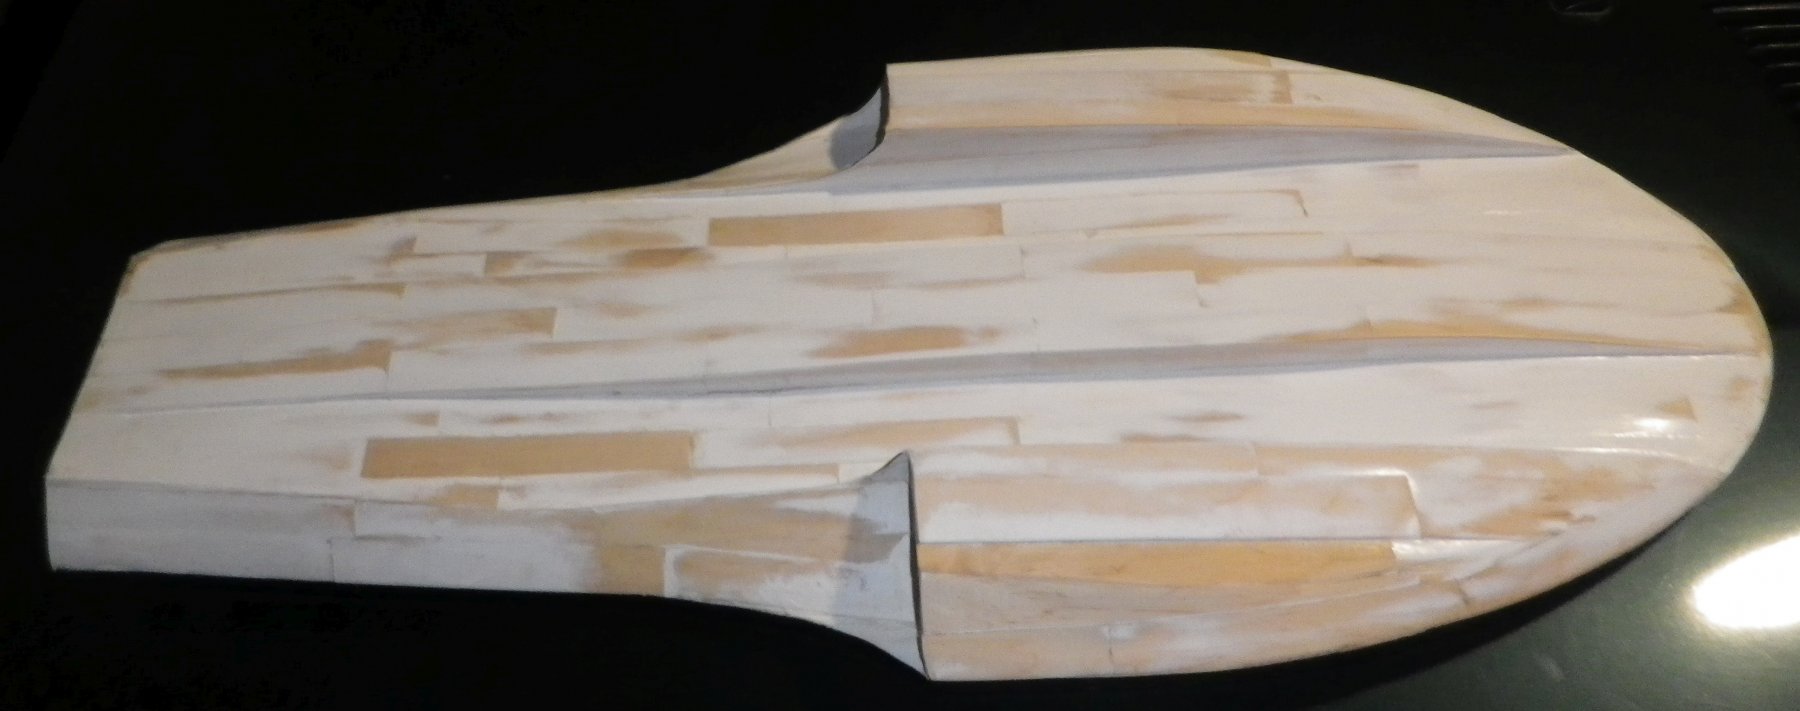
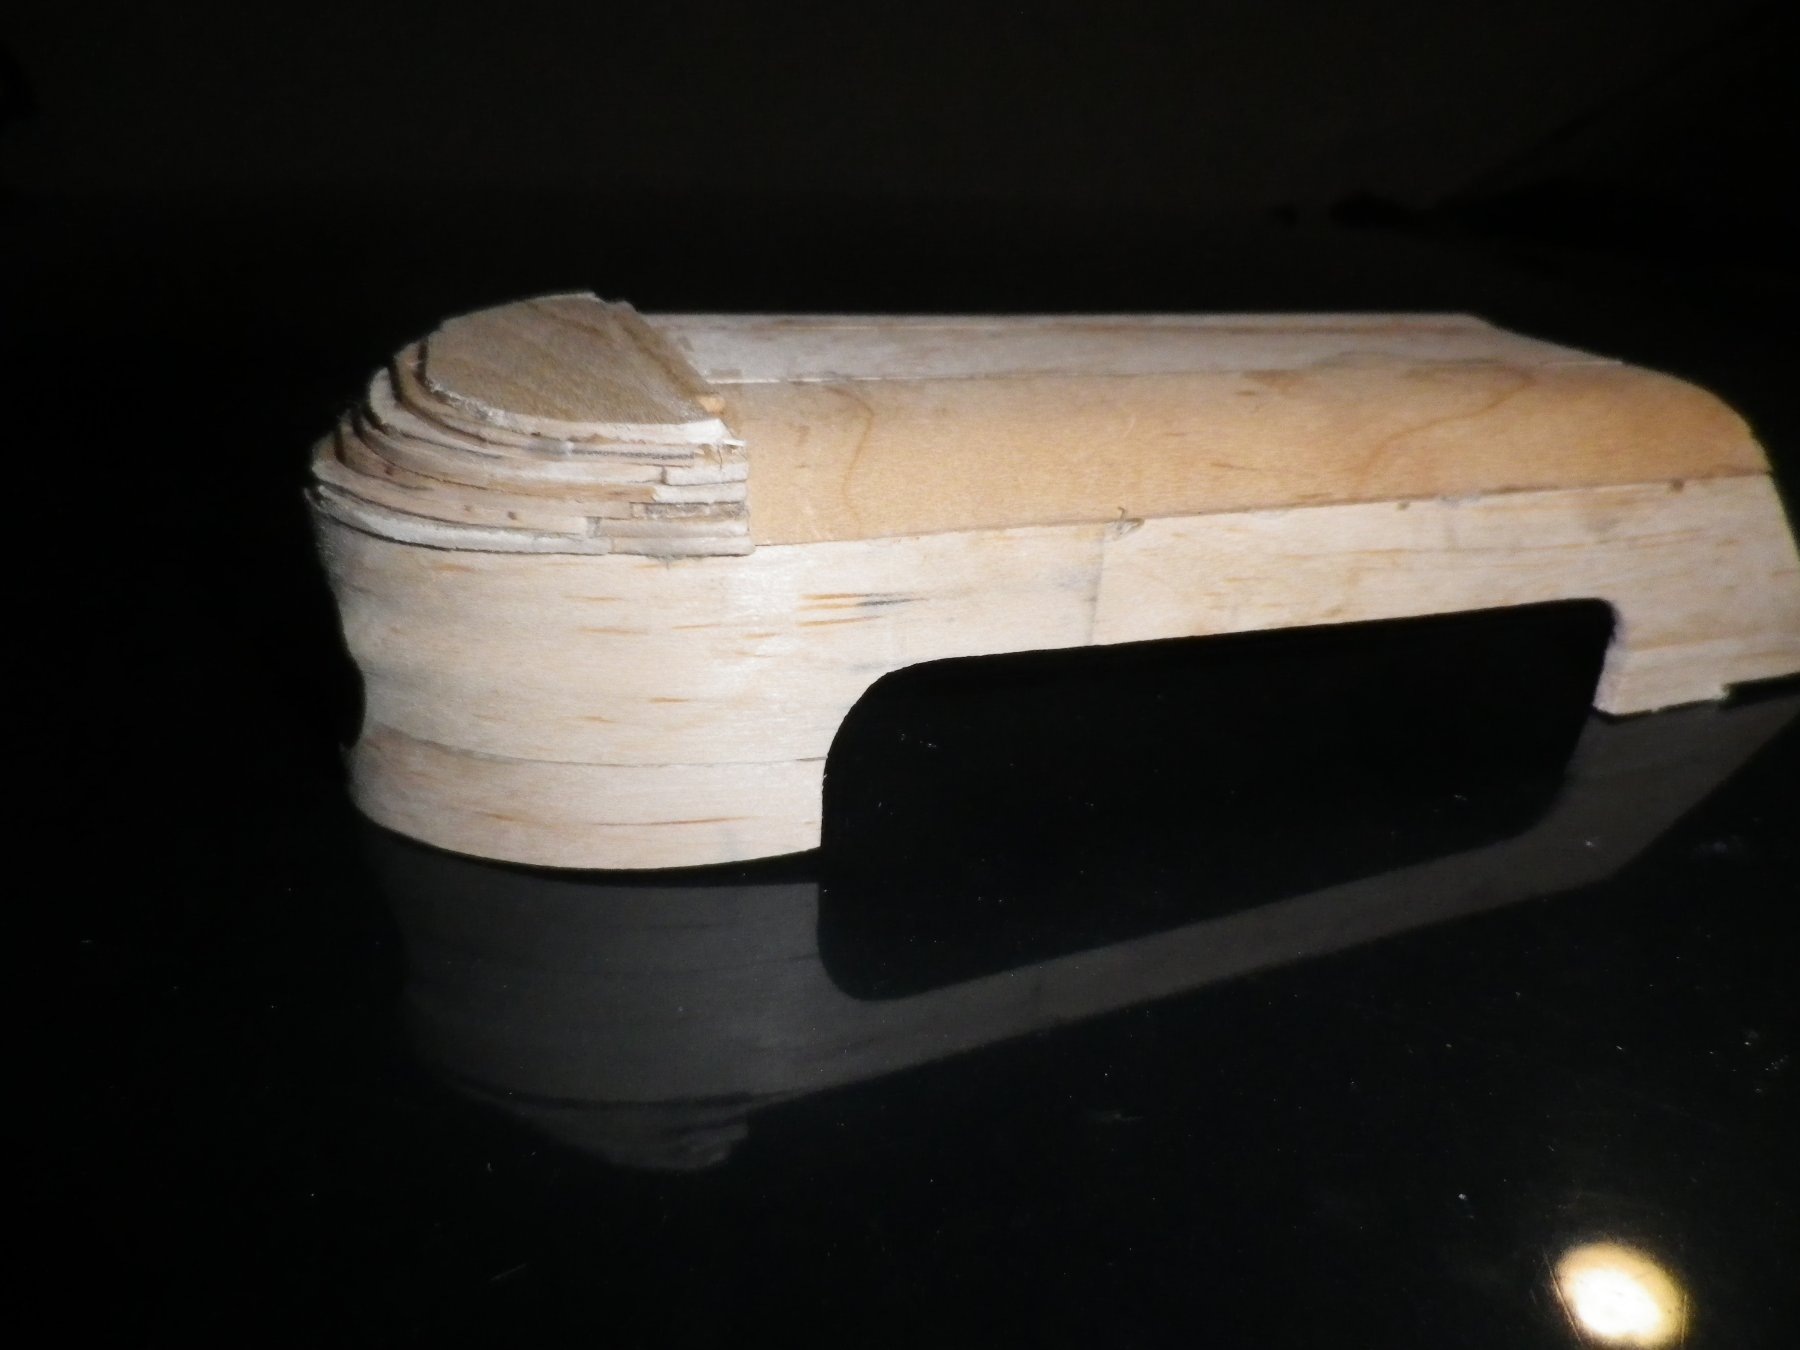
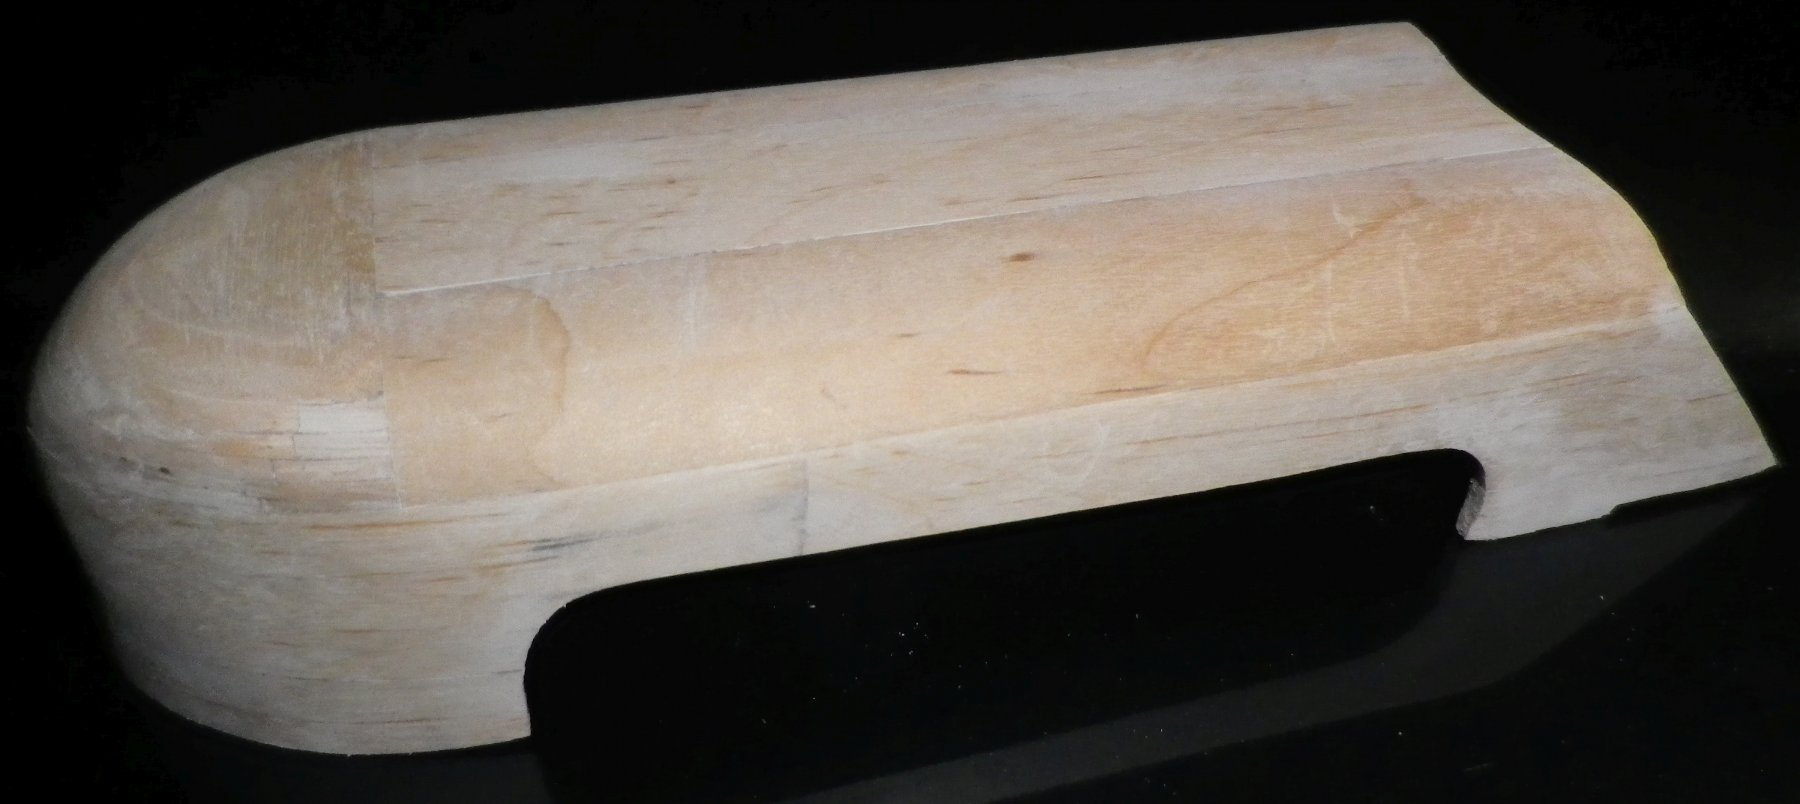
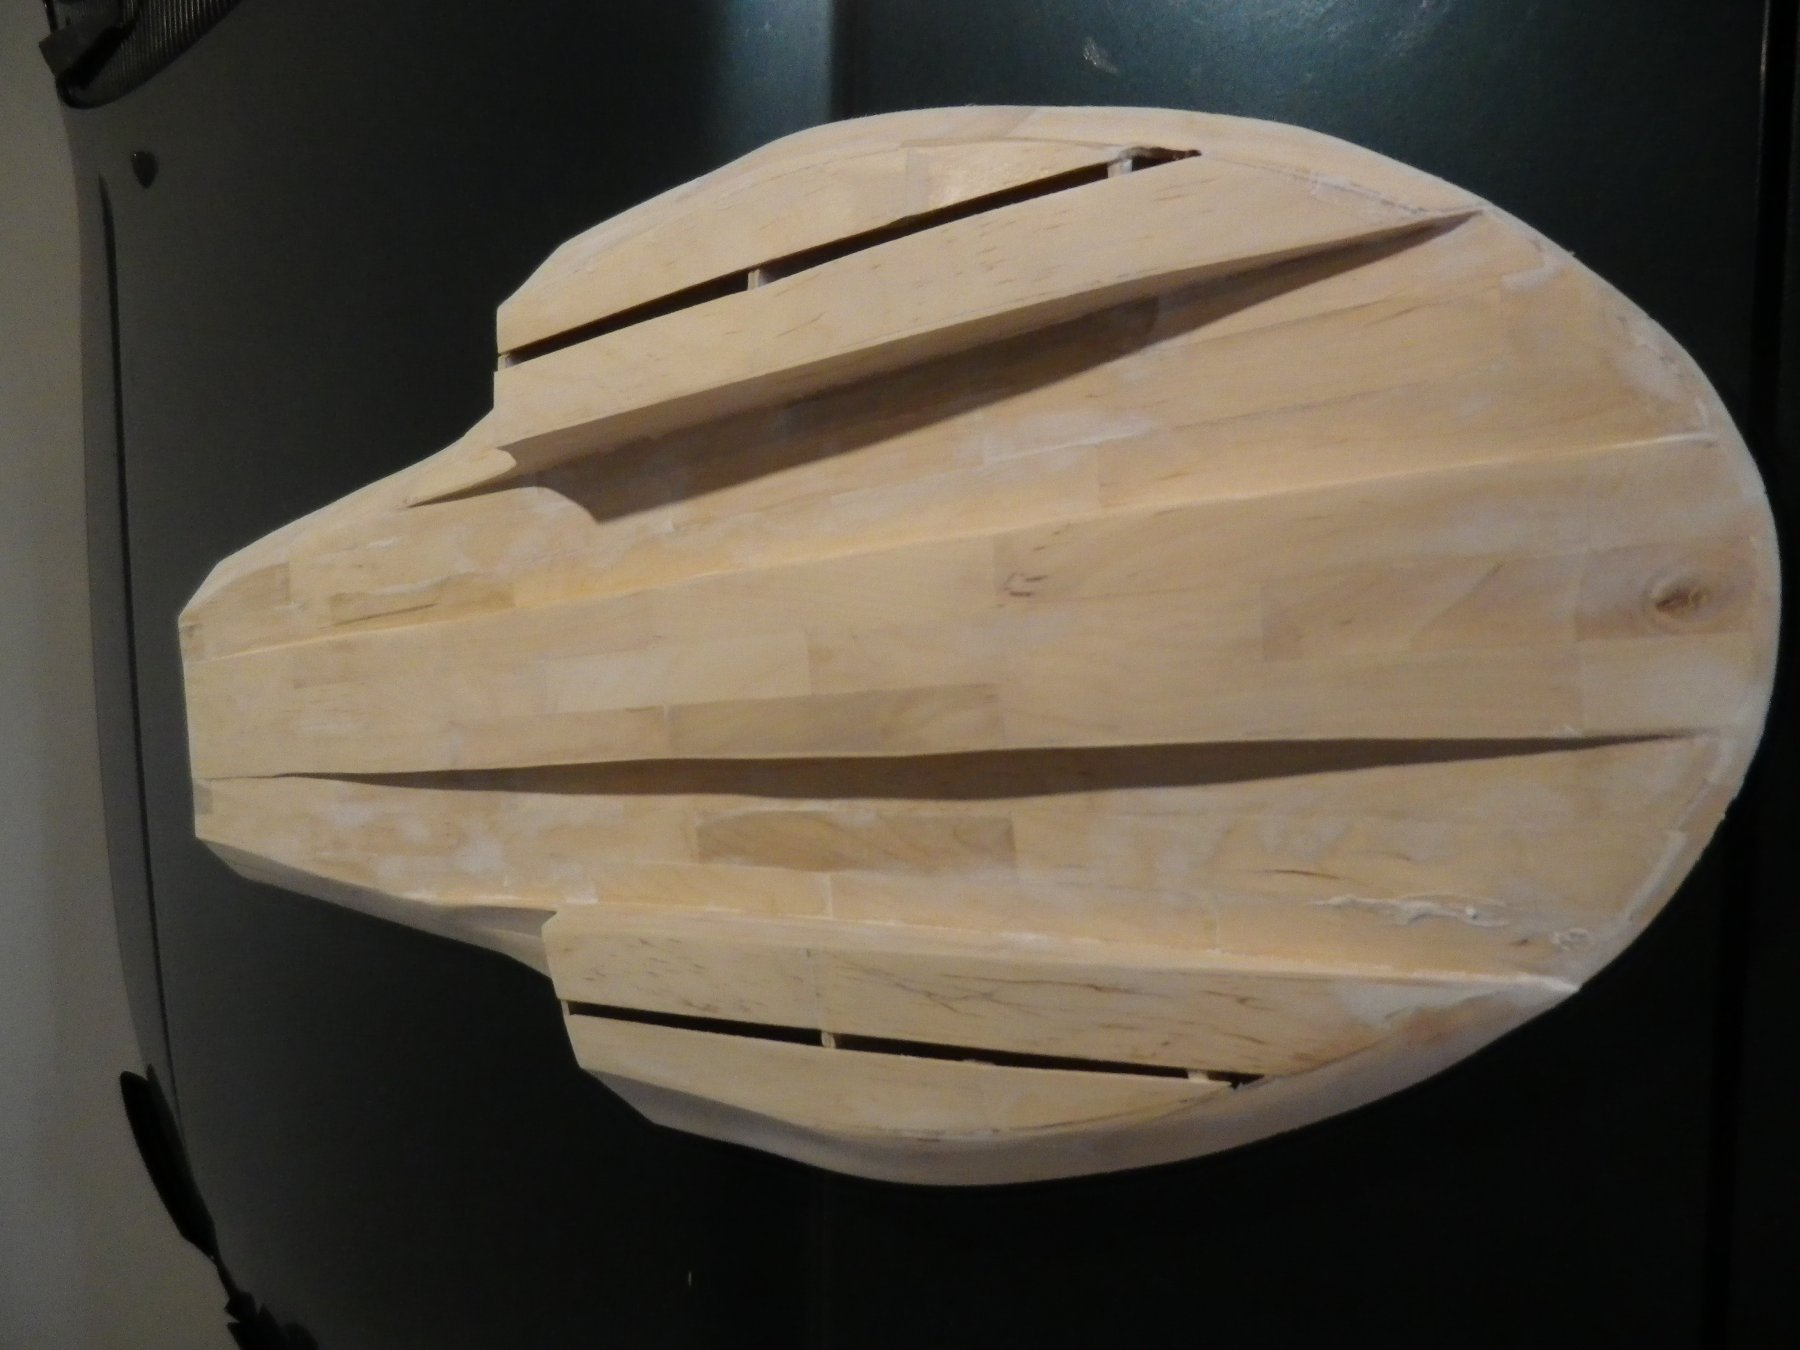
After a couple of weeks of careful drying it didn't look so bad. While the glue was still unstuck the wood sticks shrunk back to normal size, albeit with some pieces still being slightly curved. It took two months to rescue the hull, but its not too bad. The deck looks OK - you can see from the uneven sanding that some curvature needed to be smoothed down. The underside isn't so good because "walls" encouraged what were effectively "pressure ridges" and so it is more uneven. I only had to replace a couple of pieces, though. But because of the uneven surfaces the areas of power sanding were limited. In some places the wood is now paper-thin; in a couple of places I've gone right through. i'll see what things look like after a couple of coats of paint - that should show up areas that need more sanding or filling. But I haven't been idle while waiting for various bits of hull to dry; I've tackled the really hard stuff - the superstructure - which has lots of curves. As I've mentioned before, Popsicle sticks and tight curves (especially double curves) don't play well together. It took me a month to complete the cockpit and tail. Because it is often necessary to glue a single piece, then wait for it to at least bind before gluing the next piece its a time-consuming process. There are 39 separate pieces go to make this up, and a good half-dozen sticks were broken in the process. It took me another month to build the engine cover - this time (although there are a lot of pieces) the delay was more bending the nose and roof pieces to the correct curves. I broke a good dozen sticks before I got it right. Mind you some double curves are easy, if time-consuming. The top of the nose is 14 individual pieces glued in top on each other and sanded into a curve. Its nearly ready for final painting and assembly - if the painting shows everything is smooth enough!


- 22 replies
-
- 6
-
-
- notre dame
- hydroplane
- (and 1 more)
-
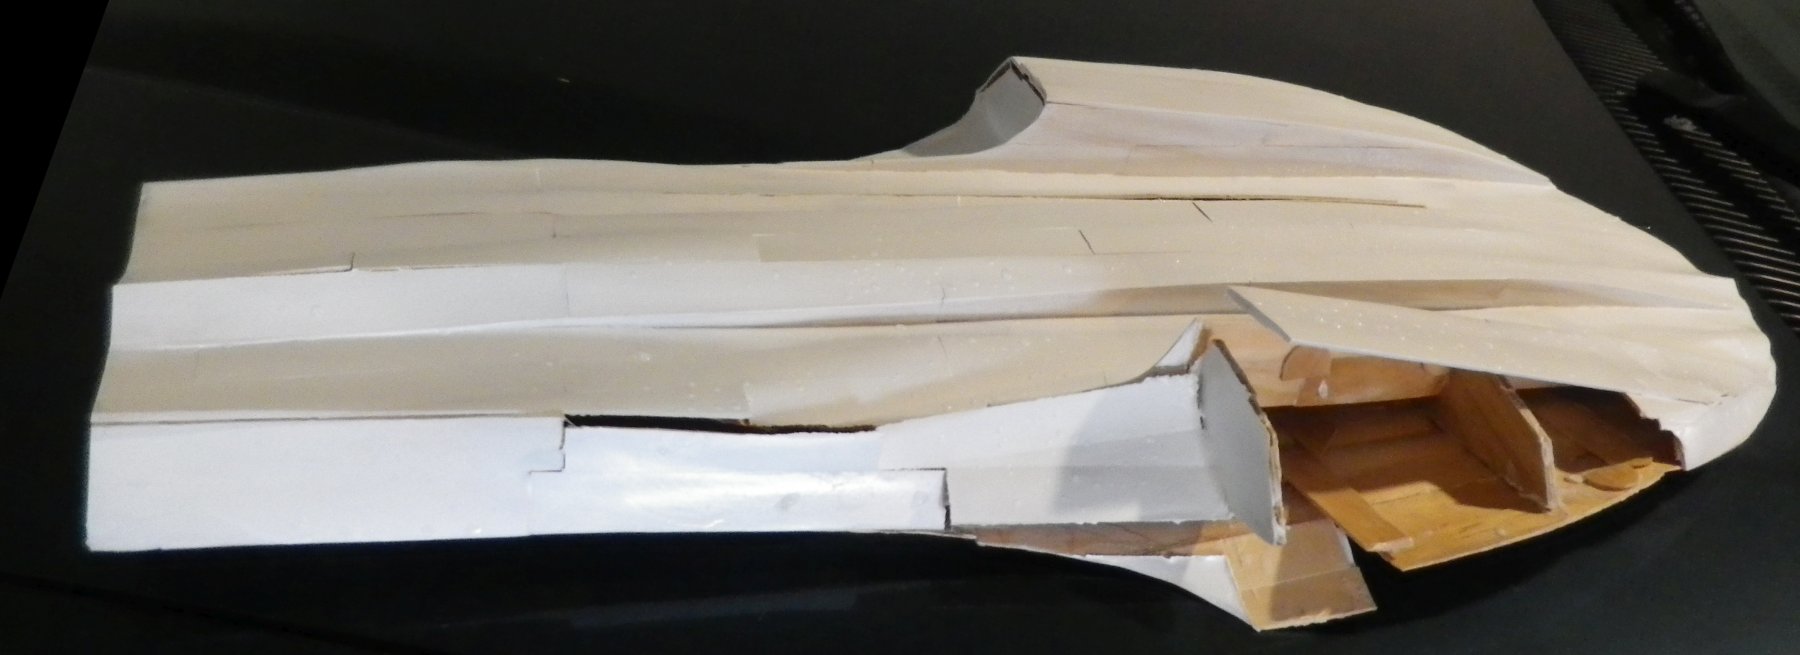
Disaster! The hull was complete with only a couple of coats of paint needed to finish. I left it out in the sun to bake, forgot it and it rained. The problem was not so much that the glue dissolved; it was that the wood expanded and - in the tight alignments - warped. My beautiful smooth surfaces are all wrinkly. It it salvageable? Dunno - the warping is a real problem. I'll dry it out and see.

- 22 replies
-
- 7
-
-
- notre dame
- hydroplane
- (and 1 more)
-
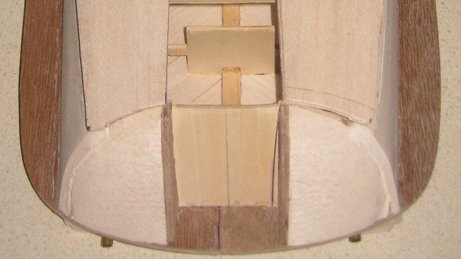
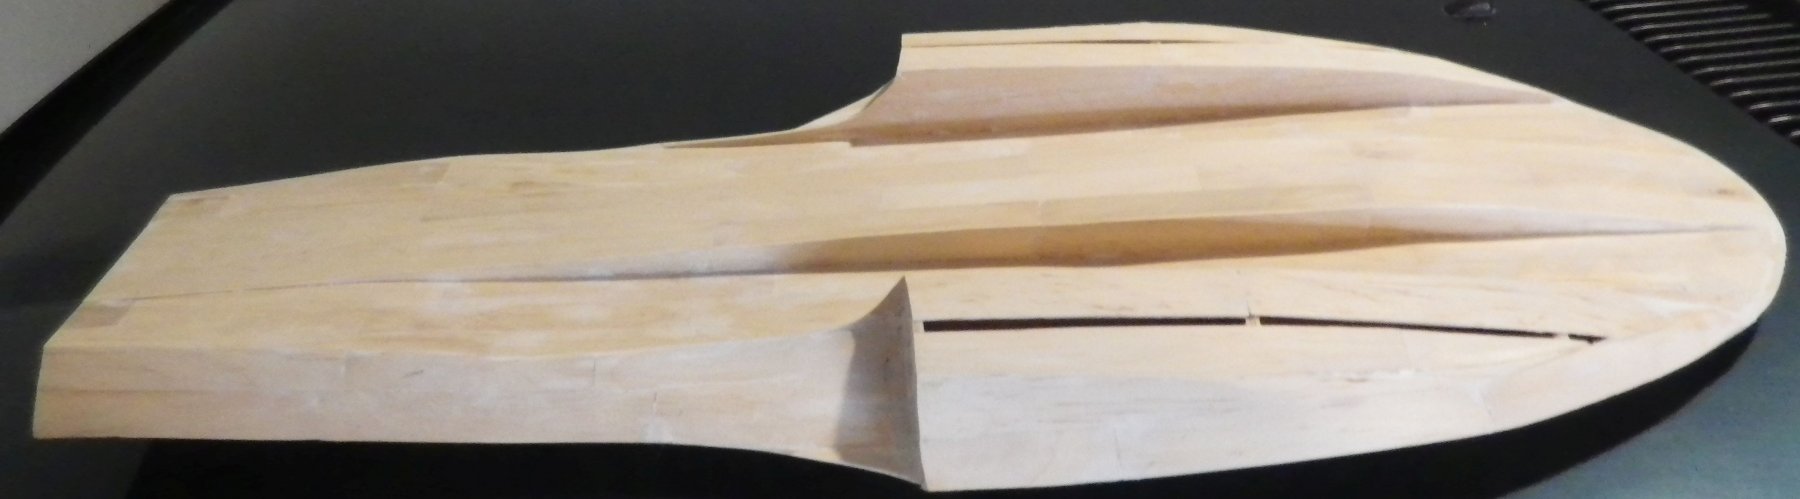
The hull has been the real nightmare. The design has internal curves, acute angles and sharp obtuse angles. Some of the sticks require double curves and keeping these the same curves (where they must butt up against each other) was difficult. But the major problem I had was that my clamps often were too short to keep planks in place. Eventually I thought CA glue might have solved this problem but the quantities would have been prohibitive. So I pressed on.I had to sand and fill the tunnels before they were complete as my finishing sander wouldn't fit once both sides were on: with sanding: But now I'm nearly there with the hull - a couple of difficult pieces to add. Much last minute gluing and filling and sanding, but its just about time to put a single spray paint coat on to see where the defects really are.


- 22 replies
-
- 11
-
-
- notre dame
- hydroplane
- (and 1 more)
-
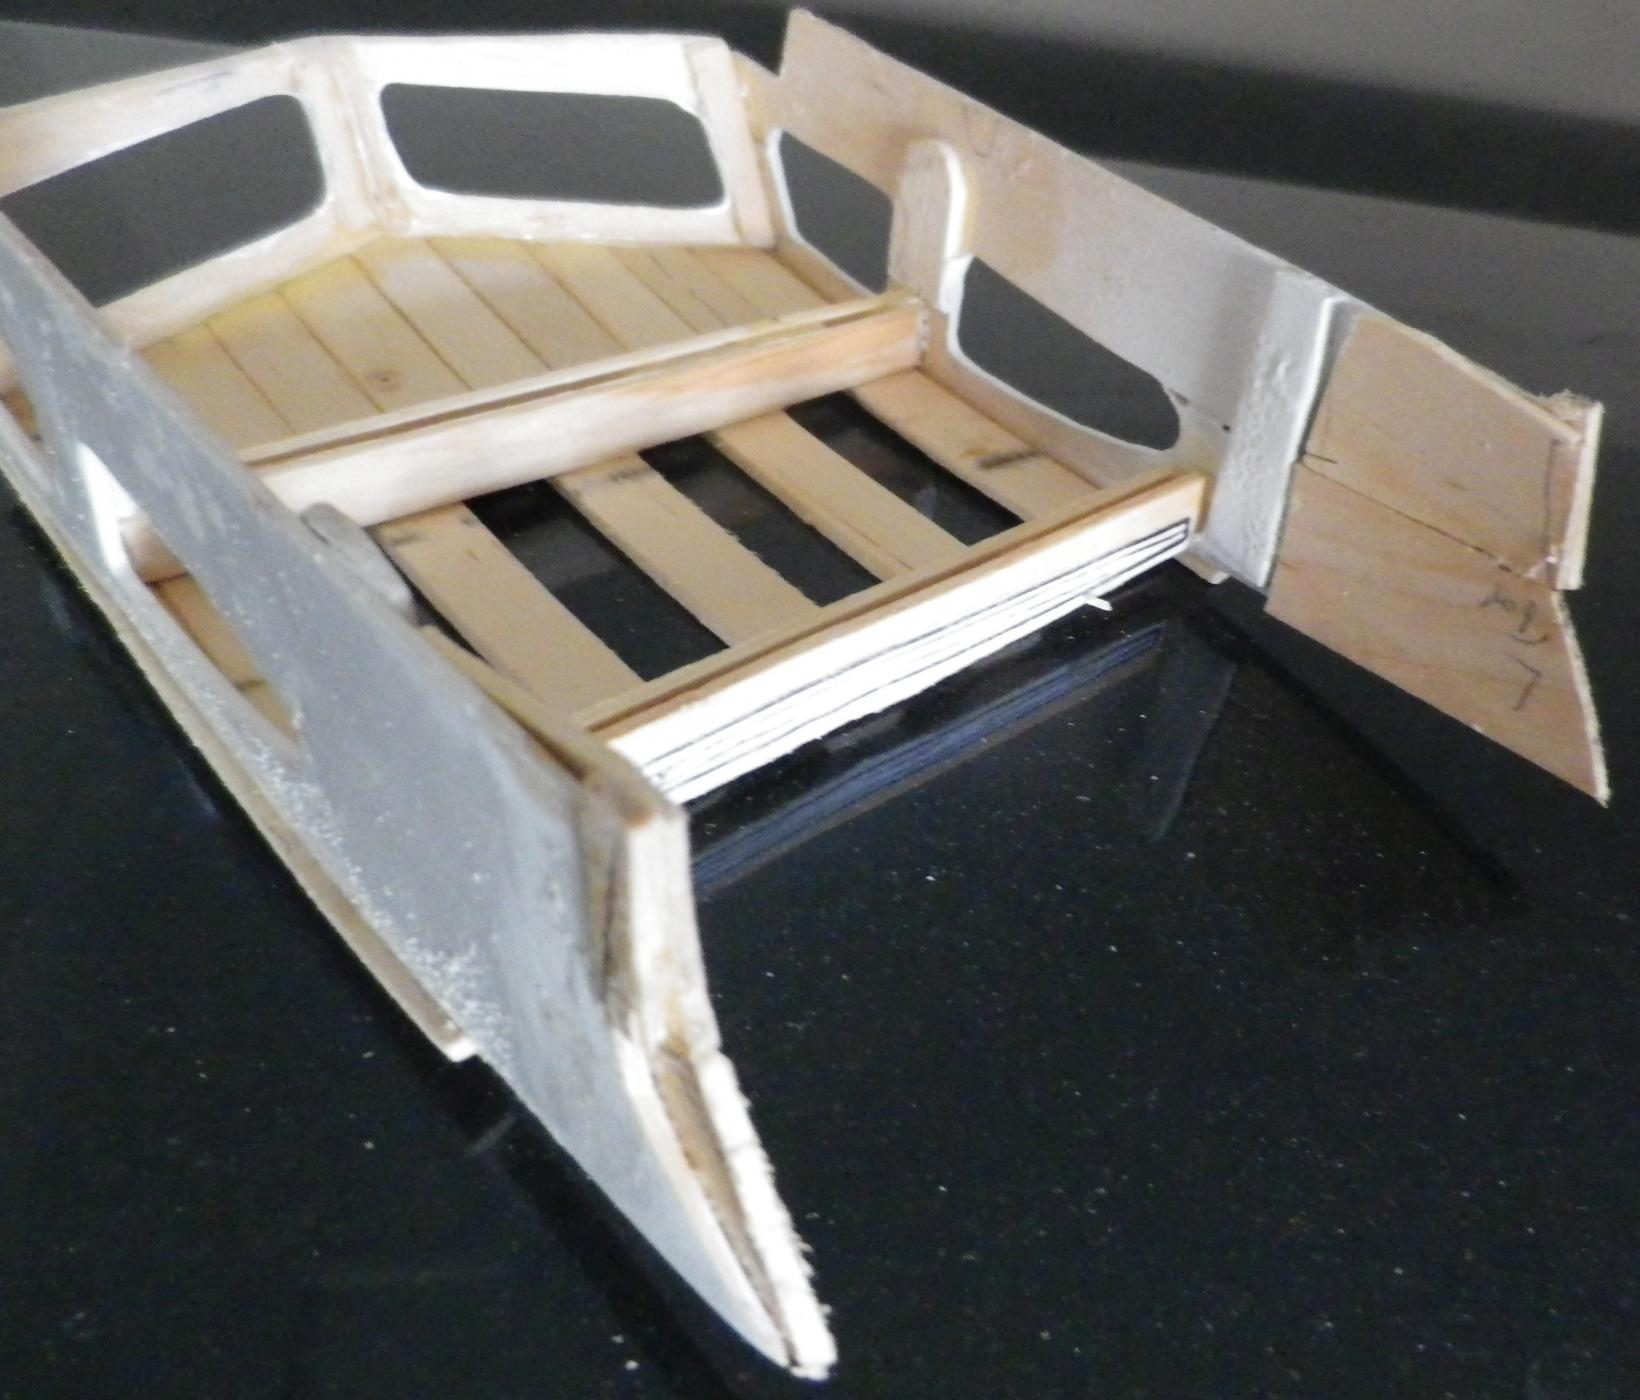
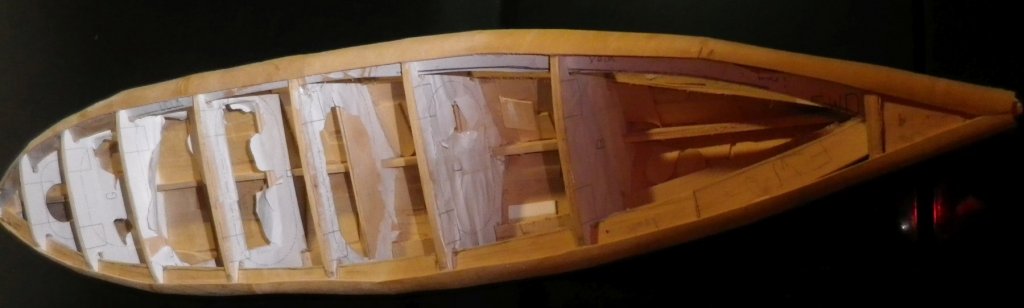
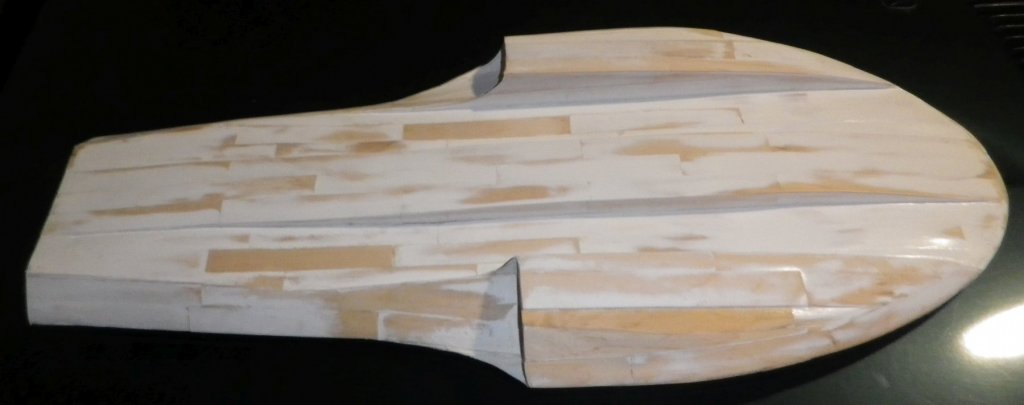
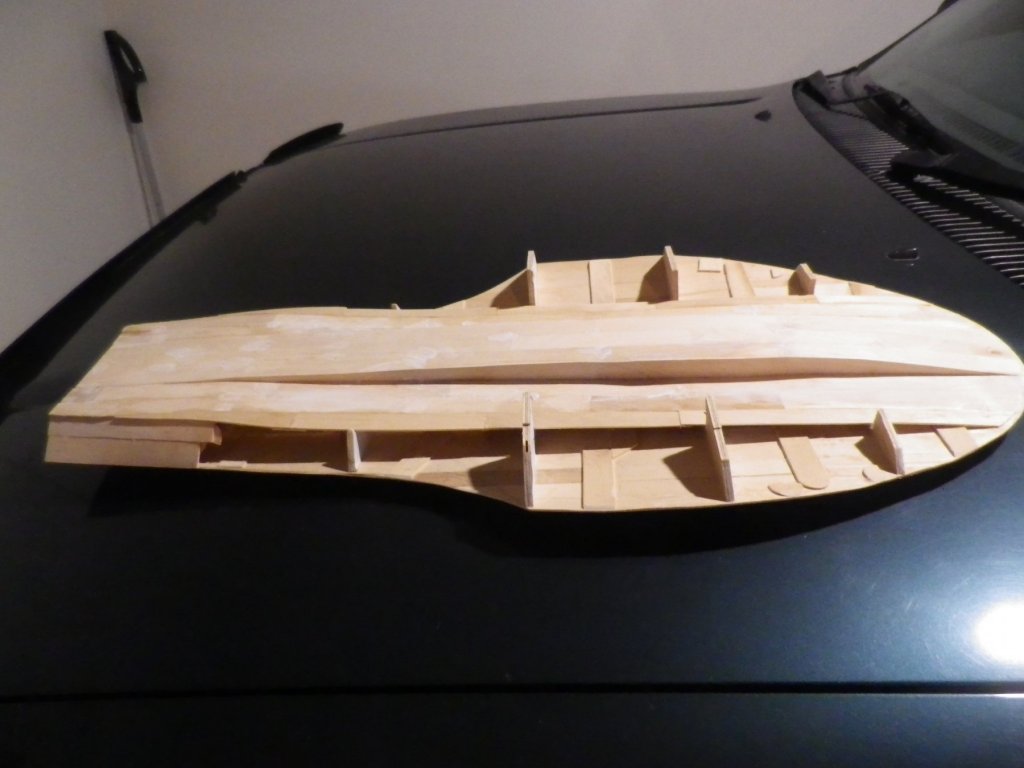
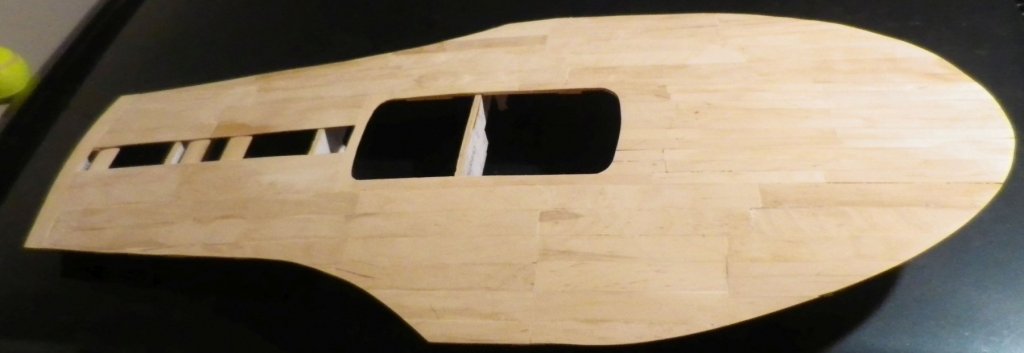
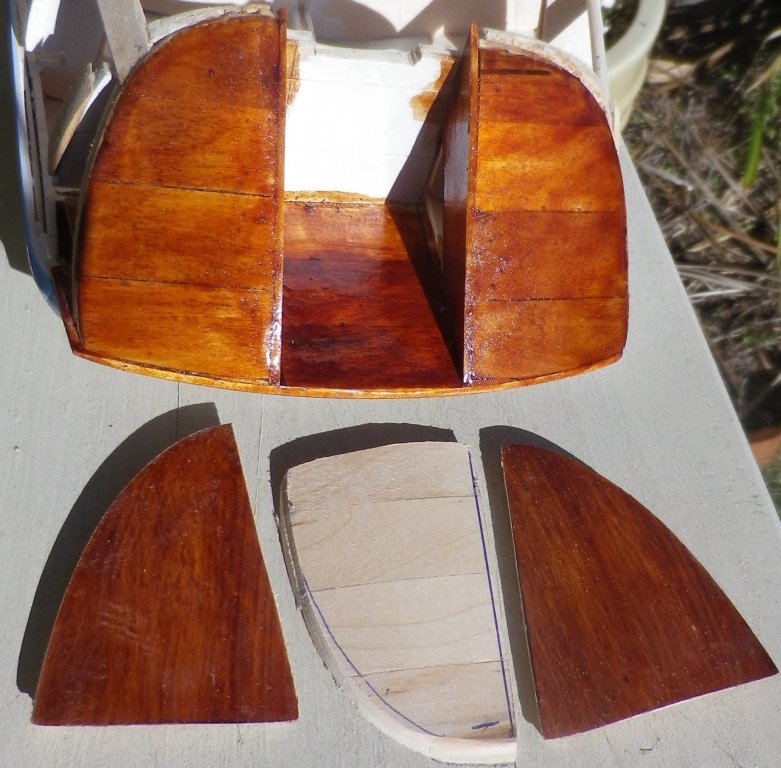
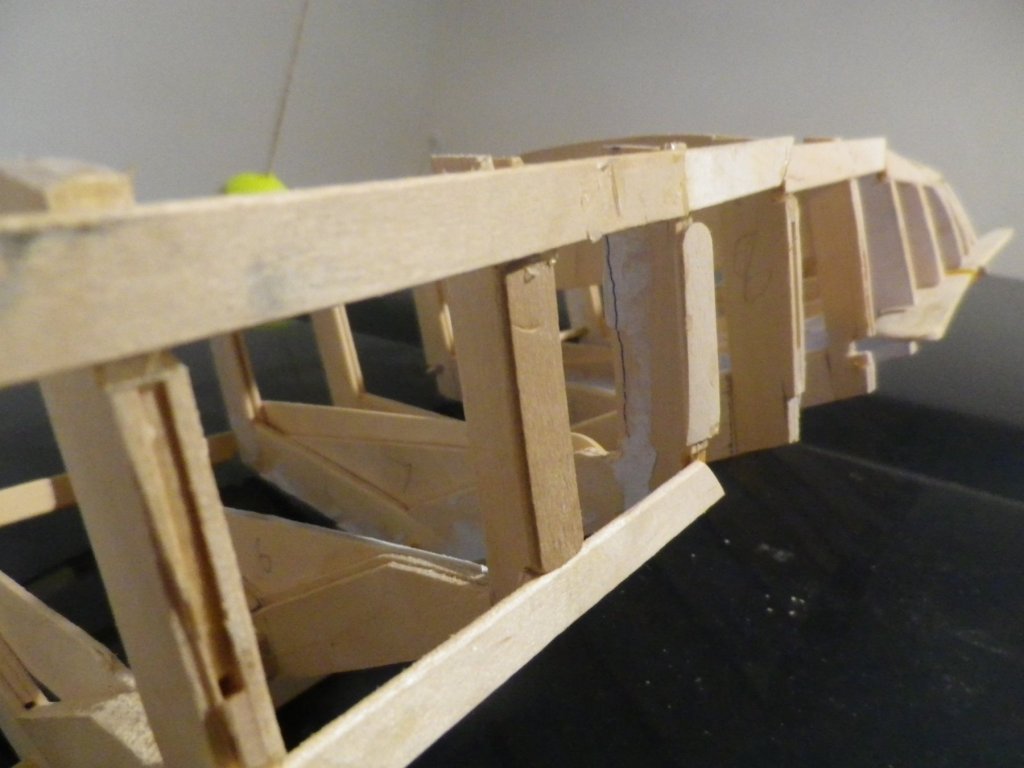
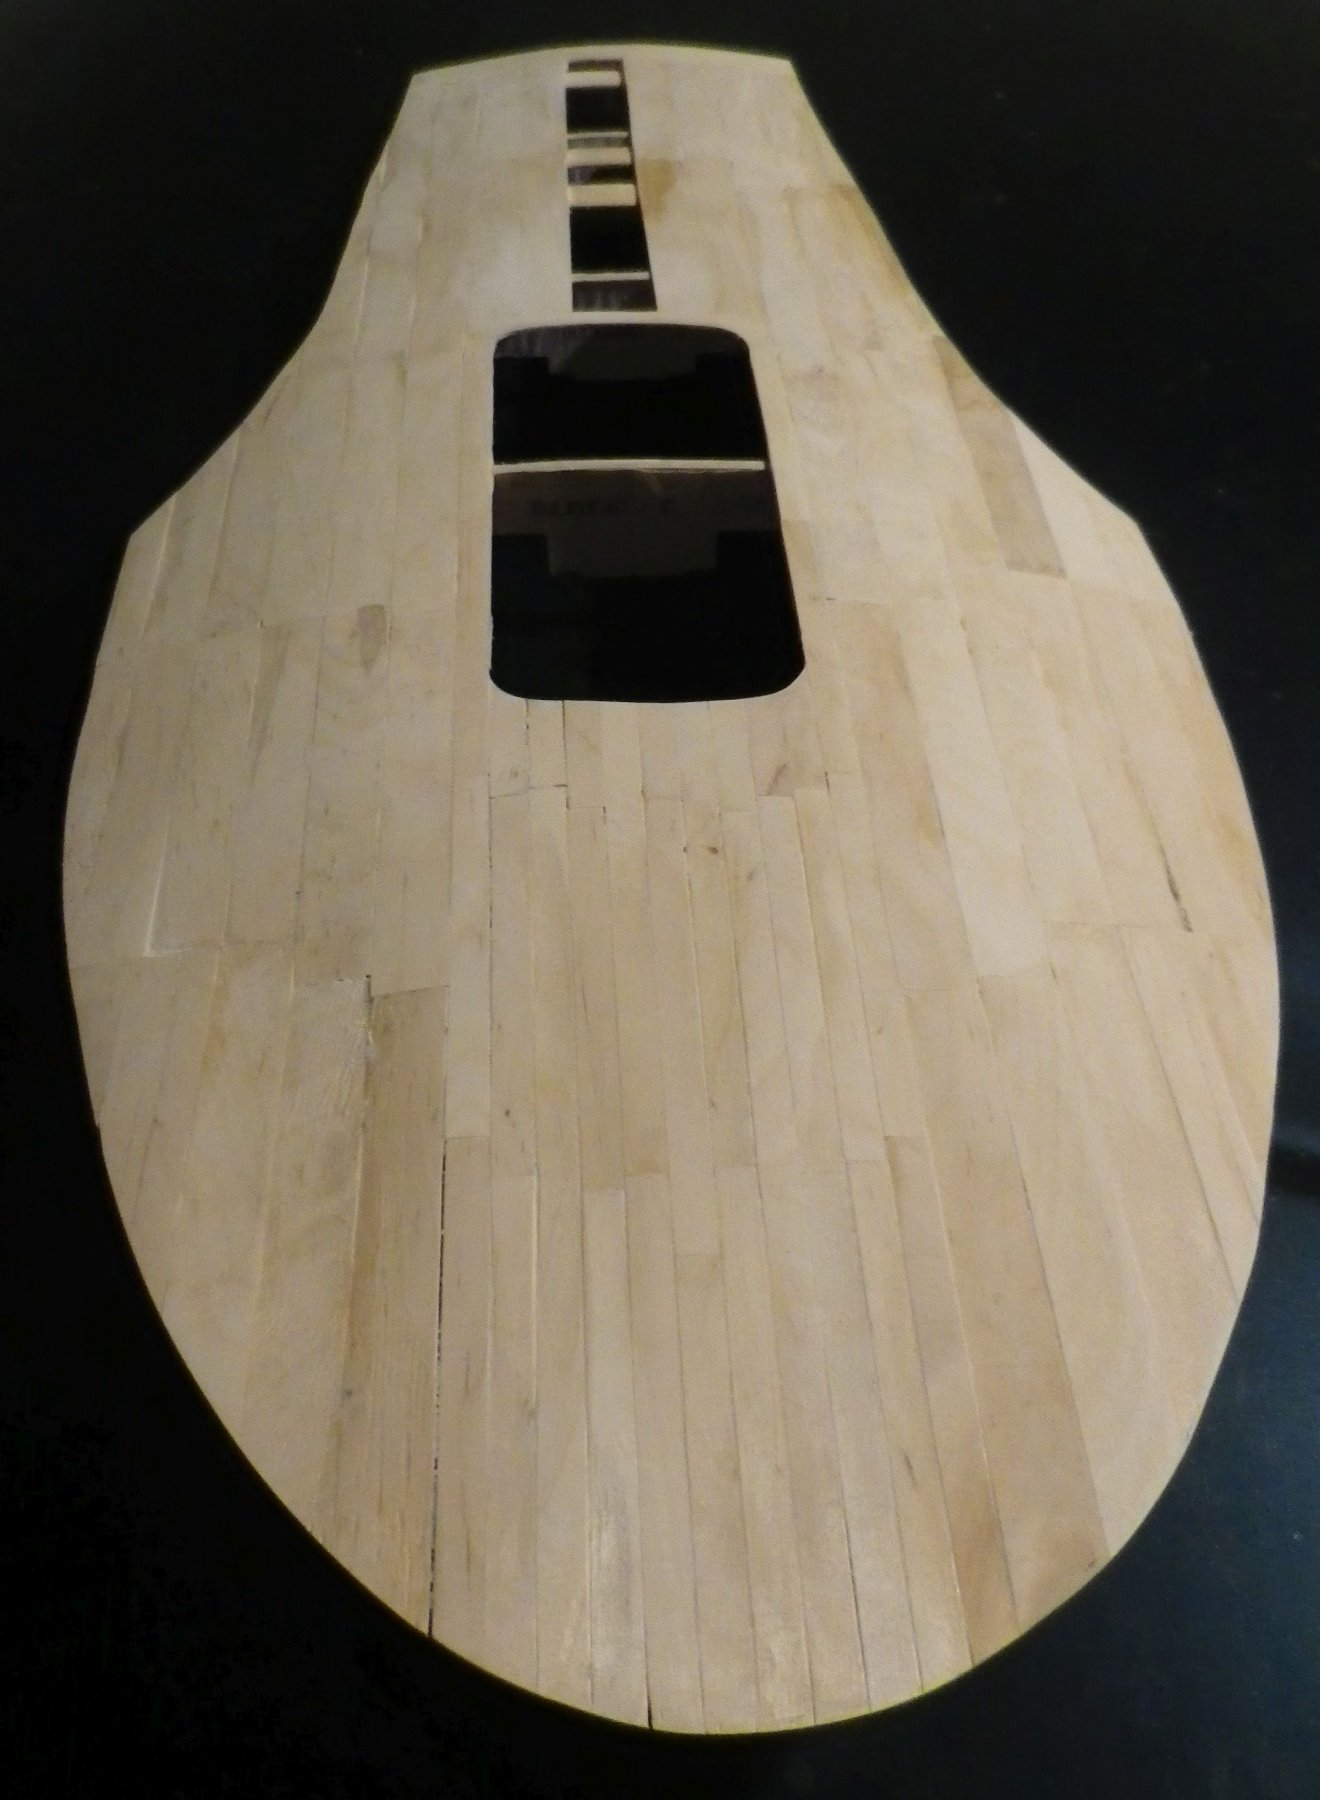
Thanks Piet. The purpose of this build was to try out the plywood frames as enablers of precision and symmetry. Thus I chose what I thought would be a simple model to prove the enabler worked. Some simple model - it is a nightmare with Popsicle sticks! The first problem is there is no keel, so lining up the bulkheads correctly was my first challenge. By sitting them on the plan and propping them in place while the glue on the stringers dried I managed to get something I was not too ashamed of. For the deck build - on a properly-built model one would stick the plan templates to the sheets of balsa and excellence is guaranteed. But with this model the deck is so wide (12" at the widest point) that ,while I could lay the cut-out deck plan on top of the roughly-shaped deck and mark the final shape, the cutting had to be done with the deck upside-down (unmarked) because of all the extra sticks (joining pieces, frames) would get in the way of the saw table if I did the cutting topside up. This is what I mean. So the shaping involved a lot of guesswork. In the end it doesn't look too bad from a distance. But I don't guarantee symmetry.

- 22 replies
-
- 12
-
-
- notre dame
- hydroplane
- (and 1 more)
-
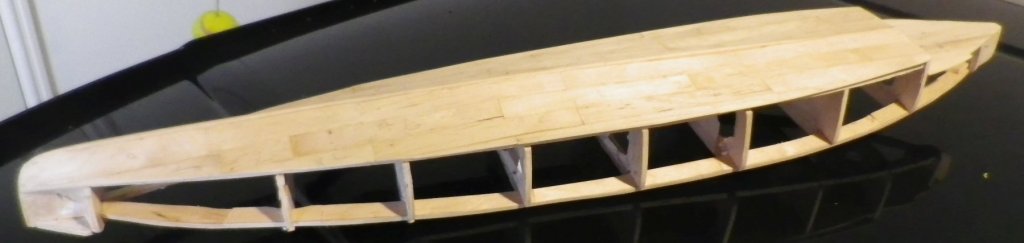
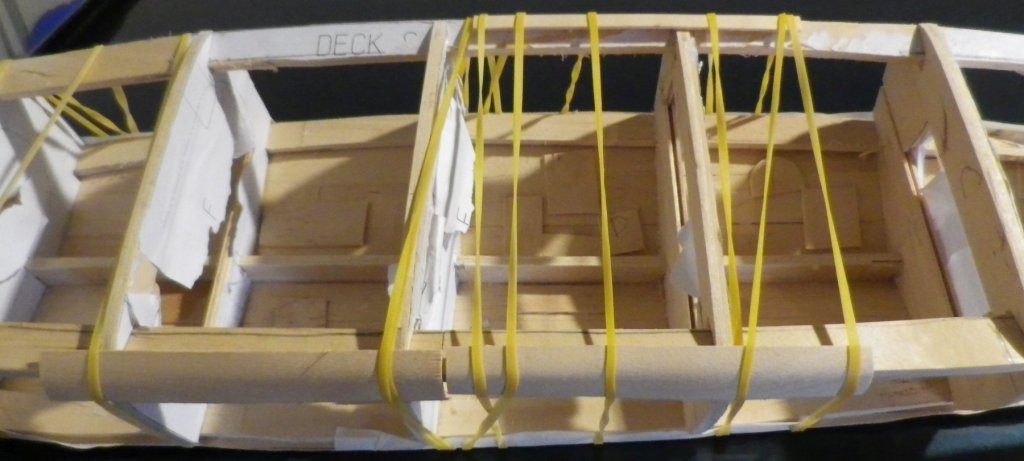
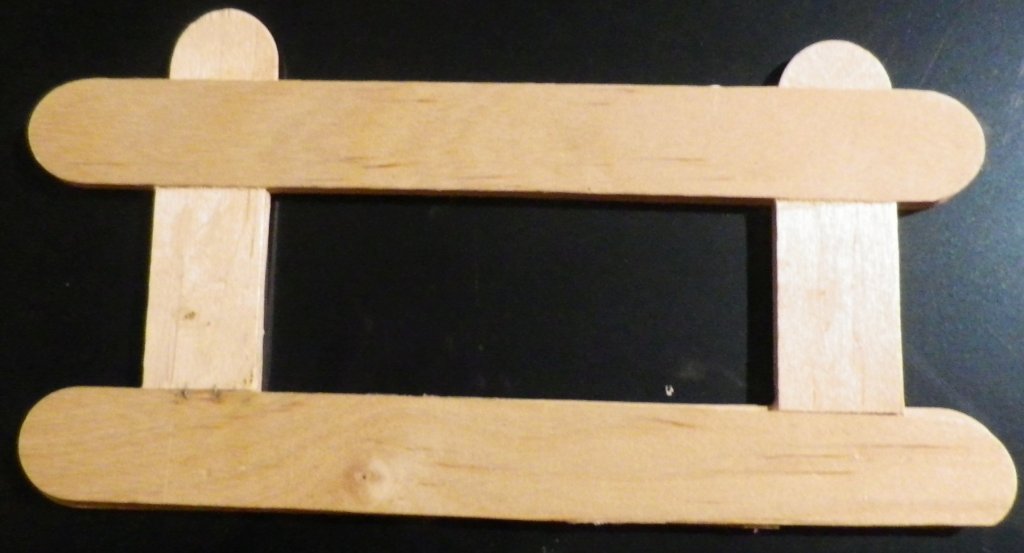
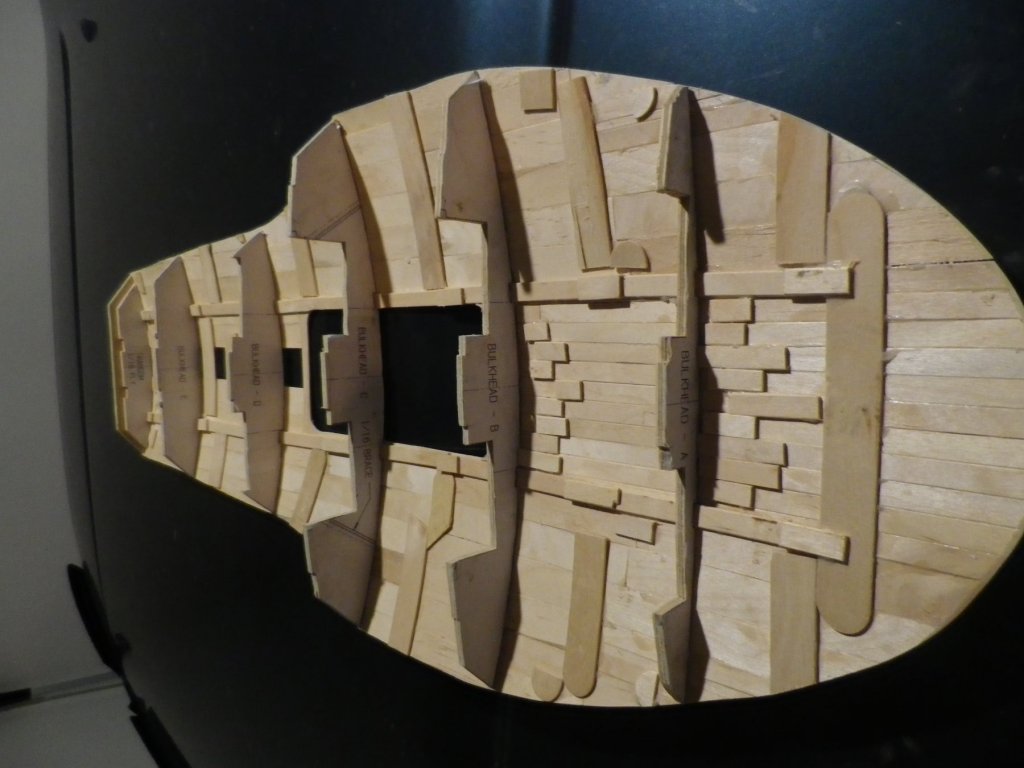
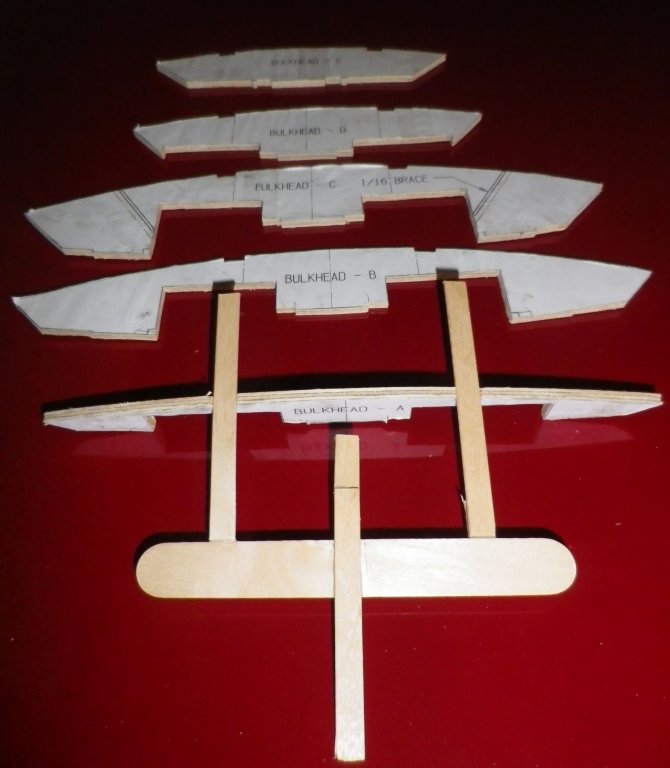
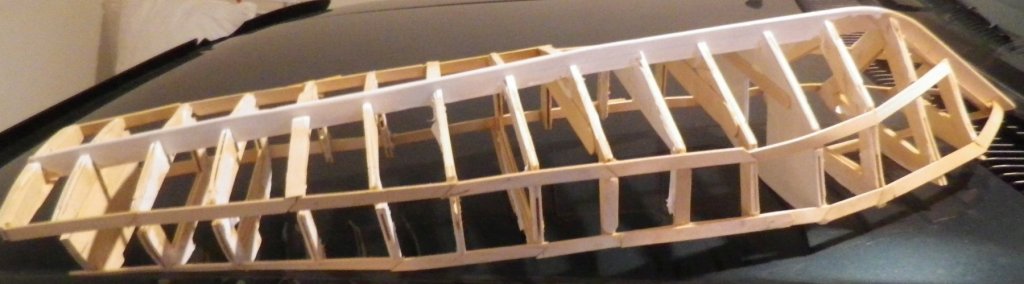
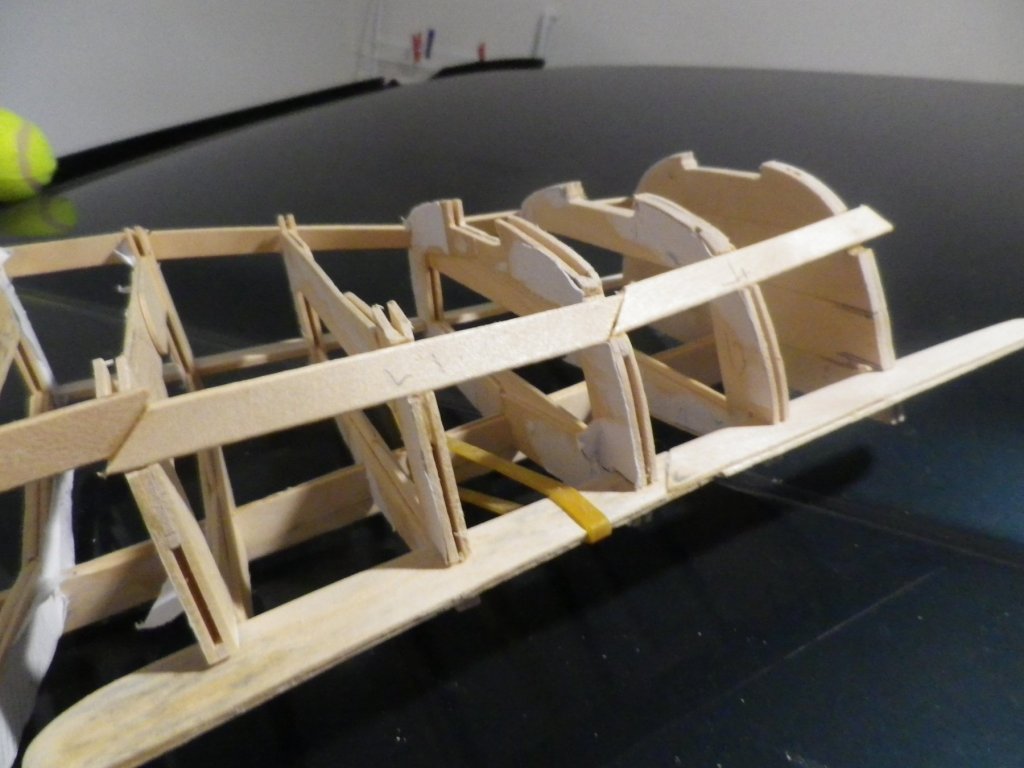
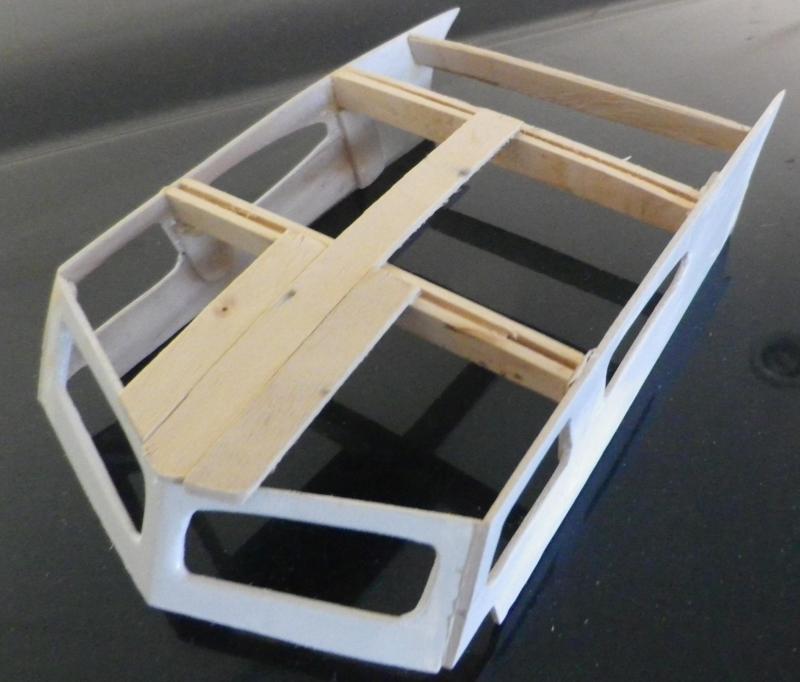
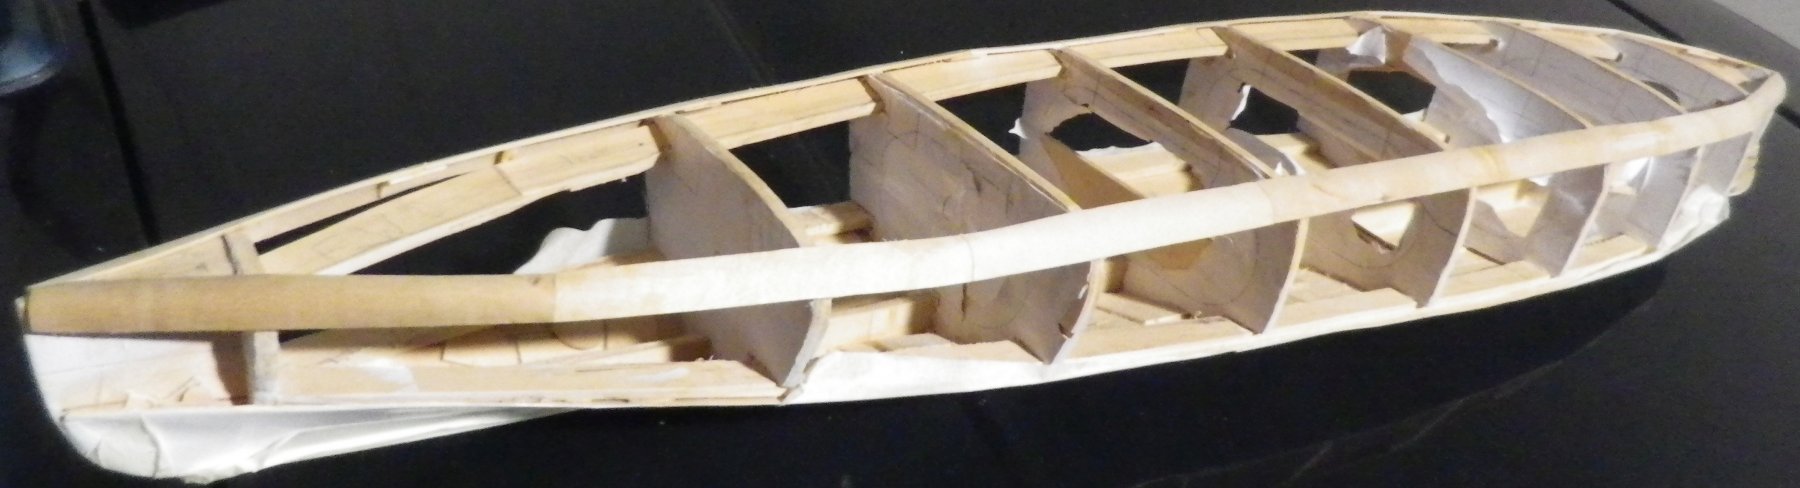
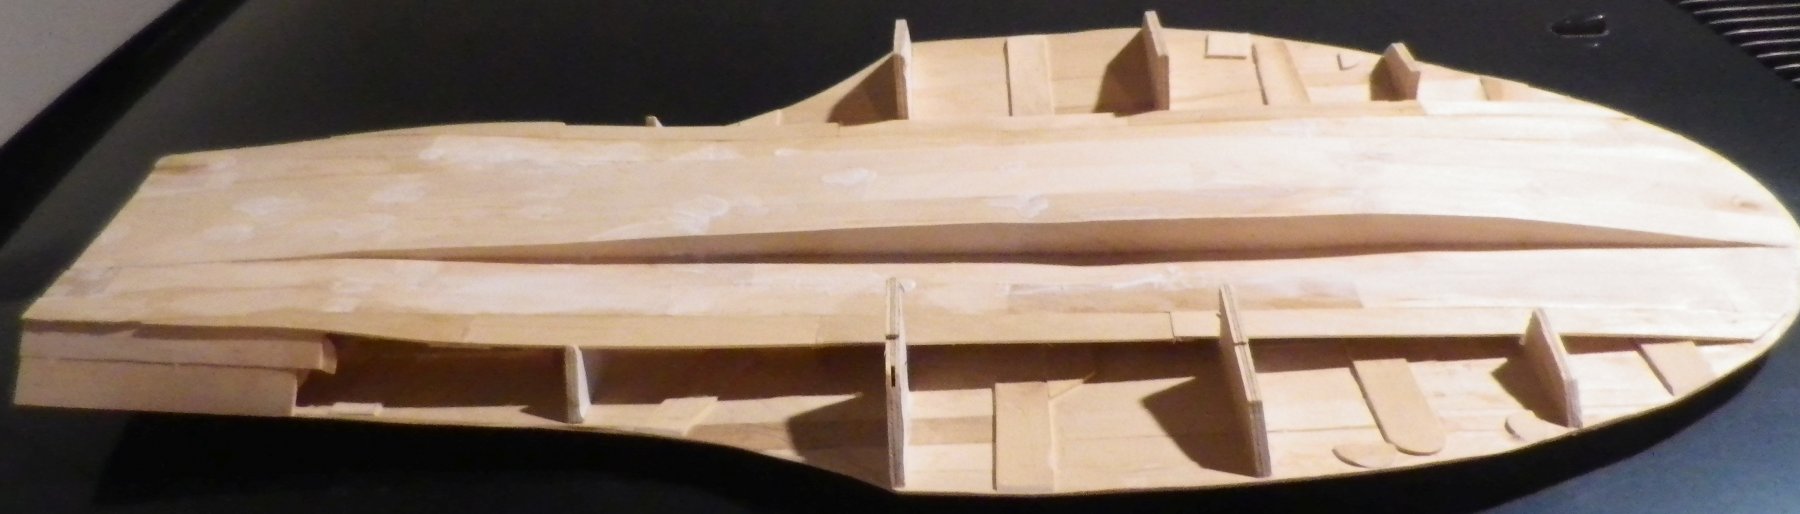
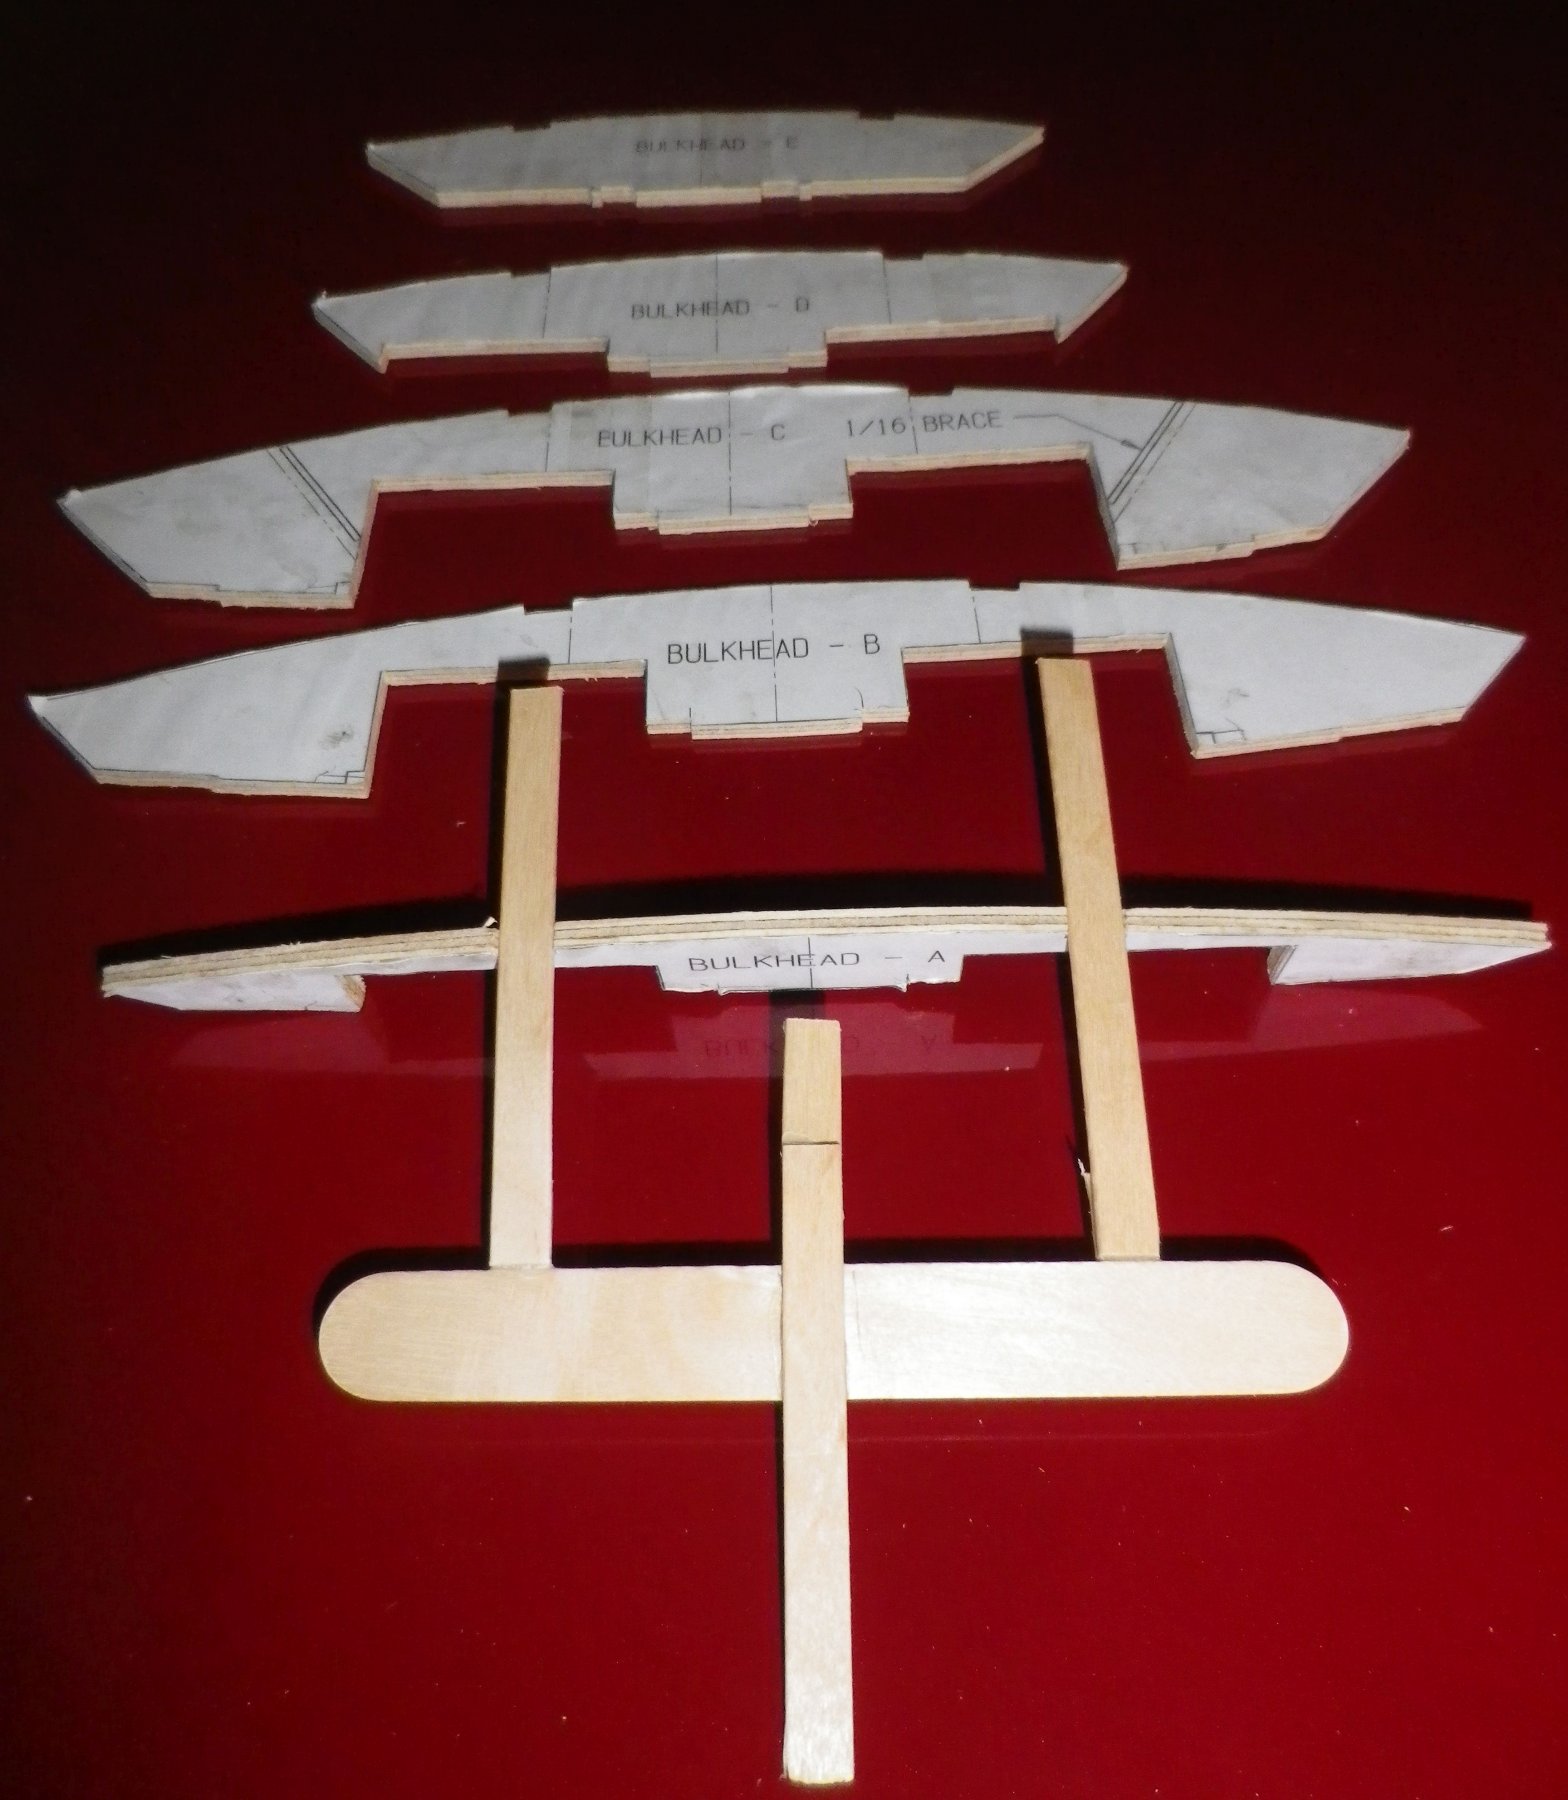
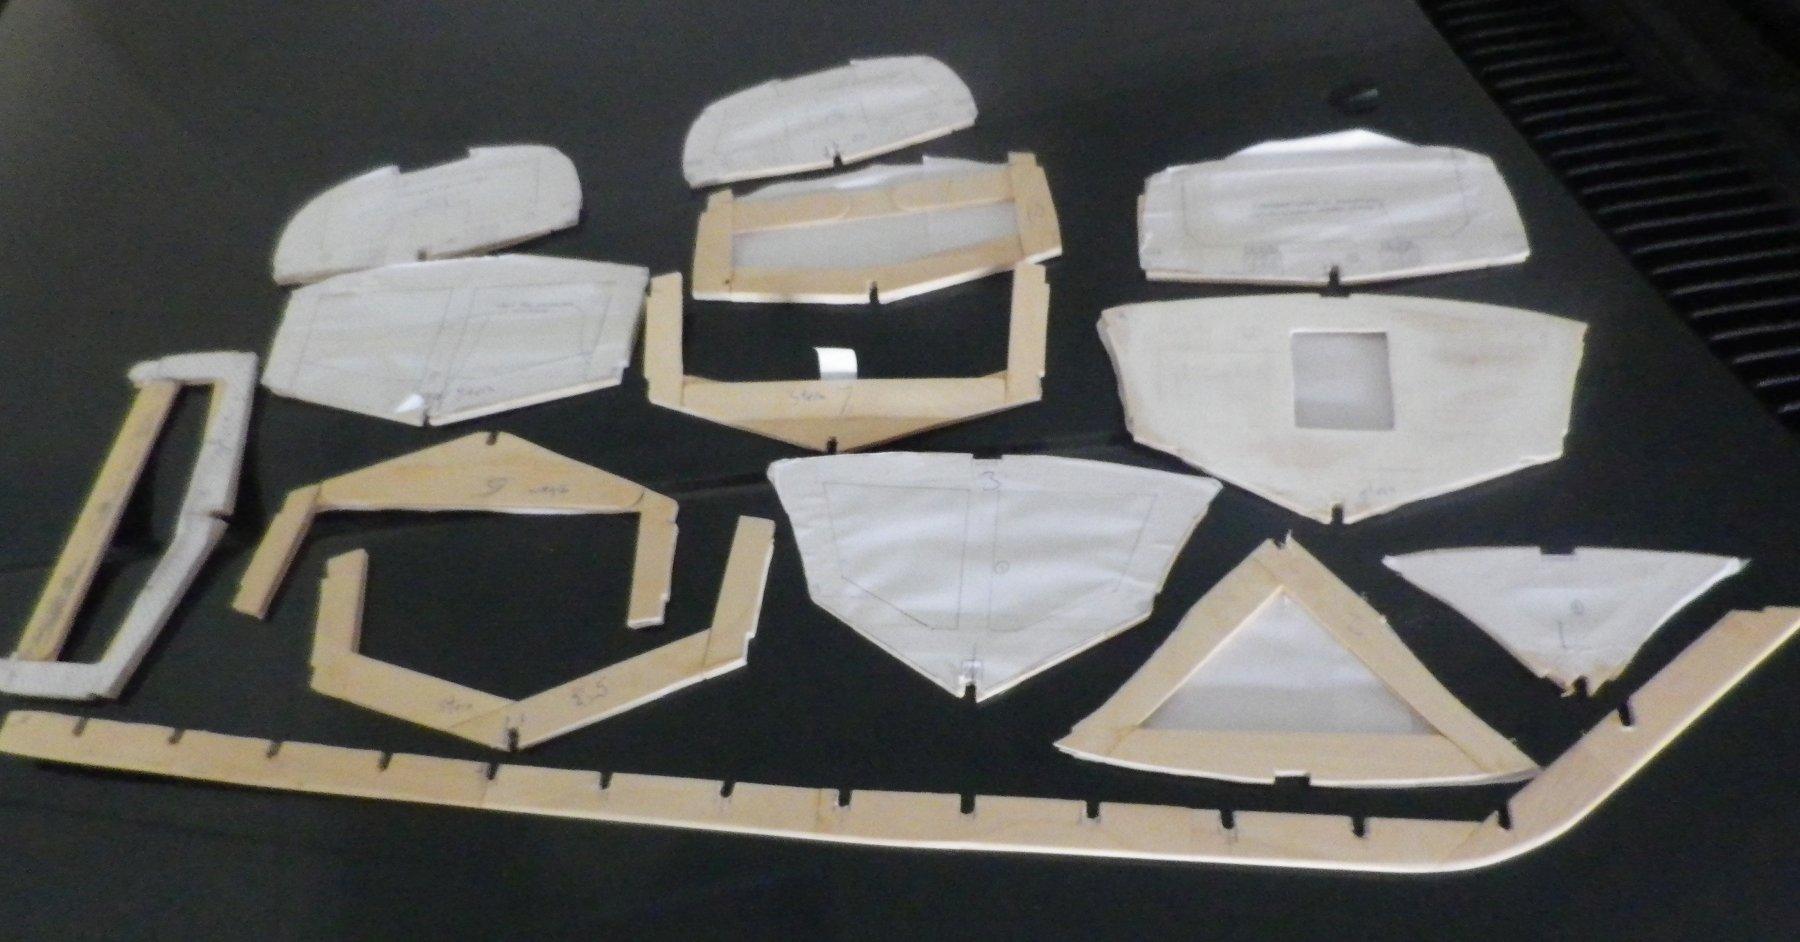
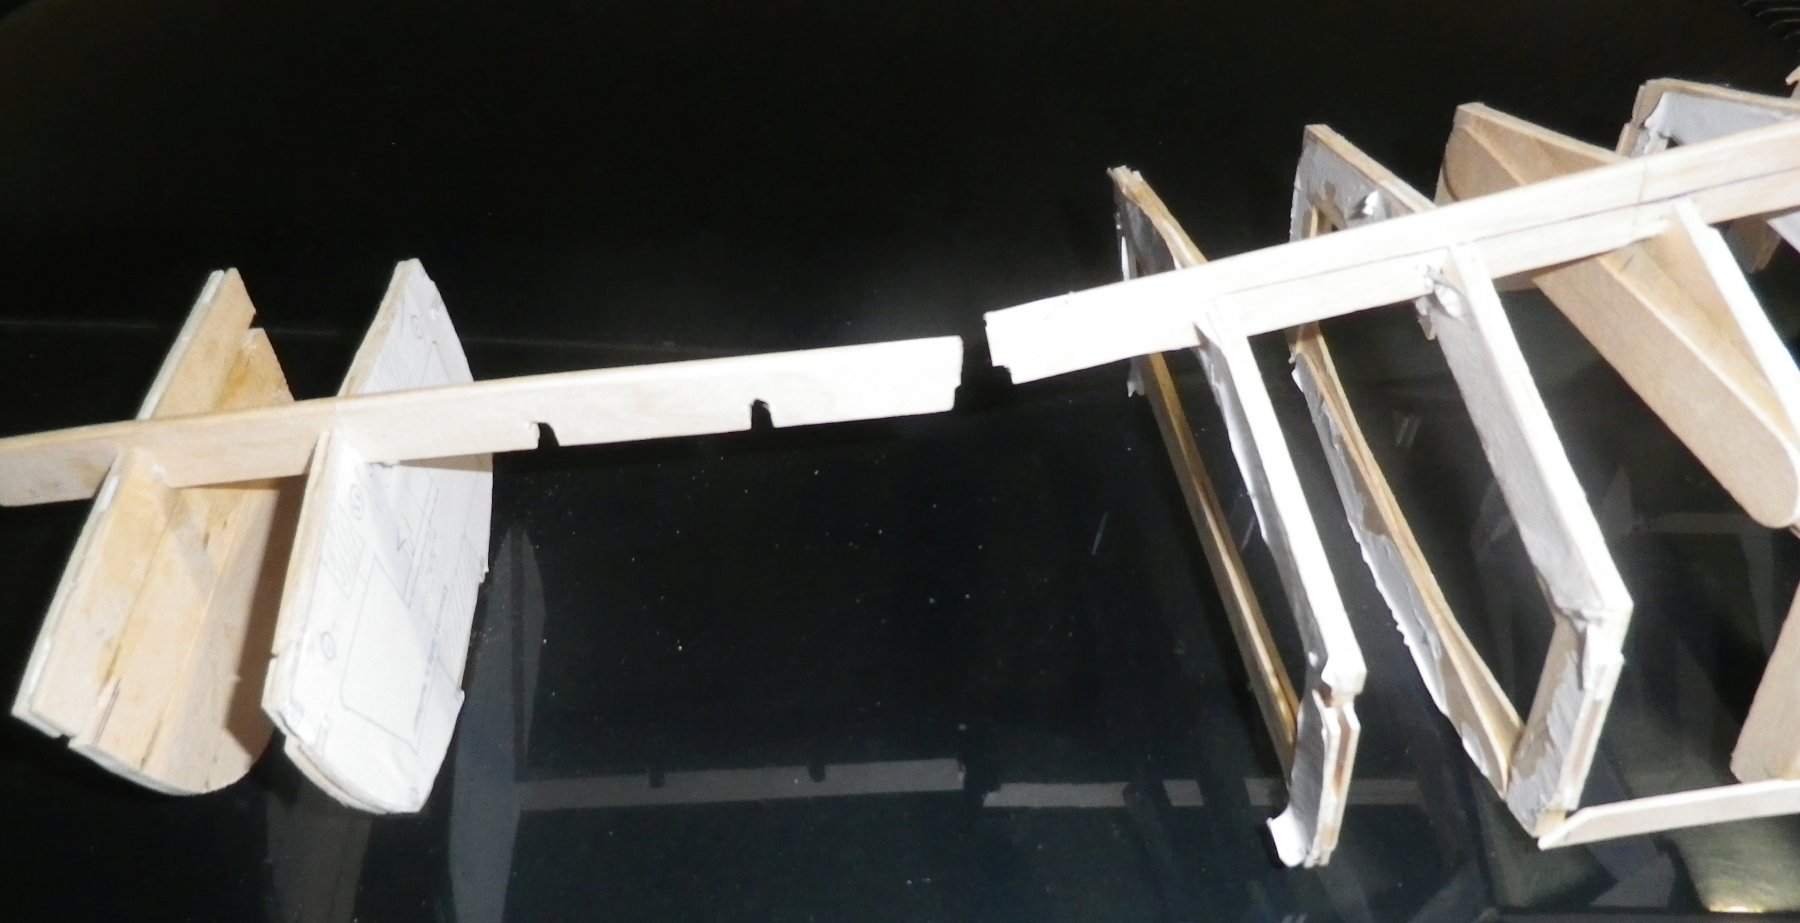
In my previous build (Riva Aquarama) I said I would never again make the bulkheads from popsicle sticks. I've proved it can be done but (as a commentator pointed out) the unevenness and asymmetry of my model may be due to uneven or asymmetrical frames. So for my next build (hydroplane - no motor) I decided to use plywood instead for these. This is what a well-made model looks like. I found precision cutting the plywood was much easier than shaping the Popsicle frames and I thought there was a reasonable chance that this model might be tidier than the previous two. The plan has stringers running fore and aft on the deck side. My first deviation from the plan was to cut notches at the bottom of the bulkheads for stringers running the full length again - the stringers (top and bottom) were to hold the bulkheads in position so the numerous Popsicle sticks would be in the right place. The above photo shows the start of the deck stringers, with an extra stick at the bow to give a surface for the sticks to glue to (a necessary addition since I'm not using a single sheet for the decking).
- 22 replies
-
- 10
-
-
- notre dame
- hydroplane
- (and 1 more)
-
Hi Popeye - thanks for the encouragement again. Next project is hydroplane Notre Dame
- 15 replies
-
- 2
-
-
- riva aquarama
- launch
- (and 1 more)
-
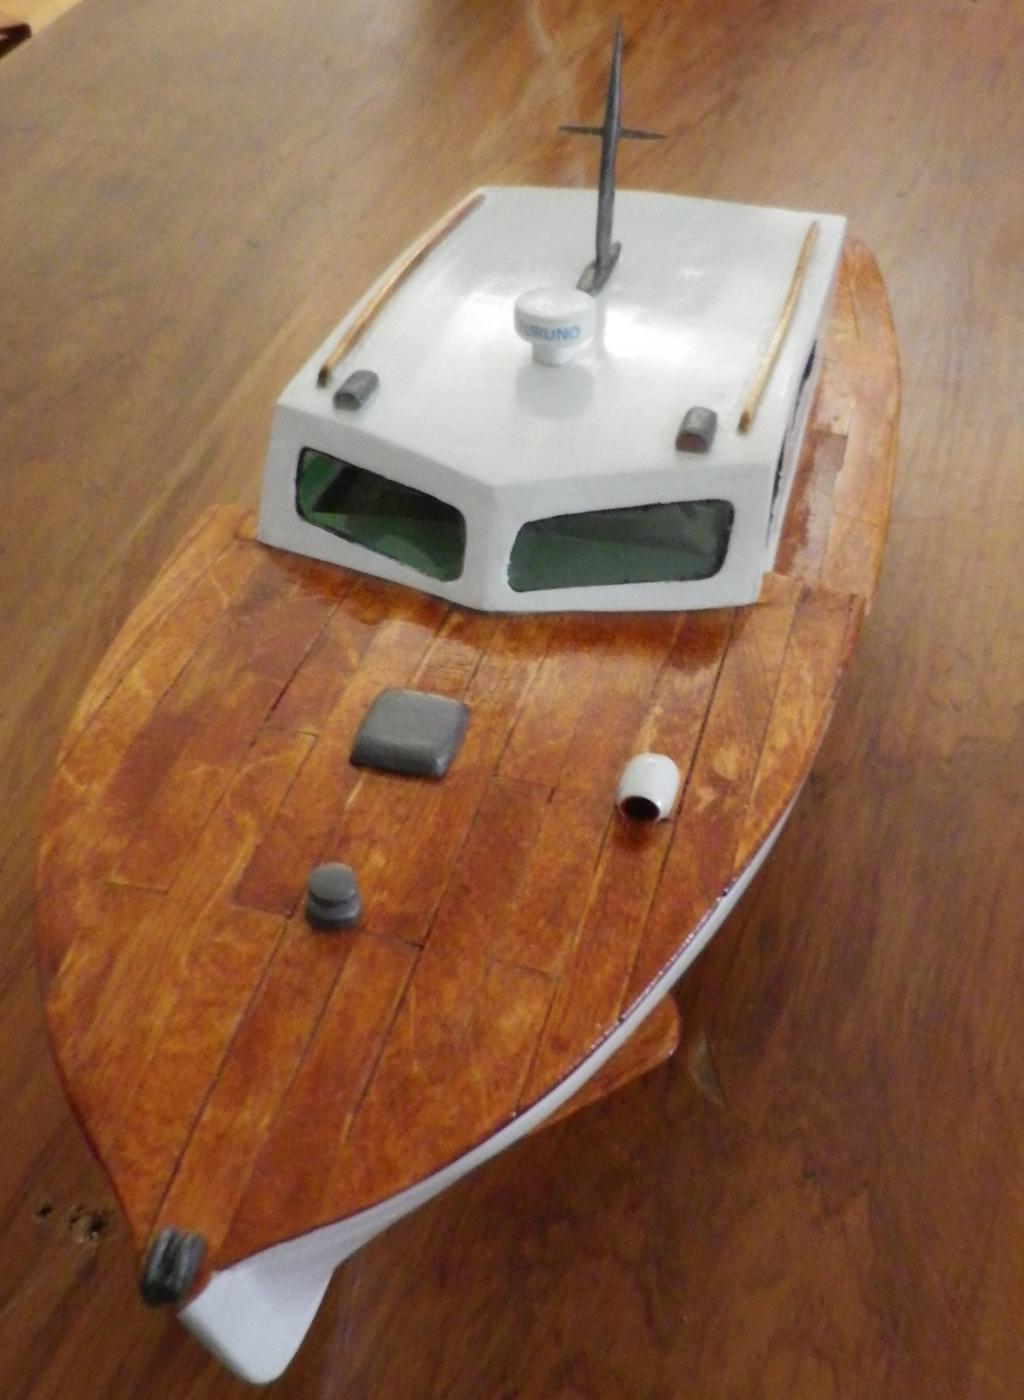
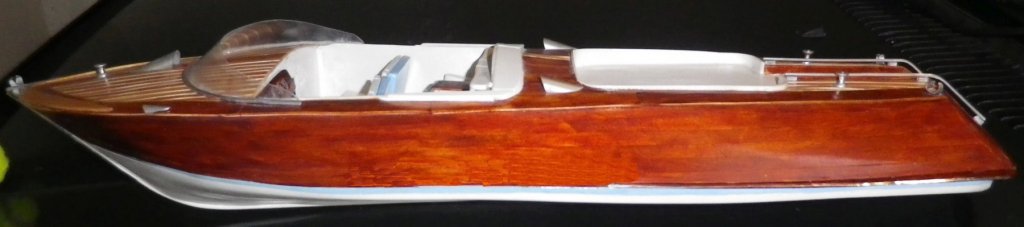
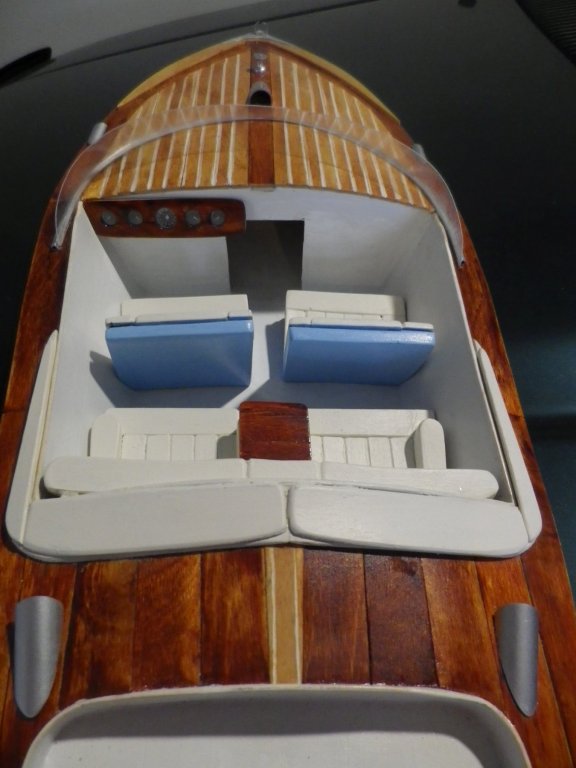
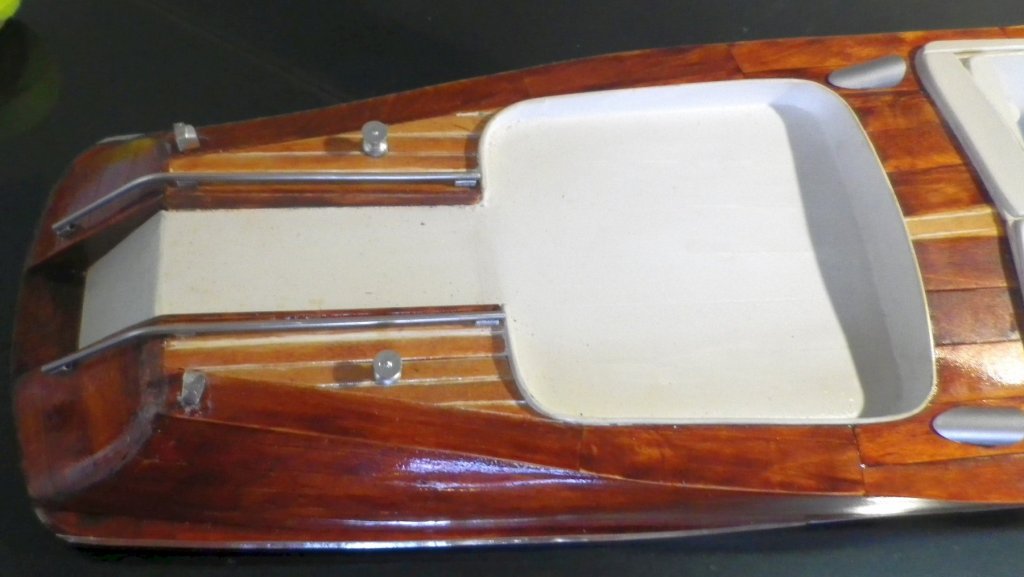
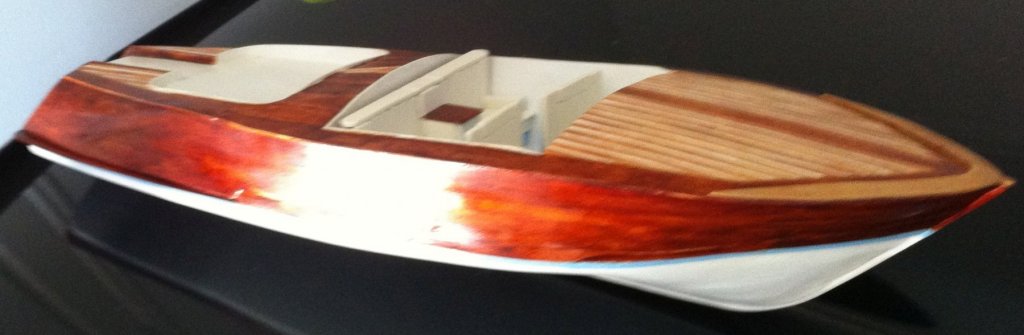
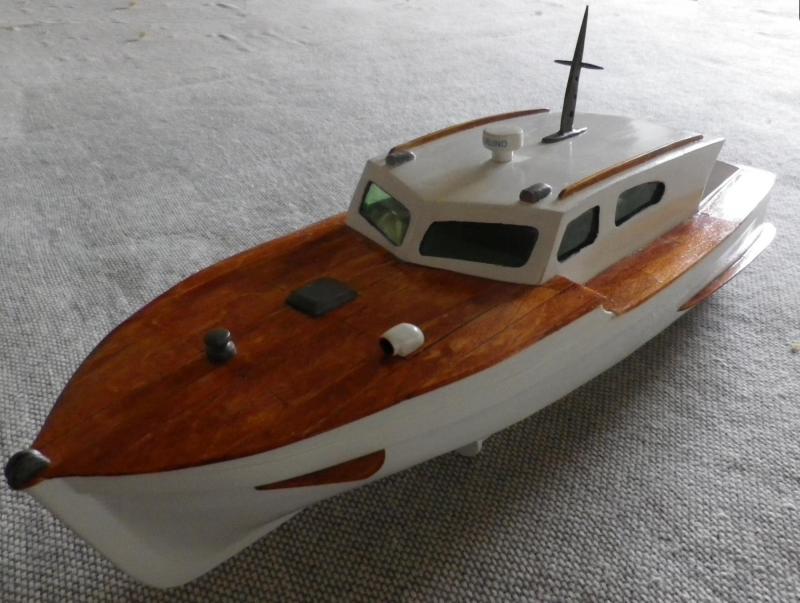
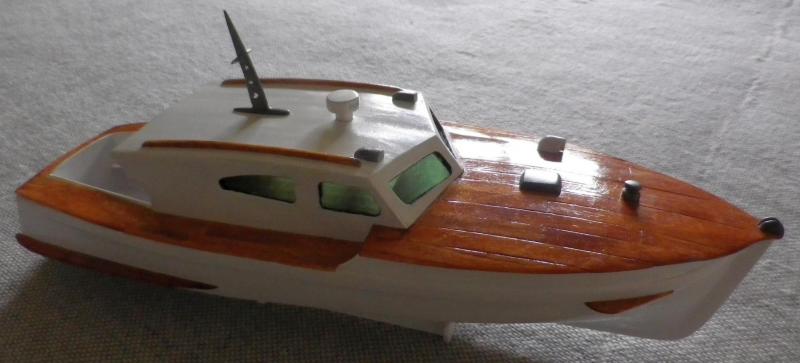
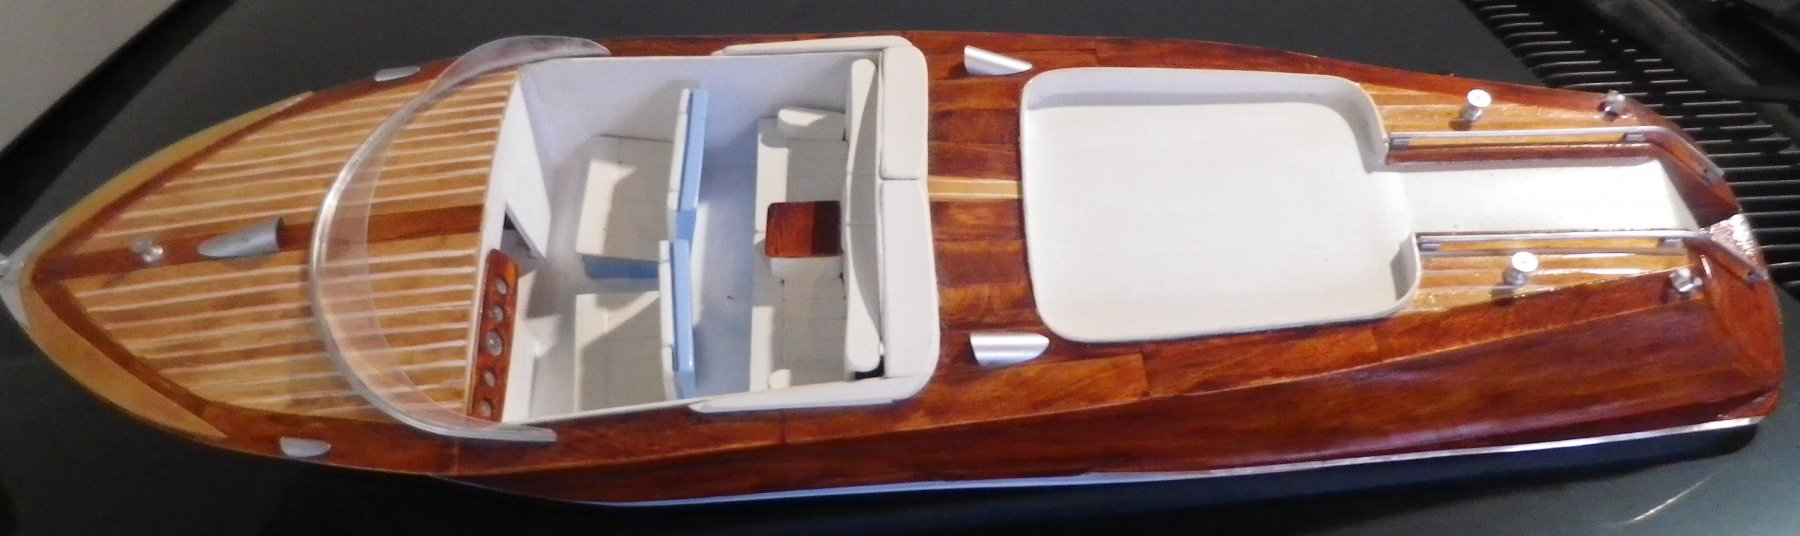
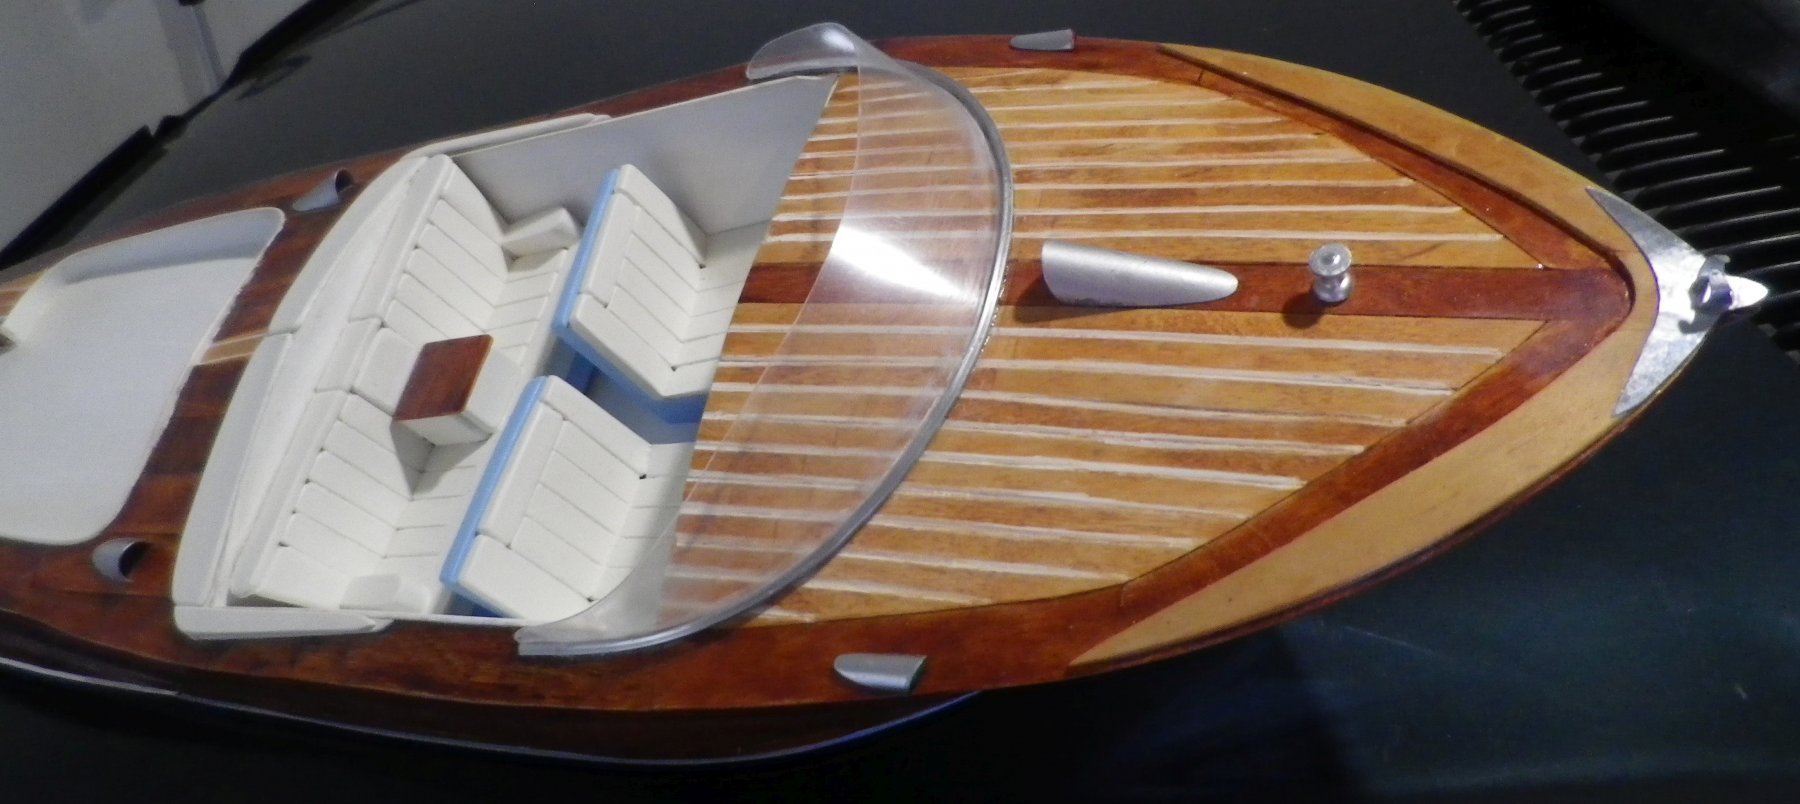
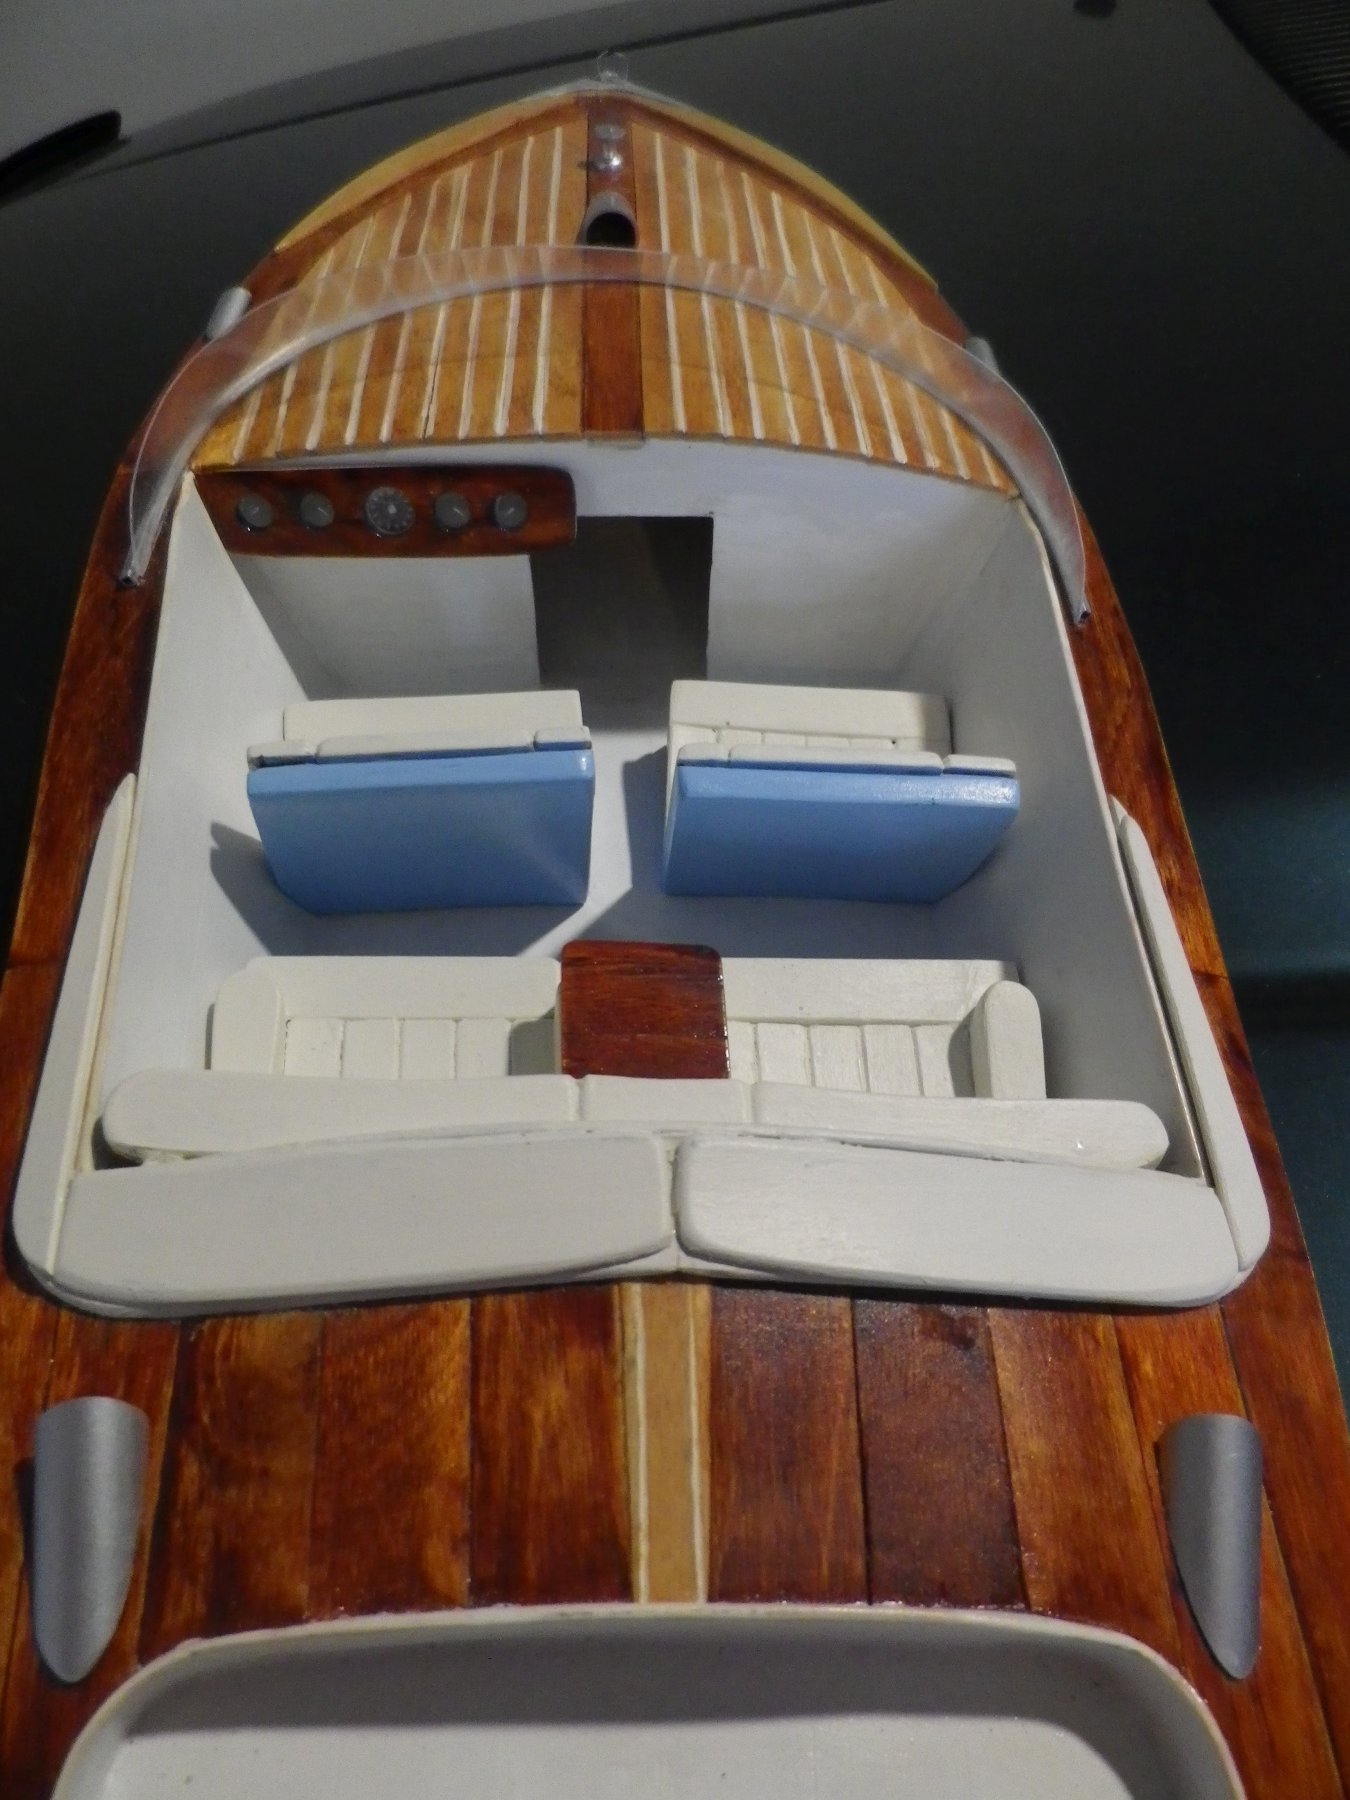
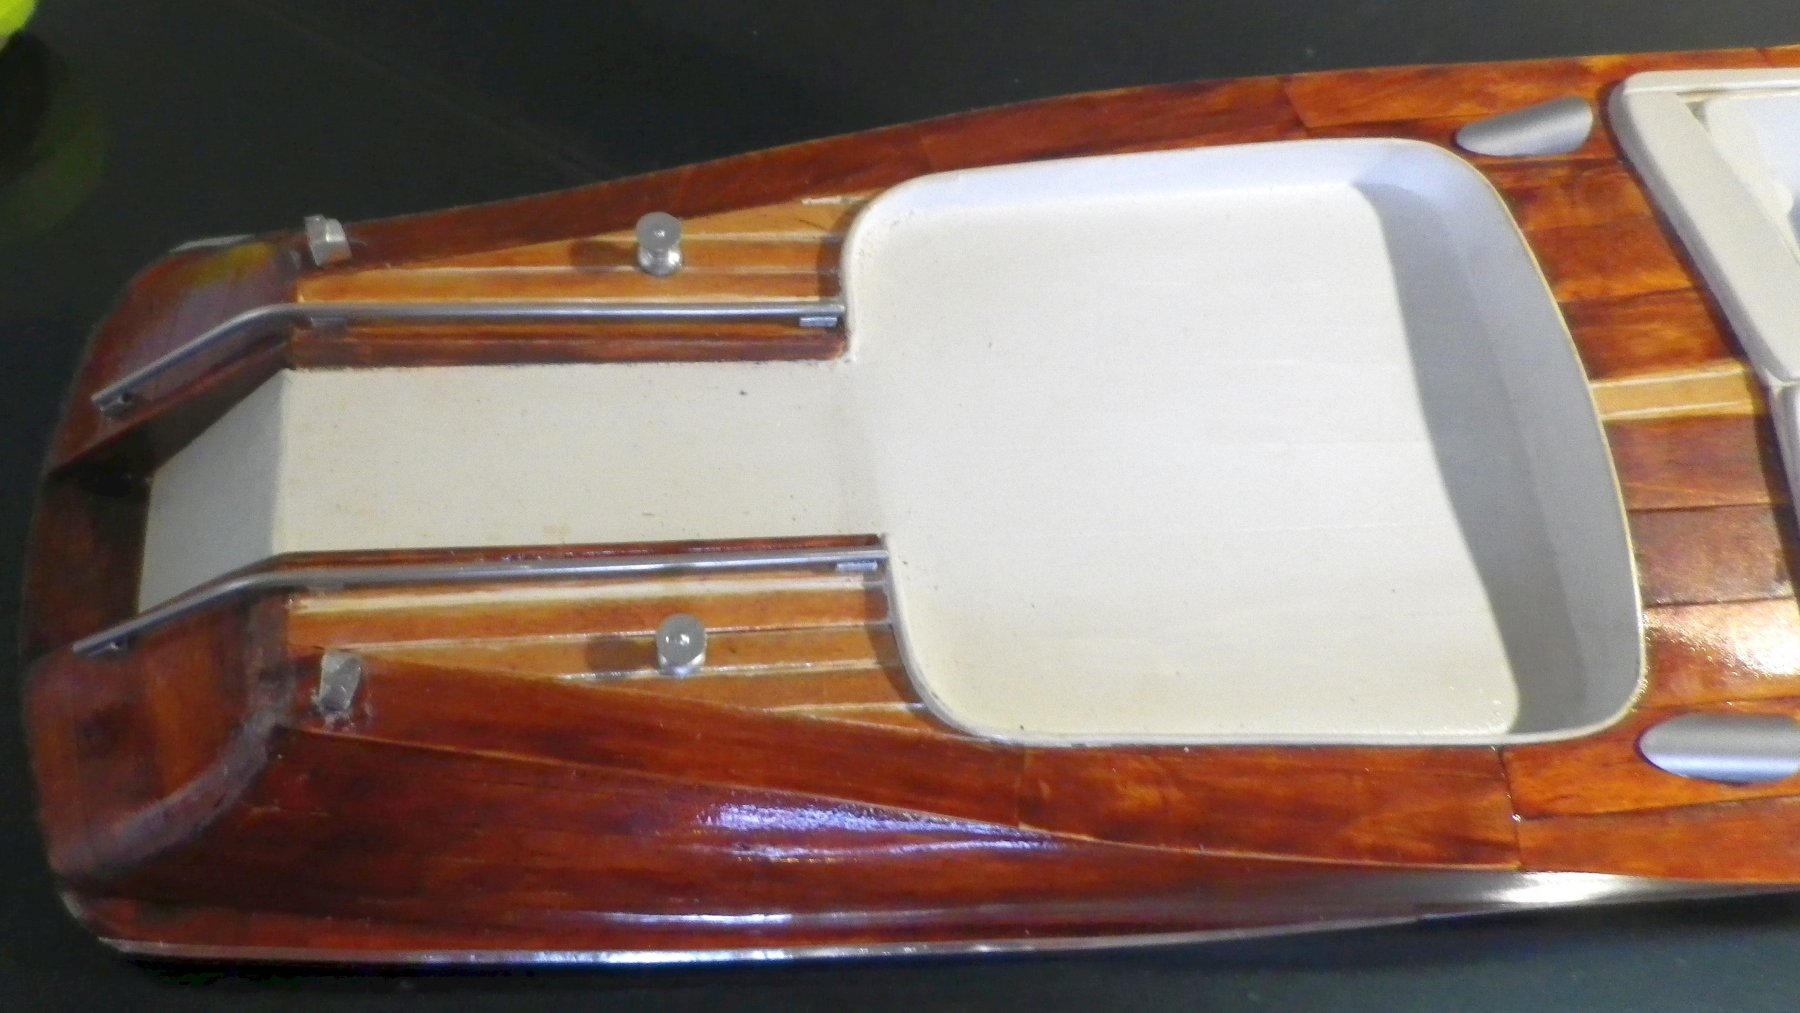
Finished - except for the steering wheel. I can't find a (cheap) toy of the appropriate size to steal its wheel. I've ordered a wheel thru my local hobby shop but they say - on past experience - it will be weeks, months or never before it arrives. Its been a month. Riva might vaguely recognize the hull but never the fittings. It was the best I could do and I'm reasonably pleased with the result. (Although I've recently noticed the hull is twisted slightly stem to stern). The dashboard bears no relation to the real thing. I had several attempts, drilling holes with bigger and bigger bits but they all ended up splitting - even when I made ply with a second layer glued on with grain at right angles. Eventually I realised splitting this medium was inevitable so a complex dashboard was out of the question. Hopefully the splits are concealed by the wood stain. The fo'c'sle ventilators should be flat and circular. My attempts at those were obviously going to look horrible so I settled for something simple and attractive. The mooring rope guides could be better, but I'm reasonably happy with the stern access rails.


- 15 replies
-
- 9
-
-
- riva aquarama
- launch
- (and 1 more)
-
Hi Popeye - thanks for the encouragement. My waistline would not survive that much eating, particularly considering the number of sticks wasted. I buy them by the 500 from educational supply shops. Cheers
- 15 replies
-
- 3
-
-
- riva aquarama
- launch
- (and 1 more)
-
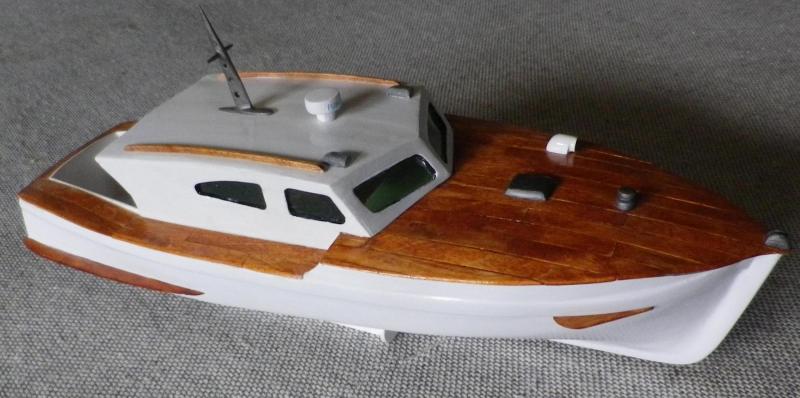
The woodwork is complete at last. My eye is drawn immediately to the numerous defects, although it doesn't look too bad in soft focus. Now comes the really hard part - I'm doing the fittings in metal and I seriously lack metal-working tools. Could be fun!
- 15 replies
-
- 5
-
-
- riva aquarama
- launch
- (and 1 more)
-
To try and compensate for the ragged frames I decided to build long planks, rather than span between frames as I did with my previous model. This would allow smoother curves although the plank attachments to the ribs might be rather tenuous. The curves of the planks dictated the shape of shims and trims on the frame so there was something for most of the planking to attach to. The result from stem to stern wasn't too bad. But from top to bottom of the planking it was definitely uneven, and much sanding was needed to give the sides an air of respectability. Indeed, a few planks are now almost transparent. While all of this was going on I was working on the split transom, in the absence of plans. It took me three weeks to achieve something that looked reasonable, with many false starts, errors and blind alleys. But I was quite pleased with the result. It was only much later that I realised that the transom was not symmetrical. But by then I had advanced too far to correct. It was either a matter of scrapping the whole project, or hoping no-one would notice. Since for me the fun is in the build I chose the latter course.


- 15 replies
-
- 5
-
-
- riva aquarama
- launch
- (and 1 more)
-
While I was waiting for the glue to dry on the frame I got started on the cockpit and well. The well (and cockpit) have rounded corners, which would mean bent sticks. I tried steaming (again - for 8 minutes this time) in a damp flannel in my microwave, but this didn't achieve anything. So I decided to try the household ammonia trick. My reference suggests 50/50 ammonia and water, but I suspected that the author never intended bends of a right angle (or more) so I omitted the water. He also suggested ammonia weakens the wood. Certainly I had a 50% breakage rate, but I got there in the end.

- 15 replies
-
- 3
-
-
- riva aquarama
- launch
- (and 1 more)
-
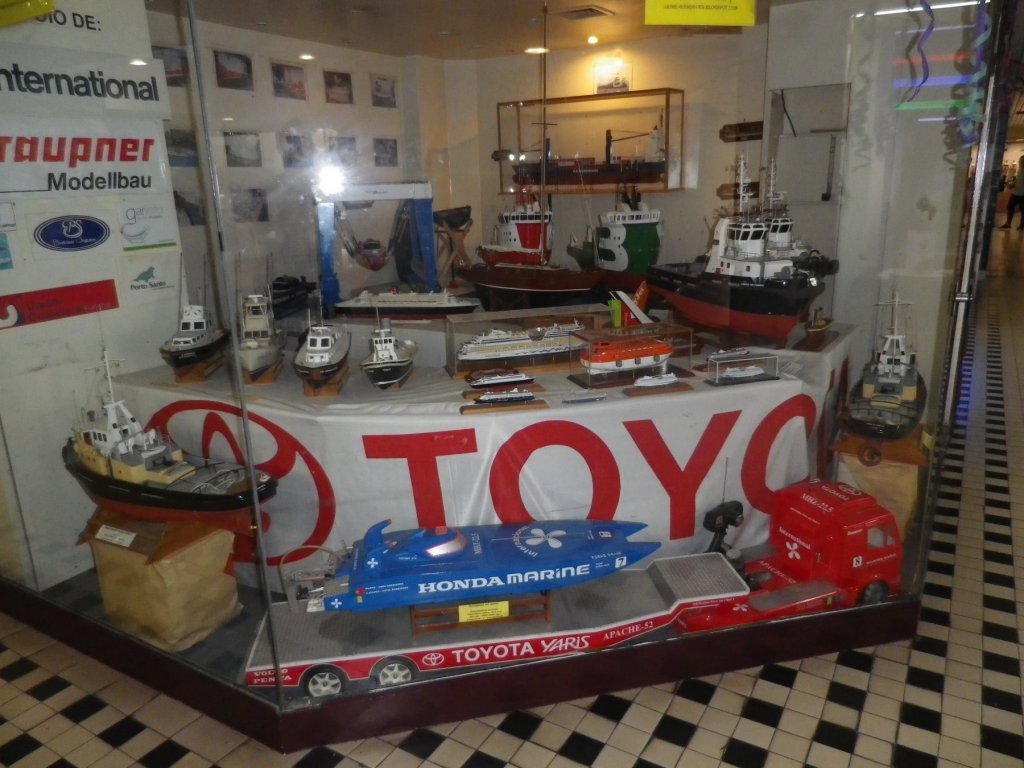
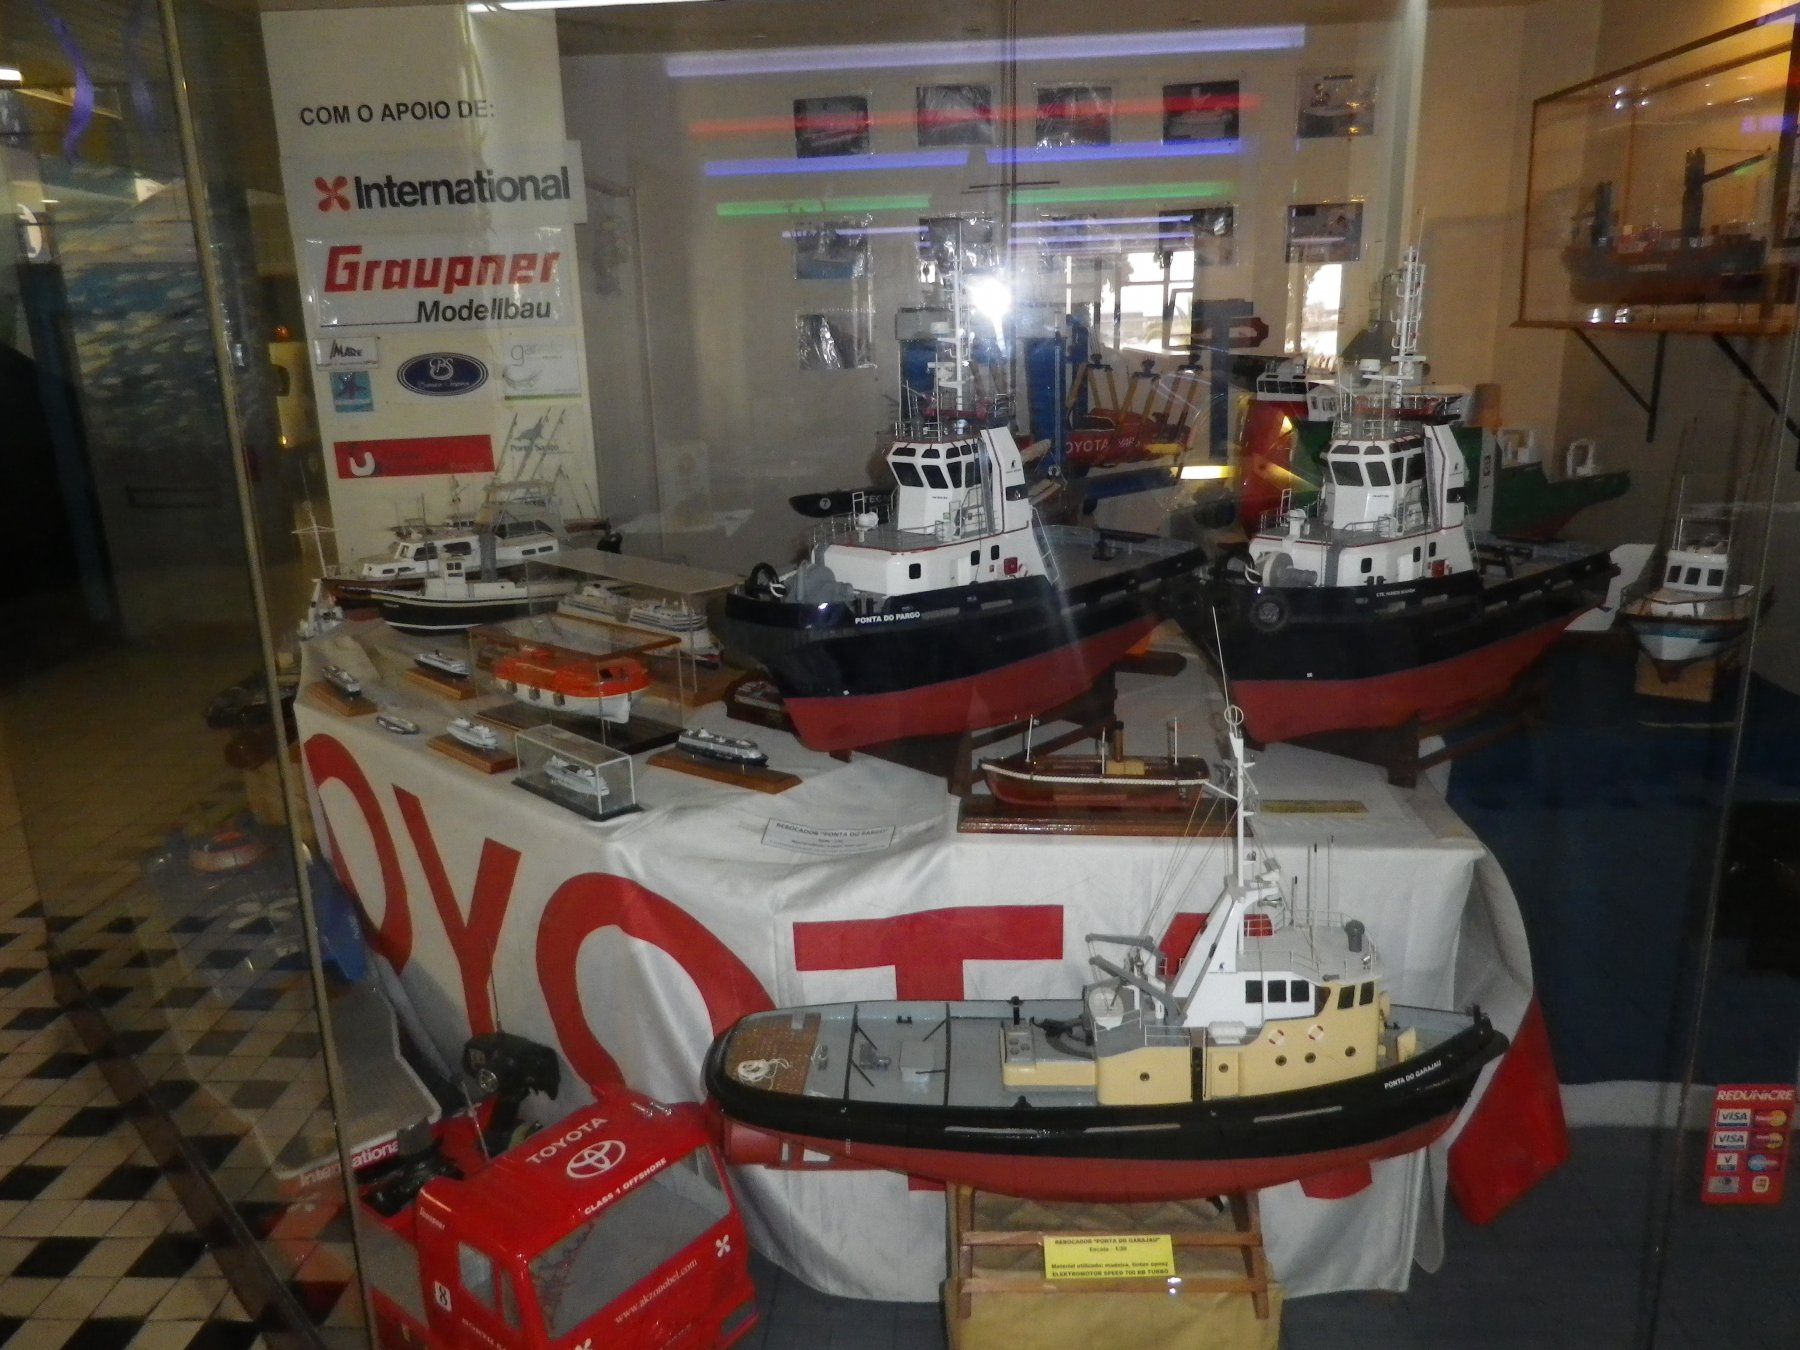
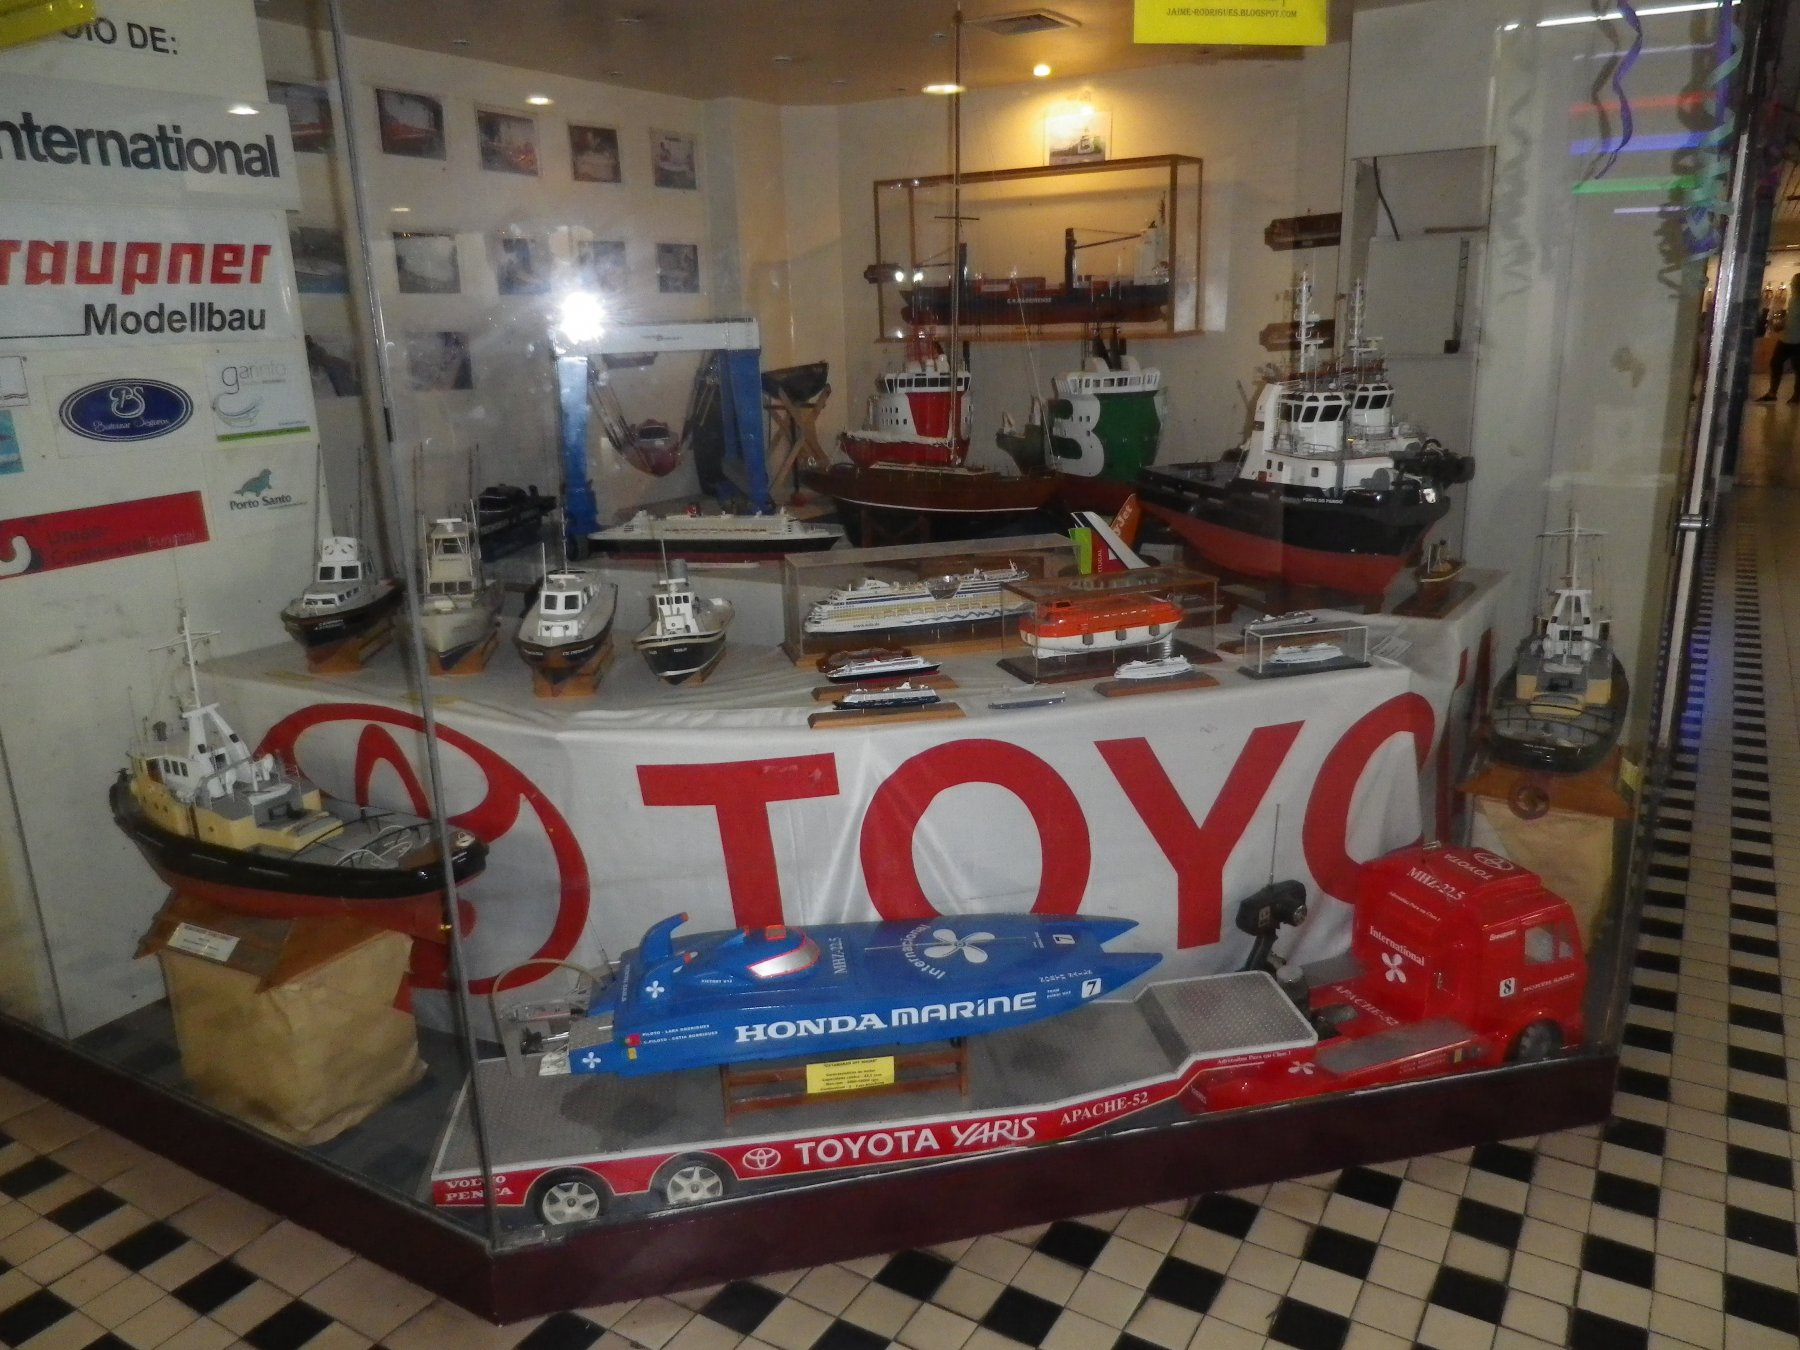
Incidentally, (and off-topic) while I was holidaying on the island of Madeira I came across these in a shop window. The Toyota truck would be a good 6 feet long! His site is http://jaime-rodrigues.blogspot.co.nz/ Its in Portuguese but gives you some impression of how he works.

- 15 replies
-
- 5
-
-
- riva aquarama
- launch
- (and 1 more)
-
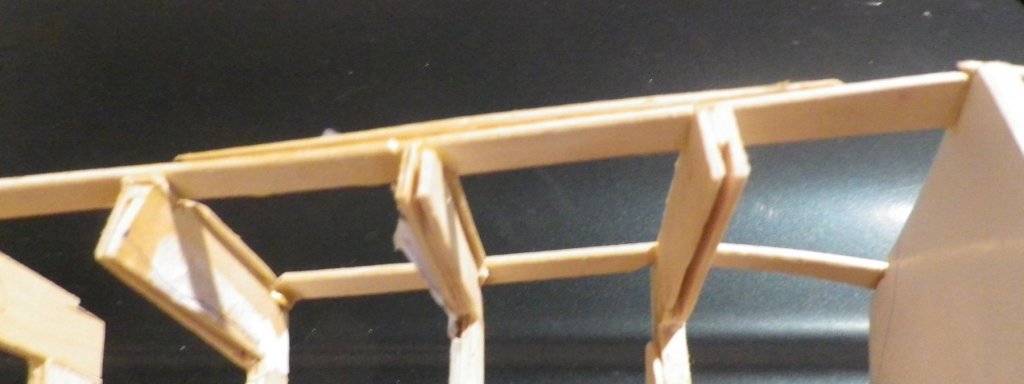
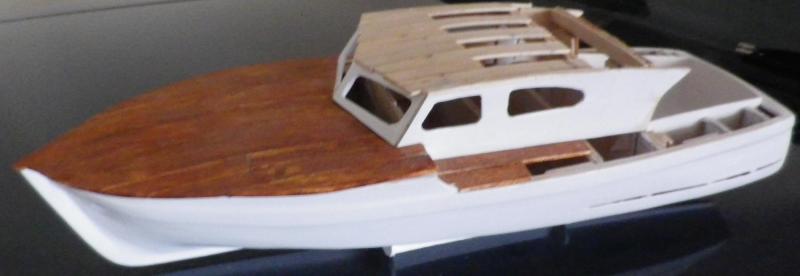
Sorry about the abrupt ending - I thought I'd loaded the recent photos onto the computer. But apparently not. The plans for this are for a radio-controlled version, but I am omitting that. The omission is supposed to simplify the construction. Assembly did not go perfectly. I also had problems with the stern. I could not understand the plans which appeared to show a solid transom and all the pictures I had seen in researching the project had a split transom. This was not helped by one of the photos accompanying the plan having a split transom and the other a solid one. Eventually I found pictures of the Aquarama which had a solid transom, so I understood where the plans were coming from. But I like the split transom so I decided to fudge my build to accommodate this revision. Eventually (apart from the transom) the skeleton was complete. From a distance it doesn't look too bad but it really is a total disaster. Even though I'd cut the left and right sides of each frame at the same time (to get symmetry) the gluing together gave somewhat varied angles (I had to judge angles by eyeballing the frame templates). It didn't help that I'd had to alter some of the dimensions to accommodate the size of the Popsicle sticks. But having put so much work into the frames I was not prepared to give up. Perhaps some fillings and sanding might save the day, and allow the skin to cover a multitude of sins. But having proved my idea that Popsicles can constitute the entire wood in a model boat, I will never again use them to build large frames.


.thumb.JPG.74d6363d7486e8166d49dae085d636c1.JPG)
- 15 replies
-
- 4
-
-
- riva aquarama
- launch
- (and 1 more)
-
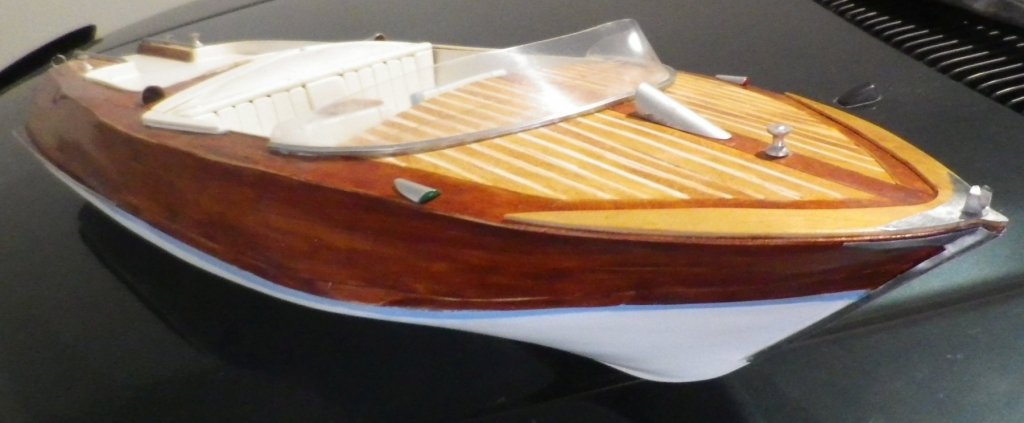
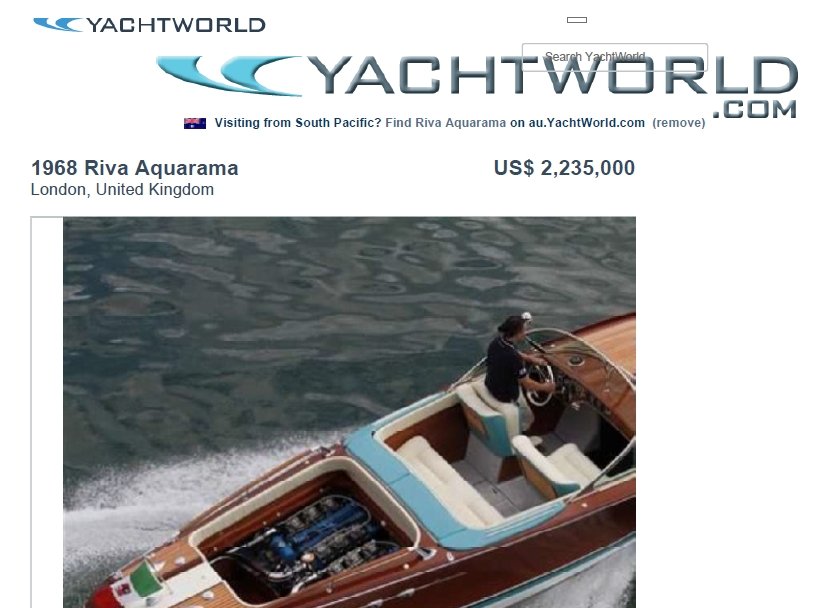
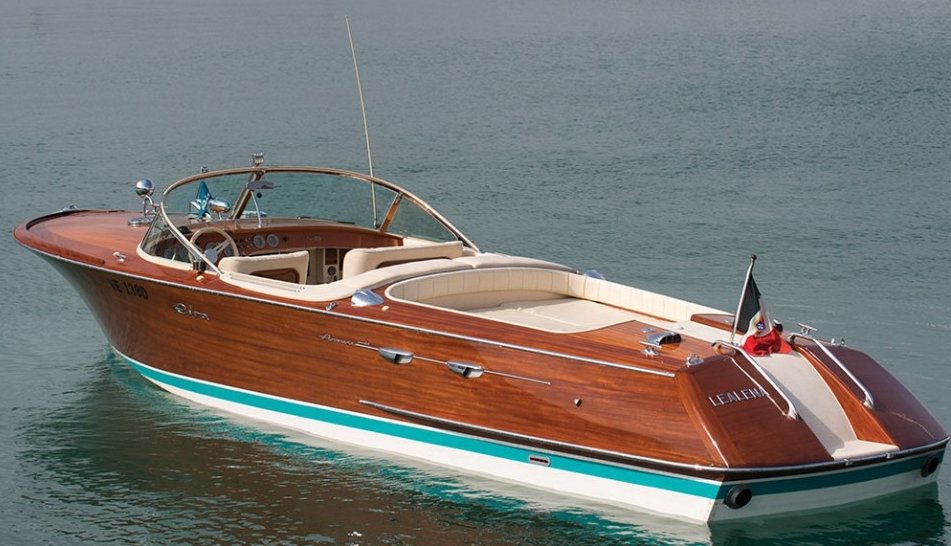
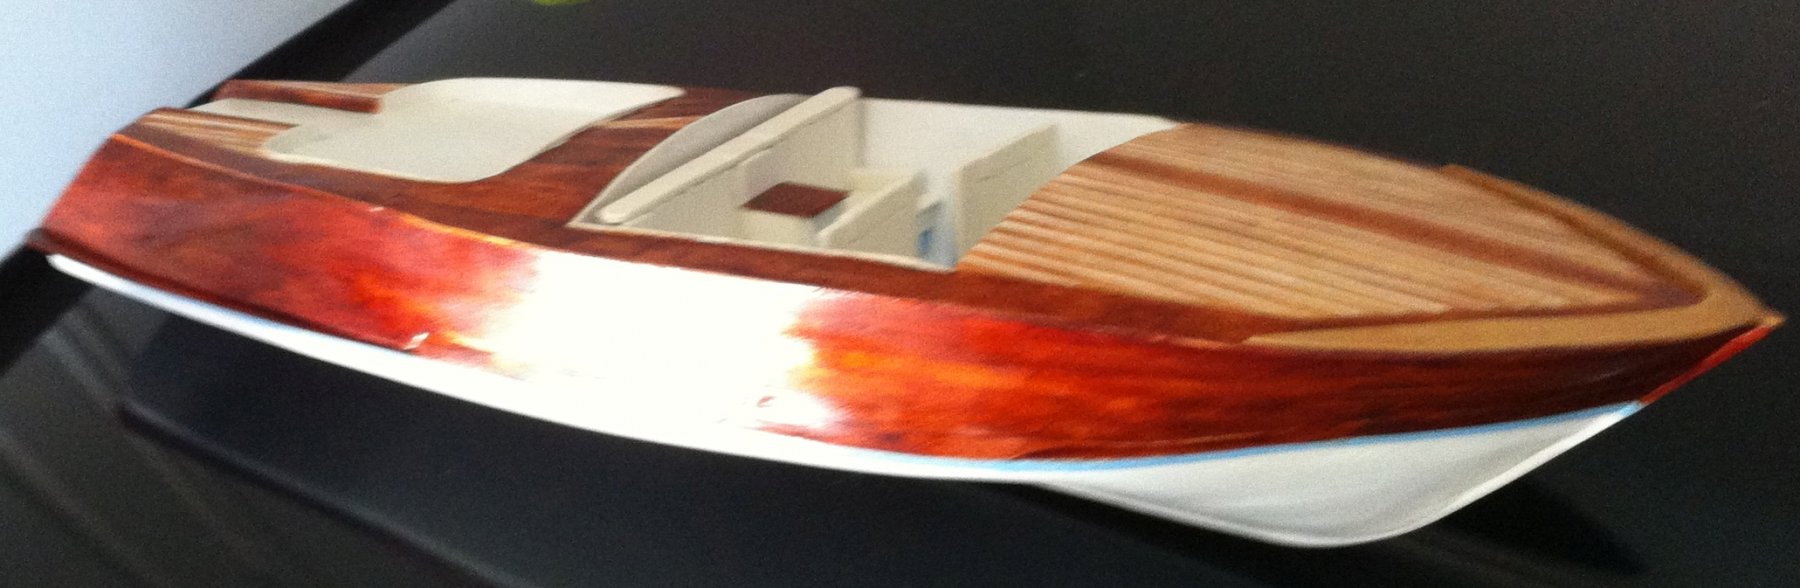
I decided it was time to try and belie my handle, and - for my second from-scratch model - build something whose beauty resides in its woodwork as well as its lines. I.e. the finish has to be perfect. Some history of the Riva Aquarama: "I’ve decided that the most jaw-dropping, eye-watering, hand-biting man-made spectacle of all time is the 1965 Riva Aquarama speedboat.. Oh, and it’ll do 50 mph." Jeremy Clarkson. I Know You Got Soul. "The Riva Aquarama was a luxury wooden runabout built by Italian yacht builder Riva. Production of it ... ran from 1962 until 1996. The hull was based on the Riva Tritone, an earlier model speedboat by Riva, which in turn was inspired by the American mahogany Chris-Craft runabouts. The boat's speed, beauty, and craftsmanship earned it praise as the Ferrari of the boat world. The Aquarama has become over the decades a nautical legend. The Riva Aquarama's 8.02 - 8.78 metre[ hull was sheathed in mahogany and varnished to accentuate the beauty of its natural wood grain. All versions were twin engined, with top speeds of 45/50 knots depending on engine choice. Power varied from 185 hp to 400 hp per engine delivered by Riva 'tuned' Cadillac and Chysler models, among others. On top of the engine compartment was a cushioned sundeck. The boats also carried a convertible roof which retracted behind the rear seat and cockpit. A swim ladder was often mounted in the stern." Wikipedia Riva Aquarama Owners have included Stewart Granger, John Barry, Rex Harrison, Peter Sellers, Brigitte Bardot, Karl Heineken, Sophia Loren, Joan Collins, President Nasser, Victor Borge, King Hussein, Ferrucio Lamborghini, Prince Rainier, Roger Vadim and Richard Burton. There are plenty still on the second-hand market. This is the most expensive one I've found: I've finally let the moths out of my wallet and purchased a small scroll saw (Dremel). The plans I have call for a build about 70 cm long. I had to reduce the originals by about 20% so that the rib spacing (3 ribs) could be spanned by a single popsicle stick. But a consequence of the largish scale is that a single stick wouldn't span the width of most ribs. So rather than making plywood out of multiple sticks and cutting them to shape (as for my previous build) I had to build the ribs rather in the shape of the plans. The largest rib has 23 individually cut pieces. Making them would have been impossible without the scroll saw.
- 15 replies
-
- 7
-
-
- riva aquarama
- launch
- (and 1 more)
-
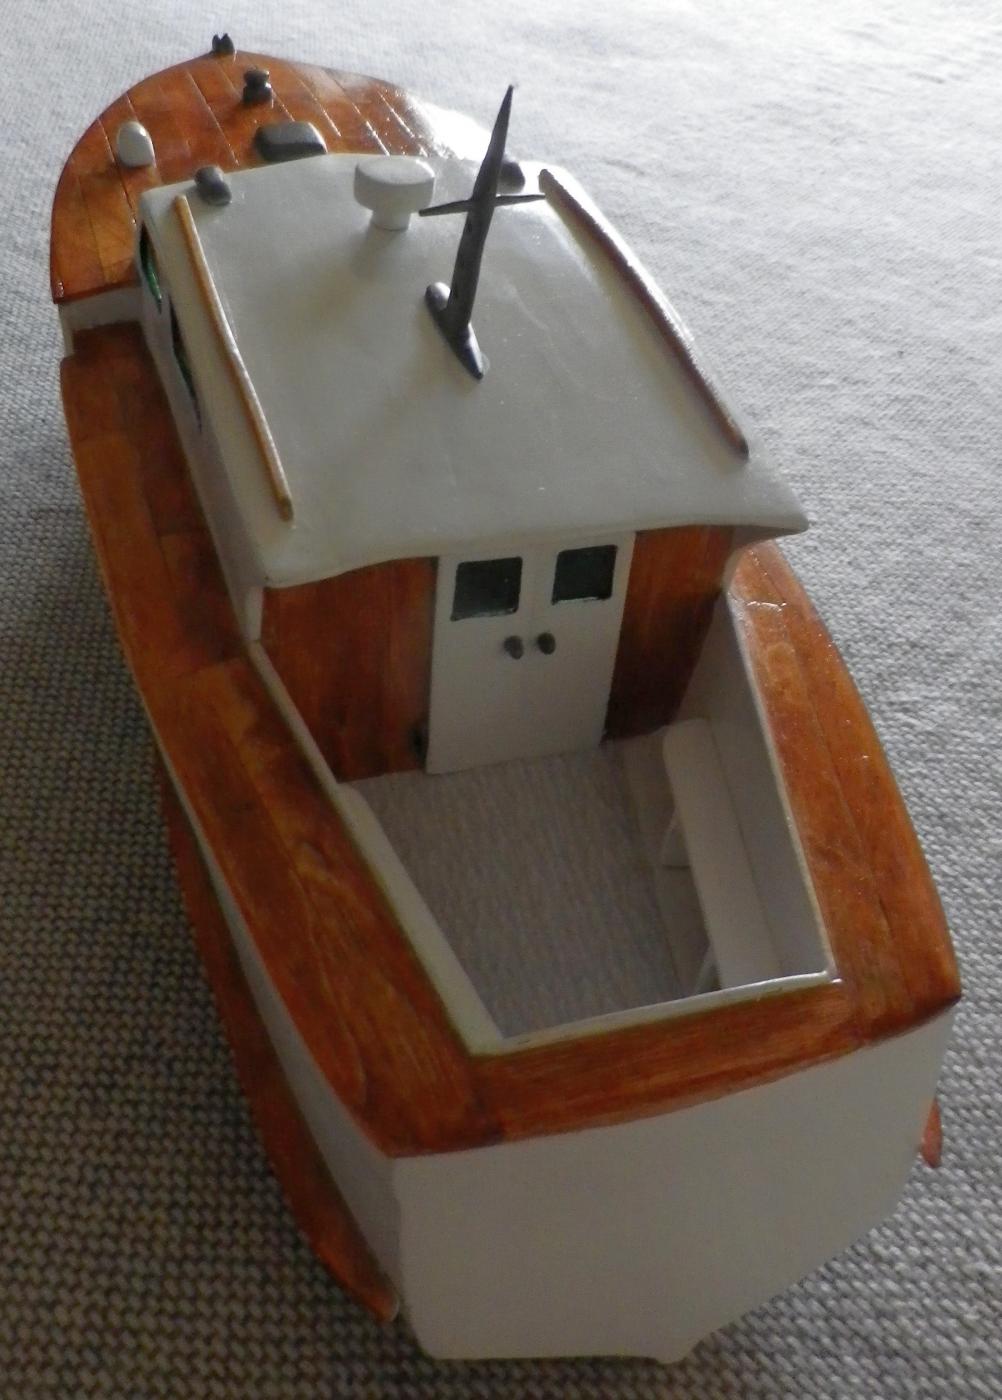
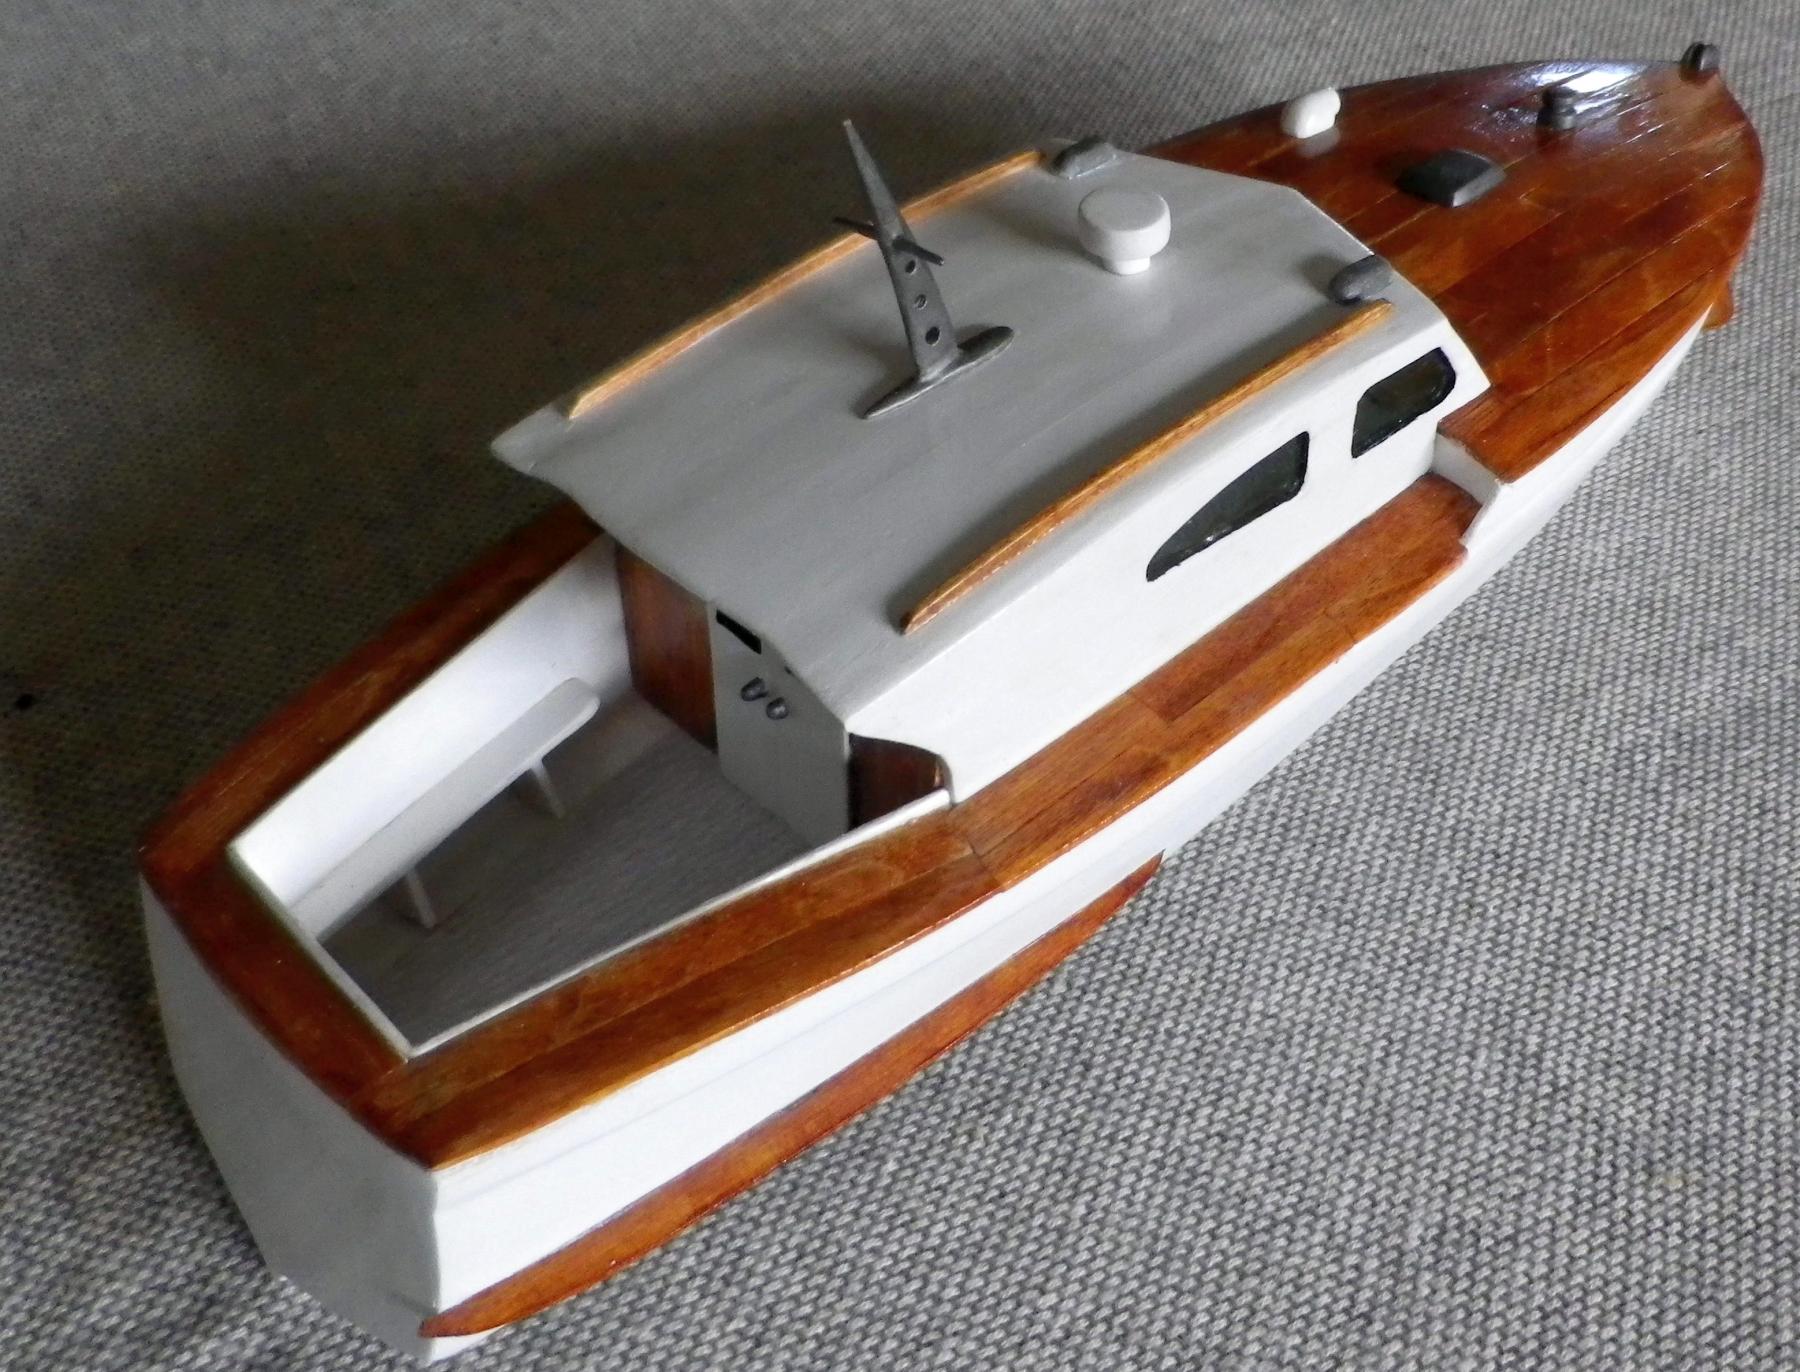
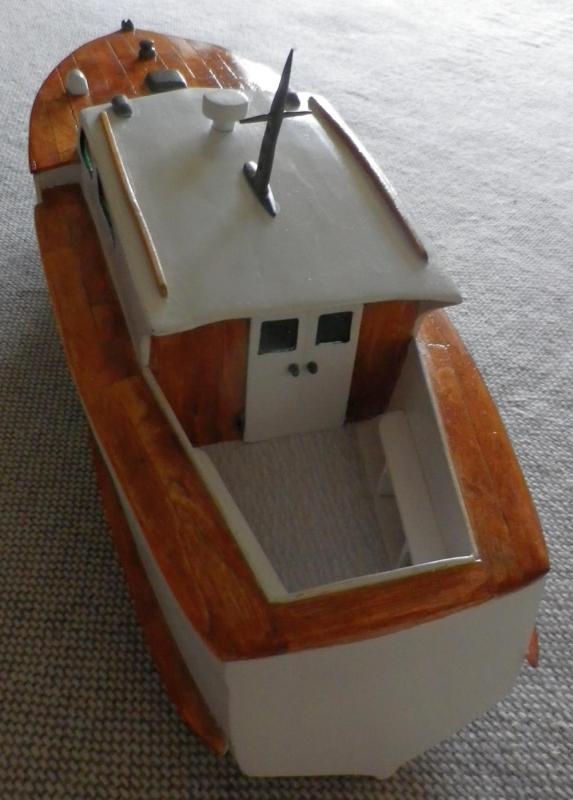
And the rest is mere detailing. All still done with popsicle sticks, except the glass and the carpet in the well (which is a piece of 240 grade sandpaper). The finish isn't as good as I would have liked, but I had many attempts to get things perfect and failed. But I had to live up to my name and I've had a lot of fun constructing it. Completed.


-
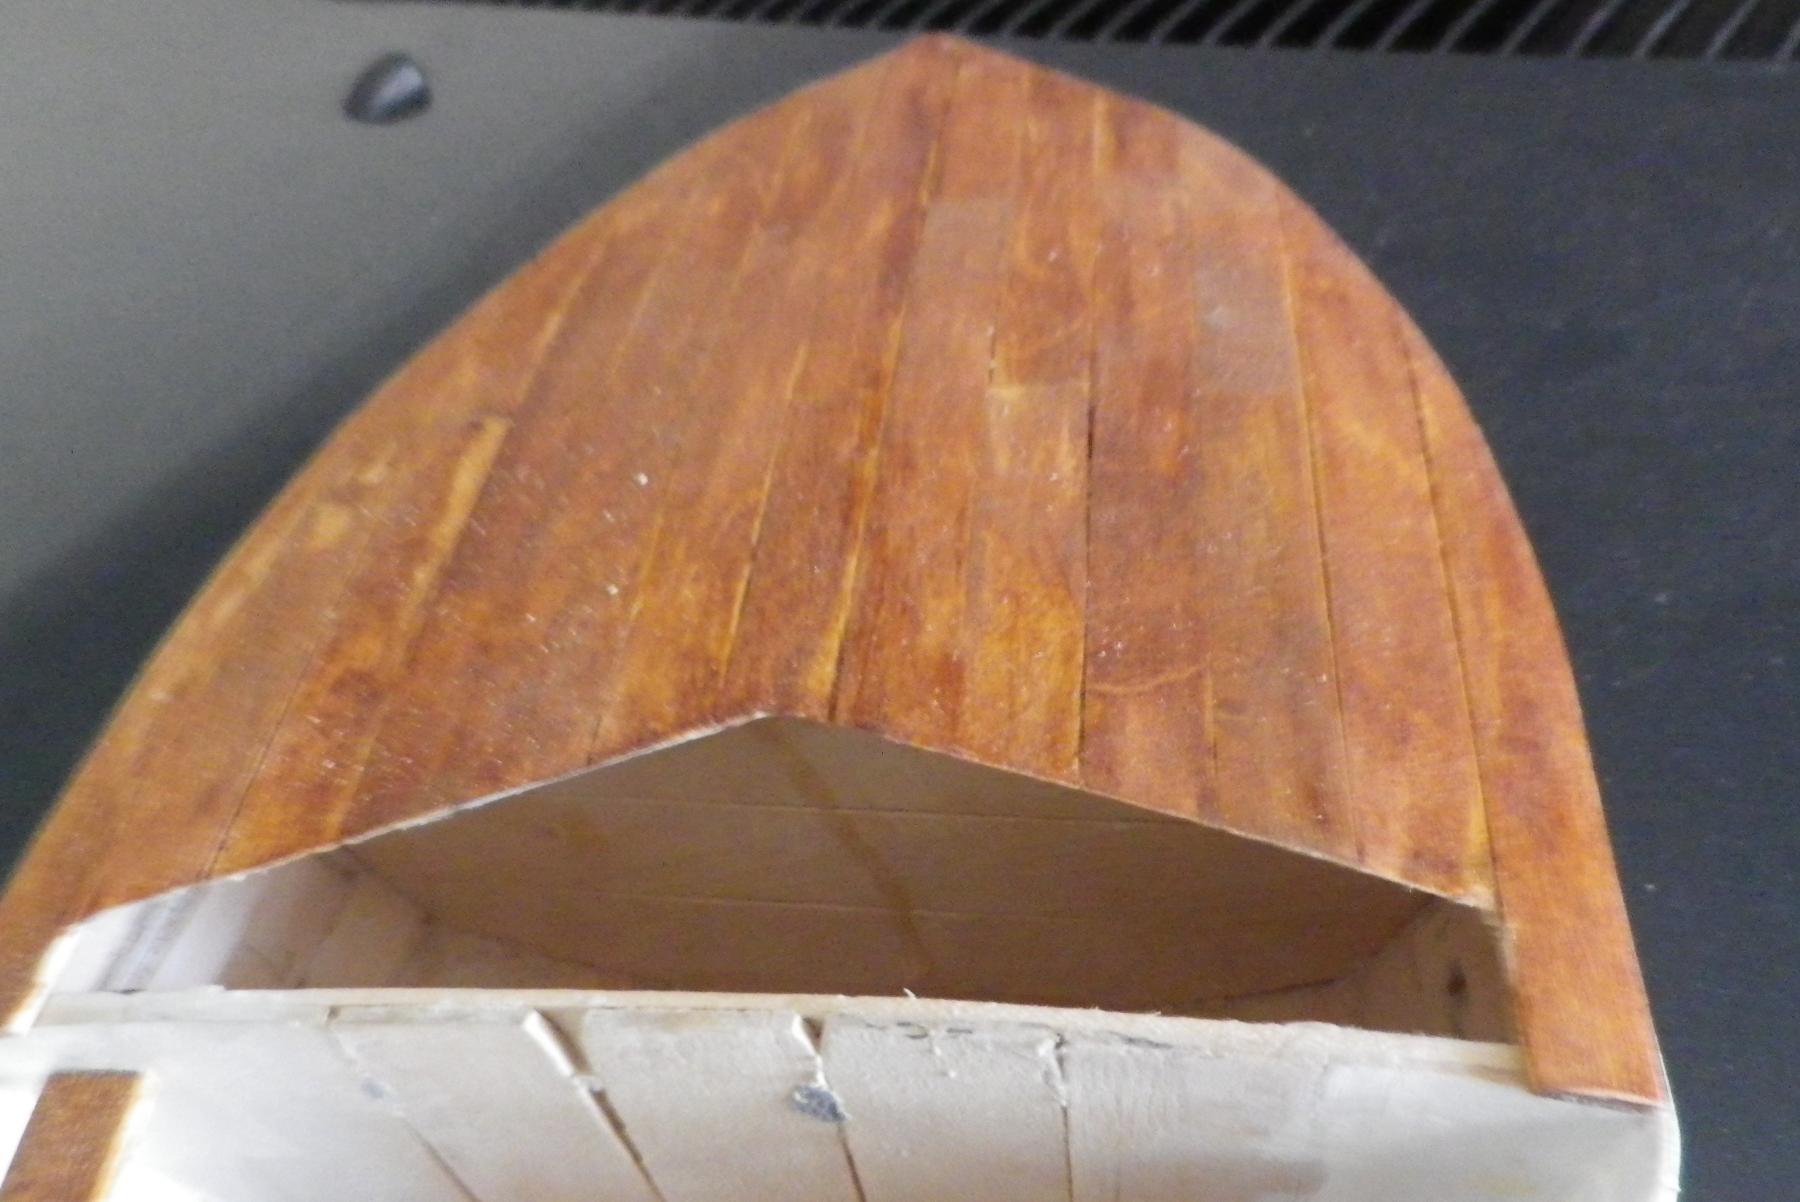
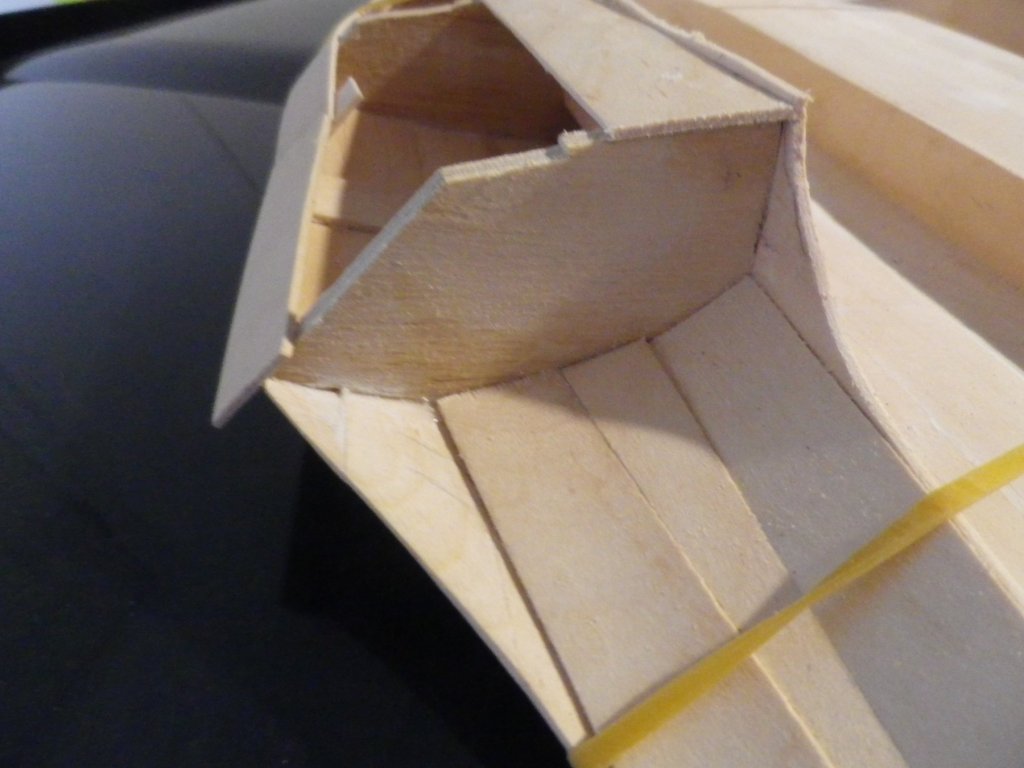
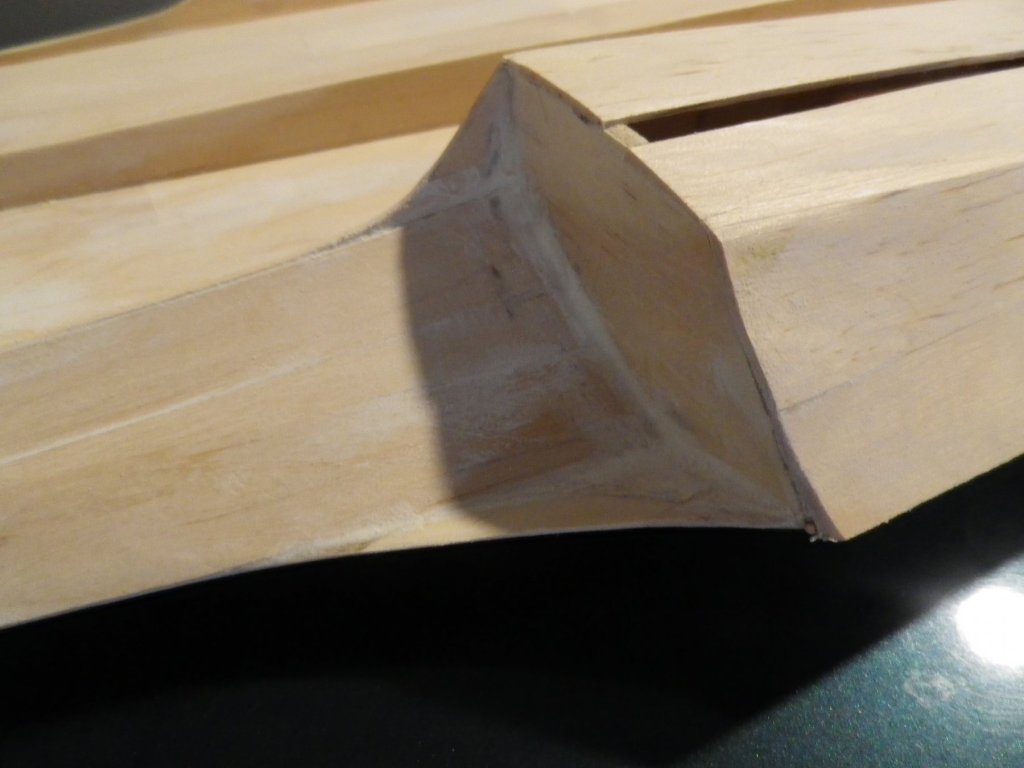
The original plans had the cabin sitting on top of the decking, but I decided to inset it into the deck, as I thought it would give me cleaner joins (the straight lines from the sticks of the deck beside the straight lines of the cabin walls), and I wasn't looking forward to shaping the deck curve on the bottom of the windscreen. This meant instead cutting a straight V into the forward deck, which was relatively easy. and then placing the planks on the side decking beside the cabin, thus giving a tight fit. The cabin build was difficult, as I had to use the deck V to give the angles of the windscreen (side to side) and somehow hold the sides in place at the same time to attach the windscreen to them. But eventually it all held together. Note that I am using three-ply for the beams to give more room for gluing ( and measurement errors). I should have done this for the hull frames, but we live and learn. But - as I feared - the pre-constructed cabin really didn't fit properly. There was a gap between the windscreen and the forward deck, and a gap from the rear of the cabin to the well sides, and the whole cabin was 3 - 4 mm off to one side as a result of the centre of the deck V being offset.. Rather than start building a new cabin from scratch I decided to bite the bullet and site the front of the cabin on top of the deck, add extensions to the back to make it longer and commit surgery upon the side deck planks to make the cabin placement central. The irony of the cabin extensions was that, in order to add pieces to lengthen the cabin I had to use two-ply to hold the extensions in place. Which was where the cabin building started. After a lot of hacking, cutting, sanding, guesswork and gluing I had a cabin that fitted reasonably well and that would allow me to progress.


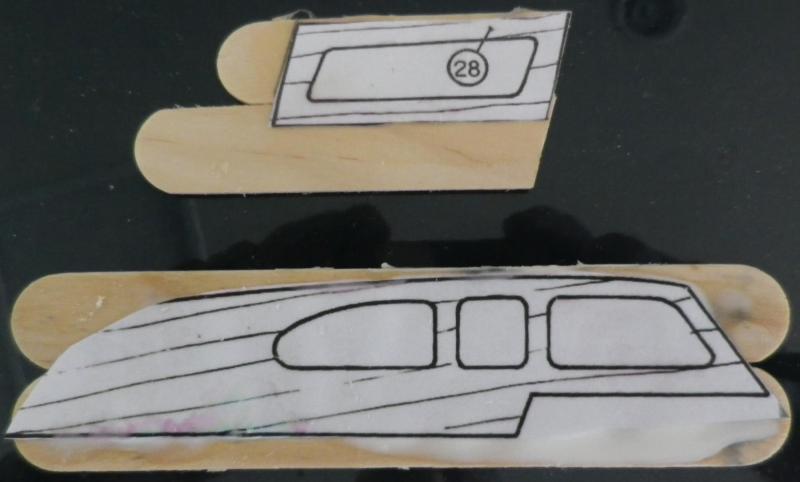
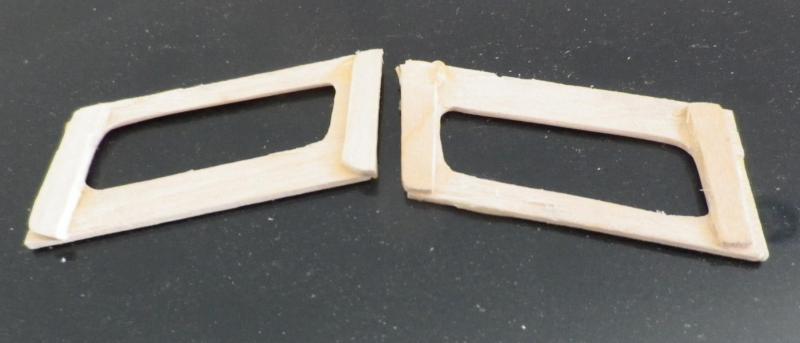
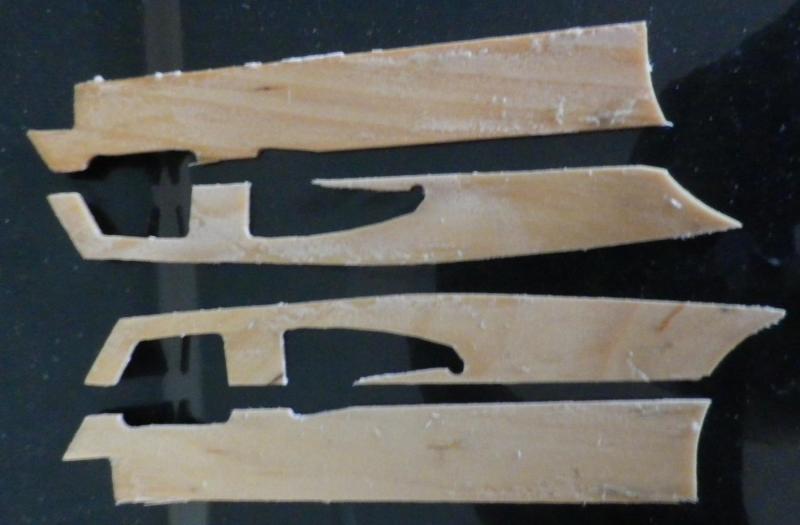
-
The next step was to build the cabin. The wood I'm using has a tendency to split when making longitudinal cuts, so I decided I'd try and minimize this likelihood by using temporary two-ply. I.e. I would glue the port and starboard sides together using (water-soluble) PVA, make the cuts and then soak the ply in water to separate the pieces. This would have the additional advantage that the port and starboard sides should be cut symmetrically; something rather lacking elsewhere. To further simplify the task I used the wider sticks. I started with the windscreen, and the cutting went well. Unfortunately when the time came to separate the port and starboard sides the glue proved more resistant to dissolving than I had expected, and I had to pry the pieces apart using a knife blade. This resulted in a couple of the window pillars cracking. But I wasn't prepared to give up after all the careful and laborious cutting I'd done, so I cut a few braces (which also joined top and bottom) and glued and clamped the lot in a vice. The result was very strong and more-or-less without blemish where the cracks had been. Thus encouraged I started on the sides. The original plan had three side windows, but they had fairly narrow pillars between them. The result was that my cutting of windows produced two major breaks (being four breaks total for port and starboard in total). This really was beyond salvage, so I started again with only two windows per side, and a wider pillar. The cutting was successful, and overnight soaking made the separation of the two sides easier. I added some bracing to attach the pairs (top and bottom). I've taken some liberties with the shape of the stern end of the cabin sides, otherwise the rear wall would have looked odd. Once I had all the pieces with their final shaping it was time to assemble the cabin. This was a task I had been dreading, because there were a lot of angles which had to be glued perfectly and I couldn't think of a convenient jig that would give me the predetermined angles that the decking and well required. Perhaps I should have started the cabin considerably earlier.


.JPG.bd7a86a661acddb1f93e7a5432cf33fb.JPG)