HOLIDAY DONATION DRIVE - SUPPORT MSW - DO YOUR PART TO KEEP THIS GREAT FORUM GOING! (Only 13 donations so far - C'mon guys!)
×


WoodButcher
-
Posts
30 -
Joined
-
Last visited
Content Type
Profiles
Forums
Gallery
Events
Everything posted by WoodButcher
-
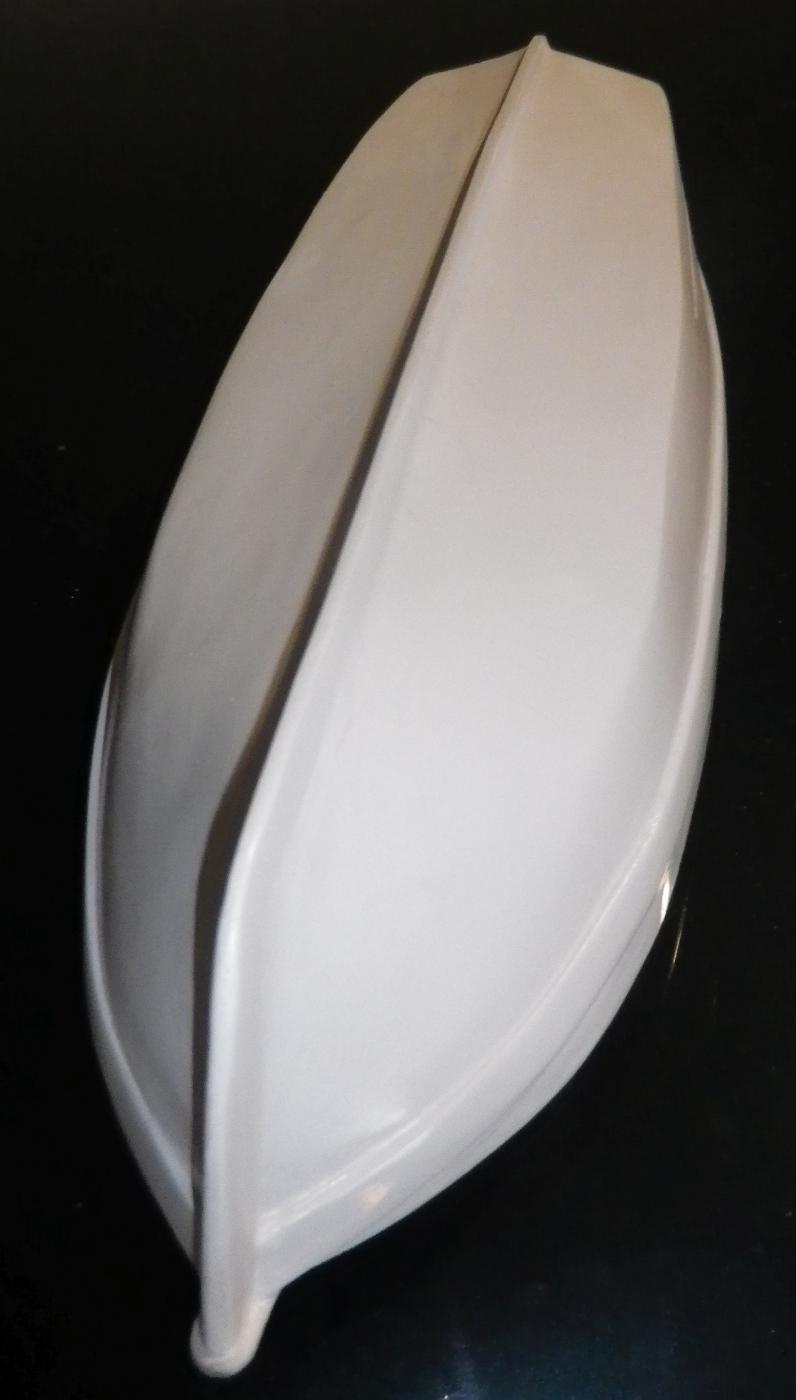
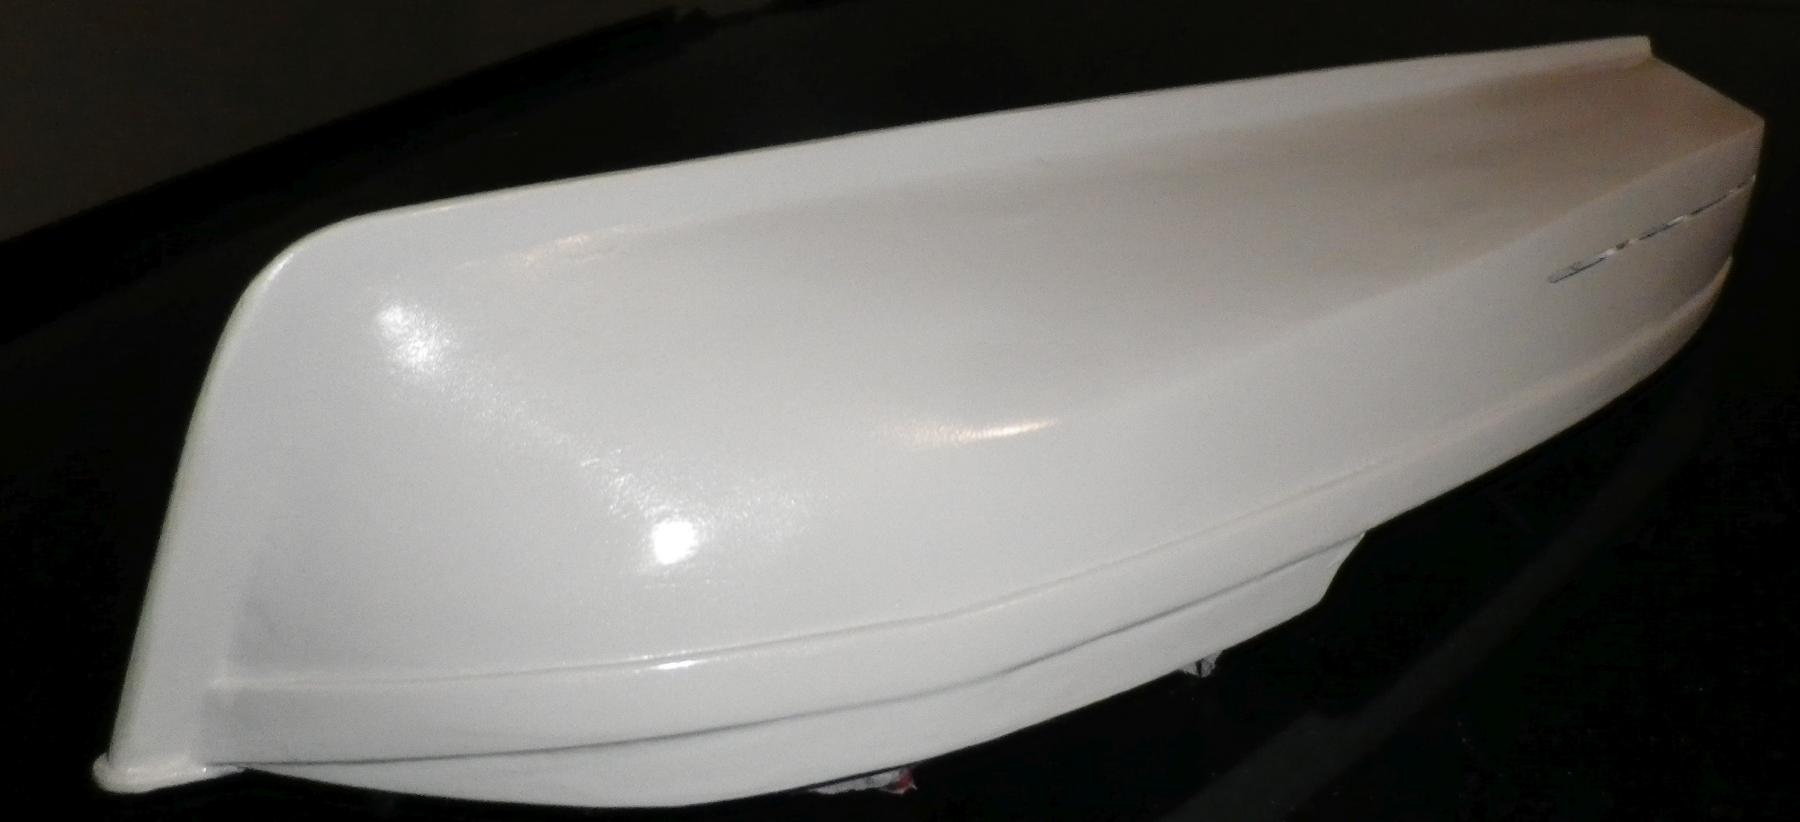
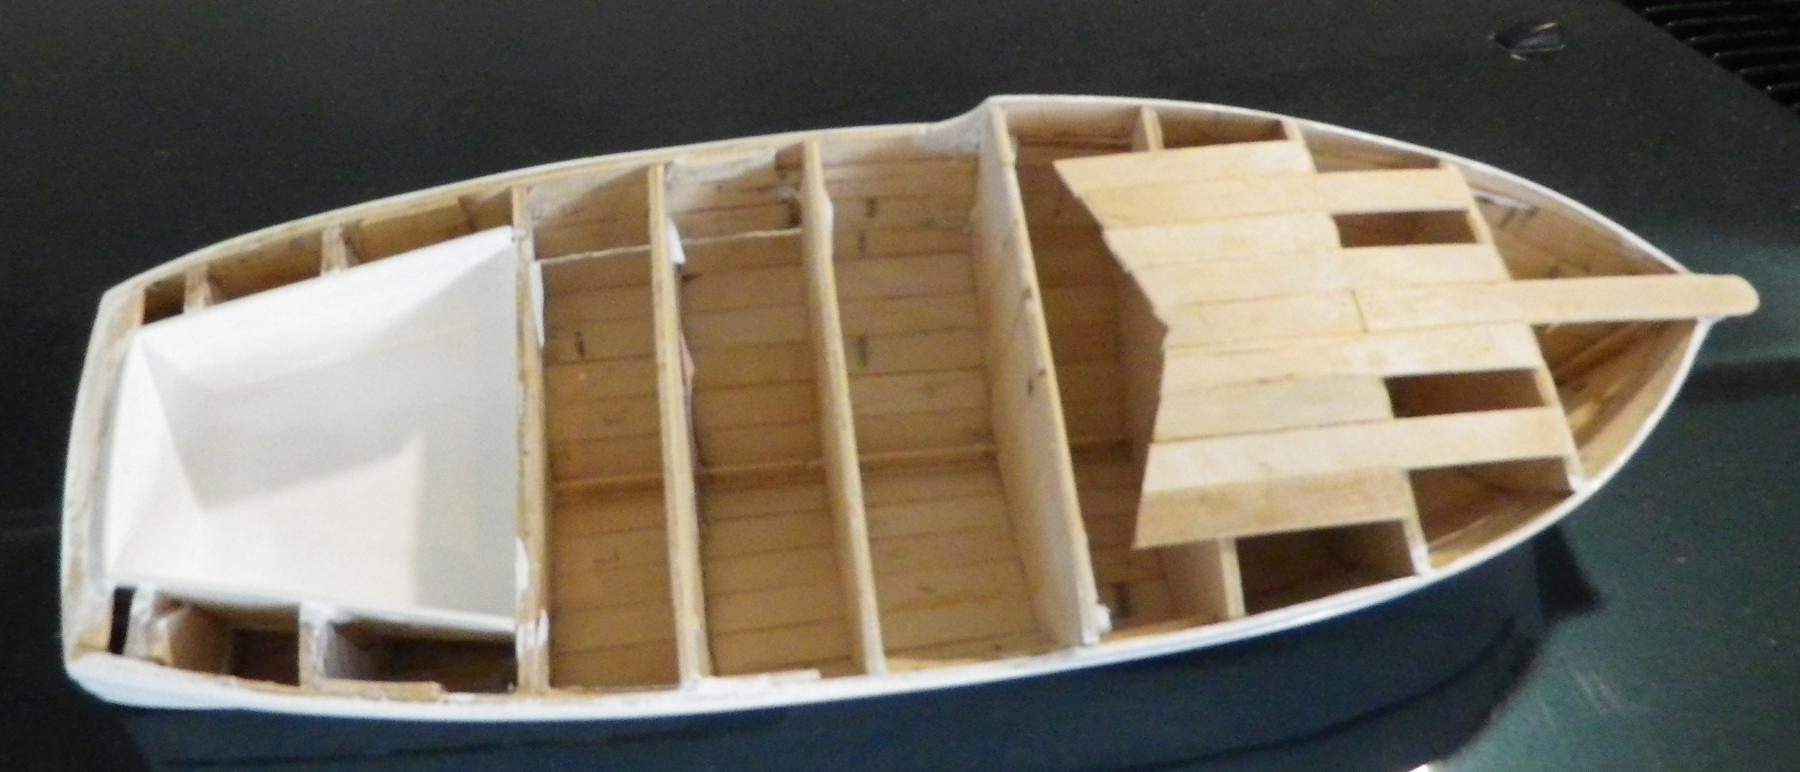
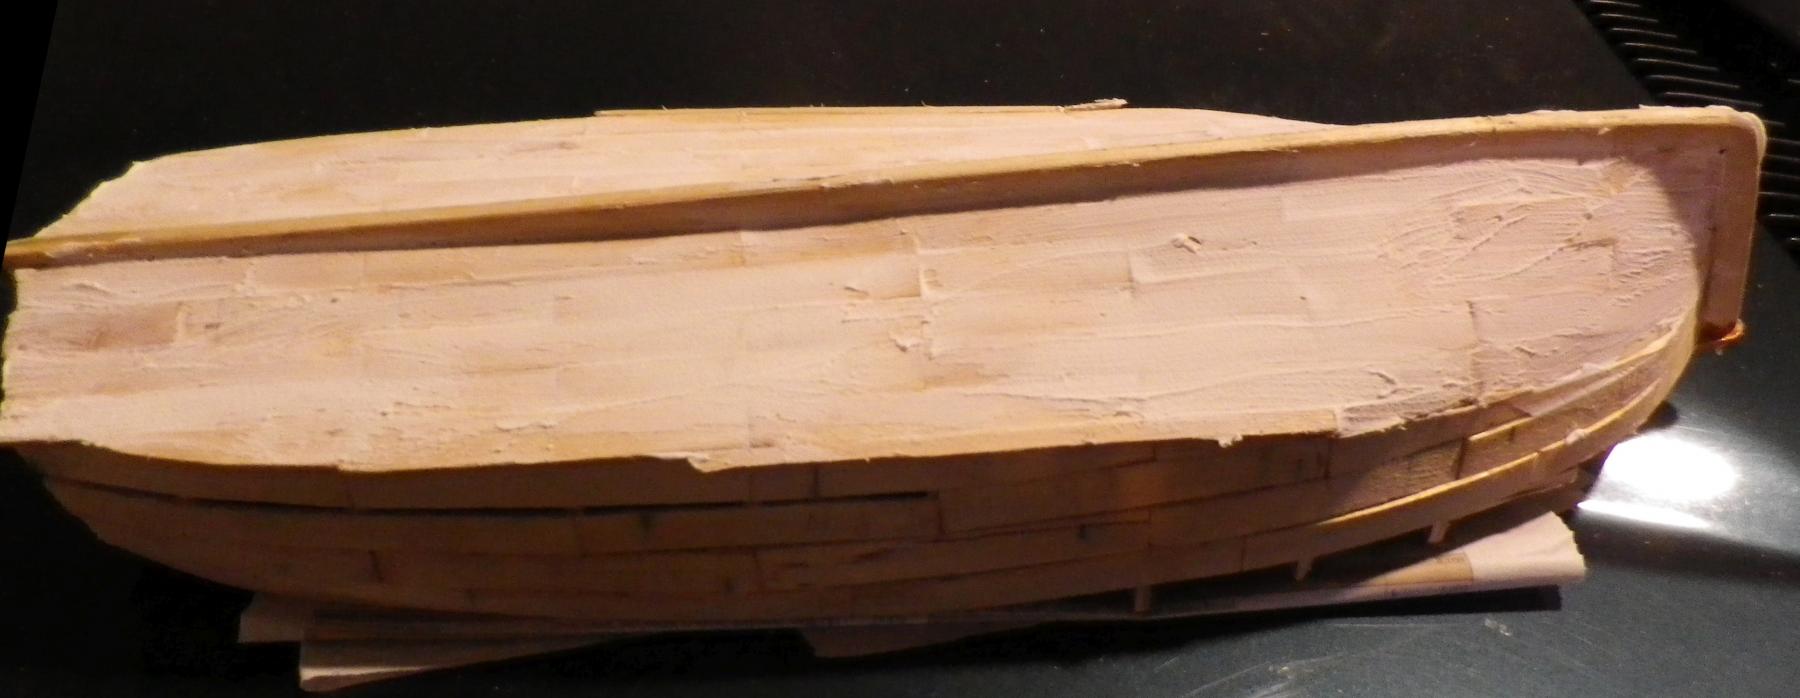
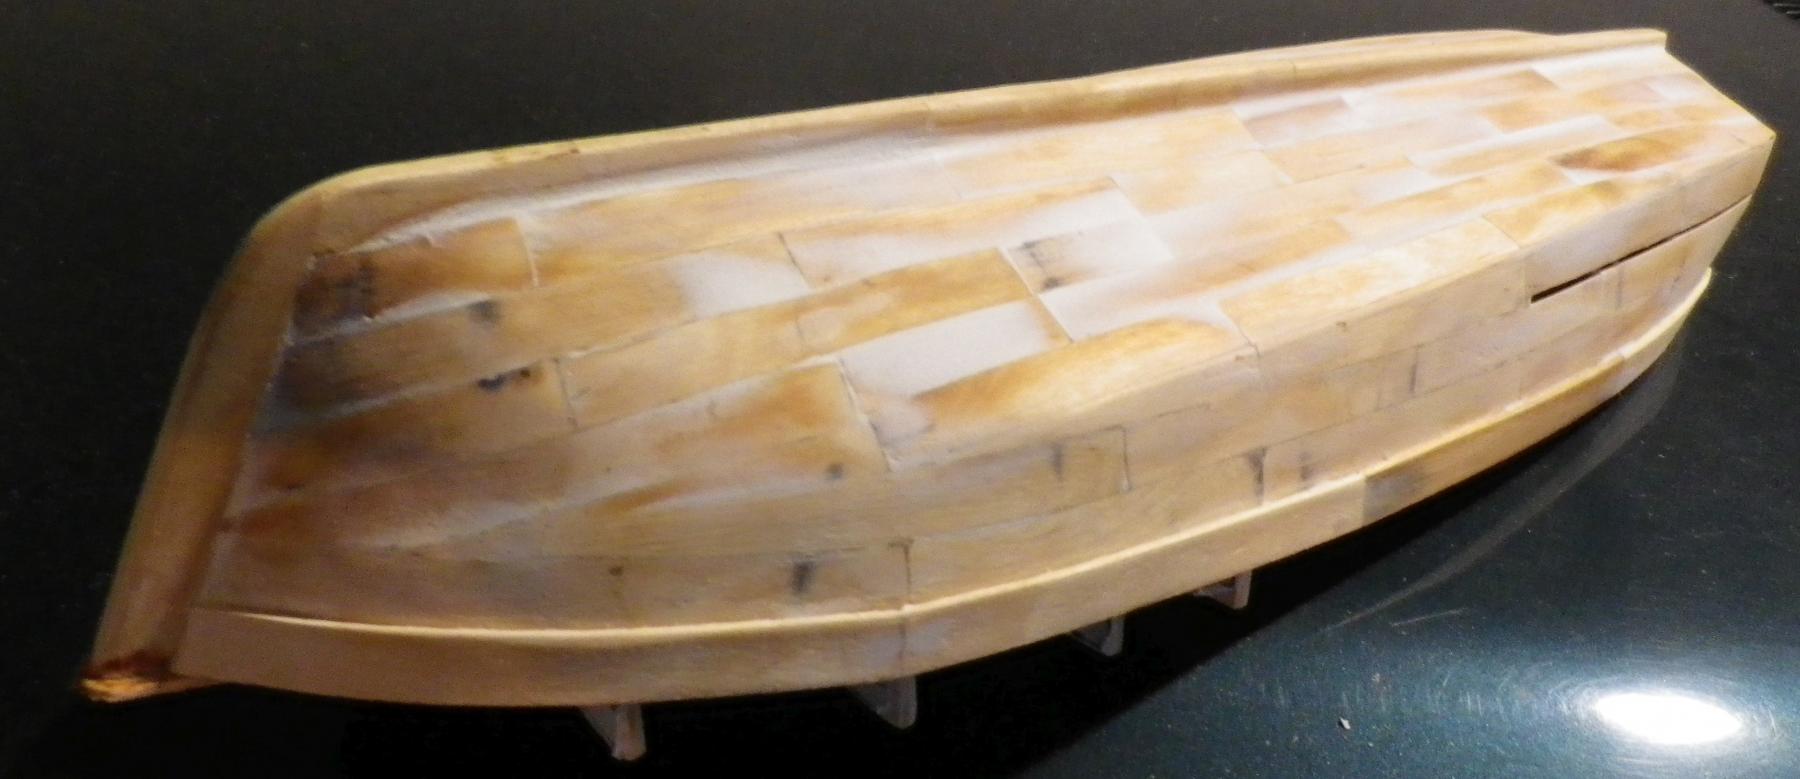
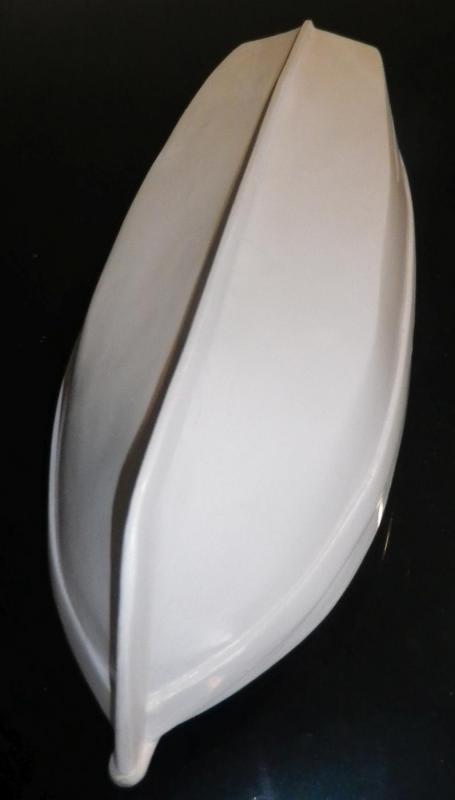
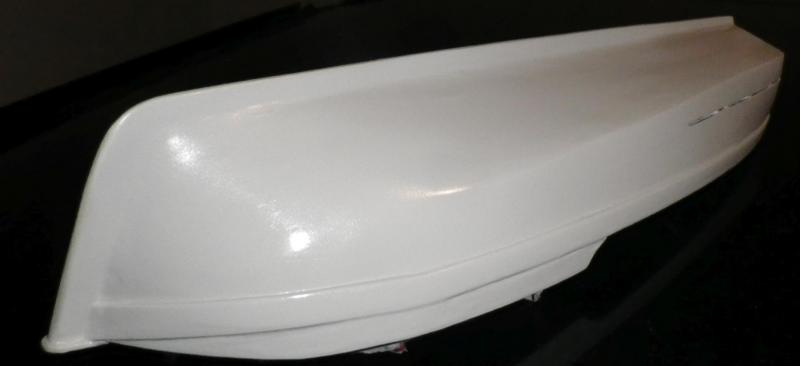
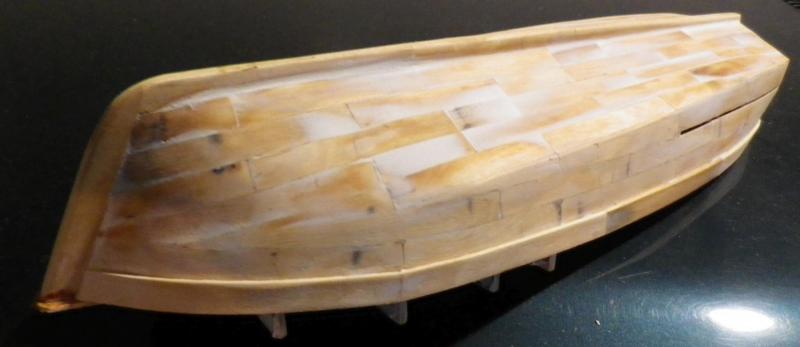
I have lost count of the number of times I've filled, painted, sanded, filled, painted and sanded and I still don't have a defect-free surface for the hull. This is more to do with the craftsman than the construction materials and - since I'm very pleased with the curves I've achieved - I'll have a couple more attempts. The photos don't show the defects so they can't be too bad, but I'd like something that looks good in close-up. I haven't been entirely idle while waiting for the filler or paint to dry. The original plan has the deck well attached to the cabin and both removable as a single piece to give access to the motor. Since I don't need this I've built the well in situ, without difficulty. I've started the decking but since I want the plank joins to be obvious when I stain the wood I want to sand it as little as possible. So I need to complete the hull painting before I deck completely so as to avoid sanding overspray. Thus the deck planks so far don't meet the hull edges.

-
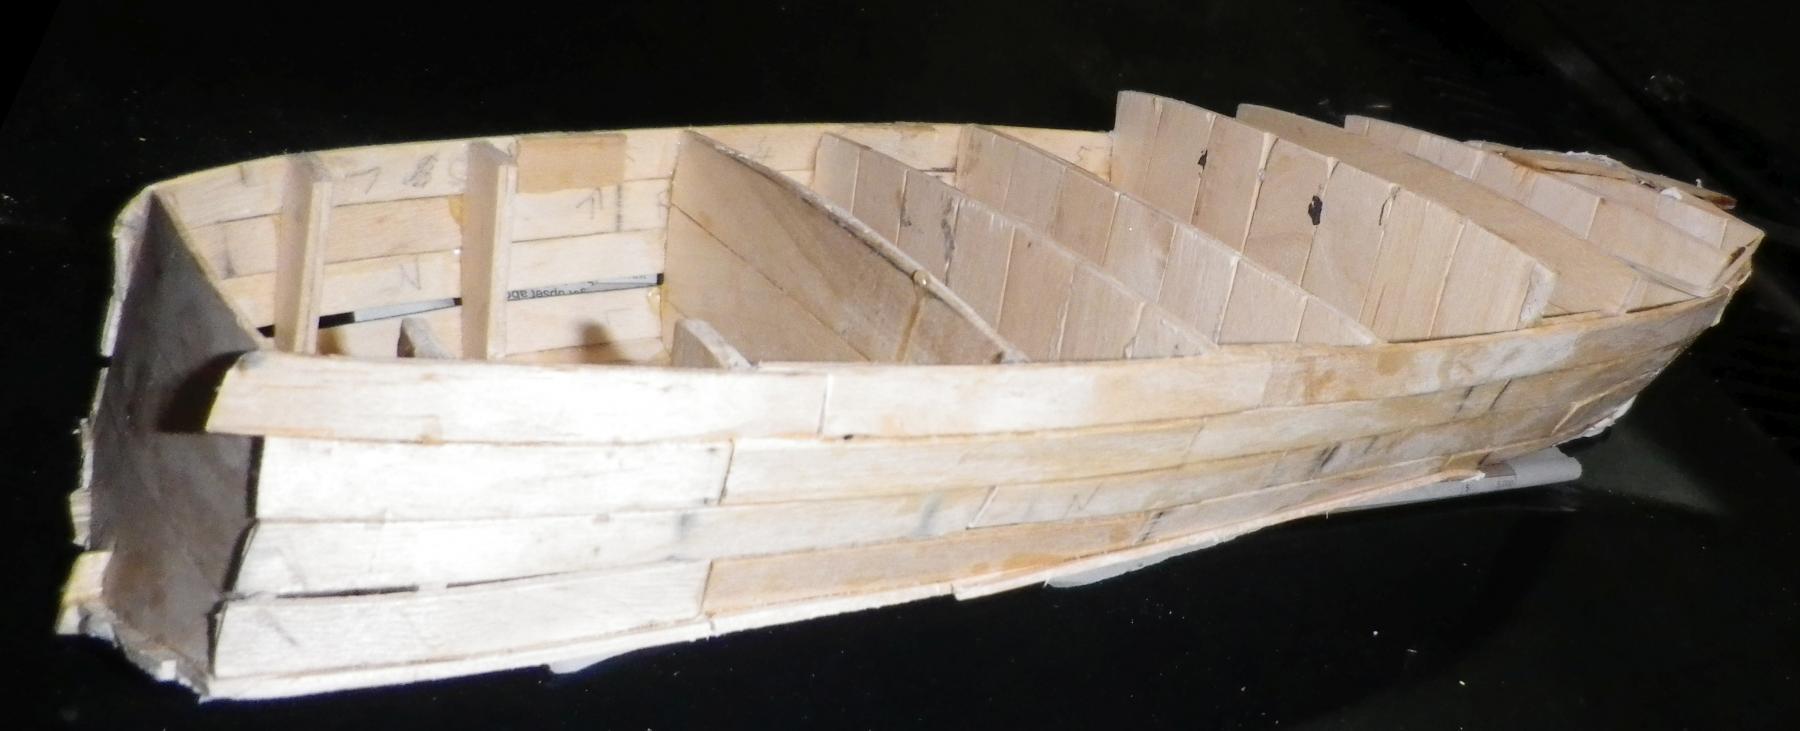
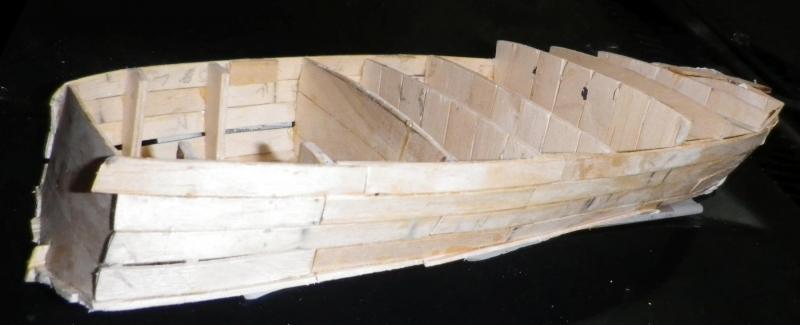
And so to the planking. I started from the stern working outwards from the keel and downwards from the deck, arranging that these should meet on the chine line. I cautiously advanced the two rows towards the bow because I really had no idea what should happen to the chine angle as it approached the stem, nor what the shape of the planks would be as they curved inwards - only that there would be some narrowing. But narrow them all, or just one or two? Because the sticks are short the maximum span a single plank could have was three bulkheads. To allow for the interlocking planks some (at the bow and stern) only spanned two bulkheads. Where one of the bulkheads was lower (from the bottom) than it should have been I could leave a gap between it and the plank if the offending bulkhead was in the middle of the span. But if it was at the end of the span I had to chop a small sliver of wood to go under the plank to make it (sort of) align correctly. With the shorter pieces of planking the problem of uneven bulkheads was yet more acute. From the top where you can't see the joints it doesn't look too bad. But once you can see the joints its a real mess! So - as I expected it was time for vast quantities of filler to cover up my sins. And then lots of sanding.


-
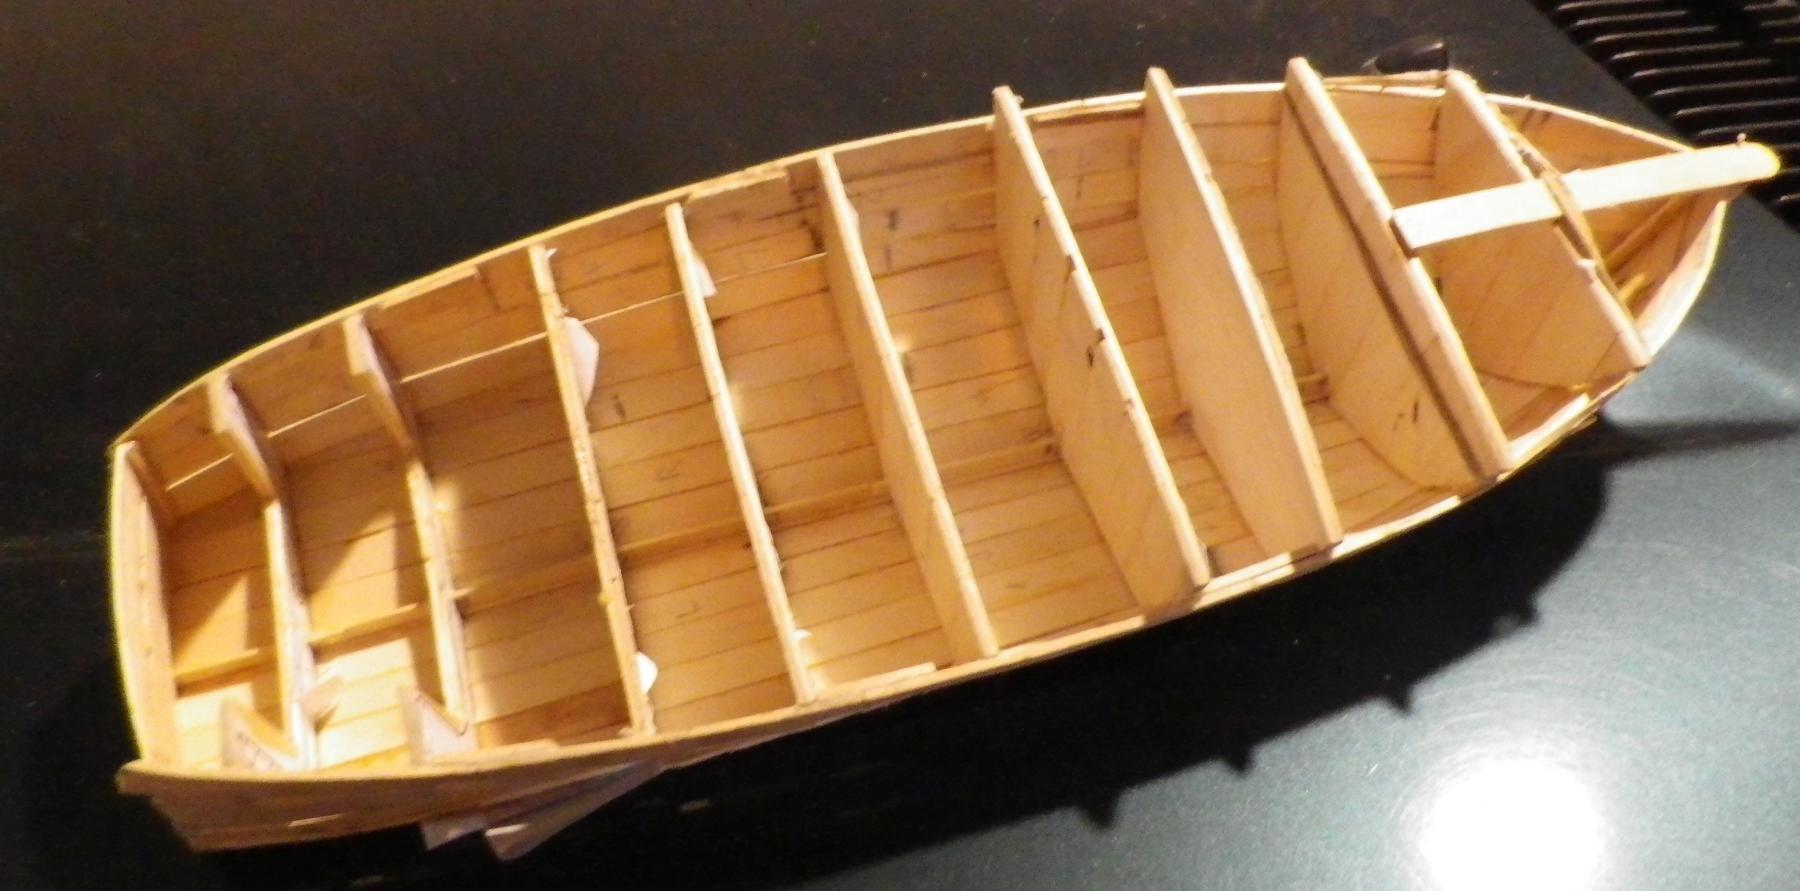
Hi Patrick - thanks for the encouragement (and to everyone else who has posted a "like"). She's 40 cm long. Cheers Alistair
-
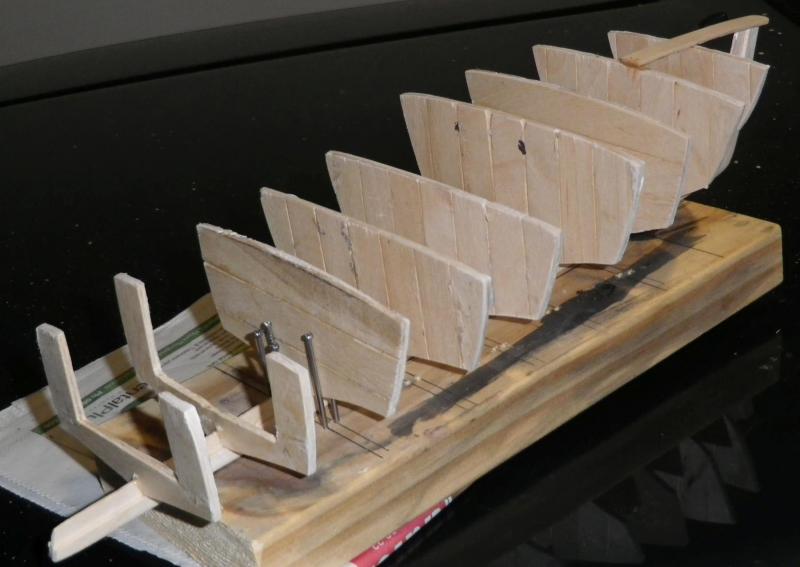
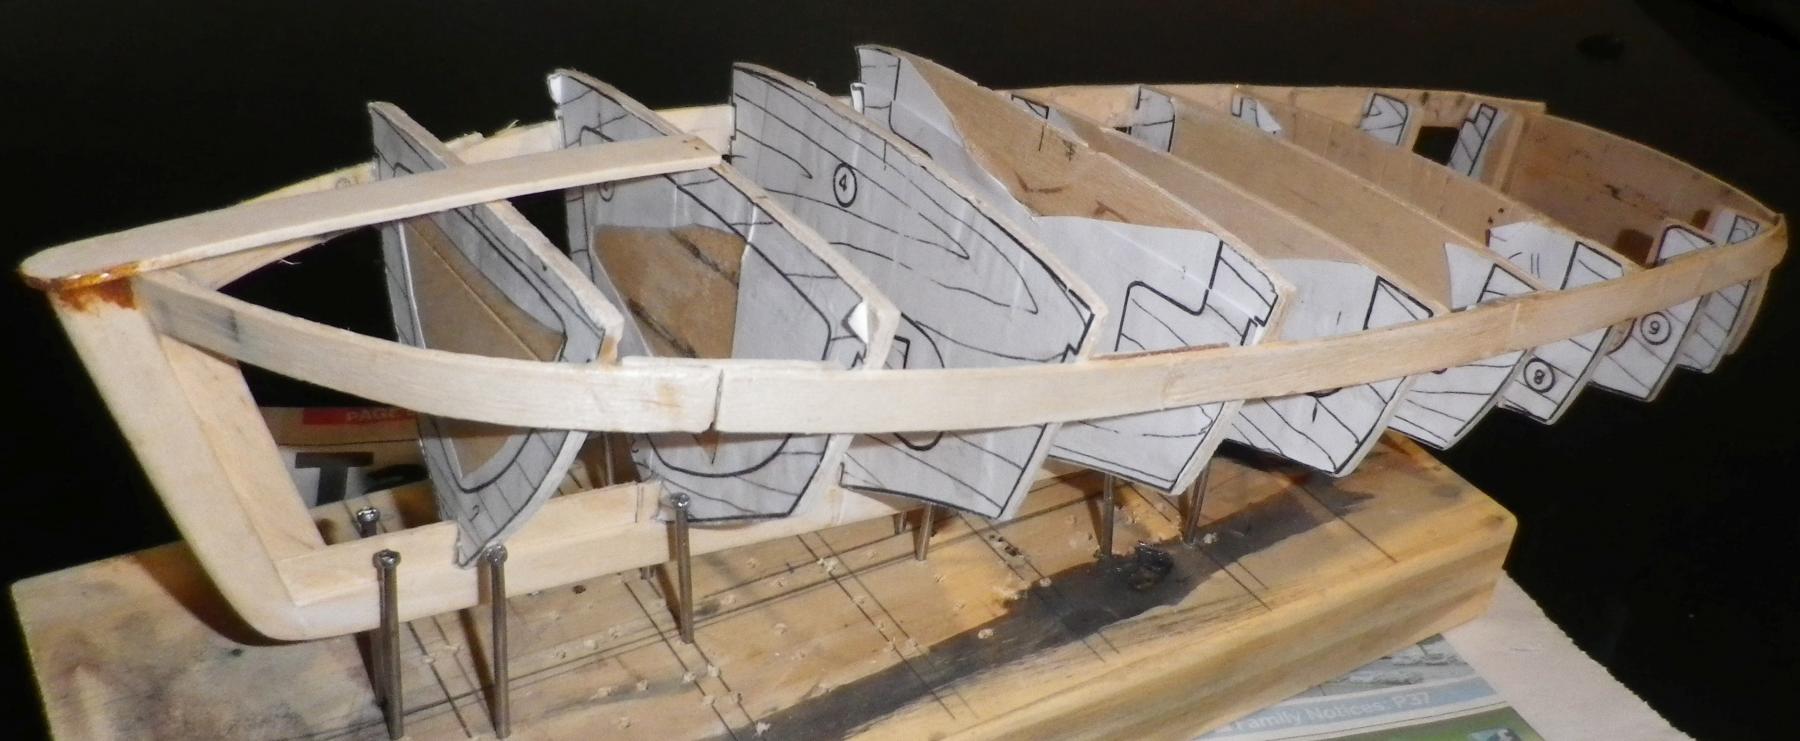
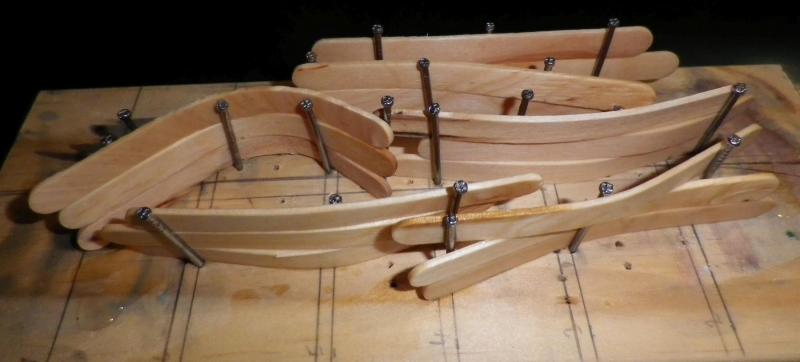
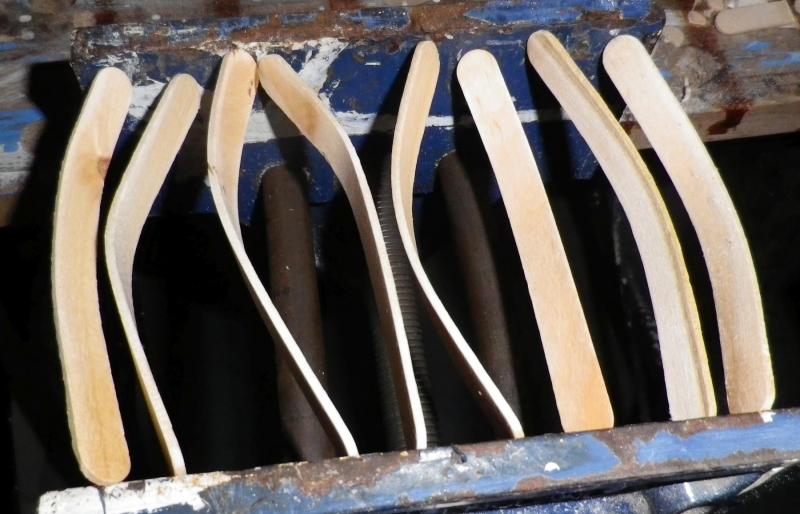
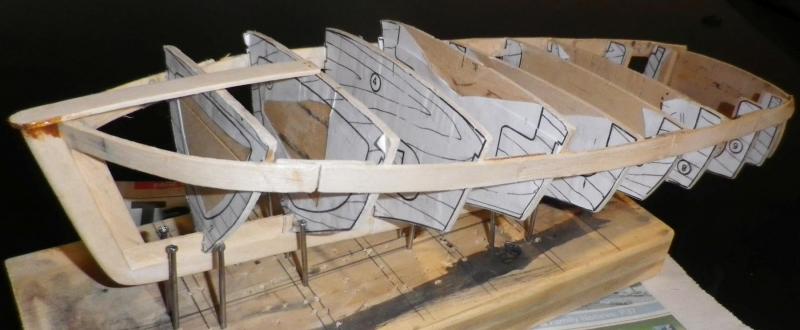
The plans suggest the next step is attaching the hull planking, from the keel upwards. Because I didn't trust the squareness of the jig I decided to put the planking just under the deck first, to ensure the bulkheads were held solidly in place. If you look at the paper glued to some of the bulkheads you'll note there is an notch for an extra thick plank. Since I was using wood of a given thickness I decided to use a double thickness layer instead. I started with the first layer. Which meant getting into wood bending. I tried the trick of wrapping sticks in a wet flannel and microwaving them, but this didn't seem to work at all. So I tried soaking them in hot (boiled) water for five minutes and shaping them after that. This worked, and I discovered - to my delight - that once the sticks were dry they remained quite malleable. I.e. having shaped them in a jig or otherwise I could further bend them (adding a second curve, adjusting the first curve) to some extent and they would stay in shape. This addition to the model really began to show up errors in the alignment of the bulkheads. In particular the top edges of the deck were uneven, and the curve from stem to stern bore some resemblance to a sine wave. Knowing that I didn't need to be precise with my bending I began to mass-produce bent sticks. Firstly from the jig - leaving aside the aforementioned malleability - this was still the appropriate method for bending to double curves. And for bending where one end of the stick needs a stronger curve than the other Eventually I tried soaking the sticks in cold water (for about five minutes) and this worked equally well as hot water. So I began mass-production of single-curve sticks. Although some decided to shape themselves to double curves when forced into the vice anyway. The bending was not always successful. The quality of the sticks varied. While most were reasonably solid, some snapped, some were a bit thin or narrow and some were too rough. And some didn't bend smoothly - they adopted a rather sharp angle at one point.
-
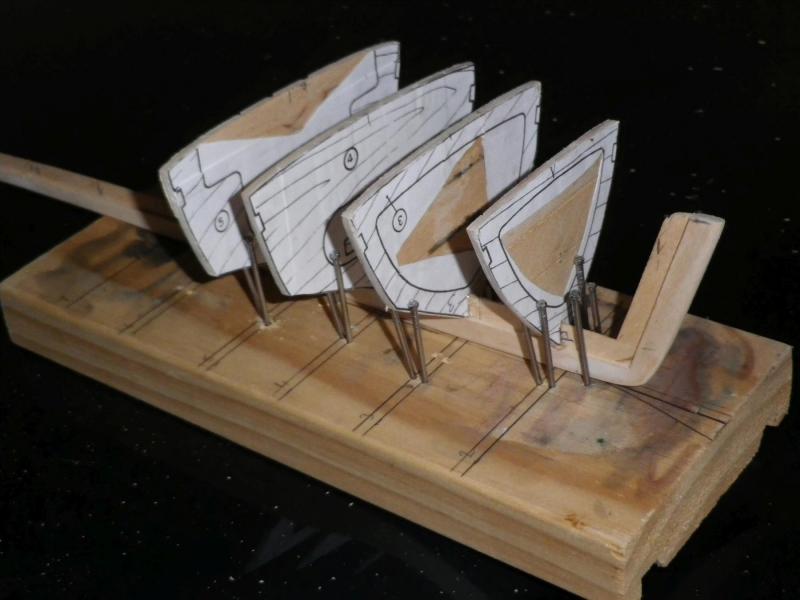
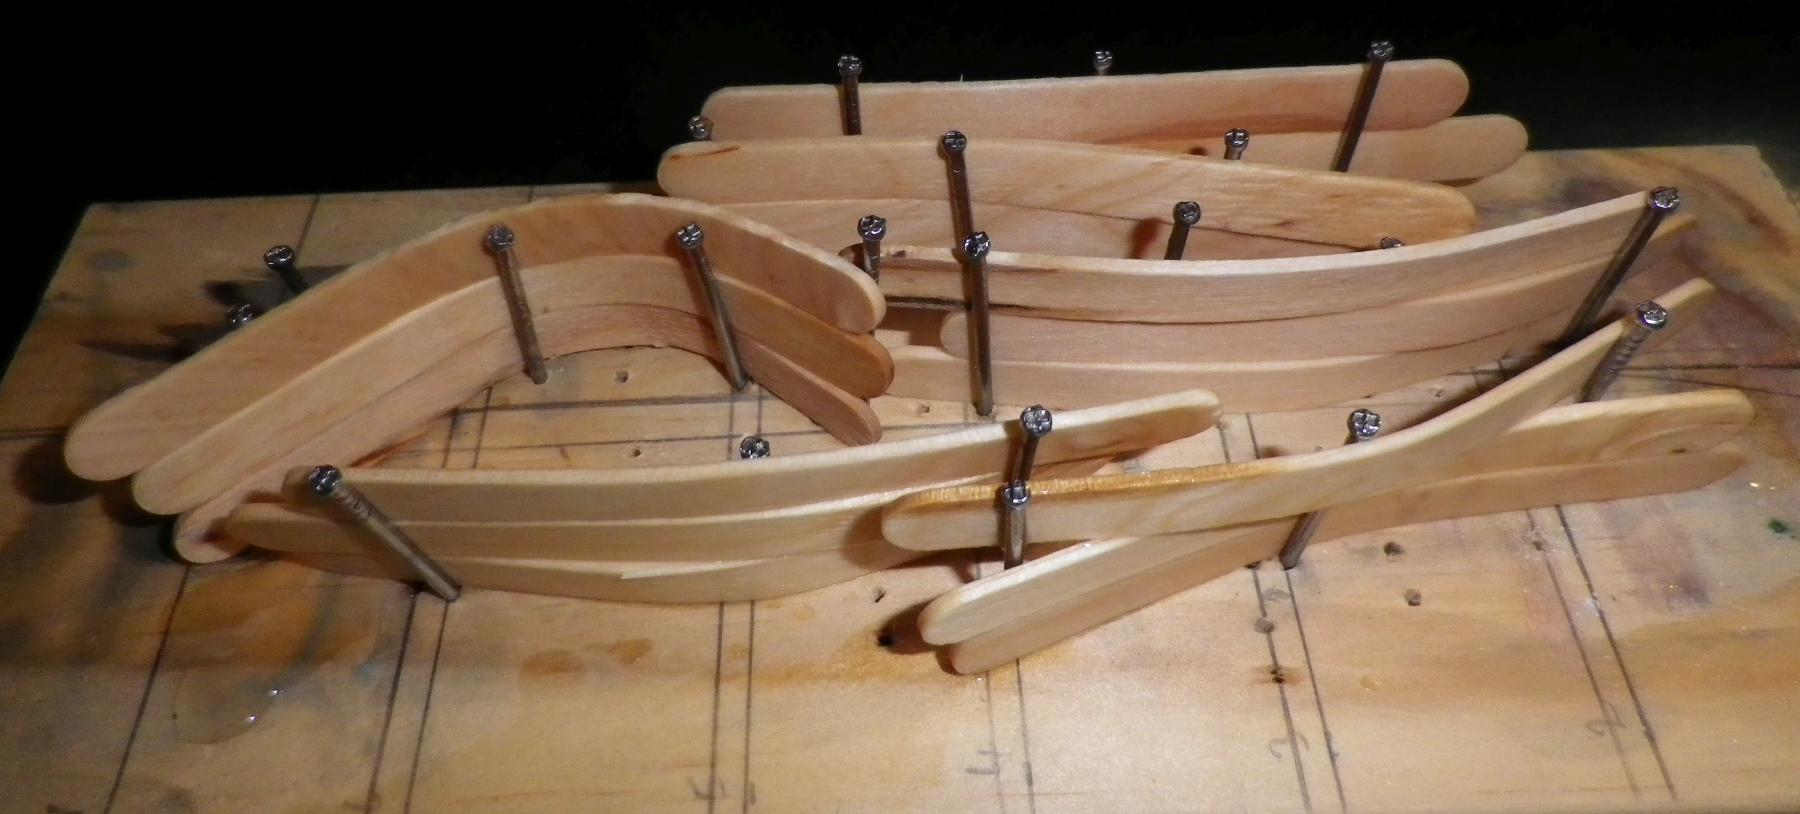
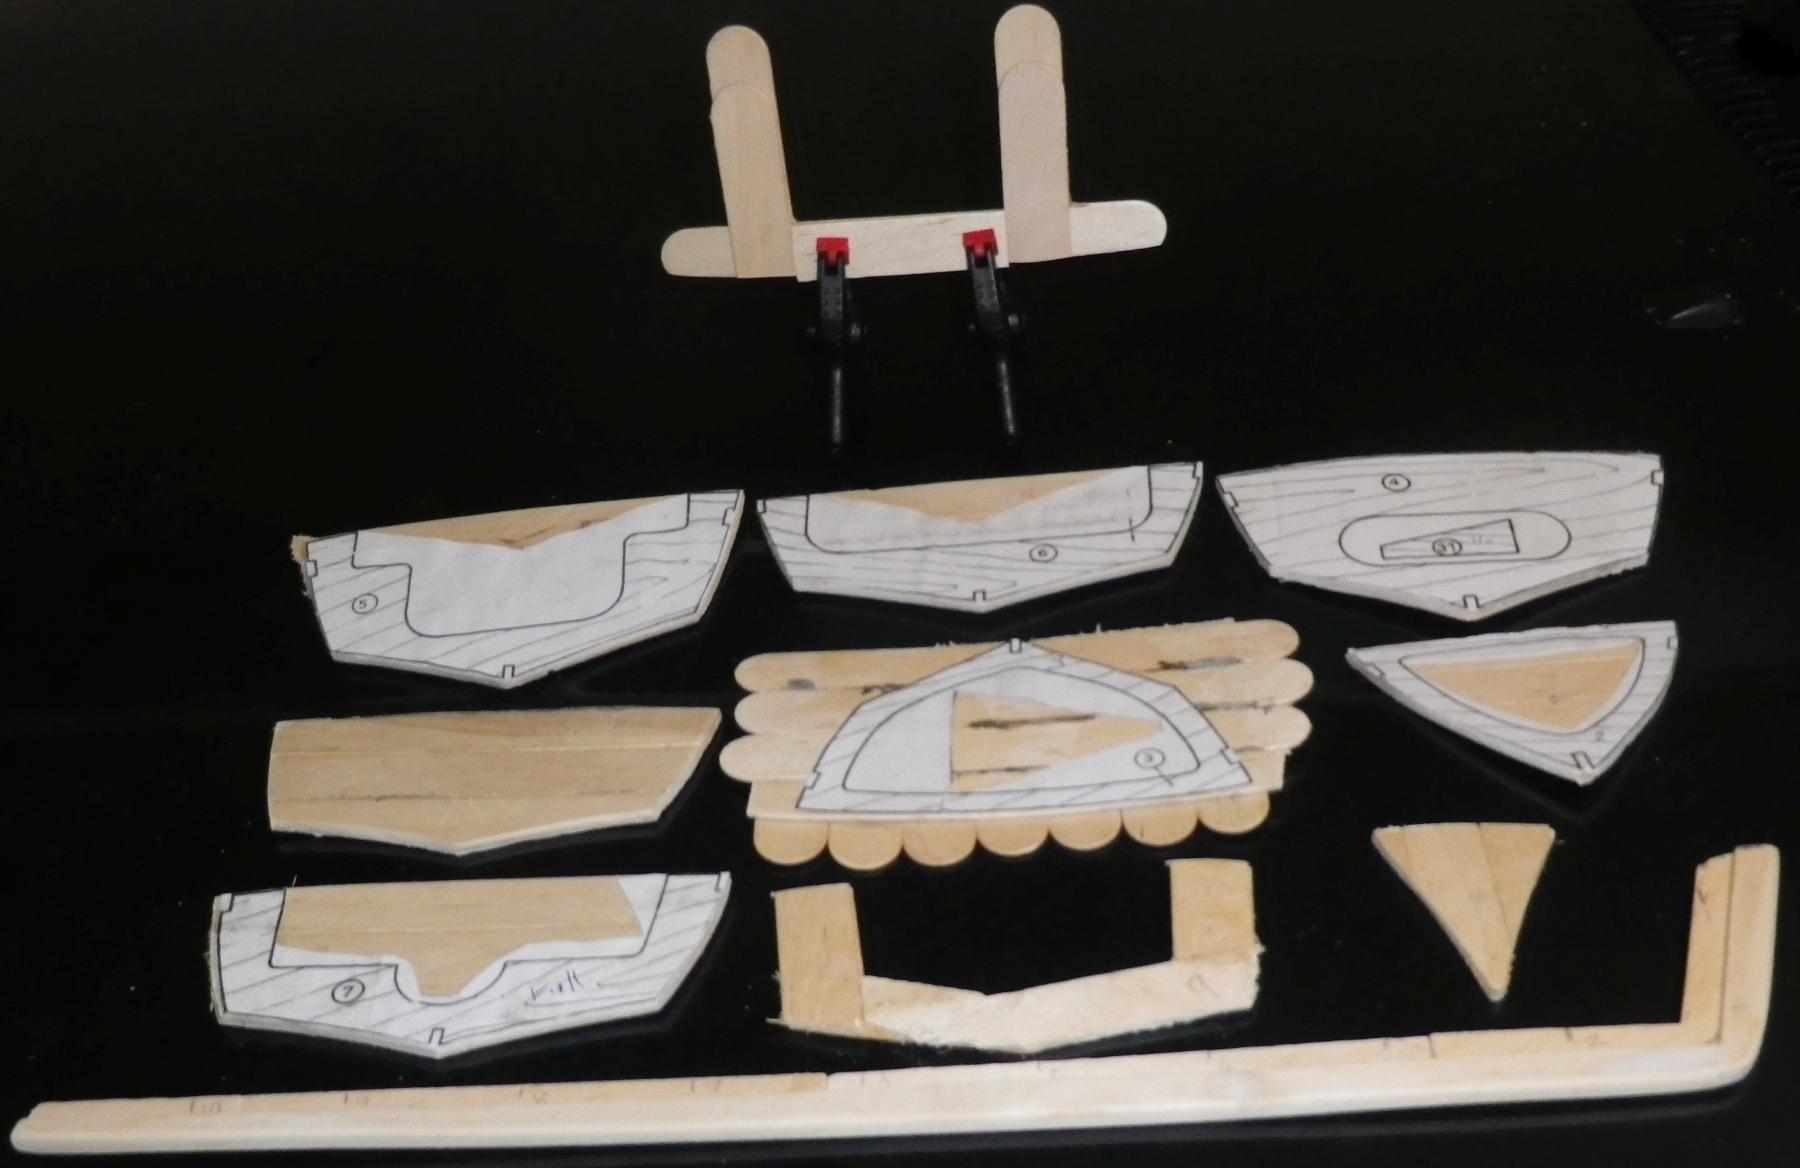
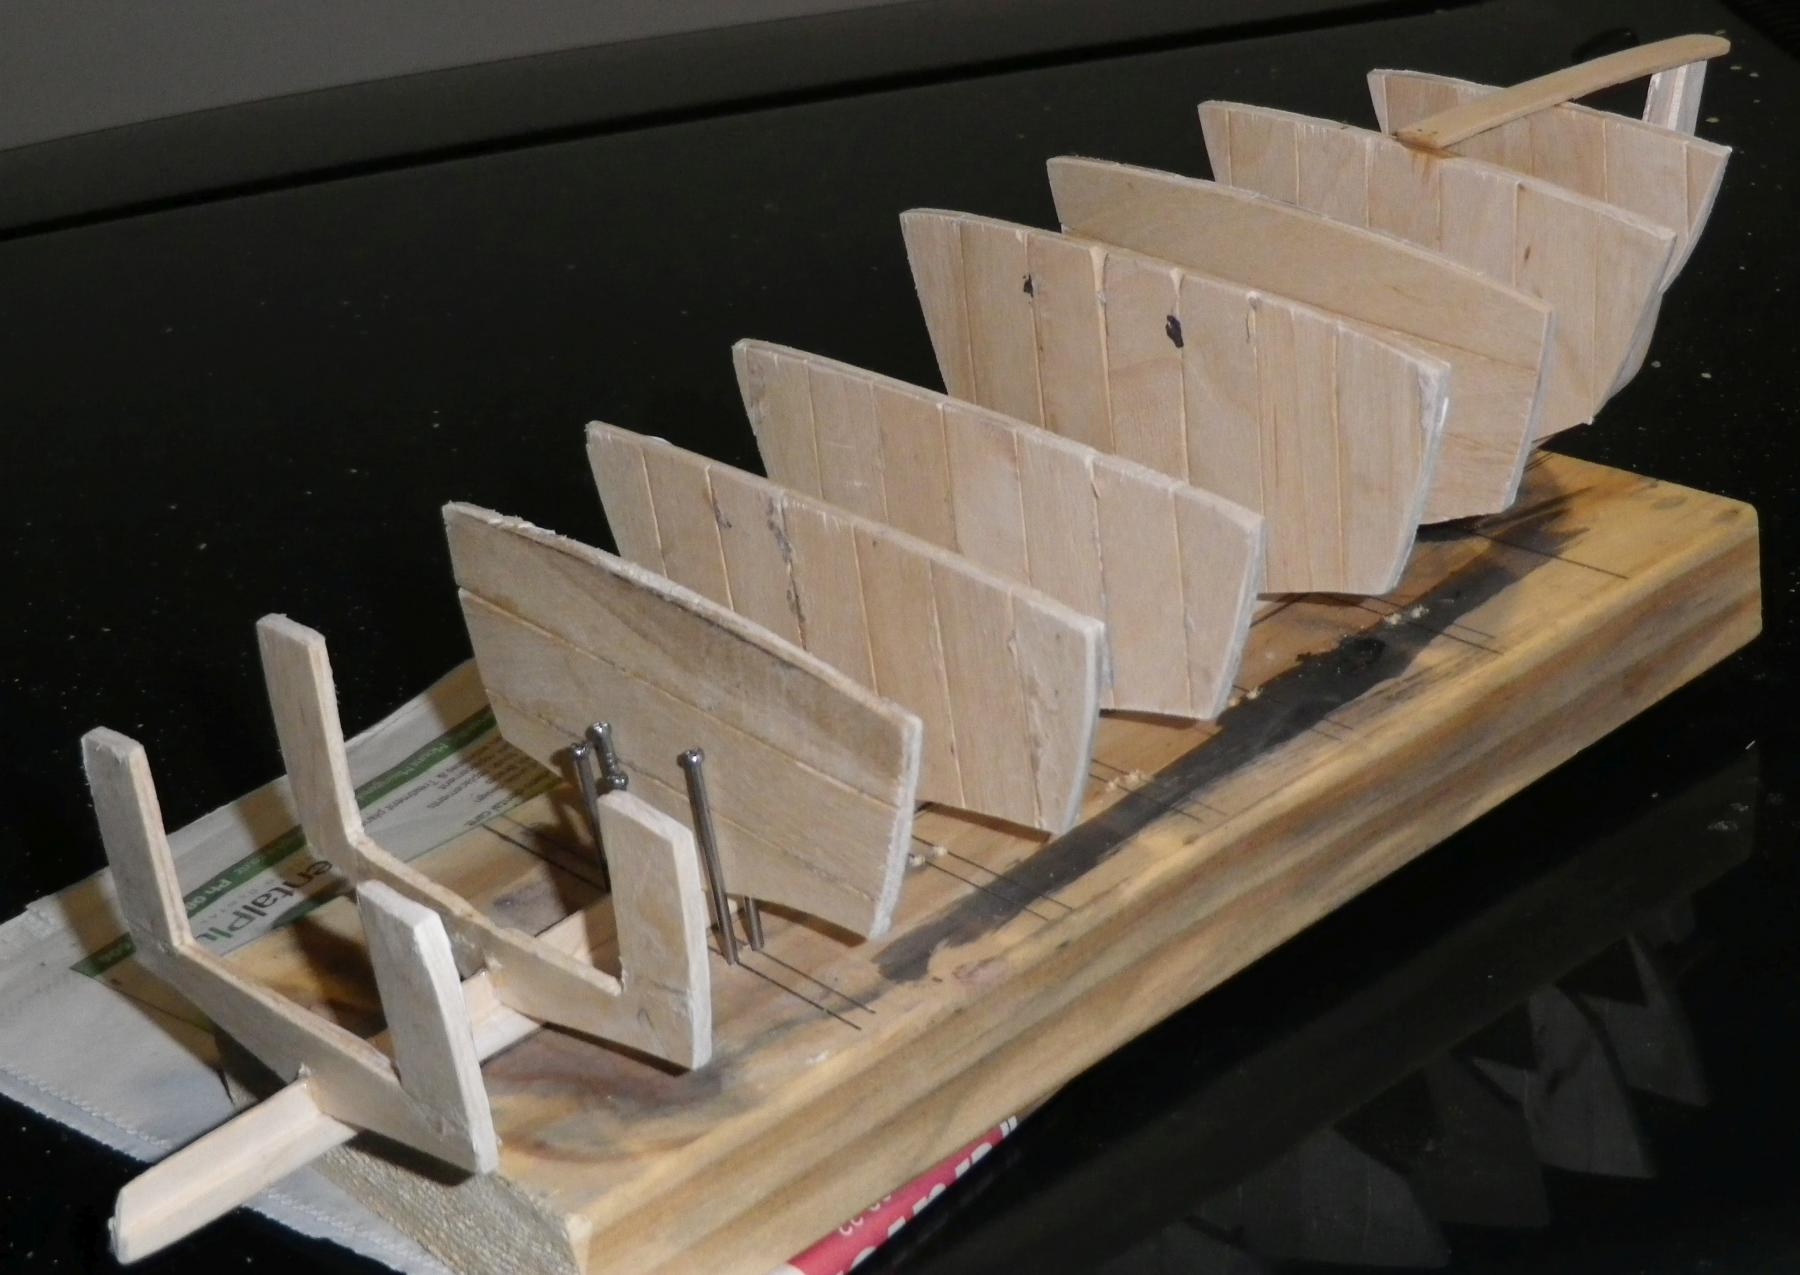
I recently retired, and having no current hobby apart from reading, decided that I'd take up model-making. My first attempt was a plastic kit set sailing ship (U.S.S. Constitution - Revell 1:146). I wanted a sailing ship so I could take a lot of time rigging it. The model has three suggestions for rigging; easy (just the moulded shrouds/ratlines), medium ( a few ropes) and hard (fully rigged). It was the first model I'd made in 50 years and I made plenty of mistakes. But - from a distance, with the light behind her - she doesn't look too bad. But as a retired person I have limited money, limited workshop room and tools, and unlimited time. Complex plastic models are expensive so I decided to build a wooden model from scratch. I found the plans of the motor launch Antares on the net. It is an attractive vessel and I thought it would do as a beginner's project. The plans assume it is motorised and radio-controlled, but my interest is in the making, not the playing with. So I would omit these. Just to make life really interesting I decided to build the entire thing out of popsicle sticks. In the absence of the expensive tools that grace the workbenches of some of the model-making community, having pre-machined wood would simplify some aspects of construction (and complicate others). Besides, I wanted to show off a real planking deck. But the real purpose was to require serious thinking in changing the design to suit the materials. Anything to stave off senility! (For people interested in a proper build project of the Antares by a newbie see http://www.rcgroups.com/forums/showthread.php?t=2008415 It has some excellent photographs and useful discussions.) However, although I have always loved working with my hands, I am a real butcher - thus the handle. So a model made of recalcitrant fiddly bits is going to be a real challenge. I read the caveats for newbies, and have progressed the model somewhat before I took the plunge to start this blog. Because the model would not be motorised I could build solid bulkheads for much of the hull, rather than the frames in the plans. But to get a solid bulkhead from small pieces requires constructing plywood. The bulkheads were straightforward to assemble, but the first constraint became immediately obvious when it came to making the keel. The plan has a nicely curved stem. I had to have a very straight stem because the sticks were not wide enough to give a curve. (I subsequently concluded that I could have taken more trouble and built a curved stem, but that was hindsight). This decision would give me trouble with the chine line later. I glued the two layers of (large) popsicle sticks together using a multi-purpose glue, one layer on one direction and one in the other to give them strength. I cut the bulkheads roughly to shape using a child's coping saw - it was the blade with the smallest set and smallest teeth I could find. The sticks appear to be made out of pine (pinus radiata) and I soon found that where I hadn't glued with a full coat there was a tendency for the wood to splinter. I wound up doing some after-the-fact gluing, and inserting replacement pieces where chunks had fallen out. I did final bulkhead shaping with an orbital sander. The keel is made of three layers; two on the outside being normal-width sticks and the middle being the wider and longer sticks. The purpose of this was to give slots in the base of the bulkheads somewhere to attach to (i.e. to the middle layer of the keel). I built a multi-purpose jig out of a piece of wood with numerous nail-holes, laid the keel and attached the bulkheads with their slots cut to it. It was immediately obvious that the #1 bulkhead would have to be omitted as the straight stem wouldn't accommodate it. The jig wasn't totally successful for this; not all the bulkheads turned out to be held square to the keel! Once I'd glued all the bulkheads in place it became obvious that not all the slots I'd cut in the bulkheads were the full depth required! I.e. the tops didn't all align (and neither did all the sides, but that would be bad shaping) and some bulkheads didn't sit hard on top of the keel - this would give problems with mounting the garboards etc later. Time to use the trusty orbital sander for corrections; at least to the top and sides. Corrections to allow even hull planking would have to wait.