HOLIDAY DONATION DRIVE - SUPPORT MSW - DO YOUR PART TO KEEP THIS GREAT FORUM GOING! (Only 24 donations so far out of 49,000 members - C'mon guys!)
×

Phil B
-
Posts
61 -
Joined
-
Last visited
Recent Profile Visitors
222 profile views


-
 gsdpic reacted to a post in a topic:
Seguin by Phil B - BlueJacket Shipcrafters - 1:48
gsdpic reacted to a post in a topic:
Seguin by Phil B - BlueJacket Shipcrafters - 1:48
-
Thanks Chris!
-
rvchima reacted to a post in a topic:
Seguin by Phil B - BlueJacket Shipcrafters - 1:48
-
rvchima reacted to a post in a topic:
Seguin by Phil B - BlueJacket Shipcrafters - 1:48
-
ccoyle reacted to a post in a topic:
Seguin by Phil B - BlueJacket Shipcrafters - 1:48
-
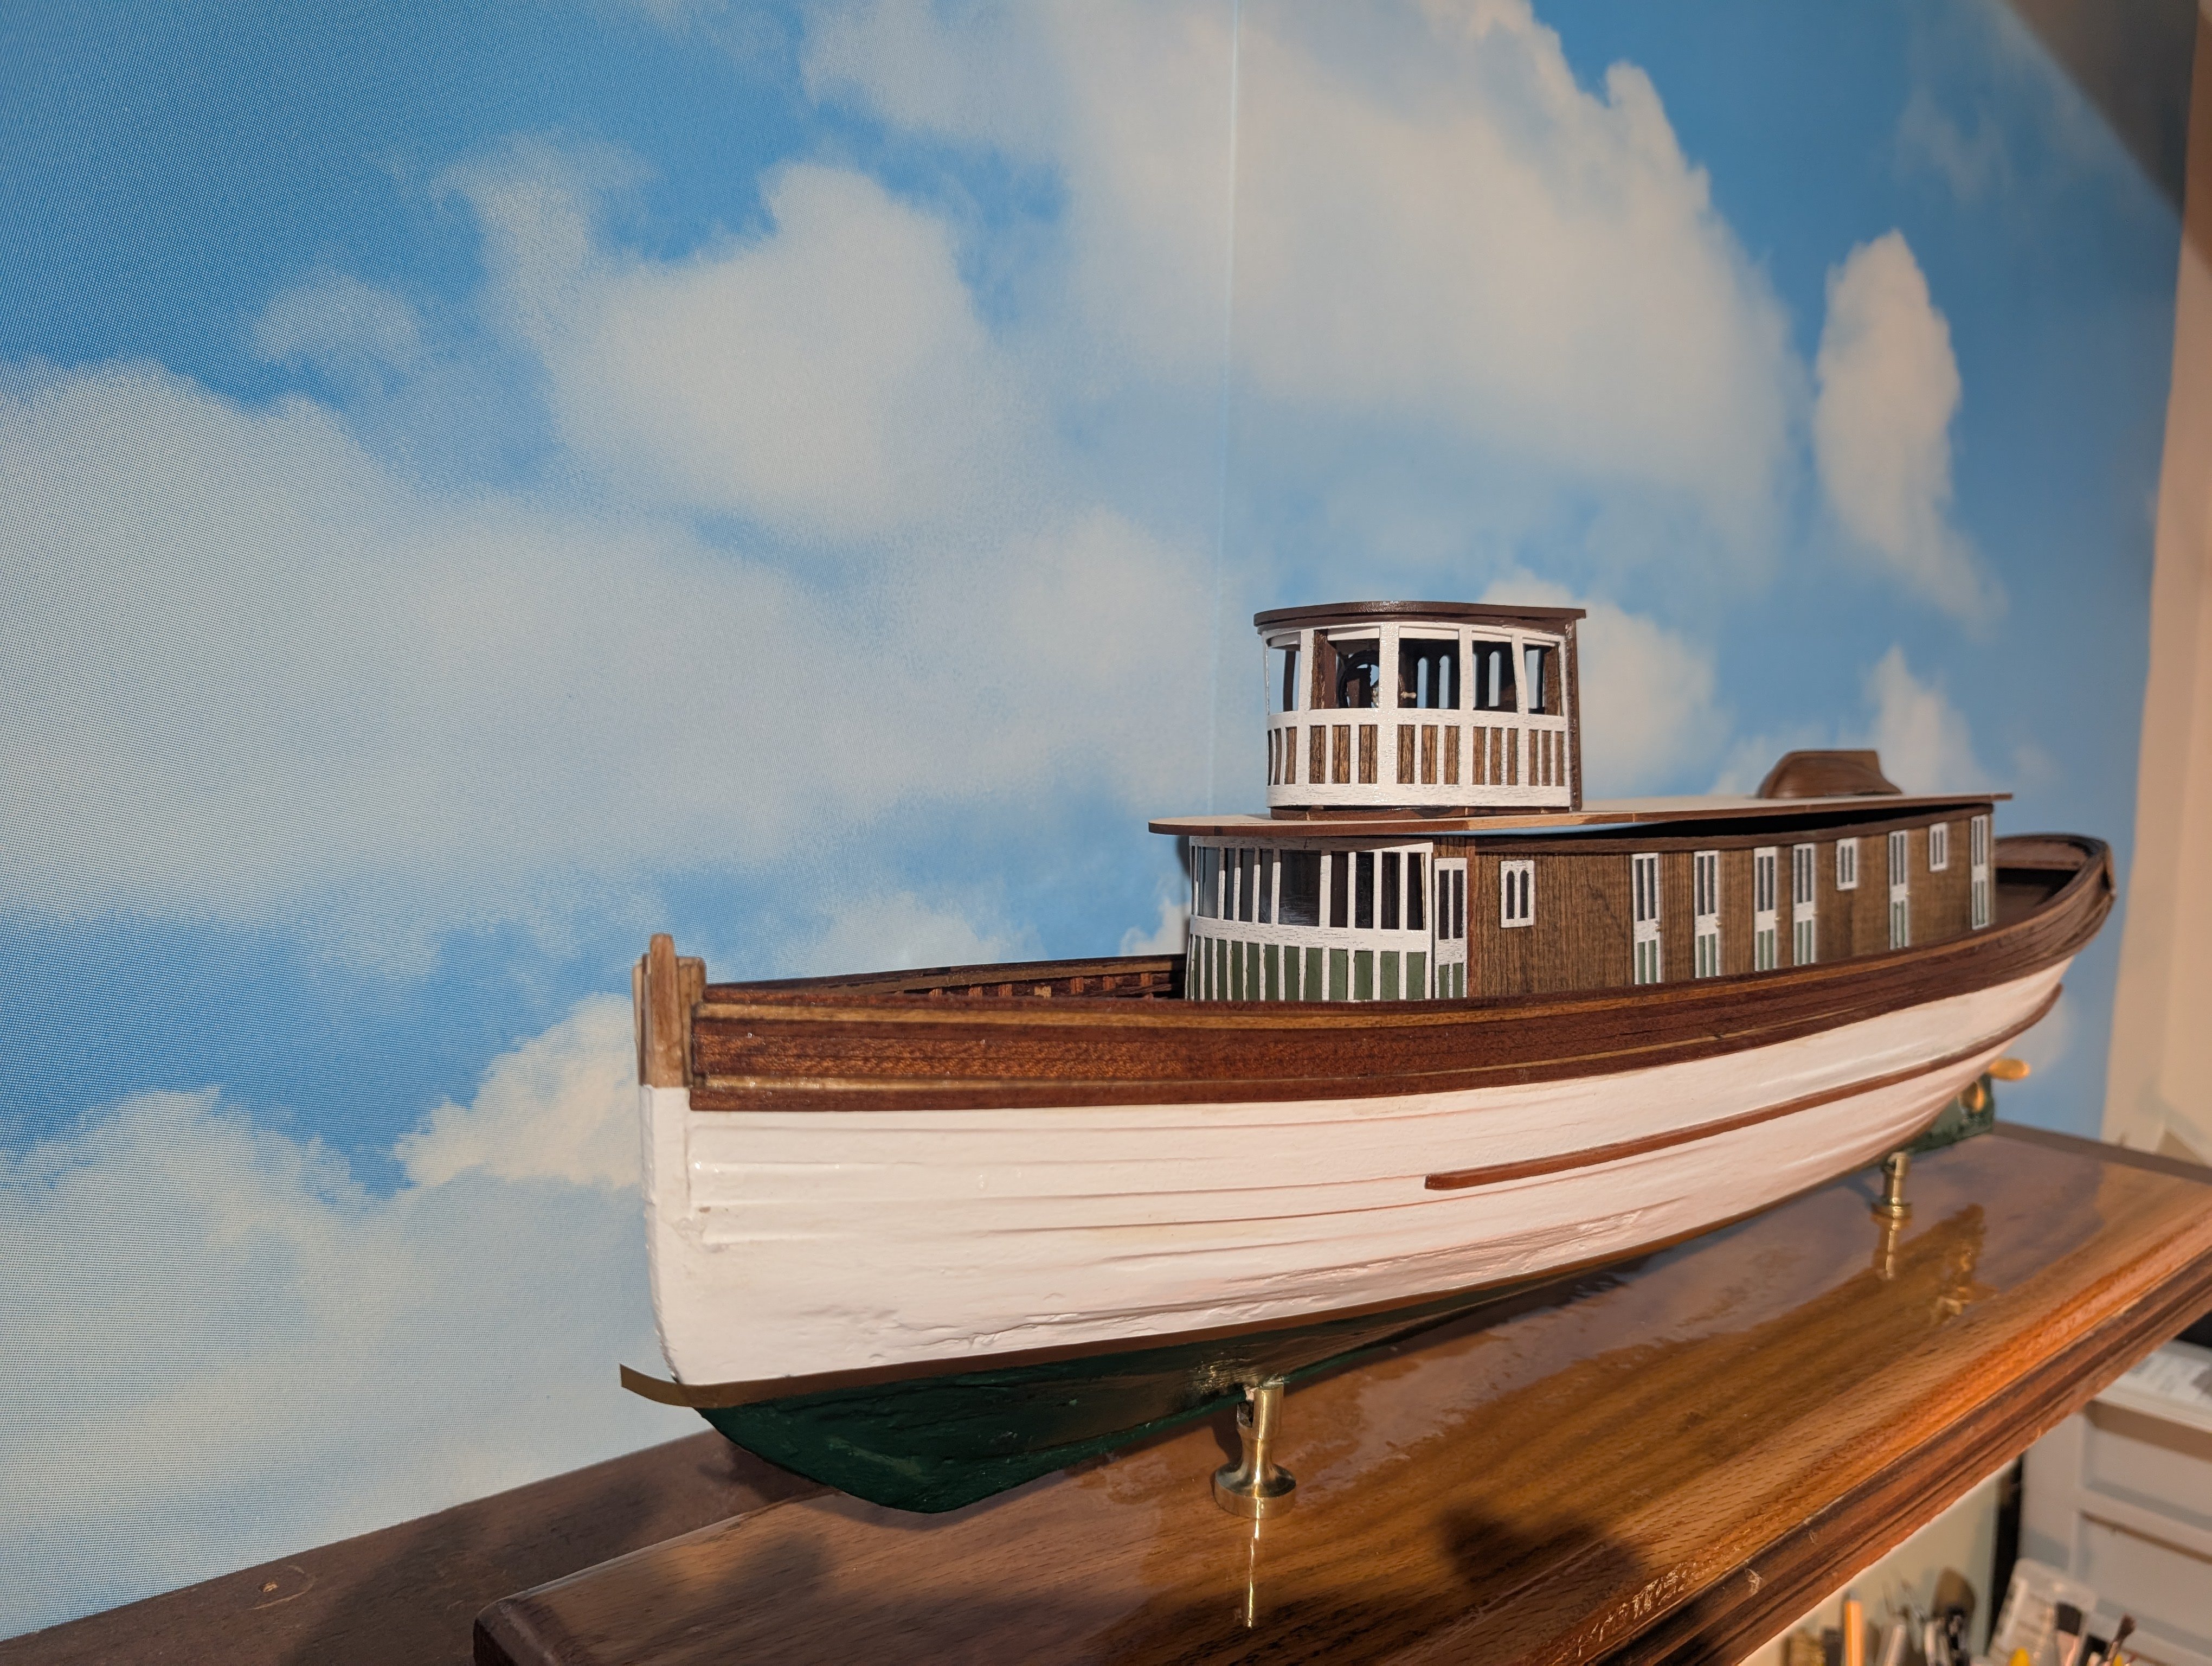
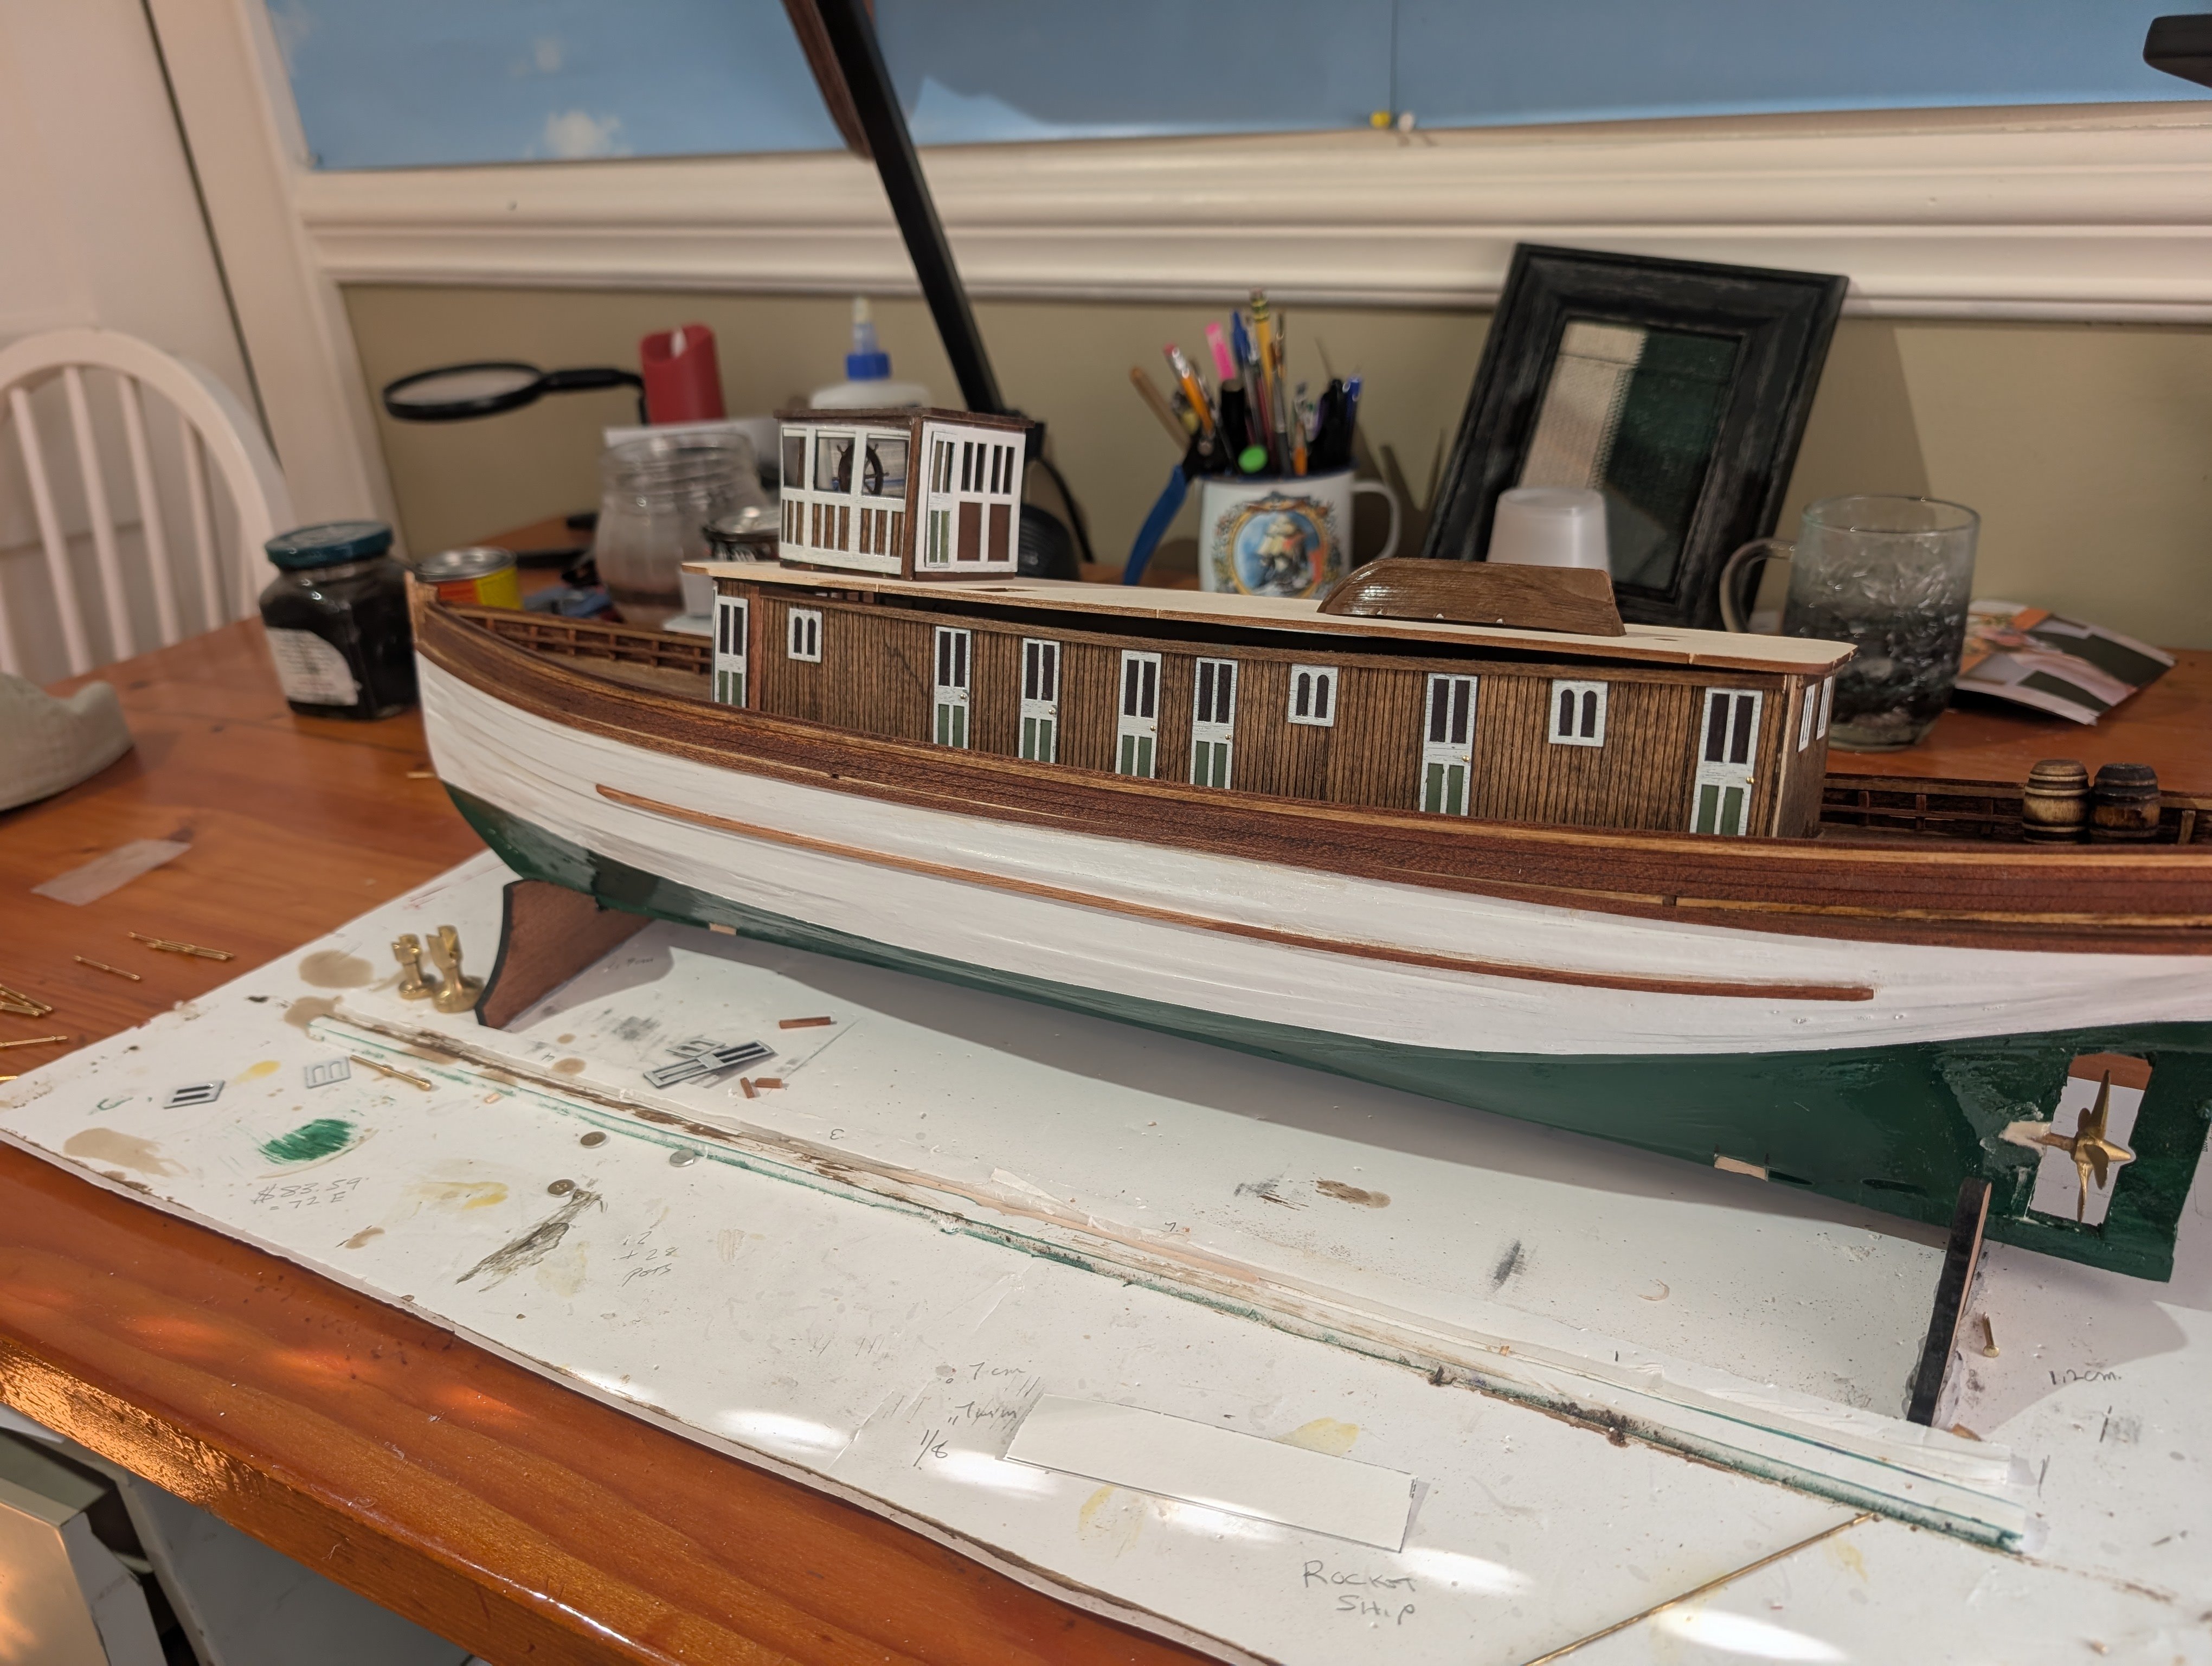
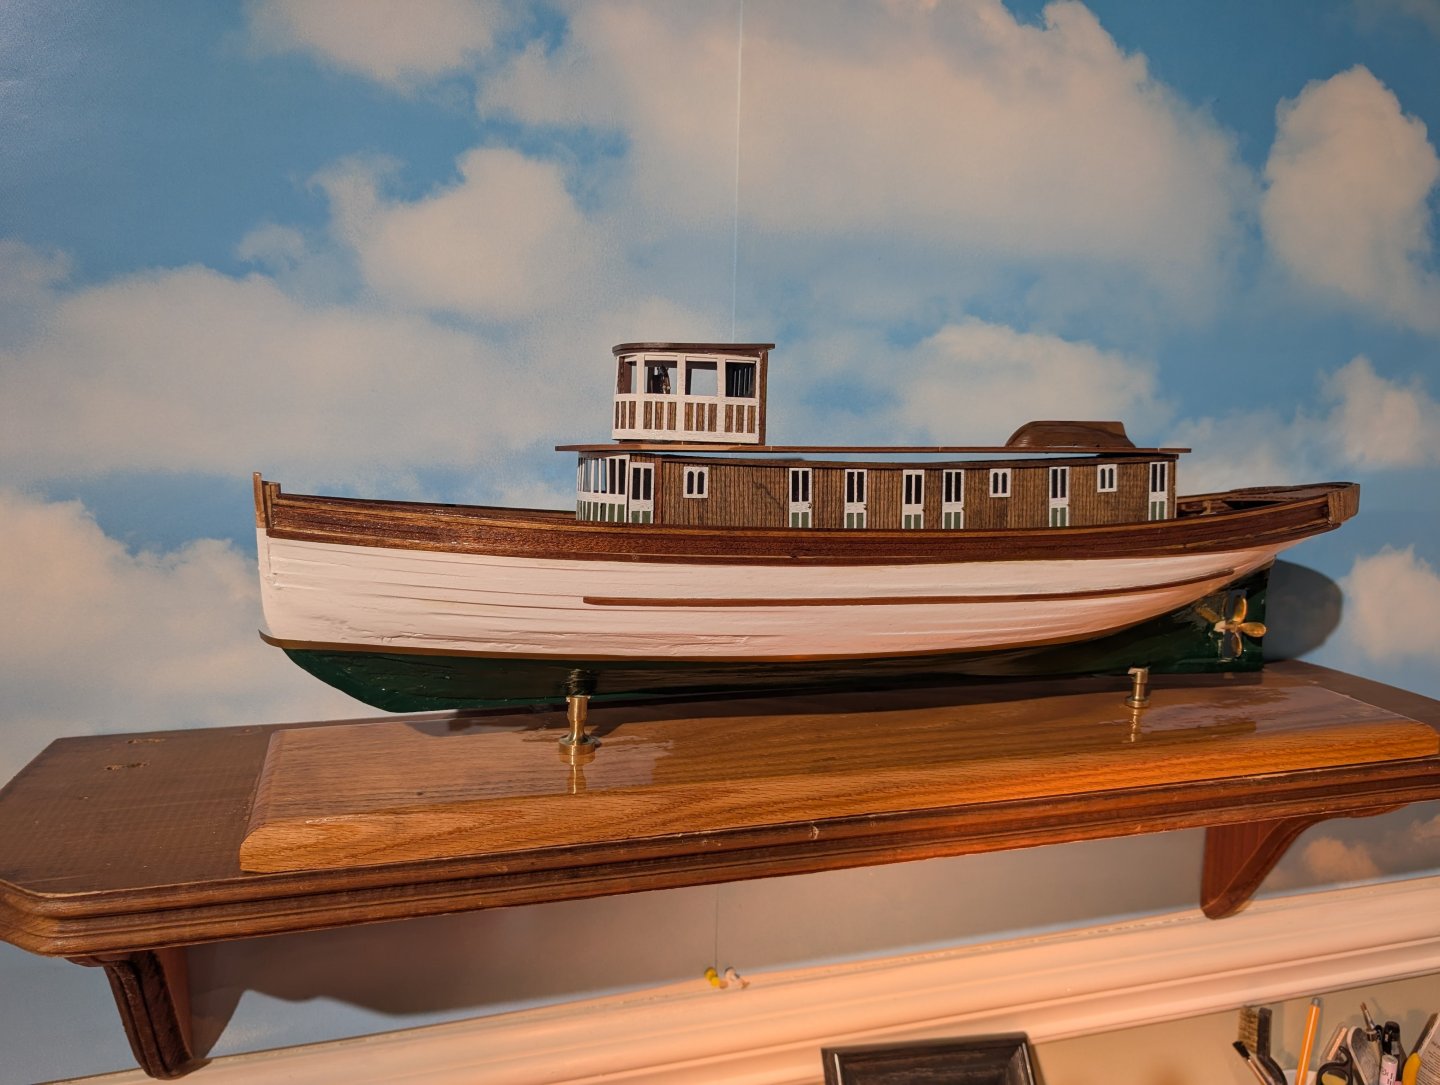
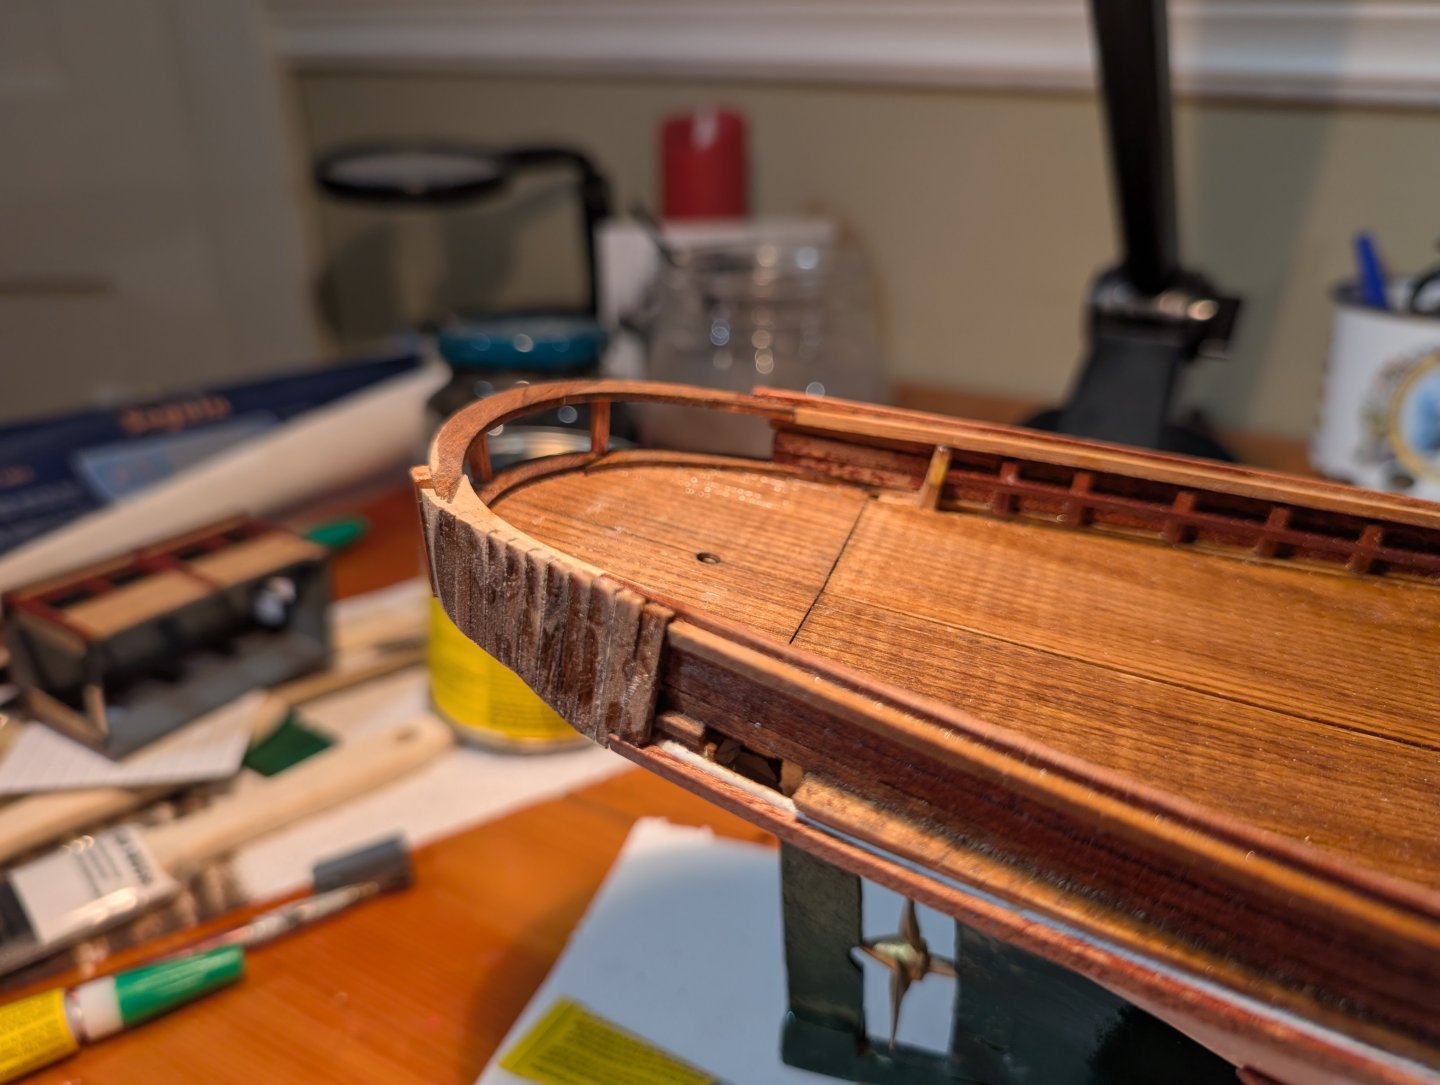
Here's a few more pics of the Seguin. While waiting for parts I mounted it on the oak base I made. The front pedestal is a little taller than the one in the back. I did it that way because the sheer makes it look like the stern is either to high or the bow to low if you use the same size pedestals. I added a length of Pactra gold trim tape at the waterline. Little brass pins worked for door knobs. Stay warm. Phil (In freezing cold NC)


-
schooner reacted to a post in a topic:
Seguin by Phil B - BlueJacket Shipcrafters - 1:48
-
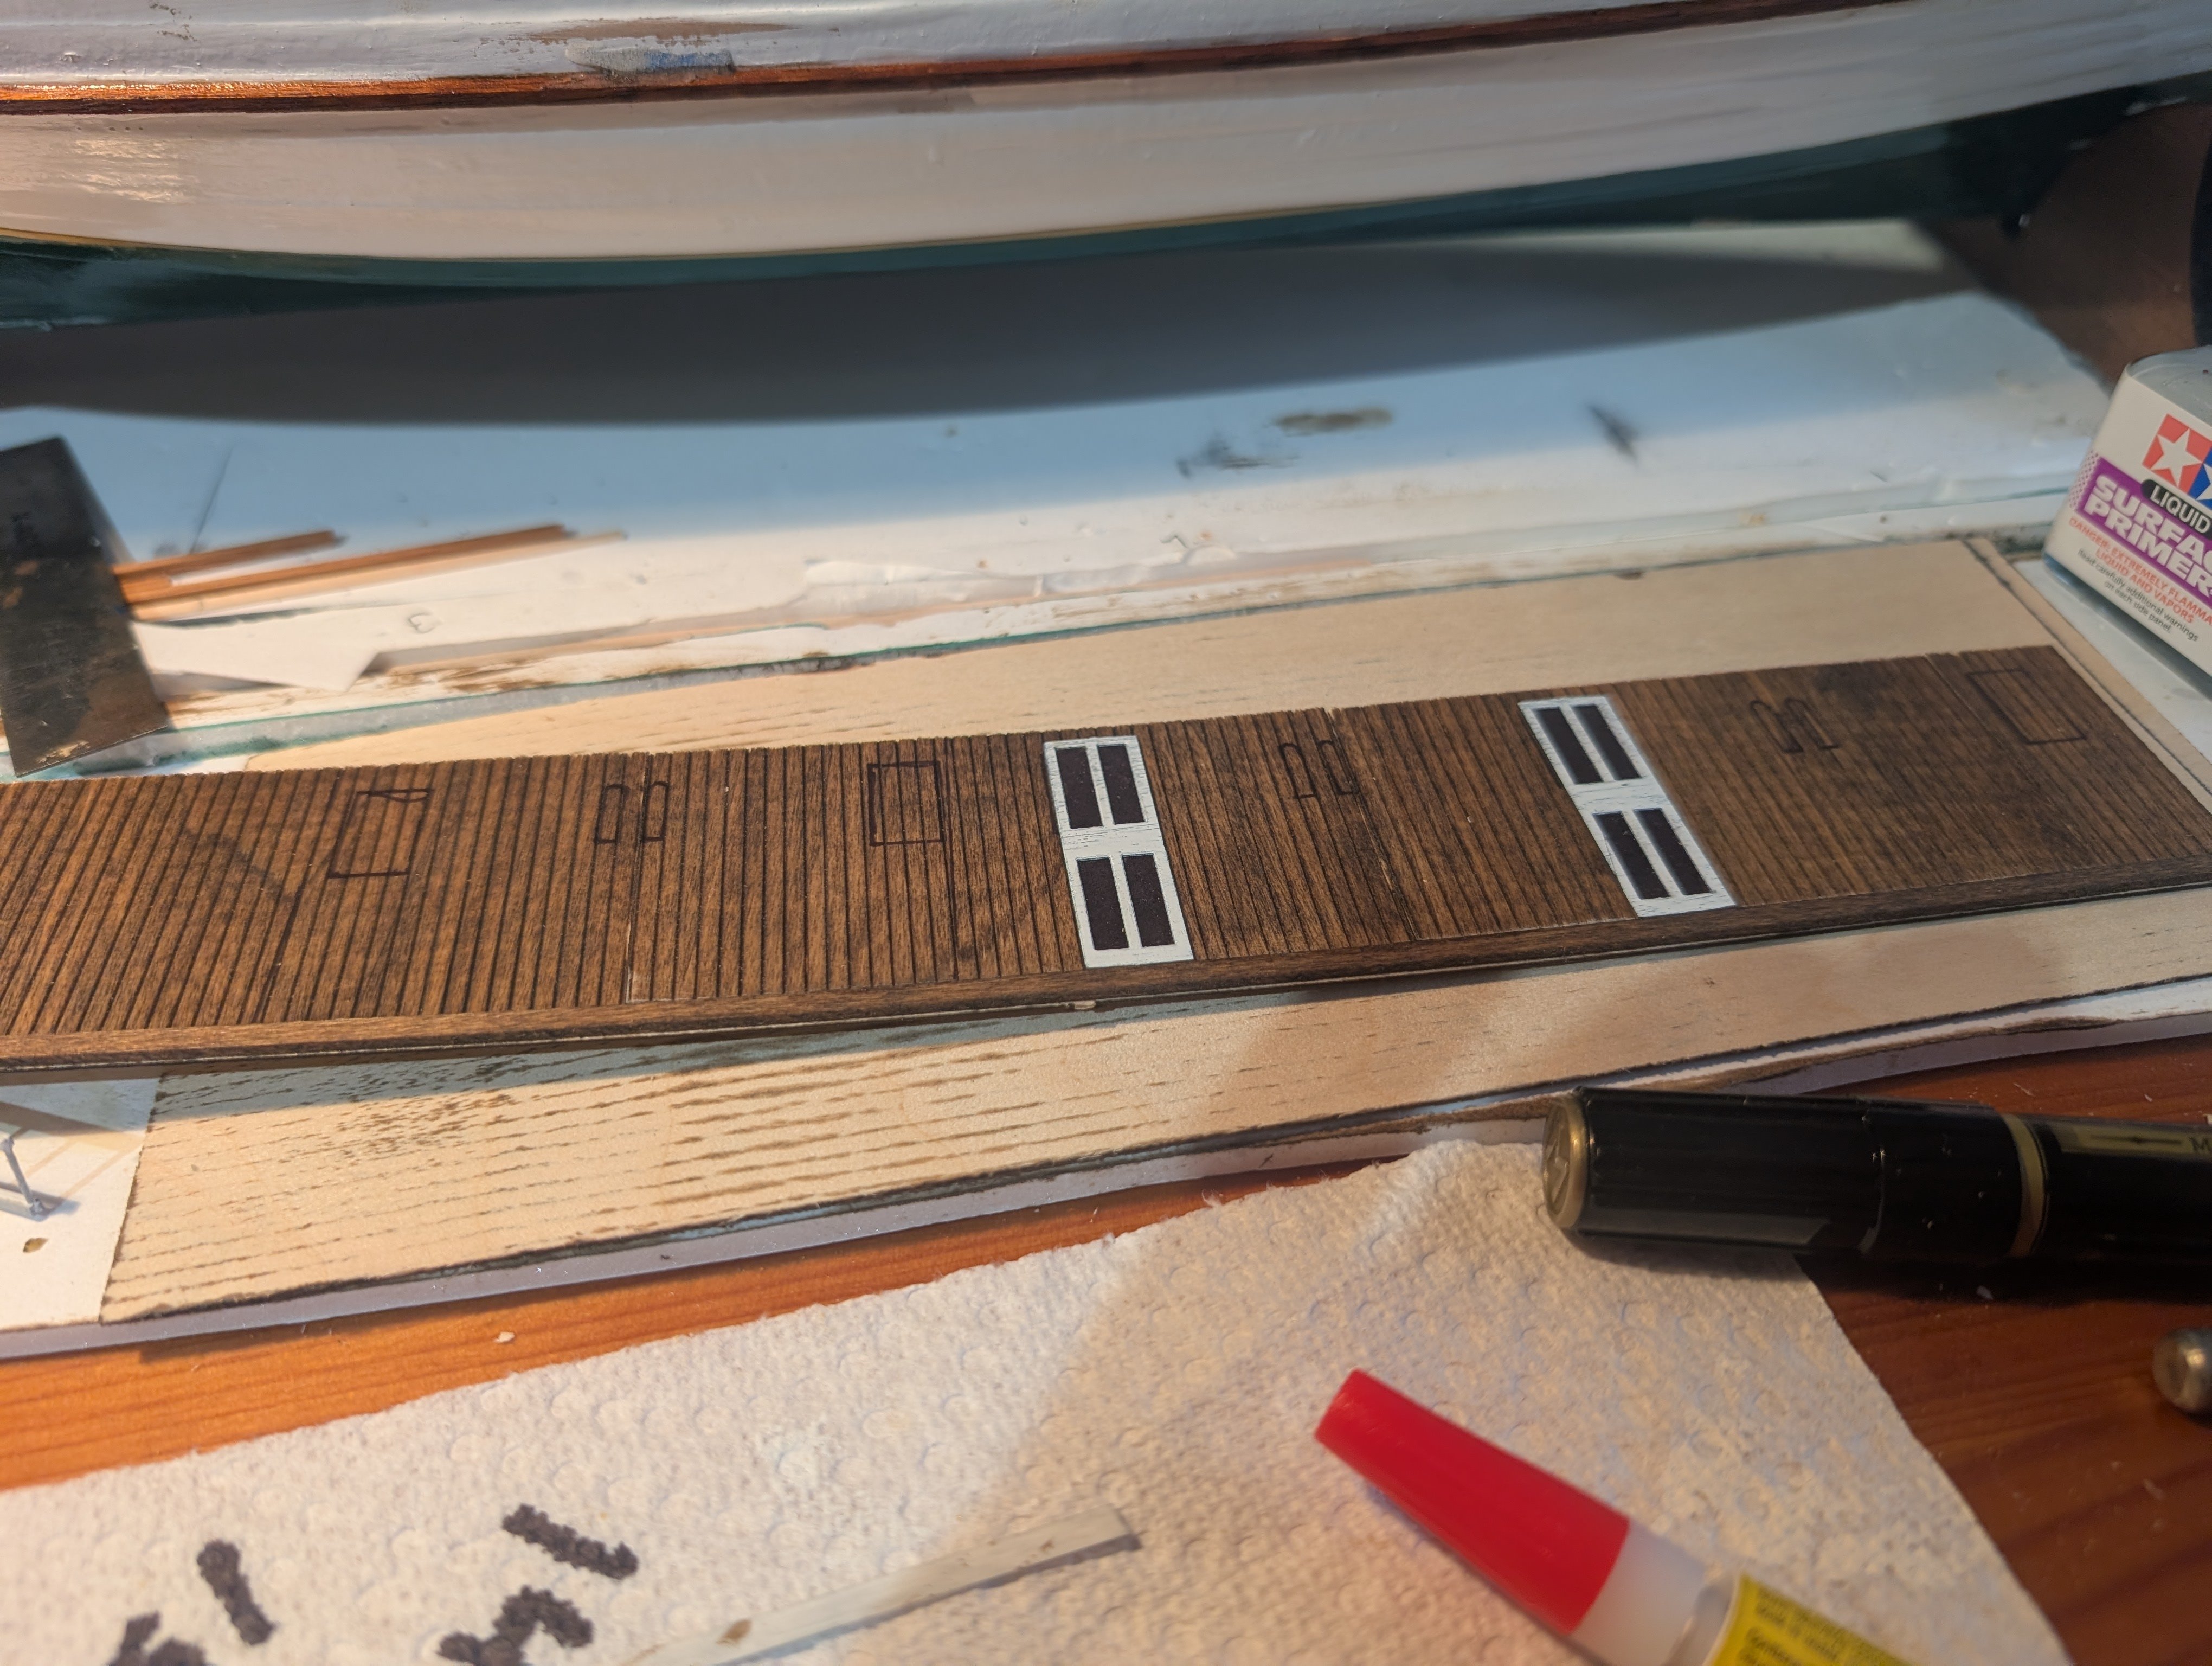
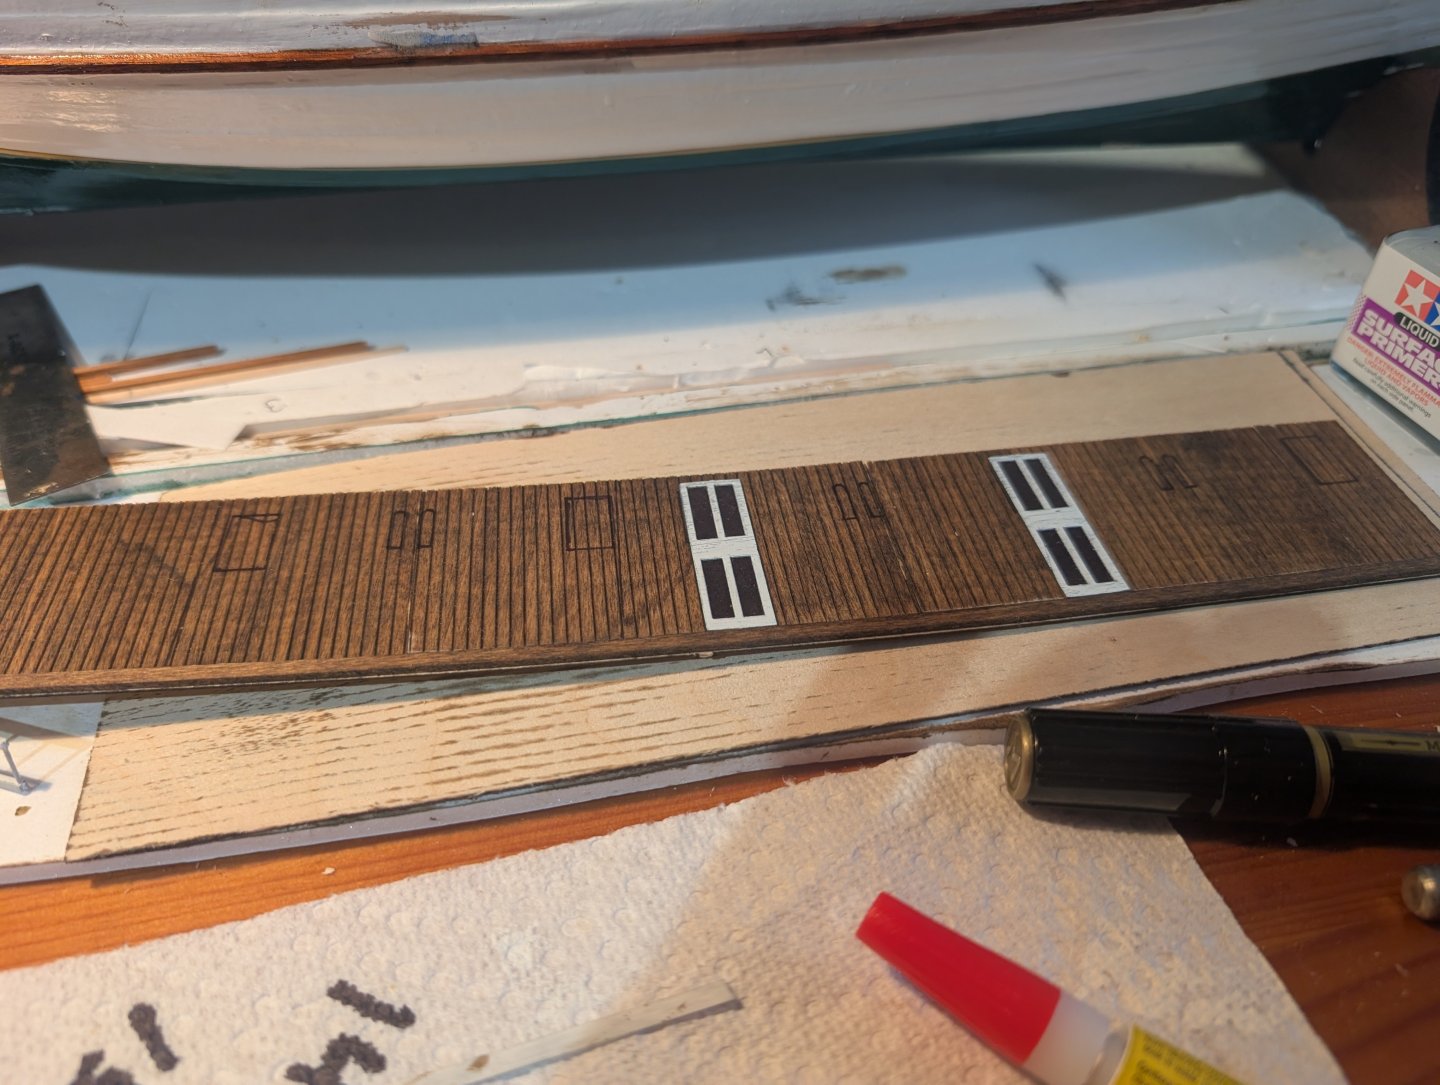
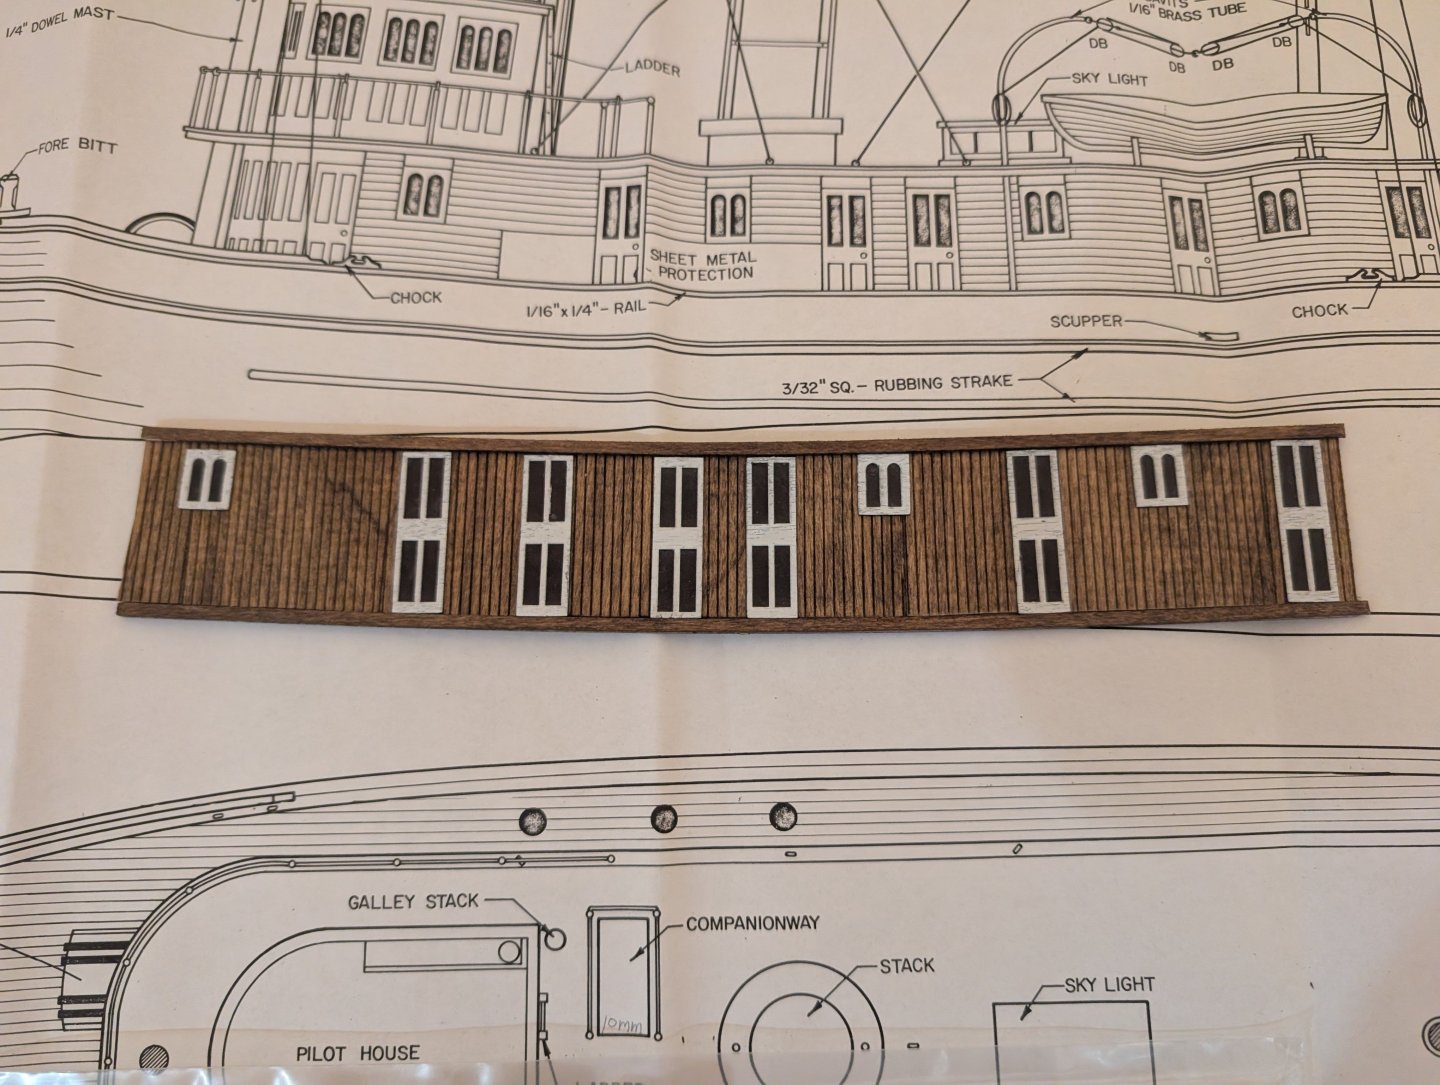
Taking a little break from the Seguin build (Big day coming et al). Gave me a good excuse to tidy up the work table. Took the opportunity to order some additional items. Decided to put scribed boards on the top deck rathers than just painting the bass wood. Also ordered nice brass stanchions from Harbor models. Have a wonderful holiday everyone. Phil

-
rvchima reacted to a post in a topic:
Seguin by Phil B - BlueJacket Shipcrafters - 1:48
-
Hey Rod, Thanks for the compliment and support😁. We were at the NCTM just a couple of weeks ago. We took all the kids to the Polar Express. Me with the 🤓 Phil

-
rvchima reacted to a post in a topic:
Seguin by Phil B - BlueJacket Shipcrafters - 1:48
-
rvchima reacted to a post in a topic:
Seguin by Phil B - BlueJacket Shipcrafters - 1:48
-
rvchima reacted to a post in a topic:
Seguin by Phil B - BlueJacket Shipcrafters - 1:48
-
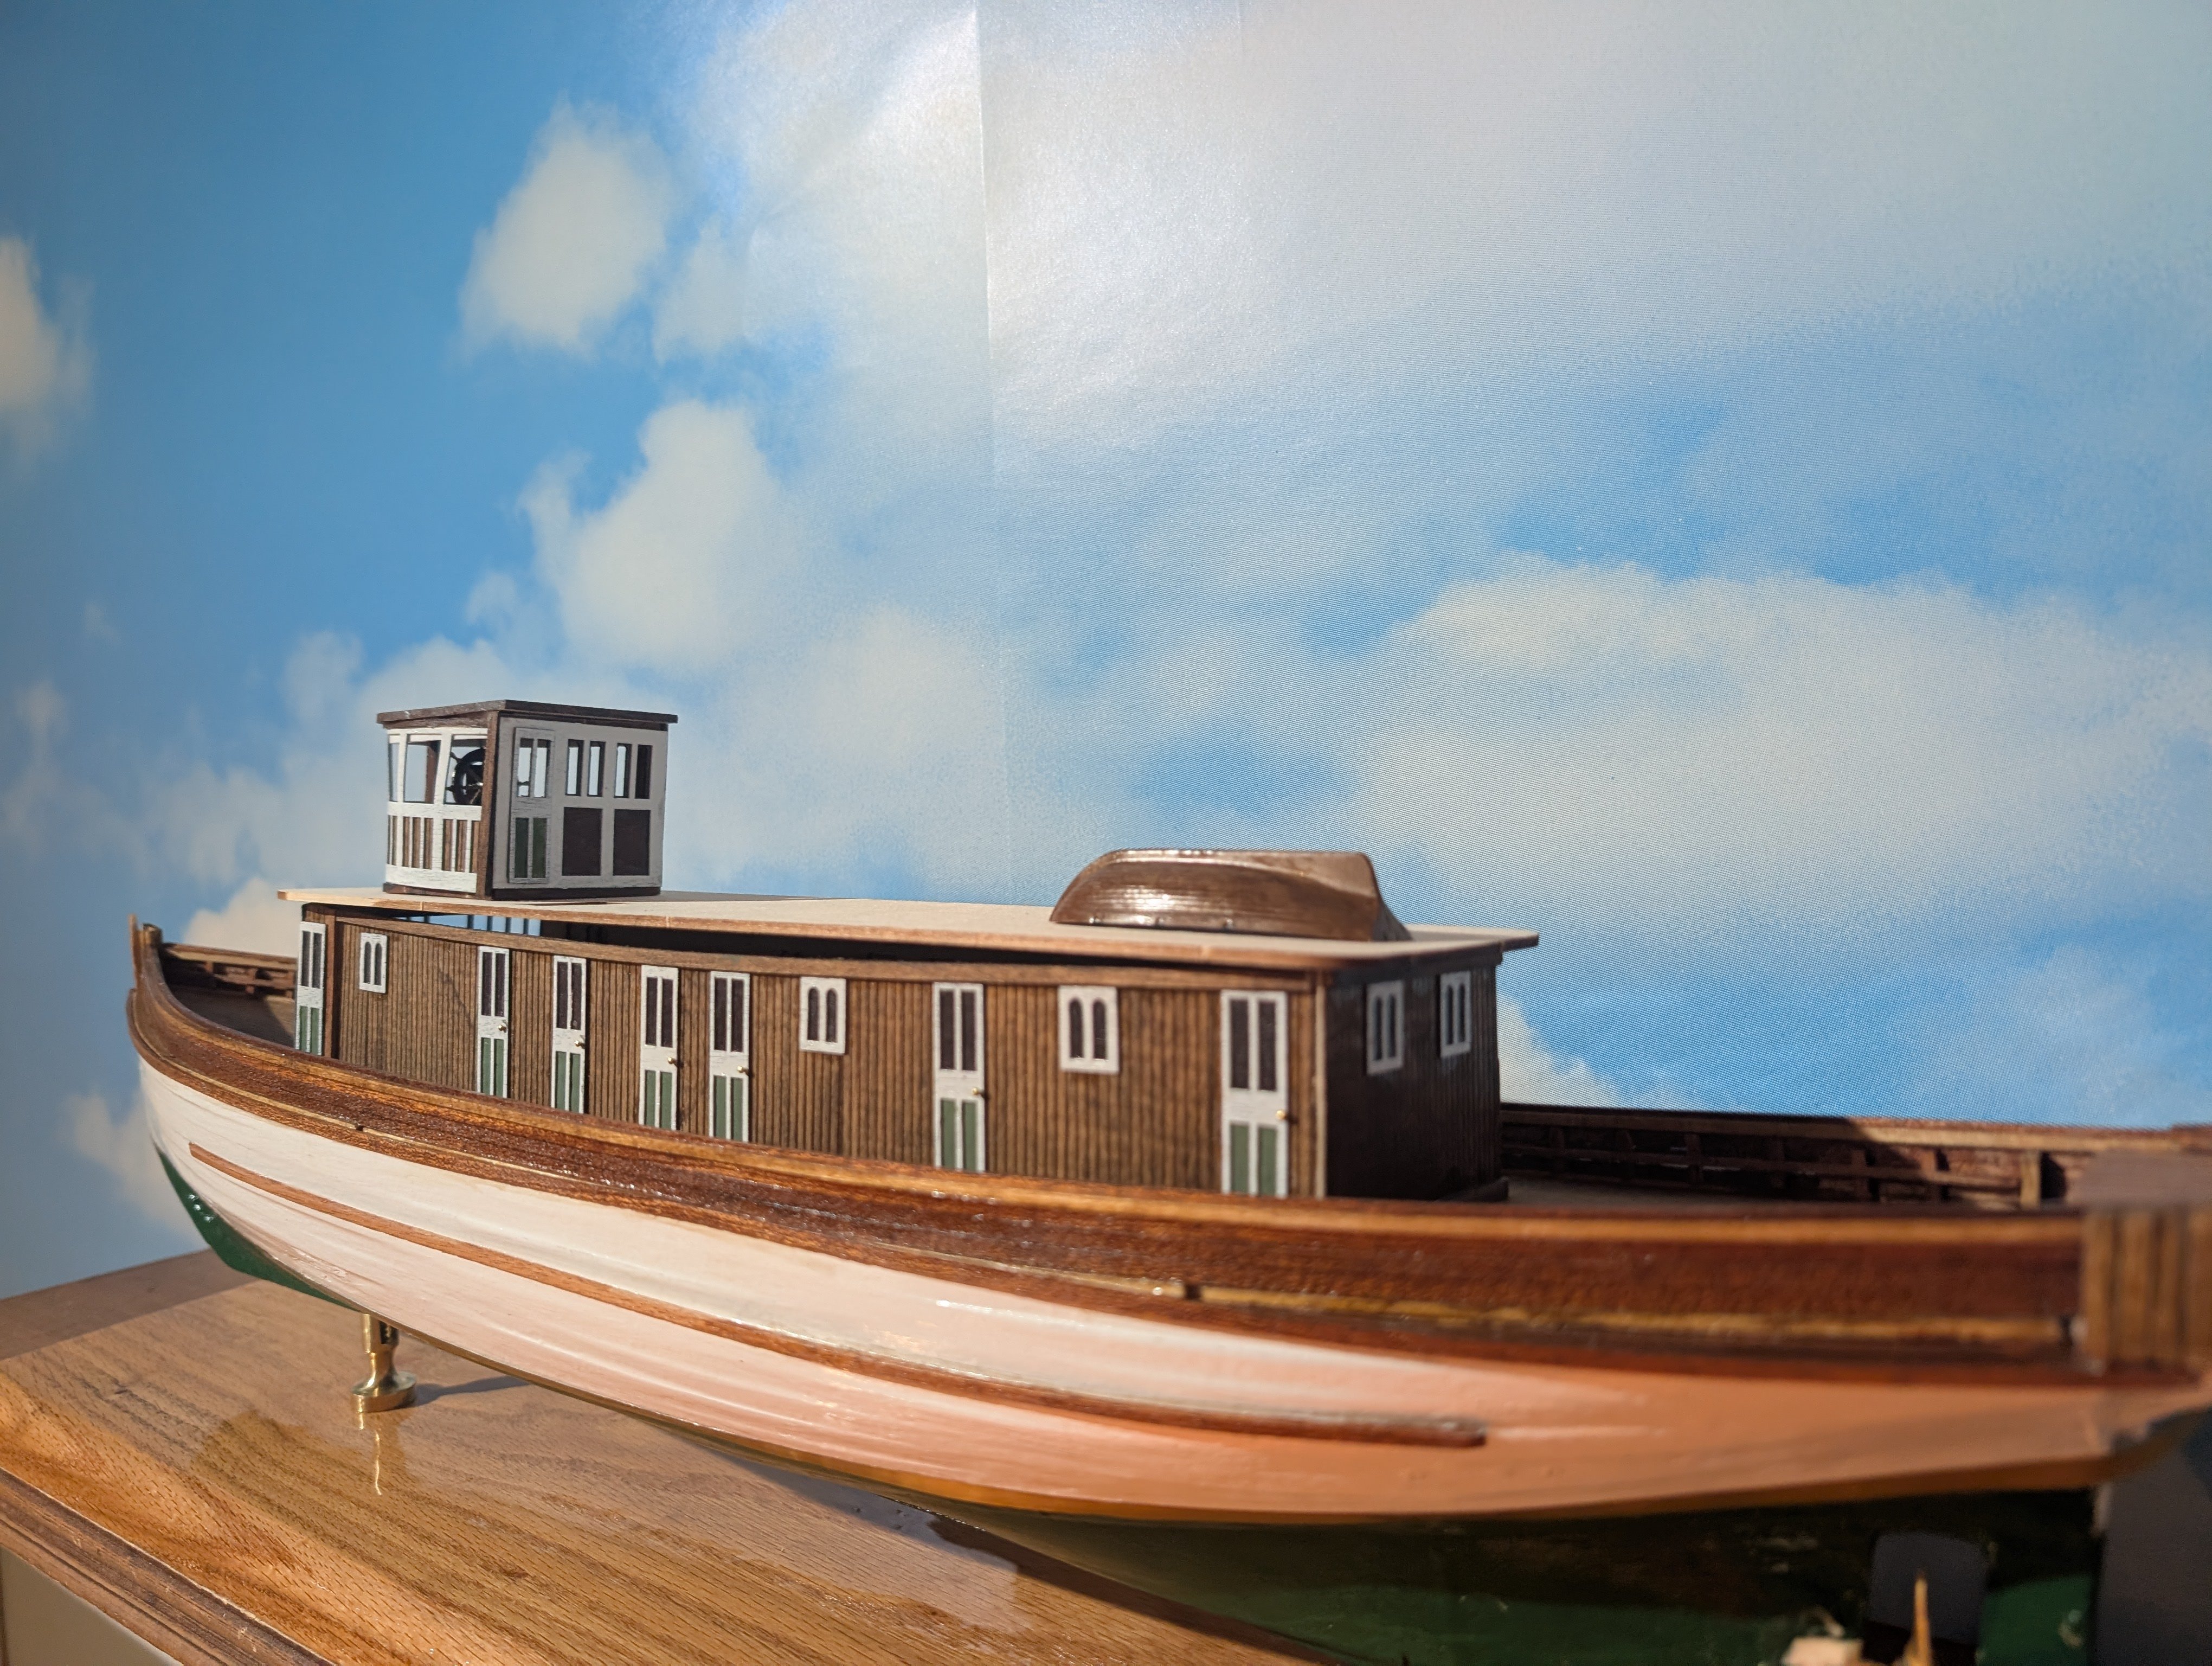
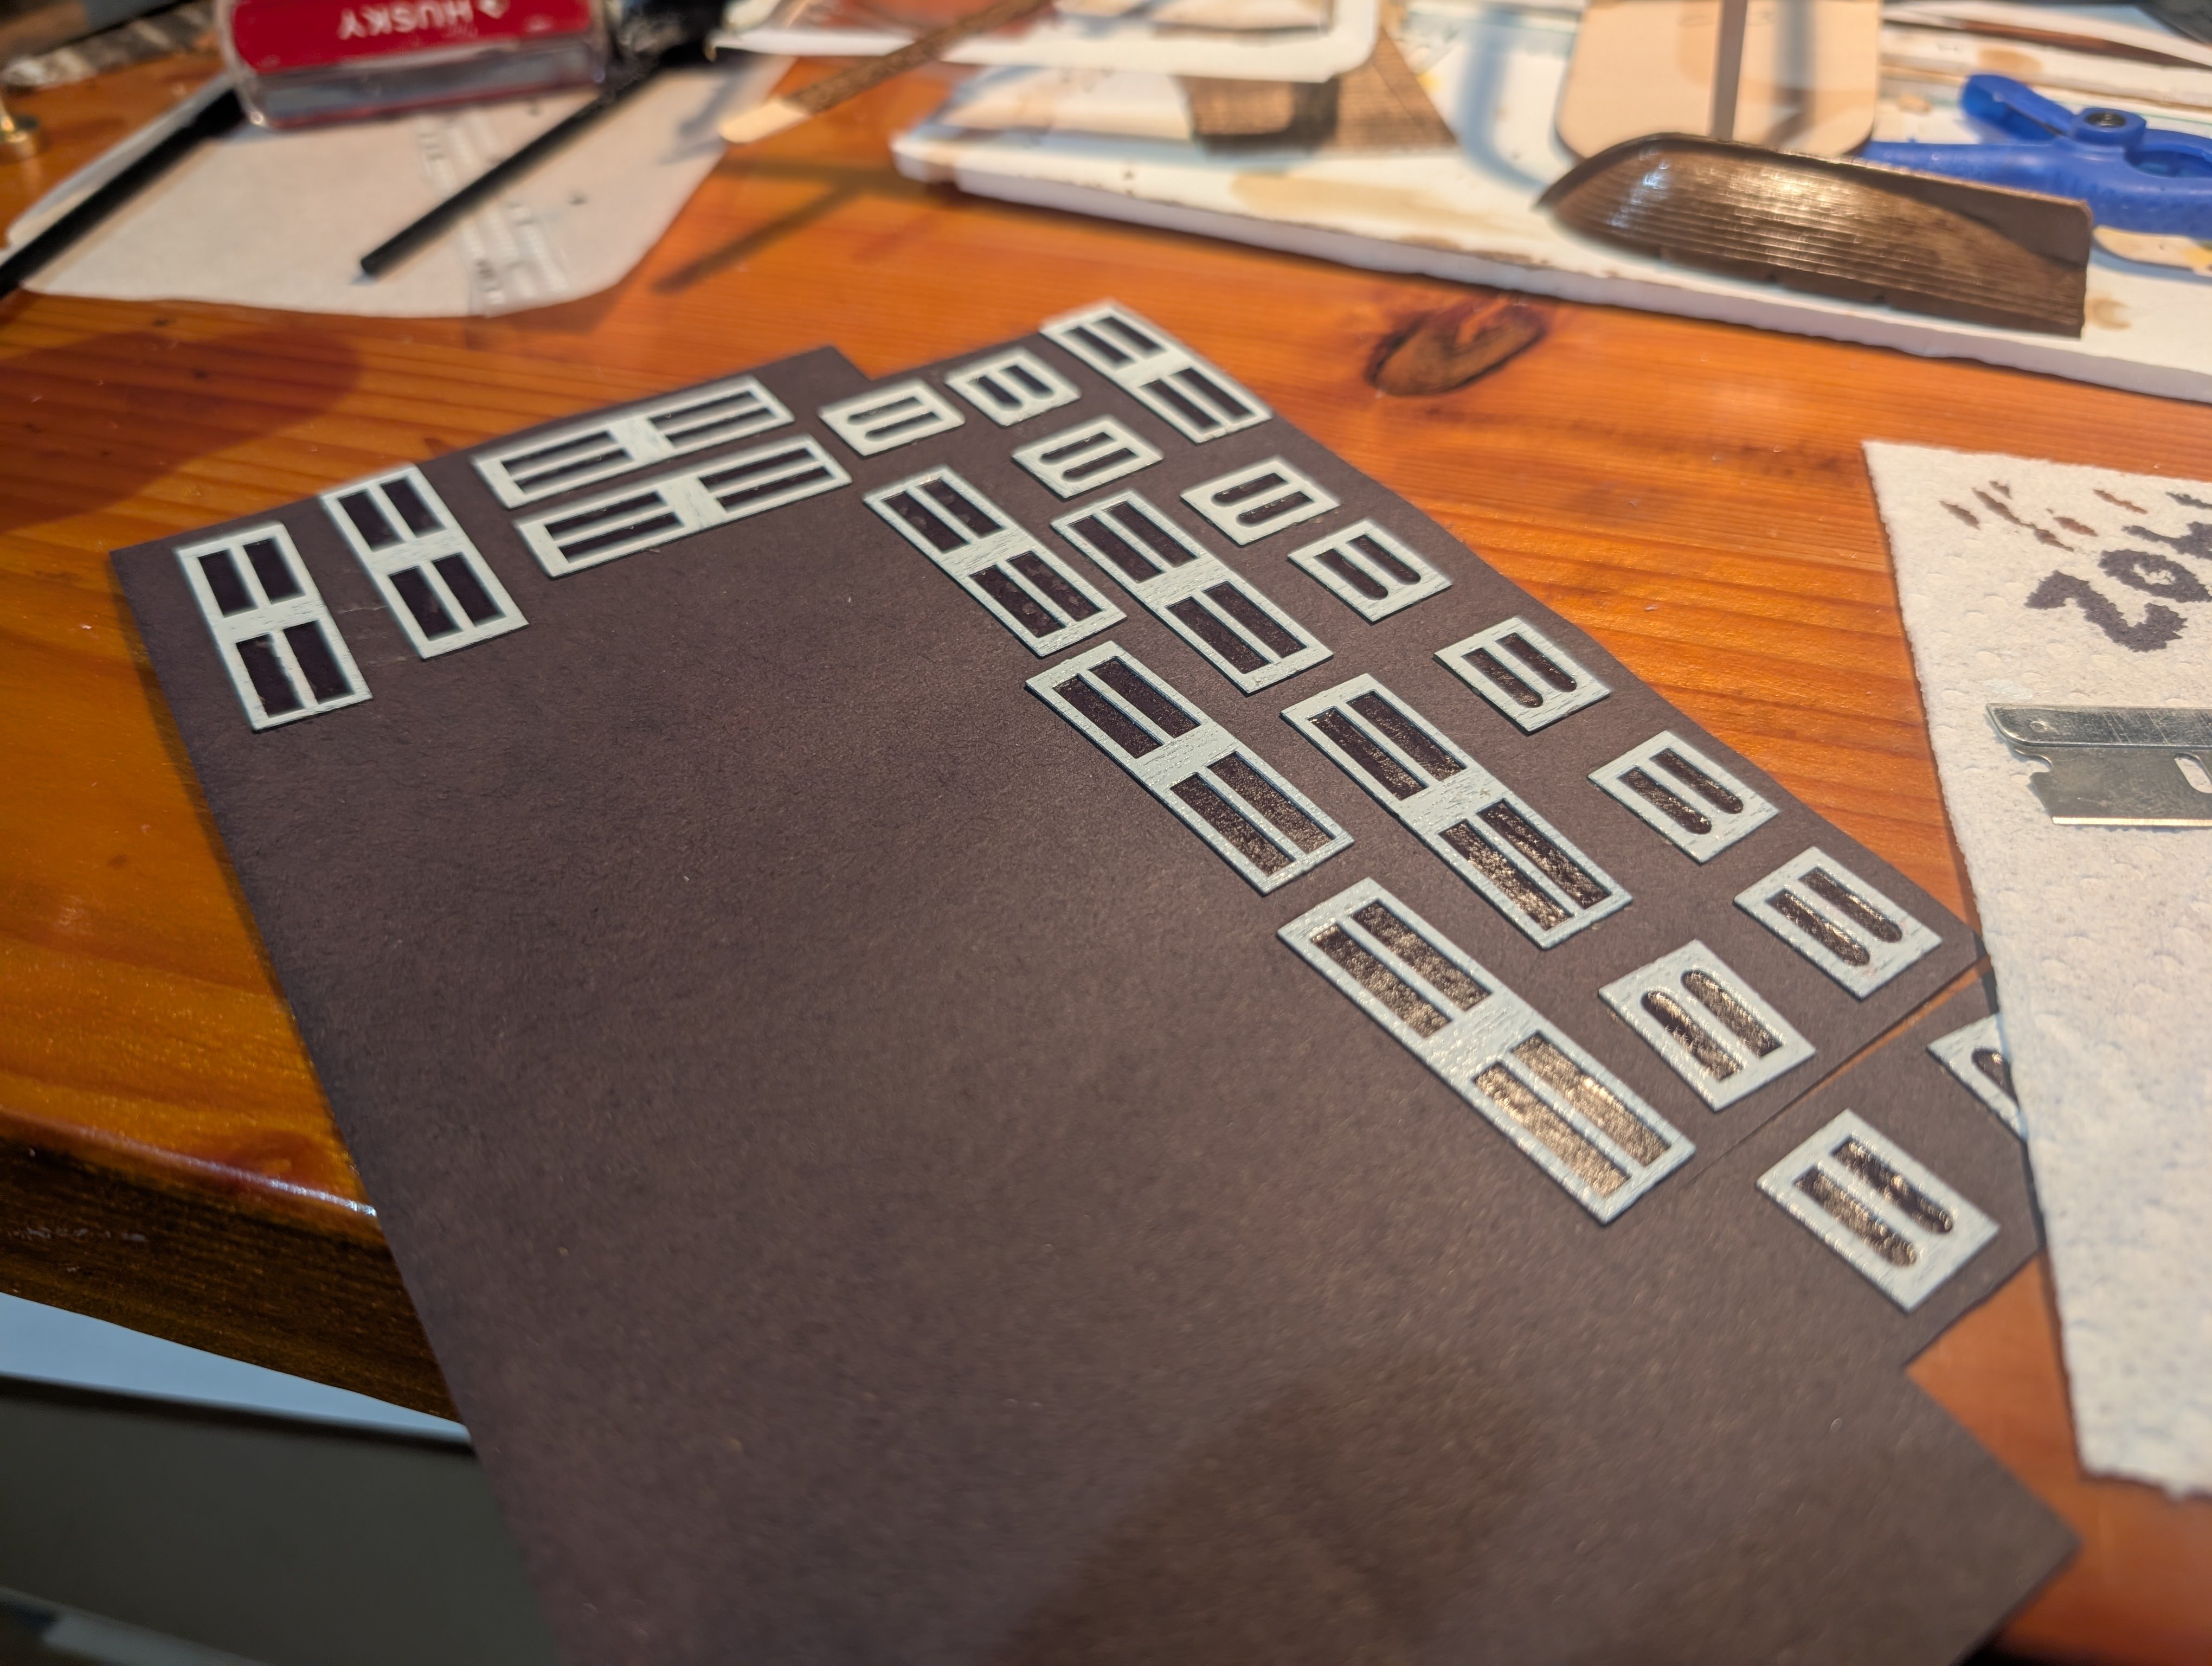
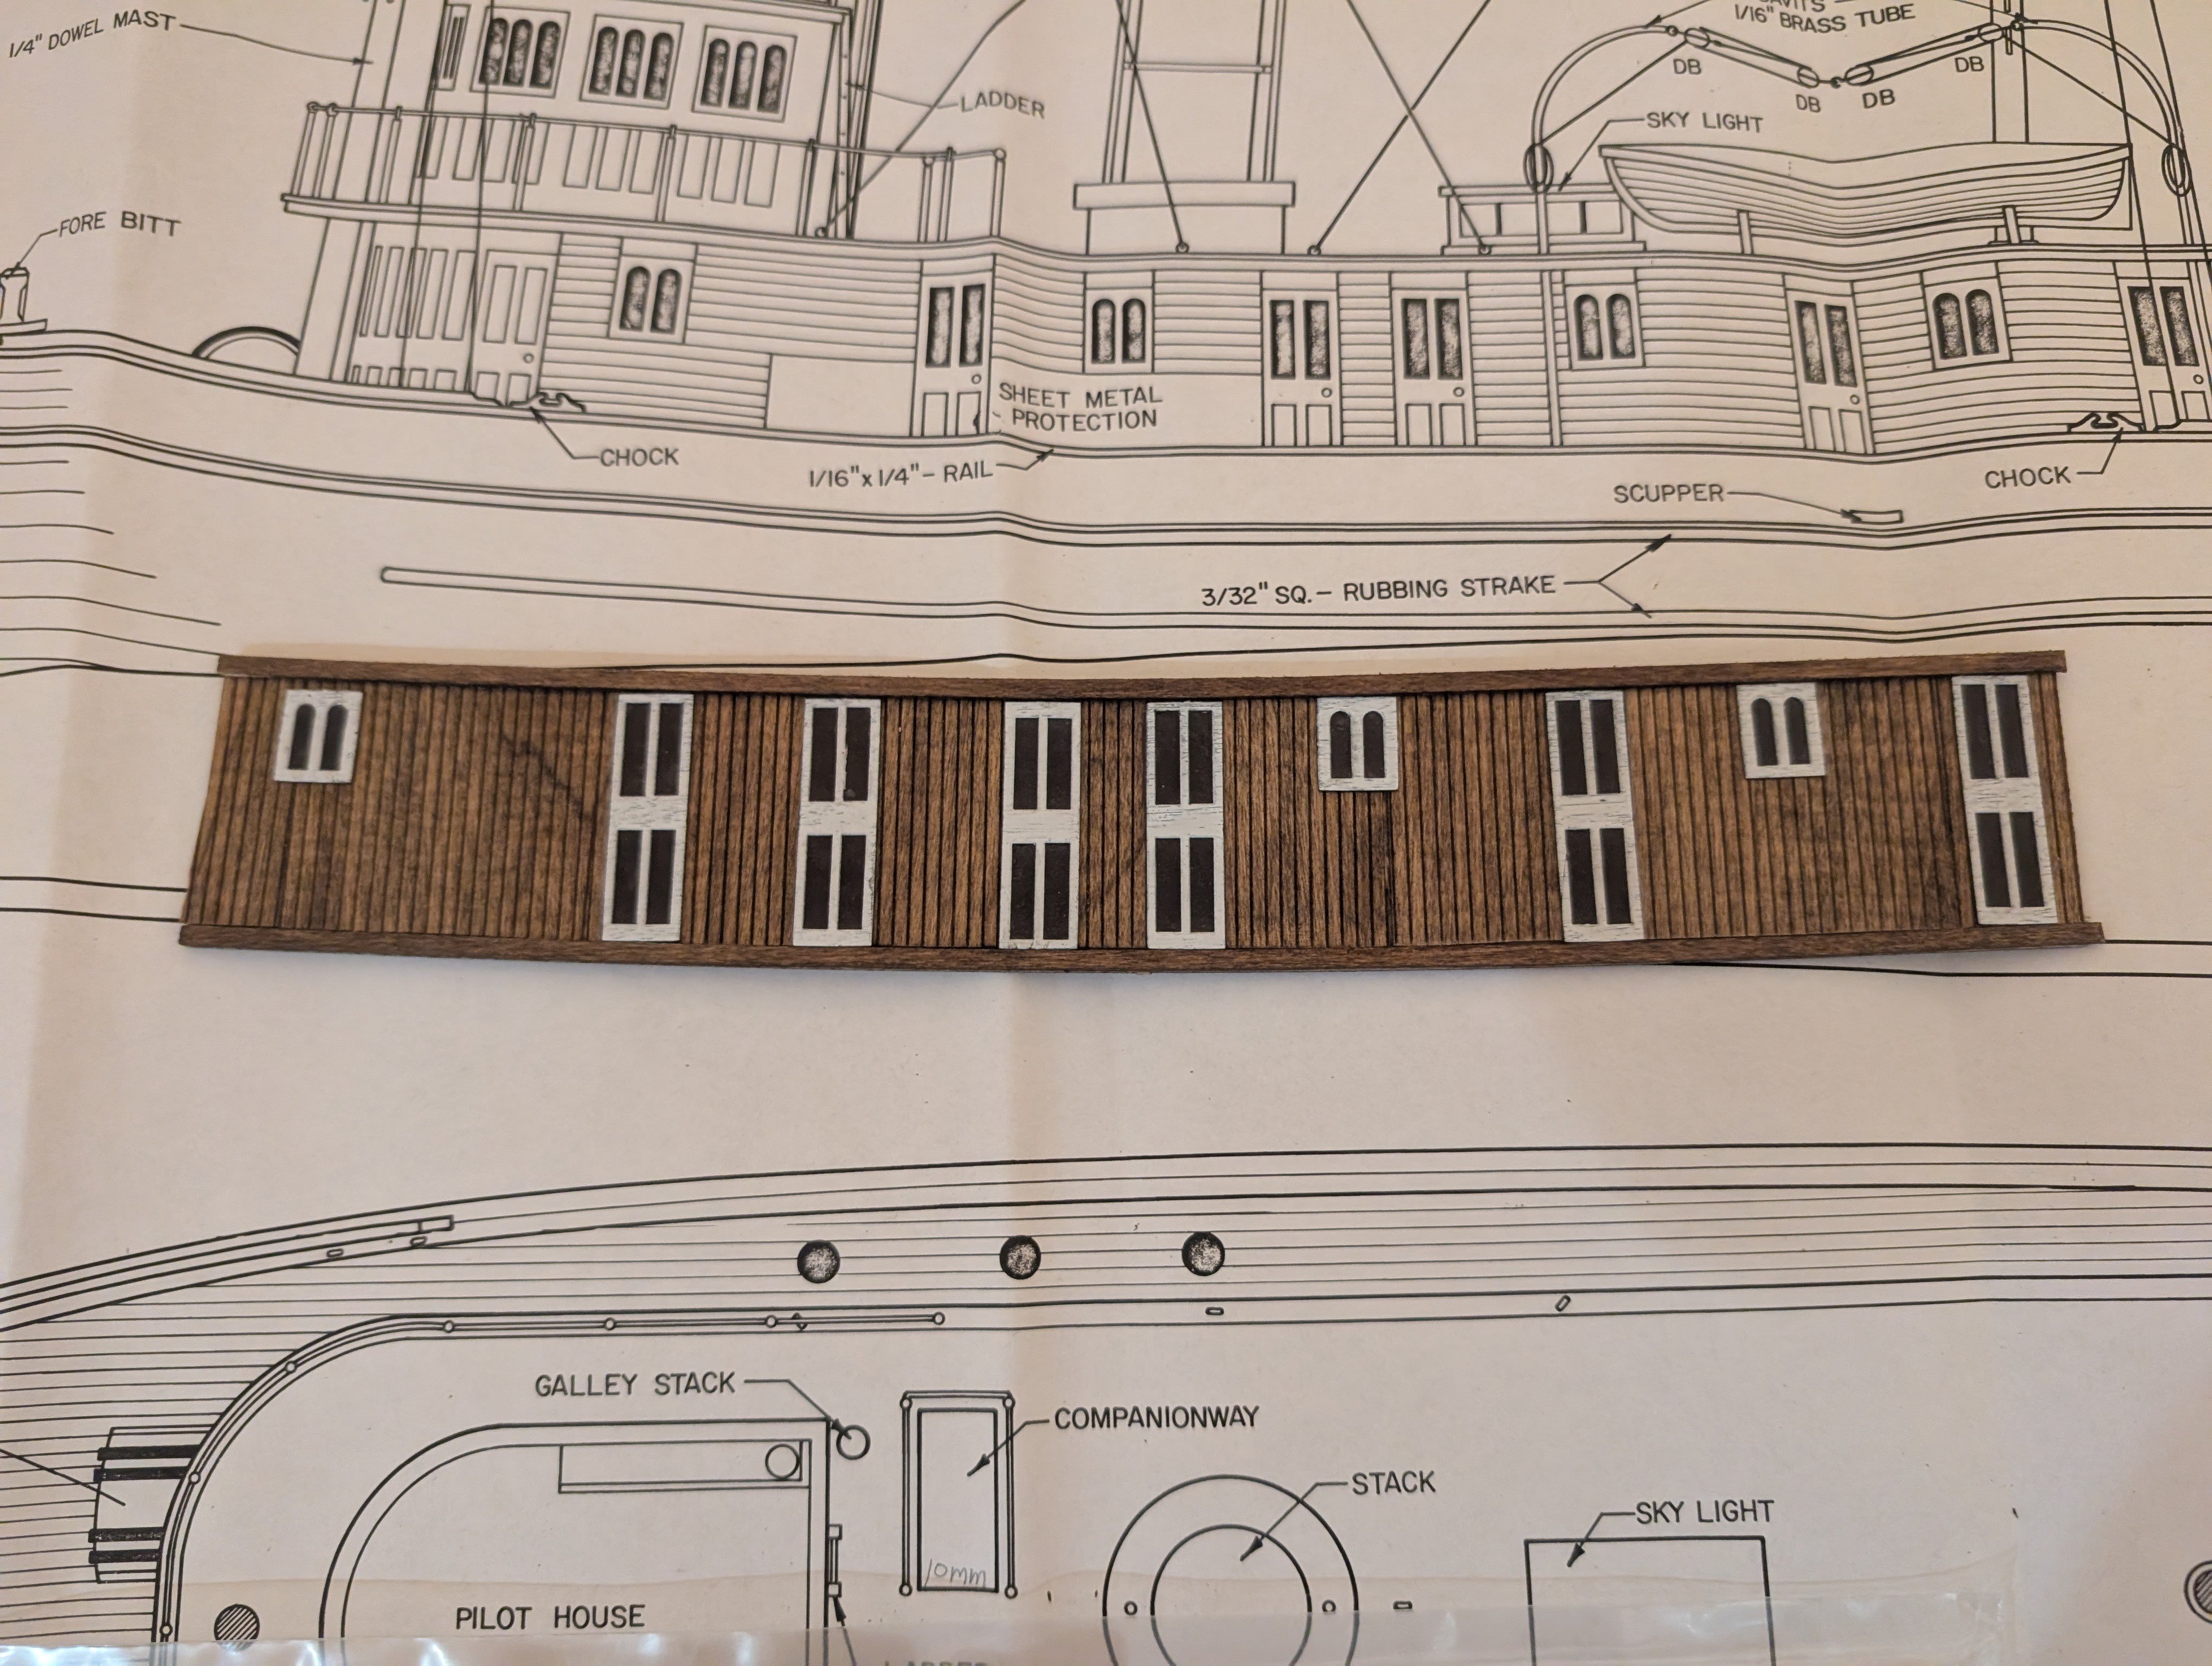
As a scratch builder/kit basher ( which is code for can not follow directions) I have taken a few liberties with the Seguin build. Installing the siding horizontally around the windows and doors on the deck house was more effort than I was willing to put in to it. Not only that, I knew the results would be dubious at best. So instead i installed the siding vertically, covering the laser cut window openings. I glued black paper to the backside of the doors and windows. When I needed a window or door I just cut them off the paper and glued them to the bulkhead. I know its probably not historically accurate, but at least it got done. (Thanks to John with his helpful editing instructions) Phil

-
Thanks John. I'll give it a try
-
Phil B reacted to a post in a topic:
Seguin by Phil B - BlueJacket Shipcrafters - 1:48
-
Question for you guys that are following along with my build here. How do I do a post where I include multiple photos and then have text after each photo?
-
Hey Rod, I've seen the layout. I was there a couple years ago, very nice indeed! When I lived in Florida I had a 7/8 scale garden railroad, 2/3 larger than g scale. I scratched built all of my rolling stock. A big difference, building trains using your full size table saw 😆. We spent New Year's s Eve in Asheville a couple of years ago and spent a day at the Biltmore. We'll have to try to do that again and go see the garden railroad at the arboretum. If we do, I'll give you a heads up. Phil
-
rvchima reacted to a post in a topic:
Seguin by Phil B - BlueJacket Shipcrafters - 1:48
-
The emphasis being on judacious 🧐
-
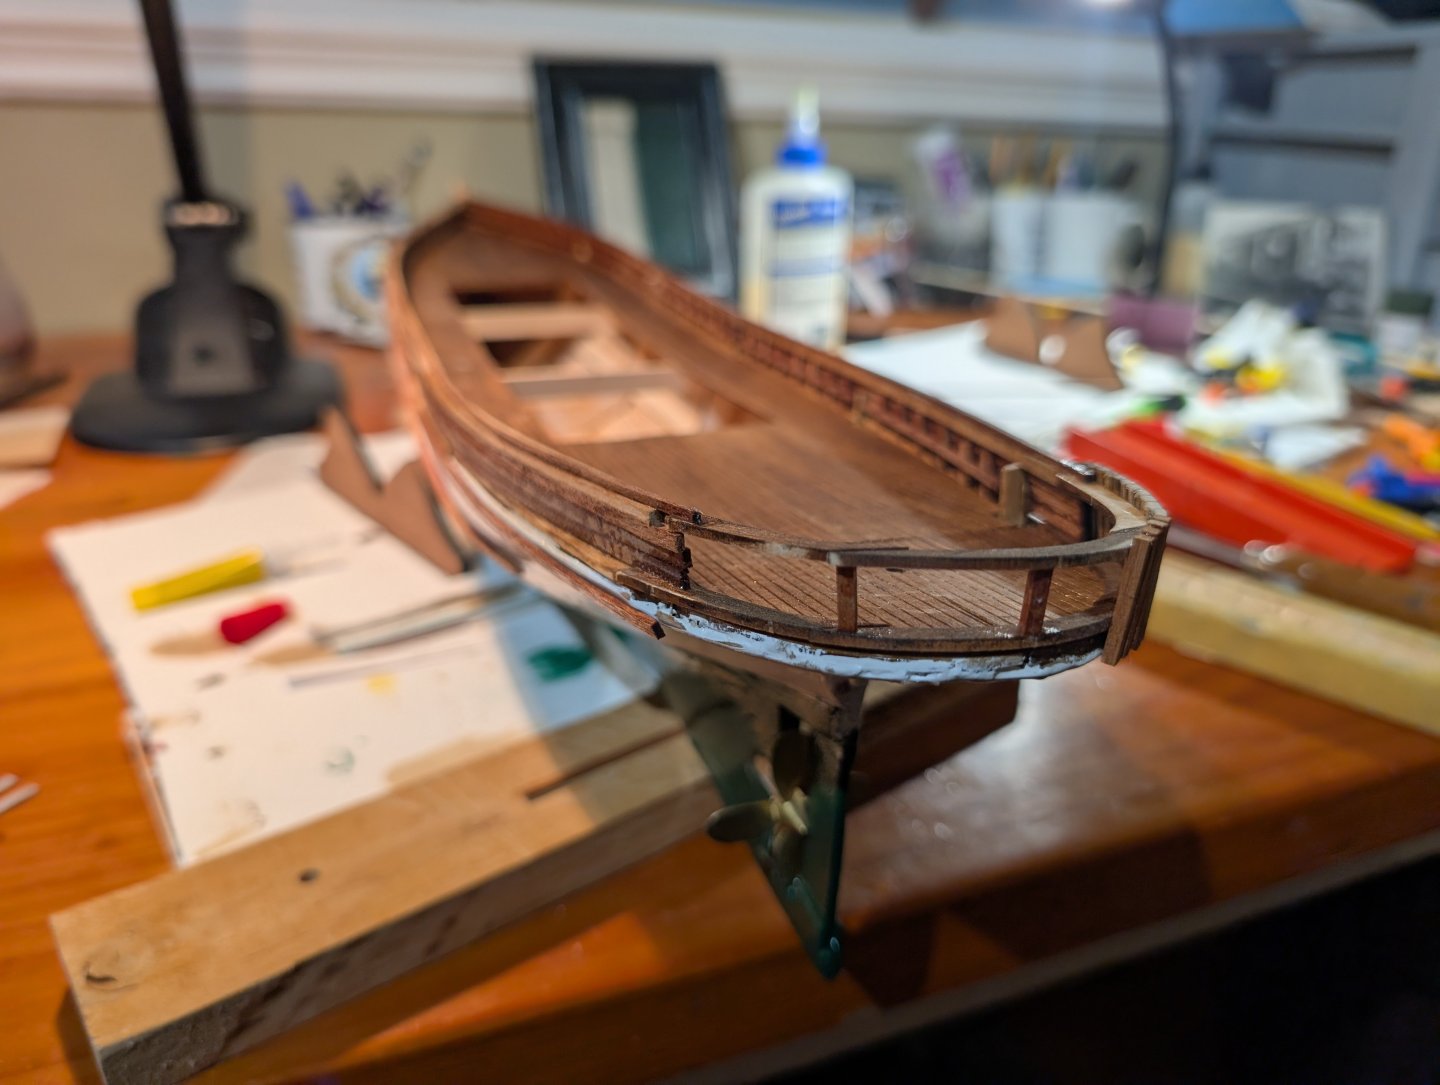
Started working on the transom. I was happy with the way the stern rail came out although I did have to cut it down a few mm. Started the vertical planking which I'm a bit iffy on but with sanding and cosmetics it should look alright.
-
Its coming along John!
-
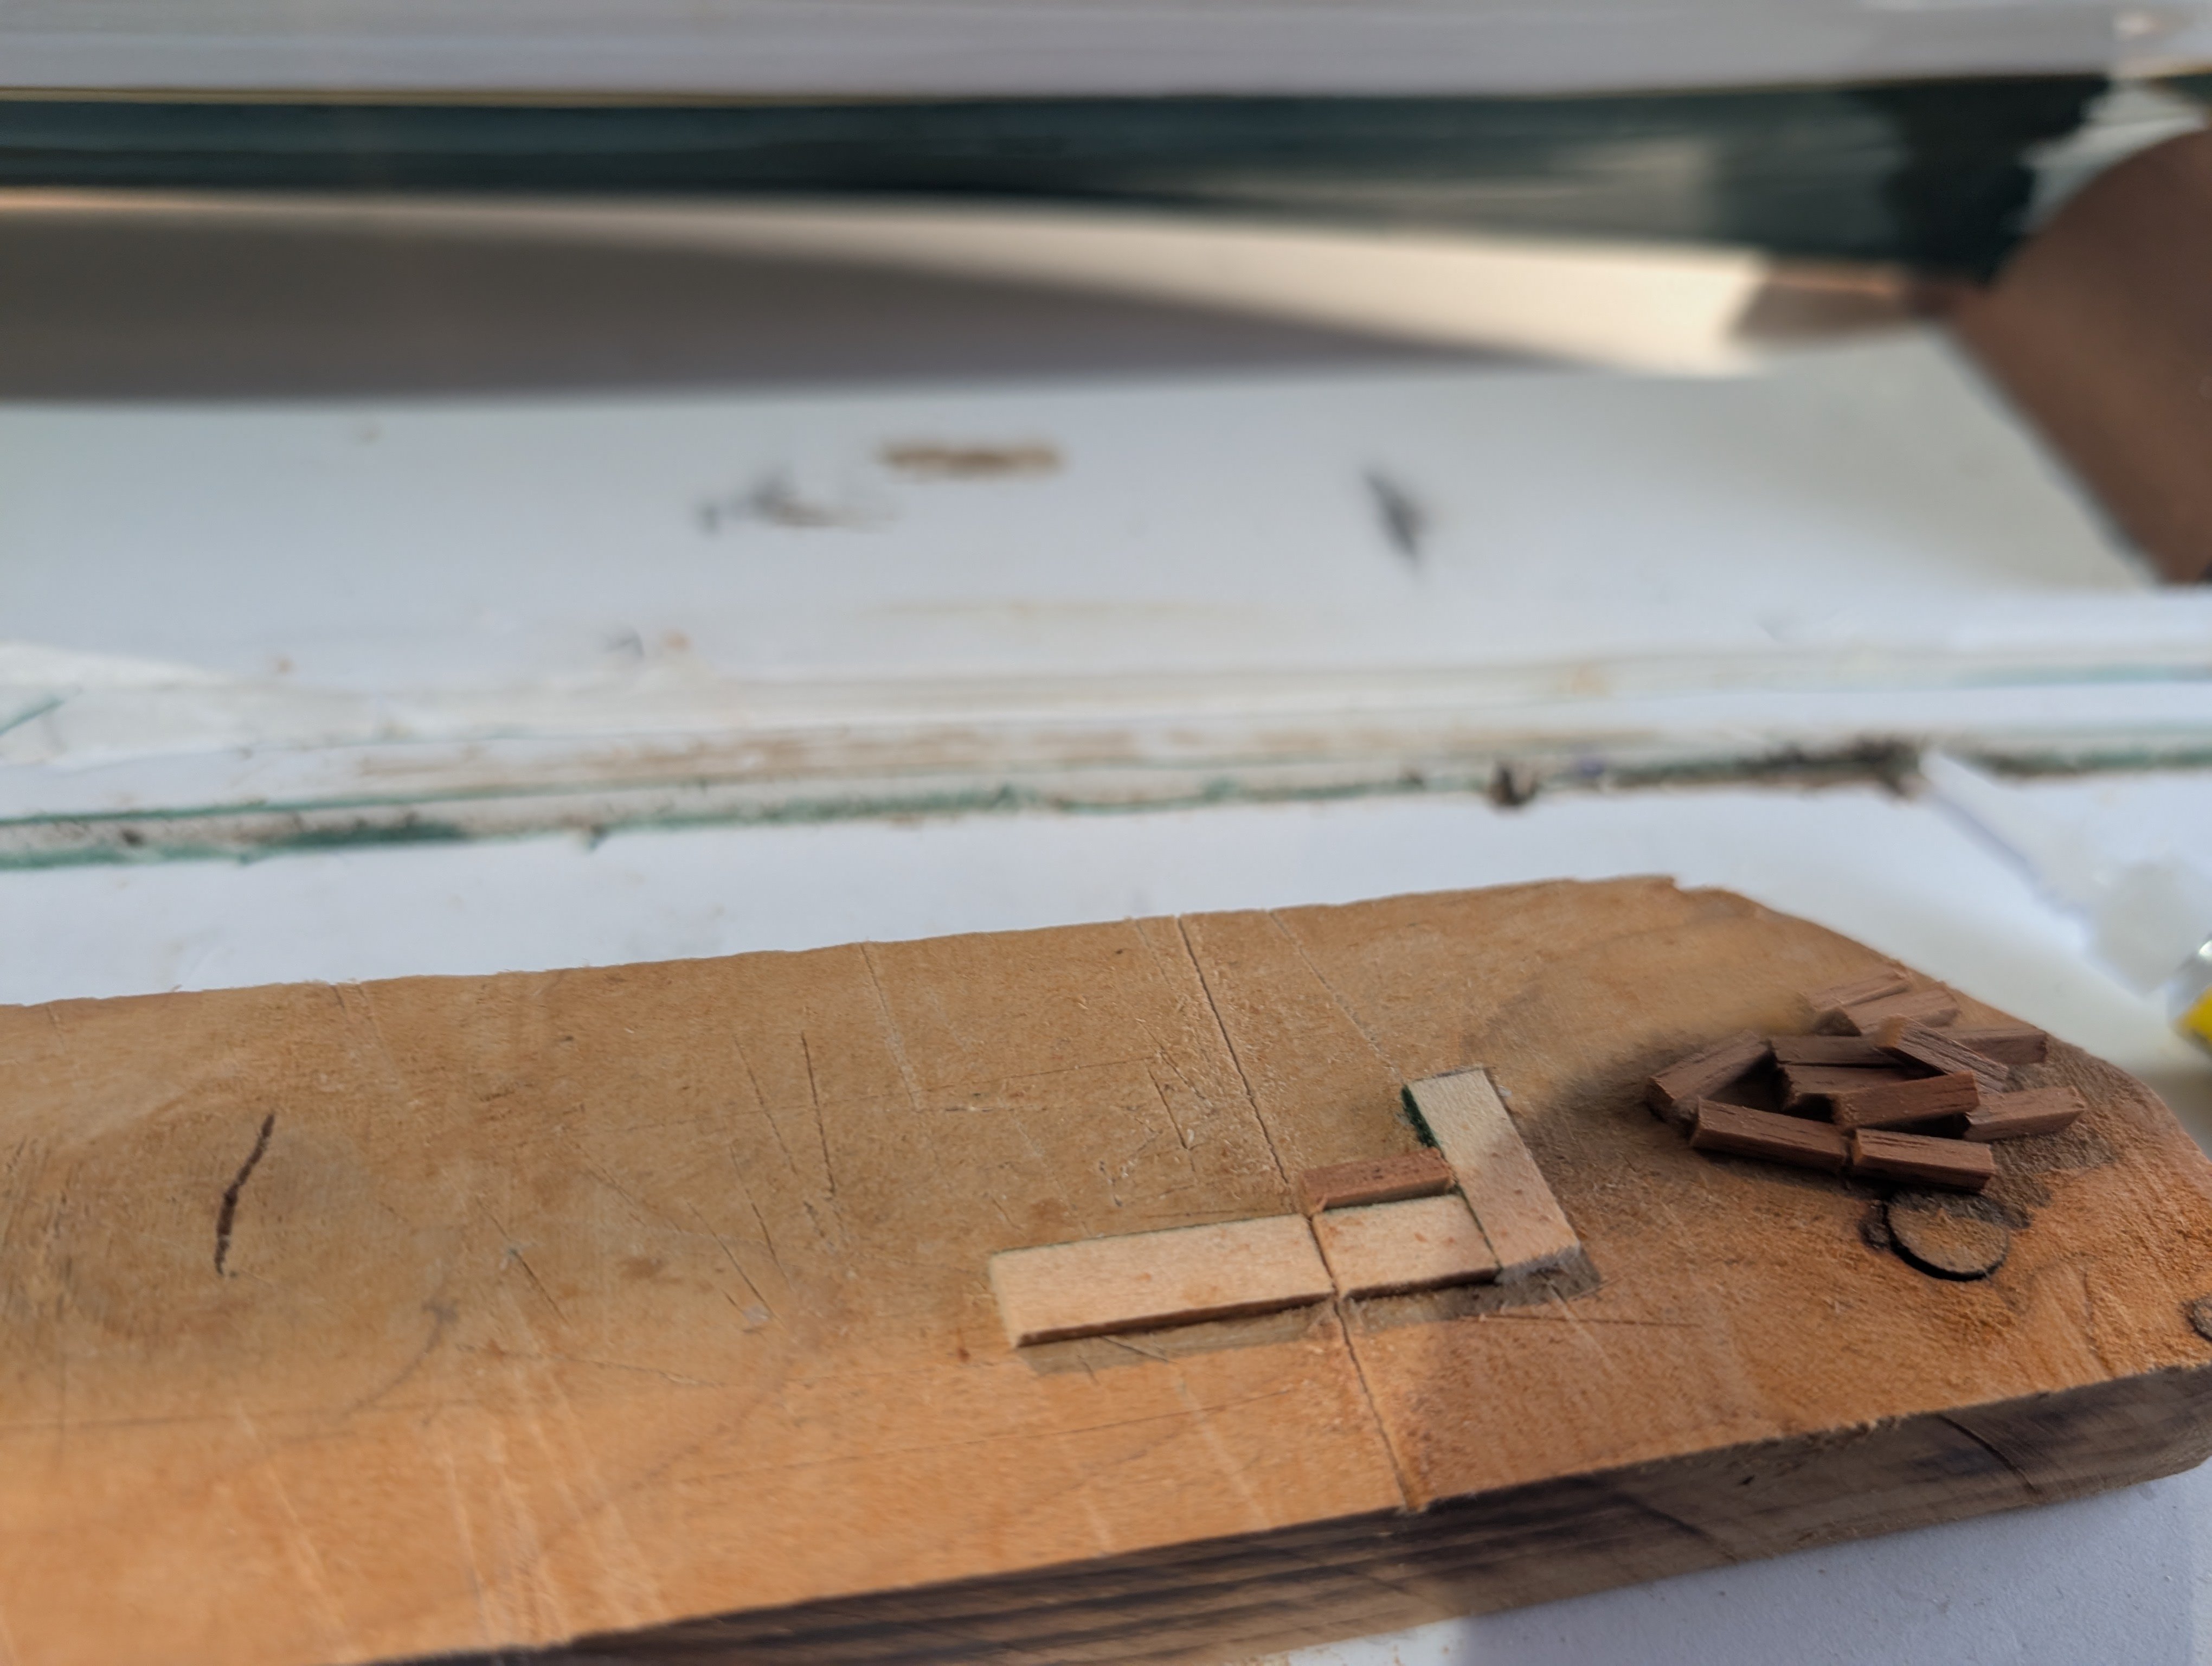
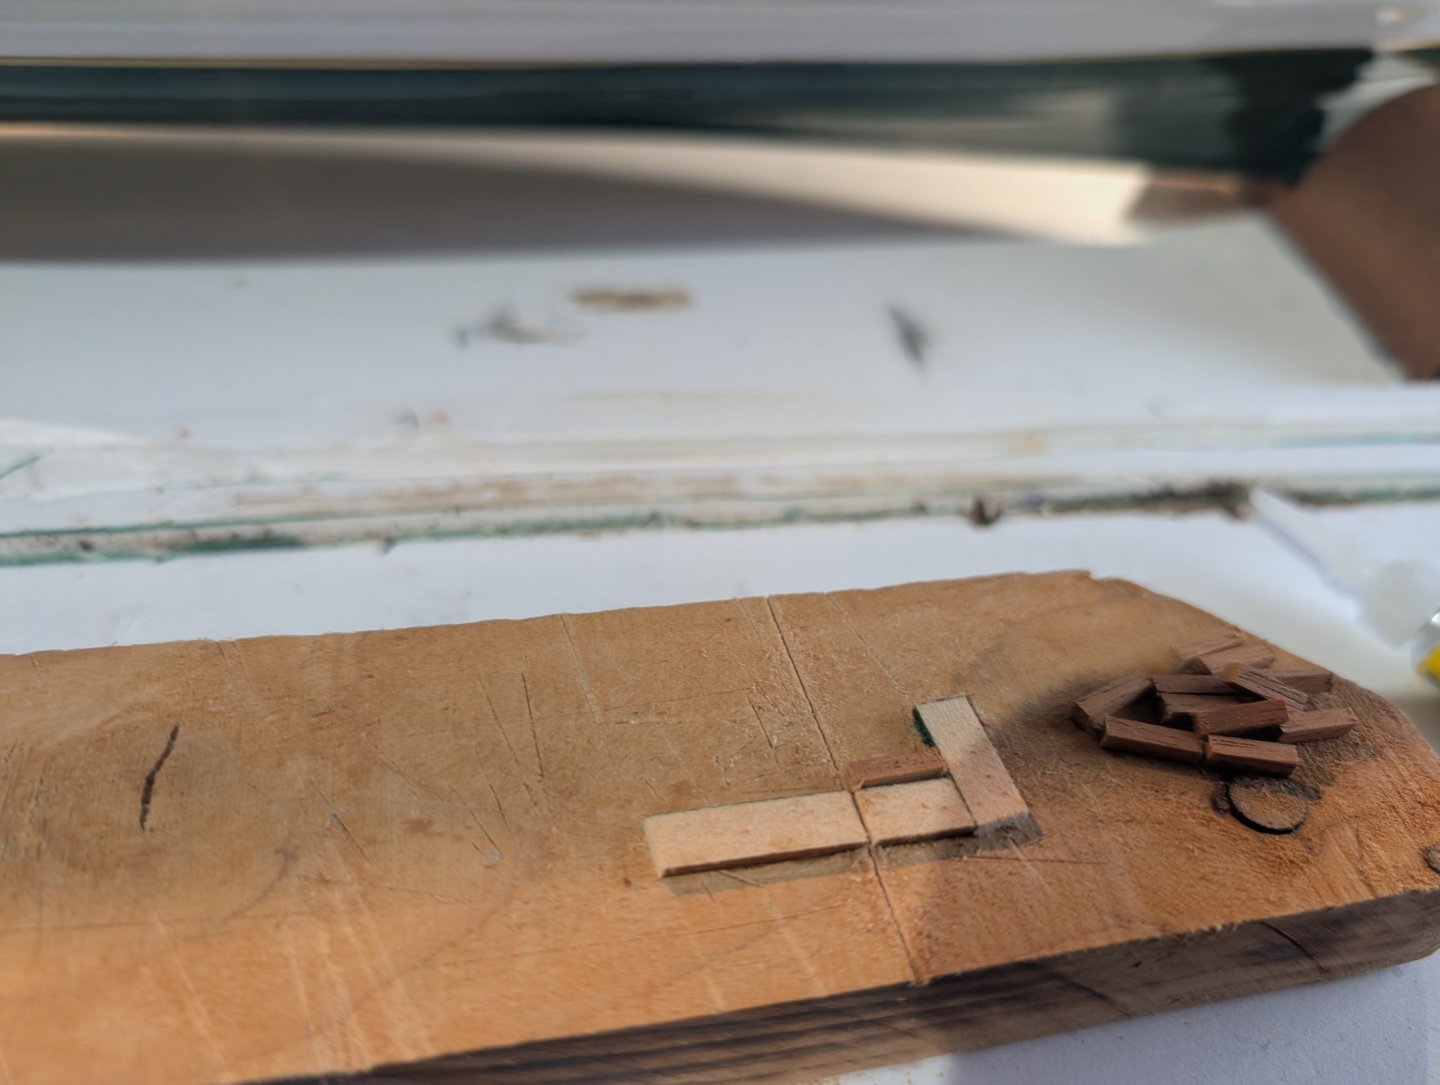
To make the 80 or so Frameheads I made a little jig to speed up the cutting and keep the pieces consistent
-
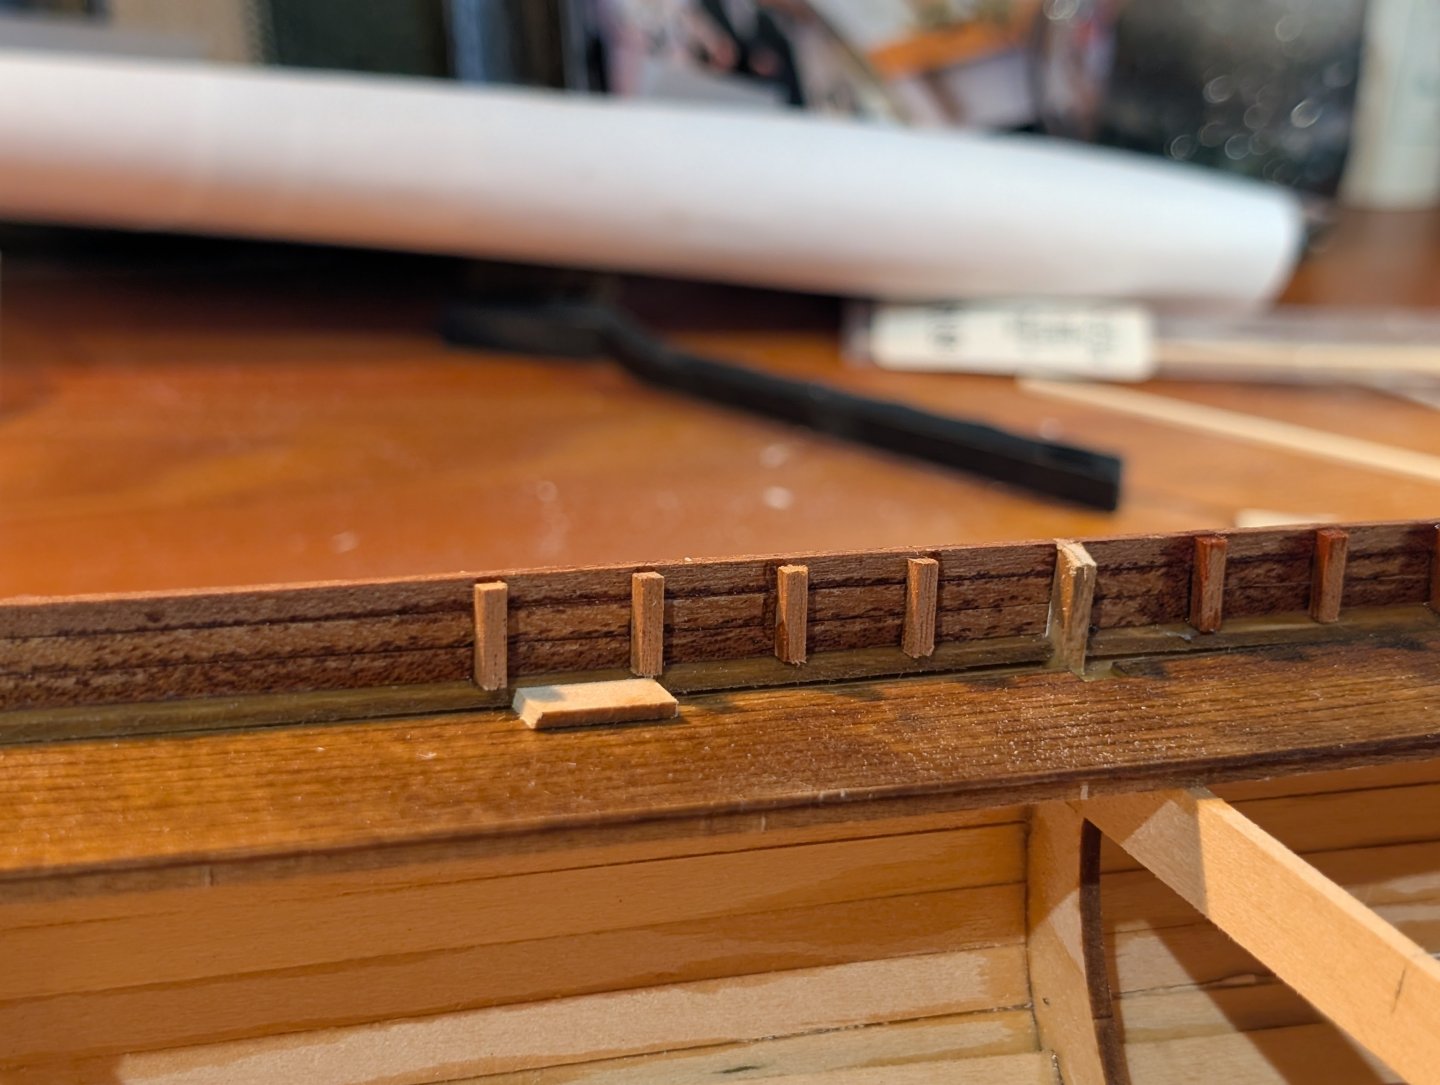
The bulkworks have been installed and the frameheads are going in
-
Thanks John!