MORE HANDBOOKS ARE ON THEIR WAY! We will let you know when they get here.
×


Sluicemaster
-
Posts
43 -
Joined
-
Last visited
Content Type
Profiles
Forums
Gallery
Events
Everything posted by Sluicemaster
-
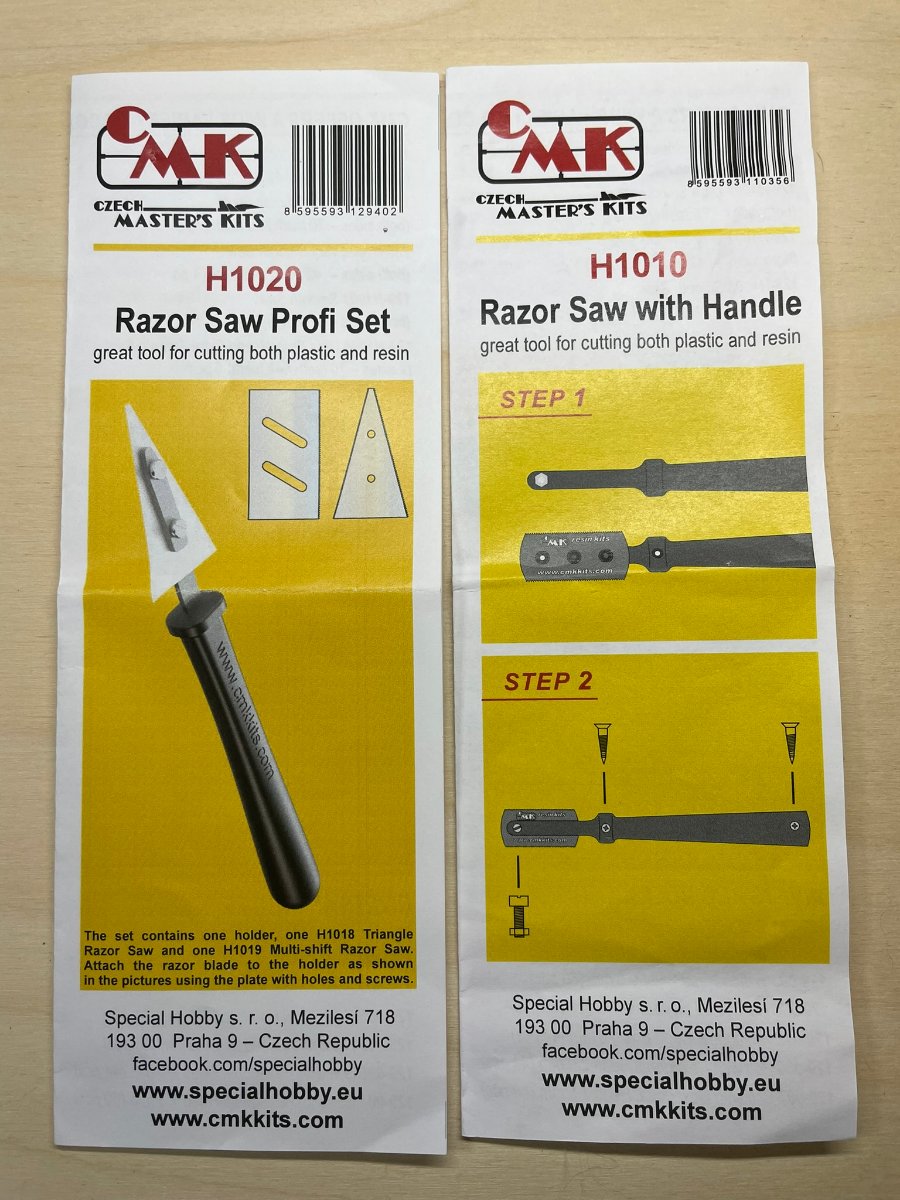
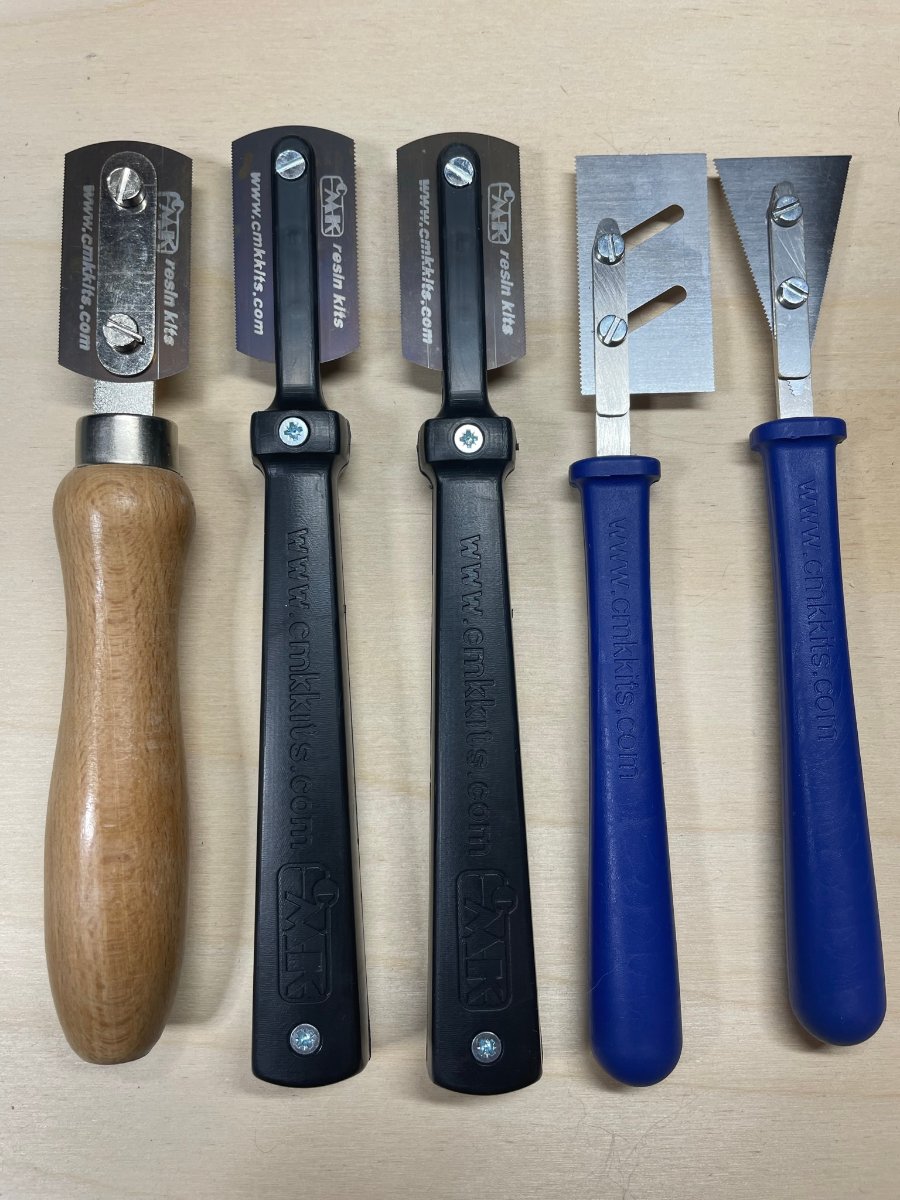
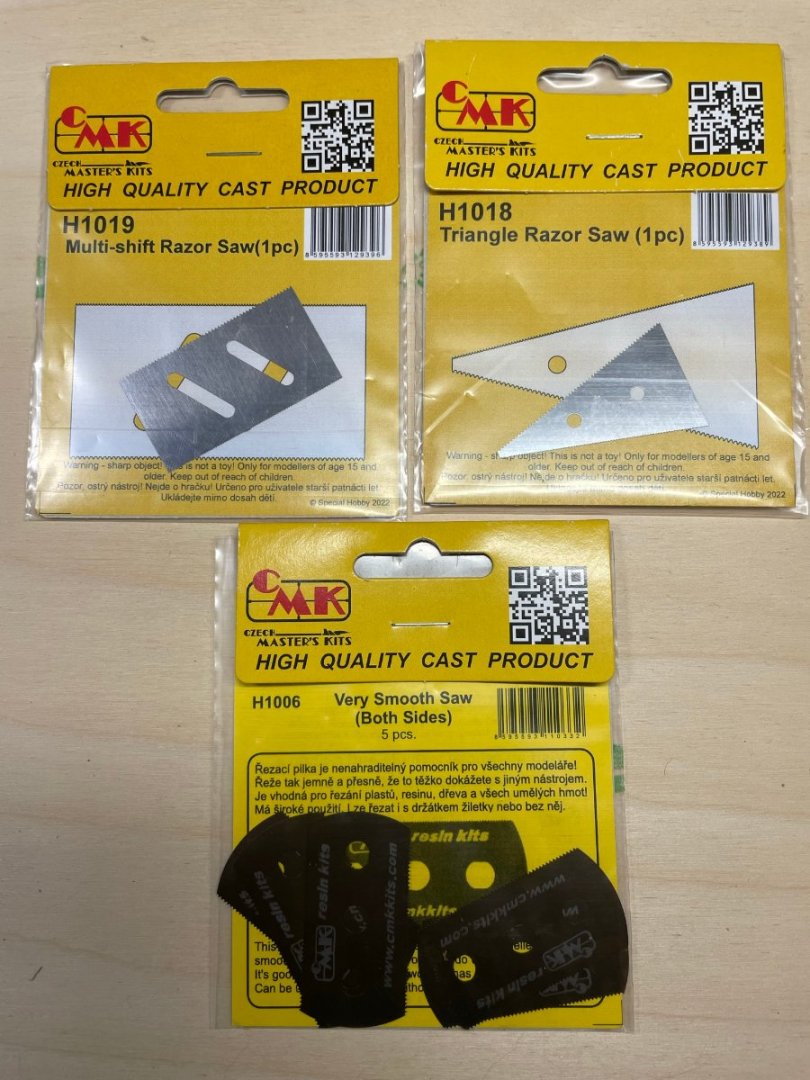
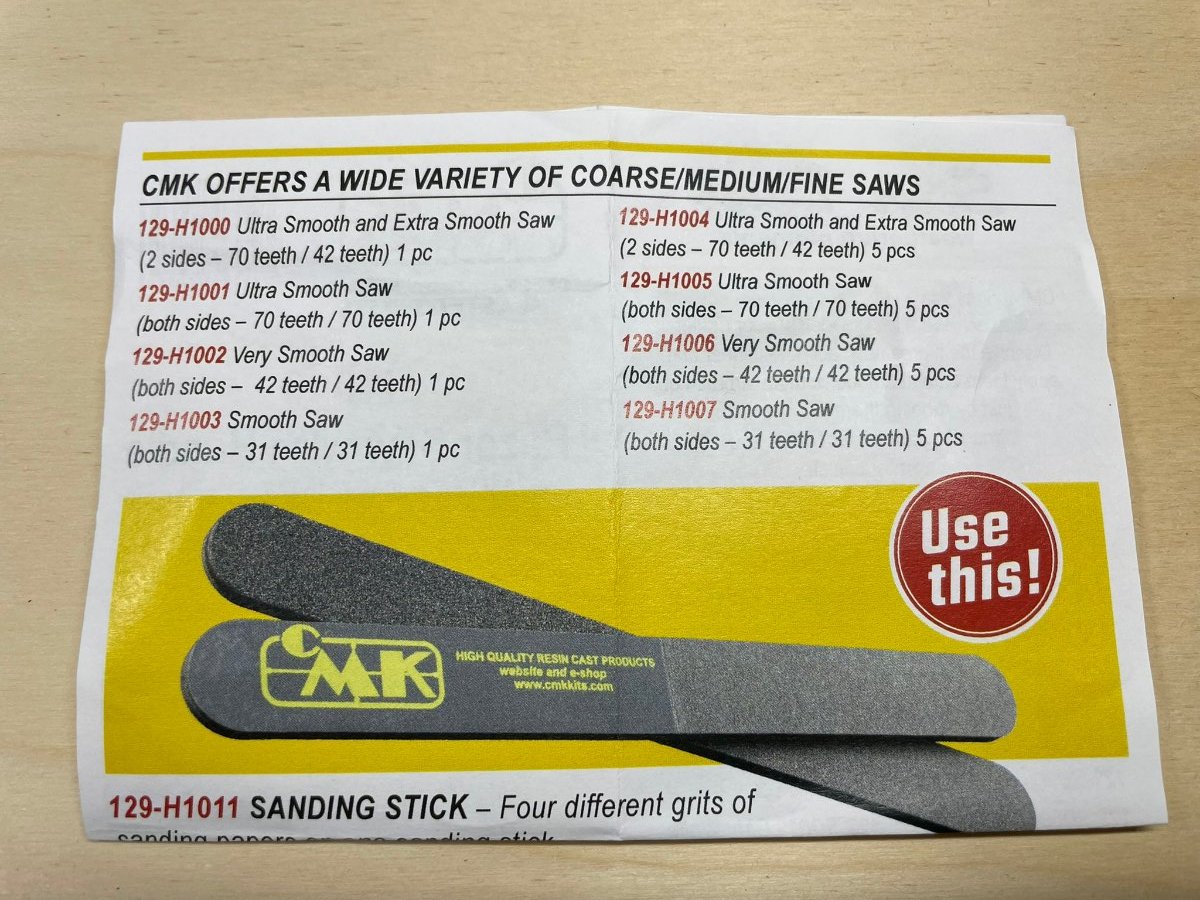
I purchased the wood handle saw and miter box from MicroMark some years ago. Recently I decided to look up the name on the blade - www.cmkkits.com. It's a company in Czechoslovakia that makes resin military model kits as well as micro saws. I ordered the ones with the blue and black handles. The blades in the wood and black handle saws will work in the miter box, but the saw blades in the blue handles will not. They are pretty handy. I reversed the triangular blade to get into a tight area. As with clamps, I believe that you can never have too many saws.


- 1 reply
-
- 8
-

-

-
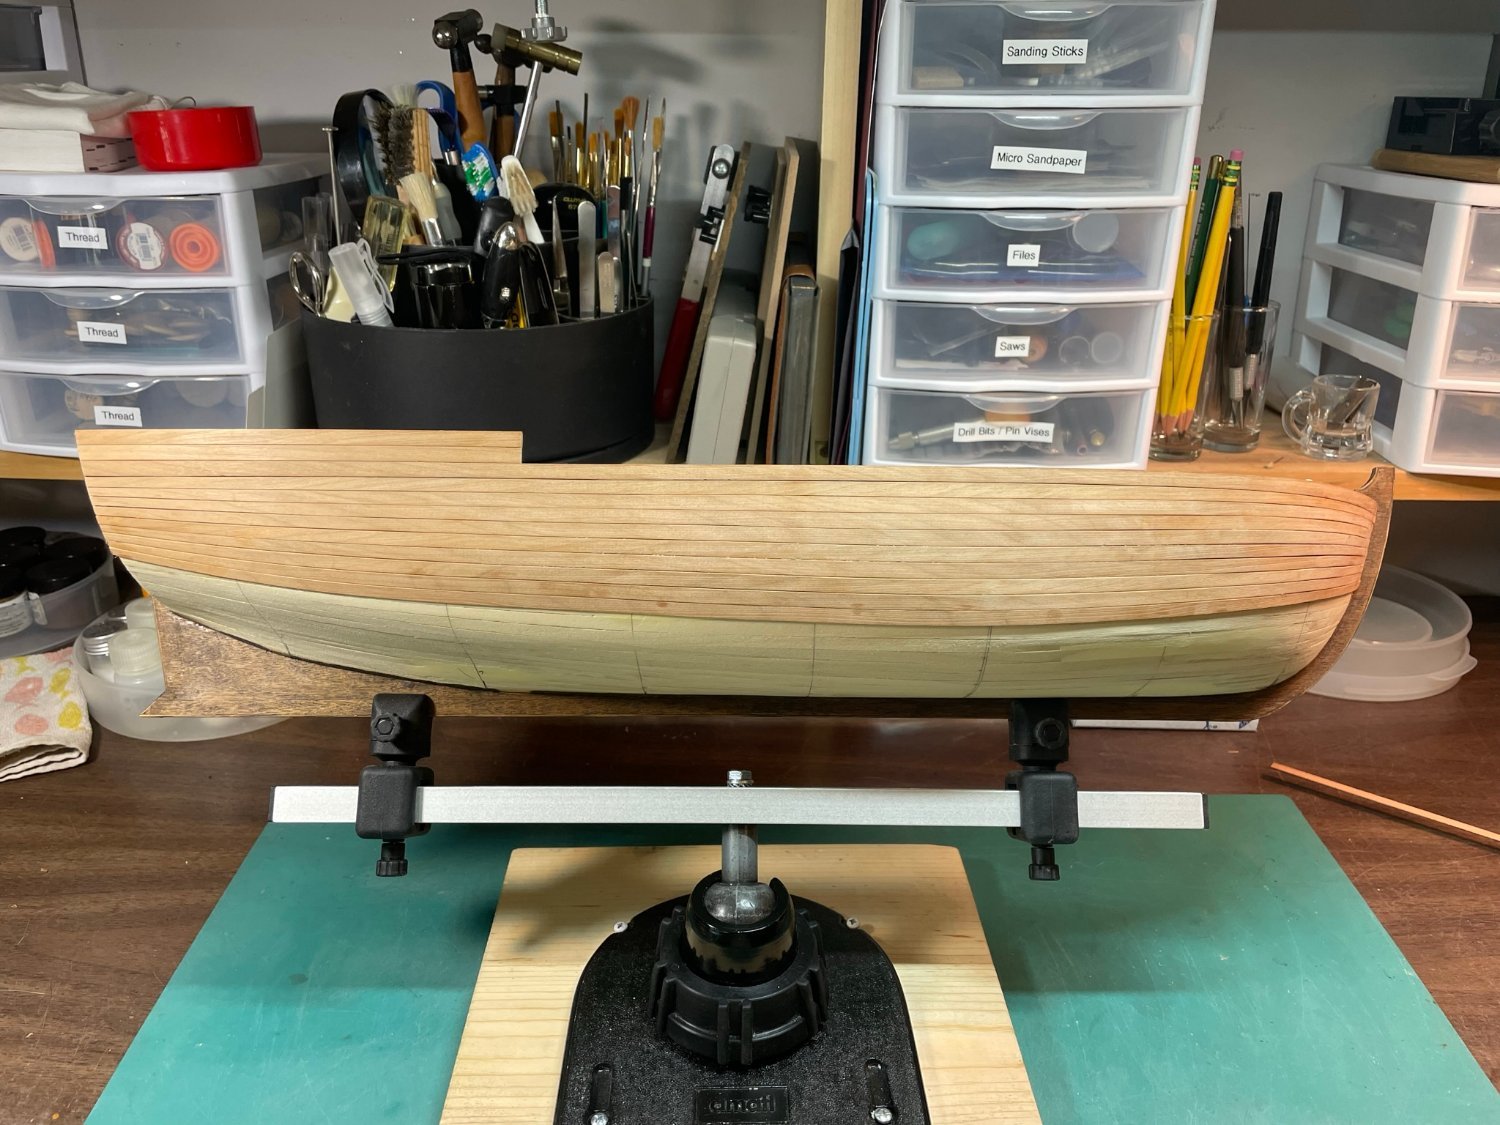
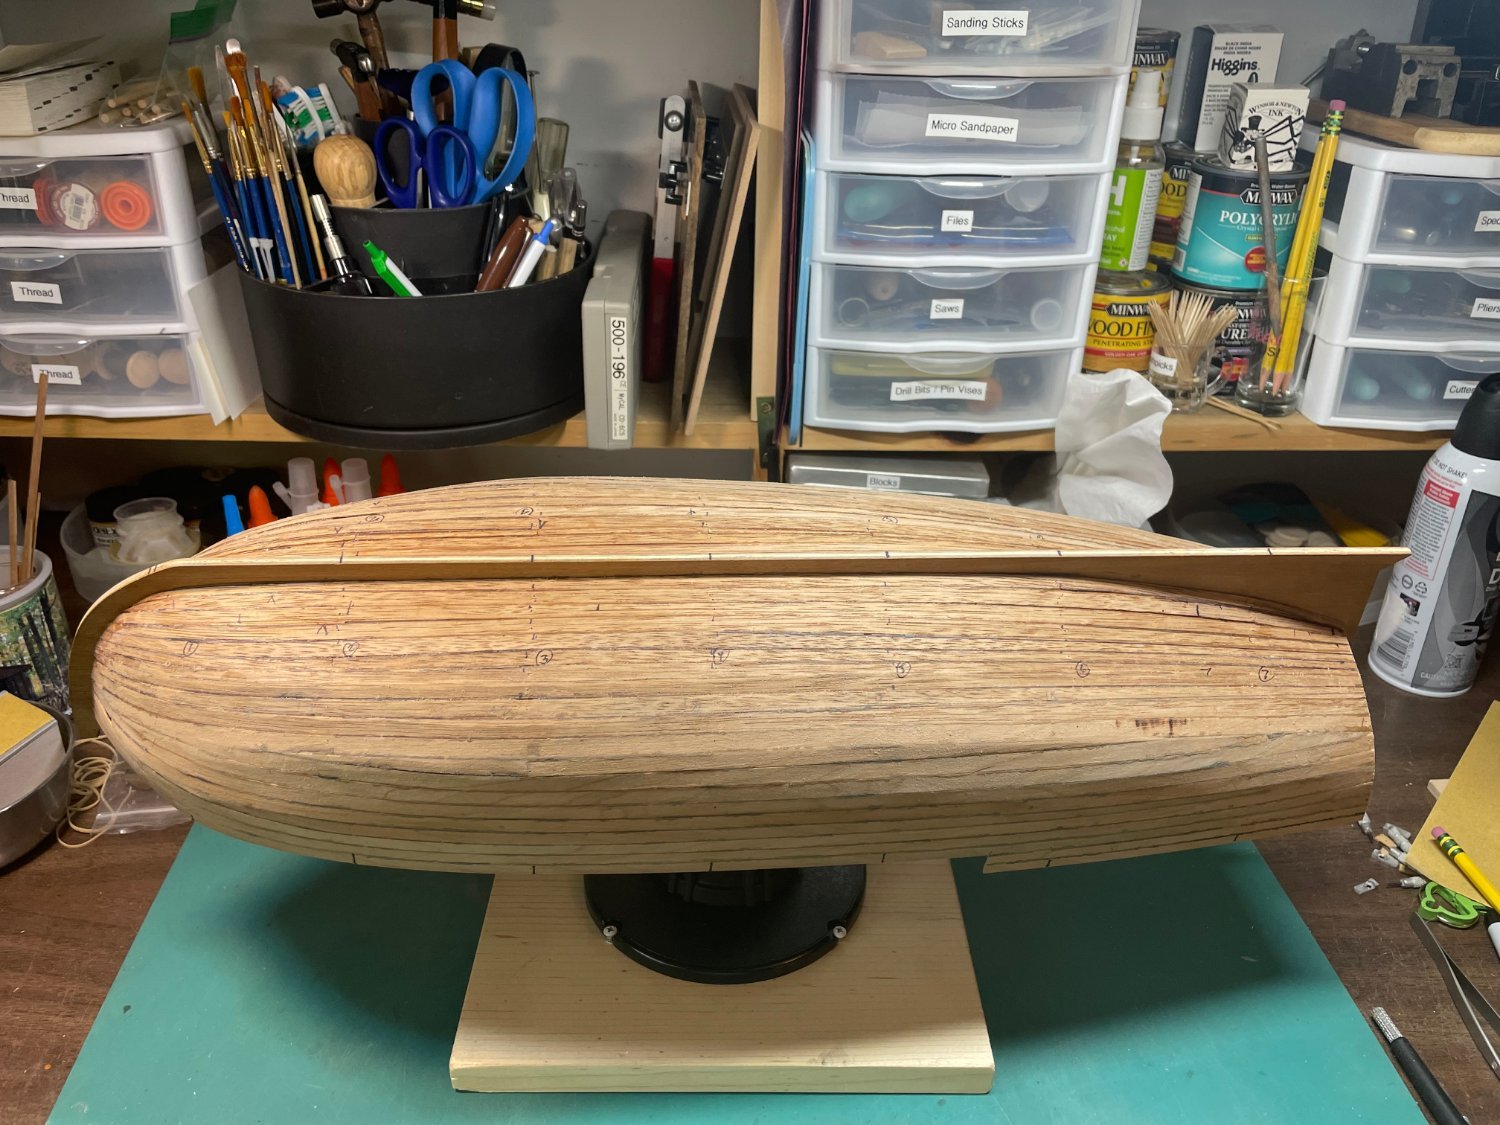
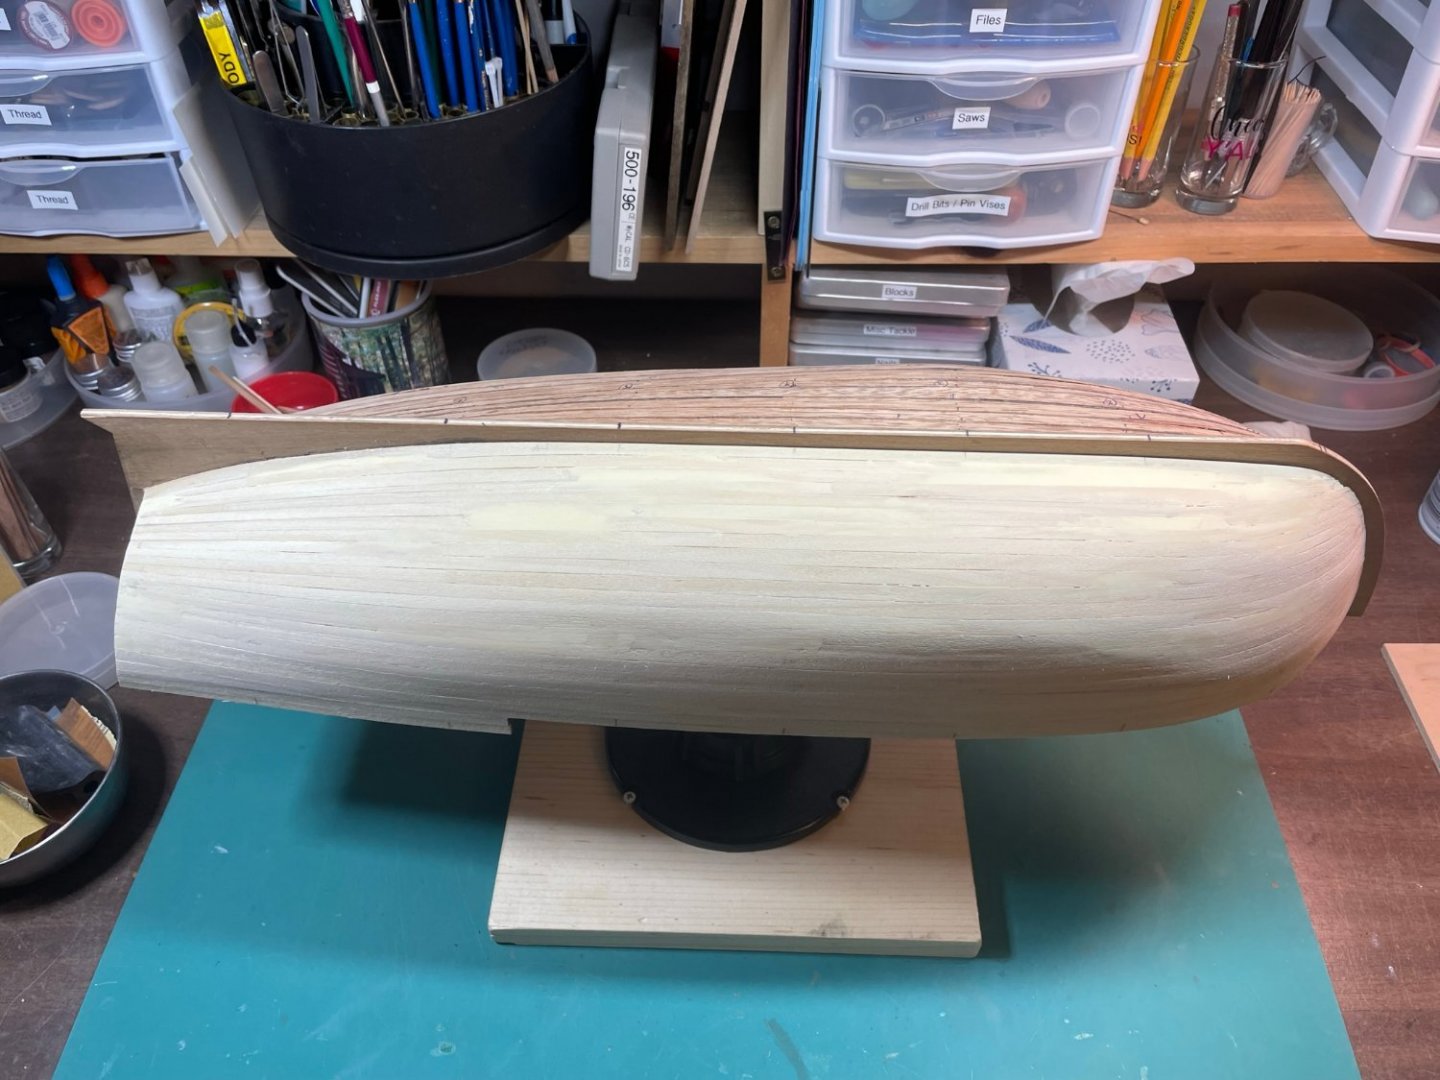
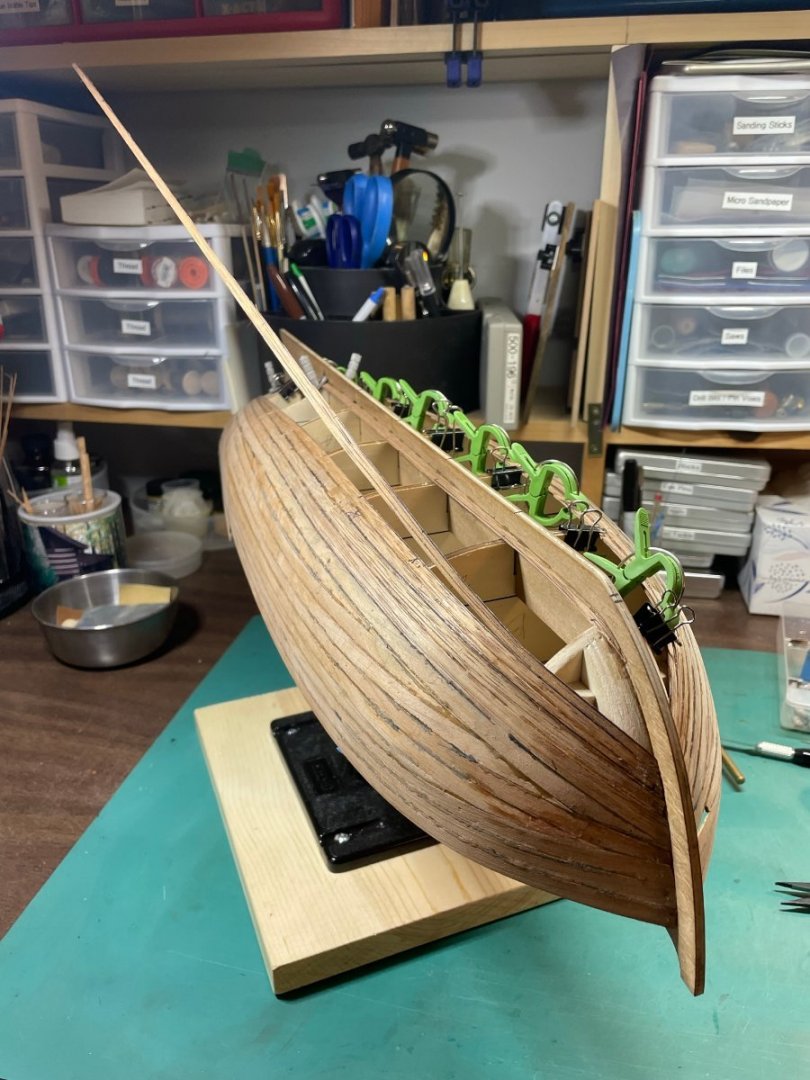
At this point I'm fairly happy with how the planking is progressing. The are some "glitches", mainly some splaying where I didn't properly bend a few planks, and where the plank meets the keel piece at the bow. The splaying is minor and has occured lower down on the hull, so I don't think it will be noticable when the model is upright. Since I didn't cut a rabbet - I couldn't figure out how to, especially on the cheap plywood the keel was made from - I beveled the planks and butted them to the prow. I hope I can carefuuly clean up the irregularities.
-
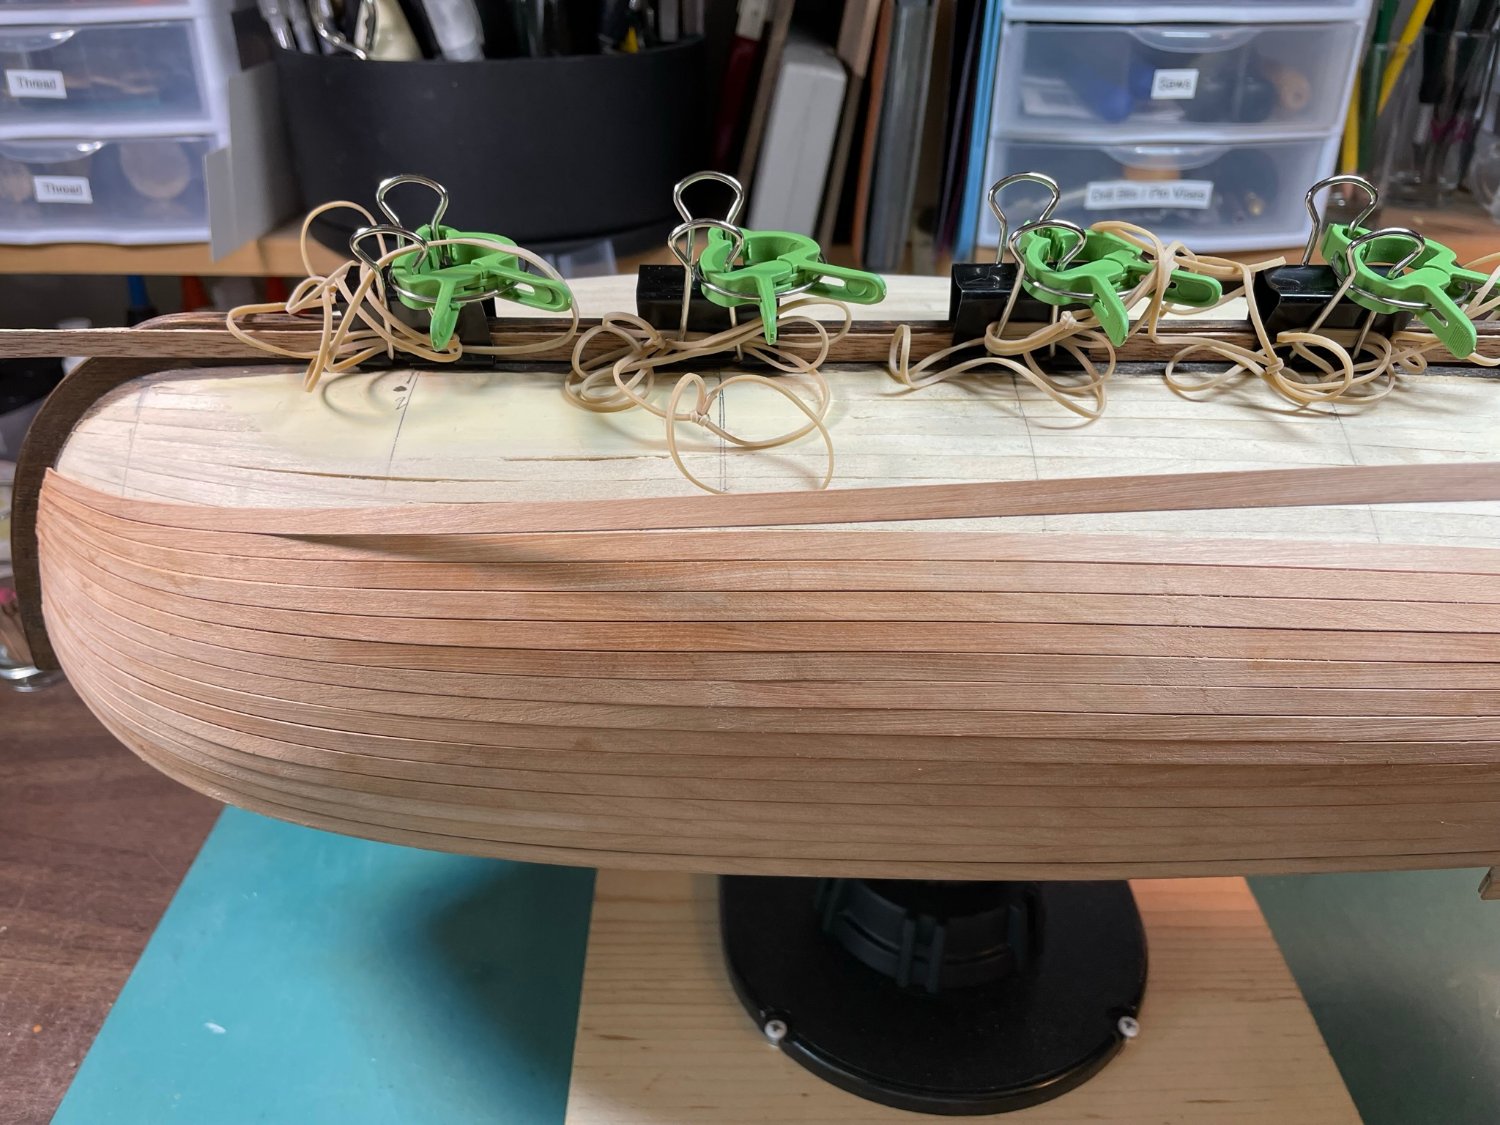
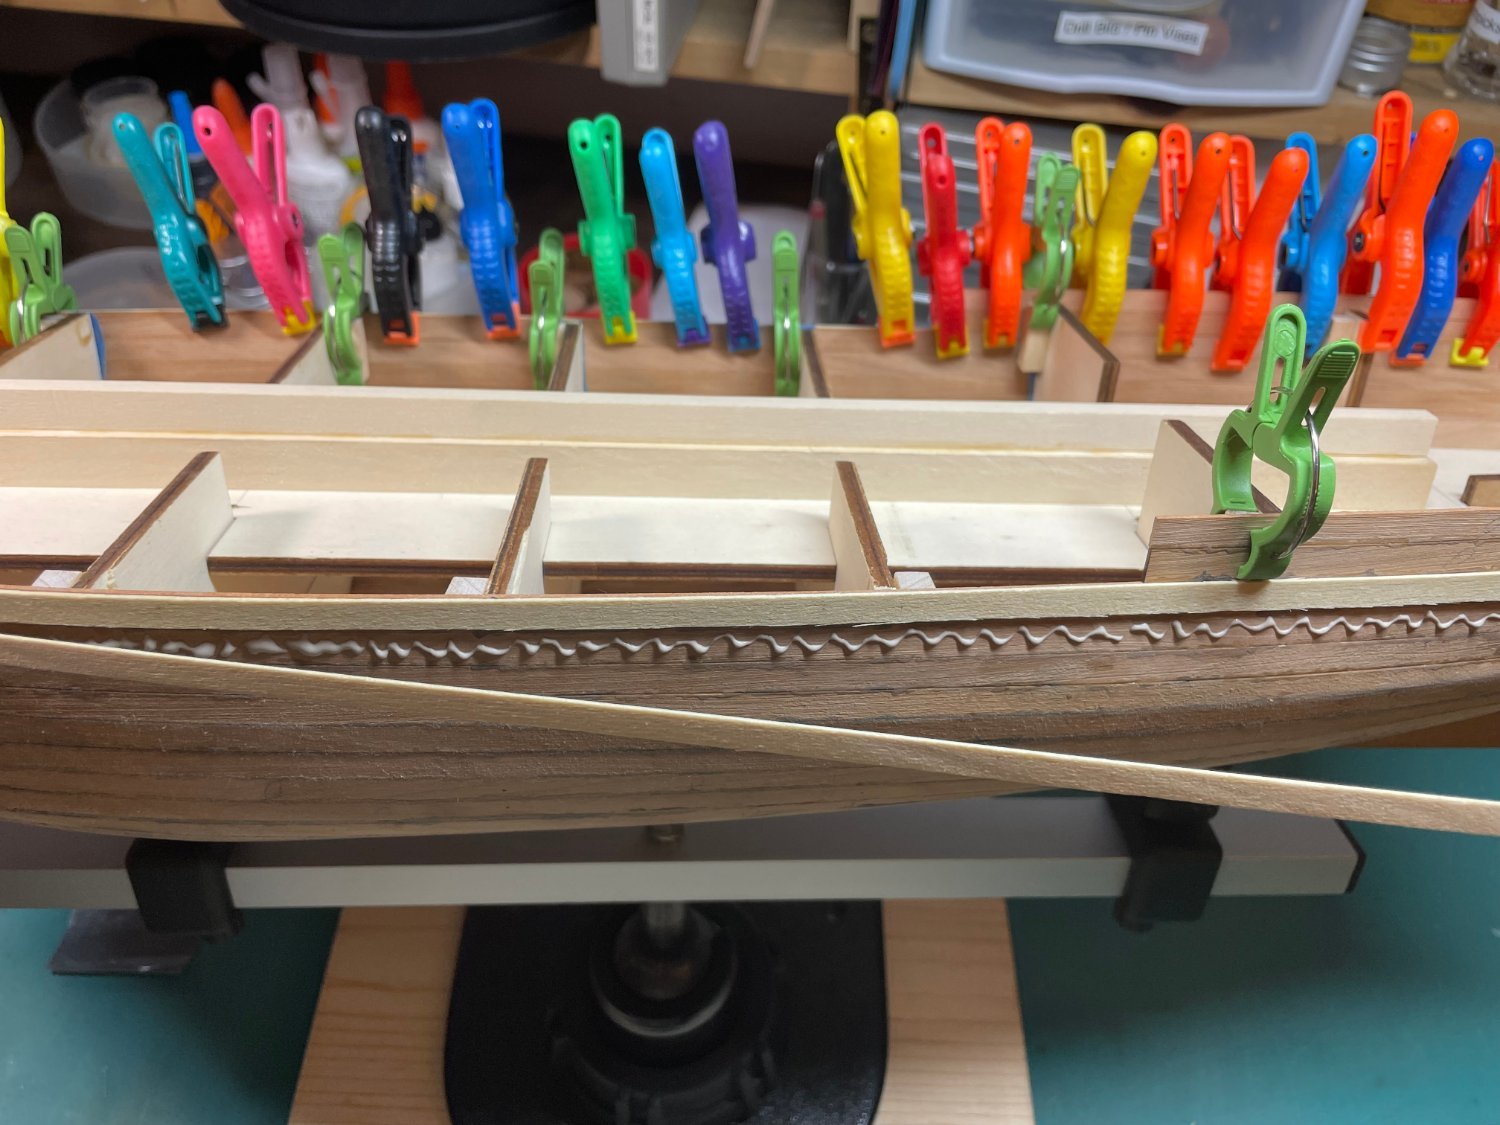
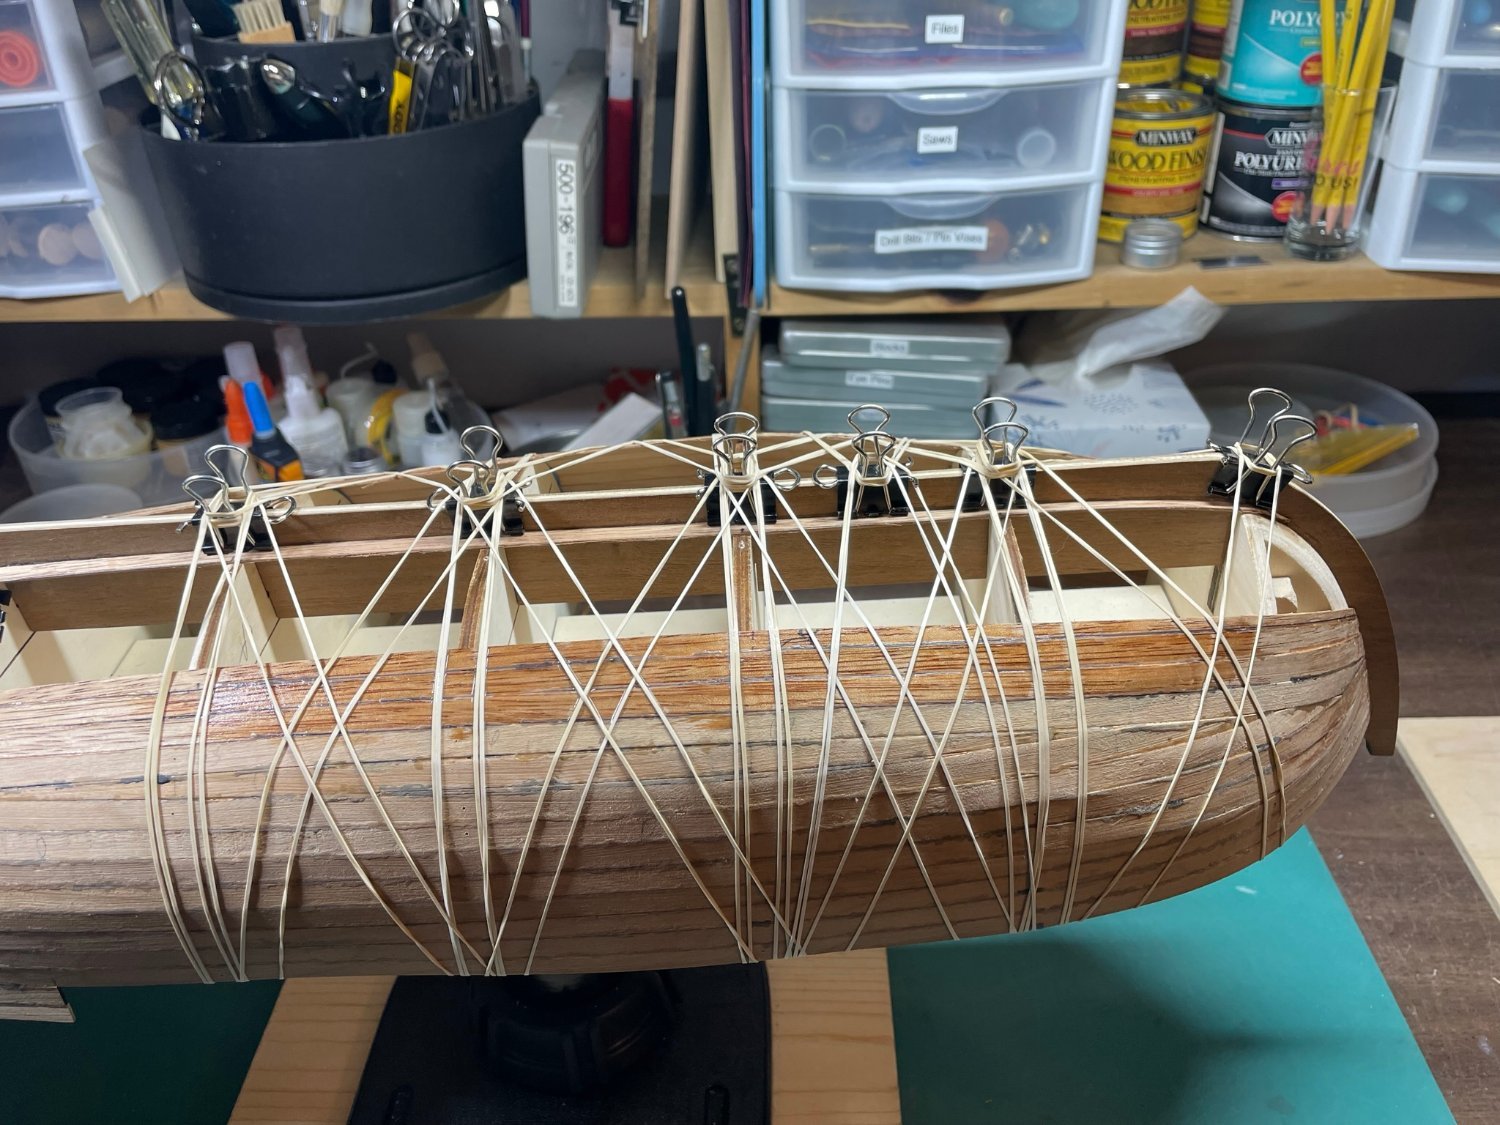
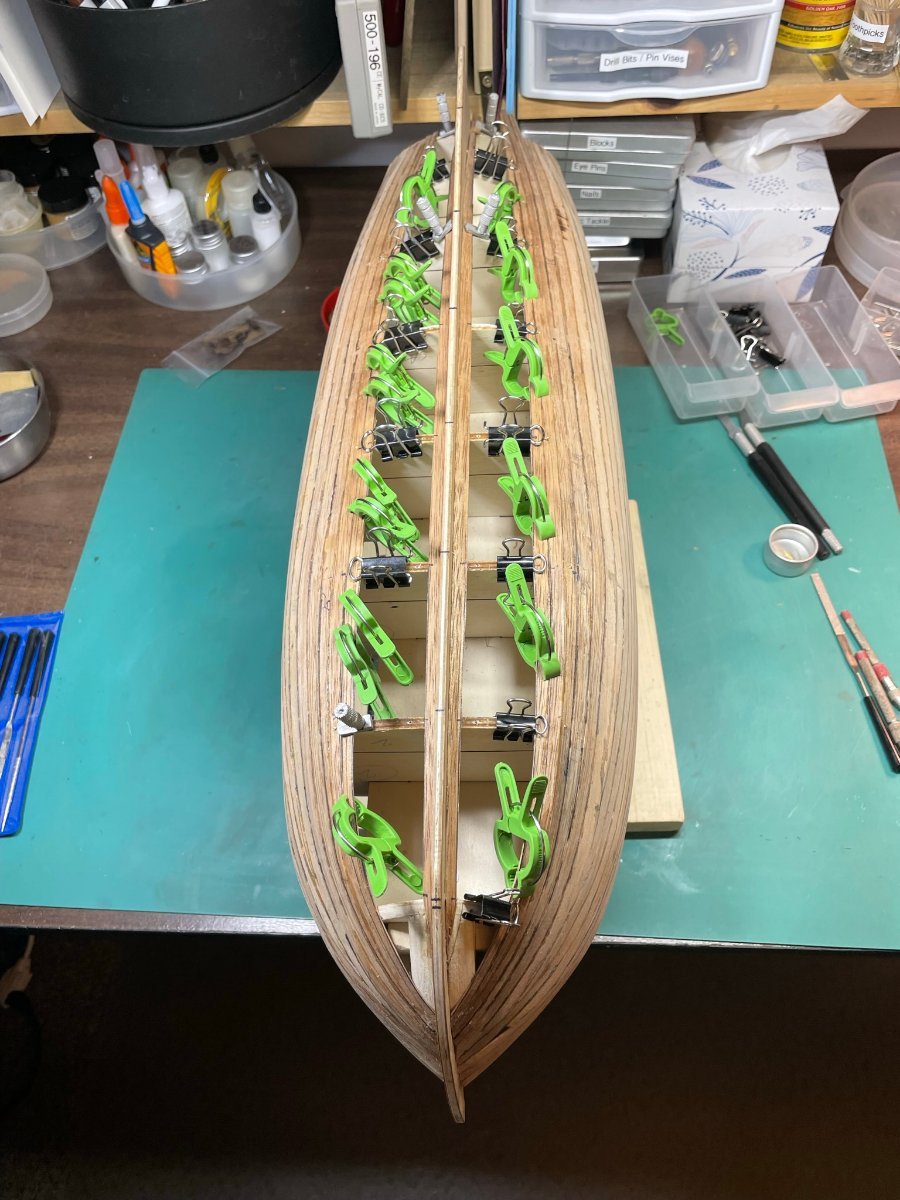
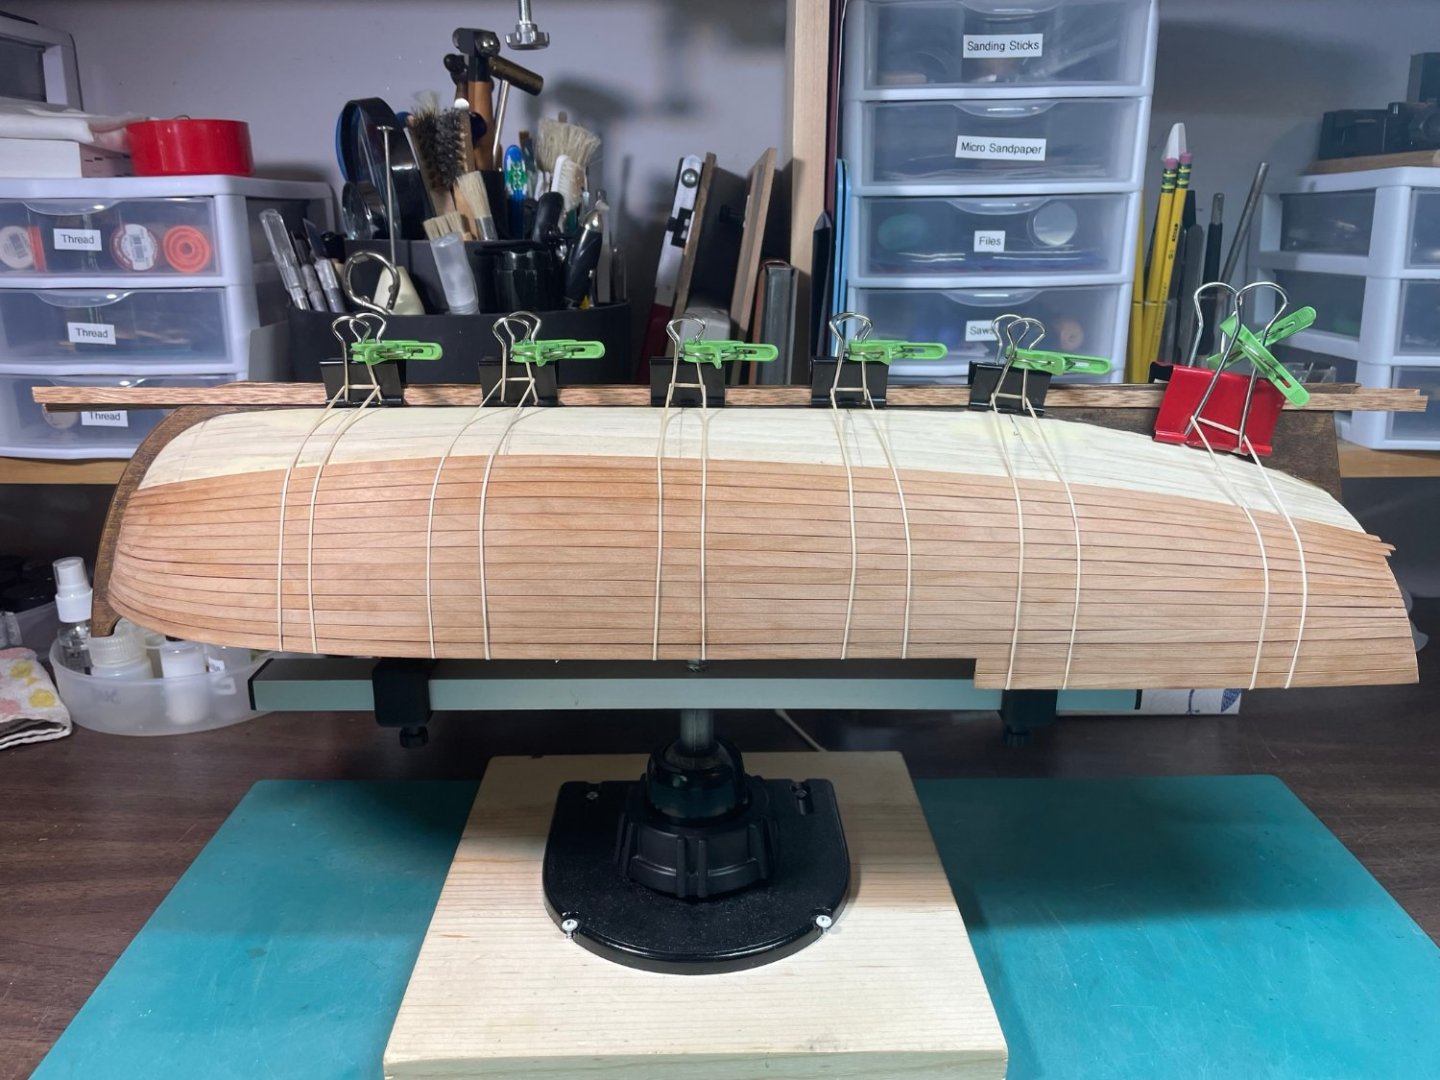
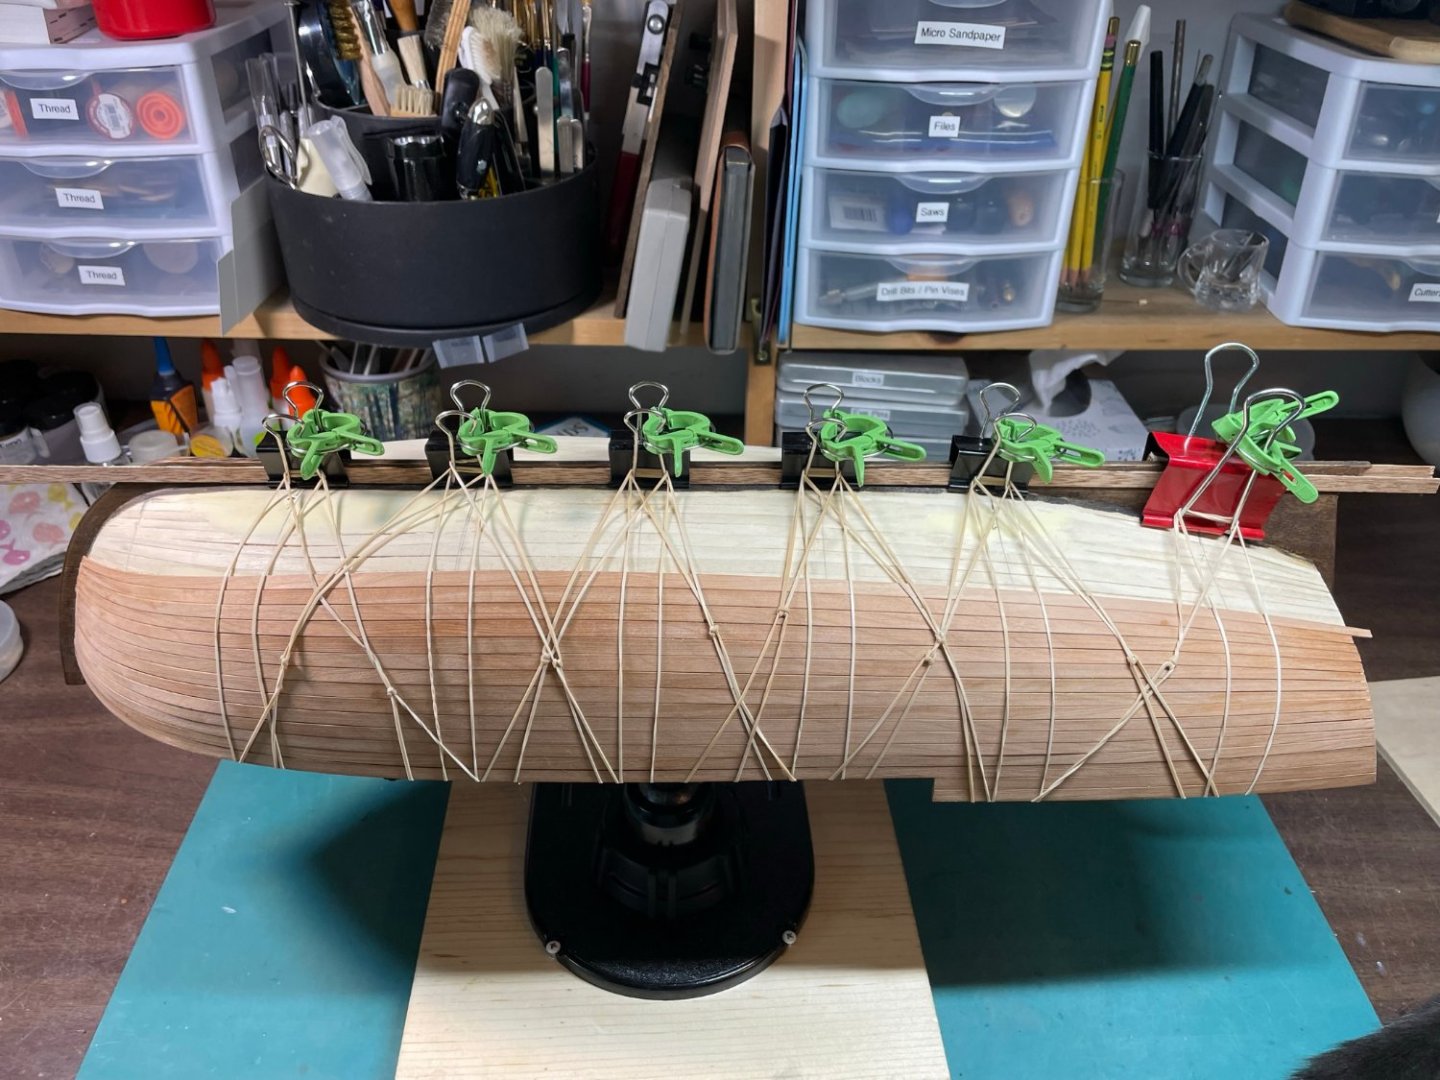
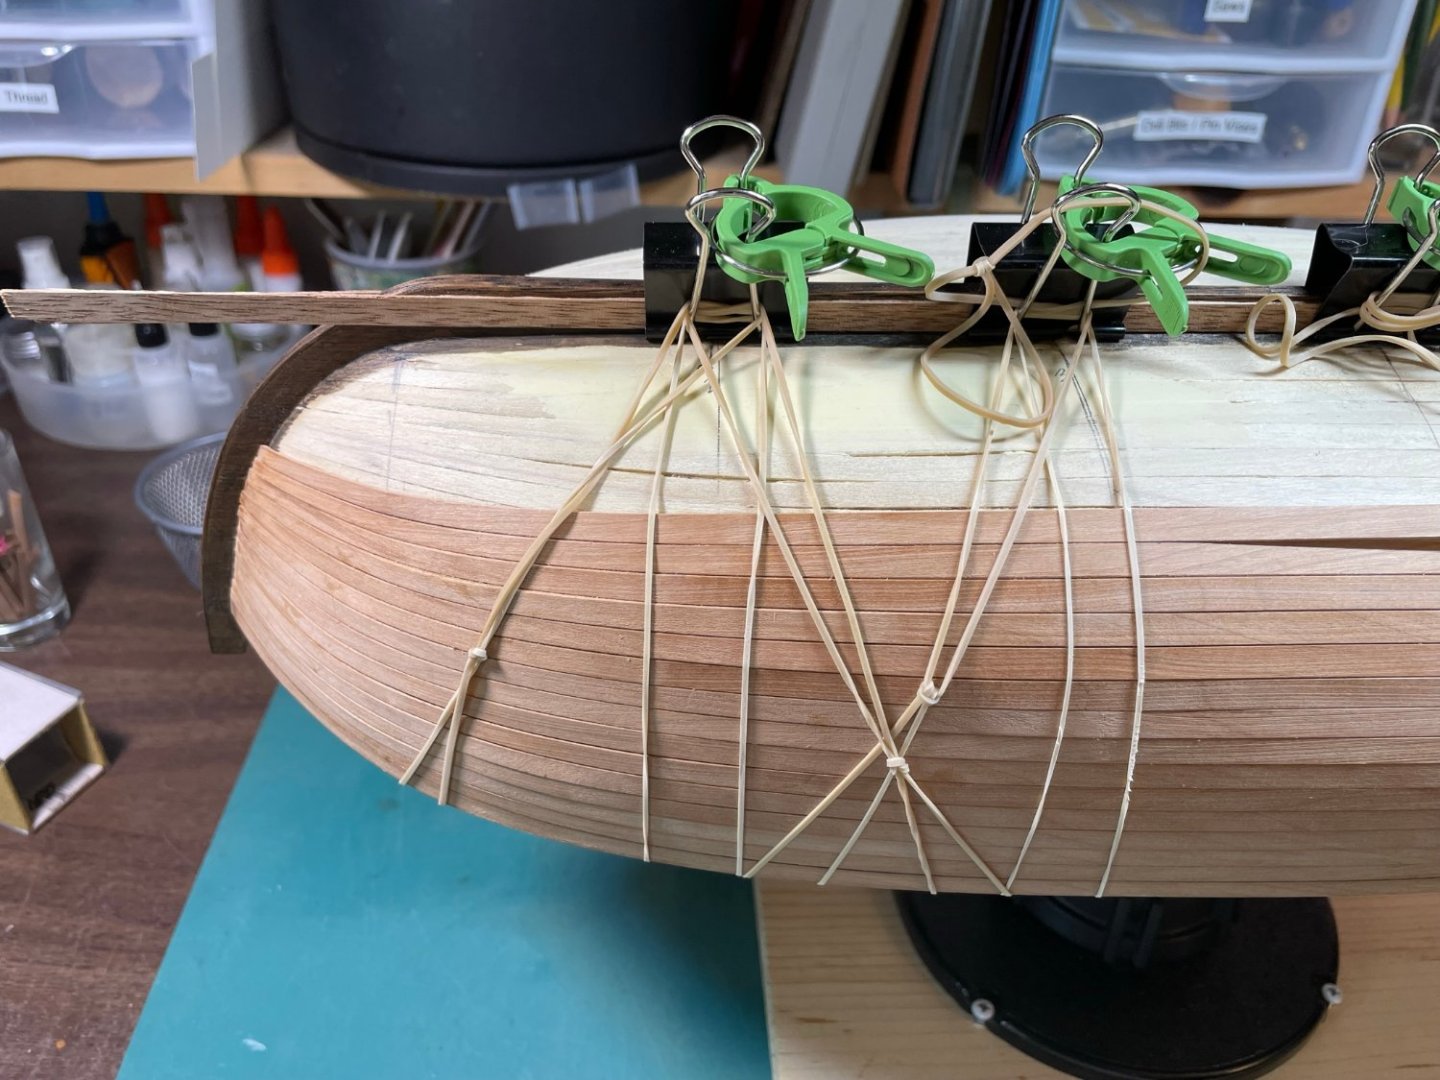
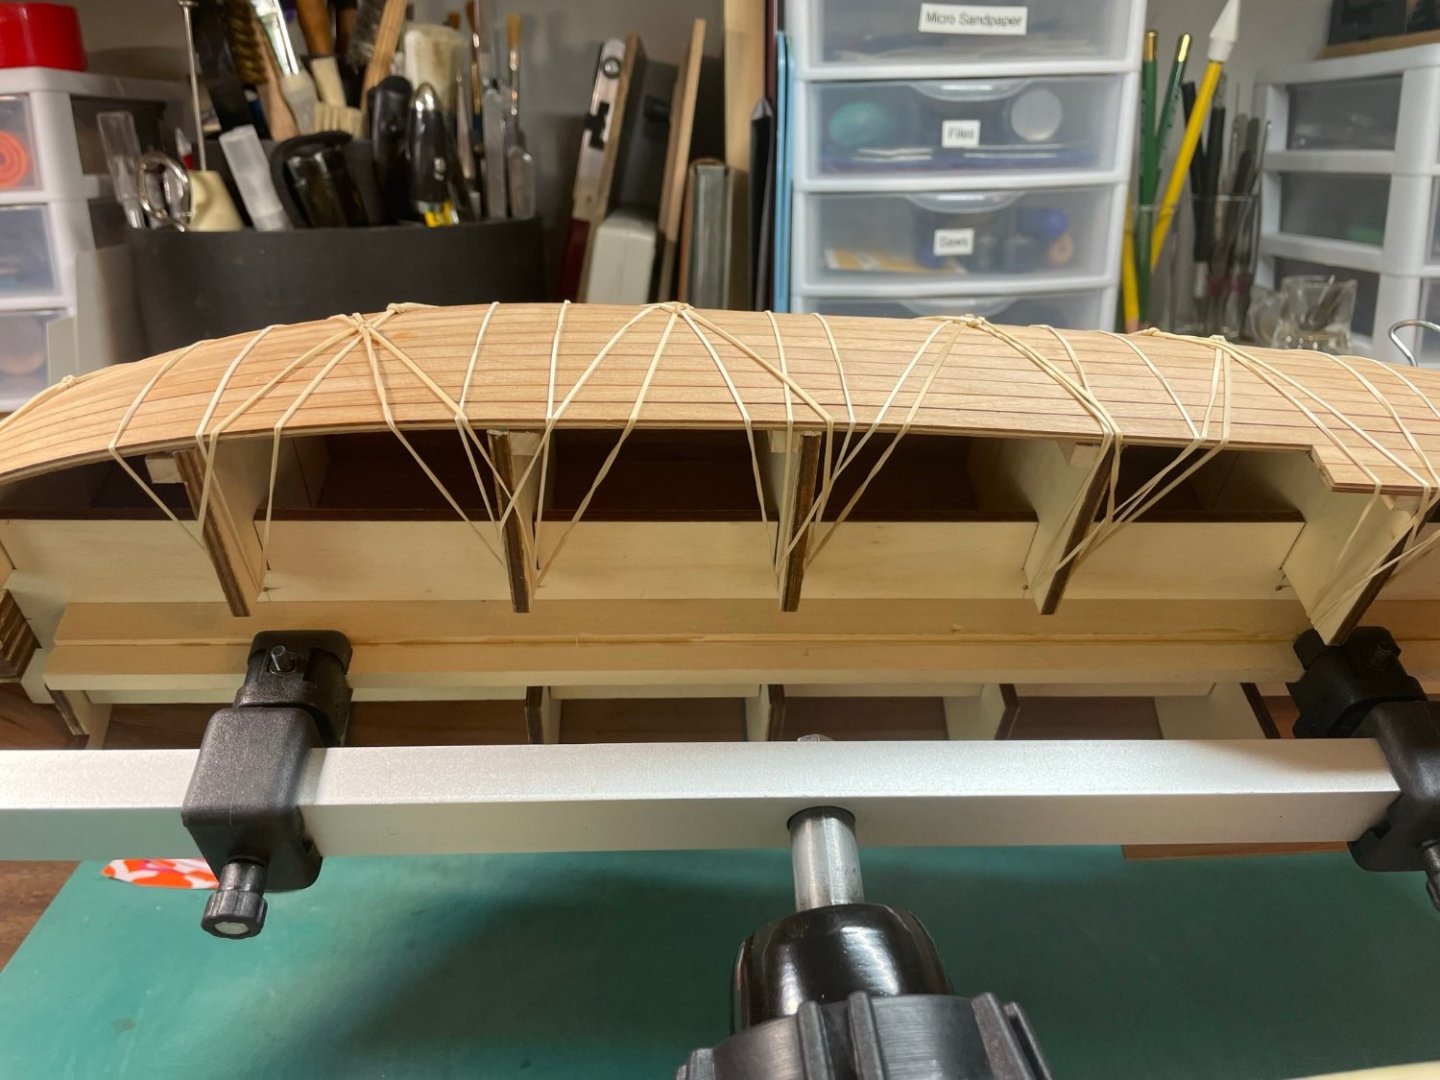
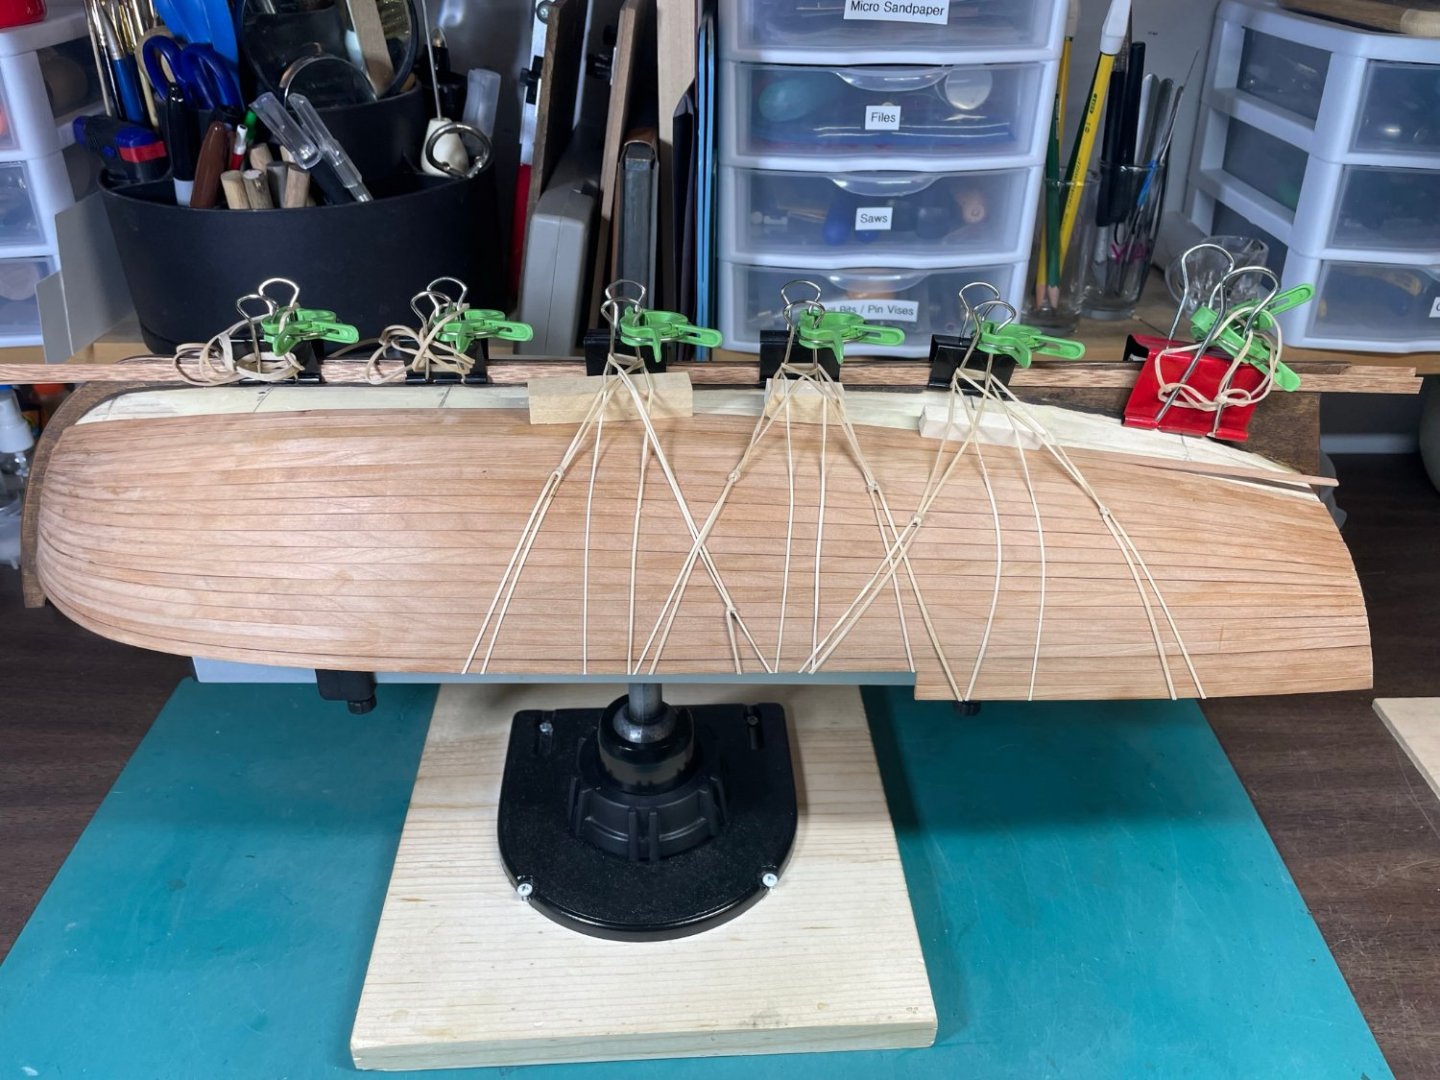
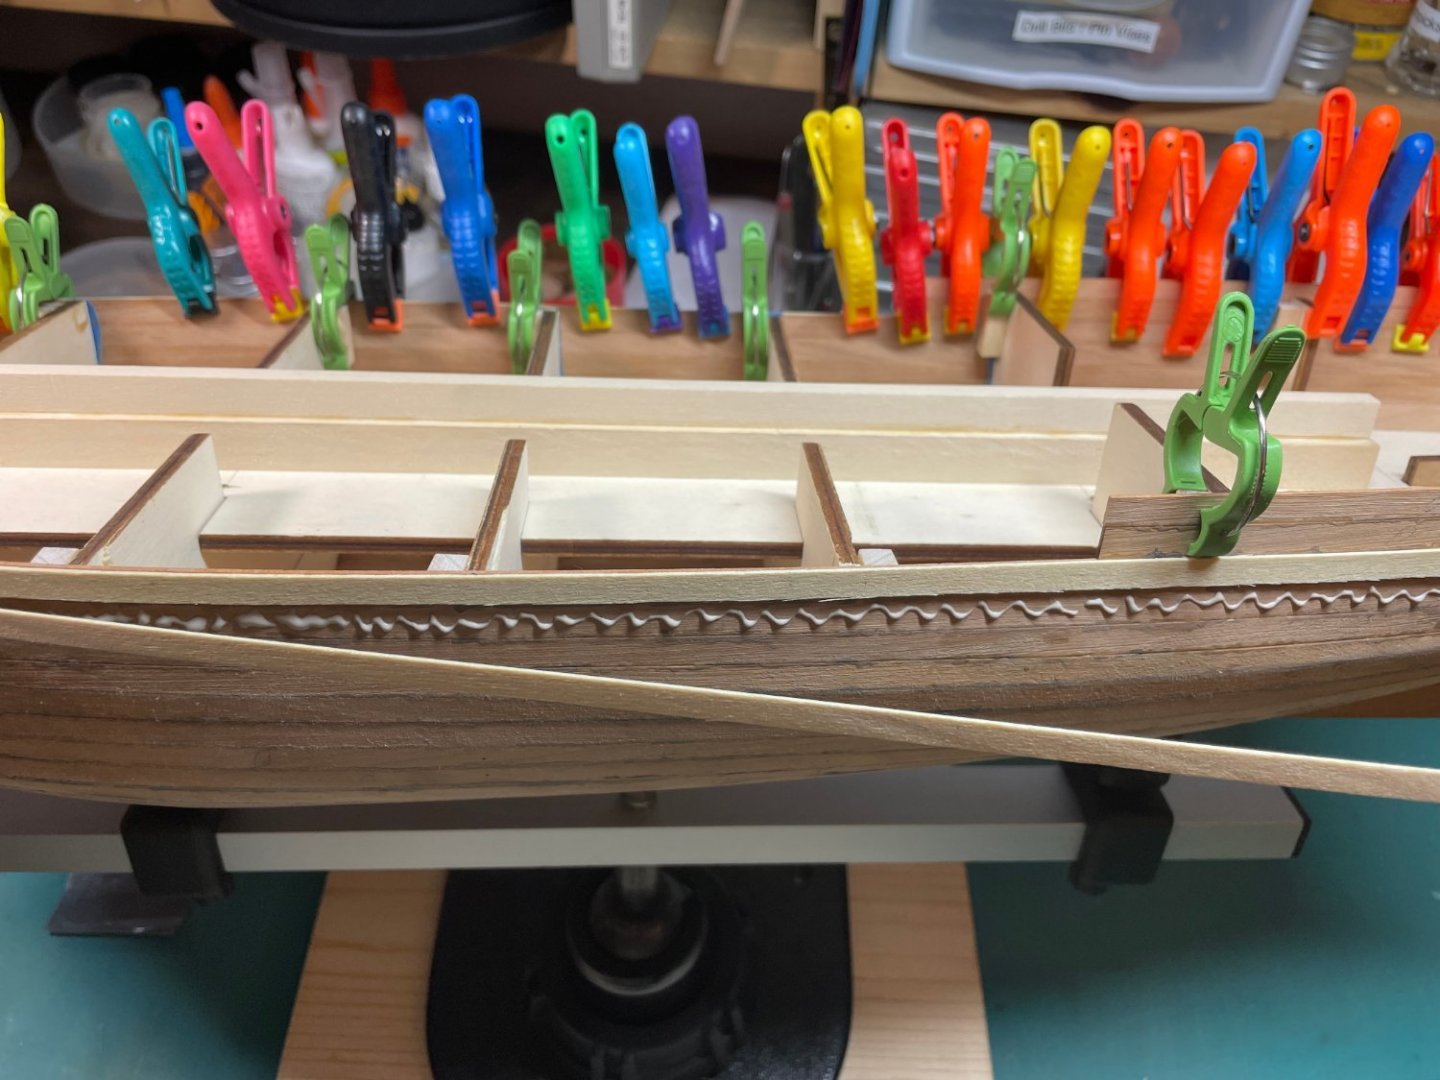
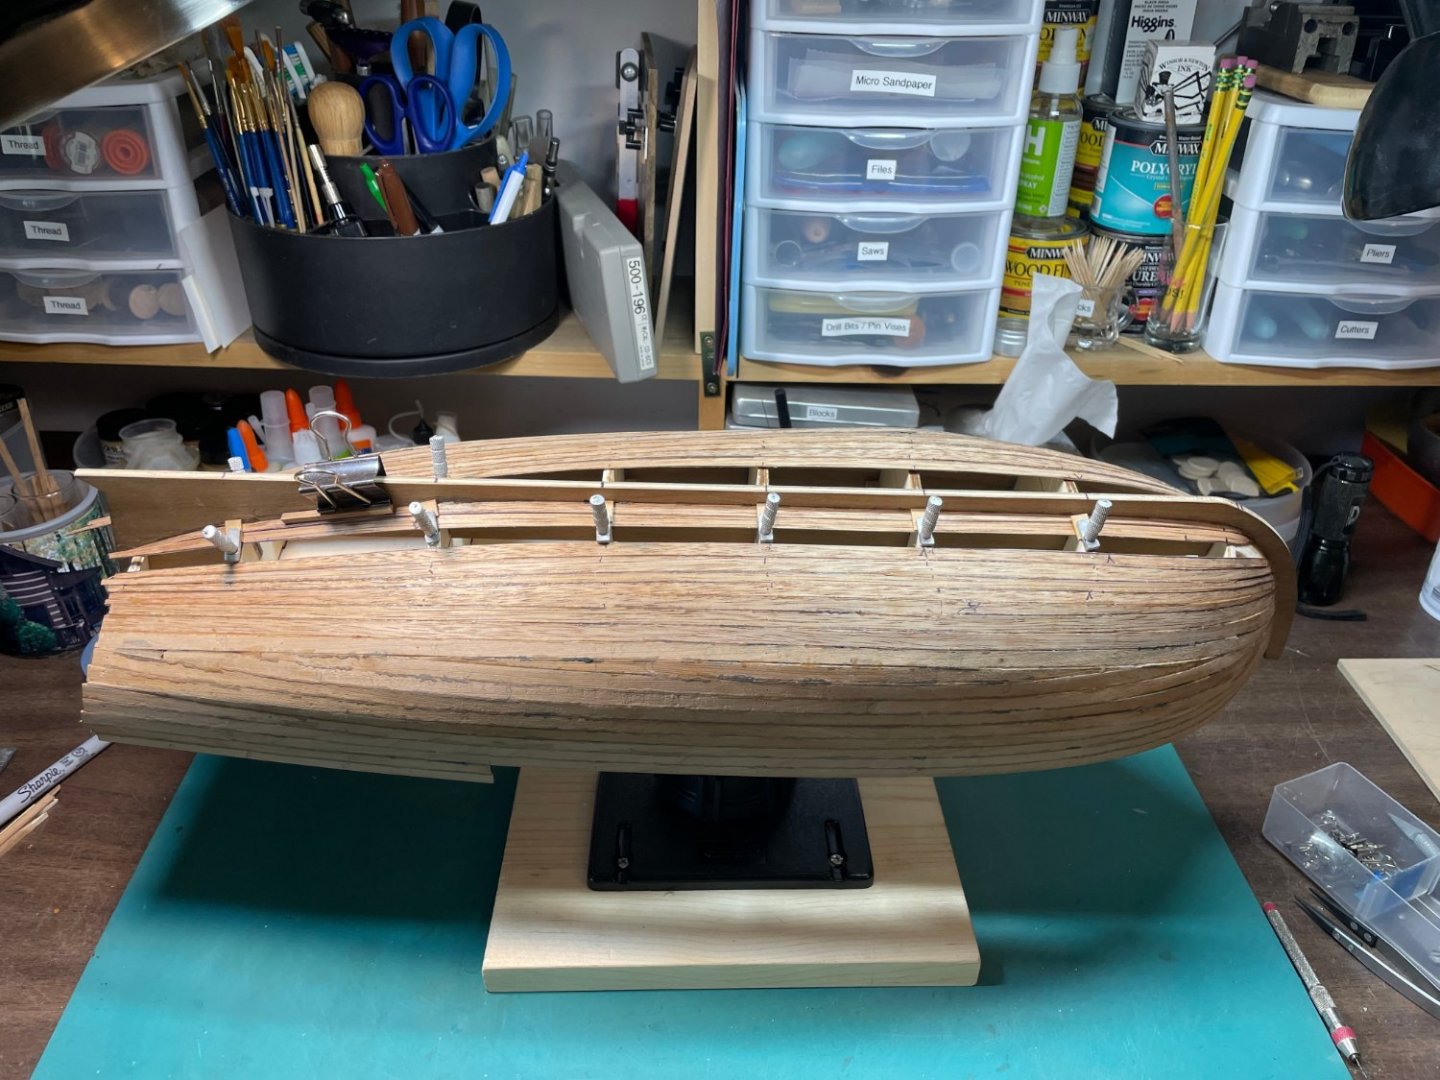
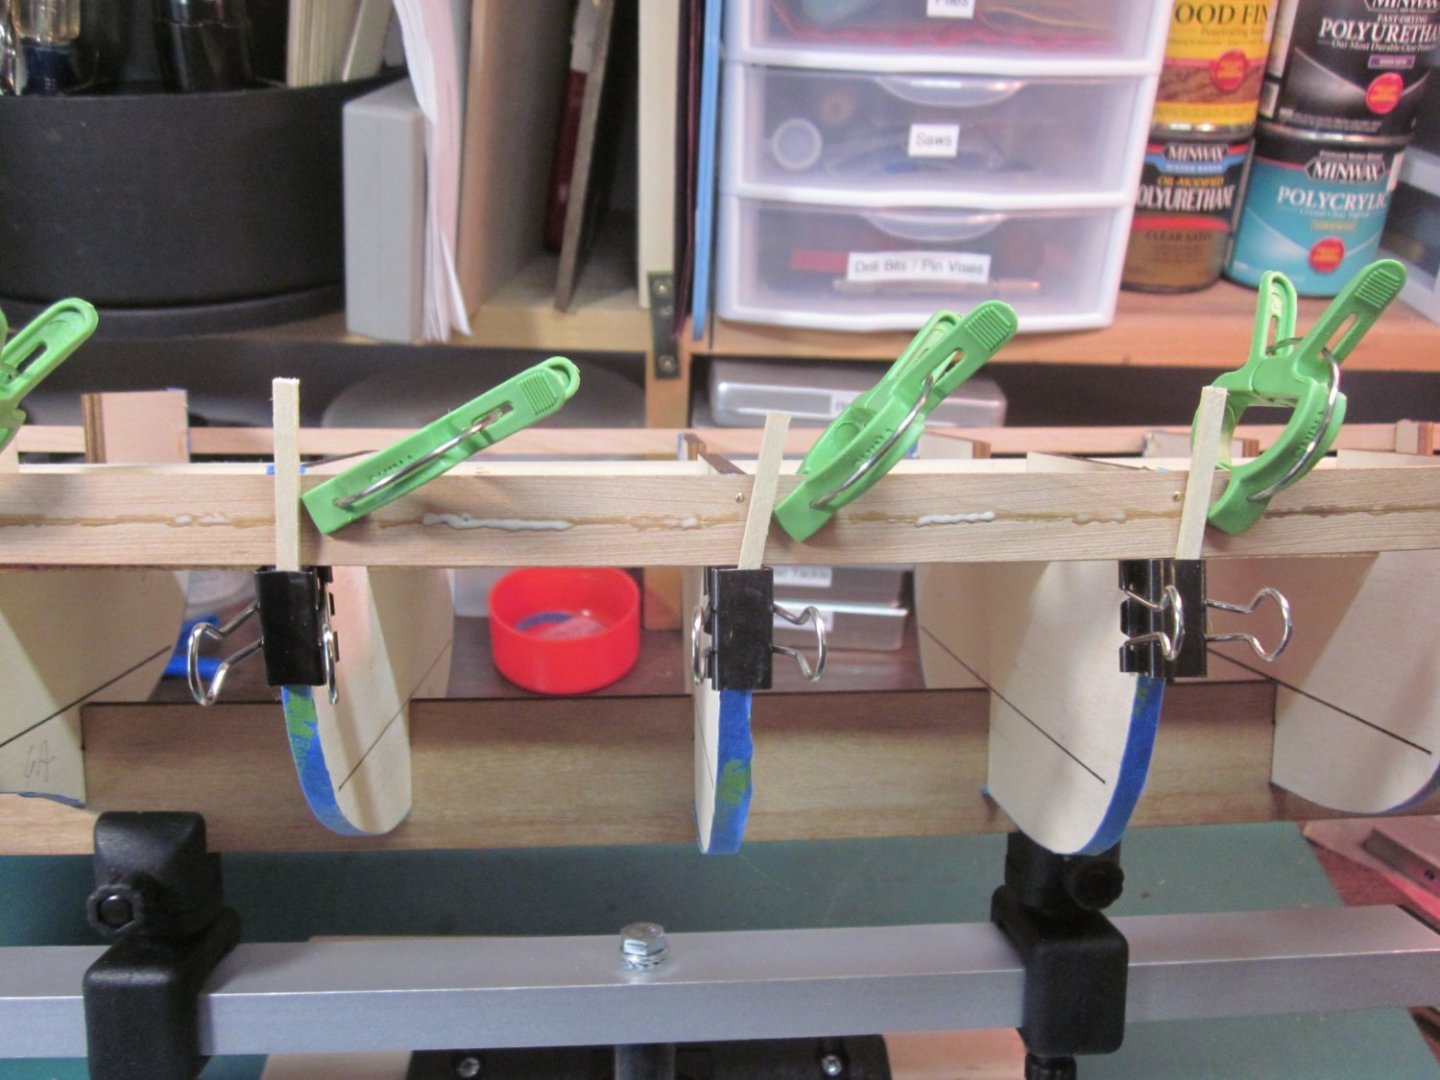
I've reached a point where I can no longer use clamps to secure the planks after gluing. I now use finger pressure and rubber bands. I use Titebond Ultimate glue. I apply glue to the first inch or so of the plank and hold it in place with my fingers for about ten minutes or until the glue has pretty well set. The plank stays like that, going off into the air, for eight hours at which point I apply glue for the remaining length and secure it with rubber bands. The aft end has to be manually held for a short period. The green clamps on the large paper clips keep them from opening due to rubber band pressure.

-
I have purchased blocks, cleats, and rope from Syren for this model, and the next two in my inventory - the Armed Virginia Sloop and the New Bedford Whaleboat, both from Model Shipways, which I purchased 25 years ago. The Winchelsea looks to be a wonderful kit to build, though I would probably start with the Medway Longboat. I've also purchased the serving machine to use when I do the AVS. Chuck certainly provides the best quality model supplies!!! I am contemplating two sctartch build projects. One is the "Pastime" a tourist boat that plyed Lake Manitou at Rochester, Indiana in the early 1900's. I was born there many, many moons ago. I have a lot of pictures of it, mostly from postcards, and a little bit of historical data. I thought it might be an intersting project to work on along side whatever kit I'm working on. I'll keep my other possible scratch build a closely guarded secret for a while. LOL. I notice that many modelers have several projects going at once, perhaps to avoid burnout.
-
Hello mikiek; Boy oh boy, planking this model is enough to drive one to drink, eh!? Your frustrations are completely understandable, and I felt the same on many days doing my launch. I like how you did the planking at the stern. I pretty much followed my 25 year old instructions, and will end up laying planks flat on the keel as shown. I didn't do a rabbet as you did because I couldn't figure a good way to do it, especially for three plank layers, on the cheap plywood supplied. I beveled the ends of my planks, hoping they would fit flush. You are at a point I hope to be by the end of summer, but I have already noticed some of the issues that will be encountered.
-
Hello allanyed. One would hope, especially a newbie like myself, that a kit - a good kit - would have true to scale planking. This kit supplied 1mm x 6mm planks for the outside layer, and 1mm x 7mm planks for the inside layer Thank you for great historical and reference data. I will check it out. I used full length planks on this, and nowhere did they taper to less than one half plank width. I'd like to add detail showing some sort of realistic plank joints or butt ends on the model, and perhaps even simulate nails or tree nails using a ponce wheel before I stain it. I really appreciate any and all input.
-
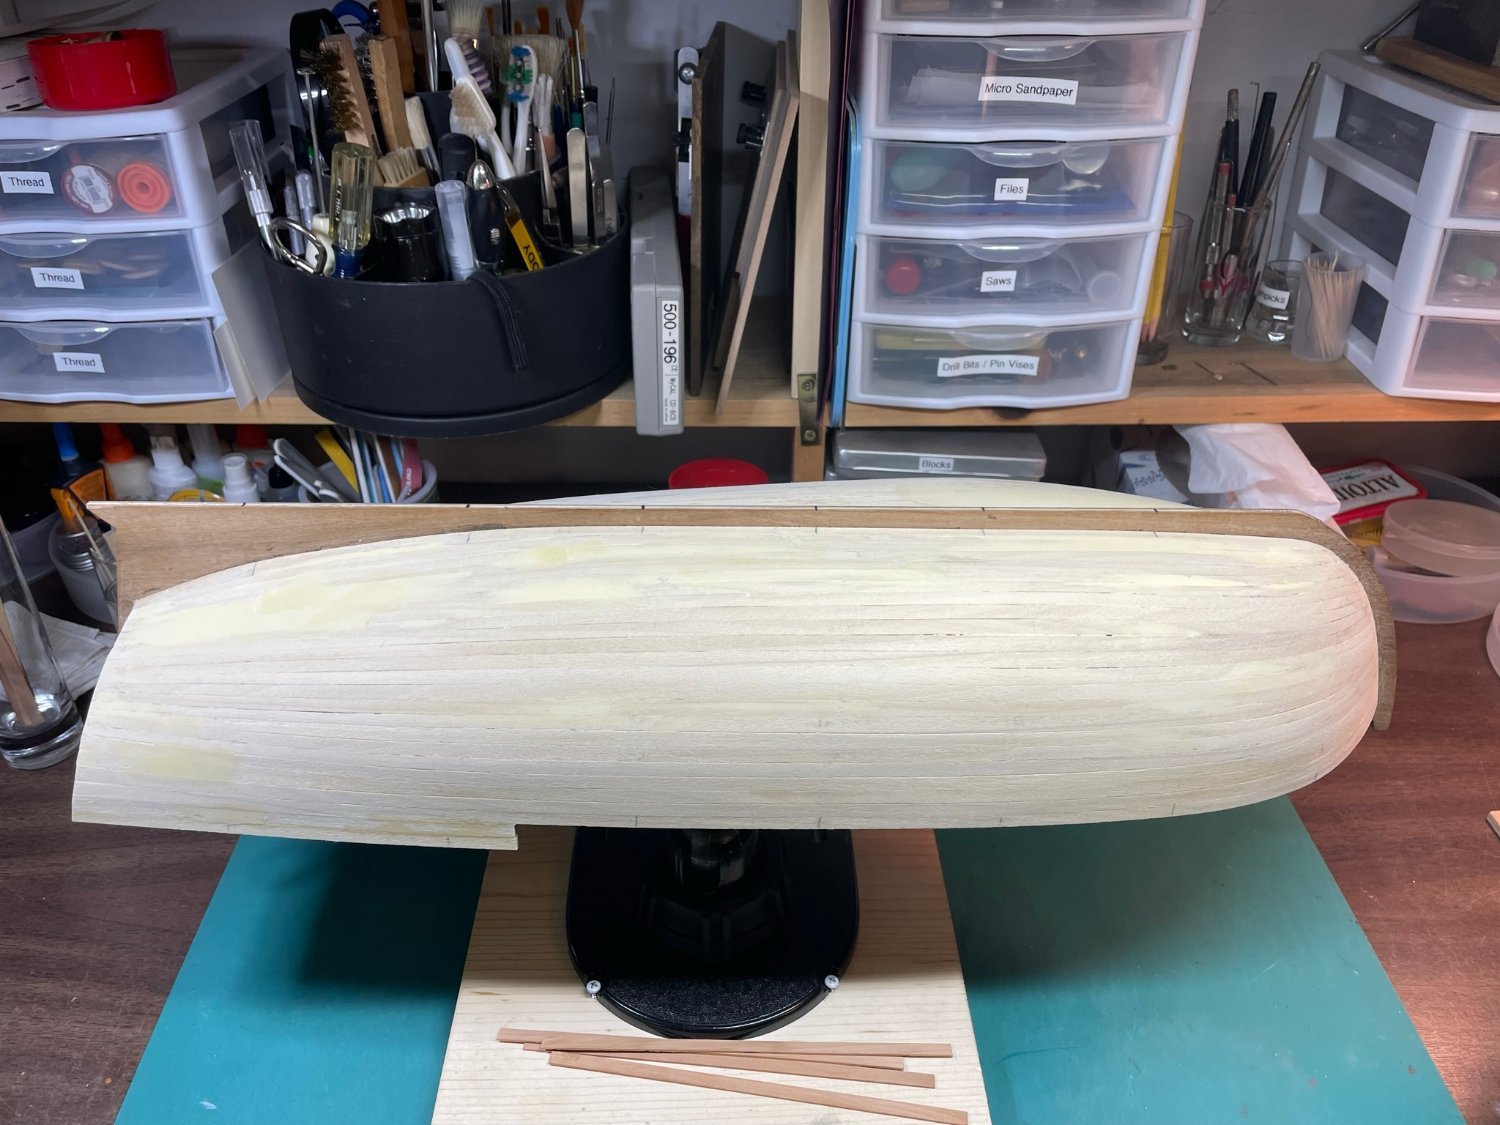
Hello mikiek - I agree with your theory about scale. This kit has been a planking extravaganza!! My only planking experience was on the Le Renard, so when I opened this kit and saw that there were three layers I darn near broke out in a sweat. The second layer was kind of a "forgiveness layer" for me as I was able to atone for mistakes in the first. I started the kit in January, hoping to be done with planking by now., however "Murphy" skewed my plans several times, and I took some breaks due to plank burnout. Now I hope to be done by the end of July. After I saw the horrible planking wood I went ahead and ordered wood from Modeler's Sawmill to replace most of the kit wood.
-
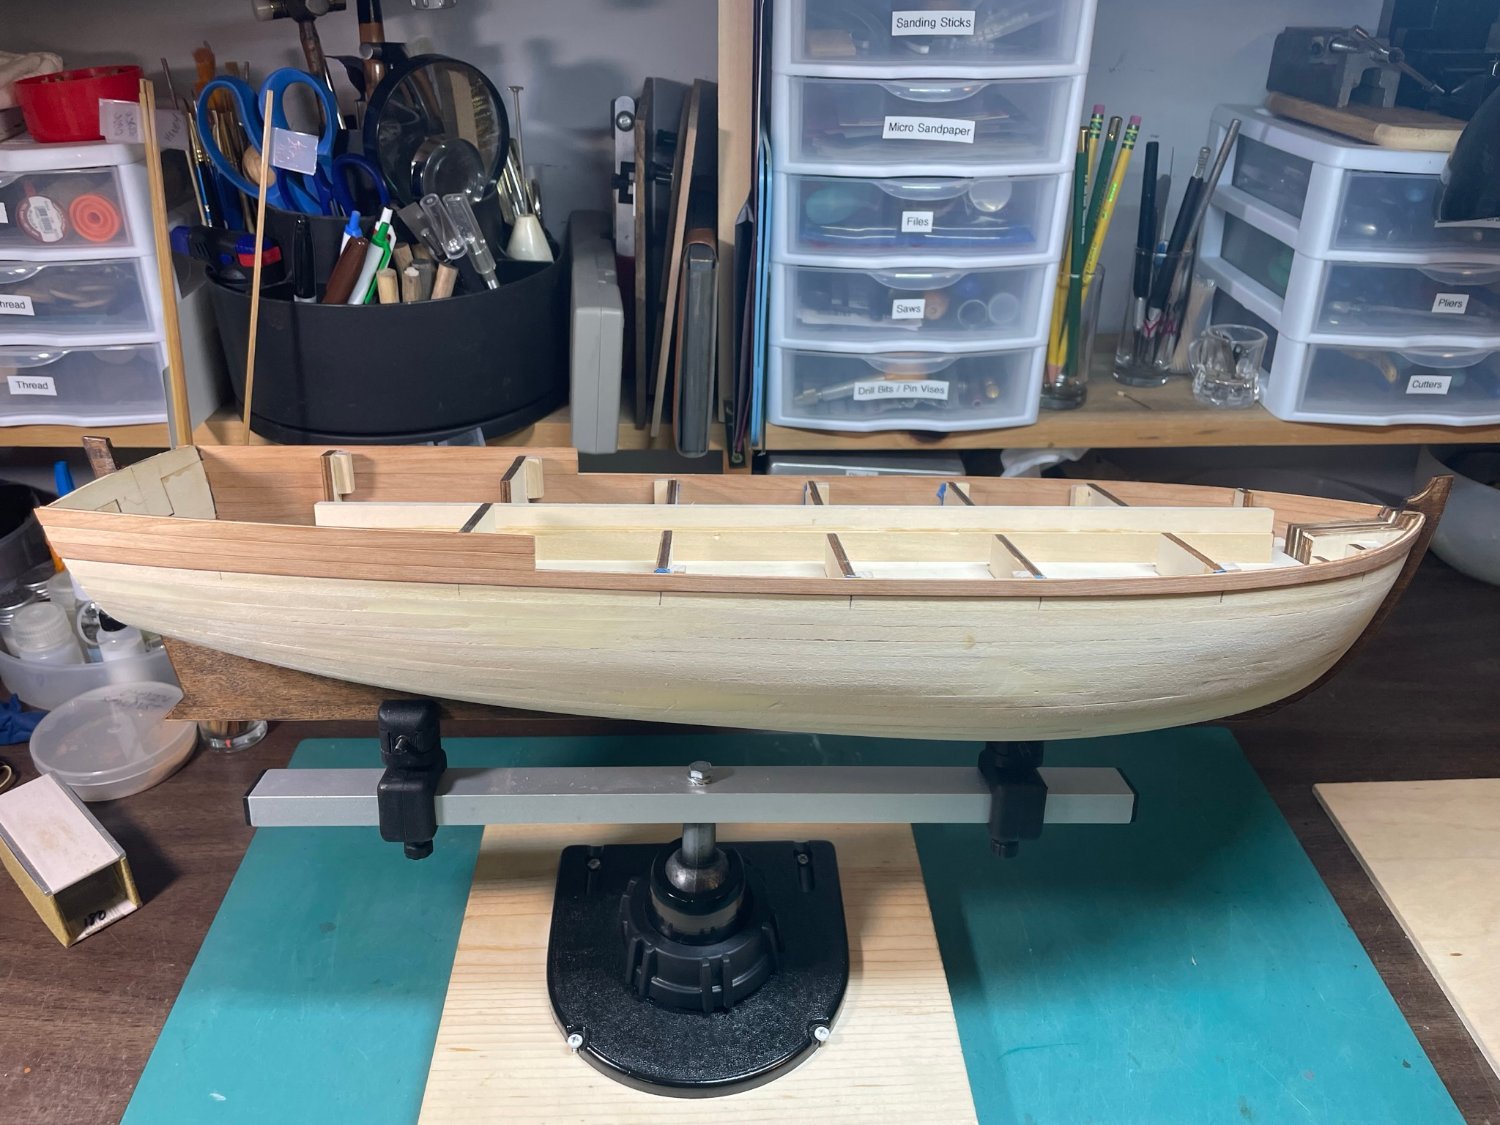
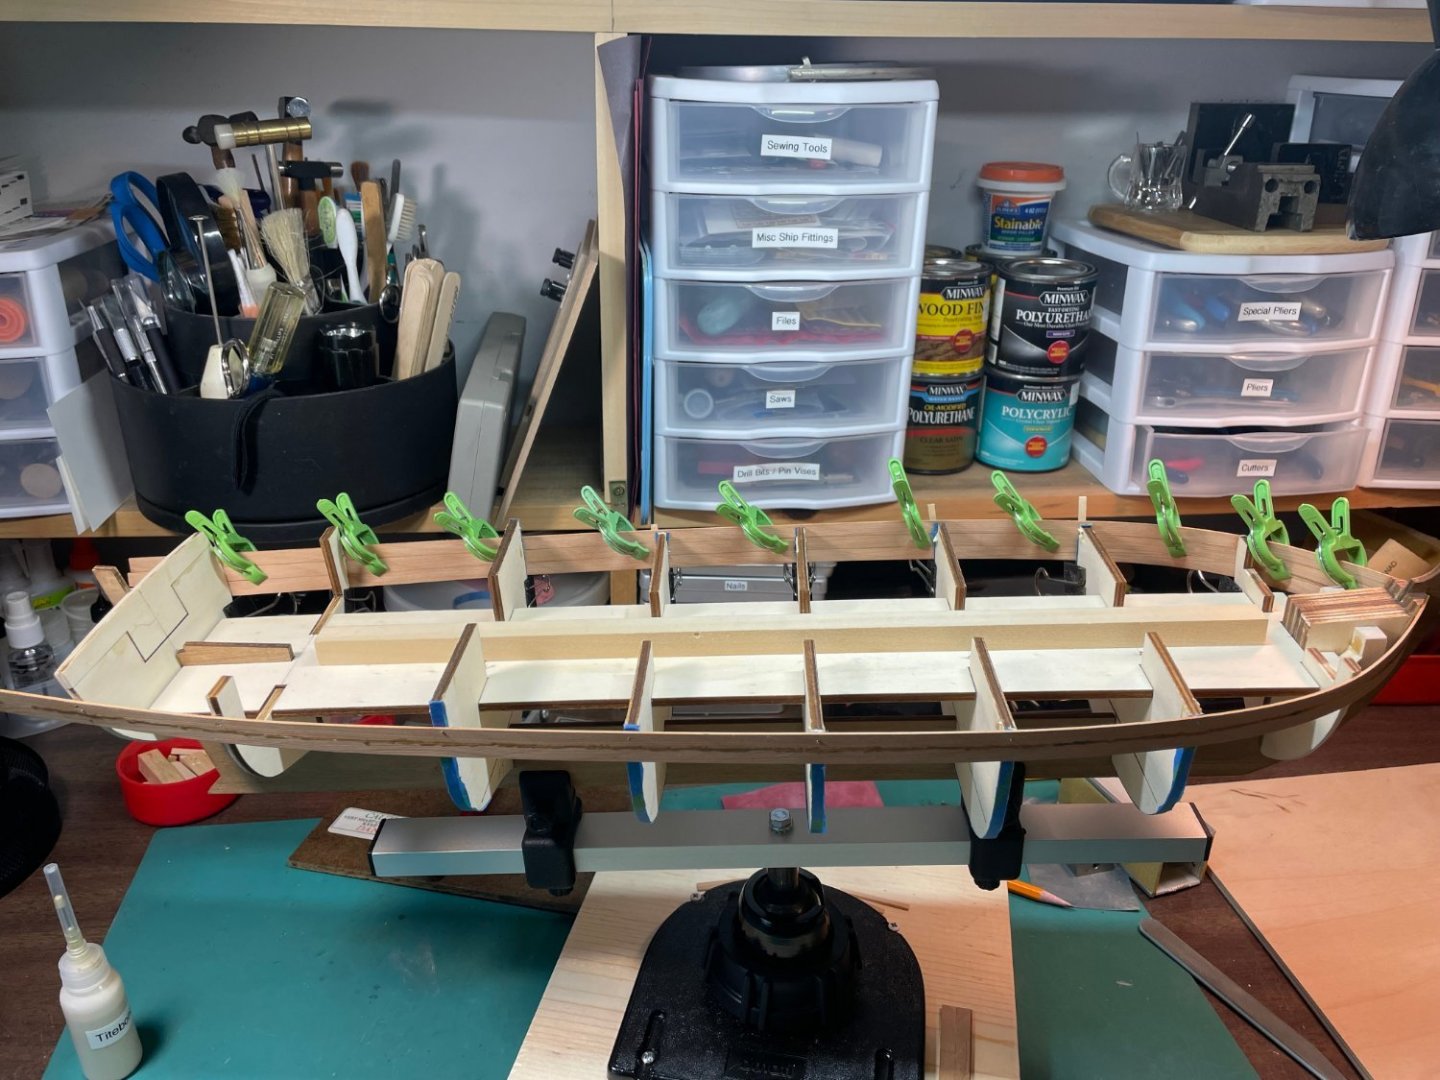
Thanks CiscoH; Most of the bulkheads used in planking the Armed Launch are removed after the third layer of planking is complete. The inner layer is visible on the completed model as well as the third layer. The kit supplies walnut for those layers, and lime wood for the middle layer. Additionally, three layers provide rigidity. The walnut that came with my kit was not at all to my liking so I replaced it I couldn't find walnut of the proper length so I got cherry wood from Modeler's Sawmill. I'm not going to paint the hull and instead will stain it since the cherry wood is to nice to cover up. The Arned Virginia Sloop is waiting for me to start when I finish this model. I boought it in the mid 1990's along with many others including the Constitution, Le Renard, Endeavor, and Puritan. I sold all but the Armed Virginia Sloop due to vision and "essential tremor" issues. Those made rigging Le Renard difficult. I believe that the rigging on the sloop will be doable for me. I'm already kit-bashing it before even starting and replaced all the rigging supplies with rope and blocks from Syren Ship Model Company and Model Expo. The rope has cost far more than the model did but is vastly superior the what was supplied with the kit - or any kit for that matter. I've kept a lot of tutorial info' for the sloop including a series of articles from Model Shipways, and have considered getting the practicums that are available. I really look forward to doing it! Do you have a log in progress?
-
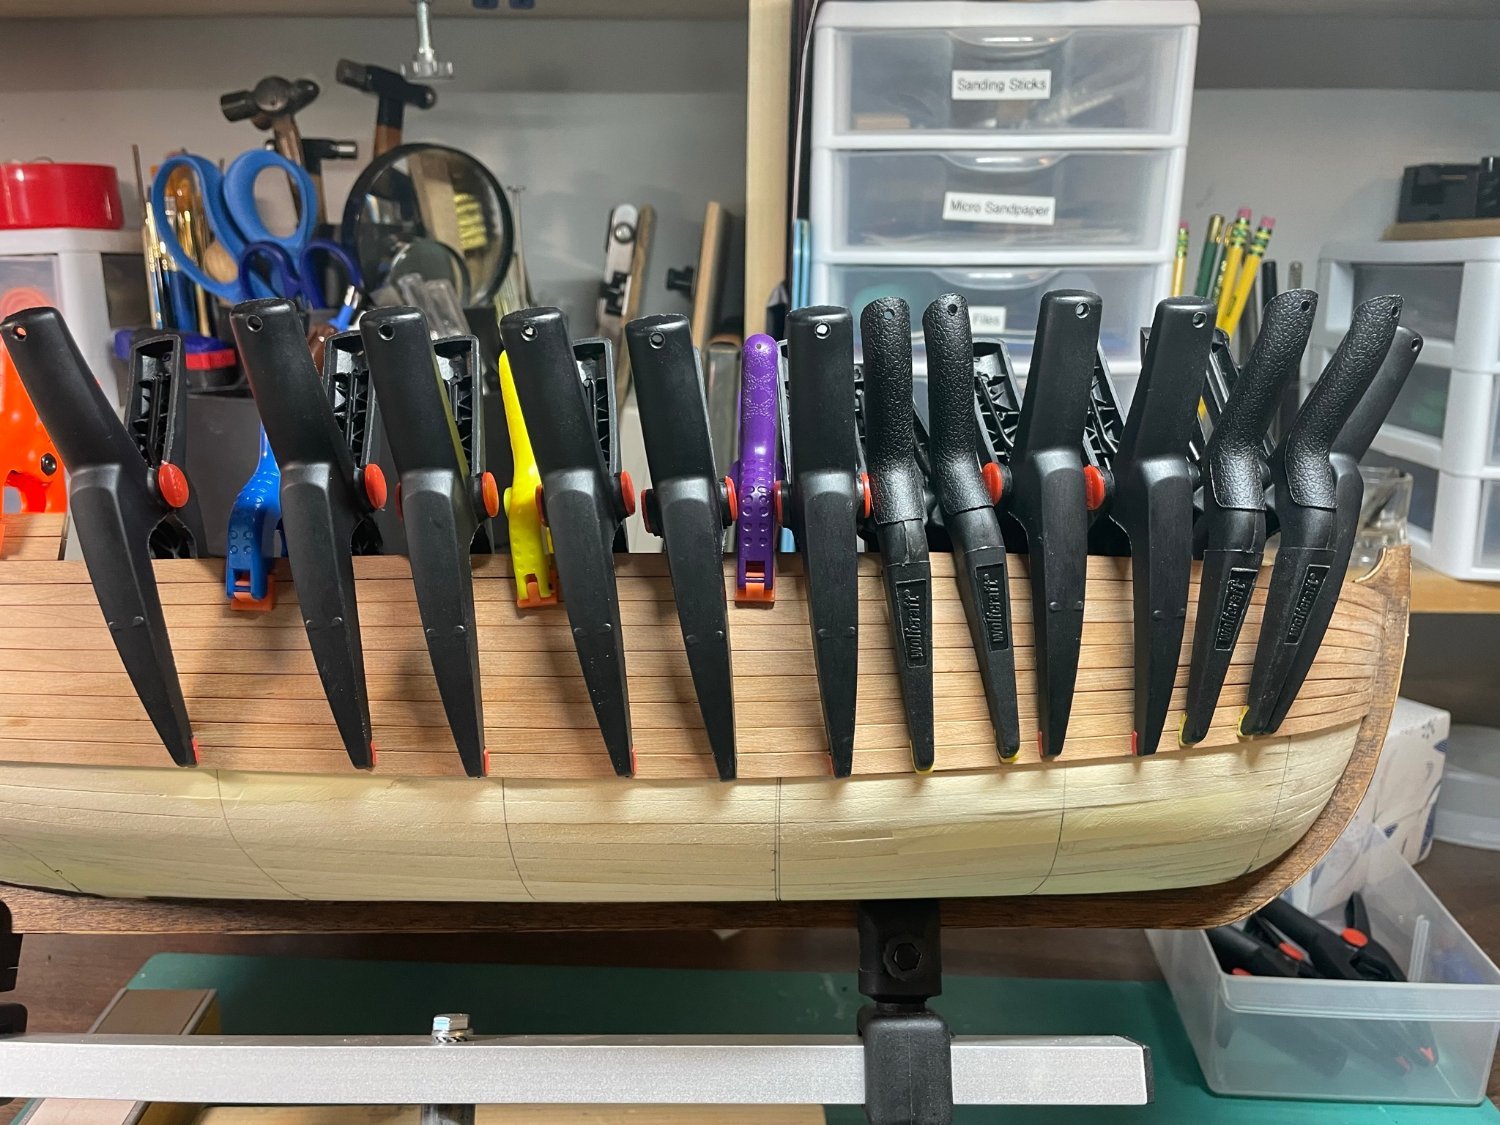
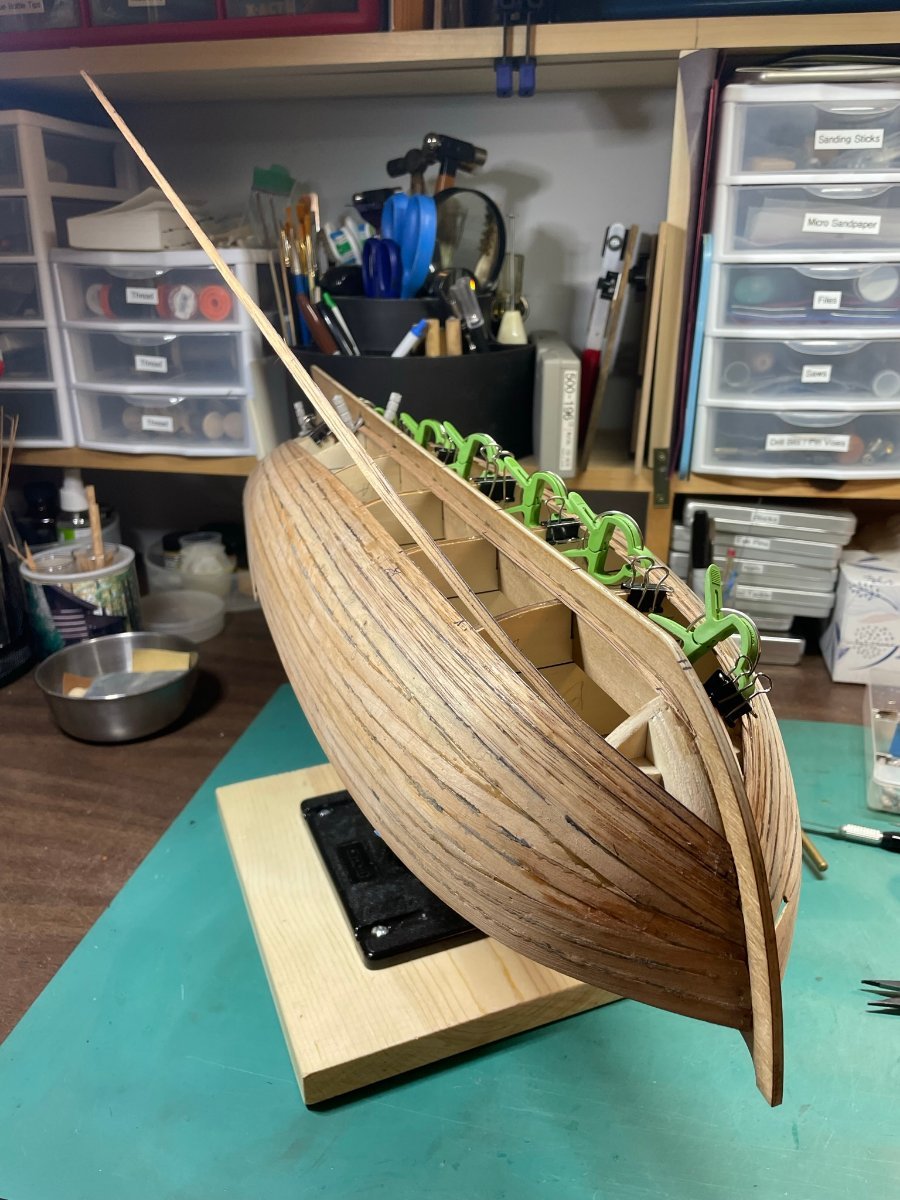
The third layer of planking is going well. I’m at the limit of the reach of my longest clamps, so will probably use finger pressure to keep the planks in place until the Titebond glue sets. I think the heat from my fingers speeds the drying somewhat. I don’t want to use super glue as I did on the second layer because I fear causing a mishap with the cherry wood planks. The model will be stained instead of painted, so errant super glue would be noticeable.


-
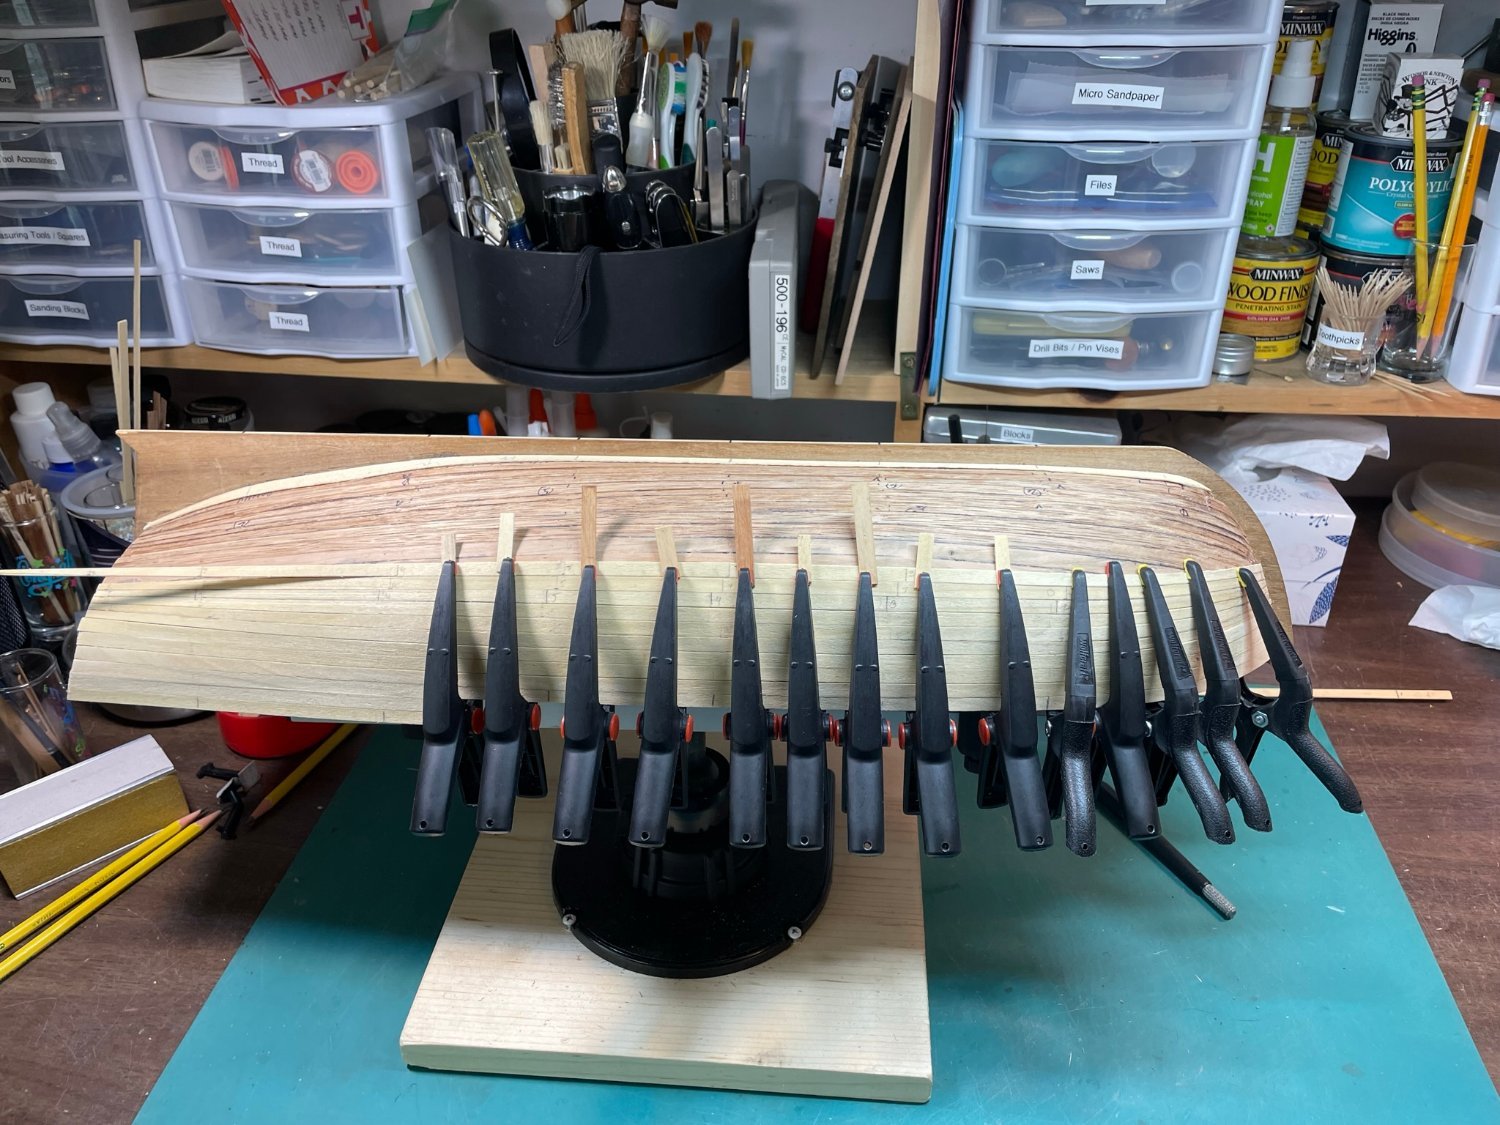
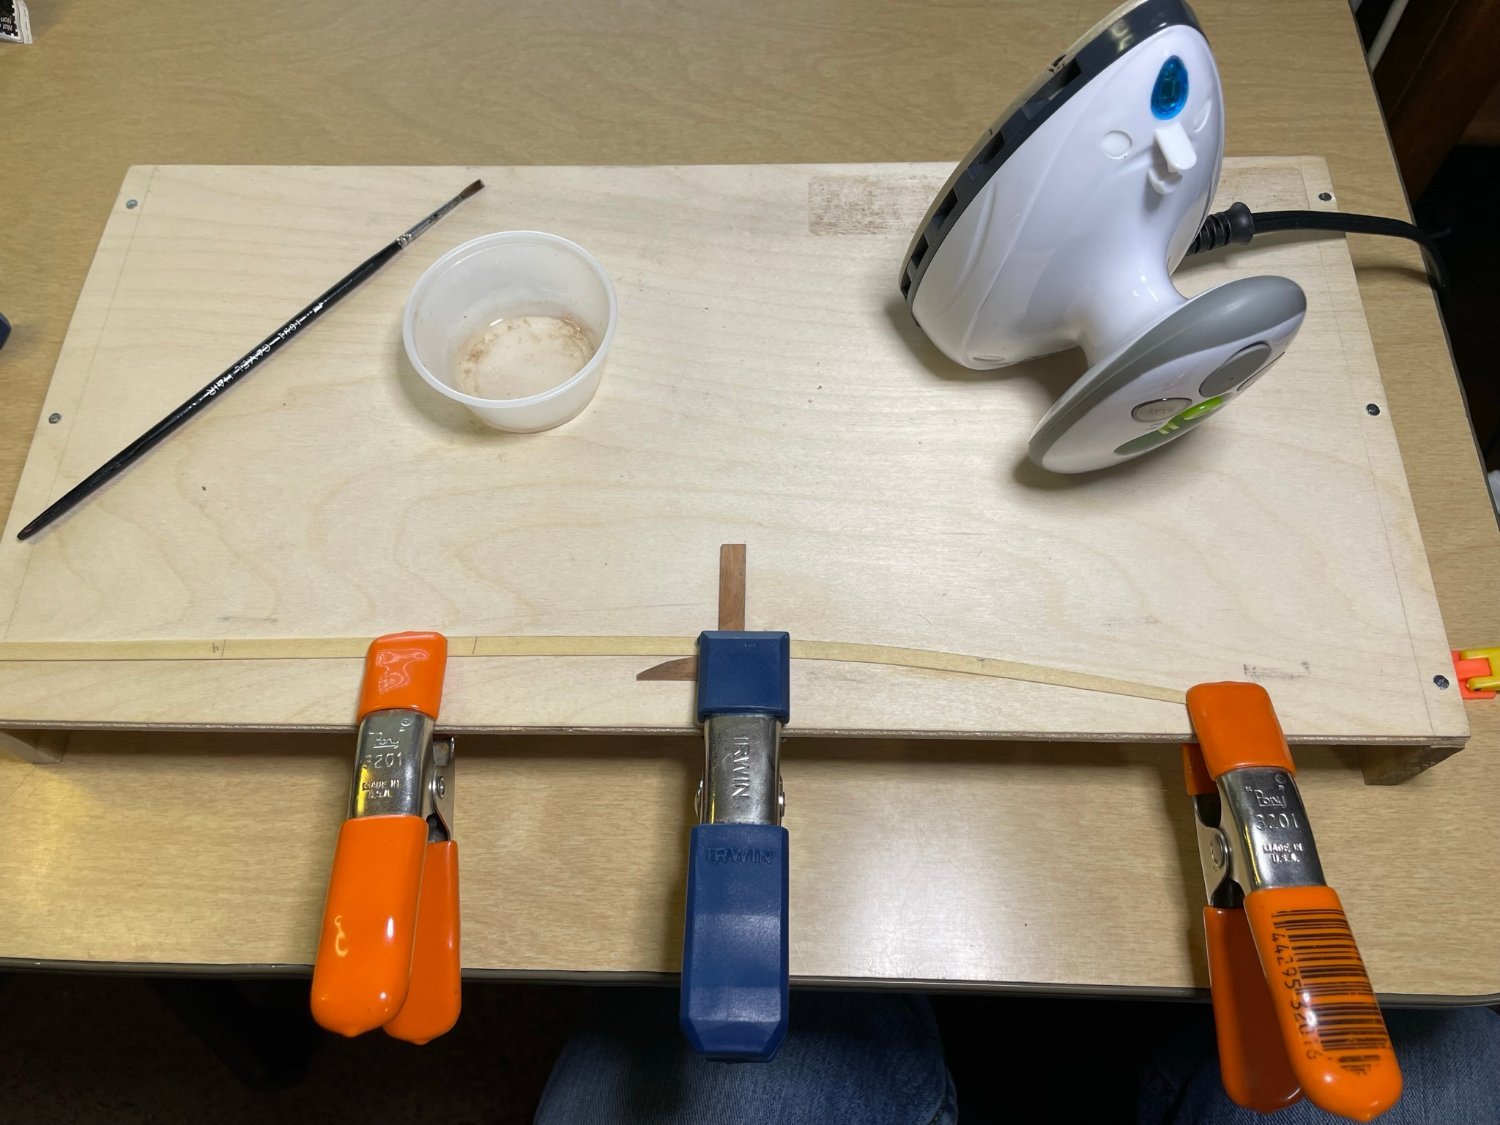
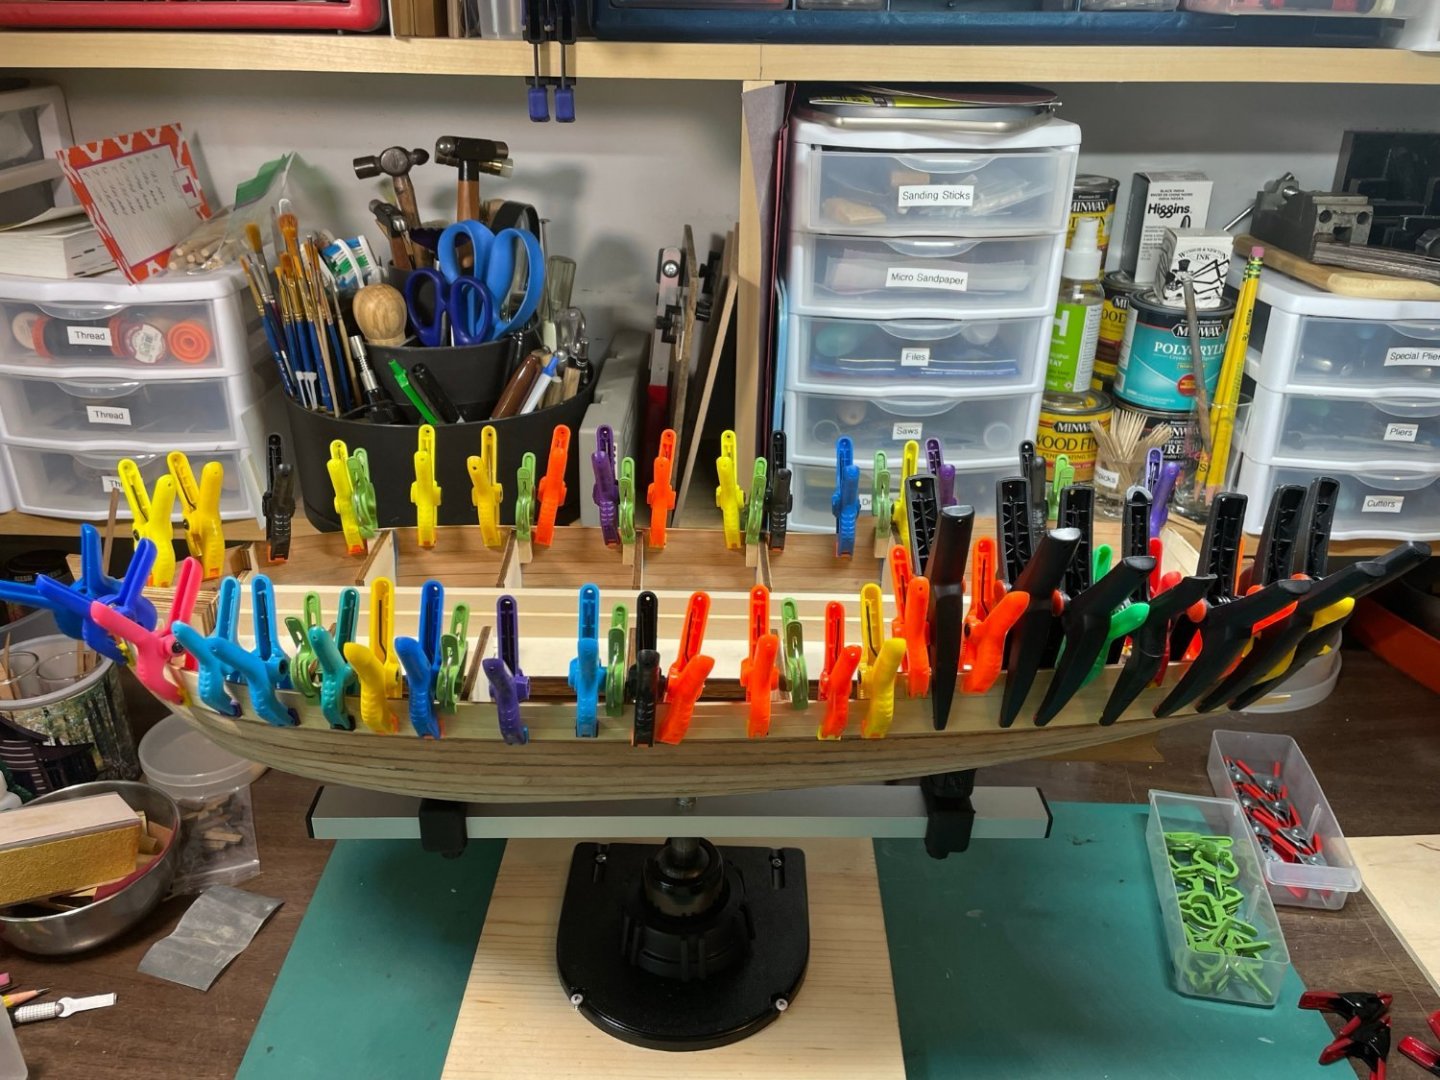
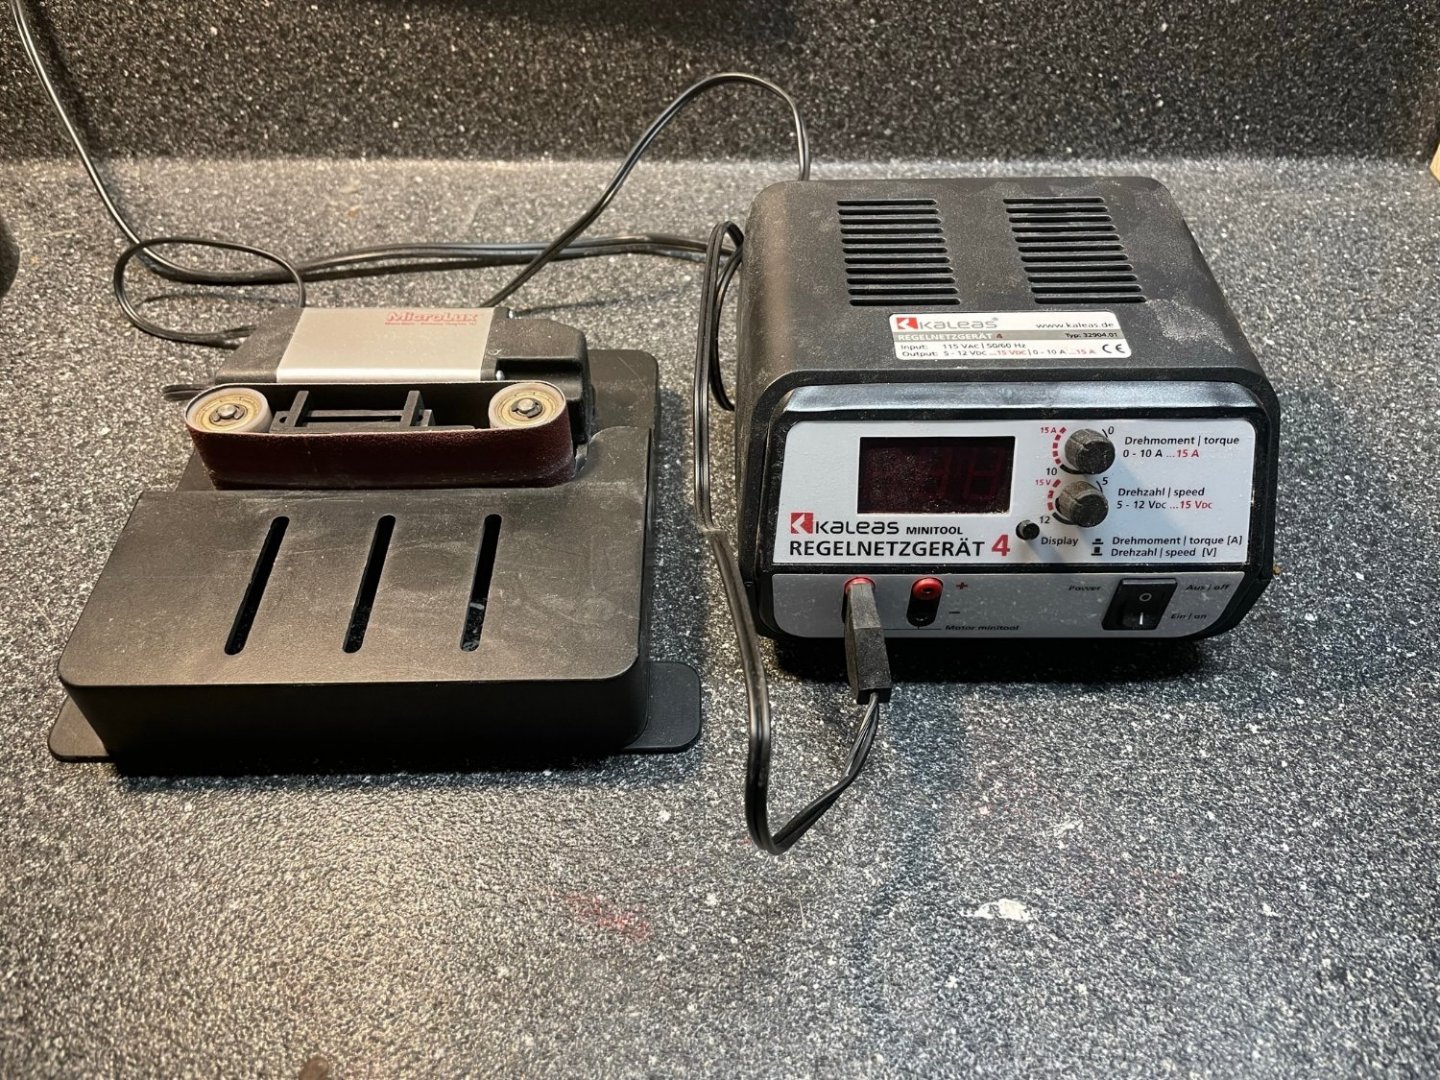
Before I began the second layer of planks I discovered and watched Chuck Passaro’s video on “Planking the Bow of the Wincheslea”, made a bending jig patterned after his, and bought a small travel iron. I also purchased a Micro-Make belt sander and benchtop holder from Micro-Mark. These together greatly improved my plank forming. I wish I’d known and done this on the first layer as it would have greatly eased my frustrations! For this layer the only part of the Panart planking illustration that I followed was to use full width lumber for the first three planks. The planks from there on were tapered and full length. I tapered the planks according to the distance between the last full width plank and the keel at each bulkhead. Ships curves were really helpful in properly tapering the planks. I had a few issues using this scheme, so on the third and most crucial layer I will likely do something different. Planking fans confuse me a bit but I’ll try to better understand them and attempt to incorporate the method. I don’t plan to paint the hull, since third layer will be all cherry wood that I’ll stain. I sure don’t want to make any mistakes so will go slower than my usually slow pace. Up to a certain point I was able to use clamps to secure the planks as the Titebond glue dried, From there on I used super glue, which I prefer to use as little as possible. I’ll probably keep using Titebond and apply finger pressure until it sets up significantly. Since I’m retired I sure have the time. Because I only applied glue to the outside edges of the planks on the first layer, the layer as a whole pulled away from the bulkheads a bit. To attempt to remedy this I glued small blocks of wood to each bulkhead then used clamps to pull the shell inward as I applied the lime wood planks. In the picture showing a lot of clamps, the small green clamps are being used for this purpose. After finishing the first layer, I tried to sand the lines of Titebond glue that were thick. I was amazed at how hard that was. Never again will I apply it in such a way that I would have to sand it after drying. During a time that I was using a music wire stopper for my glue dispenser the glue turned black. Odd!! I stopped that practice and just used a cap over the tip.


-
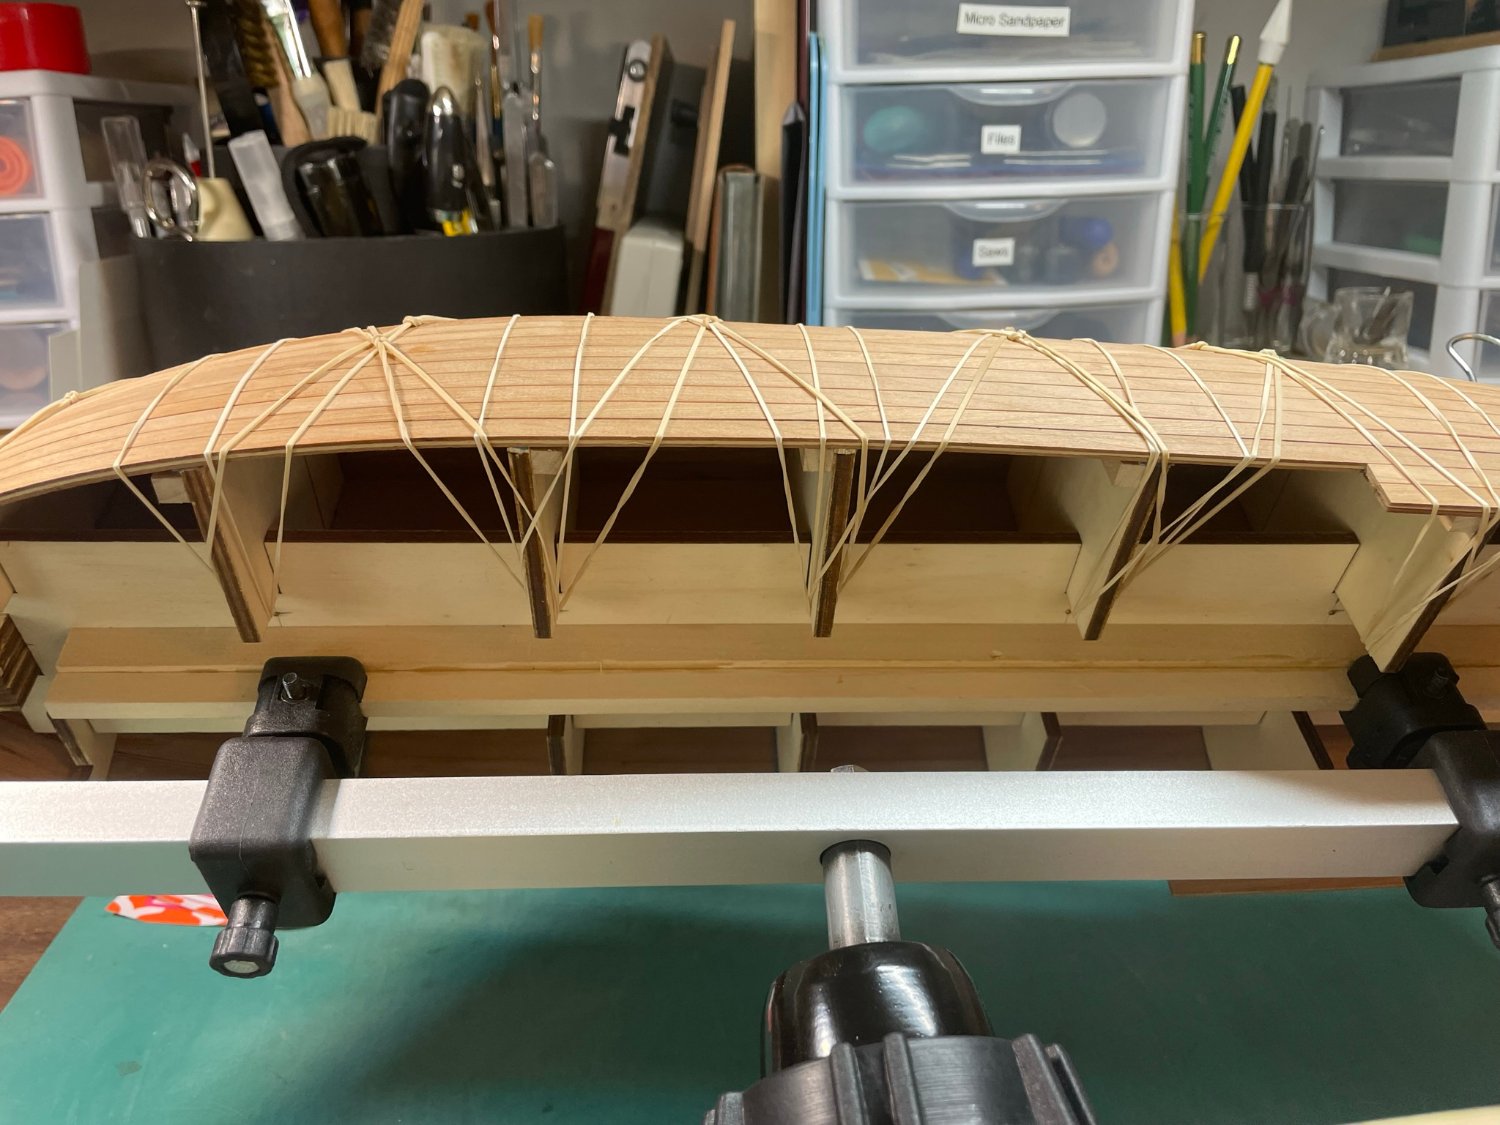
As I applied the planks using the supplied walnut strips they began pulling away from the bulkheads. This was probably due to the glue shrinking as it dried since it was on the exterior of the planks and thus putting outward stress on the planks. My solution was to push them down using rubber bands and wetting the wood throughout the day. I did this for several days and it pretty much worked. The rest of the first planking layer went pretty well.


-
The walnut planking supplied with the kit was not up to par so I decided to replace it. I was unable to find any walnut in metric sizes of the proper length so I ordered cherry wood strips from Joe at Modeler’s Sawmill. He provided excellent wood quickly and at great prices. My only previous planking experience was on the “Le Renard” so with some hesitancy I started out following the unique illustration on the plans. From the first plank onward, every plank has proven to be something of a new lesson and test. The cherry wood is a bit stiffer than the kit wood and so added an extra challenge to applying it. Since the first layer of planking would be visible on the inside, I didn’t want to have to deal with cleaning up excess glue so I slightly beveled the outside edges of the planks and applied glue on the outside seam after the planks were snugged up and secured with clamps. As I would remove the clamps, I would apply the glue (Titebond) where the clamps were.


-
Thank you james H. Now I can begin updating my buils log.
-
Thank you ccoyle. Both of your suggestions were great. Just one more question. To add a new post to my build log do I just click on the button "reply to this topic?" I searched high and low for a button that might say "update log" or something to that effect. Again, thank you!
-
I've created my first build log, added the first post and pictures, and logged out. I want to add a new post but cannot figure out how to add it. Also, how do I get to my log without having to search the forum to get to it. Any help for a newbie is greatly apprechiated!
-
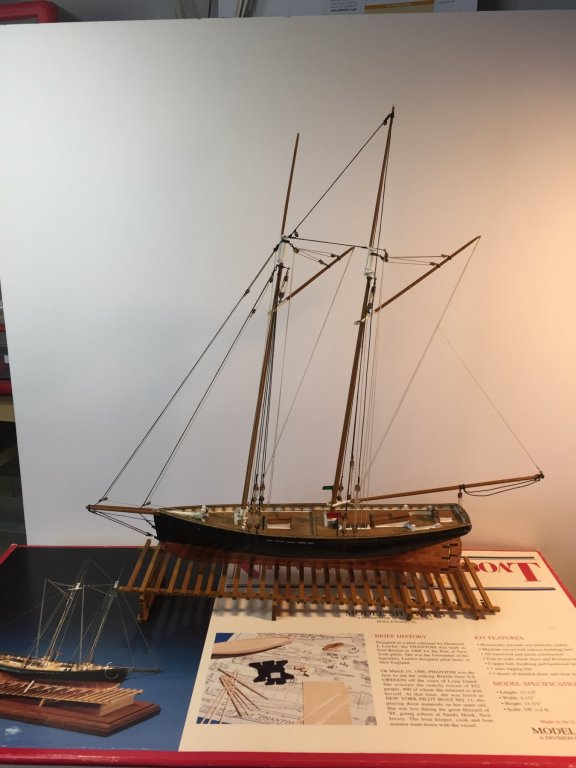
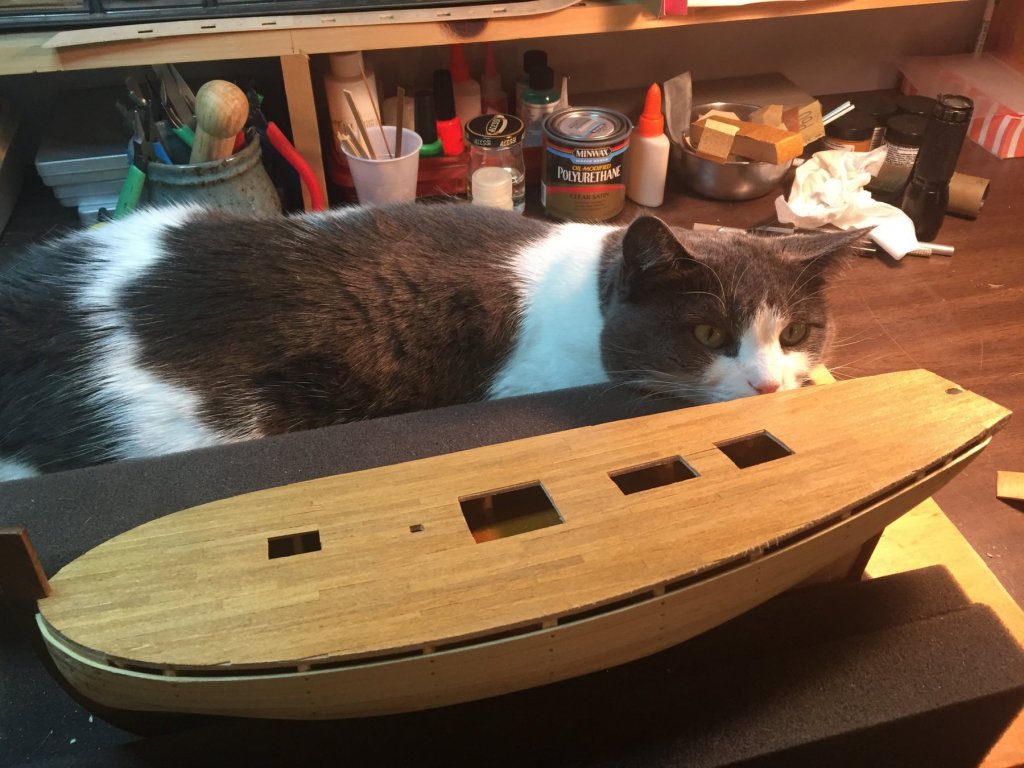
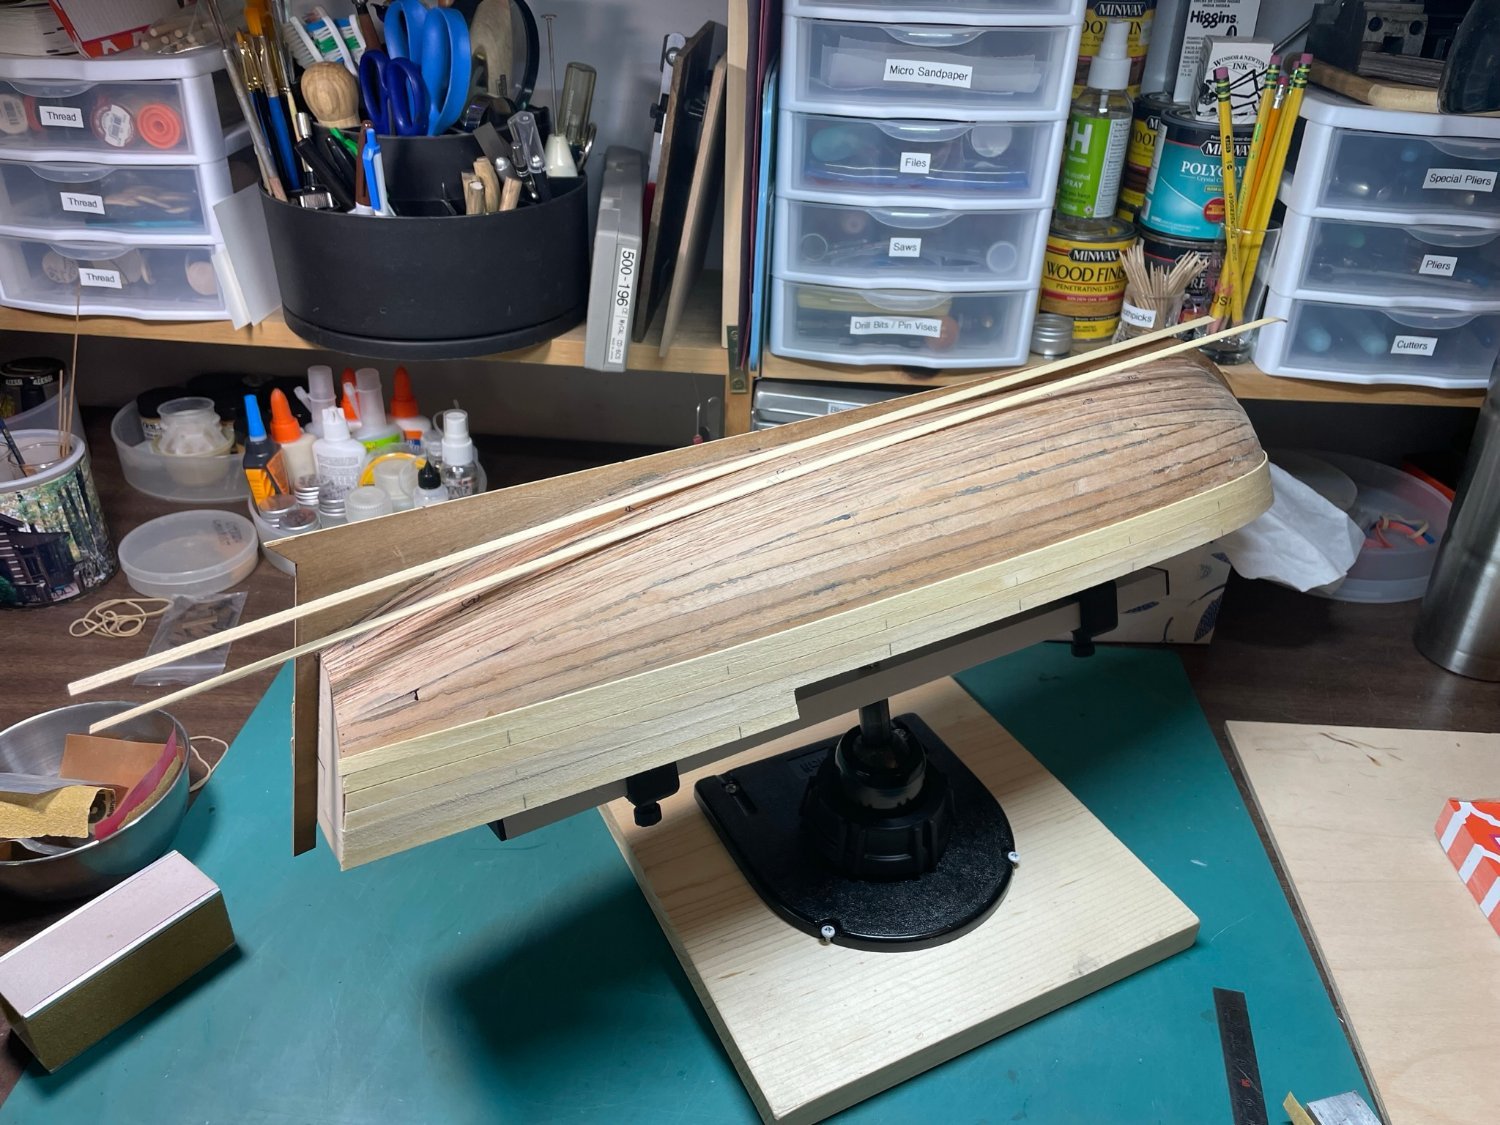
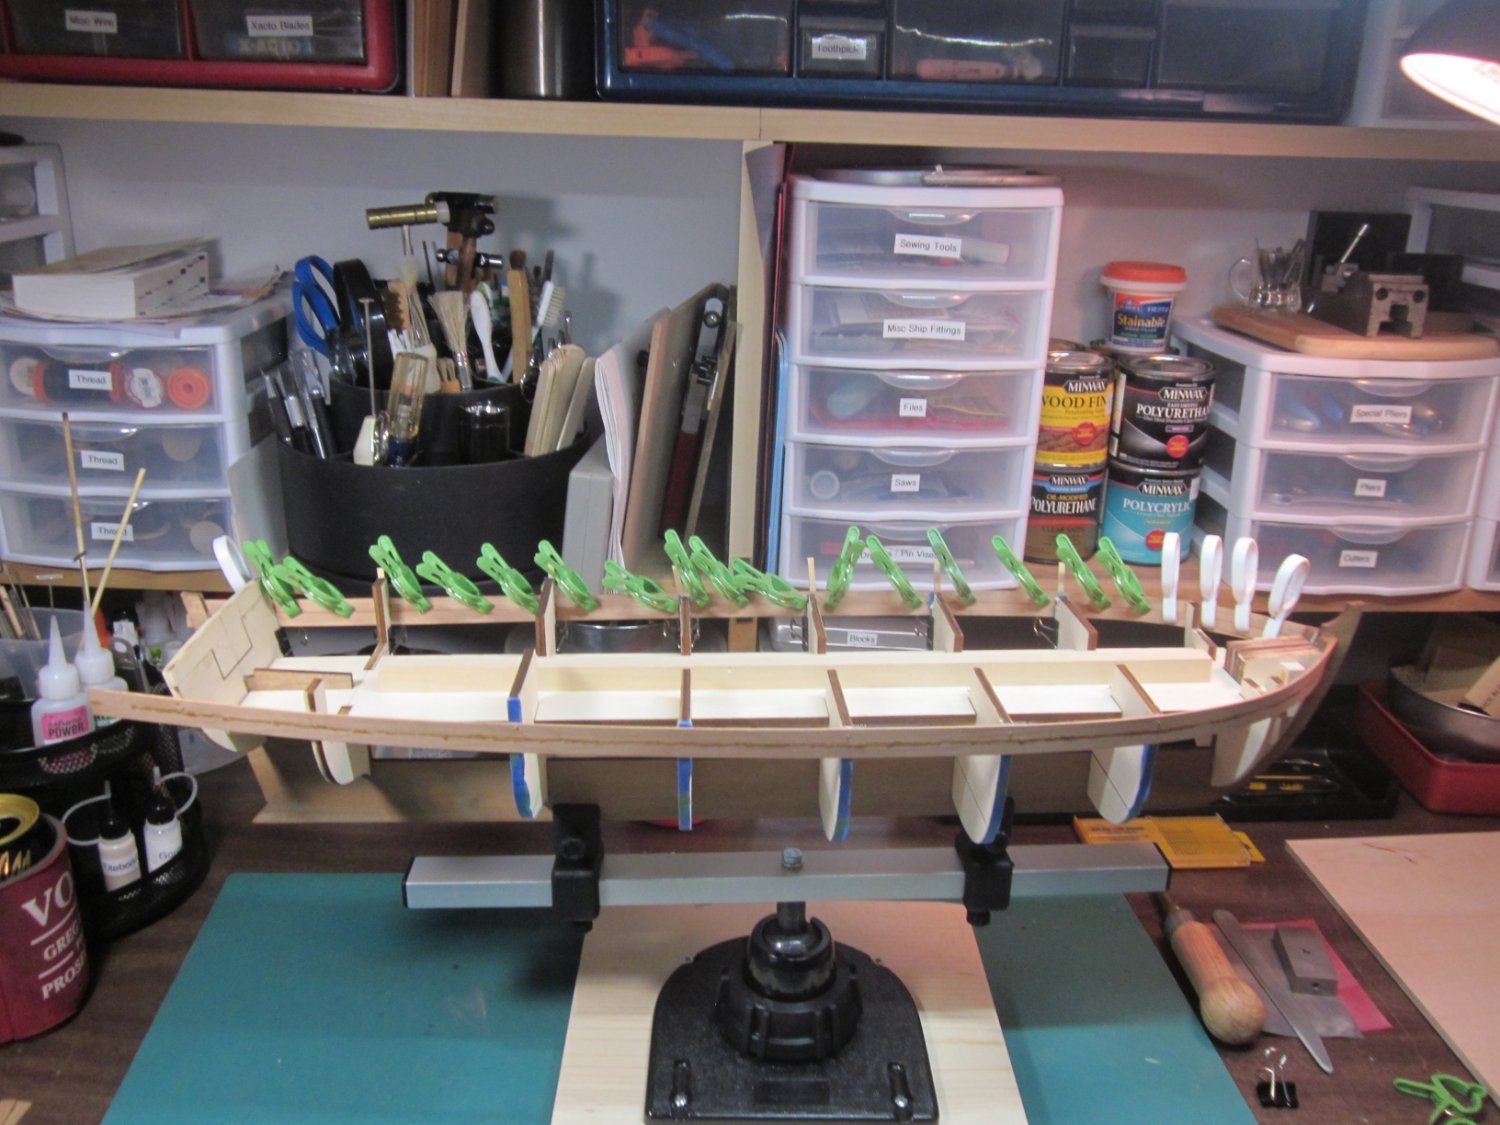
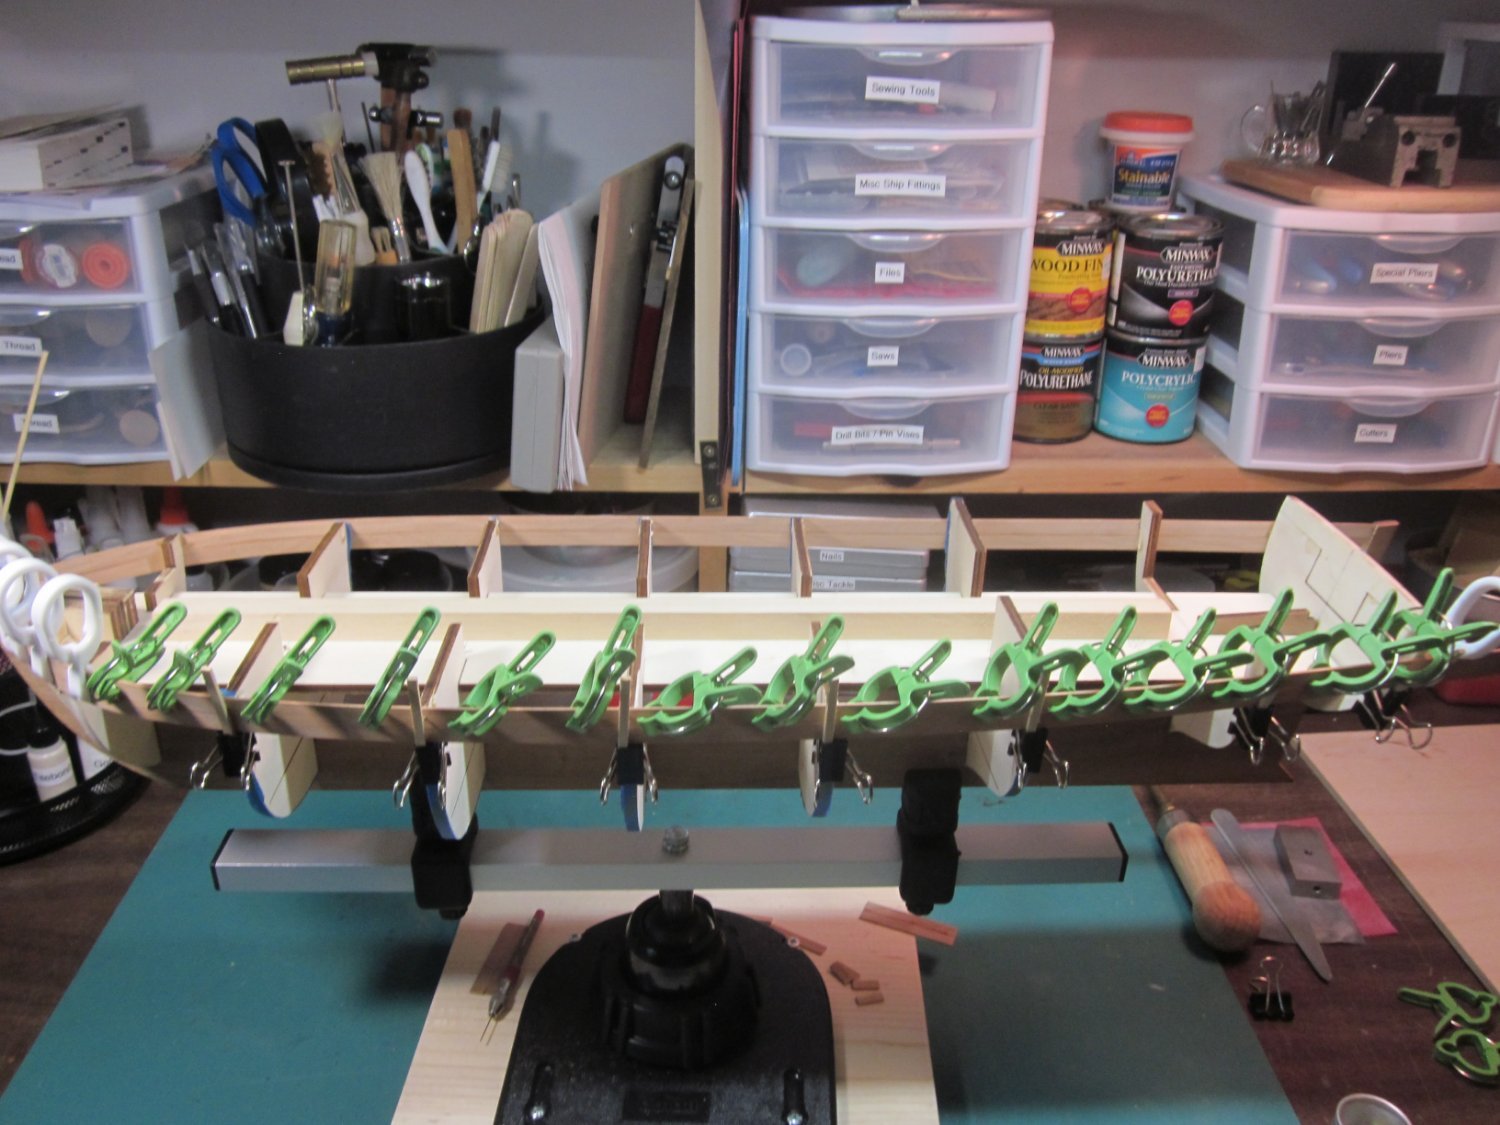
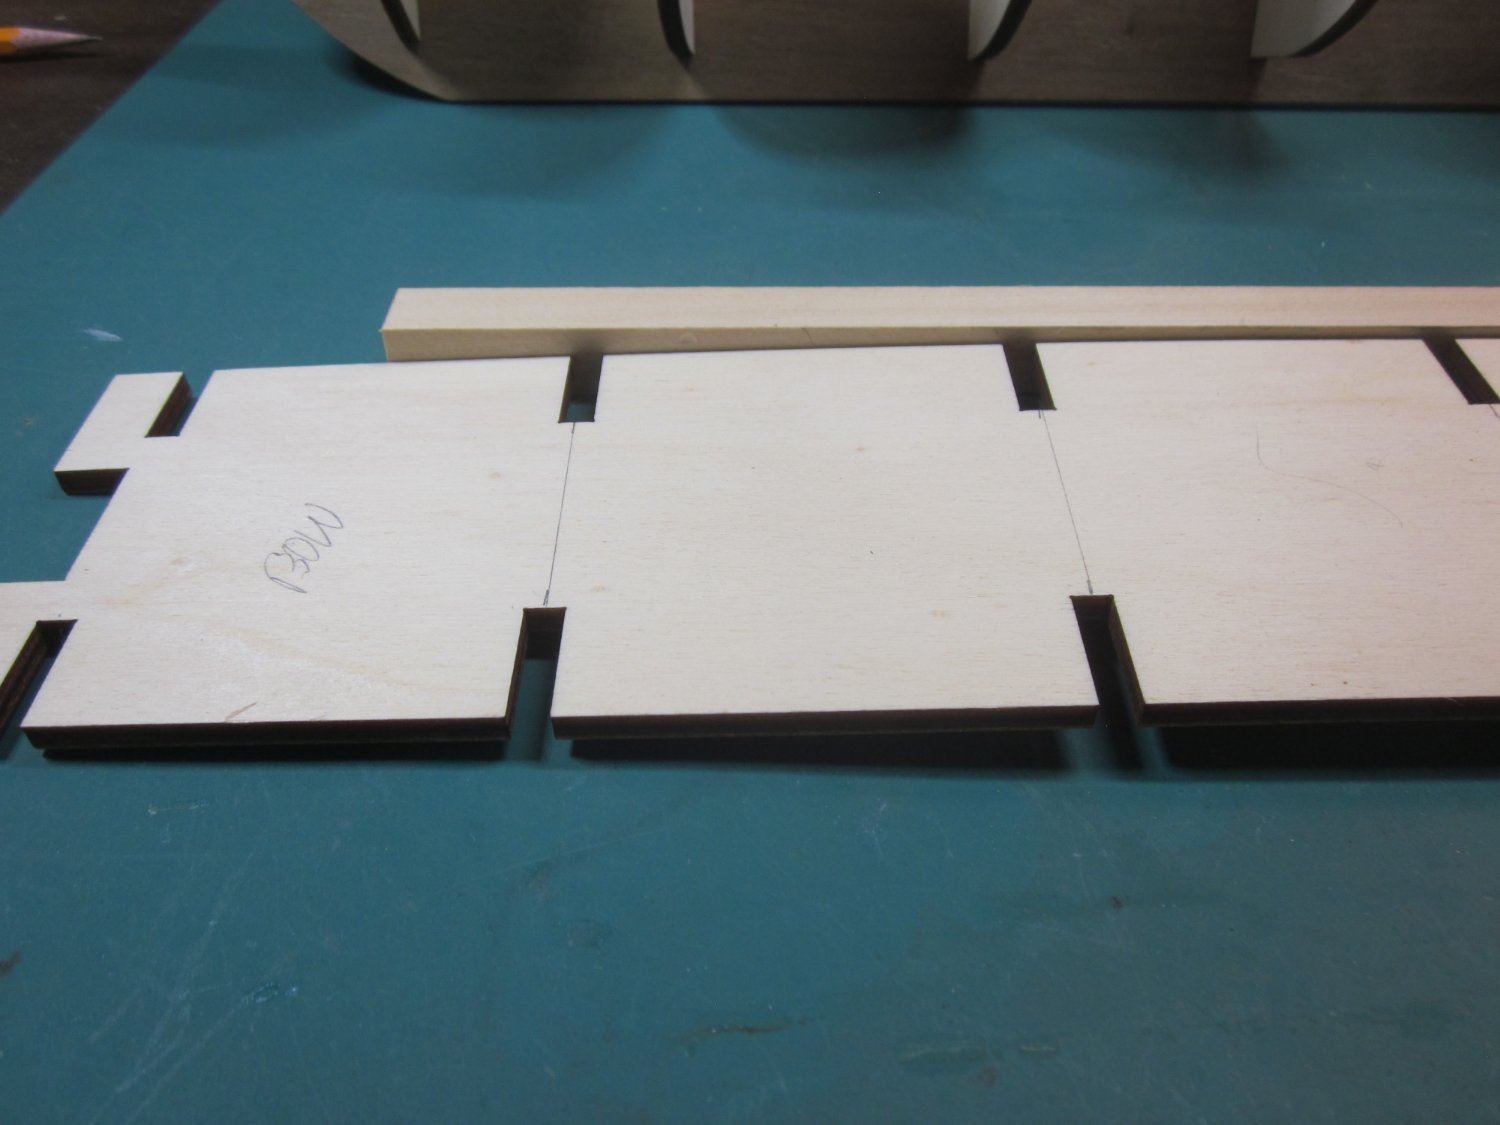
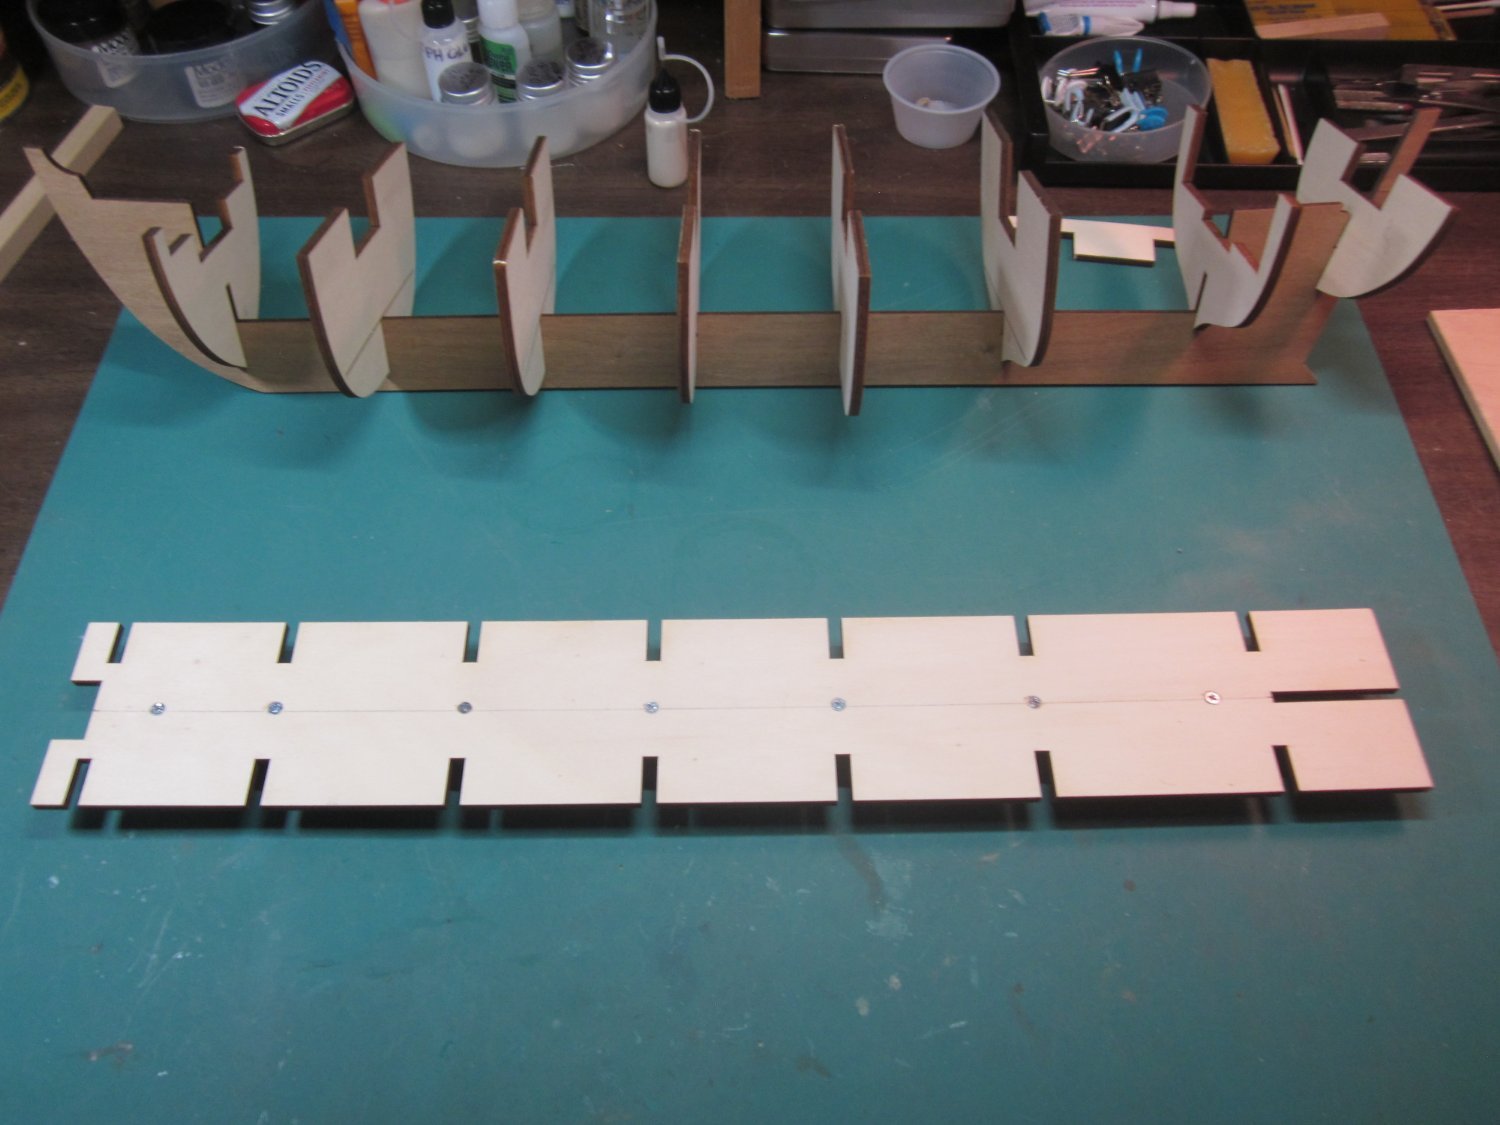
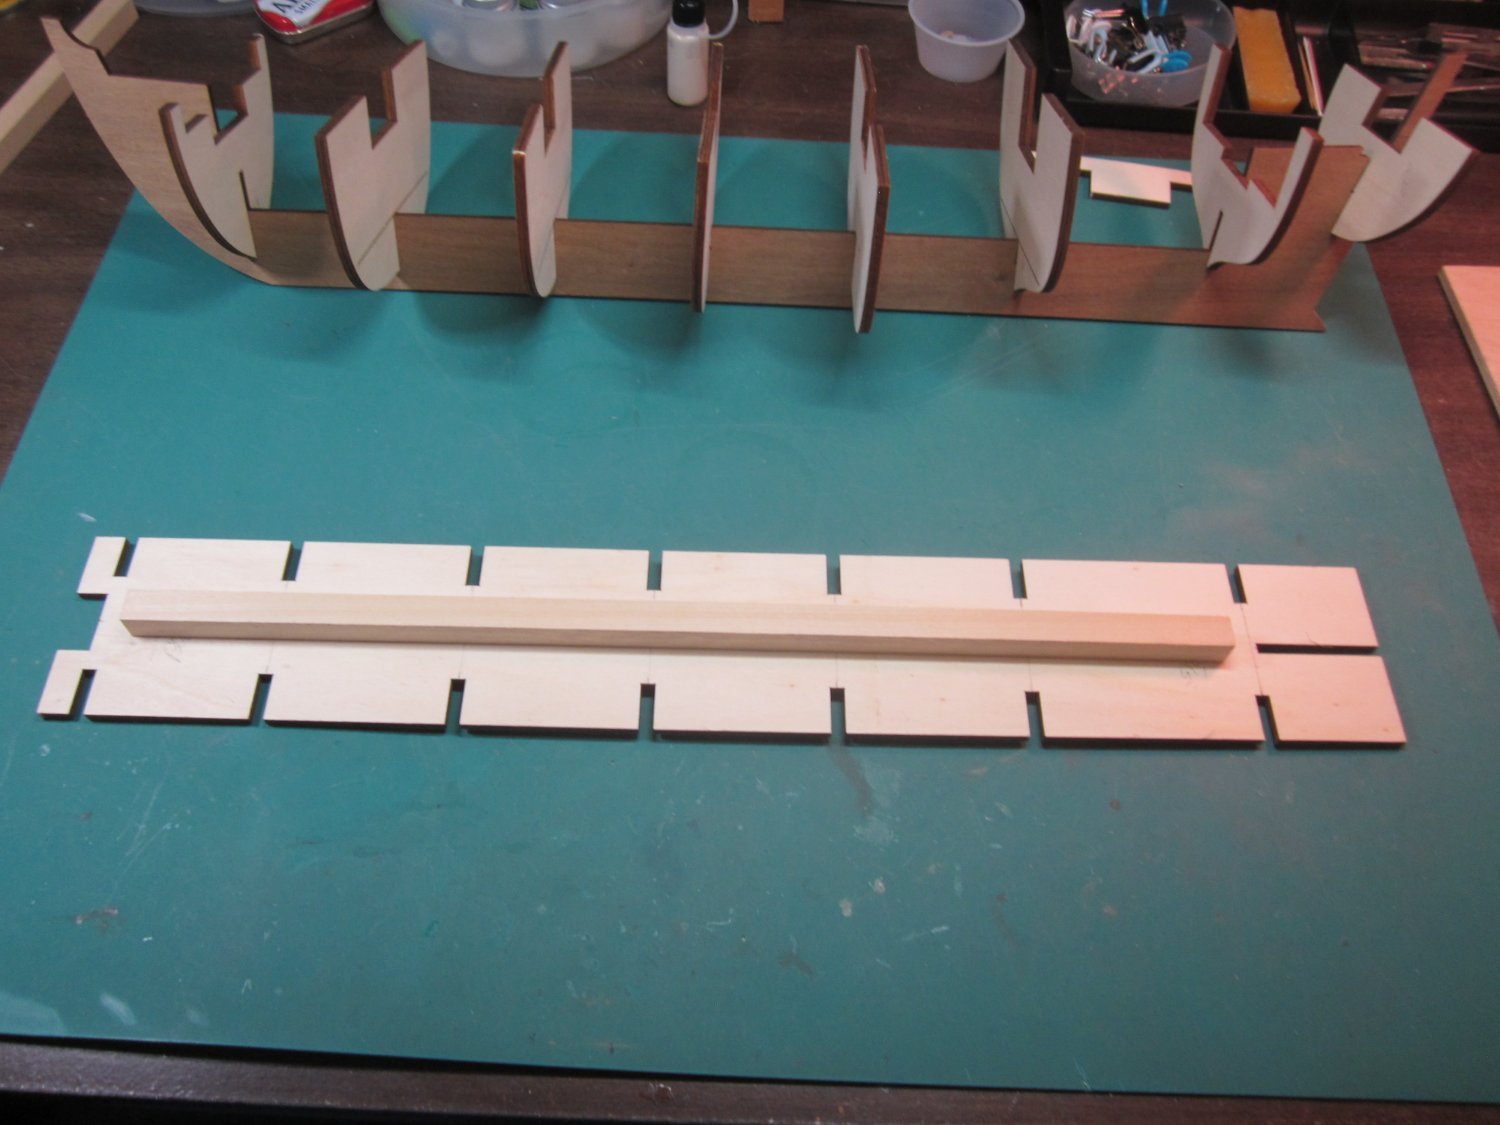
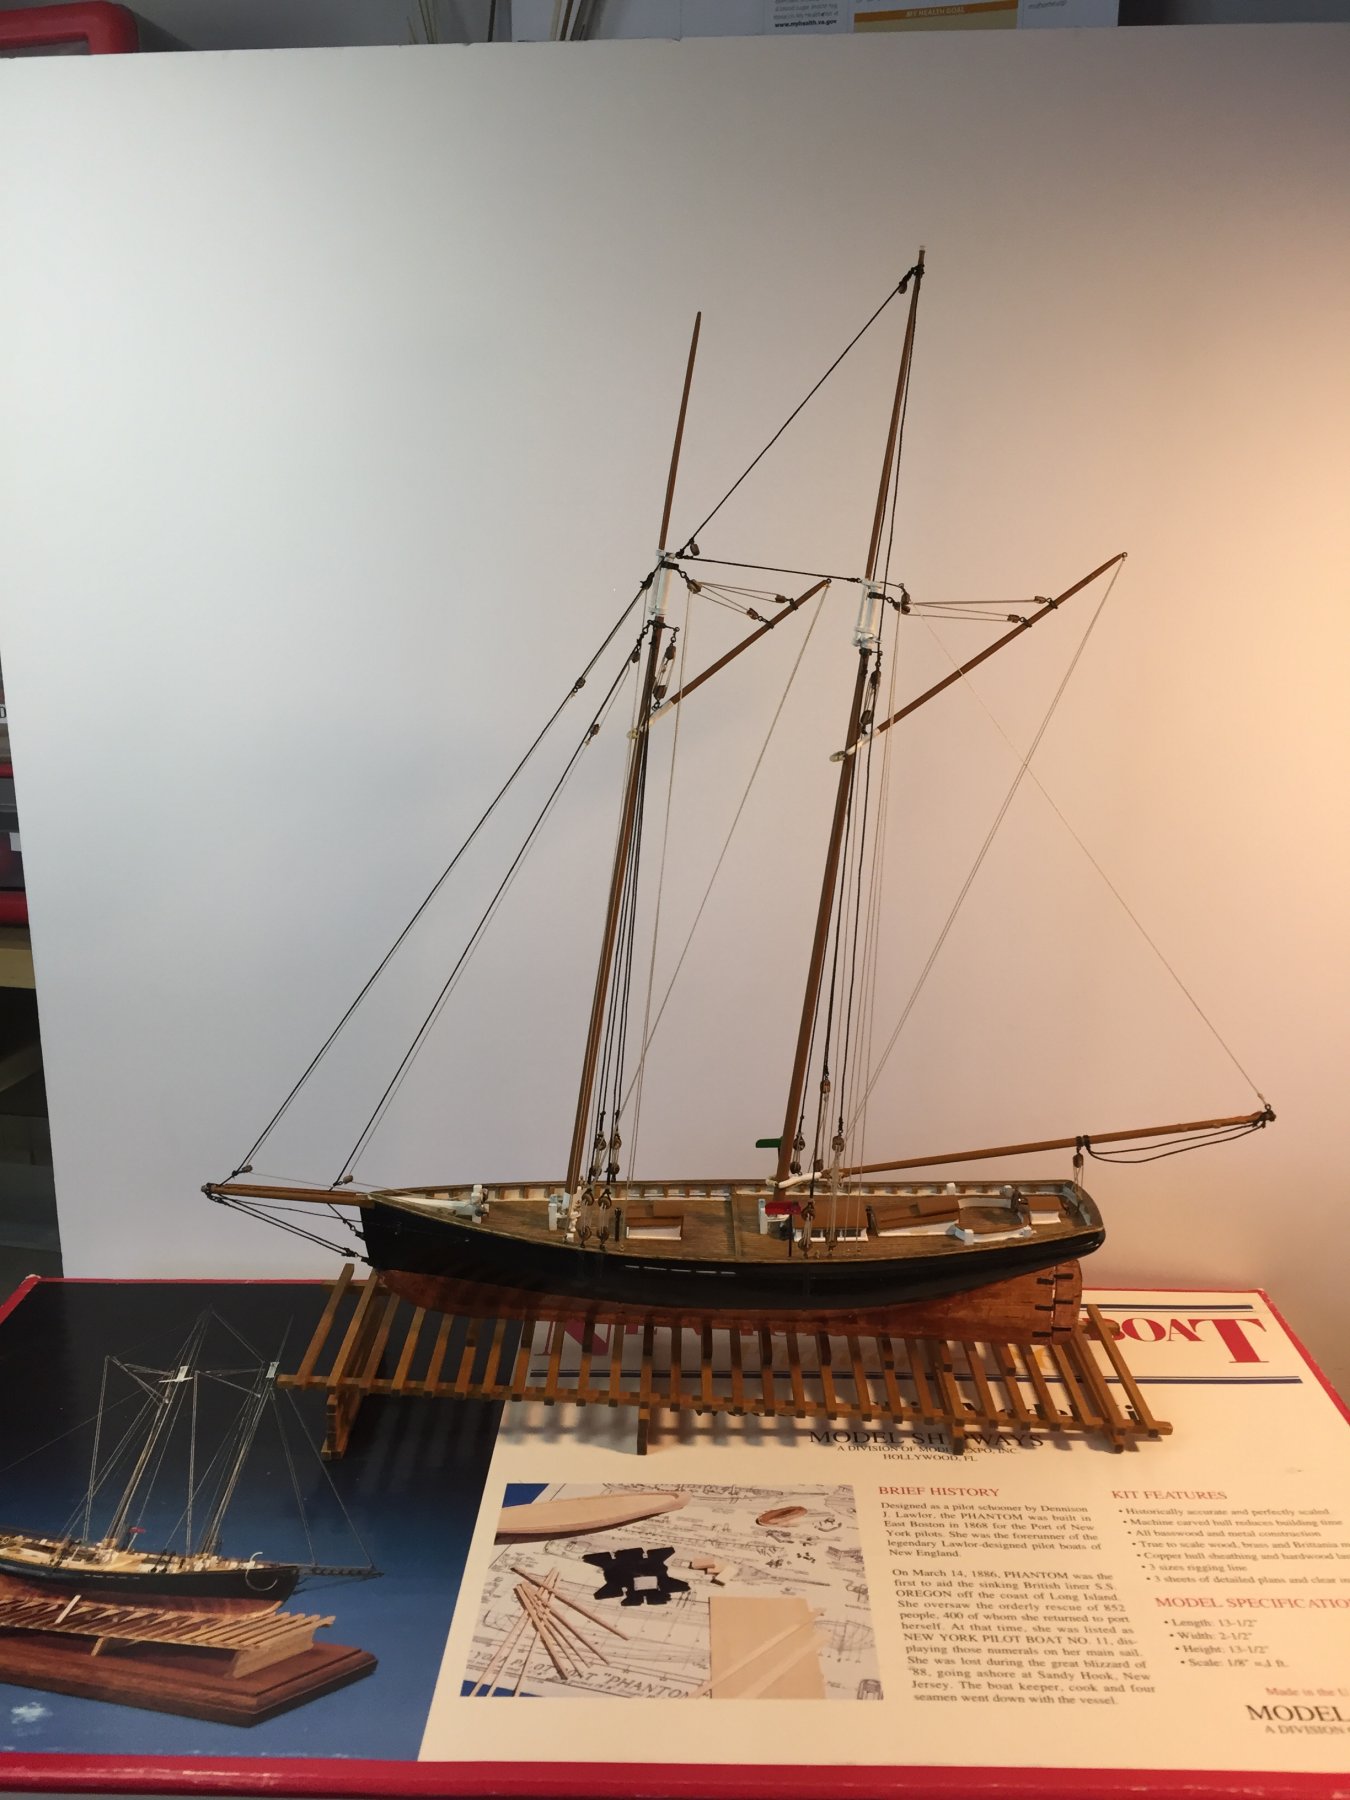
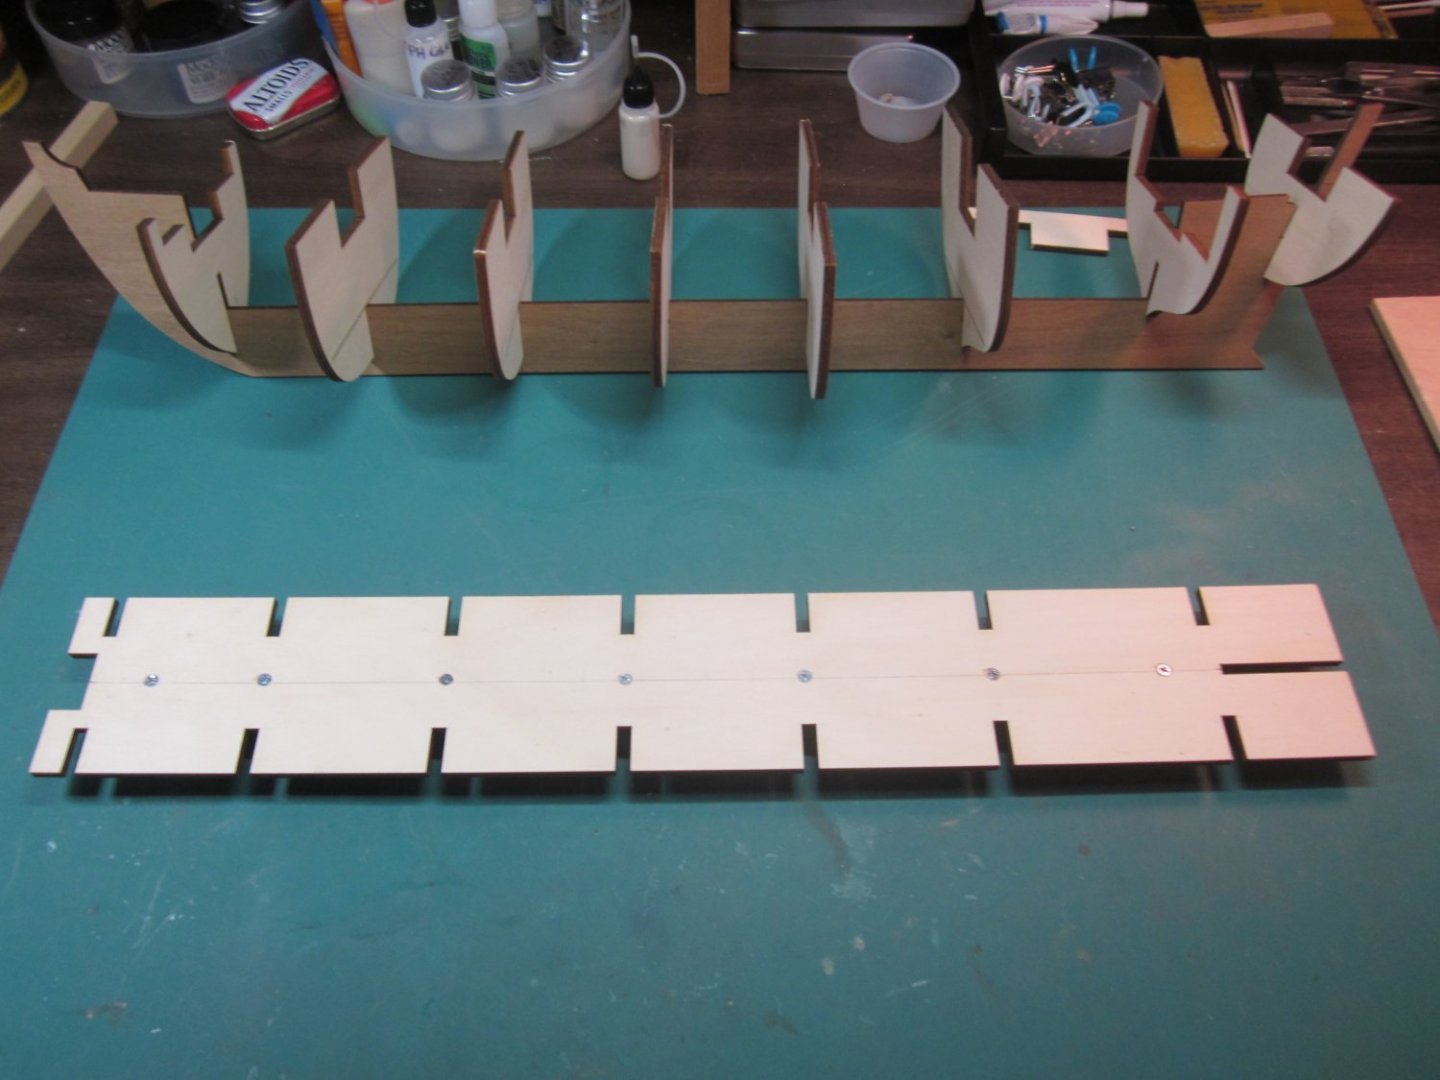
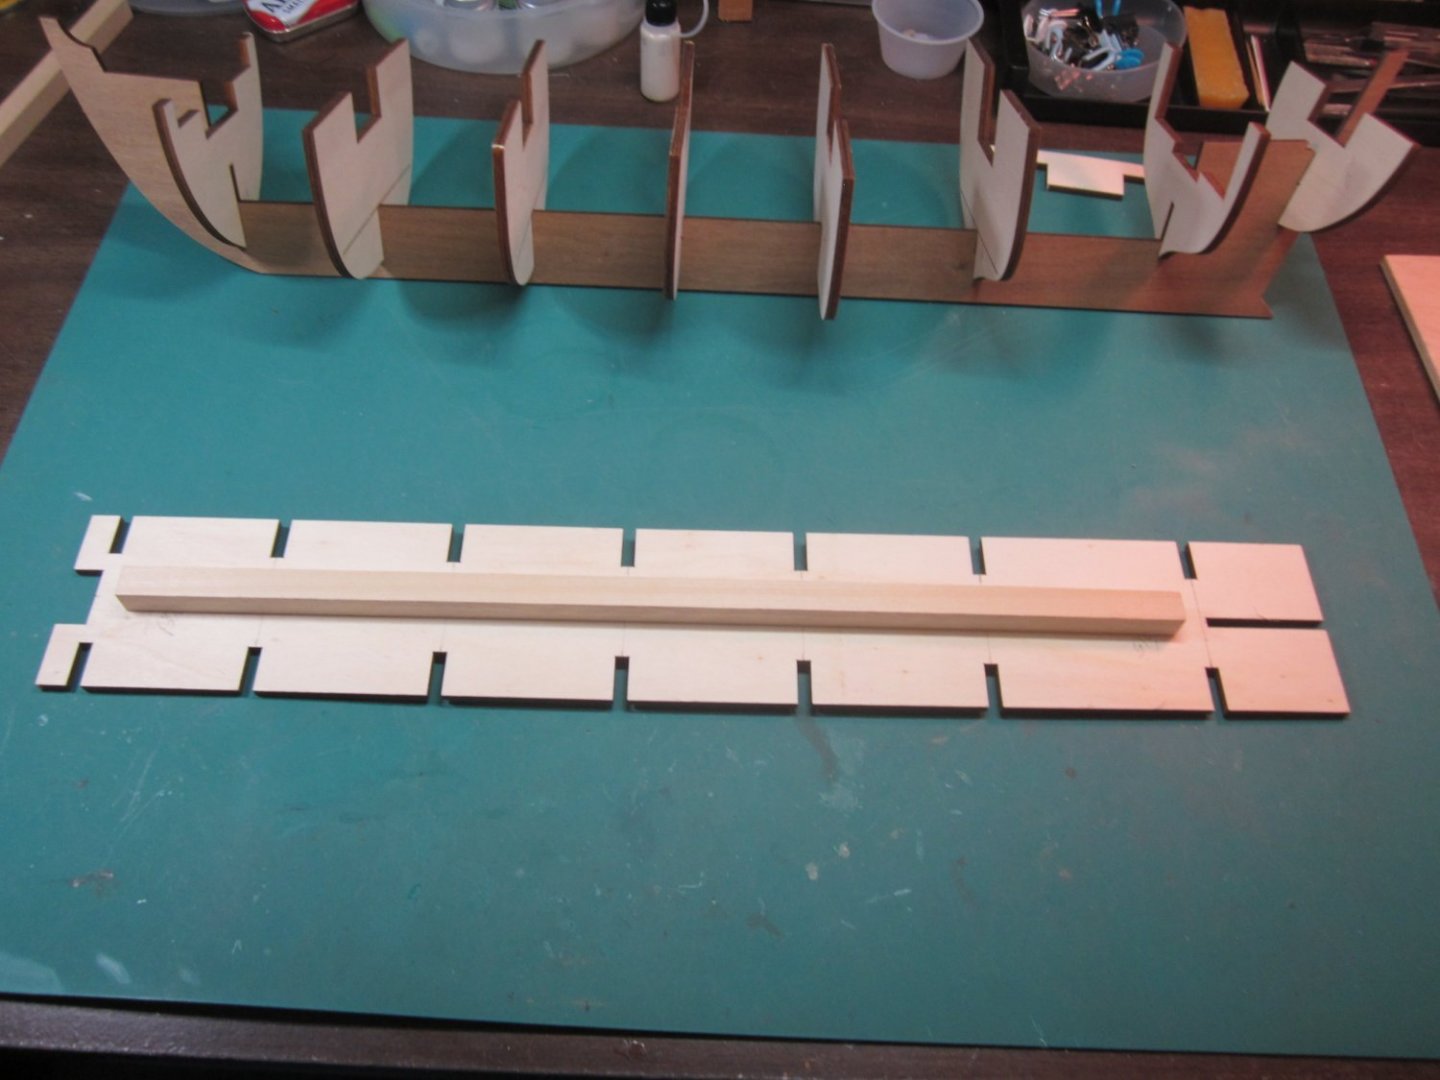
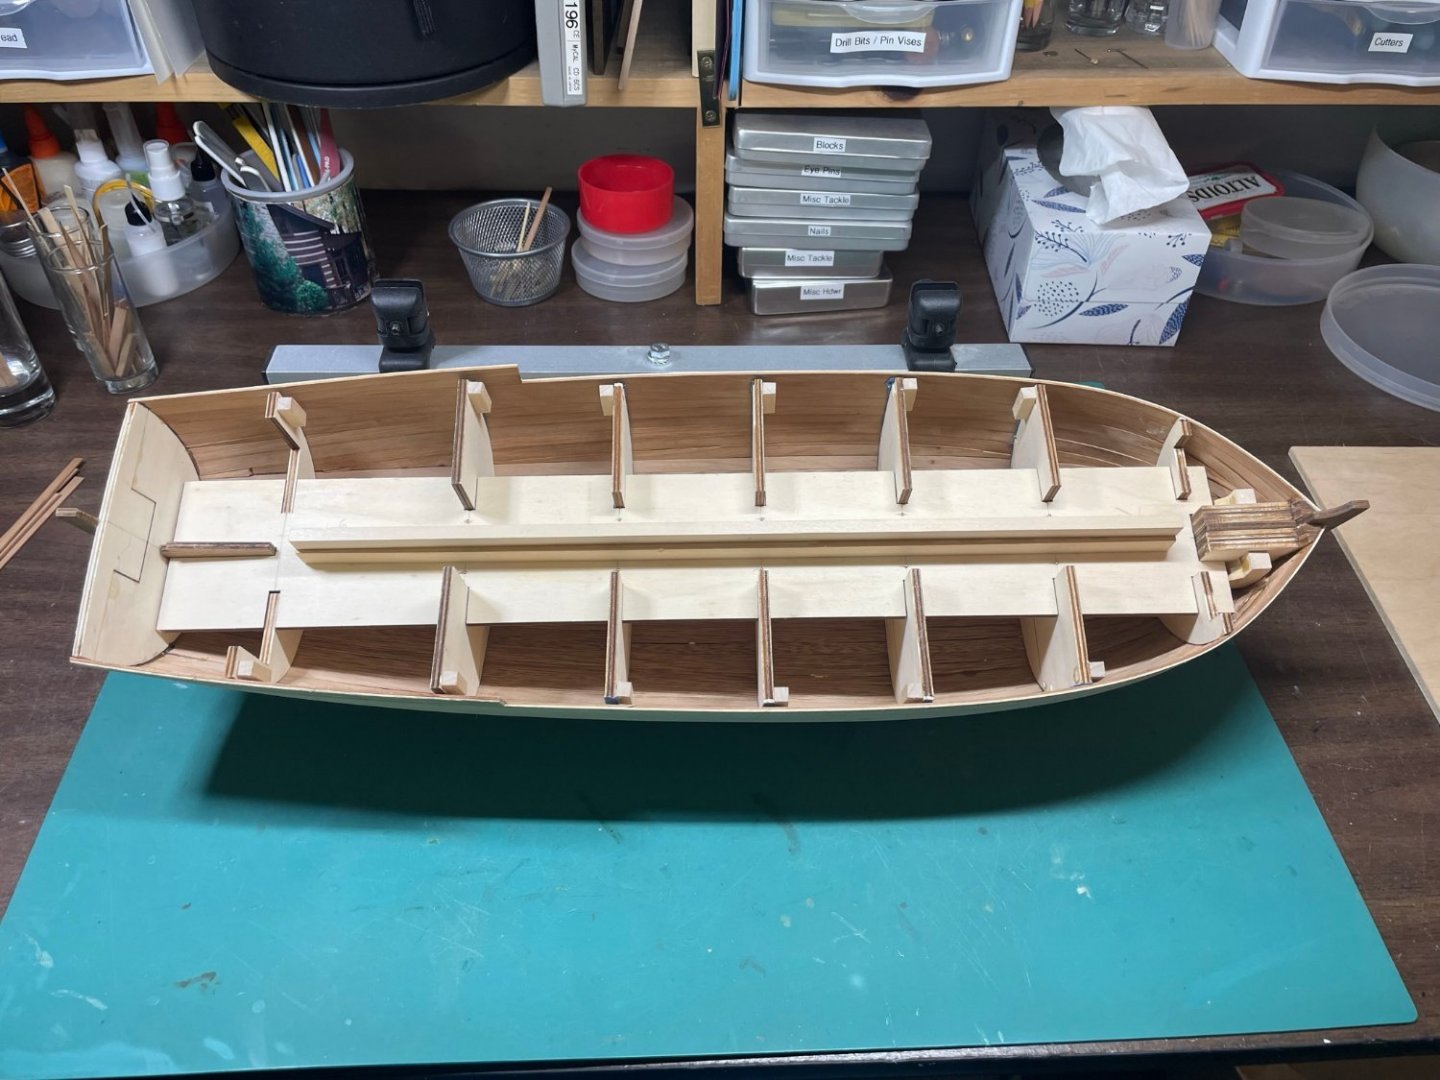
Hello All This is my first build log and is of my third model, the first two being "Phantom" by Model Shipways and "Le Renard" by Artesania Latina. I purchased this kit 25 years ago, opened and looked at it, then put it on the shelf. I don't recall my thougts on it then - I'm 74 now so can plead a "senior issue" - but when I opened it in January to begin the build I thought "Holy Moly, what have I gotten myself into!" The plans were all in Italian, there were some basic instrucions in English in the manual, and it's triple planked. Yikes! Since I am still fairly new at modeling I wasn't going to do a build log. Perusing the logs of those accomplished modelers who have done this kit I decided to forge ahead with it. Thank you to those who have shared your expreriences! You have been inspirational and instructive! Since this is my first post I'll only add a few pictures of the start and of the current status. I started in January and as I write this the second layer of planking is complete. I've promised myself not to go any further until I'd started the build log The flate piece for the form is warped. I added a stiffiner. Interior view as the model is now. Another piece has been added to the stiffener so that I can clamp it in my vise. The second layer of planking complete. I'll end this post now. My computer has been sqirrely lately and restarts on a whim. I'll begin my updates very soon.


-
Hello All; I'm Steve, I'm 71 and retired from a career in semi-conductor equipment maintenace, living and loving life in Columbus, Indiana. In the late 1990's I decided that I wanted to build ship models as a retirement hobby. At that time I decided to start buying kits and supplies while I was still working and had good discretionary income. All of my kits were purchased from Model Expo in 1997 and 1998, and most of my tools came from them and Micro-Mark. Midway between retiring (involuntarily) and buying my inventory, while living in San Diego, I discovered gold prospeecting and mining. Between that time (2005) and moving to Columbus, I had one thing on my mind - gold - and finding El Dorado. The subject of models arose only when I had to pack them up to move with my job, or when my wife would ask if I was ever going to start making them. My search for gold took me to magical places in the western mountains and deserts, I never found El Dorado, most always found some gold, and always delighted in the wild places I traveled to - especially those places that were beyond cell phone range. Our move to Indiana in 2016 brought an end to my mining adventures and allowed my model ship building to finally begin. I've completed Model Shipway's Phantom and am currently working on Artesania Latina's Le Renard which I will start a build log on itsoon. The level of craftsmanship that I see displayed in the build logs is beyond impressive and I'm happy to be in the company of such skilled model makers.