
native one
-
Posts
66 -
Joined
-
Last visited
Content Type
Profiles
Forums
Gallery
Events
Everything posted by native one
-
Hello everyone from Spain
native one replied to Jose Luis Verdejo's topic in New member Introductions
Welcome aboard. -
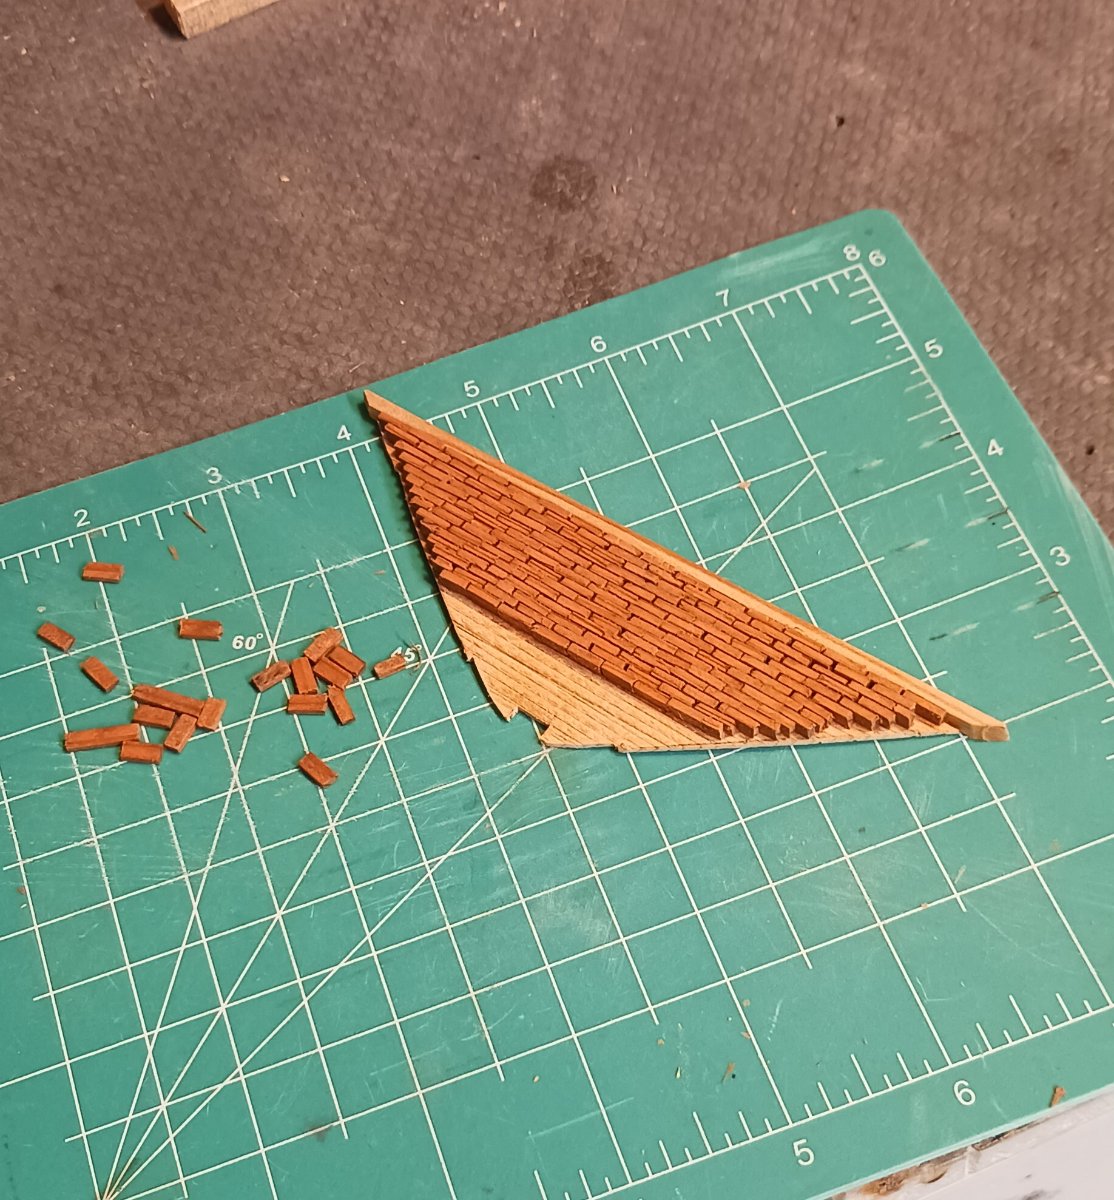
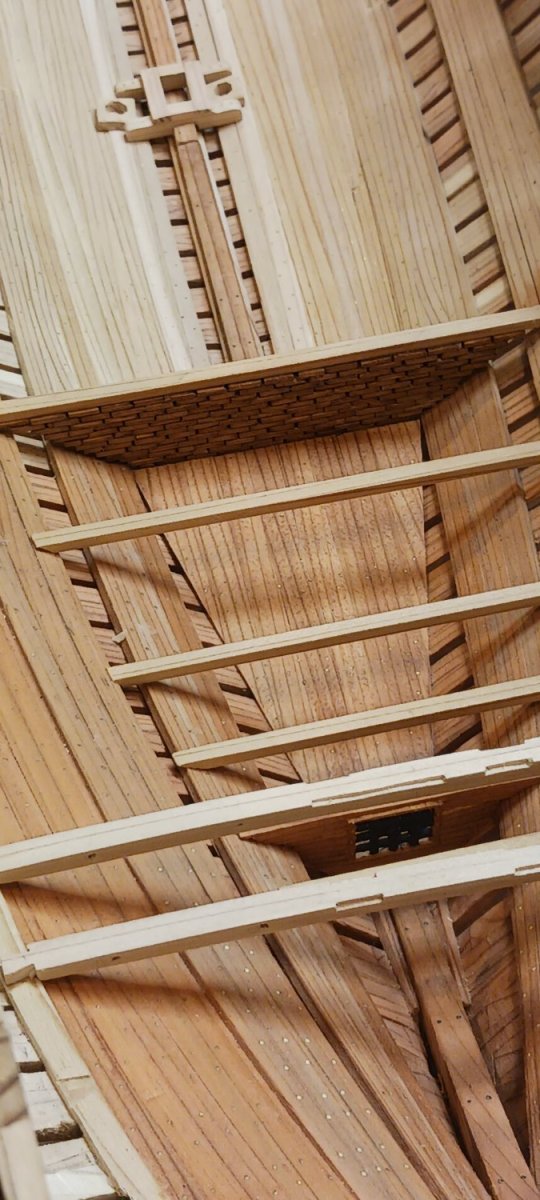
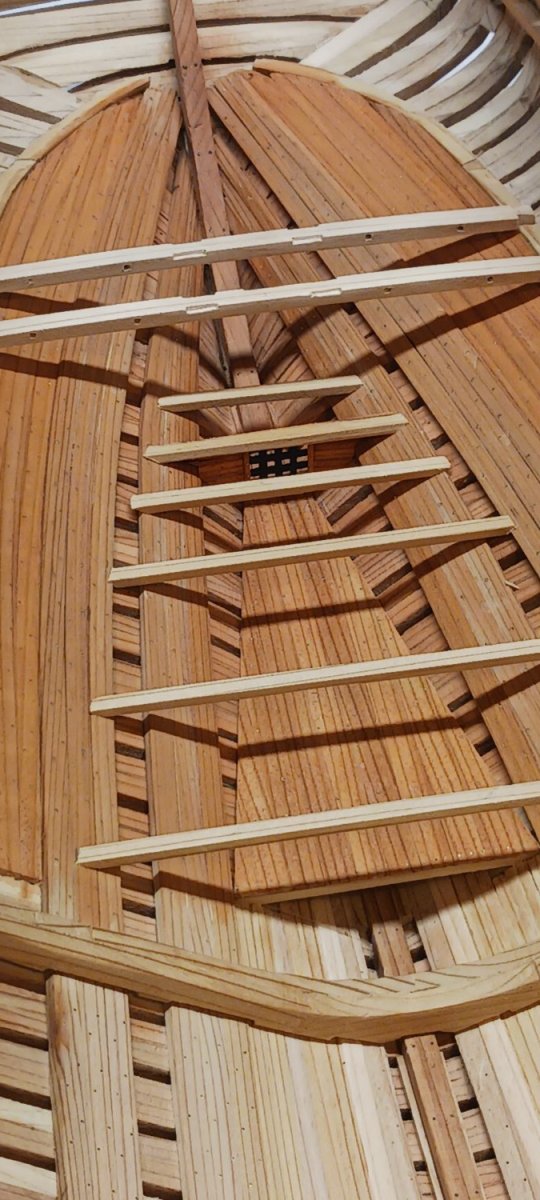
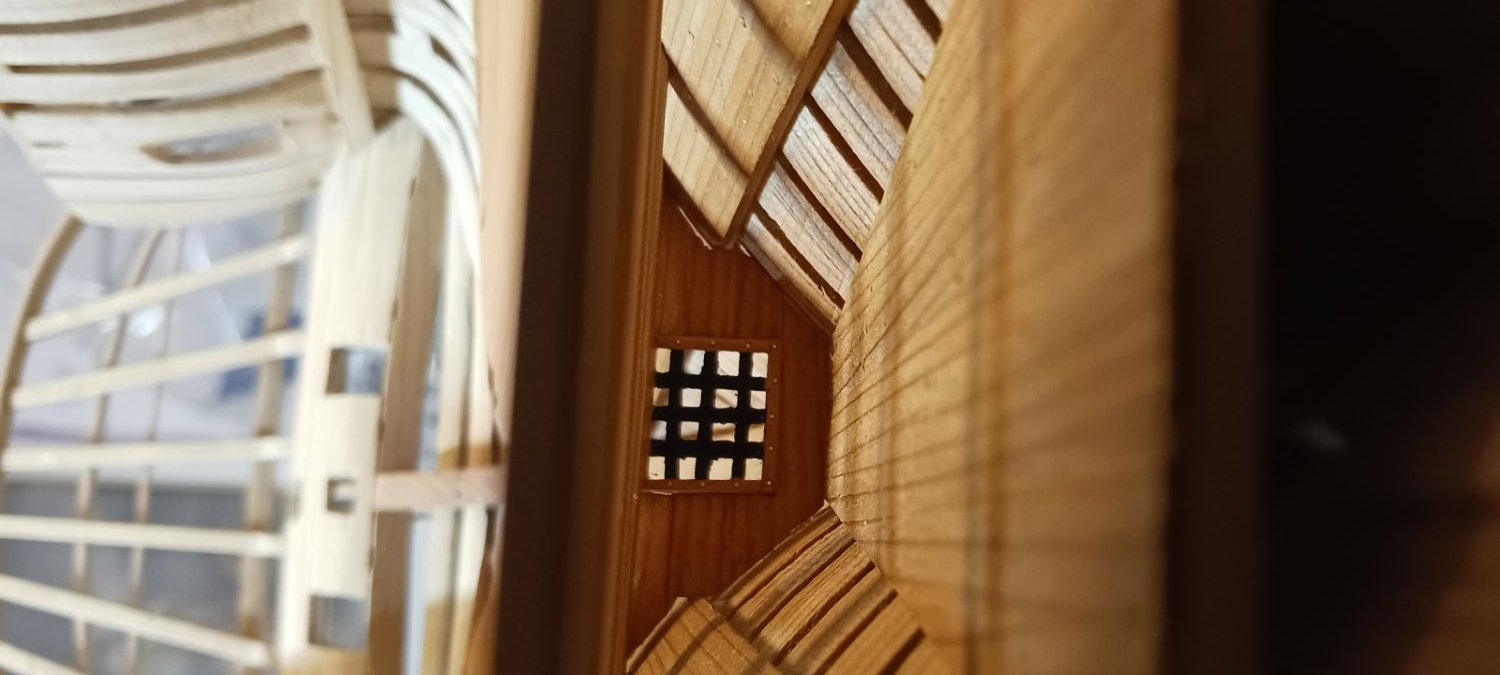
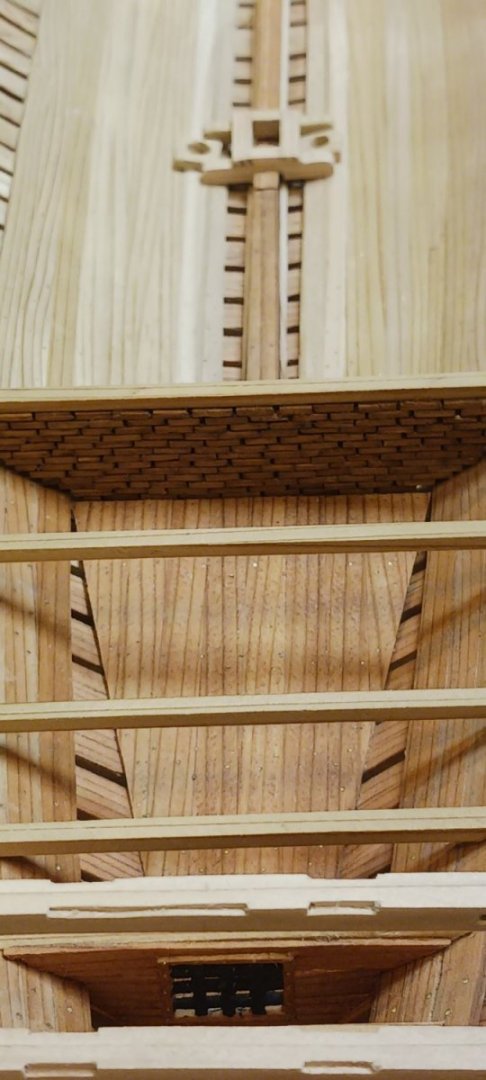
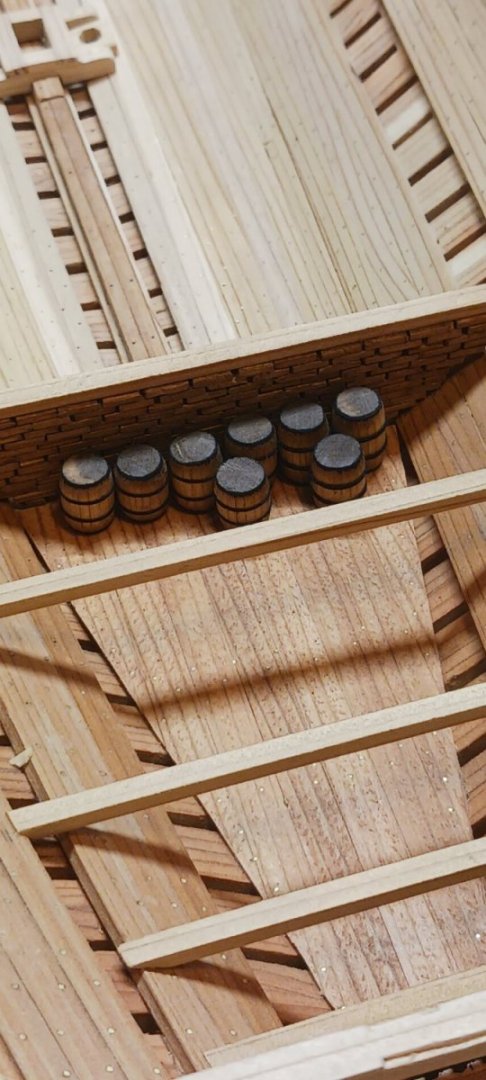
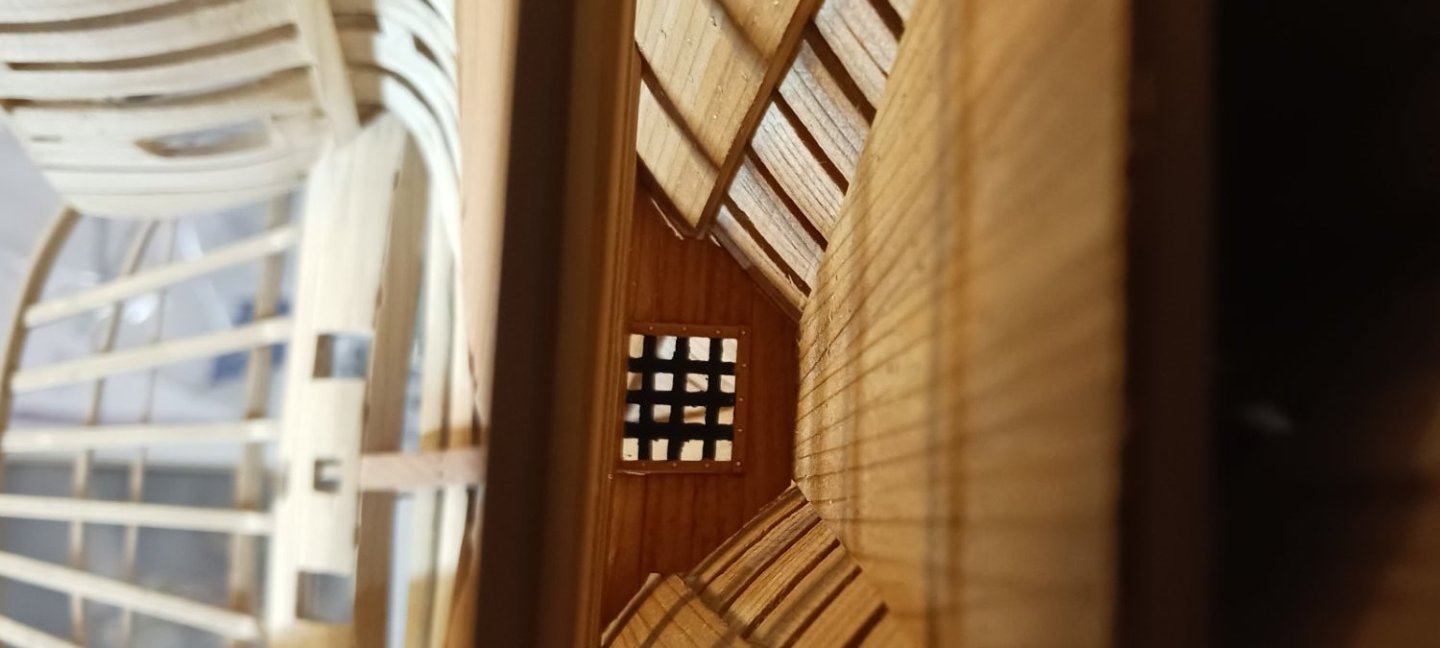
The bulwark that separates the gunpowder storage from the rest of the hold calls for a brick filled wall for protection if there is ever a fire aboard so I used some clay to make the bricks and fired them in a friend's kiln to harden them,it calls for both sides of the wall to be covered with wood to enclose the bricks but I chose to leave one side open so you can actually see the bricks,then made up and put In a few gunpowder barrels.


-
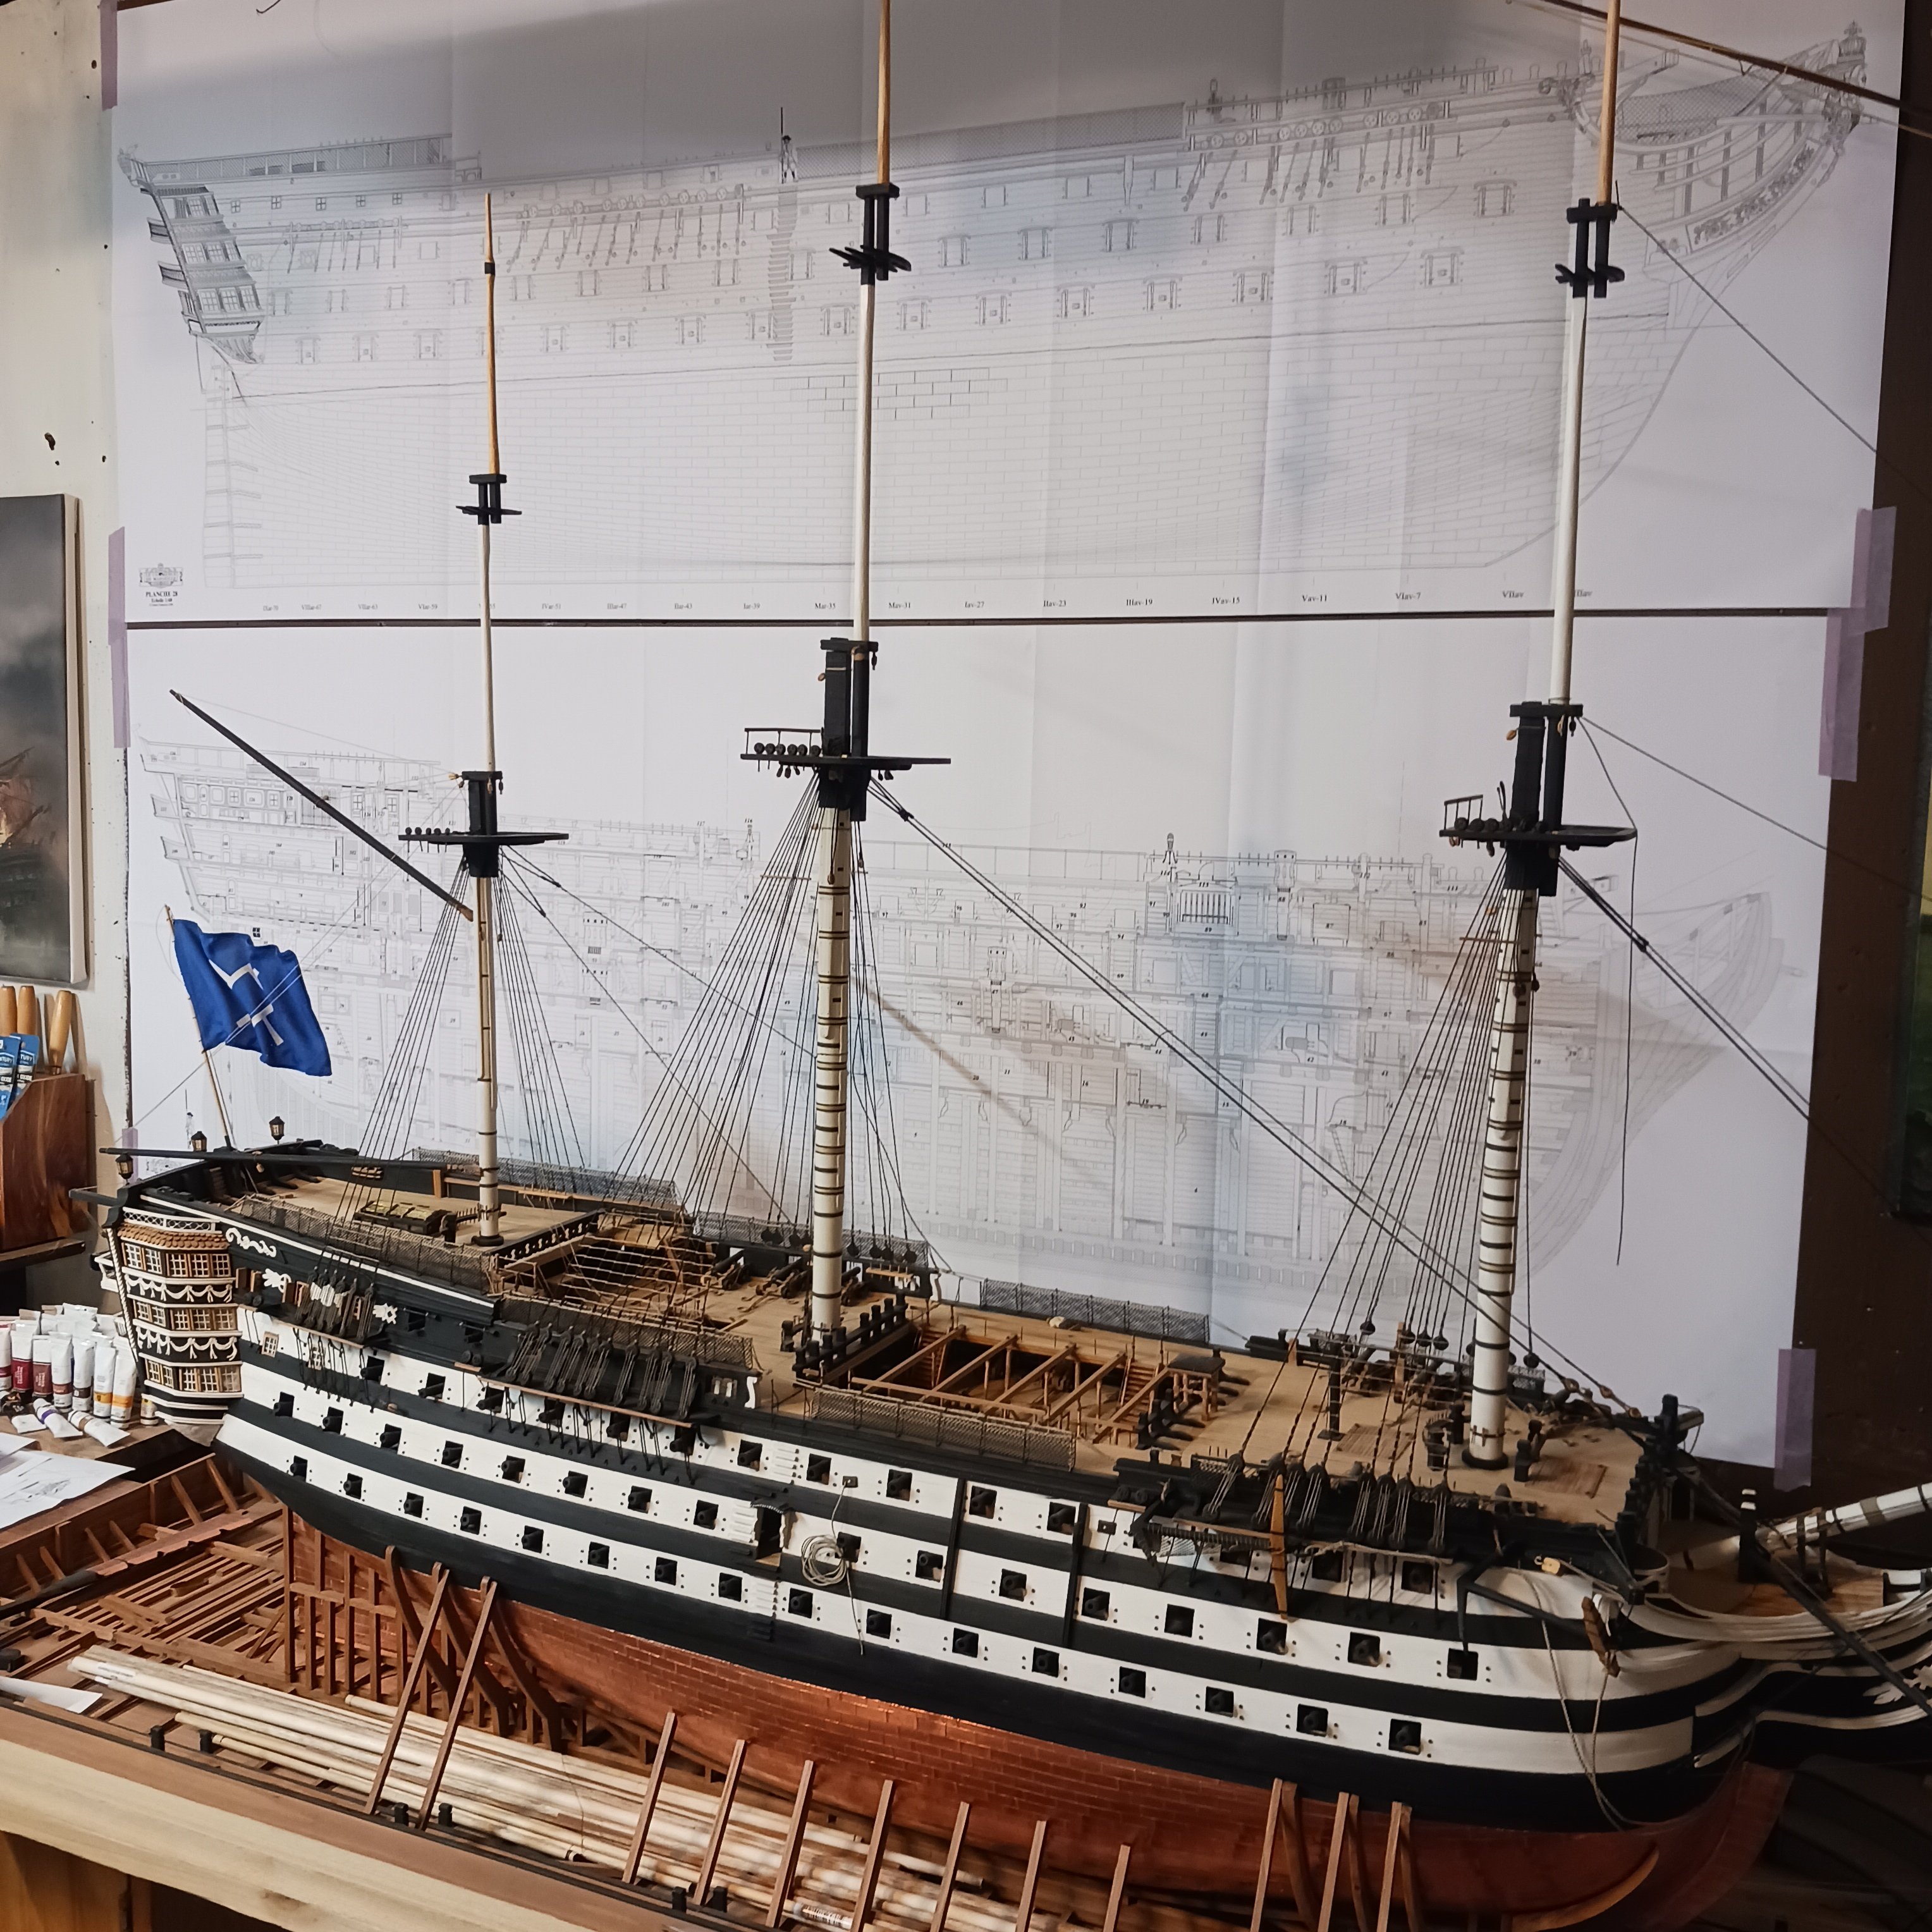
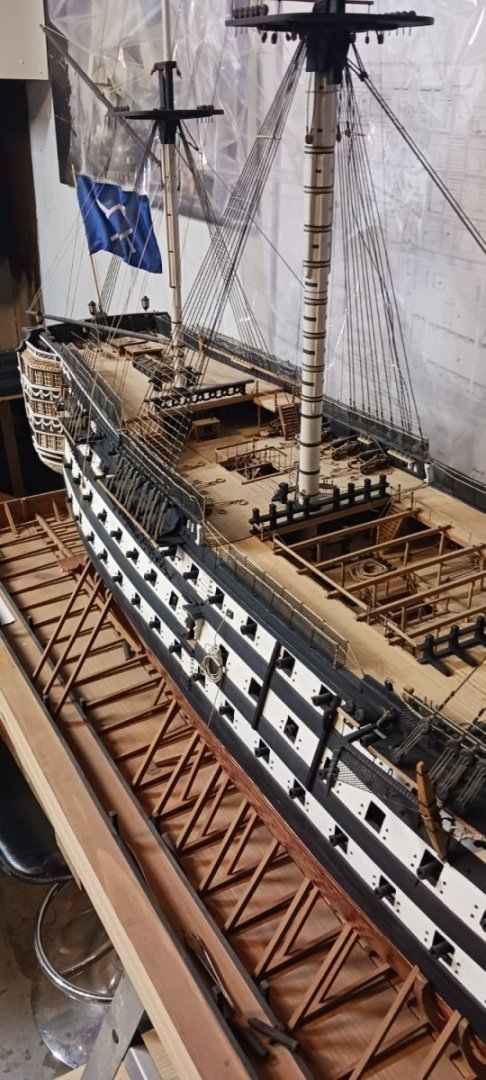
Sometimes we have to use what we have available to us,boxwood and pear are the preferred woods people like to see in ship modeling,but there is other woods that are more accessible to some of us,this 110 gun ship of the line I'm finishing up is actually made out of ponderosa pine and juniper cedar from my backyard,which is a really grainy wood and a softwood but with alot of it painted over you can't even tell the difference unless you really look close at it.
-
I'm aware of the wood grain showing thru, I'm actually a finish carpenter and the Alaskan yellow cedar I'm using are cuttings from trim work and cabinetry so some of it is aged and not really the best cuttings,and the grains are making it more of a challenge,it's harder to work with and brittle,so shaping and bending has it's own challenges that I have to improvise and overcome.
-
It's ebony stain.
-
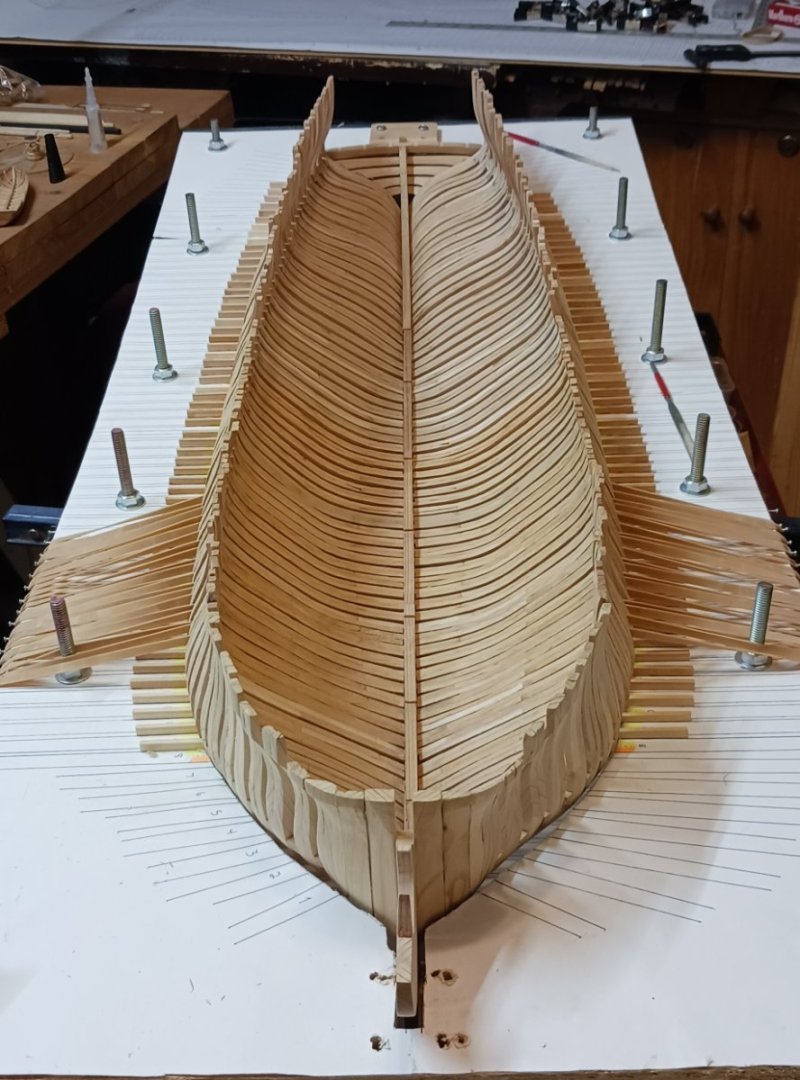
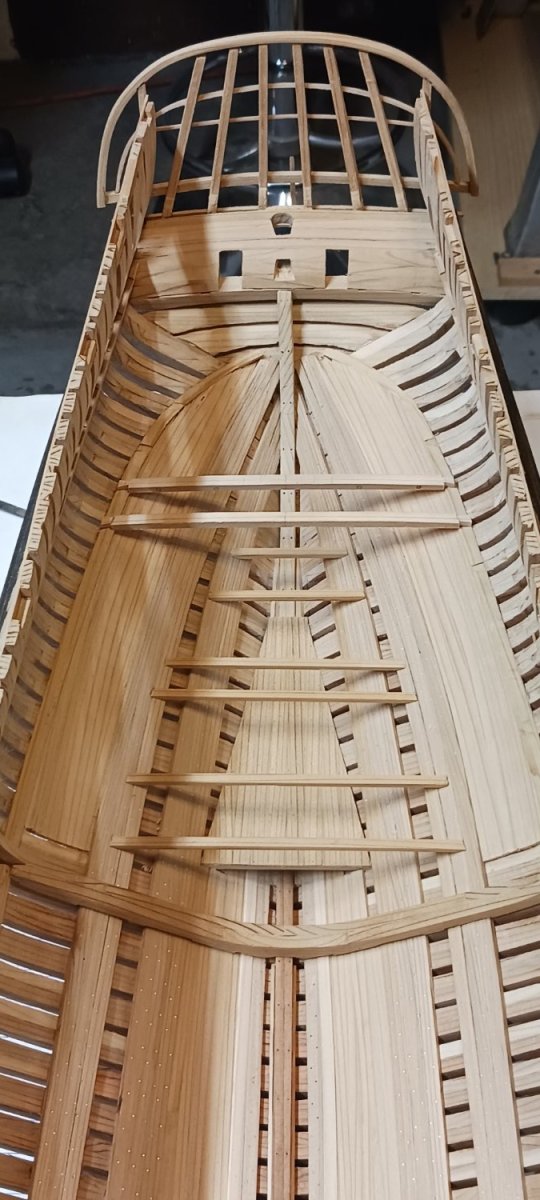
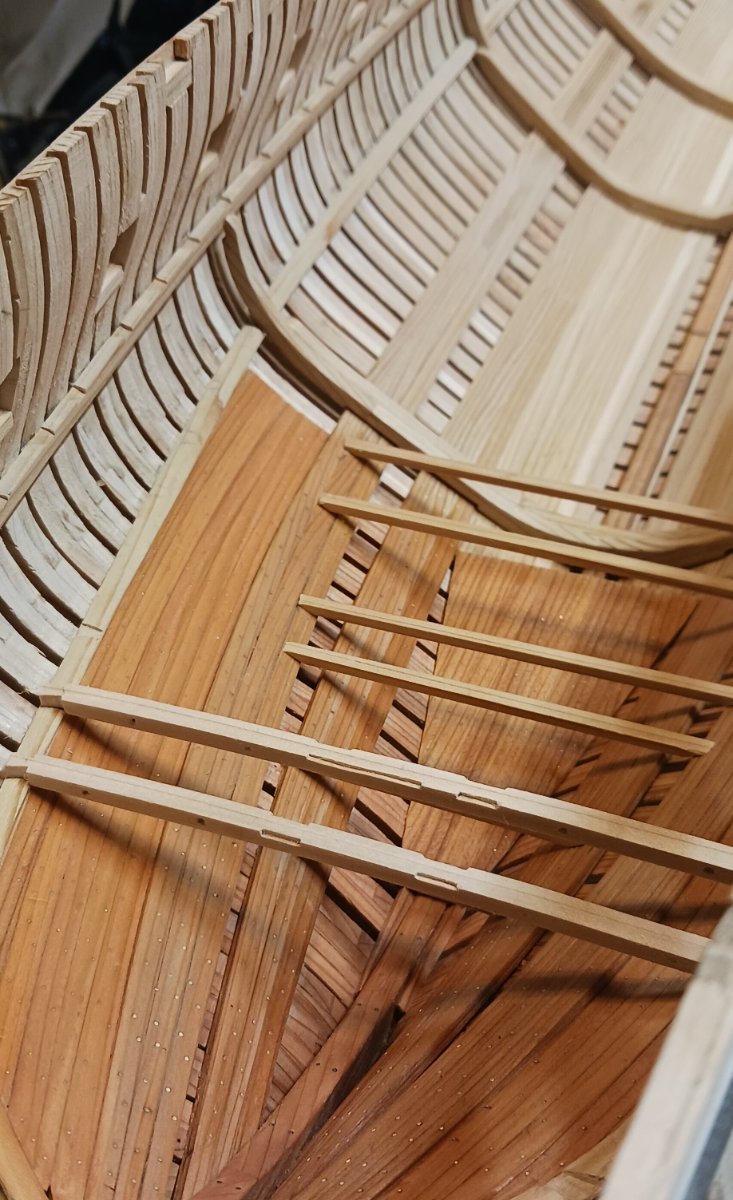
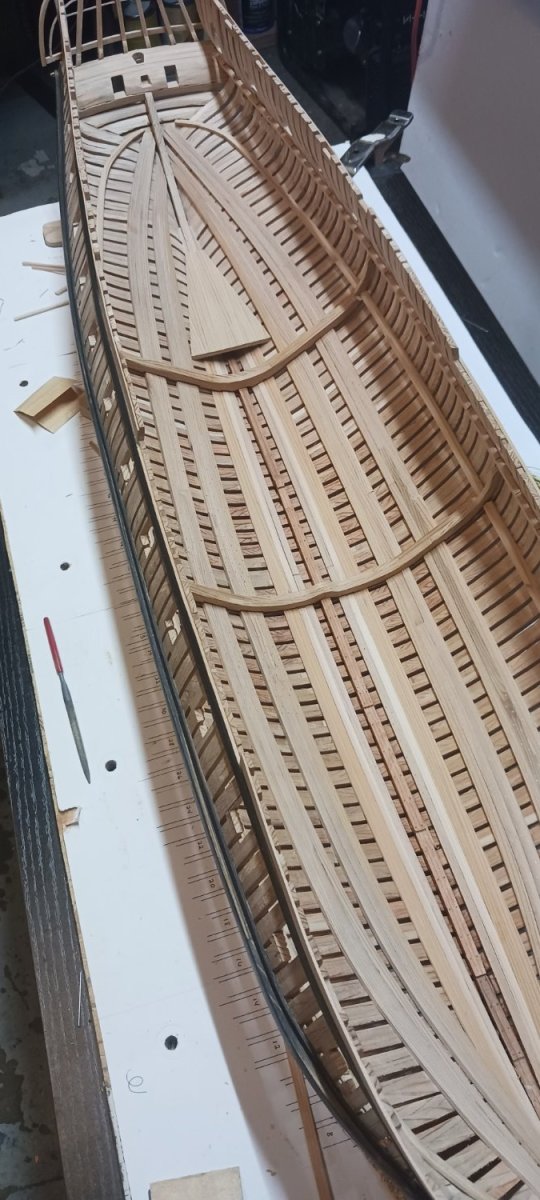
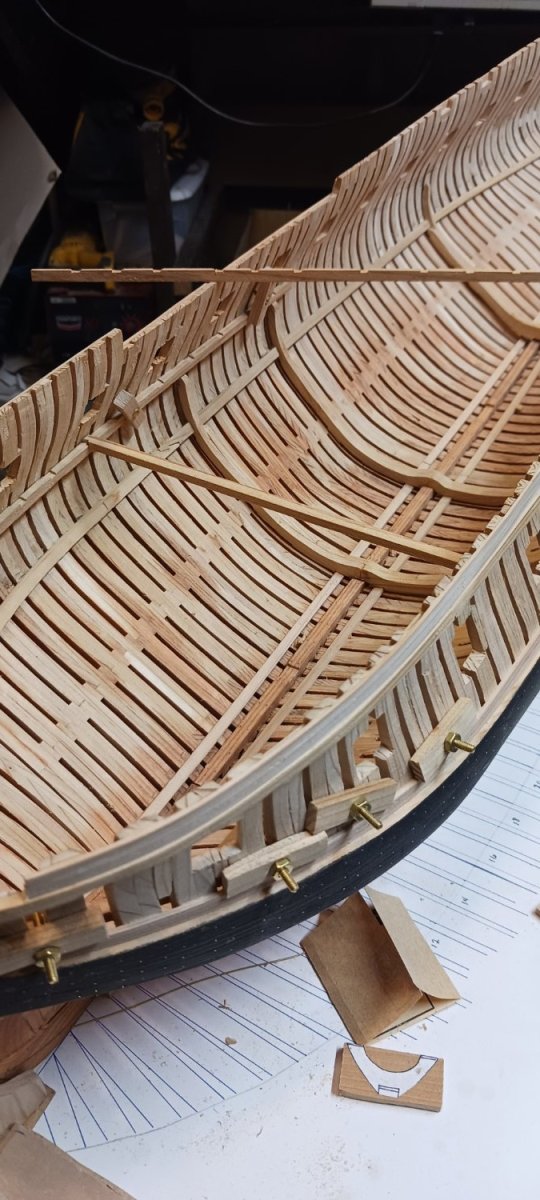
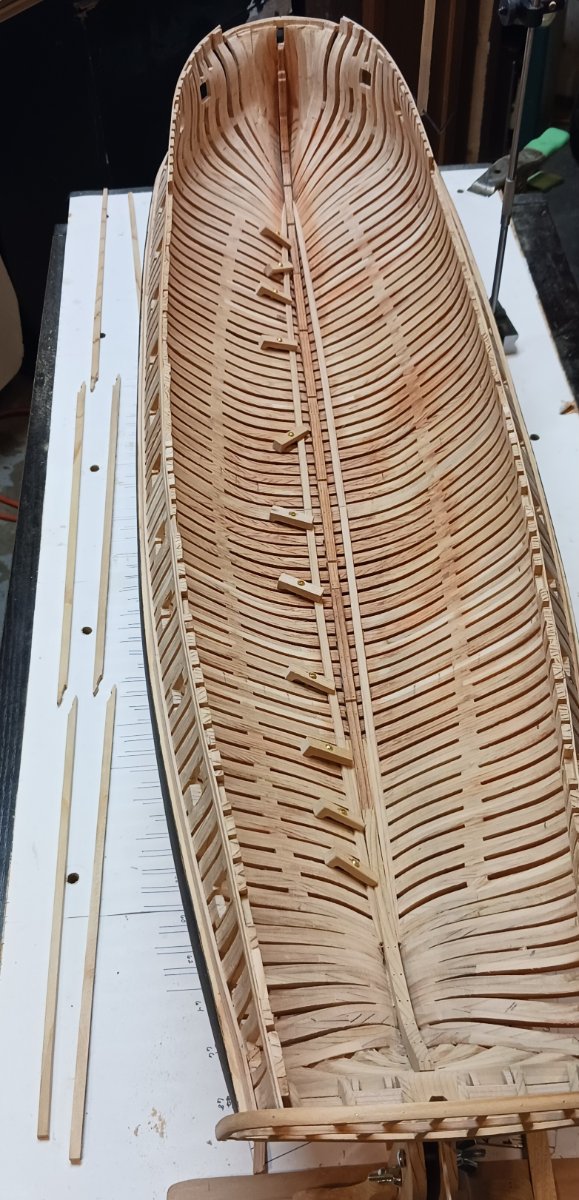
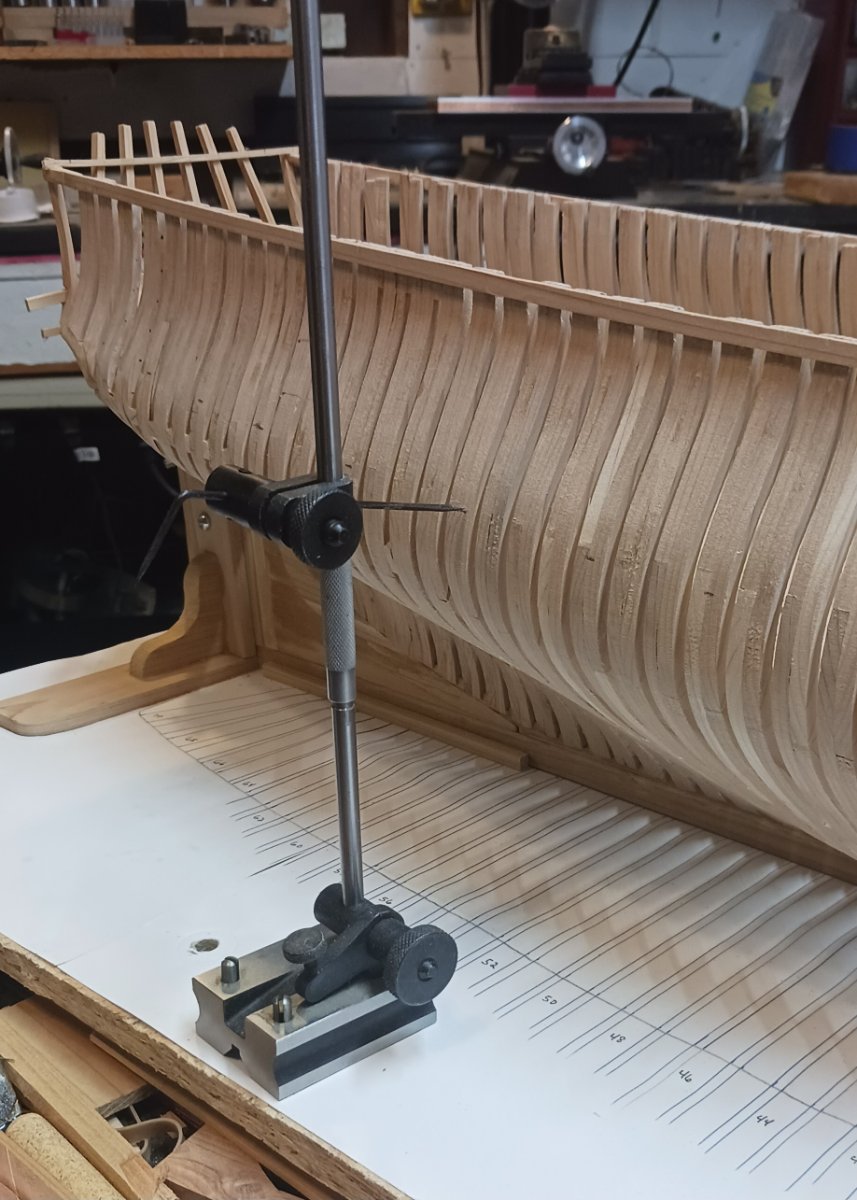
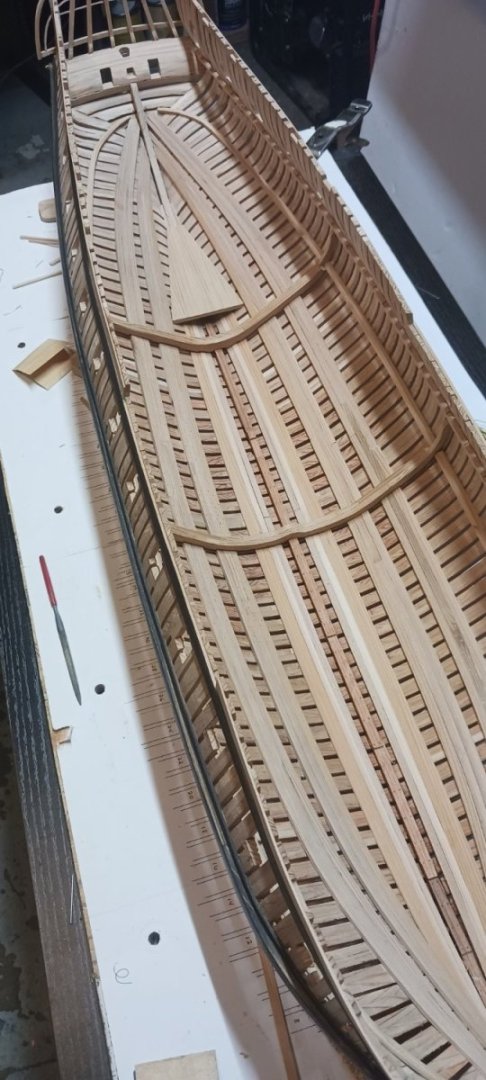
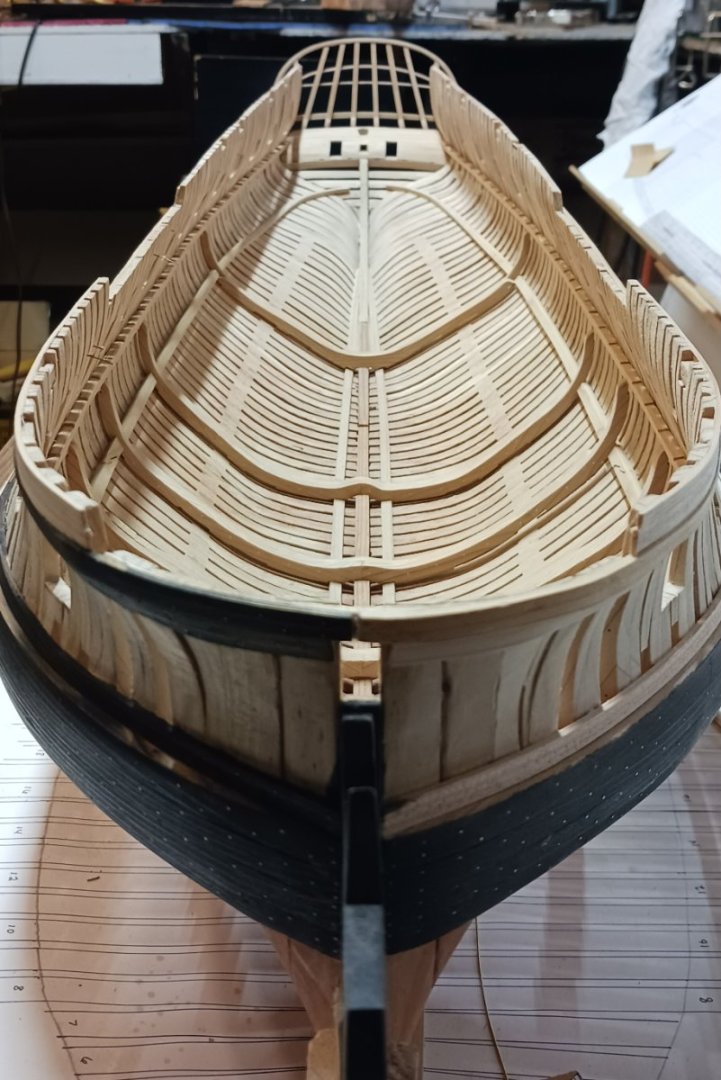
well I came to a decision on the planking,to leave some out of the center just in case I feel like removing some of the framing to view the interior so I am just planking the bow up to the first rider,and planking the stern up to the last rider,then made up the frames of the orlop deck in the areas where the bulwarks of the hold extend all the way up to the bottom of the orlop.


-
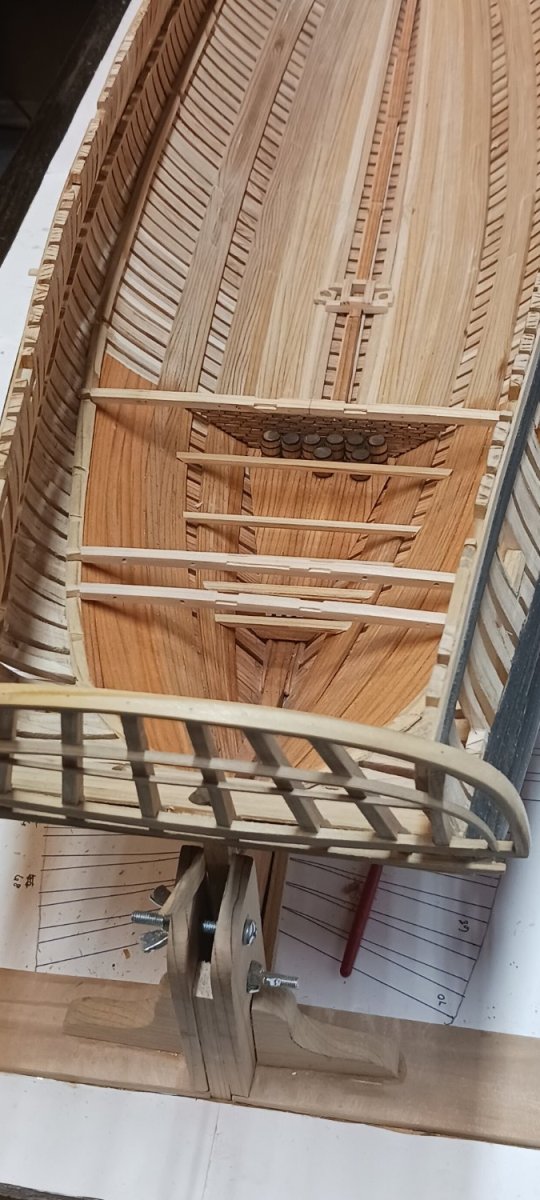
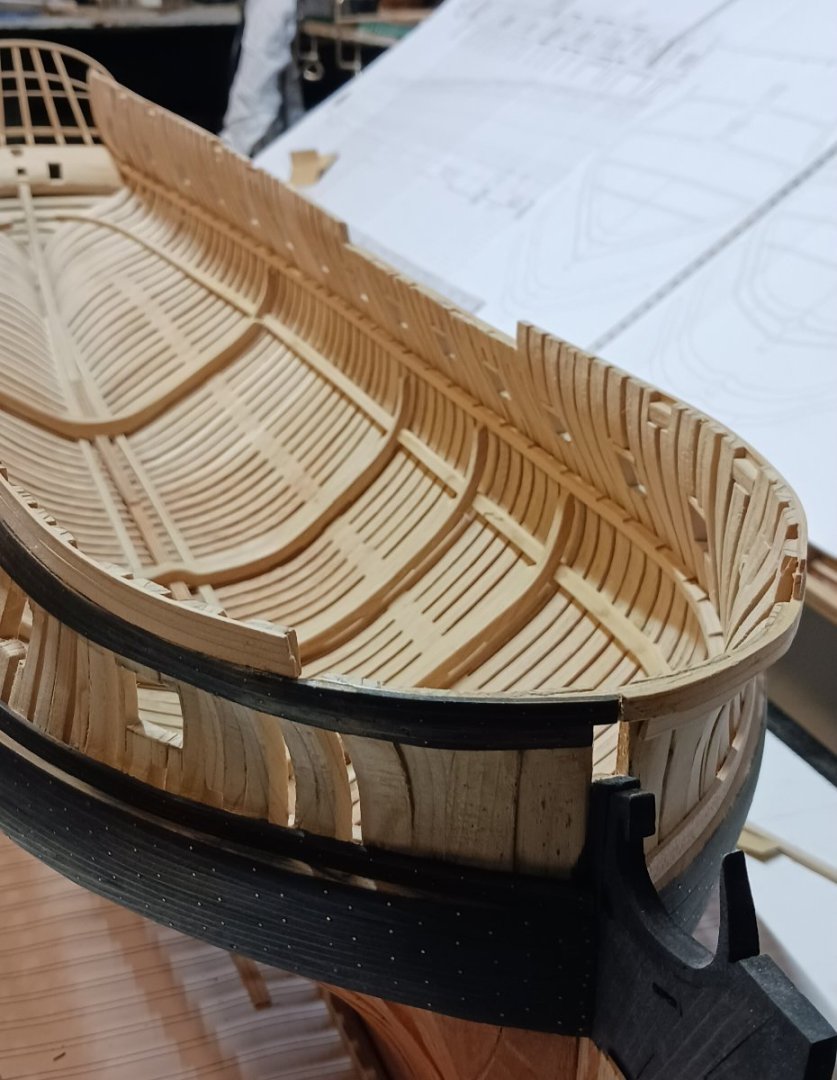
finished up the strakes and began little planking,also built the platform for the. gunpowder storage. planked the floor but I'm really. debating if I should leave some. planking off on the sides so you. can view some of the interior. finally put in the cills around the gun. ports.

-
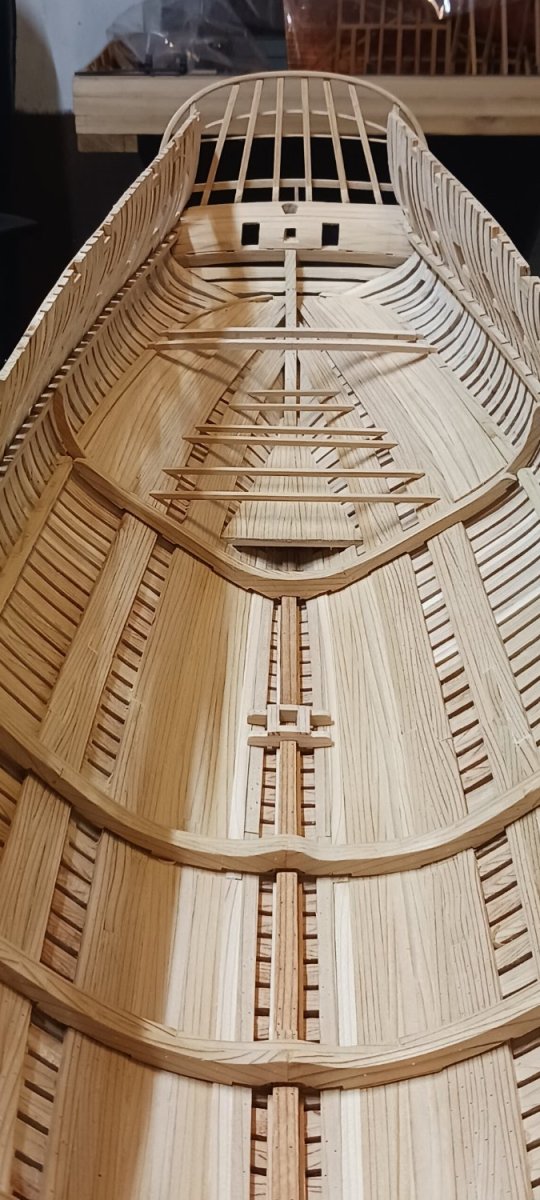
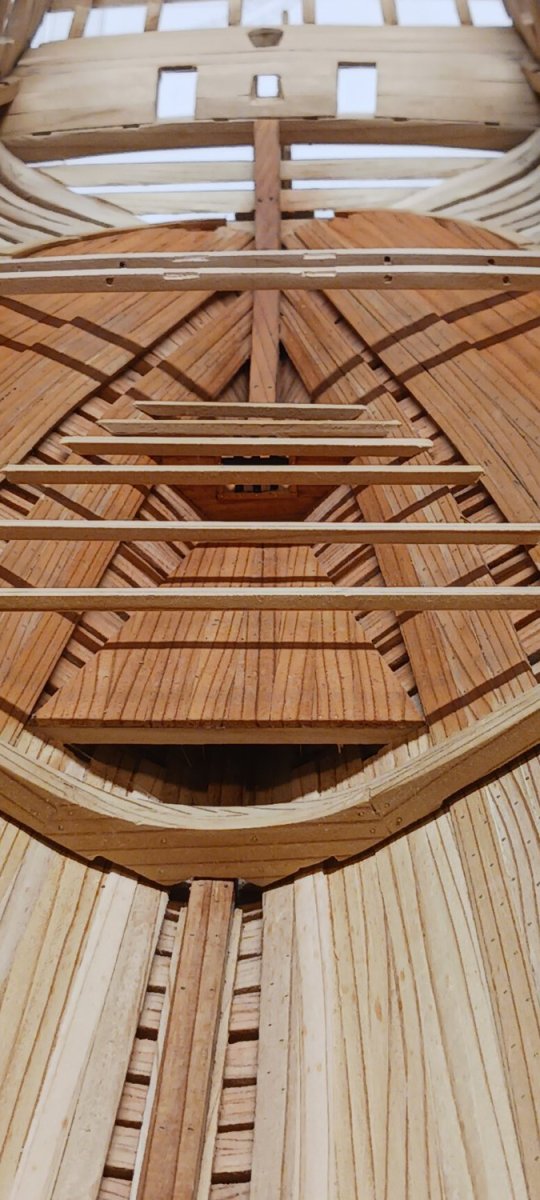
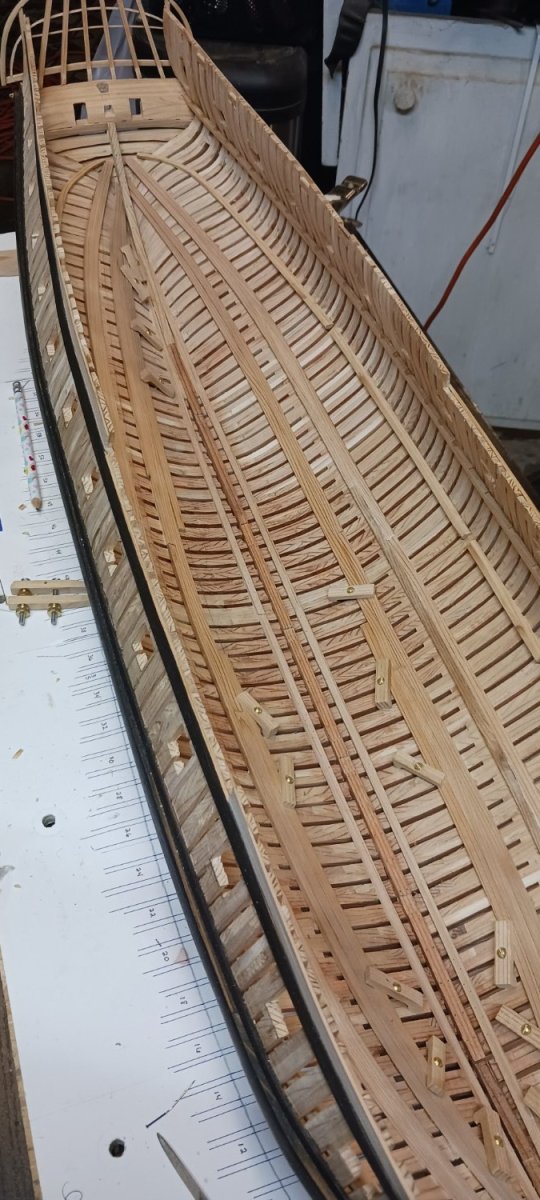
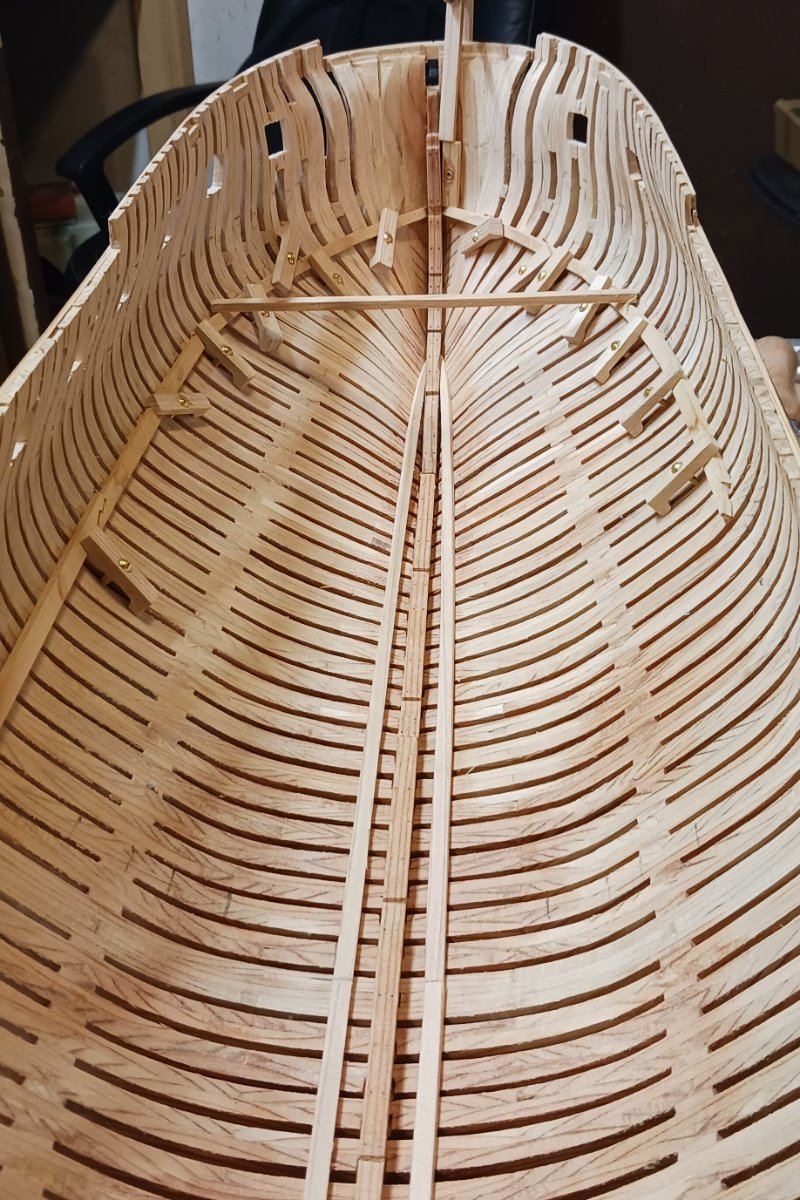
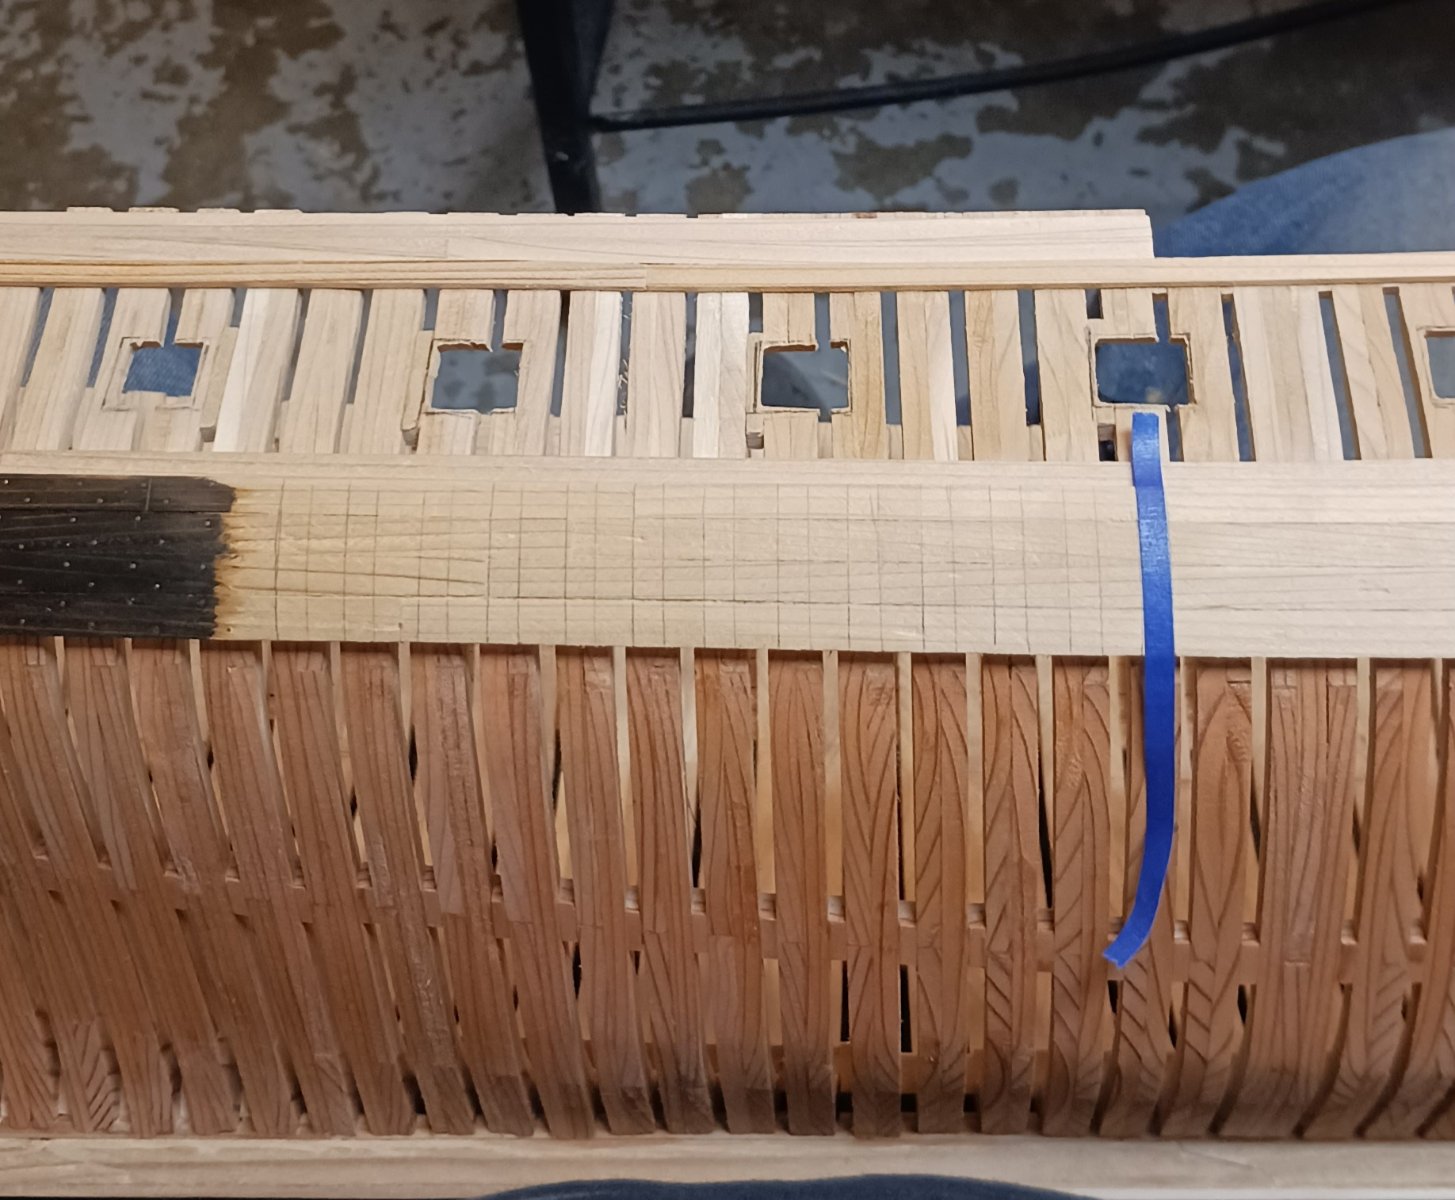
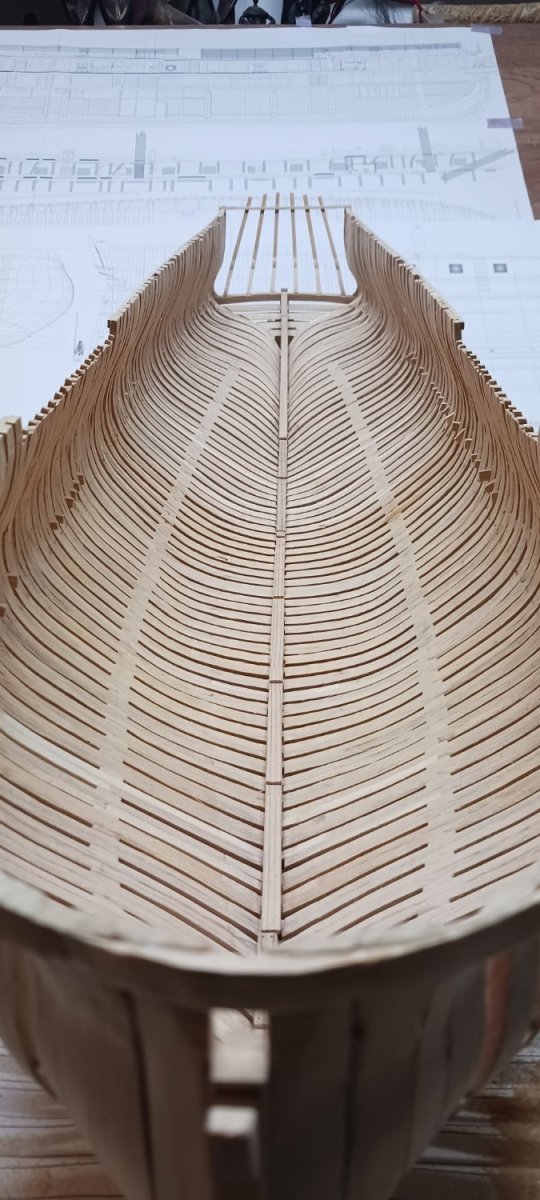
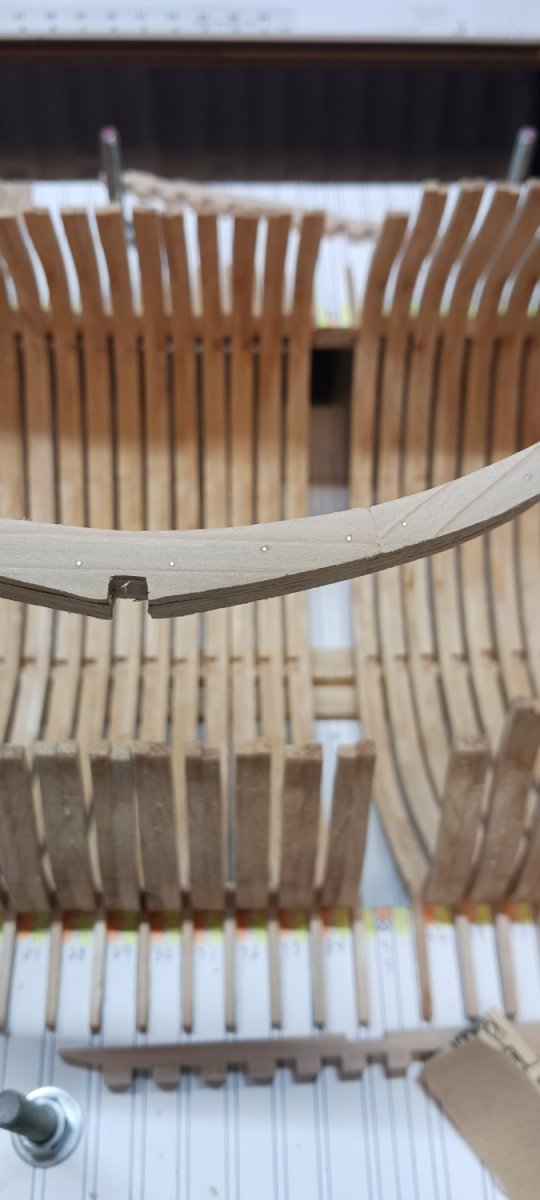
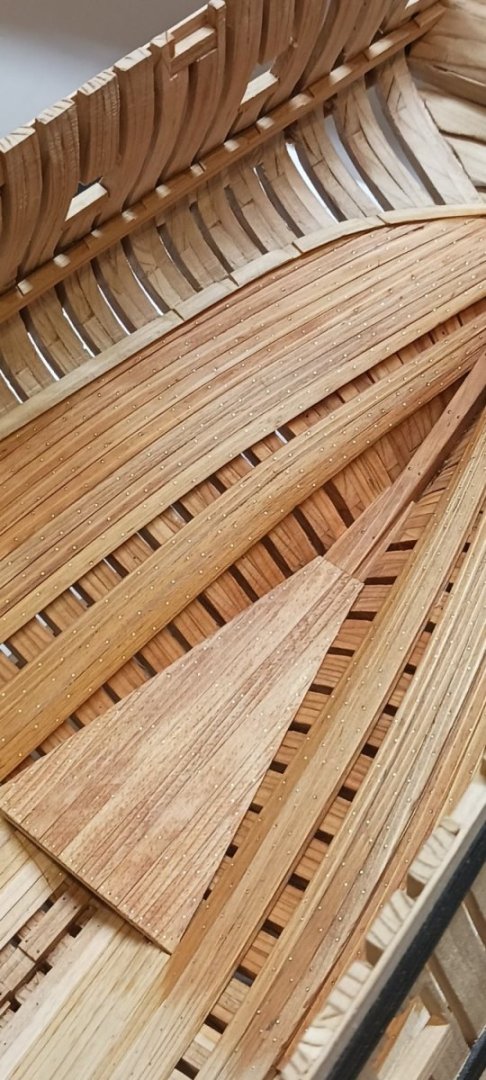
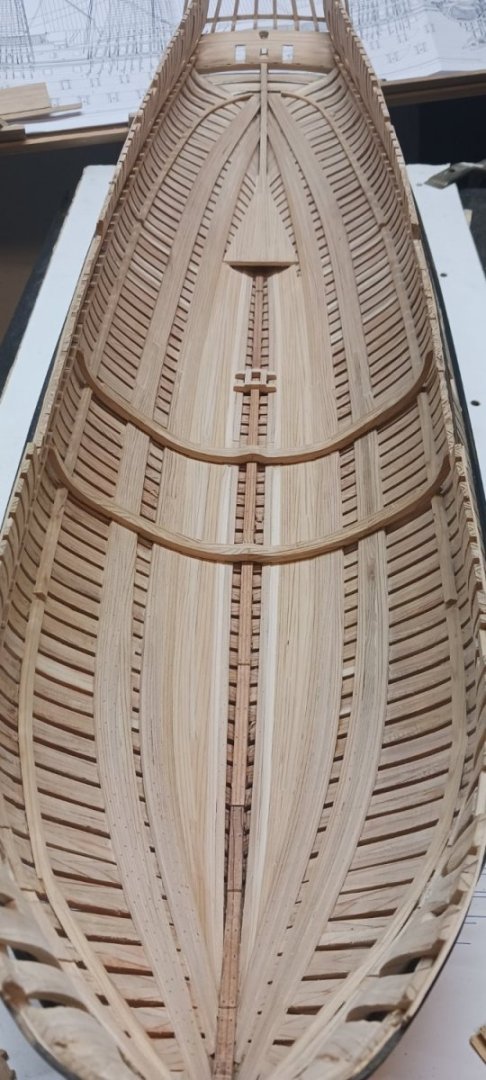
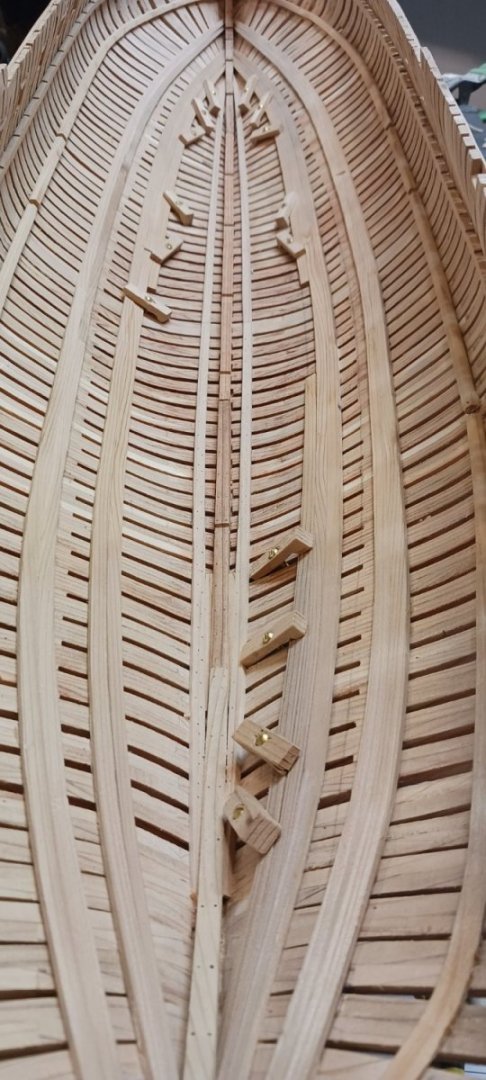
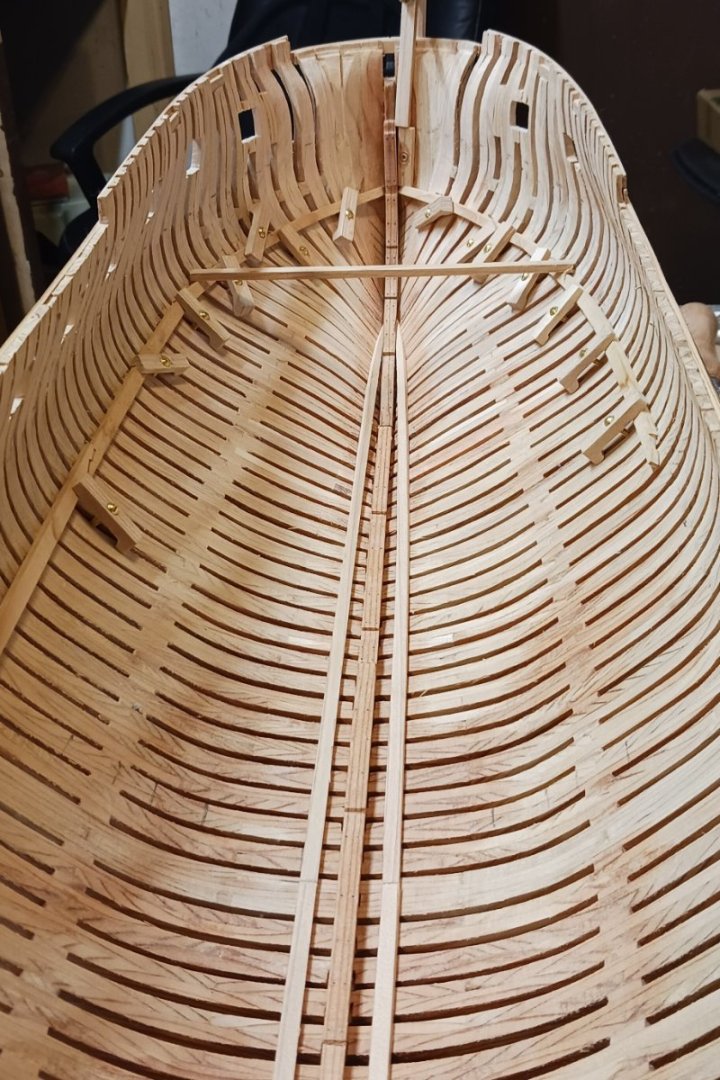
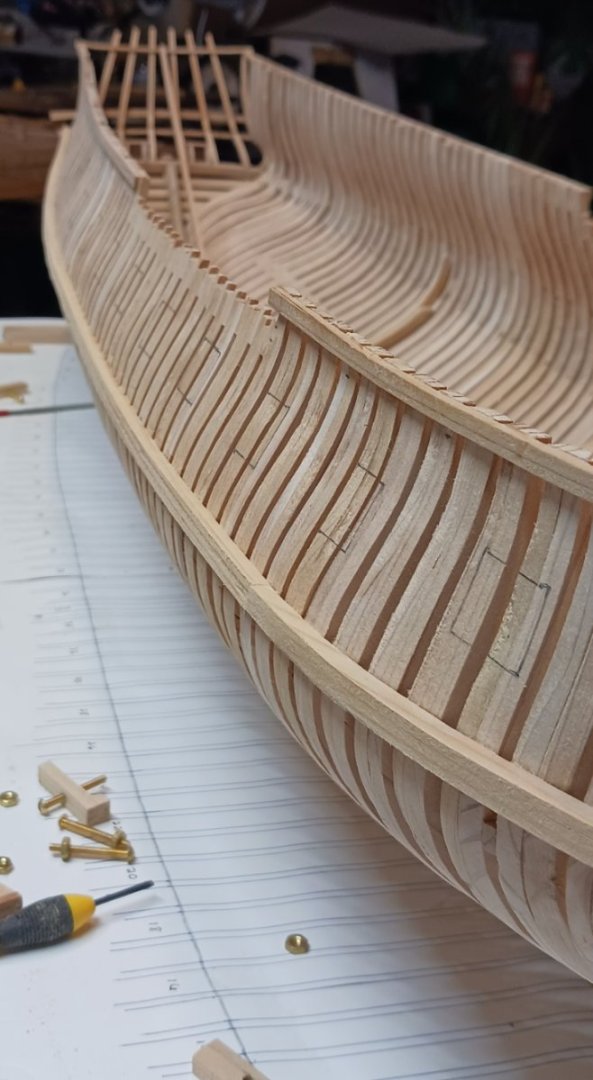
Installed the stringers that run the length of the hull,I used the cutouts in the riders to get an idea where they went,they followed the first futtock joint most of their length before having to come together at the bow and stern,spanish ships used two rows of stringers on their hulls compared to other countries.


-
Installed the gundeck clamp,used the riders that I made Earlier to help to get the clamps to the right height ,then did some more bolting and staining on the exterior.


-
Oh wrong ship,wrong country ,I thought we were talking about the spanish frigate Diana built in mahon's.
- 12 replies
-
- 1
-

-
- Frigate Diana
- occre
- (and 1 more)
-
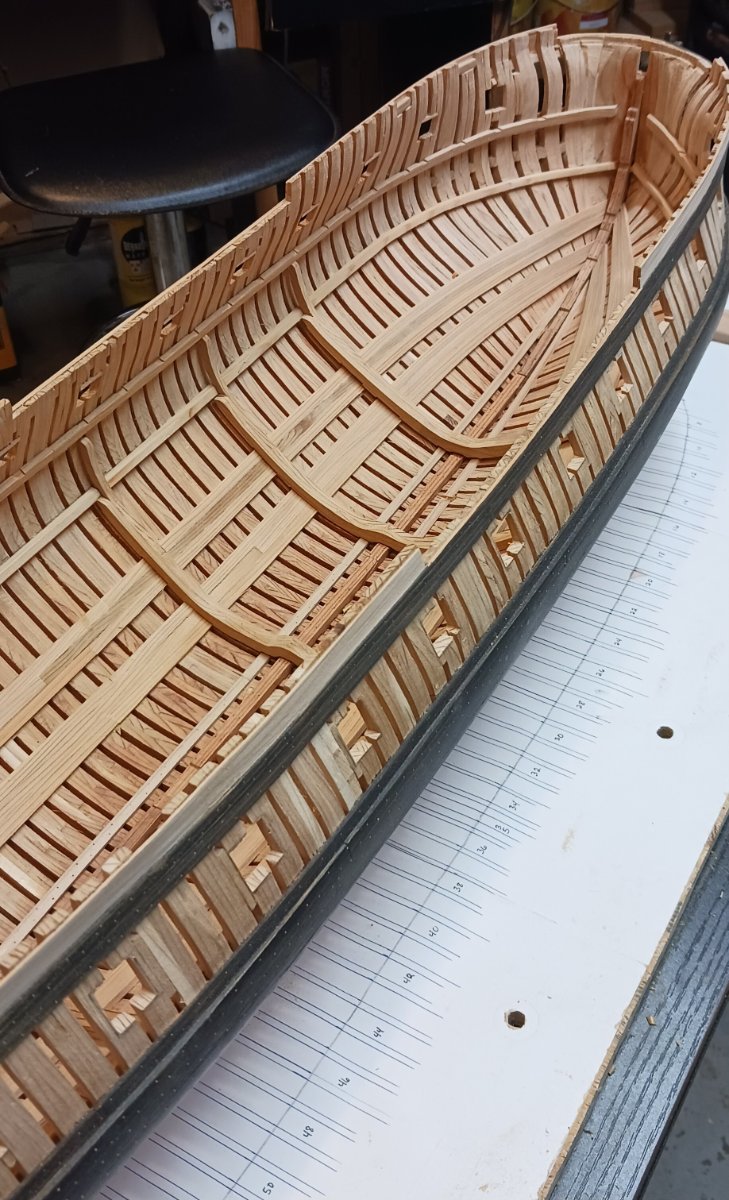
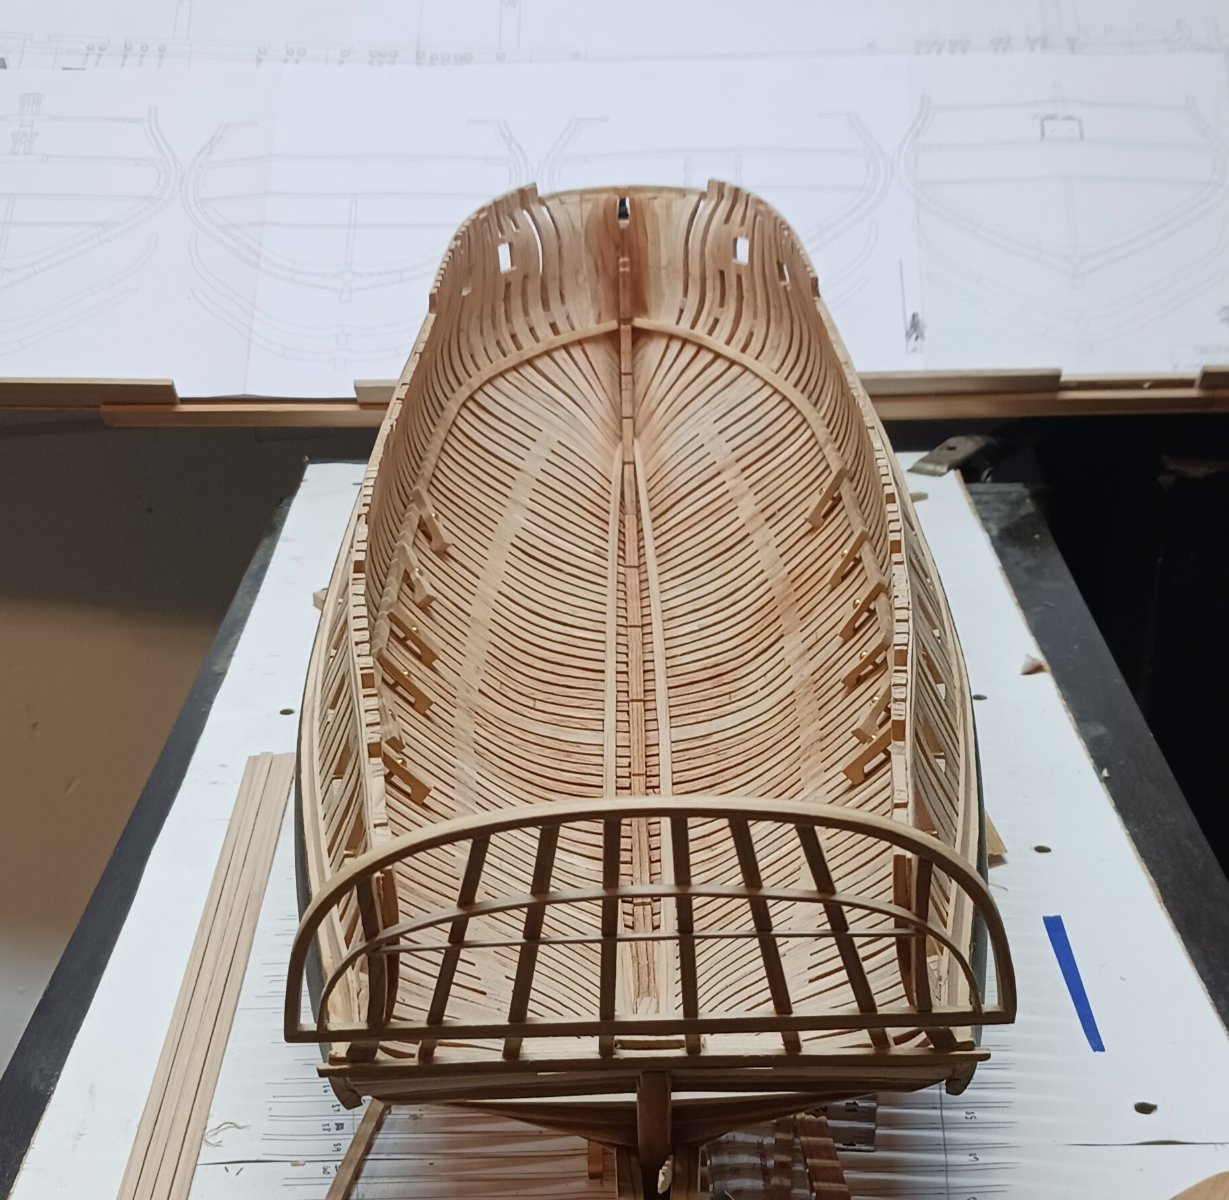
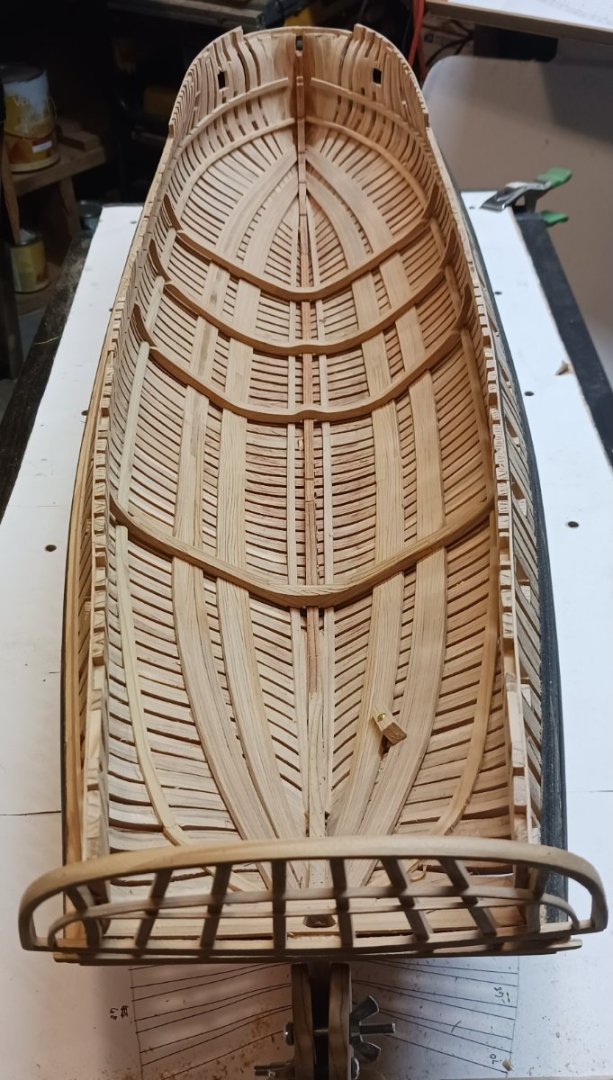
A little more progress, lower counter planked,limber strakes installed and orlop deck clamps,I made up the riders and they really helped with getting things lined up and the deck clamps at the right height.


-
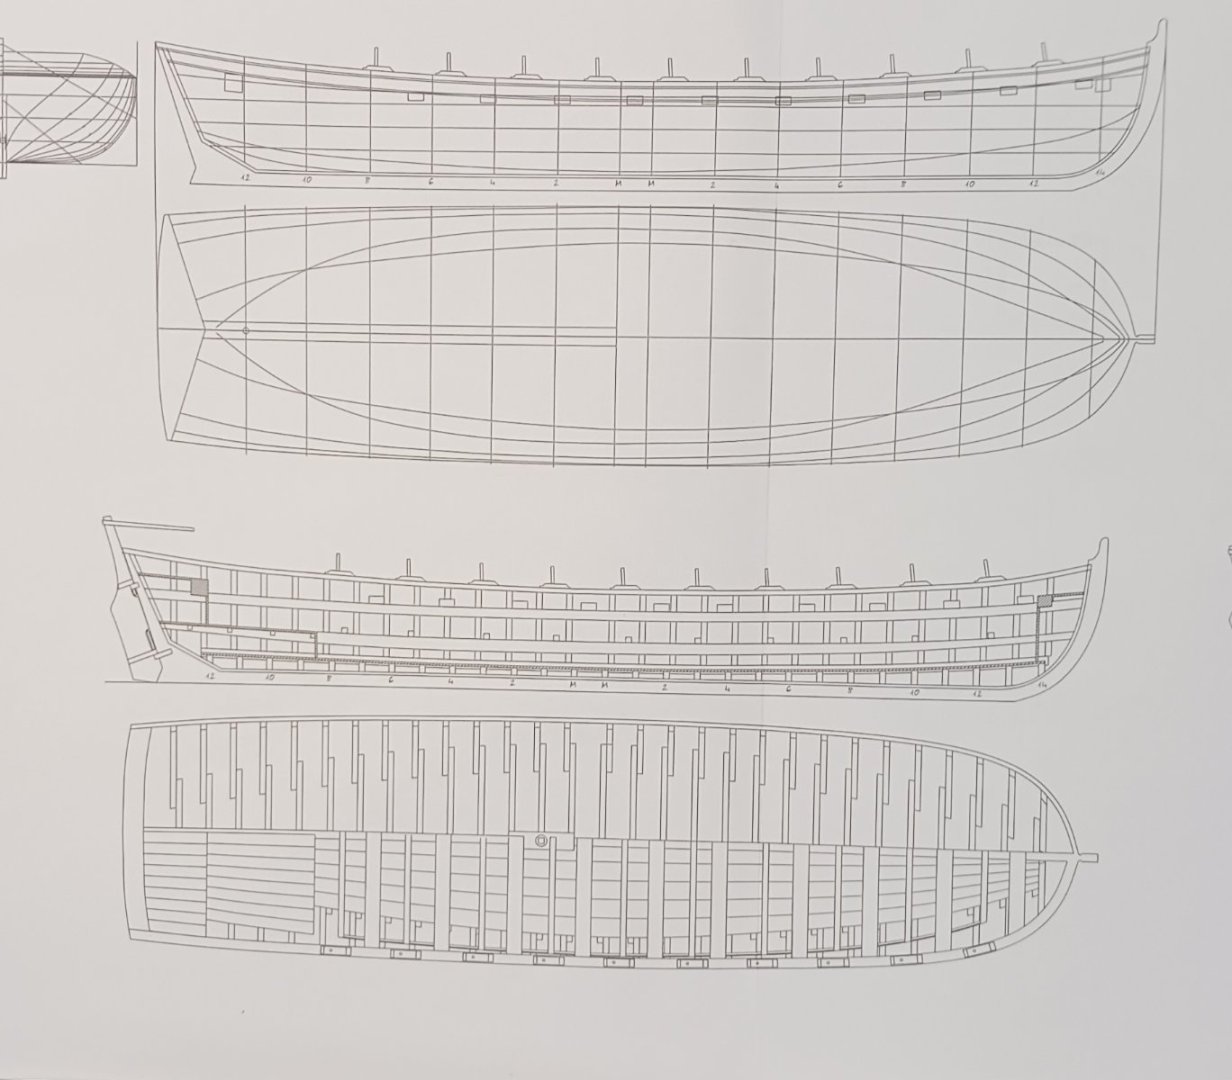
Those are from the actual plans of the Mahonesa's monograph from Ancre.
- 12 replies
-
- 1
-
-
- Frigate Diana
- occre
- (and 1 more)
-
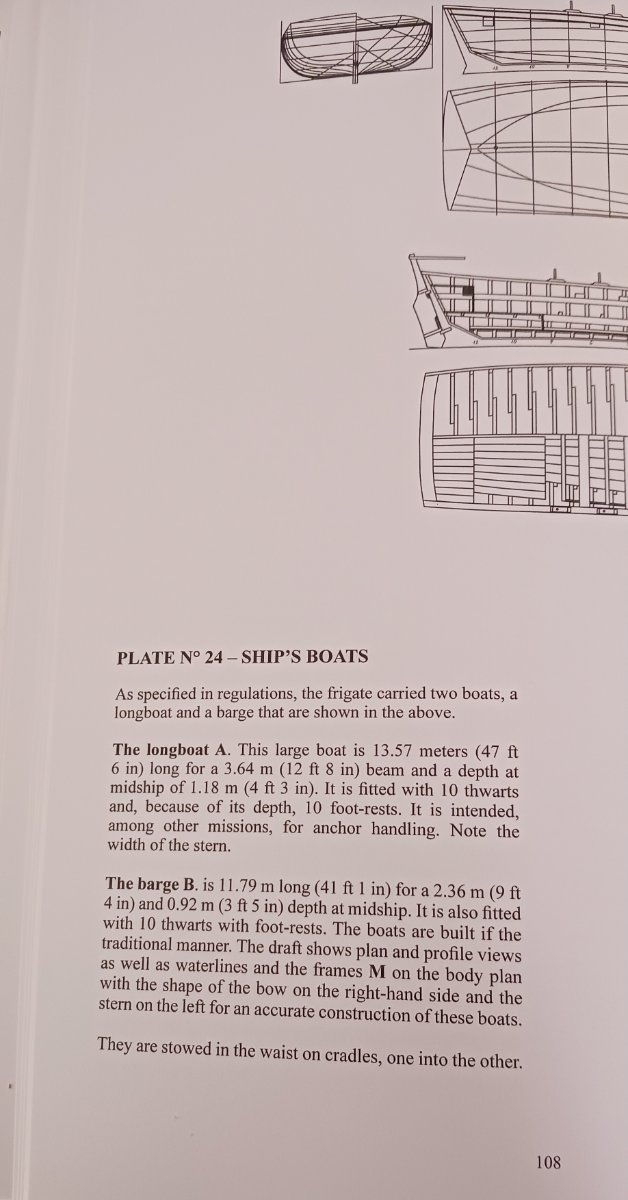
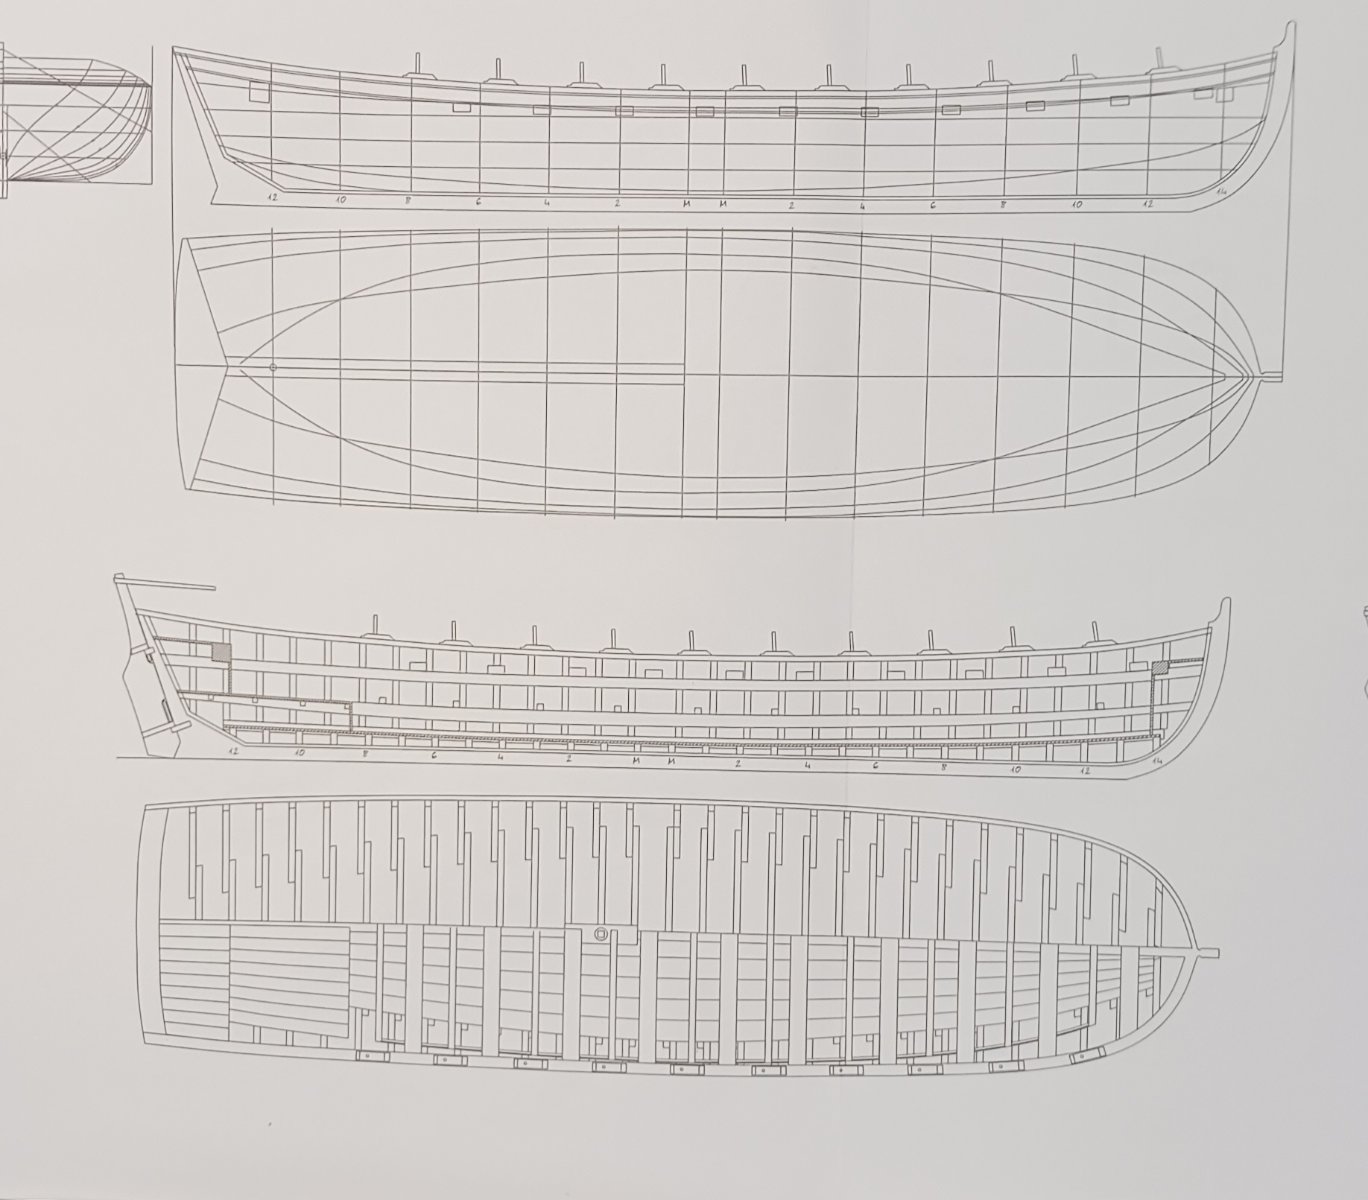
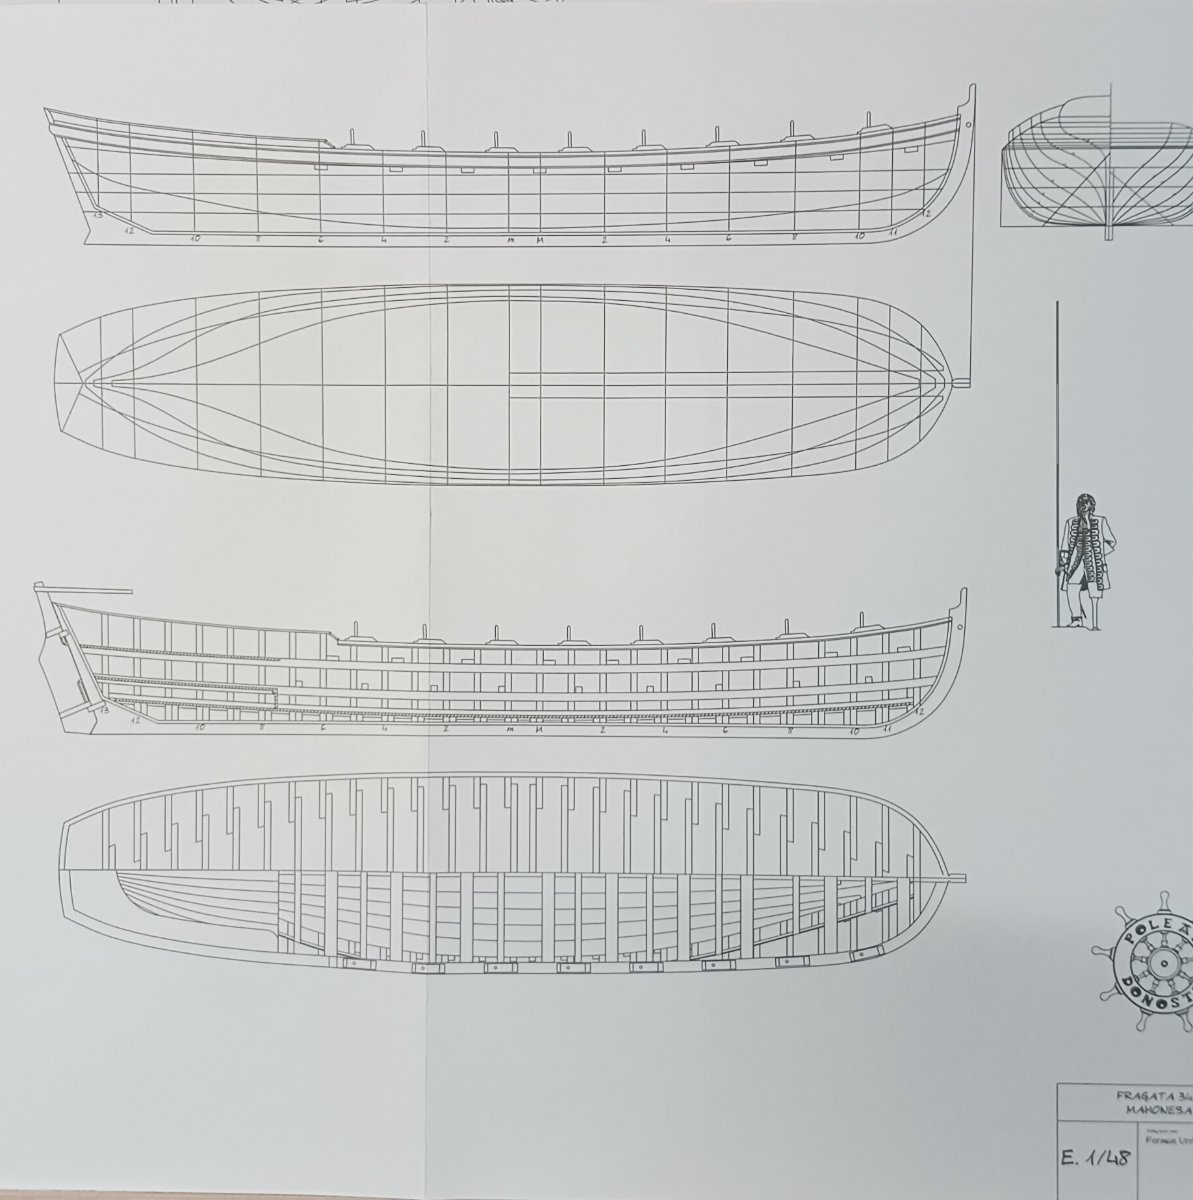
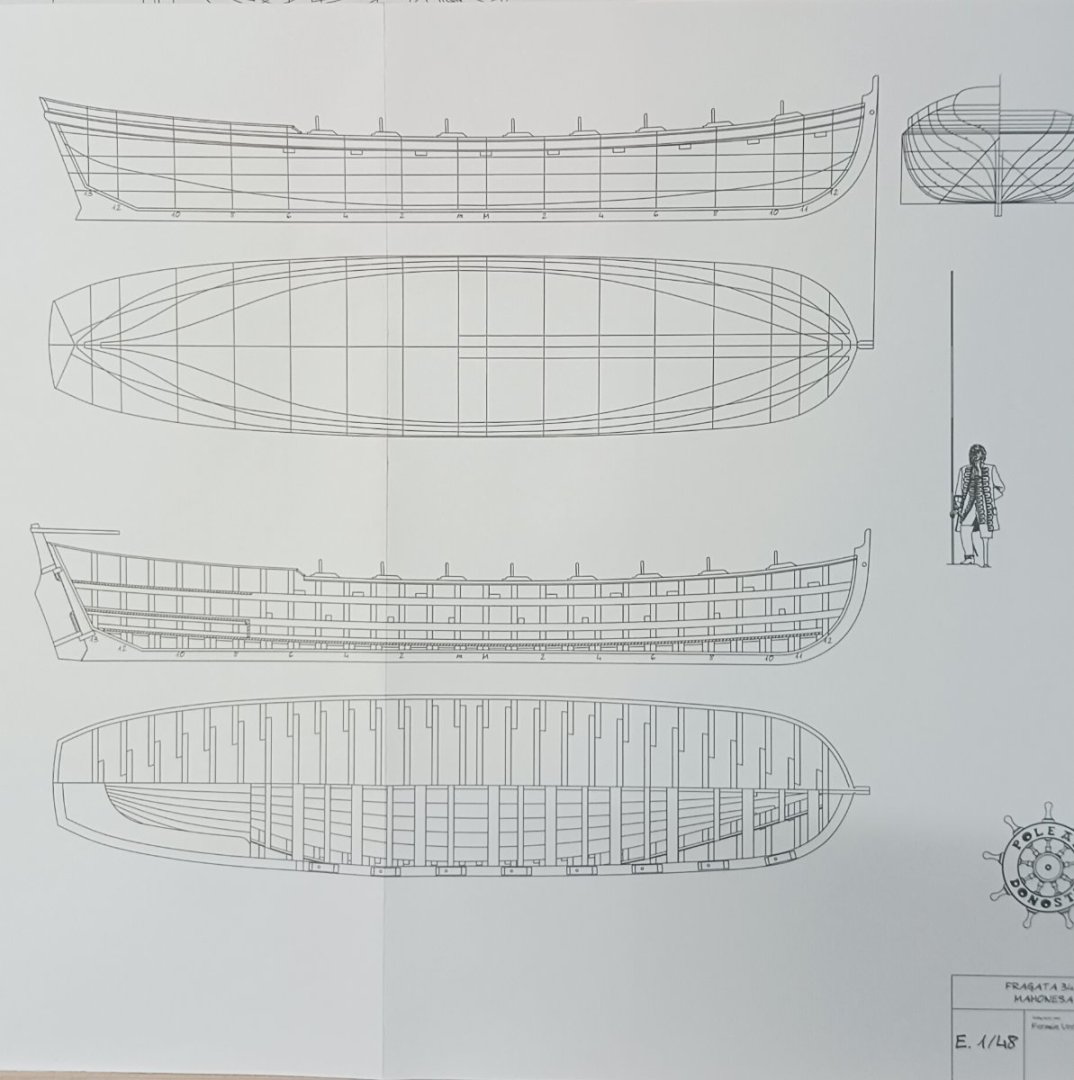
If you're really want to try to detail your boats,here's the plans for the longboat and barge that the Mahonesa's carried aboard,1/85th scale is kinda small to add to much detail but I hope these will give you a general idea of their appearance.
- 12 replies
-
- 2
-
-
- Frigate Diana
- occre
- (and 1 more)
-
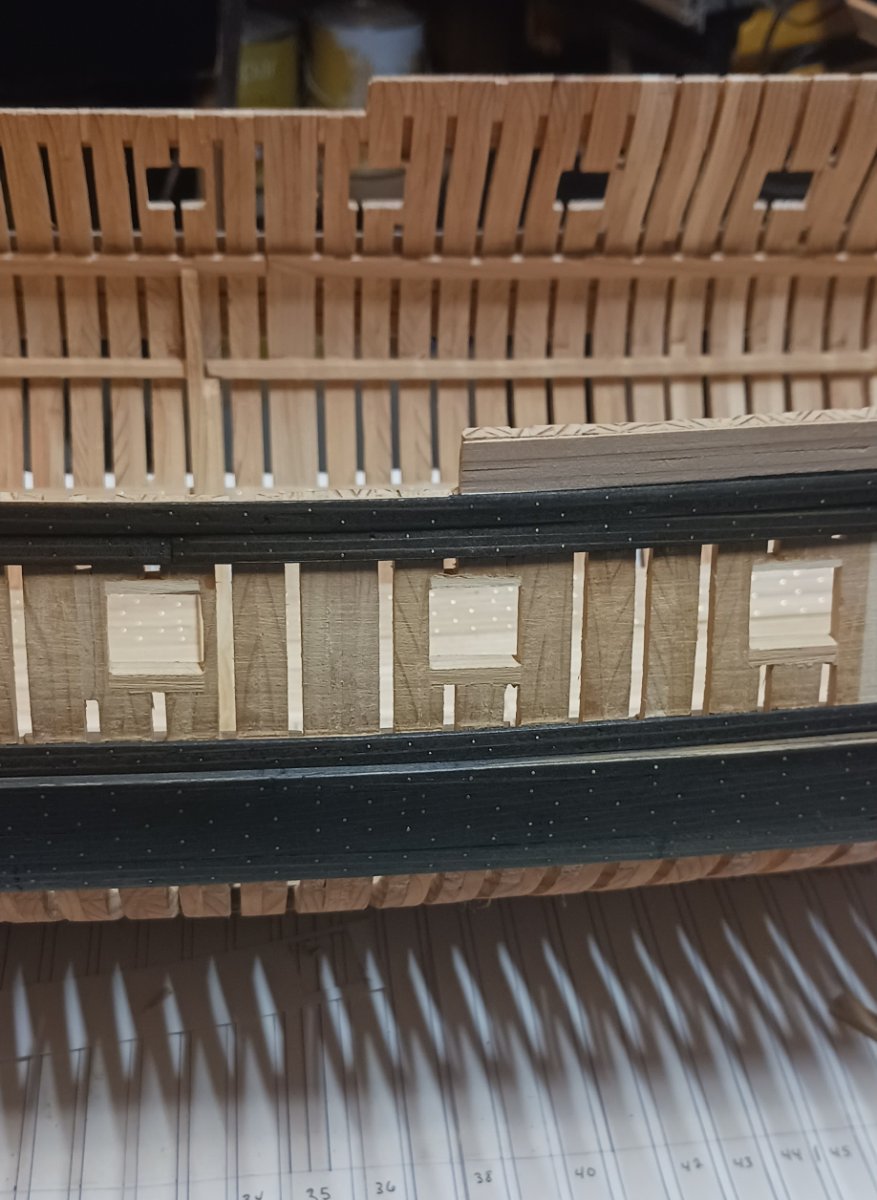
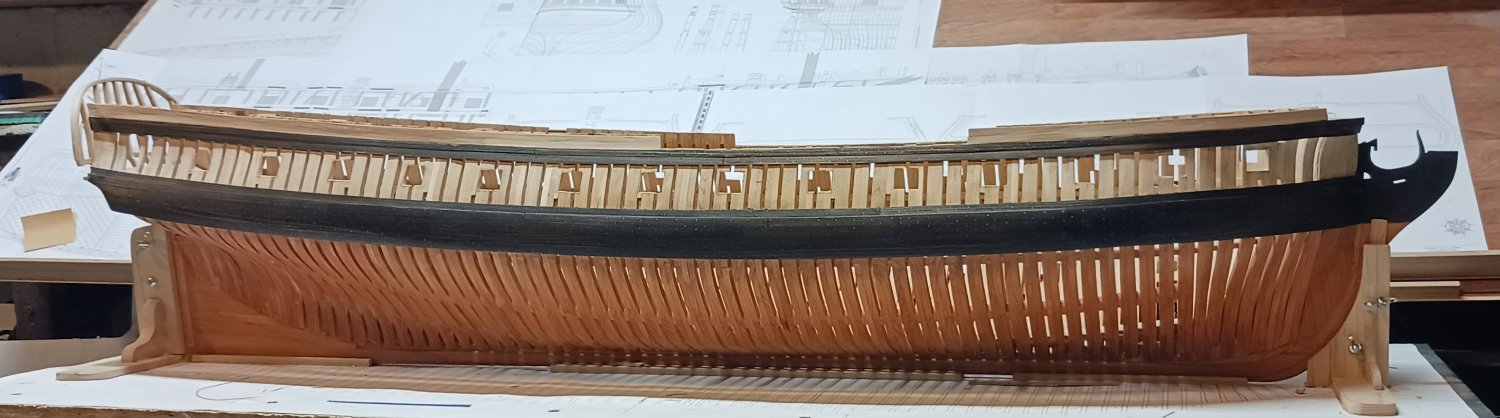
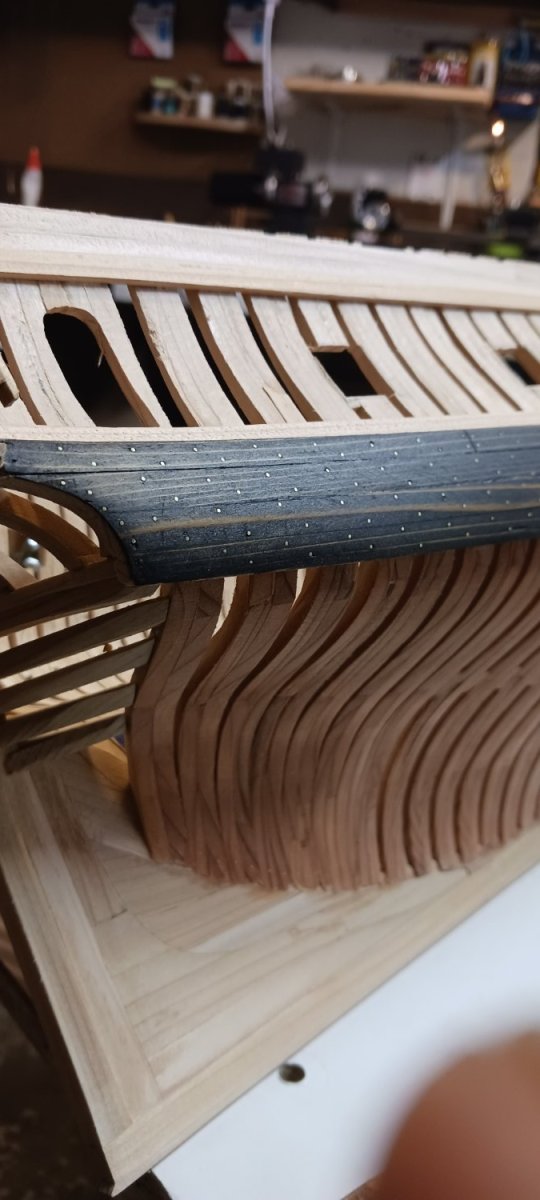
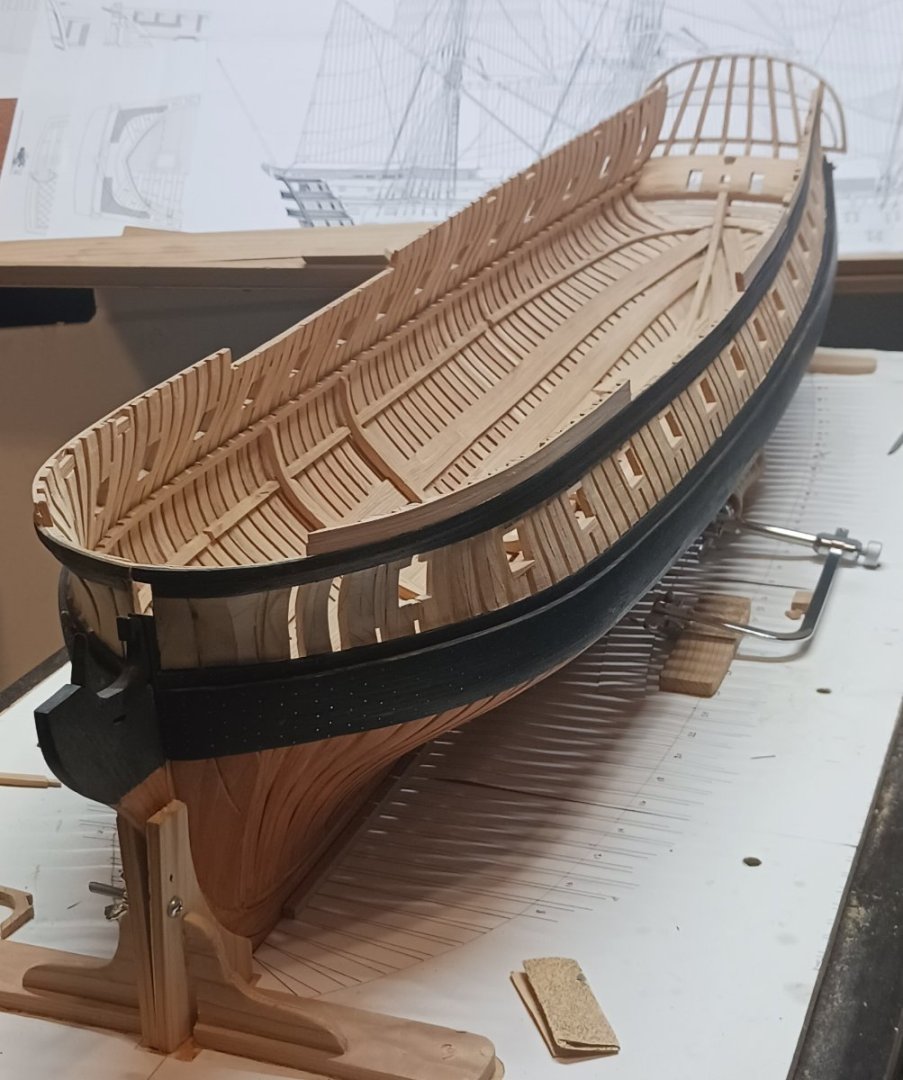
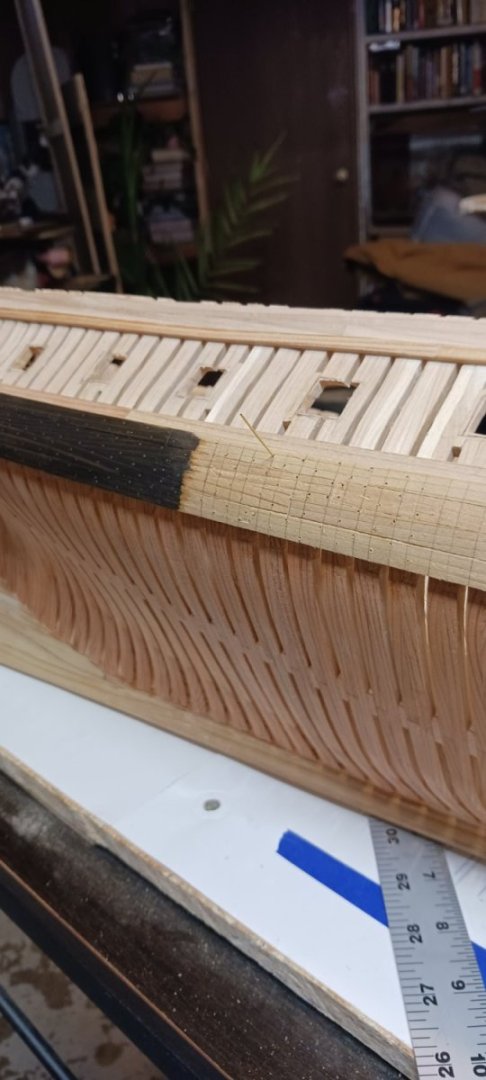
Began cutting out the gunports,not going to put in the sills until later,stained the framing of the hull,then bolted and stained the wales.


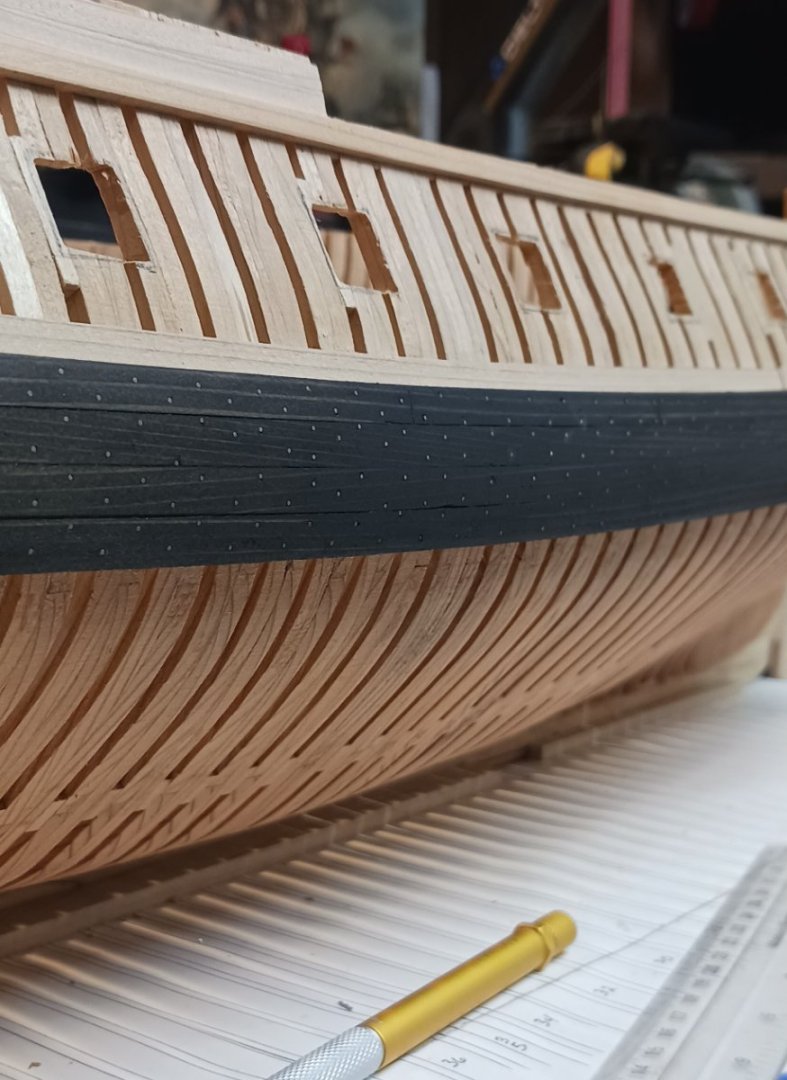
-
After the wales were on I removed the temporary supports on the bulwarks,cut in the gunports for the upper deck,and proceeded to add a little planking to the upper works.


-
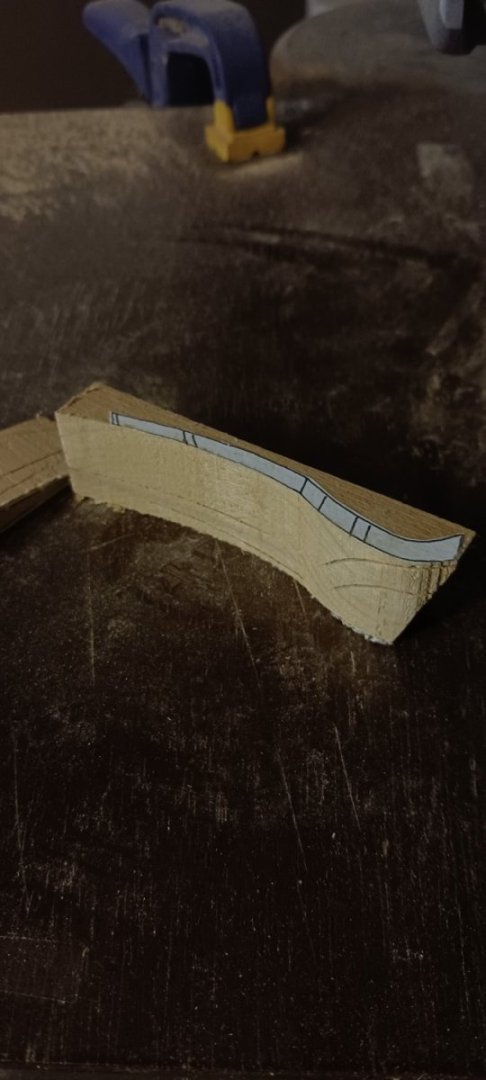
Working on the stern was a lesson in patience,tried to rush it and ended breaking more wood than I put on trying to get it to bend,my first time working with Alaskan yellow cedar and trying to bend it,took alot of trial and error before I found what works best,finished the structural framing on the stern then finished up installing the rest of the wales.


-
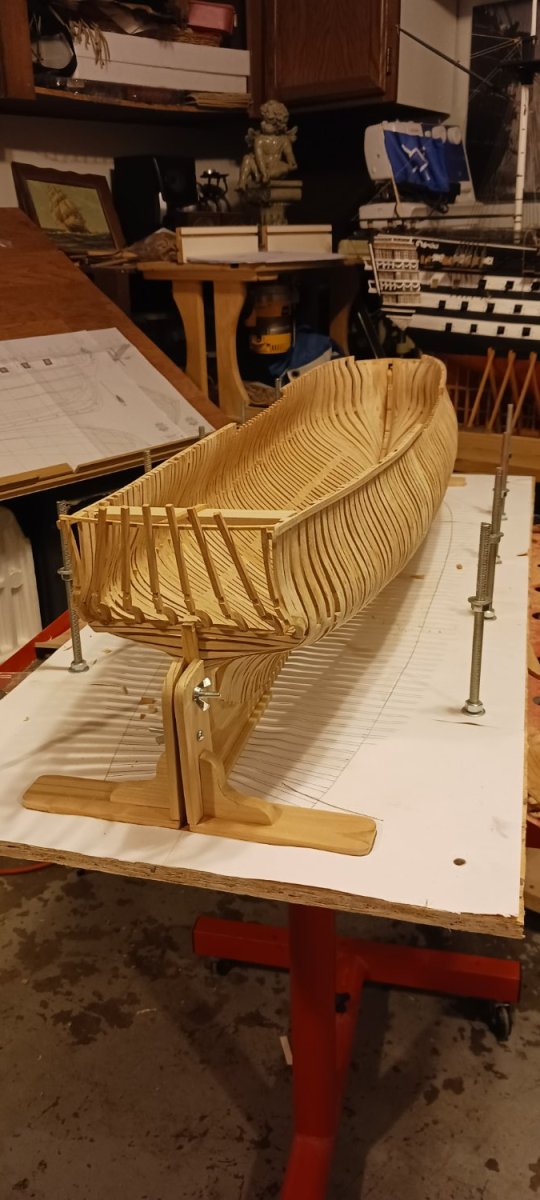
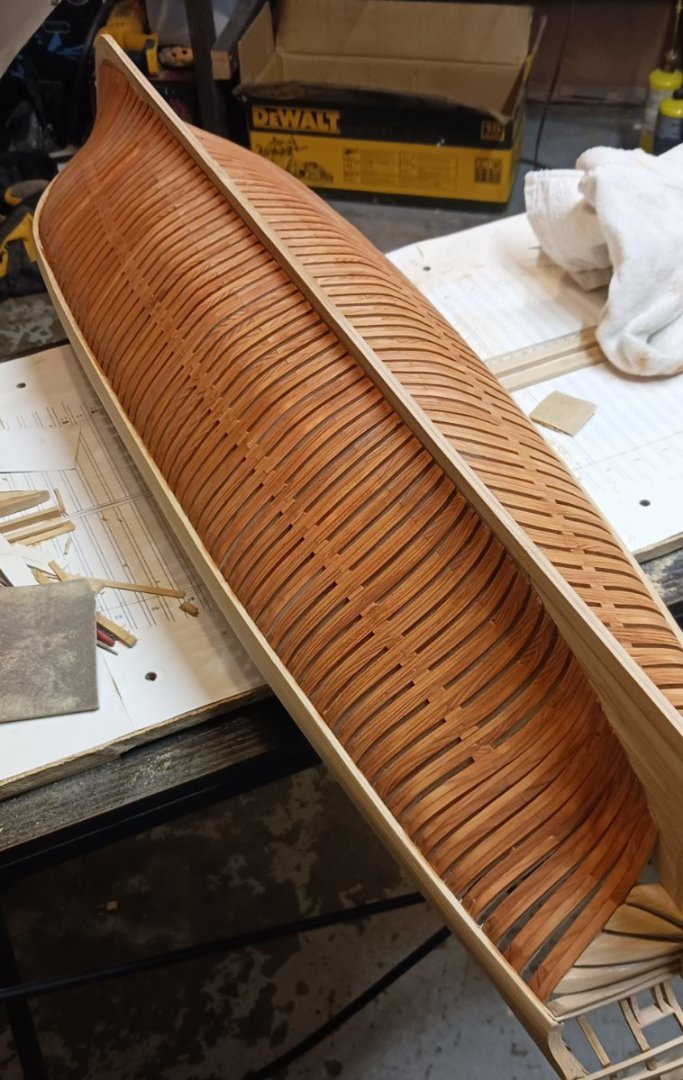
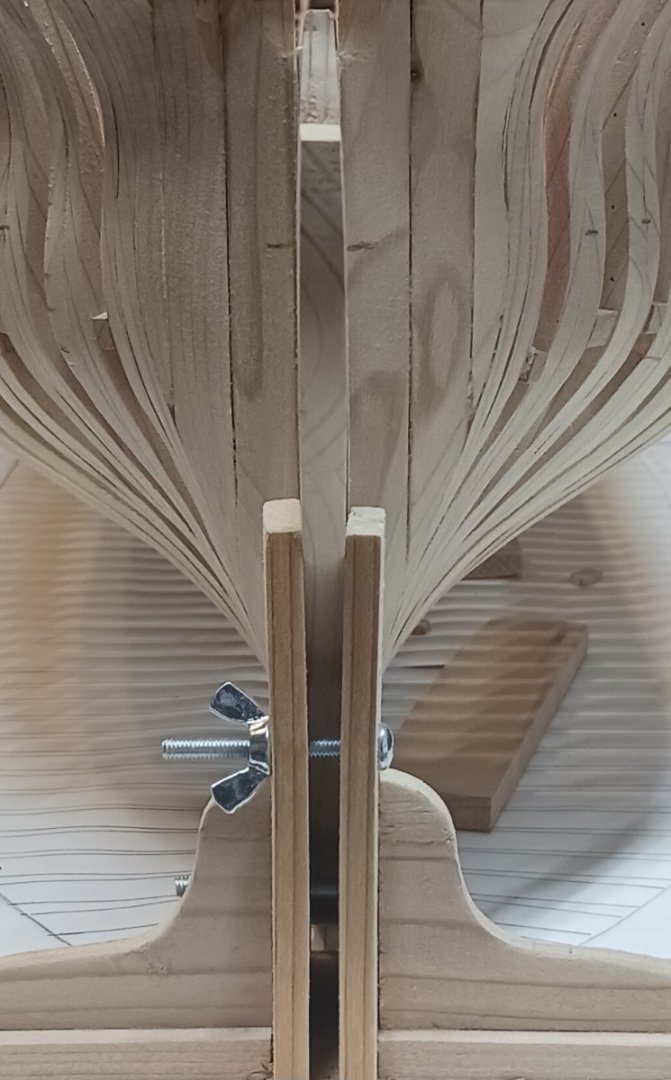
After installing a few Wales to help strengthen the hull it felt safe enough to flip over and finish sanding the very bottom that I couldn't reach before.


-
Began working on the Wales,made them the right width but just a little thicker than what the plans called for because from experience I had clamps impress the wood in certain areas,so I left enough extra so I can sand to the right thickness later,and while tha Wales were drying I put together the internal riders .


-
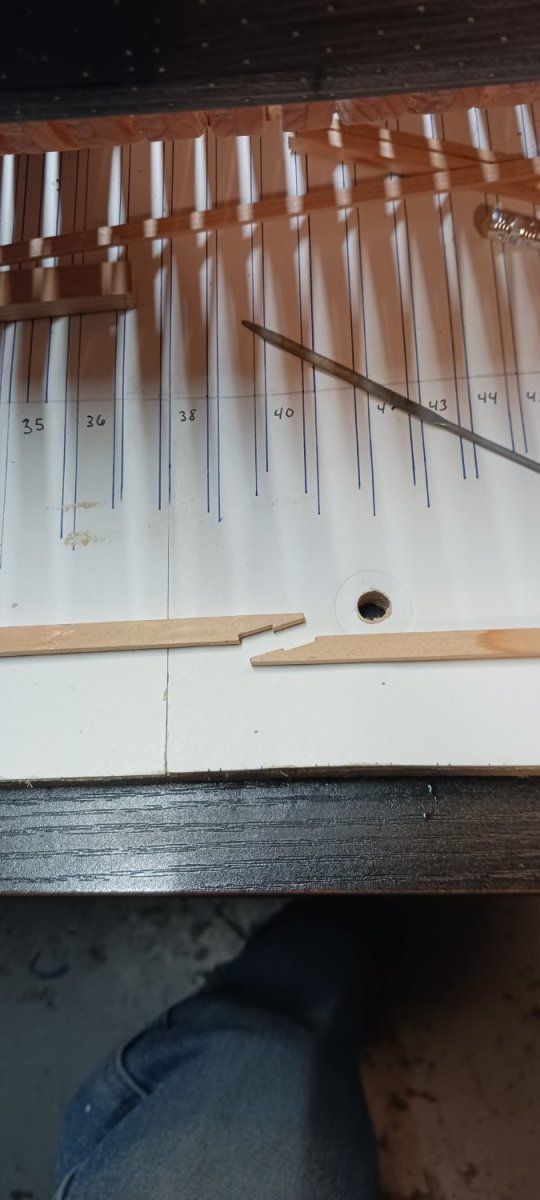
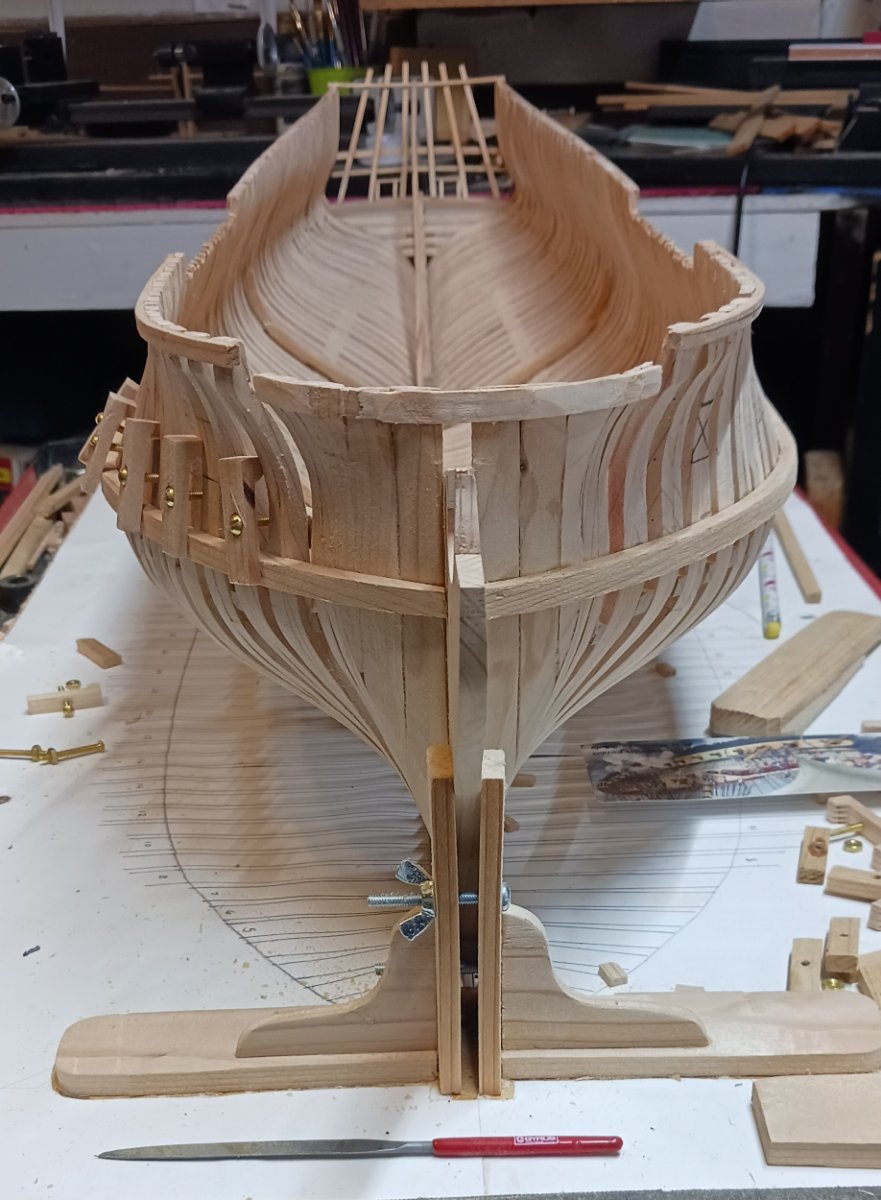
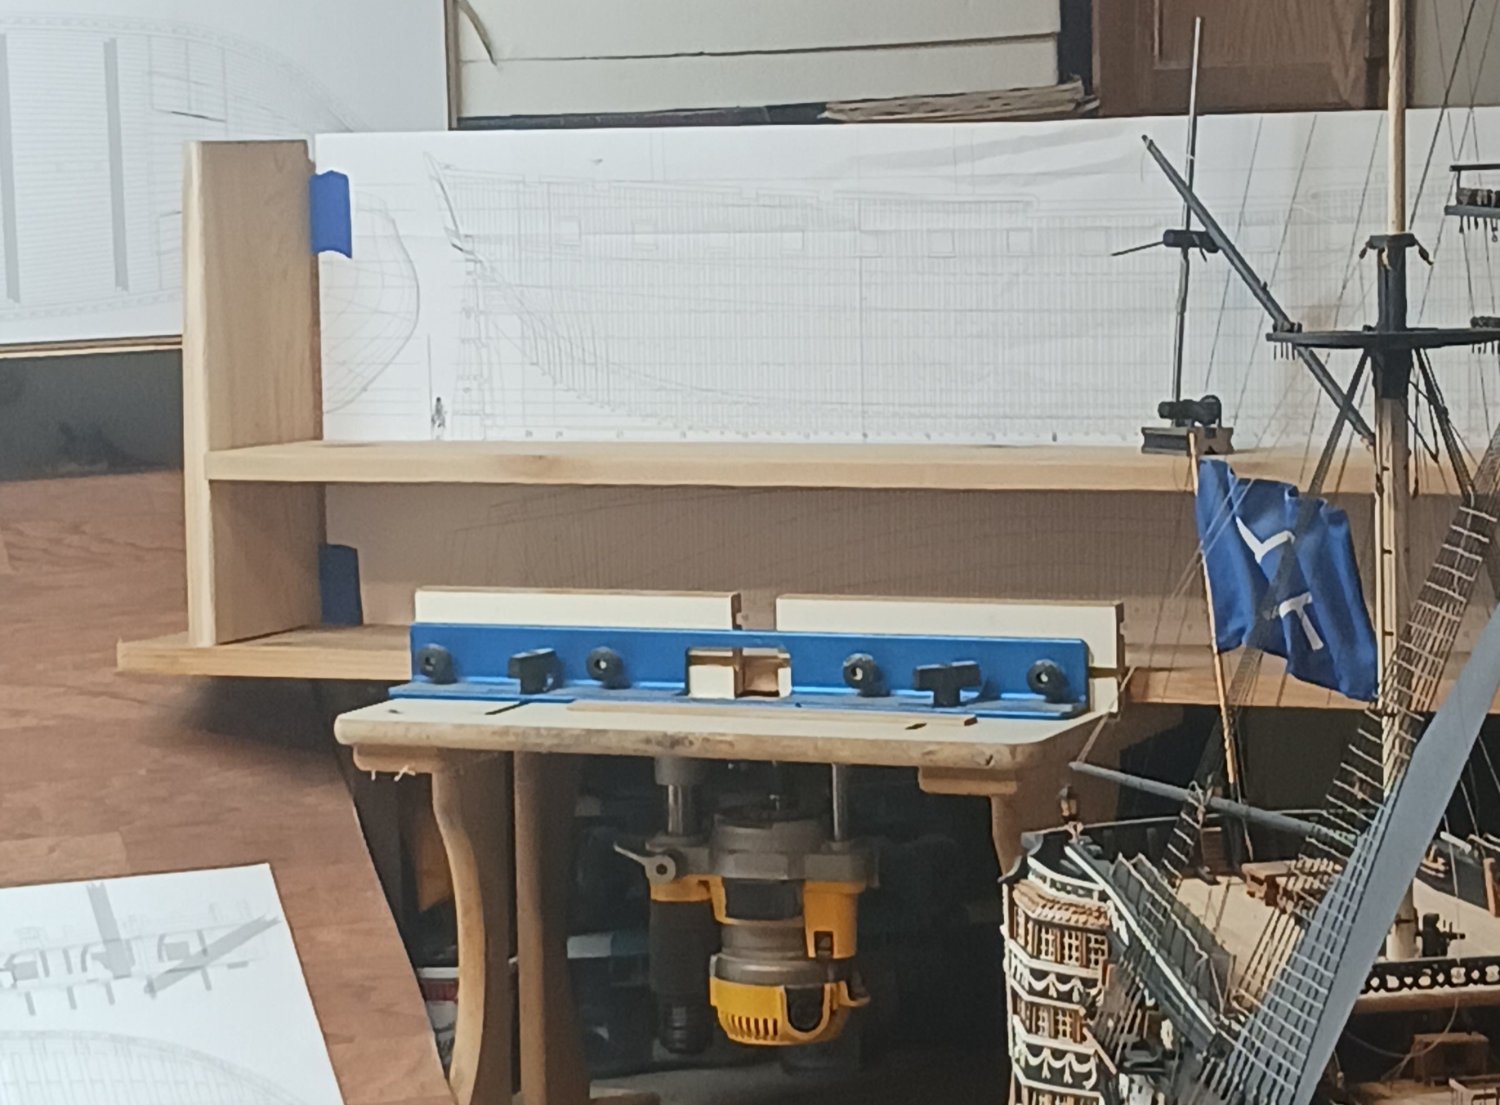
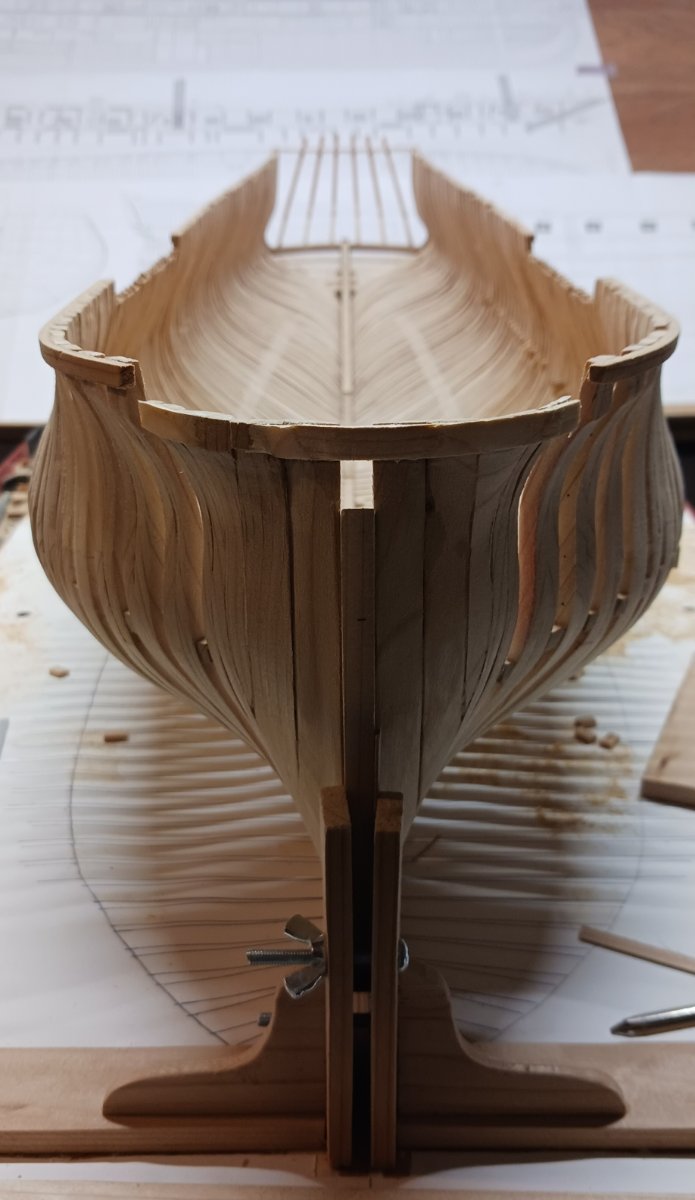
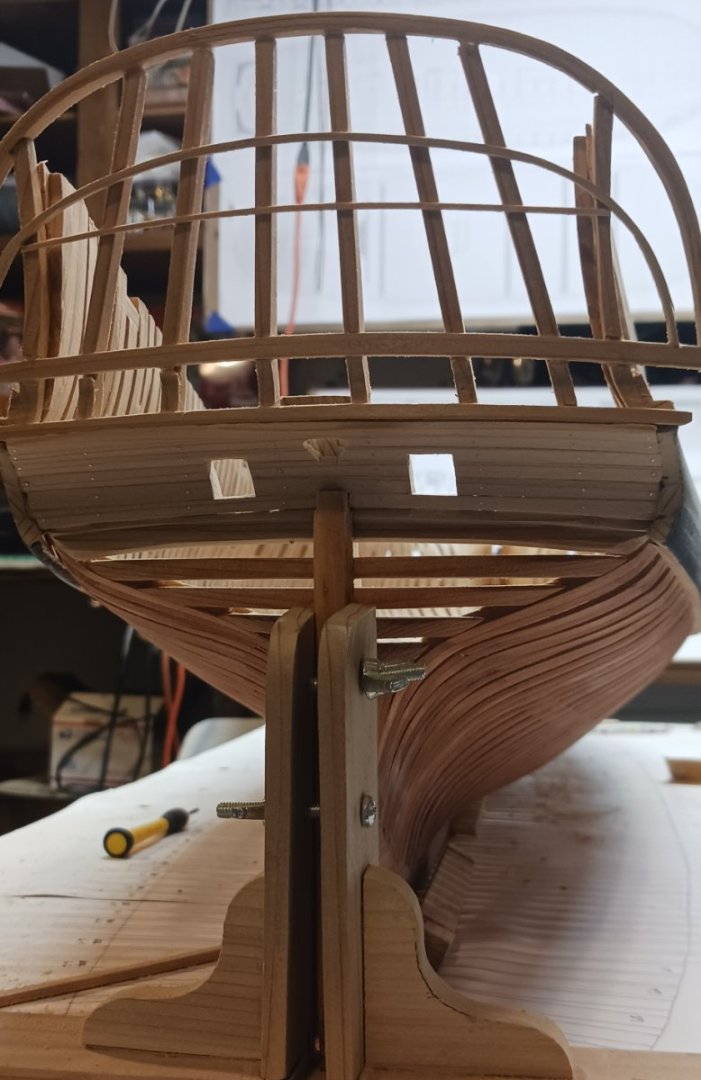
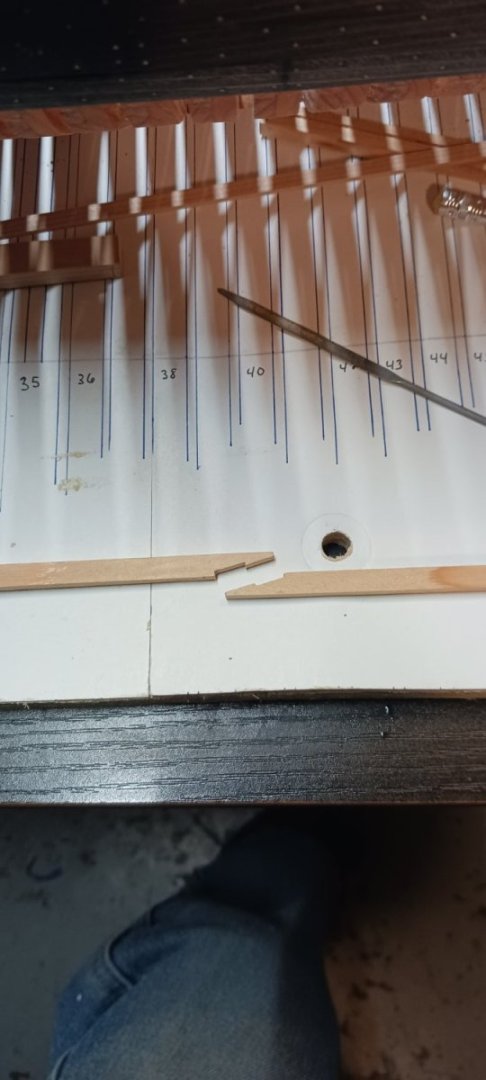
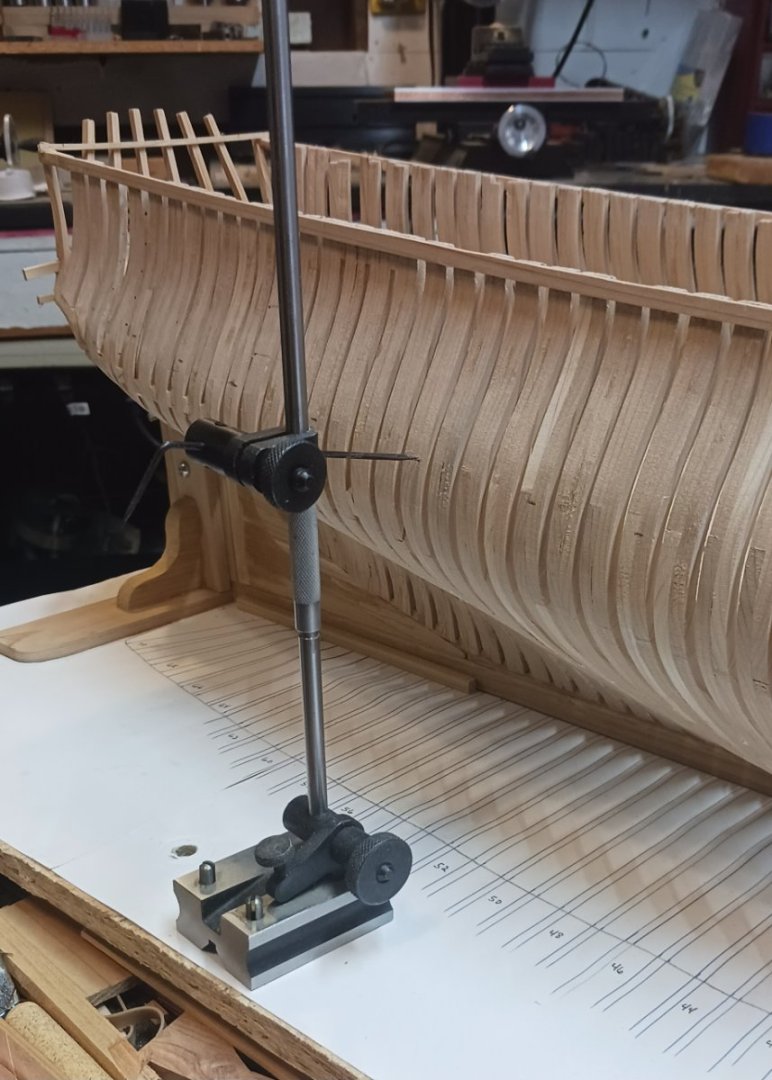
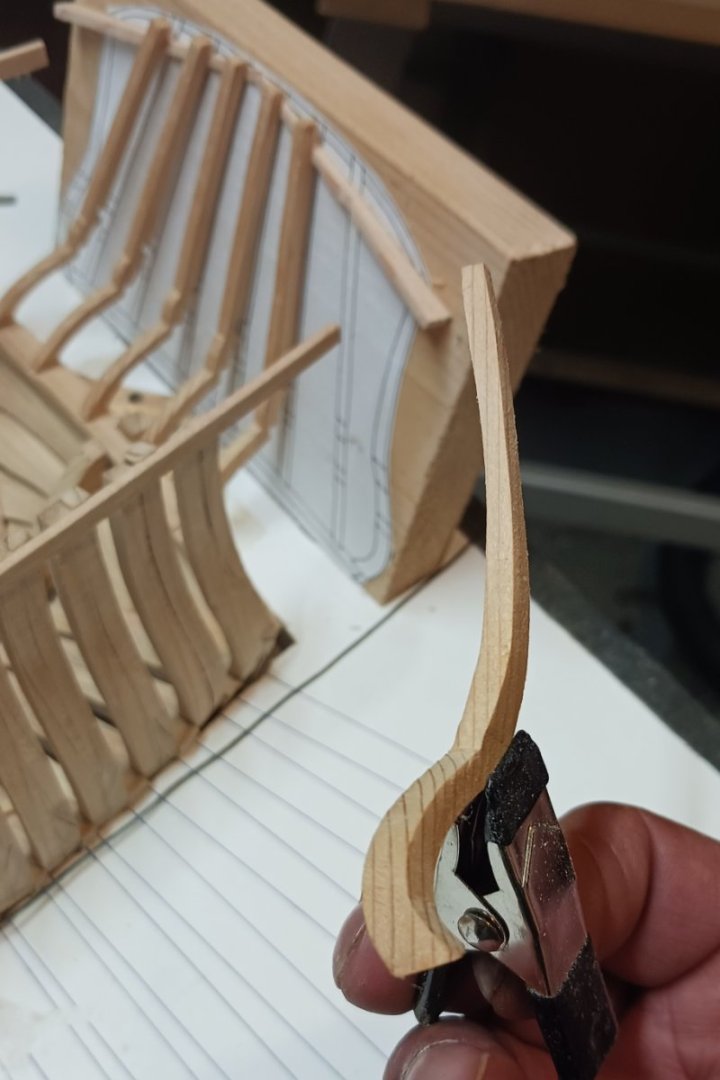
Finished doing the structural frames on the stern,the framing for the vent ports on the lower counter were a little tricky because of their size but I managed,getting the timbers above the counters to bend in two directions took making a jig to hold them while they dried,Alaskan yellow cedar you can soak and heat it to get it formed to where you need it but as soon as it starts drying it Wants to straighten back out quite a bit,several soaks and a little more time in the jig solved that,after the stern was strengthened I moved on to making a plan holder so I can accurately mark out the Wales and gunports.


-
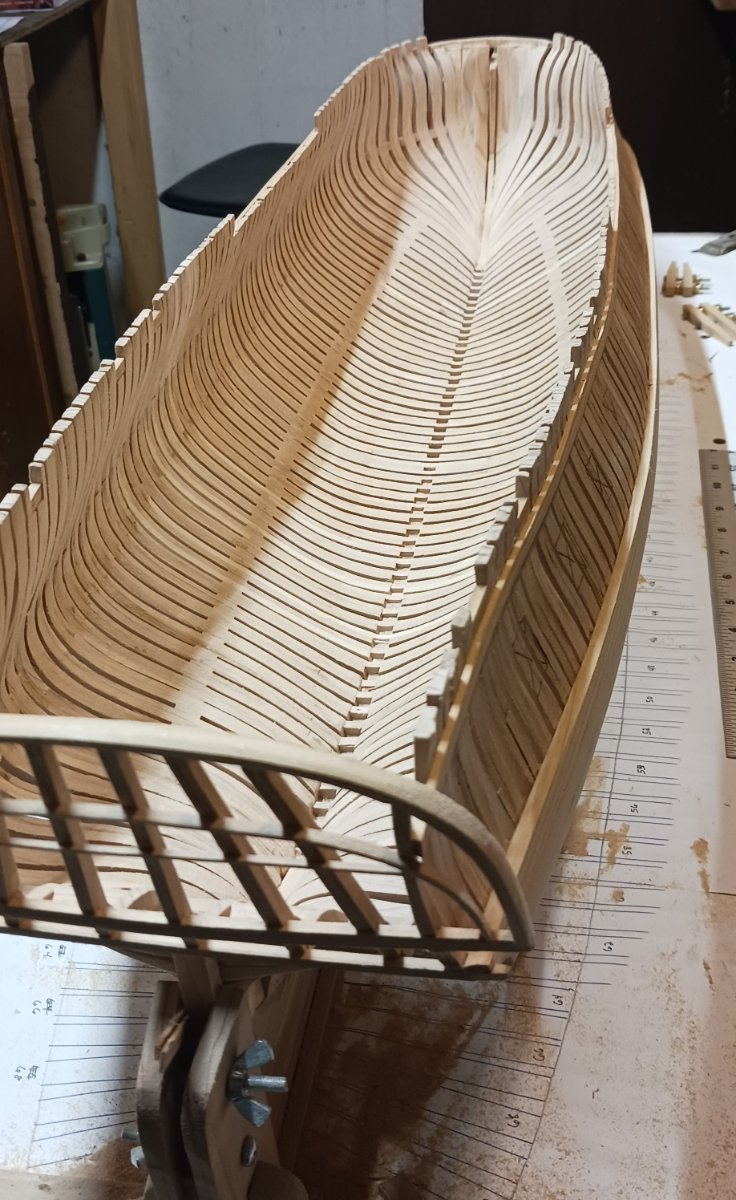
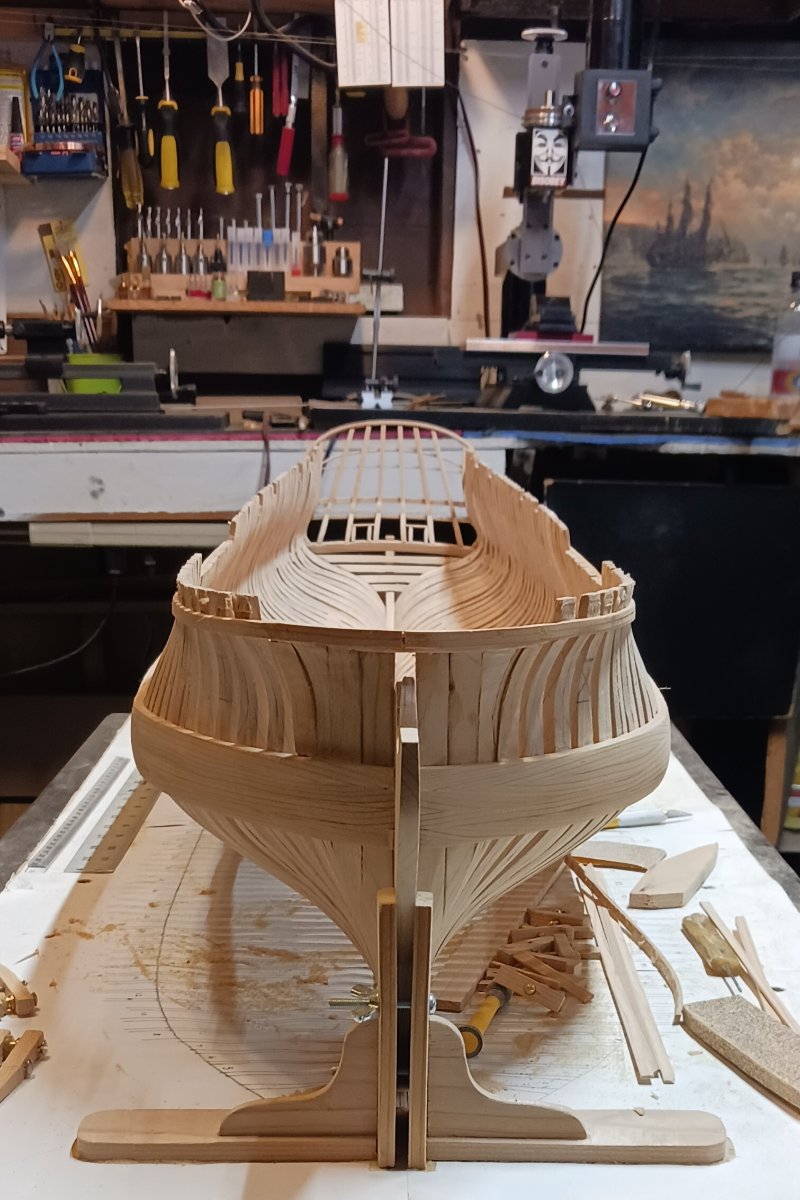
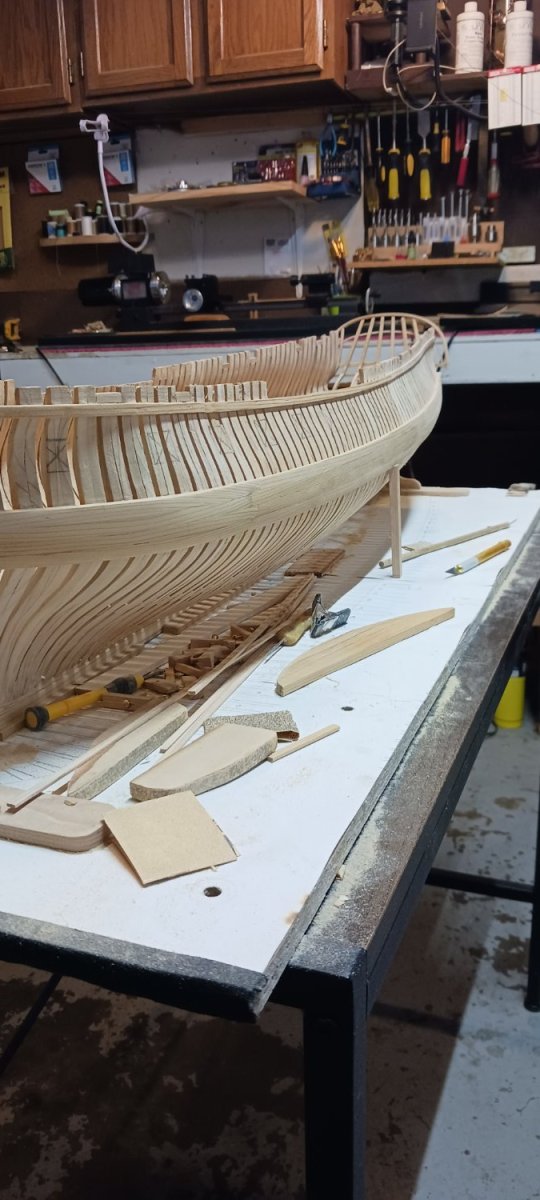
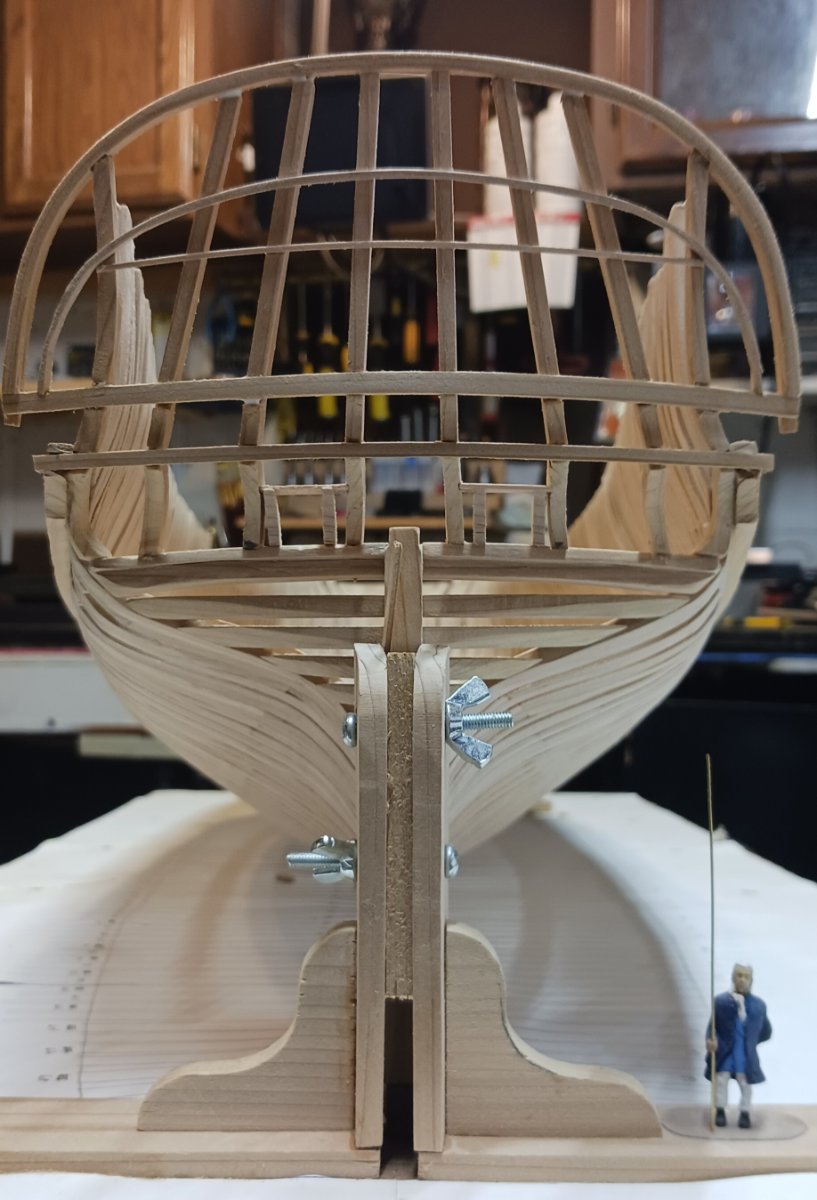
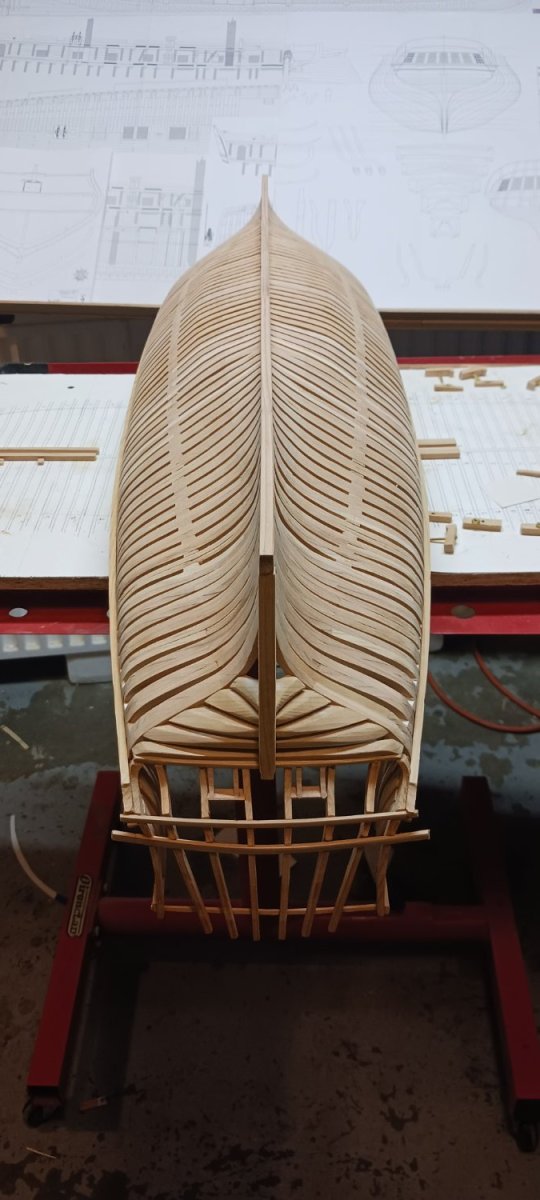
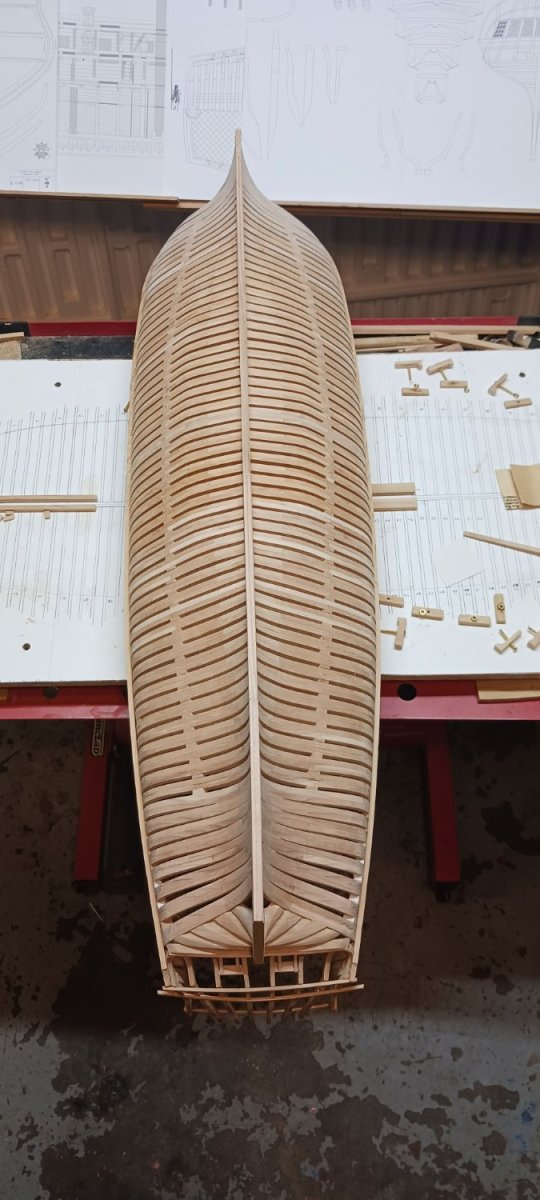
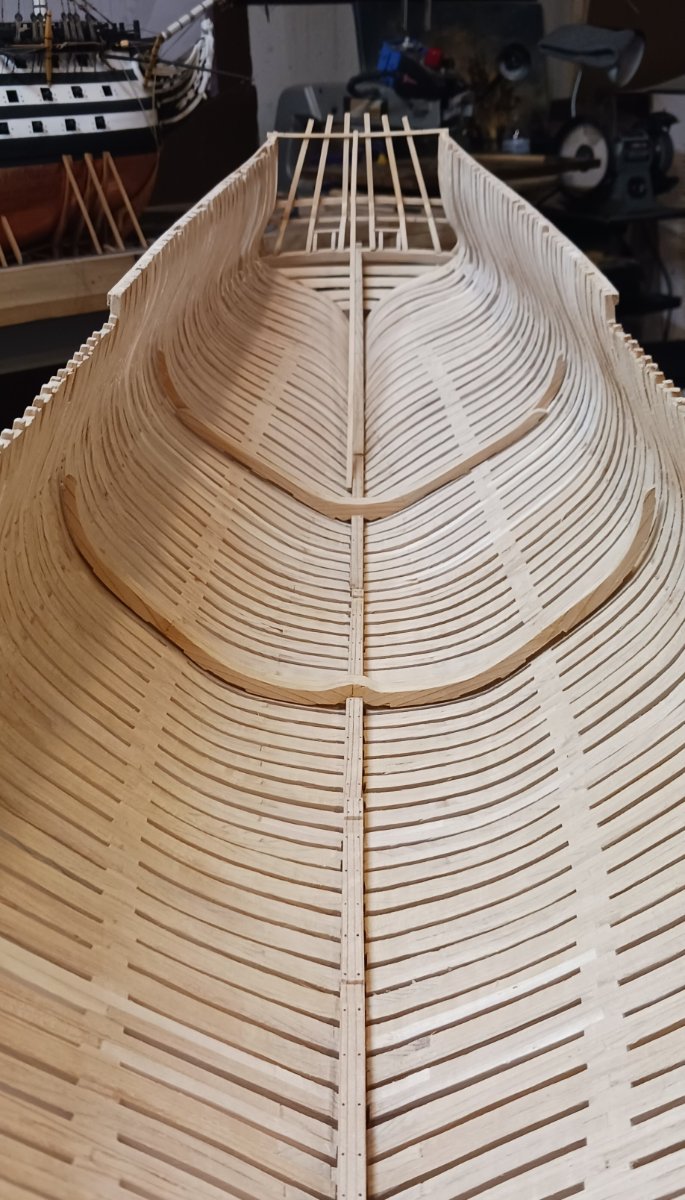
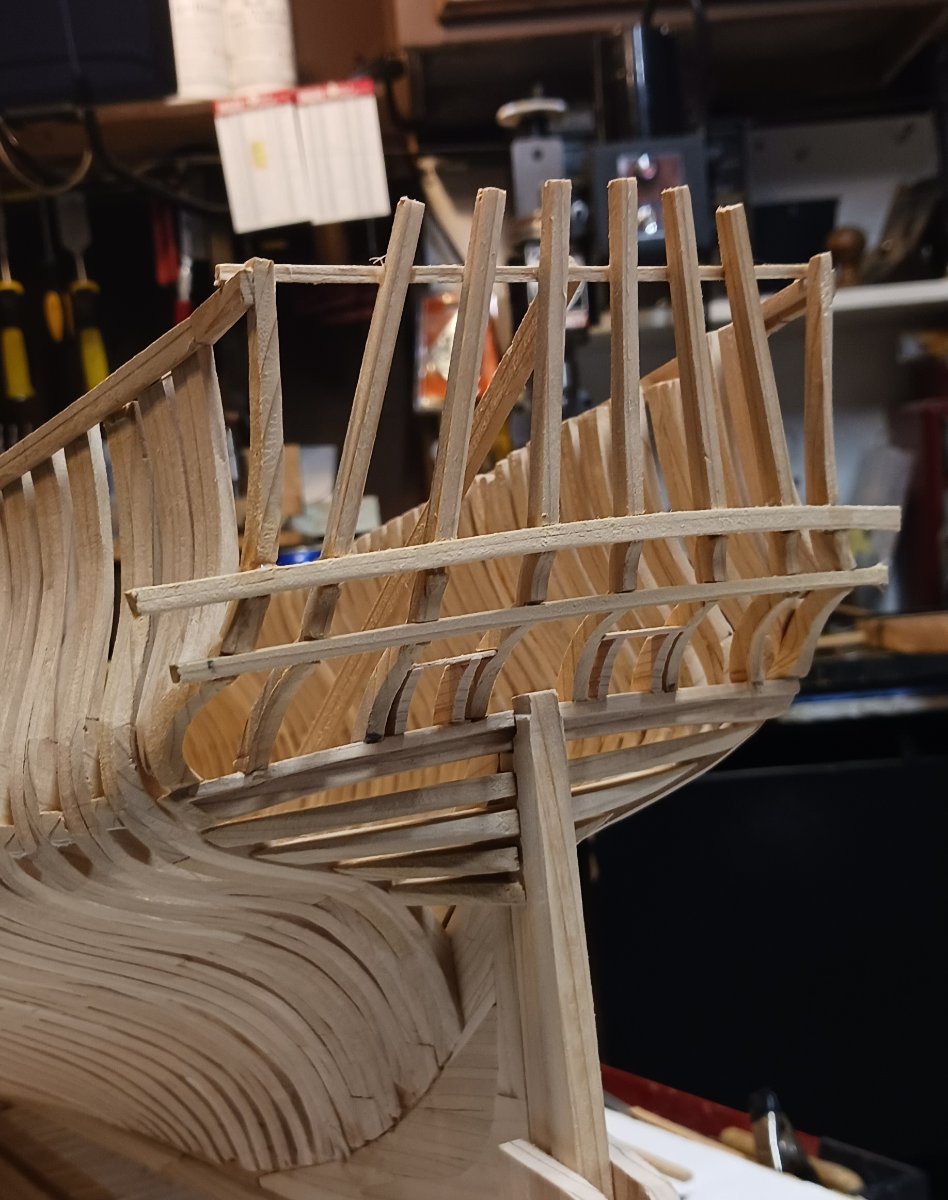
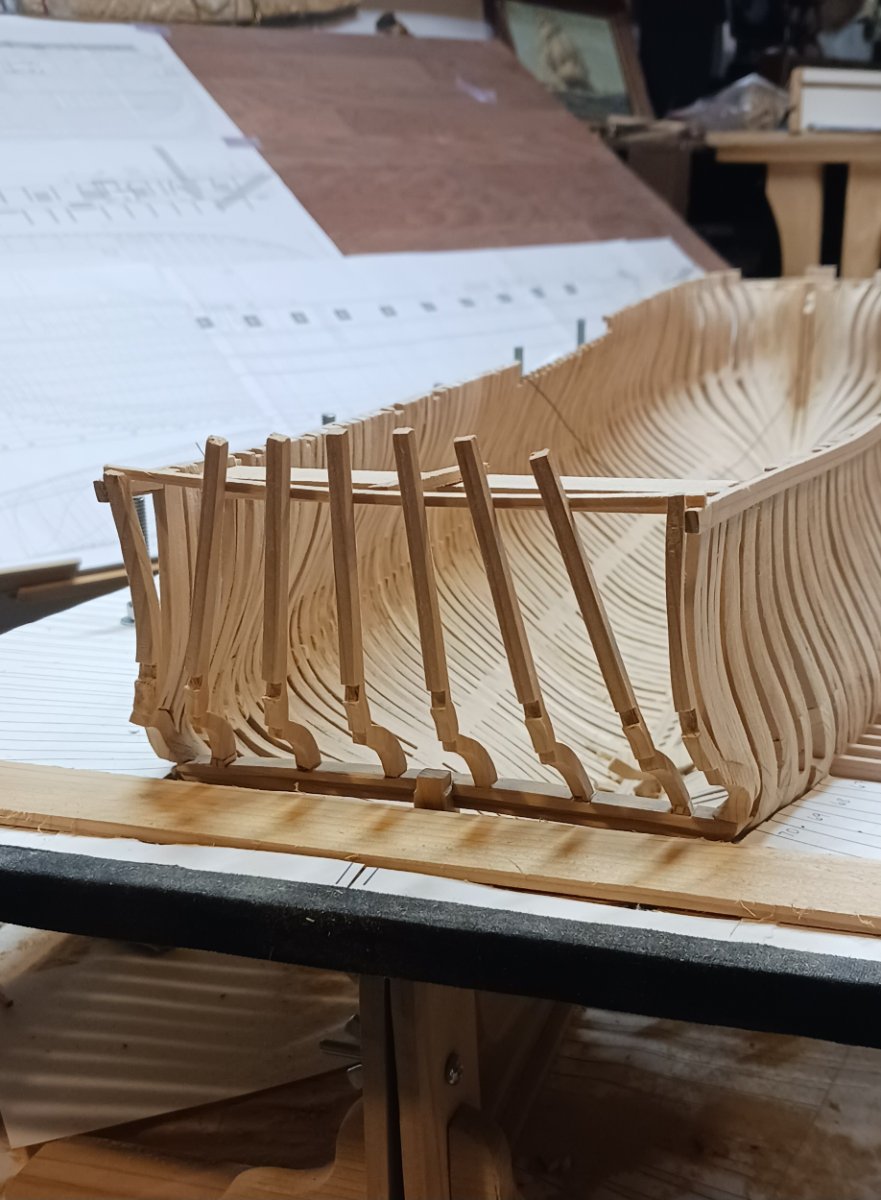
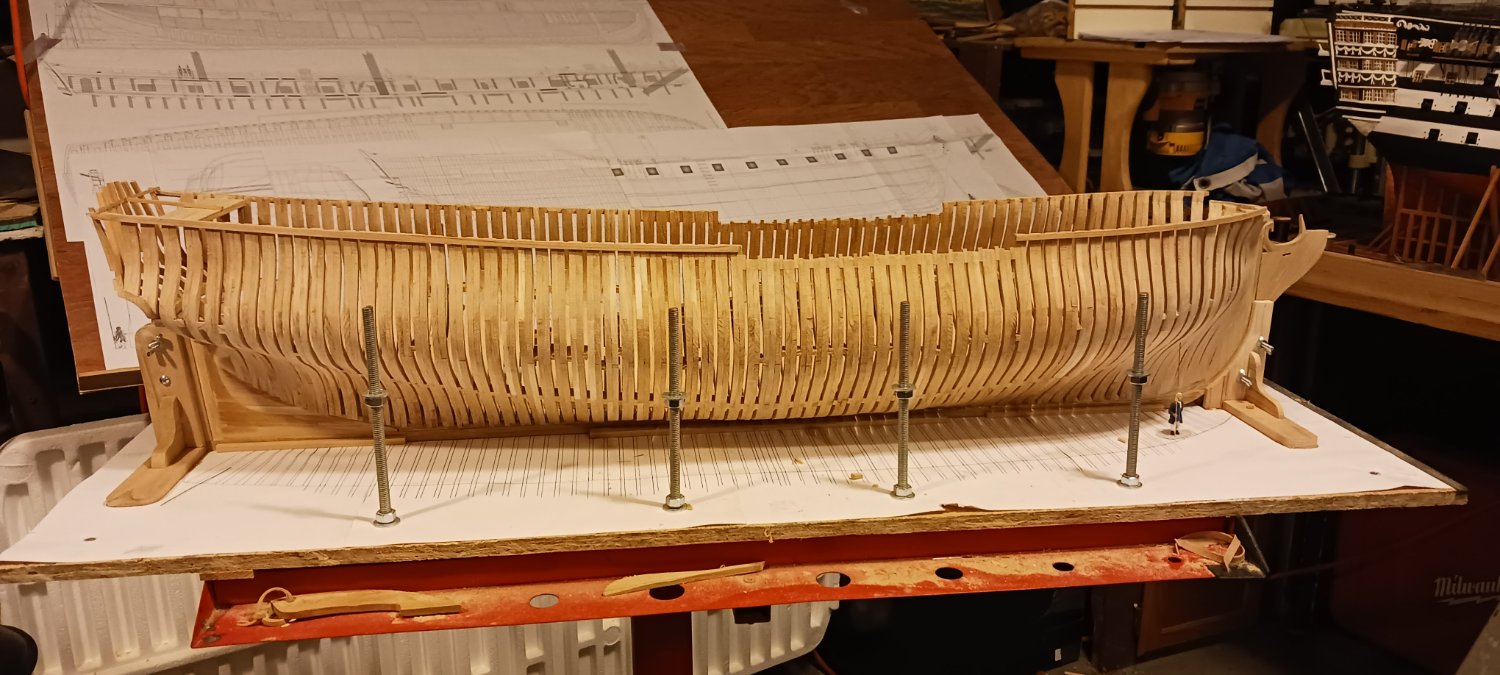
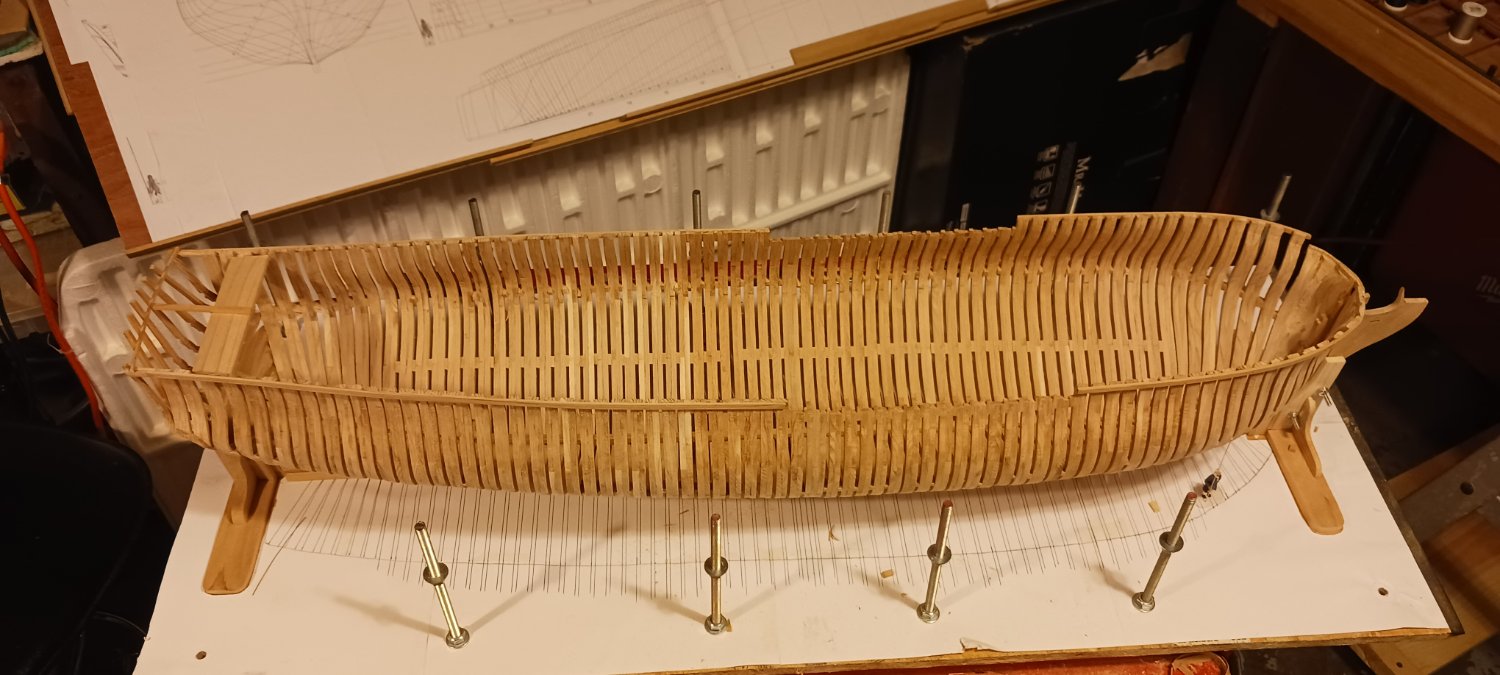
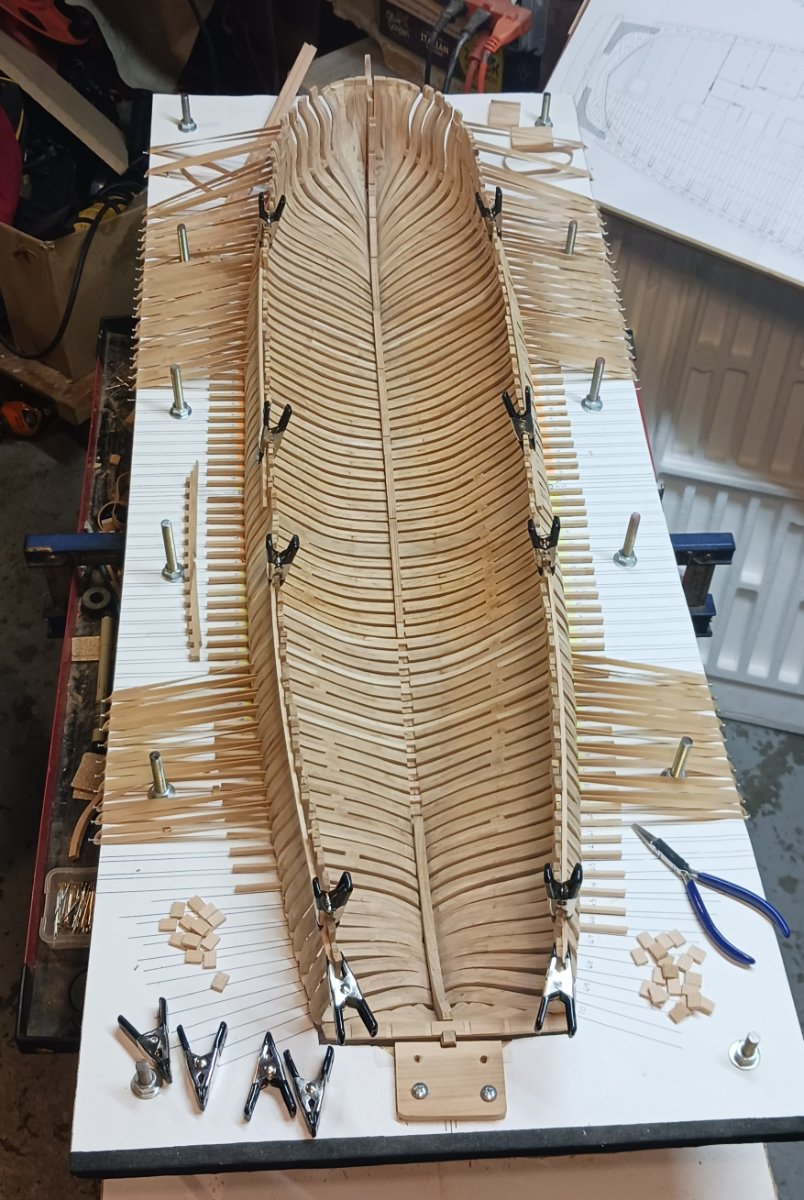
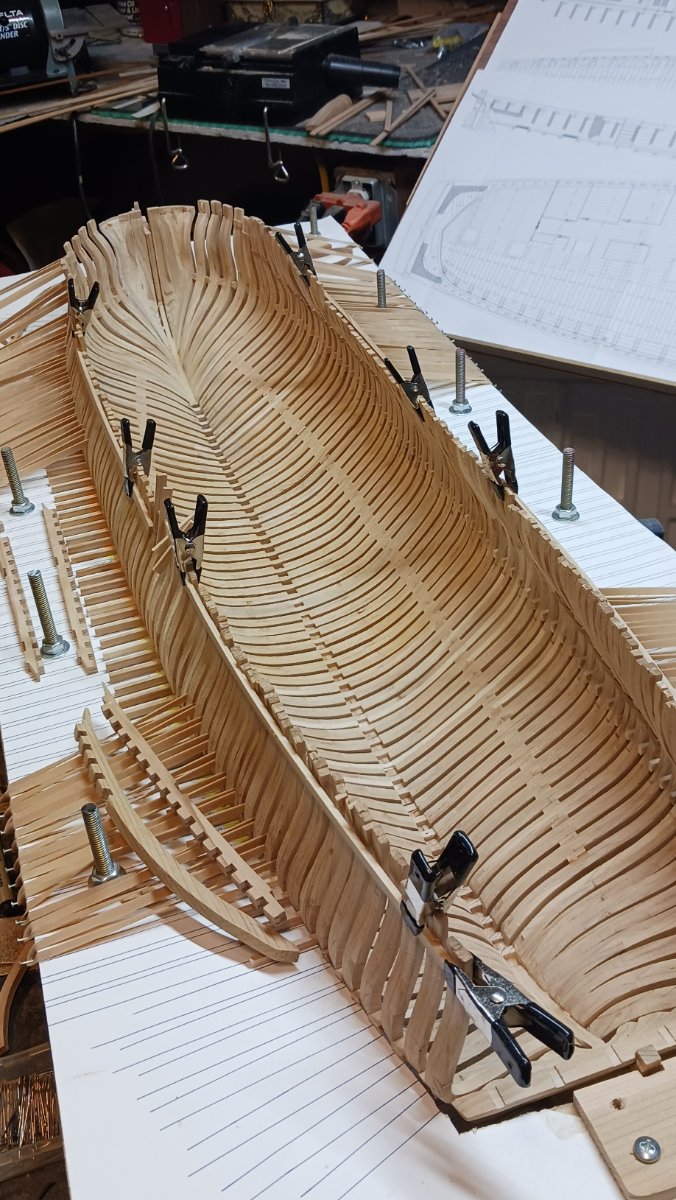
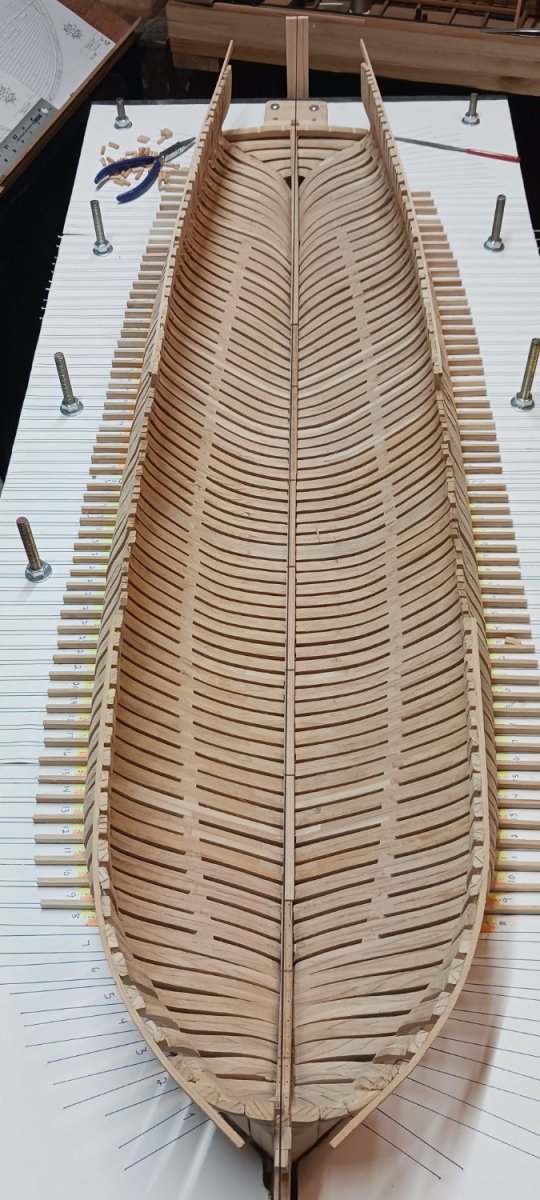
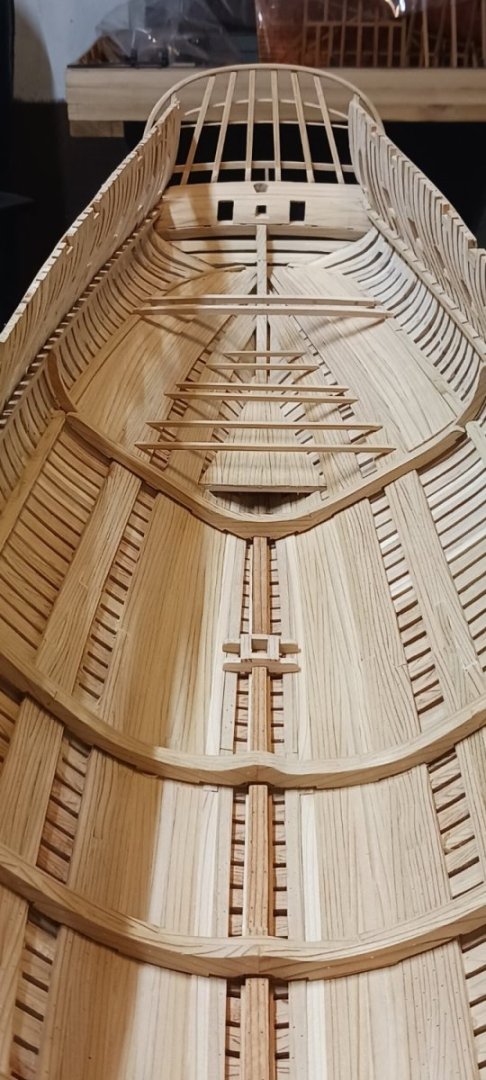
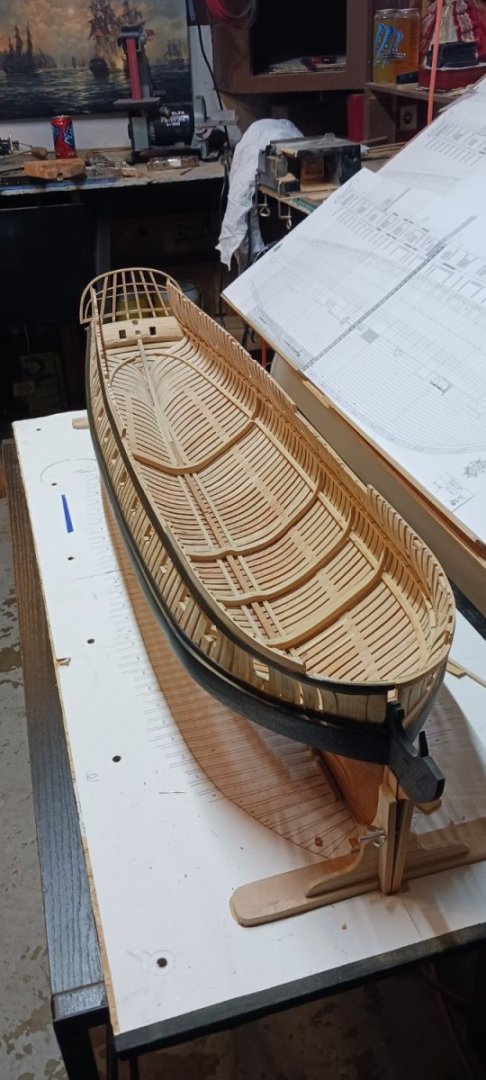
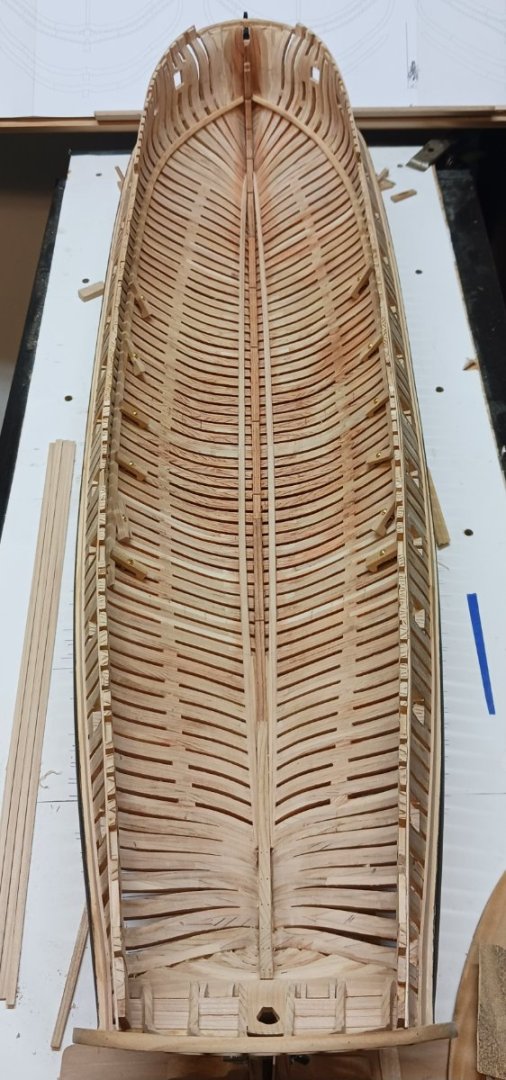
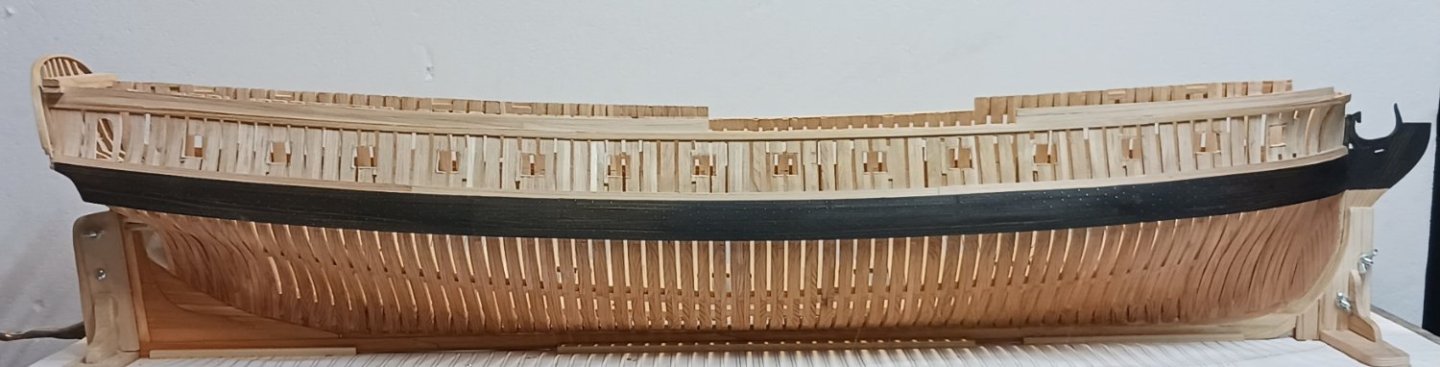
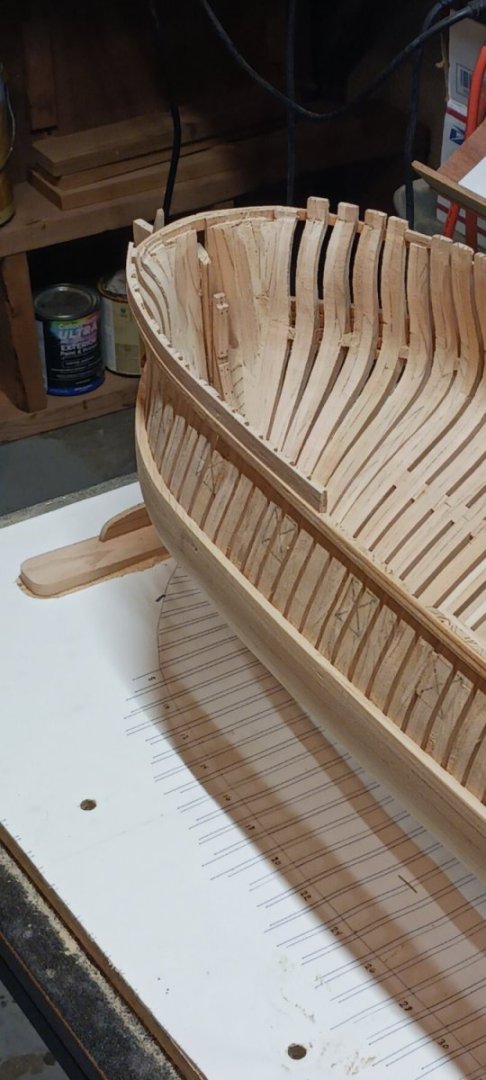
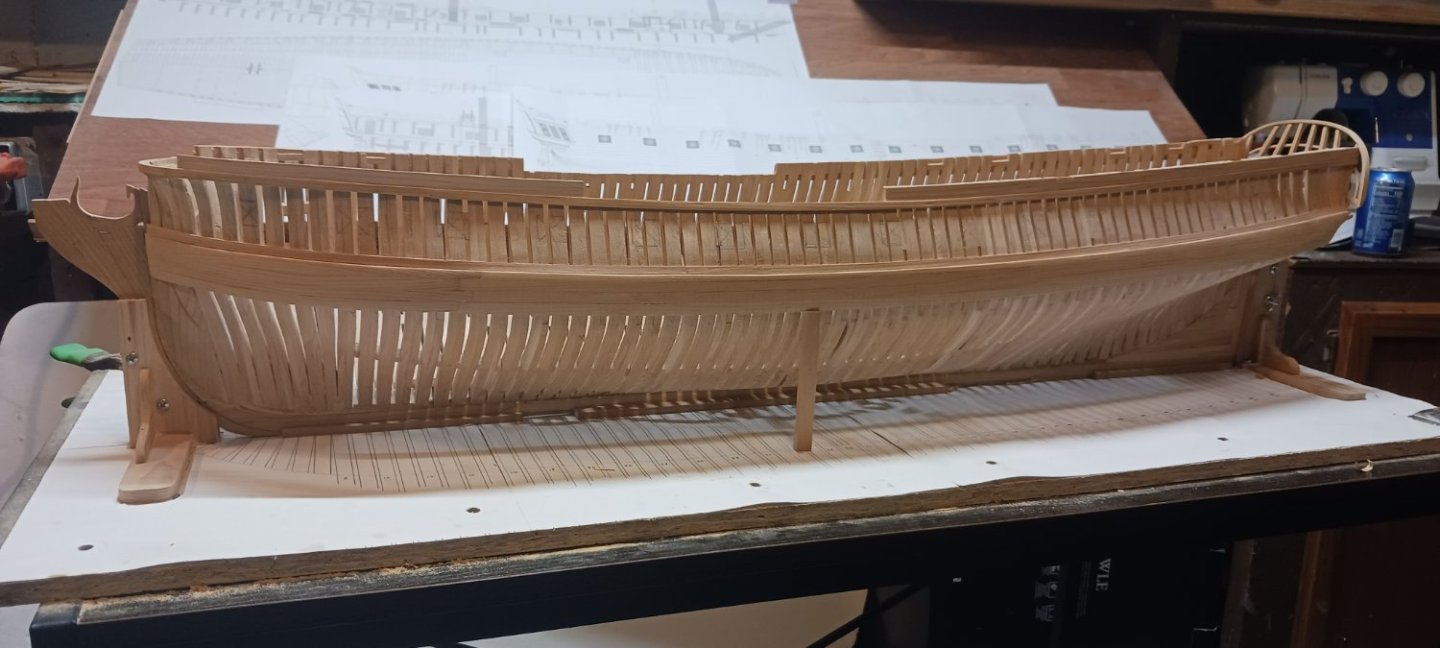
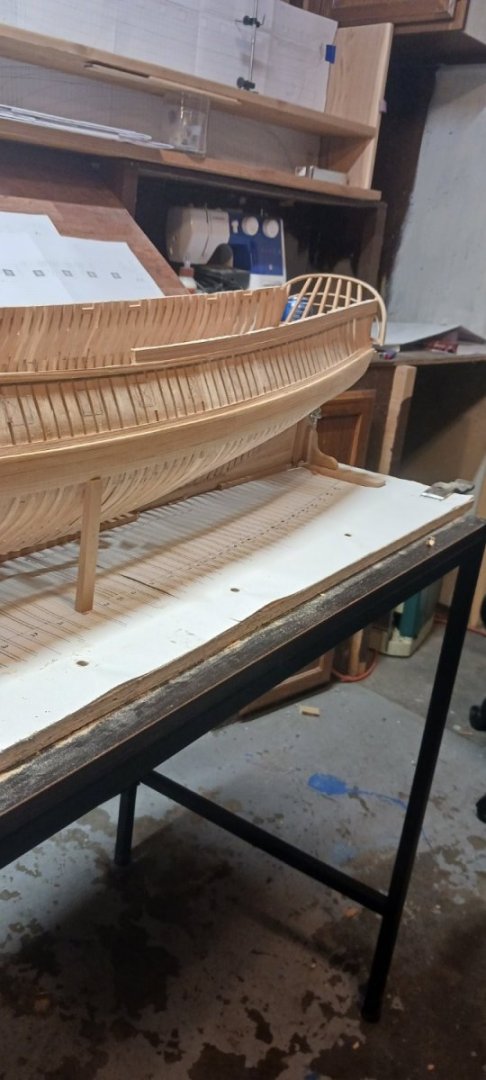
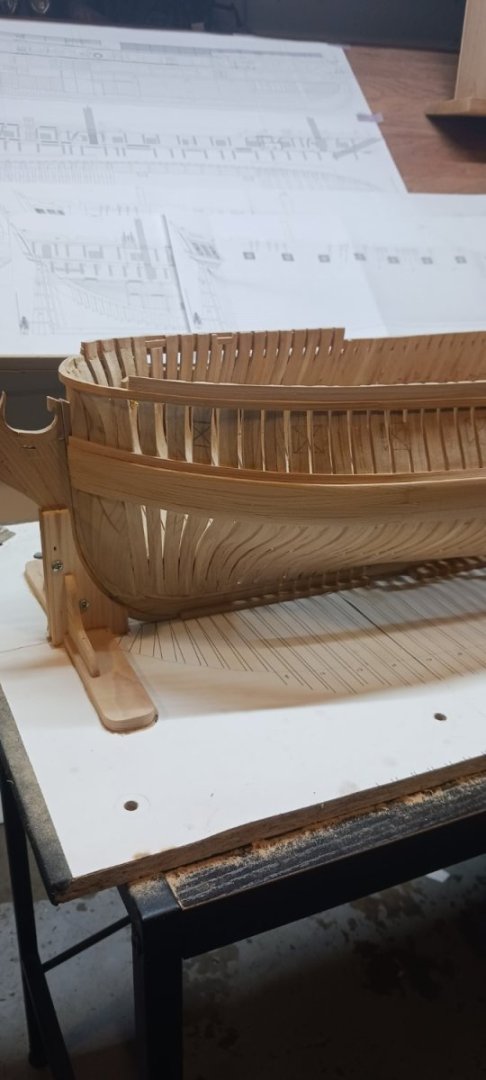
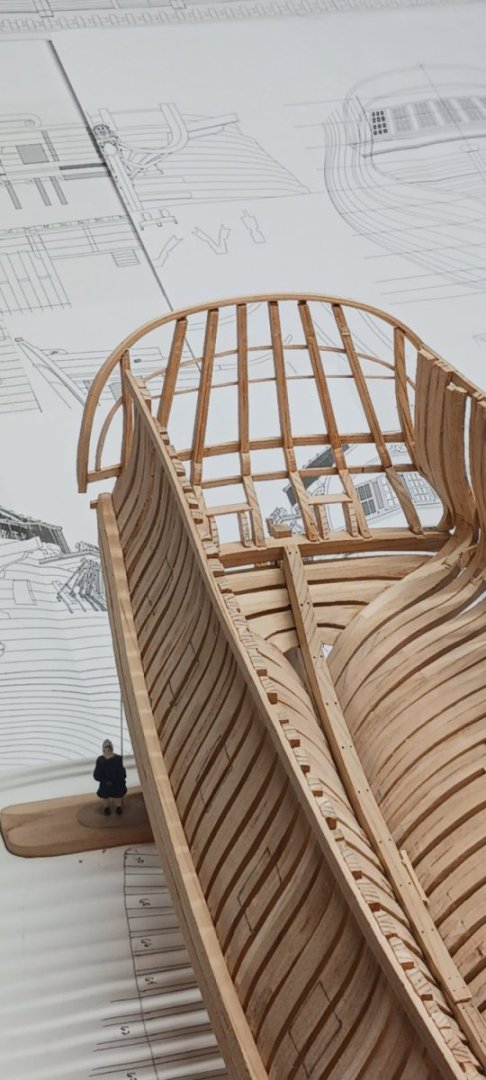
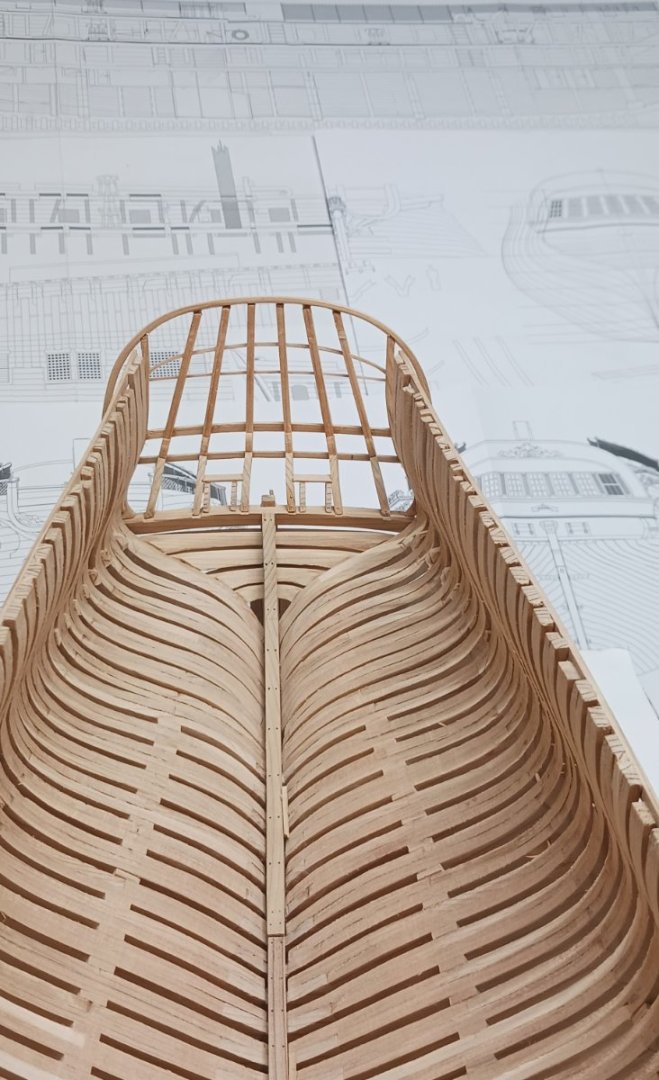
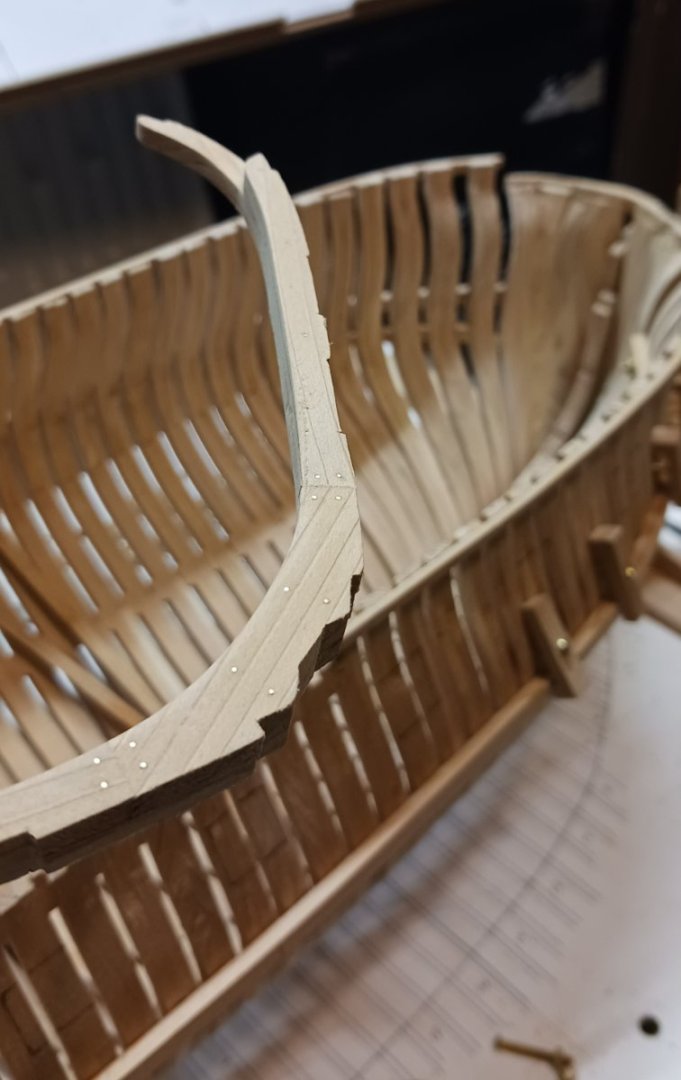
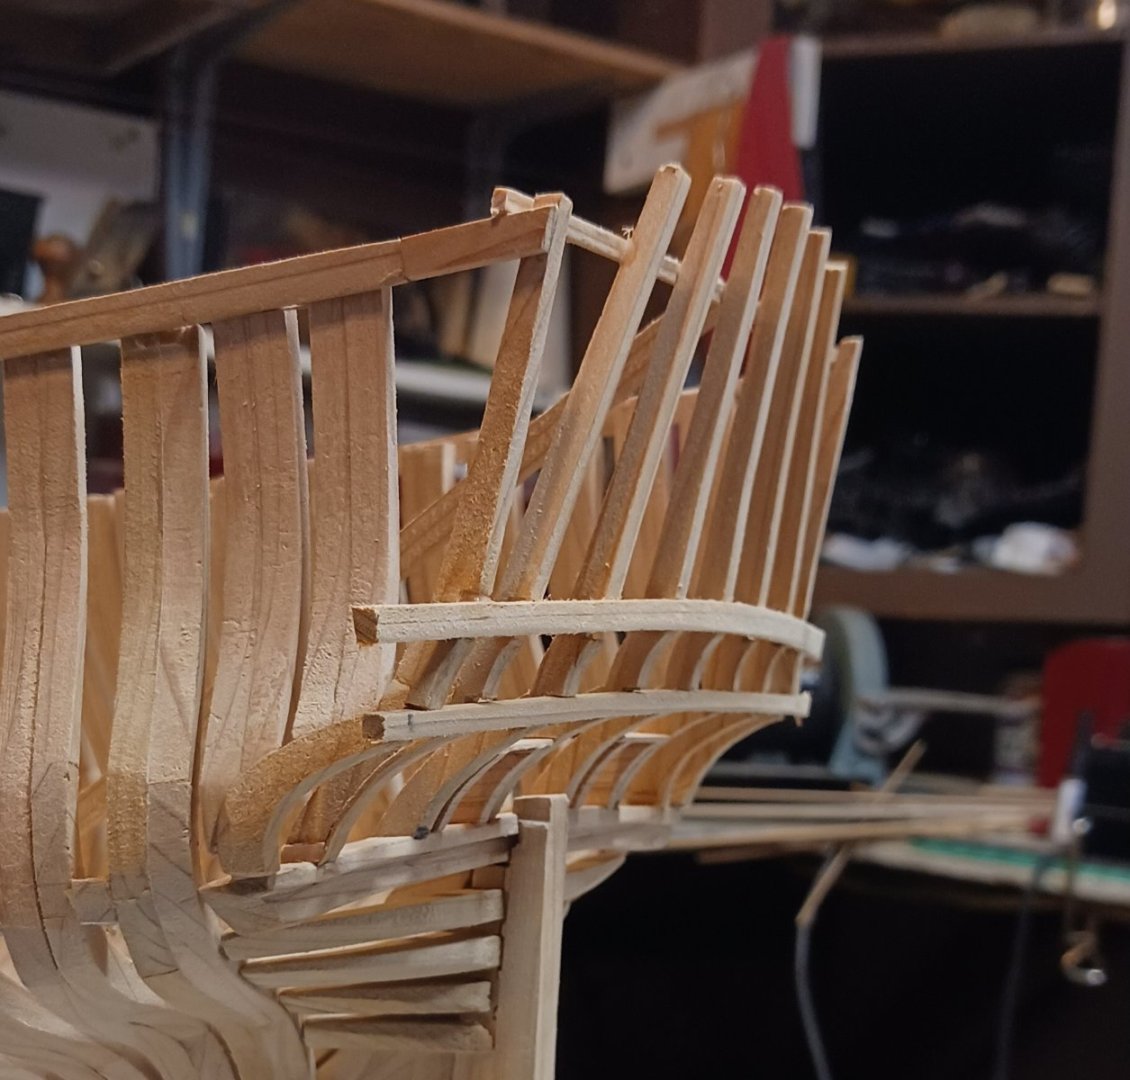
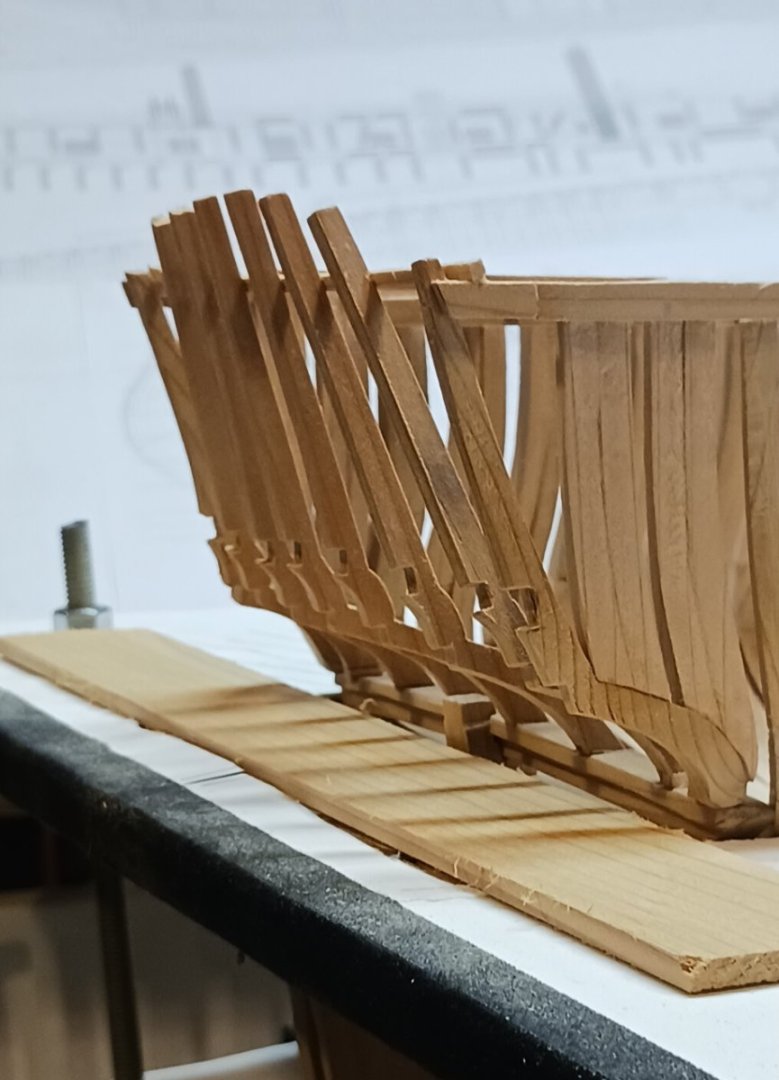
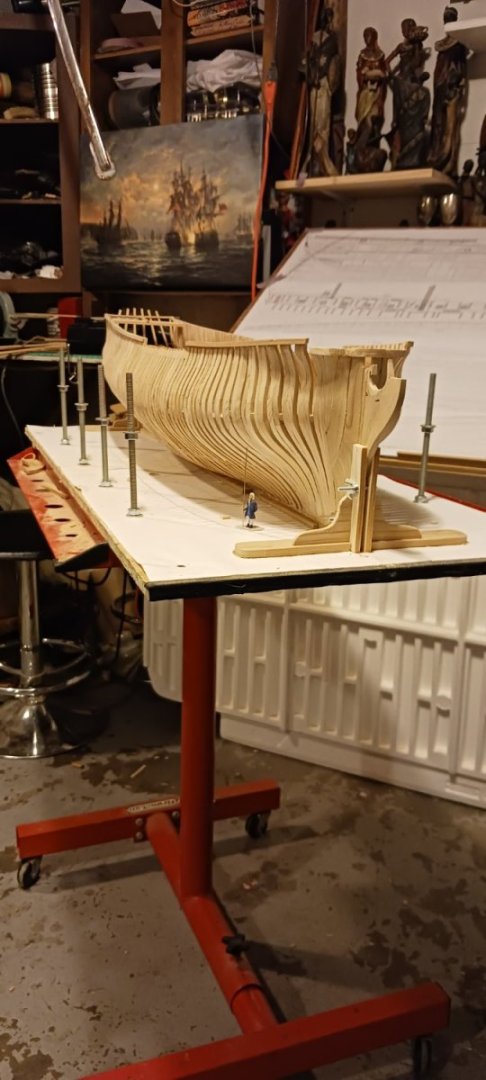
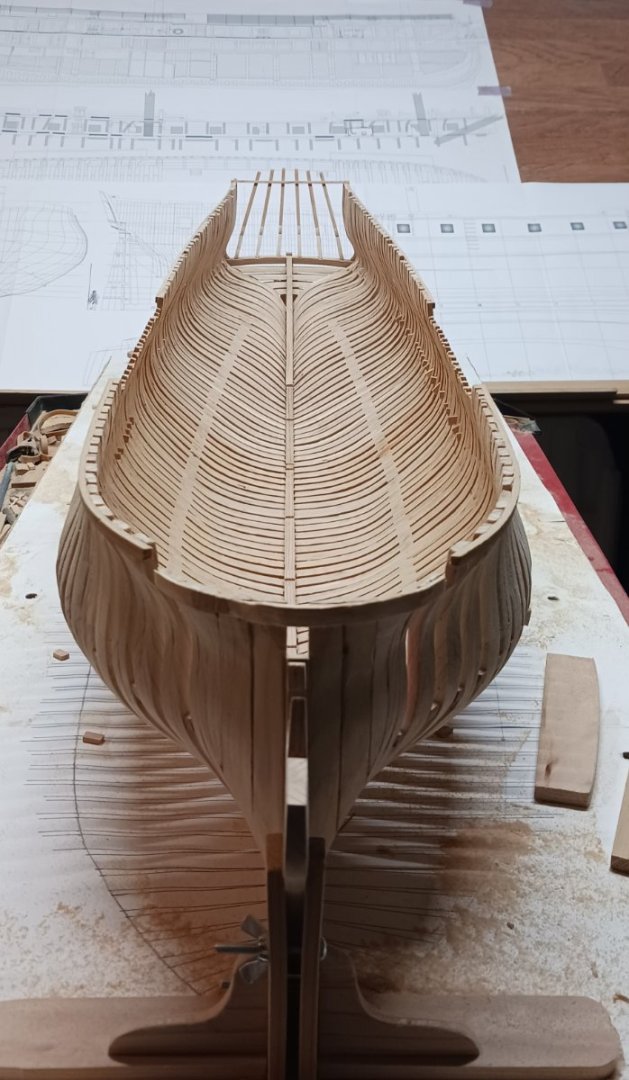
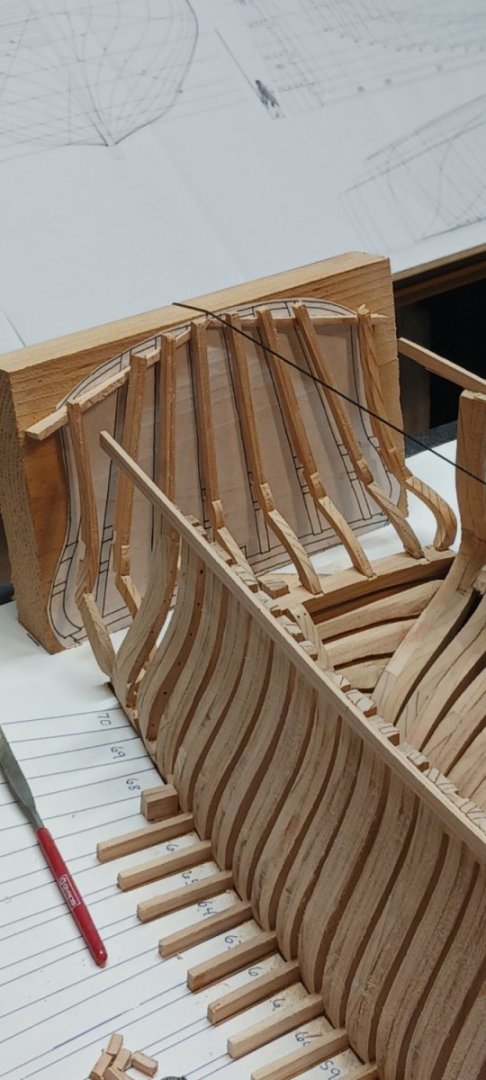
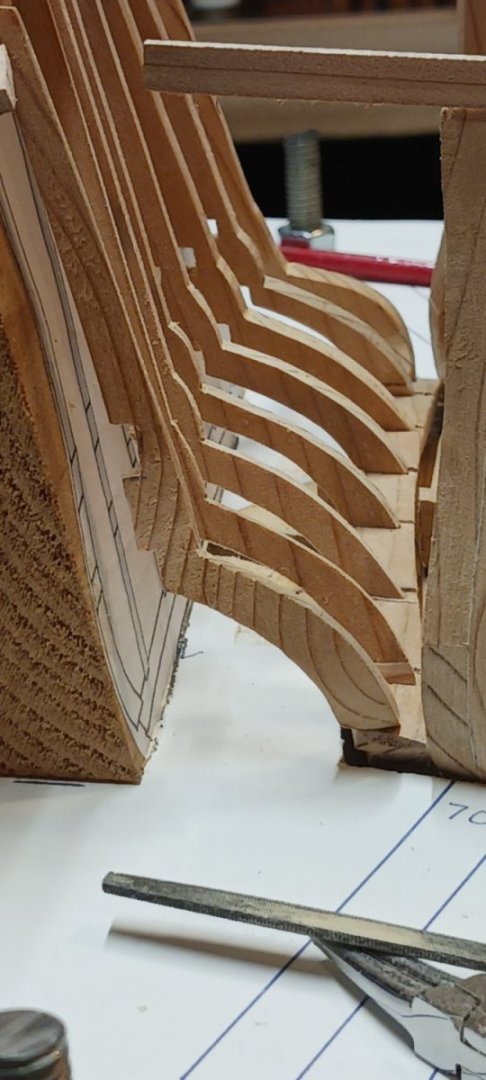
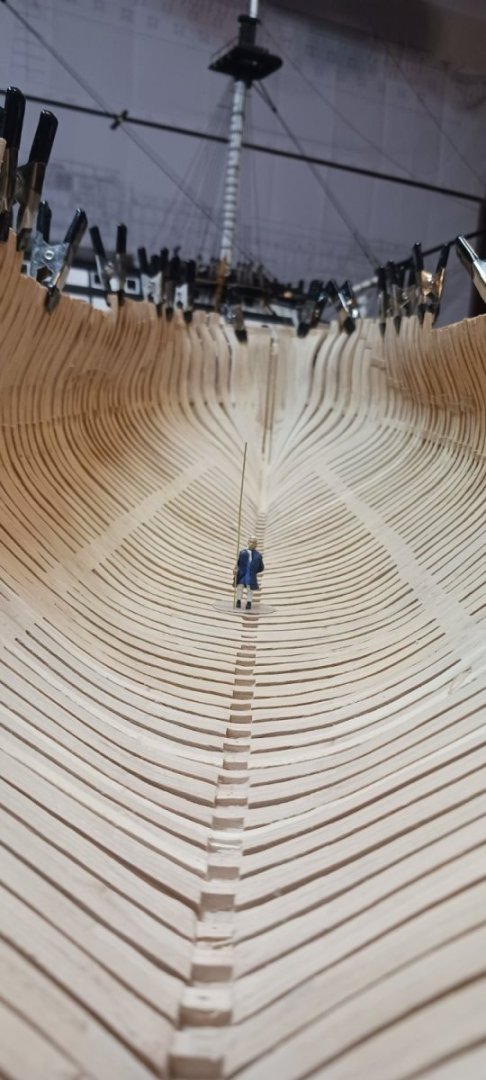
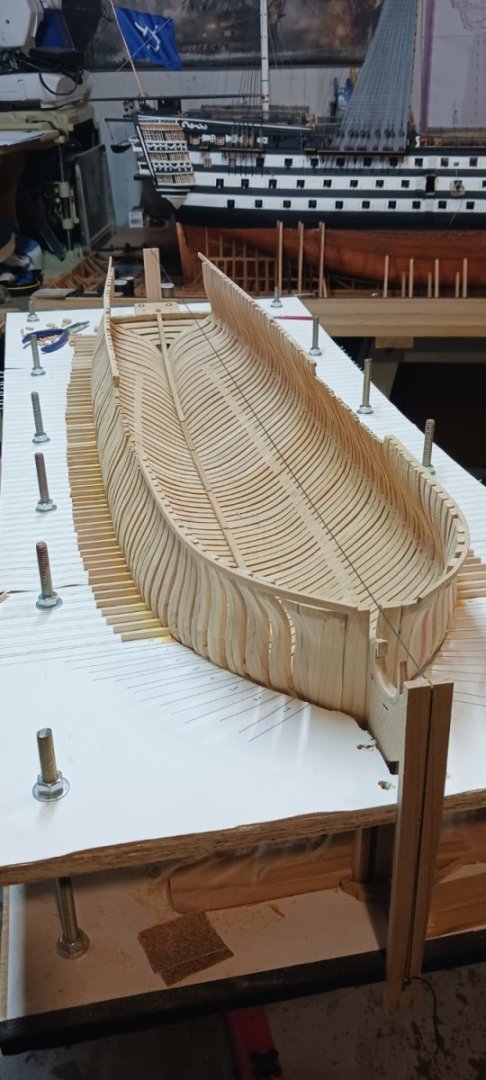
With the stern counter timbers in place I installed temporary bracing to help maintain the curvature of the stern,and continued with the fill in frames all the way back to the stern,made sure everything was glued up and squared up then let it set a day to cure completely,with the stern on and secured I removed the ship from the building board and finally got to view the complete shape of her,the lines of a spanish frigate from that Era are sleek and refined, no wonder they were so agile and maneuverable while under sail,now my next move will be to start fairing the frames which means sanding, sanding,double checking ,sanding some more.


-
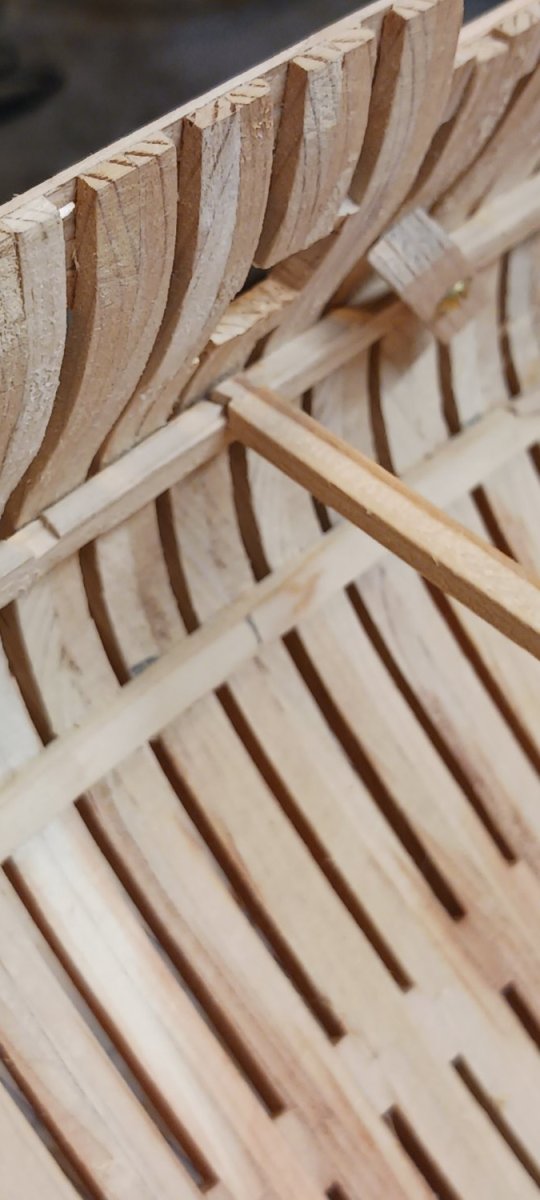
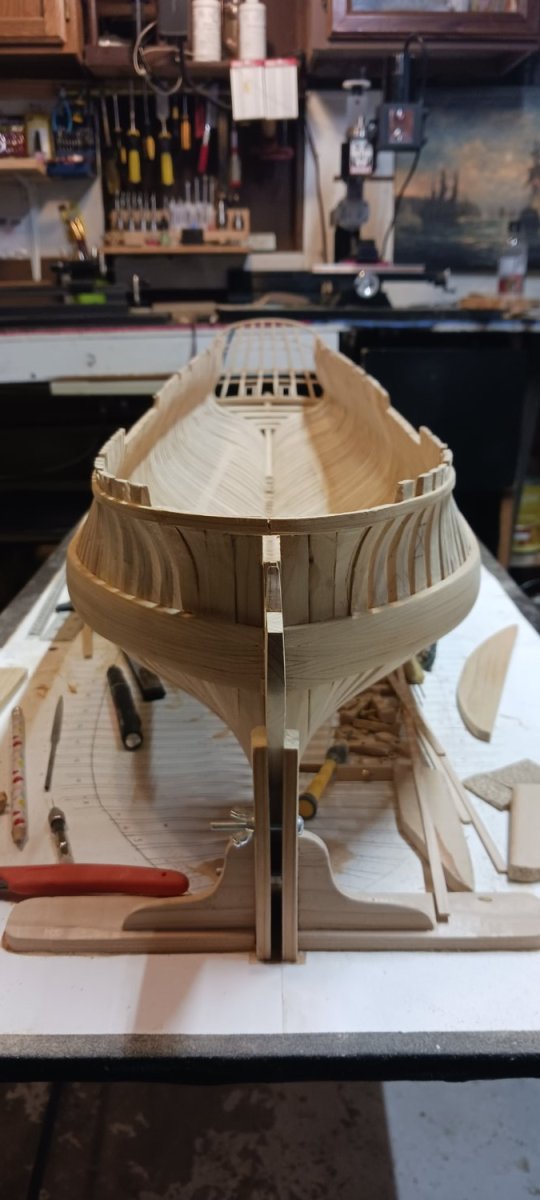
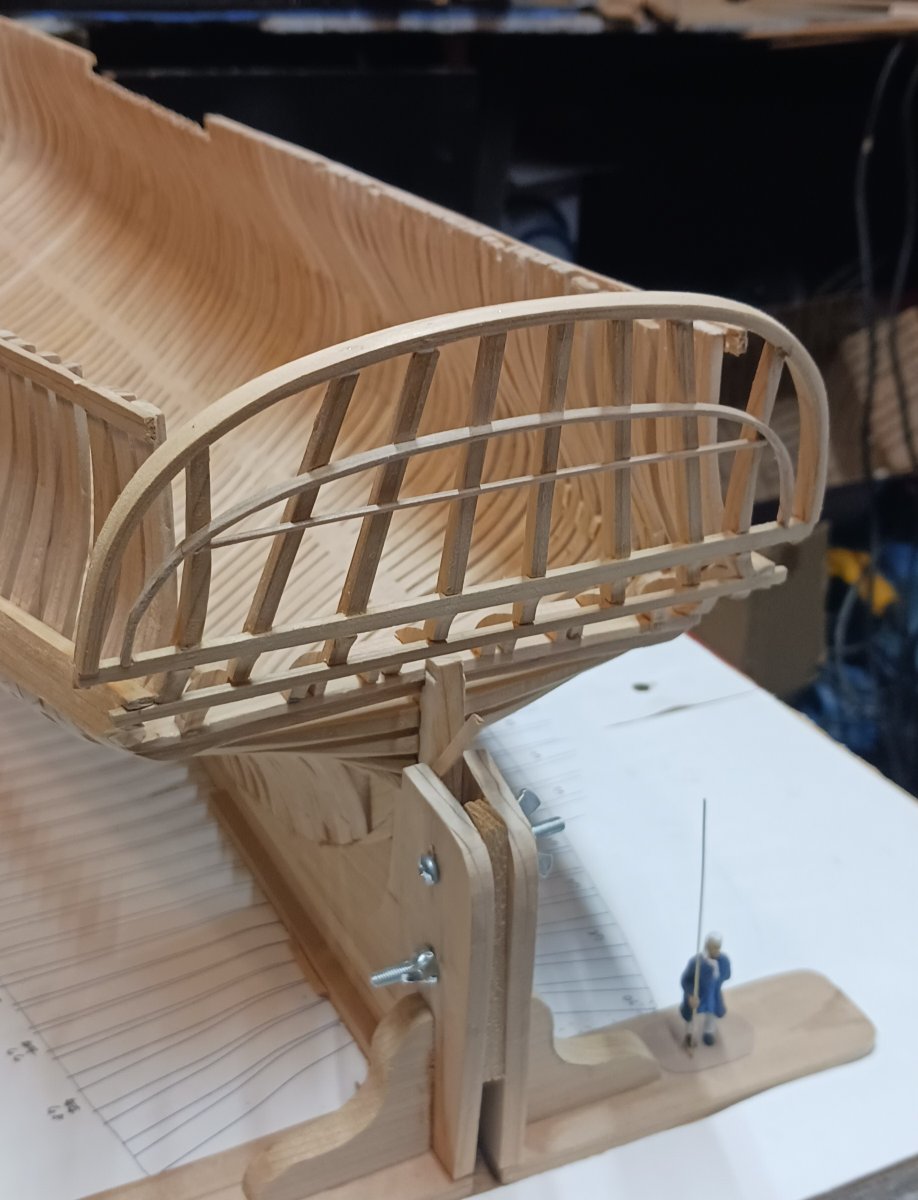
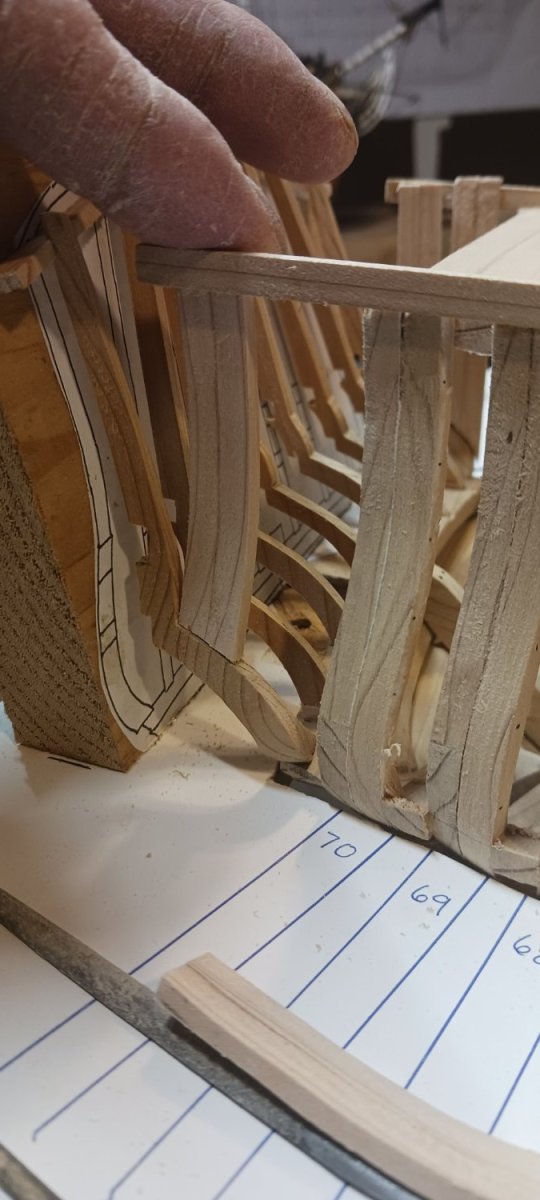
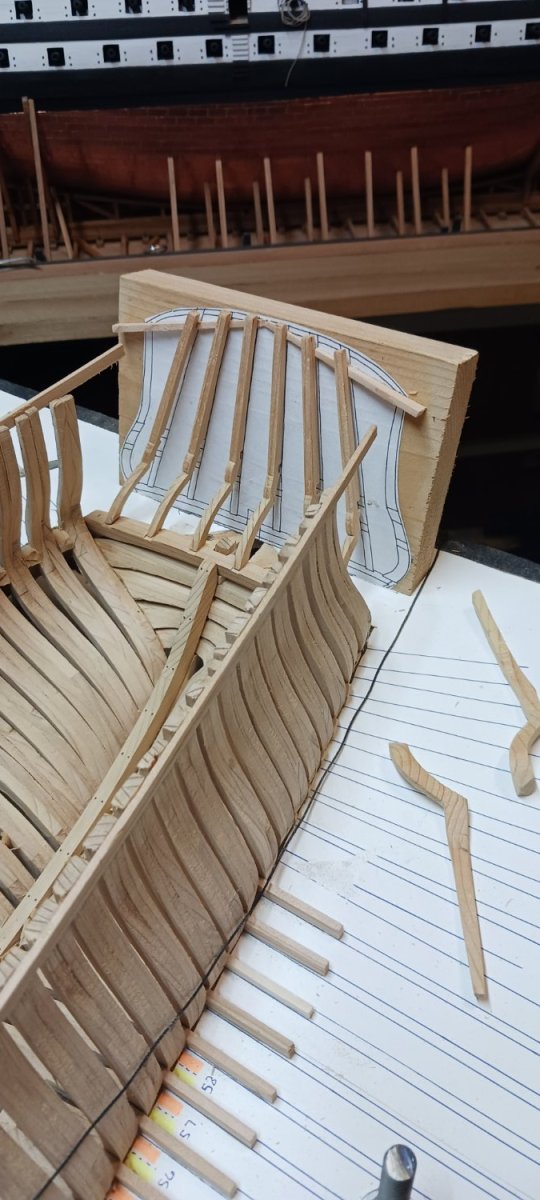
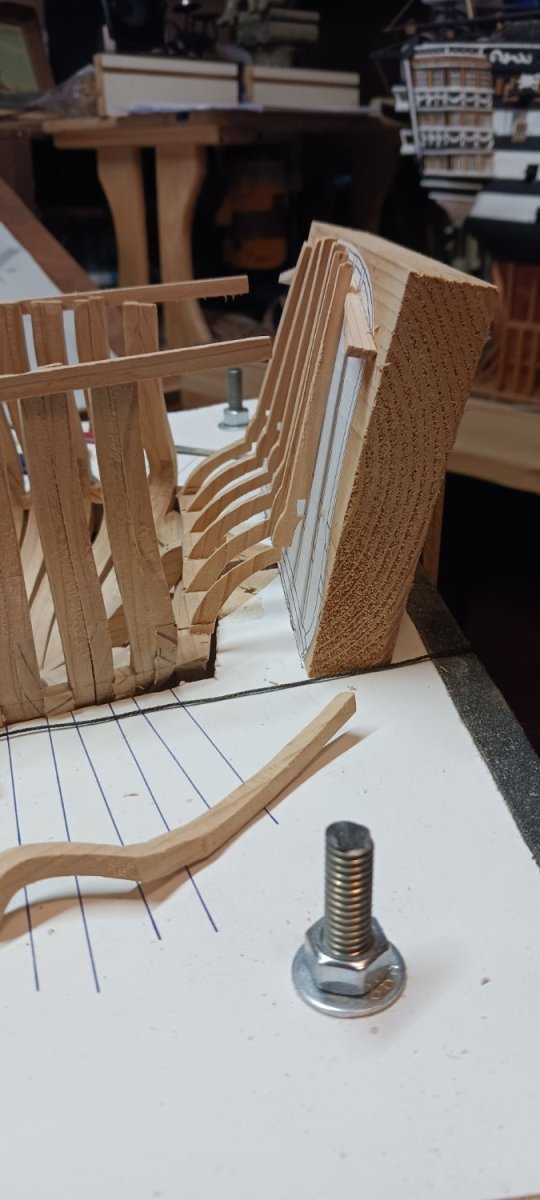
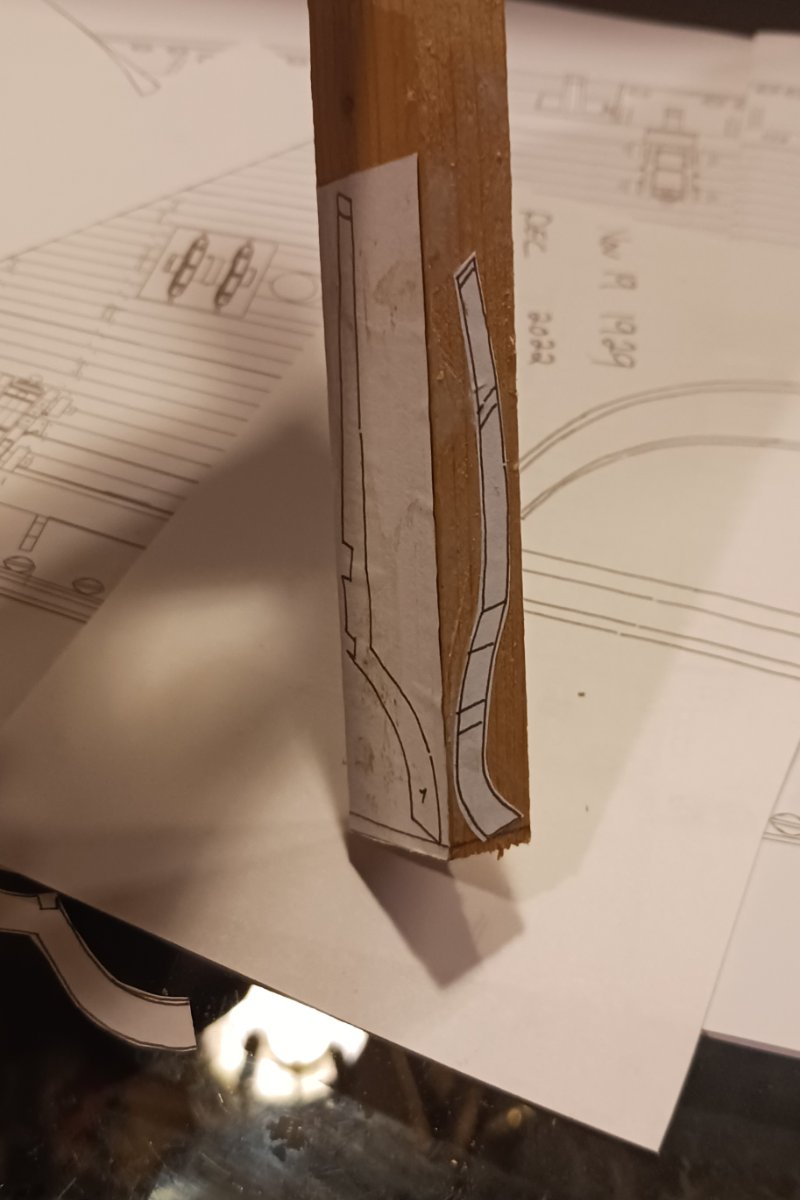
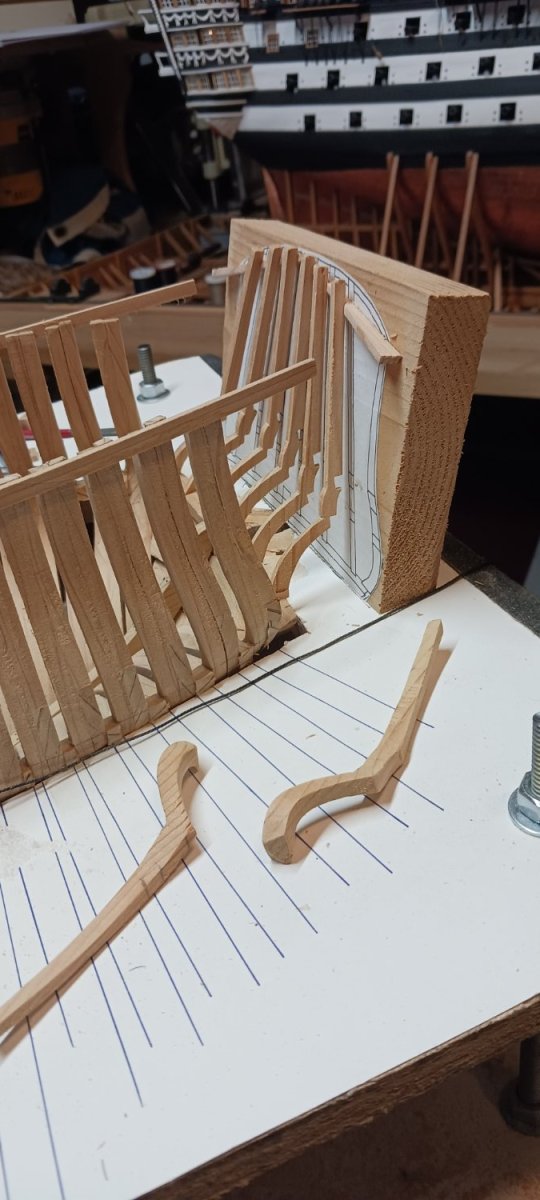
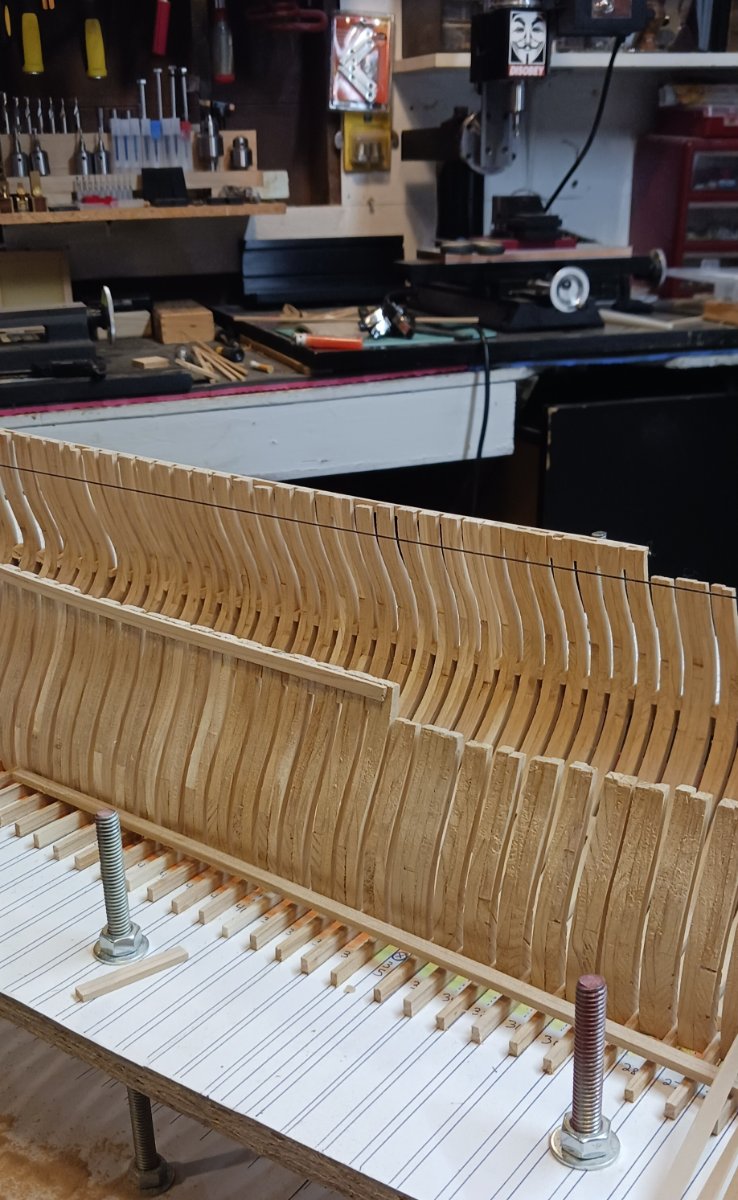
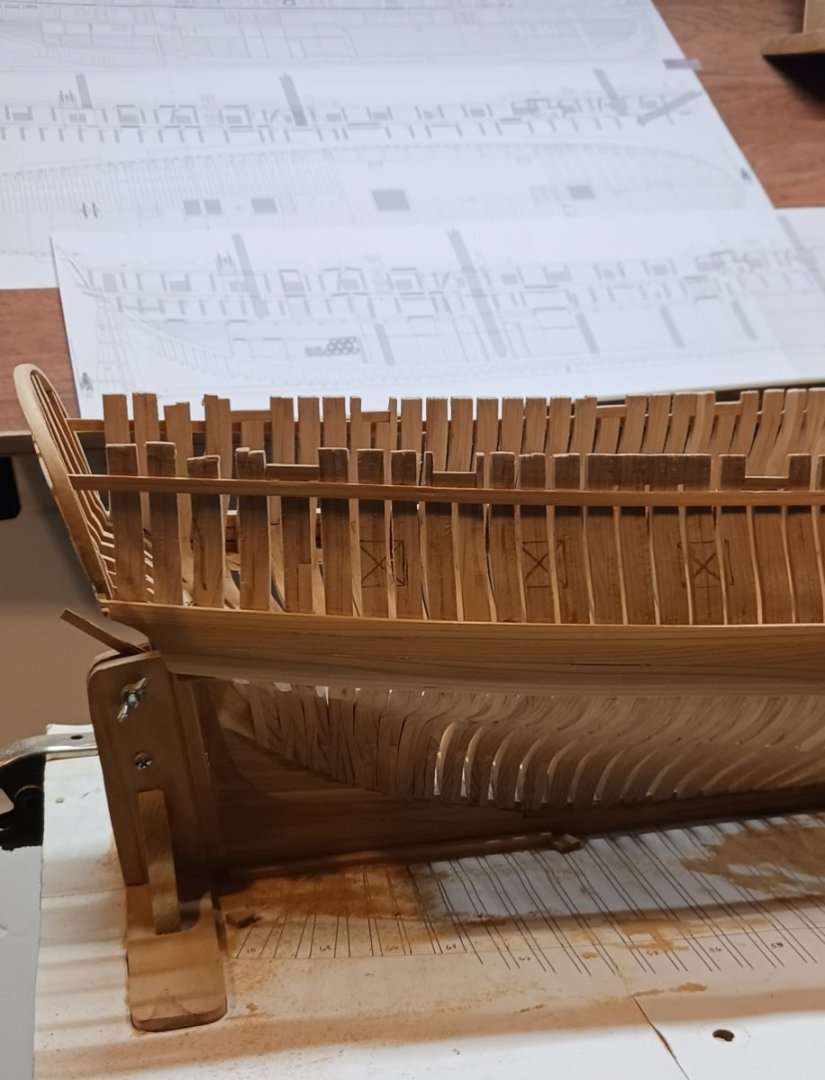
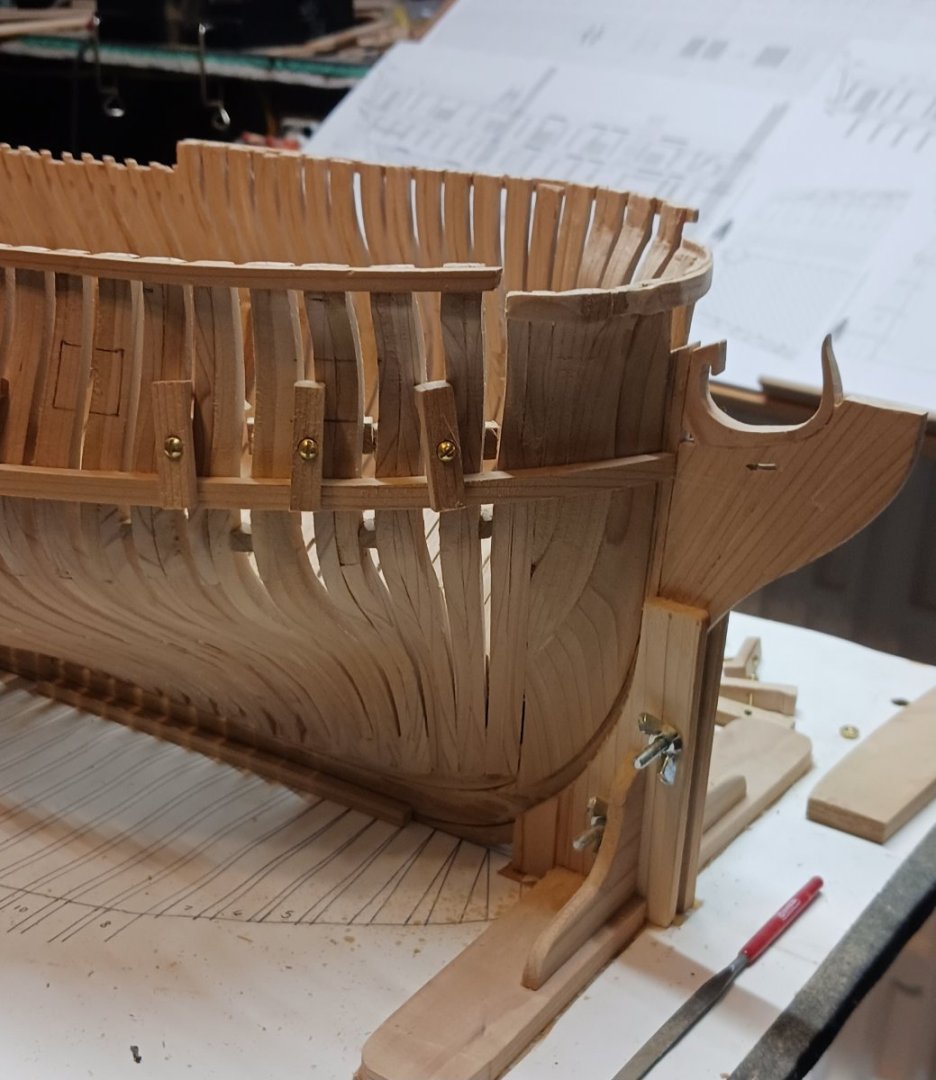
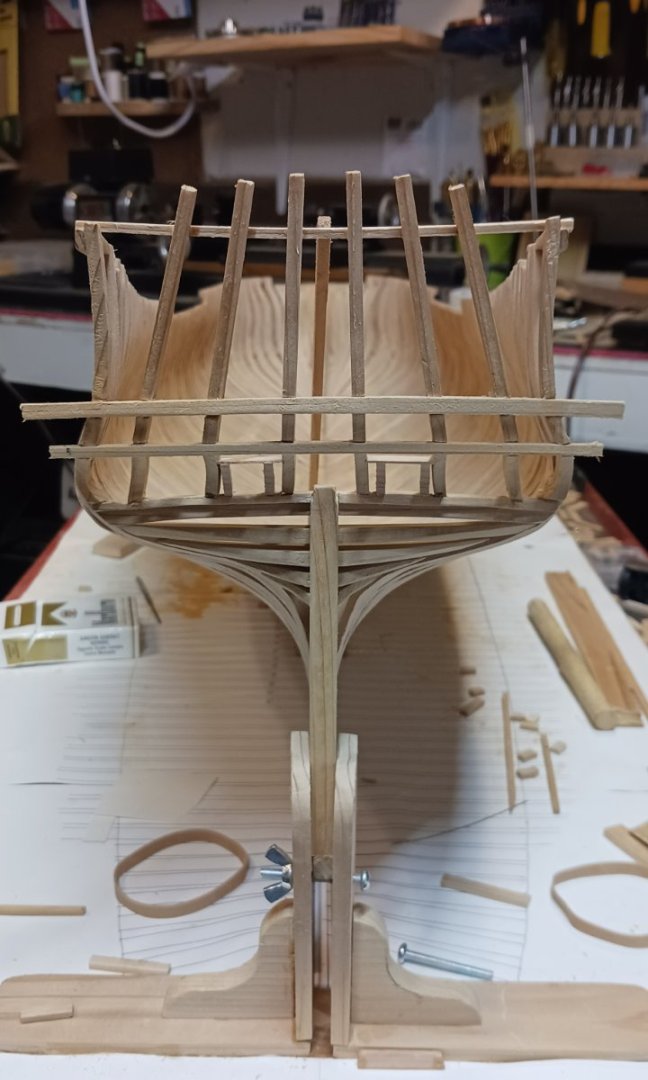
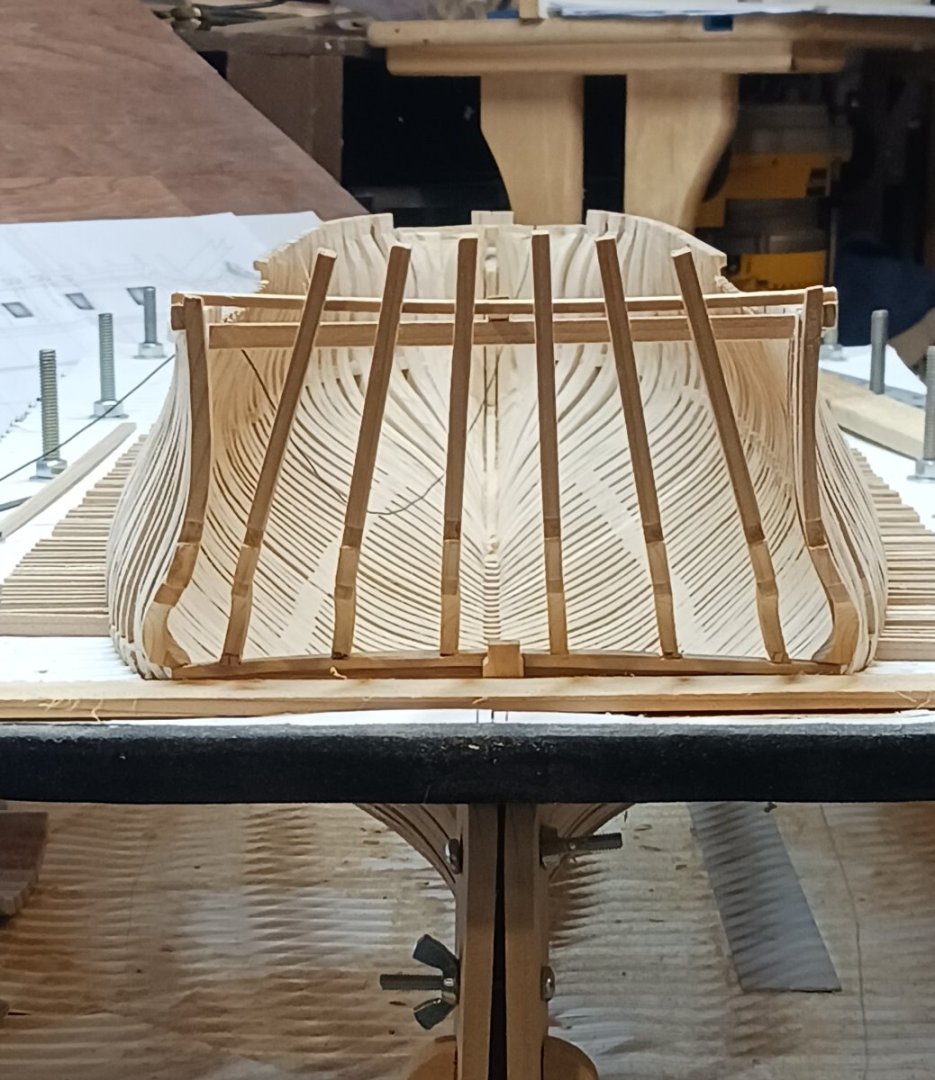
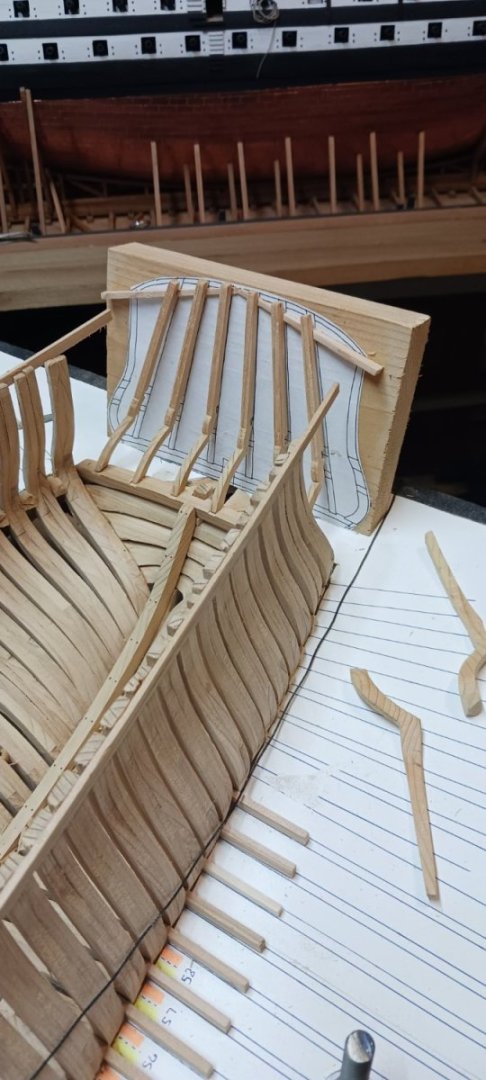
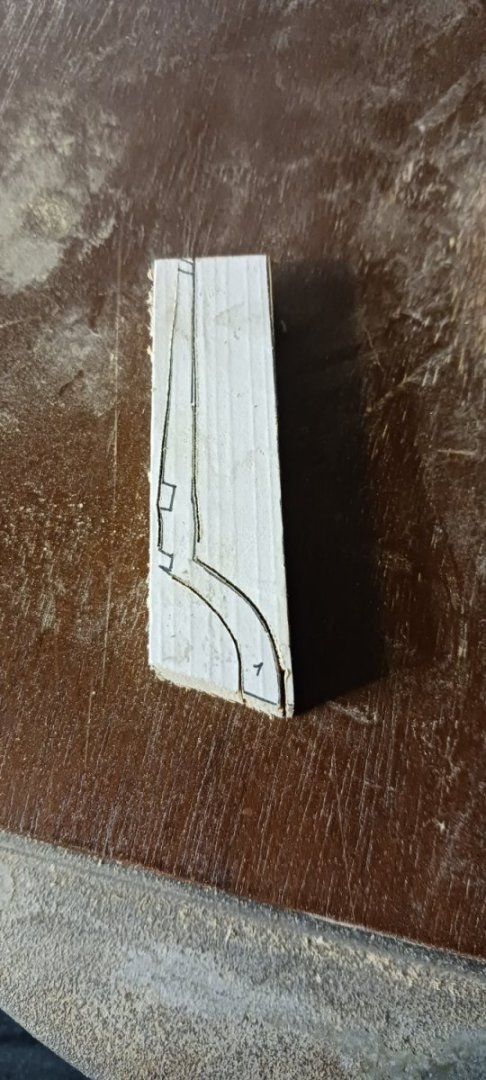
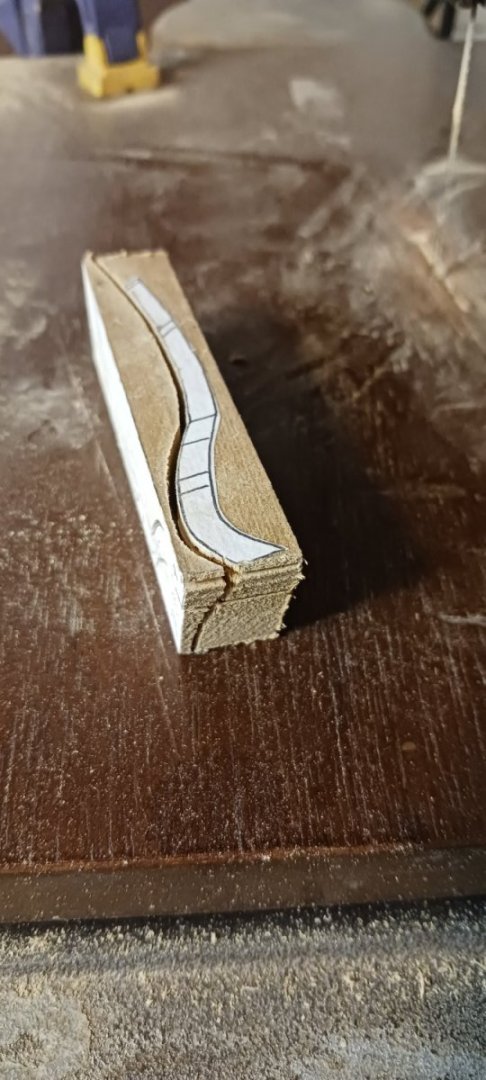
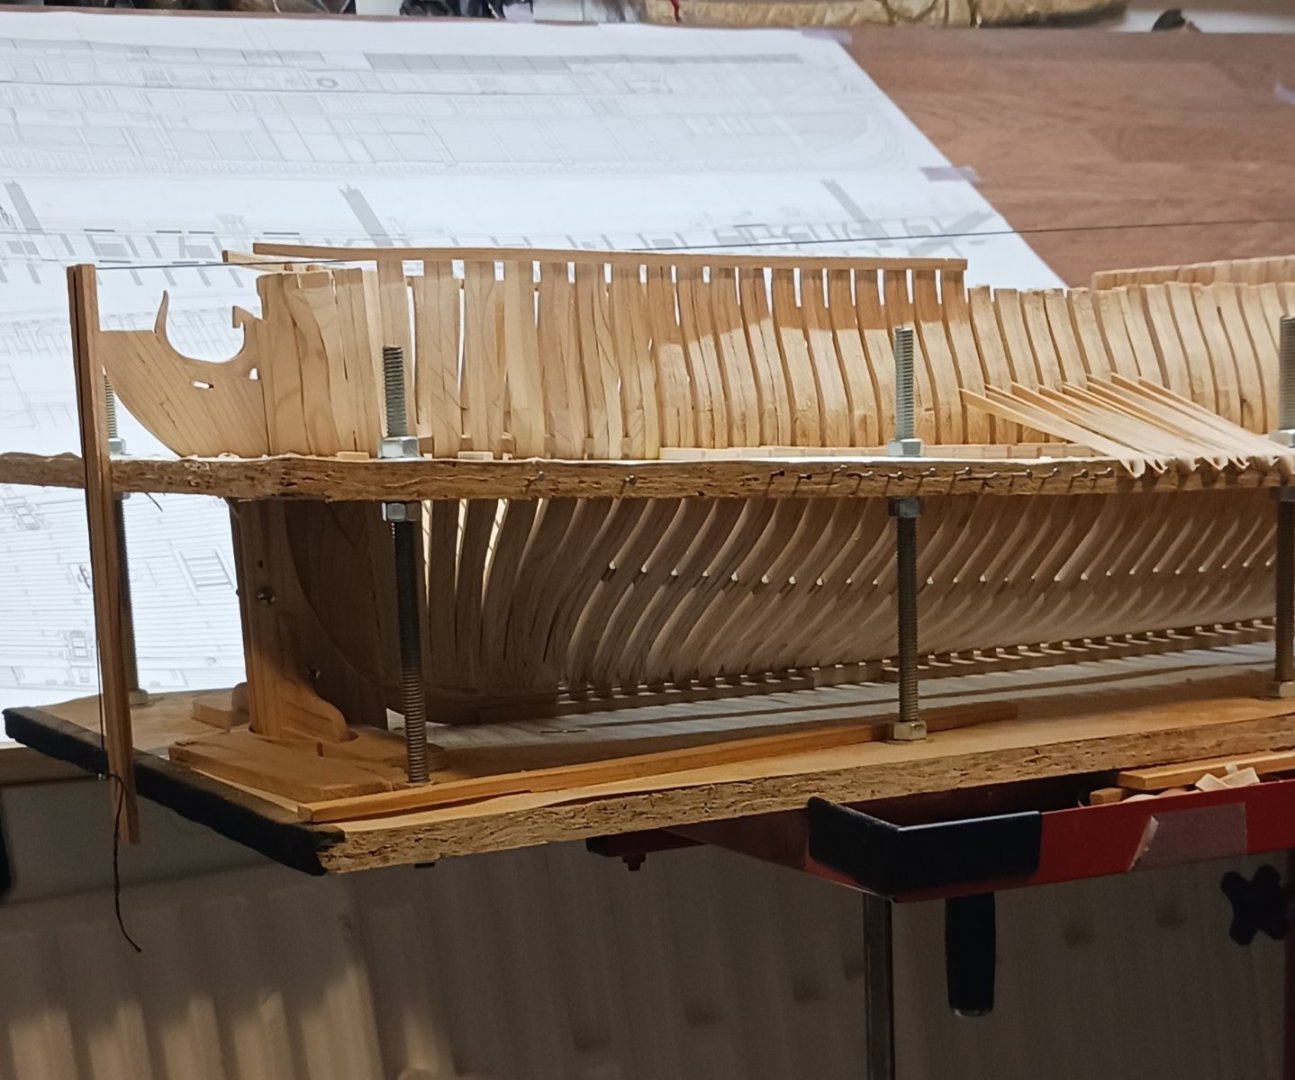
Finished putting in the battens to hold the top of the frames,and moved on to doing the stern,the port and starboard outside counter timbers were a little tricky but not really to difficult to make,just have to pay attention to the angles when gluing the template to wood,the rest of the installation of the counter timbers went without problems,I drew up a template of the stern framing ,glued it to a piece of wood and mounted it to the back of the build board paying close attention to the angle and distance from the wing transom,to help support the top of the timbers I glued two wedge shapes with notches filed into them to maintain the curvature of the stern,most modelers do this off the model then install their stern,but since my wing transom was already glued on this was the only other way to do it that I know of.


-
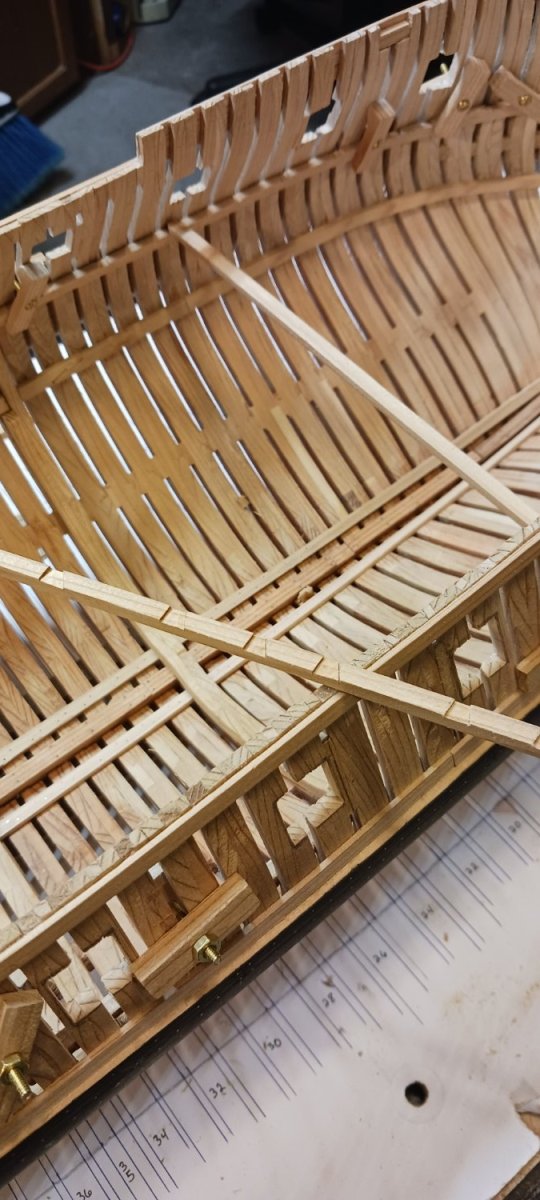
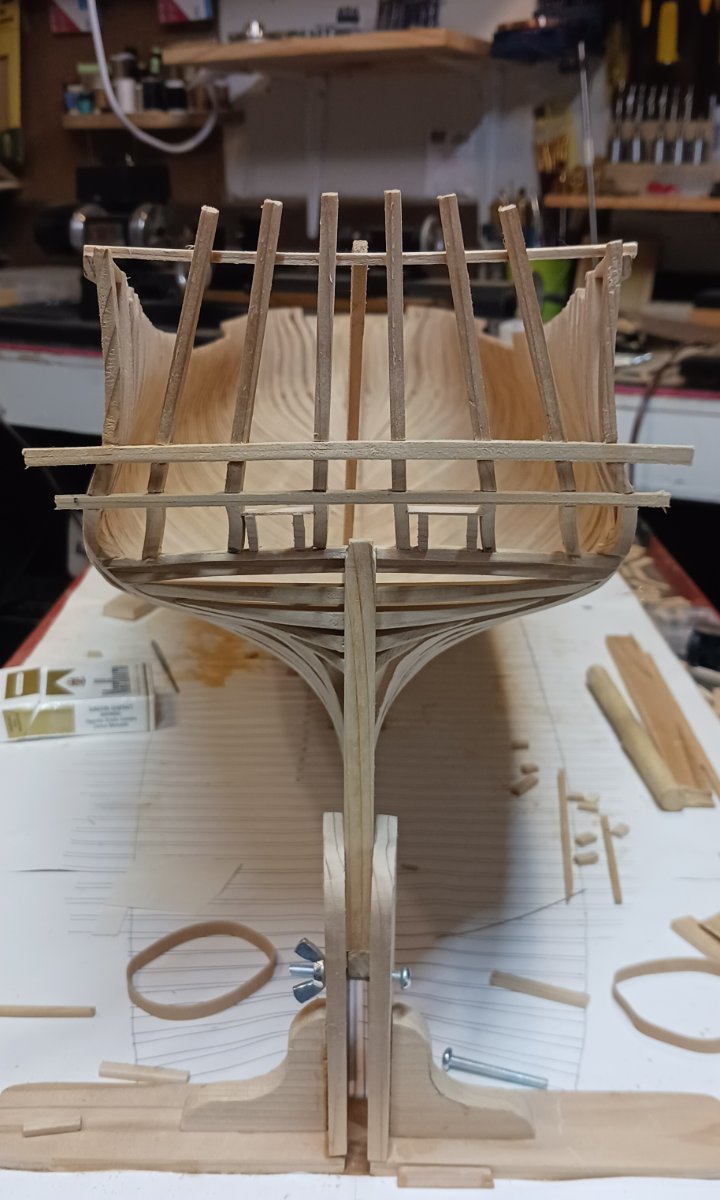
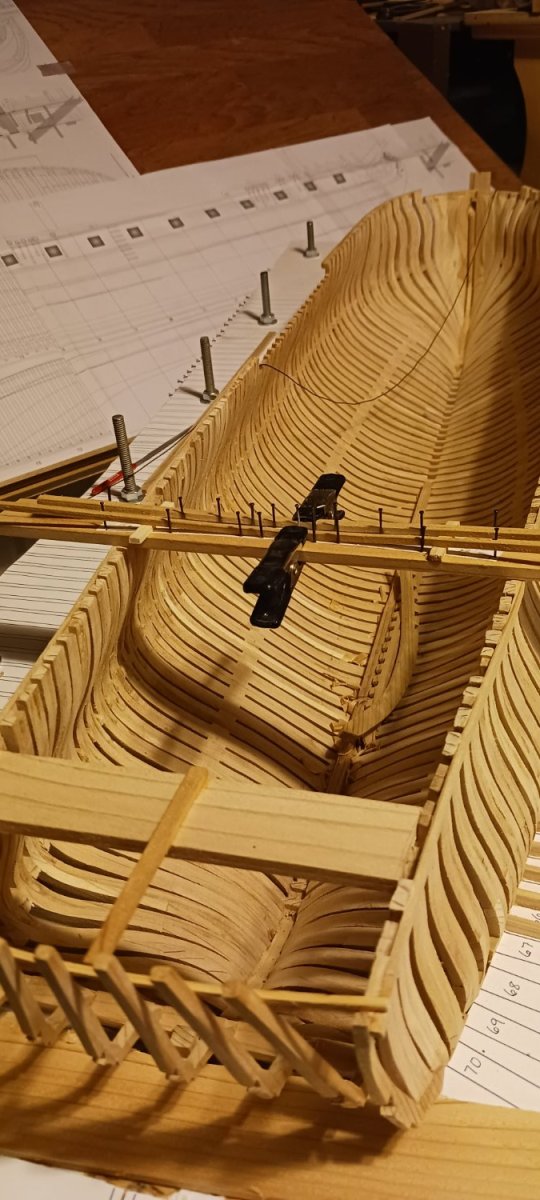
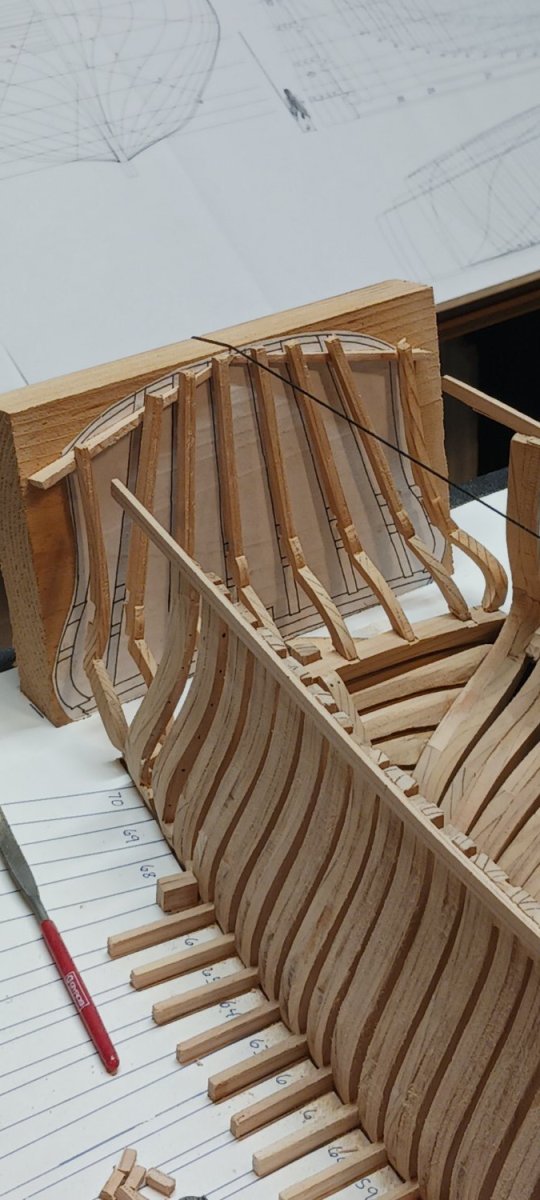
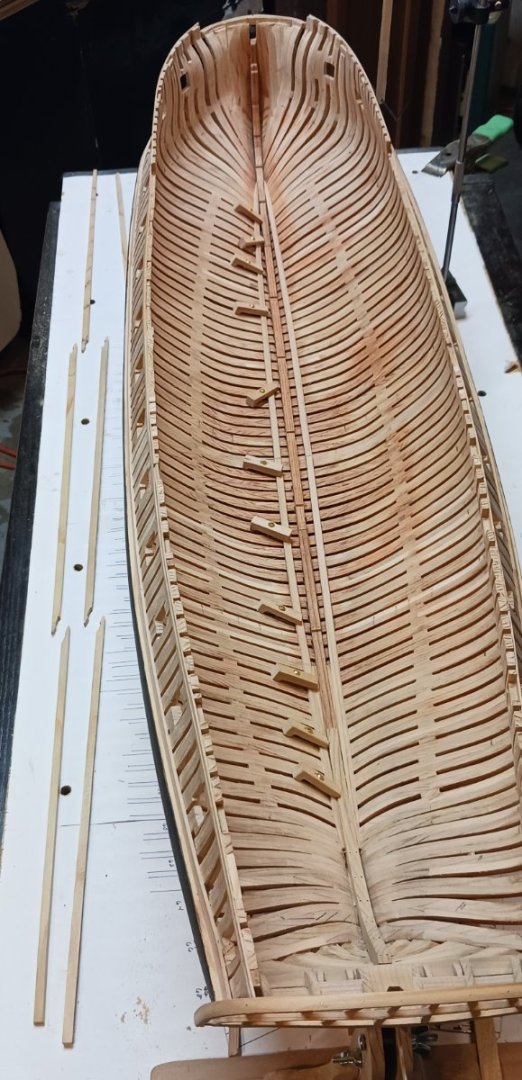
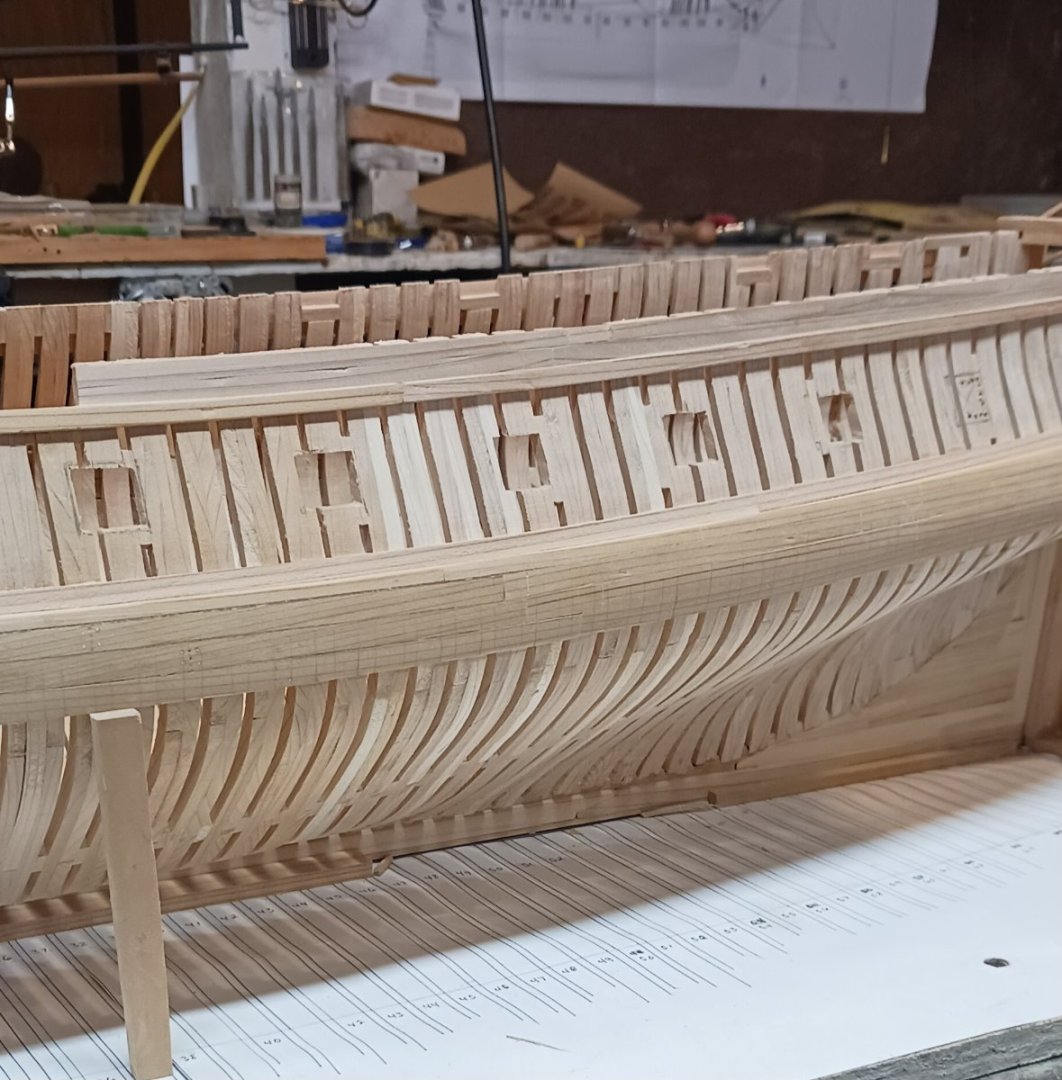
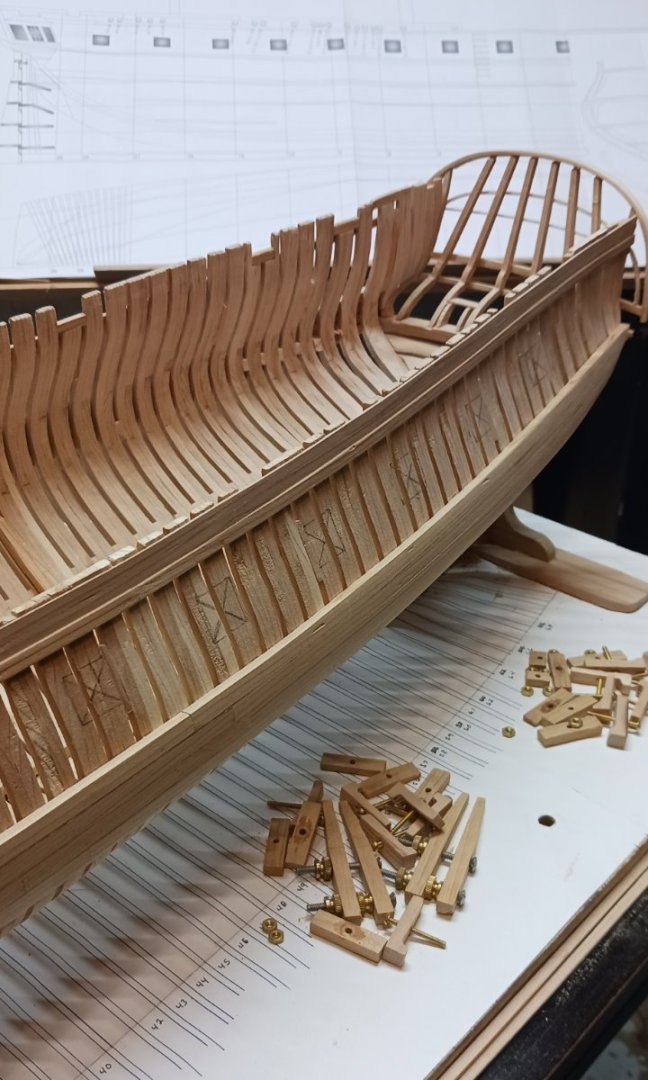
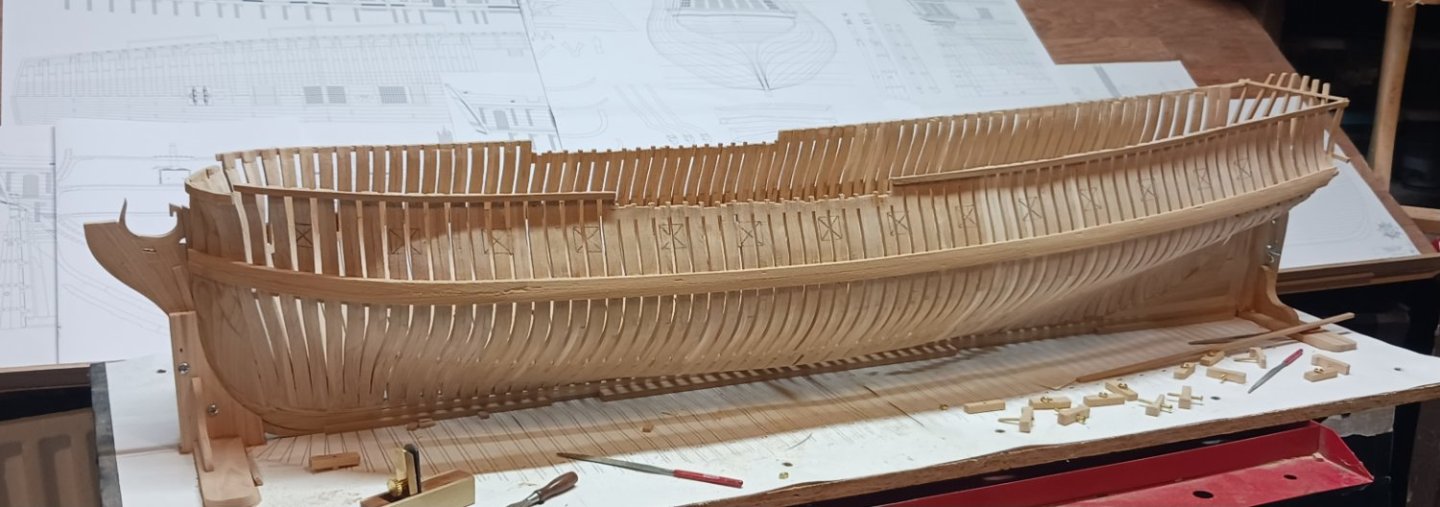
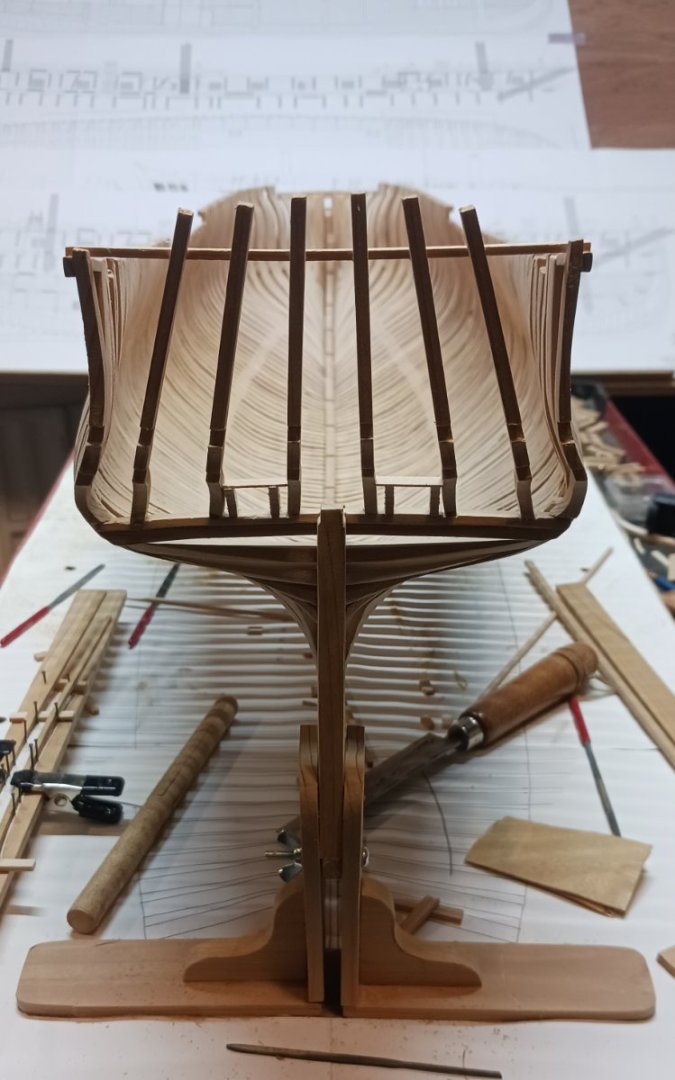
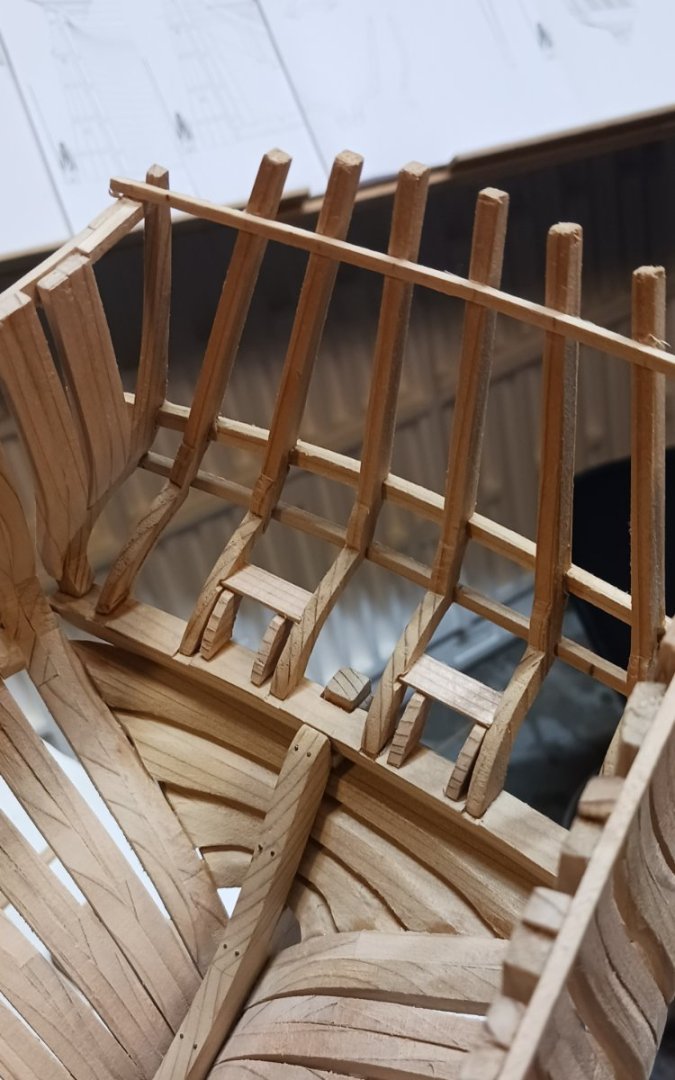
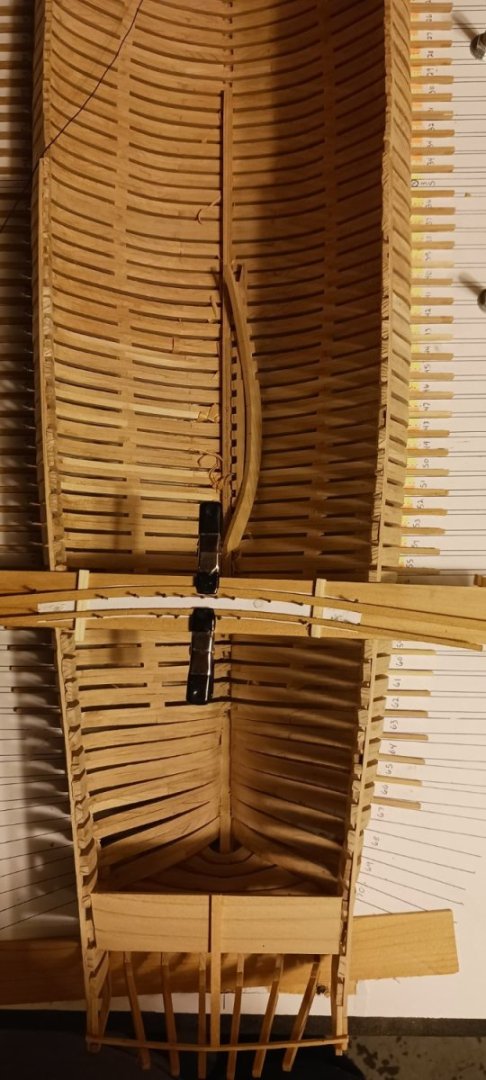
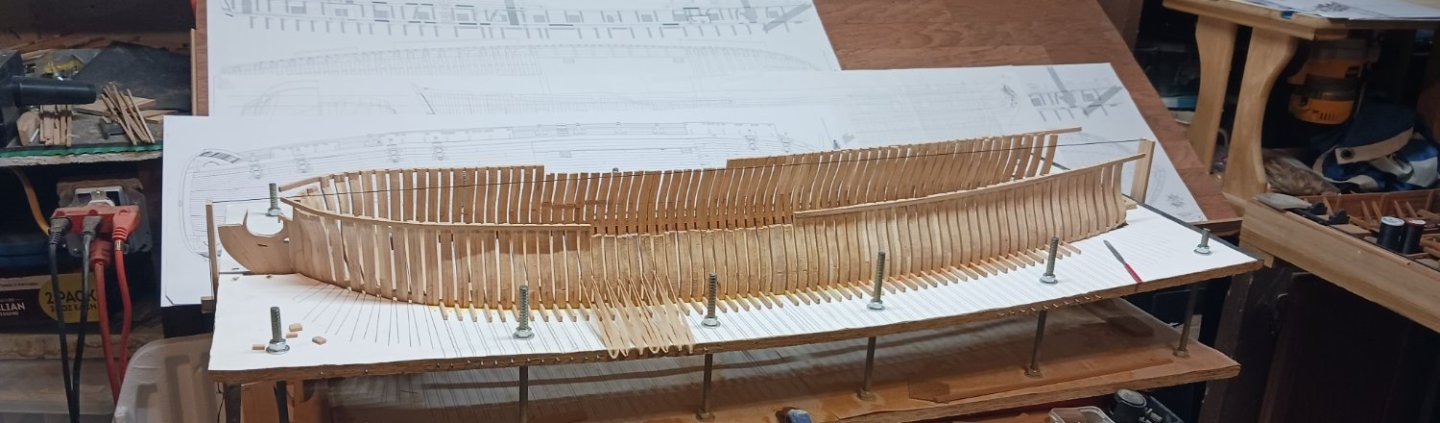
Finally finished bolting and installing all the frames,put a batten across the top of the frames to help keep everything aligned and to strengthen the hull,put in the frame chocks(filling pieces)between the frames wasn't quite sure about them I didn't see anything on the plans or if they were needed but for me it's common practice to install them to stiffen the space between the Wales and the keel.


-
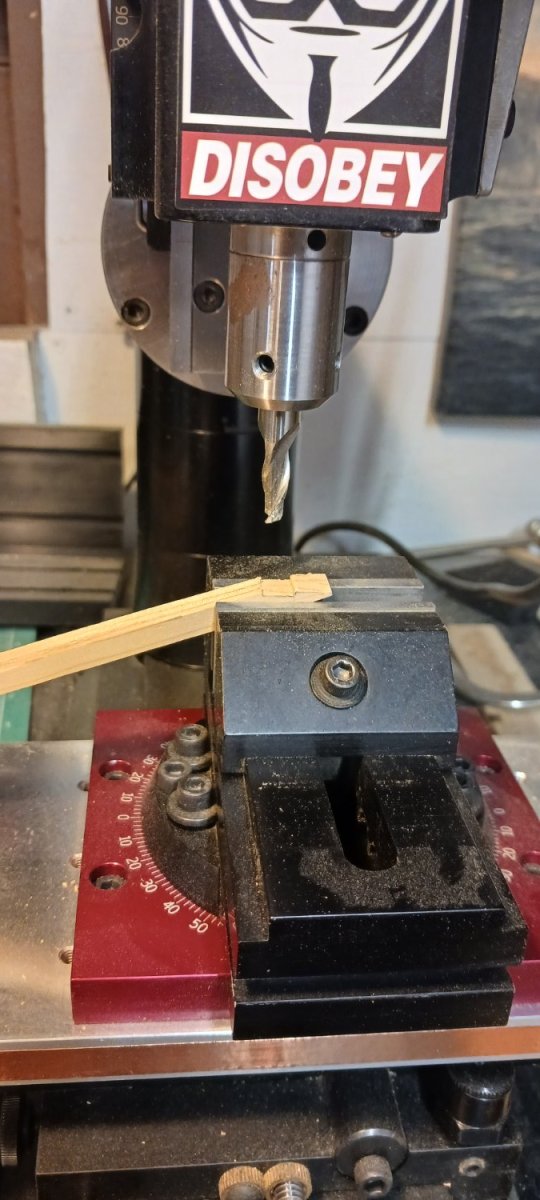
My stock of ebony for making the square bolts is limited way out here in rural Montana,so I decided to bolt the frames with brass rod,I will use ebony up top where it will be more visible

-
I needed access to the interior of the ship,so I cut down the temporary deck beams and relocated them to the outside of the build board,now I can remove the frames individually sand and bolt them before permanently mounting them.