Romique
-
Posts
11 -
Joined
-
Last visited
Content Type
Profiles
Forums
Gallery
Events
Everything posted by Romique
-
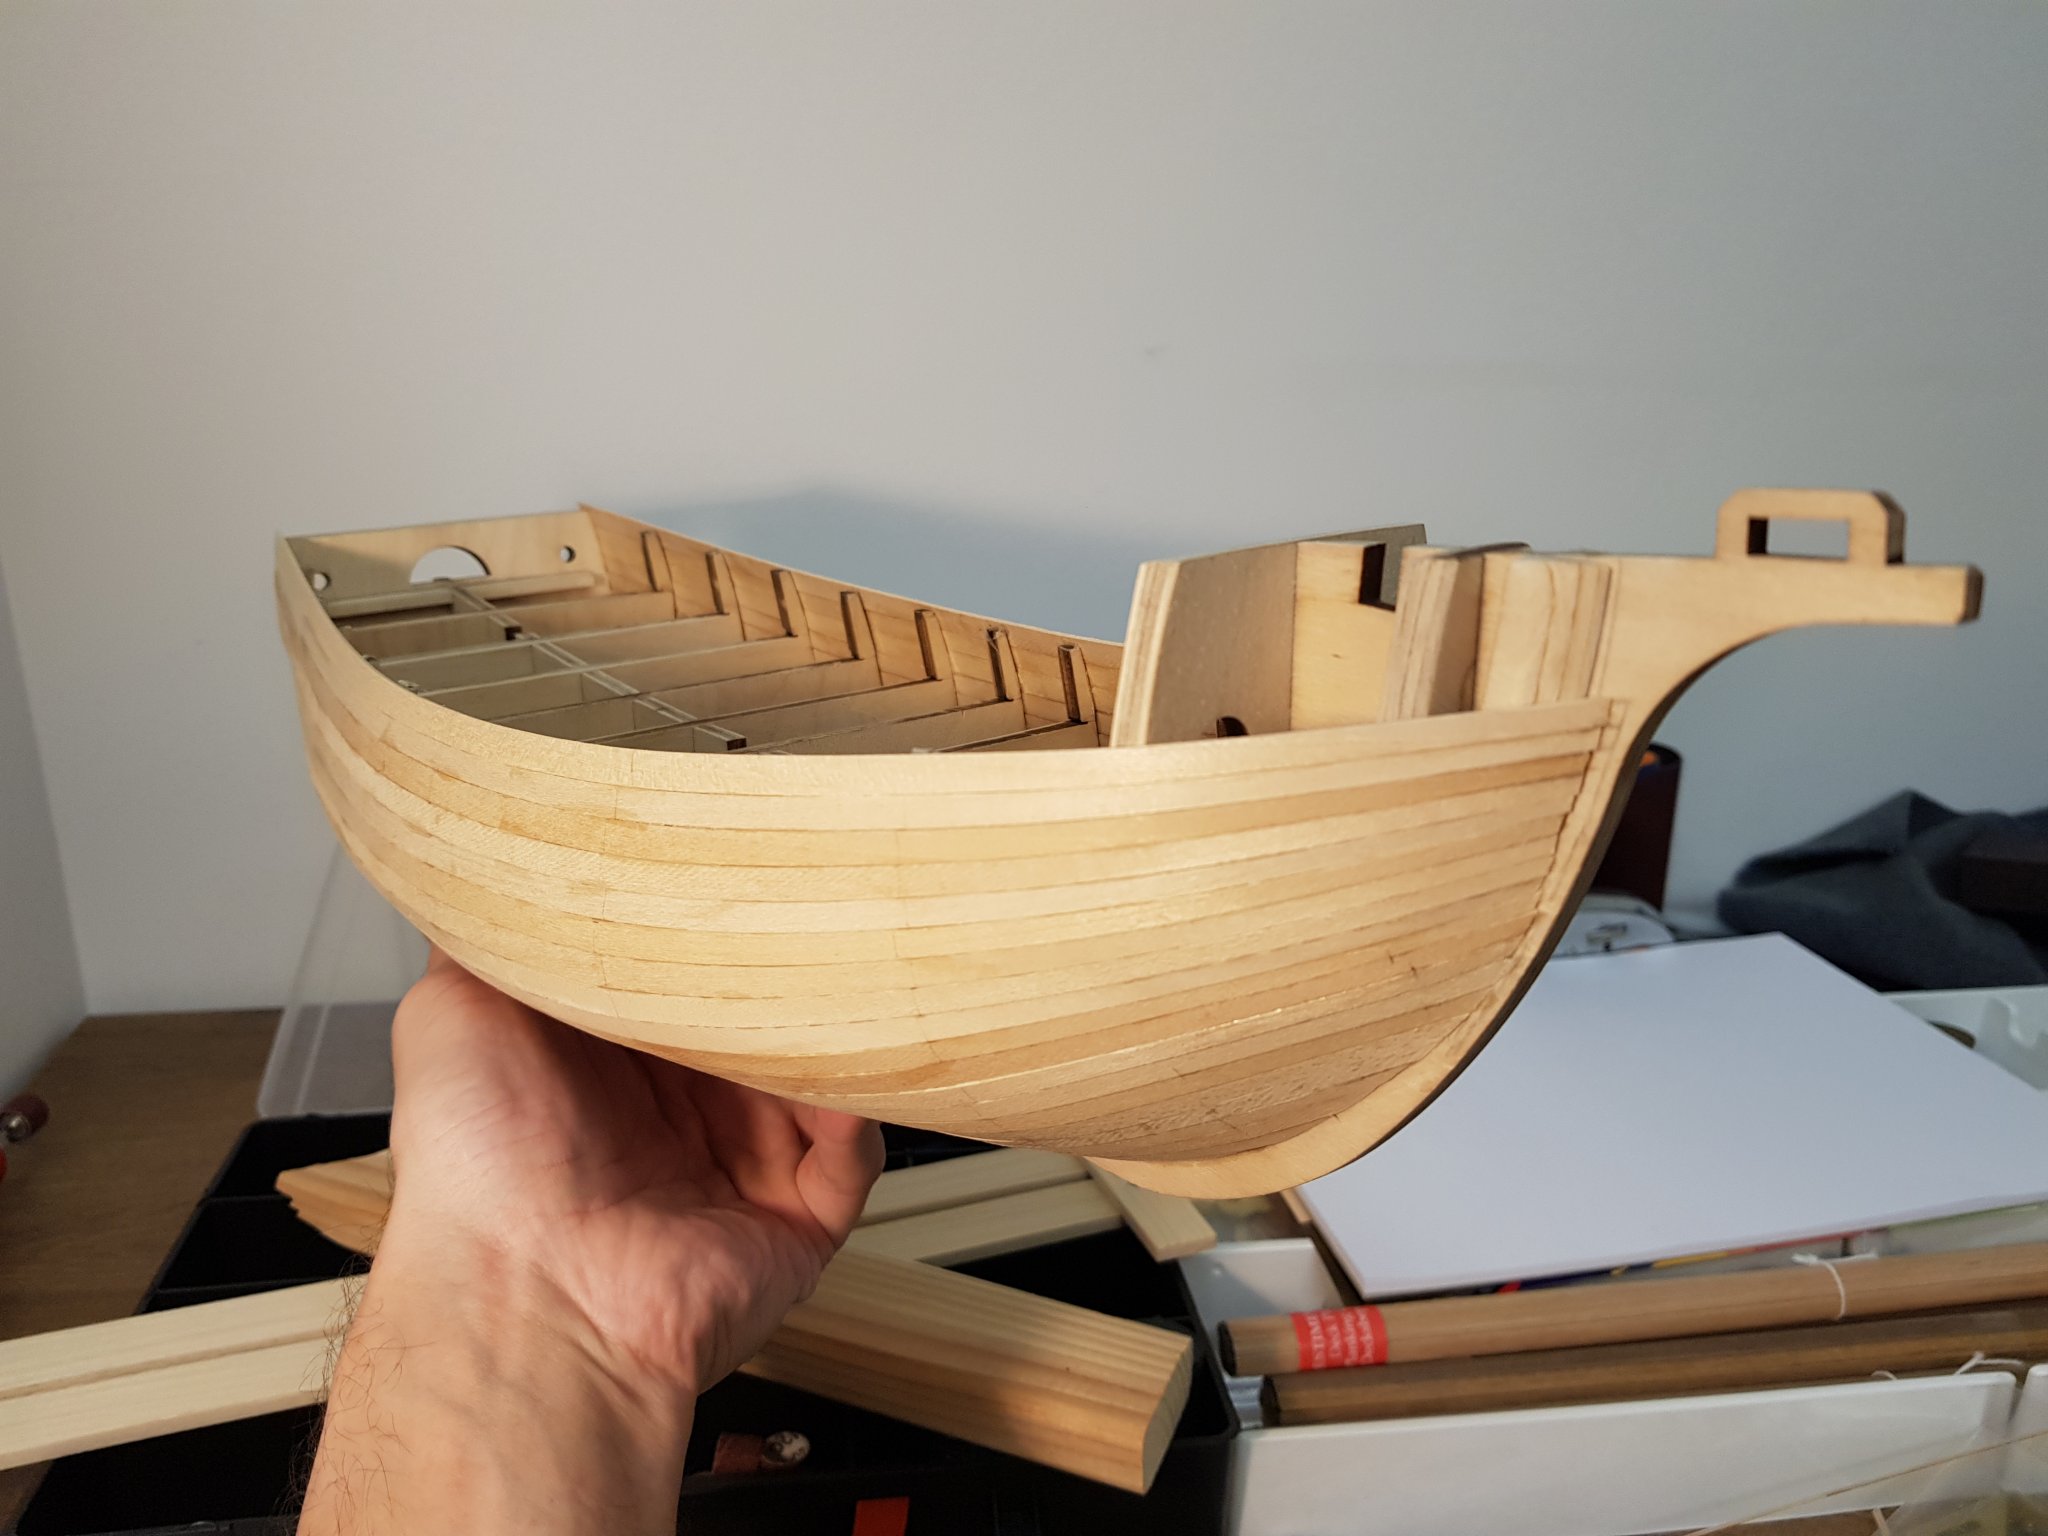
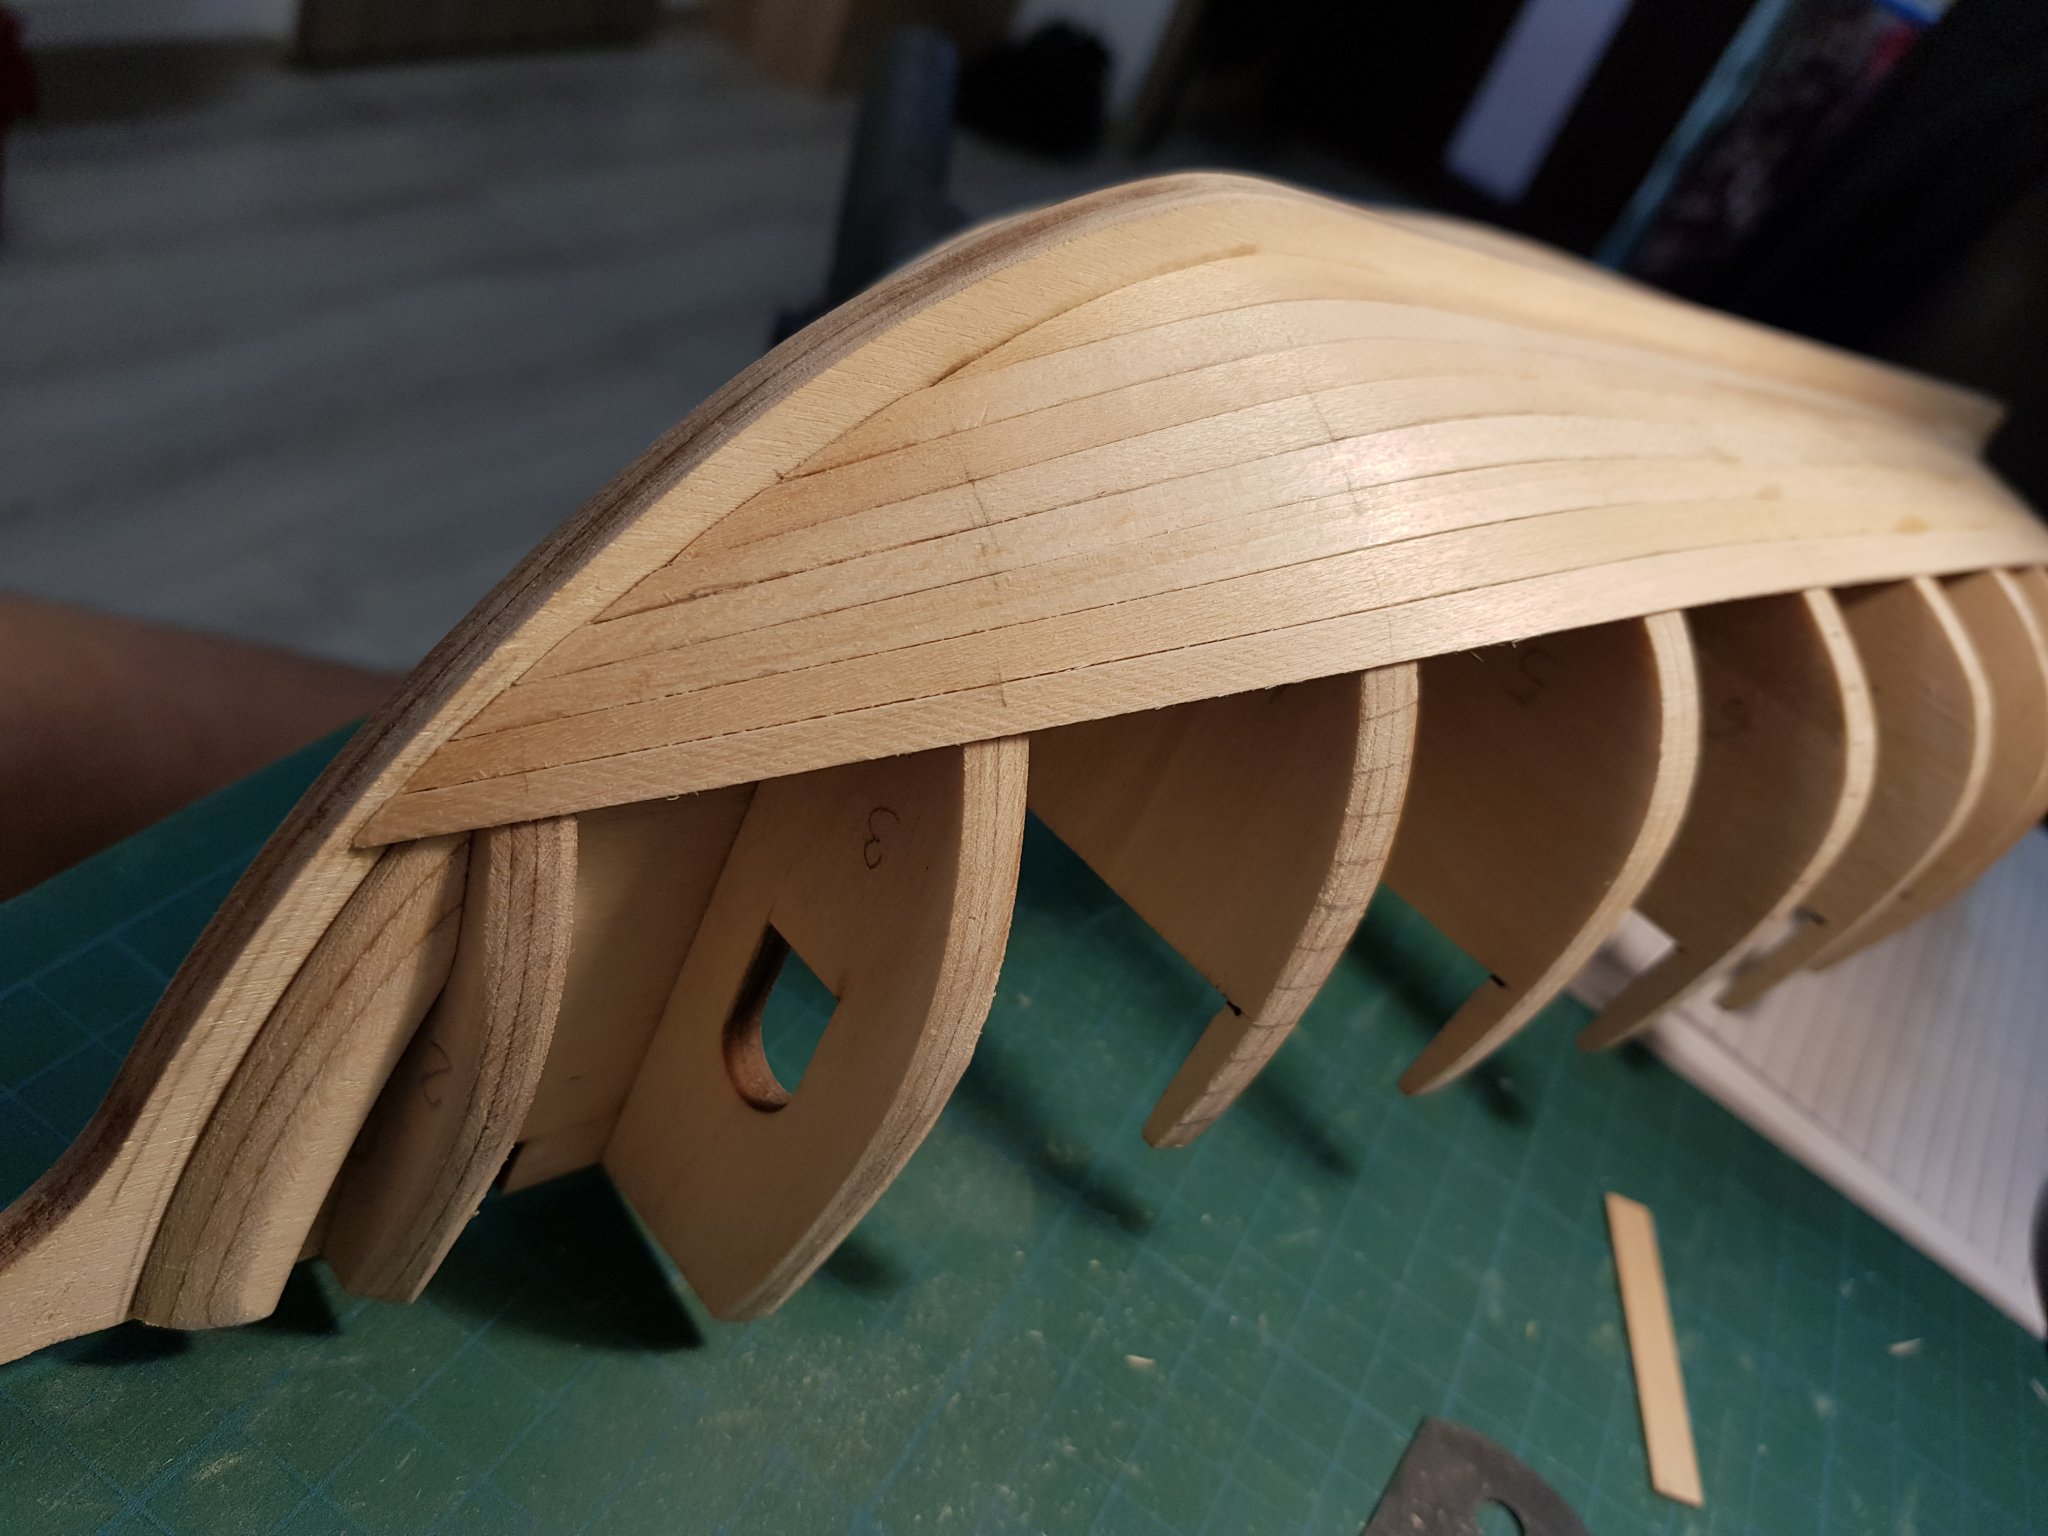
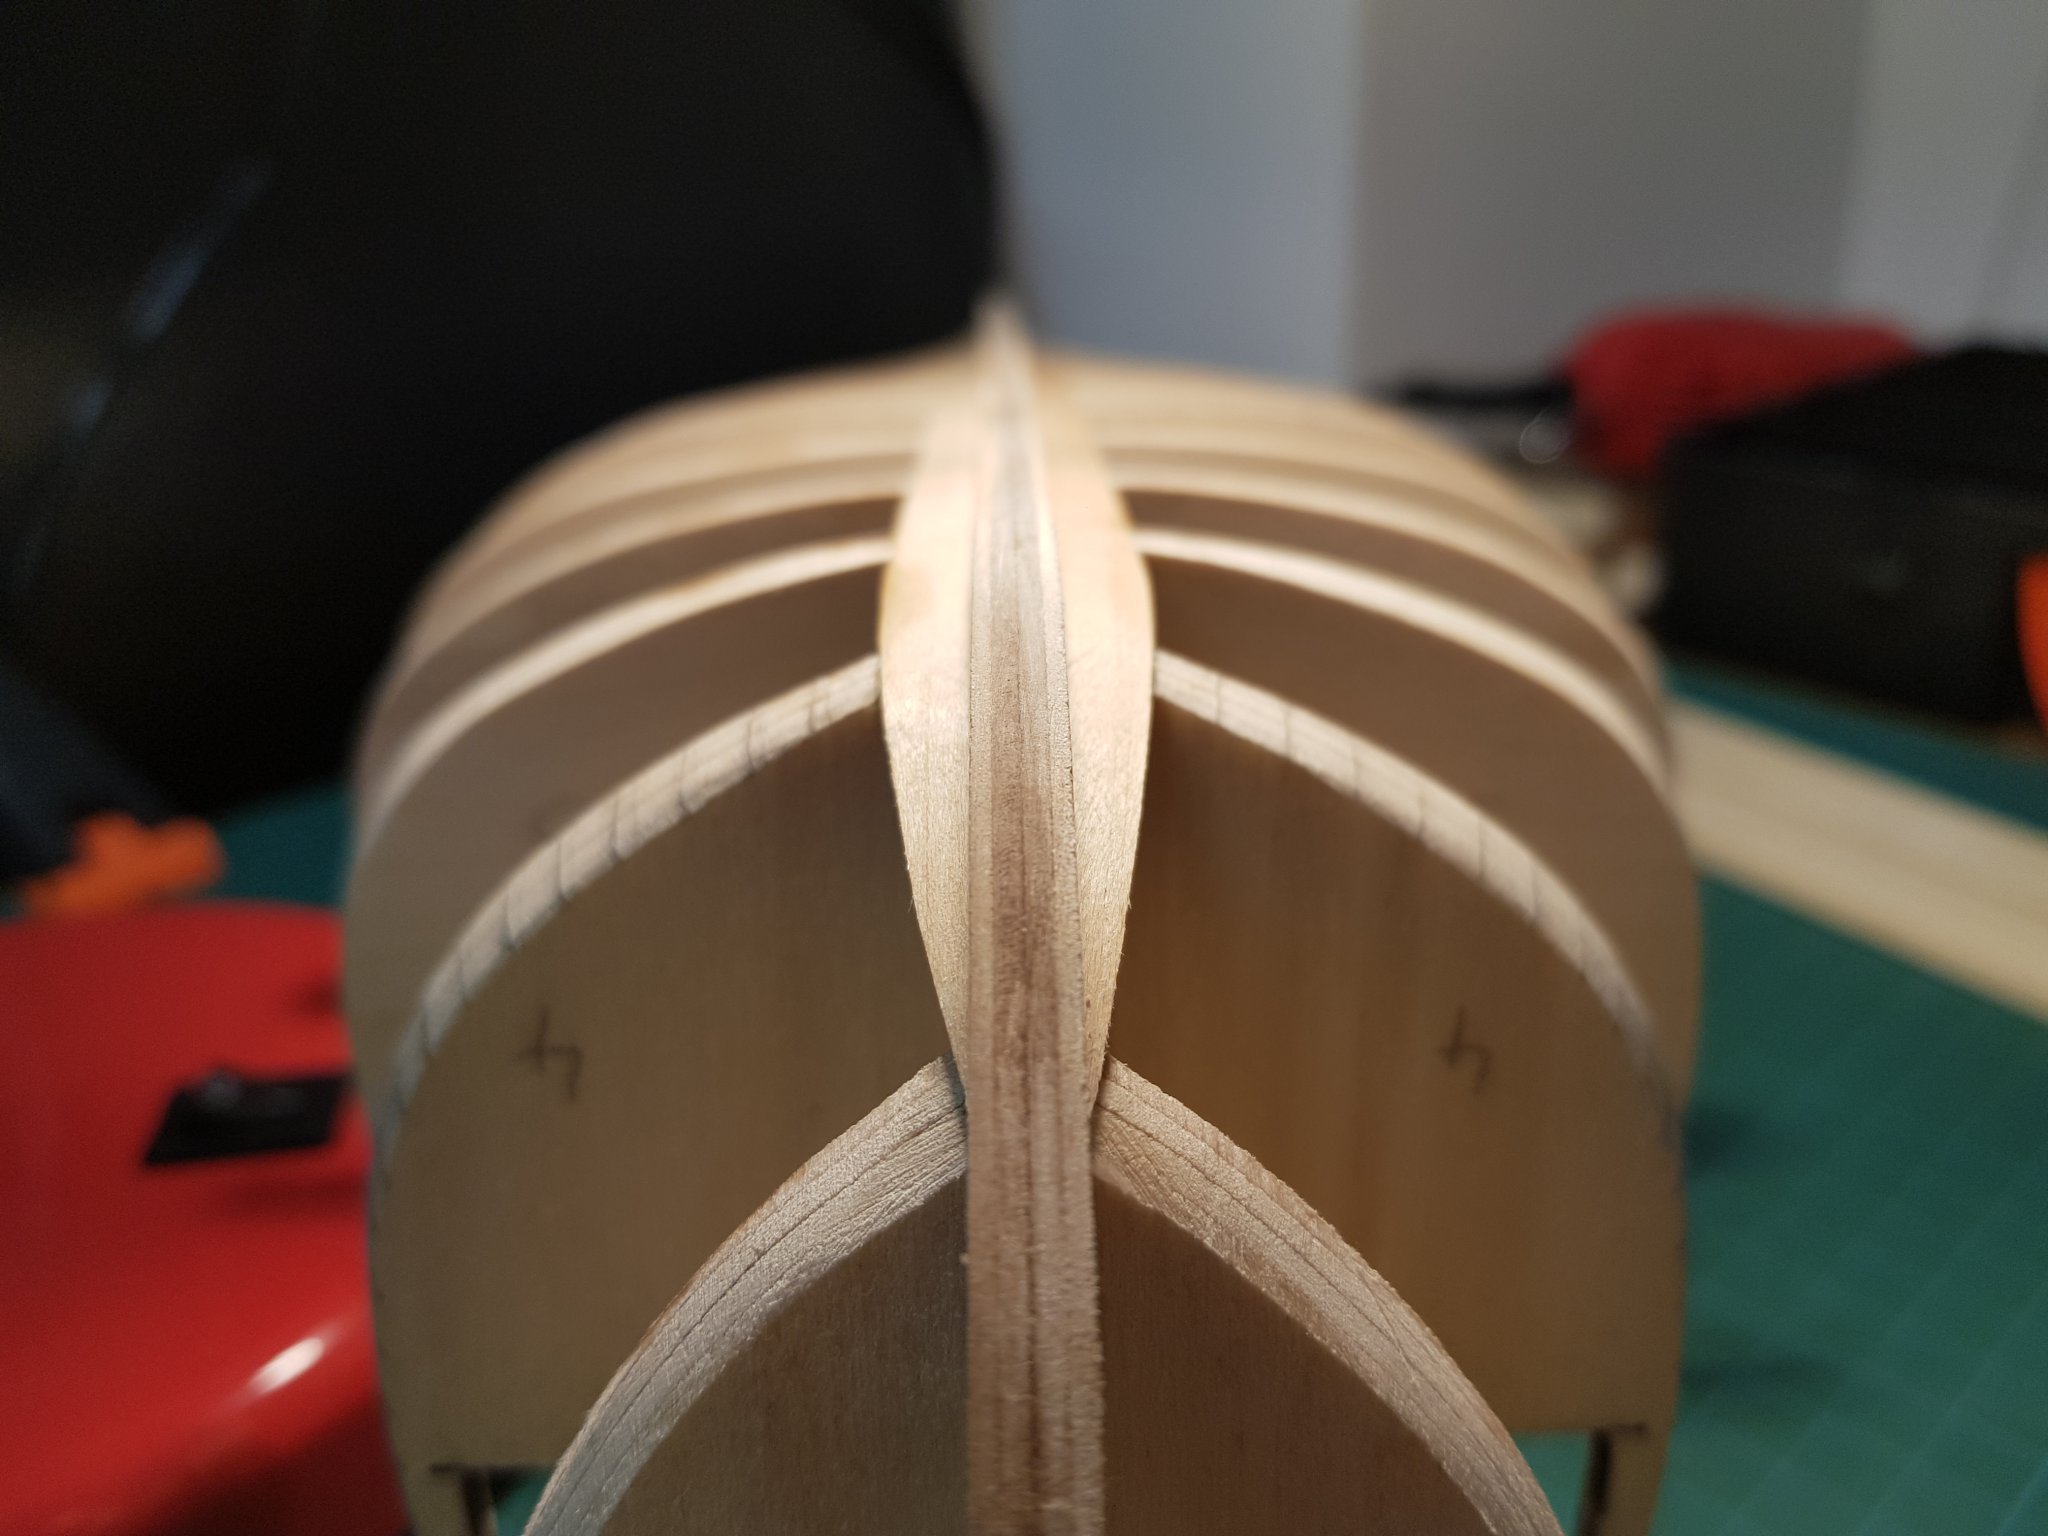
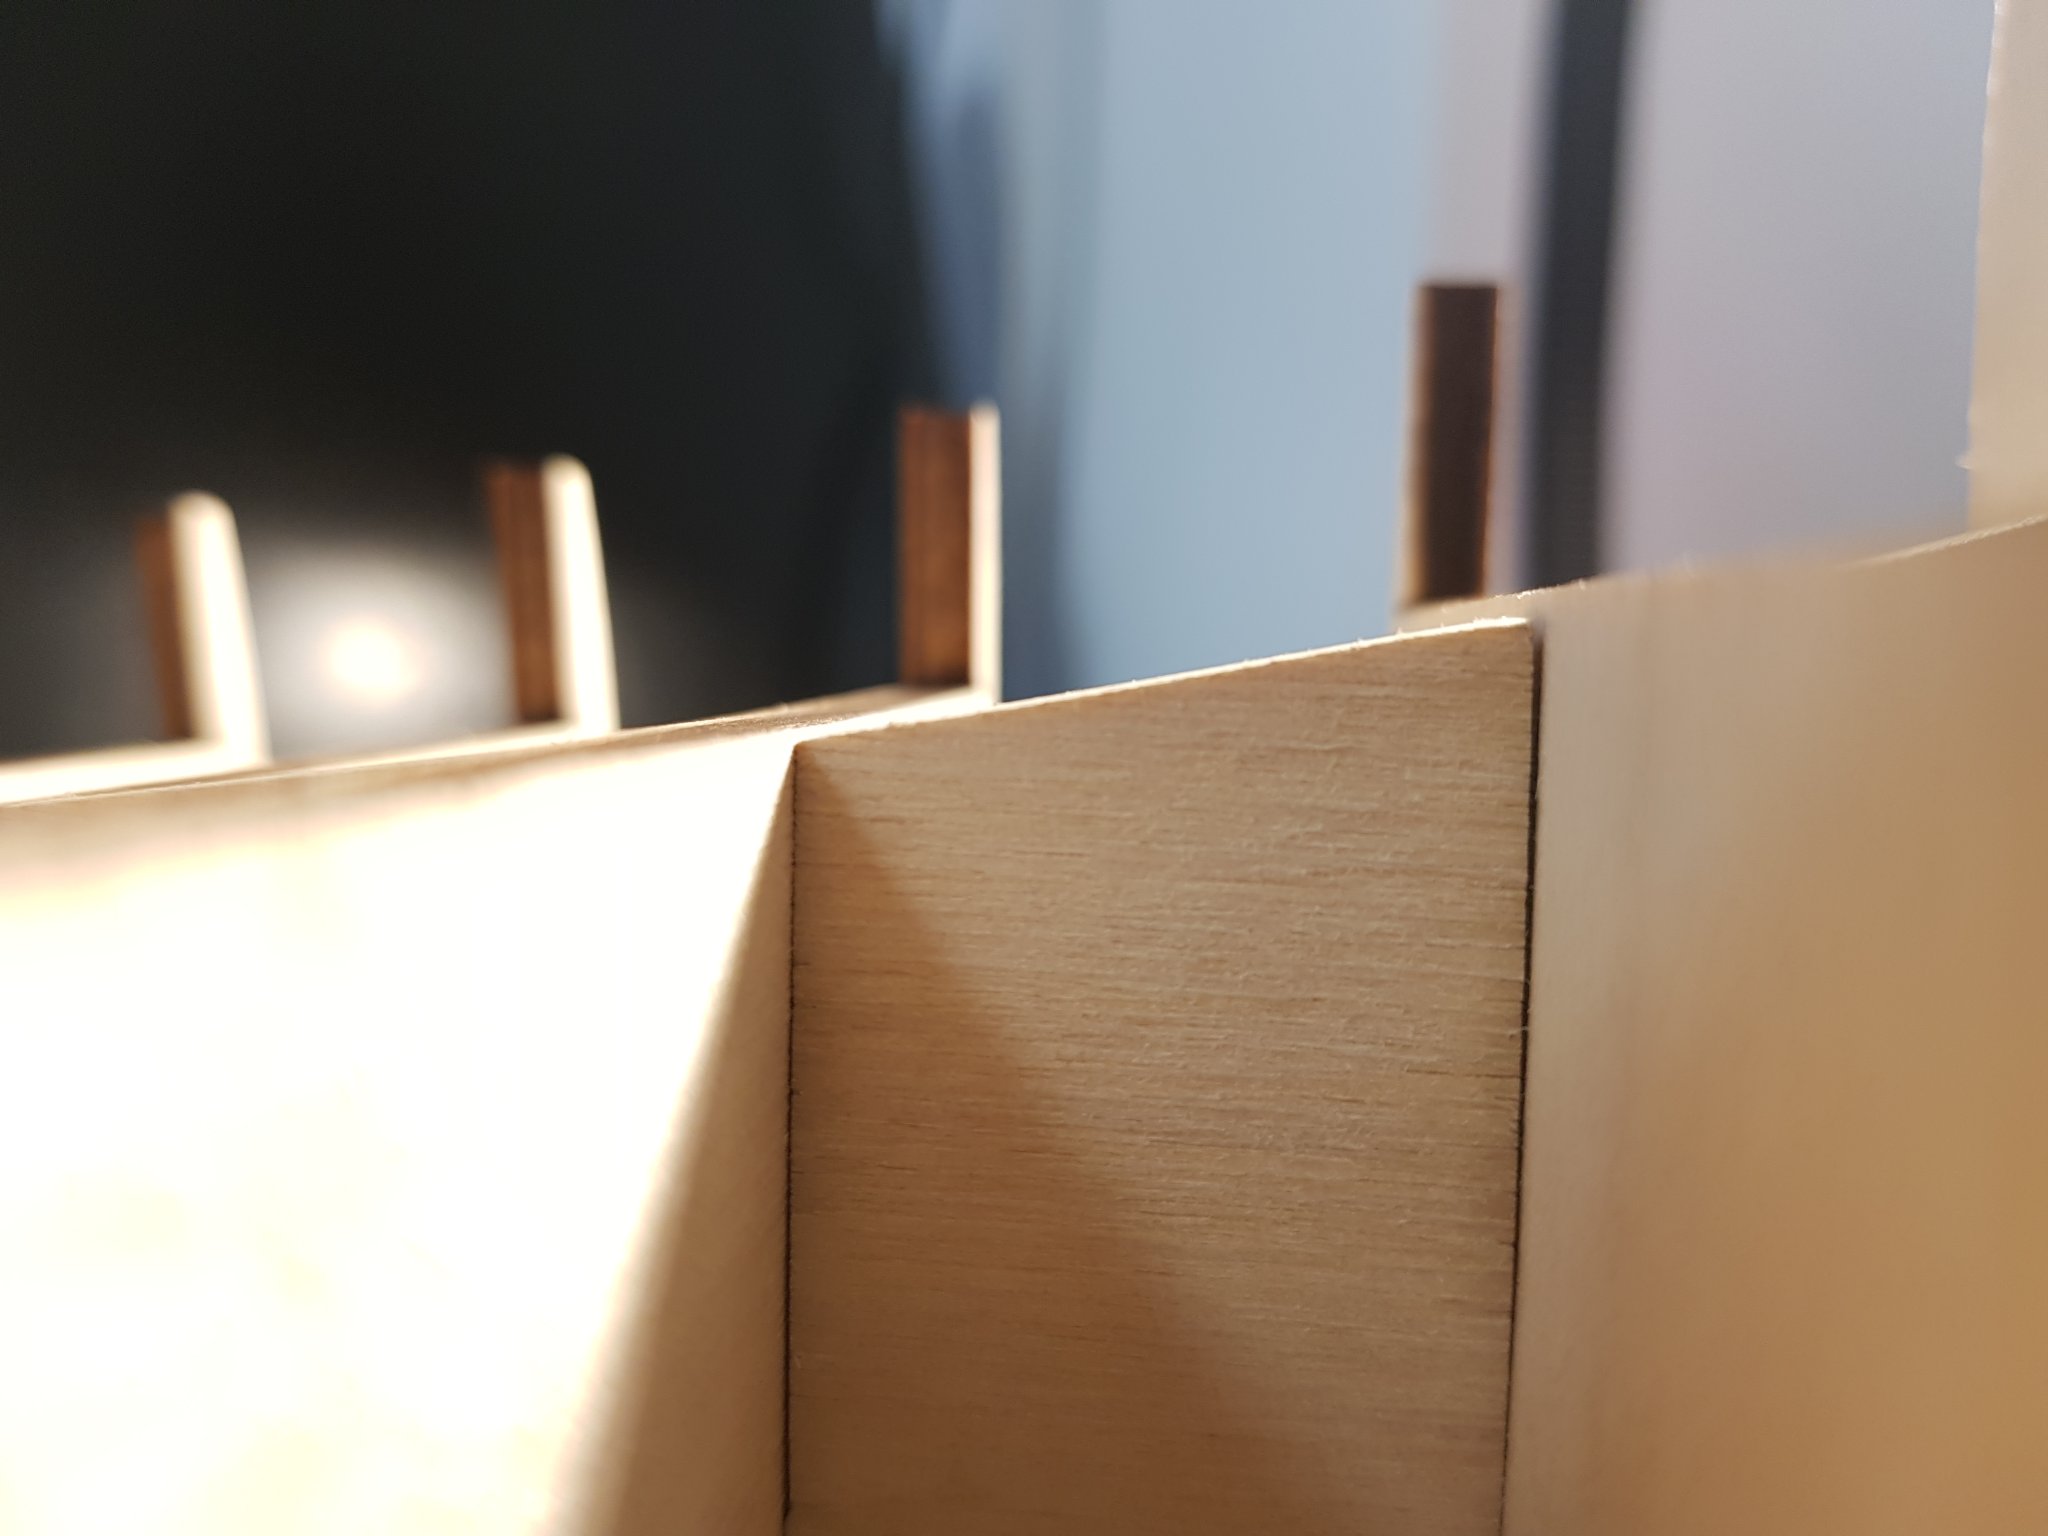
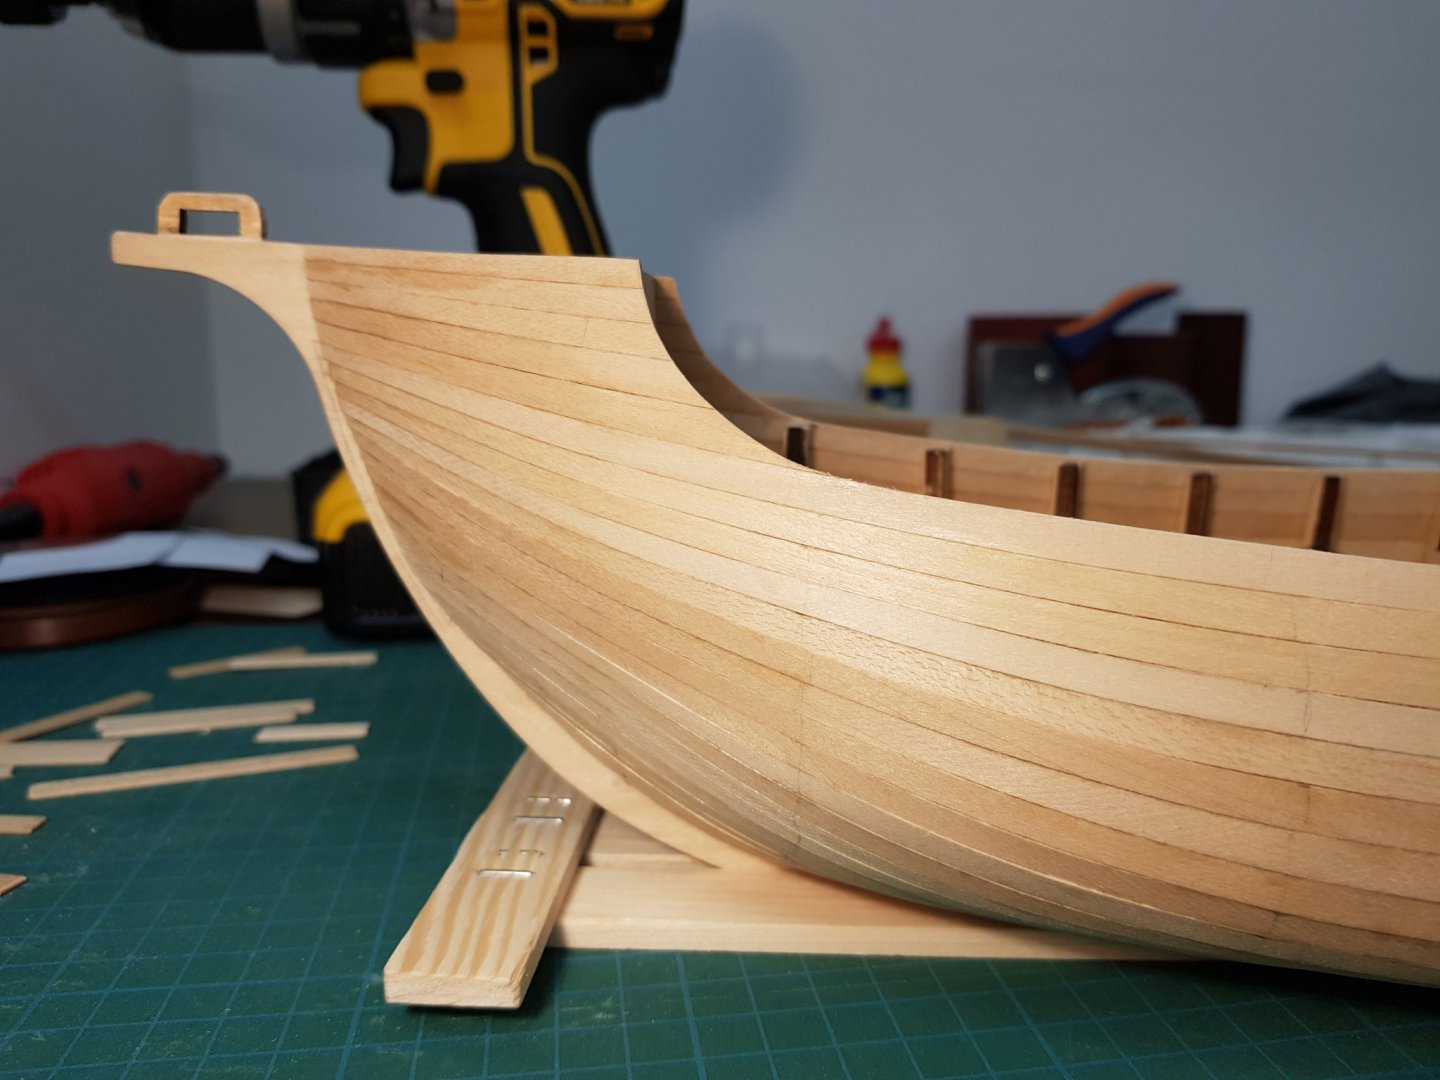
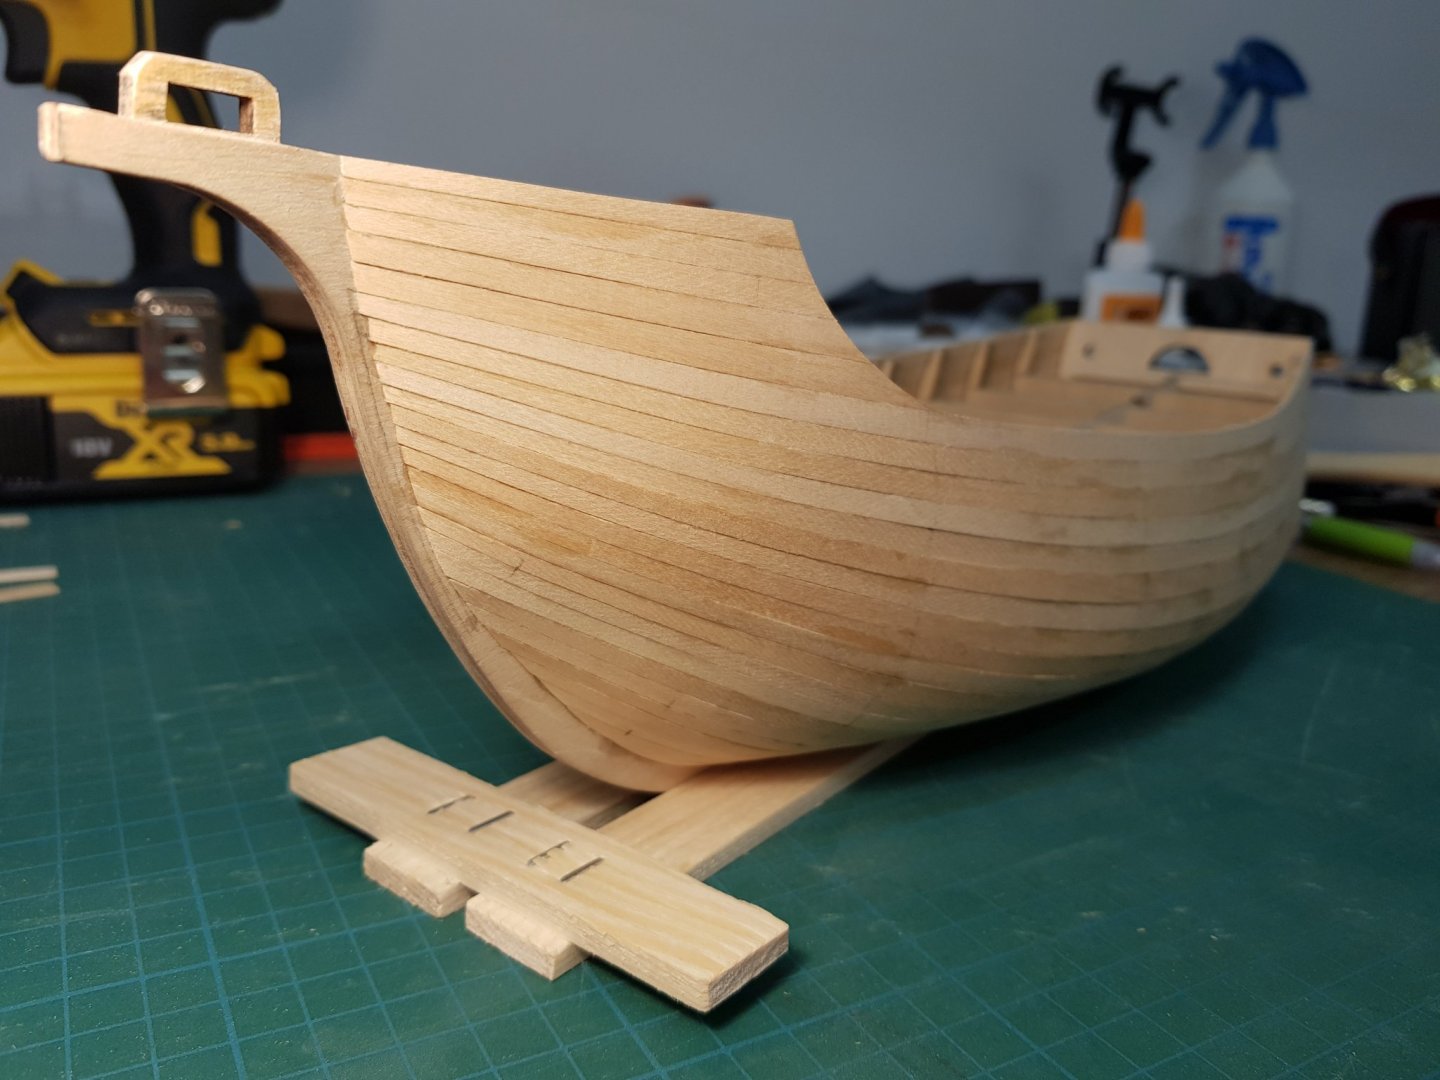
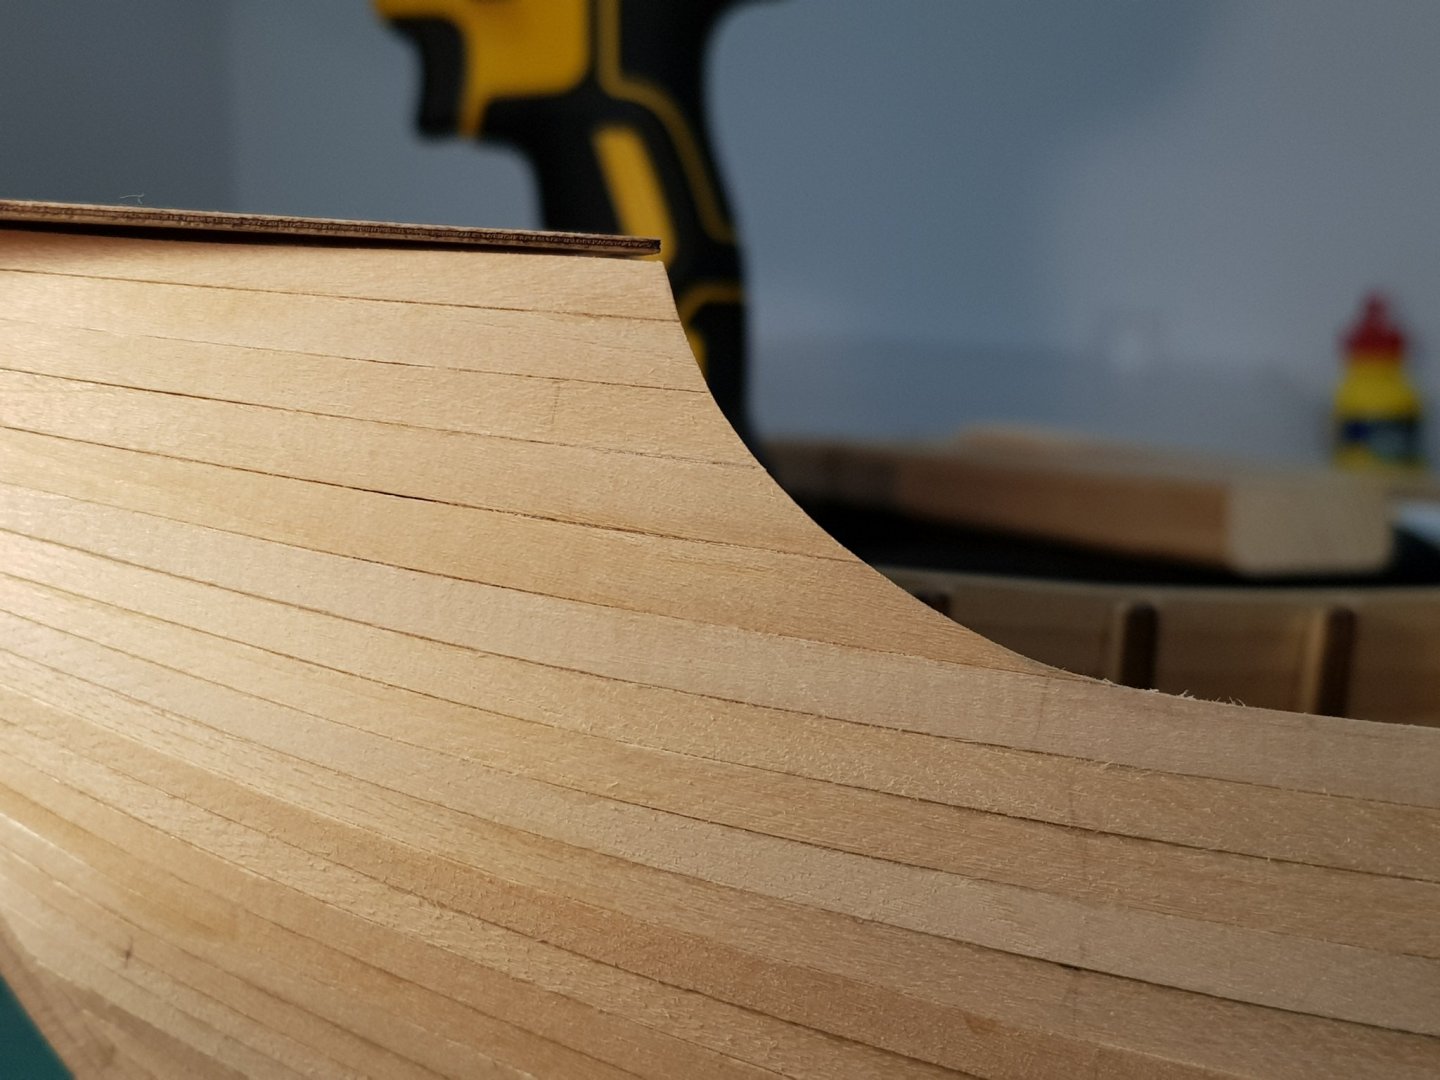
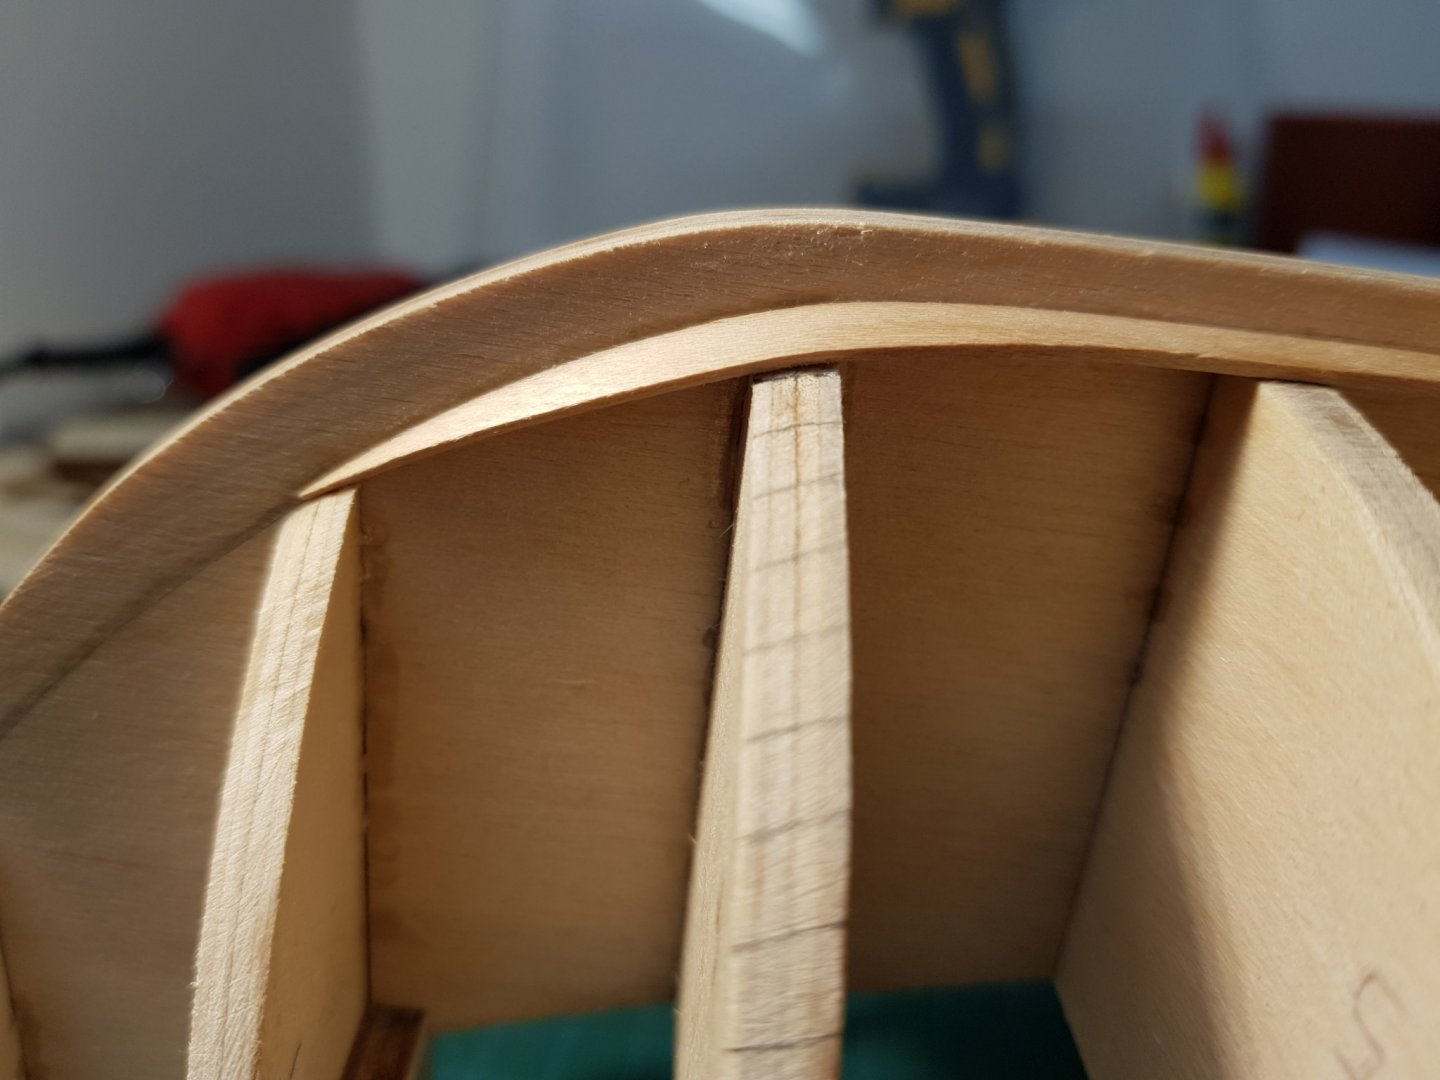
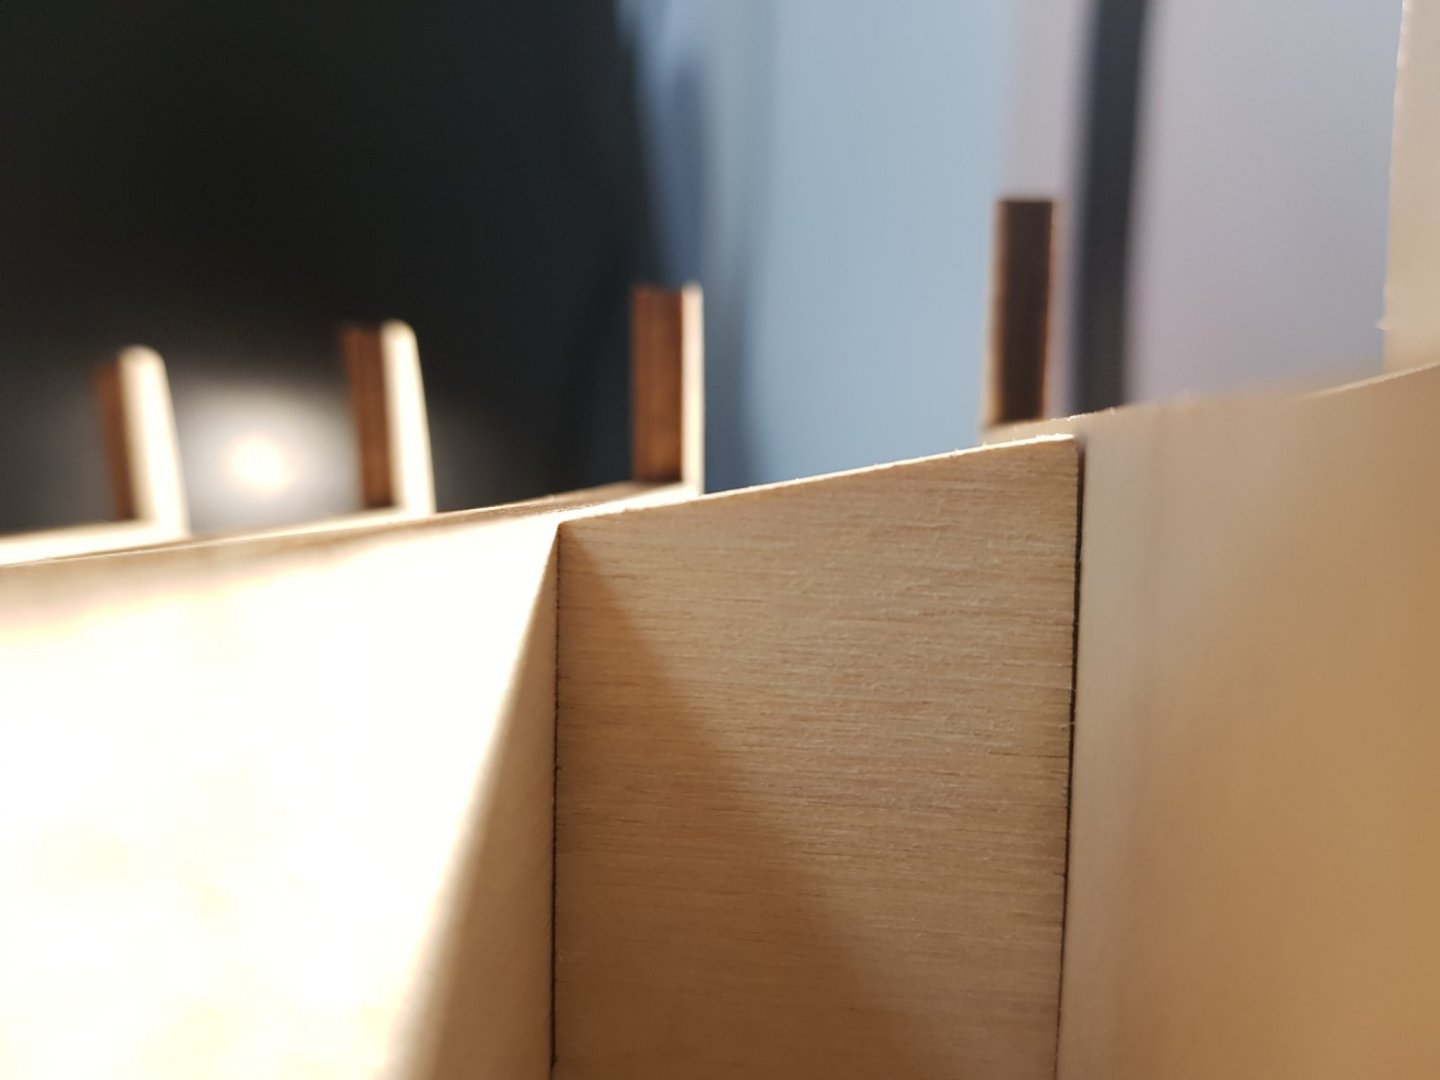
 A little update on my build. Finally got the first planking done. I'm really satisfied with my work except one part... the bow area. One mistake i made was to sand down the bulkheads separately before gluing them to the keel and that resulted in this wobbly line where the planks touch the bow. Anyway, i think i can fix that with some filling and sanding so i get a much even surface for the second planks to go on. I think i did a good job... what do you guys think? I'd love to hear your opinions! Cheers! Romulus


-
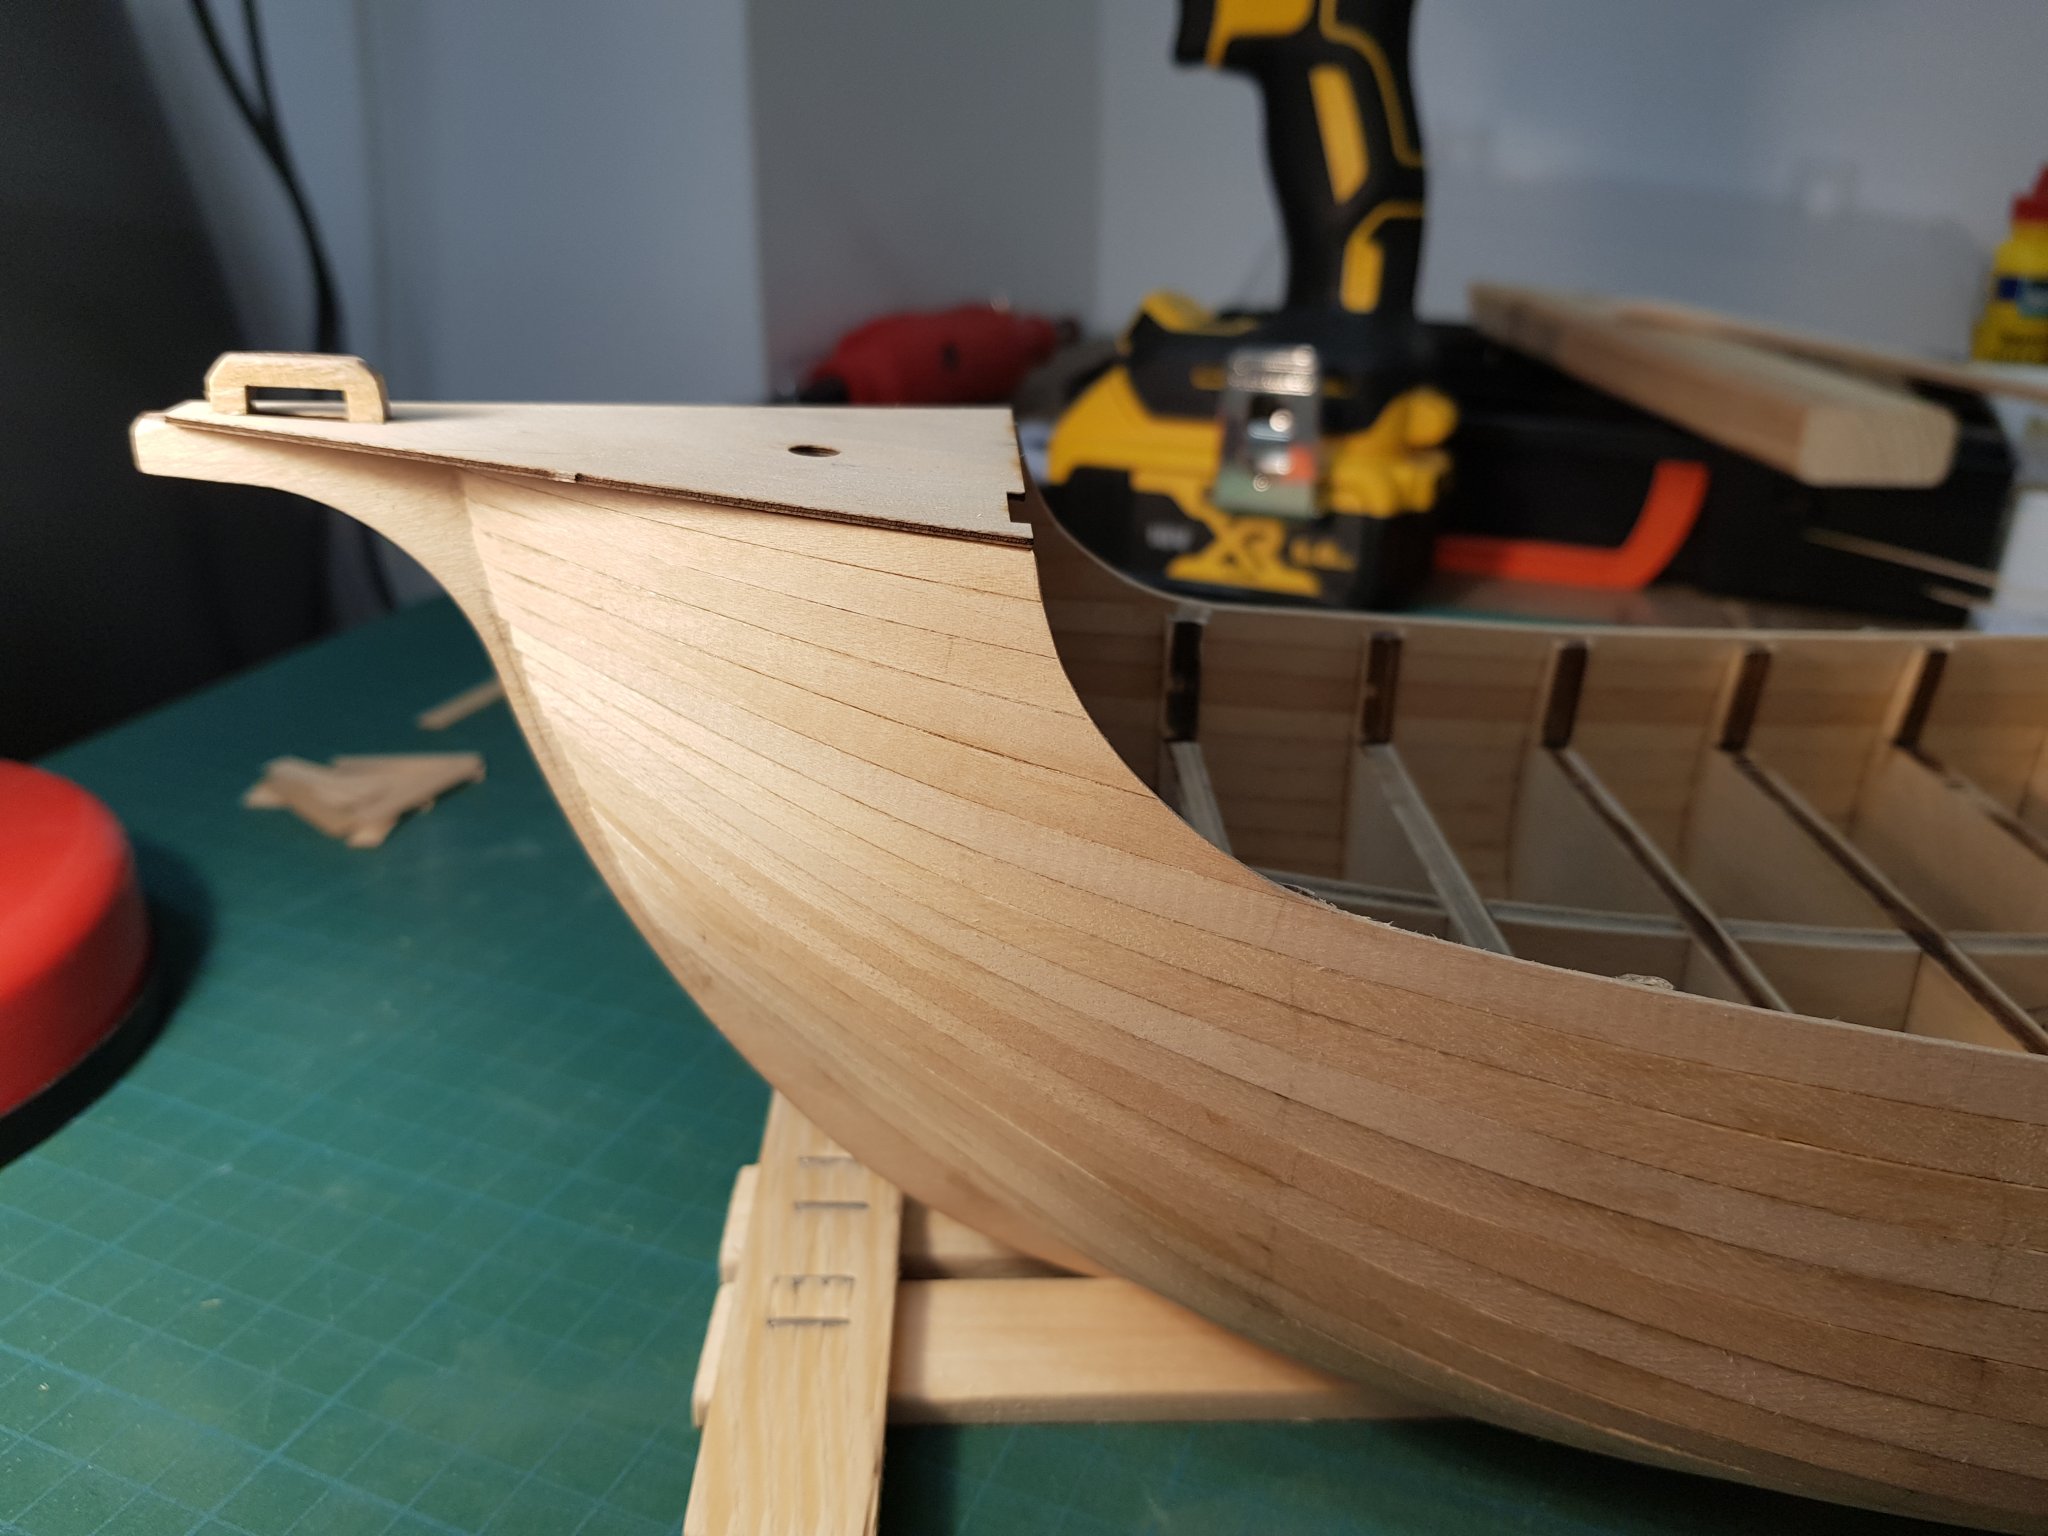
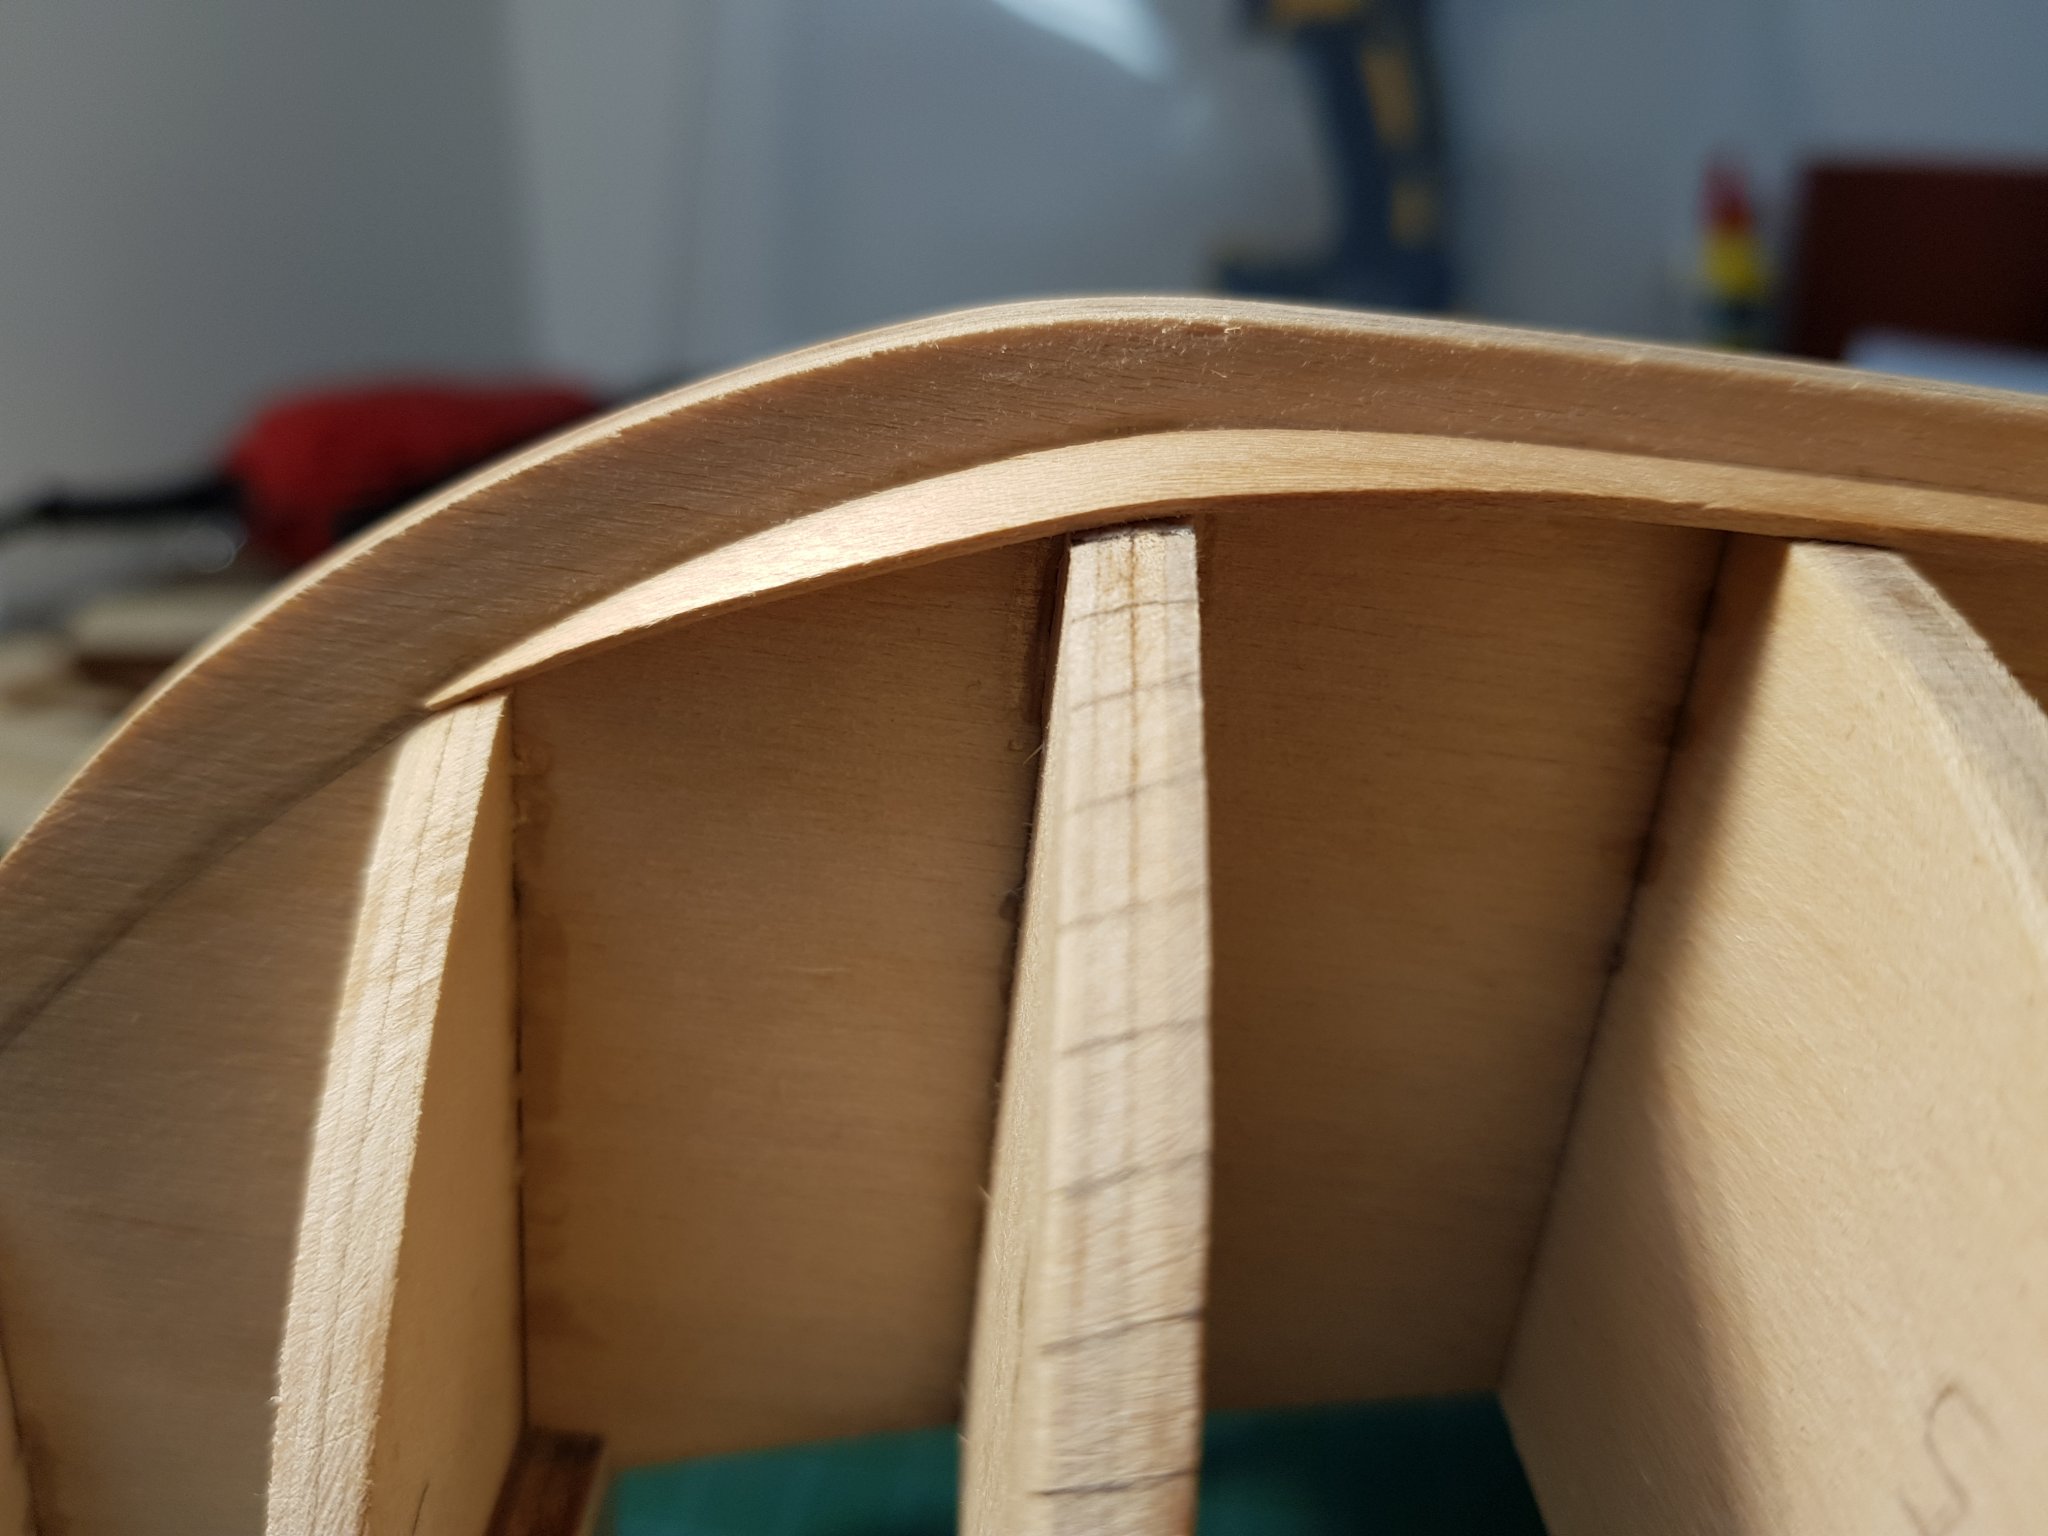
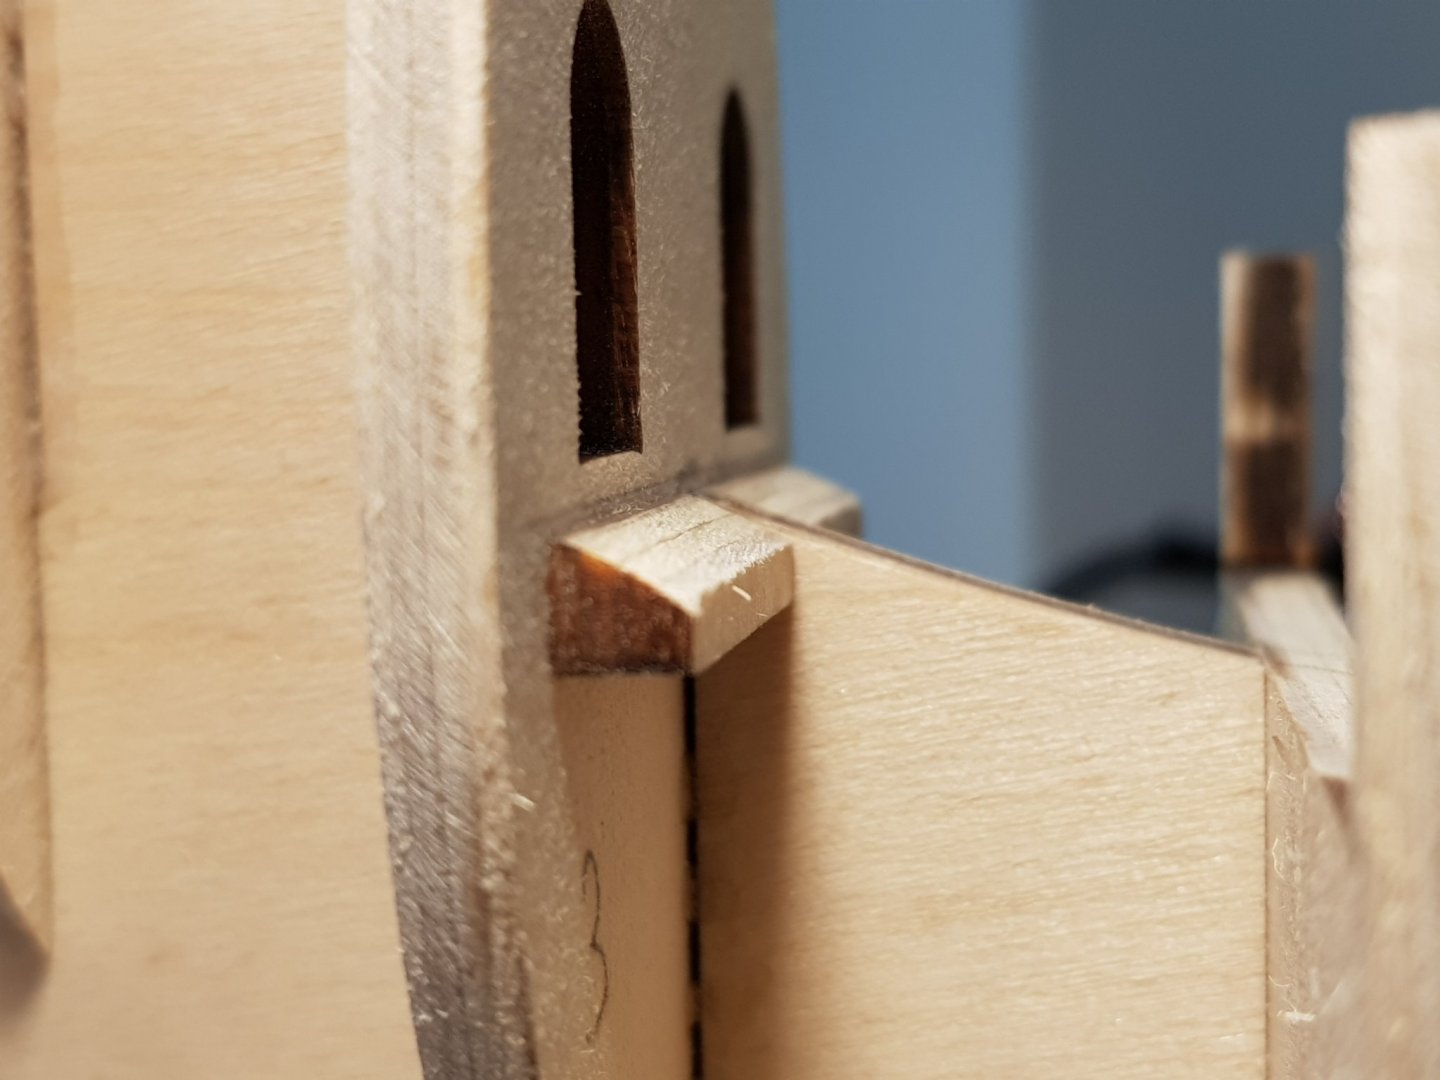
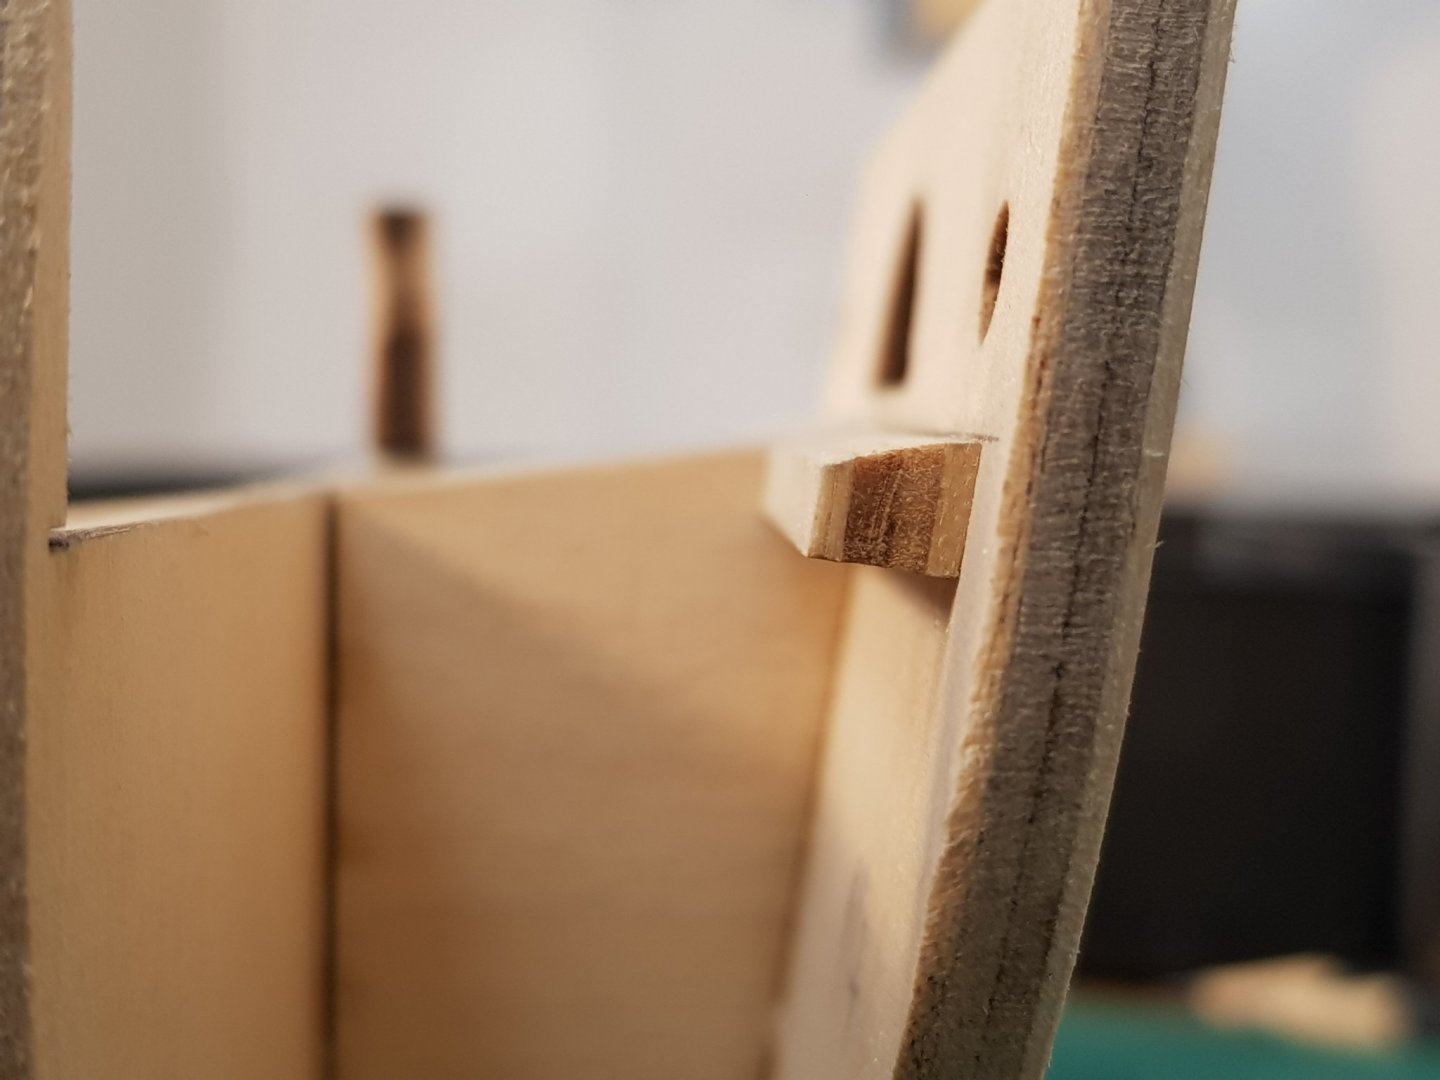
Hi Ron, I value your appreciation! I see where you're pointing... looks like bulkhead #2 is not following the curve from the stem to bulkhead #3. One mistake i did was to sand it while the pieces weren't glued on... i took each bulkhead out and gave it a good sanding prior to fairing and i believe i may have shaved too much wood off in that process. After some investigation i came with the conclusion that bulkhead #2 didn't need any sanding at all in order to stay fair with the stem pieces and bulkhead #3. One solution would be to glue the planks only to those small pieces and to bulkhead #3 in order to have a nice curved line. I'll do my best to give it the proper shape. I believe it makes no difference if the planks don't touch that bulkhead because the glue i use is super strong and i also glue the planks together on their edges... so in the end it will still be solid. Thanks for noticing! I may have done a mistake otherwise. Romulus
-
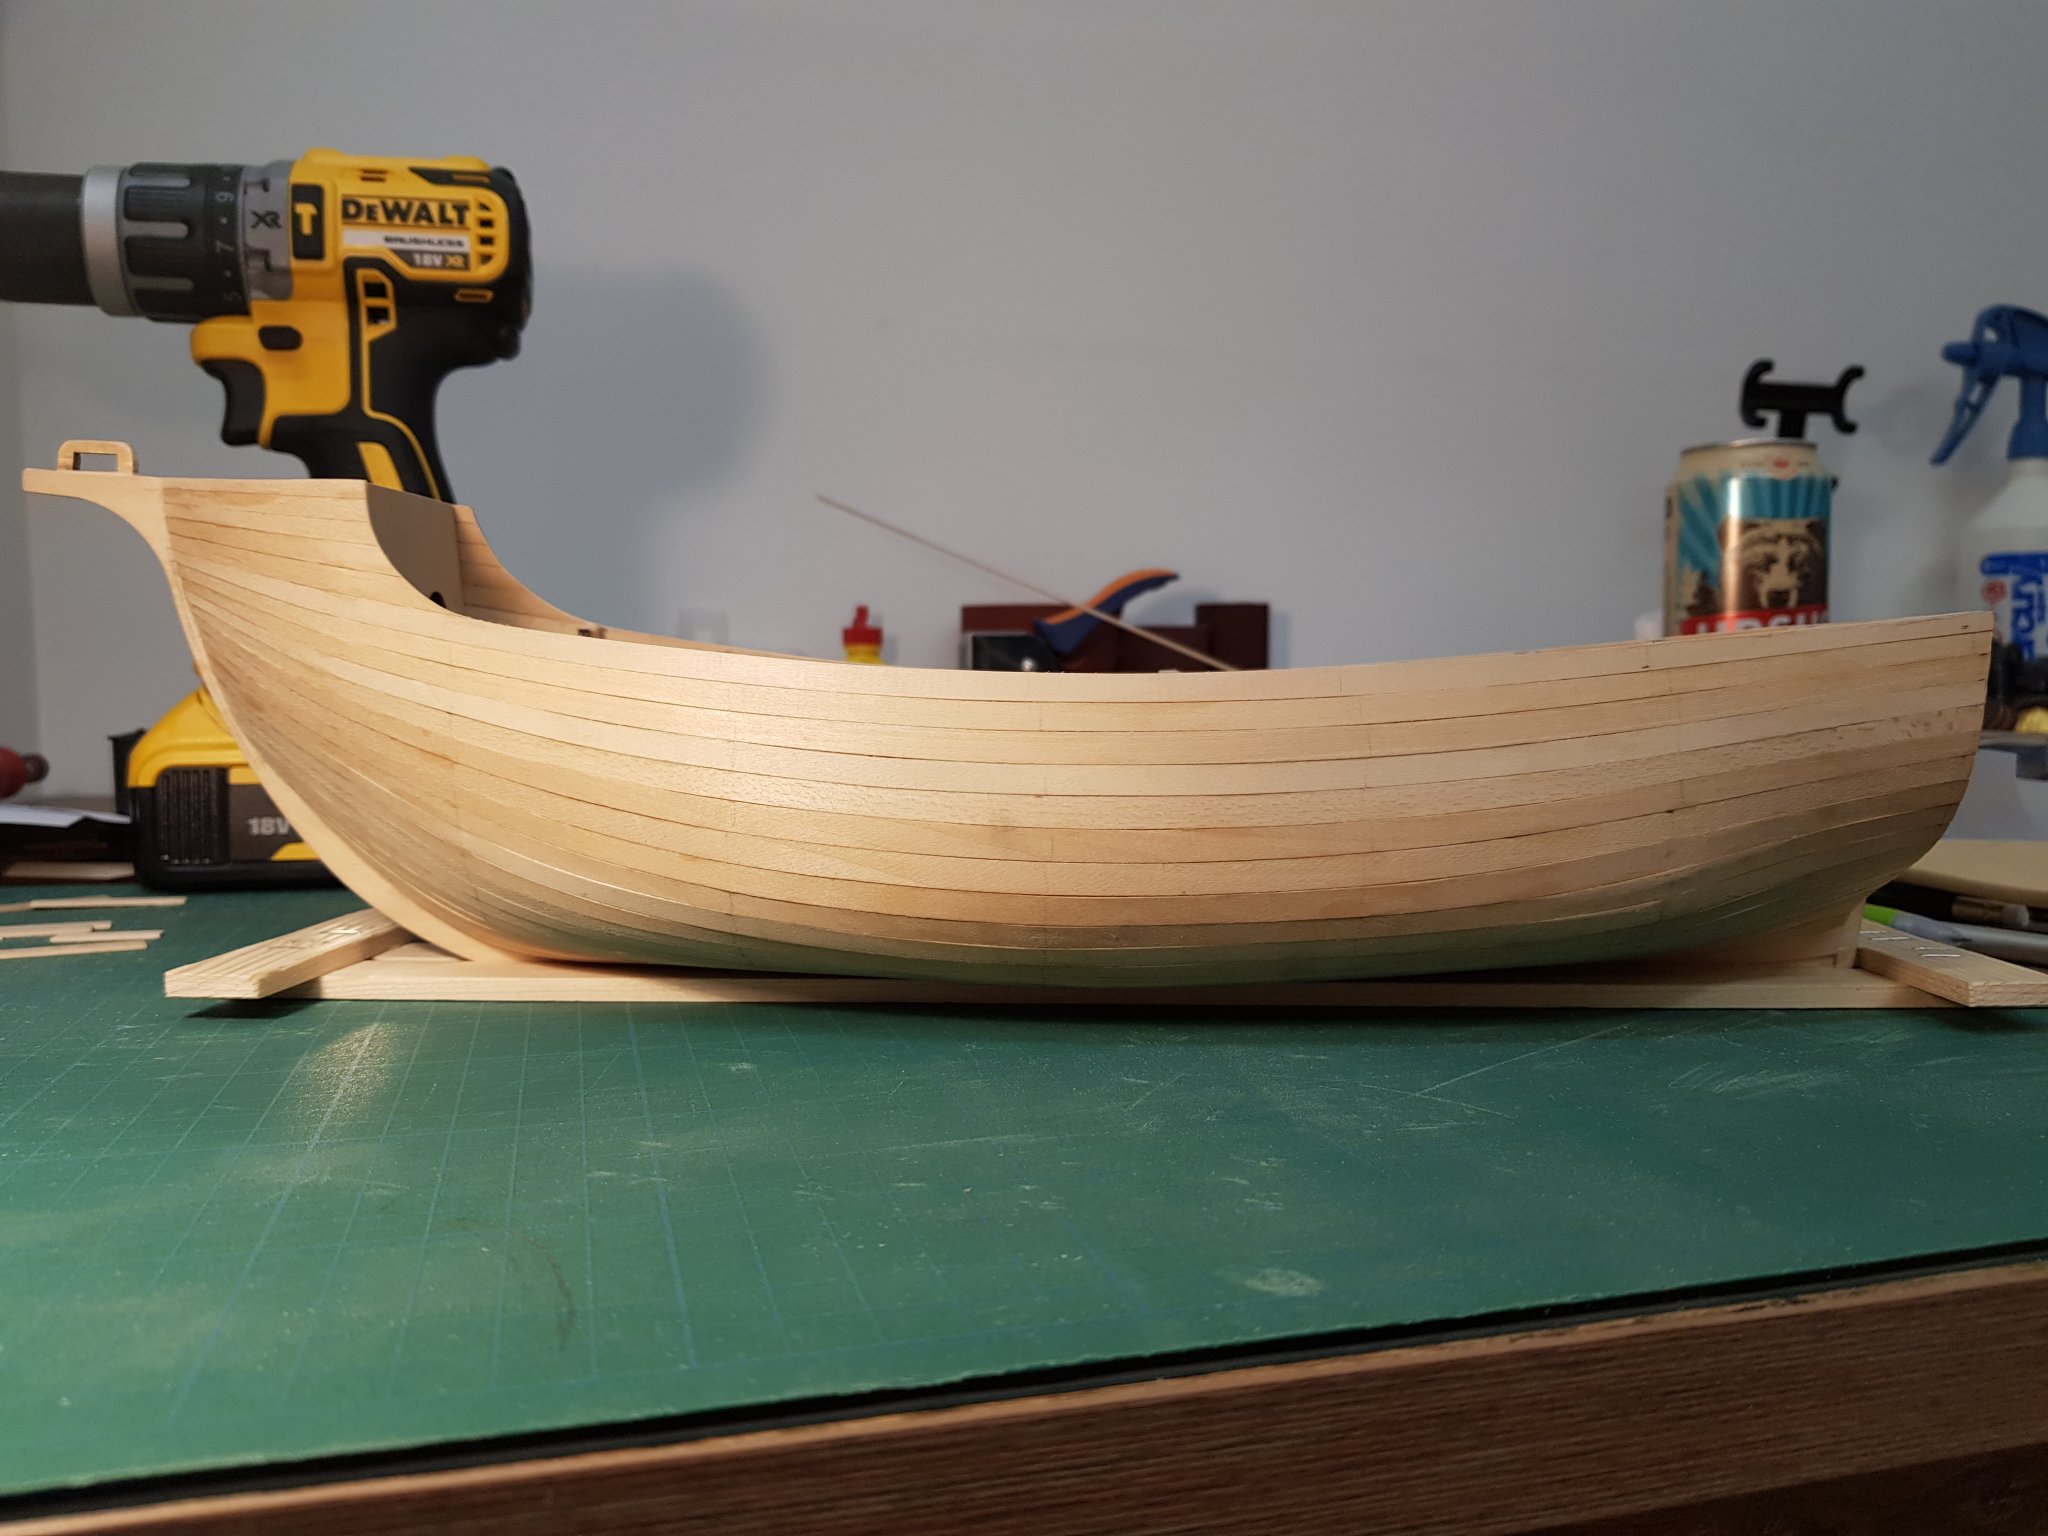
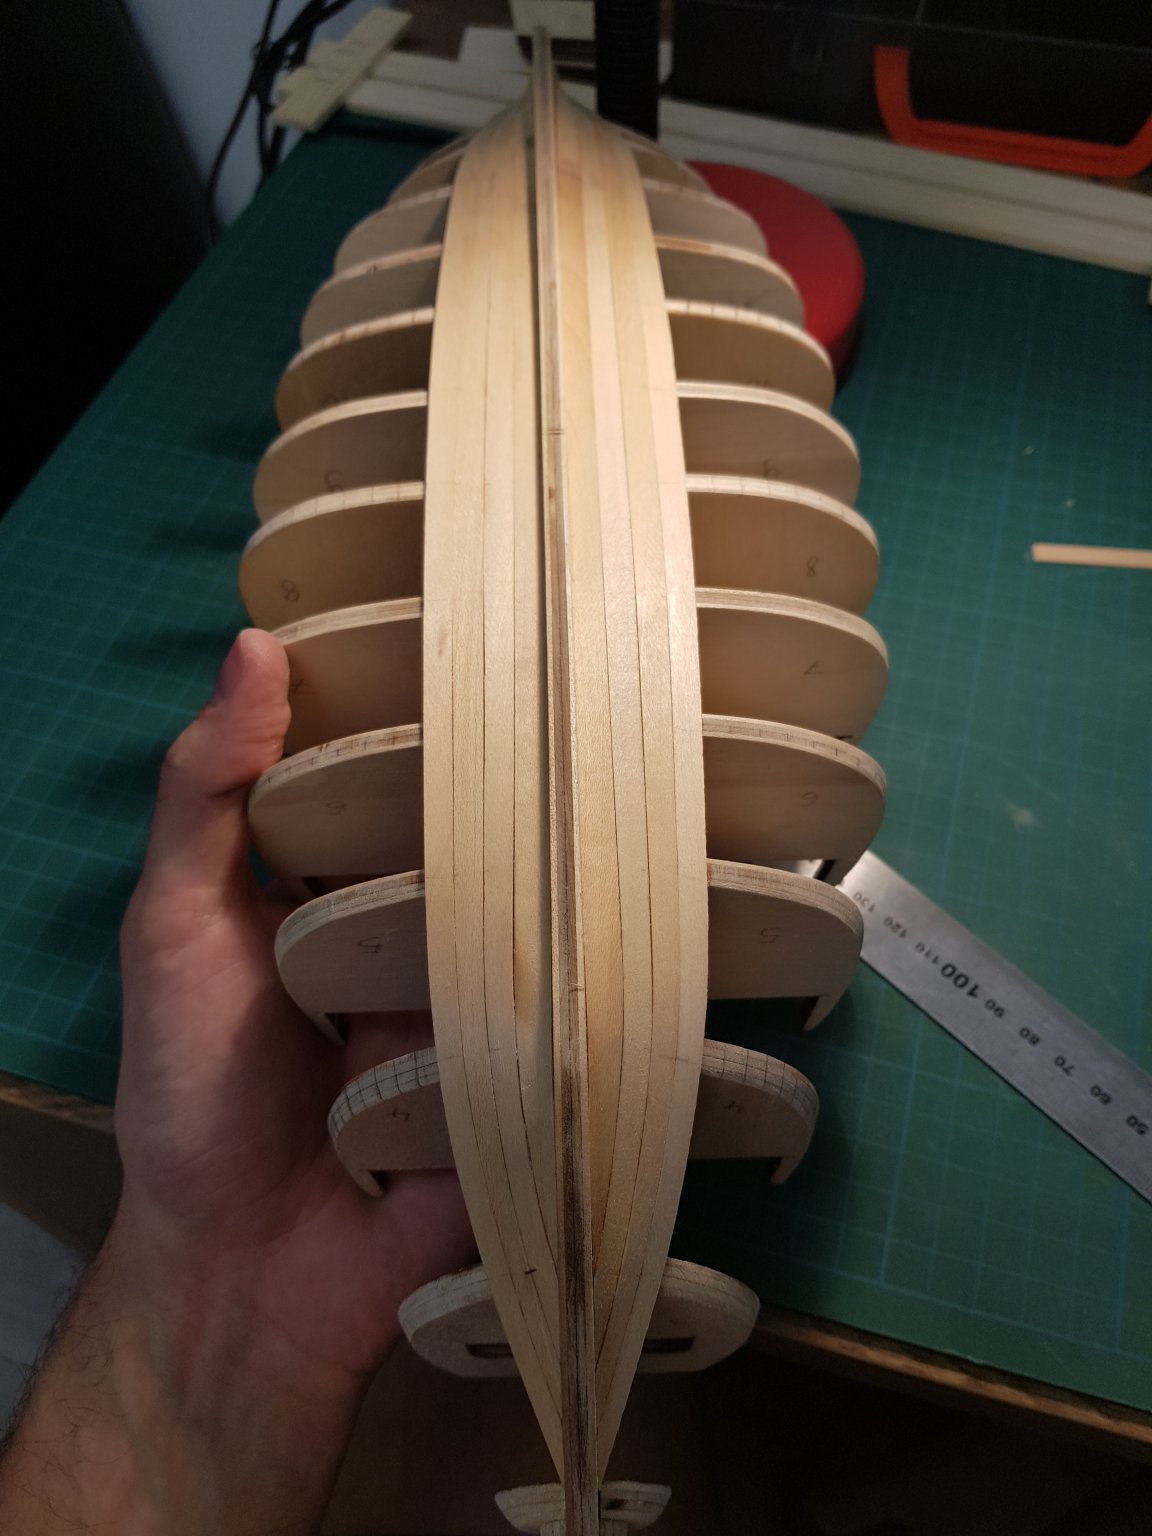
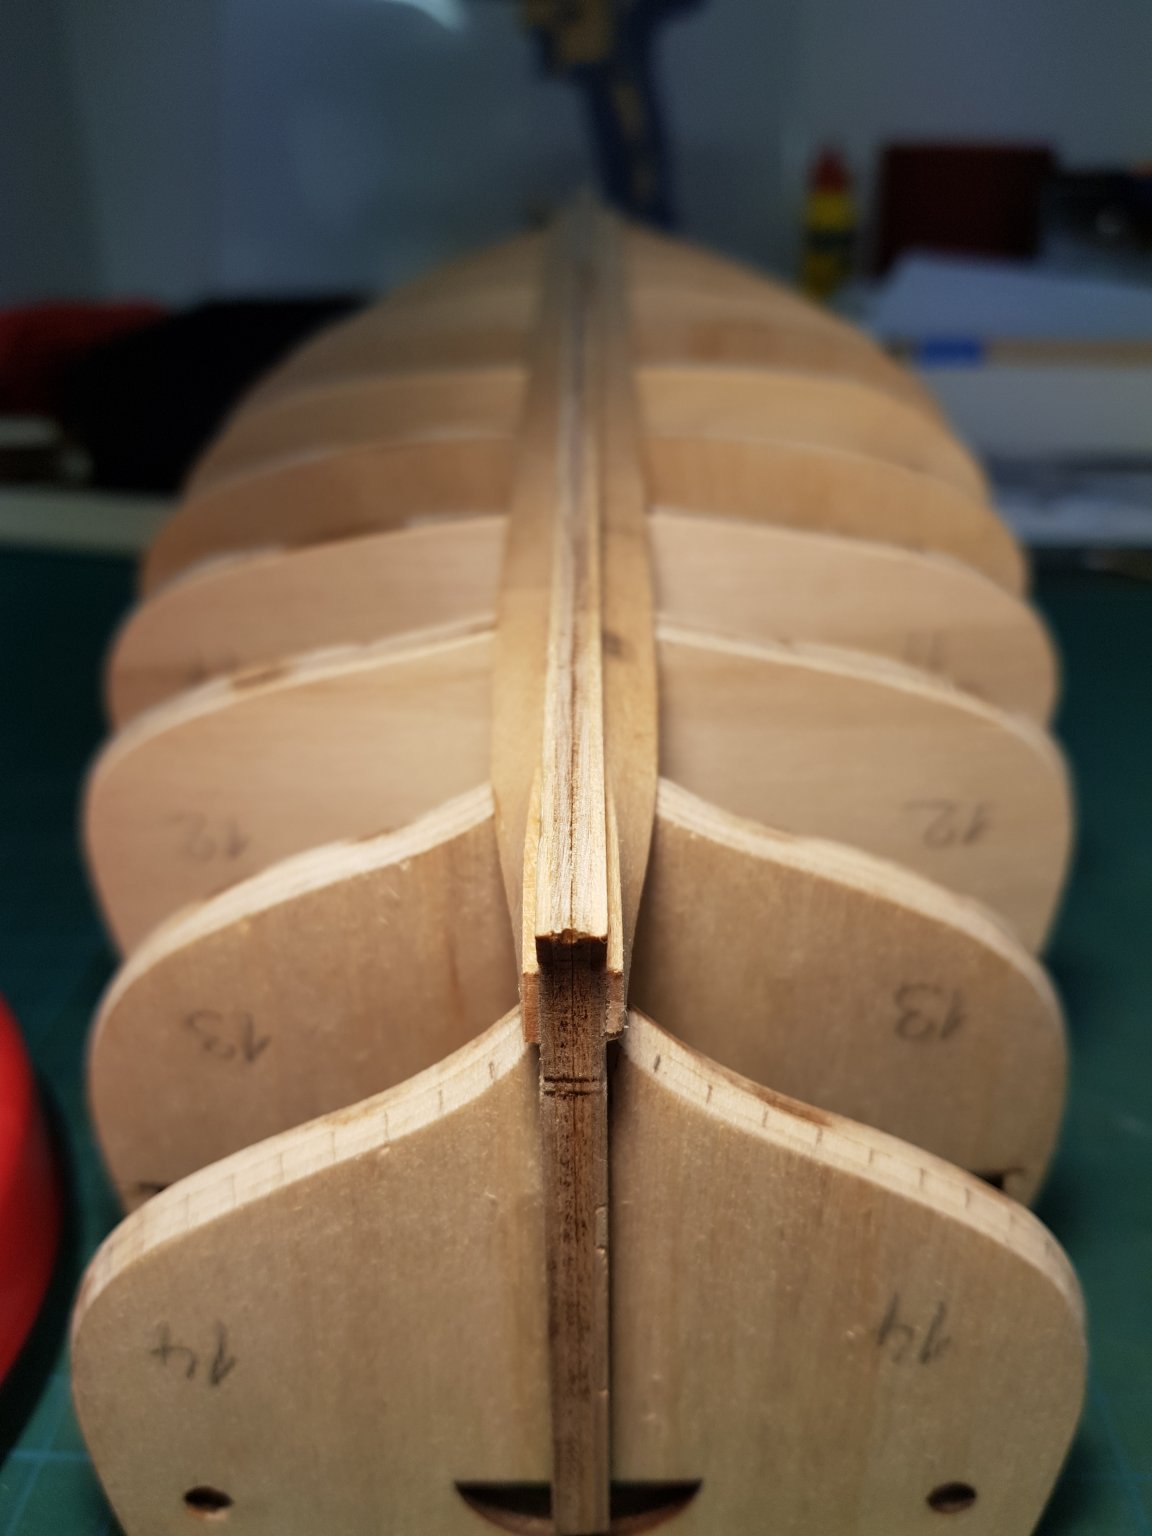
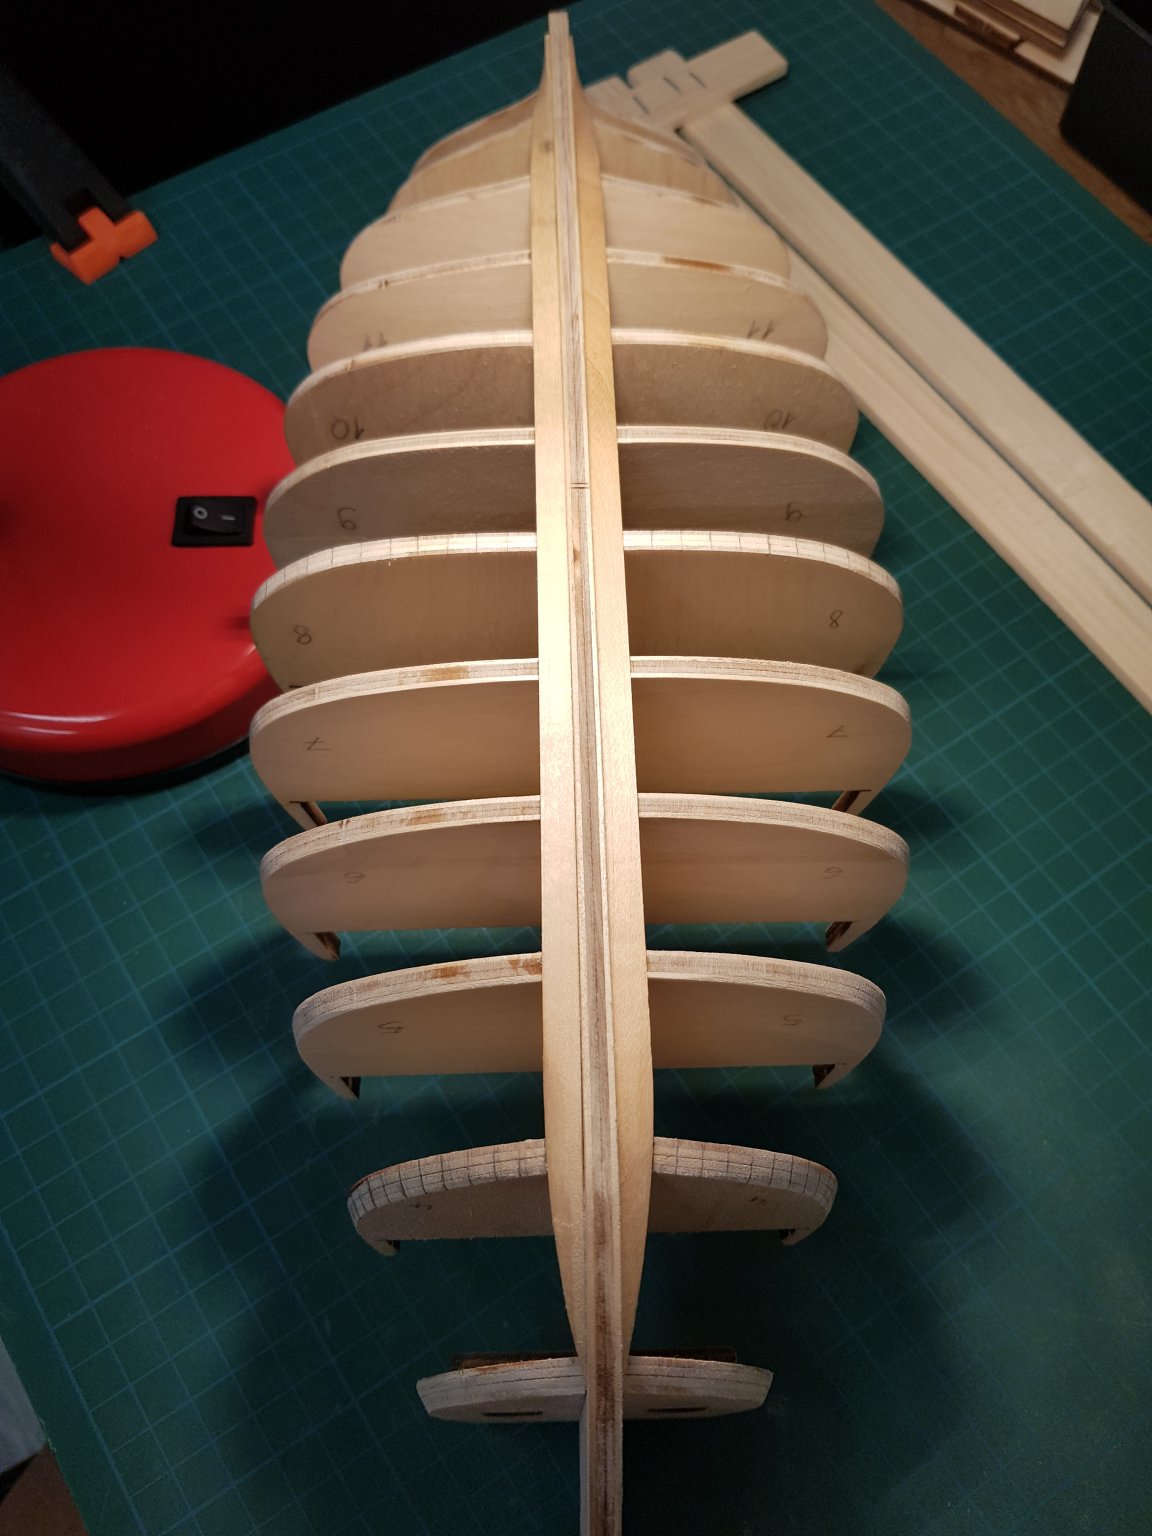
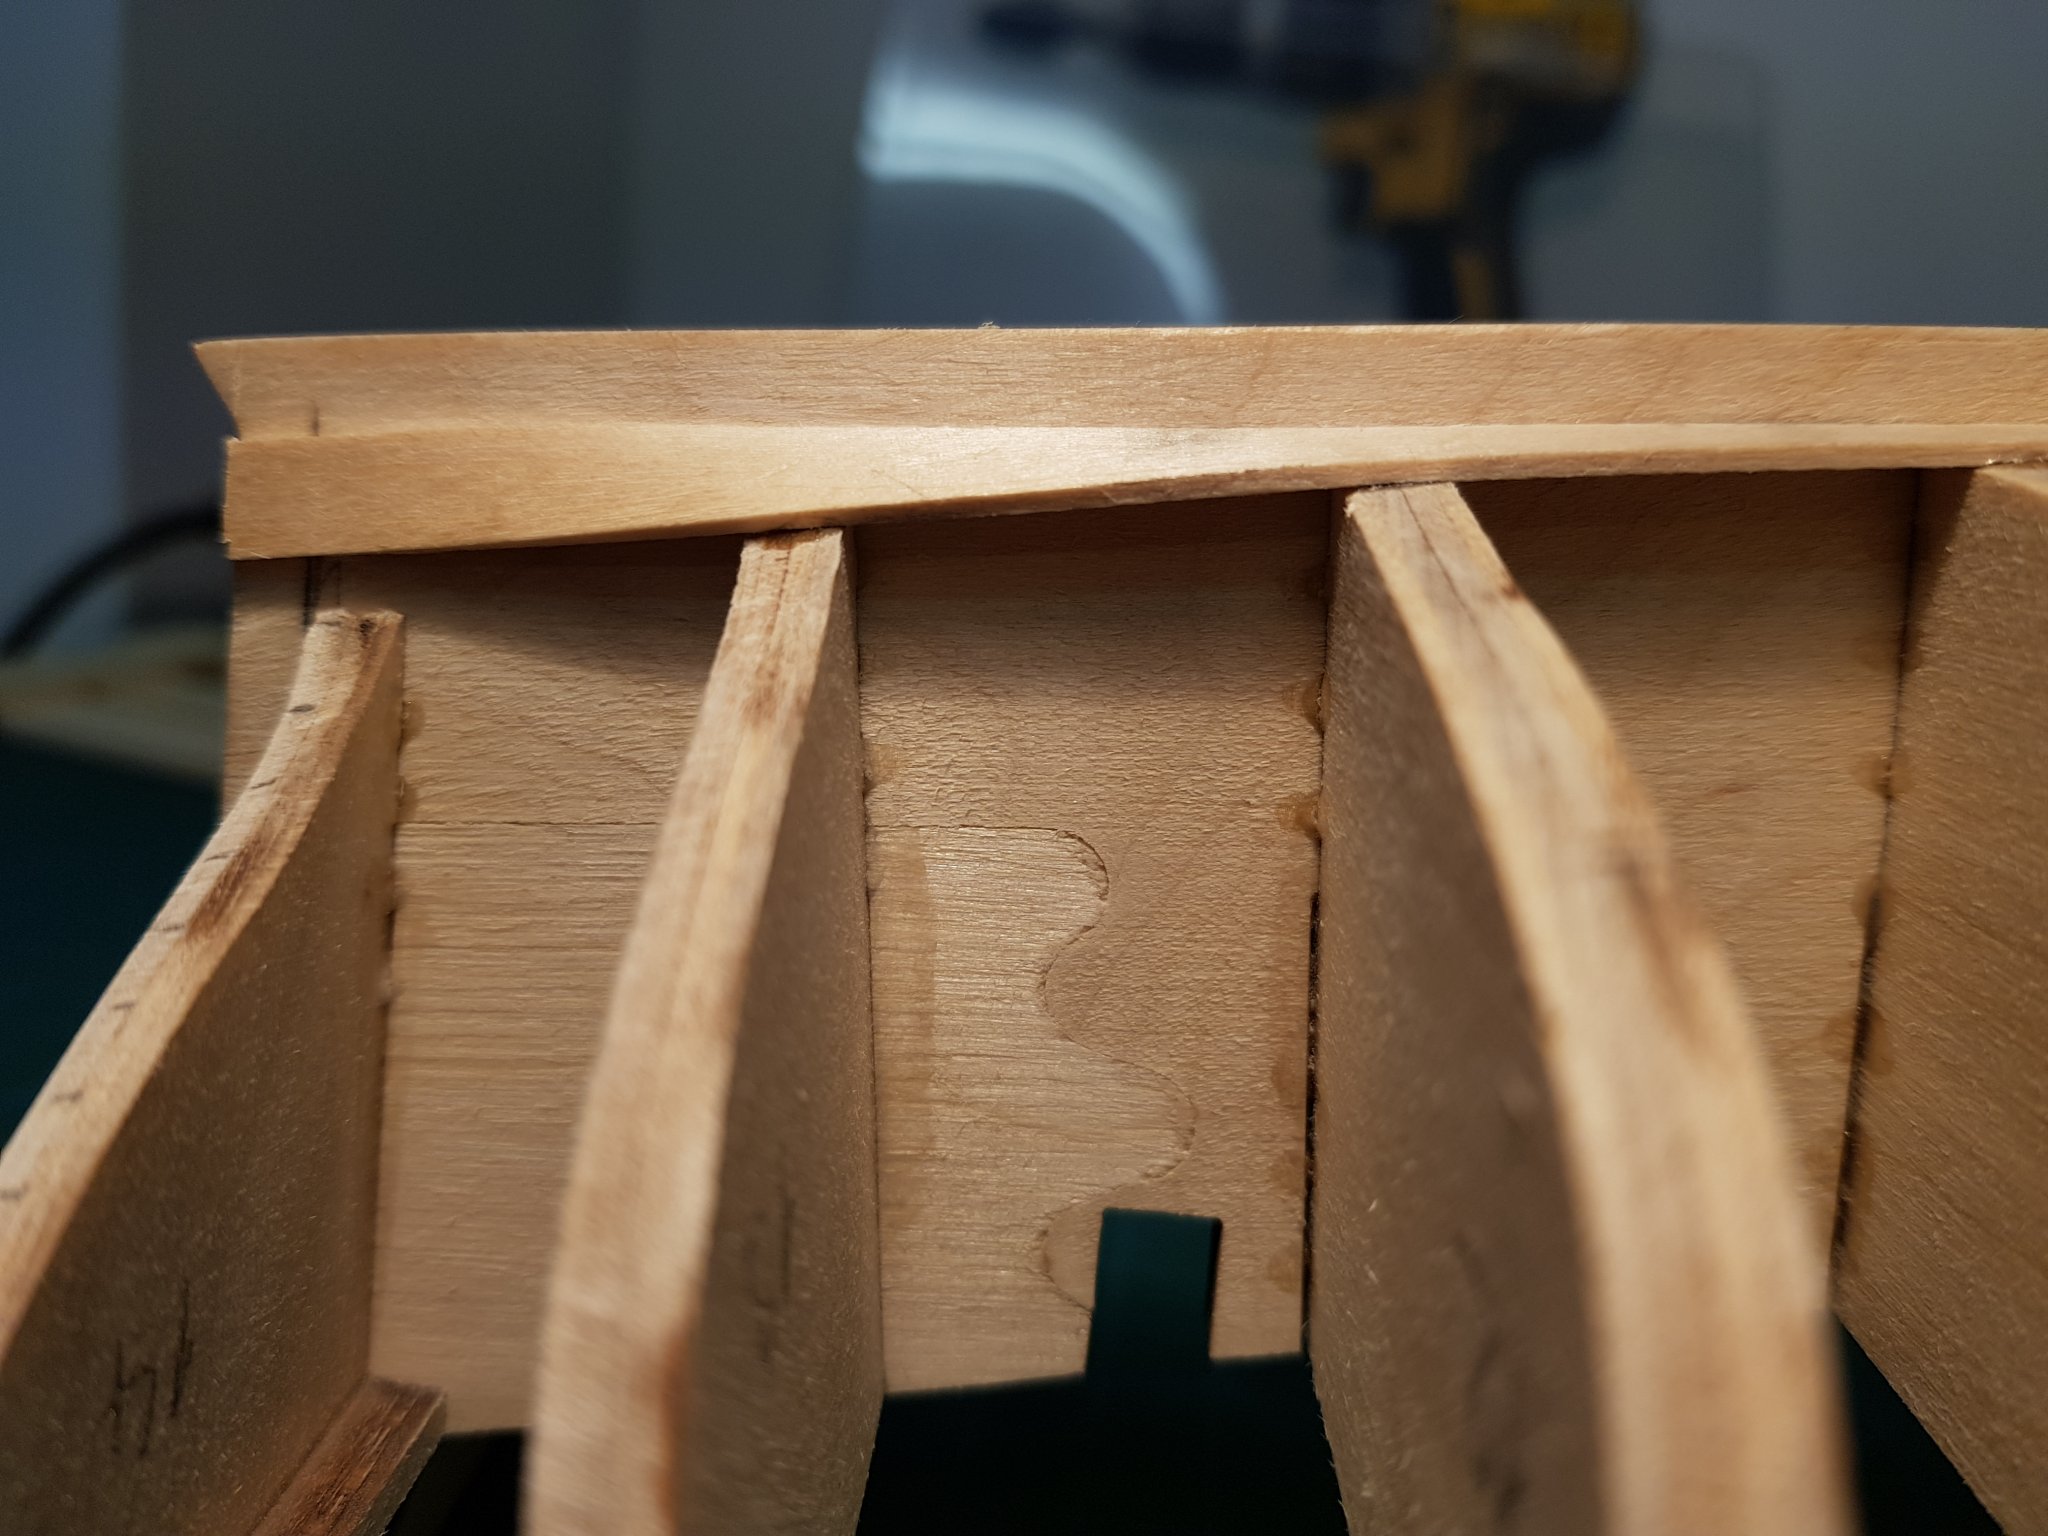
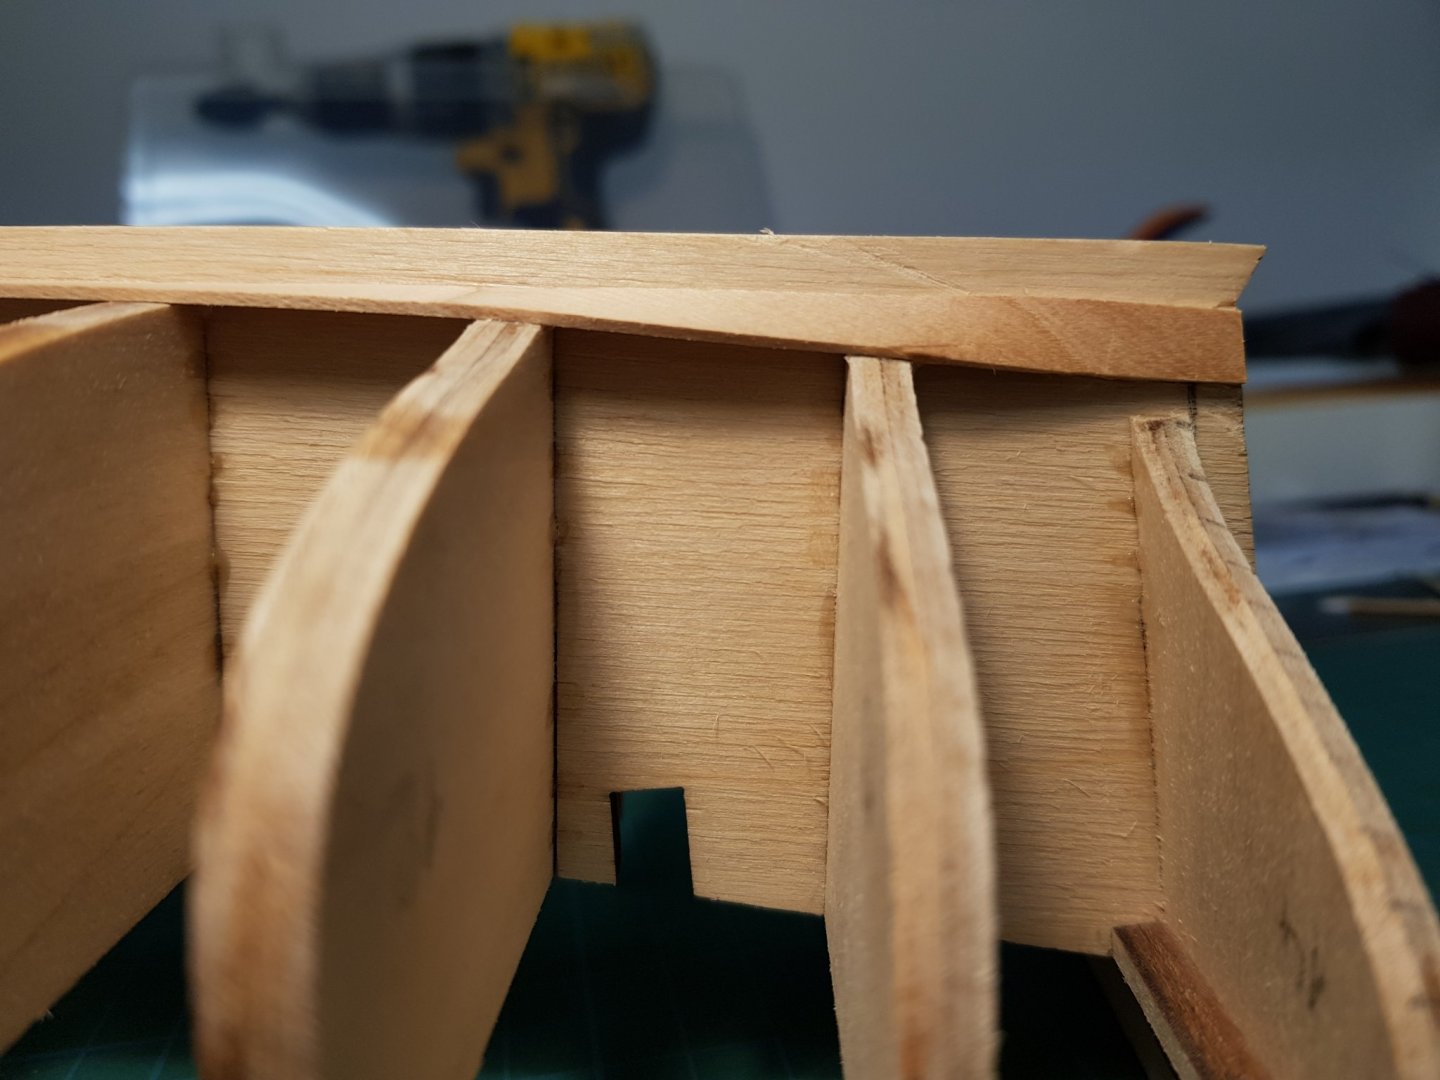
Today's progress: Tapered the ends some more in the bow area to avoid overcrowding and it looks pretty nice. The ends are 3.5mm out of 6mm in width which means i'm playing by the rules. No drop planks needed for this layer of planking. This first layer of planks looks so good that my next build will definitely be a singer layer build. I'm working at the speed of two planks per hour and it's exhausting me fast. I found that working in mirror gets rid of the hassle of taking measurements for each plank on the other side. Once i trim one plank, i use it as a template to cut the corresponding plank from the other side. Then bend them to shape with my flatiron and carefully glue them in place. Little sanding needs to be done here and there to get a perfect fit and so far i have no gaps or weird warps. Got the roundness i was looking for 😁 therefore i won't be using fillers and very little sanding needs to be done prior to second planking. What do you guys think?


-
Hi Ron, Btw my name is Romulus, romique is just my nickname 😊 Thank you! I really am taking my time with this build. Yes, it's a double planked hull, but the second planking strips are 3mmx0.5mm. For the second planking i will start from top and bottom and fill the gap to the center. As the wood is dark colored, i will use a dark putty as a filler, i will sand everything with fine sandpaper and then varnish it. I imagine it will look like the hull is carved into one piece of mahogany wood... something like shipcarpenter's Santa Maria build if you have seen it. So i wouldn't worry if planks get crowded. I've gotten to the fourth plank from the garboard so far on each side and by the looks of it i will have some crowding even with the first layer of planks... but i will do my best to make it look good or at least to get a solid base for the second layer. More pictures to come tomorrow after i glue on some more planks. I'm learning from mistakes as i progress into the build but there's nothing i can't manage to fix so far. I'm pretty confident in my abilities. Everything looks neat so far 😁. Stay safe! Romulus

-
Thank you! I'll try to keep it as clean as possible because i'm a perfectionist and suffer from OCD... If you mean the bulkhead close to the bow that was sticking out 1mm towards the keel, i already sanded it to get fair with the others. Otherwise the garboard plank would've had a weird shape. Now everything's aligned and follows a smooth line. Can't wait to finish all the planking and get drunk after 😆. I really hope everything comes out round and smooth in the end. Follow my log if you desire as i'm trying to finish this build until the pandemic is over. My build log is going to receive updates constantly and, of course, i need somebody to give me advice if i ever get stuck on something. Cheers! Romique
-
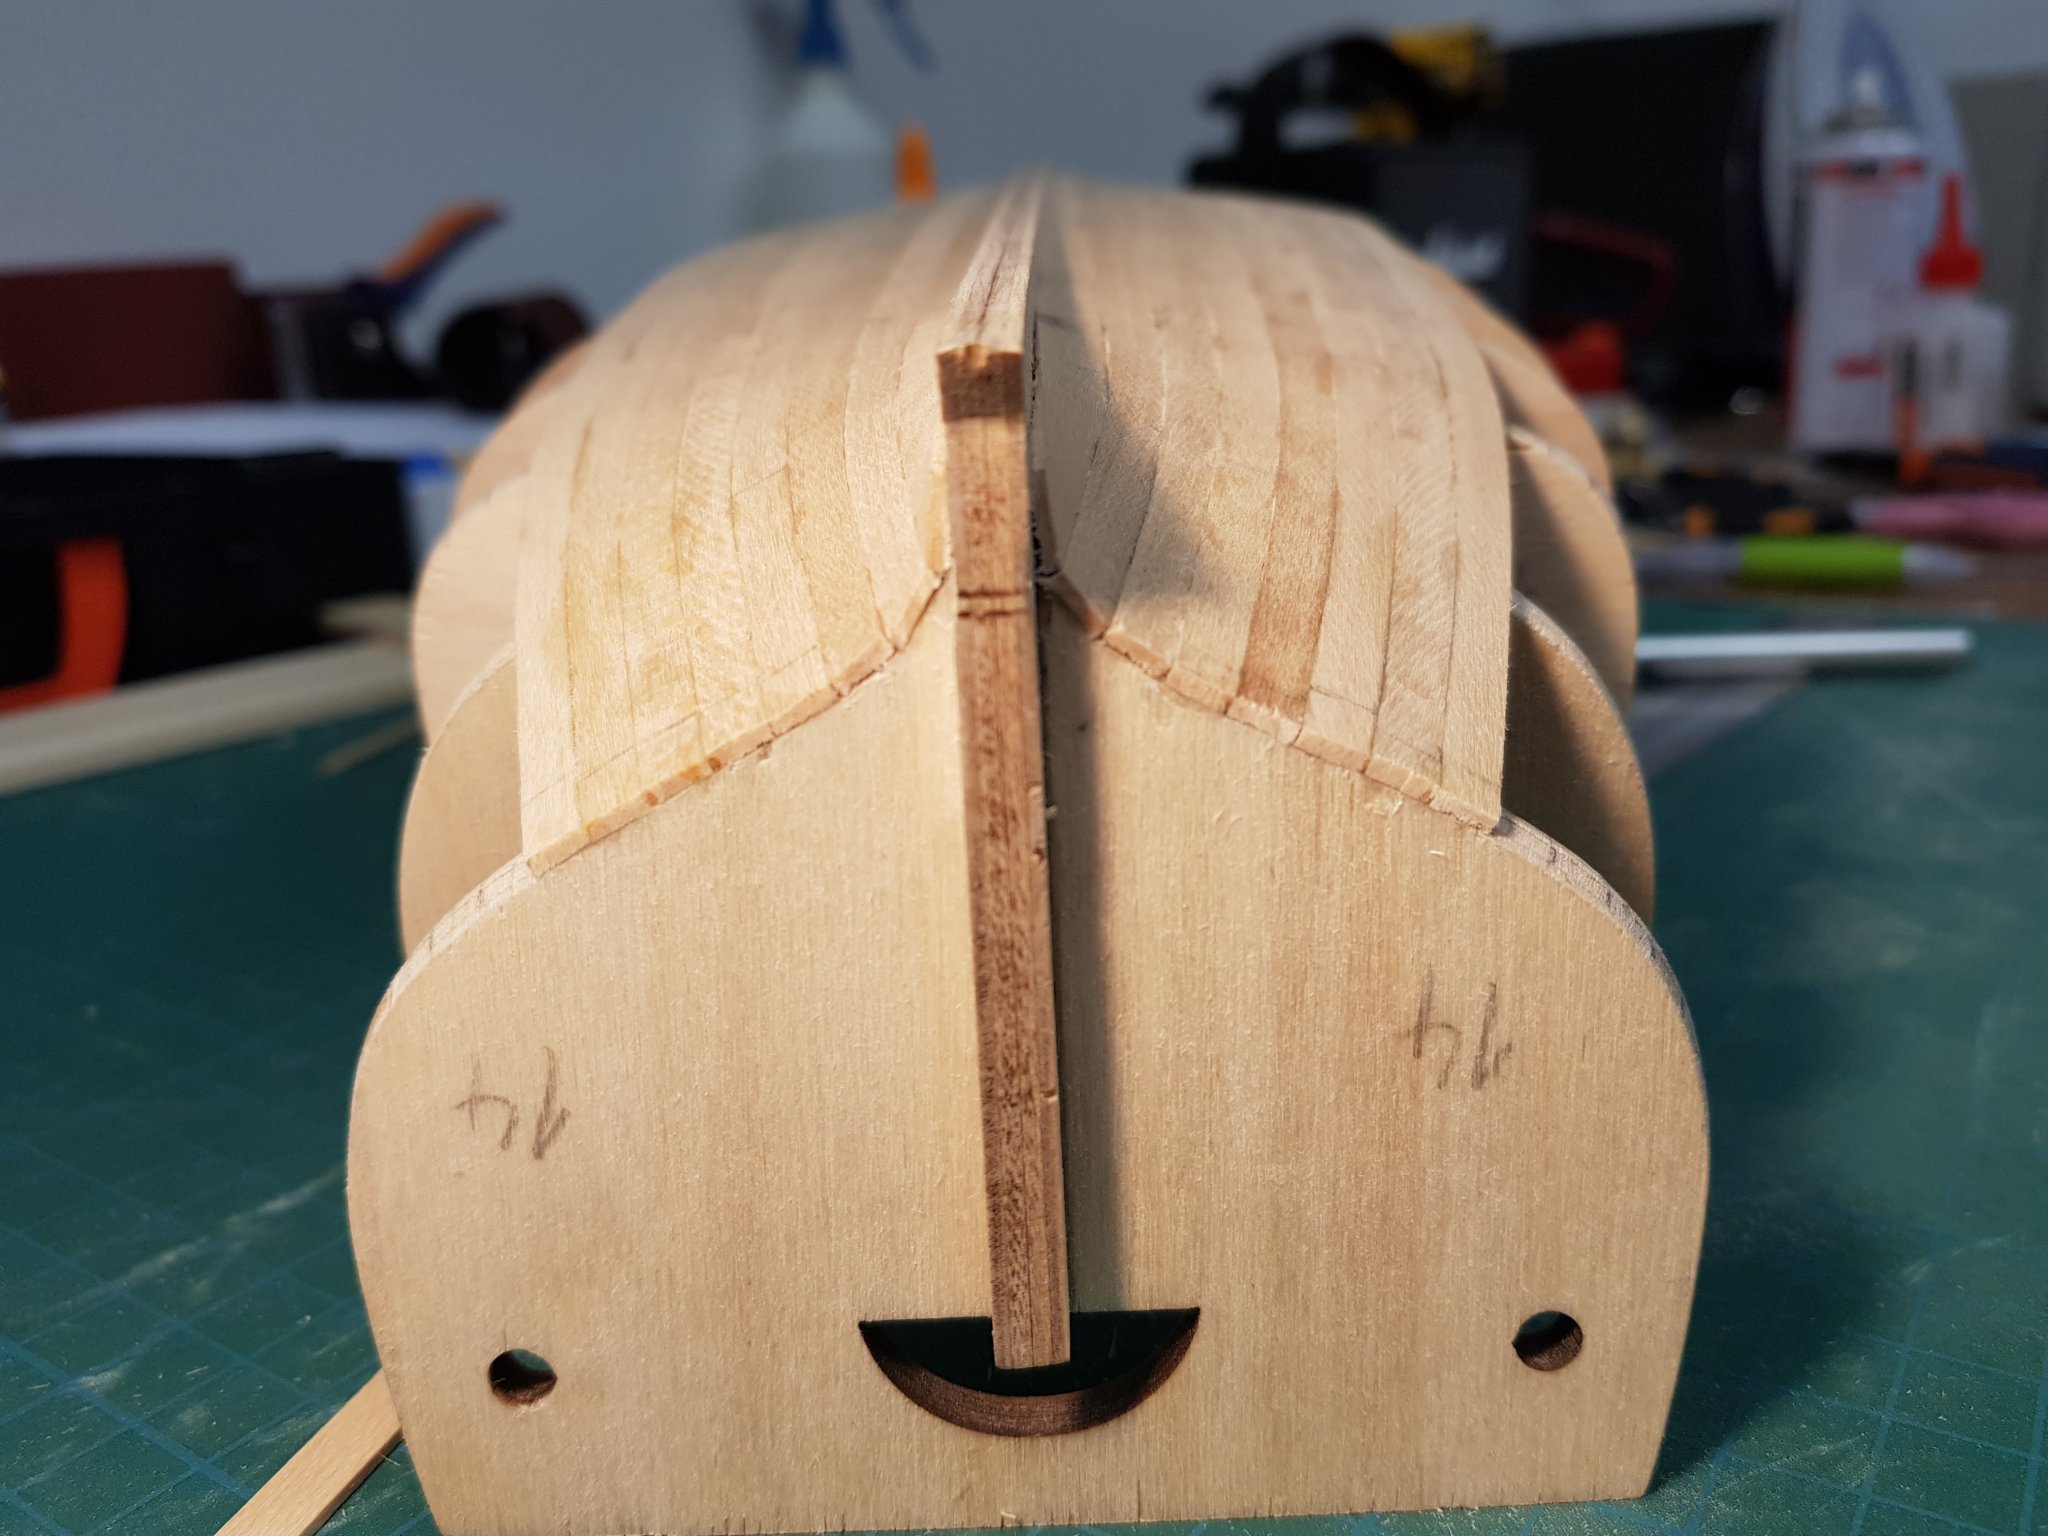
So after a lot researching and planning i finally glued in place the garboard strakes. Huge achievement for me as these are the first planks i've ever put on a hull in my whole life 😄. I am a bit surrounded by fear because i don't know what to expect in the end... It's easier to visualize the final product than actually doing it. So far everything looks good, I've checked with an unbent plank if it alligns to the garboard strake and it does, without bending. So it's mostly tapering from now on... a bit of bending here and there and it should come out really nice. I found the flatiron to work like a charm in bending the planks after watching Chuck Passaro's videos on Youtube. I've obtained an almost perfect curvature on the garboard strake by applying a bit of pressure to shape it with the hot iron. Nothing is forced into place because it's pre-bent. I used a super strong CA glue with a spray activator for fixing the planks in place. The garboard plank is left at full width and only tapered to a sharp angle at the bow. Did this to avoid crowding of the other planks in this region. Here's some pictures of what i've accomplished so far. Will keep you posted with future progress. Any suggestions or opinions are welcome.


-
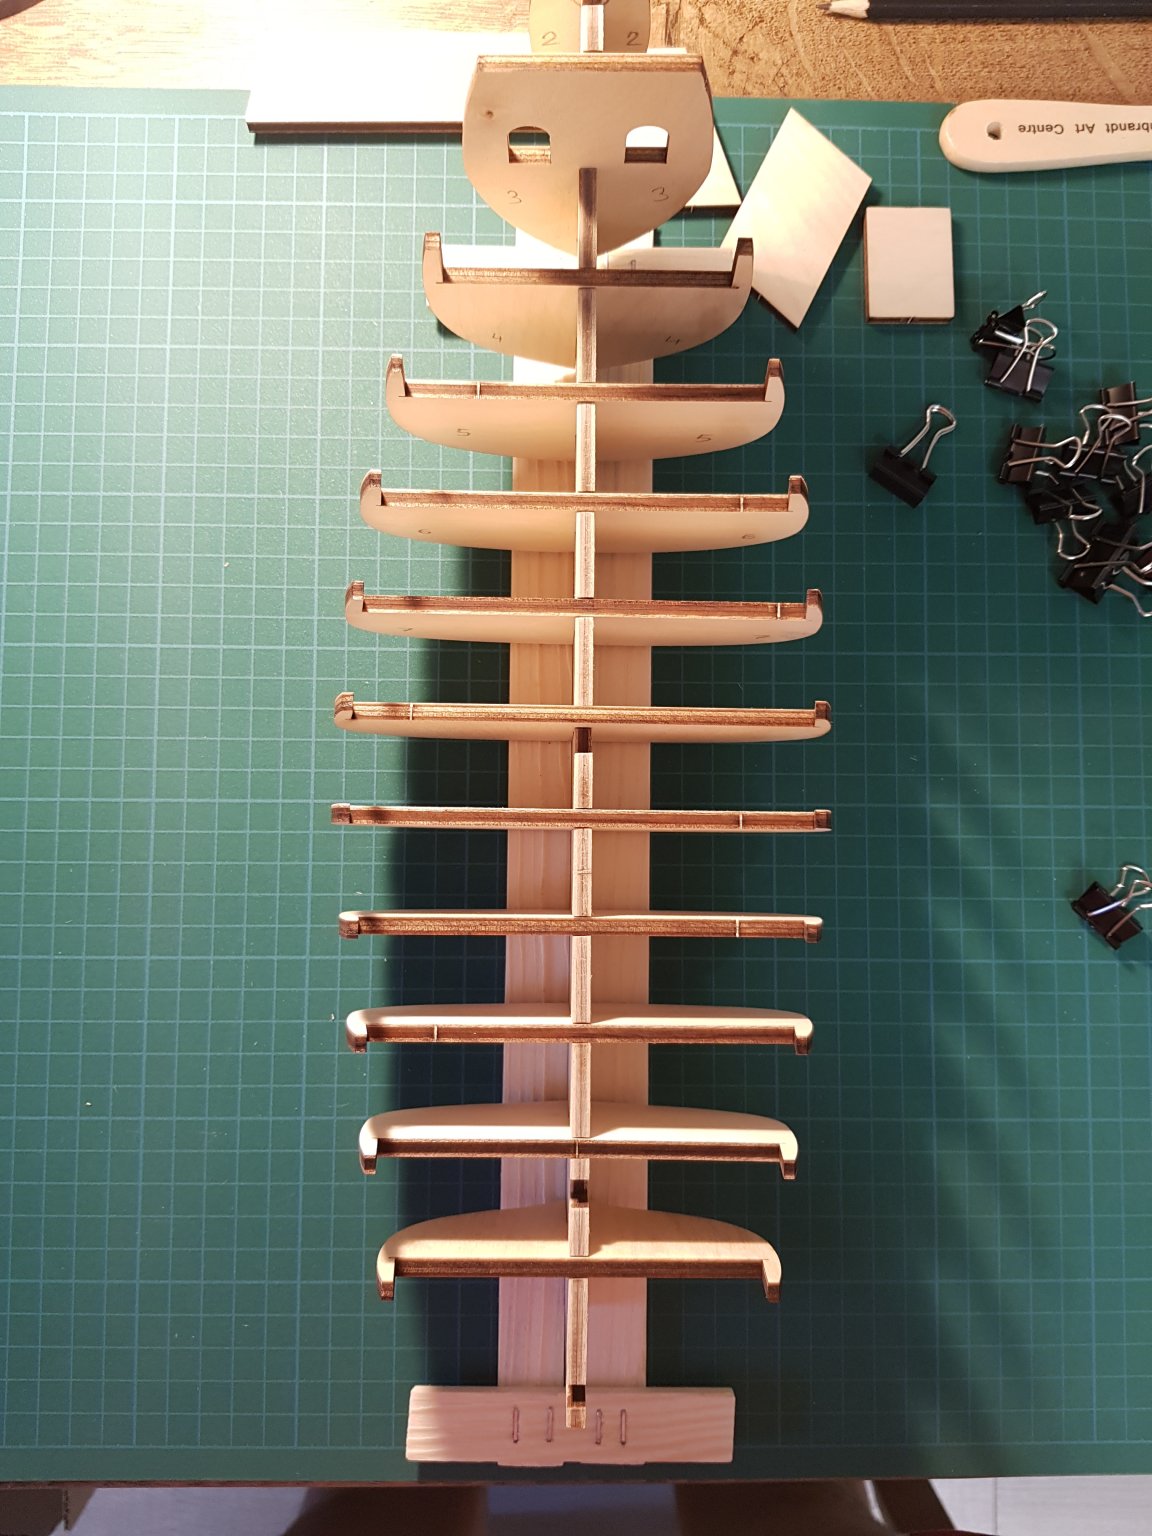
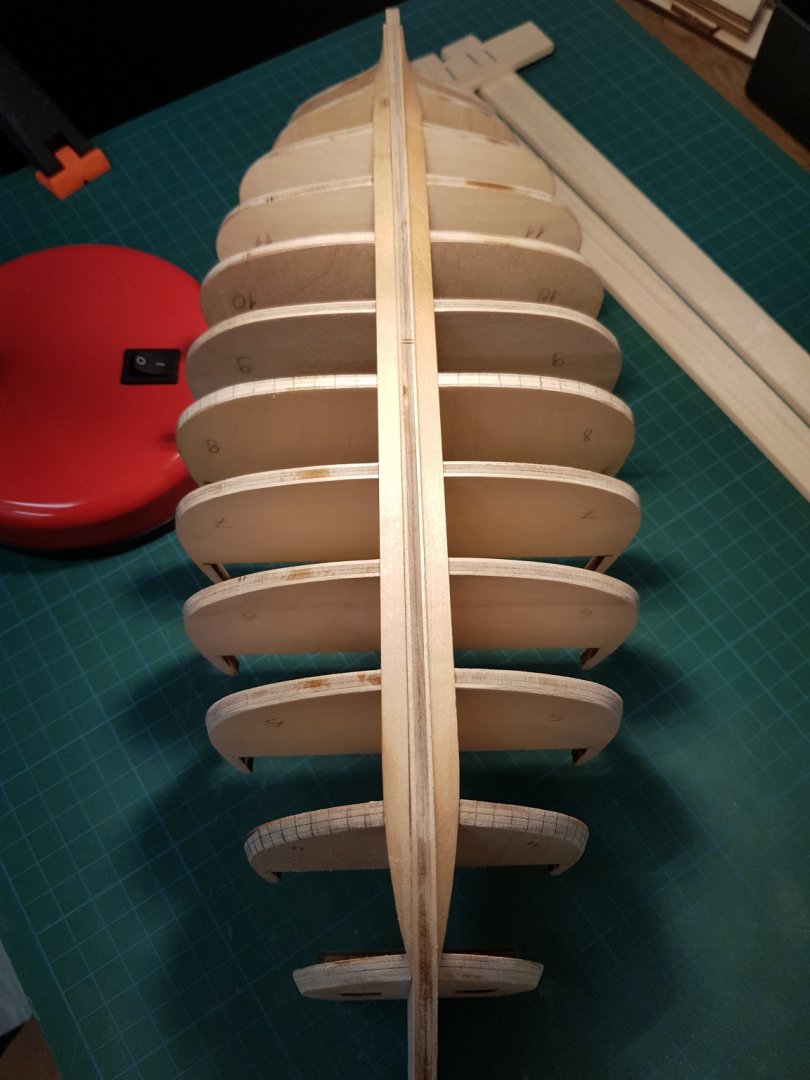
Back with an update on the progress so far with the build. Didn't do very much because i'm taking my time and following other people's builds to learn techniques and get inspired. So far i've managed to glue the bulkheads to the keel board using vinyl wood glue and reinforced with CA glue for a stronger and durable hull. I've aligned all the bulkheads with 0.5mm precision and a lot of patience because i want a close to perfect support for the planking process. Did some fairing on the hull and on top of the bulkheads so the deck will sit flush. Also added some small pieces of wood at both ends of the deck for extra support. Not too much of a progress but for me it's a big step towards completion. I'll be studying more on planking cause i'm still confused on where to start... from the keel or from the top down? Any suggestions are welcome. I will try to avoid using drop planks for the first layer of planks and i will calculate the width of every plank to see if i can get away with only tapering and bending the planks sideways. I will use a flatiron with steam for bending the planks. Some beveling will be done to avoid using fillers. Will follow up with more photos after i make some more progress. Cheers! Romique


-
This hull looks amazing! I'm currently working on Santa Maria by Amati... just started gluing the bulkheads to the board. I hope i can get the planking looking like yours. Have you considered ordering online for supplies? Or do you want to see and feel the materials before buying? Keep up the good work! Romique
-
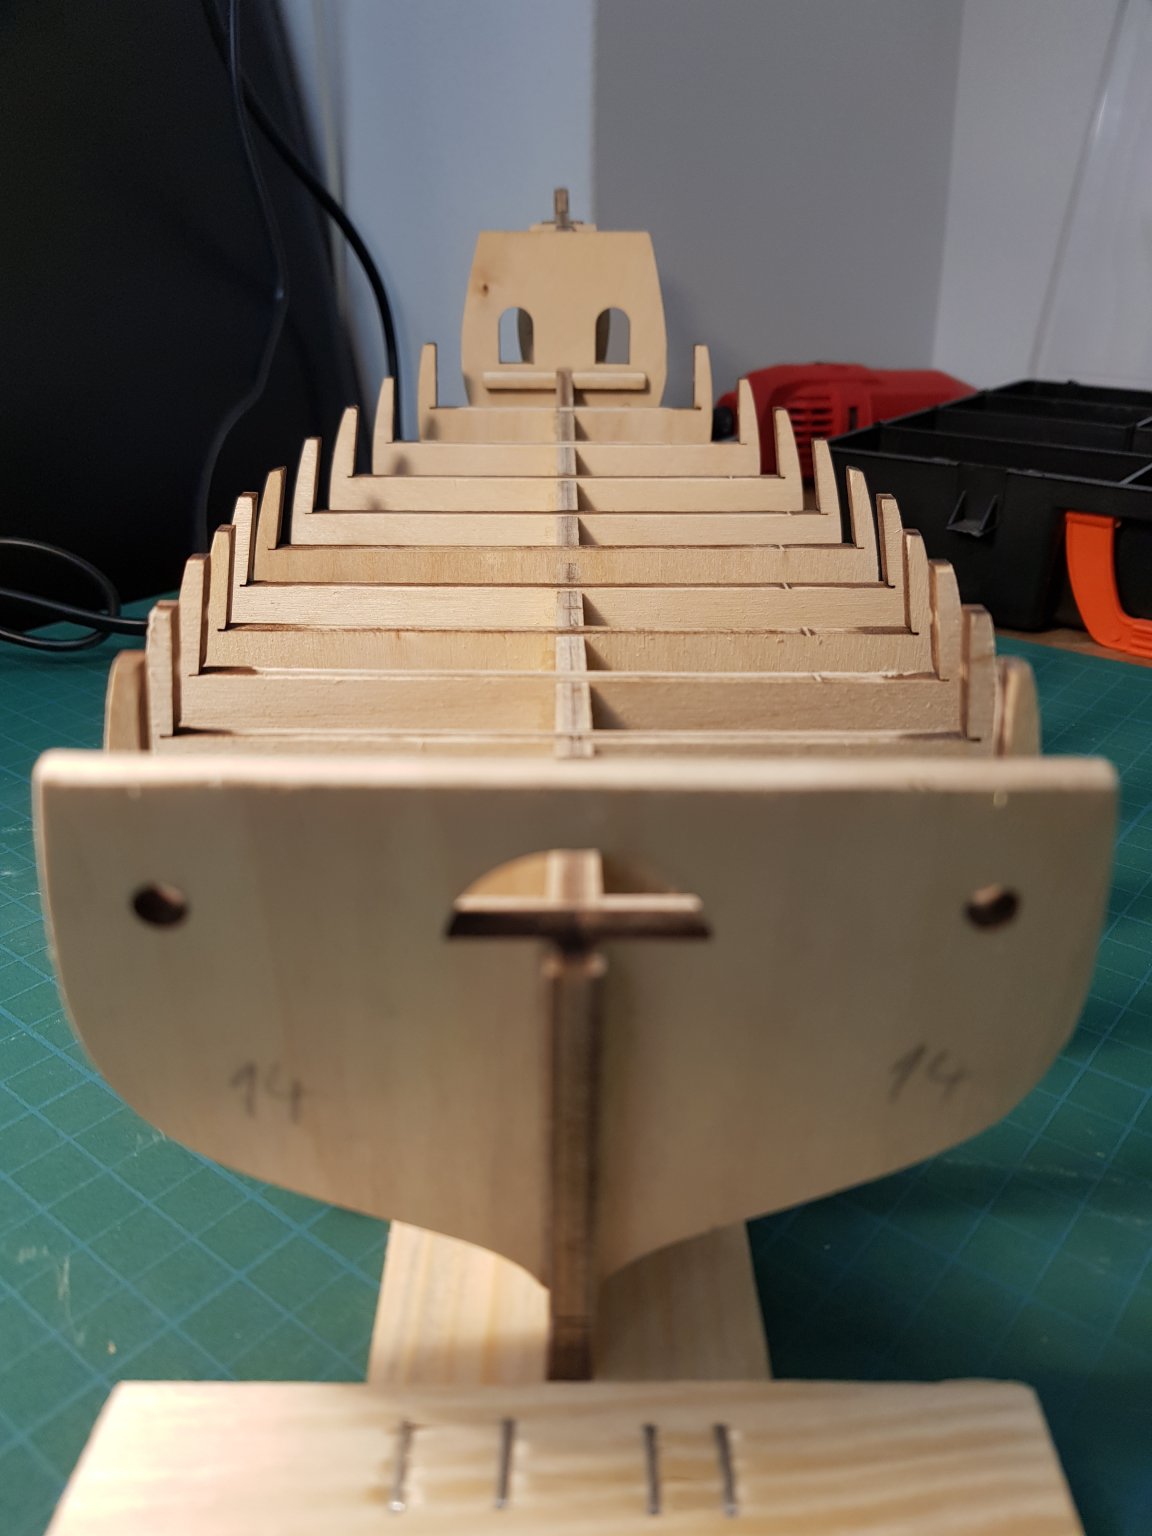
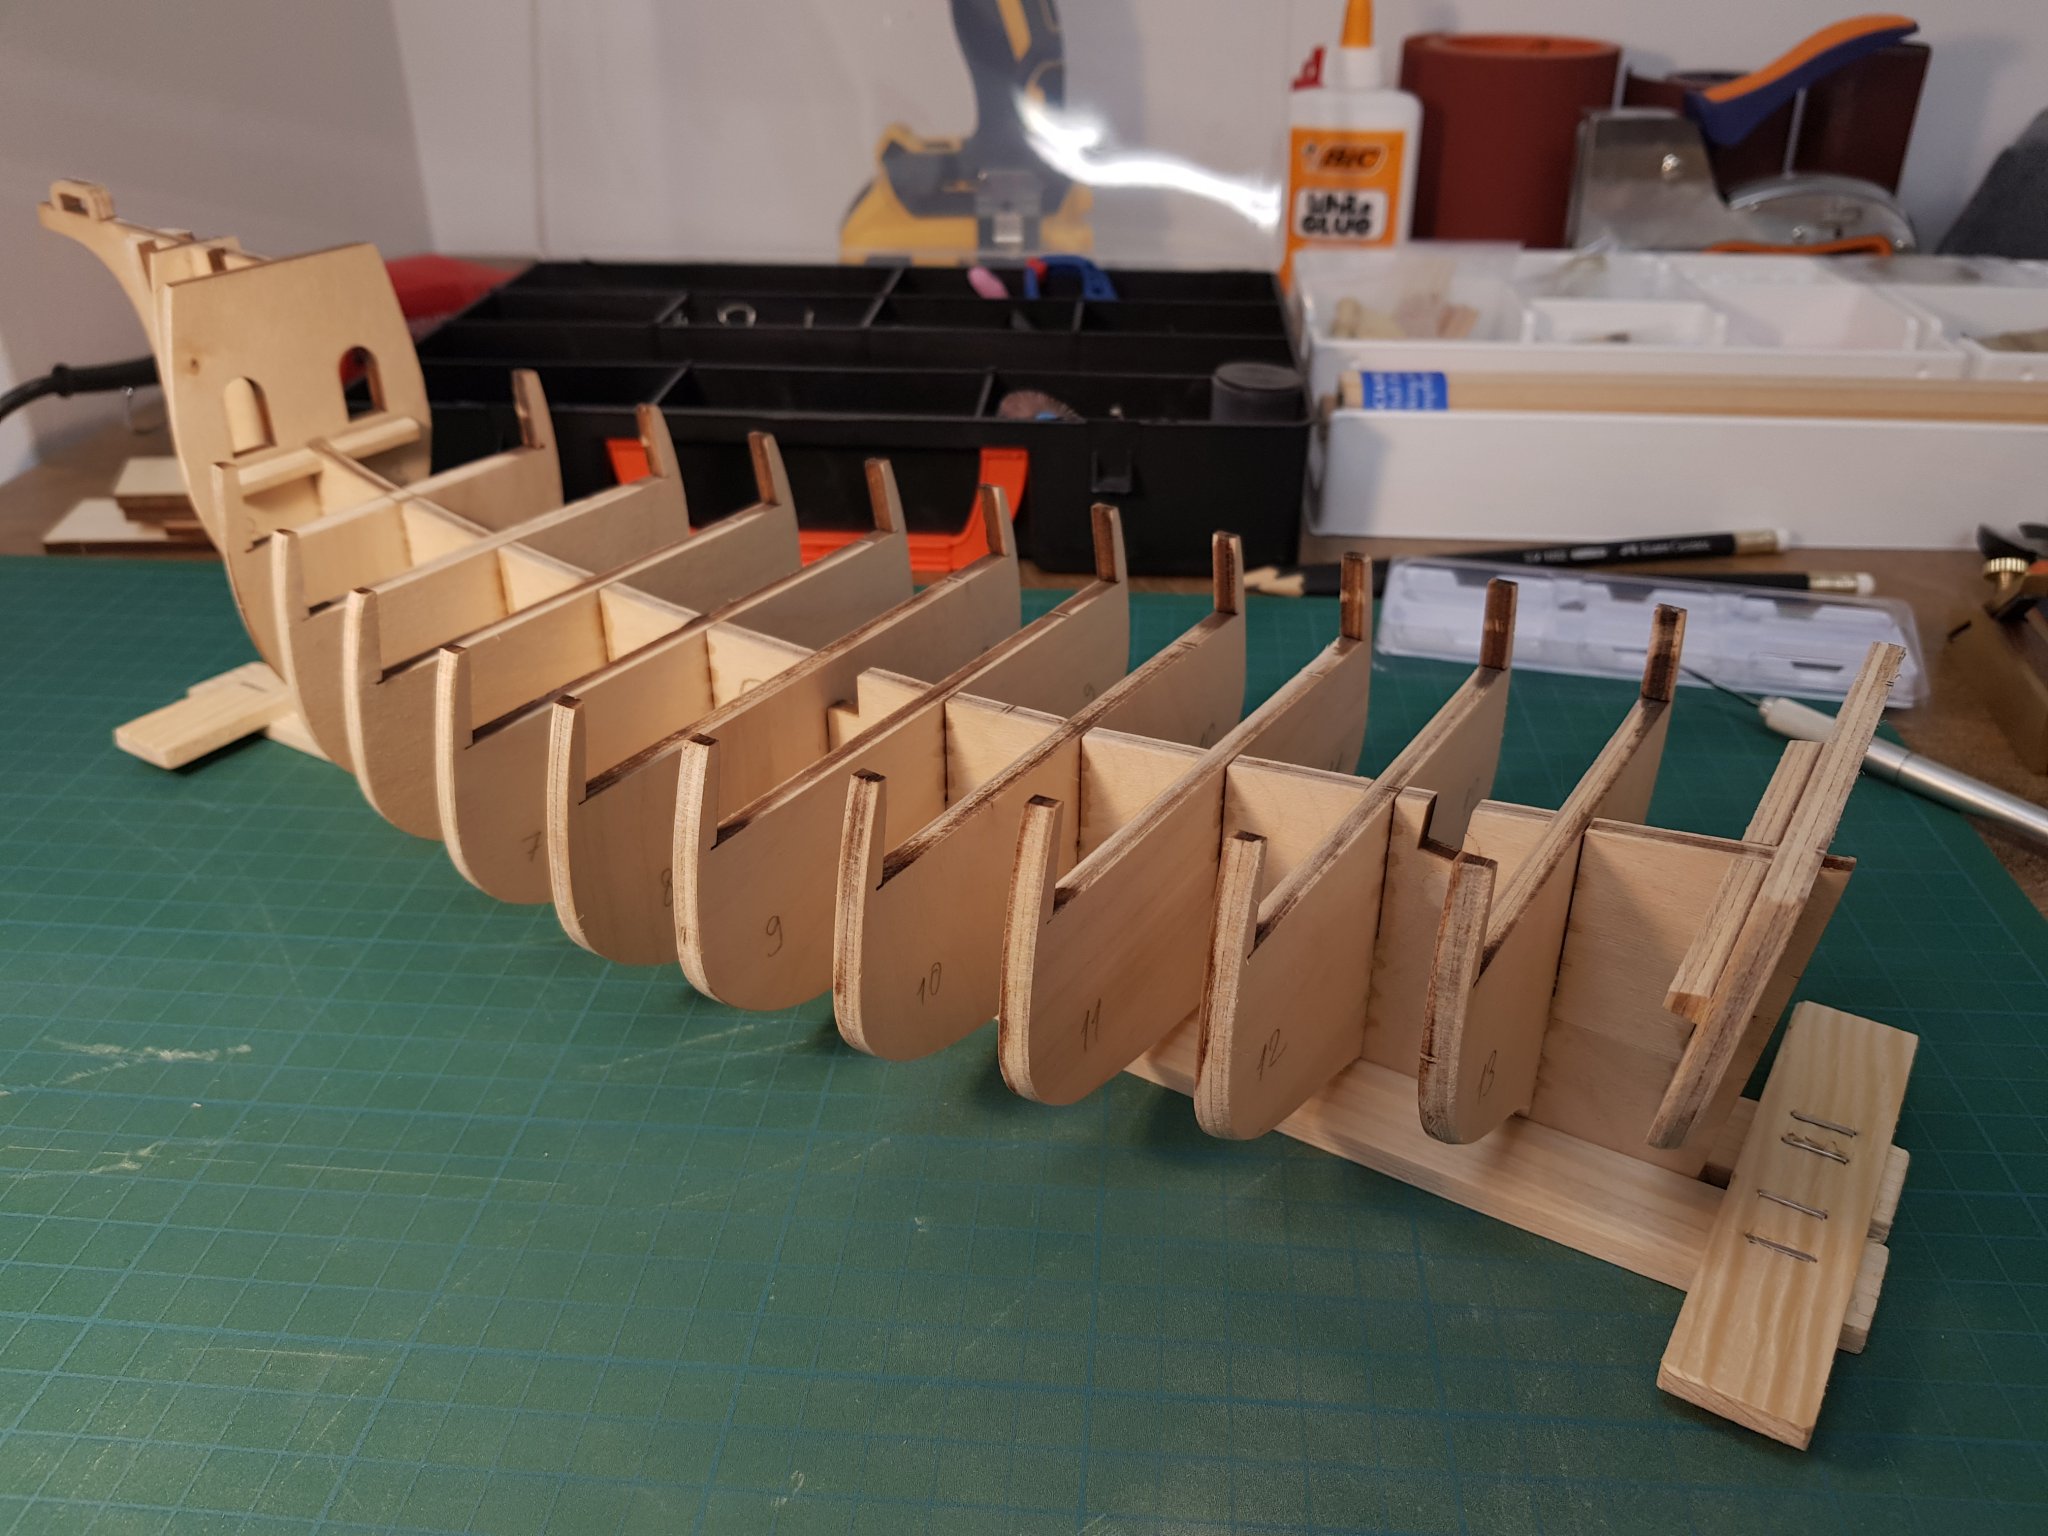
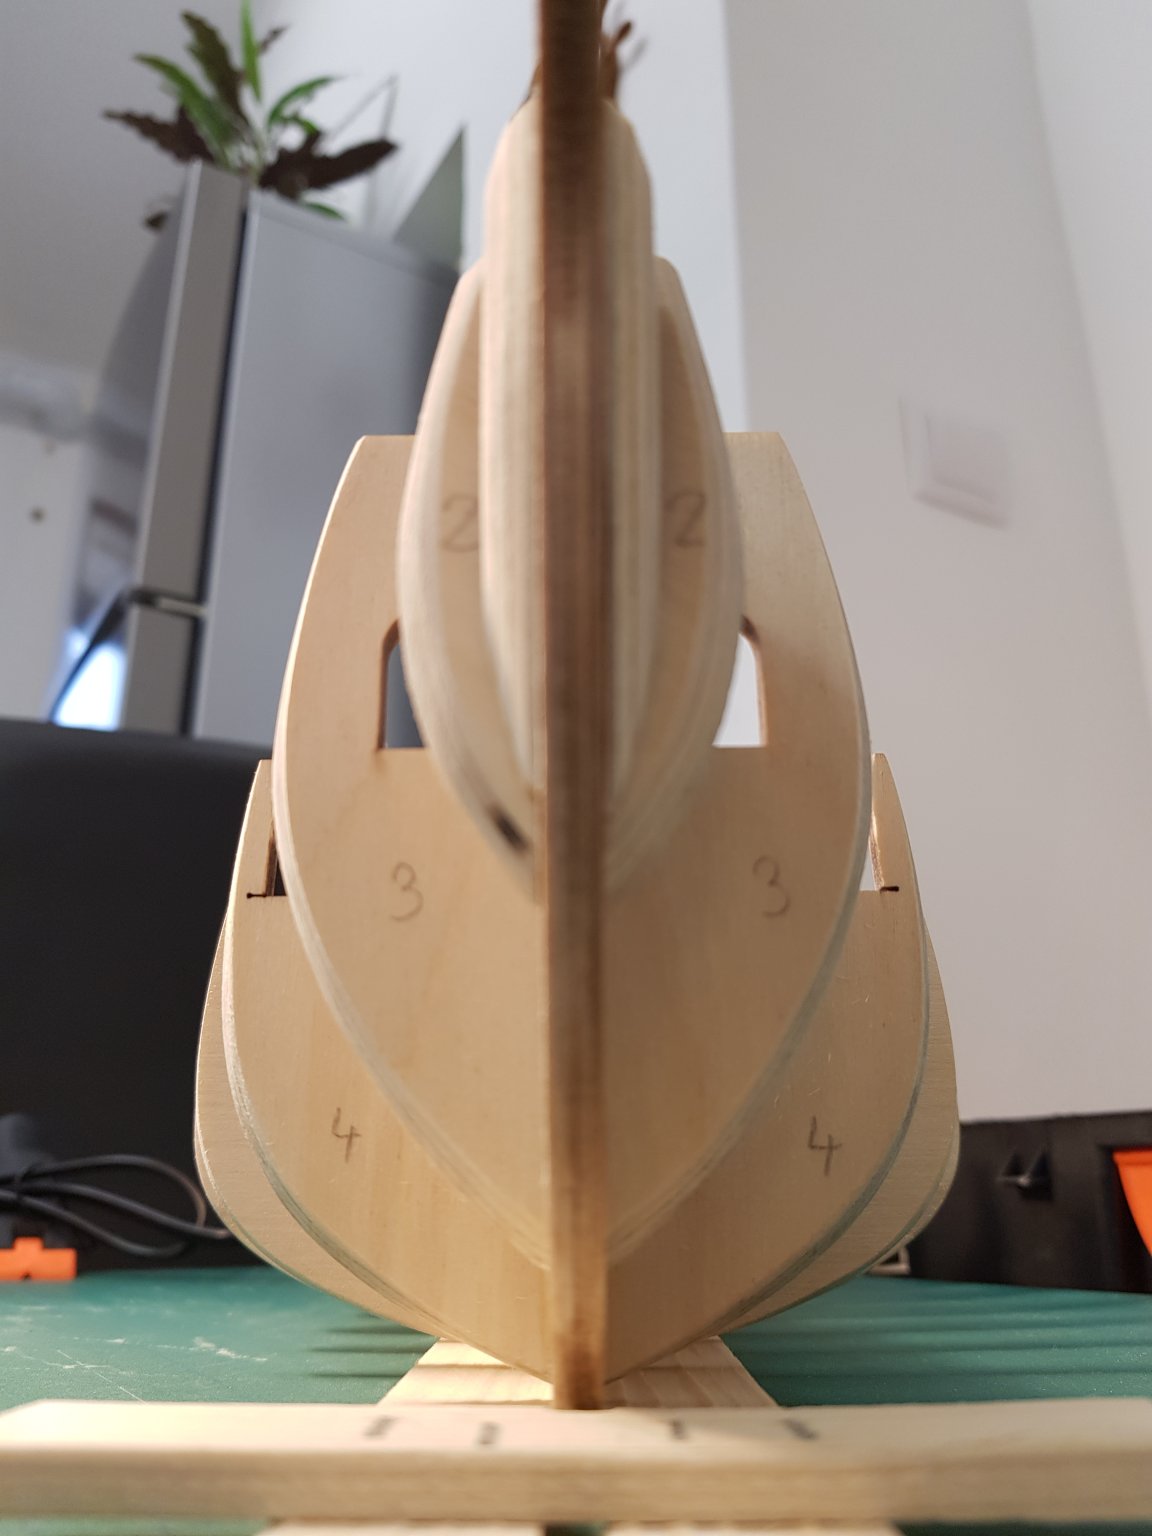
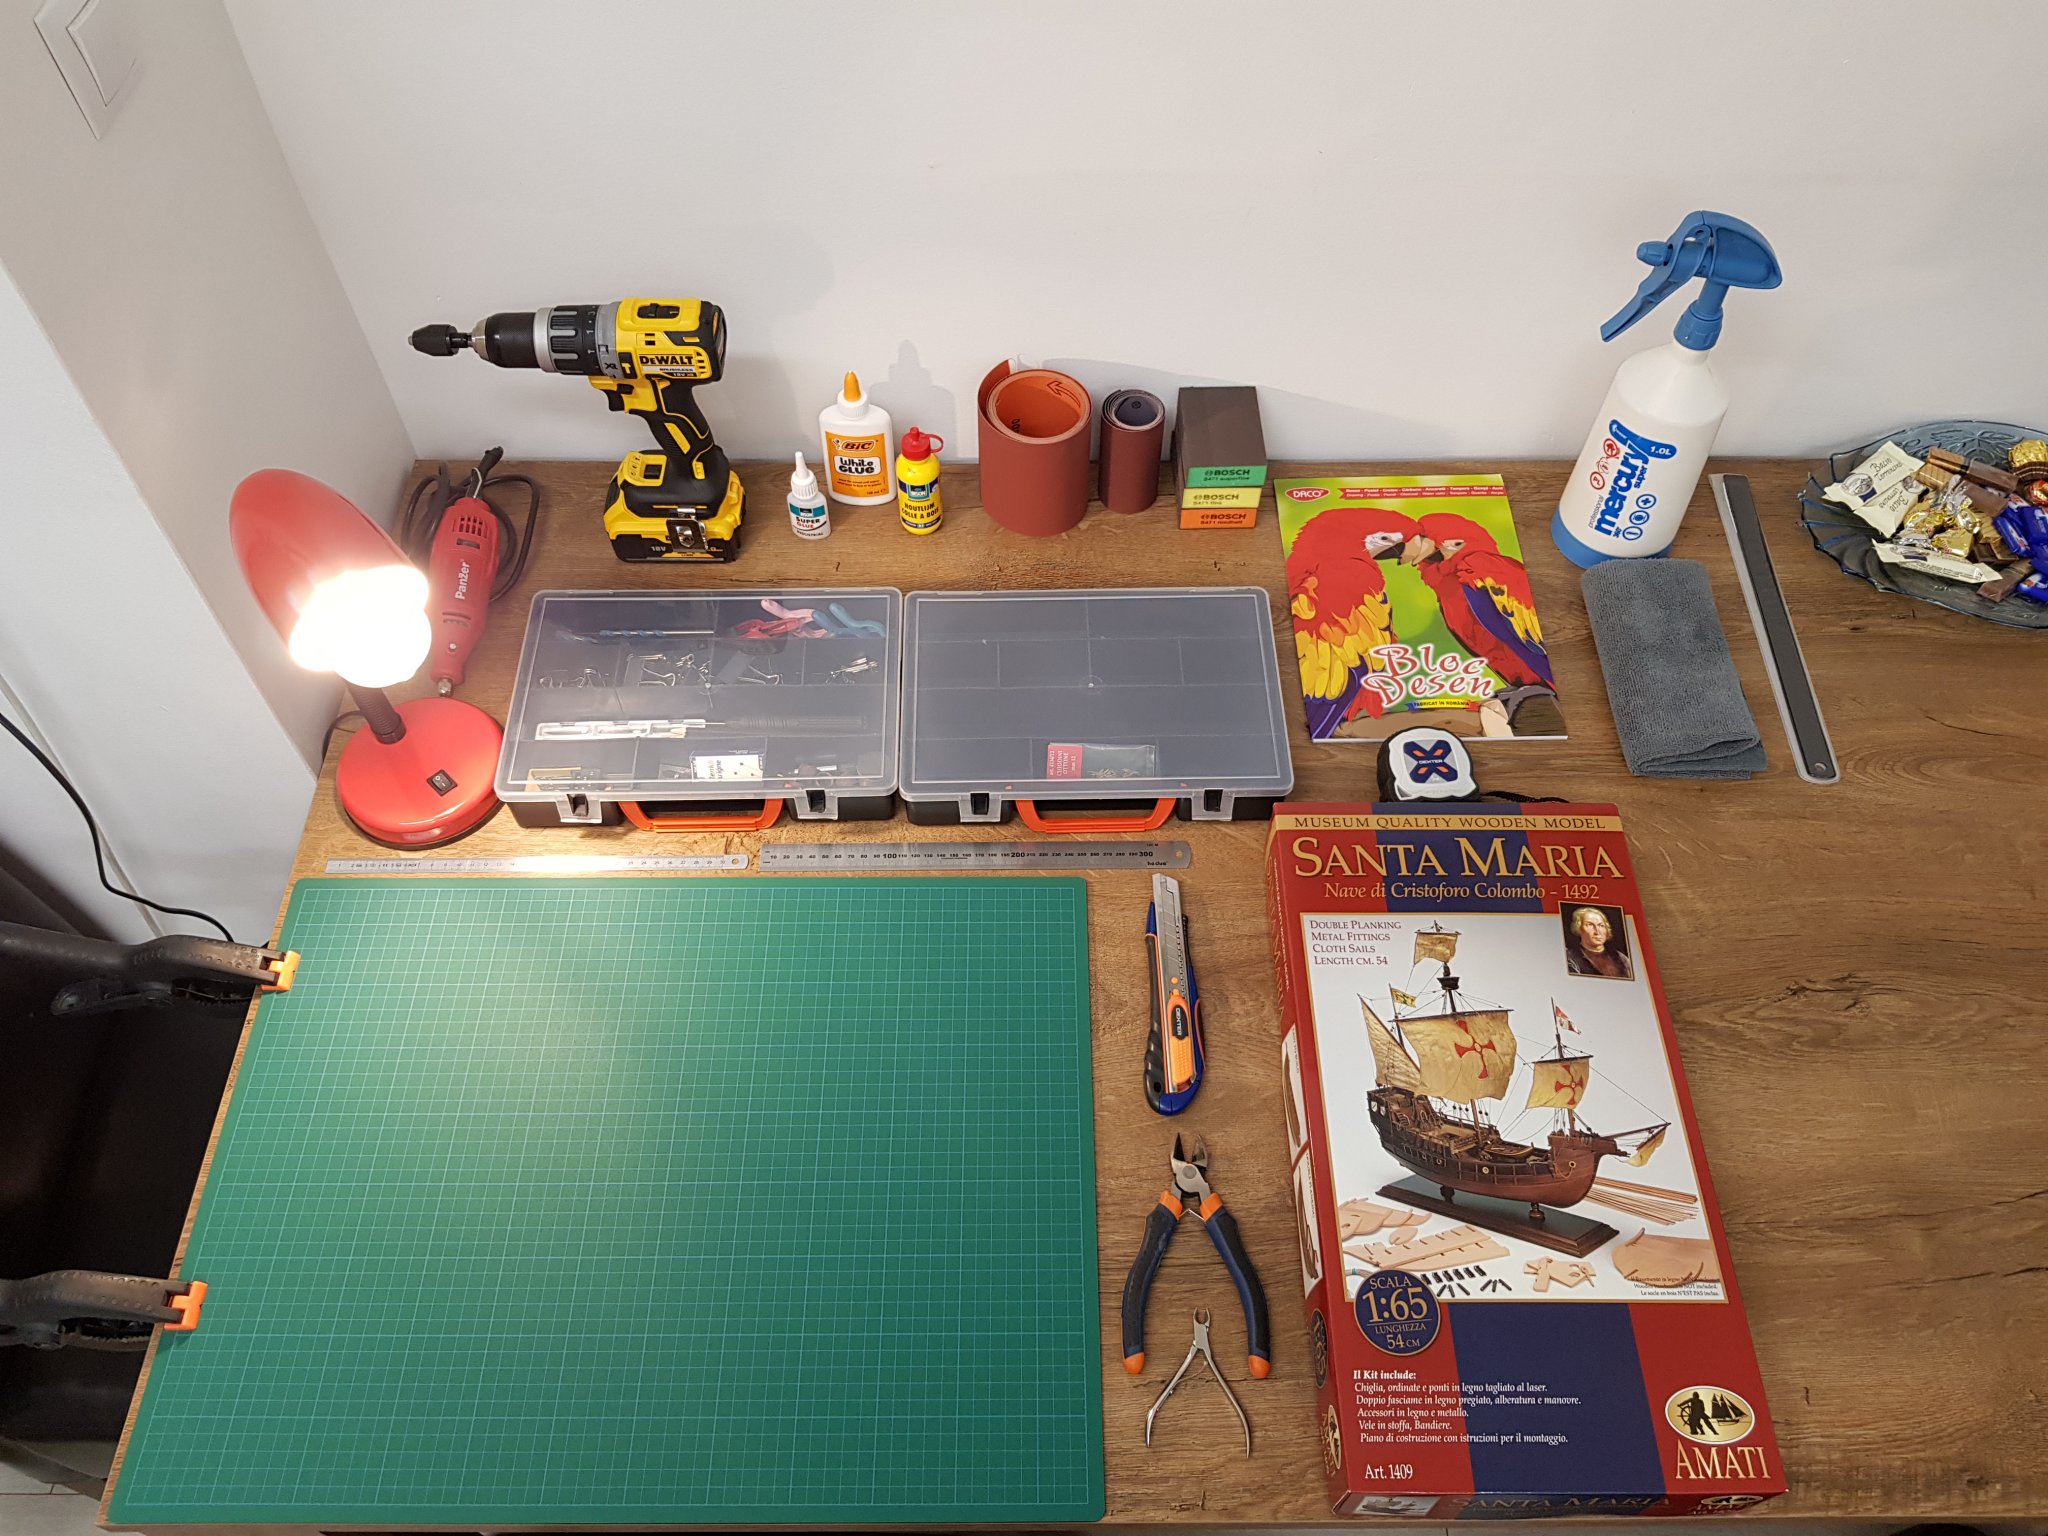
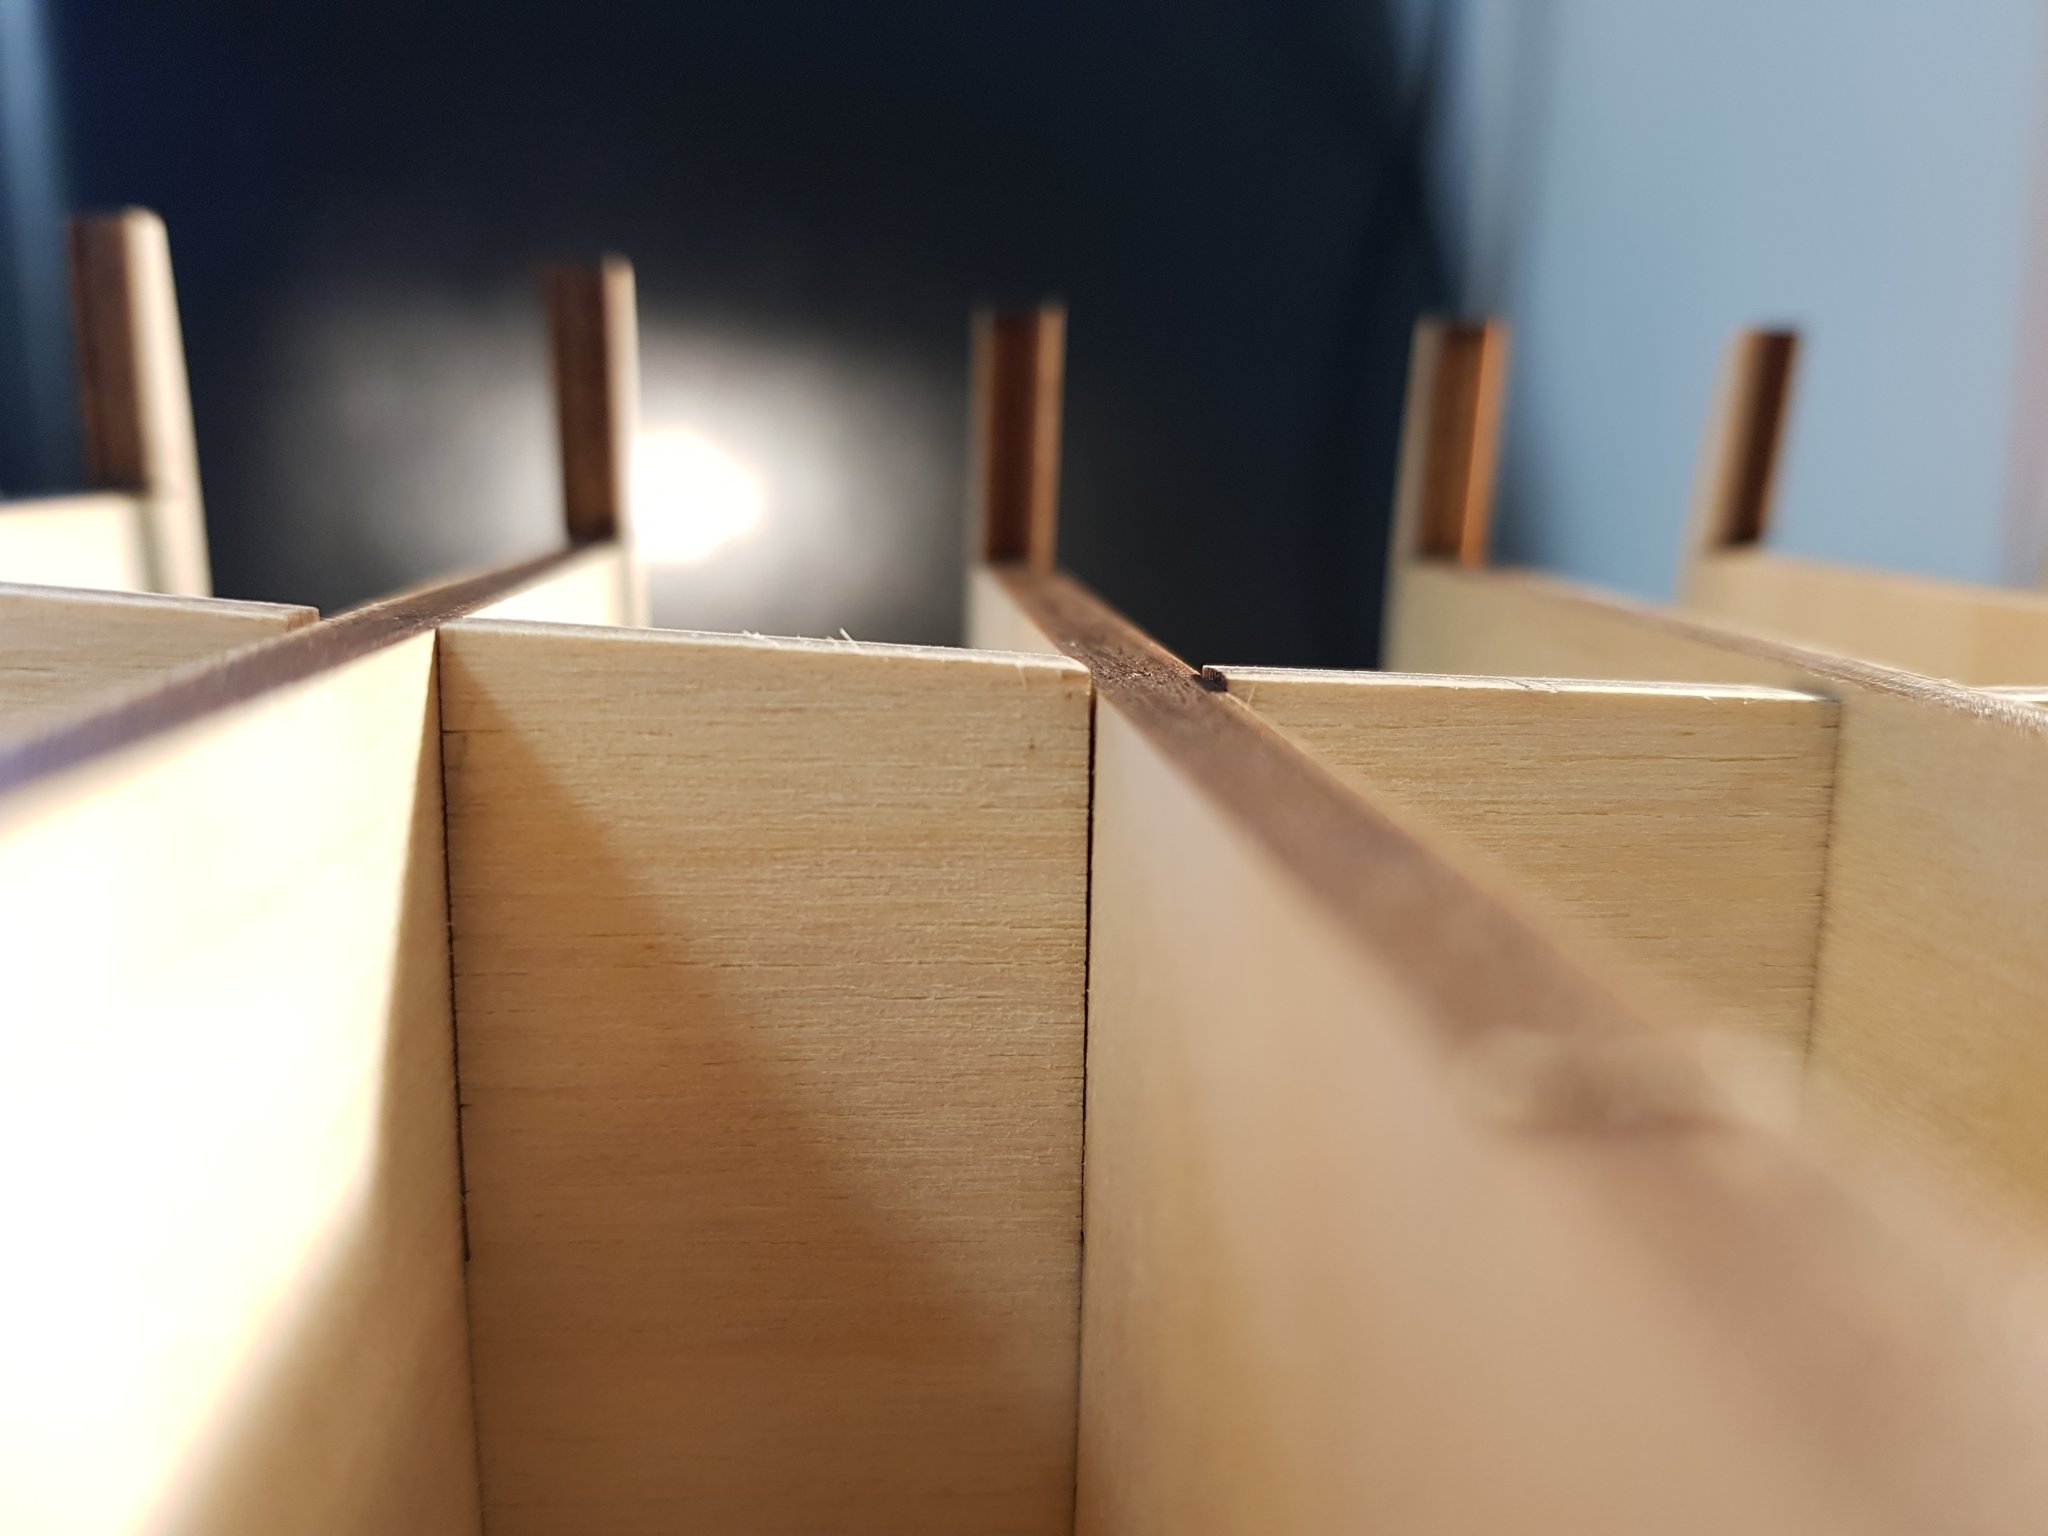
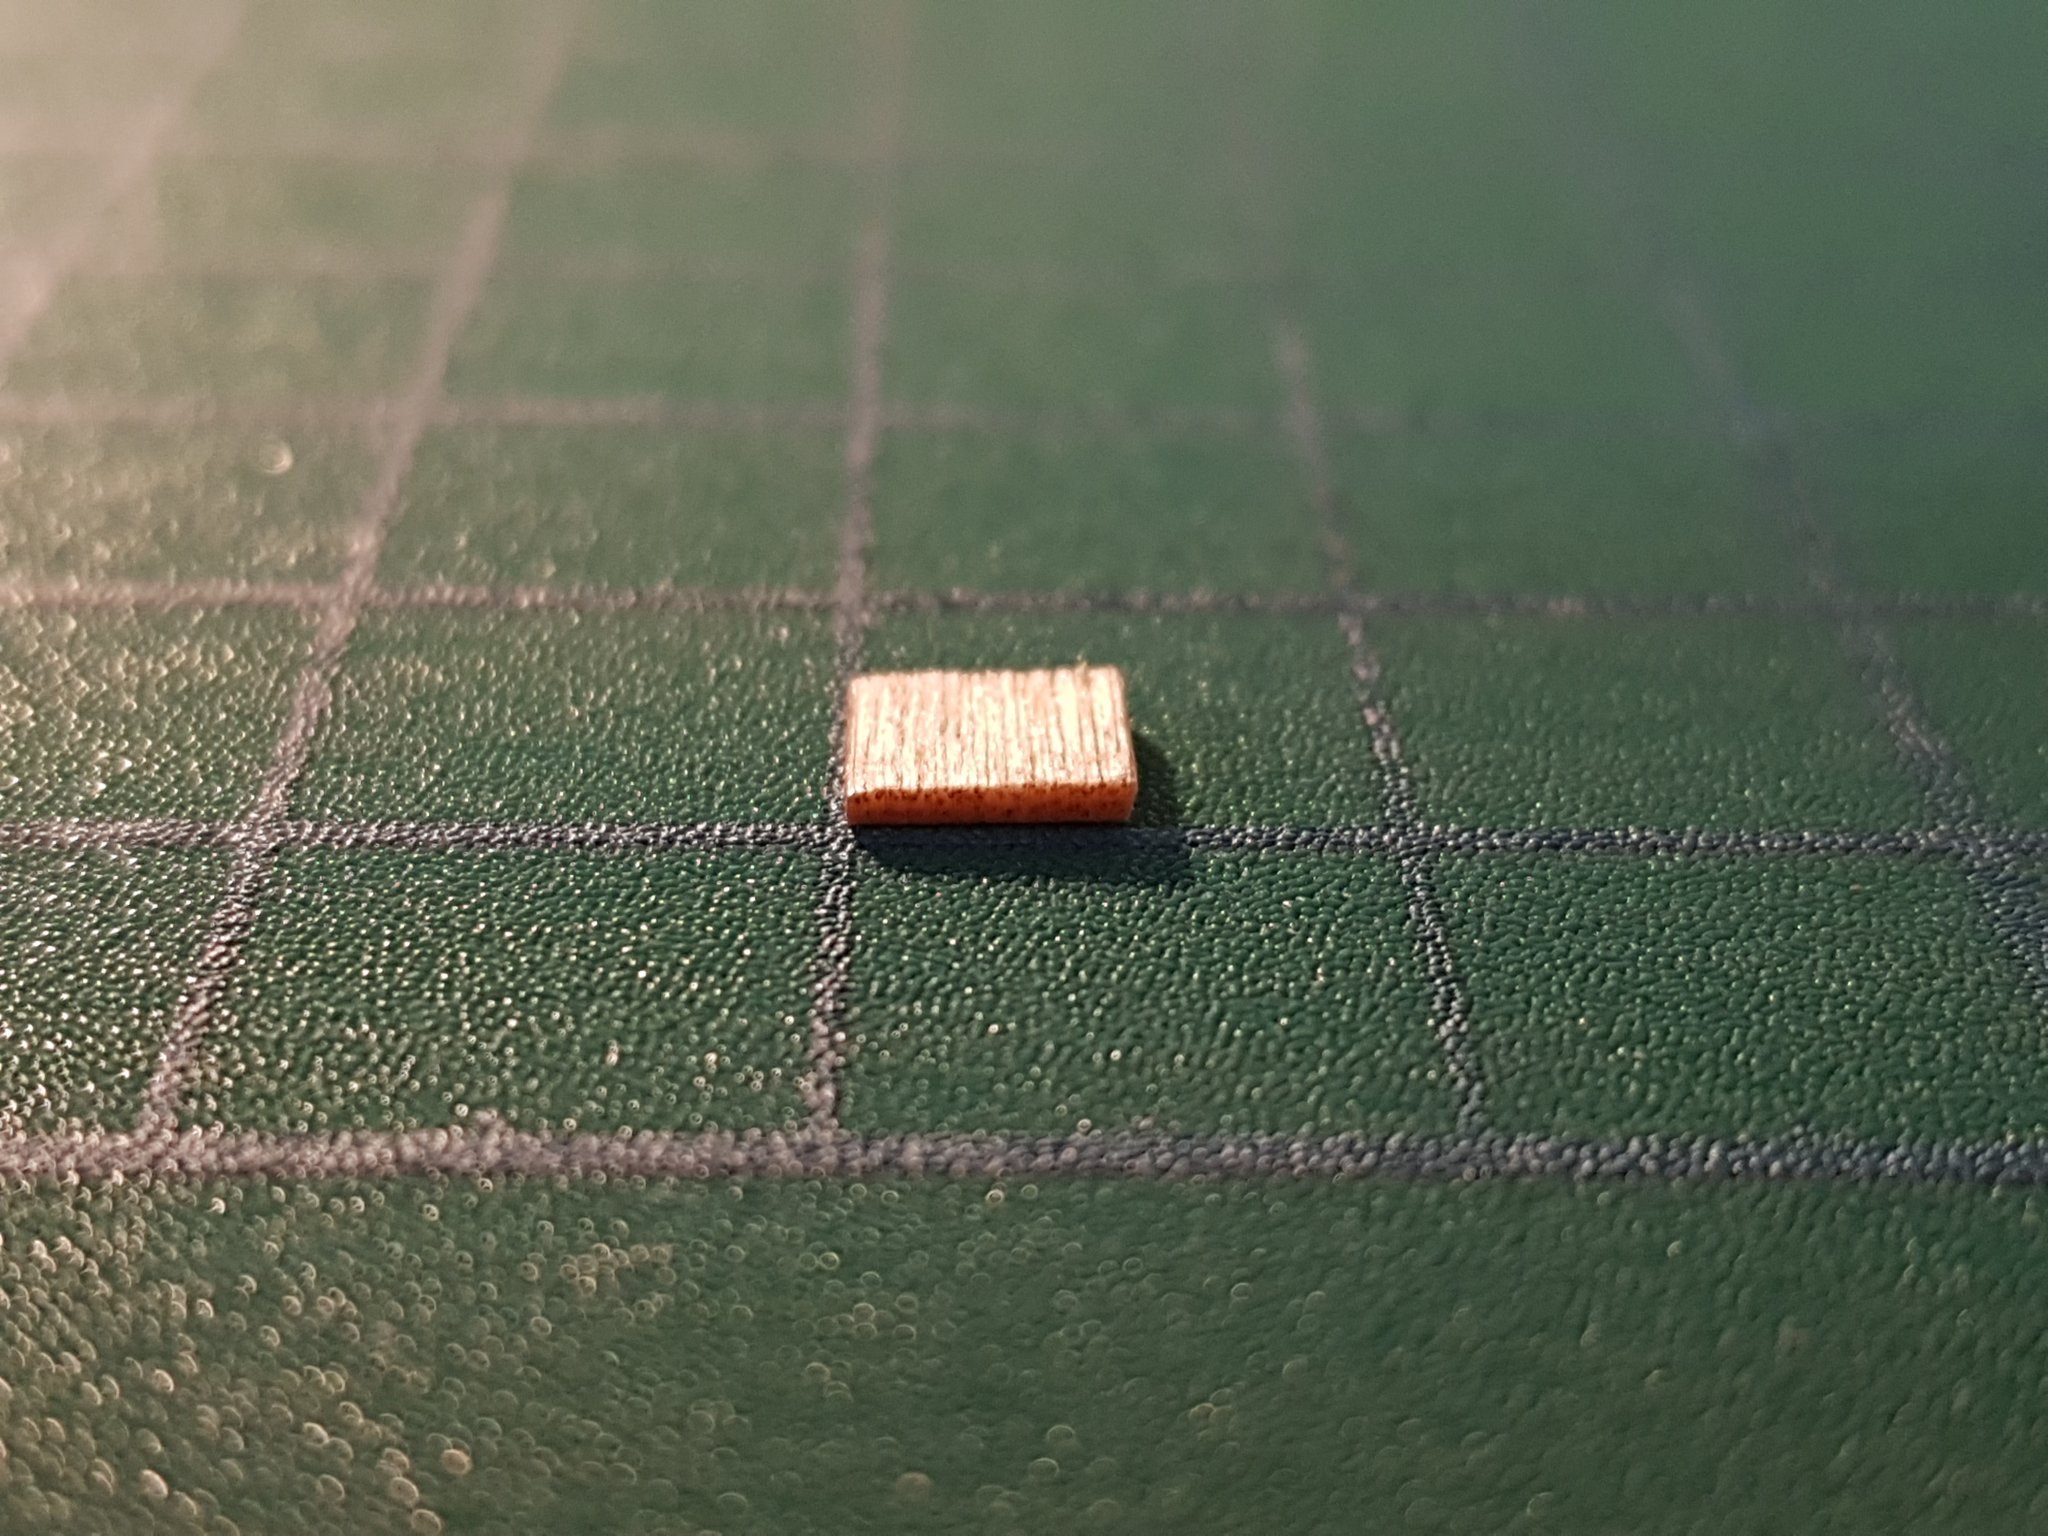
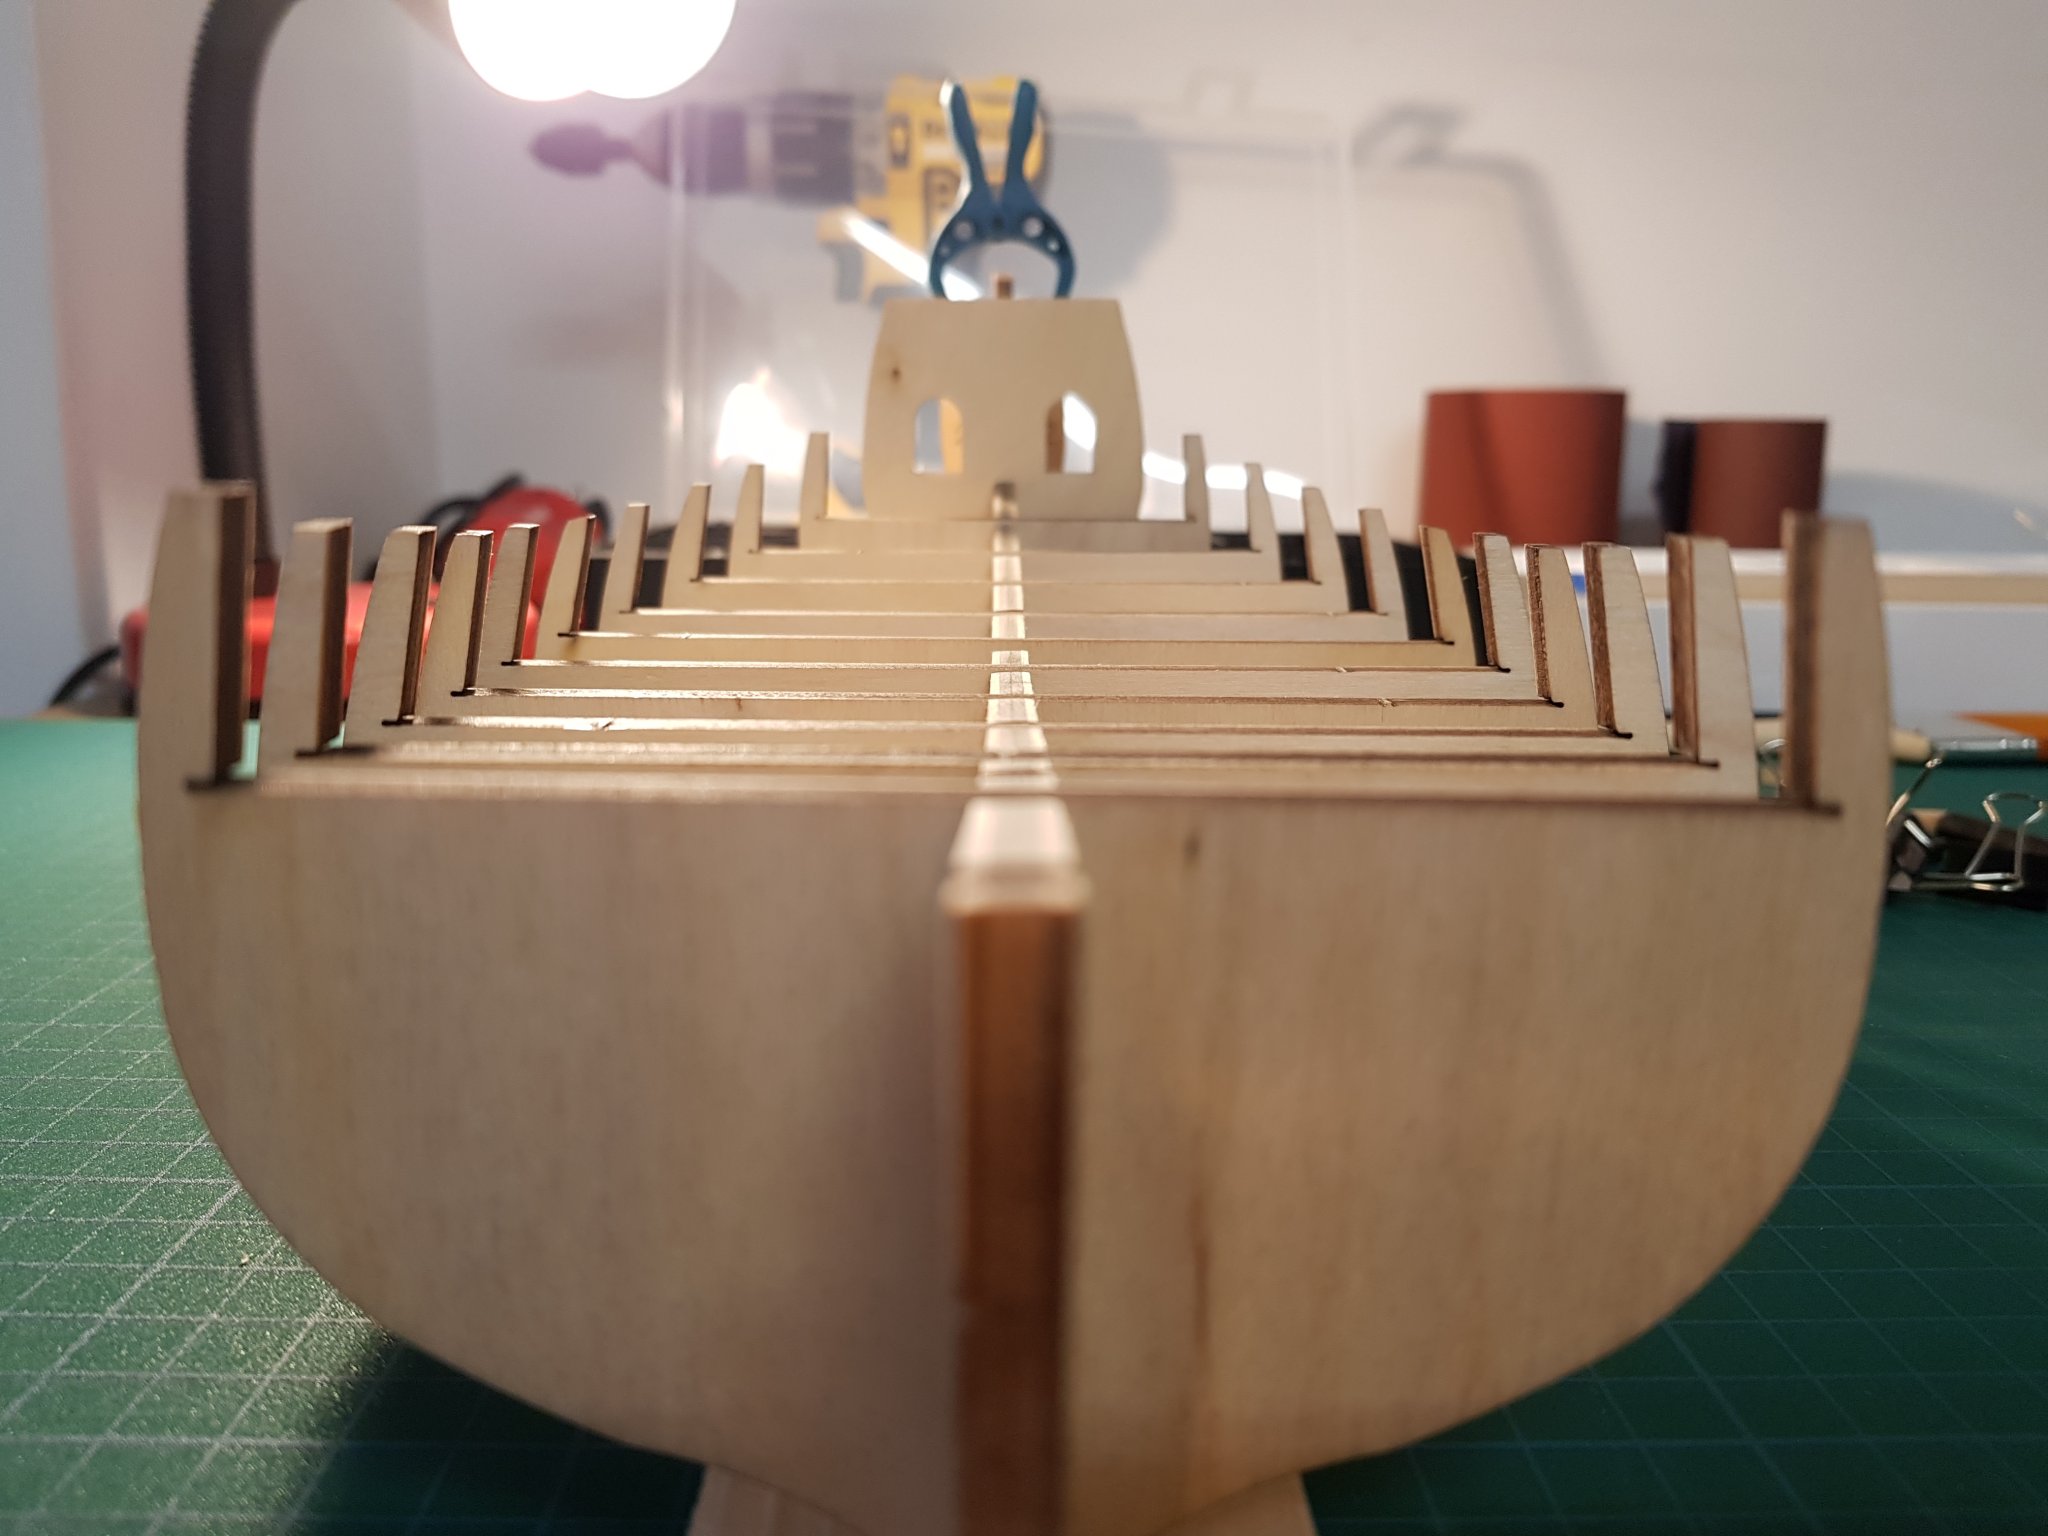
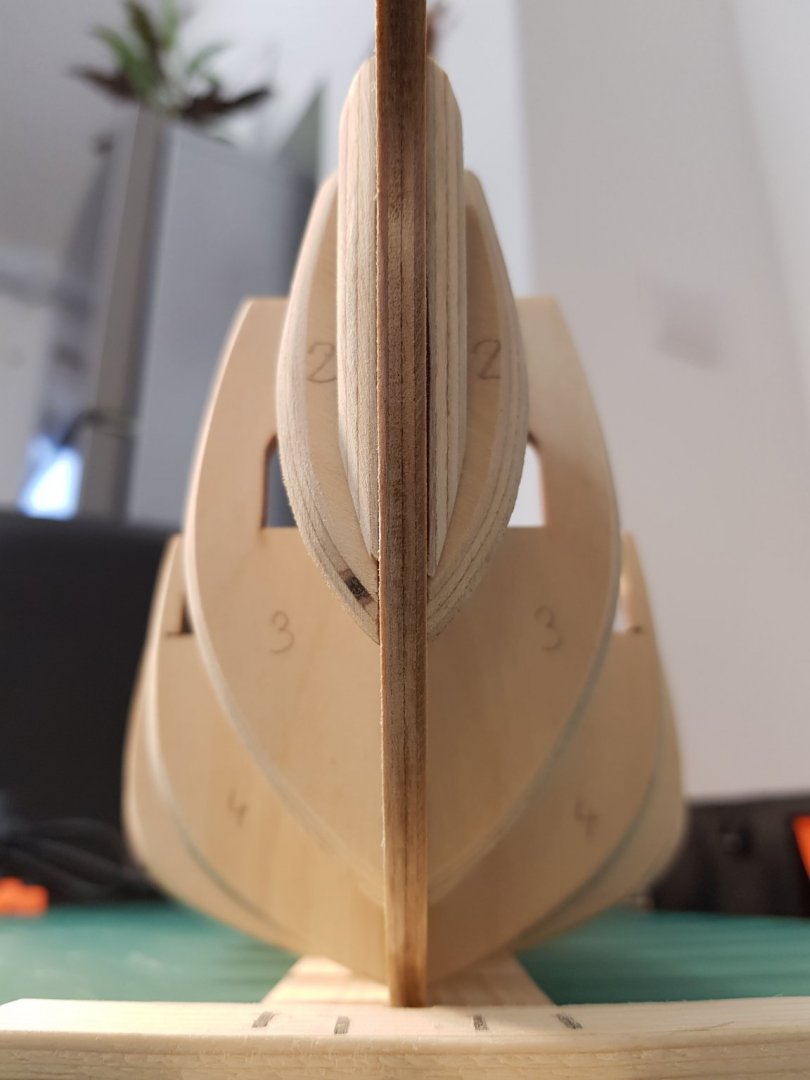
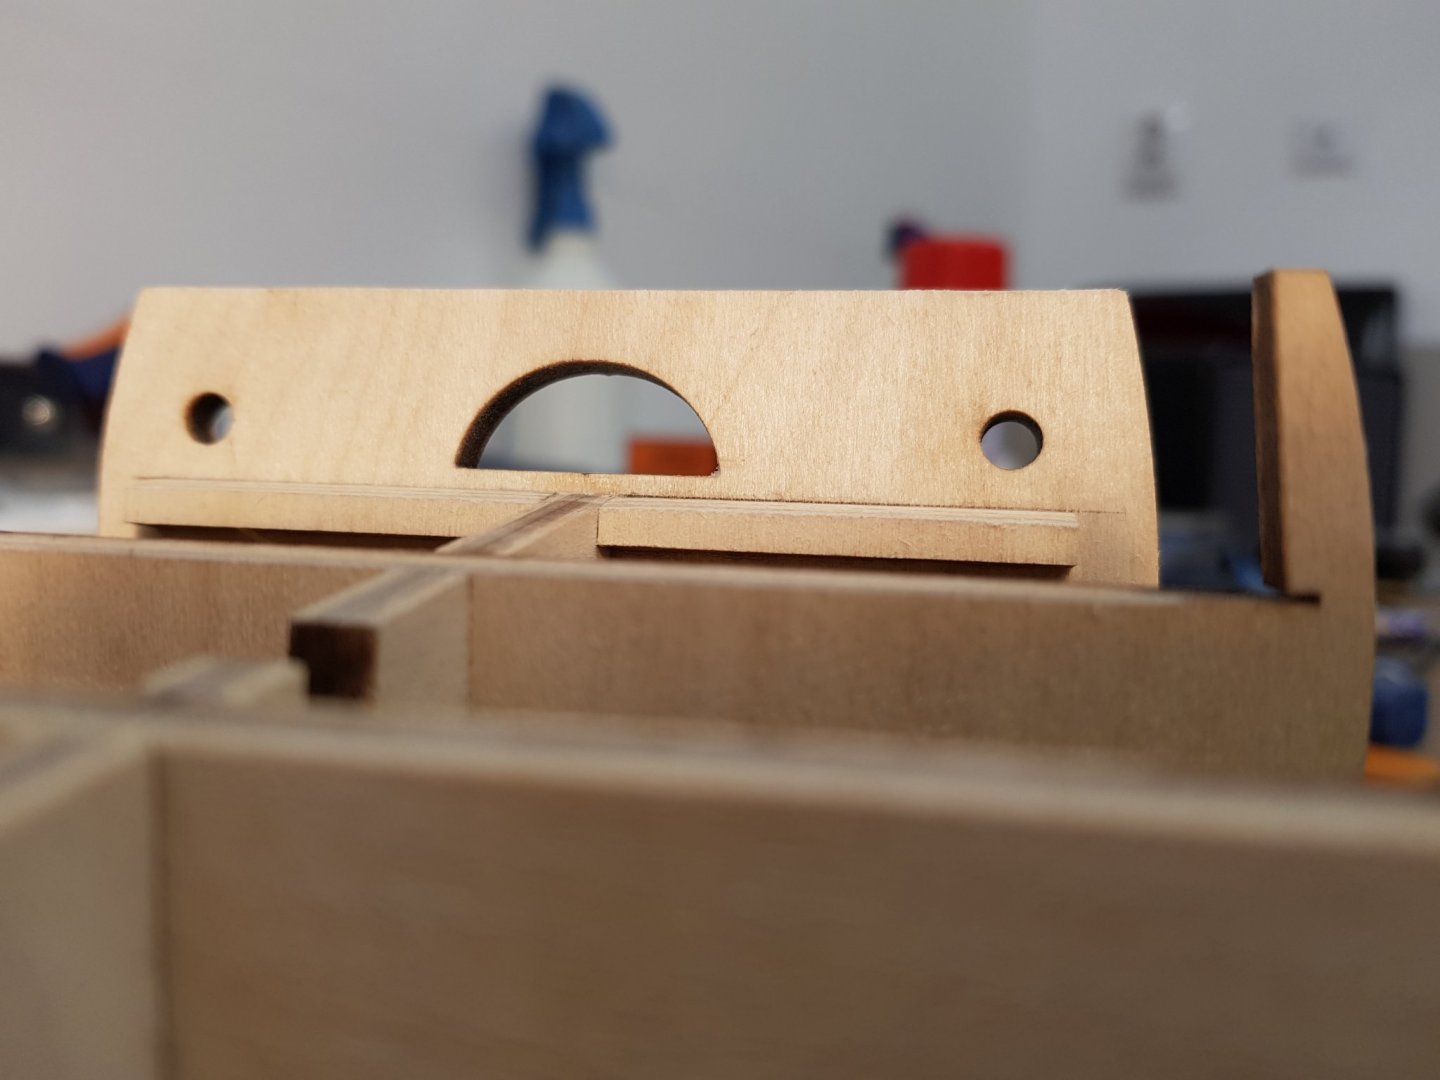
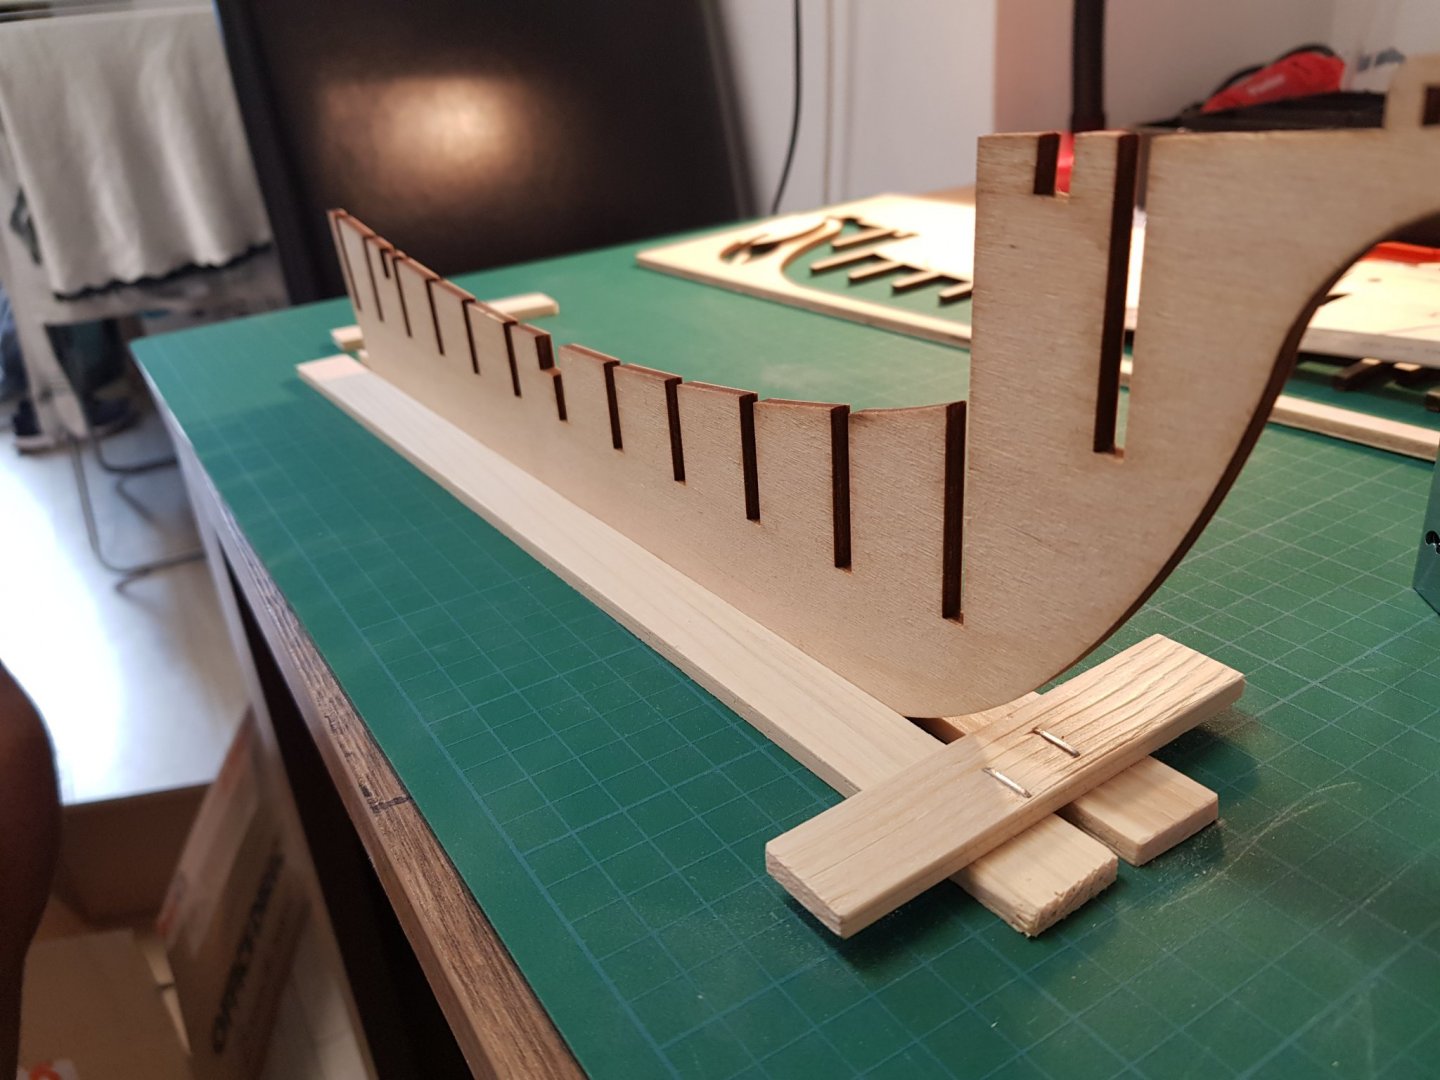
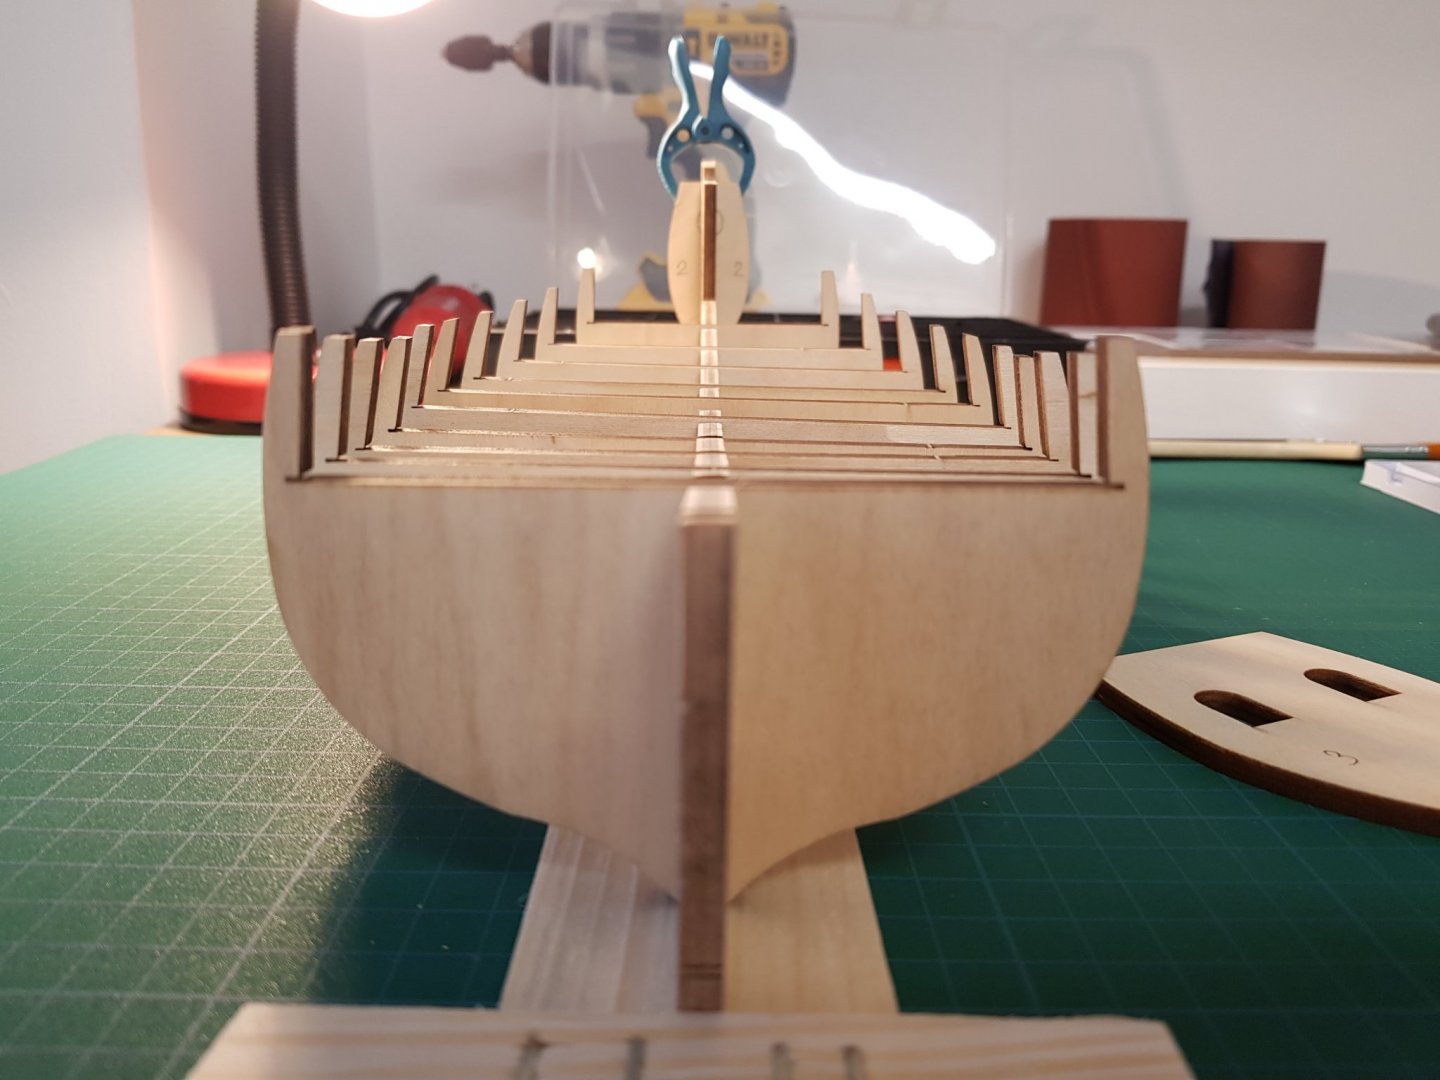
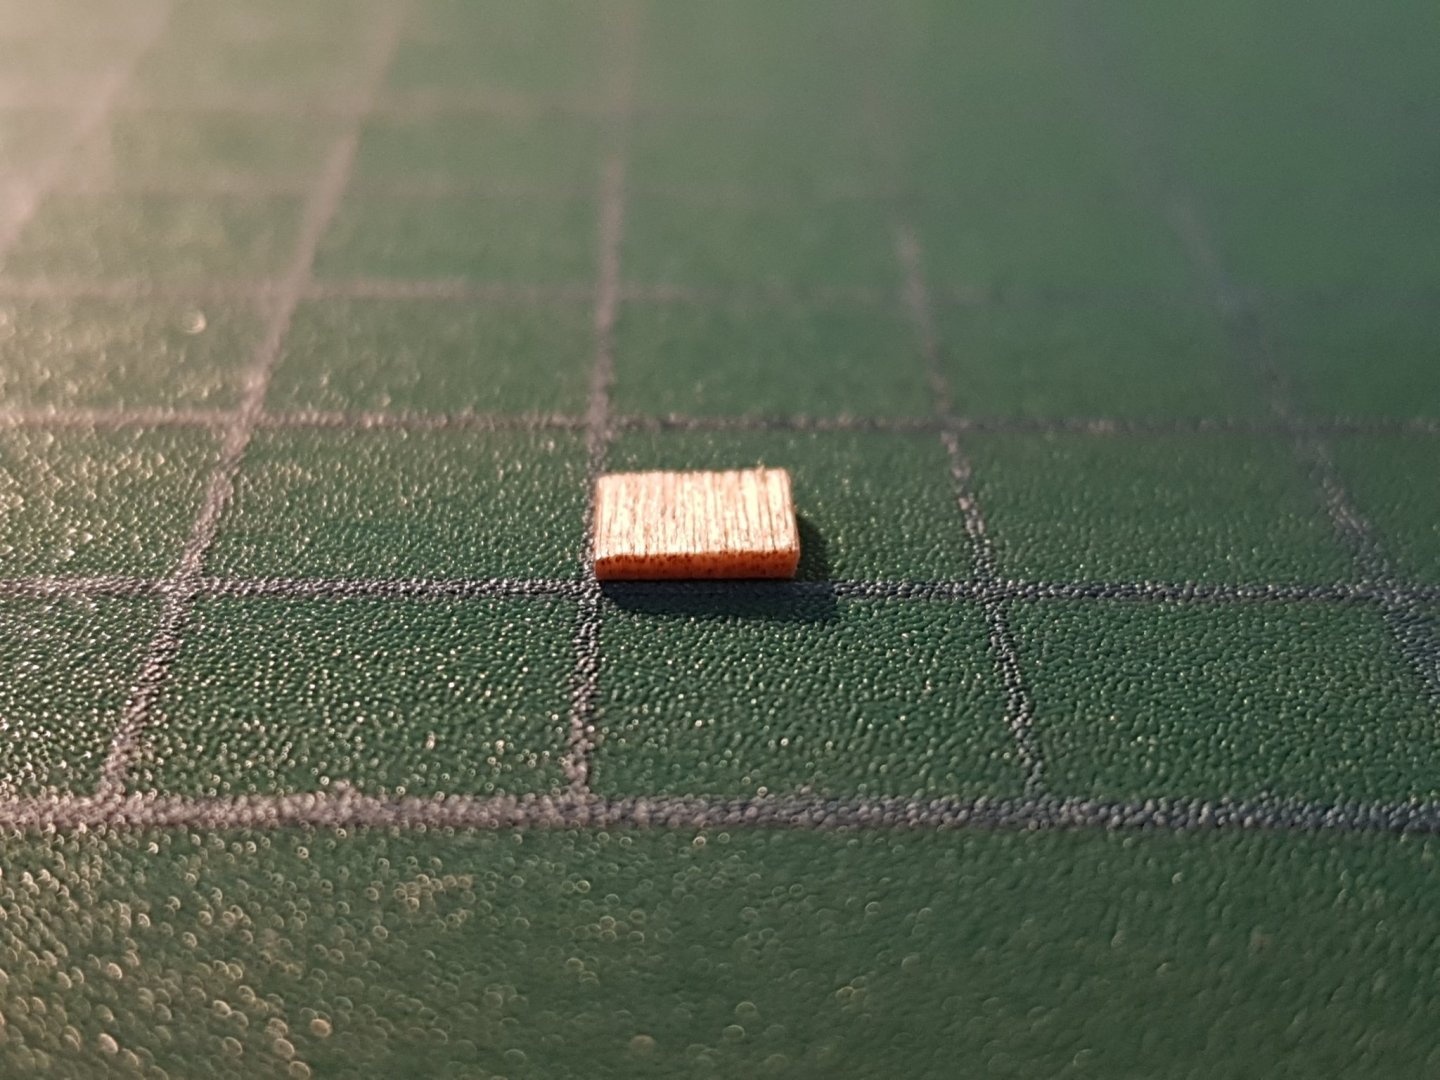
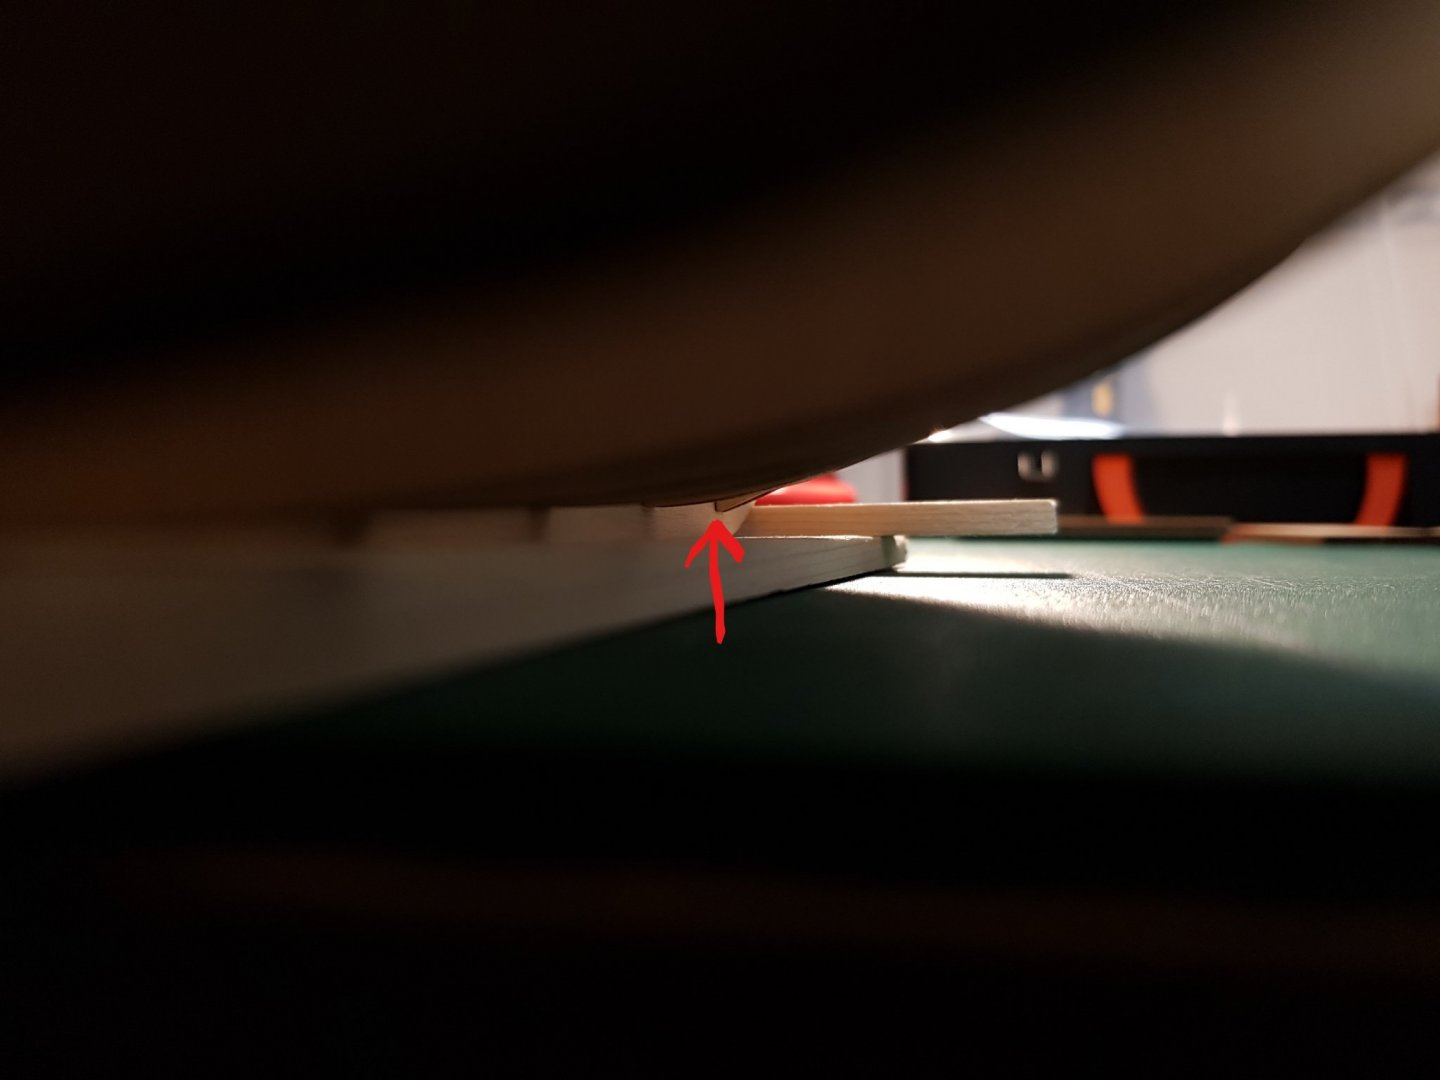
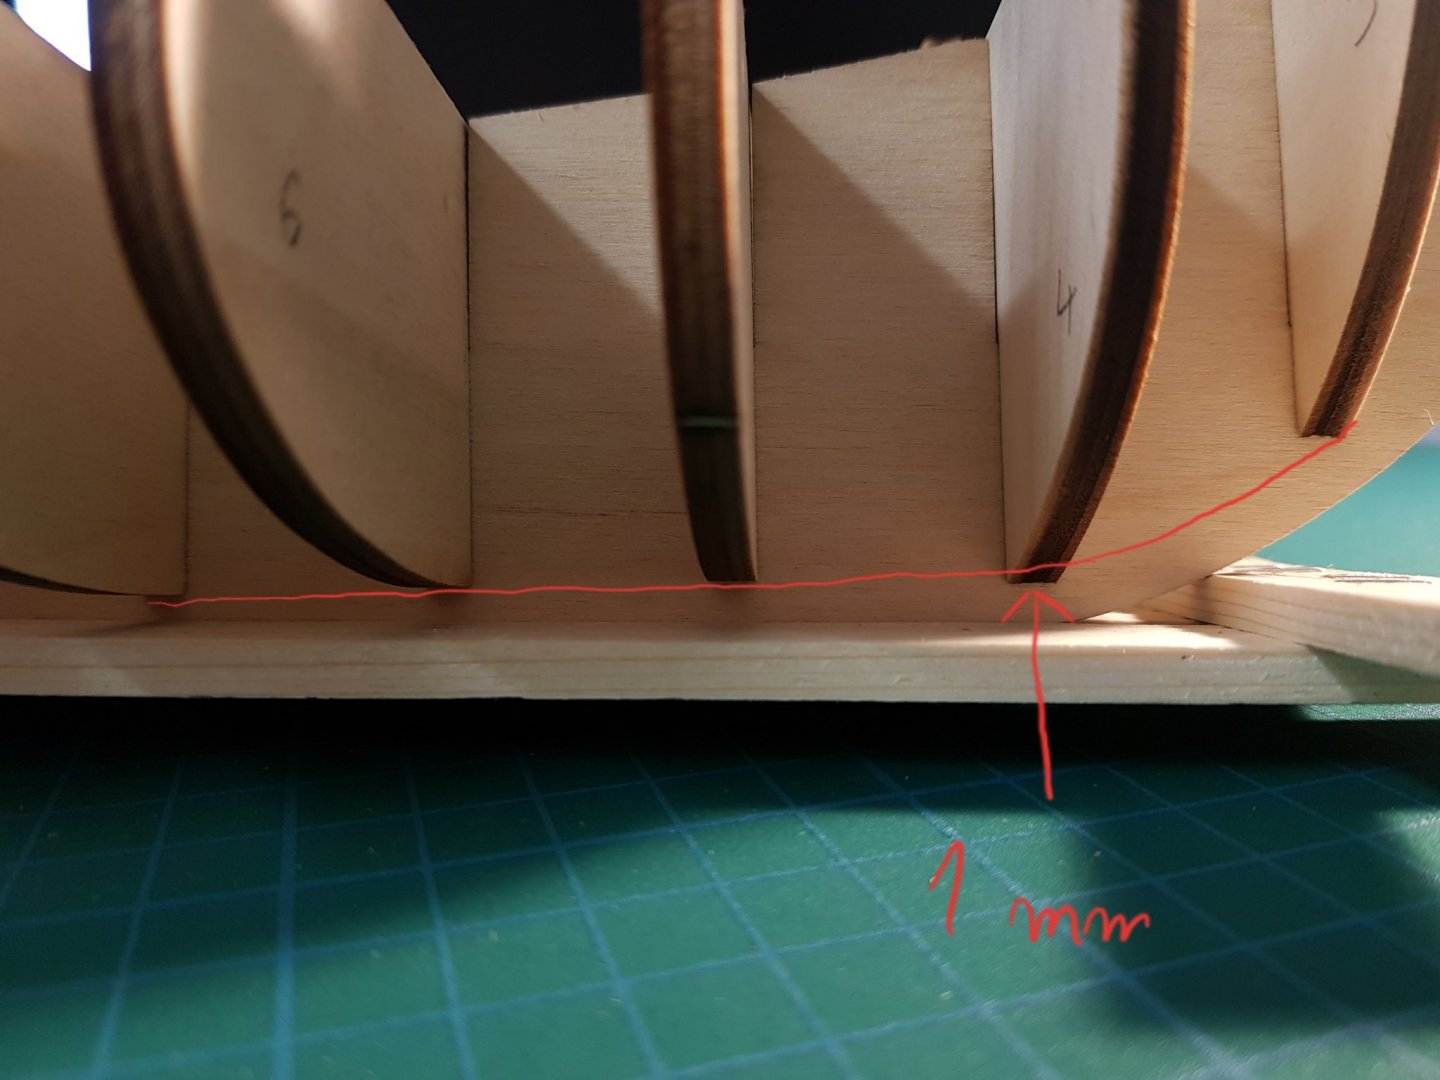
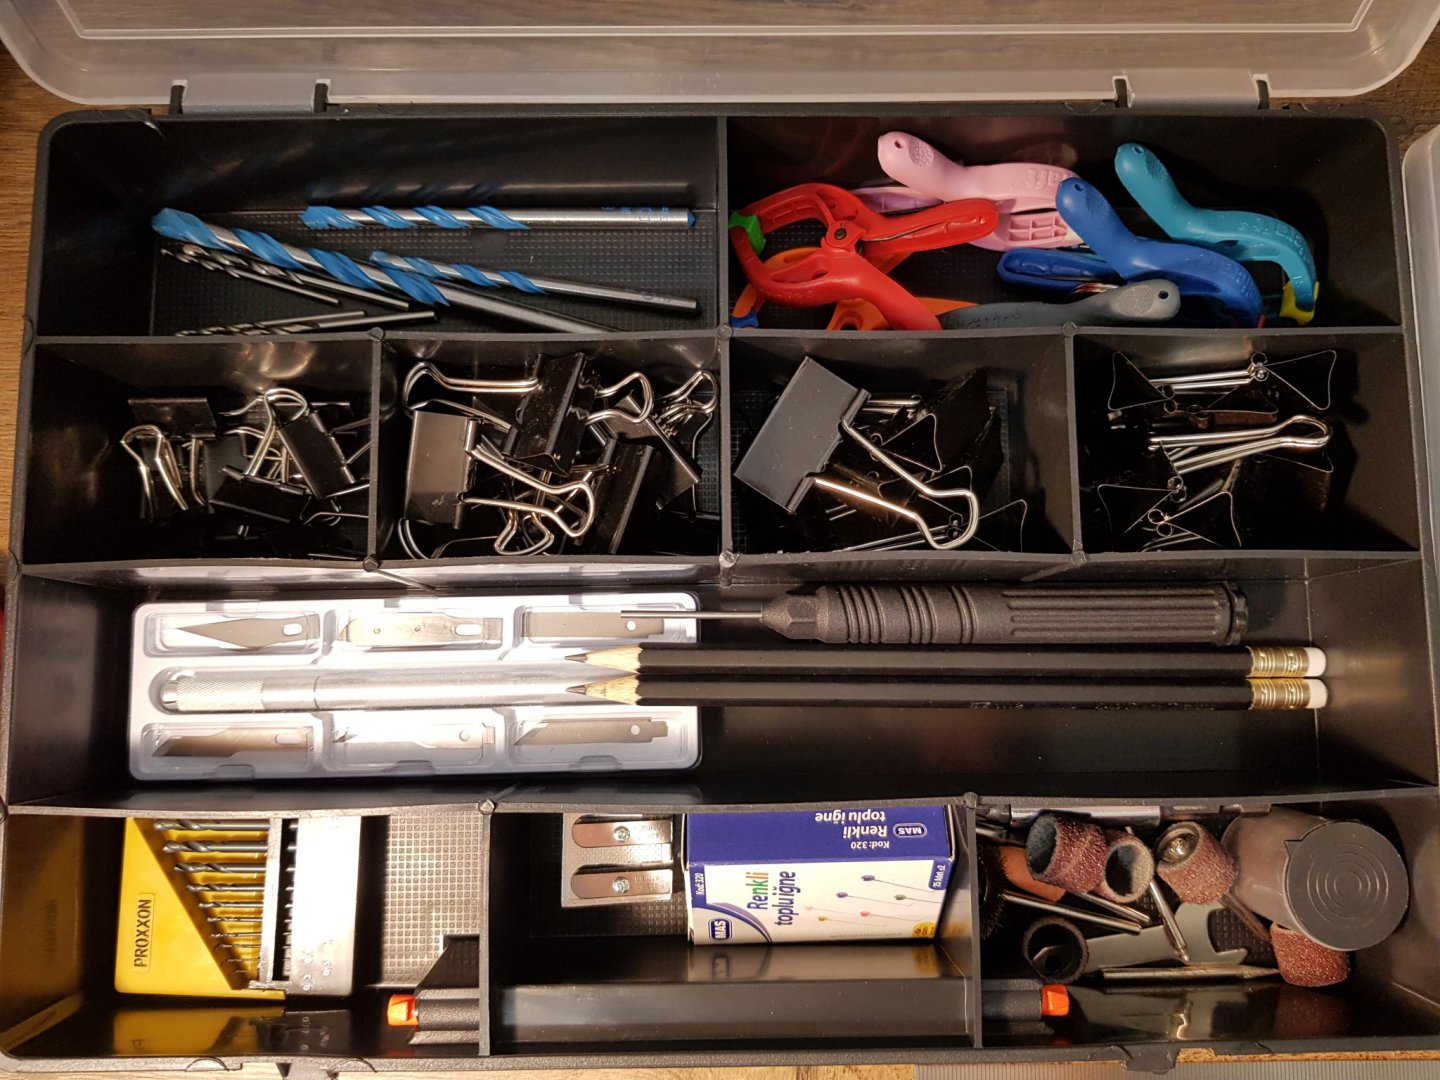
Hi everyone! This will be the build log of my first wooden ship model. It's the Santa Maria by Amati 1:65 scale. I've gathered some tools that i had laying around in the house, especially power tools like a DeWalt cordless drill and a dremel type rotary tool. I think these will come in handy in some parts of the process. Ordered some more tools online, some of them have arrived but some still on the way. As of now i have two types of white wood glue, some industrial strength CA glue, 180 and 400 grit sandpaper, medium/fine/superfine sponge sanding blocks, two 300mm stainless steel rulers one of which is flexible, drill bits varying from 0.3 to 8mm, various sized clamps and clips, an exacto knife, regular cutter, tape measure, nail pushing tool, small and medium wire clippers, sketchbook, needle tweezers. Still waiting to receive a set of precision needle files, a 360 degree rotating vise, a small wood scraper and some sanding rotary tool bits. As i progress through the build and find the need for additional tools i will order them and get the job done. Here's my workbench: So far i got to the point of cutting out the laser cut parts from the plywood boards and trying to fit them together to get an idea about how it will come together and also built some kind of support to hold the keel upright. After fitting the bulkheads on the keel i've instantly noticed that the laser cuttings weren't very precise. The bulkheads have the tendency to lean to the right towards the middle of the ship and that is because the keel has a slight warp in it. I have attempted to straighten in using a flatiron but as it cools down it warps back to the original shape. The warp is not that bad as you can barely see it with the eyes but when laid flat on the table, the bottom part sits flush and the upper part rises about 1-2mm towards the middle of the board. This is after correcting it with the flatiron because before it had a 5mm bend. Also noticed a difference of level between the tops of the bulkheads. Got this fixed by adding some thin pieces of planking material where the bulkheads make contact with the keel, and in some places i had to scrape a bit of material from the contact point in order to lower some bulkheads to sit flush with the top of the keel. This was the initial difference in level and the piece fitted to correct this issue: After applying the corrections it now looks way better and all the bulkheads seem to be of proper height. Here's a view from above and from stern to stem. There is a fair amount of space for the bulkheads to move freely in the slots cut on the keel and i can adjust when gluing to get everything properly lined up. It's looking better already even though nothing's glued in place. One more thing isn't right. One of the bulkheads in the bow area sticks down too much and doesn't follow a straight line with the other bulkheads. This will be an issue when planking because the garboard plank will be pushed downwards at the bow area by this bulkhead. The upper part of this bulkhead is flush with the frame therefore i cannot rise it anymore. What do you suggest doing? Should i sand it down when fairing till it comes to a level with the other bulkheads and use a batten to determine the proper curve? Or should i rise the bulkhead to the point it follows a proper line at the bottom and then sand the top part of the bulkhead till it comes flush again with the frame? I would like to fair the edges and fine tune everything prior to gluing because i will use the small rotary tool with a sanding drum bit to shave most of the material from the bulkheads and then fine sand it to get a perfect surface for the planks to adhere. I am also wondering if the edges where the deck sticks to the bulkheads need fairing because the deck has a slight upwards curvature towards the stem and stern. Any suggestions on how to approach this last issue are welcomed. I won't do any progress until this is solved. Thank you! Romique


-
Thanks everyone for the warm welcoming! @rlb Glad to hear that at least one of your daughters continued with ballet. Our kind is prone to extinction so every one of us counts. I bet you are very proud of her and i suggest to never give up on supporting what she does. Good luck in her career and good health! @Ryland Craze I will start my build log today and am waiting for some tips and guidance as i've already stumbled upon some slight problems with the kit. I'll post pictures and detailed information there. @ccoyle I'm not so much into football but i'm proud of this team's achievements. Glad to hear that the world knows about my city... By the way my city is growing fast and it's the first most popular city in Romania. Bucharest got outcompeted because Cluj is the first SMART city in the country. Our mayor constantly upgrades the city and increases life quality for its citizens. Nice place to visit if you plan a trip to Europe. Romania in fact is a marvel of nature so do think about putting it on your travel list. Glad to be part of this community and looking forward to making new friends. People here seem to be "infected" with kindness 😊
-
Hi everyone! My name is Romulus, i'm 31 years old and i live in Cluj-Napoca, Romania. My main profession? I'm a professional ballet dancer at the Romanian National Opera in Cluj-Napoca for 13 years. I study balet since i was 10 so that makes over 20 years of my life dedicated to this wonderful art. Besides that, i have developed a passion for hobbies, and i'm constantly chasing new challenges. One of my main hobbies is aquascaping, i've been doing it for three years now and i'm getting pretty good at it. Other hobbies that i have are photography, bushcraft, cooking and many more but these are my main ones. We're living hard times now with this horrible pandemic and we have to do everything in our powers to get over it and back to our normal lives. Since there is a major national emergency situation in my country, people are only allowed to do their necessary grocery shopping near their homes and take care of other people in need. Basically we're forced to stay locked in our homes most of the time until everything comes back to normal. My job is on hold until the whole coronavirus thing goes away because the Opera house auditorium holds 1.000 people and the current restriction is for maximum 8 persons indoors. I won't be resuming work anytime soon. Anyway, this is the time i got this new passion: model ship building. And i'm pretty serious about it. It all started from a conversation with my girlfriend's parents... we were talking about what kind of indoor activities can we do since this is going to be a looong isolation. And then her father told me that he knows a guy that's been working on this wooden model ship for a couple of years now and still hasn't finished. That literally lit a spark in my mind and i've told him that i will try to build one myself. Two obvious reasons made me do it... 1. i'm a passionate hobbyist and 2. i always accept a challenge if it captures my interest. And the challenge was that he told me not to do it because it's hard 😆. Challenge accepted! So then i did my research and i've looked up on the internet for retailers of model ship kits in my country (there are a few). My eye was attracted by the Lady Nelson, the Mayflower and the Santa Maria, all by Amati / Victory Models, there was also a ship called the Buccaneer by Occre, and a few other ships manufactured by Constructo. These are the only (quality) manufacturers that retailers sell in Romania. And then i thought i should search the internet again for opinions on which of these three makers was of better quality and other aspects that might influence the building phase and i found modelshipworld.com. Man is this a gold mine! After spending almost 100 hours reading through the topics and build logs and articles in the database i have decided to go with Lady Nelson because it was my favorite of the ones mentioned and there were many build logs available so i could get some inspiration and info. I called the retailer and sadly, it was out of stock (haven't updated their site), so was the Mayflower, but they still had one kit of the Santa Maria. Couldn't find a build log for the Buccaneer by Occre and the ships made by Constructo seemed of a poorer quality compared to Amati, so i've decided to buy the kit form Amati - Santa Maria. The guy from the shop also said it's a good beginner's kit. Gathered some tools that i had laying around and bought some more online and had the kit delivered a few days ago. All set up and ready to go! I'm pretty enthusiastic about it and i know i will face many troubles during the construction, but i have fate in this forum's members that they will help me get over everything that comes in my way until i finish it. Yep! I won't give up, i'll take my time, do some more research and hope not to bug you with stupid questions. So far i've read every article in the database, some of them twice, and tens of build logs on different ship models. I'm confident that i will be doing things right and won't disappoint anyone. I will start a build log and will constantly post pictures of the progress and hopefully i will end it with a beautiful display of my hard work. Long story short, here's what i have so far... more tools on the way


- 15 replies
-
- 10
-