StuC
-
Posts
20 -
Joined
-
Last visited
Content Type
Profiles
Forums
Gallery
Events
Everything posted by StuC
-
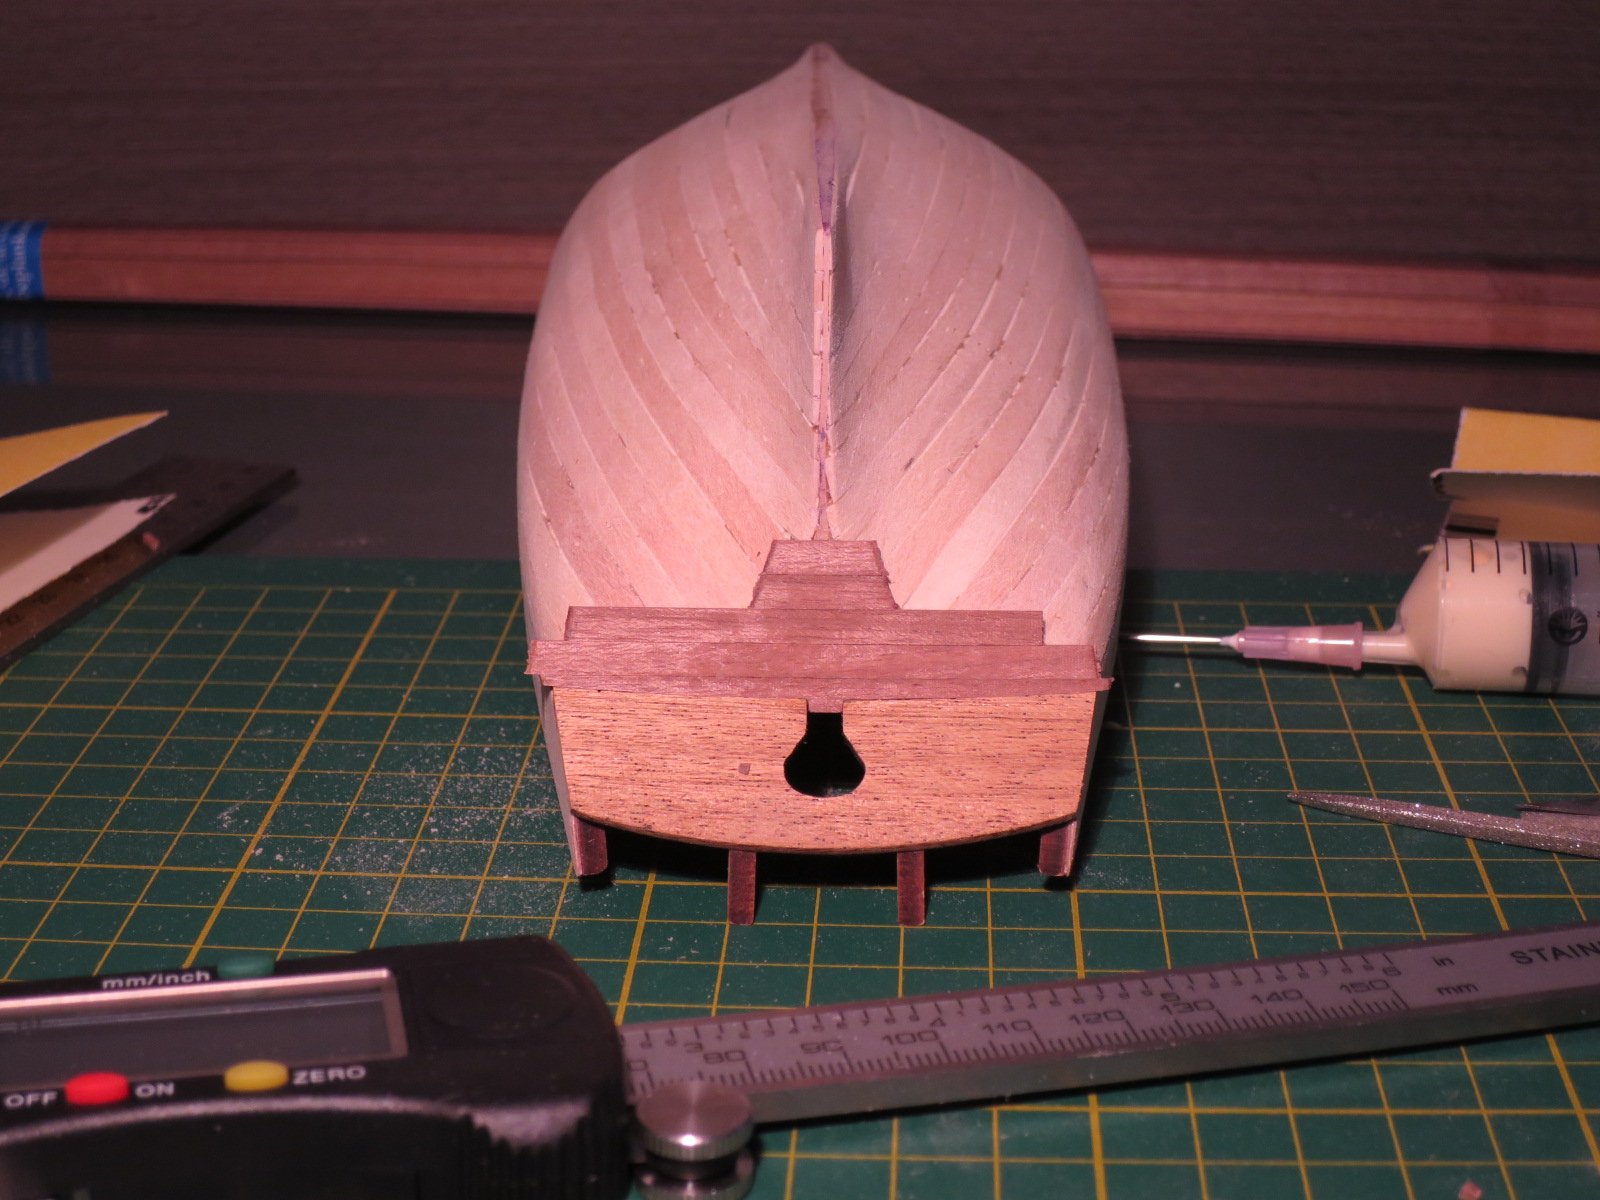
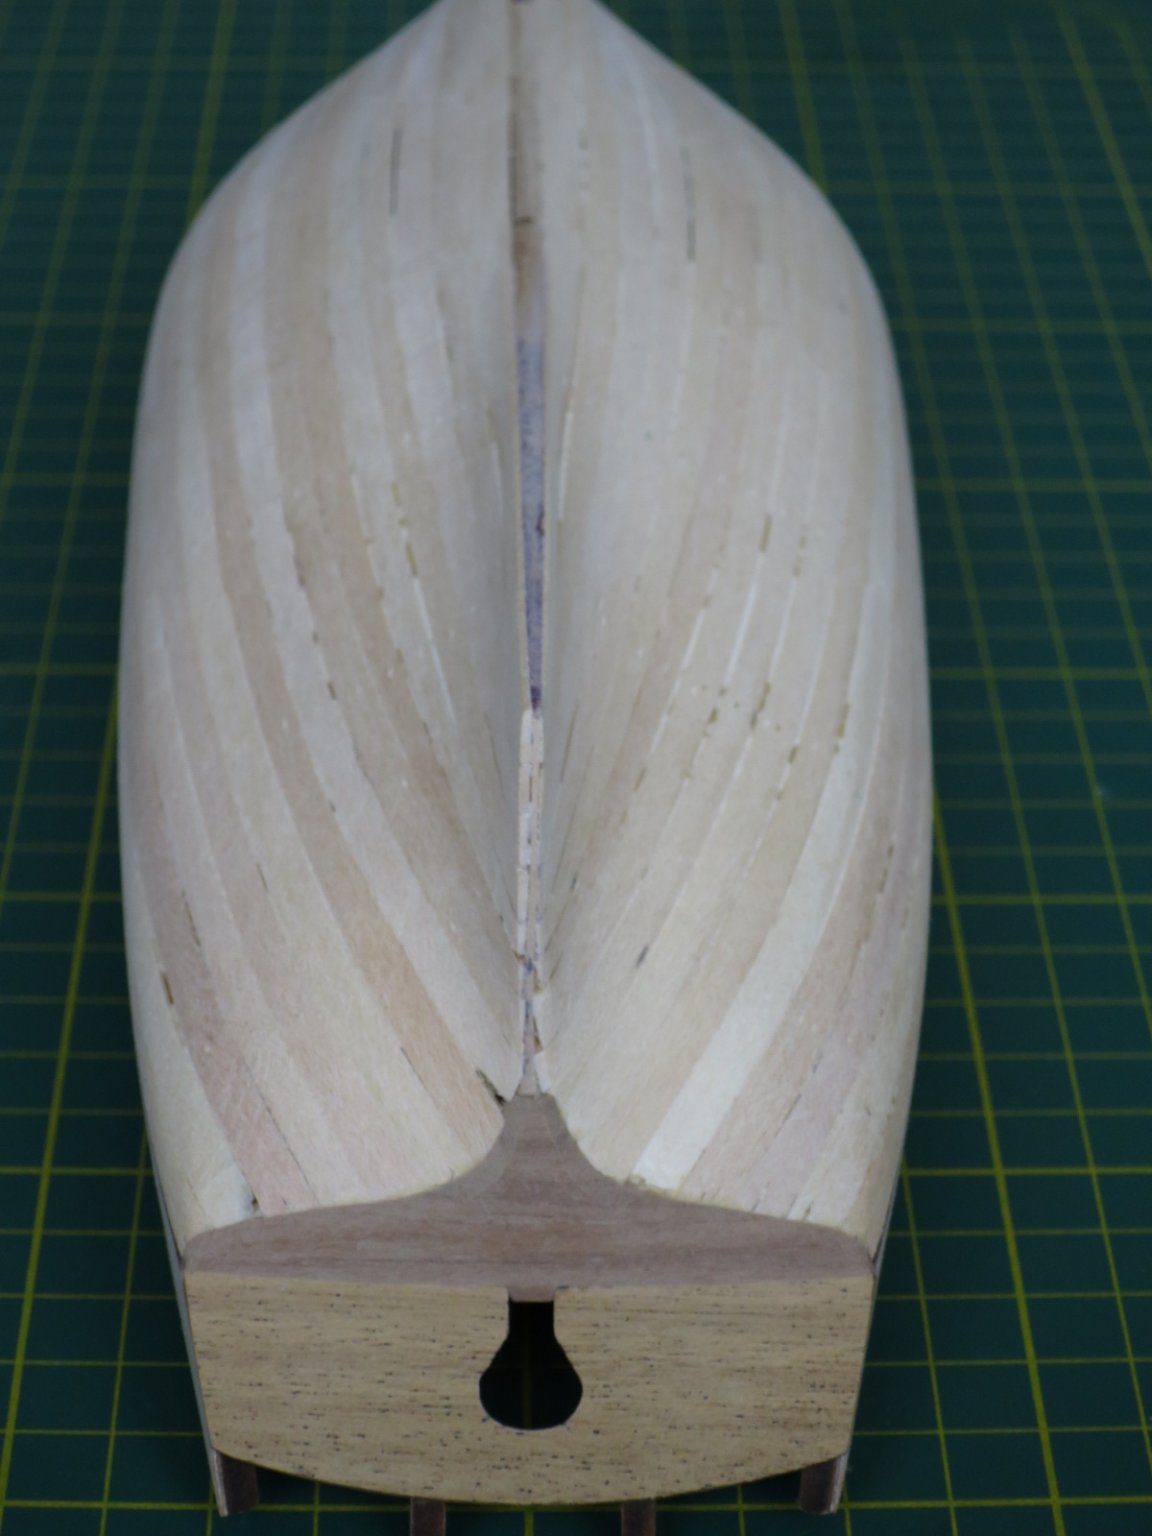
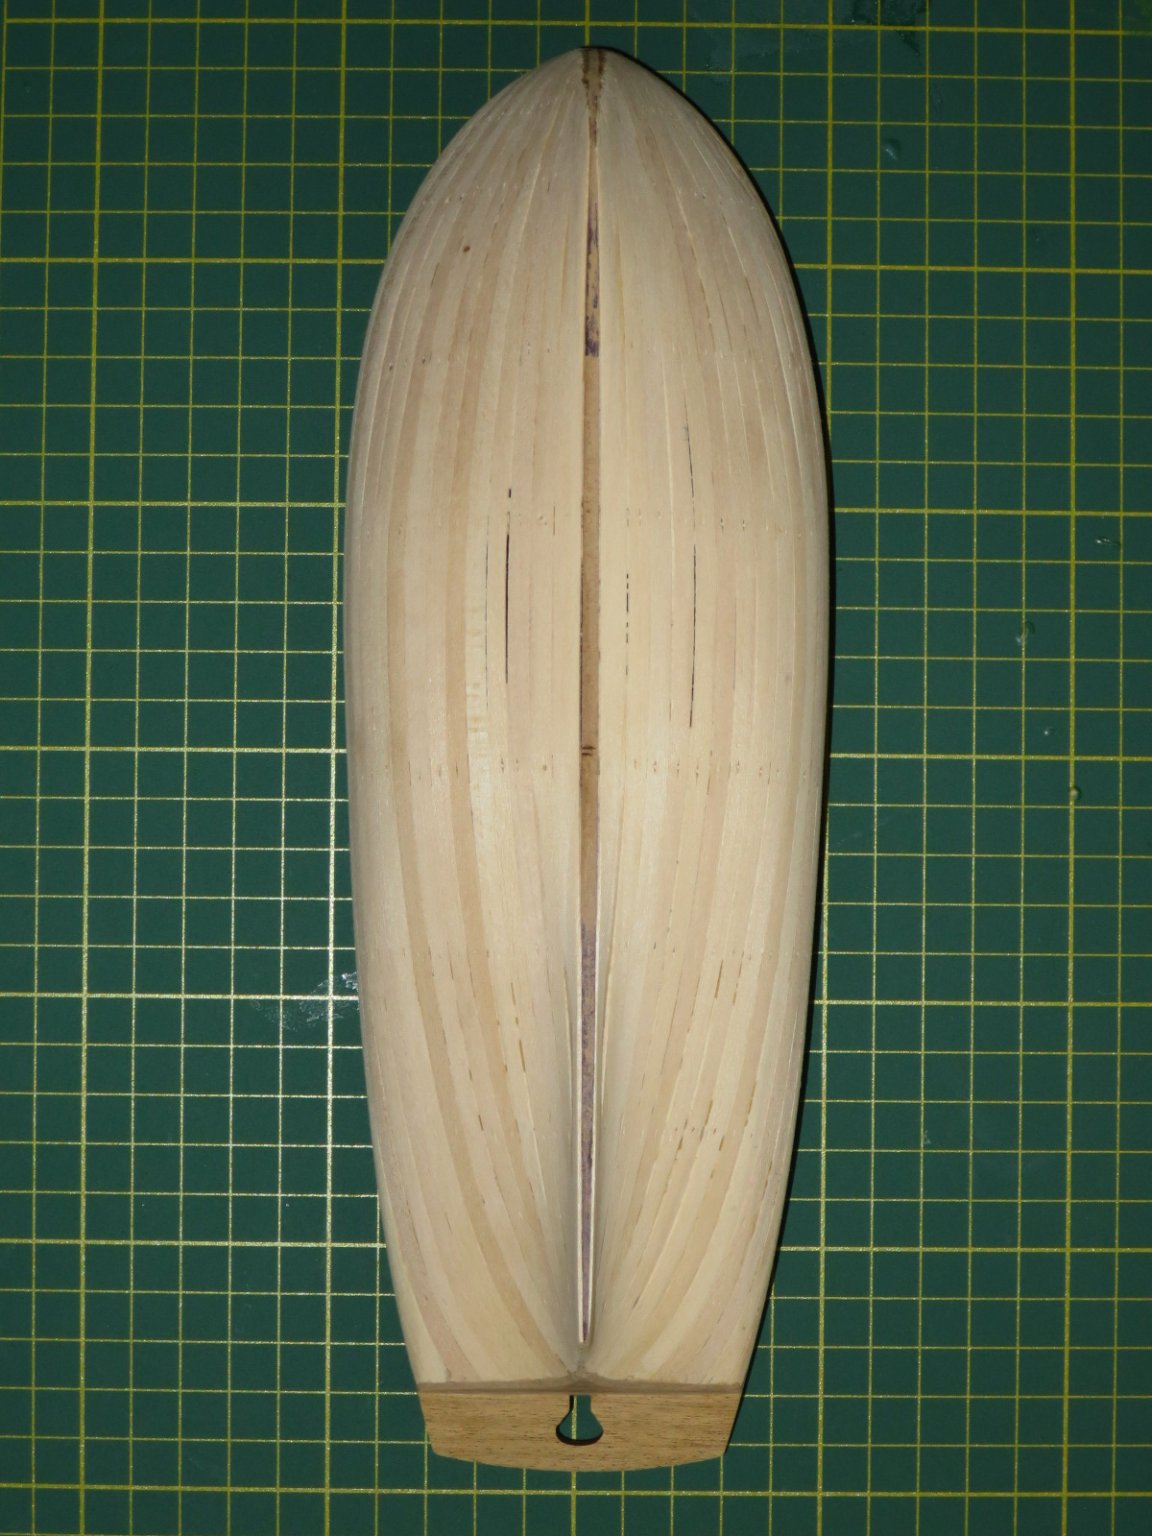
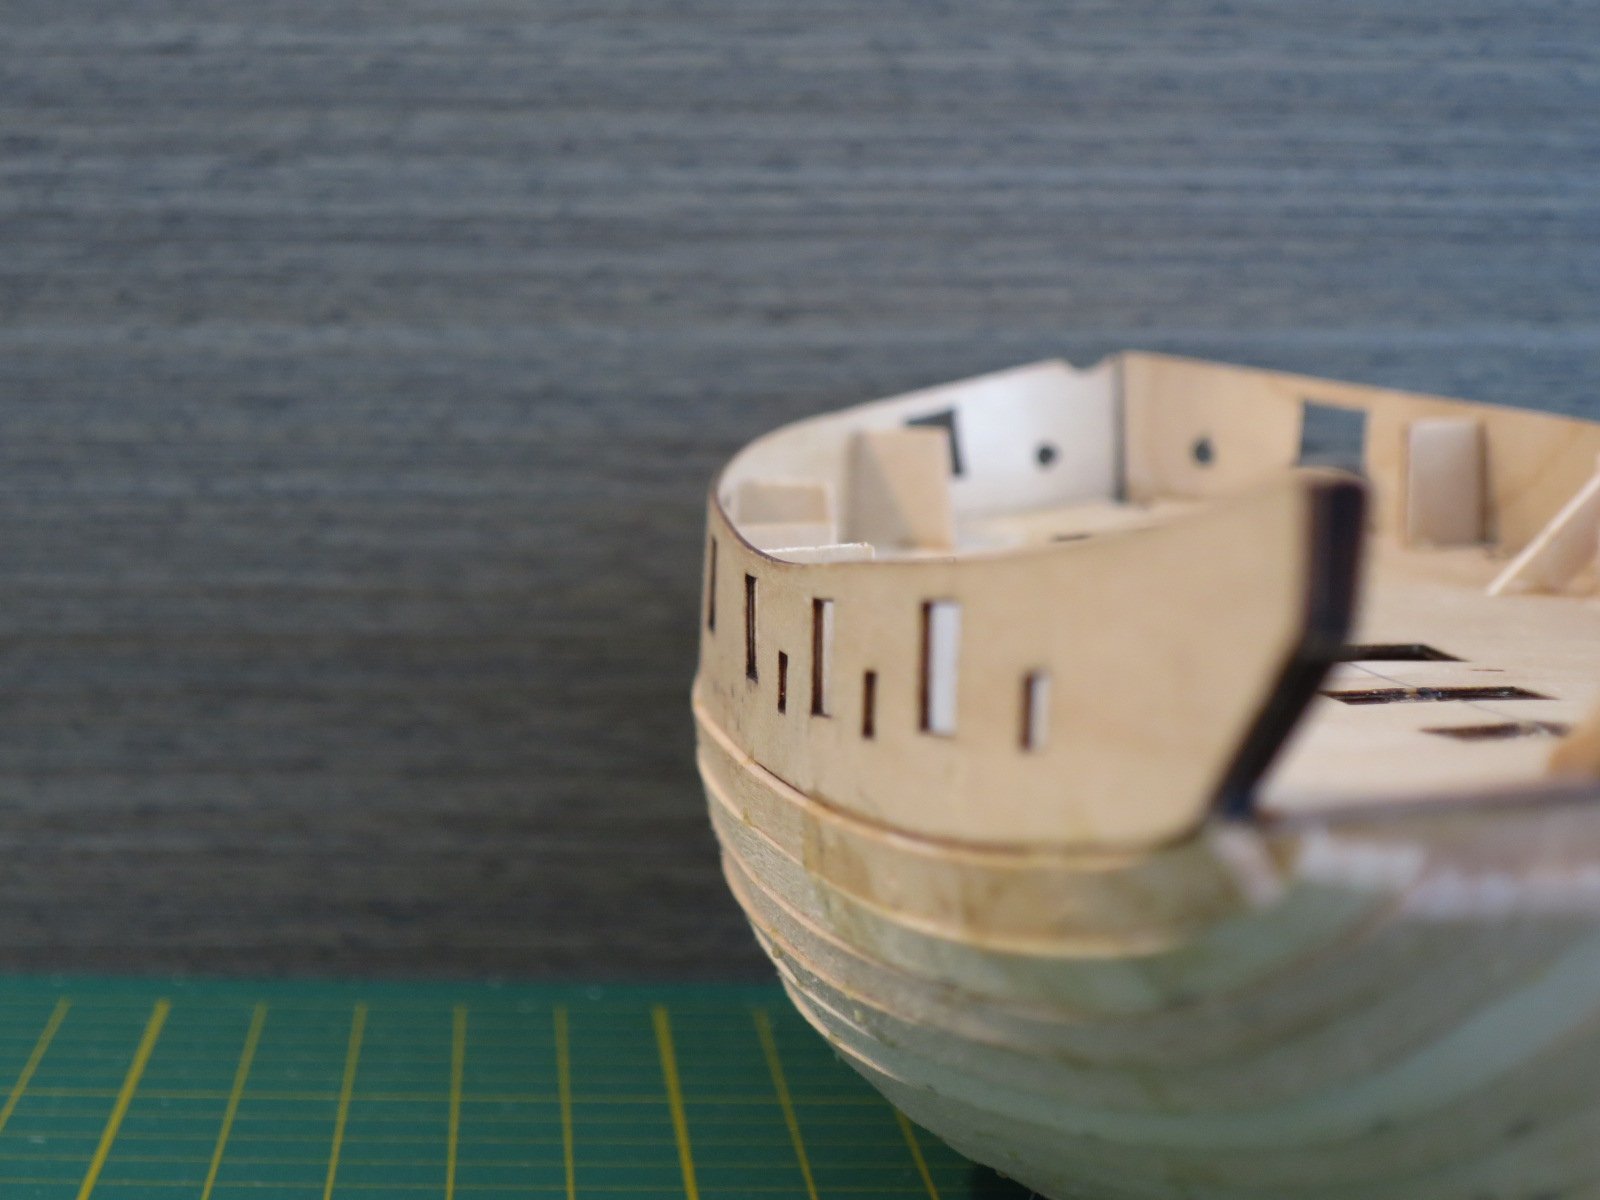
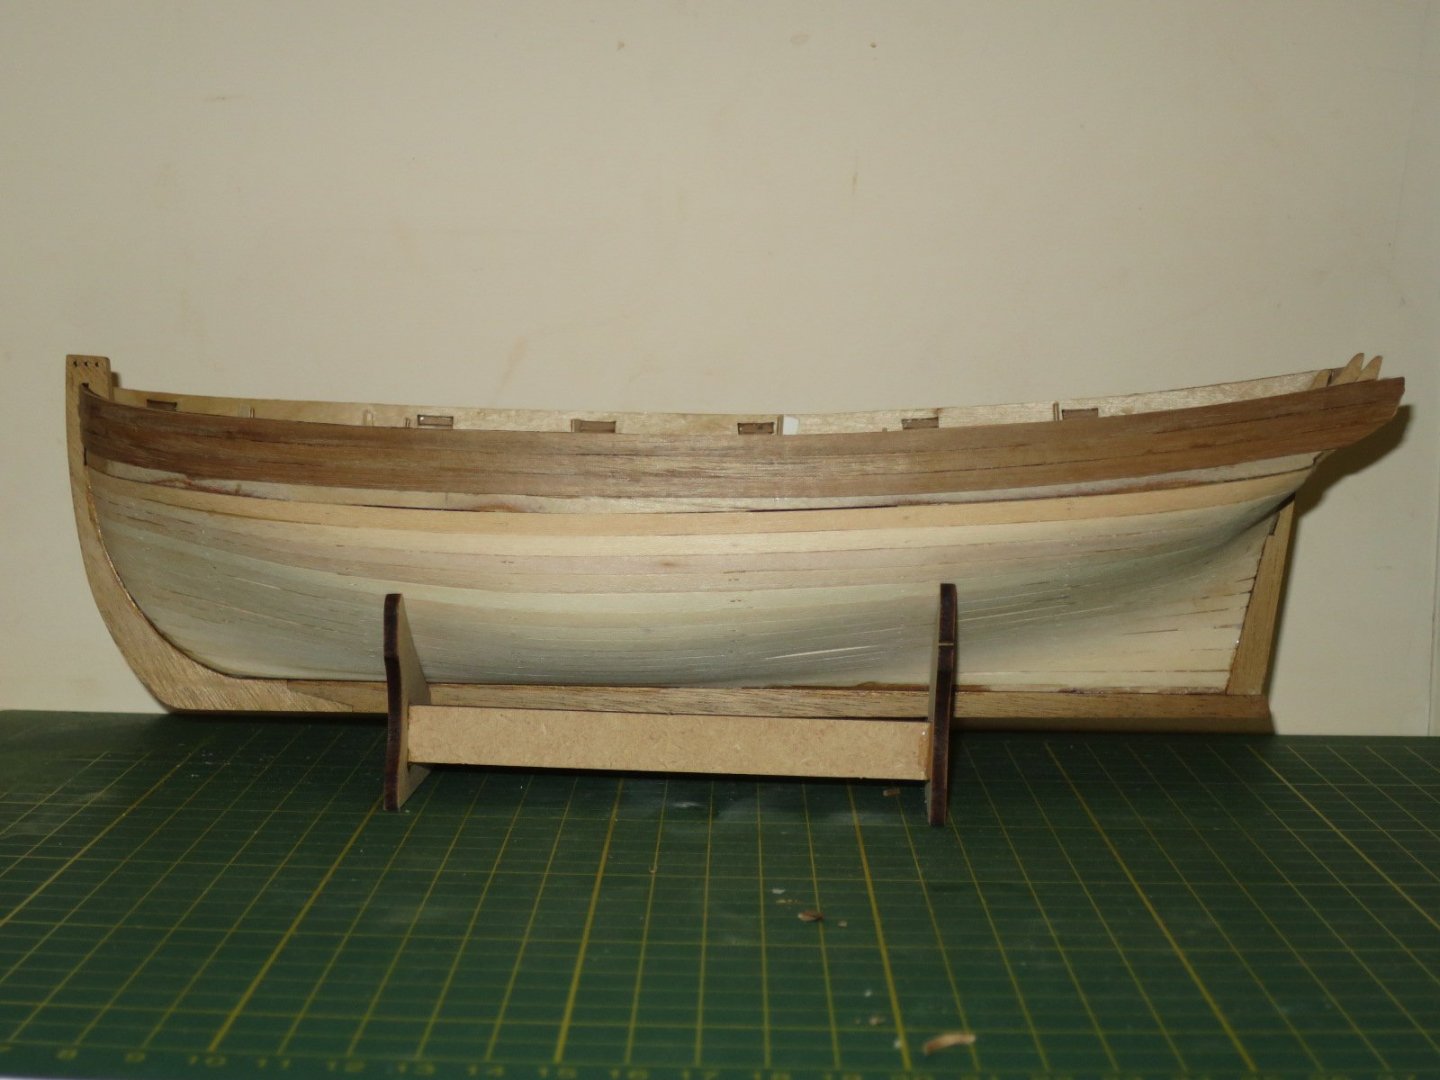
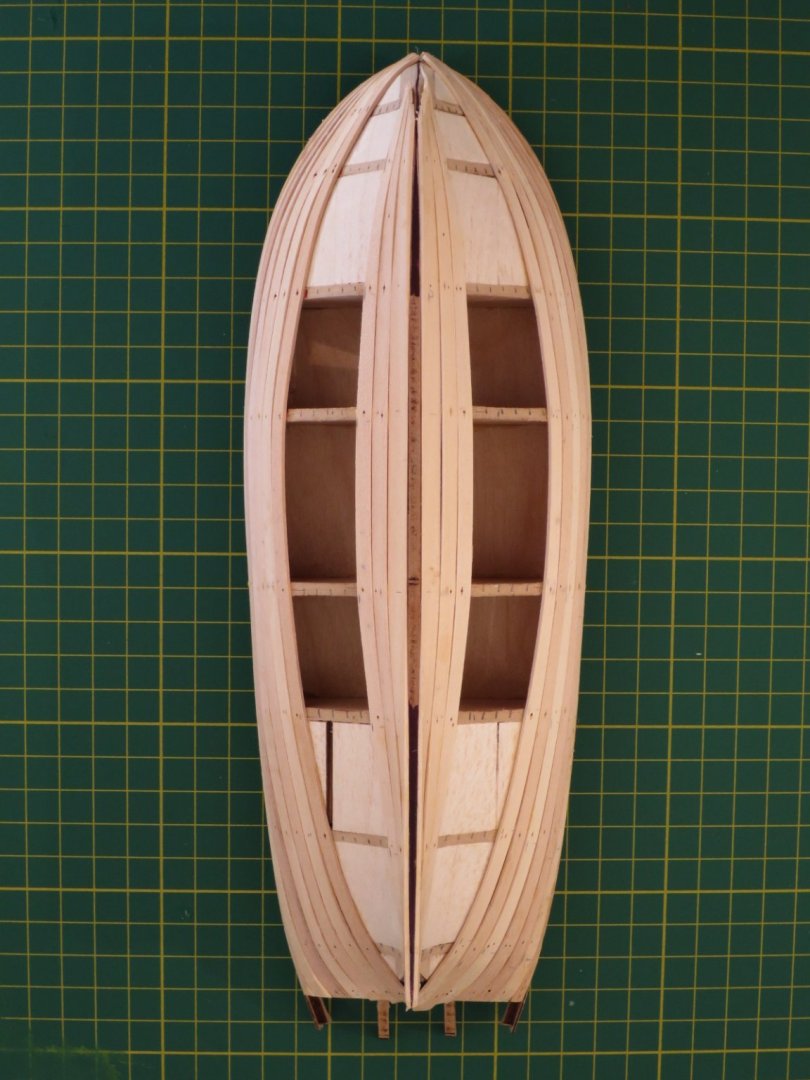
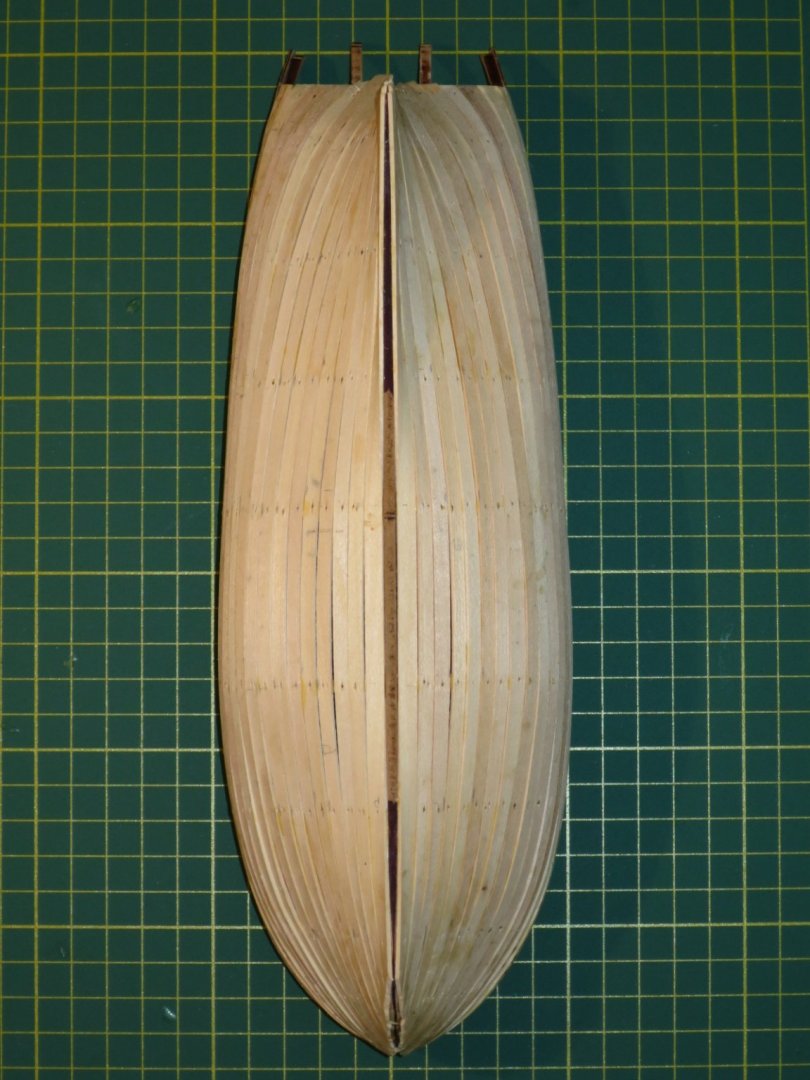
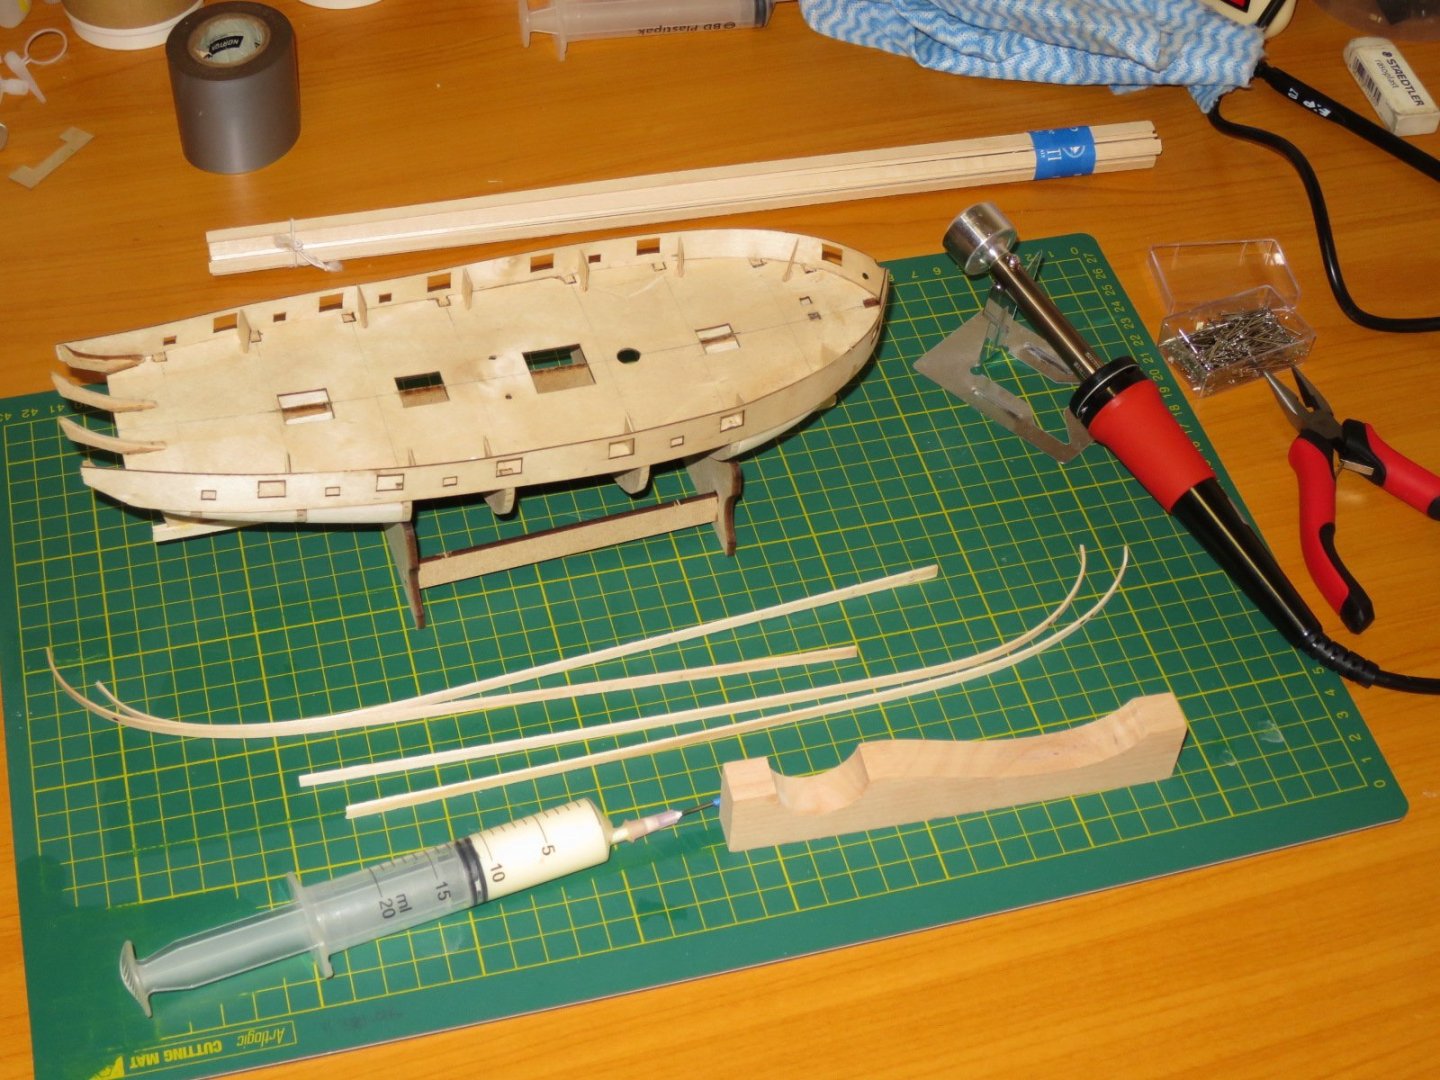
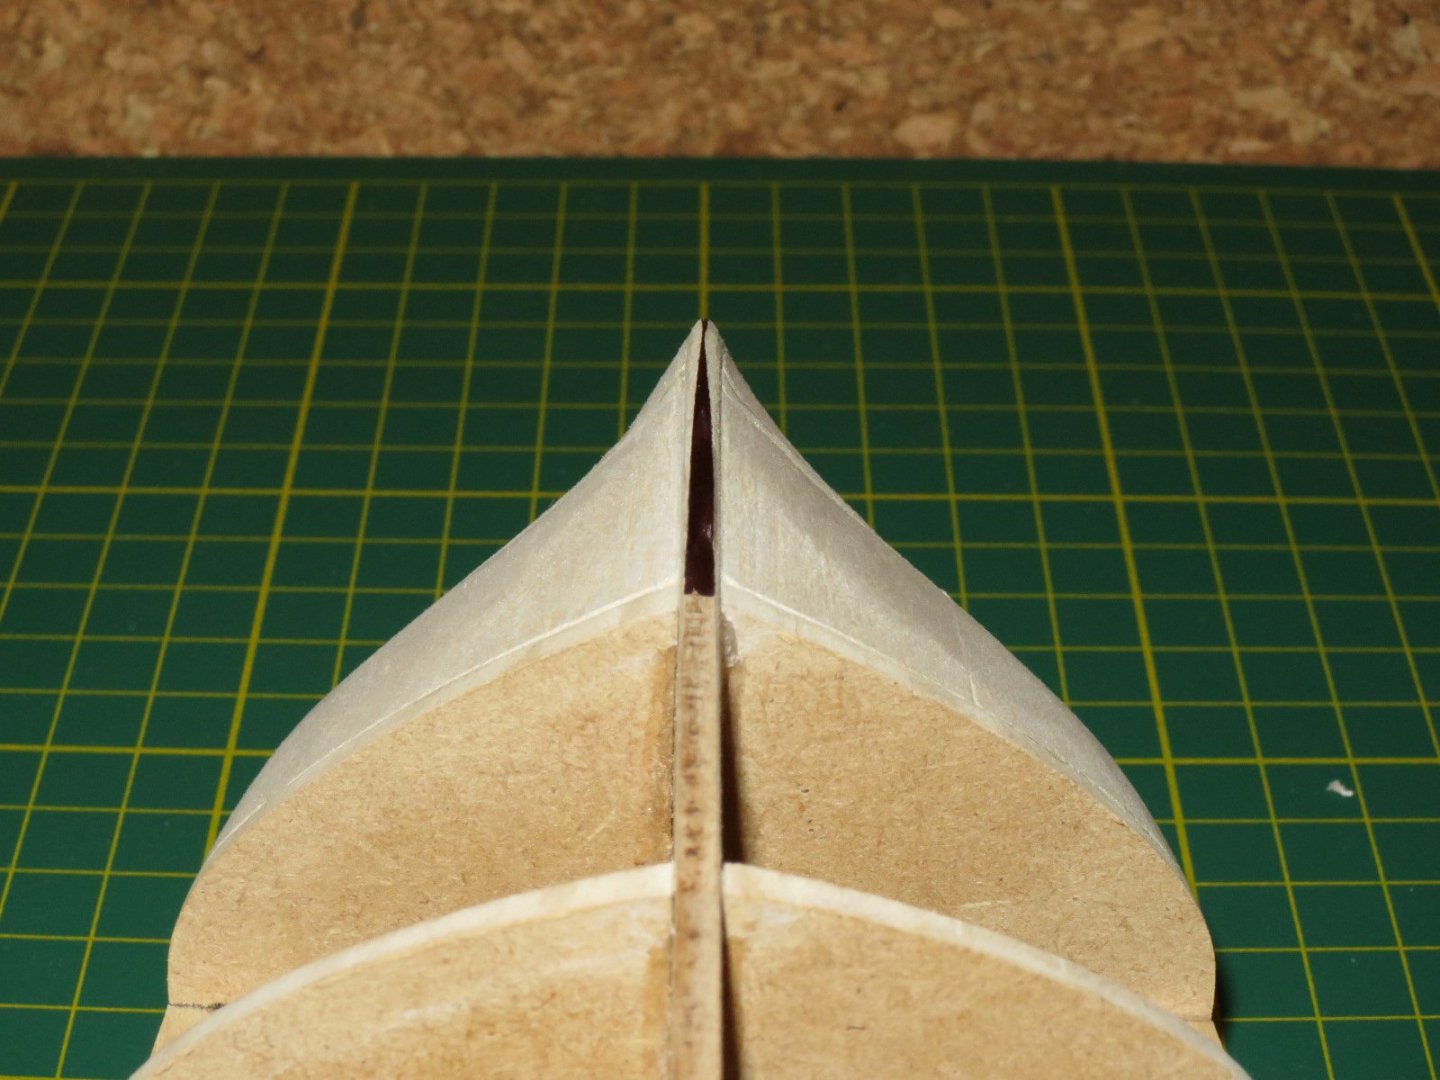
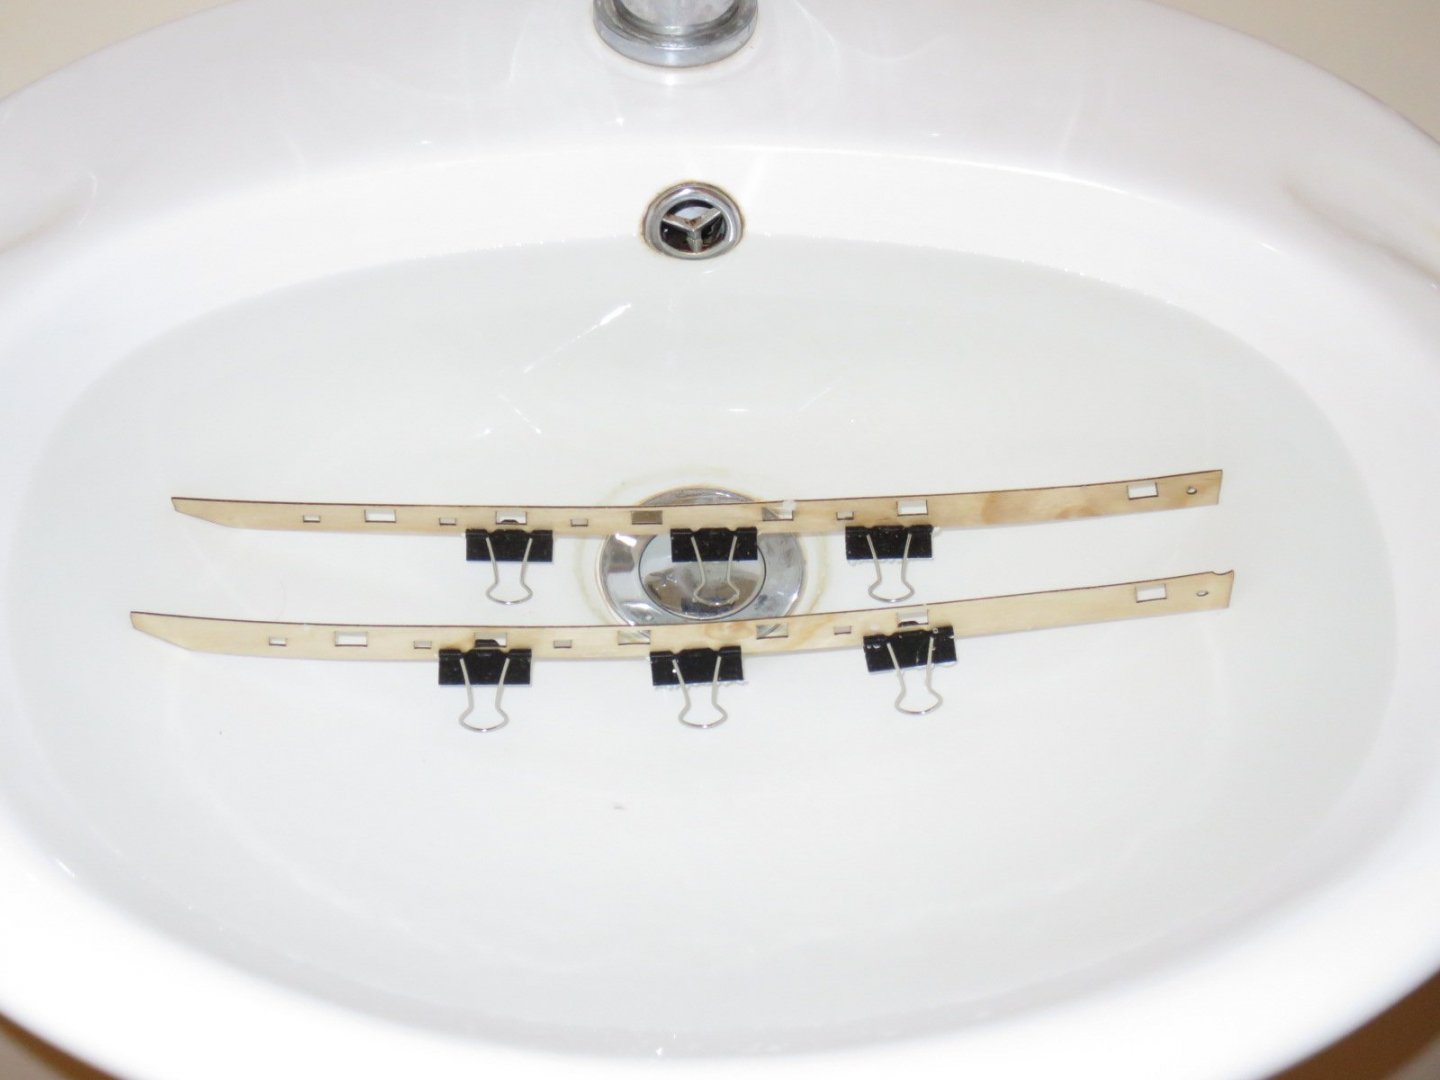
 Thanks Captain, and thanks for the prompt! I fair bit has happened in the last month. I still haven't been home, but started on a new project (for work) on the other side of Australia and am now on the east coast. My workload is pretty high and spare time has been minimal. I've got the 4th plank on and today cut both rabbets which I'm reasonably happy with , but they are far from perfect. Maybe a 6 out or 10 if I'm being generous, but as I will paint below the waterline, I think it will do. I made un-tapered garboard planks for both sides and soaked and ironed the compound curves at the bows. I didn't think I would have enough time to place them correctly if I used CA, so I decided on yellow PVA and did one side at a time. I held the stern and amidships in position with clamps, and pressed the bow into position and help it with my fingers. I'm intentionally using the darker timber below the waterline (as it will be painted), but will colour match above the waterline where I plan to use a couple of coats of thinned matt varnish to seal/protect the timber. Now I need to decide on the layout for the second planking. I don't like the look of steelers, but they will give a much fairer line to the rest of the planking. I'll have a look through some of the other Lady Nelson and Sherbournes for ideas. Cheers, Stu
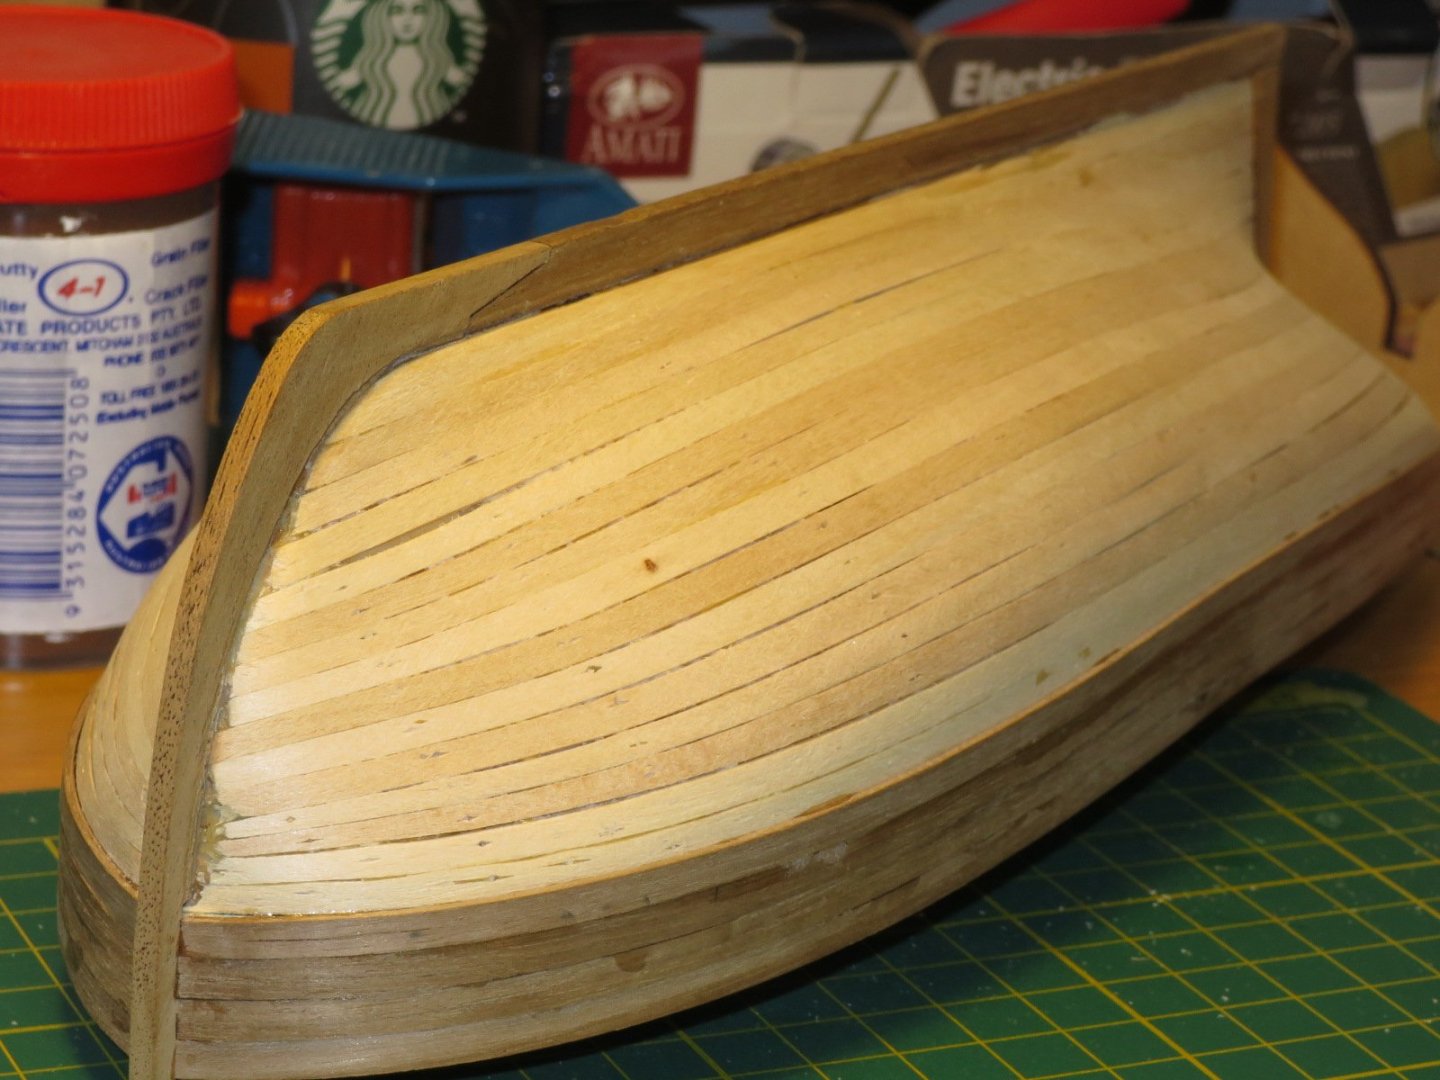
- 34 replies
-
- 4
-

-
- lady nelson
- victory models
- (and 1 more)
-
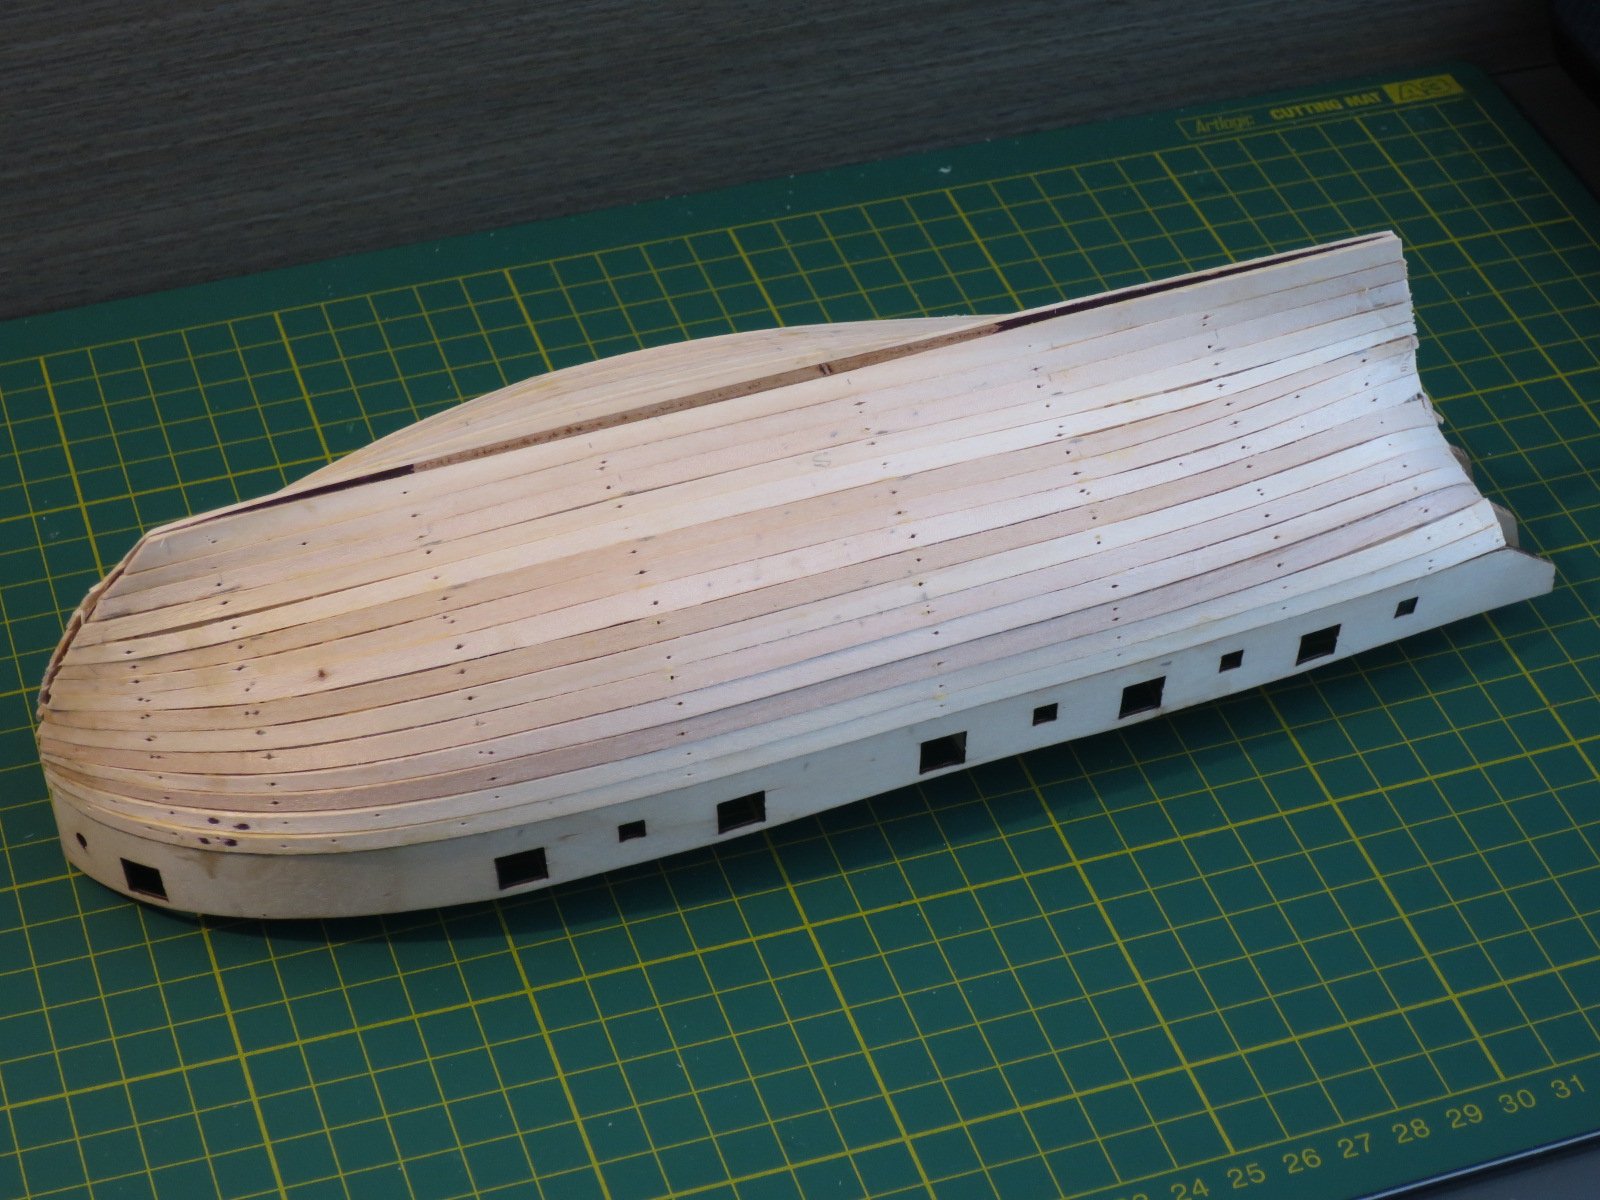
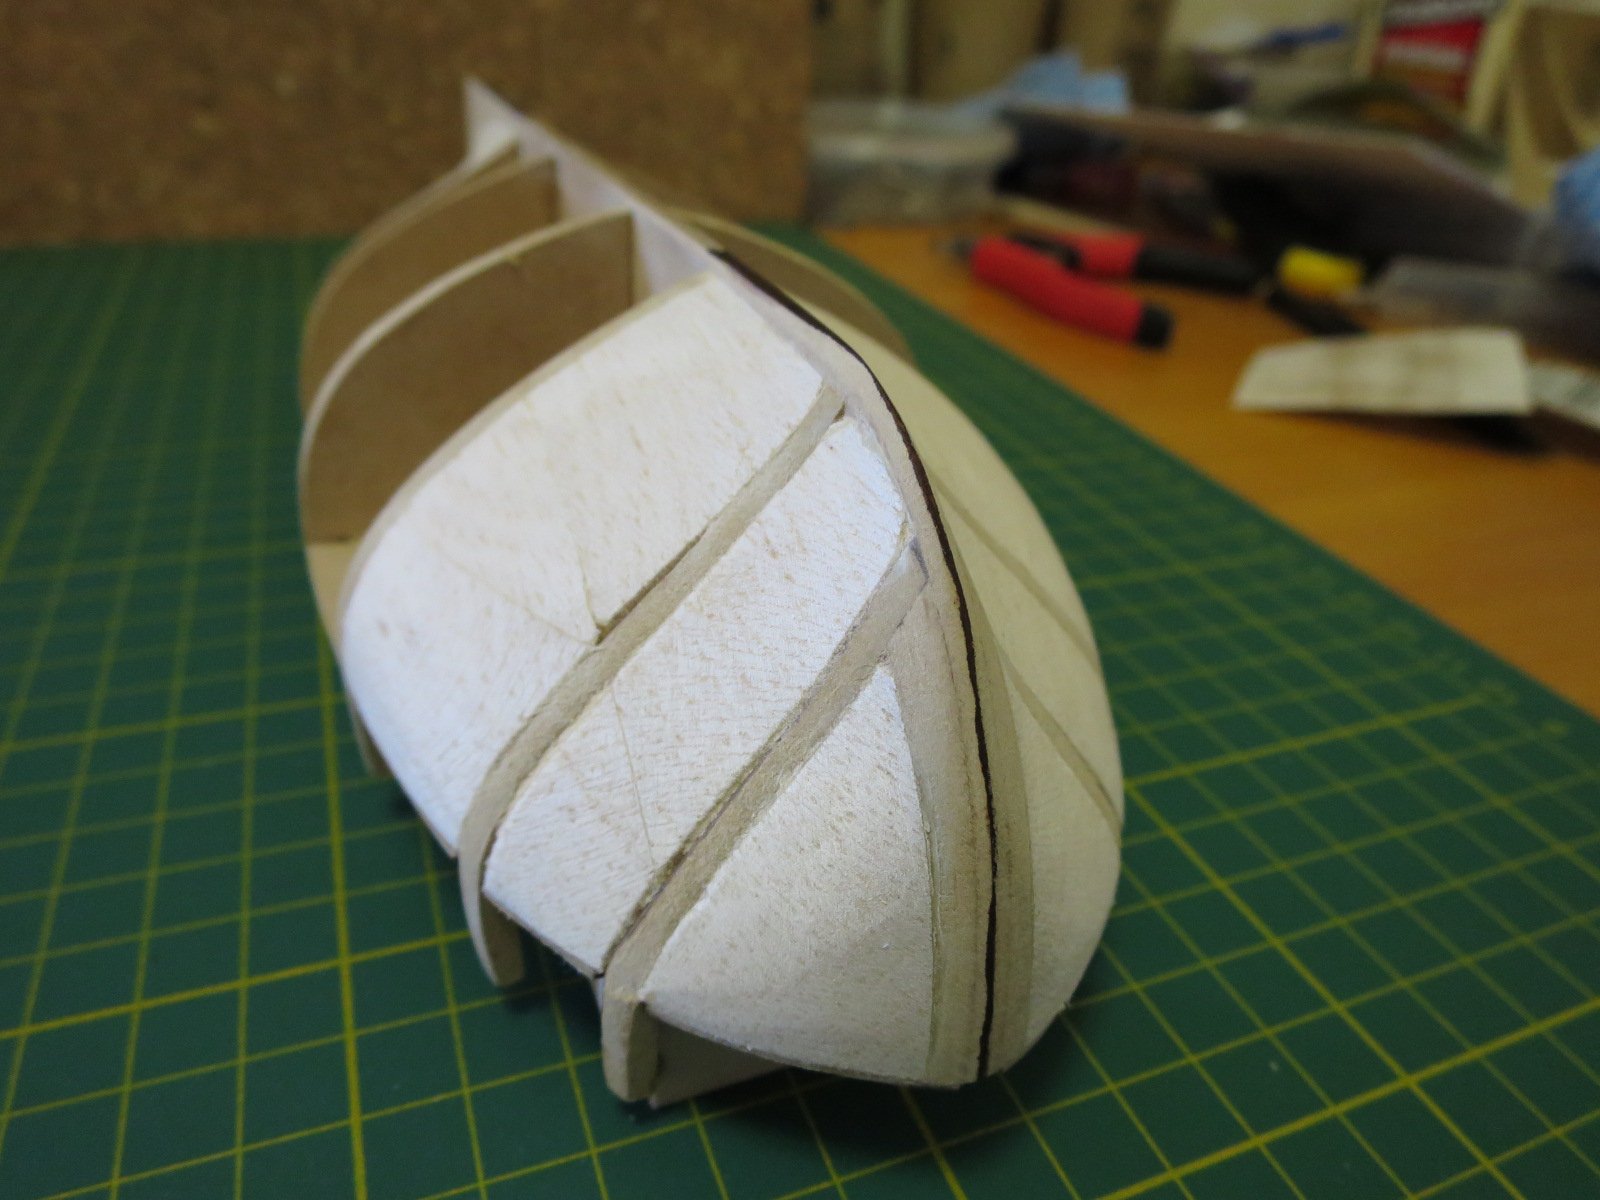
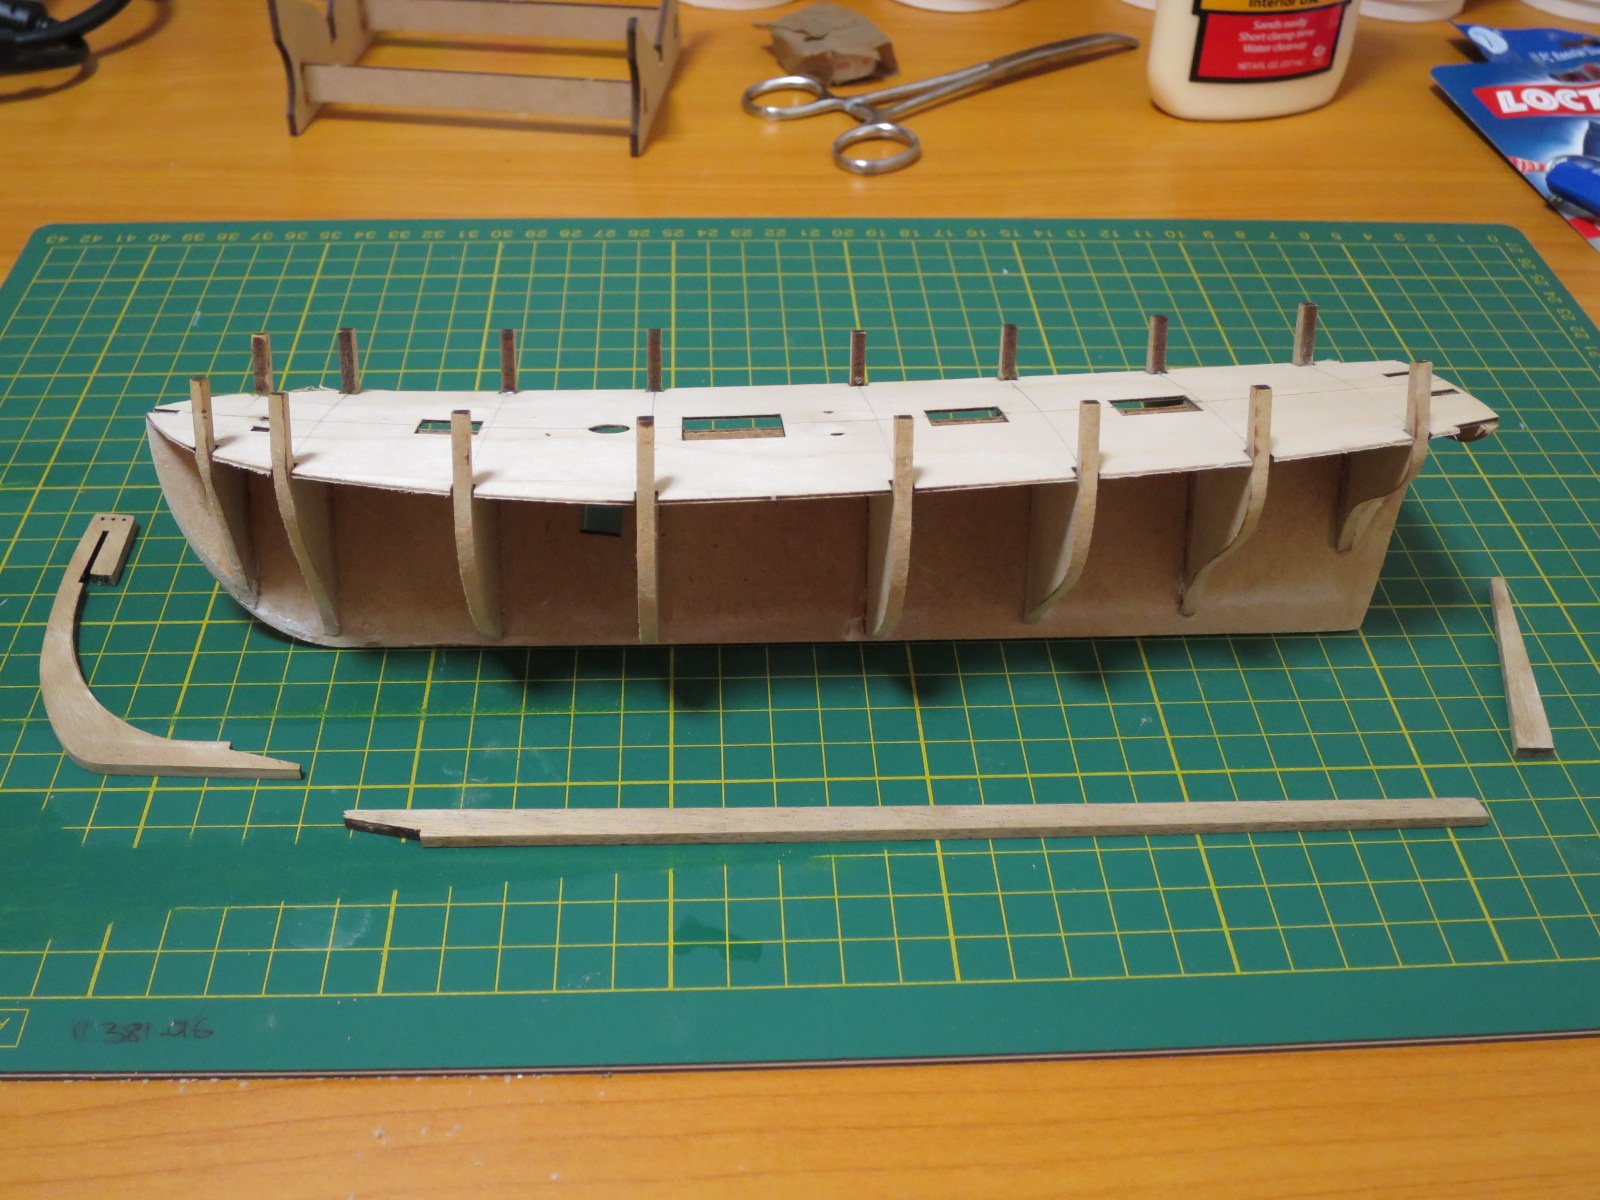
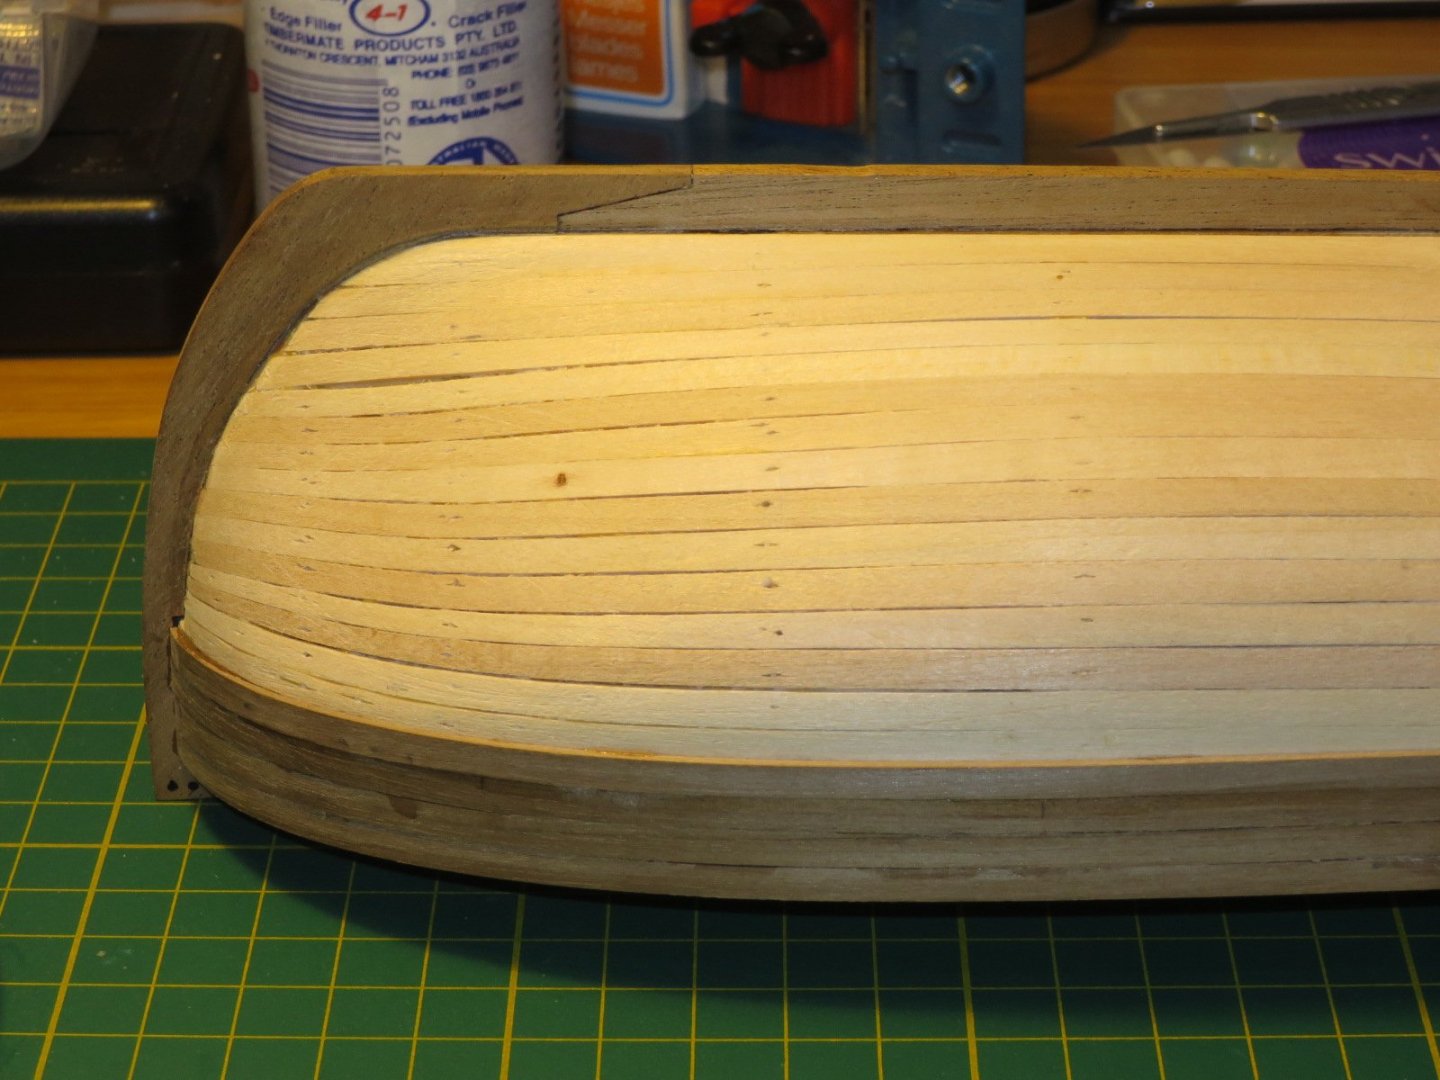
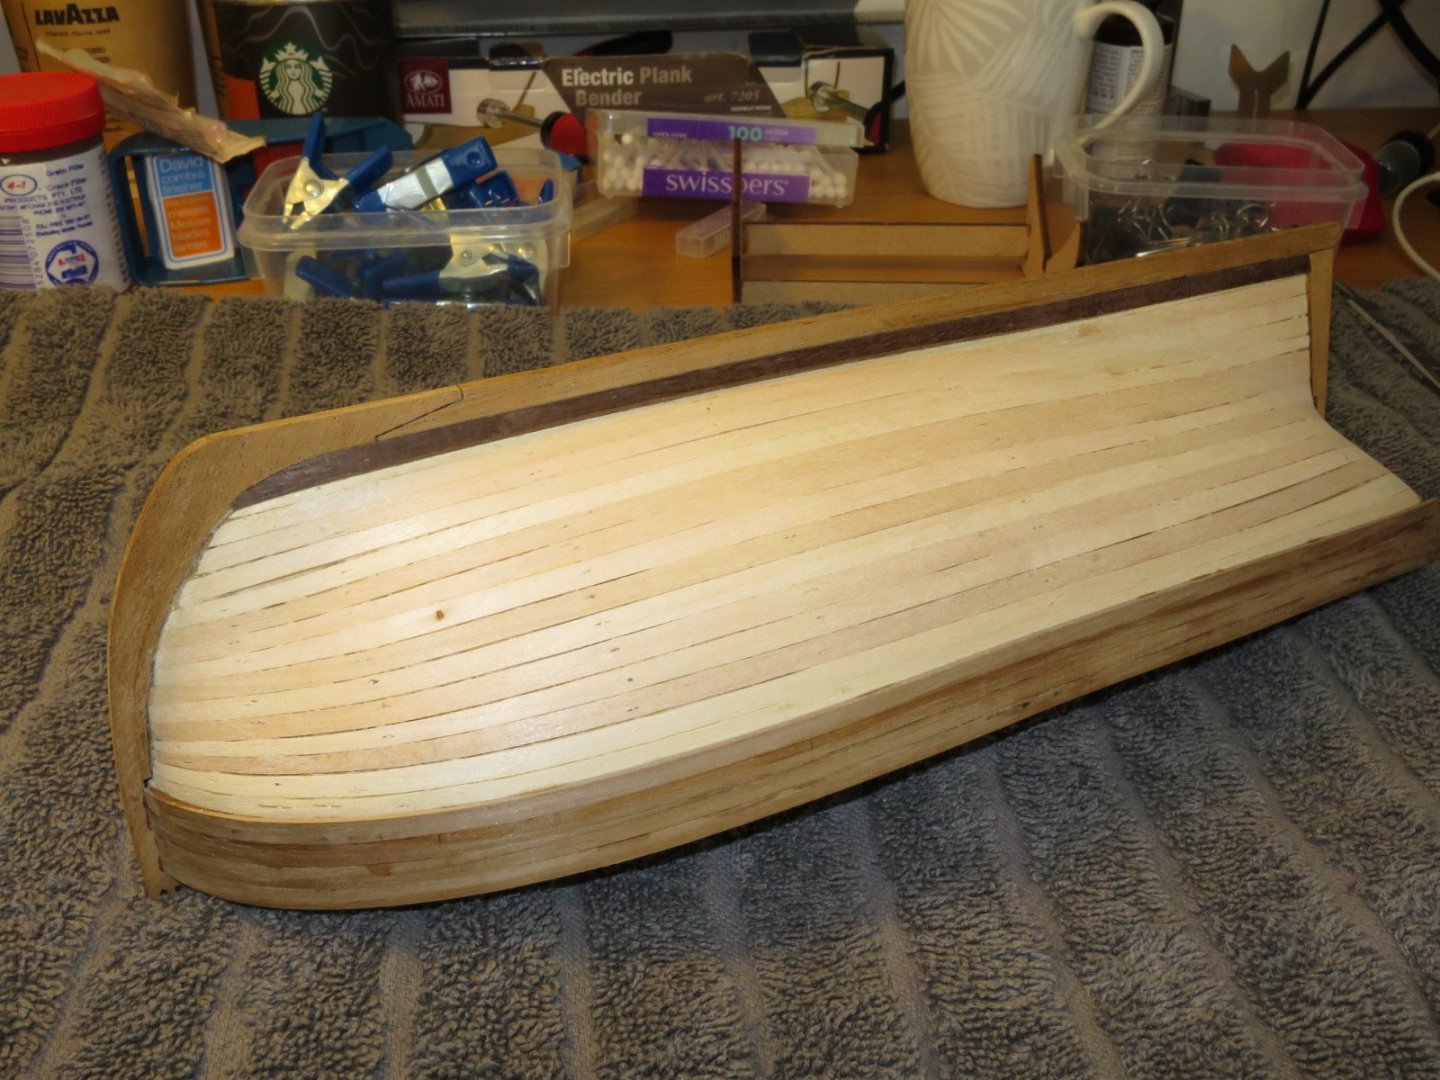
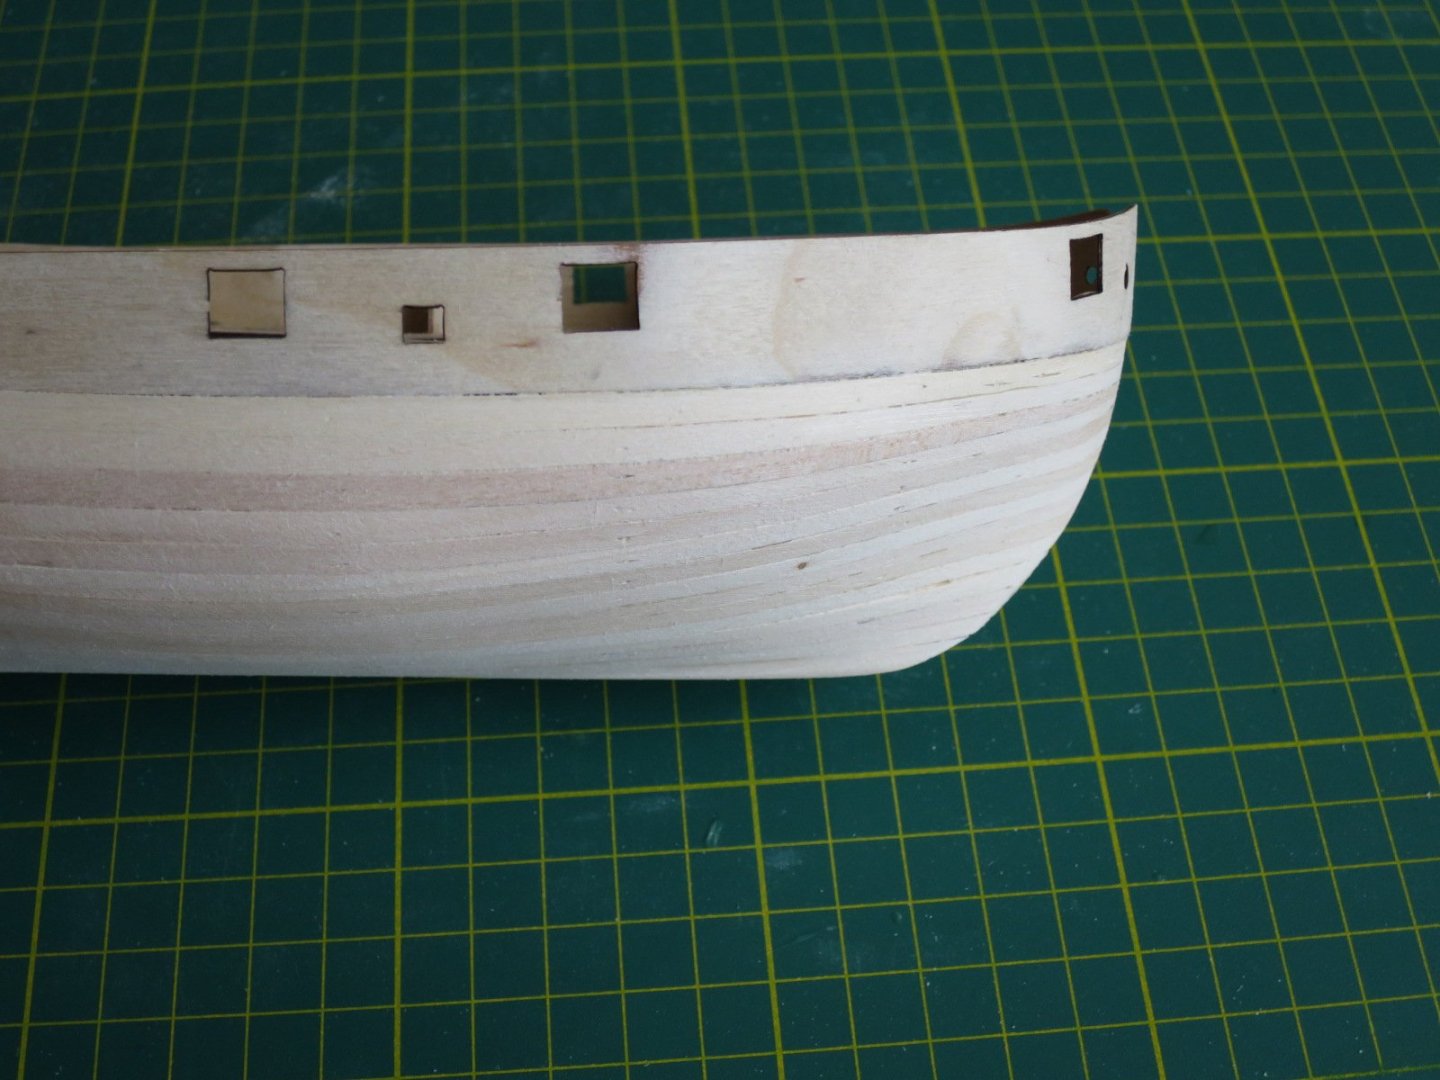
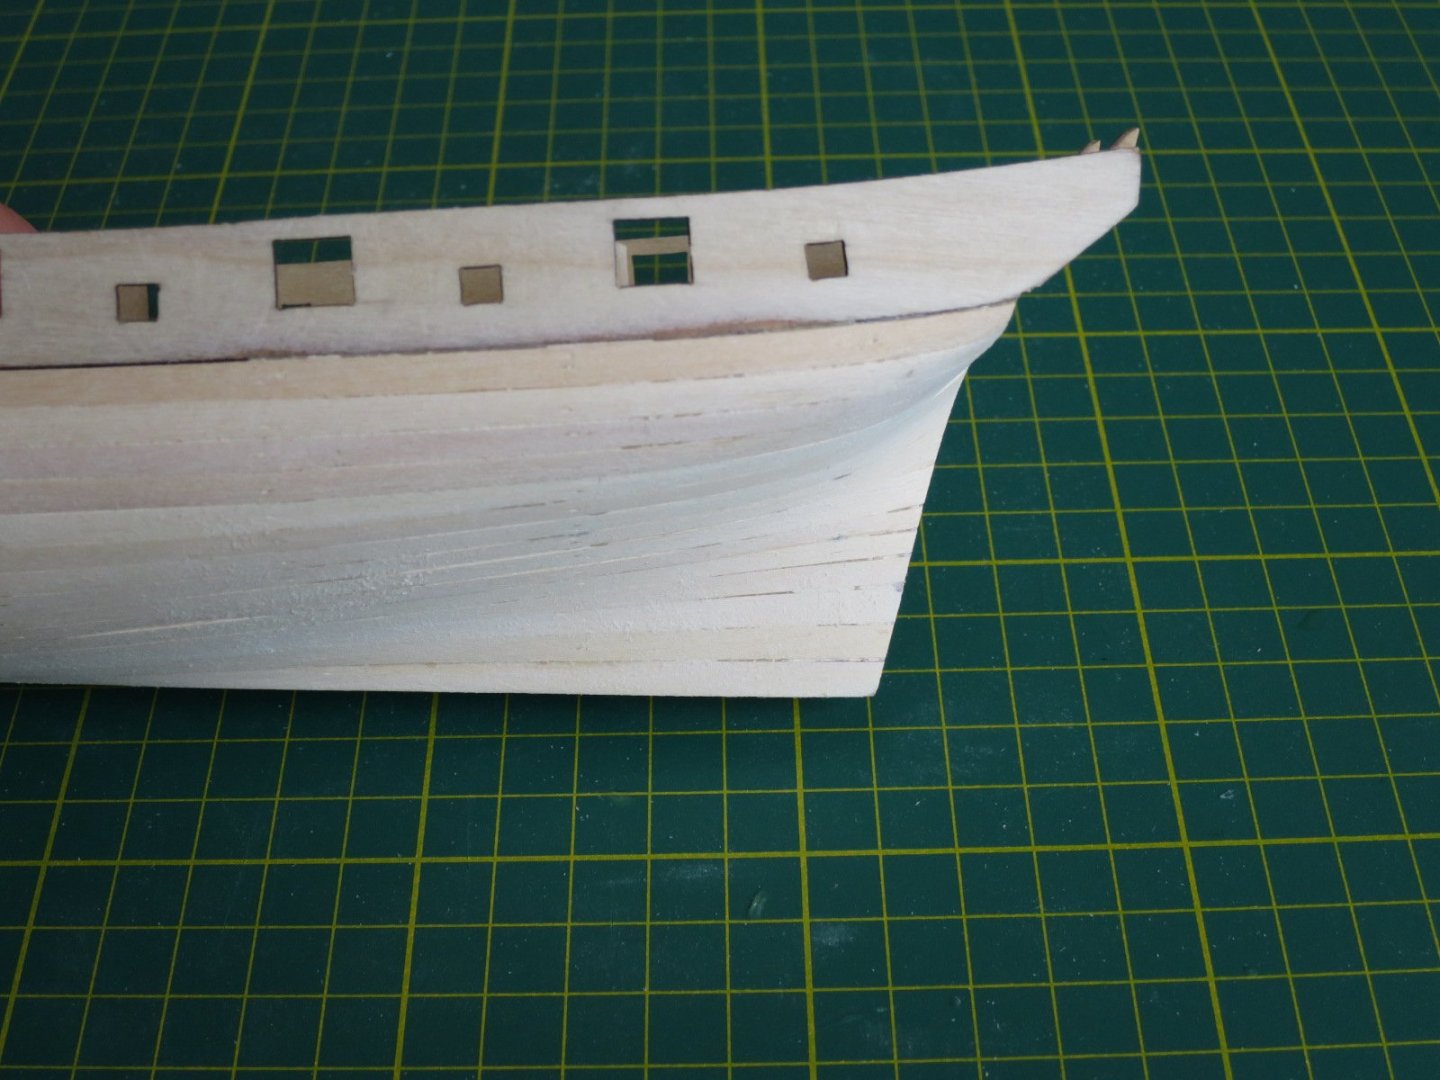
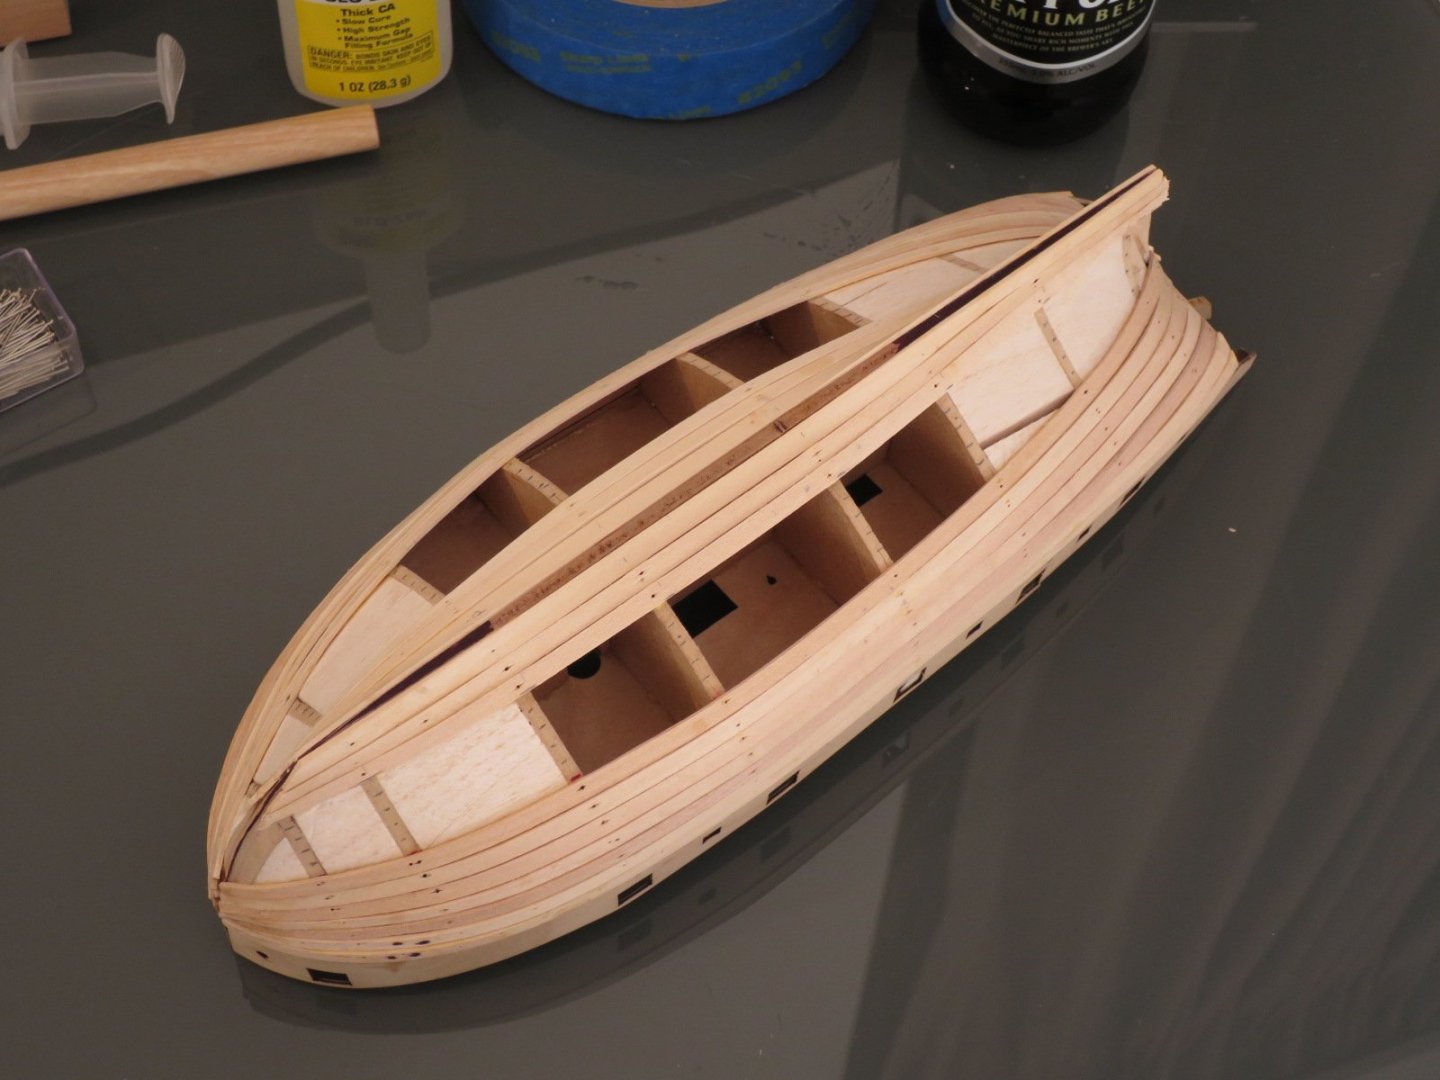
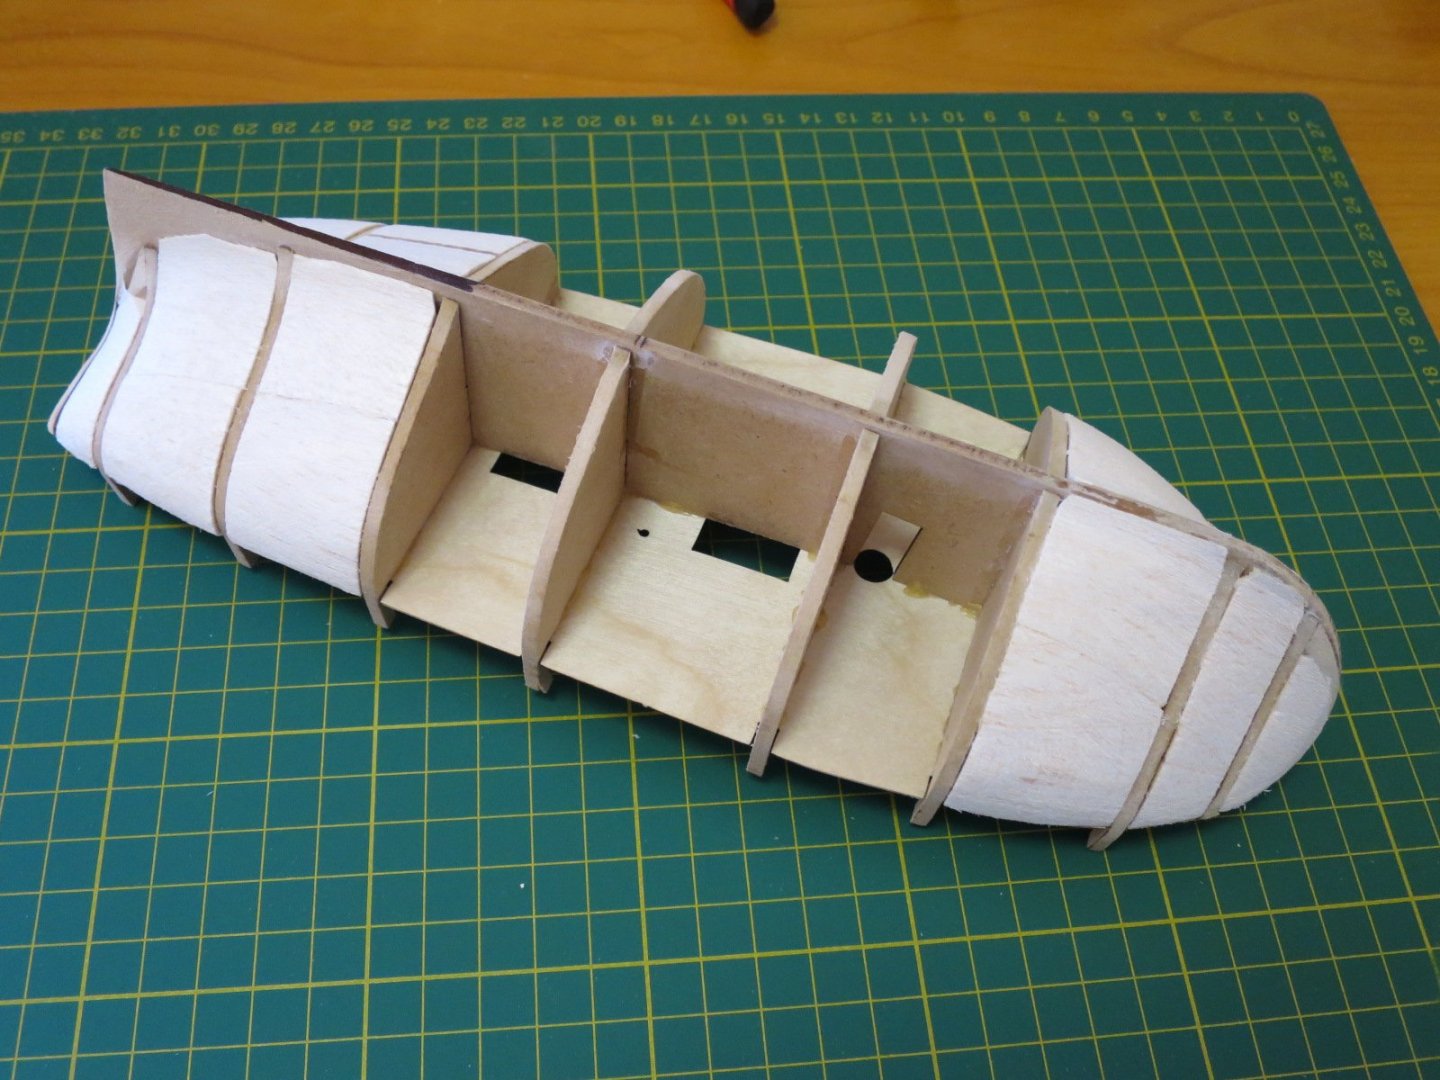
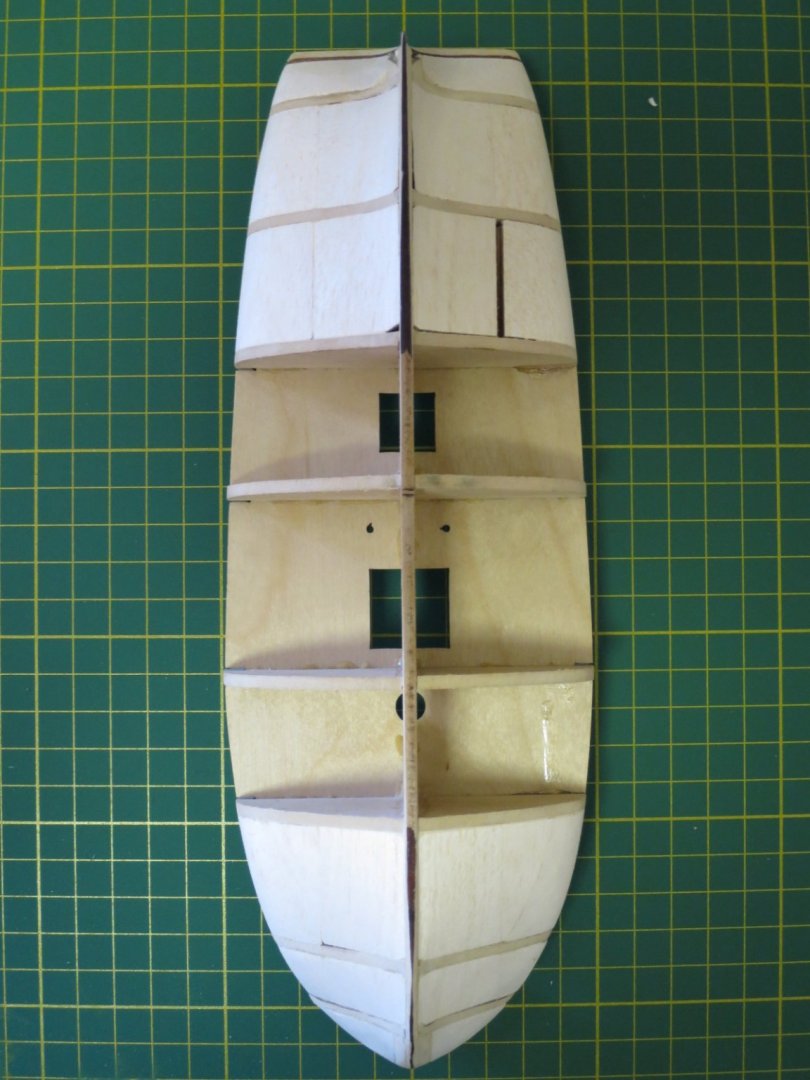
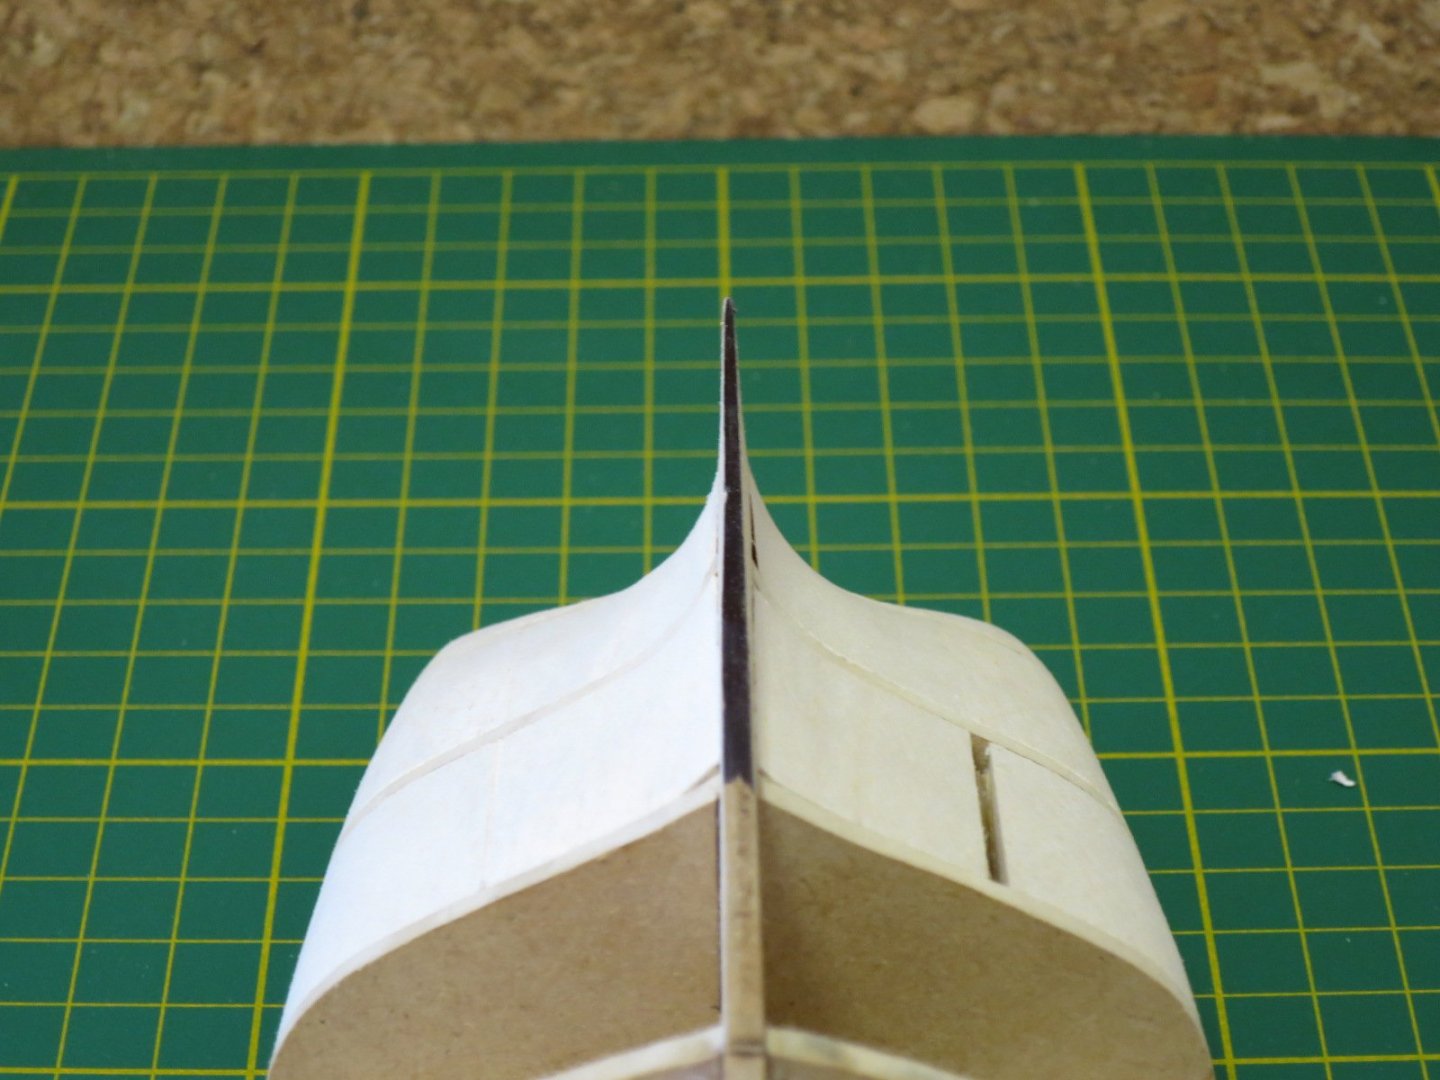
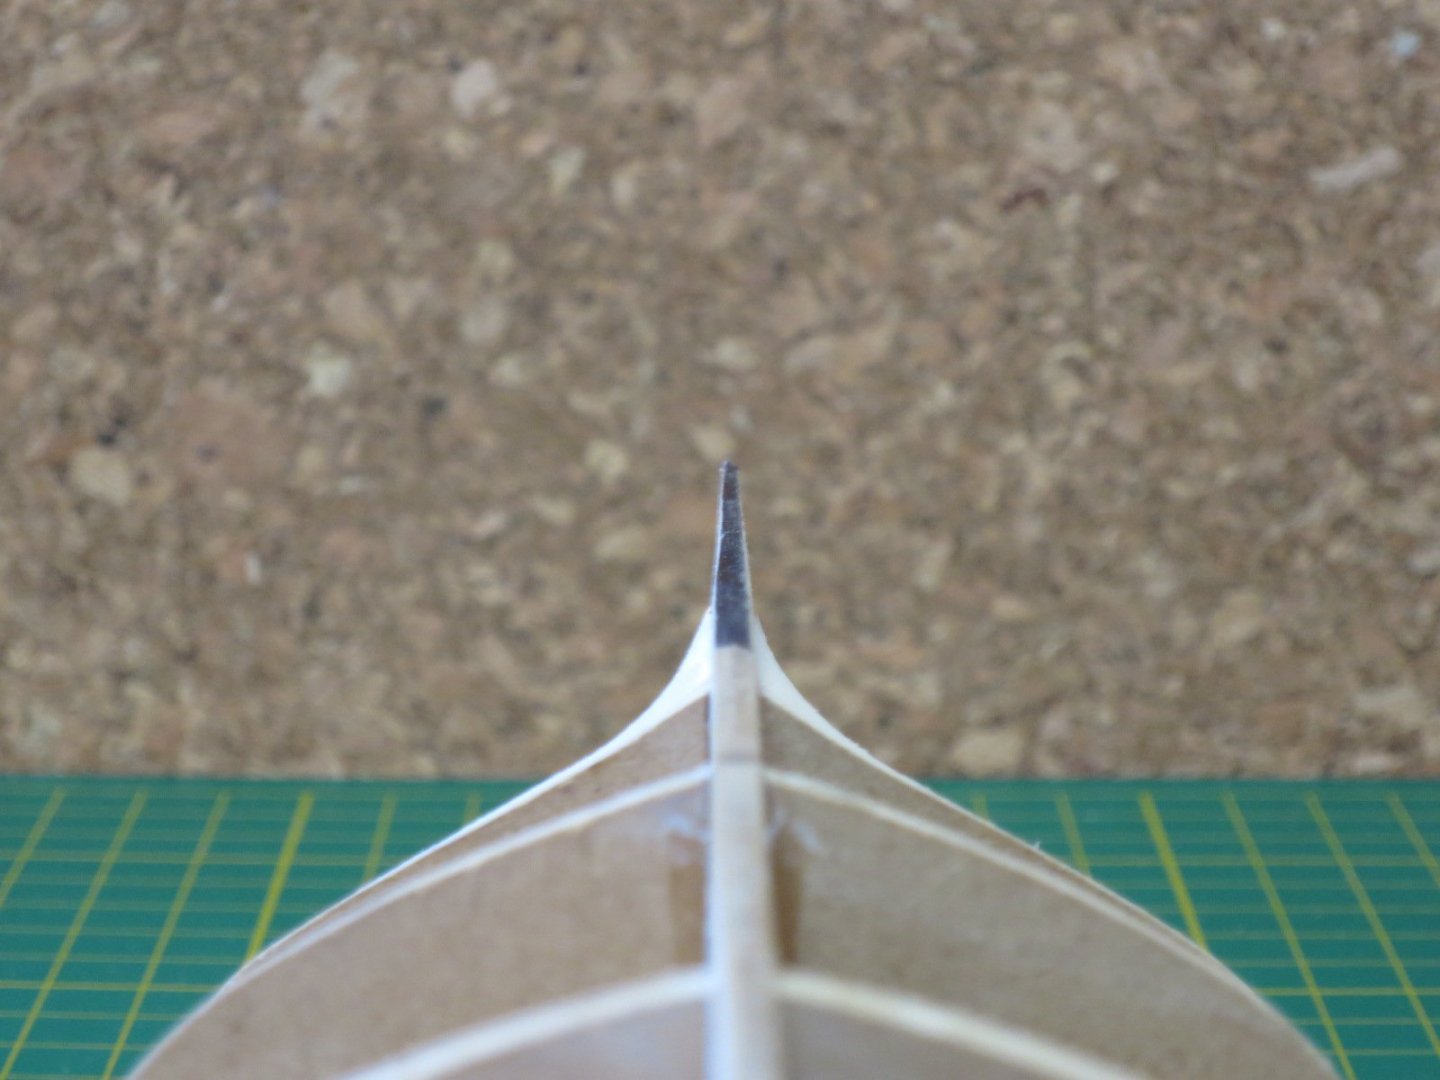
To be honest, not too much to report, but I've got the top 3 planks on both sides. These weren't tapered at all, and as I suspected, soaking and forming the planks on the bulwarks didn't do anything to help. I ended up slightly over bending the planks to fit the curve at the bow to making gluing with CA easier. I glued the planks in about 3" sections at a time i.e. apply glue to about 3" of hull, then fit and hold the plank in position for about 10 seconds until the CA held it, then would apply glue to the next section etc... It's not perfect, but I'm pleased enough with it so far. I will fit a 4th untapered plank on the topsides, then an uptapered garboard plank at the keel. The rest will be tapered. Cheers, Stu


- 34 replies
-
- 4
-
-
- lady nelson
- victory models
- (and 1 more)
-
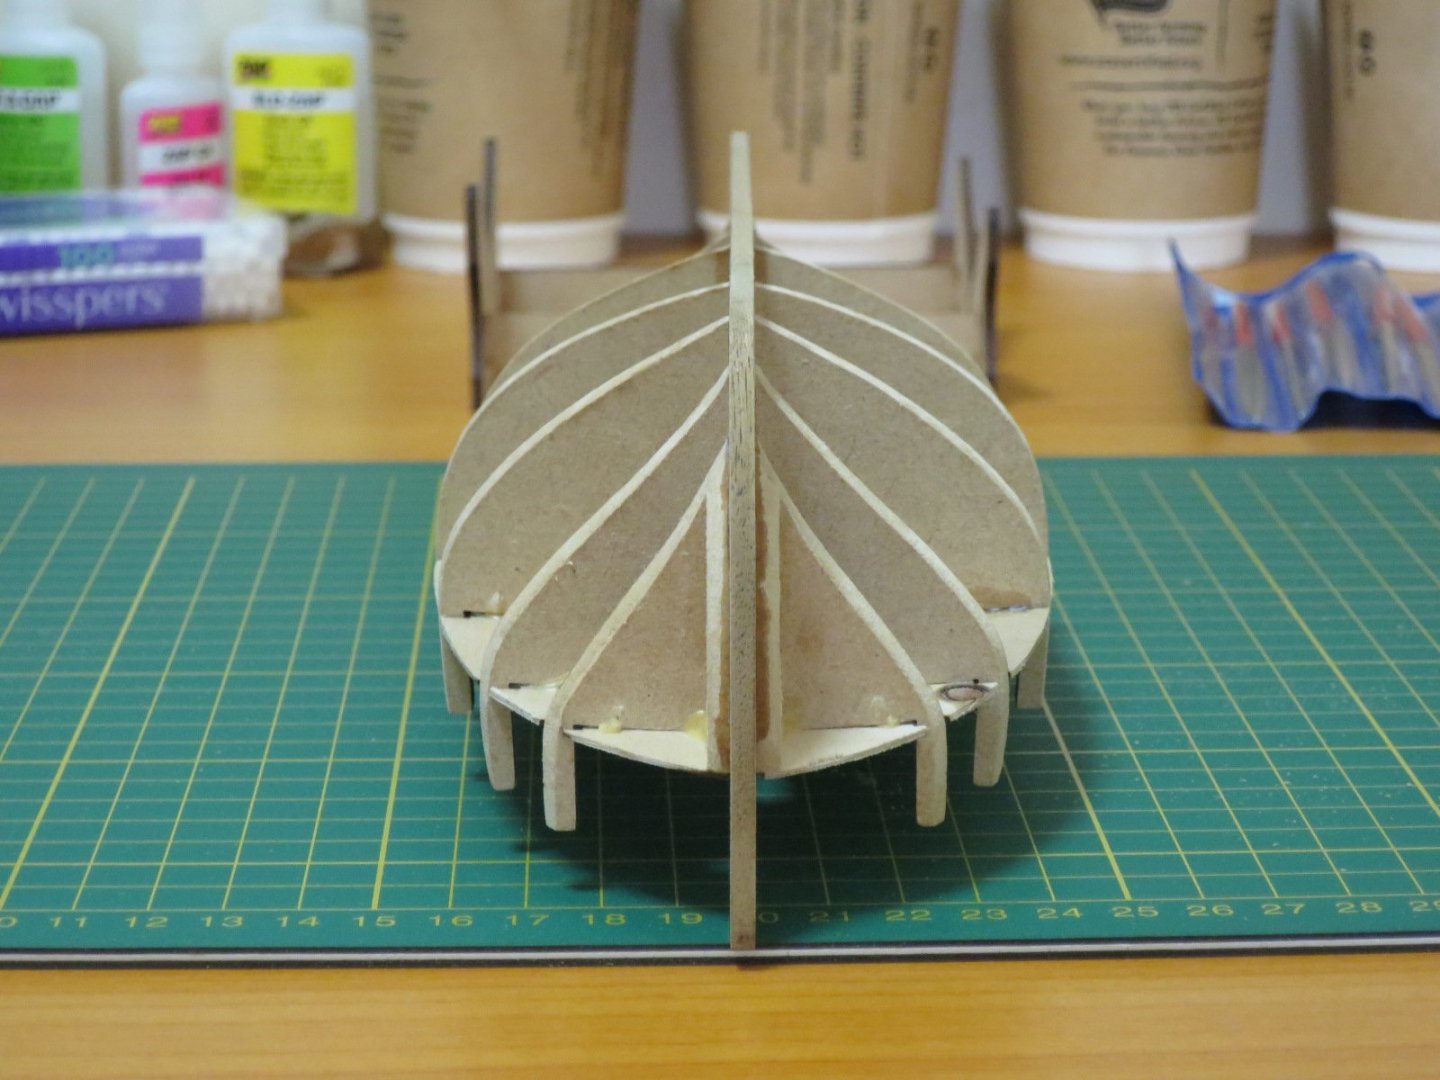
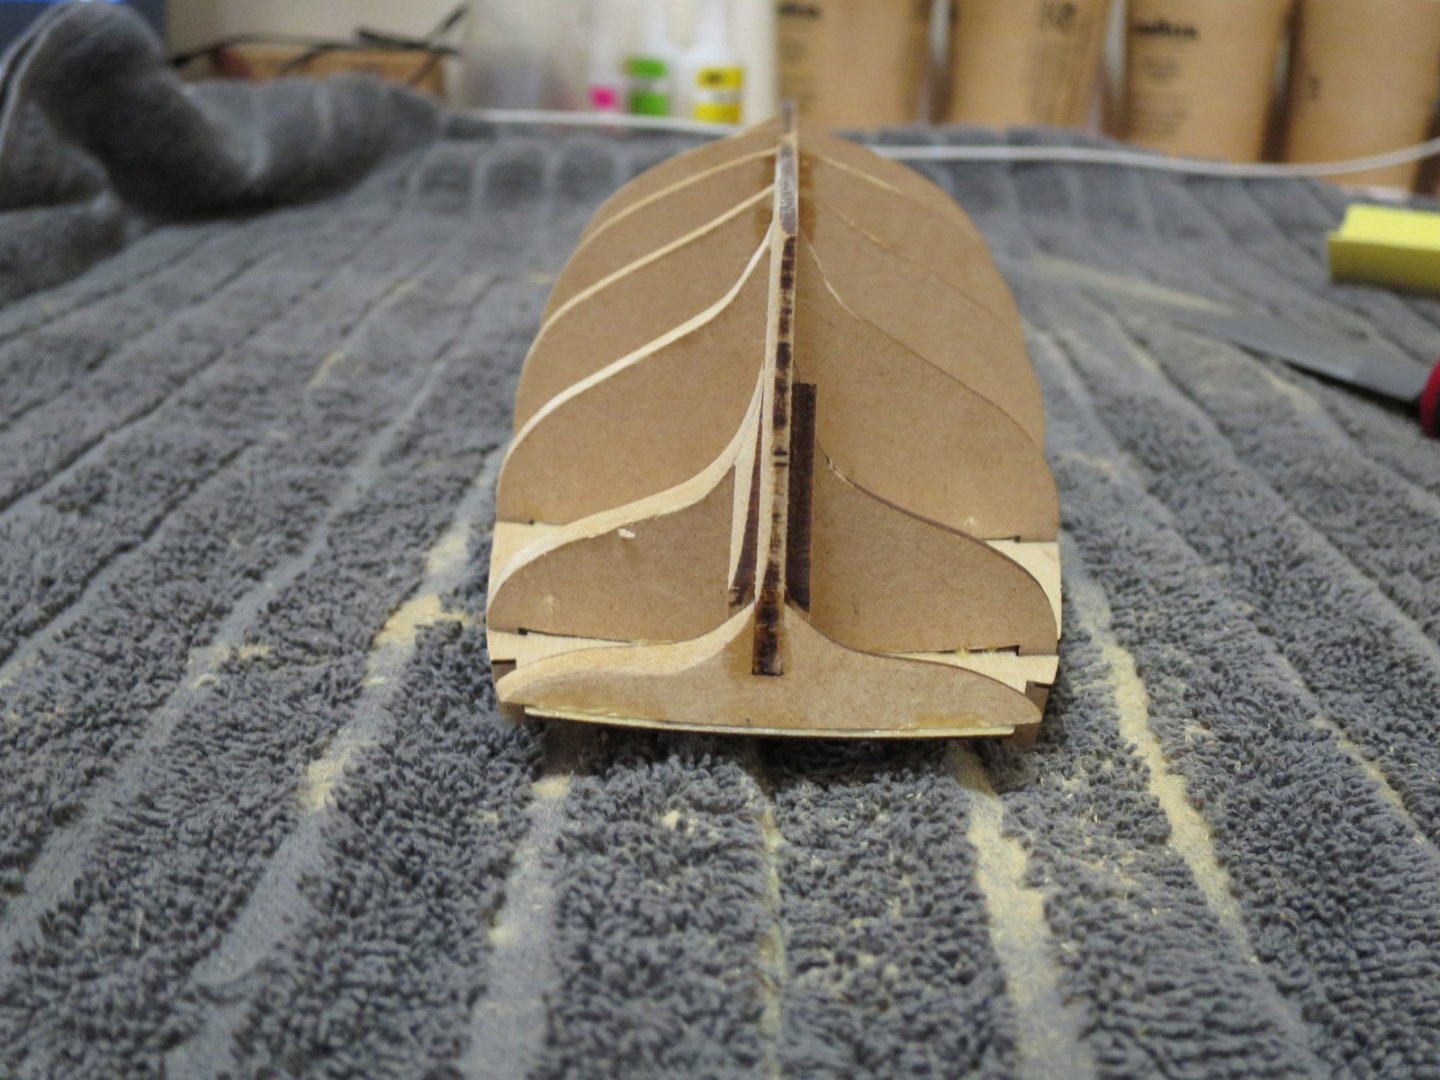
I pre assembled the bow and keel pieces Then after making a miniature long board did a bit more sanding at the stern and along the keel to try and form a rabbet. I actually reverted to a 16mm hardwood dowel with 120 grit paper wrapped around it for most of sanding, then glued the bow, keel and stern post on. Sorry I forgot to take a photo of this. I roughly graded the walnut planking by colour and plan to use the lighter at the top, then get progressively darker toward the keel. I soaked 2 light coloured planks and bent them to shape around the top of the bulwark and clamped them in place. I'll let it dry overnight, but I can tell already that this won't do much for me. I think I'm better off just soaking and bending (with my planking iron) the bow section, then gluing it on progressively with CA once it's dried. I would give it a go now, but need to psych myself up for it... Stand by - more in 24 hours. Cheers, Stu


- 34 replies
-
- 9
-
-
- lady nelson
- victory models
- (and 1 more)
-
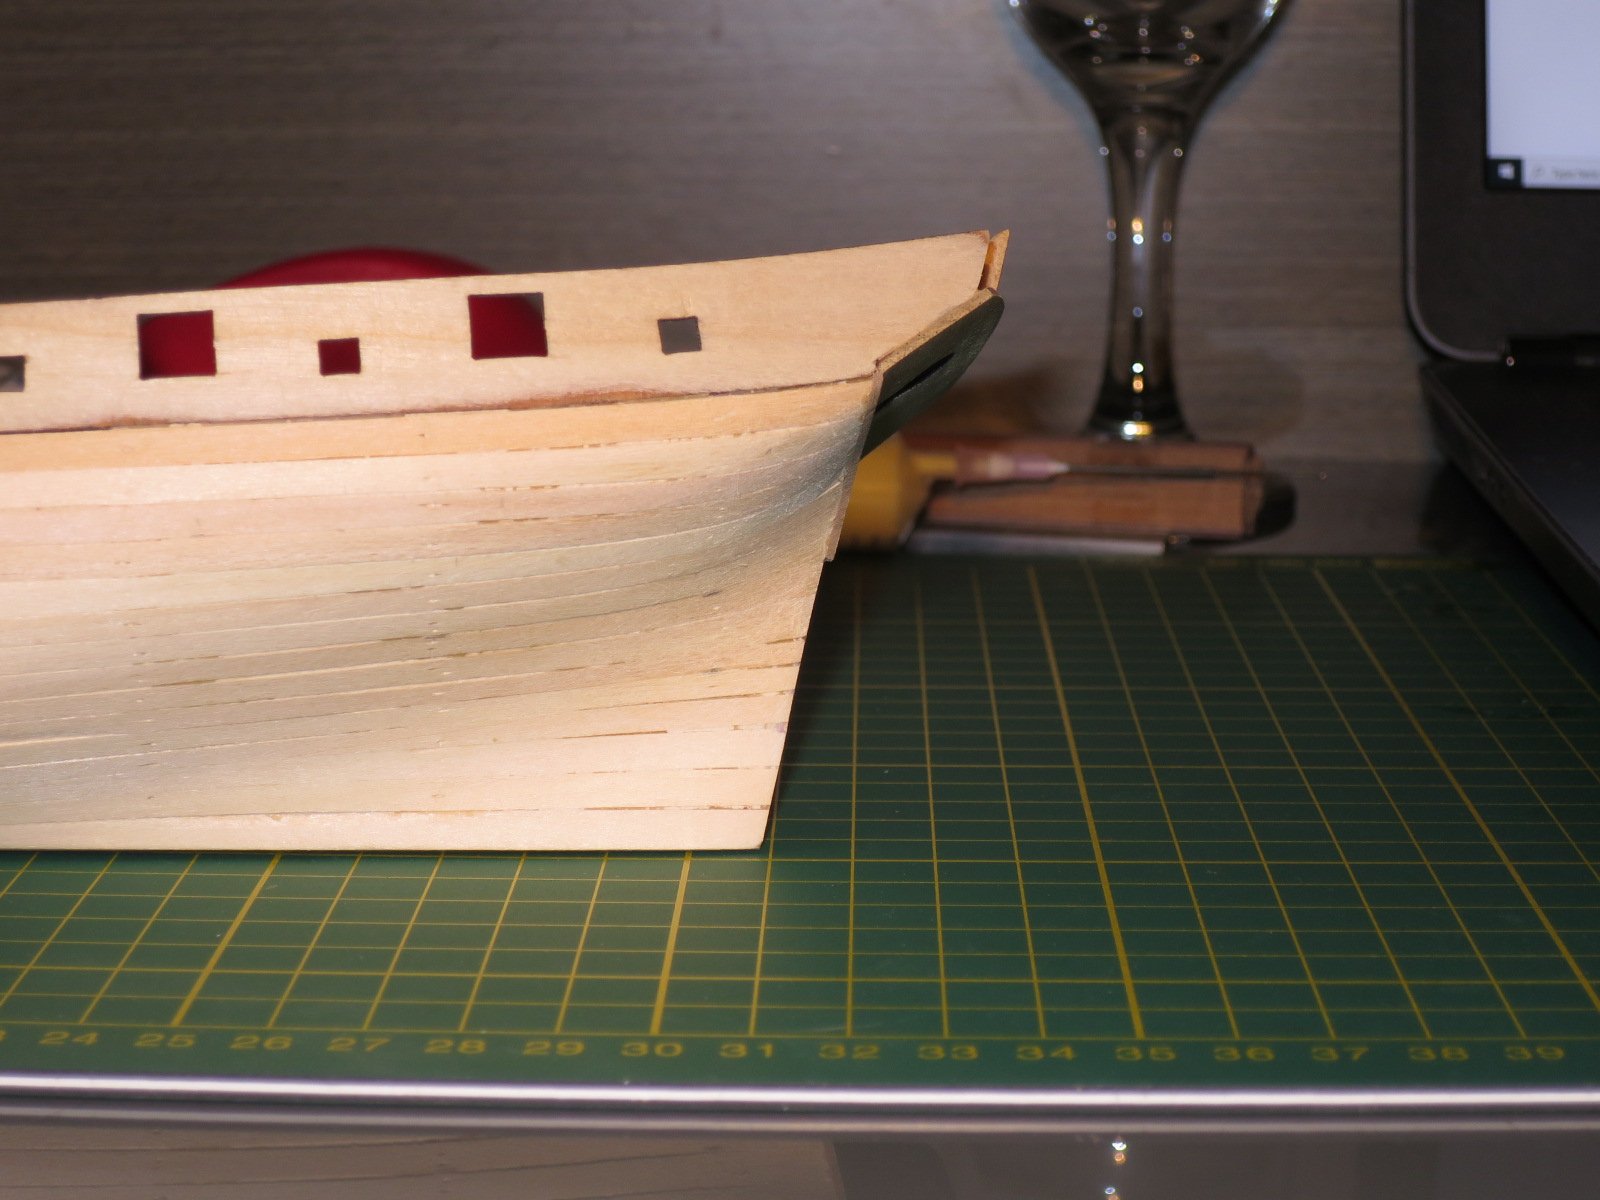
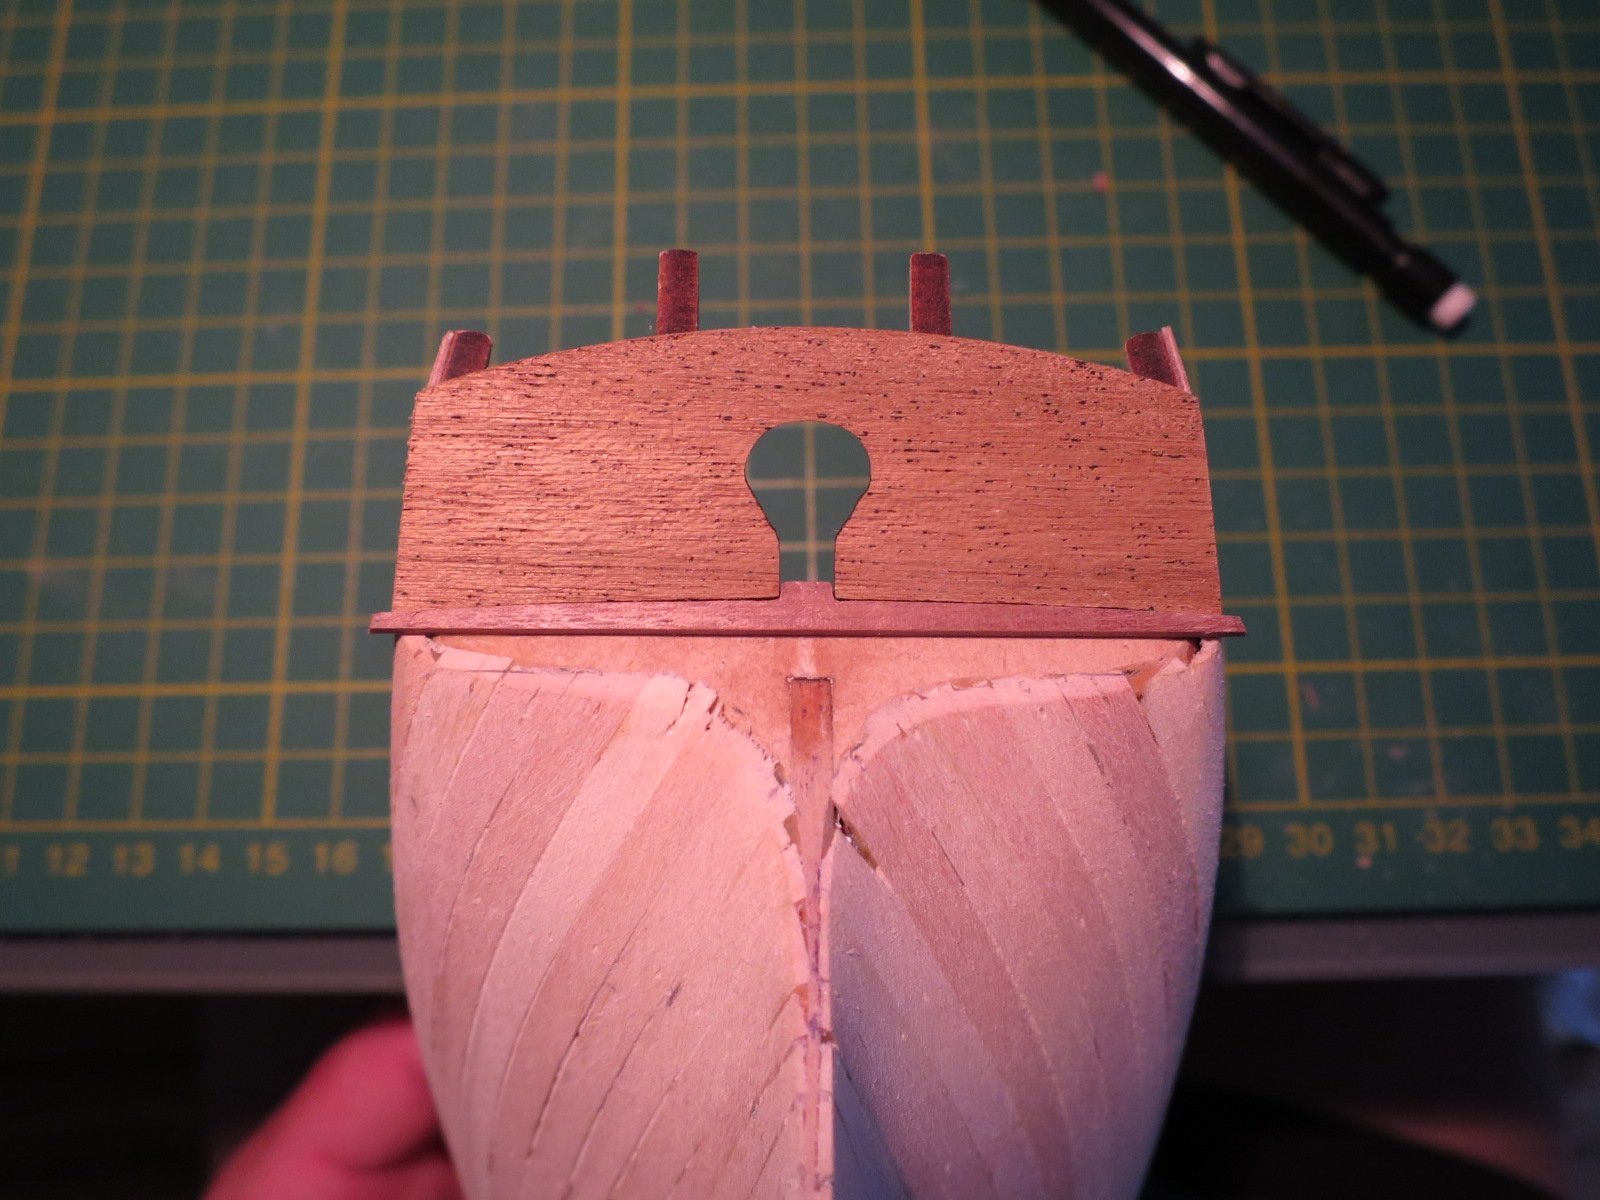
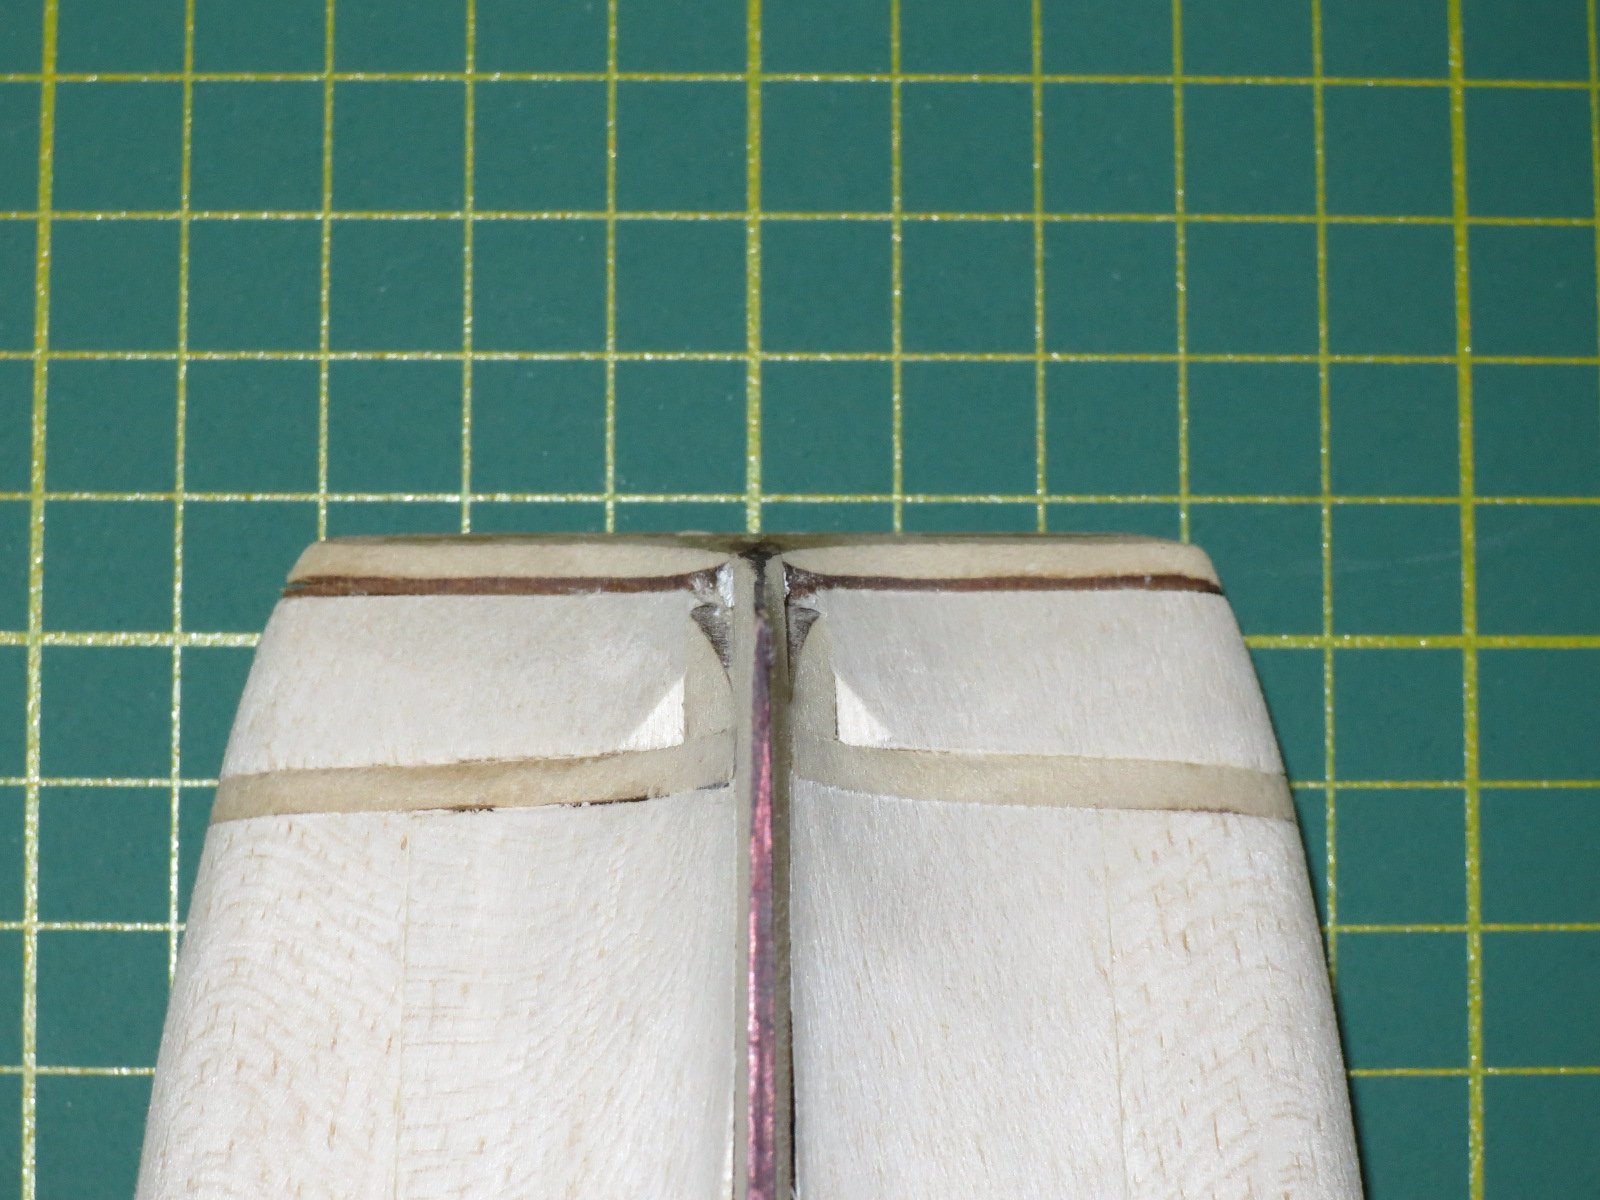
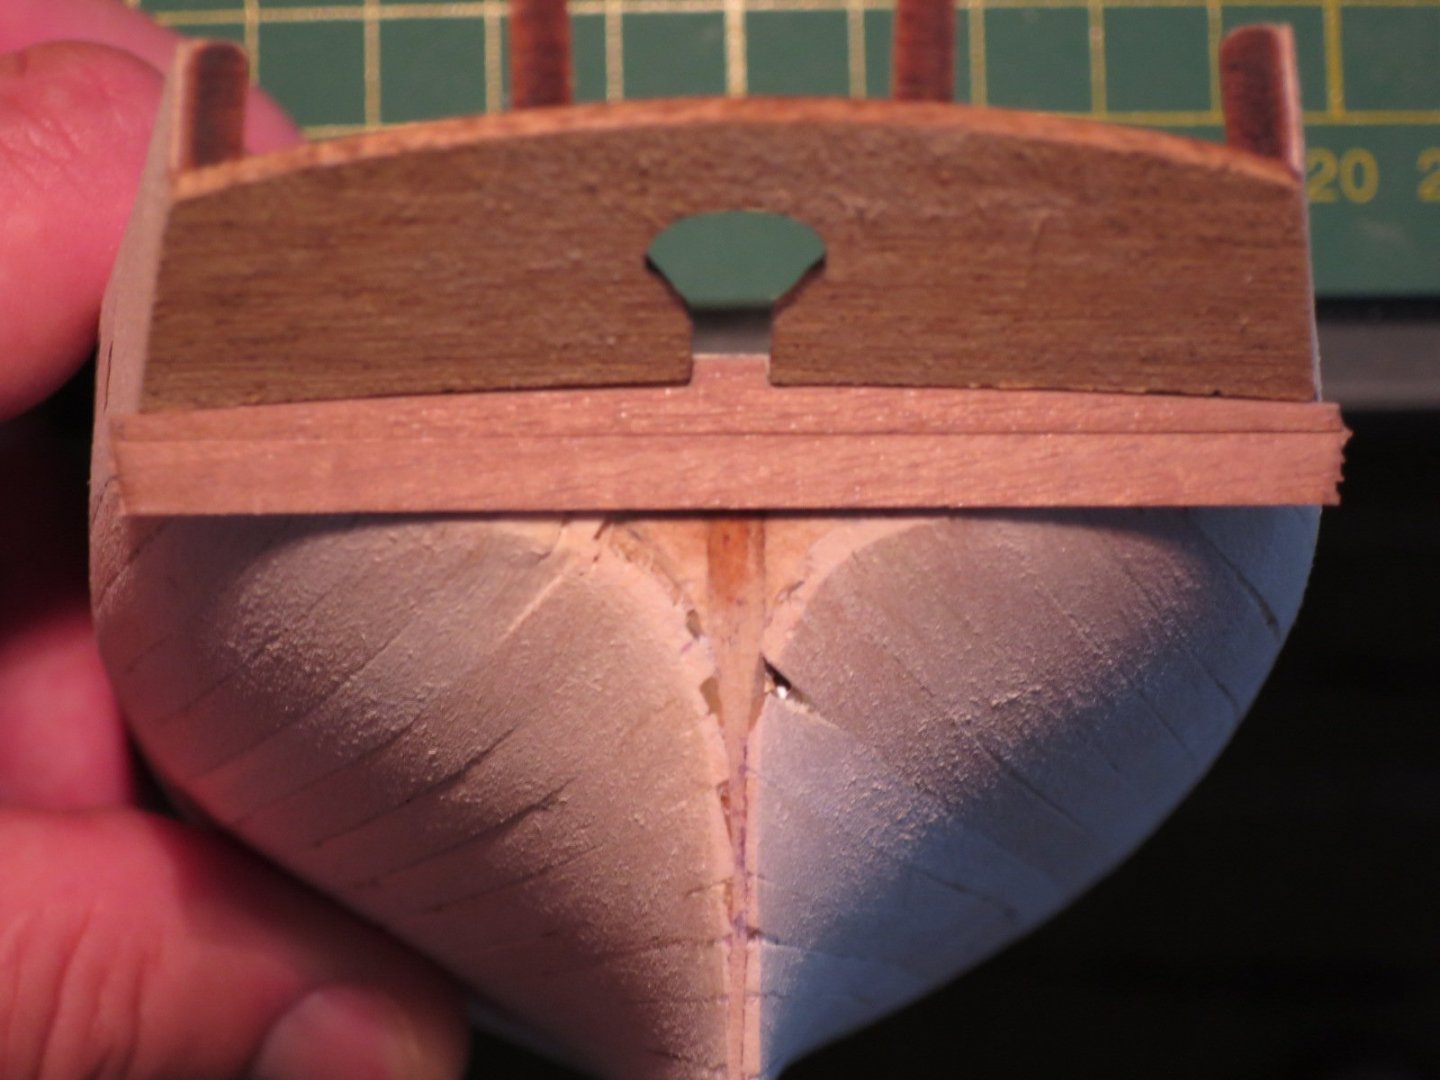
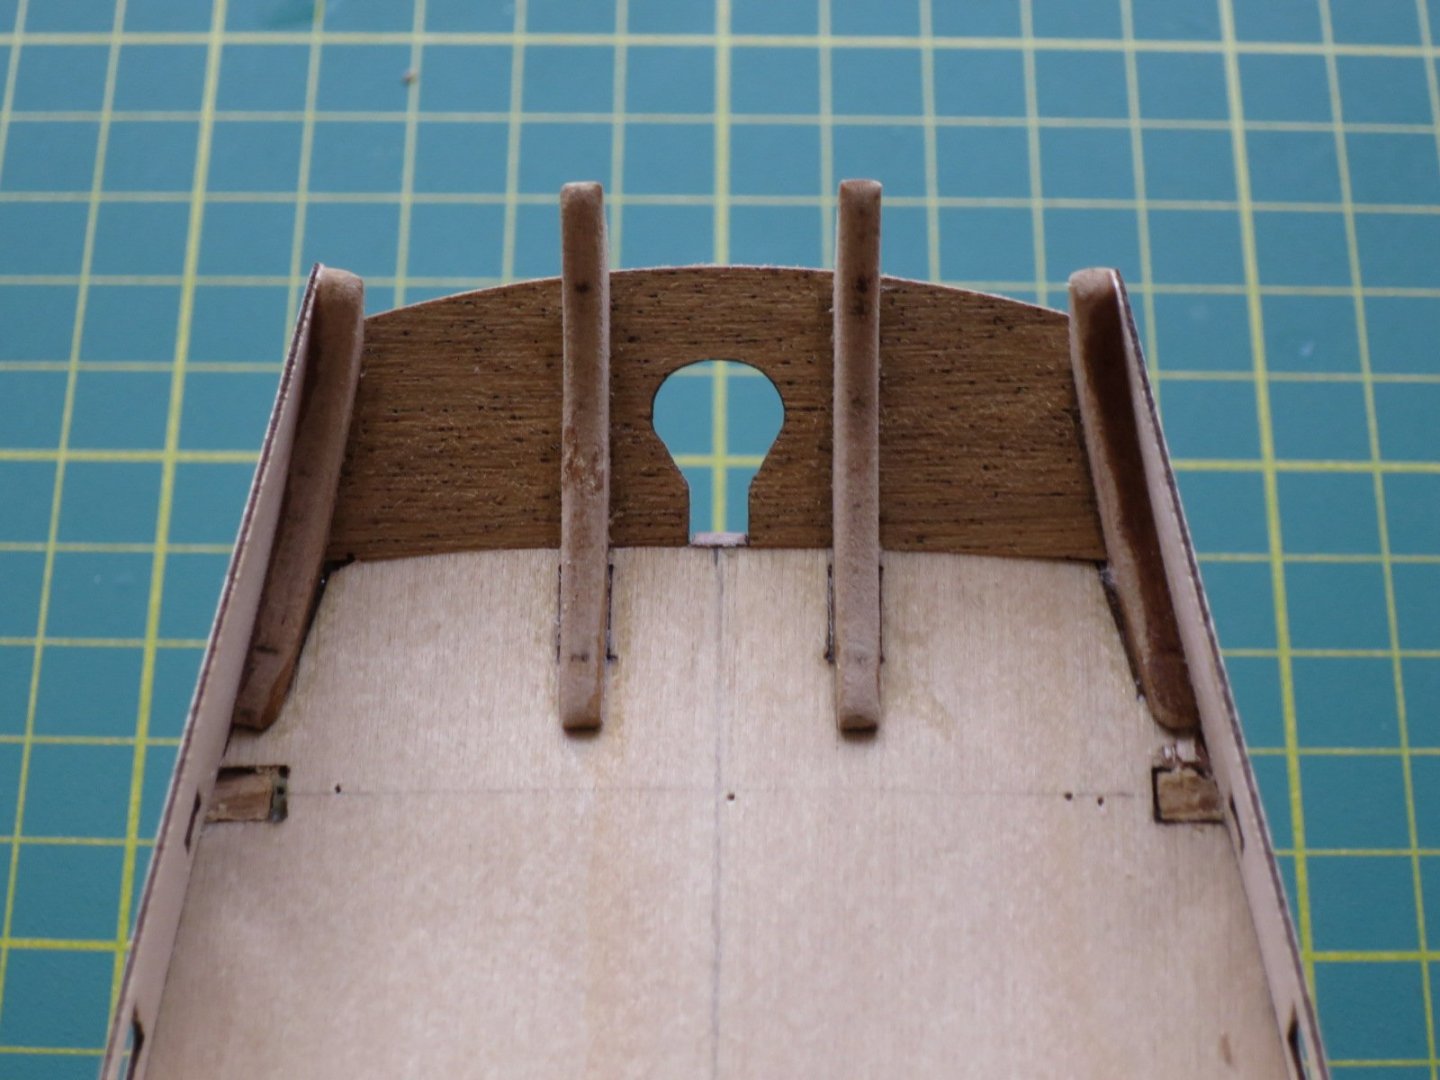
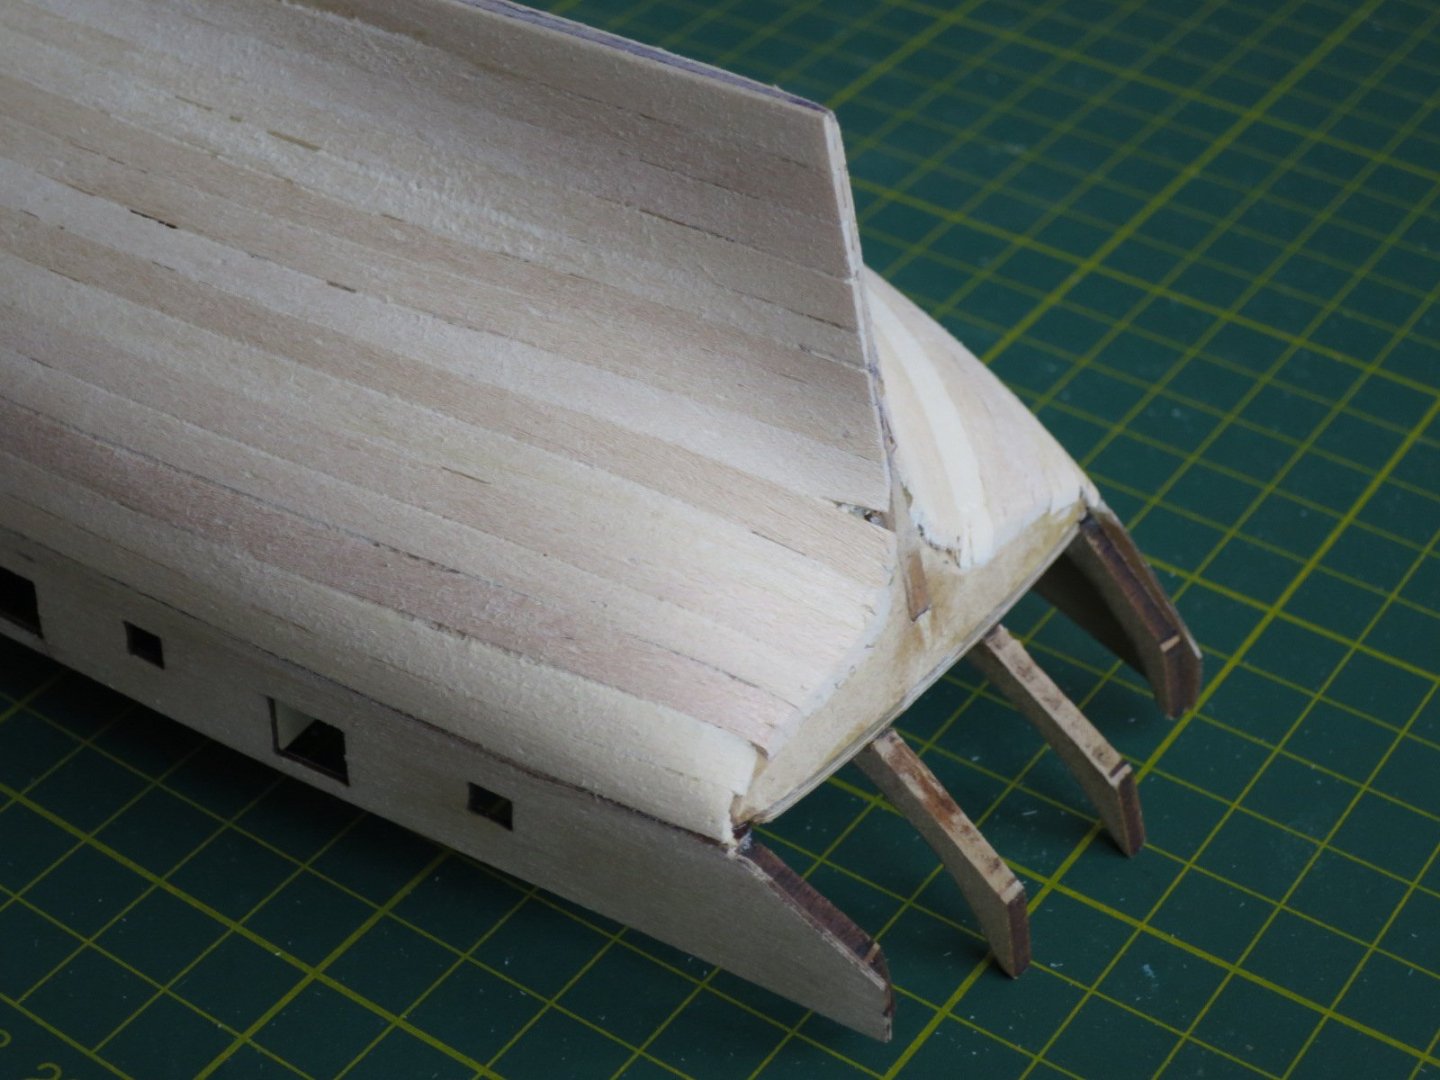
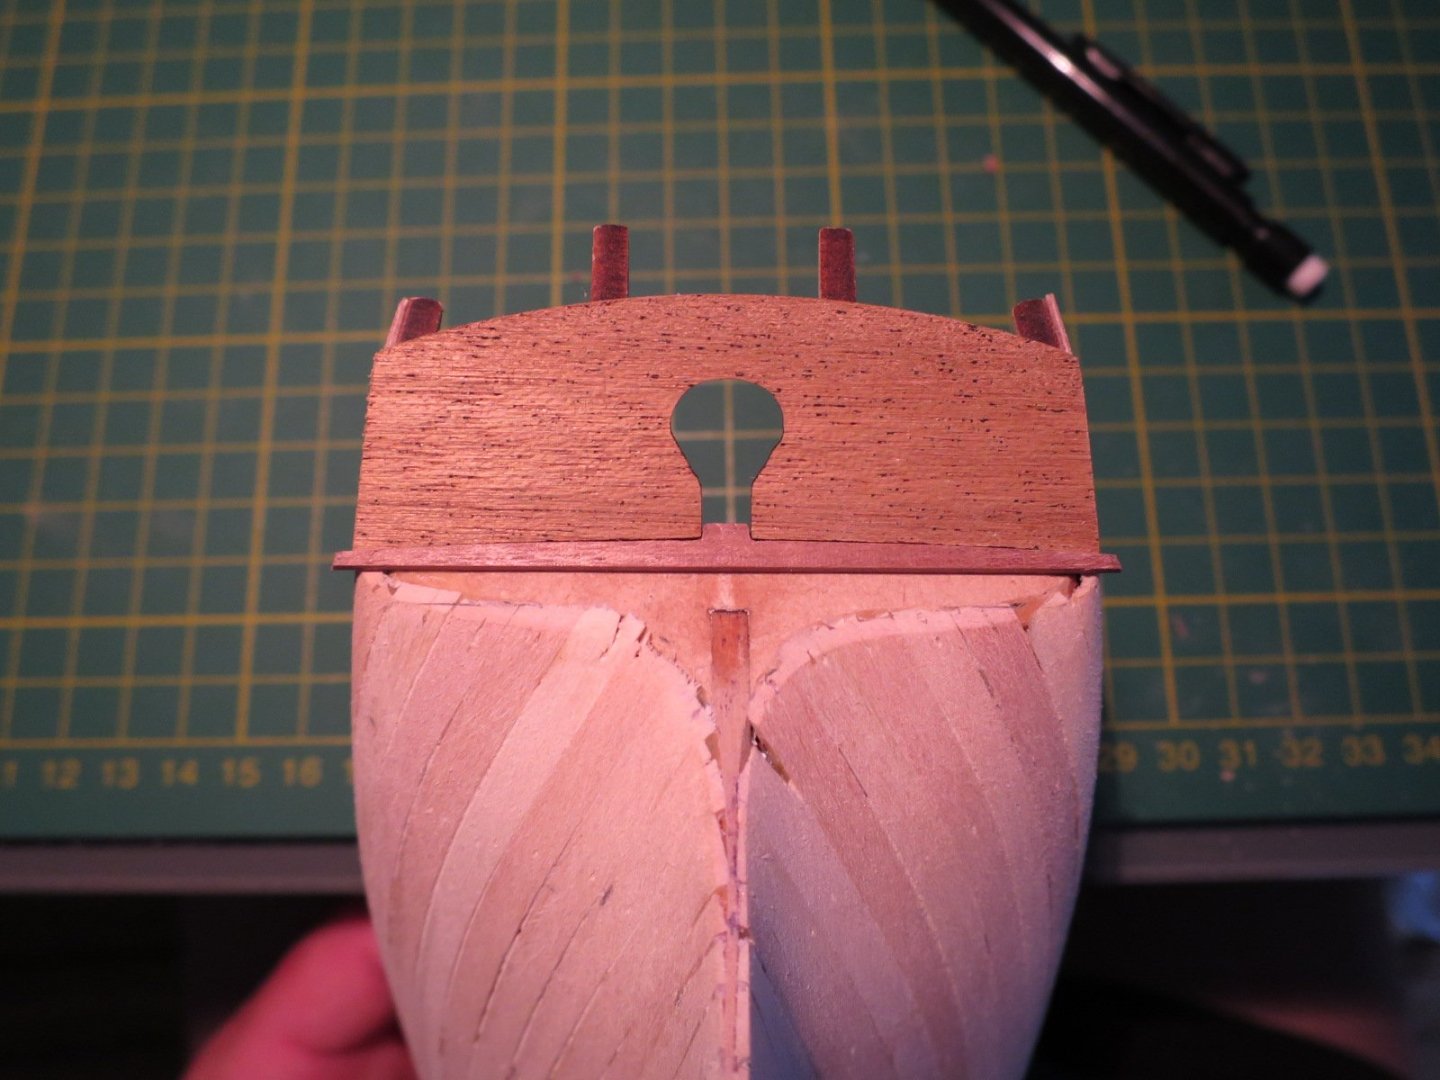
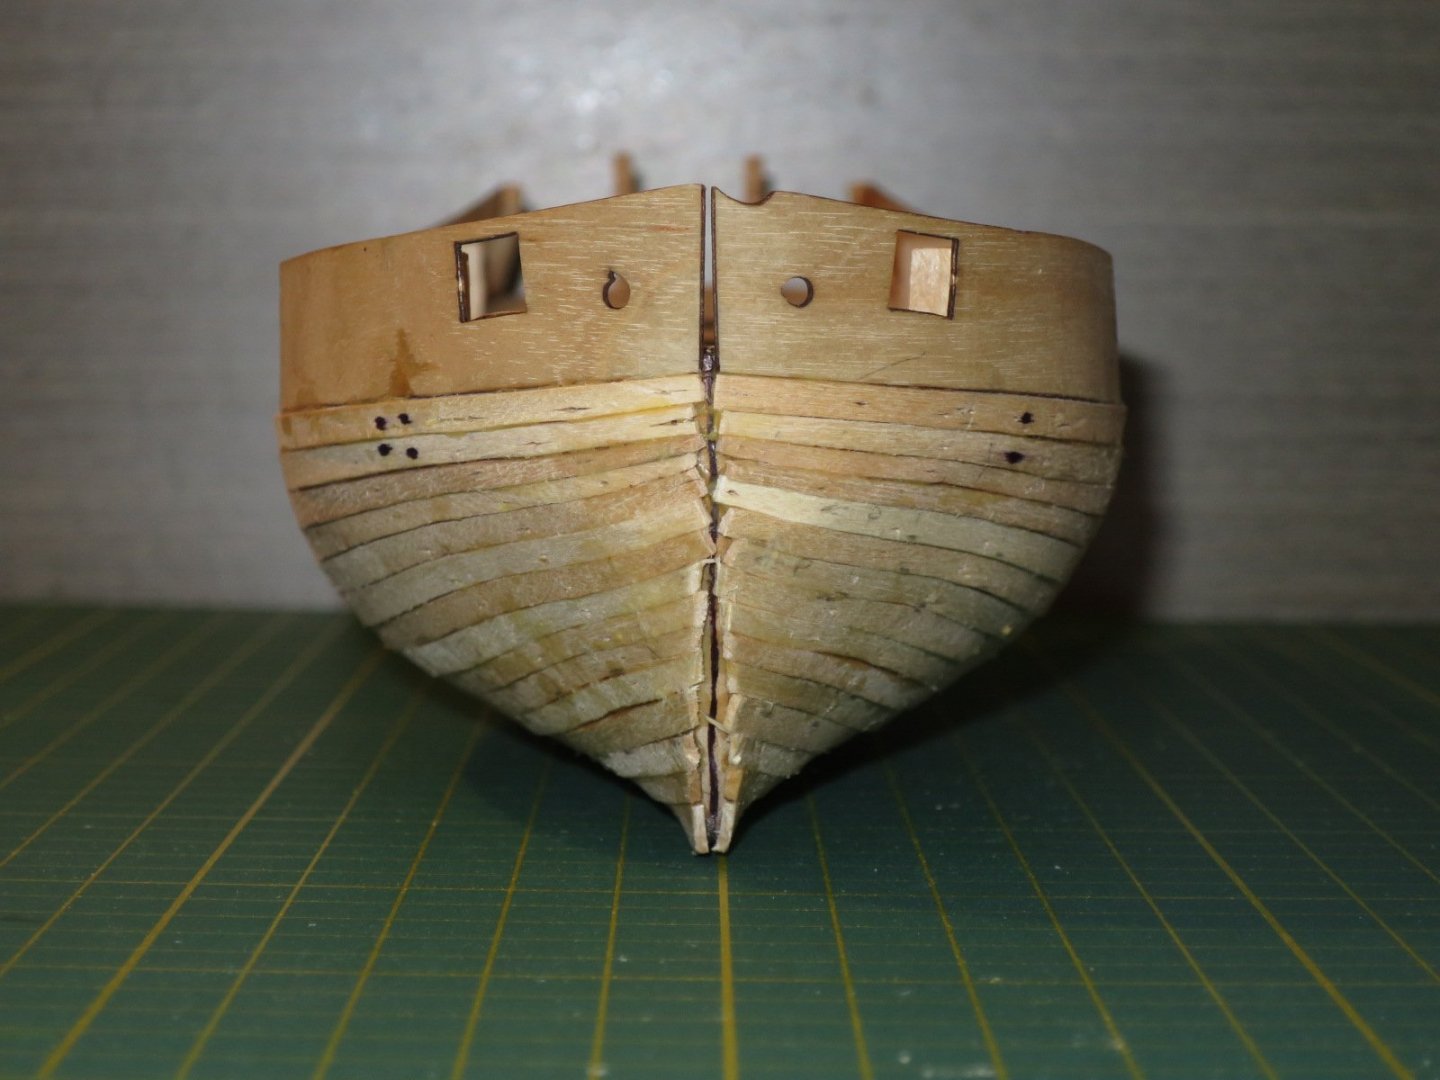
Again, forgive the red hue in the photo. I glued the top and second stern plank. Then Then the third and forth. Then trimmed and sanded fair. Profile of the stern showing where I will need to trim the rudder post. I'm enjoying the build so far. Cheers, Stu


- 34 replies
-
- 5
-
-
- lady nelson
- victory models
- (and 1 more)
-
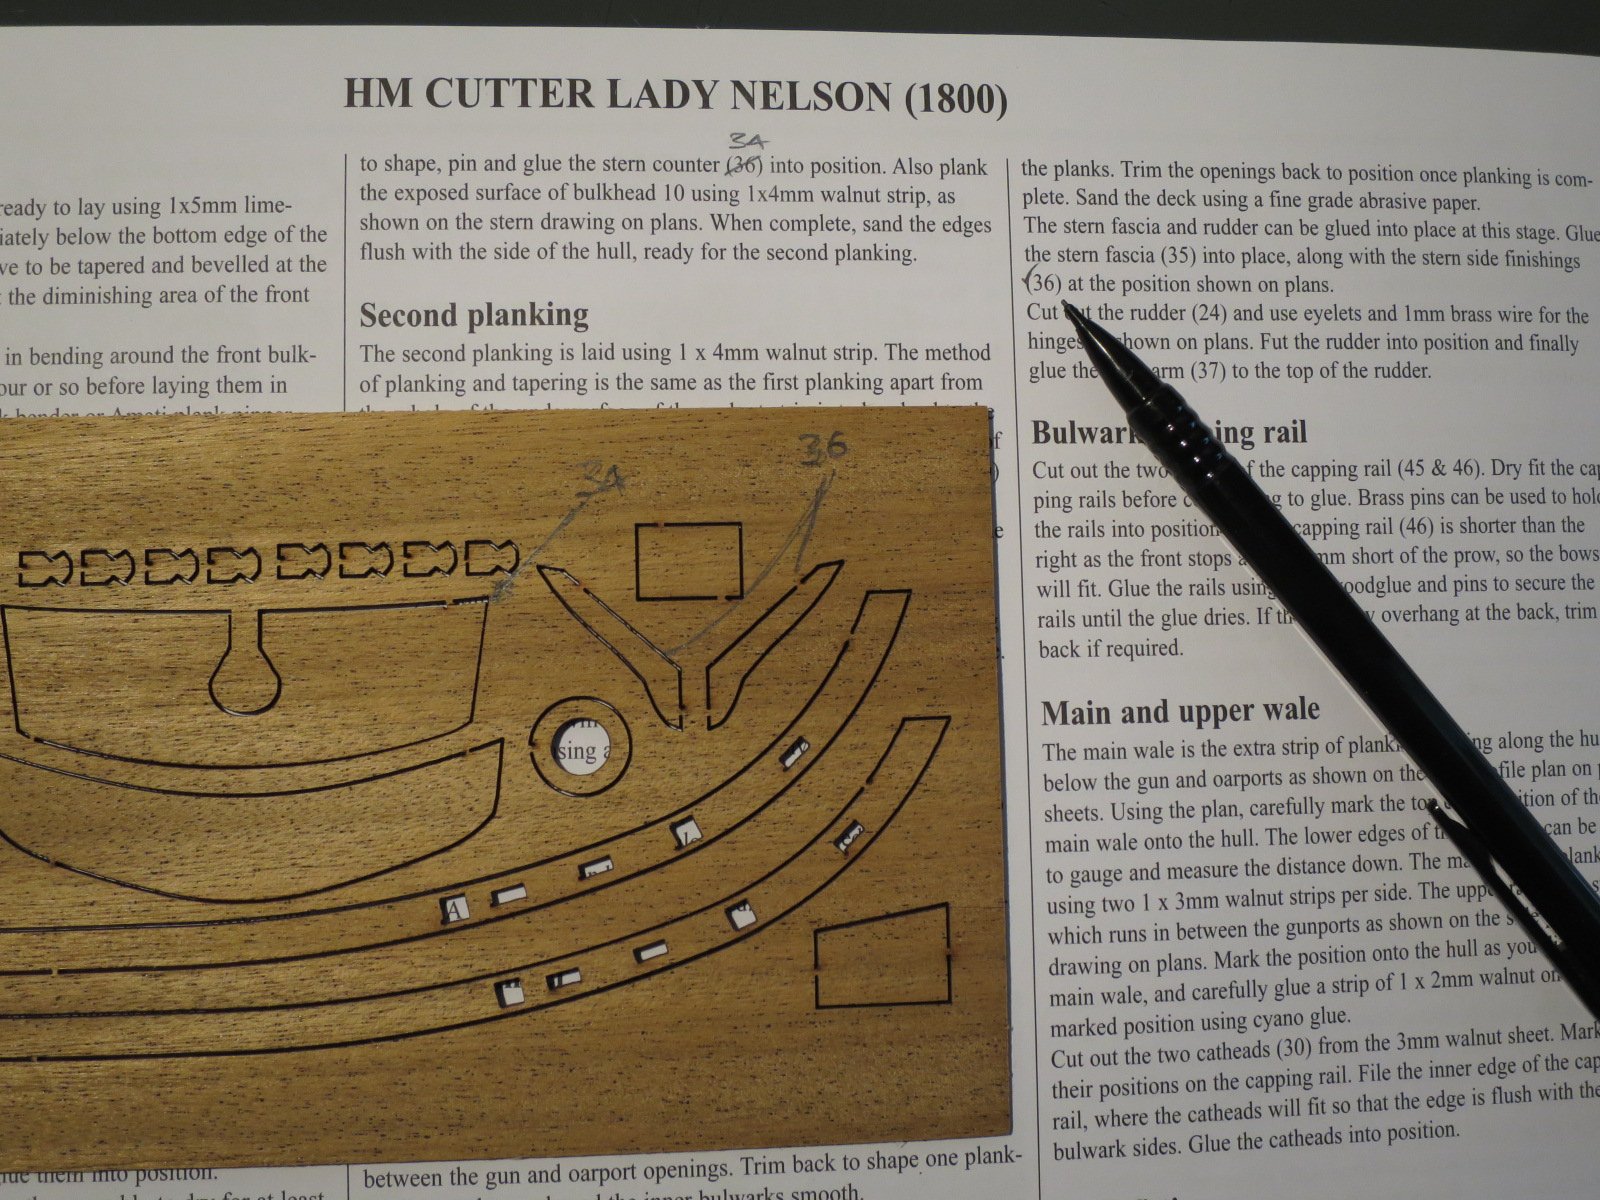
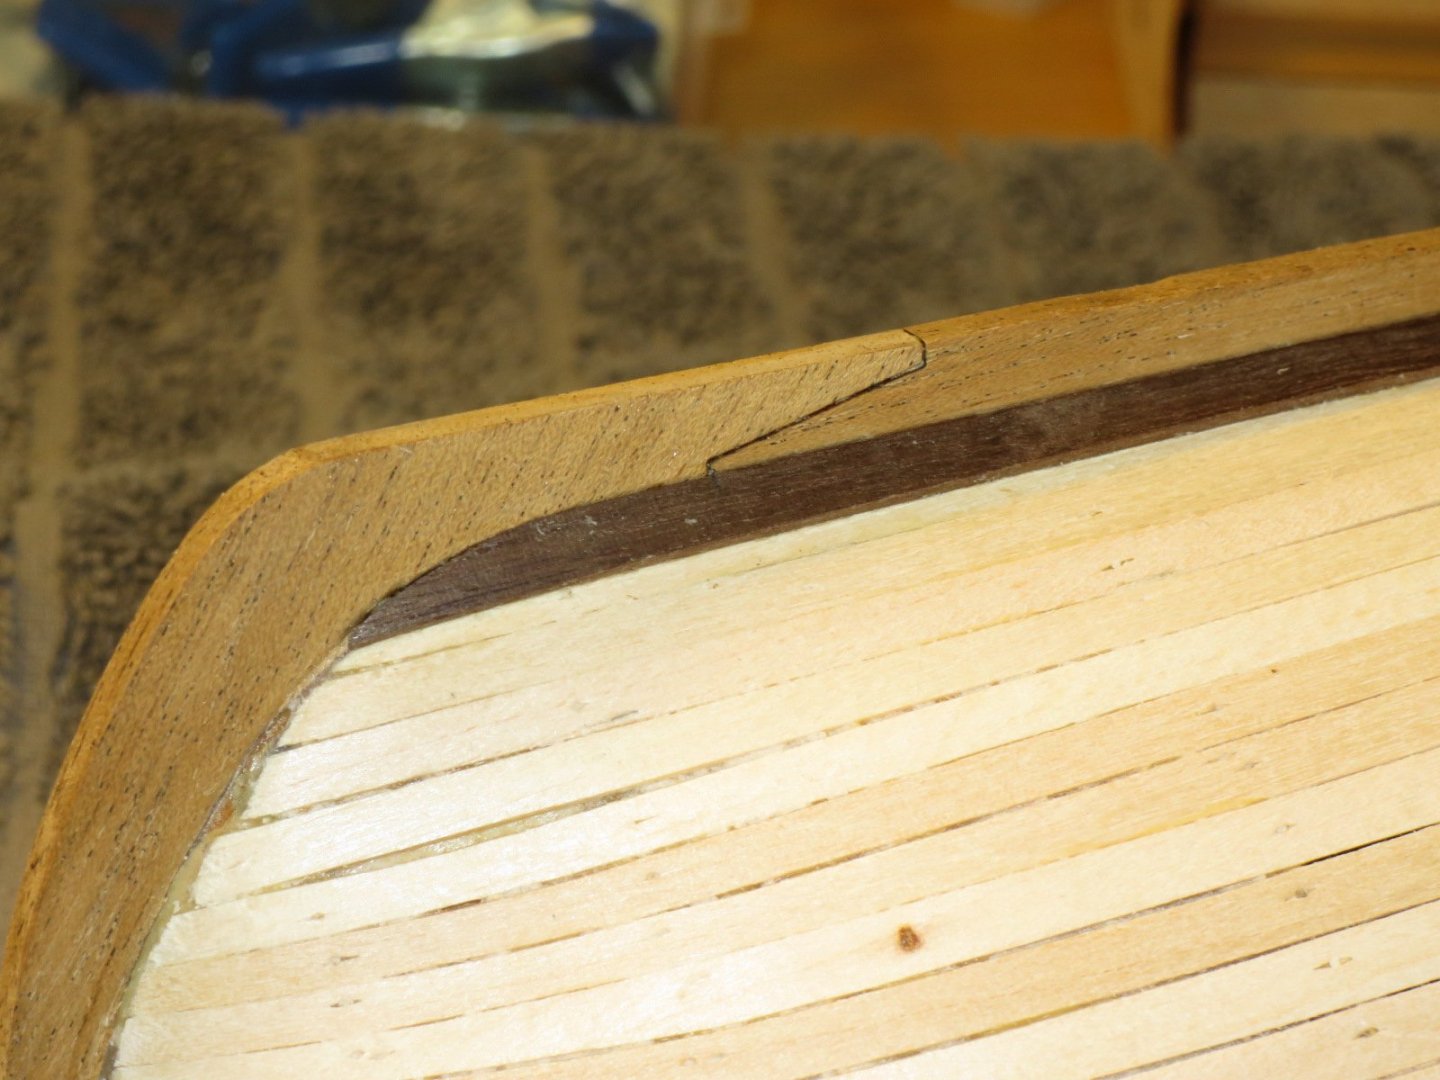
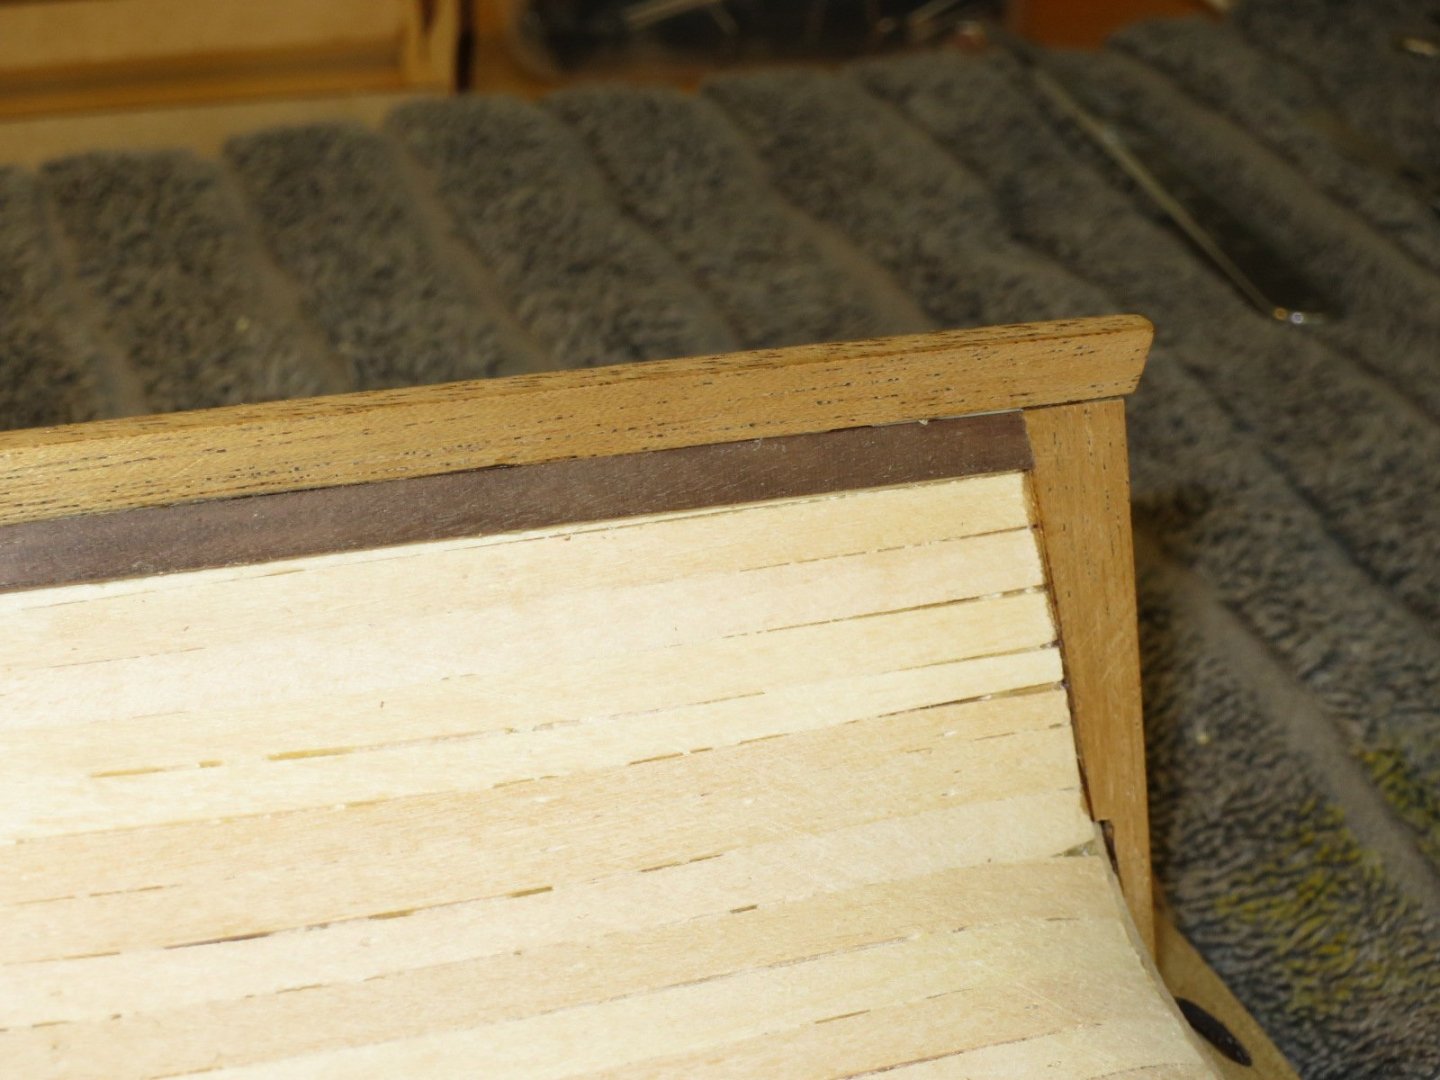
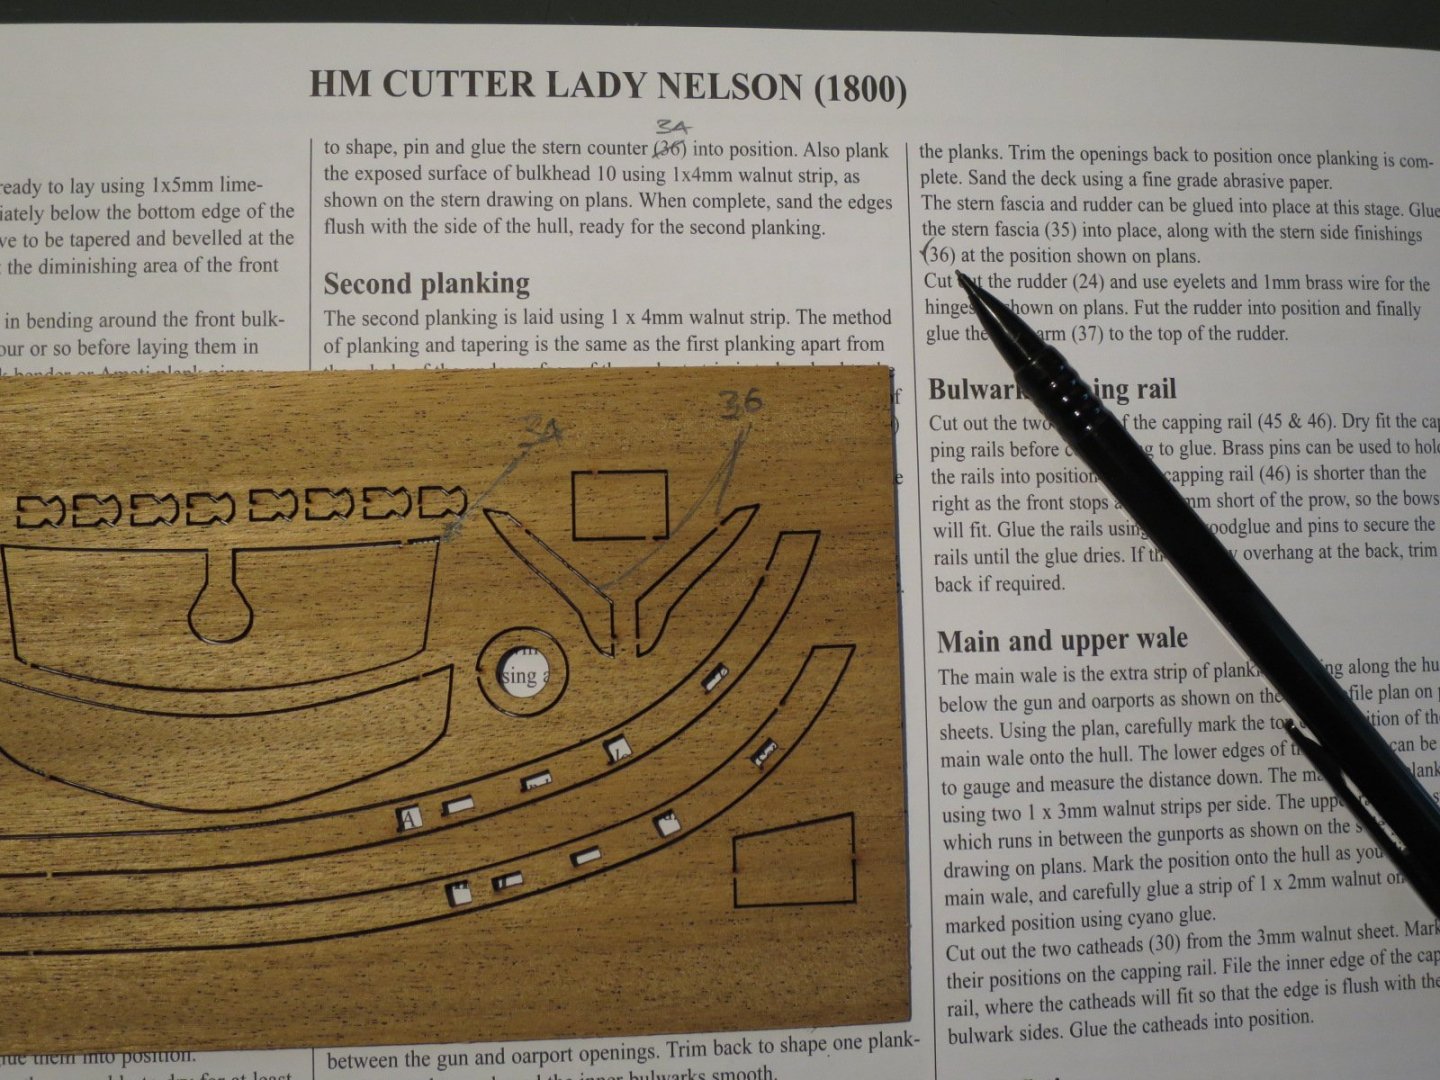
Hi Guys, @captain_hook Thanks for the advise on the Walnut planks. I have read in other build diaries that it can be replaced, but I quite like the dark colour and will stay with it. I had contemplated changing for thinner planking, but decided against it as I wanted to stick with the kit supplied materials, I guess not so much for cost saving, but just to stick with the kit because I think I can make it work. Having said that, I do like the look of pear and may consider it for future models if I do another... Yes I have found the planking tutorials thanks. I'm still undecided about steelers and having sanded the first planking, I quite like the overall effect of the the planks. I think I'll keep with the stern to amidships plank thickness/tapering, but will increase the topsides planking thickness towards the bow and decrease it a little towards the keel to compensate. @Jonny 007 Thanks mate. I was a little disappointed before I sanded her first planking, but as of now, I'm pretty please so far. I've been in Perth for a week and the weather has been great until today, but it's pretty stormy now and have spent most of today on the ship. I am also following your Ballahoo. Looking good so far and I understand why you clamped it so hard. better than nailing and pinning the deck down as I did. @Gaffrig Thanks for the encouragement. I read through your Le Renard build and it is very similar to the Lady Nelson and you have made good progress so far. I really like your deck and the framing around the hatches and skylight openings. I think I will do the same with the Lady Nelson. I am also following your build with interest. While my kit (Amati) has bulwark stanchions/uprights, the Medium Density Fibreboard (MDF) (as opposed to plywood) tended to split when pins/nails are pushed/tapped through the planks. This has been an issue when trying to hold the planks down when shaping and gluing. Great work so far on your Le Renard and I'm and following your build with interest too. So I gave the first planking a good sand with 80 grit and then 120 grit and it came out quite well. Please forgive the awful hotel carpet... I sanded the bow profile back to the MDF and faired it in. I also trimmed back the stern and sanded it down to get good symmetry. in these photos, the stern is still about 2.5mm-3.0mm which I need to sand down to at least 2.0mm to allow for the second planking to finish flush with the stern post which is 3.0mm thick. I haven't yet trimmed and sanded the bulwarks at the stern. Having learnt from my mistakes, I took time to read the instructions and spotted an error. Before Before fitting the stern counter (34 - not 36) I should have given the inside face a light sand finishing it with 1200 grit sand paper. Oh well... I decided to deviate from the instructions a little here and fitted the stern planking before fitting the rudder post (23). This was for 2 reasons. First, I wanted the stern planks to be continuous and straight, and secondly because had left them behind when I was away... This means I will need to carefully notch and fit the rudder post before the second planking, but I think it will give a better result. So I had to custom cut and shape the top stern plank. This had to fit the deck profile and the notch out in the stern counter for the rudder and tiller. It took a couple of attempts and about an hour to get it right. Dry fit. forgive the red hue in the photo. More in the next post.

- 34 replies
-
- 5
-
-
- lady nelson
- victory models
- (and 1 more)
-
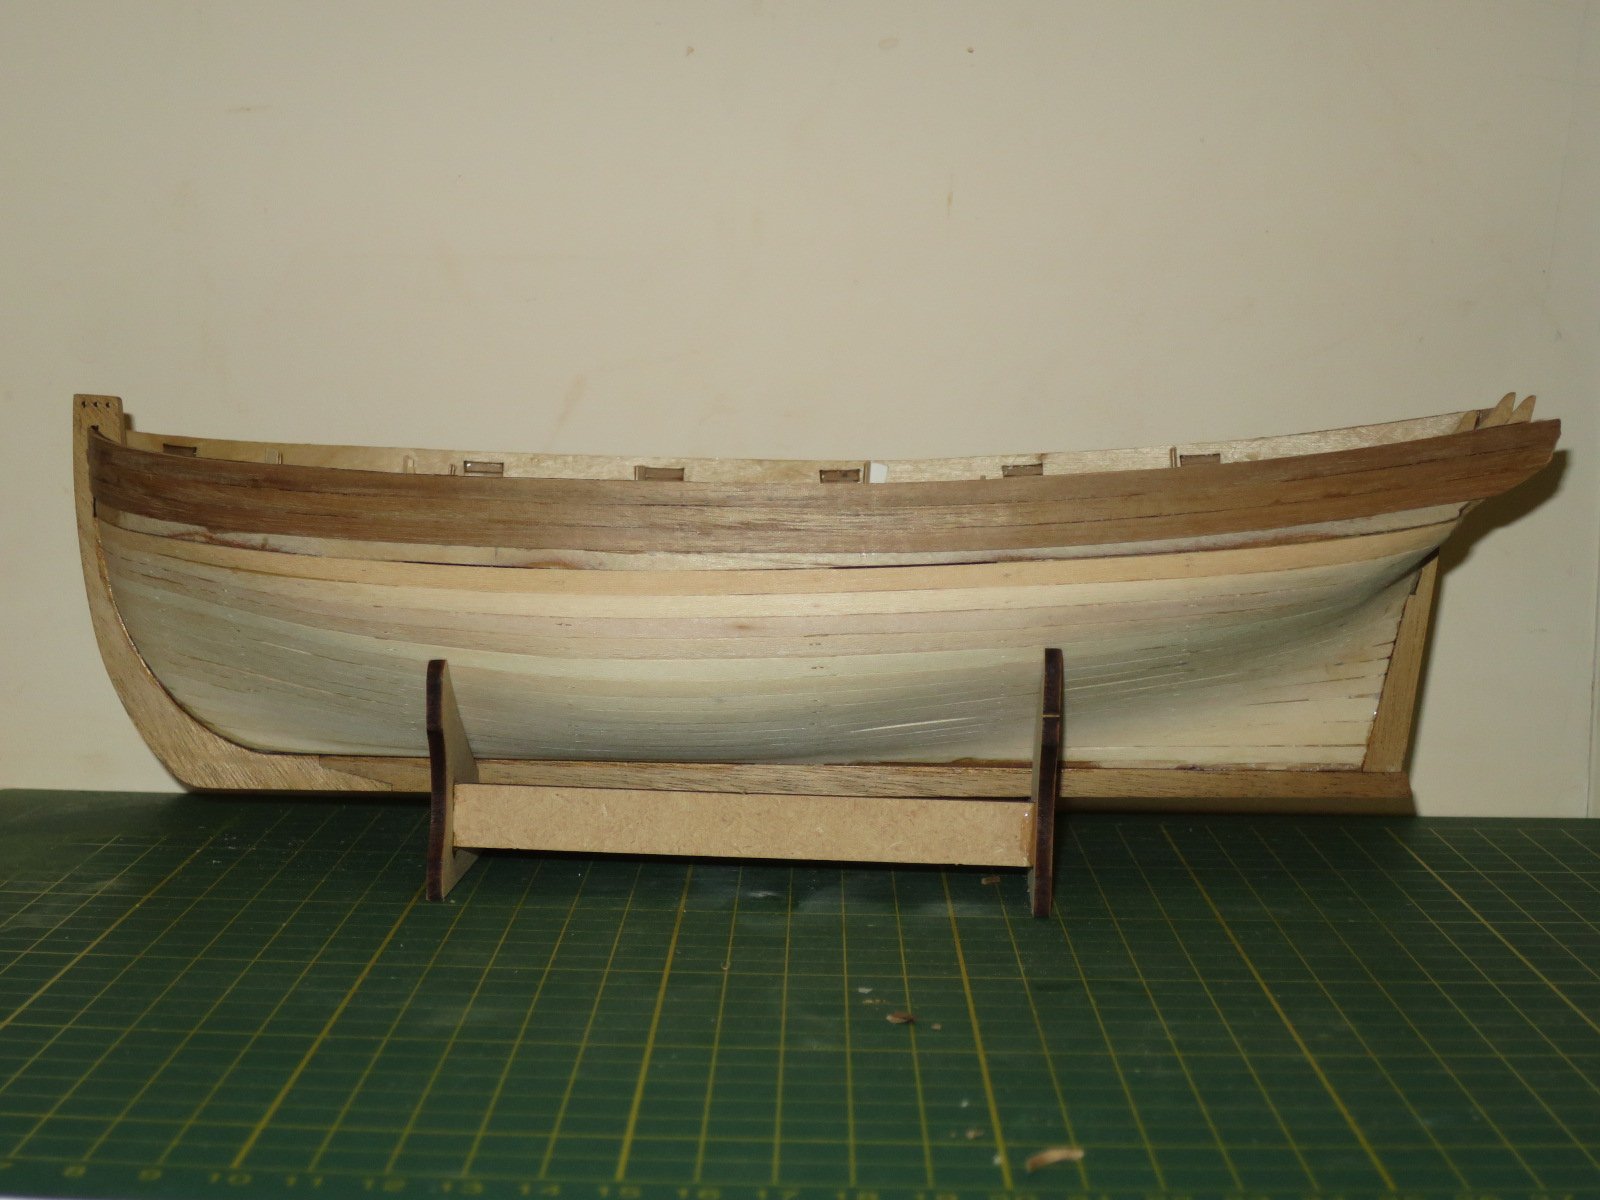
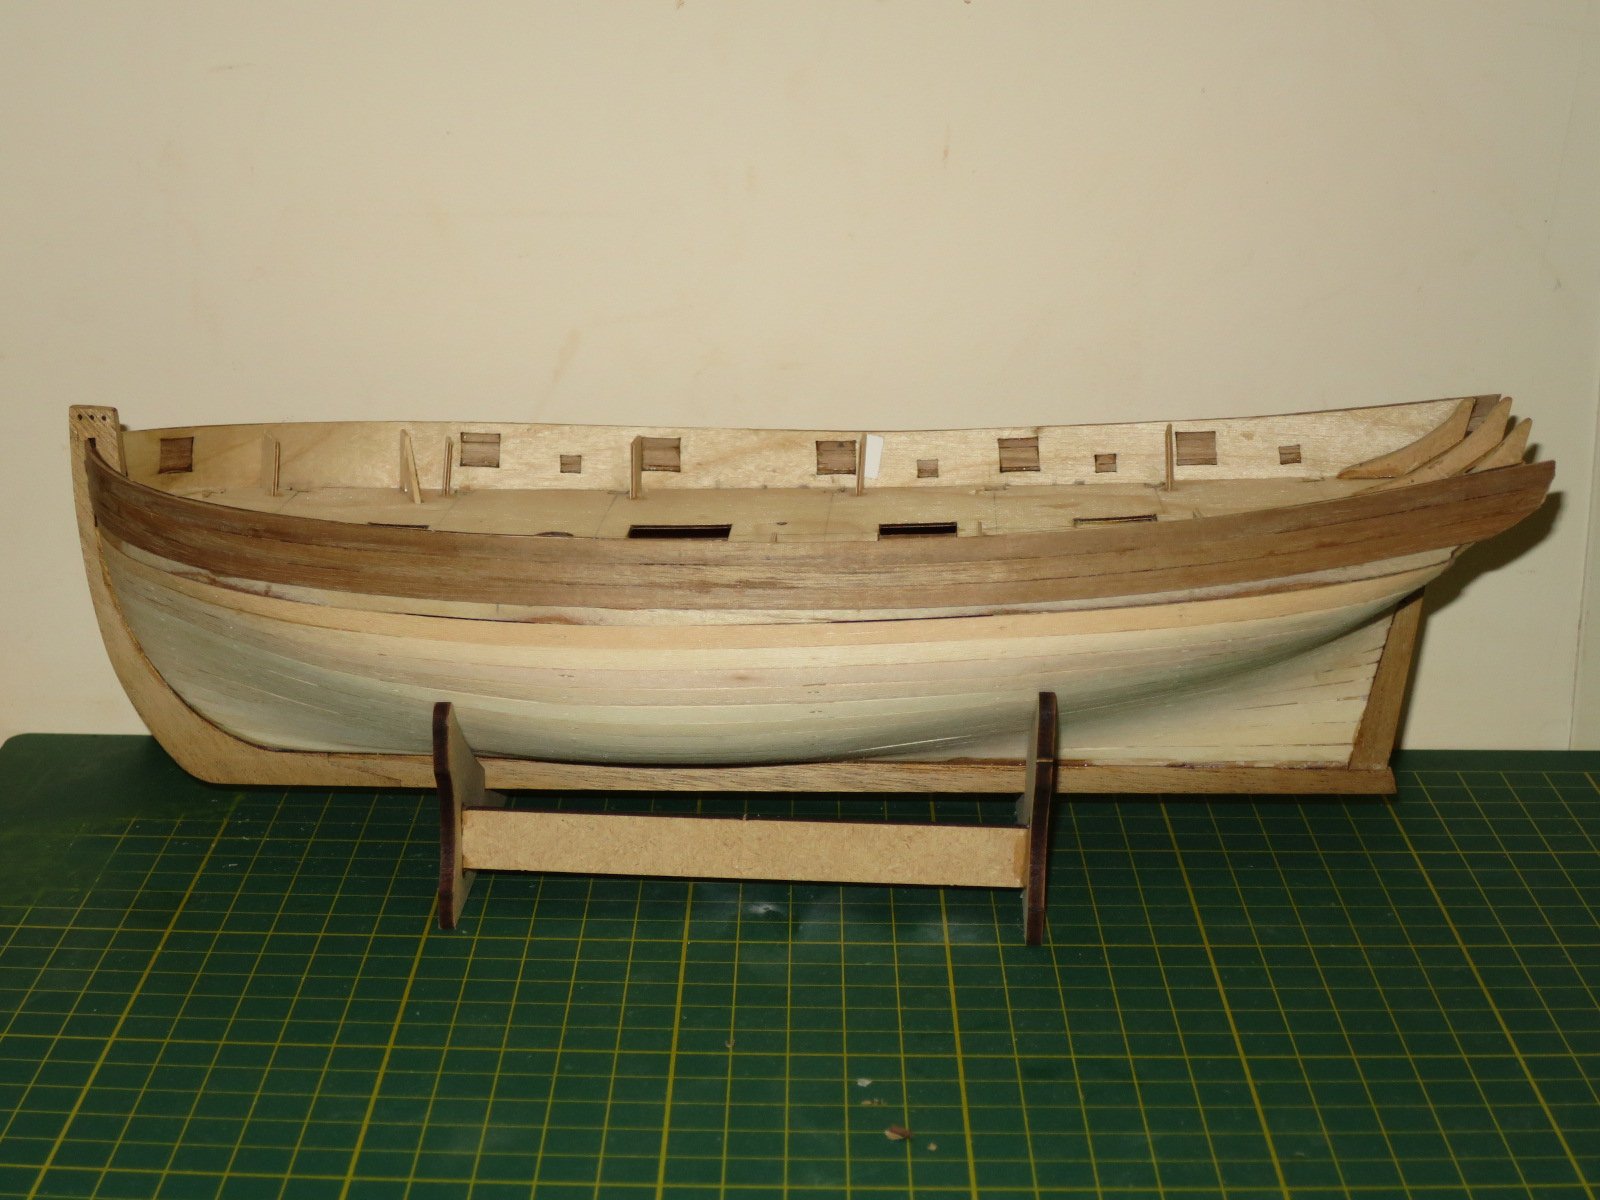
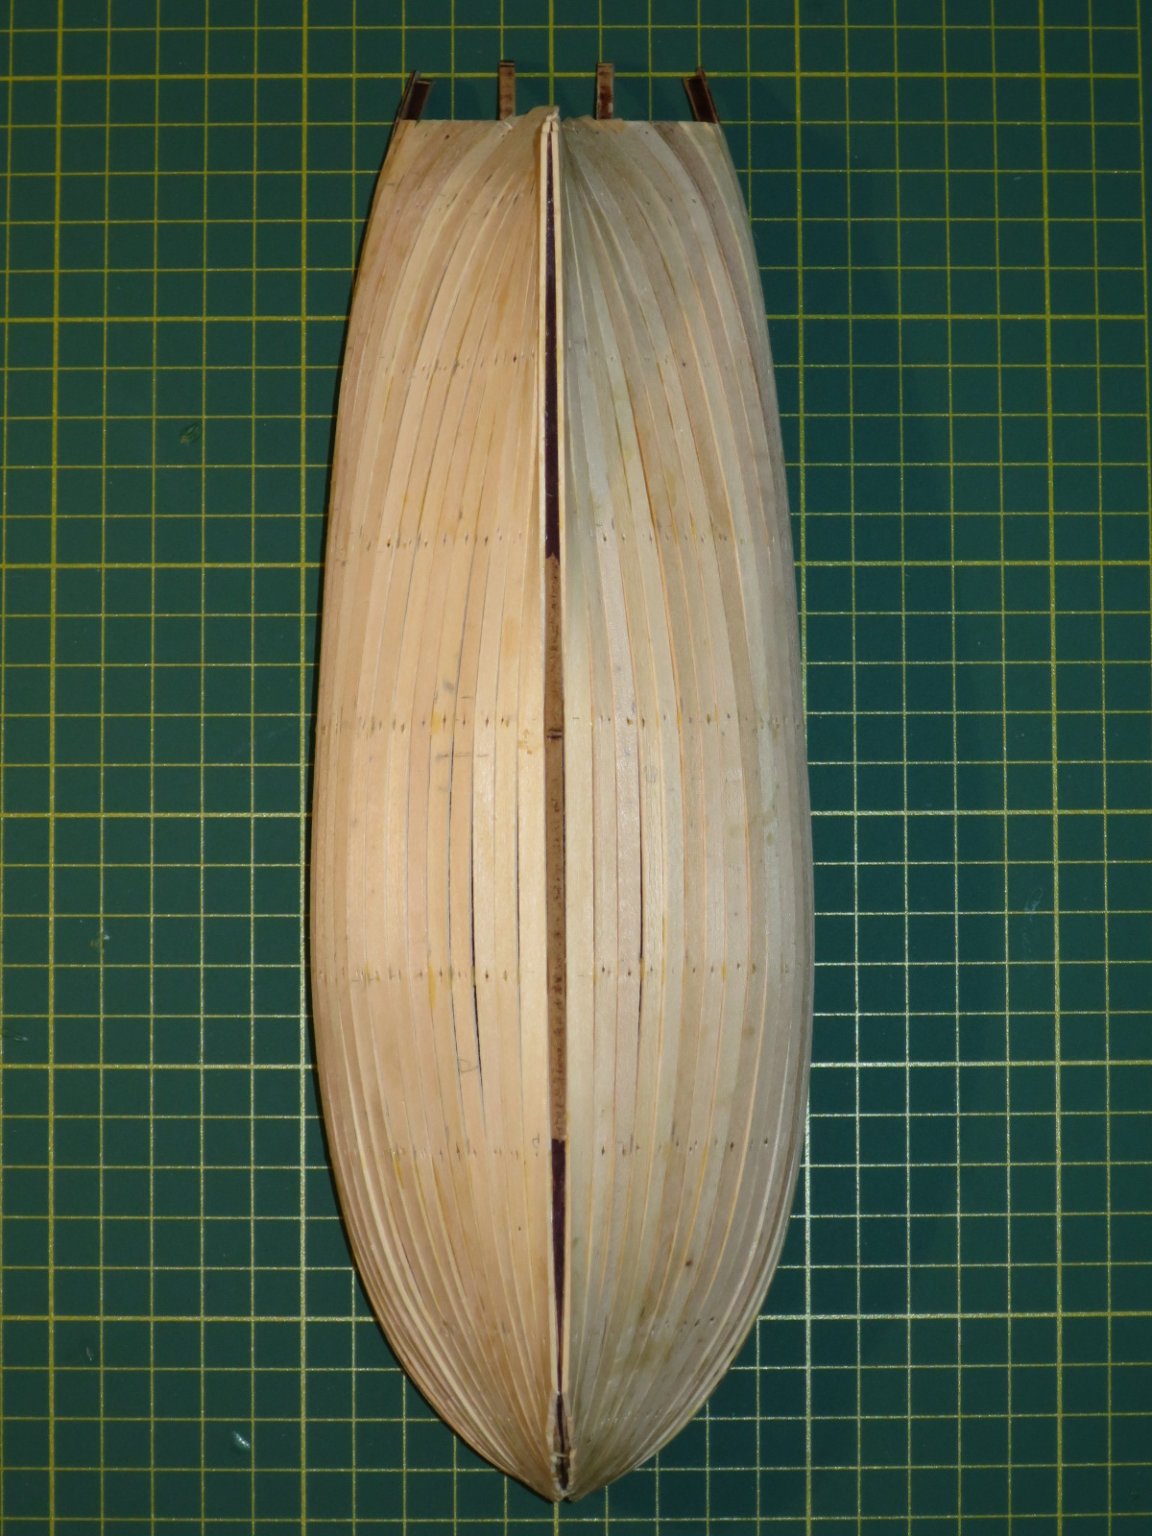
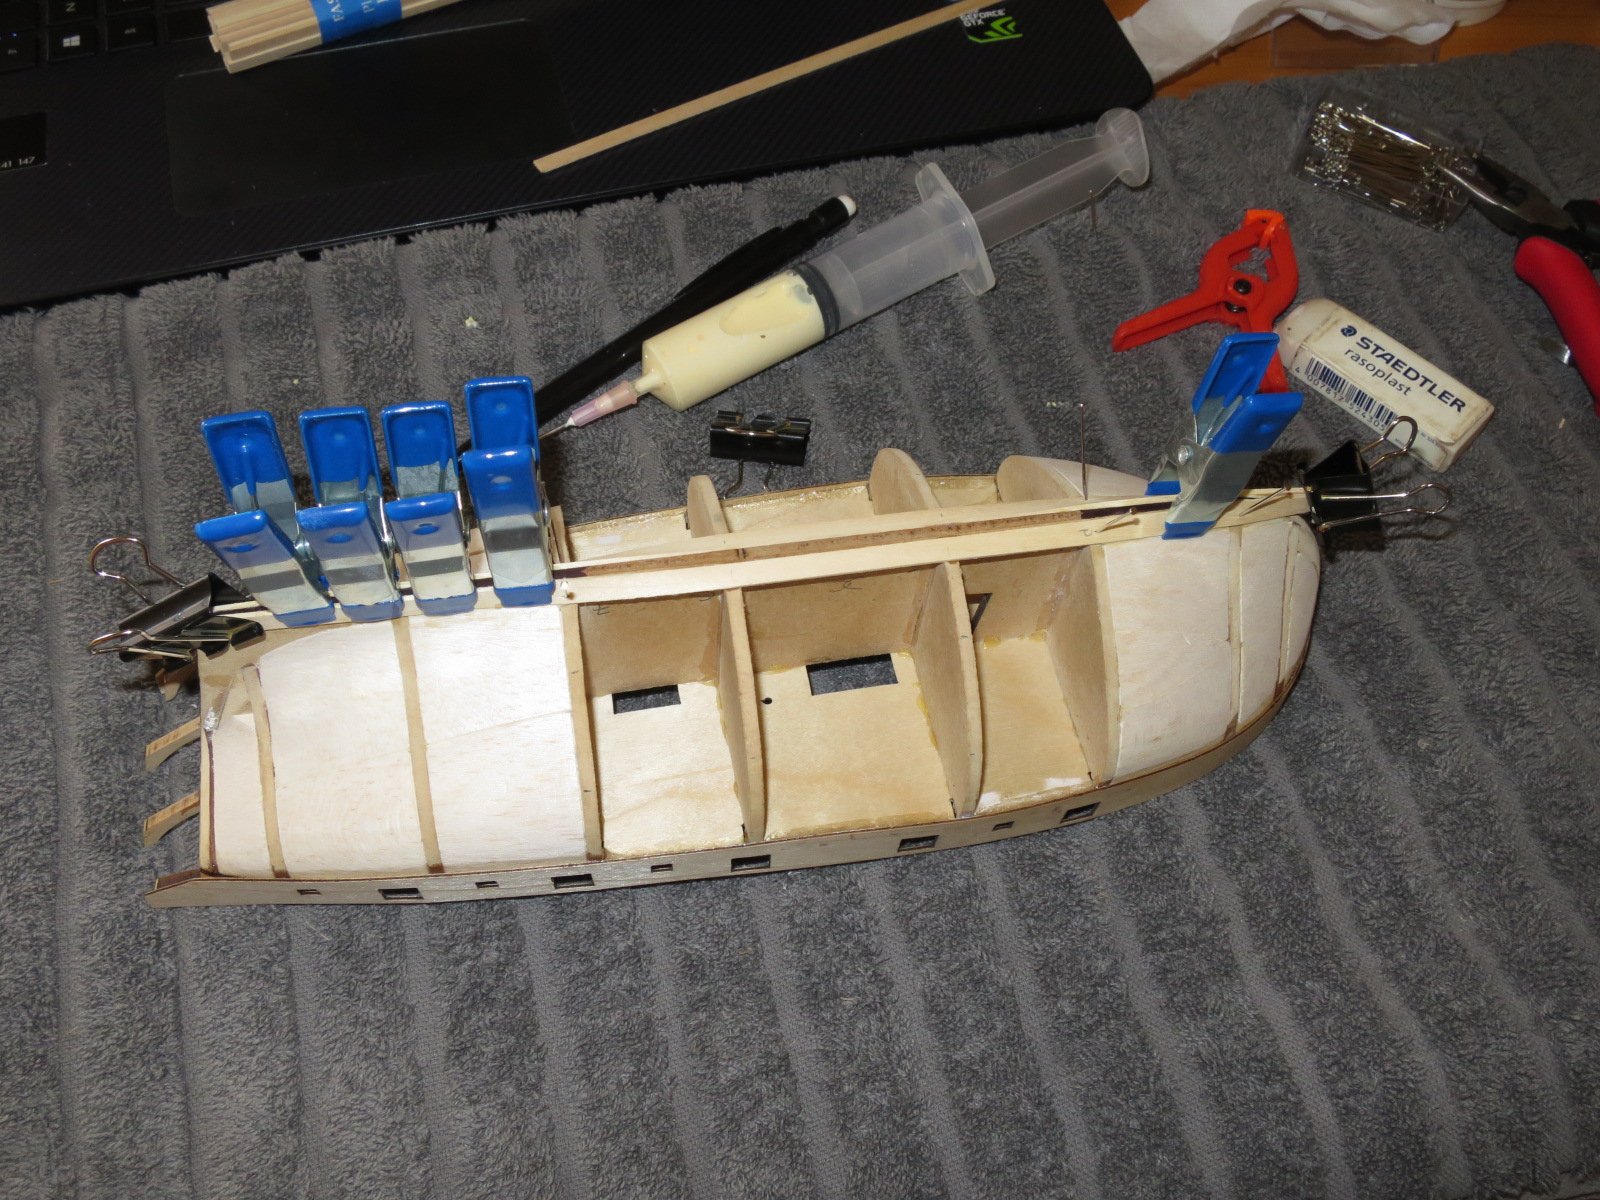
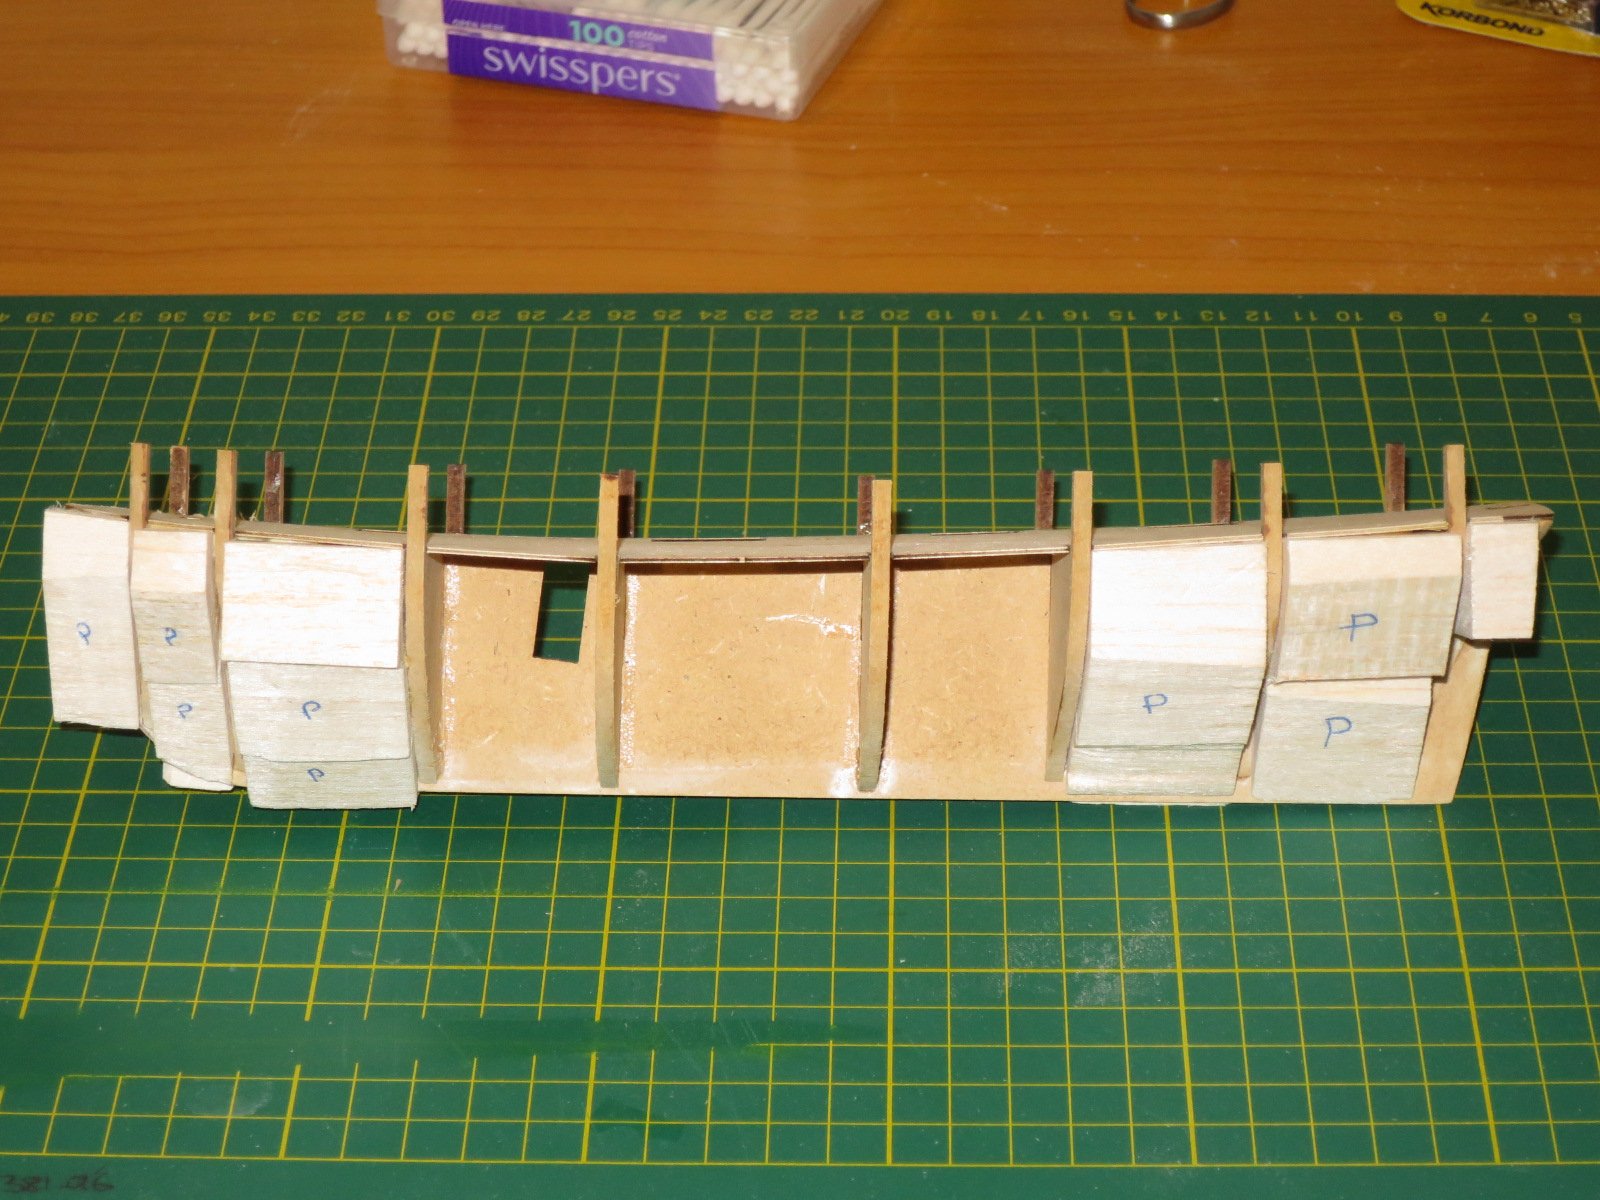
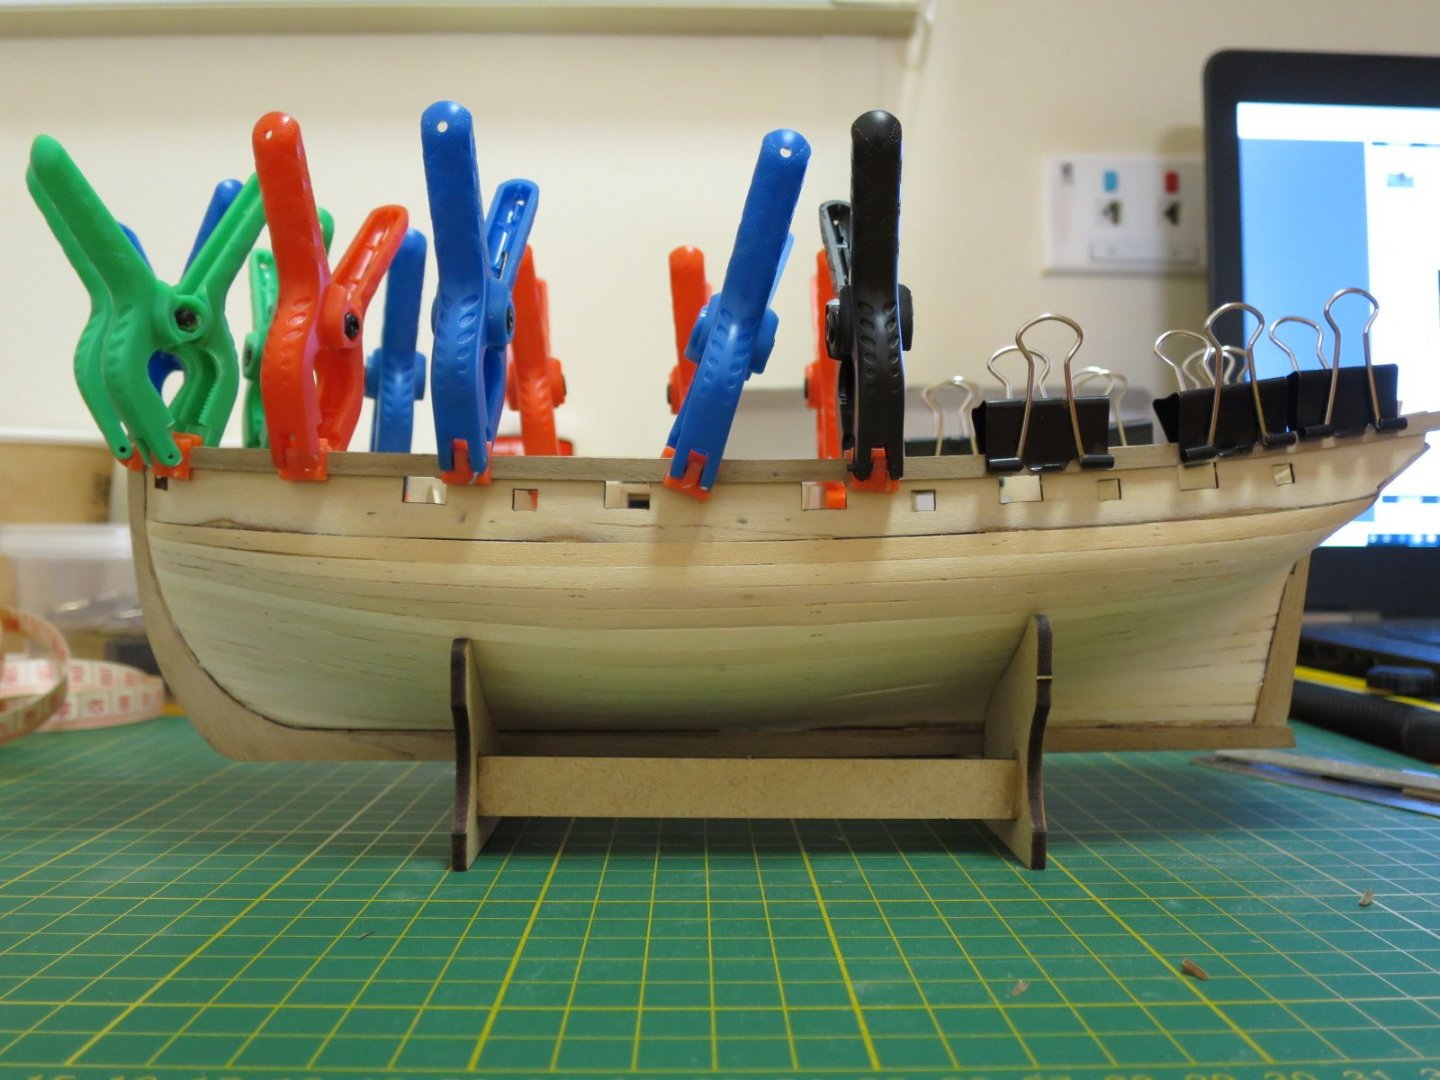
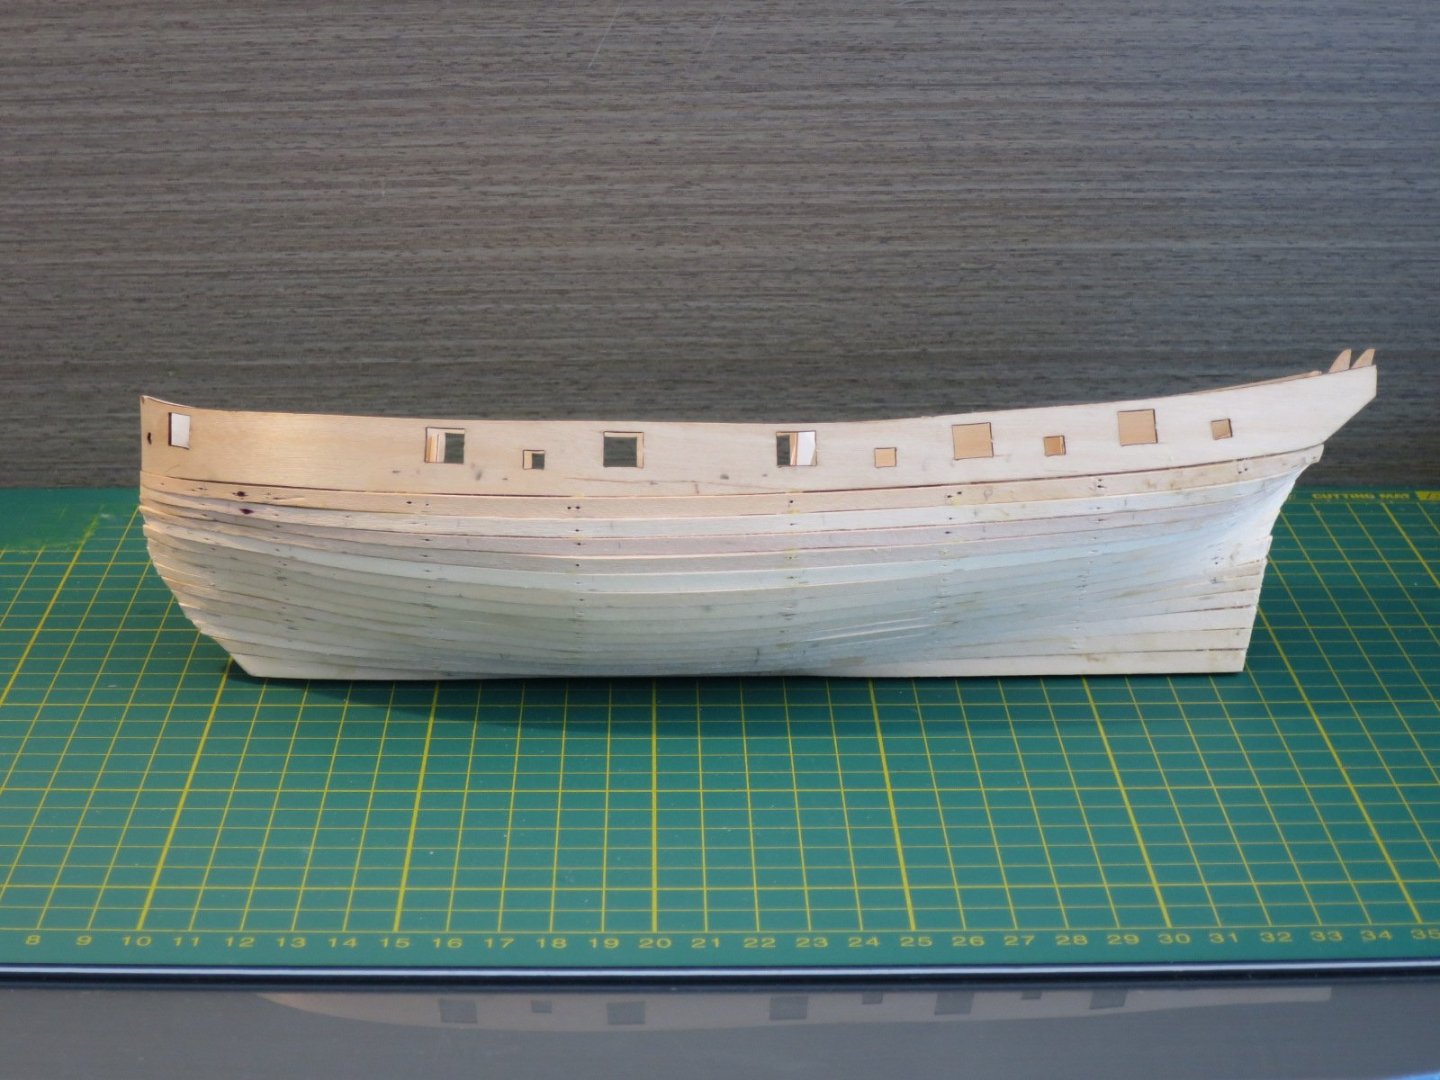
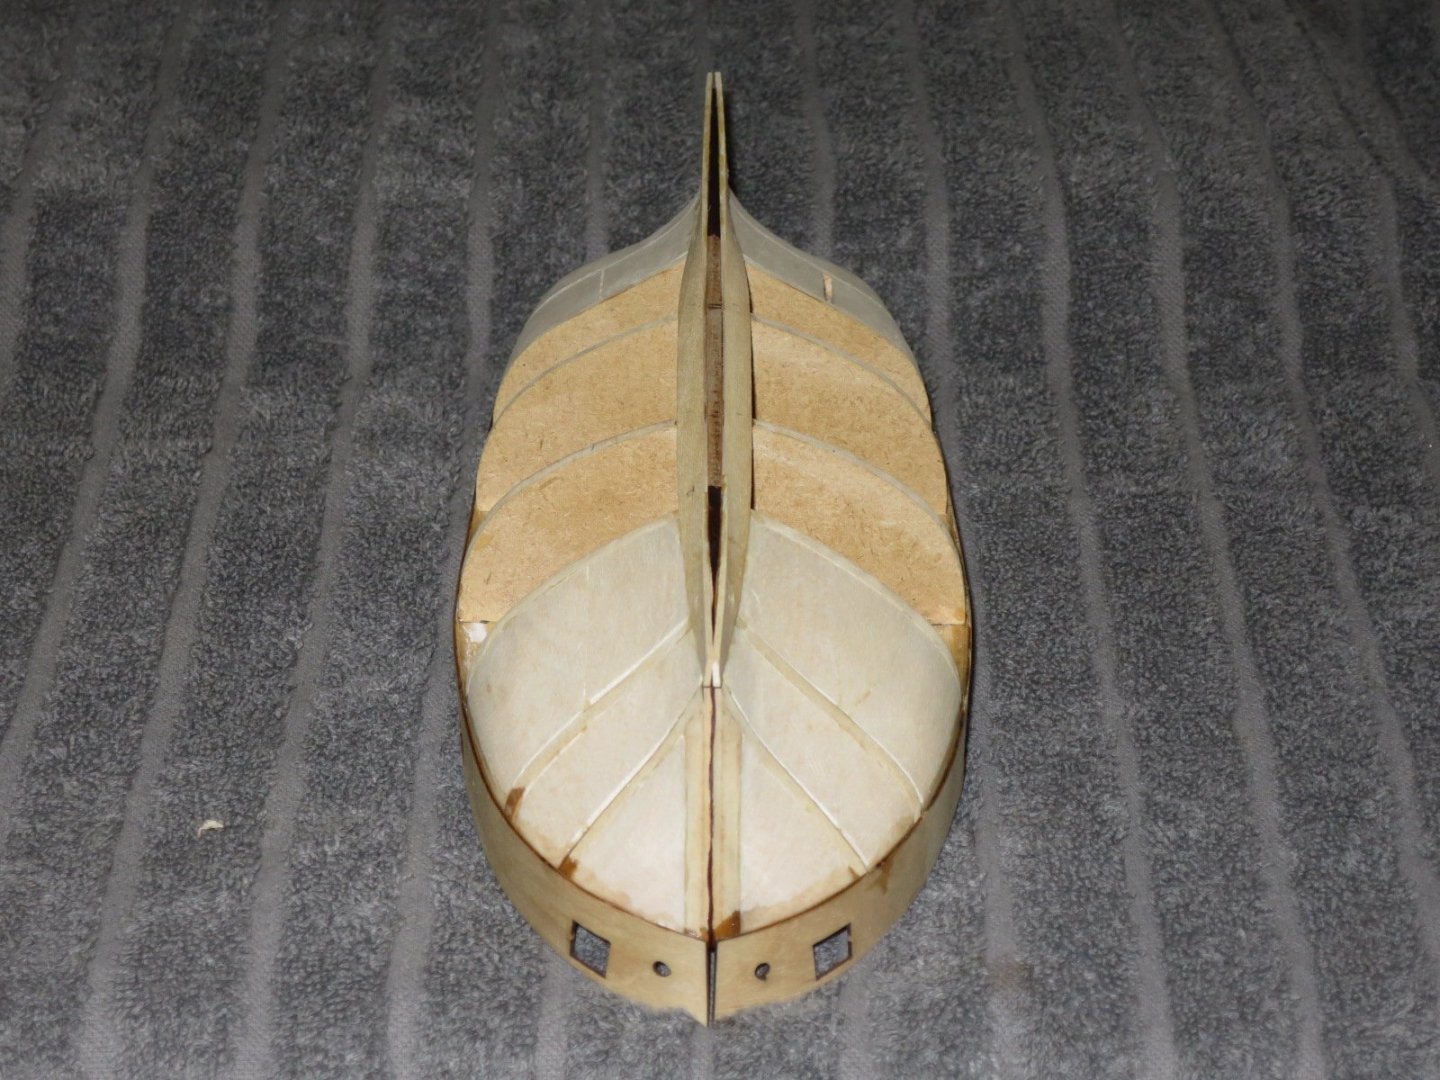
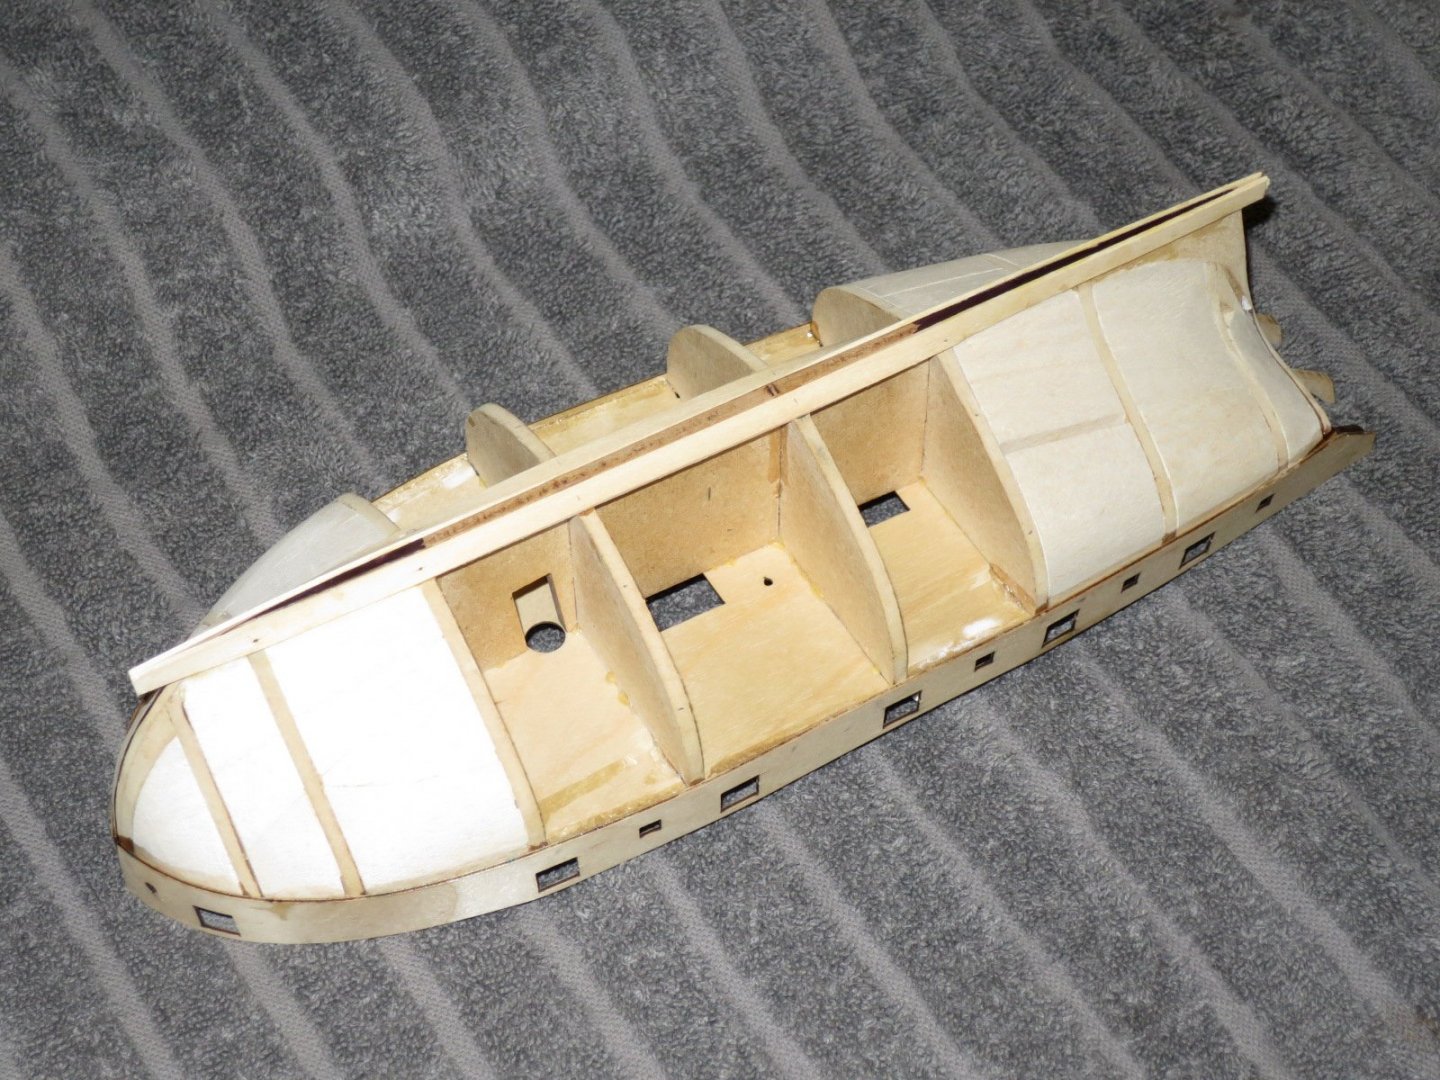
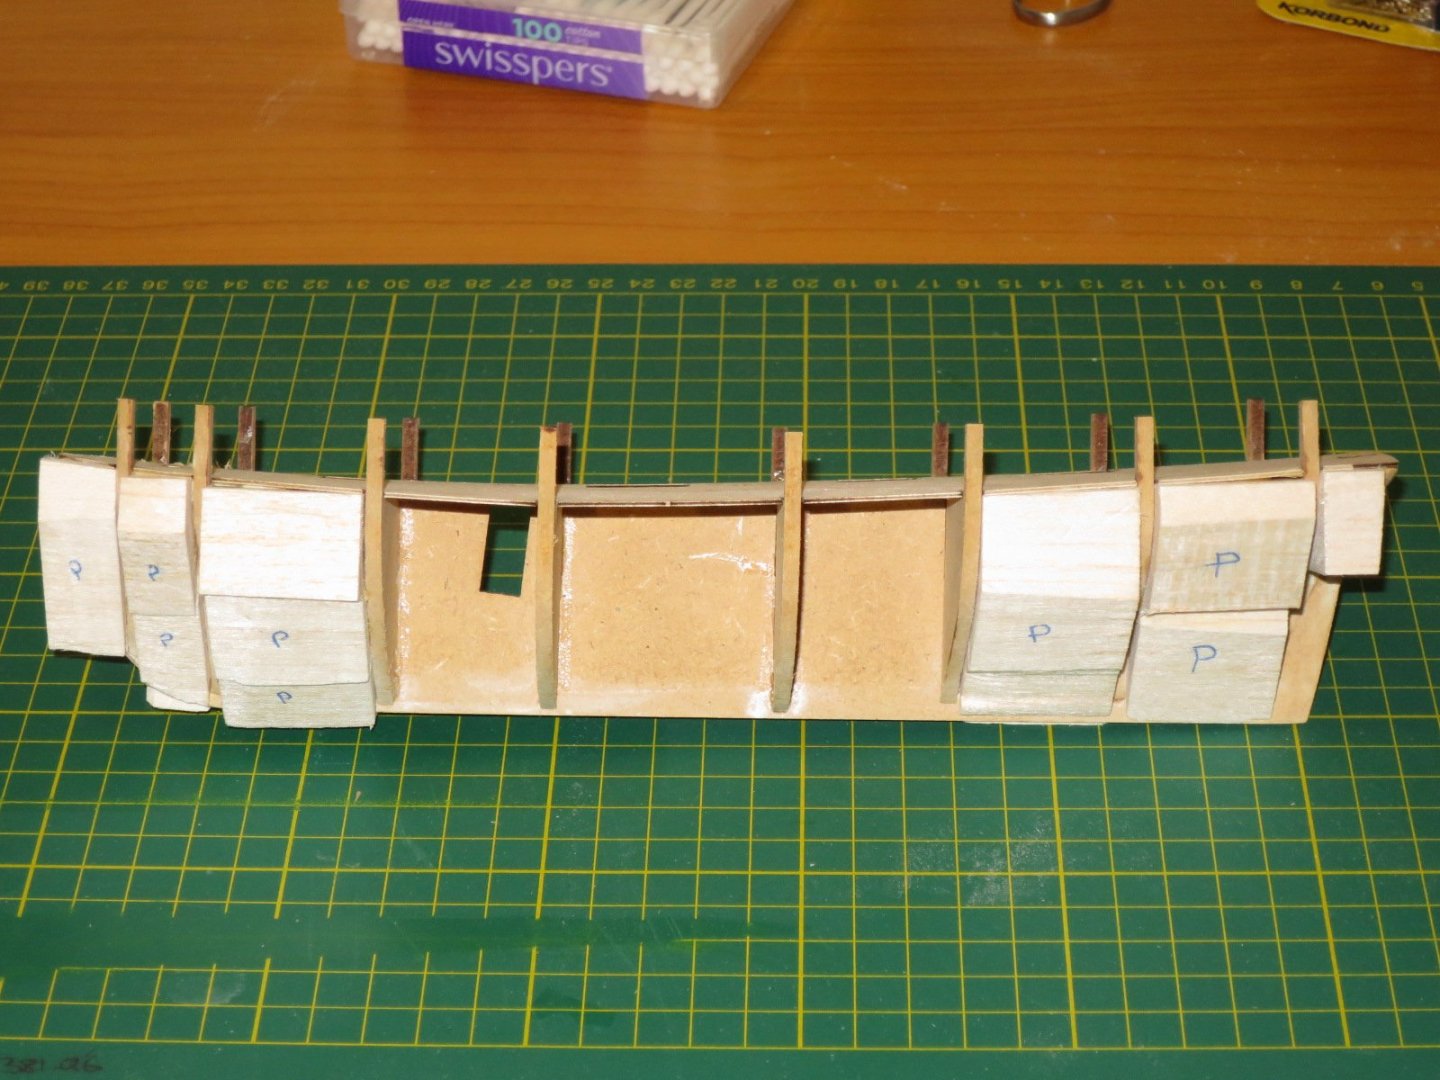
Thanks Joe, I think the bulwarks will straighten out as well, but that slight ripple on the port side just aft of amidships is more of an optical illusion as the top of the bulwarks don't quite follow the sheer line. I do have a noticeable bulge on starboard by the second gun port which I and trying to address with some more bracing. A couple of photos to try and show what's going on Anyway, I've got the first planking done. I'm not too happy with it, but it will suffice for first planking and has shown a few issues with my planking layout that I want to avoid on the second planking. Here are the warts and all progress photos. There is some "clinker effect" at the bow which will sand out I want much nicer, fairer planking lines for the second planking. I'm going to divide the planking into 3 sets of 5 planks, and try and lay down tapered planks 5 and 10 first to conform to the hull shape better and avoid that pregnant look when viewed from the side. The top planks should taper less toward the bow and the bottom planks should taper more. I'm considering doing the same for the stern, but will then need steelers which I wanted to avoid, but maybe the overall effect will be better. The second plank down on the starboard side got away from me at the stern...


- 34 replies
-
- 6
-
-
- lady nelson
- victory models
- (and 1 more)
-
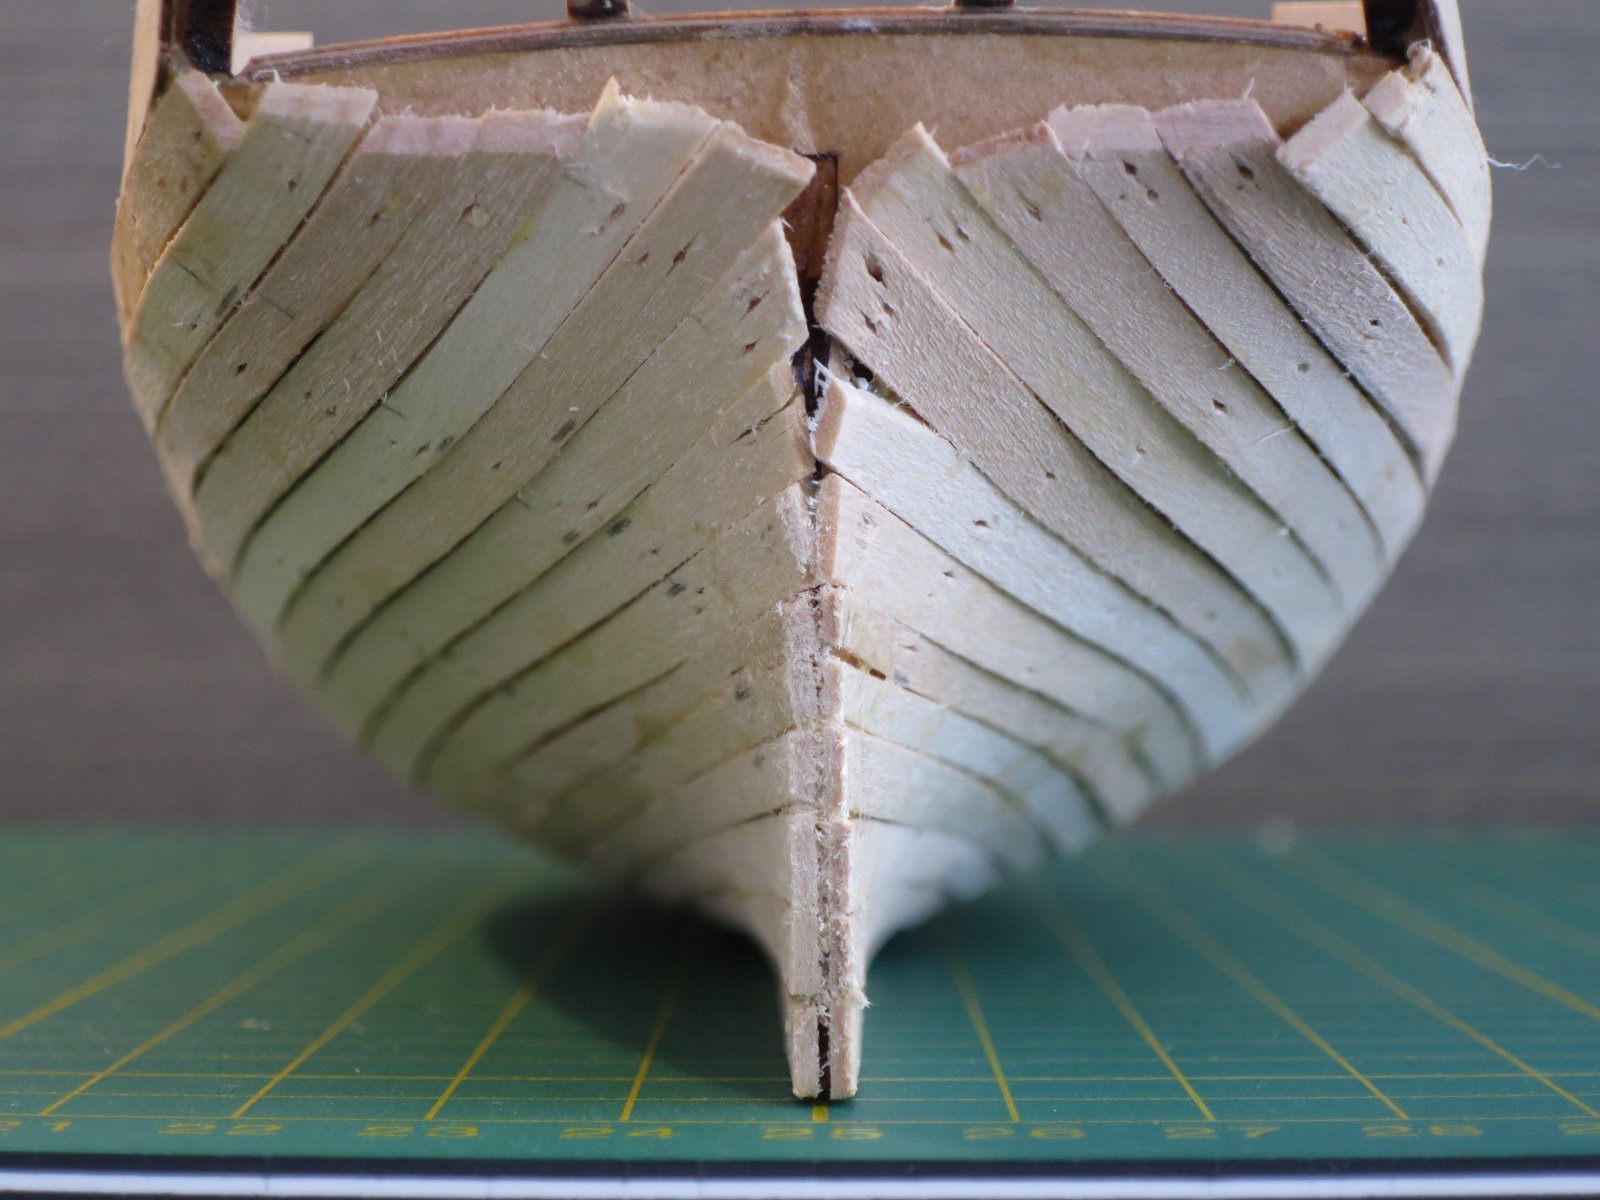
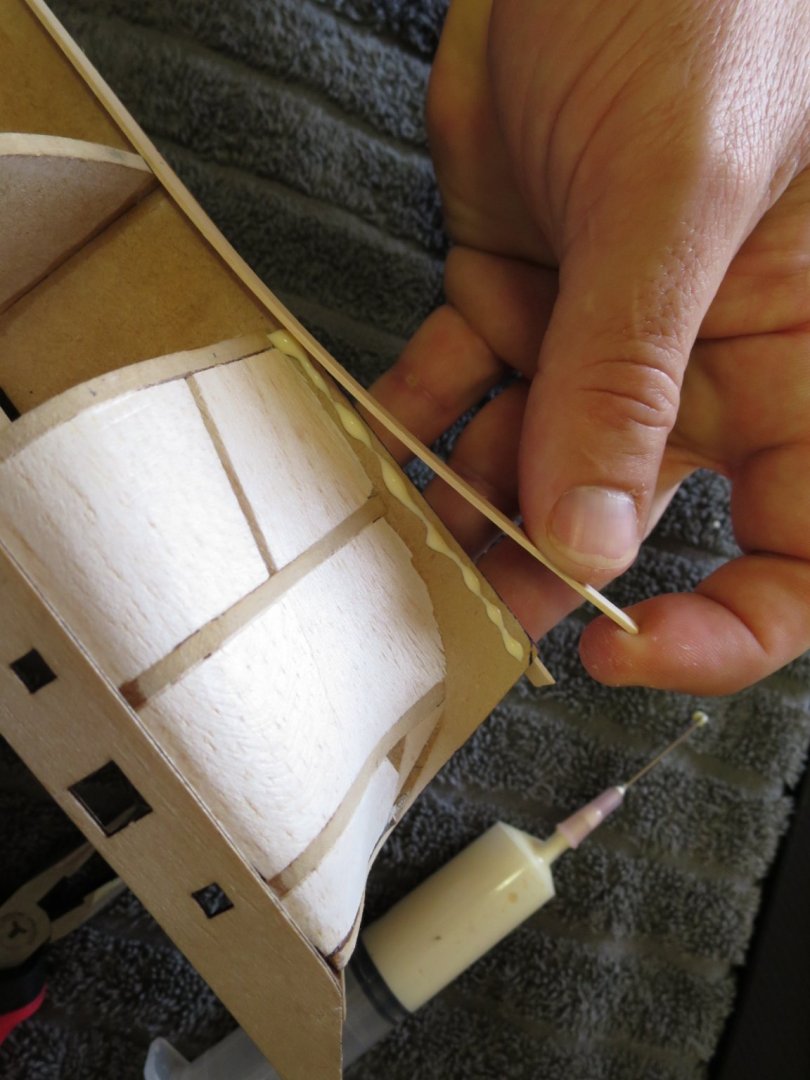
@captain_hook Thanks for pointing out my error. That makes perfect sense and reading the instructions helps... I cut some scrap and glued them to the deck only at right angles as you suggested. After doing a fair bit of reading, and a lot of looking and measuring, I decided to start with a full width garboard plank each side of the keel. I glued and positioned these flush with the bottom of the backbone keel and will trim them after. The end result is quite pleasing, but I'm uncertain how this will work out with the second planking, and still rebate/fair into the keel. I then measured each station and divided by 14 planks to get the plank width at each station. I know this is a lot of work for the first planking, but I wanting to try/practice second planking technique and learnt form it. I don't want steelers in my second planking. After tapering/profiling and bending 4 planks (see the first photo in this post) I glued them in place. I know why people take the time to spile planks - the bow has a bit of clinker effect. Cheers, Stu


- 34 replies
-
- 5
-
-
- lady nelson
- victory models
- (and 1 more)
-
@Jonny 007 we are just down the coast from Maori Bay and moved out there from the city about 5 years ago. Love it in summer, winter not so much. I just read your build log intro - I grew up in Cambridge in the Waikato and then shifted to Kawakawa Bay in Auckland when I was about 10. I've been kicking around Oz and doing project work for almost 20 years now. Given the restrictions of international travel I'm likely to be stuck here for a few more months, so I'm now on the scout for a board and wetsuit in Perth as I'll be down there for a week from this Sunday and probably another week in a months time. Not much in the way of boards on the second hand market wetsuits are full price... Looks like I'm buying myself some early Christmas presents 😀 Thanks Moab. I don't have much time to check out other peoples work, but I do now and then. Will have a look at some of those card models soon.
-
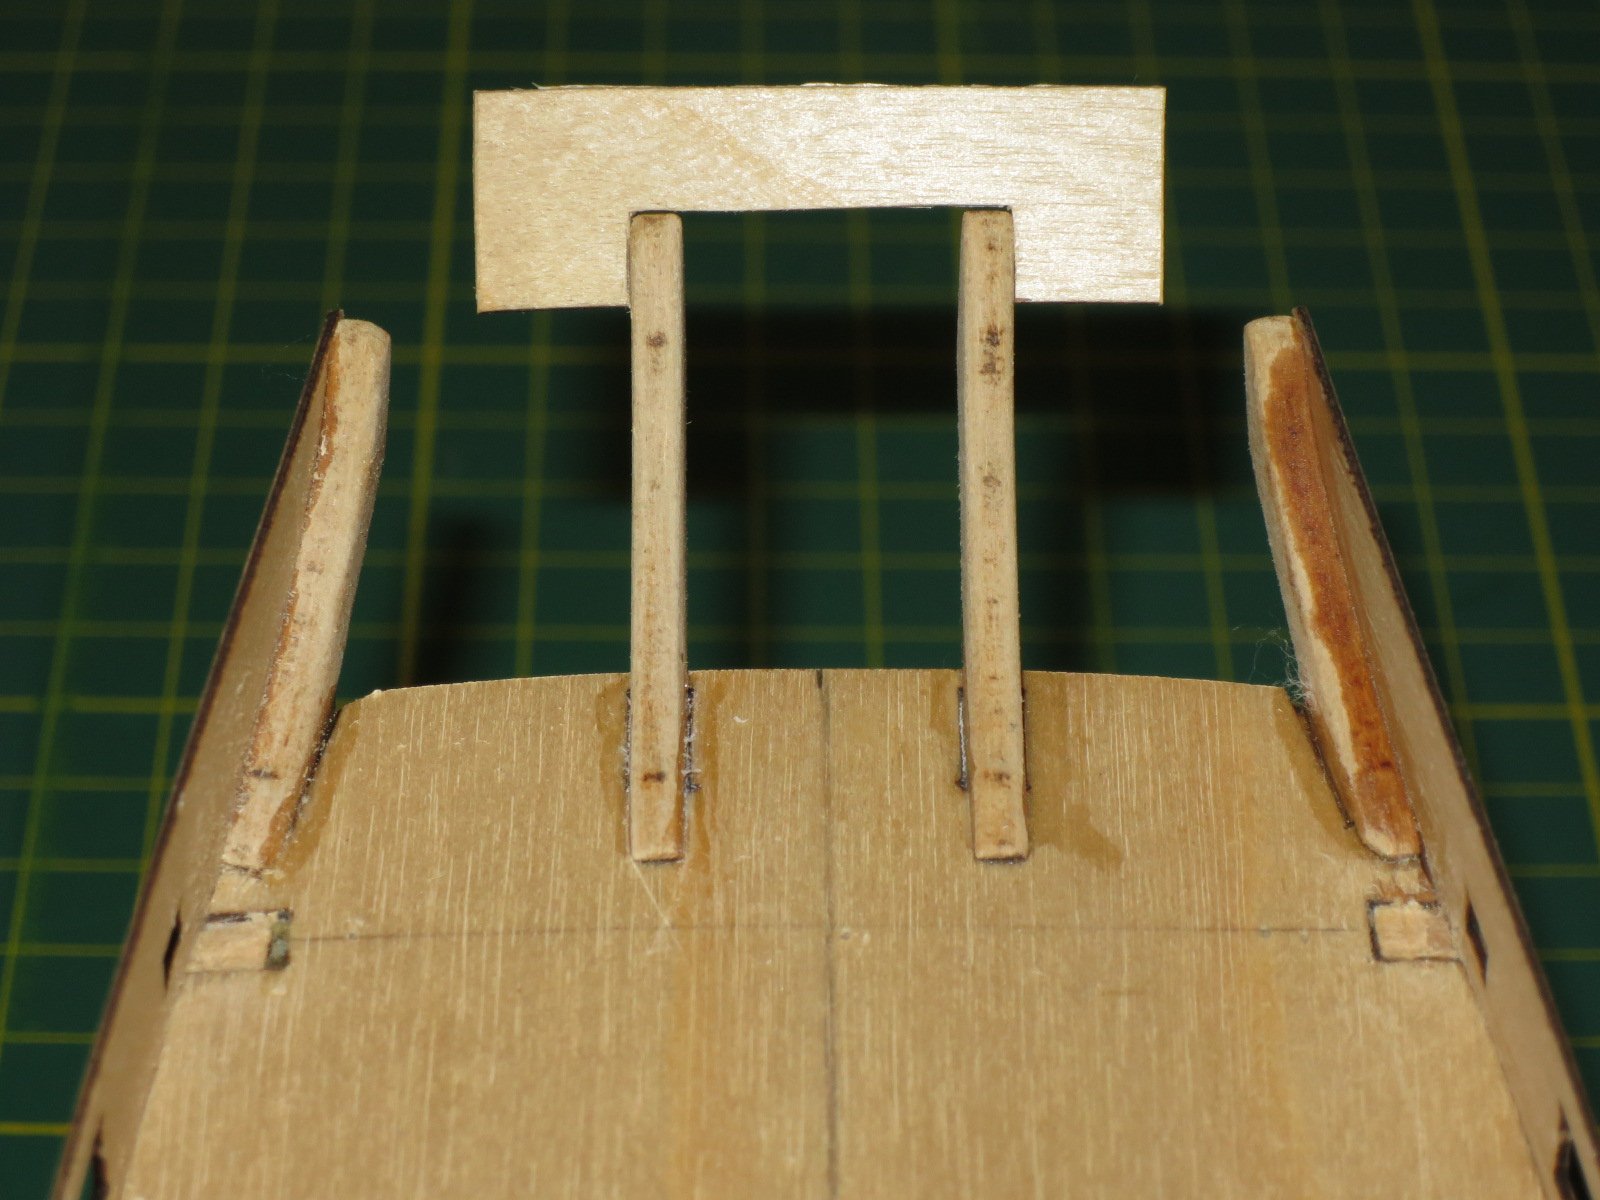
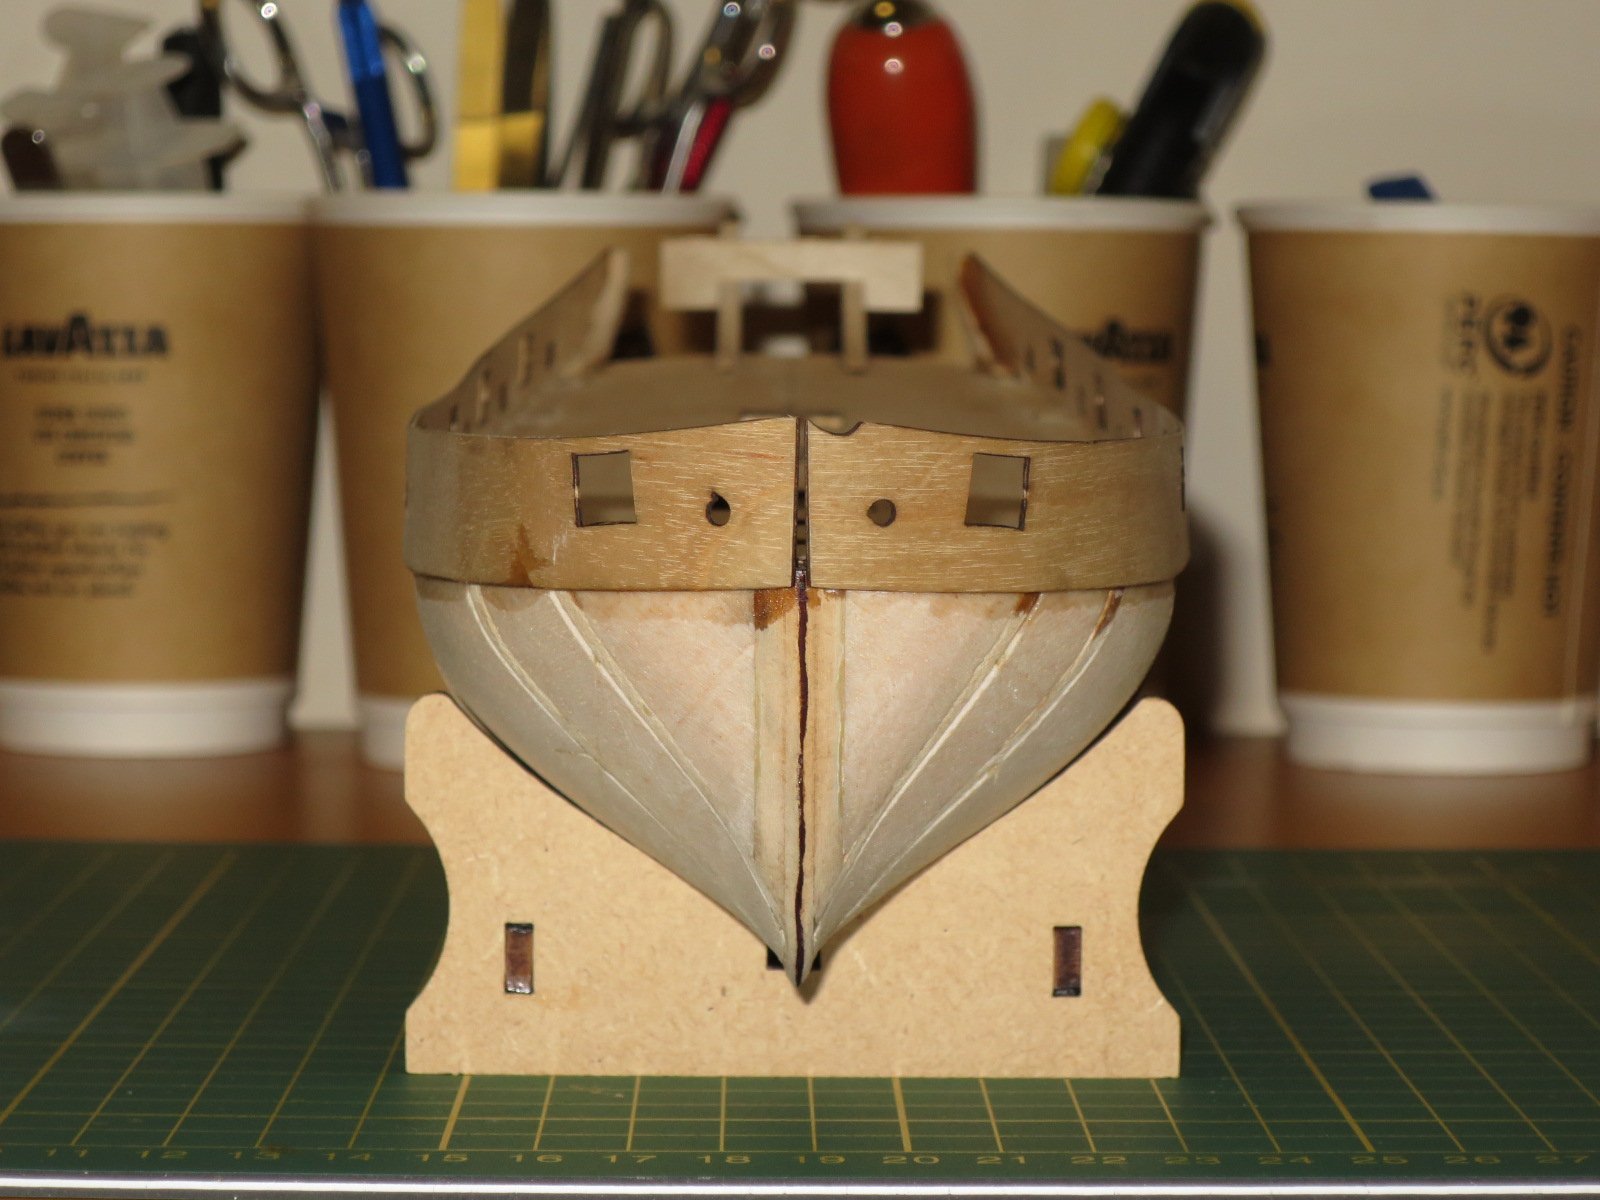
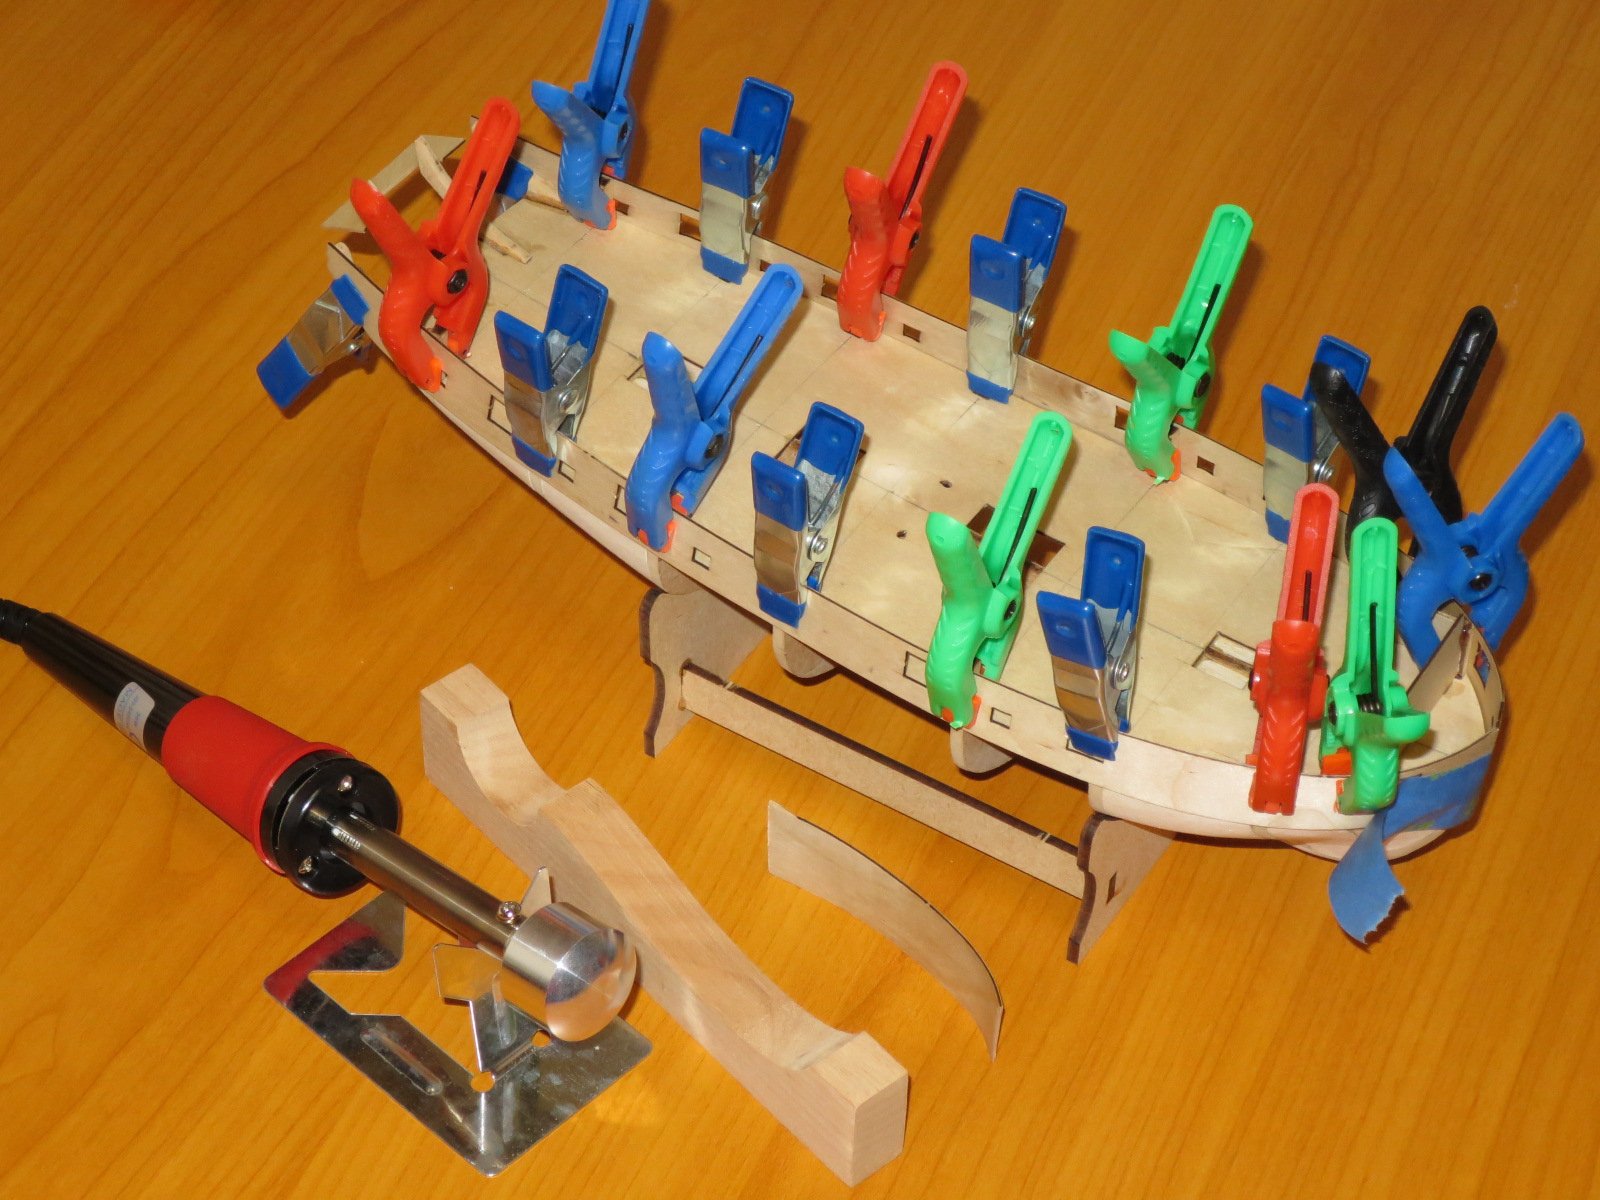
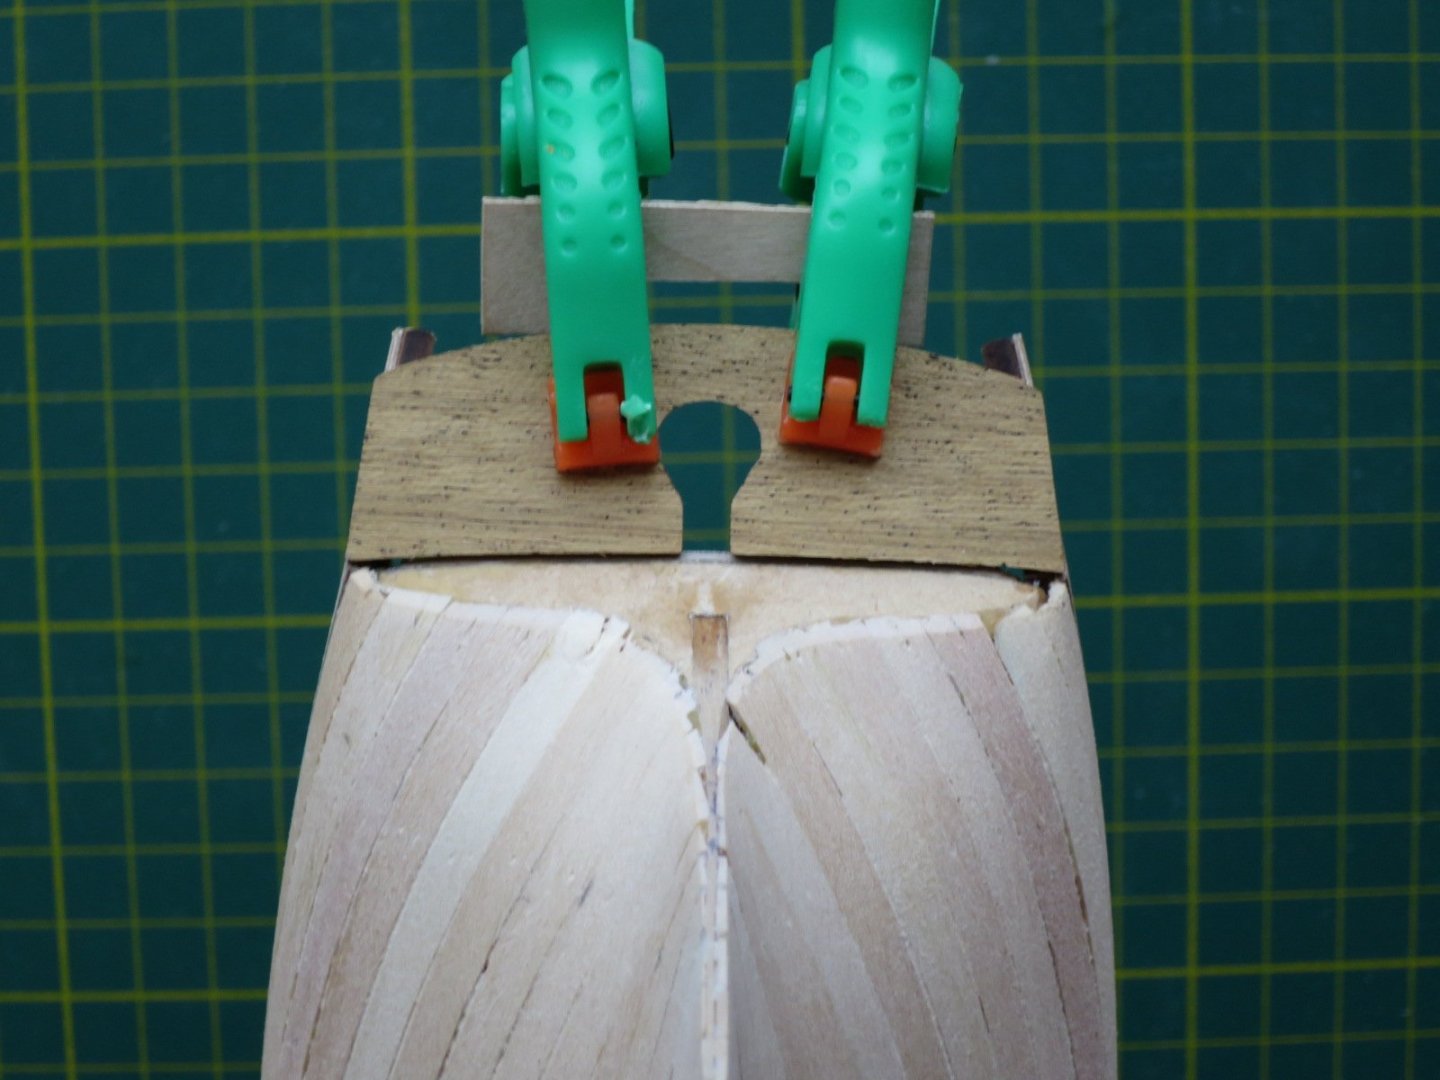
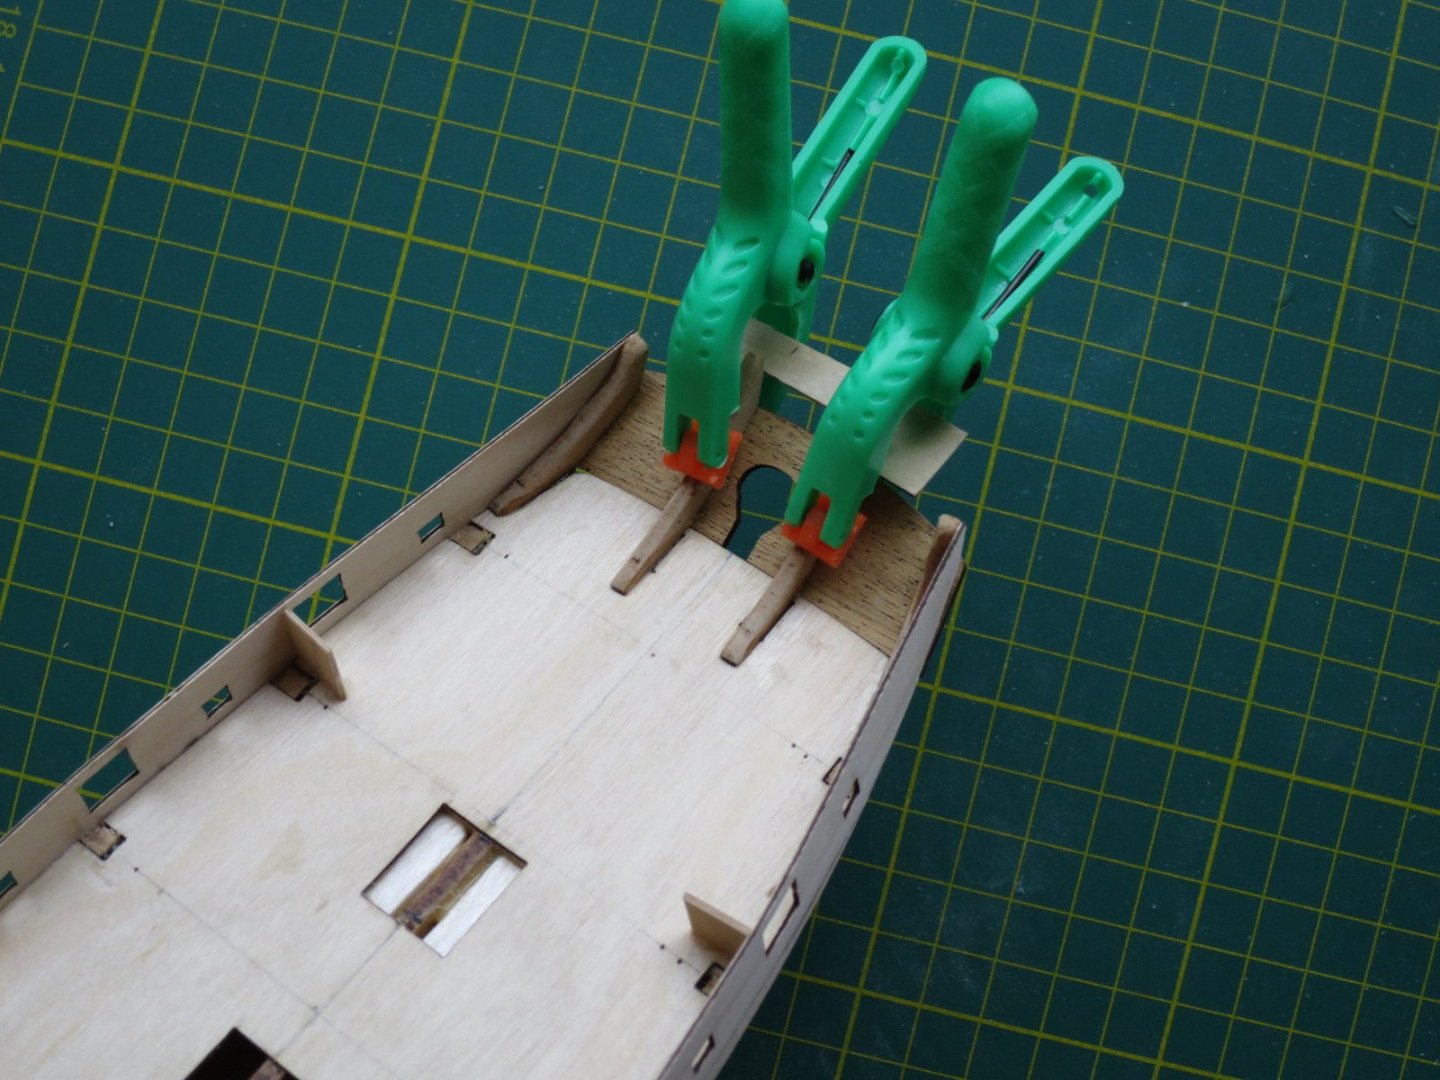
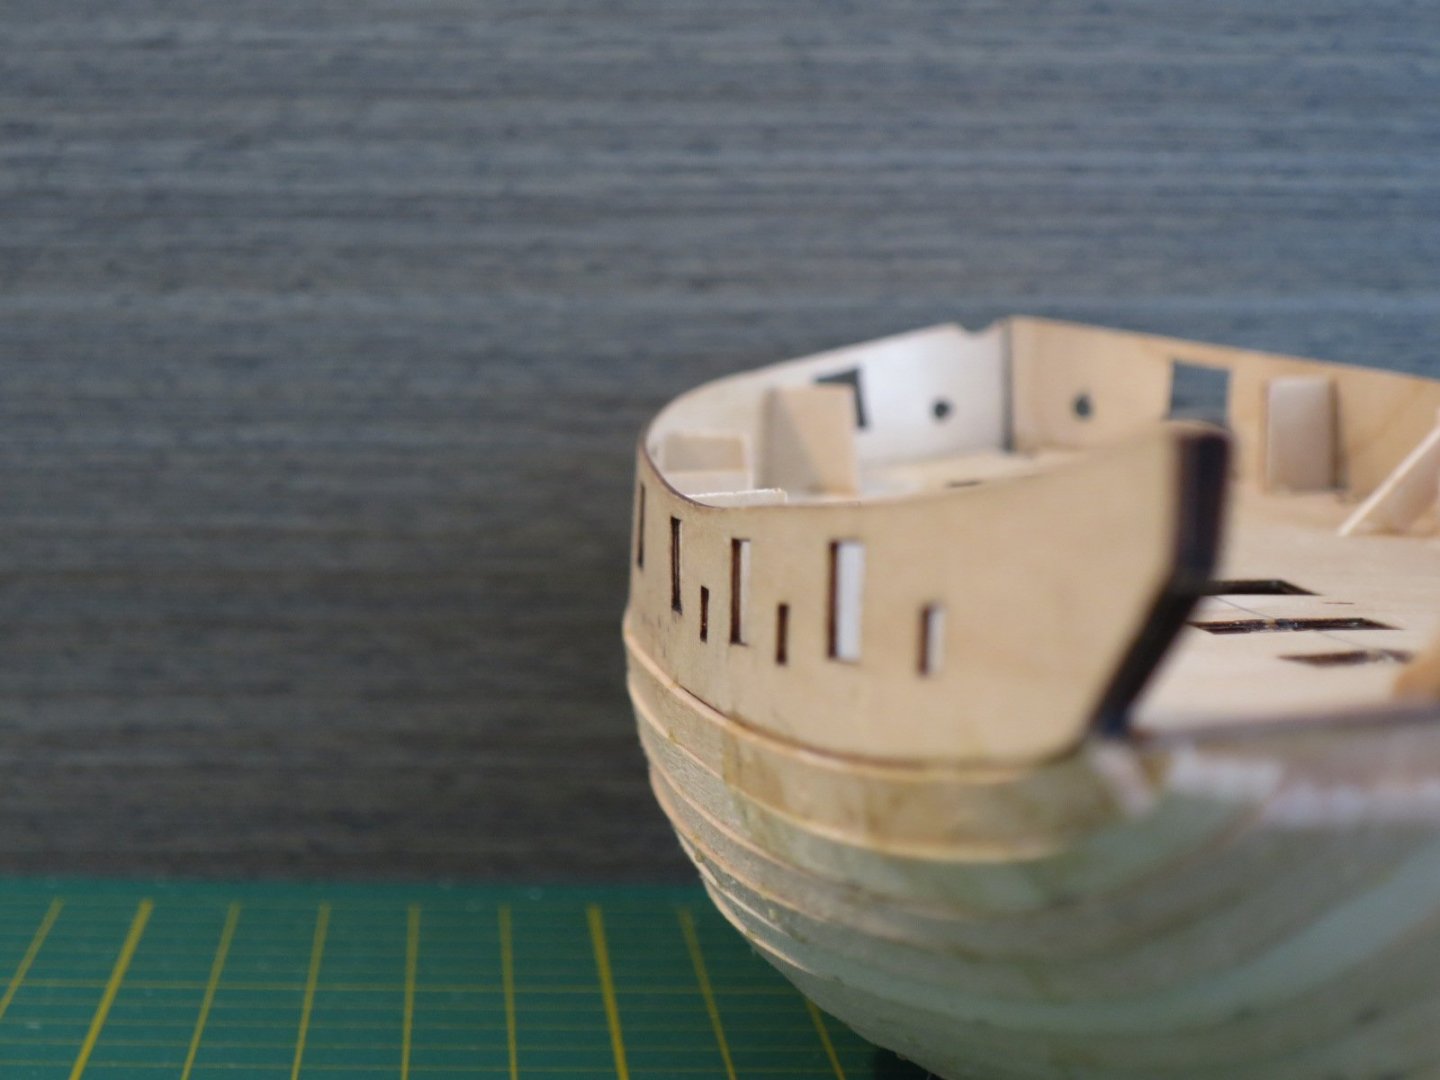
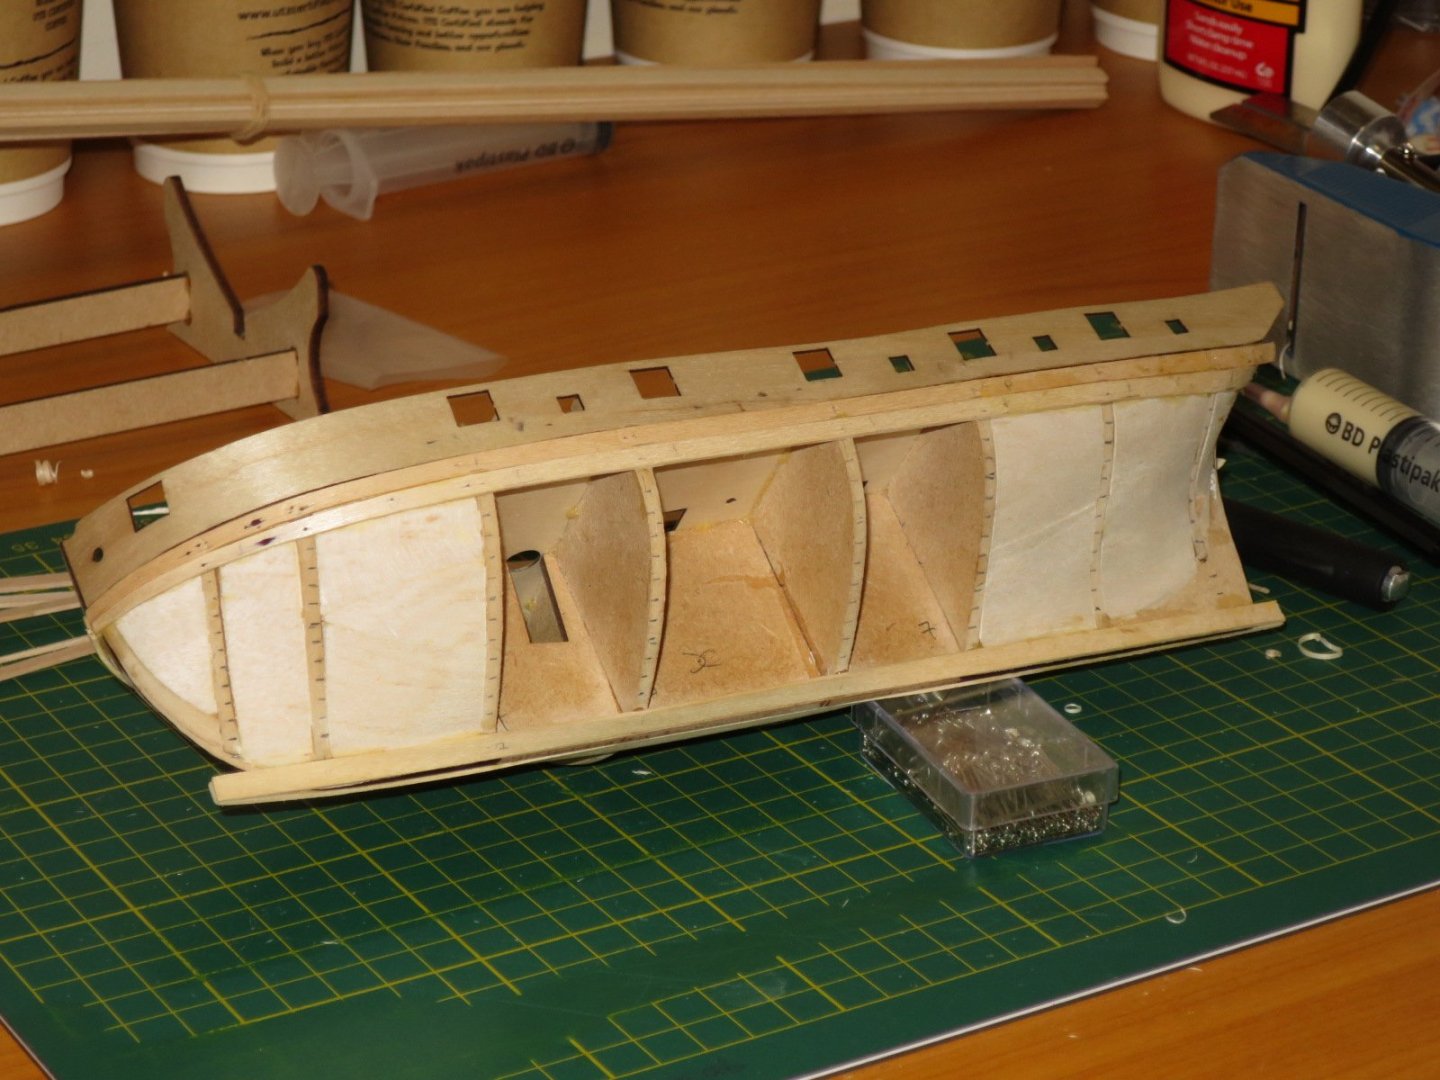
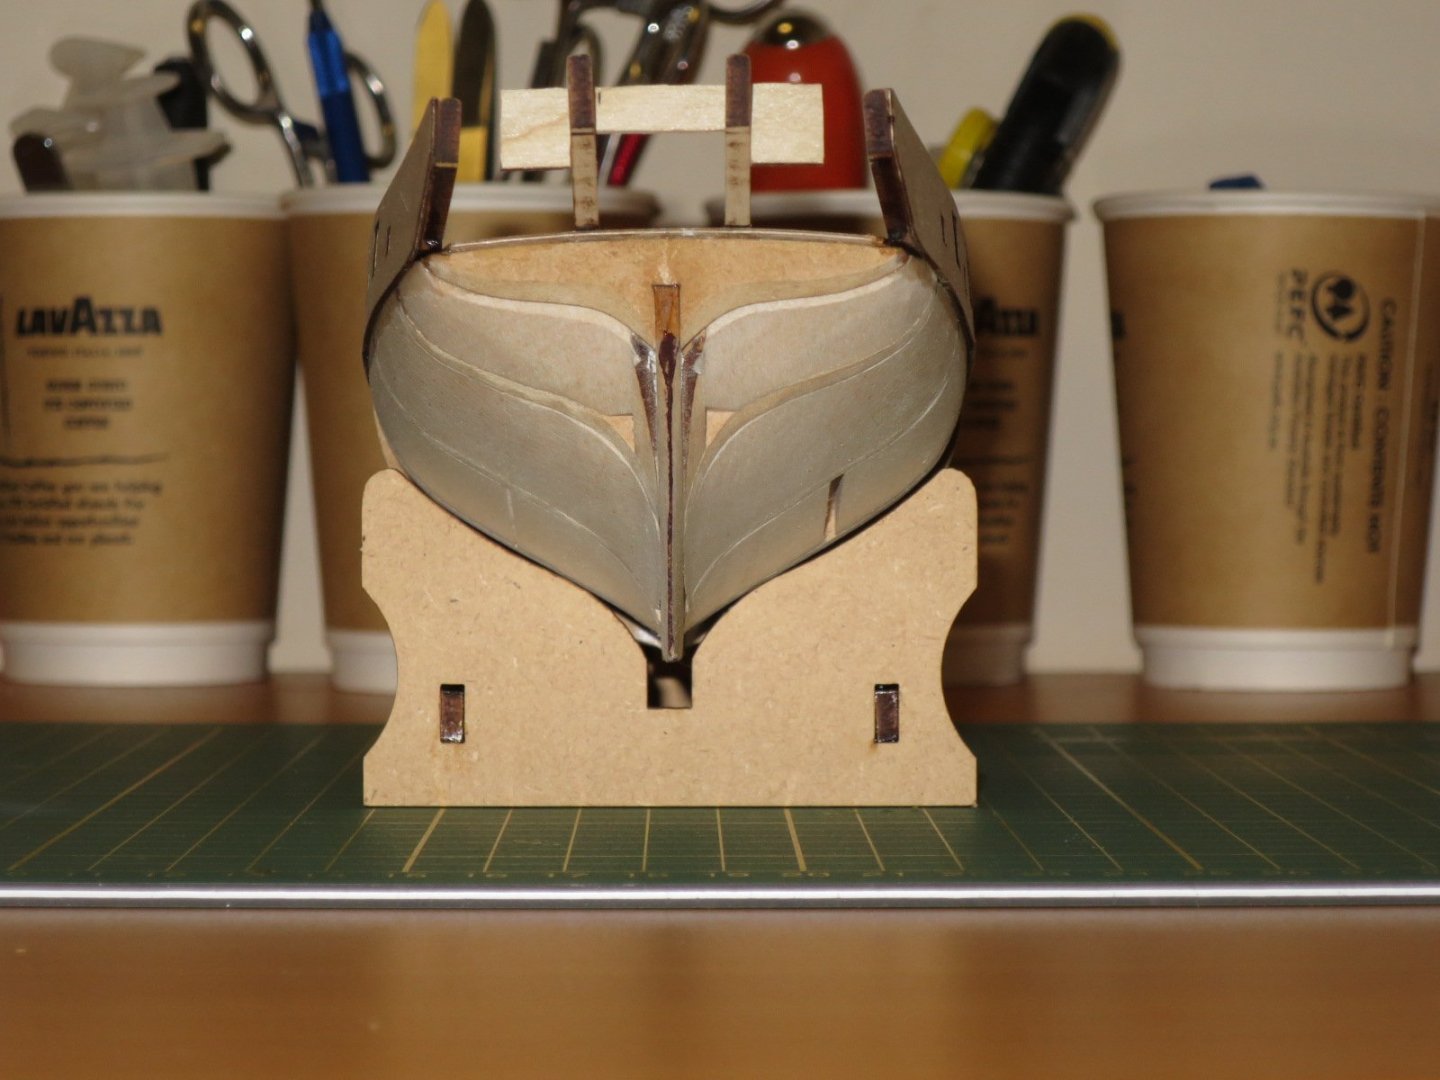
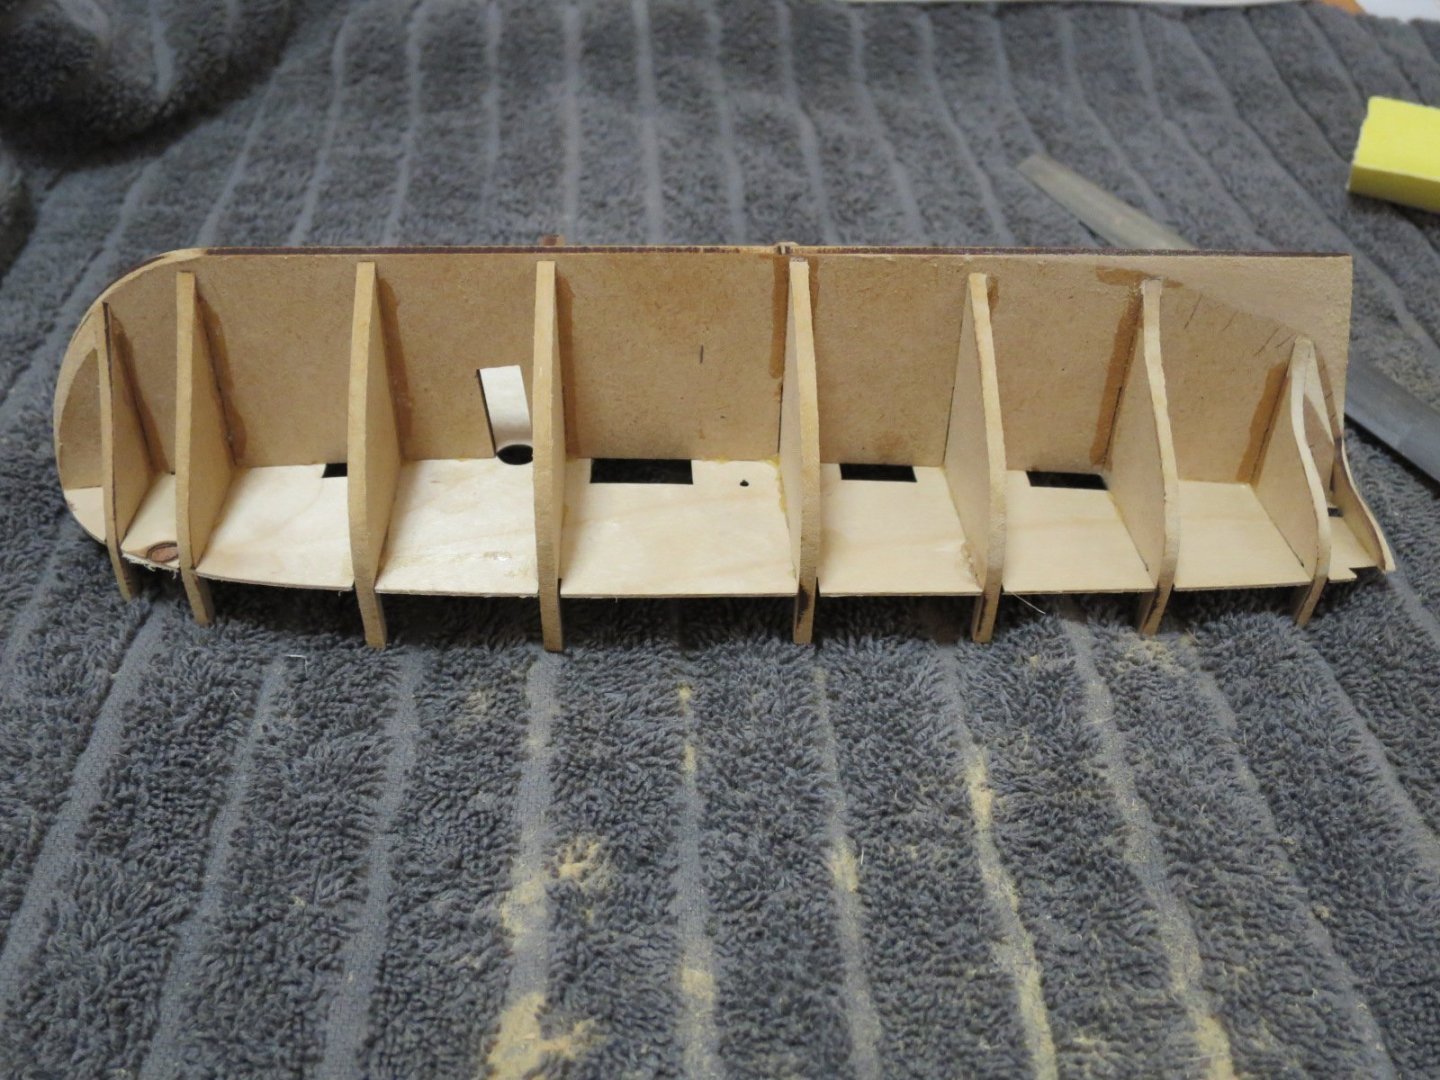
These photos are taken slightly out of sequence. I also sanded the stern fashion pieces and gave the top edges a slight radius before gluing them in place. They weren't quite parallel so I cut a temporary (removable) clamp from scrap to align them correctly when I glue the transom on. I took the bulwarks off and they held their shape very well. I then positioned them in the final location with clamps. I used the stem piece as a reference for the correct height by aligning the top of the slot in the stem with the top corner of the bulwark. I then glued them in place with thin CA applied on the bottom edge of the bulwark and the balsa blocks at the stem and stern and underside of the deck in the 3 middle stations. If I were to do this again, I would have started at the stern a gently lifted maybe a 1/4 of the bulwark at a time and using thicker CA and carefully placed it with a fine nozzle in sections while the clamps held the rest of it in place. The thin CA wicked up and glued some on the stanchions to the inner face of the bulwark and took some time and care to get off. I'm reasonably happy with the bulwarks, thought there is a slight ripple amidships in the starboard side. The bow is also quite symmetrical, though there is a small crease on the second starboard gun port which should sand out. Showing the transom and feathered stern trailing edge. I have also cut the stanchions off and using a chisel blade cut them down to be flush with the deck.


- 34 replies
-
- 6
-
-
- lady nelson
- victory models
- (and 1 more)
-
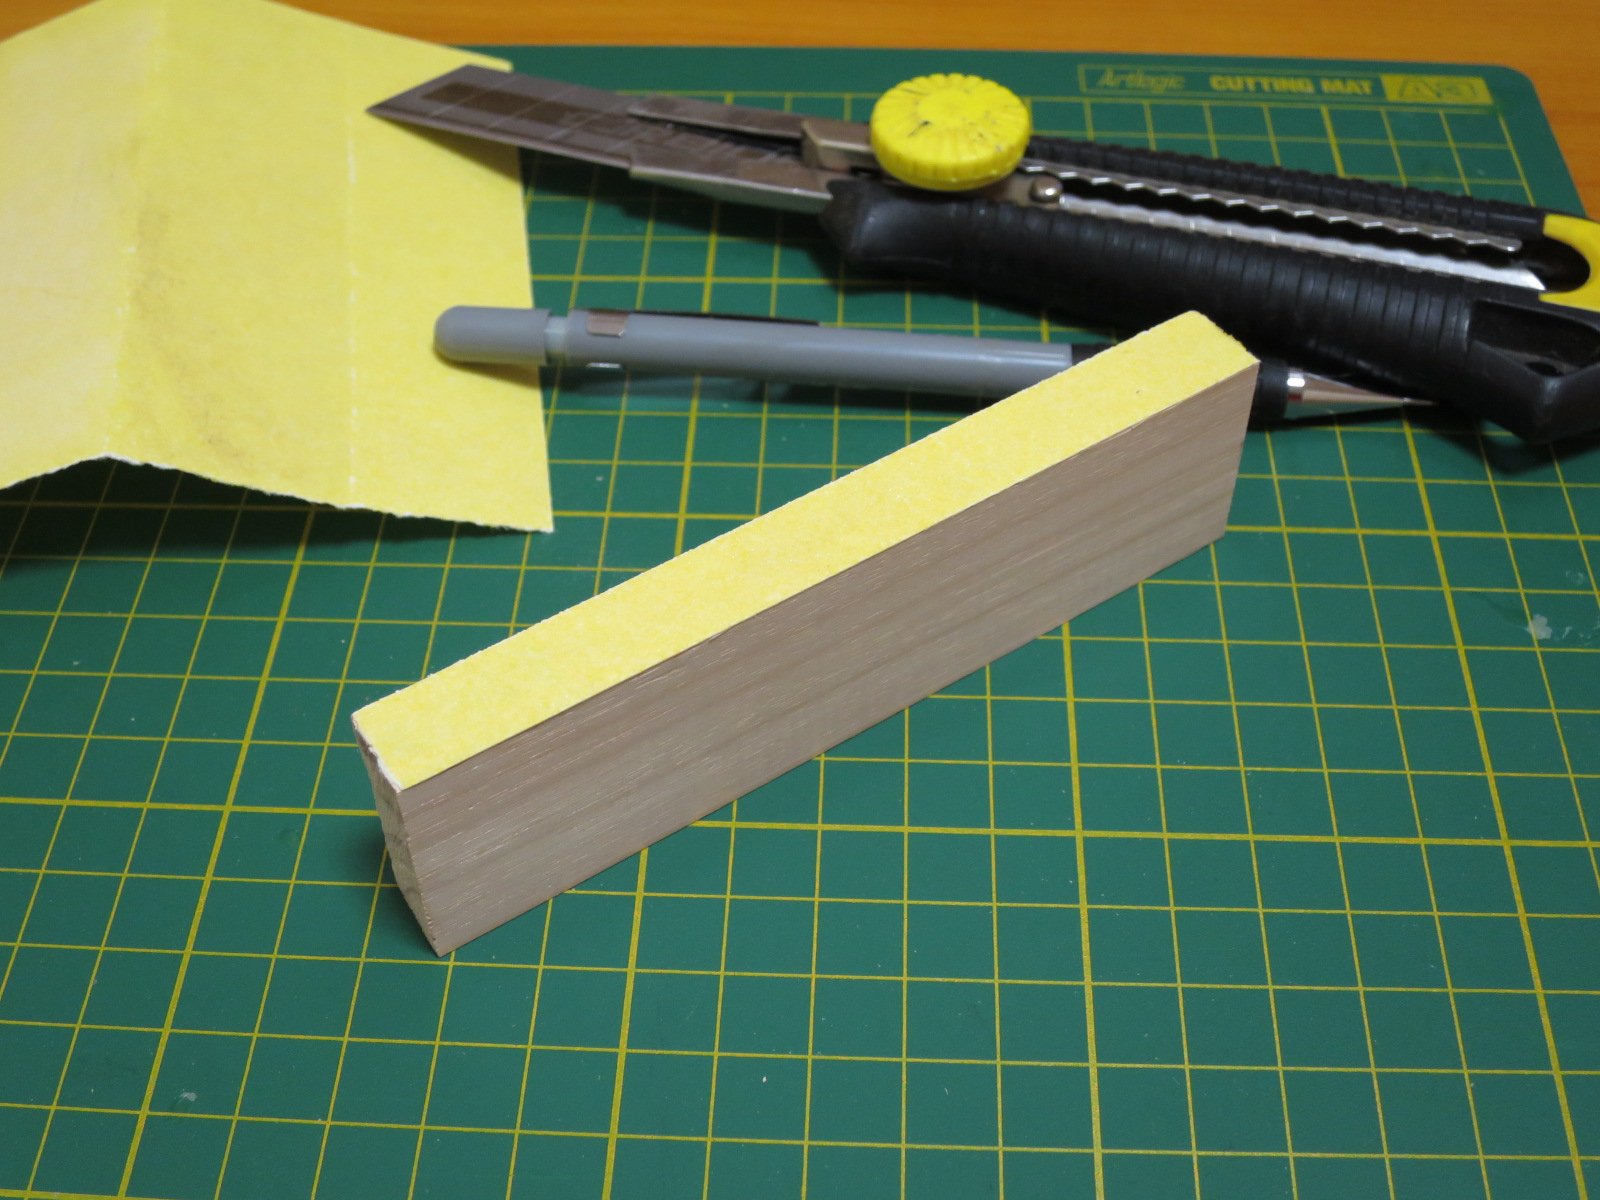
Hi wbozza, I bought mine from modelerscentral.com (based in NSW I think) but I see they are our of stock www.modelerscentral.com/tools-paints-glue/hand-tools/plank-benders/plank-bender-electric/ hobbytools.com.au have a number of options, but these are also all sold out: www.hobbytools.com.au/electric-plank-bending-tool-240volt/ www.hobbytools.com.au/ship-modellers-hobby-tool-kit/ www.hobbytools.com.au/artesania-latina-plank-bender-with-2-blades/ I did a quick search on ebay, and there are some international options. Search for "electric plank bender" There isn't much special about these plank benders - they're soldering irons with a turned aluminium tip. So something else you could do is buy a 40W soldering iron ($20 from jaycar www.jaycar.com.au/40-watt-240v-soldering-iron/p/TS1475), have someone machine up a cylindrical tip for you (aluminium - can give you the dimensions of mine) and simply make your own former(s). I recommend this as I paid AUD$105 for mine, which is extortionate. If you have a mate with a lathe, it will cost you $20 and a 6 pack... Cheers, Stu
- 34 replies
-
- 3
-
-
- lady nelson
- victory models
- (and 1 more)
-
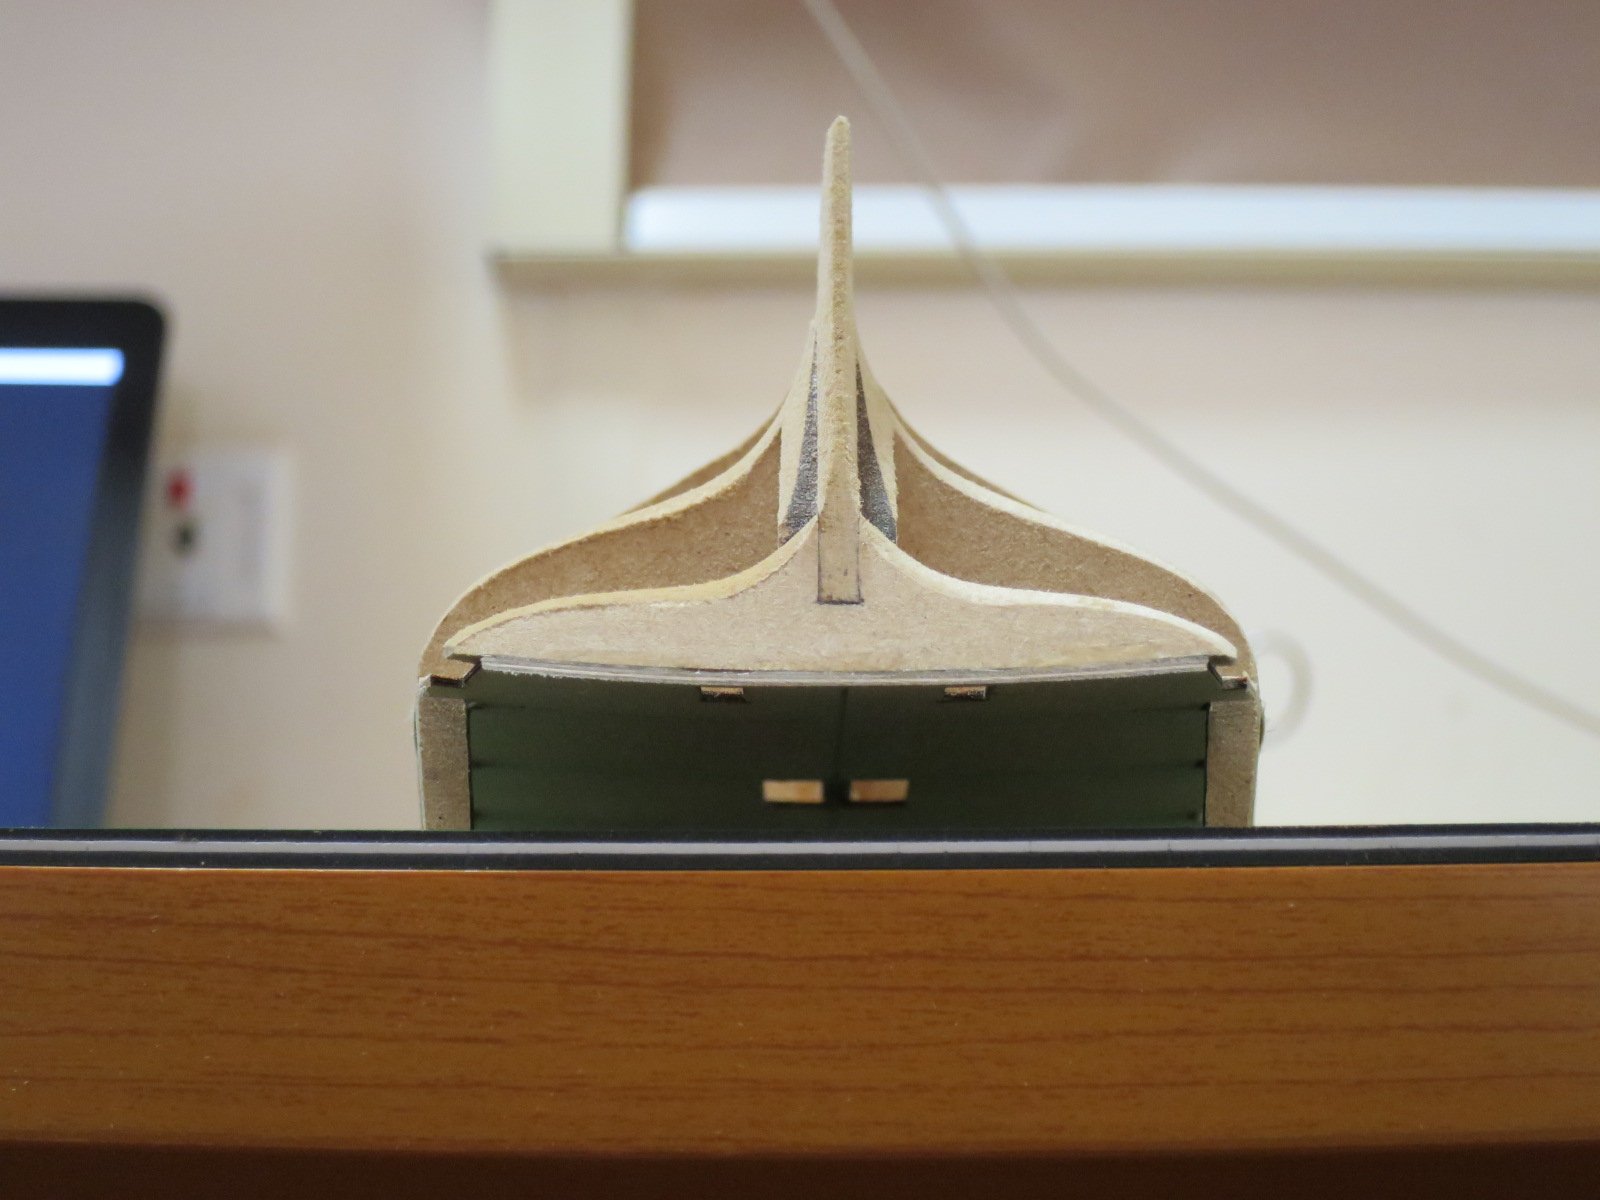
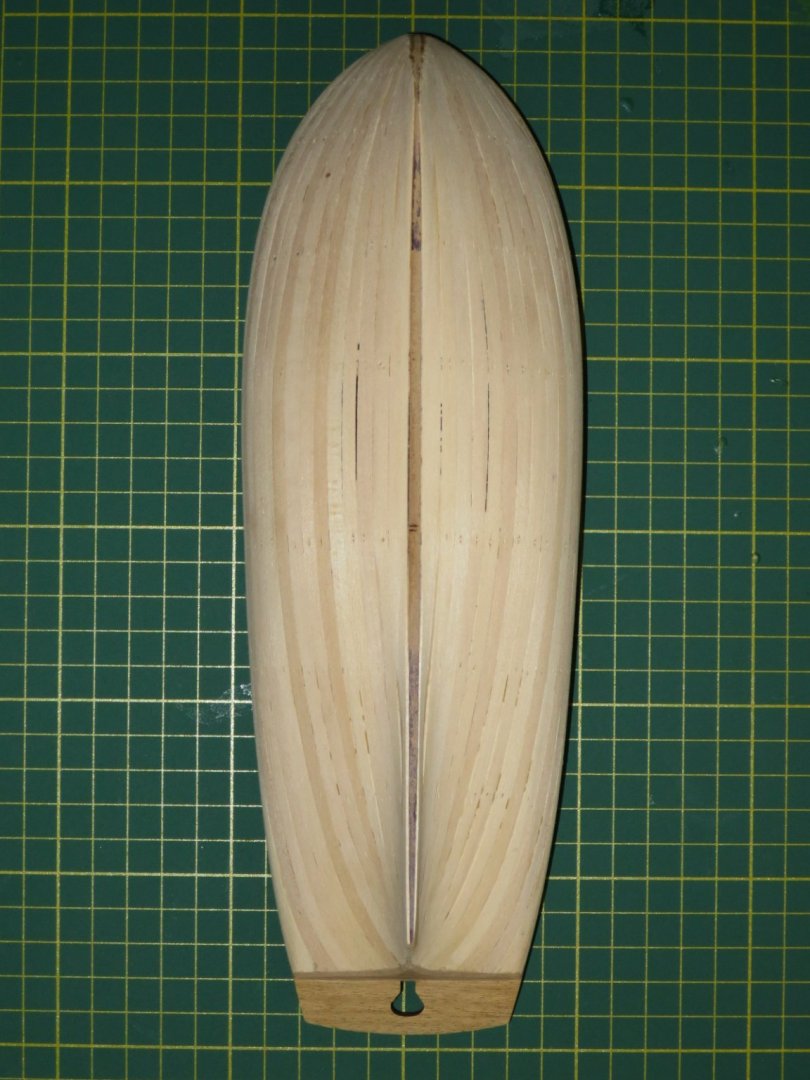
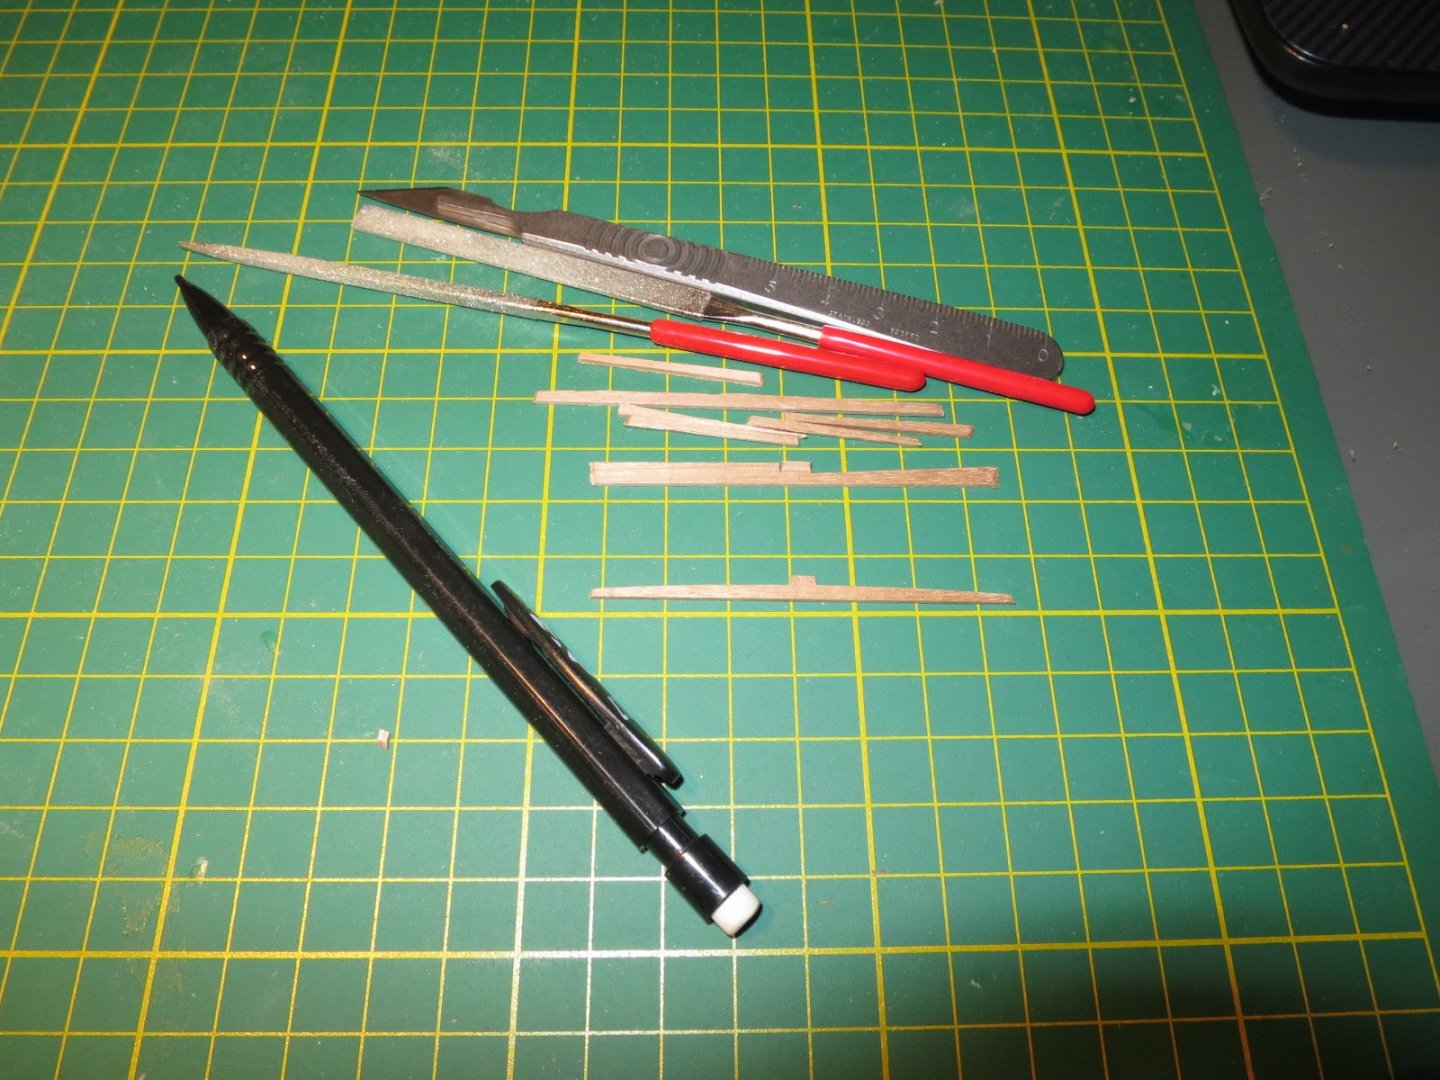
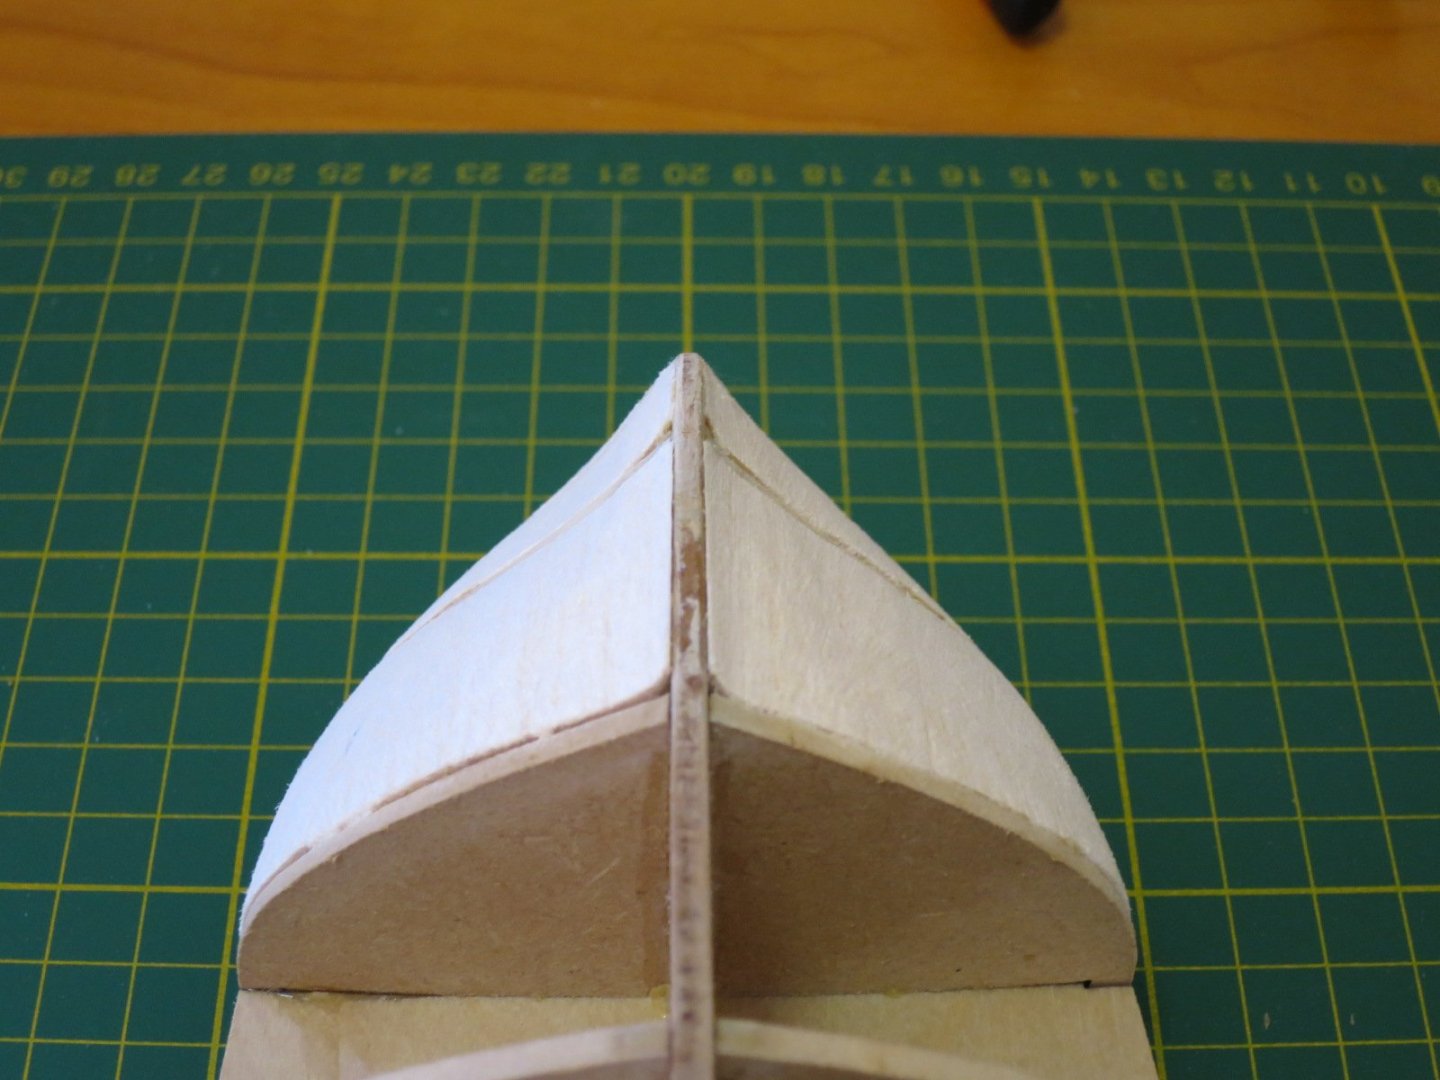
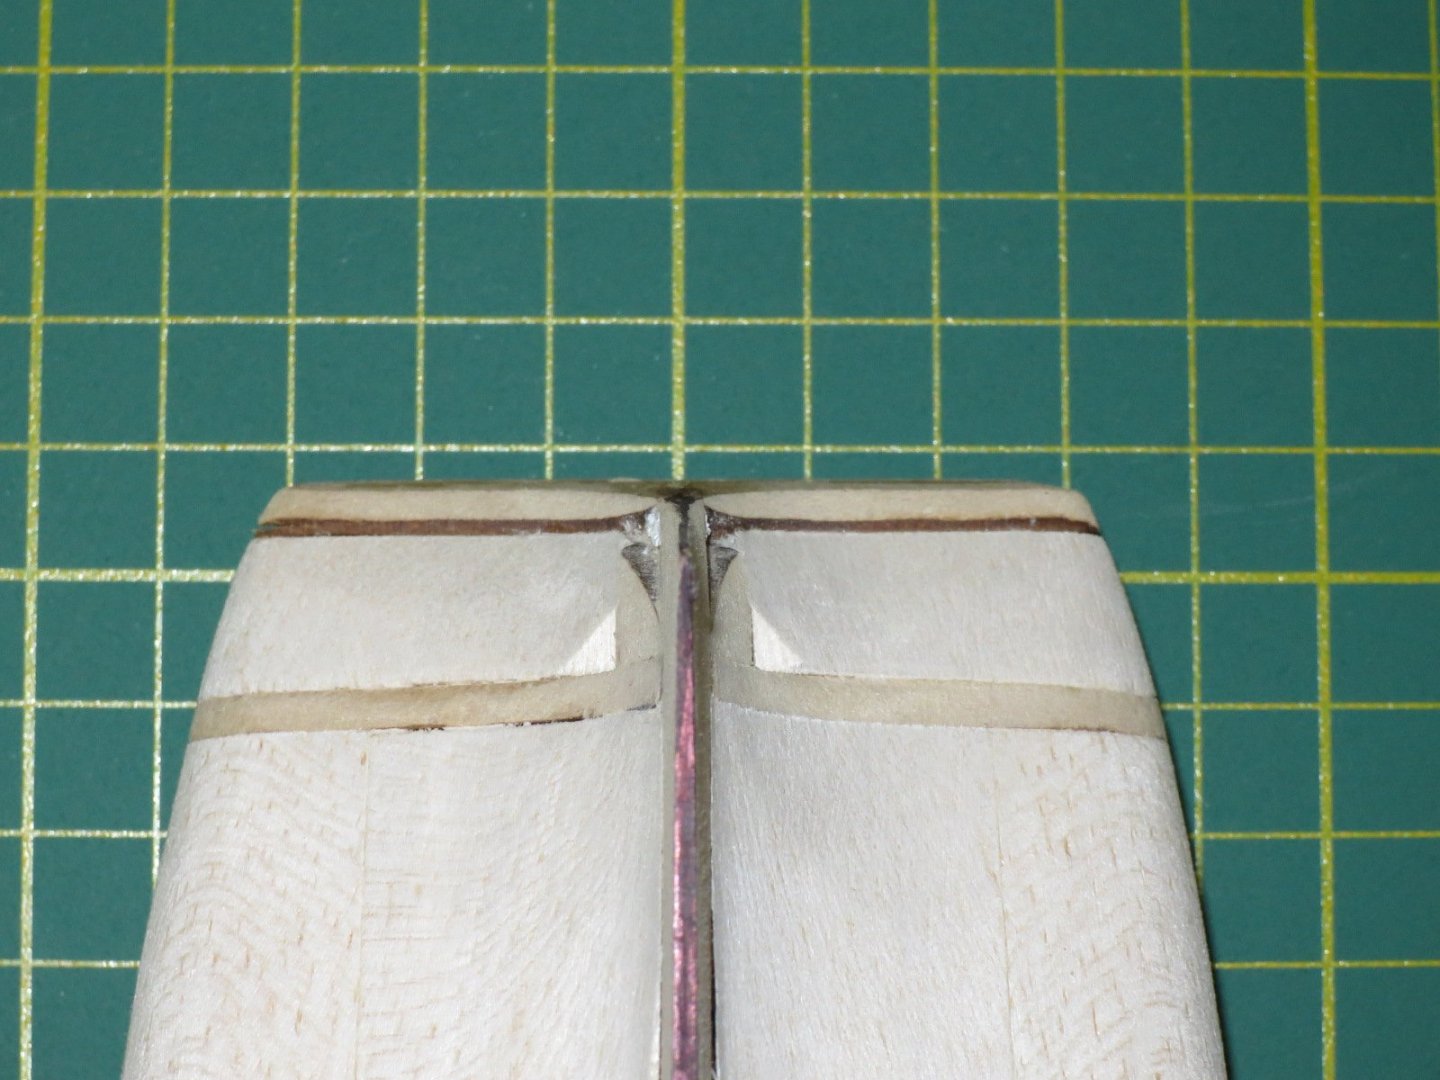
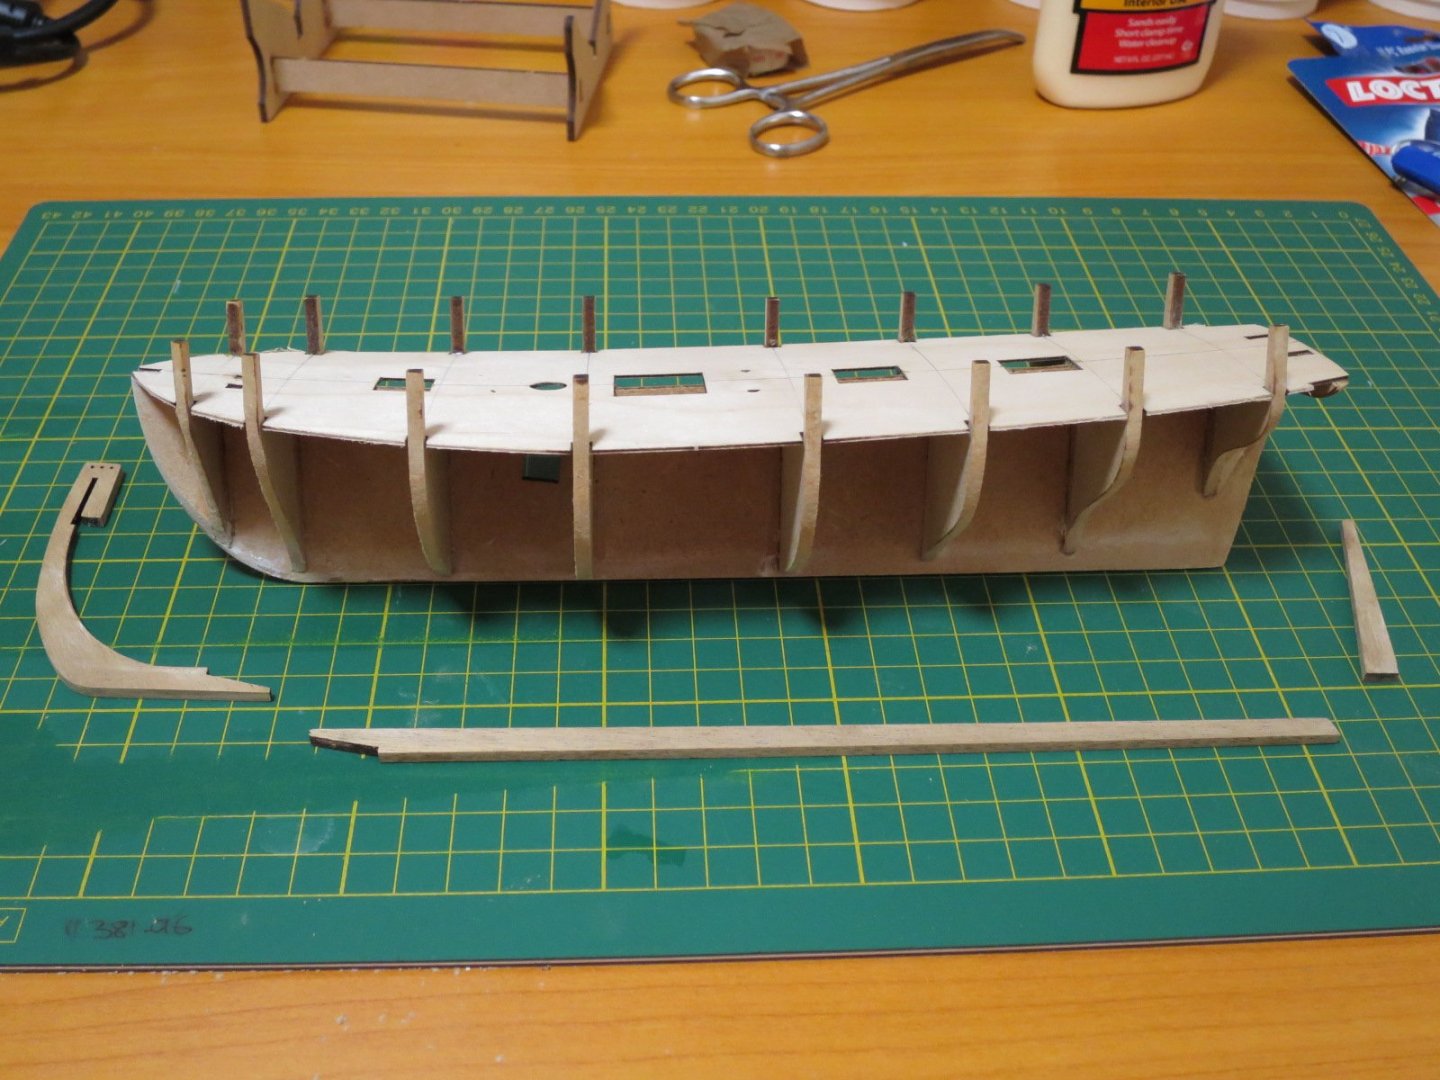
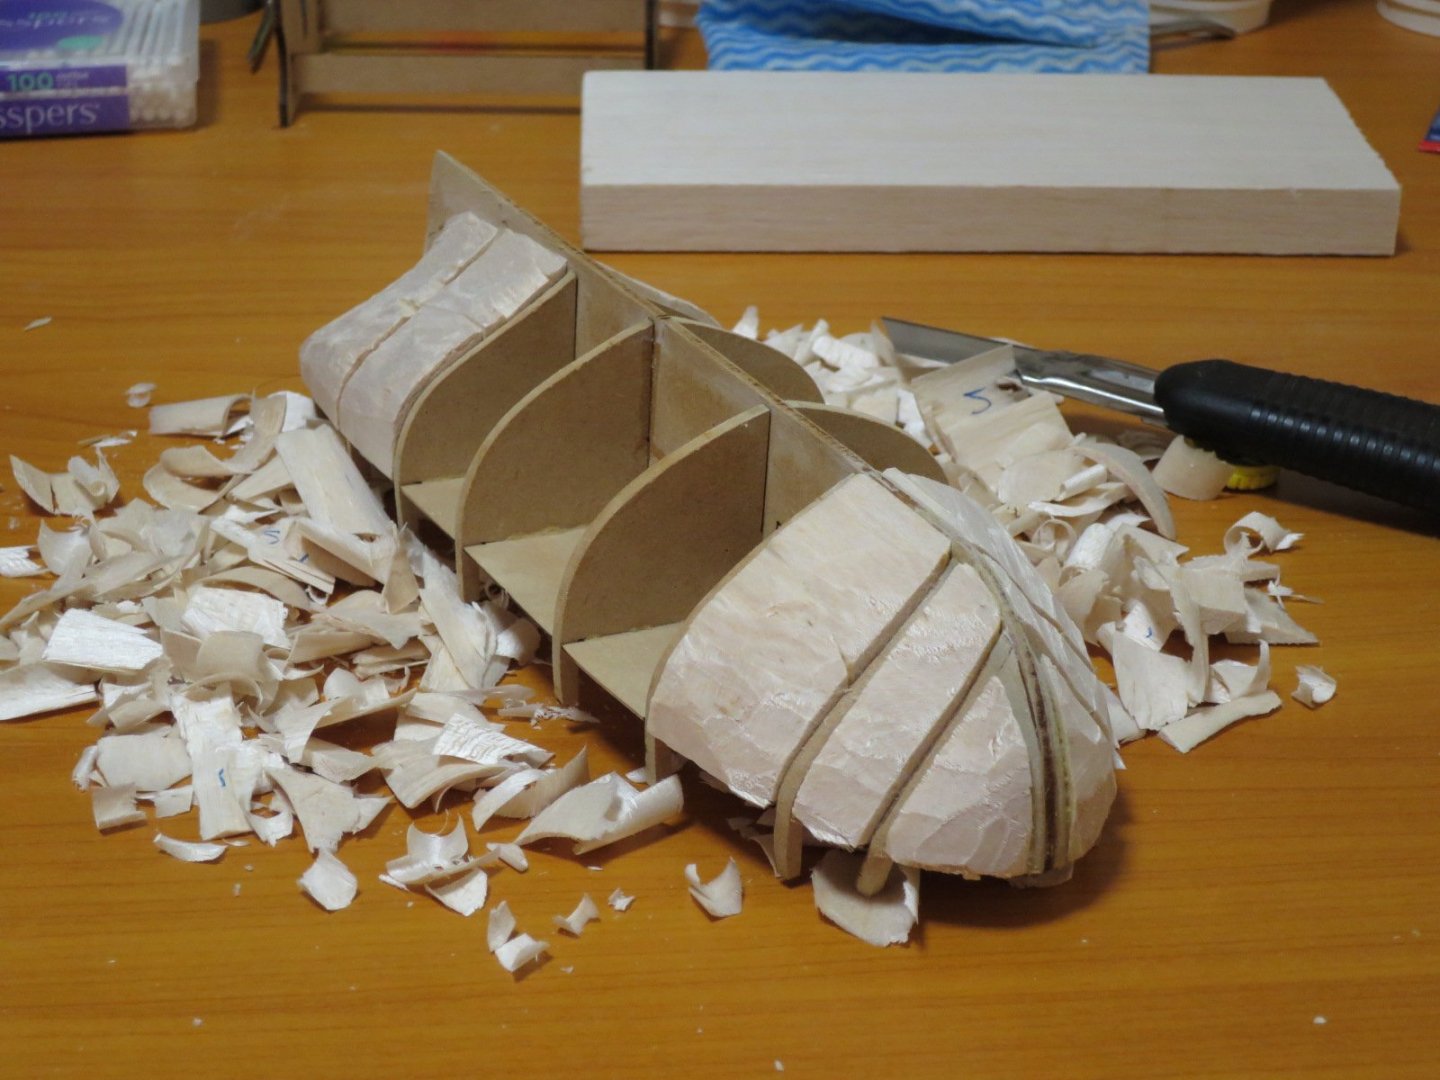
Armed with 2 short lengths of 16mm and 25mm dowel, a sanding block and some 80 grit sandpaper, I got the balsa down to about 1mm off the bulkheads. I swapped the 80 grit for some 180 and did the final fairing. I used a black marker so I could get the feathering as symmetrical as possible and I'm reasonably pleased with the results. The bow is slightly fuller on the starboard side, but I'll correct that before planking. I'm very happy with the stern. I did a lot of work on the trailing edge at the stern with a flat diamond needle file and got it down to a uniform 0.8mm. This shot is looking down the stern post. I'll get the bulwarks glued on tomorrow, then get ready for first planking. By "get ready" I mean trawl through other build logs and the planking tutorials for about a week. Cheers, Stu

- 34 replies
-
- 7
-
-
- lady nelson
- victory models
- (and 1 more)
-
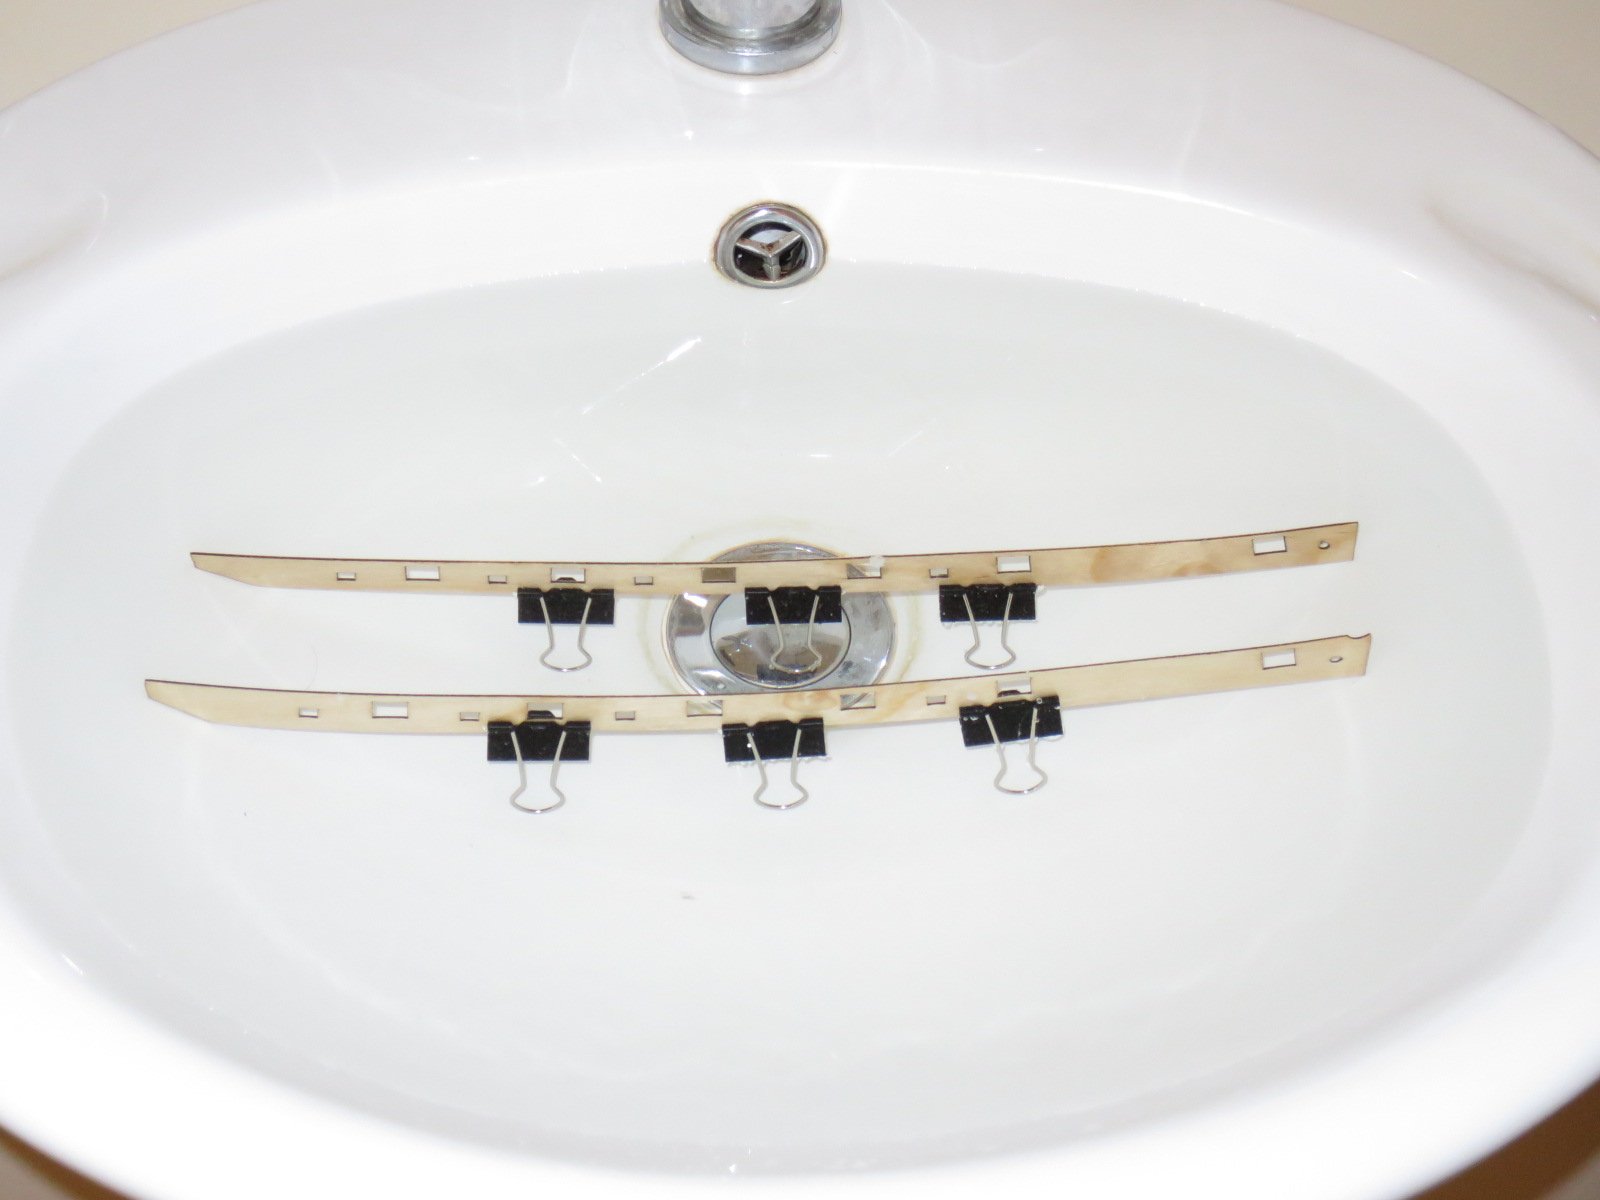
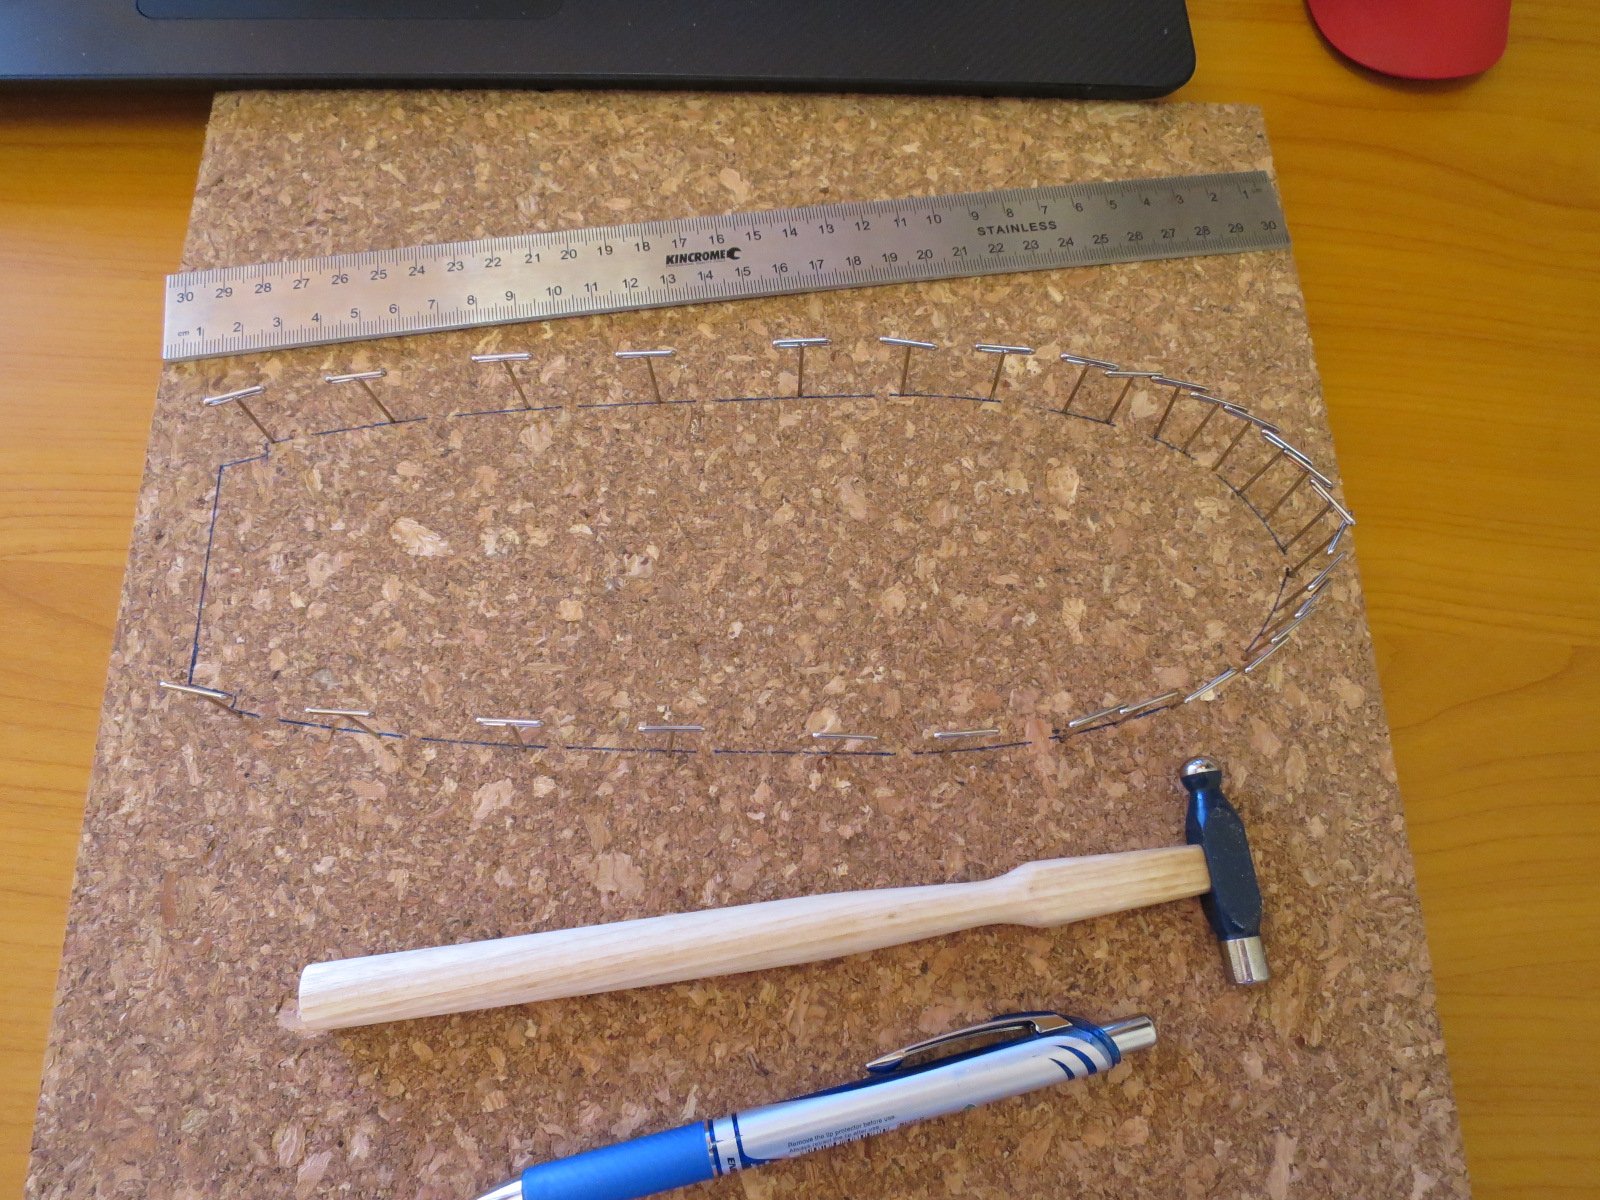
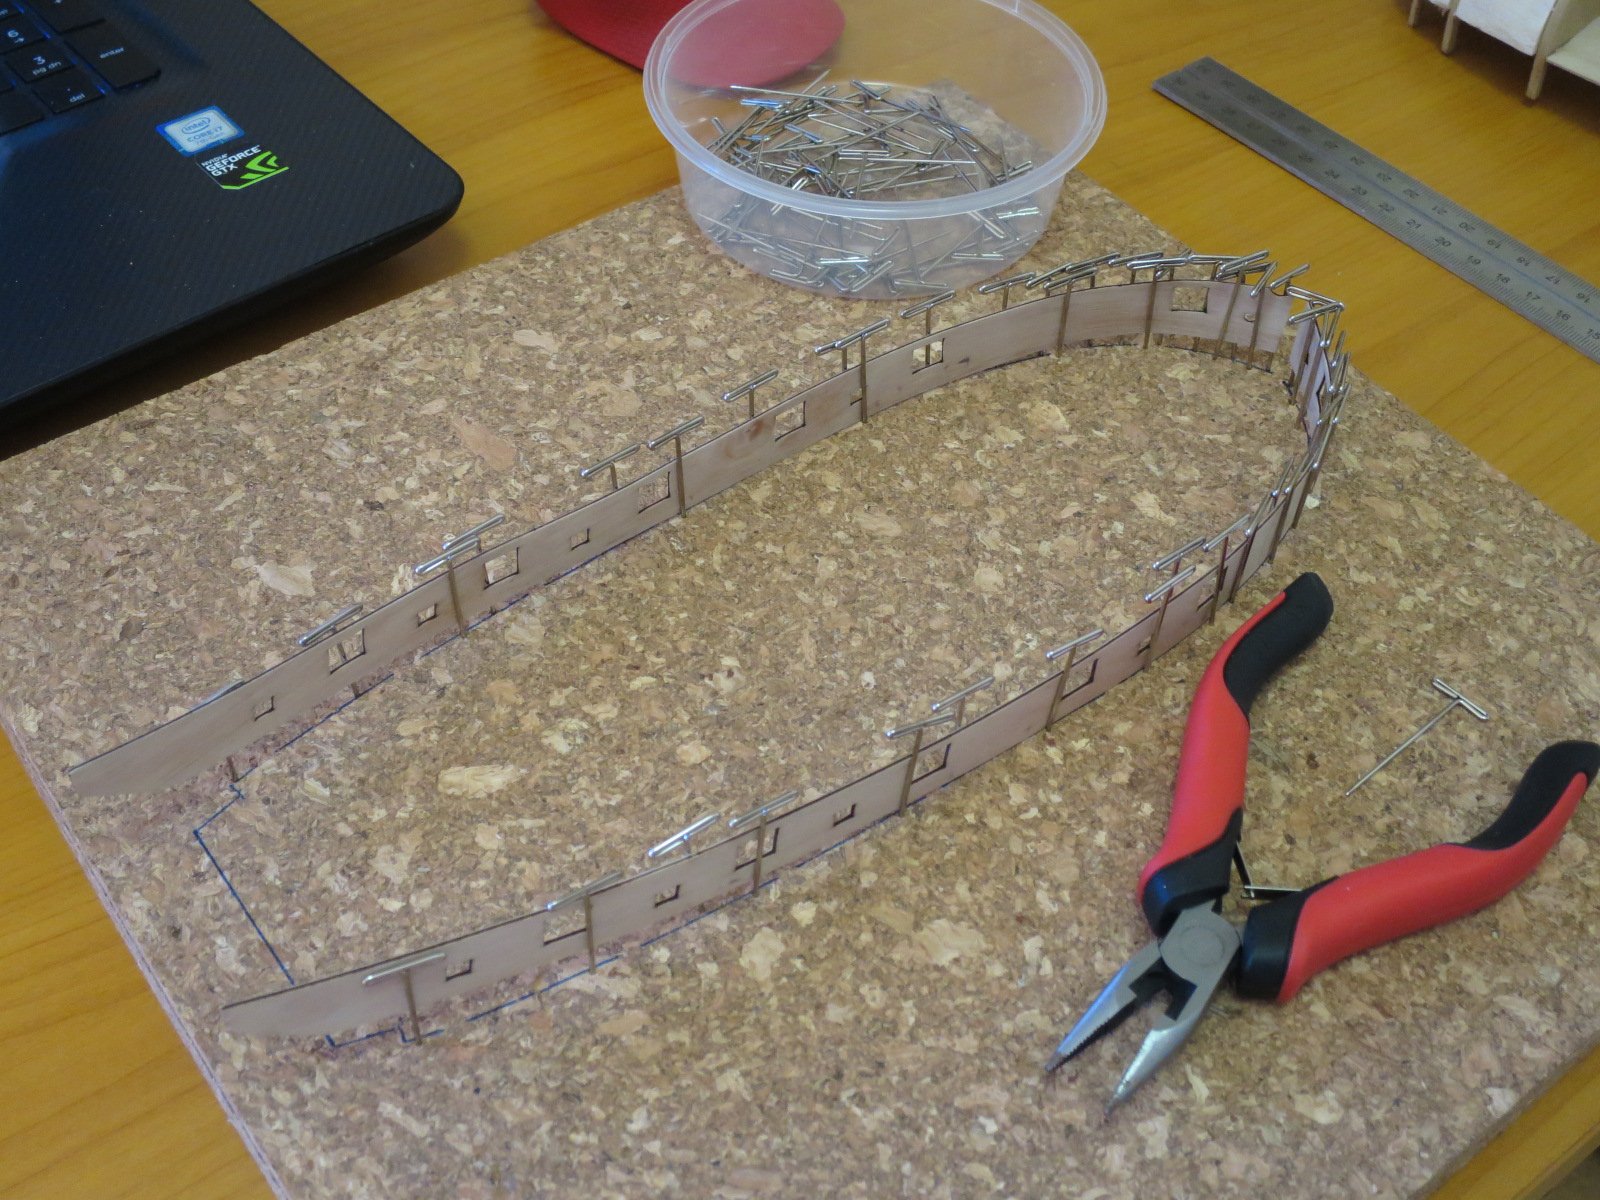
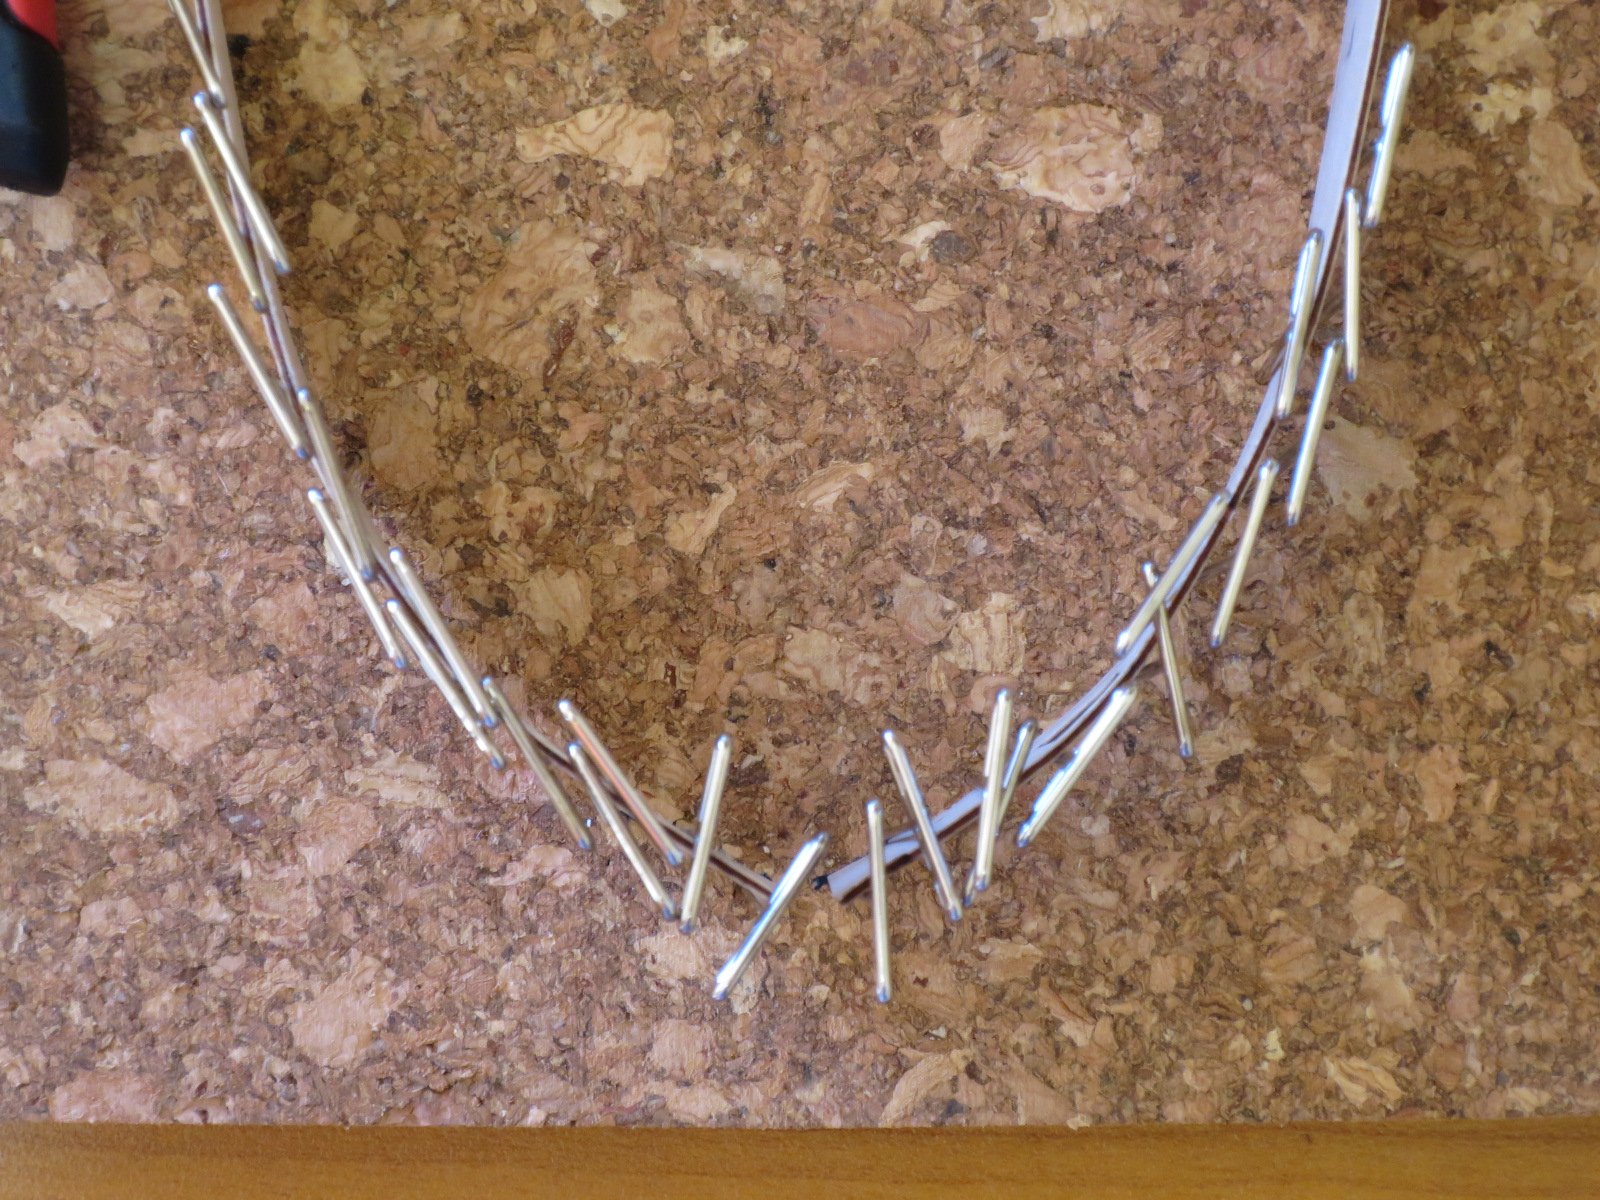
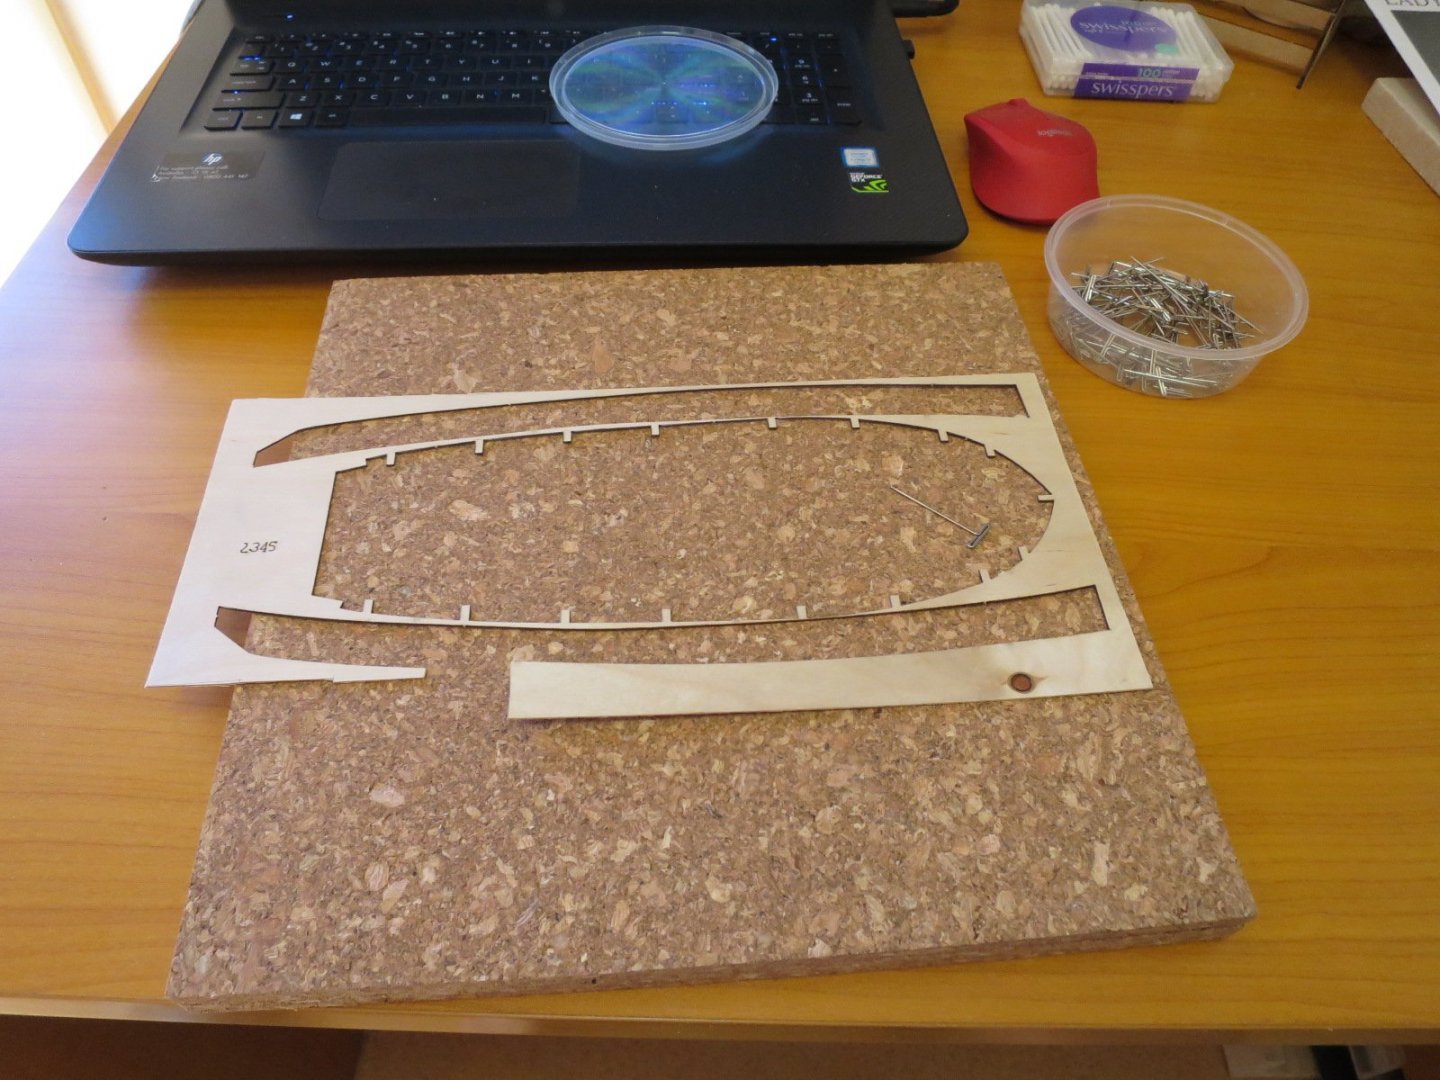
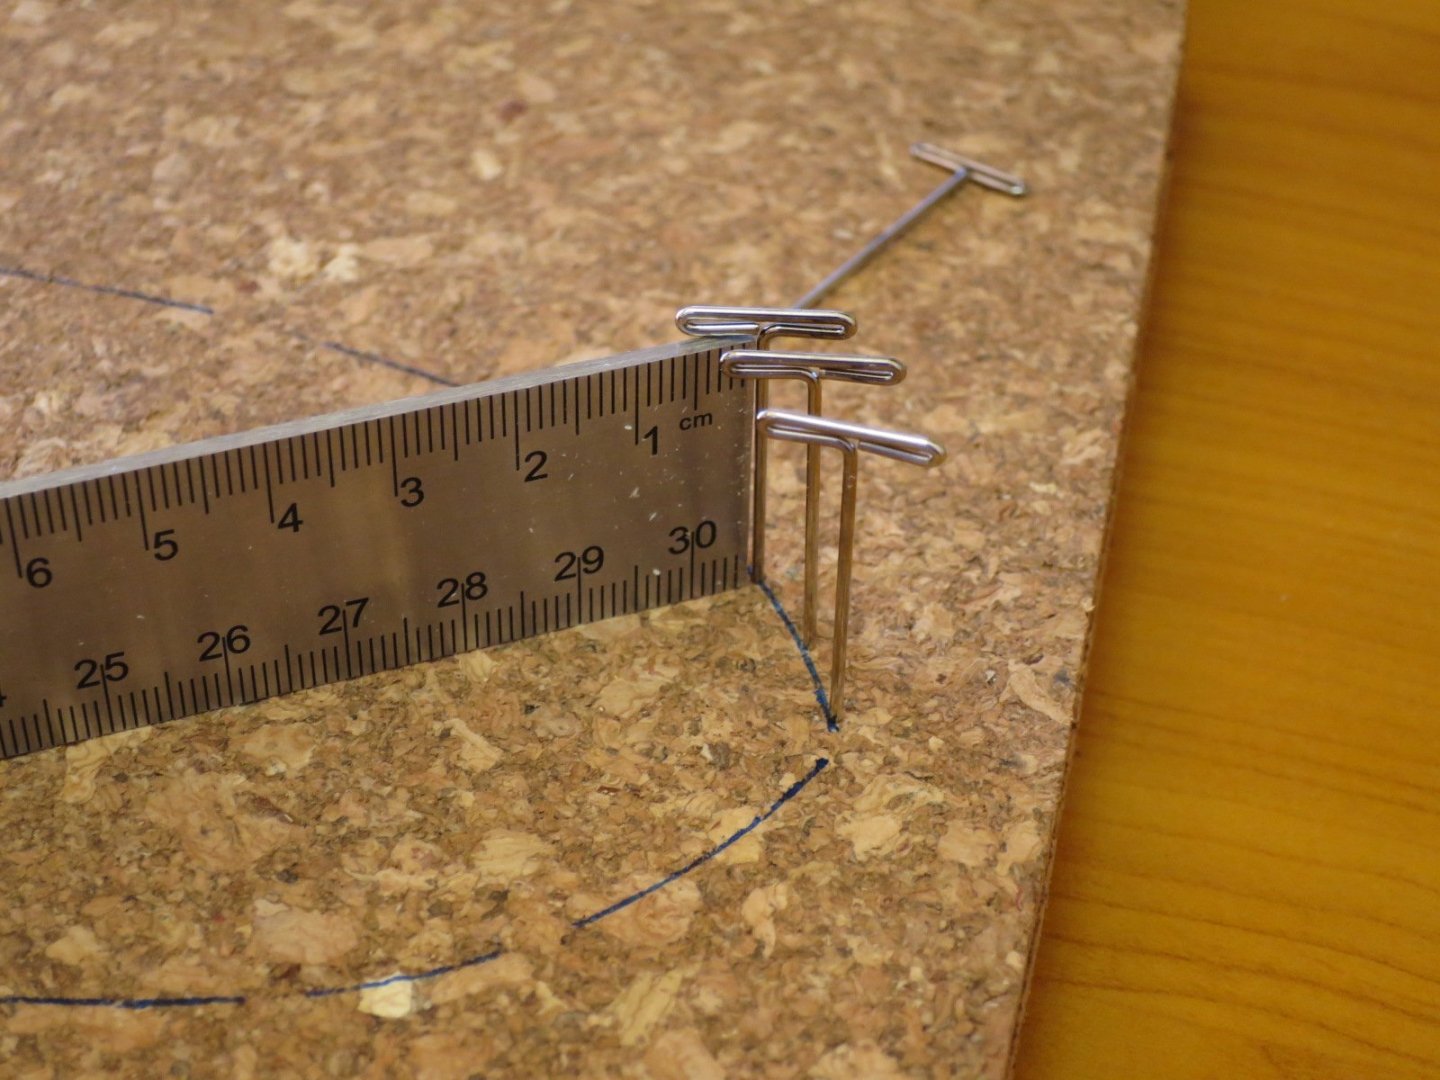
I got the bulwarks soaking in quite warm water and traced the deck profile onto a stack of 3 cork tiles. Using a metal ruler as a square I set up some 1'1/2" pins as a clamping line for the bulwark shape. I thought I had a pretty good fair bend in the bow section until I removed them the next day and it was cactus. So I re-soaked them, and got a good bow profile with a planking iron/bender and then clamped it onto the stanchions to get the rest of the curve. I tested the planking iron on a piece of scrap first as I was worried the soaking and/or heat may cause the glue to fail. But it didn't and I've got a much better result now.


- 34 replies
-
- 7
-
-
- lady nelson
- victory models
- (and 1 more)
-
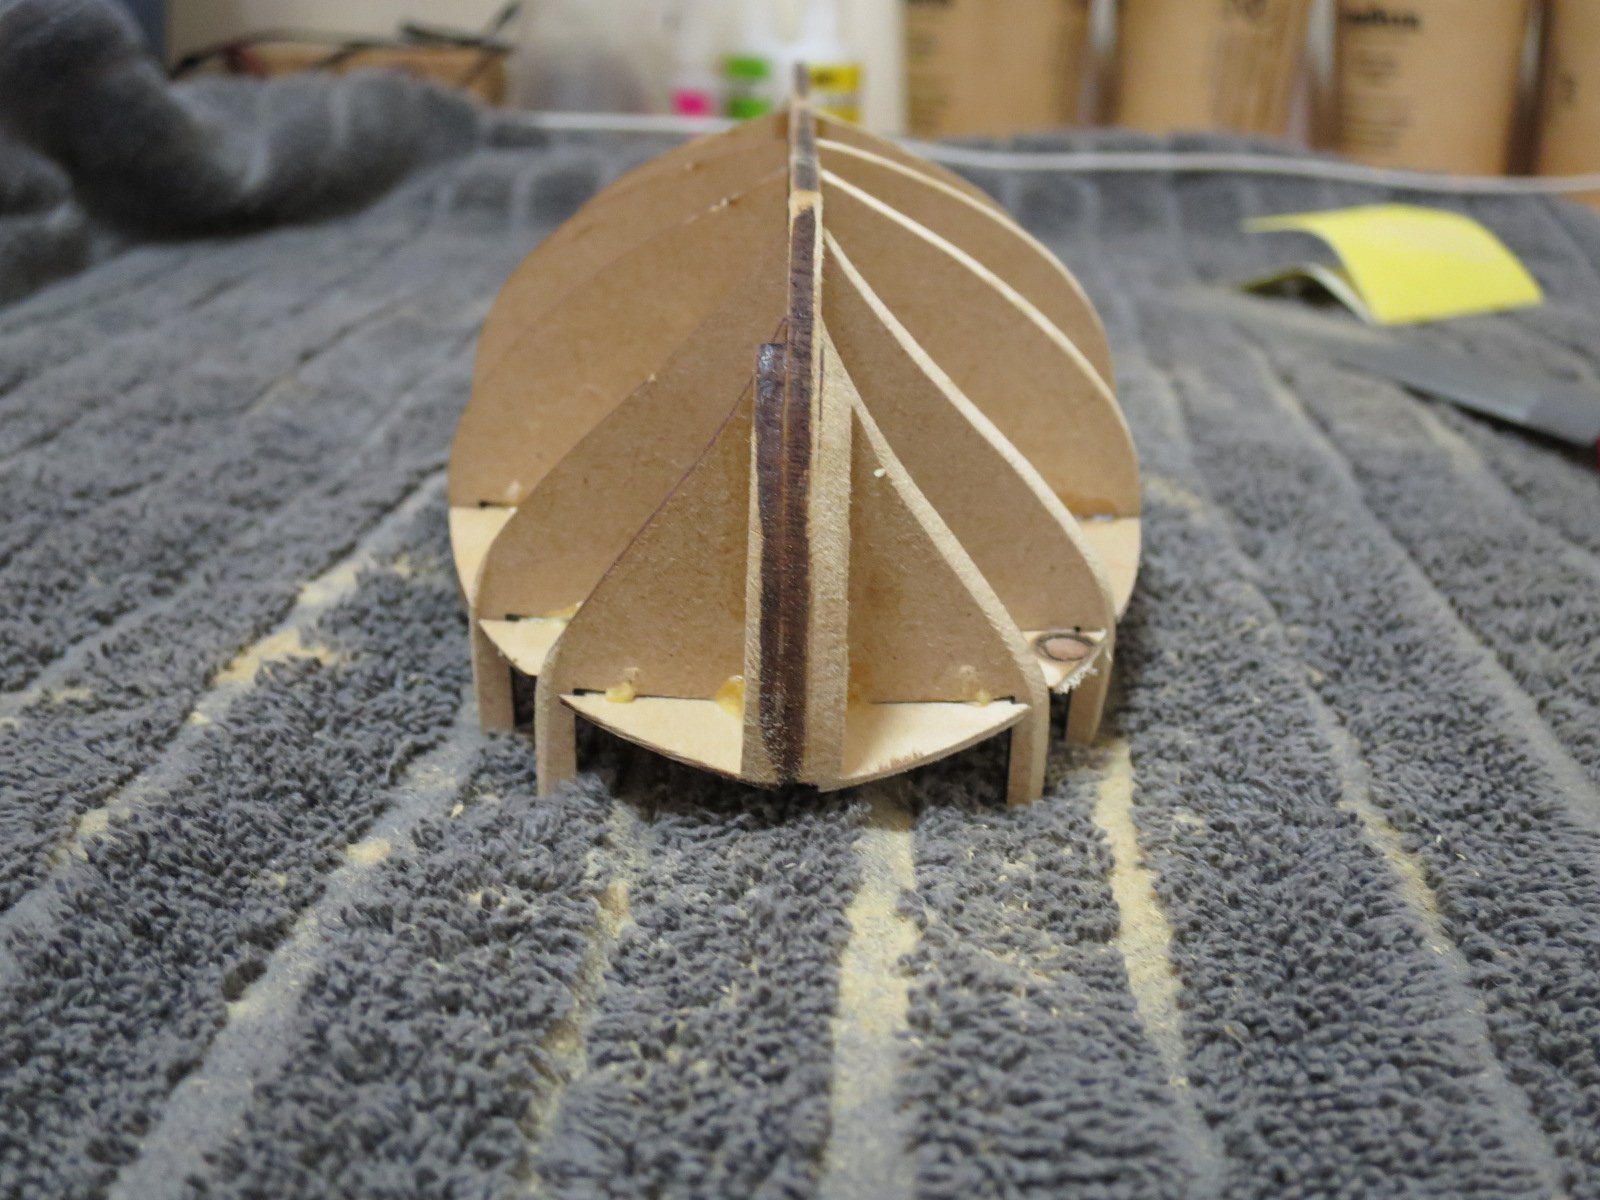
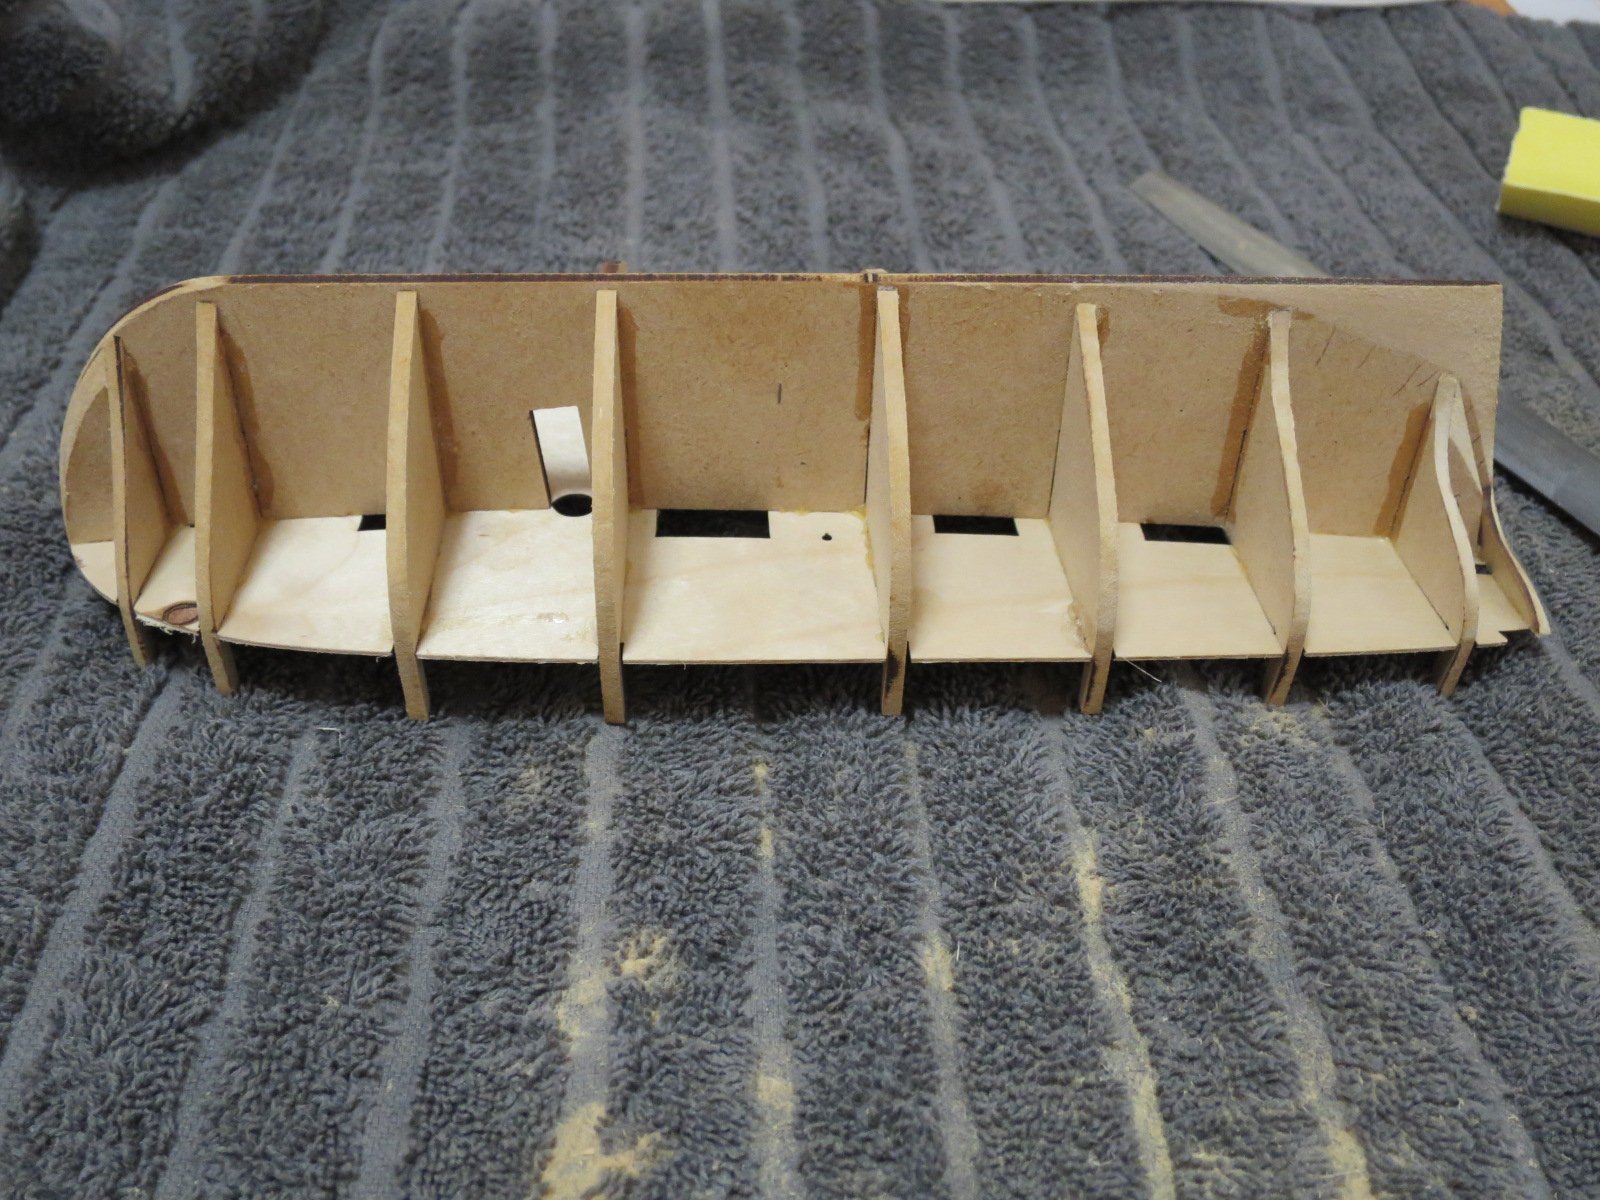
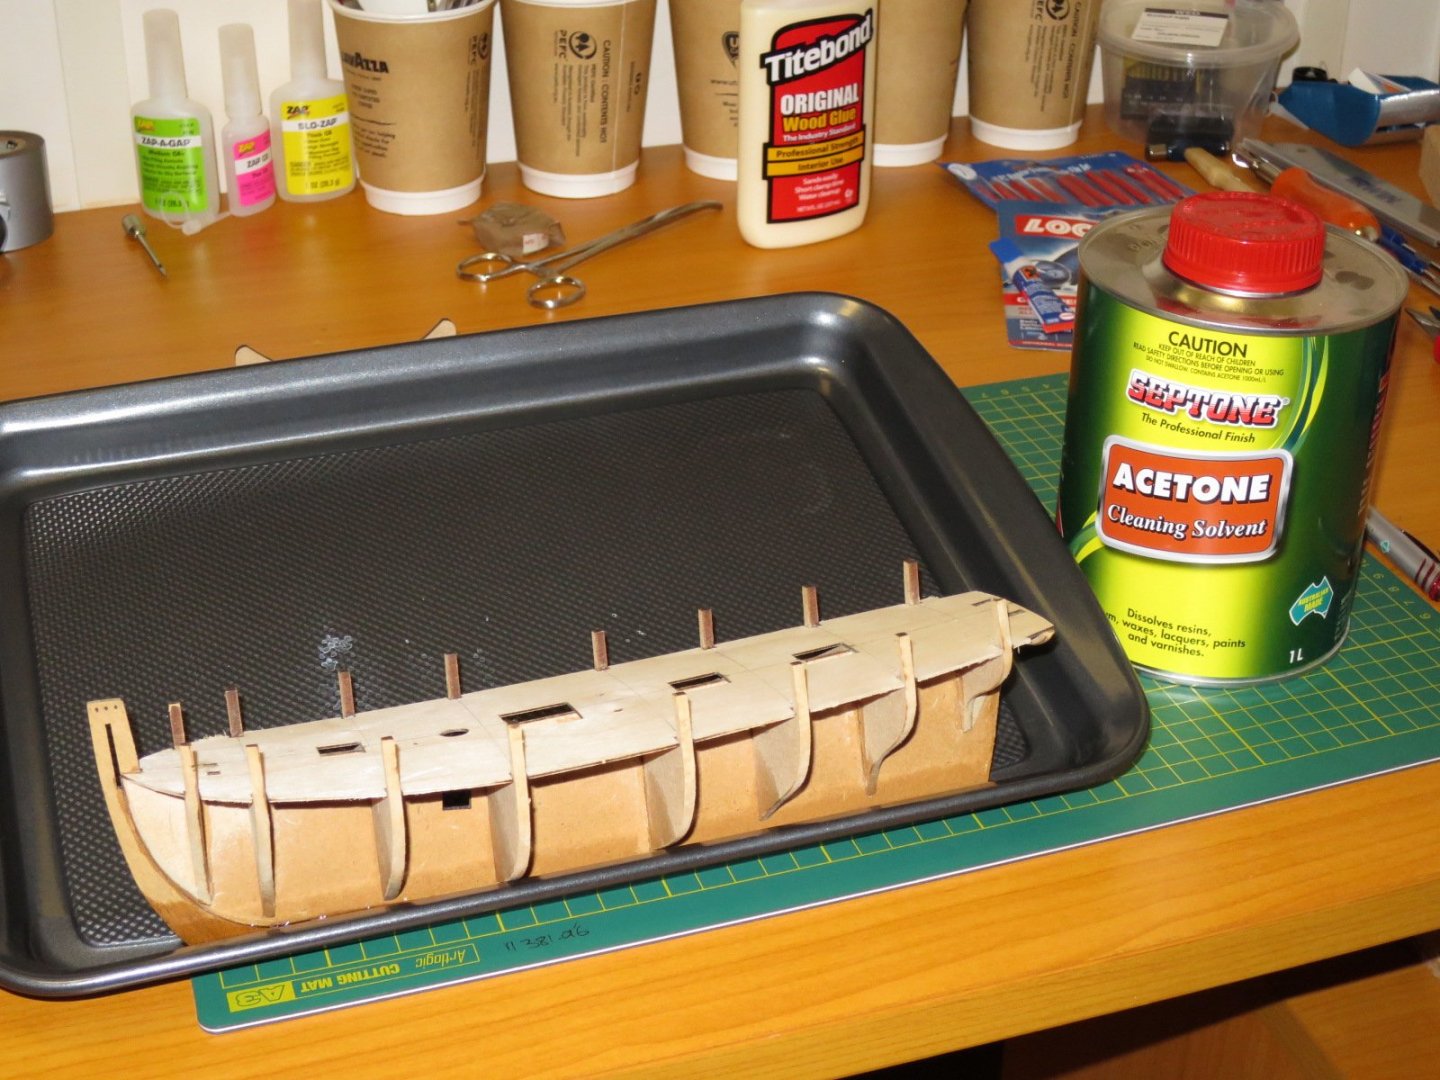
Well the CA debonder didn't work that well, but I managed to get some acetone a couple of days ago. After about 20 minutes of soaking the keel, I wiggled it loose, then did the same with the stern post and bow. I sanded the removed parts and we're back to a bare keel. Armed with balsa, a mitre box, razor saw, and PVA wood glue, I got to work filling in the bow and stern sections. I don't have a scroll saw or coping saw on site, so had to piece together the smaller balsa sections I had. To summarise my back story, I'm working on a fairly remote mine site in the middle of Western Australia. While we are remote, it's a large site (and expansion project currently in progress) and the total number of people on site is over 3,000. The nearest town is an industrial mining town of about 7,000 people, but it is 140km away and we cannot go there due to COVID-19 travel restrictions. Even if I could, small tool and modelling supplies are scarce. The nearest metropolitan area is Perth, which is a 1 hour 50 minute flight, but is also in almost complete lock down at the moment. So I'm limited in what I can get my hands on. Any mail order is at least 10 days, and if coming from the east coast of Australia, then it's 3 weeks. Anyway, I got the balsa glued in over the last couple of evening and roughed it out tonight. Carved down to about 1/8" off the bulkheads. I'll sand the rest tomorrow. Cheers, Stu

- 34 replies
-
- 6
-
-
- lady nelson
- victory models
- (and 1 more)
-
Hi All, Steve, I do like the Lady Nelson and I think she is a good starter ship for me. Being small is very handy as I don't have a lot of room, and of course I want to take her back to NZ with me. I make it out to Port occasionally, but mostly work at the inland mines around Newman. Karel, my wife and I live at Muriwai beach on the west cost of Auckland. Lovely spot (in summer anyway) - I just don't spend enough time there. Welcome to the forum - obviously I'm new here myself. Per, thanks for the welcome. Being away from home isn't a new thing, but for 3-4 months at a time is. I think Australia will open up domestic travel in a few weeks, and I'm hoping trans-Tasman (between NZ and Oz) travel in a couple of months. You're right, model warship combat is costly. I built a fully armed USS Massachusetts (about 4'9" long) about 15 years ago, and I conservatively estimate I had over AUD$3,000 (US$2,000) in her. Great fun though! John, with an avatar name like that I though you had to be a Kiwi! My wife and have been trout fishing around Taupo. When I say fishing, I mean finding a good excuse to take the dogs for a walk and have a beer looking at the river - I'm an awful fly fisher. She's pretty good though. BTW - definitely a flat white. Take care as well. Well, back to the build log in the weekend. I'm making some progress this week and have Sunday off again. Cheers, Stu
-
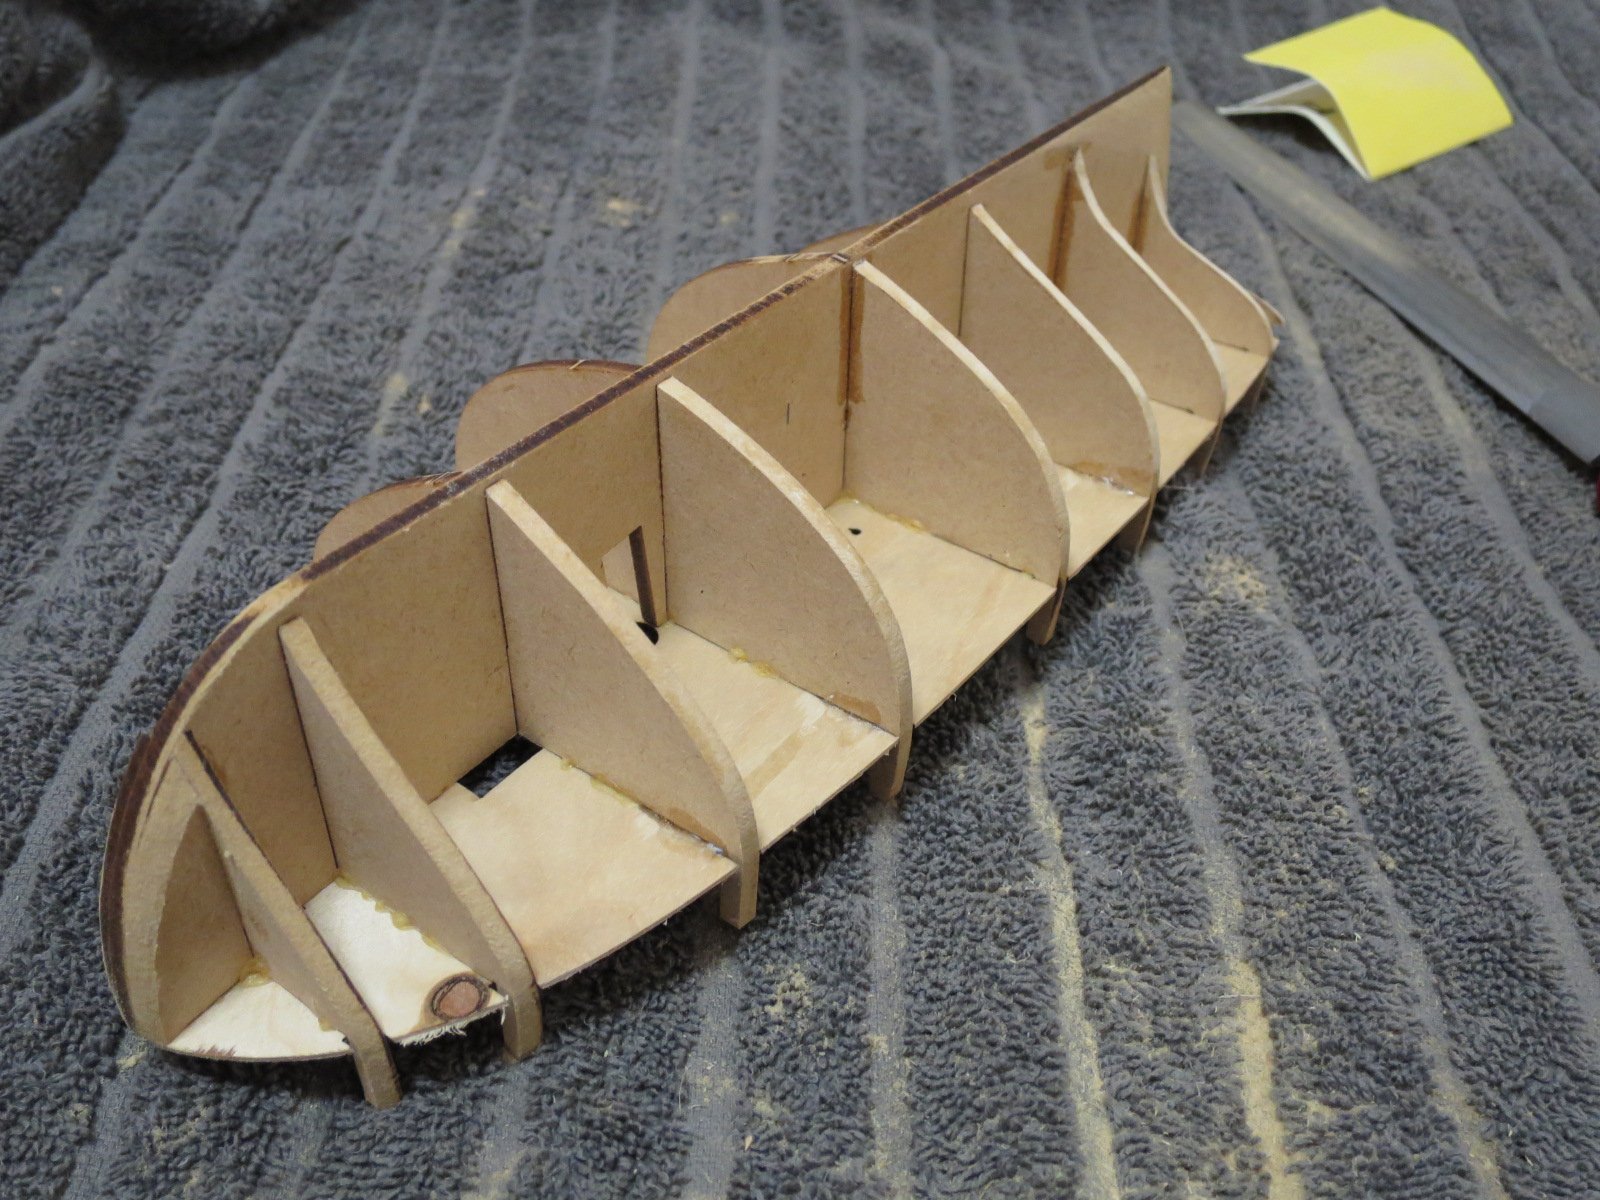
Well I've been thinking about it overnight and all day today, and I've decided to take off the bow, keel and stern post. I've managed to get some CA debonder, balsa and a small mitre box (to go with my razor saw) sourced and brought up on a flight tomorrow. So the keel is coming off, and thanks captain_hook, I'll fill in the bow and sterm sections and fair in the balsa. As it's only a small ship, I'm thinking about filling in all the stations. Is this advisable? Will it make planking and fairing much easier (with a solid substrate)? I've previously looked at some other Lady Nelsons, particularly the build by vossiewulf and I've also looked though captain_hooks AVS just now (both very nice). Tony I'm taking your advice to vossie and going to refit the bow, keel and stern post after the second planking. As both first and second planks are 1.2mm, my plan is to fair the stern post down to a feather edge for the first plank, then sand the first planks down to 1mm total at the stern post, or slightly more, then after second planking, sand a smidge off to make it flush with the stern post before fitting that. I haven't quite figured out the keel and bow rebates , but I'll do some cross section sketches tomorrow to try and nut it out. Cheers, Stu
- 34 replies
-
- 3
-
-
- lady nelson
- victory models
- (and 1 more)
-
Thanks for the welcomes. What a nice online community. I've been away from home for almost 2 months now. I'm lucky in that my wife is very practical, pragmatic, and independent - she understands. The project is in quite a busy period now, and I'm so site for about 6 weeks but I'm now taking every Sunday off. I work 11-12 hour days, work out after work with my brother (who is an electrical engineer and coincidentally is also on the same site, but different project), and do some model building most evenings and Sundays. Re model warship combat, it was actually started in the US and has been quite active in Australia for the last 25 odd years. There are 2 different sets of rules and therefore different clubs. "Fast gun" is only in the US and ships are allocated "units" where a unit is a single fixed (cannot rotate or depress) 0.177" (bb size) cannon with a 50 shot magazine. The captain can fire each cannon as quickly as he likes. Ships speeds are set depending on size or displacement and bilge pumps are constrained by output nozzle size only (I think). The other is "Big gun" where everything is to scale. The guns rotate and depress to allow for different ranges (they never elevate above horizontal for safety reasons), and the allowed projectile diameters (steel ball bearings) depend on the original ship. 0.177", 3/16",7/32", and 1/4". 1/4" is allowed for ships that had 15" guns or over. Firing rates are also regulated at 2, 4, 6, 8 seconds respectively. Bilge pump flow rate depends on the displacement of the original ship. There is only "big gun" in Australia and I much prefer the concept of it. In both cases, the penetrable areas all follow the same rules, but in "big gun" the balsa sheet thickness is dictated by the armor belt thickness of the original ship, and ship speed is to scale. Anyway, I enjoyed by time in the hobby, but found it a little disappointing that others didn't put more effort into increasing the effectiveness of their ships (read reliability) which makes it more fun for everyone. Steve, I'm at Mining Area C (MAC) just out of Newman. I've spent most of the last 12 years doing iron ore projects in the Pilbara. I will get down to Perth for a one week break in about 3 weeks. I'll take my modelling gear in the storage container and make sure everything is nicely wrapped up and protected. Cheers, Stu
-
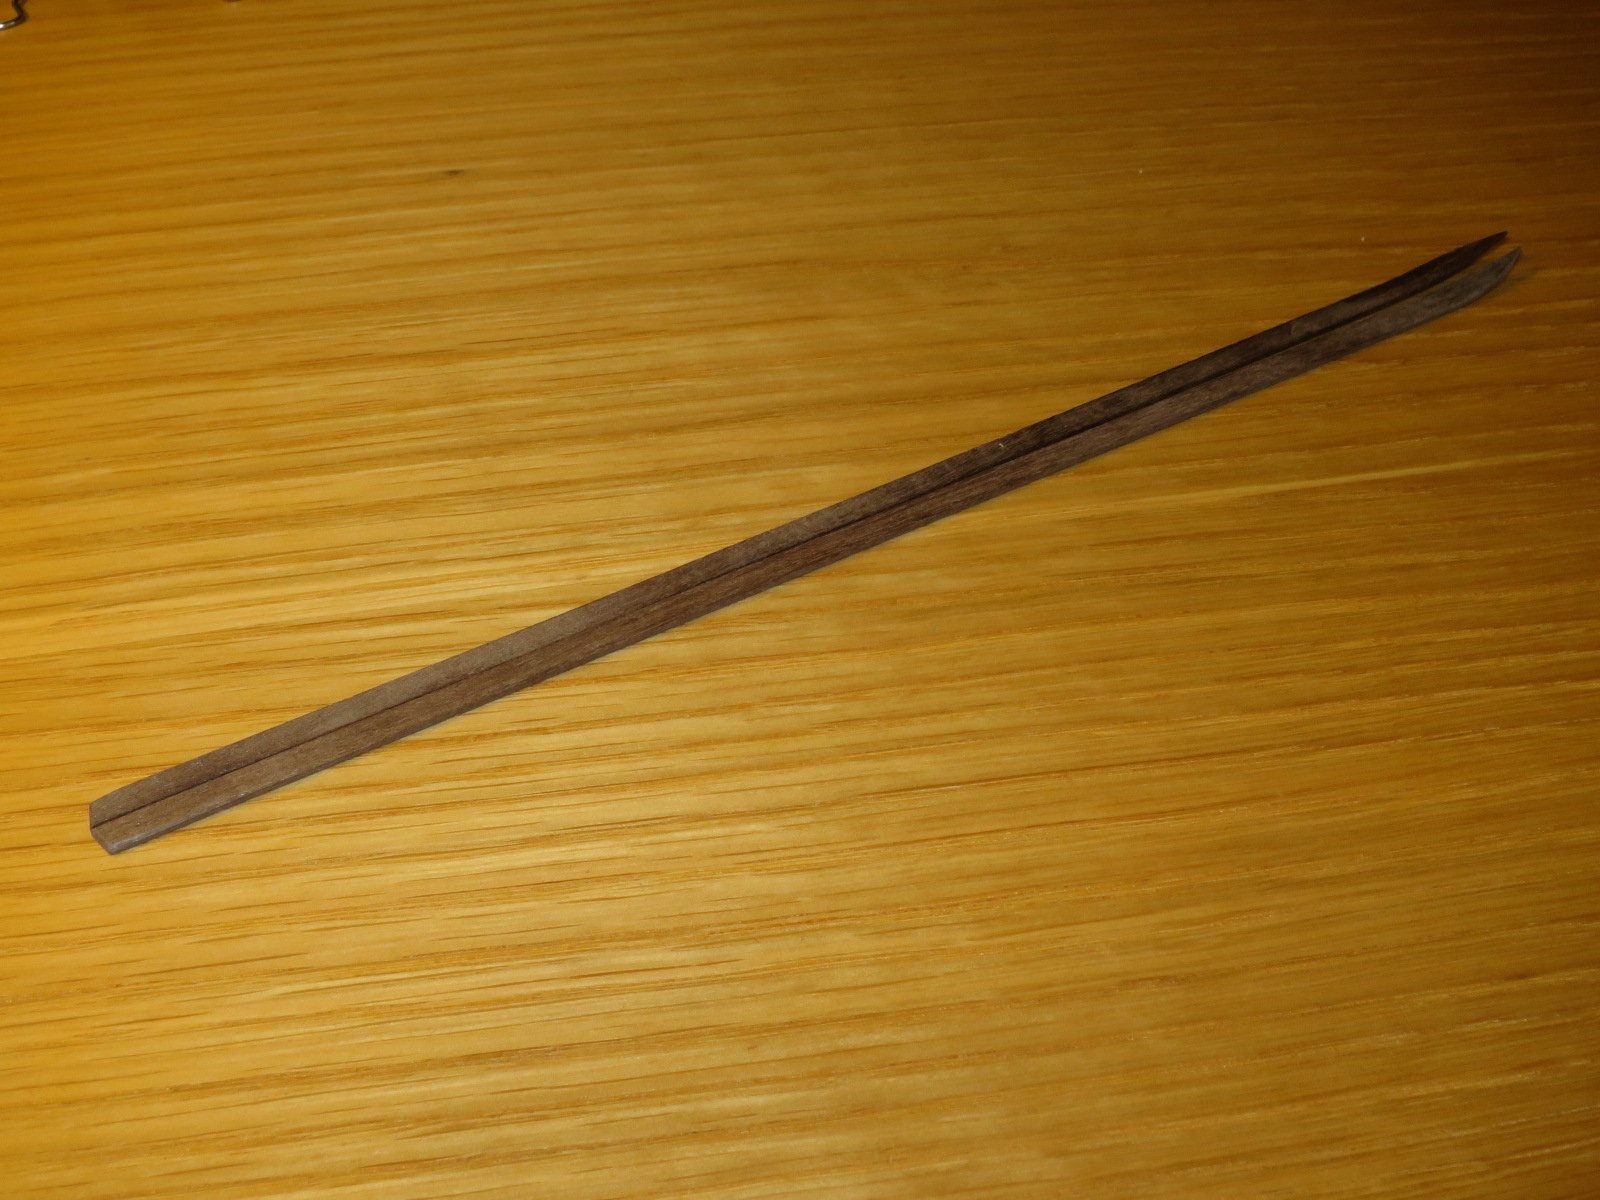
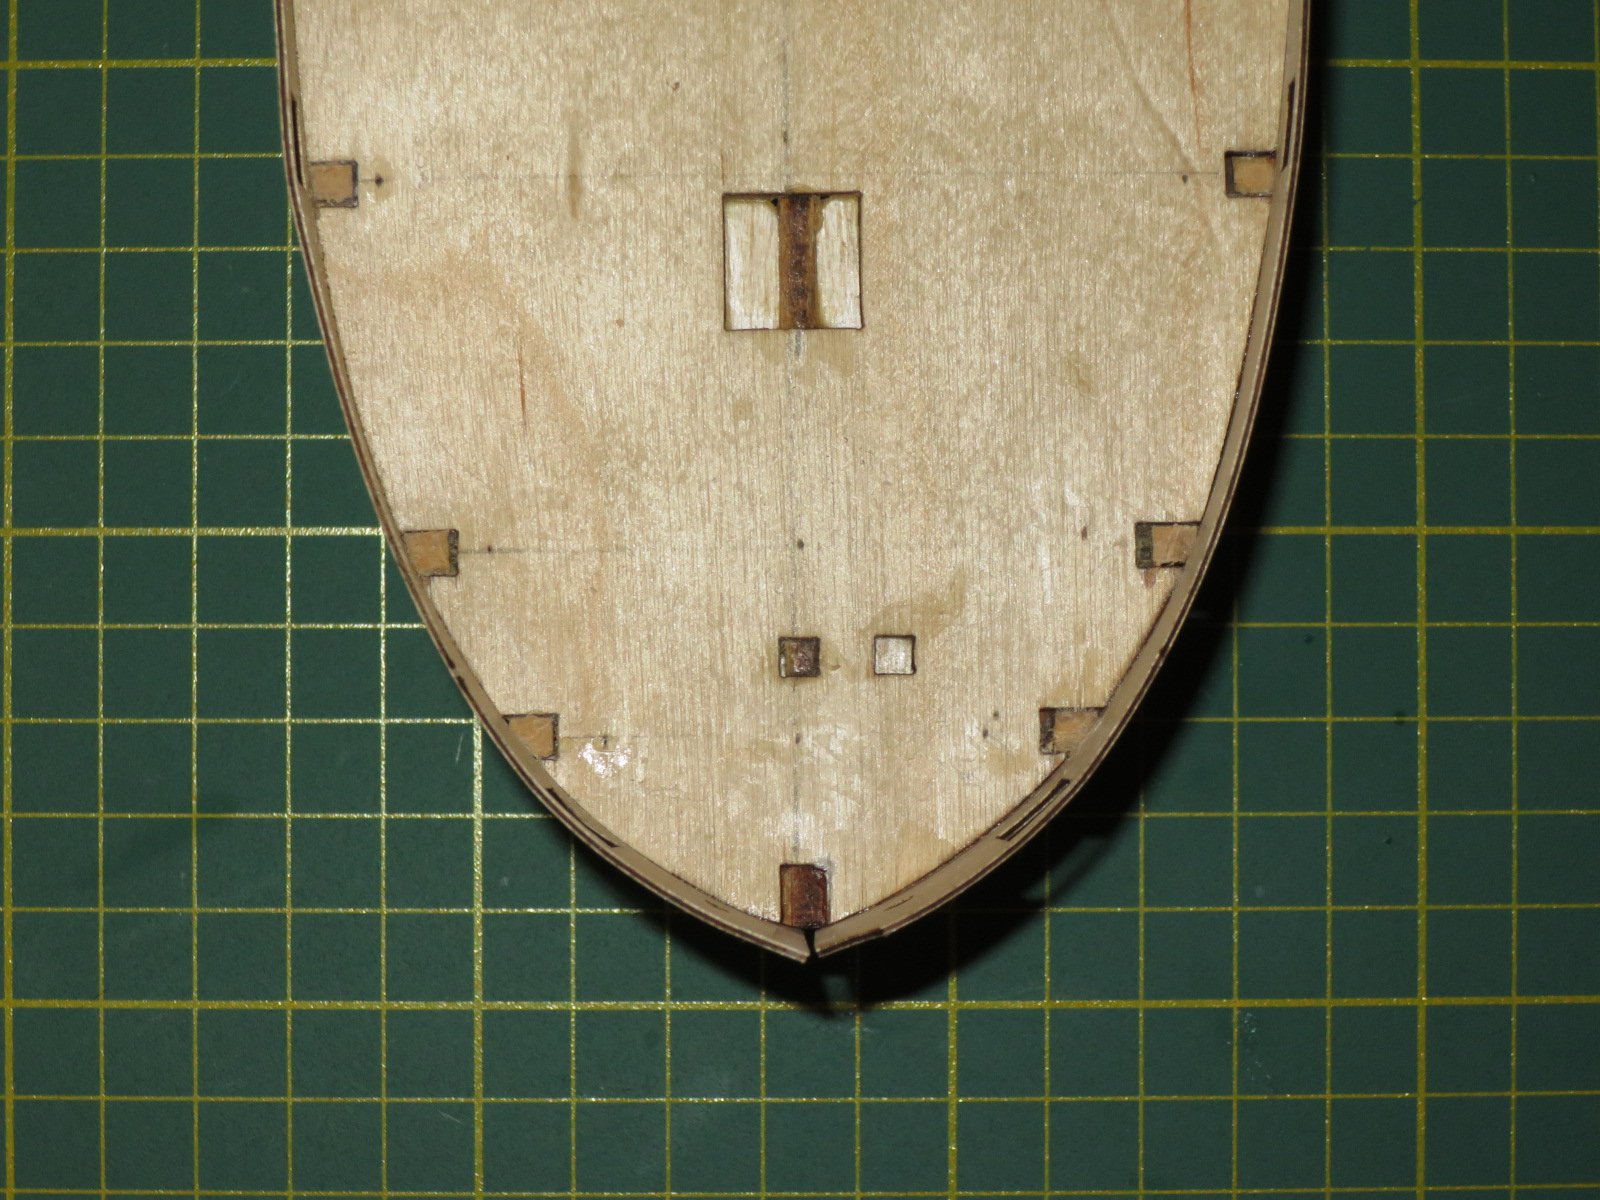
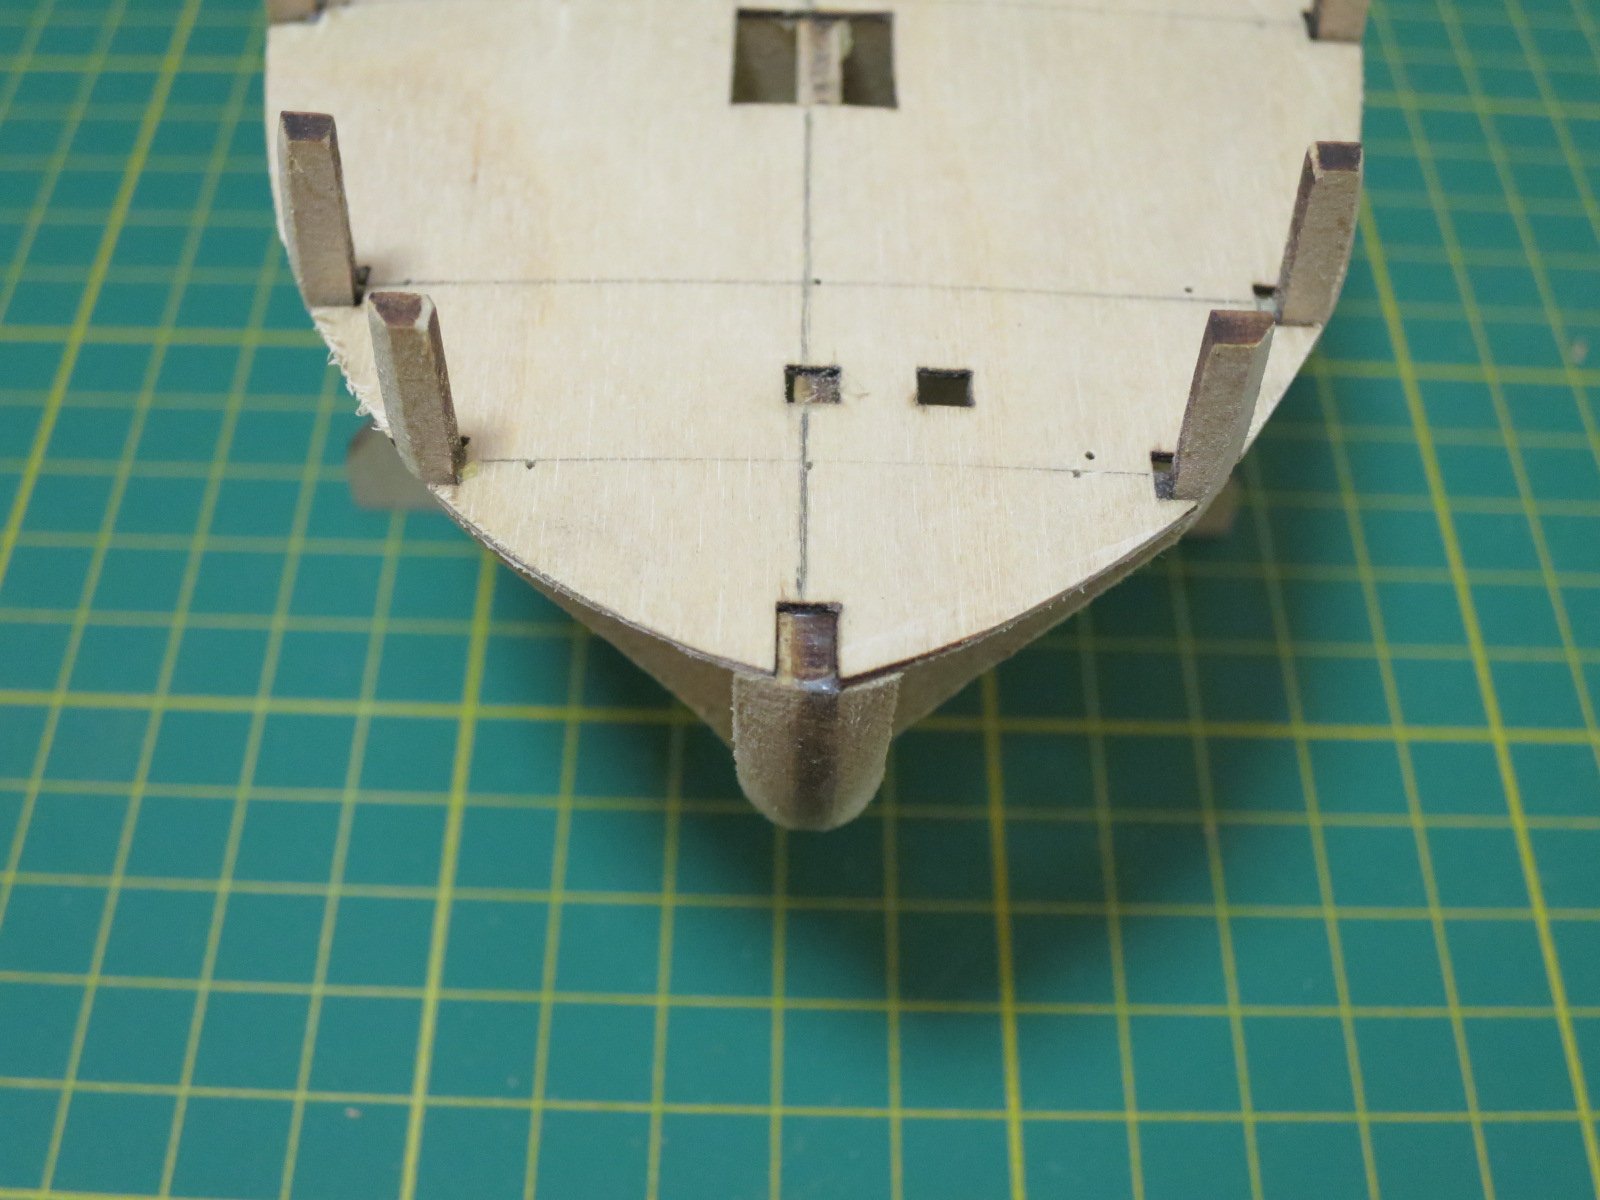
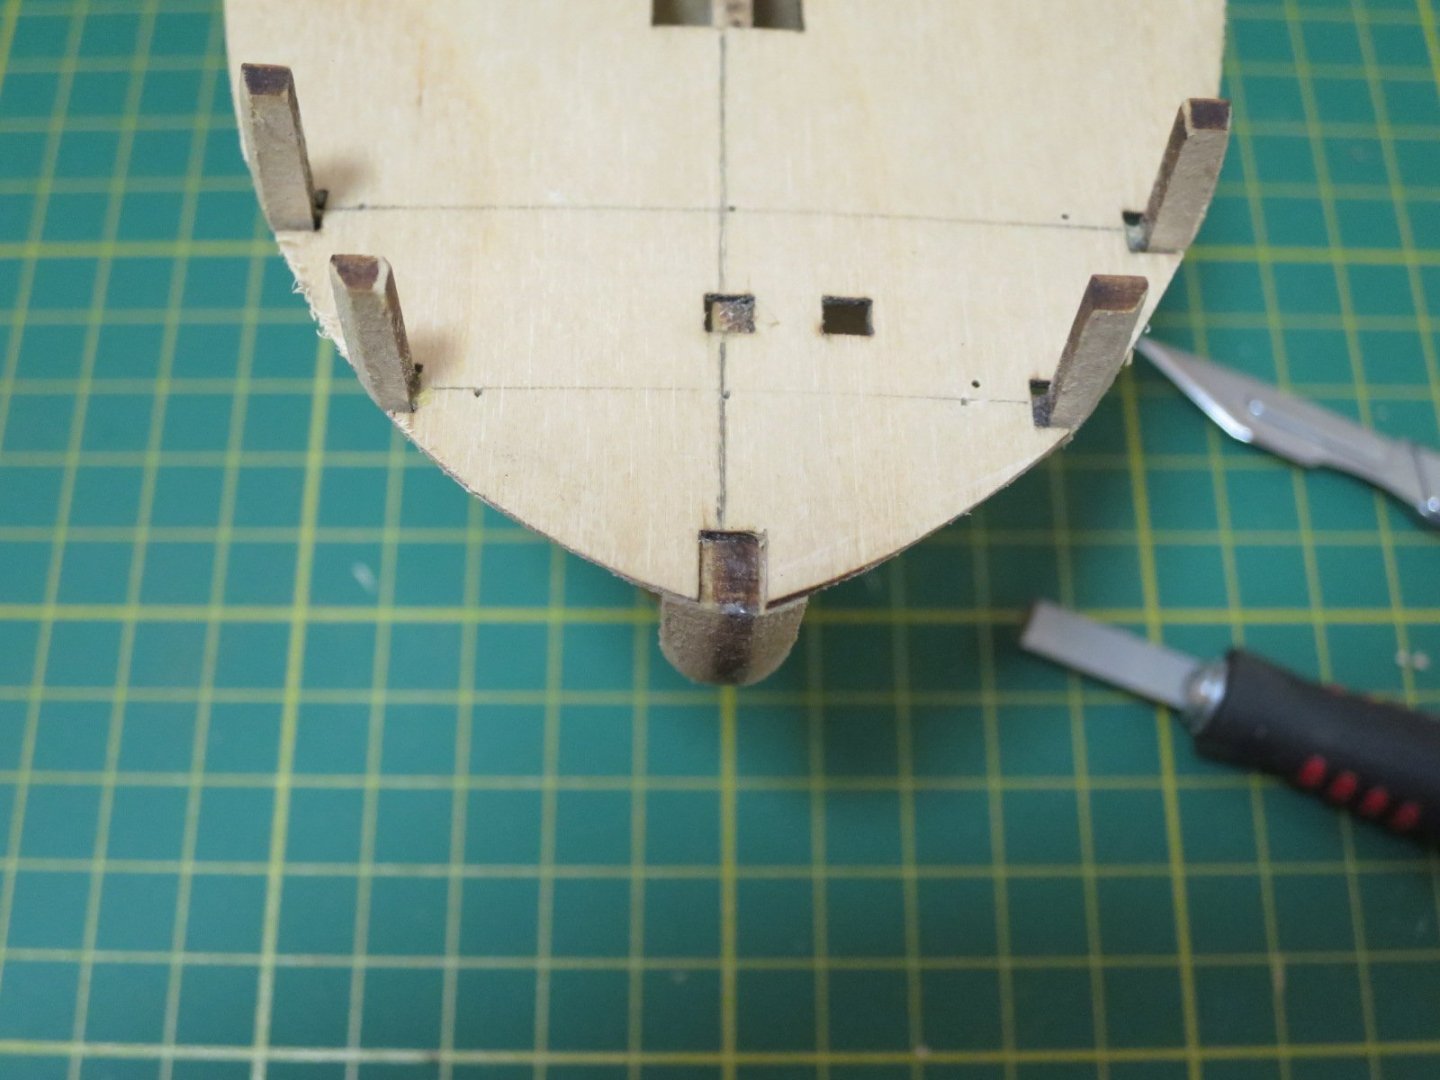
I can't get rid of that last photo under "Cheers, Stu" in the previous post for some reason. never mind. I then decided to follow the instructions and in glue the prow, keel and stern post. I was on the fence about doing it now for a couple of reasons. I've been trying to some balsa up to site to fill between all the bulkheads, but without success, and I just got impatient. I imagine this will make planking easier as well as sanding it fair as it will have more rigidity I think it might give a better result to fit these after the first planking as I would have been able to sand the first planks down to achieve a rabbit line, rather than probably having to try to shape it Anyway. I gave them a light sand with 600 paper fixed up the offset deck notch at the stem Before. After. I even got the bow and keel on reasonably straight. I'm also pretty happy with the stern post. It looks like it's slightly off in this photo, but it's just a bit of CA that run on to it. Cheers, Stu


- 34 replies
-
- 8
-
-
- lady nelson
- victory models
- (and 1 more)
-
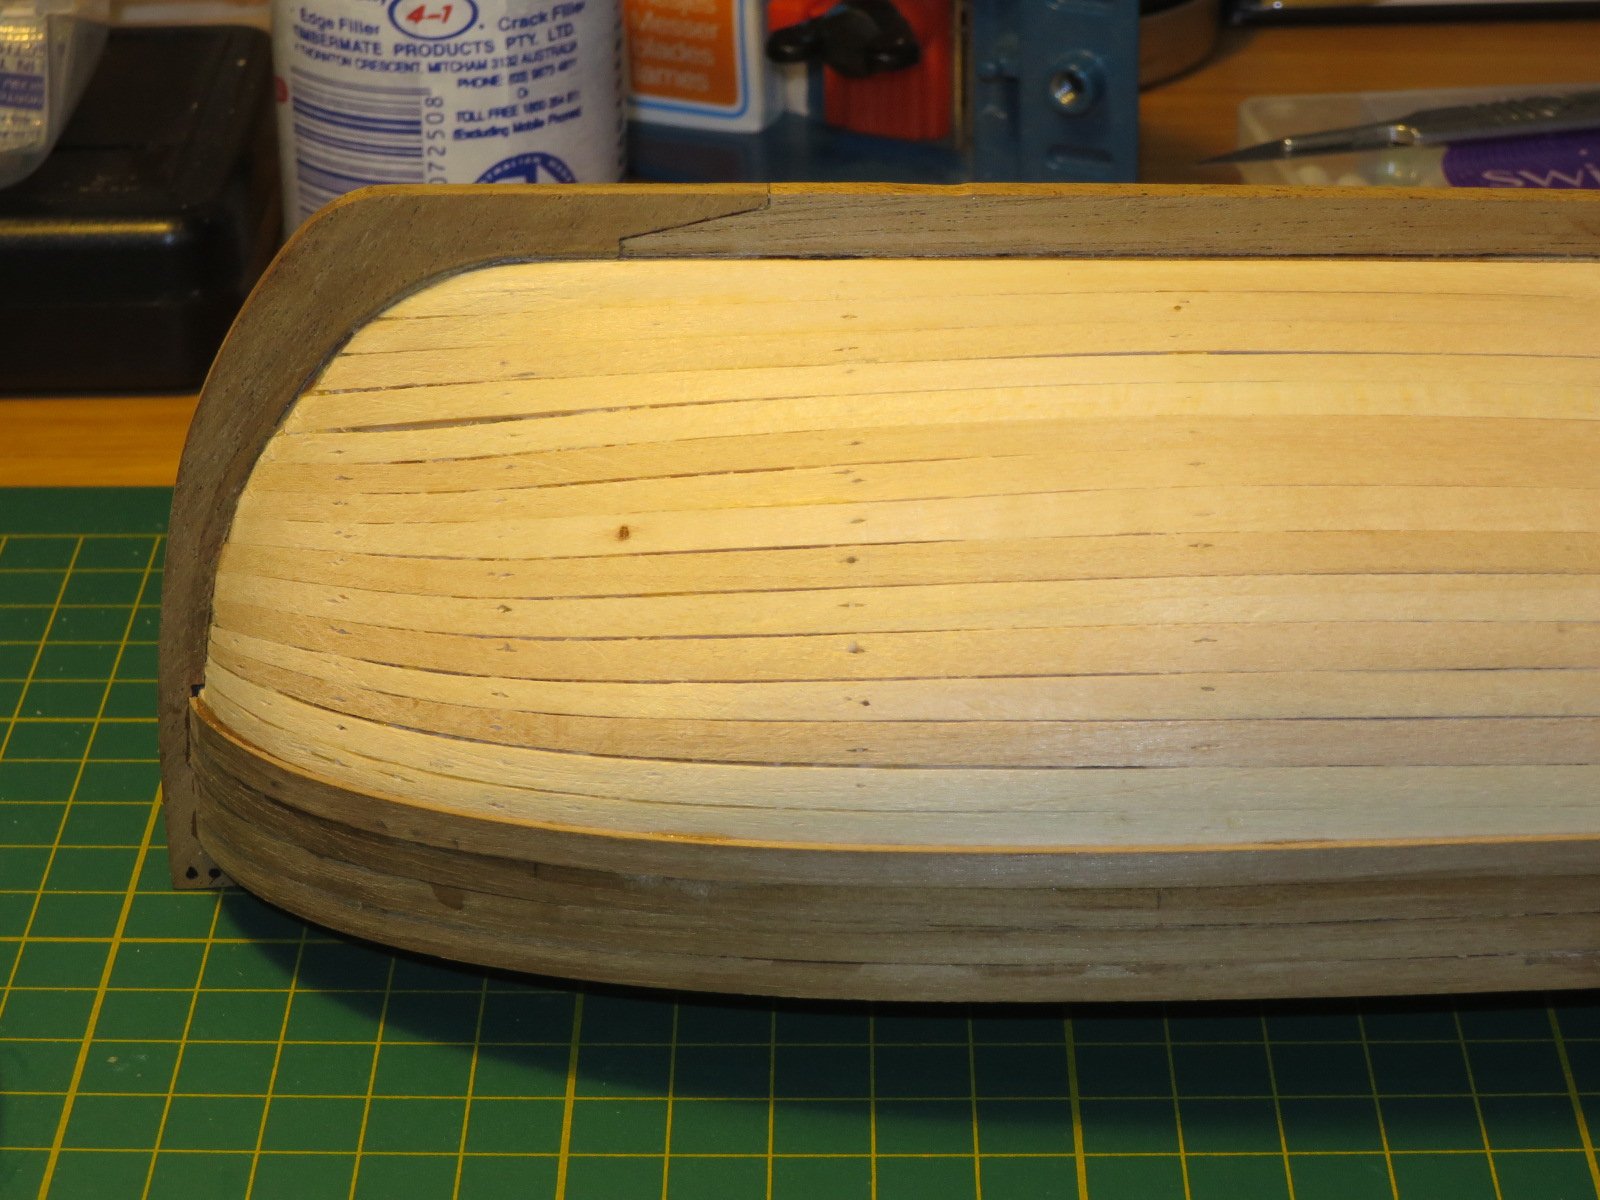
I took my time fairing the bulkheads. I was hesitant to take too much off and took some shots showing 1 side roughly completed before going on to the other side. I figure this might be helpful as a guide to others who are building a small cutter like this. I'll give some feedback later if it was too much or not enough. I used a 200mm flat and half round file (second cut file- as opposed to a coarser first cut), which did the job quite well. I then went on to the other (port) side. I fixed up the slight asymmetry at the stern post after these photos I didn't want to take more off where the stern post will be glued to, but in hind sight maybe I should have. In any case I think I should be able to taper the thickness of the first and/or second planks to fair it down to the 3.2mm (1/8") of the stern post. Cheers, Stu


- 34 replies
-
- 4
-
-
- lady nelson
- victory models
- (and 1 more)
-
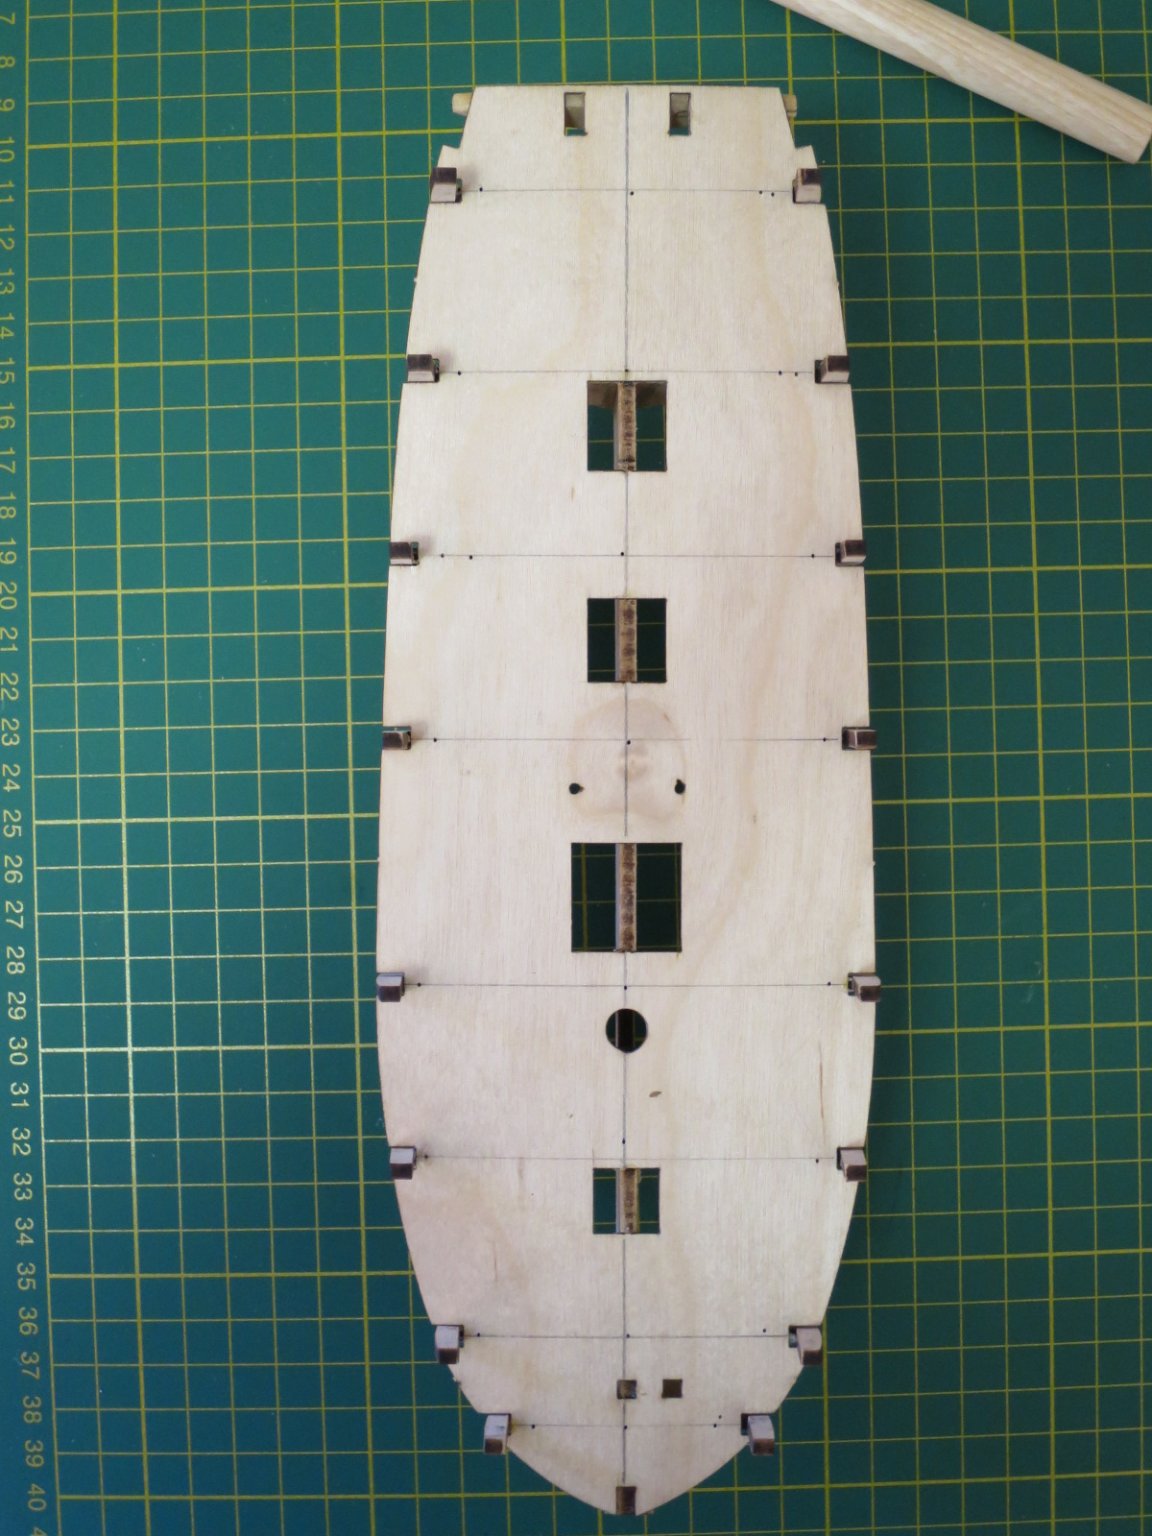
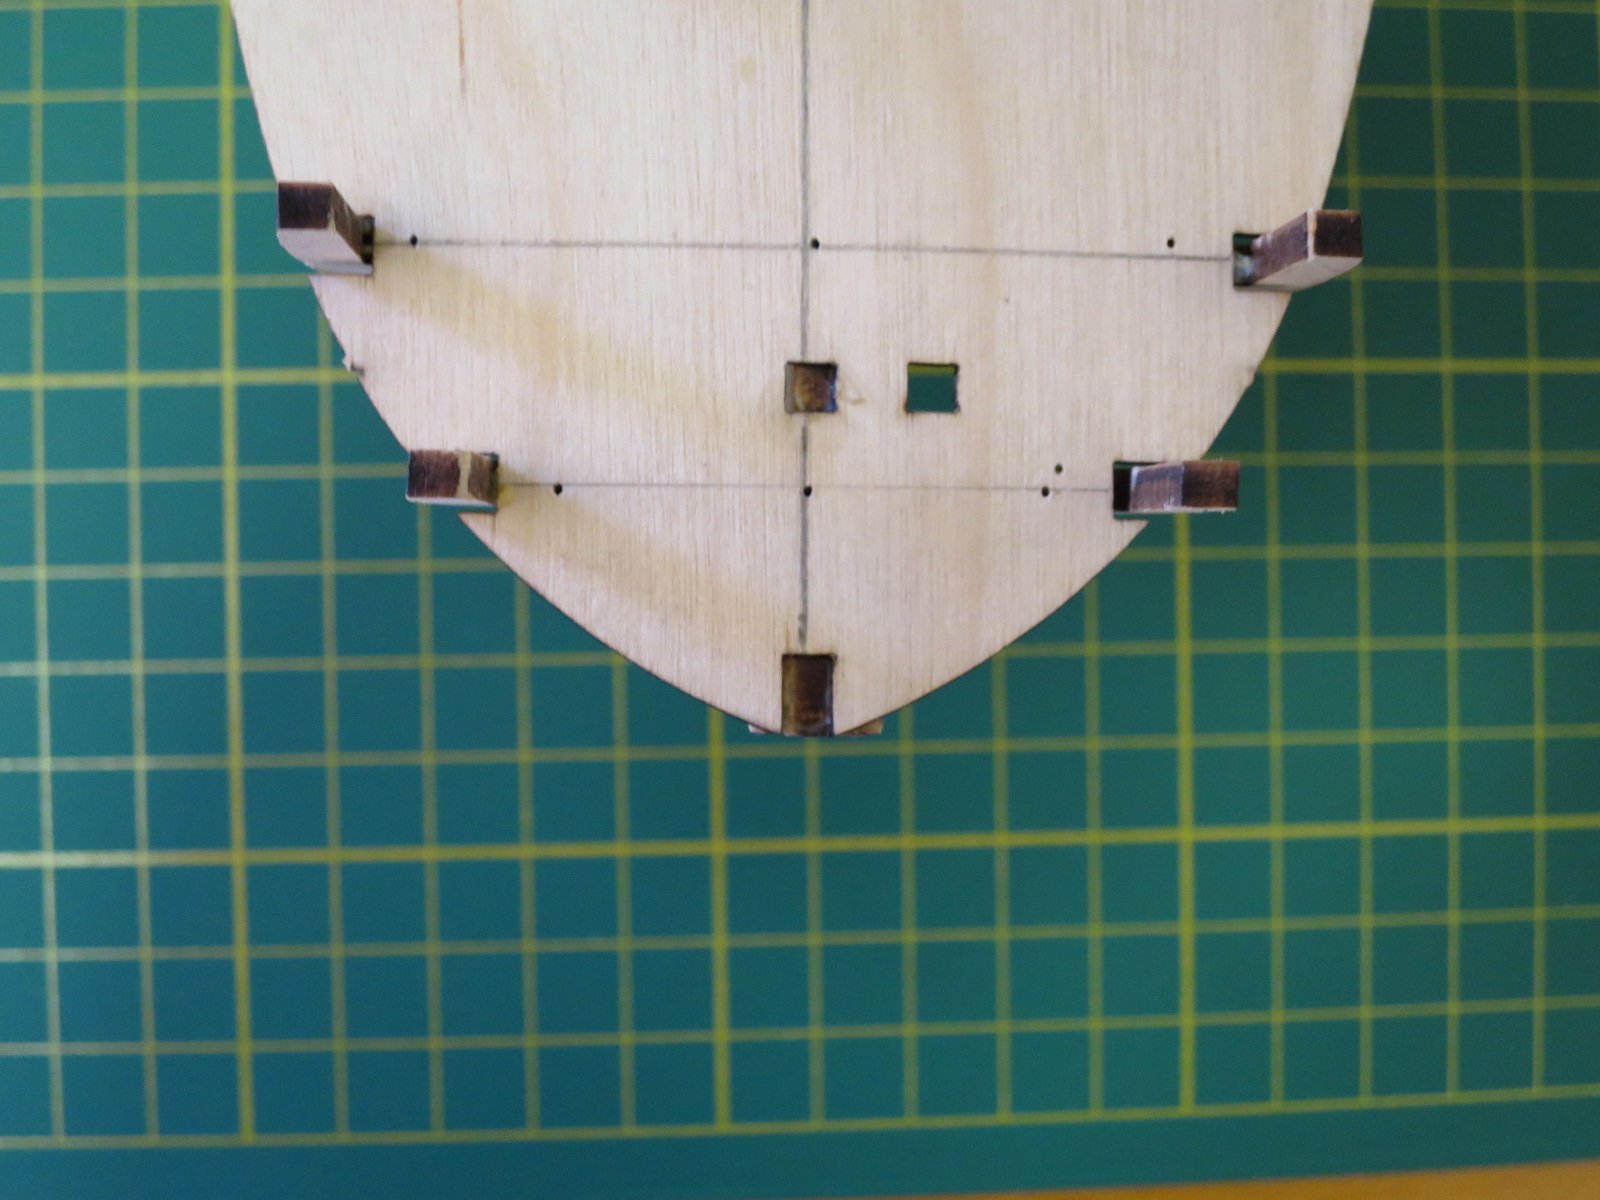
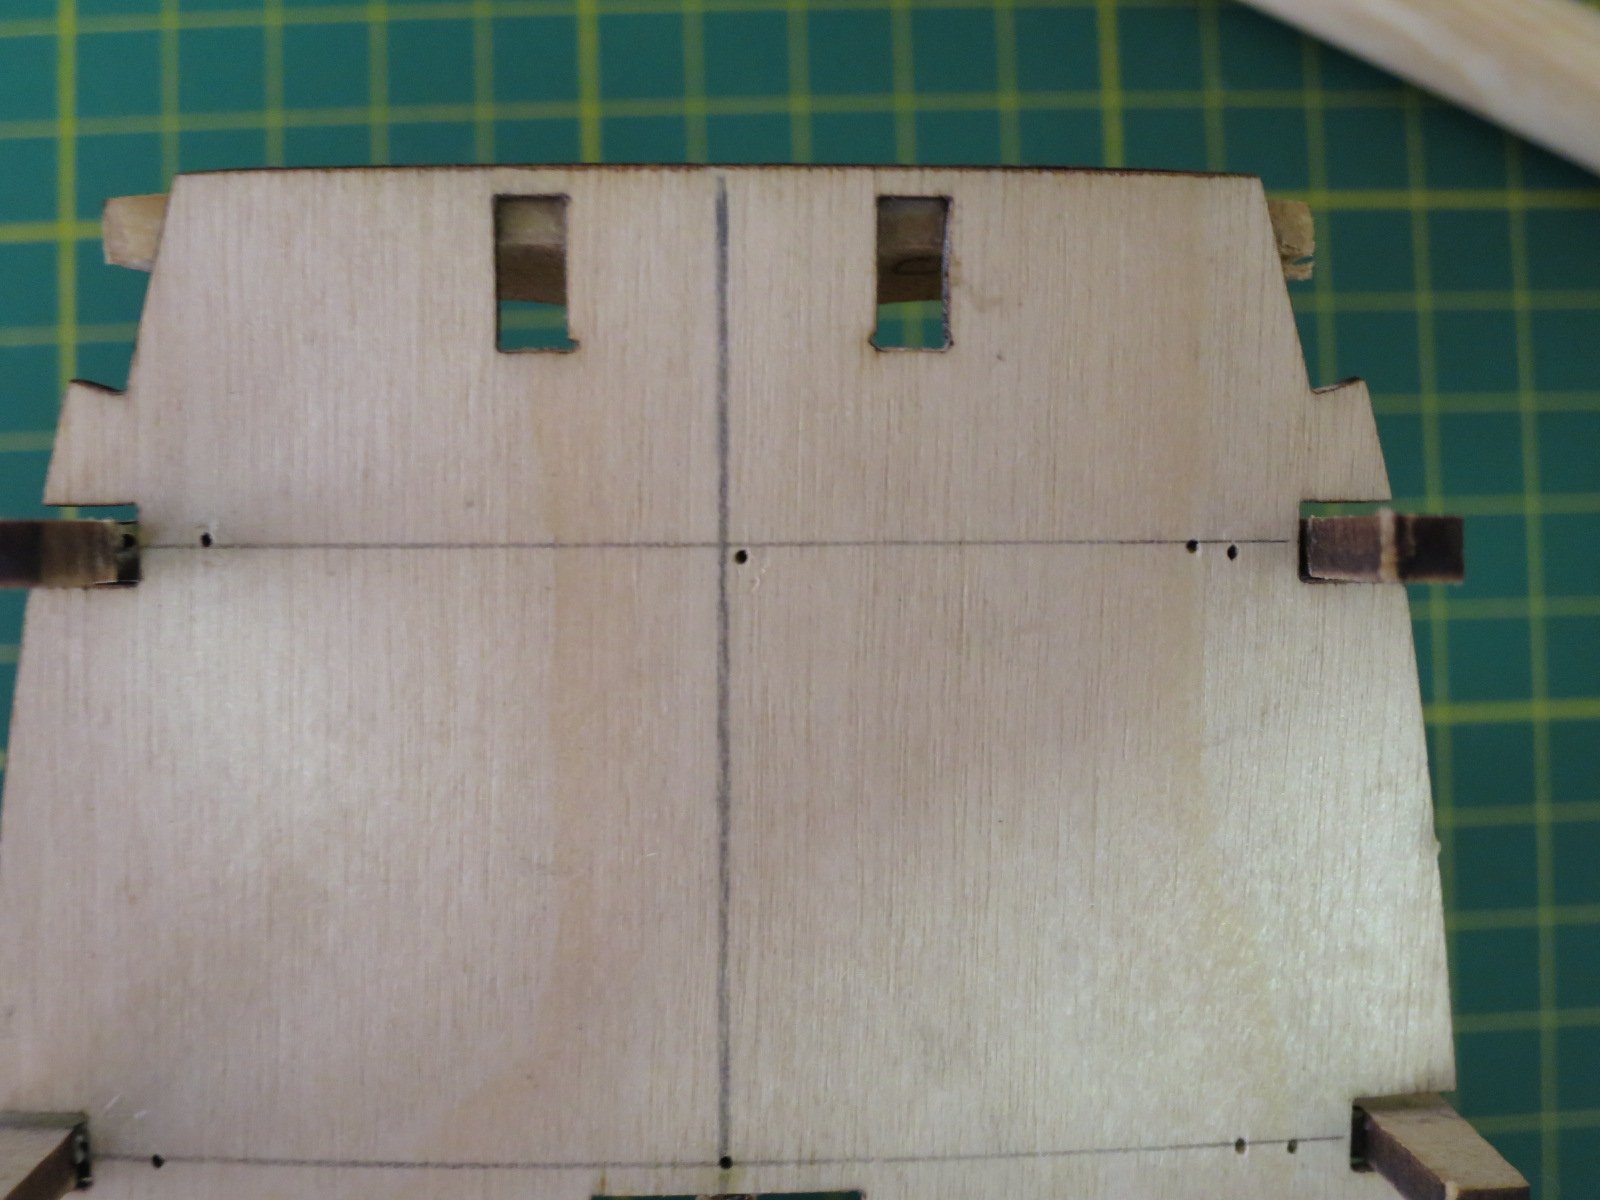
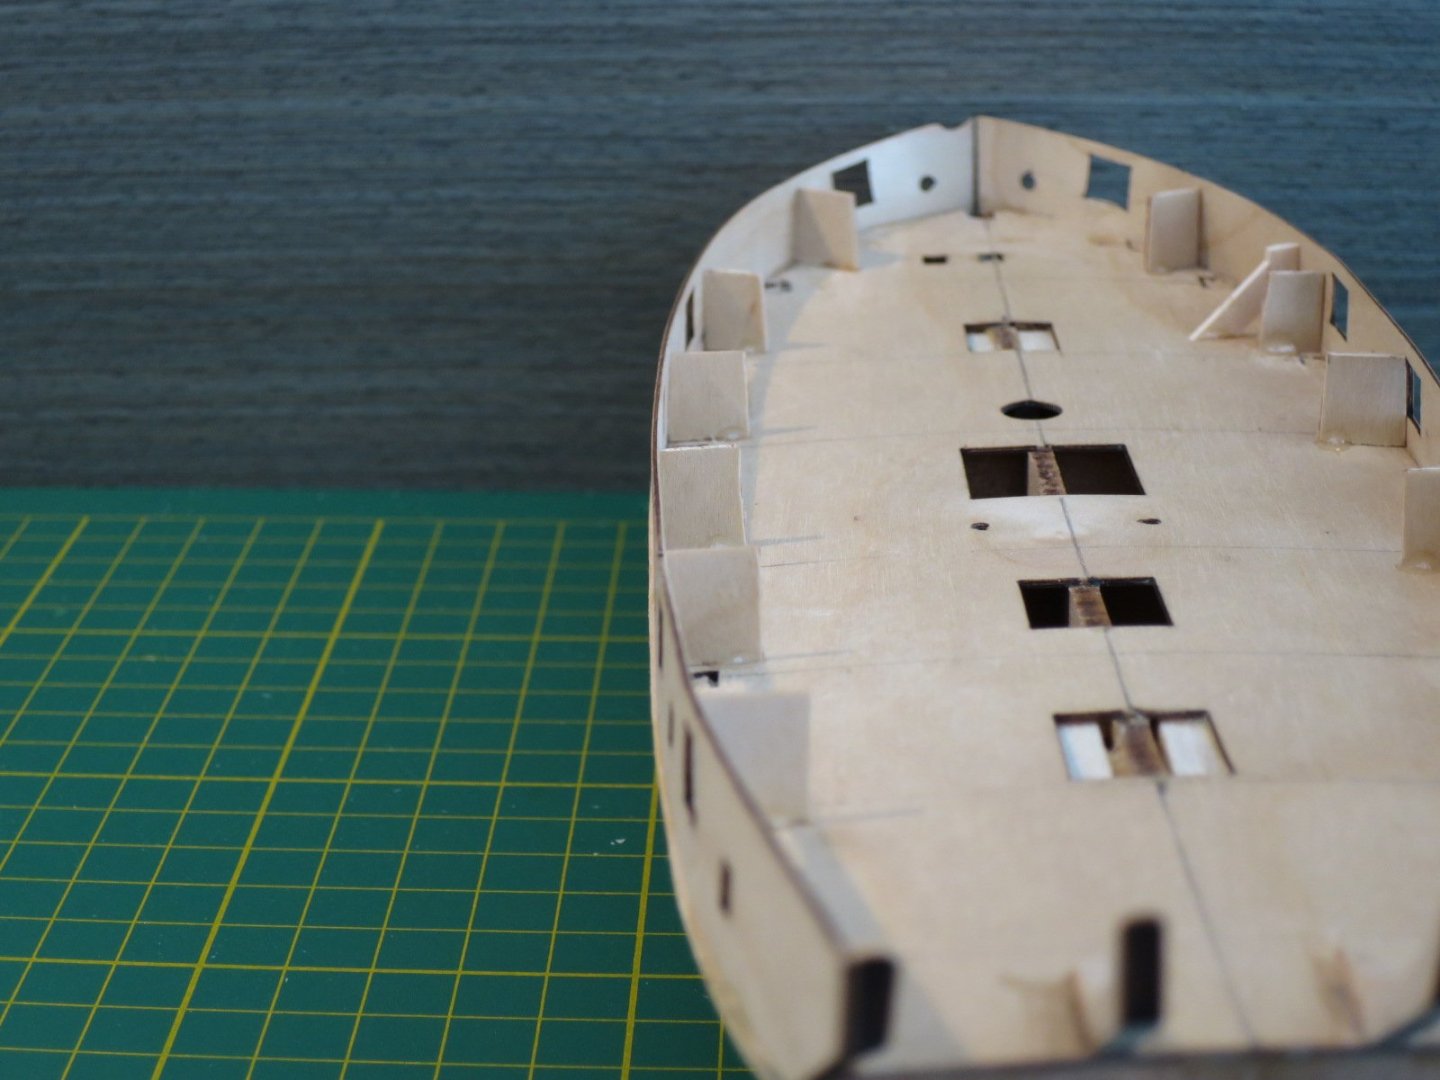
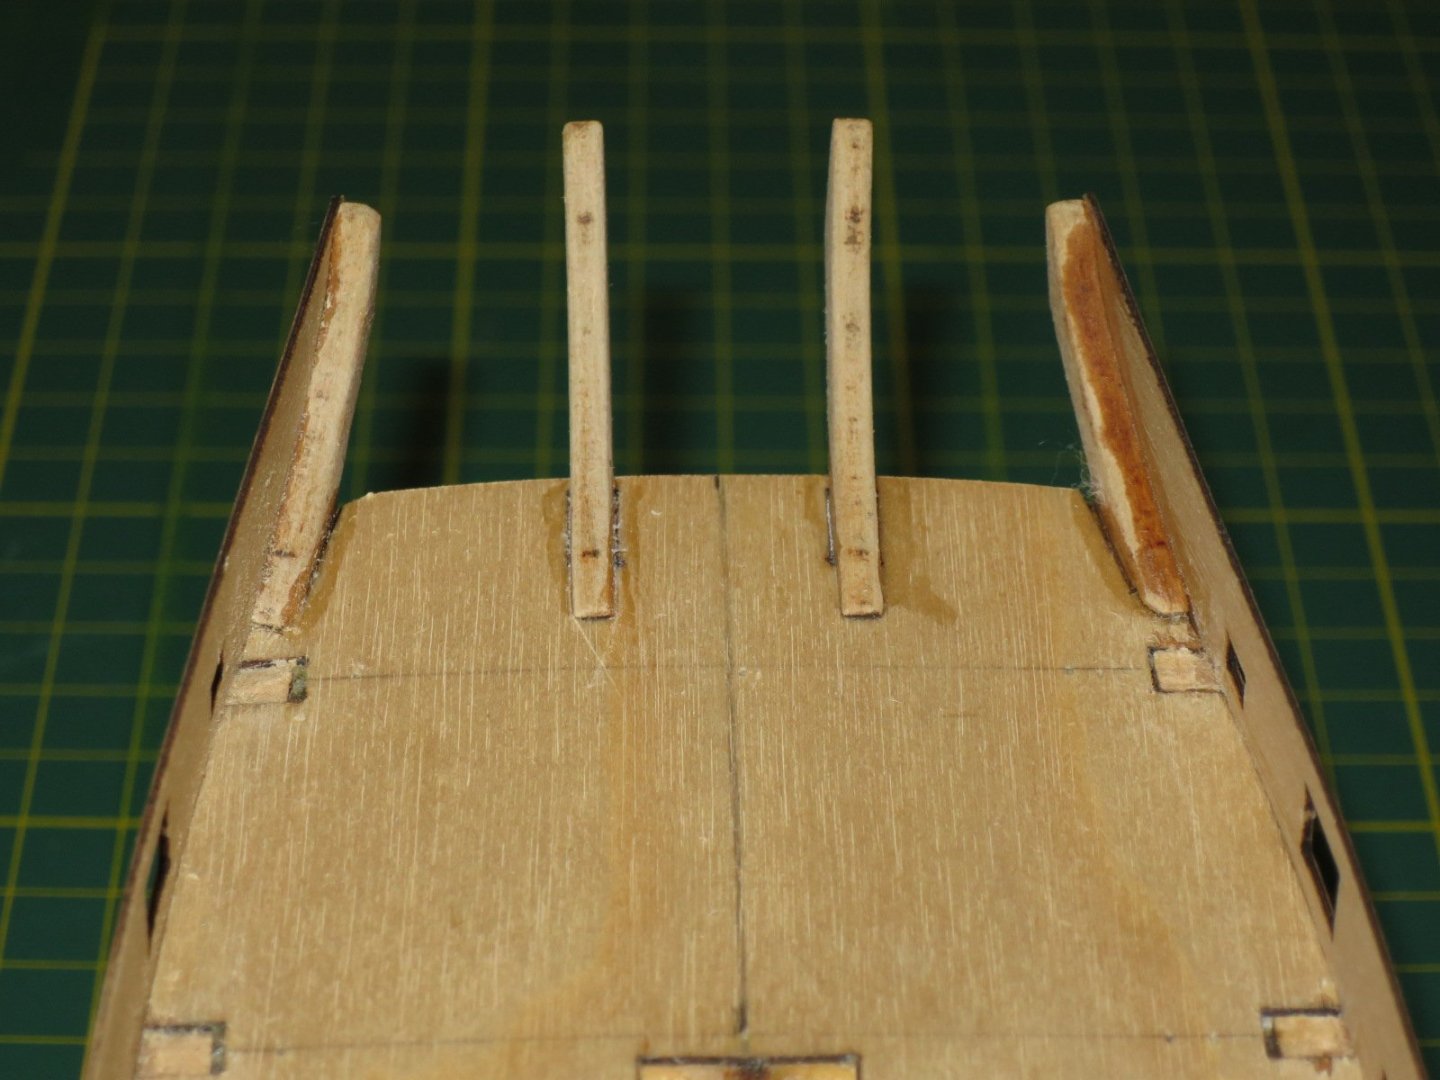
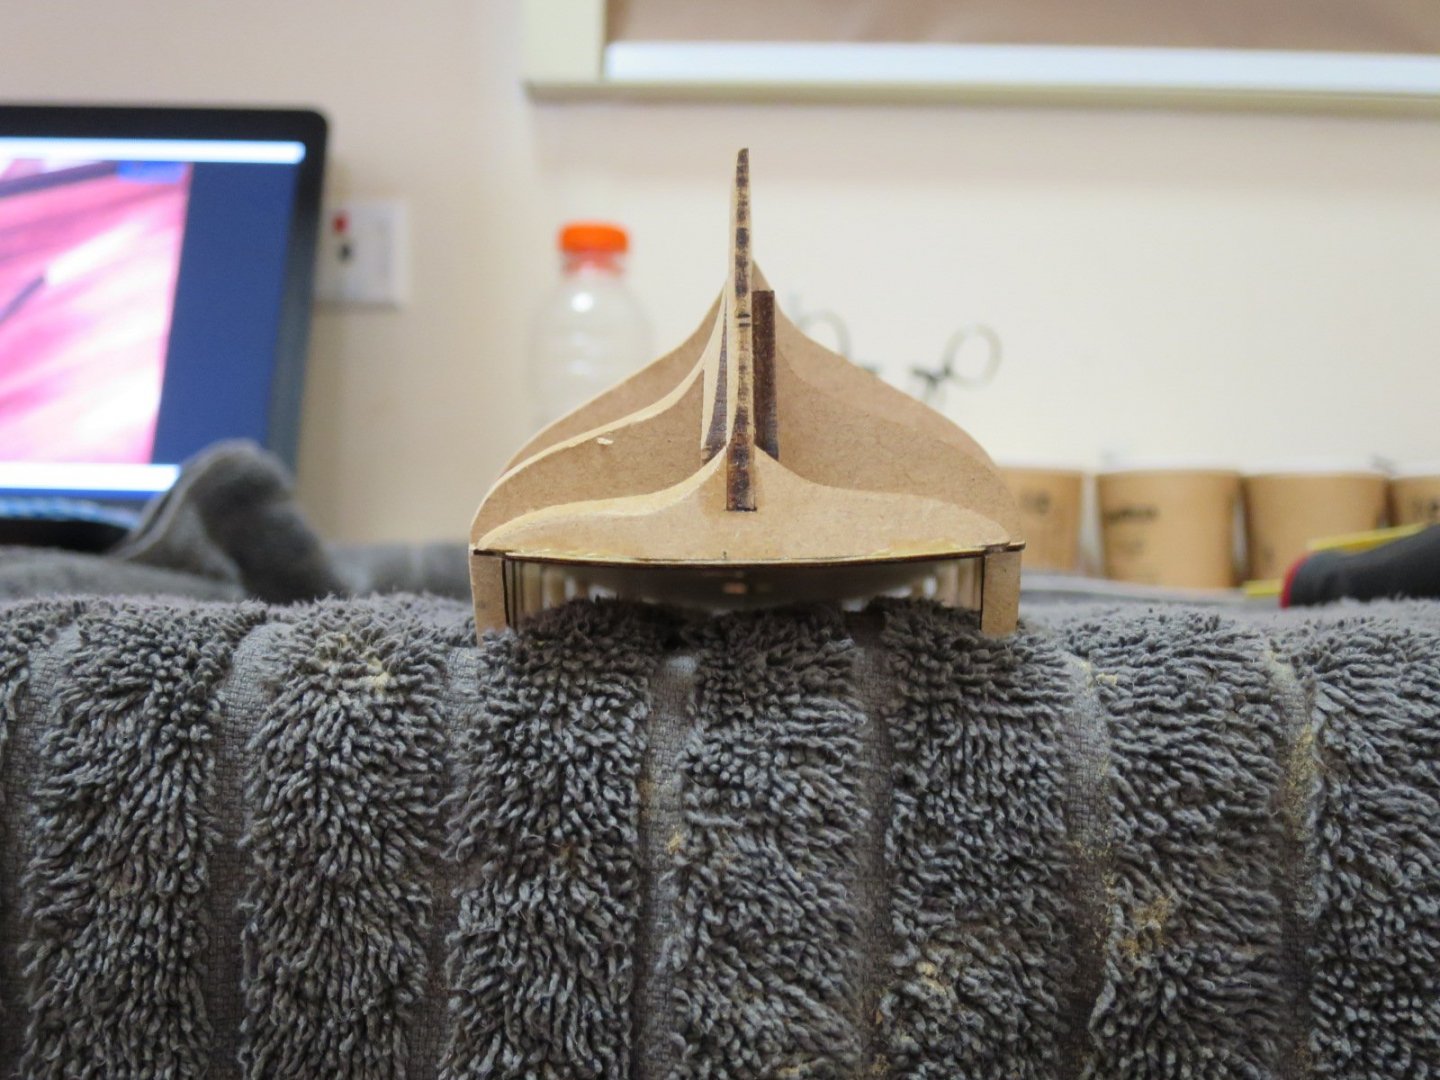
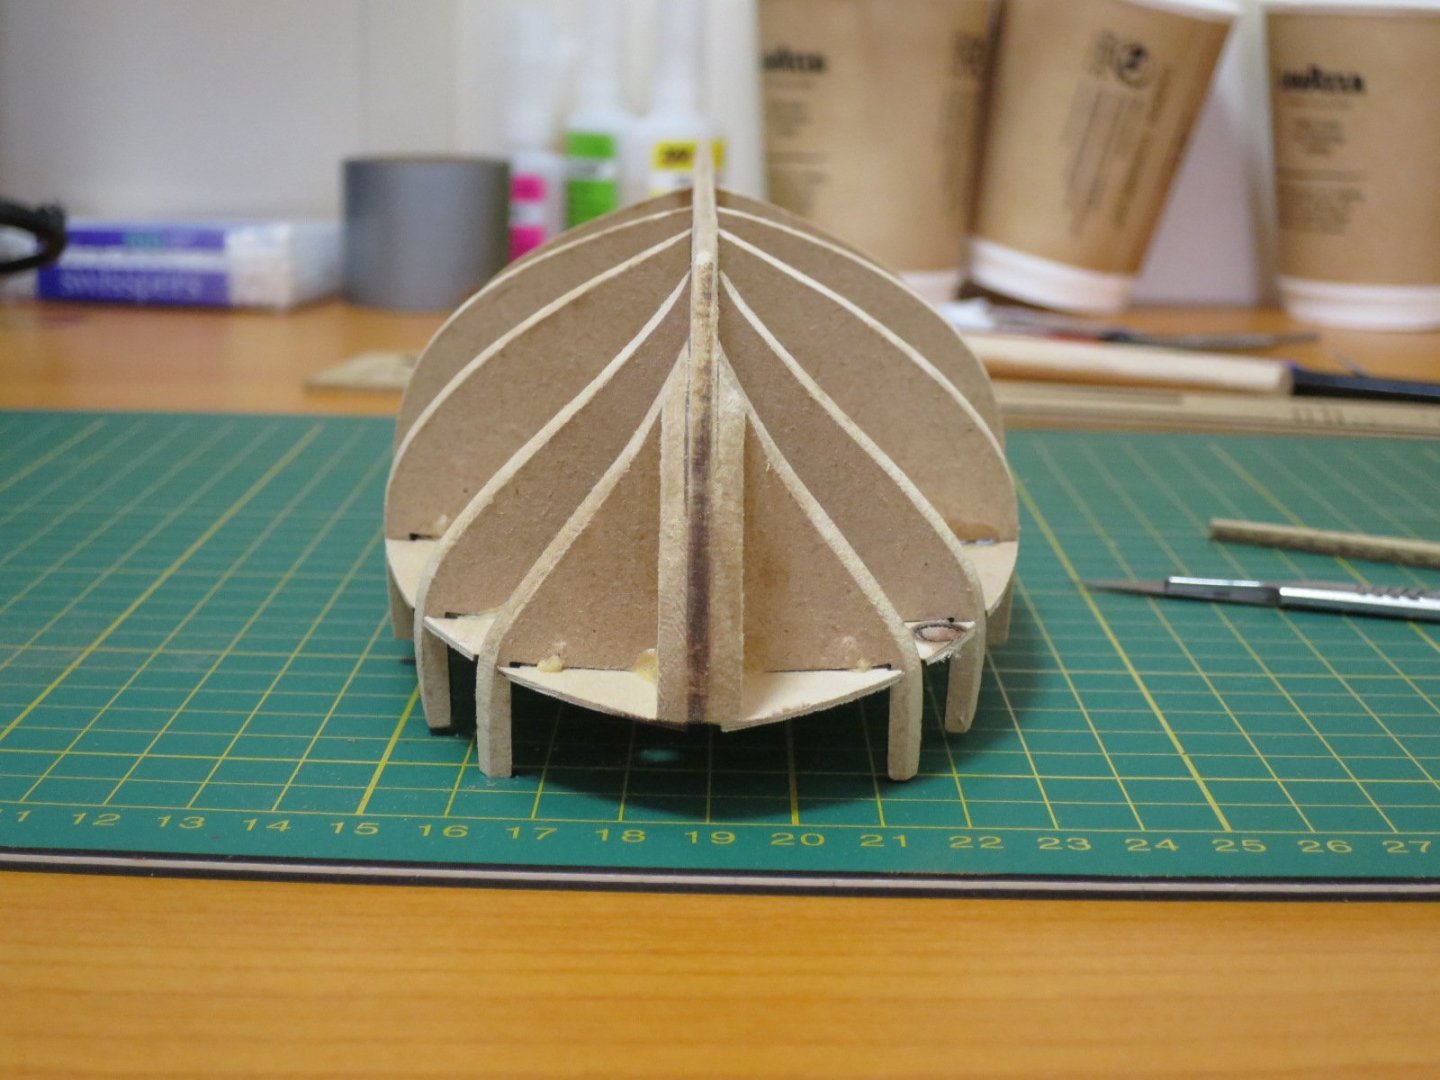
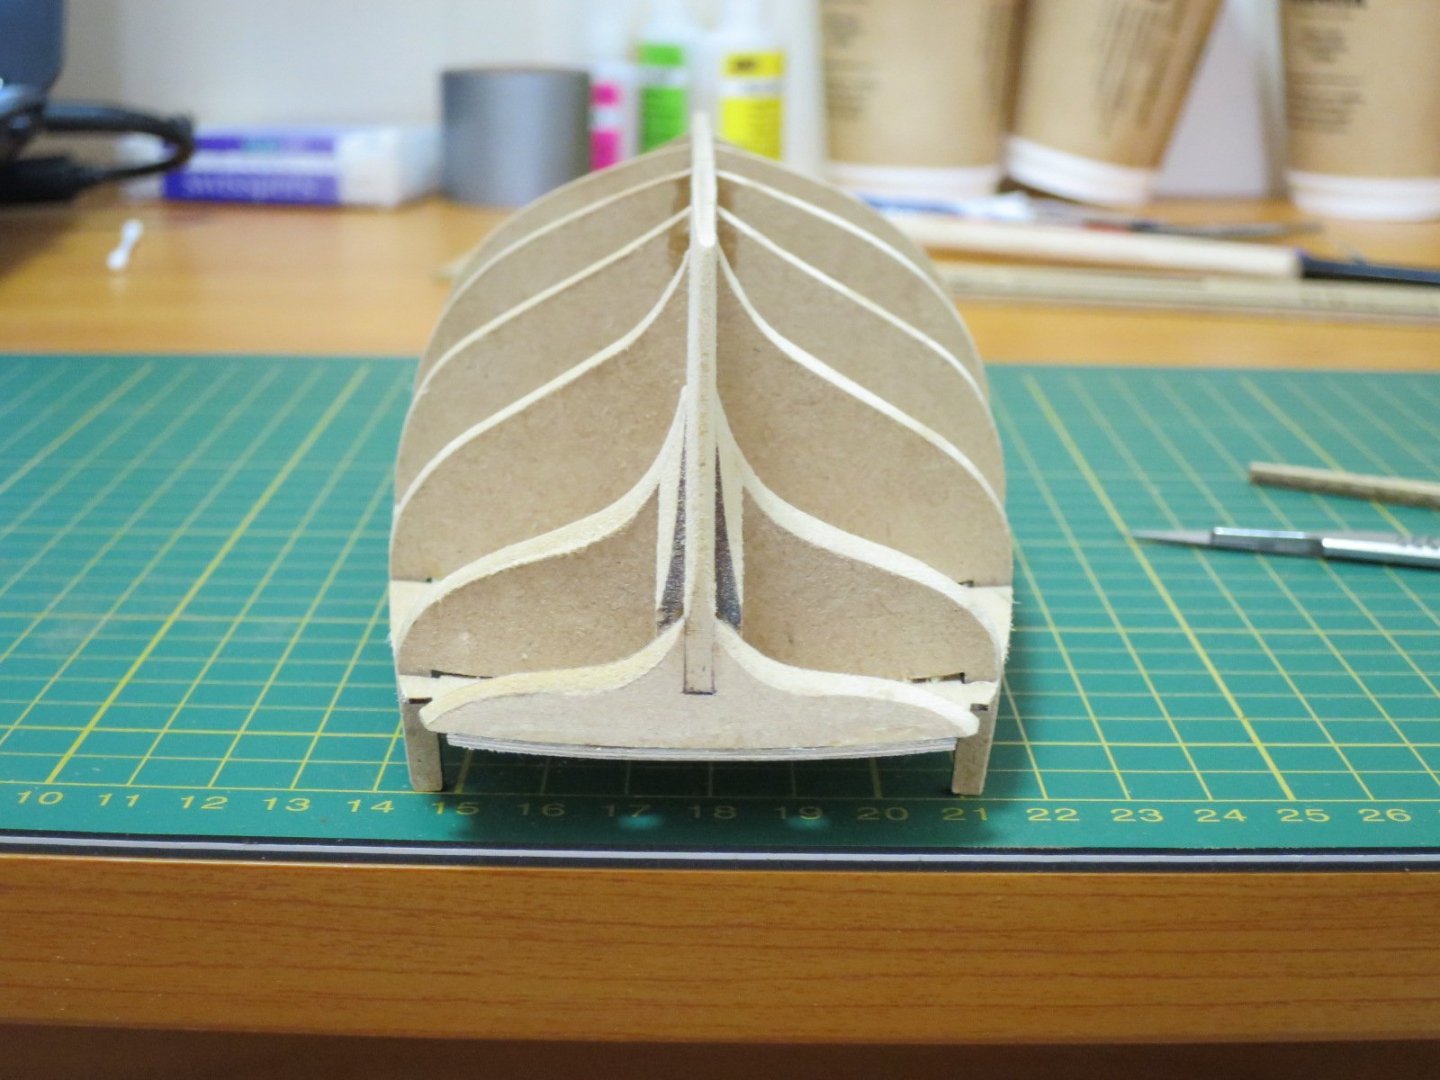
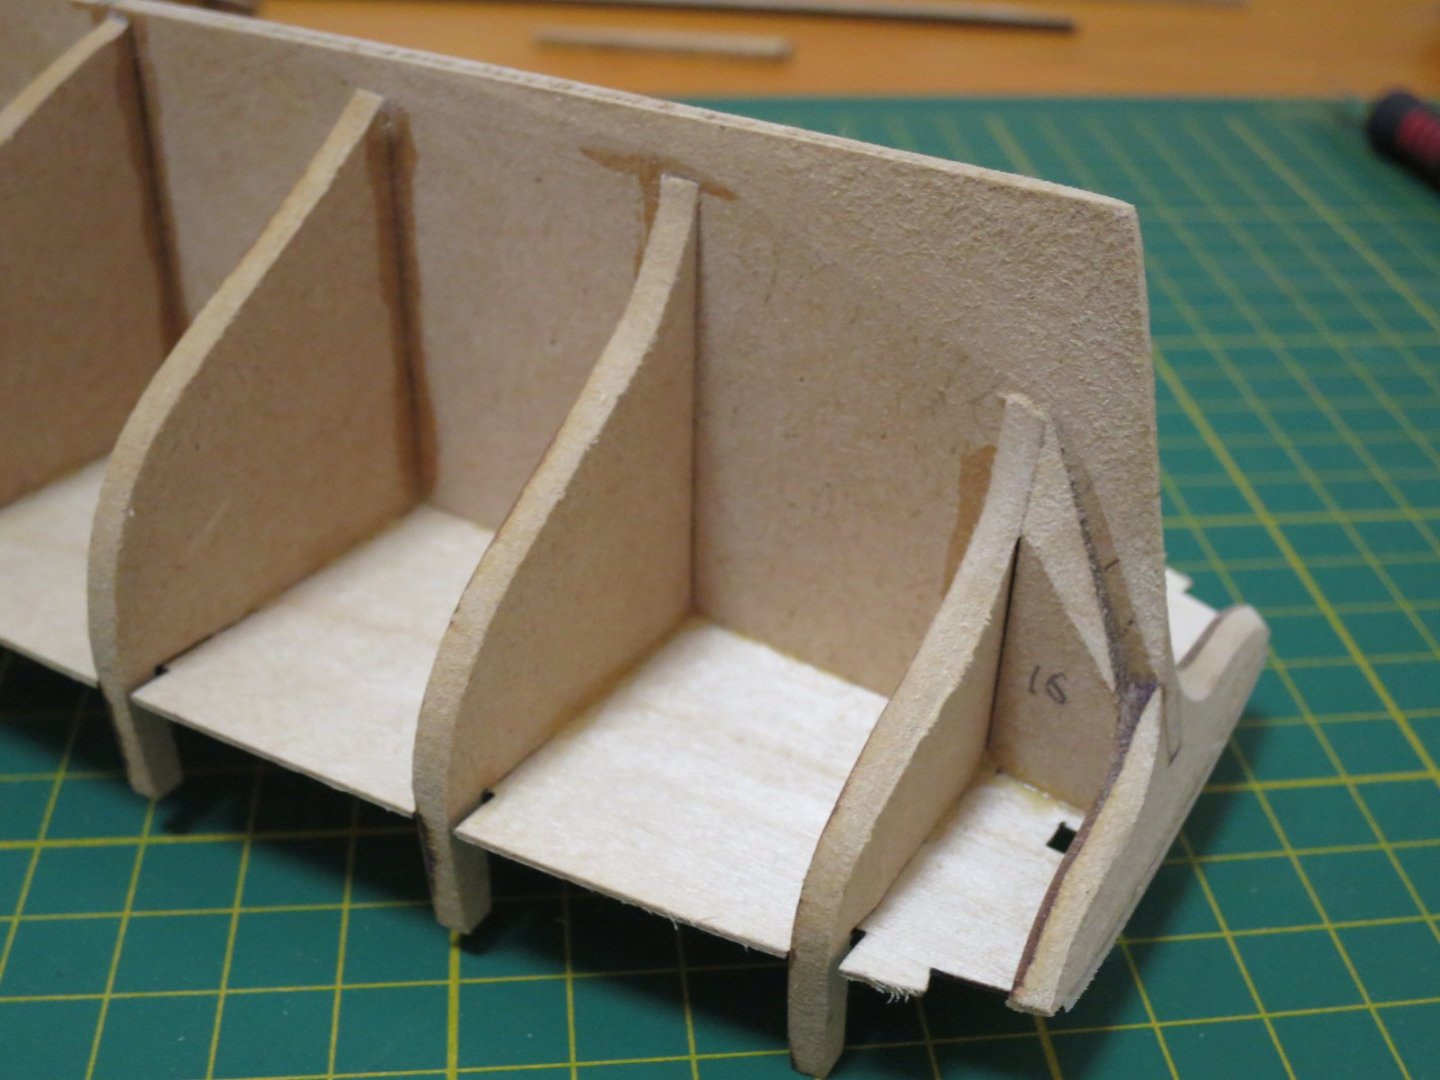
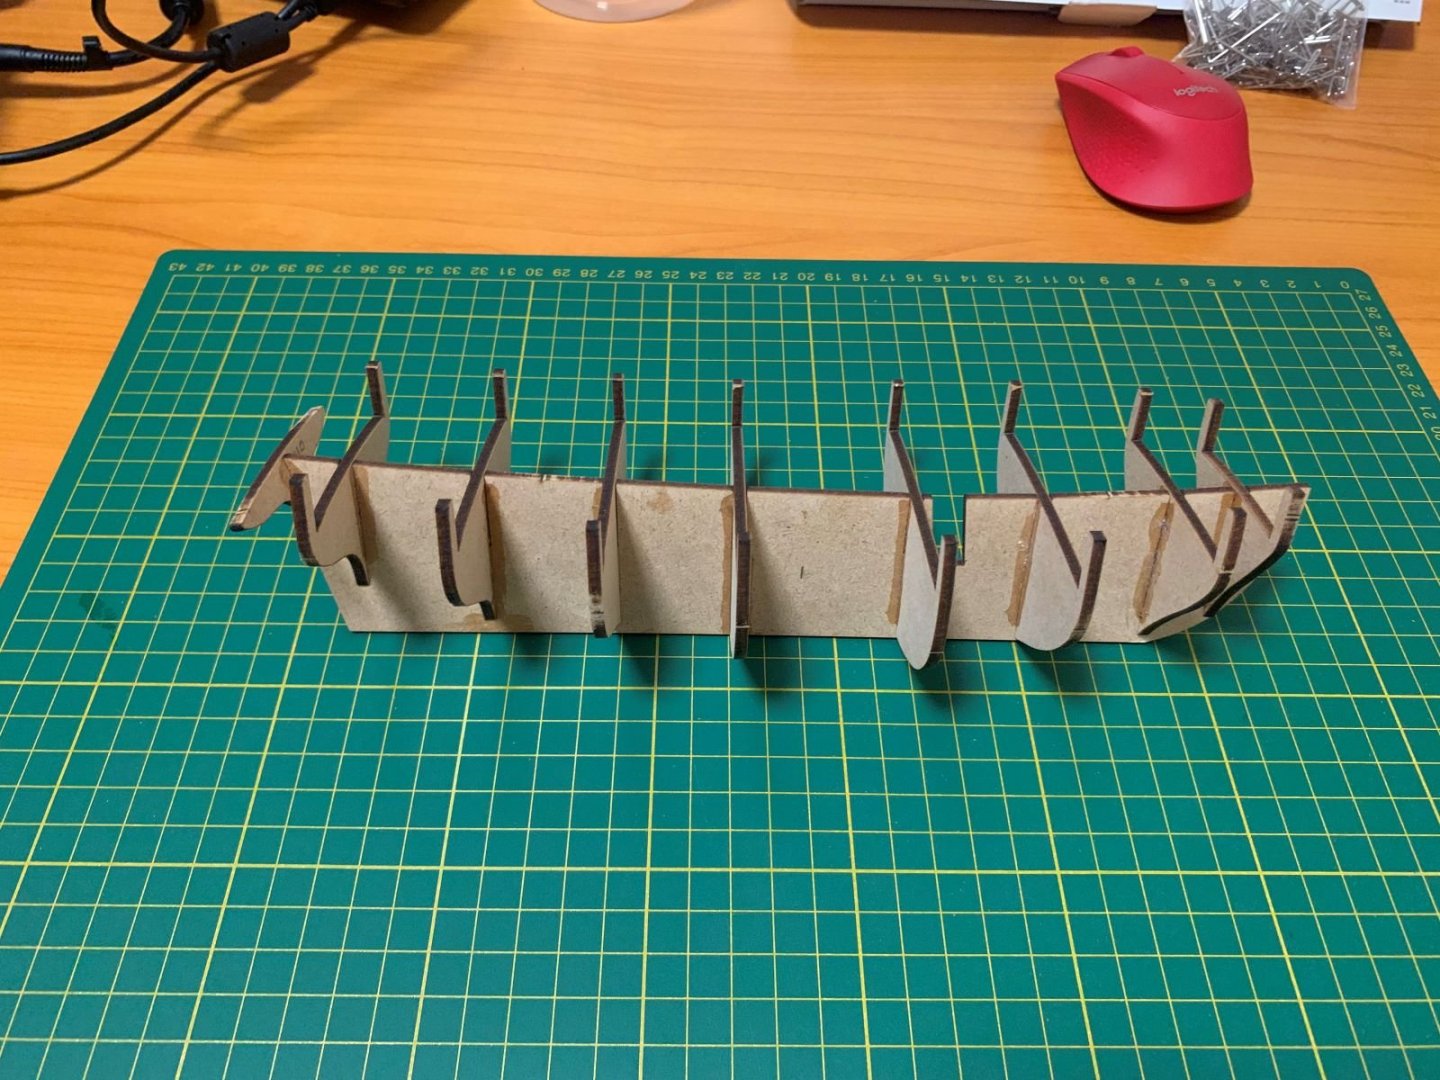
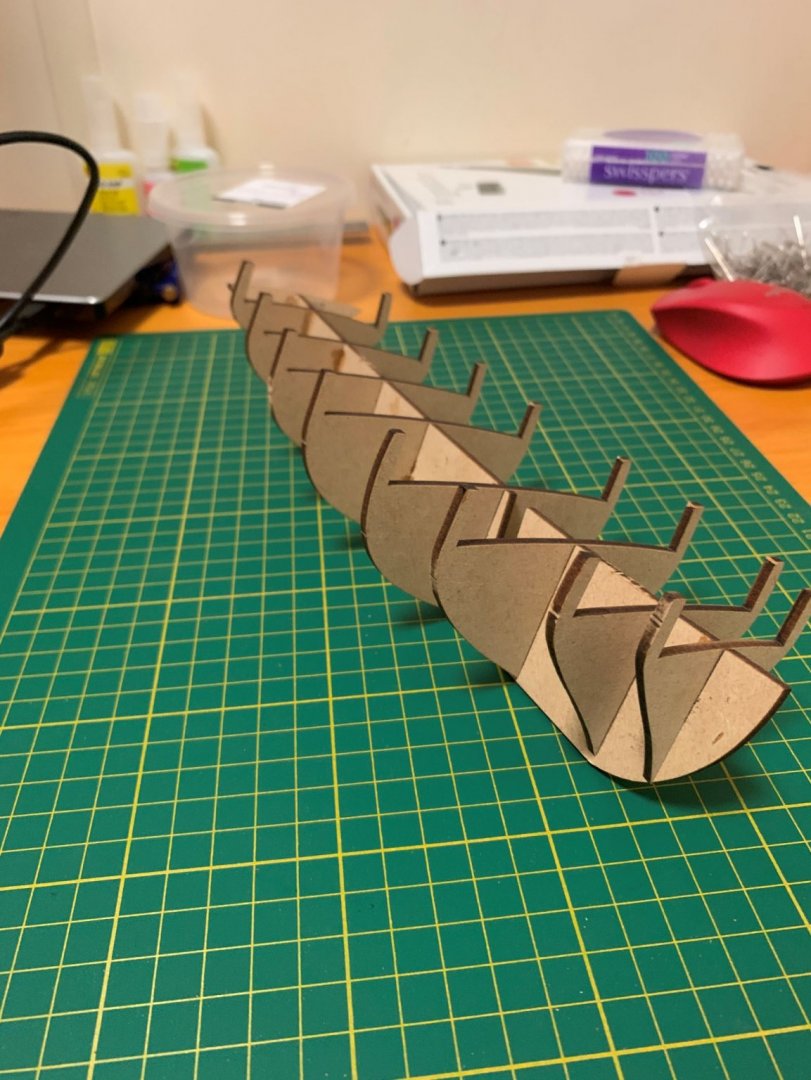
I've just joined up and introduced myself here You've probably seen it all a bunch it times, but here's the frame. I shimmed up the bulkheads with some thin card and they are all in nice a square. I used thick CA for gluing the bulkheads onto the false keel. It does look a little rough, but you won't see it. I glued the deck on with PVA, let it dry overnight and removed the pins. I used the pins in the kit with a nailer. The accuracy with the nailer was a bit hit and miss and I had a couple of goes with some of them. I think I would prefer some map pins or similar - maybe hold/push them in with nose pliers and tap them down... On inspection, I skewed the deck to starboard at the bow and to port at the stern, which was a little disappointing, but I think I can correct this with the deck planking. Off to port by a mm or so at the stern. So far so good (ish). I need to work a bit neater and take more care. Cheers, Stu


- 34 replies
-
- 4
-
-
- lady nelson
- victory models
- (and 1 more)
-
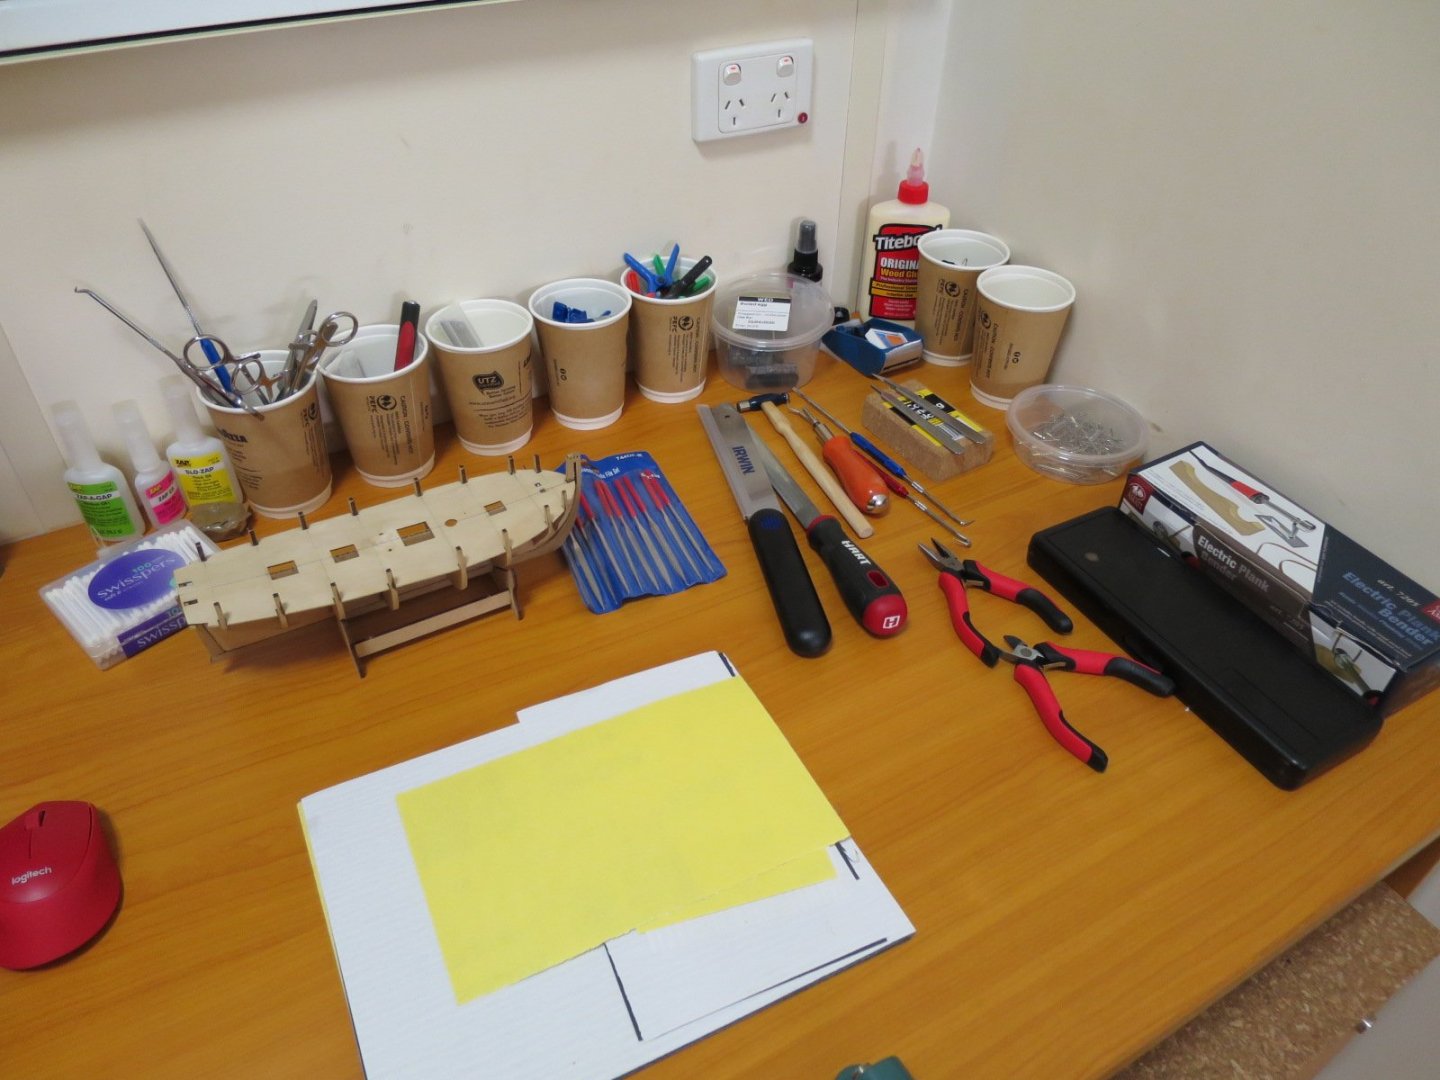
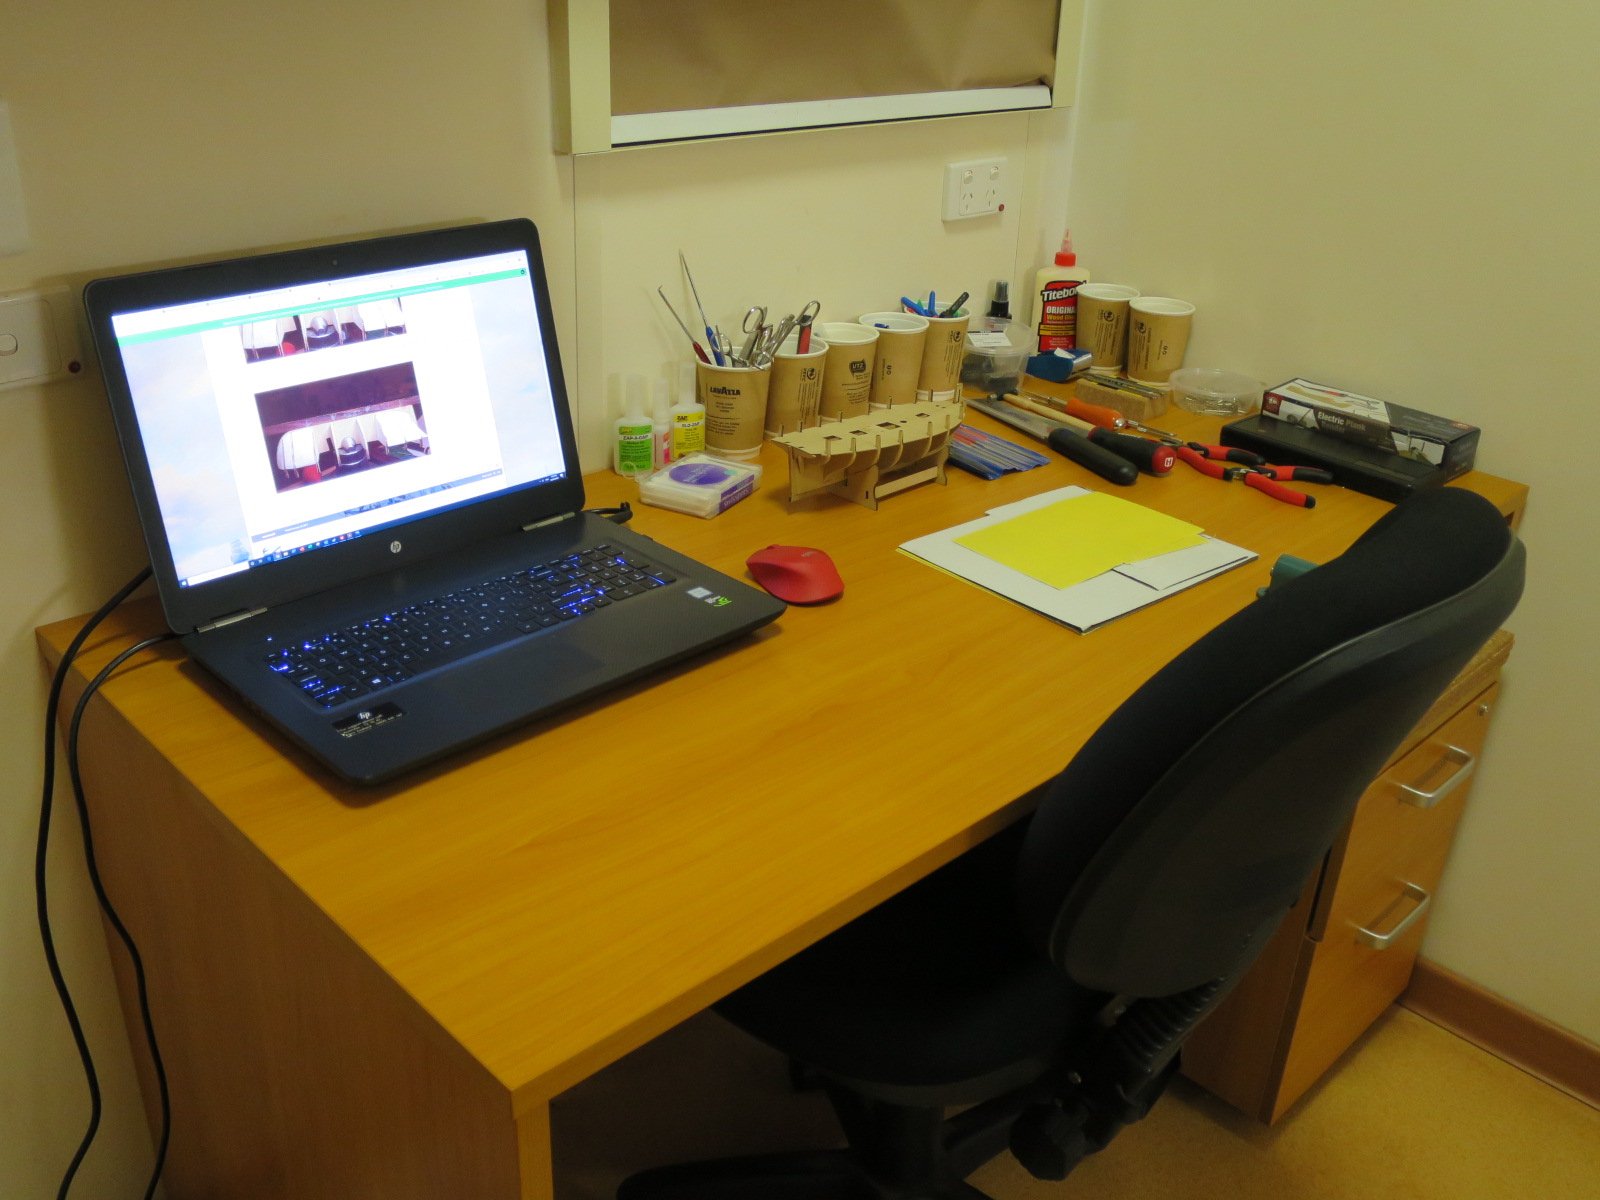
Hi All, I'm a mechanical engineer and live in New Zealand, but work extended rosters in the mining industry in Western Australia. I normally work 3 weeks on, 1 week off and do project work which means anything from 6 months to 3 or more years on a project. With COVID-19 preventing me from flying home now for a couple of months, I need something to occupy my time in the evenings and days off. I've done some modelling before - many ubiquitous balsa planes, an RC plane that had a single flight that ended in 1 very short and sharp landing (it was 20 years ago, but it's still quite raw), but mostly larger scale WW2 RC ships with medium detail, but again, that was years ago too. I was also quite active in Australia model warship combat (1/144 scale) until about 2007 and built very reliable ships that I kept looking very clean. Here's a photo of the USS Artemis I built in New Zealand years ago in 1/96 scale, and is in a state of semi disrepair here. It was armed with a single rotating cannon in the stern. I really enjoyed the hobby. It was a good mix of modelling and engineering, and I fabricated brackets and set up the pneumatic systems for the CO2 powered cannons. What made an effective ship was thought in design, good execution and reliability above everything else. My ships were reliable. I understand scale modellers sometimes frown on warship combat, but I liked it. Having said that, I probably enjoyed building them more than battling, and I always put more detail on my ships than others. I've worked extensively on our family wooden yacht (a Sparkman and Stephens 35 foot sloop built in the 1950), so I know all about refastening, re-caulking, and anti-foulling bigger boats. My brother and I also built and sailed a racing skiff when we were at school, and I'm in the final stages of finishing a Lotus 7 kitcar - I really enjoy making things. When I'm at home my wife and I (no kids) surf, look after our rescue animals and work on our lifestyle property on the west coast of Auckland. That always keeps me busy, which I enjoy, however with travel restrictions keeping me in Australia, I've got myself a Victory Lady Nelson to keep me busy in the evenings and on my days off while I'm on site. I've always wanted to build a smaller scale "age of sail" model and this is it. Here's the set up in the room at camp, and I've made a start. Everything packs up into a small storage container. I'll kick off a build log with my progress so far. Cheers, Stu