
HOLIDAY DONATION DRIVE - SUPPORT MSW - DO YOUR PART TO KEEP THIS GREAT FORUM GOING!
×


tenderfoot
-
Posts
38 -
Joined
-
Last visited
Content Type
Profiles
Forums
Gallery
Events
Everything posted by tenderfoot
-
 Looking fantastic! We seem to be tacking along at about the same pace so will check in here regularly to follow along.
 -
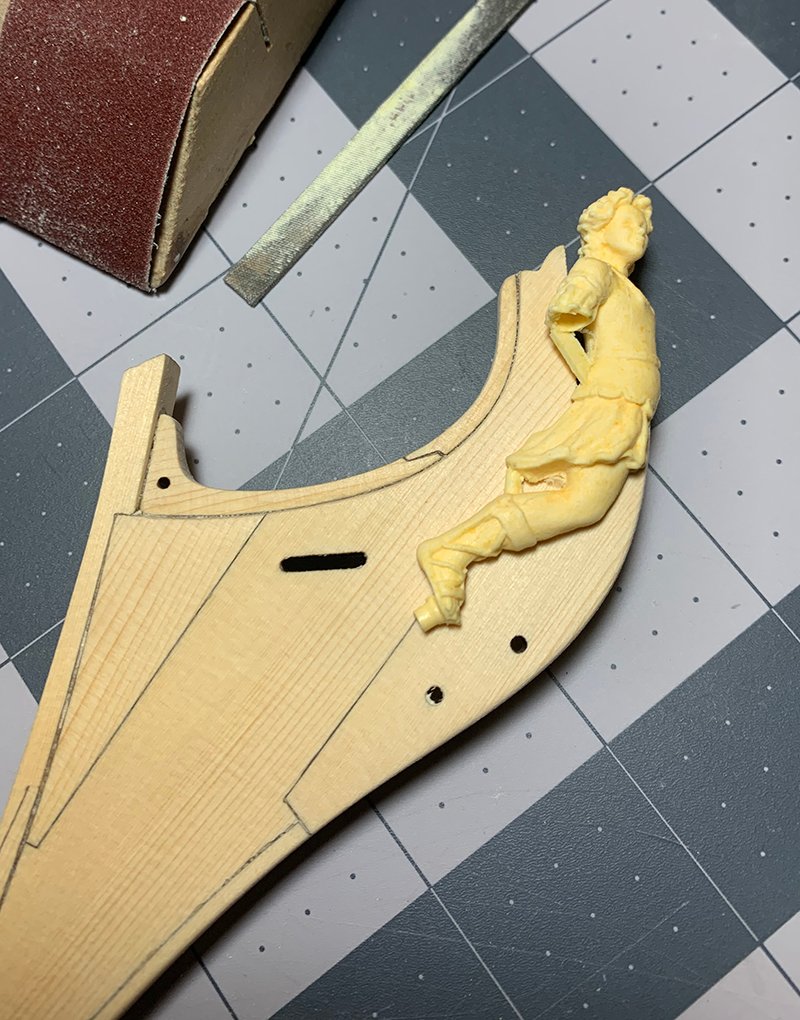
Received the castings this past week (Christmas in March!) so continued on my way with the build. Noticed that nobody has told me to "hurry through", and instead to "take your time" which tells me "take your time" is solid advice. So I took my time to ensure the area of the stem where the figure head rests turned out nicely. All jesting aside, too often I find myself want to hurry through a bit, especially the more mundane bits such as fairing a hull. However, as is obviously the consensus around here, I have found that those mundane areas tend to require the most patience to ensure quality results. Now, when I do find myself starting to hurry through something I take a step back and sometimes walk away all together as it usually indicates my mind is not in the right space at that point in time...so better to come back later. Putting my struggles with my mental state aside, as I just mentioned, received the resin casting and got Ted seated nicely on the stem. Don't ask me why his name is Ted, just for some unknown reason I started to call him that as I moved him back and forth a few dozen times between the work-bench and the stem, slowly sanding away until he was comfortable in his place at the front of the ship. "How's that feel Ted? Good fit?" Bit of sanding "Alright Ted, let's give her another go." Bit of sanding And on and on it went for about an hour.
-
Woot! Woot! Resin castings were in so went ahead and ordered them. For some reason I get a bit giddy when expecting new shipments for this build...sort of like receiving a gift to myself each time.
-
Freed the keel pieces from their respective boards. However, noticed that one piece had partially delaminated from #11 across to #28. I wiped some TiteBond within the delaminated areas, placed some weight on top, and let it set for a couple days. That should take care of things. Question for anyone else with experience in this issue is if the delamination will likely continue and cause me structural issues later (thinking maybe just a poorly laminated board overall) or am I good to continue with confidence. I checked the other parts from that same sheet of ply and bulkheads M and 15 are also partially delaminated, but not as bad. Again, can glue them up easy enough but as I have not encountered this before not sure if I should be weary of the entire piece of ply these pieces were cut from.

-
Thank you Ron, absolutely helps and appreciate you taking the time to measure it. And thank you Chuck...will order as soon as I see them available. In the meantime, going to assemble the keel. Planned to do that earlier this week, but life interrupted.
-
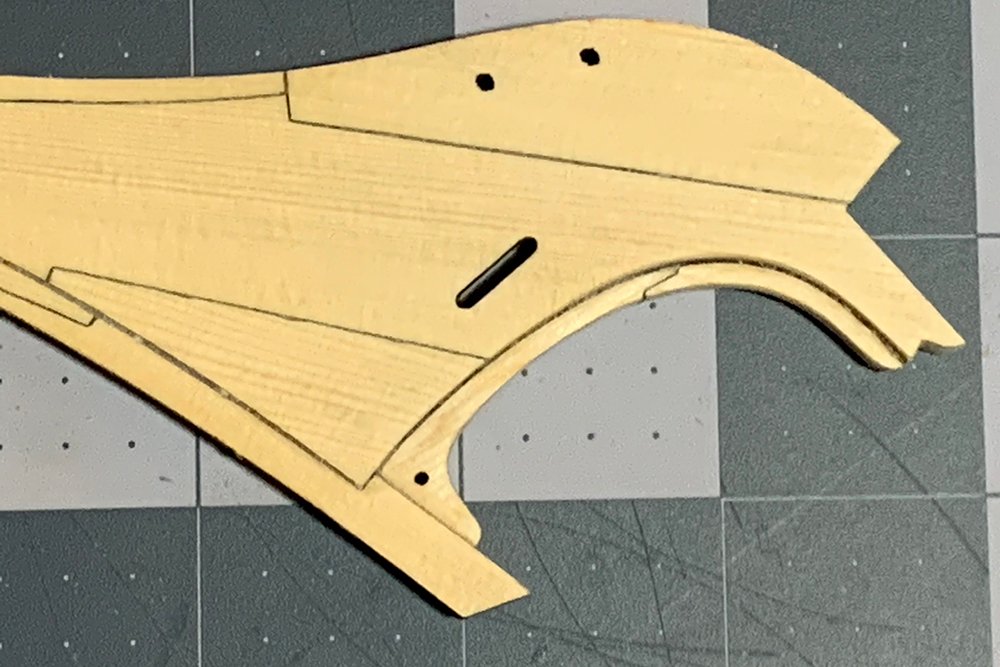
Thanks to all for the encouraging words! Went ahead and took care of the gammon knee and extension. Thought it would be a fairly simple and quick thing to do, but in actuality took a while to get the fit just right. Happy with the results. Even looks good super close up in a photo. I have found that enlarged photos really highlight where imperfections may reside...things my eyes don't always detect. If the photo looks good, then happiness ensues. Now it's on to tapering the head knee. If I am understanding the directions properly, I should taper per my pencil markings below. I went hunting for the figurehead, but am having no luck. I thought I had seen it, and other carvings, available at Syrene as resin casts...but my memory is often an issue and I am not finding them on the site. Been searching around other blogs and have not yet had any luck in tracking down where I can obtain these. Any suggestions? Not sure I should taper the head knee until I have the figure head to ensure a proper fit. Cheers
-
Chuck strongly recommends taking the time to build a quality build board. This is only my third build, but with my first effort - HMS Victory (DeAgostini subscription) - I instantly learned the value of this. At the early stages of planking the hull is became apparent that I had a serious twist along the keel. The only remedy that I found was to remove all my wonderful planking, set the keel in a build board, and start over. It was weeks of effort down the drain and not something I want to re-experience. For my second build, the USS Constitution I went right to a build board, but used metal brackets. This worked fine for the most part, but the metal brackets did pose some issues with marring the wood. Due to past experience, and the consensus on every build log I have read here, I will put even more effort into this for the Winnie. I have debated getting the HobbyZone Building Slip, but just can't get myself to spend that sort of money. Still paying off college loans for my children's education so I need to be pretty frugal. I have decided, instead, to get a solid flat board that will be large enough for this build. Will also use the squaring brackets available from Chuck for the Winnie. At $15 it is affordable and will allow me to get started in the right way. Between that and the board I am looking at around $25 for a solid building slip...my kind of deal While I await the arrival of the brackets I will get the keel assembled. I have a decent sized table with a thick glass top. Got approval to use it to ensure I get a nice and flat result when gluing up the three main parts of the keel.
-
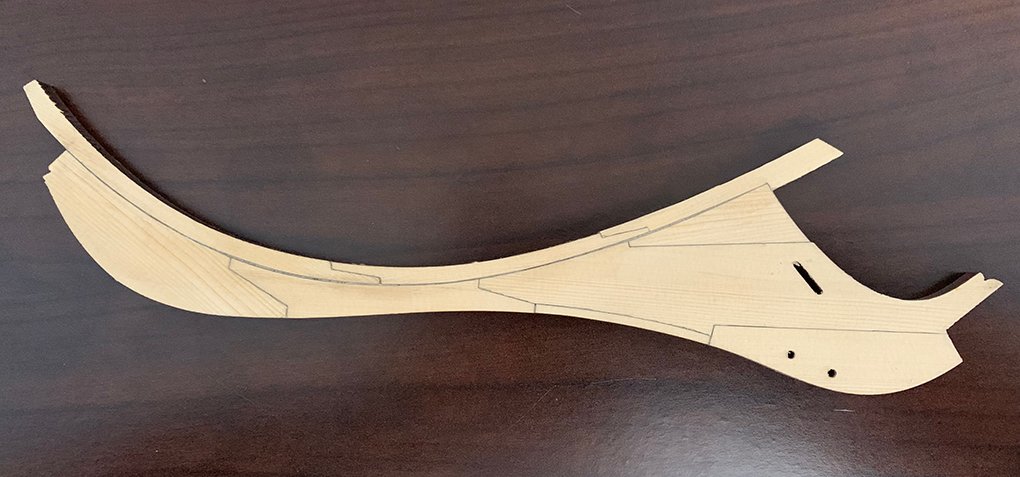
Thank you all for the helpful input. I know I tend to over think some things, so validation of these tendencies is something I am always open to. As suggested, I did take the smallest bit off here and there as needed. Then I went in and colored in with a #2 in the few areas that the char was removed. End result was a fairly tight fit across the board. I did encounter a bit of trouble nicely fitting the two main parts of the stem together...took a bit of extra sanding. A couple areas are not as tightly fit (result of my sanding to fit, not the laser cut) and the seam ended up a bit wider than I had hoped for. But it fits to the drawings, so I left it as is. Still needs a bit of sanding to finish it up; however, in the end, I think it looks okay.
-
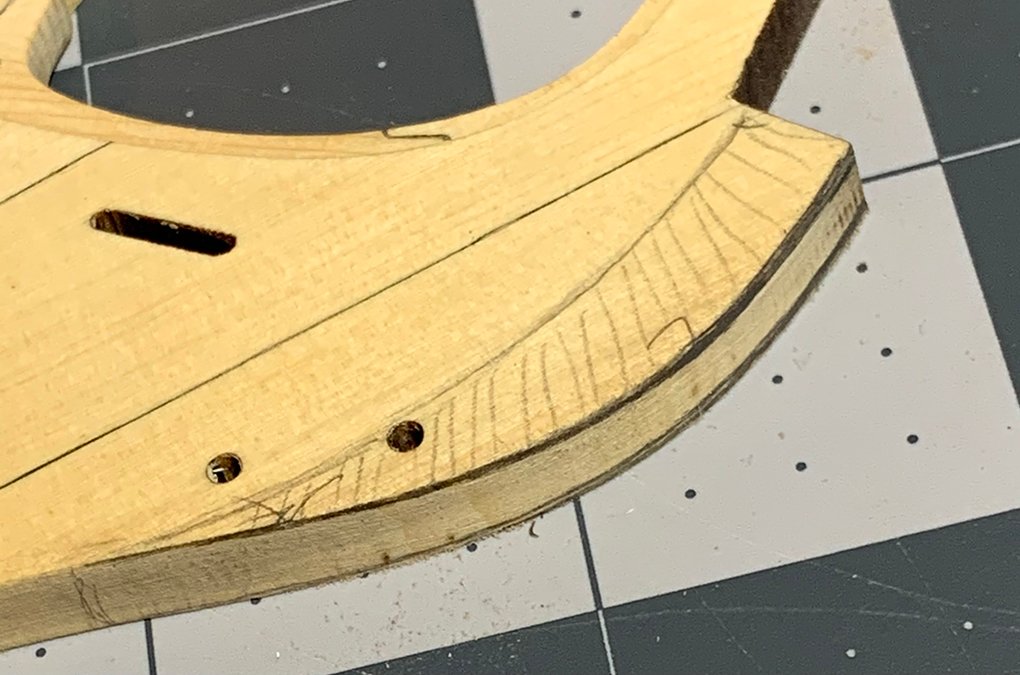
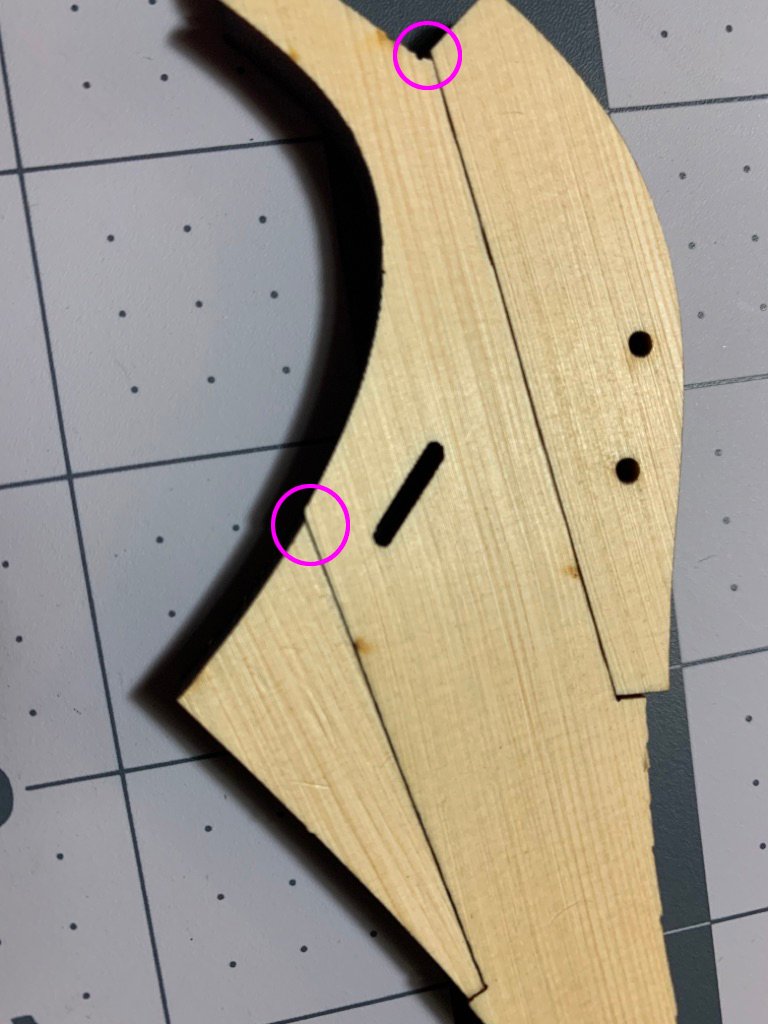
Started with the head knee. Or is it stem and knee? Or knee of the head? Learning as I go. I looked it up online and to me it all seems a bit interchangeable. Is there a clear delineation between the three? Are the knee and head part of the stem? Any good trustworthy resources for this type of information that have pictures/drawings for clarification? That aside, following Chuck's instructions and did not remove the char on the edges, but did clean them up a bit by scraping with a blade. There were only a couple areas that needed this and even those only needed ever so little. These are quality laser cut pieces However, upon a dry fit I find that there are a few areas that are just slightly off (circled in the images below). In all cases, on one side the fit is nice and tight, but on the reverse there is a gap due to the bevel in the cut. Not a big deal, I know; but, I am not sure what the best course of action is. Should I remove just the slightest bit from one edge of the bevel so that the seam is tight on both sides? I tried these pieces against the full size plans and afraid that if I do this I will end up slightly short overall - maybe even up to .5mm by the time I reach the bottom of the stem. Or, do I let it go and fill it as I sand? not sure how this will look. When viewing the image in the instructions the seams look soooooooo tight that I don't believe this second option was the way to go. In a couple other places, again due to to the bevel, the edges don't quite match on the reverse. Since these are at the top of the stem (is there a name for this section?) I don't think it is as big a deal. However, when it comes to attaching the gammon knee there will be a gap here as well. In the past I would have just simply trudged ahead, consequences be damned. But I am keen on this being a real showpiece and want to tread carefully. Or, I am simply over thinking it all? Cheers!

-
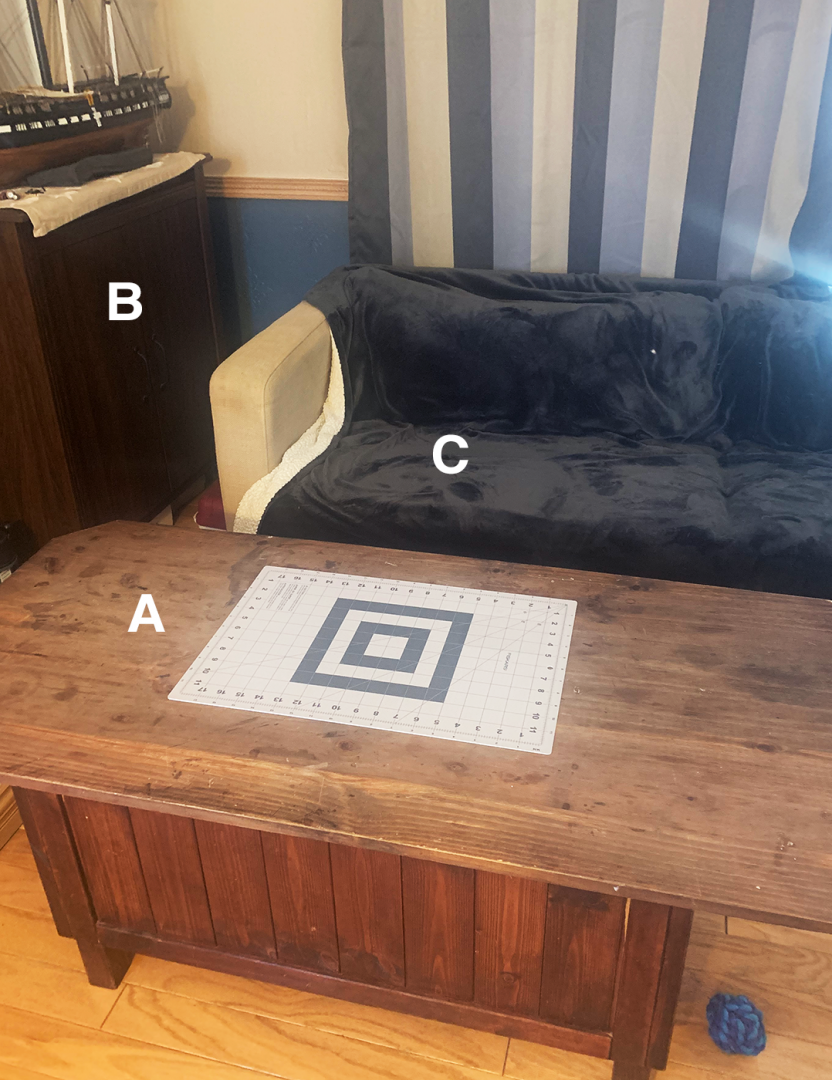
Promised to follow up with a description of my shipyard, so here goes. It's not much, but it work...albeit a bit difficult at times. I mentioned earlier I live in a very small home with my wife and daughter, so space is at a premium. Sadly, I do not currently have garage or basement space so I need to go with the multi-purpose approach. Happily, my wife thinks my adventure in ship building is splendid, so I am allowed to repurpose a corner of the living room. However, part of the agreement is I keep it clean...always...and never leave stuff laying around. This actually works out to my benefit as it forces me to clean as I go and pay careful attention to where things are at all times. I took a simple shot of my humble corner below. A = my coffee table/workbench. Every year or so I replace the top on this as it tends to get a bit beat up. Also note that it is a storage box. Within is where I keep much of my wood supplies along with some other materials. B = My storage cabinet. Within is where I keep all my tools. It's actually quite roomy and I store my drill press, Dremel, and much much more in there. Also servers as the dry dock when I am done working for the day. Cool part of this is friends and family come over and actually take note of progress...it's amazing how many folks are drawn to it and it is a fun topic to start a conversation. C = My work seat/sofa...also serves as the relaxation area when the dog joins me during a ship building session. When I need a really large and perfectly flat work surface I will either pull out a composite shelf that I use or...for total perfection and what I will leverage for this build, a big glass top table in the kitchen area (there again I need to be super clean...always). Again, it isn't much, but I make do and find that I have adapted. I have big dreams, but for now I am content.
-
Put a good deal of thought into which approach I preferred for this build and have decided on the following: 1. Going with Yellow Cedar - it just looks really sexy in the pictures. Honestly...clean and smooth lines that appear to hold details very well, especially at small scale. Overall, the color and look of the wood make we want to reach out and touch it. Gotta...touch...it... 2. Going with the Laser Cut starter pack - yup...cost a pretty penny, but worth it. Few reasons for this. One, I am not yet comfortable enough with my knowledge of ship building to tackle scroll cutting the pieces myself. Two, having done other wood scrolling projects, I just don't find much entertainment in scrolling...just not my thing. Third, laser cut is so clean and accurate and provides consistent results. 3. Sticking to the plan - as this is a big leap for me in learning I have read ahead on the chapters to ensure I have an overall understanding of what is needed. Also, will continue to read ahead bit-by-bit to ensure that as I approach a section I don't just understand what needs to be done, I also understand the implications further down the road. The goal is to reduce the number of times I need to redo something because I didn't quite know what I was doing or just flat out did it wrong. 4. Sharing everything, the good and the bad. I don't have much experience to offer others and fear this may become a lopsided experience in that I hit everyone up for assistance and can't offer much knowledge in return...at least in the beginning. To help balance this out I think bearing all in the forum will provide good information. Likely provide this forum with a lot of material for "this is not what you want to do" 5. Have a blast. At that point in life where I missed too many years caught up in the race. New meanings have come to surface for me and those I love. As a result, I am doing this for enjoyment, relaxation, and as a challenge. I think I have a great sense of humor and take no issue with laughing at myself, my mistakes, and others joining me in that. Getting my workshop set up over today and tomorrow. I have seen other forums where workshops are shared and they are really impressive. One day I aspire to several that I have seen. Alas, I currently live is a really small home so I need to take more of an Ikea style approach to my workspace. Pictures will be included starting tomorrow. Cheers!
-
Well, it's only taken me about 8 months...but I am finally ready...I think. I admit to putting this off as I was intimidated by the challenge and how I thought my skills aligned. Spent the past several months on other projects getting better at working with small scale wood and other bits. This is a beautiful ship design and I want to do it justice. I know there will be a lot of mistakes along the way, but here goes...I am off to Staples to print out the plans and get started this week.
-
Yes! I am excited about this. I am fairly new to the ship model scene and have only completed one ship to date, the HMS Victory - my first model. Although I paid a premium for the model, it did come with exceptional instructions, which were a life saver. Thankfully, I found the hobby to be 100% relaxing and enjoyable. When laying the billion copper tiles one by one on the Victory I would find myself entranced and awake hours later having cut, shaped, attached a hundred or so in one sitting. Did not expect it to have this effect on me. Although it took me the better part of two years, I did complete the HMS Victory and have had it on display...it may not be professional grade, but it sure is a show piece and I get excited whenever a visitor walks up to it and I see how hard it is for them to resist touching the thing. Well, I have since been working on the USS Constitution and this time around I find myself modifying, upgrading, adapting the model as often as my knowledge and skills allow. Now that I am nearing the rigging stage on the Constitution I figured it was time to look for a new challenge when...what do you know...I found the HMS Winchelsea. I started buying rigging and blocks from Syrene for the Constitution so it was inevitable that I come across this. Although I can not start into it for another few weeks, I am eager to get going and am going to try to scratch build as much as possible. I will be lurking around everyone's builds and asking lots and lots of questions. Of course, always here to offer what little that I have experienced and know as well as keeping this build log up to date as best as possible.


