Albuk
-
Posts
74 -
Joined
-
Last visited
Content Type
Profiles
Forums
Gallery
Events
Everything posted by Albuk
-

Bracera (Brazzera) by Albuk
Albuk replied to Albuk's topic in - Kit build logs for subjects built from 1851 - 1900
It's an addiction, he, he... Cheers, Alex -
Bracera (Brazzera) by Albuk
Albuk replied to Albuk's topic in - Kit build logs for subjects built from 1851 - 1900
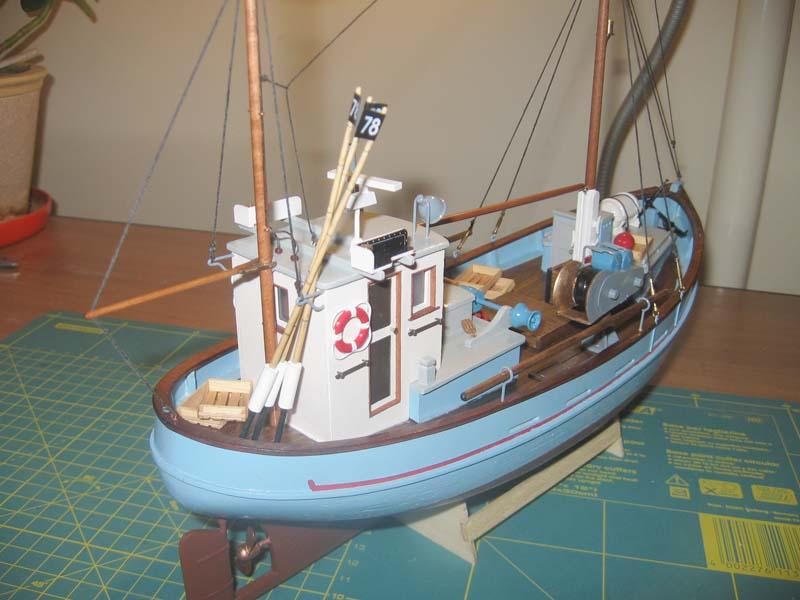
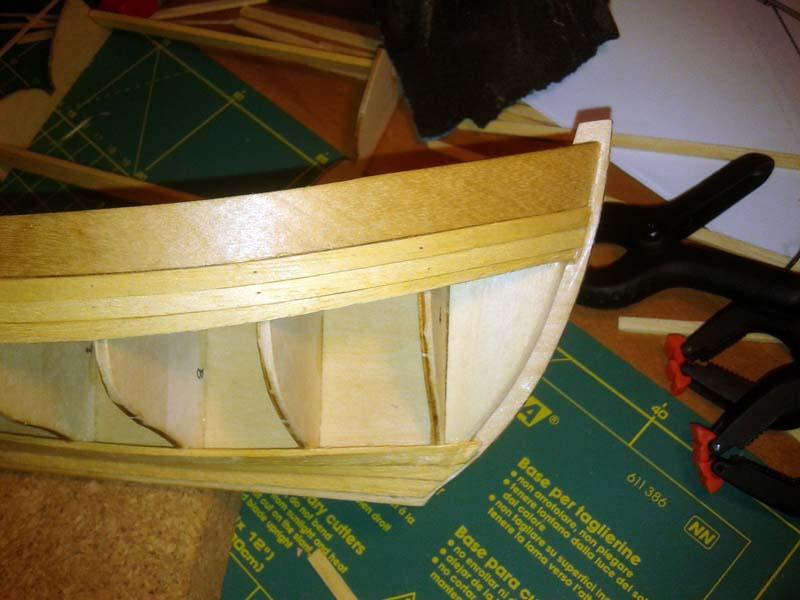
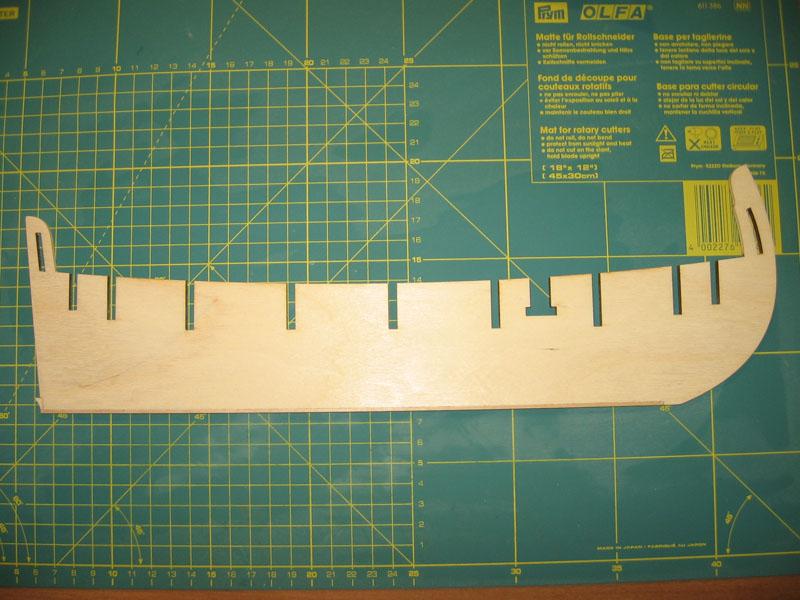
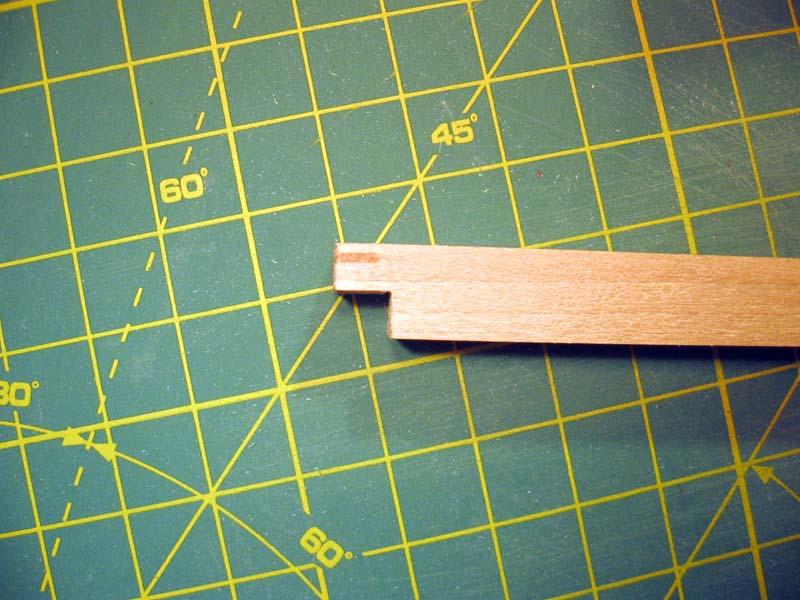
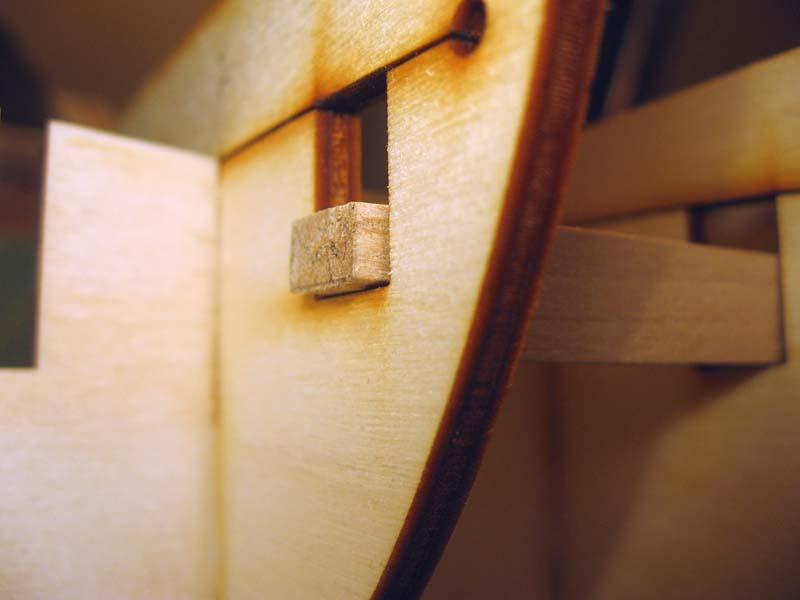
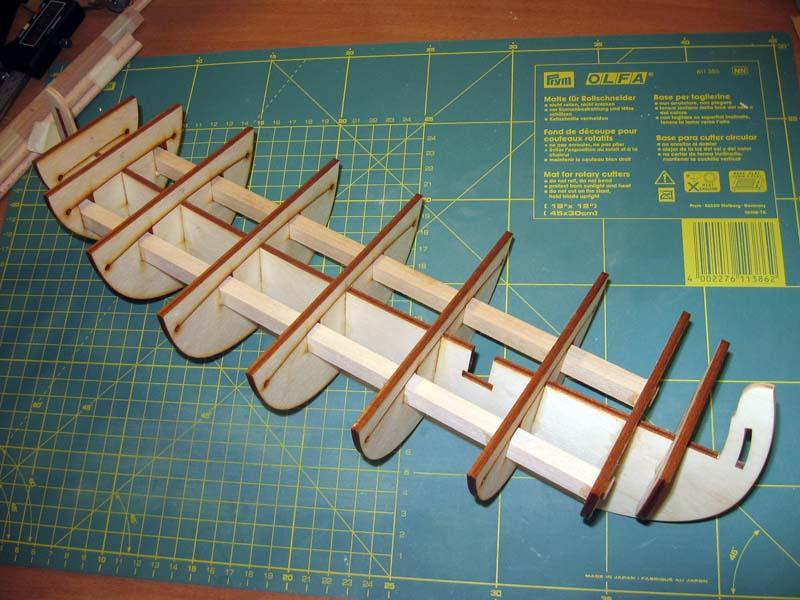
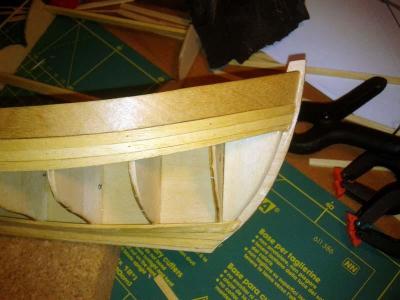
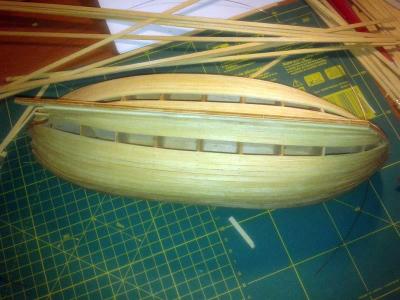
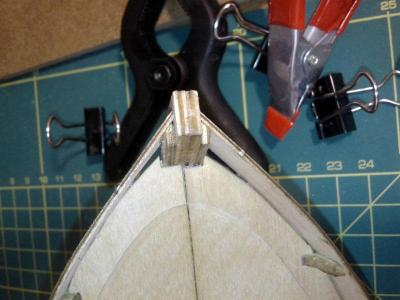
The laser cut parts of the kit are nicely done but when inserting the rods, that make the whole construction stronger, I found out that the "windows" on the second bulkhead are not tall enough for the rods to go through. The bulkhead in case, differs from the plan in that aspect and I suppose the manufacturer wanted to make it stronger because it will have a fair amount of fairing. A little fabrication made the rods come through.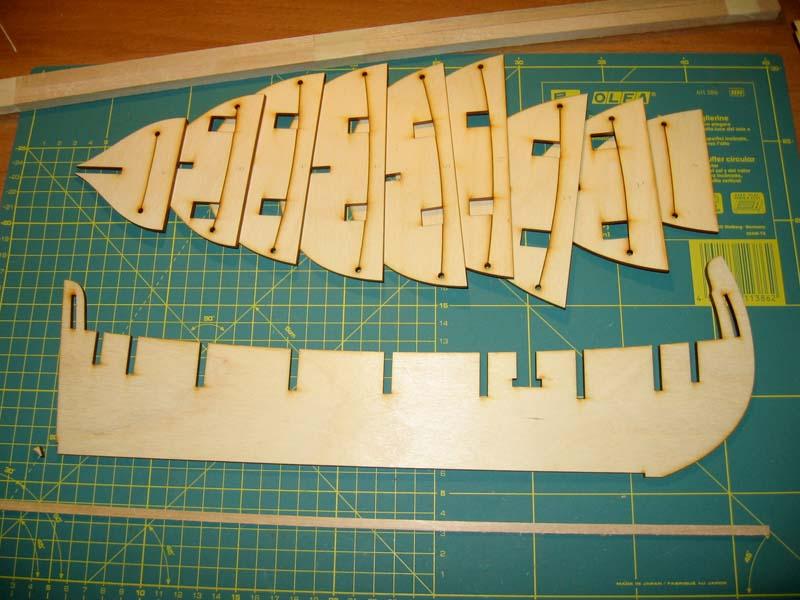
-
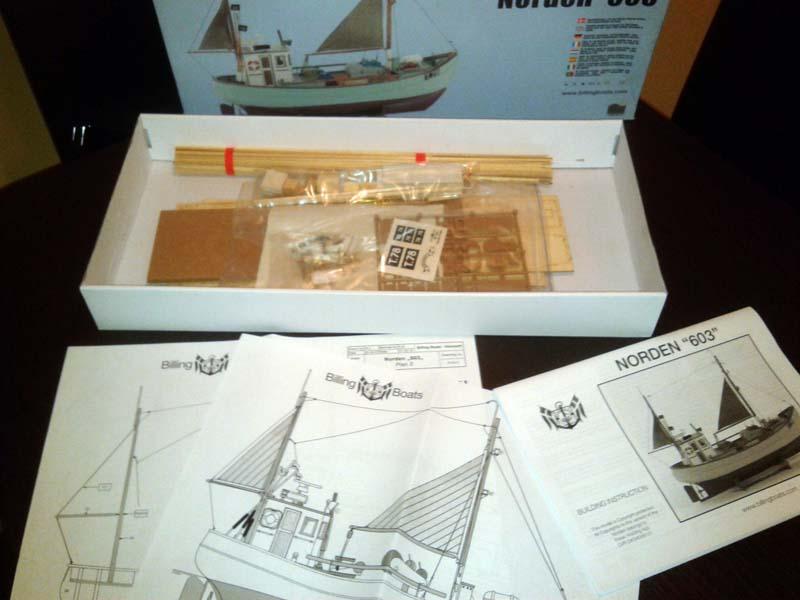
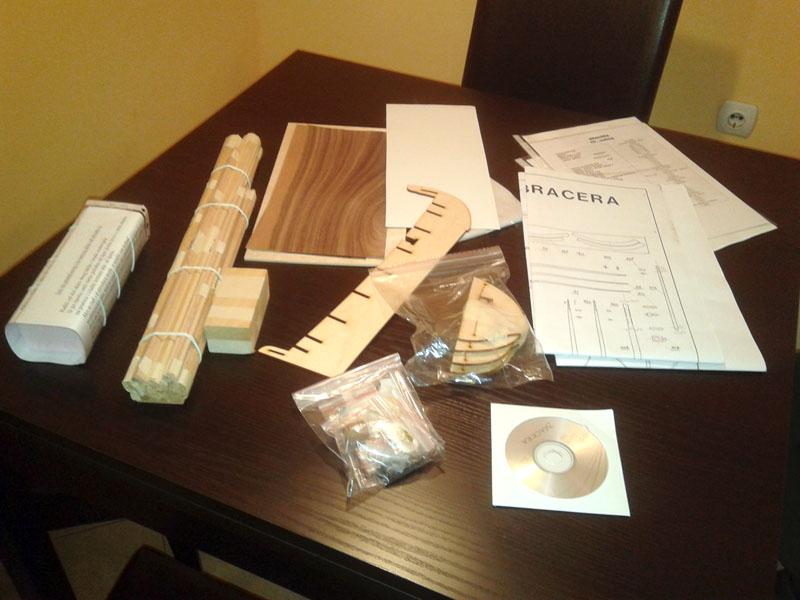
Well, the local shop didn't have the kits I had my eyes on, so I did some research on the web and found a website that sells their own kits in my hometown. The kit I finally bought is a type of 19th century coastal vessel from the Adriatic sea called Bracera or Brazzera and is based on a plan from Tehnodidakta-Pula from the 80's. It comes with bulkheads and centerboard laser cut and Linden and Beech wood planks for the hull and deck. For the second planking there is a bunch of veneer strips, but the name of the wood eludes me. The fittings are from Mantua and the ropes are polyester. Beside the building materials, the kit comes with general instructions of how to make a wooden vessel but not specifically the Bracera. For that, you get the plans and a CD with images of a completed boat.
-
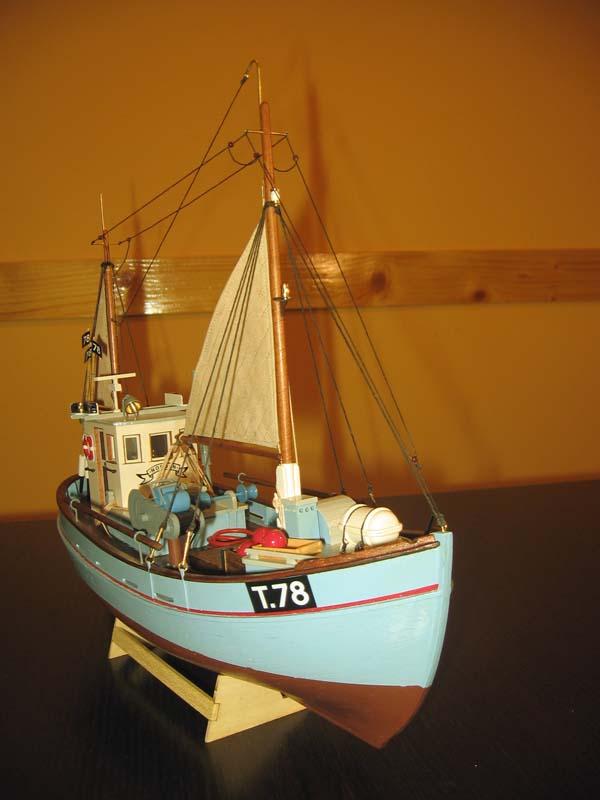
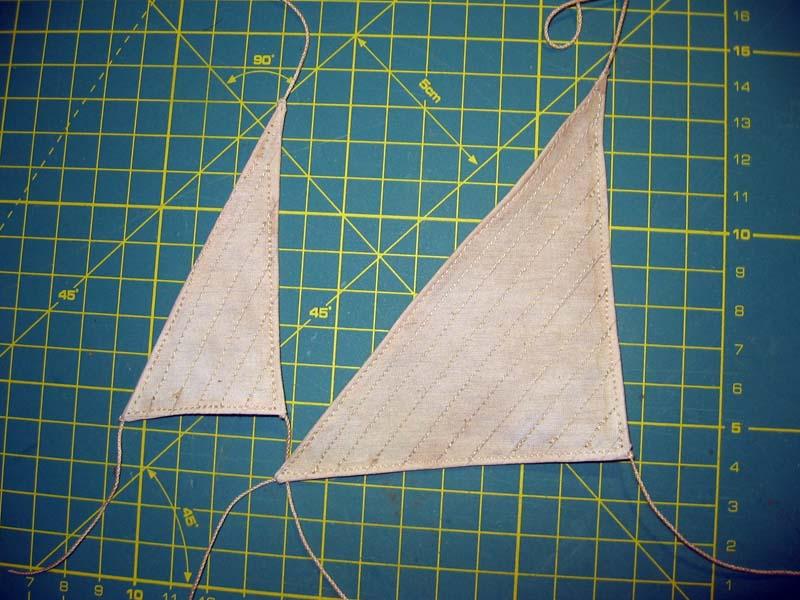
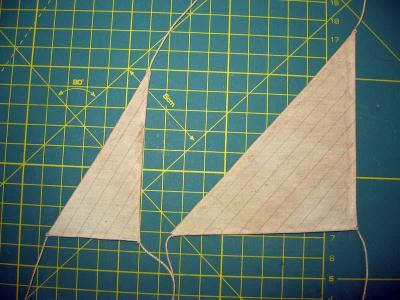
Thank you Mike. I am quite happy with the result as most of the time I had no clue what I was doing . As for the CA on the sail, well... The seams look better but there is an added rigidity. It is easier to sew as you don't have to hold the edges (which is hard, given the scale and my skills) but you need a strong sewing machine and a very sharp needle. If you make a mistake you are left with gaping holes, as the cloth doesn't "heal" itself. So, Its a love and hate situation. I would have to try without CA to get a final opinion. Also, I don't know what will time do with the CA-cloth combination. My next build... I had my eyes on Billings FD 10 Yawl. There used to be a nice gallery on the old MSW and would have made things much easier as Billings instructions are well... . Cheers, Alex
-
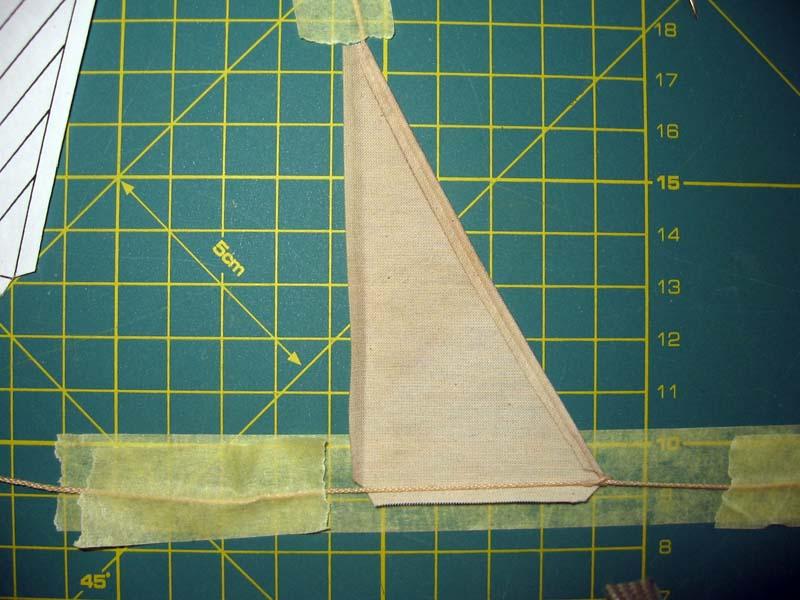
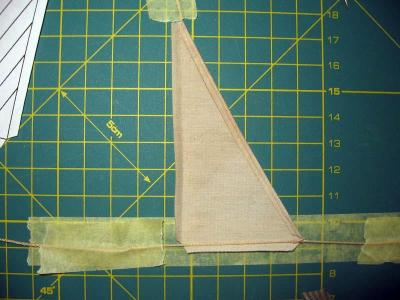
Thank you for your kind words Mike. Here are the sails (finally). First I tried to dye the sail cloth with black tea... It darkened it a bit and left stains which I kind of like because it made it look weathered. I drew the contours of the sails and before cutting the cloth, I painted the edges with diluted PVA so that I could cut the sails more easily. To make sewing easier (or that is what I thought) I glued the seams with CA which made the sewing machine unable to do its work until a sharper needle was used. You learn new things with every step...

-
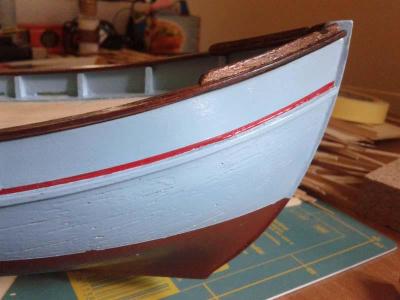
A perfect waterline... Nice! Cheers, Alex
-
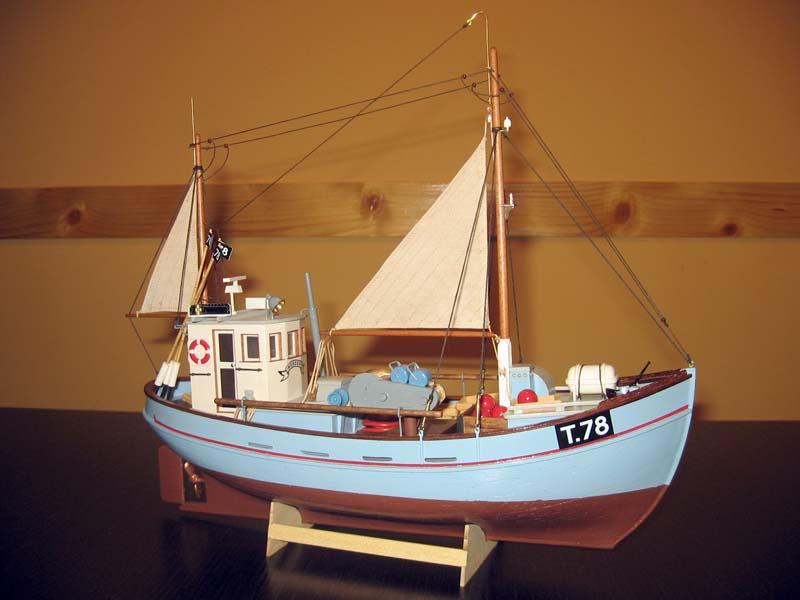
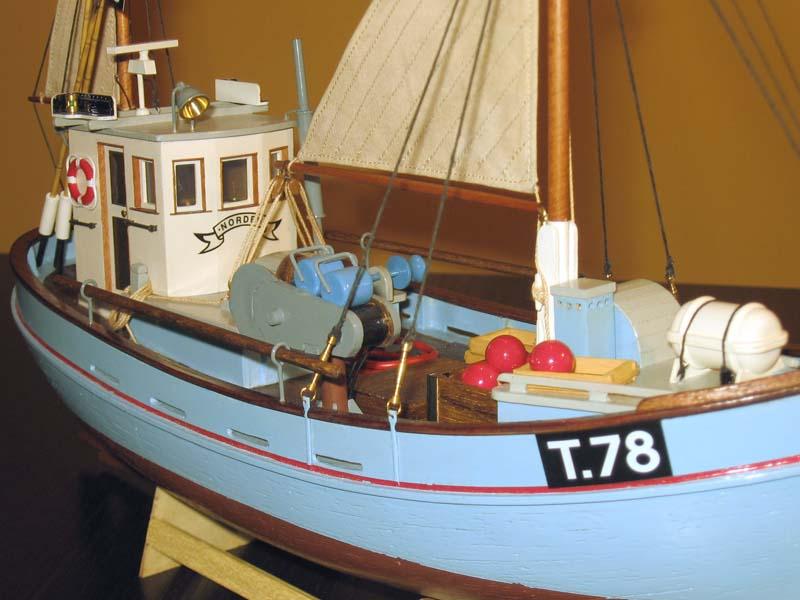
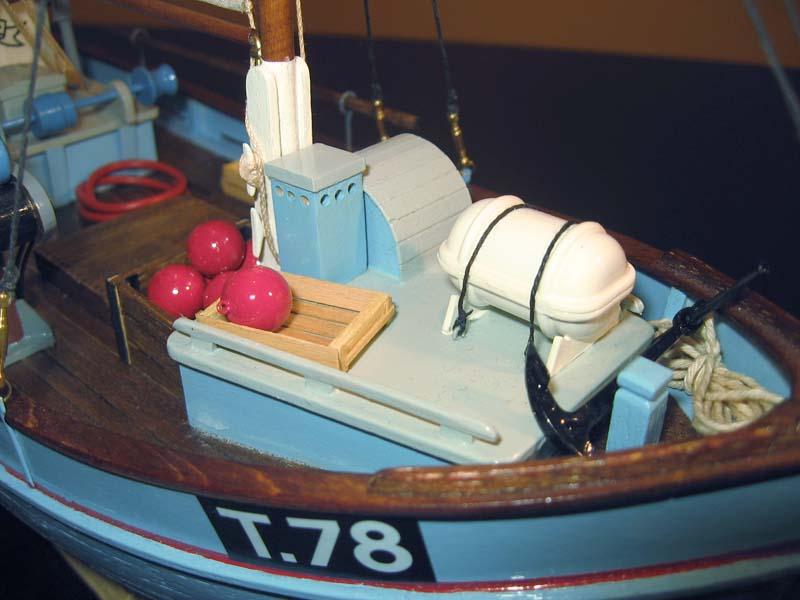
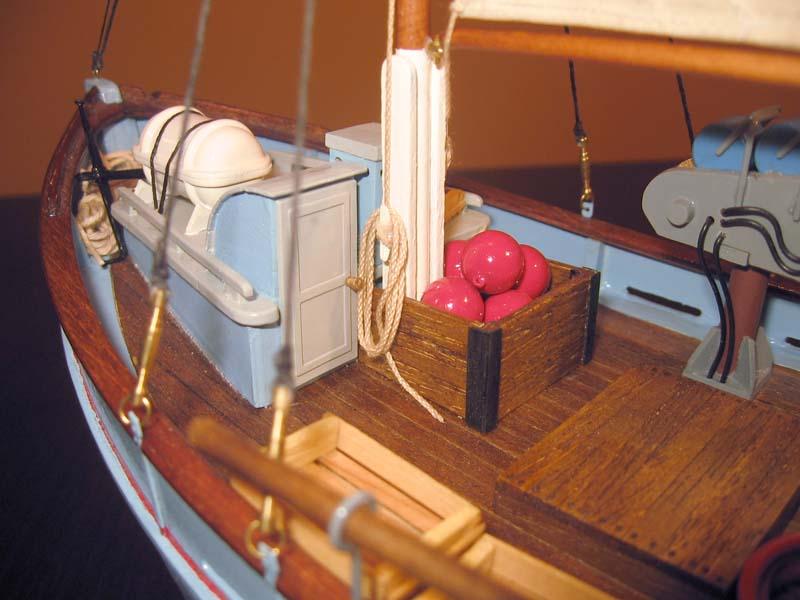
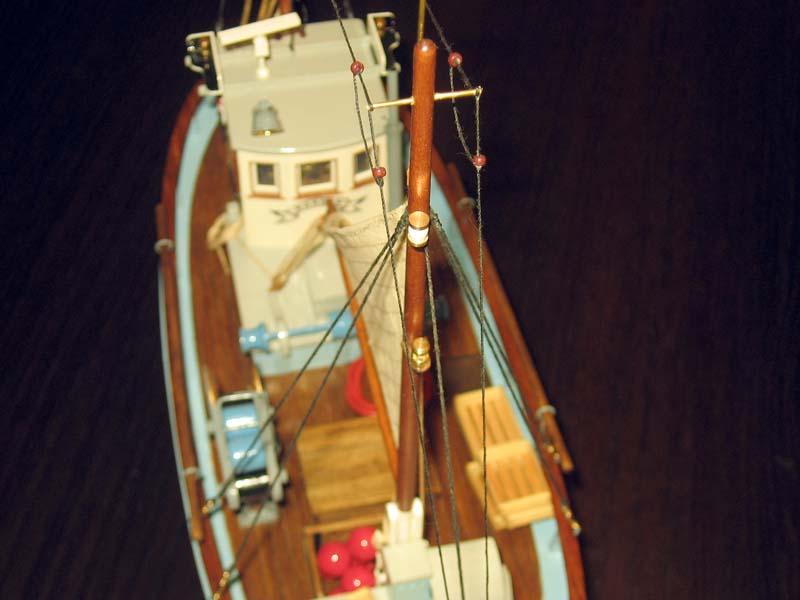
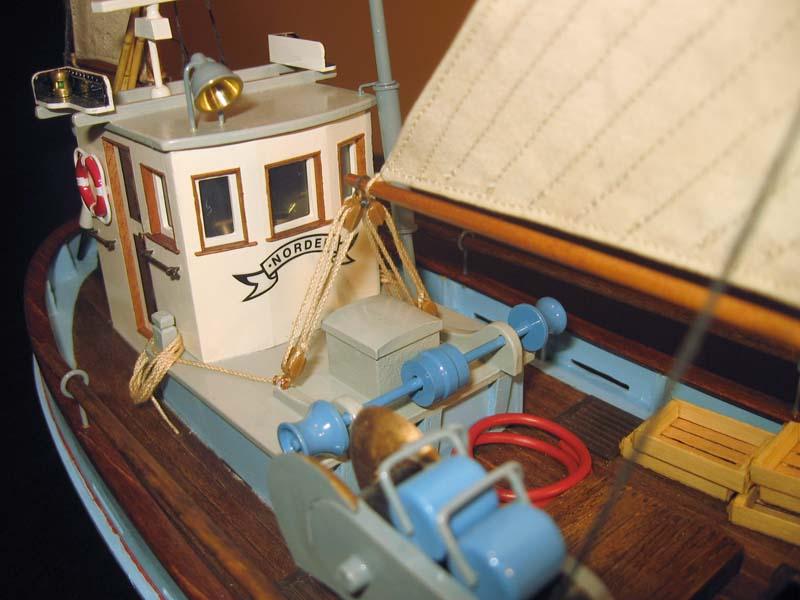
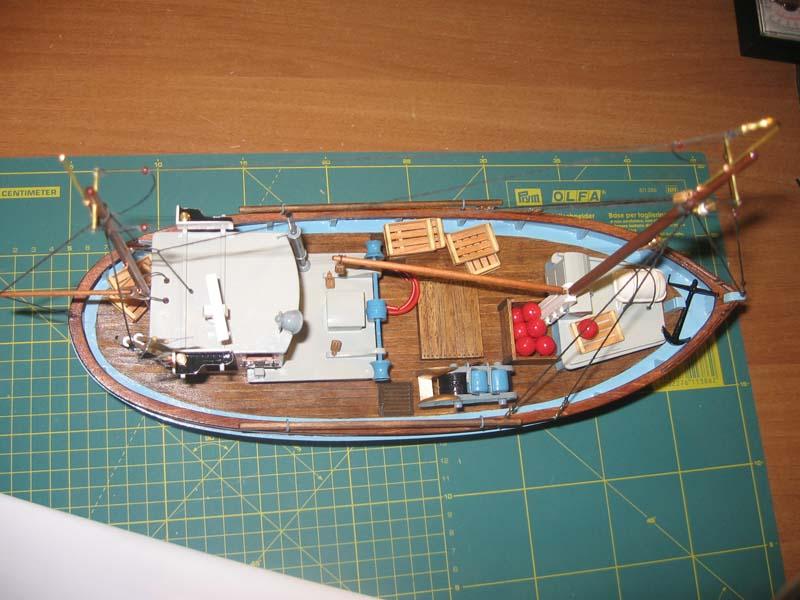
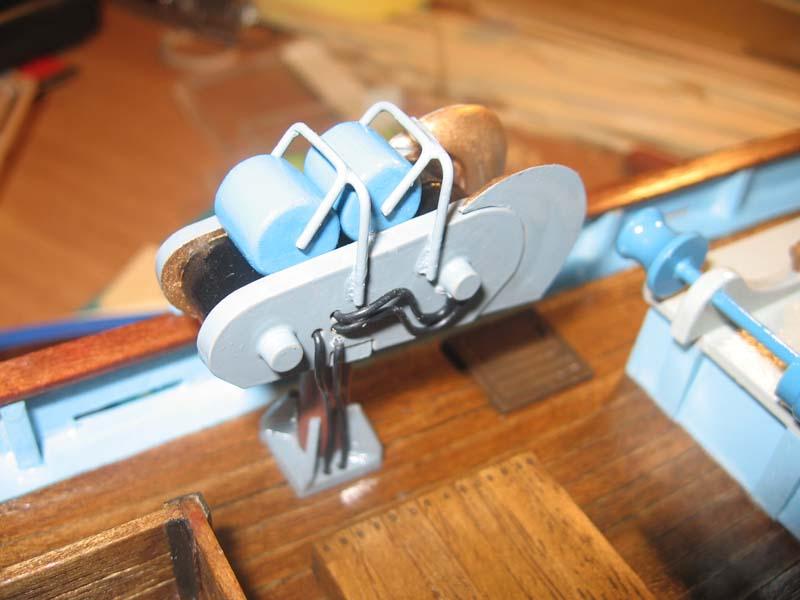
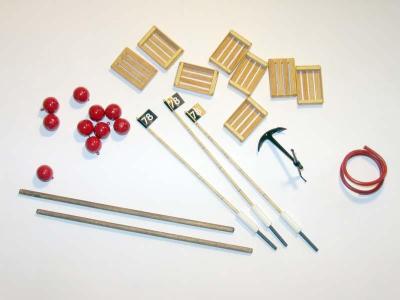
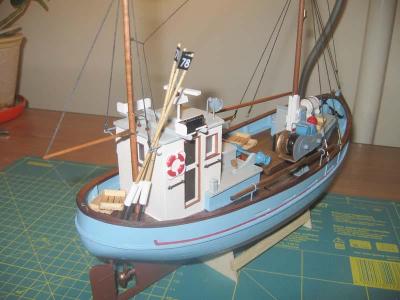
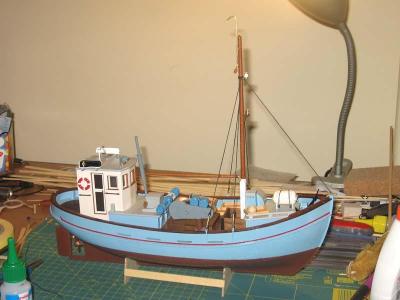
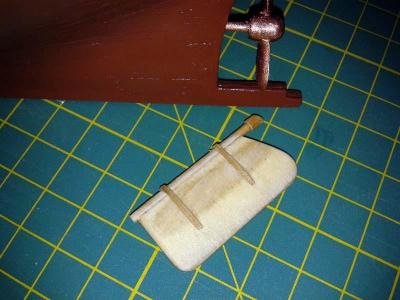
More fittings, rigging. Only sails remain to be done...


- 28 replies
-
- 1
-

-
- norden
- billing boats
- (and 2 more)
-
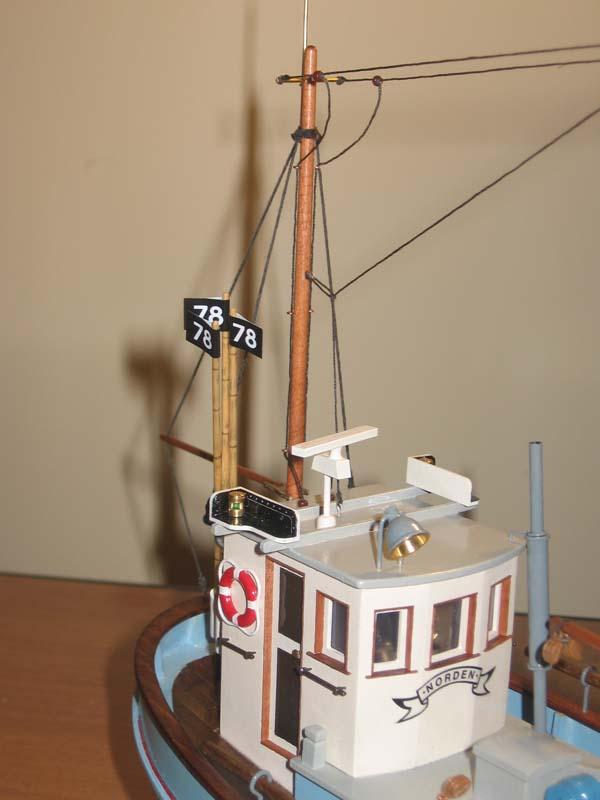
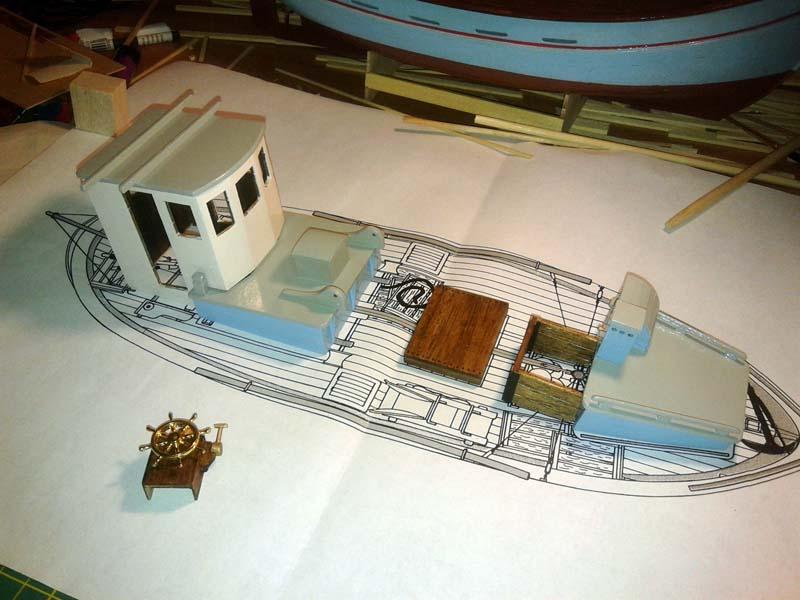
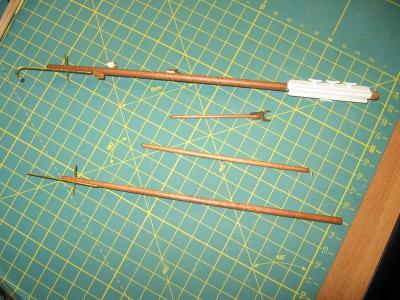
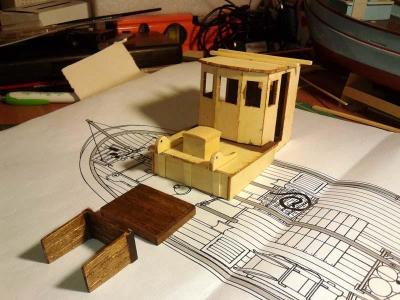
Masts, rigging...
-
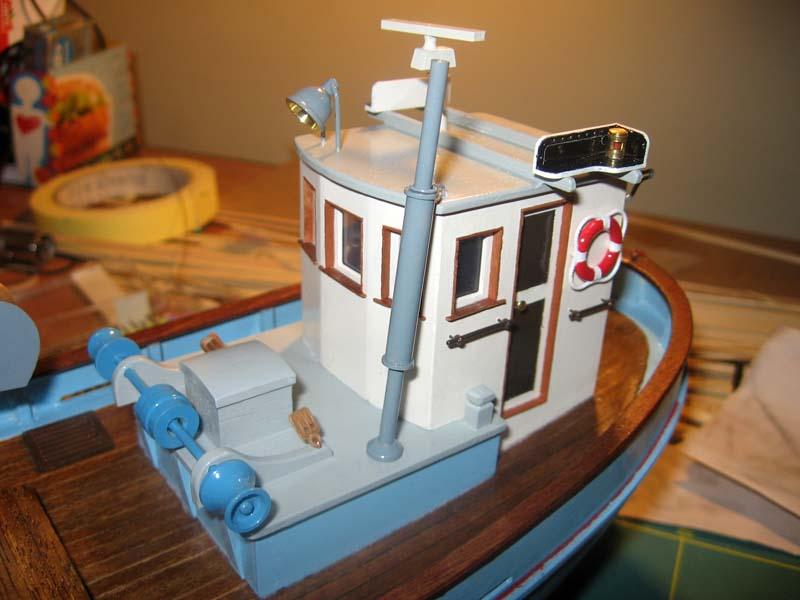
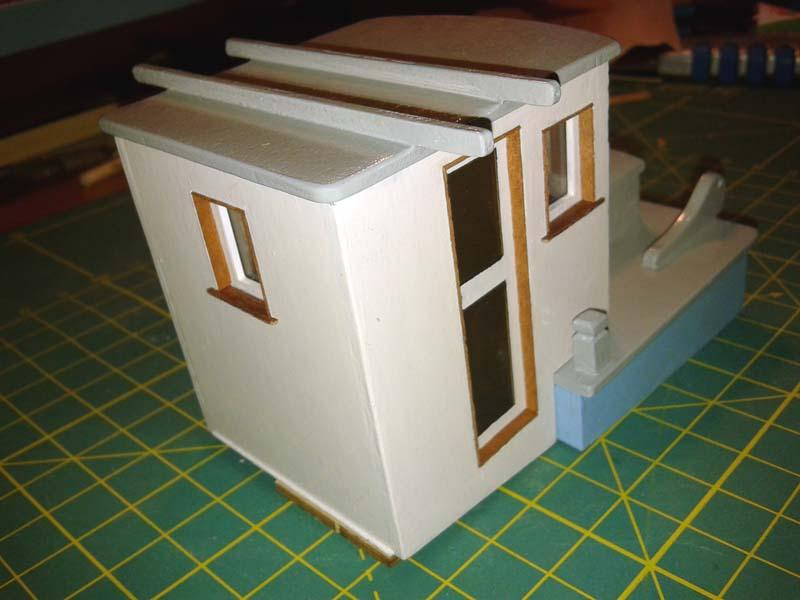
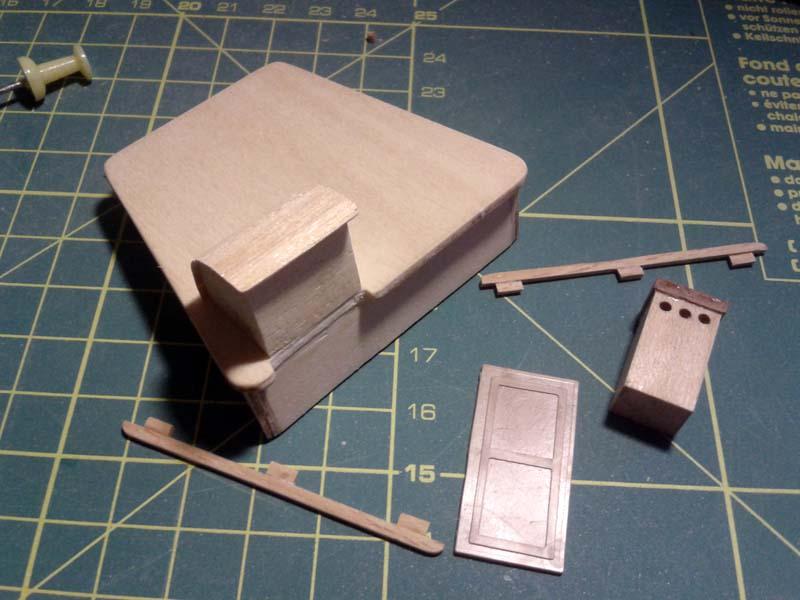
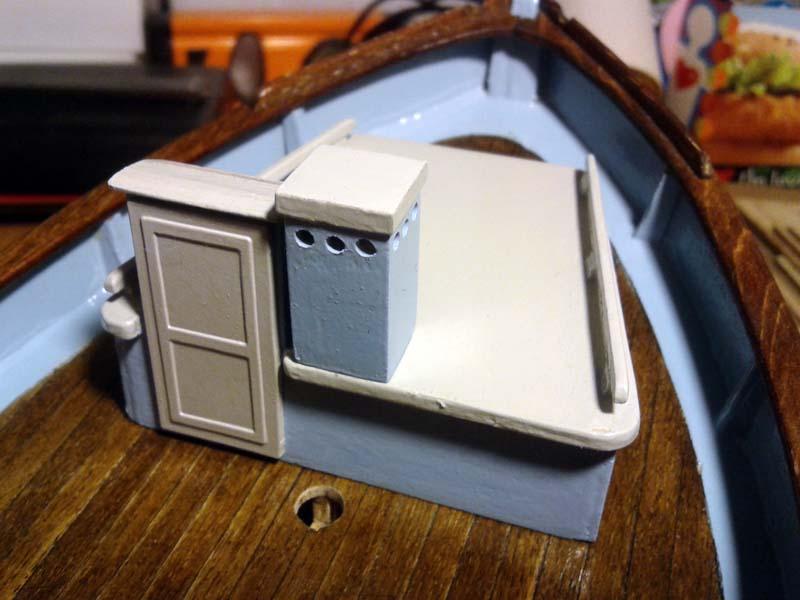
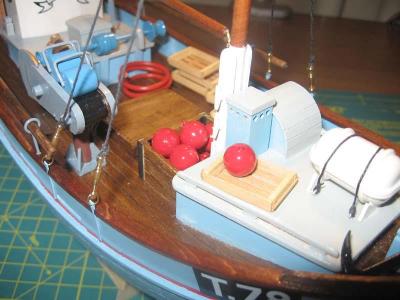
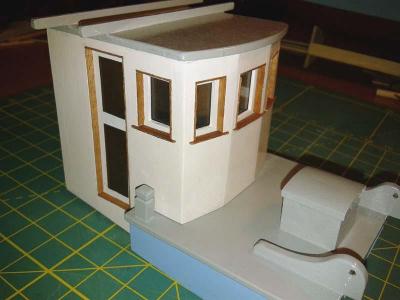
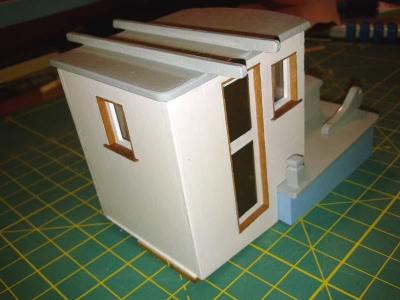
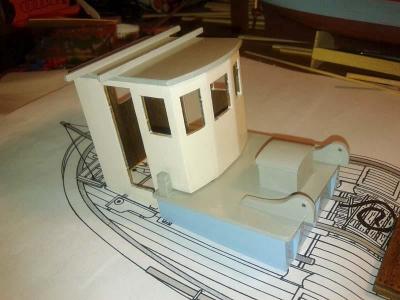
Windows, doors...
-
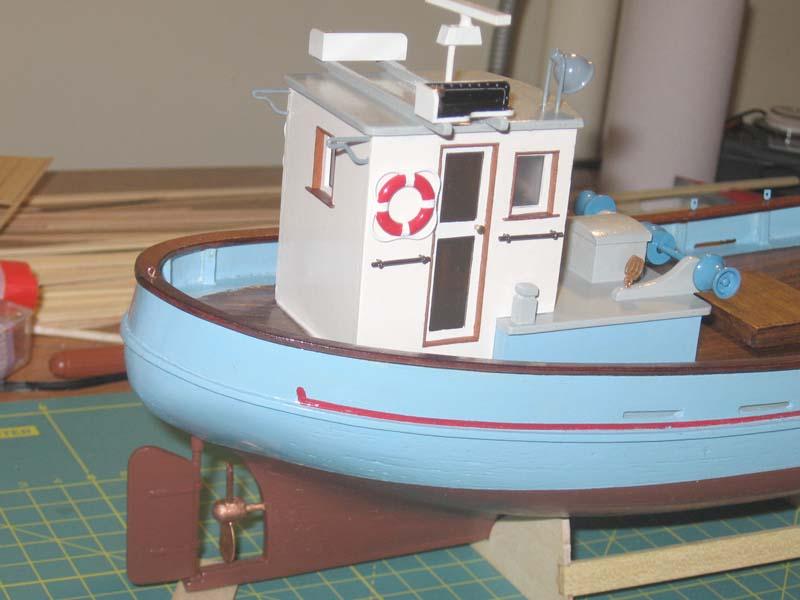
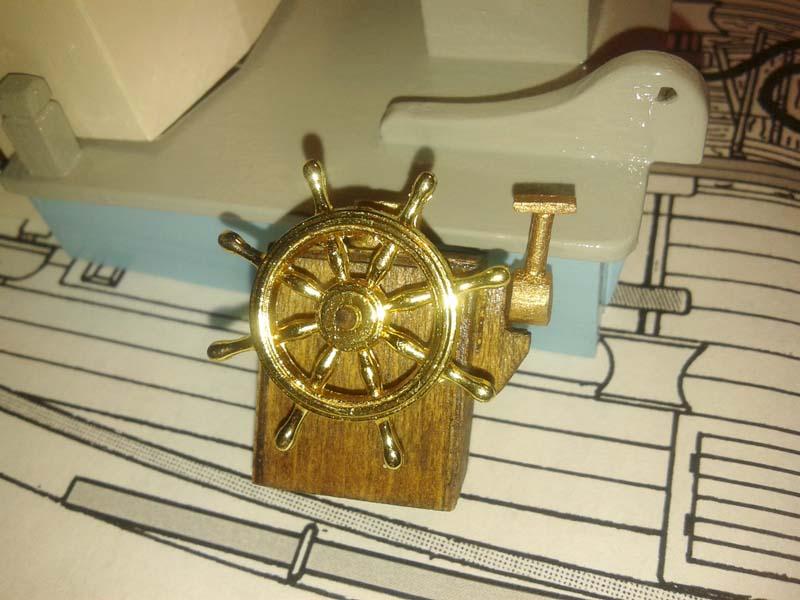
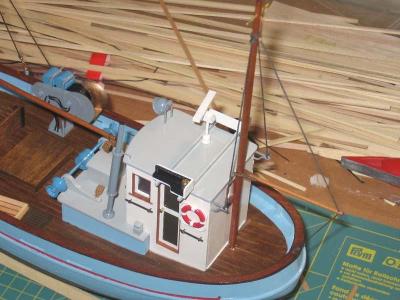
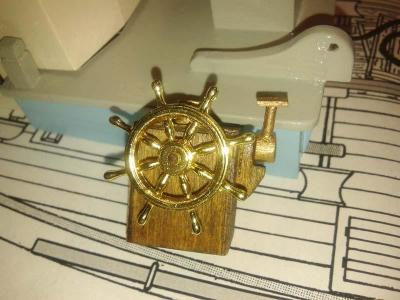
The stern cabin. Getting the angles for the panels took some time. They needed to be tappered to make them fit and I used wood filler to fill the gaps between them. The steering wheel is out of scale but will at least be visible through those small windows.

- 28 replies
-
- 1
-
-
- norden
- billing boats
- (and 2 more)
-
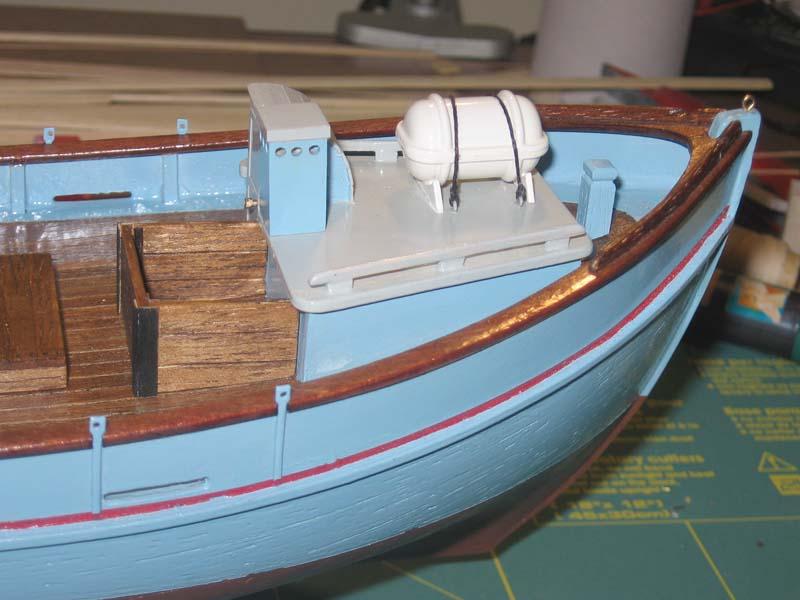
The bow cabin...


-
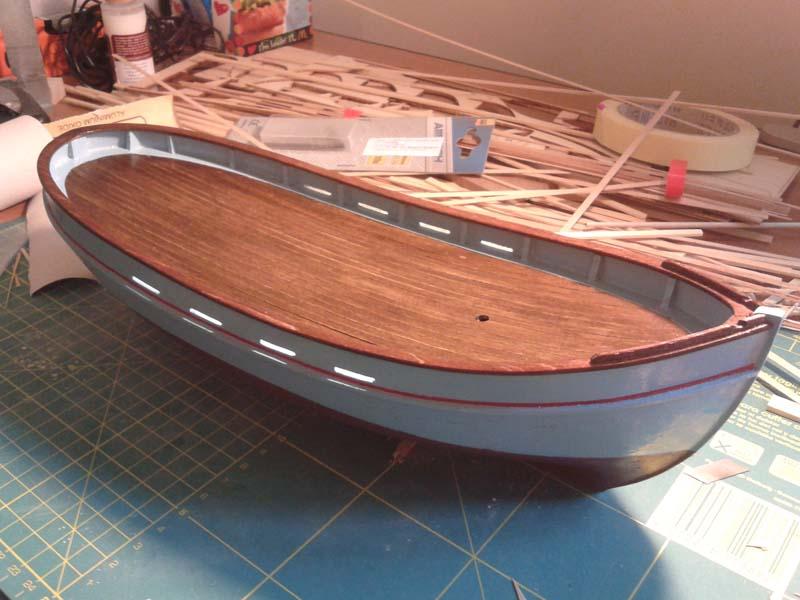
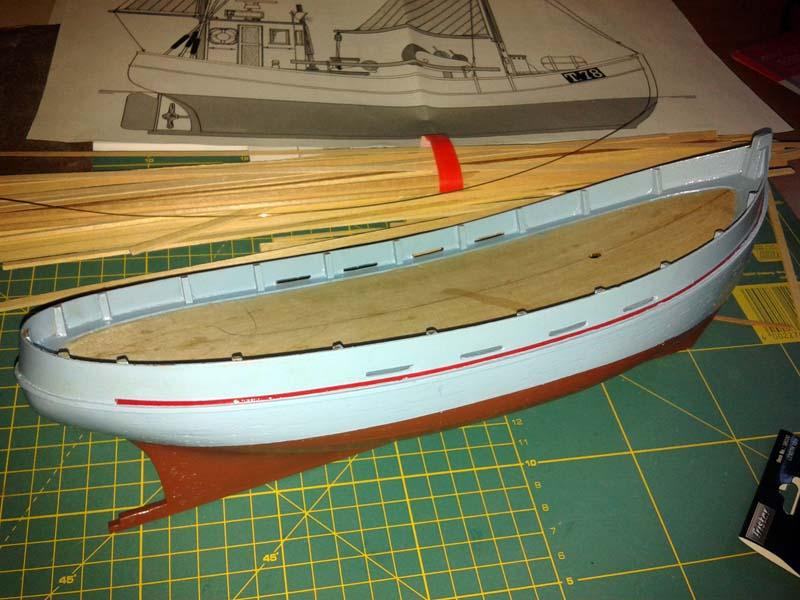
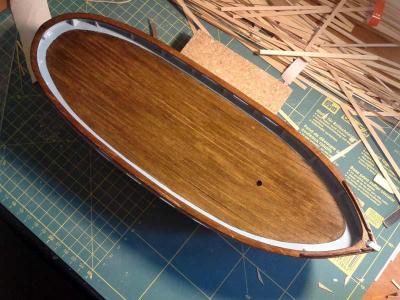
I glued the deck planks making shure that I had no glue spills as I wanted to stain it. I used CA to do it and it was quite difficult as the glue dries very quickly, resulting in some small gaps here and there. After sanding the deck to make it flush, I stained it with a wallnut stain. To make it look more realistic I sanded it a bit with a fine grit sand paper. Satin clear coat was used after that.
-
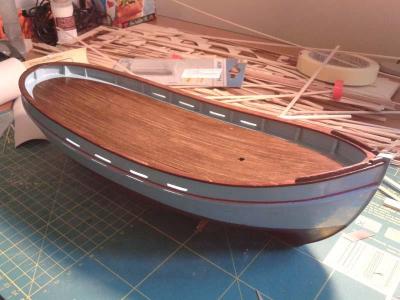
For the handrail I used a mix of walnut and mahogany wood stain and then finnished it with a satin clearcoat.
-
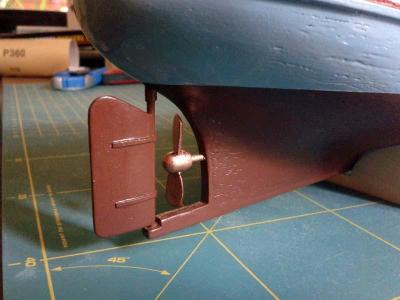
The rudder was made with the supplied material.
-
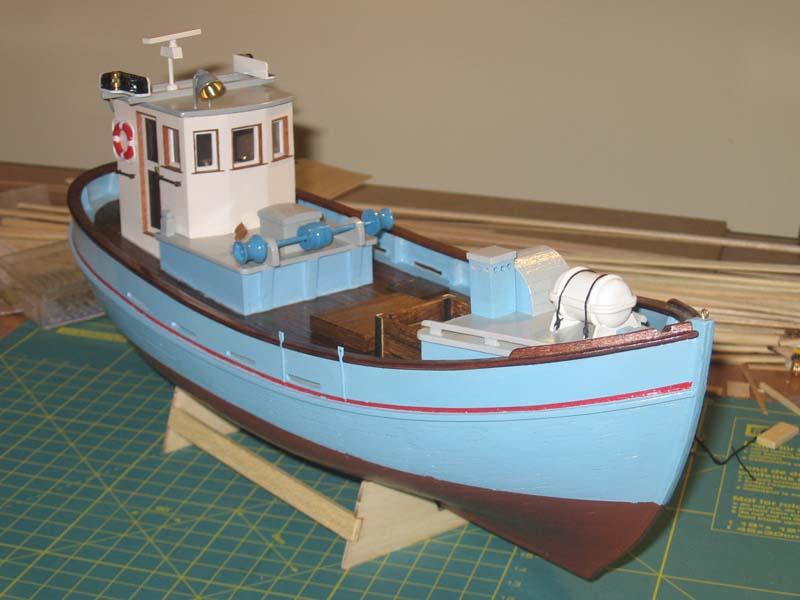
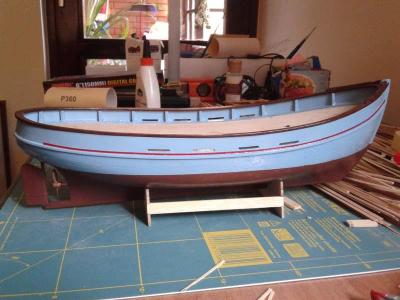
I painted the hull with different sized brushes. I took 4 coats of paint in some parts. After using the right type of masking tape, I was finaly able to make a nice water line. The red line was made in the same way.
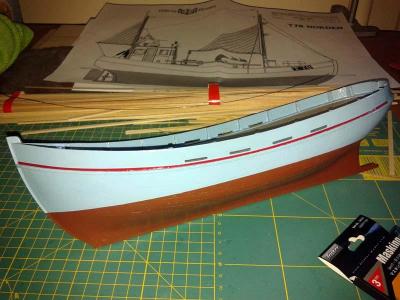

- 28 replies
-
- 2
-
-
- norden
- billing boats
- (and 2 more)
-
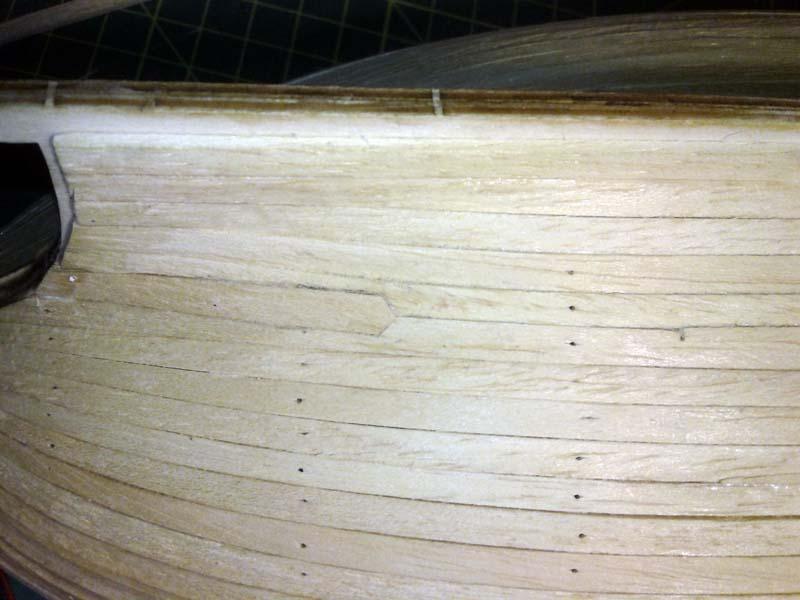
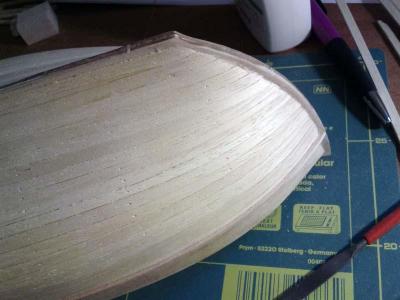
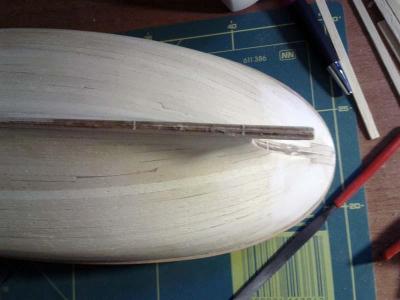
I sanded the hull and used wood filler on the stern as it is made with balsa. I decided not to use wood filler on the rest of the hull as I wanted the planks to be visible through the paint job.
- 28 replies
-
- 1
-
-
- norden
- billing boats
- (and 2 more)
-
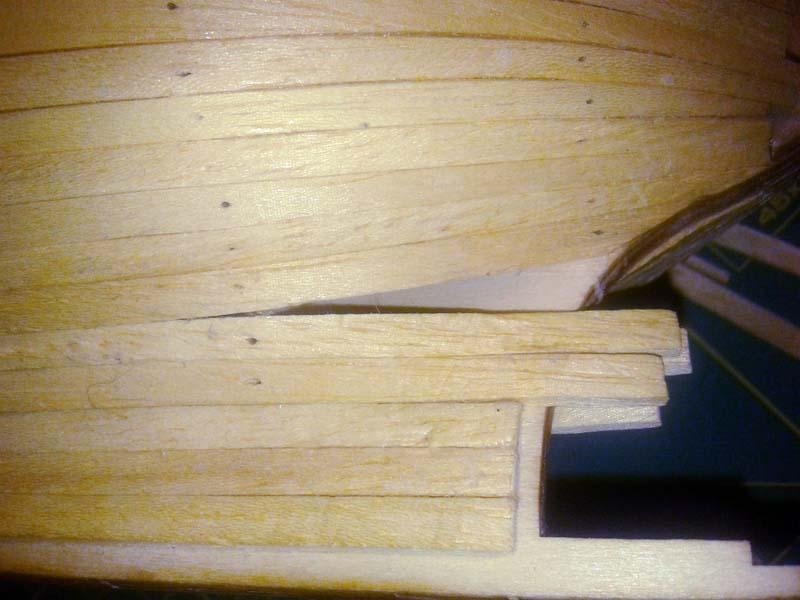
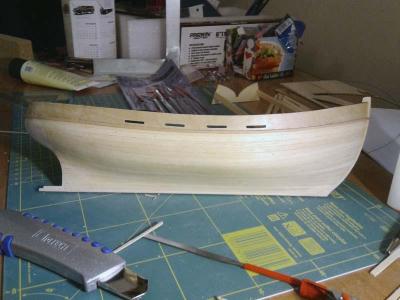
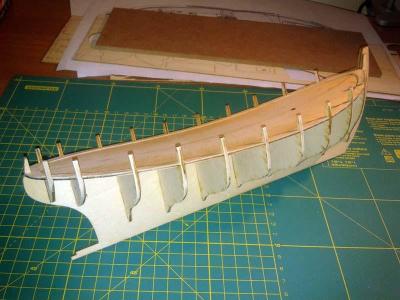
As I was planking both upwards and downwards, I was left with gaps in the planking. I had to use stealers to fill them. I really enjoyed the whole planking process.


- 28 replies
-
- 1
-
-
- norden
- billing boats
- (and 2 more)
-
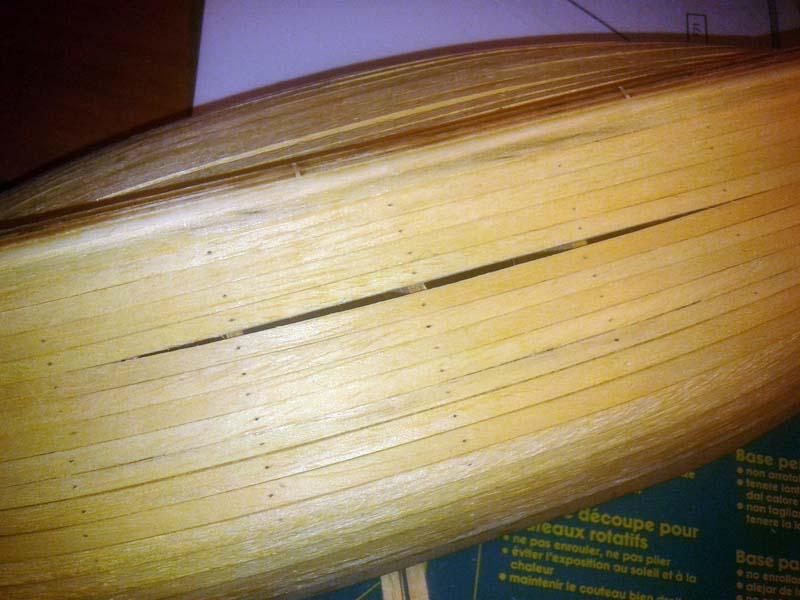
Hull planking... It took a while to do it. I was planking both sides at the same time so that the hull wouldn't bend to one side as the planks dried. I should have started tapering the planks immediatly. Failing to do so led to some clinkering on the stern. I was bending the planks by soaking them in hot water for a minute and then shaping them with a help of a steam iron and ceramic mugs

-
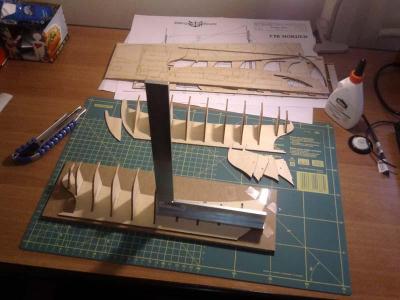
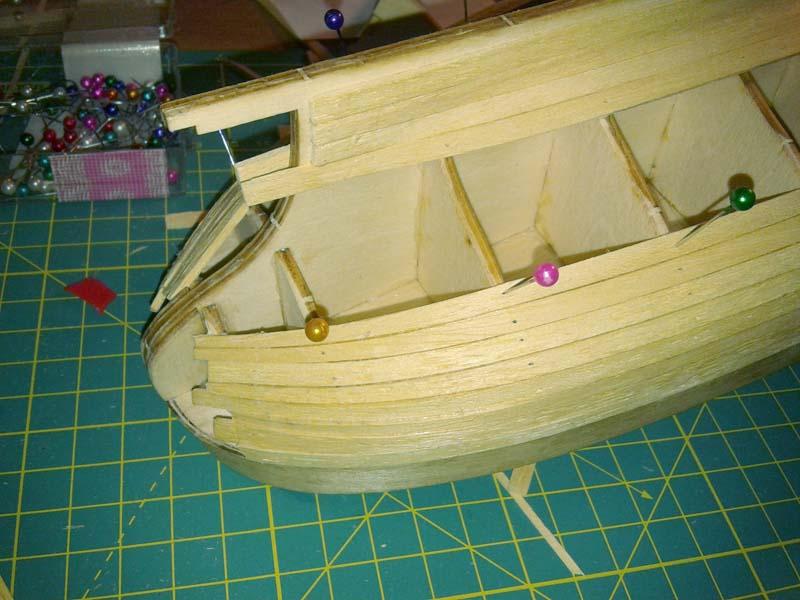
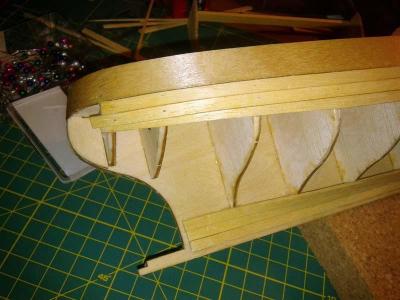
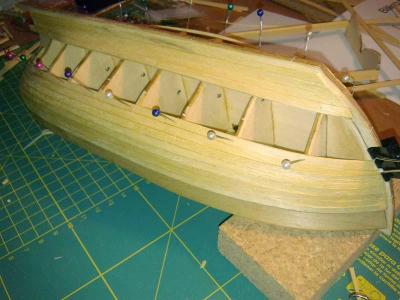
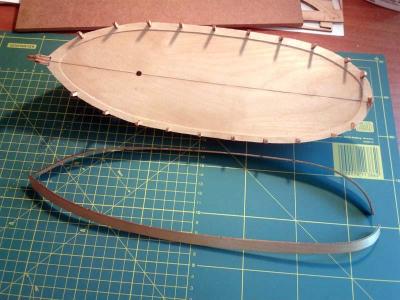
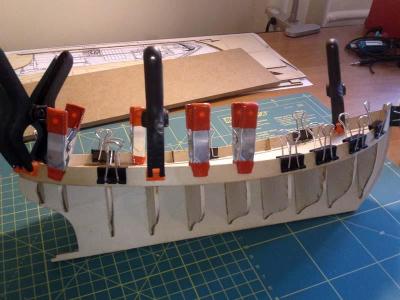
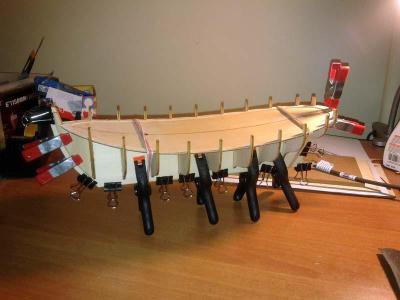
With the help of a steam iron and a couple of different sized ceramic mugs I have pre-bent the bulwarks in a matter of minutes. I was worried about the wood bending process, but it turned out to be easy. To glue the bulwarks, I first positioned them properly, trimmed them to size and then glued the stern half. After 20 minutes I glued the bow half. The glued bulwarks left a gap on the bow deck. I'll have to fill the gap somehow.
-
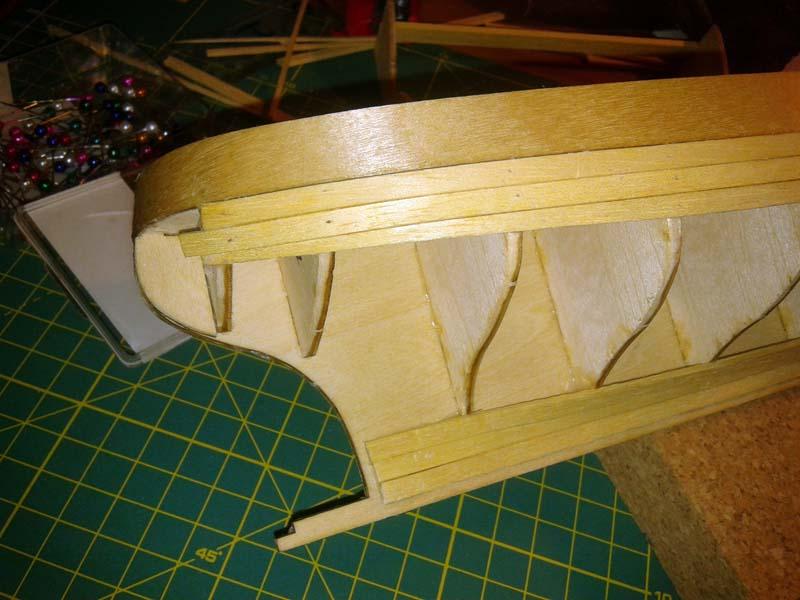
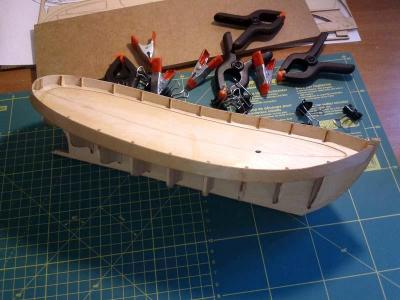
I decided to glue the two halves before planking. The wood glue that I'm using is setting so fast that I failed to align them perfectly. A little bit of sanding made my problem invisible. I also did some fairing of the bulkheads and got close to the scary part - fitting the bulwarks and hull planking.
-
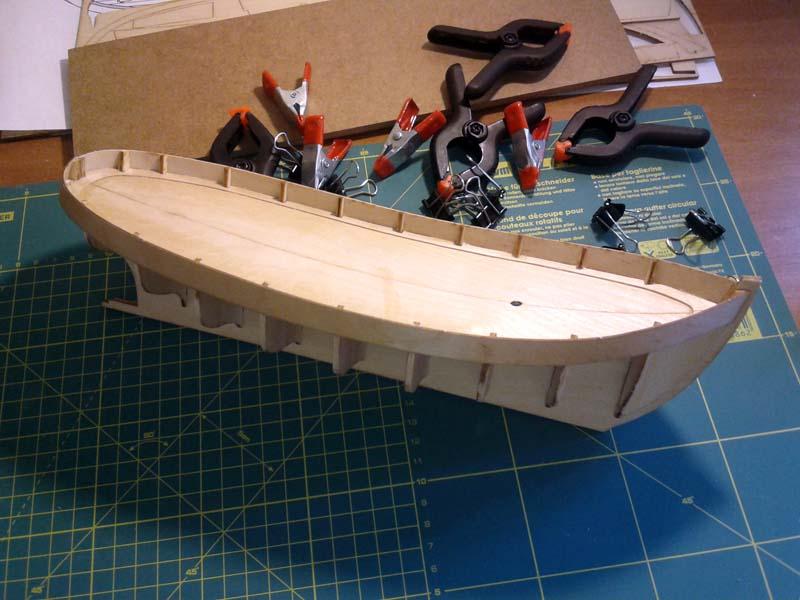
I made the waterways (which are not included in the kit) from a thin sheet of plywood. I thought the deck would look nicer with them.

-
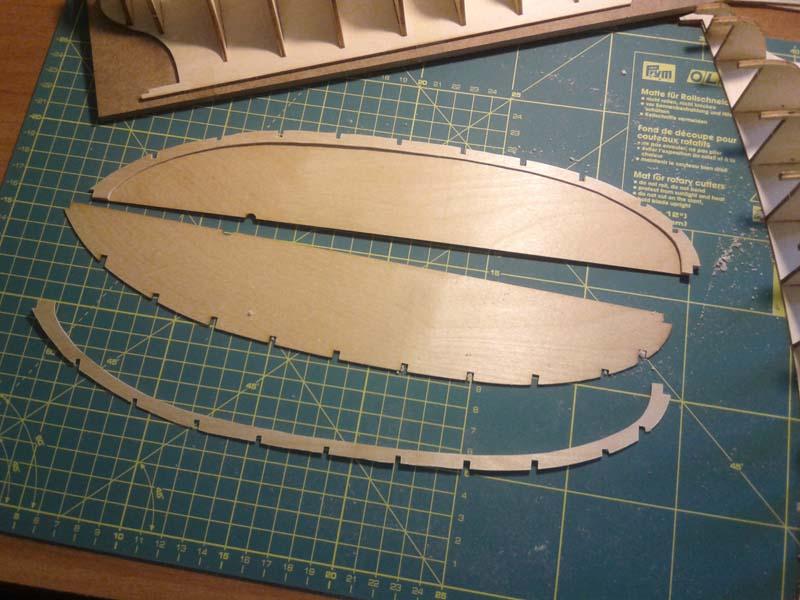
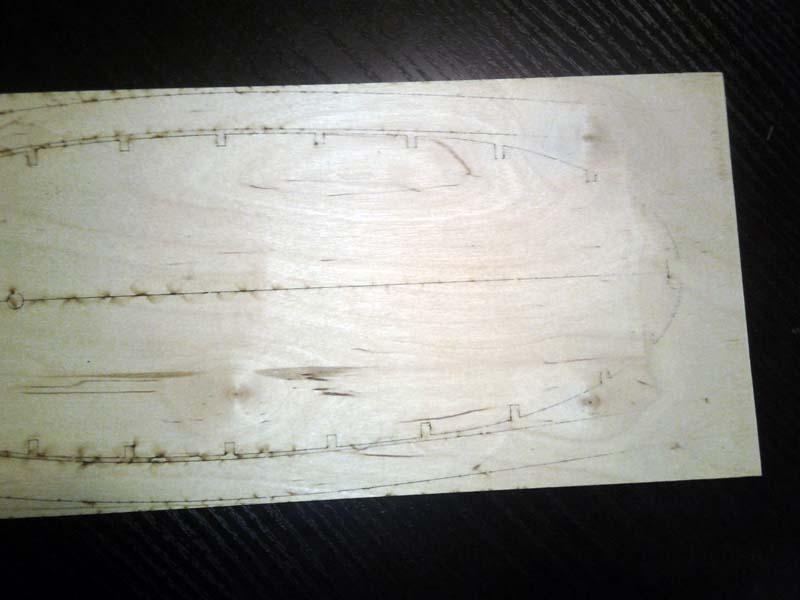
(I will try to recreate my Norden build log) This is my first build. When I opened the box everything from the list was inside. The instructions are very basic for a beginners set. On some boards, the laser didn't go all way through and some were bit warped which made me think of problems joining the two halves, later on.