


Boydie
-
Posts
24 -
Joined
-
Last visited
Content Type
Profiles
Forums
Gallery
Events
Everything posted by Boydie
-
Time again to bash on with King George IV, today I got quite a bit of railing done, taking shape quite nicely. Thought about adding a bit extra to the hose reel. I've nicked this fine bit of copper coil from a old robot from my workplace. It's so small I thought I'd make use of it in my modeling. Maybe it will be good for rigging in the future too. I've wrapped this coil onto a length of copper wire, I realised this would be a lot easier and faster for just cutting the length to size for other reels too. After a good few wraps I've cut the length of wire to size to fit the hose reel. Quite happy with the end result, still got a ton more to do! Thanks for looking.
- 32 replies
-
- 7
-

-
- tamiya
- king george v
- (and 1 more)
-
Thank you! I never got a notification that someone had replied. This will help a lot. I bought the Eduard railing and crane set as I found the older WEM set a bit too fragile for my liking as even a light touch would bend the fine PE railing. I find the Eduard set a lot more sturdier. Started adding the railing. After looking over the plan I've noticed a watertight door needs to added to this part too. Had a delivery from Hong Kong eariler this week, XY Model resin chain, think this will add a lot to the model in the end personally. Thanks for looking.
- 32 replies
-
- 8
-
-
- tamiya
- king george v
- (and 1 more)
-
Wondering if anyone can help me find a photograph of the area where the ships boats used to be. Now it's where the anti air armaments are. The kit detail is pretty bare as you can see and I can't find any reference photos of it in any of my books. I've got plenty photos of the aft range finders, but nothing about the area where the area of upgraded AA is.
- 32 replies
-
- 5
-
-
- tamiya
- king george v
- (and 1 more)
-
A little bit of detail was added tonight, I was hoping to start the kit earlier today but I managed to cut my internet cable to the house, don't ask how I done it. My partner works from home so the priority was to get that sorted, a trip to B&Q and Screwfix for drop in cable, a long masonry drill bit for my surprisingly thick walls and few extras bits, a few hours after cutting the cable we were back online. I wanted to add ladders to this part of the super structure but the standard kit doesn't have this to show. So I've had to drill, cut away and file two squares so the ladders can get to the upper deck. I found the PE ladders are fine with the hand railing only being two easy folds. What took me a while to figure out was unfolding the steps. I finally figured out if I held the ladder in my Tamiya PE pliers and using my thinest tweezers squeeze into the steps and turn them. Second ladder was quick to build after figuring that out. Easy enough to do, something I'll get quicker at too with the many other ladders to add. Not much done but I do think those little details really make a difference in the long run.
- 32 replies
-
- 7
-
-
- tamiya
- king george v
- (and 1 more)
-
Thanks, I think your right, I've seen the another King George Class battleships at 1/700 with more detail in the hull than this old 1/350, so thought I may as well give it a bash. Happy with the result of it so far considering it was just a spray can primer for automotive use.
- 32 replies
-
- 3
-
-
- tamiya
- king george v
- (and 1 more)
-
Funny because while I was cutting I just noticed the crack on the blade and thought, "has that always been there?" Then the blade just popped off into my glasses. 😅
- 32 replies
-
- 3
-
-

-
- tamiya
- king george v
- (and 1 more)
-
Agreed, had plenty of experience with them and they brush nicely also.
- 32 replies
-
- 3
-
-
- tamiya
- king george v
- (and 1 more)
-
Just a wee bit of work today, got the other side of the superstructure PE on but to my surprise my knife snapped while cutting the PE and if I wasn't wearing my glasses then it would ended up in my eye, lucky escape there. After that scare... 😅 onto the deck above for plastic and PE. Got hose reels to add, but I'll be making them from copper coil from a clock, it's very tiny and should be good for a hose on a reel at this scale.
- 32 replies
-
- 4
-
-
- tamiya
- king george v
- (and 1 more)
-
I've got a short update today, I've been busy with another project, a 1:1 nursery in one of the spare bedrooms, been knocking off the old polyester ceiling tiles which have been glued down heavy, bit of a nightmare honestly, ceiling is gonna need to be skimmed too. But I have found a wee bit of time to carry on with the kit. I battered on with the super structure, getting some PE on it. This is my first 1/350 and I'm actually enjoying the PE for a change, I'm used to handling 1/700 so the practice with that tiny scale is helping me now. Aim was to get the portholes, watertight doors and ladder glued on. Happy with it so far, wish I had a bit more time today to bash on with the kit but the nursery will be the priority until it's finished. Also got my delivery from Sovereign Hobbies to add to my now growing collection of colourcoats. Thanks for looking in.
- 32 replies
-
- 6
-
-
- tamiya
- king george v
- (and 1 more)
-
I thought I'd start tonight with a few sub assemblies for a quick nights work, and ready for PE. First thing was to drill out the portholes once again. Watertight doors will be cut off and replaced with PE. As you can see I've been quite heavy with the filler putty, the kit left some horrible visual joints. I'll let that dry overnight and sand it. But if I'm still not happy with it I've got 0.5mm polystyrene sheet I can cut to size and sand down to 0.1mm to hide those joints. Dry fitted these parts to the hull, taking shape but still a long way to go. Was thinking about adding LED's since I've went to the effort of drilling out the portholes, on the fence about it.
- 32 replies
-
- 10
-
-
- tamiya
- king george v
- (and 1 more)
-
Back on the bench today, the aim was to get the turrets assembled and ready for PE. First was to clean the cuts from the sprue and remove the molded ladders for PE ladders. Cut most of the plastic off with the knife and finished with some fine files. Master barrels I bought from eBay a while ago, so I cut the plastic barrels off at the correct length, filed flat the cut and drilled a hole with a 1mm micro drill bit. After dry fitting the barrels to make sure they were all the same length, CA glue was applied and the barrels fitted, paying attention to making sure they would shoot straight and weren't squint. Finally the details for range finder molds were removed, ready for the PE when it arrives through the post. A wee bit of work done, waiting on a few things to come but still have plenty to keep me busy.
- 32 replies
-
- 7
-
-
- tamiya
- king george v
- (and 1 more)
-
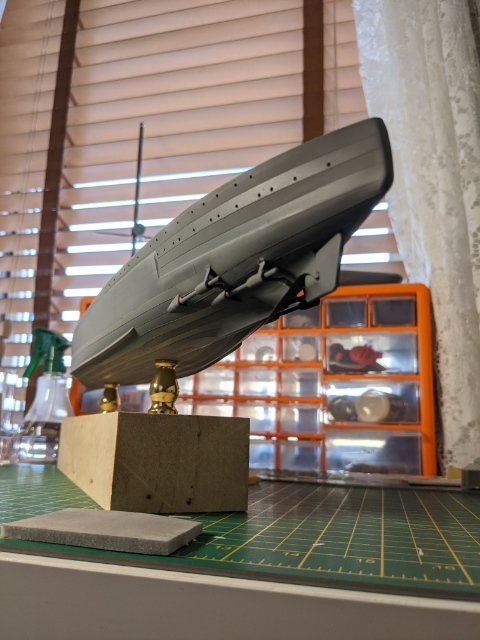
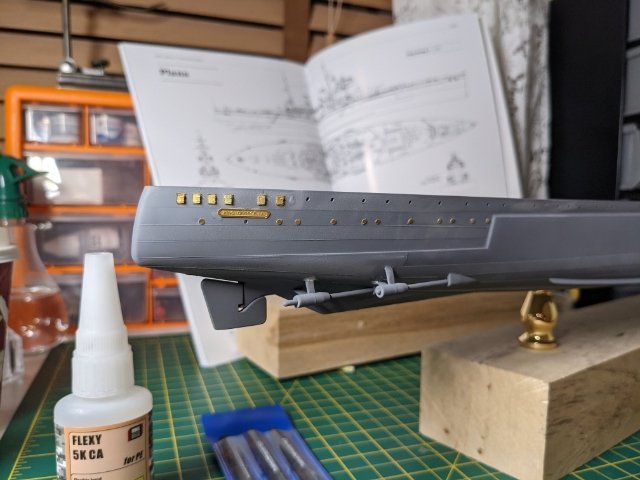
I've actually just been told the objects are called a gash chutes for throwing garbage overboard.
- 32 replies
-
- 2
-
-
- tamiya
- king george v
- (and 1 more)
-
Thanks for the suggestions guys. I was already leaning to that conclusion but was wondering if there were any other ways of doing it. Anyway I wanted to add some more detail to the hull before I start painting and after looking at photos I'm wondering what the purpose of these objects are I've highlighted?
- 32 replies
-
- 1
-
-
- tamiya
- king george v
- (and 1 more)
-
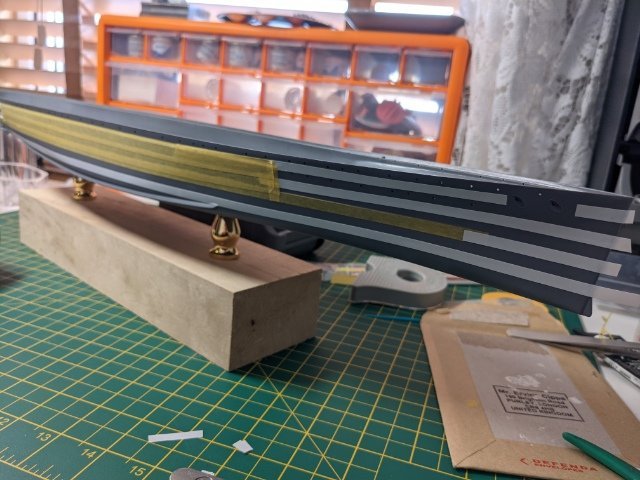
I had to sand down the hull plating a touch more, I must of missed a spot last time I done it, but happy now it's more in scale. Also I used the debonder and removed the excess glue on bits of the hull. Dry fitted the deck and seems like they'll only be a small gap to be filled on the bow. Thought about fitting the scaledeck I've bought but realized I've got a decision to make. Finish off the plaque first, tighten down the hull to the brass pedestals then glue down the plastic deck then wooden deck. Then paint and weather the hull while it's on the plaque. Or paint the hull and weather the hull now then fit it to the plaque and then fitting the rest of the deck. Would be interested in peoples opinions?
- 32 replies
-
- 7
-
-
- tamiya
- king george v
- (and 1 more)
-
Back at it again and I have added the rigol and porthole caps to the model, these sets are for IJN ships but who's really gonna notice the difference at this scale? The MK1 set is for Royal Navy watertight doors and hatches, the wee hatches seem perfect for the square ones on the real thing. I found this gorilla glue with a brush and nozzle today in Tesco and thought I'd give it a shot, turns out the wee brush is quite handy accurately applying the glue. Think I prefer it to the copper wire I usually use. I'll double check the references but I think I might be done with the hull. I'm only aiming for accurate to the eye. But we'll see. The porthole caps were added after lessons learned from the Prince of Wales sinking, that's my understanding anyway. But I'll let the glue harden overnight then use my super glue remover to fix some excess and blobs.
- 32 replies
-
- 8
-
-
- tamiya
- king george v
- (and 1 more)
-
You're doing a great job so far. Sometimes I found it easier cutting the PE apart at the folds then just gluing them back together again when I had already placed it on the model.
-
I've built her, great little kit I'm sure you'll enjoy. PE is paper thin so be careful with it, but I'm sure you've already found that out.
-
Cheers guys for the nice comments, I was hoping to get a bit more done today but I've been floored with the second dose of the covid vaccine. But treated myself to a new chair too, coming at the end of the month, an upgrade on the dinning room table seat anyway. 😄
- 32 replies
-
- 5
-
-
- tamiya
- king george v
- (and 1 more)
-
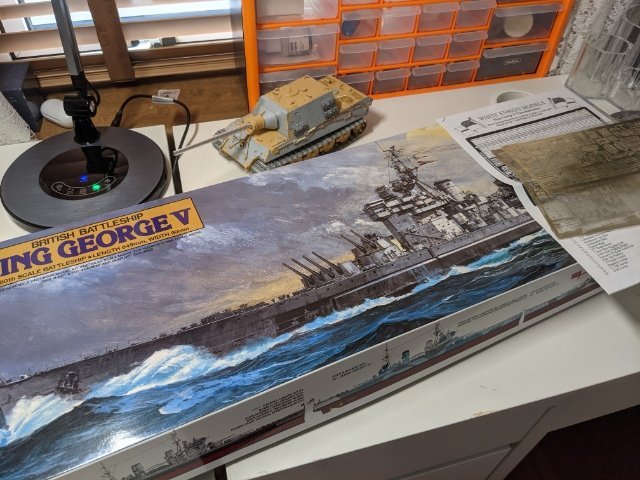
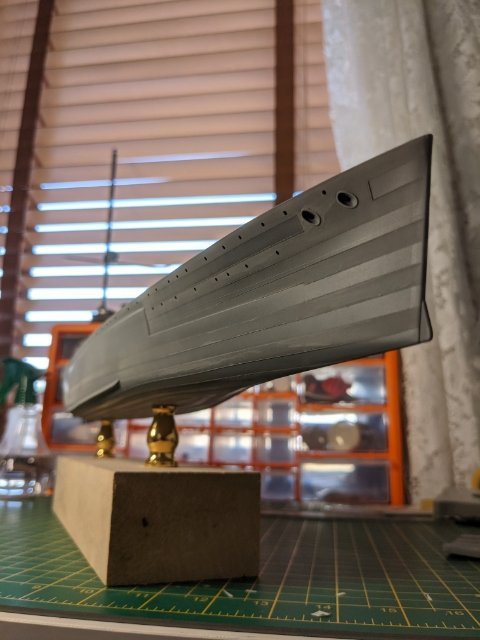
This is my current build, Tamiya King George IV 1945 with White Ensign photo etch along with other extras, I'll show them off further along the build. First thing I done was mask off the panels/ armour plate on the hull, the Tamiya hull is pretty bare and I've seen 1/700 with better detail. But I've tried to get it semi accurate to the real thing. Then I used Halfords primer, it's for cars but read it has good reviews from other modelers, a solid primer. l've never attempted to model the panel detail but I was happy with the result. Sanded down to smooth the effect. Lastly some photo etch on the hull, to match the source material I'm using. I'll clean up the super glue residue once I've finished with the PE on the hull. This is what I done so far from a few months ago, in the meantime I've bought my first house and decorated it. Thought I'd restart with the house in a good state. Any ideas or helpful advice welcome.

- 32 replies
-
- 10
-
-
- tamiya
- king george v
- (and 1 more)
-
Thanks for the welcome guys, I'll get started on that build log as soon as I figure out how to post photos.
-
Thought it would be best to introduce myself, I'm Boydie from near Edinburgh. I'm a former Marine Engineer in the Merchant Navy, now I'm a Multi Skilled Engineer in the food manufacturing industry; maintenance, installation of new production lines, robots ect. I've been building models for a while, I'm currently building HMS King George IV 1/350, it's been on hold for a few months due to buying a house and decorating it. But I think I've made enough progress with this to treat myself in restarting the build. So I thought I'd keep a build log to keep myself motivated and maybe learn a few new tricks on the way. Looking forward to meeting you all. 😀