Javlin
-
Posts
1,622 -
Joined
-
Last visited
2 Followers


About Javlin

- Birthday 01/05/1961
Recent Profile Visitors
3,178 profile views


-
 yvesvidal reacted to a post in a topic:
Scharnhost by Javlin - Trumpter - 1/200 - PLASTIC - Operation Paderborn - Kriegsmarine
yvesvidal reacted to a post in a topic:
Scharnhost by Javlin - Trumpter - 1/200 - PLASTIC - Operation Paderborn - Kriegsmarine
-
Canute reacted to a post in a topic:
Scharnhost by Javlin - Trumpter - 1/200 - PLASTIC - Operation Paderborn - Kriegsmarine
-
king derelict reacted to a post in a topic:
Scharnhost by Javlin - Trumpter - 1/200 - PLASTIC - Operation Paderborn - Kriegsmarine
-
I will get you a measurement tomorrow if that works my boot is just a tad thin @1/4" I would say it needs to be about .300" if memory is correct good luck finding tape in that size. A video were she stands ATTM.
- 57 replies
-
- 3
-
-
- Scharnhorst
- Trumpeter
- (and 1 more)
-
scrubbyj427 reacted to a post in a topic:
Scharnhost by Javlin - Trumpter - 1/200 - PLASTIC - Operation Paderborn - Kriegsmarine
-
yvesvidal reacted to a post in a topic:
Supermarine Spitfire Mk. VIII by Javlin - Tamyia - 1/32 - PLASTIC
-
Jack12477 reacted to a post in a topic:
Supermarine Spitfire Mk. VIII by Javlin - Tamyia - 1/32 - PLASTIC
-
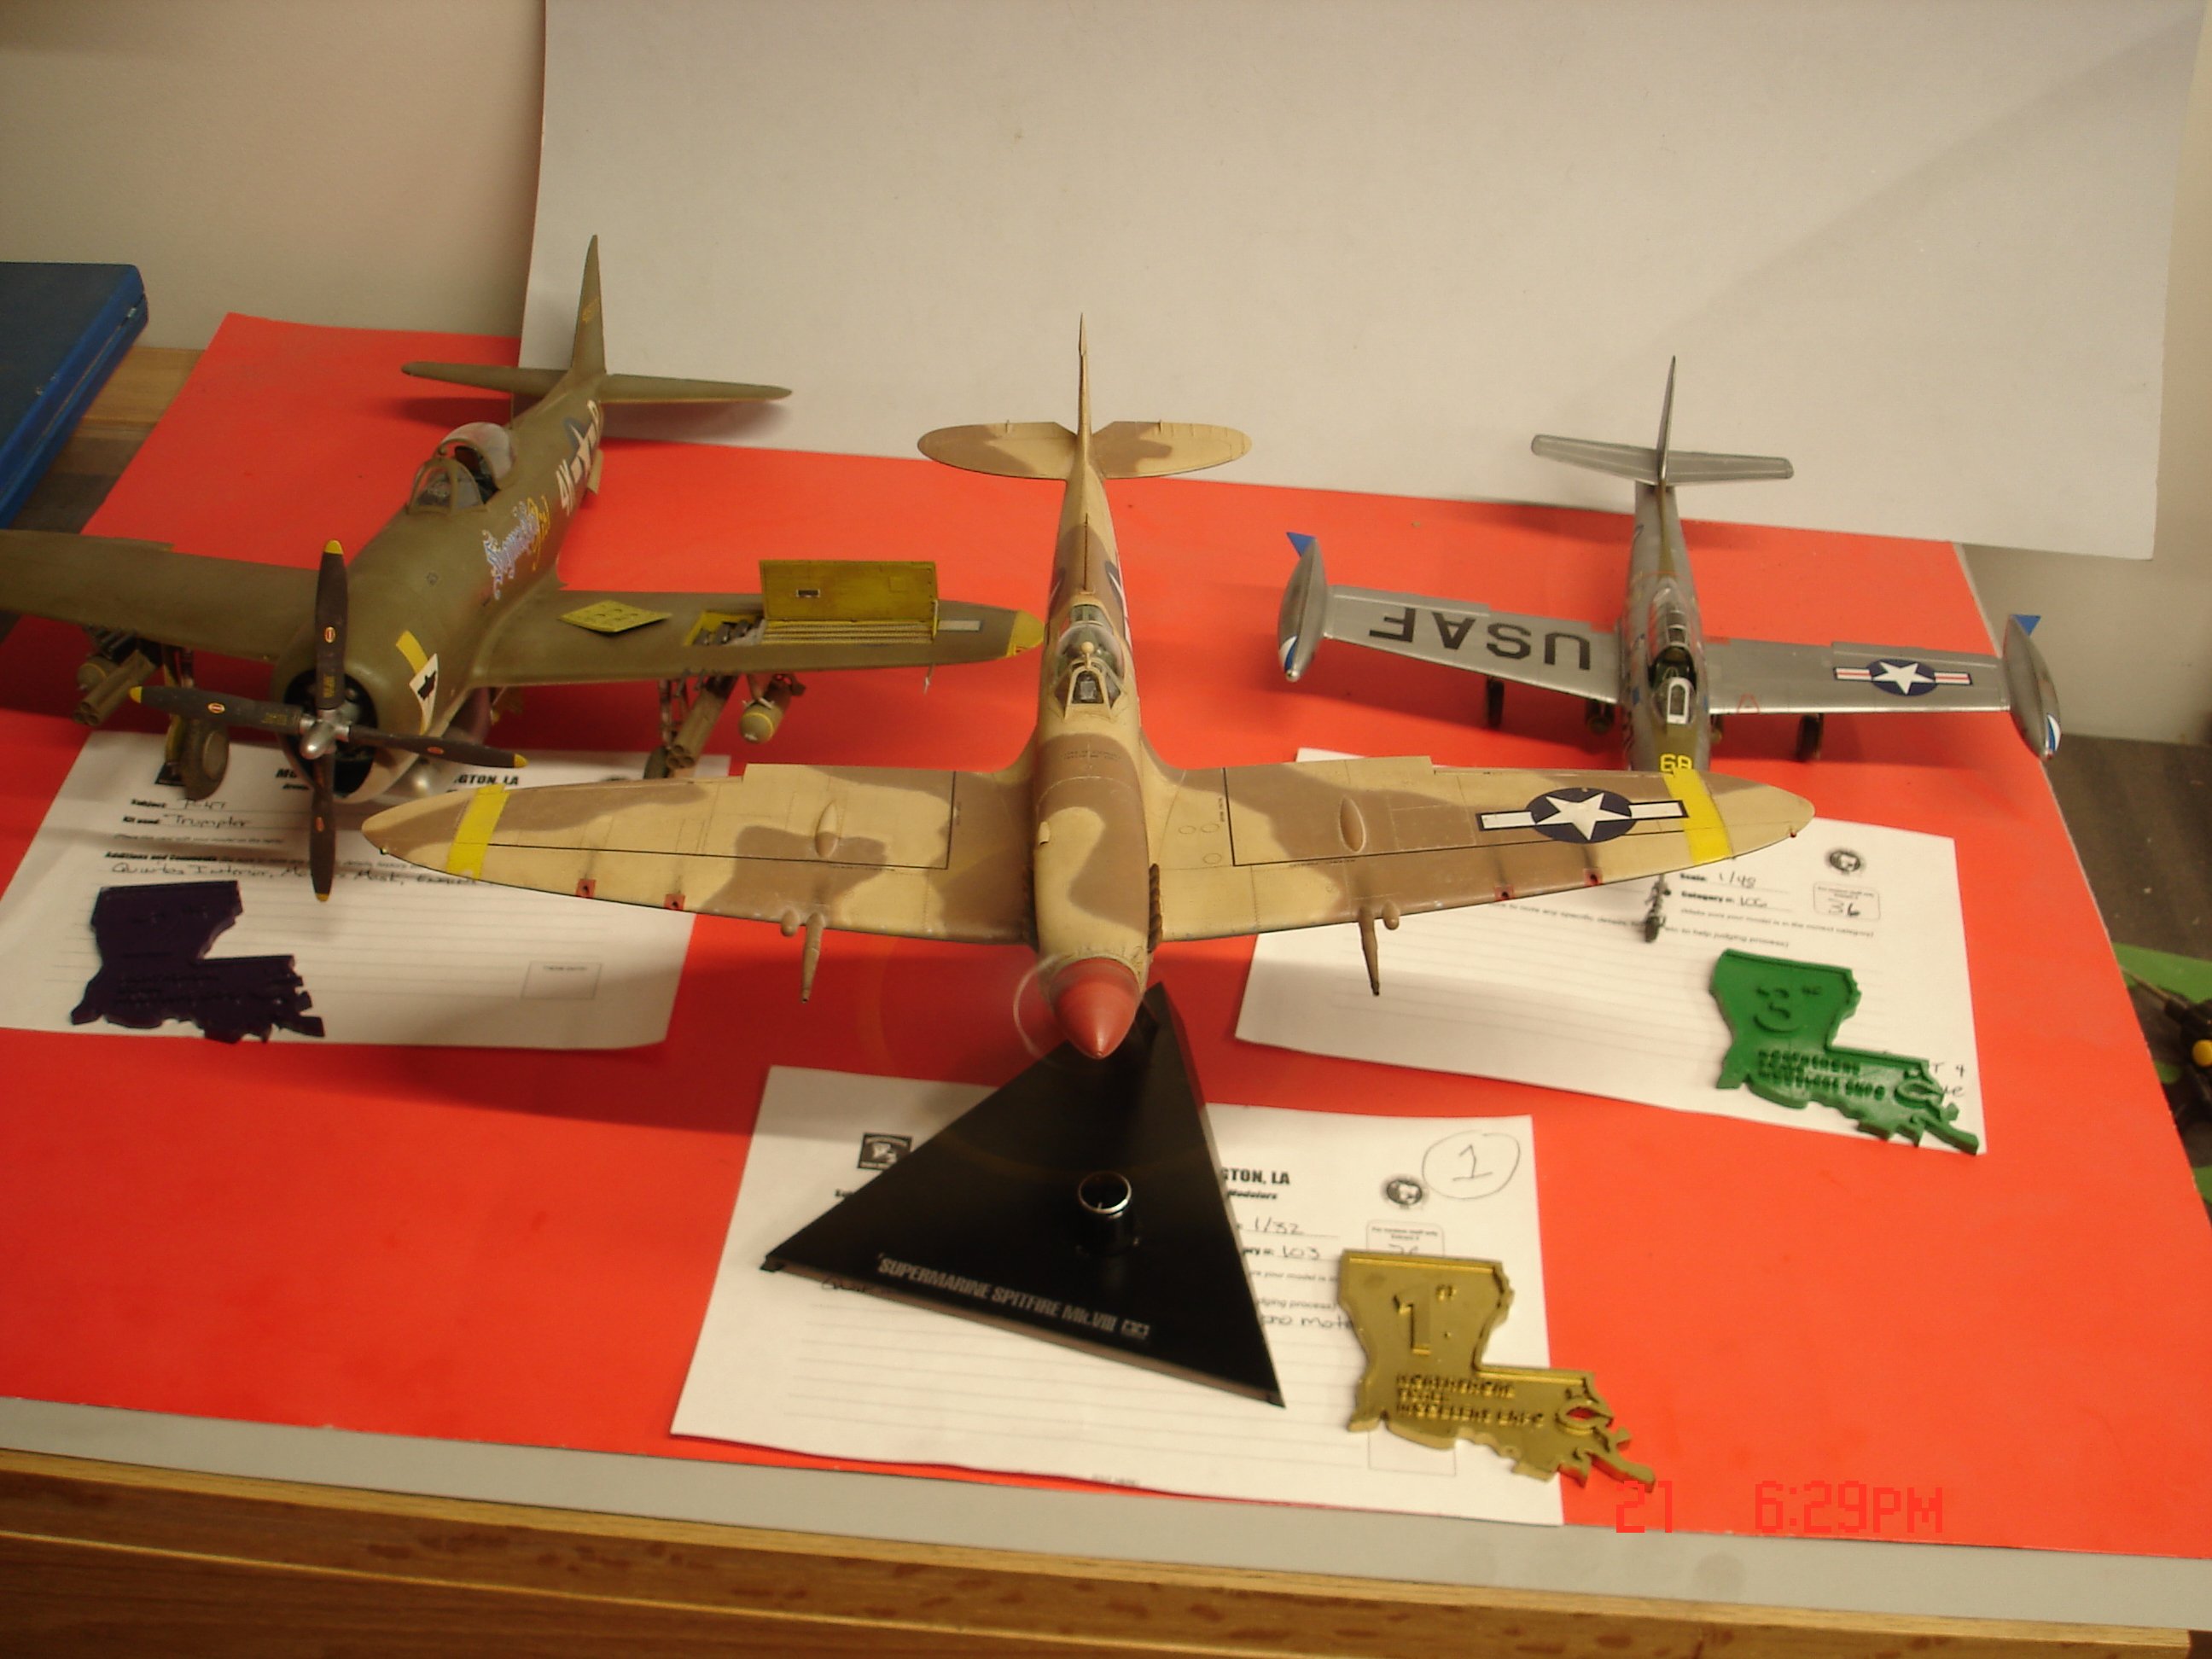
I am sorry guys I forgot my camera but I received 1st,2nd in 1/32 prop missed in the 1/48 prop with my Academy B-25 PBJ and struck 3rd in the 1/48 jet with the F-84 from Tamyia the F-84 was last minute.The contest had a decent showing of 246 entries this year my buddy and I had fun he garnered 2/3 place with his 1/48 Fw-190 Eduard with all the goodies and a 1/72 Me-262 bomber version.The buddy bought $20 worth of raffle tickets and won about six kit and bought four more.

-
 Javlin reacted to a post in a topic:
Supermarine Spitfire Mk. VIII by Javlin - Tamyia - 1/32 - PLASTIC
Javlin reacted to a post in a topic:
Supermarine Spitfire Mk. VIII by Javlin - Tamyia - 1/32 - PLASTIC
-
It came with the kit Mike I did have to add the top cover the switch/potentiometer mounts on to though.The hardest part was the mounting of the micro engine I started further in the engine assembly but friction played a great factor.I was sitting one evening and a thought hit me ......mount it in the front crankcase assembly? I thought ...NO!! ...but it fit!So I can now outfit the rest whether it be a Spit or a P-51!
-
 Javlin reacted to a post in a topic:
Supermarine Spitfire Mk. VIII by Javlin - Tamyia - 1/32 - PLASTIC
Javlin reacted to a post in a topic:
Supermarine Spitfire Mk. VIII by Javlin - Tamyia - 1/32 - PLASTIC
-
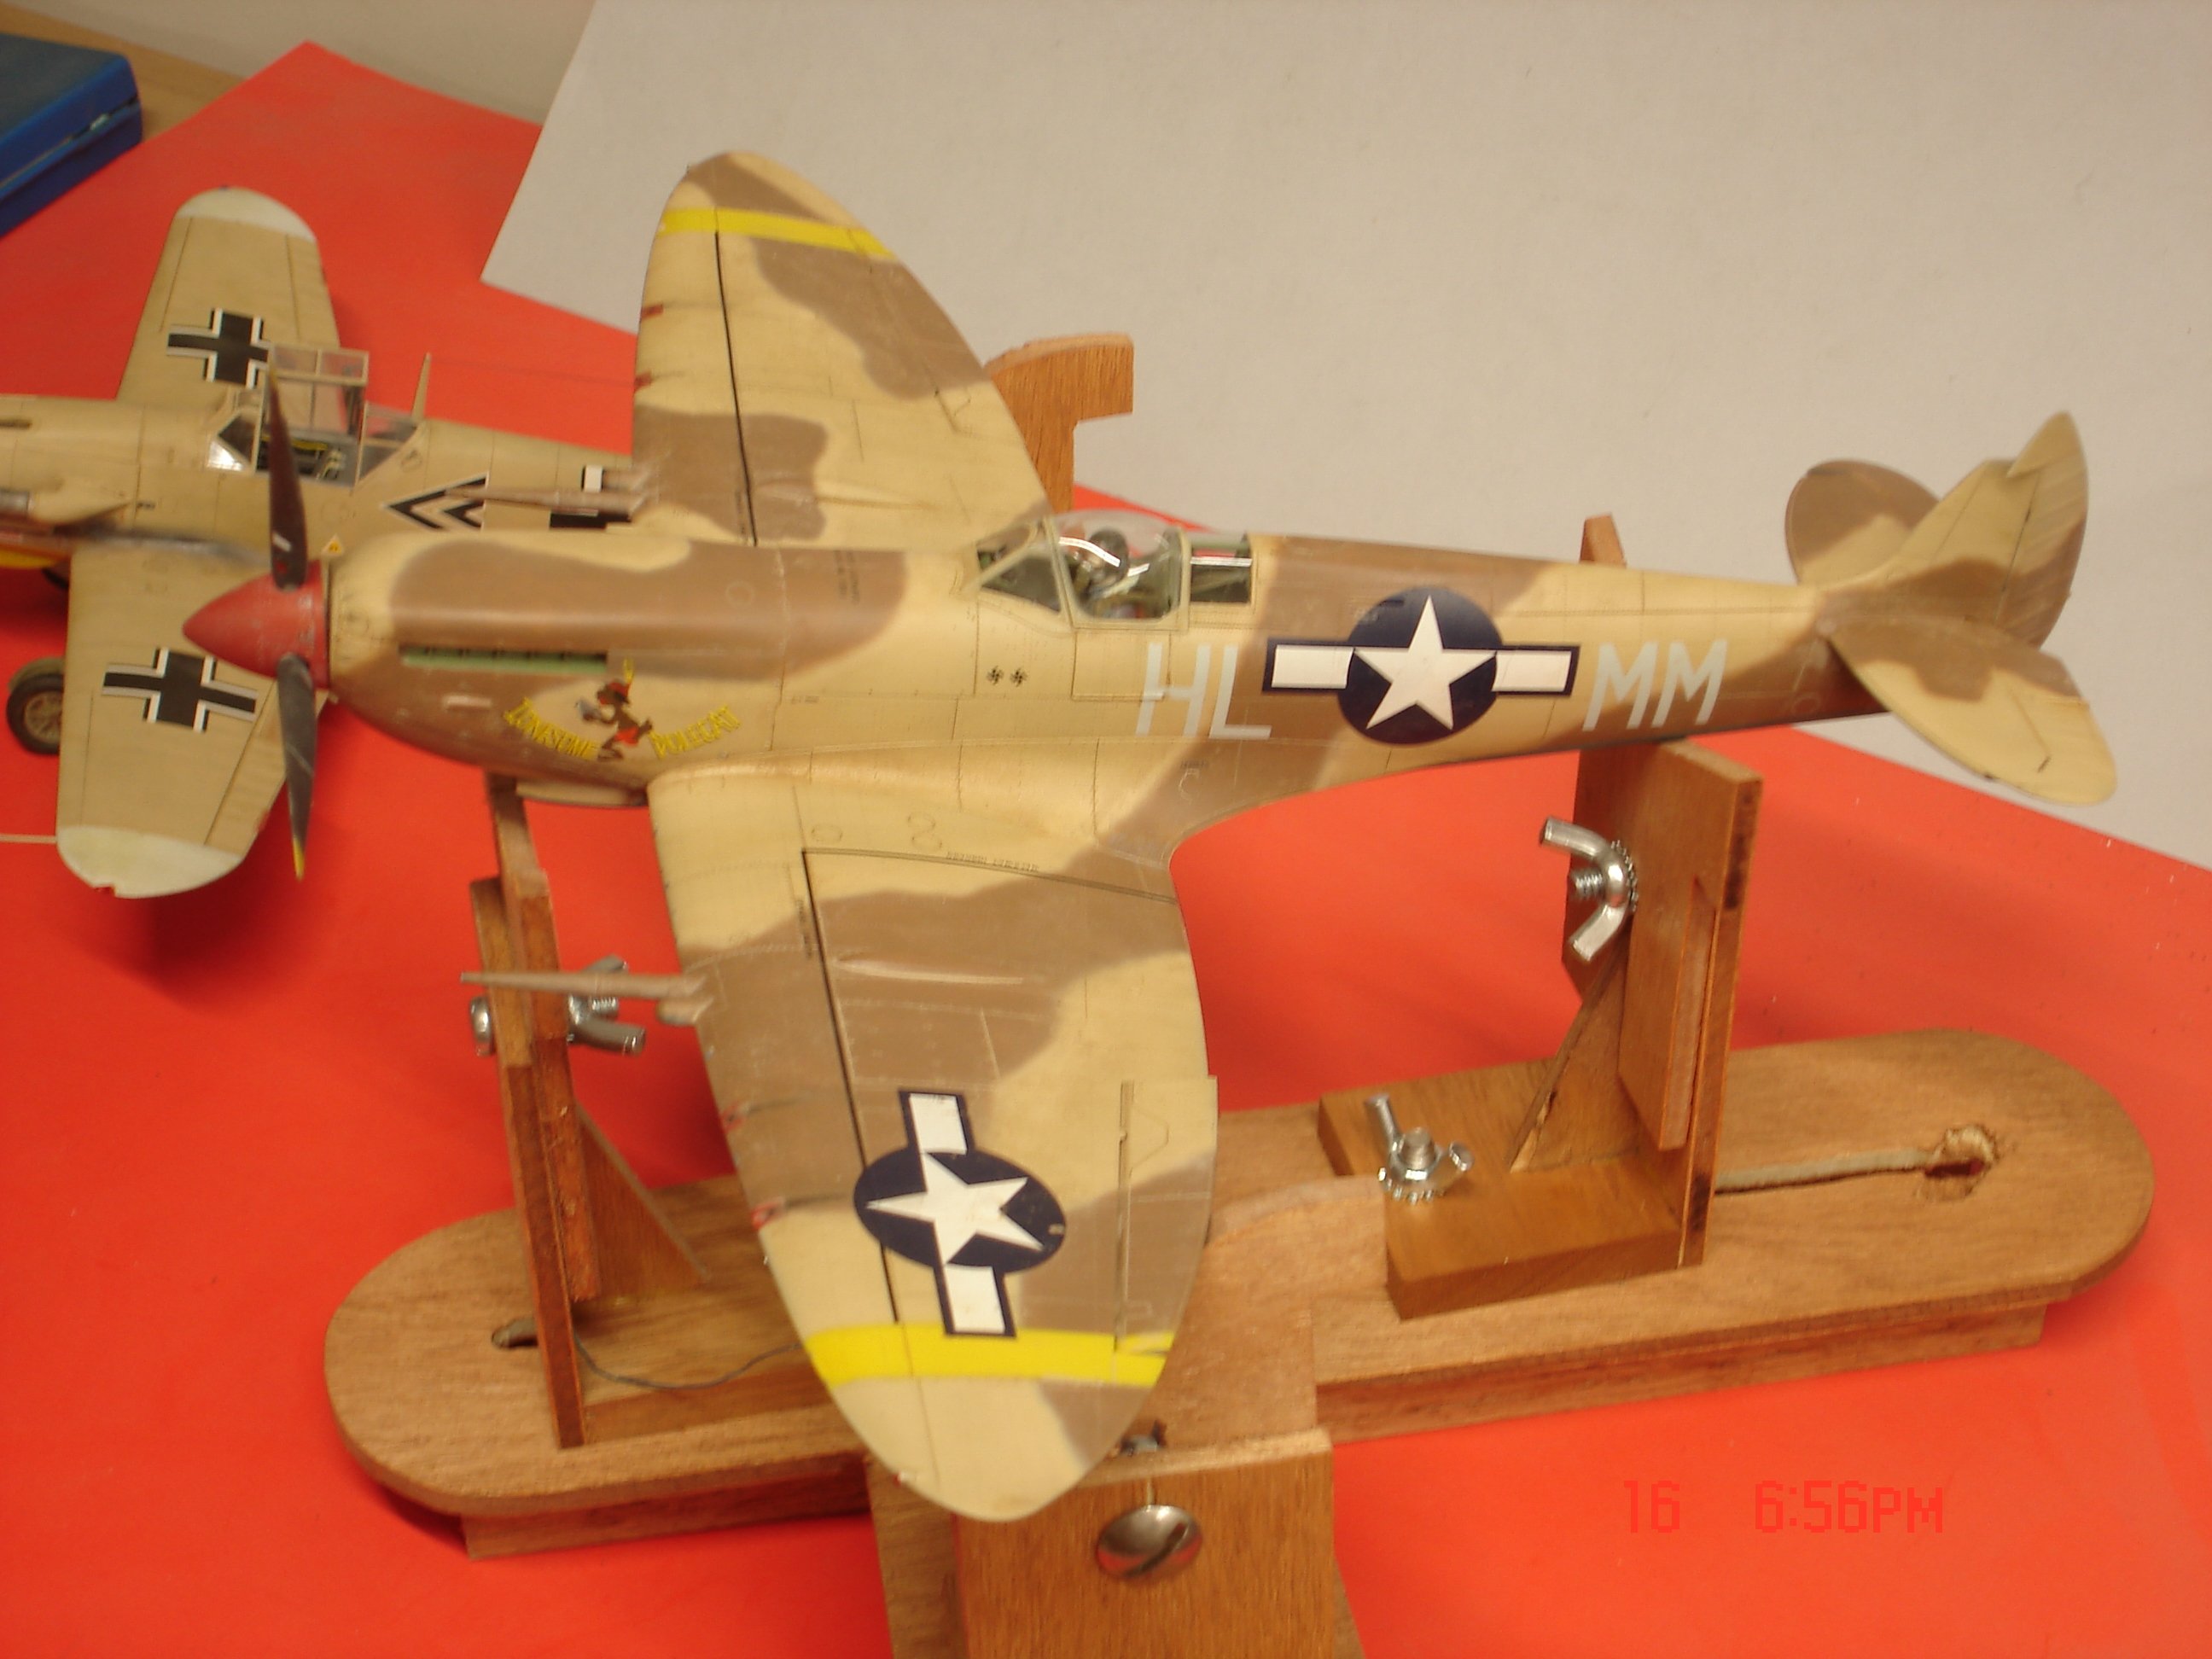
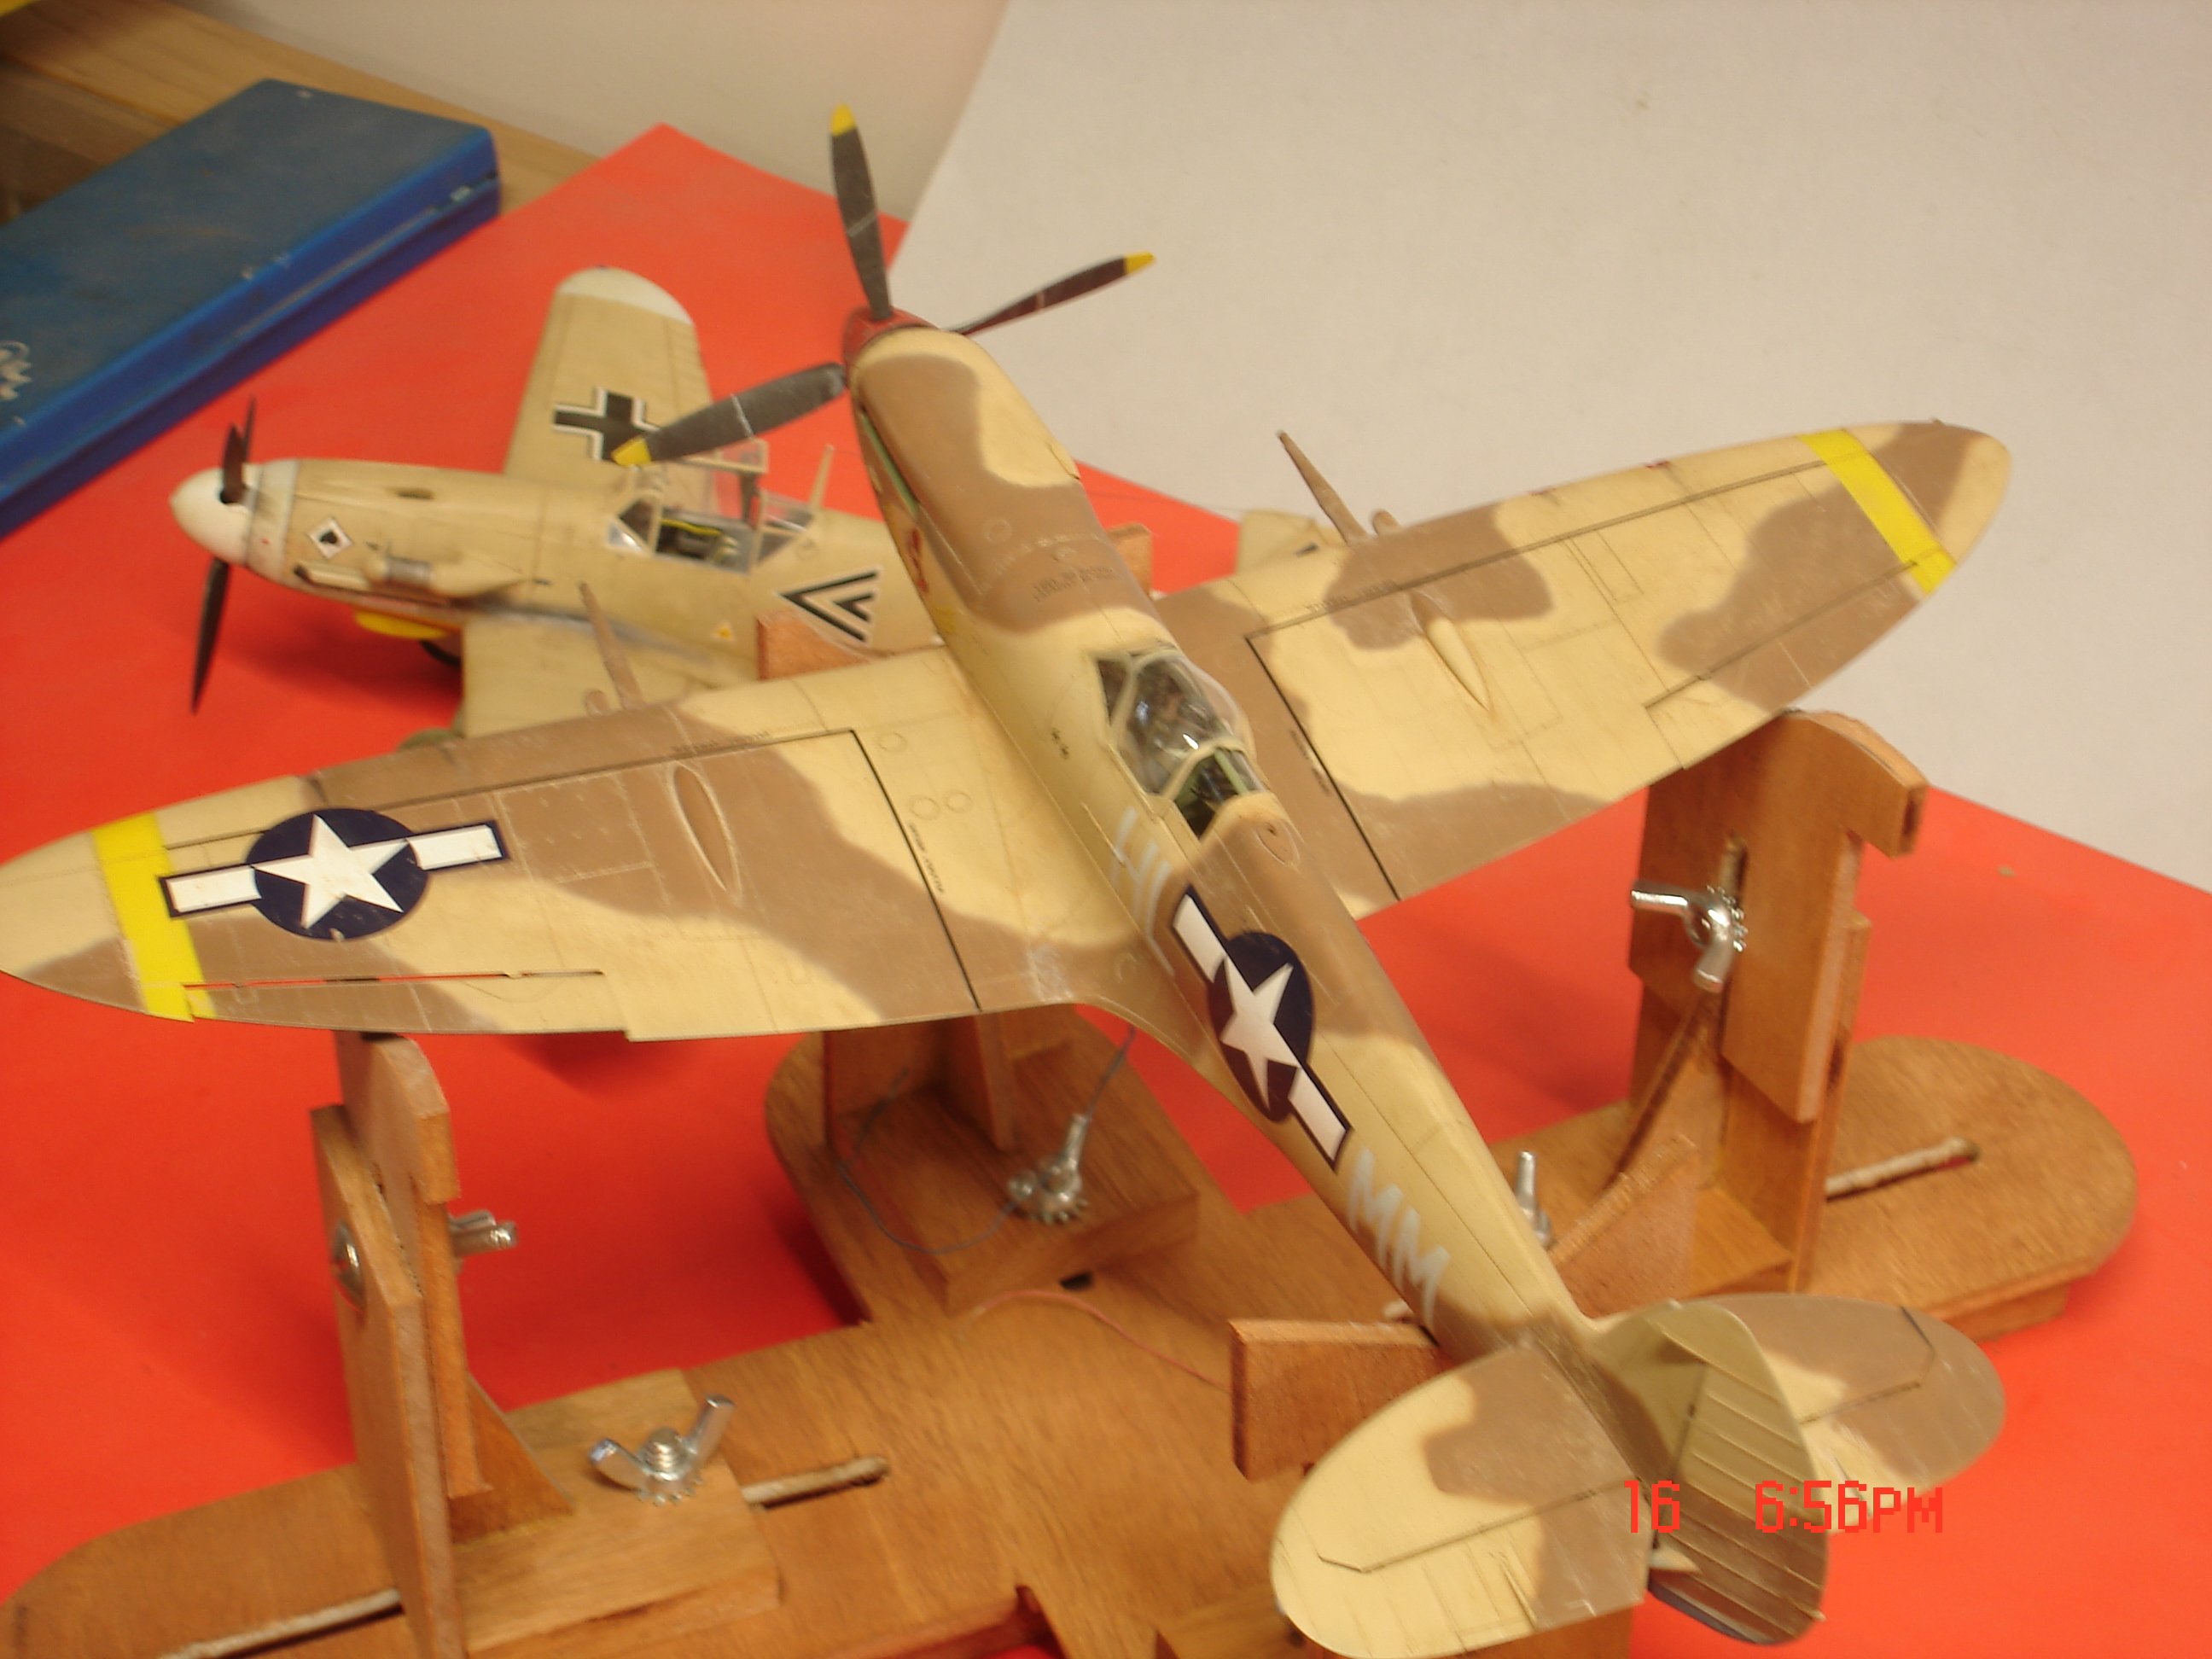
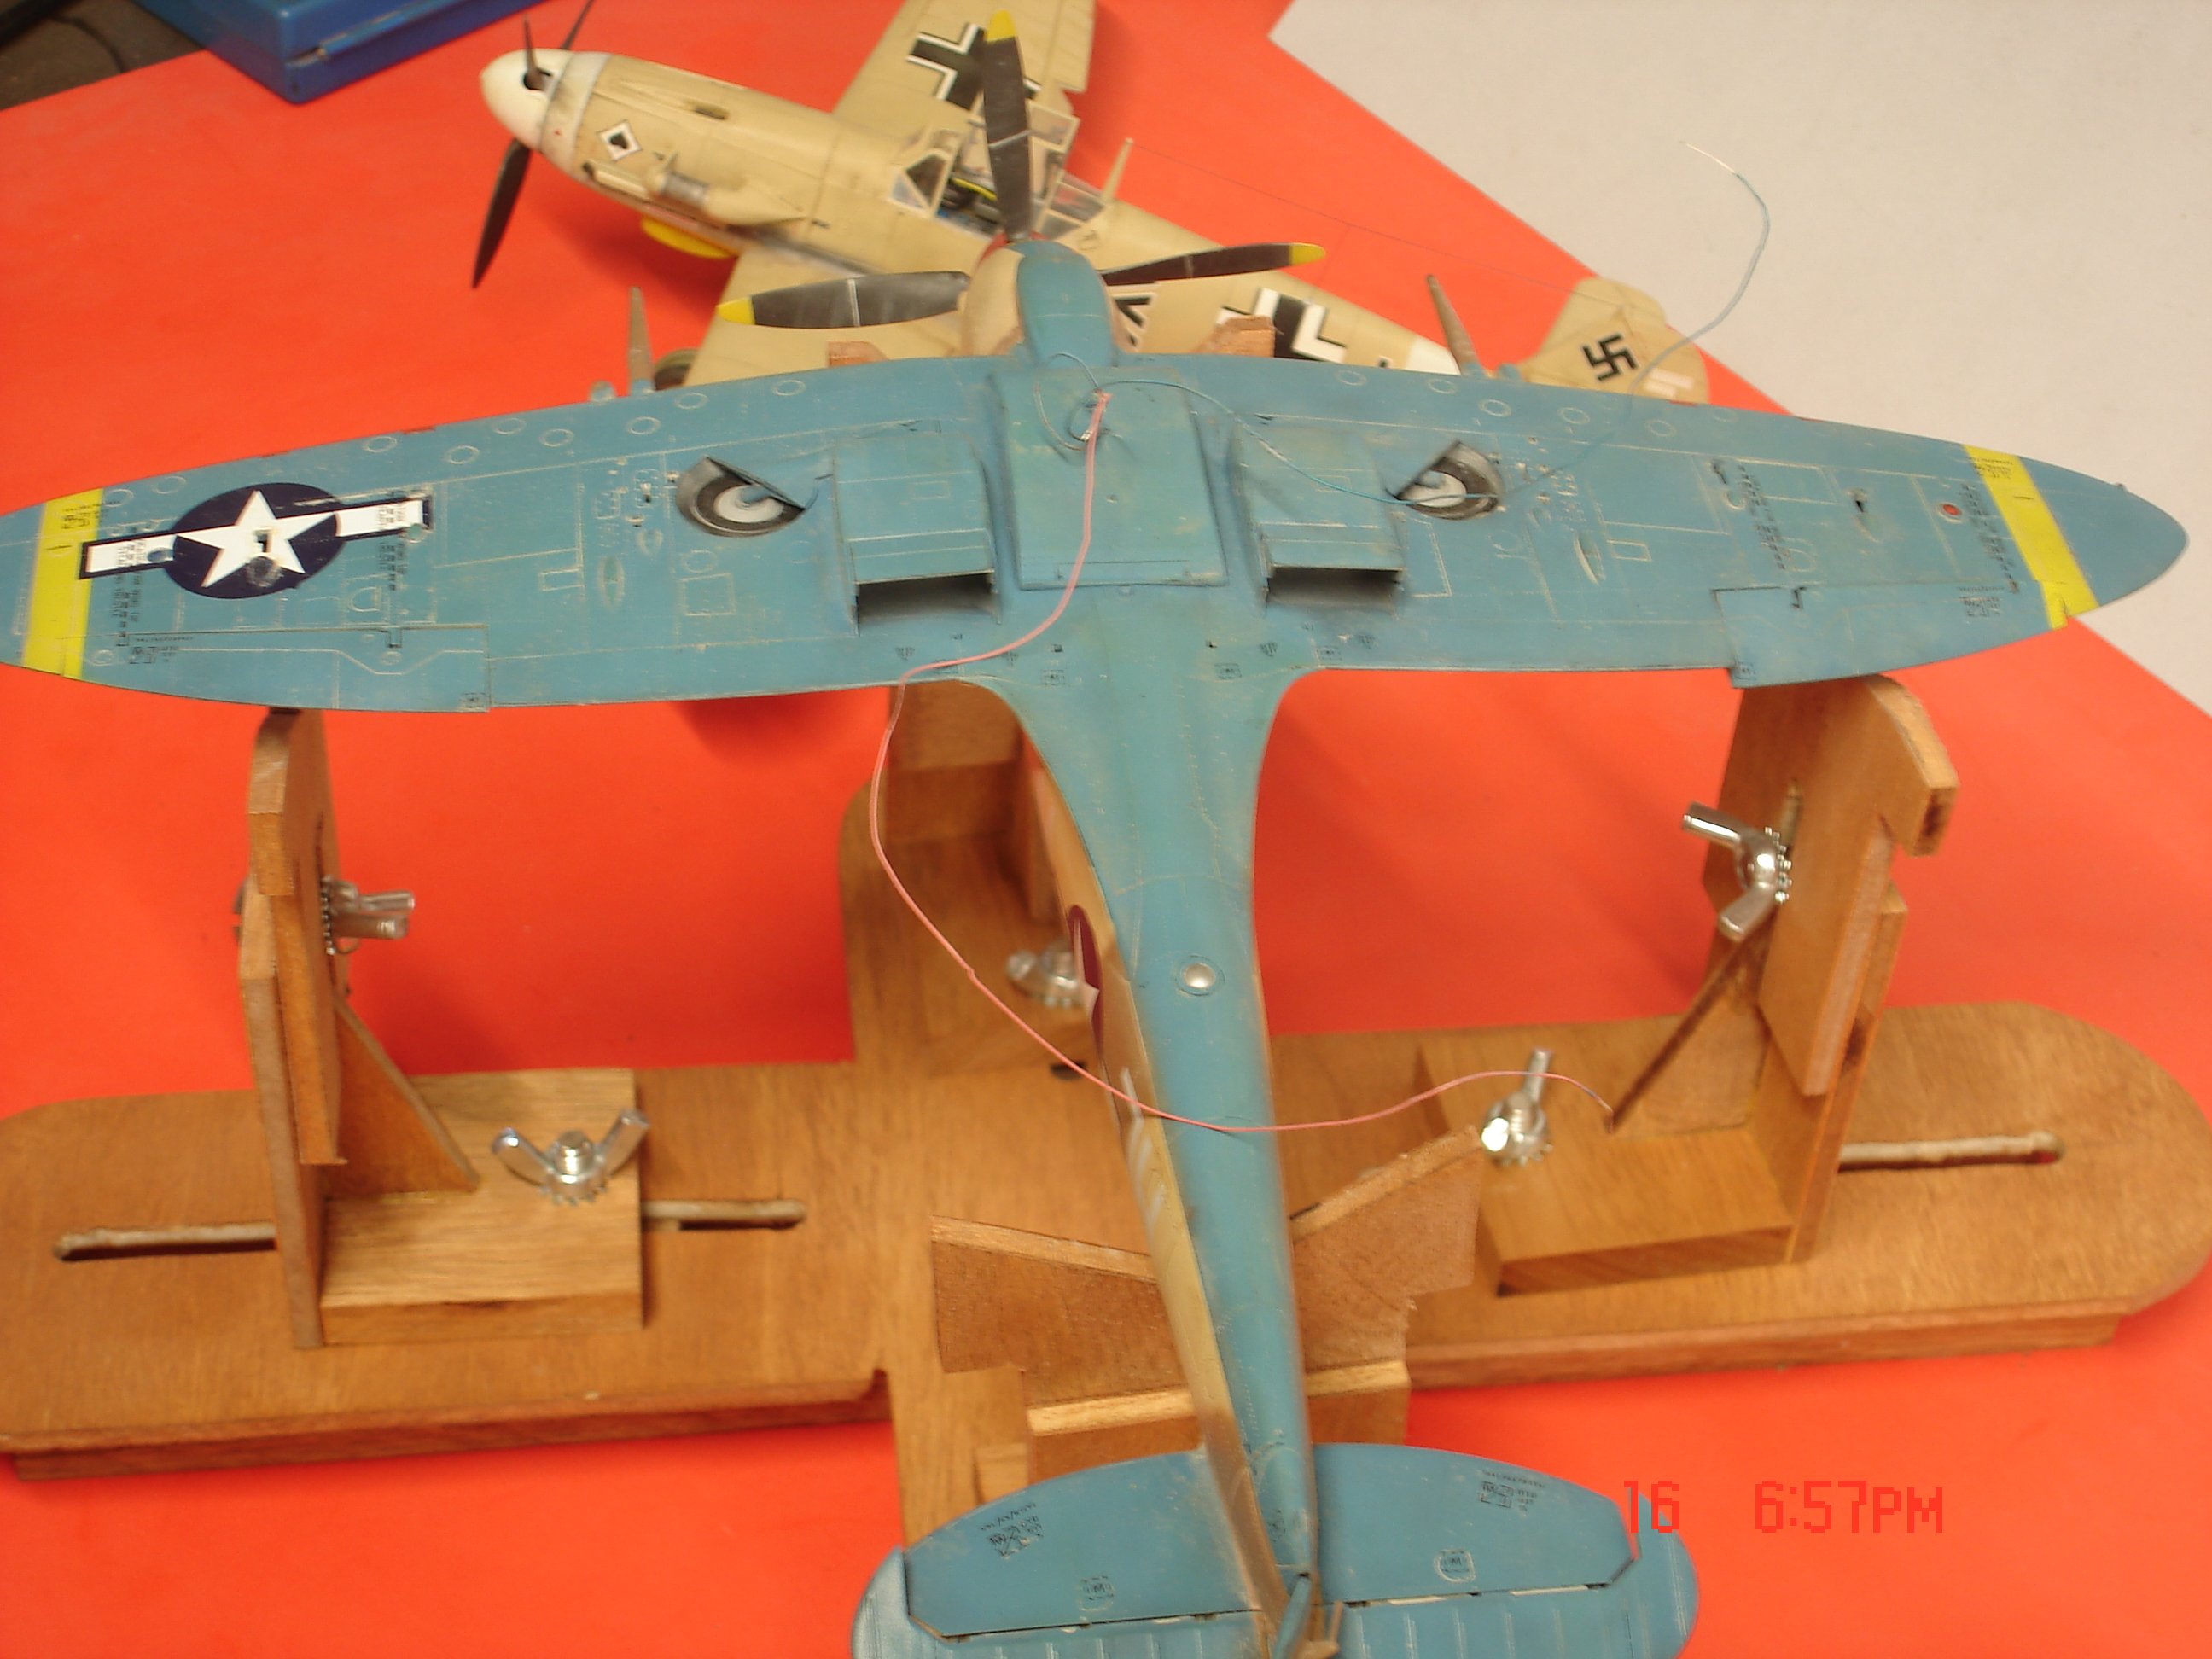
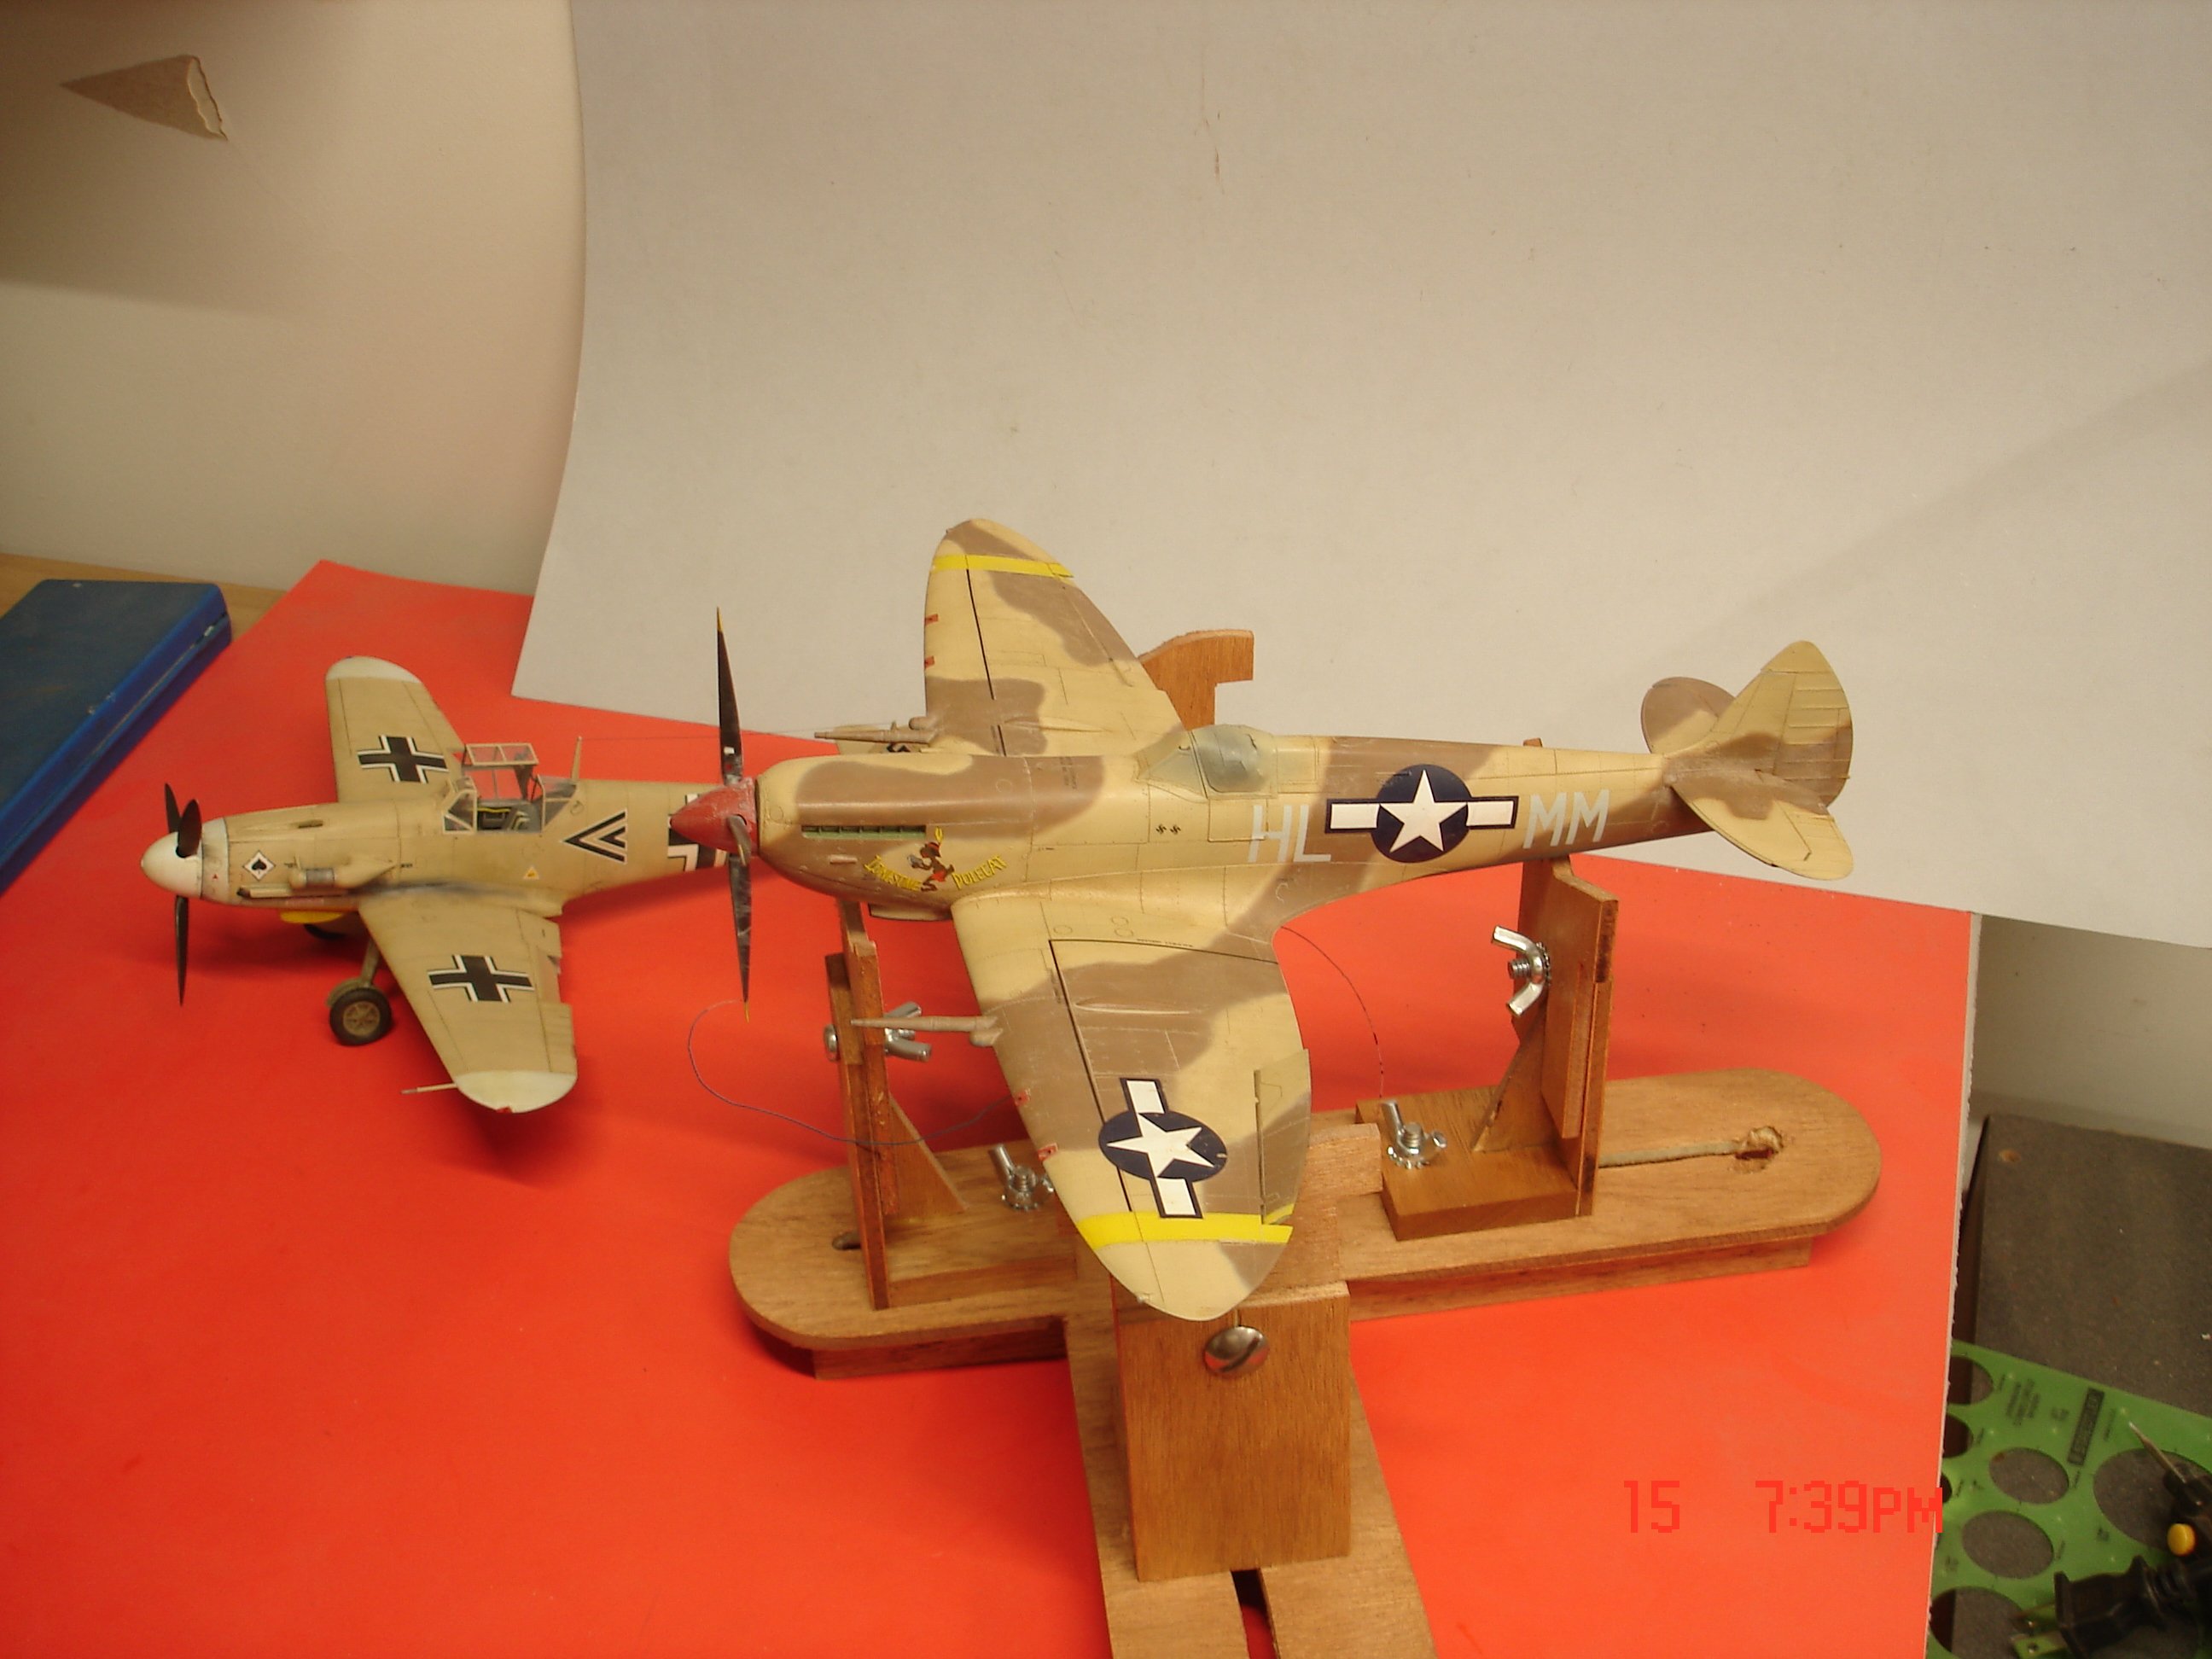
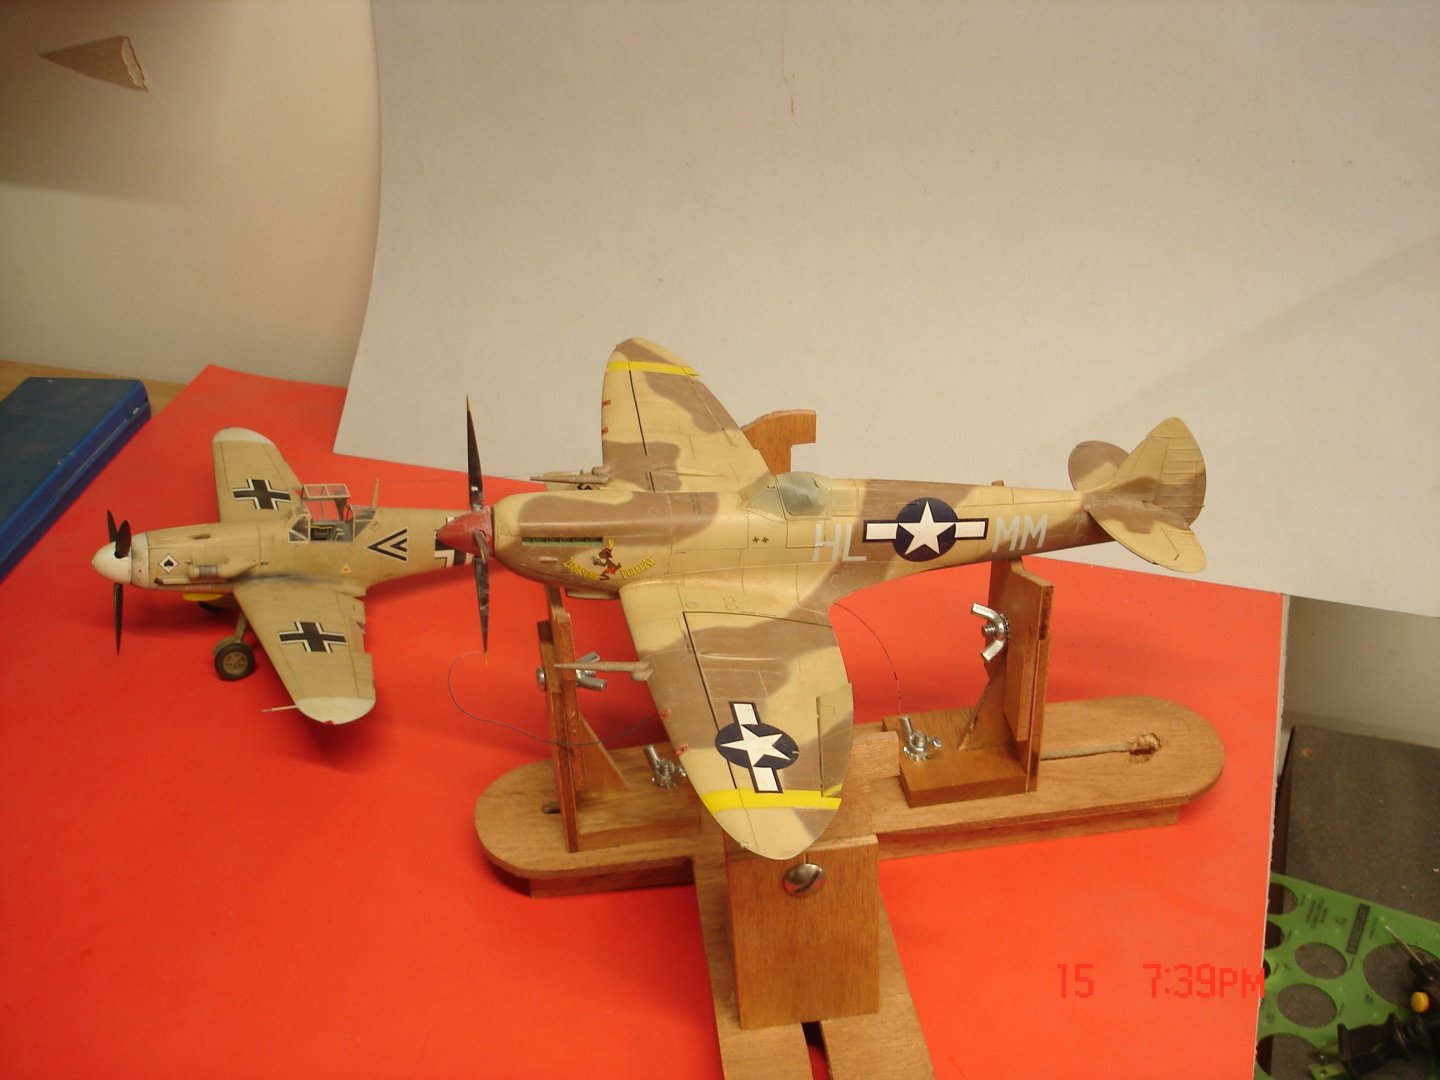
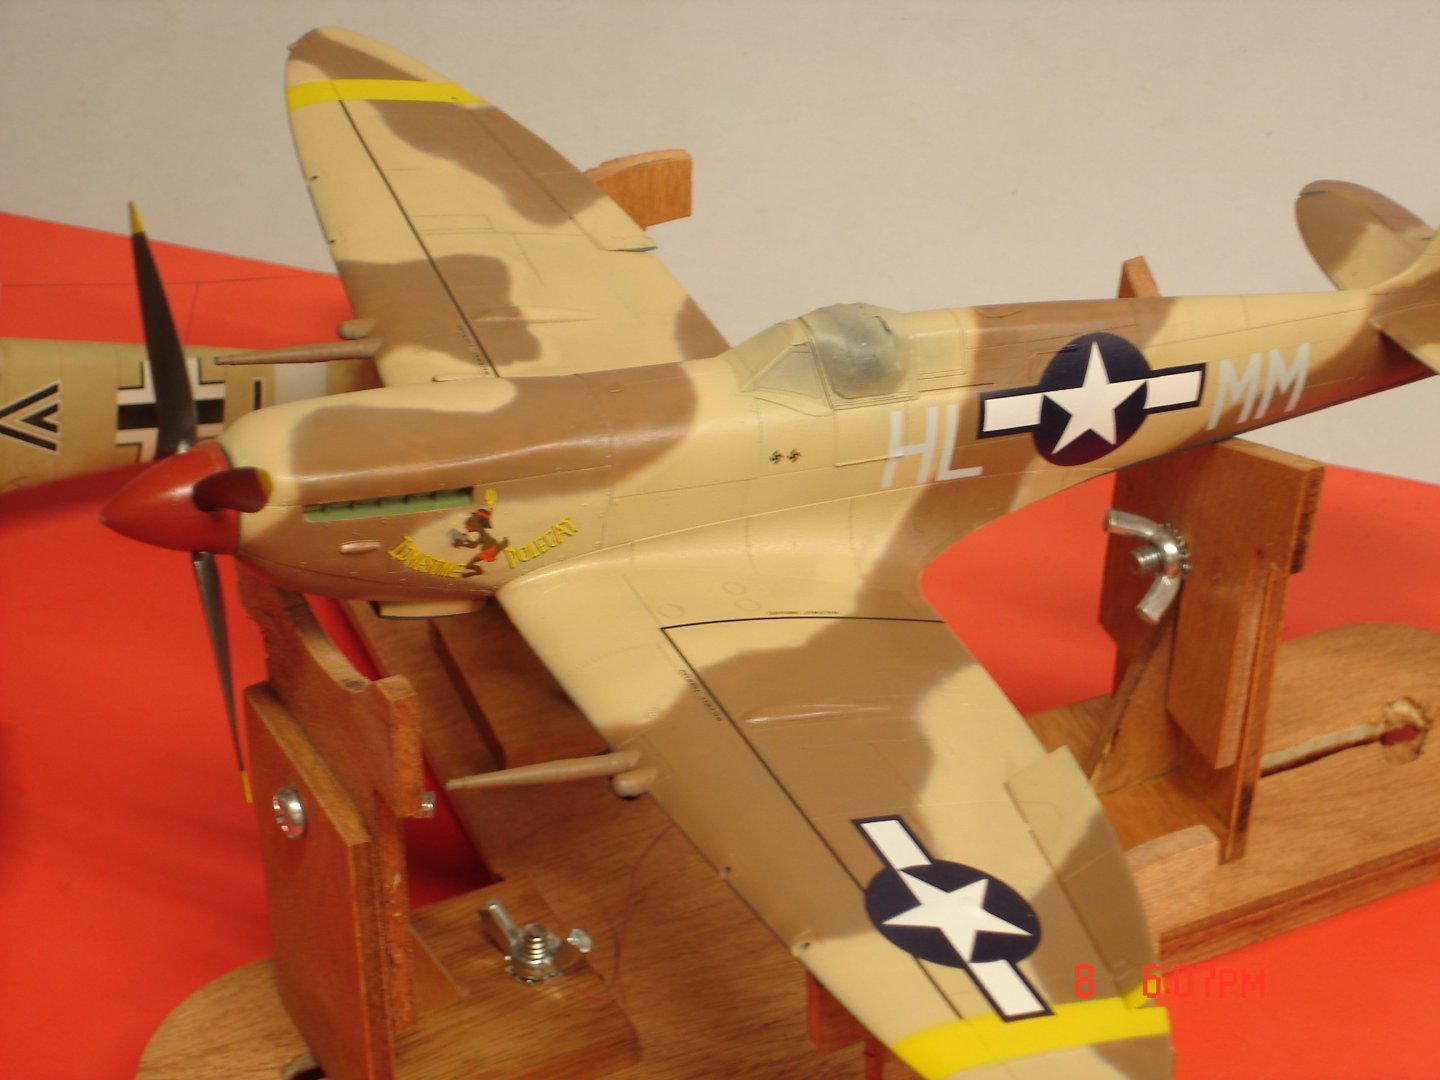
She is up on her stand just a little more work on the exhaust staining and the headers.
-
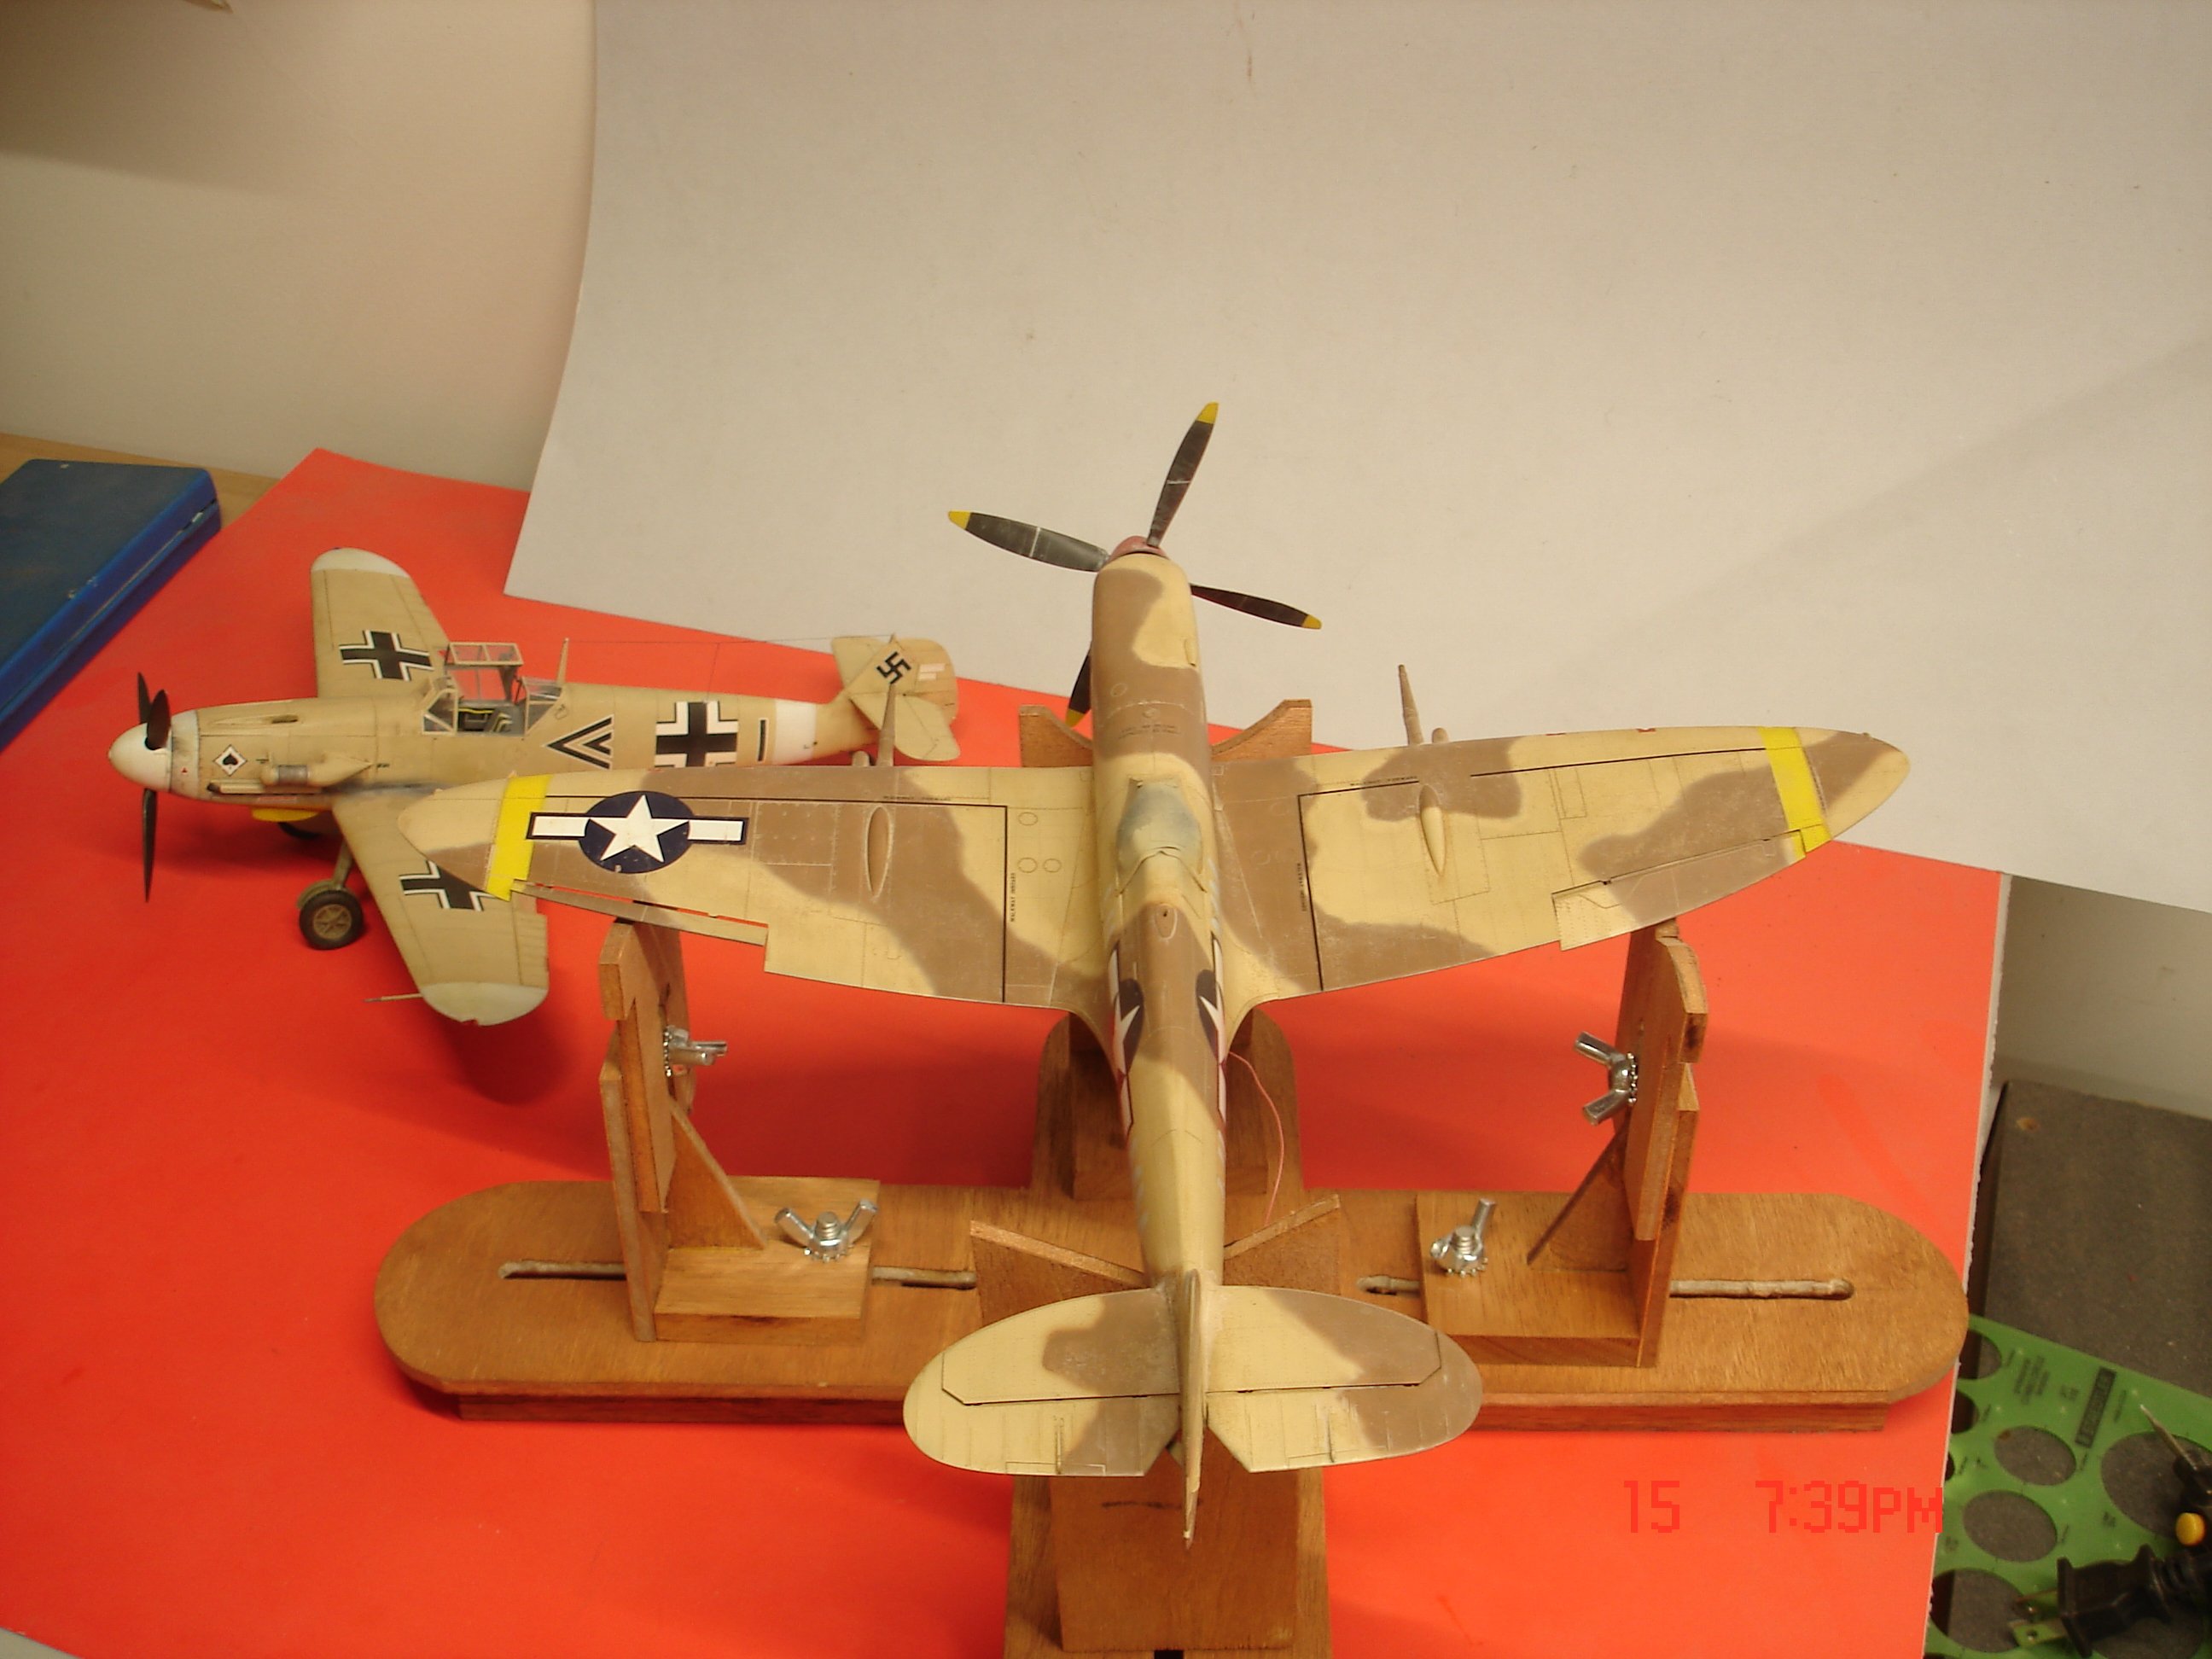
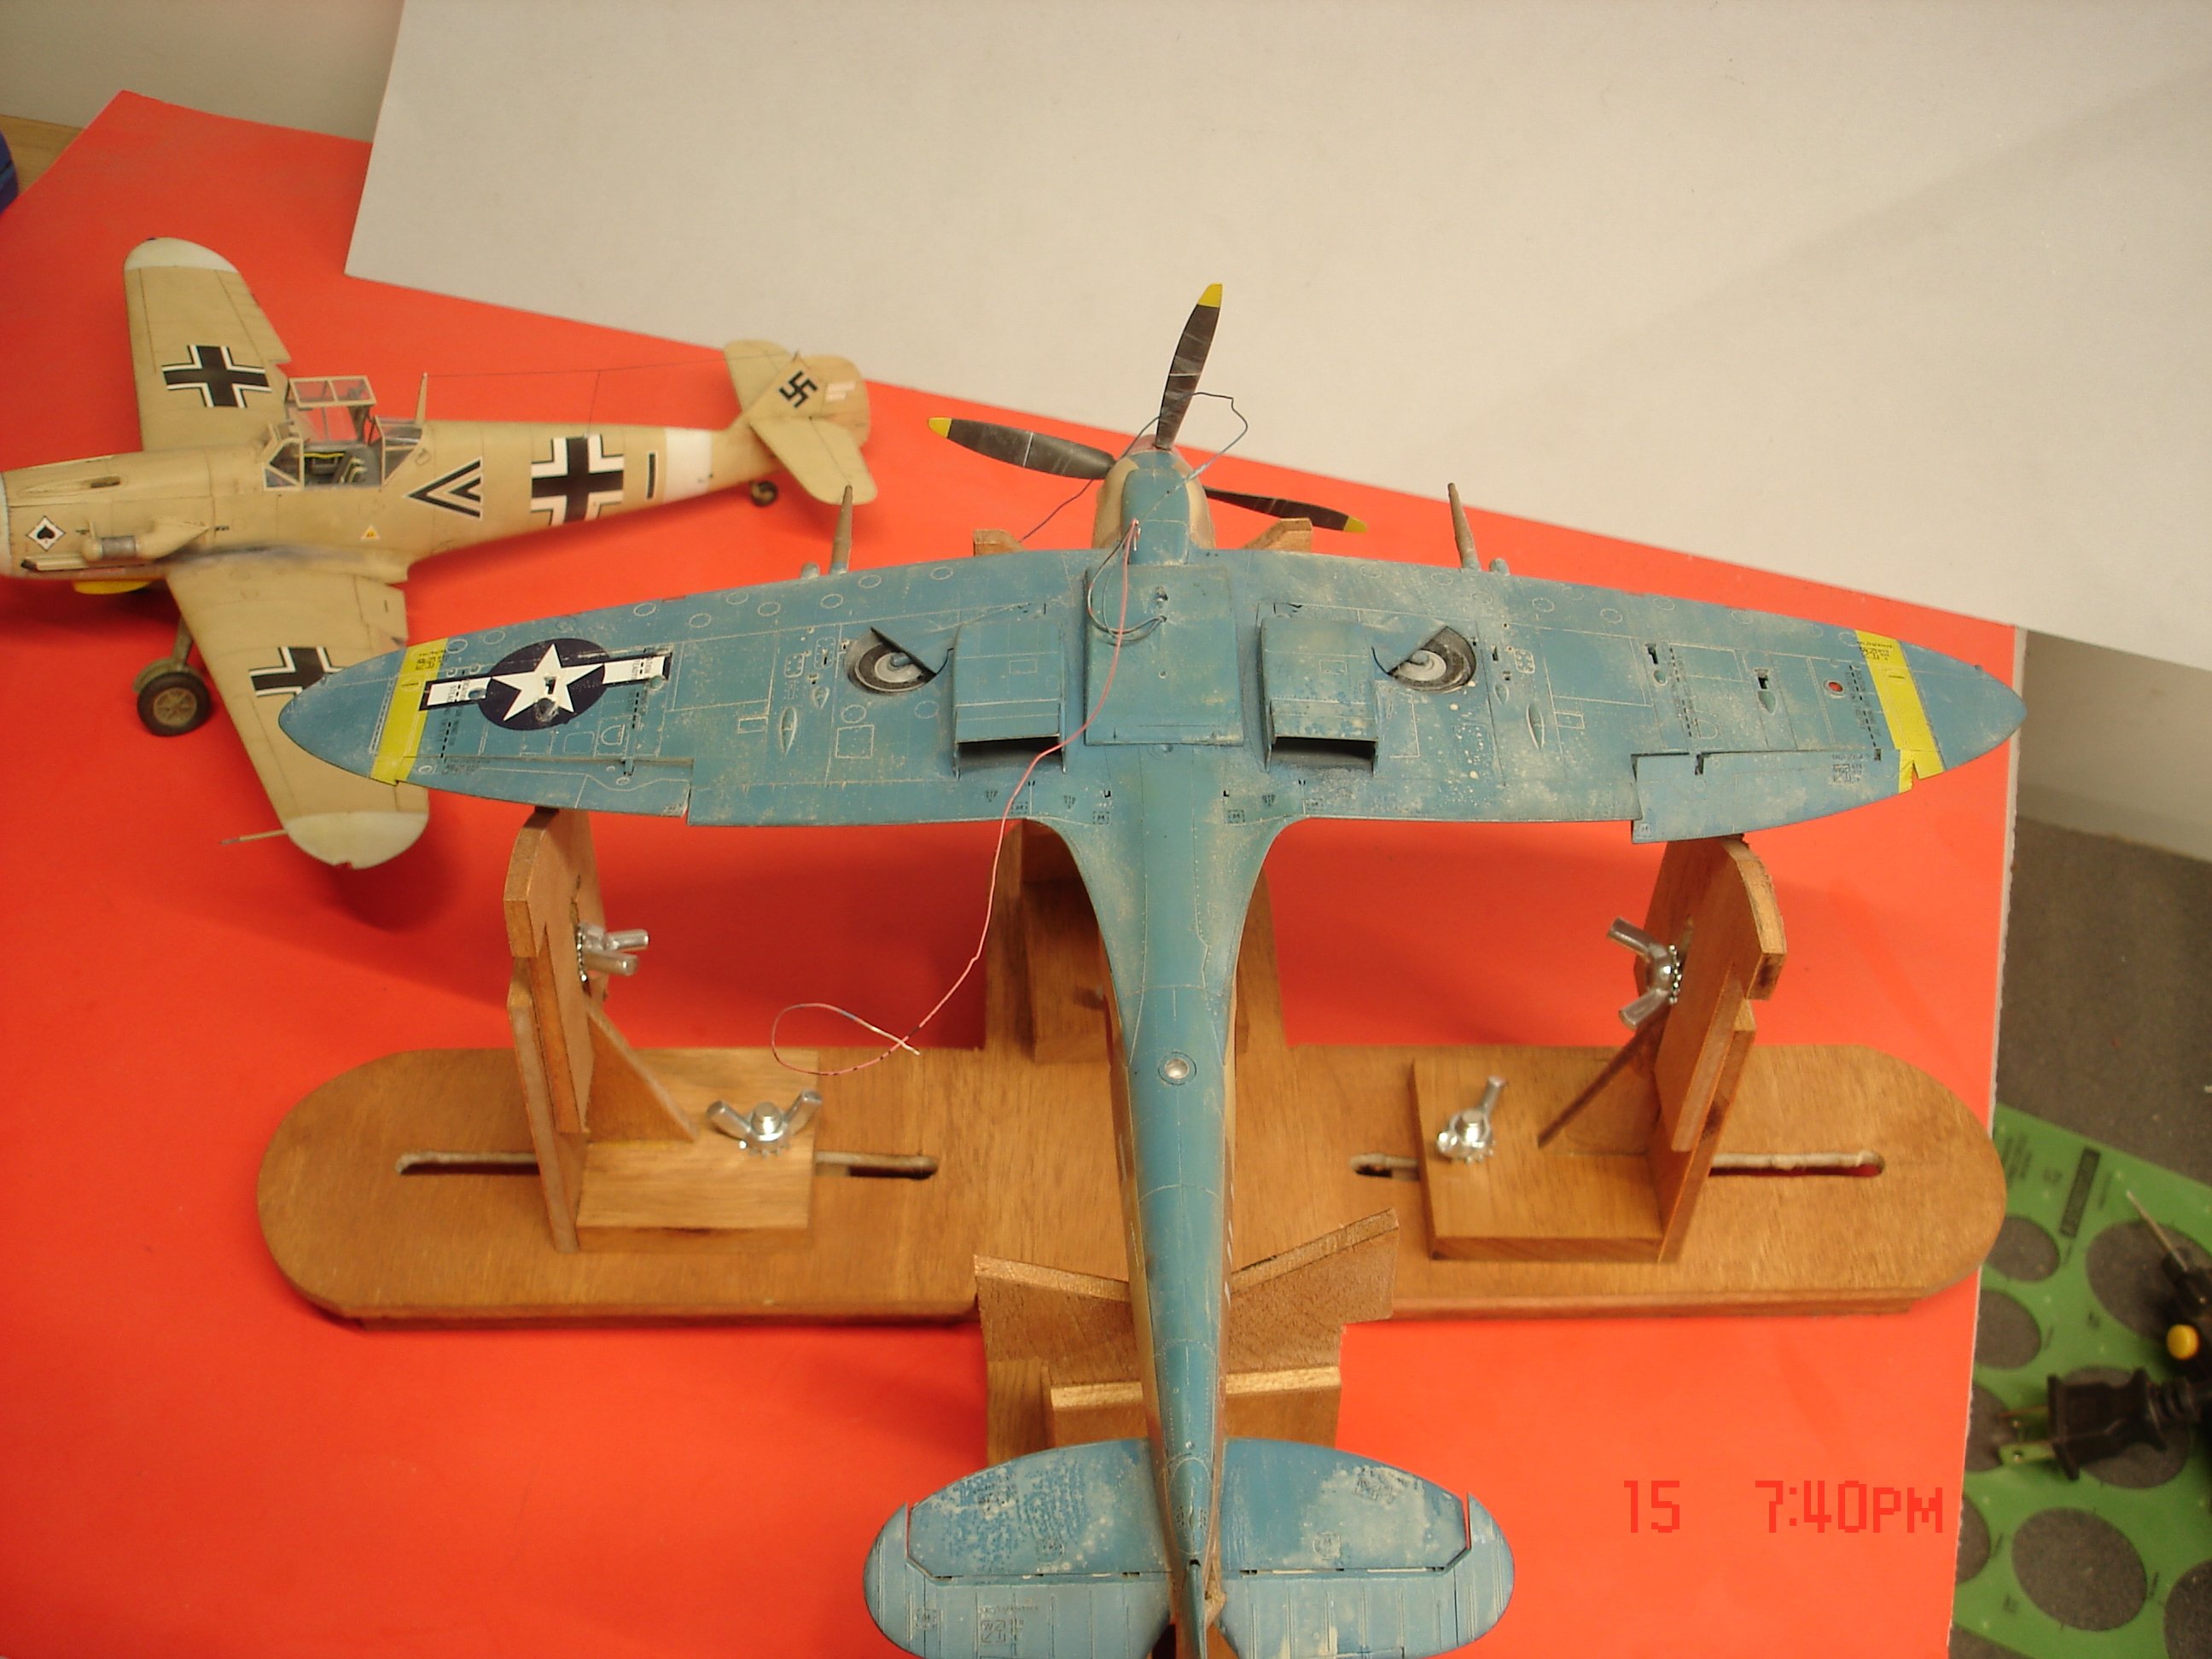
I am down to now antenna,canopy mirror,pitot tube and the exhaust.The next part will be wiring up the power supply hopefully completed to my liking by Wednesday.The overall look upstairs I am content with the undersides is so-so.🤨


-
I have started applying the wash first the whole topsides got a dark sand wash then wiped but the brown did nor look fades enough?So I took mostly light sand in a container added 1/4 dark and went over just the brown areas looks better to my eyes.I then applied that same color to the bottom to which I have only started to wipe off the excess.The plan is once I am comfortable with the wash and it still a bit heavy I am going to spray with future since it's more water base than anything else that hopefully will dilute it some.That's the plan.


-
Javlin reacted to a post in a topic:
Brabham BT45 by DocRob - Model Factory Hiro - 1/12 - multimedia
-
Javlin reacted to a post in a topic:
Brabham BT45 by DocRob - Model Factory Hiro - 1/12 - multimedia
-
That looks really good Chris!
-
 Javlin reacted to a post in a topic:
Mitsubishi A6M5a Rei-sen by ccoyle - FINISHED - Halinski/Kartonowy Arsenal - 1/33 - CARD - Allied code name "Zeke"
Javlin reacted to a post in a topic:
Mitsubishi A6M5a Rei-sen by ccoyle - FINISHED - Halinski/Kartonowy Arsenal - 1/33 - CARD - Allied code name "Zeke"
-
Javlin reacted to a post in a topic:
Mitsubishi A6M5a Rei-sen by ccoyle - FINISHED - Halinski/Kartonowy Arsenal - 1/33 - CARD - Allied code name "Zeke"
-
Javlin reacted to a post in a topic:
F4F-3 and F4F-4 by davec - Eduard - 1/48 - PLASTIC
-
Javlin reacted to a post in a topic:
Mitsubishi A6M5a Rei-sen by ccoyle - FINISHED - Halinski/Kartonowy Arsenal - 1/33 - CARD - Allied code name "Zeke"
-
Javlin reacted to a post in a topic:
Mitsubishi A6M5a Rei-sen by ccoyle - FINISHED - Halinski/Kartonowy Arsenal - 1/33 - CARD - Allied code name "Zeke"
-
The main decals have been applied no flash(cam) this go round guys and when the wash hits it's going darker
- 18 replies
-
- 11
-
-
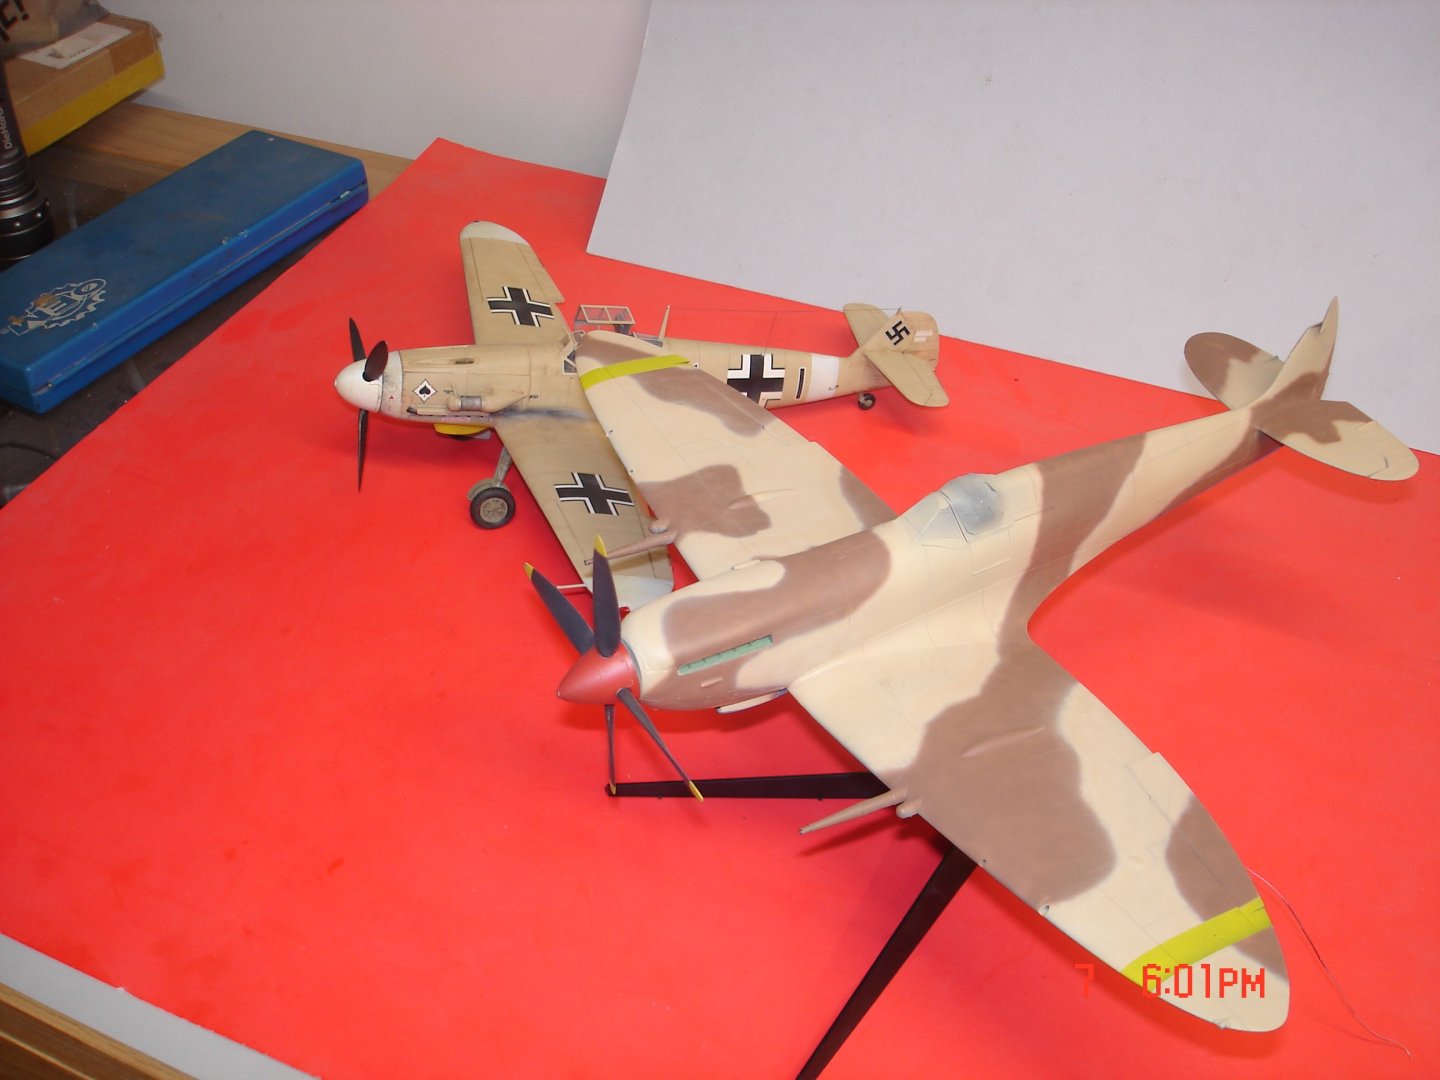
I have the camo on the plane was not totally satisfied with what Tamiya called out for l.Sand but that is what I did the 109 in in the background.I think once I get to the point of weathering it will go darker some and blend in well enough
-
Well I have started the painting process on this one.I started with Mr Surfacer 1500 grey,Tamiya Semi Black,silver (chip) and I guess yellow ID bands.The plane looks like it's going to get colors from 3 different manufactures go figure🤨

-
You can probably bet on that one Chris🤨
-
The same process when I clean the brass for reloading with a liquid additive to enhance the process for more polished effect.Thanks for popping in and the likes guys the wings,tailplanes and landing gear (up) are now finished and fixed in place.The canopy is about to be masked and put in play and it's off to primer.I am bring this if I finish to the meet in Covington LA in June.
-
I really like the results of this kit and your efforts Chris looks Sharp! As to the fins I go opposite paint the cylinders silver and a thin black wash in the crevices for the highlight and dirty from there.
-
Looking good there Sir!as to the pre-shading on a solid color like this the option of paint then if good and straight lines do the shading and repaint in light coats to desired effect works nice on RLM 76/78
-
Alan you showed me something new today ...Comet never heard of it?The build came out really Nice with the turret having vague references to a Panzer like the design of this one.