
Coyote_6
-
Posts
555 -
Joined
-
Last visited
Content Type
Profiles
Forums
Gallery
Events
Everything posted by Coyote_6
-
 Mark - if you do decide to make sails the Sig Aircraft Silkspan techniques look good - that is what I am going to try. I bought the thinnest of I think three thicknesses direct from Sig for 1:58 scale. I think there was a recent NRG presentation on the subject as well. (Full disclosure - never made sails, haven't even mounted my masts - I guess my advice is worth what you're paying for it 🤣.)
 -
Good to see you at it Bob. Can't wait to see her finished. "I love it when a plan comes together!" Happy building sir.
-
My condolences sir. I am sorry to hear of your friend's passing. I am glad to see you honoring his work with yours. He was a genuine craftsman based on the work you've shown us.
-
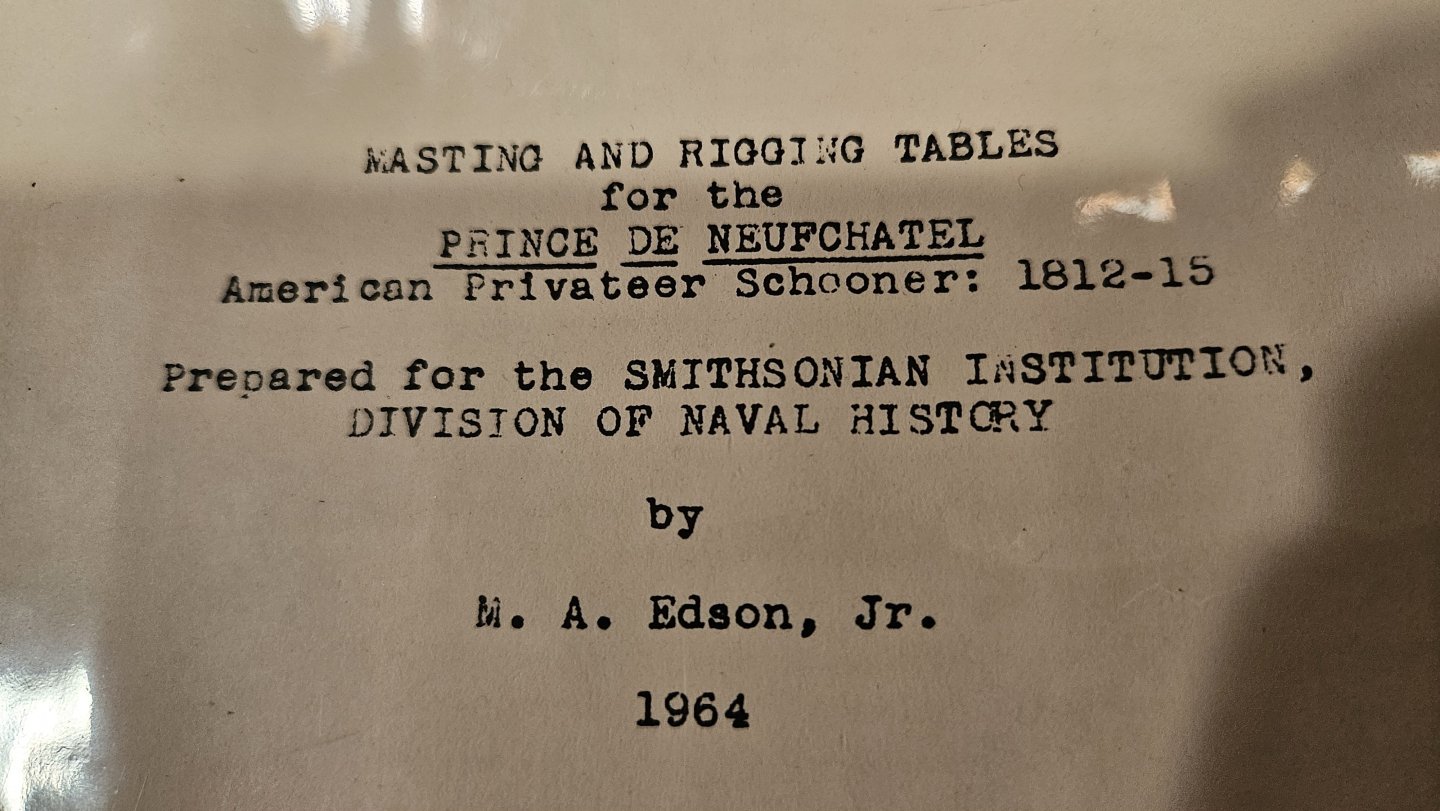
As an example, I have actually used the following books for my current Prince de Neufchatel build - they have been invaluable: Mastini's Ship Modeling Simplified: Fitting deck structures to the curved deck. (Maybe not invaluable, but a darn good trick.) Chapelle's Search for Speed Under Sail: Bowsprit angle. Rudder fittings. Transom stern shape. Rigging and sail plans. Chapelle's History of American Sailing Ships: Tiller configuration. Bowsprit angle. Confirmed deck layout. The Ashley Book of Knots: Rigging blocks. Seizing lines. Harland's Seamanship in the Age of Sail: Steering gear rigging. How to hoist out a boat that's amidship. Marquardt's The Global Schooner: All things rudder related. Anchor planning (next for me after the guns). And the best part - plans only tell you how to do something. Books tell you why. Great topic!!
-
(and note I was typing book recommendations WHILE you guys were discussing book recommendations so I think we're all on the same track here!!)
-
No problem from my end gents. I love the discussion. But I guess now I'll have to actually get something done on the Prince so we can get back to our regularly scheduled program. Baltimore Clippers/Schooners are an addiction methinks.
-
@Dr PR Like they say - "Godfather of Schooner Rigging". Sorry Phil, I can't resist! But bro, your knowledge on these subjects is stellar and I am so glad you are here to share. @SaltyScot Mark, for me I learned early on that kit plans are not the end all be all of what a ship was or should be (especially Constructo's plans). I treasure the shipbuilding library I have been assembling, and many informative books can be had used on amazon or Abe's for a pittance. The Search for Speed Under Sail Phil references above is a great resource to check out for yourself. The Lynx is just an amazing subject - I would recommend running down some old resources on your own to get a feel for here design/history - it is one of my favorite parts of this build to date. Kind of like a nautical Indiana Jones experience. Chapelle's books (and a sharp eye at my modeling guild meeting) saved me from Constructo's bow sprit disaster after all. As an aside, the paper and inks used to print books in the 50s to 70s is a treat to touch compared to some modern books. Recommendations include: Generally anything by Chapelle on the topic of sailing vessels. Ashley's Book of Knots (particularly the chapter on Marlinspike Seamanship). Ship Model Builder's Assistant by Davis. The Global Schooner by Marquardt (hat tip to @Dr PR for the recommendation)
-
I love this forum! Thanks Phil!!
-
@Dr PR Thanks Phil. I am very glad to have you around on this build. Always new things to learn.
-
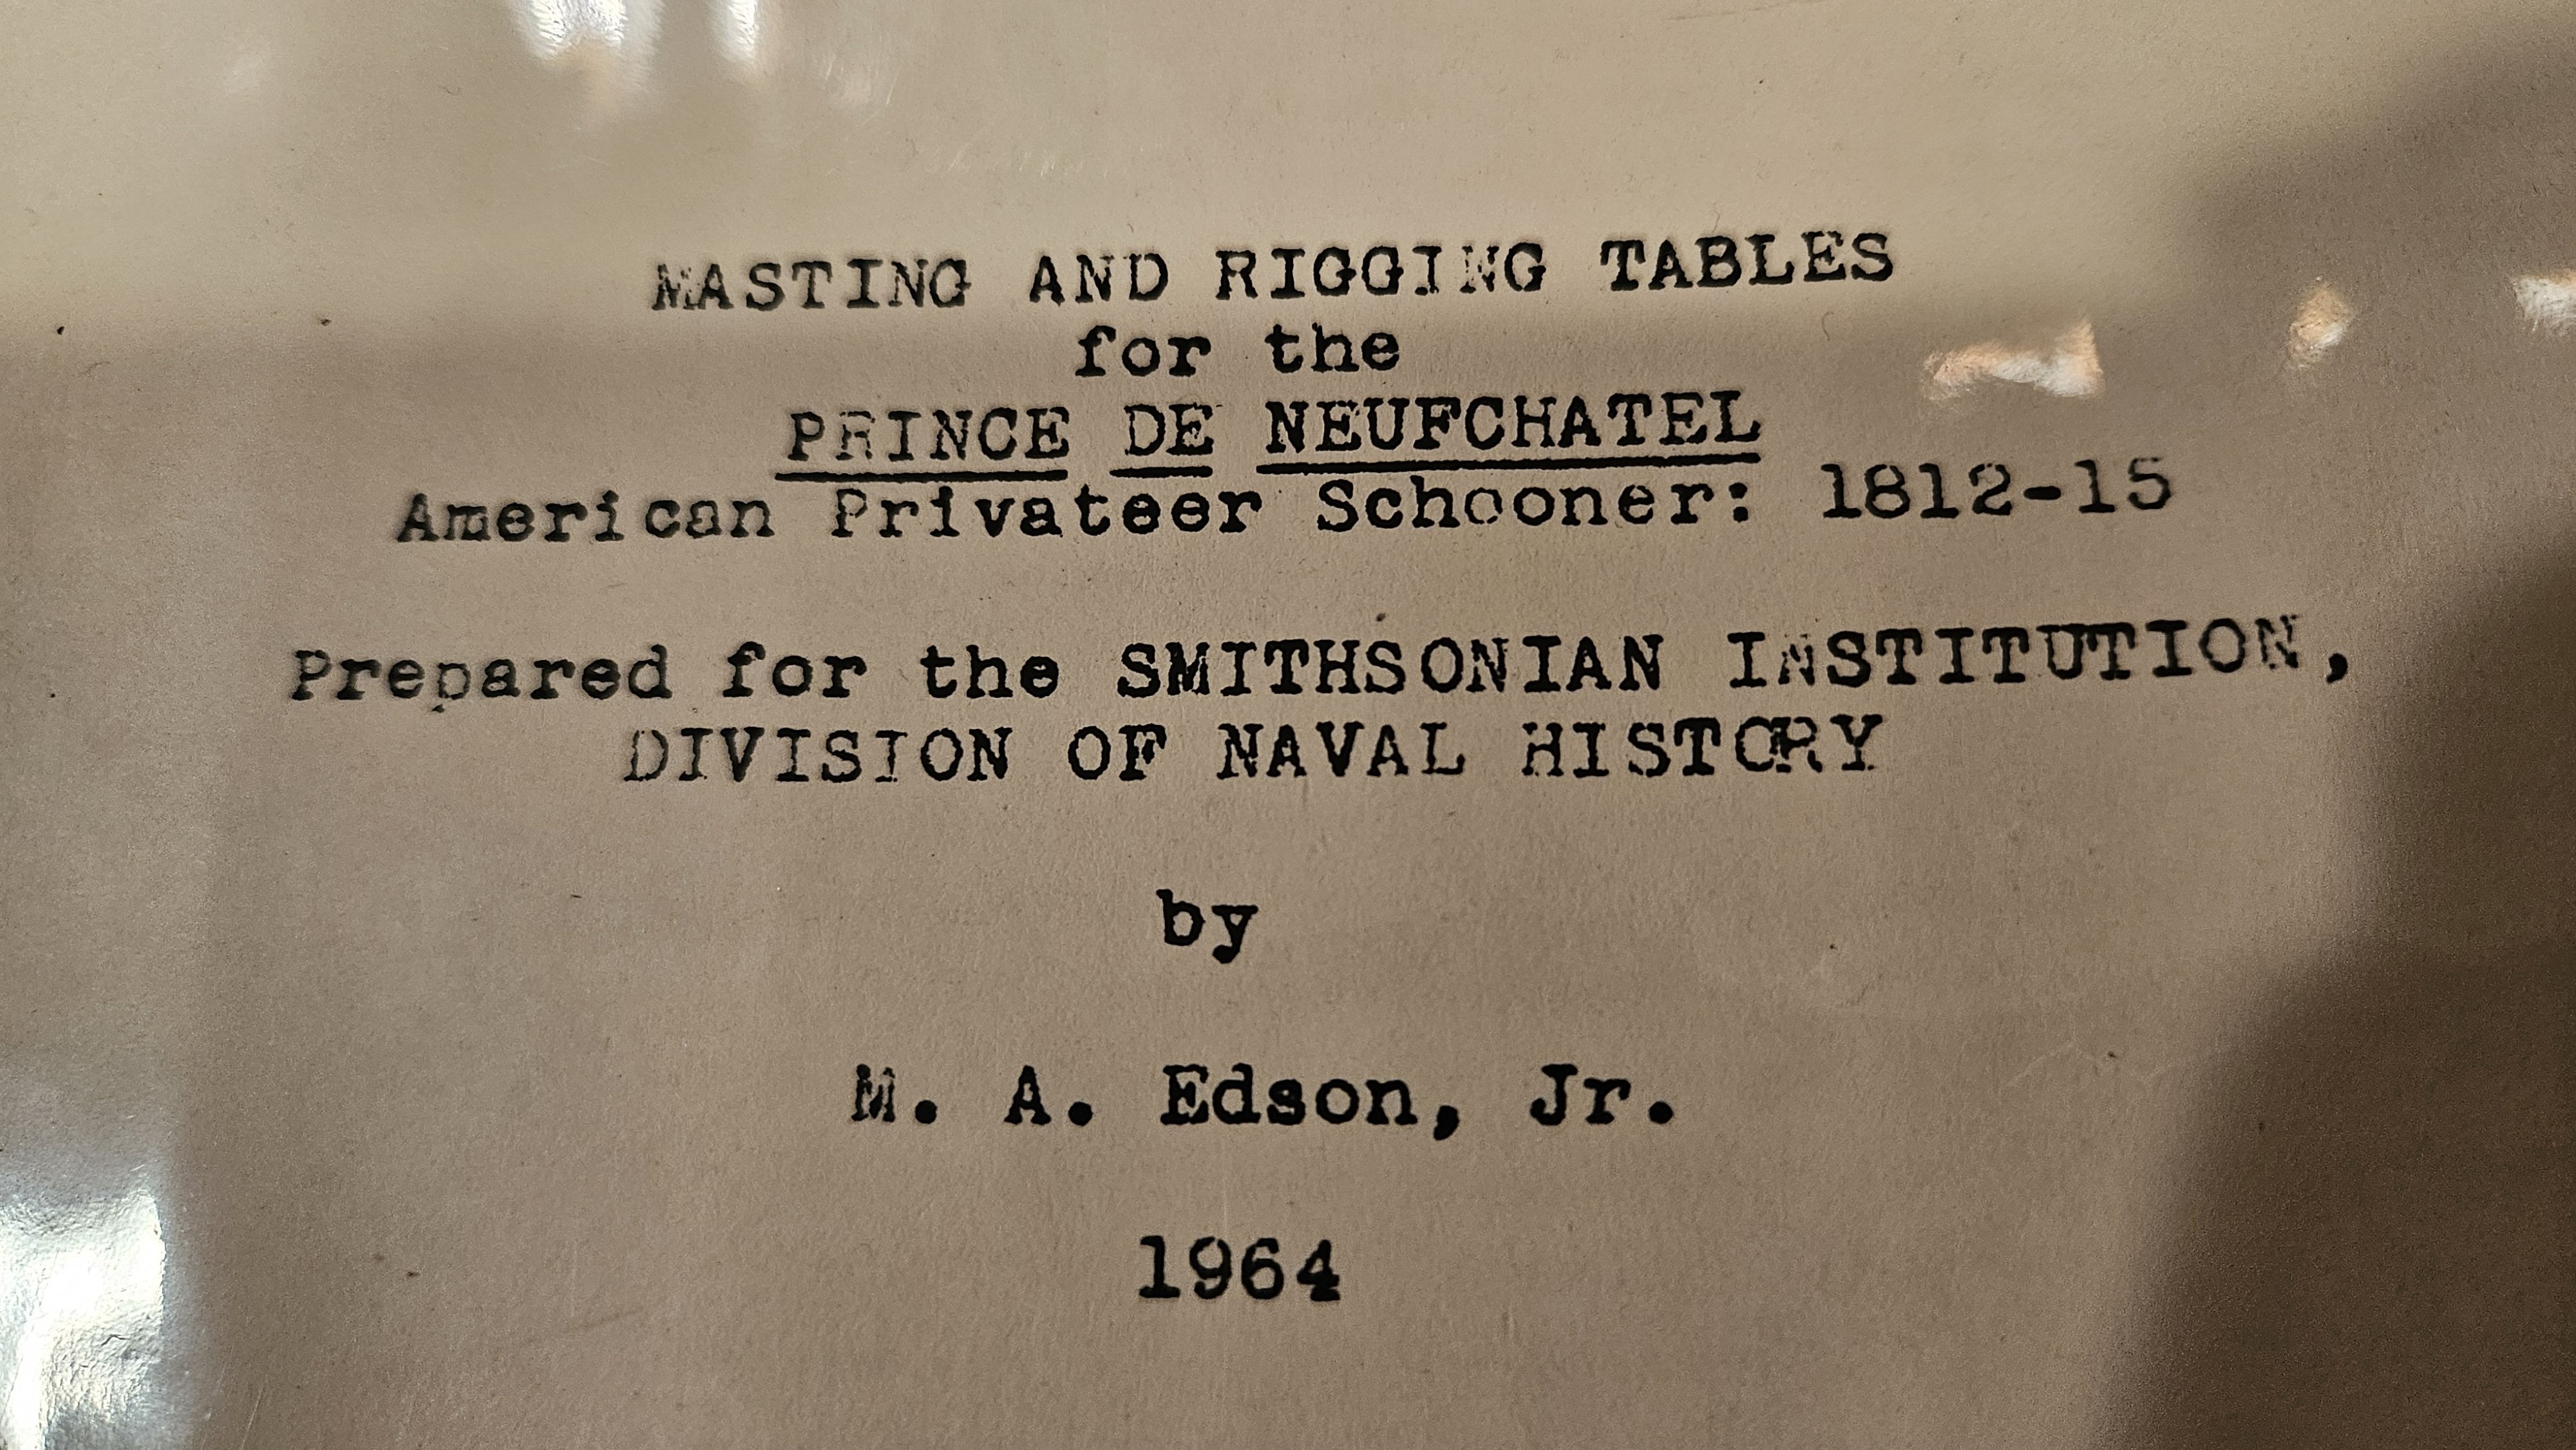
Ok - that didn't take me too long. I inherited the following Smithsonian document: Sure enough! Fore mast rake - 7" every 3' 0". Main mast rake - 7.5" every 3' 0". Now we know!
-
@Dr PR Leave it to The Godfather of Schooner Rigging to keep us honest! One more thing to research on the Prince - someday I will learn not to trust the Constructo plans for "anything". Ironically my next model will probably be Constructo's Enterprise 1799 so alas... Thanks Phil for the heads up! Any idea why it is that they are not equivalent? I'm gonna see if I can find what the Prince should be. As if the bowsprit angle craziness wasn't bad enough!
-
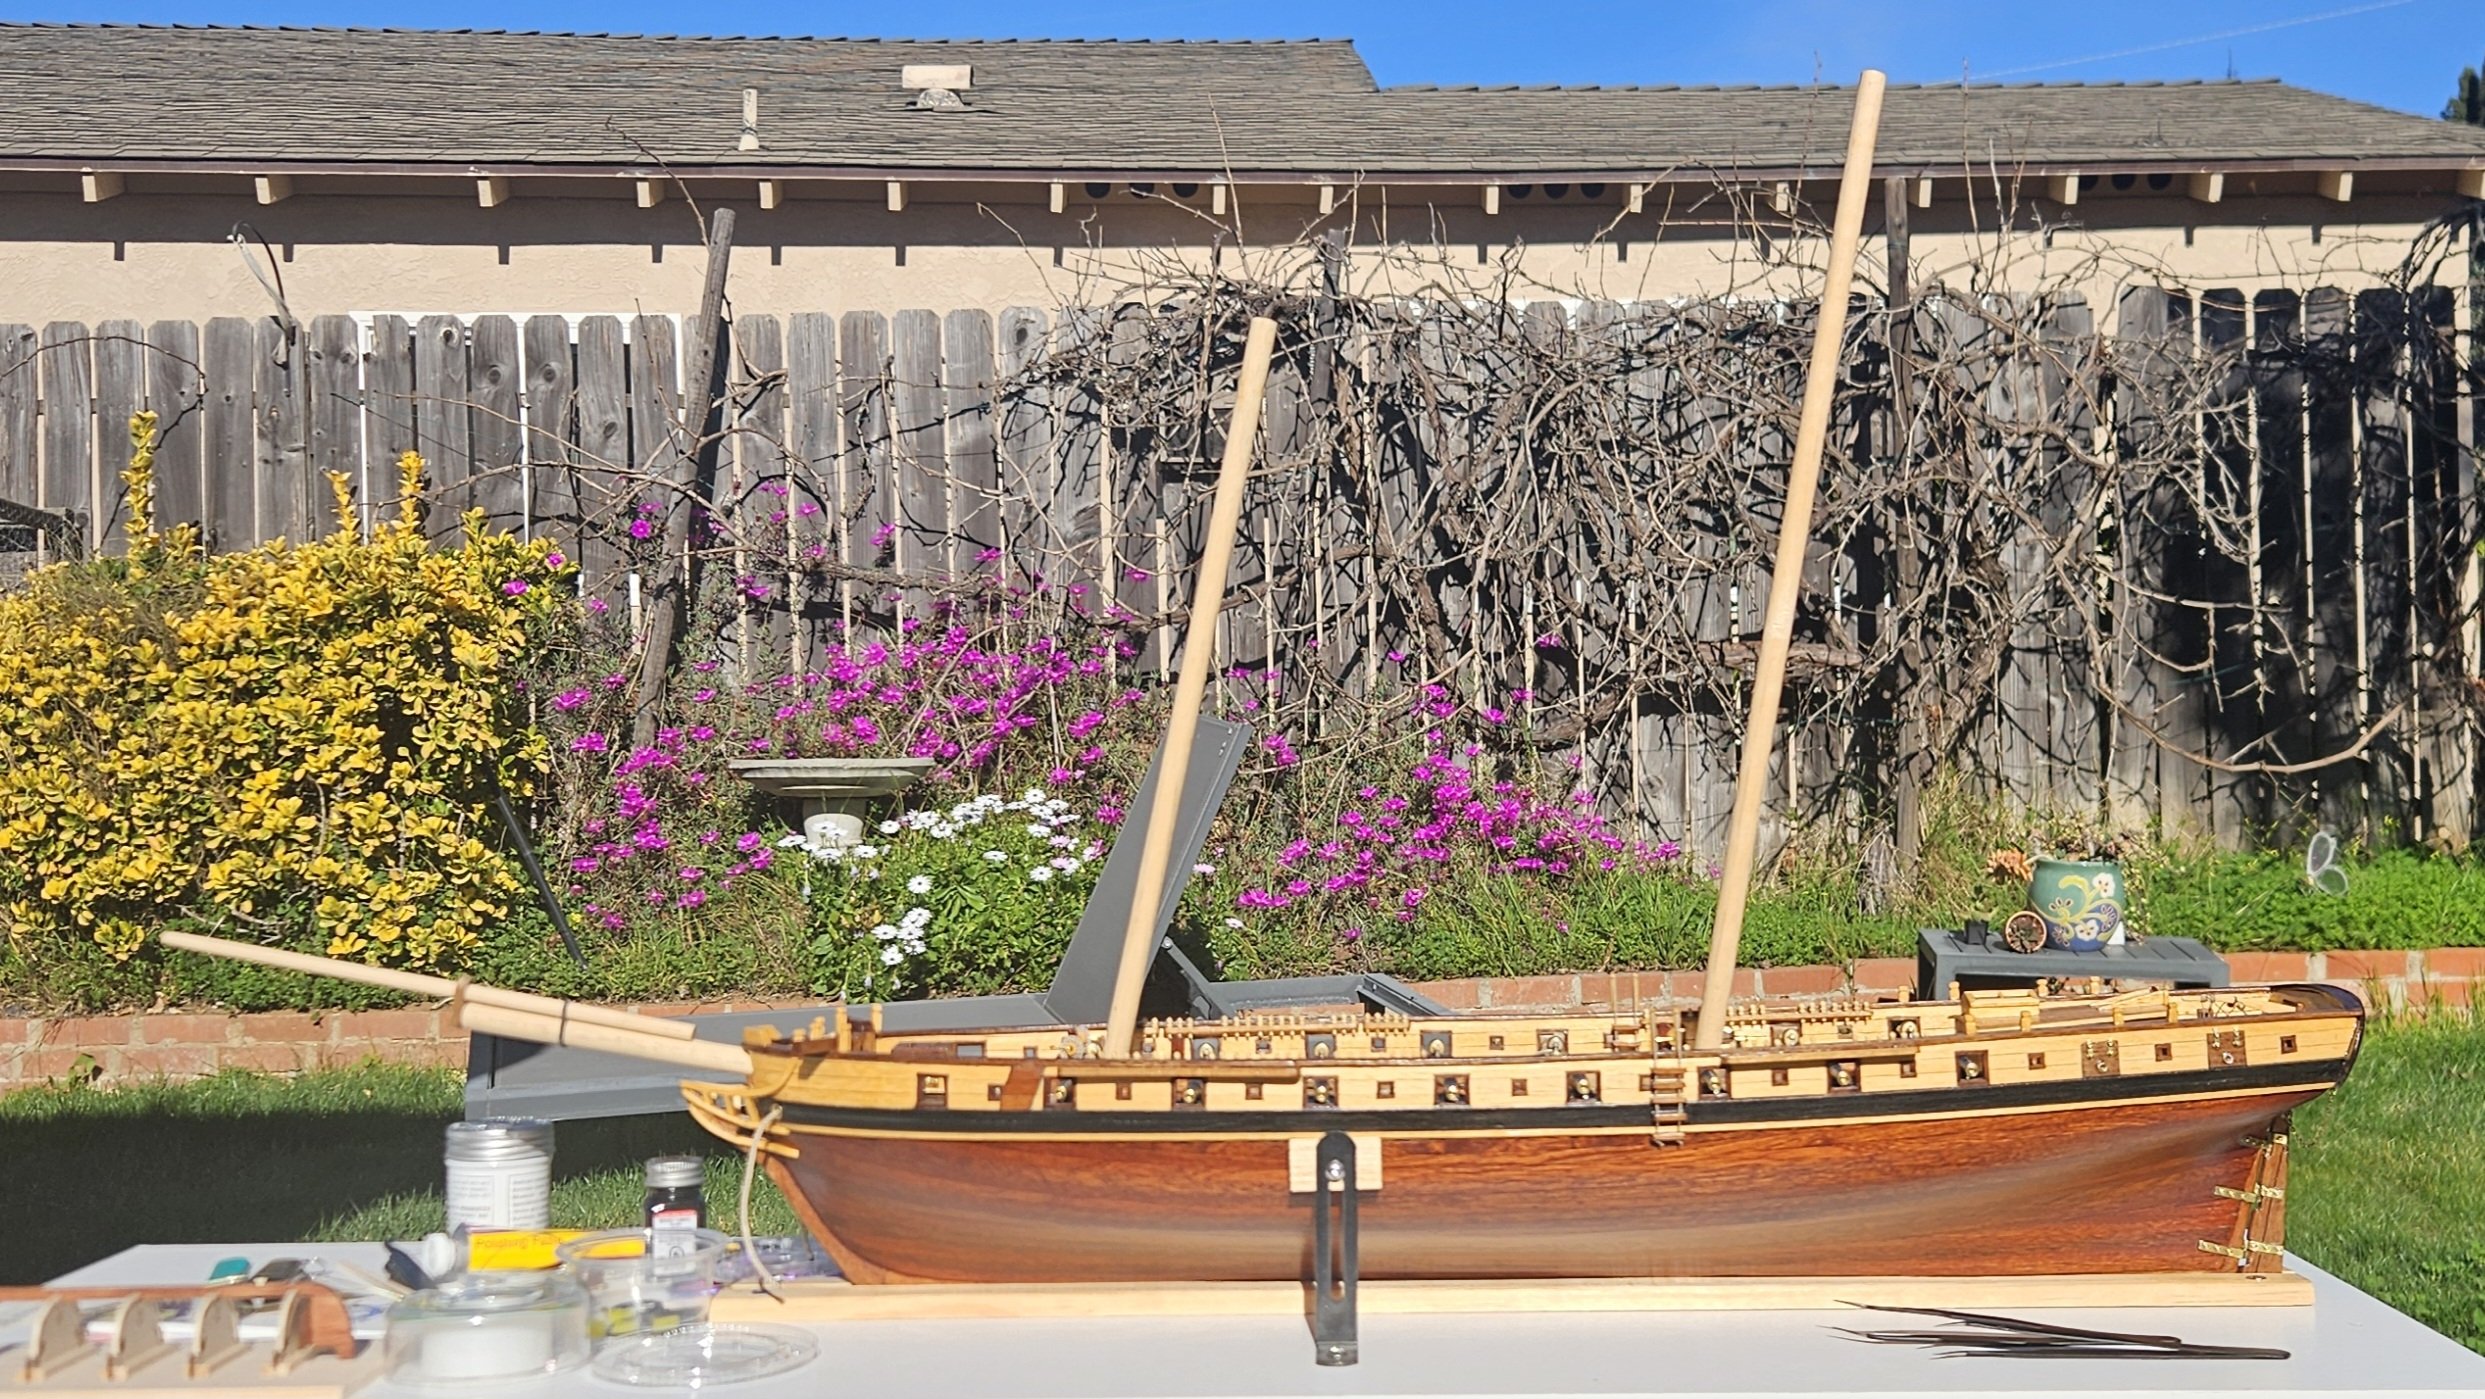
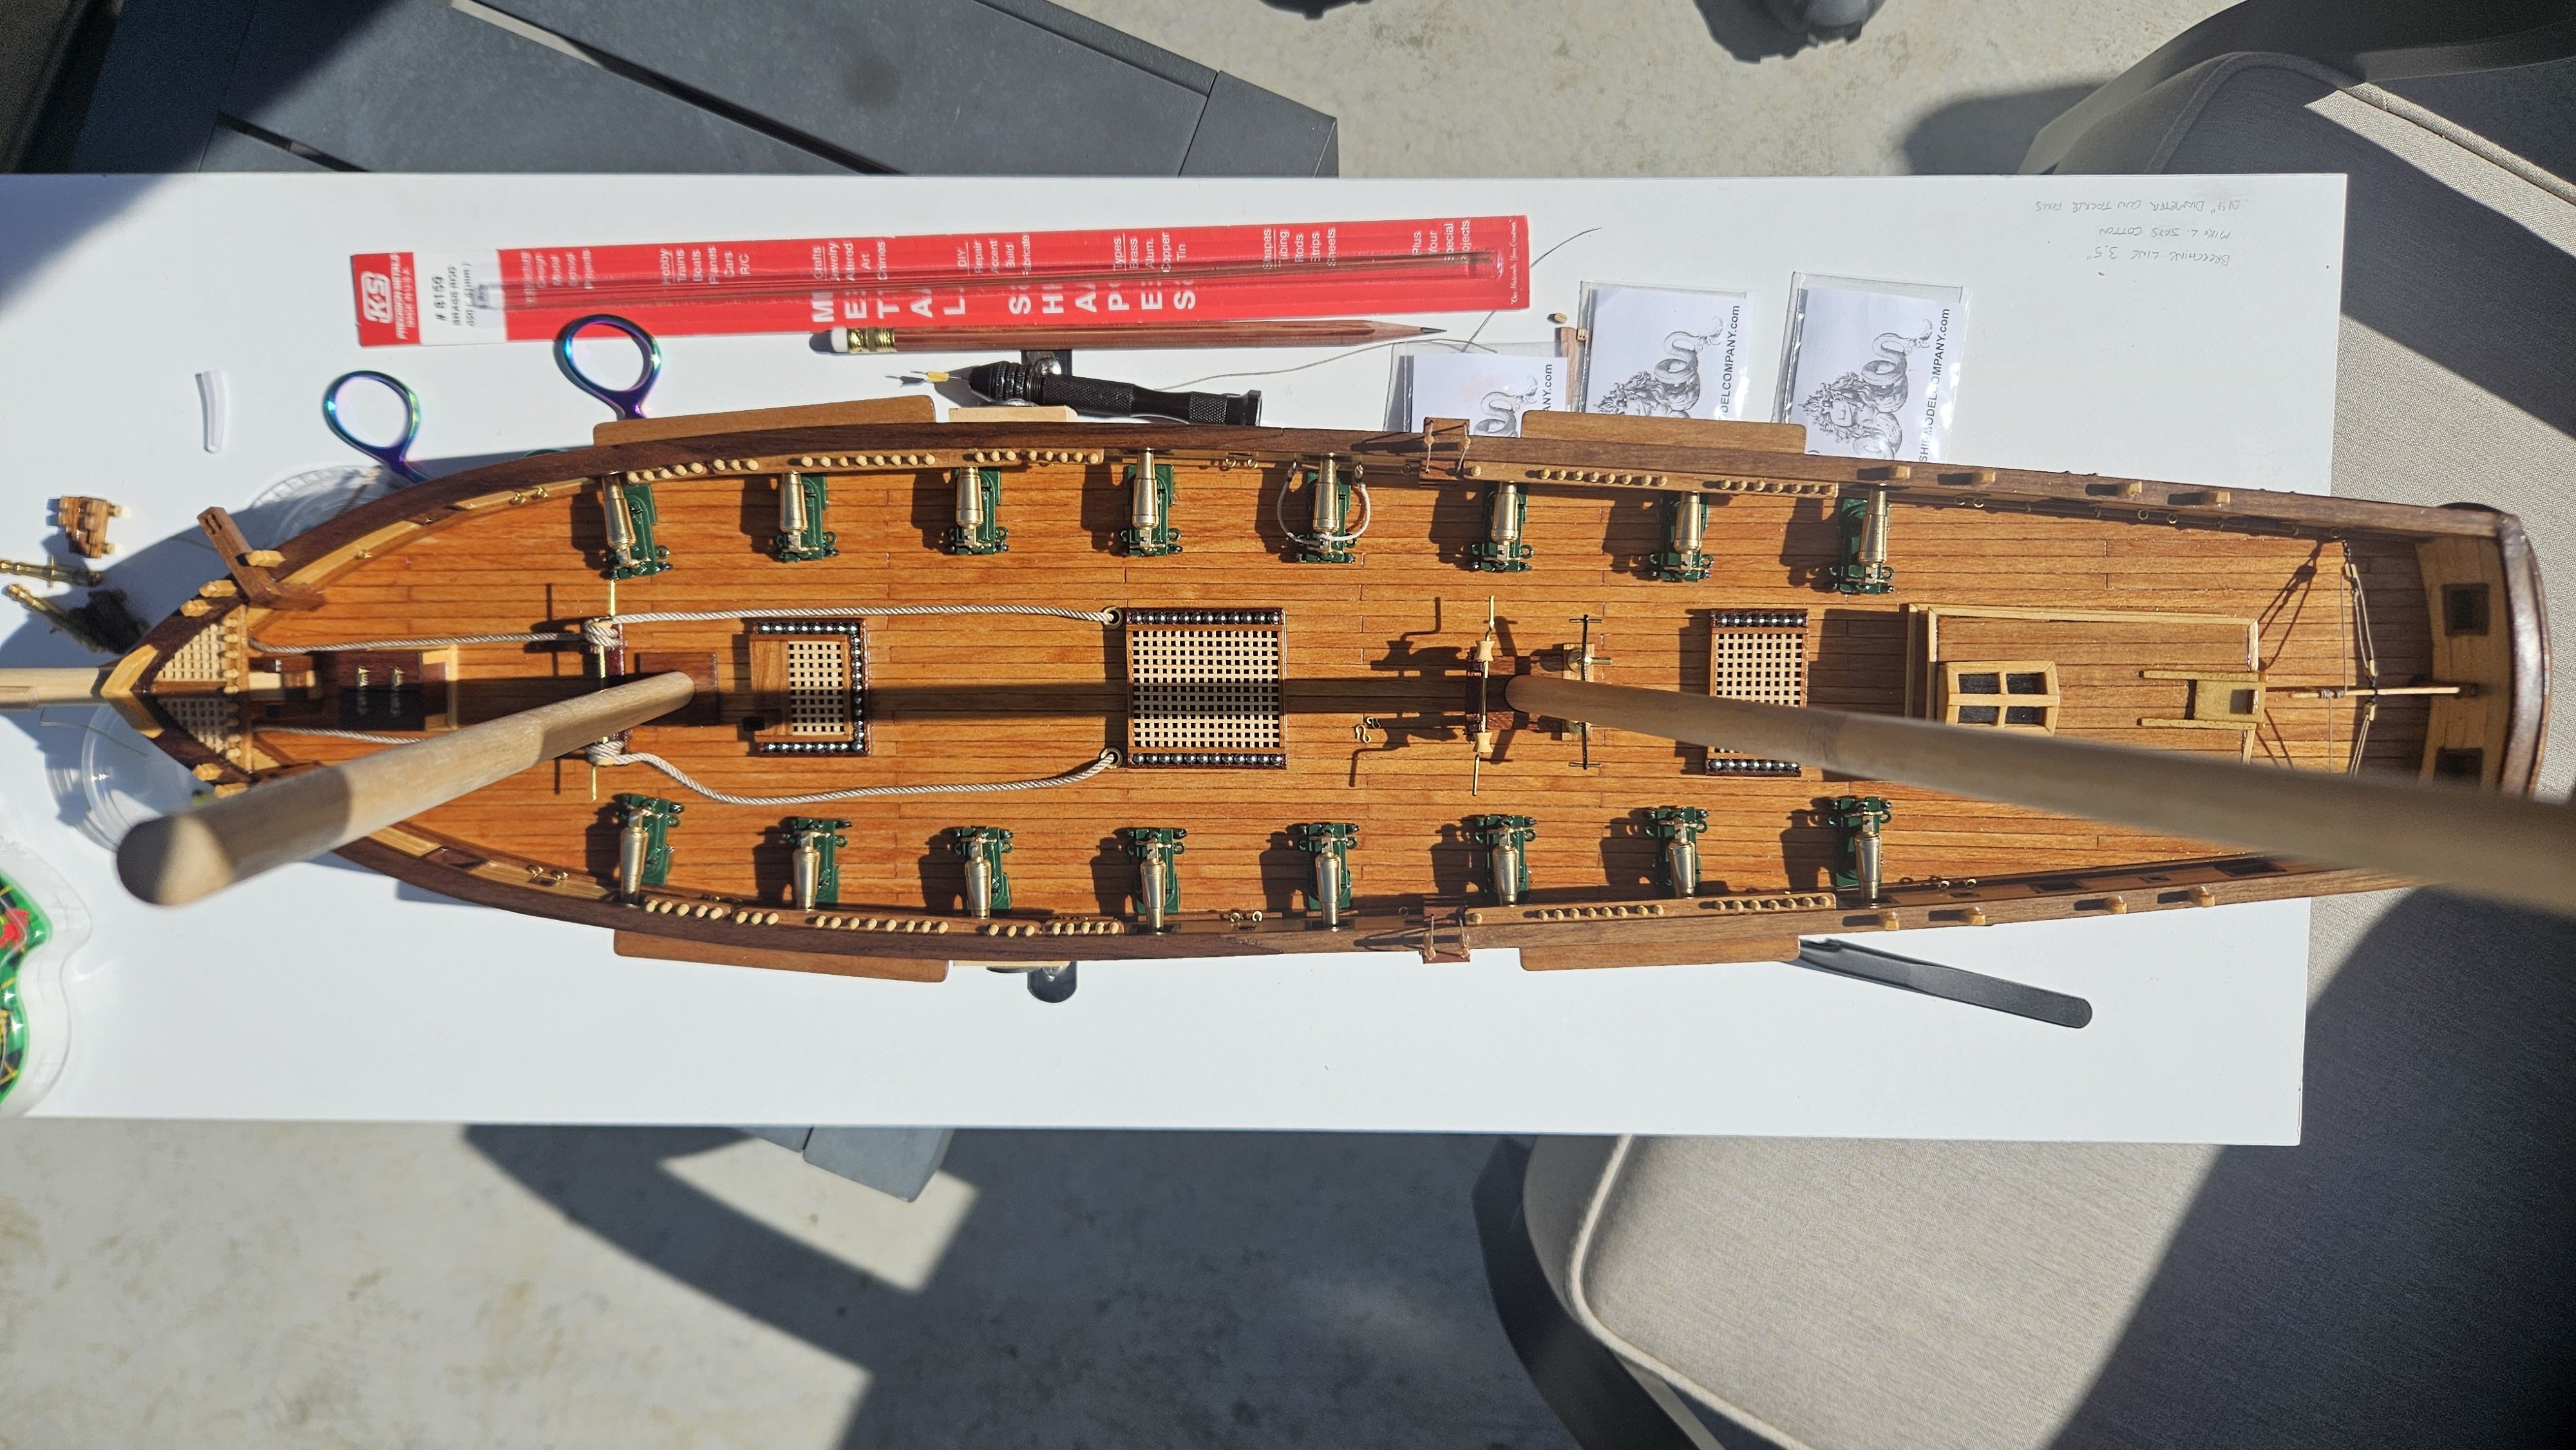
@SaltyScot Hi Mark! Thanks for the kind words. You are on the mark, at least from what I have seen, that the masts should have the same rake. I think a lot of the issue stems from the fisheye effect of my phone camera. If you step back and shoot (and then crop the photo) you see the "masts" are much more uniform in angle: The "masts" in the pics are just the raw stock pieces (as is the bowsprit) - after I shape them properly they will be shimmed, and between the shimming and the rigging I hope to get the mast angles proper. The Lynx is a beauty - I have used the modern one's photos to sort out several questions on the Prince. That should be fun - I'll keep an eye out for your build log if you do one!

-
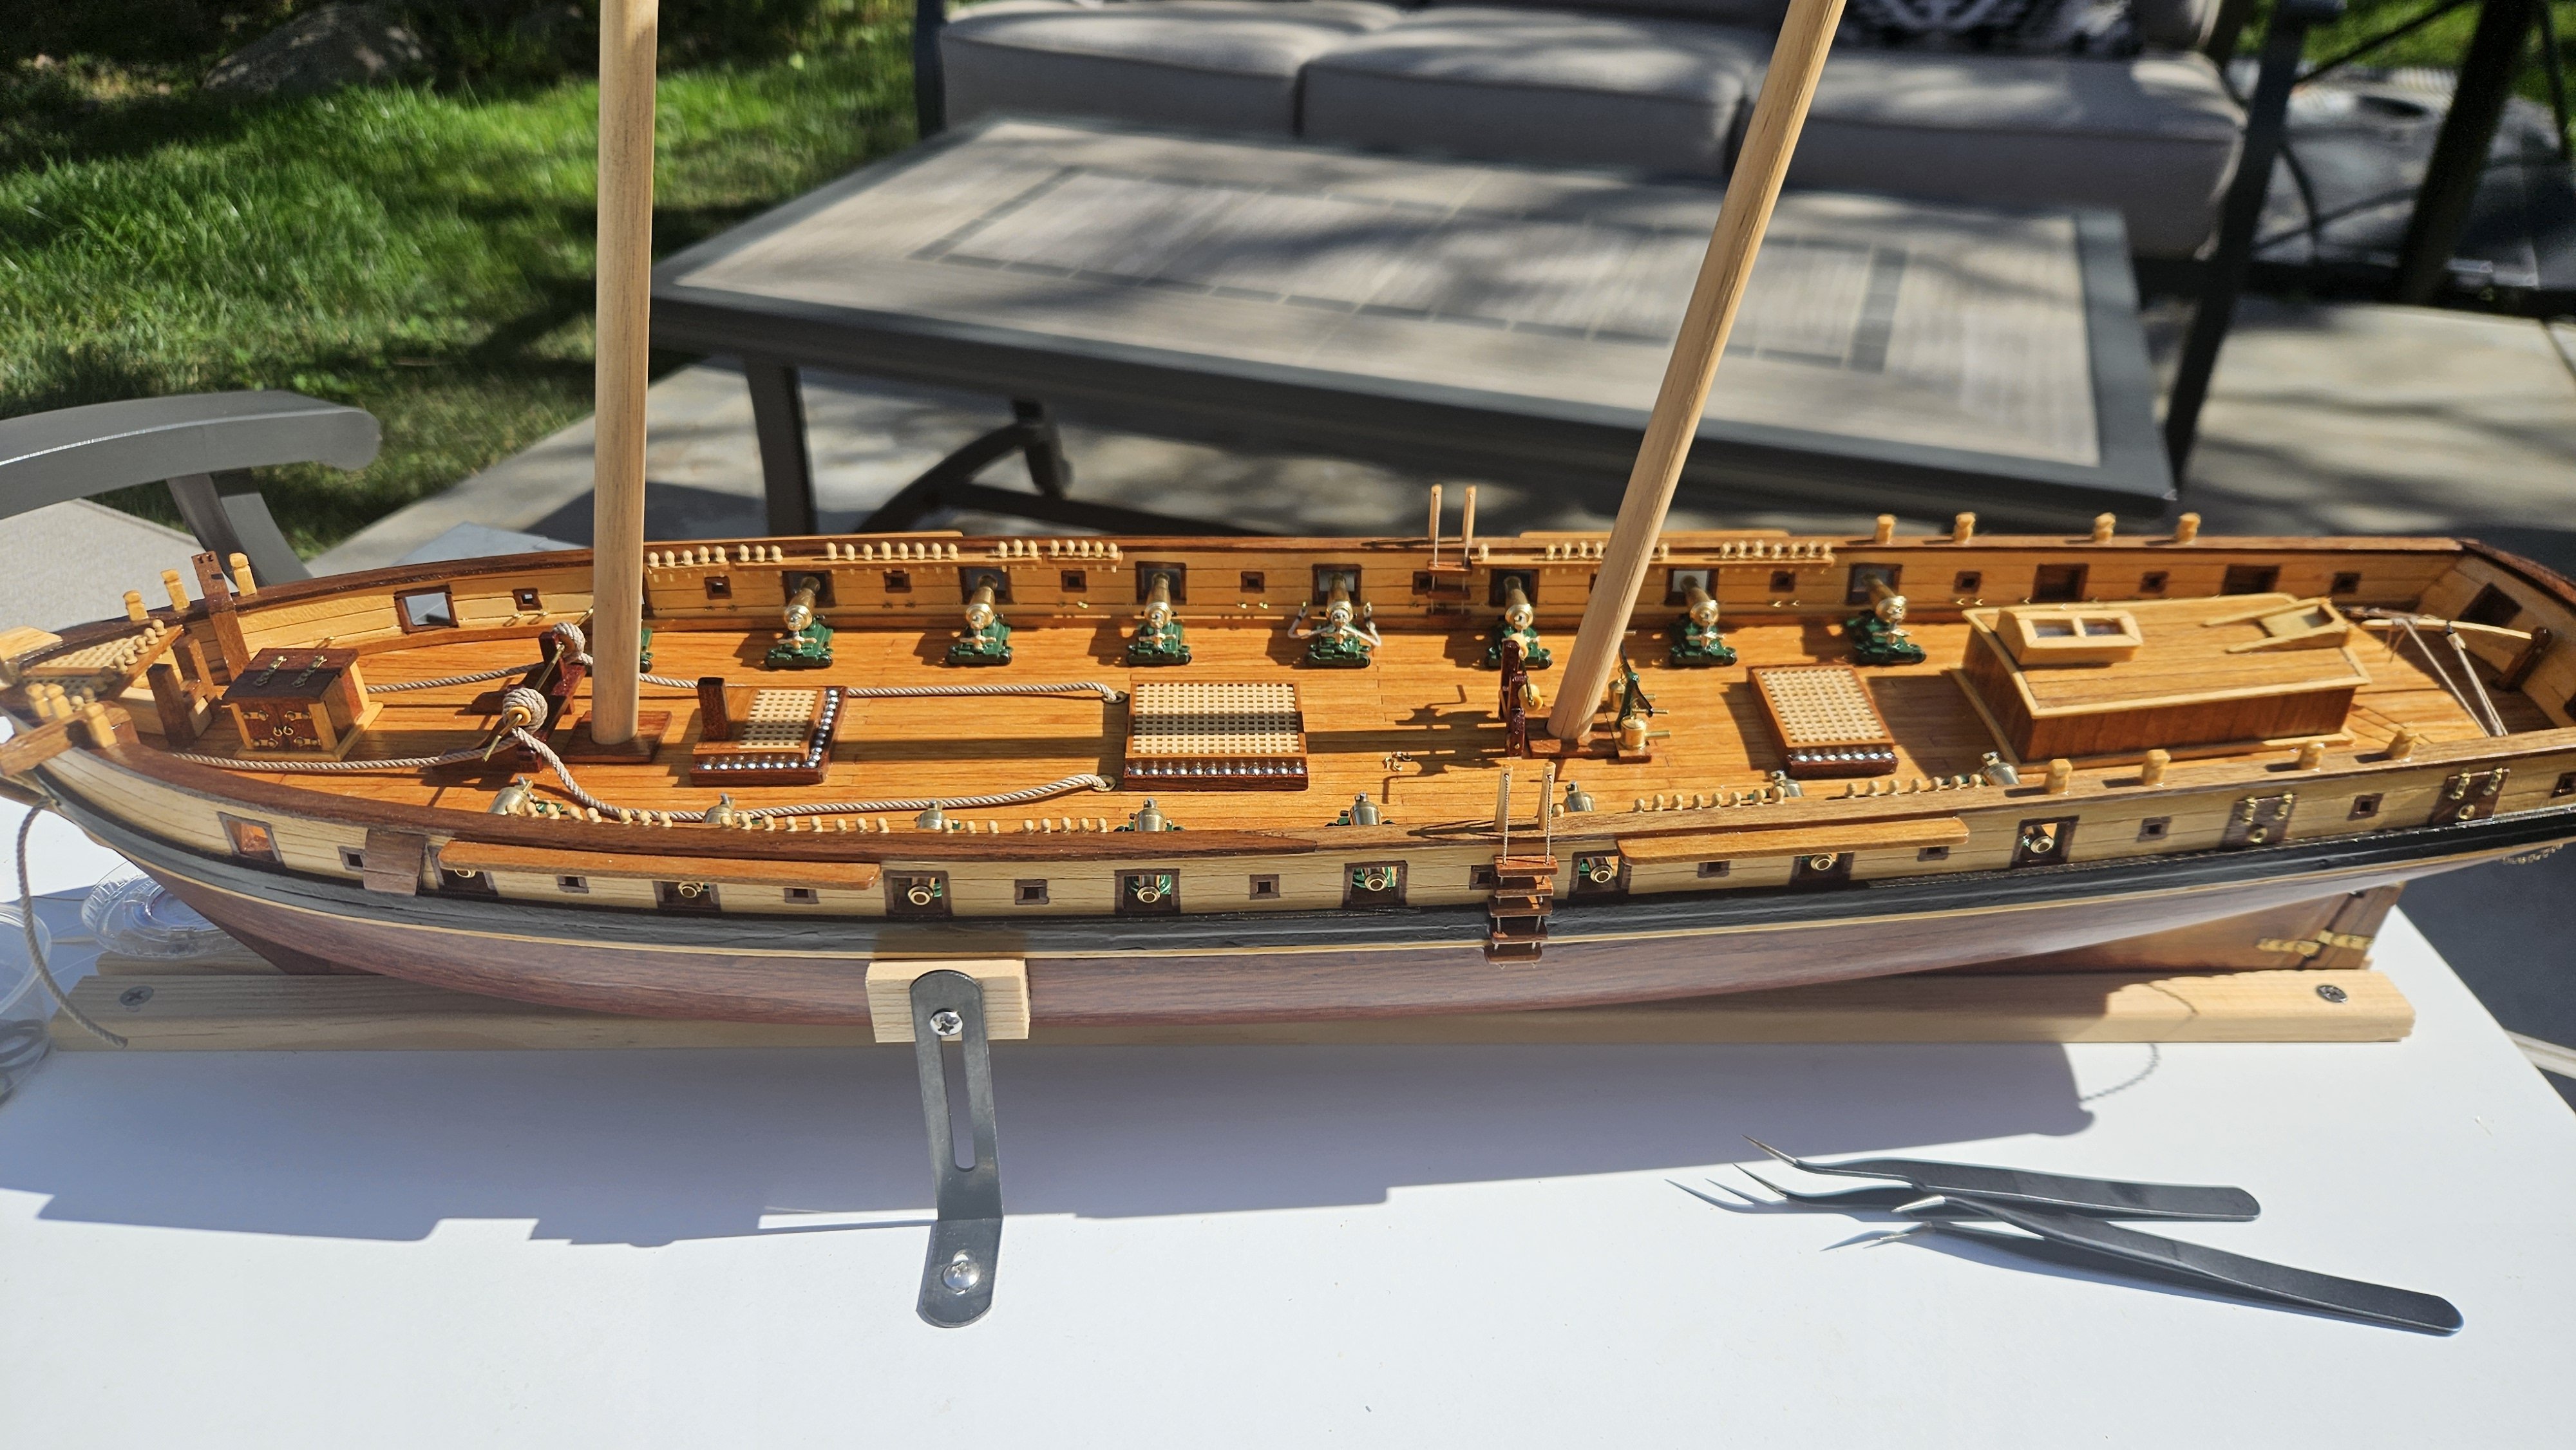
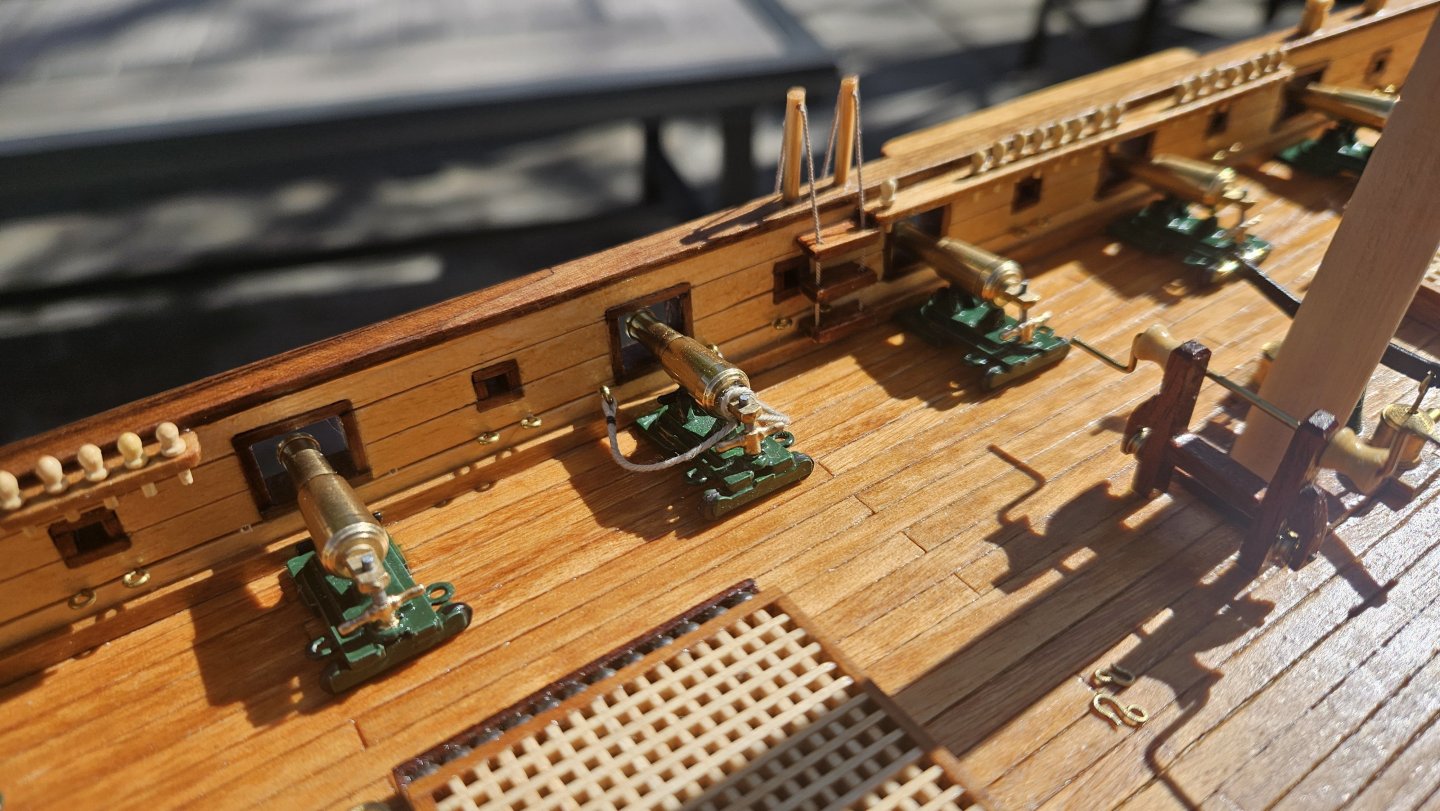
Full complement of 12 pound carronades. Painted, polished and ready for rigging. The train tackles will have hooks, so in theory hook, hook, tighten, tighten and wrap and done in 1:1 fashion. We'll see how it goes in reality. Decided to bring her out in the sun to see how these look.


-
Trying to work out the guns. Painting the rest to match the prototype. Fit check after bulkhead rings installed. (I will be making a lot of hooks I see!)
-
"Leave the jib. Take the cannoli." But yeah - a "suggestion" from the Admiral is not to be ignored.
-
Jsk nailed it. That handle is gonna stick! "Godfather of Schooner Rigging!"
-
No more shelf time Phil! Ordinary only leads to troubles! It looks fabulous and you're almost there. (Maybe more martinis in your future though! 🤣 ) The sails really make an impression - I'll likely follow your lead! Steve
-
Very neat work there!
-
Yeah Phil (saw it coming a mile away). I didn't wanna push but you get one chance to do right by her. Glad you're going this route. It is such a cool project.
- 492 replies
-
- 2
-

-
- minesweeper
- Cape
- (and 1 more)
-
Phil - whatever you do it will be the right decision. Based on the accuracy of your Albatros details, I have an inkling of where you might go with this. Just an awesome project - your stories are investing us all in Cape!
- 492 replies
-
- 2
-
-
- minesweeper
- Cape
- (and 1 more)
-
@Dr PR That is amazing! Any regrets on not blackening them? It definitely looks the business. My fear with clear would be non-uniform coatings and non-uniform tarnish. Natural looks good after 50 years there. Different, but good. So many decisions Captain!
-
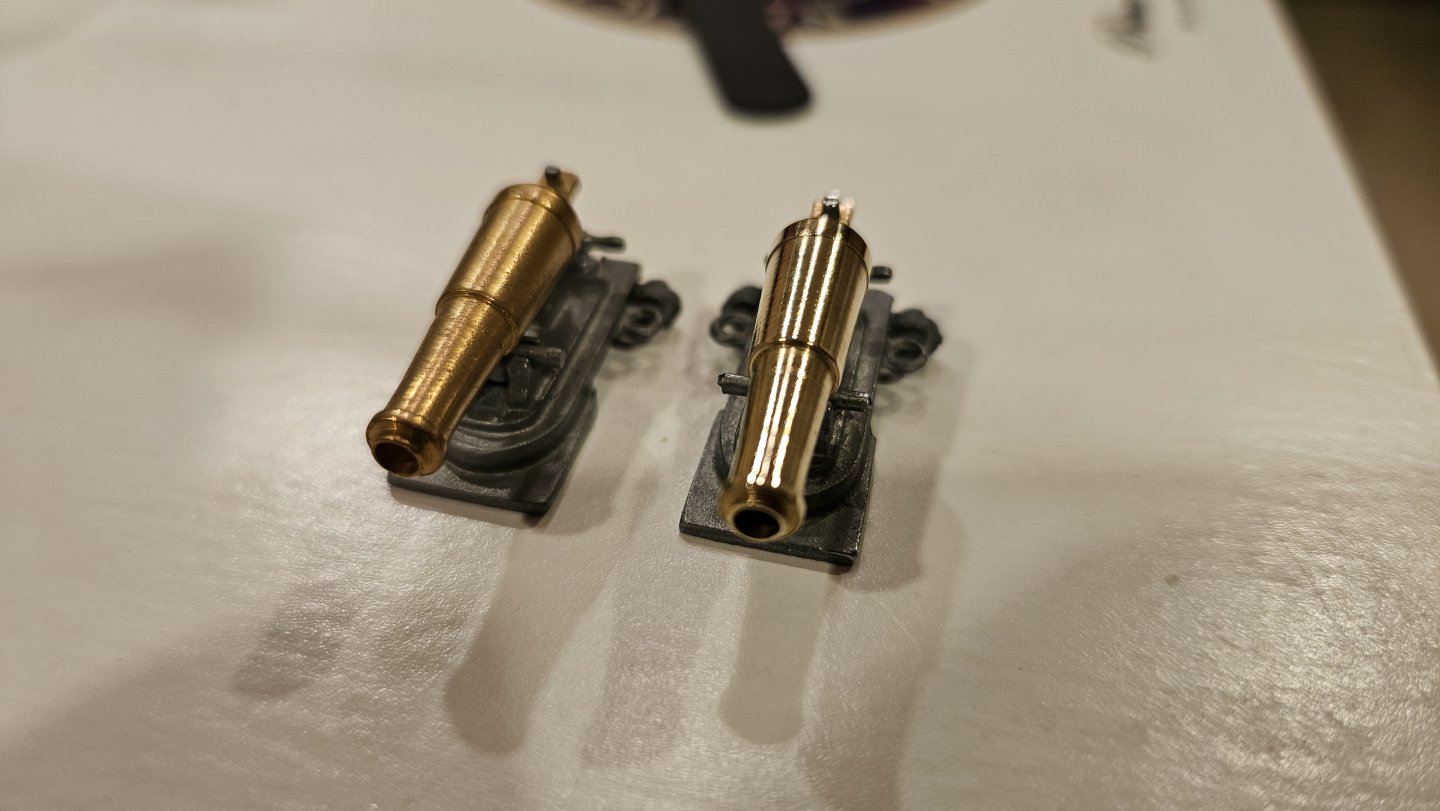
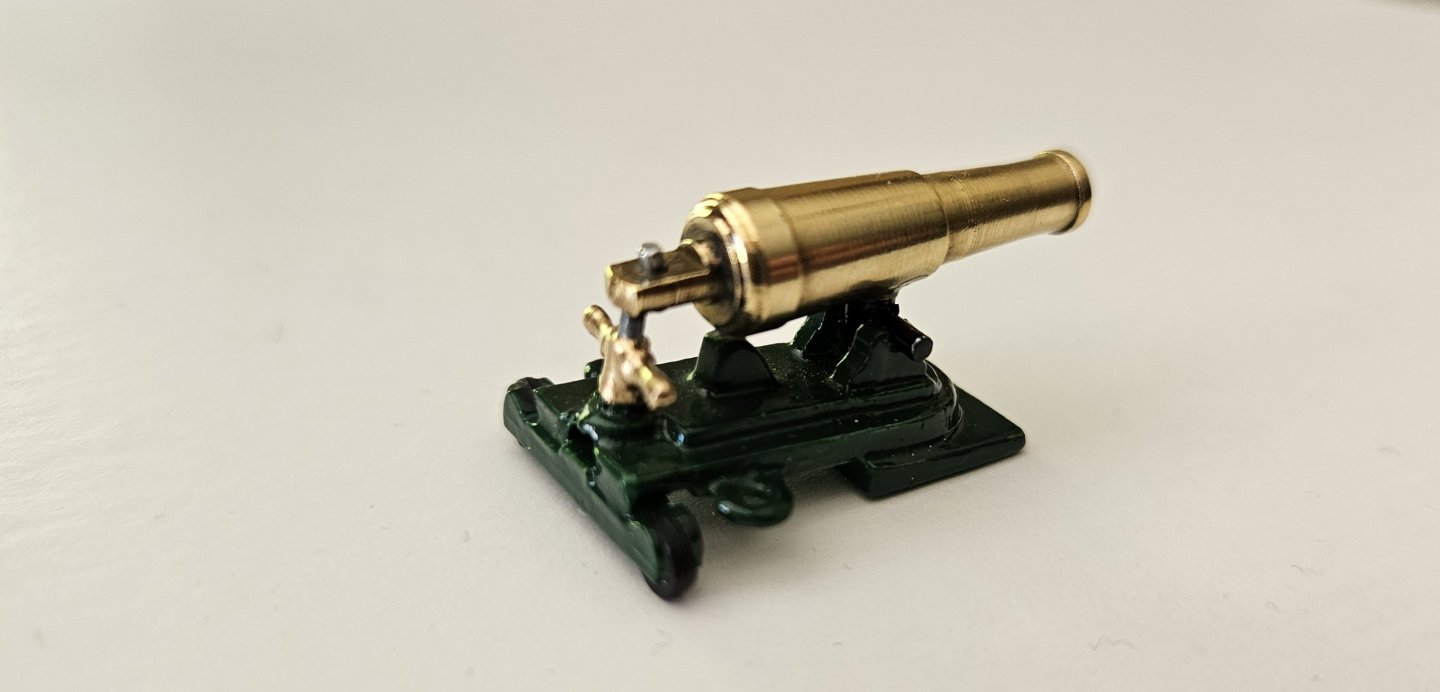
I am building a Constructo model with some beautiful natural wood colors. My vision is to keep with the natural theme and leave the guns brass. Does anyone have pics of brass cannon on a ship they built decades ago? I am polishing them for install but after rigging I think they will have to be left to the elements. How will they look in 20 or 30 years? The left gun below is 20+ years of tarnish, the right was polished tonight. Once I get them polished I will paint the carriages like this and then get them rigged. Any thoughts or pictures appreciated. Thanks!!
-
Neat work Chris. Phoenix has handsome lines.
-
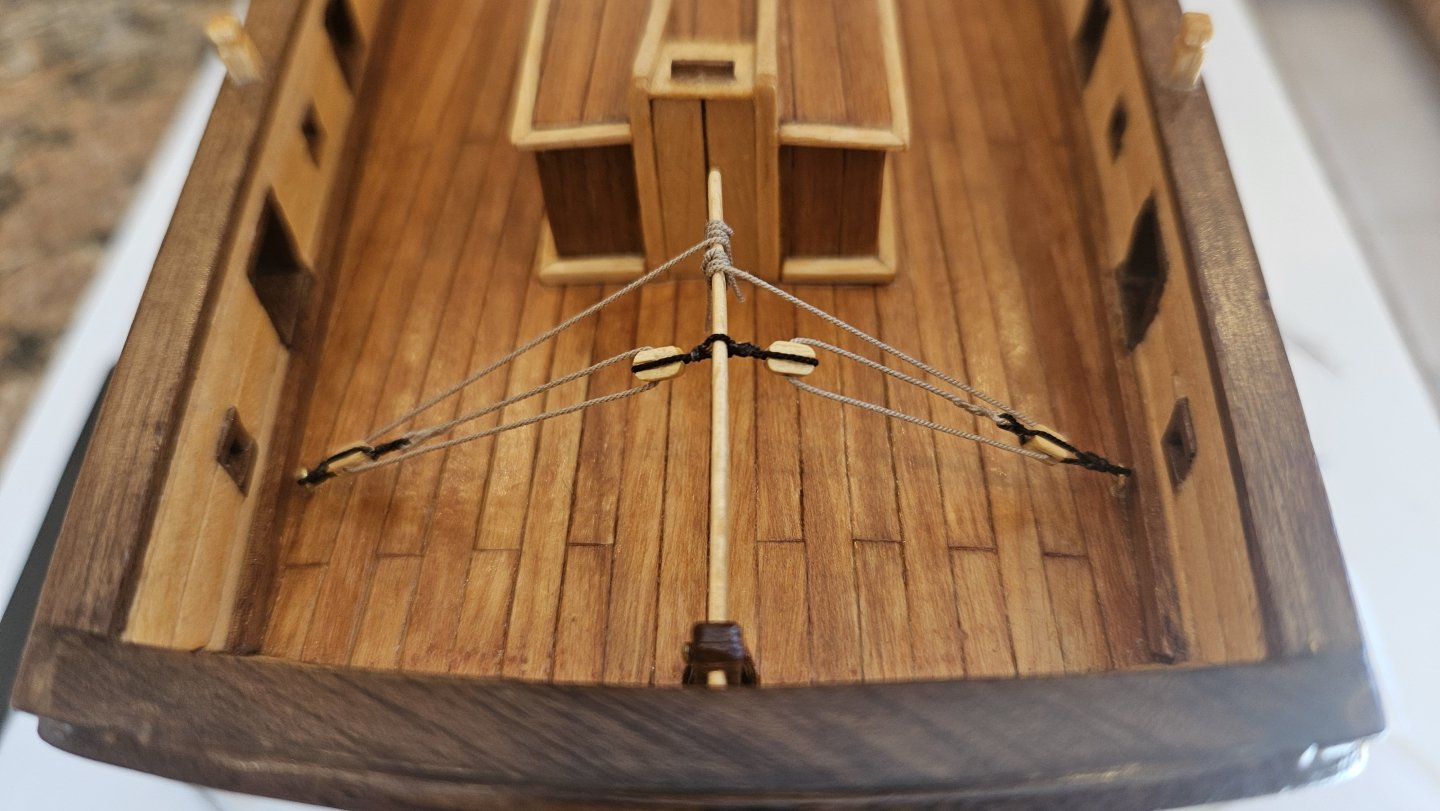
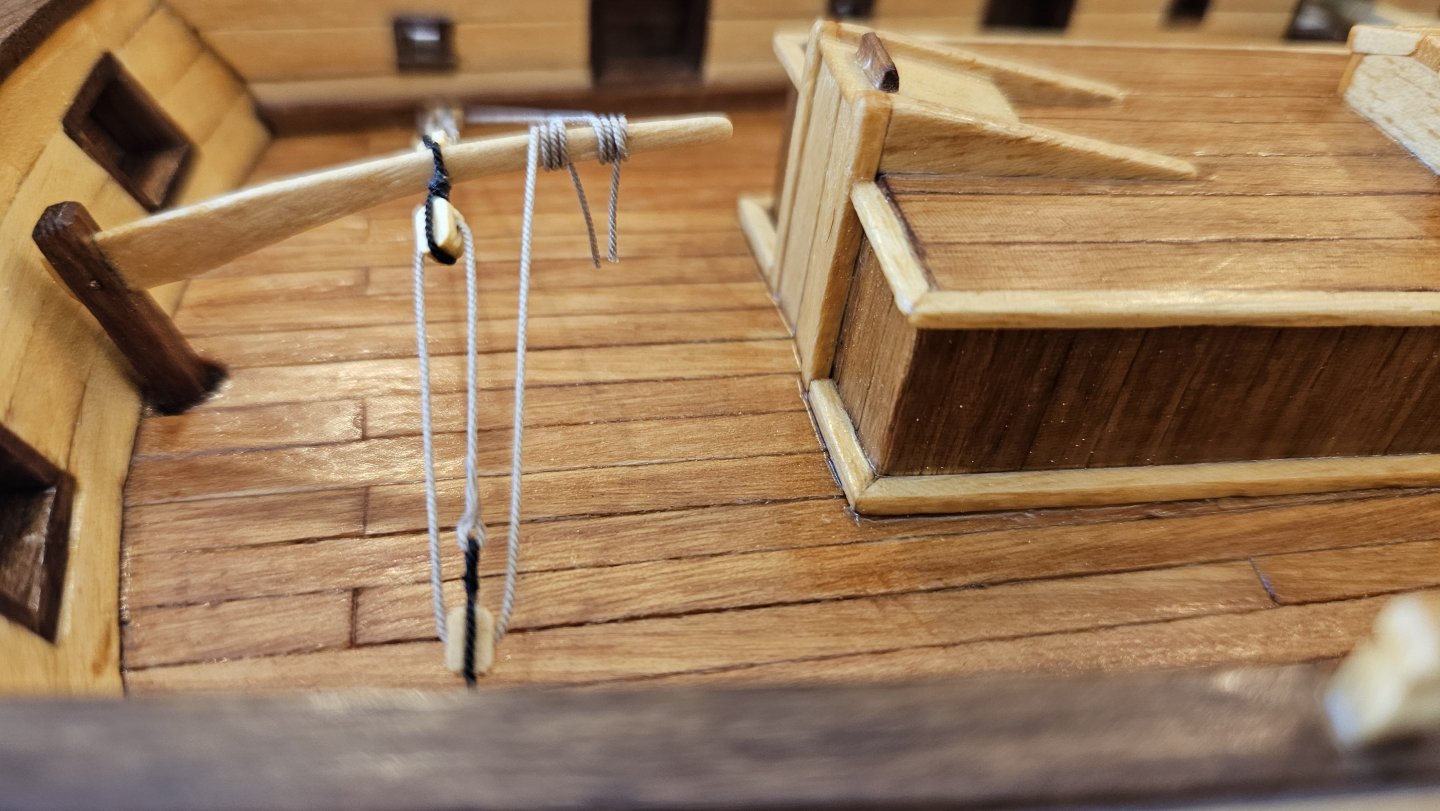
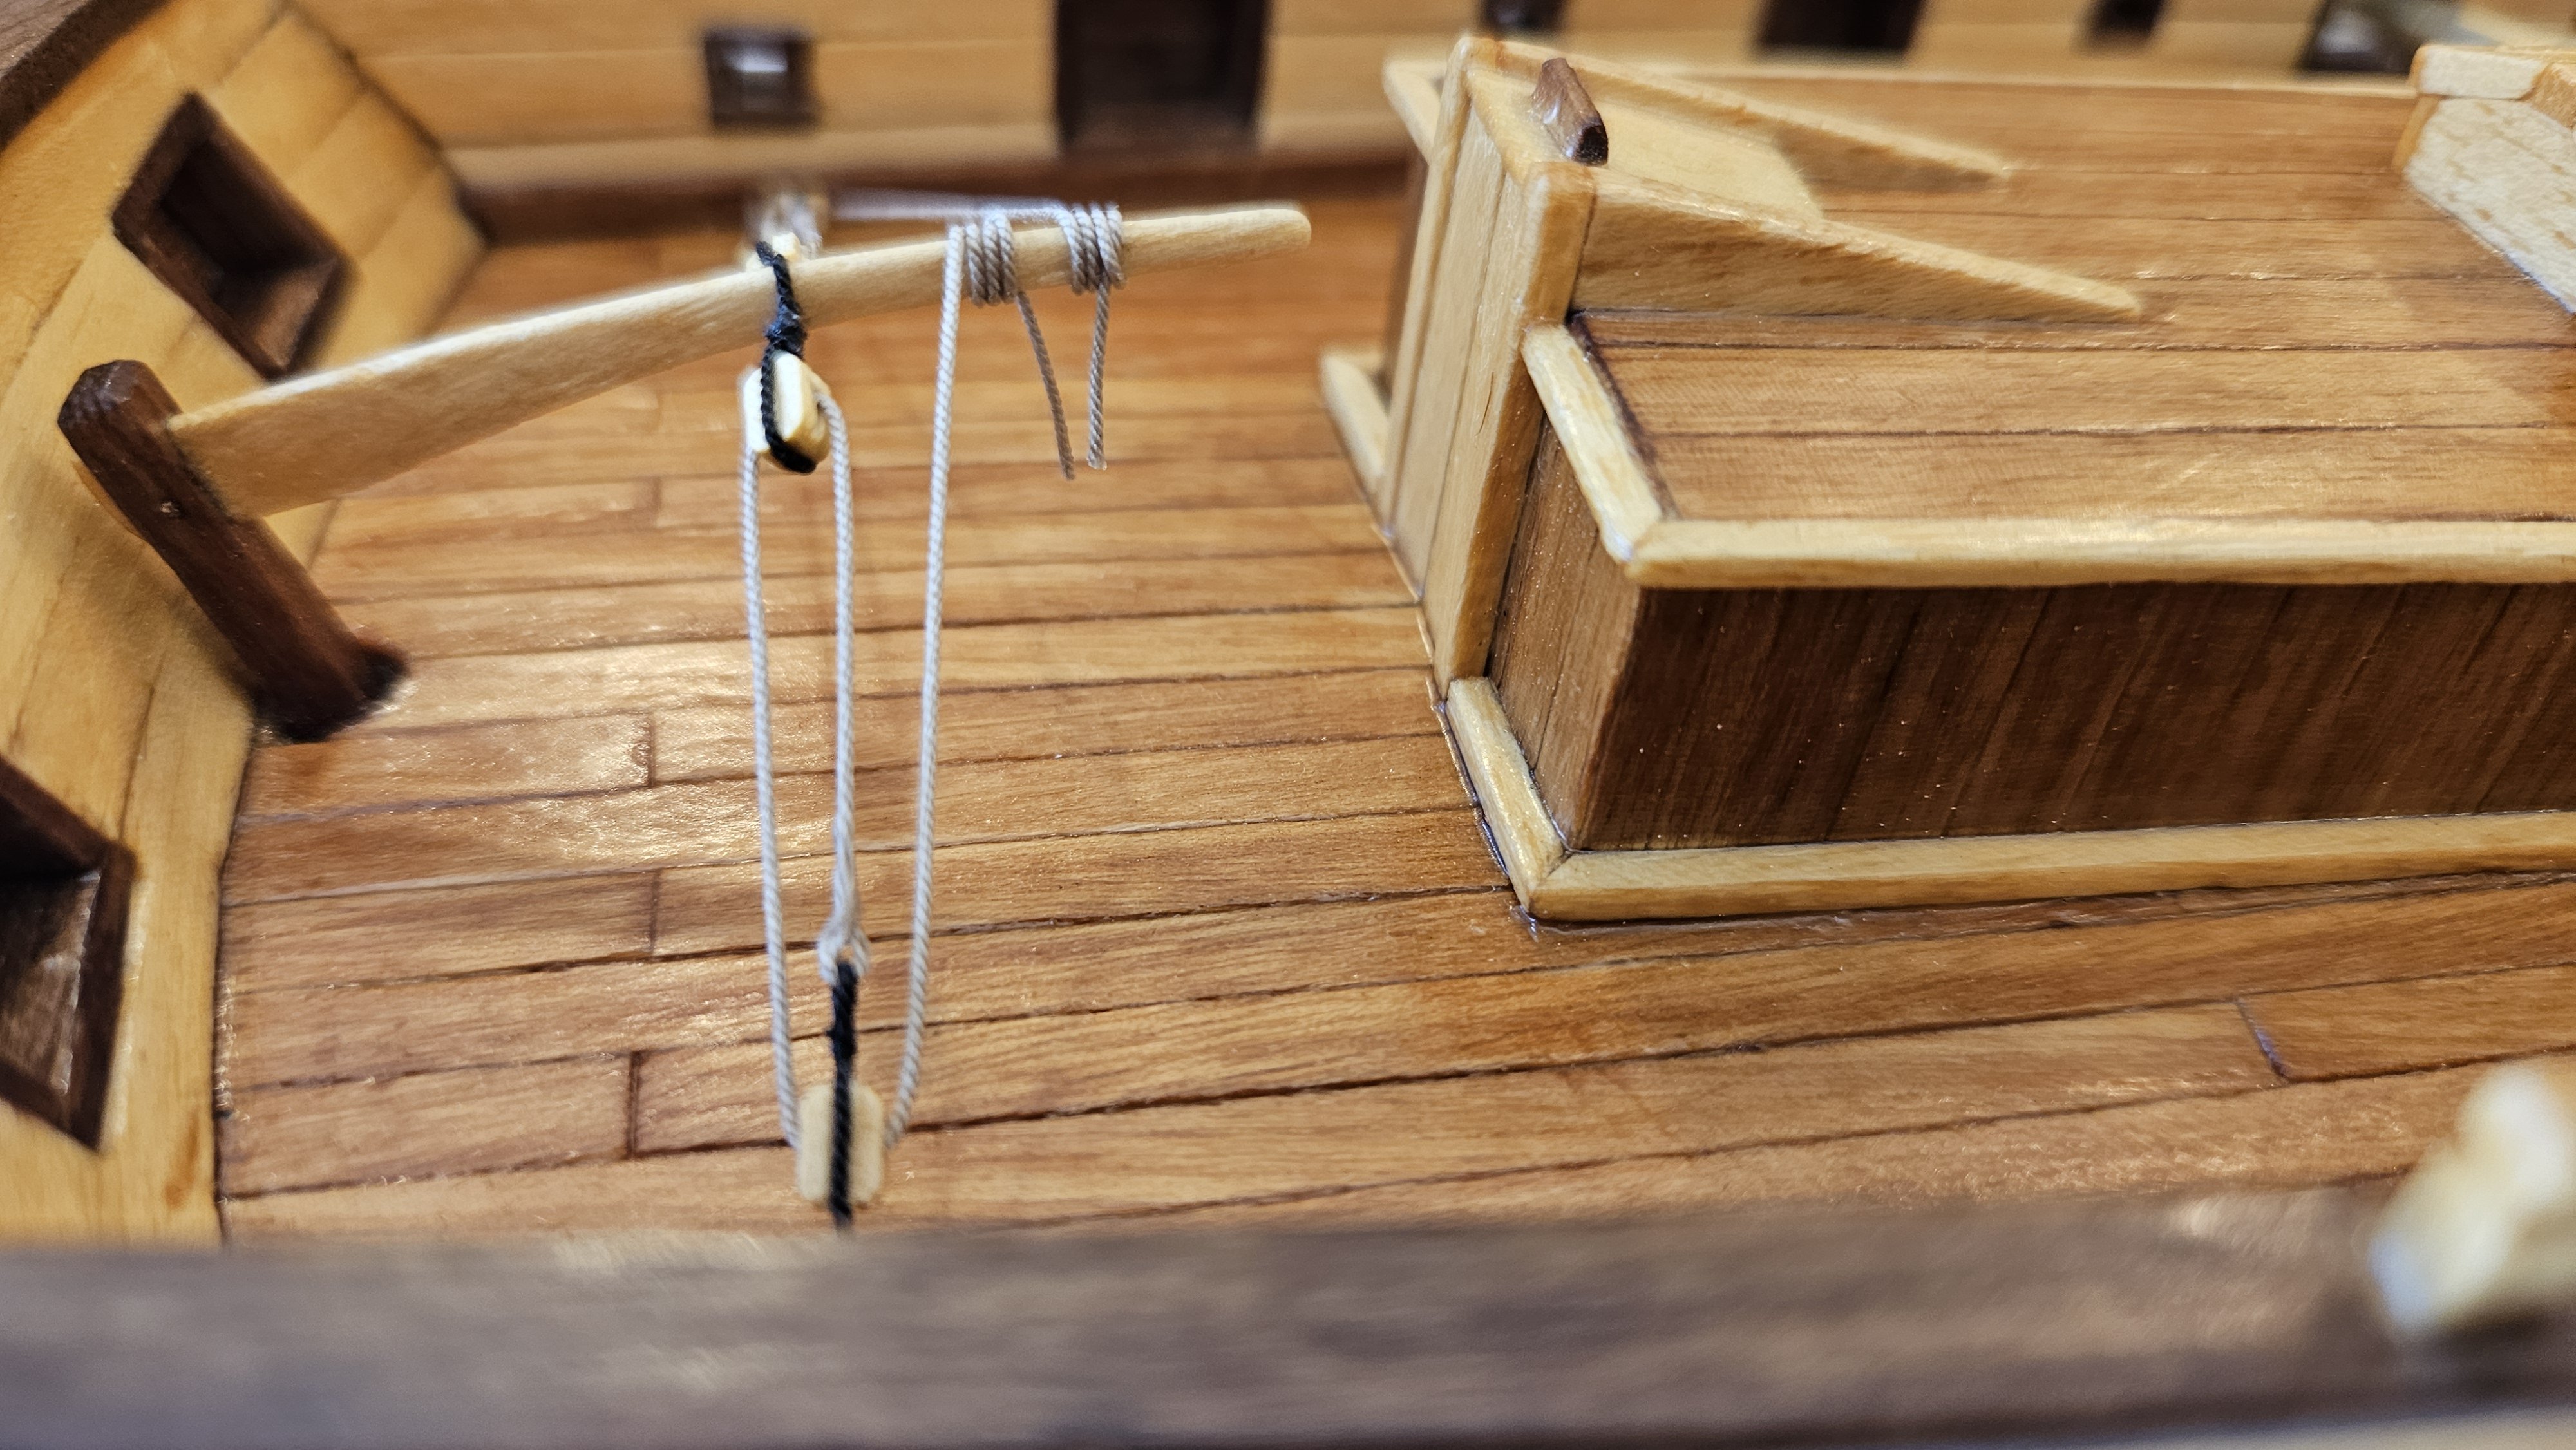
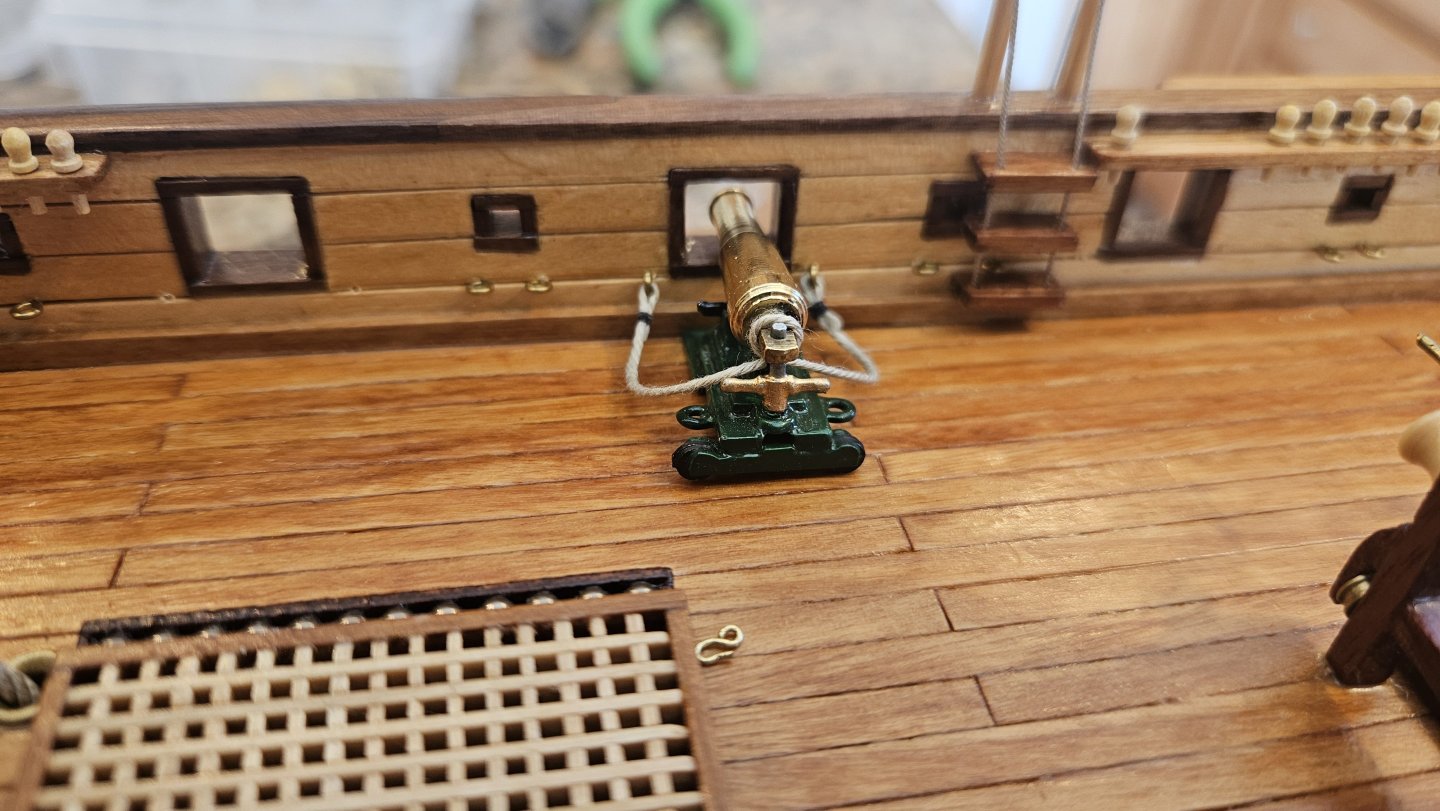
Tiller damper rigging completed.