


RH-J
-
Posts
9 -
Joined
-
Last visited
-
 JDillon reacted to a post in a topic:
Polaris by RH-J - OcCre - 1:50
JDillon reacted to a post in a topic:
Polaris by RH-J - OcCre - 1:50
-
ccoyle reacted to a post in a topic:
Polaris by RH-J - OcCre - 1:50
-
Polaris by RH-J - OcCre - 1:50
RH-J replied to RH-J's topic in - Kit build logs for subjects built from 1801 - 1850
Taking a break on the build while I research and organise the additional bits and pieces needed for the deck fittings and rigging. Back soon. -
JDillon reacted to a post in a topic:
Polaris by RH-J - OcCre - 1:50
-
Polaris by RH-J - OcCre - 1:50
RH-J replied to RH-J's topic in - Kit build logs for subjects built from 1801 - 1850
@JDillon Thanks for the compliments, Joe. Probably the only colour that is historically correct is the red ochre. The rest were chosen for various reasons and nothing to do with history! Bottom line - I just liked them and that, I think, is the point: choose a colour scheme you like but which looks convincing. Don't worry about copying someone else - imitation is the highest form of flattery! The bare timber is the strips from the kit with just a coat of matt acrylic varnish. By the way, all the paint I use is acrylic primarily because I cannot ship (no pun intended) enamel paint. Based on years of modelling, it is far easier to paint models before too much detail is fixed in place. It is much simpler to touch up small areas where the paint has been damaged than it is to cut it in around detail. It is also easier to paint the detail before you fit it for the same reason. The only note of caution I will give is, if you are mixing colours jot down the original colours and their mix ratio so you can match it in the future. Cheers, Rowan. -
JDillon reacted to a post in a topic:
Polaris by RH-J - OcCre - 1:50
-
JDillon reacted to a post in a topic:
Polaris by RH-J - OcCre - 1:50
-
JDillon reacted to a post in a topic:
Polaris by RH-J - OcCre - 1:50
-
Polaris by RH-J - OcCre - 1:50
RH-J replied to RH-J's topic in - Kit build logs for subjects built from 1801 - 1850
HM Schooner Cockle. At the moment, I am working on hatches, companion ways and deck fittings The next major leap forward will be fitting and rigging the bowsprit followed by the foremast. I am hoping this will then dictate where and how the anchors are stowed. Rowan.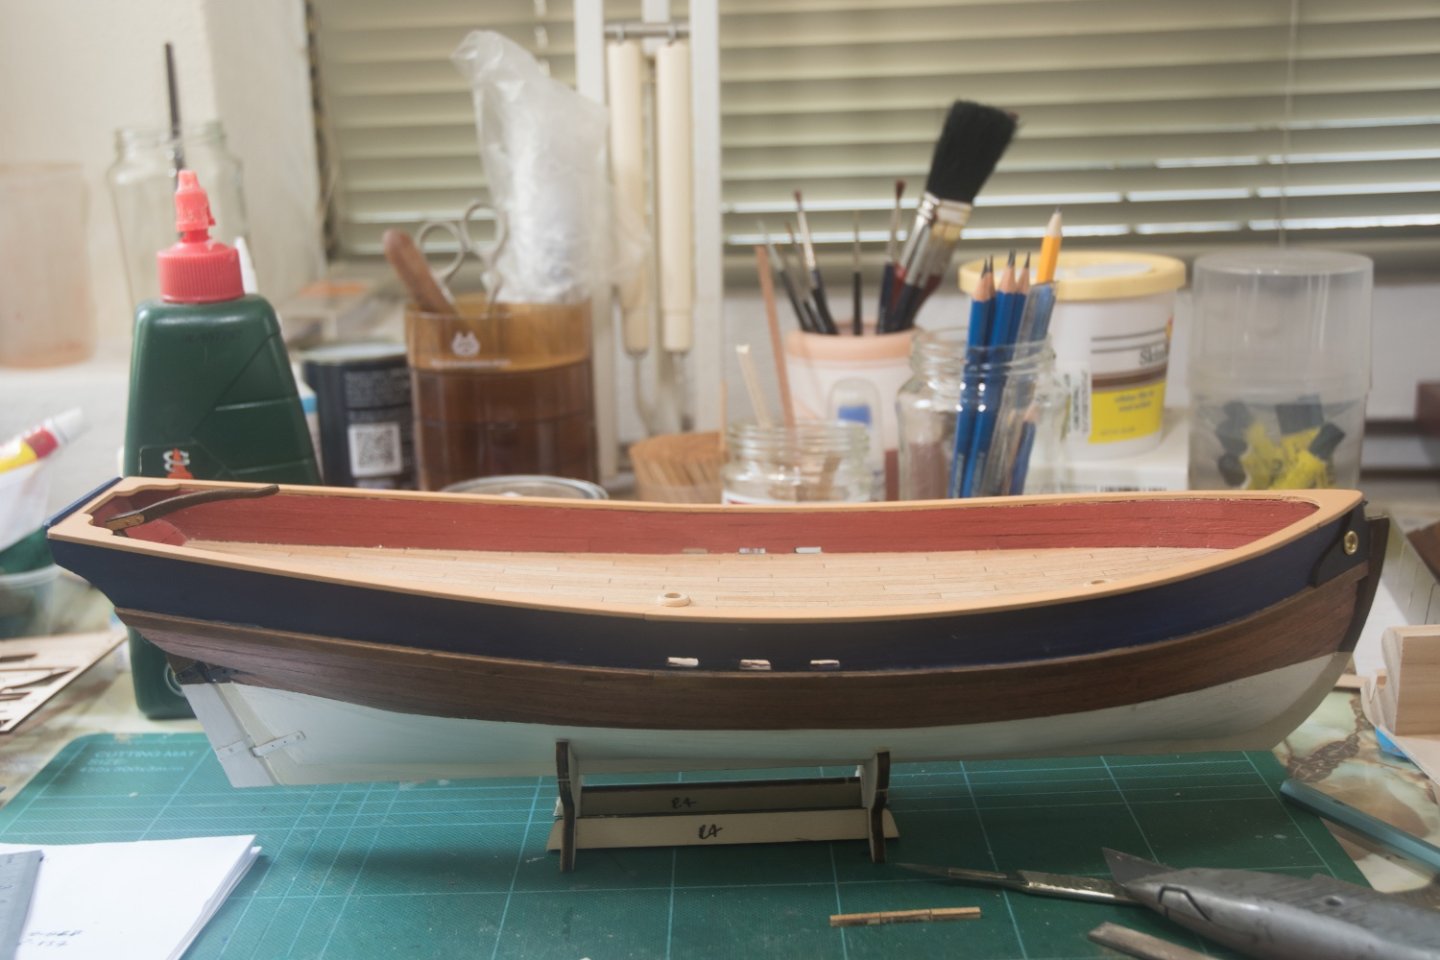
-
Polaris by RH-J - OcCre - 1:50
RH-J replied to RH-J's topic in - Kit build logs for subjects built from 1801 - 1850
HM Schooner Cockle deck planking.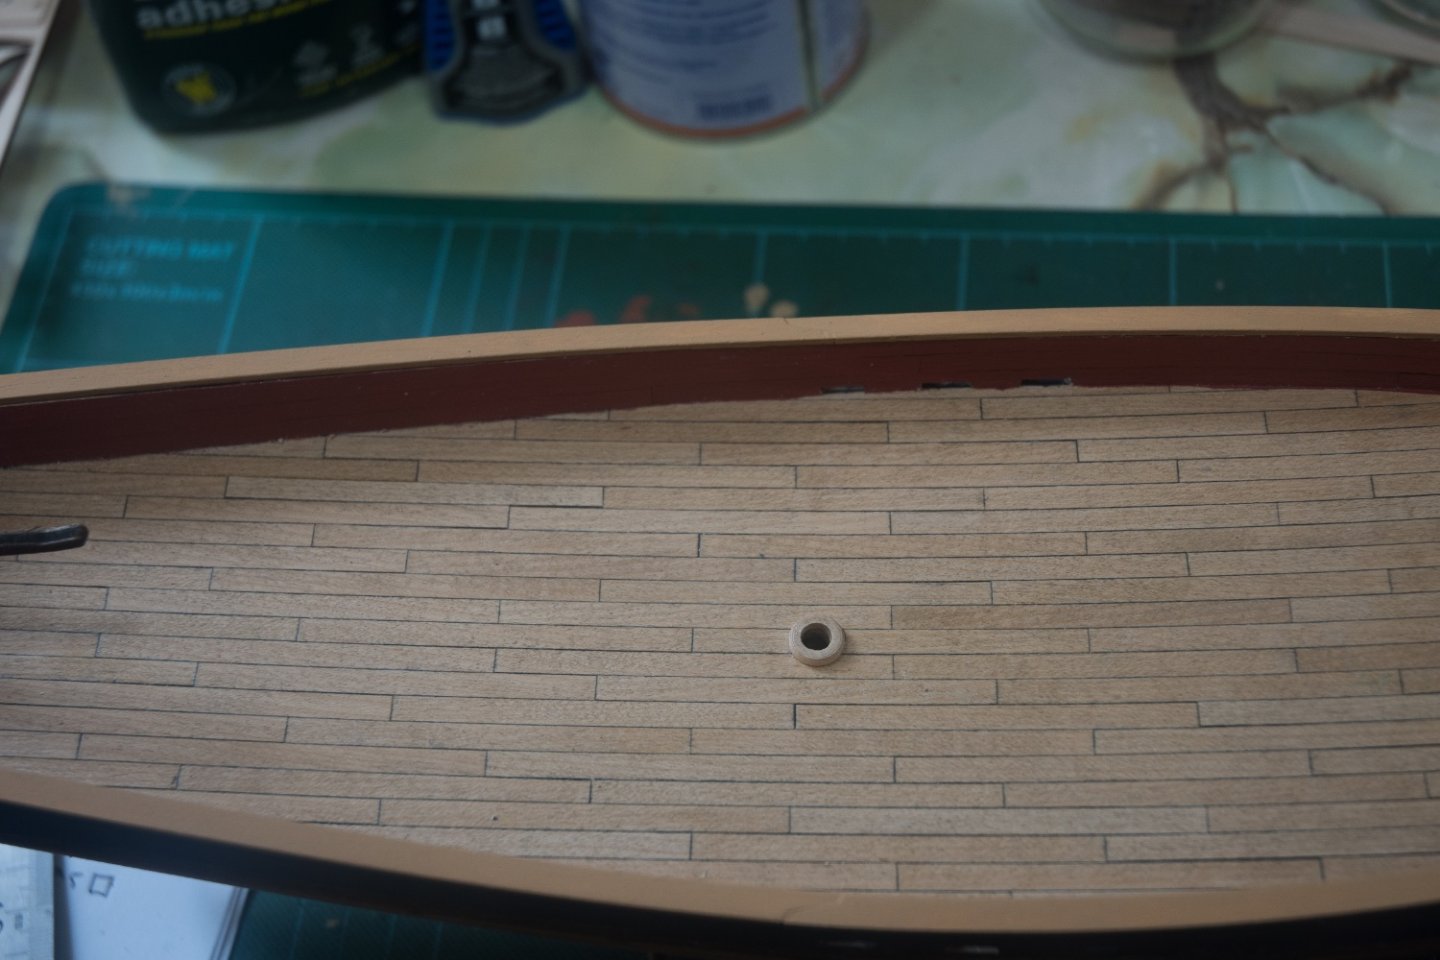
-
Edwardkenway reacted to a post in a topic:
Polaris by RH-J - OcCre - 1:50
-
Edwardkenway reacted to a post in a topic:
Let me please introduce myself
-
Dave_E reacted to a post in a topic:
Let me please introduce myself
-
Dave_E reacted to a post in a topic:
Let me please introduce myself
-
Polaris by RH-J - OcCre - 1:50
RH-J replied to RH-J's topic in - Kit build logs for subjects built from 1801 - 1850
@ JDillon You've done an excellent job of the planking - much better than mine! And I will post photos of where I'm at as soon as I can as a picture is worth a thousand words. By the time I had completed planking the outside of the bulwarks, I had, pretty much, decided Polaris was doomed to morph into HM Schooner Cockle so I changed the colour scheme - white below the waterline with navy blue bulwarks. I also scrapped all the framework to the inside of the bulwarks and planked them instead, painting them red ochre (doesn't show the blood!). Rowan. -
Many thanks for the heads up, Peter. I will, most certainly, look for the book. I do have to confess, the rigging was the one part of building model ships that scared the pants off me and still does! The rest is just a question of transferring modelling skills from one interest to another plus loads of research! @ Brian. I will, most certainly, post photos of my build as soon as I can but not here; probably better on my build log. 😉
-
With apologies, this is not a build log per sa but a resume of the problems experienced by a complete beginner and their solutions. As is common in most activities, manufacturers and authors assume a far greater knowledge than a novice possesses even though their product/literature is targeted towards them. Hopefully, as my jottings catch up with my build progress the following will evolve into a true build log. Ribs. Placing these was the first challenge. It is essential these are fixed perpendicular to the false keel. I read/watched many tutorials, which showed many and varied ways of achieving this with varying degrees of complication. In the end I opted for a very simple solution - bulldog clips. By placing a bulldog clip on the false keel and tight to each rib, the rib was a) kept in place and b) held at right angles to the false keel. There is the additional benefit of the bulldog clips providing 'legs' to support the skeleton while the glue set. Planking the deck. I was less than convinced with OcCre's instructions for planking the deck. For starters, nail heads would not be visible having been countersunk and plugged in a real boat. I subsequently learned, in real boats, the planks would be a) in 6, 9 or 12 foot lengths, b) begin with a king plank on the centre line of the deck and not a joint and c) laid to a 4 plank stagger for French built boats or 5 plank stagger for British built boats. Through trial and error, I also discovered shading the plank edges with a 5B pencil produced the best simulation of the caulking. Once I decided to use planks rather than complete strips, a contact adhesive was impractical and I reverted to PVA. To scale a 12' plank in a 5 plank stagger produced impossible fractions of a millimetre so I made the decision to utilise a 4 plank stagger. I also decided an edge plank was beyond my skill level and, in any event, this would be covered by the edge plank included in the kit. Planking the hull - 1st layer. I began by studiously following OcCre's instructions and the method I had seen on many tutorial videos. When I was about half way, impatience got the better of me and I started to prepare for the 2nd planking layer. I began by filing the heads off the pins as per the instruction but soon discovered I was doing more damage than good. The solution was to remove the pins. The planks stayed in place so, from then on, pins were only pushed in sufficient to hold the plank in place until the glue dried. Once this 1st layer was complete, it was thus a simple task to remove all the pins with a pair of narrow-nosed pliers. HM Schooner Cockle is born. Once the deck was fitted and the hull planking complete, I began looking at the rigging together with the deck fixtures and fittings. Based upon years of sailing, what was being proposed bore no relationship to how things would be in the real world. Now I know Polaris is a generic boat made simple for beginners such as myself but a degree of realism ought to be maintained. I began to research gaff rigged schooners. I soon discovered the 'fish' class of dispatch boat built 1805 to 1807 in Bermuda for the British Royal Navy. Polaris' hull and sail plan was virtually identical so it seemed a logical decision to complete Polaris as a 'fish' class dispatch boat. The only problem, as I saw it at the time, would be her armament. My build was too far advanced to begin piercing her sides for carronades so, instead, she would not be named as a 'fish' class boat but be named anything else and be fitted with swivel guns. It would also afford me a degree of latitude in not having to be historically accurate. So that is where I am at - building a model boat that is neither a kit nor scratch built and is well beyond my skill level, researching how anchors were correctly stowed, how standing and running rigging was correctly installed and sourcing additional fixtures and fittings such as capstans and the like.
-
Many thanks, one and all. As you all point out, research is the key. That task is made more difficult because, unlike modelling a 1920's railway, the camera had yet to be invented 😪! But I am sure patience will be rewarded and I have already learned a lot from you guys.
-
Since I was in short pants, I have always enjoyed making things. When I retired some 14 years ago, I embarked upon an ambitious model railway. Health issues brought that project to a screeching halt at the beginning of this year so a radical rethink was required. The first book I ever read, when I was 7 or 8, was Dana's 'Two Years before the Mast' and my love of boats and the sea was born. Given my enjoyment in sailing (when I was younger!) and my interest in Nelson's Navy, it seemed logical to build model sailing ships. Practicality dictated I bought a beginner's kit to learn how to build these fascinating yet complicated machines so I bought OcCre's Polaris kit with every intention of building it as per the instructions. However my pedantic nature intervened - there were simply too many discrepancies between the kit and how things were done in the real world of tall ships. Unfortunately this has meant my simple beginner's model has morphed into something well outside my comfort zone and is now HM Schooner Cockle: a vessel loosely based upon the 'fish' class of dispatch boat built for the British Navy between 1805 and 1807. Line drawings of the hull exist but I can find nothing that shows the deck fixtures and fittings or any details of the standing and running rigging. All I do know is they were gaff rigged schooners. I have many, many questions but one of the most fundamental ones is, did only the running rigging go to belaying pins with the standing rigging going to the chain plates and Samson posts? Any advice would be most welcome.

