HOLIDAY DONATION DRIVE - SUPPORT MSW - DO YOUR PART TO KEEP THIS GREAT FORUM GOING! (Only 27 donations so far out of 49,000 members - C'mon guys!)
×

Rik Buter
-
Posts
61 -
Joined
-
Last visited
Content Type
Profiles
Forums
Gallery
Events
Everything posted by Rik Buter
-
 Thanks man! And I noticed you are using a proxxon, would you recommend that one?
- 968 replies
-
- 1
-

-
- hahn
- oliver cromwell
- (and 1 more)
-
Hi Mike Y, Congratulations with your build log. I haven't read everything but there seems to be a lot of useful information in here. Thanks for taking the trouble to share all that. The ship is looking great. And I was wondering, how do you know how to use the milling machine? Does one need to do a course for that or would you recommend just buying one and do it with YouTube-tutorials? Best regards, Rik
- 968 replies
-
- 3
-
-
- hahn
- oliver cromwell
- (and 1 more)
-
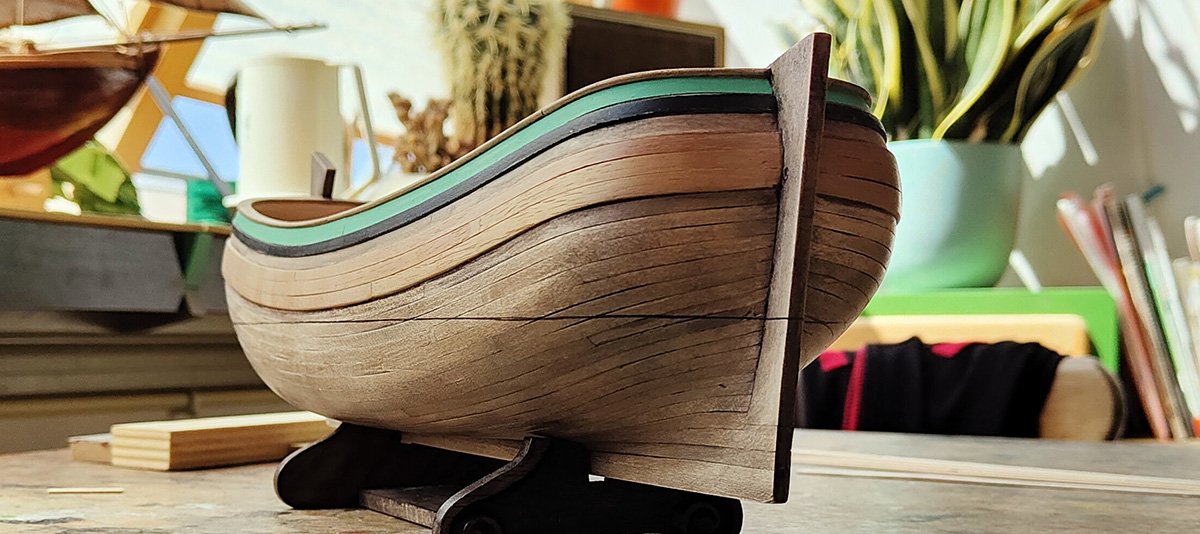
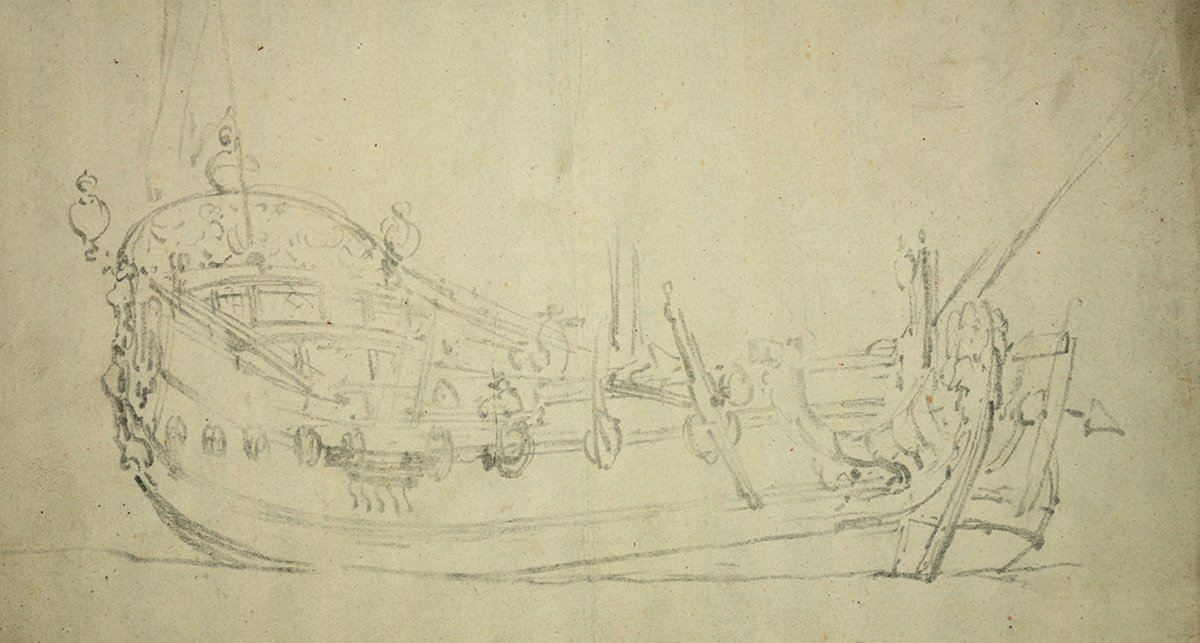
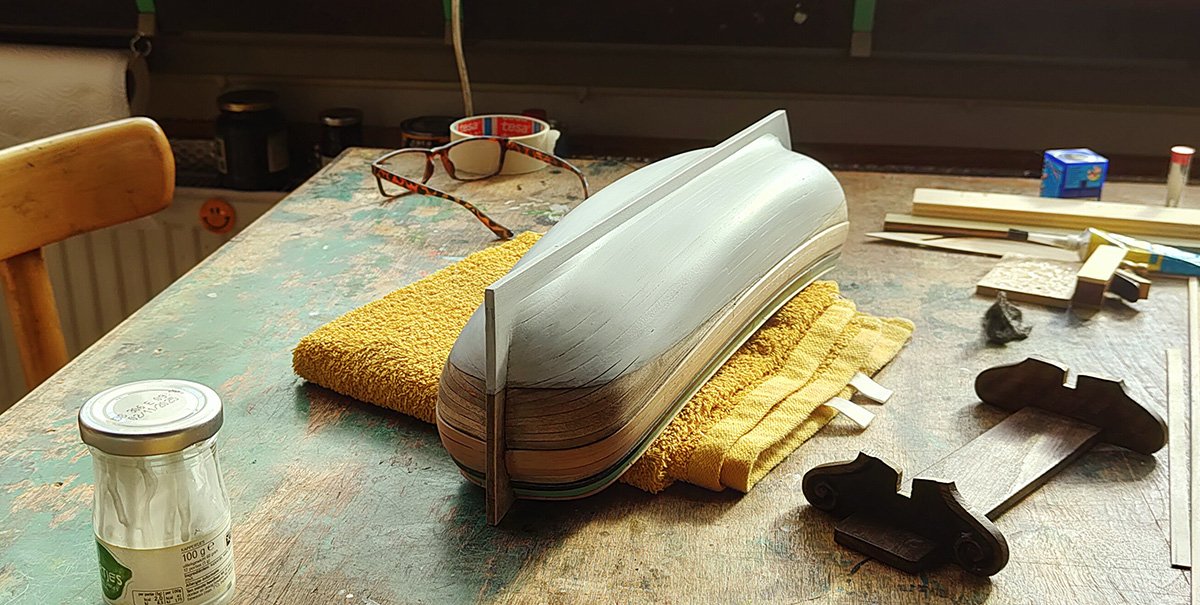
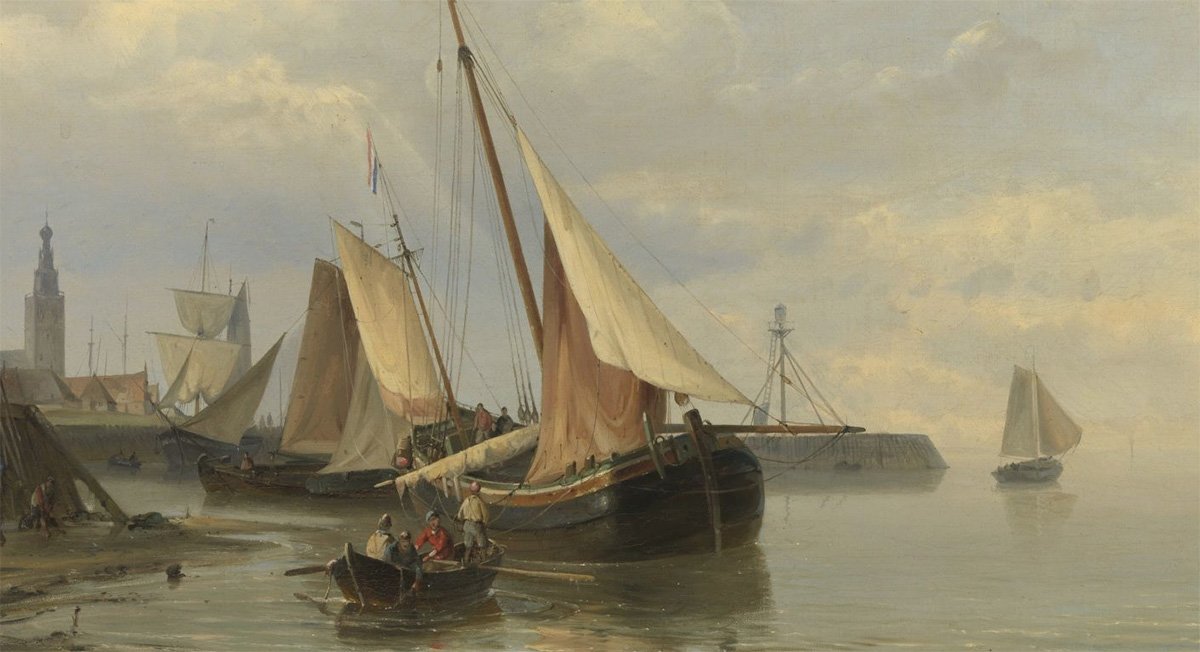
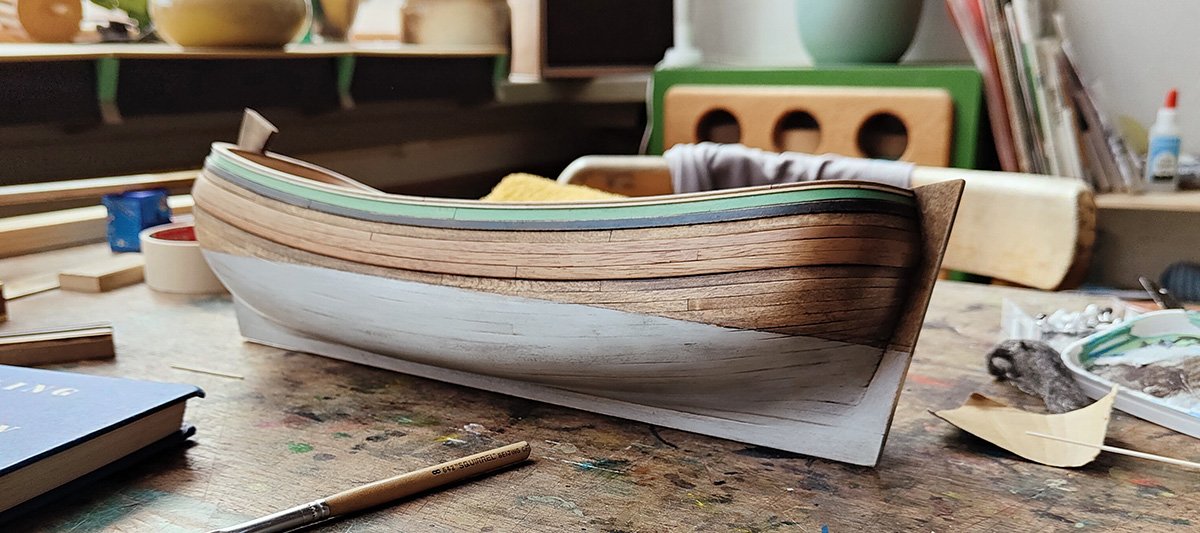
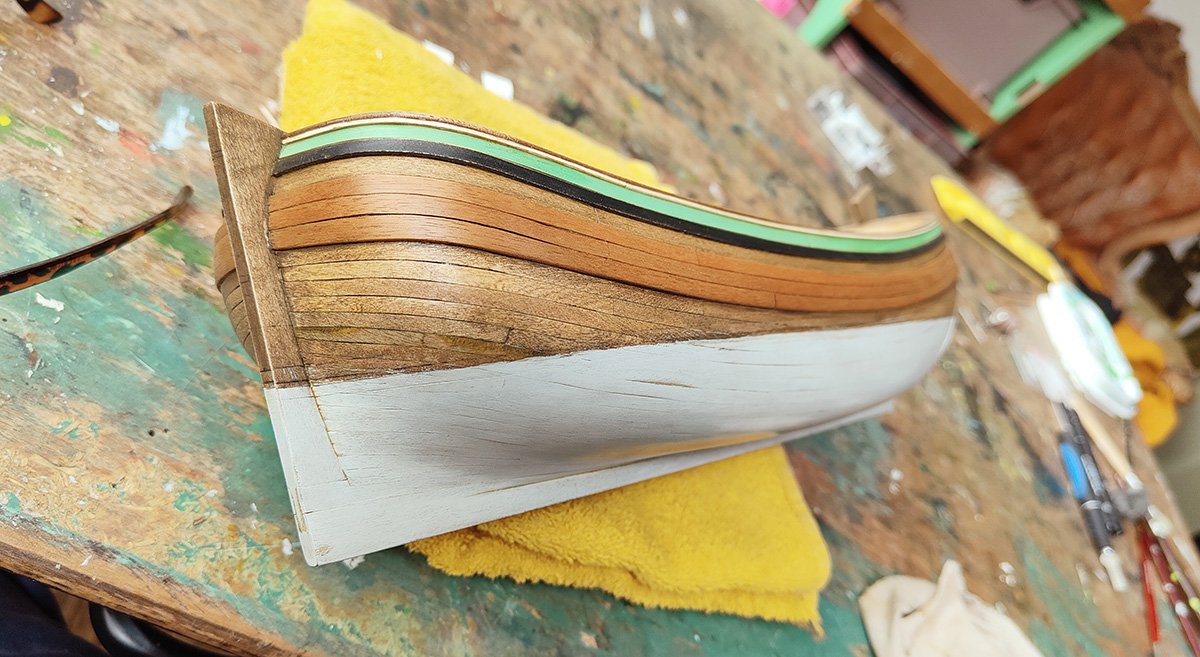
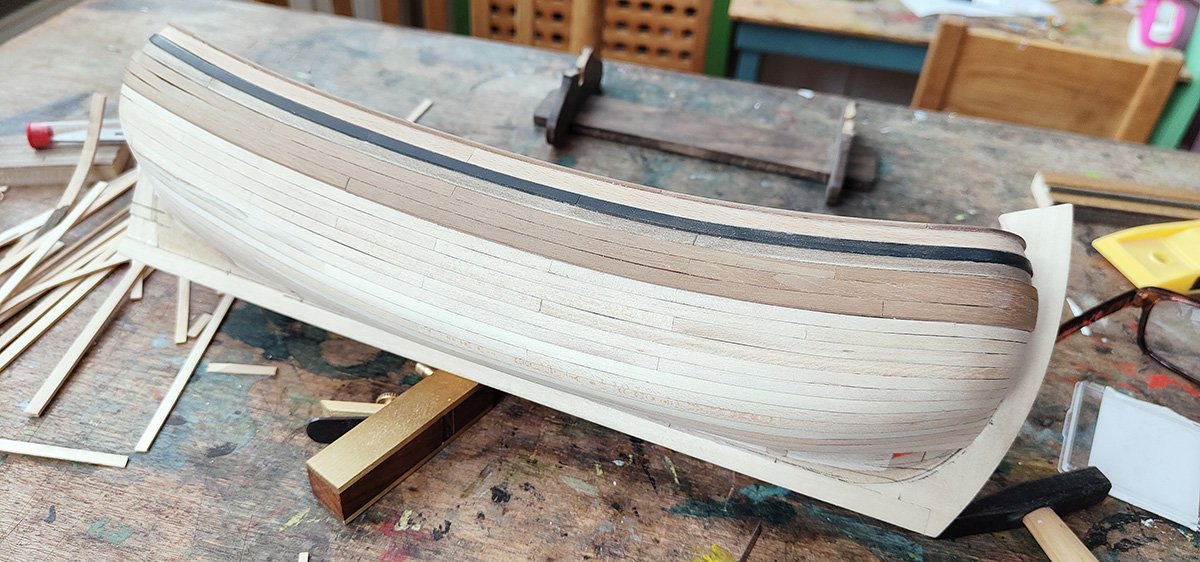
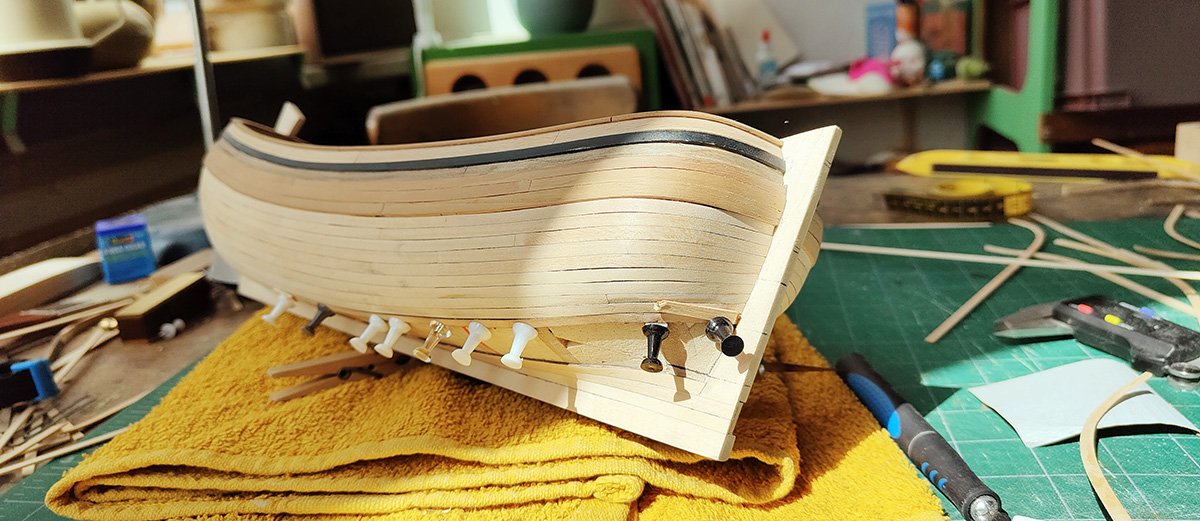
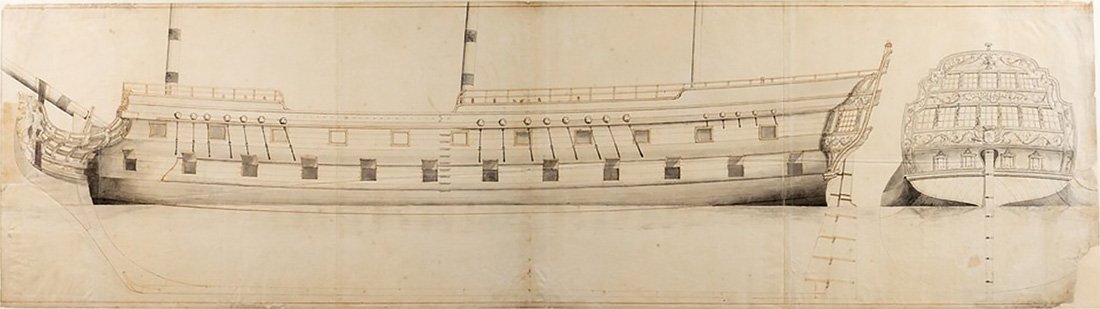
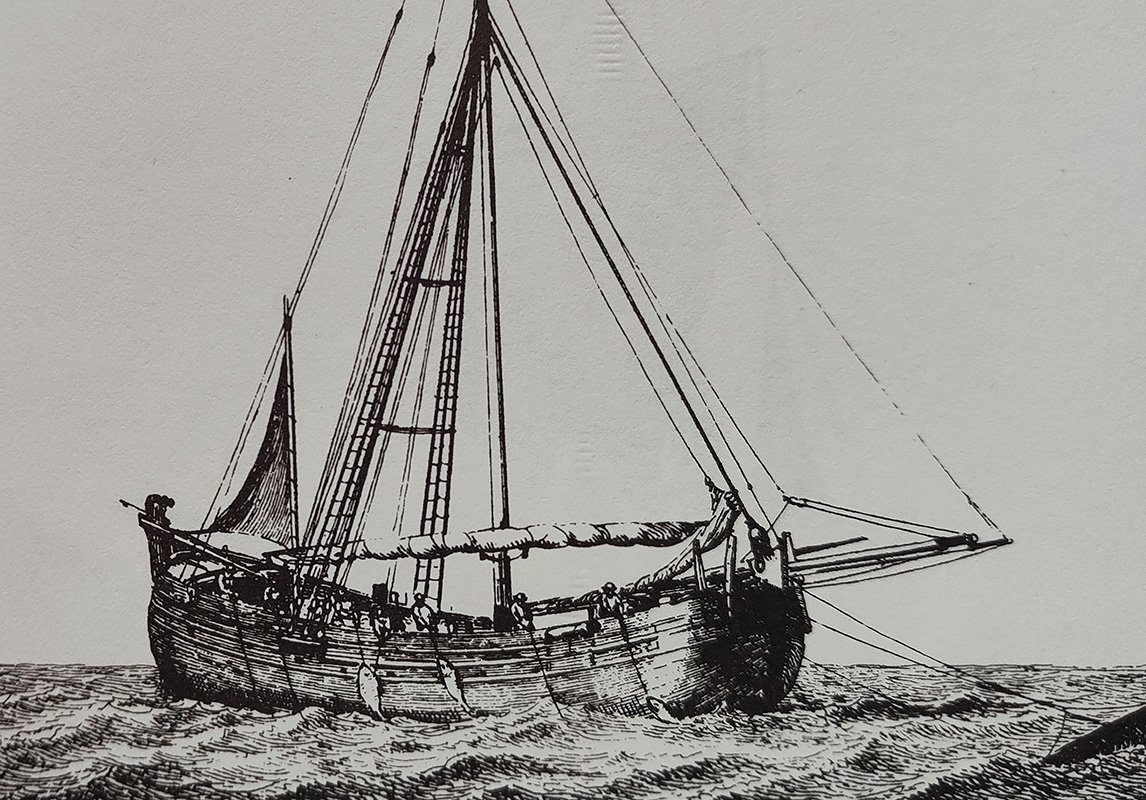
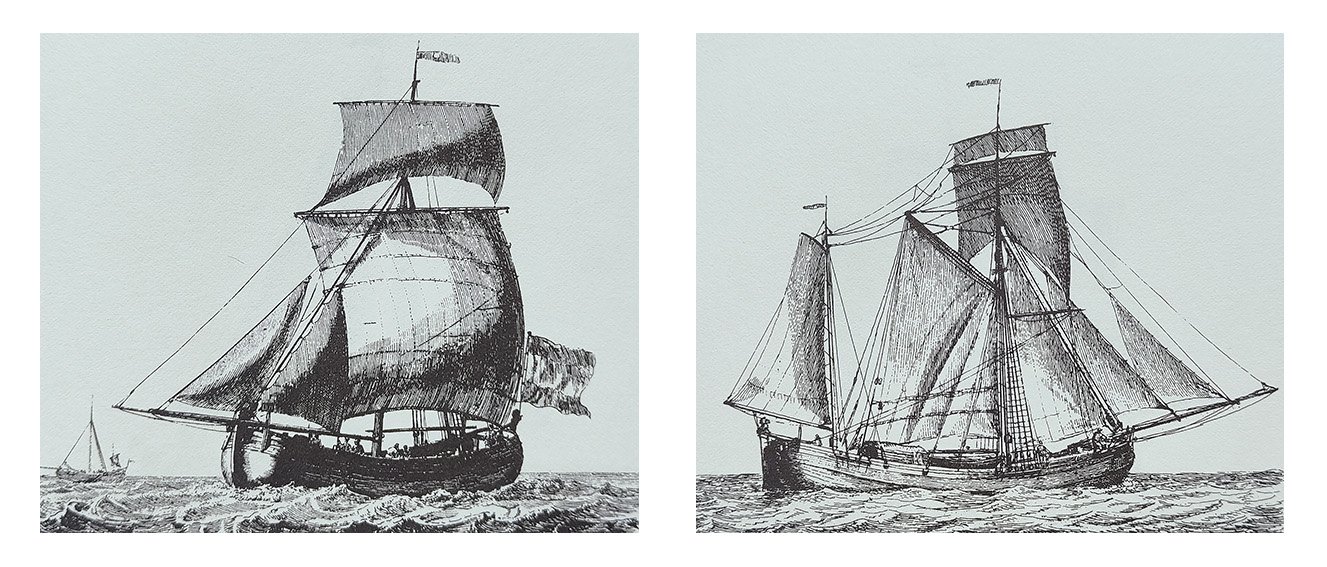
After the planking was finished, I painted the hull and applied the first wash. Then I went on to draw the waterline. But then I remembered that on the drawings of the van de Veldes the wales always dip into the water for a while at the lowest point. Like in this drawing of an English yacht of about the same dimensions as the hooker ship. So I decided to put on another waterline. Then I painted it, but I made the mistake to use acrylic paint. My plan was to apply several thin coates and keep it somewhat transparent. Normally when you paint a painting, acrylic paint is well suited for making transparent layers or glazing. However here on the model it dried so quickly that I couldn't get an even coat without stains. Also sanding it slightly down didn't work out well because acrylic paint is just a plastic coat on top of the wood. It doesn't penetrate. I should have used an oil based paint. So in order to get a nice and plain coloured bottom of the ship, I had to apply three layers which made the coat way too thick. Also the second waterline turned out to be too high. I tried to find images from which I could determine the waterline better. I found out that in most images the waterline is at least one or two planks lower than the lower wales. So I carefully scraped off the paint again, down to the first waterline I drew. It became a bit of a mess. By the way I added a thin 1mm. strip of wood underneath the railing. I kept that white. A coat of Osmo decor wax - oak colour goes on top of everything.
-
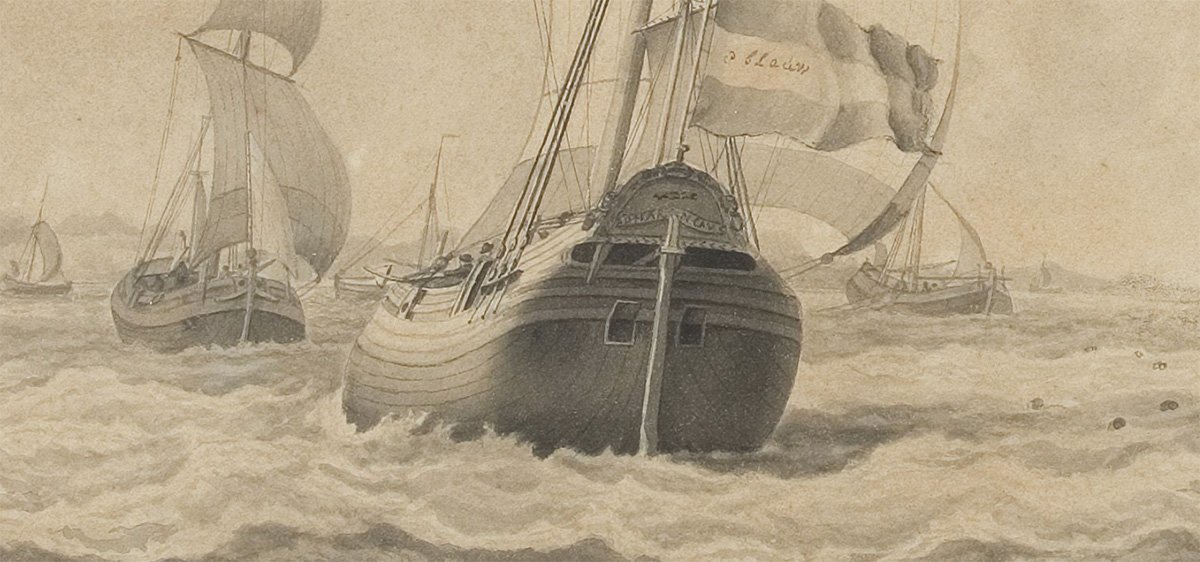
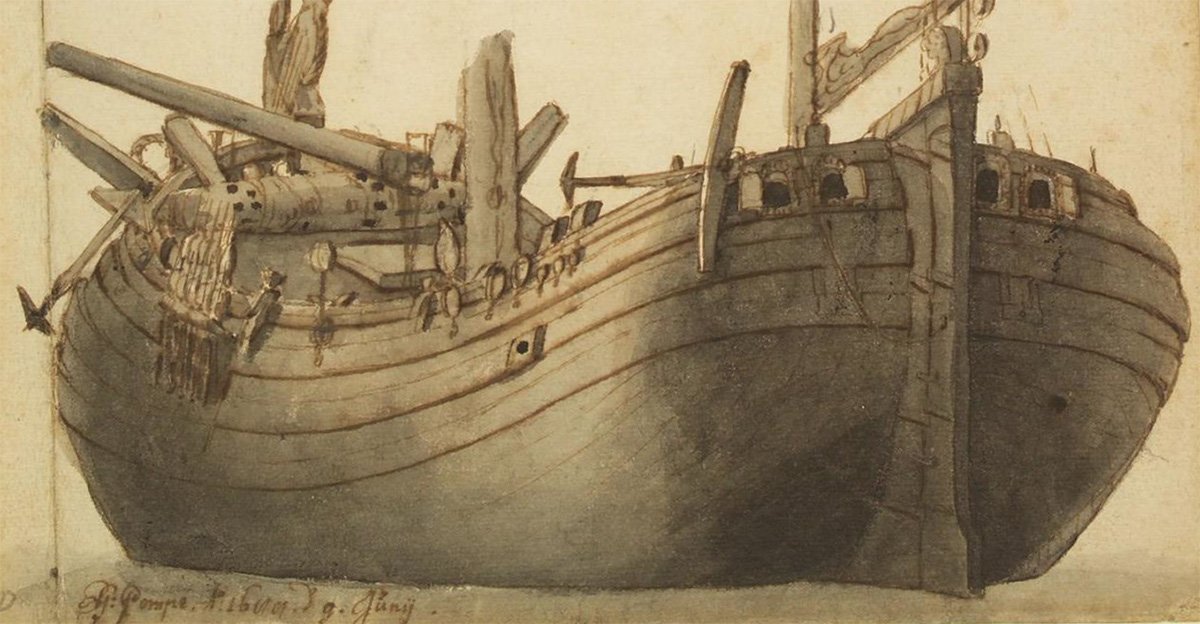
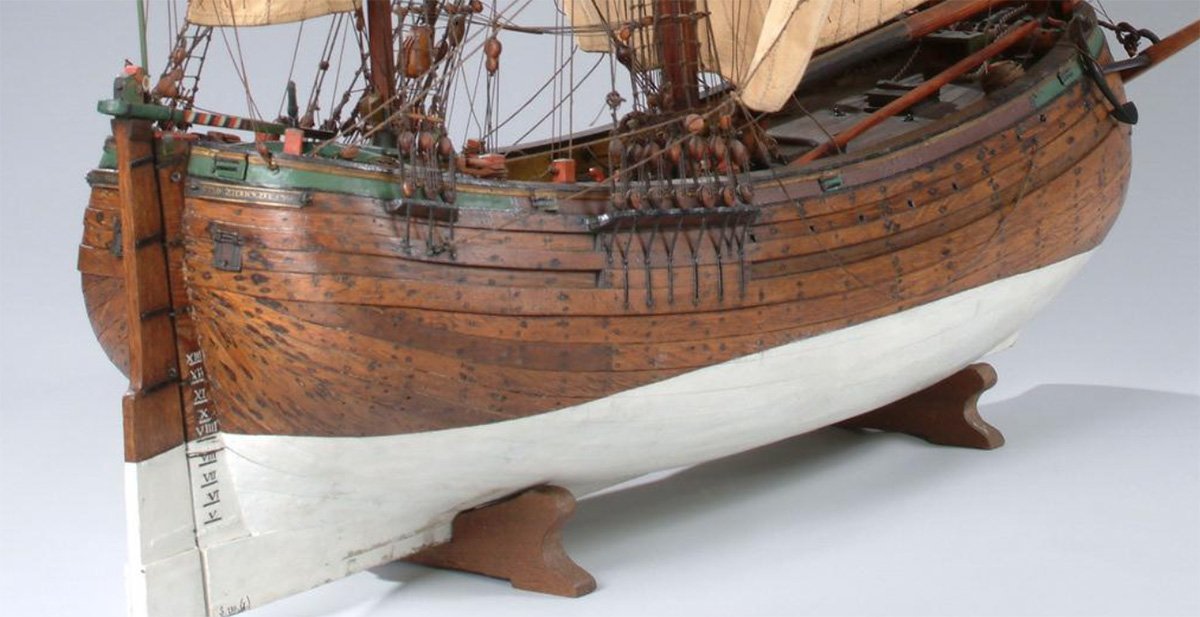
I wanted to post a few pictures which show a planking method that is probably closer to the way it really was done. When I saw images like these for the first time, I thought that the way the strakes are running was more of an artists interpretation. If you look at the first strake underneath the wales, it tapers off into a point shape right around the corner of the hull. First of all that would be hard to make. Second it would be hard to fasten against the frames. If you put a nail or peg in it, it would split easily. And third it would always stay a vulnerable part of the hull. But apparently they did use this kind of solution. The other day I heard a short lecture of Kroum Batcharov in which he tells us there is evidence in excavated ship wrecks that shows us that. See here a beautiful watercolour of a galliot by Gerrit Pompe made in 1688 (70 years earlier though) which shows the same run of the strakes. It would never result in an even distribution of the strakes along the sternpost though, and it would definitely require the use of multiple steelers. Here is one more example on a real contemporary model. greetings
-
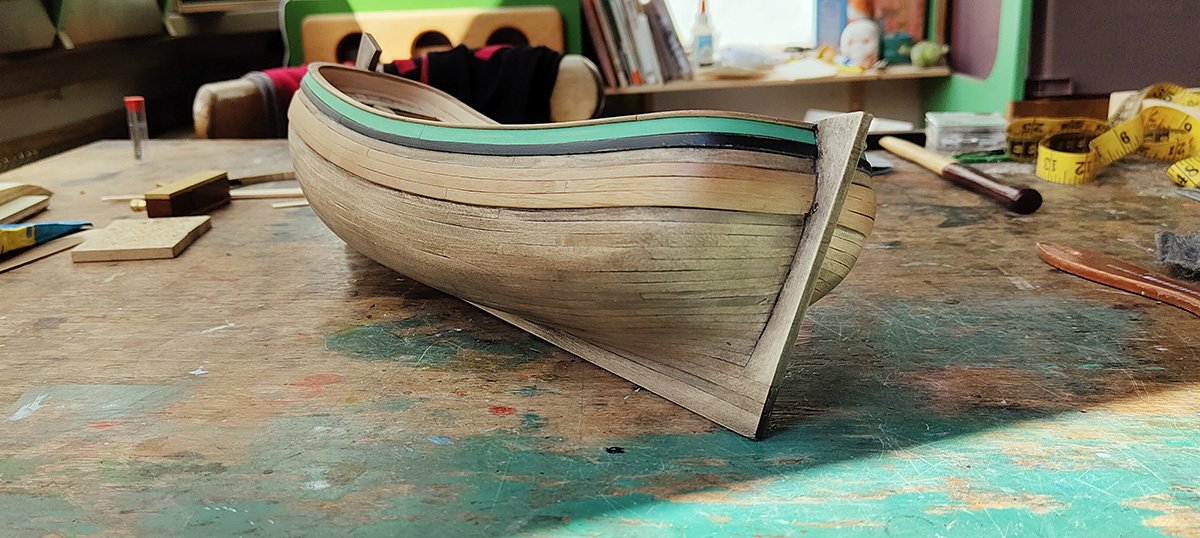
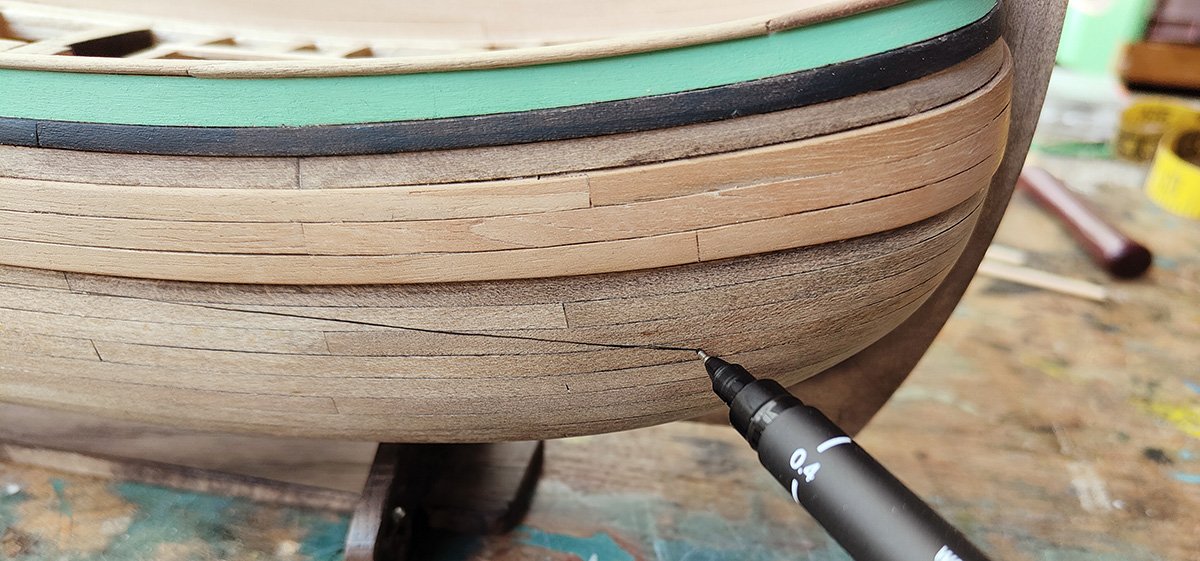
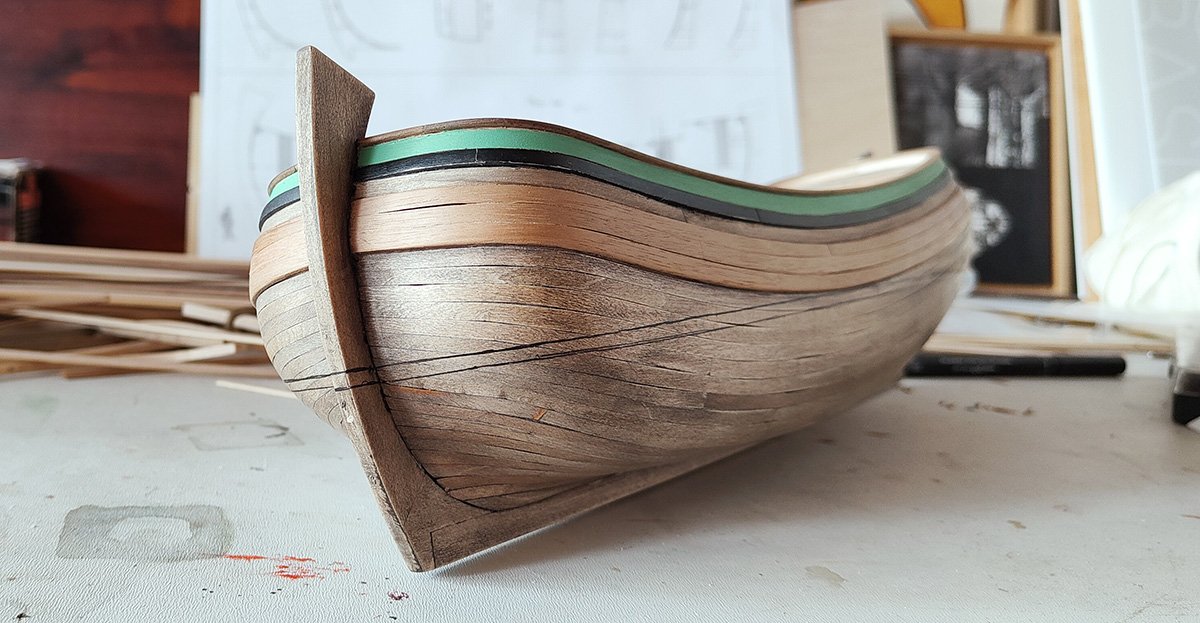
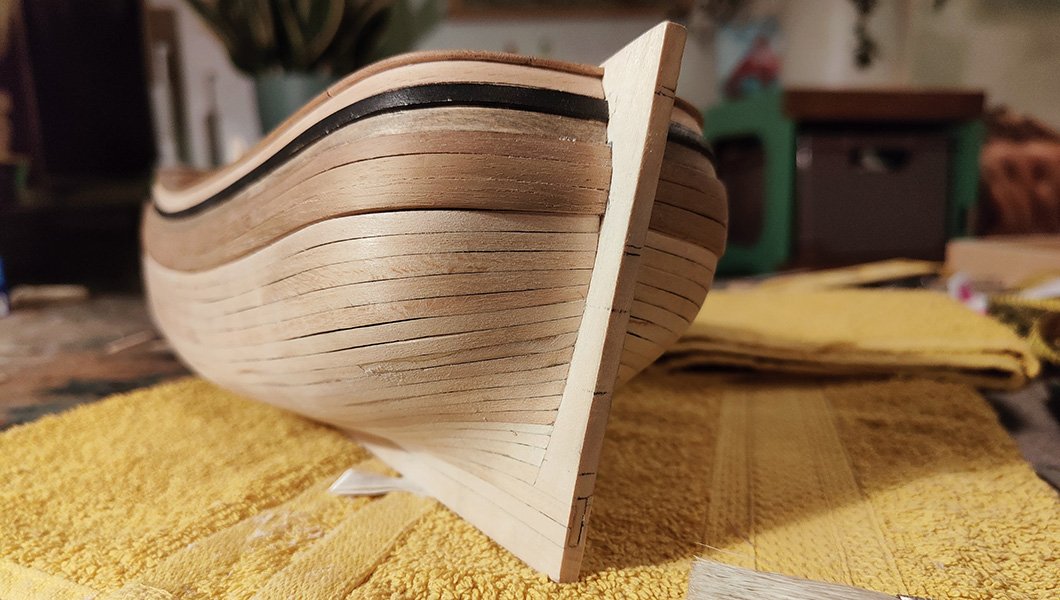
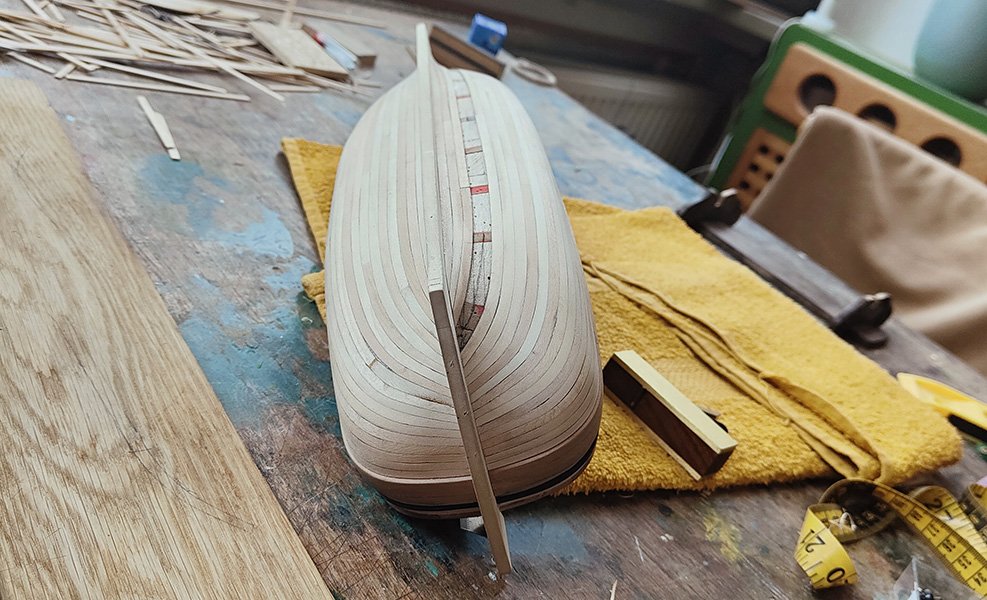
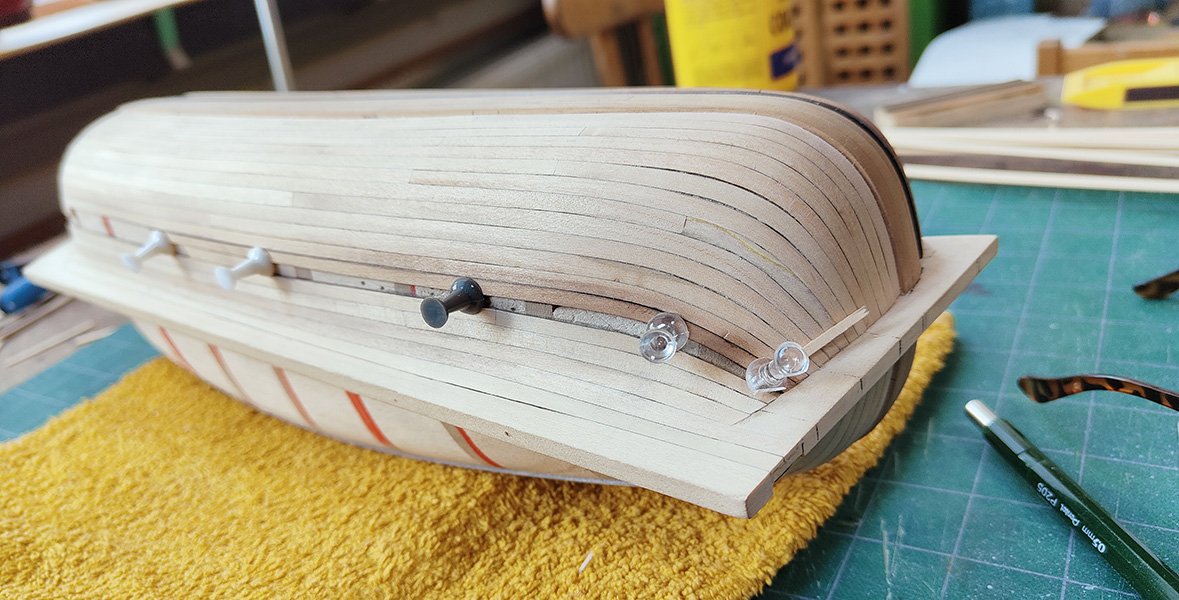
Thanks guys. Before I started planking, I calculated there were going to be 19 strakes down from the wales to the keel, including the garboard strake. So I tried to make the distribution along the stem- and sternpost as even as possible. It turned out that was hard to accomplish. At such a small scale it is matter of tenths of millimetres per strake. As you can see the last few are out of proportion. It did work out though on the broadside of the ship. Here you can see how even the empty strip for the last two strakes is and I hardly had to do any trimming for that, besides at the very last ends of the strakes at the bow and stern. I also didn't need to put in any steelers. There is some severe curving of the planks going on though. I mean in the length direction. That was quite hard to do and in those areas I was unable to put the planks in tight. In one area the planks needed to be curved, then bend and started to be trimmed. That is why I don't think the planking on a real hooker ship was carried out in this fashion. So although there were benefits, in hindsight I think I chose the wrong planking-trajectory for that matter.
-
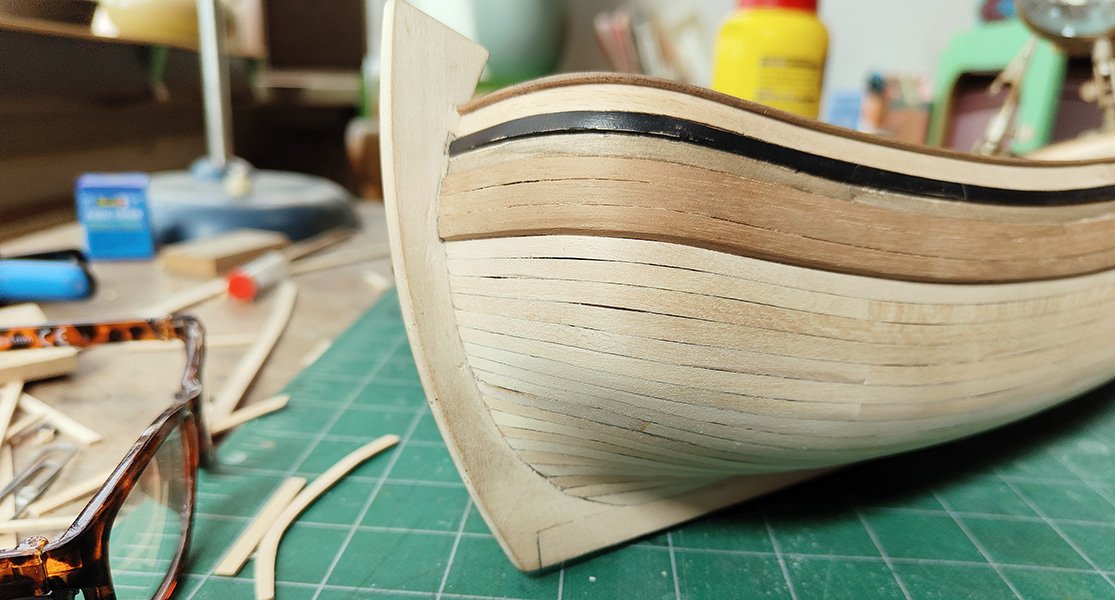
One more plank to go on port side Port side ready. I always like the fan-like course of the planks at the knee of the stem. Then onto starboard side
-
Hi Paul, Great build! Very peculiar hull. It is almost the opposite of the one I am building where everything is circular and bulky. Yours is slender. Very different construction also. But it is interesting to see how both methods produce sailing vessels. I'm looking forward seeing the rest of the build.
- 201 replies
-
- 5
-

-
-
- Oyster Sharpie
- first scratch build
- (and 1 more)
-
Some more planking. Along the sides of the hull I don't need to do any trimming. Merely some curving with the travel iron like I explained in post # 13. But after the side of the hull turns towards the stem- and sternposts, I trim the planks from 4 to 3 mm. After I rounded the bilge, I started to plank from the keel upwards. The two planks above the keel go over the sternpost and make that area plane or level (I hope that is proper English).
-
Thanks Ronald-V, on behalf of the DuckDetective.
-
Hoi Ab, Thanks, great that you take notice of the build log. That 's pretty cool.
-
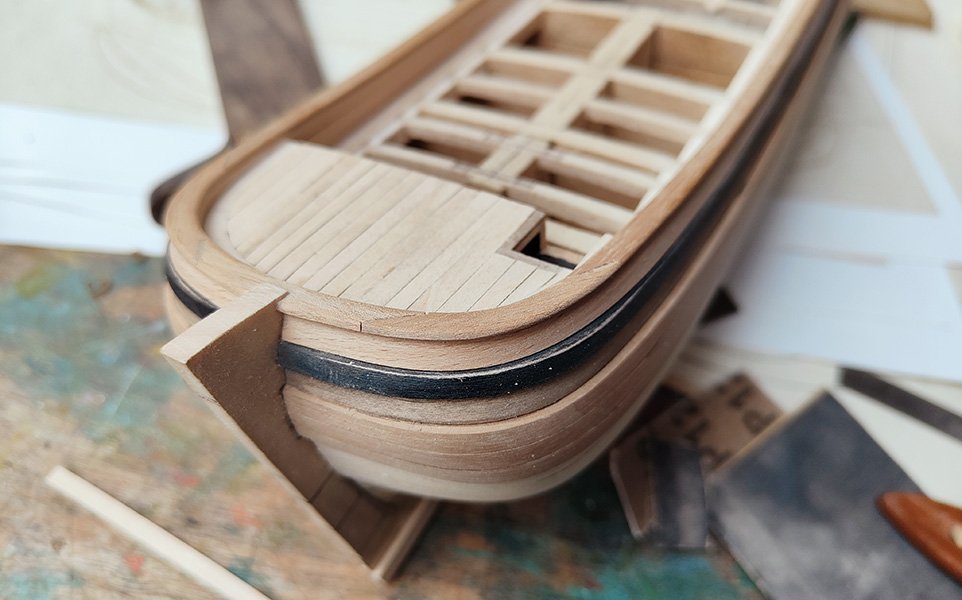
I put on the top of the bulwarks or railing. What surprised me, was that the pieces right behind the stem post and right in front of the stern post didn't need any bend. So for a while there the railing is straight. You can't really tell something like that from the construction drawing. I also planked the top of the cabin.
-
Rutger, thanks for your reaction. The Twikkelo, that would be awesome! Quite a lot of tumblehome for a Dutch ship, which is always cool I think, but which in later designs almost disappears. In the book 'In Tekening Gebracht' they speak about a ship model at the Rijksmuseum that is called MC 498. It is built in England in 1738 but it was apparently ordered by Paulus van Zwijdregt after his design. If you could somehow get to see that model from up close, that could be of great help. And about getting your hands on the book of A.A. Lemmers and Ab Hoving; you should get ALL the books by Ab Hoving. That guy is brilliant! Not only does he know all the history and does all this cool model building projects. He is a really good writer, very eloquent and knows how to tell a story. I wish there were ten of him. At least ten.
-
Before I started with the planking, I took measurements between the wales and the top of the keel on all the frames. Oddly enough they kept being quite even all the way up to the outer two frames at the bow and the stern. That means that the rising sheer of the wales exactly makes up for the declining or shrinking of the hull towards the front and the back. Frame 5 is the middle frame out of 9, that is where the bottom of the hull is widest. Frame 8 is the second to last at the stern. I think it goes to show that the shape of the hull is not designed at the drawing table using mathematical formulas but it 's the other way around. The van Zwijdregts developed formulas or geometrics to describe the shape of a hull that emerges from the building methode they used. That is what is so interesting about these drawings. They are technically adequate but they still breath the 17th century hull shapes that were obtained by building methodes from carpenters. They have this eloquent and intuitive feel for hydrodynamics.
-
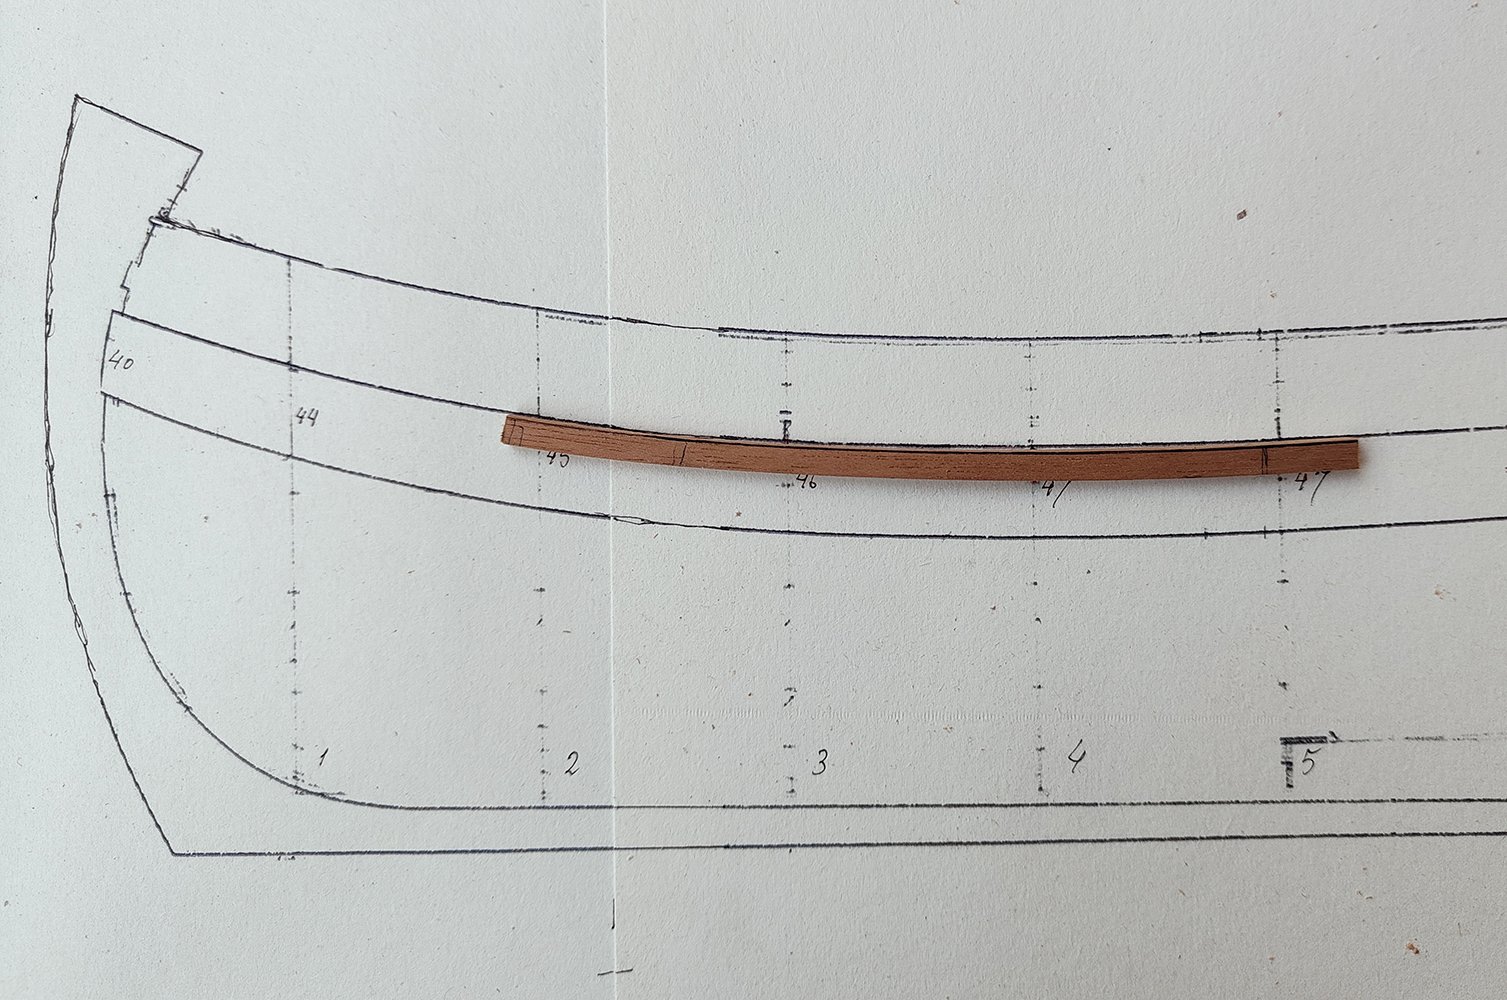
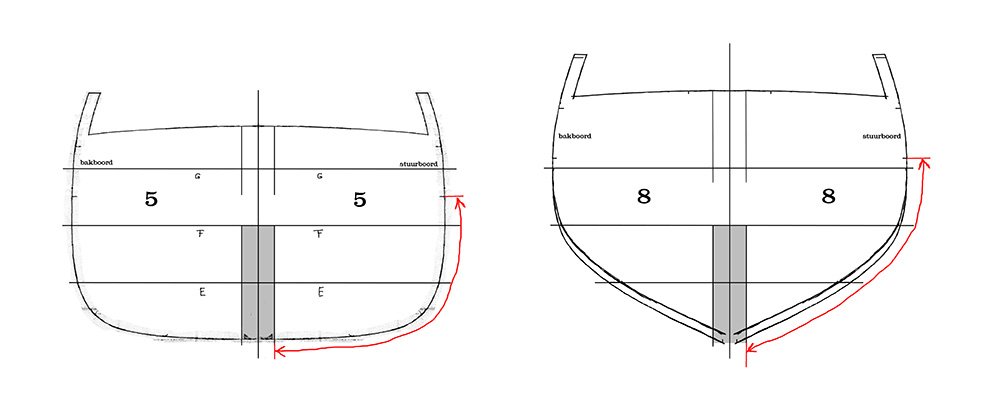
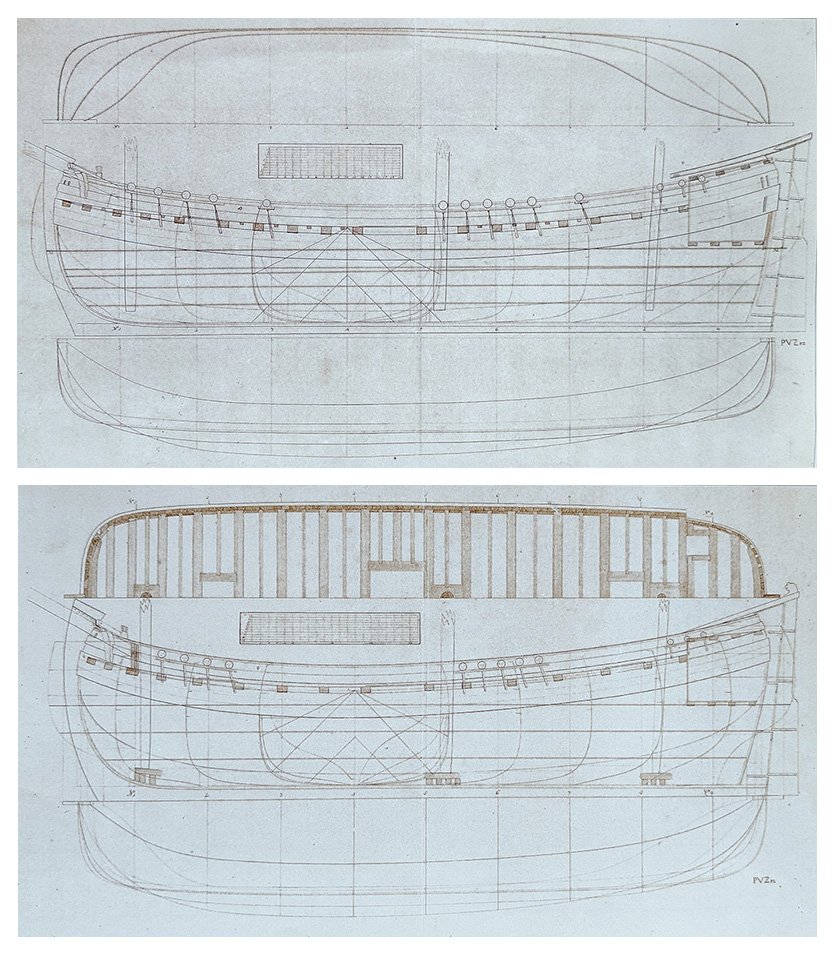
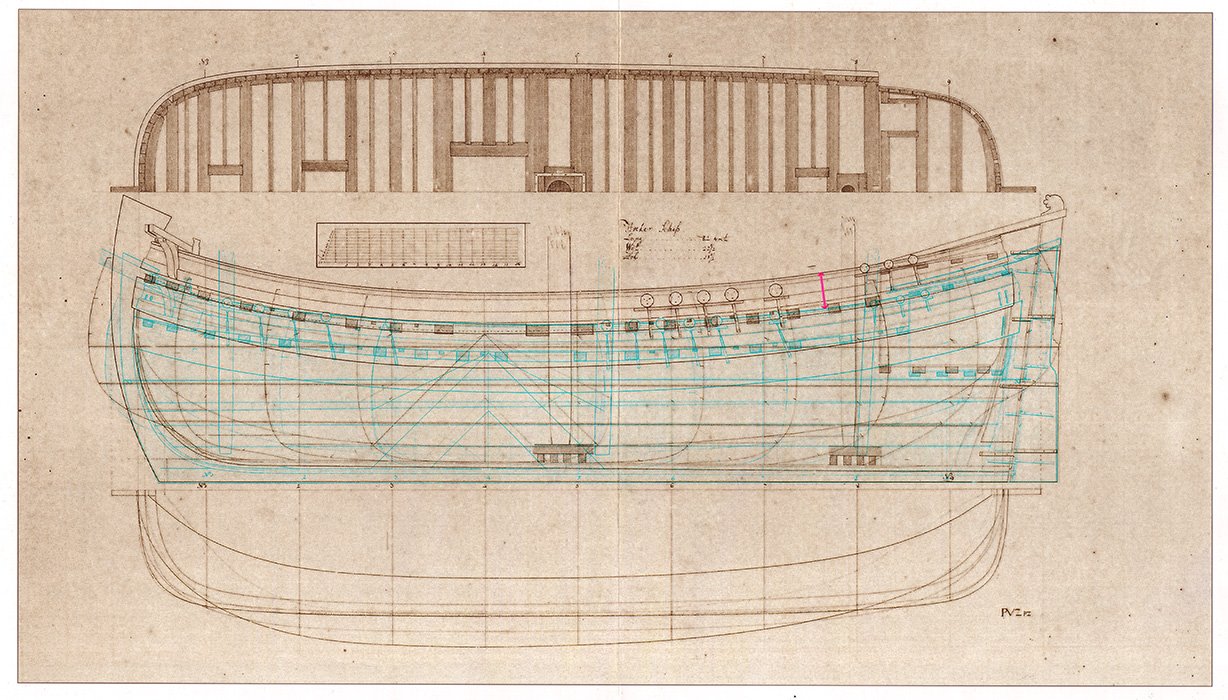
Thanks CiskoH. Why is it called a hooker ship. Well I read that it was initially a fishing vessel with very long lines with hooks on them, so called 'hoekwant'. So they called those ships 'hookers'. There are a few drawings from Groenewegen that depict a hooker ship while they are actually catching fish that way. They are standing along the board or railing, pulling in the lines with the hooks. In order to create more working-space along the boards, the channels for the mainstays are placed backwards. That is also the case with the design I am building from. However I was wandering if perhaps there was a more specific quality in the shape of the hull that would make this ship a hooker ship and, for instance not a galliot. These are two drawings from the same series by van Zwijdregt. I couldn't really tell the difference but one is a hooker and the other a galliot. Maybe one is build a little higher. But then I remembered I read an old piece of text somewhere about hooker ships, so I looked it up. So there is this old text about shipbuilding dating from 1837 written by F. N. van Loon. And it also contains a chapter about hooker ships in which he says that it is a strange kind of ship that is known for its resilience. There is a fleet of about 80 fishing-ships and they have the habit to stay onto the North Sea for 16, sometimes even up to 20 weeks. All that time they do not go ashore. They are even able to anchor at sea and he explains in short how they do that. Then goes on to tell us that the circular shape of the bow and the stern attributes to its exceptional seakeeping together with its ballast of water and salt and sand which is stored in compartments all over the bottom of the ship.That way they are always able to keep the vessel's draught at a constant level. To successfully sail on the North Sea with its short high waves in turbulent weather, every loaded ship needs a certain amount of empty cargo space above sea-level. Aha, that is why the hooker ship has such a high cargo space. And that is the difference with a galliot. I made a test and put the lines of a galliot in blue colour on top of the drawing of the hooker that I am building and enlarged it to the same length (while keeping the original aspect ratio of course). The difference at the red arrow of 90 cm. (about 3 feet) might be the difference between a wet or a dry deck. Now if you have to stay at sea for 20 weeks that is pretty valuable I guess. After this 'discovery' I was checking the book with the Gerrit Groenewegen drawings again to see if it remained intact. Once you know it, you see it. best regards
-
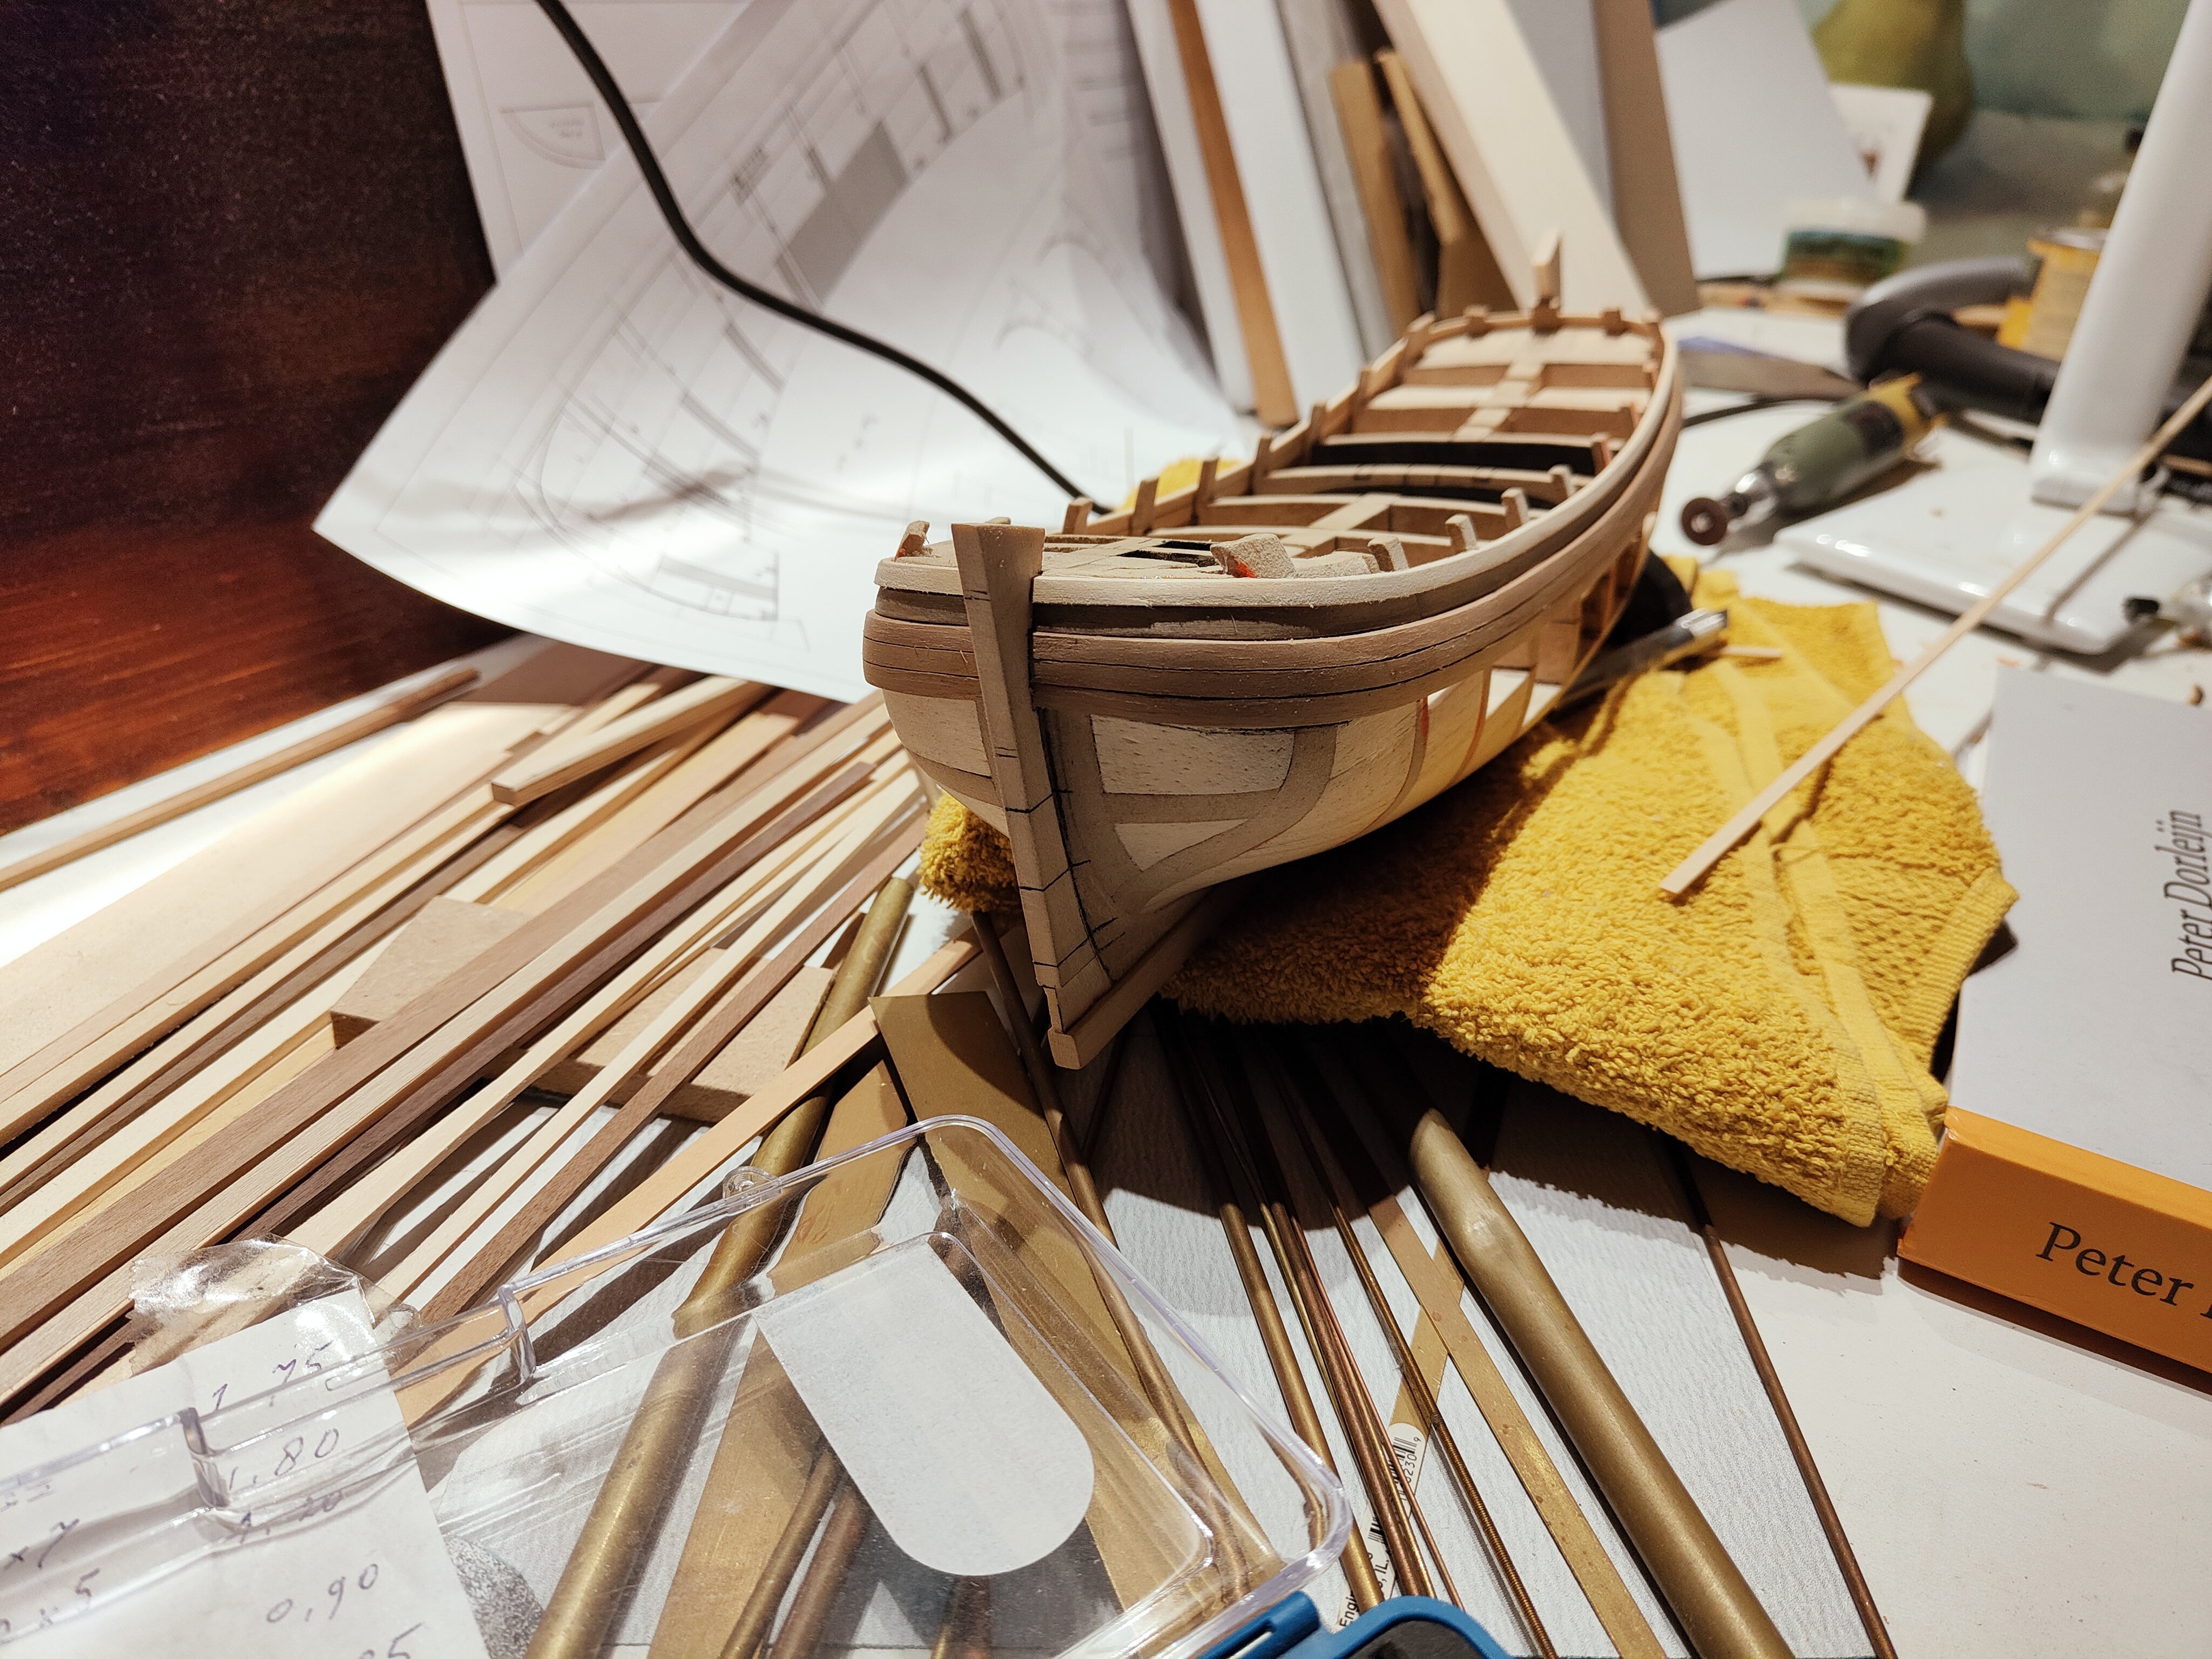
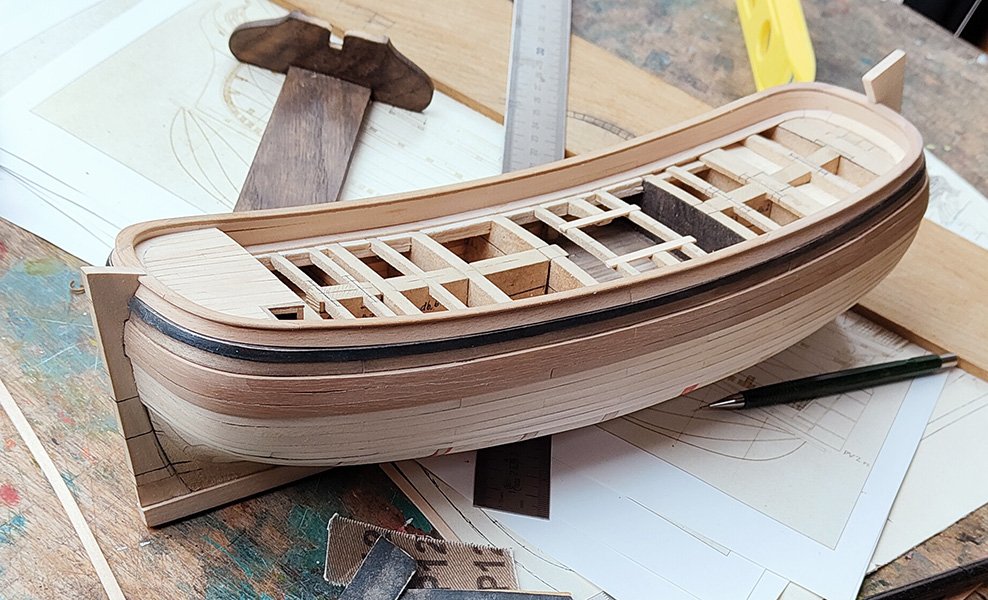
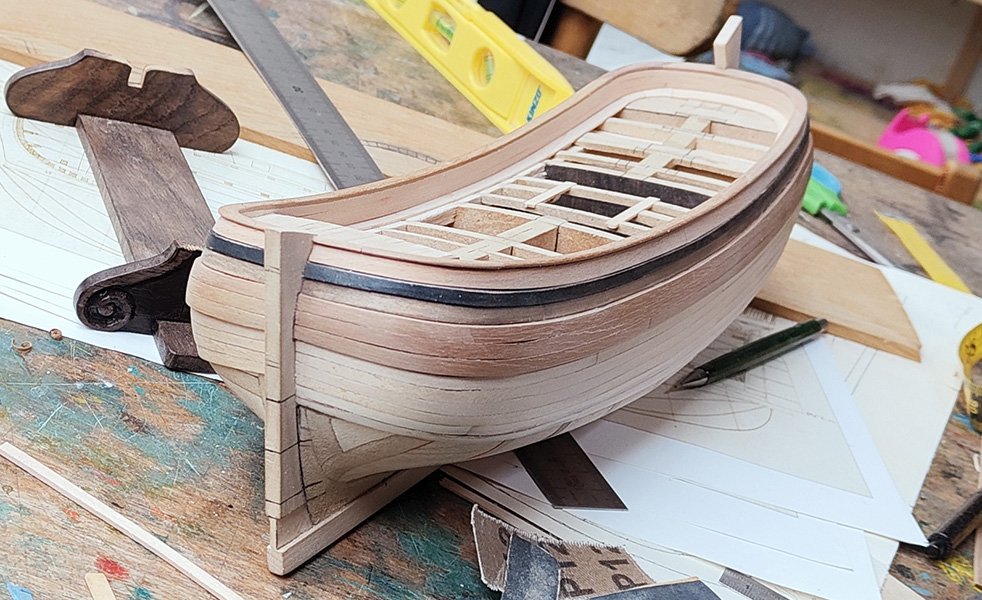
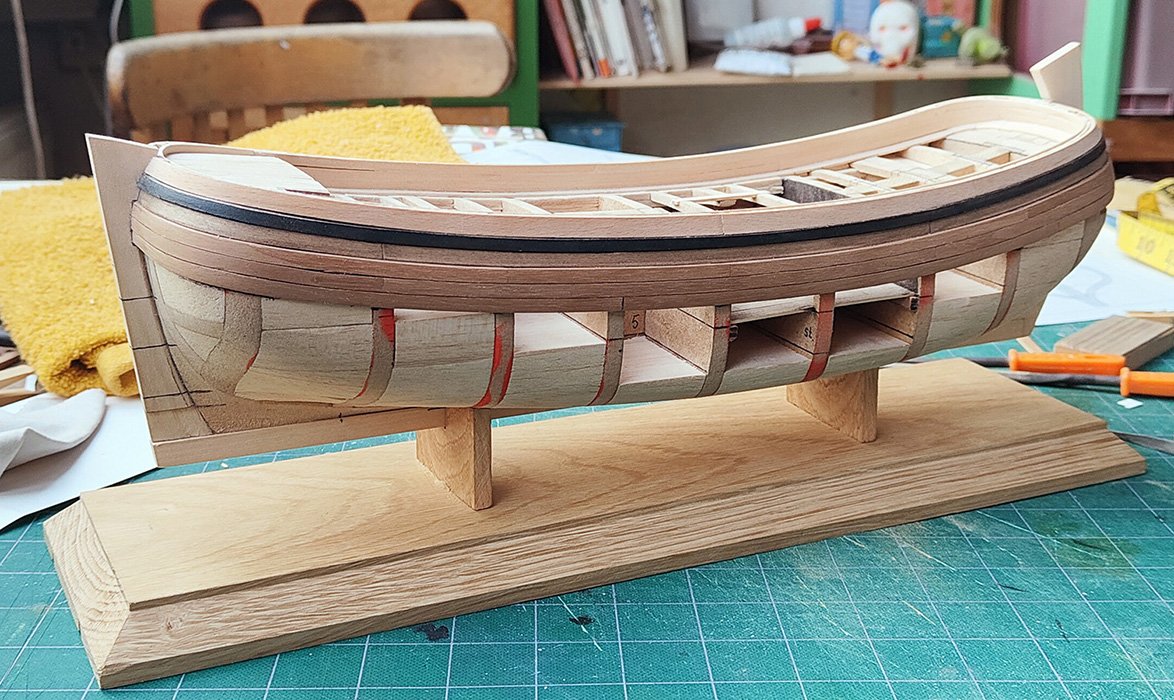
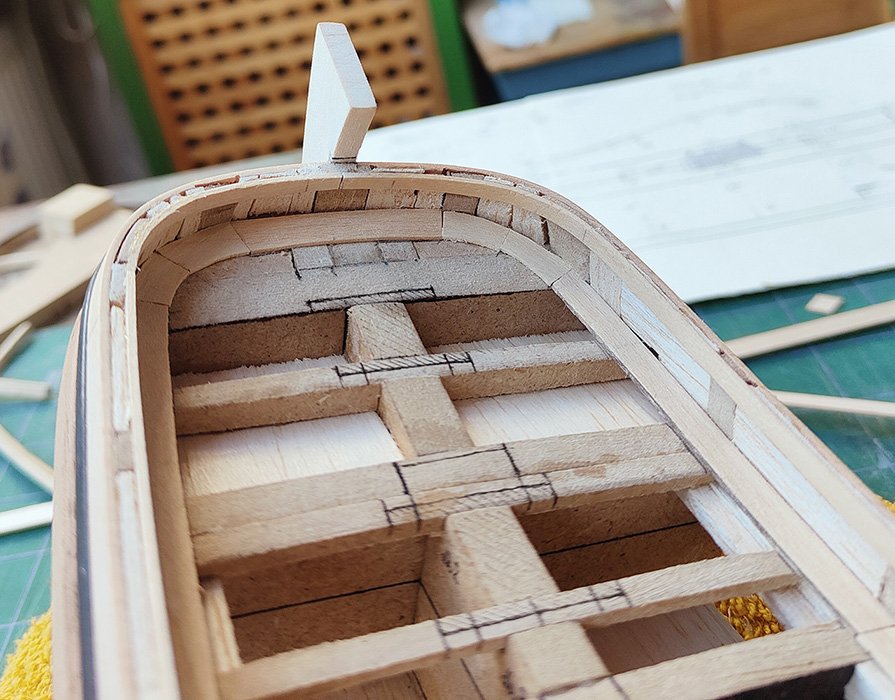
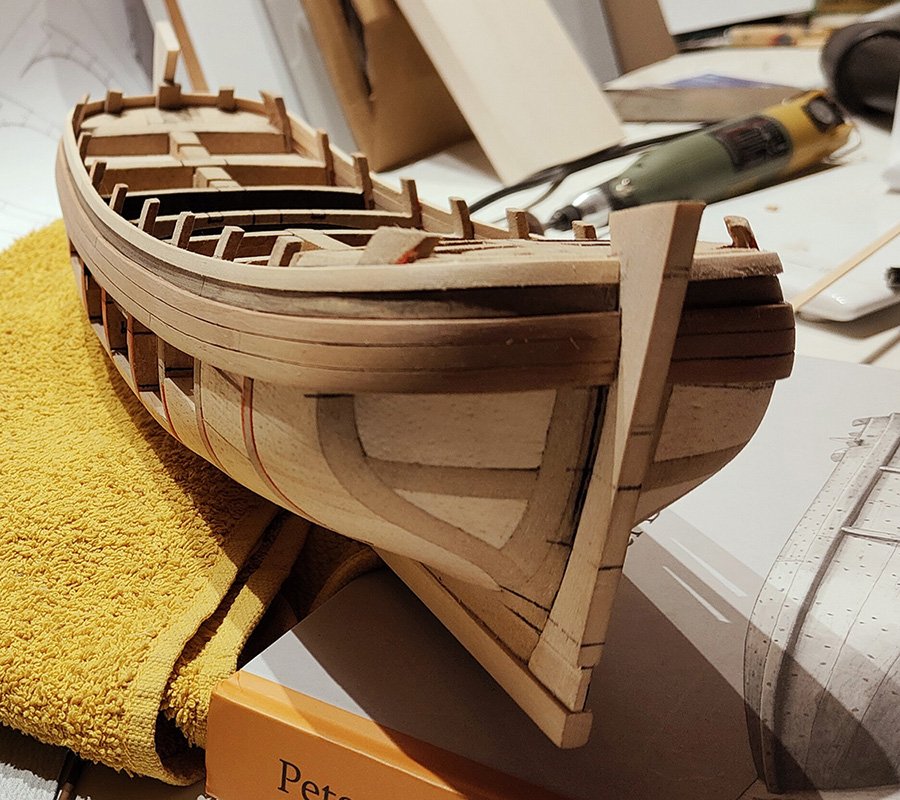
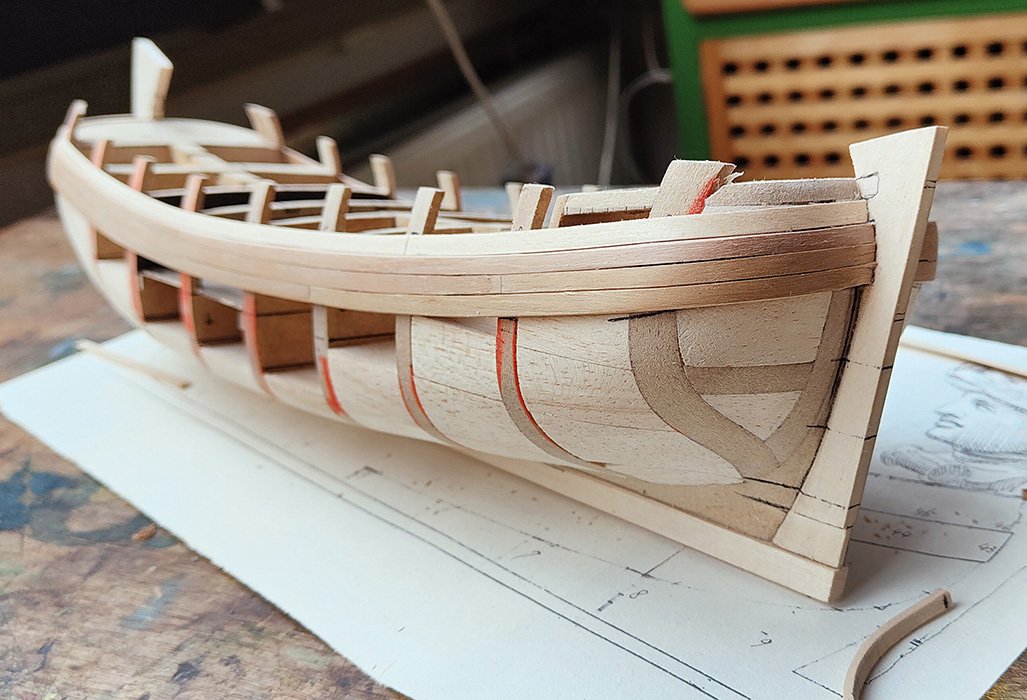
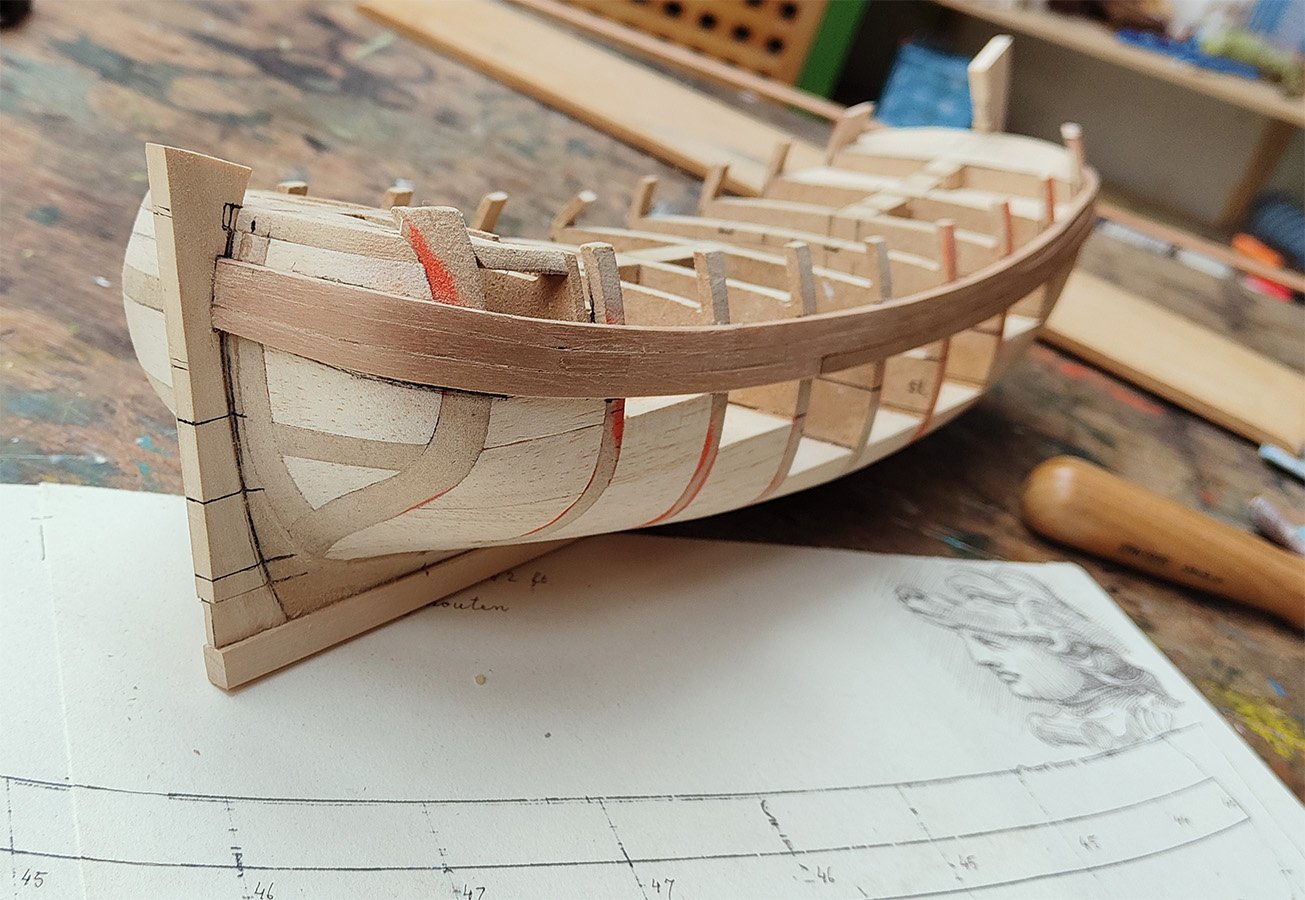
After the inner planking was ready I made a stance out of a piece of oak floorboard. I don't like it too much though. What I really do like is the strong sheer of the boat. That was actually one of the main reasons why I choose this one from the set of drawings that accompanied the book. I was really curious what it would look like on a three dimensional ship or model. I have tried to put the wales as accurate as possible on the frames so that the sheer would come out smooth. What I also like is the shape of the bow that starts to become visible at this stage. It reminds me of the bow of a so called 'Lemster aak' which are known for their outstanding sailing qualities. The more I look at this boat, the more I start to believe that this Pieter van Zwijndregt was quite genius.
-
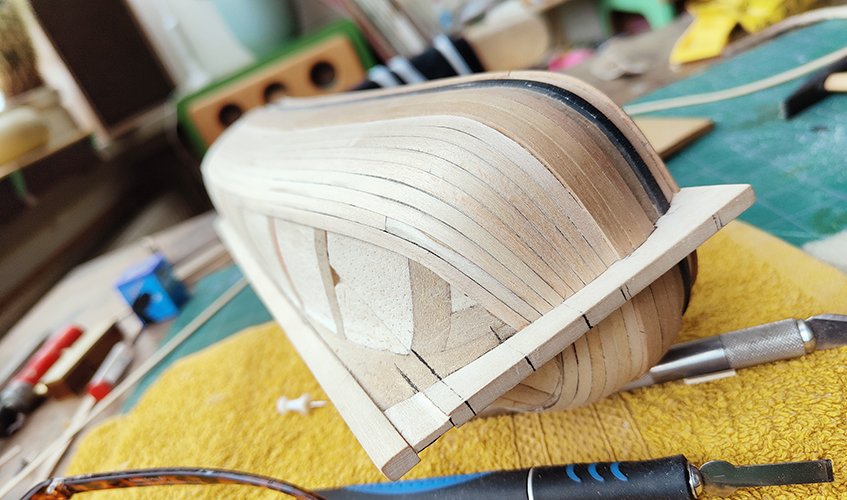
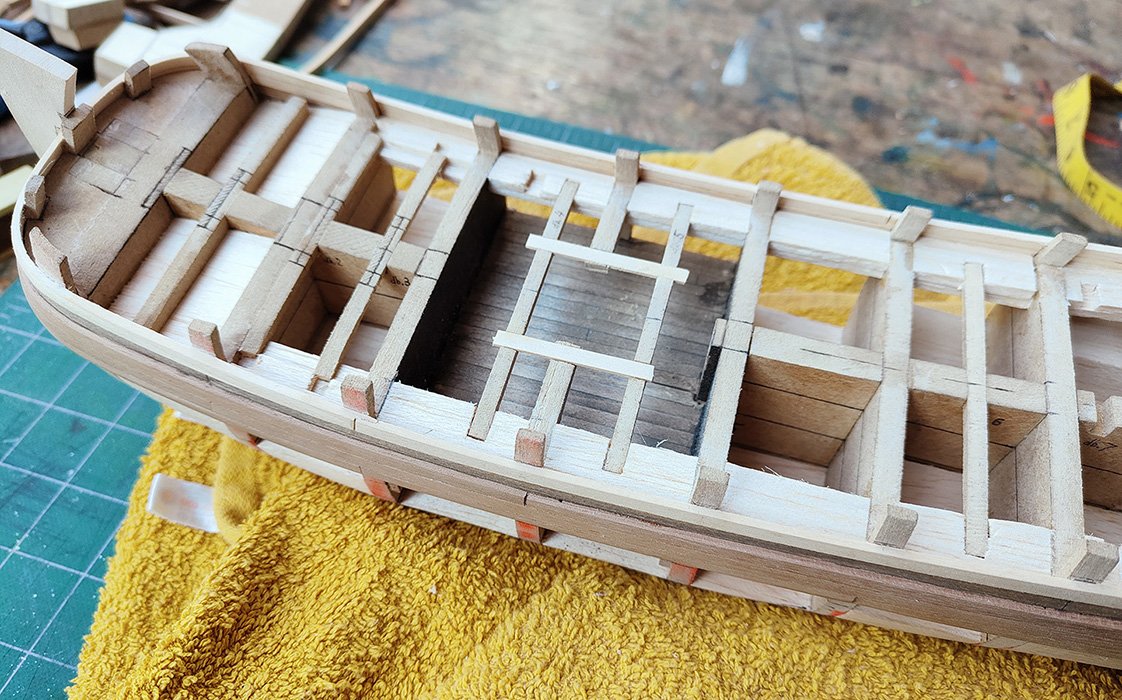
I put pieces balsa wood in between the frames so I could sand it down a bit more easily. Then I started withe inner planking. I also laid the outer rim of the deck so I can work towards that with the inner planking.
-
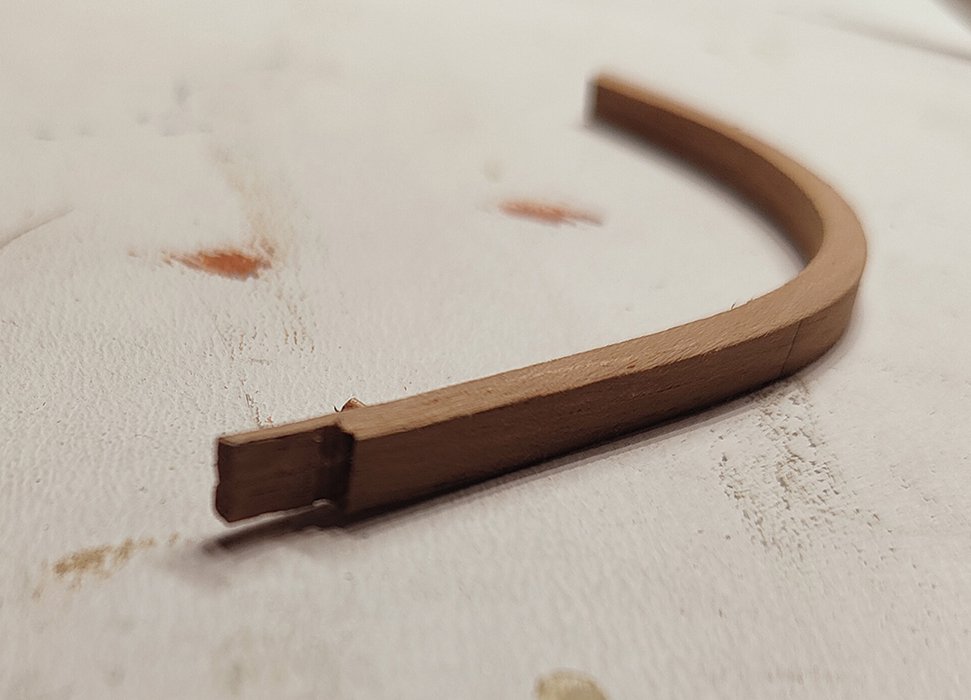
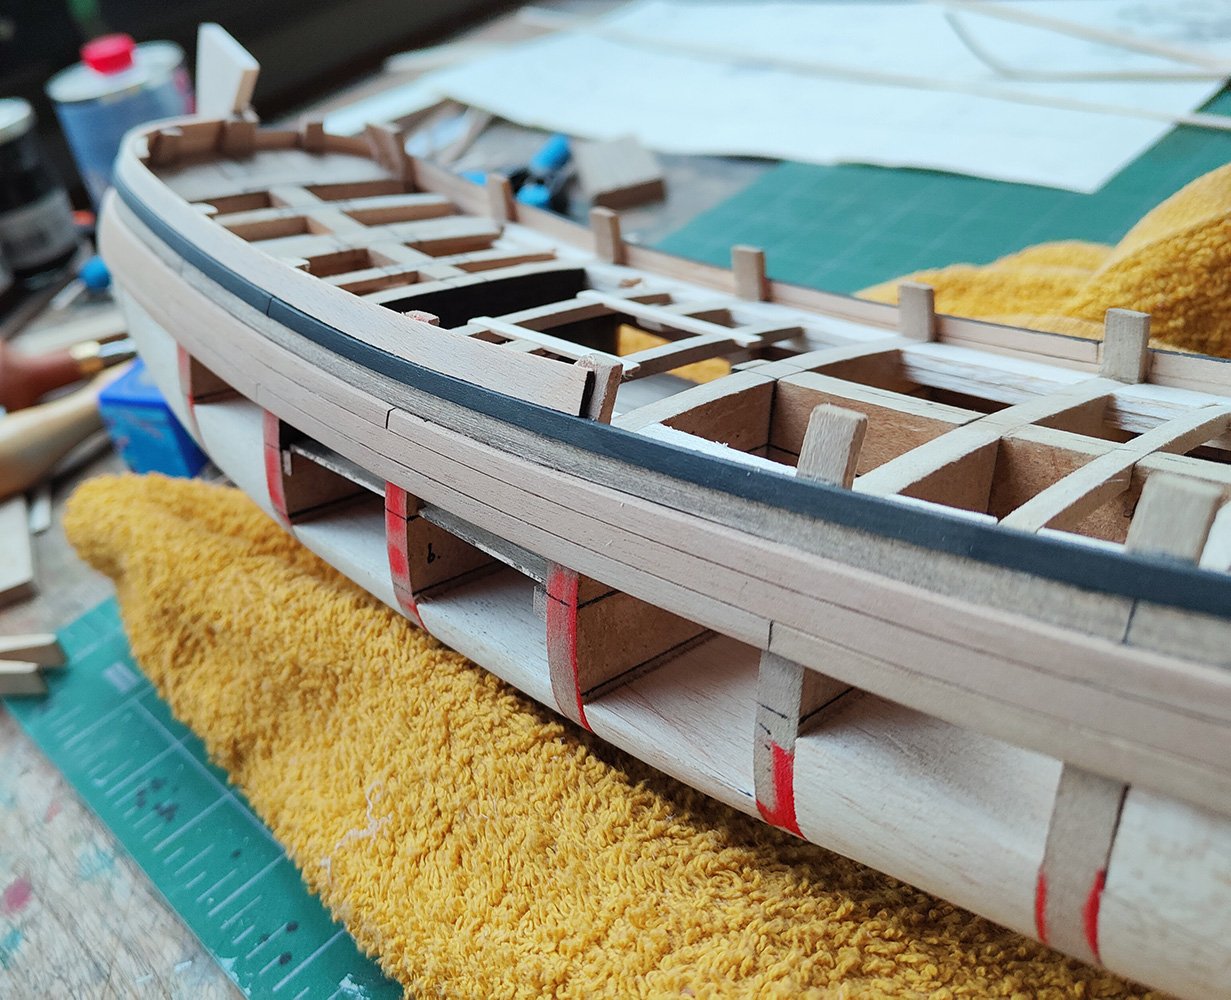
I painted the upper wale black. The upper plank of the hull ( I don't know the name for that one ) I made out of bendable beech because the curve was so severe. That part is going to be painted green.
-
view from the stern with the main wales and upper wale.
-
the upper wale is on the model and I put some deck beams on it. And because I want to cover the main hatch with a grating, I put in a small piece of the cargo-deck.
-
the mainwales finished
-
starboard wales finished
-
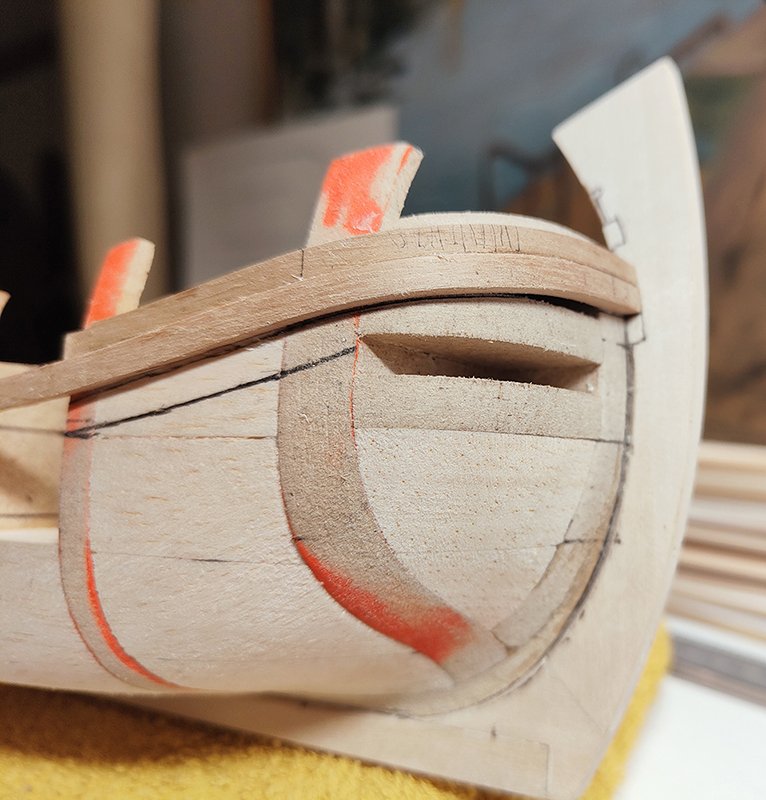
one of the cool things about the van Zwijndregt construction drawings is that he put the wales on it so you can very accurately transfer them onto the model. And from there you have a base for the rest of the planking. There is a hardly noticeable but very imported trim of the wales towards the stem and the stern.


-
the first wales up on the model. Notice there is no rabbet for the wales, just for the planks.
-
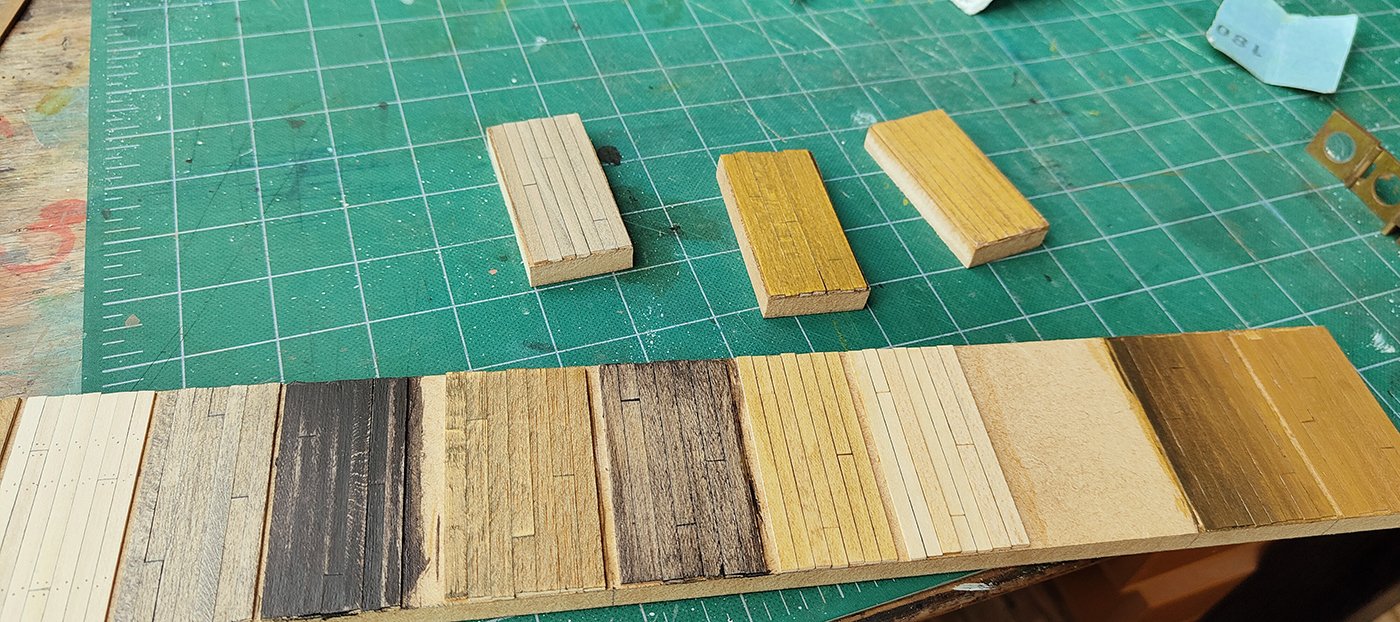
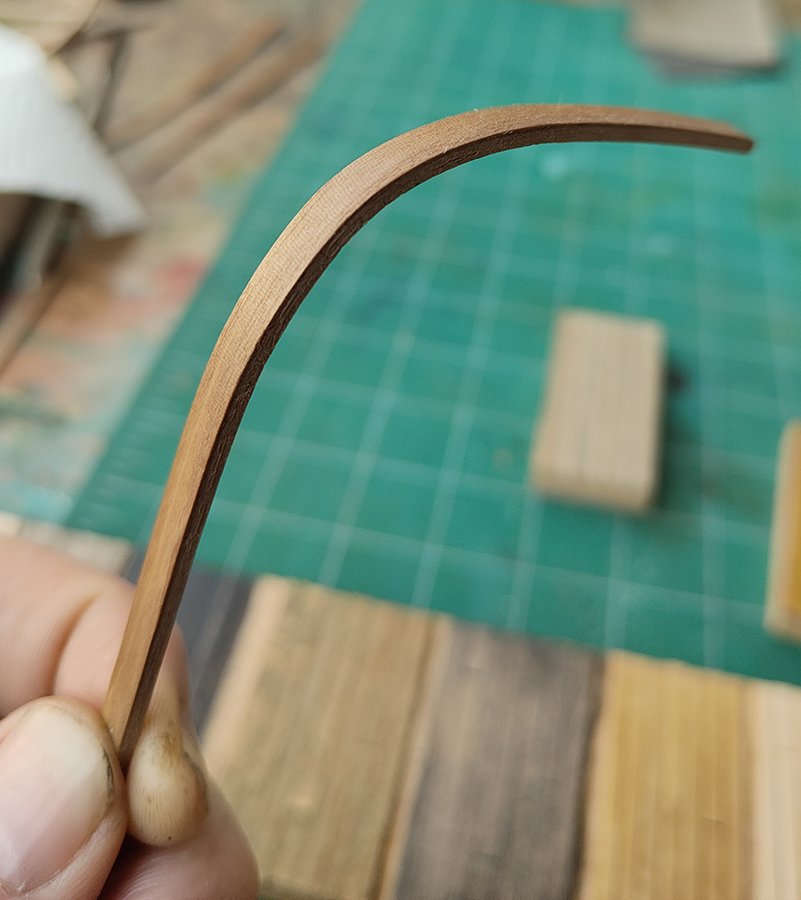
I did some tests of different kinds of varnish and washes on different kind of woods. Mainly limewood and walnut. I also did tests with steam bending. Especially with 3 mm. thick wood, the walnut was easier to bend. So I decided to make the wales out of 3 mm. walnut and the rest of the planking out of 1 mm. lime wood. The wales had to be bevelled first, then curved lengthways with the 'Chuck-method' (using a travel-iron) and then steambended.