
Reub
-
Posts
27 -
Joined
-
Last visited
Content Type
Profiles
Forums
Gallery
Events
Everything posted by Reub
-
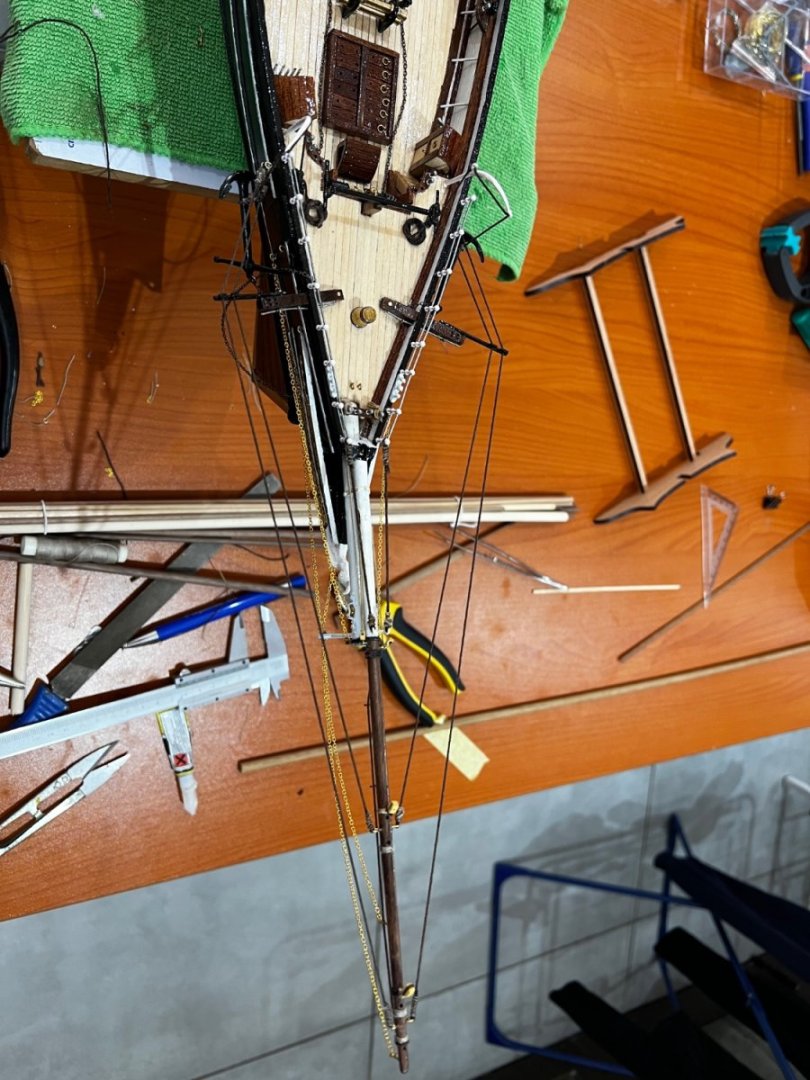
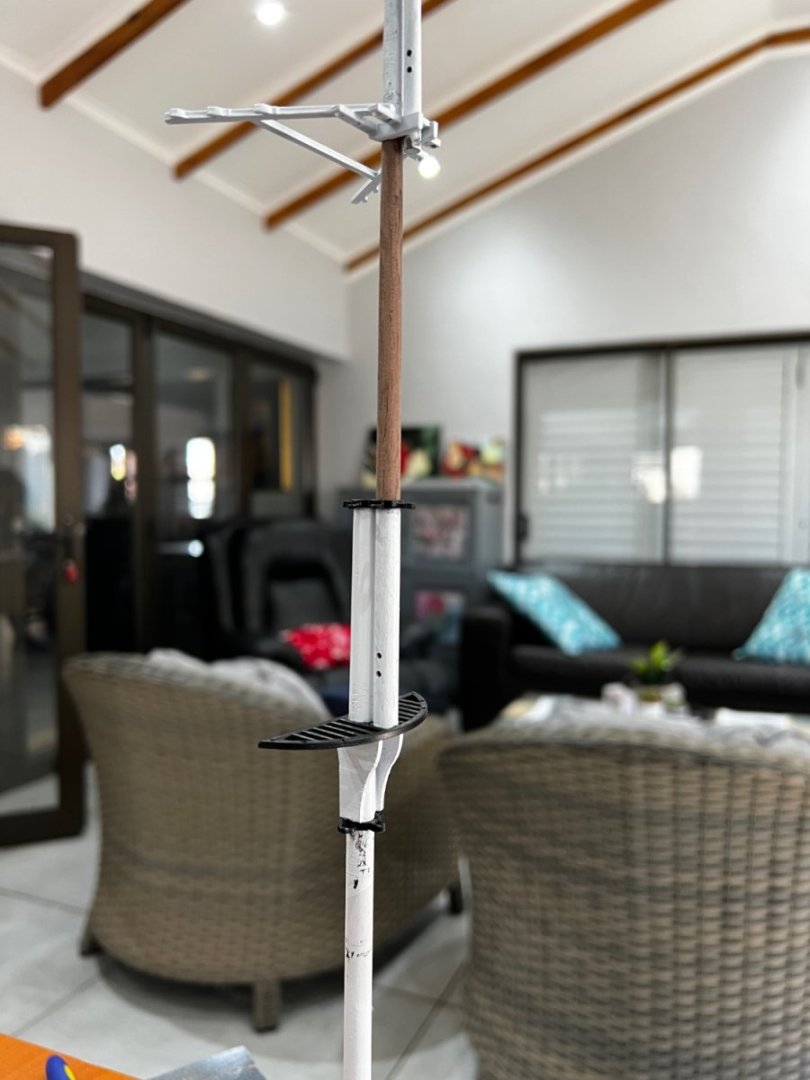
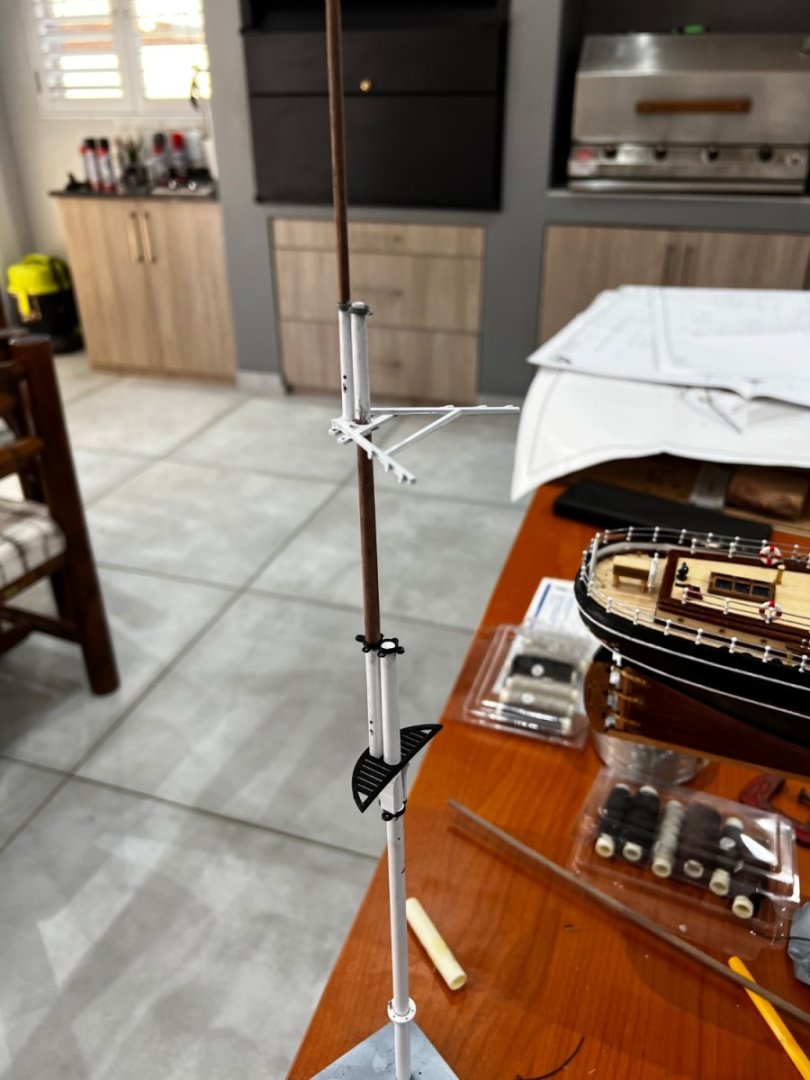
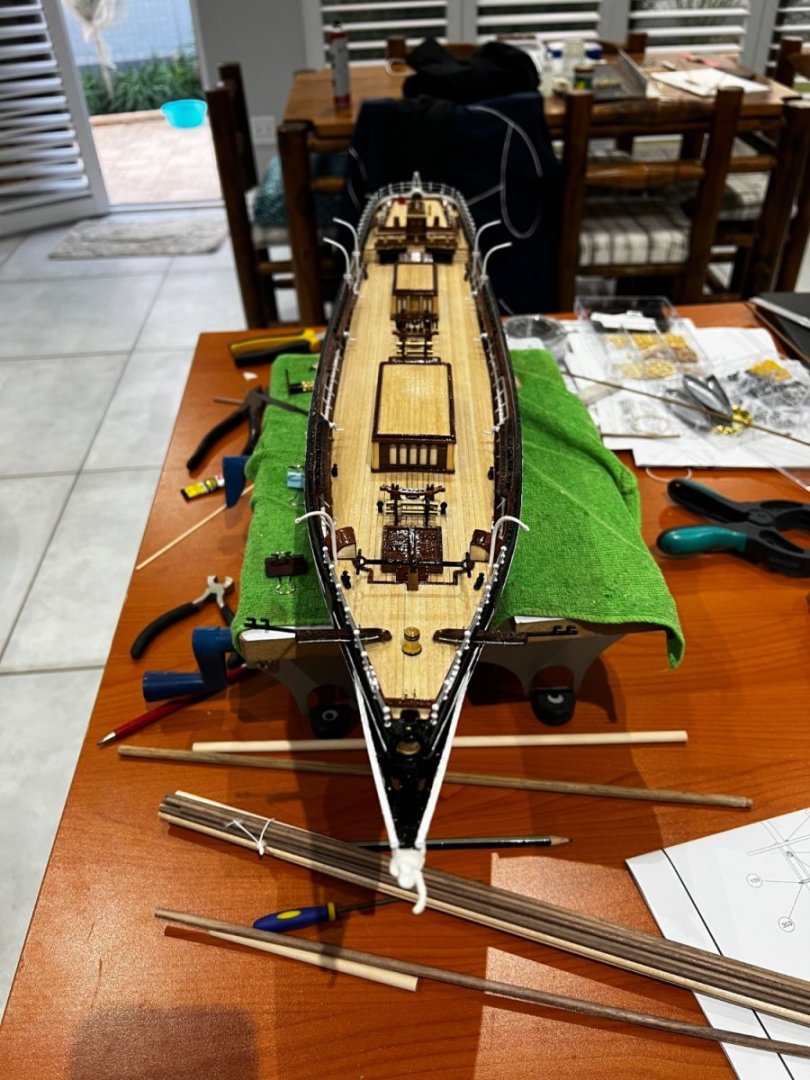
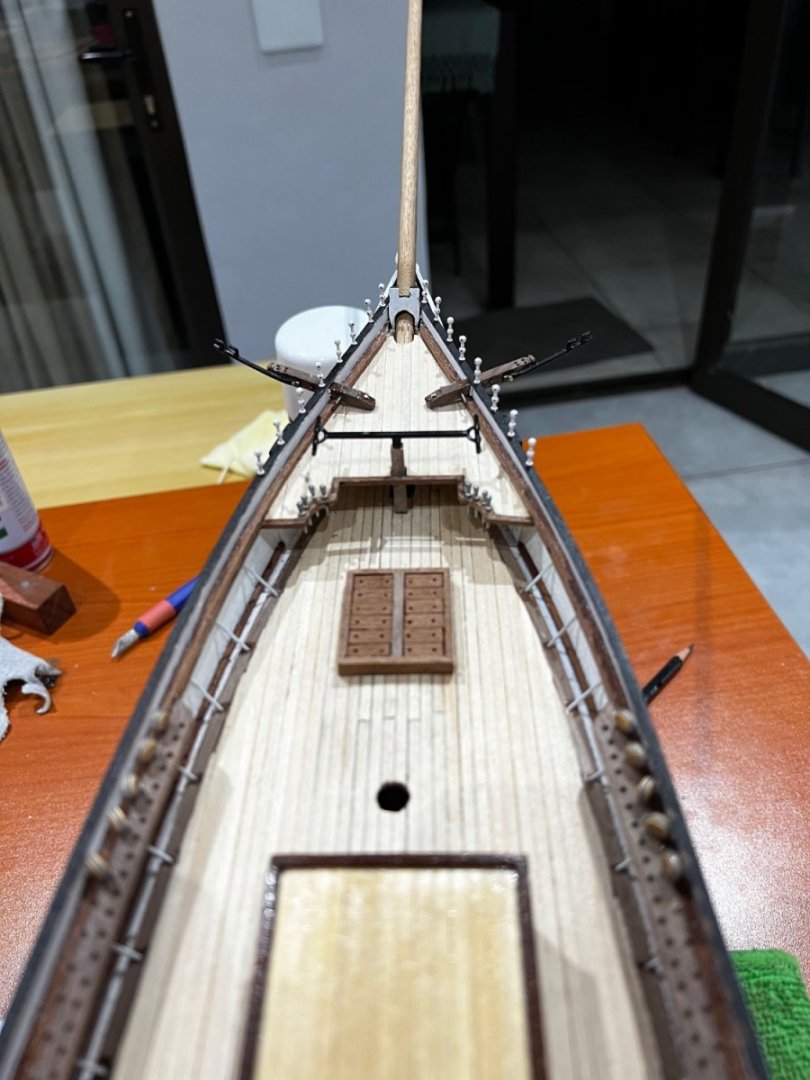
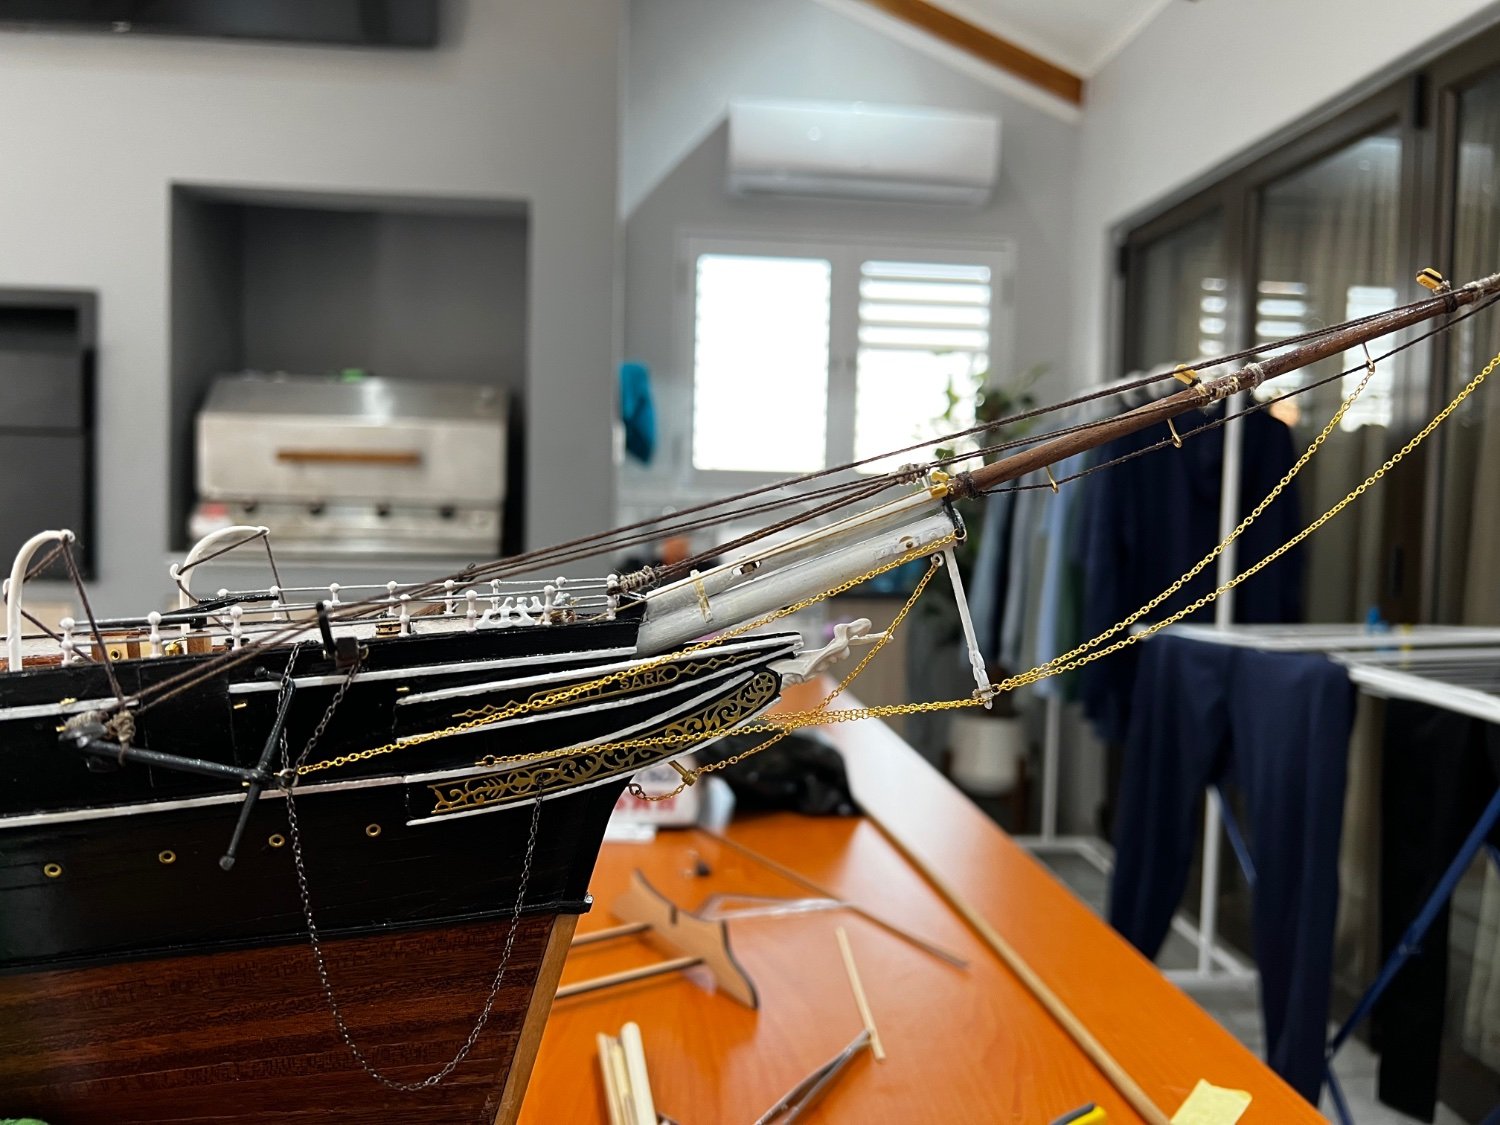
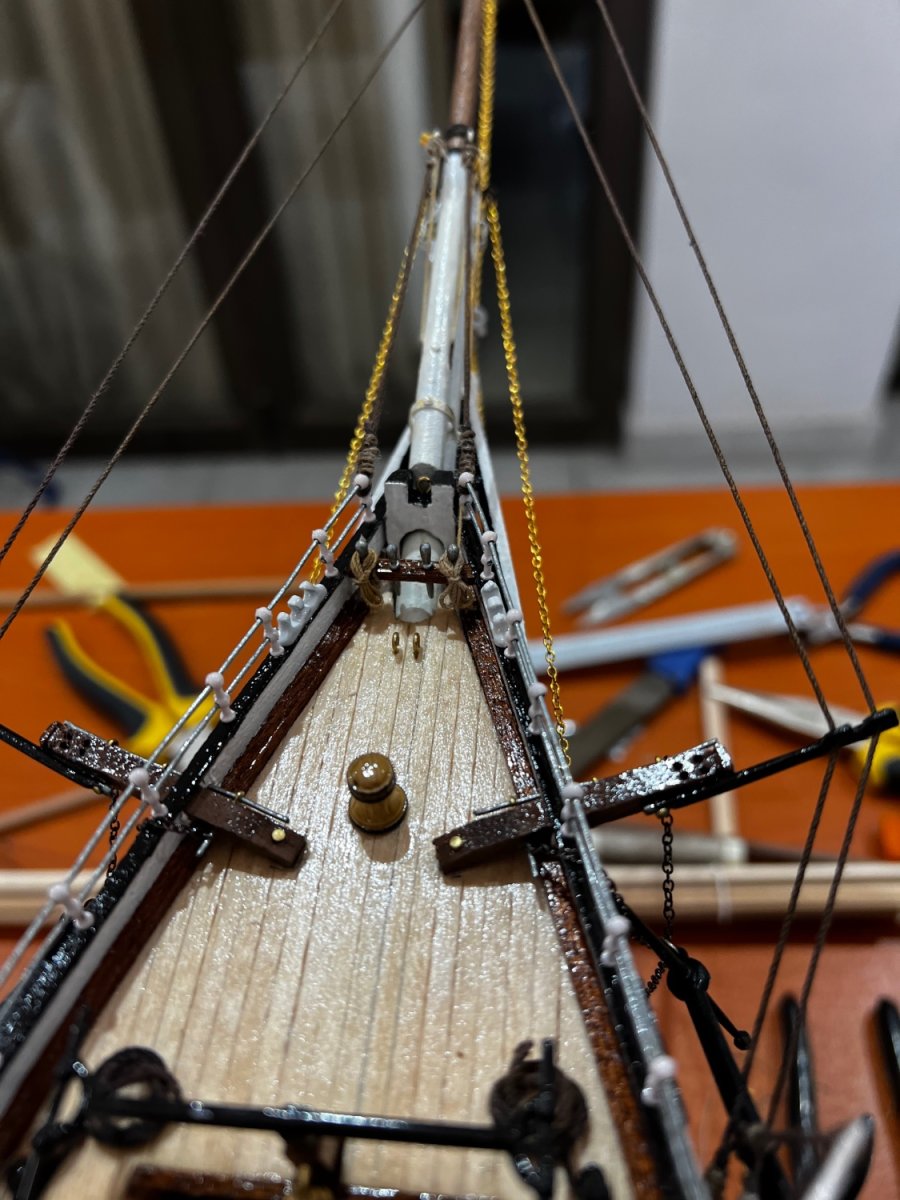
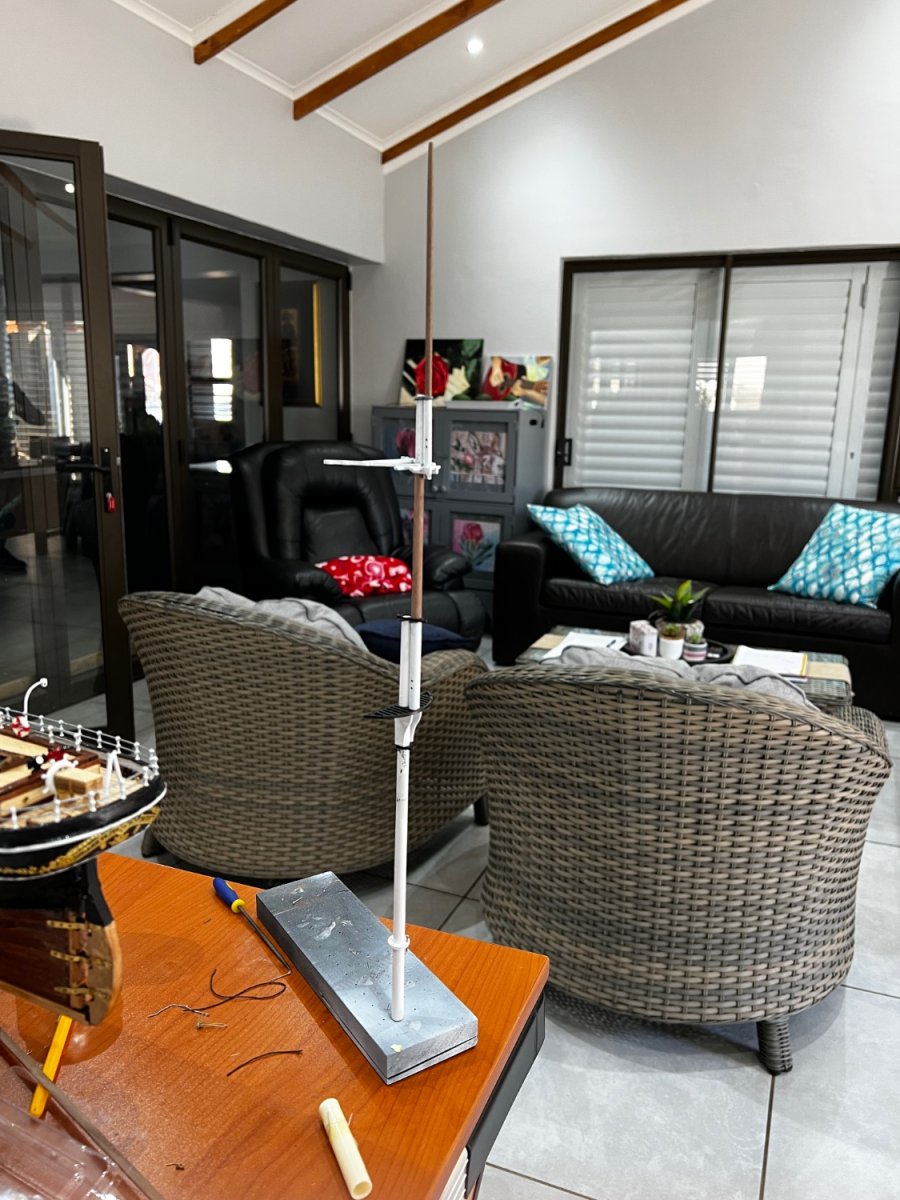
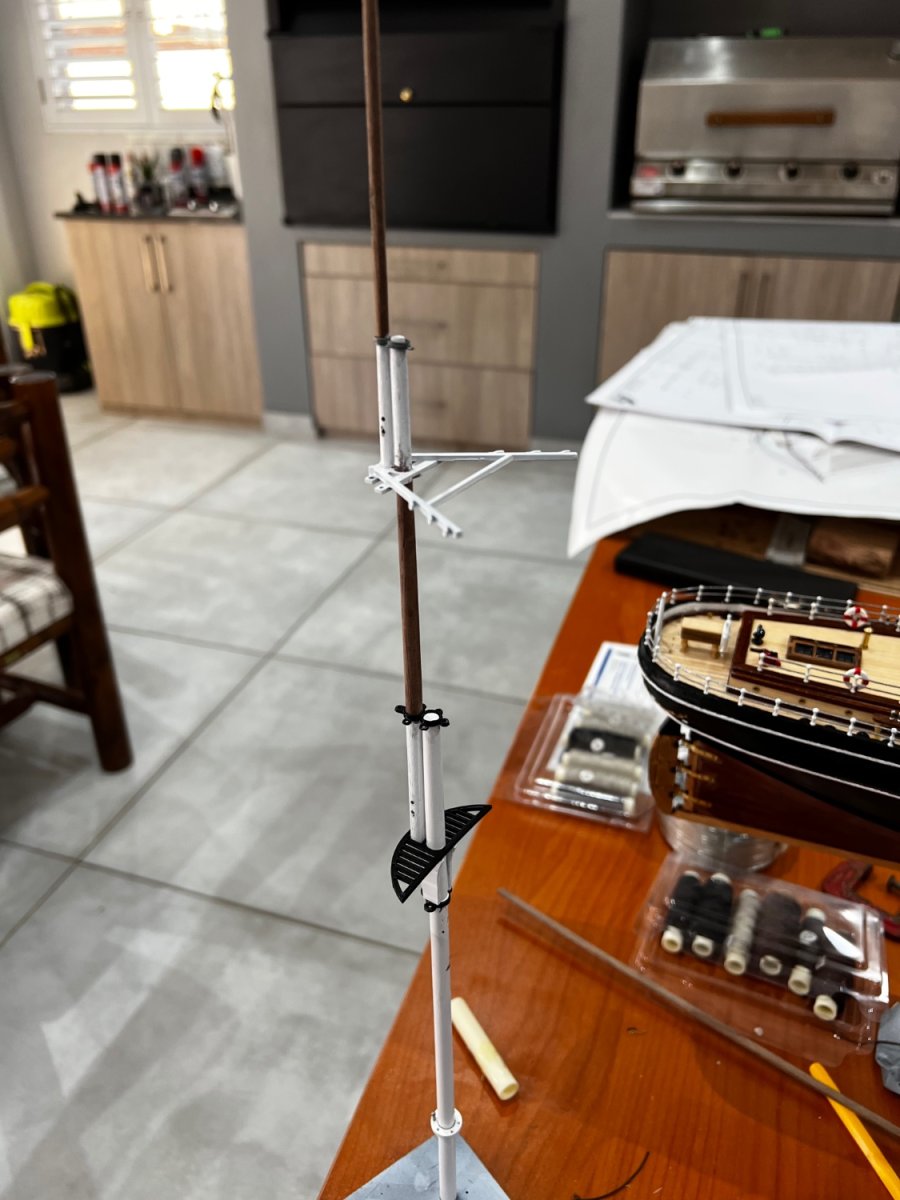
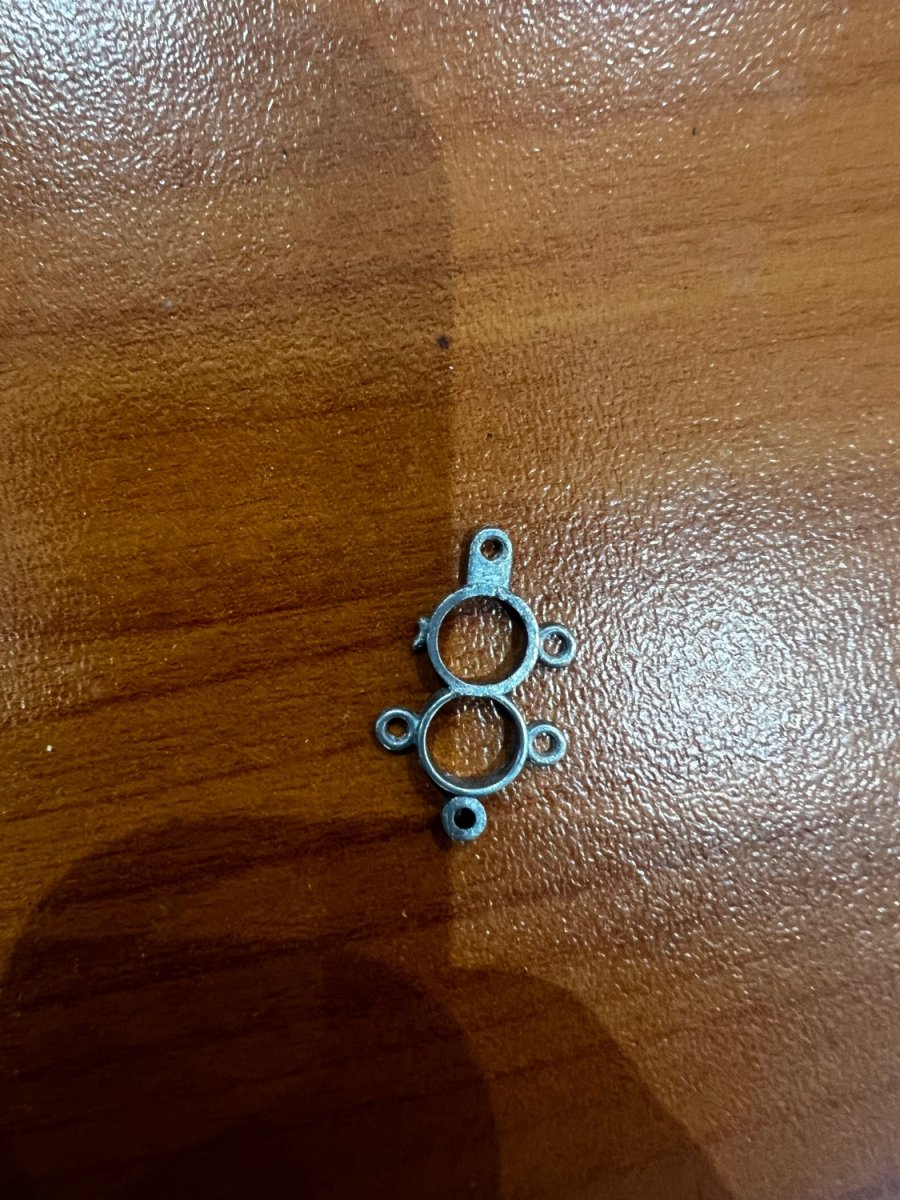
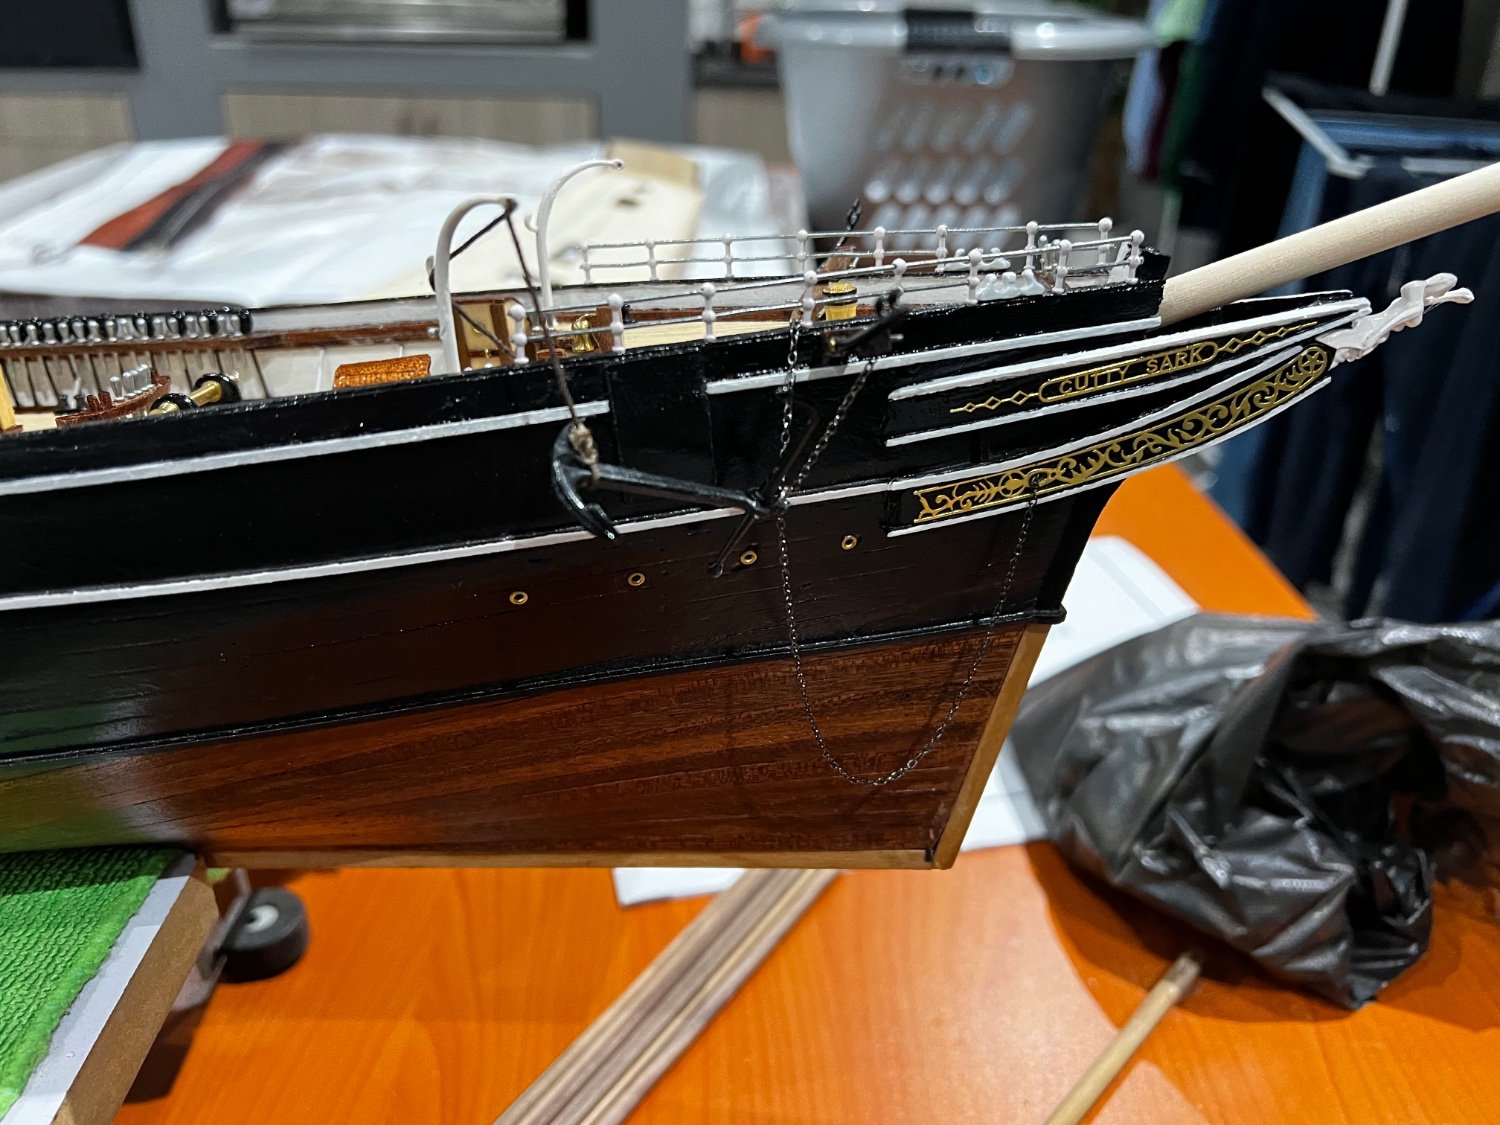
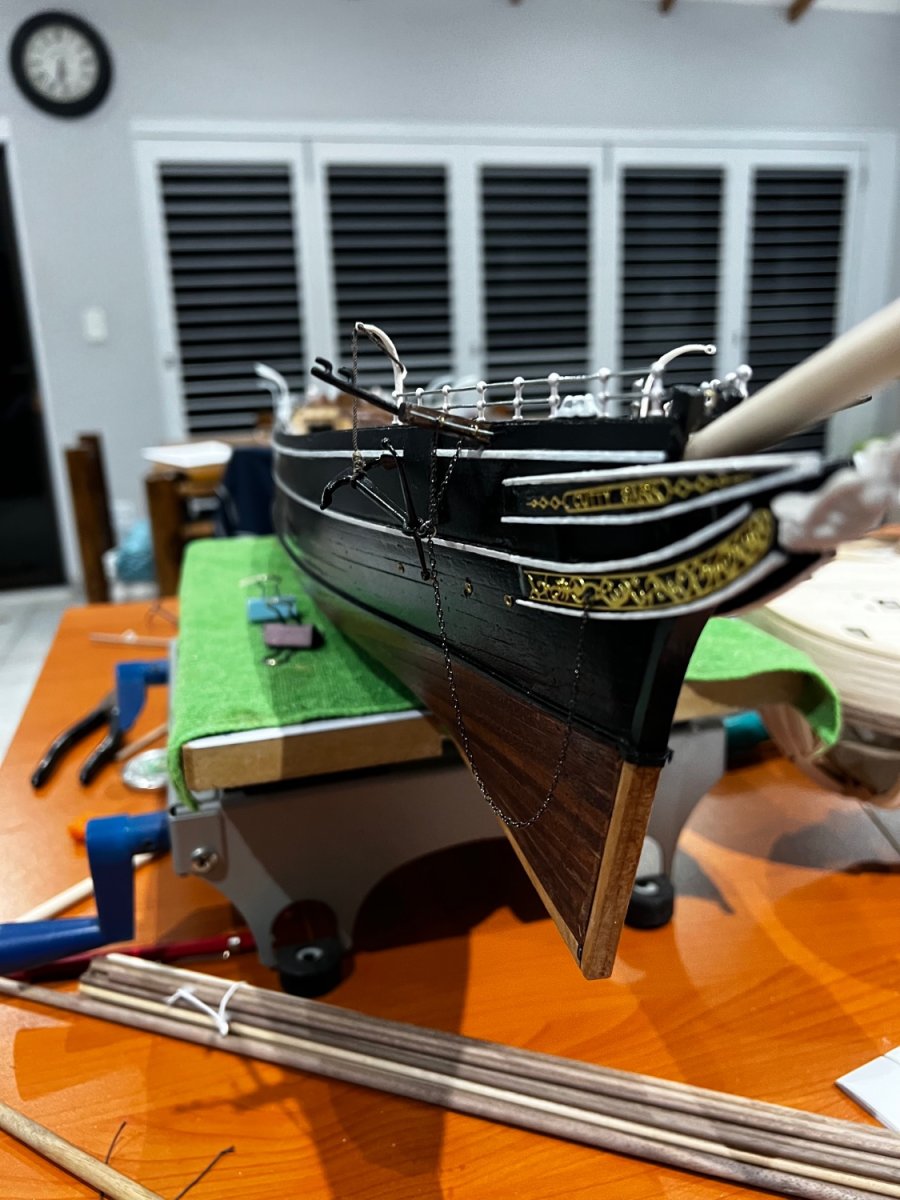
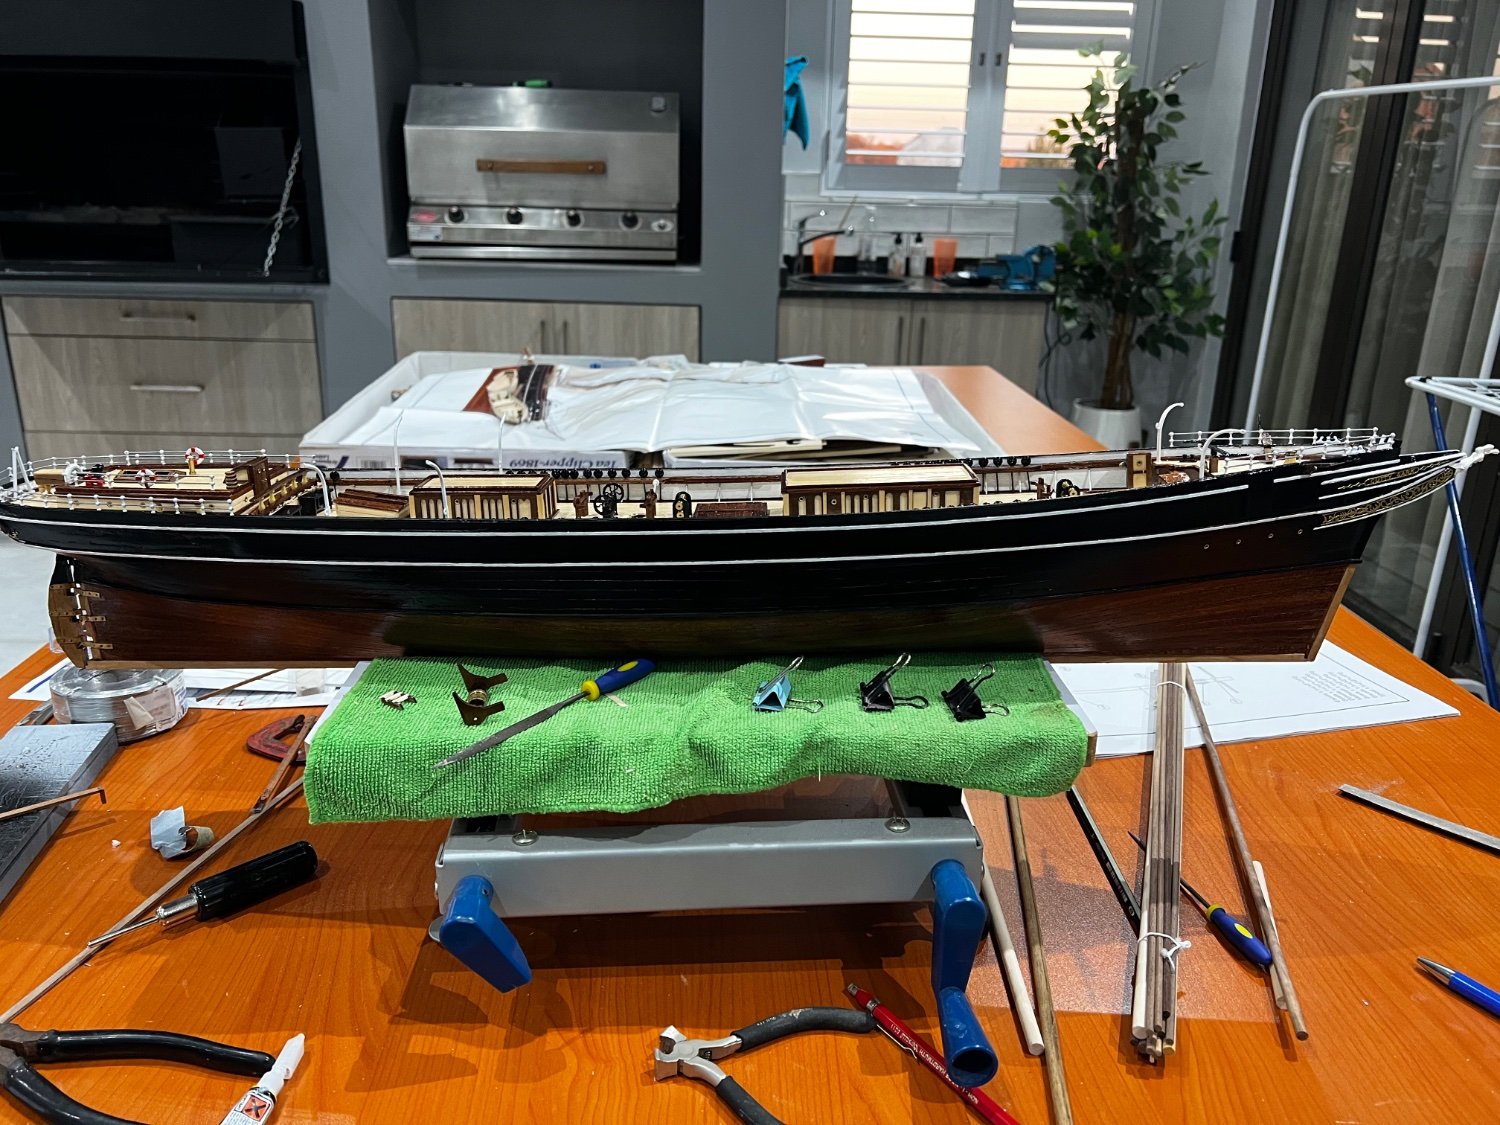
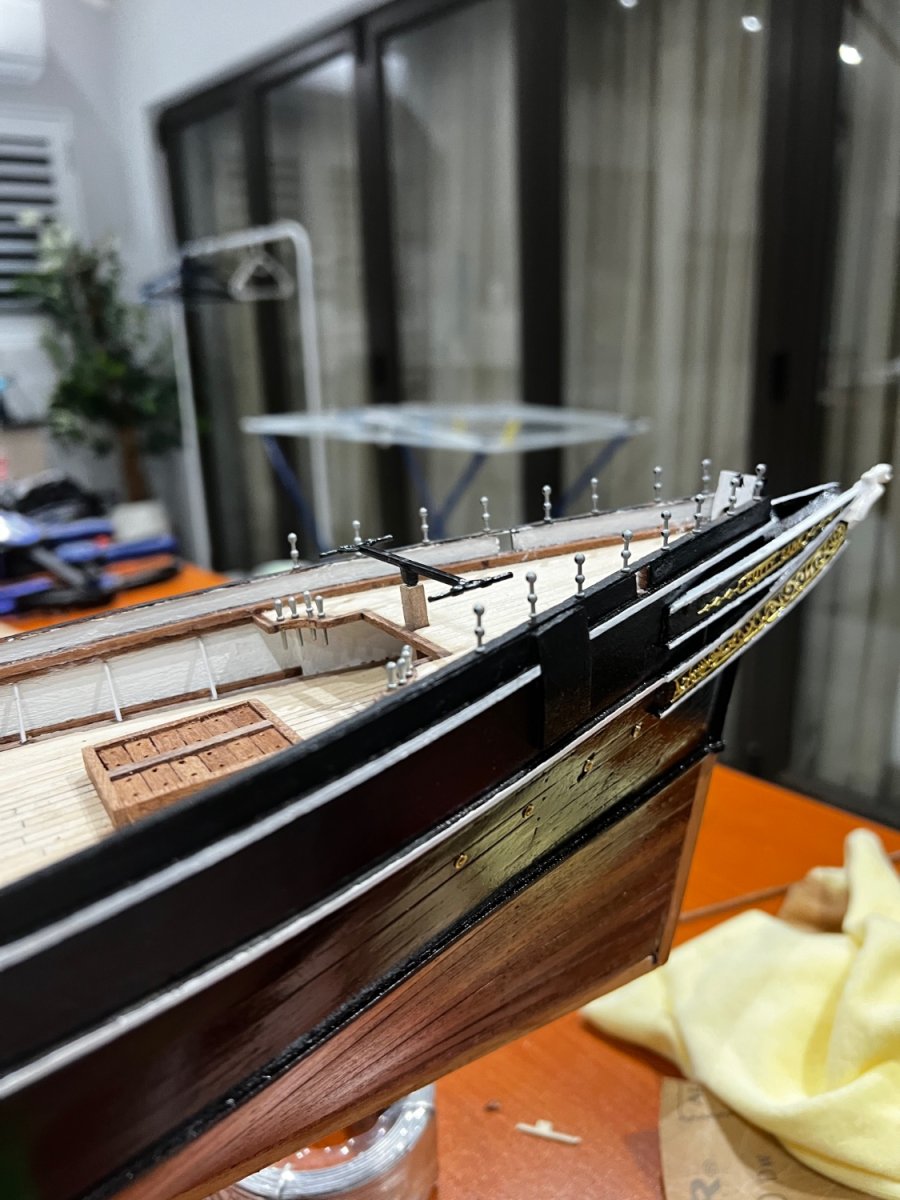
Hi all. Small update. the bowsprit is done and work has started on the foremast. Alot of the metal pieces’ rings came broken as can be seen in one of the photos. I have thus far used the intact ones. Any ideas to fix or substitute are welcome. Ordinarily, i would just super glue the broken pieces but the broken off rings are nowhere to be found. Maybe i just have to insert extra eyebolts in the mast or is there a more elegant solution? All comments and suggestions are welcome. kind regards


- 47 replies
-
- 4
-

-
- Cutty Sark
- Artesania Latina
- (and 1 more)
-
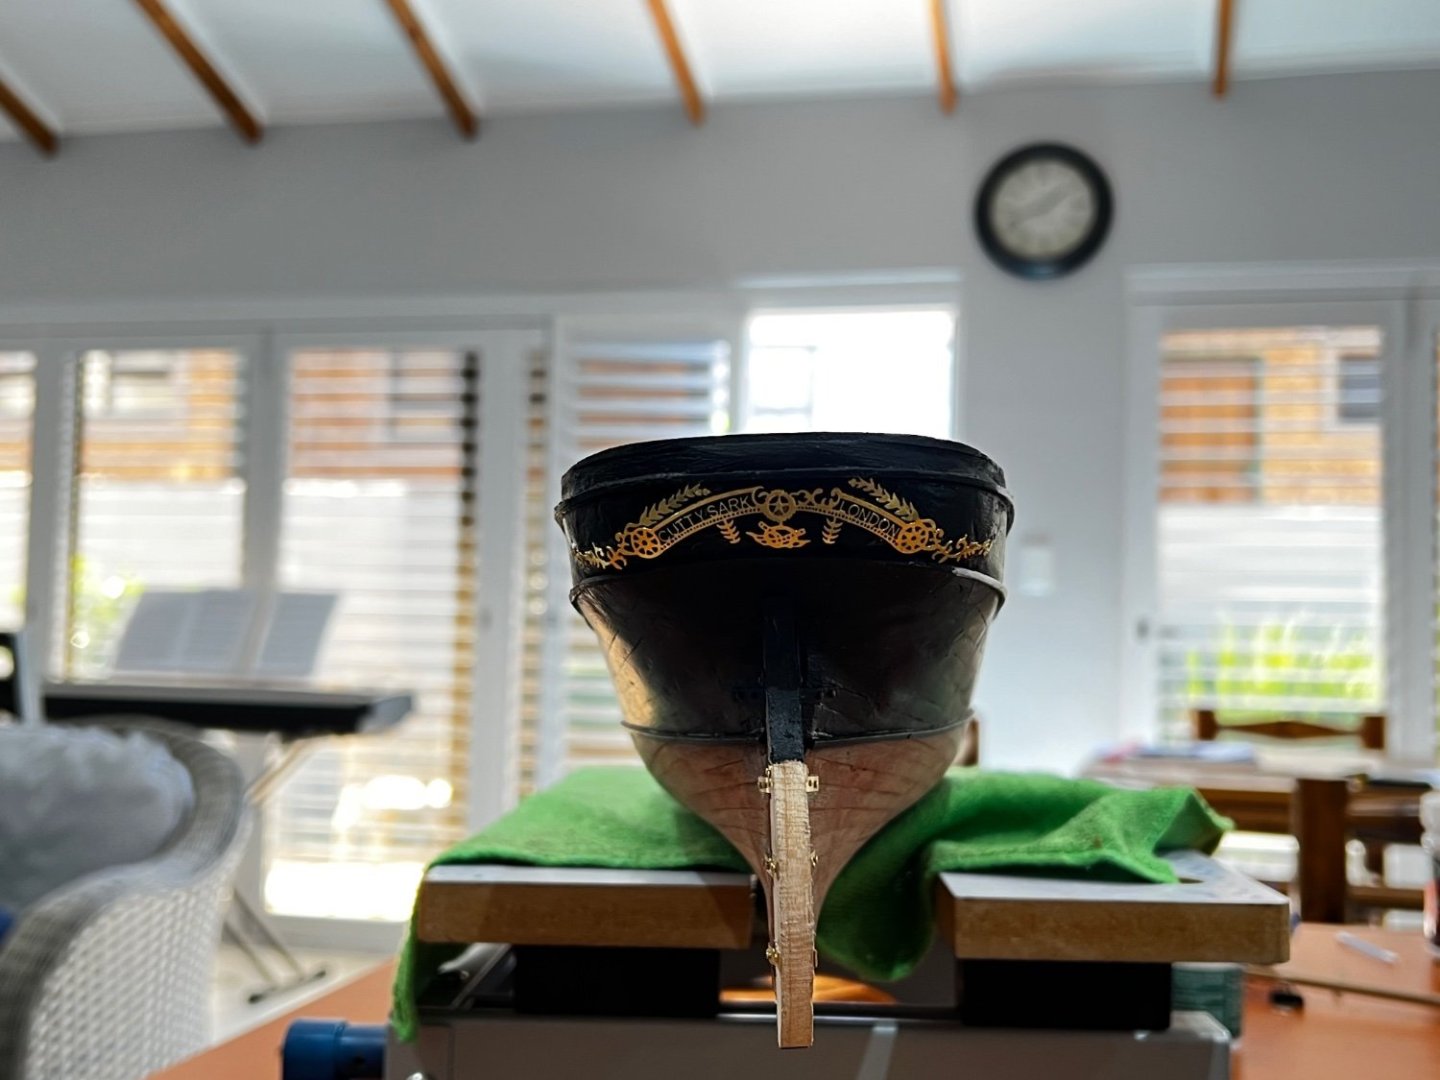
The first anchor is rigged up. Now onto anchor number two. kind regards.

- 47 replies
-
- 3
-
-
- Cutty Sark
- Artesania Latina
- (and 1 more)
-
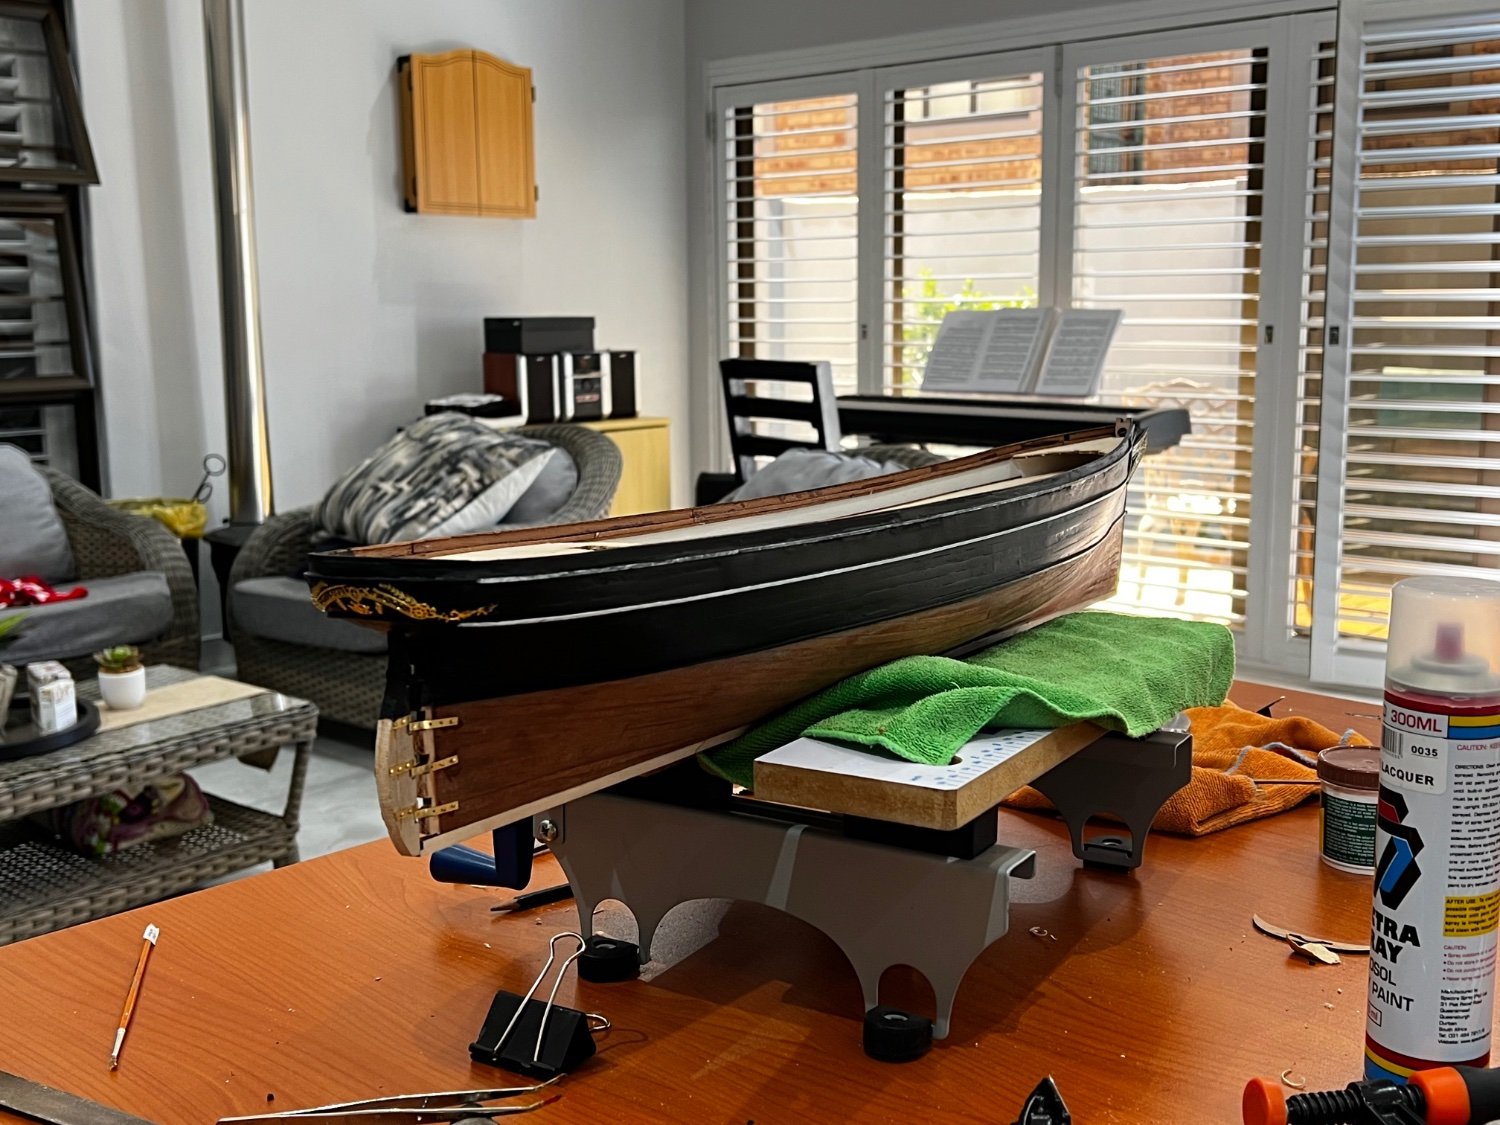
Thanks for the advice however i think ill still go with the lifeboats on the davits. kind regards
-
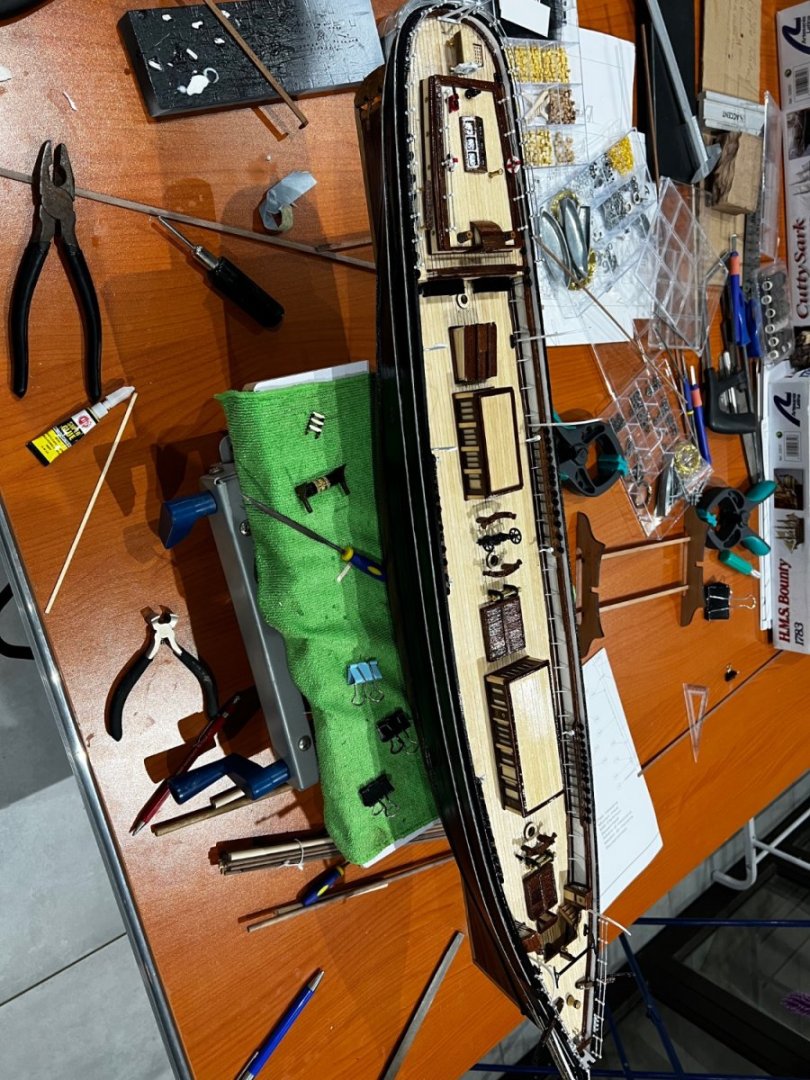
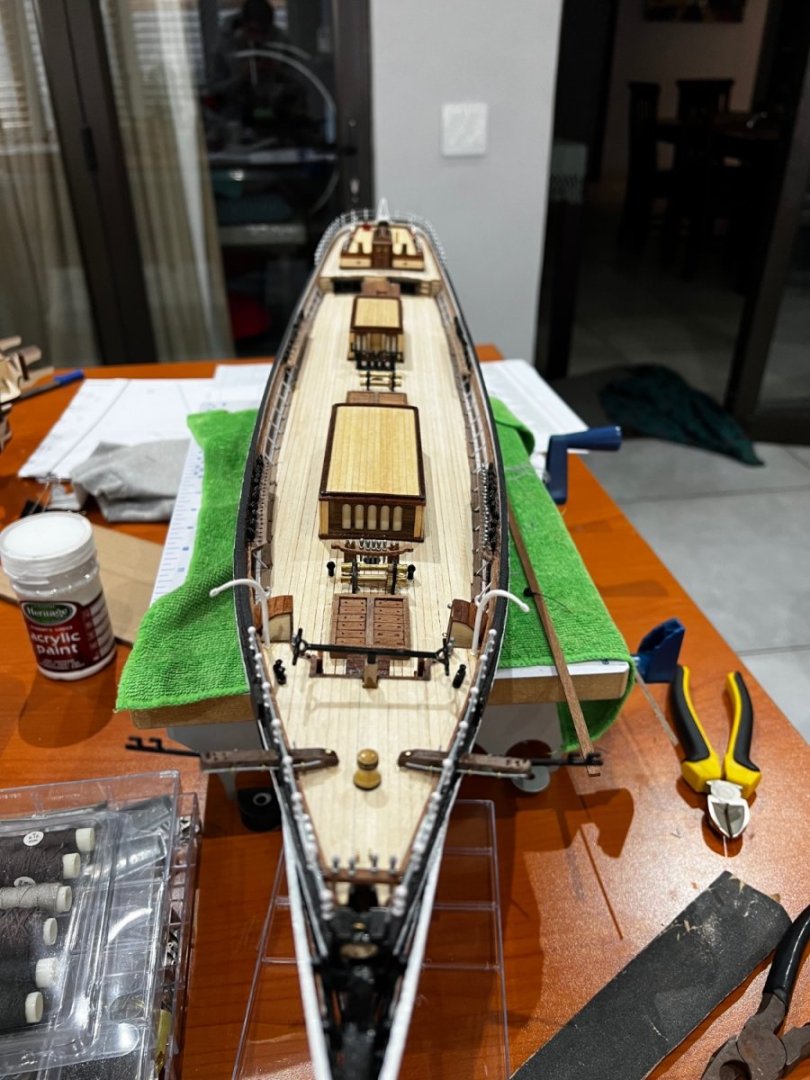
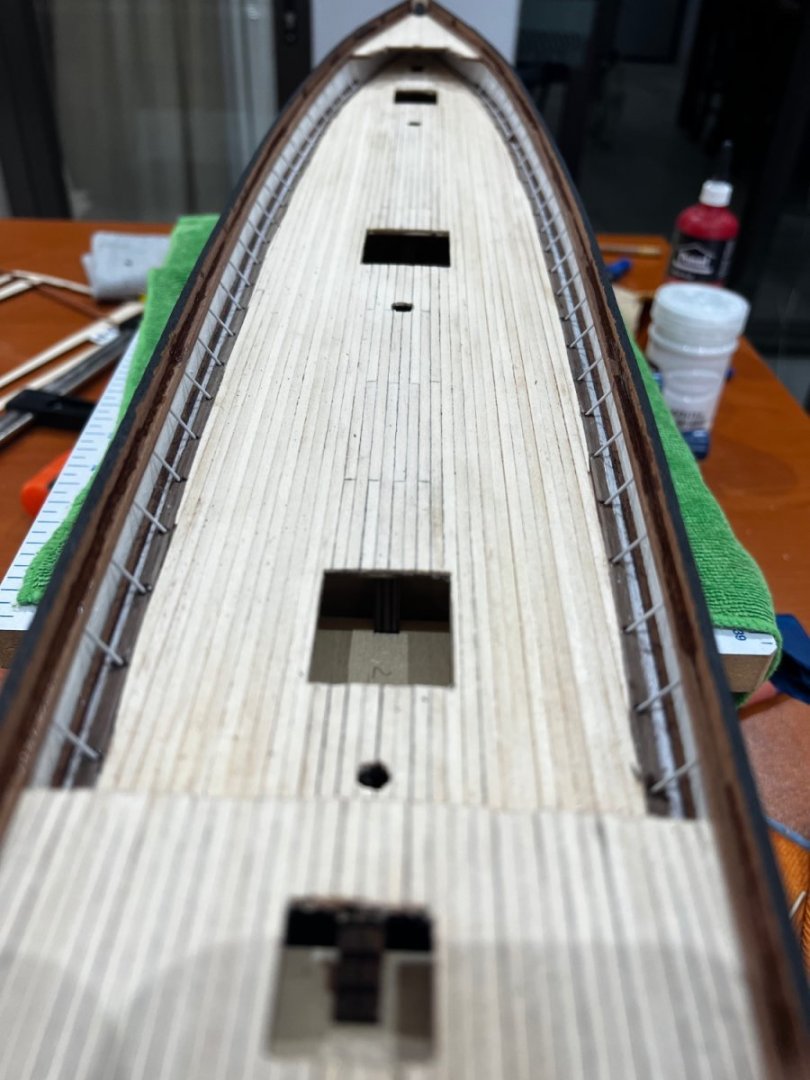
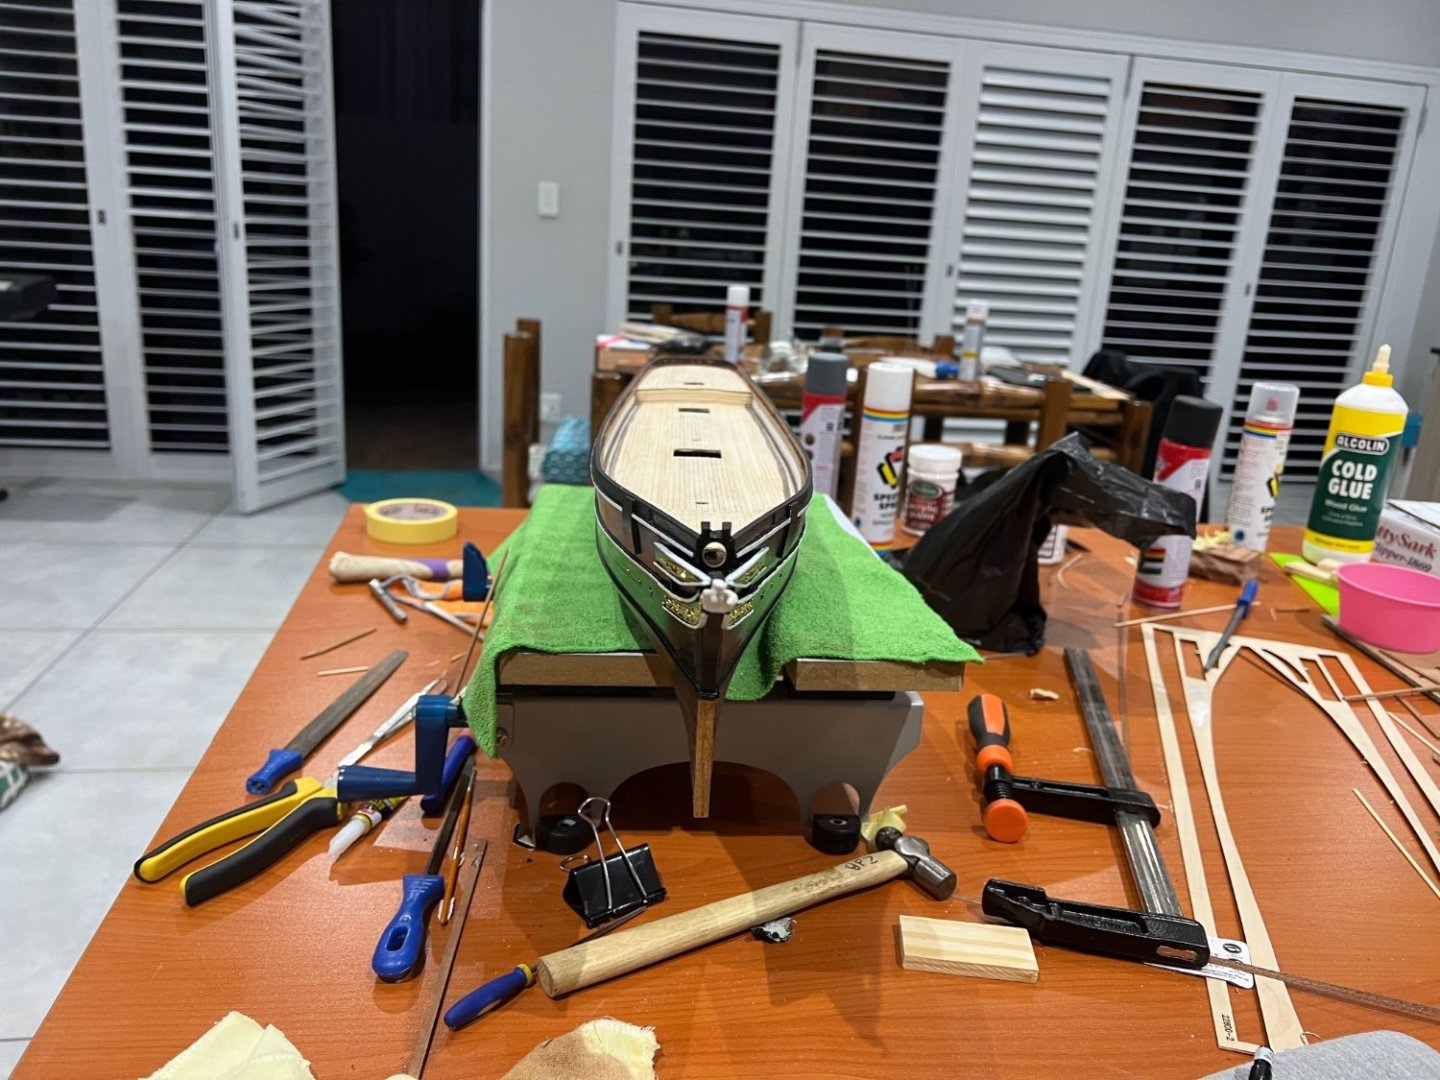
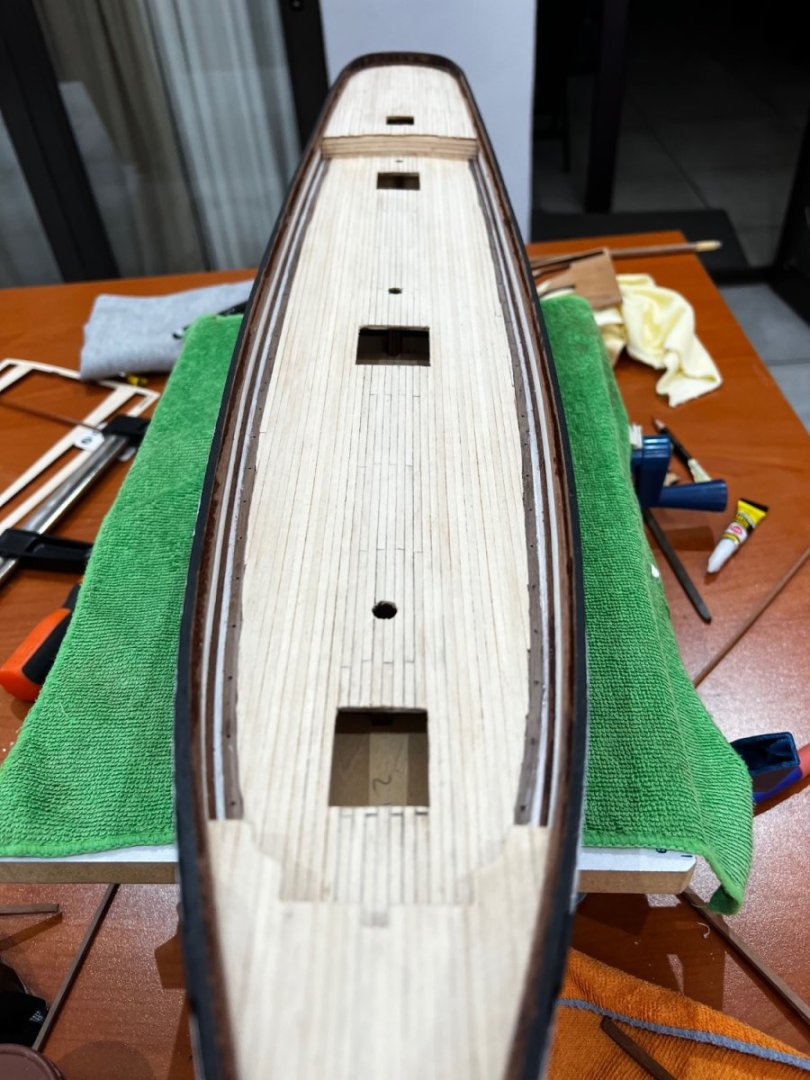
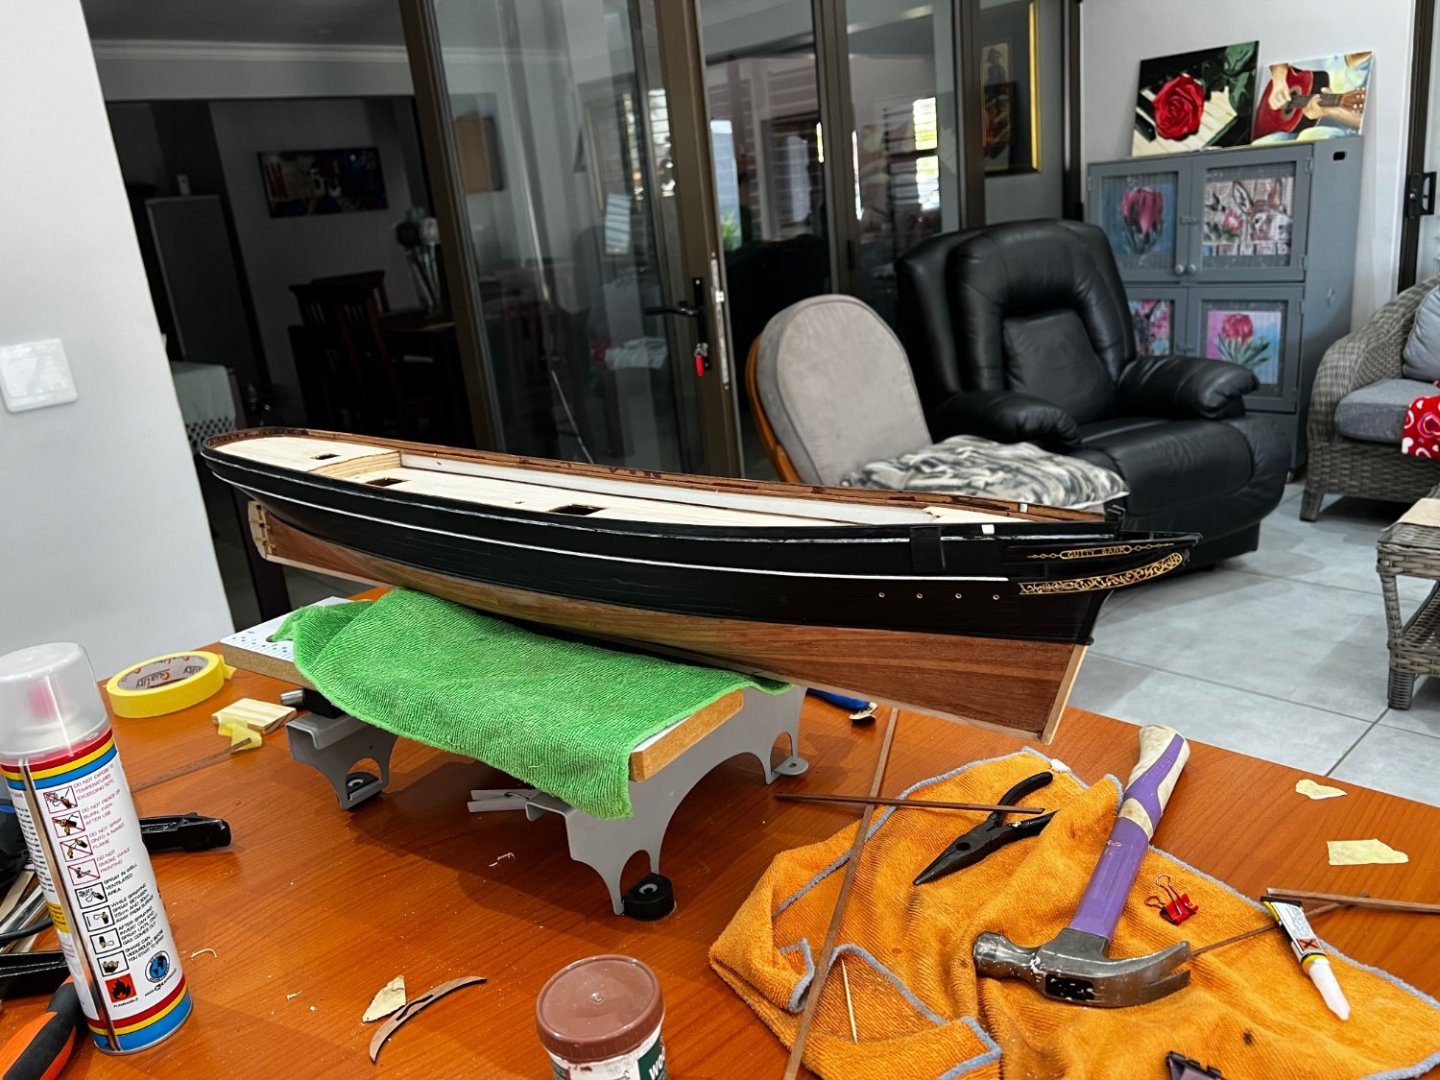
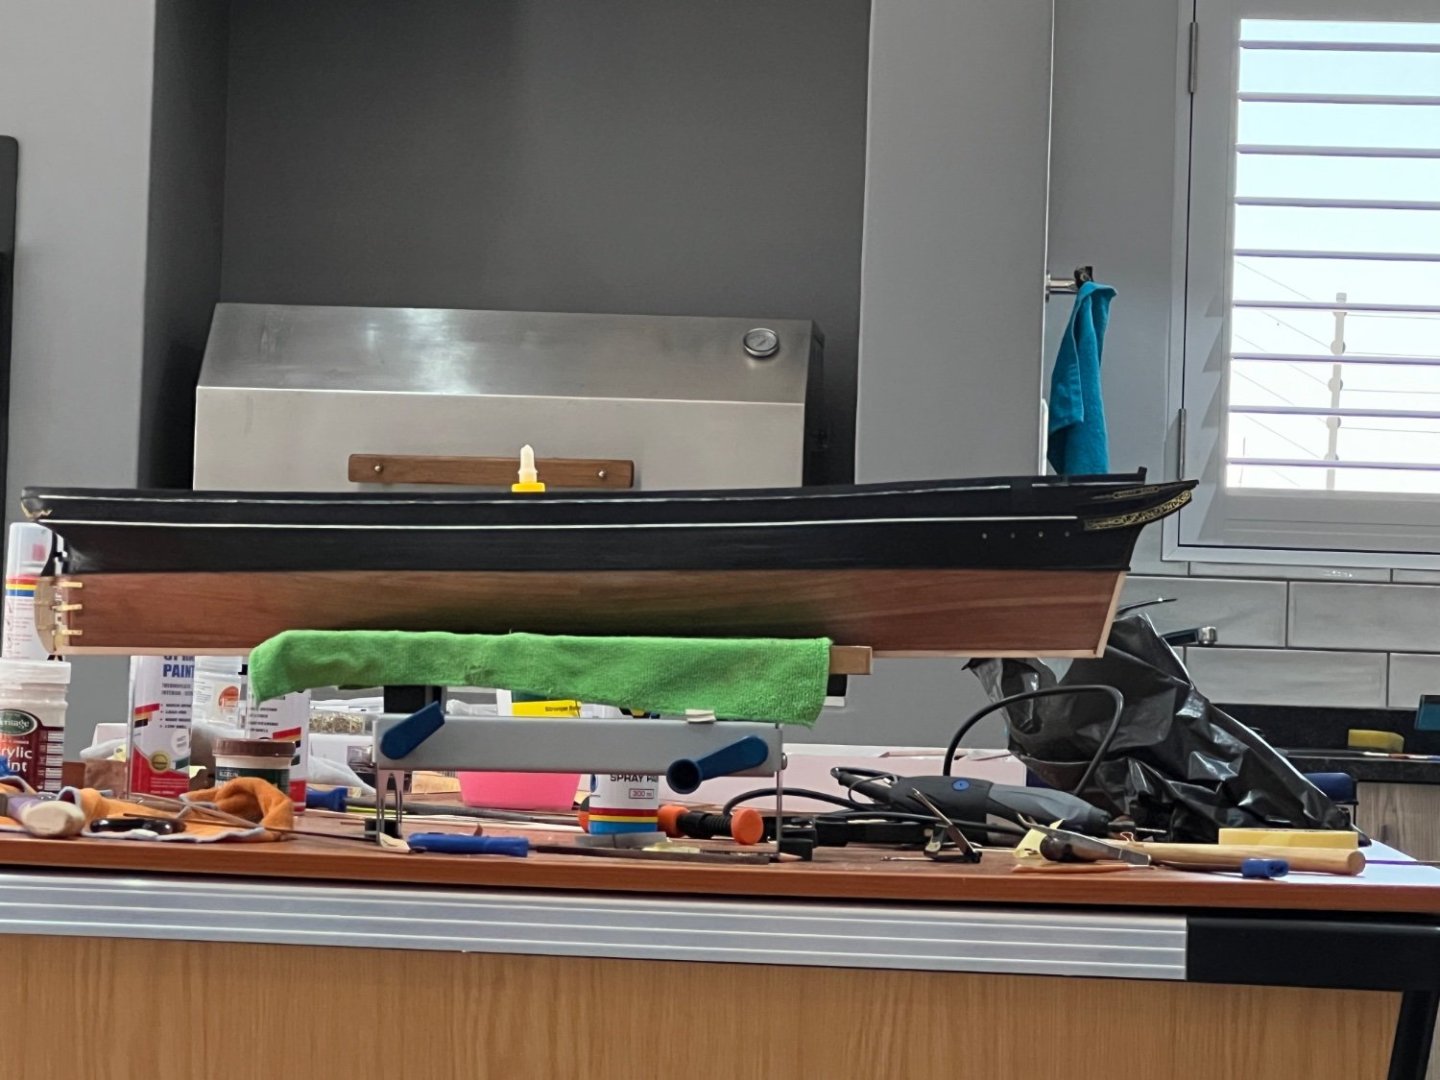
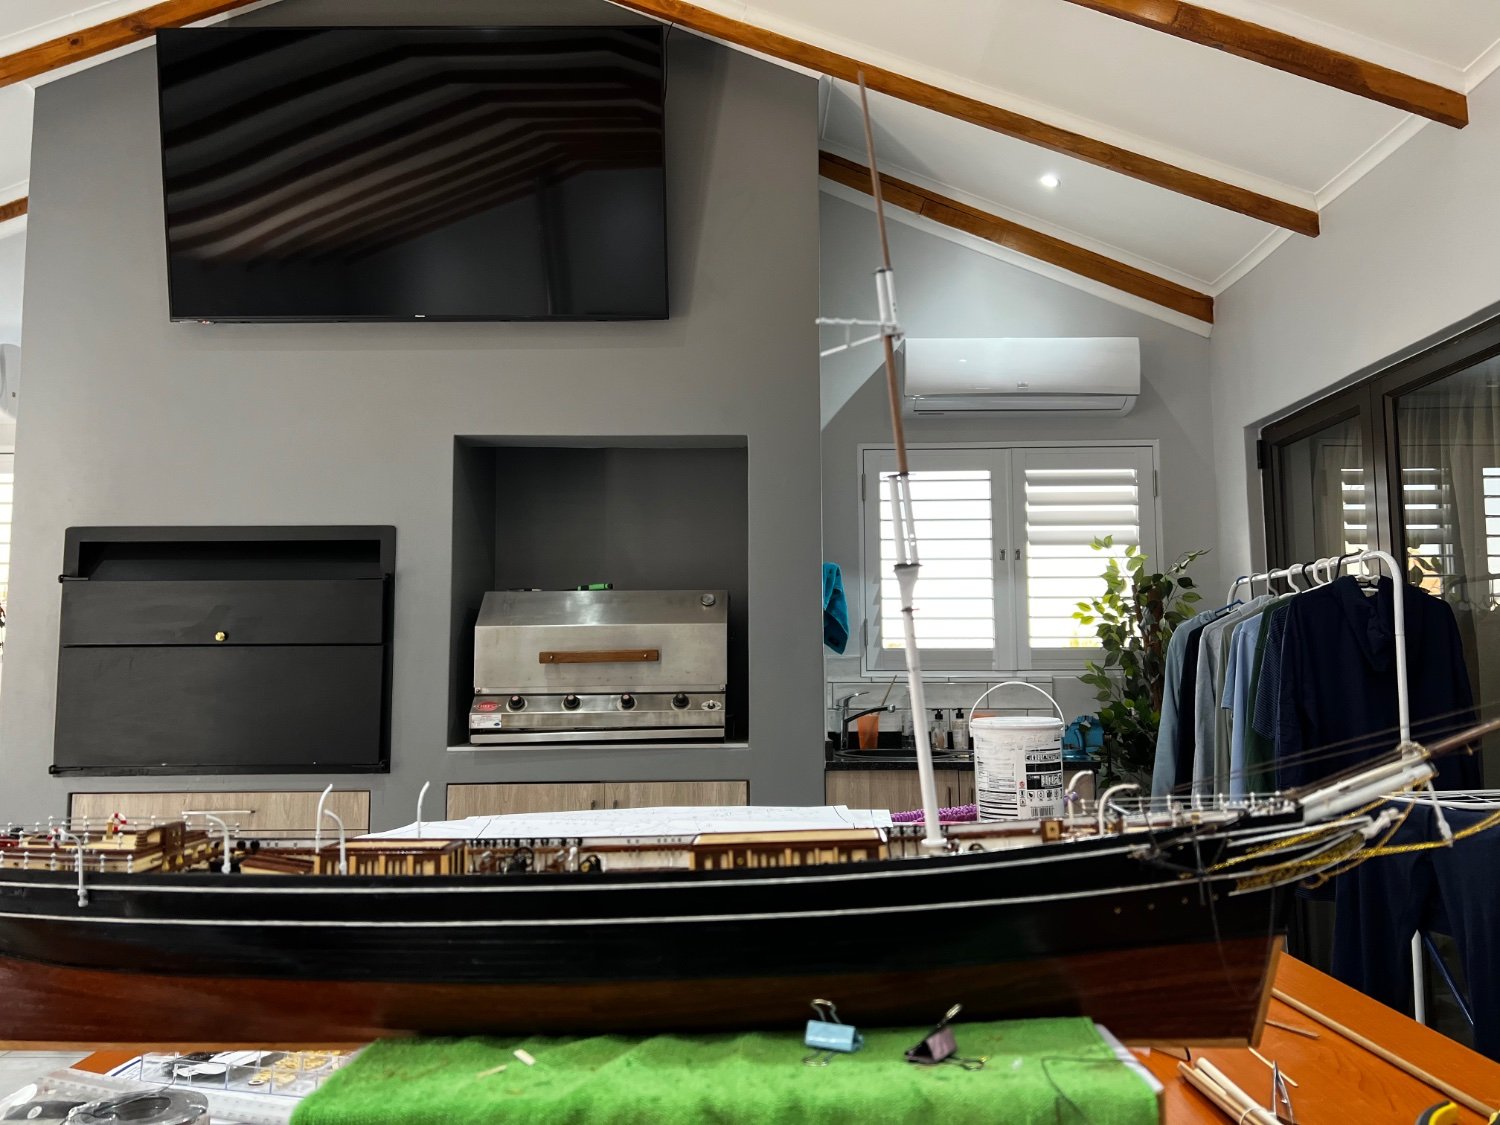
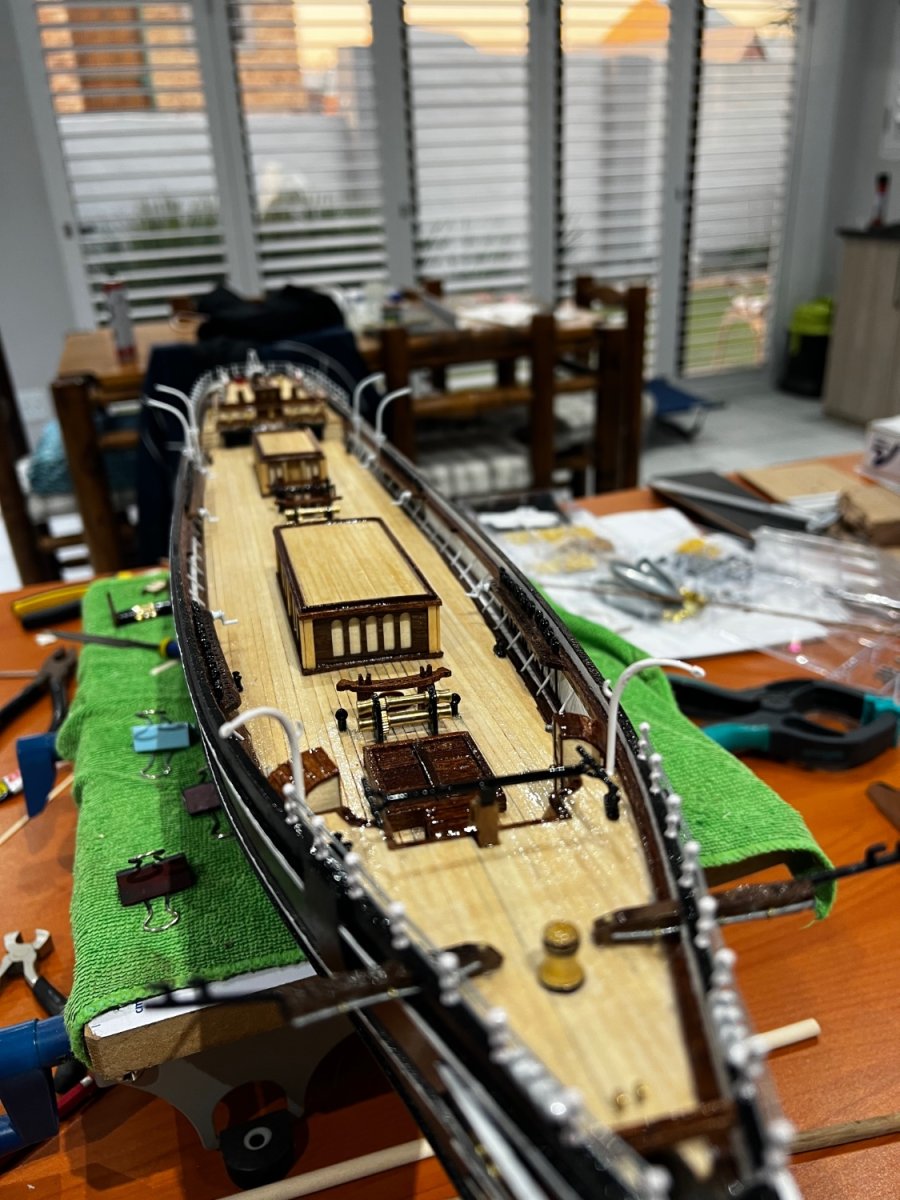
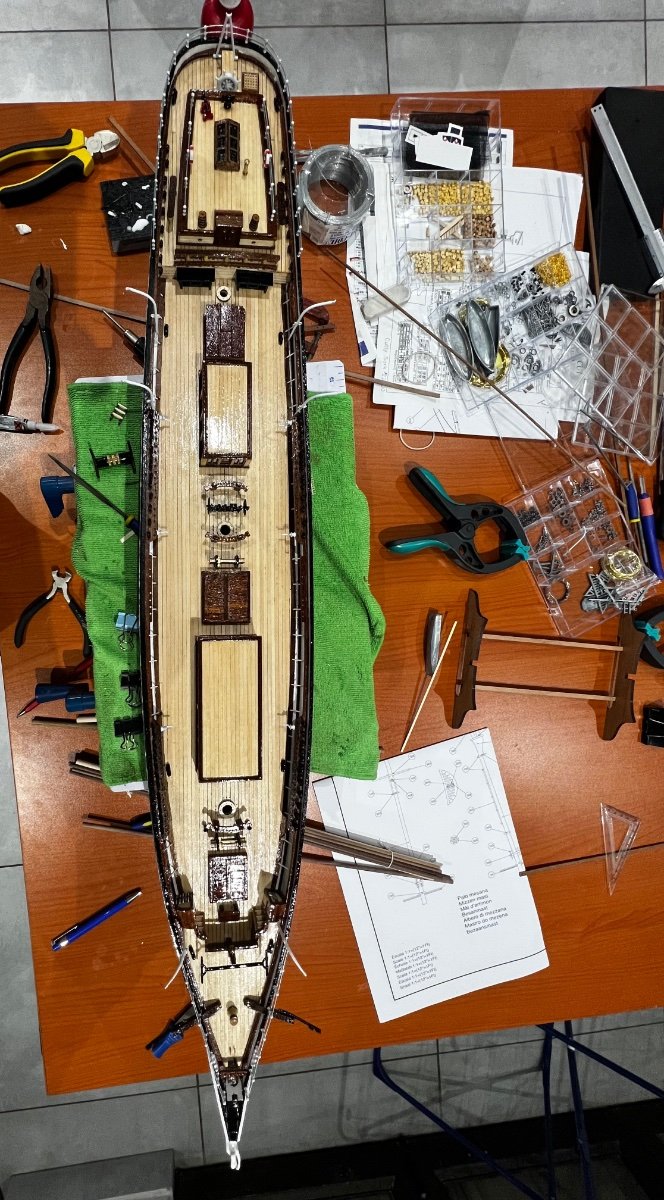
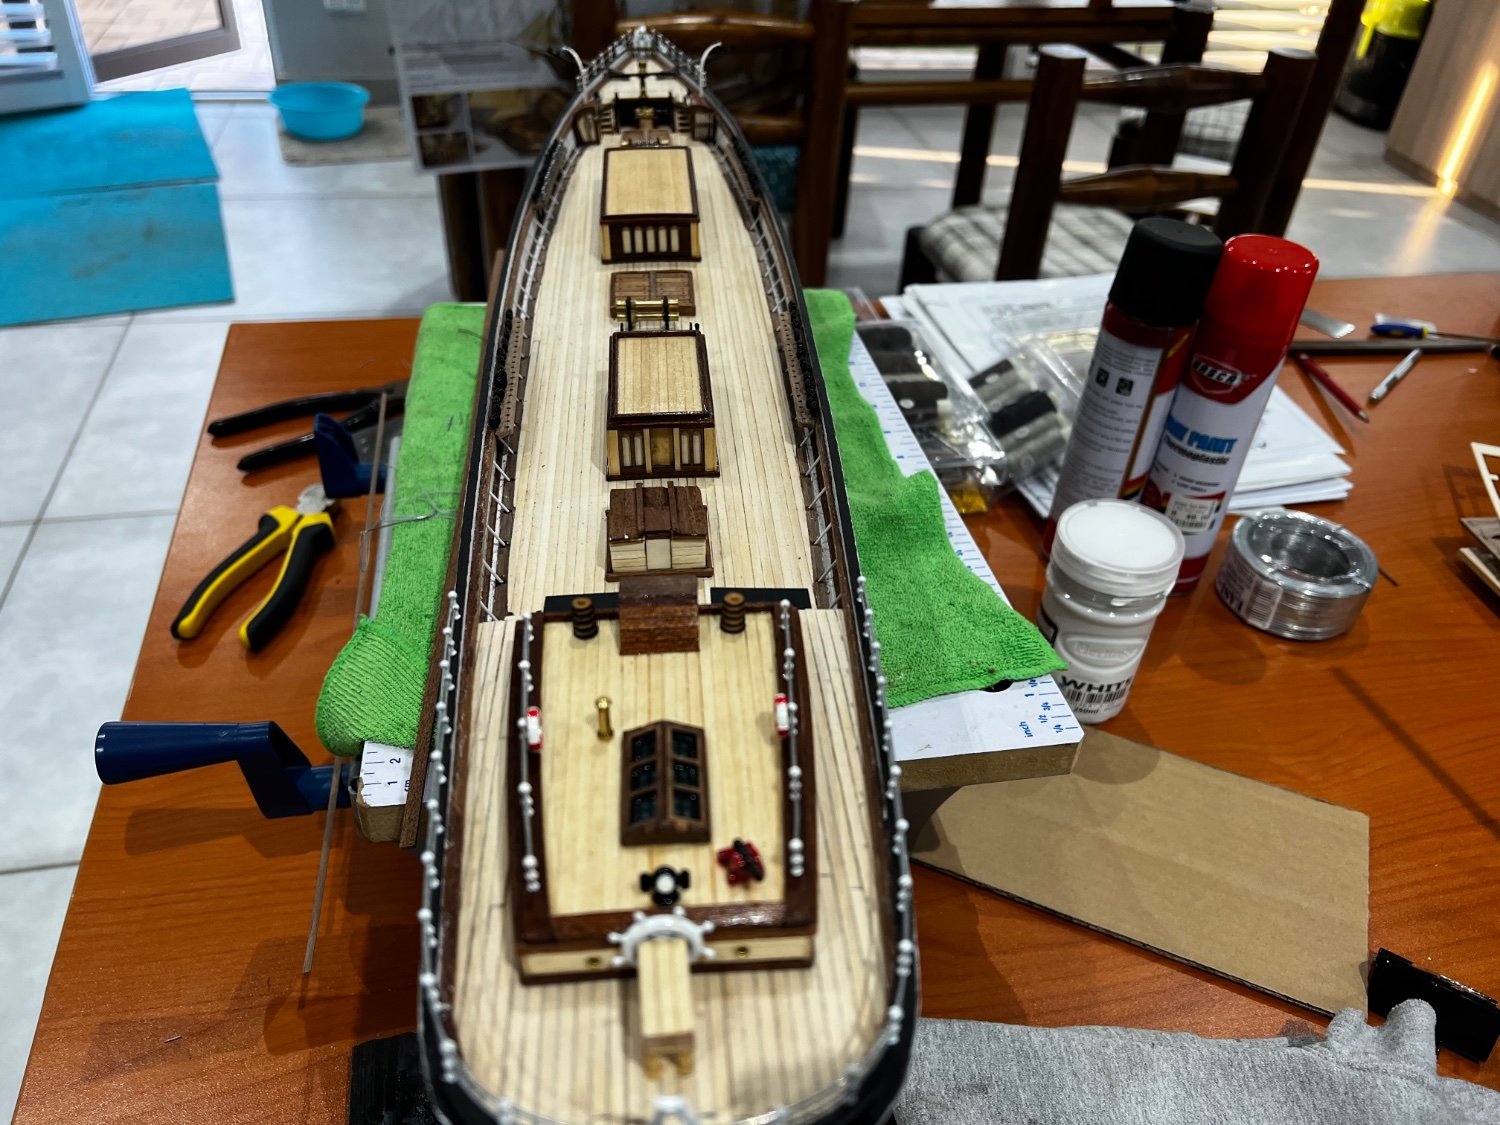
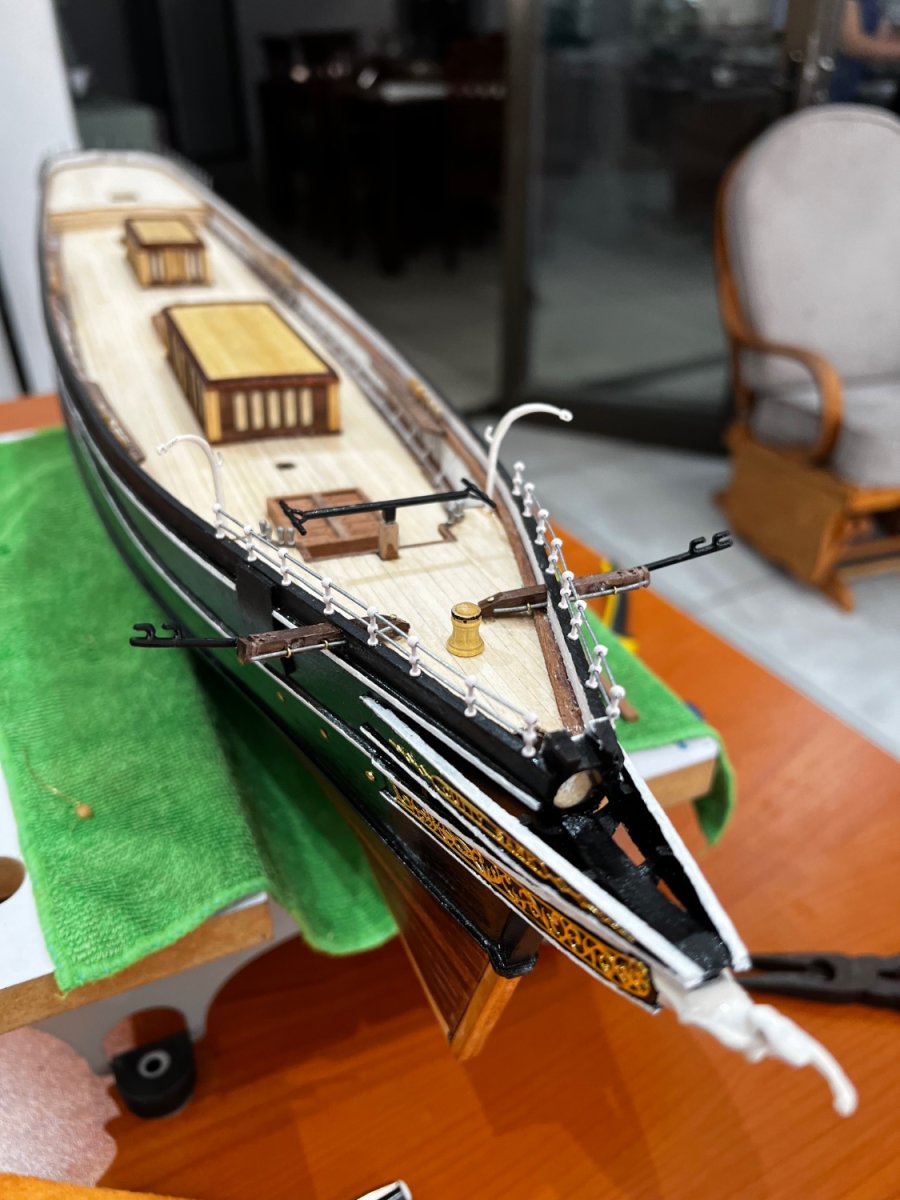
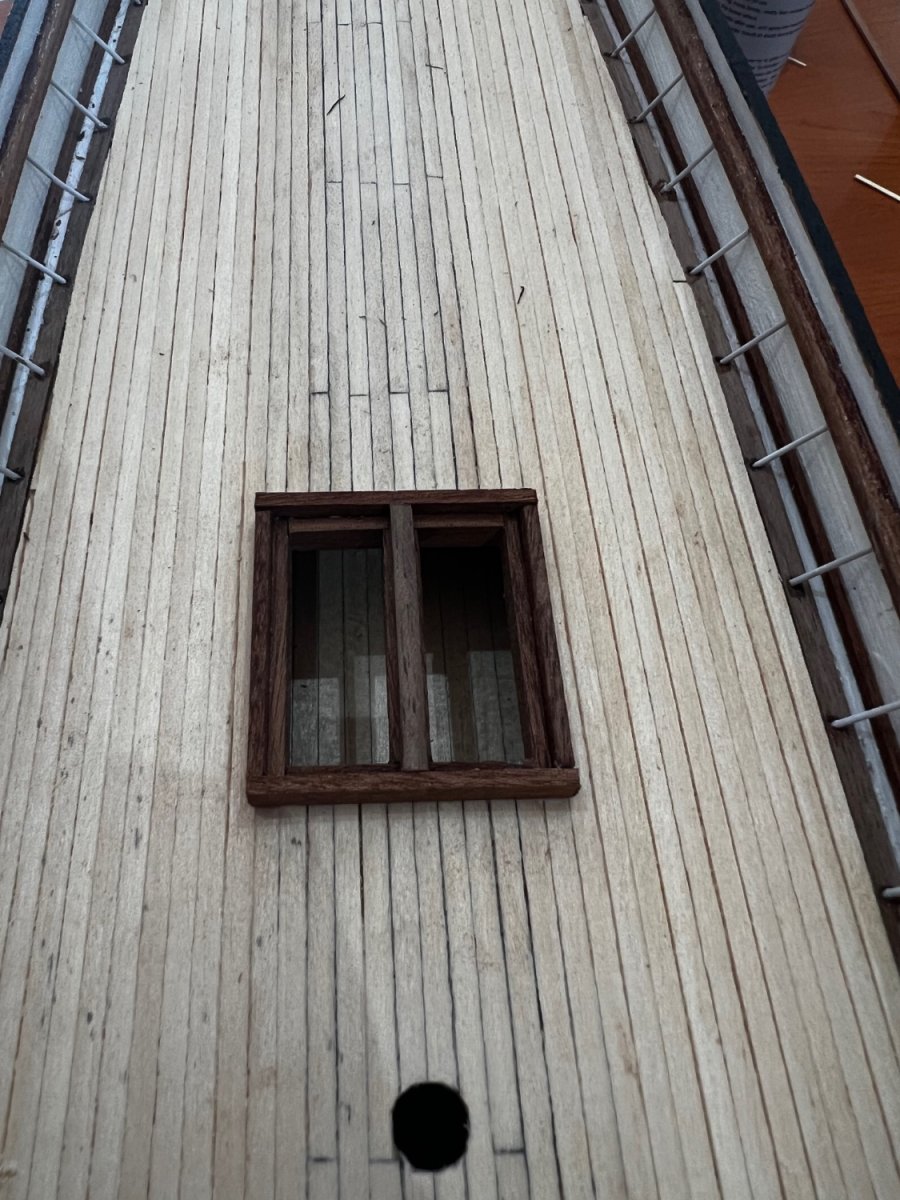
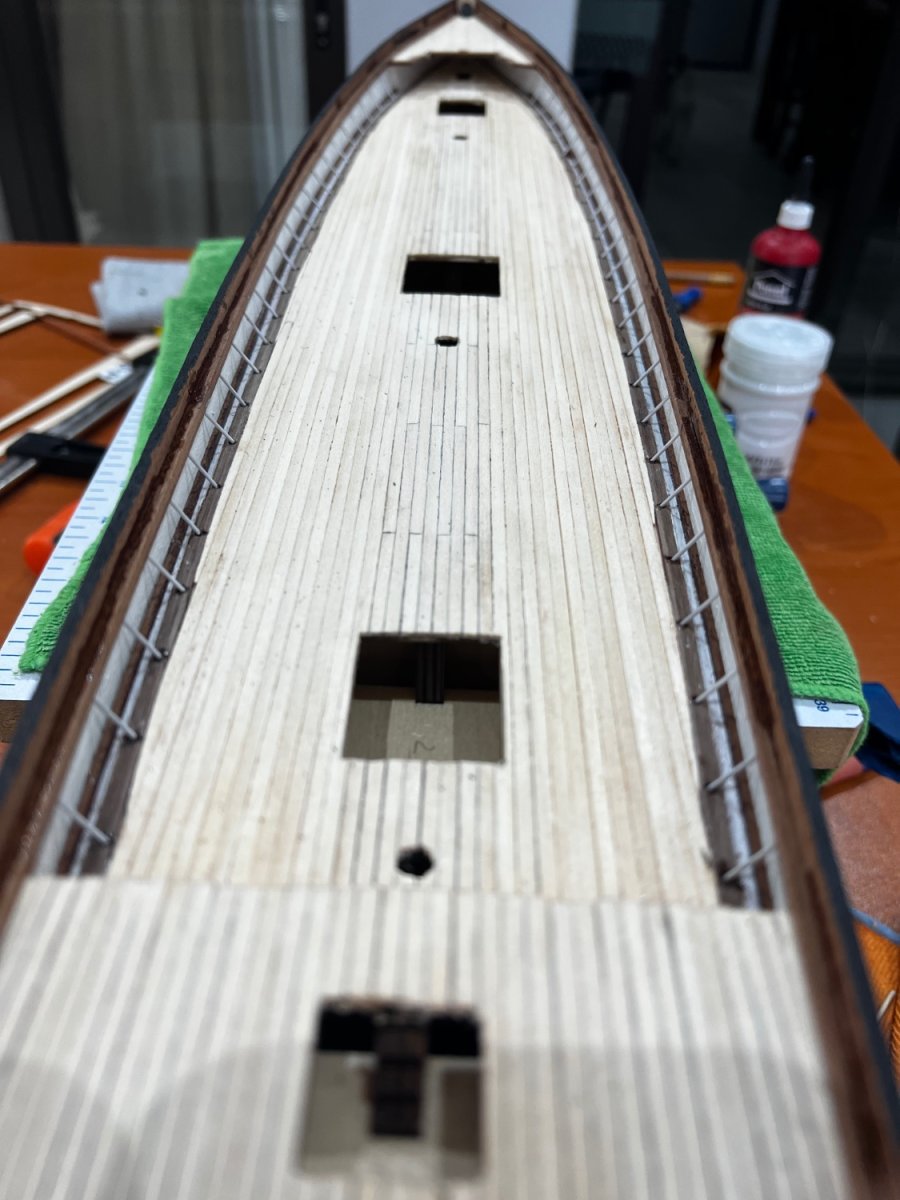
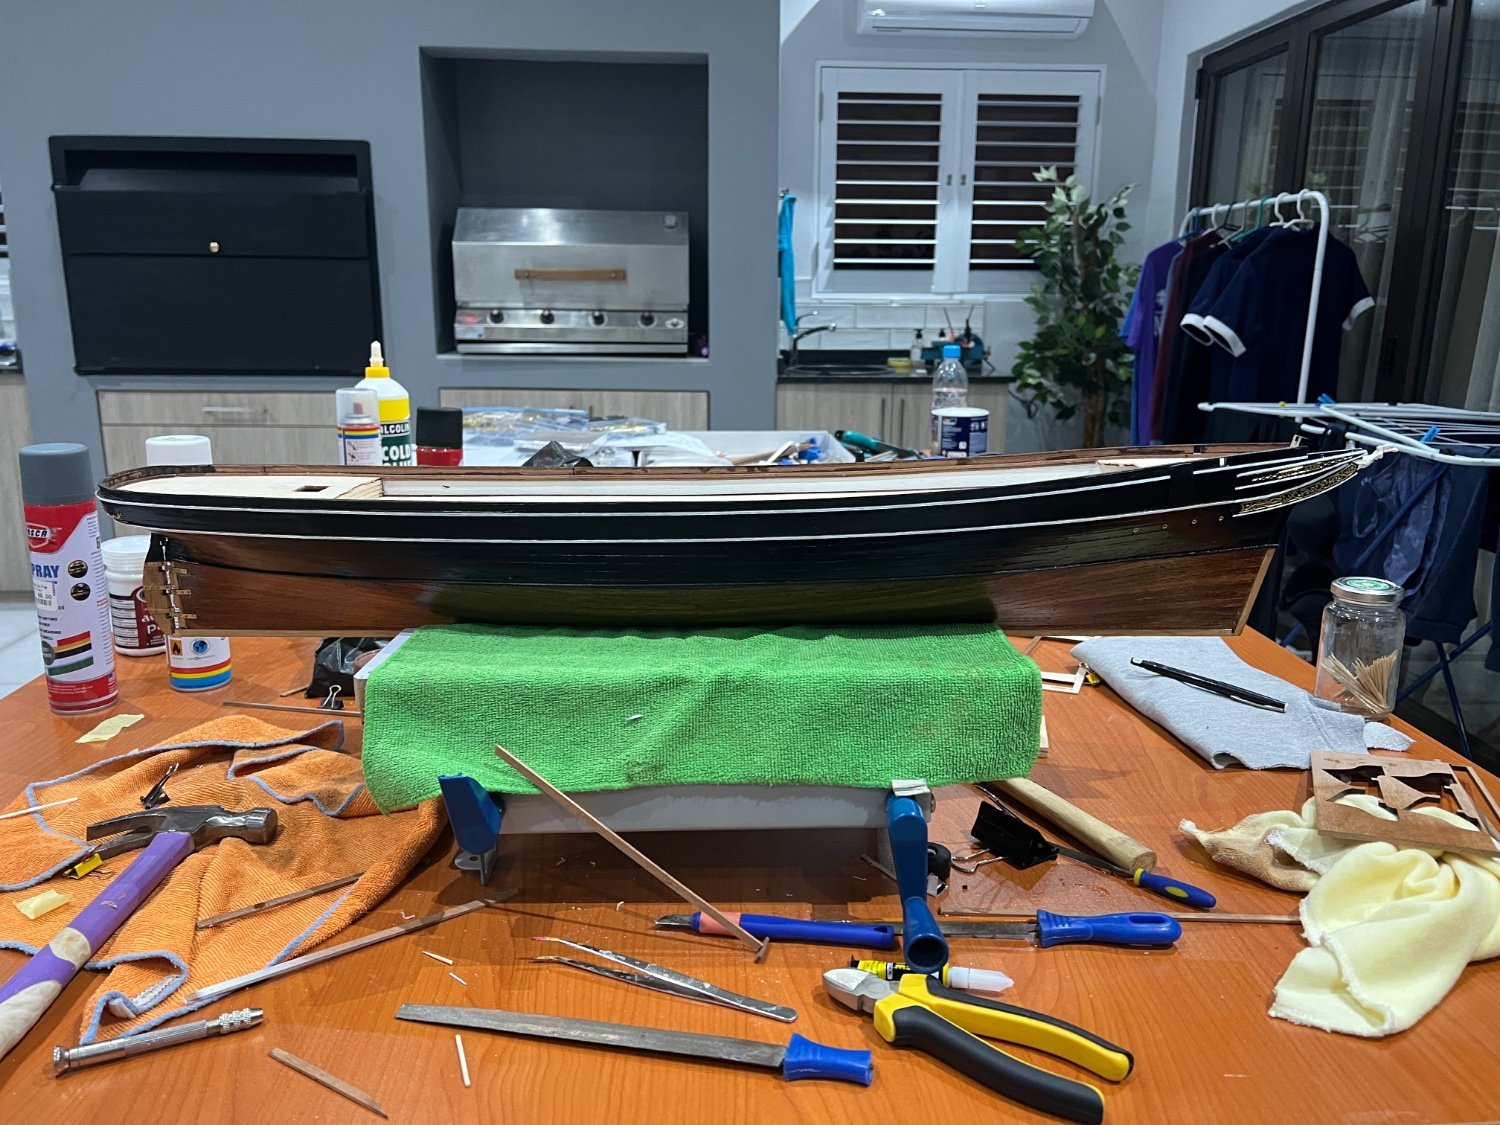
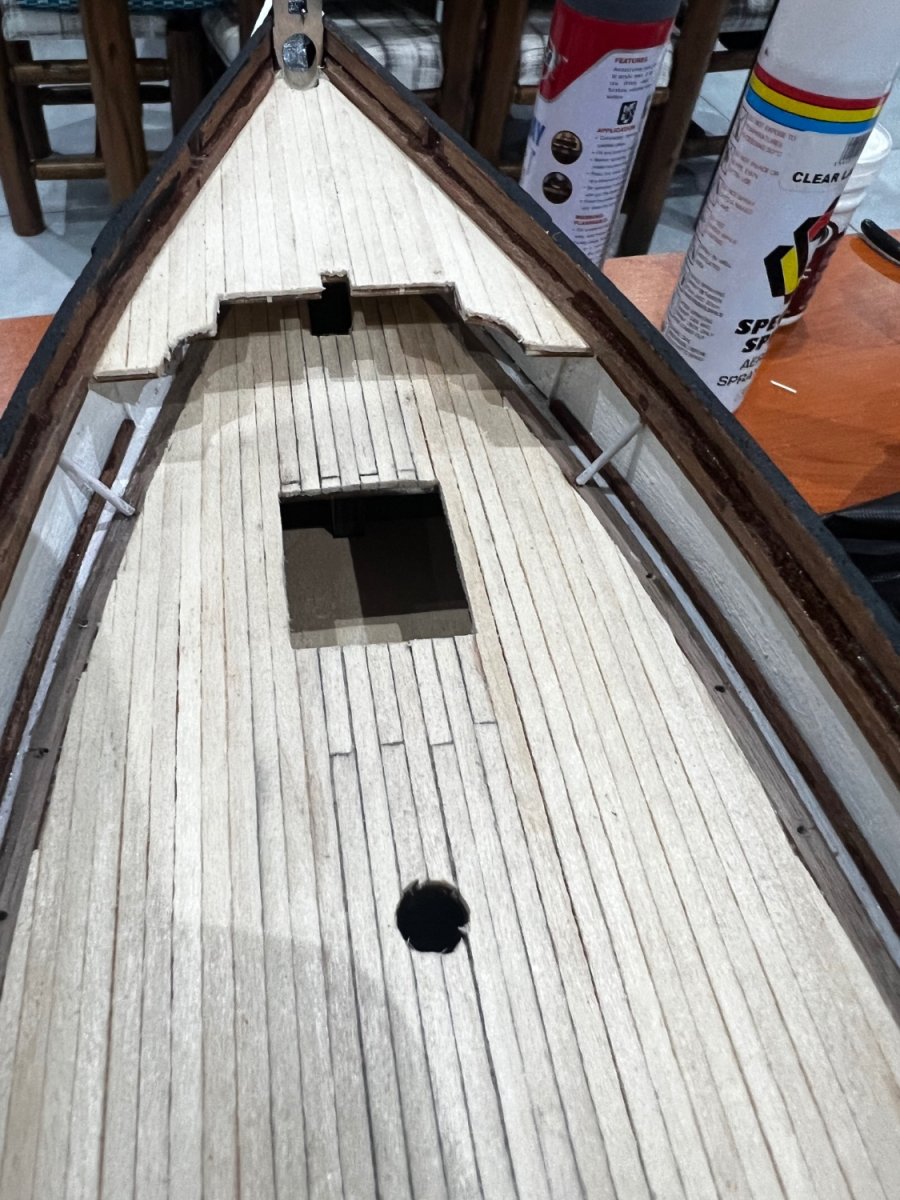
Hi all. a milestone has been reached. All deck fittings have been added and the whole deck has been varnished( unfortunately, the metal pieces on which the 3 lifeboats at the back rest are too small and are broken. I have decided to hang two of the lifeboats on the rear davits). The next step is to fit all the eyebolts and anchors etc.. and then its onto the masts and rigging. kind regards


- 47 replies
-
- 4
-
-
- Cutty Sark
- Artesania Latina
- (and 1 more)
-
Hi all. progress has been a bit slow due to mid semester exams. The fore and mainmast deadeyes are complete as well as some deck furniature. regards


- 47 replies
-
- 8
-
-
- Cutty Sark
- Artesania Latina
- (and 1 more)
-
The cutty sark is an amazing kit. Instructions are a bit crude though. regards
- 47 replies
-
- 1
-
-
- Cutty Sark
- Artesania Latina
- (and 1 more)
-
Thank you for your kind words. kind regards.
-
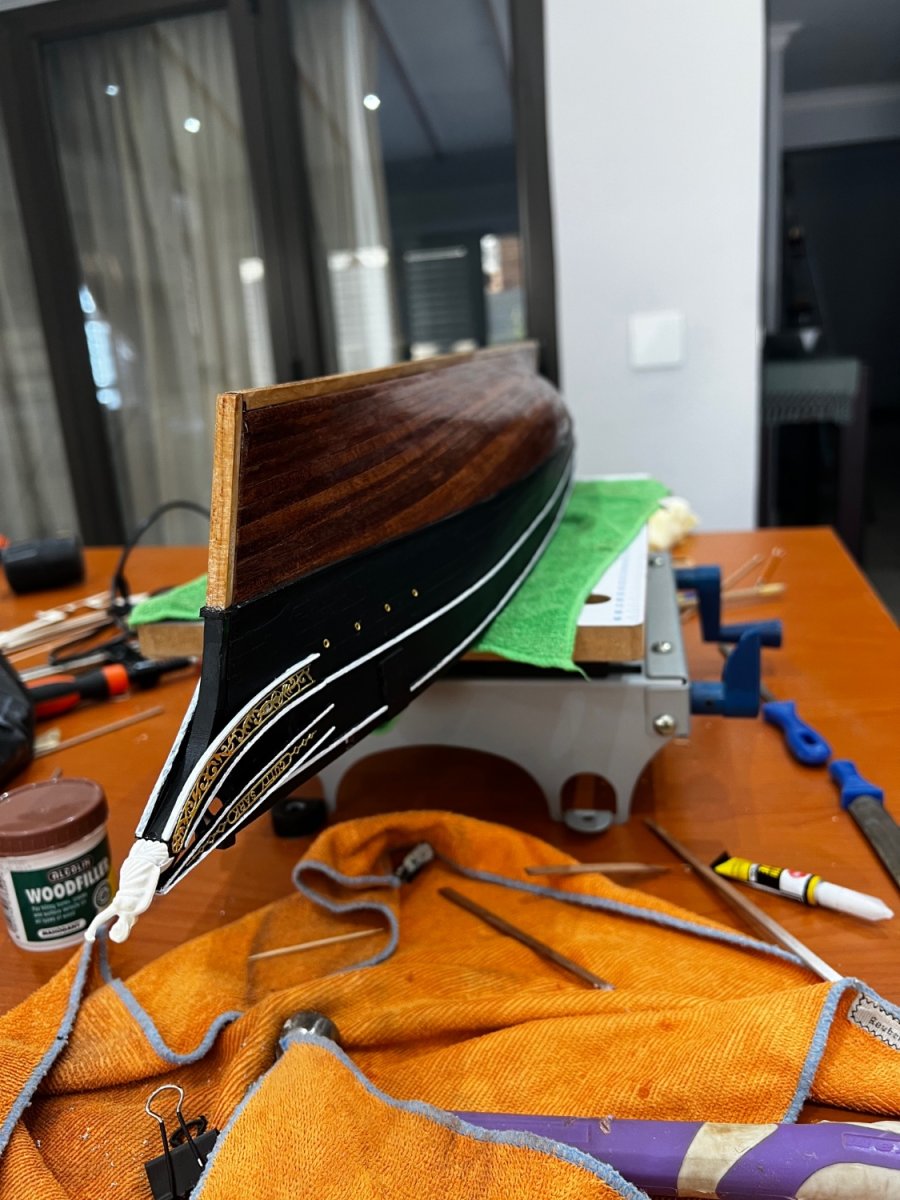
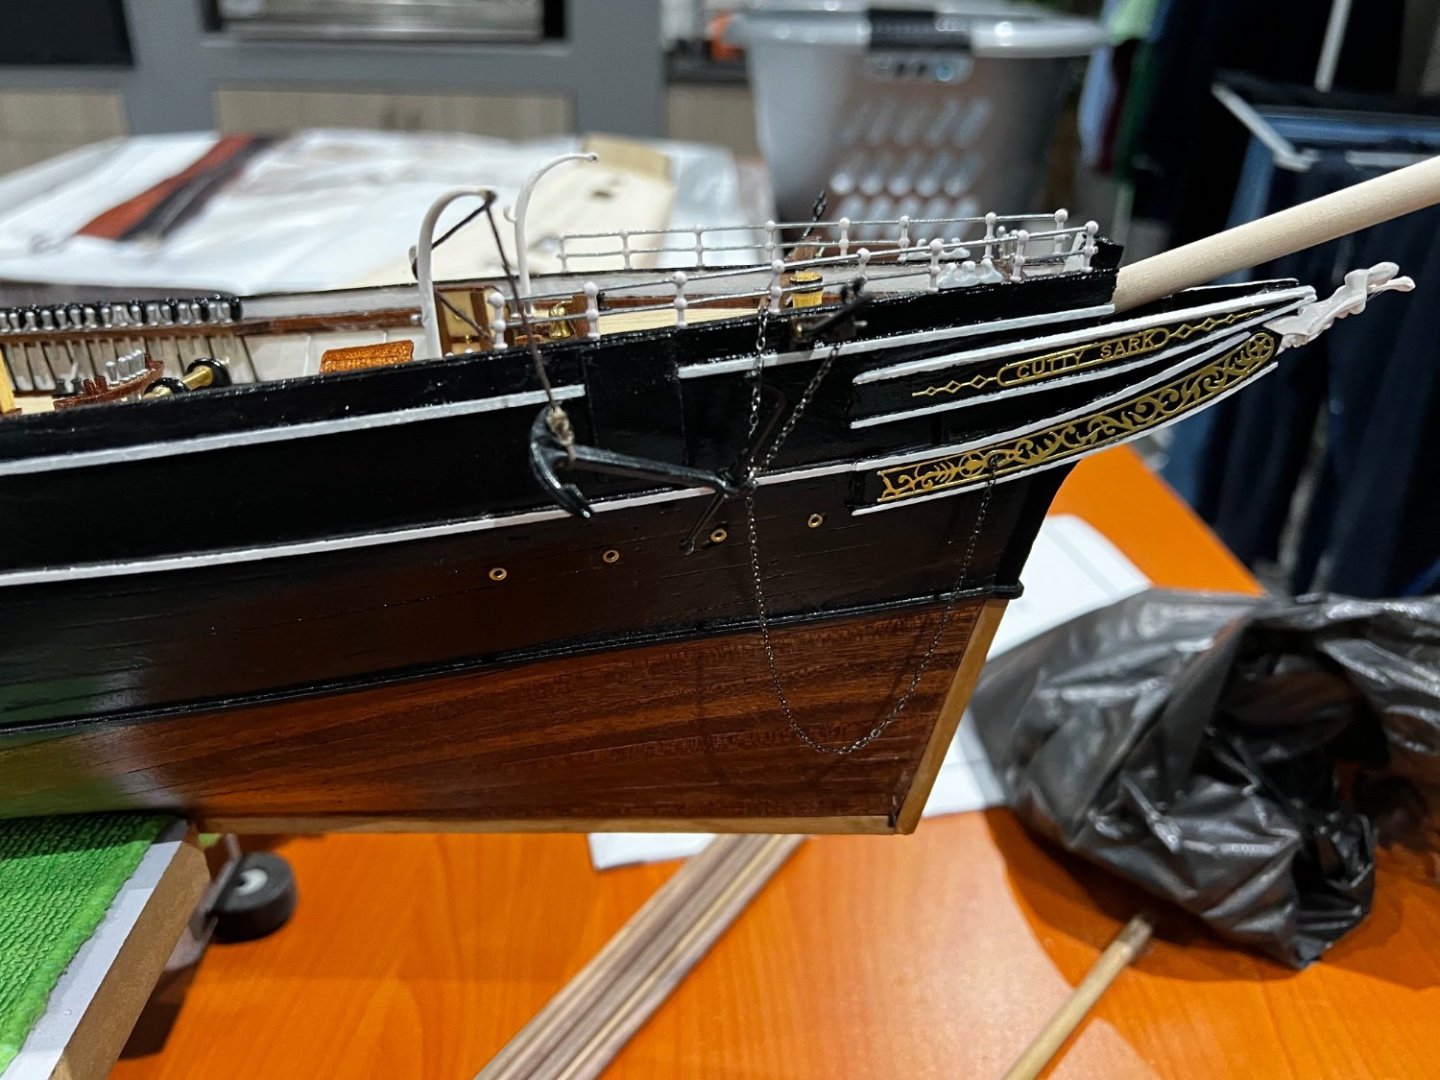
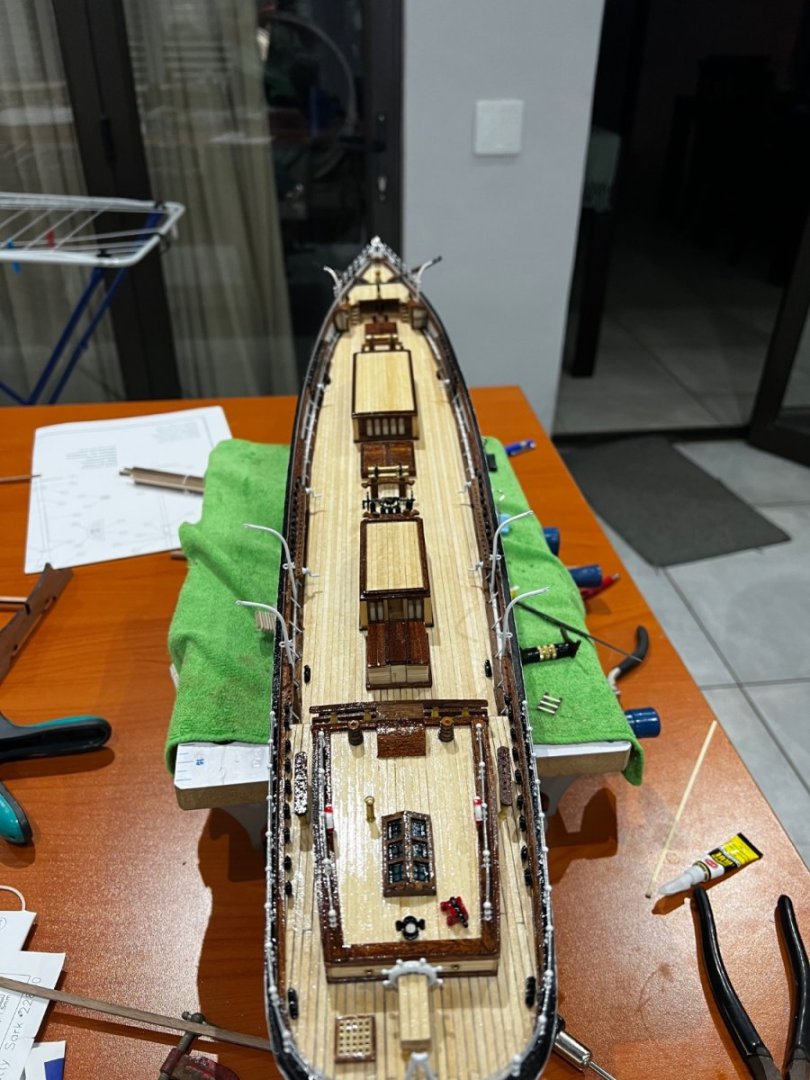
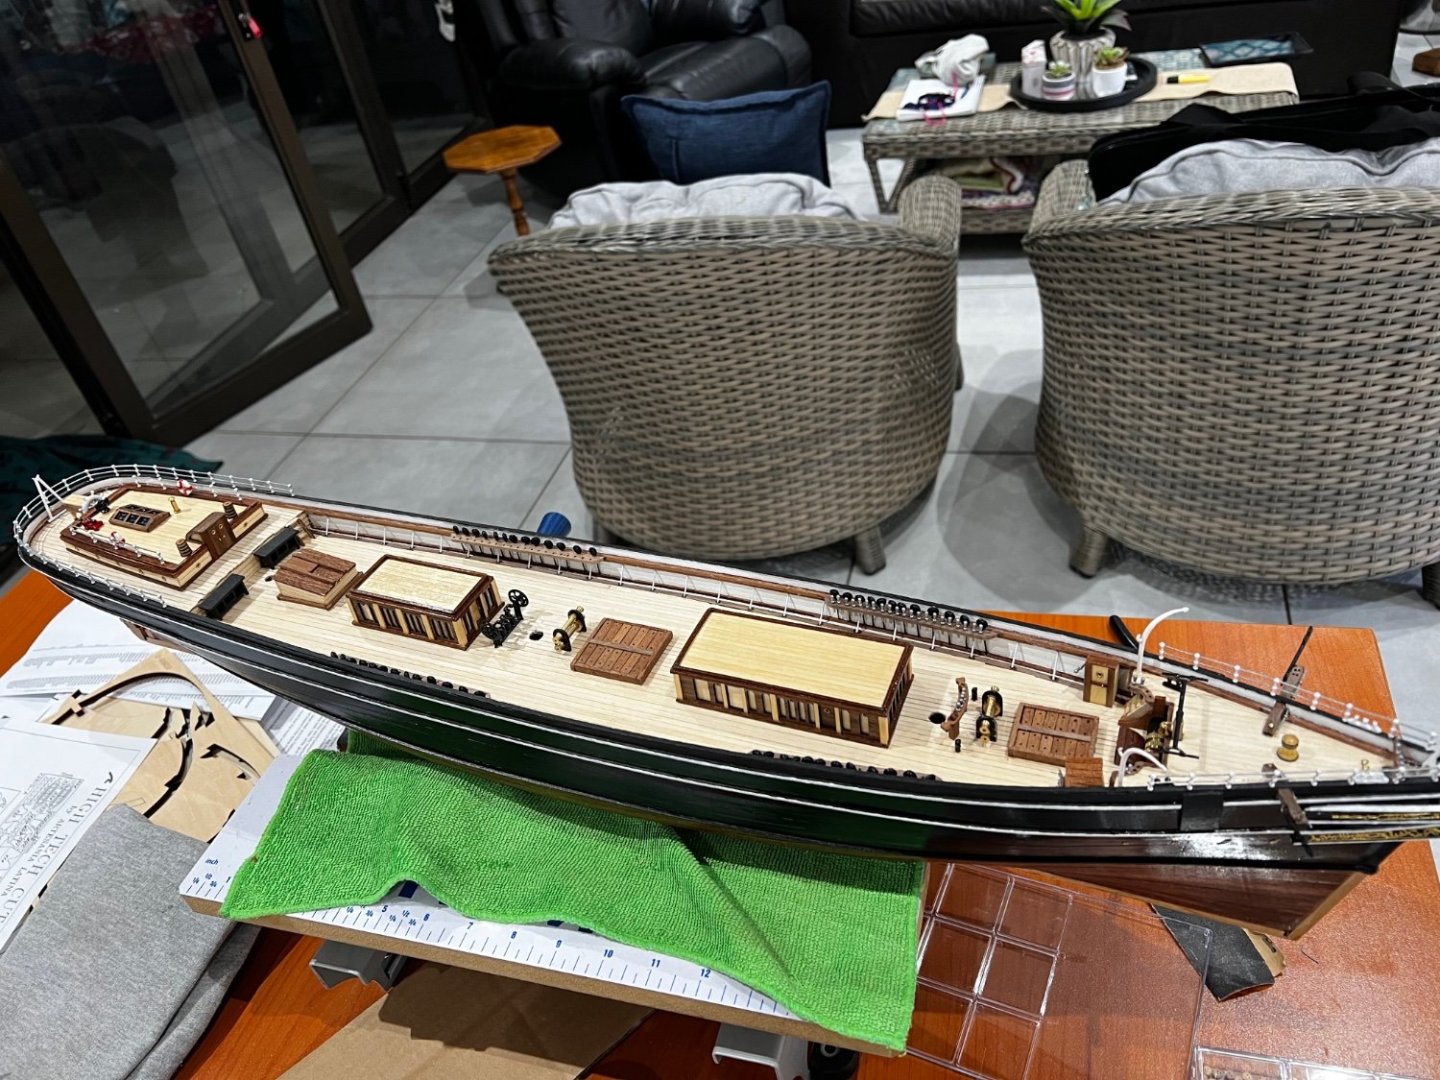
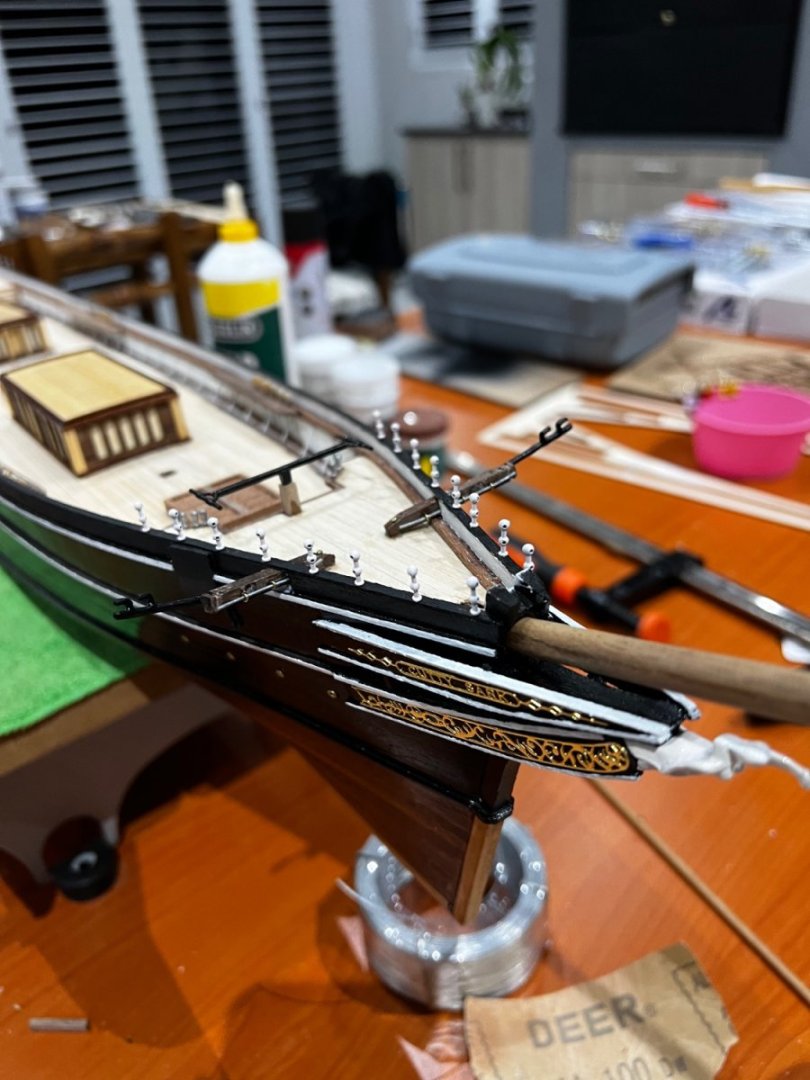
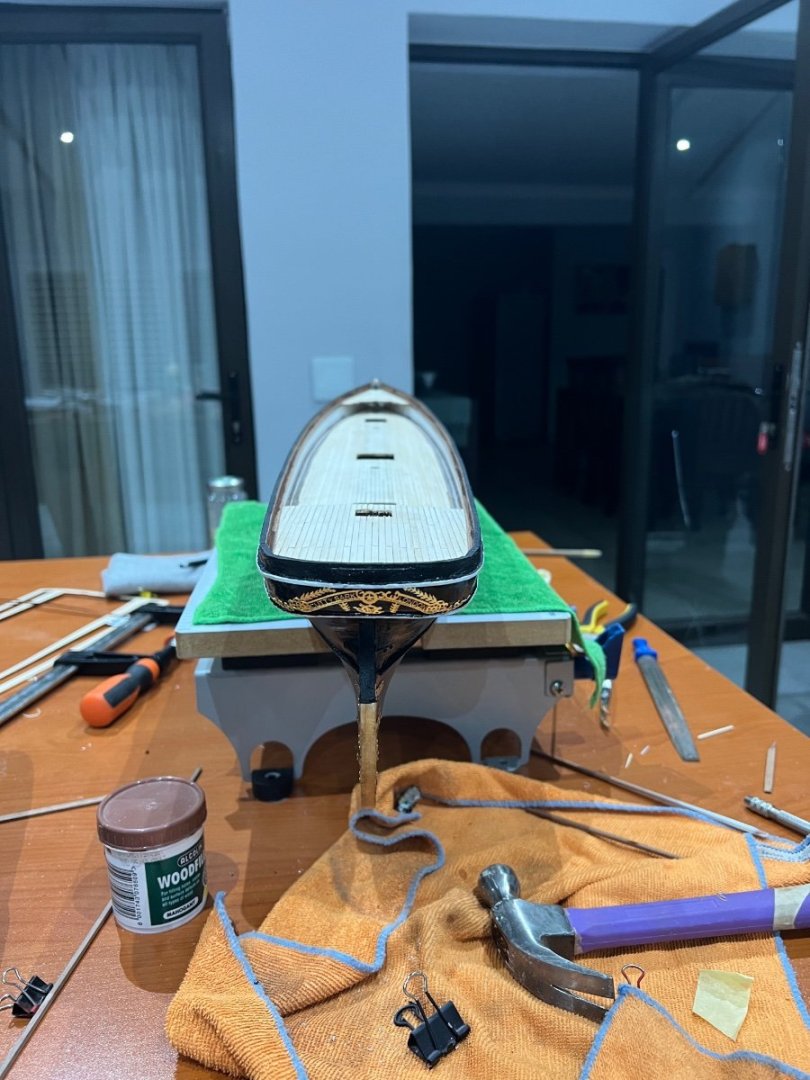
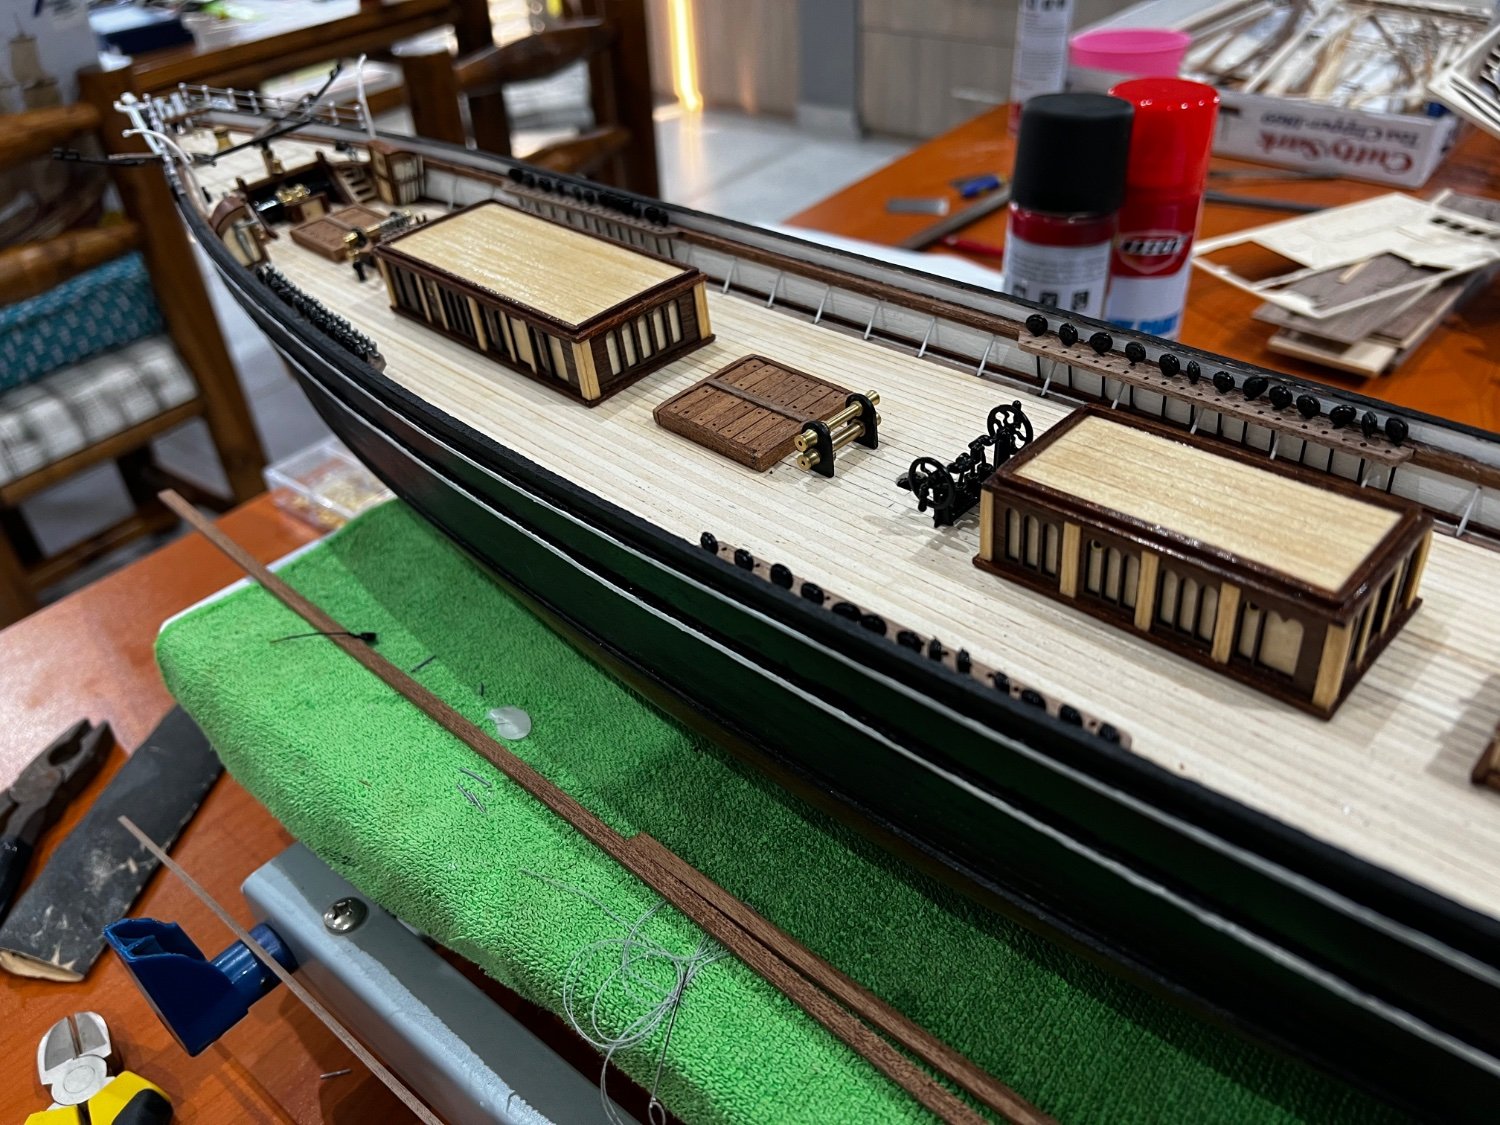
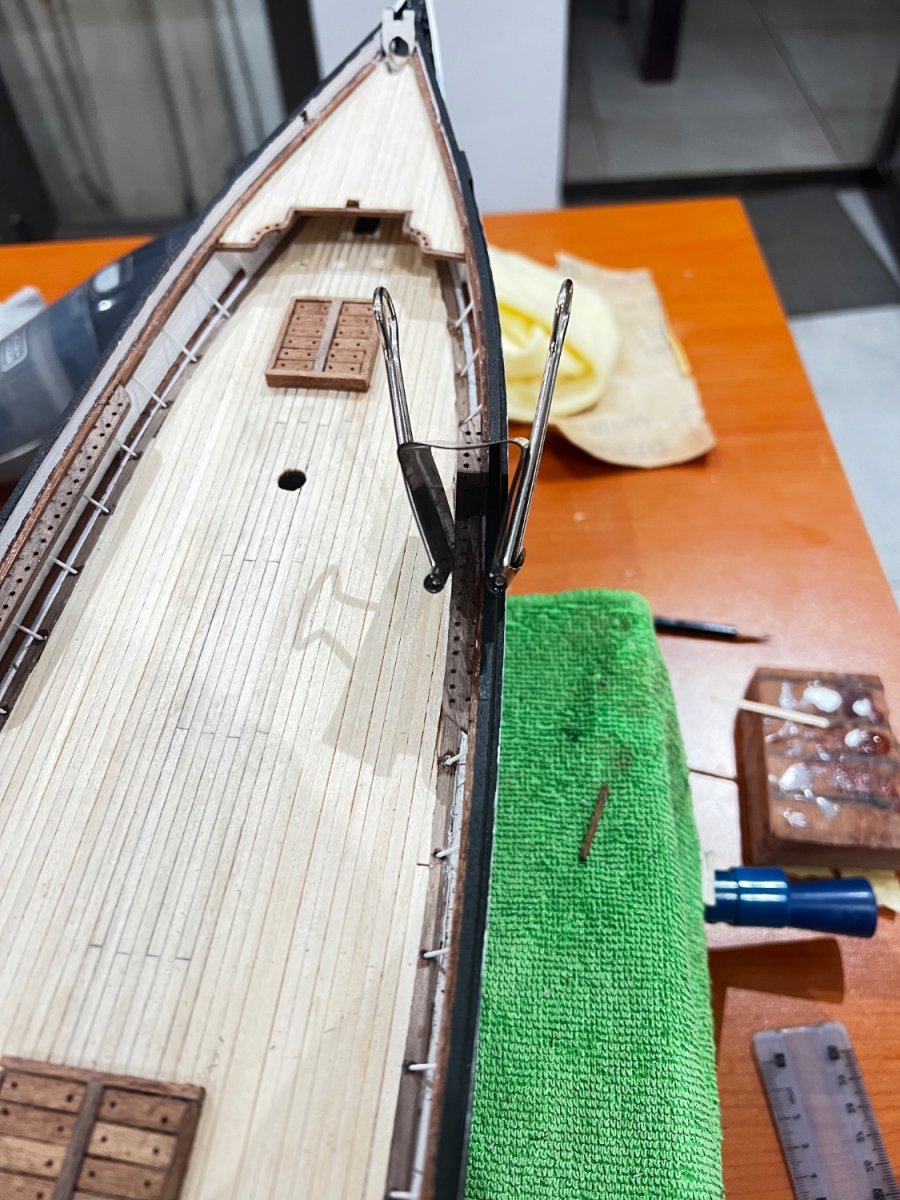
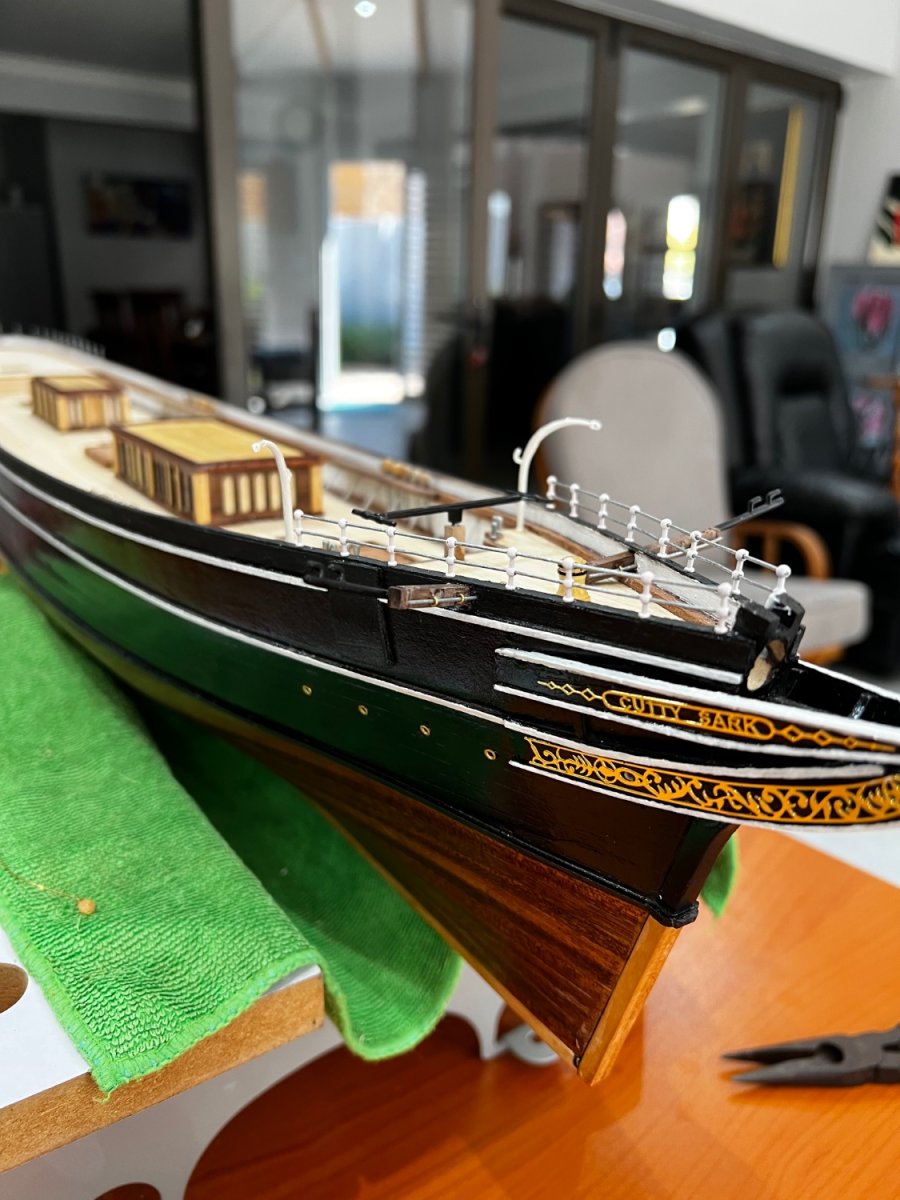
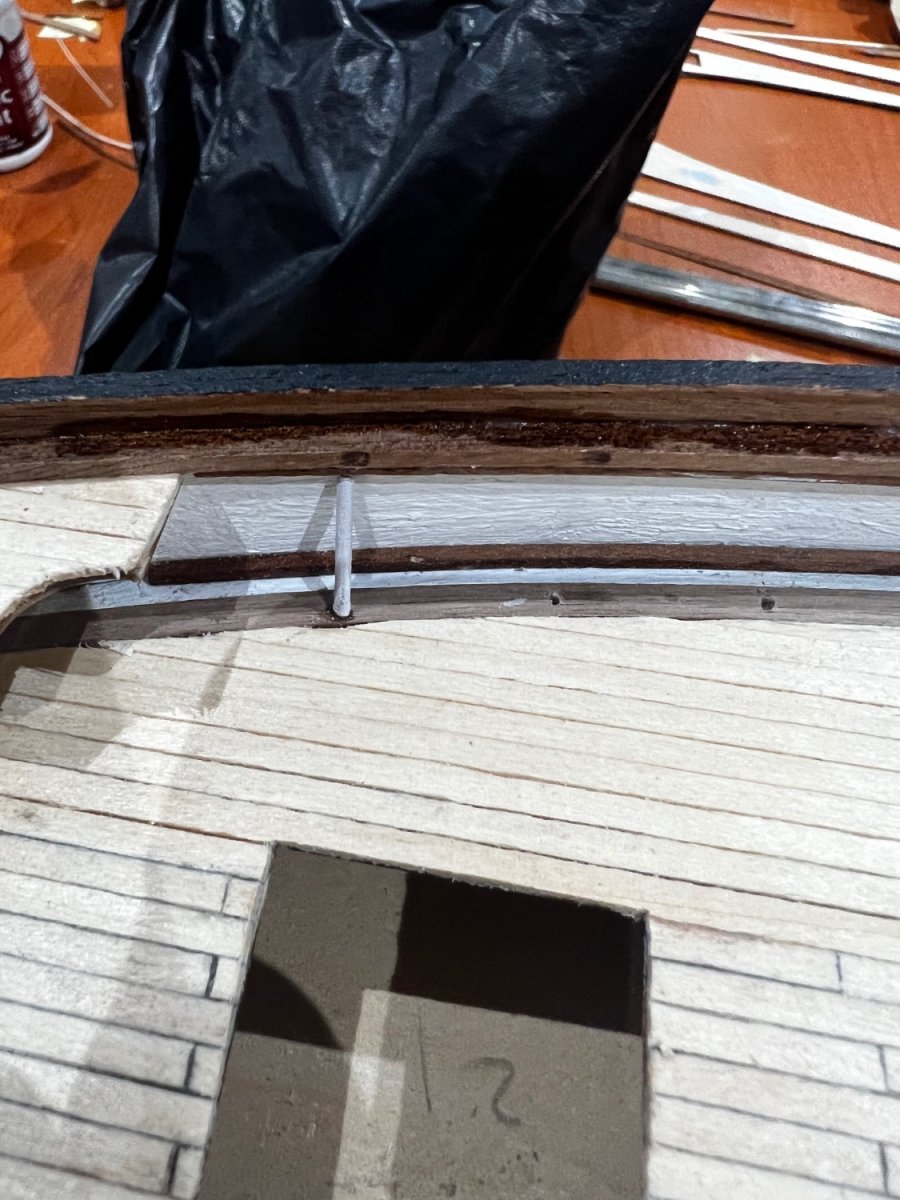
Hi all. the channels have been fitted as well as the larger deadeyes(i am busy with the smaller ones). I messed up with the channels in the provided mohogany so i used some left over walnut. I also fitted some of the features on the front of the boat. The anchor davits were quite tricky as the instructions are blurry. The front railing has also been fitted. regards.


- 47 replies
-
- 6
-
-
- Cutty Sark
- Artesania Latina
- (and 1 more)
-
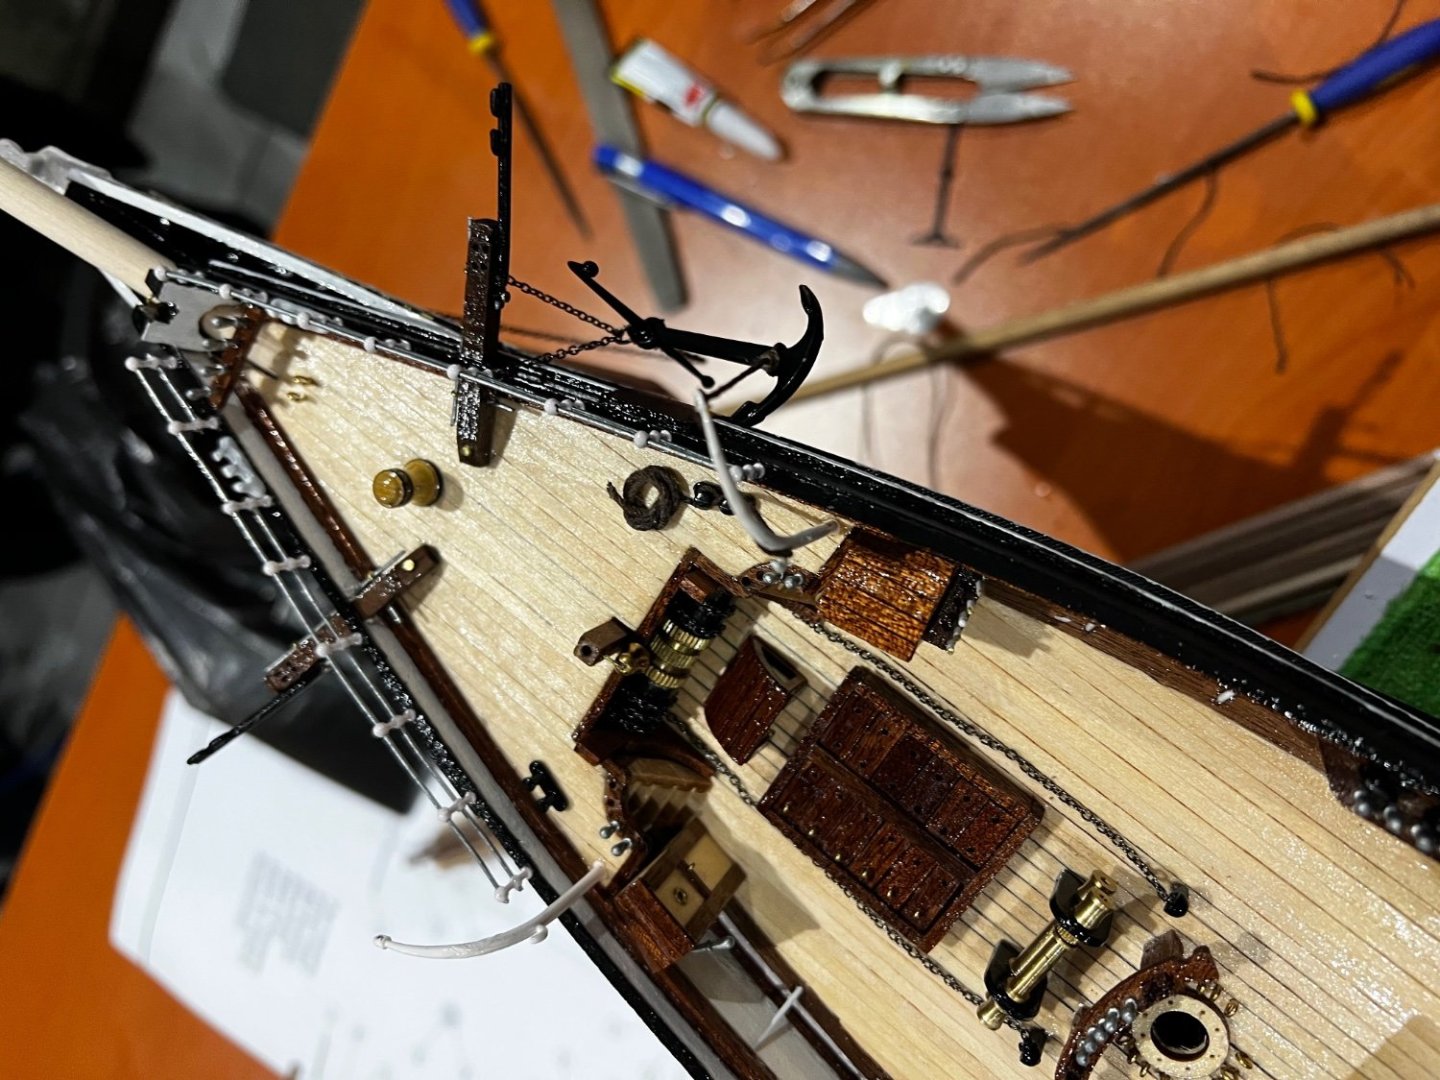
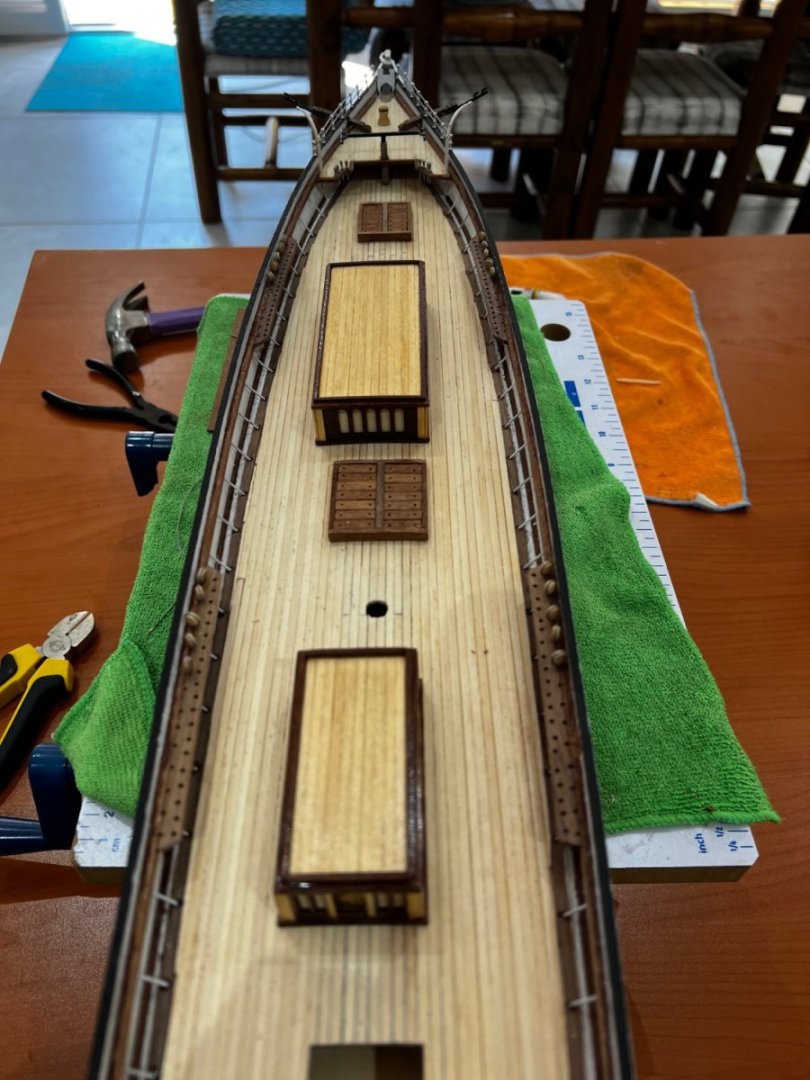
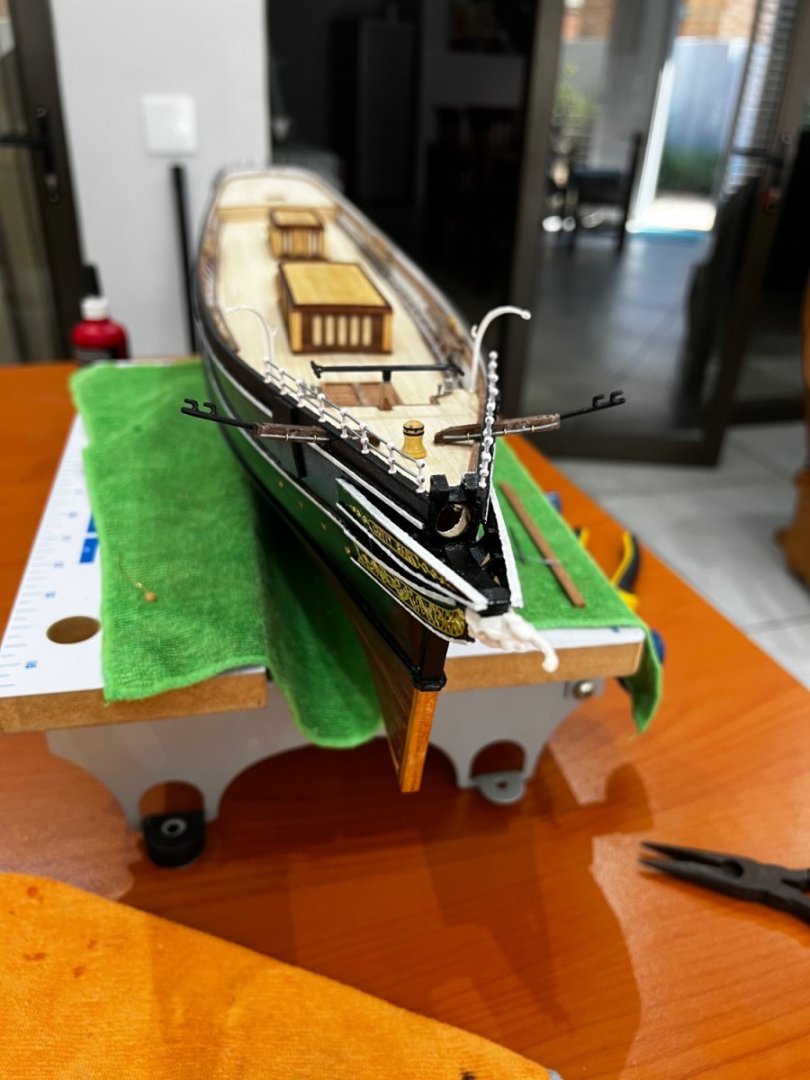
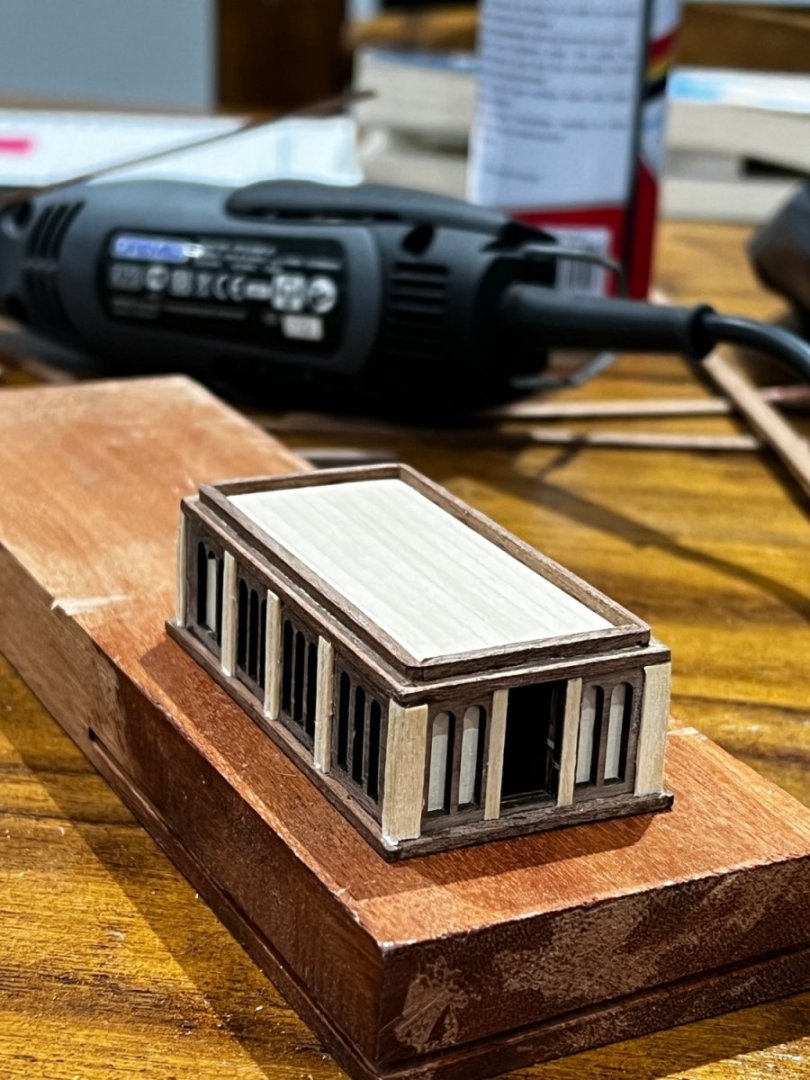
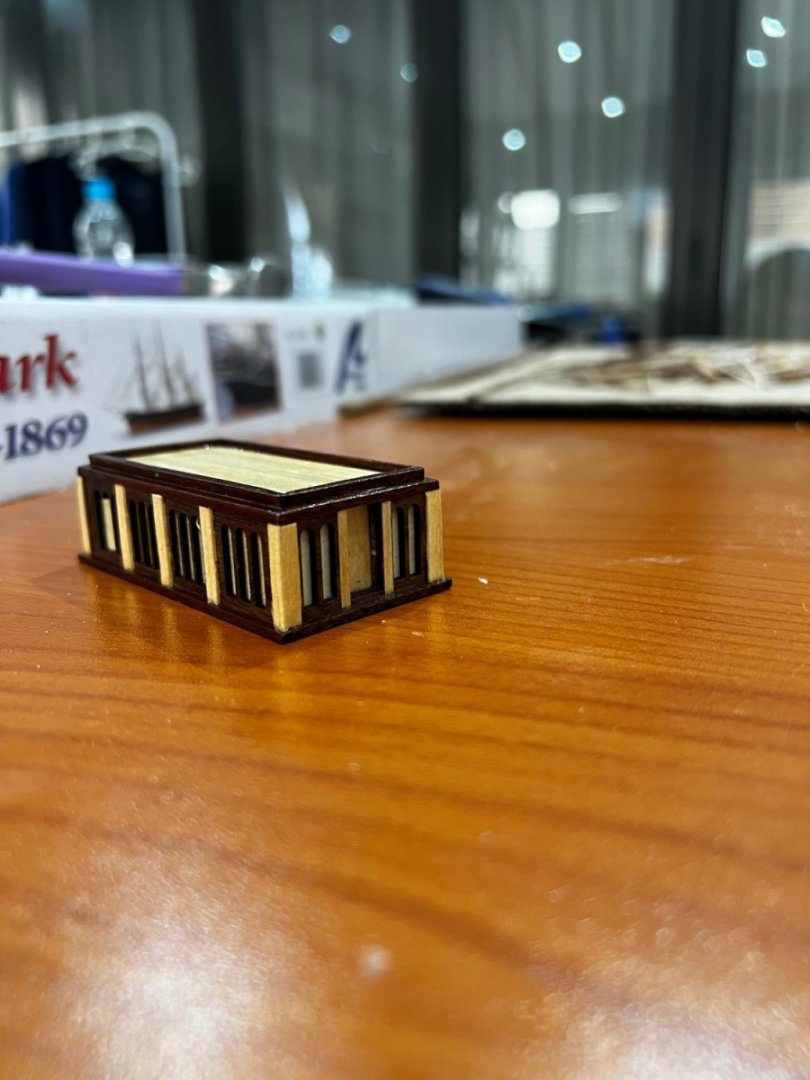
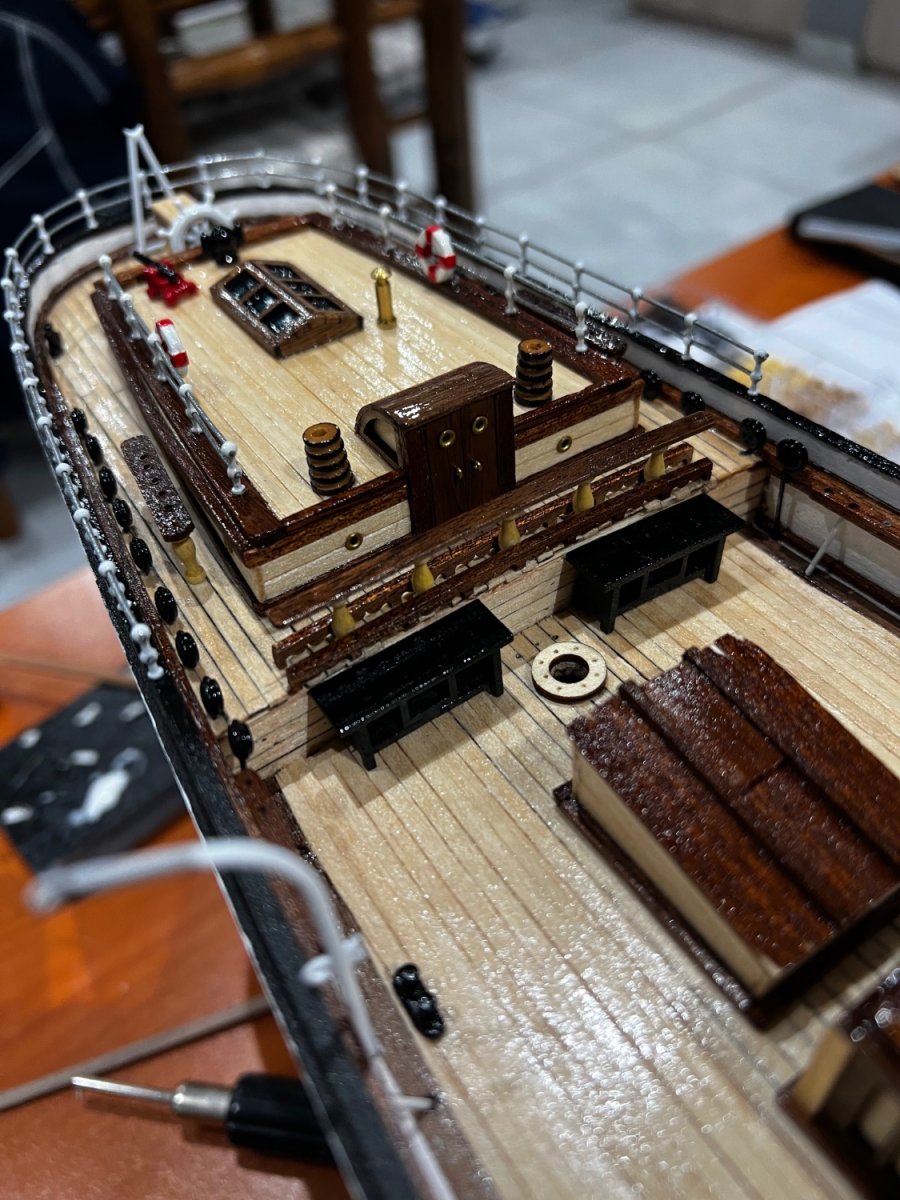
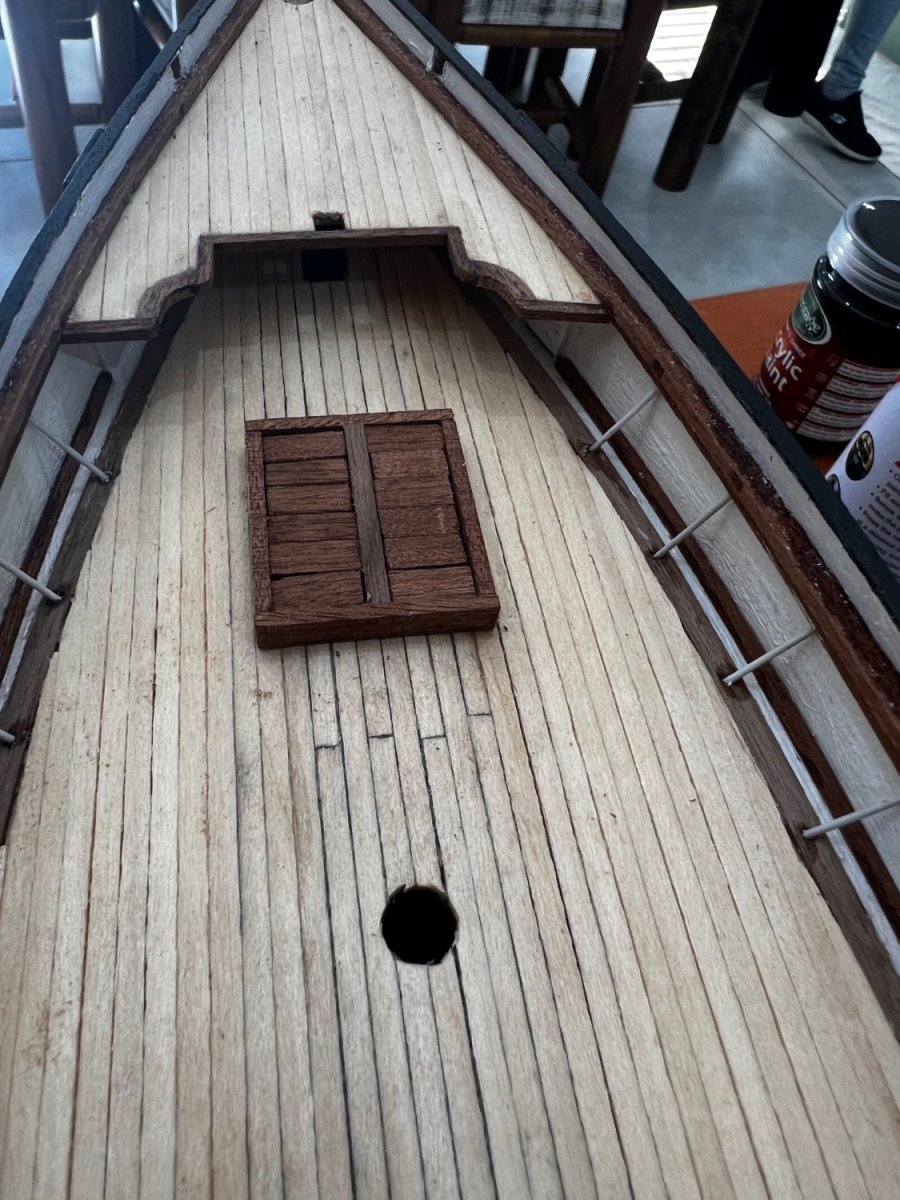
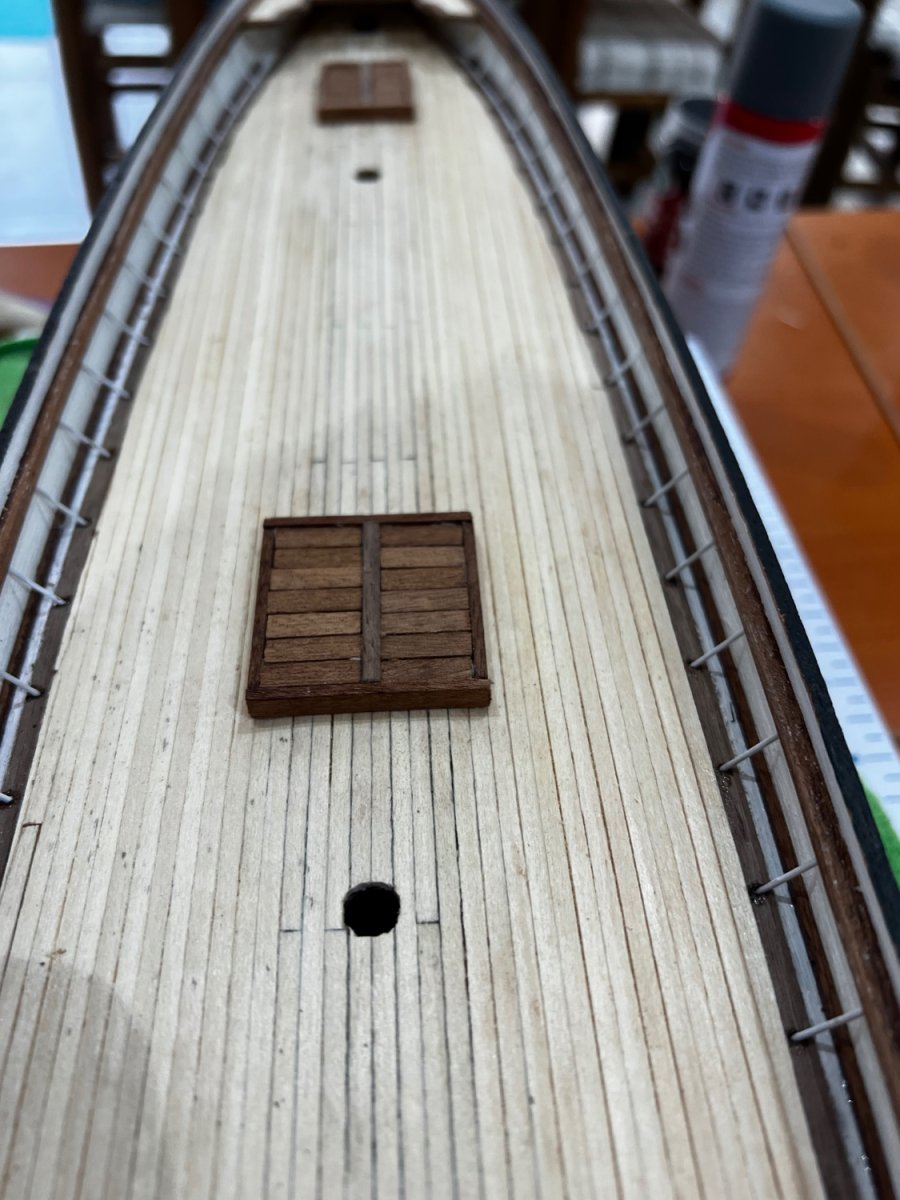
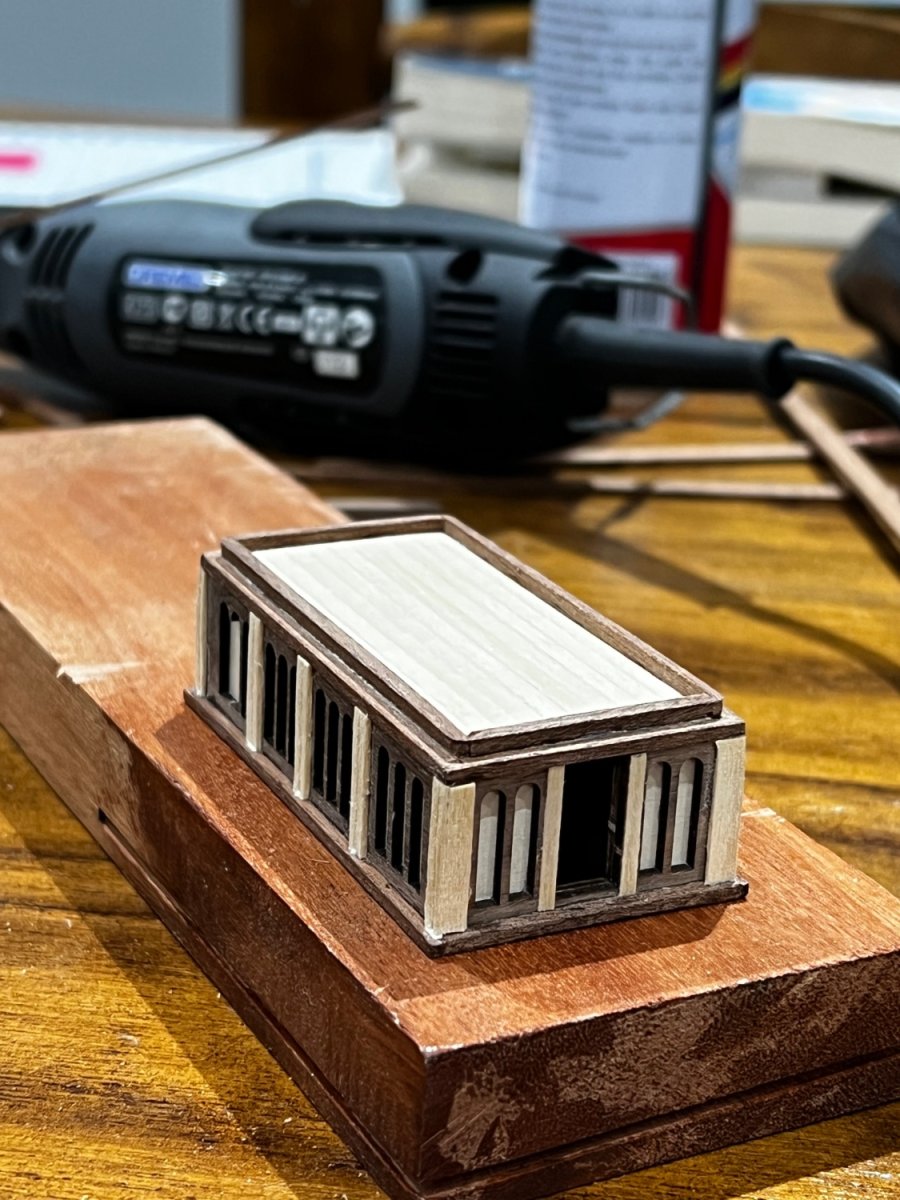
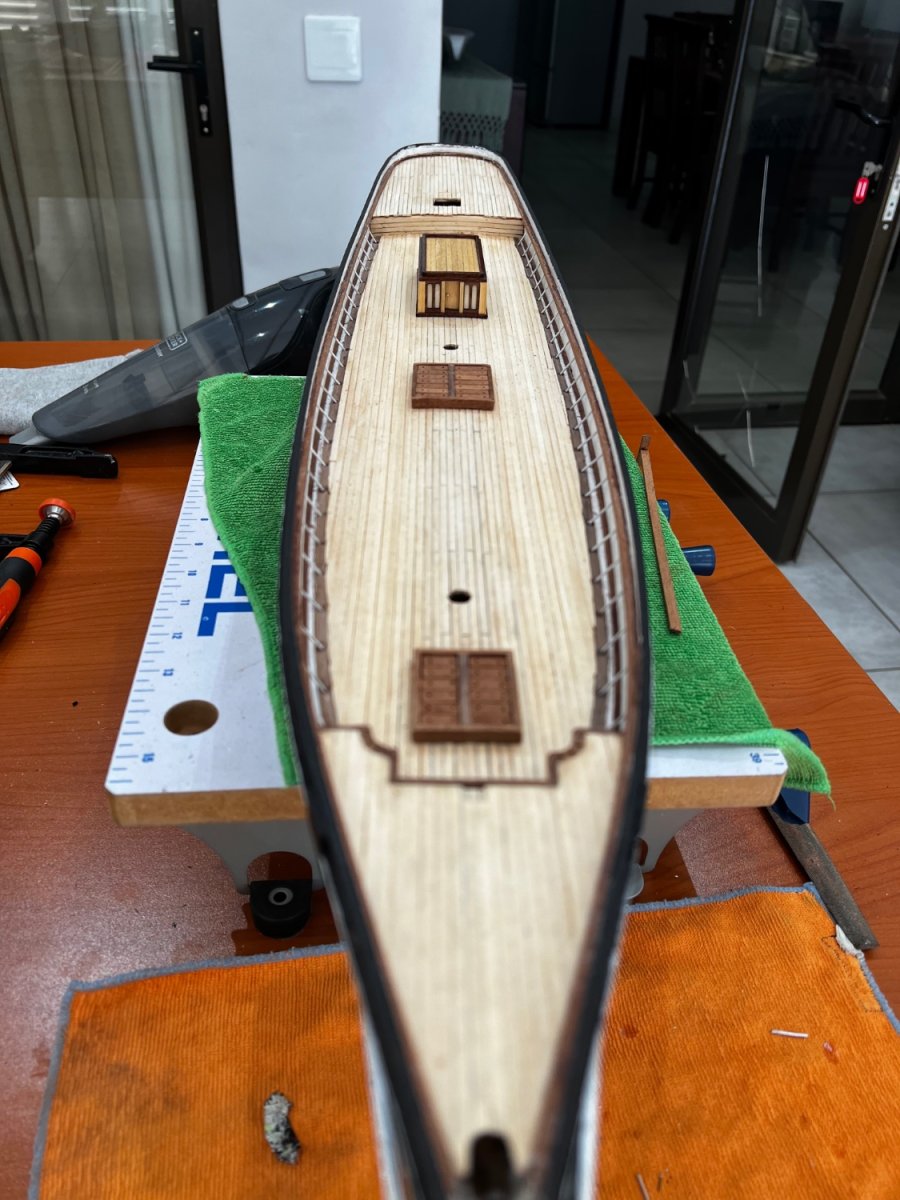
The hatches are done ( i will only put in the eyebolts and rings after varnishing the deck ). I also finished one of the deckhouses. I lost the doors so i had to improvise…. They are almost like a kit of their own. Regards


- 47 replies
-
- 3
-
-
- Cutty Sark
- Artesania Latina
- (and 1 more)
-
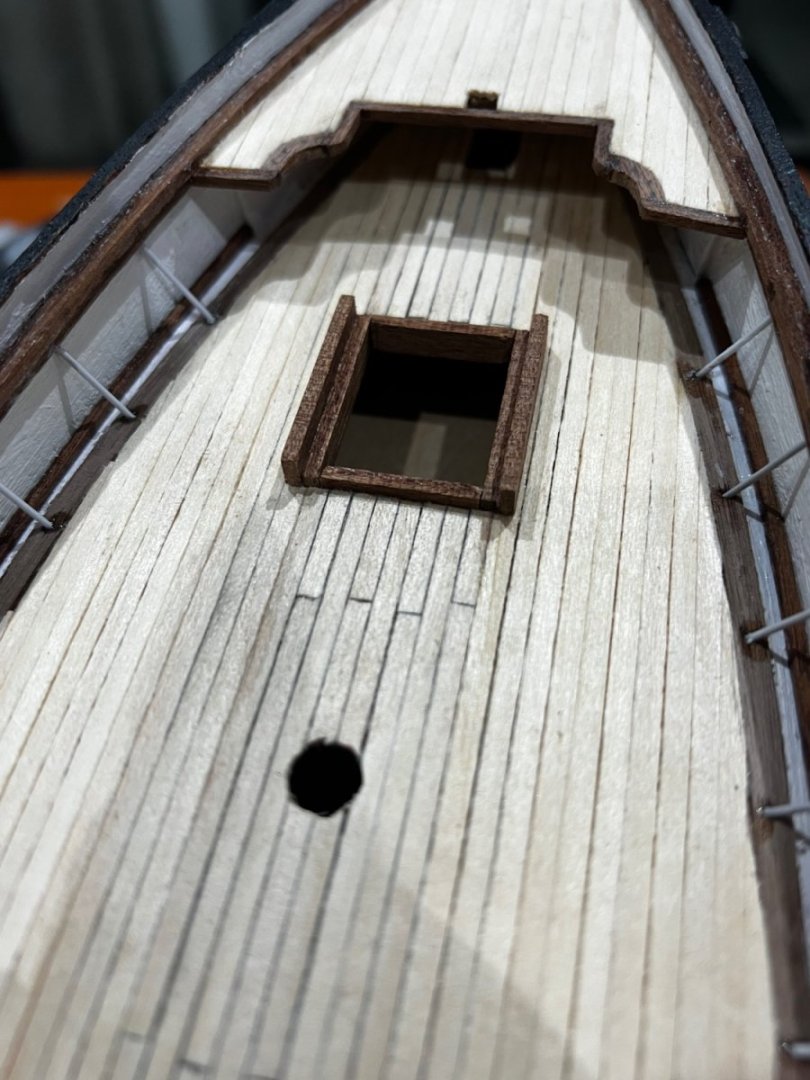
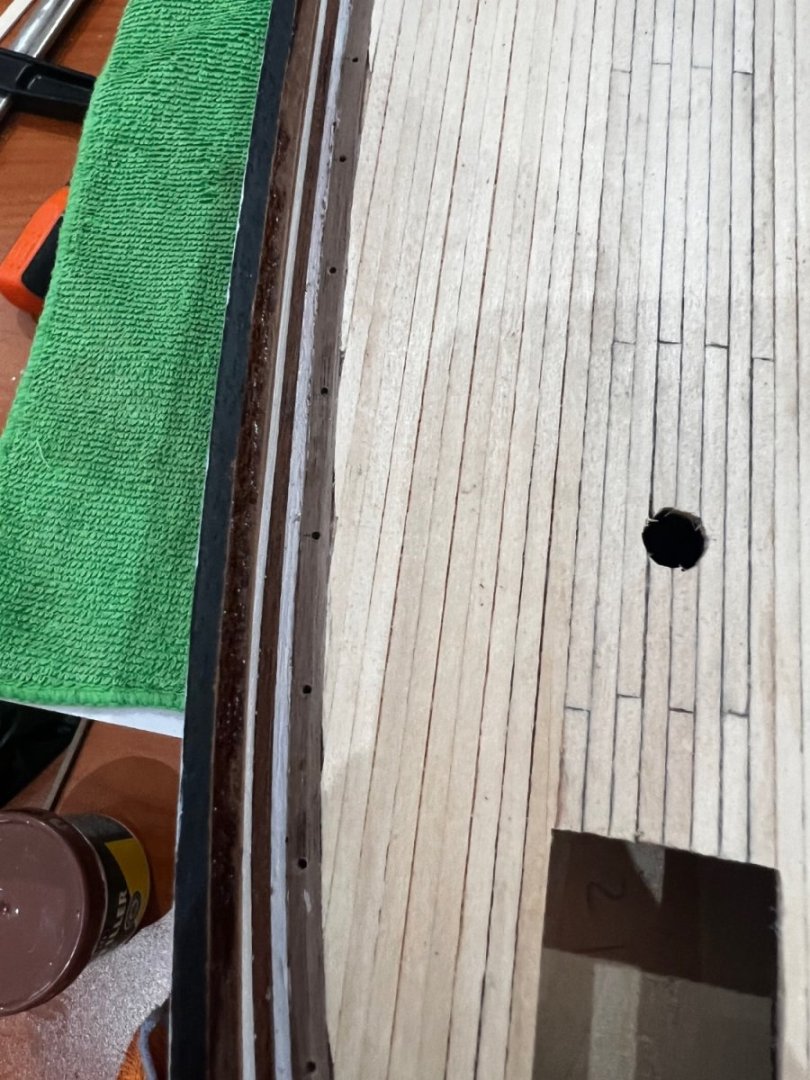
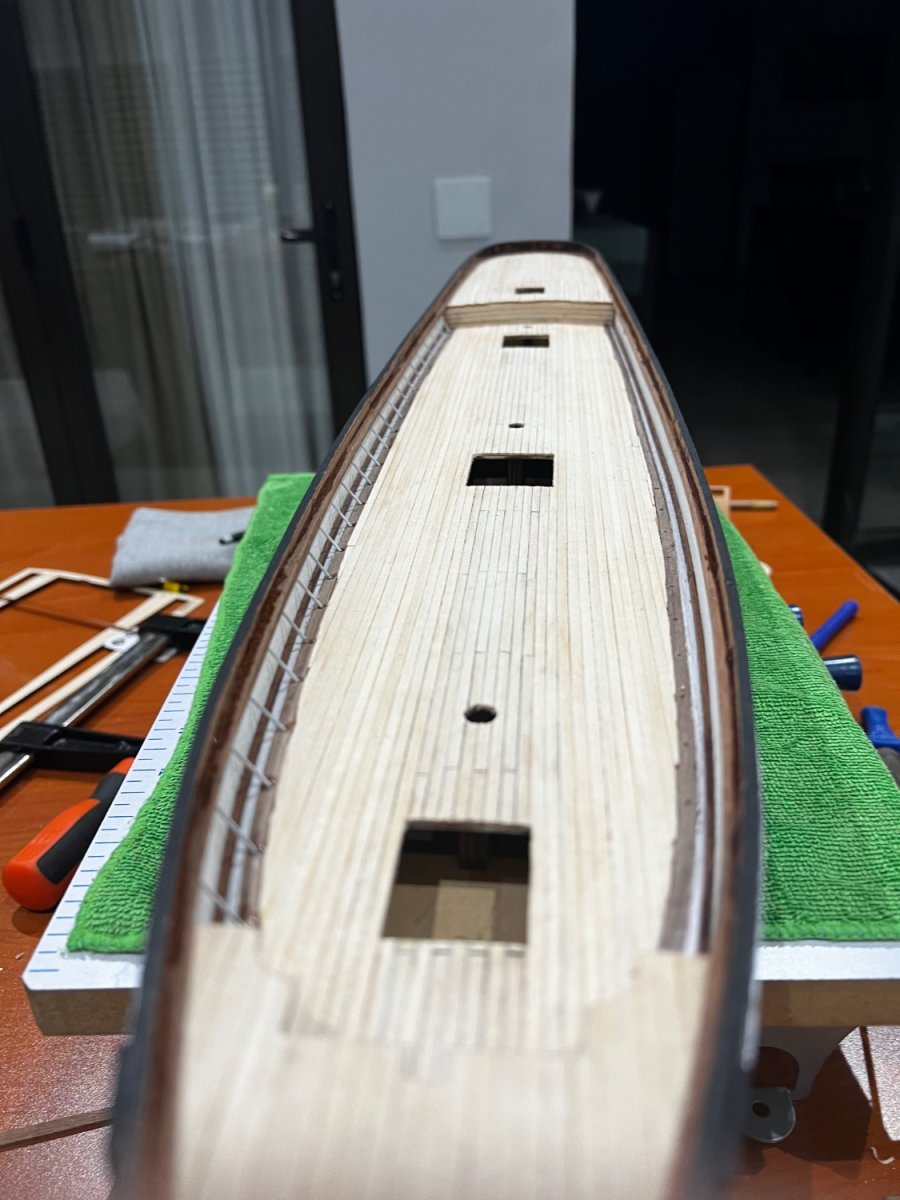
Installation of the stanchions is complete and work has started on the hatches…

- 47 replies
-
- 4
-
-
- Cutty Sark
- Artesania Latina
- (and 1 more)
-
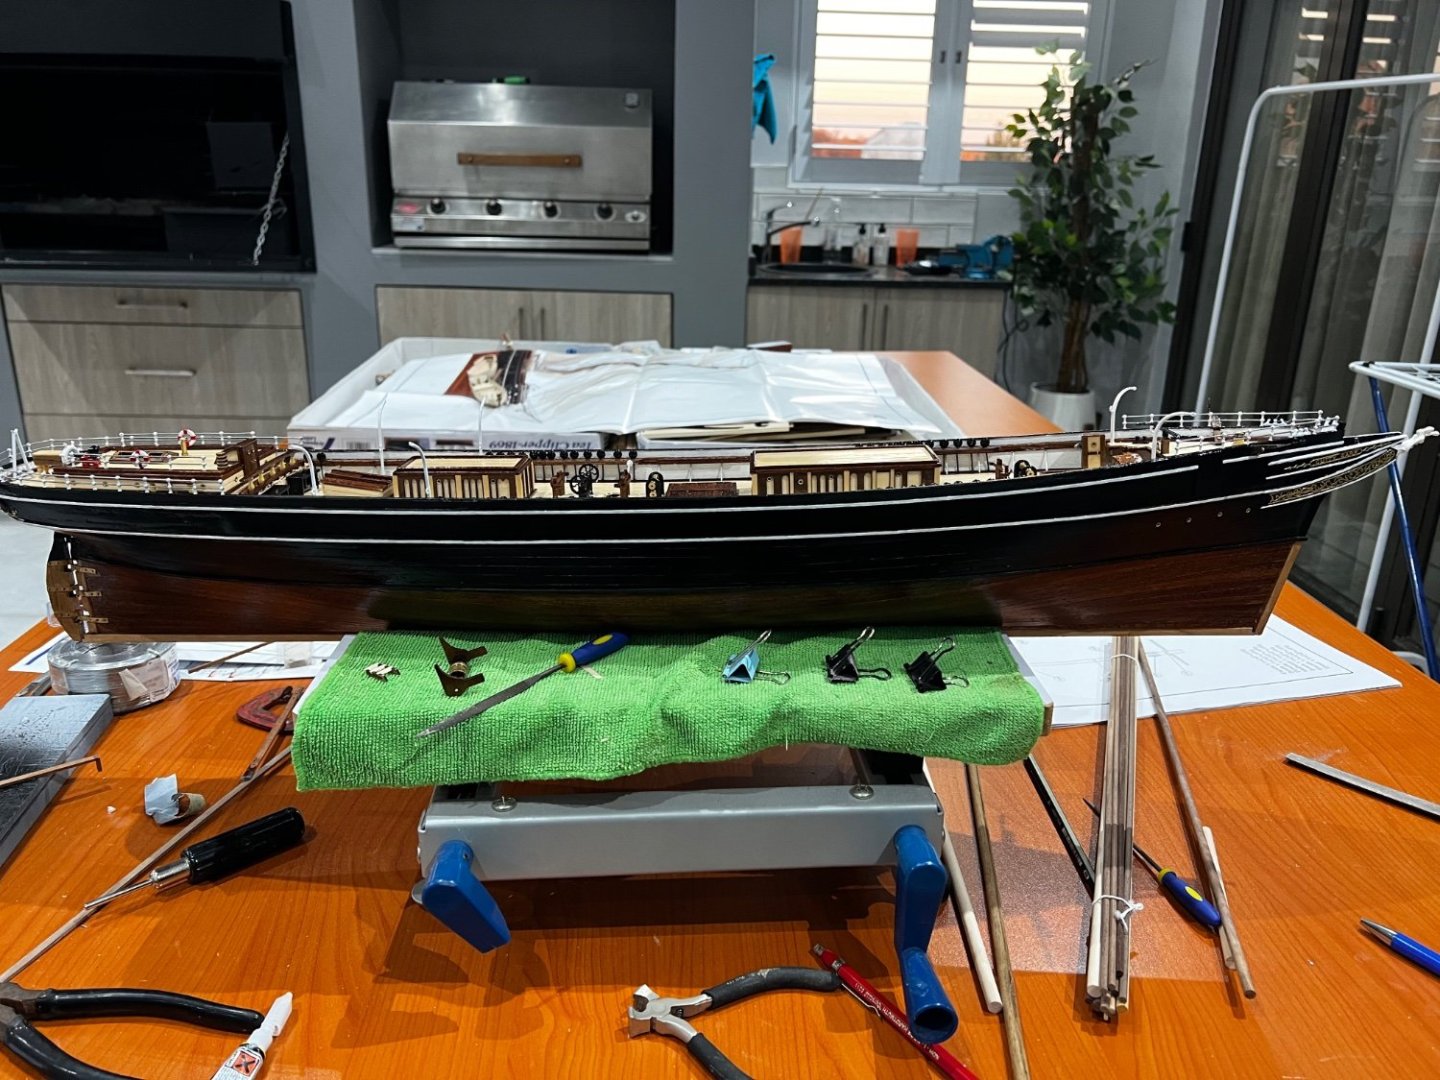
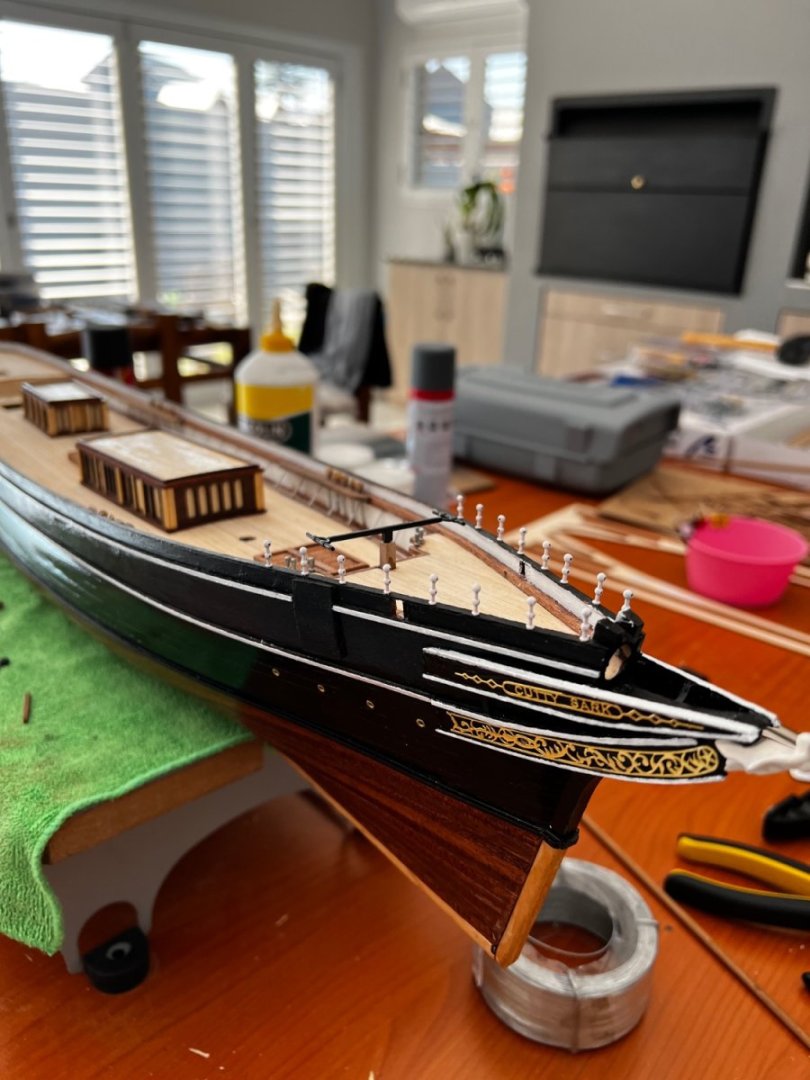
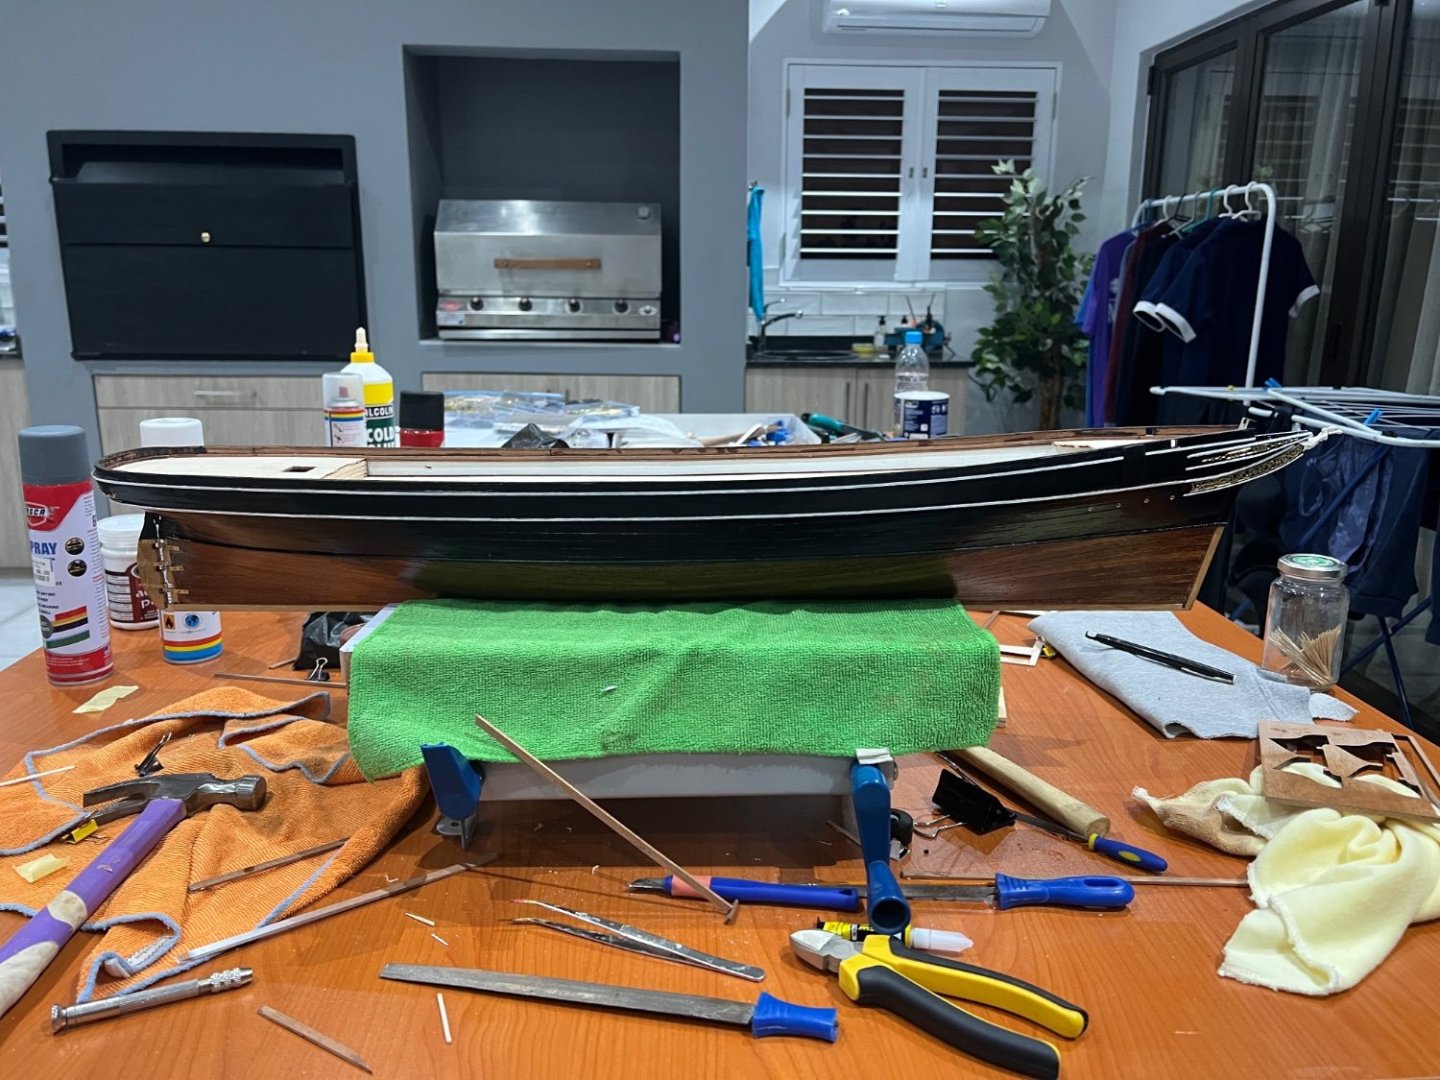
Hi all, a quick update… the whole model has been sprayed with a clear lacquer to protect the paint etc.. making and installation of the stanchions has also begun. This part is going to take long…


- 47 replies
-
- 2
-
-
- Cutty Sark
- Artesania Latina
- (and 1 more)
-
Thank you very much. yes. I think i will sink them into the waterways as not to accidentally drill through the thin bulwarks as they have already been varnished and would be a pain to fix up. kind regards
-
Hi VitrusBering. The belaying pins are made from cast metal. kind regards.
-
Ill definitely go take a look🙂. kind regards
-
Okay cool. I do have some experience in pinning, glue alone feels too flimsy. this is also my first model with inboard channels and chainplates. Next step is to insert the stanchions. regards.
- 47 replies
-
- 1
-
-
- Cutty Sark
- Artesania Latina
- (and 1 more)
-
Good day all. while waiting for the final coat of varnish to dry, i went looked ahead in the instructions. by the looks of it, the deadeye chainplates are connected to the bulwarks by only glue. This troubles me somewhat because will the glue alone be able to support the tension of the shrouds? any ideas how to improve the structural integrity of the the deadeyes chainplates. further more, the mizzen mast deadeyes seem to be inserted into the deck and also relies on glue alone to keep it secure. Thoughts? Regards
.thumb.png.912a09f021da638ad17ed28ee9b0170c.png)
-
Thank you LeoM. So far she has been a pleasure to build. Regards.
- 47 replies
-
- 2
-
-
- Cutty Sark
- Artesania Latina
- (and 1 more)
-
Yes. The scale is quite nice to work with. But it is the latgest model i have ever made so thus quite new to me. But i have found it easy to work on so far. I feel her size is a great display size. Regards
- 47 replies
-
- 2
-
-
- Cutty Sark
- Artesania Latina
- (and 1 more)
-
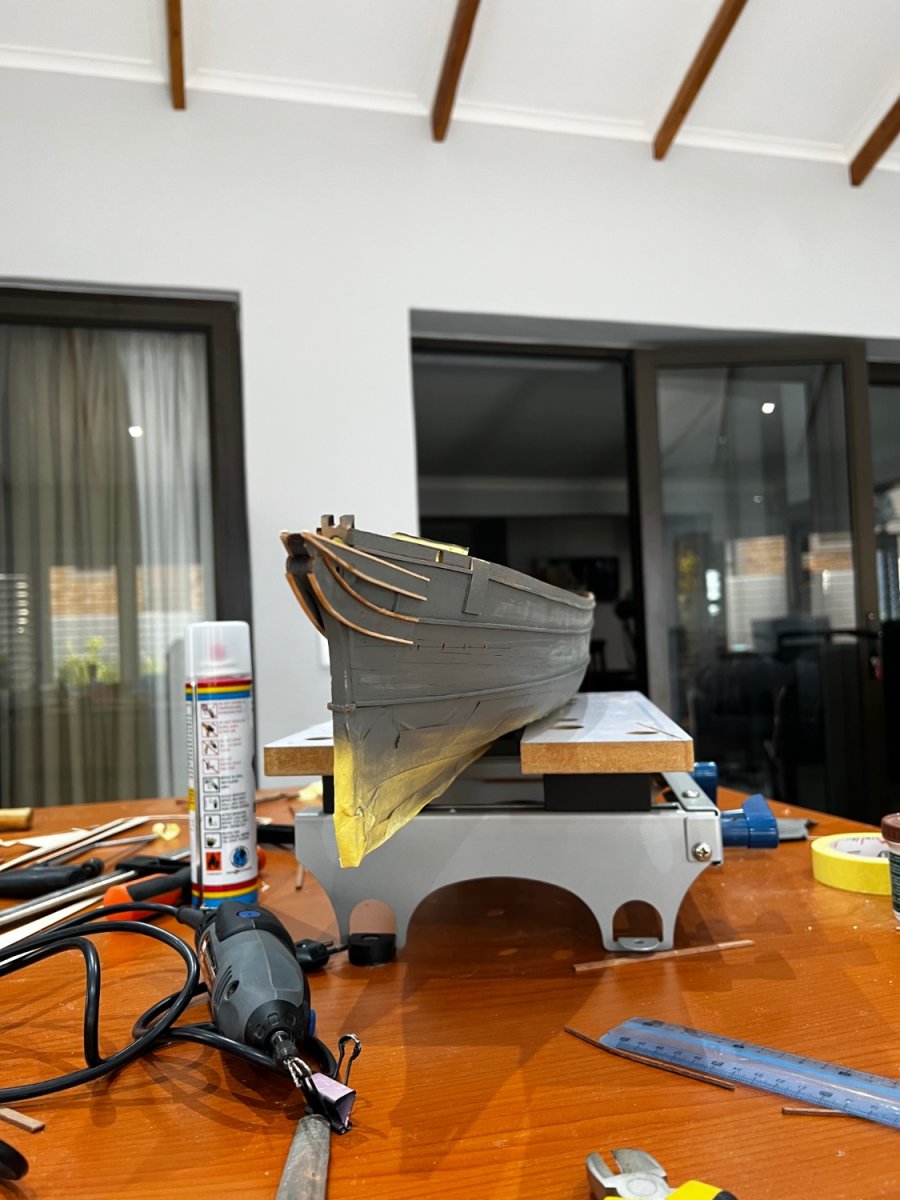
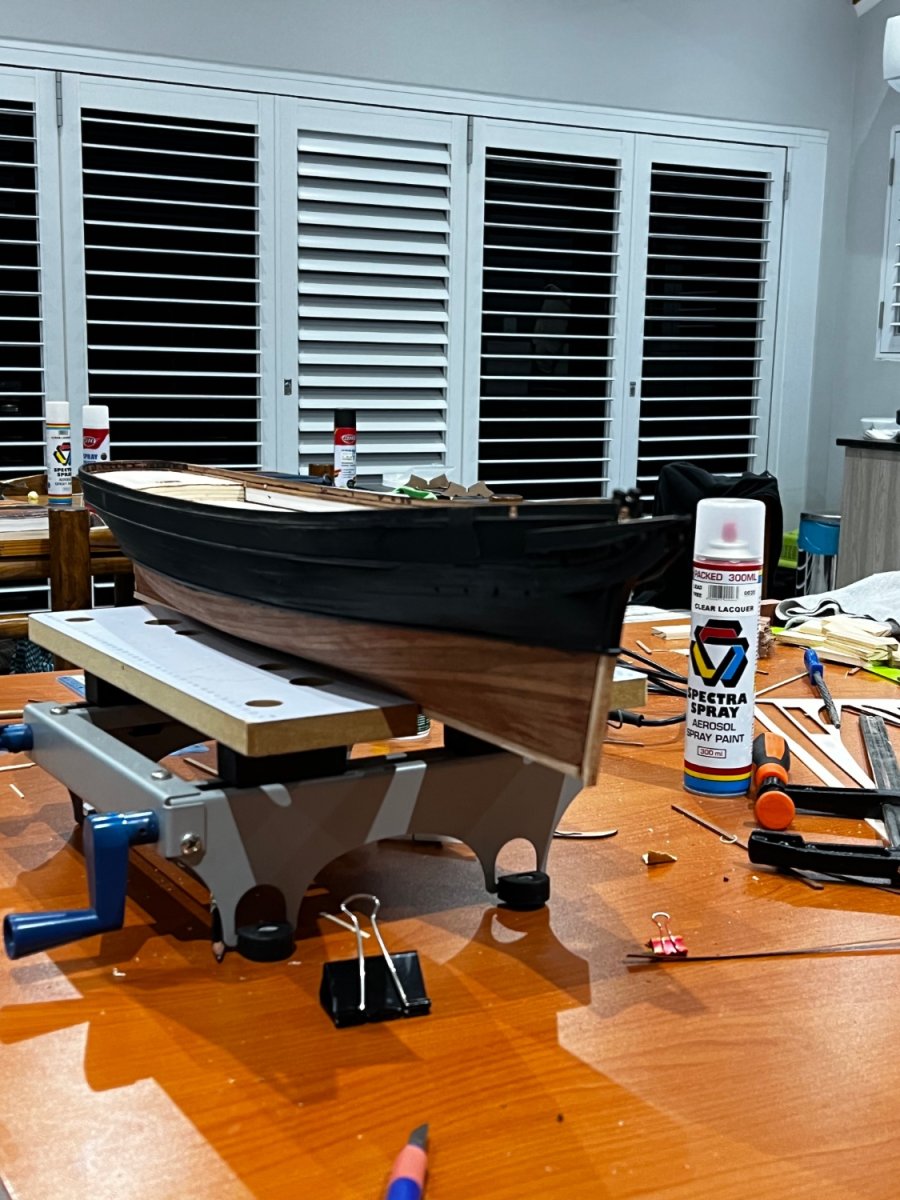
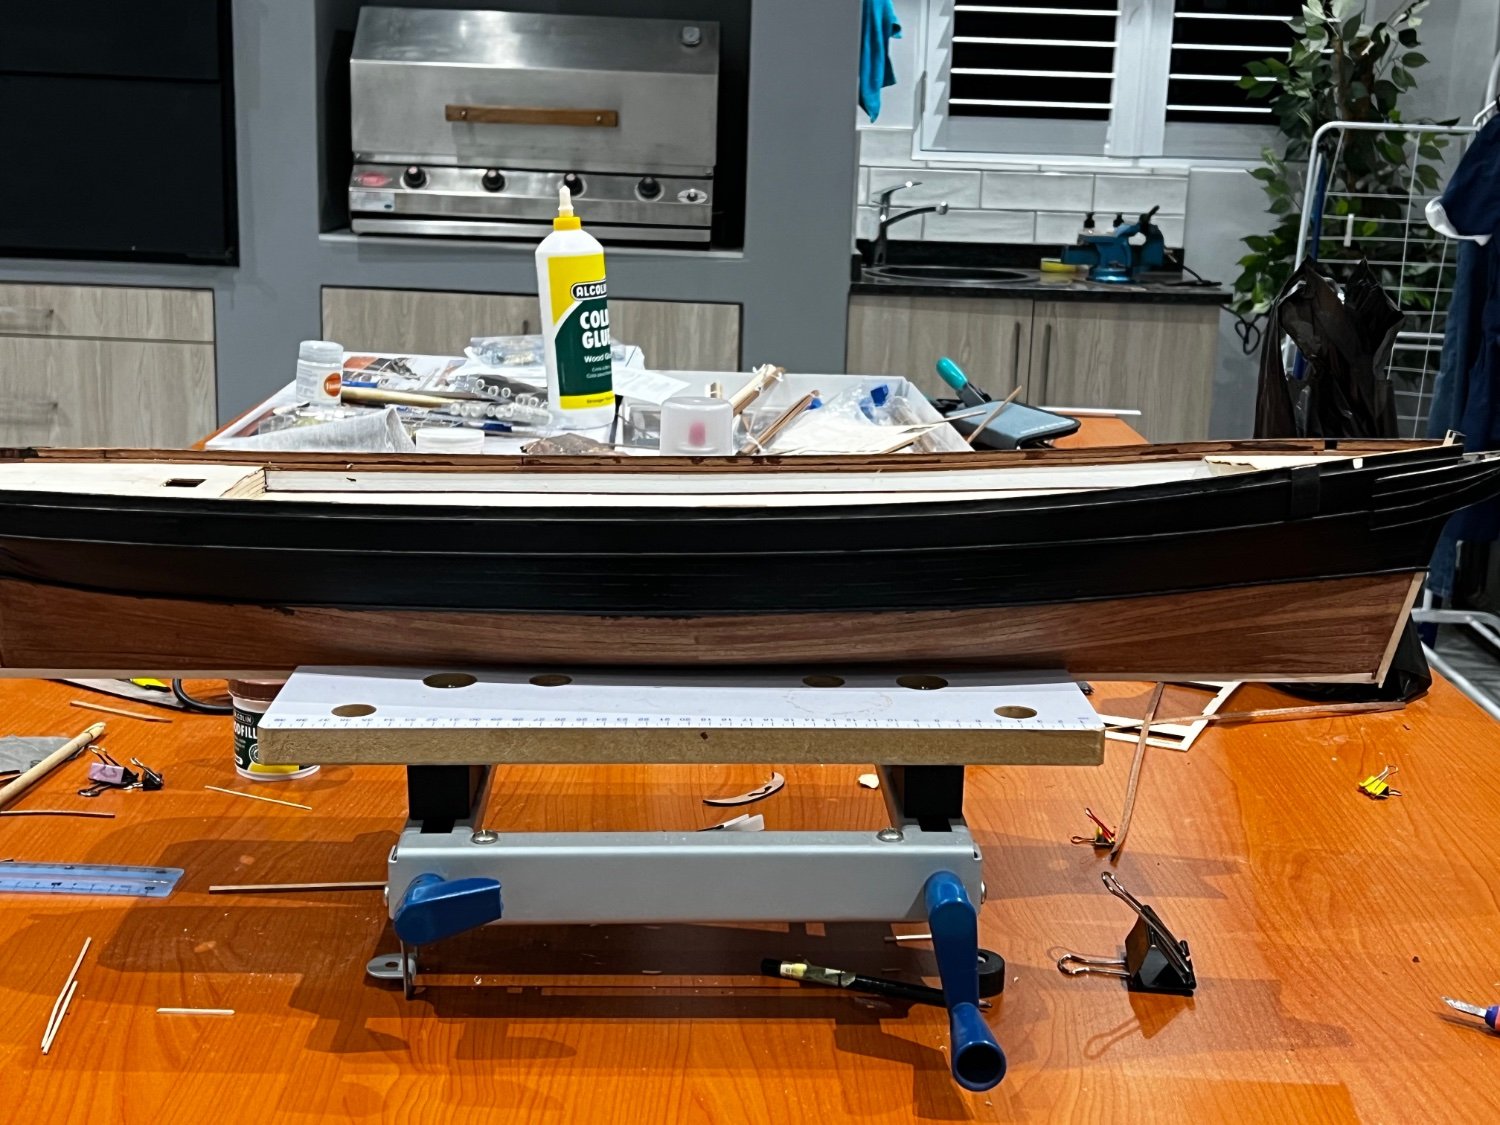
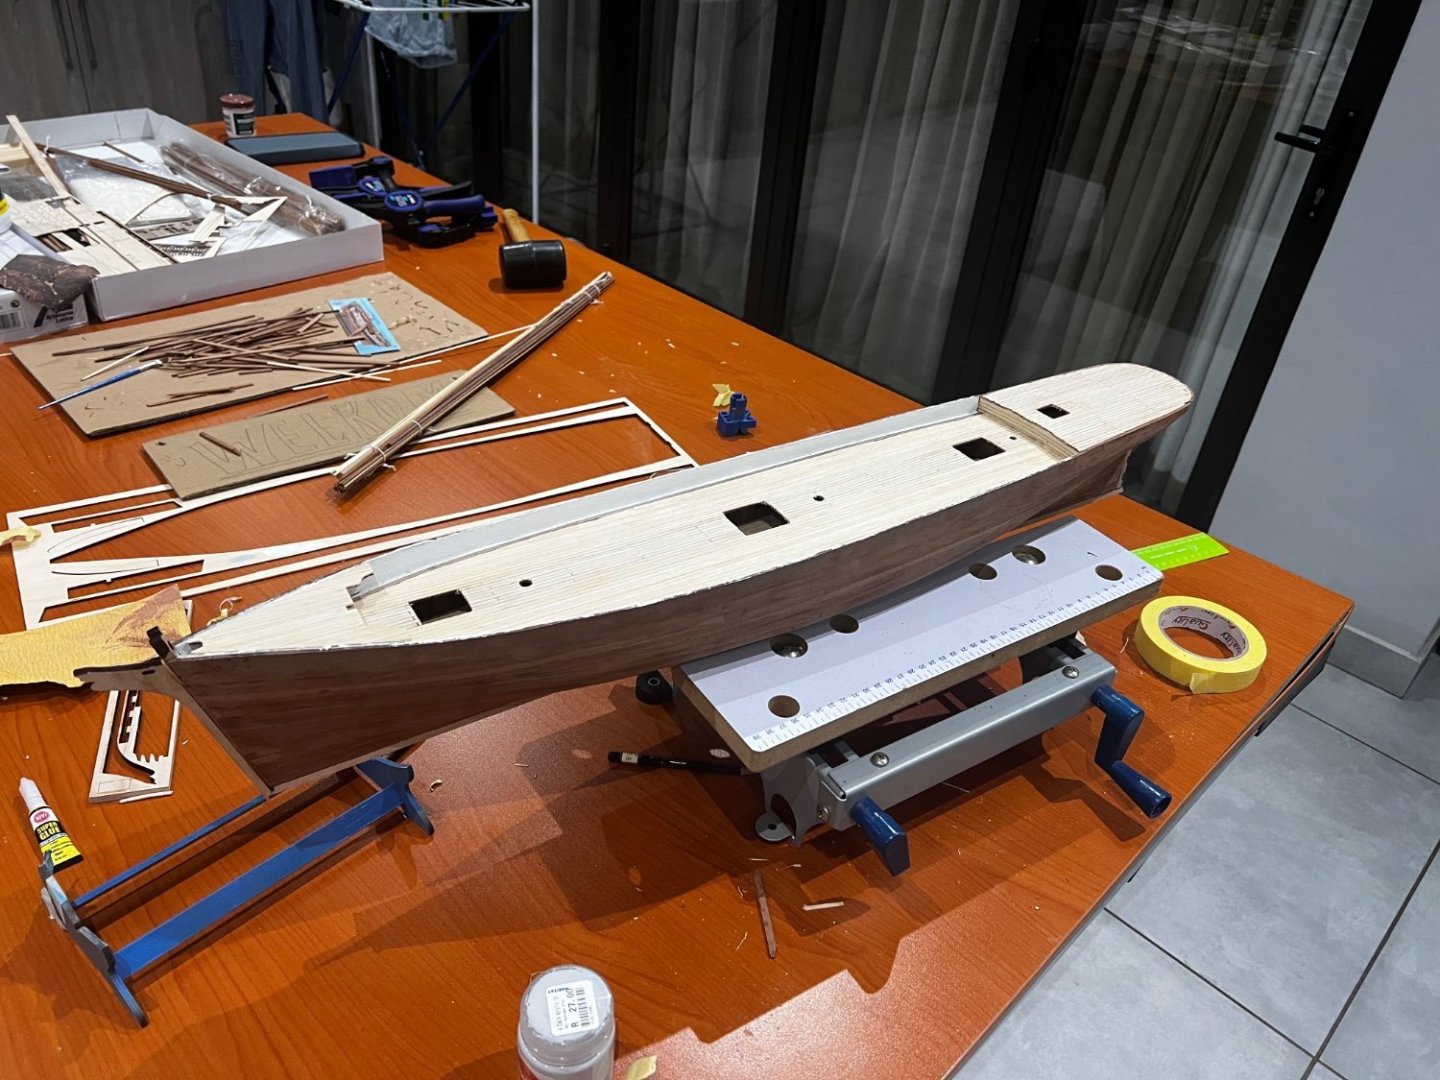
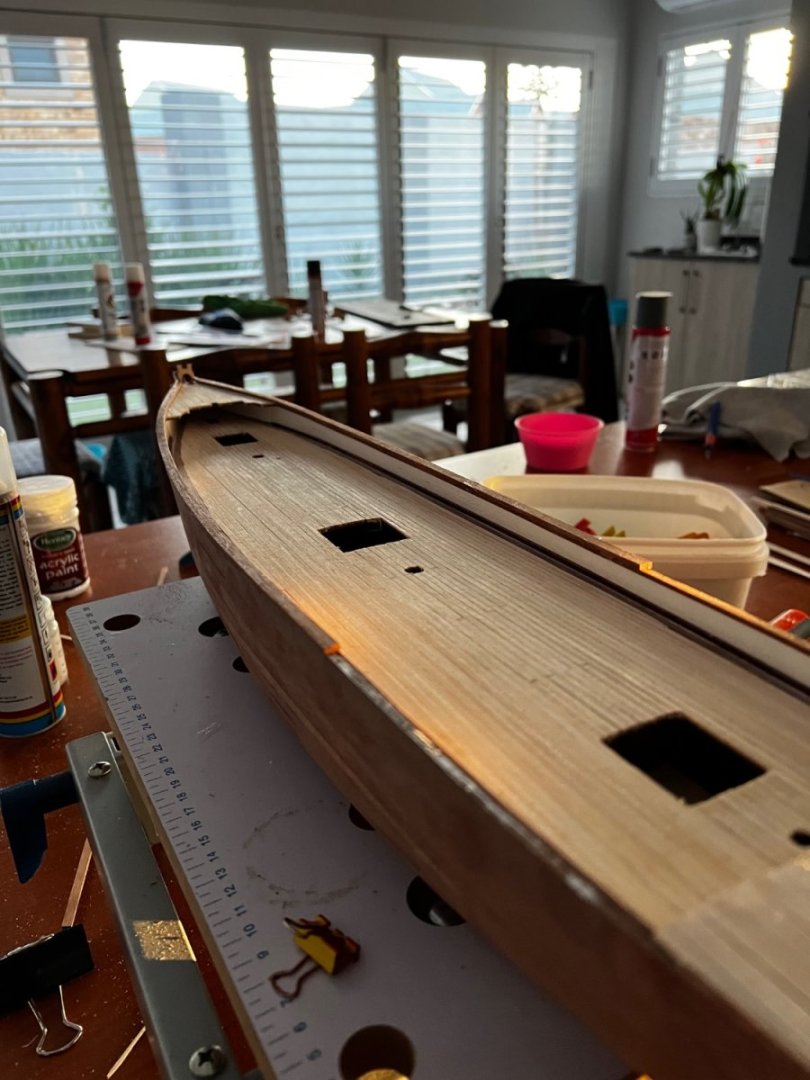
Hi hof00, I didn’t have too many problems with the planking because the curvature of the hull is not too bad except at the stern. At the stern the wood twists quite a bit so to counter that I left the planks long becuase the are easy to twist like that and nailed them to the filling pieces with some wood glue. When the glue had dried, i cut the planks to length, mind you alot of wood filler was used as well. One thing i did have problems with was the bulwarks. As you have probably seen, the wood is very thin above each of the gunports/holes. They were very prone to snapping at those points and that is exactly what happened. I ended up scrapping the plywood ones provided and traced them onto a sheets of 2 mm mdf and sanded them down to 1.5 mm. This is the reason why there are no gunports on my model. I do definitely plan to add sails. I believe it adds a certain “grace” to the model. Getting back to the single planking, artesania provides abit more than double the required planks so is if you mess some of them up, it will not be a problem. kind regards.
- 47 replies
-
- 2
-
-
- Cutty Sark
- Artesania Latina
- (and 1 more)
-
Thank you Sir.
-
Feel free to ask any questions relating to this build or modeling related topics. Regards
- 47 replies
-
- 1
-
-
- Cutty Sark
- Artesania Latina
- (and 1 more)
-
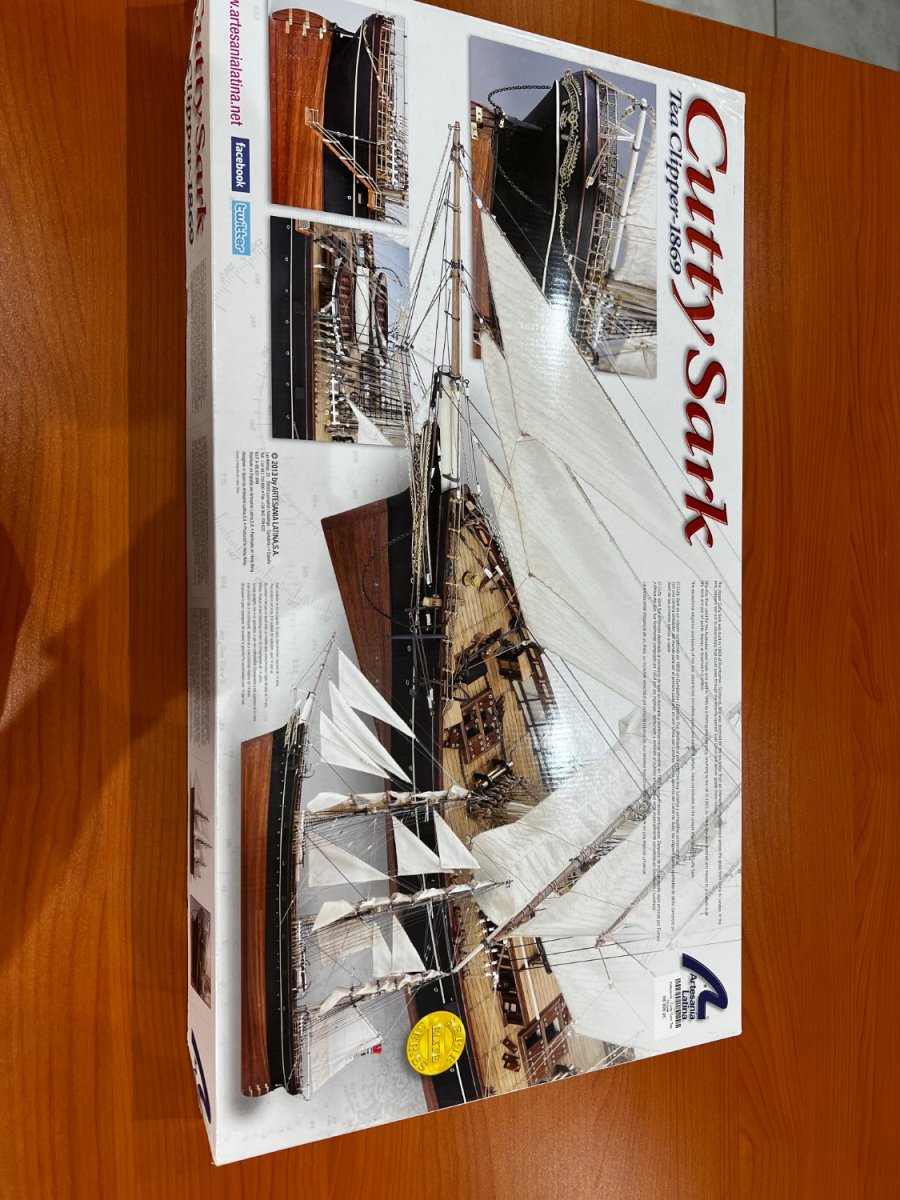
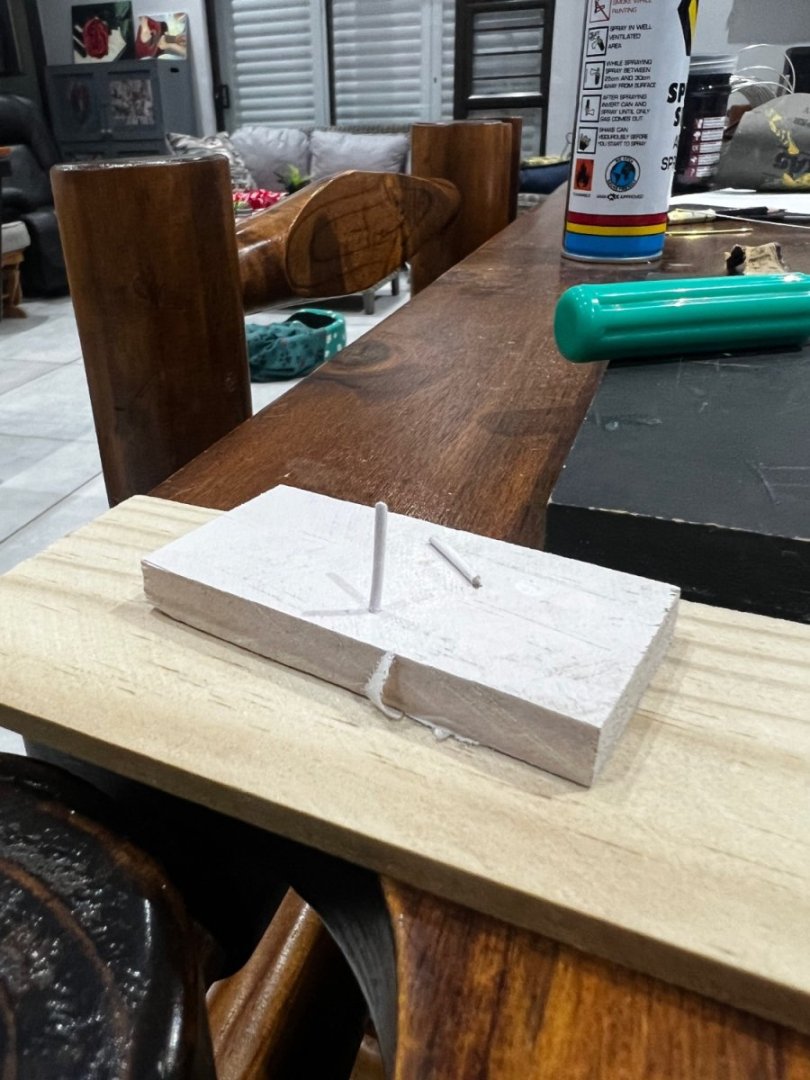
Hi all. This will be my first build log and will be of my 3rd model ship kit. I started this build back about a month ago and have only now thought to do a log. Not many photos have been taken up until this point. I will post the photos that I have up until today. I will then update you all as I go on to another step.


- 47 replies
-
- 6
-
-
- Cutty Sark
- Artesania Latina
- (and 1 more)
-
Triton Notes
Reub replied to Matrim's topic in HMS Triton - 28 gun frigate's Cross Section Build Logs for HMS TRITON
I, unfortunately, can't find them. would you happen to know the file names in case I missed them?


.png.5affcecf44220d8fa656548bbb2b6e8c.png)