Kestros1
-
Posts
6 -
Joined
-
Last visited
-
 CiscoH reacted to a post in a topic:
Modelling HMS Surprise as Lego-Scale 3D Printed Pool Toy in Fusion 360
CiscoH reacted to a post in a topic:
Modelling HMS Surprise as Lego-Scale 3D Printed Pool Toy in Fusion 360
-
mtaylor reacted to a post in a topic:
Modelling HMS Surprise as Lego-Scale 3D Printed Pool Toy in Fusion 360
-
mtaylor reacted to a post in a topic:
Modelling HMS Surprise as Lego-Scale 3D Printed Pool Toy in Fusion 360
-
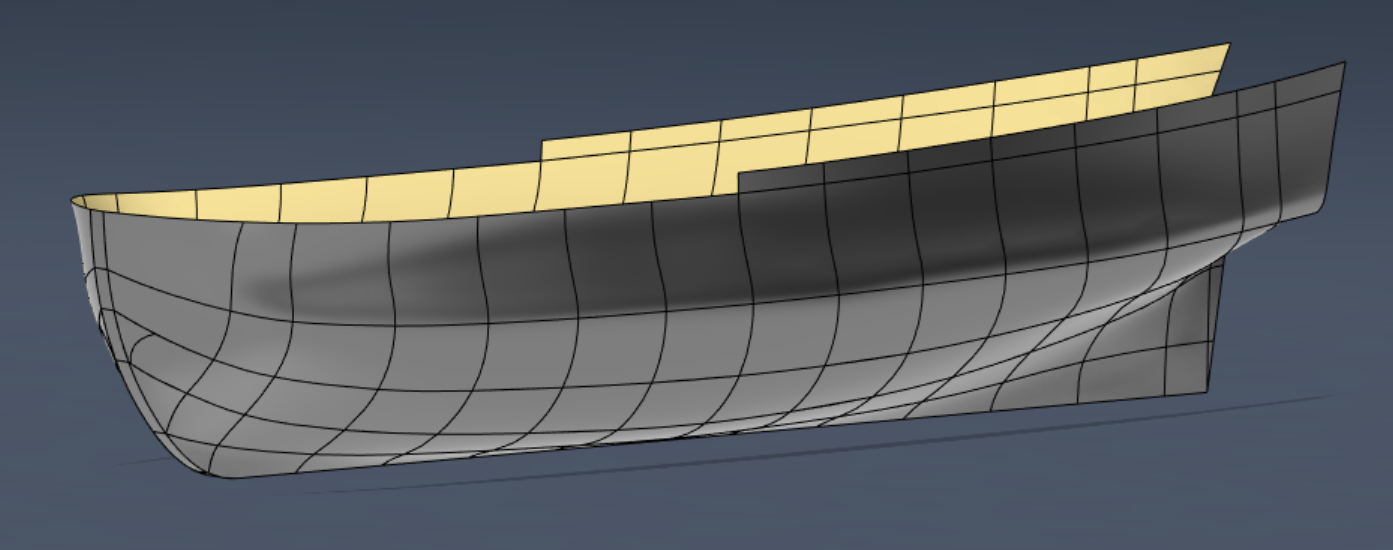
Thanks, Martes, I should have mentioned I'm using this surface loft as a frame, and I plan to plank over it. I was thinking I could plank it with the Sweep function, sweeping a profile from one end to the other, but after playing with it a little that doesn't seem likely. Loft is another option, and if all that fails Thicken seems to work ok, but would need to add planking texture.
-
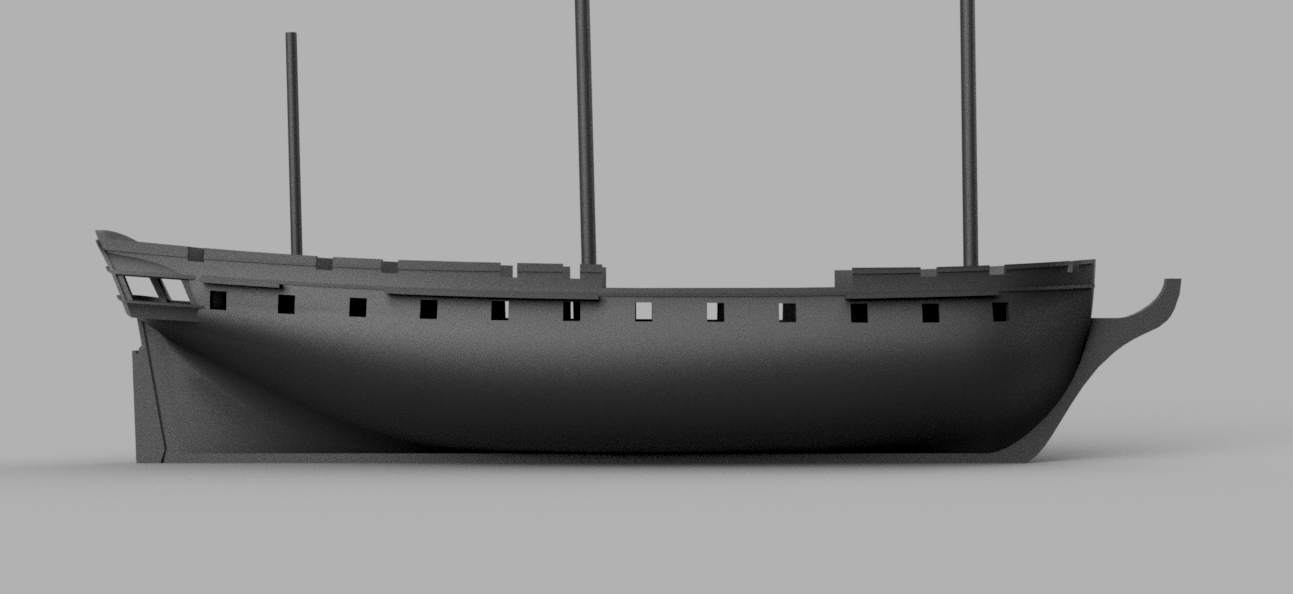
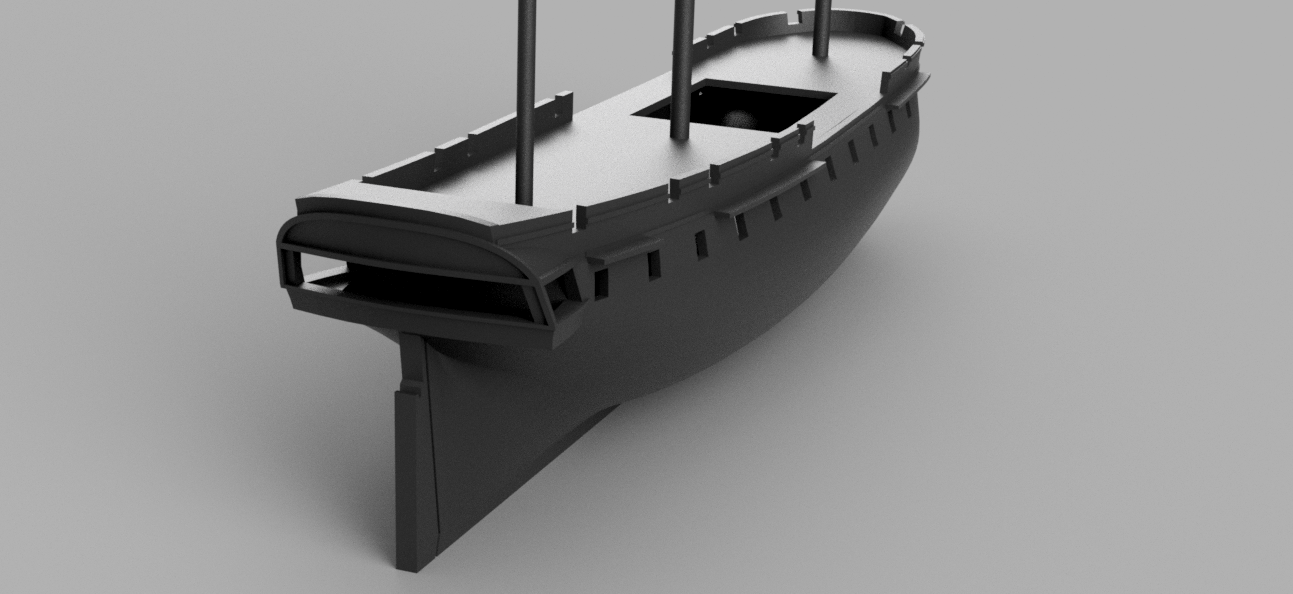
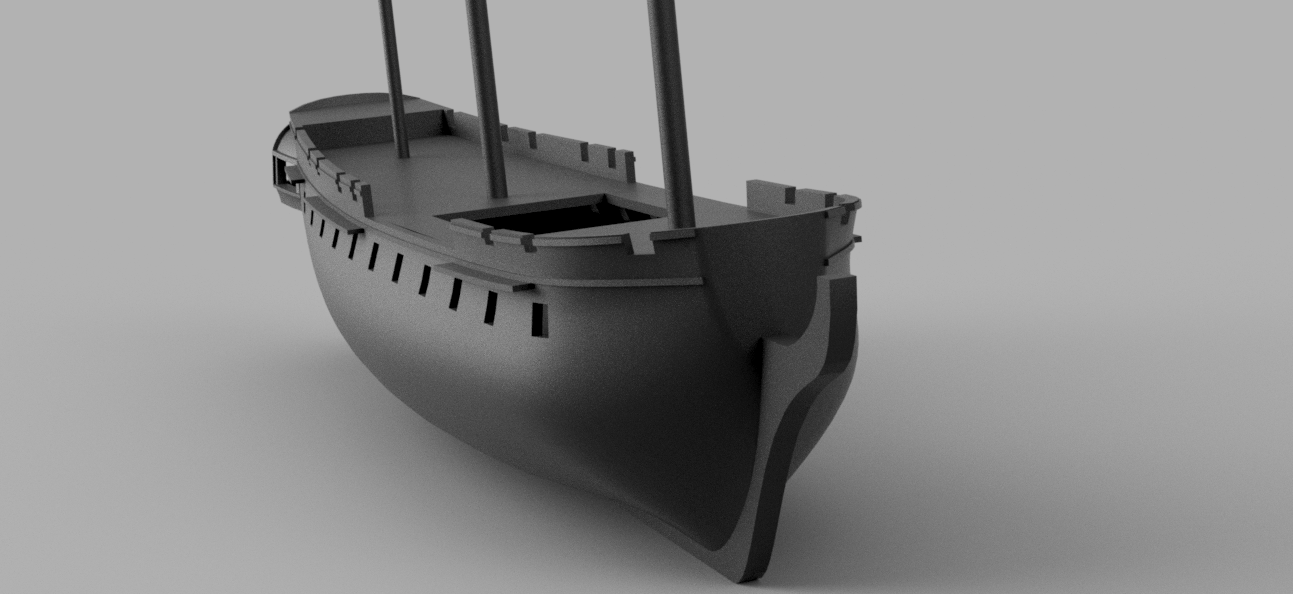
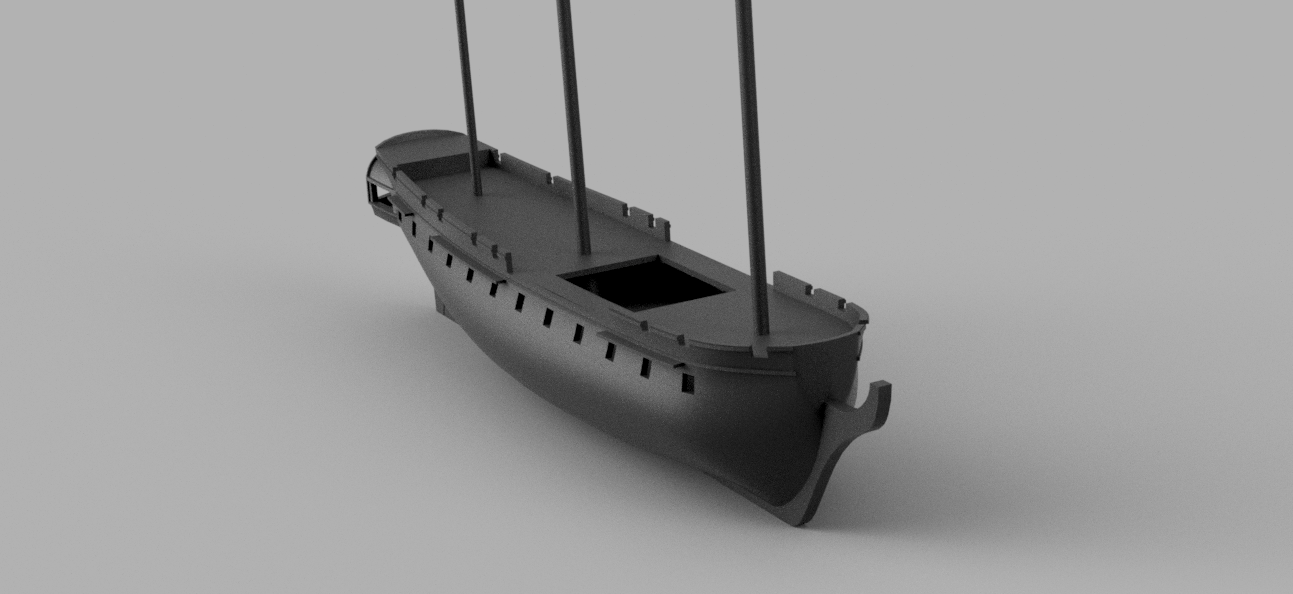
Martes you have a brought up a number of issues with my model as it was progressing that all stem from the same thing. The hawse holes moving over slightly, not properly accounting for hull planking, hull lines not quite matching, all stem from a sub par initial loft. So your comments, as well as spending time on this forum, have me raising my standards. So I went back to the drawing board with the higher quality prints and with a bit of research on hull topology. The new loft is certainly not perfect but is a significant upgrade in accuracy. I still don't need to or plan to model out every frame section, but I am going to change tactics and build the ship from the frame out as opposed to cutting it out of a solid block as I was last time. I also have some plans to use some methods to clean up the modelling along the way. There is a lot to learn on this ship modelling stuff..
-
mtaylor reacted to a post in a topic:
Modelling HMS Surprise as Lego-Scale 3D Printed Pool Toy in Fusion 360
-
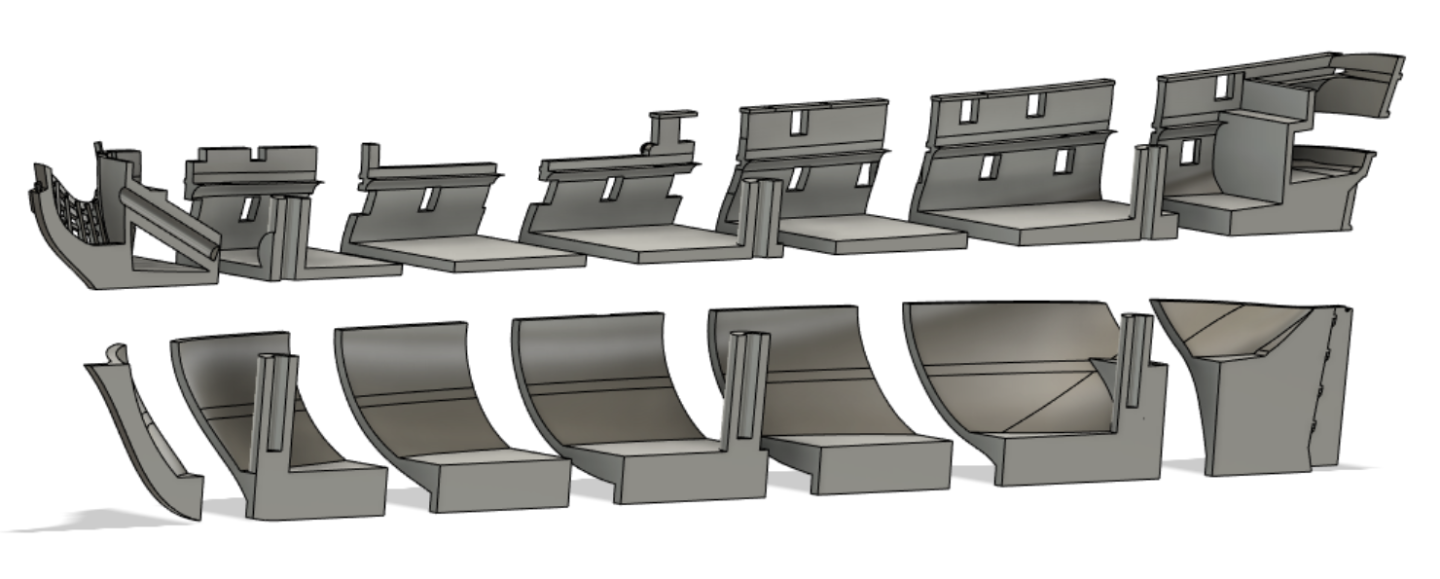
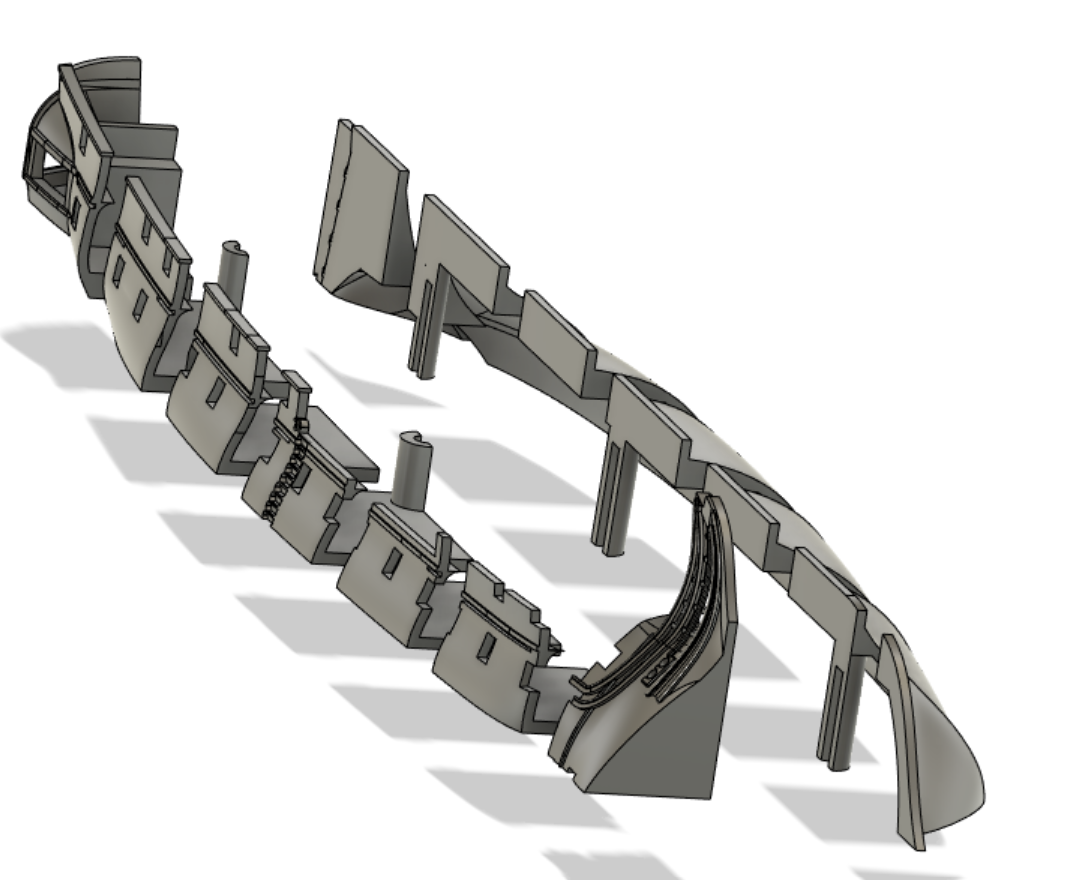
Working on the print planning, the ship is wide enough to necessitate splitting into quarters for printing. Current plan is to split the ship down the middle and in top and bottom halves, and flip the bottom half over to print upside down. I'll print the bottom half upside down and the top half rightside up to minimize support material and keep a clean outer hull. The lower deck will print with the rest of the structure, the upper deck will print separate. I'm going to try the bow vertical, might take some experimenting. A ship for Lego people will need a proper Lego figurehead
-
berhard reacted to a post in a topic:
Modelling HMS Surprise as Lego-Scale 3D Printed Pool Toy in Fusion 360
-
mtaylor reacted to a post in a topic:
Modelling HMS Surprise as Lego-Scale 3D Printed Pool Toy in Fusion 360
-
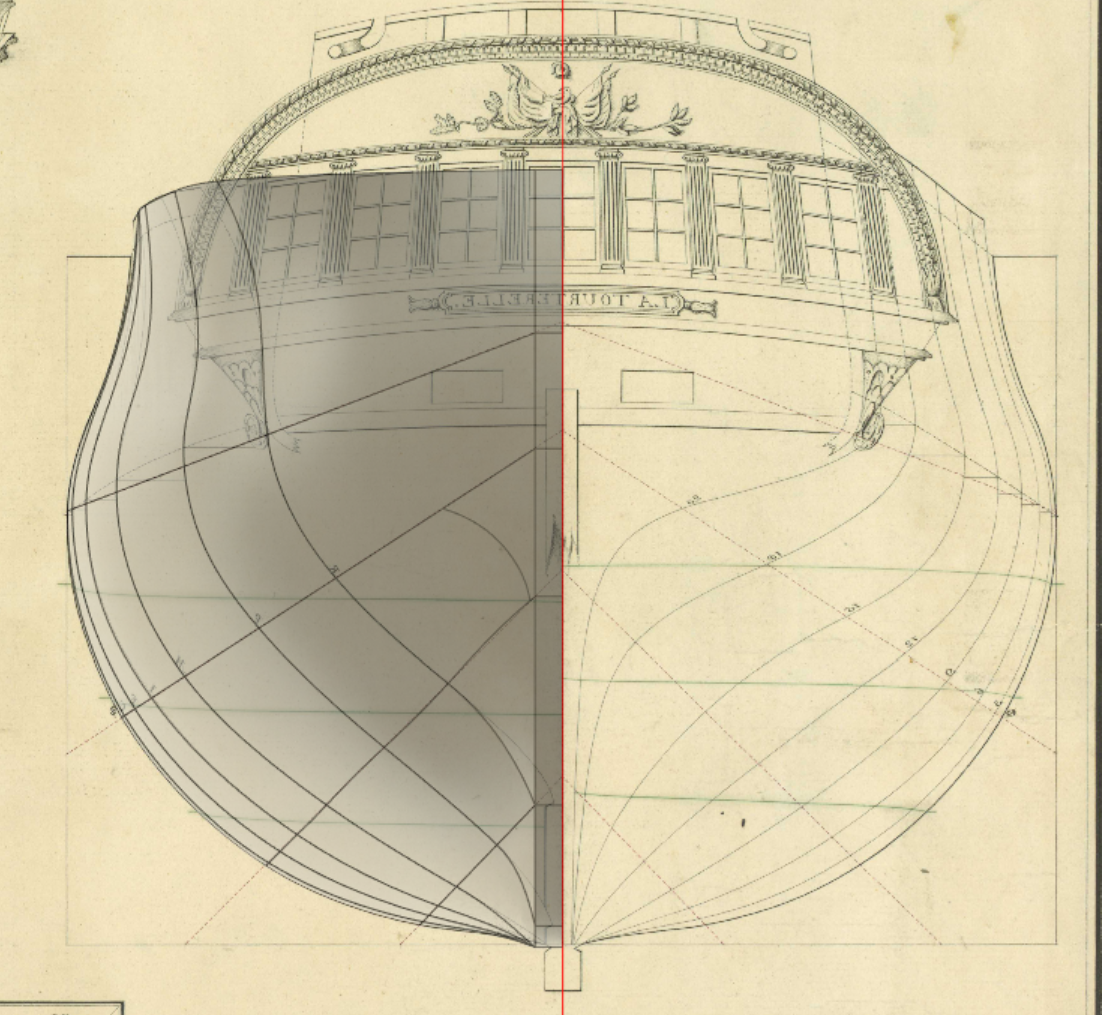
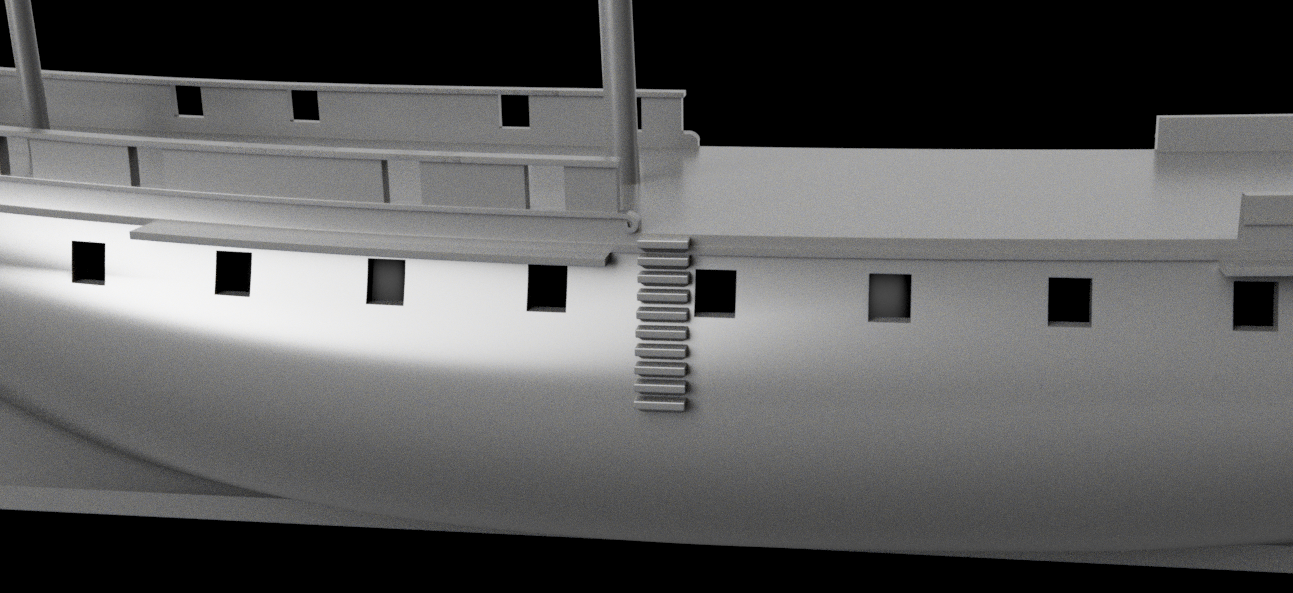
Thanks Martes, That looks like an interesting modelling challenge for the next ship. Yes most of the quarterdeck and forecastle and the top of the cabin will be removable to set up the Lego pieces inside, I'm going to put lots of 1/8" dowel around for handholds for them. Those drawings are really helpful, the clarity is fantastic. A few little updates today, I'm working on getting the main hull prints detailed out with interfaces for smaller glue-on pieces, will add detail to the smaller pieces later. Steps are sized so Lego characters can hang on.

-
mtaylor reacted to a post in a topic:
Modelling HMS Surprise as Lego-Scale 3D Printed Pool Toy in Fusion 360
-
mtaylor reacted to a post in a topic:
Modelling HMS Surprise as Lego-Scale 3D Printed Pool Toy in Fusion 360
-
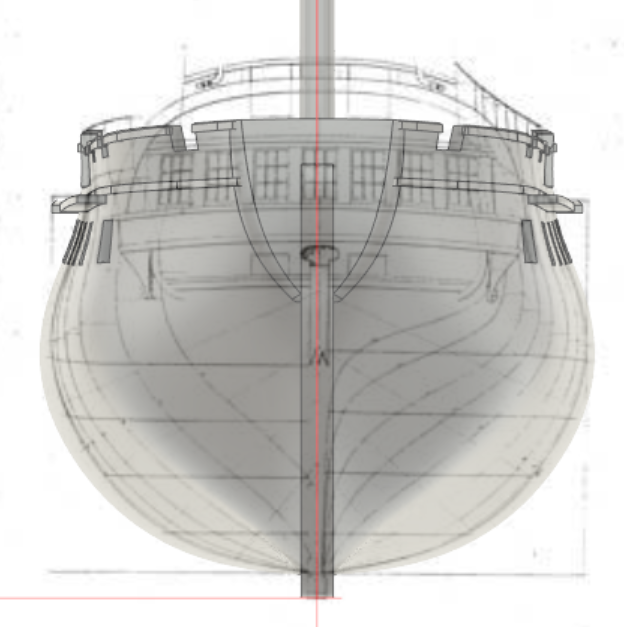
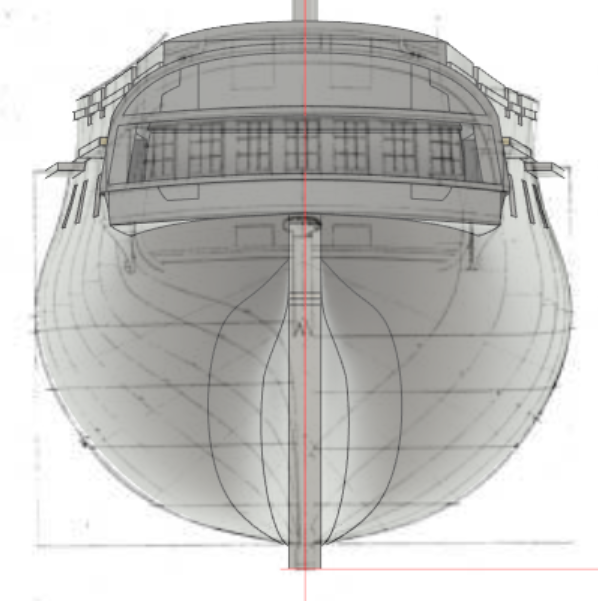
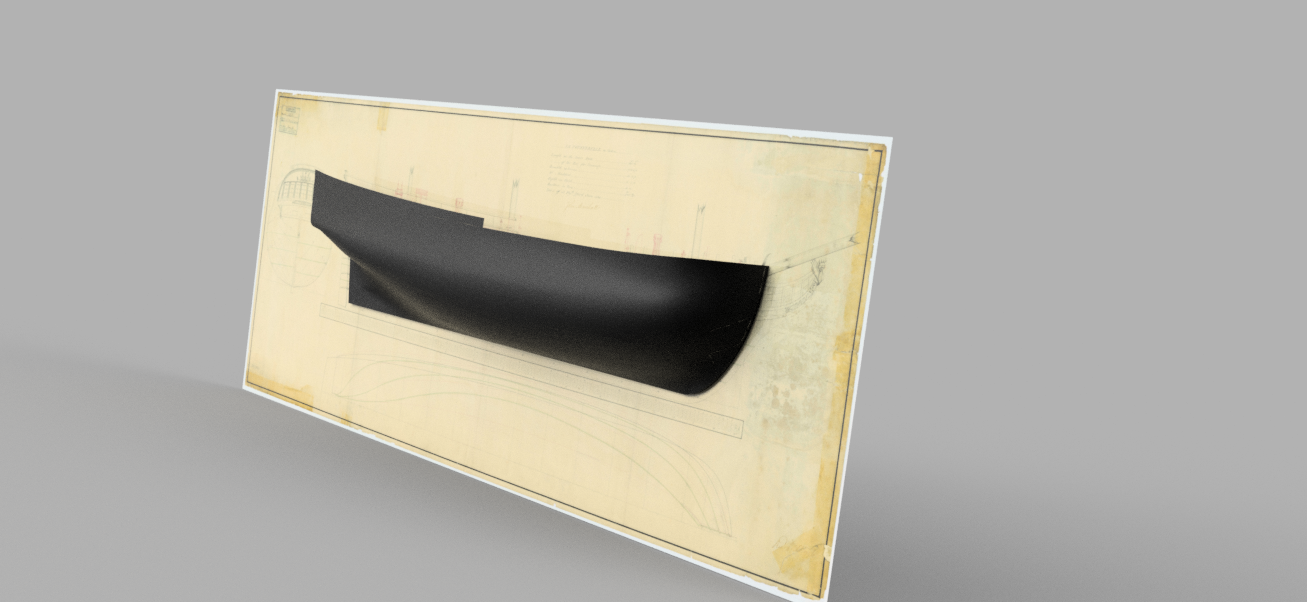
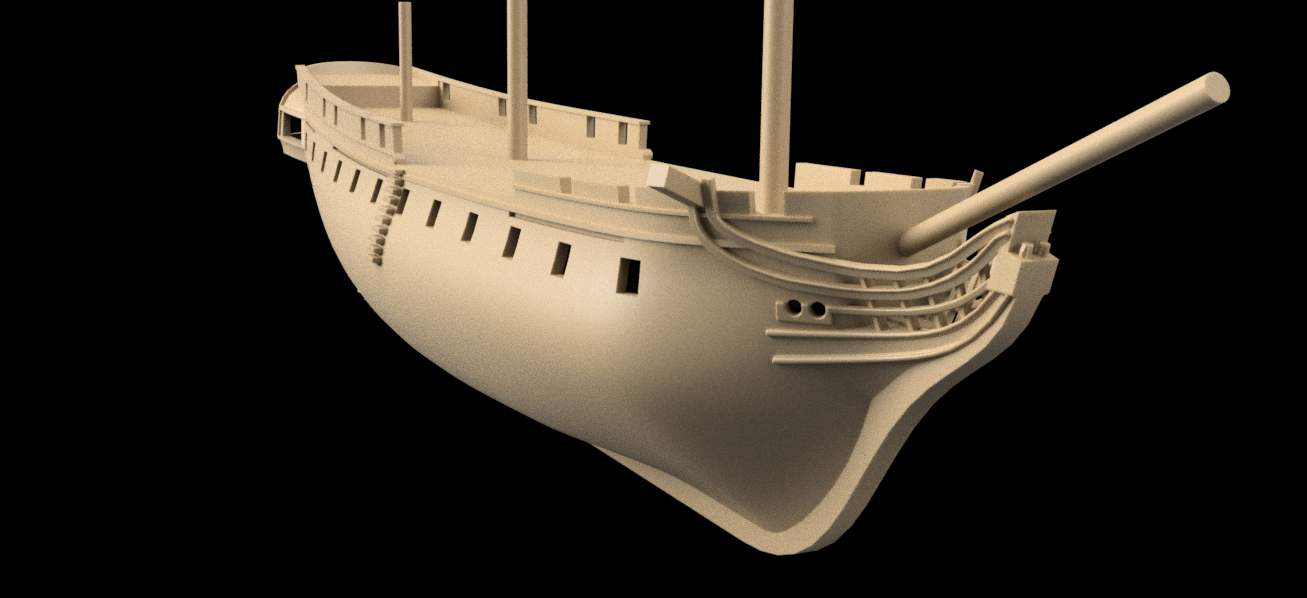
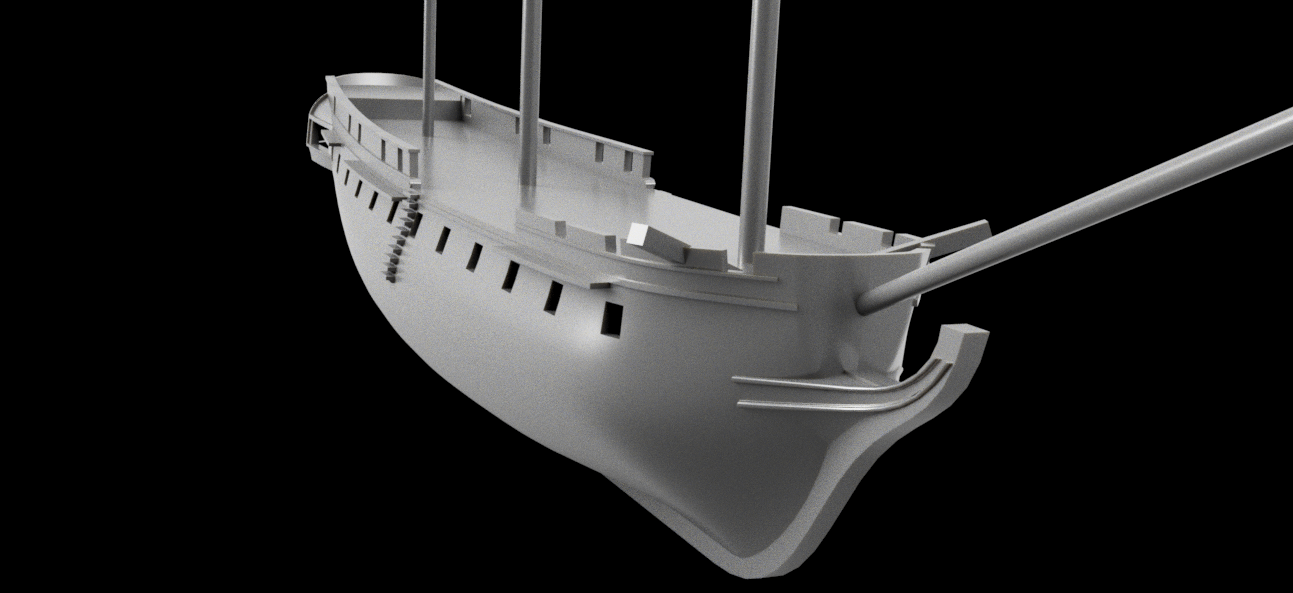
To be honest I did not account for the planking and followed the frame lines, did not even consider the planking thickness. Makes perfect sense but didn't occur to me, so thanks. The bulge is from the lofting method I used in Fusion. I at first attempted to loft using every frame section provided on the drawing, but could not get a smooth wrinkle and bump free loft. I opted to use less forms for a smoother loft, but it does hurt accuracy. I'll add a curve to the deck when I detail out the removable deck pieces. The raised section in back is there to give enough headspace for Lego figures in the cabin, the thicker skin I needed for printing took up too much space for characters to stand up, this seemed like the least bad way of doing it. The wide keel is for strength yes, I'll need to deepen it a little bit too for more room to bolt on the weighted keel. Thanks for the link, that's great info for laying out the rest of the ship!
-
GrandpaPhil reacted to a post in a topic:
Modelling HMS Surprise as Lego-Scale 3D Printed Pool Toy in Fusion 360
-
Lieste reacted to a post in a topic:
Modelling HMS Surprise as Lego-Scale 3D Printed Pool Toy in Fusion 360
-
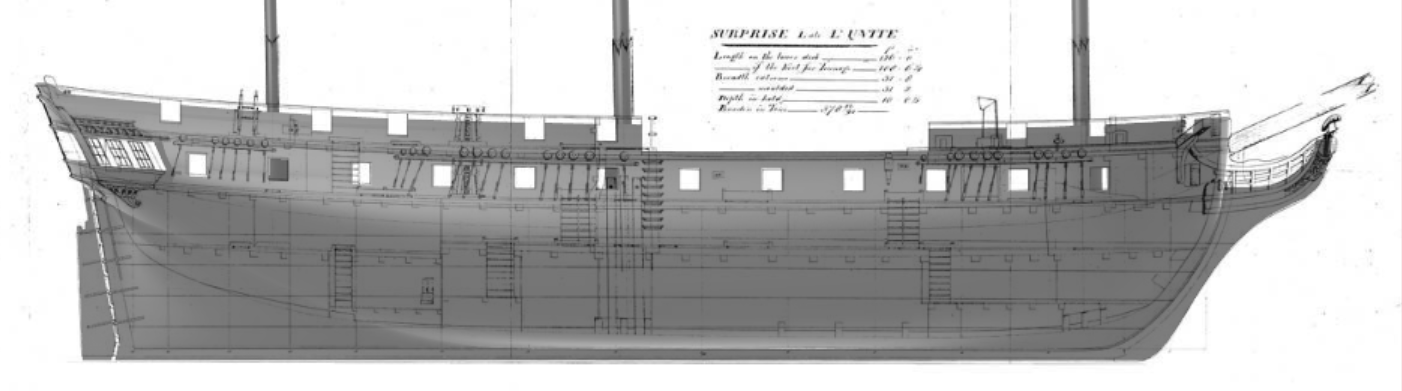
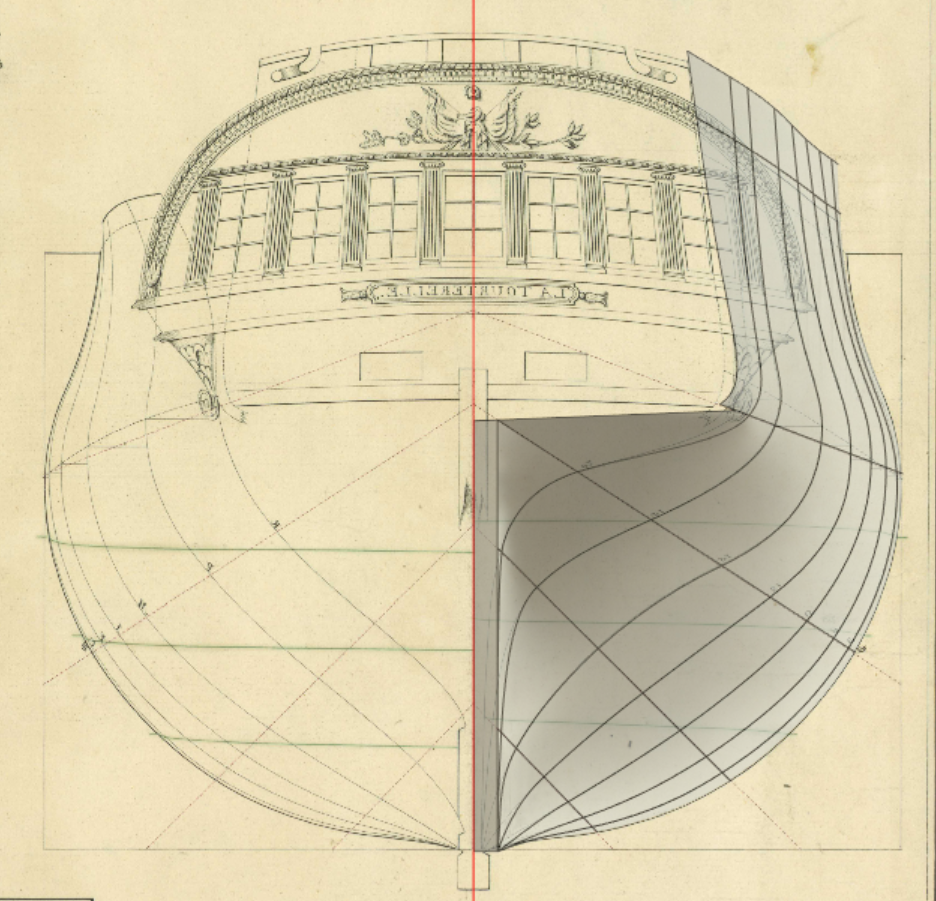
Hi all, this is my first post here at MSW, so first off thank you all for the fantastic contributions! I’d like to start this log by setting expectations for the build. As the title suggests, this model will be used to 3D print a ship intended to set sail on the rough and dangerous waters of my parent’s pool. I grew up constantly sailing (and repeatedly sinking) my Playmobil pirate ship in the pool. I loved that it was functional on the water and it helped grow my love of sailing ships. I did however always wish it was a bit more, accurate. I always wished they had put just a bit more effort into making more correct lines and shapes. Now, with kids of my own I’m embarking on a mission to make more correct sailing ship pool toys for my kids and others that have the same interest. A couple years ago I modelled a 24 gun frigate (the name of which is lost to history) and converted it to a 12 gun Playmobil scale single deck ship and printed it. It's 30 inches long, has a 2.5 lb bolt on weighted keel, and looks and sails beautiful on the water. My kids and my niece and nephew can’t put it down when we’re swimming! However, the design left a lot to be desired, which has me working on model 2. I wanted to do a better documented ship, so I chose the HMS Surprise as there is plenty of information out there for a non-expert like me. I need to put more effort into planning out the 3D printed sections for easier assembly. I am switching to Lego scale (1:42), so Surprise comes out to 36” long on the gun-deck and I can draw it all to scale. As it is a toy and must be 3D printed strong enough for abuse, I will need to take design liberties. Rigging will need to be limited to a reasonable amount and some things will be omitted for various reasons or time permitting. She will have a ~3-4 lb bolt on keel for the pool. That said, I would love input from all of you on the project as it takes shape! Now on to the model: I am working in Fusion 360, which does some things very well. Complex surfacing however, is not one of them. Even Solidworks has tools that would make much of this easier, but alas we must use the tools we can afford and do our best to cover up the mistakes and errors. I am no expert on surfacing however and I am sure better results could be achieved on the hull, but at some point I had to cut my losses and move on with the design. I’m still early in laying everything out, so much more to come. I’ll keep you updated as she progresses!