

Herby63
-
Posts
82 -
Joined
-
Last visited
Recent Profile Visitors
212 profile views


-
 Canute reacted to a post in a topic:
IJN Mikasa by Herby63 - Merit International with Pontos set - 1/200 - PLASTIC
Canute reacted to a post in a topic:
IJN Mikasa by Herby63 - Merit International with Pontos set - 1/200 - PLASTIC
-
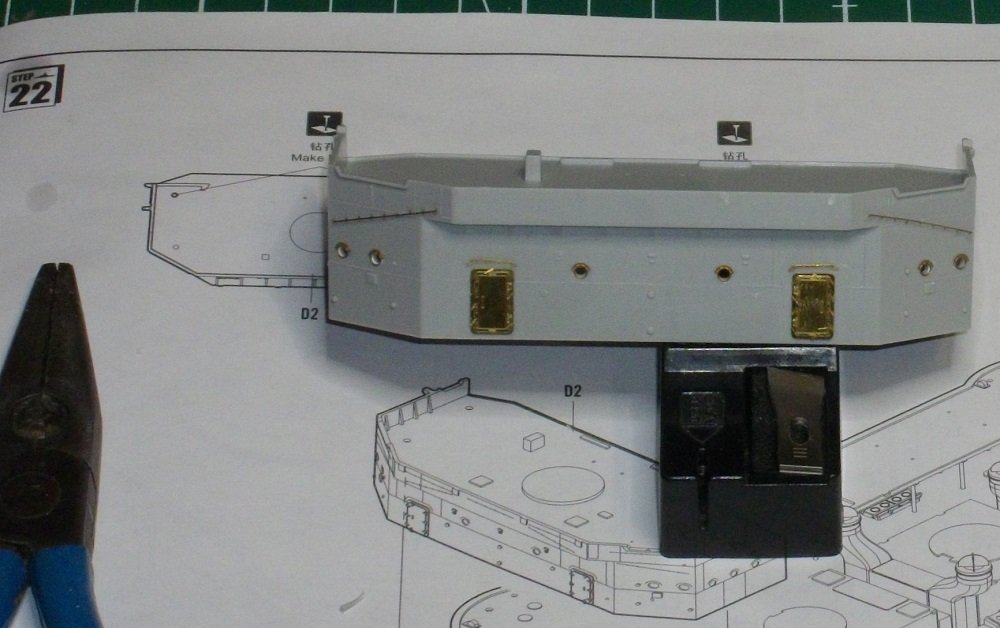
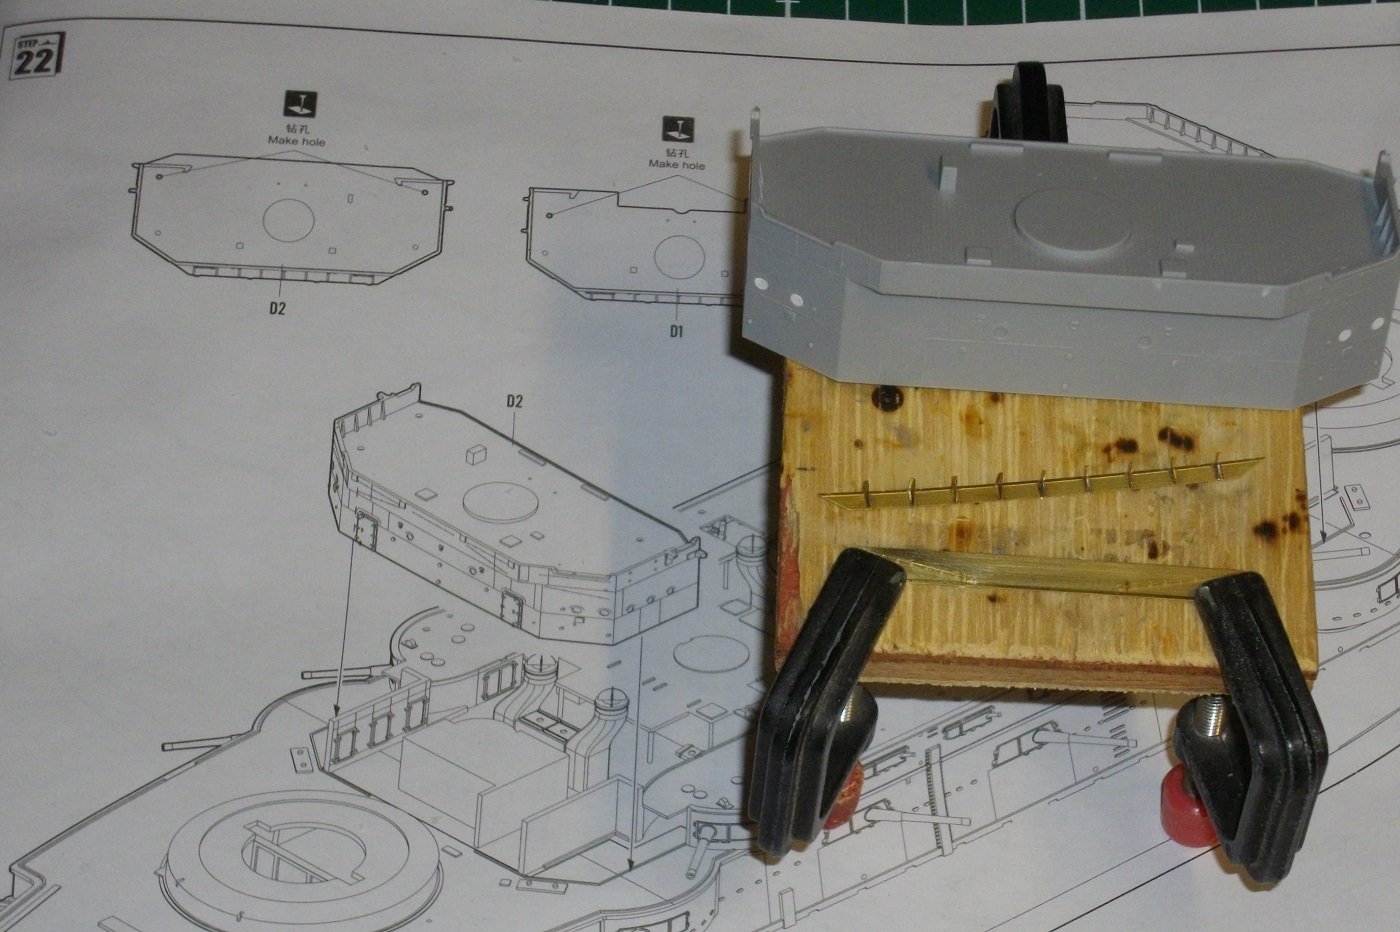
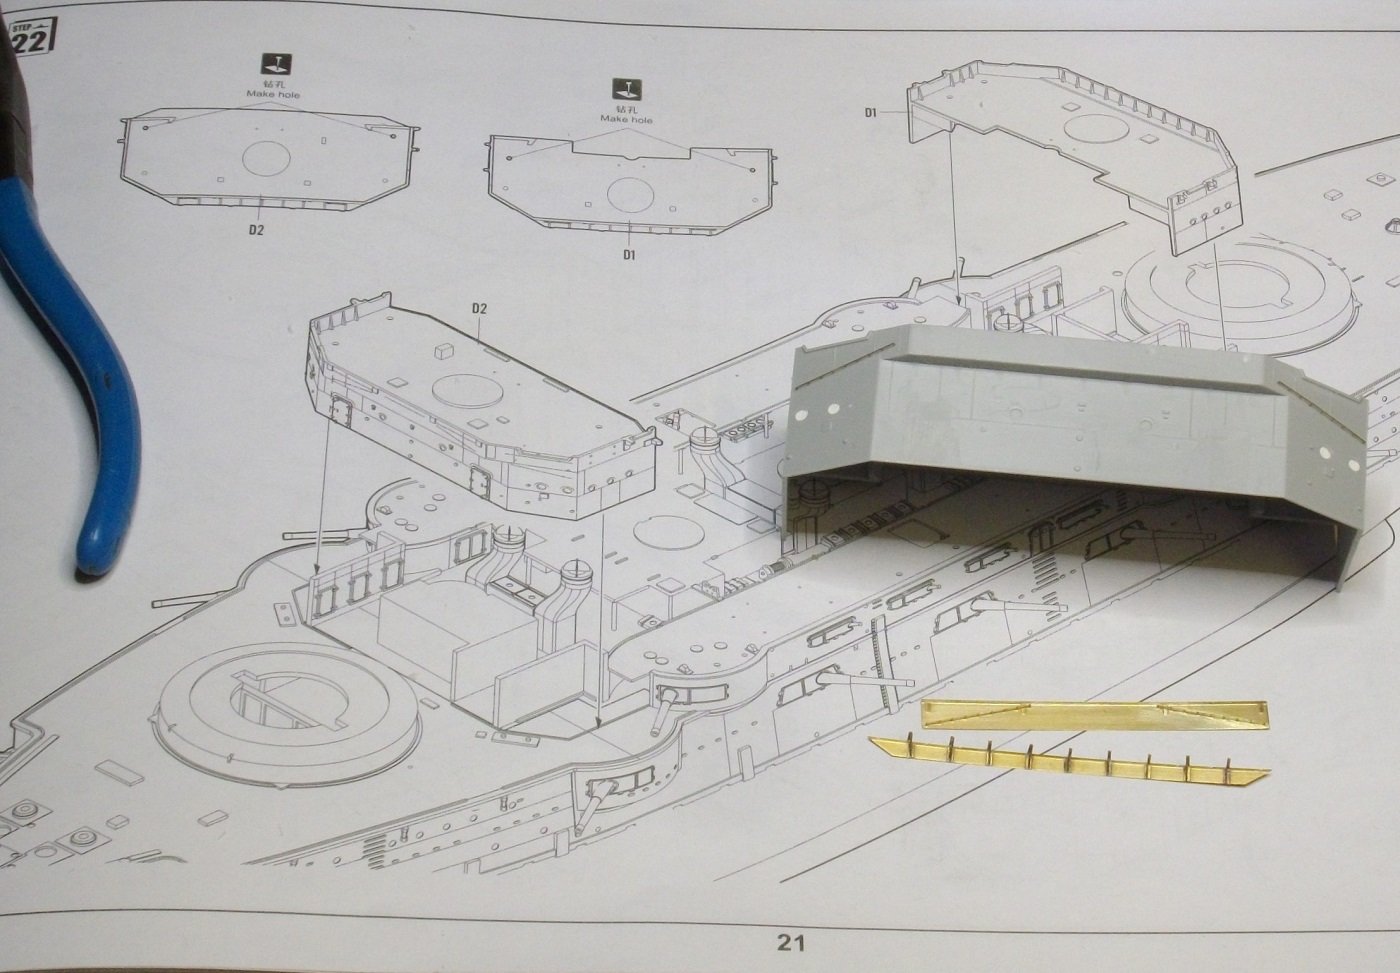
 Time for a little update. I drilled out the porthols and glued the messing parts. Then I soldered the doors from the back and glued them with PVA-glue to the bridges (single doors to the front bridge and double doors to the aft bridge). Until next update, enjoy modelling.
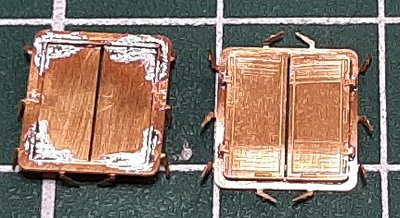
- 79 replies
-
- 1
-
-
- Mikasa
- Merit International
- (and 1 more)
-
Herby63 reacted to a post in a topic:
HIJMS MIKASA 1902 by Jeff59 - HobbyBoss - 1/200 - PLASTIC
-
Herby63 reacted to a post in a topic:
HIJMS MIKASA 1902 by Jeff59 - HobbyBoss - 1/200 - PLASTIC
-
Herby63 reacted to a post in a topic:
HIJMS MIKASA 1902 by Jeff59 - HobbyBoss - 1/200 - PLASTIC
-
Herby63 reacted to a post in a topic:
HIJMS MIKASA 1902 by Jeff59 - HobbyBoss - 1/200 - PLASTIC
-
madtatt reacted to a post in a topic:
IJN Mikasa by Herby63 - Merit International with Pontos set - 1/200 - PLASTIC
-
madtatt reacted to a post in a topic:
IJN Mikasa by Herby63 - Merit International with Pontos set - 1/200 - PLASTIC
-
mtaylor reacted to a post in a topic:
IJN Mikasa by Herby63 - Merit International with Pontos set - 1/200 - PLASTIC
-
mtaylor reacted to a post in a topic:
IJN Mikasa by Herby63 - Merit International with Pontos set - 1/200 - PLASTIC
-
GrandpaPhil reacted to a post in a topic:
IJN Mikasa by Herby63 - Merit International with Pontos set - 1/200 - PLASTIC
-
GrandpaPhil reacted to a post in a topic:
IJN Mikasa by Herby63 - Merit International with Pontos set - 1/200 - PLASTIC
-
GrandpaPhil reacted to a post in a topic:
IJN Mikasa by Herby63 - Merit International with Pontos set - 1/200 - PLASTIC
-
GrandpaPhil reacted to a post in a topic:
IJN Mikasa by Herby63 - Merit International with Pontos set - 1/200 - PLASTIC
-
GrandpaPhil reacted to a post in a topic:
IJN Mikasa by Herby63 - Merit International with Pontos set - 1/200 - PLASTIC
-
Fore bridge: I tried soldering the parts shown in the bottom left corner of the previous picture. The brackets on part 138 went OK. The handrail to part 139 however did not want to stick. I had to clamp down this piece as it was bent due to the etching process. The contact points were so small and the heat could not be applied in such a way that the very small amount of soldering paste woul melt. So i glued the handrails with PVA-glue. The rails to the sides of the bridge I glued too, in order not to mix them up (error in Pontos instructions, numbers are switched). This was not a good Idea. The handrails are easily knocked off when handeling the part. More about that in a future update. Till next update, enjoy modelling.
- 79 replies
-
- 5
-
-
- Mikasa
- Merit International
- (and 1 more)
-
Herby63 reacted to a post in a topic:
HIJMS MIKASA 1902 by Jeff59 - HobbyBoss - 1/200 - PLASTIC
-
Herby63 reacted to a post in a topic:
HIJMS MIKASA 1902 by Jeff59 - HobbyBoss - 1/200 - PLASTIC
-
Herby63 reacted to a post in a topic:
HIJMS MIKASA 1902 by Jeff59 - HobbyBoss - 1/200 - PLASTIC
-
Herby63 reacted to a post in a topic:
HIJMS MIKASA 1902 by Jeff59 - HobbyBoss - 1/200 - PLASTIC
-
Herby63 reacted to a post in a topic:
HIJMS MIKASA 1902 by Jeff59 - HobbyBoss - 1/200 - PLASTIC
-
Herby63 reacted to a post in a topic:
HIJMS MIKASA 1902 by Jeff59 - HobbyBoss - 1/200 - PLASTIC
-
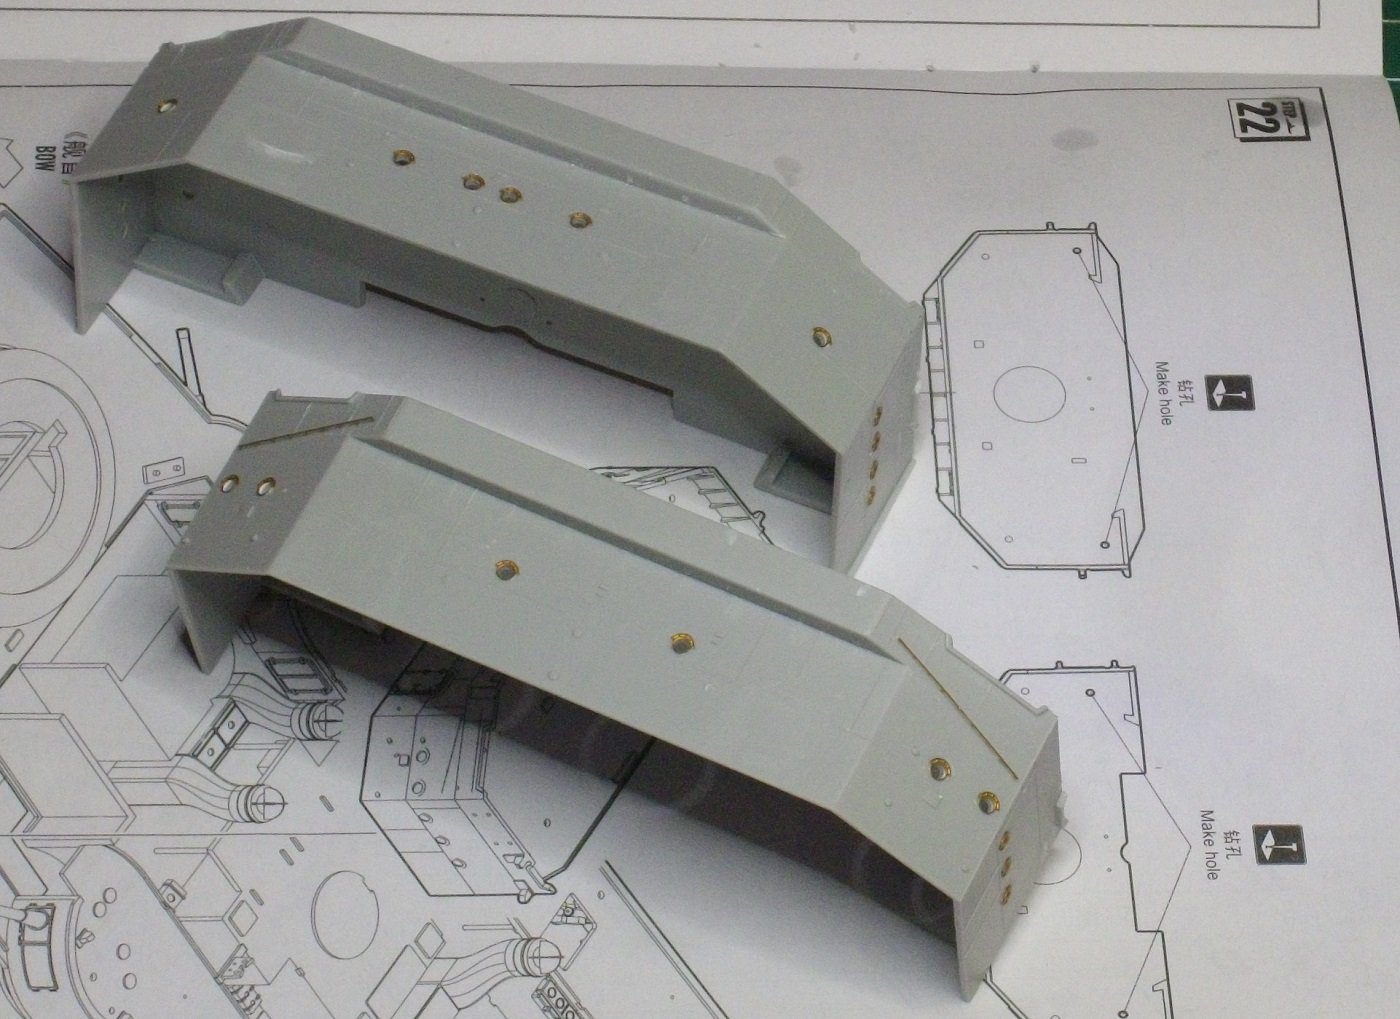
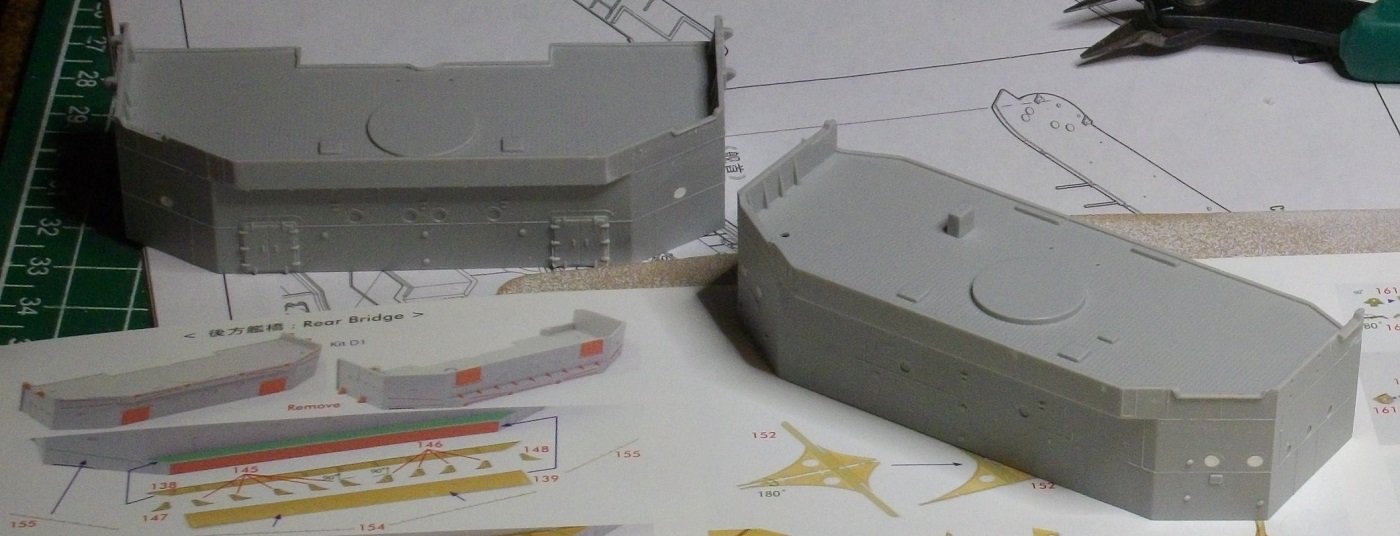
Fore and aft bridge: I started removing all details that will be replaced by Pontos parts. I also filled some portholes that turned out oblong due to the casting techniques used. Till next update, enjoy modelling.
- 79 replies
-
- 4
-
-
- Mikasa
- Merit International
- (and 1 more)
-
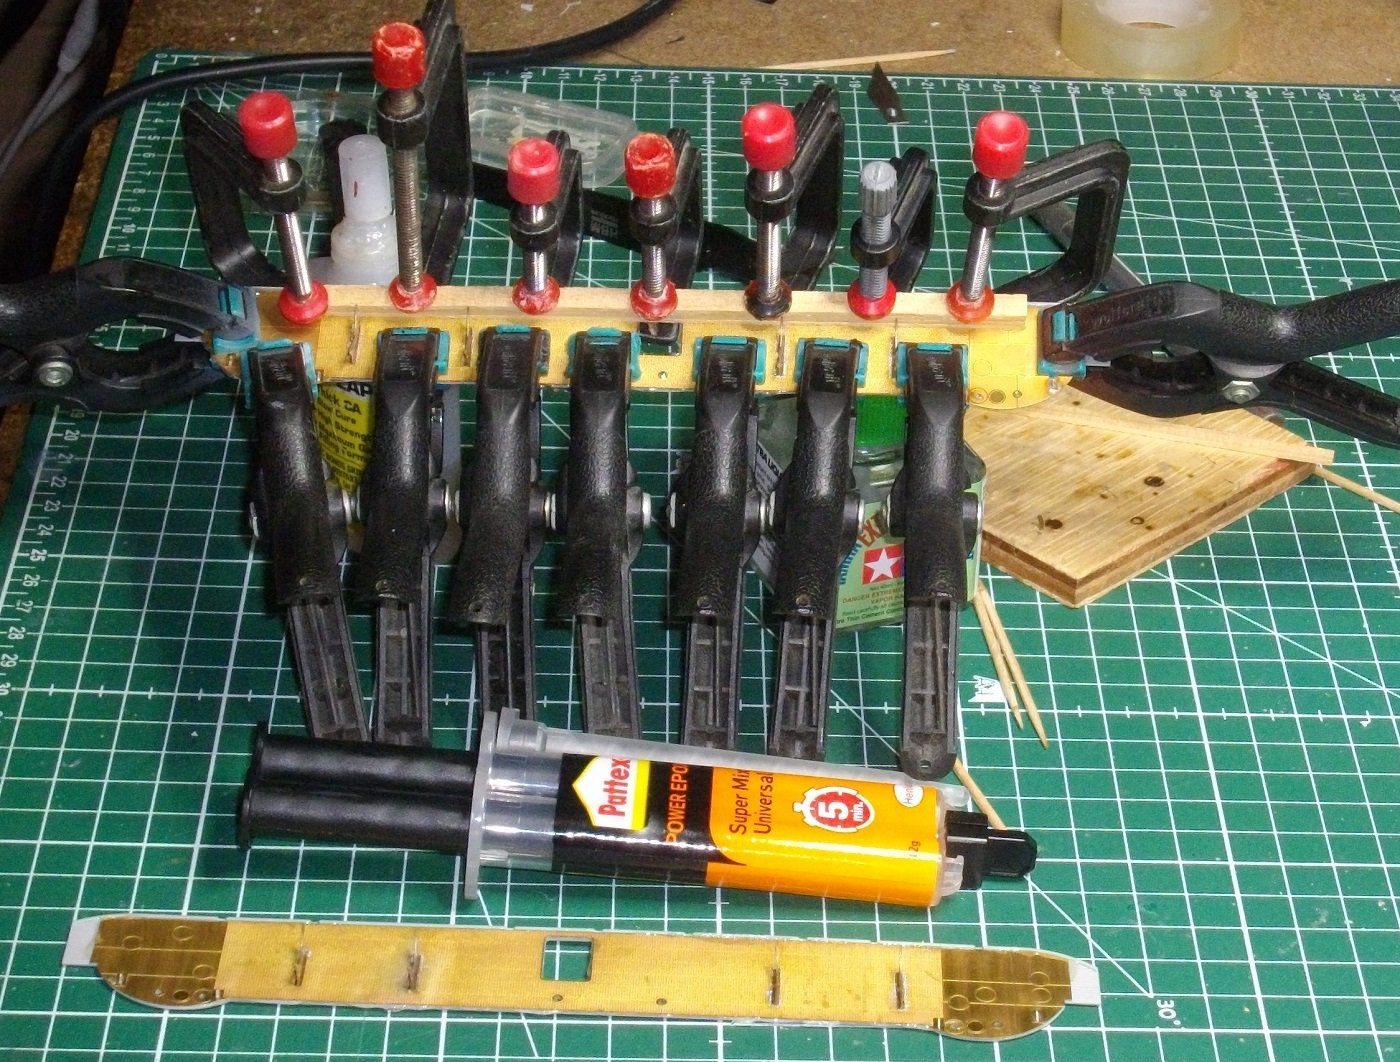
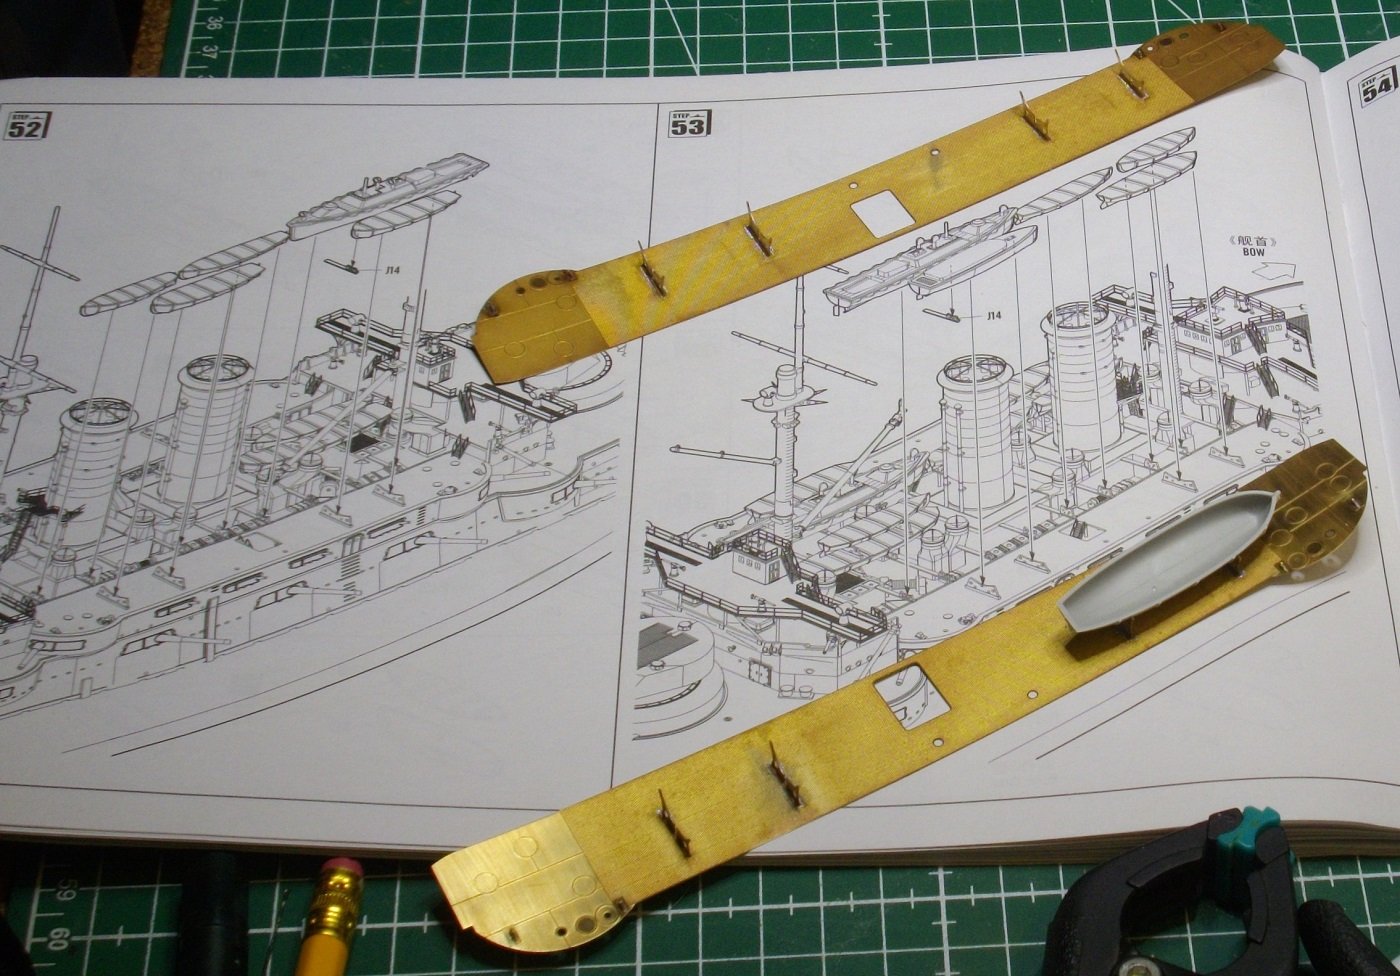
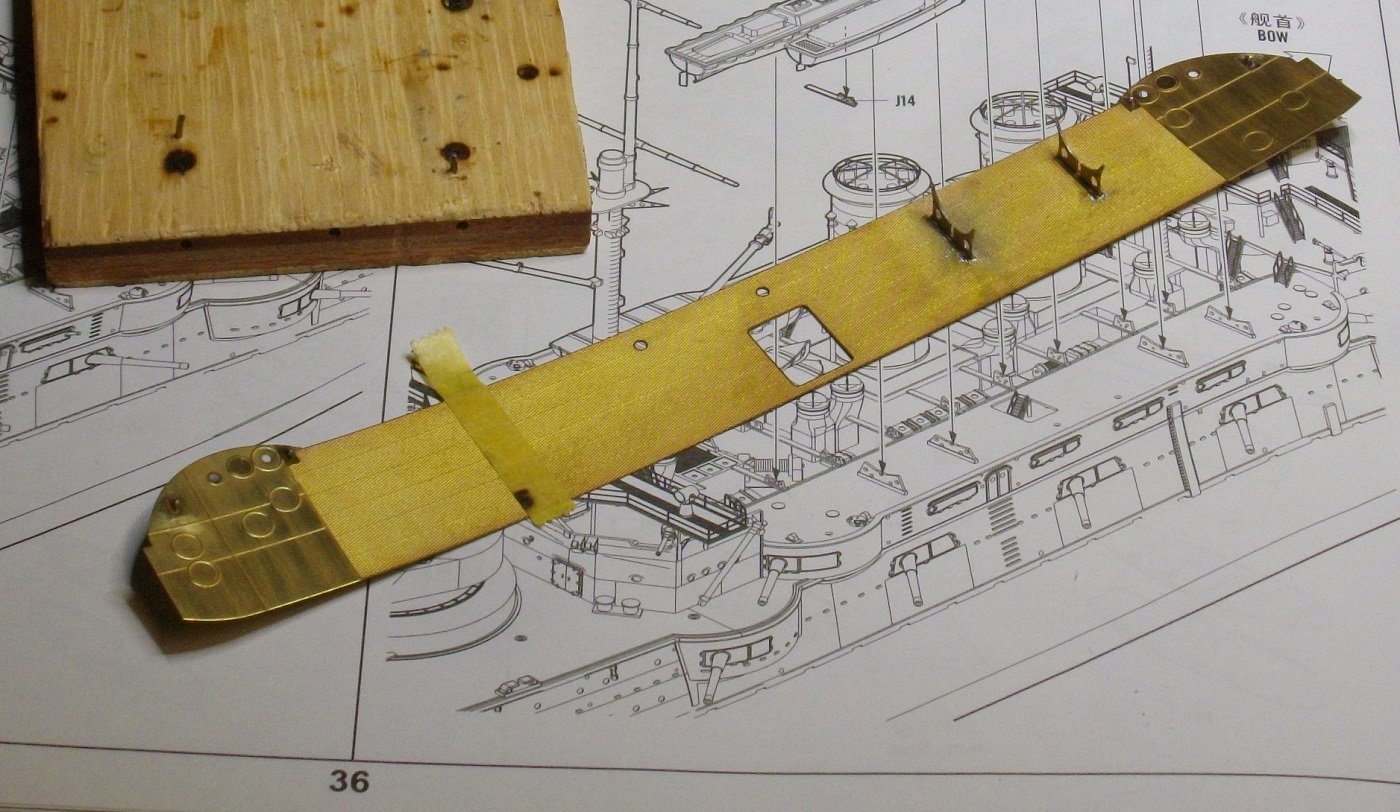
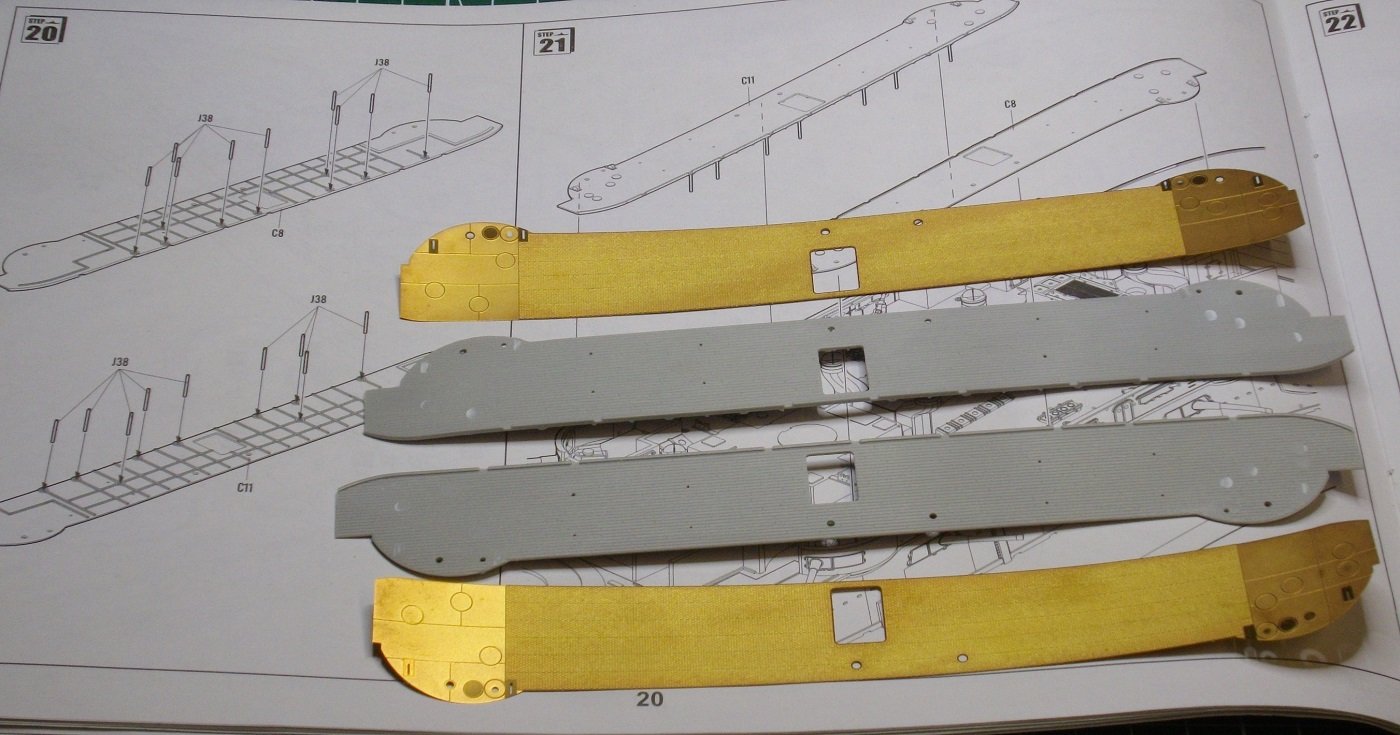
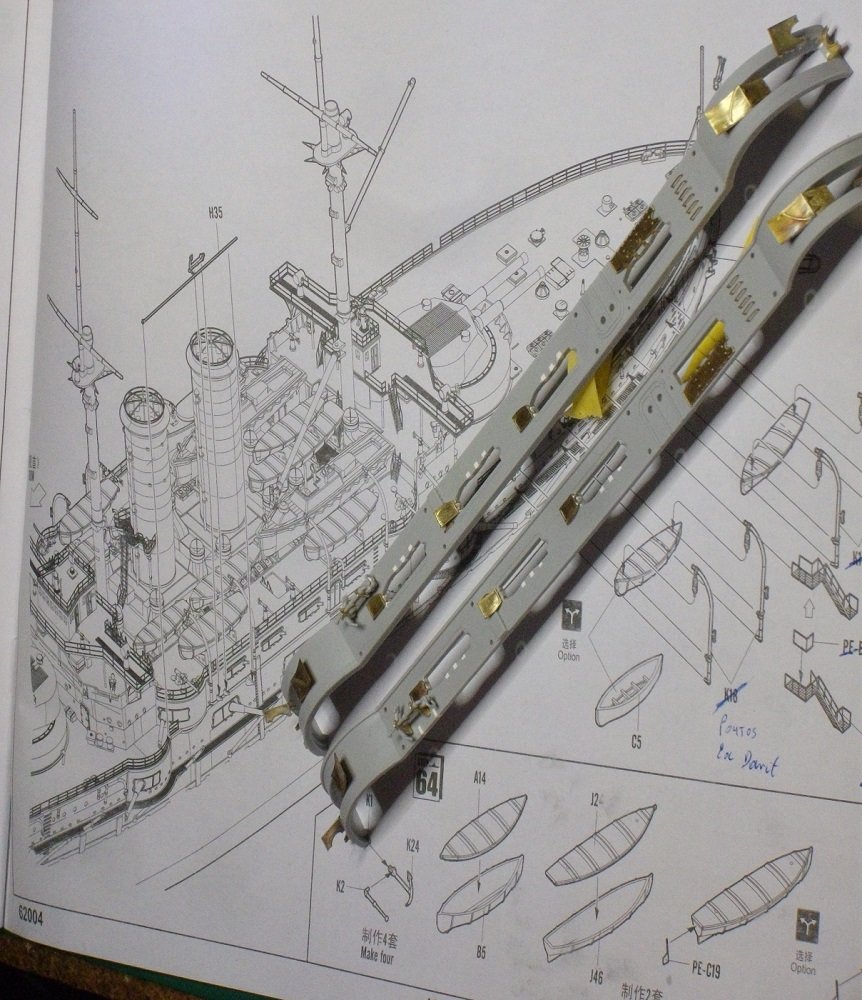
Steps 20/21: boat decks. I removed the protruding datails of the Merit parts as I did ont the main deck. Then I soldered rigging brachets and boat supports to the baseplates, and finaly used 5 minutes epoxy to glue the brass plates to the plastic base. After curing, I cut the excess glue off. Till next update, enjoy modelling.
- 79 replies
-
- 5
-
-
- Mikasa
- Merit International
- (and 1 more)
-
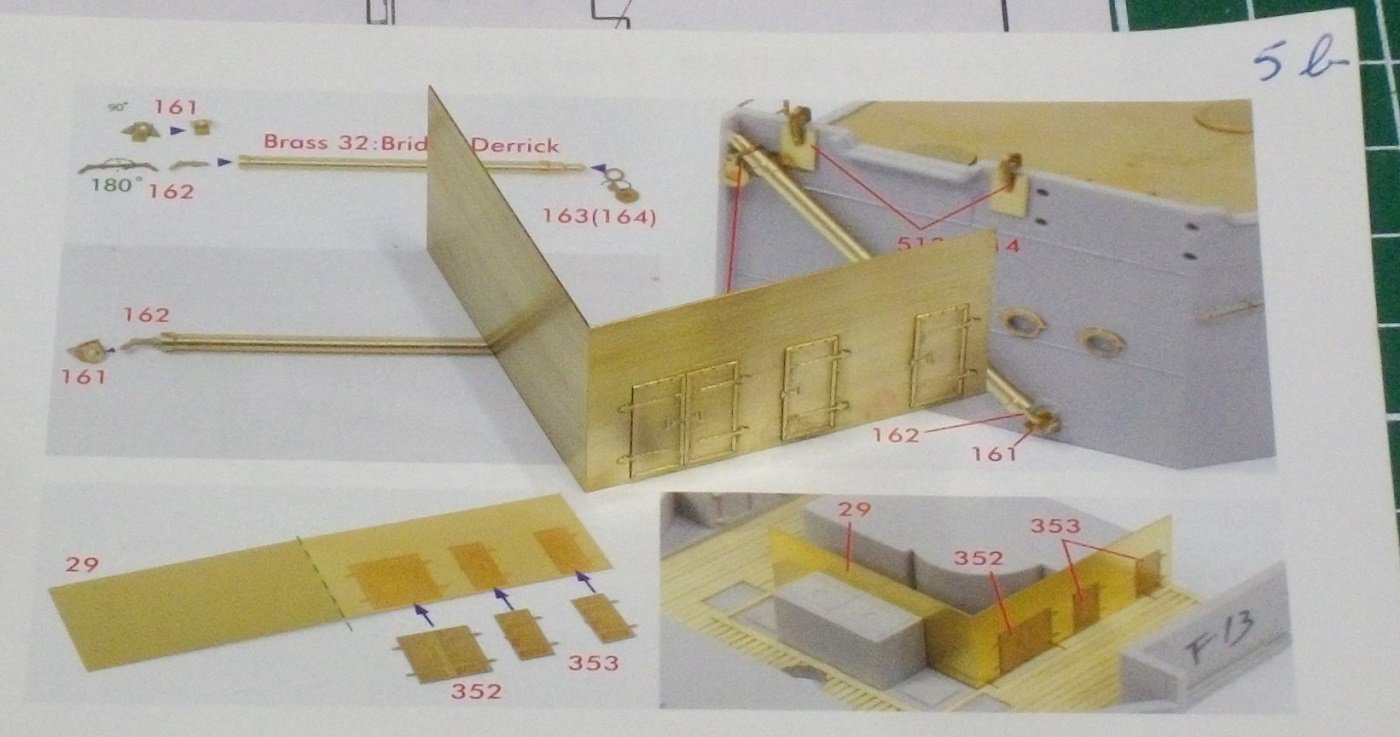
Browsing through the manuals I came across the following part for the midsection of the main deck. Pontos parts 29, 352 and 2x 353 are soldered together with a little soldering paste and heat applied from the back. Till next update, enjoy modelling.
- 79 replies
-
- 5
-
-
- Mikasa
- Merit International
- (and 1 more)
-
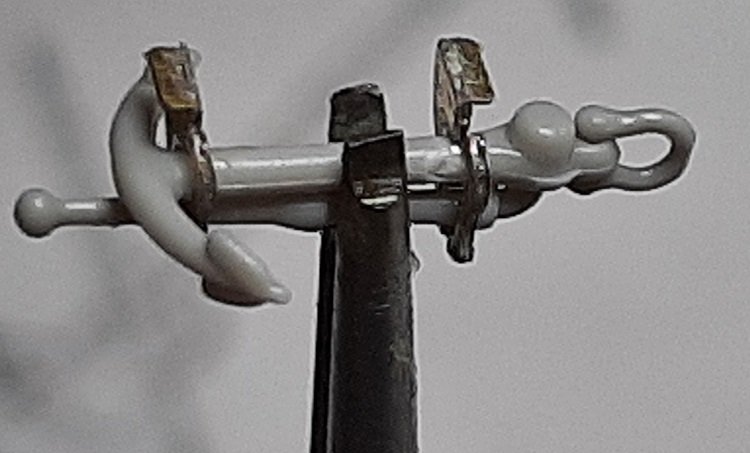
Ladder rungs, casemate lids and anchors attached to the sides. Till next update, enjoy modelling.

- 79 replies
-
- 4
-
-
- Mikasa
- Merit International
- (and 1 more)
-
The Pontos handholds were glued in with PVA-glue nd the Pontos shutters for the 4 rounded casemates were bent, soldered and glued with SloZap. Till next update, enjoy modelling.
- 79 replies
-
- 4
-
-
- Mikasa
- Merit International
- (and 1 more)
-
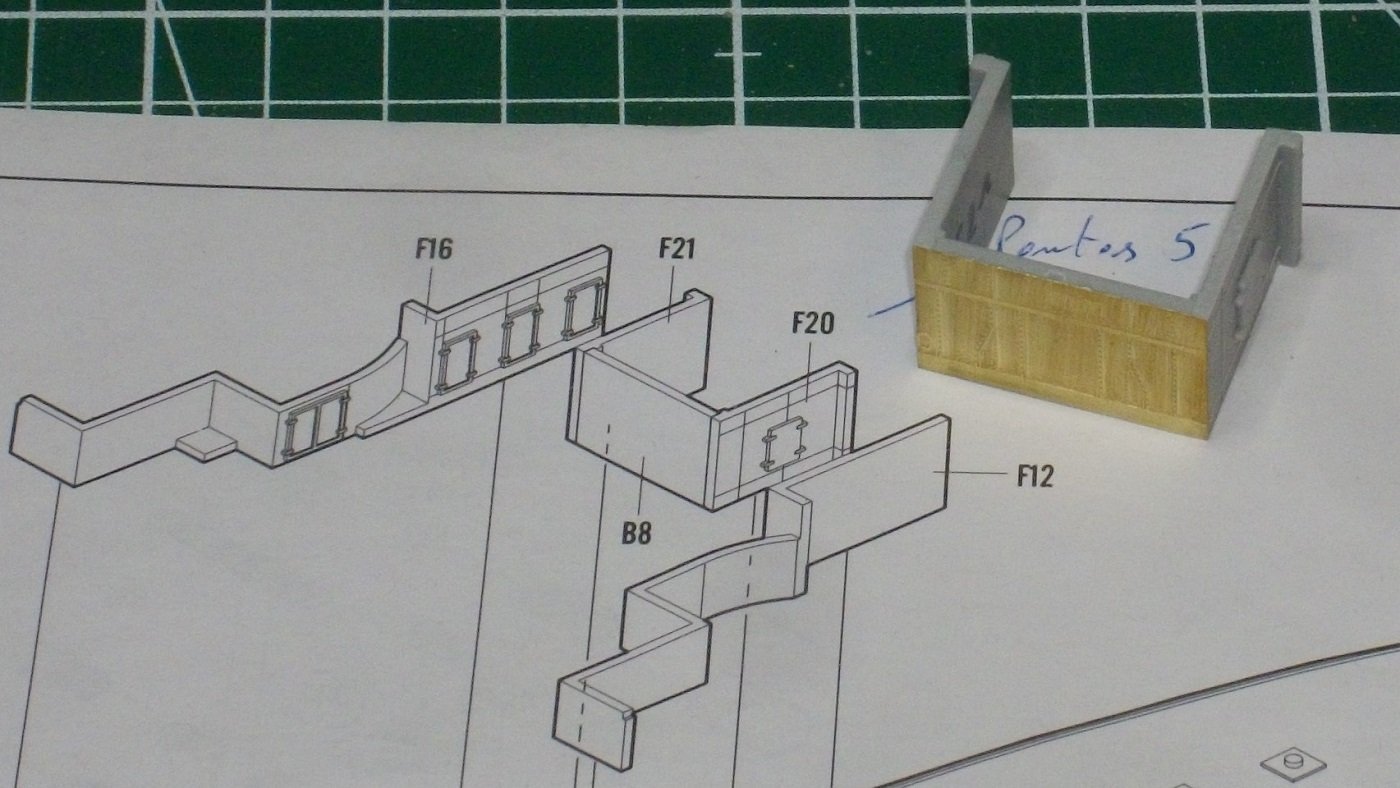
I allmost forgot to put Pontos part 364 to the front of part B8. The handholds were removed from the casemate sides , Pontos templates applied, and 0,4 mm holes drilled usong the Tamiya electric handy drill. Till next update, enjoy modelling.
- 79 replies
-
- 5
-
-
- Mikasa
- Merit International
- (and 1 more)
-
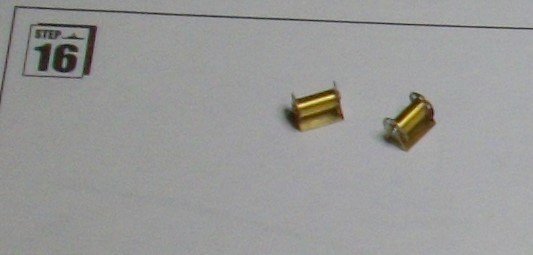
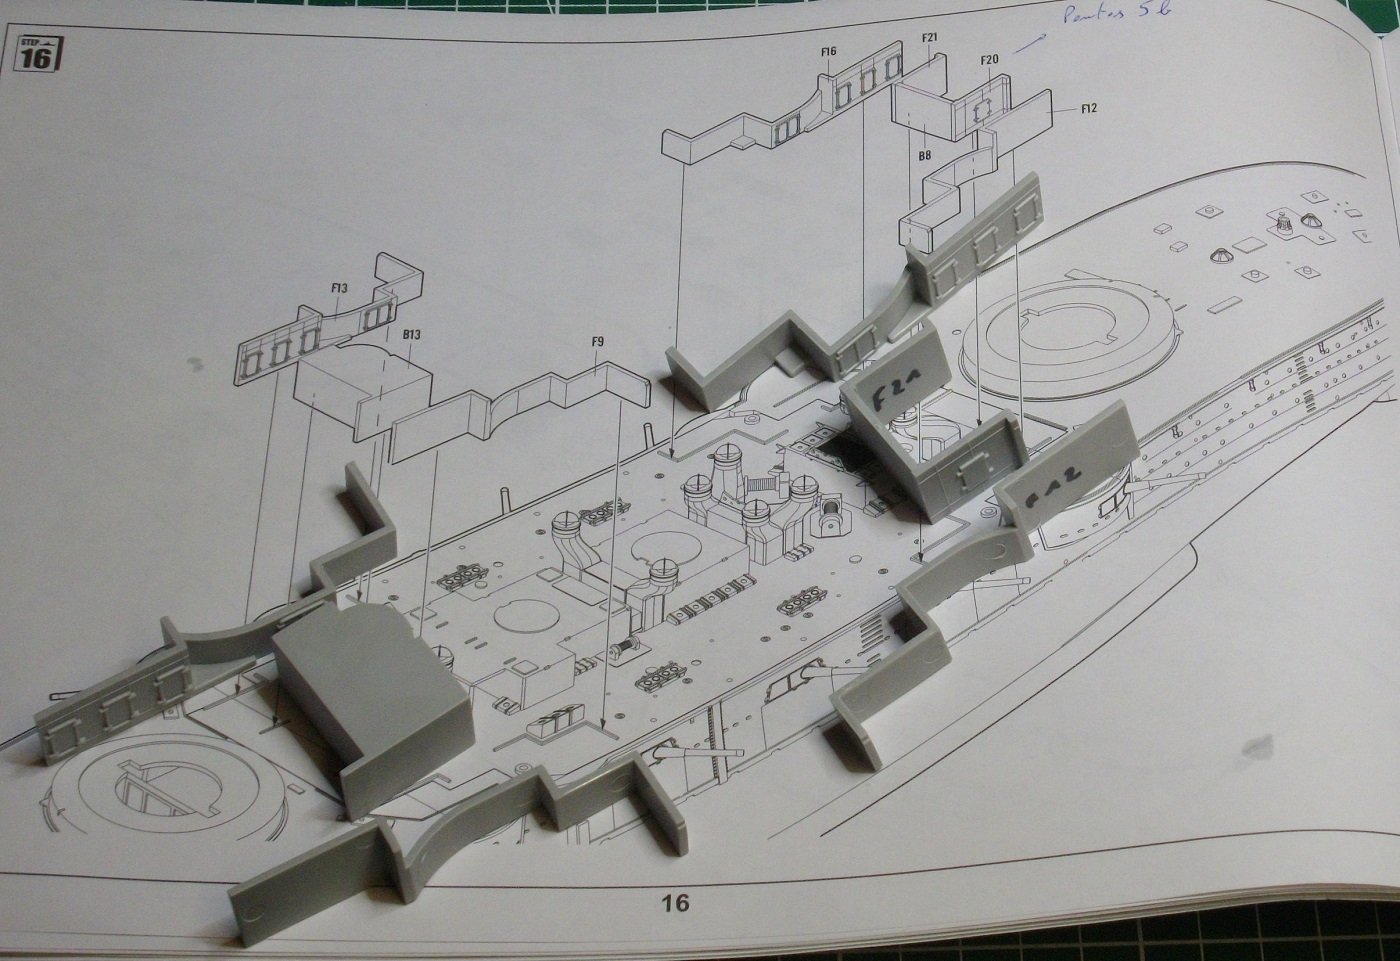
So here come the 2 Pontos reels for the middle deck. I then collected and cleaned up the midship bulckheads for step 16. and finished the day by preparing the casemate sides by filling the recesses for the hinges of the shutters wirt Vallejo putty, leaving them to dry overnight. Till next update, enjoy modelling.
- 79 replies
-
- 4
-
-
- Mikasa
- Merit International
- (and 1 more)
-
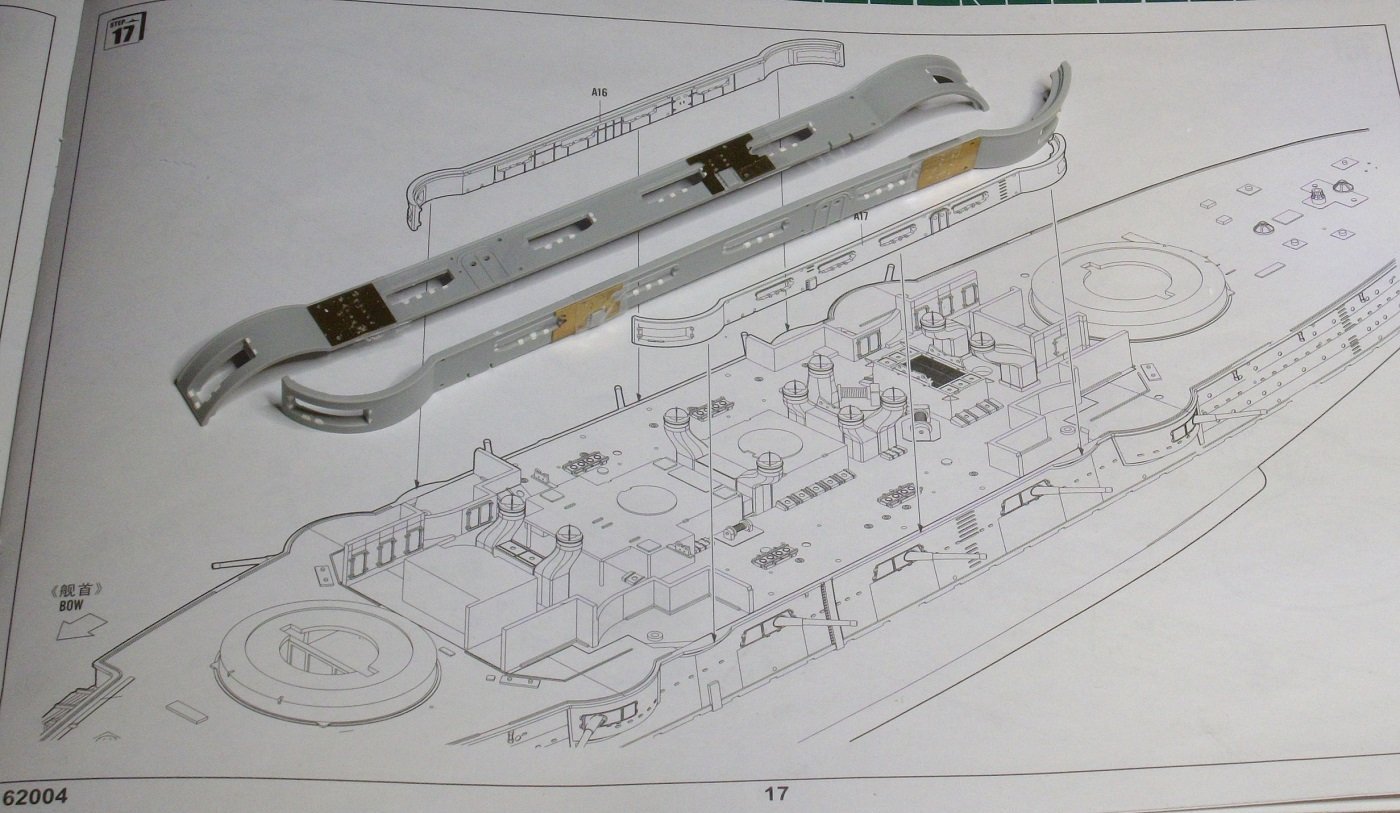
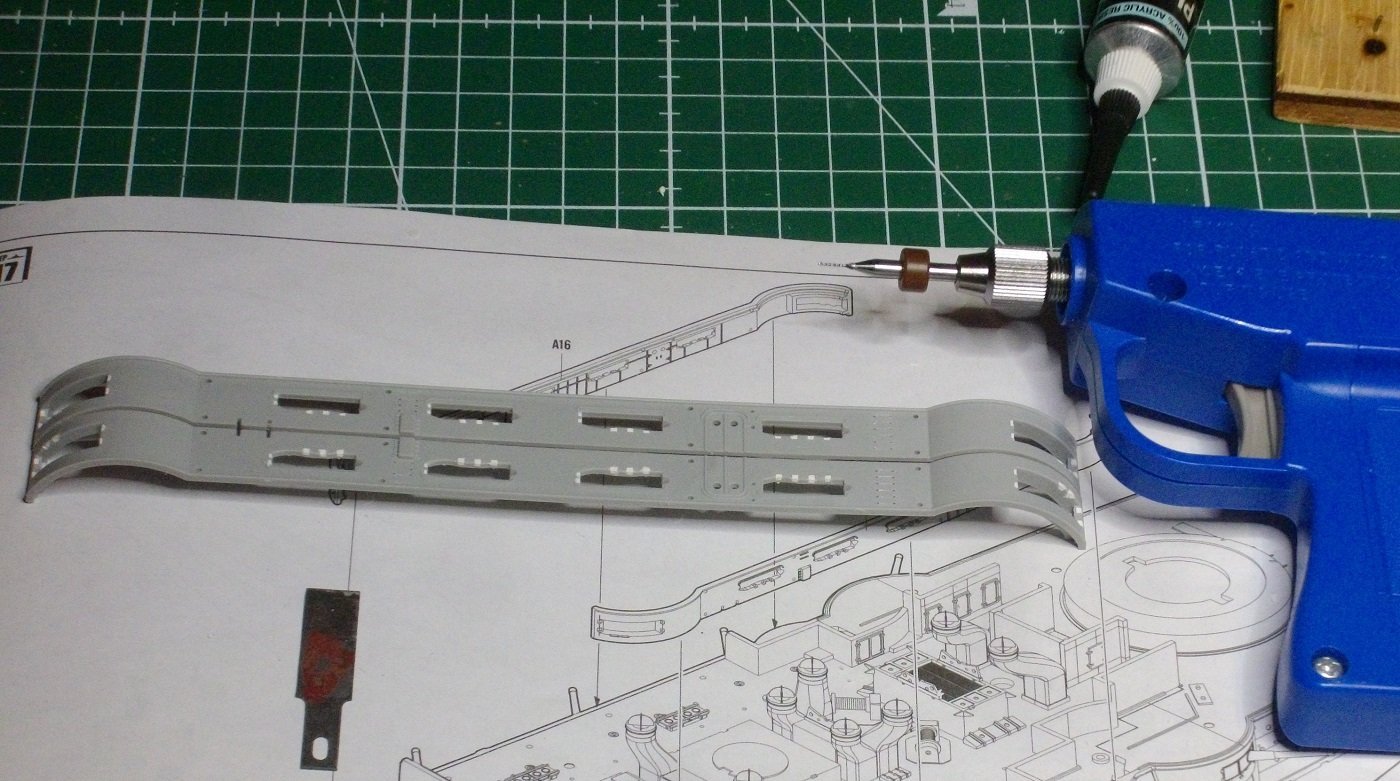
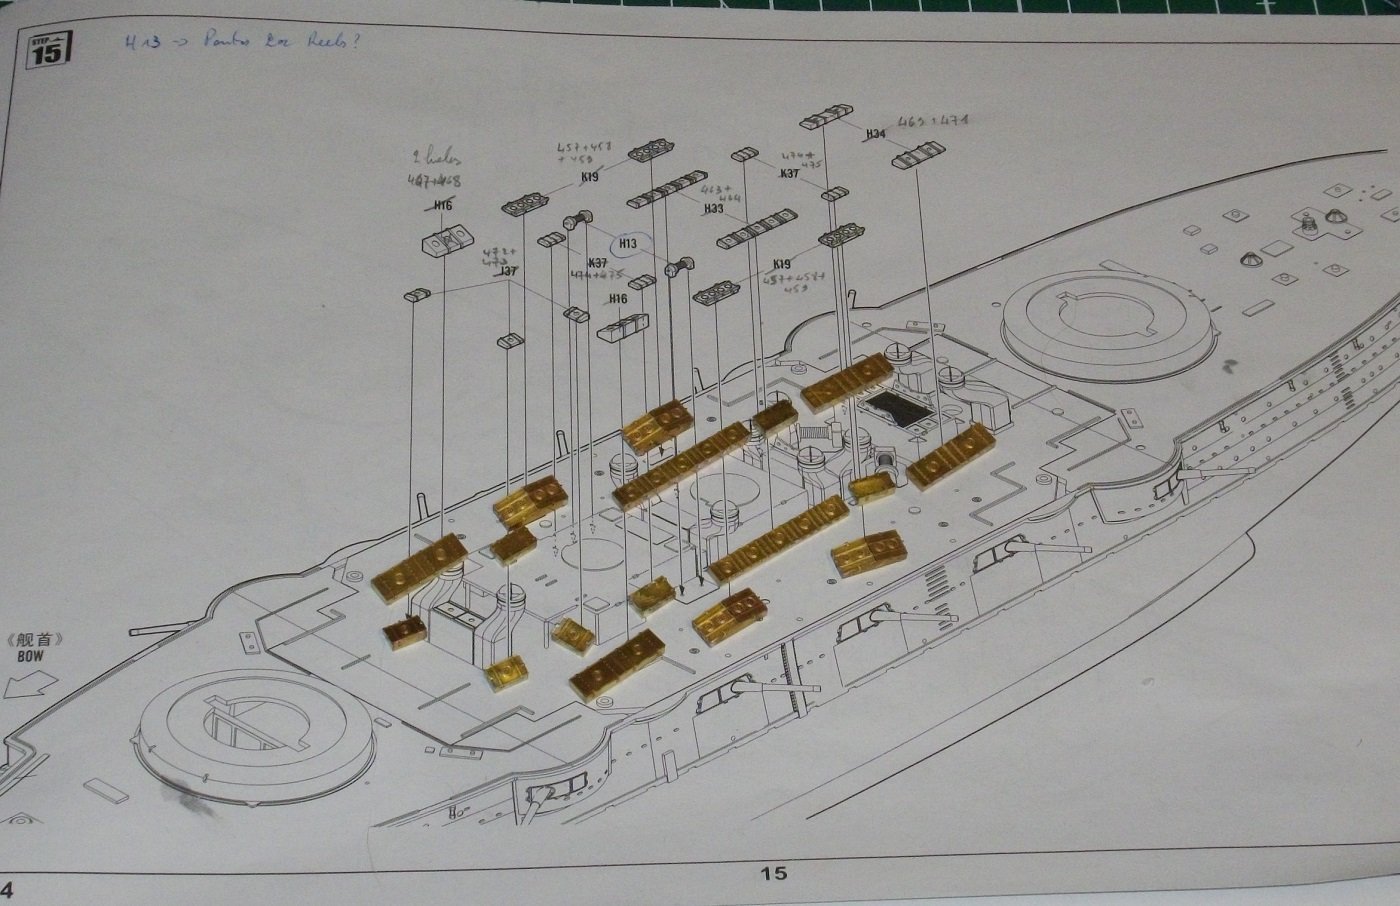
Step 15: deckfurniture of the middle deck. All Merit parts are replaced by Pontos Photo-etch, bent and soldered together. Only the reels remain to be assembled Till next update, enjoy modelling.
- 79 replies
-
- 4
-
-
- Mikasa
- Merit International
- (and 1 more)
-
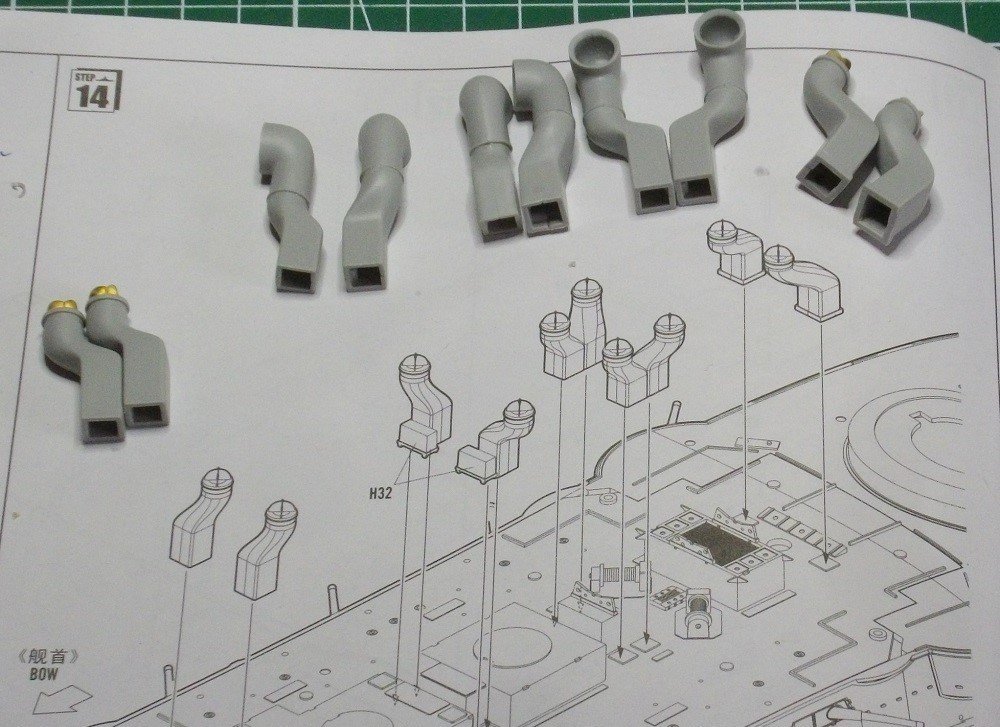
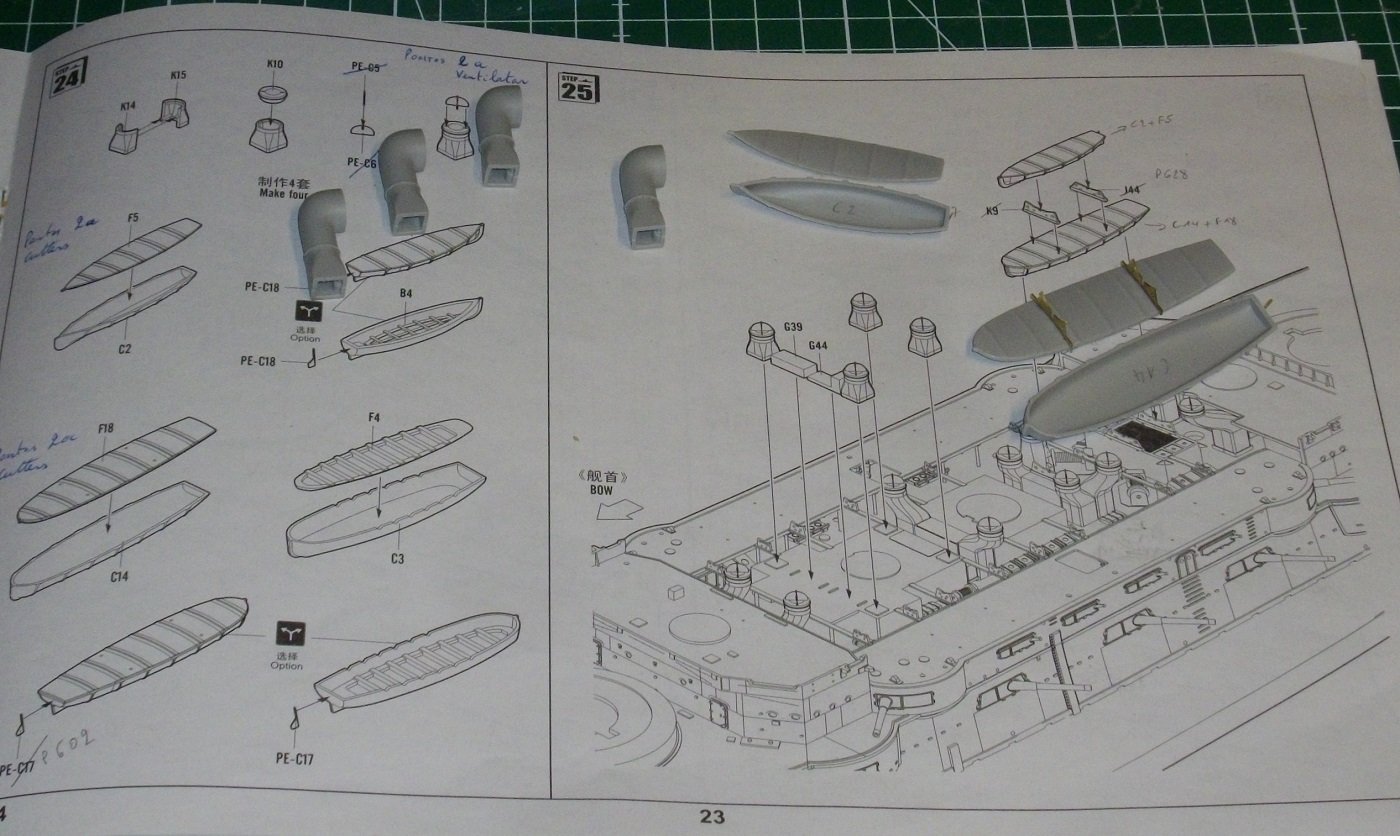
I assembled the ventilation shafts from step 14 and jumped to steps 24/25 to finish theremaining ventilation shafts. Those are mounted on the fore funnel base. To finish off step 24 I cleaned the cutters, added the rudders and glued the supports on the cover of the largest cutter. I also replaced part G39 by the Pontos equivalent and glued it together with part G44 on the funnel base, but forgot to take a picture. No doubt it will be seen in future updates. Till next update, enjoy modelling.
- 79 replies
-
- 4
-
-
- Mikasa
- Merit International
- (and 1 more)
-
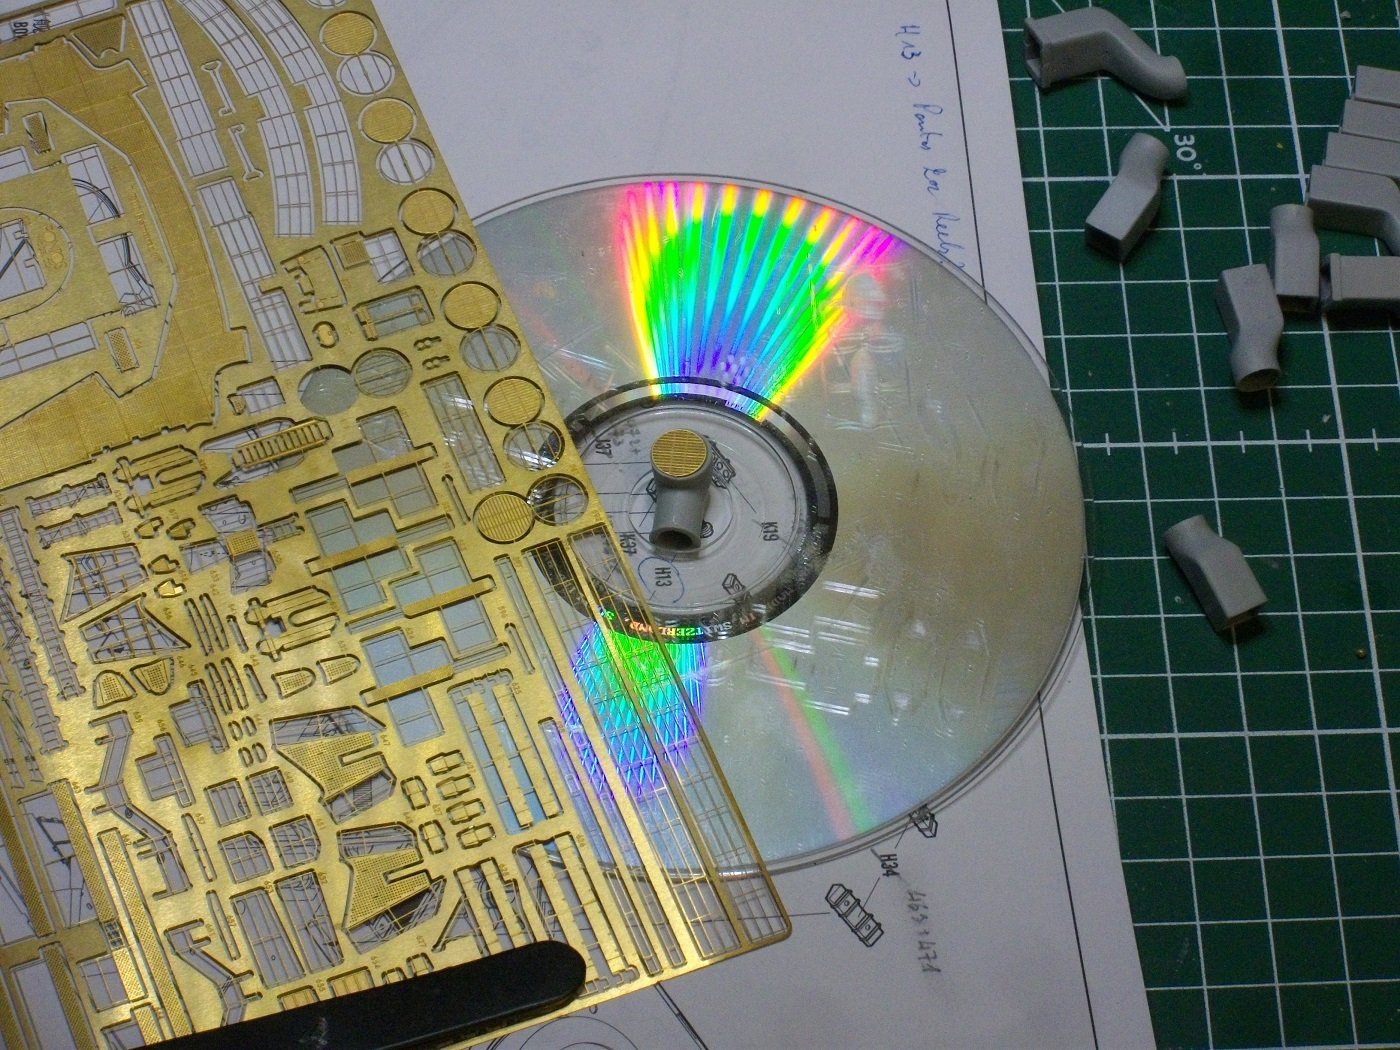
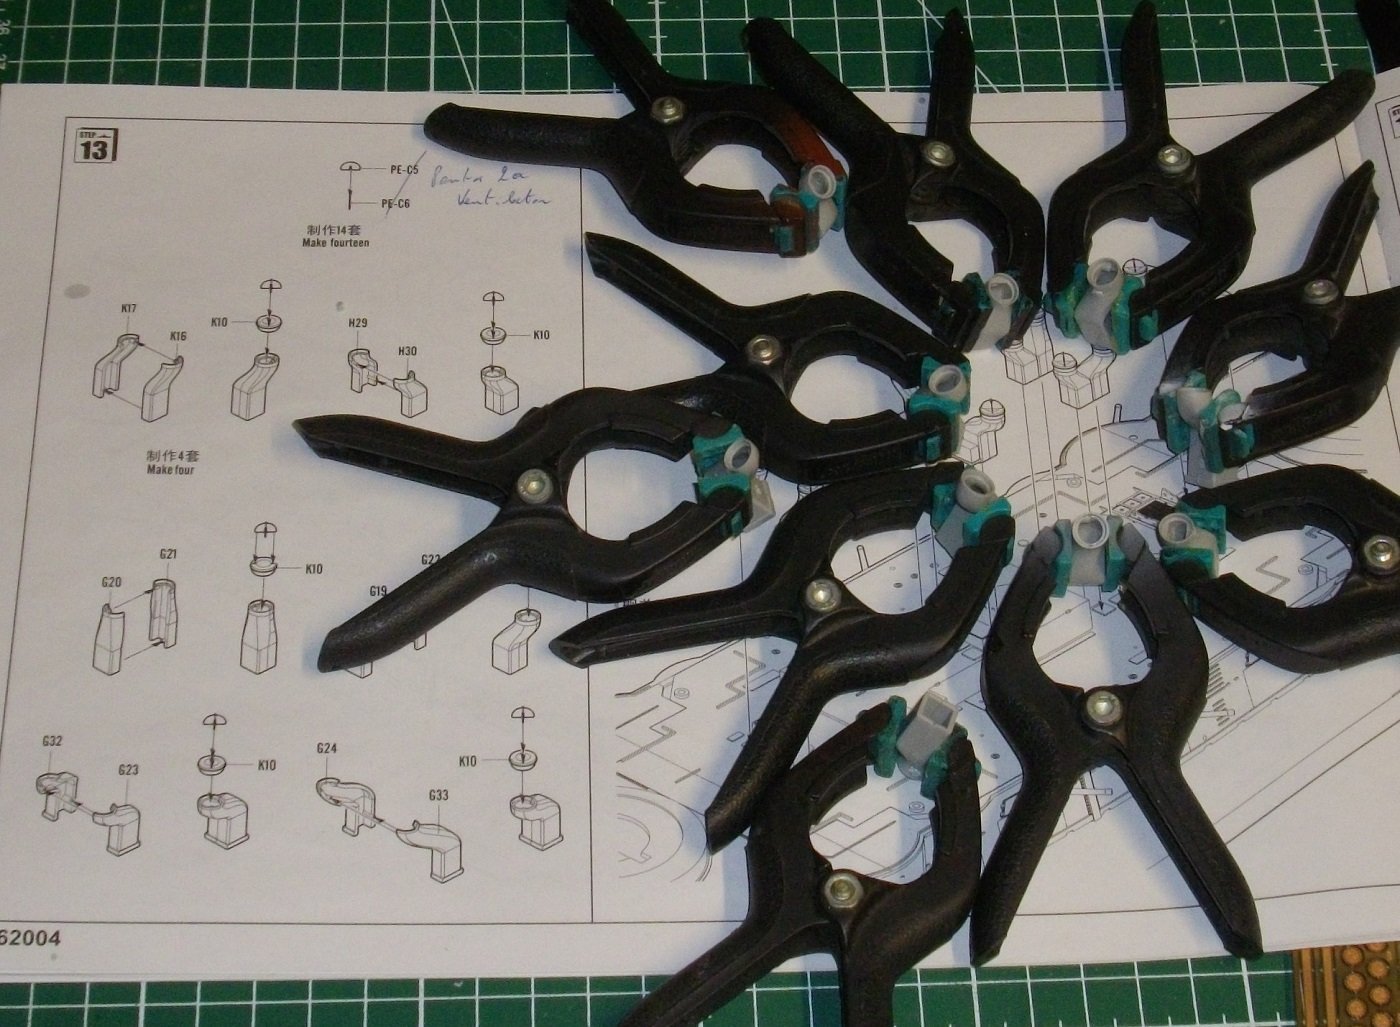
Merit Step 13: The bottom parts of the ventilationshafts have been glued together with Tamiya Extra Thin cement. I cleaned up the seams of these parts, scraping with an X-Acto knife, using needle files and medium and fine sandingsticks. According to my humble opinion, a maximum of 10 of the 14 ventilation shafts have "trumpet like" openings. The other four have a ring with crossed half round ribs. According to contemporary pictures that have been coloured, the "trumpet like" tops have red louvres. Although those "trumpet like" tops are present in the Merit kit, they are nowhere mentioned in the manual, and the gratings that are supposed to represent louvres have diagonal holes and bands. In the Pontosset there are round gratings with exactly the right diameter. But these are for the searchlights. However, this gave me an idee. Previously I built the Trumpeter 1/200 Bismarck, with a lot of functions. In this kit there are 8 gratings for 7 searchlights. Those happen to have the same diameter. And I also have a second Bislmarck kit, that I intend to upgrade with a Pontos detailing set to make a very detailed display model. Therefore I have an extra grating. The Pontosset for the Bismarck also contains 8 gratings but those are fully closed. In case I want to install LED's in the searchlights, as I did in the first model, those gratings are not usable, and thus available for Mikasa, giving a perfect illusion of clased louvres. The half round ribs have been glued woth a dash of Pink Zap, and attached to the round tops with PVA-glue. Excess glue is easily removed with a damp brush. Till next update, enjoy modelling.

- 79 replies
-
- 4
-
-
- Mikasa
- Merit International
- (and 1 more)
-
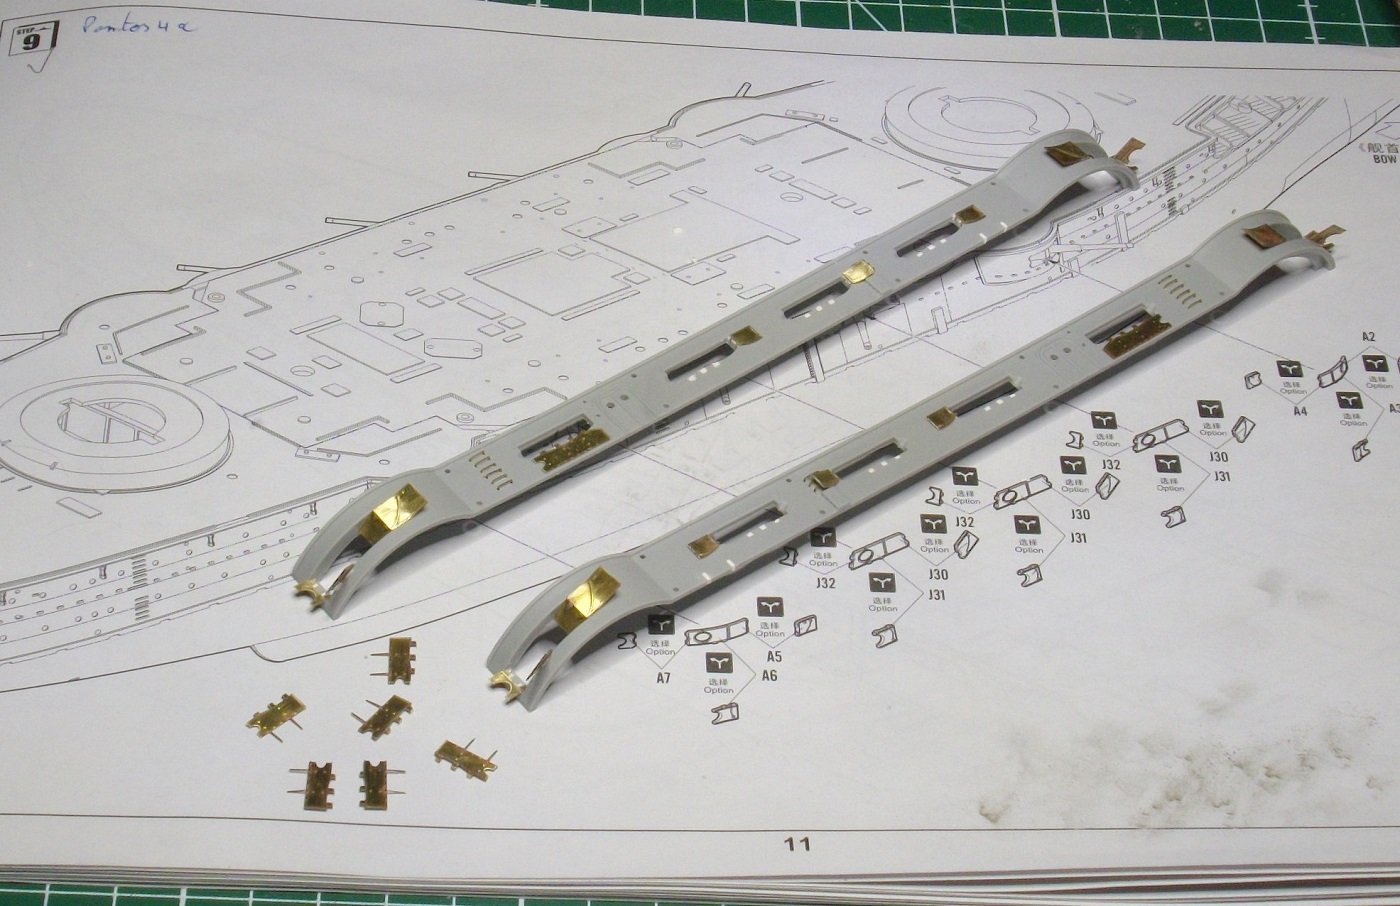
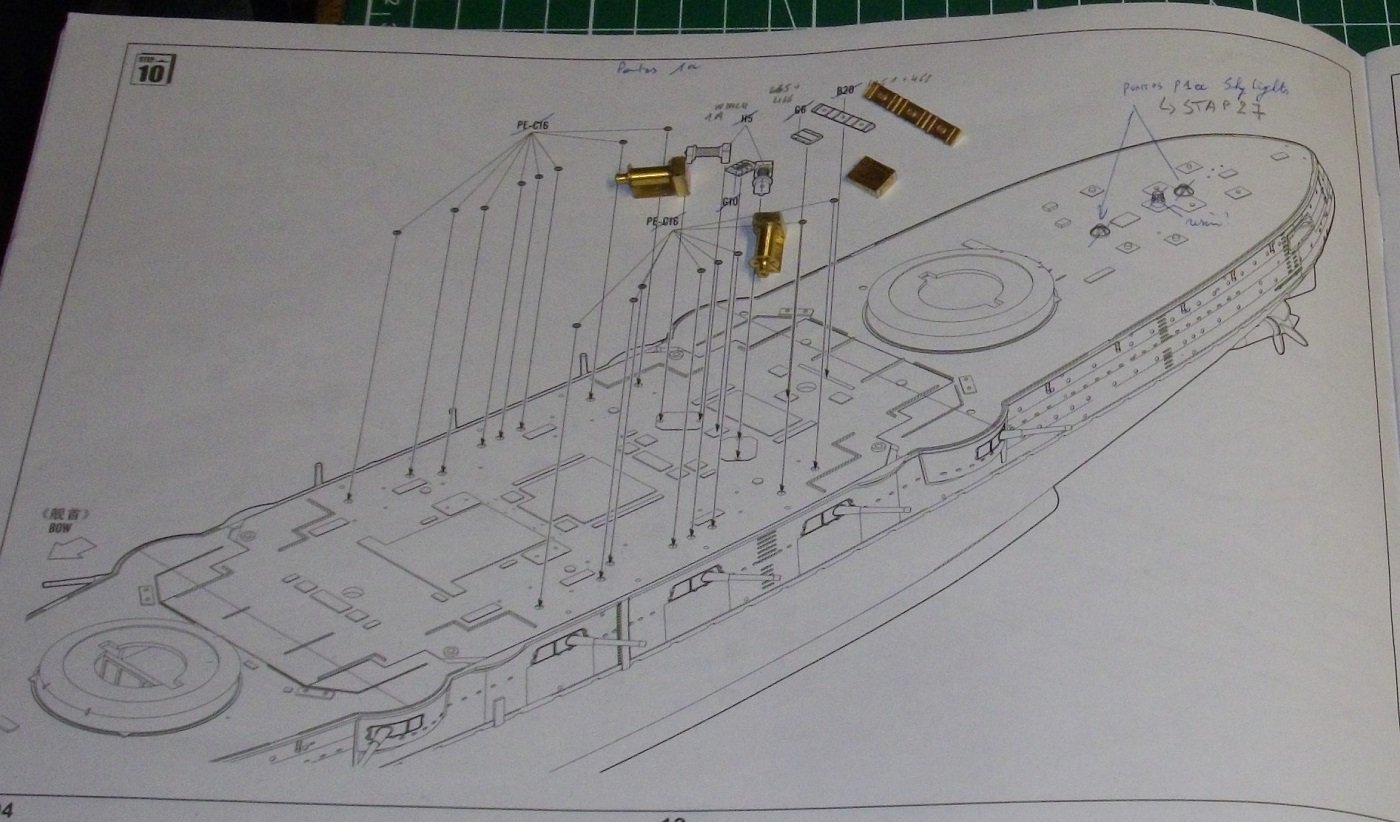
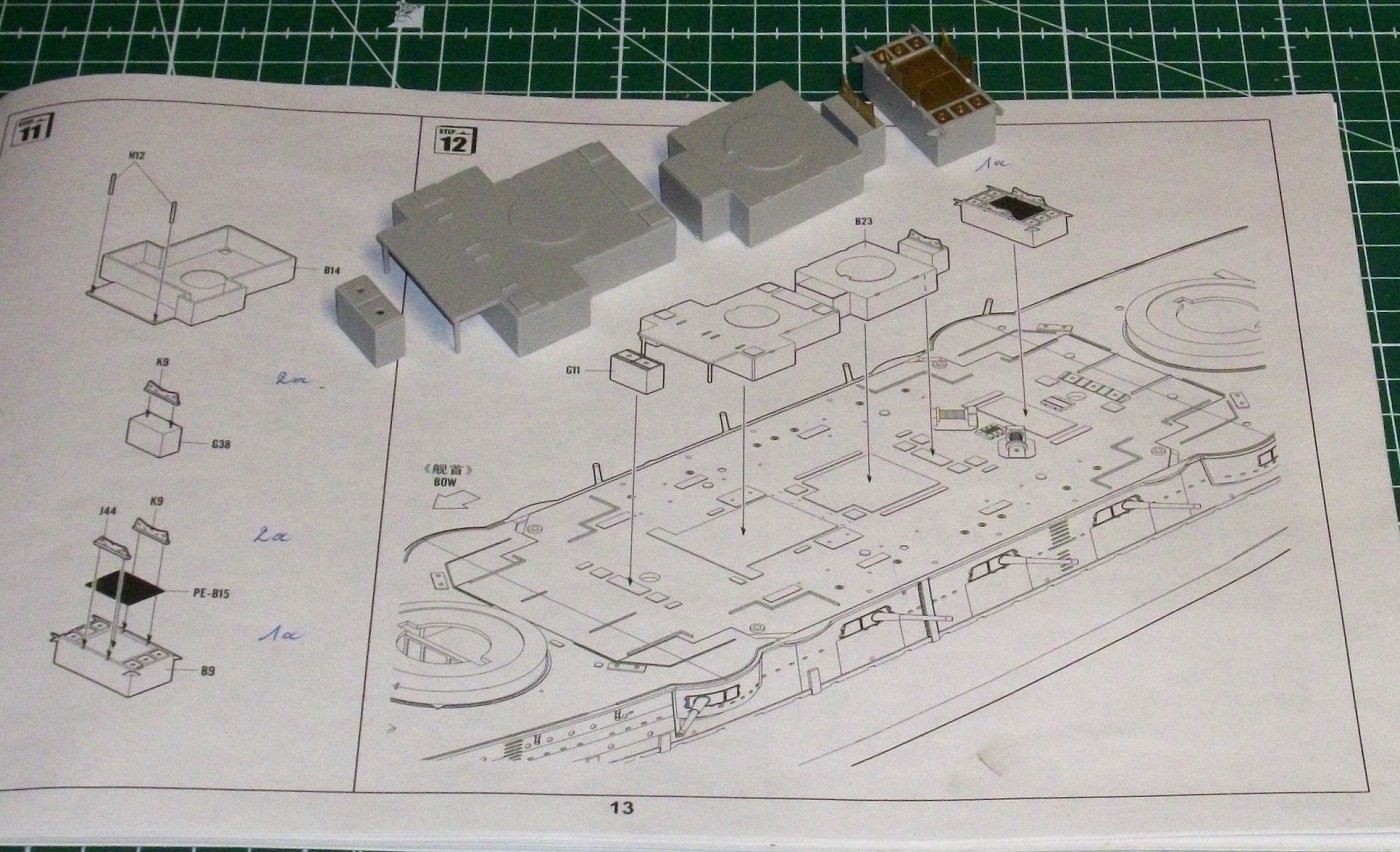
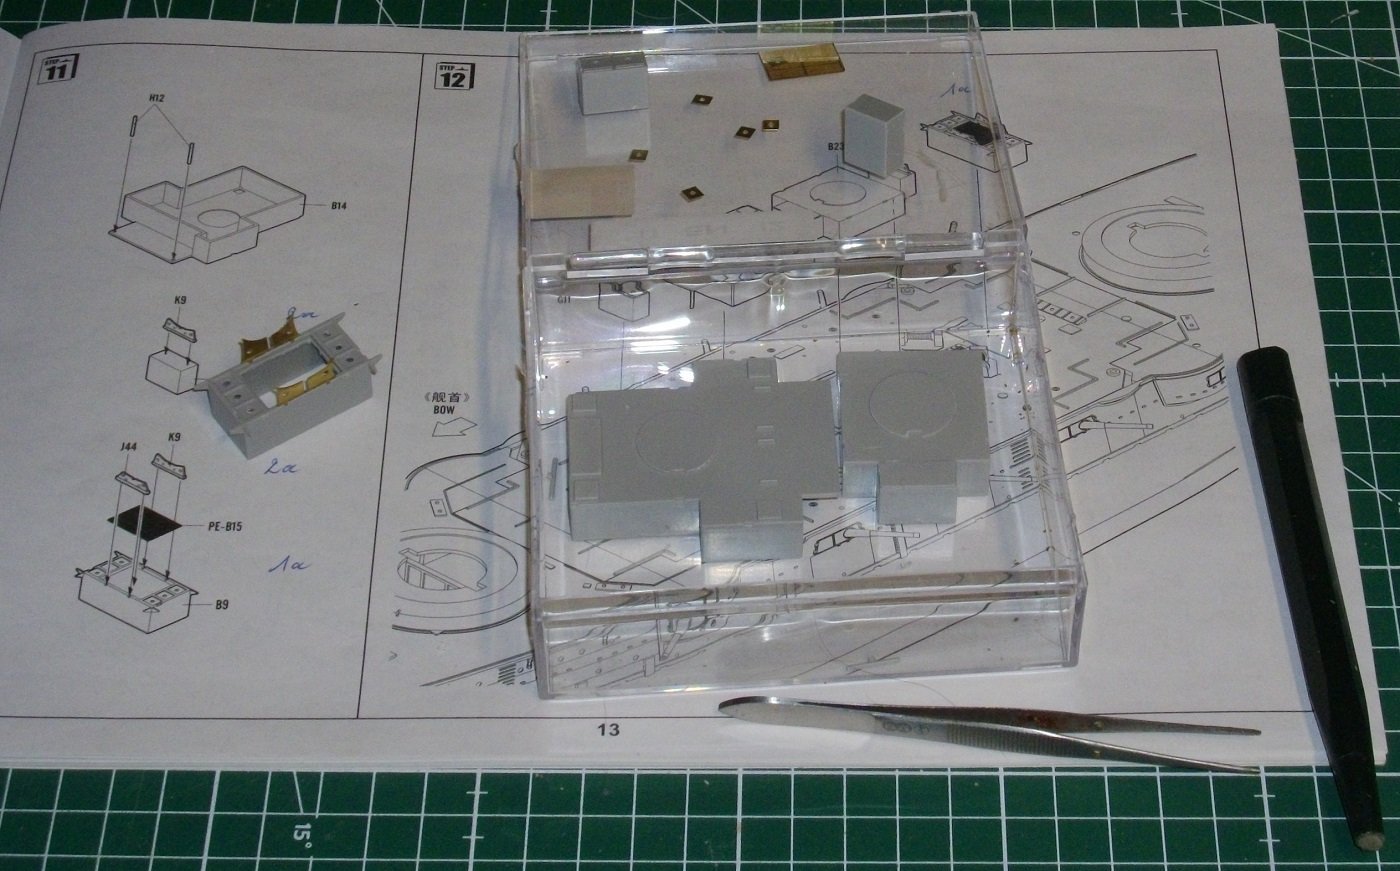
I assembled and soldered all Pontos parts to replace the plastic parts of step 11. Till next update, enjoy modelling.
- 79 replies
-
- 5
-
-
- Mikasa
- Merit International
- (and 1 more)
-
Steps 11 and 12, all brass parts glued on ant the slots for the boat supports filled with Vallejo Plastic Putty. Ready for paint. Till next update, enjoy modelling.
- 79 replies
-
- 4
-
-
- Mikasa
- Merit International
- (and 1 more)
-
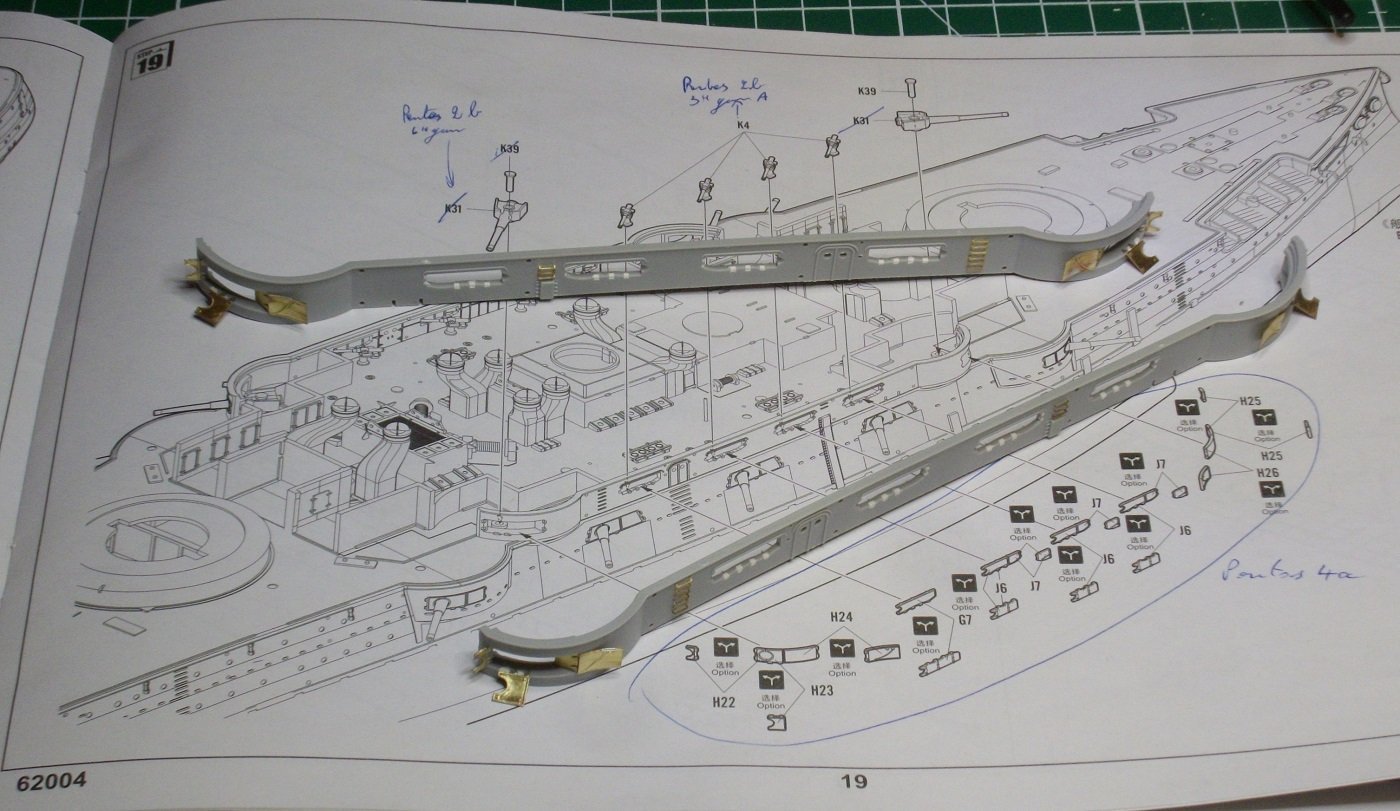
Now that a considerable number of parts have been detached and collecte into numbered boxes, it's time to start assembly. Merit step 11: cleaned up the plastic parts with file and fine sanding stick. Part B9: drilled out the 6 holes in the sides and chamfered from the underside. I removed the centerpart drilling holes, one next to the other and straightened the edges is with a knife I bent and soldered the Postos boat supports and glued them on part B9 with SloZap. Till next update, enjoy modelling.
- 79 replies
-
- 5
-
-
- Mikasa
- Merit International
- (and 1 more)