HOLIDAY DONATION DRIVE - SUPPORT MSW - DO YOUR PART TO KEEP THIS GREAT FORUM GOING! (Only 20 donations so far - C'mon guys!)
×

BrochBoating
-
Posts
186 -
Joined
-
Last visited
Content Type
Profiles
Forums
Gallery
Events
Everything posted by BrochBoating
-
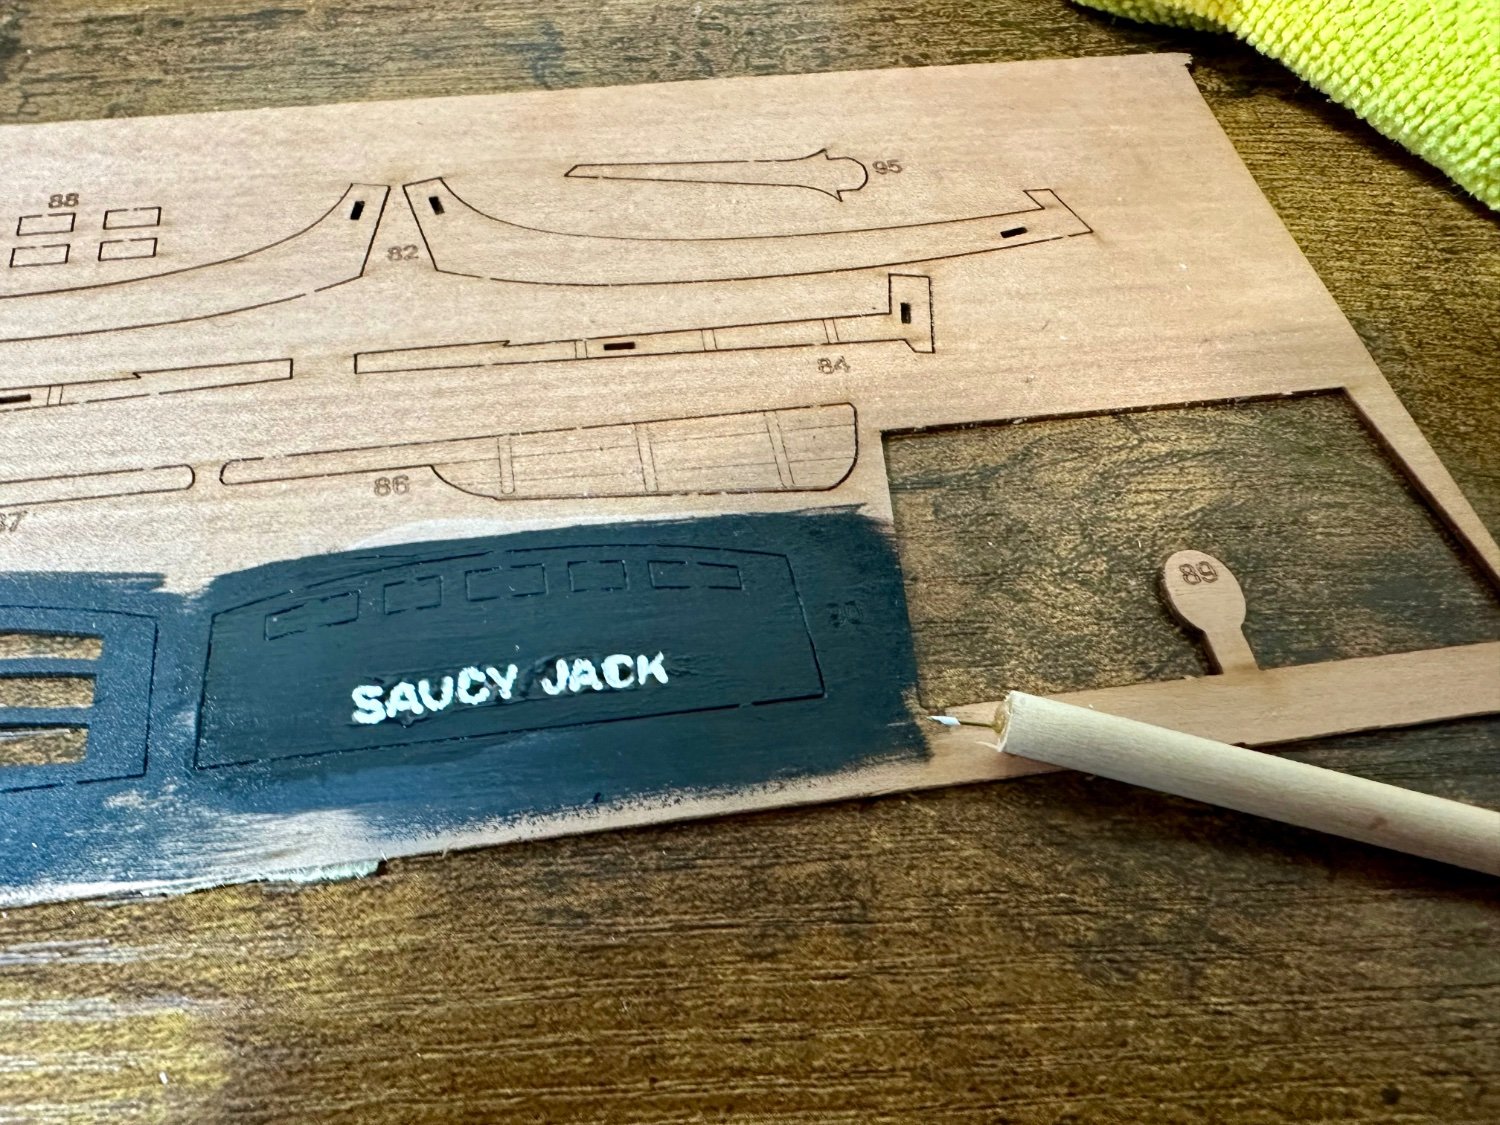
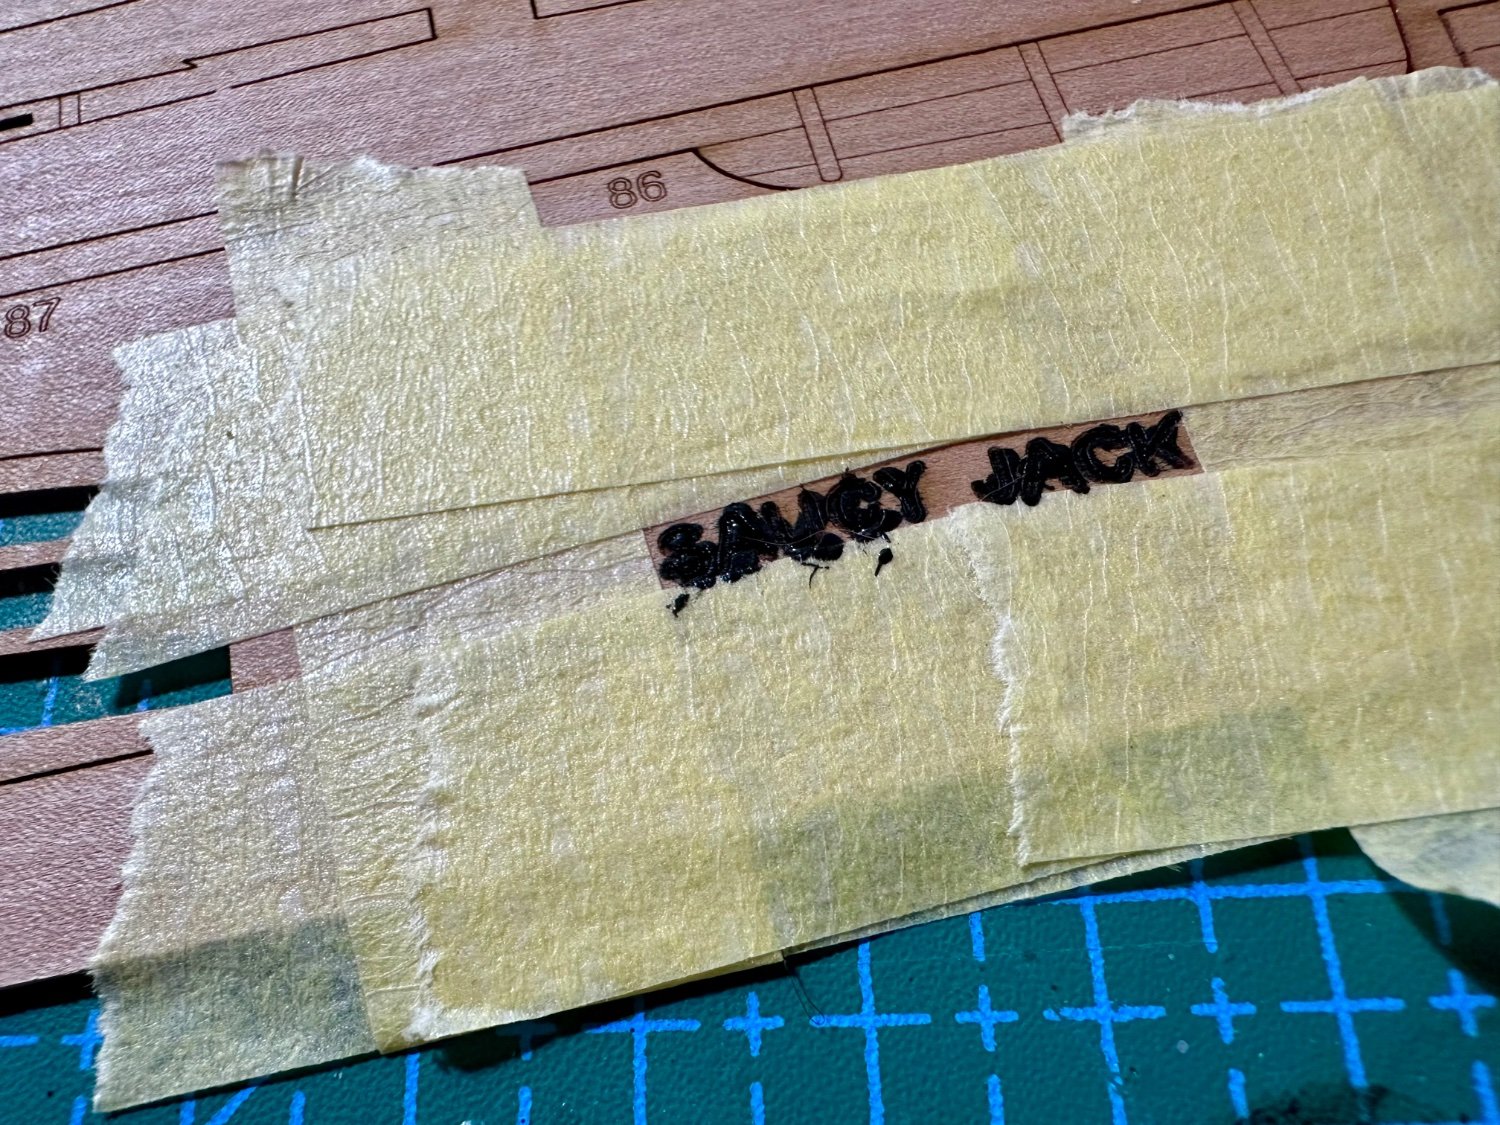
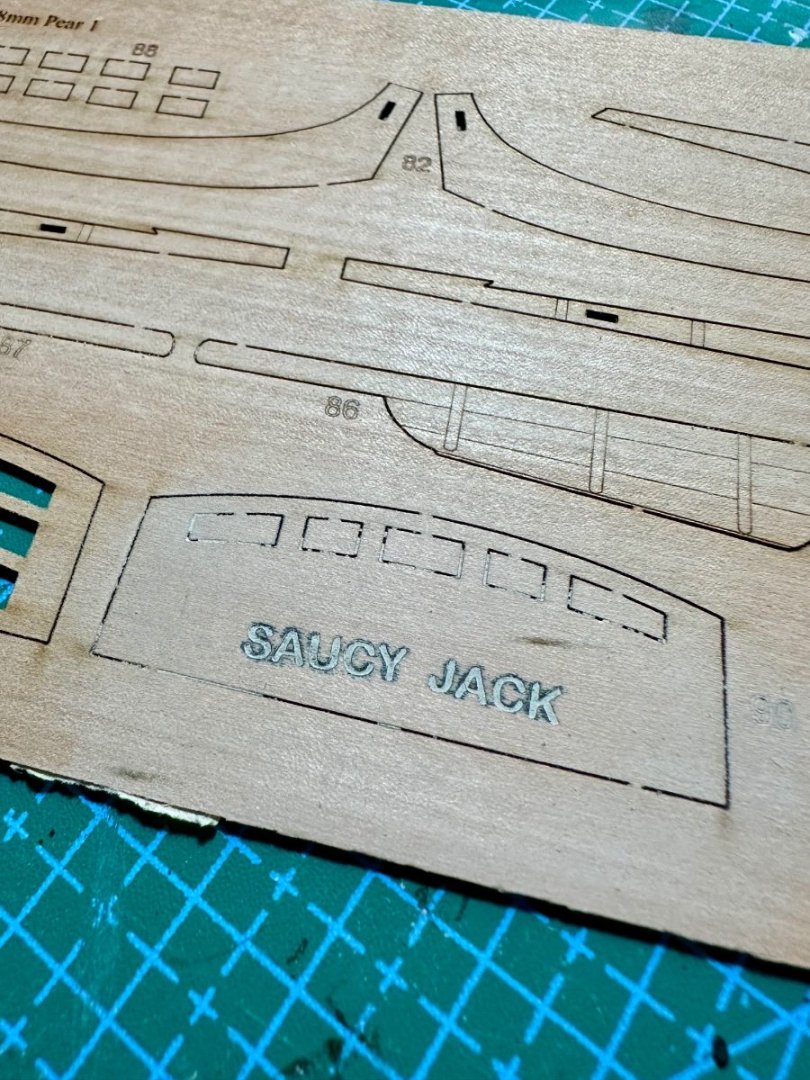
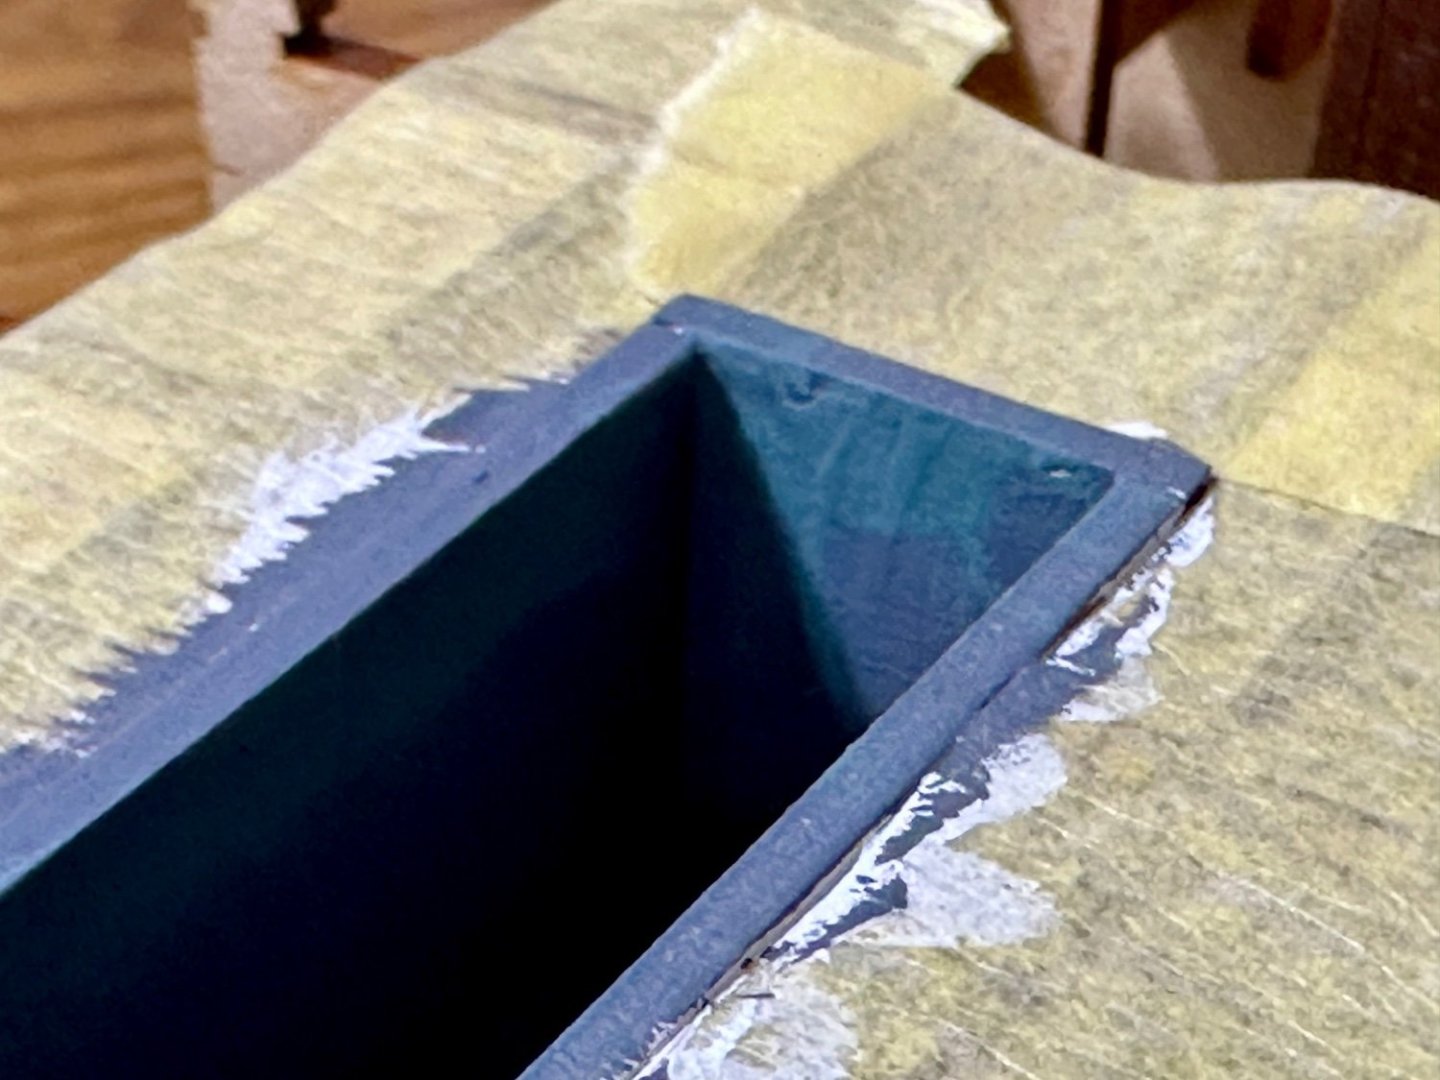
 Made progress with stern plate painting. Paint and wipe didn't work so made a 'brush' with a brass pin stuck into some mast stock which made picking the name out in white easier. Once dried the paint had settled and looks better than here. Began the sanding and got the first run with 220 all done. Got some wood filler on the way to make up for the poor work at the stern and will continue sanding once done. Simon.

-
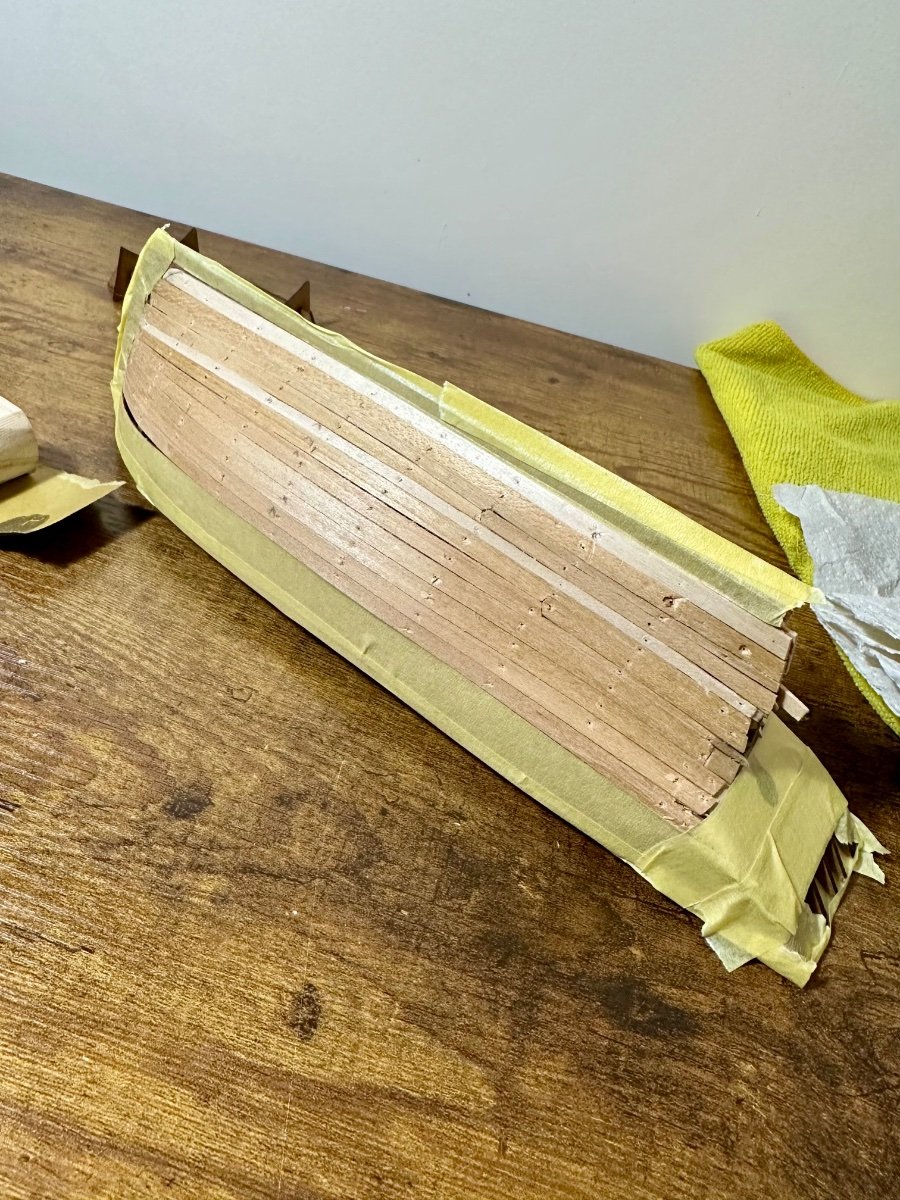
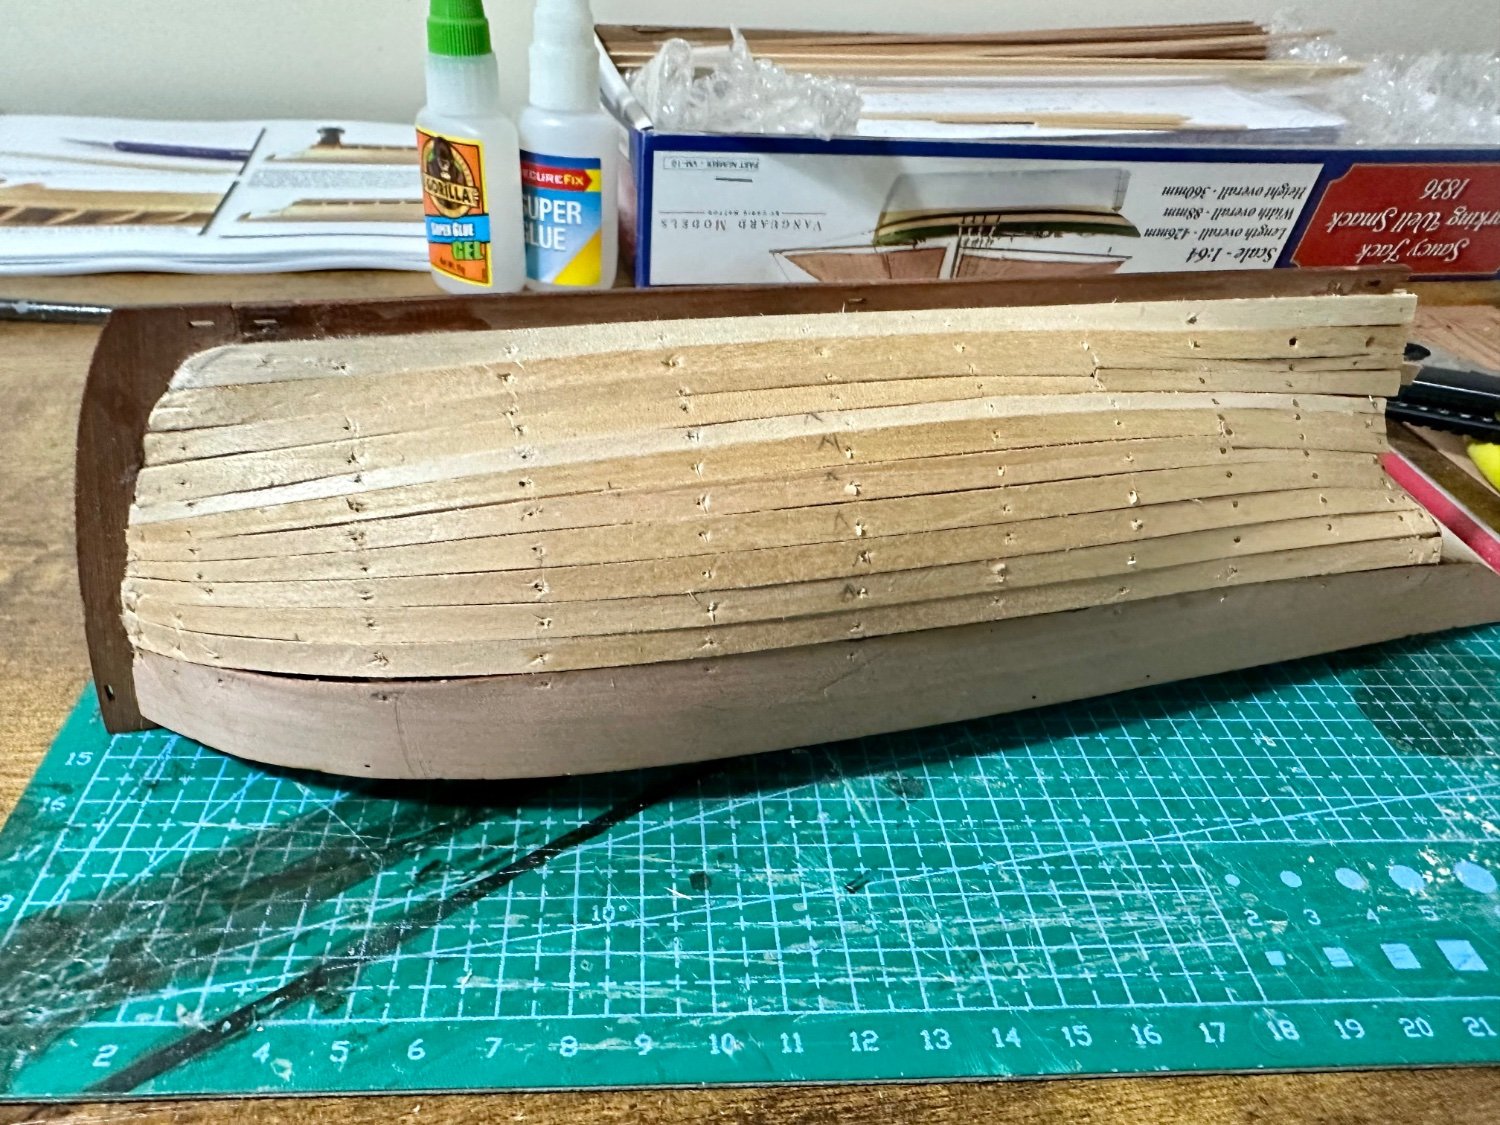
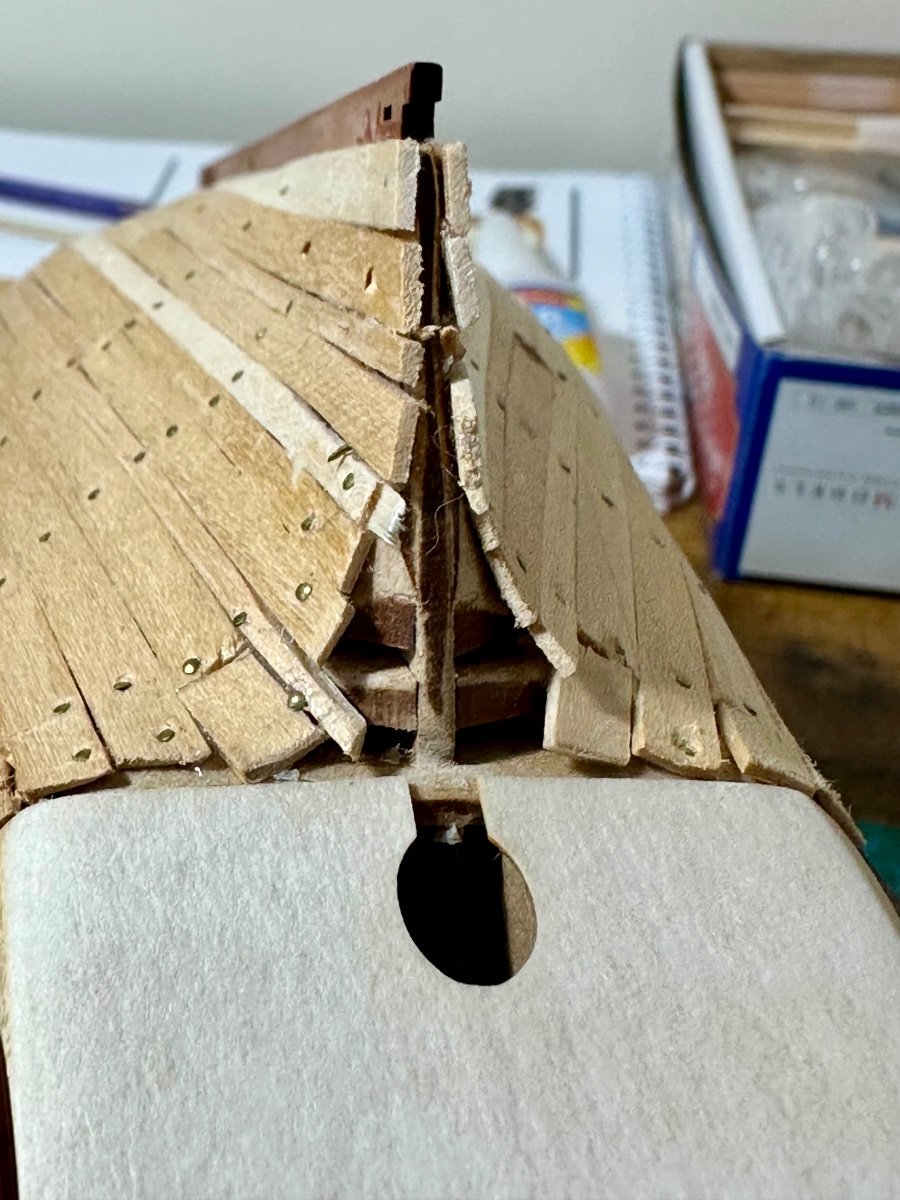
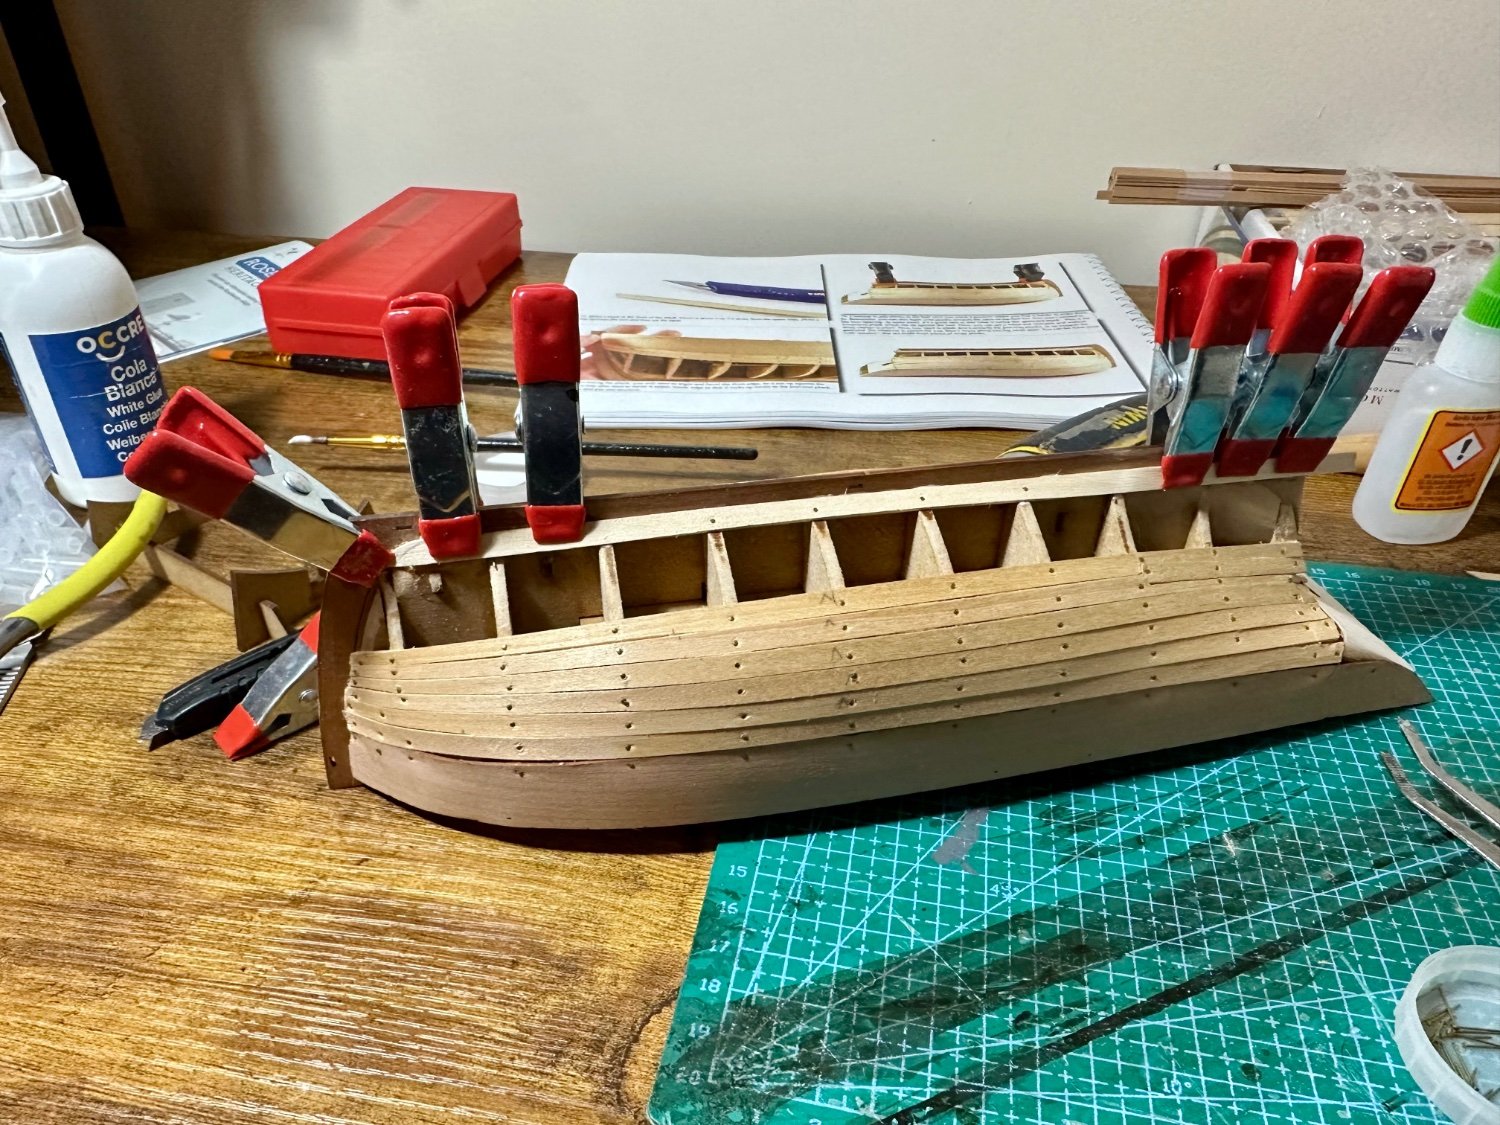
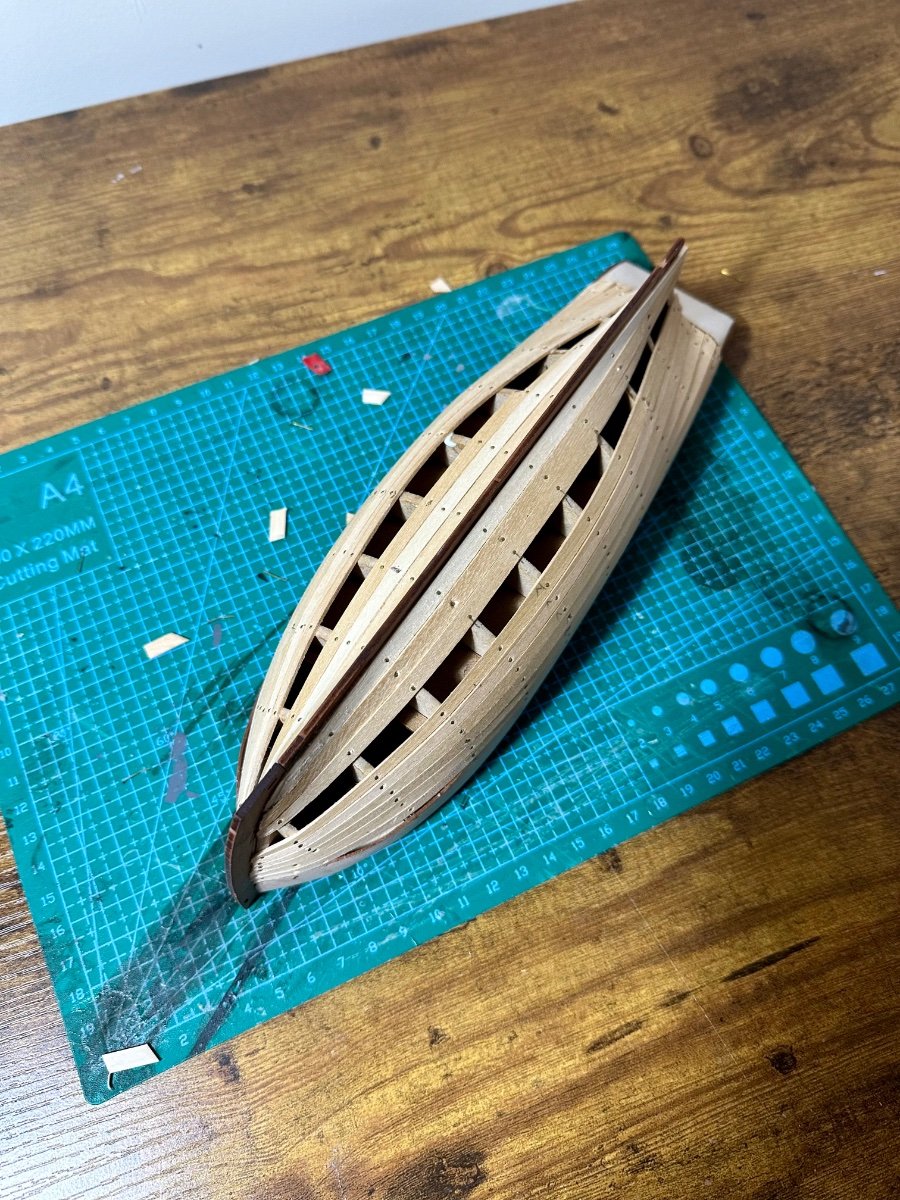
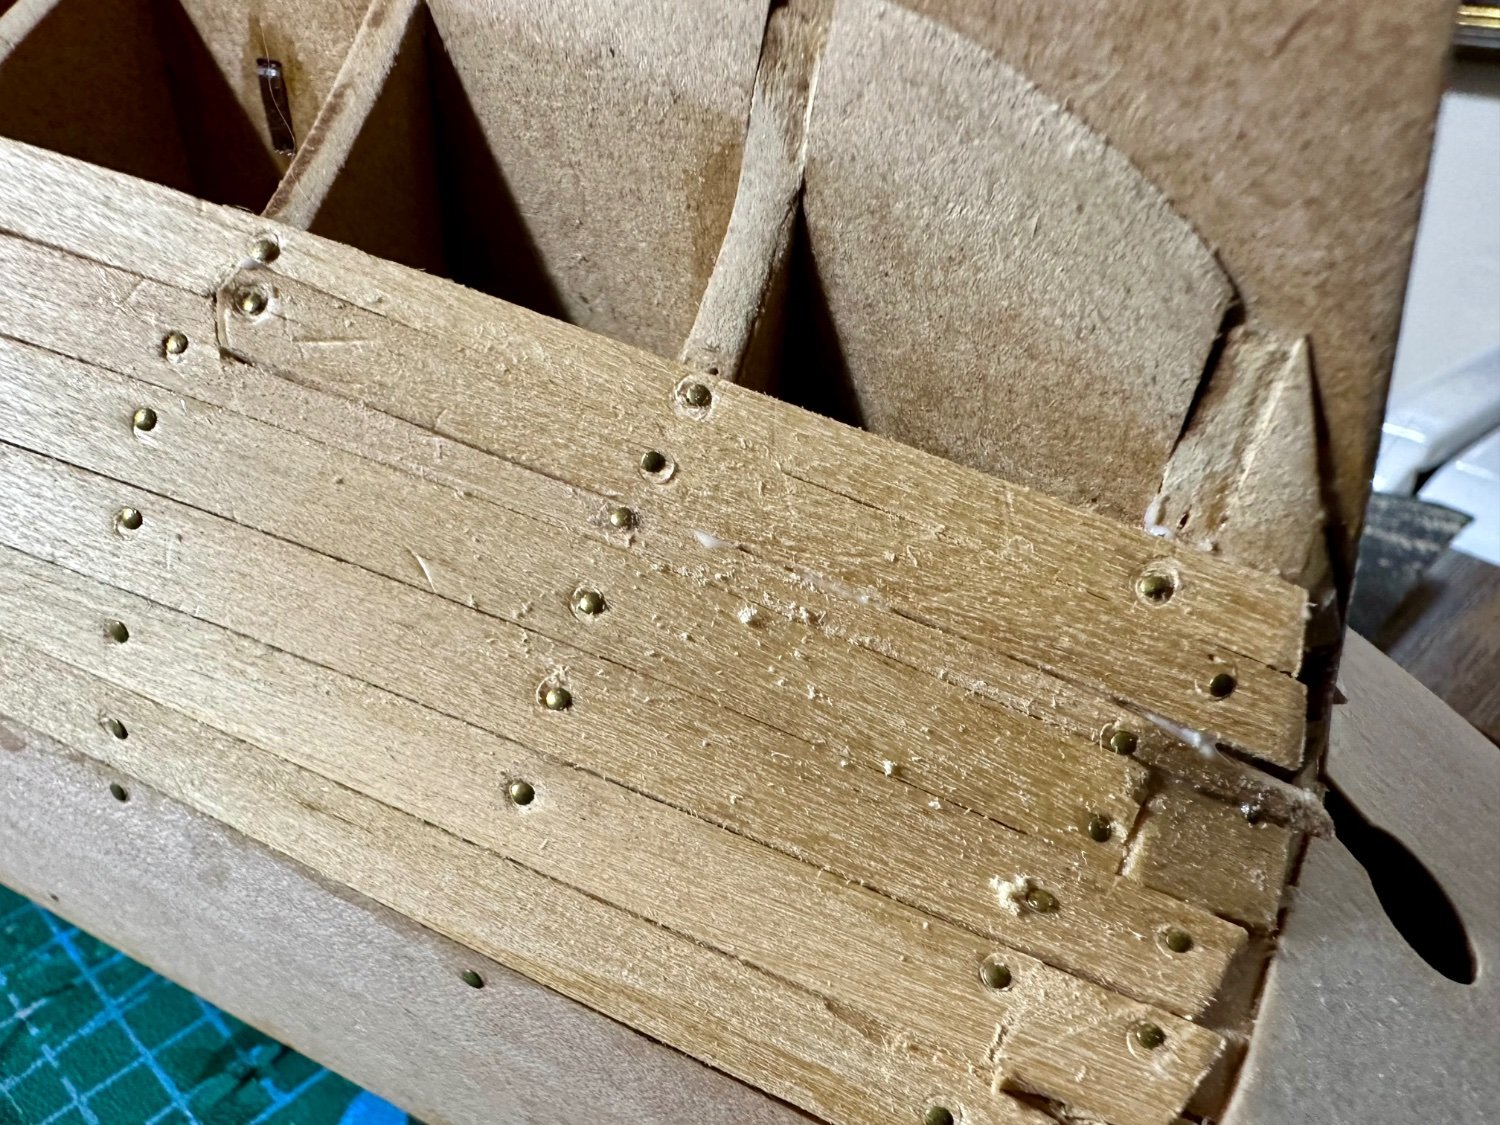
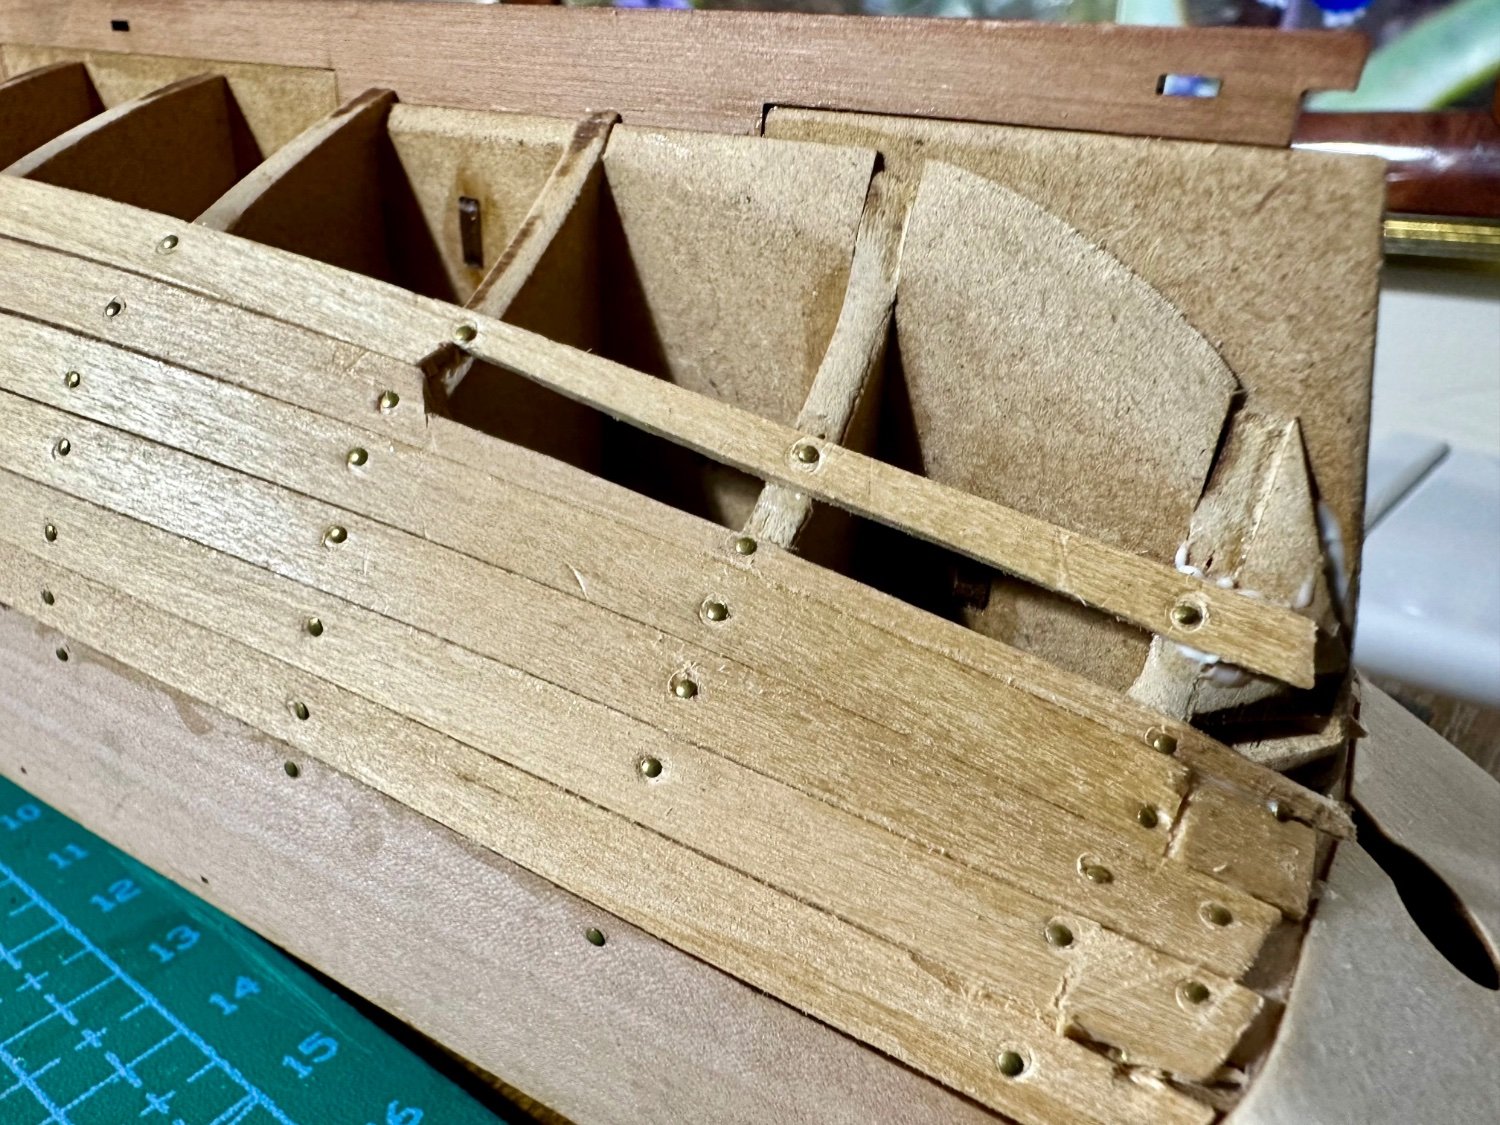
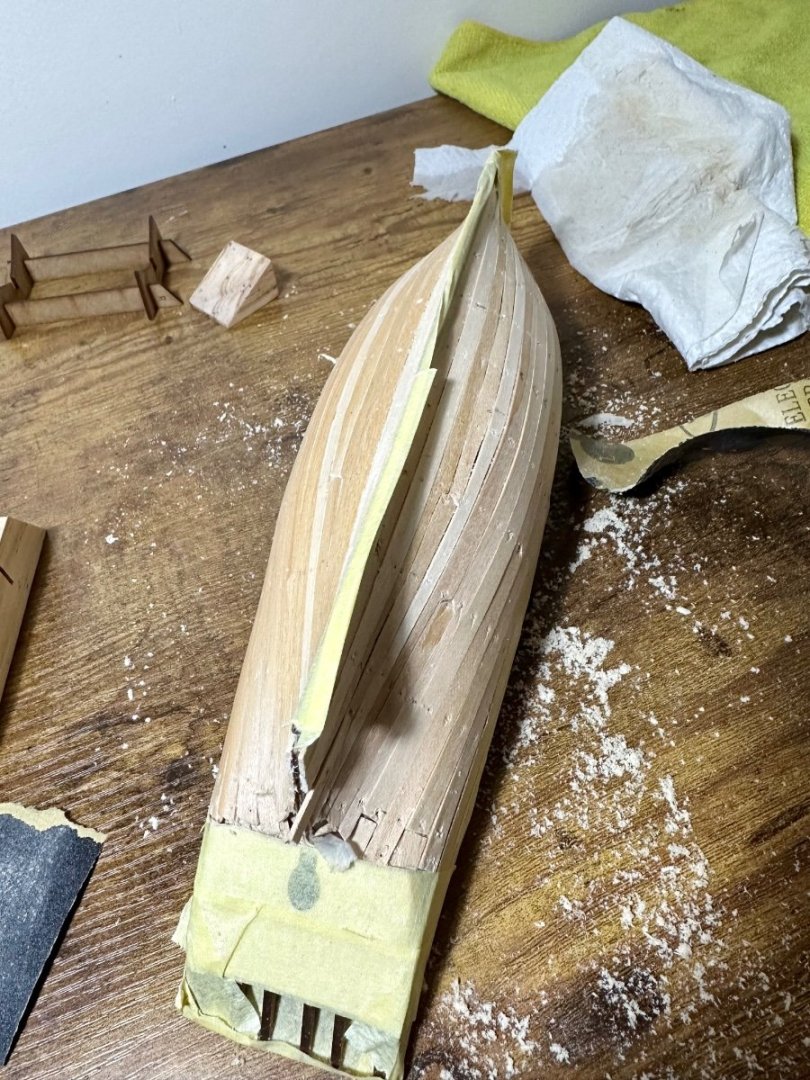
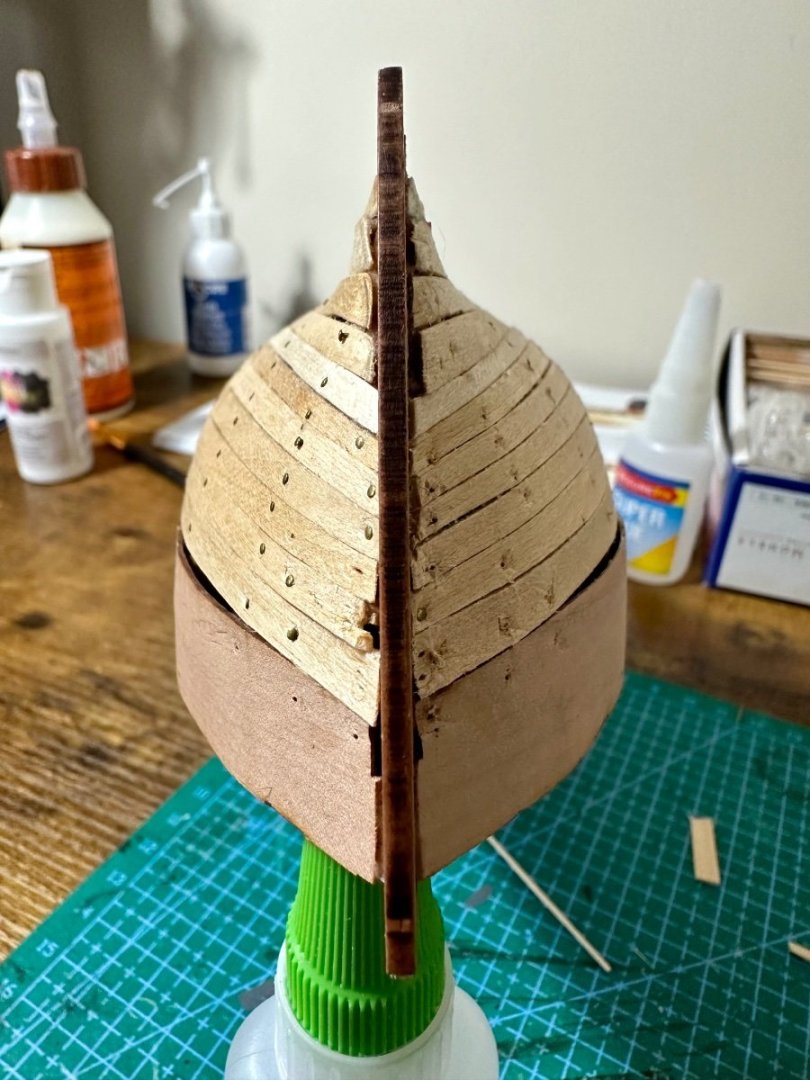
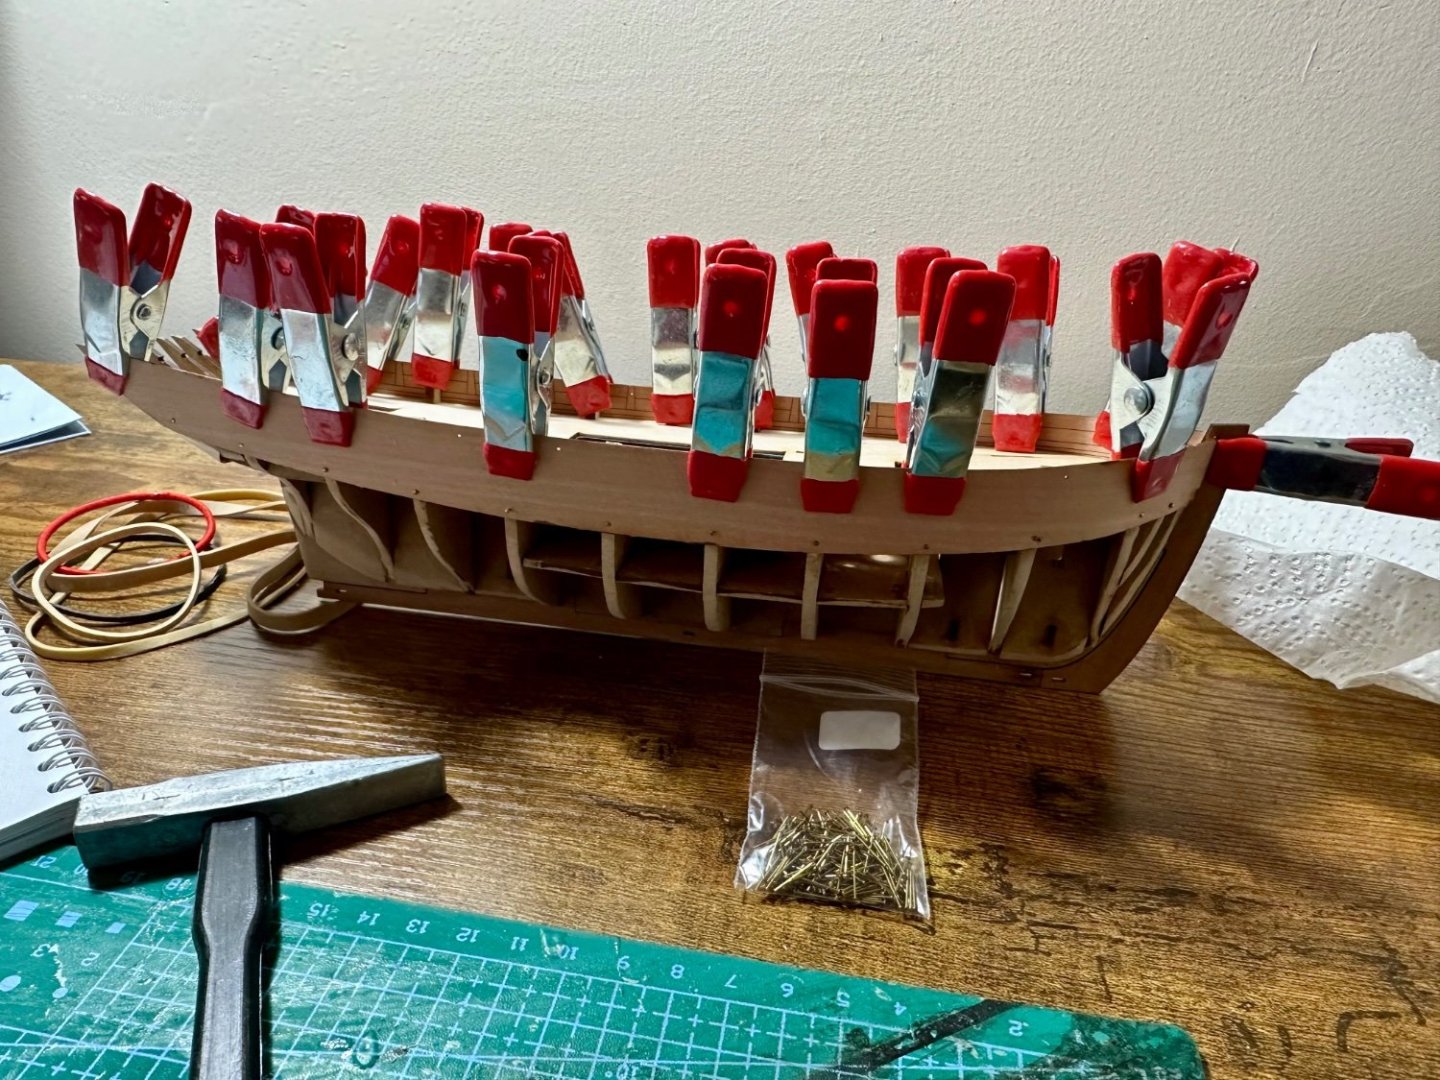
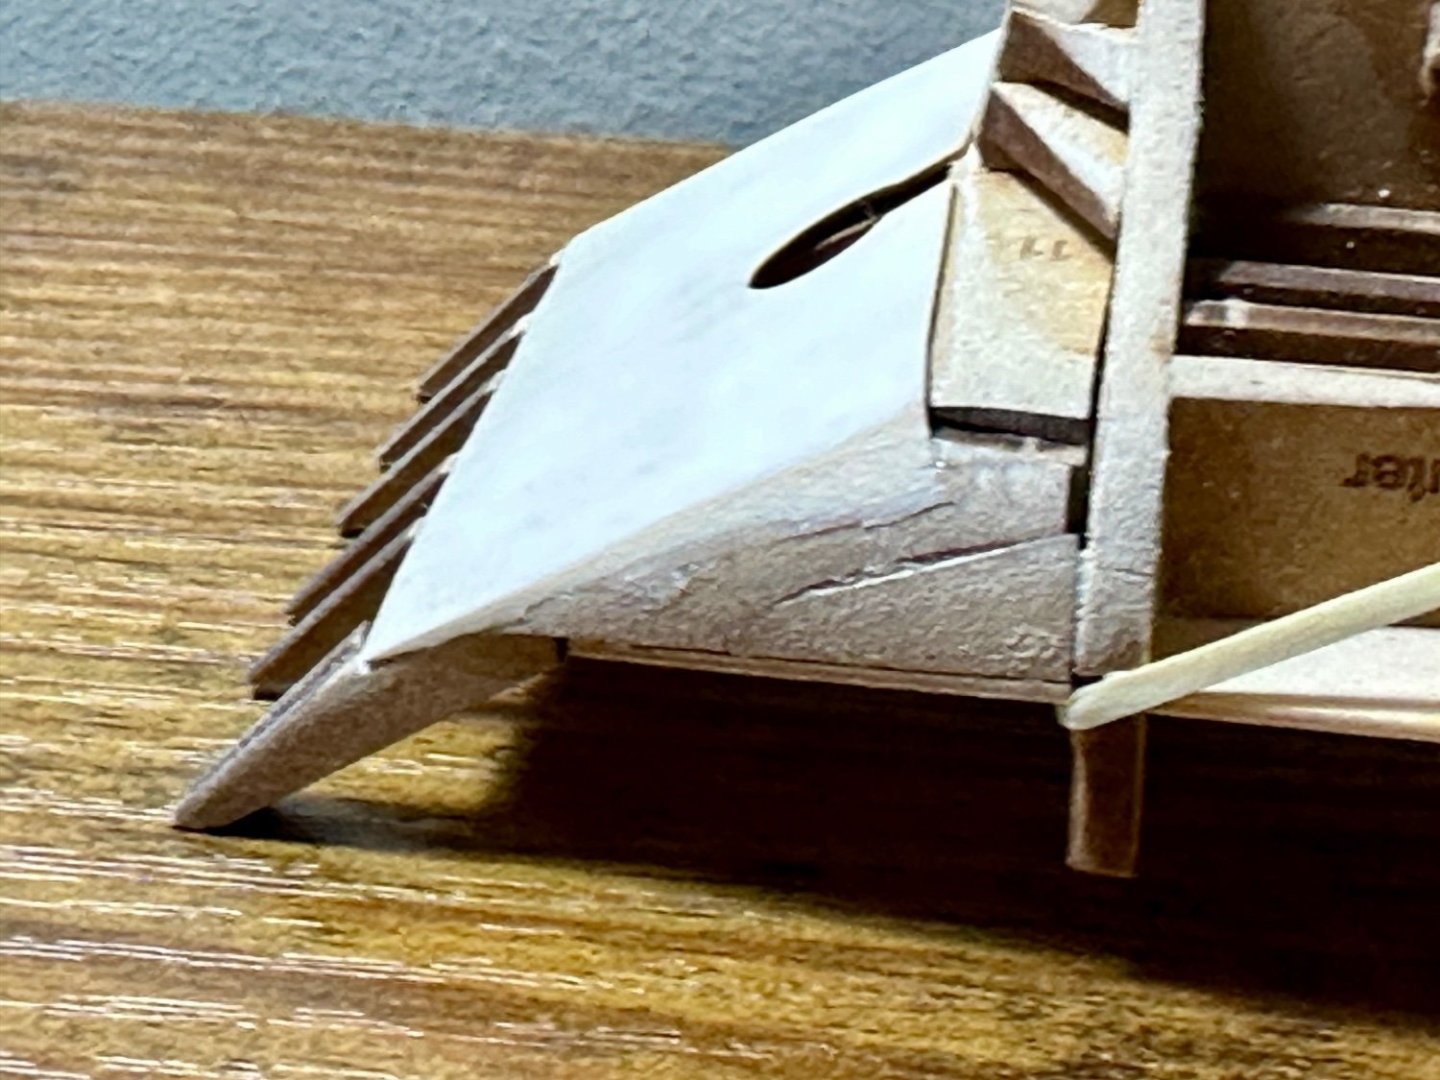
Weekend update. Finished the first planking. Happy overall. Better than the first kit but note for next time is to leave the planks long at the stern to shape and trim properly not try and trim at fitting and leave a problem. As you can see I'll need to do work at the stern because of this but I think filler and sanding before second planting should rectify this. As you can see at the bow I have a problem with a gap between the planking and the bulwark. I can only assume I was at fault with the fairing. Not certain if this could/should be fixed before the second planking. Didn't think I'd be able to but removed all but one of the pins after curing. Simon.


-
Bit of time today. Tried to pay attention but some mistakes got through. I was concentrating on trying to get the bow shape better than my last build and I think I succeeded but at the same time haven't tapered any of these lower planks. That said I did start to learn how to use CA gel which went well. Now I'm left with a space that's wide at the bow and narrower in the midsection which I'm not sure of the best way to fill. I know it's only the first planking but I'm trying to do it as well as I can to learn as much as possible and provide a good base. If anyone can advise the best way to proceed here and any techniques to remove the pins I'd be grateful. Simon.


-
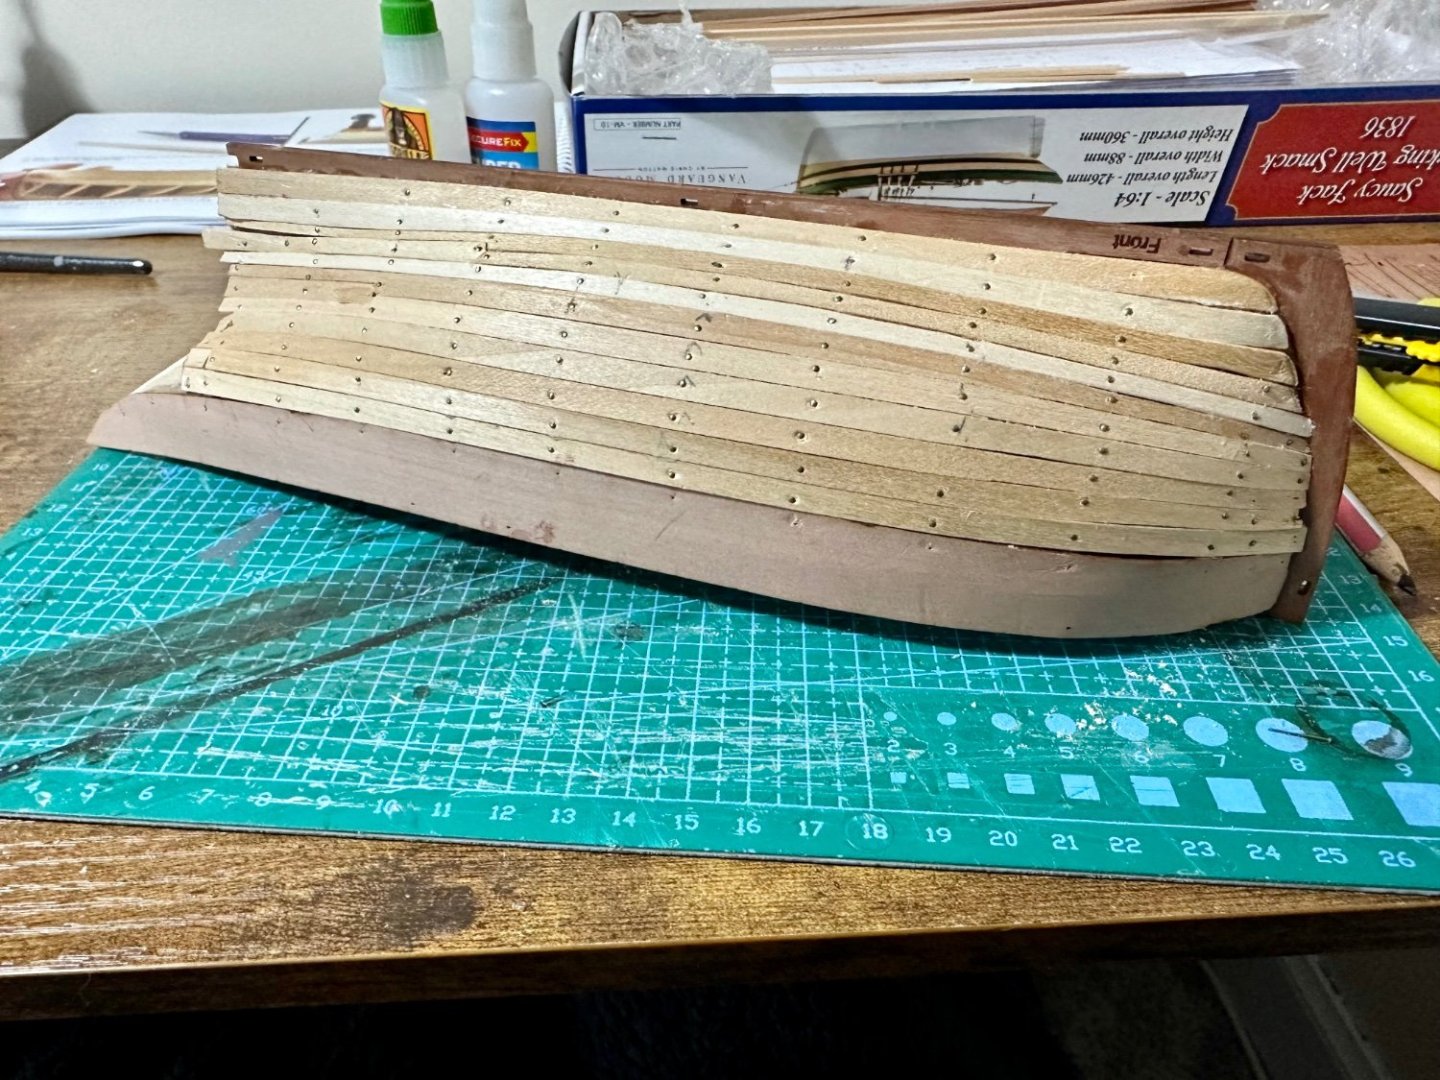
Started off with some Danish oil to bring out the grain on some future pieces. Will probably matt varnish these tomorrow. Then made a start on the first planking. From reading on here and the manual this time I'm trying to be much neater and started tapering at the bow. This seems to be going ok. Also made my first drop plank (is that right) to avoid stealers, hopefully, at the stern on each side. Pretty pleased with them for a first go. Will be the garboard planks first on my next session. Might need some more fairing here.


-
Excellent that makes sense. Thanks.
-
My theory to pick out the name didn't work. Sure I can rescue it though The stern piece fitted and faired well though In better news the prow, keel and inner bulkhead parts seem to have gone together very well. I used pins to try and make sure they stick in place correctly. Not sure if I'll need to remove them. Pins are really tiny but the Modelcraft pen type pusher (I found the adjustable one too clunky) made the job very easy. Simon.
-
Focus Stacking
BrochBoating replied to Dennis P Finegan's topic in Photographing your work. How to do this.
Don't think any of the crop sensor models have it. Could make a shift to full frame expensive with change of lenses. That said it might be worth (for framing advantages with a movable screen if nothing else) a jump to mirrorless. Various crop sensors but in the UK I'd look at used from MPB and maybe a shift to Olympus? -
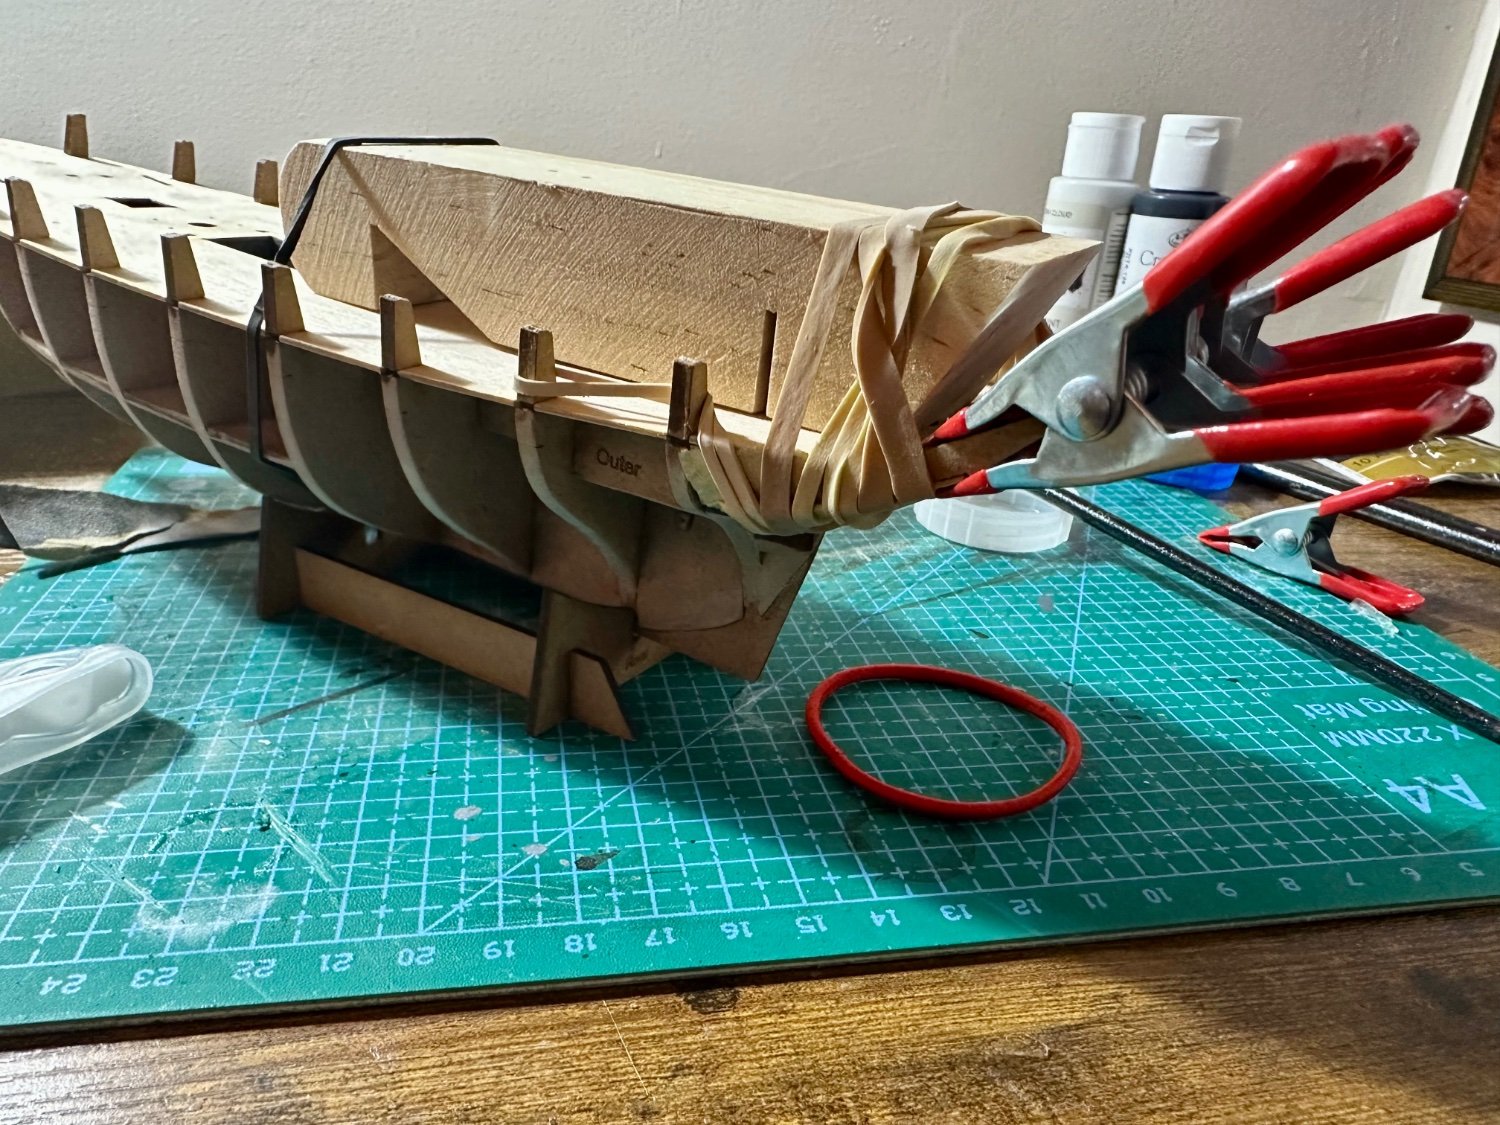
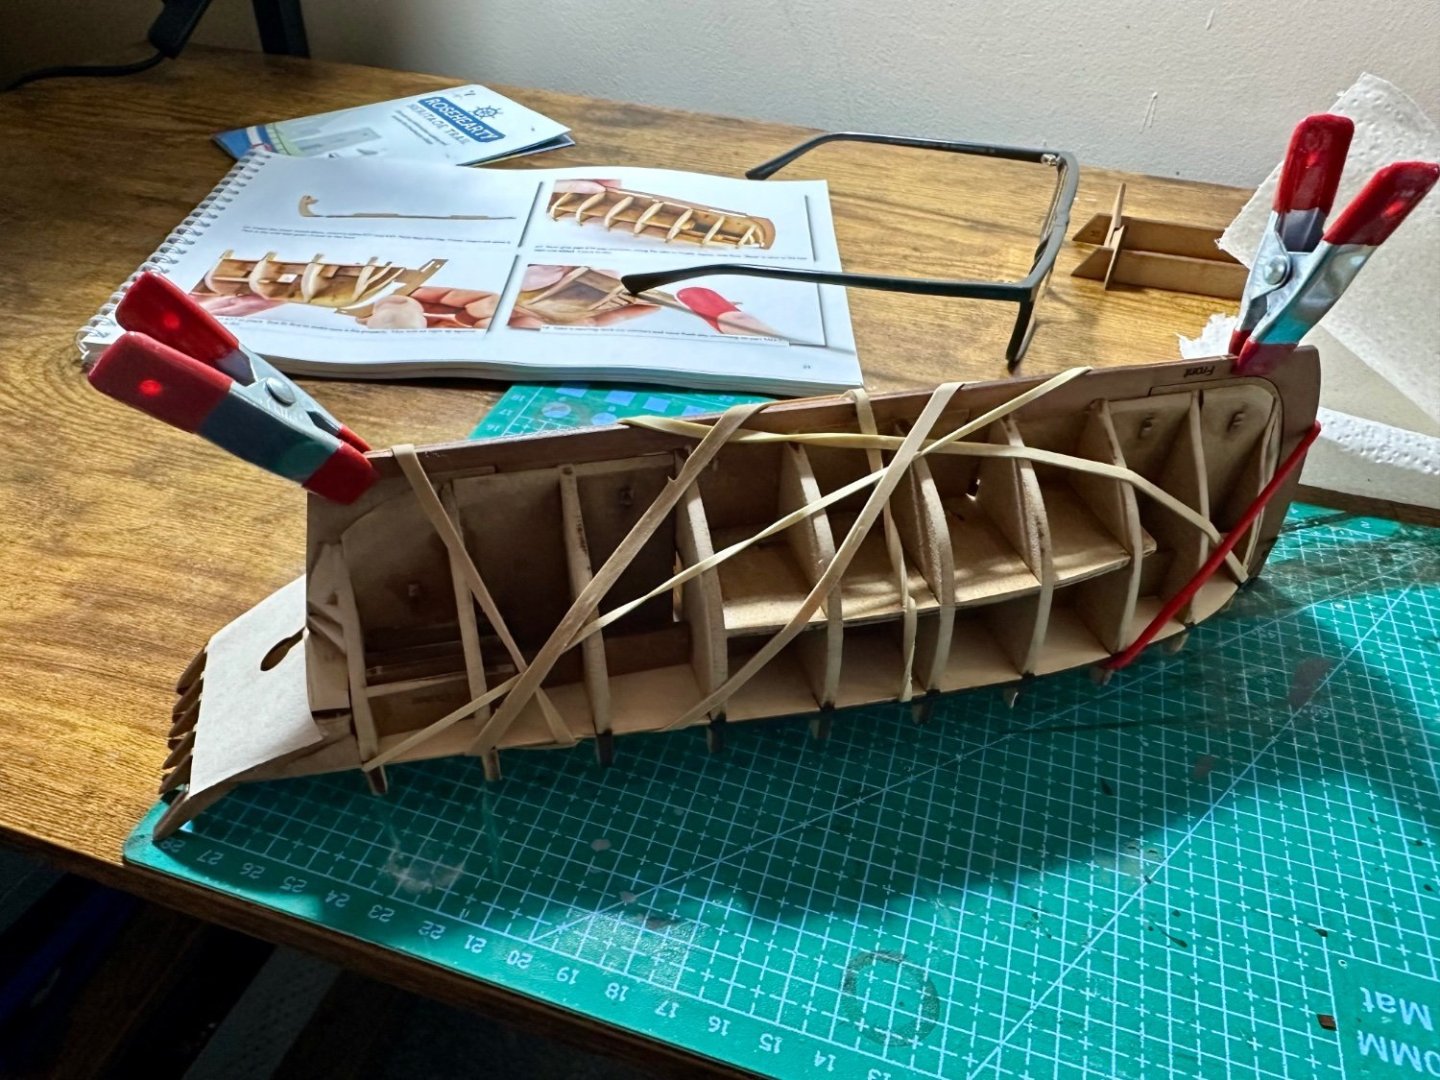
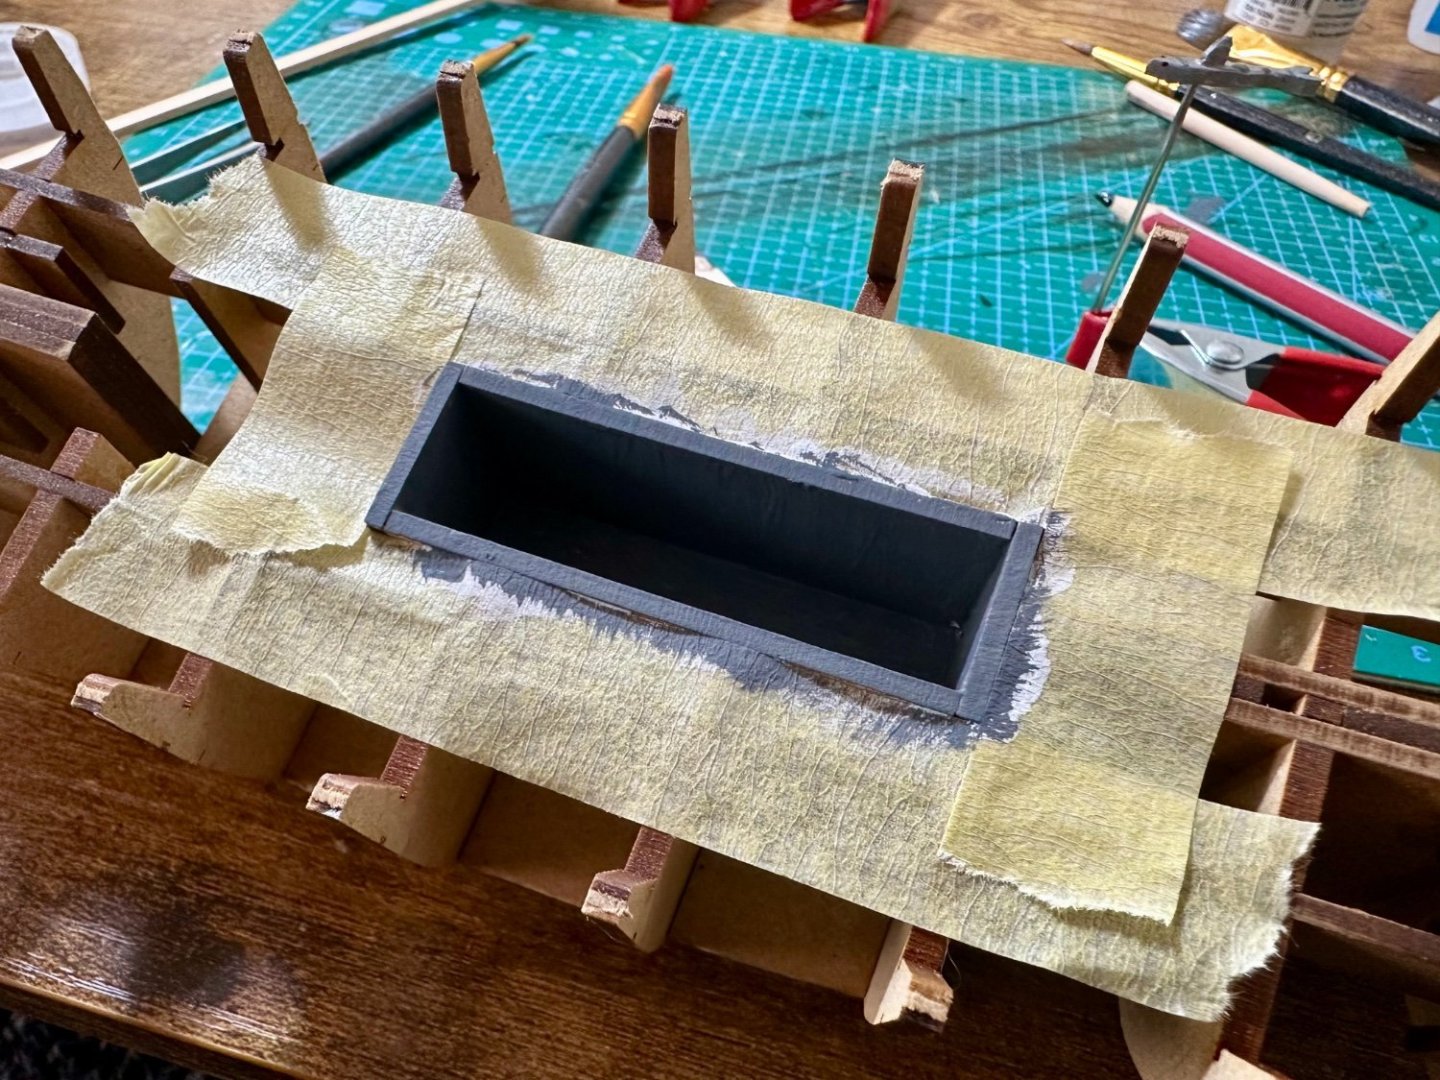
More time than expected today! Got the bulkheads faired and deployed tape, clamps, bands to hold the first stern piece in place while glue sets. Finally for today painted the name on the stern, my theory being I can very gently sand to remove bleed once thoroughly dry and it'll be more obvious once in place. Simon.


-
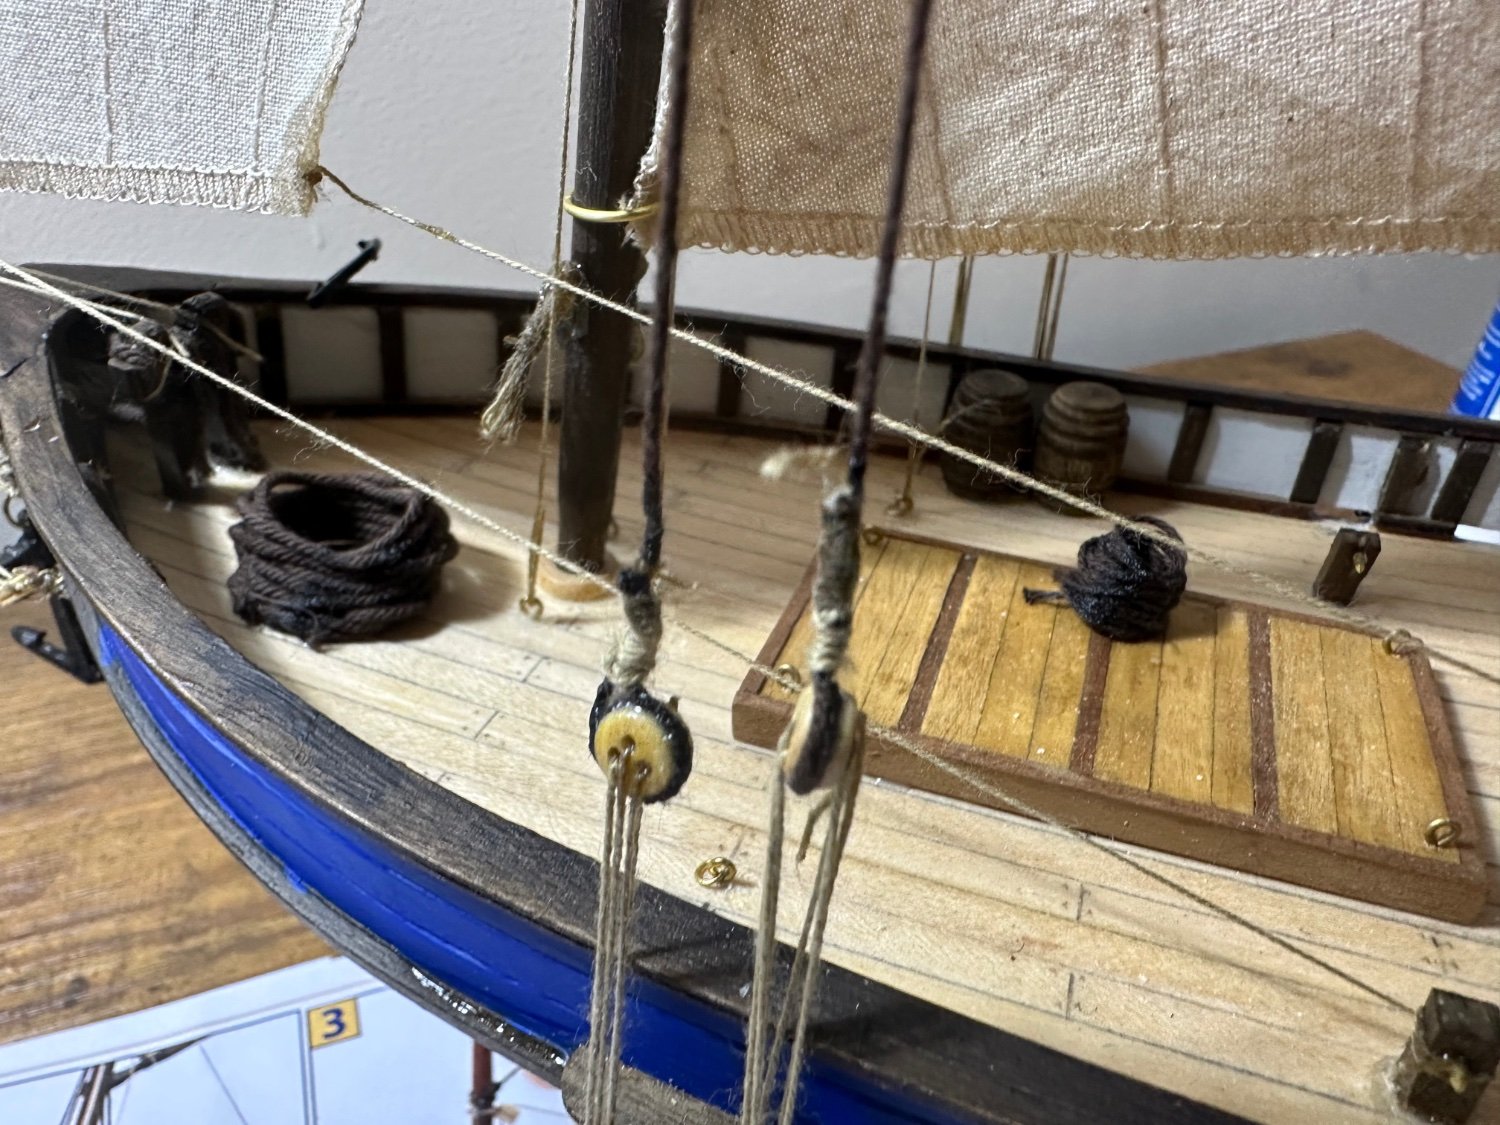
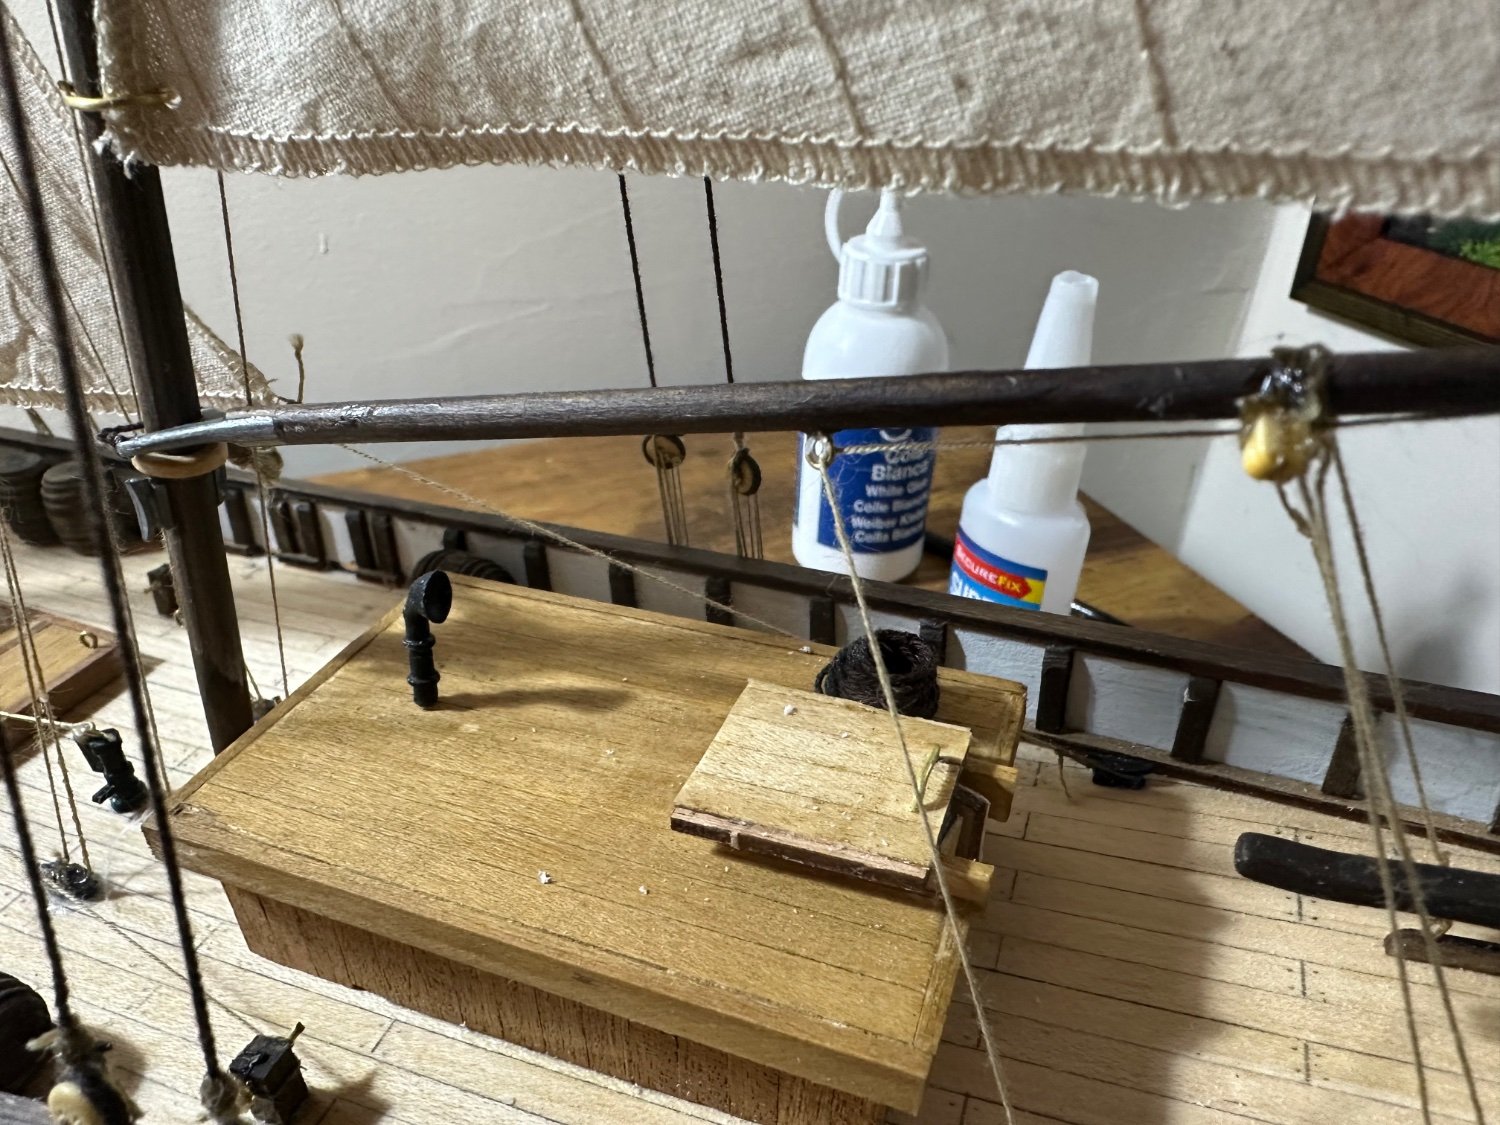
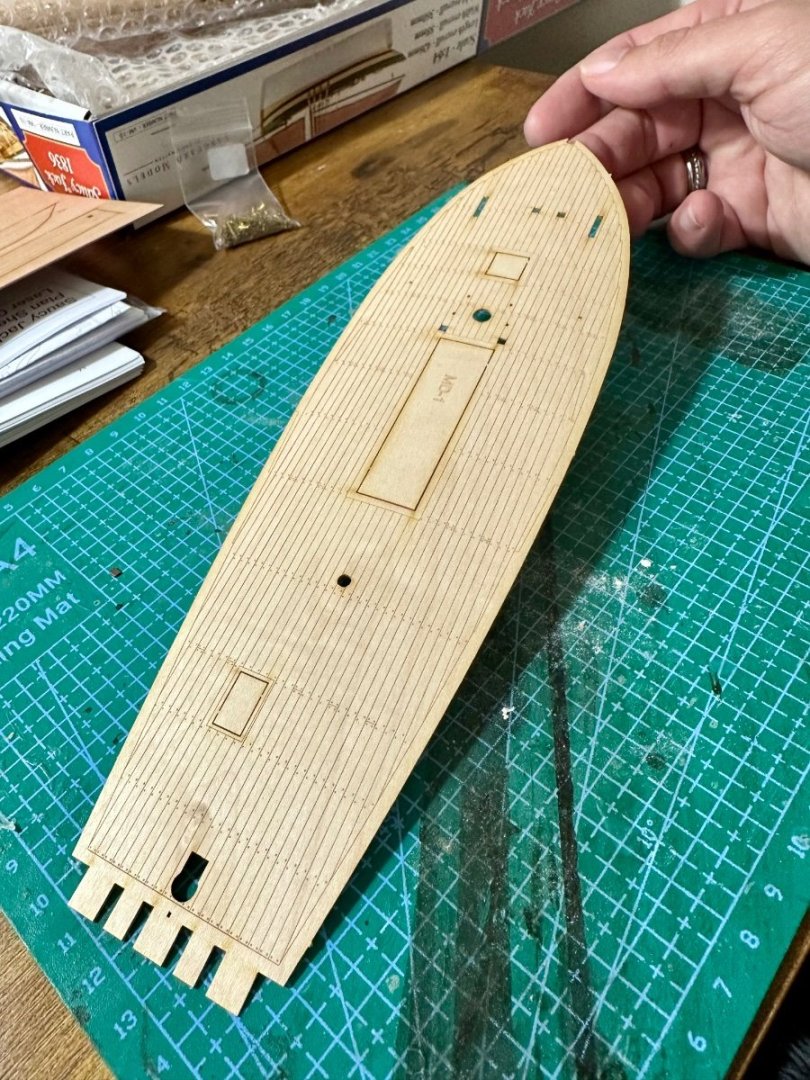
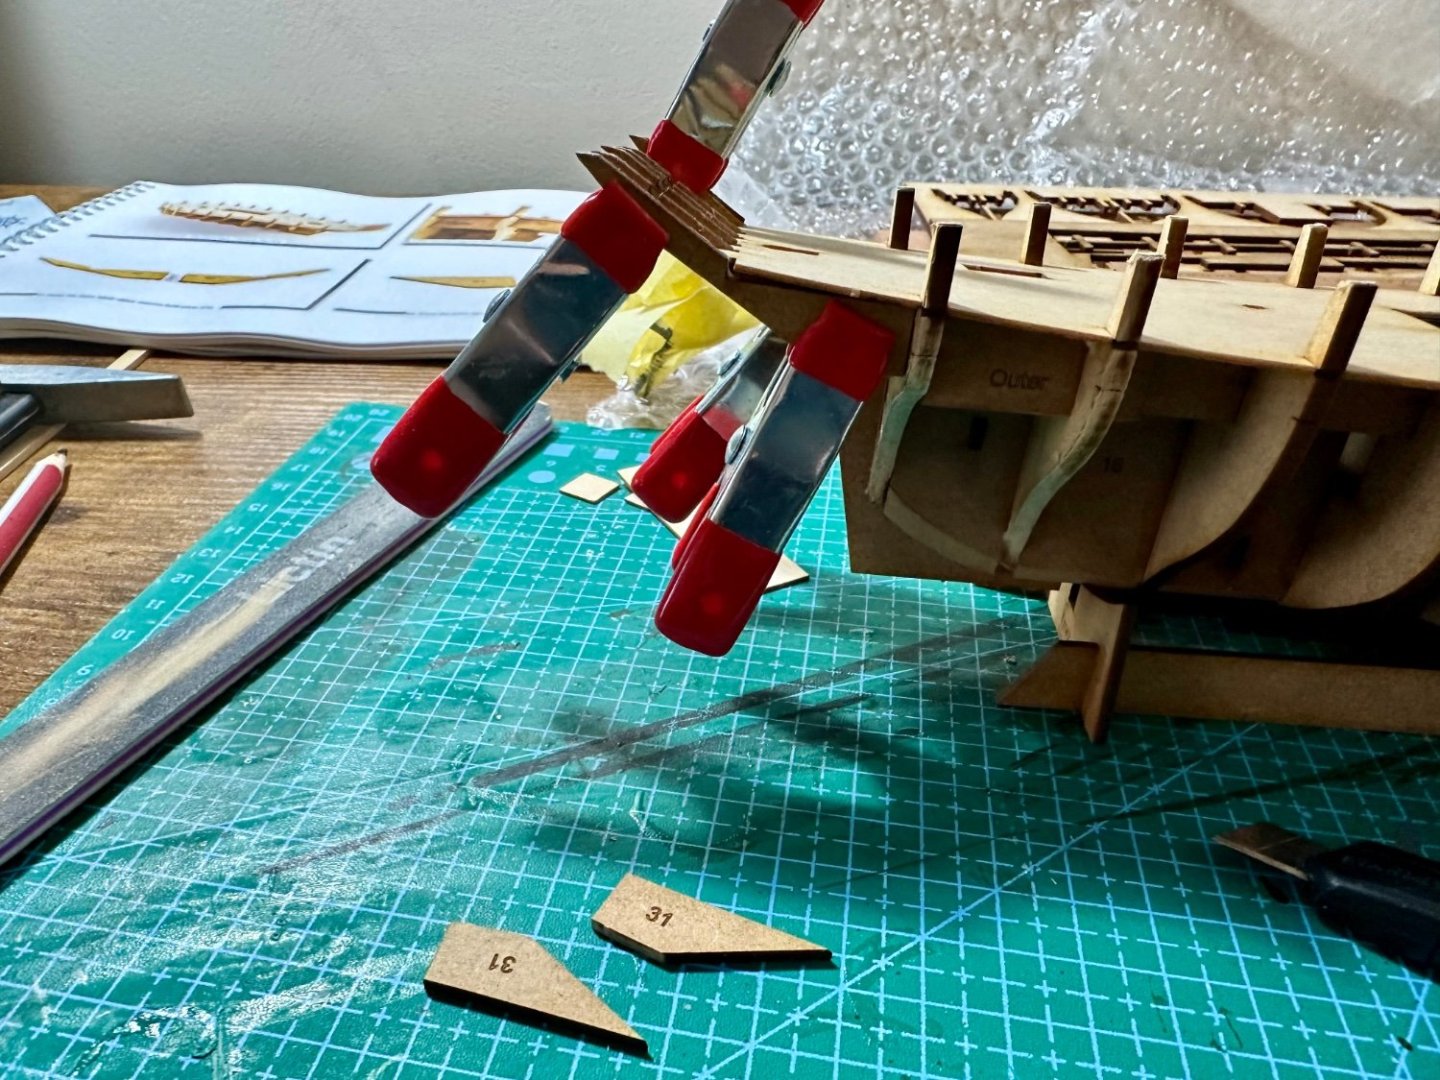
A bit more decoration for later in the well. Fitted the sub deck and managed to knock one of the delicate stern pieces off. The sub deck itself was a perfect fit with no fettling needed. Stern piece refixed and then various pieces added that will be faired with the bulkheads once everything's cured. Simon


-
Having a few thoughts about how to make this a little individual. Going to try some work in the well. At least then if I’m not happy the cover goes on and all is well.

-
Focus Stacking
BrochBoating replied to Dennis P Finegan's topic in Photographing your work. How to do this.
Just about anything before the D850 as far as I know. Nope macro and stacking go hand in hand for a large amount of subjects due to the microscopic depth of field at life size or above. -
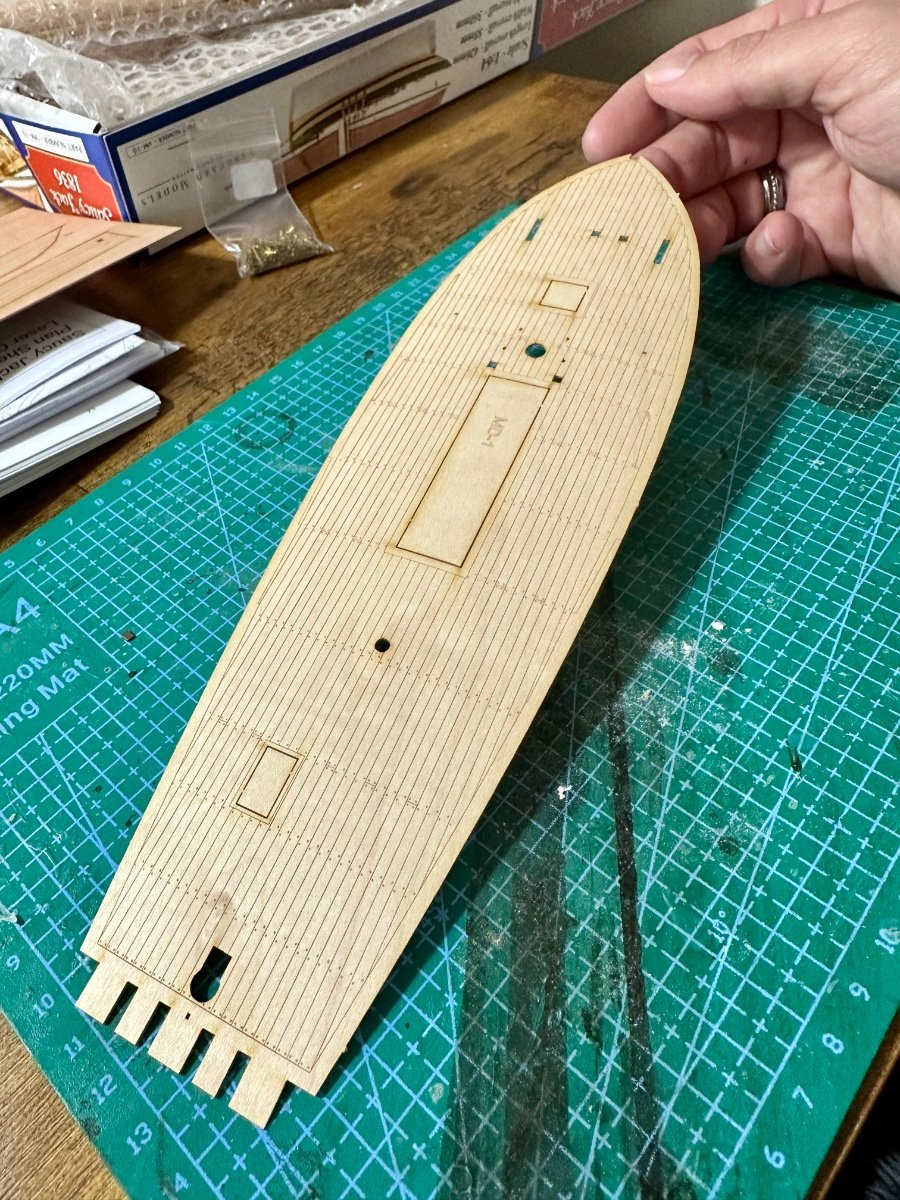
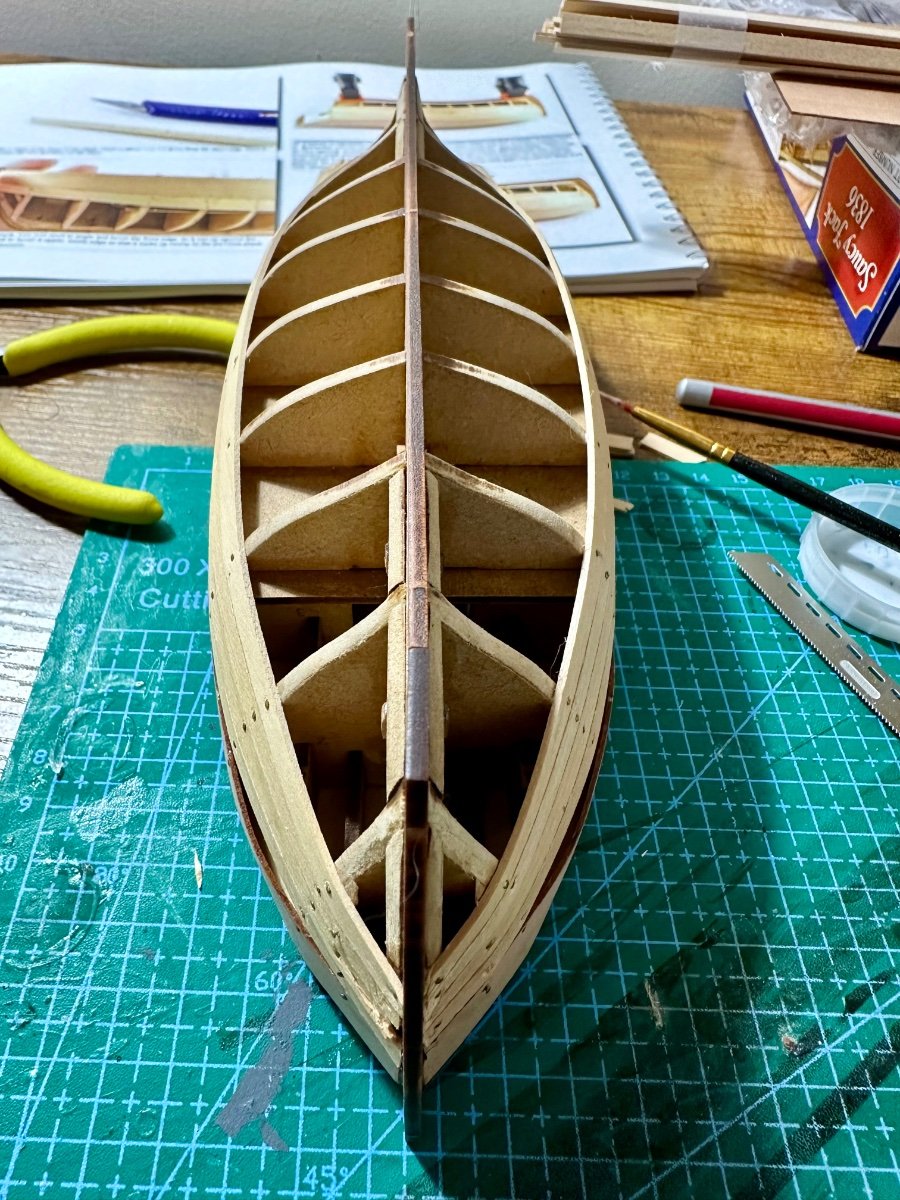
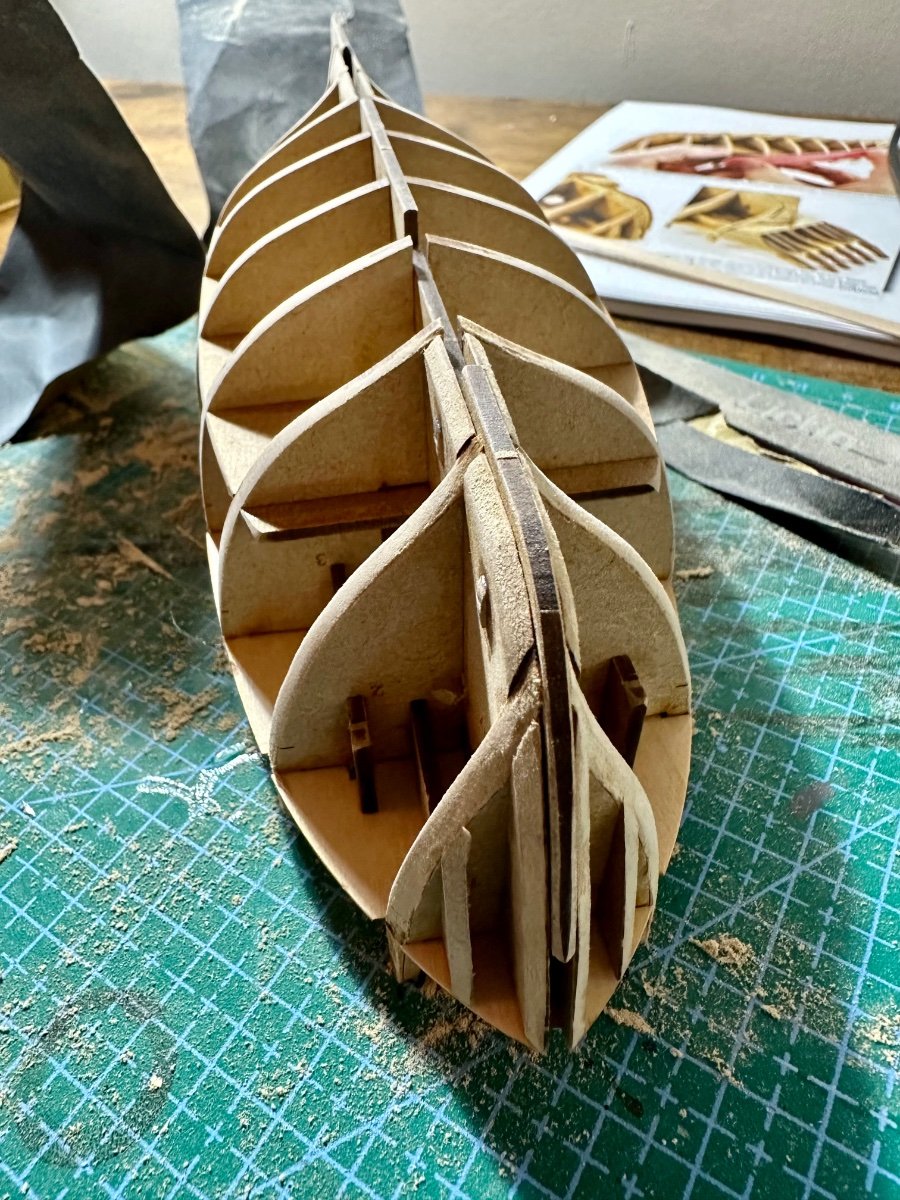
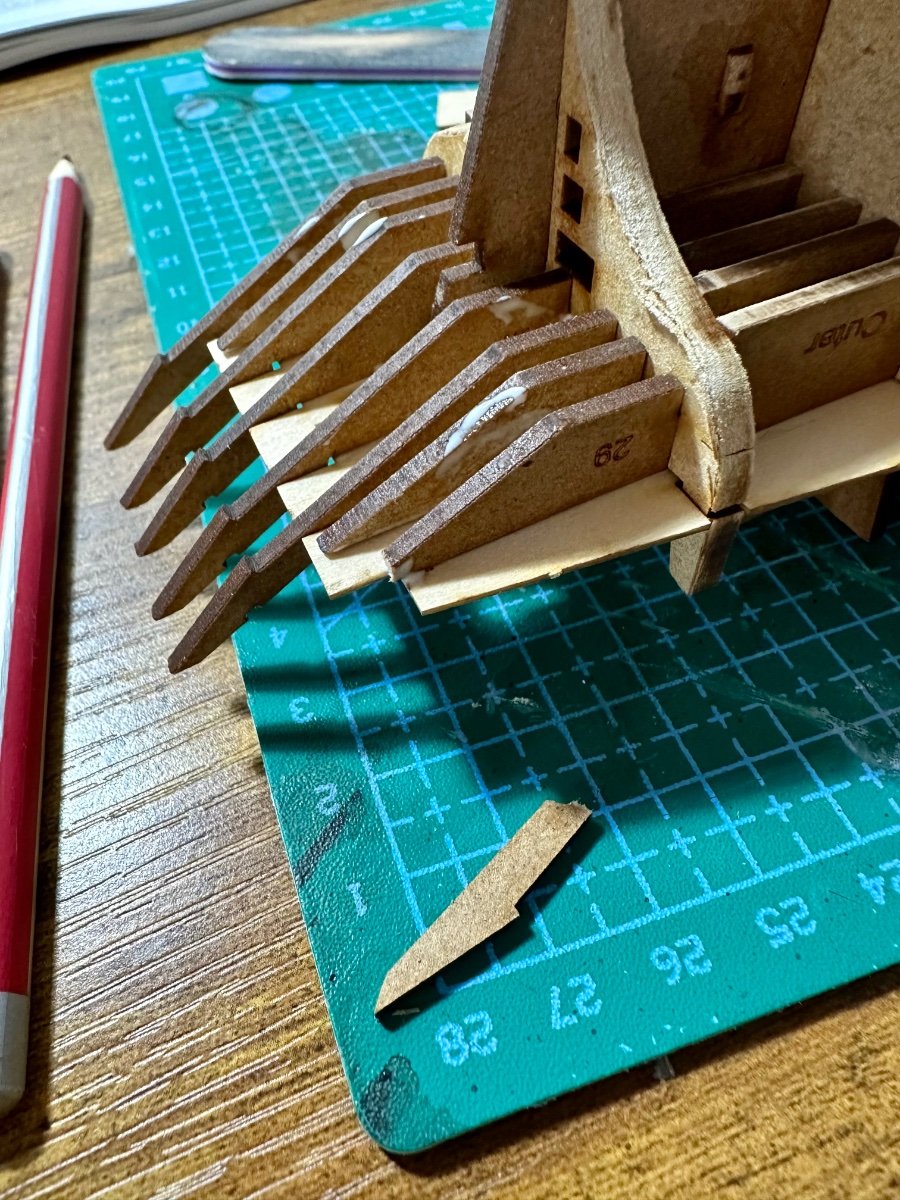
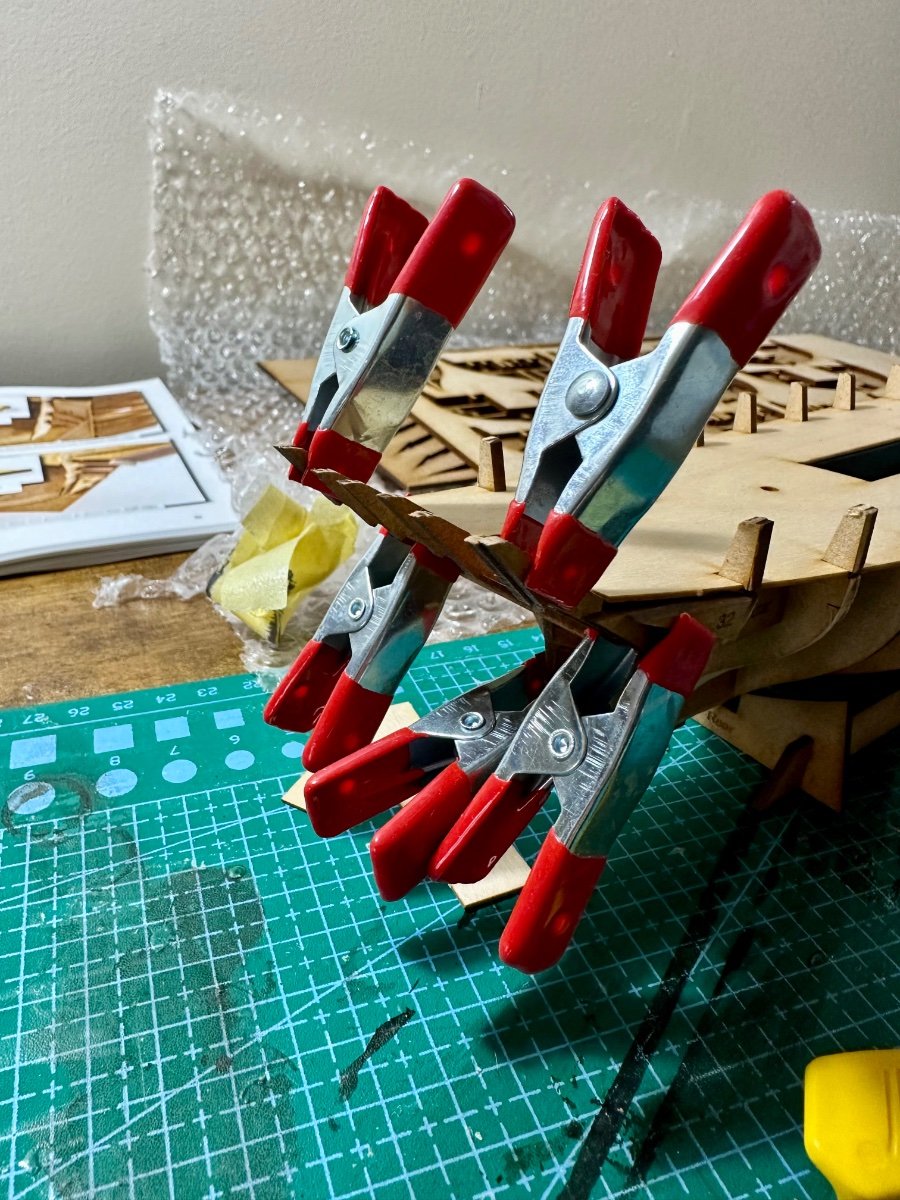
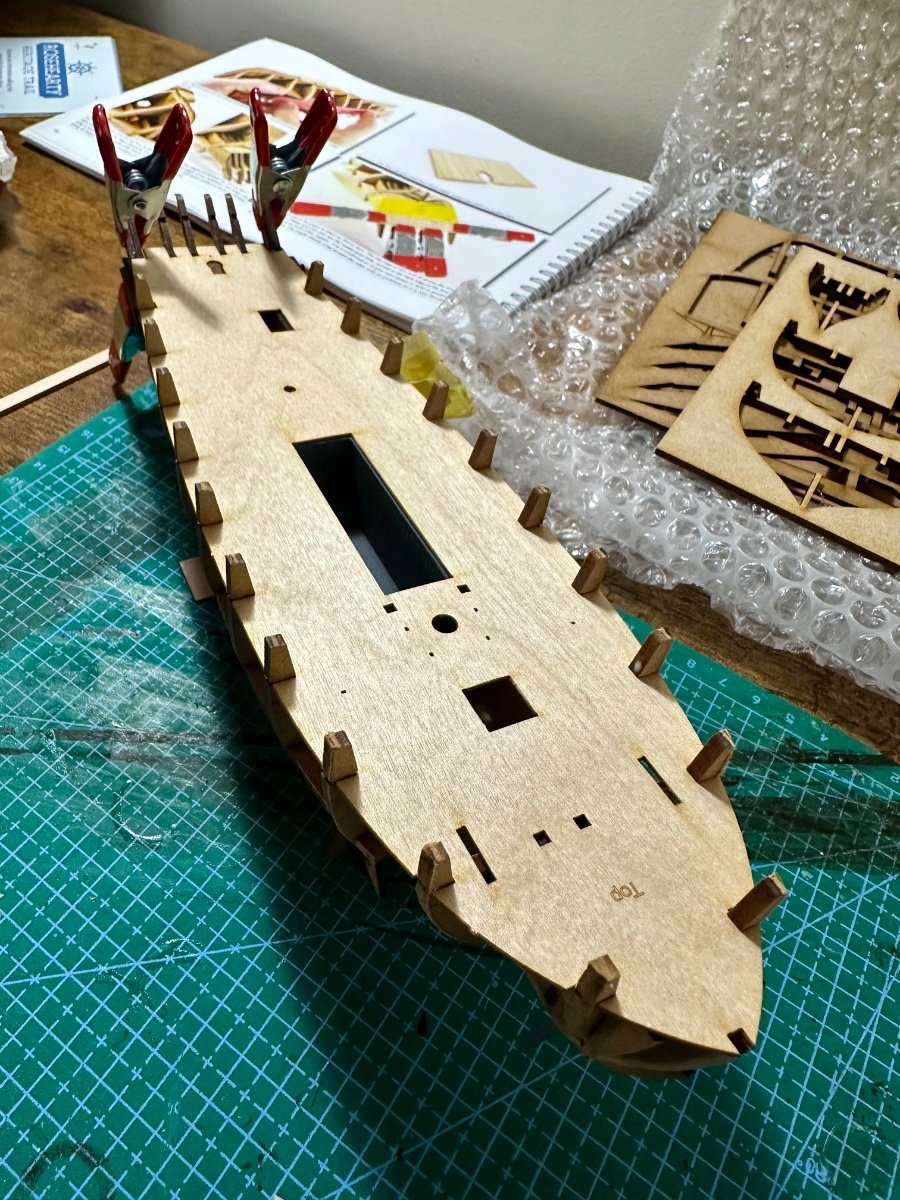
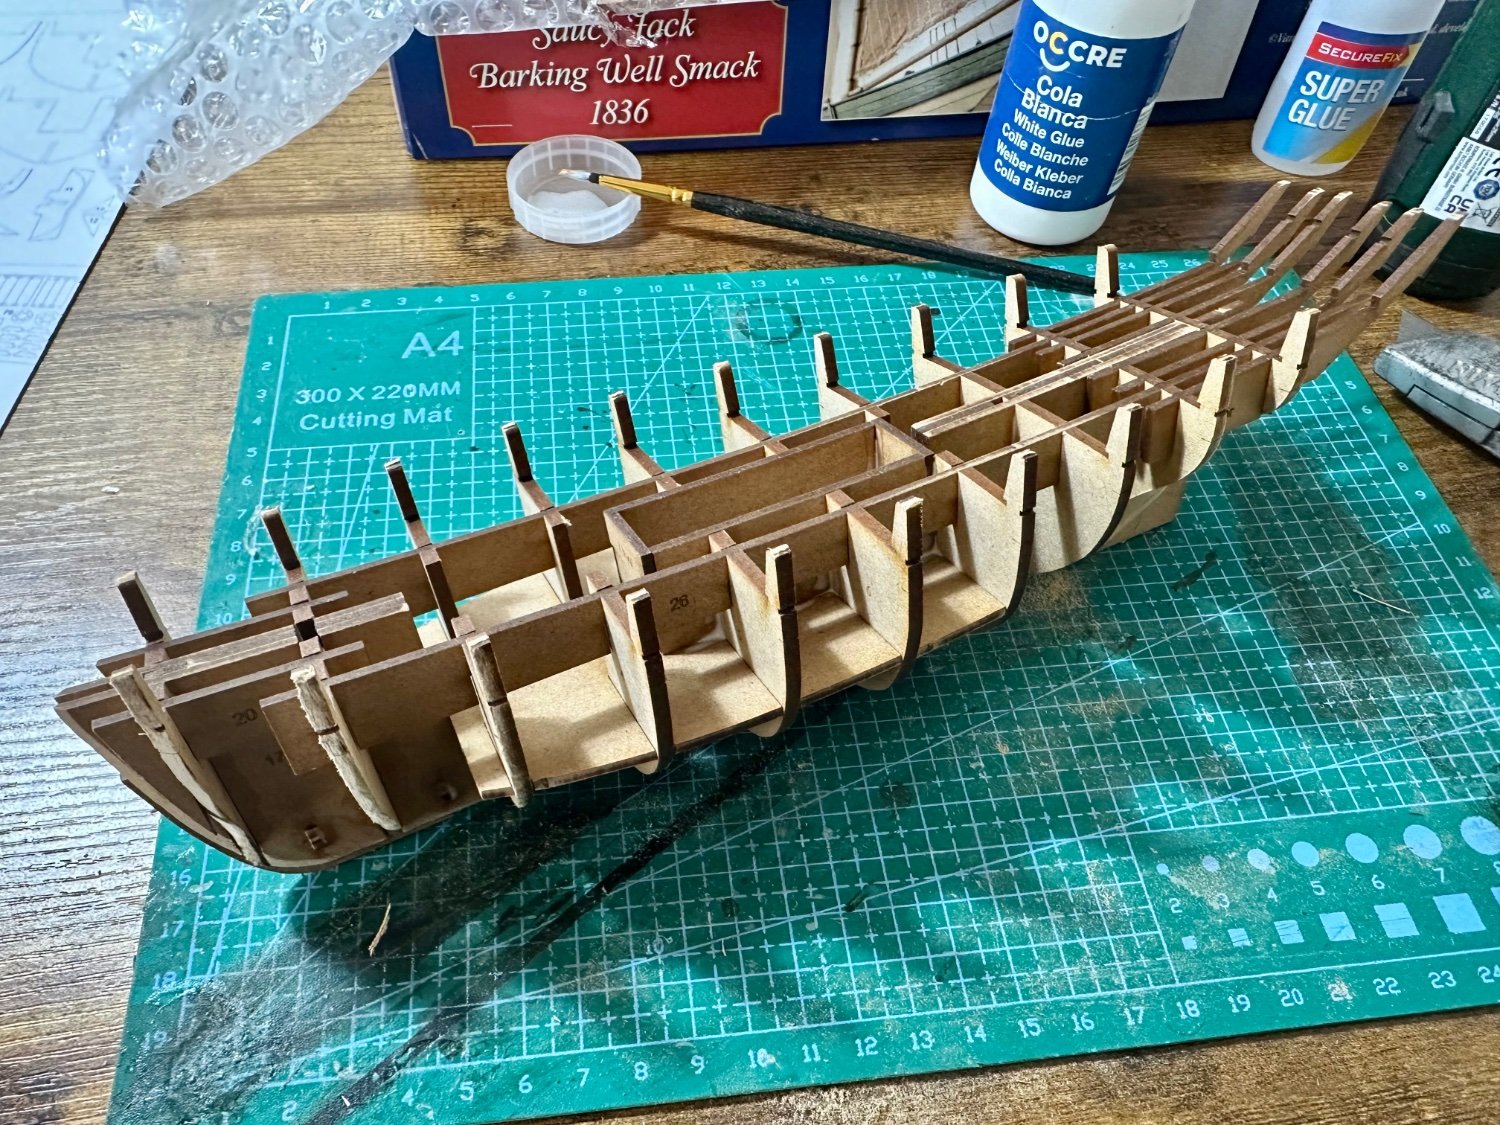
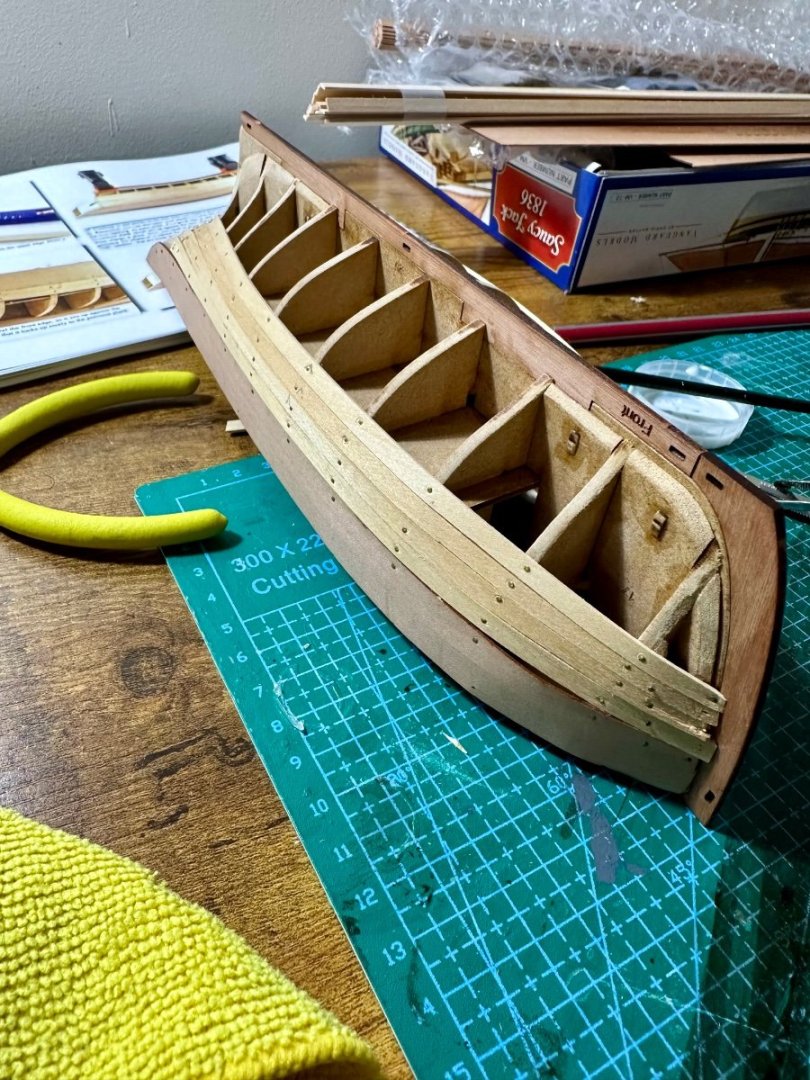
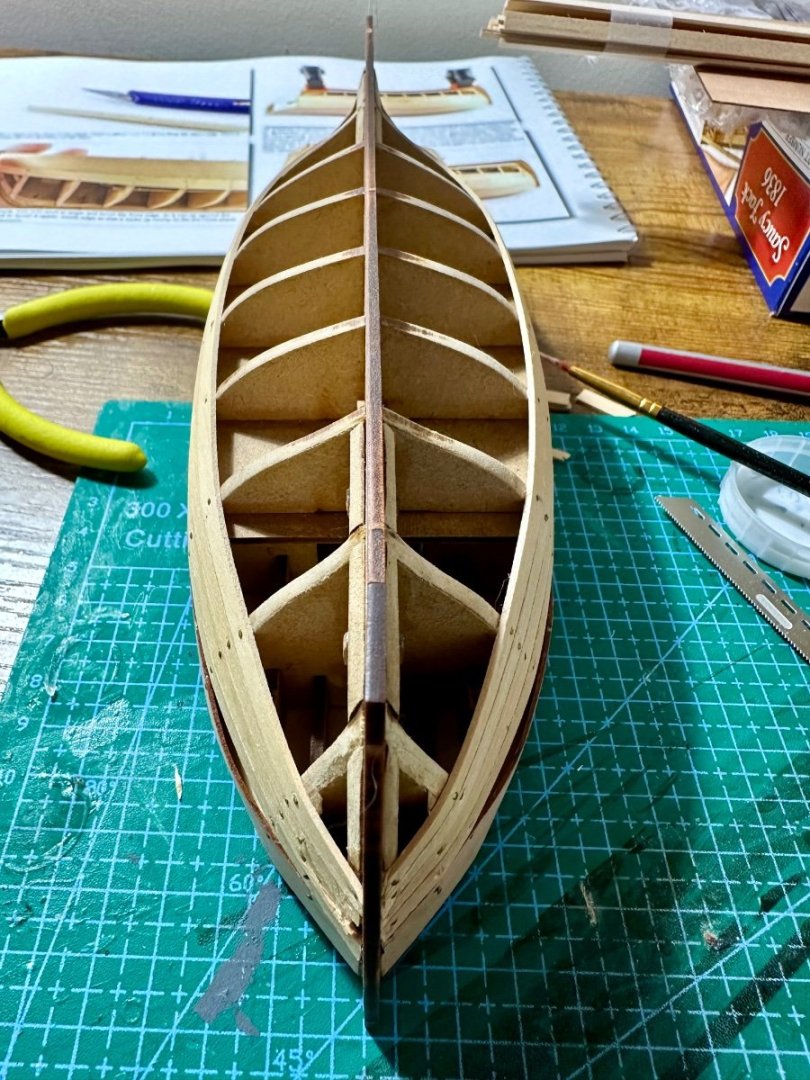
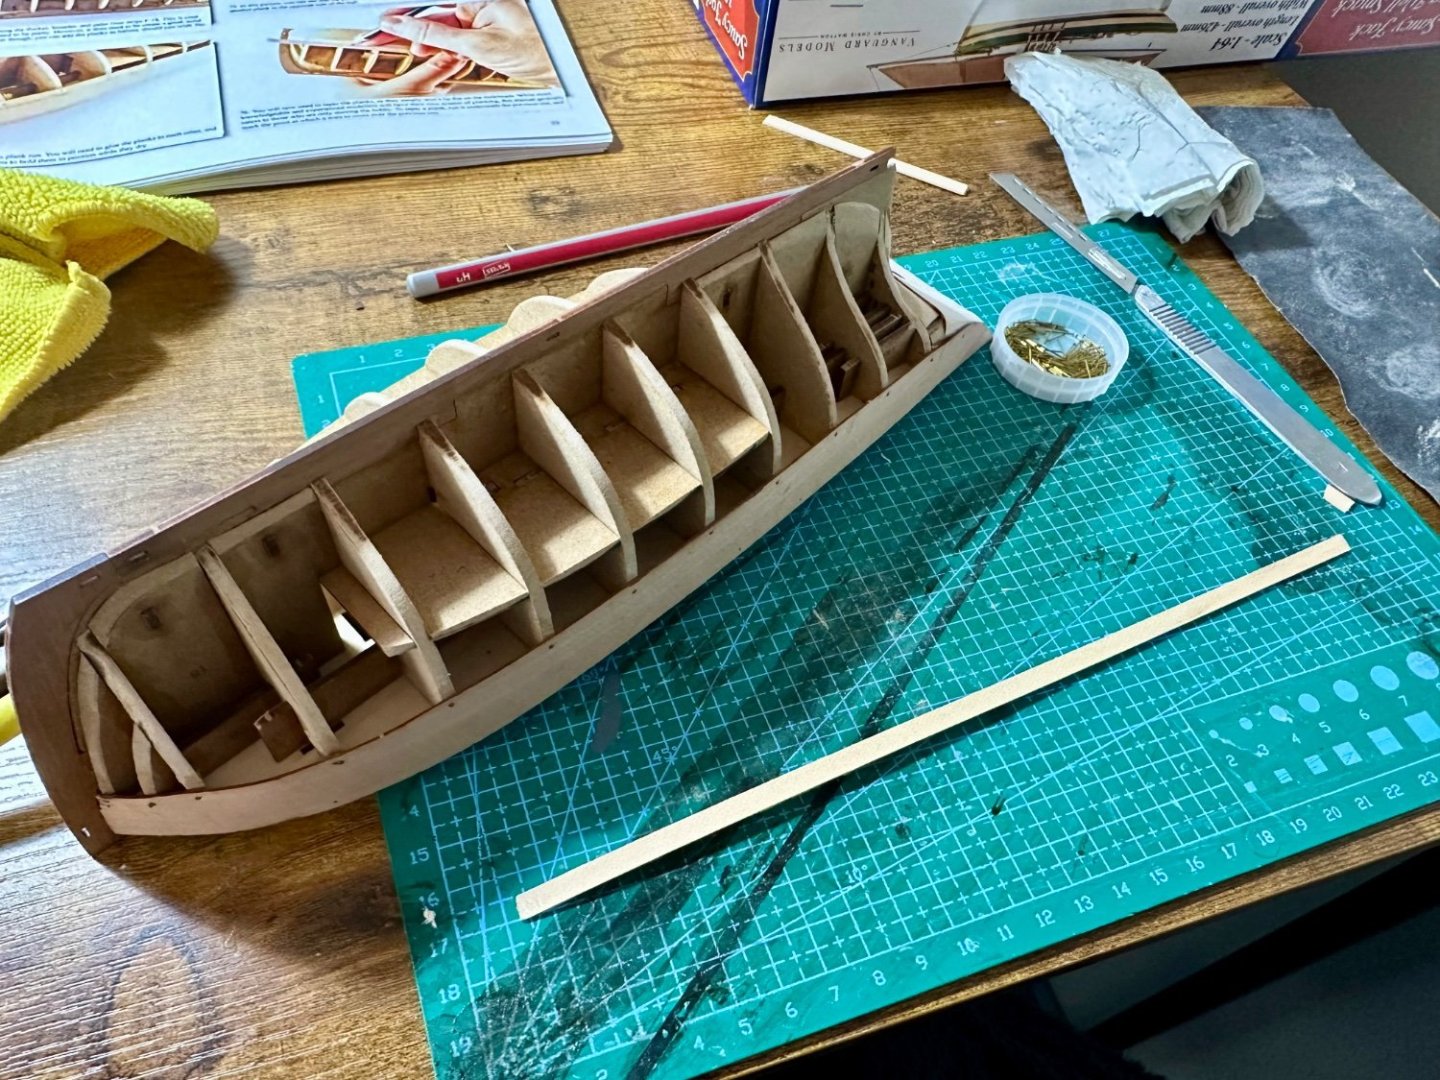
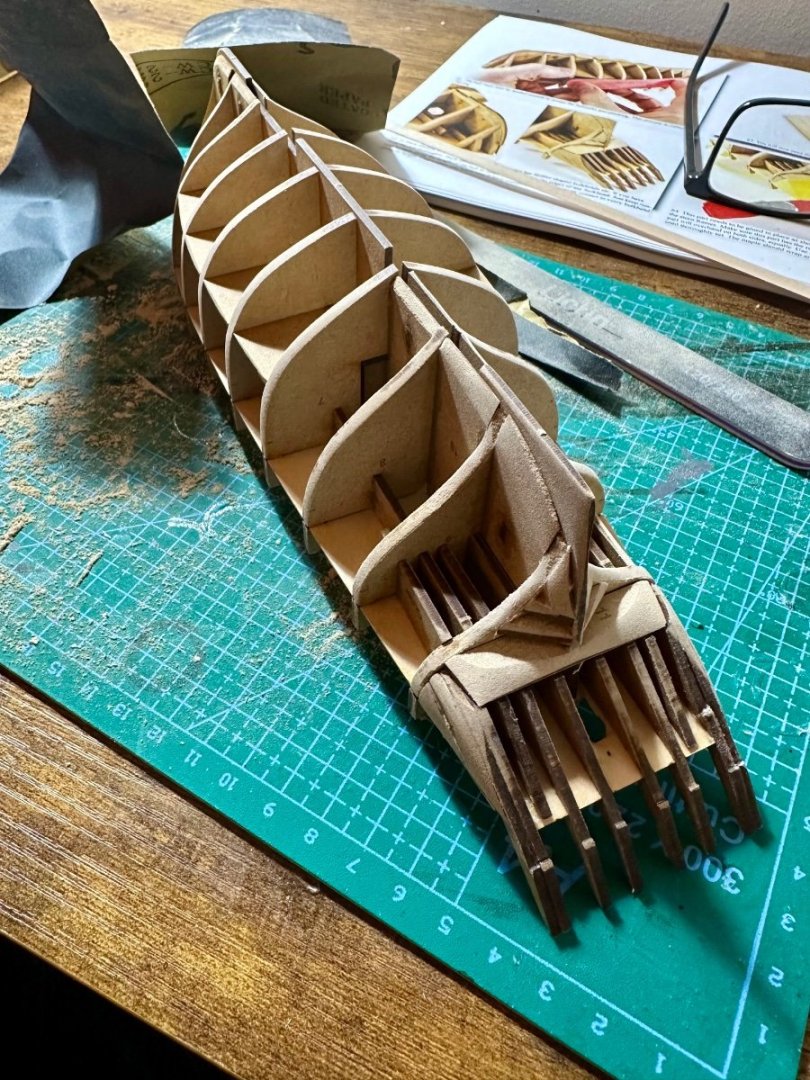
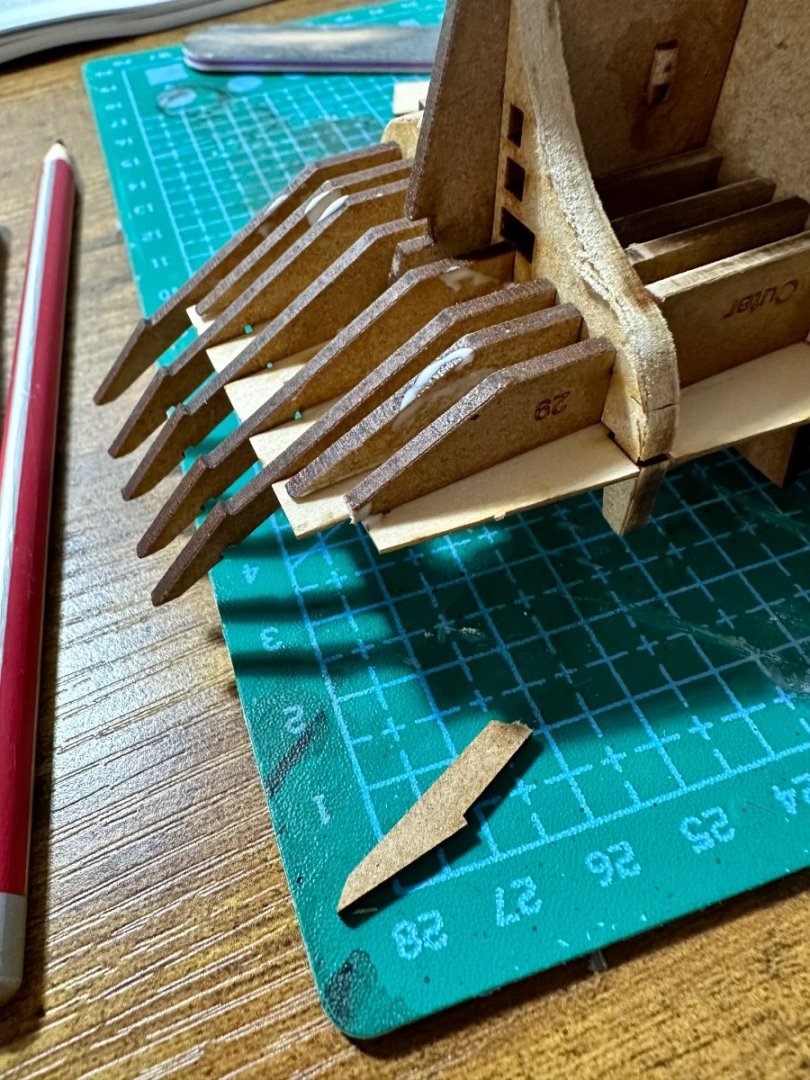
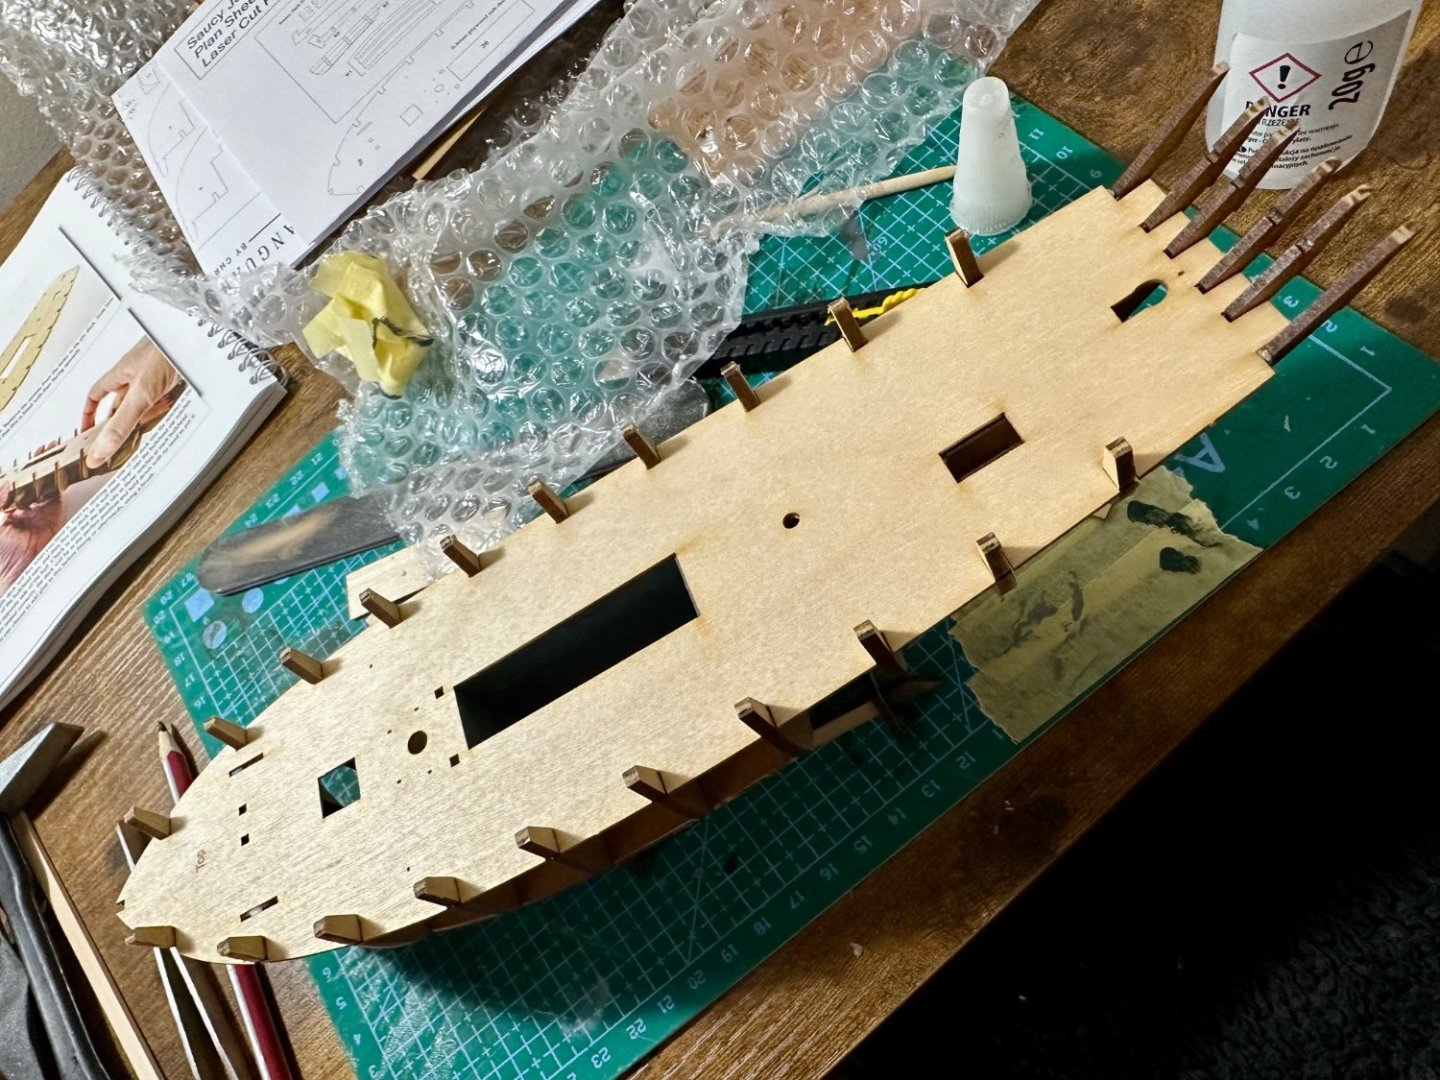
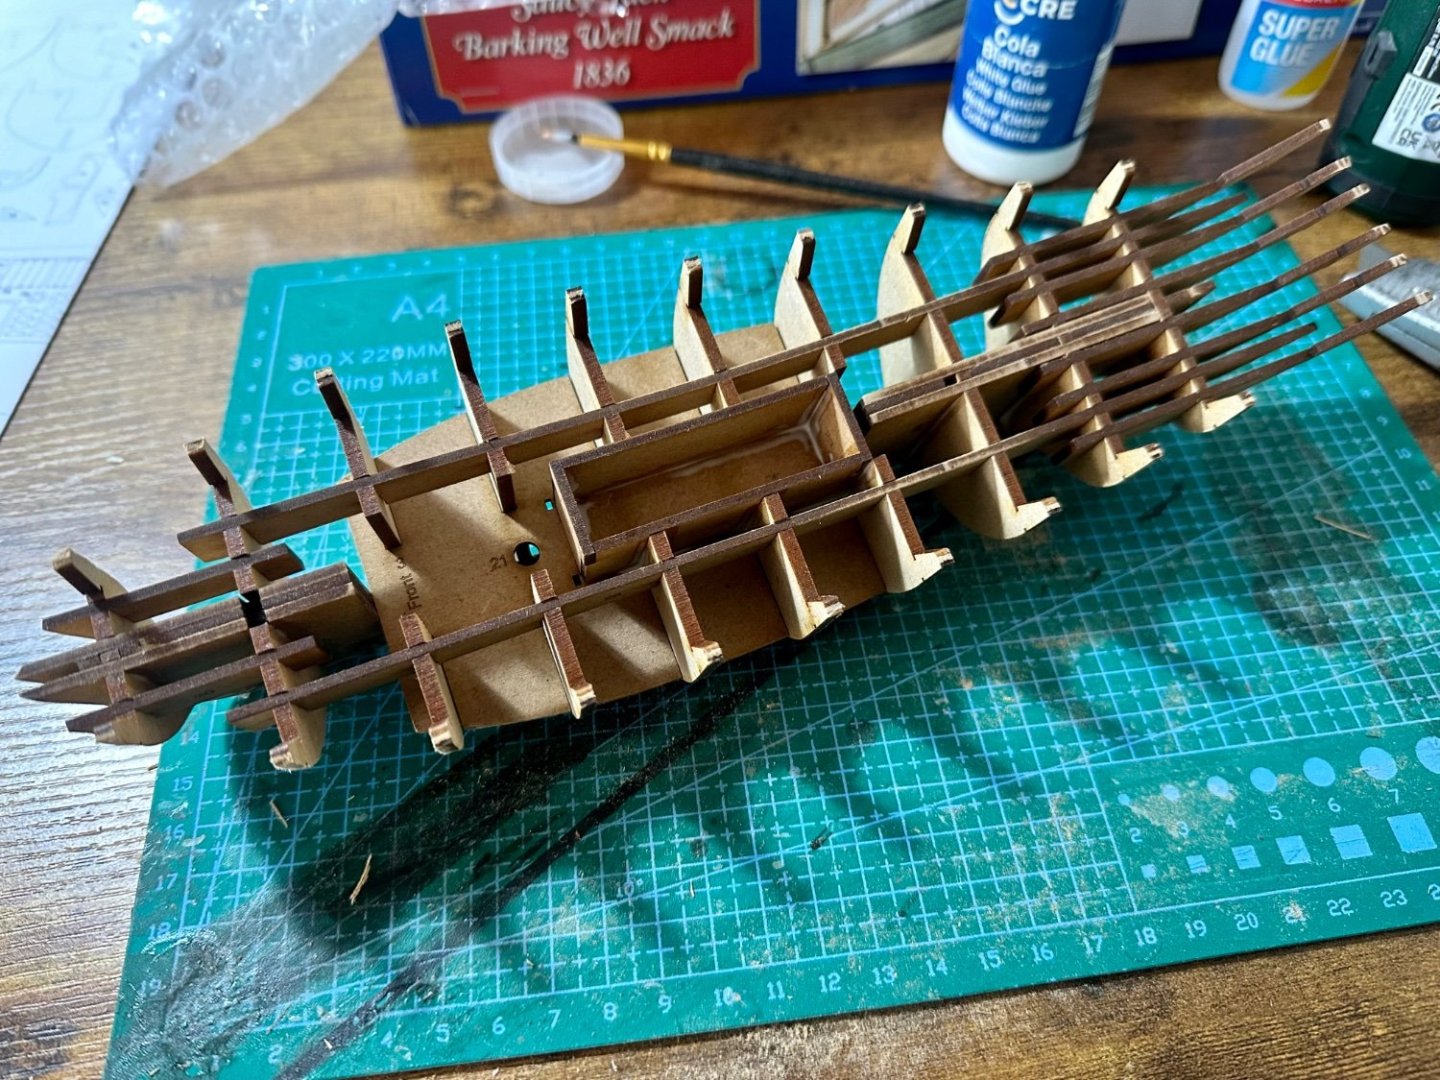
Hi all, This is my second kit. First was the Occre Polaris which you can see with the start of this project below. Really enjoyed that build and hopefully have learnt a lot from it to make this one better. Today was my first session on this kit. All I've done is make up the skeleton of the hull. This was a very different experience than with the Occre kit. Vanguard is much tighter tolerance and I suspect a far better base to start from as it all locks together to keep things square from the start. All went as written in the manual without any fettling needed other than the start of fairing. Using a Dremel to sand to the provided lines was very easy. I've a few ideas to make this my own but for now it's just sat curing for the next session. Back soon I hope. Simon.

-
Focus Stacking
BrochBoating replied to Dennis P Finegan's topic in Photographing your work. How to do this.
Newer ones do but older Pro cameras have no aids like this as it’s assumed you have the technique to do it yourself by that point 😉 Be interested to hear how this goes as not sure how it would work. -
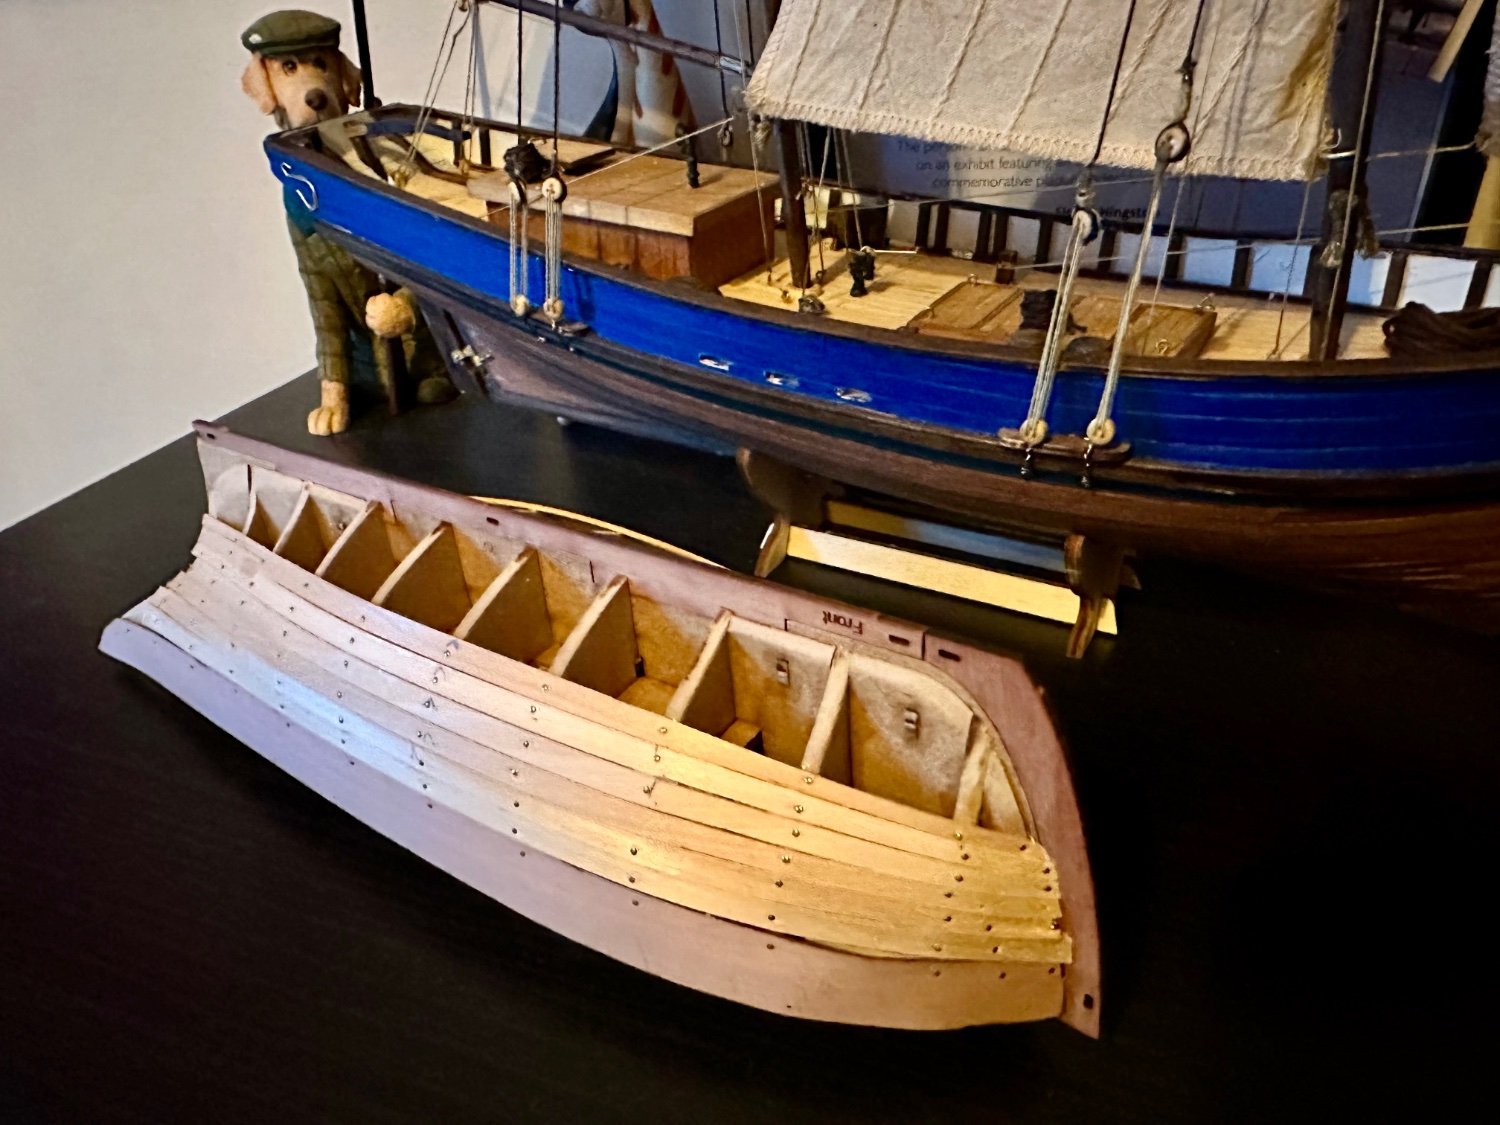
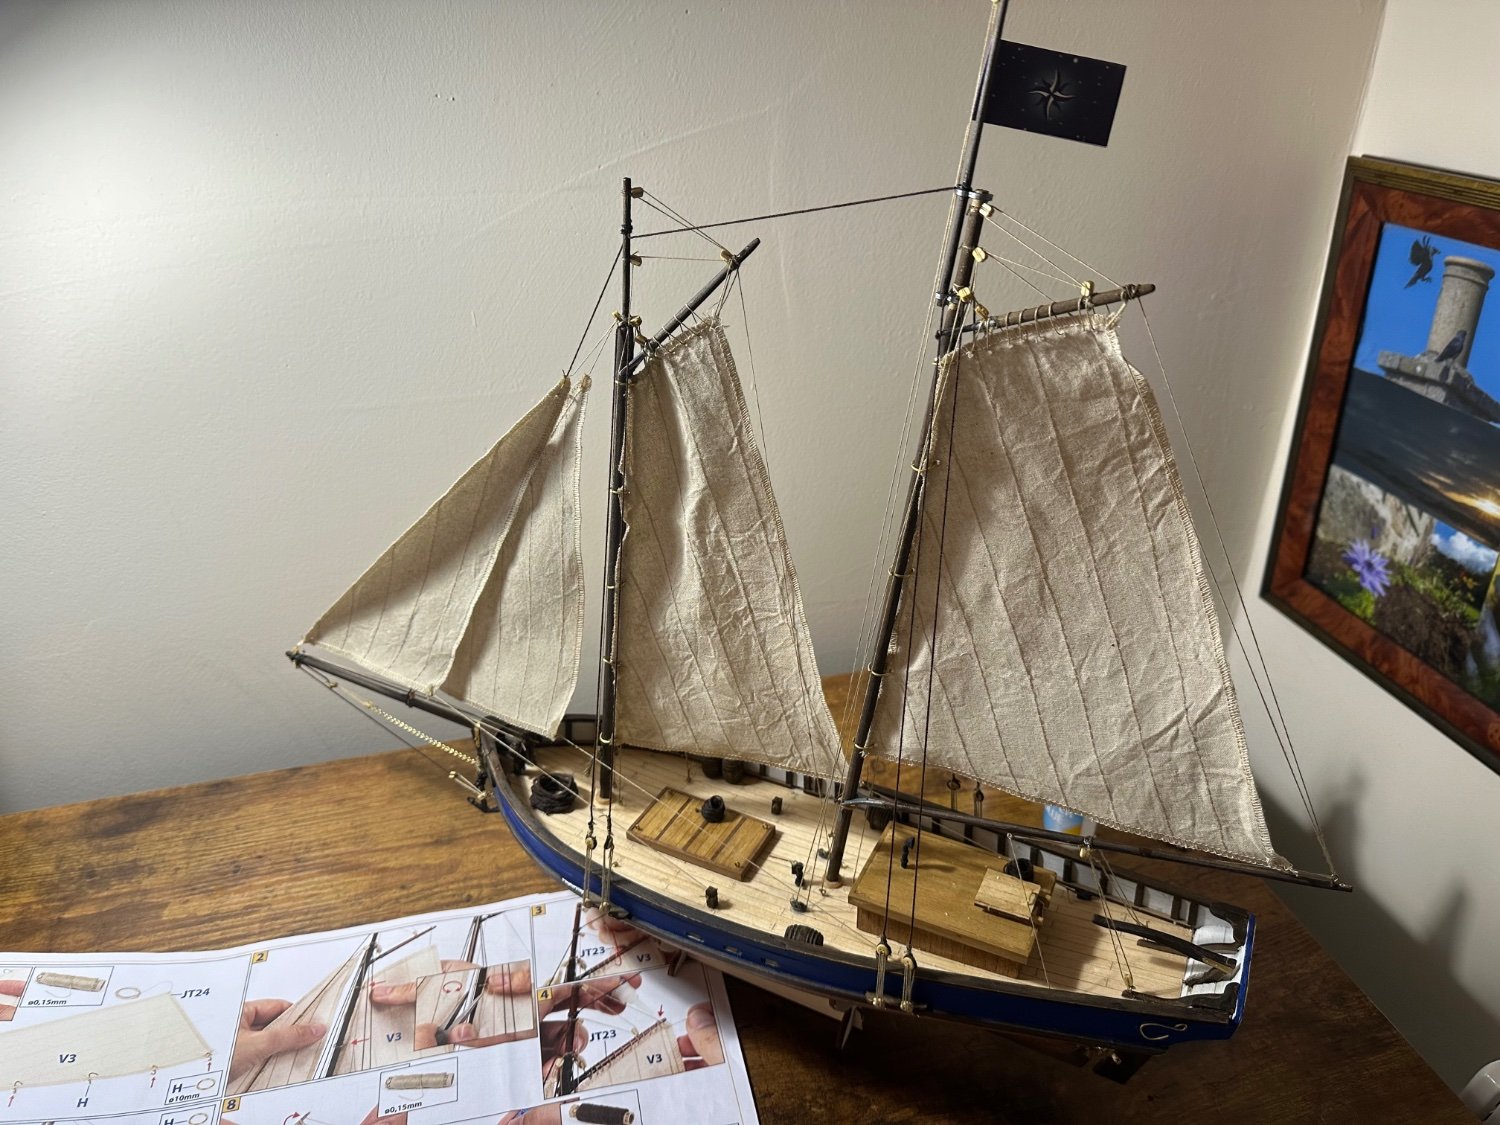
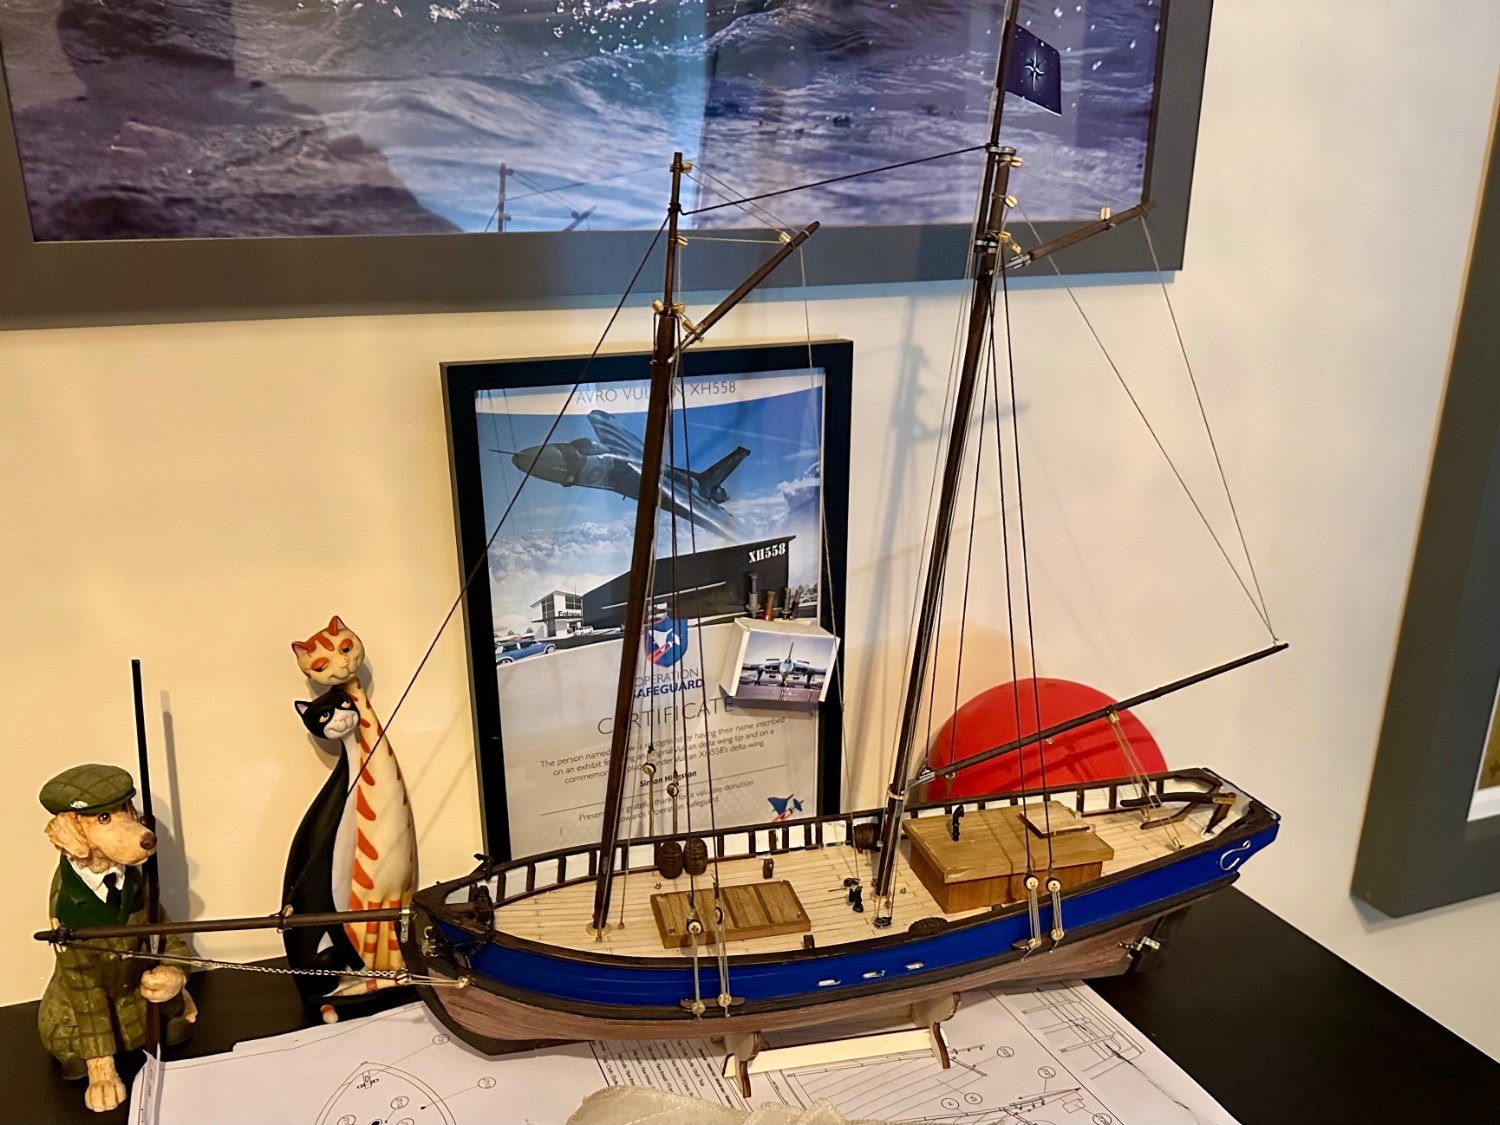
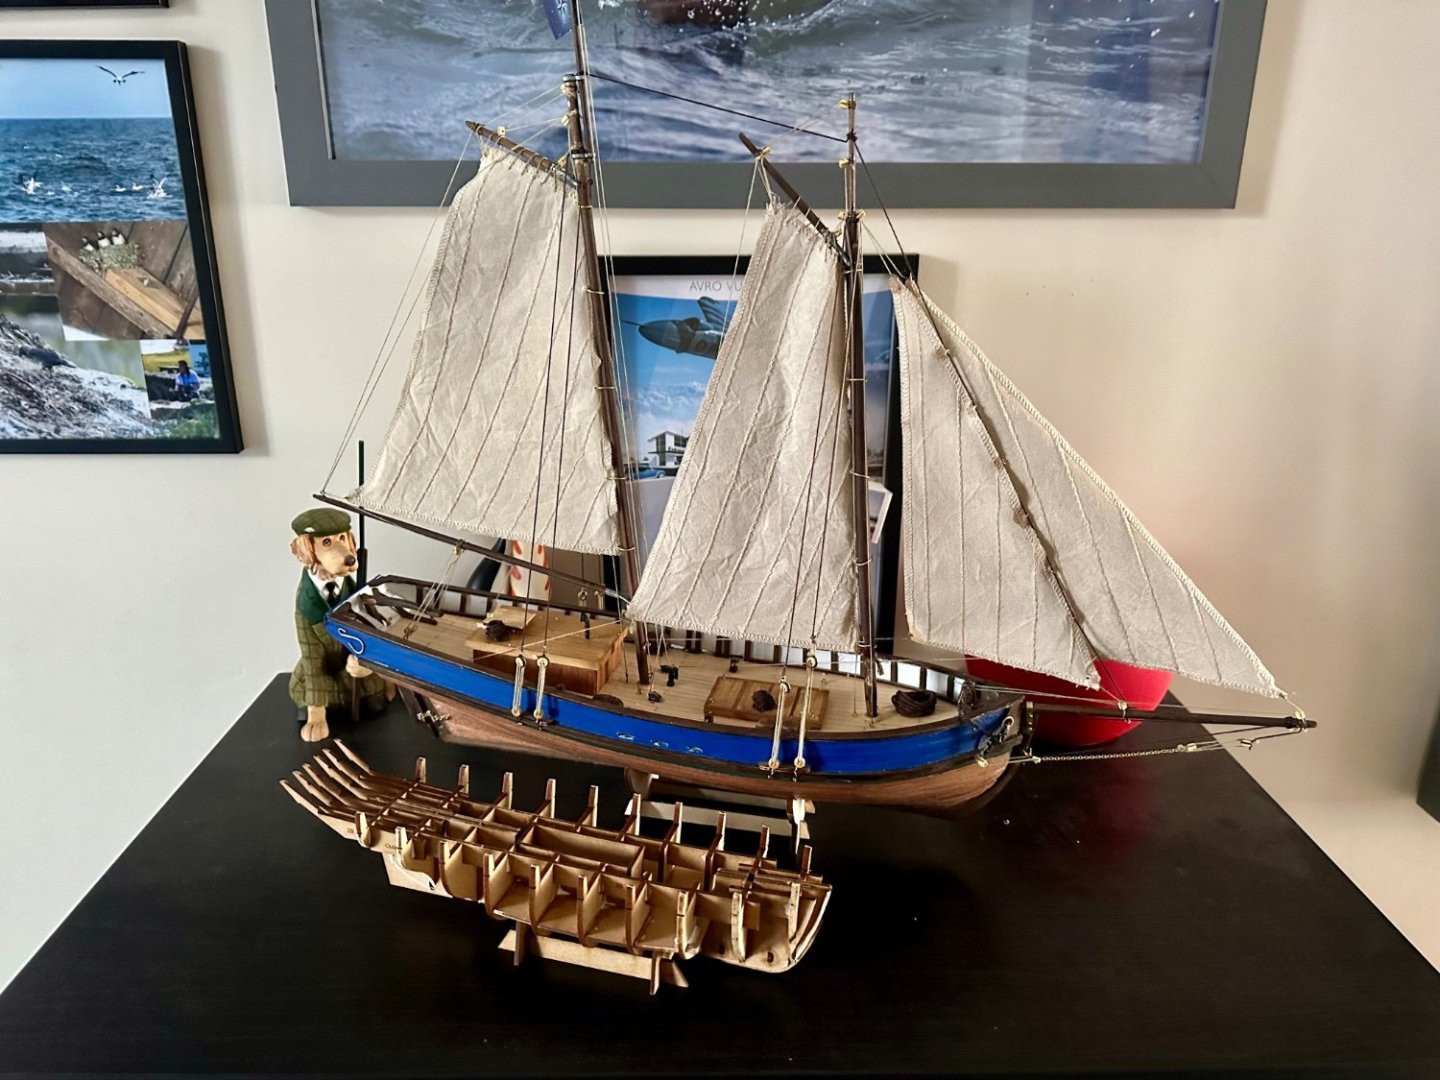
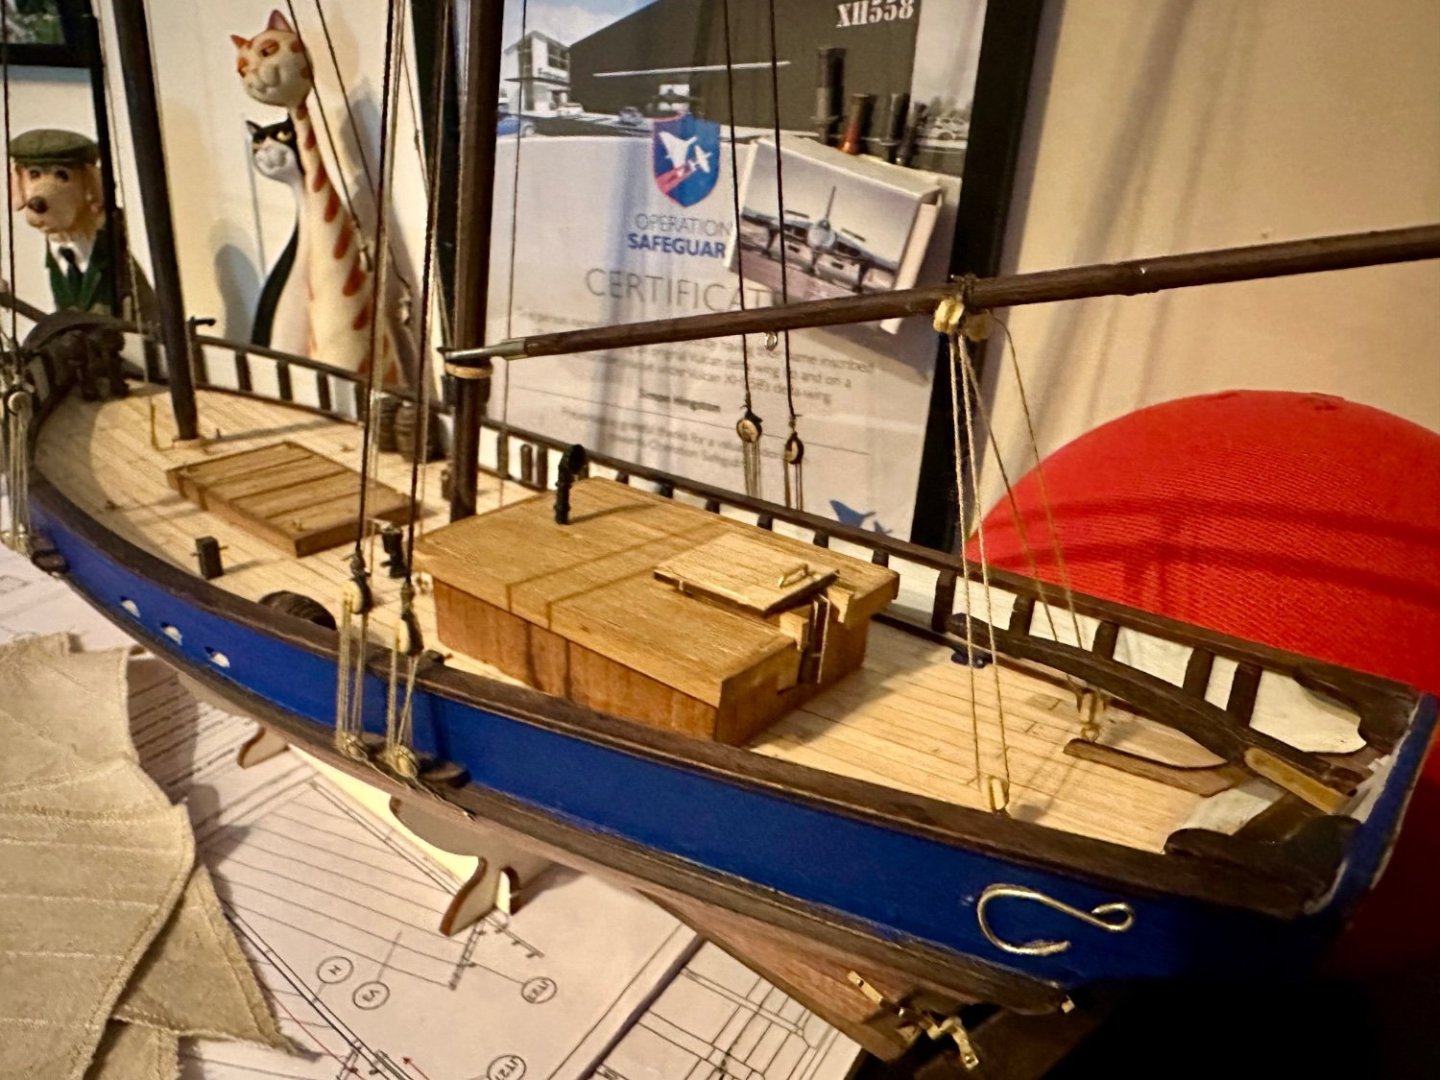
And here is the finished article. Happy overall.


-
Focus Stacking
BrochBoating replied to Dennis P Finegan's topic in Photographing your work. How to do this.
Great bellows, a set are on my list. Long focal length (I’d very much like the 180mm for specialised use)and high magnification with the bellows could make for some very interesting pictures. -
Focus Stacking
BrochBoating replied to Dennis P Finegan's topic in Photographing your work. How to do this.
Can be done by hand but should be done with tripod and rail. That way a true macro lens can be used and allows for the changes in aperture and microscopic depth of field that brings. Even cheaper rails will usually do with decent technique. Processing with Lightroom or Photoshop is simple, if time consuming too. Not a difficult technique. Lighting is likely to be more difficult. -
Thanks a lot. For a first go I'm pleased.
-
Focus Stacking
BrochBoating replied to Dennis P Finegan's topic in Photographing your work. How to do this.
Probably missed this being said but for reliable focus stacking move the camera not the focus. -
Thanks Particularly enjoyed the planking. And the work to improve it after lol!
-
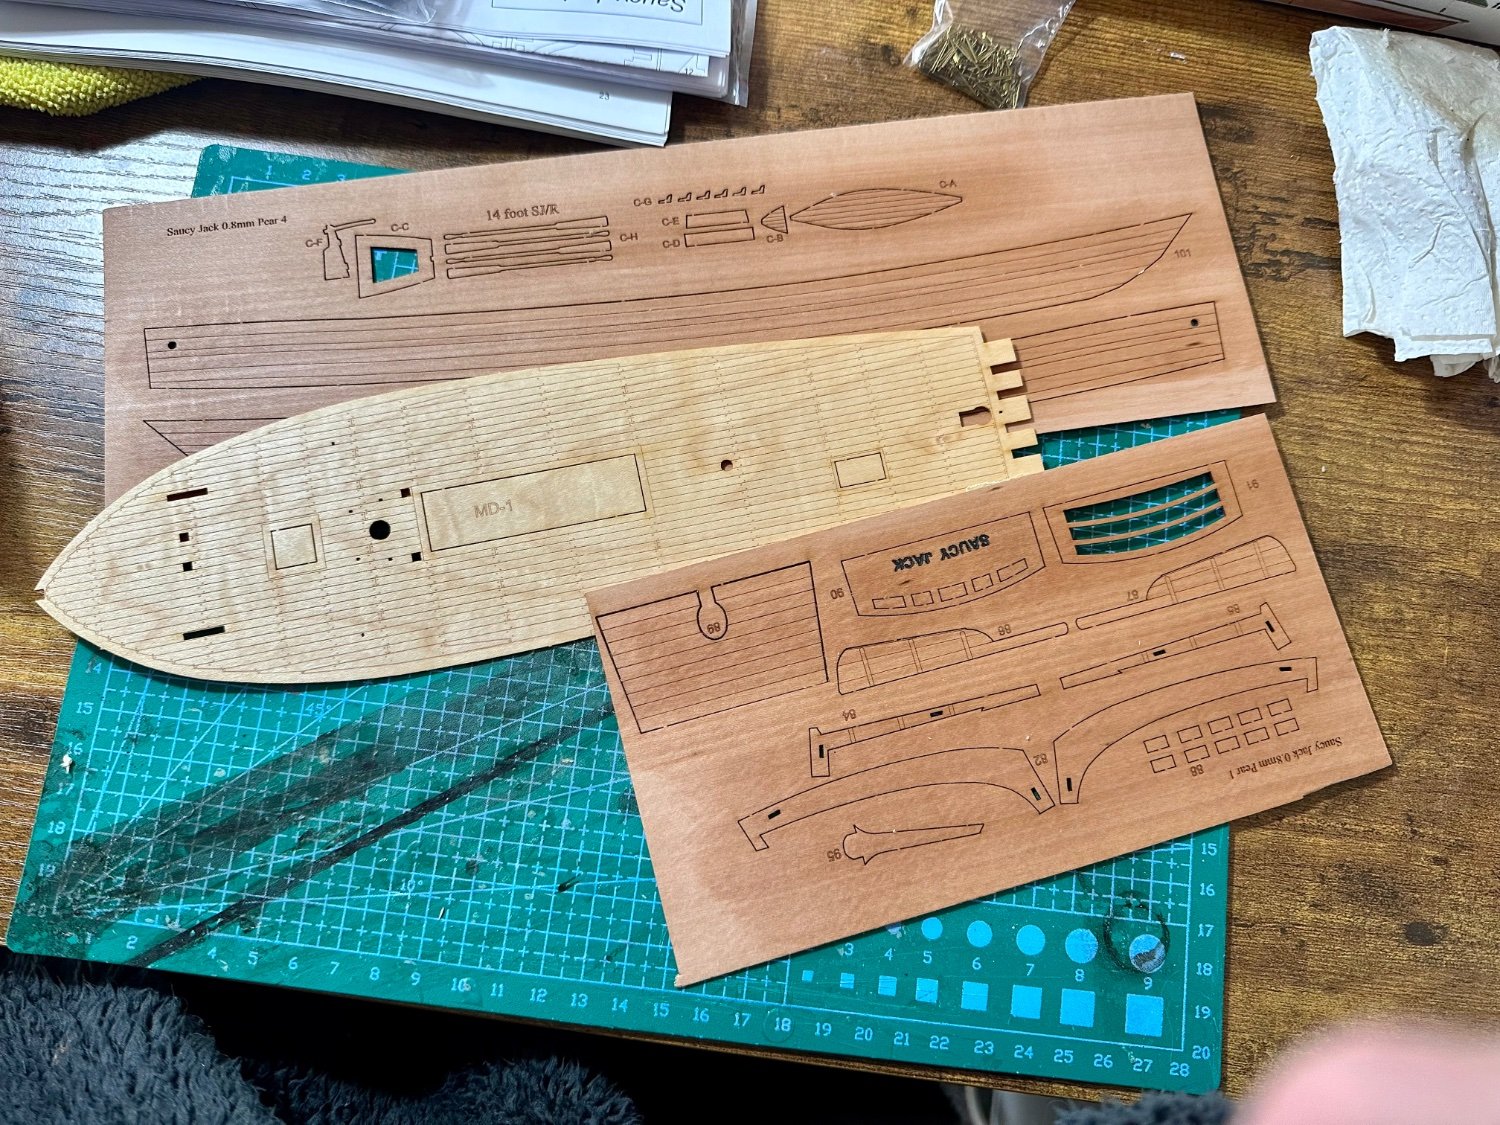
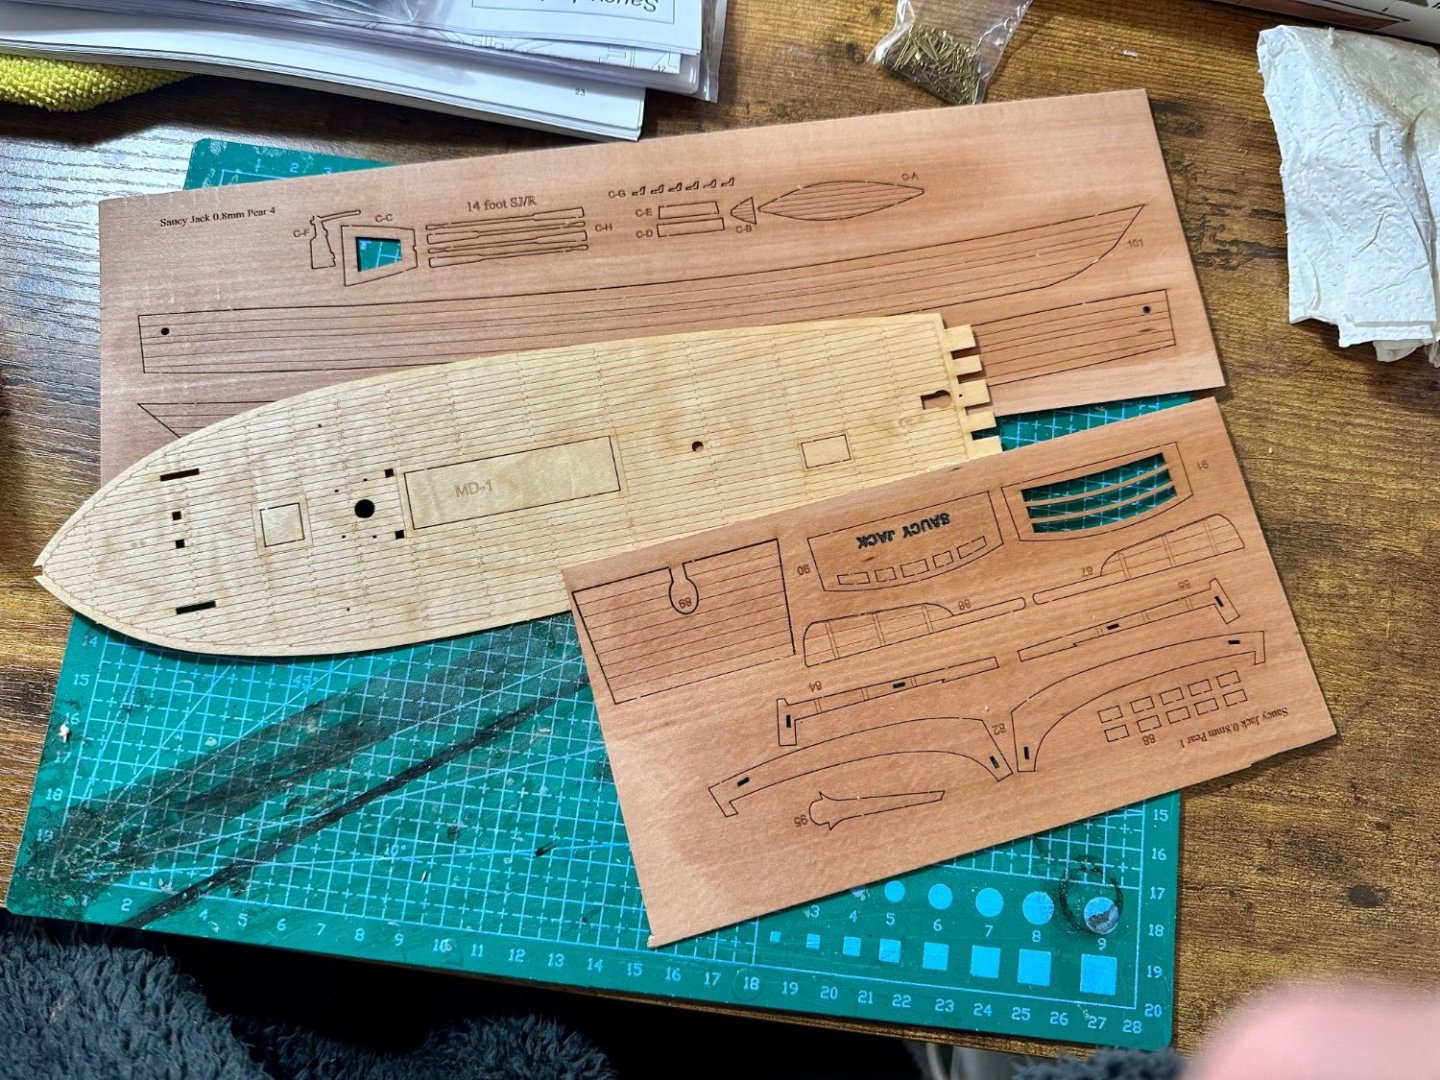
Cheers. I have the Saucy Jack to start next. The Mumble Bee is similar to boats my late father's family had. The Zulu was built two miles from me and the Fifie fished from my village!
-
Thanks. Lots of errors but happy for a first go. Will be happier after I've got some proper applicators for liquid CA!
-
It would be good if there were more really good quality kits of the exploration & industrial/commerce ships.
-
Here she is:

- 20 replies
-
- 15
-

-
Afternoon all, Joined recently after an email conversation with the very talented Chuck. My name is Simon and I'm the prototypical middle aged chap in north east Scotland. I'm my wife's carer and I'm hoping model boats can be a relaxation when time is available. I have a mild brain injury so while I'm not too bad with the doing but I'm not great with the remembering of lots of names for new things, apologies in advance. I used to do a reasonable amount of woodwork with just hand tools but arthritis put a stop to that. Smaller tools seem, so far, to be kinder. I'm nearly finished my first kit, the Occre Polaris starter kit, and I'll get some pics next time it's out. It's taken me about five weeks to get to standing rigging and I'm quite pleased with how I've got on. There are plenty of errors but most I've found my way round or been able to repair. Having taken a lot of time looking at the various manufacturers and folk's results here I now have two Vanguard kits in the stash to work on. It seemed they are expensive compared to most but the quality and level of detail as standard makes them great value for money in comparison. Hopefully I'm realistic though and will do one or more of the fishing boats before progressing to any of the fighting boats. Personally I'd rather not model the fighting ships but as Vanguard kits seem so good I'd rather attempt them than not. Look forward to speaking with you all and hope to do a build log for the next kit. Simon
- 20 replies
-
- 11
-