HOLIDAY DONATION DRIVE - SUPPORT MSW - DO YOUR PART TO KEEP THIS GREAT FORUM GOING! (Only 20 donations so far - C'mon guys!)
×

BrochBoating
-
Posts
186 -
Joined
-
Last visited
Content Type
Profiles
Forums
Gallery
Events
Everything posted by BrochBoating
-
Welcome Andrew, you'll find the building really helpful.
-
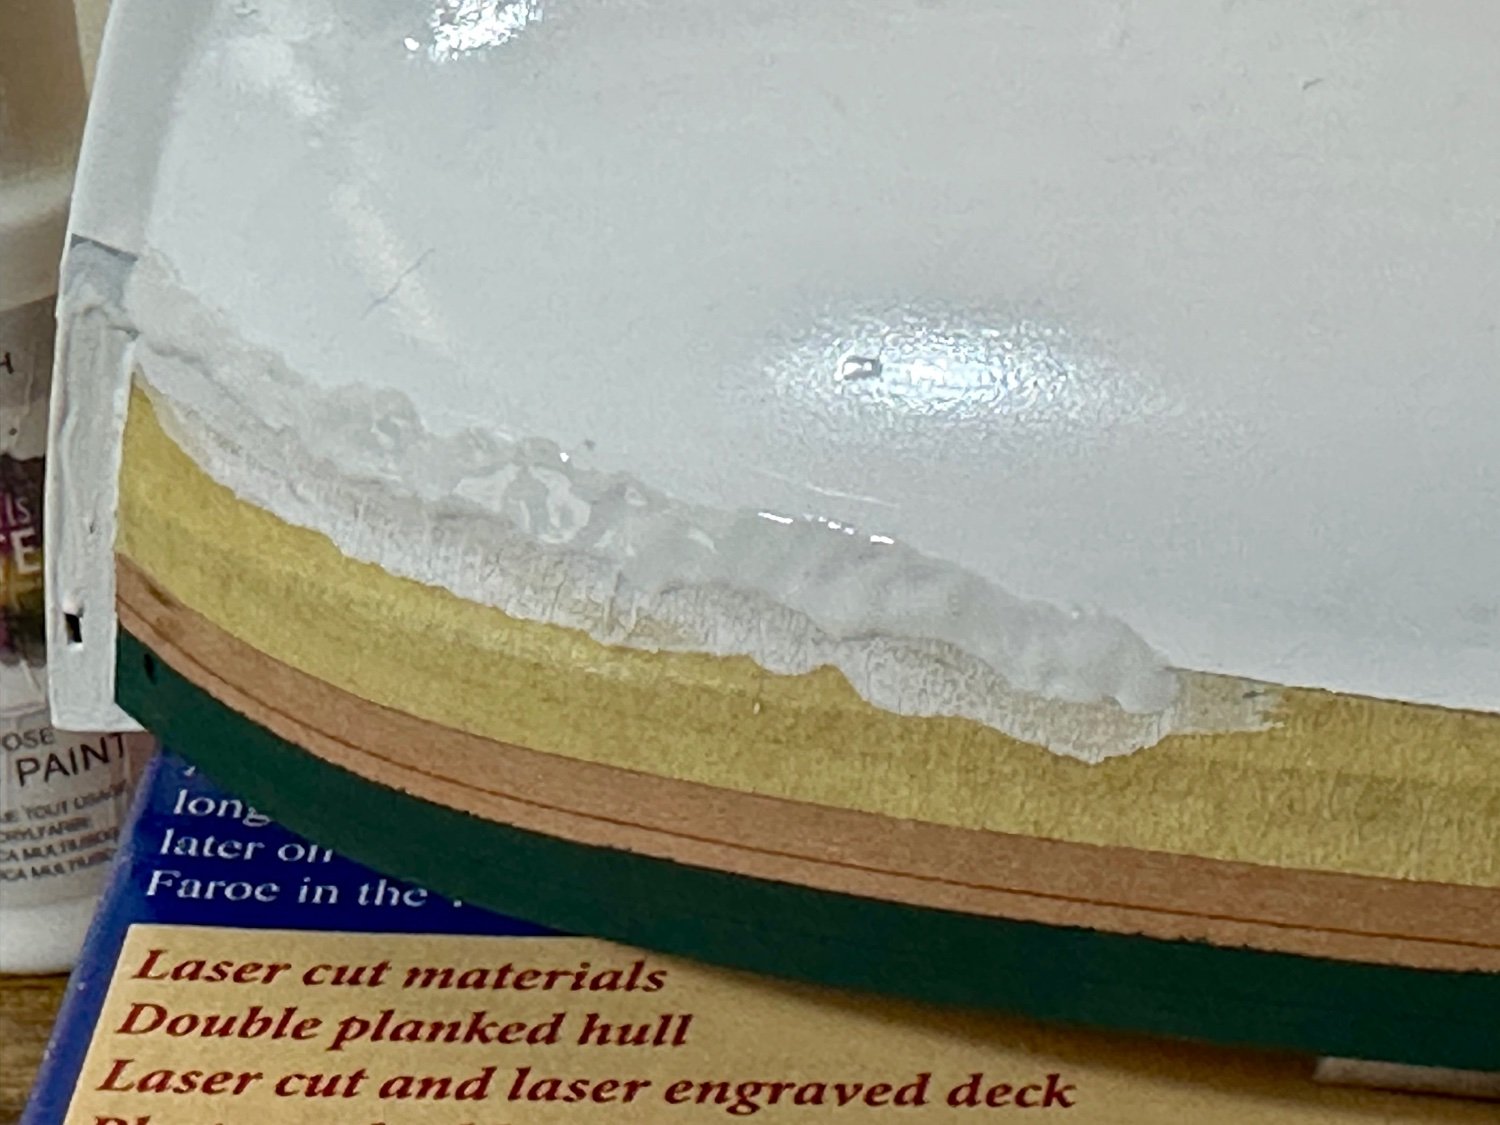
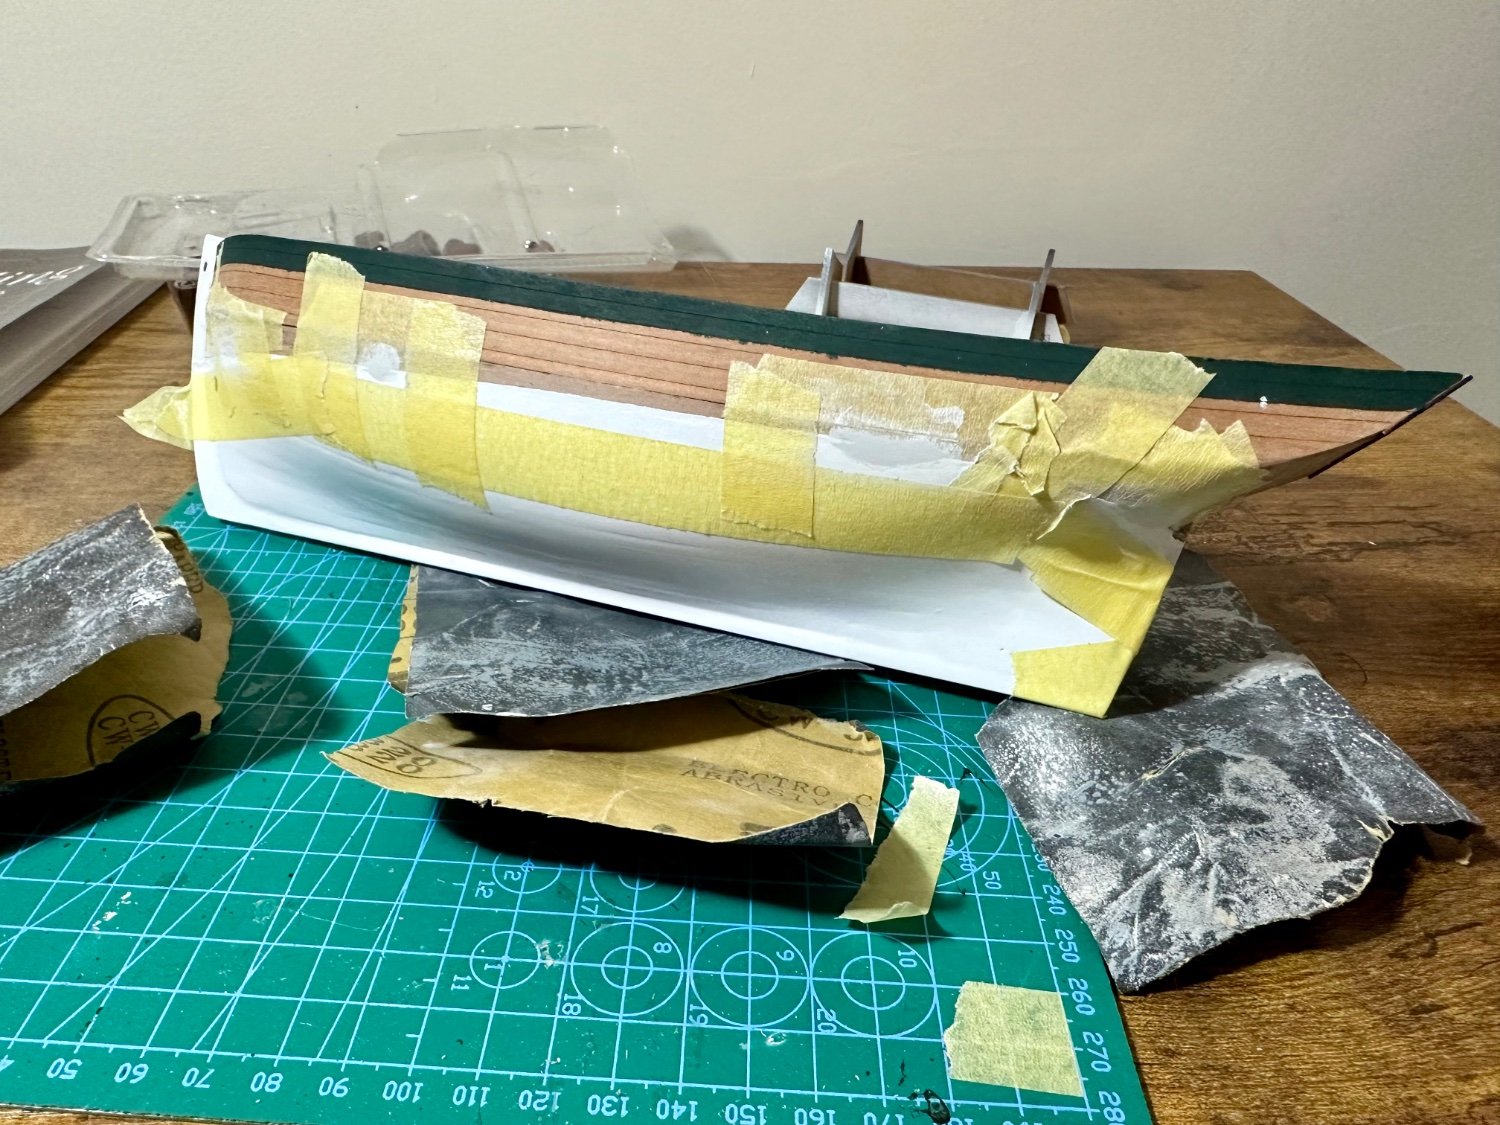
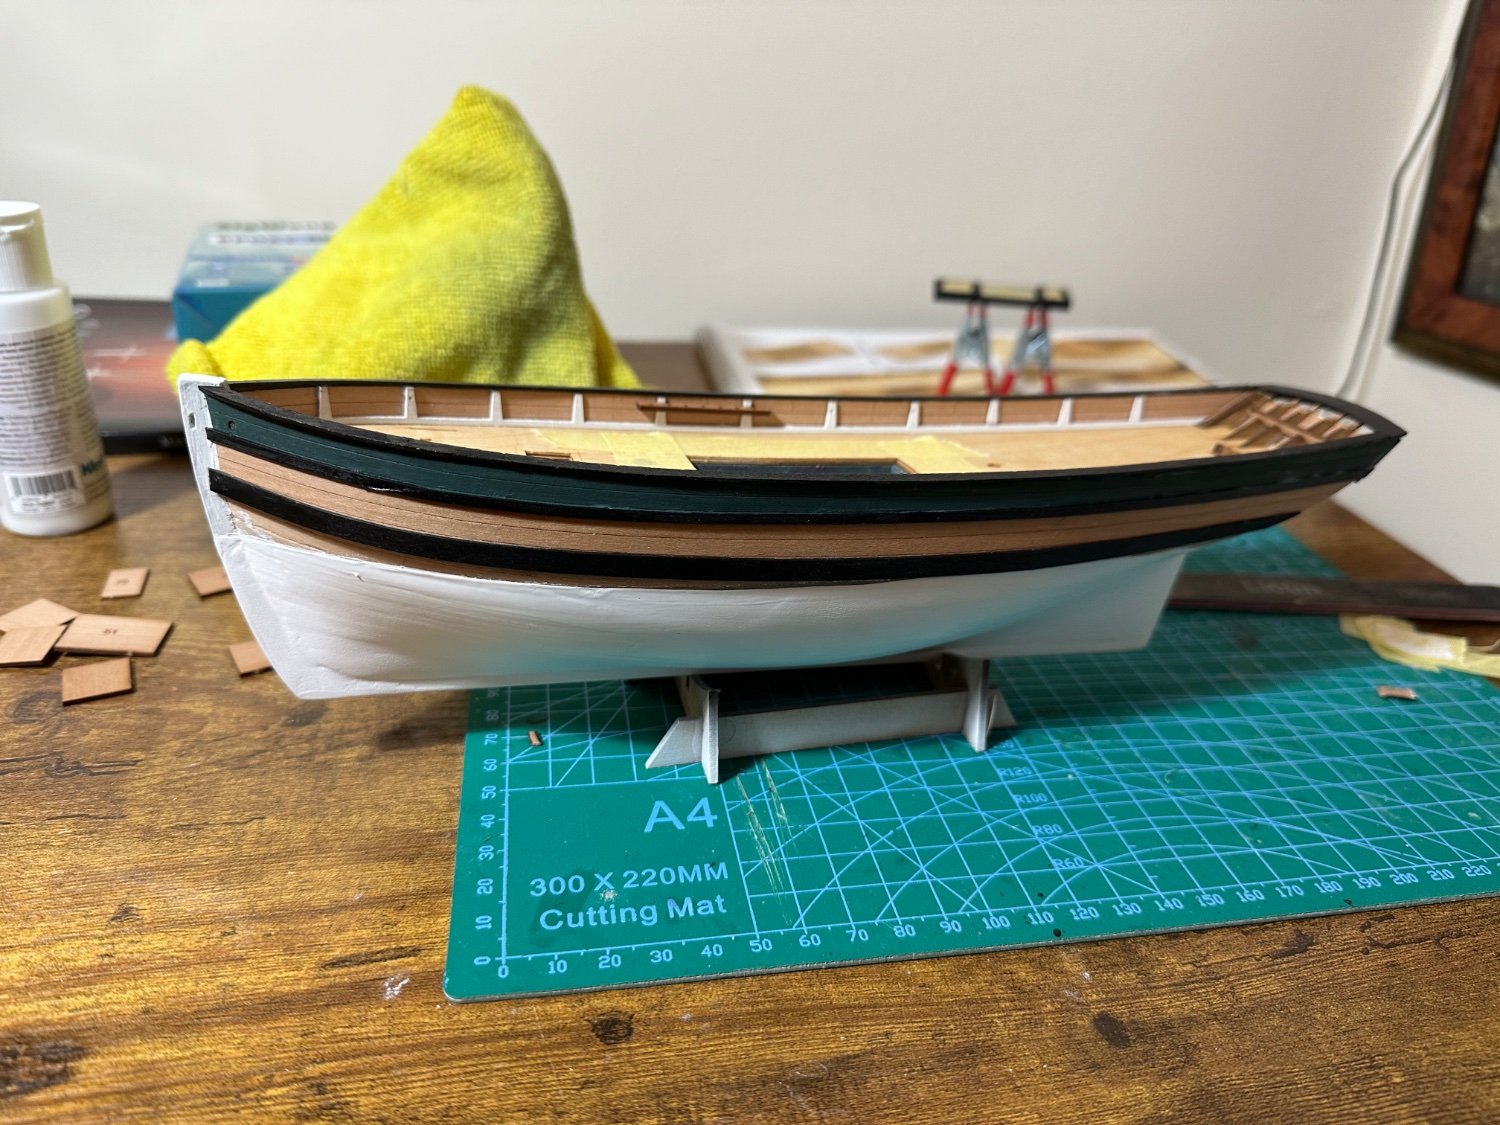
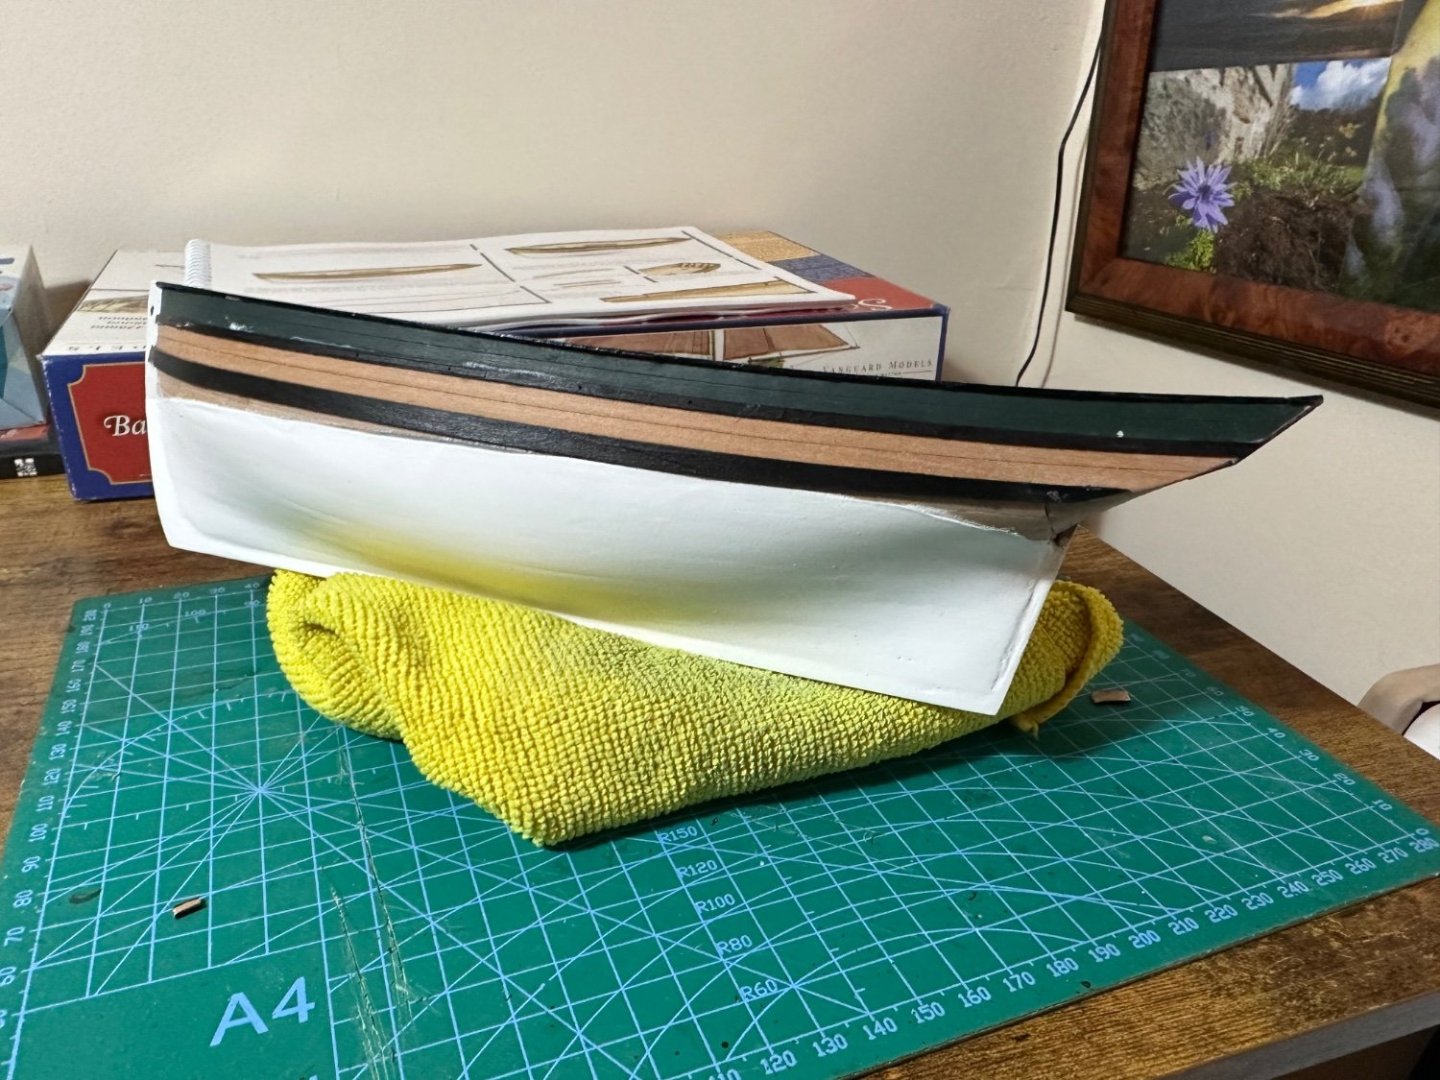
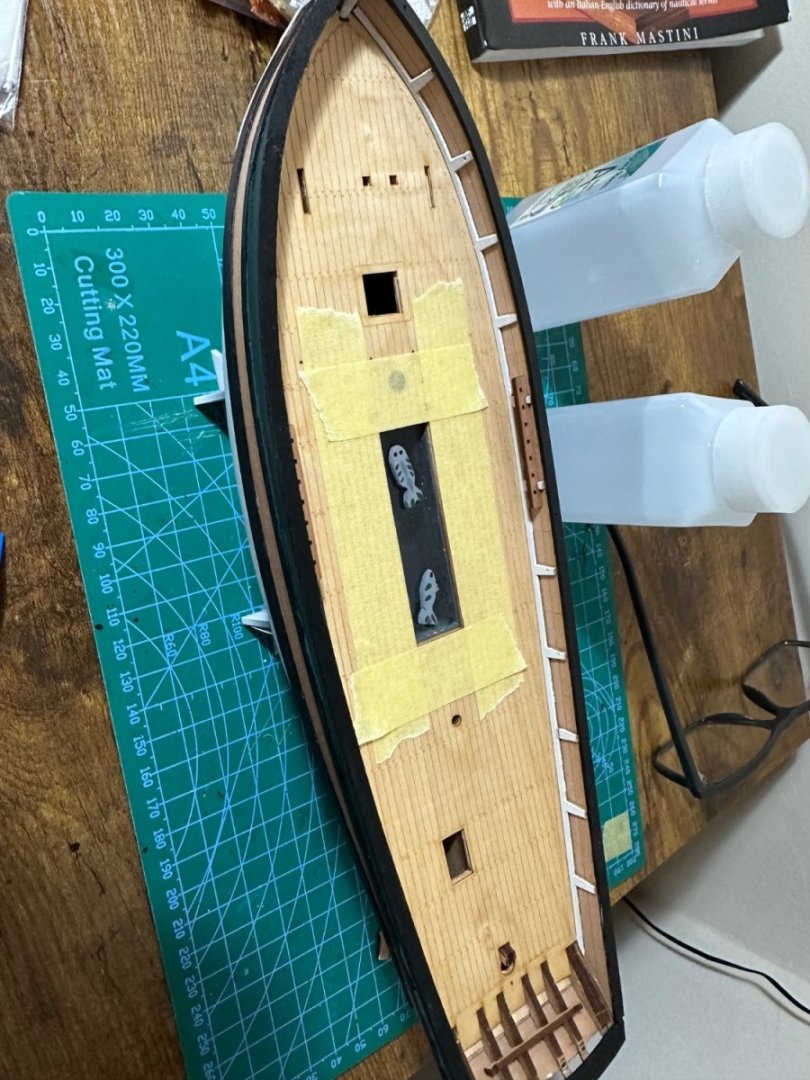
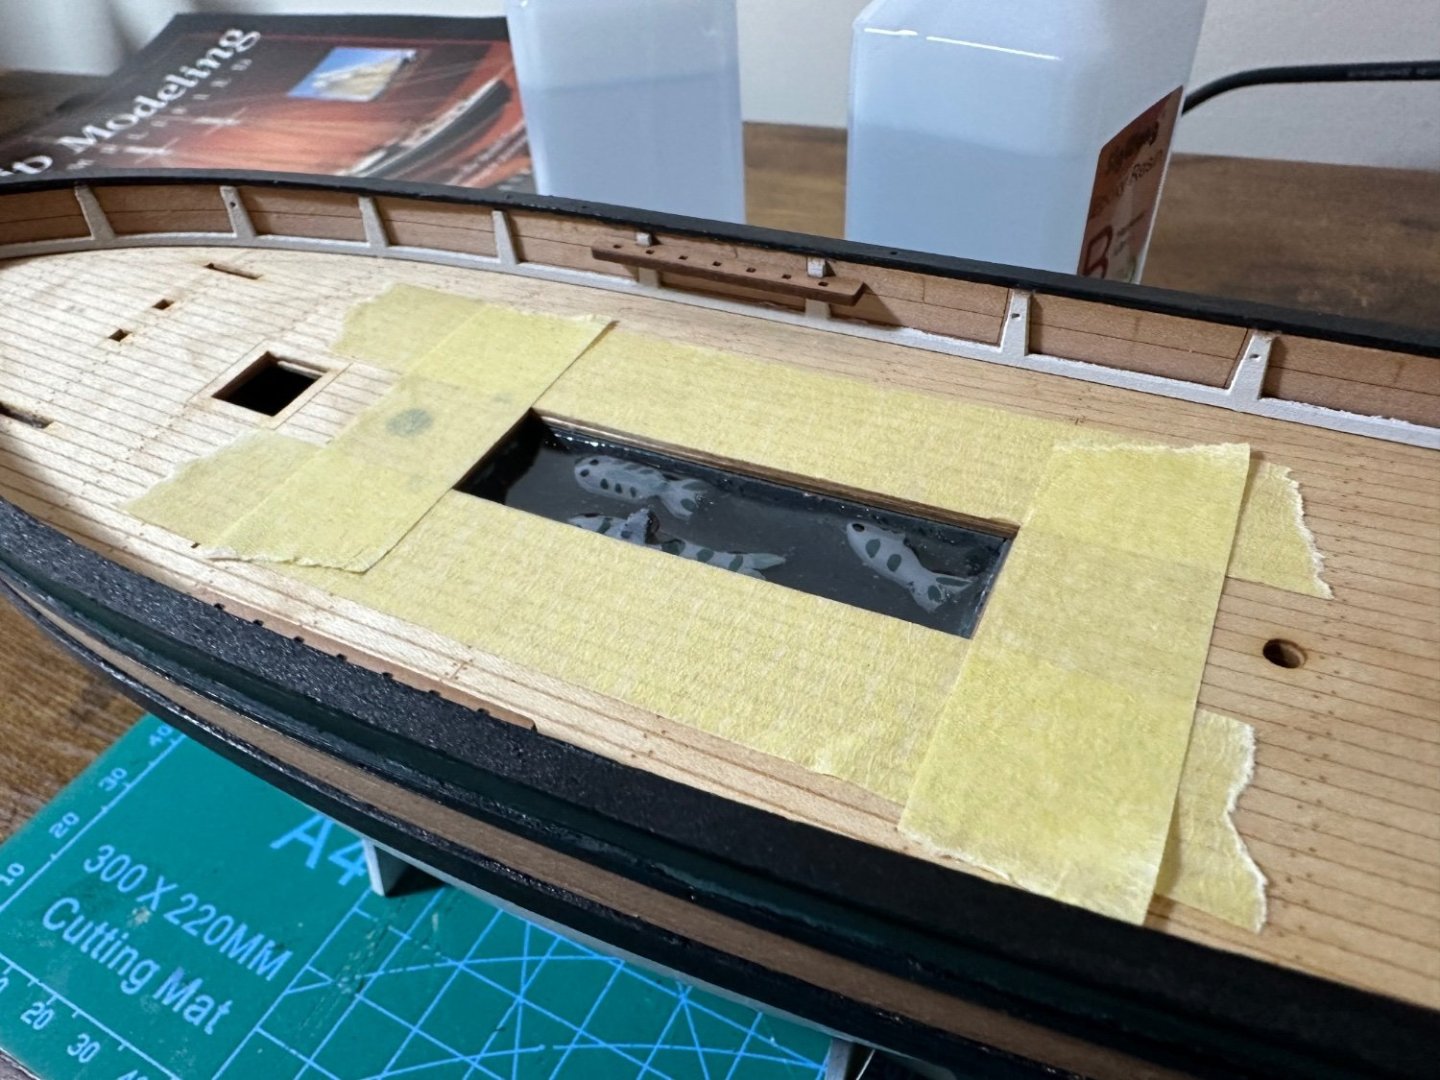
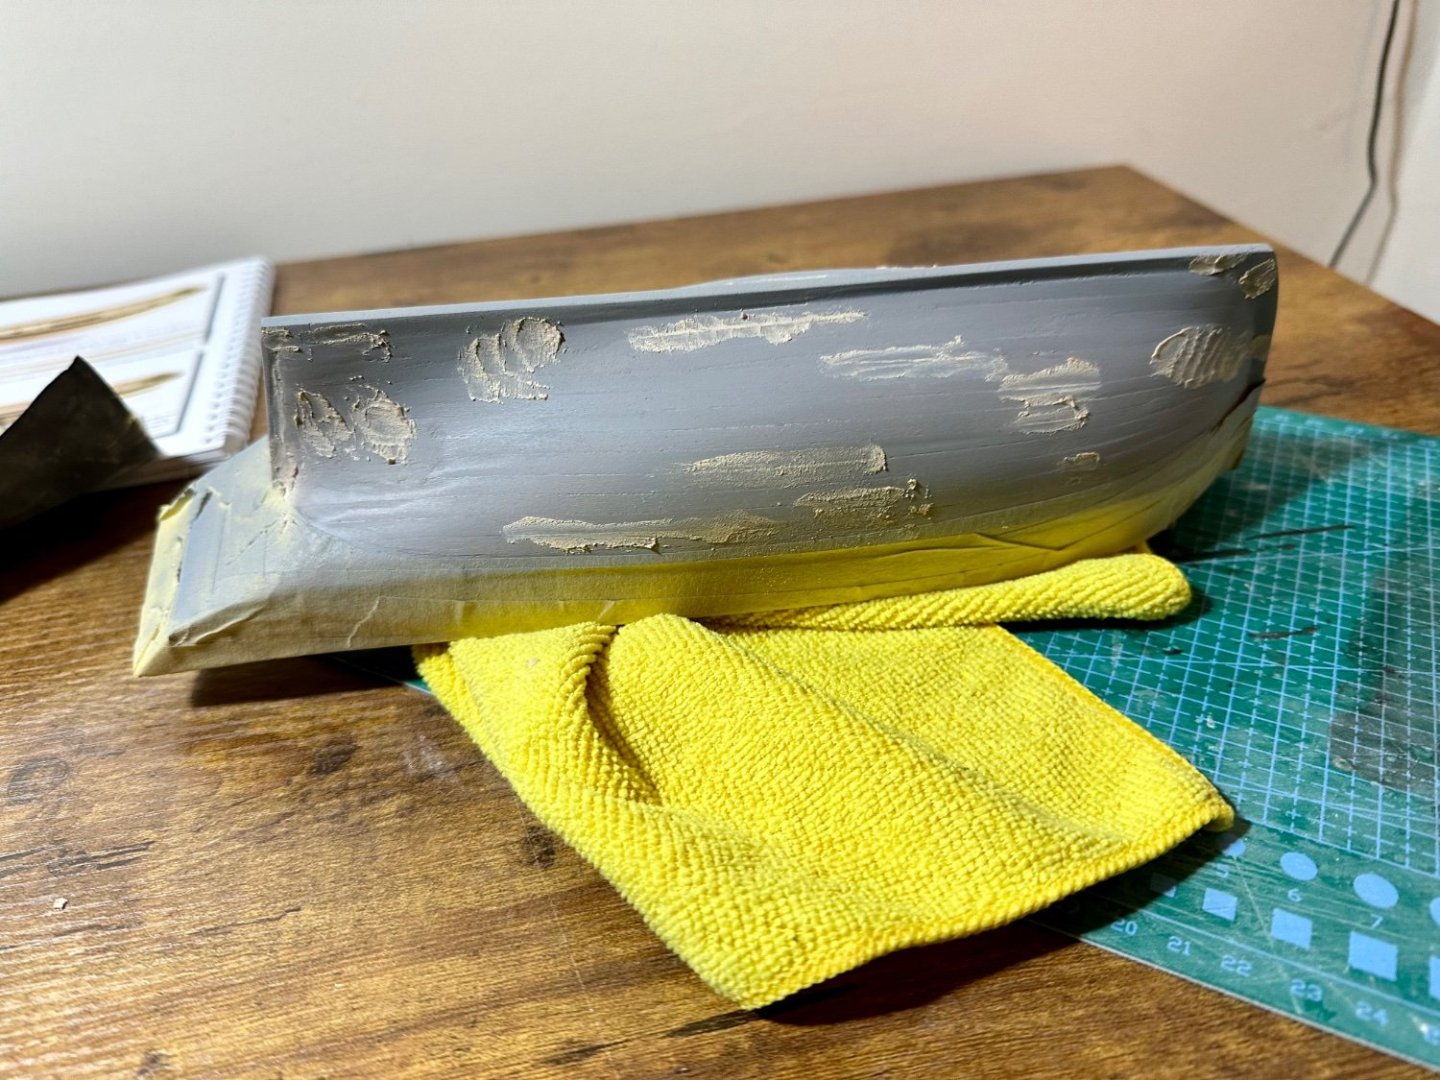
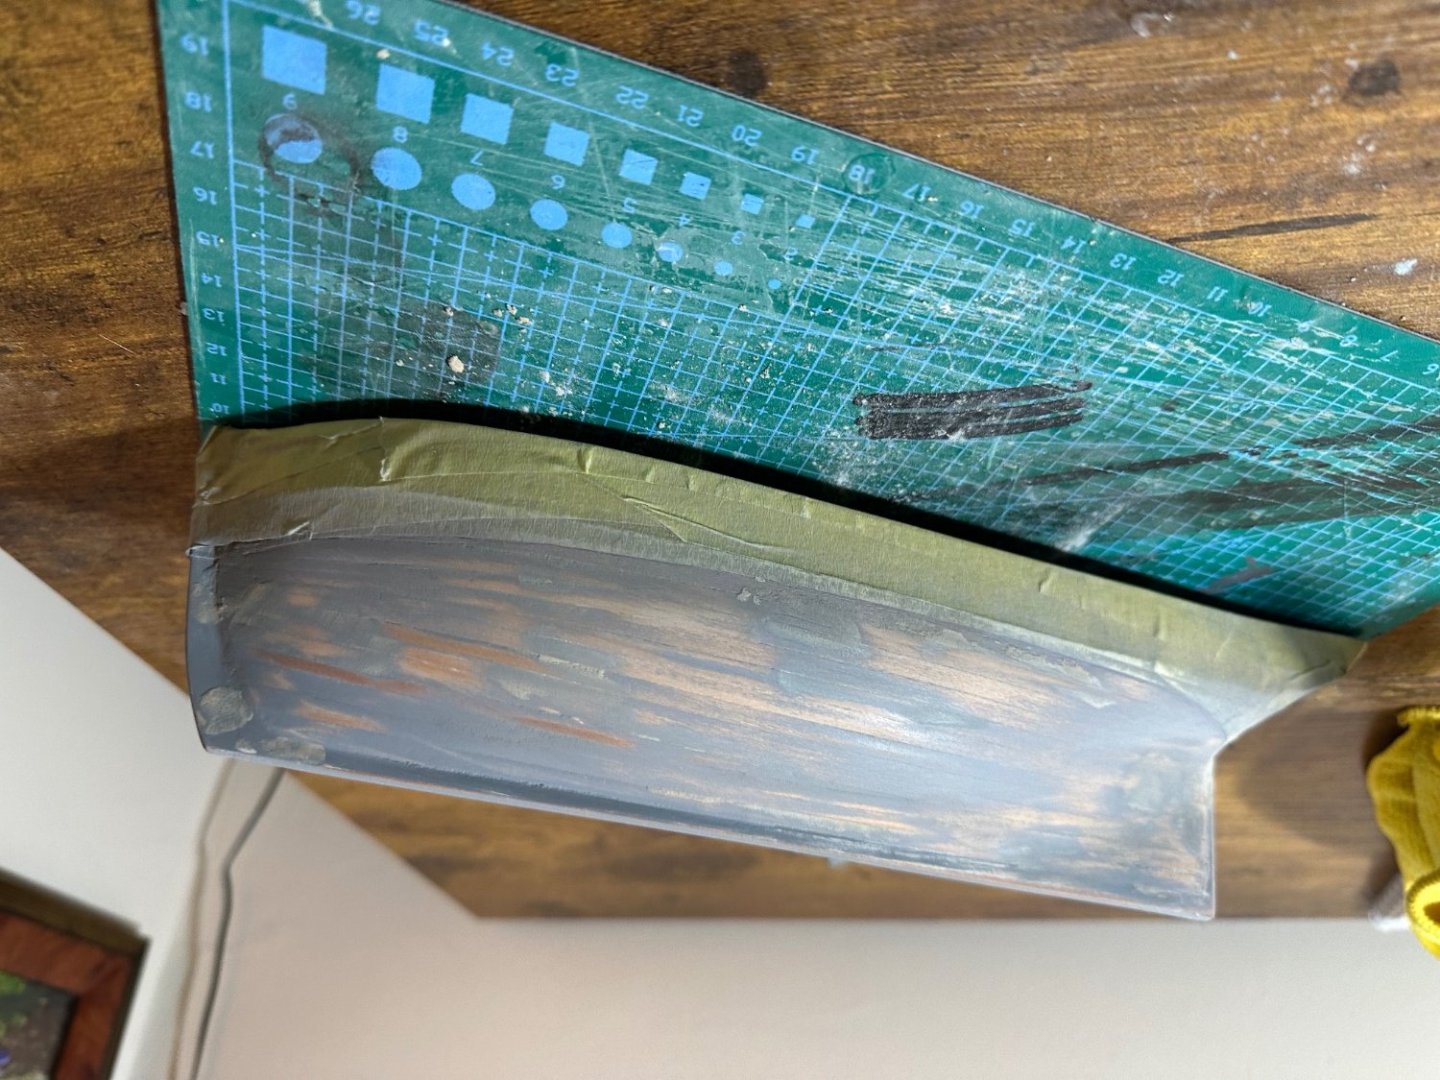
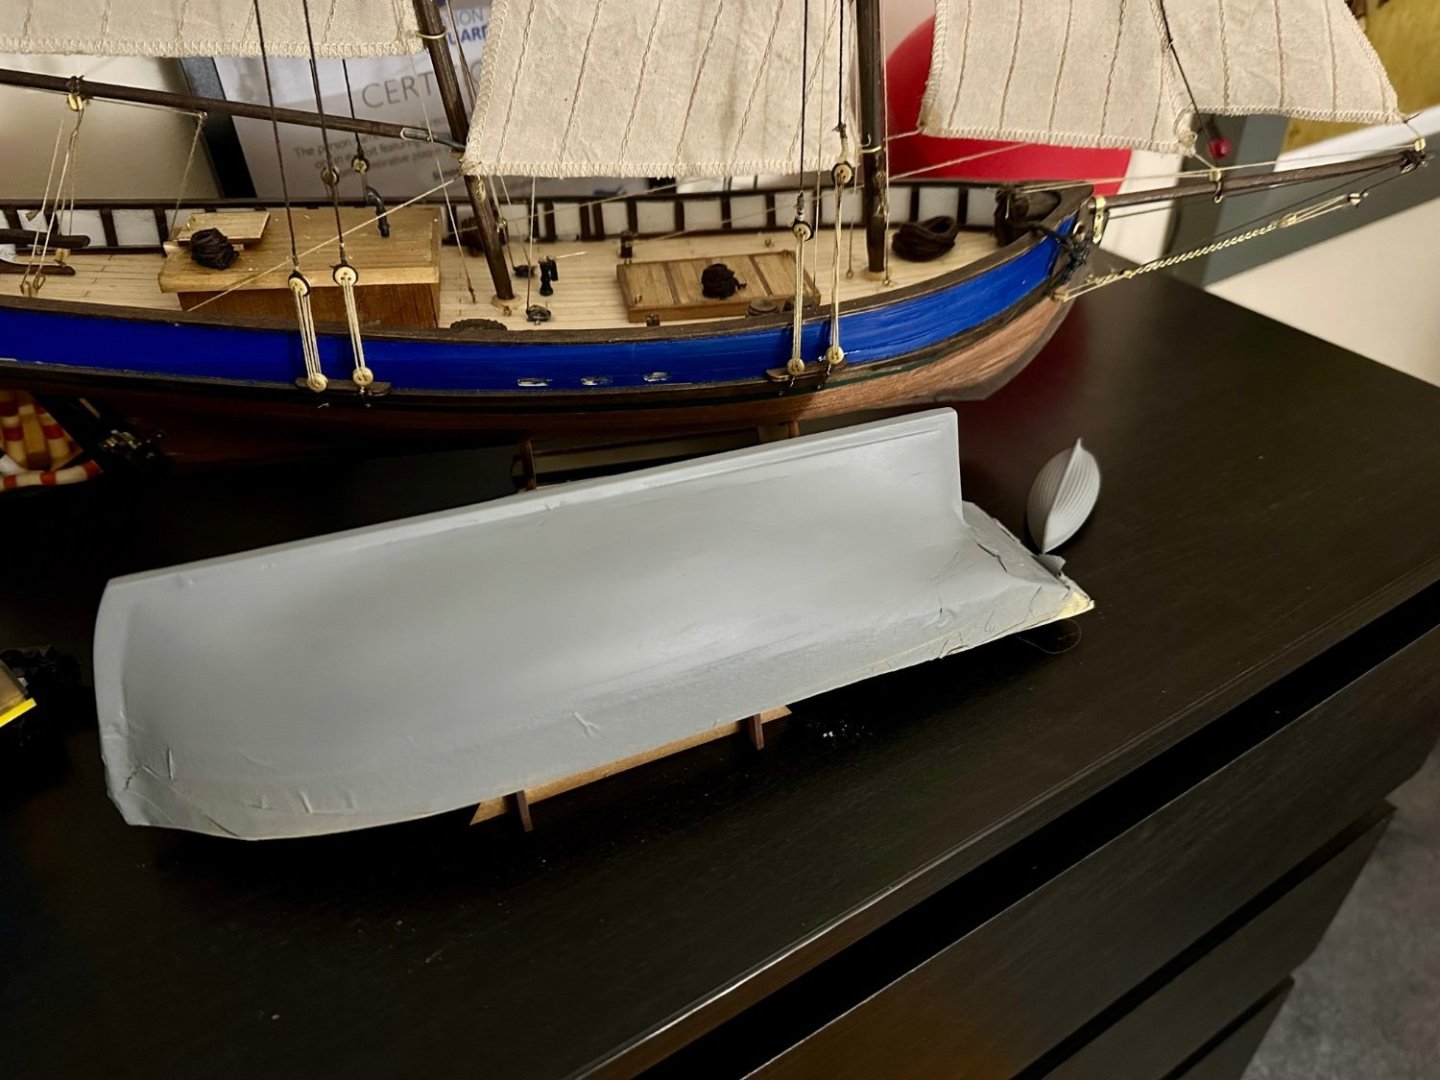
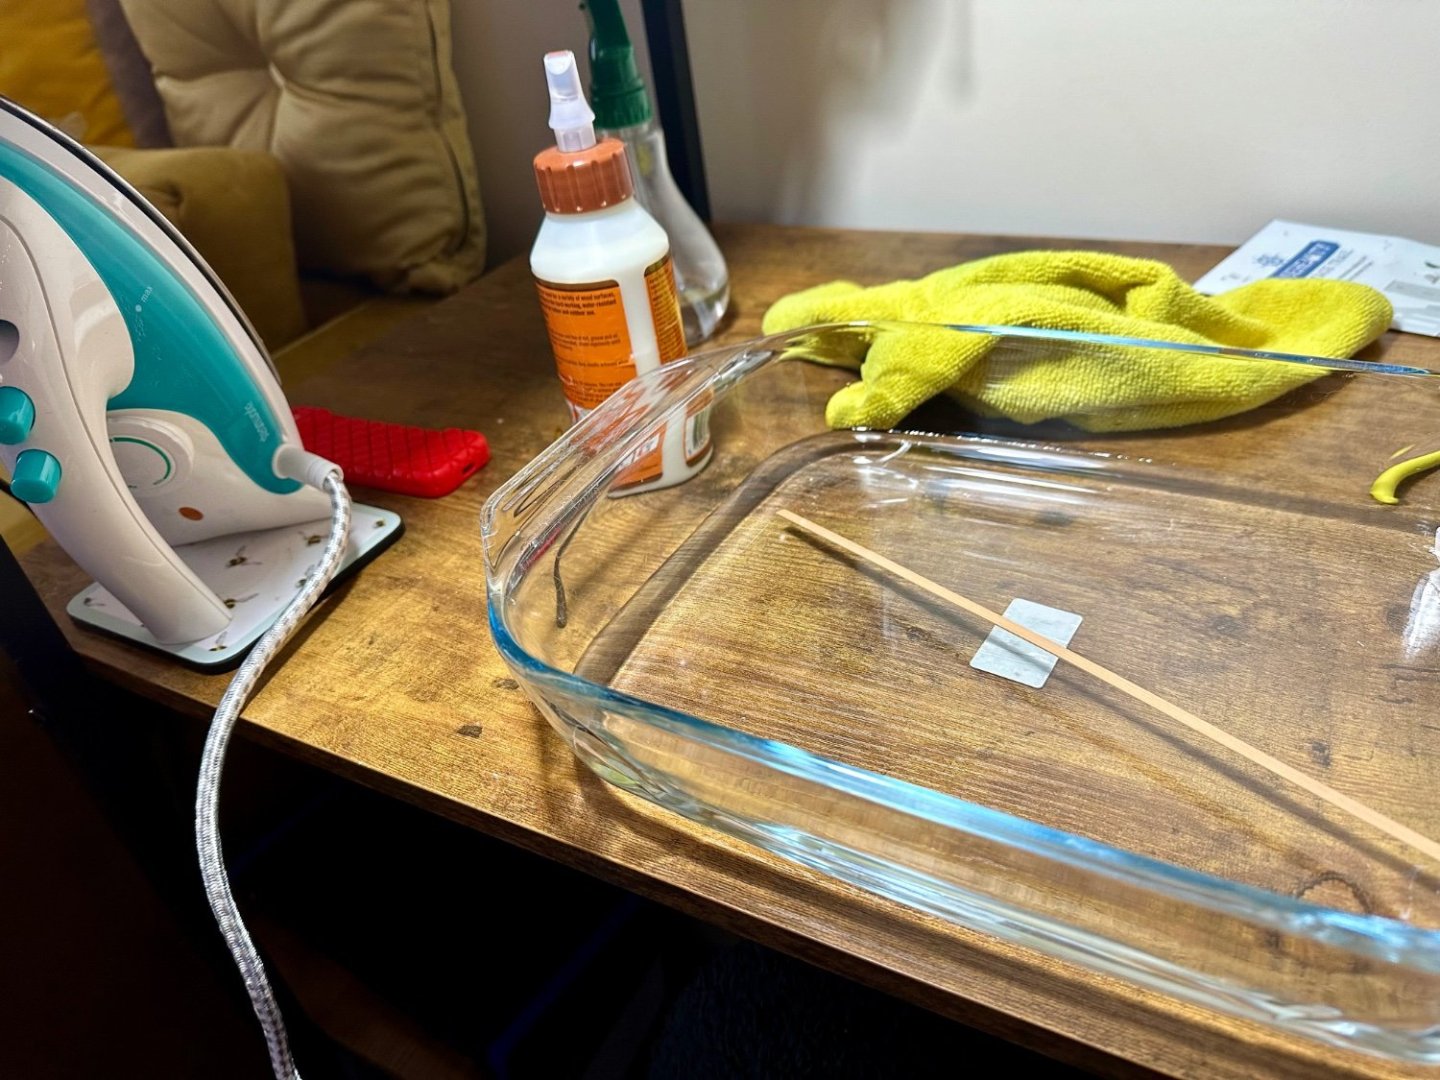
 Merry Christmas all. Lots of tail chasing this week trying to get the white paint of the hull vaguely correct. Finish on the primer was pretty good. Initial finish on the white looked good but then wasn't adhering well, together with my errors removing masking tape lead to damage. A lot of work to get the damage back to a similar level to the surrounding paint and more painstaking tape removal later I think it looks decent. Whilst doing that removed various rails to finish the paint on those and once the white was done and varnished, hoping to protect the edges, these were easily fitted and the whole touched up as needed. Lastly for today I've mixed and poured resin into the well tank and set the fish 'free'! Thanks to all those working over the festive period and hope the rest of you get some build time.
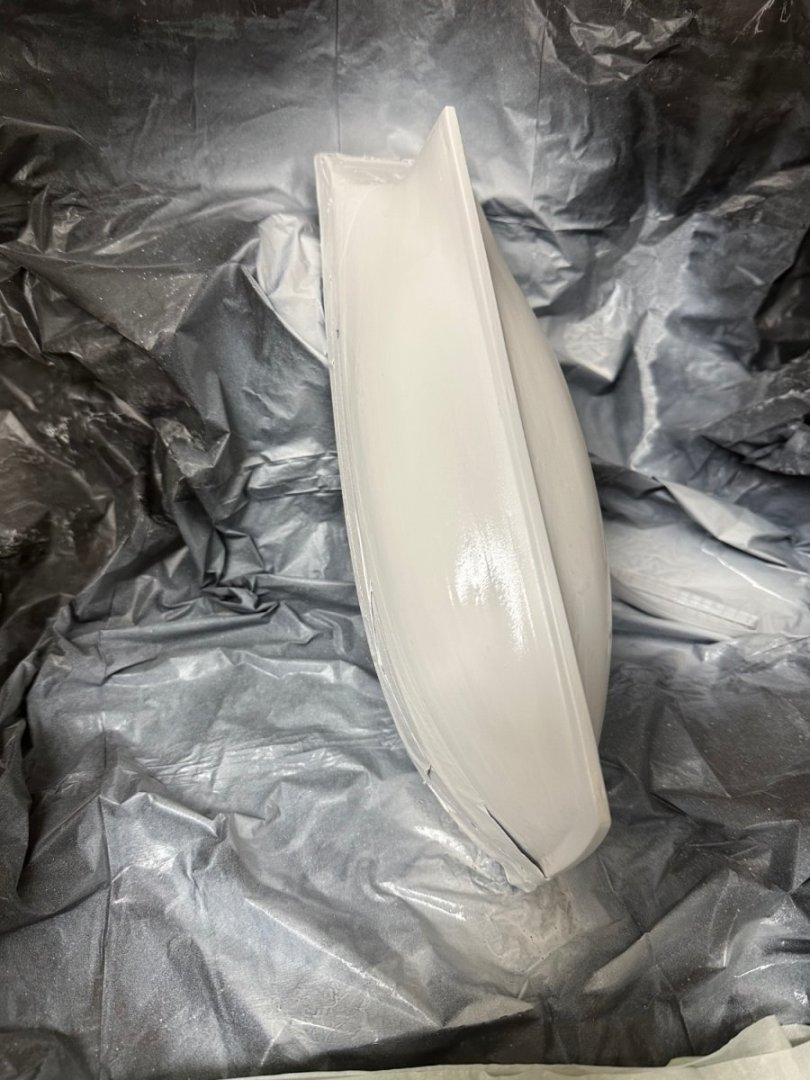


-
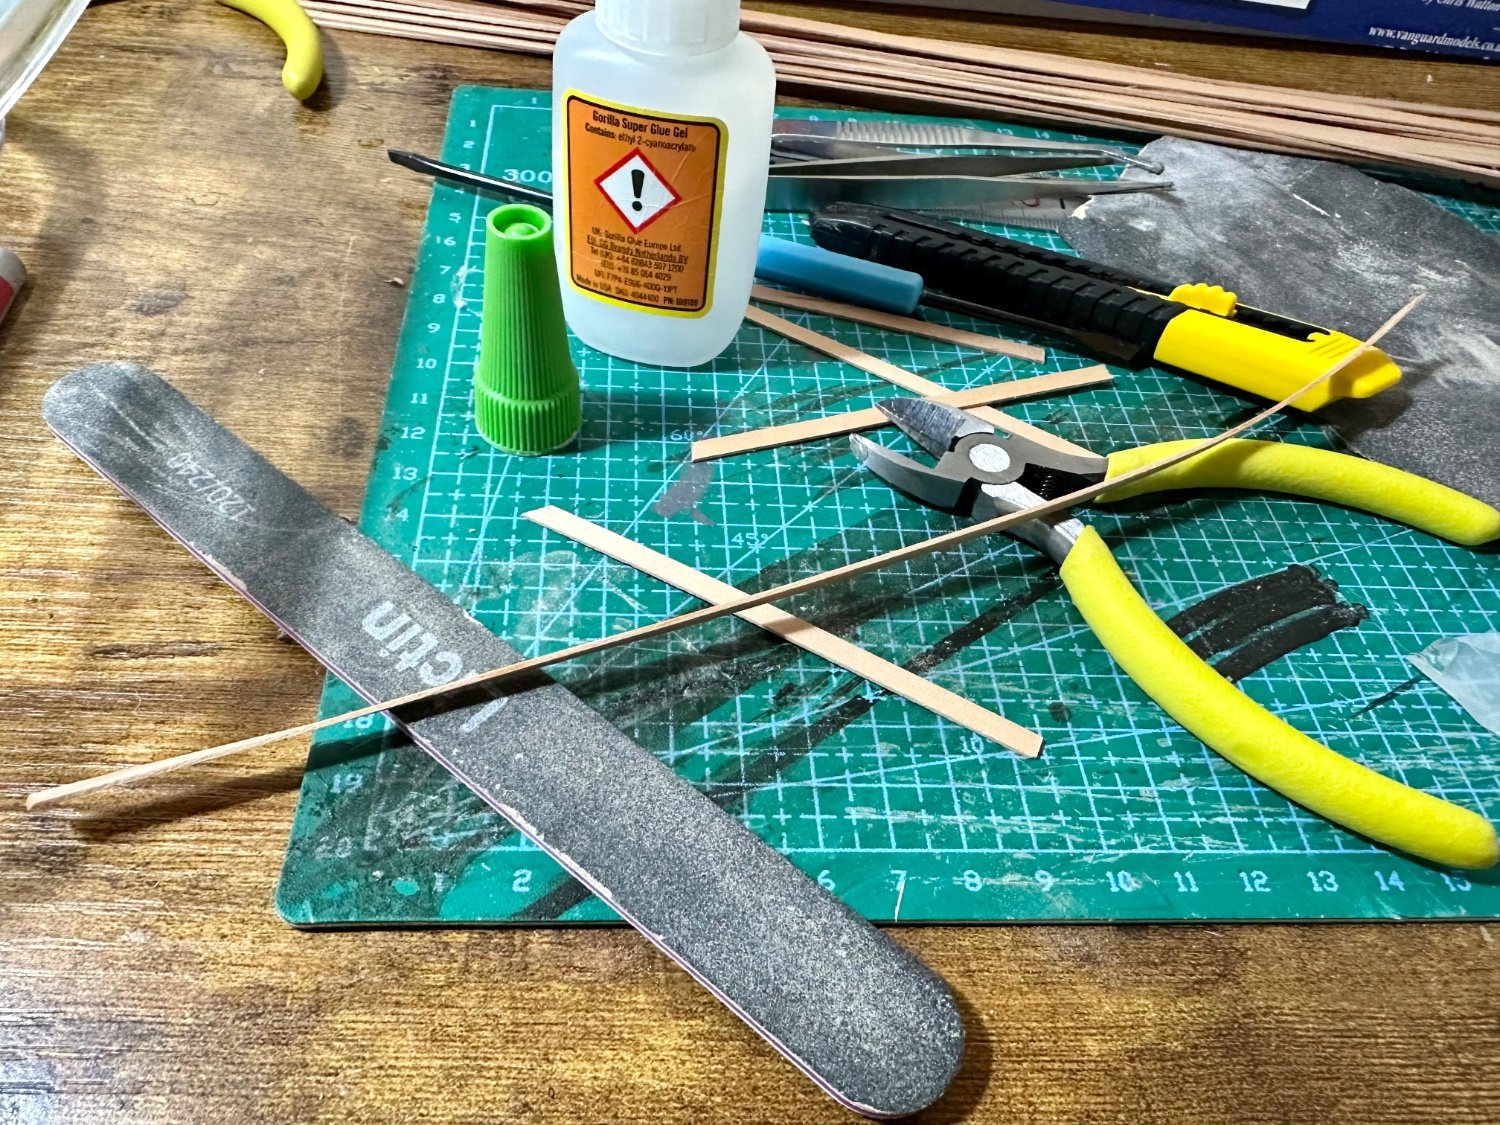
Thanks a lot Andrew. It stands up to a fair degree of scrutiny, just hope all is well once the tape comes off! Don't know about you but I really like making tools from offcuts and scraps. This was mostly the offcuts from the bulkhead sheet. I'm very luck and Santa arrived early and brought two new kits for next year. Speedy looks rather daunting (mainly the rigging) but will be more done before then so fingers crossed. Hope you enjoyed your tipple from one of our local breweries.
-
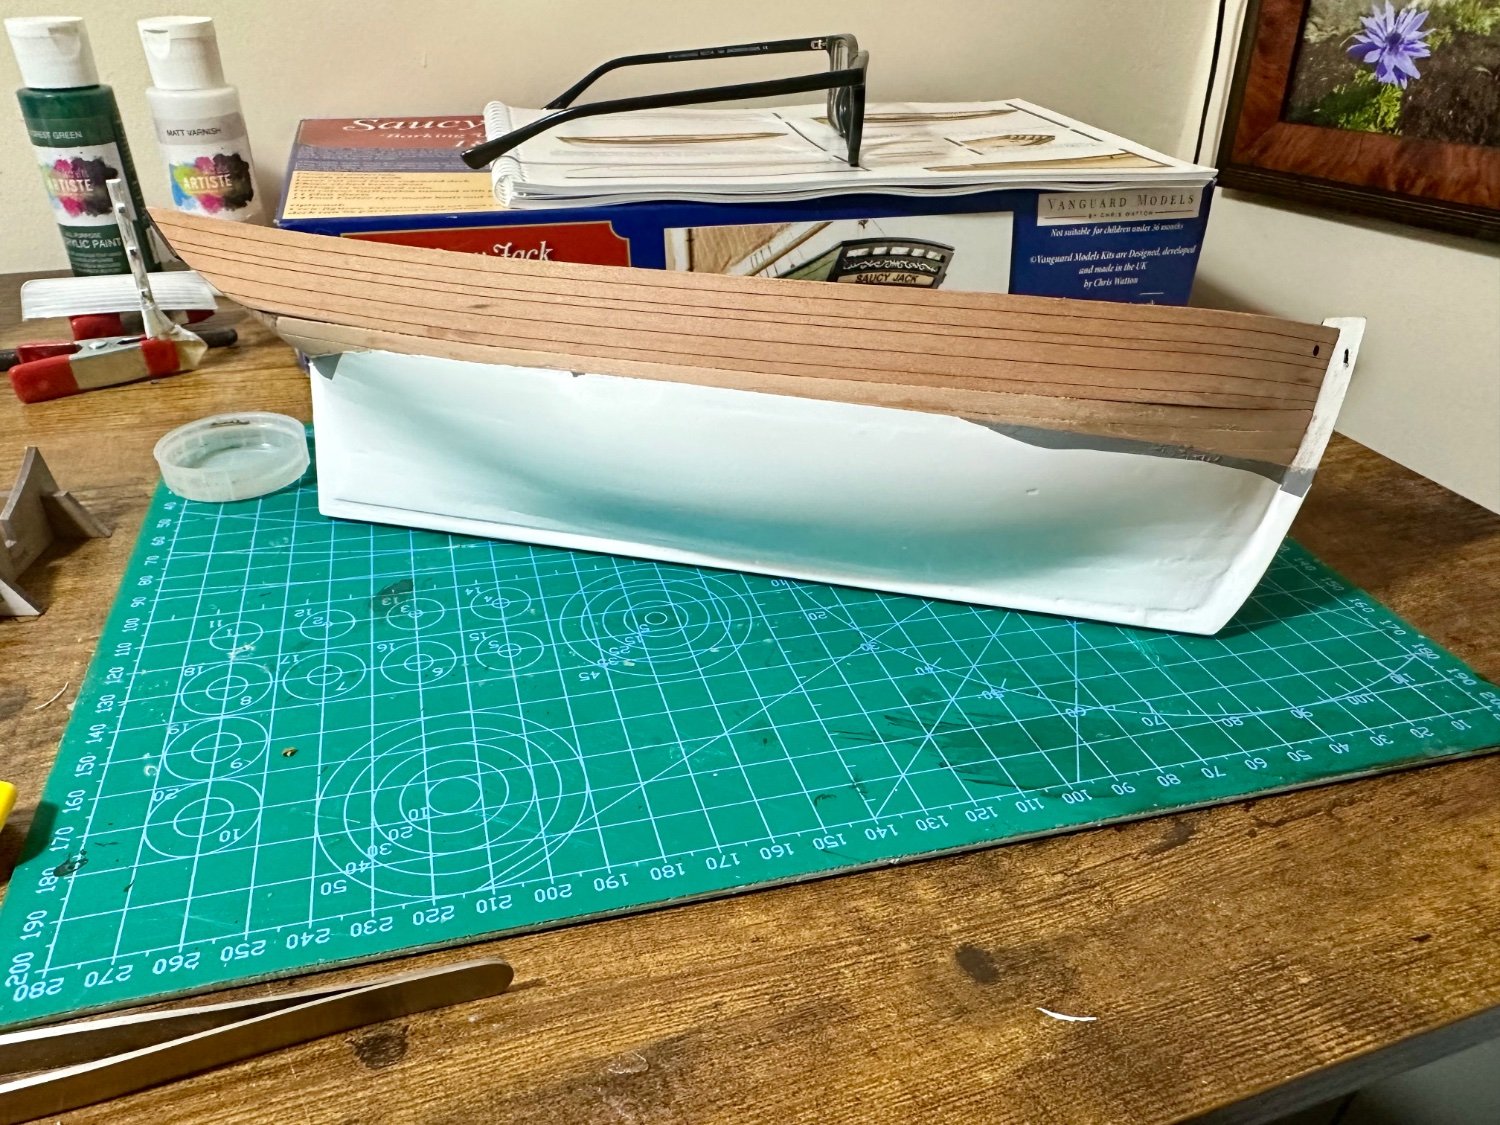
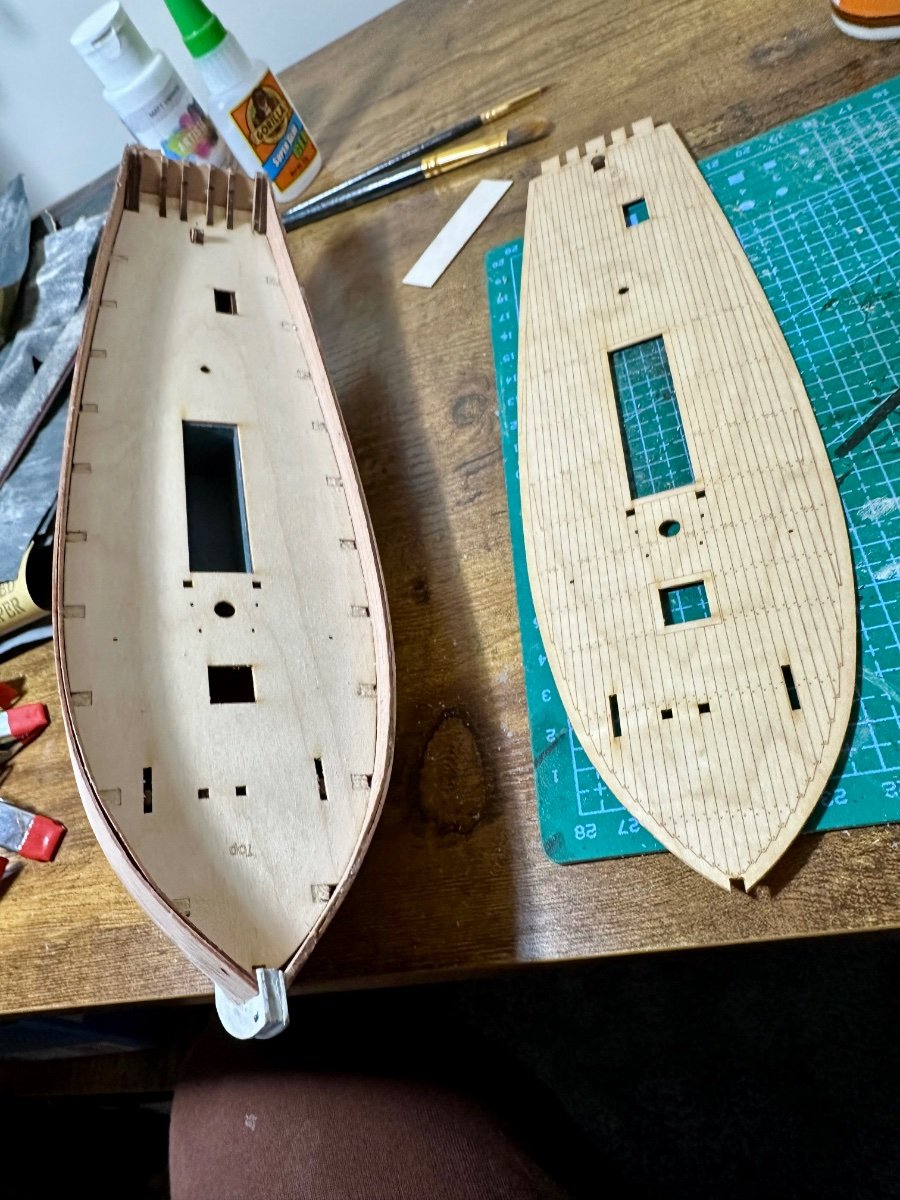
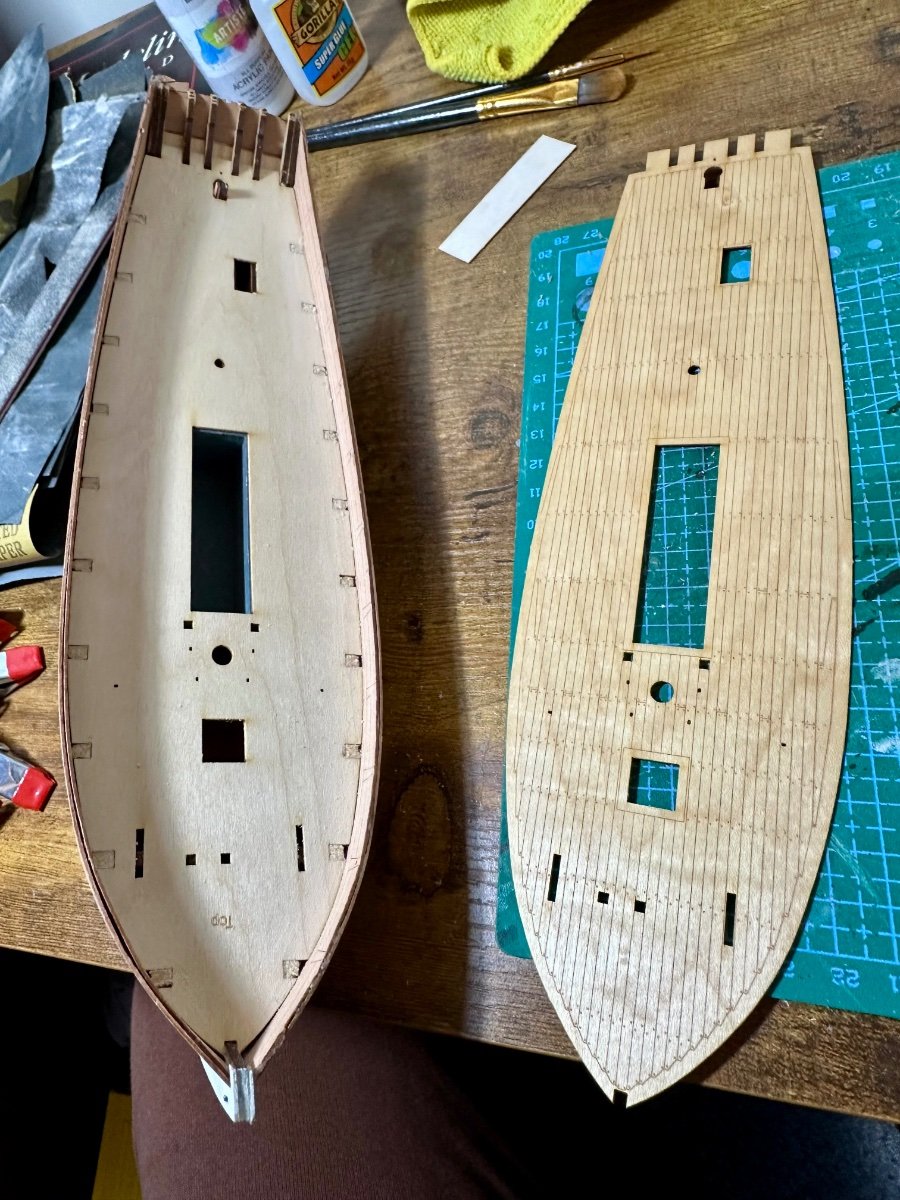
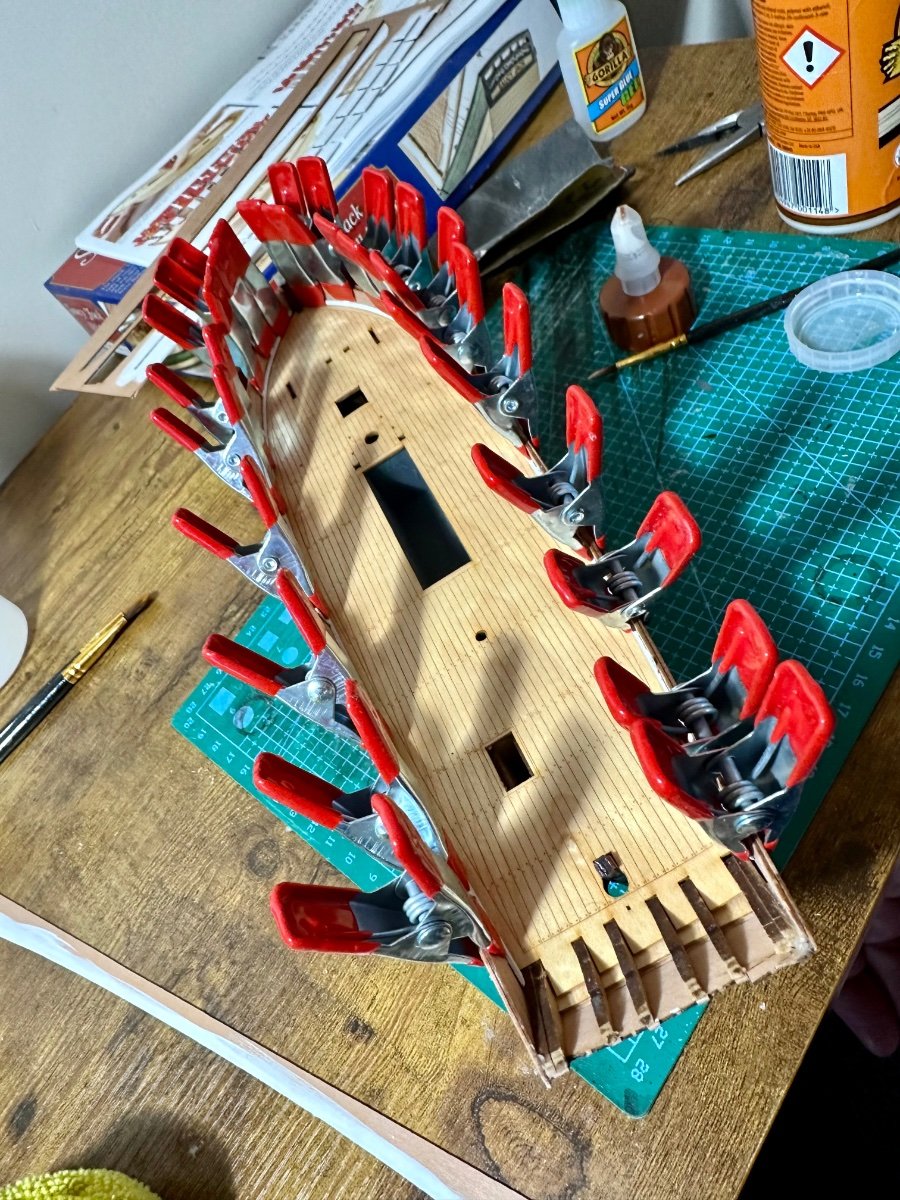
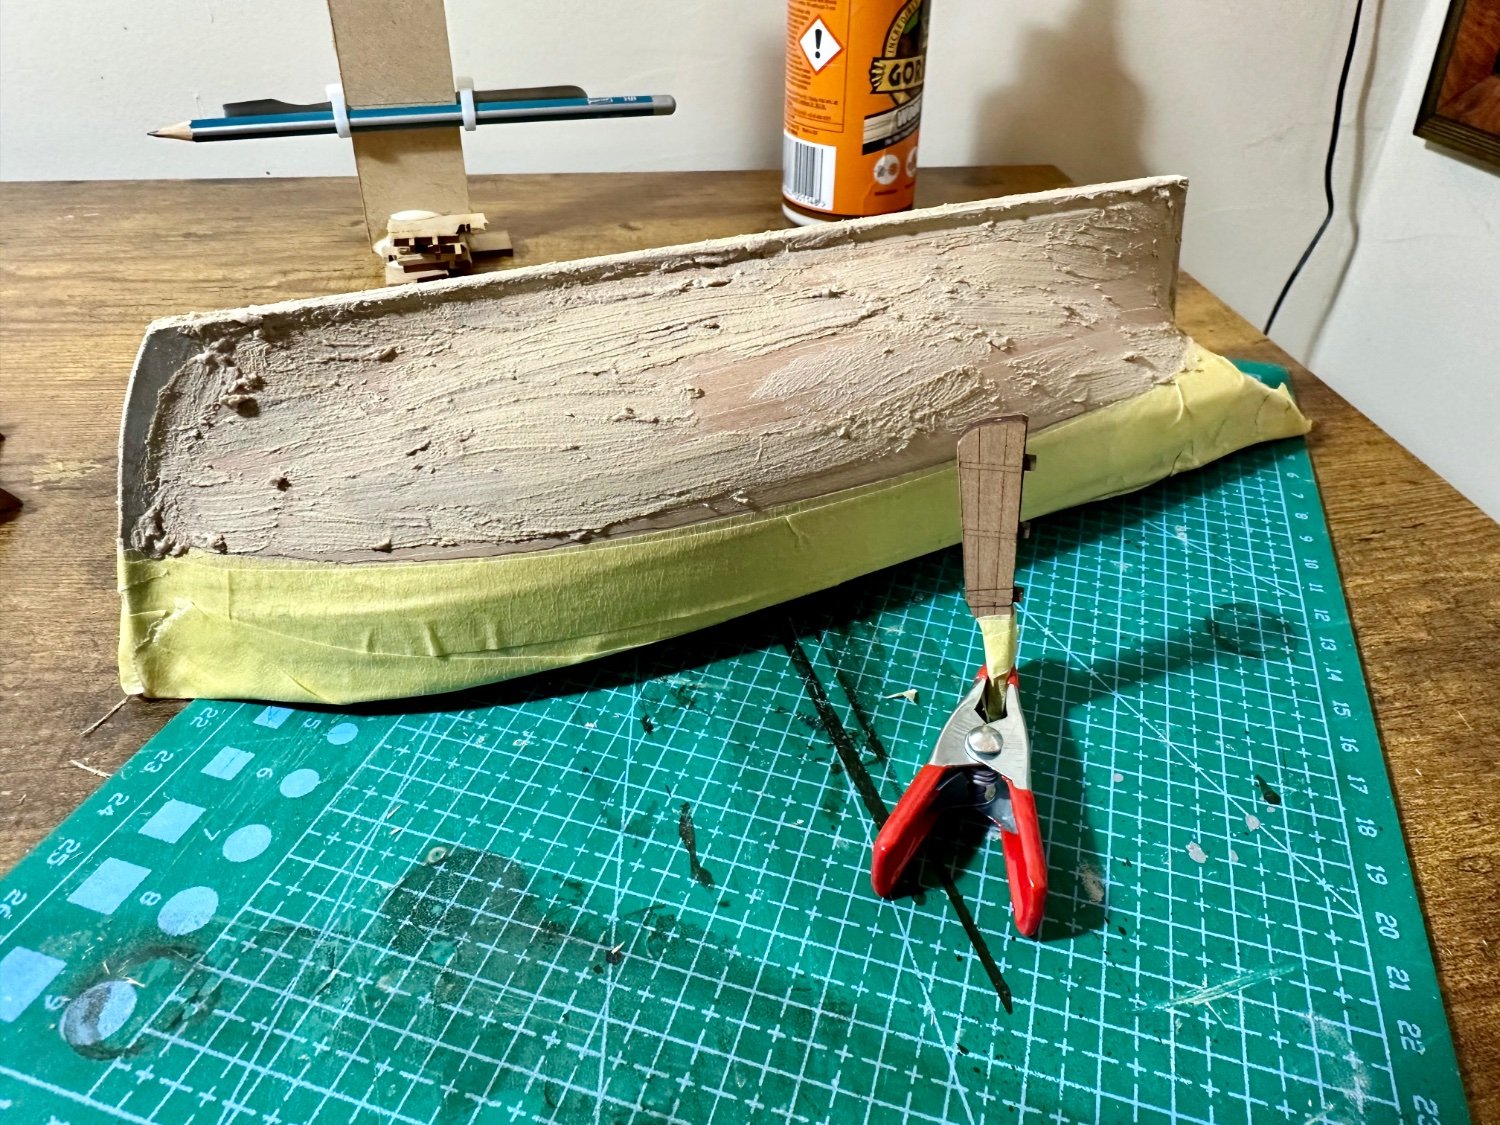
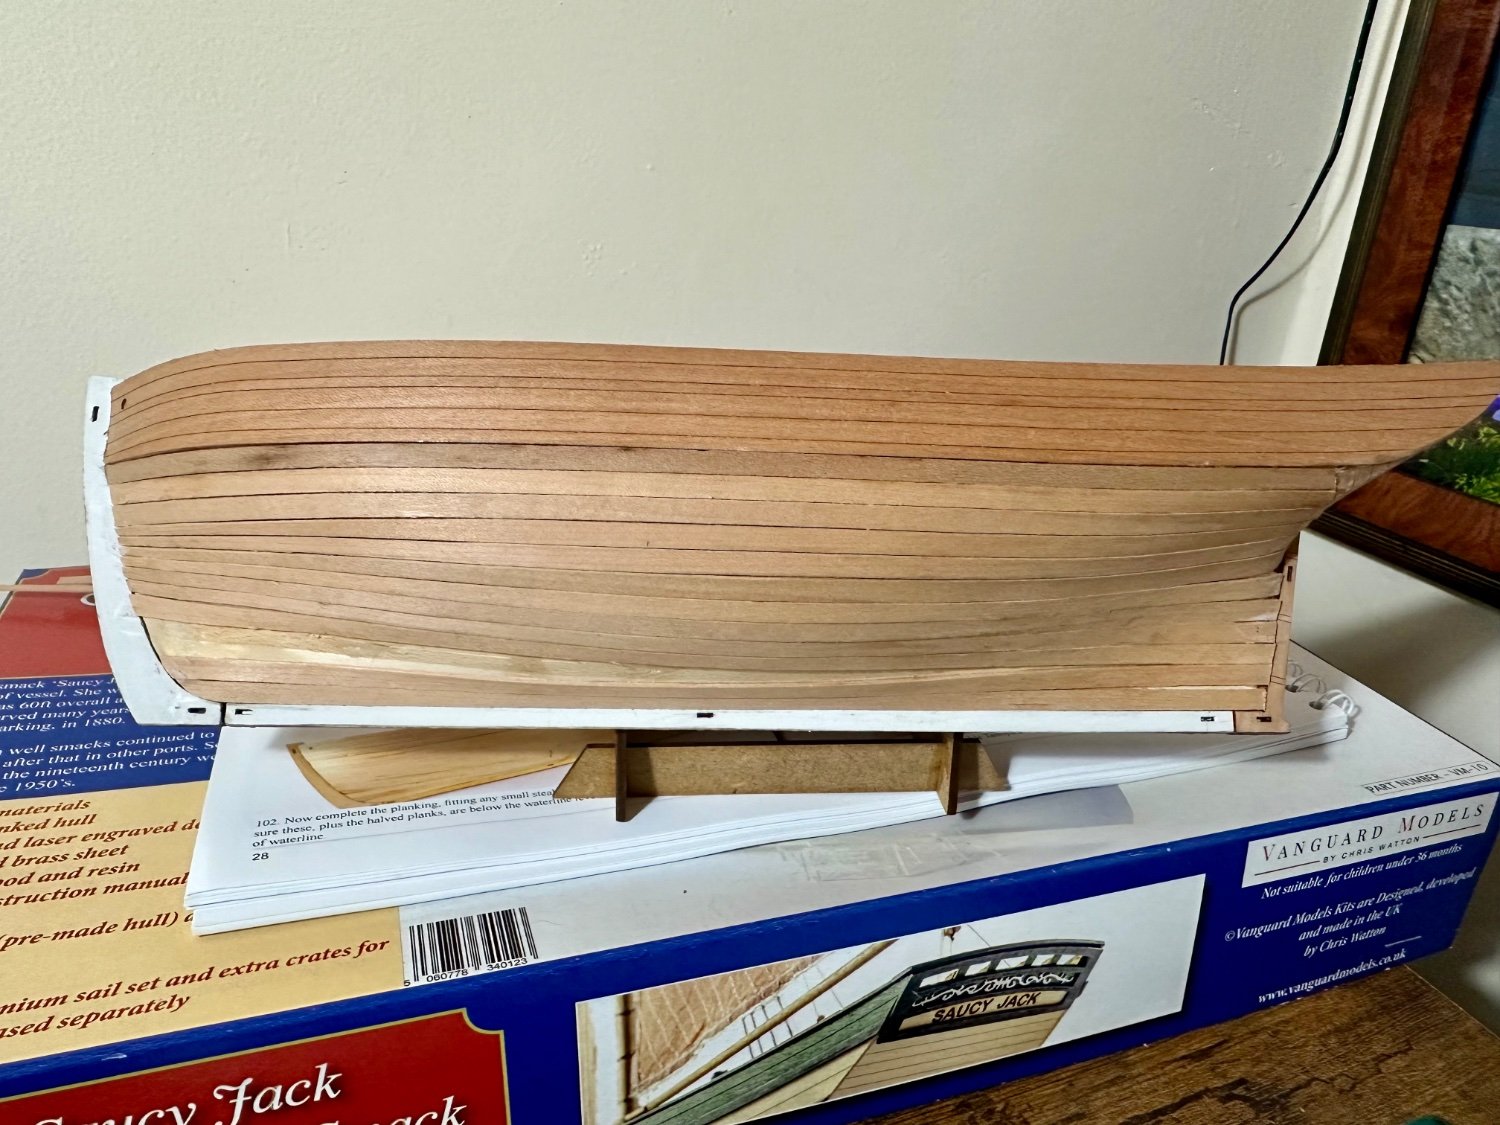
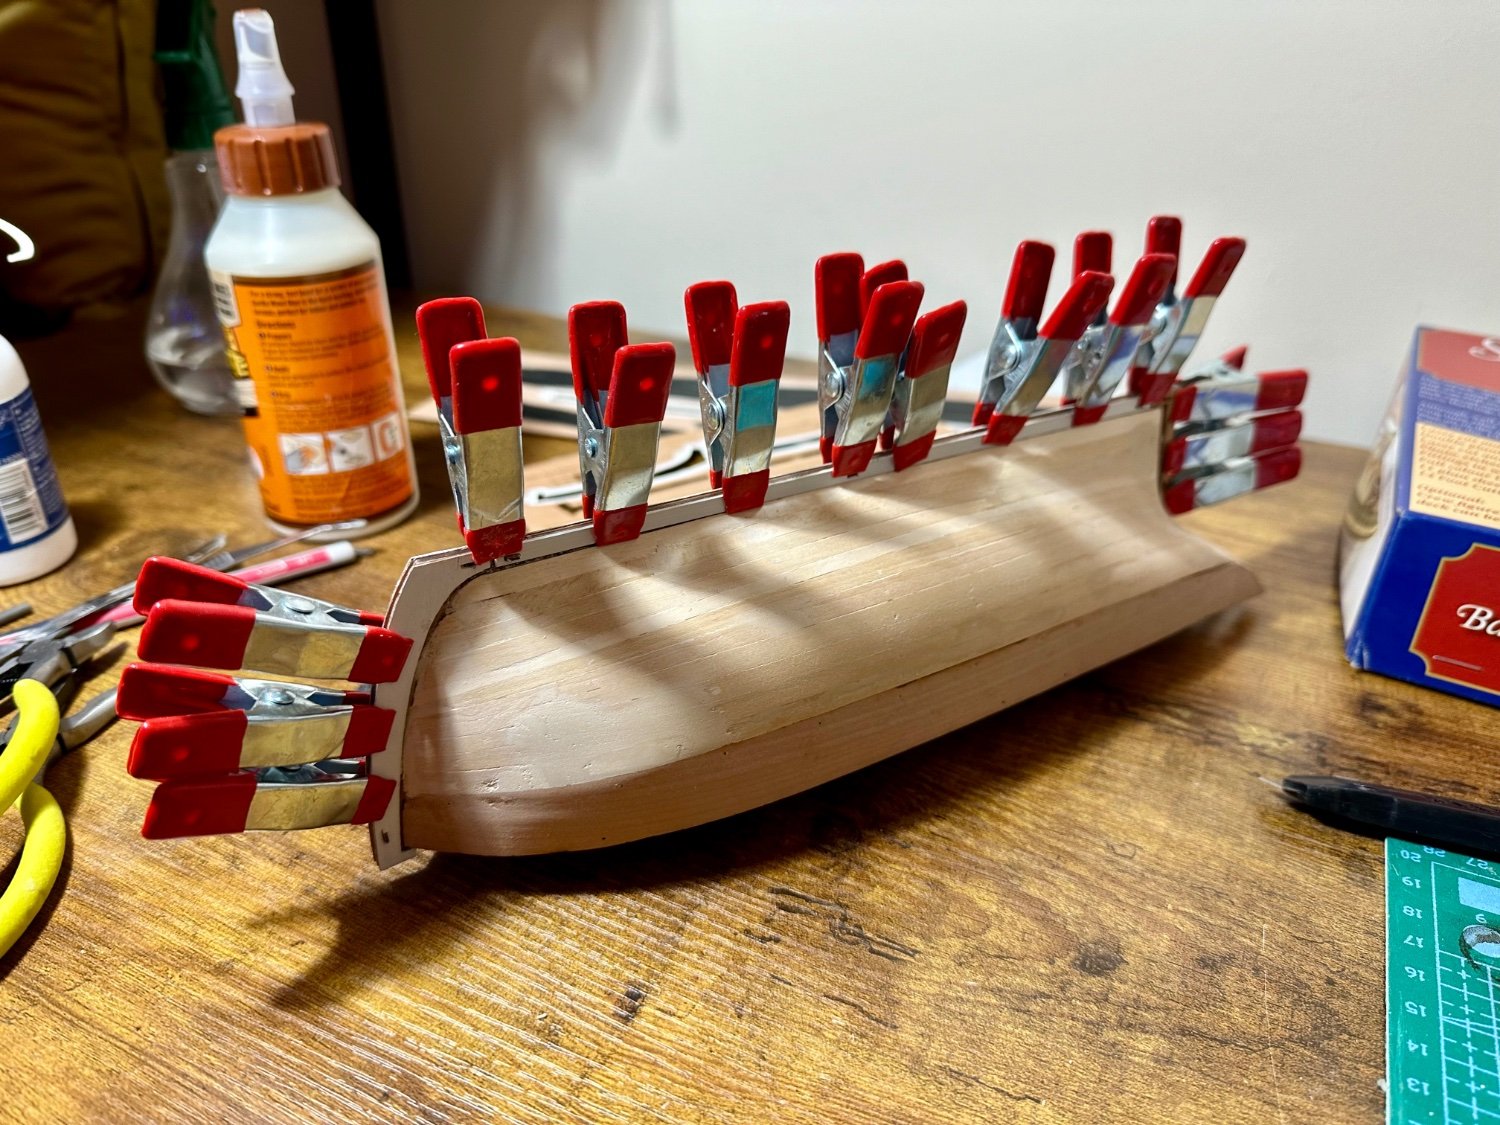
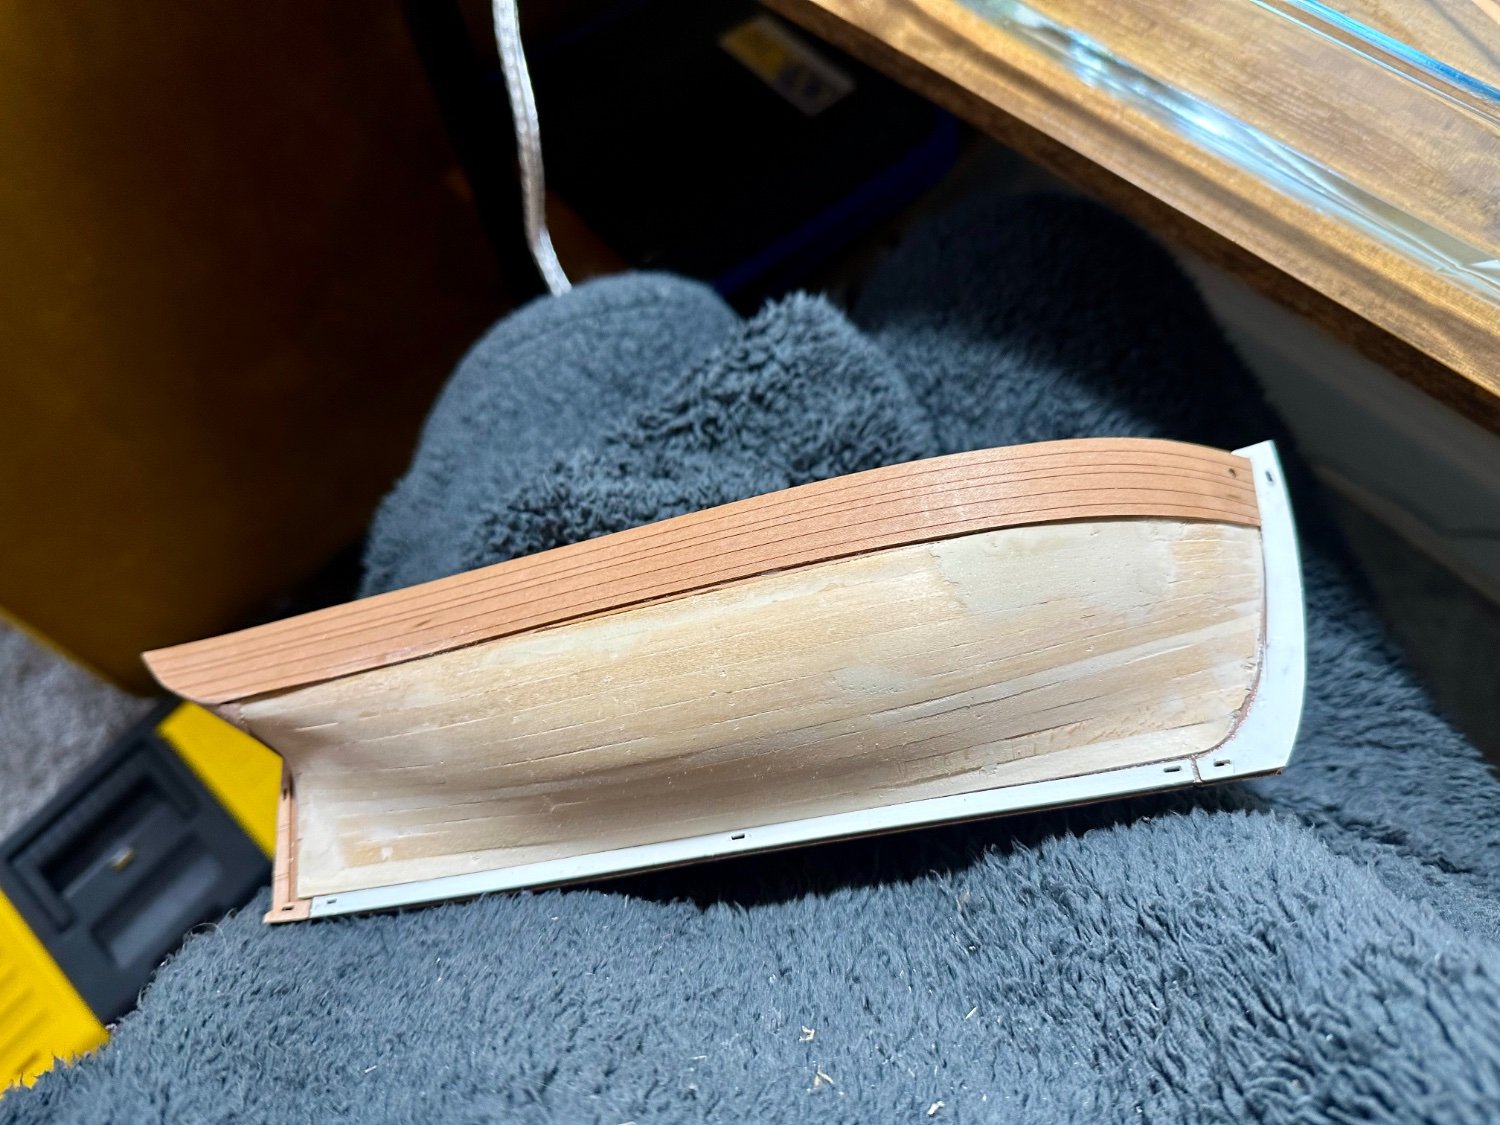
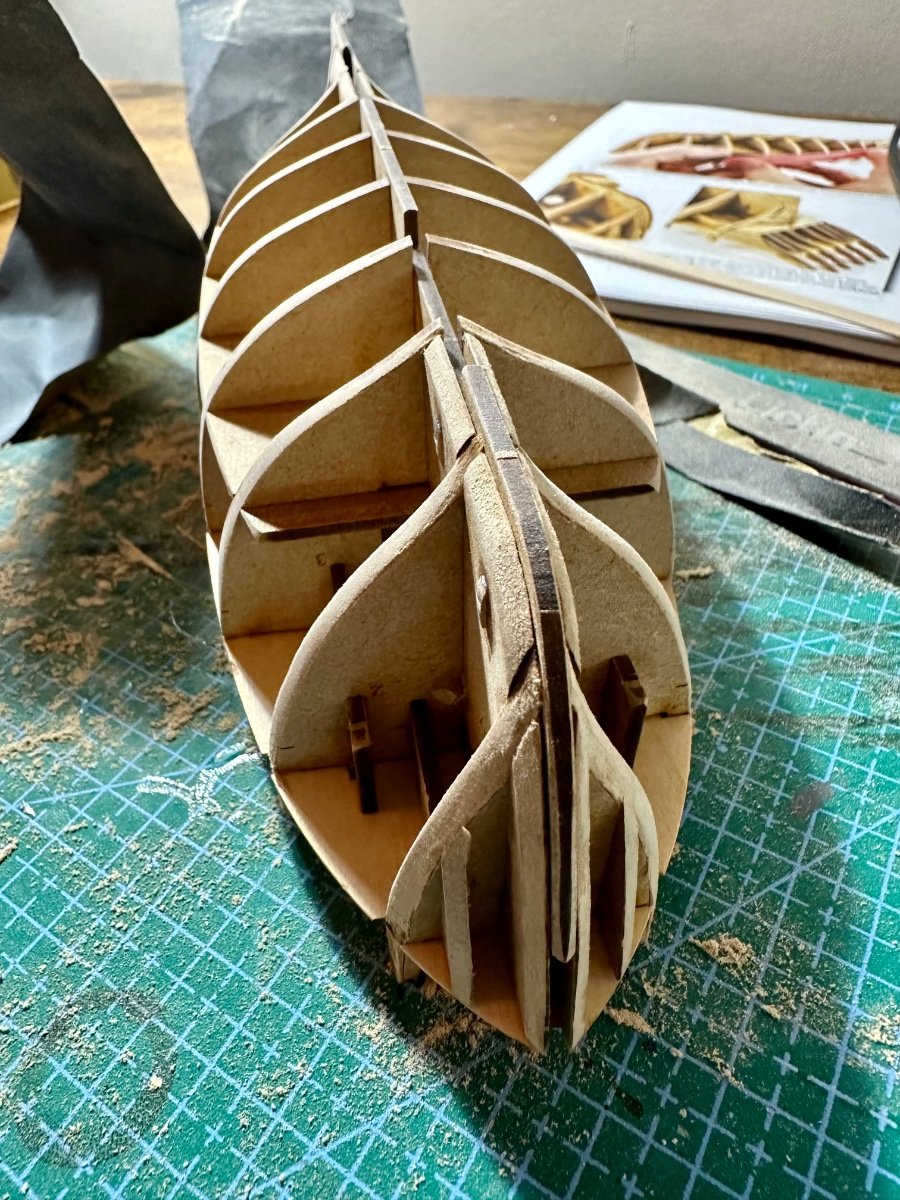
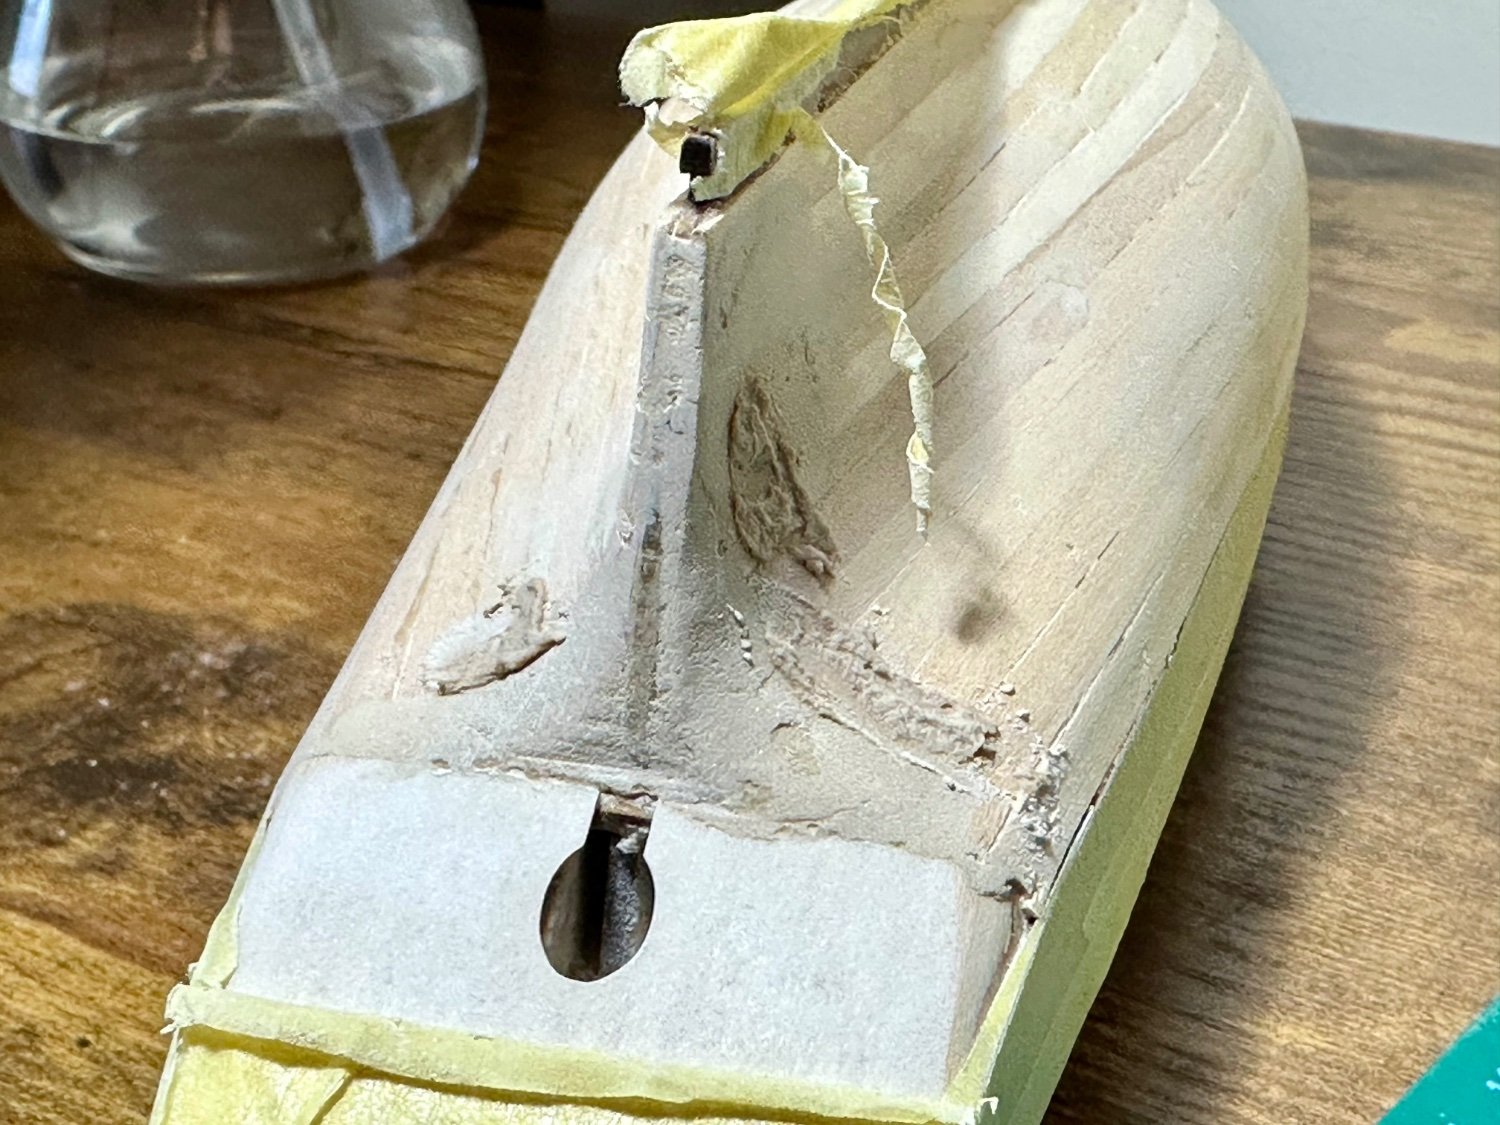
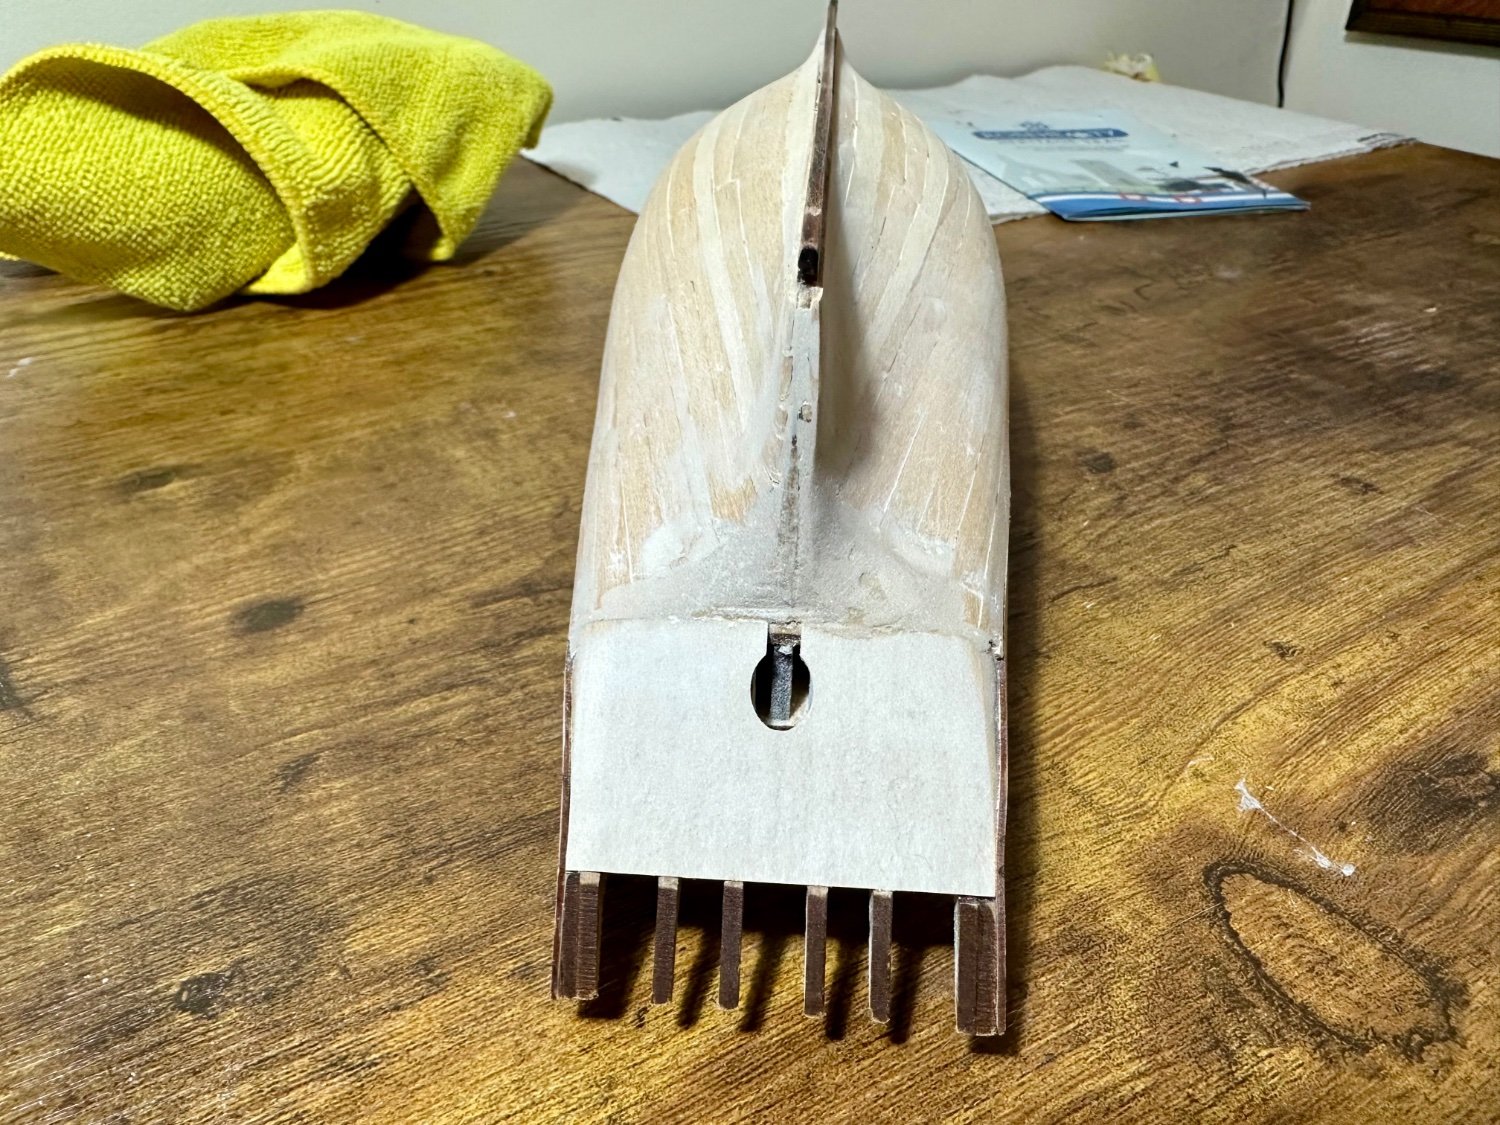
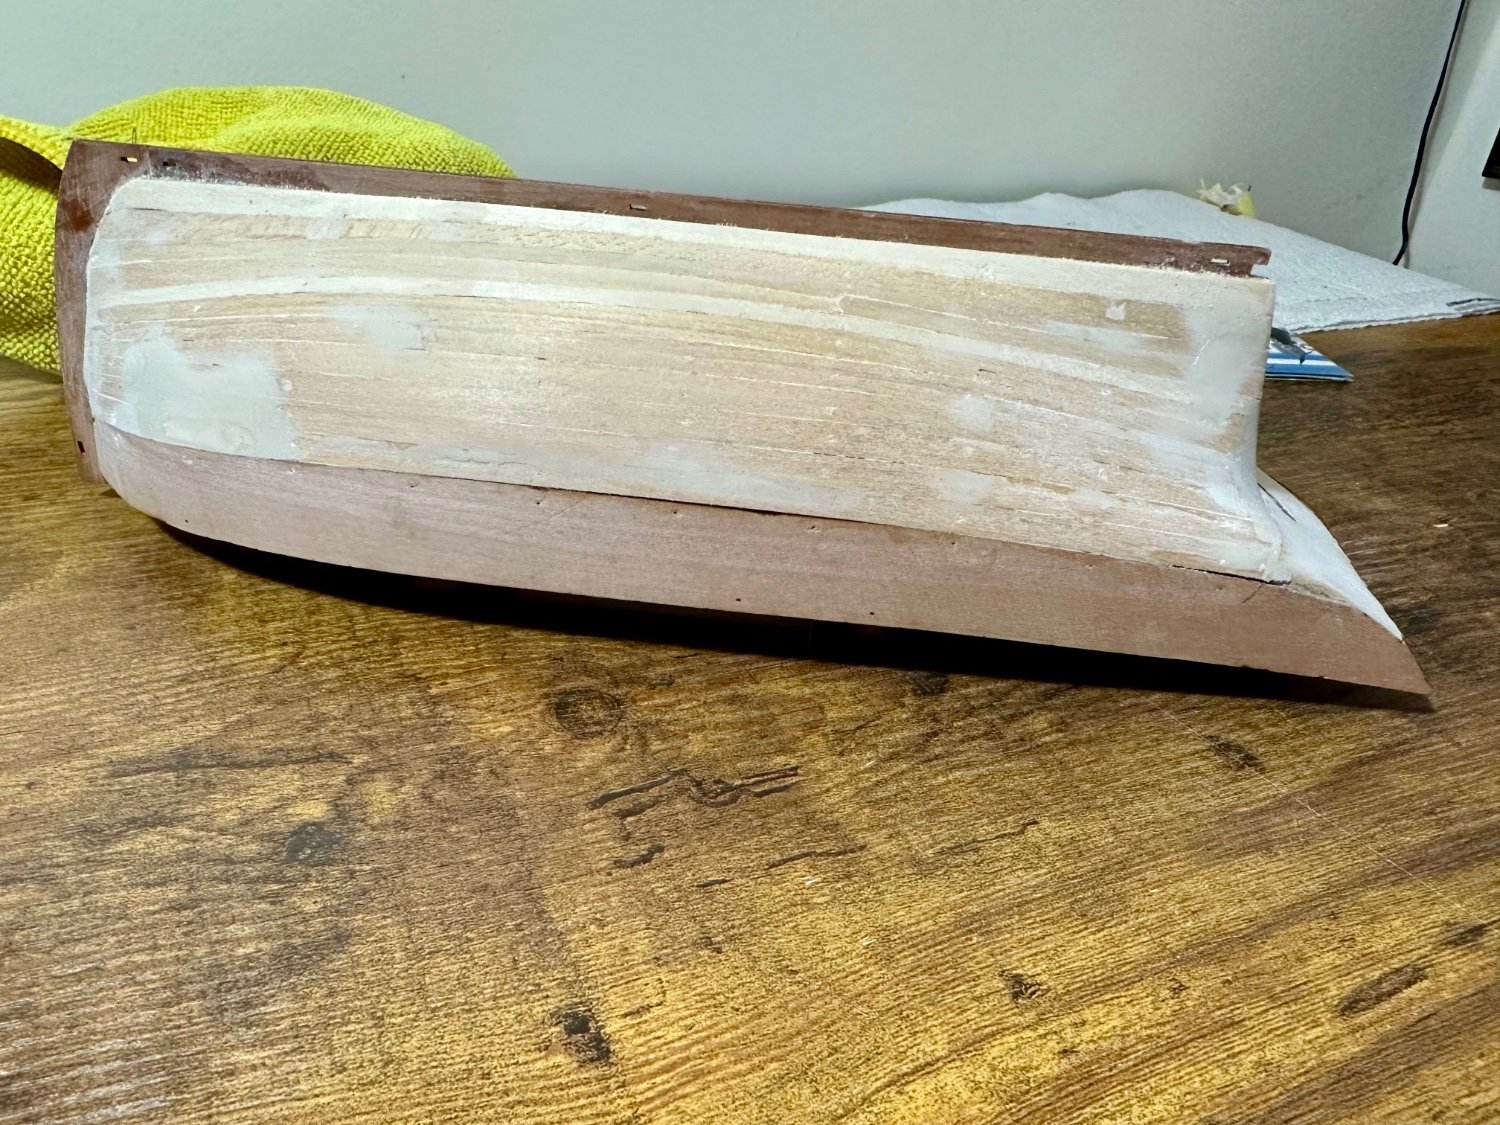
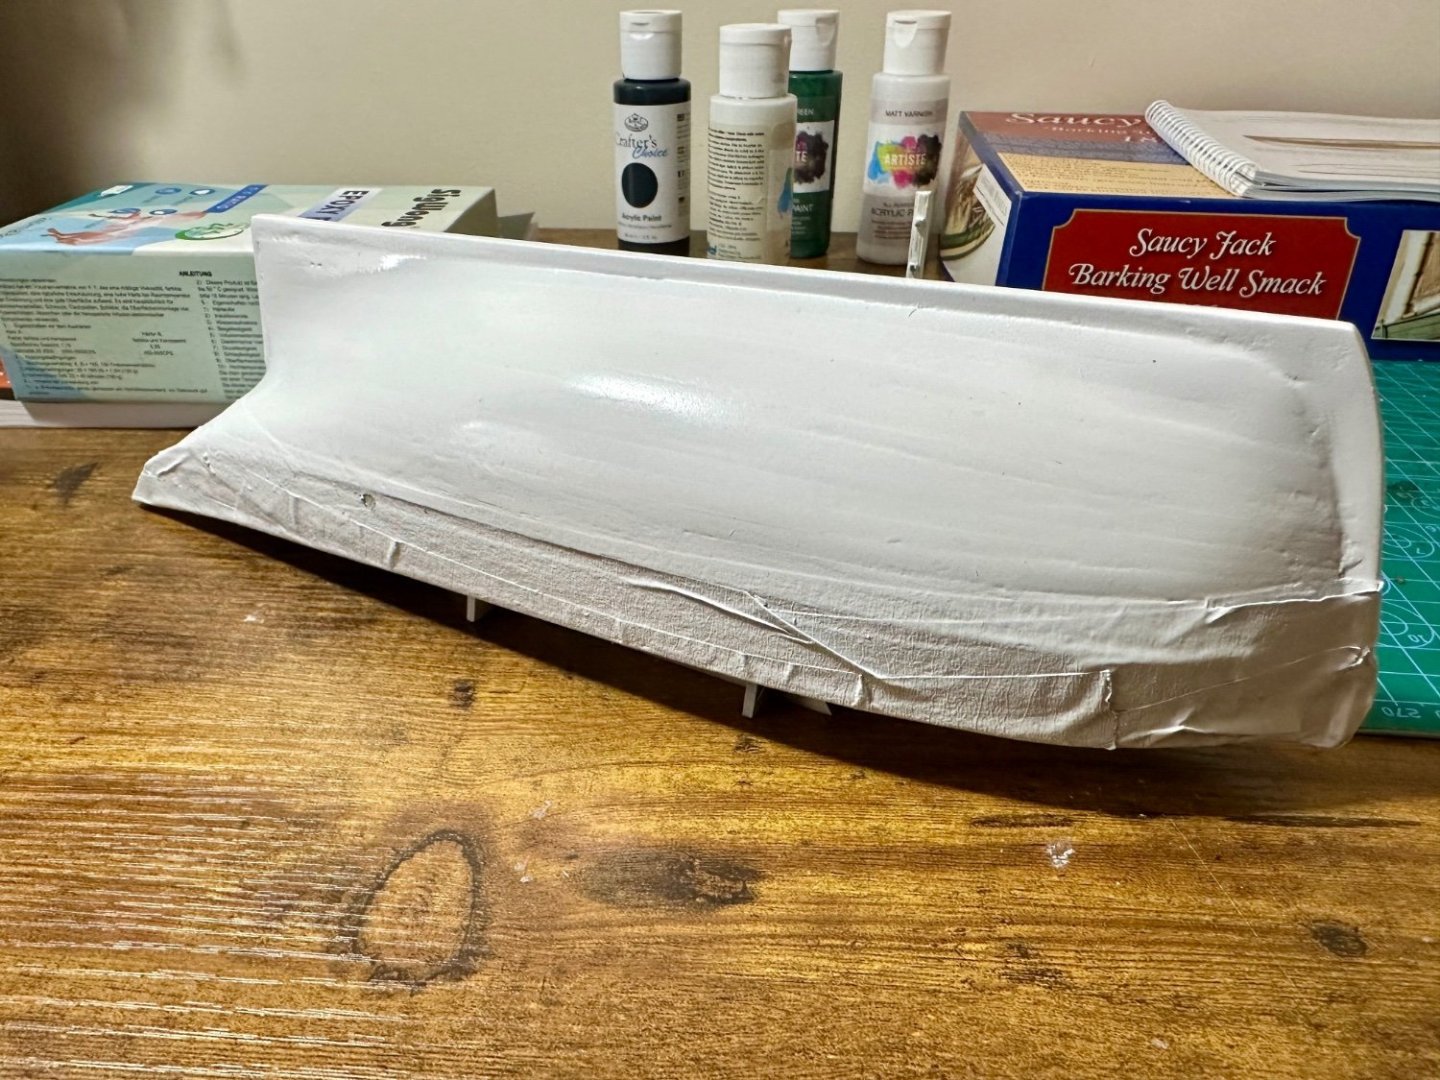
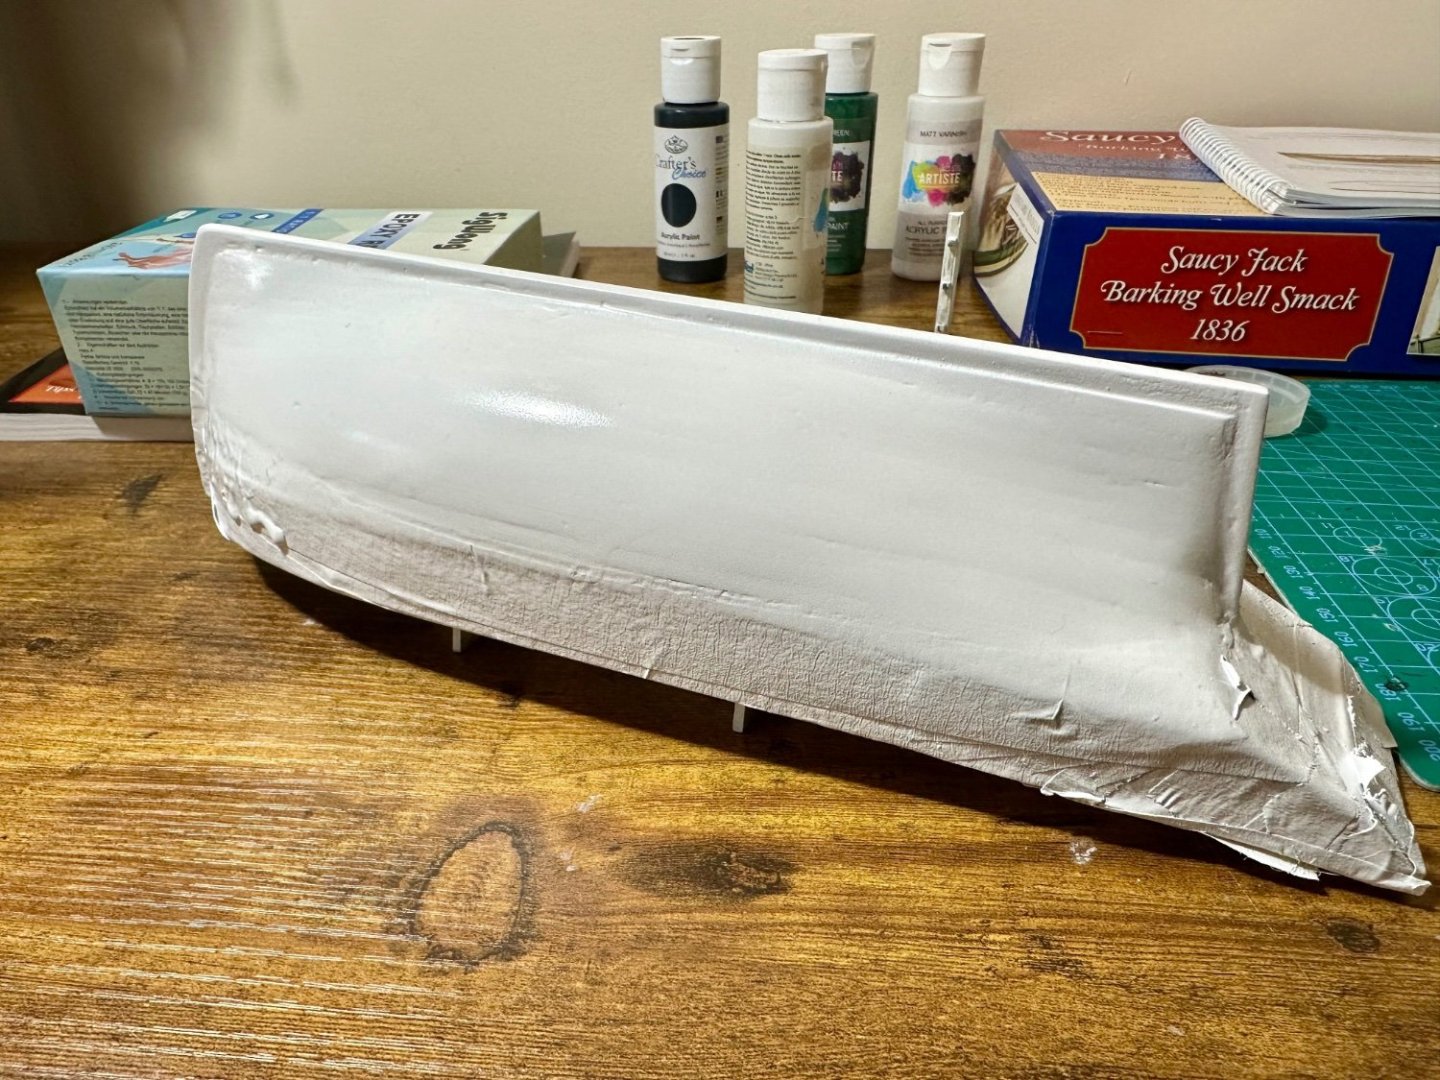
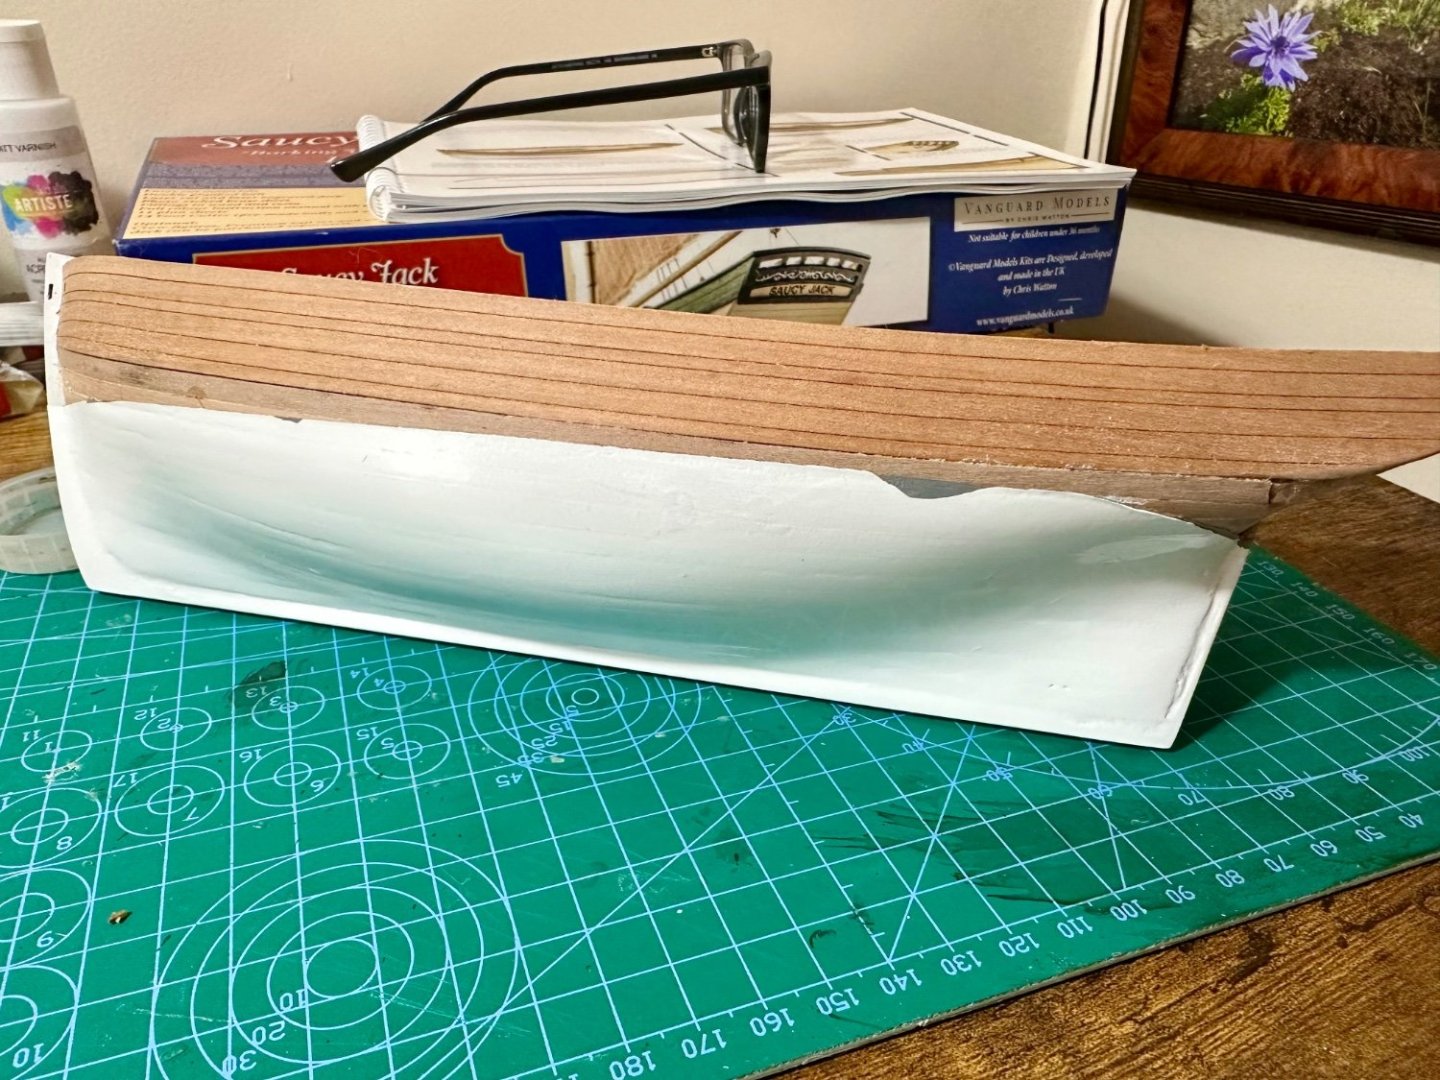
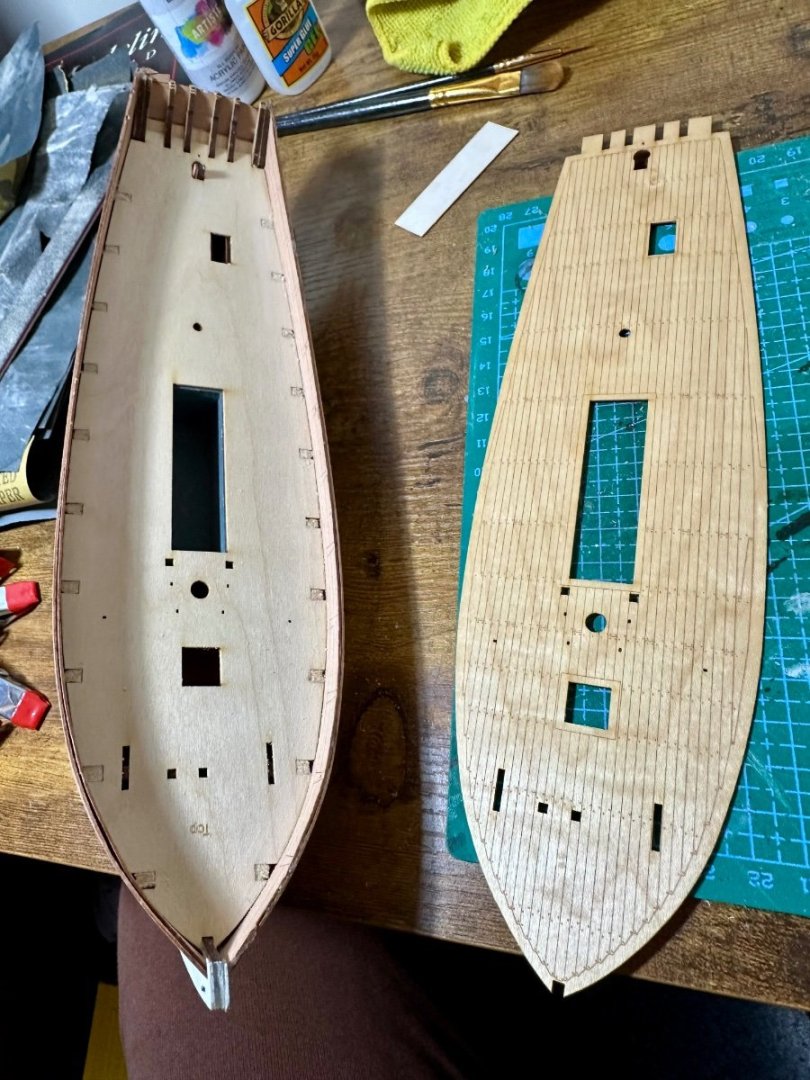
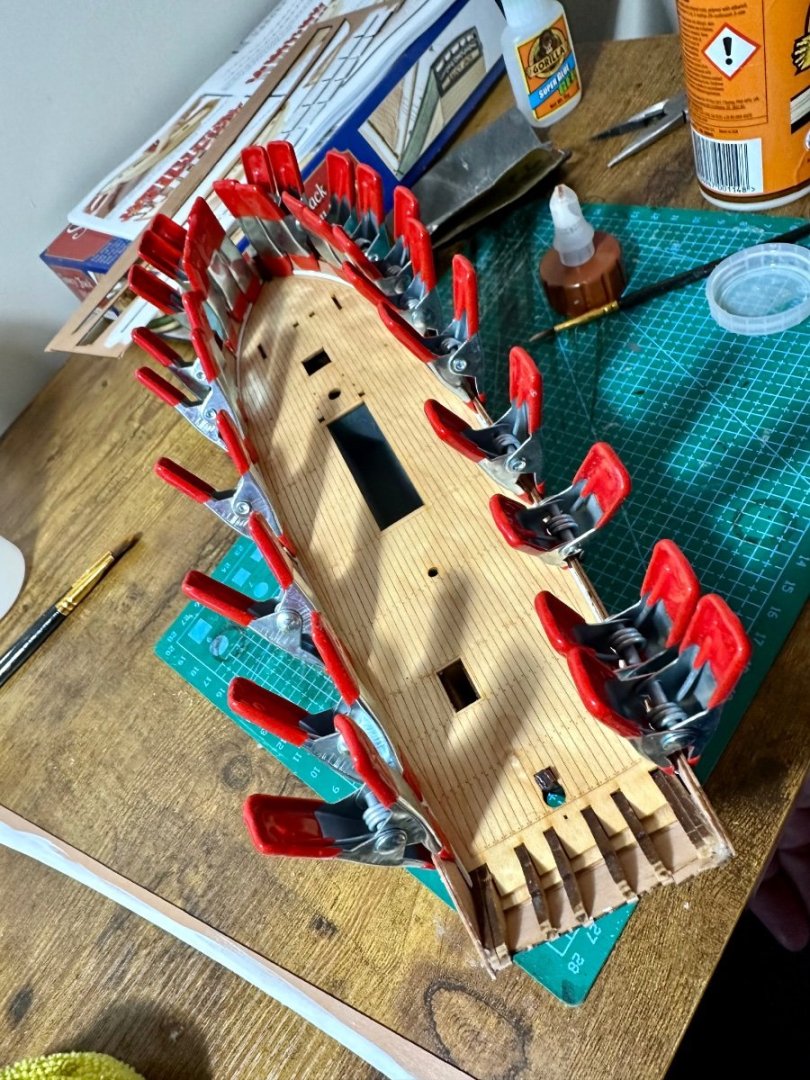
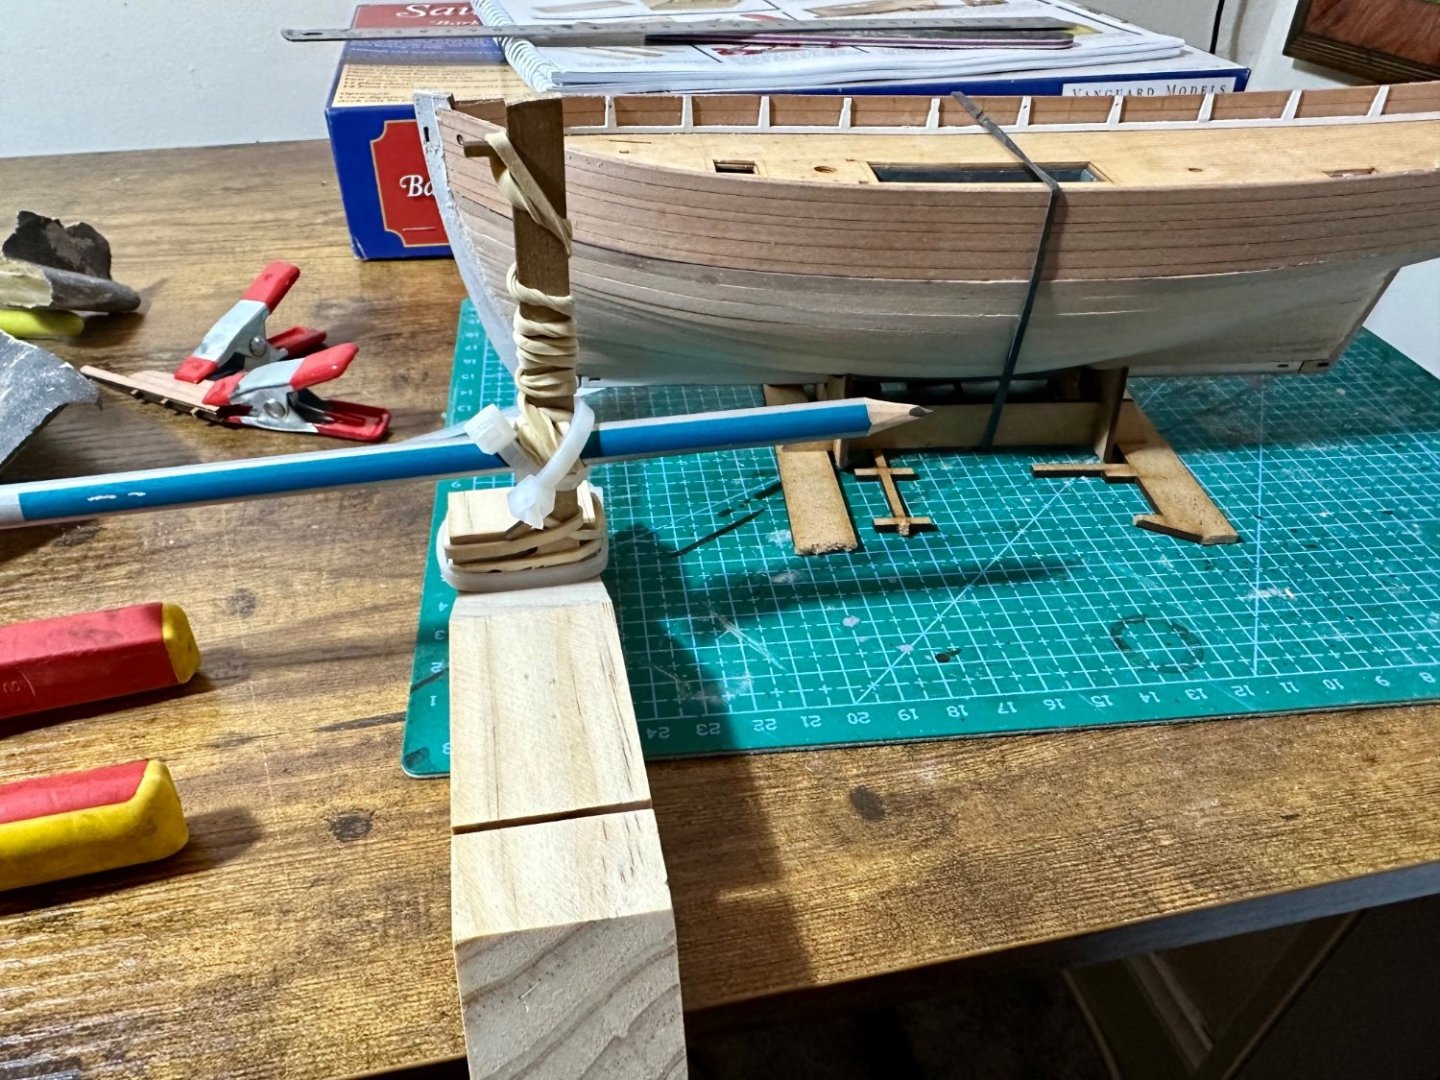
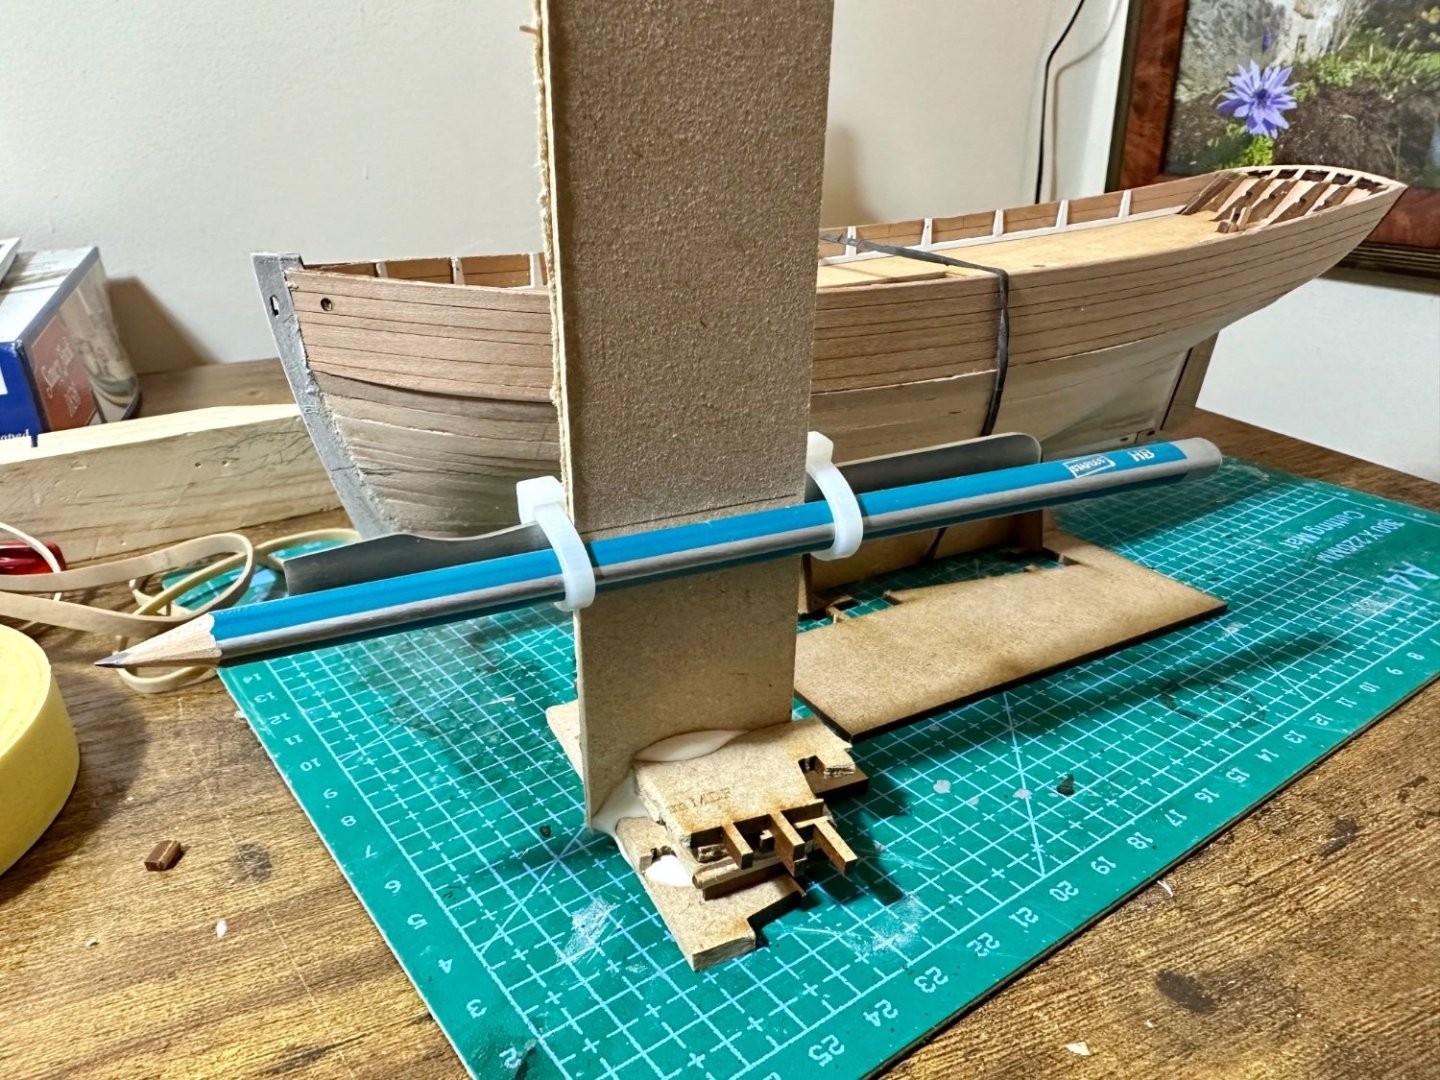
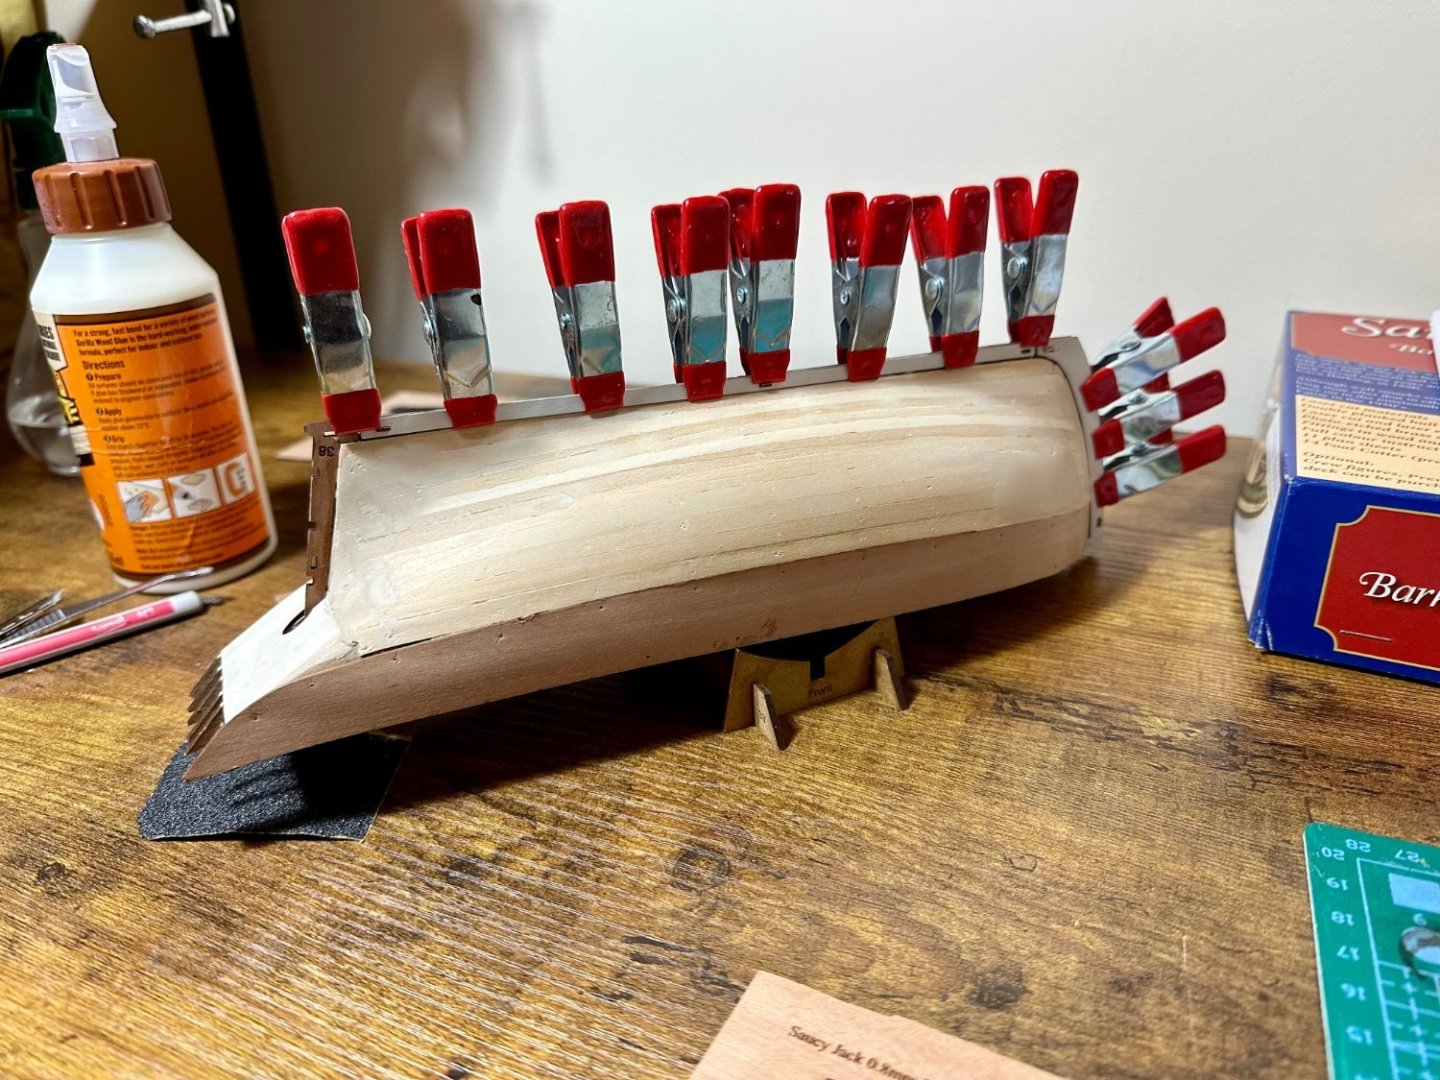
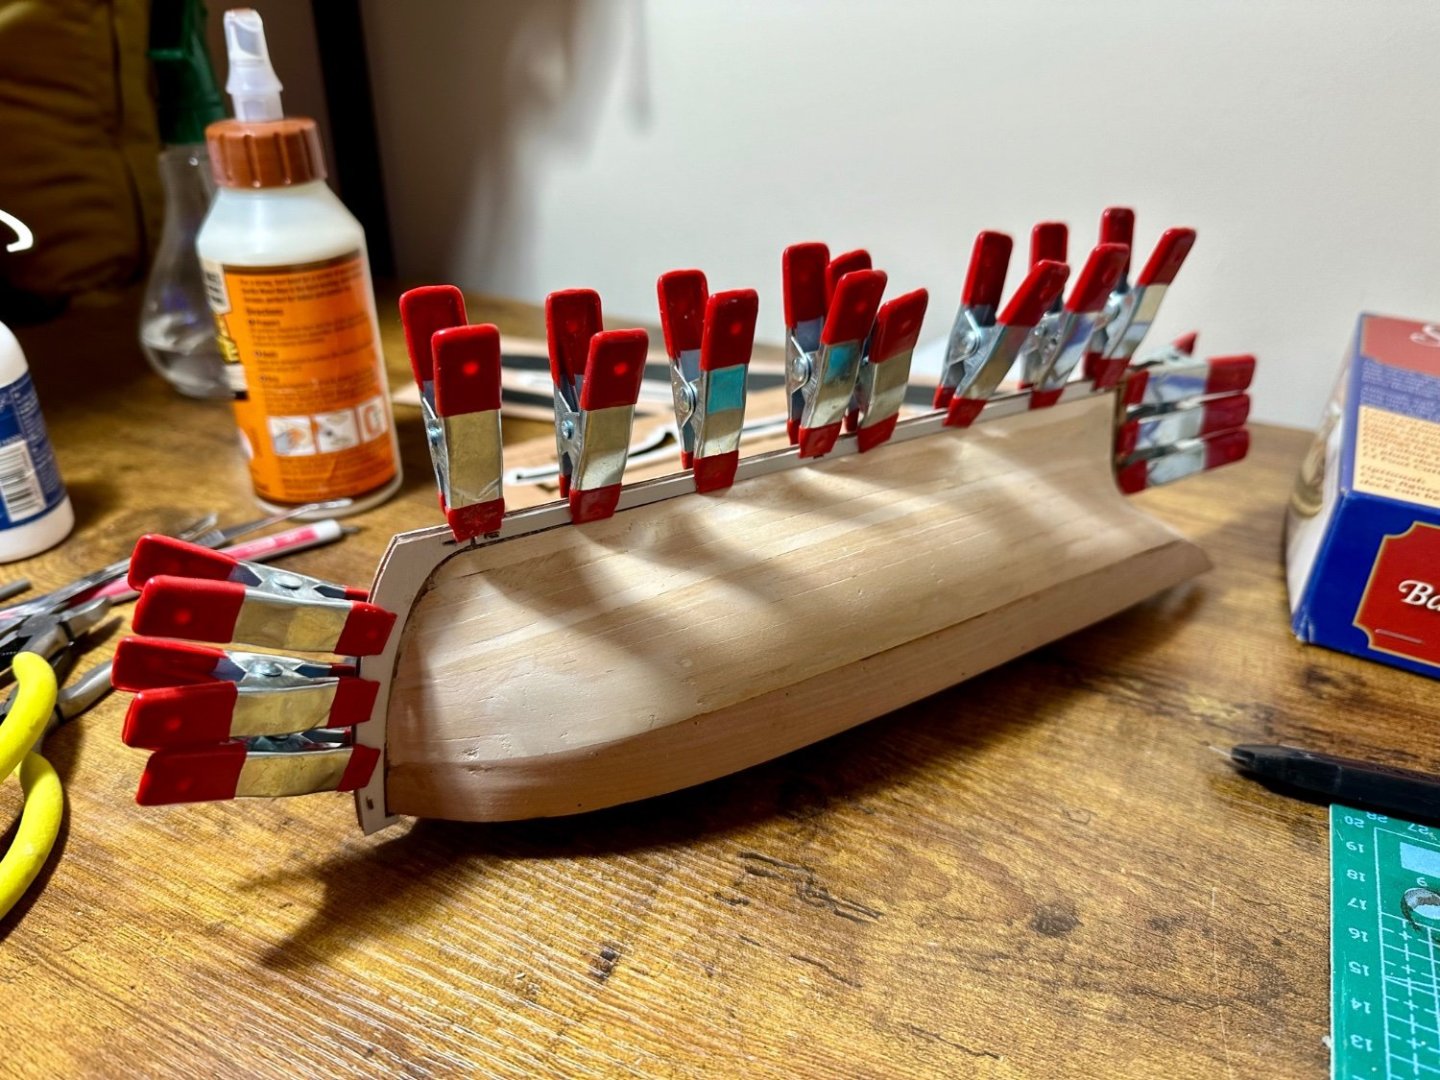
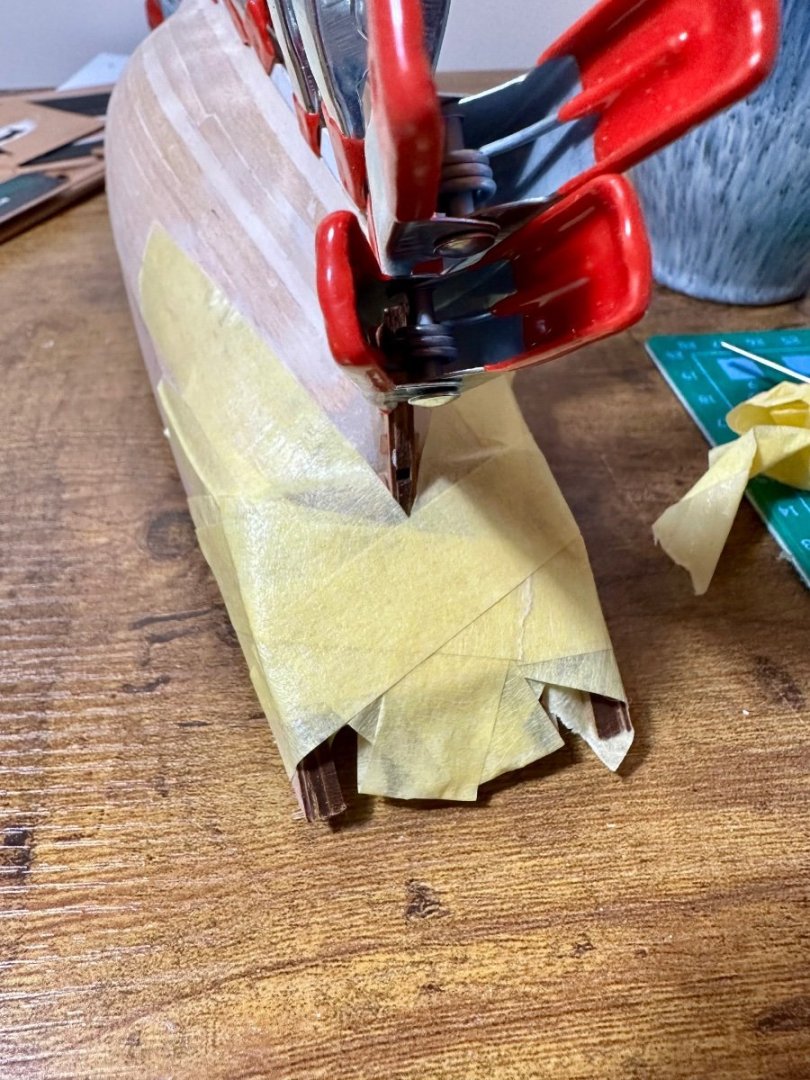
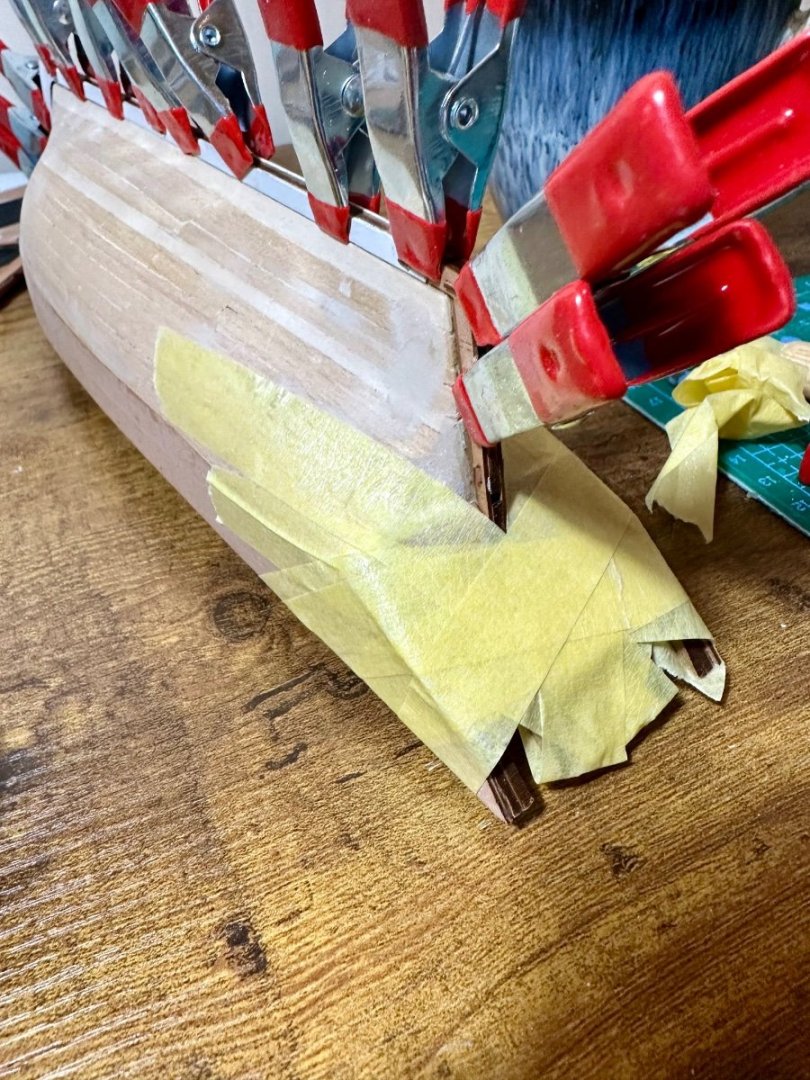
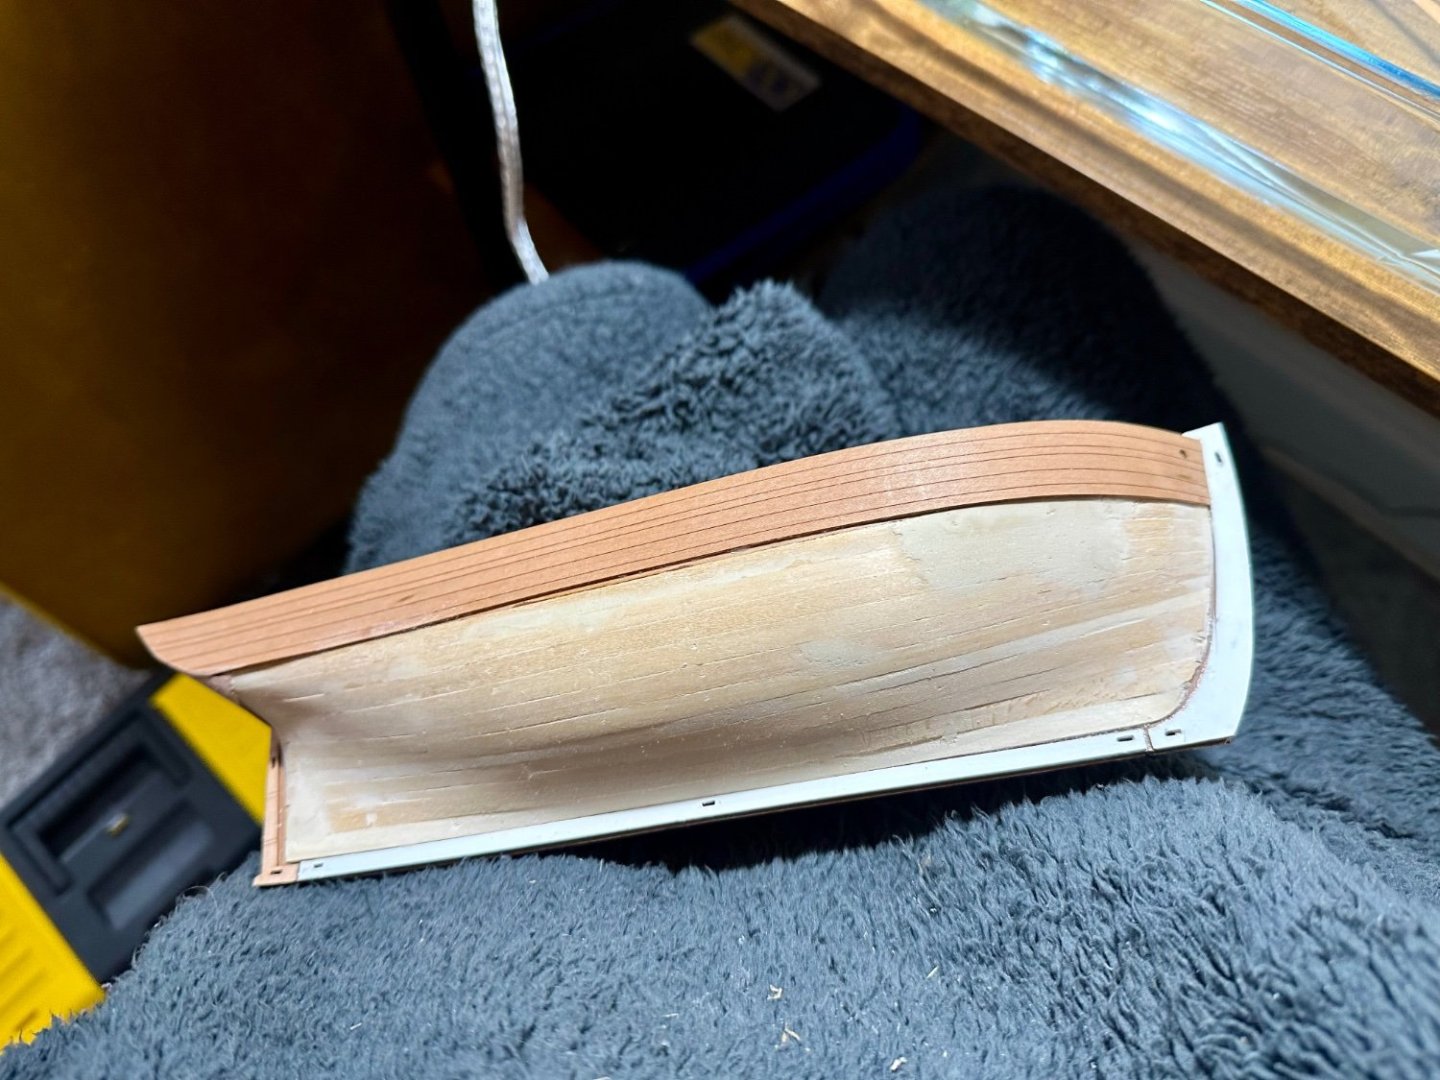
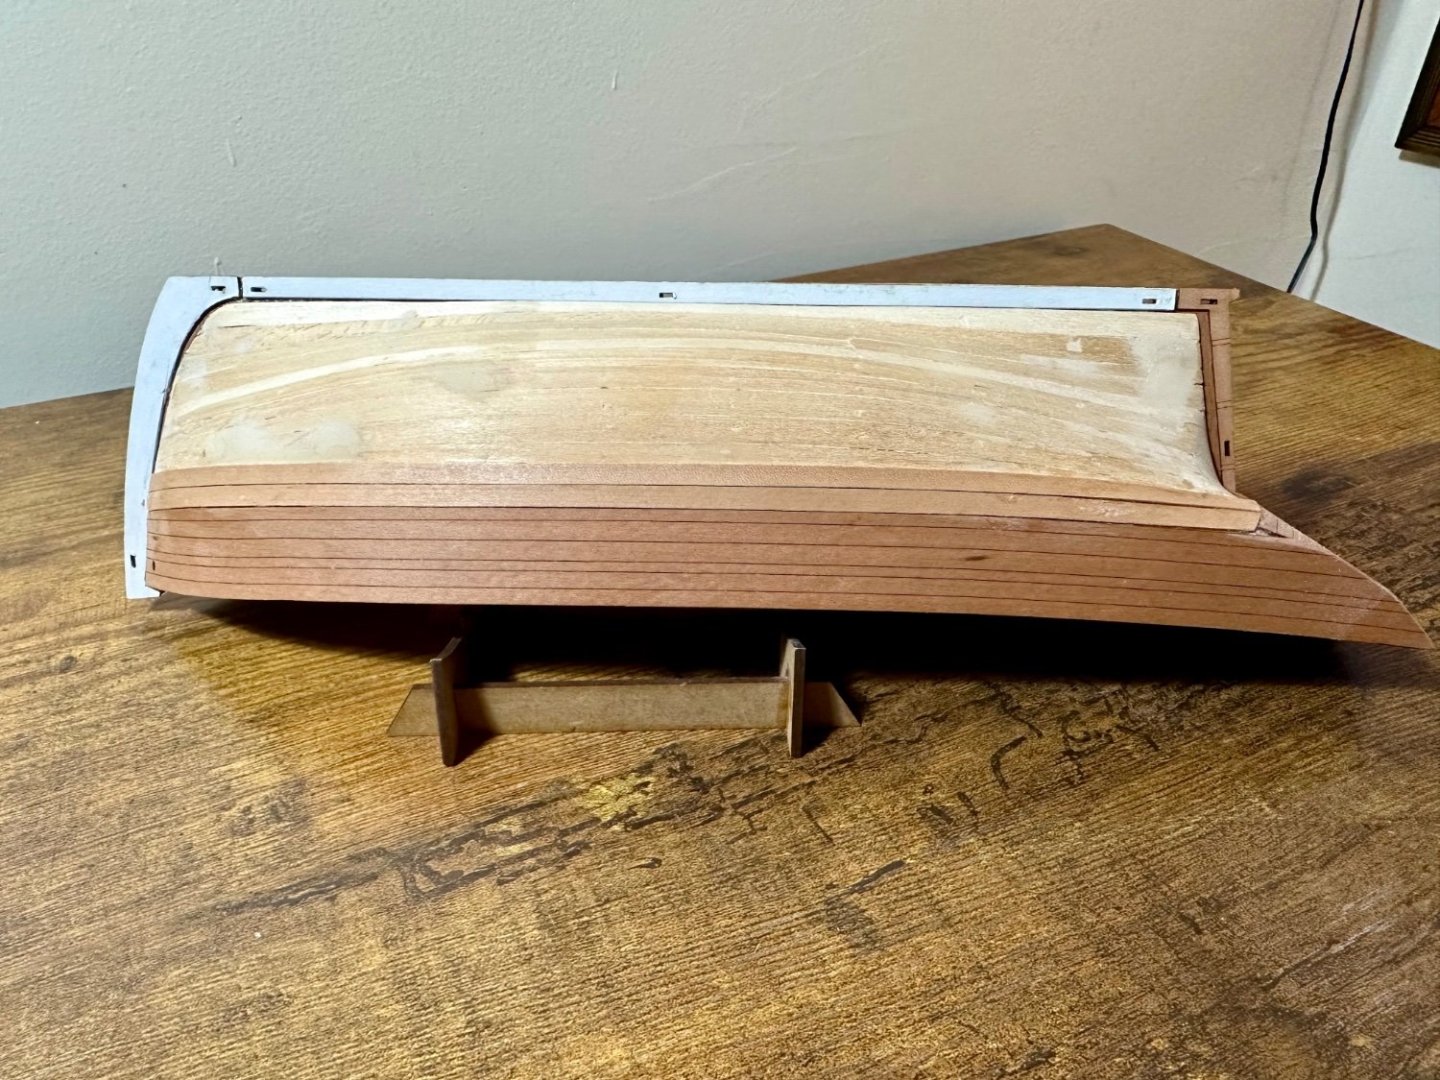
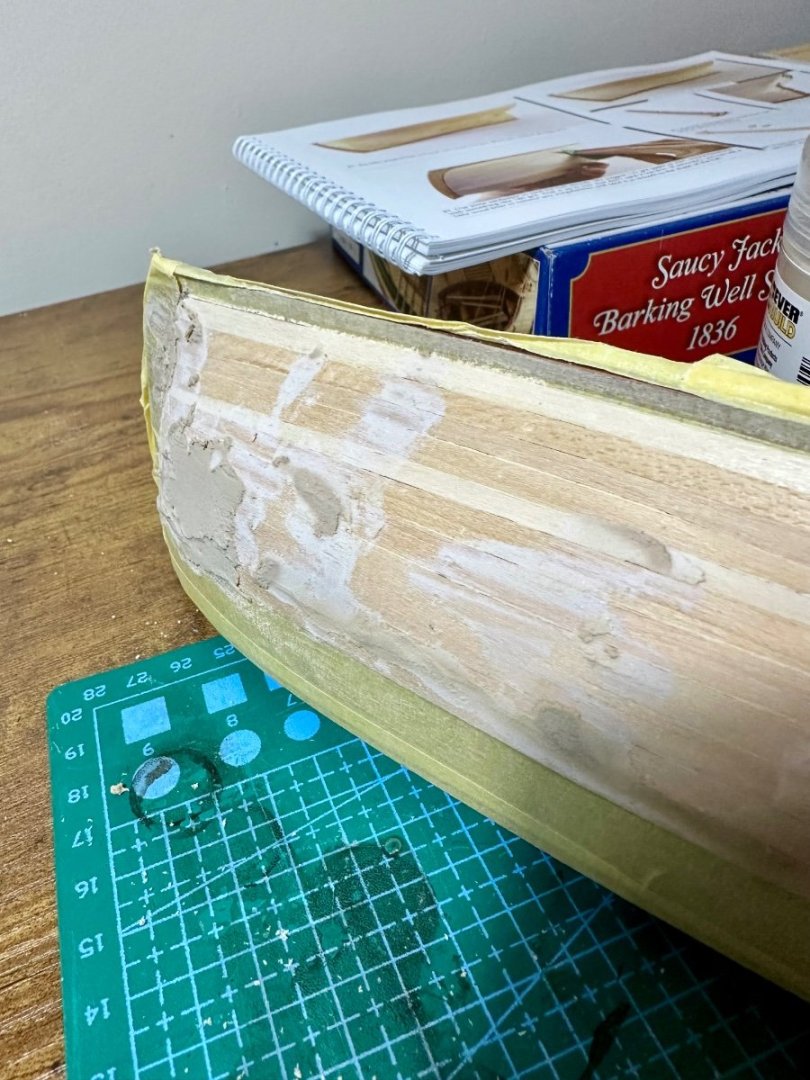
Productive week. First off with the second planking done it's time to fix the battle damage then prepare and fit the engraved deck. I used Danish Oil on the deck to bring the grain out. No adjustment needed for the deck, just some weight as it sets just in case. Before After Inner bulwarks fitted well. A little battle damage removing them from the sheet as I decided I wanted them painted but easily fixed with gel CA. Now waterline and paint. A proper tool is on the list but forgot to order with latest Vanguard order so made my own. Mk1 was too wobbly but Mk2 worked well enough. Masked hull and rudder then filled, primed and sanded & repeat until happy. Reached the point of chasing improvement after about 5 cycles so stopped. Now awaiting a can of white paint to move forward. Oh yes the little jolly boat got a priming too. One pass too close on the stern has caused bubbles so I'll fix that shortly.


-
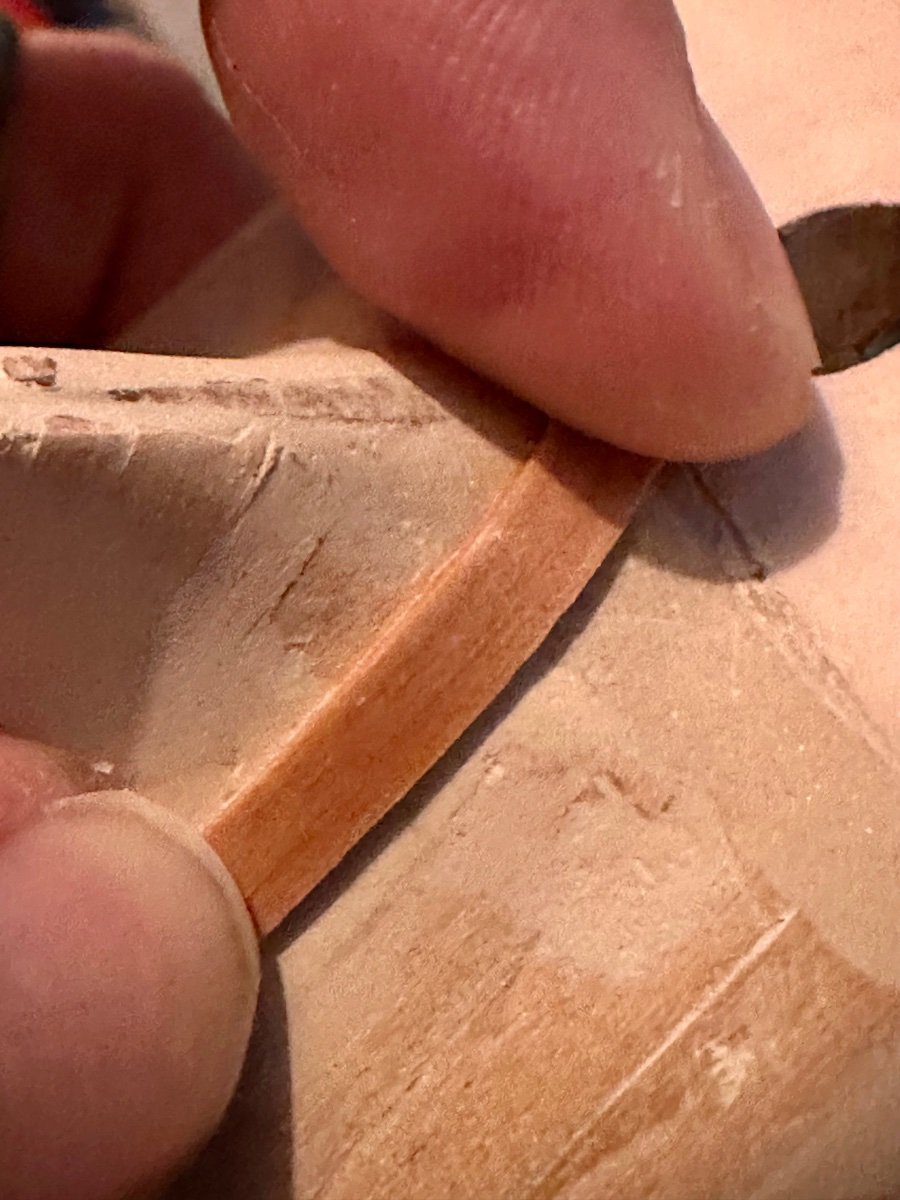
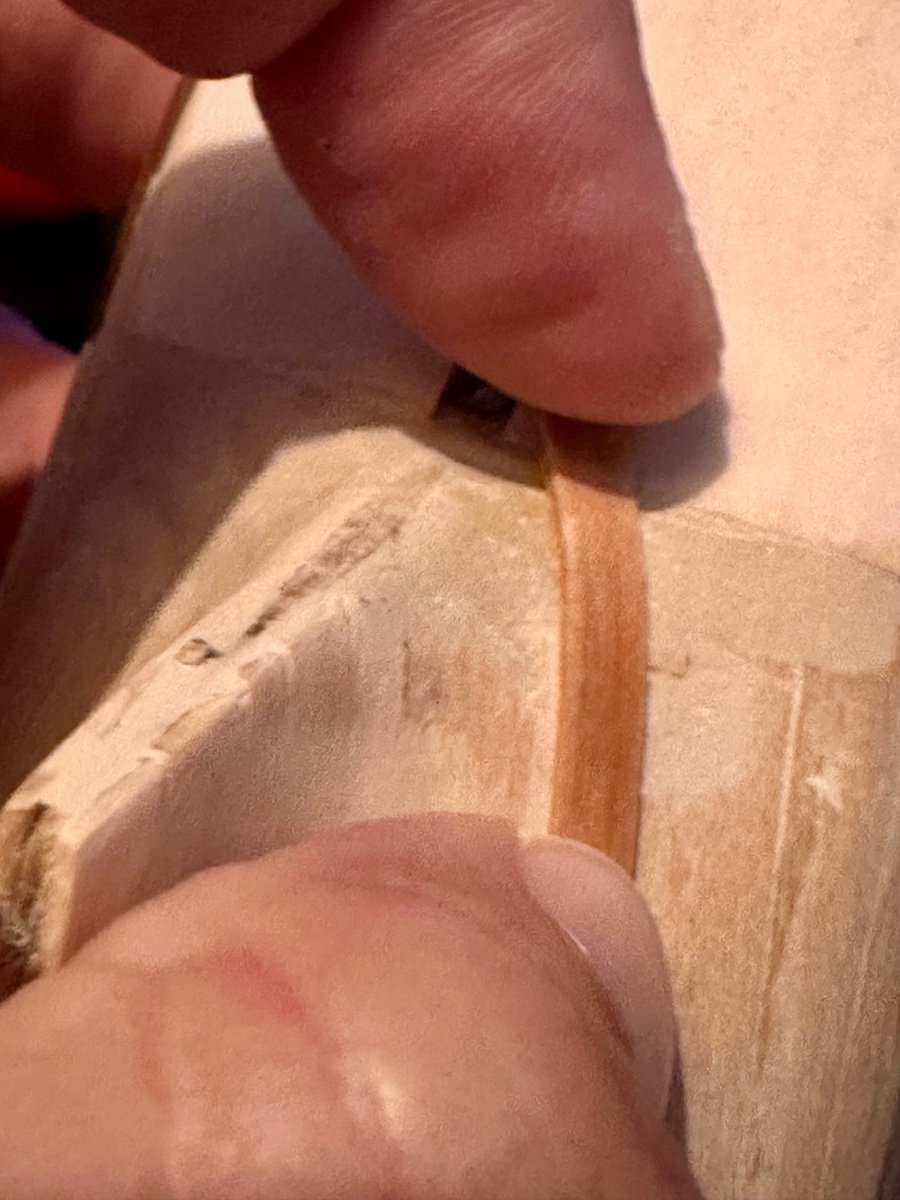
Few updates. First some battle damage while planking. Fortunately noticed quickly before either of the cats stole the piece. I'll refit later when it's safer. Last time I used white glue, having tried the recommended (in the Occre instructions) contact adhesive which was awful, but this time I'm using CA gel for the second planking. Dabs of gel along the plank which I then use a piece of scrap to wipe that along the plank to try and avoid any splurge at the sides. Seems to work well so far. Painted the black PE parts. Will do the white once that's dry. Nearly done the second planking. Much happier than last time but definitely some mistakes. I assume the planks riding so high is because I've trimmed them too much for the curve? At least it'll be below the waterline and painted. Lesson learnt.


-
Just a quick follow up after 24 hours. I'll confess I didn't realise I should have wiped the PE with alcohol to clean but that primer seems to be strongly bonded. Can't scratch it with a screwdriver anyway.
-
Lol that's just plastic modelling Seriously though look at the Vanguard models their frames are a better start. Expensive but worth it.
-
This one?
-
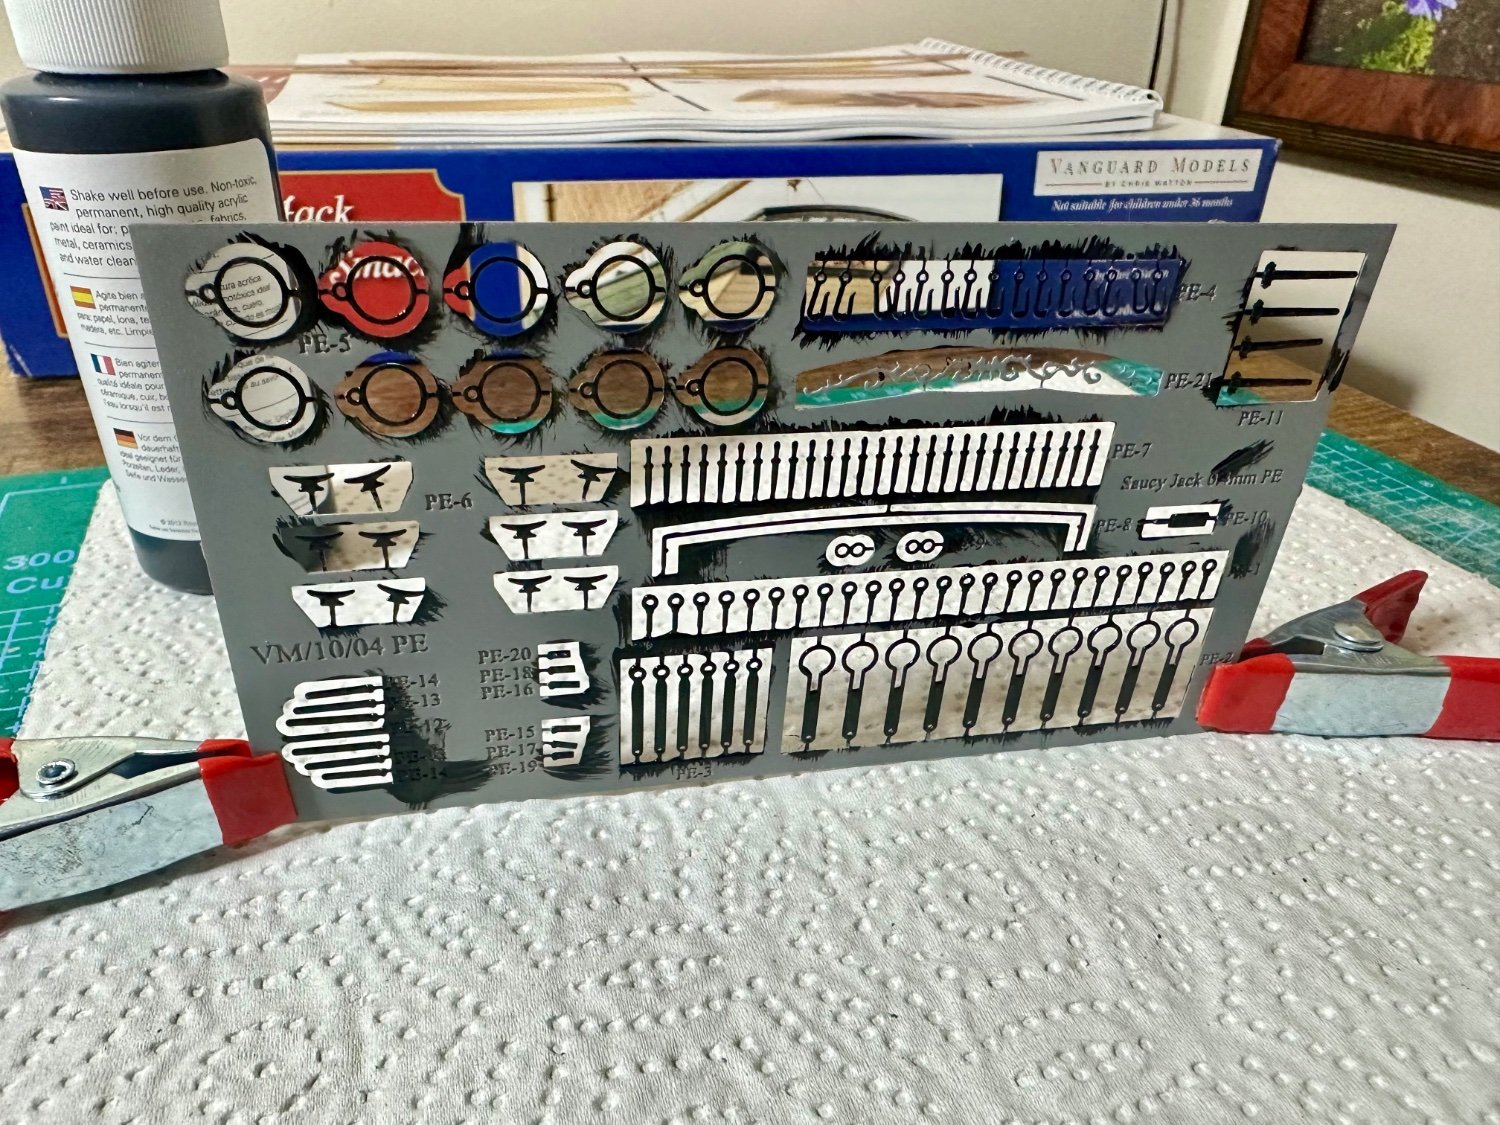
Thanks Andrew I'll be happy tomorrow Whatever happens I'm pleased compared to my first kit and probably can't ask for more than that. It's this one. I'll leave it for a day or two to see how strong it is. I've not done any PE before and couldn't see a readily available product here so I was going to try grey prime then matt black sprays and touch up if needed once fitted. I must subscribe to your cutter build as I think that will be my next but I believe Santa has visited Vanguard for me too.
-
Very welcome. Again a thought from an inexperienced novice who doesn't know this kit. That said if there is scrap material available I'd consider adding another layer where it's marked a14 & a15 (and the same at the stern) so there's more space to make securing the planking easier whether with glue or pins.
-
Welcome! As another novice my first impression is that you probably haven't gone too far, yet. Take a plank from the kit and use that to see/feel if the wood flows over the shapes you've made. Bear in mind you will probably need to soak the plank so it relaxes enough. Should give you a much better idea how it is. Good luck and maybe start a build log in the relevant section. Much more experienced people than me will help and you can use it look back on to improve your next kit.
-
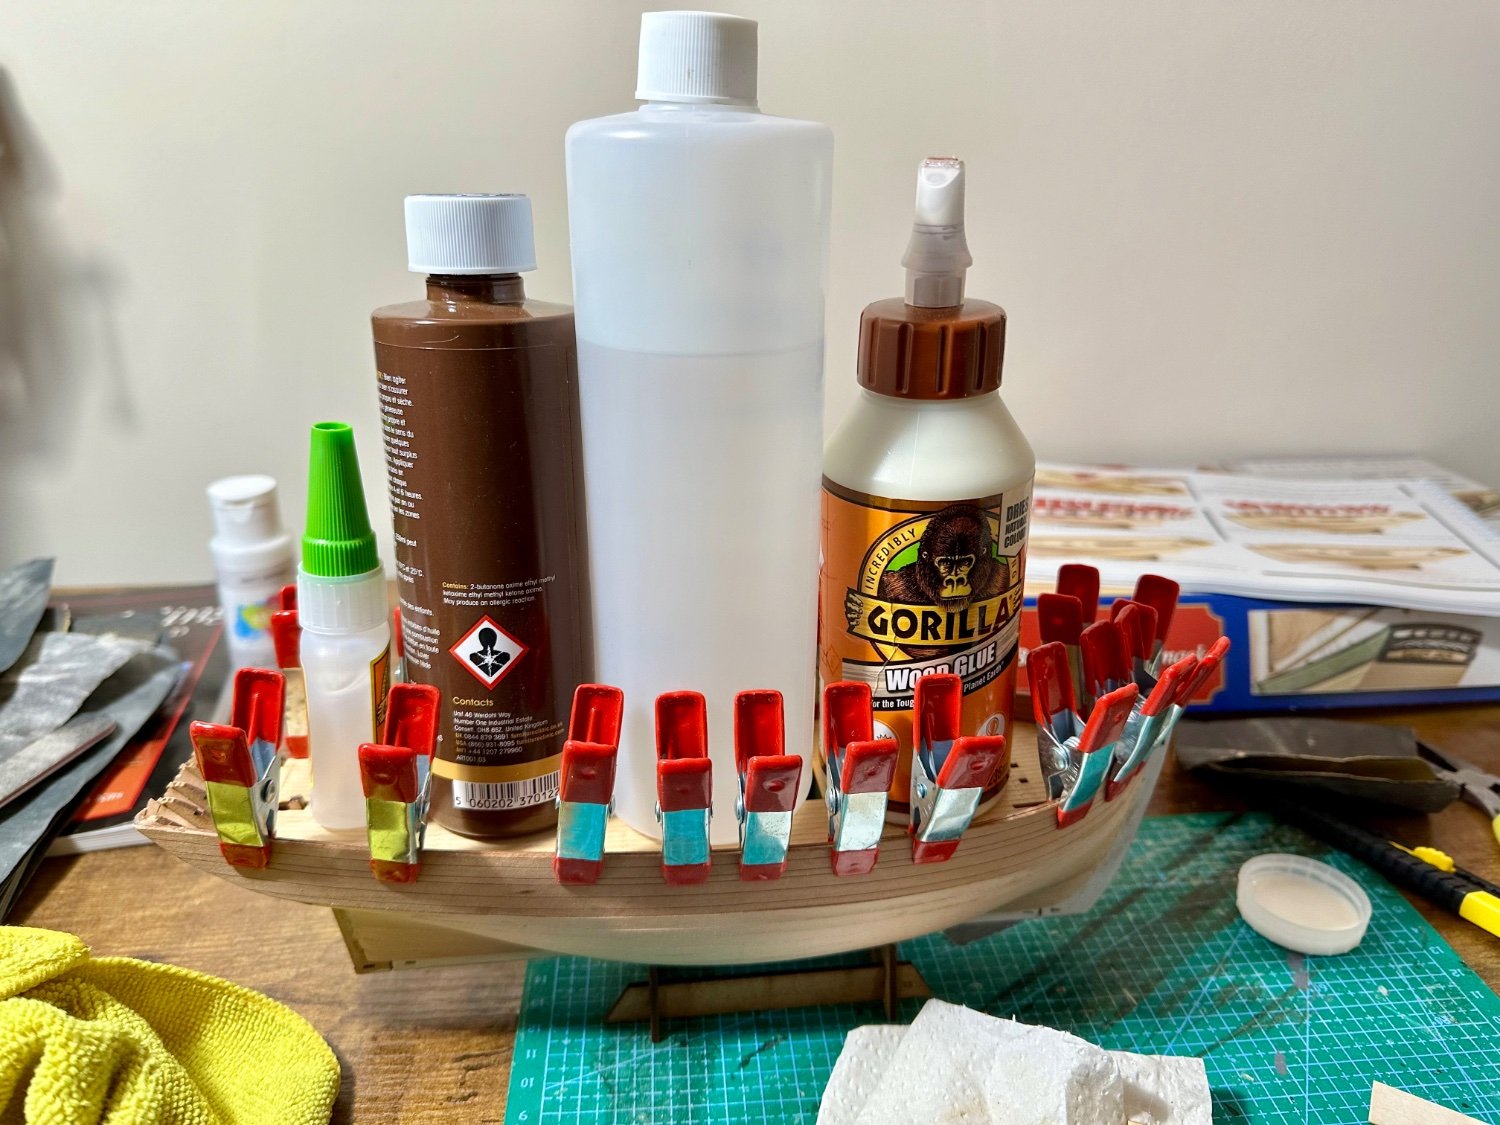
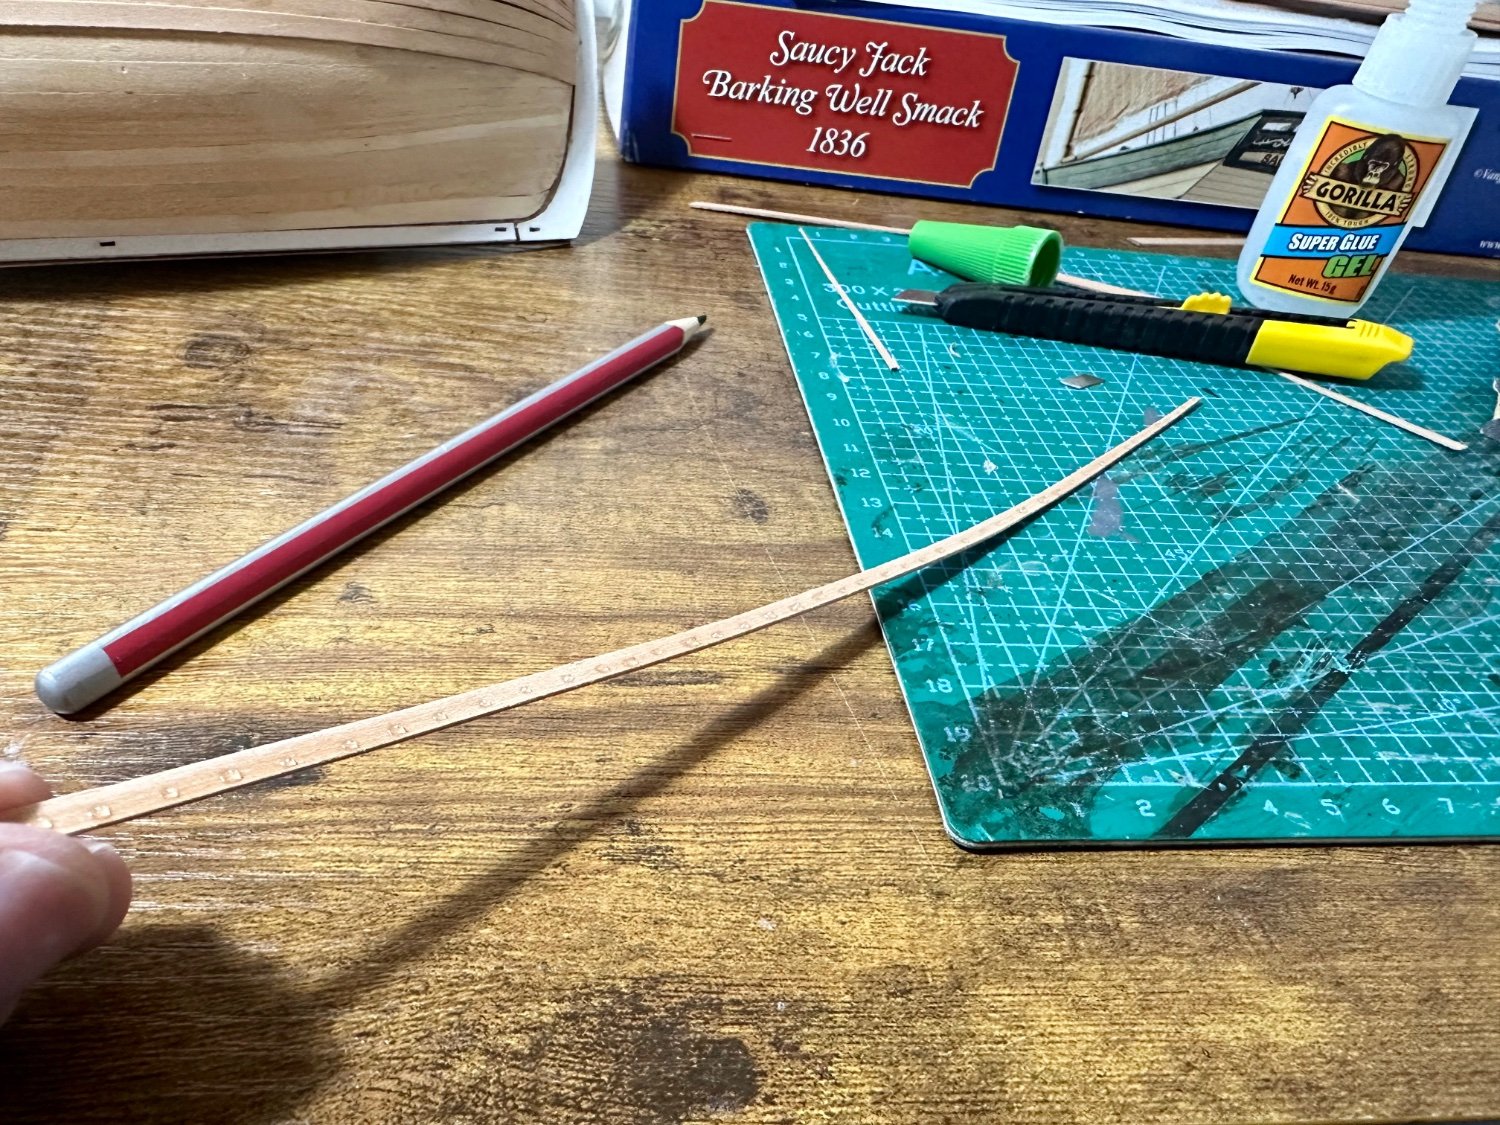
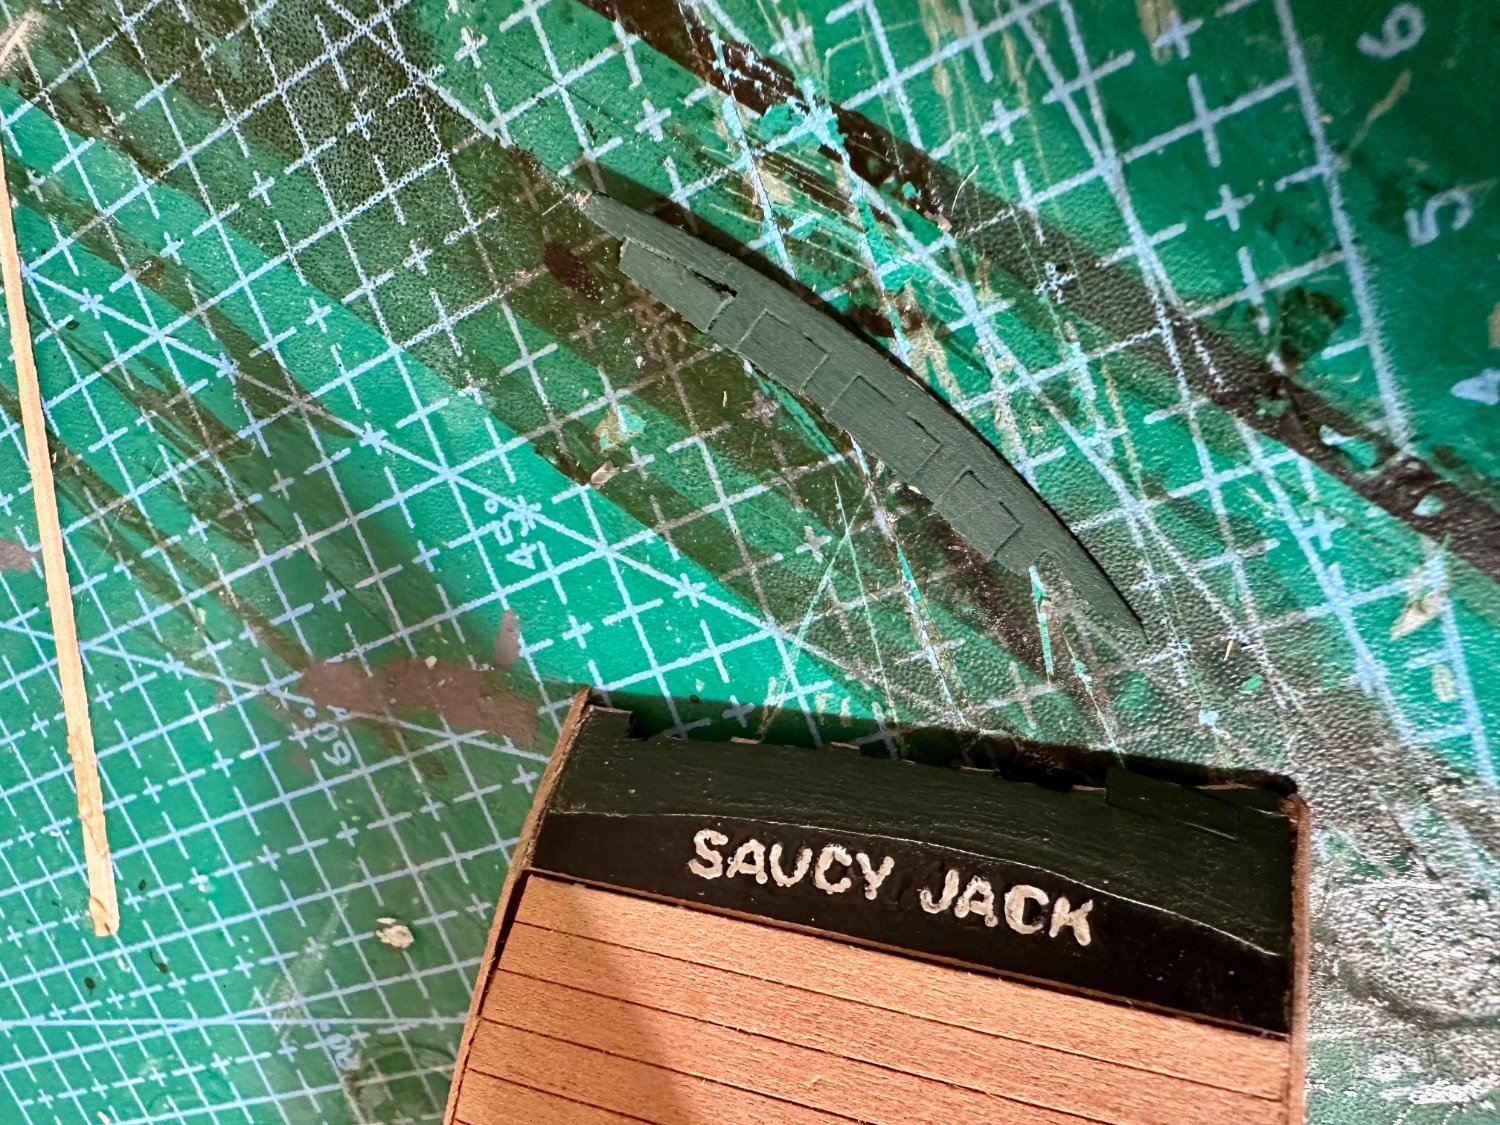
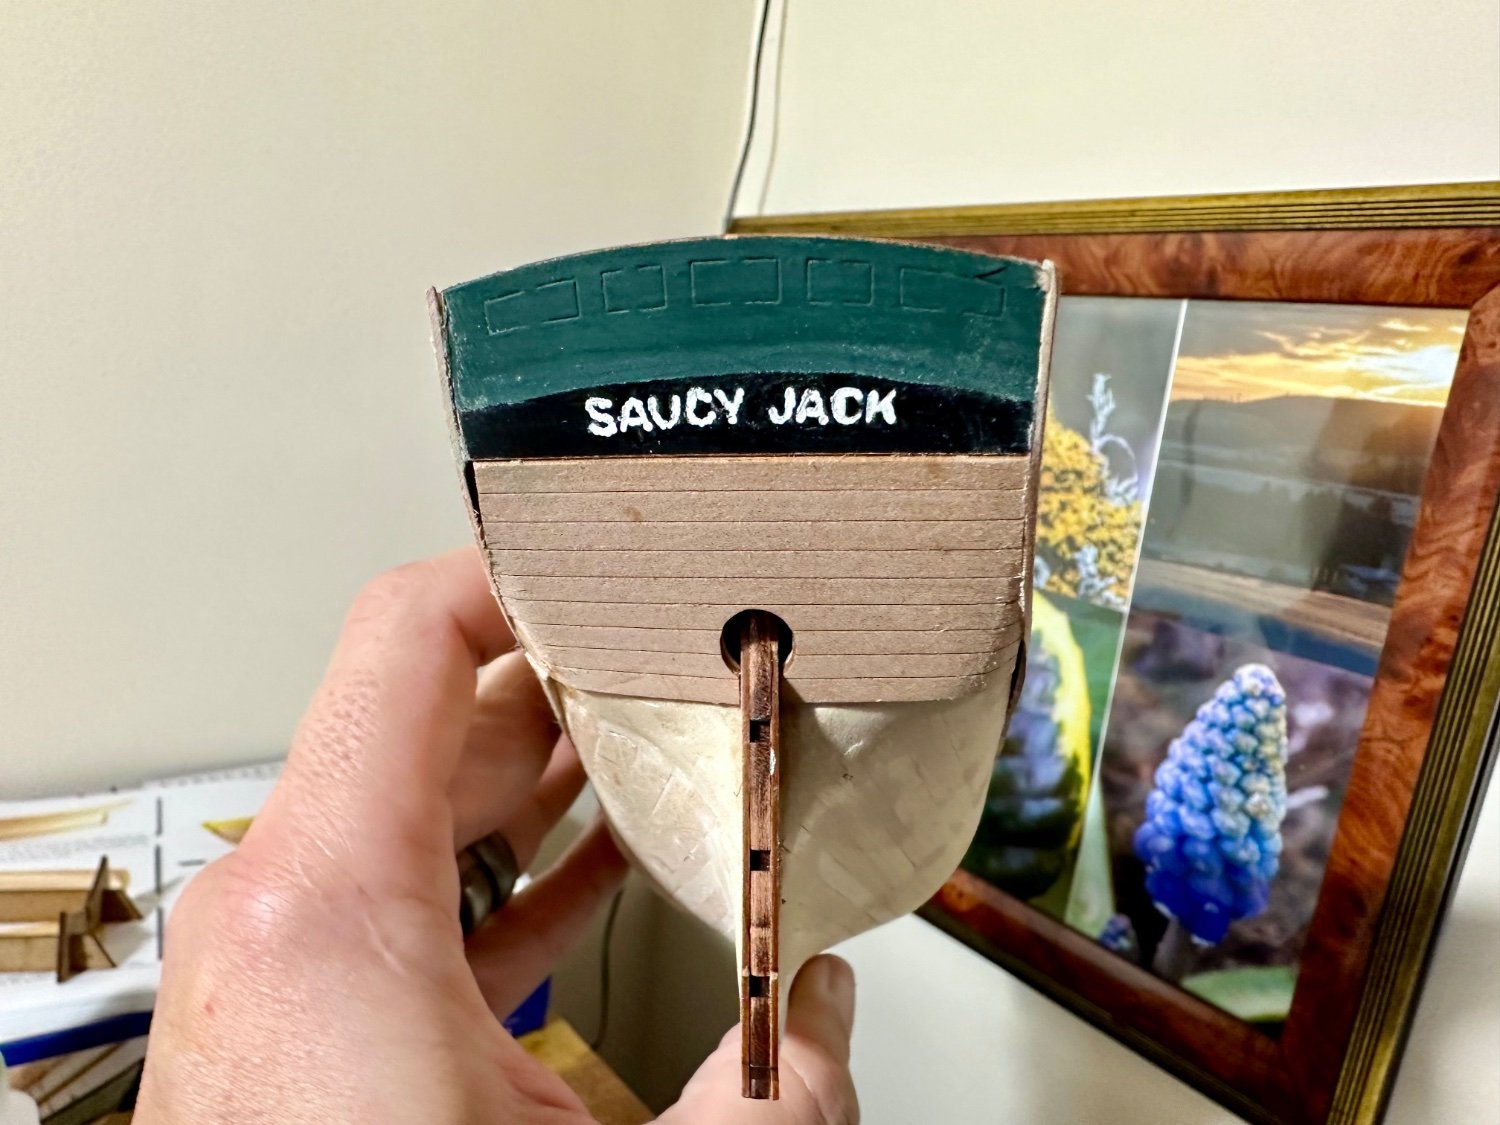
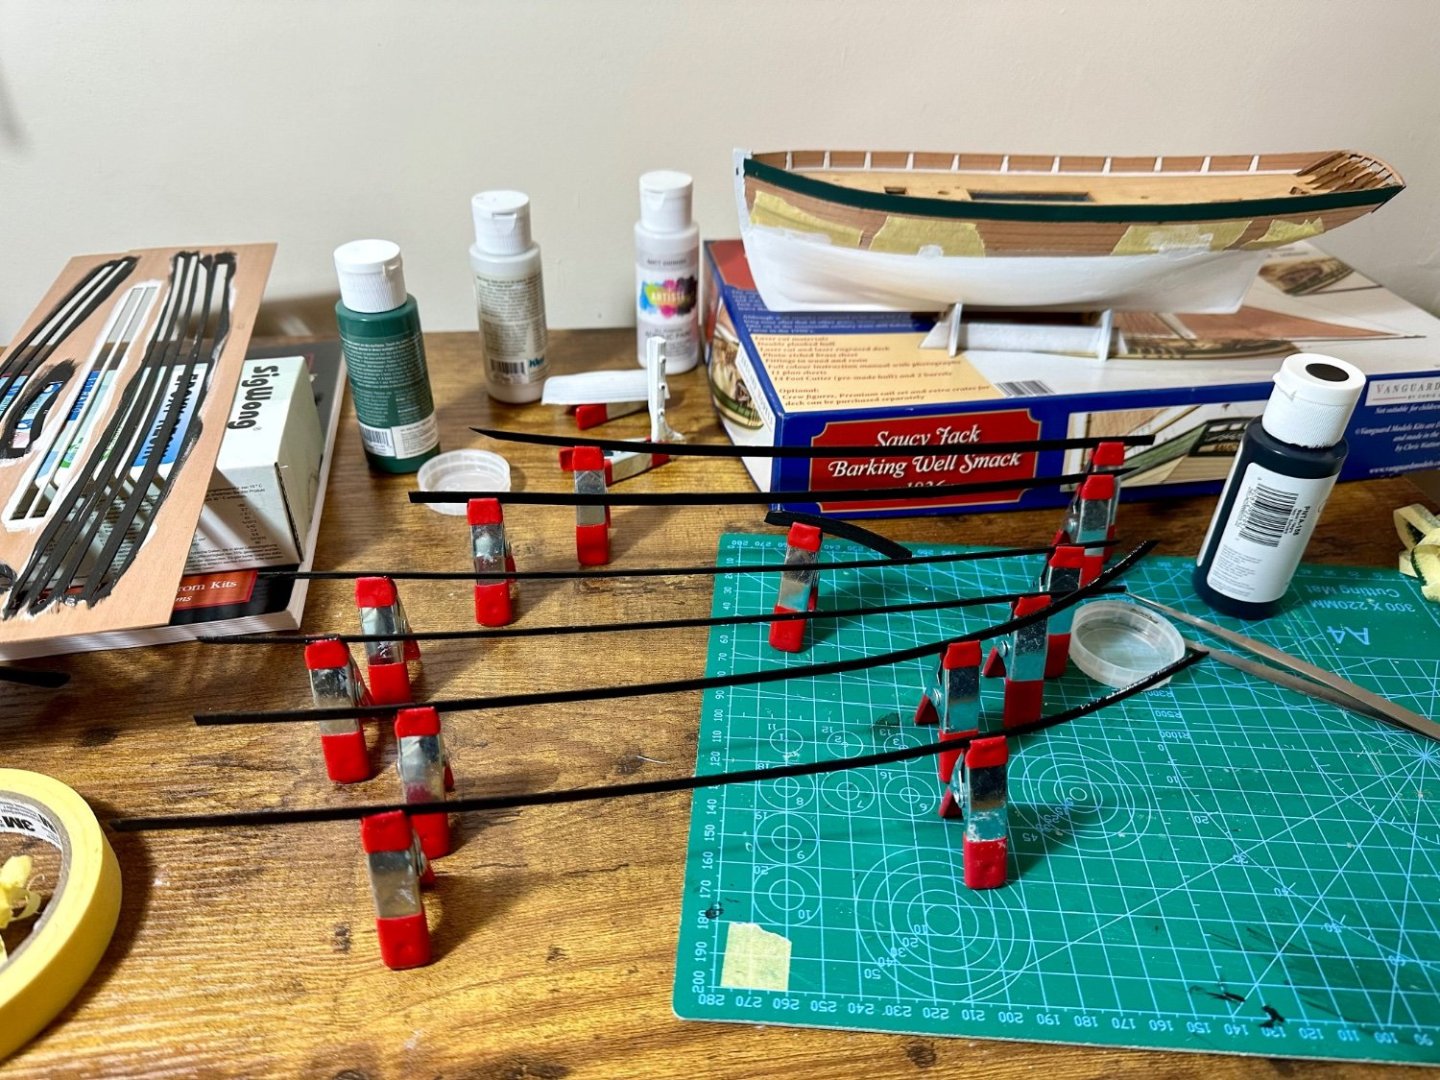
Weekend update. A few errors now, no one to blame but myself. Worst is trying to be prepared I painted as many components whilst still in sheets as I thought I should but didn't think about the the bow pear pieces of course only needed painting to the waterline. Had a look and was worried they were too thin to sand off so I've left them as is for now and I'll deal with it when painting the finished hull. Fitted the cover pieces along the keel and all fit very well with the alignment pegs provided. A little fiddly but a good lesson in patience which worked out well overall. Next was soak and 'dry' fit the stern piece. This seems to have shown that something at the stern wasn't totally straight. Not awful and I'm sure solvable once its all together. Outer bulwarks fitted as per manual without a hitch. Only change I made was to use CA gel at either end and along the bottom edge but white glue across the rest. Seems fine. Onto making a start with the second planking. This time I'm fitting the plank, as in the length and shape at either end, then soaking and using a dry iron to set the curve as much as possible then using small amounts of CA gel along the back to attach.. Only done the first two top planks so far but I like the method so far. The work I did with filler at the bow to correct the fairing of bulkhead two seems to have been good. Stopped now to make sure I'm still happy tomorrow, or whenever. A more tiresome problem is not realising/noticing that the plank stock varied in tone quite a lot. Noticed this when applying the second plank on one side. Now sorted by tone so hopefully with the offending planking being right at the top it'll not be too obvious. Last job of the day was to etch prime the PE parts for later. Simon.


-
I had a similar problem with mine too but it was most likely operator error. I thought I'd faired well but bulkhead 2 ended up too short. If I'd realised earlier I would have fixed at this stage by adding material behind the bulkhead and re-fairing. As it is was I used filler after the first planking and that seems to have sorted the problem. Only done top two planks on second planking but seems ok. Stick with it they're really good kits.

- 32 replies
-
- 2
-

-
- Saucy Jack
- Vanguard Models
- (and 2 more)
-
Me too the gel is much more manageable.
-
Thanks. The Vanguard kits seem to be so far beyond any other I’ve been put off looking elsewhere. Yes they’re a premium price but so obviously worth the extra. I’d rather model civilian craft so hopefully there will be more.
-
As a test I soaked (sucked on the end for 30 seconds) of the second planking and tried it out on the tightest section of the curve from various, vaguely correct, angles and all was well so hoping can proceed well. Simon.


-
PS love your Nisha. Probably my next fishing boat as my late dad's family had one in Brixham. Unfortunately for the wallet one of the other Vanguard fishing boats was built about two miles along the coast from my village and another fished from our harbour so I think I'm obligate to really
-
Thanks I\m intending to fill the well with resin and the 'fish' with some surface effects. If it' doesn't work out I can always close the hatch! I think my next step is to fit the stern plate and then see how the secondary planks will mate to that. Looking (and feeling) again I still think the shape is good. I can see that if the shape between the two 'sides' had less of a curve between them right at the stern then it might make planking easier but also looking down the line of the first planking the current shape is organic. The reason I resorted to shaped filler was purely that I made mistakes with the length of those planks and by the time I'd realised what I'd done I couldn't go far enough back.
-
Question about Symbol on building mast
BrochBoating replied to ChuckP's topic in Masting, rigging and sails
A is looking at the part from the front as shown in the A elevation on the right. B is looking down on the part, showing the platform in B elevation on the left. -
I gave up trying to remove them, however their tip to file the tops of them worked ok as they're quite domed meant it didn't damage the wood beyond anything that isn't going to be sanded anyway. Please don't take me as any kind of authority but the various kinds of superglue (CA) are widely used and recommended. Thick (what I'd call 'normal'), thin and gel all seem to have their place you just need to learn where and how to apply so you don't end up with a stick mess. I've found I can apply very tiny bits of gel with the standard Gorilla bottle but thin, as you expect goes all over the place. I've bought some of these to try for the normal glue but haven't tried yet.
-
Thanks, I'll check again together with the stern piece that fits before the planking. It does blend well but I take your point.
-
Question about Symbol on building mast
BrochBoating replied to ChuckP's topic in Masting, rigging and sails
Does it refer to a different elevation on another plan at that point on the part? -
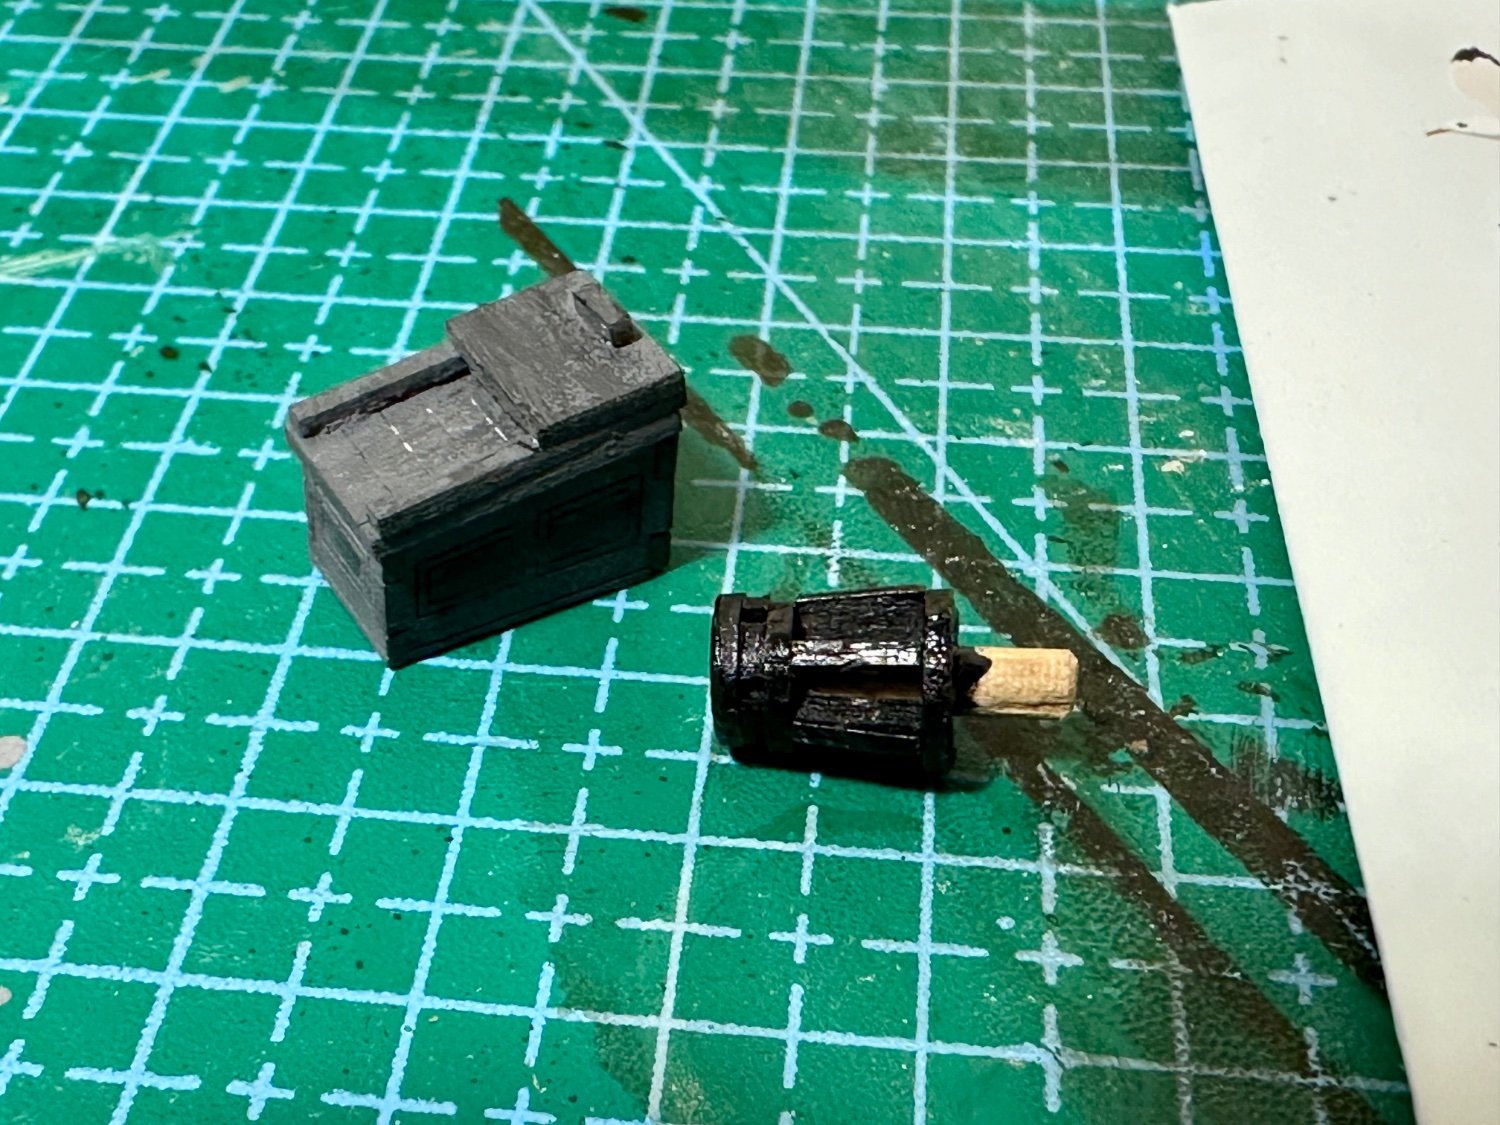
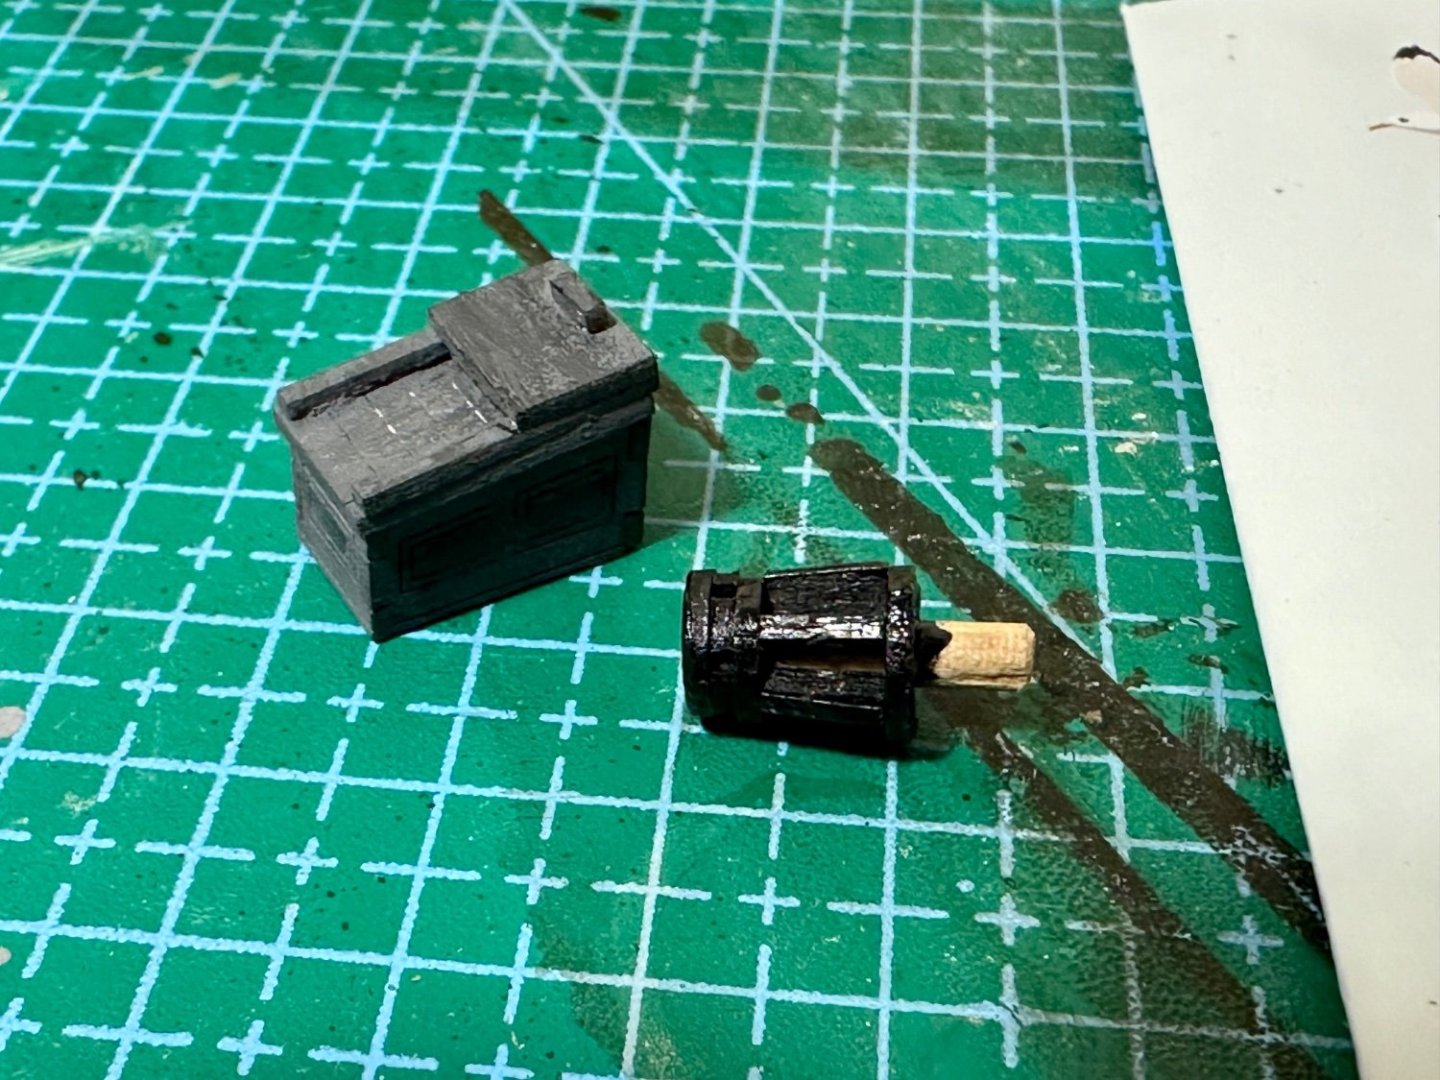
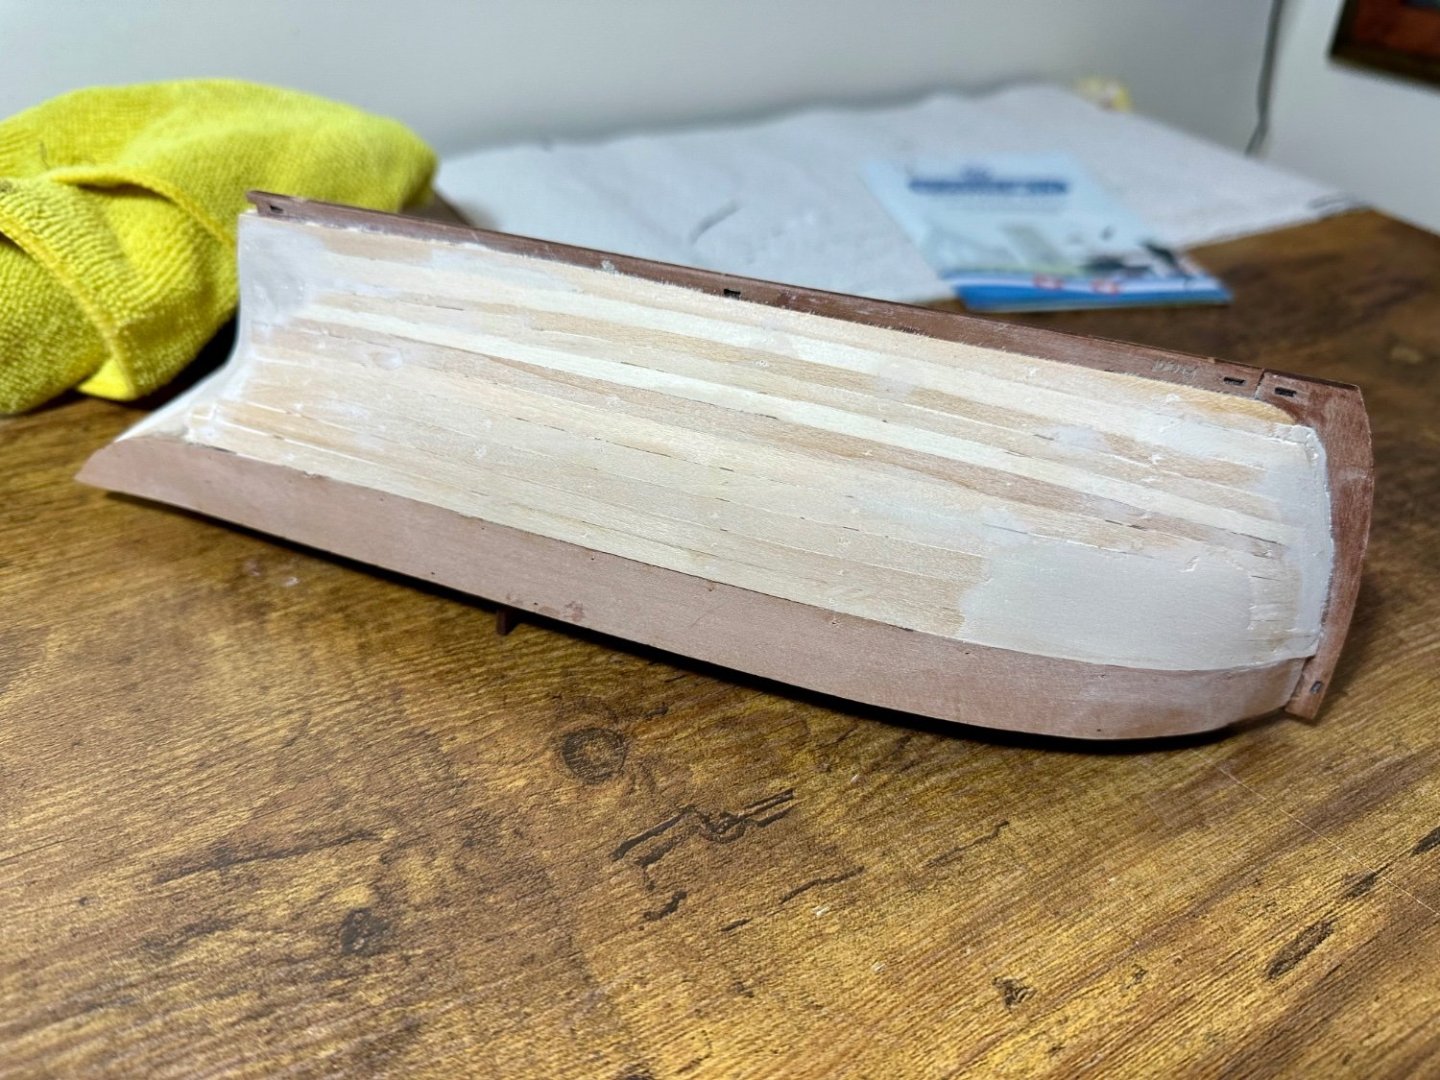
Filling sanding and shaping after first planking done. Decided to add at the bow to make up for the fairing error (at least I assume that's what happened) before the second planking. Also shaped the stern to make up for the errors there too. Used 120 then 320 and 600 paper to finish. Looks good under a decent light and feels well blended. I prefer to use paper over finger tips rather than blocks so I can feel what I'm doing. Also made up and painted some of the parts for later and experimented with some light weathering. Painted plain grey then dry brushed with a darker grey, black mix. Simon.


-
Nail files can be found easier in some places and work well. I can sympathise with using them as only on my second kit. However the Occre ones (I did the Occre Polaris first), at least with the Occre wood stock are very coarse and hard to remove. The pins supplied by Vanguard (which I think are Amati pins?) are much finer and easily removed. Another tip I'd consider is to learn to use gel superglue as it's very useful.
-
Now that's exciting Any hints?