HOLIDAY DONATION DRIVE - SUPPORT MSW - DO YOUR PART TO KEEP THIS GREAT FORUM GOING! (Only 20 donations so far - C'mon guys!)
×

BrochBoating
-
Posts
186 -
Joined
-
Last visited
Content Type
Profiles
Forums
Gallery
Events
Everything posted by BrochBoating
-

Hello from the Scottish North Coast
BrochBoating replied to Scottish Guy's topic in New member Introductions
Hi Micha. Positively local by our standards! -
You're not alone there Andrew. Won't stop me getting more stock asap though. Need to get a bucket of Vallejo Off-white.
- 125 replies
-
- 1
-

-
- Trial
- Vanguard Models
- (and 1 more)
-
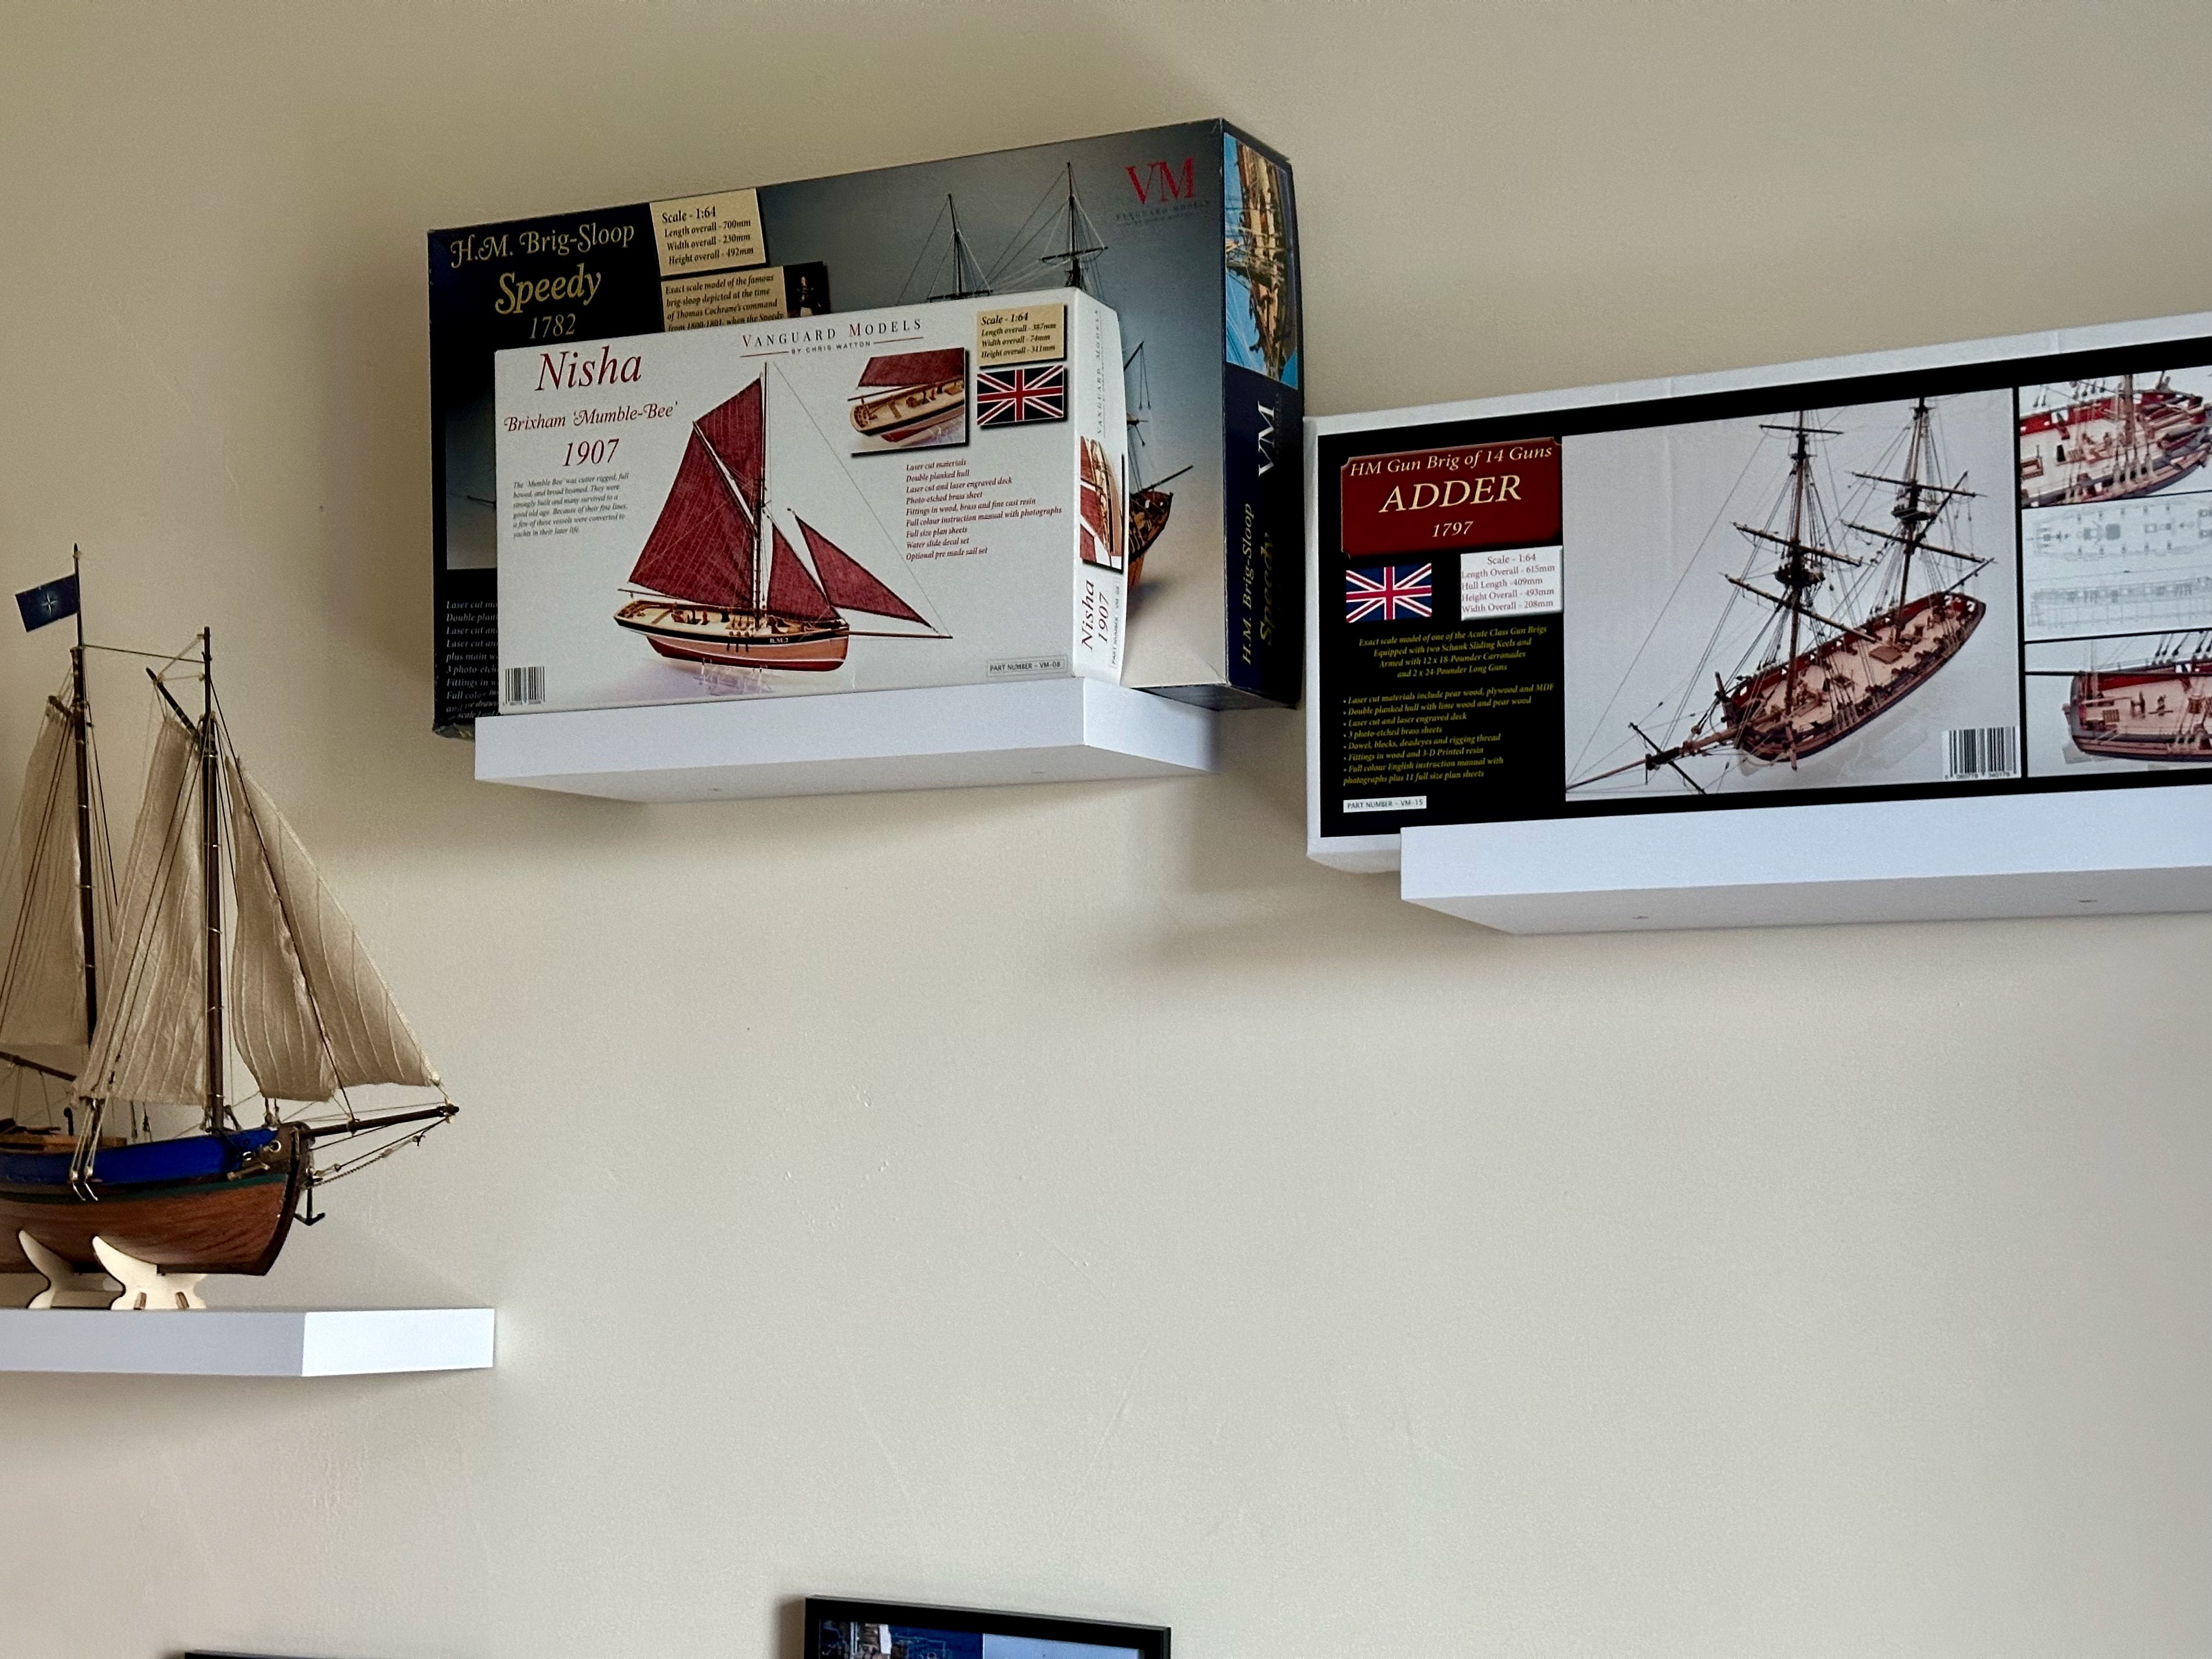
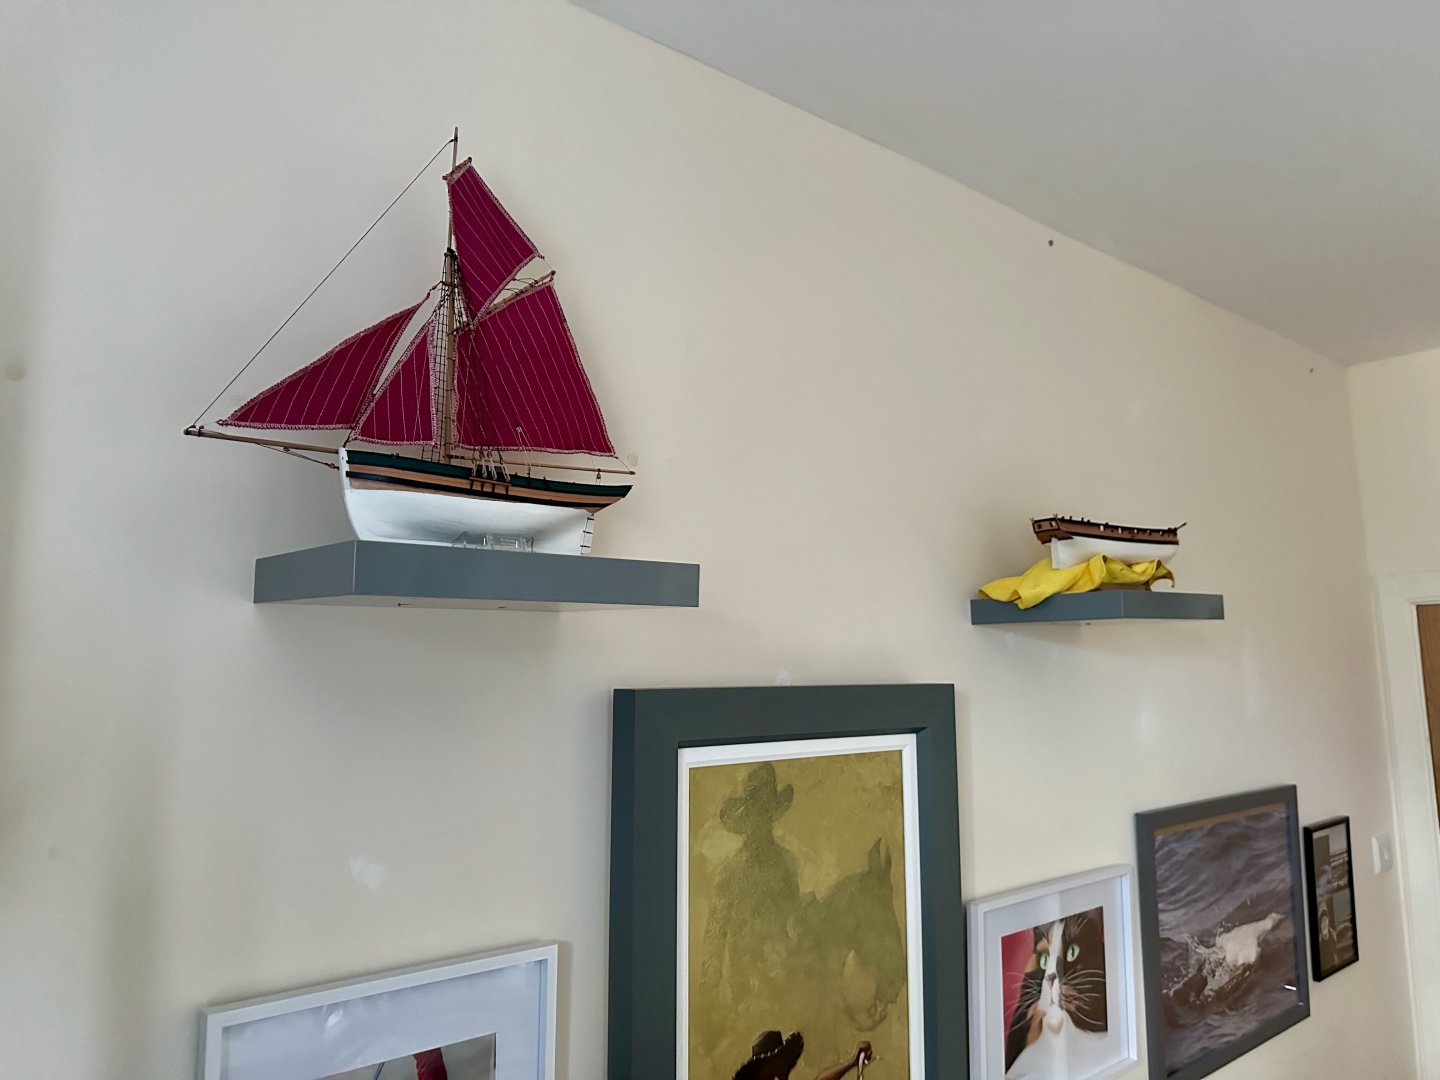
No progress but another addition to stock arrived so the shelves have been updated.


- 125 replies
-
- 9
-

-

-
- Trial
- Vanguard Models
- (and 1 more)
-
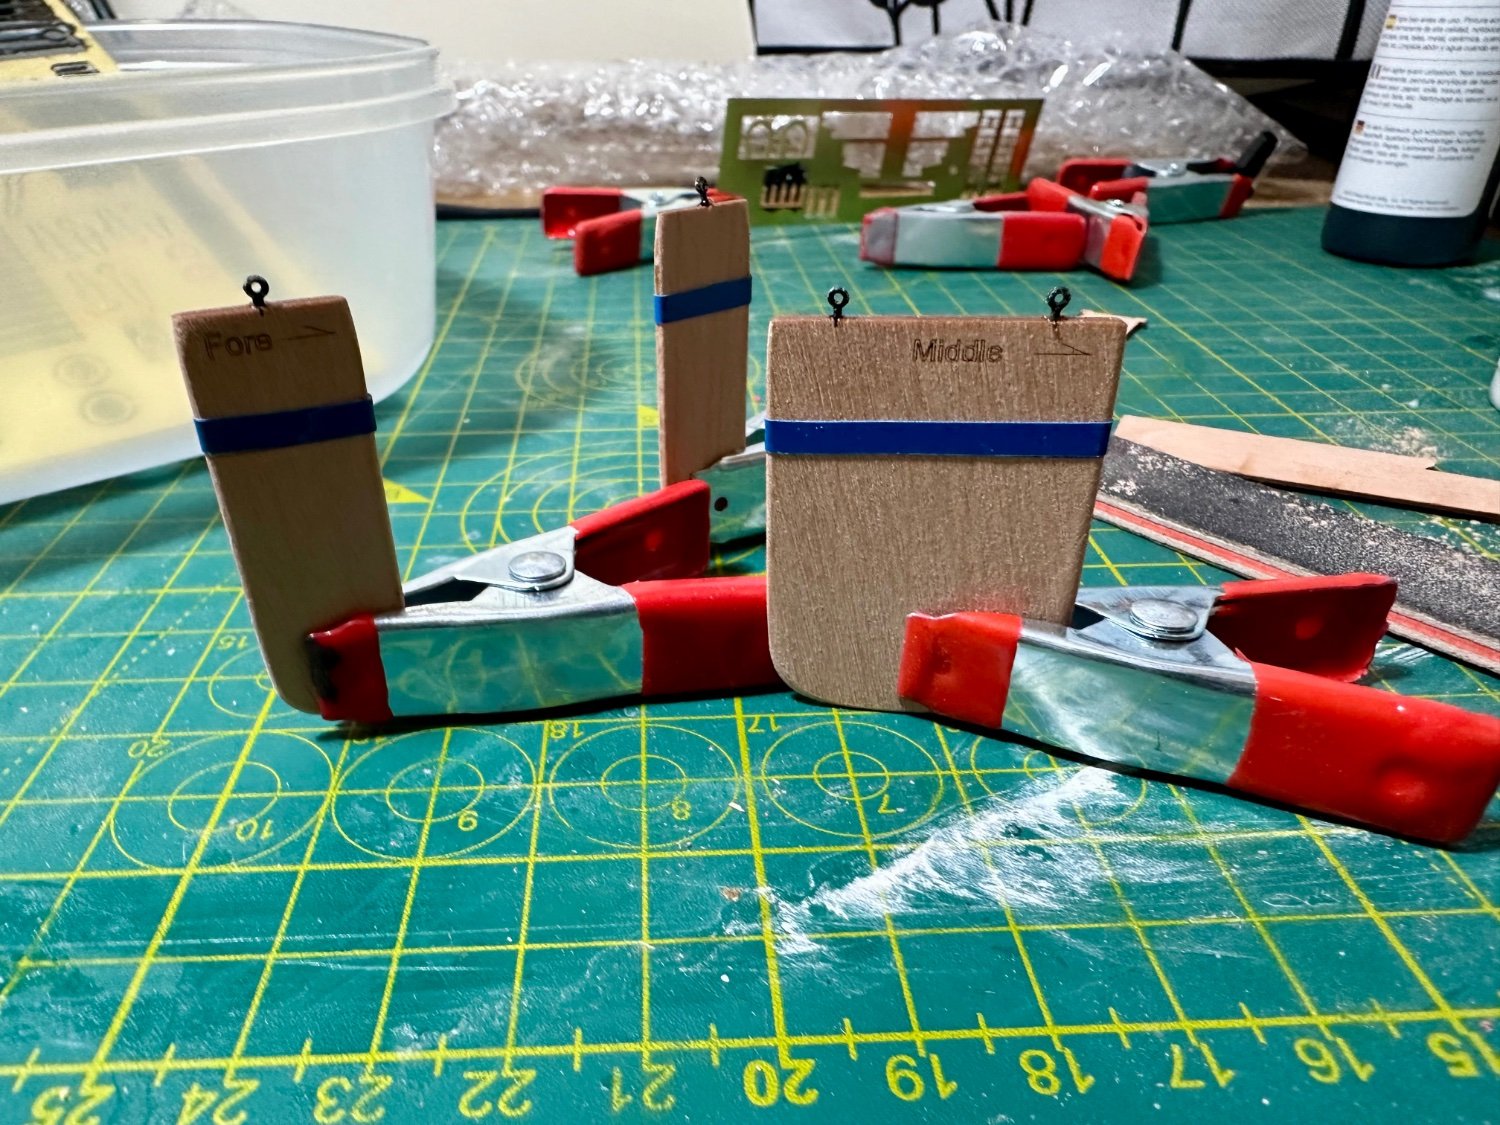
Thanks all. I thought slow and steady was the only solution and I’ll try harder. I’m trying to avoid making a hash of things and making them ugly and would rather leave off and found another solution. I’ve seen the off-hull cannon rig which looks very useful. I take it the general idea (this is my first non-civilian kit) is that all the cannon rigging that isn’t attached to the hull is done here then unhooked and attached to the hull so they’re all as identical as possible? Made a fair bit of progress over the weekend with all pretty straightforward and good results. Keel slots will need a little widening from paint but they’re nearly there. Ladders were frustrating but got there slowly with only one small break that got reattached with CA gel.


- 125 replies
-
- 11
-
-
- Trial
- Vanguard Models
- (and 1 more)
-
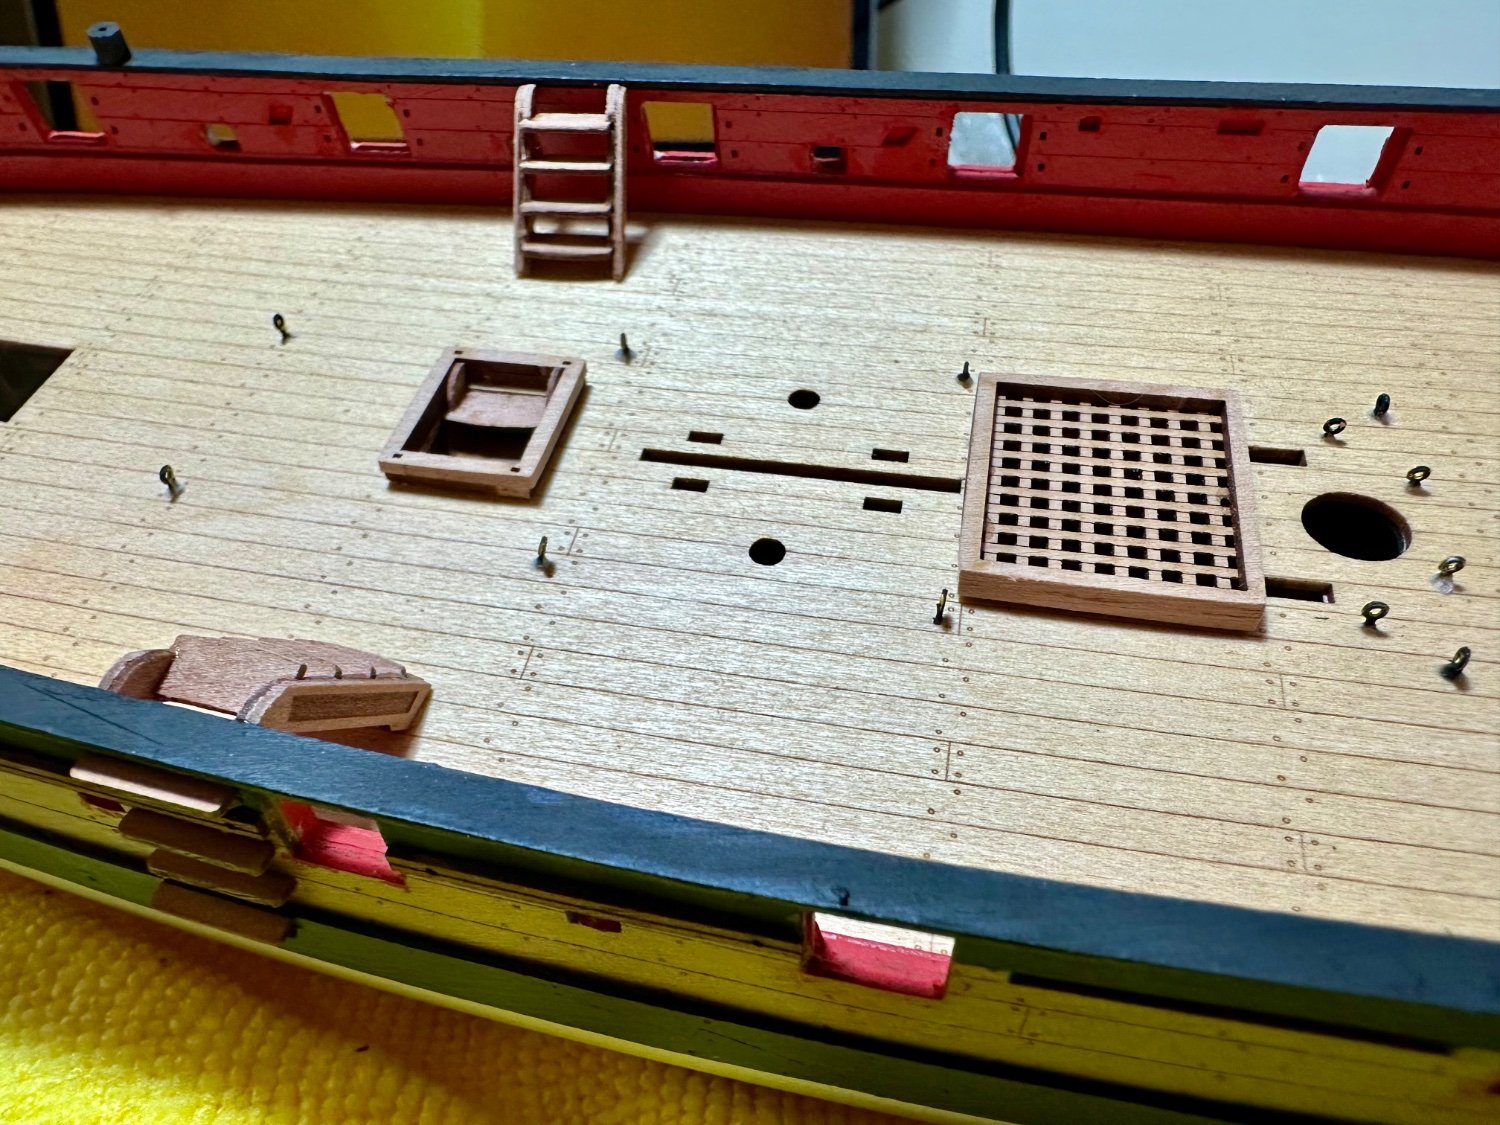
Any tips for applying the PE1 eyelets around the gun ports? On deck is easy as the slots are rectangular and perfect. Around the gun ports they seem to be too small and efforts to enlarge aren't going well. I could try the 'tongue' off but think would be ugly with the CA.
- 125 replies
-
- 1
-
-
- Trial
- Vanguard Models
- (and 1 more)
-
A week to cure and I'm very happy with how things are looking. Onward shortly.
- 125 replies
-
- 12
-
-
- Trial
- Vanguard Models
- (and 1 more)
-
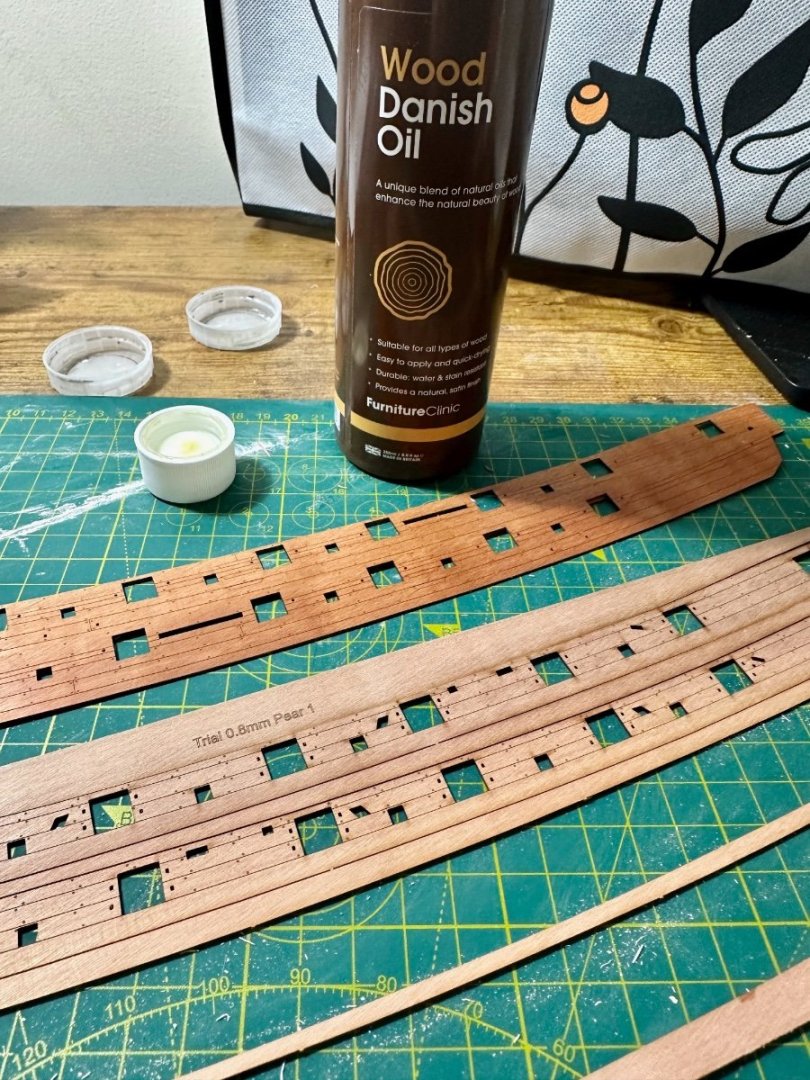
I bought a travel iron from Argos and, occasional burnt finger aside, it works really well. Soak for about five minutes then hold in position with one hand and iron with the other gradually moving along the plank. Of course the colour of the wood shows you progress but check the under side too as it can take longer than you’d think. I spoke to Chris about this and he suggested the other way round due to Speedy’s complex rigging. Grecian is on the list too but I want Duchess in the stash first 😉
- 146 replies
-
- 1
-
-
- Adder
- Vanguard Models
- (and 1 more)
-
Couldn't agree more. Not sure historically what would be right but I try to get subtly obvious.
- 146 replies
-
- 3
-
-
- Adder
- Vanguard Models
- (and 1 more)
-
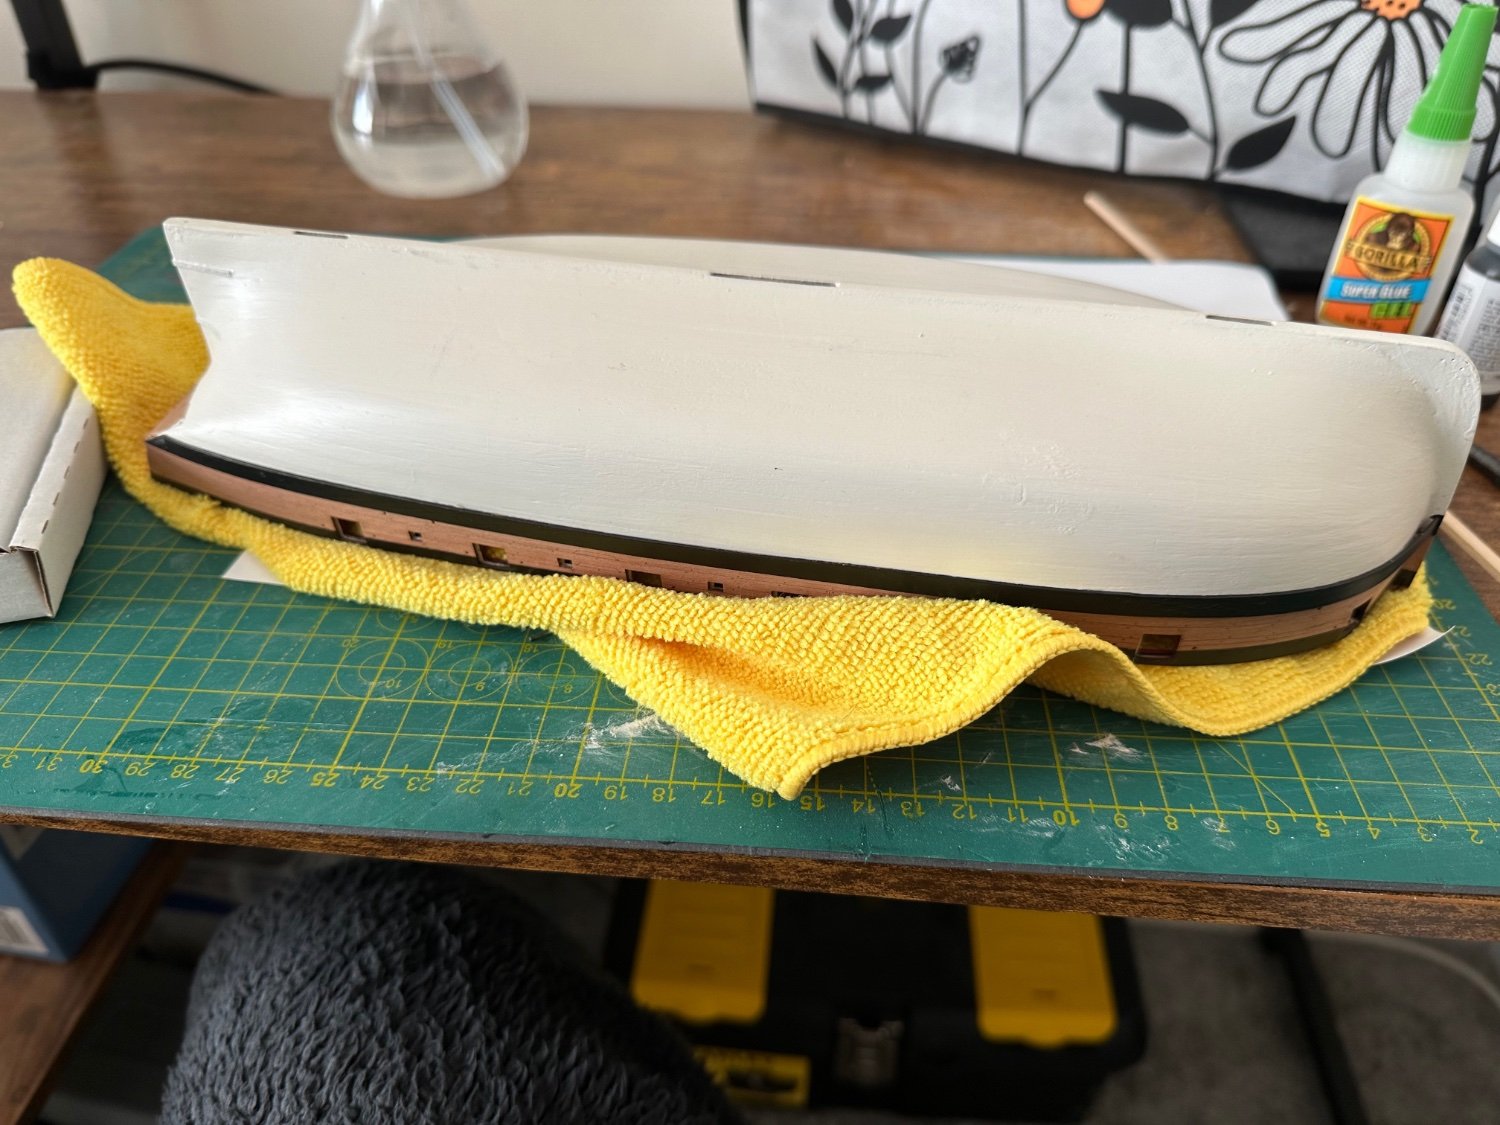
Thanks Dan. It seems Adder and Trial have a similar very bluff bow. As you can see on mine I made some big mistakes but recovered. Overall I found pretty severe bow tapering and edge sanding helped mitigate lifting then soaking and ironing onto the bulkheads. Quite a lot of ironing to get any shape. While I agree that partial pinning (ie not fully inserting) is probably ideal for me it doesn't really work when the curves are strong. I push the pins fully home to hold the curve and leave for at least 24 hours to cure the PVA. Then a craft knife blade under the head easily levers the pin out. I'm very novice but this was more challenging, with or without my brain farts. However I'm now very happy with the hull finish after a few running repairs, varnish and leaving for a week to cure. Adder won't be my next but should be a good stepping stone from Trial to Speedy. With maybe Duchess and a few fishing boats in-between
- 146 replies
-
- 2
-
-
- Adder
- Vanguard Models
- (and 1 more)
-
Just ordered Adder so will be following very closely.
-
Hello from the Scottish North Coast
BrochBoating replied to Scottish Guy's topic in New member Introductions
Welcome to the Scottish part of MSW Another hearty vote for Vanguard Models. -
Then more care needs to be taken. Use gel CA such as from Gorilla and use a piece of scrap to spread a thing even coat on the back of one plank at a time and you're unlikely to have any mess.
-
Great start. I've not read the manual yet, this seems to be a similar build scheme to Trial. If so, so far on mine, it's great and such a leap over traditional kits.
- 146 replies
-
- 4
-
-
- Adder
- Vanguard Models
- (and 1 more)
-
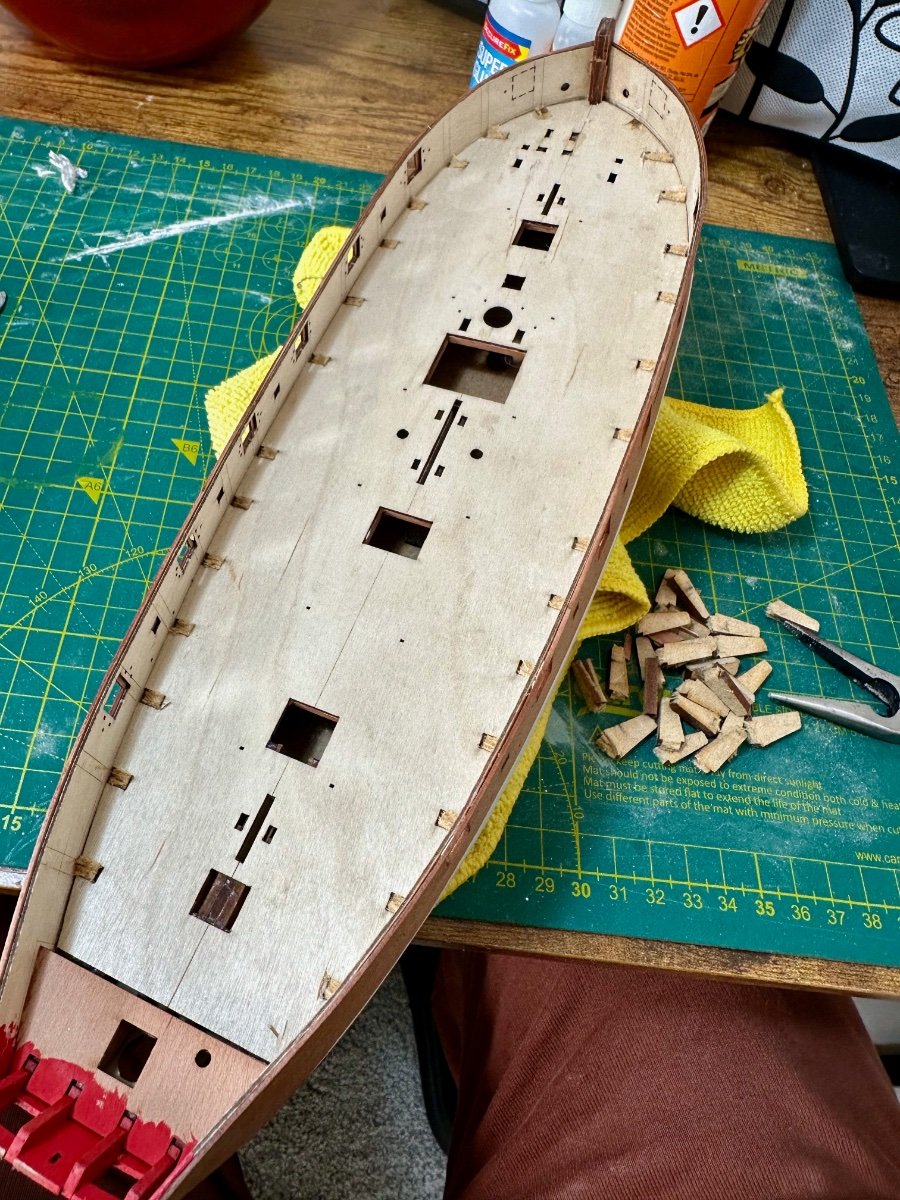
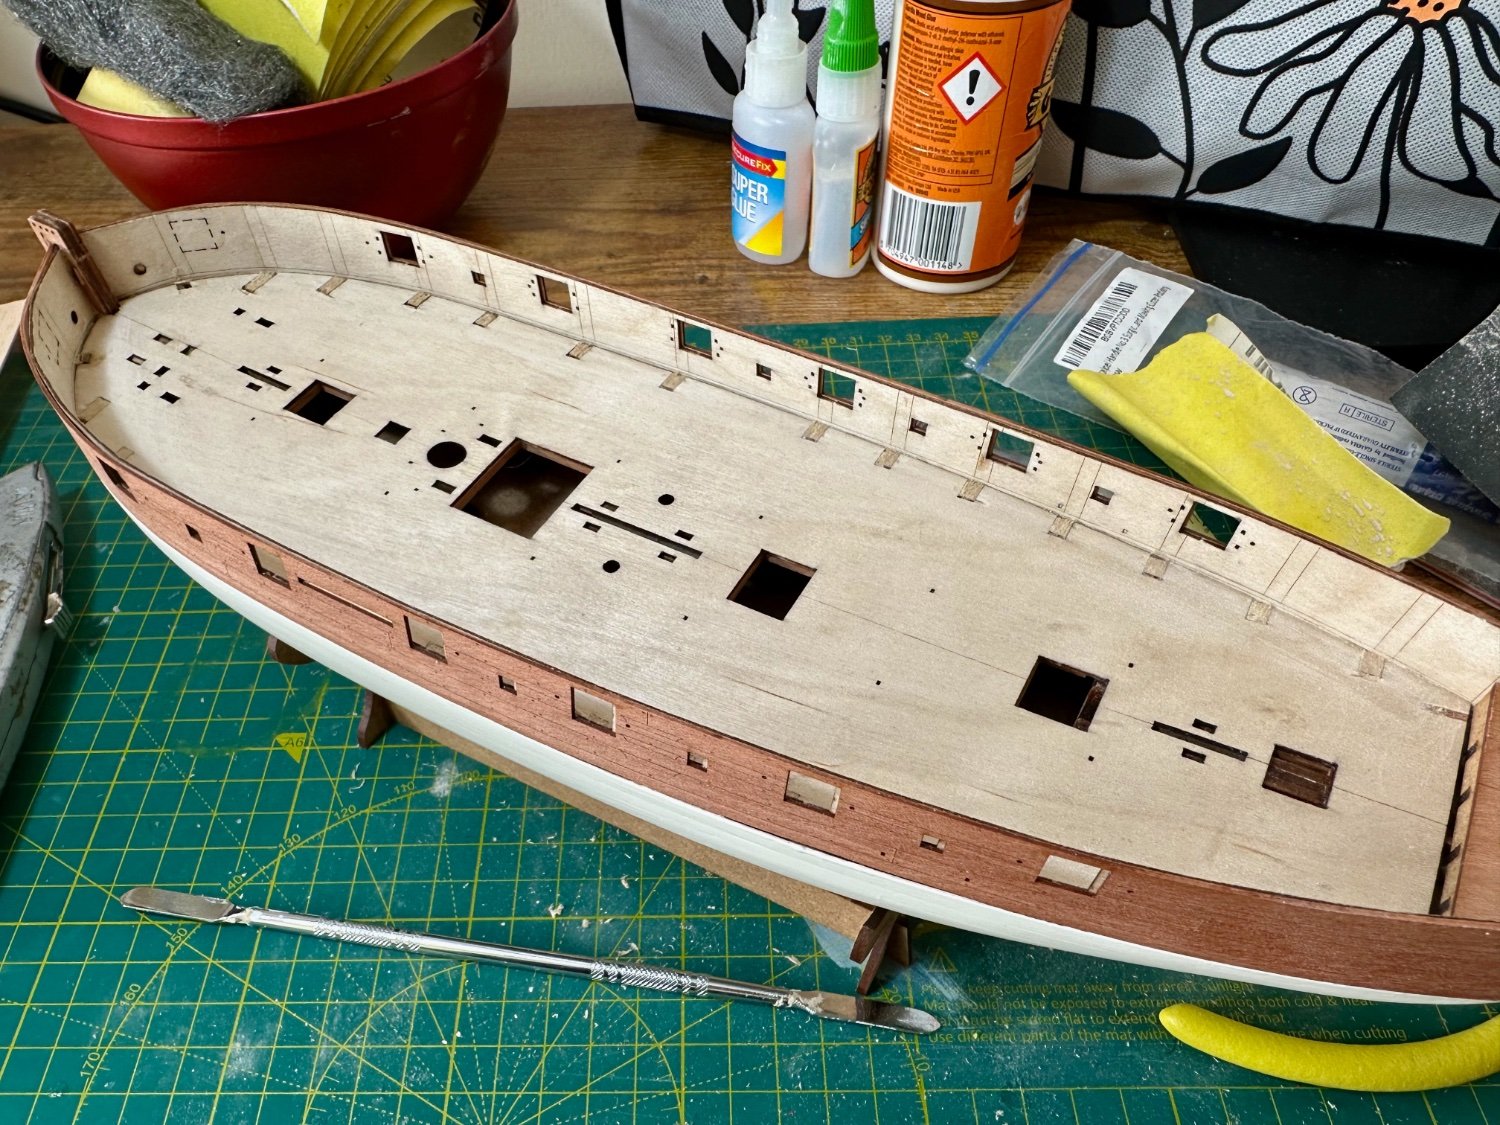
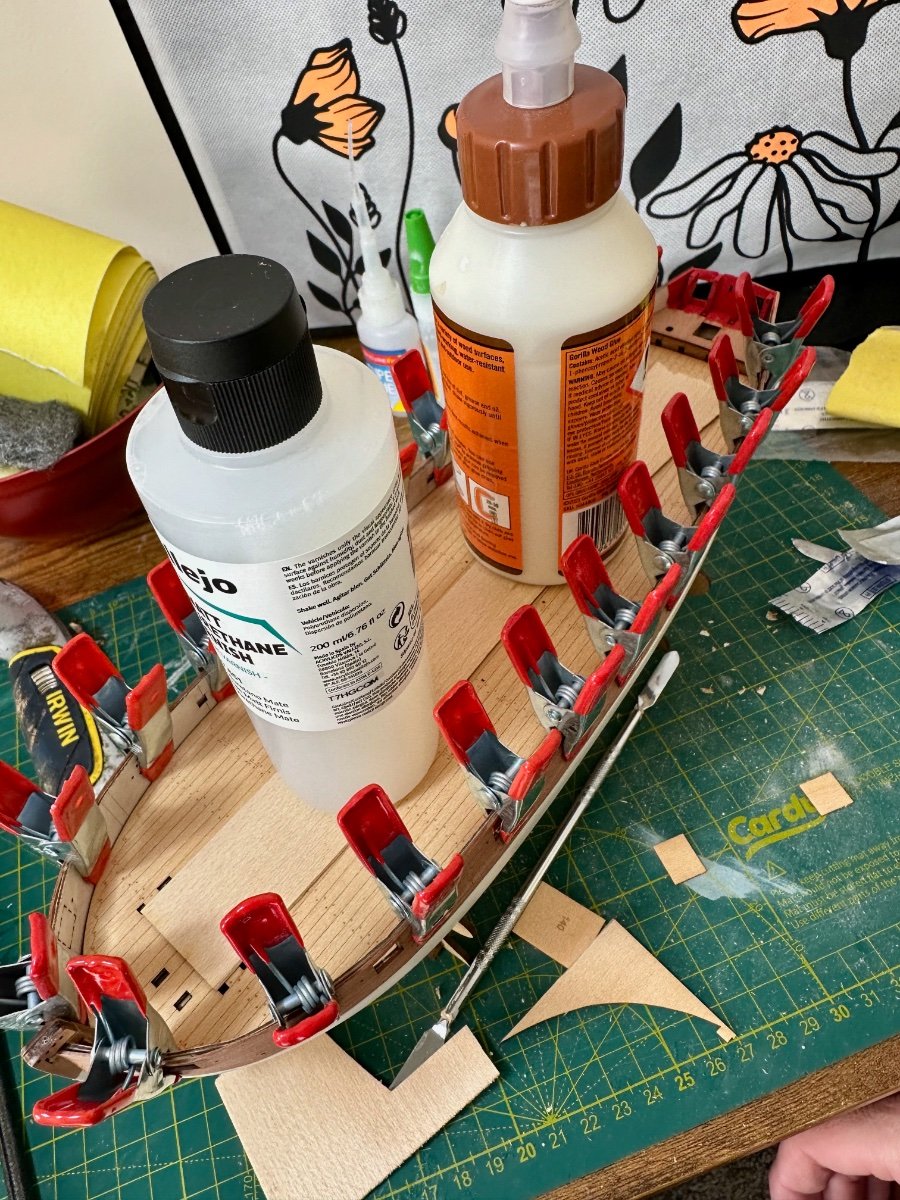
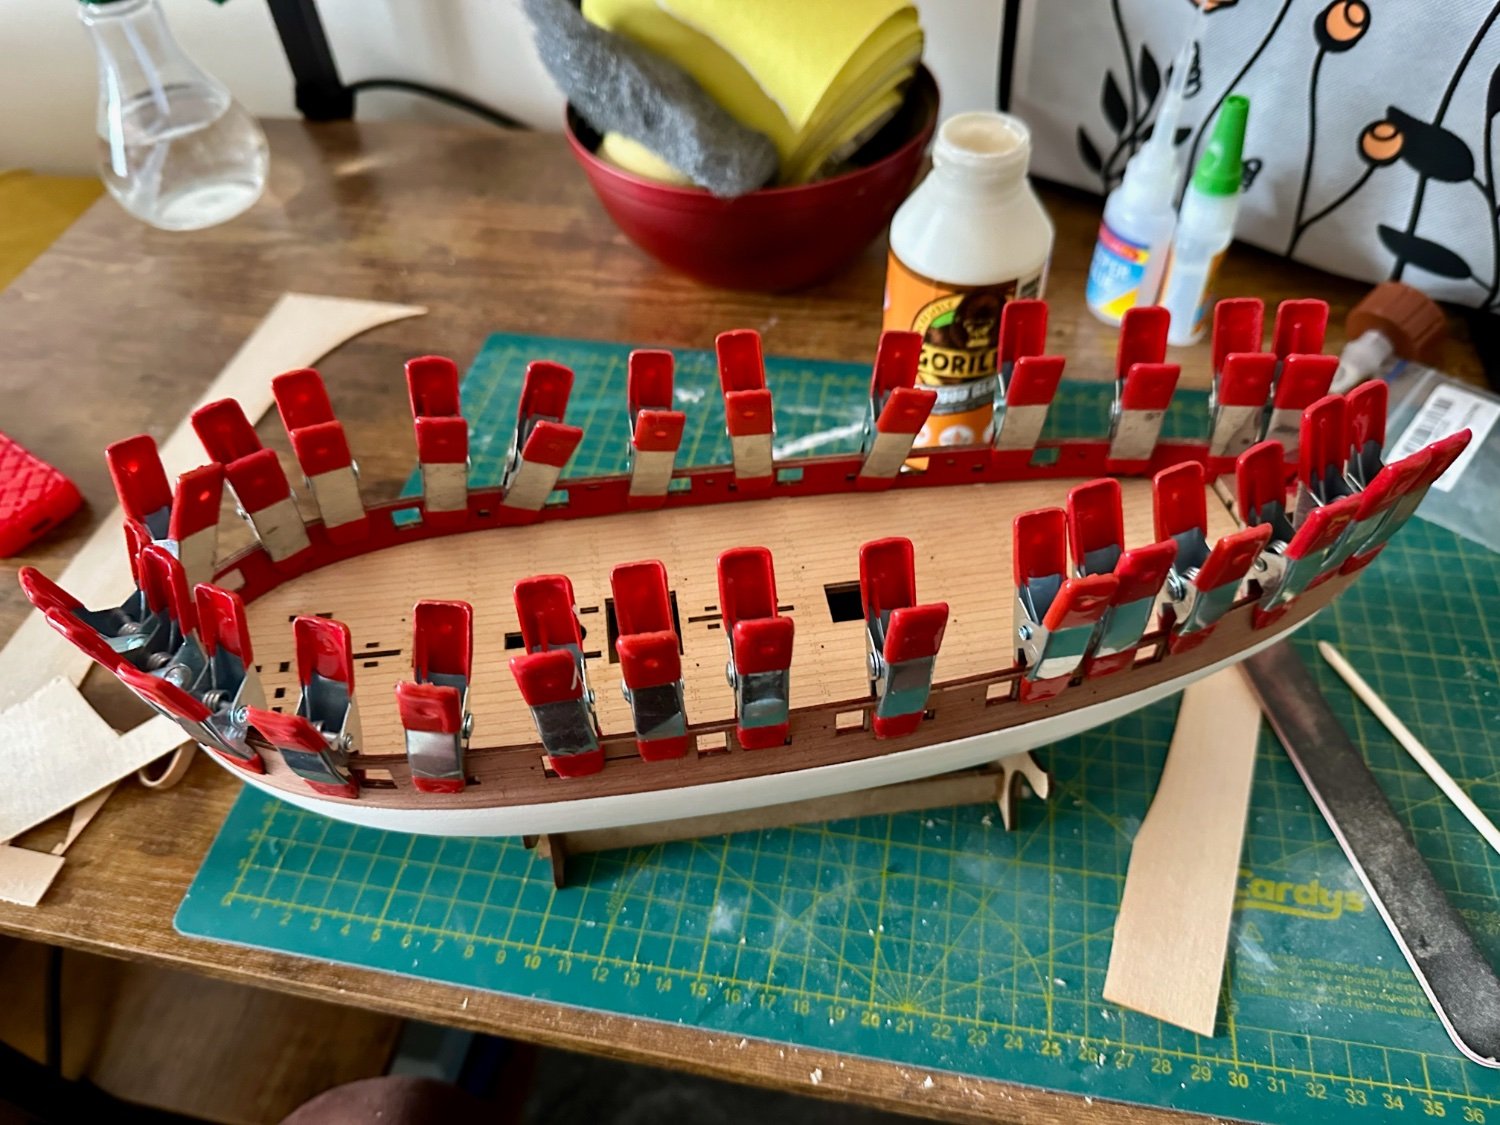
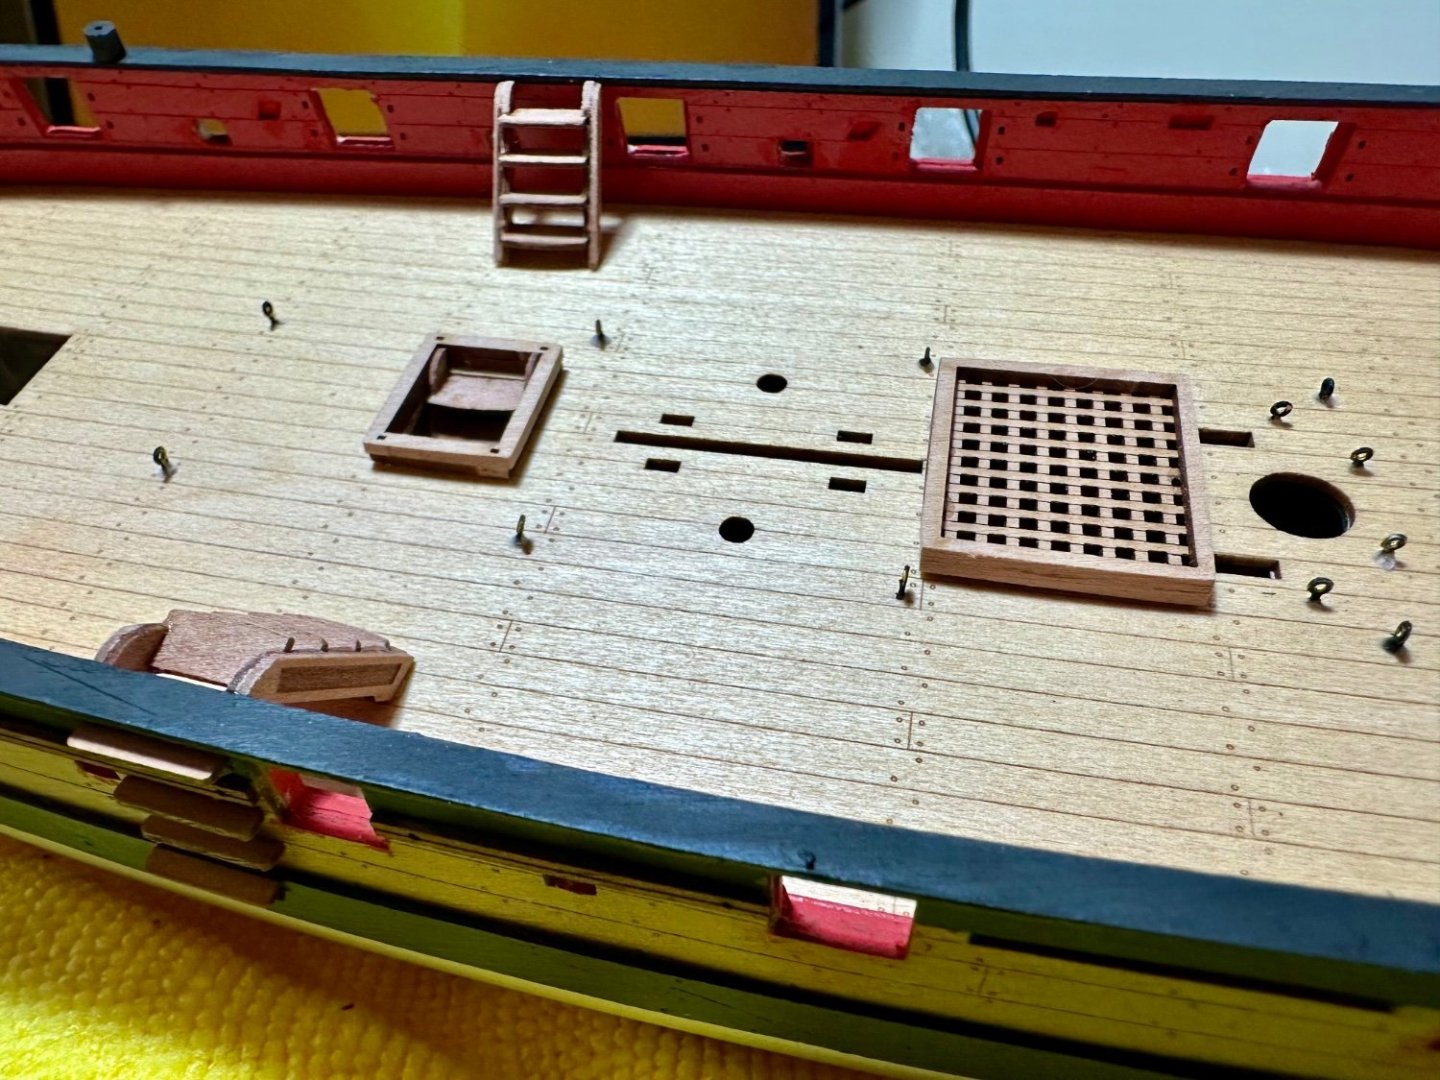
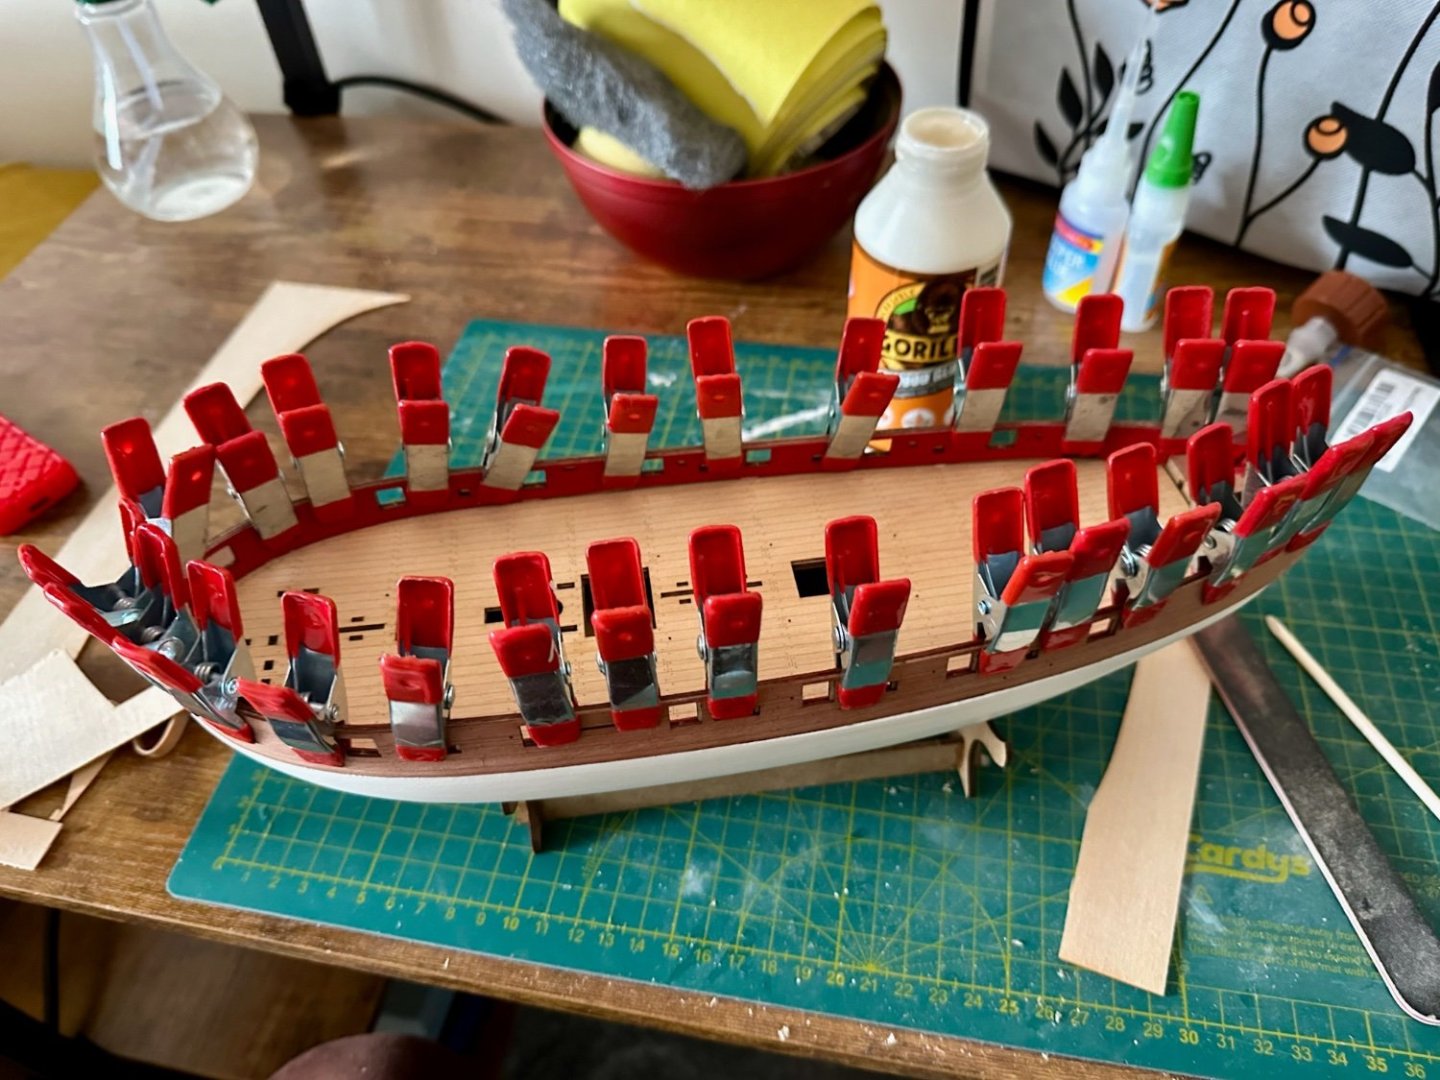
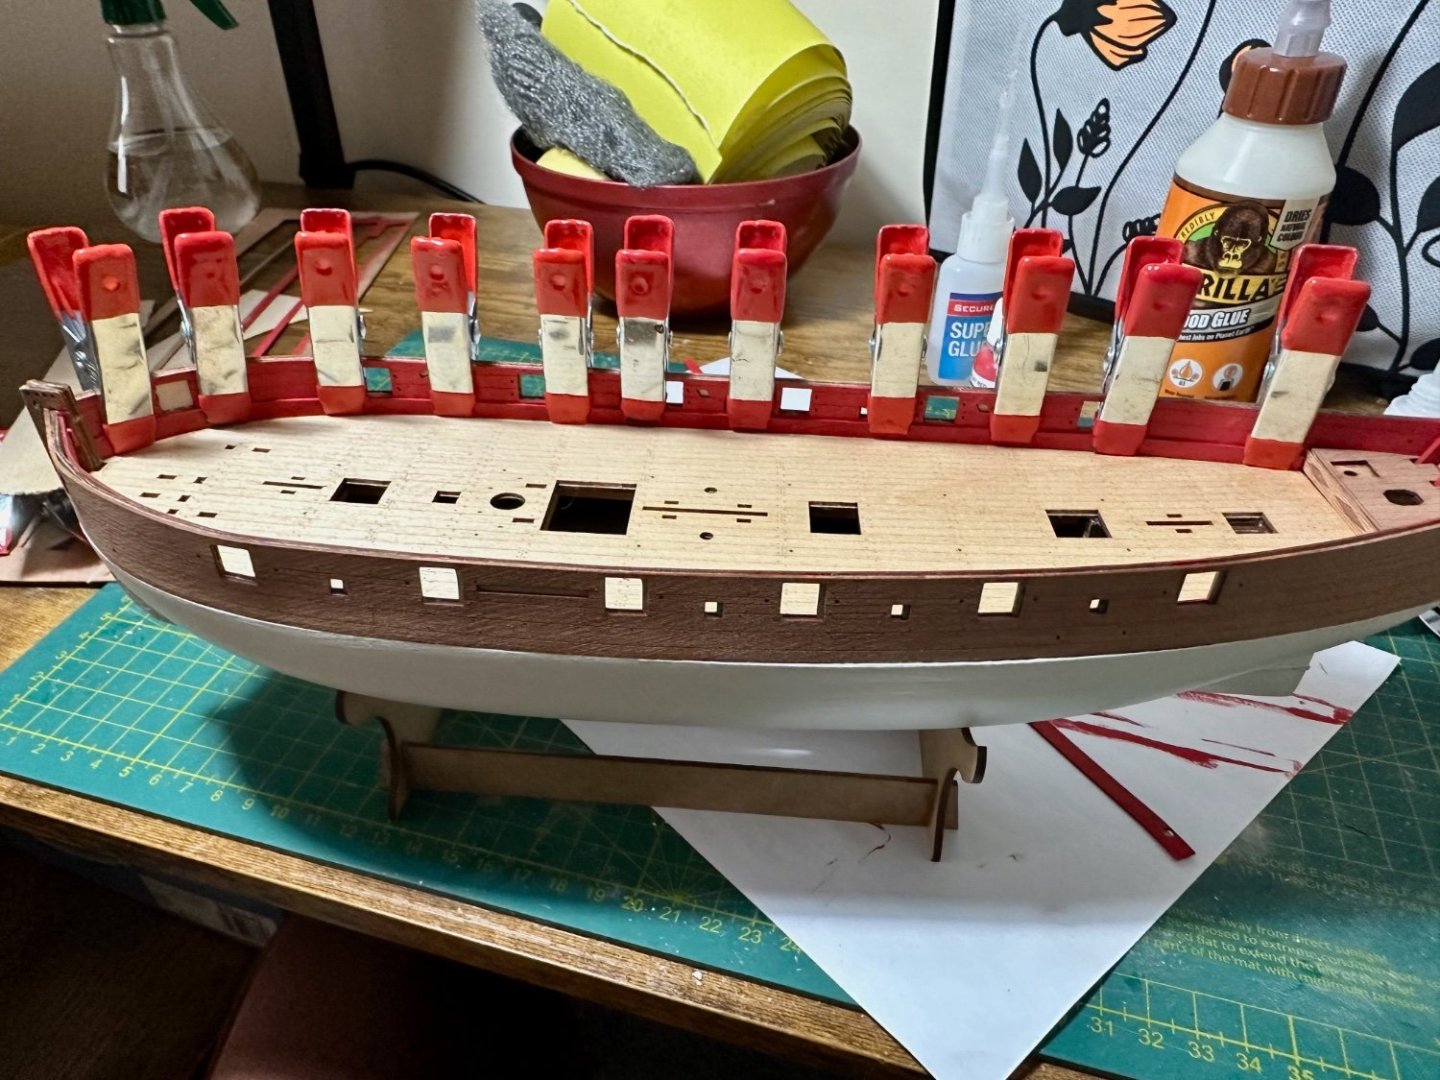
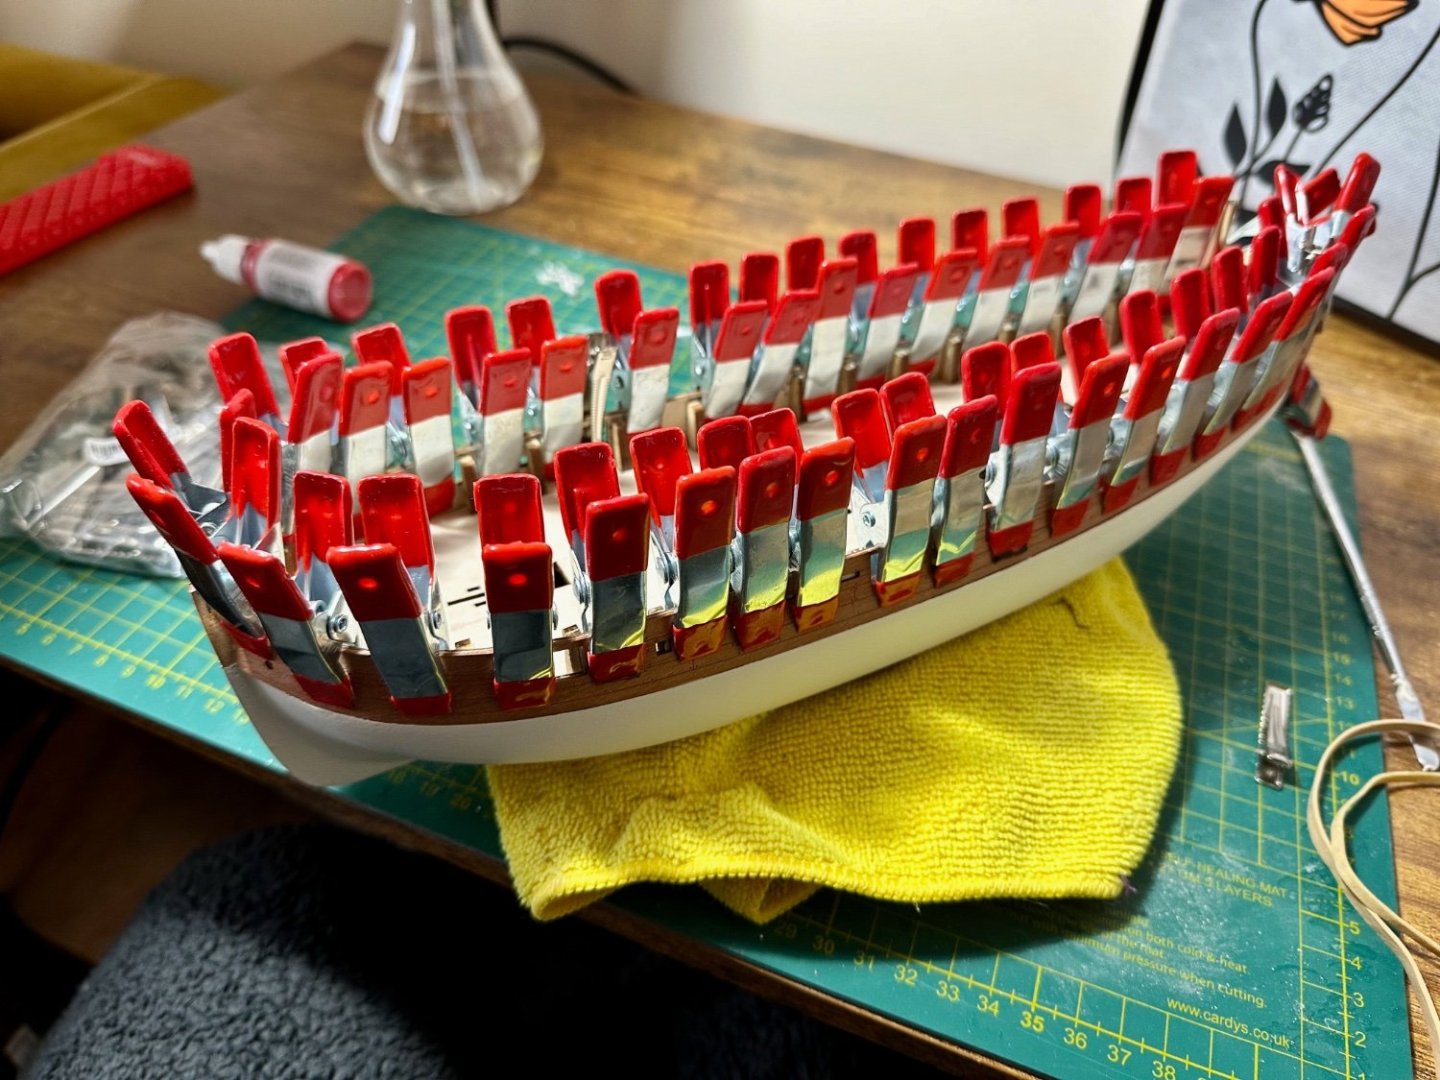
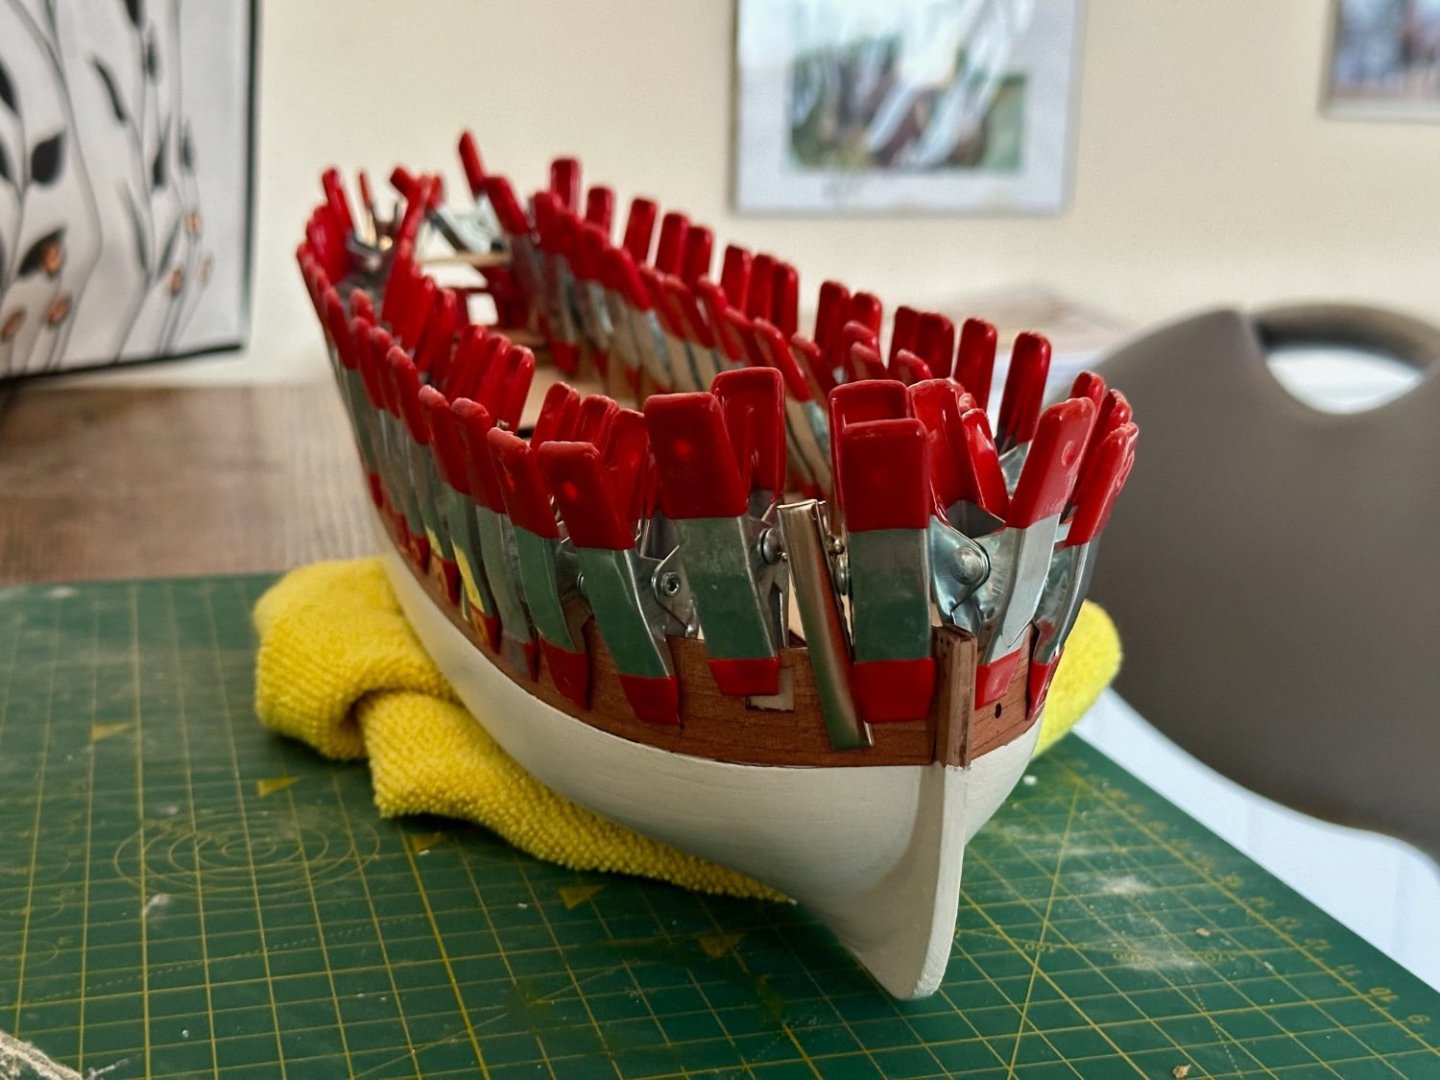
Last update for a bit I suspect. The excellent system of twisting supports off above deck level works as well as usual, just take it slow and gentle and they'll break well with no damage. Then I use a scalpel to get the remains as close to deck level as possible and sanding to finish. The engraved deck was a perfect snug fit. Just be very careful bending lengthways on this one as the sides coming inward mean it needs a little more bend than you might think. I placed fingers through the hatches to provide support then very slowly bend the sides down. Be very sympathetic to how the wood feels doing this. Once sure the fit is good then a thin application of PVA over the full area making sure to (try) and steer clear of the keel slots. Once back in place then clamps all round the edge to hold it down and some scrap down the middle with weight to keep things in place. Stern panel and step fitted but forgot to photograph. The panel took a little while to fit as it's quite delicate but looks great once in. Next the inner bulwarks. I decided to paint these first along with the spirketting pieces, all in Vallejo Flat Red. These received PVA and a lot of clamps. Next spirketting pieces (?). Some fettling to fit but lovely once done. I decided to use CA glue in the same way as second planking with lots of clamps just for a short time to be sure. The Wales were a minor pain as I had another of my brain blips and didn't soak and shape when I should have. Anyway I painted them first then PVA, pins and rubber bands at the stern. Once that had gone off I removed the pins (can someone pop over and find where my craft knife has been hidden by the kitten?) tidied up and painted where the pins were. Finally varnished to go away and cure for at least a few days before going further DIY allowing!


- 125 replies
-
- 16
-
-
- Trial
- Vanguard Models
- (and 1 more)
-
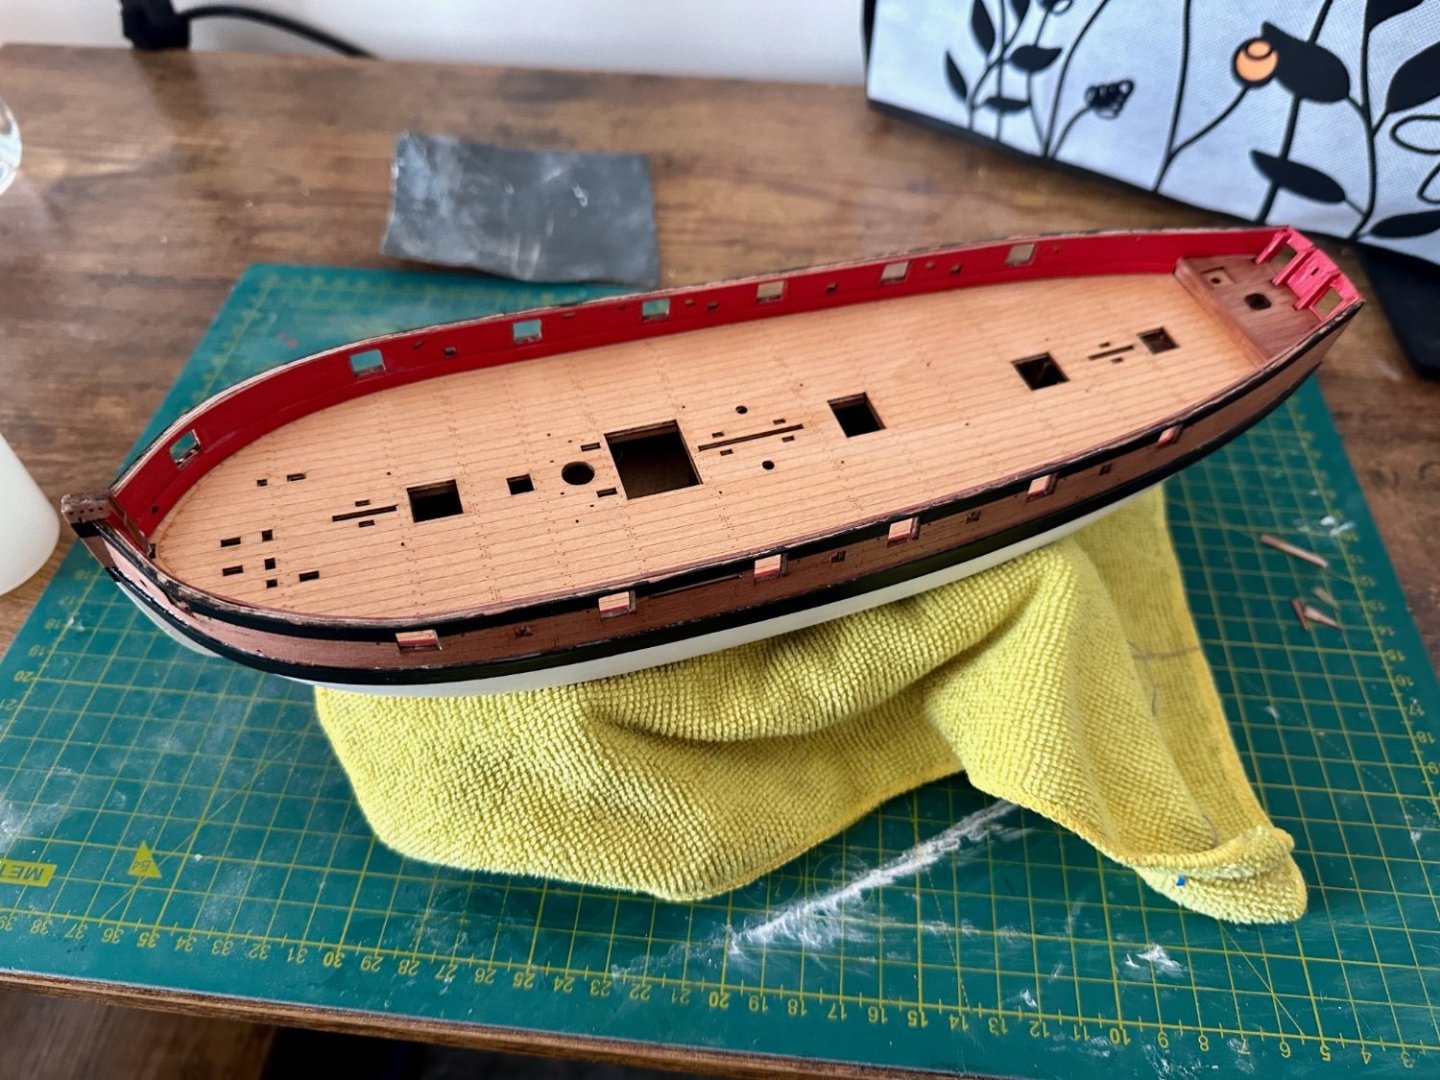
Here we are. Varnish to go on and cure. Museum quality it is not but I'm really pleased given my mistakes this time.

- 125 replies
-
- 9
-
-
- Trial
- Vanguard Models
- (and 1 more)
-
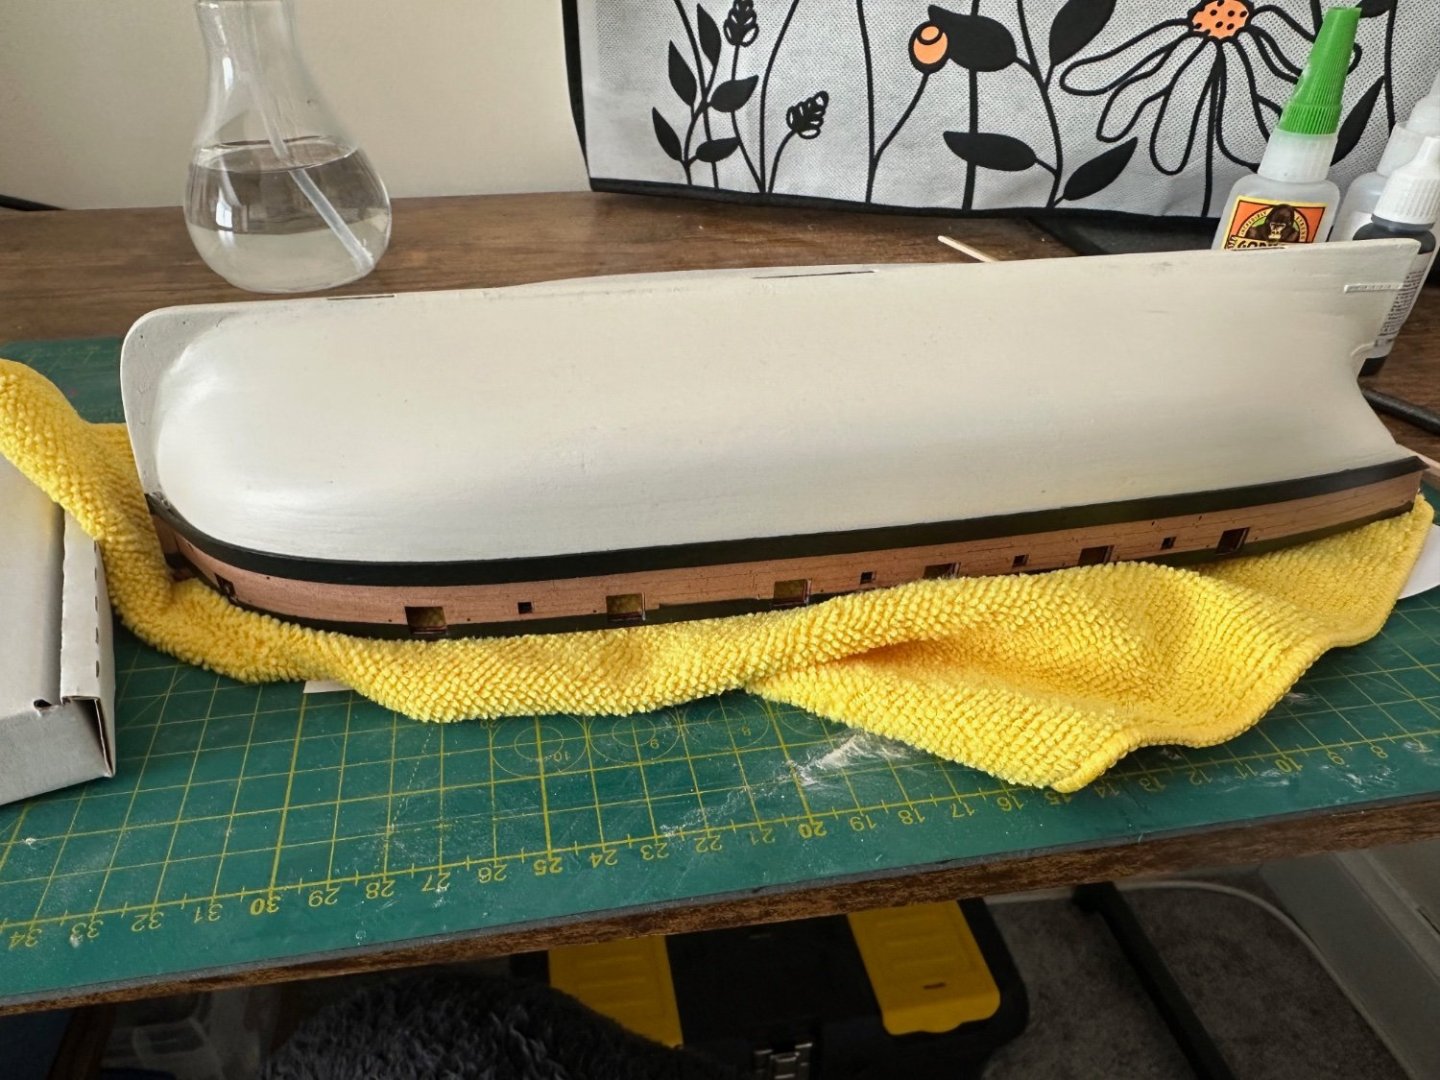
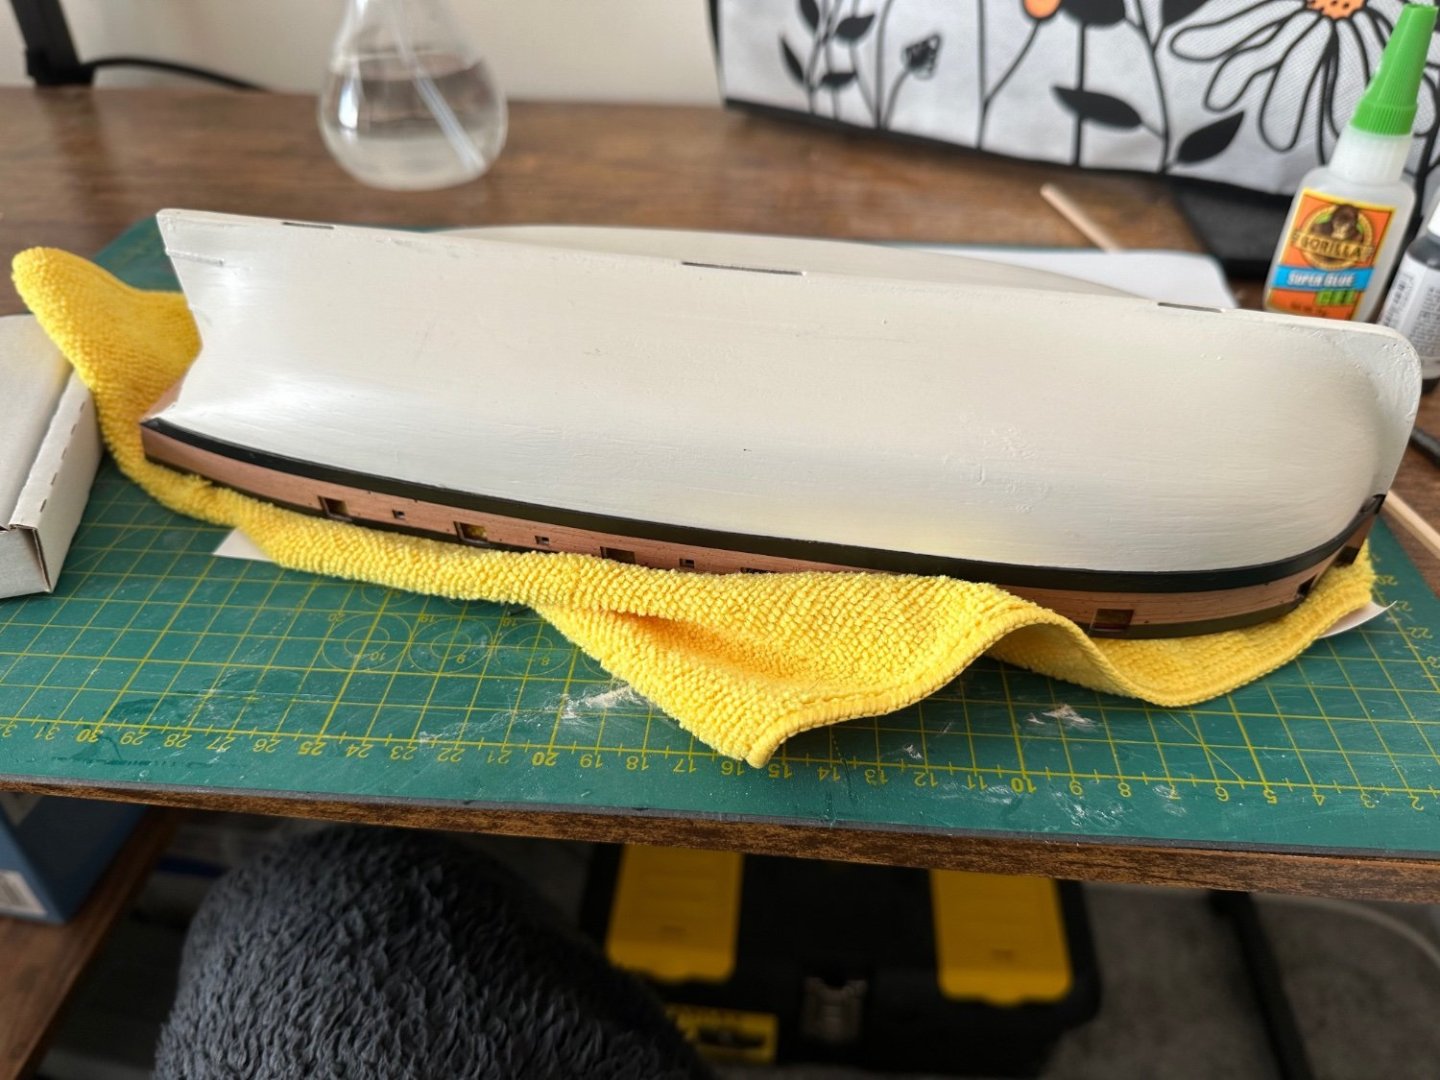
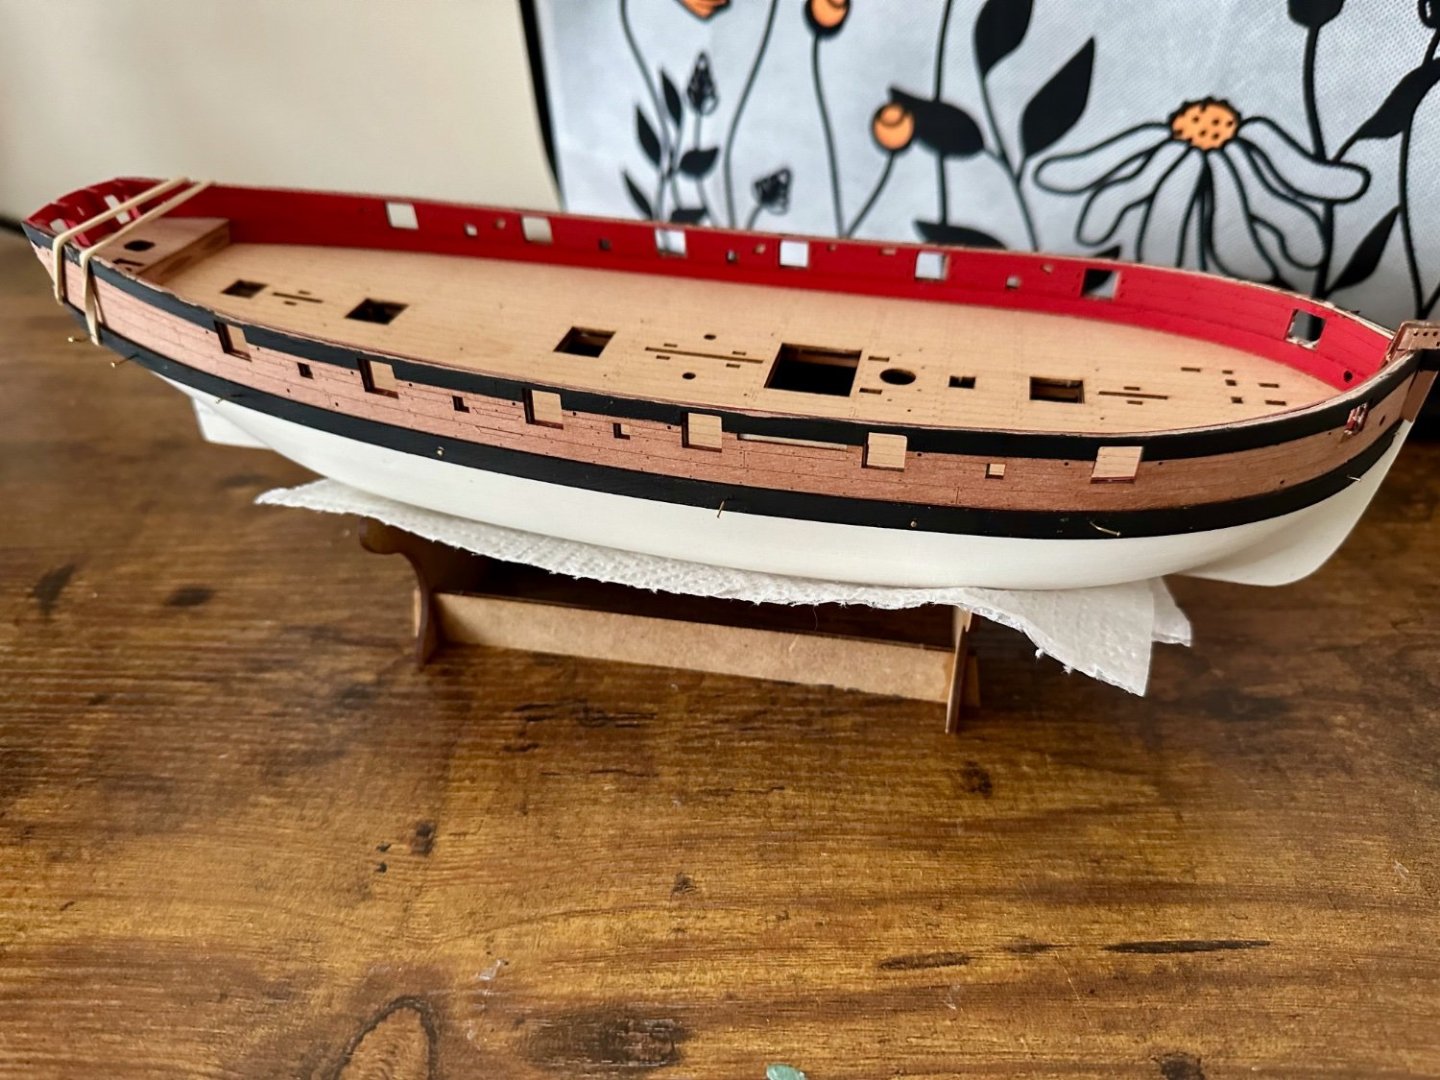
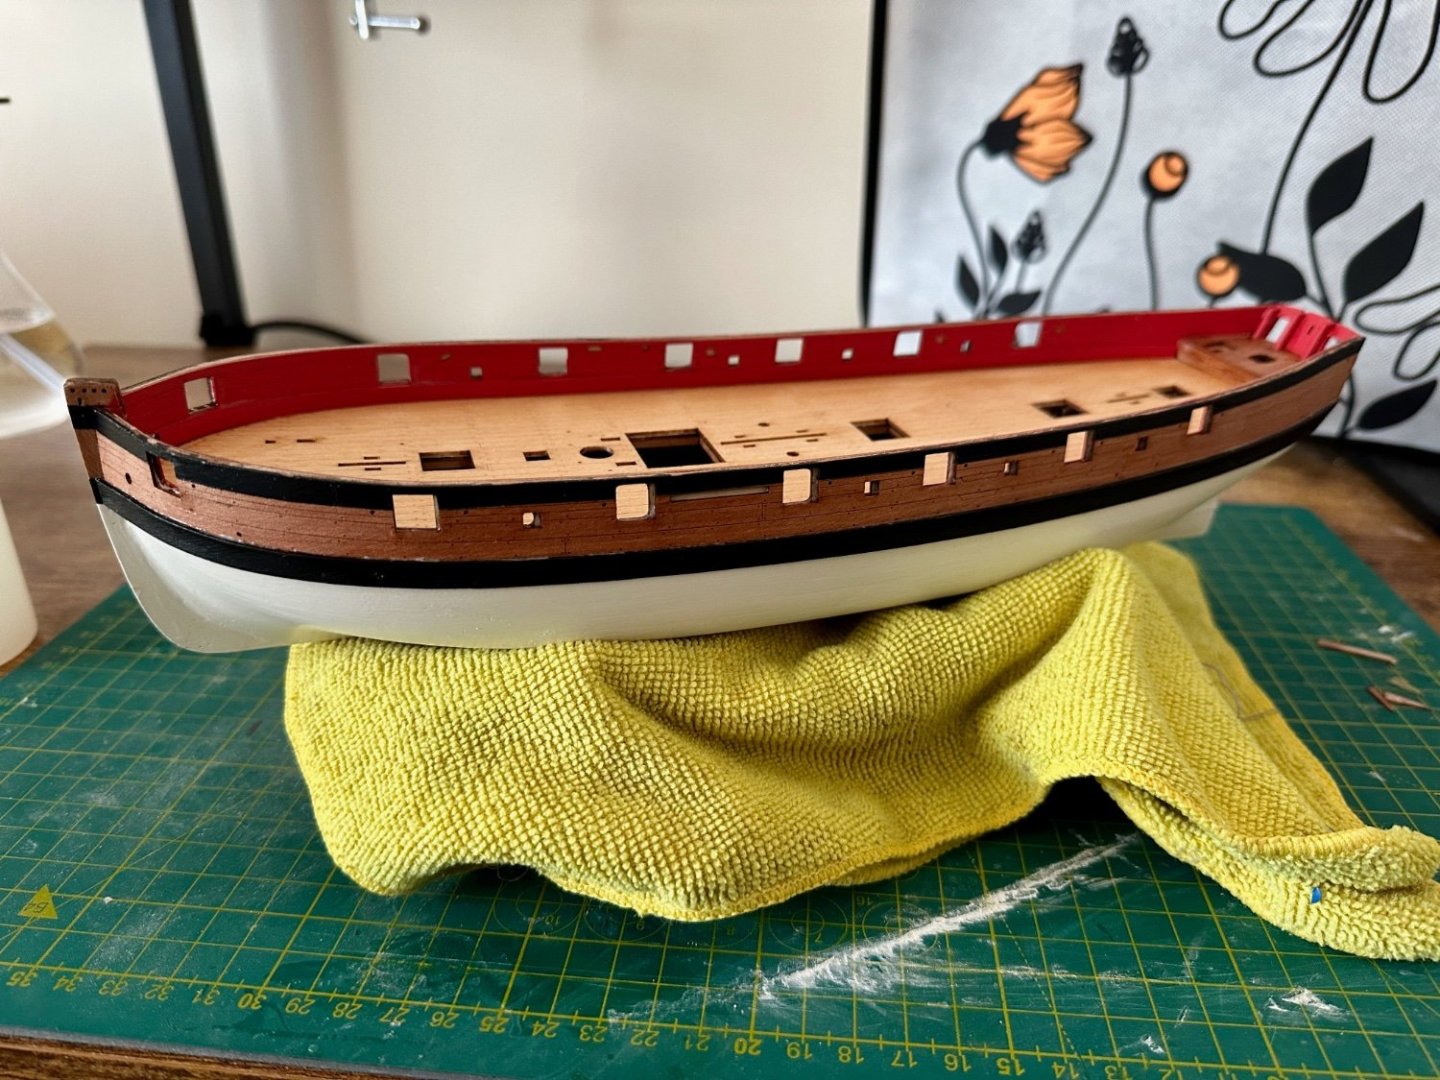
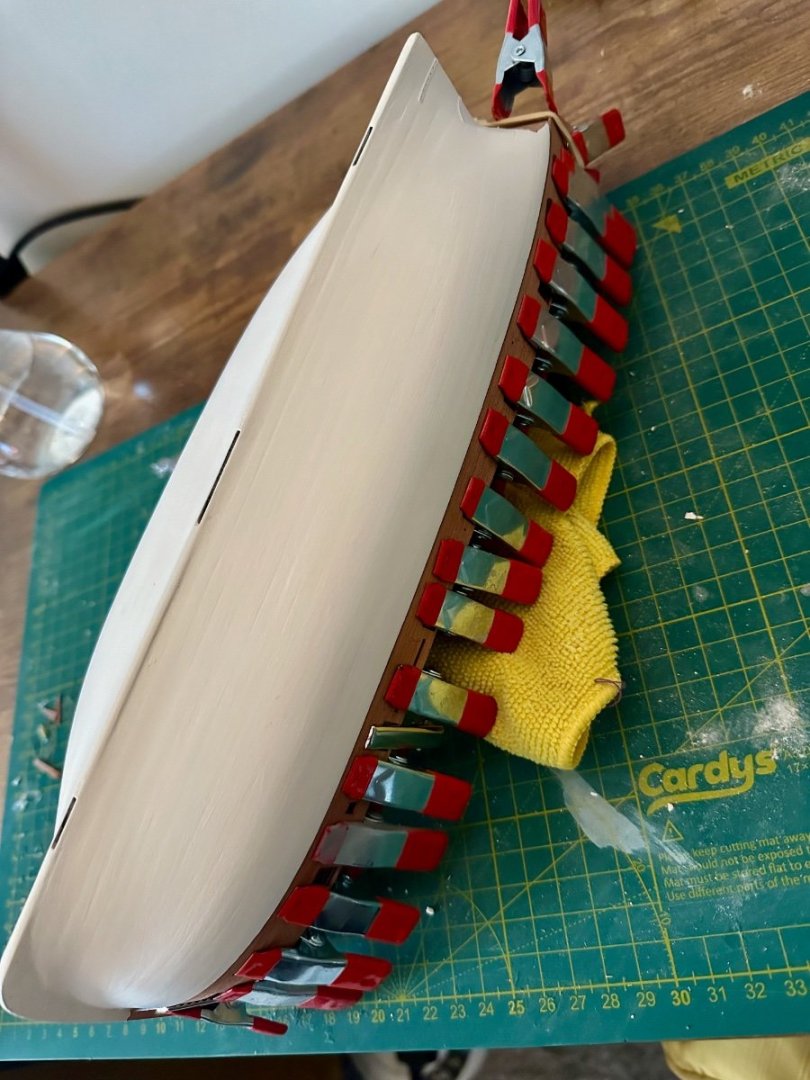
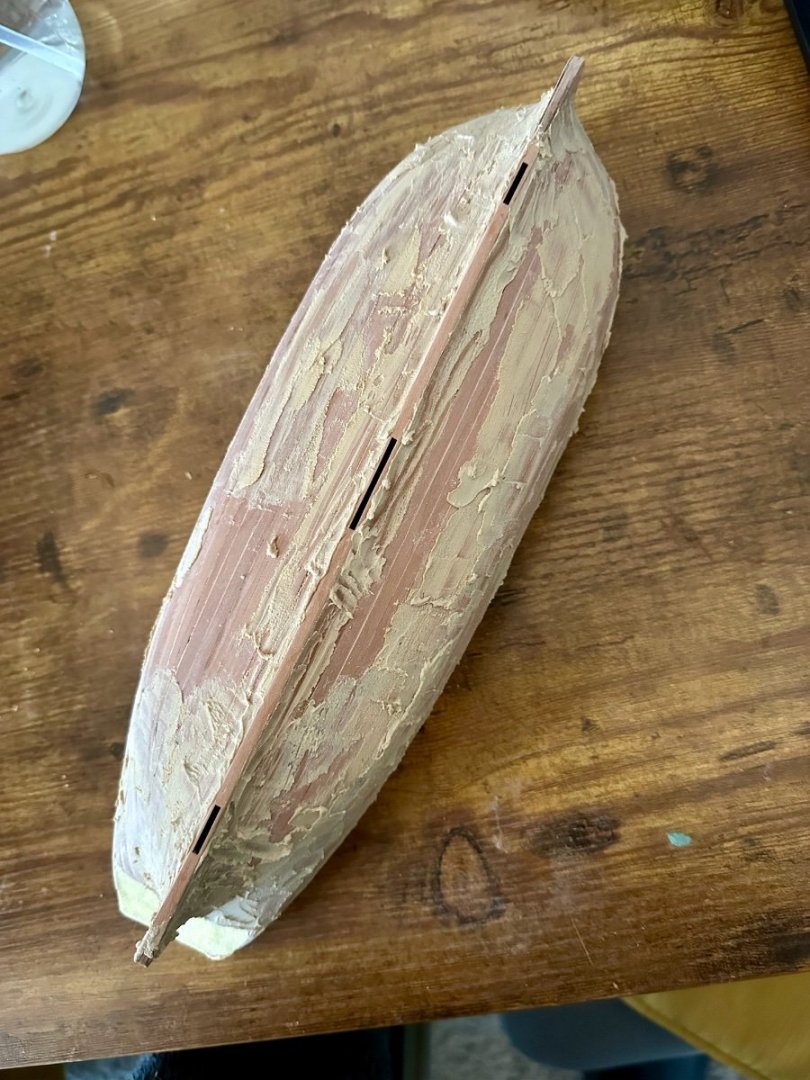
Plenty of progress before DIY begins. Hull (finished pics later once the clips for outer bulwarks are off) finished with lots of filling, sanding and painting. I like to see the planking so happy with the finish. Oiled the outer bulwarks and deck to enhance the grain and all of this will be varnished next to try and avoid damage while everything else gets done.

- 125 replies
-
- 8
-
-
- Trial
- Vanguard Models
- (and 1 more)
-
Thank you. Probably plenty as held off decorating as they were on order. Oh boy! Really enjoy this stage of a build. It’s once we get above deck and tying knots I get into most trouble. At the moment trying to decide whether to use some light washes under the white (as I think I remember you doing?) so it’s not so uniform. Can’t decide as the rest of the ship is likely to be fairly sparkly new looking.
- 125 replies
-
- 1
-
-
- Trial
- Vanguard Models
- (and 1 more)
-
Thanks Andrew. Mine will shortly too as windows ordered last year are suddenly being fitted next week. Lots of making good to come I imagine
- 125 replies
-
- 3
-

-
-
-
- Trial
- Vanguard Models
- (and 1 more)
-
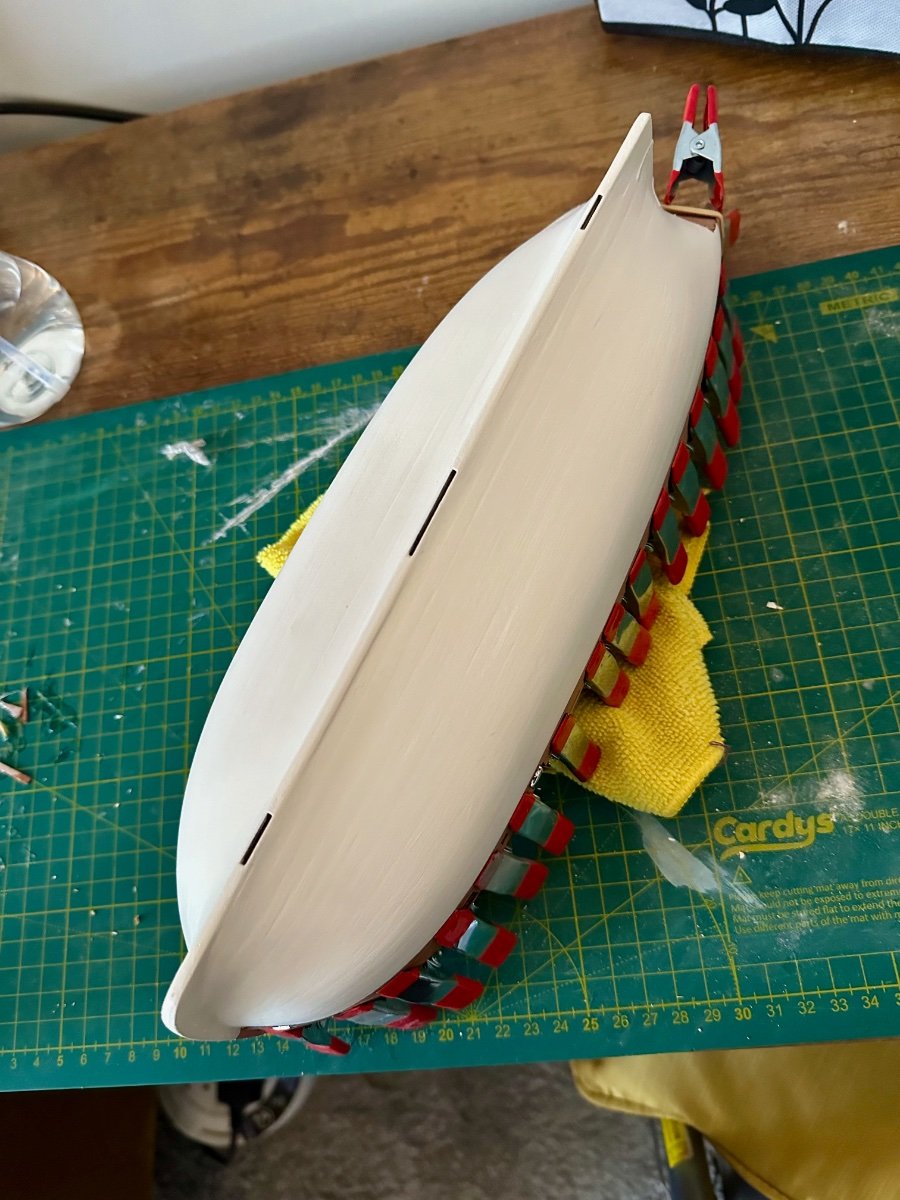
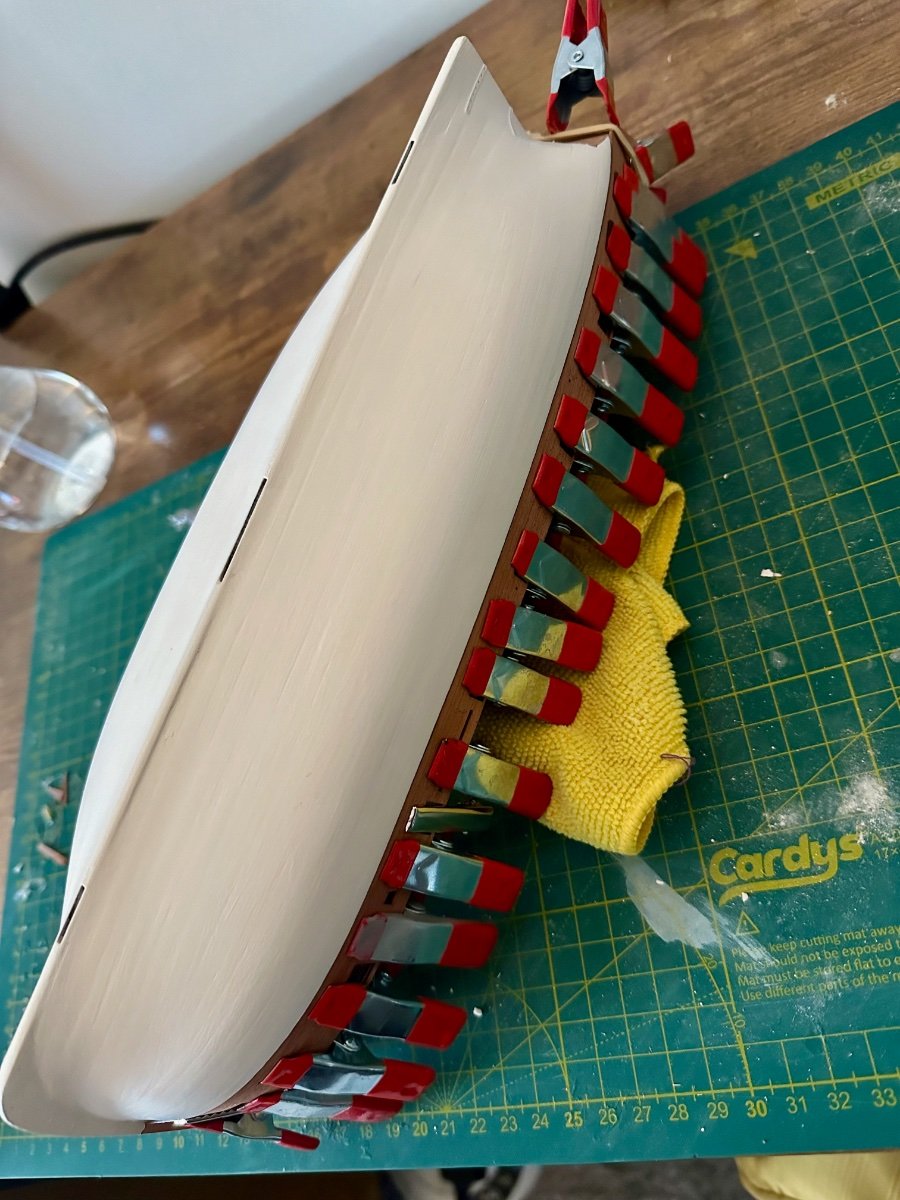
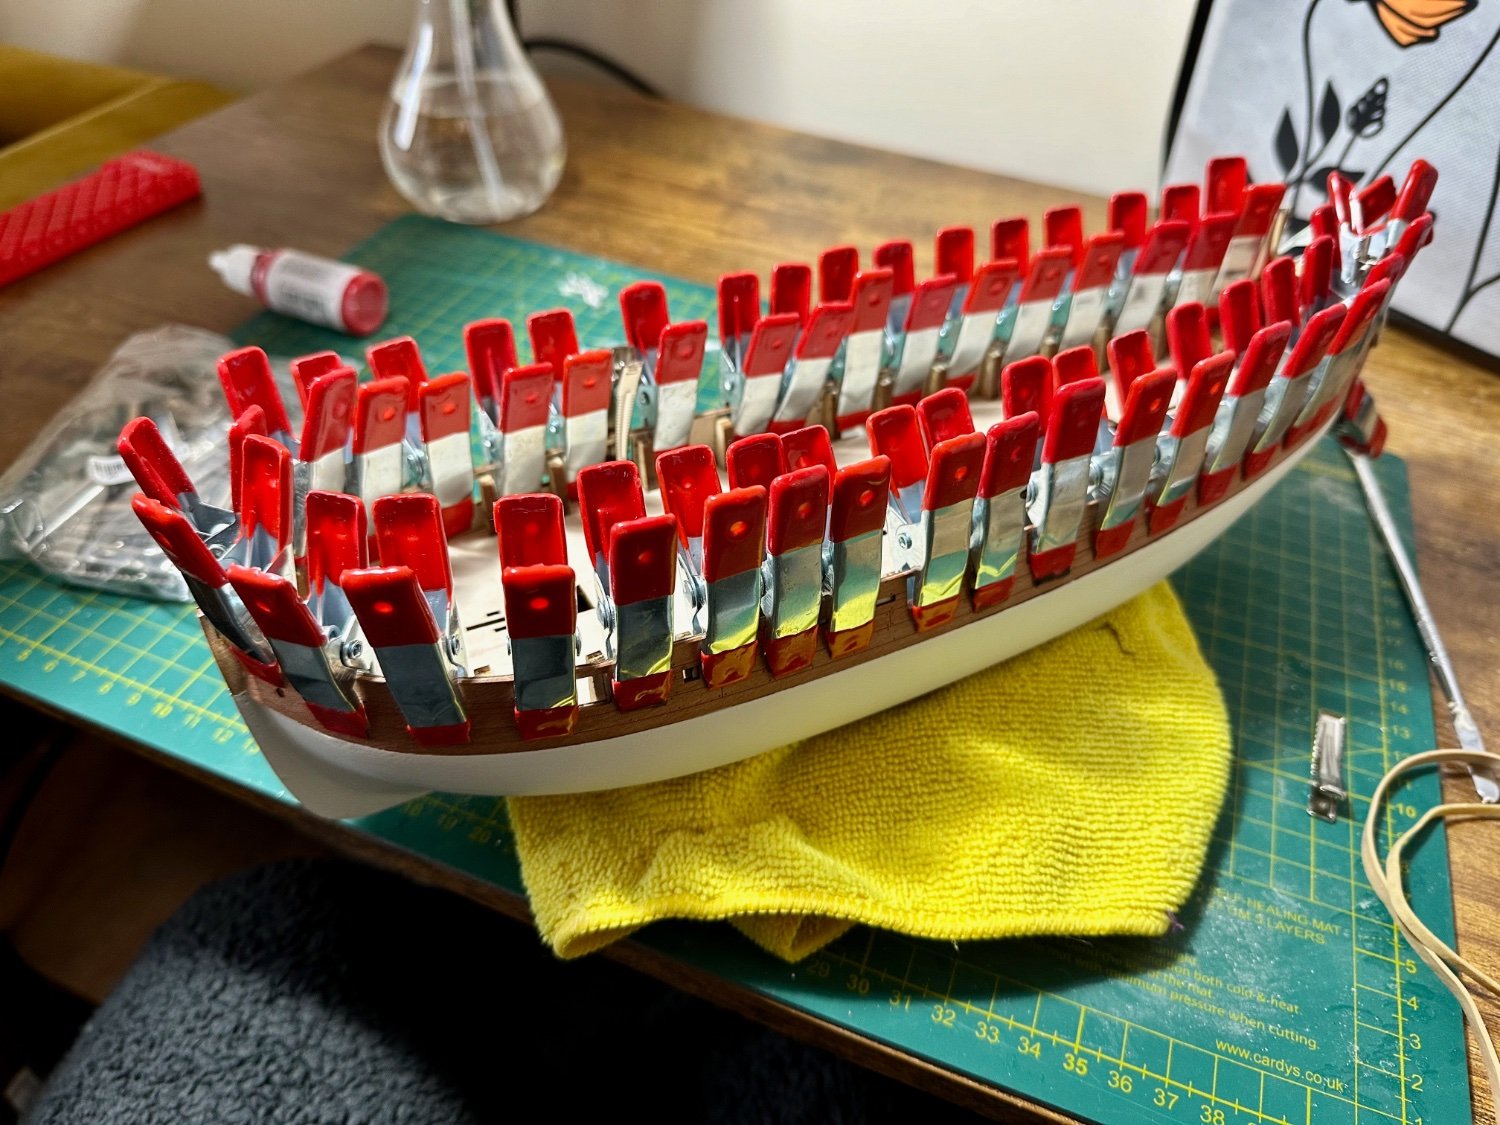
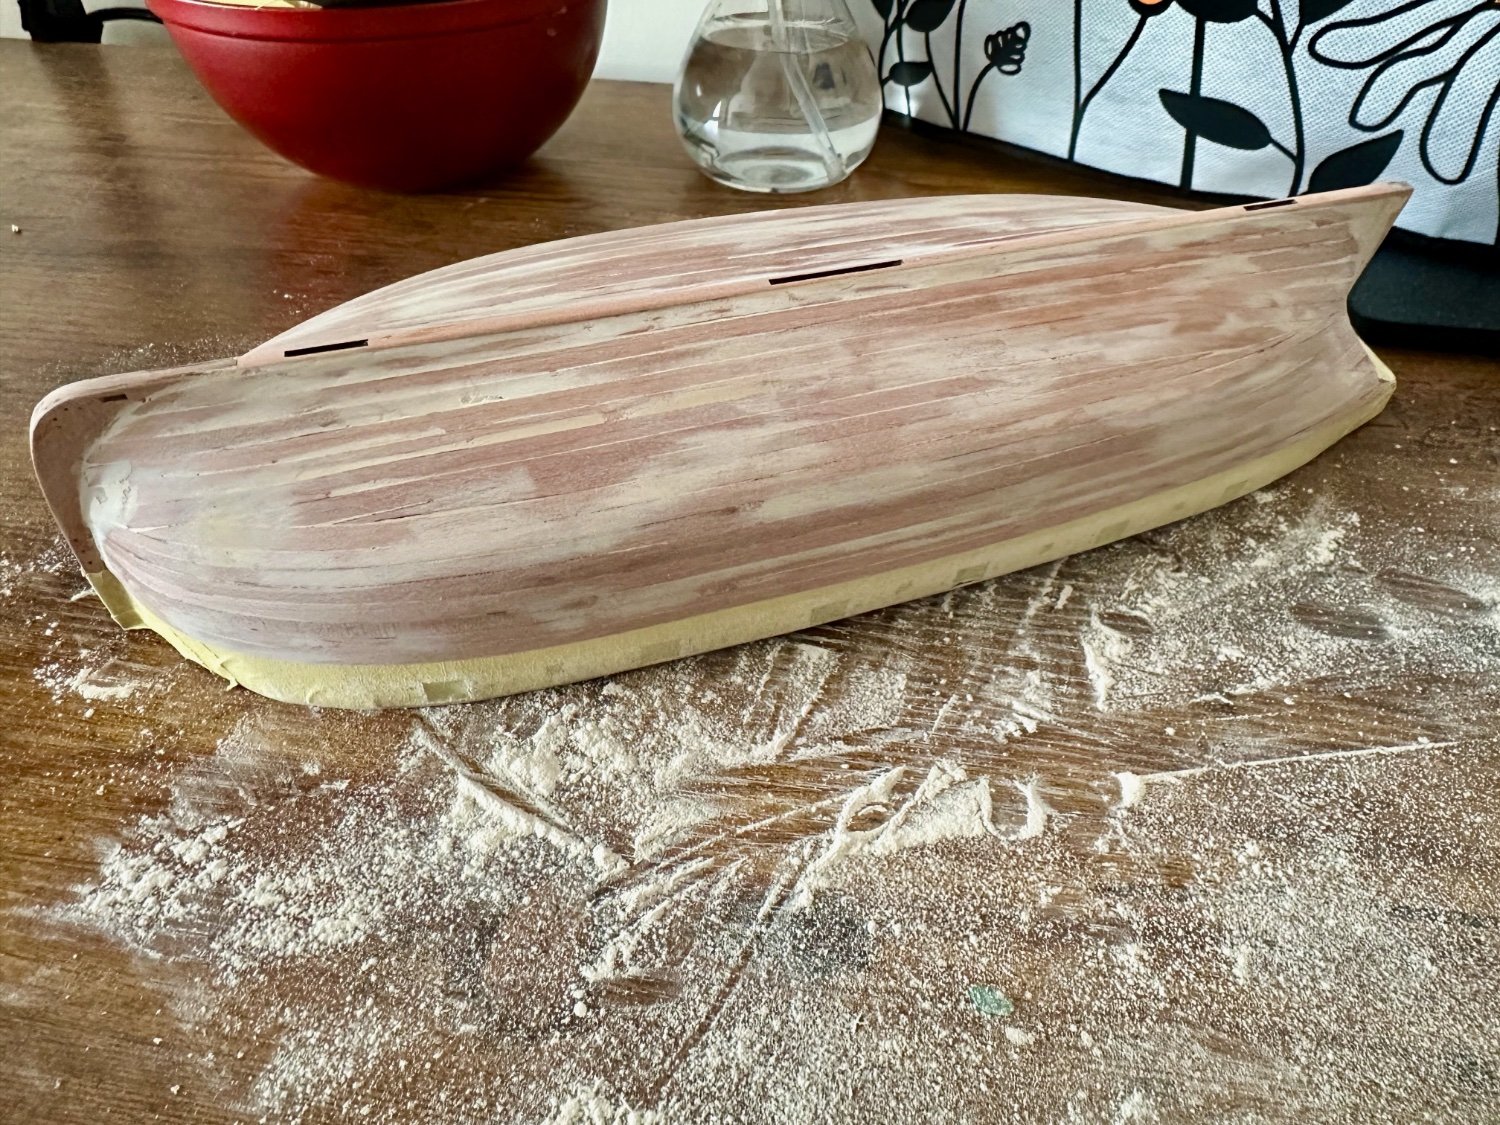
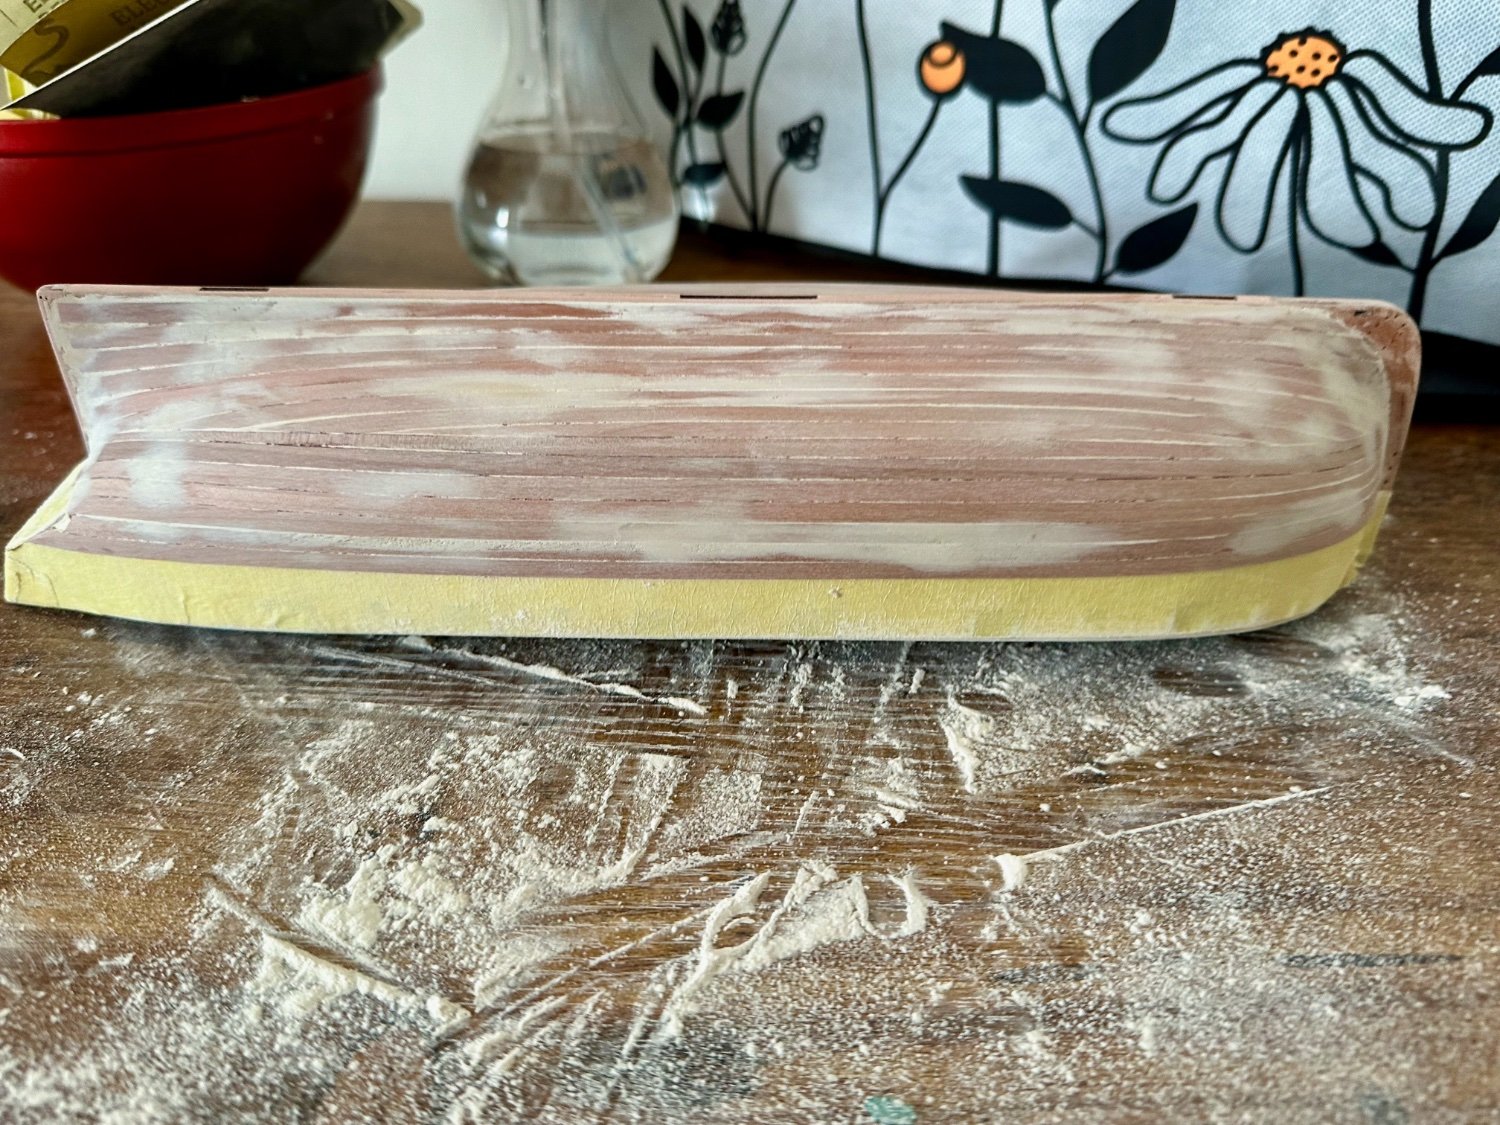
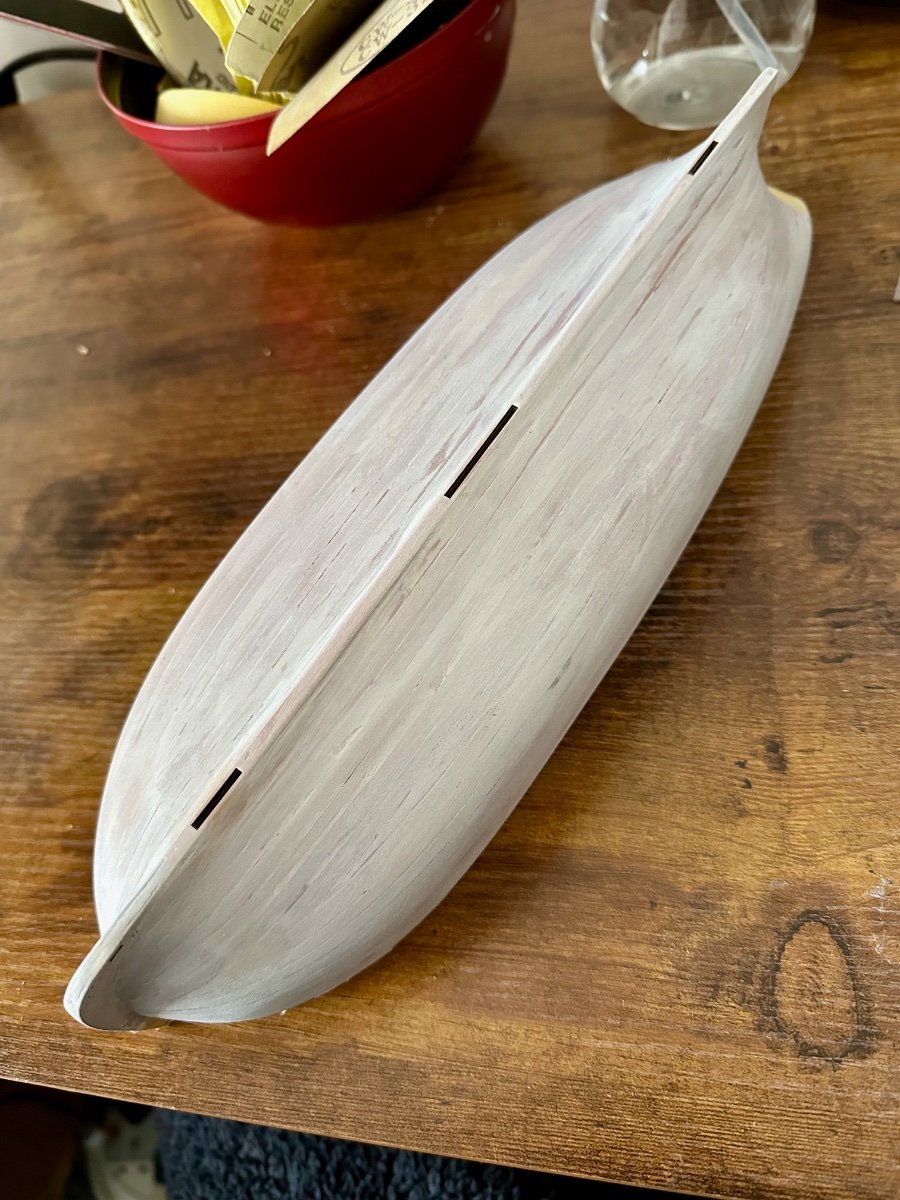
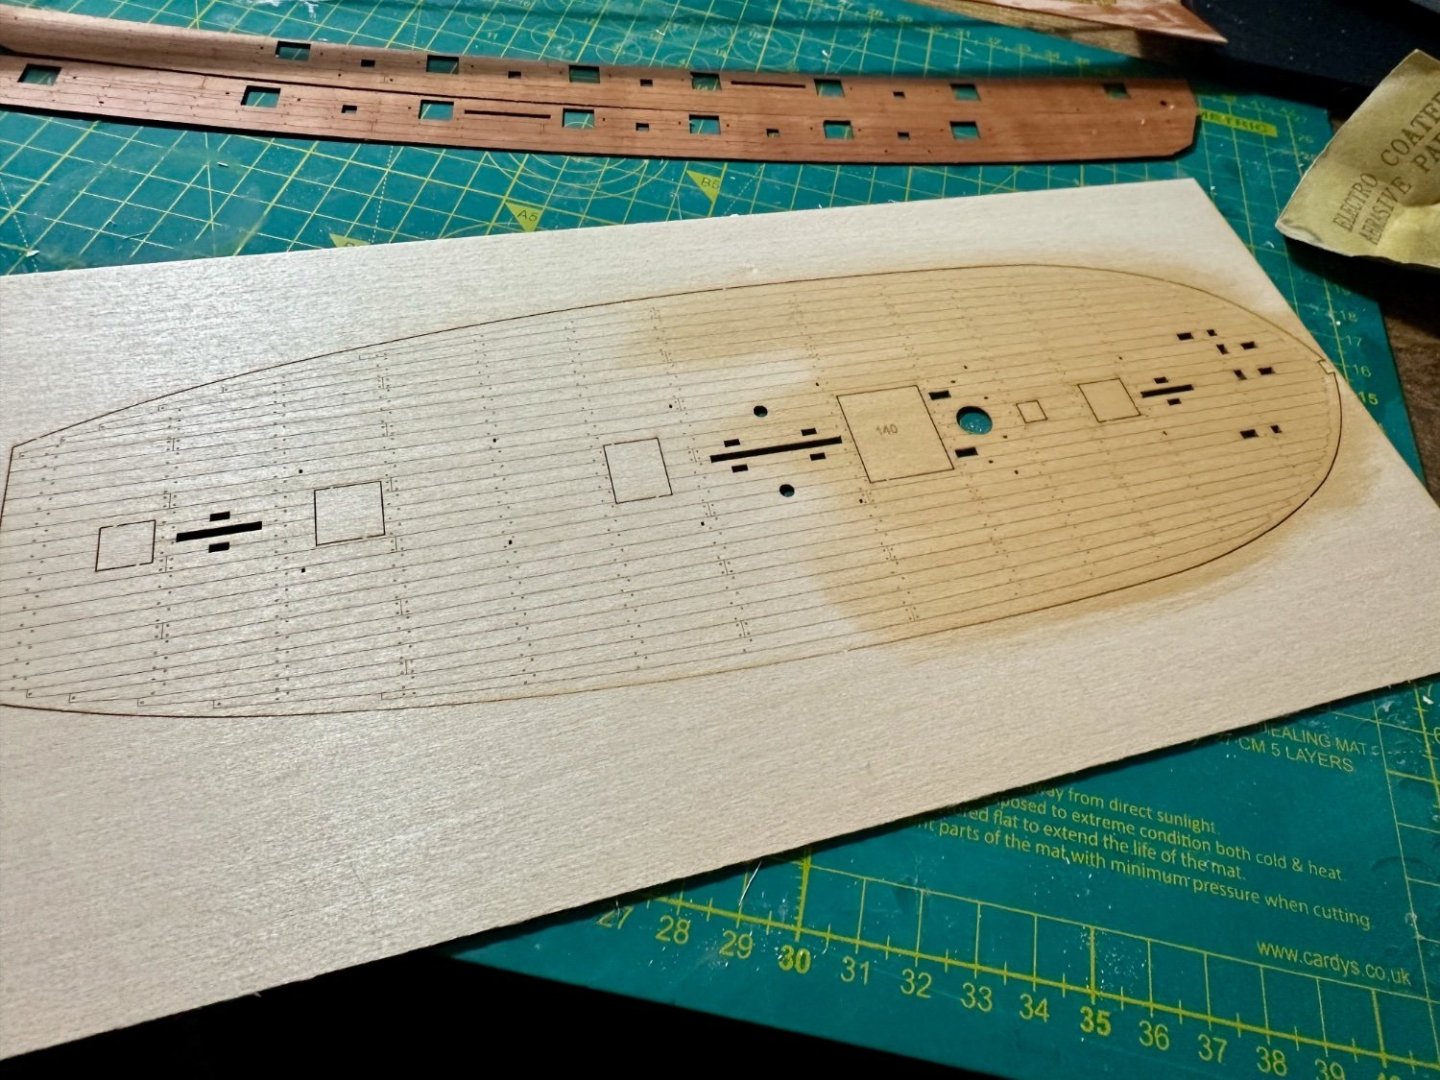
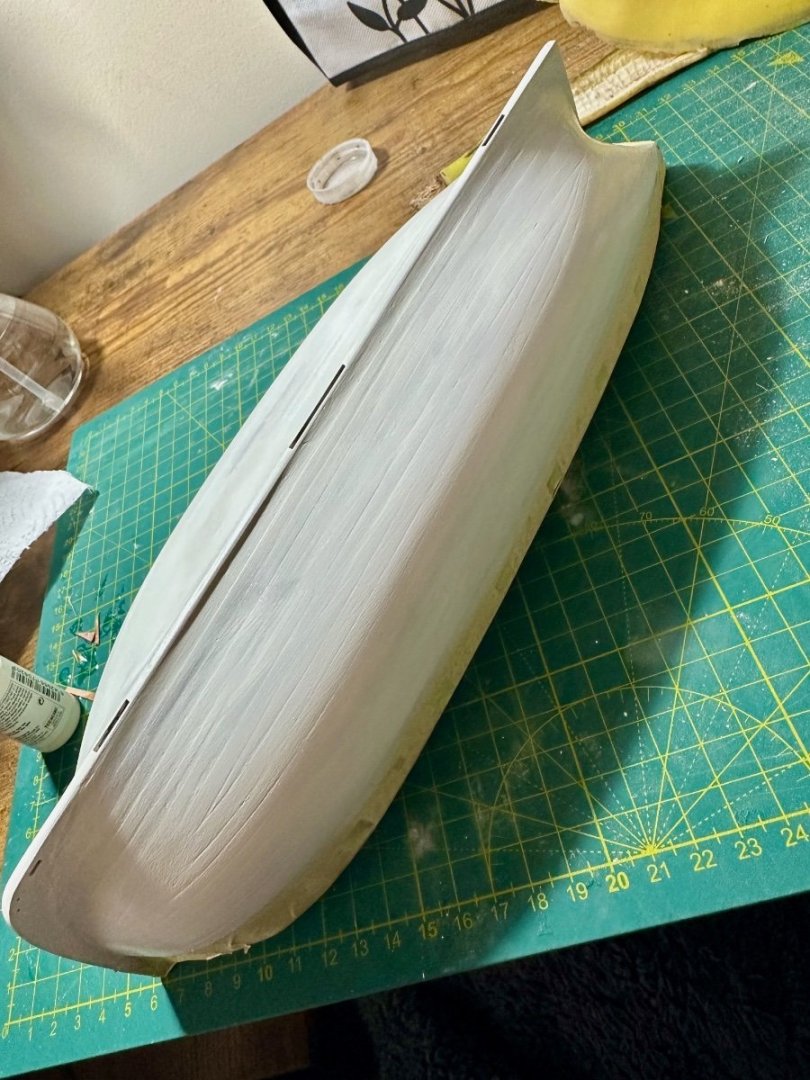
Two passes of filler and sanding on bare wood and now the first coat of paint is being sucked up by the hull. Using Vallejo Off-White and brush painting this time.


- 125 replies
-
- 7
-
-
- Trial
- Vanguard Models
- (and 1 more)
-
Very much on my list so looking forward to another stellar build.
- 146 replies
-
- 3
-
-
- Adder
- Vanguard Models
- (and 1 more)
-
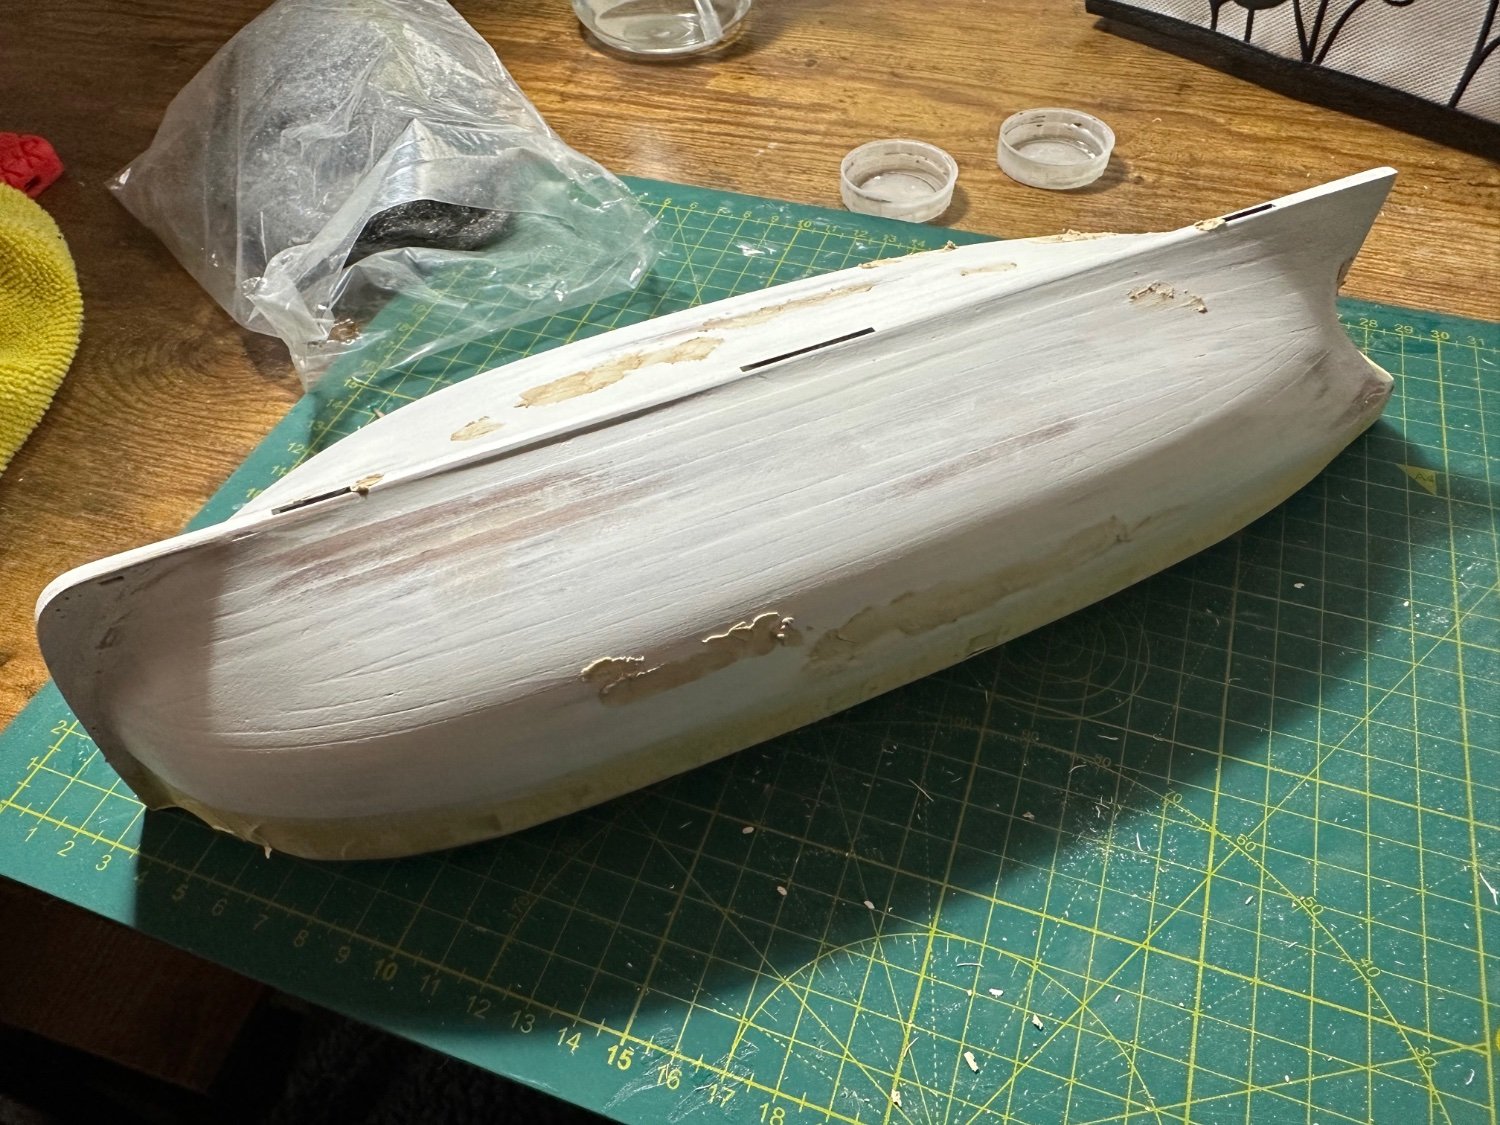
No point waiting eh! First sanding and filler drying.
- 125 replies
-
- 6
-
-
- Trial
- Vanguard Models
- (and 1 more)