HOLIDAY DONATION DRIVE - SUPPORT MSW - DO YOUR PART TO KEEP THIS GREAT FORUM GOING! (Only 20 donations so far - C'mon guys!)
×

BrochBoating
-
Posts
186 -
Joined
-
Last visited
Content Type
Profiles
Forums
Gallery
Events
Everything posted by BrochBoating
-
 Some improvement in the second planking but far from perfect. I think my taper at the top was too extreme. Practice makes perfect hopefully. Guess the rest of the week will be sanding.

- 125 replies
-
- 5
-

-
- Trial
- Vanguard Models
- (and 1 more)
-
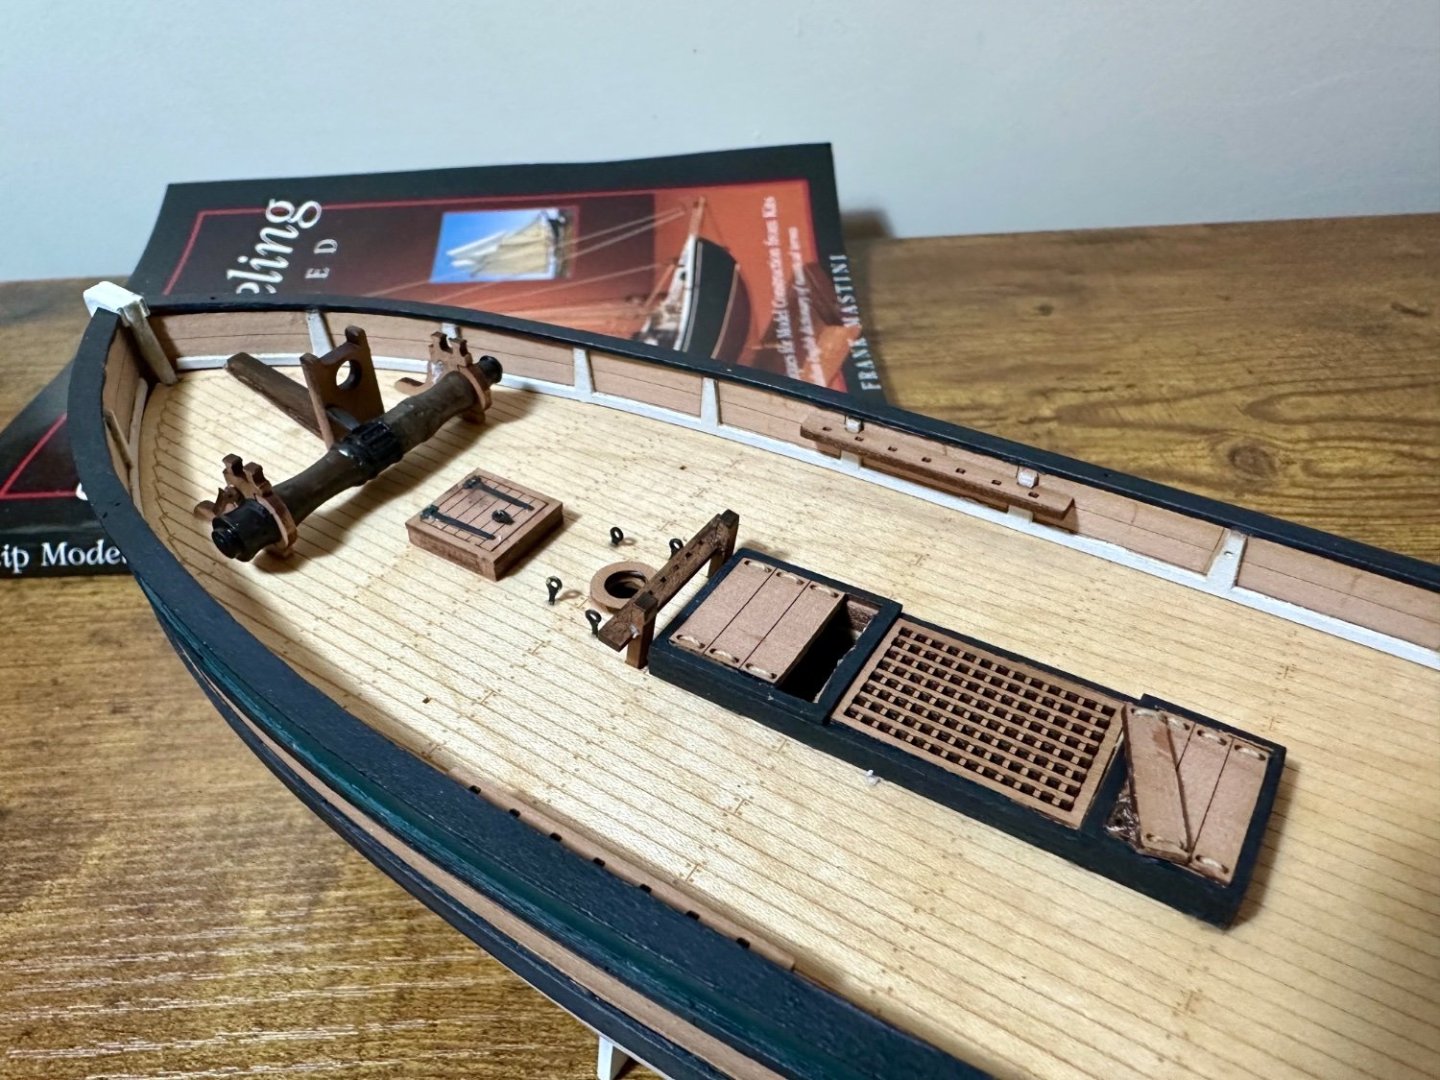
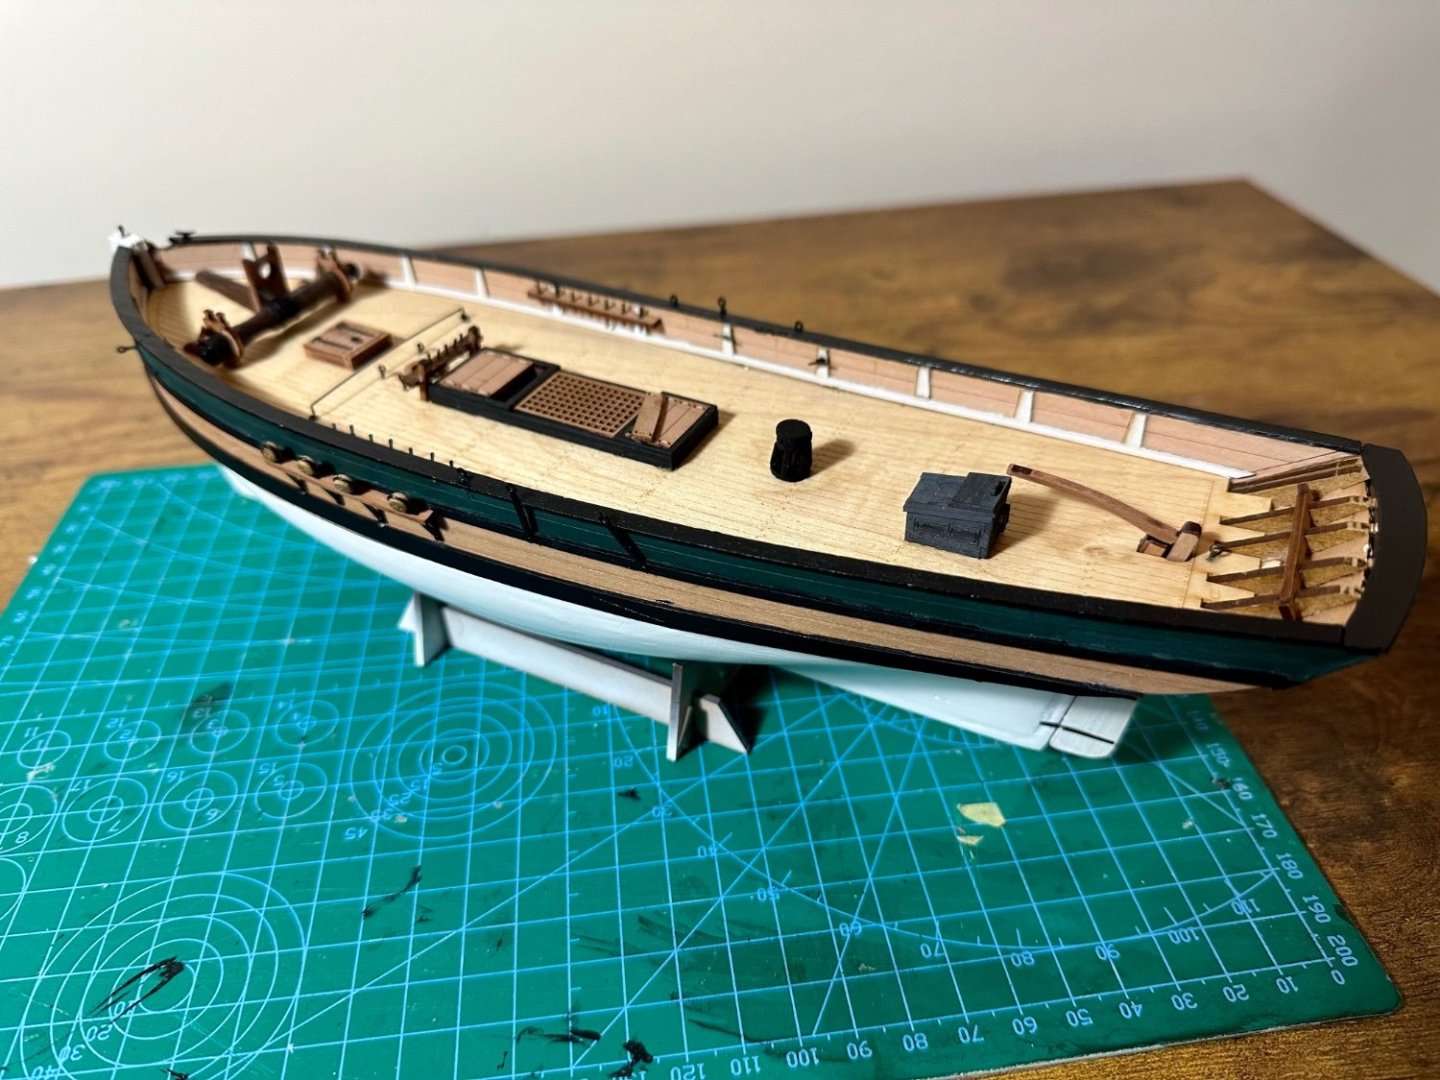
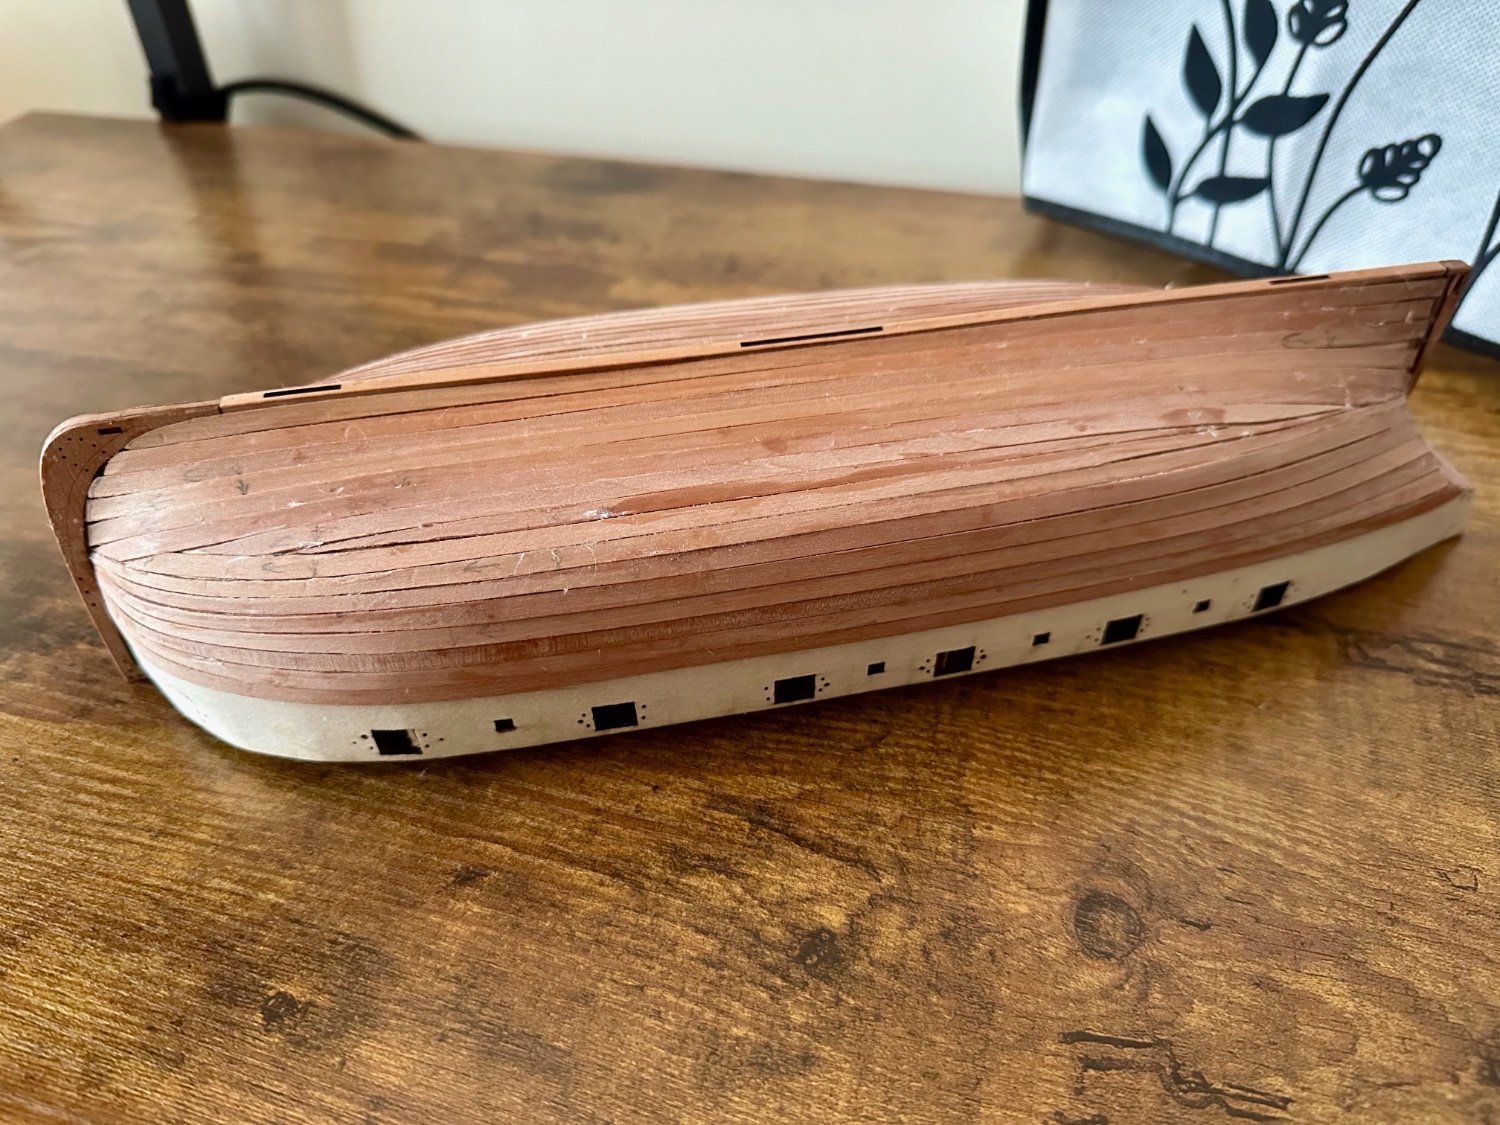
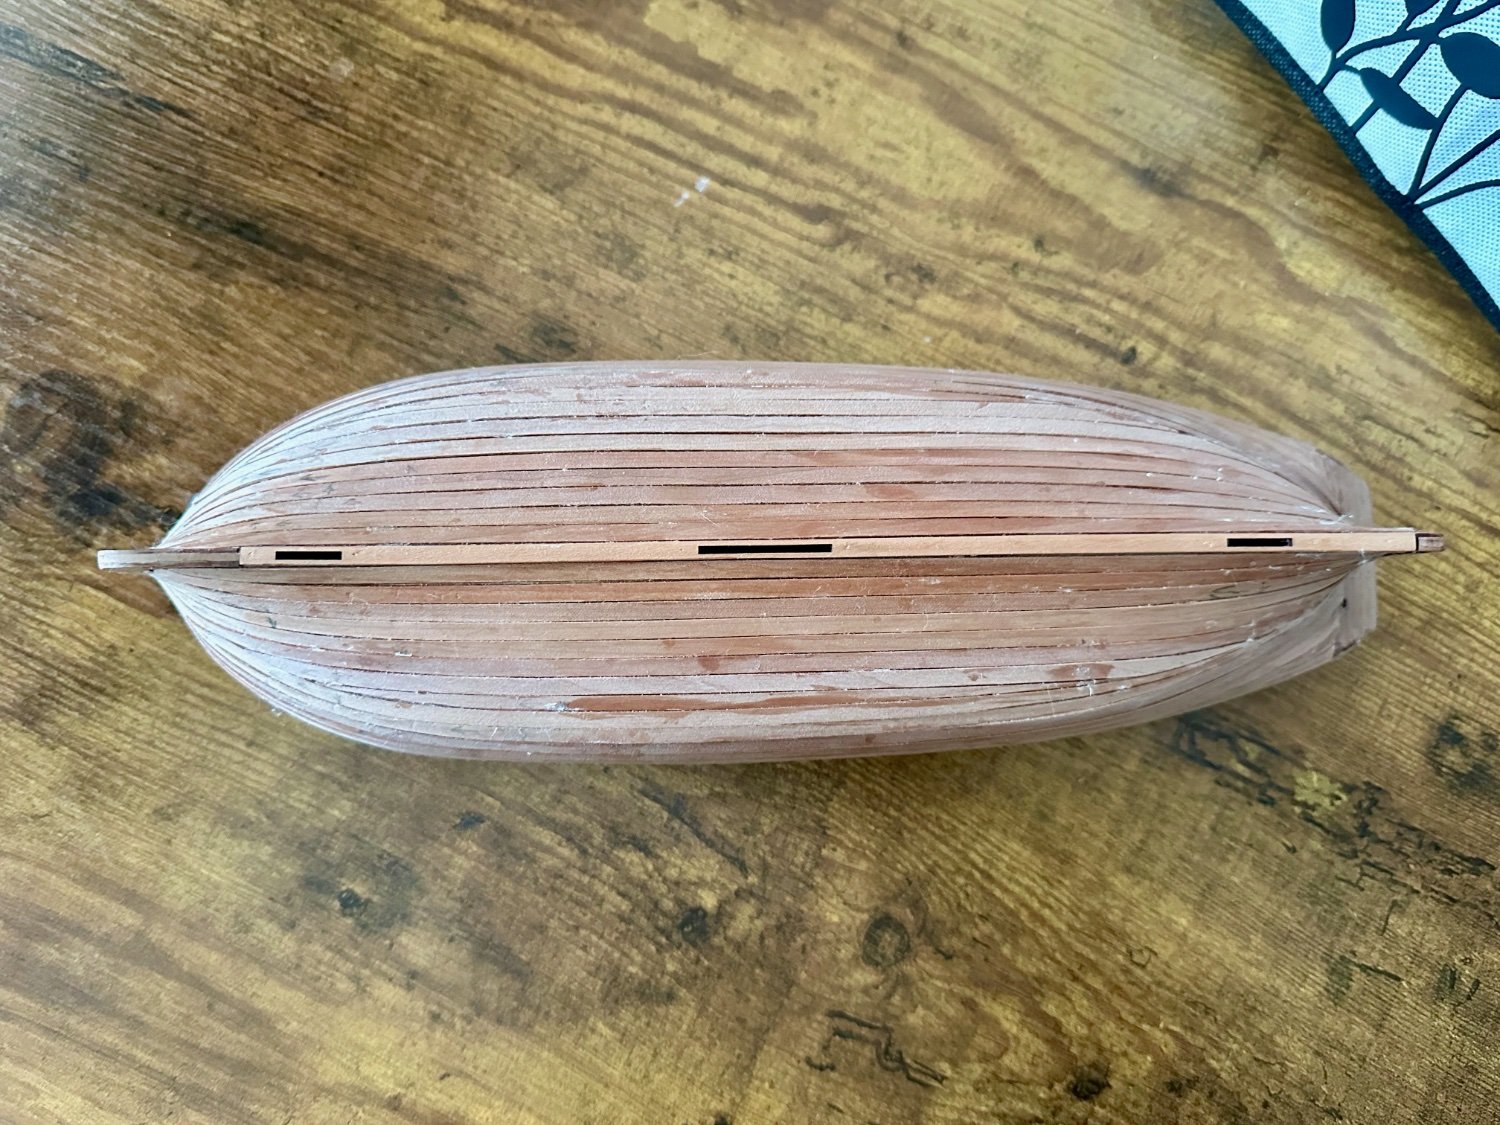
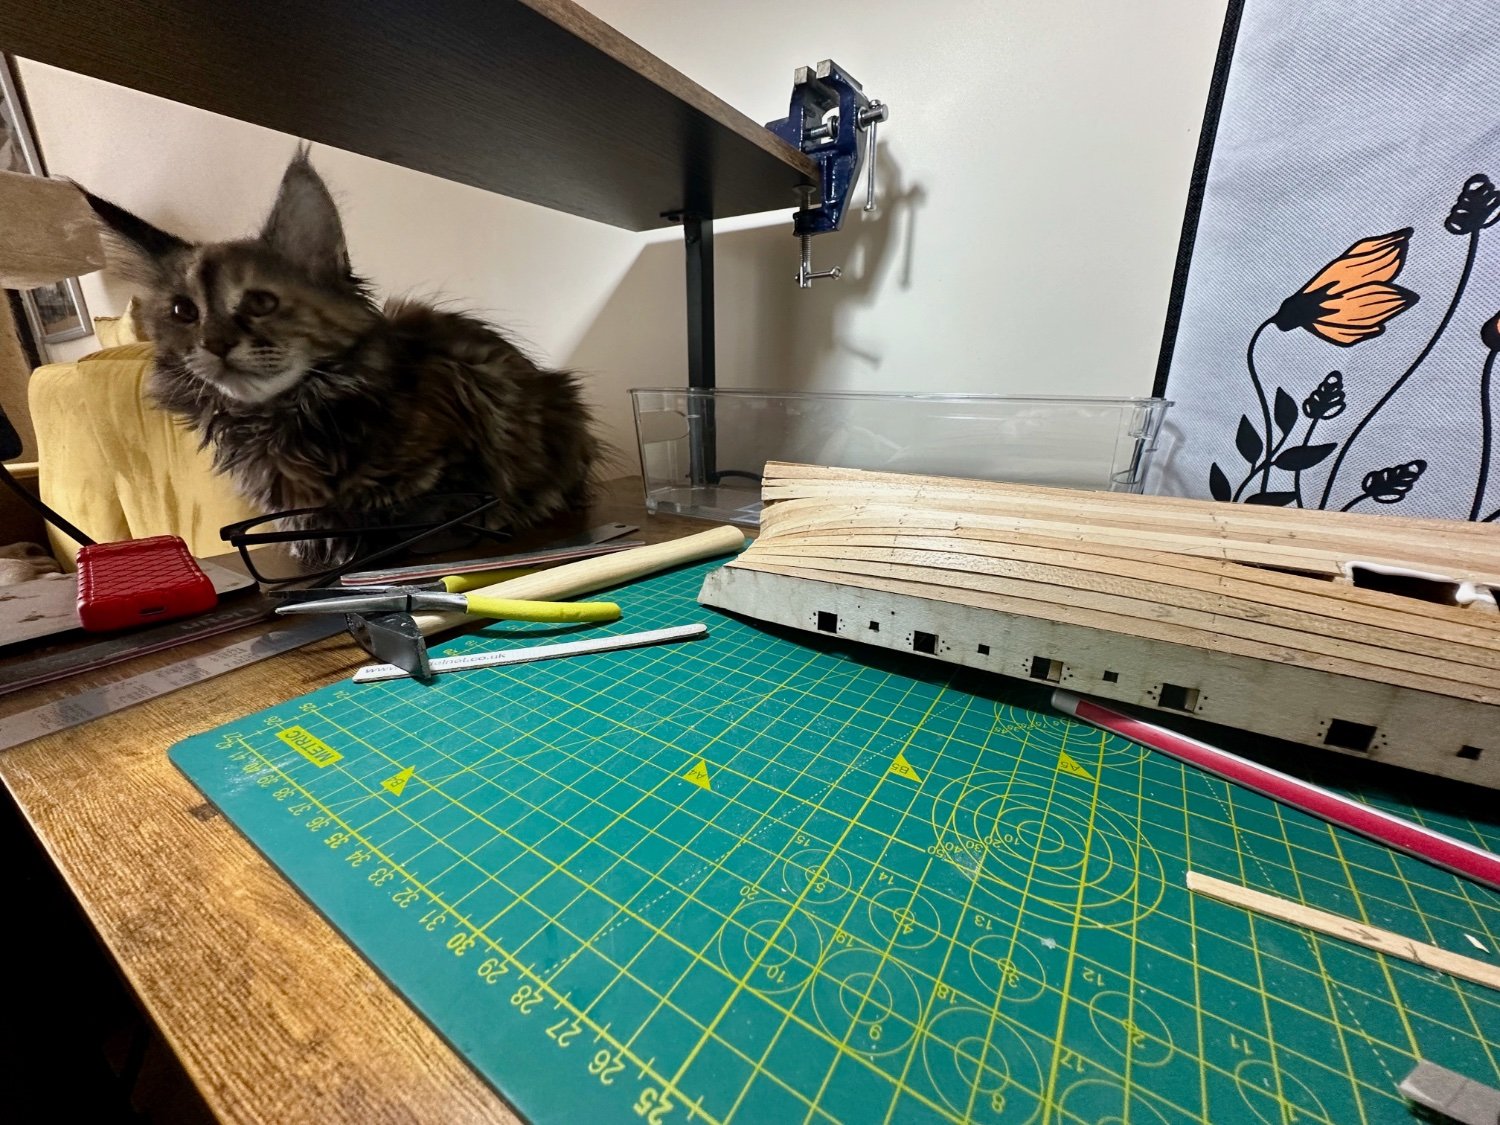
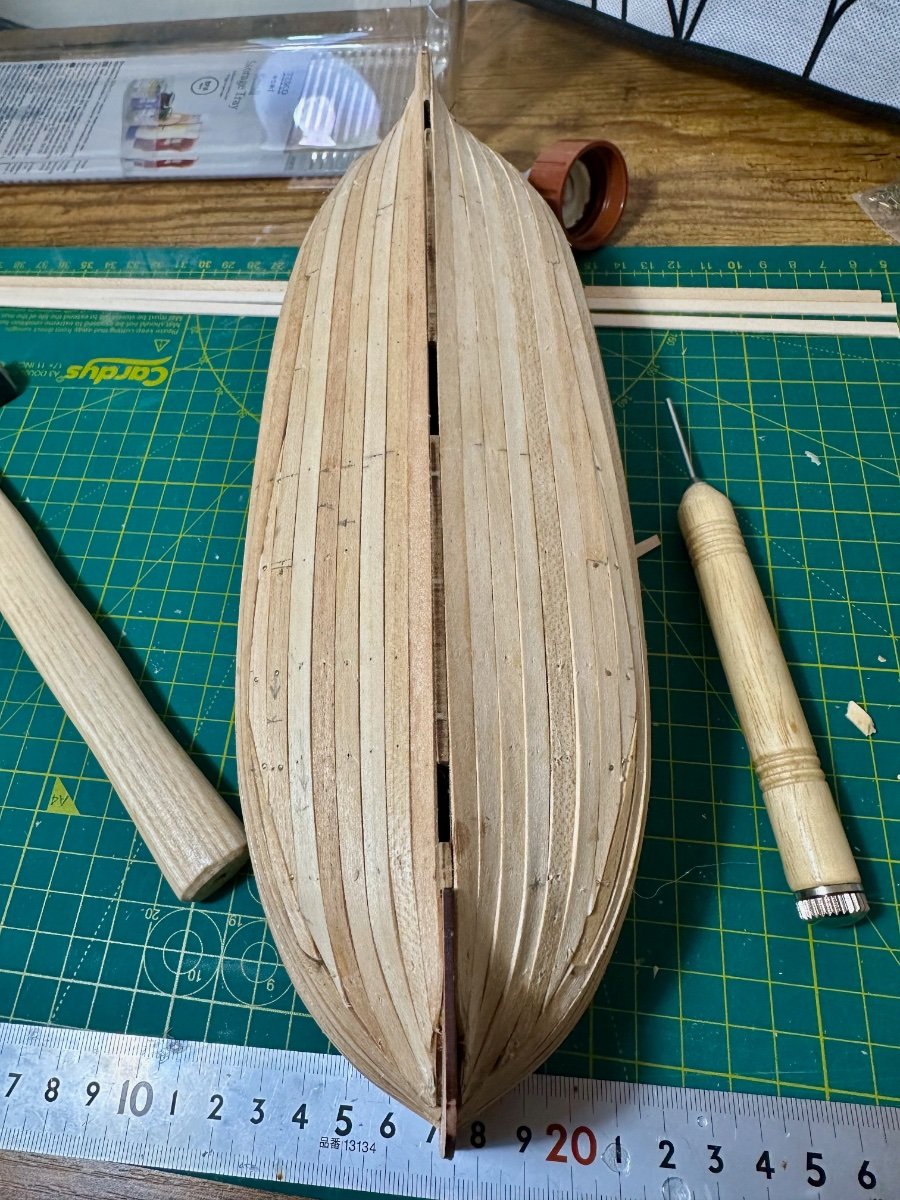
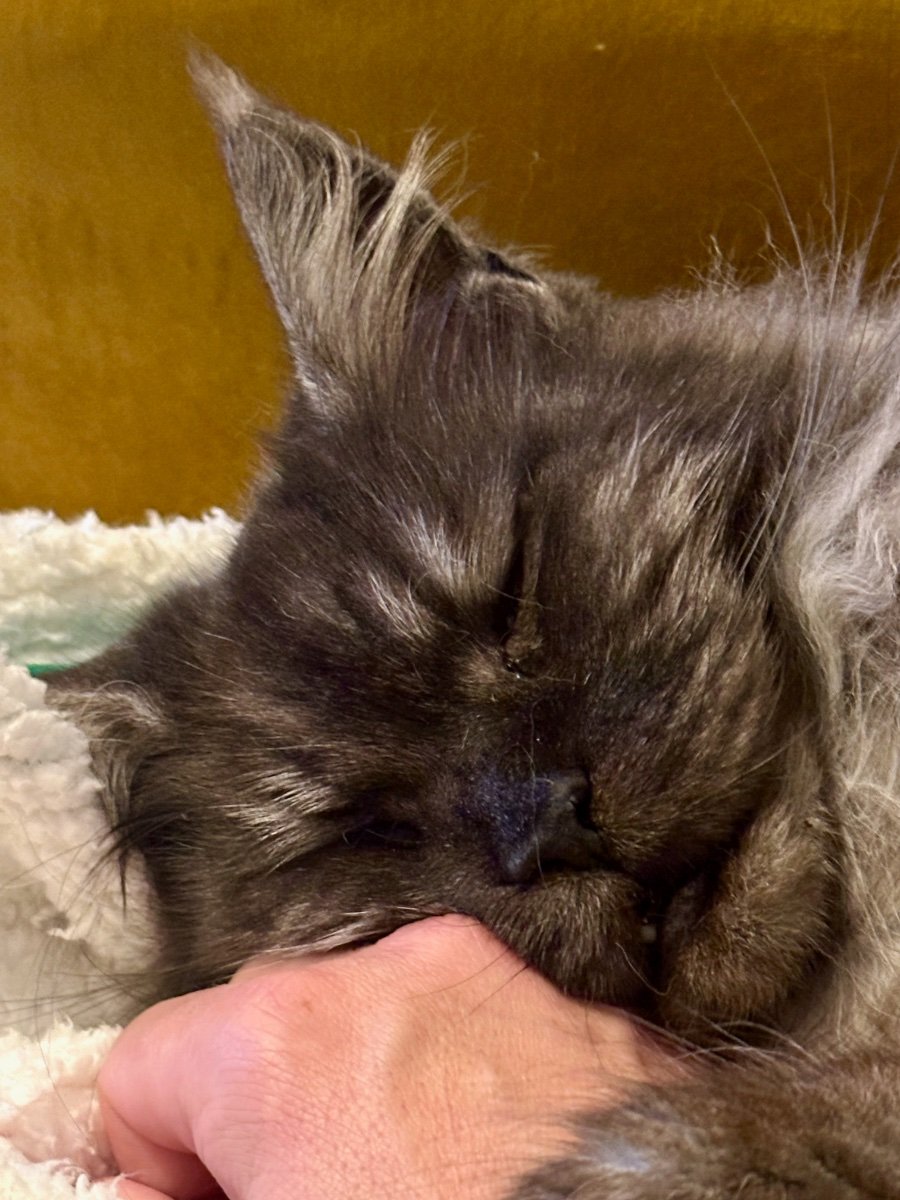
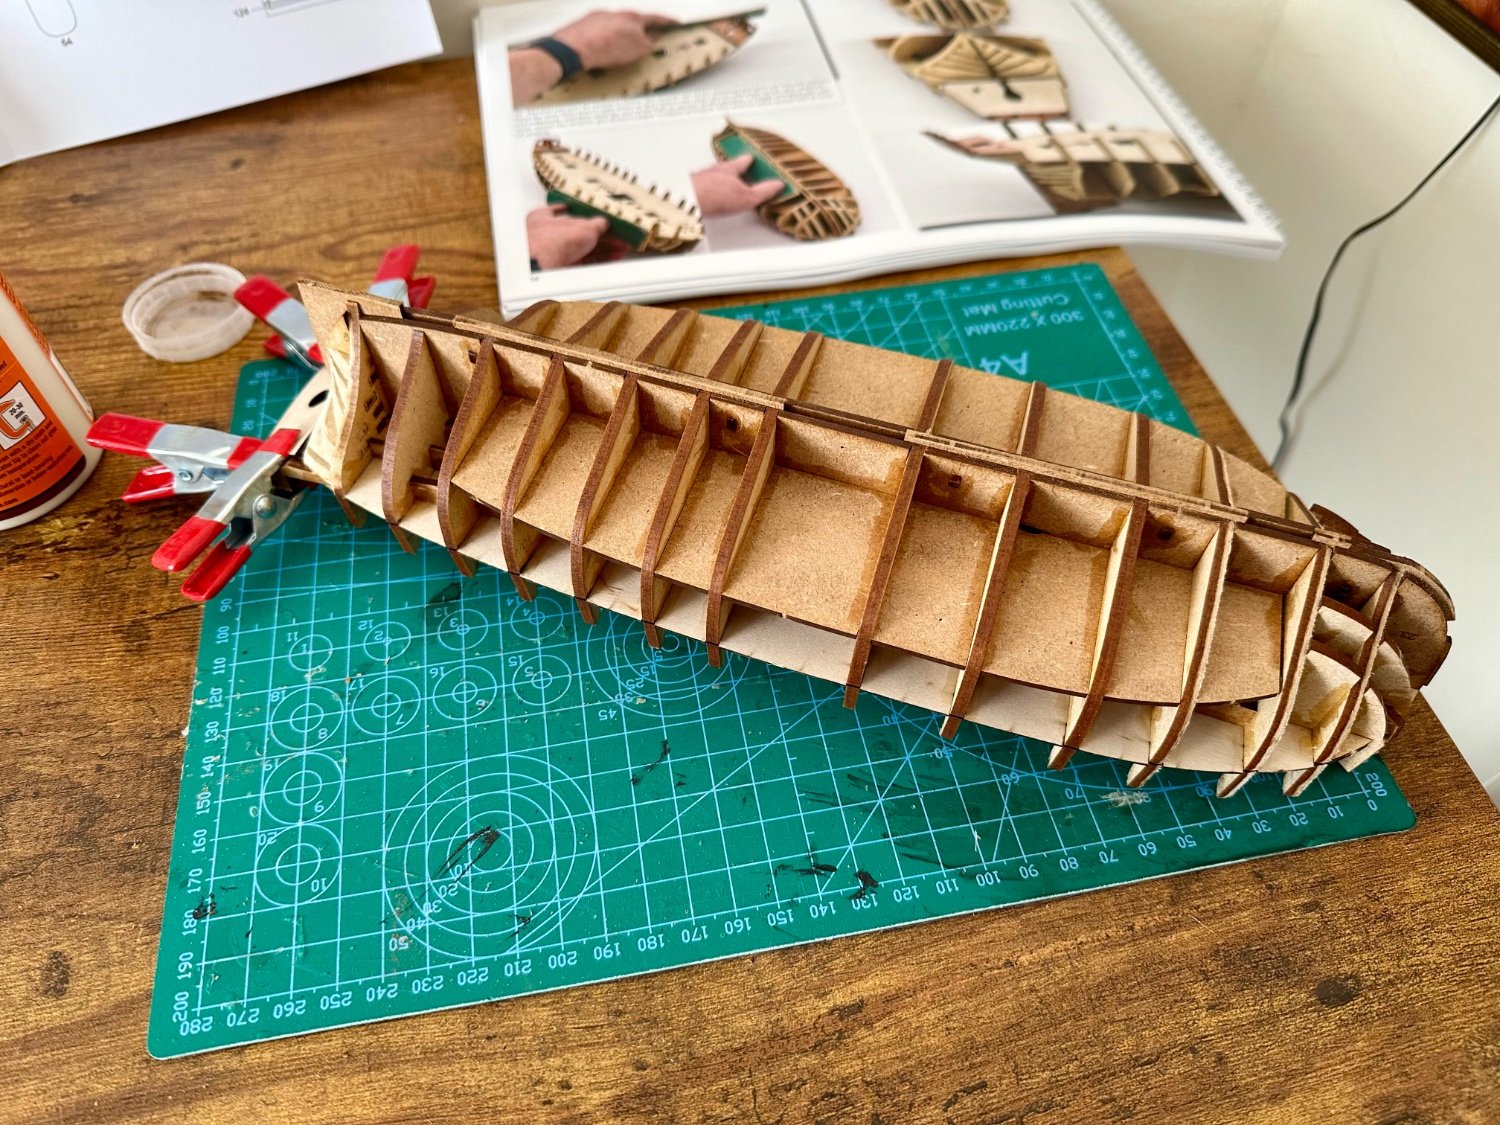
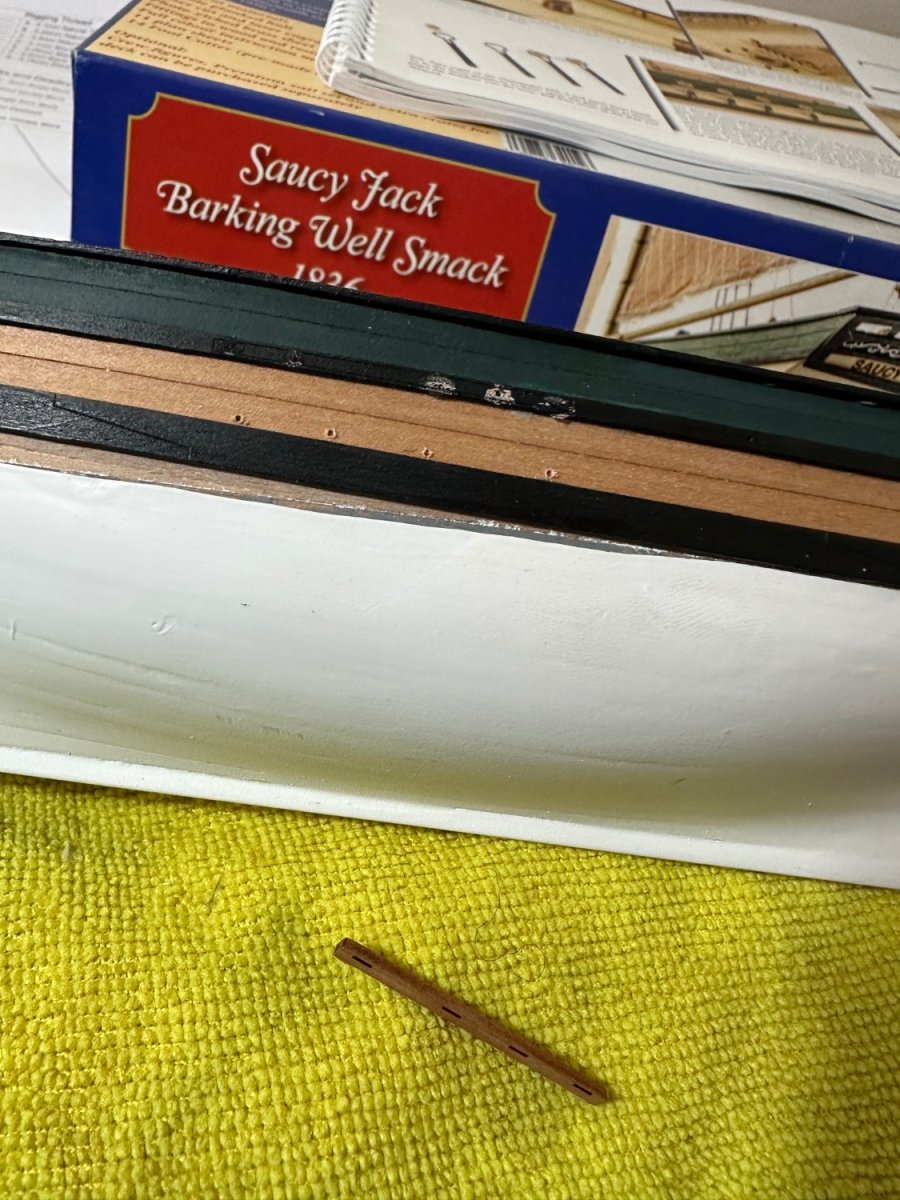
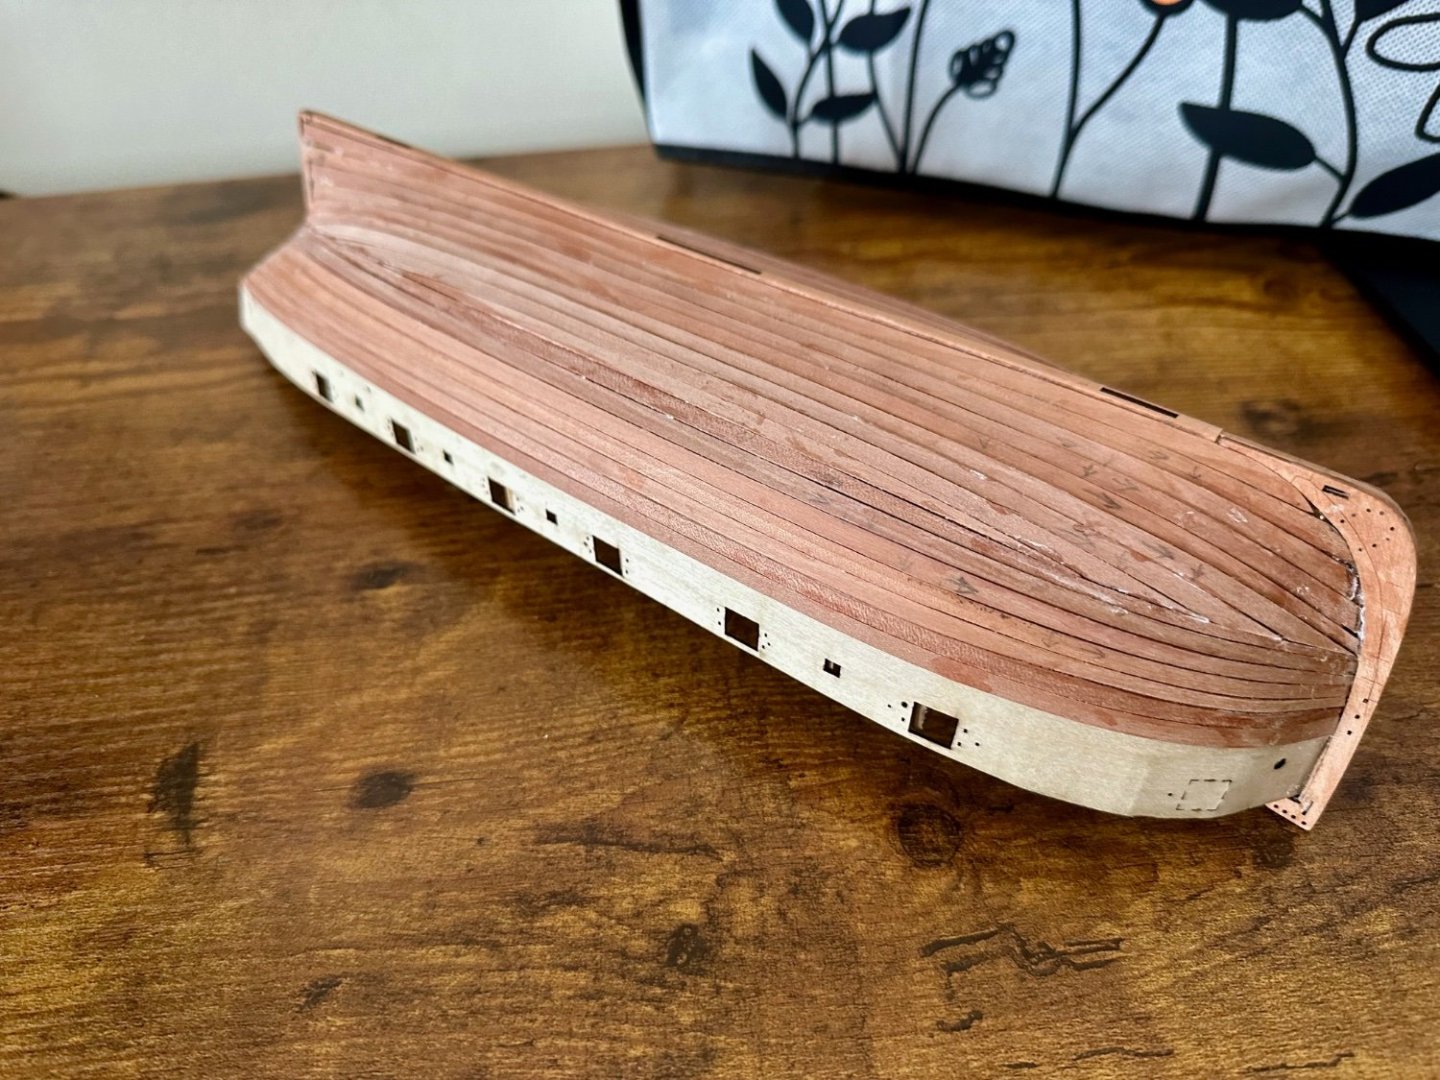
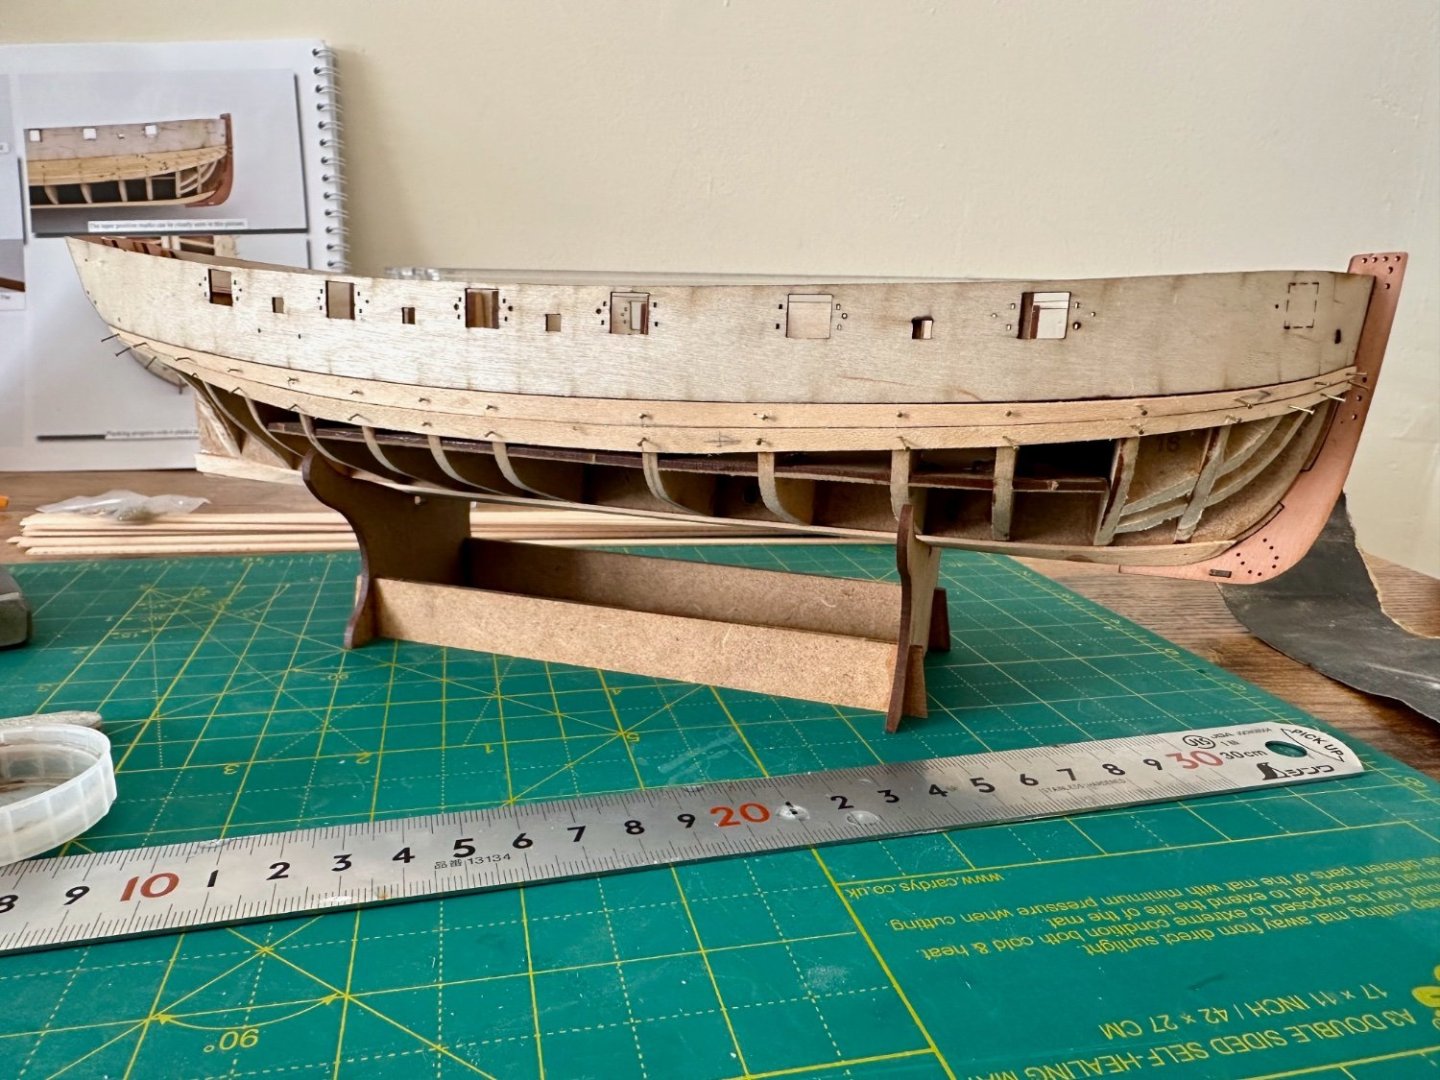
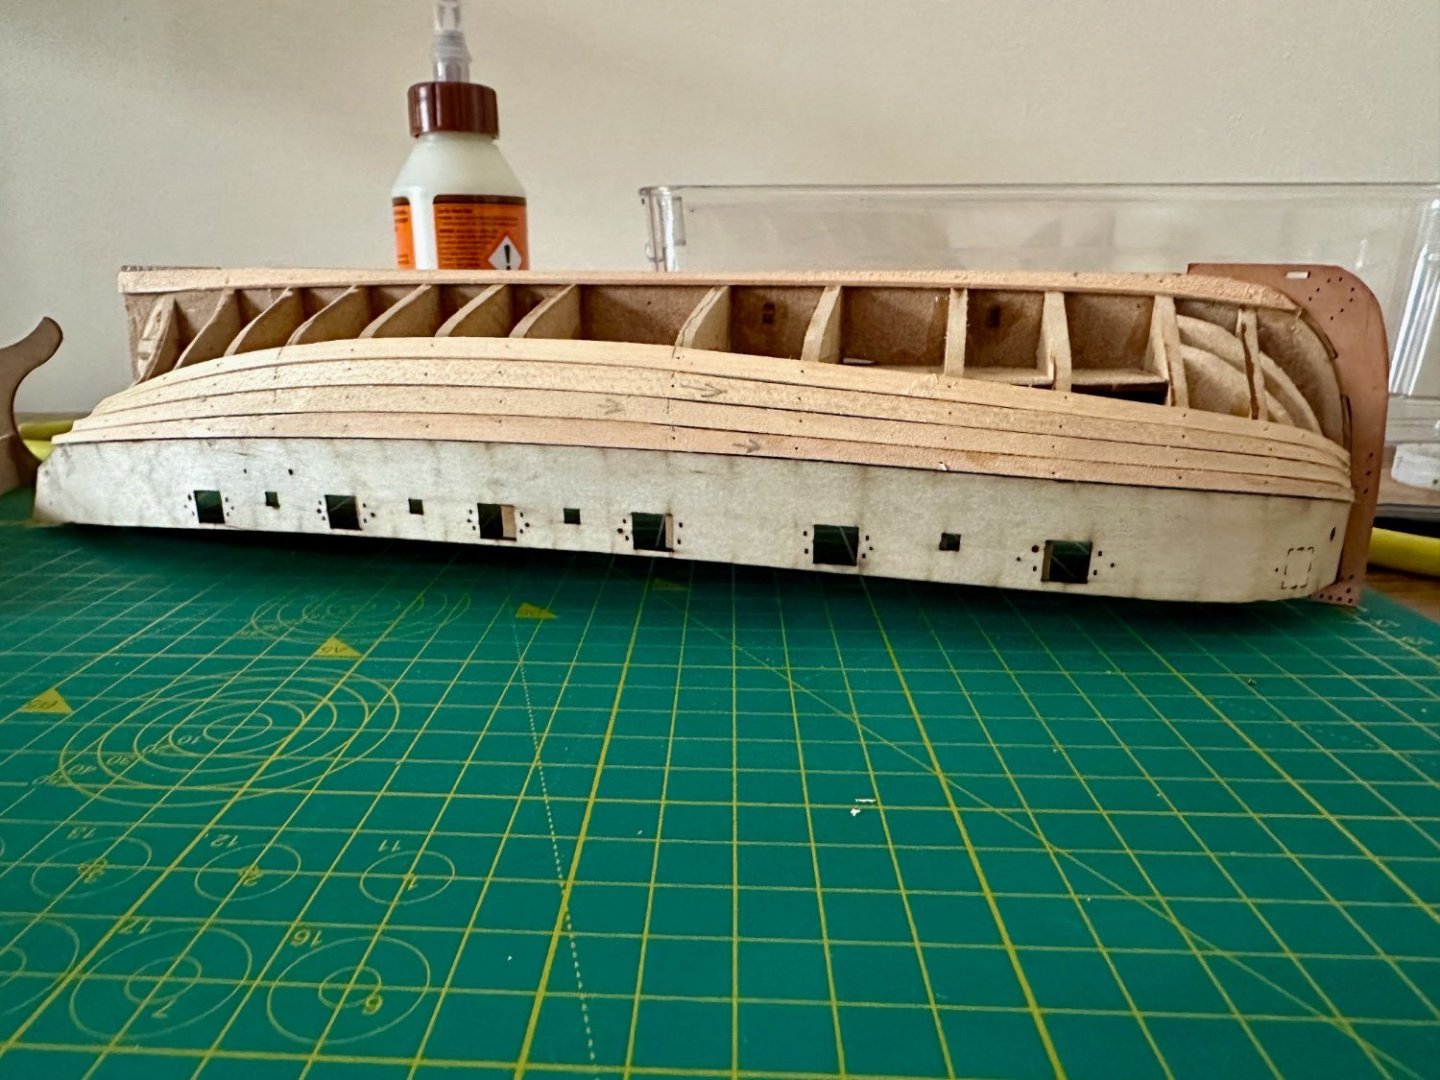
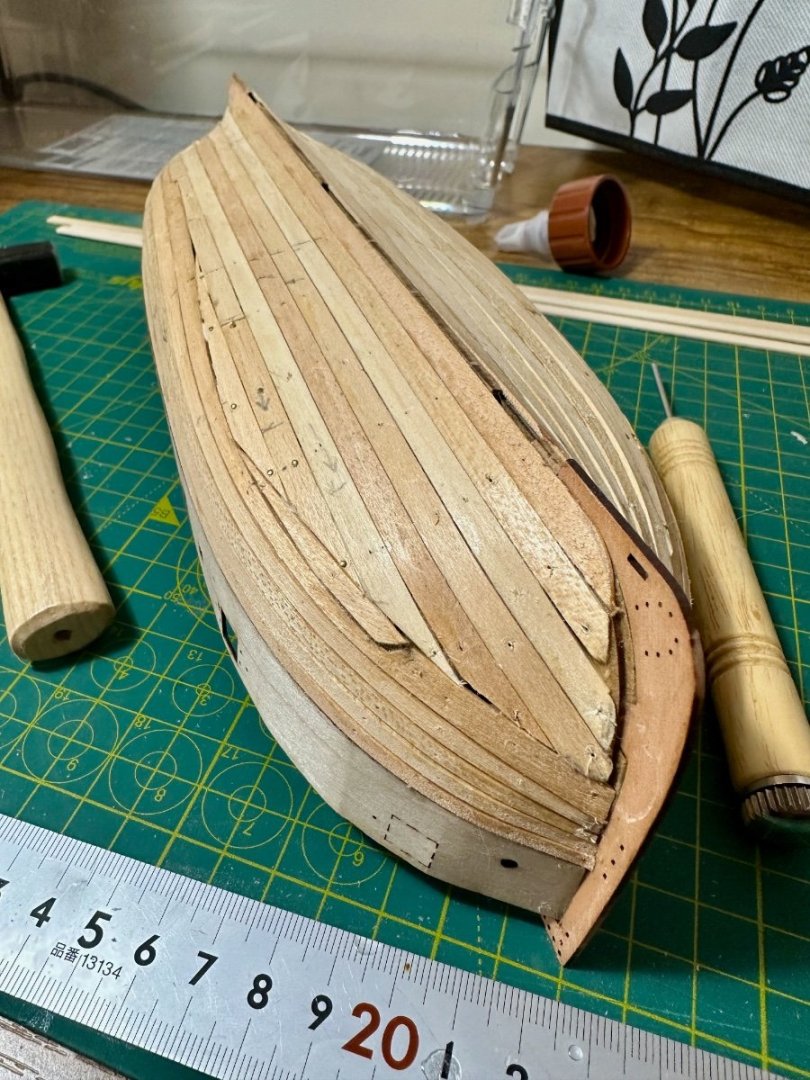
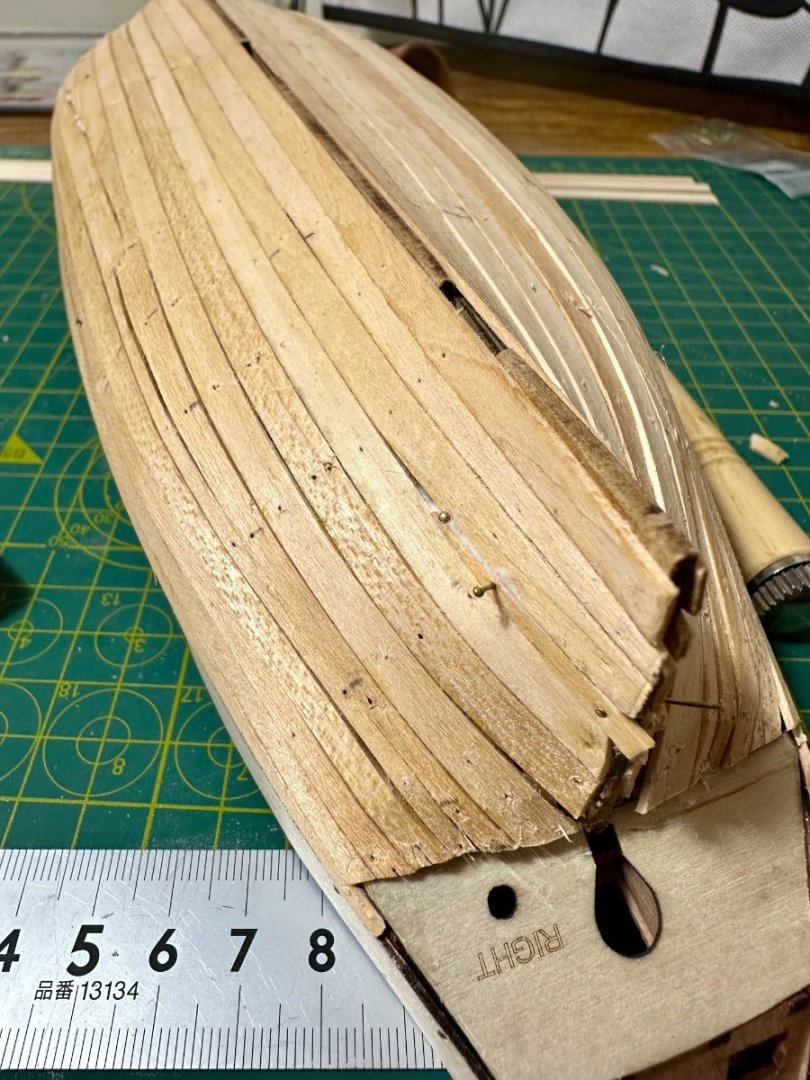
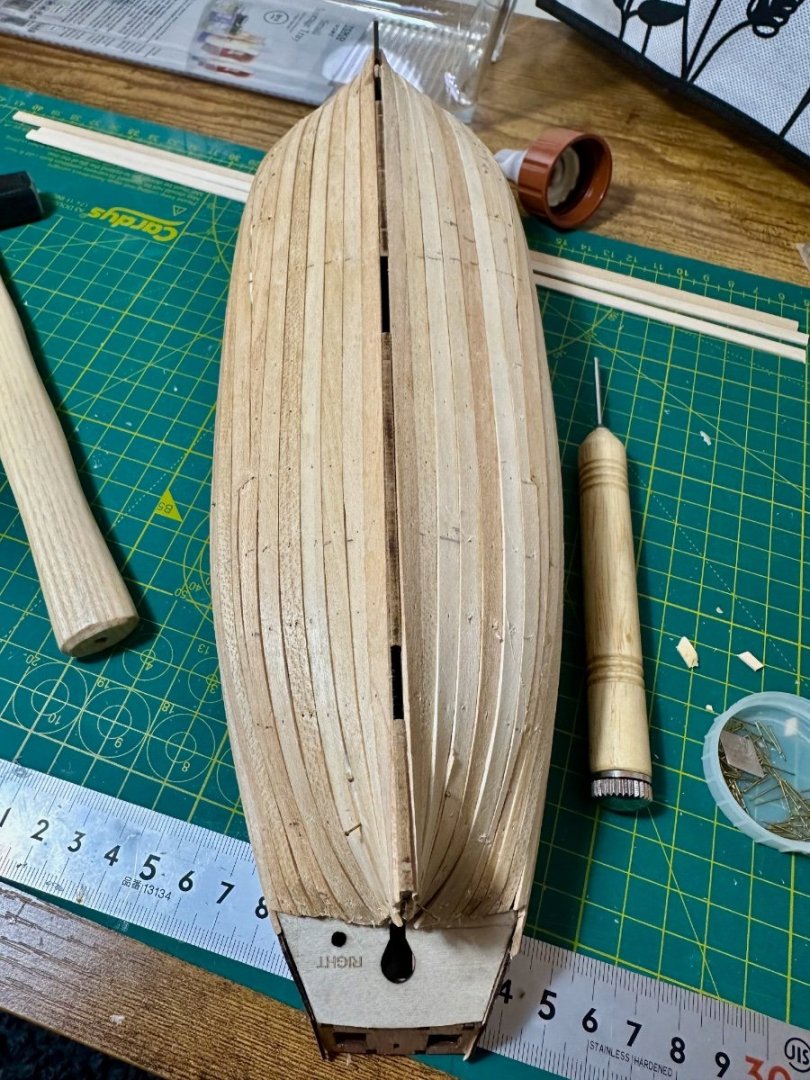
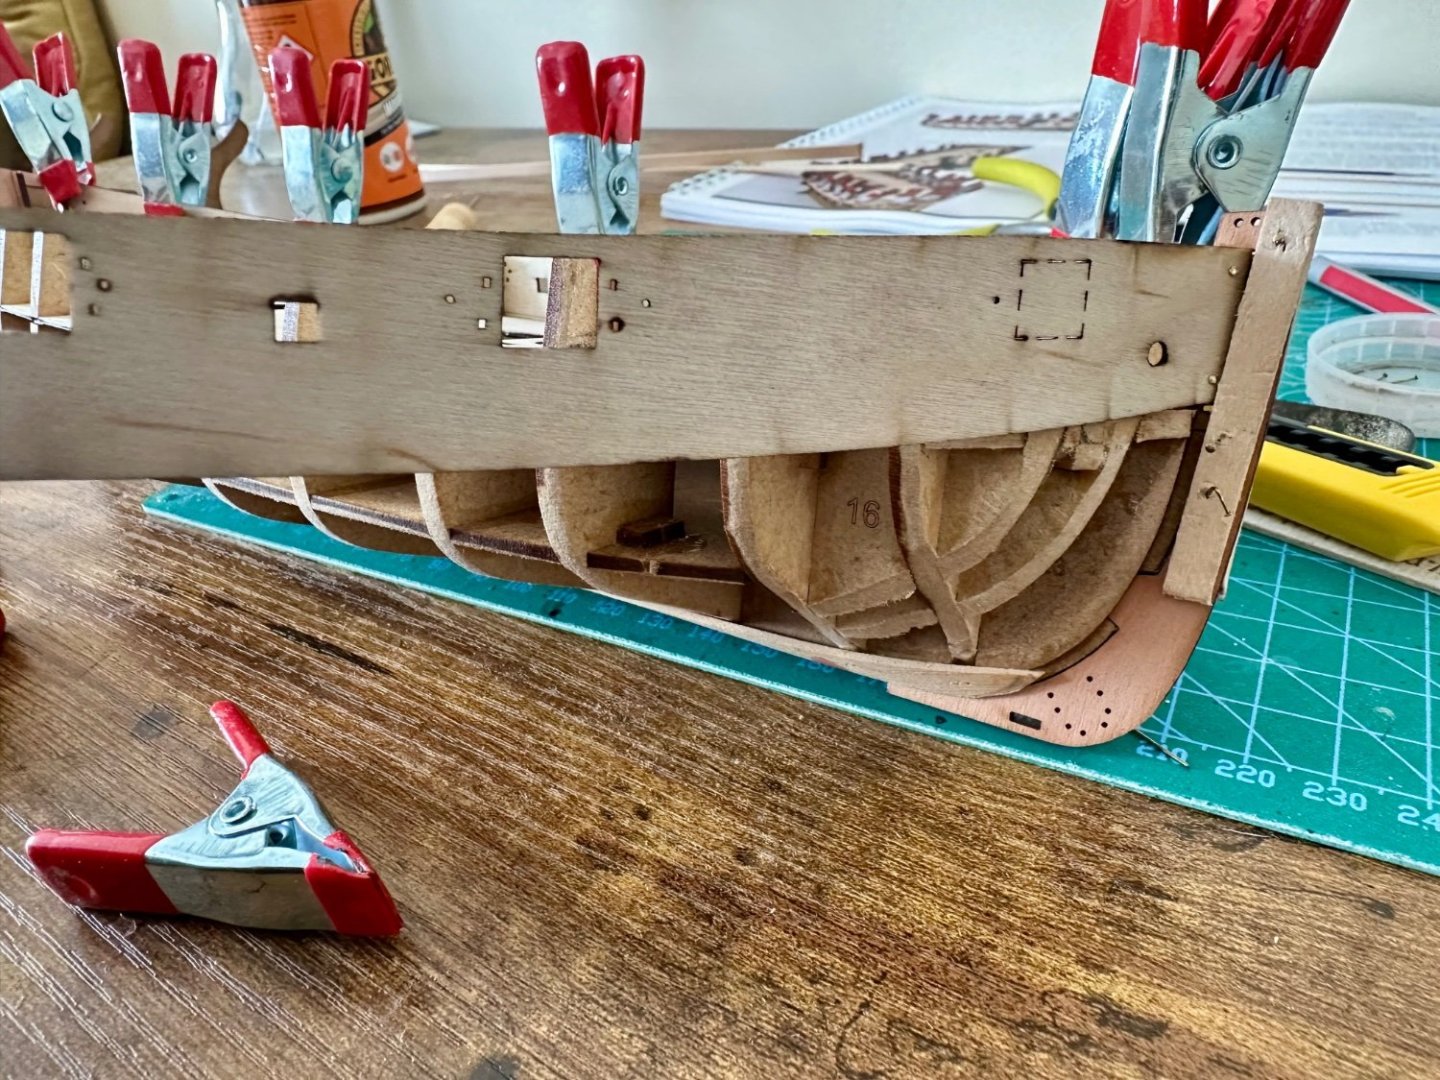
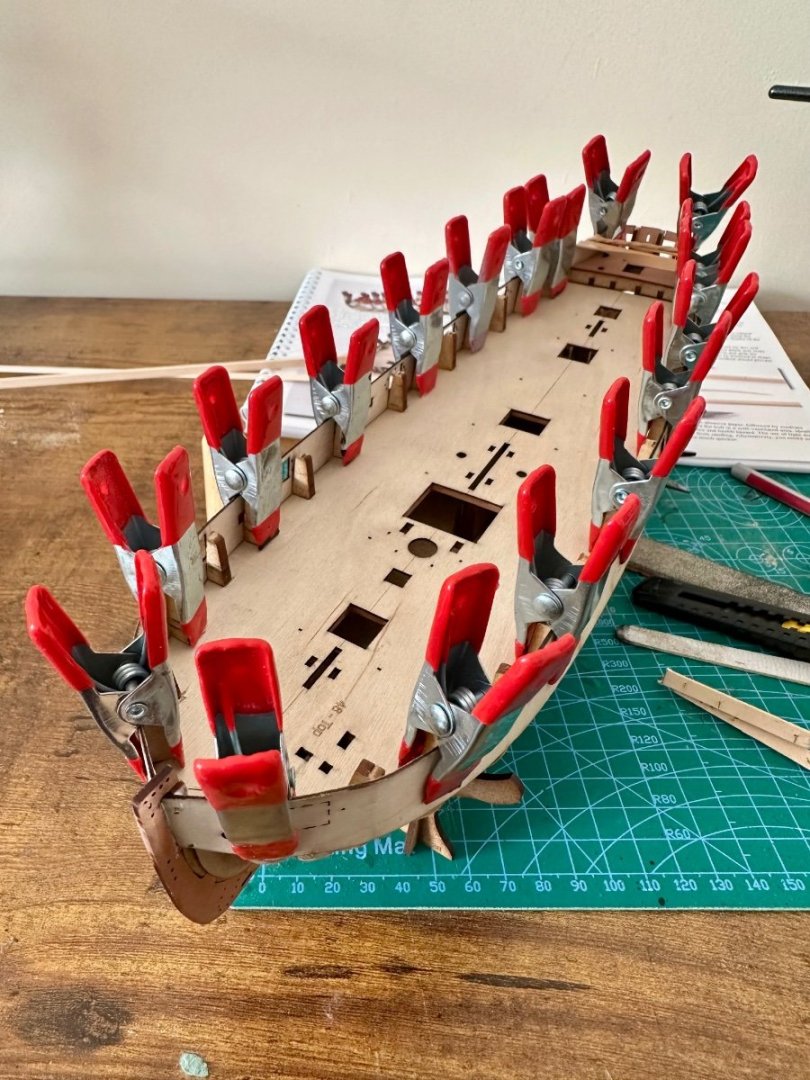
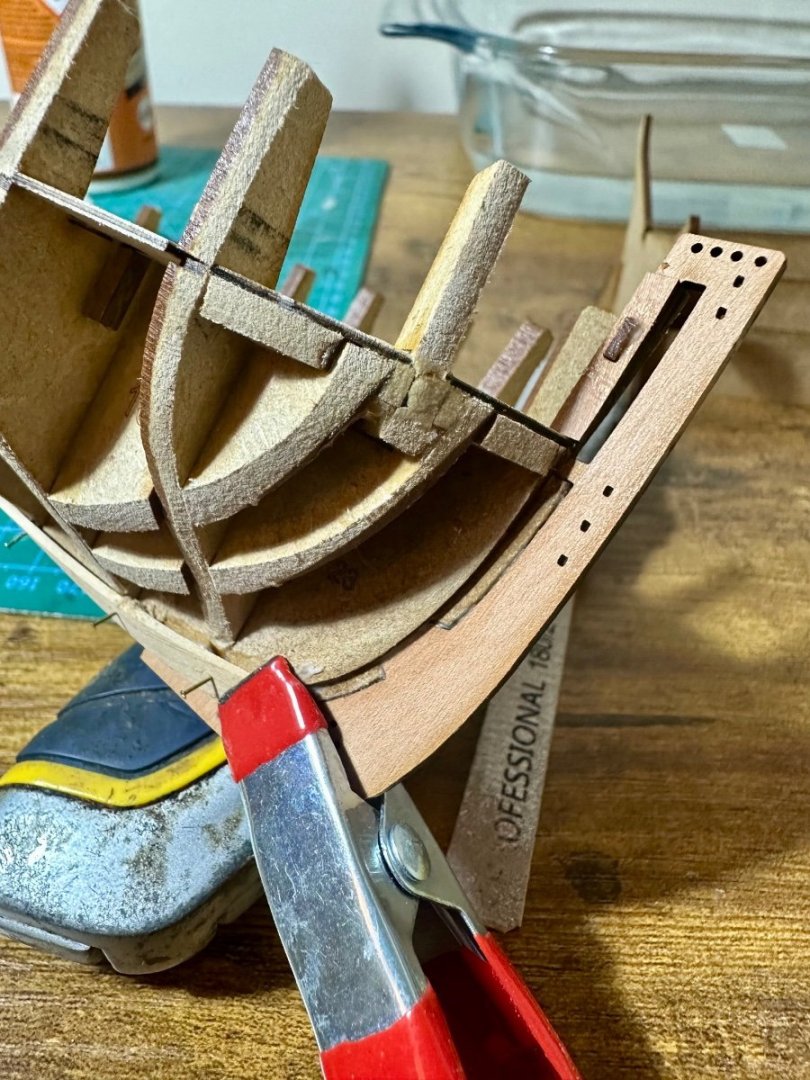
Bit of a slow few weeks following the sudden death of my previous foreman Oz: His brother was bereft so I now have a apprentice foreman, Maisie: Lots of on the job training to complete but she enjoyed a paddle in the plank bath! So back to the model. Due to a combination of distraction and stupidity I made a massive mistake with the first planking. Instead of marking at the fifth bulkhead then tapering from the overlap I managed to just taper from the fifth bulkhead! Didn't notice till the fifth plank on each side by which time there was nowhere near enough stock from this and previous to remove and start again. Onward and upward etc etc. Brain wasn't functioning very well for the repairs either but got there in the end. The stern hadn't adhere as well as it should so that got another go which has worked: Finally got the first planking done this morning with a few stealers at the stern but not excessive. All pins removed (some had been flush to help hold tighter curves while curing but I find a craft knife easily levers them out with minimal damage) and sanding done. Followed by adding the bow, keel and stern facings. Keel facing pinned as well as glued for now helping to make sure the keel slots are lined up and stay so. Lastly the stern cover fitted the part above held temporarily for alignment:


- 125 replies
-
- 7
-
-
- Trial
- Vanguard Models
- (and 1 more)
-
Good to hear your plans. Hoping to order Sherborne and Adder at the end of the month
-
More than reasonable. Kits I have couldn't be more different (positively) than others I've looked closely at. Is there a likely release date to try and avoid missing the first run?
-
There never has been a time when a good kit (not been in boats long but done plenty of other sorts) has been cheap. Cheap kits are exactly that.
-
Not really. There are plenty of prices that will print for you at a modest cost. Yes there are other costs of design etc but much can mitigated with cheap/free software. Really just a modern version of home monkey metal casting.
-
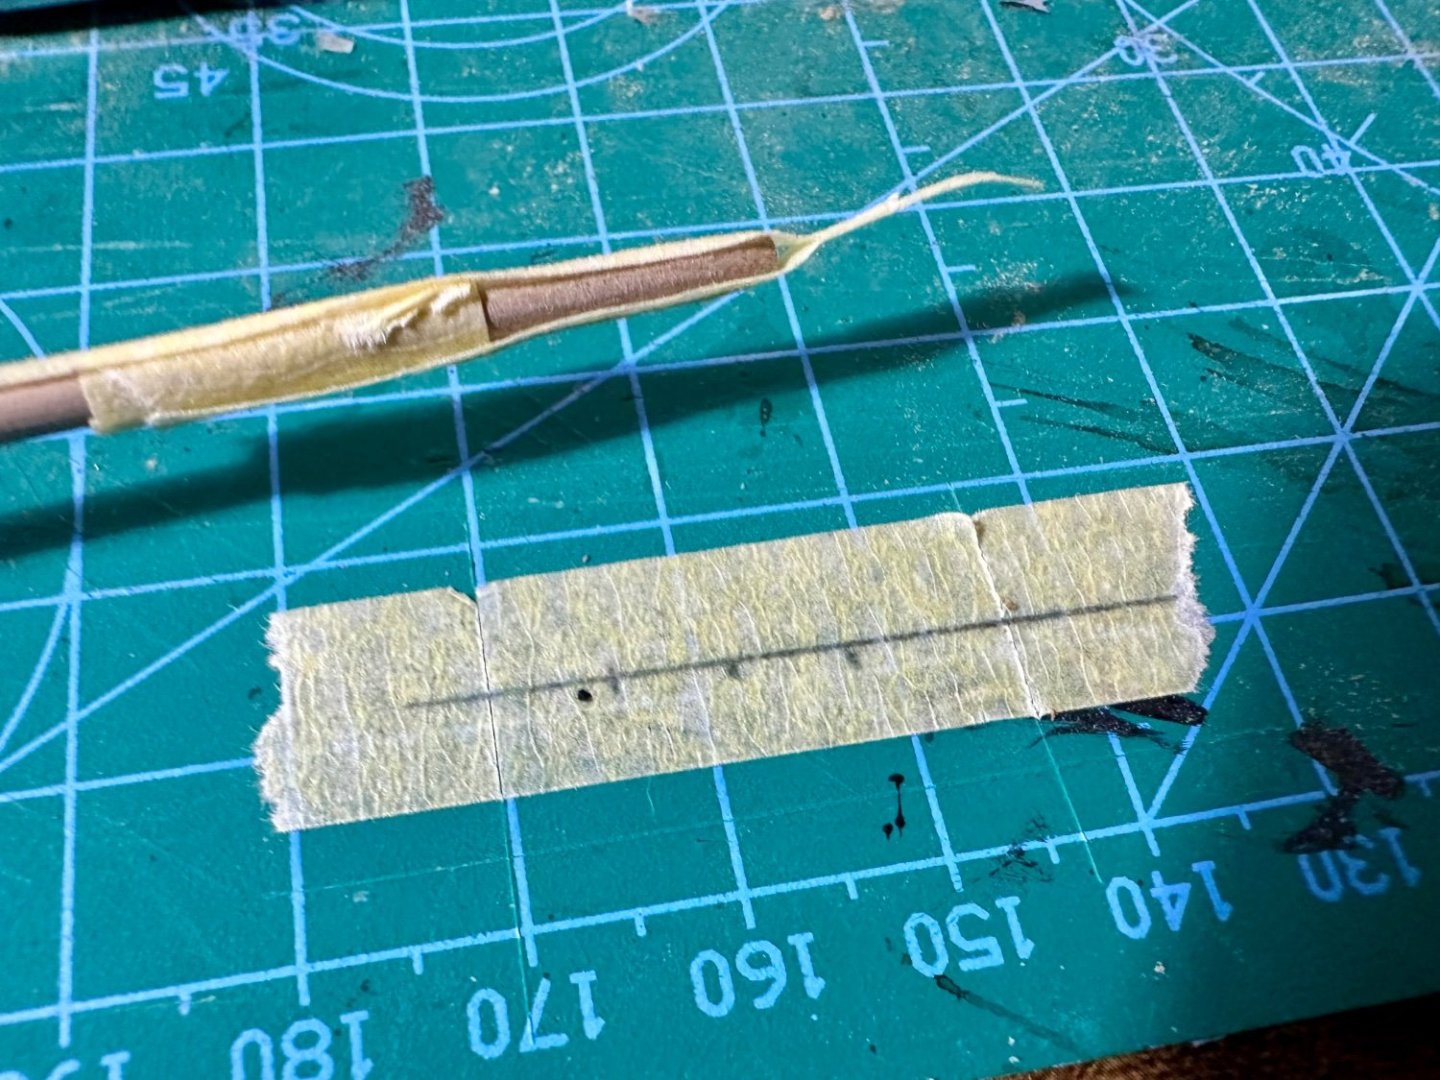
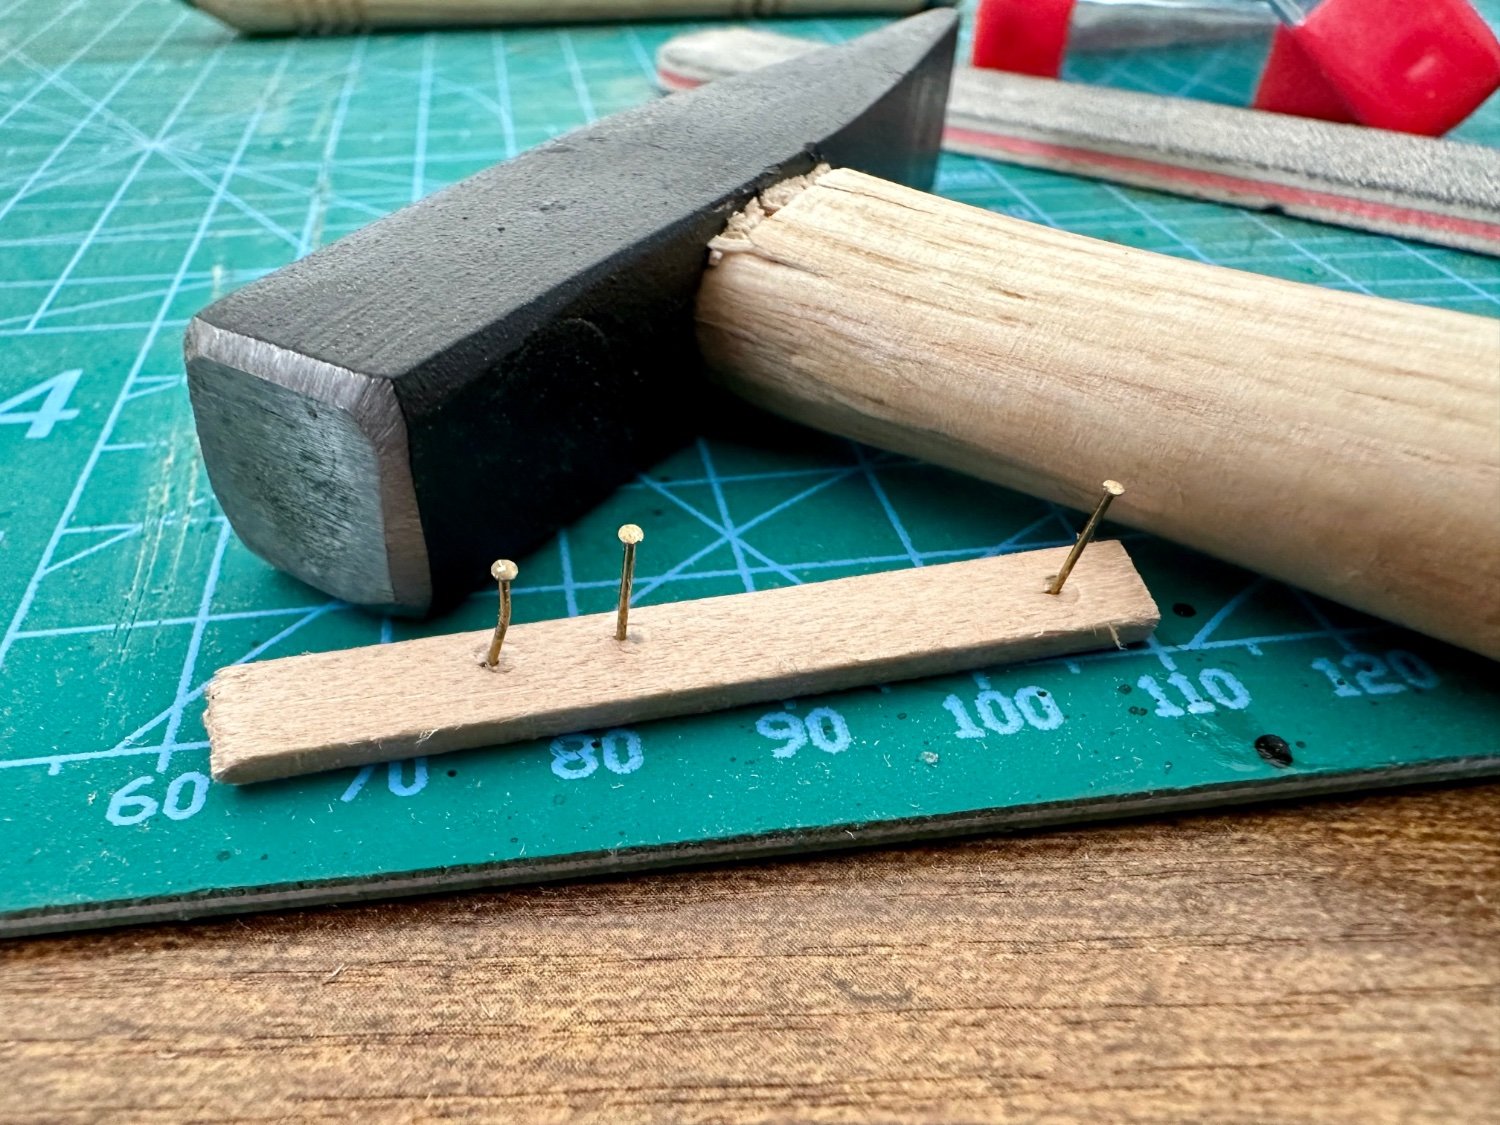
Worked wonders. Kept them perfectly in place to allow pinning. I pinned so I could then remove these pieces to run glue lines to help after pins are removed. Could probably do better with more practice but was very effective.
- 125 replies
-
- 4
-
-
- Trial
- Vanguard Models
- (and 1 more)
-
Am I being unkind that it looks rather like the ones that go past on Facebook Reels being built for tourists in Vietnam?
-
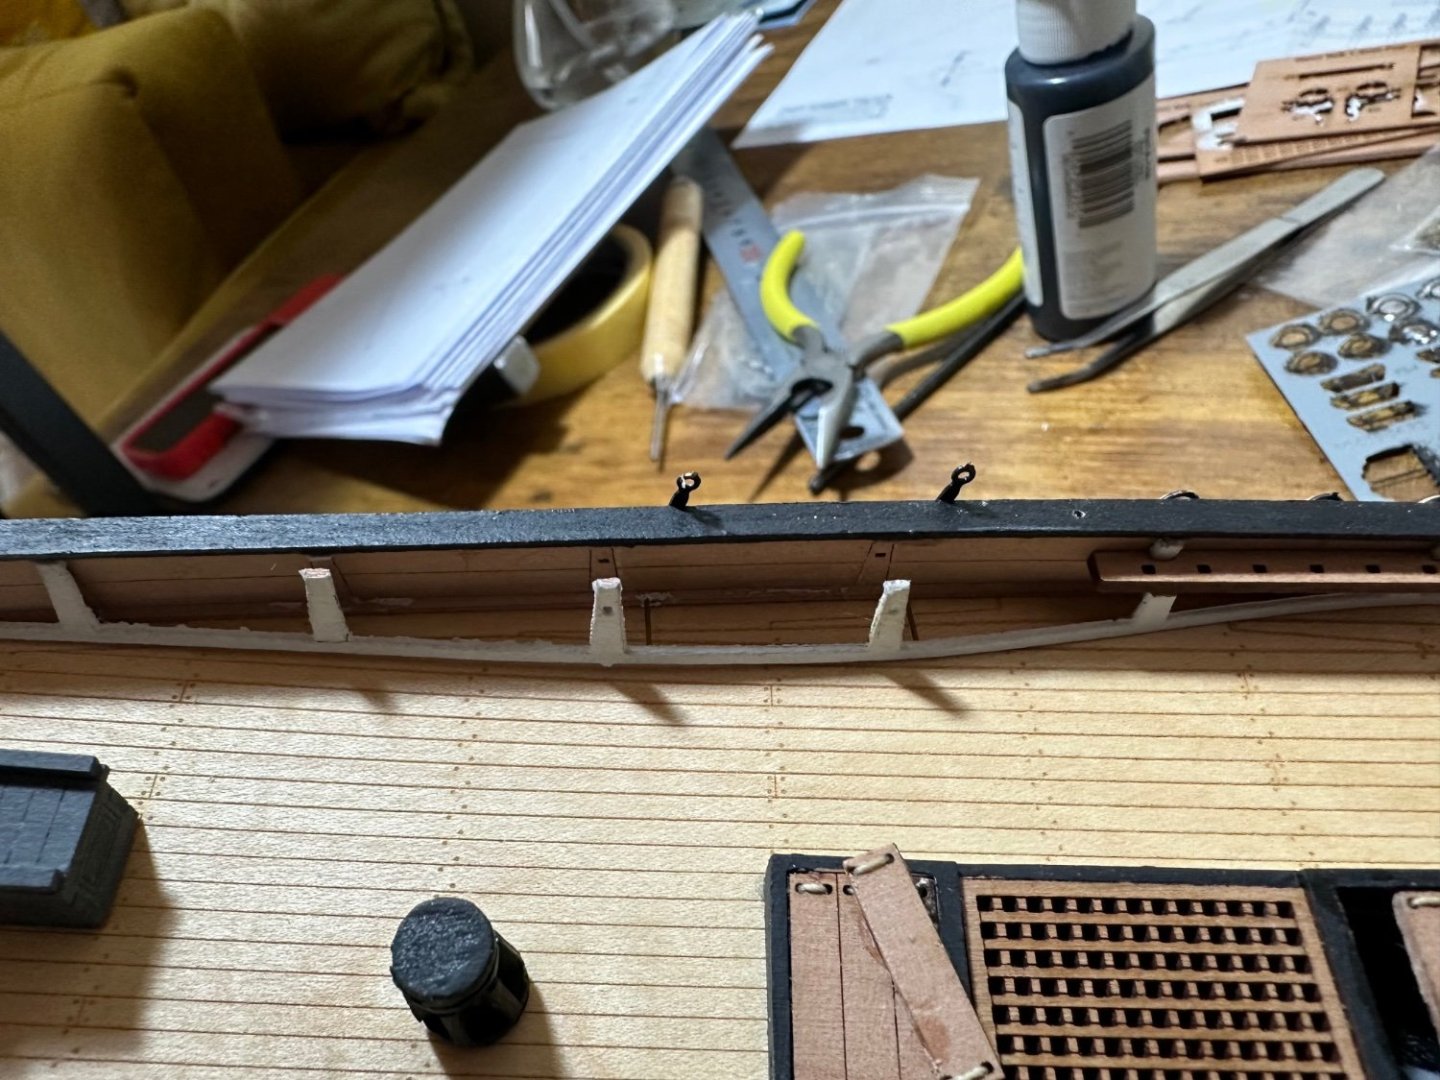
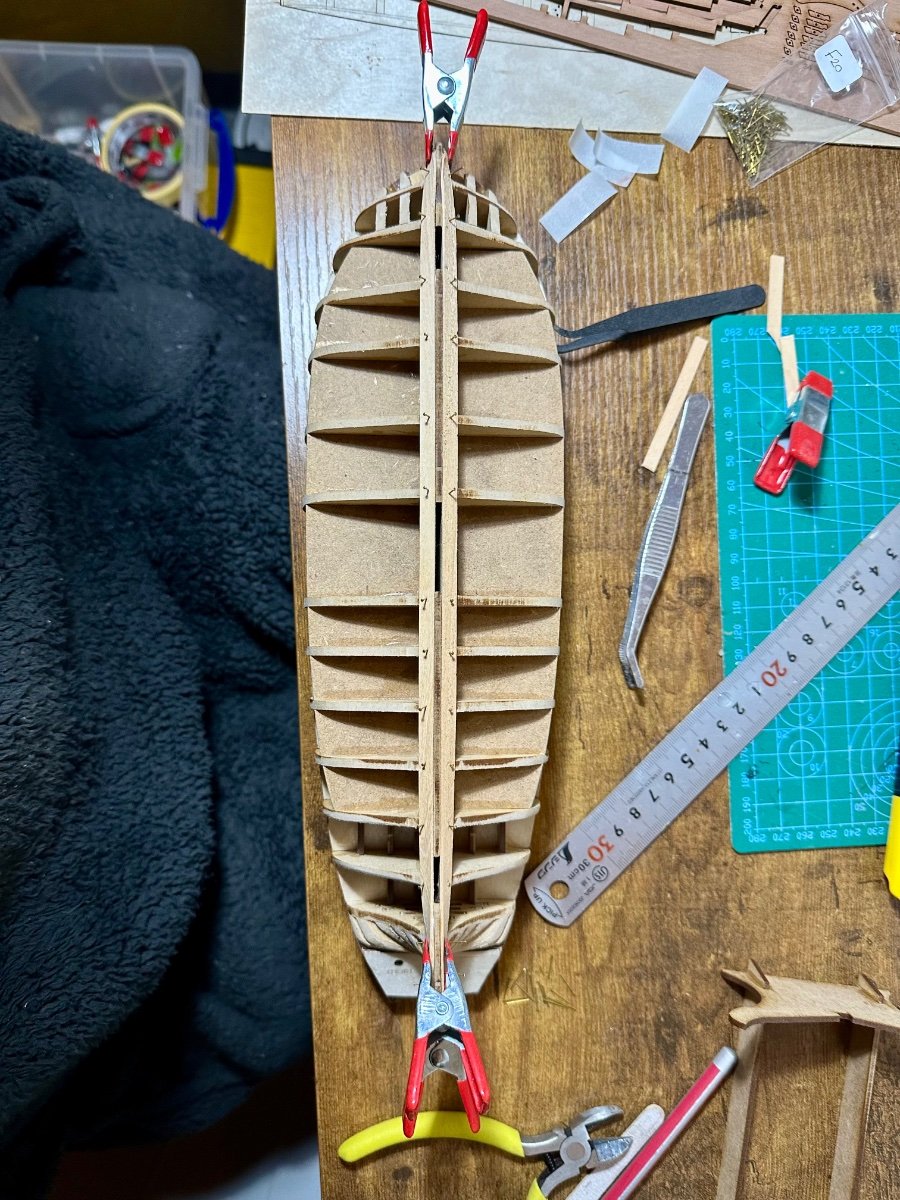
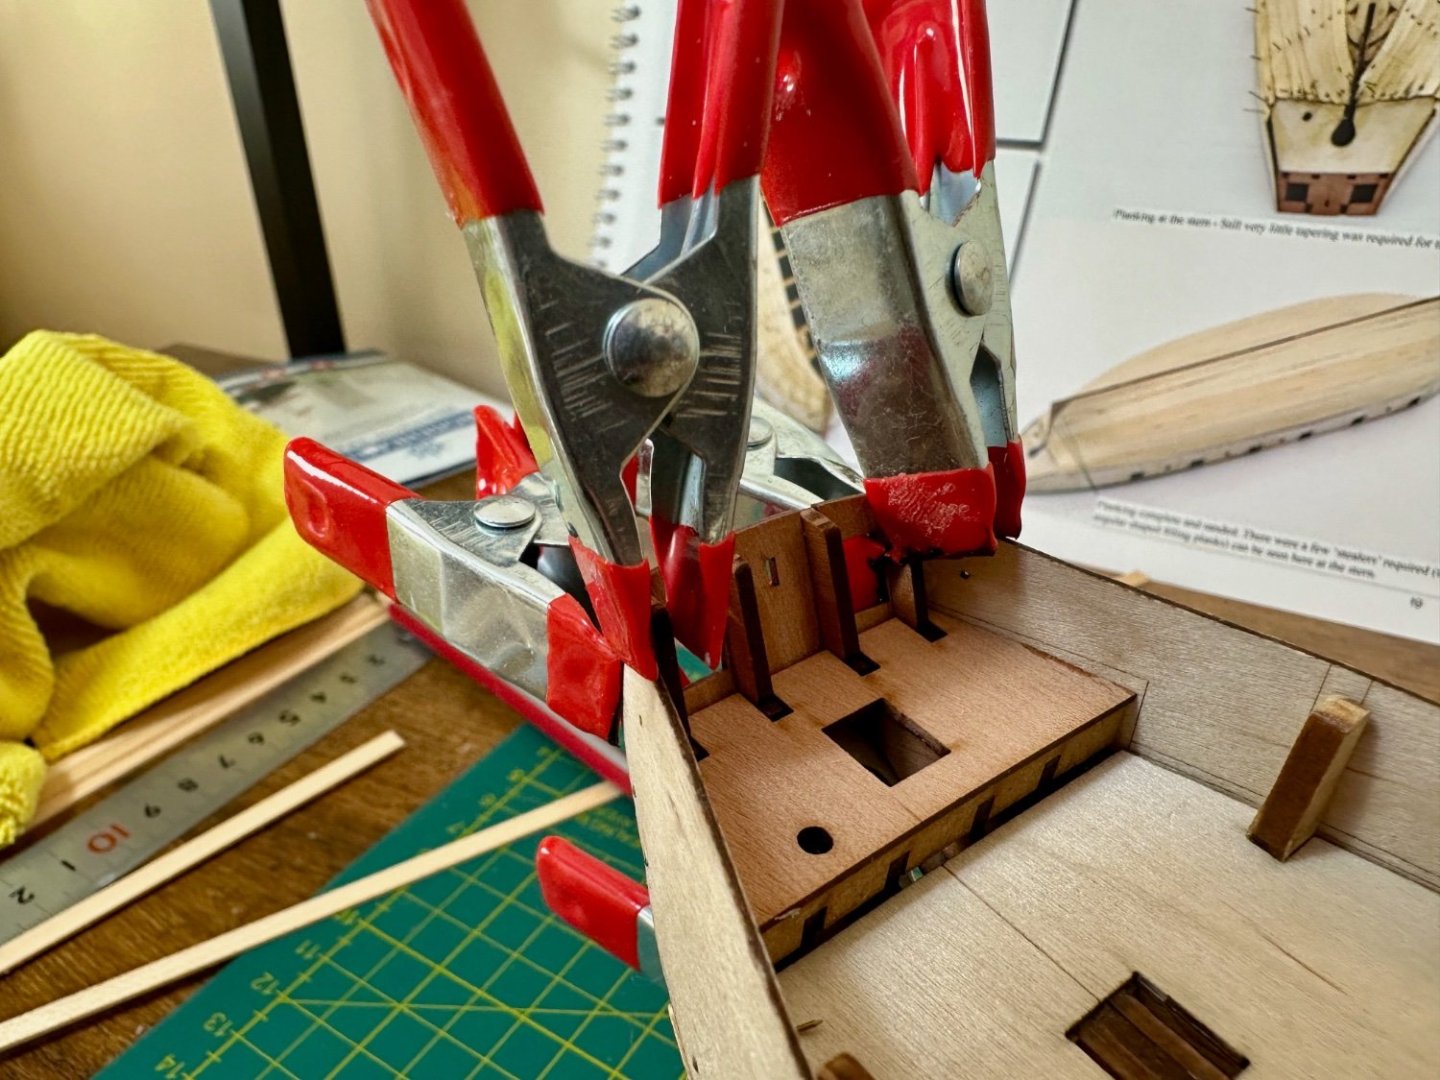
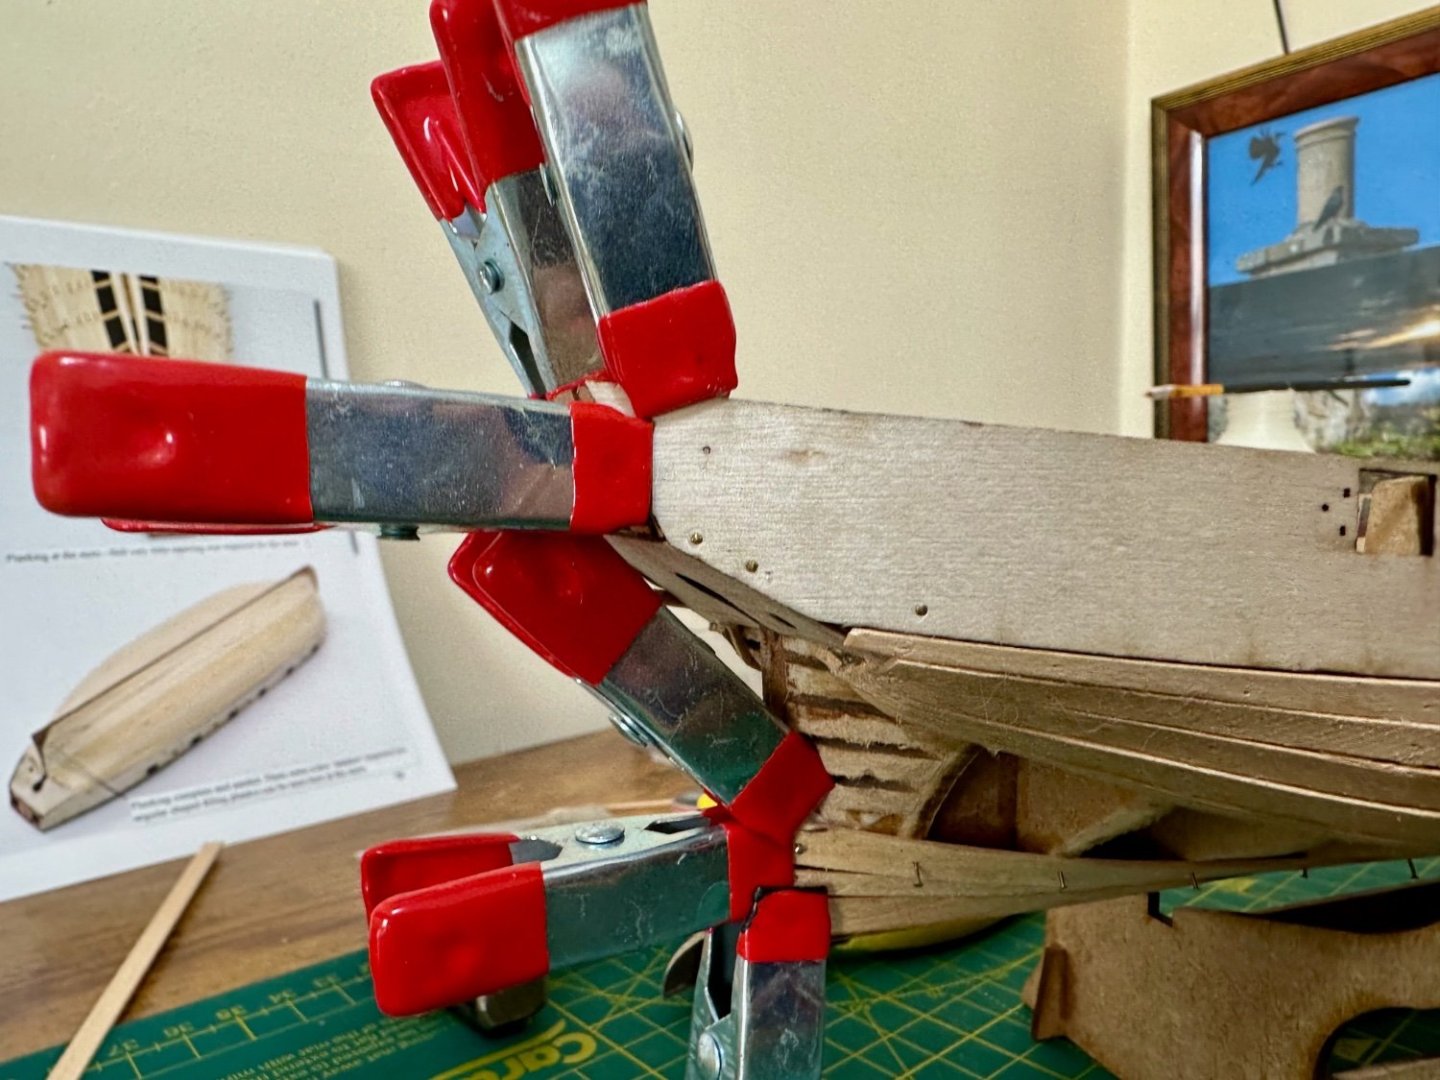
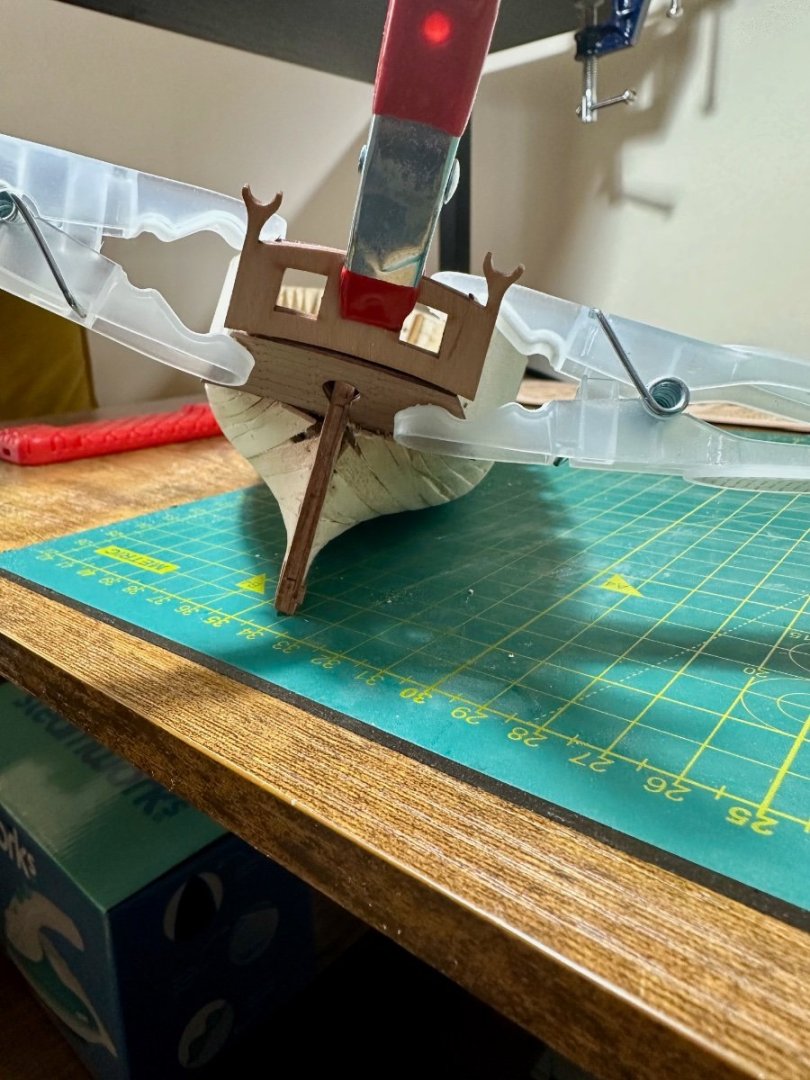
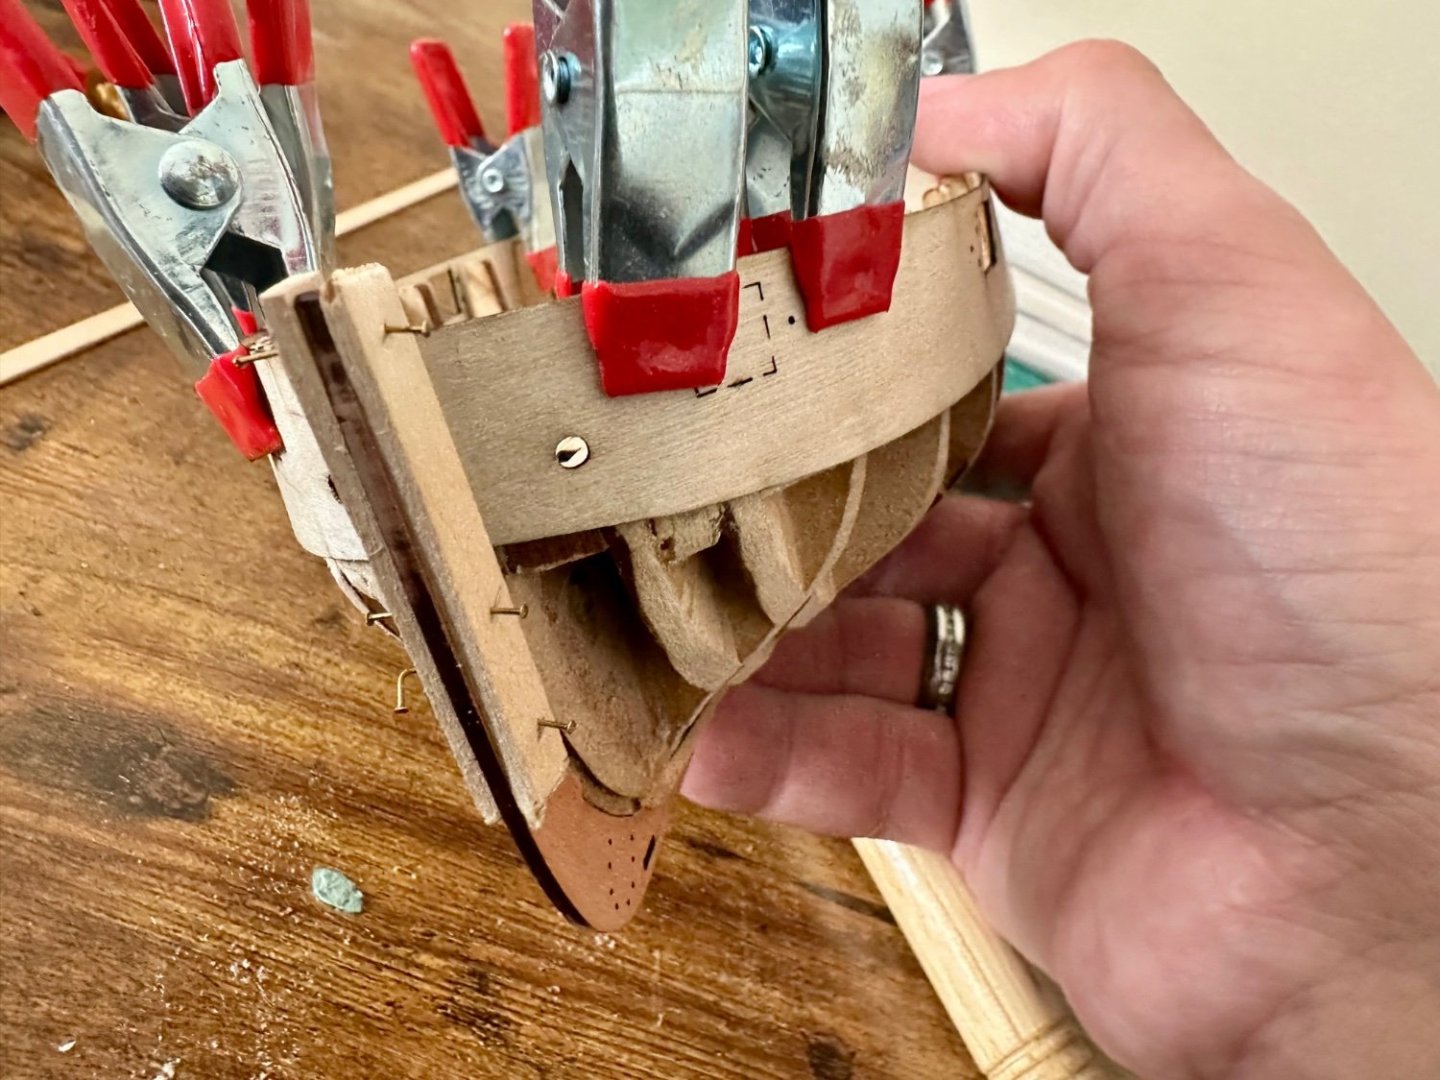
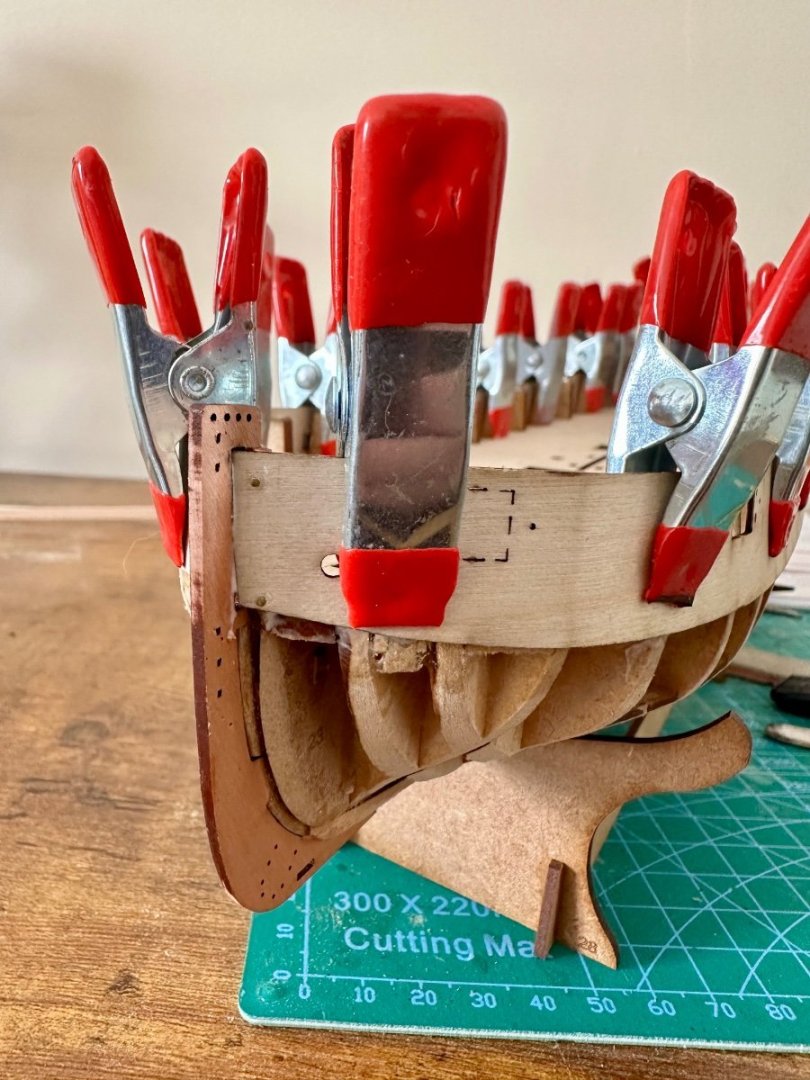
Short session today as needs to cure. Despite sanding getting the bow here to stay in place is tricky as the bending forces want it to leave at speed and the surface is very small, despite the design being excellent. Not referenced in the book but seen in the accompanying pictures I used some scrap wood to increase that area while getting everything lined up dry. Once all in placed a few carefully placed pins (which will be removed later) to keep everything together while gluing. Then most of the clips can be removed and the bulkhead glued (below the deck line) and clipped back while carefully observing the lower engraved line inside. Once all in place I removed the temporary stays and ran a glue line in and out of the bow and tidied up carefully so as not to effect subsequent parts. Lastly a glue line where possible under the deck. Again tidied afterward.


- 125 replies
-
- 6
-
-
- Trial
- Vanguard Models
- (and 1 more)
-
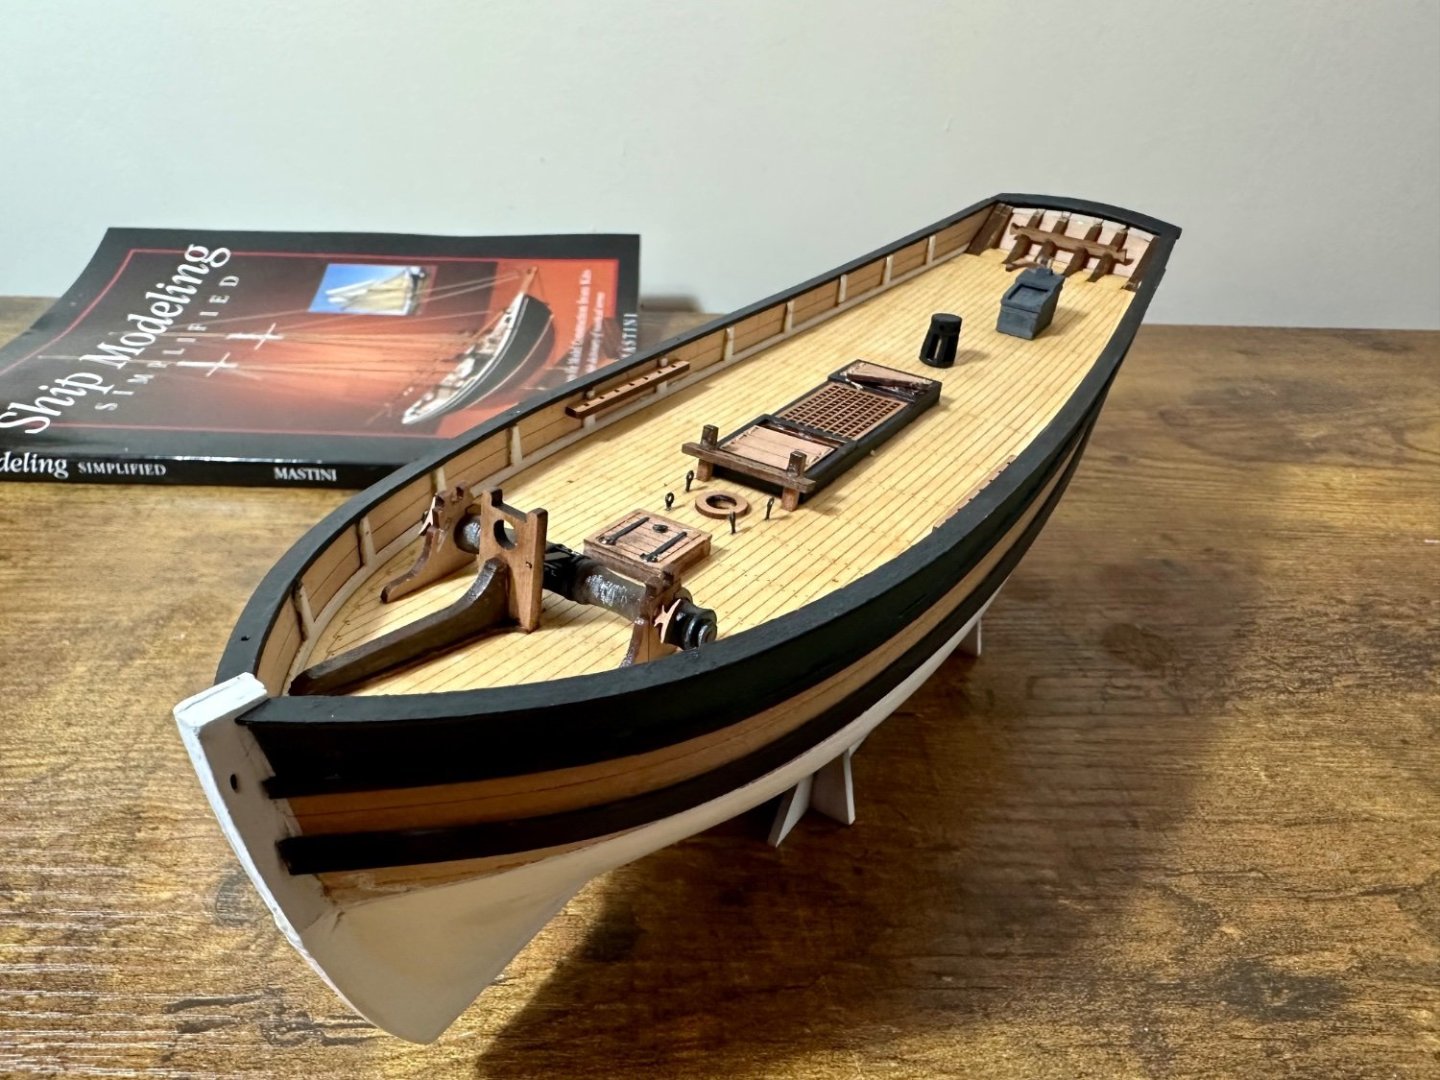
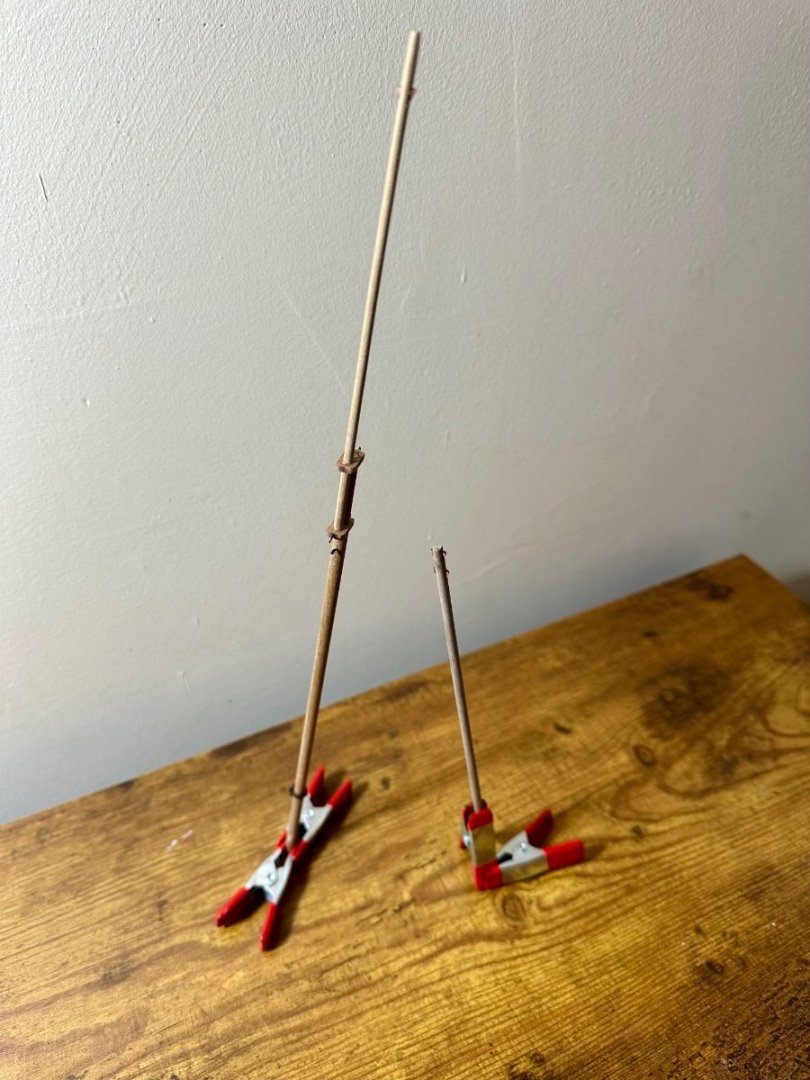
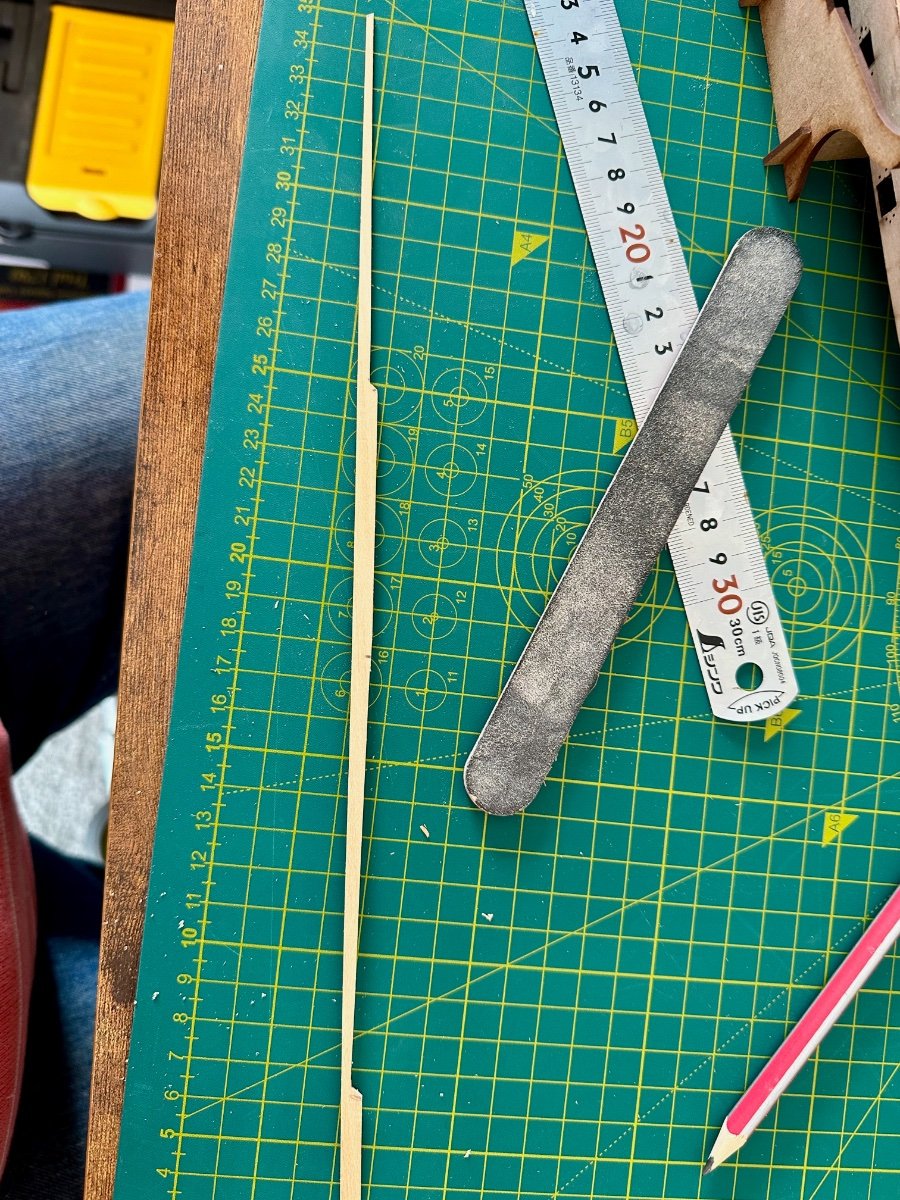
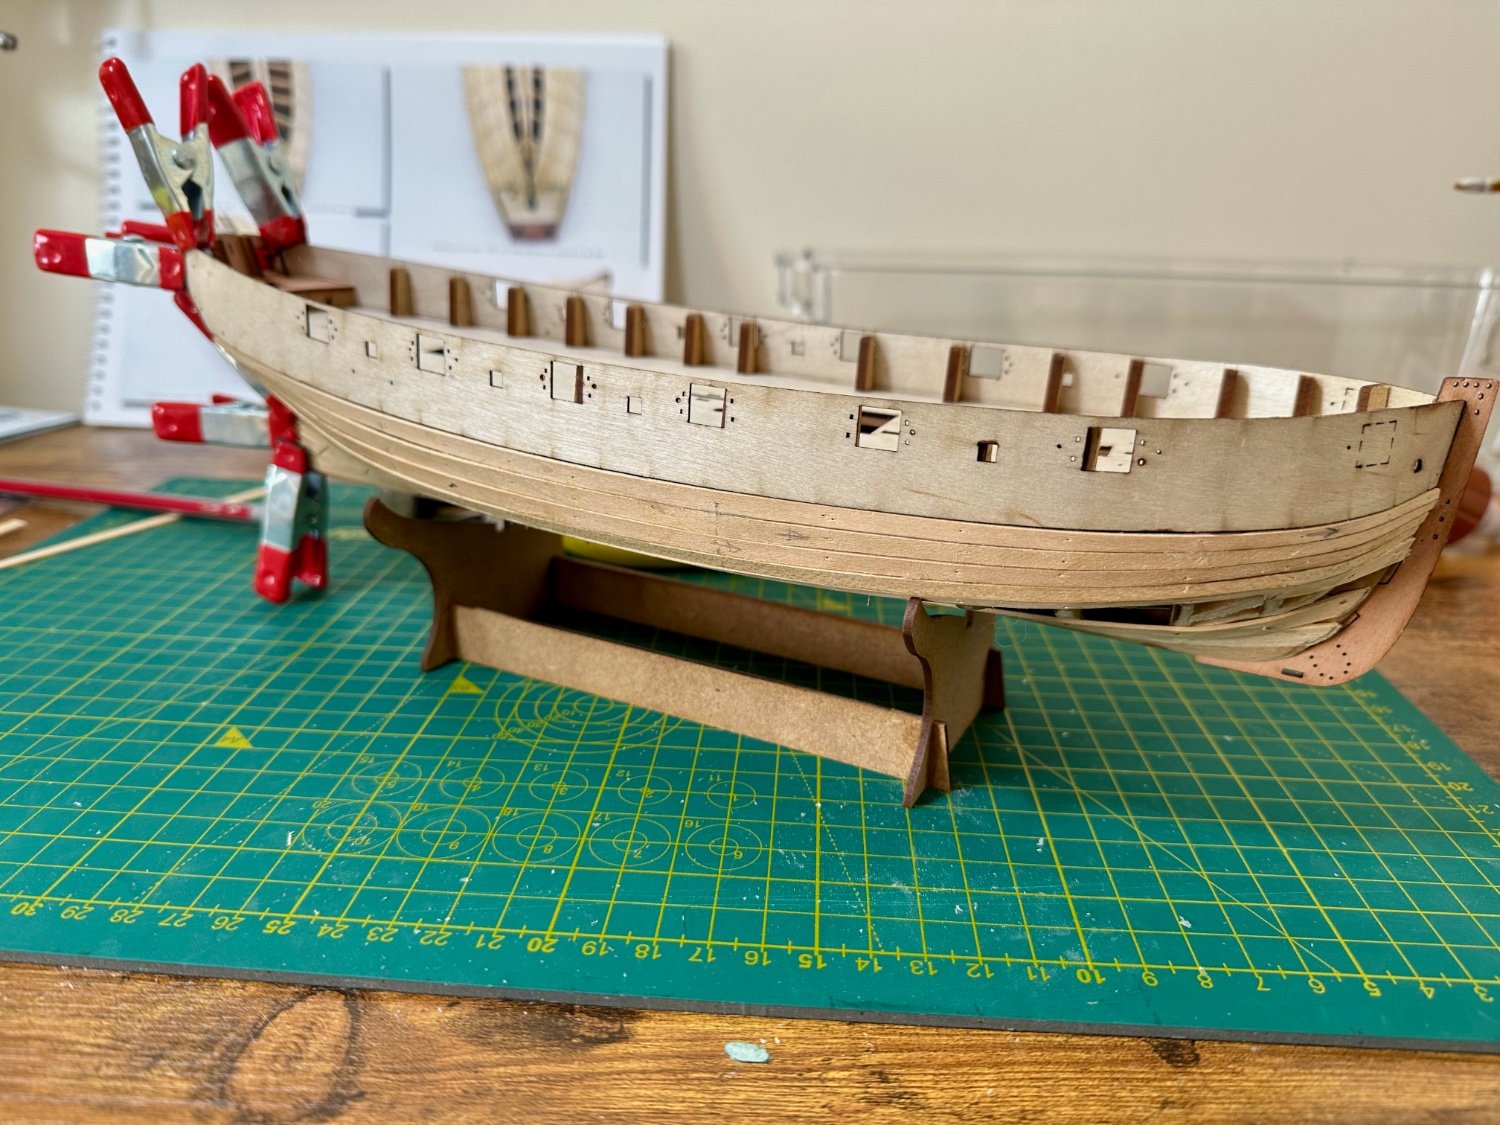
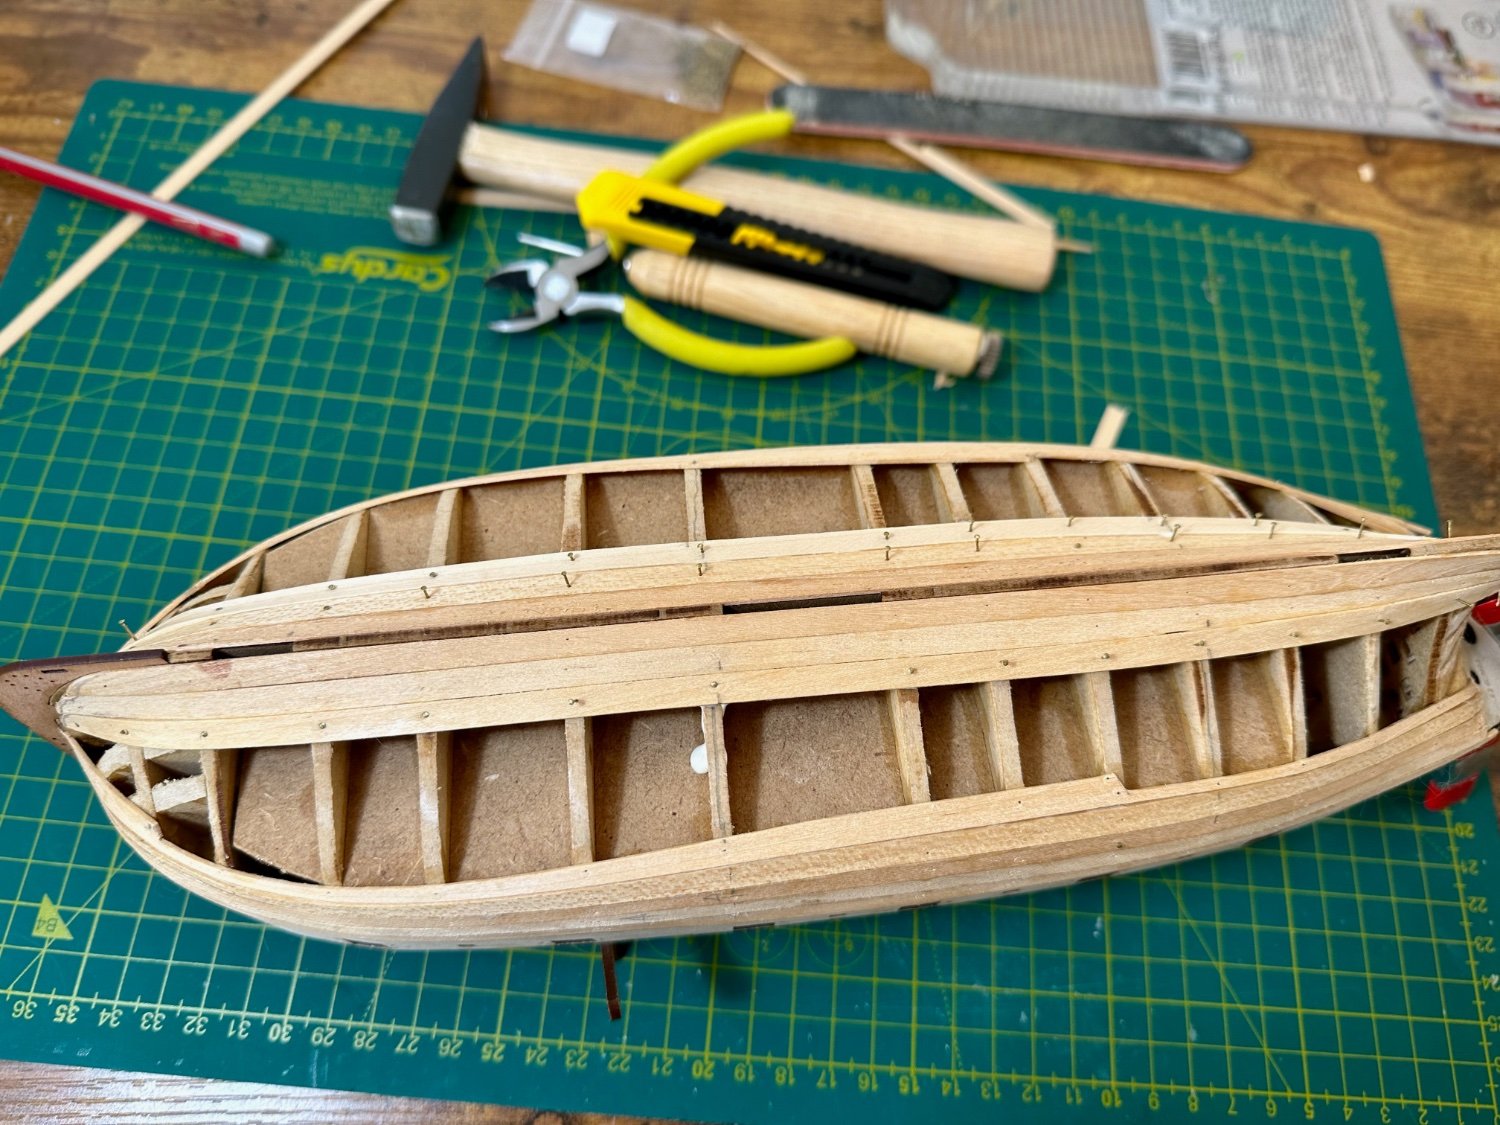
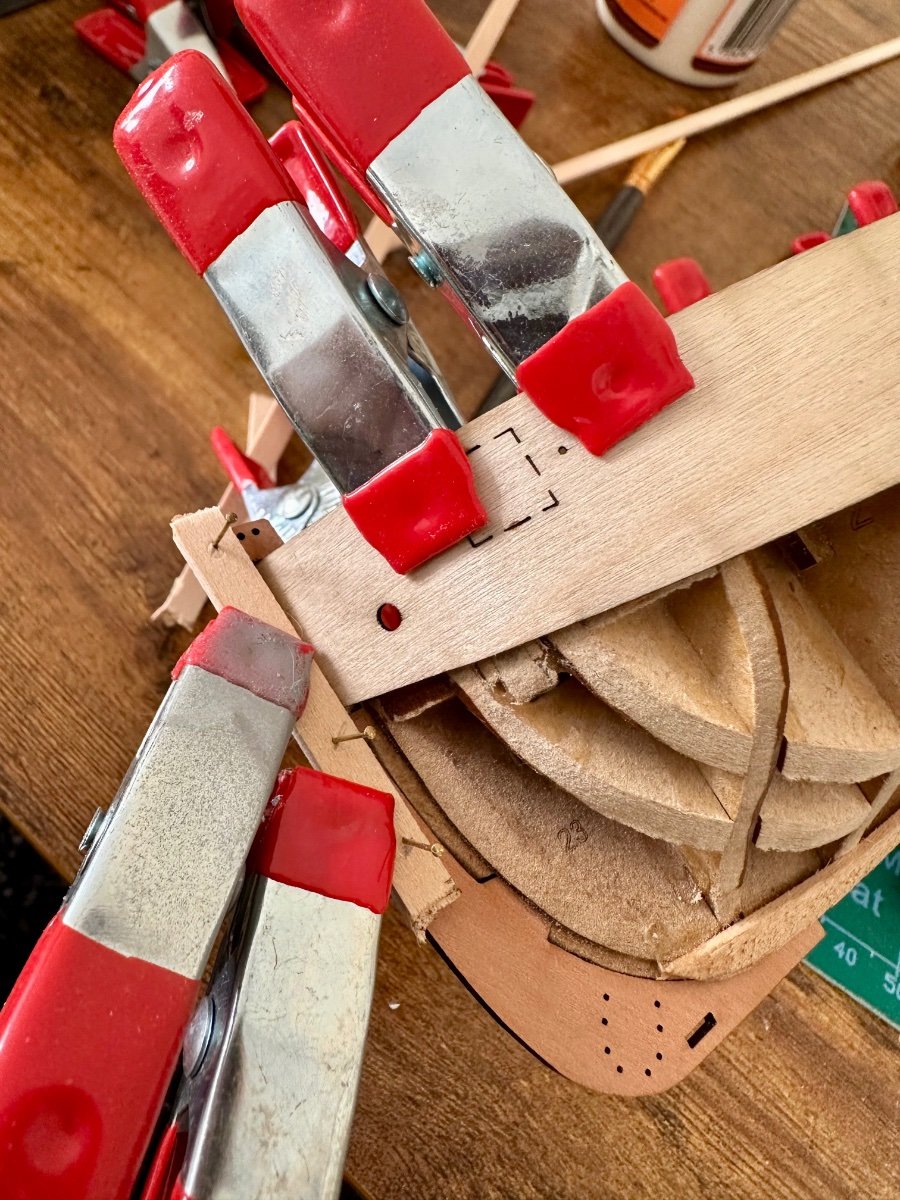
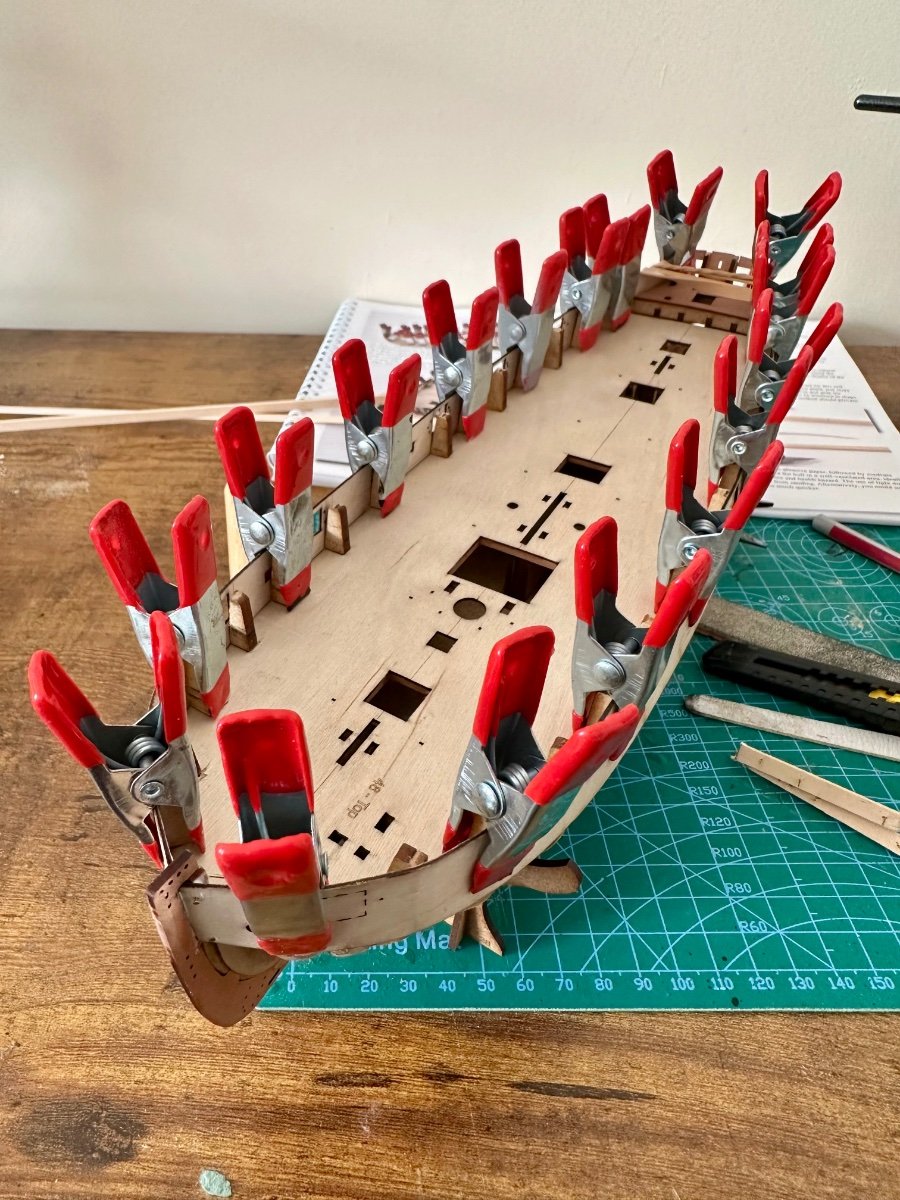
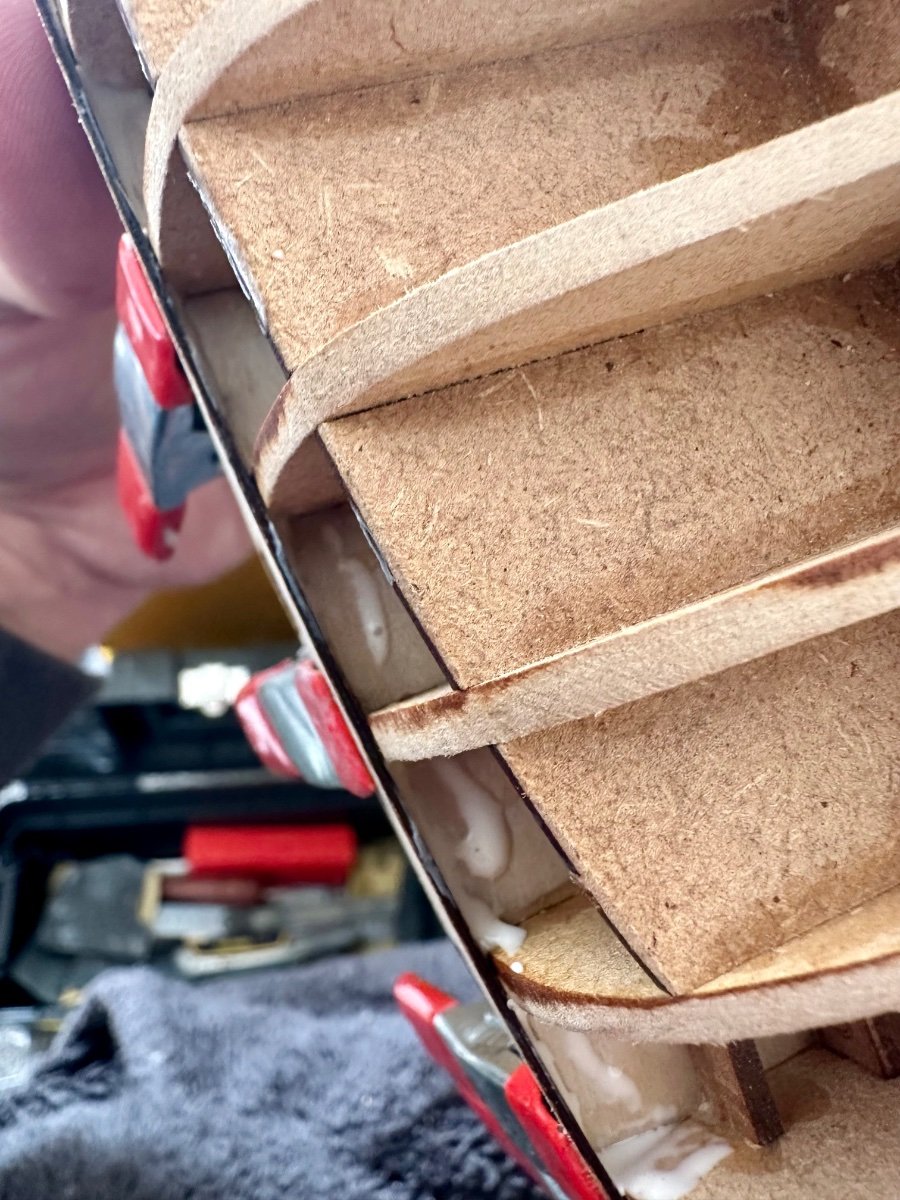
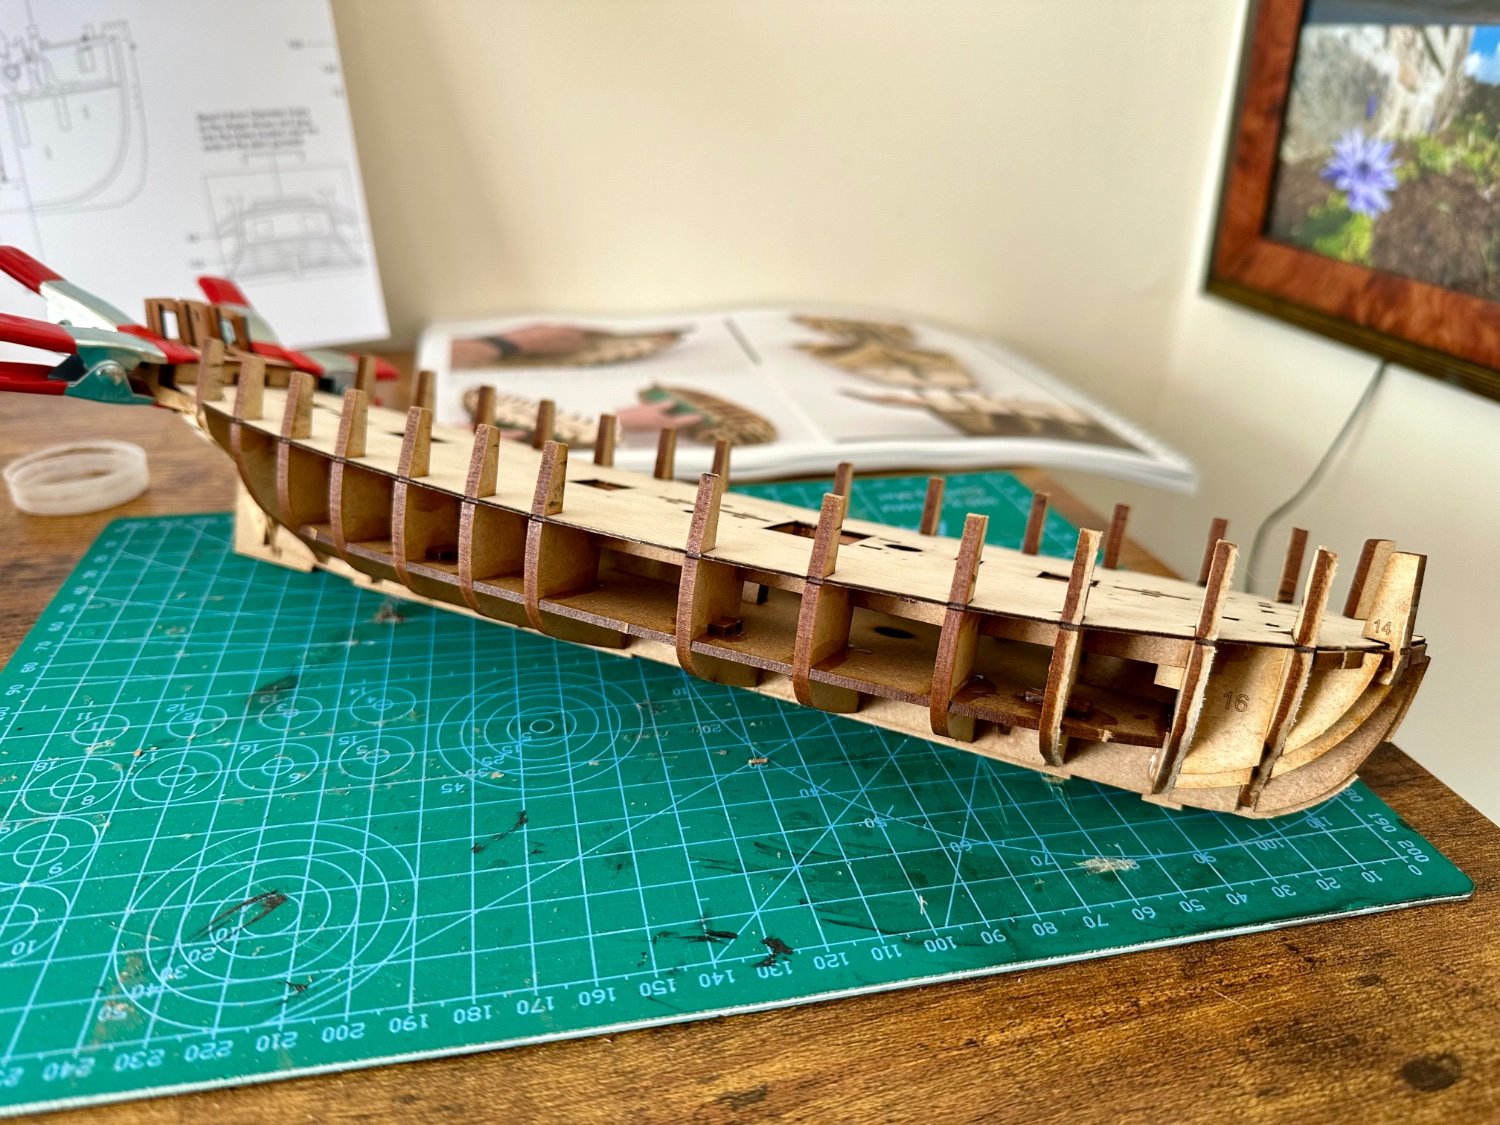
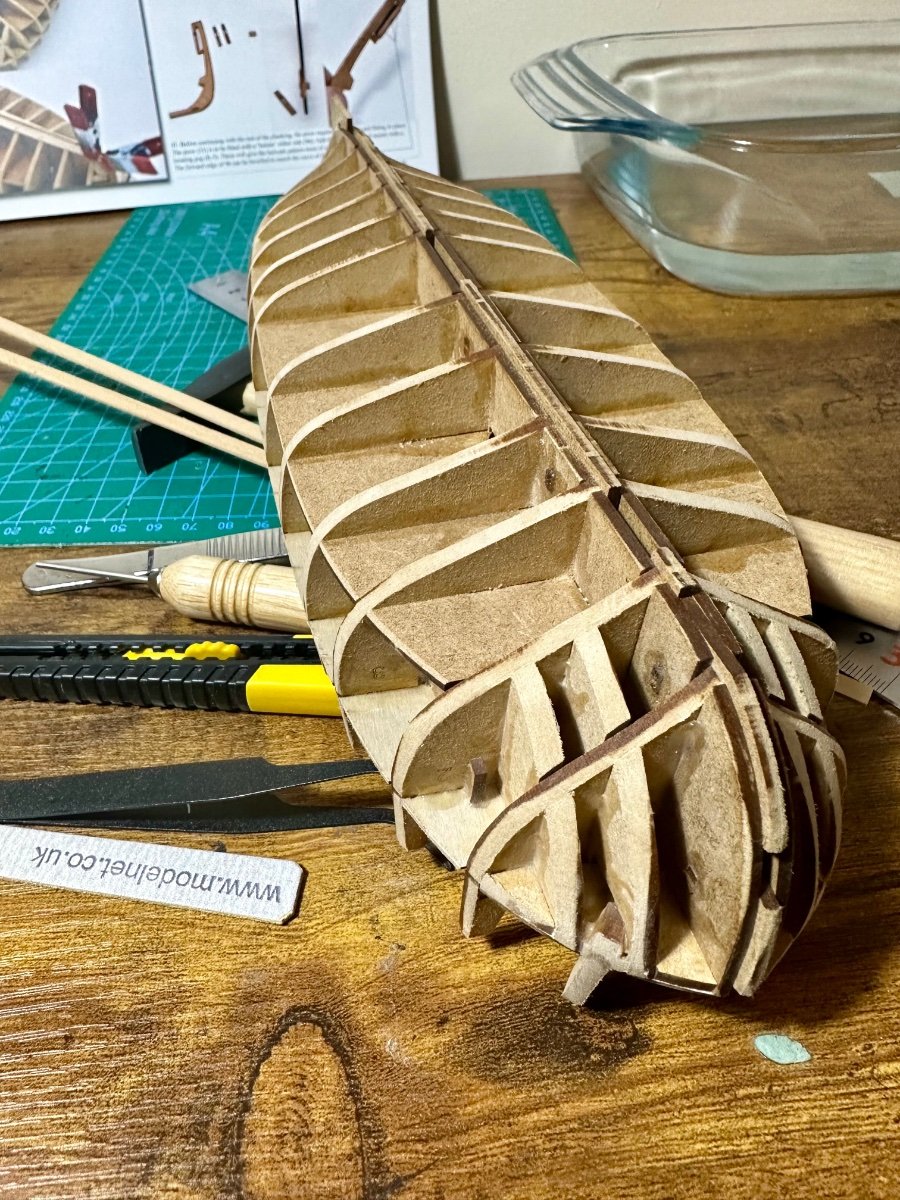
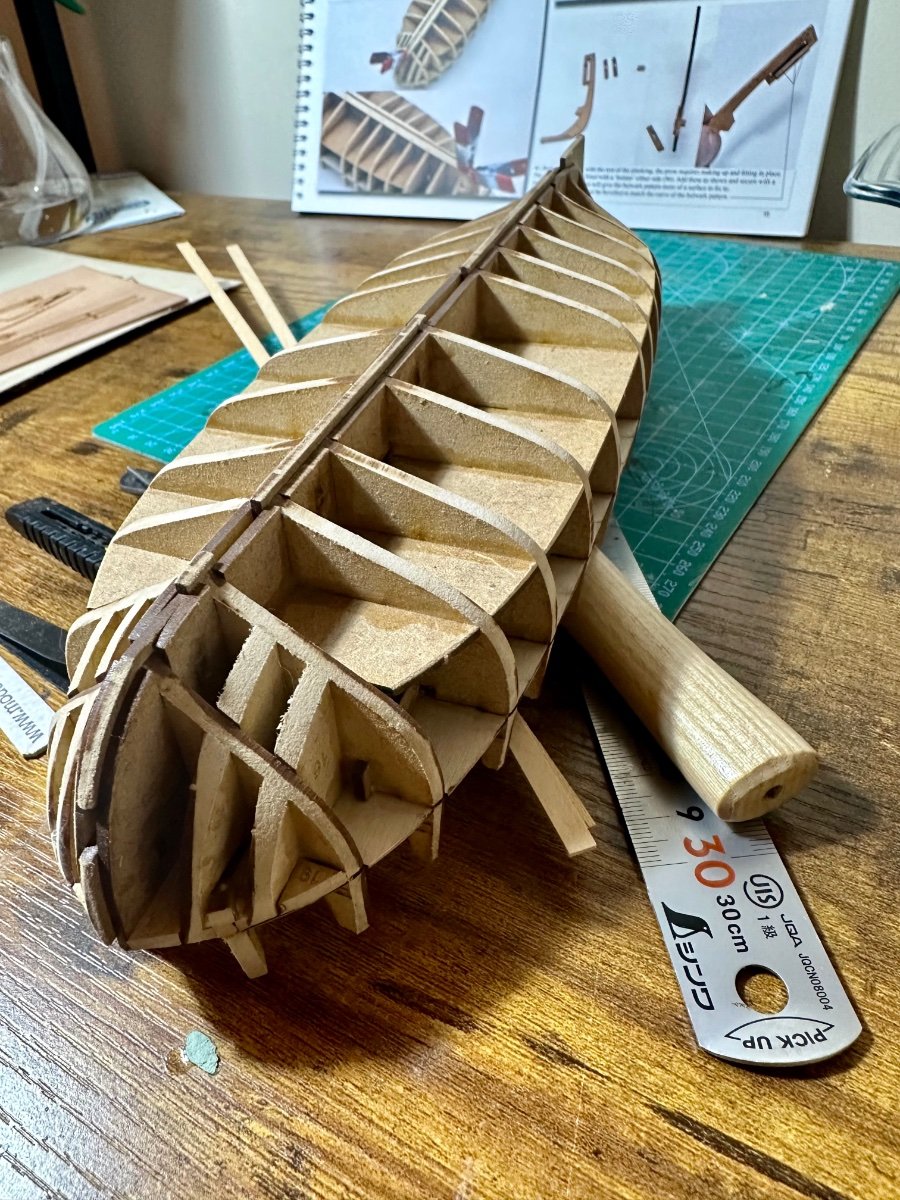
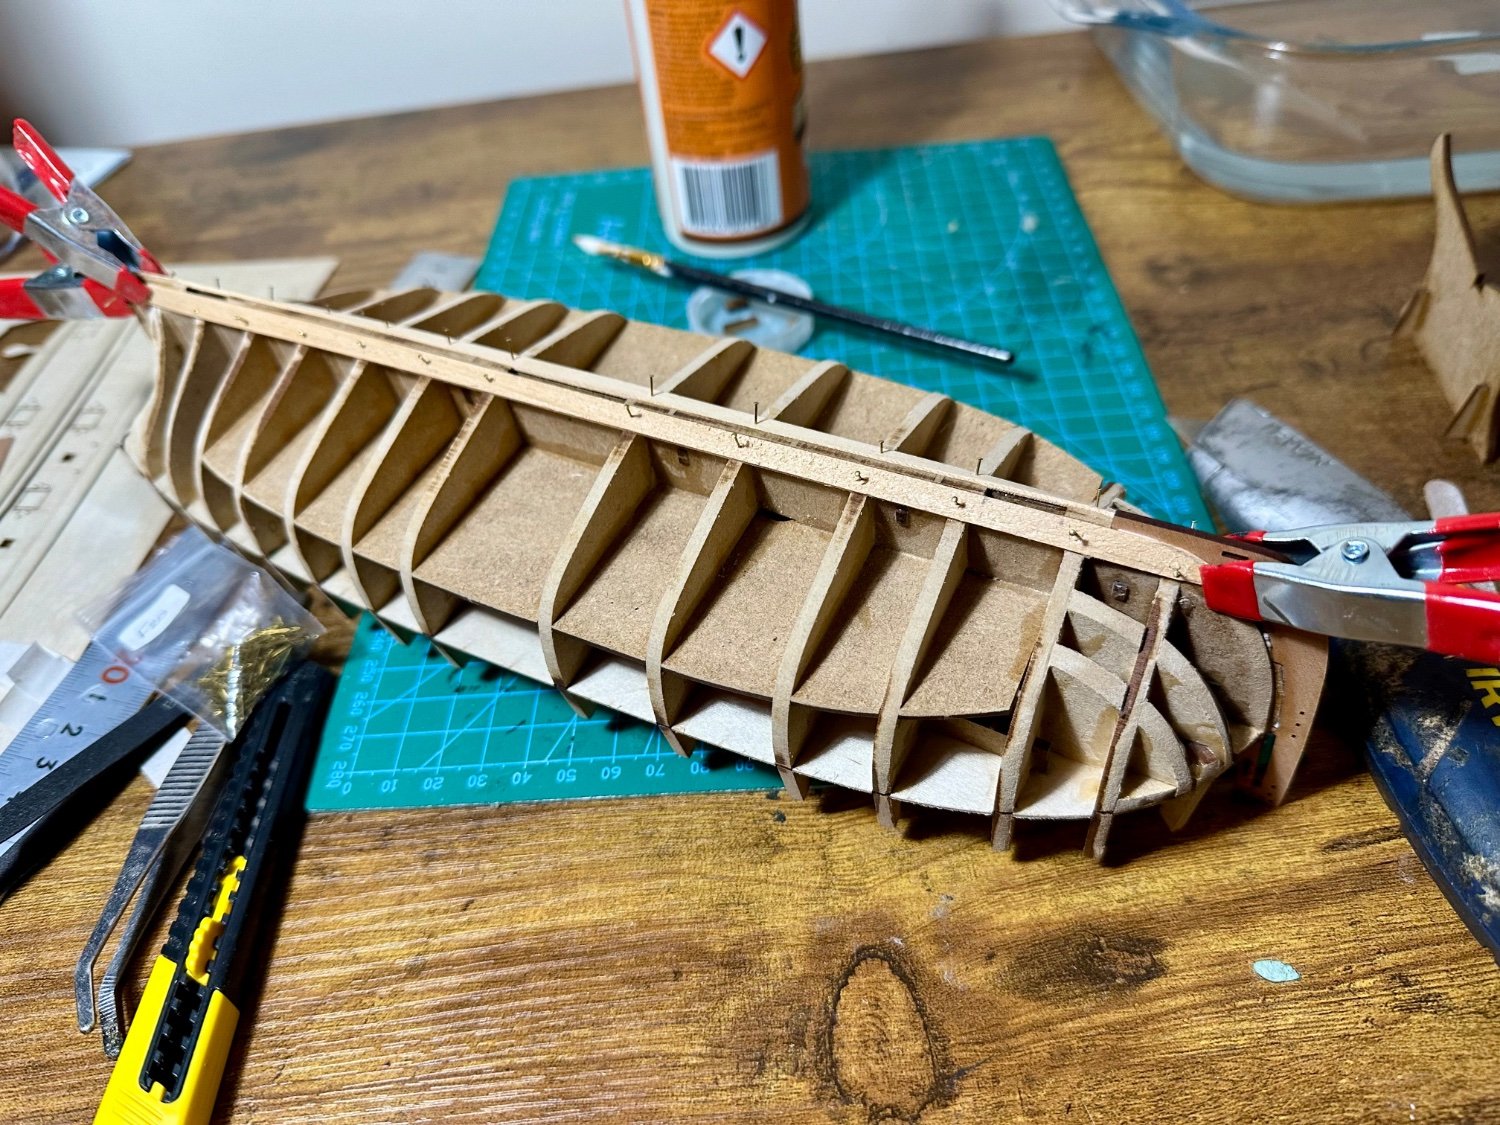
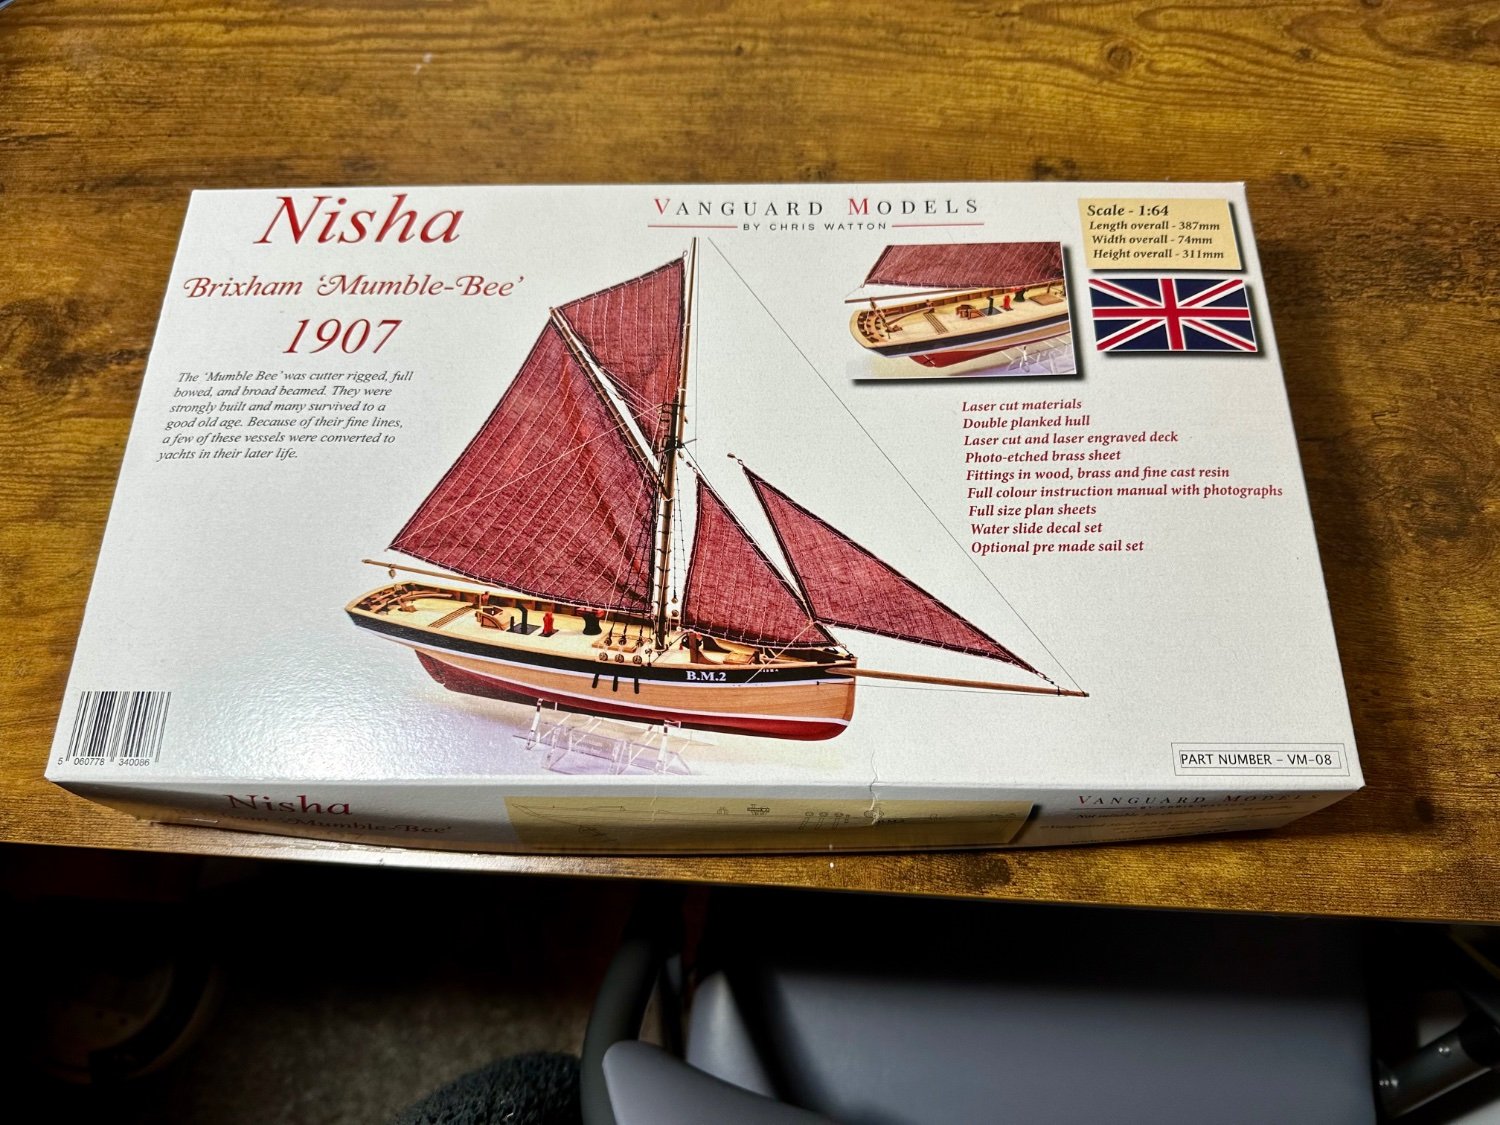
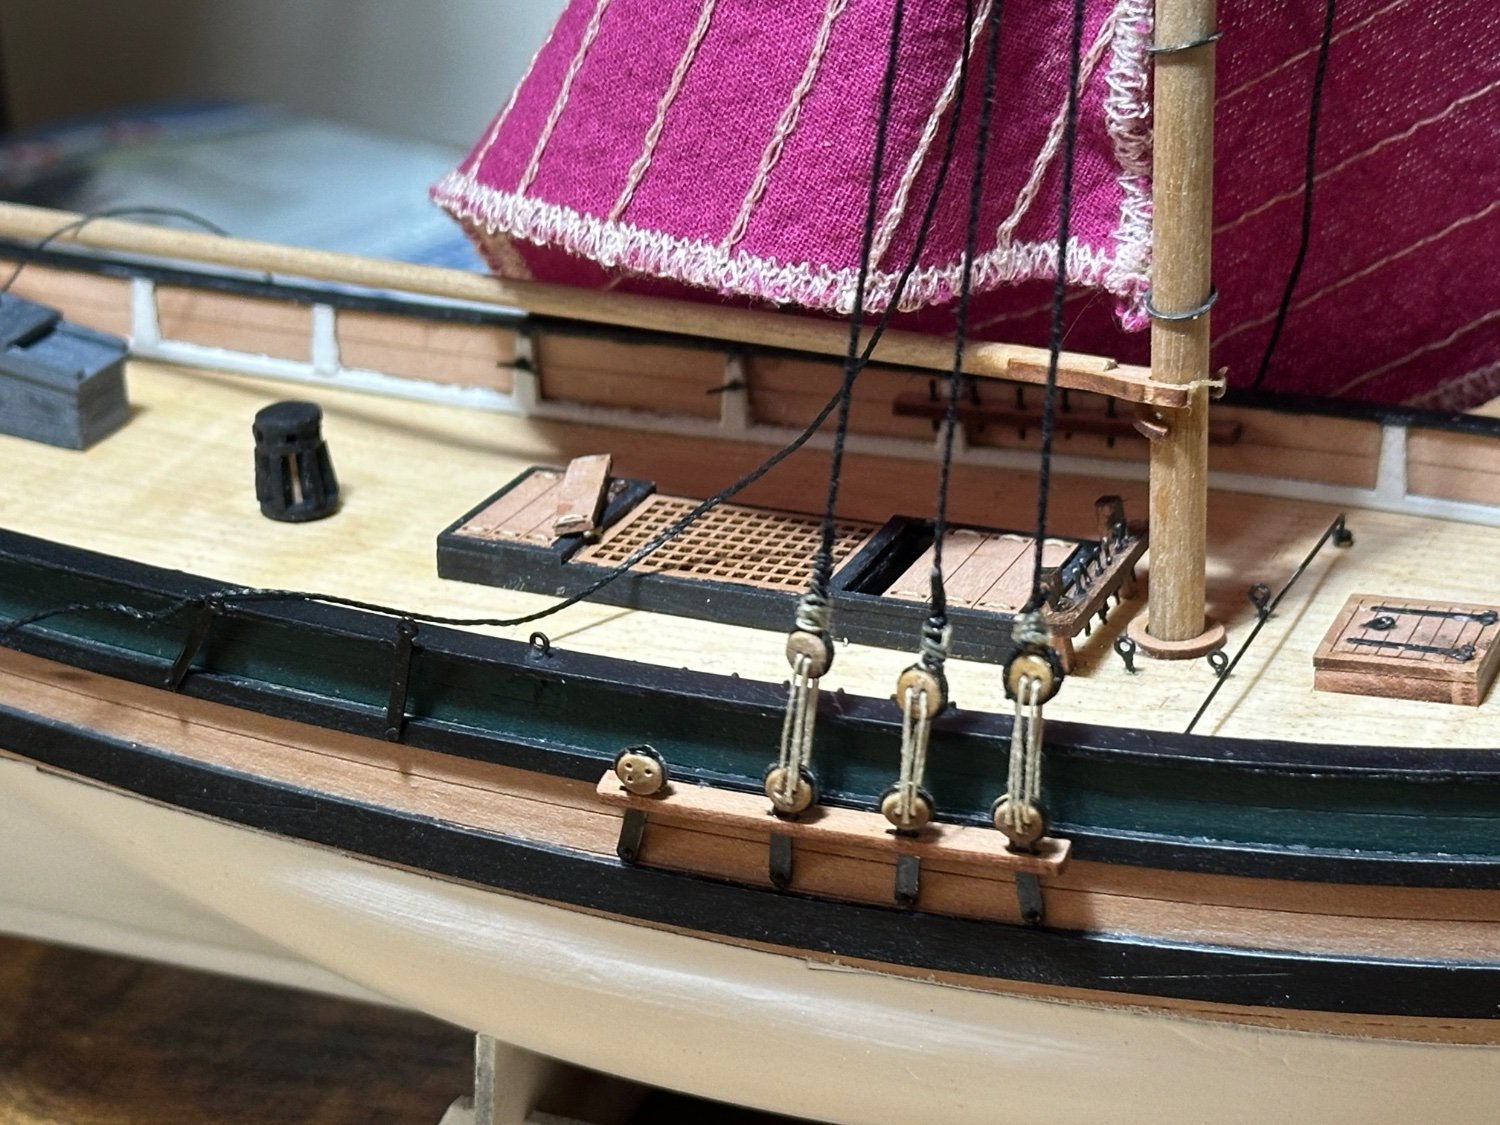
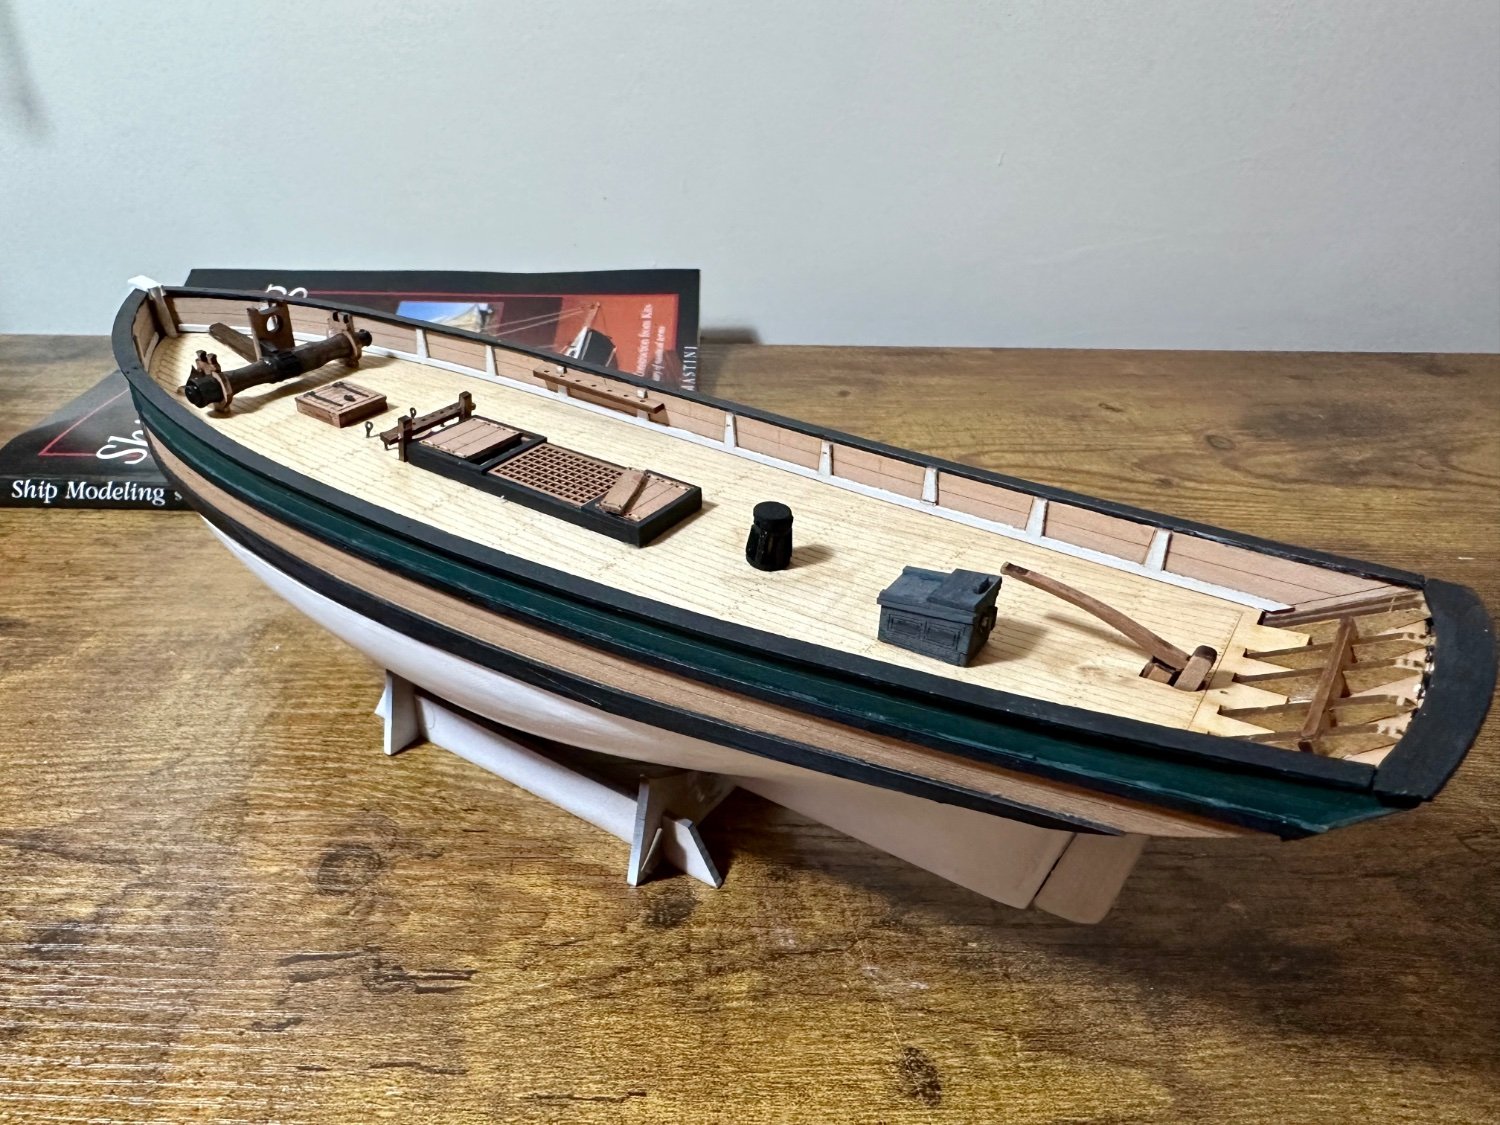
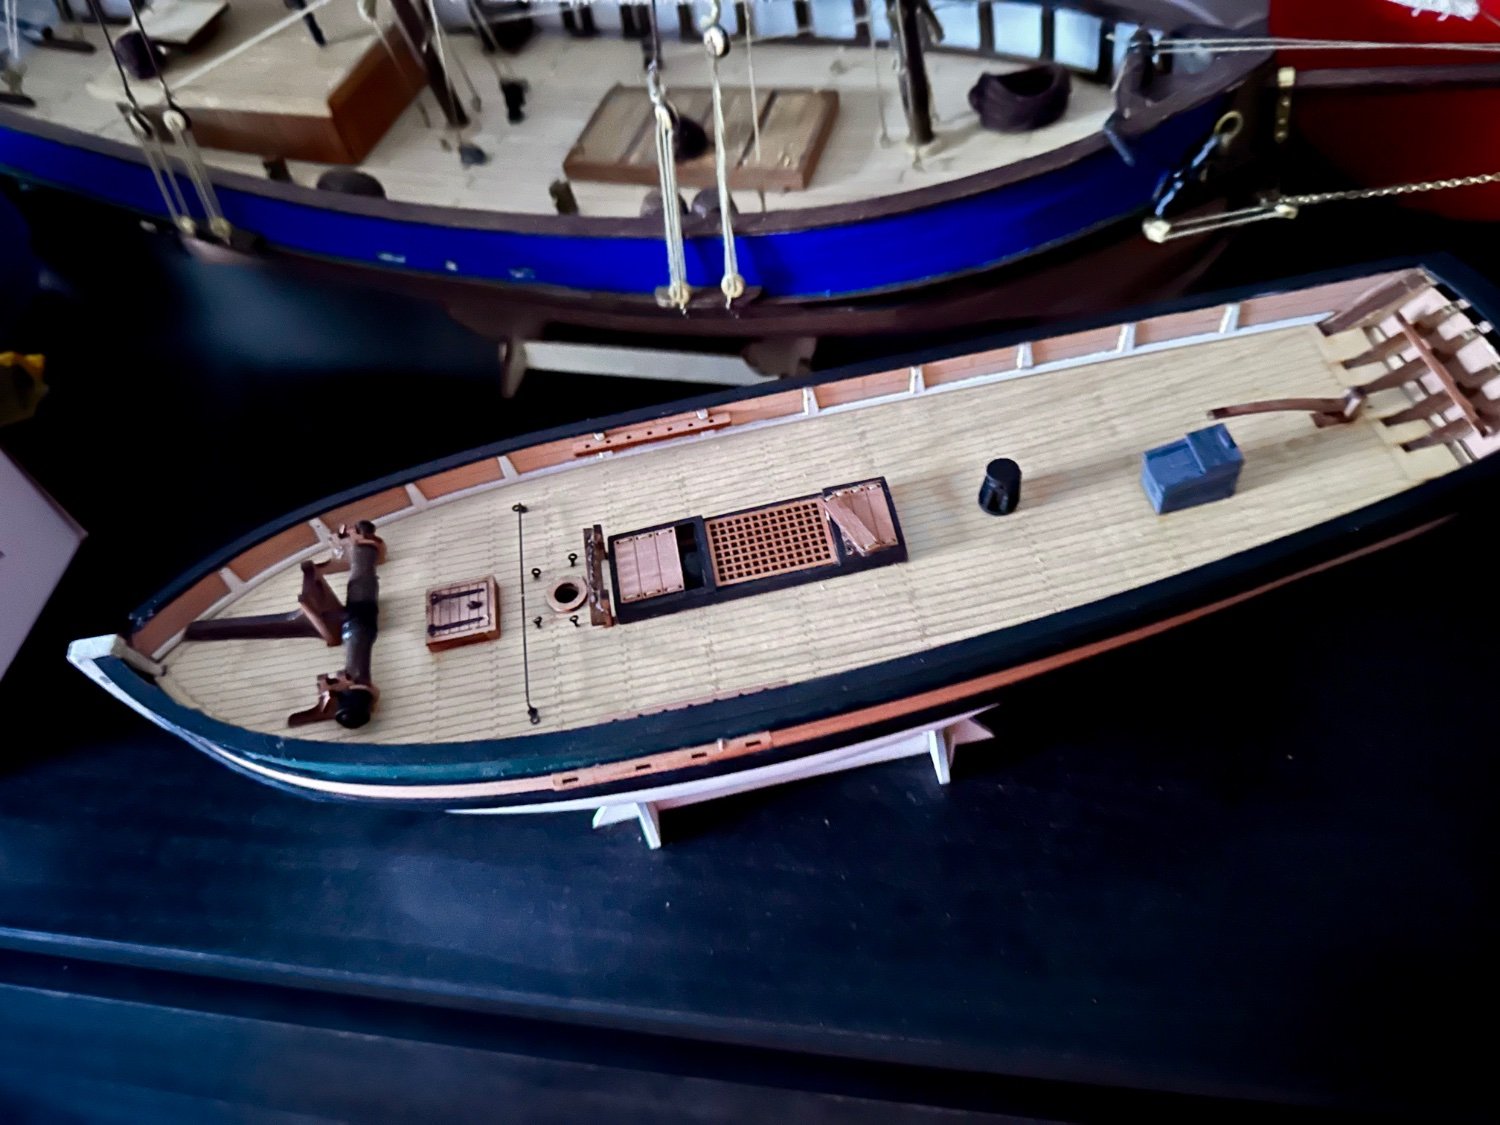
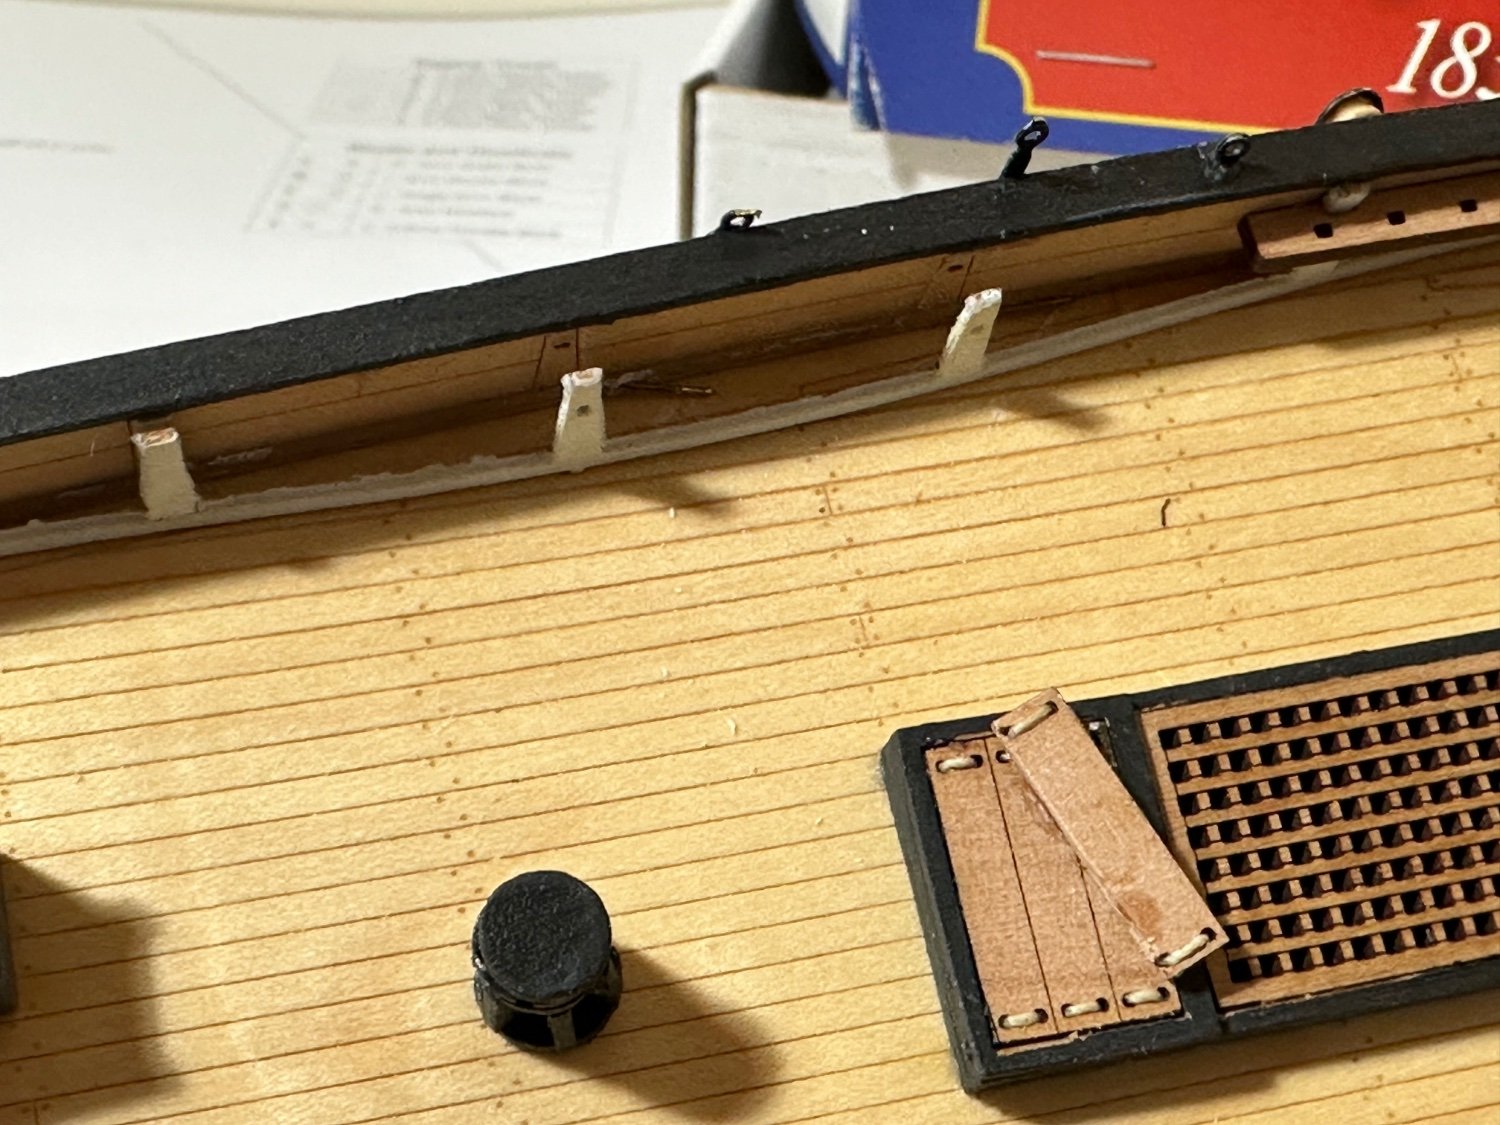
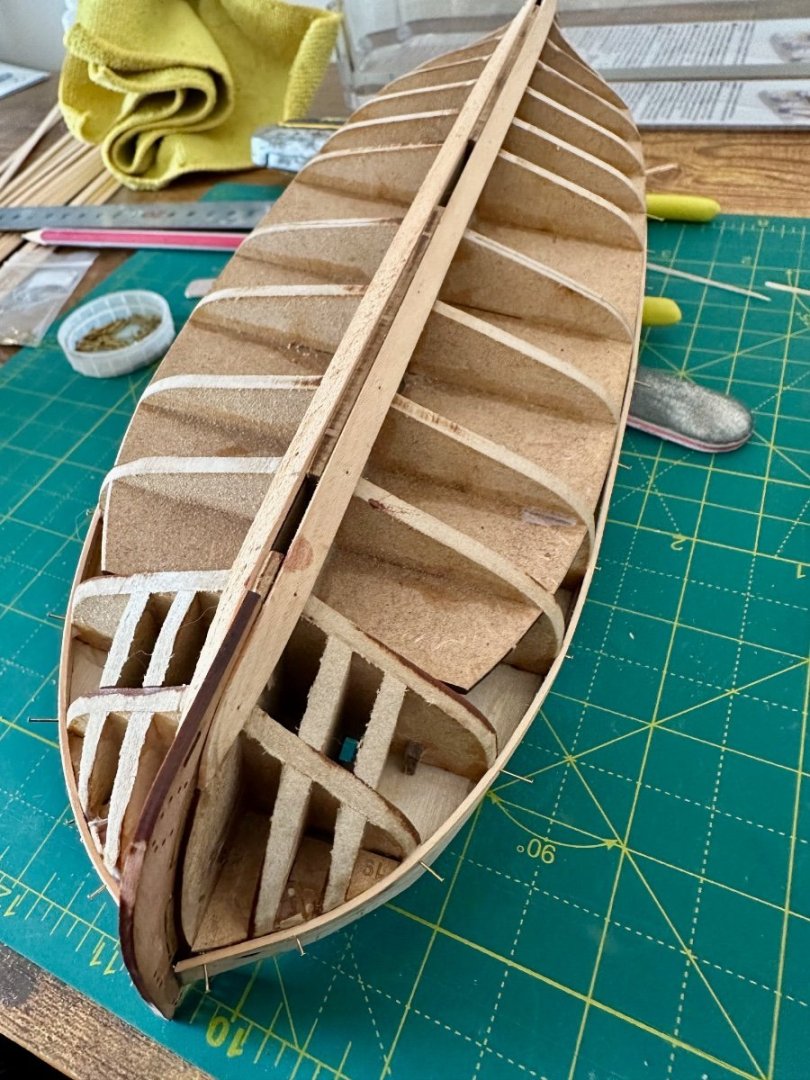
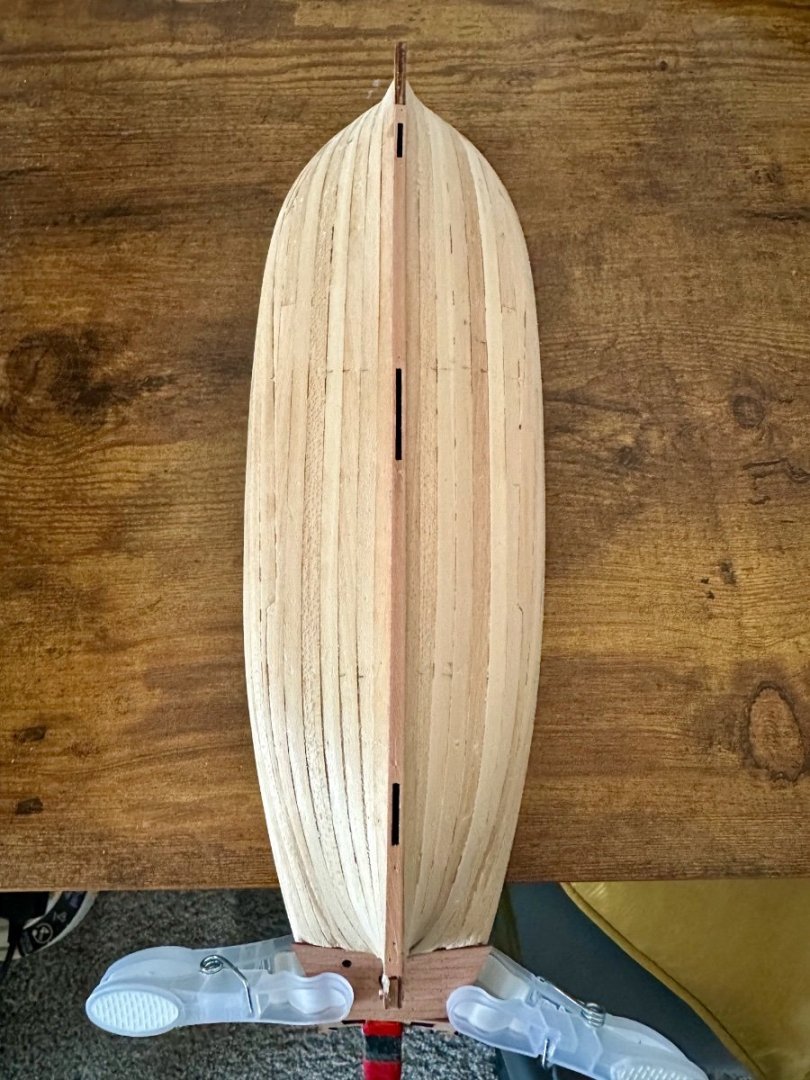
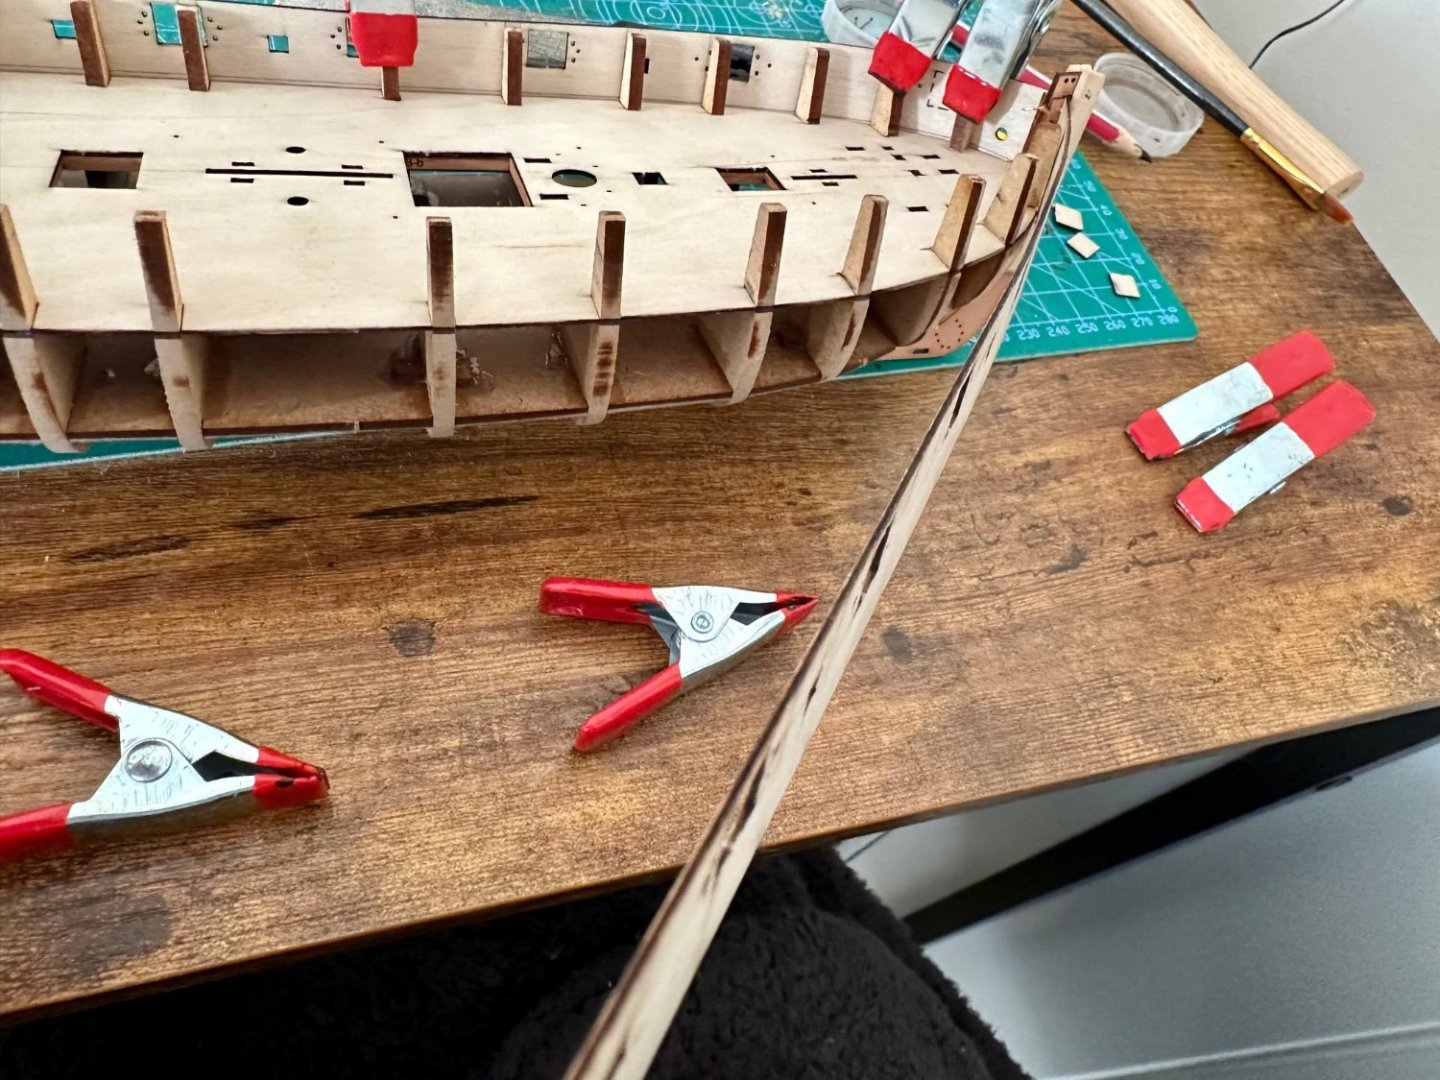
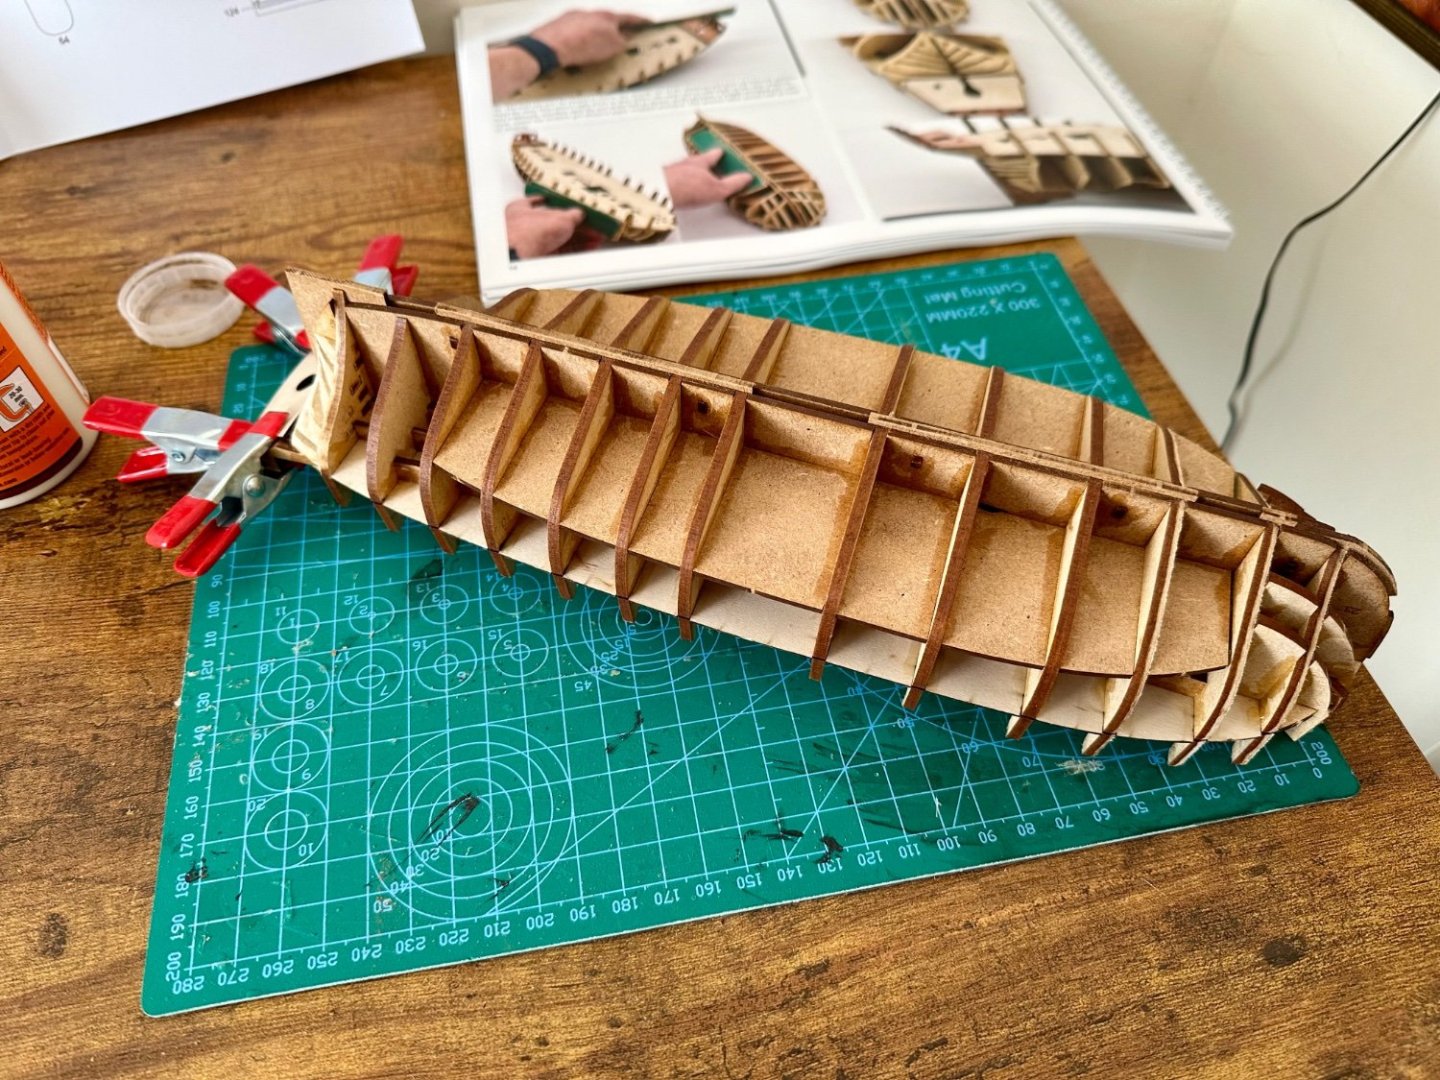
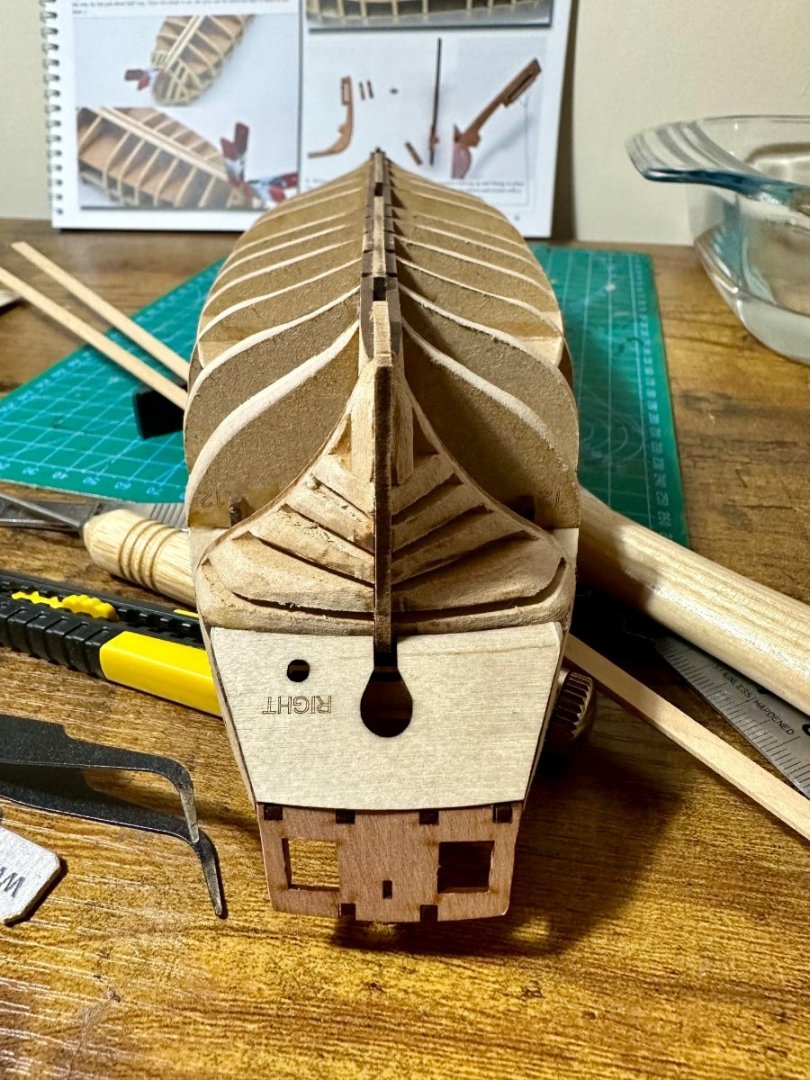
After the completion of Vanguard's Saucy Jack I said I'd move onto their Nisha. However I decided to push a little further and start HM Trial Cutter, also from Vanguard. I was unsure whether to do another log but obviously changed my mind there too and here we are. As I was undecided I had made a start and got here: As usual the frame was an excellent, careful fit. The stern is strengthened early on which is an improvement on Saucy Jack that stayed vulnerable for a while and needed repair. Only problem so far was breaking one of the tabs (numbered 14 here) that are added separately to allow the false deck to be added. These are weak by design as they have to be snipped off later. An easy fix. So onto fairing with a mix of Dremel and nail file. Paid a lot more attention than last time to try and avoid mis-shaping. Happier but guess I'll ultimately have to wait and see. Next to the first row of planking which involves quite a twist at bow and stern. Easily dealt with in soaking, pins and PVA then a clamp until cured. Lastly for now build up and fit the prow. The usual Vanguard locating pins help hugely.


- 125 replies
-
- 9
-
-
- Trial
- Vanguard Models
- (and 1 more)
-
Might have to hold of and get Sherborne rather than Alert as the build looks more akin to your more recent kits? Looks great and thank you, your kits are so much better than anything this side of the pond I've seen. Can only think of one other I'd buy from much further away .
-
Thanks Dan. They really are great kits compared to any I've seen and well worth the premium. Plus having the maker available to help is invaluable. I actually changed my mind and start Trial the other day. Maybe I'll start a log a little late.
-
Thanks Andrew I've enjoyed it. Can't decide whether to do another log or not.
-
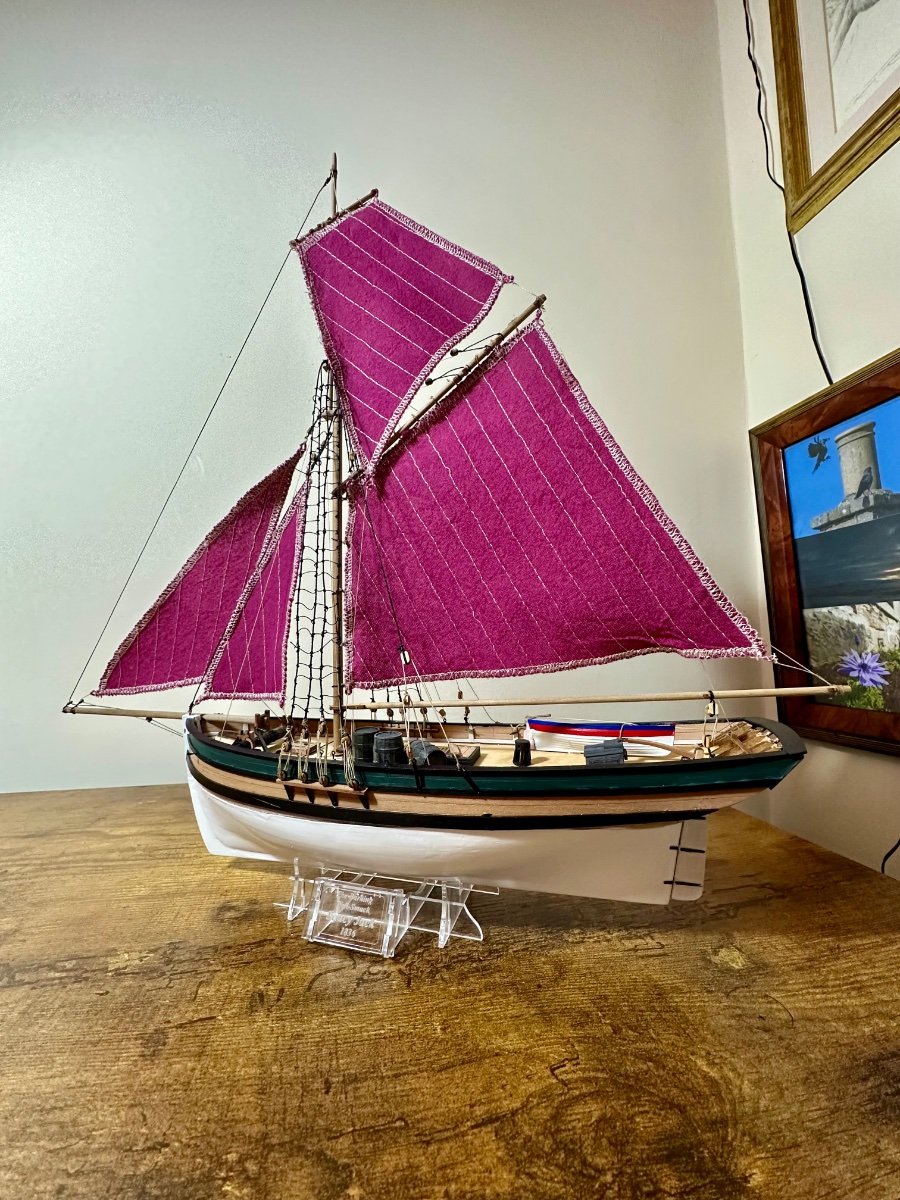
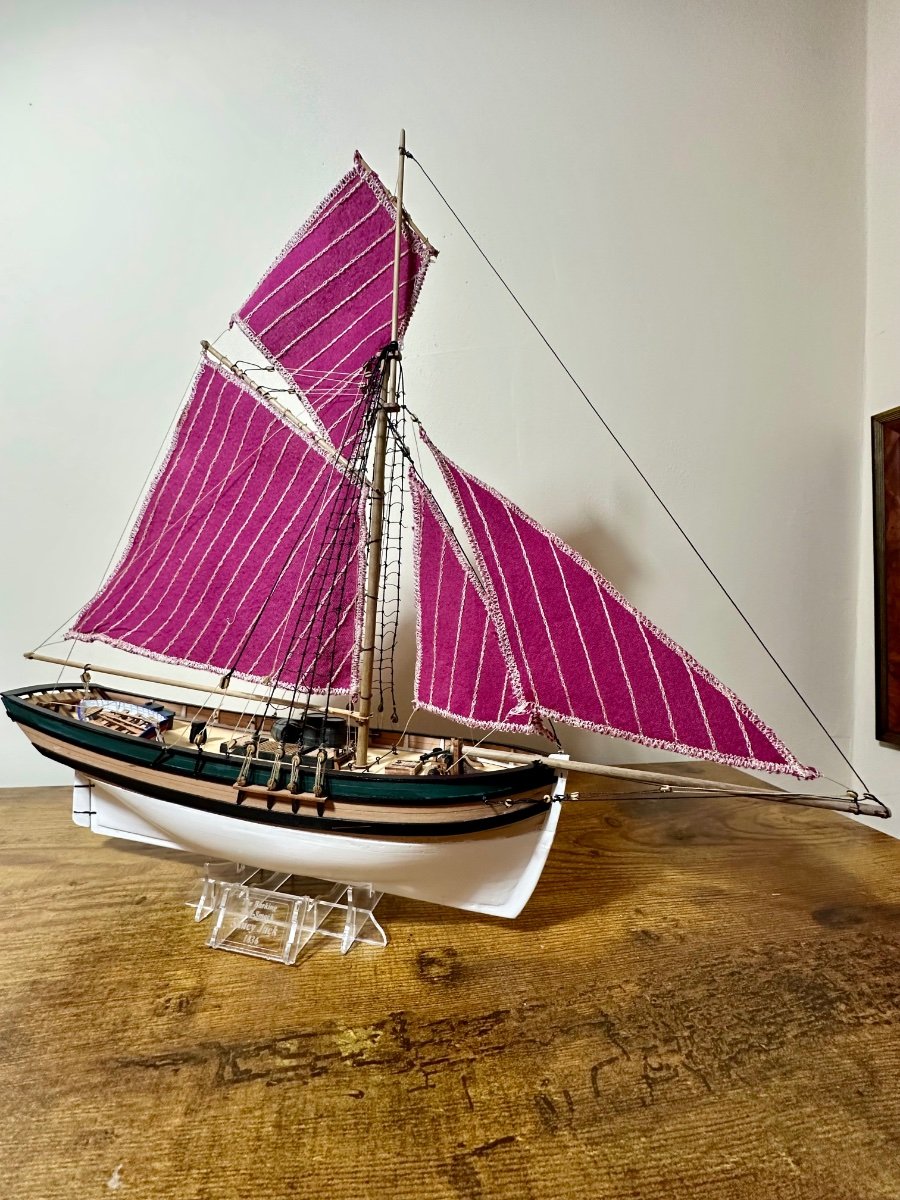
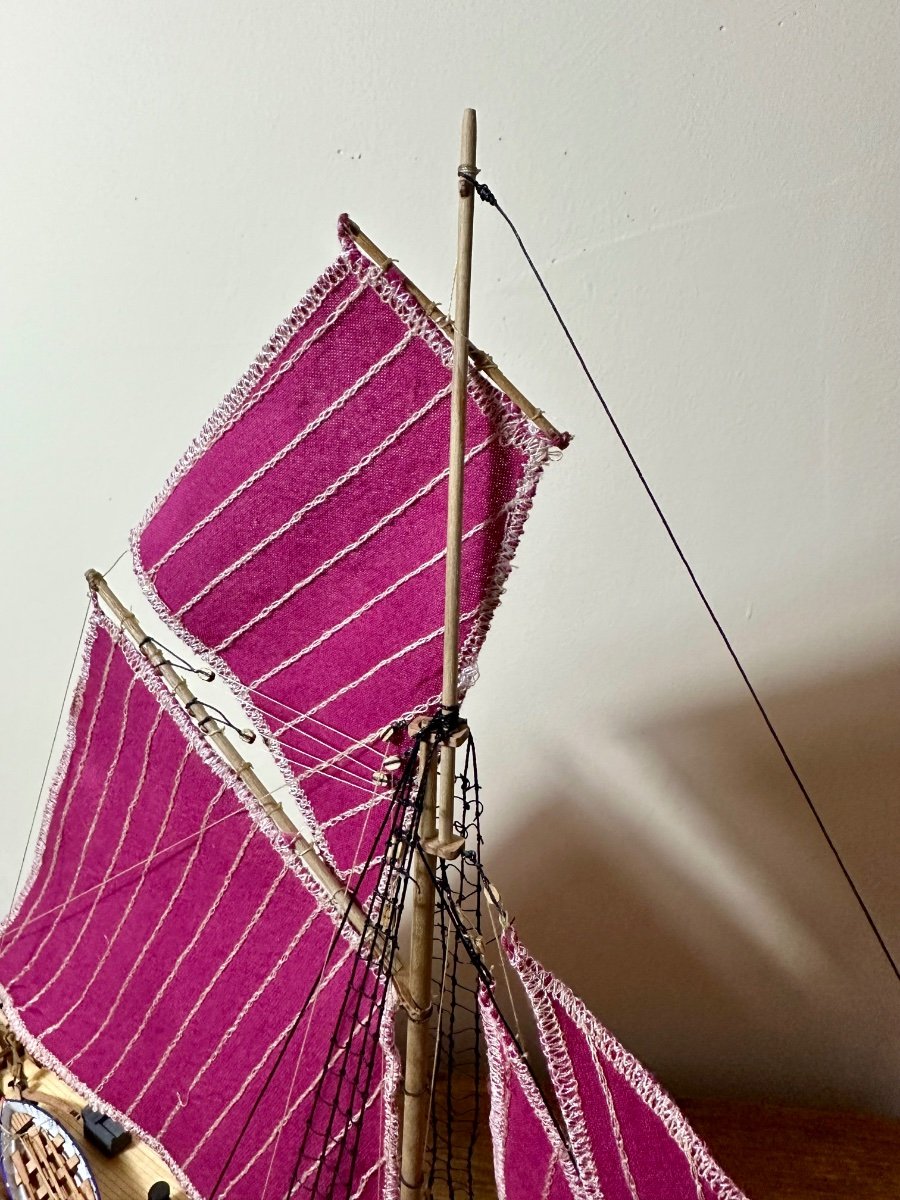
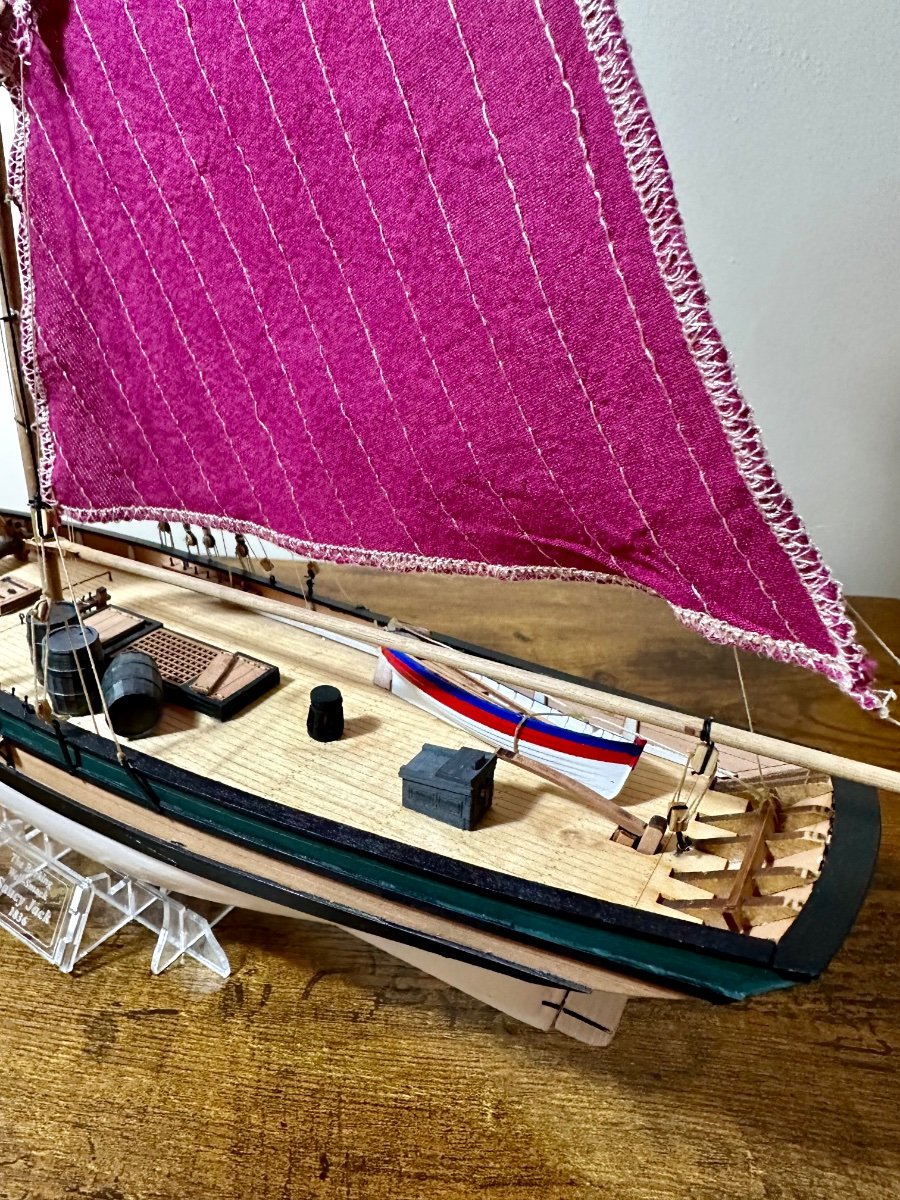
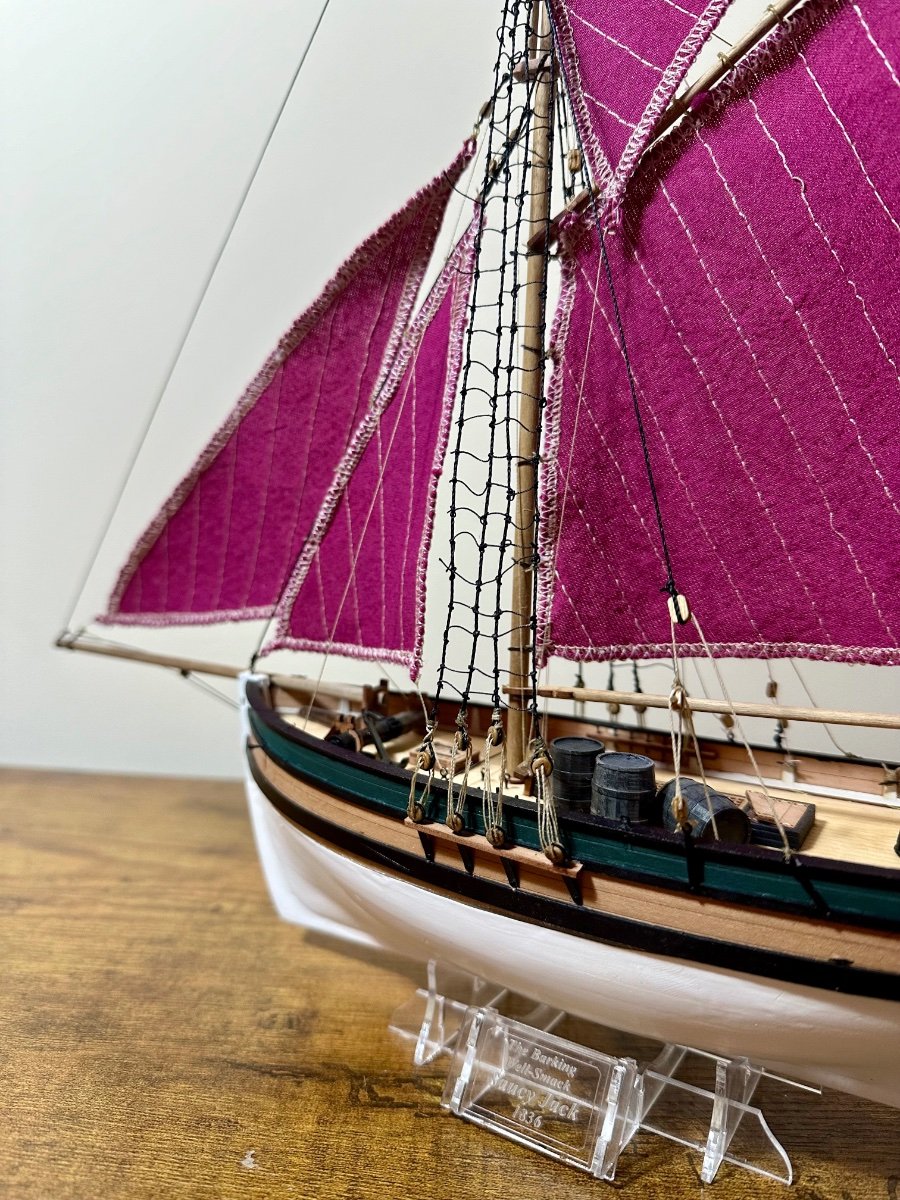
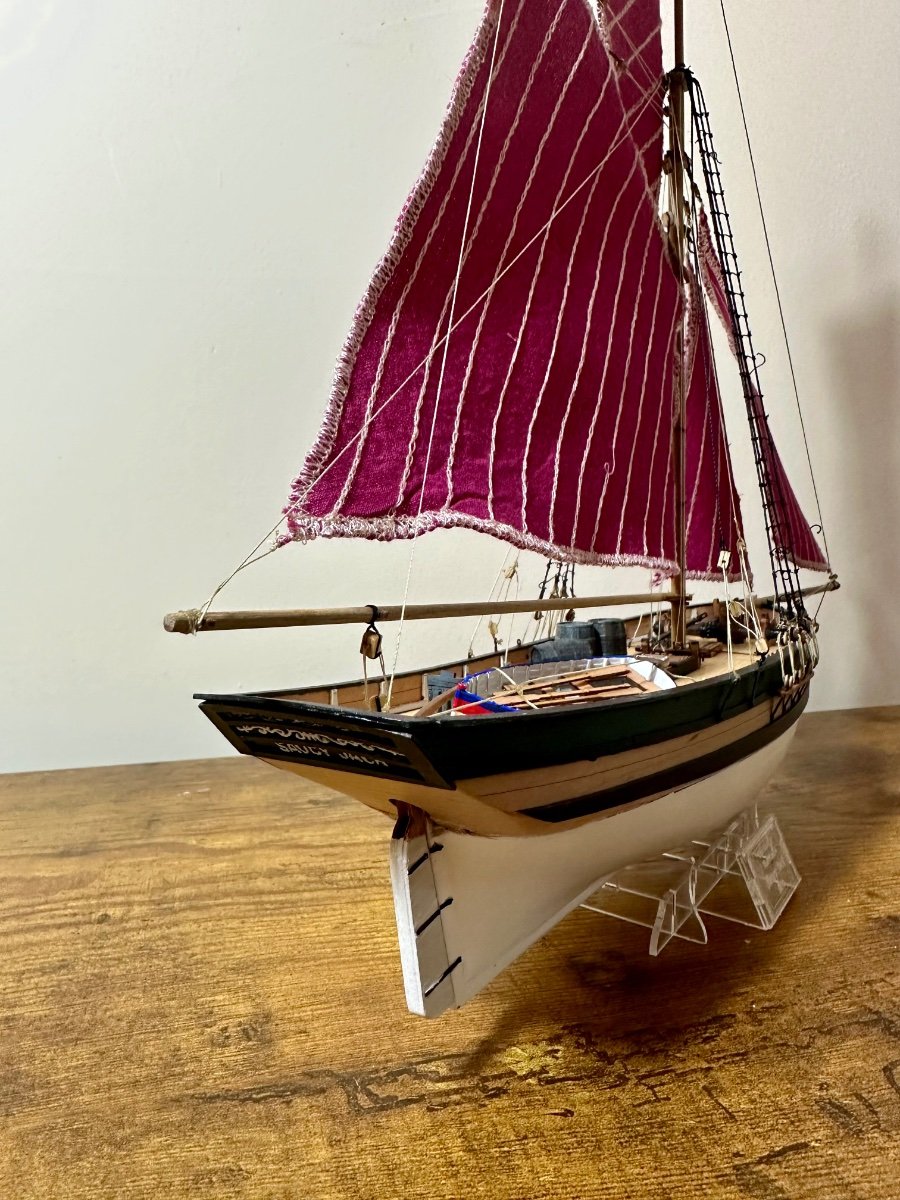
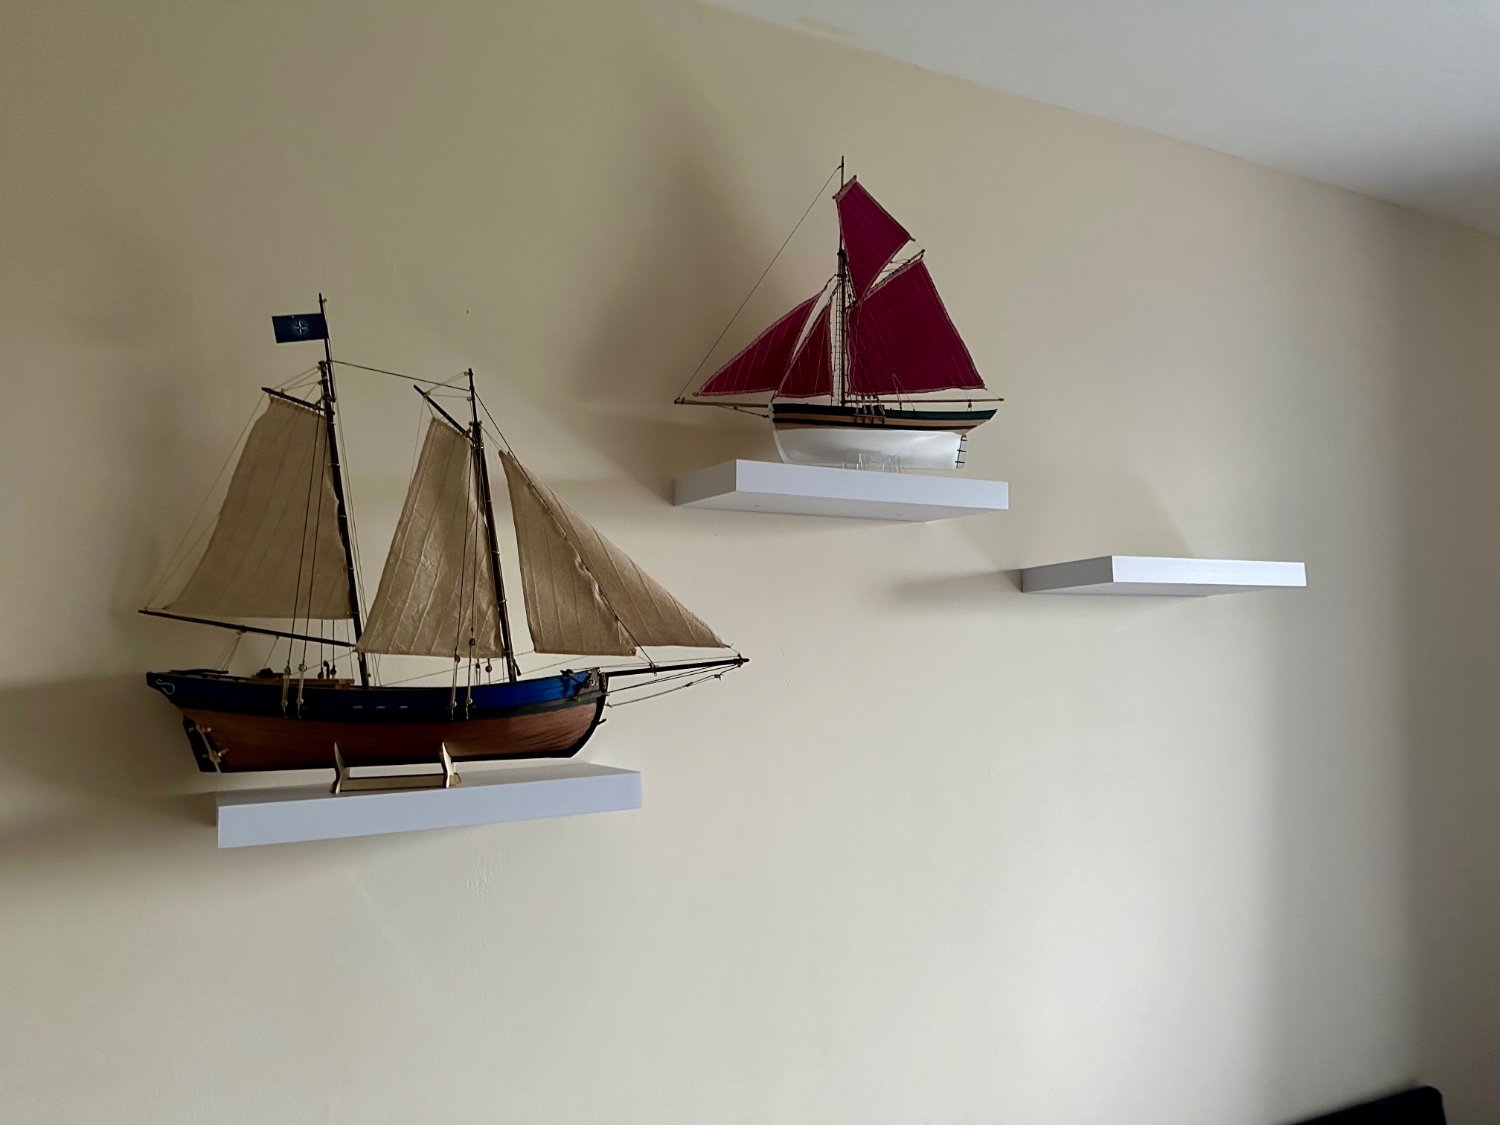
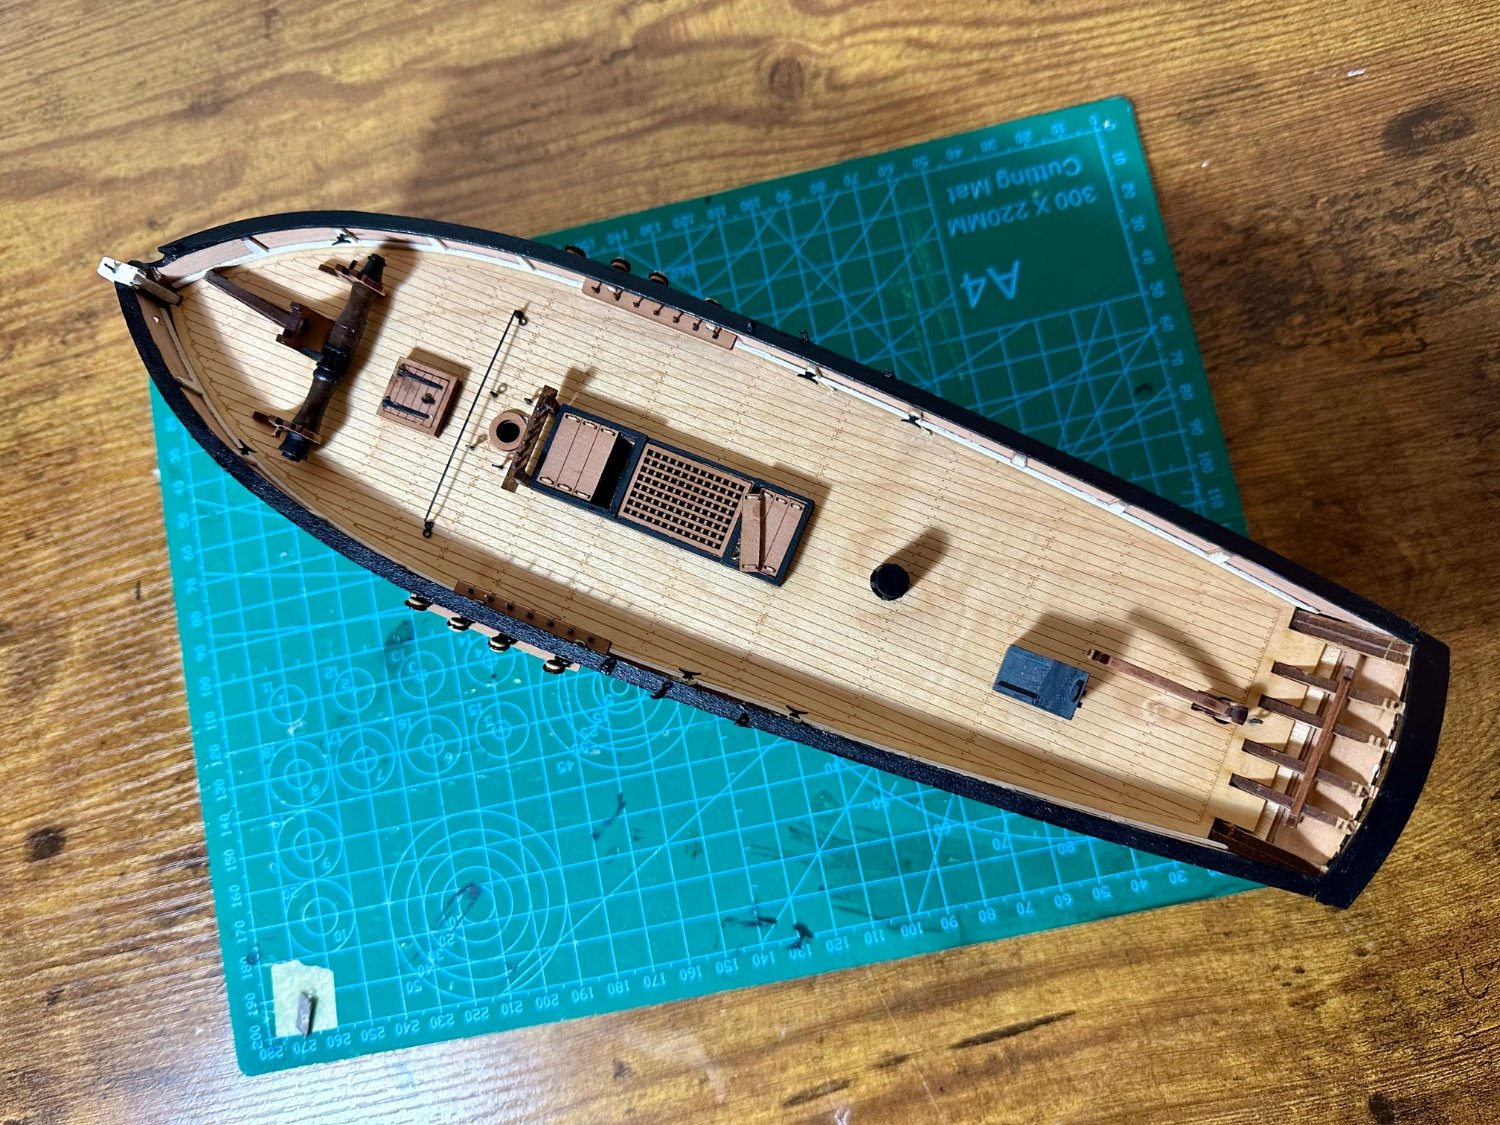
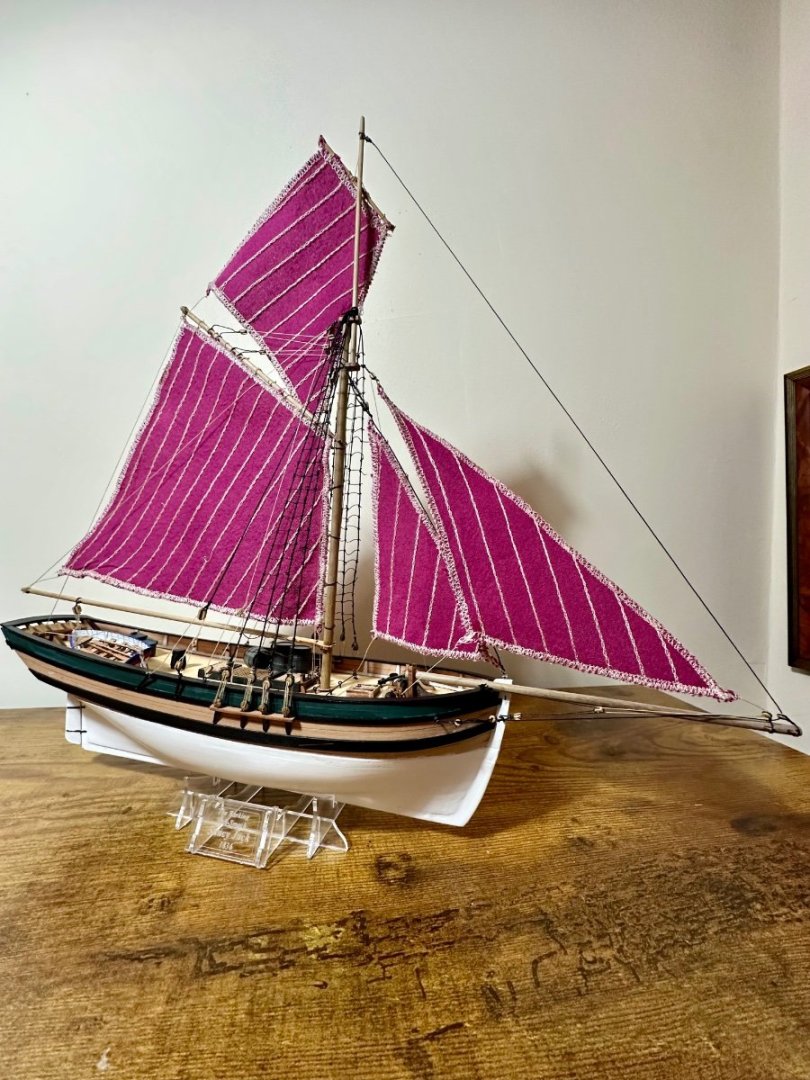
So Saucy Jack is done. Just under 12 weeks and enjoyed nearly all of it (ok the ratlines floored me for a while). A much 'better' kit than my previous and definitely worth the premium. Looking at it critically there is a lot that could be better but I think I can improve where needed. On display (and facing the right way to hide the dodgy starboard ratlines!) and viewed from that distance I think she looks great. Can you guess what's next?


-
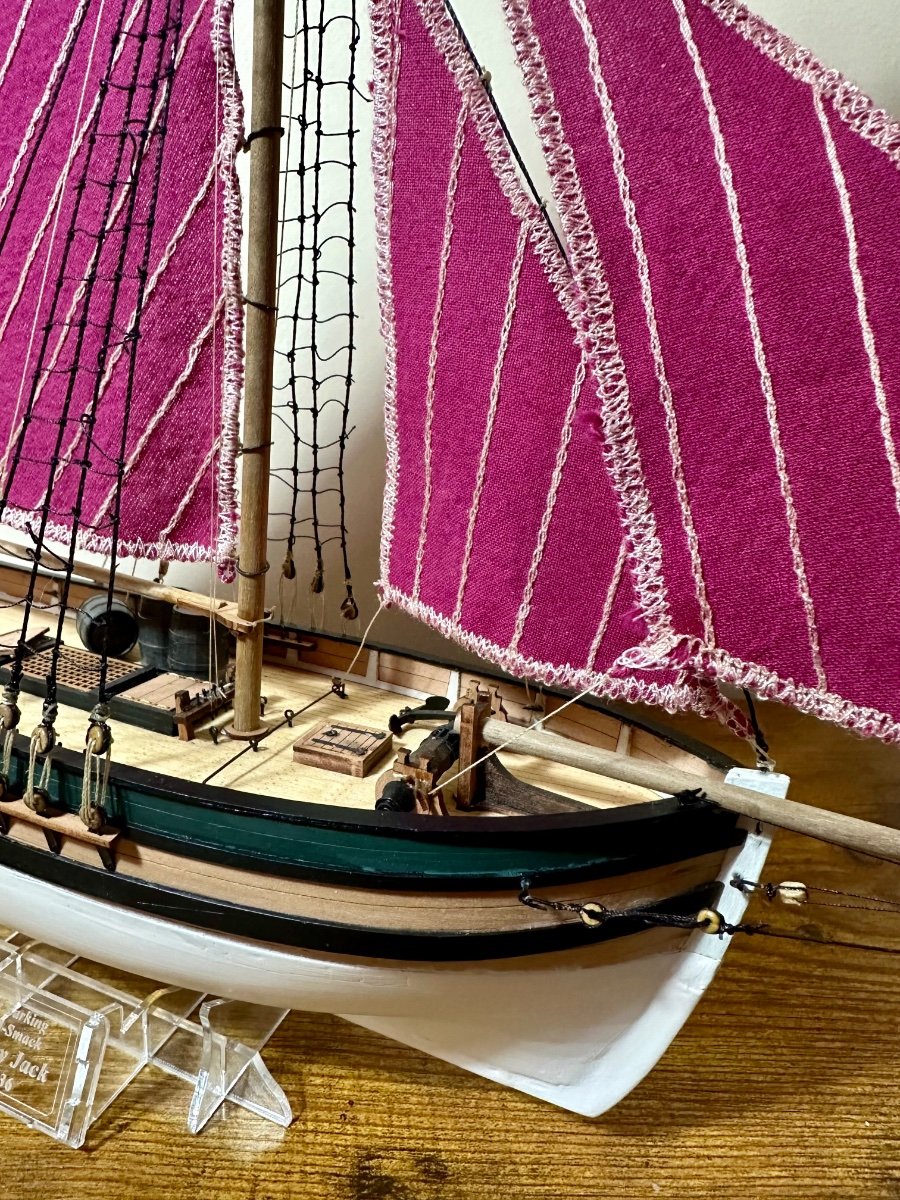
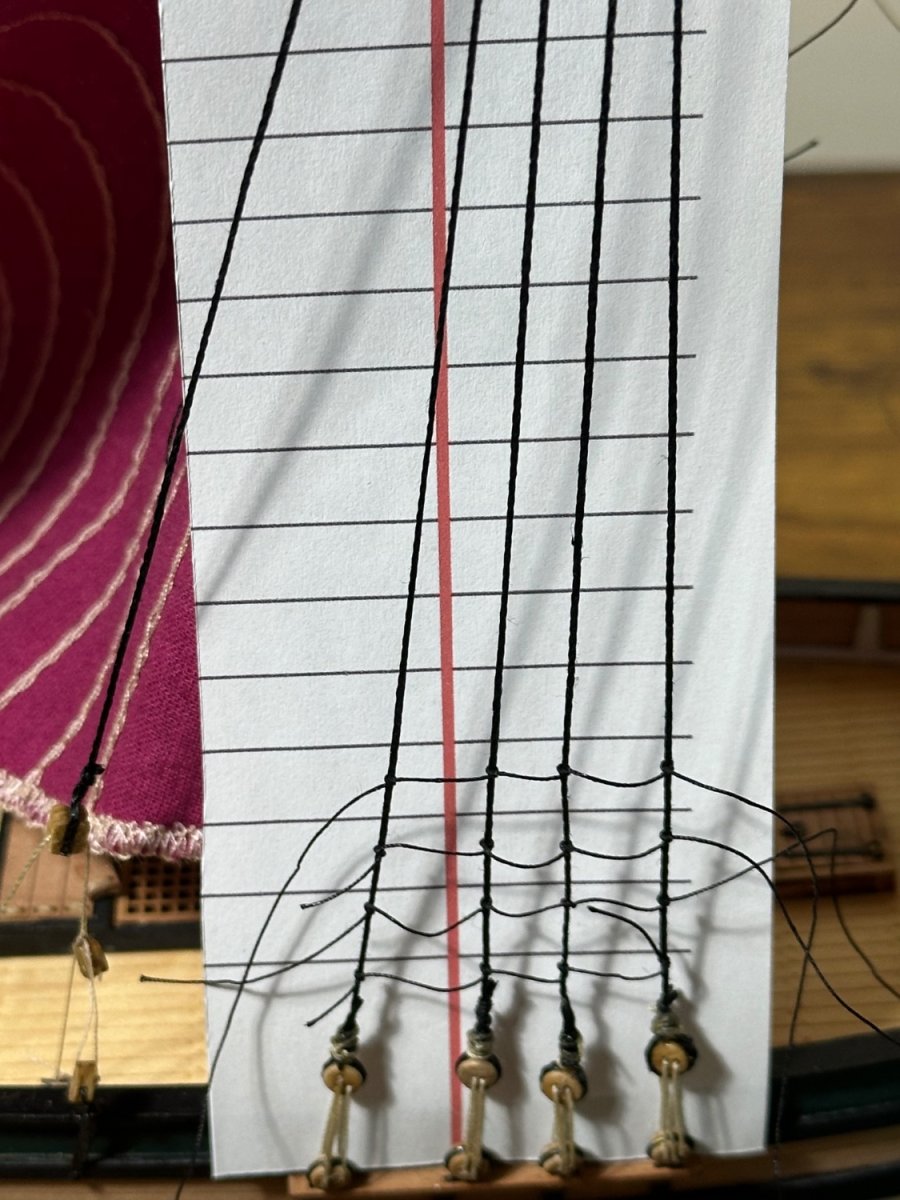
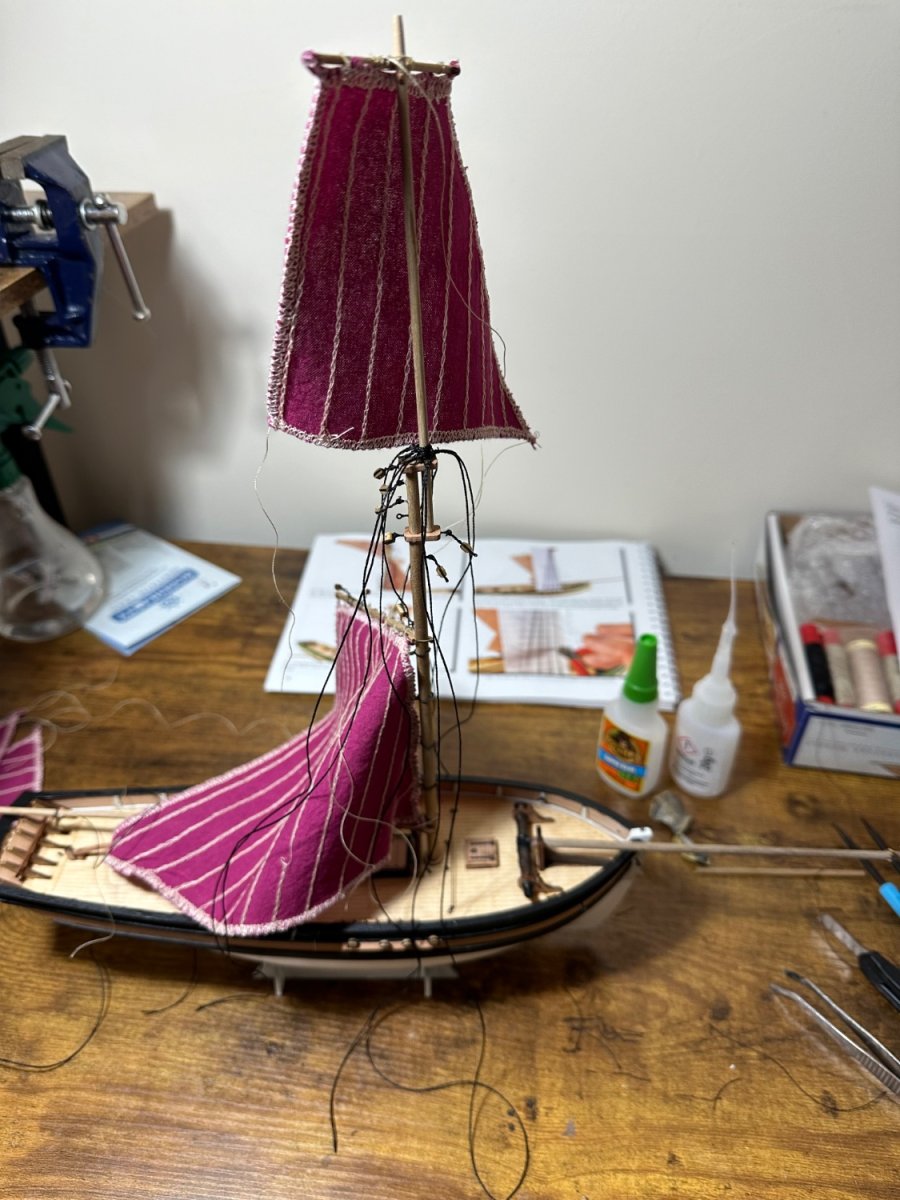
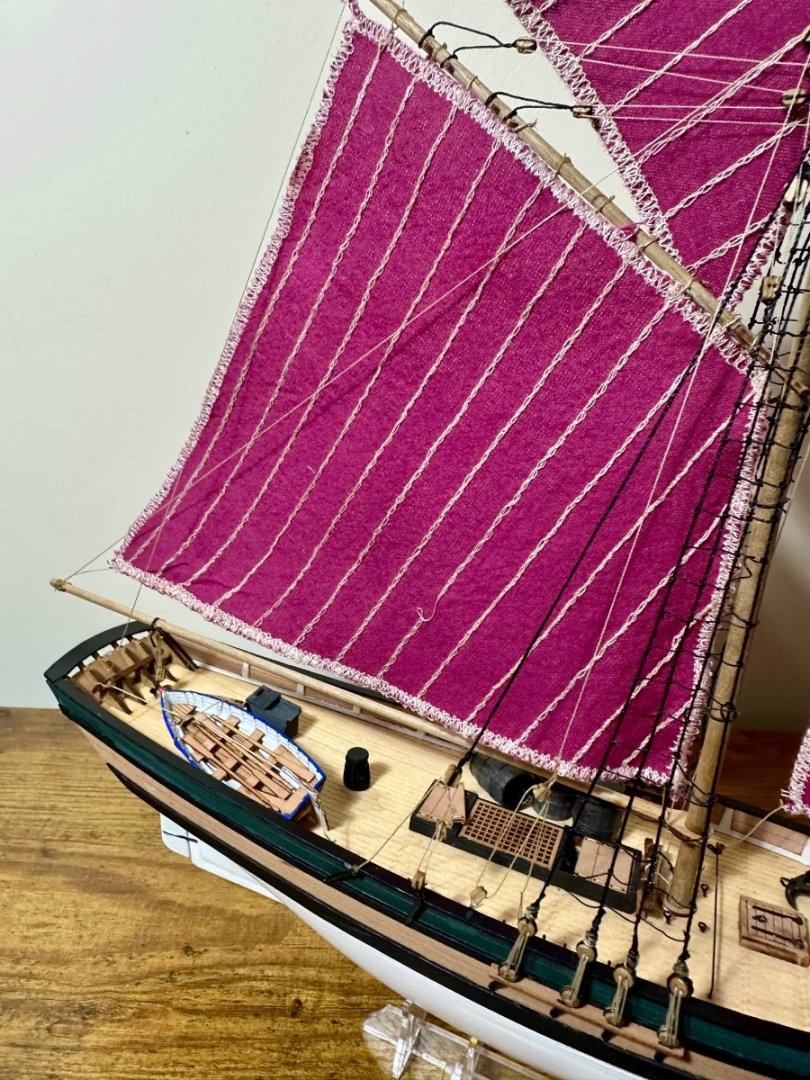
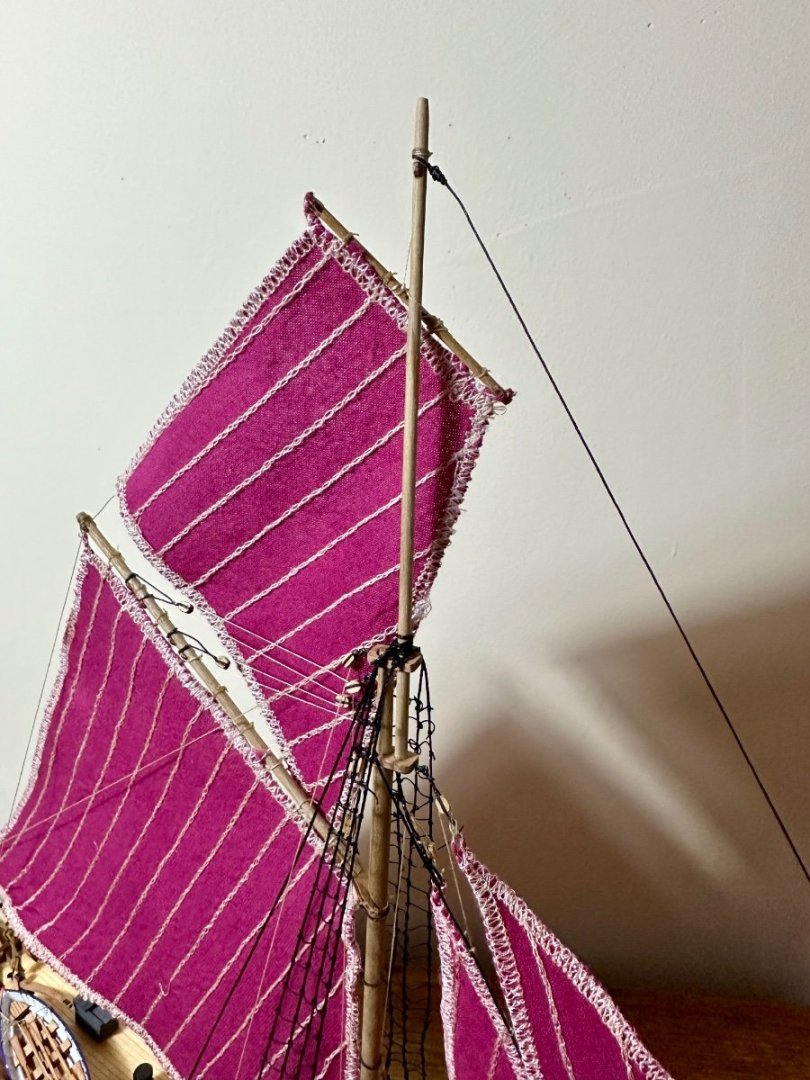
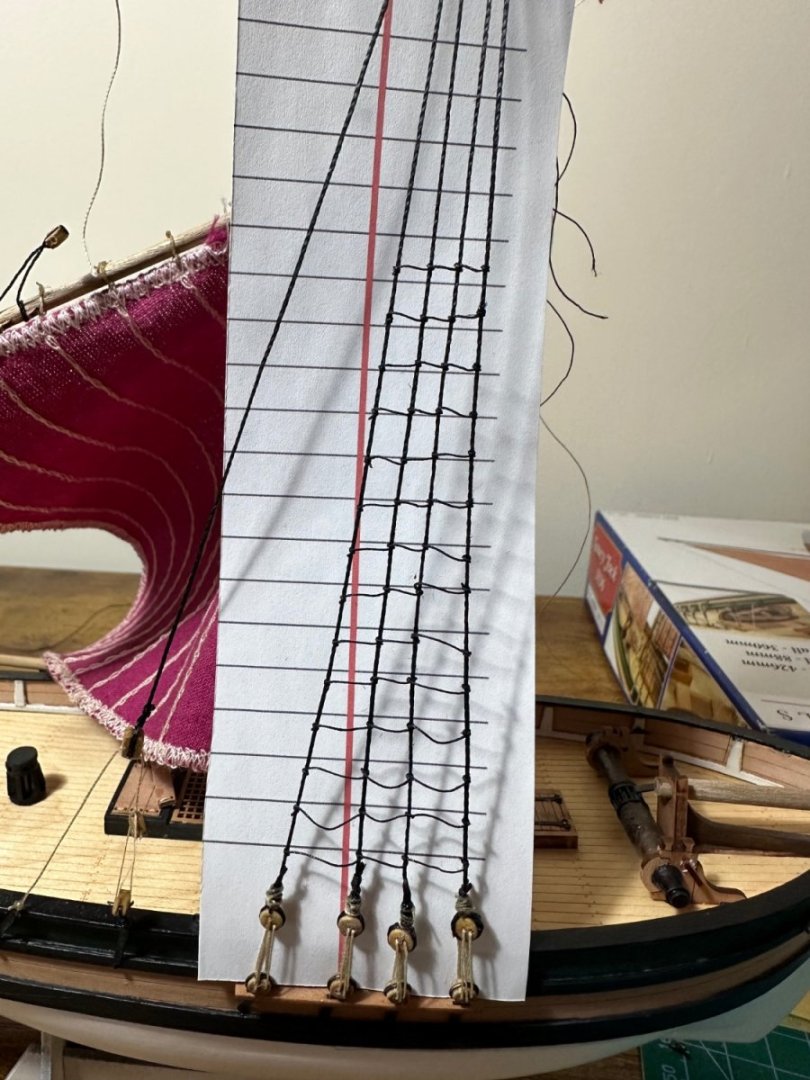
Bit of a break. Been taking too many photographs but mainly the ratlines temporarily beat me. I'll get some proper pics on the next stage but the first half of the port side are not good. The second half are better. However by the time I got to the starboard side it had clicked a bit better and I'm much happier. I noticed today I managed to put the shrouds in entirely the wrong part of the mast! How I managed that and didn't notice for weeks I have no idea. Funnily enough I'm not changing that. Stays and main sail are in place and will get pics next time.

-
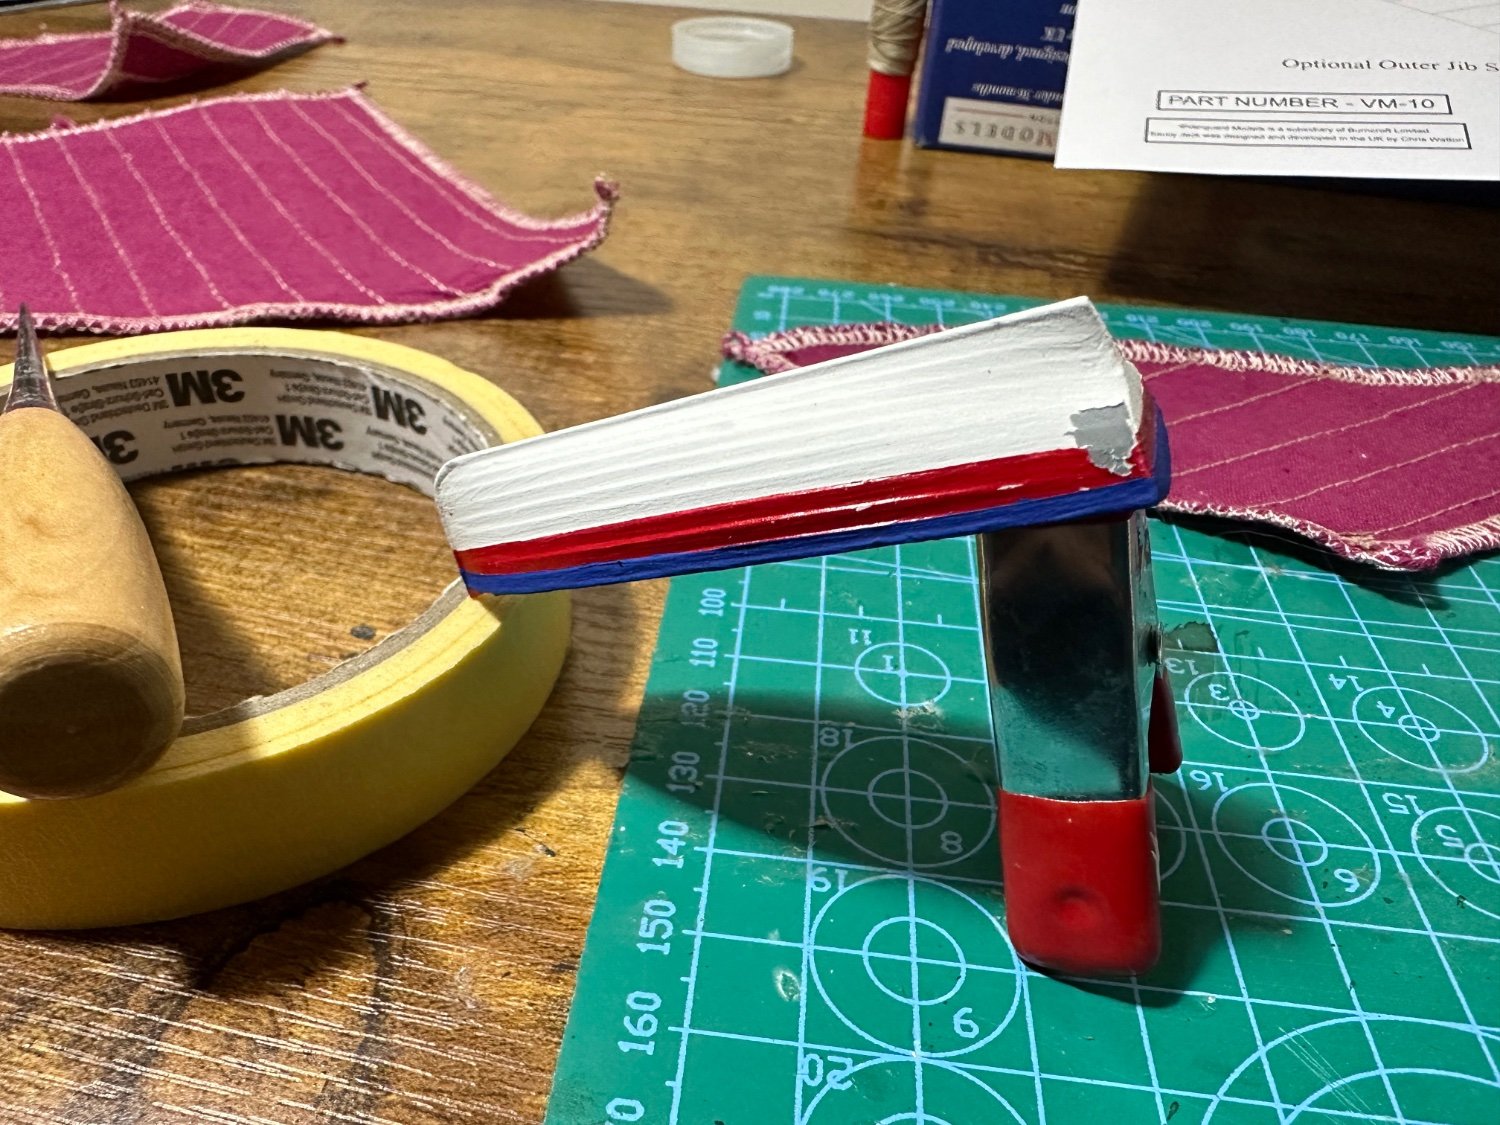
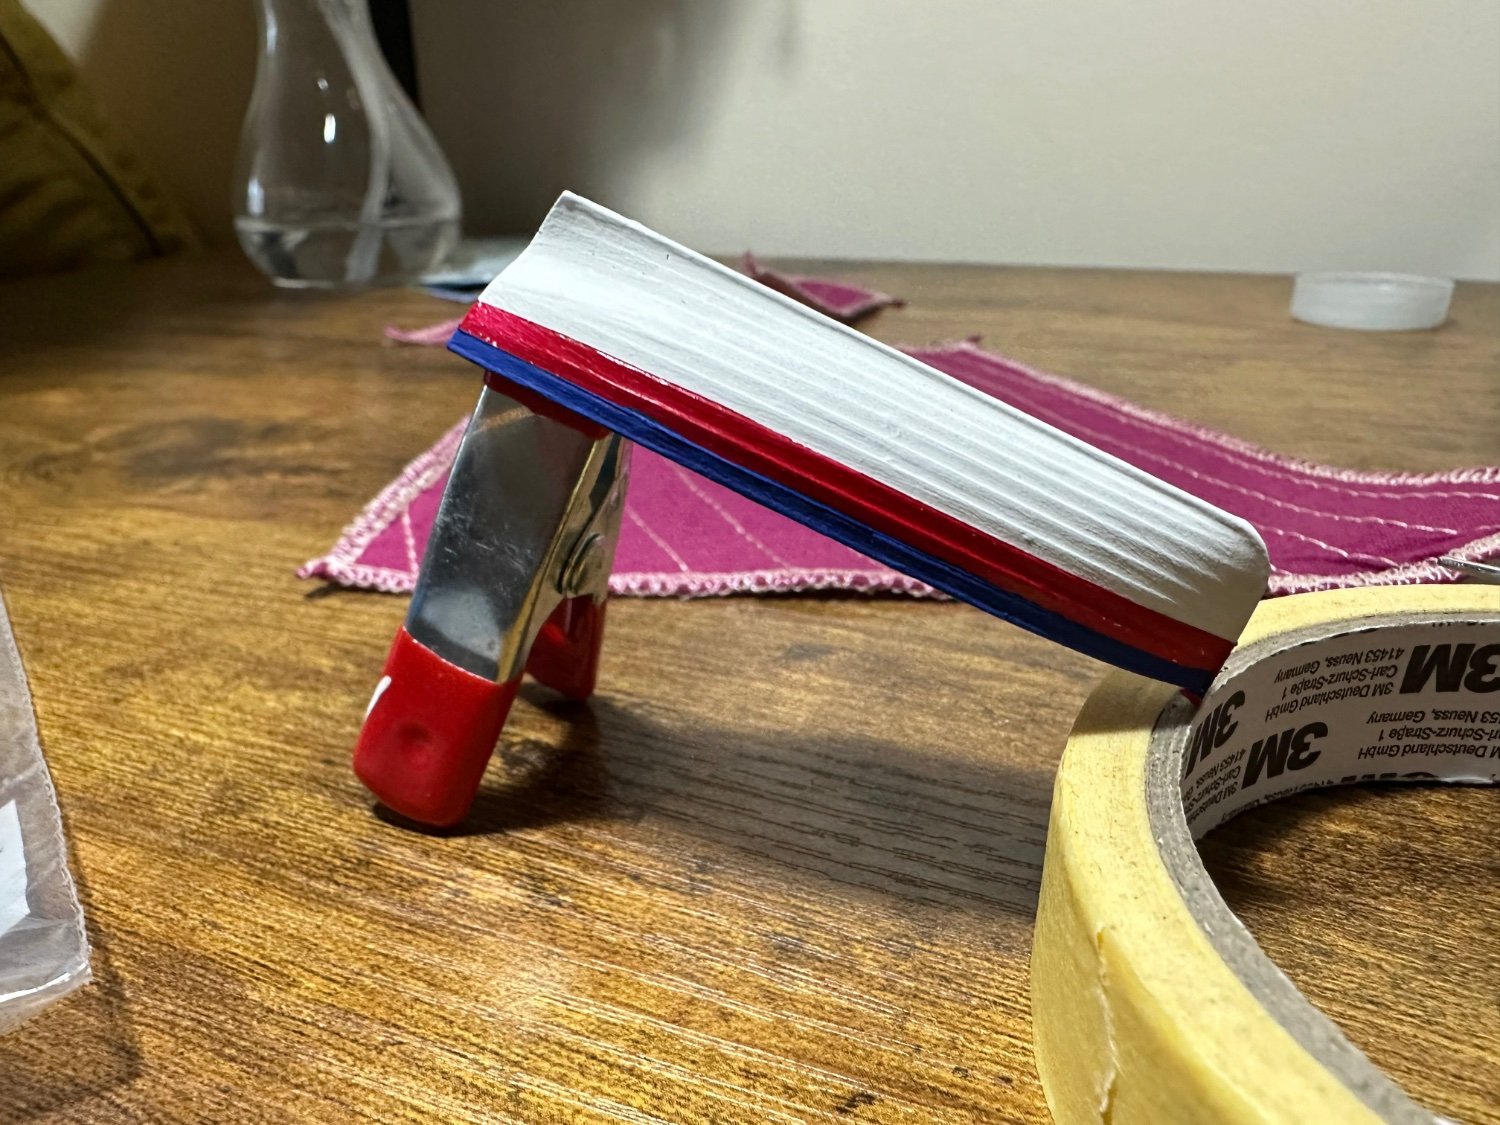
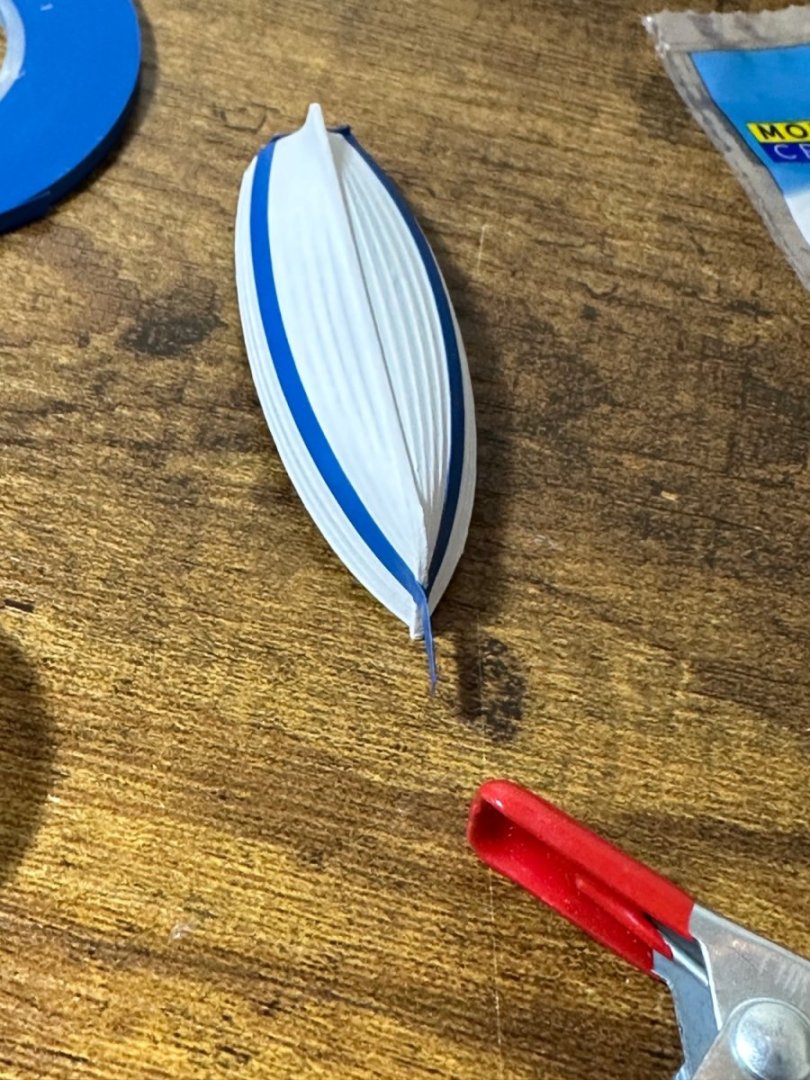
Thanks Andrew. Yes it is. One of the 3d printed ones. Sure the colours are inappropriate but I like too and gave me a chance to use model craft flex masking tape which was very good. Had to repaint a little after. I suspect the grey primer I used isn’t very good.
-
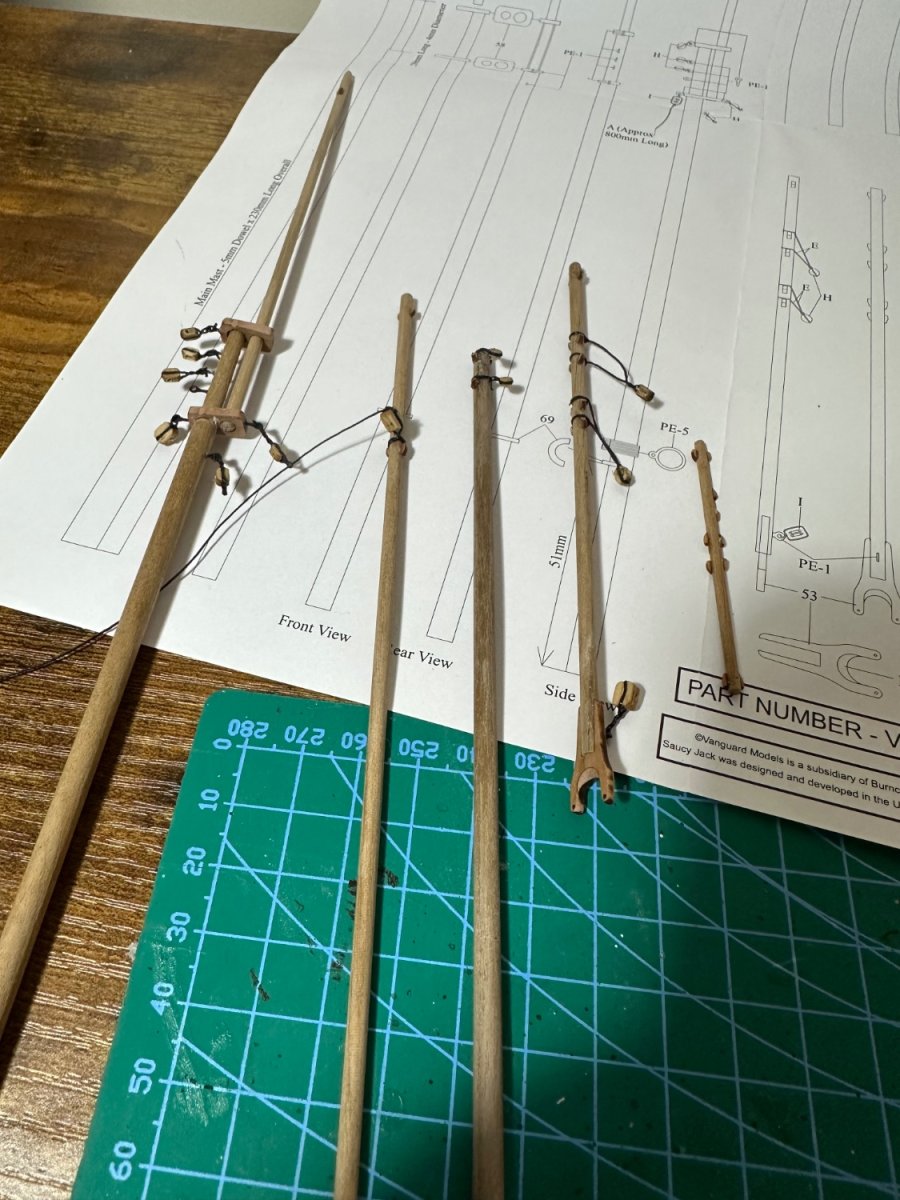
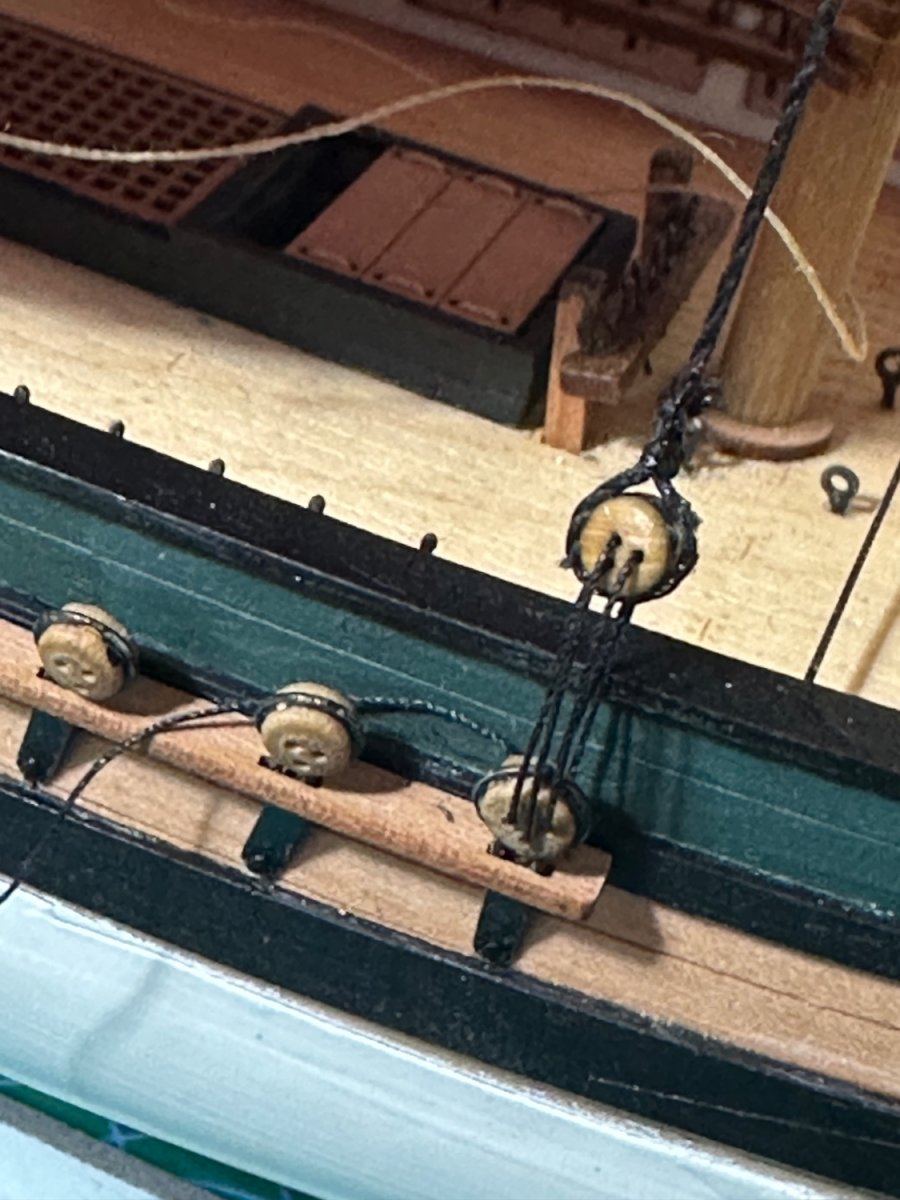
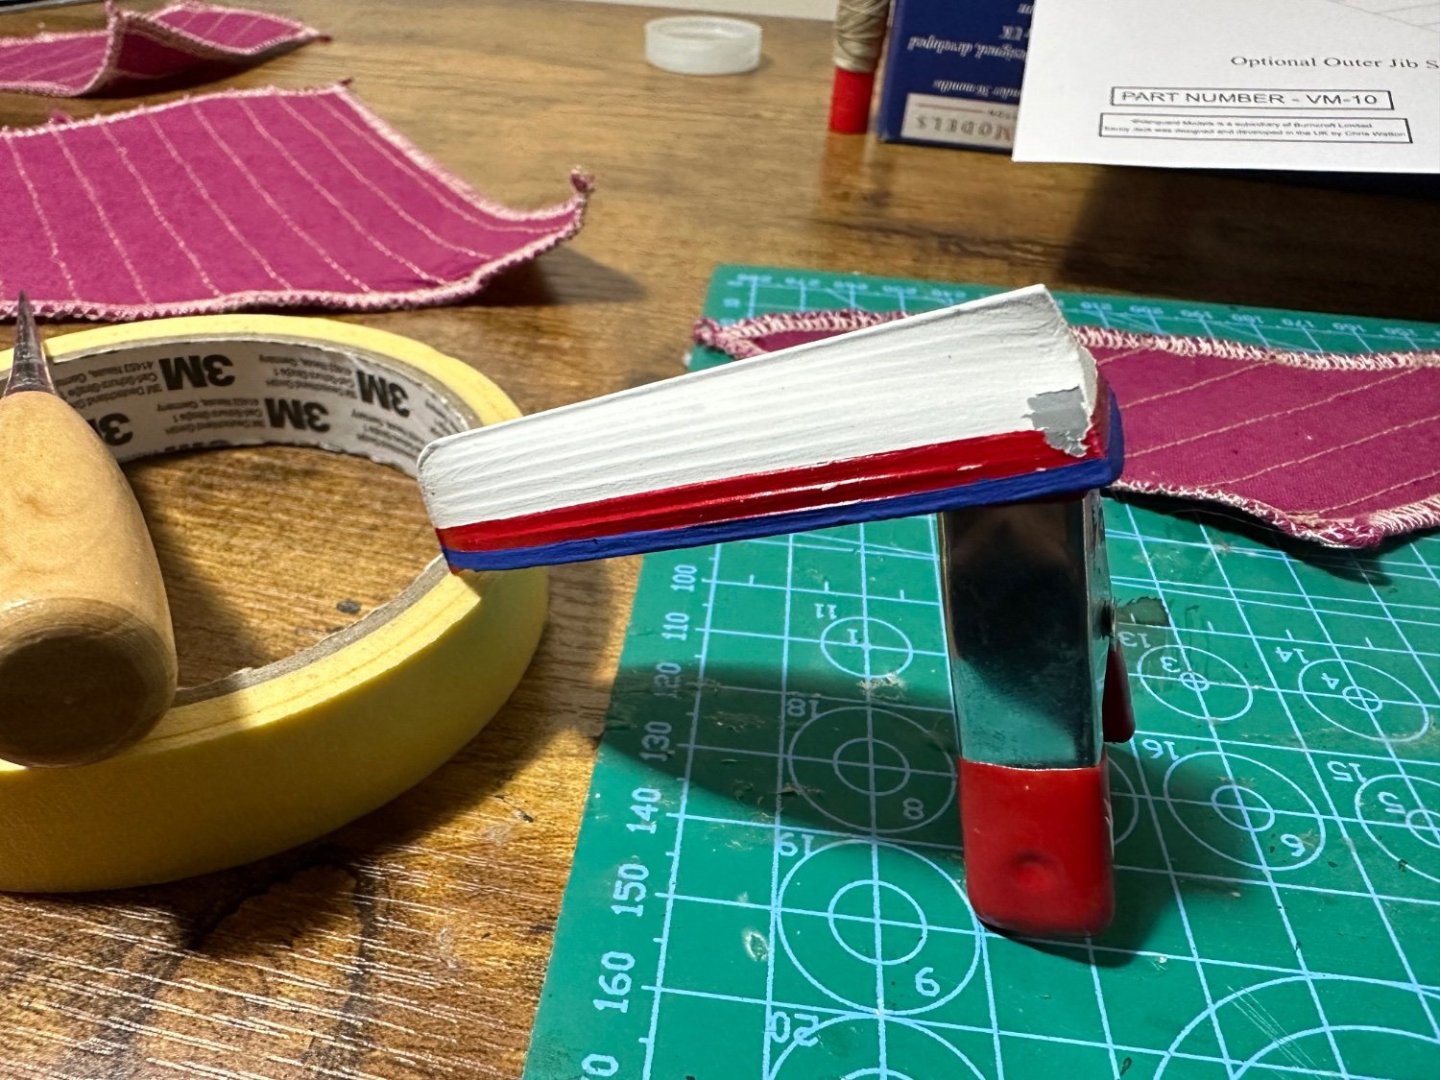
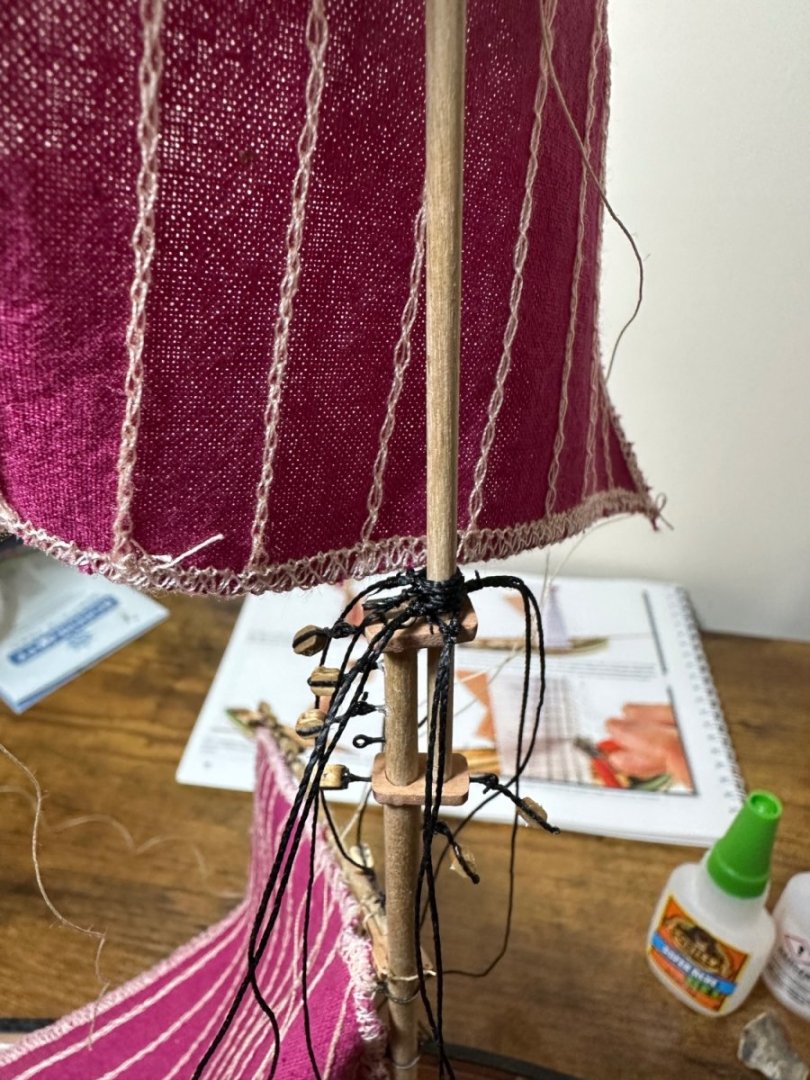
Reasonable progress. Masts all made without any terrible problems. Ships boat painted just to make it a little more attractive and for practice with flexible masking tape. Repairs to paint made. Shrouds made and happy with getting them quite neat. Made a start on deadeyes. Some seem to have gone missing so had to wait for more to arrive. Had made the first one, then noticed used black not natural thread. Then , on another day, remade it. Again in black. Third time lucky in natural and two more done. Gradually improving I think,


-
It’s meant to look how you want it too 😊 so that could be very smooth and glassy or a slightly more worldly appearance from a lower grit. Again if you use any finish after like varnish, shellac or WOP that will effect it too. Experiment on samples (maybe make up a small set of frames so you can see over more than one plank) and see what you think.
- 33 replies
-
- 2
-
-
- Victory
- DeAgostini
- (and 1 more)
-
Ok in that case I definitely would. But I'd consider the final look/finish you're going to use and maybe do some tests with wood samples at different grits to see how they come up. High grit could end up lovely but could also be too 'new' if you see what I mean.
- 33 replies
-
- 2
-
-
- Victory
- DeAgostini
- (and 1 more)
-
I would, but in all honesty I doubt it's needed for a first planking. Looks great.
-
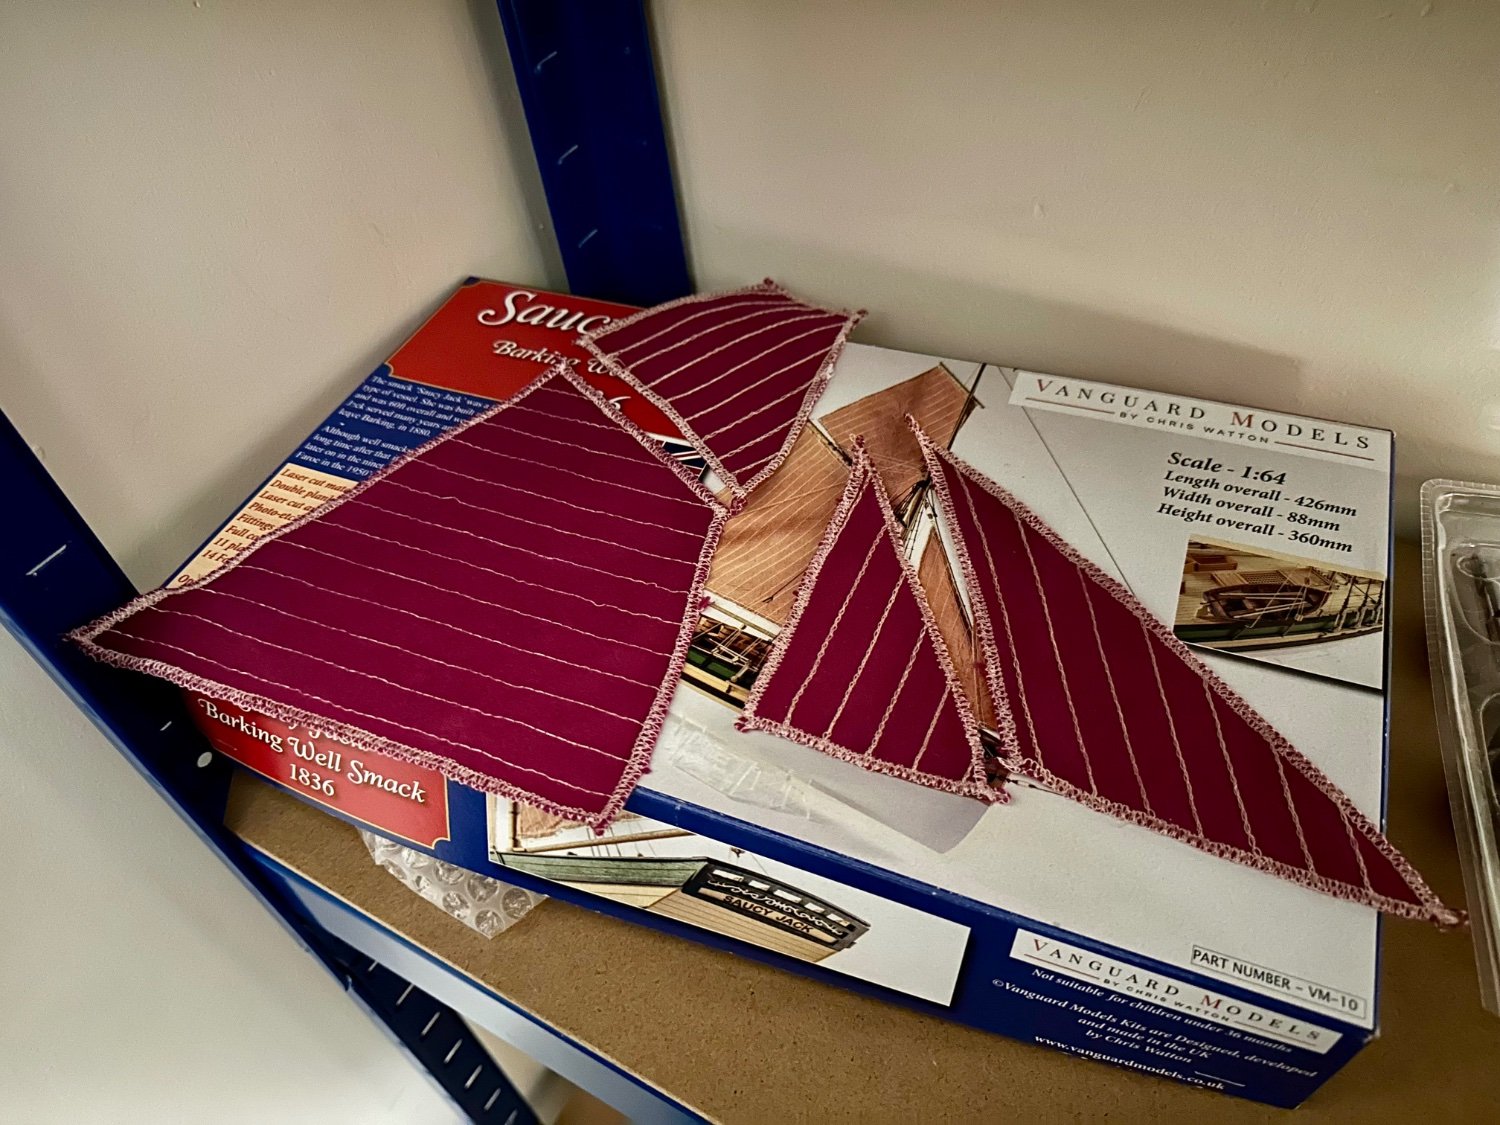
Sails looking a lovely colour, can't decide if I should try and get the better ones?

-
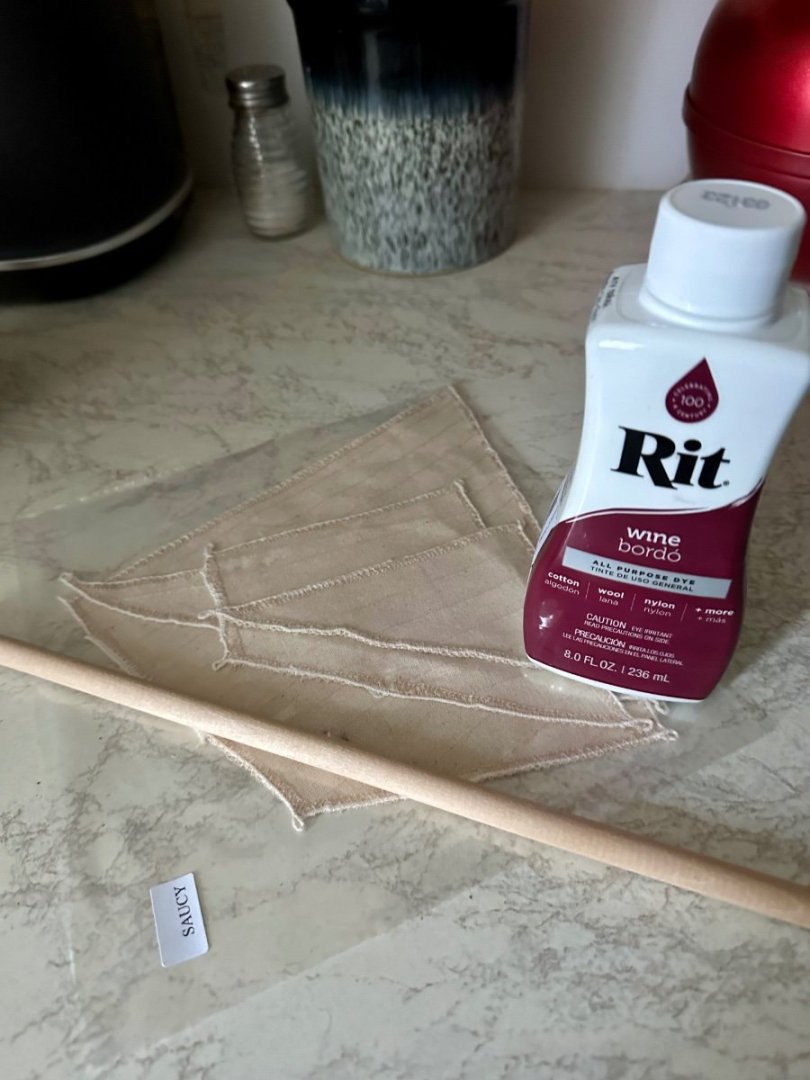
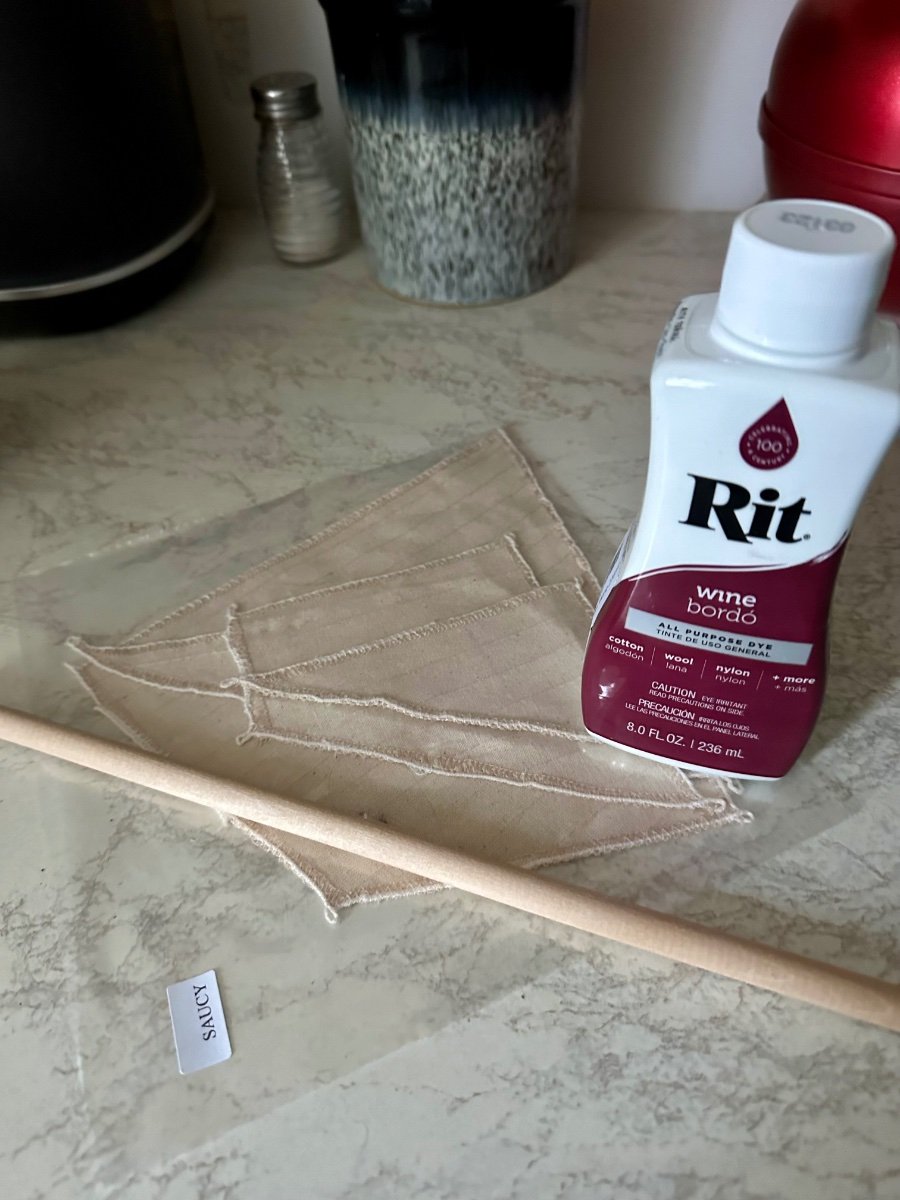
Plenty of progress. The hull is now complete. Couple of hitches (i.e. mistakes on my part). Firstly didn't see that these parts were handed so had to remove and replace but easily done. Then I misread the manual that these needed short pins not full nails, again fixed easily. Started on the masts etc. Using masking tape to try and get all the tiny pieces correctly lined up. Sails dyed and now washed, now drying.