
Chikpeas
-
Posts
19 -
Joined
-
Last visited
-
 GrandpaPhil reacted to a post in a topic:
Polaris 1850 by Chikpeas - OcCre - 1:50 - first build - loosely based schooner
GrandpaPhil reacted to a post in a topic:
Polaris 1850 by Chikpeas - OcCre - 1:50 - first build - loosely based schooner
-
GrandpaPhil reacted to a post in a topic:
Polaris 1850 by Chikpeas - OcCre - 1:50 - first build - loosely based schooner
-
GrandpaPhil reacted to a post in a topic:
Polaris 1850 by Chikpeas - OcCre - 1:50 - first build - loosely based schooner
-
GrandpaPhil reacted to a post in a topic:
Polaris 1850 by Chikpeas - OcCre - 1:50 - first build - loosely based schooner
-
GrandpaPhil reacted to a post in a topic:
Polaris 1850 by Chikpeas - OcCre - 1:50 - first build - loosely based schooner
-
 Chikpeas reacted to a post in a topic:
Polaris 1850 by Chikpeas - OcCre - 1:50 - first build - loosely based schooner
Chikpeas reacted to a post in a topic:
Polaris 1850 by Chikpeas - OcCre - 1:50 - first build - loosely based schooner
-
Coyote_6 reacted to a post in a topic:
Polaris 1850 by Chikpeas - OcCre - 1:50 - first build - loosely based schooner
-
Coyote_6 reacted to a post in a topic:
Polaris 1850 by Chikpeas - OcCre - 1:50 - first build - loosely based schooner
-
ccoyle reacted to a post in a topic:
Polaris 1850 by Chikpeas - OcCre - 1:50 - first build - loosely based schooner
-
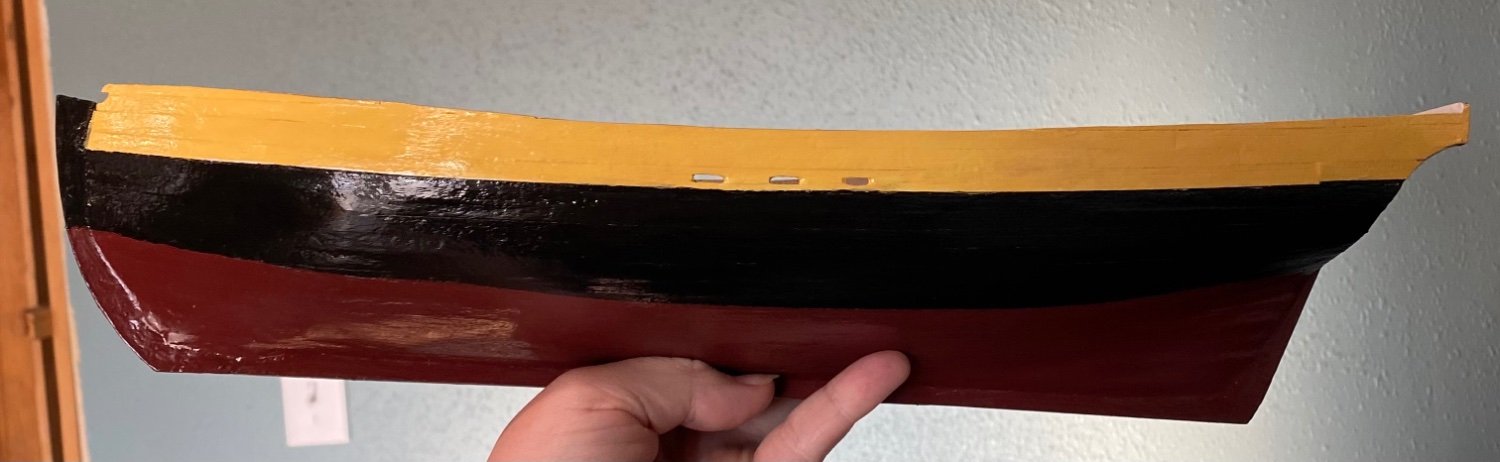
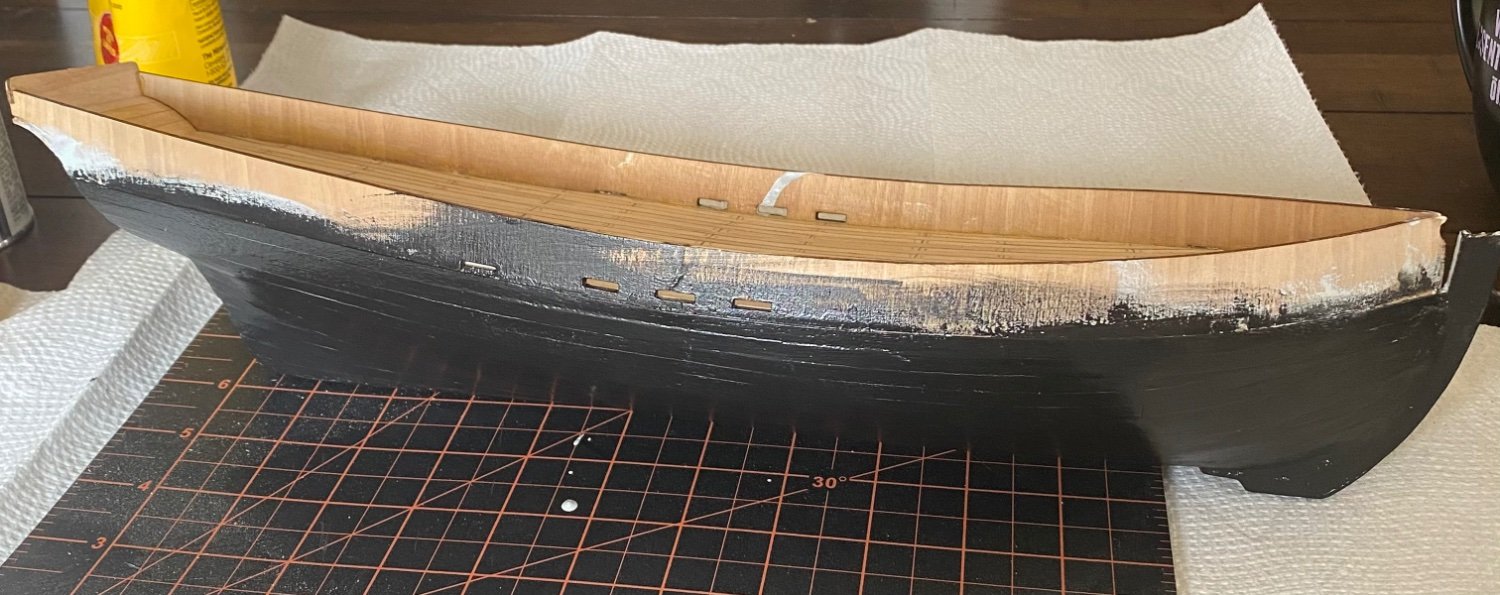
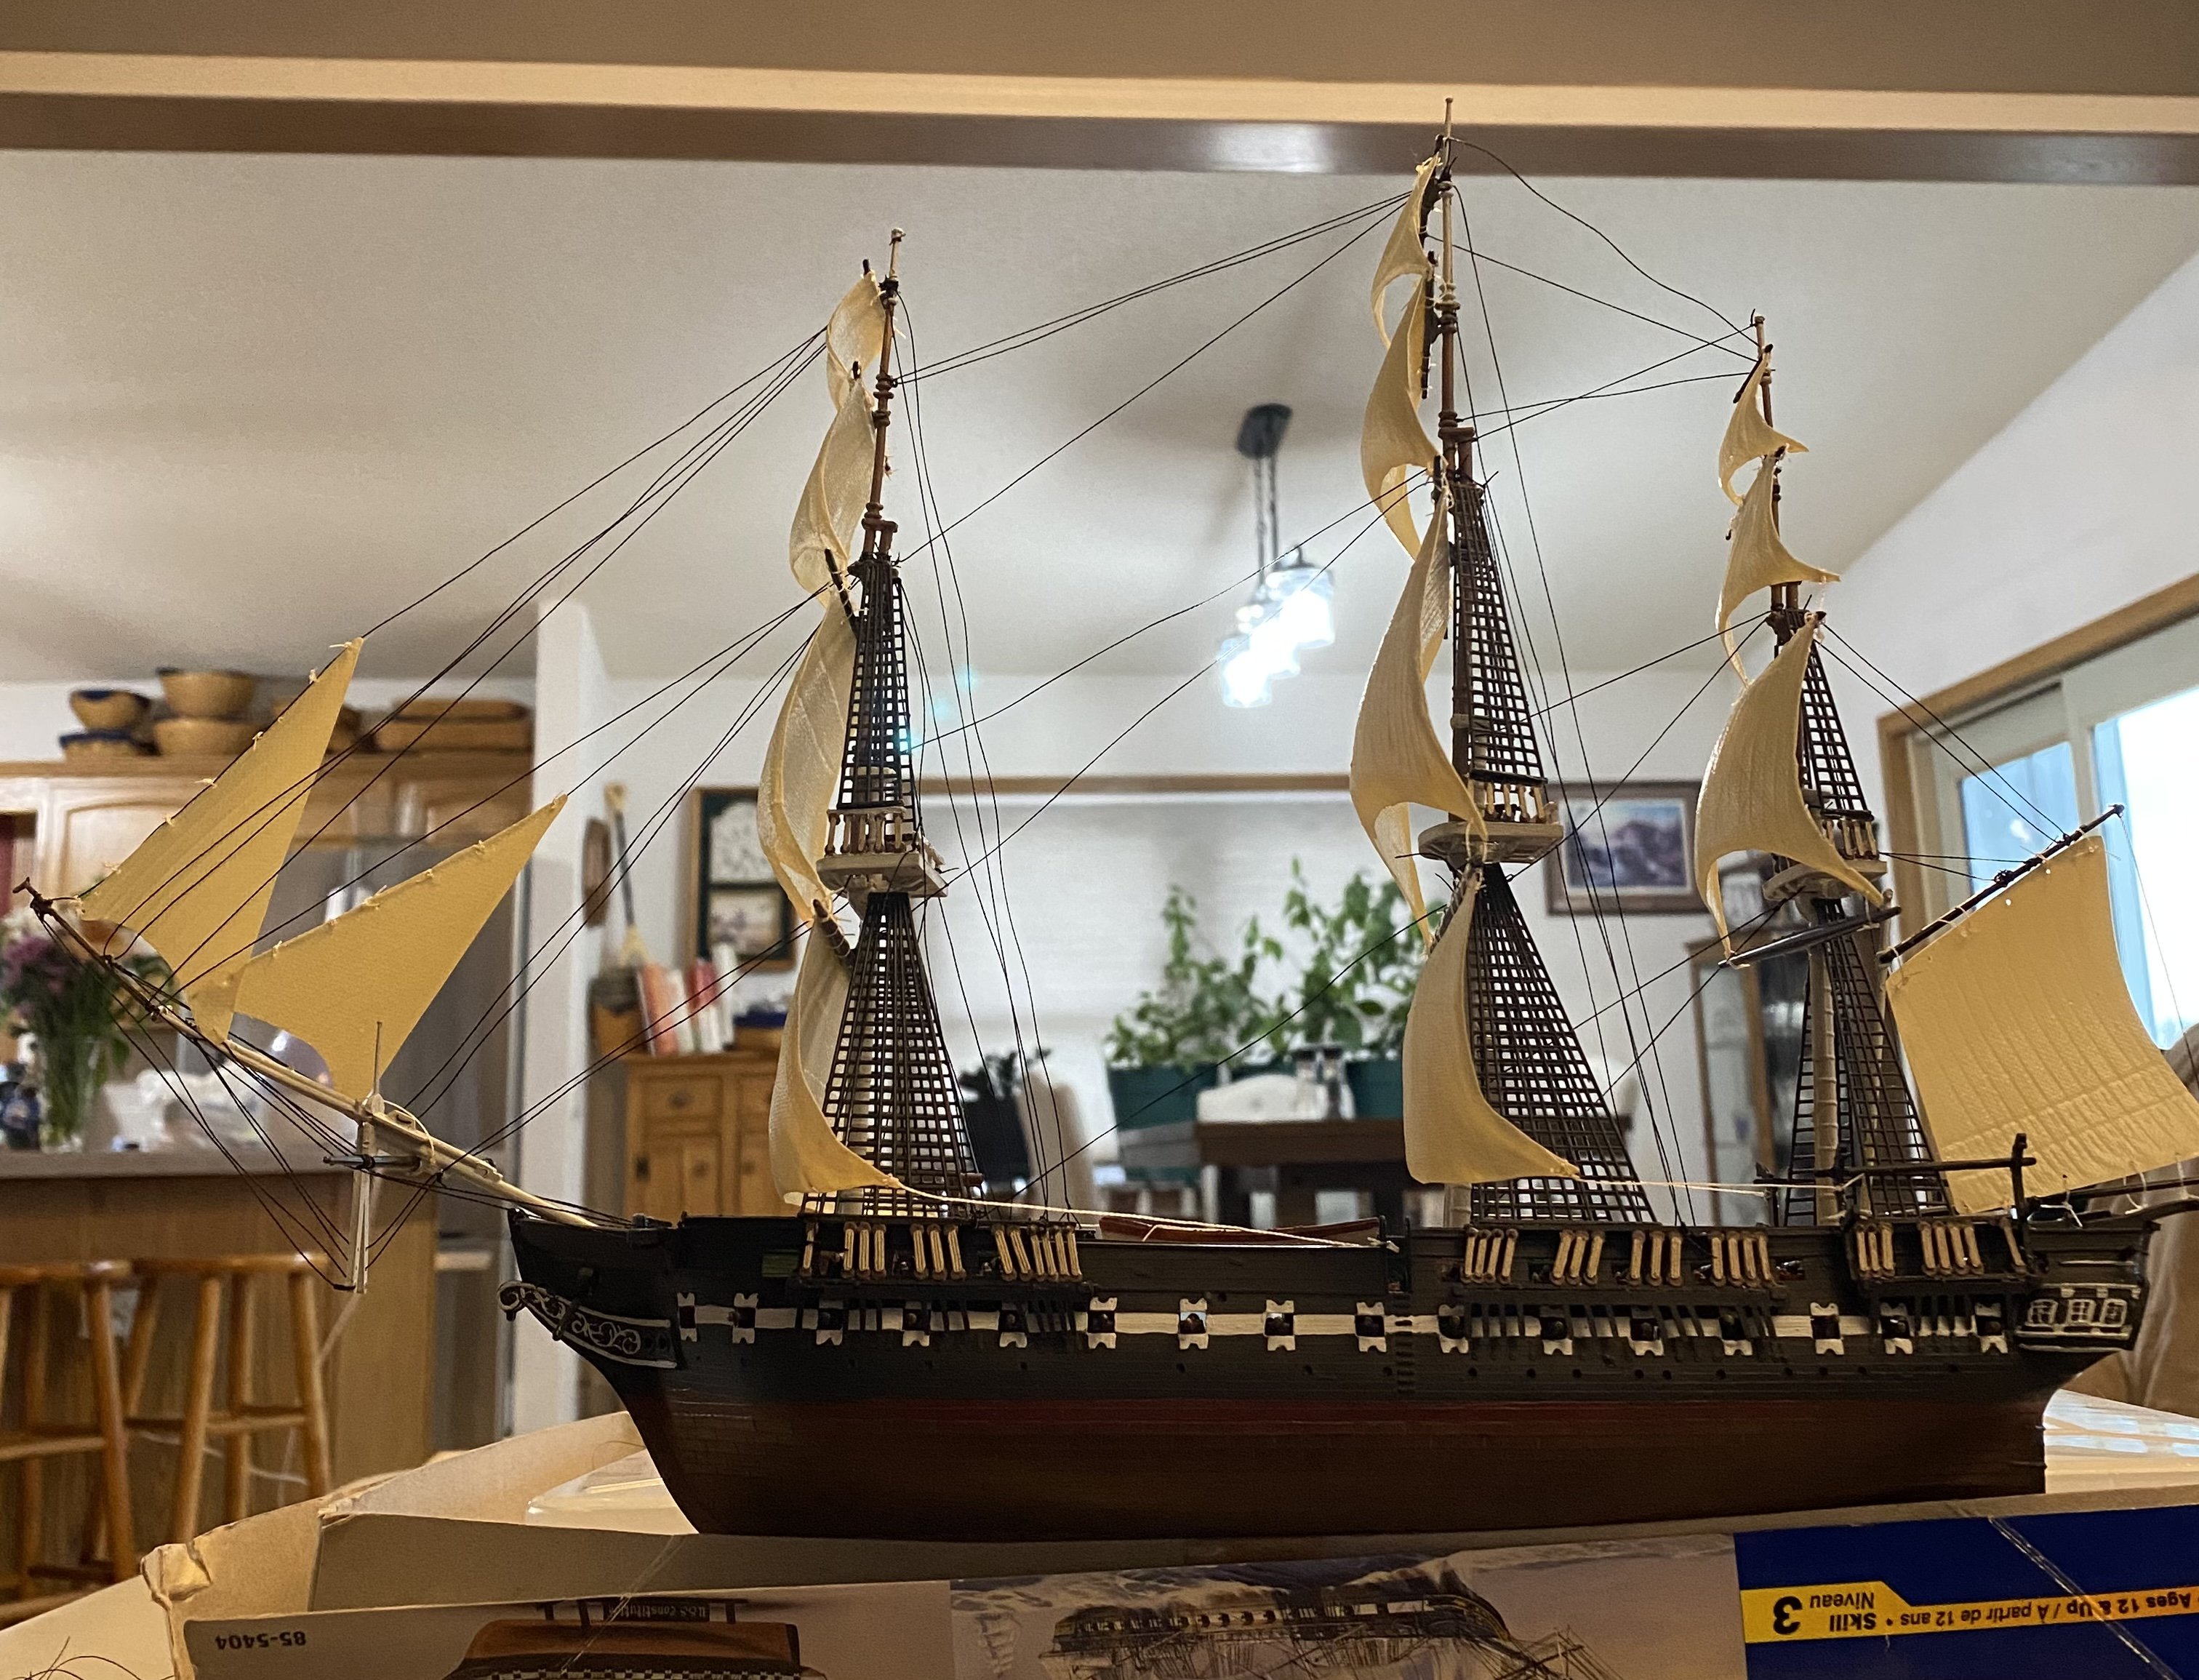
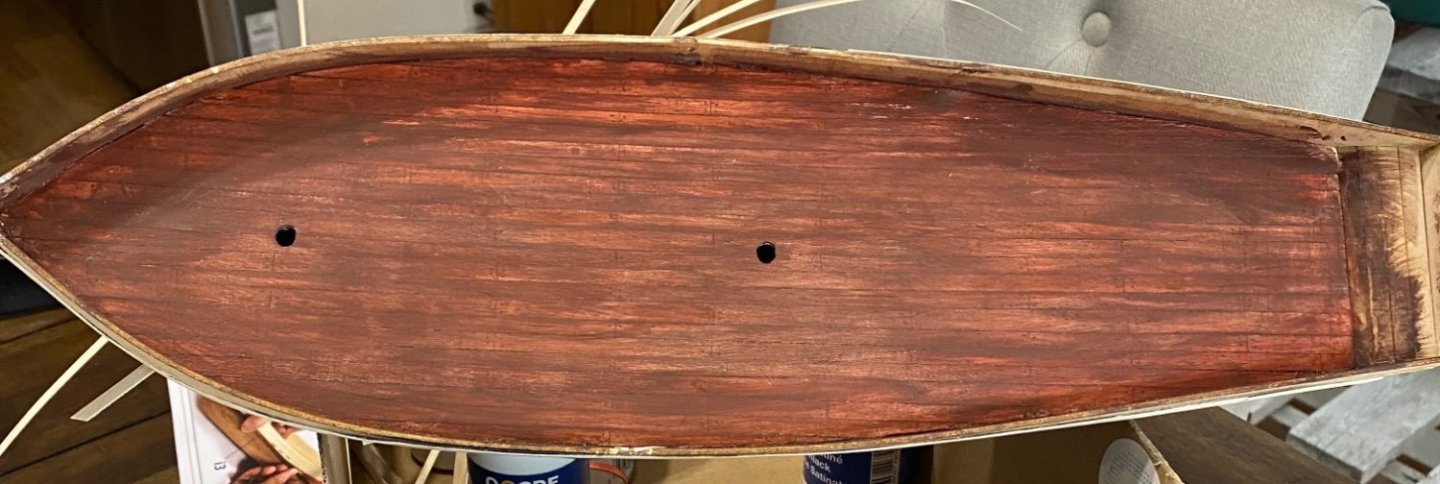
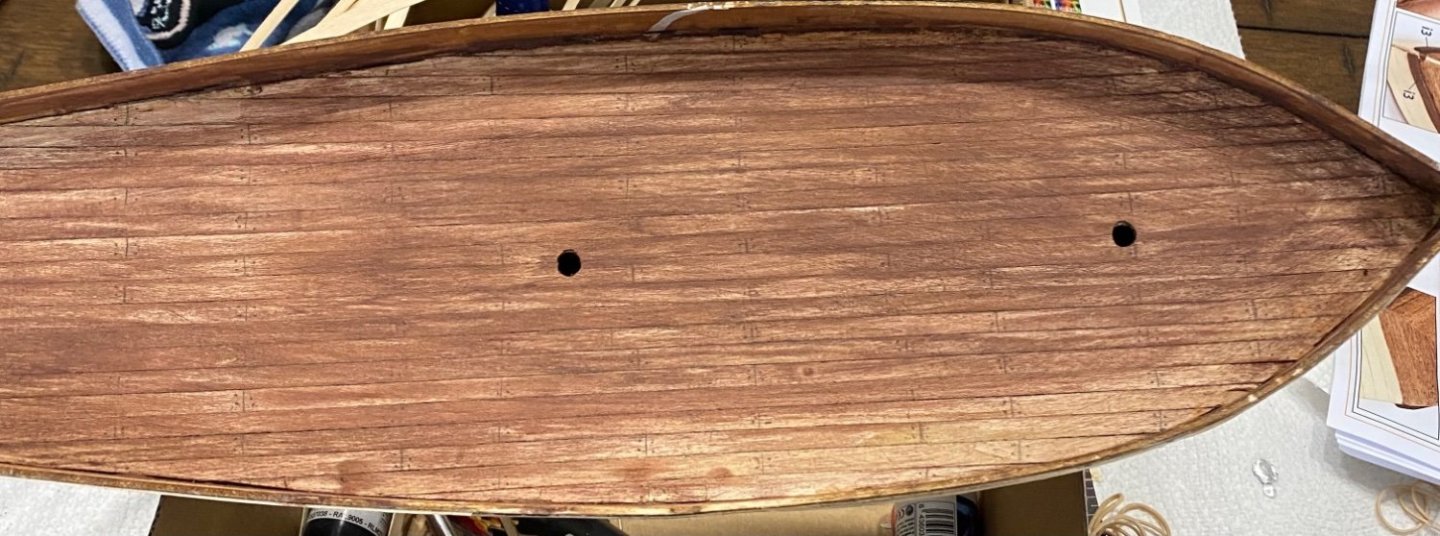
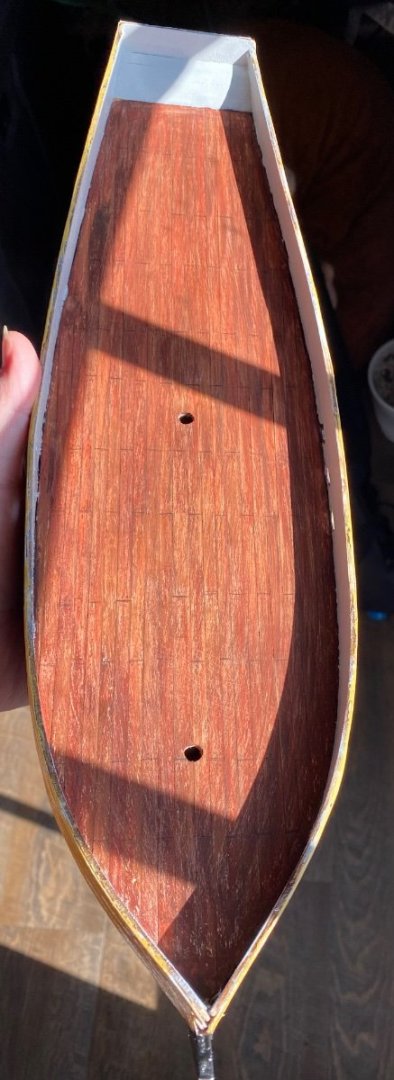
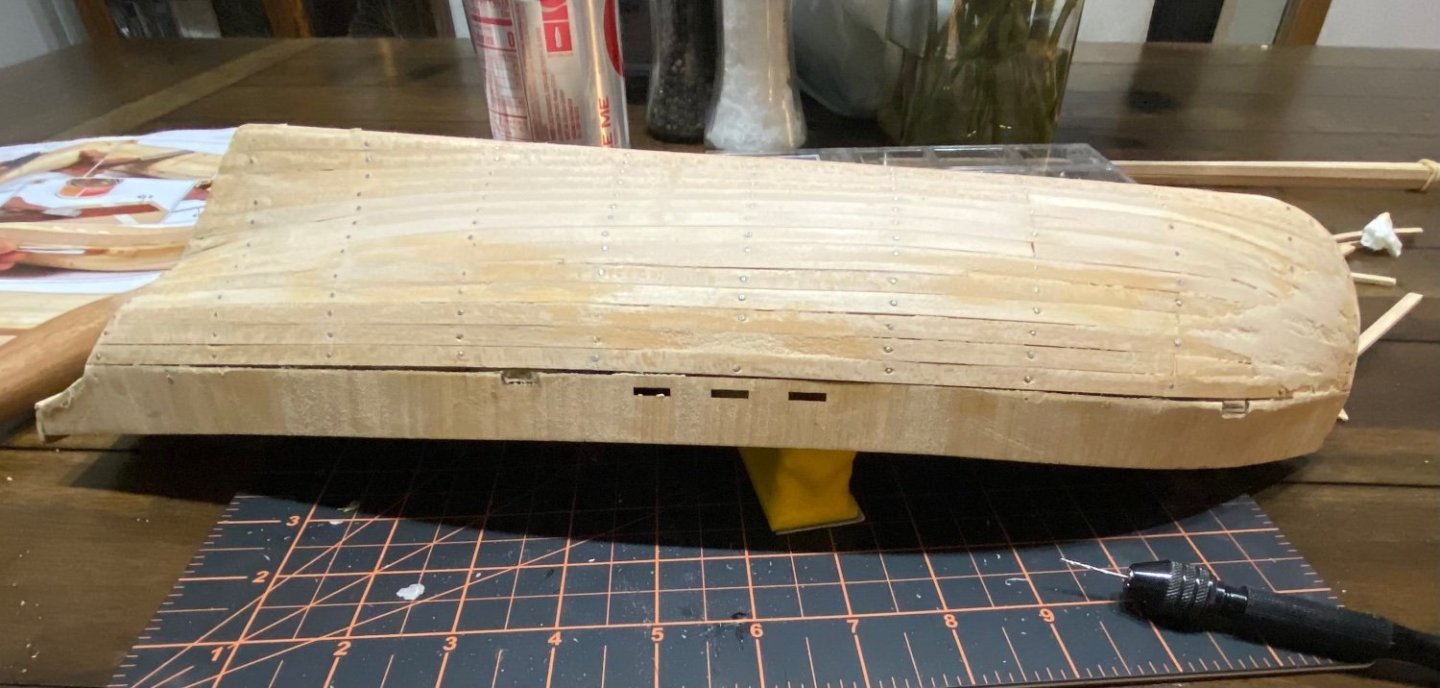
this is where I ran out of Occre’s magic instant glue, I felt lost. Anyway, The deck, remember the varnish? yeah so you can’t stain wood after varnish apparently. (Yes, I am a woman with 0 experience with wood, projects, anything like this! Haha!) I tried to make an acrylic wash, that didn’t work. Tried to sand off the varnish, that didn’t remove it all. I was down to my list will to keep this project and not give up…. I used the sander on the paint but it ended up looking way too weathered. So- out came the crayola pencils. It worked, all thanks to the brilliance of a 5 yo! I feel quite a bit of guilt looking at the professionalism of the other build logs on the site, but I’m hoping gloss will make it a bit more not like pencils… oof. And here is my current progress! one layer of hull gloss done! I have some Side panel thing to do on it, but I get to start finishing it now! 😄 Thanks for reading the current progress! I started this February 28th of this year, I hope to finish it soon!

-
ccoyle reacted to a post in a topic:
Polaris 1850 by Chikpeas - OcCre - 1:50 - first build - loosely based schooner
-
ccoyle reacted to a post in a topic:
Polaris 1850 by Chikpeas - OcCre - 1:50 - first build - loosely based schooner
-
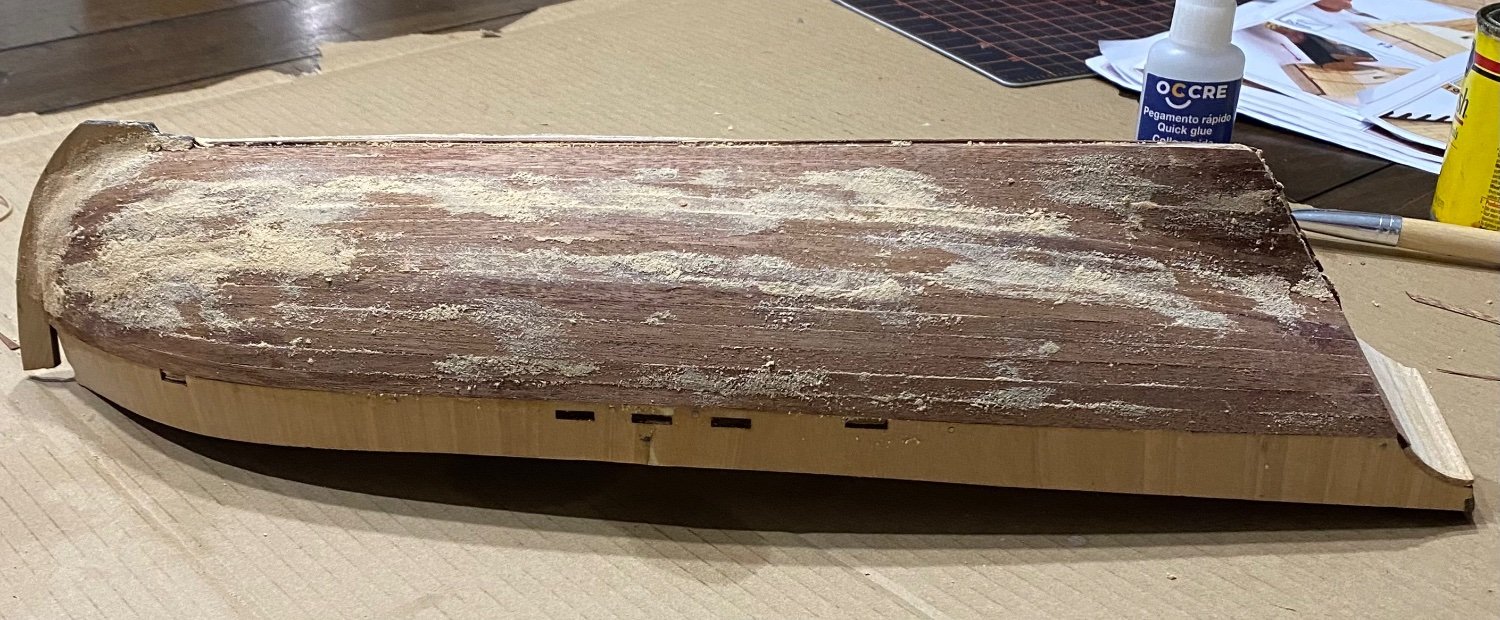
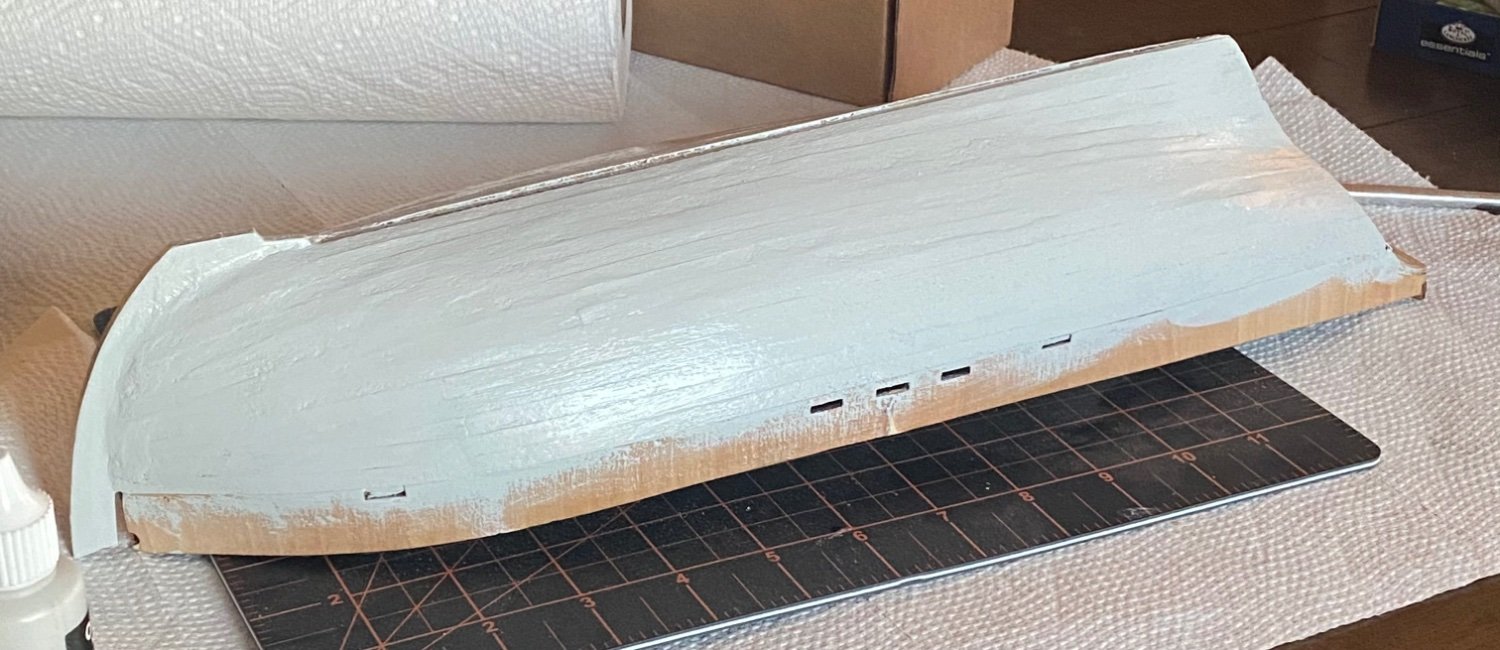
I TRIED to do research on planking! But realistically the measuring and math was wedged into NOVEL long paragraphs and I couldn’t understand what was being said… I struggled really hard with this. Nothing made sense…. Soooo I winged it. Didn’t come out too horribly actually. I was relieved that someone actually advised me to hide mistakes through painting, I still think of you whoever you were ✌️ It was Very rough at the bow. Perfect everywhere else, so I learned that’s my weakest point in modeling so far. But again, filler and sanding bailed me out…. and then I drowned it in primer. Now, sure you can’t drown your problems with paint, but if you do it right…… you sure as hell can 🤣 I just was completely happy with how it came along. I know I might’ve jumped too soon into painting, but looking at the instructions, it seemed like a good idea to get into it. From here on out I’m going to be careful with how I glue and handle things, but now you get to see my second hell. Remember that Varnish I applied? Well, the deck popped too much for what I envisioned. so let’s dive into that journey next post 🙂


-
That is GENIUS 😄 That looks way easier than trying to sand brass nails 🤣🤣🤣 I’ll try that out next build thank you!
-
Chikpeas reacted to a post in a topic:
Polaris 1850 by Chikpeas - OcCre - 1:50 - first build - loosely based schooner
-
Chikpeas reacted to a post in a topic:
Polaris 1850 by Chikpeas - OcCre - 1:50 - first build - loosely based schooner
-
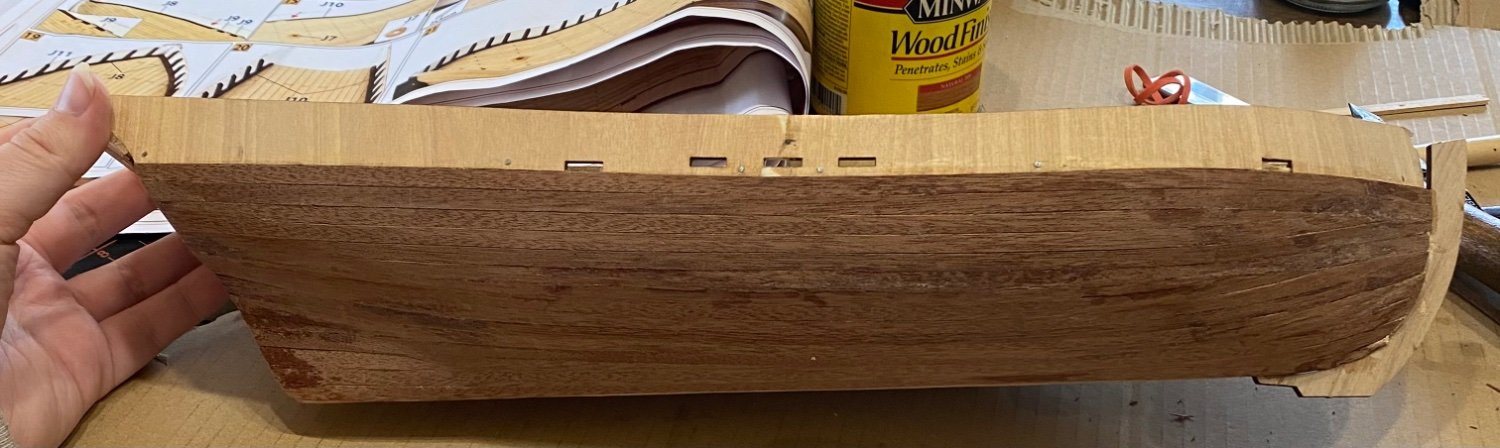
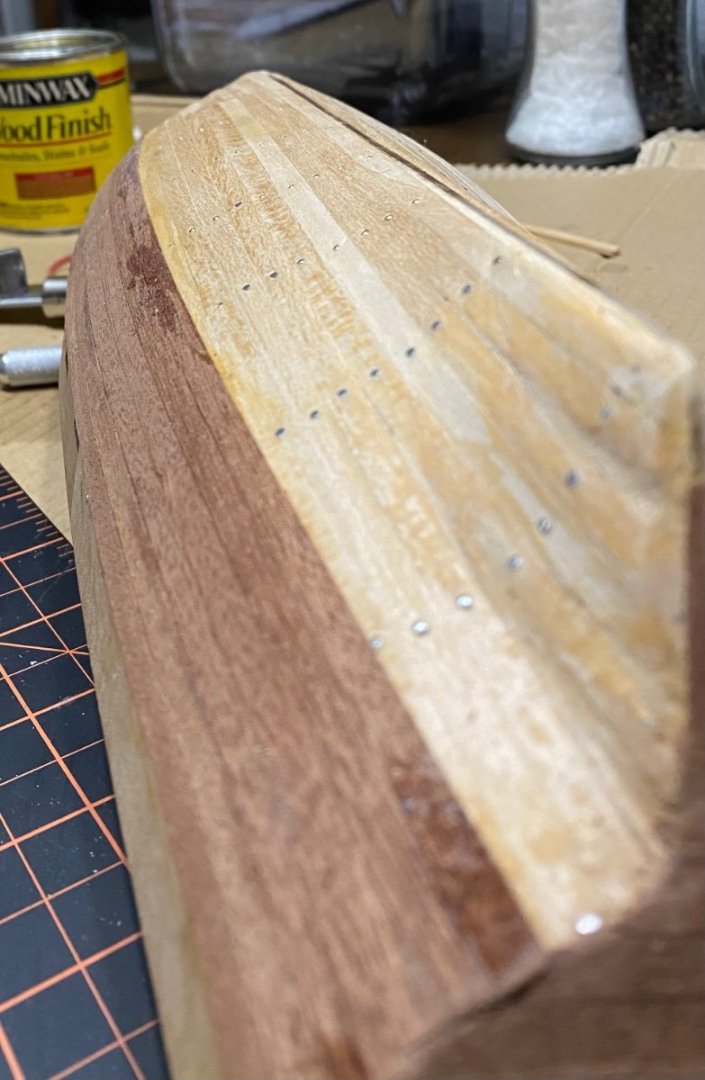
THIS FIX TOOK A WHOLE WEEK it was so painful not to mention, my ship got broken and I lost a lot of the planks that actually Looked decent…. but she started to look a little better!!! and even turned to looking like an actual boat 😭😂 I found some excellent wood filled…. A bit of carving to create the stake plank appearance, and she was saved! I have never used electric tools in my life, but I discovered a cordless model dremel off Amazon and put it to use. It did wonders in shaping and sanding. This the second planking layer began!
-
Oh I love that information! Thank you 🤣 Funny that you mention that, I absolutely am turning this into just a first ship progress- off the books. I’m even planning on remaking the flag. Haha!!!!
-
 Chikpeas reacted to a post in a topic:
Polaris 1850 by Chikpeas - OcCre - 1:50 - first build - loosely based schooner
Chikpeas reacted to a post in a topic:
Polaris 1850 by Chikpeas - OcCre - 1:50 - first build - loosely based schooner
-
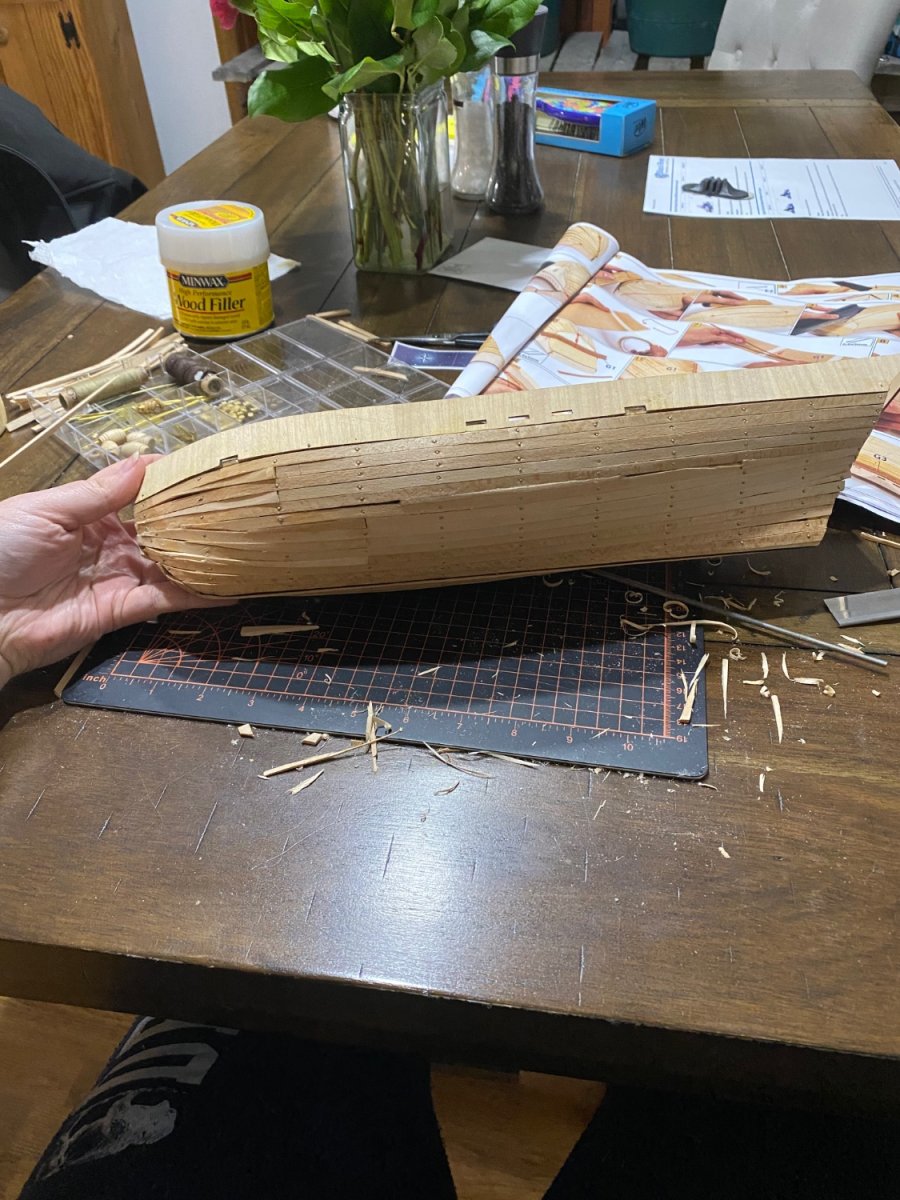
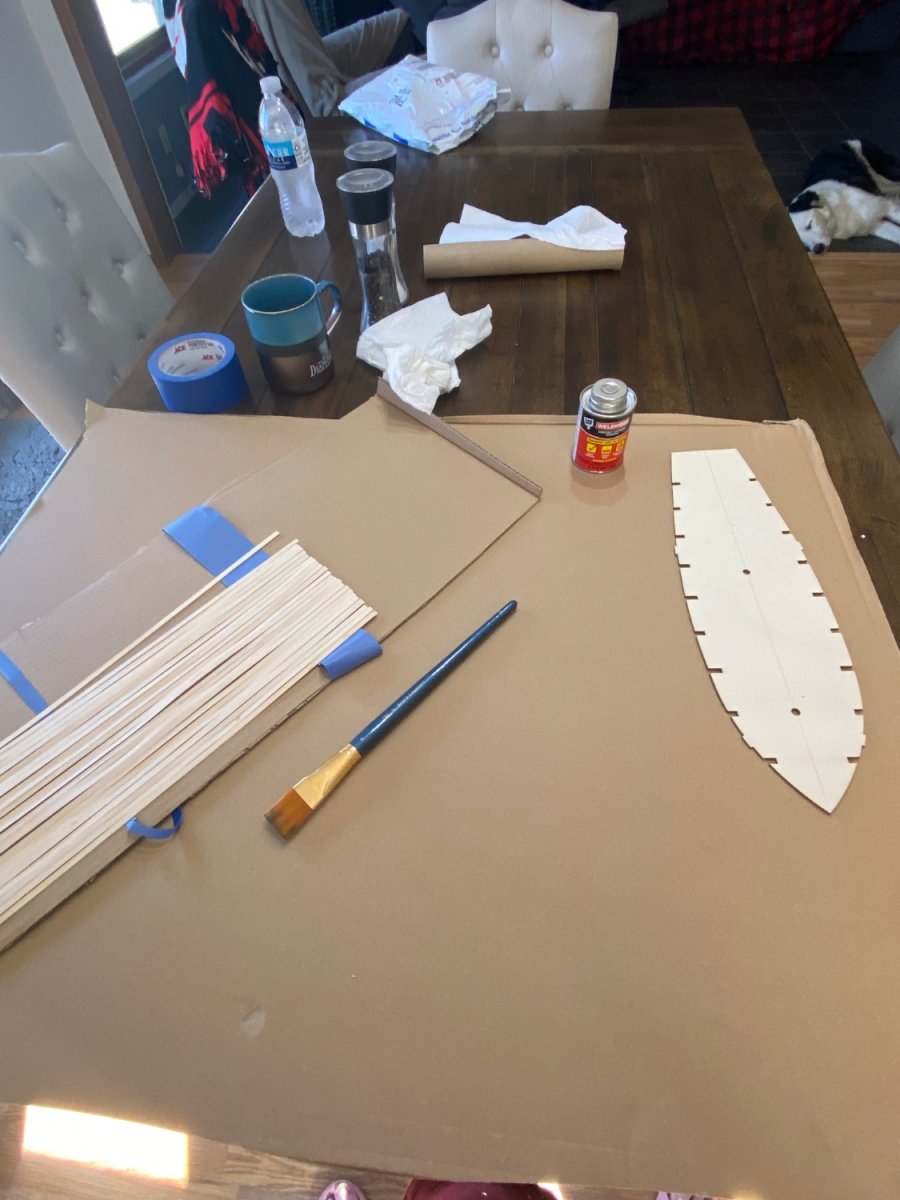
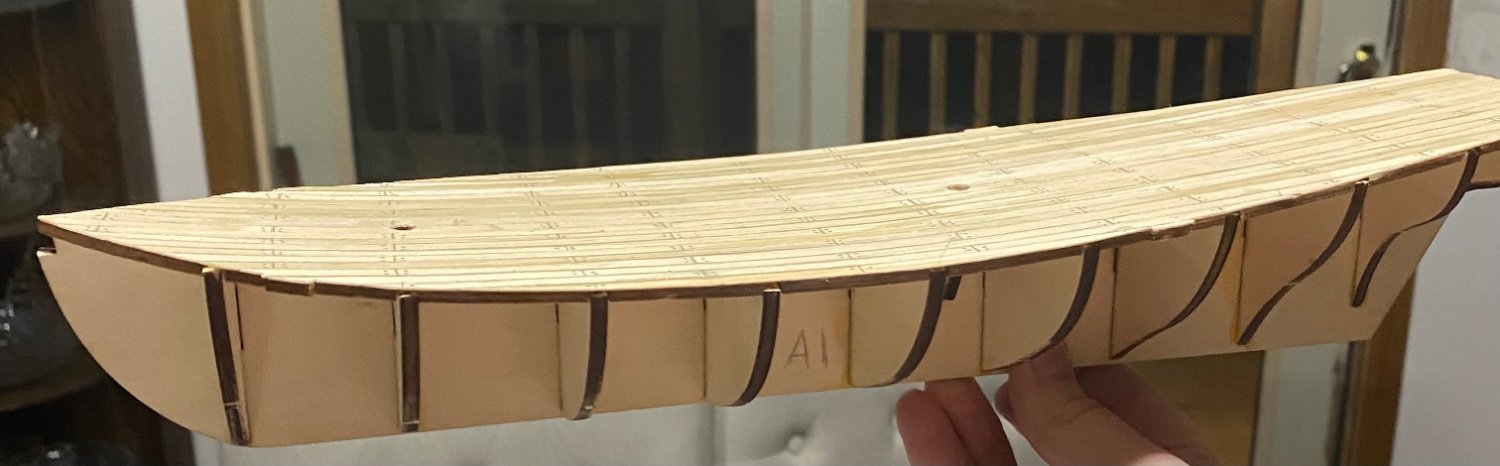
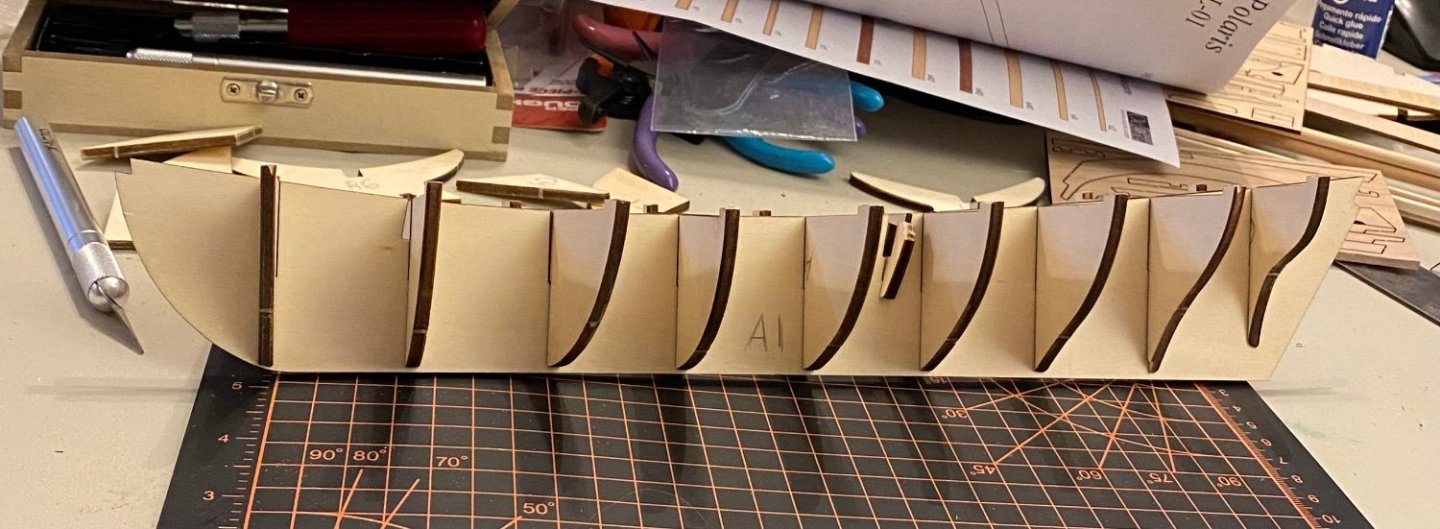
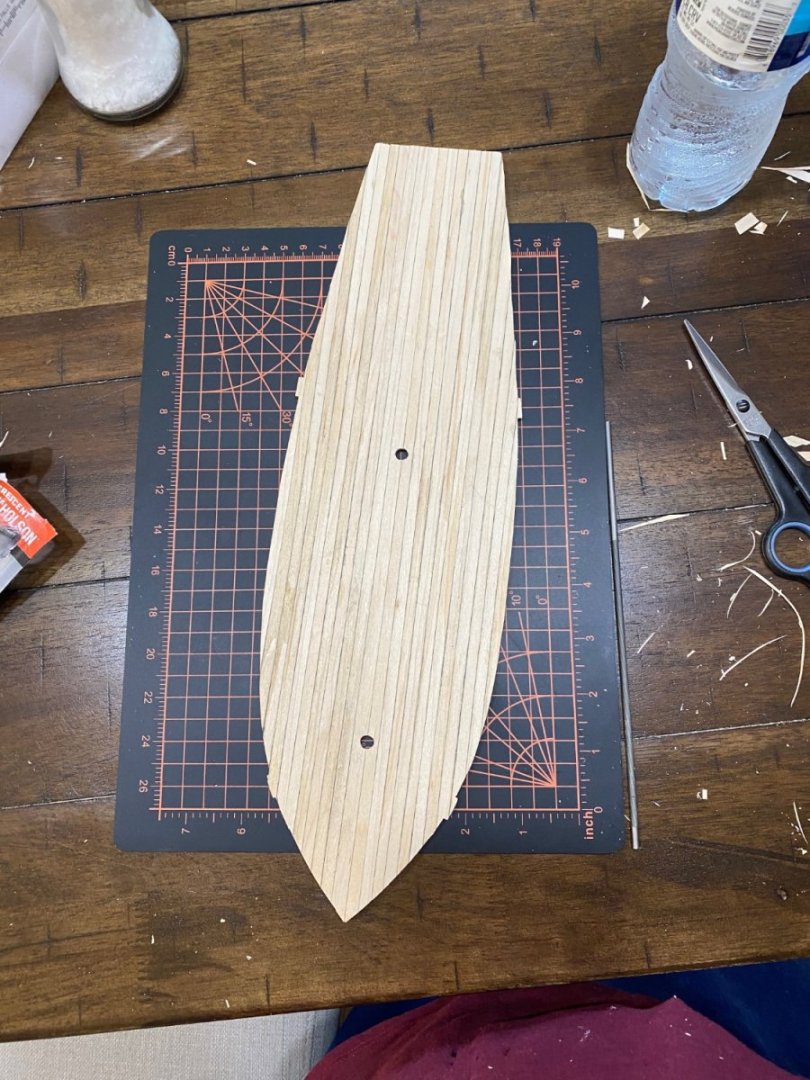
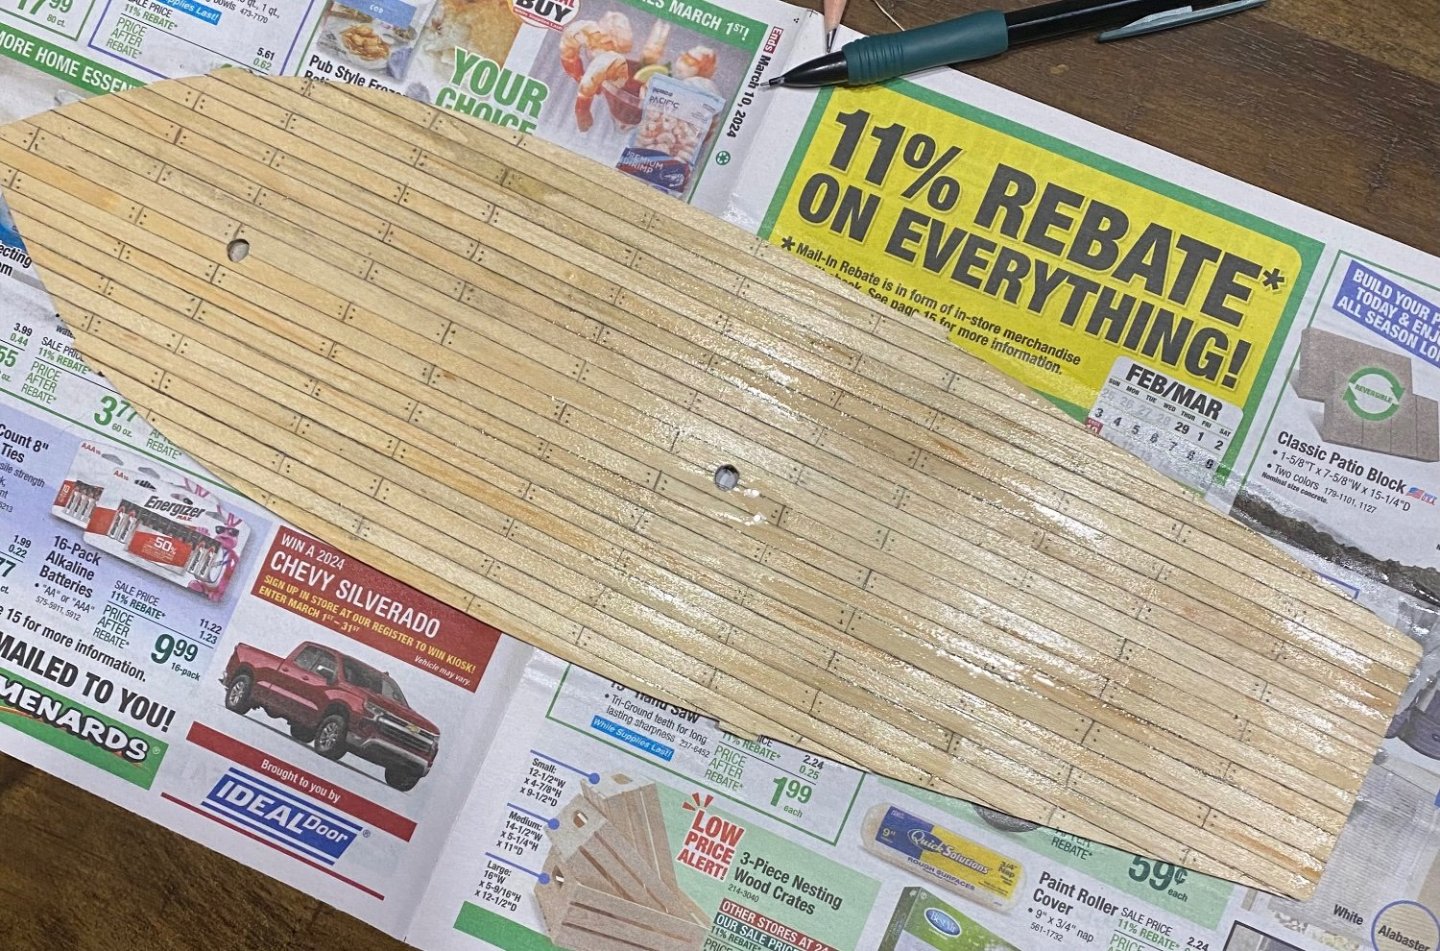
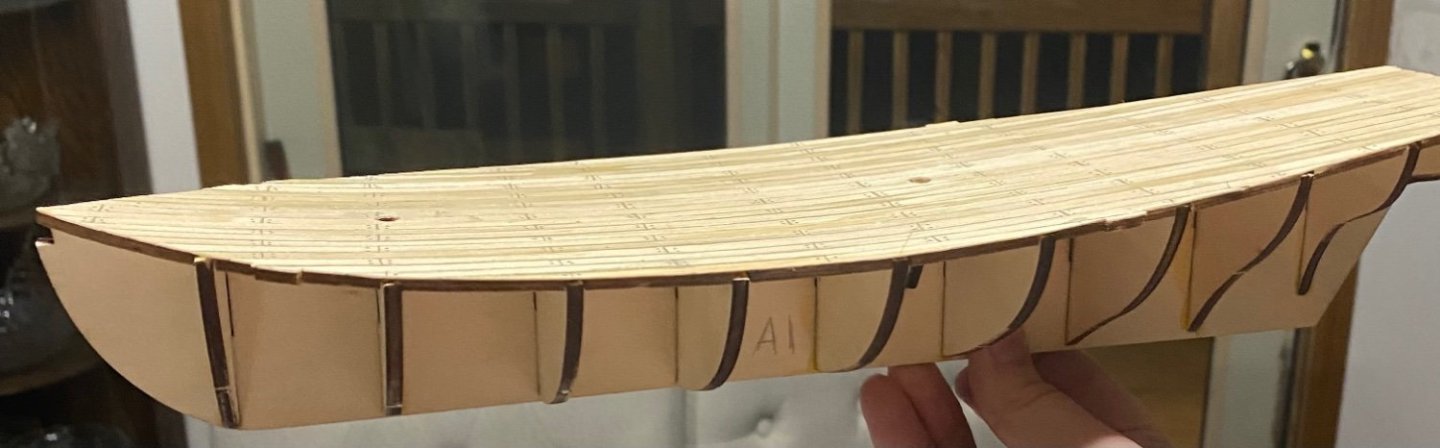
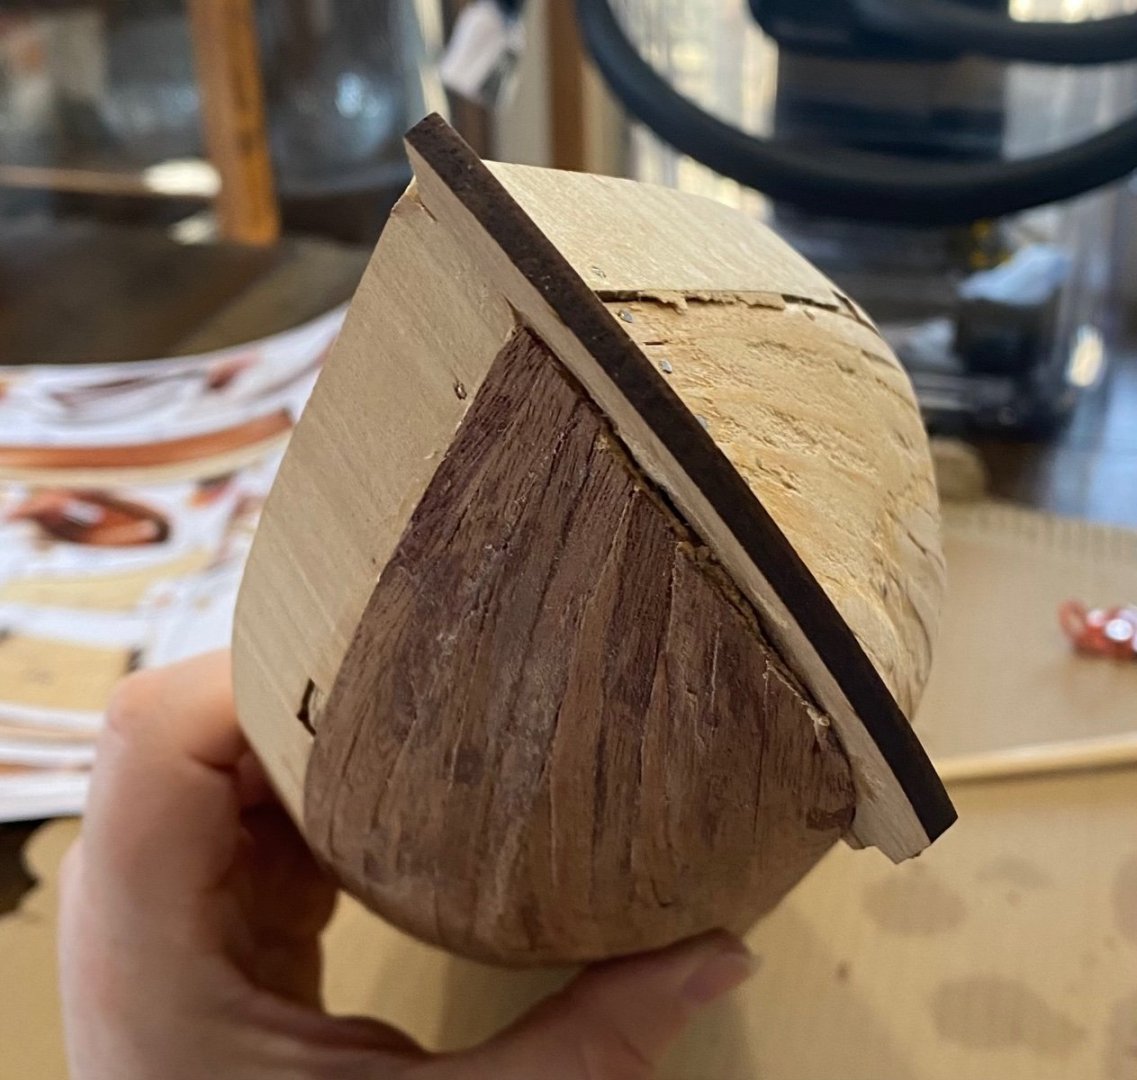
So there you have the first two days, one day of gluing the skeleton of this ship, and the second of getting the deck done and down, I was determined to devote a LOT of time into this project, something to stay distracted with. Then the first layer of planking! WHERE DO YOU GUYS GET MAGNETIC BRAD PUSHERS CMON… I instead I learned how to hand-drill the holes, put in the brass nails, and use a small pin hammer to smack them in. My mom was beyond annoyed with the noise, honestly it was not a great time—- but I still had plenty of fun! So far the instructions and videos were clear enough, I was sort of struggling with the bow of the ship. I hadn’t learned that if I curled the planks pre-setting them, they would have fit better and be easier to handle. THUS, I started to have a WHOLE mess 🫣 I cut the planks improperly, measured them wrong…. And this was the Terrifying end result… ouch Fortunately, I used to sculpt, so I know for my particular situation it wasn’t the end of the world. There was a second layer of planking, so as long as I could get the end result to resemble a sort of hull…. I could make it work…. this is the first and last time I hope to ever be doing that.


-
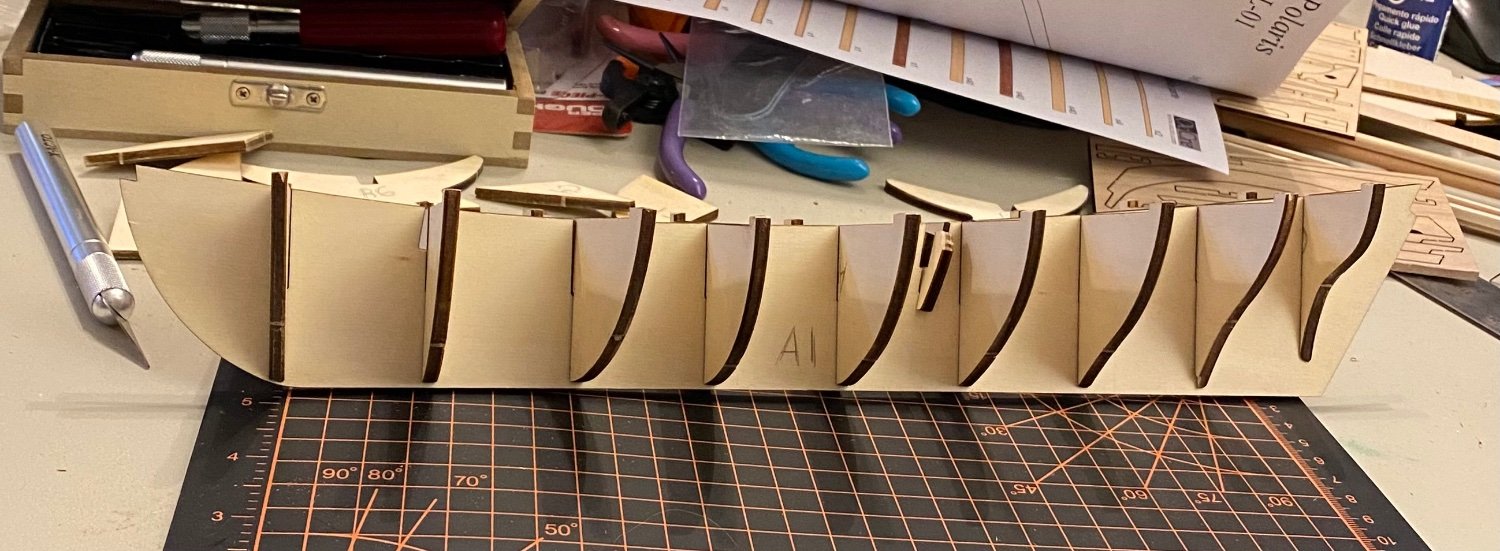
Hello! so being new to the ship world and to modeling them, I thought the Polaris build from Occre was a completely random kit specifically designed to help you into the world of wooden models. I have since learned the Polaris WAS actually a real ship! And a steam one at that, so this kit is not completely accurate, from what I read this vessel was procured by the US Navy and was actually known as the USS Periwinkle prior to being an arctic expedition ship? That being said, I took a lot of artistic liberty. I have been learning some terminology in the nautical world, what parts and pieces are, how things work— but slowly. I have some learning disabilities so PLEASE don’t judge me too hard for sounding so basic with what I post! I know there’s measuring involved to make the strake planks accurate, Occre is very difficult in the sense that they just shrug and have you figure out how to hodgepodge the pieces. You’ll see I followed Occre’s instructions up to the second layer of planking, where I tried to fiddle with things a little to make it easier. anyway! I used a 90 degree ruler to make sure that the ribs were PERFECT, and of course they were! Until I tried to glue the deck on. Thankfully the wood glue I used it rather forgiving and a bit rubbery when it dries, so I could gently crack the ribs into place without breakage. I learned the cement I was used “contact glue” was garbage. I must have gotten a bad bottle because the planks didn’t stick to the wood very well. It was a frustrating process of using the glue I bought from Occre to get everything to lay down well AND HERE IS WHERE I MADE MY FIRST MASSIVE MISTAKE I followed the instructions TOO precisely. Using the varnish. That was a big whoops. It was after I applied the varnish I looked at other finished kits and saw that they stained the deck to get richer colors… Well, I guess I’ll be getting back to this—- and you can already tell what’s going to happen. All in all, I was feeling very proud and excited to be getting this far

-
Chikpeas reacted to a post in a topic:
Newbie here- Flattening the planks?
-
Thank you- 🥰 I’m going to give it a go, and you’re right these planks are thin and Very brittle. Cutting them is a complete nightmare even with a surgeon 11 scalpel. I feel like I need to break out the dremel saw but I’m nervous these planks will split and crack like hell. I really hope drowning it in paint will make it look better and fixing up the stem will do it justice…
-
Chikpeas reacted to a post in a topic:
Newbie here- Flattening the planks?
-
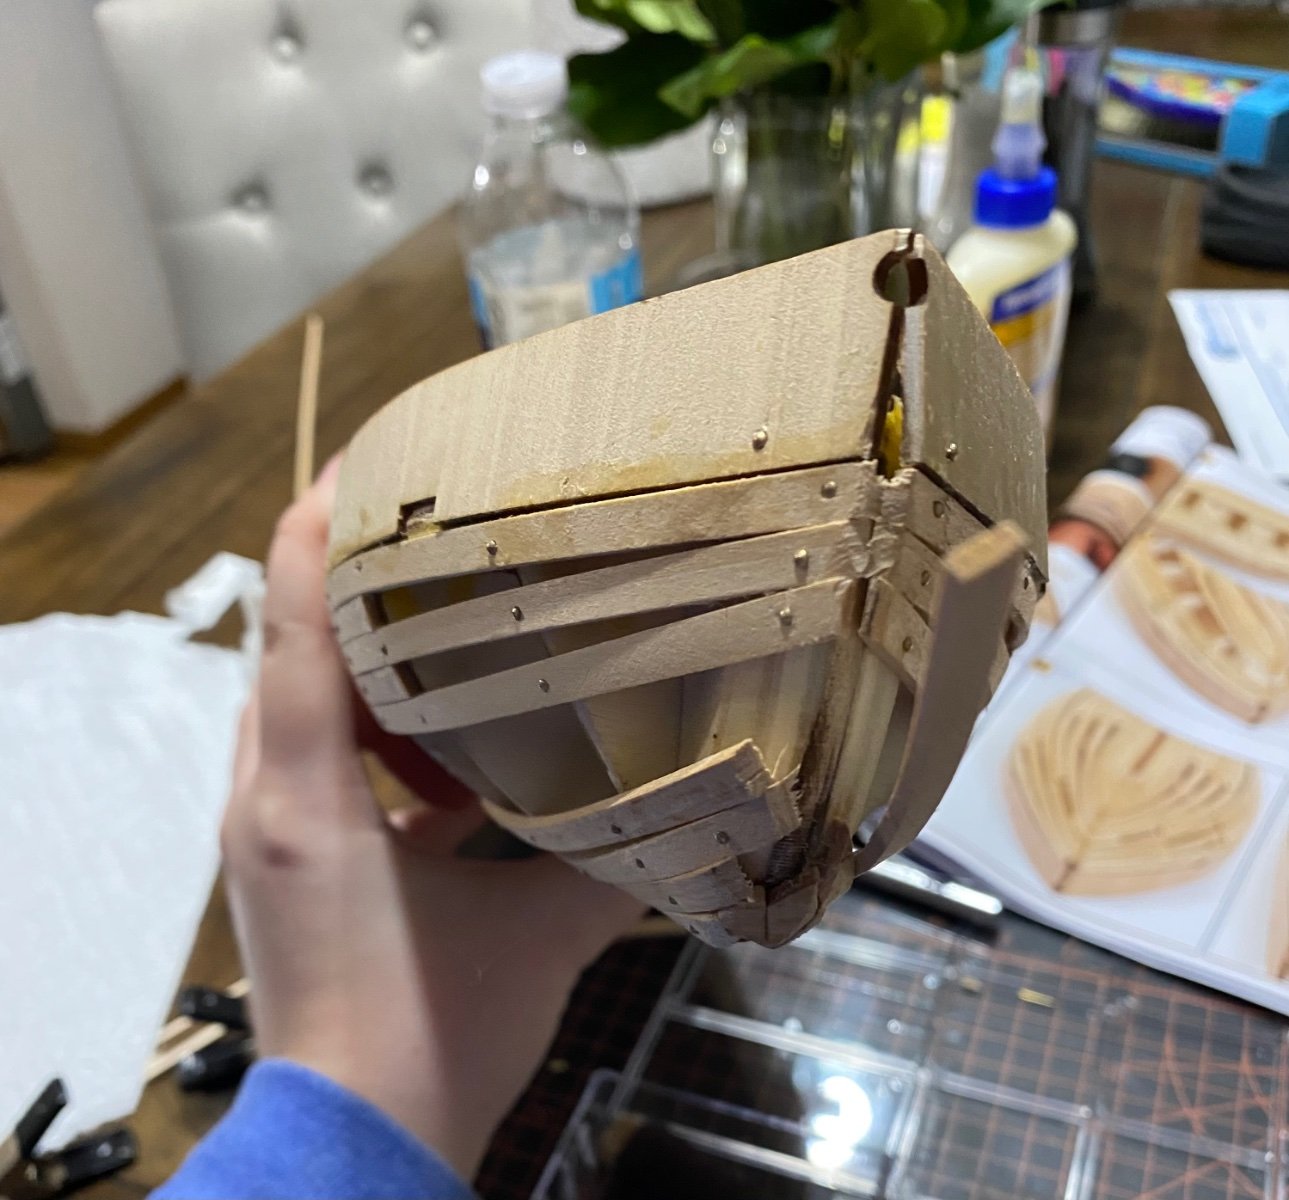
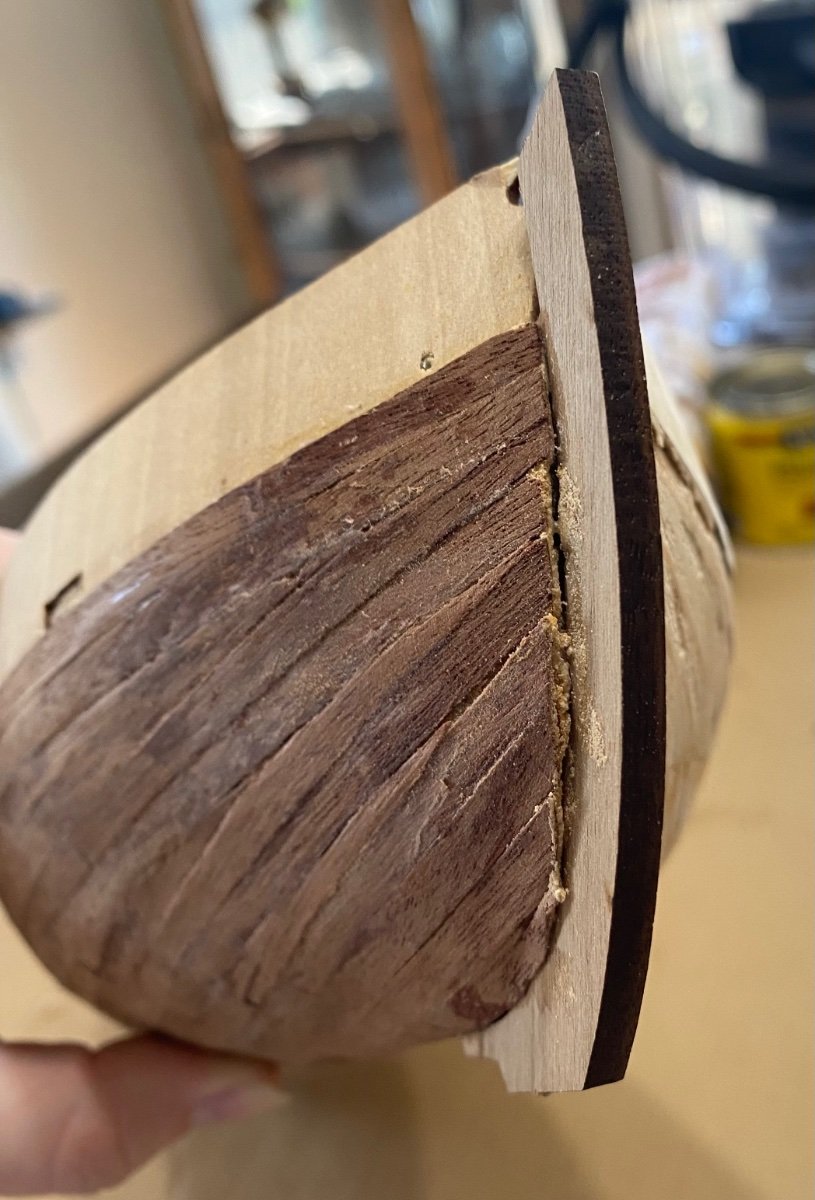
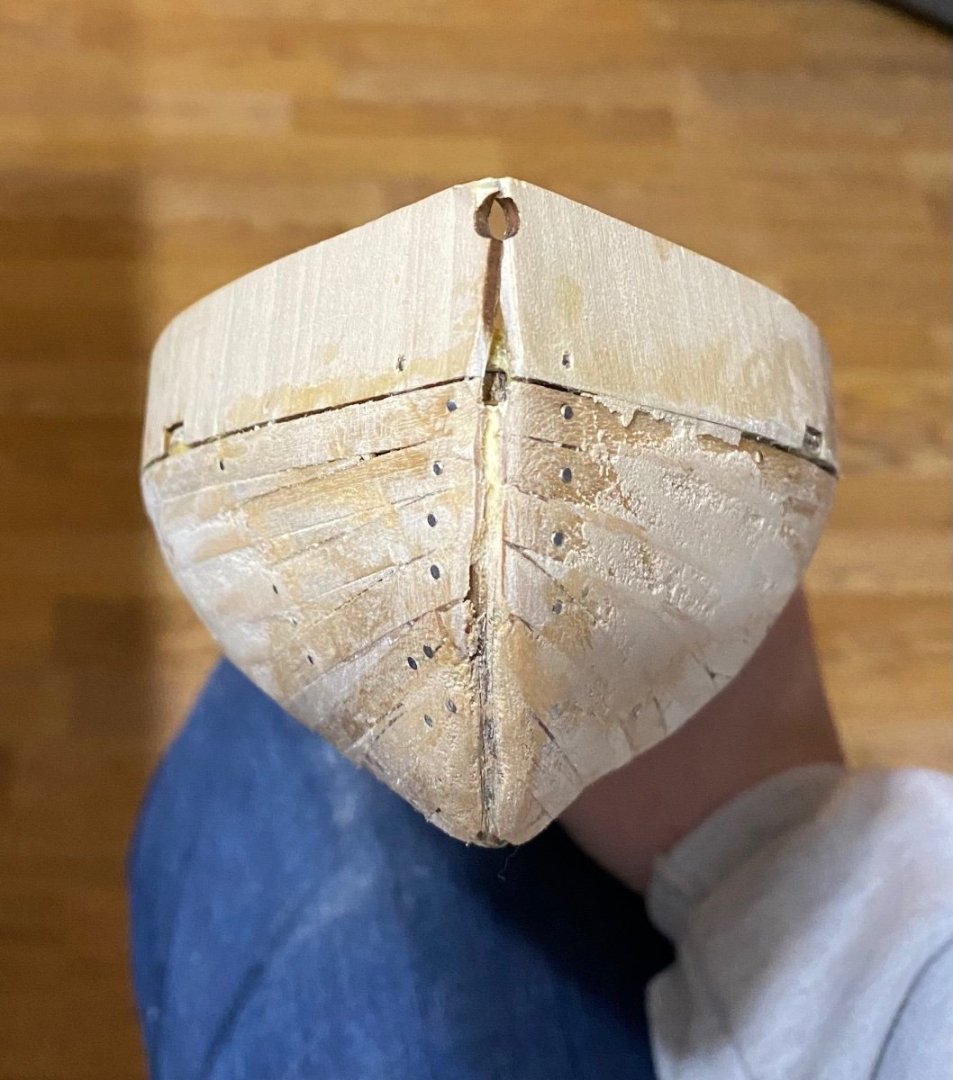
Hey everyone, I am happy to have an arsenal of informative on actual planning shared here, for this build I just wanted to finish it just how I’ve been doing it and then learn the new planking methods for the next build, but I ran into a rather large problem so back when I was trying to sand, I did it wrong. I couldn’t find any head-on images for this boat so I really didn’t know what I was doing and as a result, this happened: how could I fix this? It’s completely due to the hull being misshapen… (it looks really gross on the planks right now but I’ll be fixing it) could I sneak a third row of planking to extend the ends, tidy it up, and hide this?

-
Chikpeas reacted to a post in a topic:
Howdy! From Wisconsin, USA!!
-
Chikpeas reacted to a post in a topic:
Howdy! From Wisconsin, USA!!
-
Chikpeas reacted to a post in a topic:
Newbie here- Flattening the planks?
-
Thank you for the heads up! I complete agree, it is bloody awful, they really just skipped the entire bow and said “eh the pieces are magically supposed to fit there.” so what I did is pack on a bunch of pieces so I can carve the wood into what it’s Supposed to look like instead of worrying about the first layer of planks looking gorgeous 🤷♀️🤦🏼♀️ I’m going to try and Actually do the planking more realistically to what is on the forums for the second layer. Hopefully it works! I actually plan on painting the Polaris too, I just don’t like the wood finish look.
-
Chikpeas reacted to a post in a topic:
Howdy! From Wisconsin, USA!!
-
Okay, that makes me feel better 😅
-
Hello! stealer planks for sure! I feel like I’m pushing the limits to the type of wood I’m currently working with, actually to the point that I’m splicing and puzzle piecing the bow. (The front? That’s the bow— I think.) Going to try to learn a different way to do planking in some of the videos others posted on this site like it was suggested, I would cry if I had to rip all the planks off right now😭
-
w o w, I didn’t know that.. I have a Lot to learn because I had to Google quite a few things you said 😅😆 I’m fresh out of the oven in this hobby. To get the planks to work, I steamed them for like 20 mins over a pot of boiling water and did a little crimping to get them to bend easier… that explains why I broke a few… Thank you so much!!! I’ll finish this with what I have but once I’m Done I’ll go through what you’ve suggested, I might actually try another beginner build with other planks for practice 😄
-
LOL you broke it too, that made me laugh, I’m glad to see I’m not the only one. But- Hey that’s coming along really well though!!!! 😄 Here I’ll show my hot mess and shame, I can’t figure out How they wrapped the planks around the bow… it’s impossible. Maybe this will give you a bit more confidence on yours 😆 BEHOLD the Occre eyesore 🫣 gonna patch this together like a jigsaw puzzle I guess 🤣 I’ll take your hint at sanding this puppy like a madwoman. Keep me updated on the masts and rigging!

-
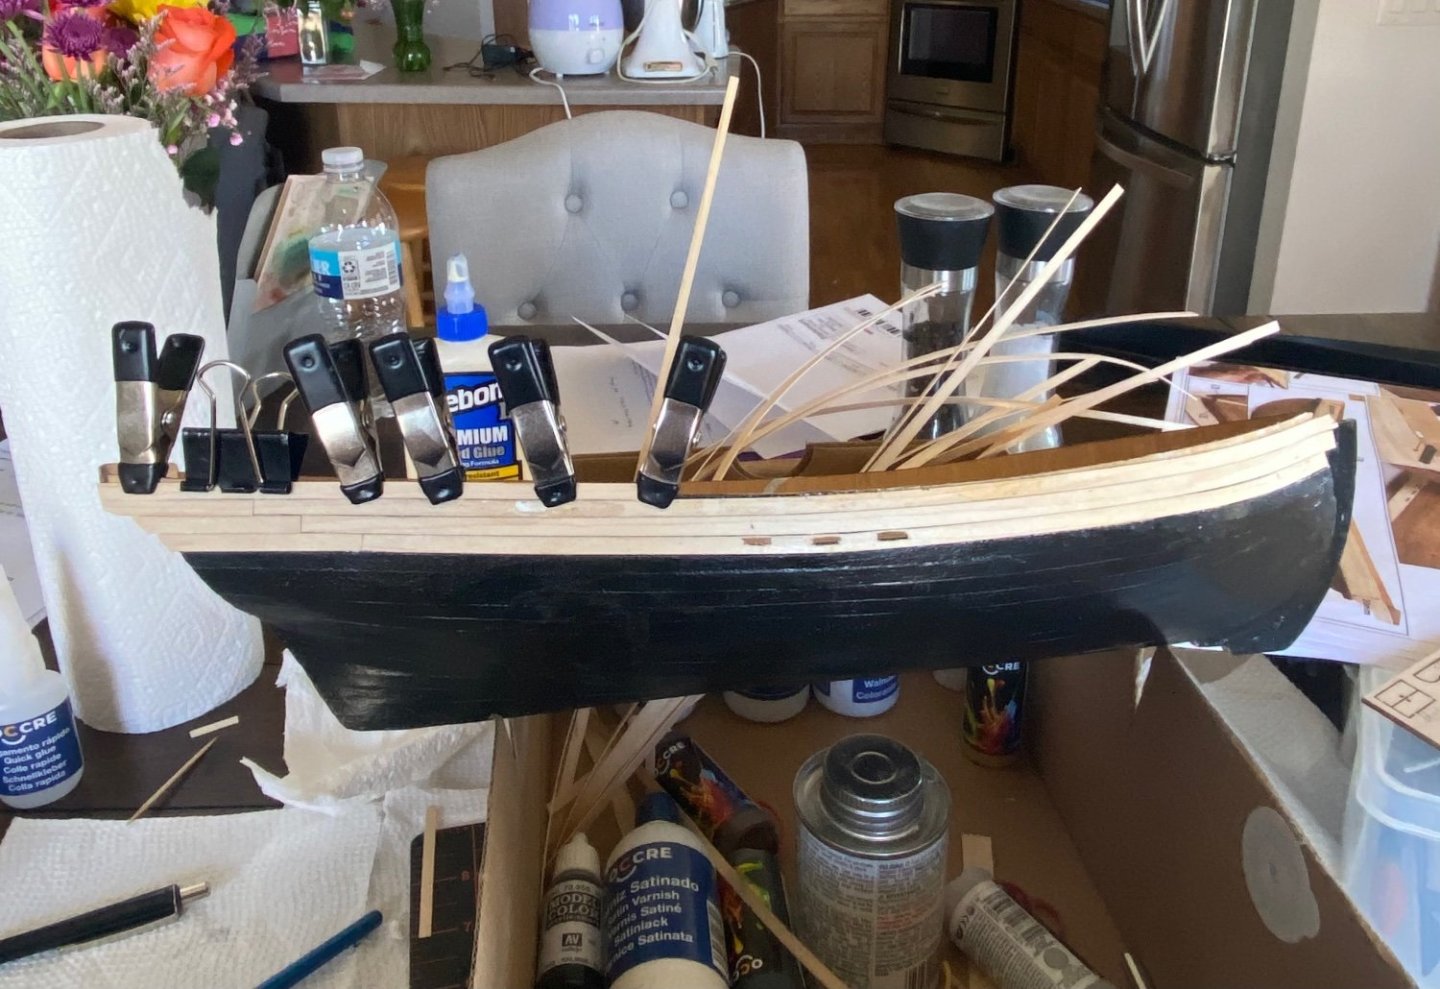
—— edit: someone said yes lots of glue and lots of clamps and they were correct 👍 let’s see if I can nuke this post