
Desertanimal
-
Posts
21 -
Joined
-
Last visited
Content Type
Profiles
Forums
Gallery
Events
Everything posted by Desertanimal
-
Jet 1020 drum sander
Desertanimal replied to SteveA's topic in Modeling tools and Workshop Equipment
Sorry I can’t help with that exact sander. I have a larger shop version of Jet sander. It’s an excellent tool. I’ve found it to be well engineered and when I had a technical issue they solved it right away on the phone. I’ve used it to sand pieces probably 1/16” occasionally. -
Thank you all for the kind words and encouragement. The build has stalled a little while I wait for smaller nails to arrive. I ordered them from Drydock and shipping takes quite a while. Some questions while I wait. I understand all the brass should be blackened in order to look like iron. What about the white metal parts? Should those also be black? Is there a good source for reference photos with this boat? I would like to see what “accessories” I can make that will be good practice on scratch building parts and also make the model just a little more realistic. I would appreciate any suggestions. Thanks for checking in! Chris
-
Thank you all for the encouraging words! I guess it also begs the question of do I want to create a lobster smack (next build) that looks like it just rolled off the showroom floor or one that has put in 35 years of service to the lobsterman and his two sons? Would that be a difference in the two edges shown above? New boat vs. old? As they age do laminations begin to show? Do they get thick clumps of paint in the corners or is it common practice to strip off all old paint before repainting? Thanks!
-
Hey Robb, yeah I was concerned about that. I made sure it was a pretty loose fit before paint. Fingers crossed!🤞
-
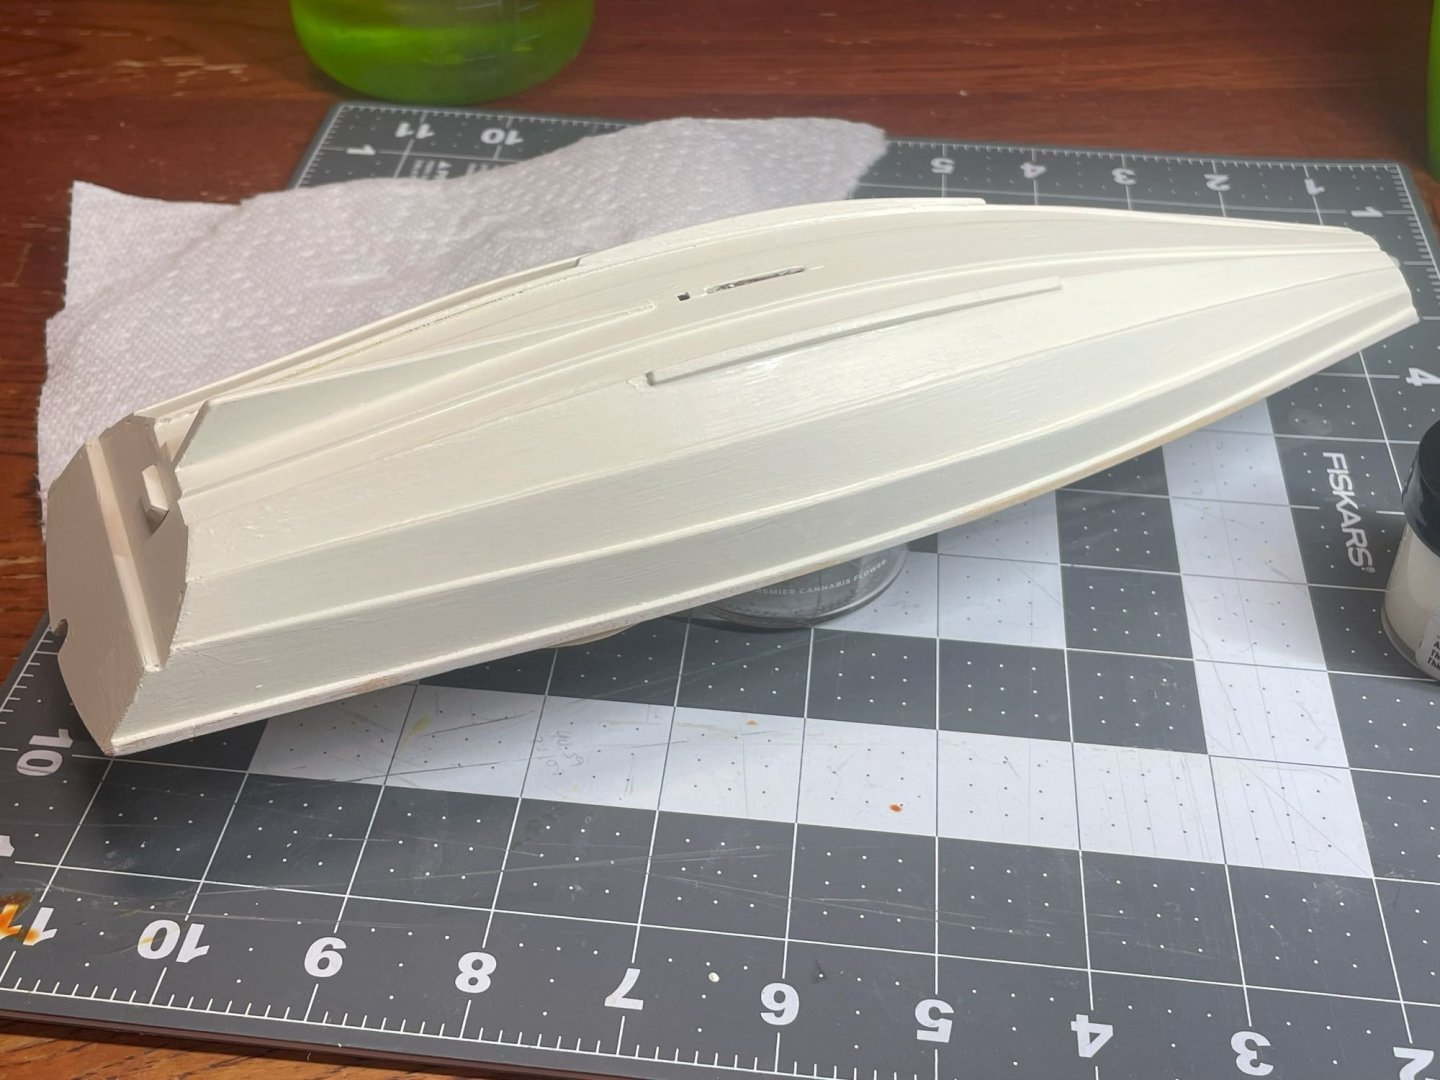
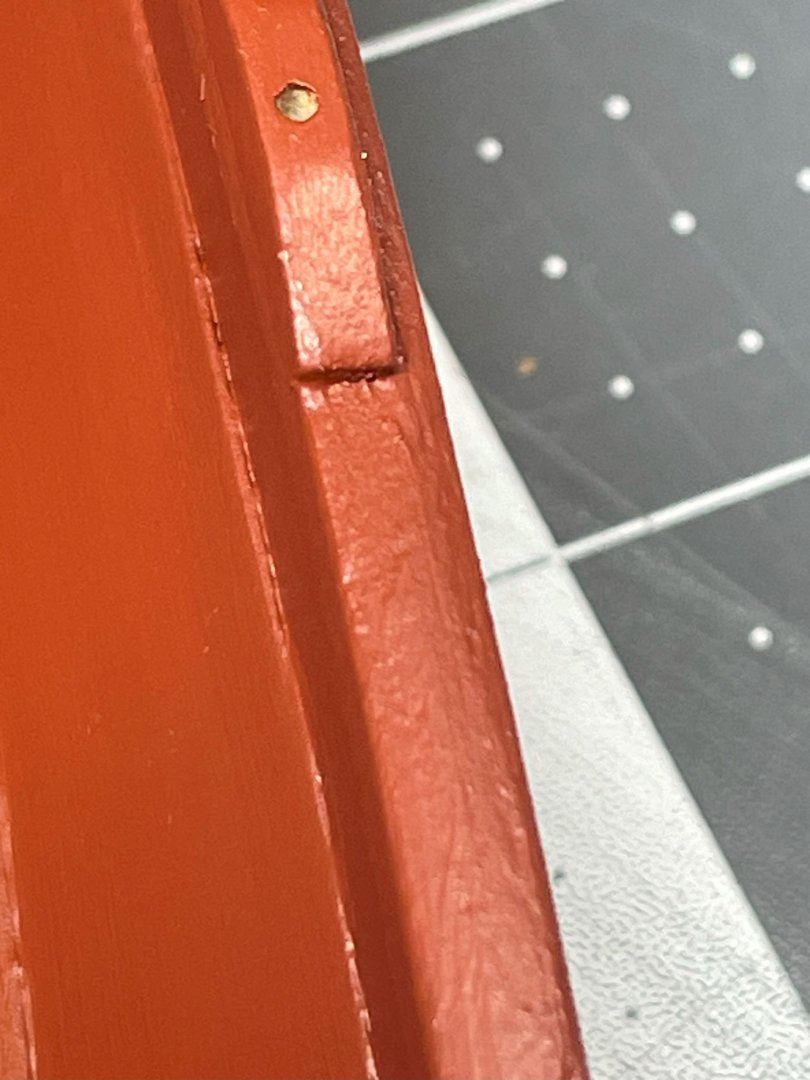
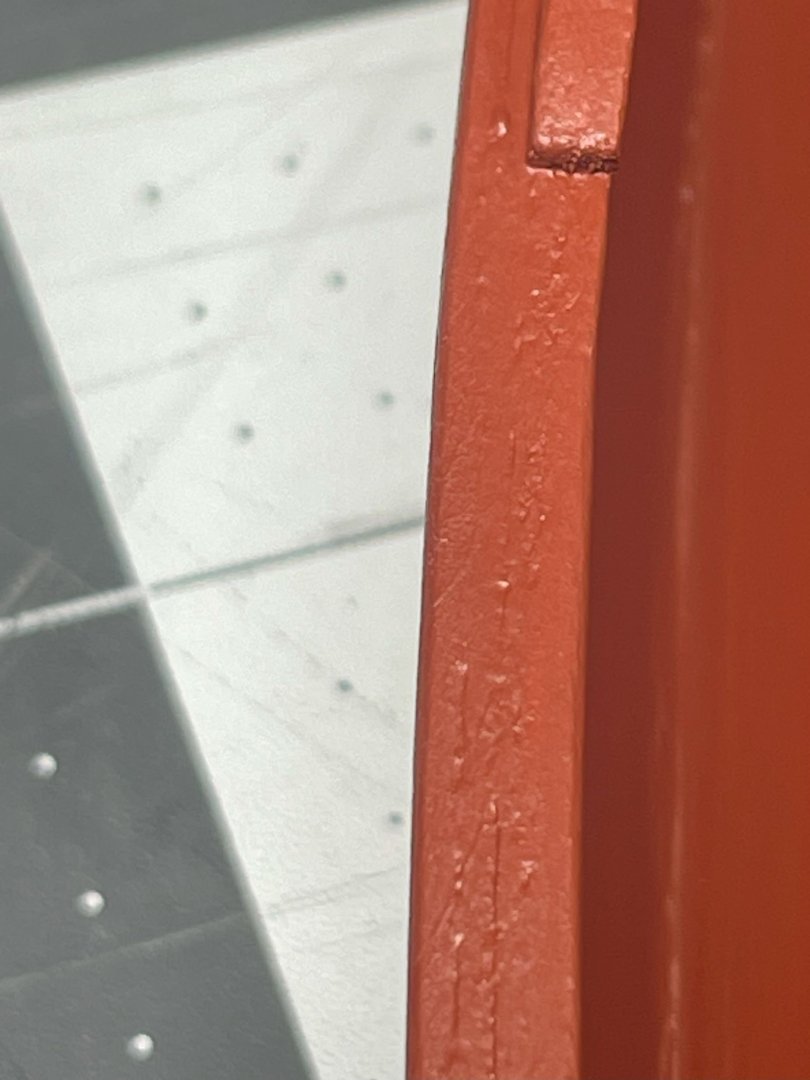
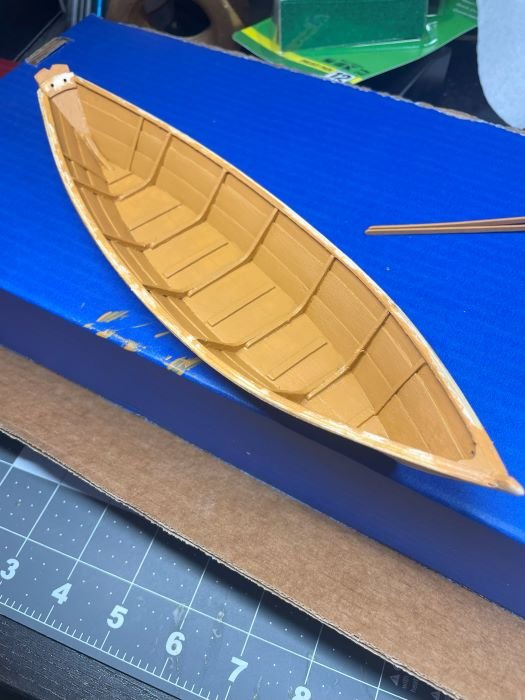
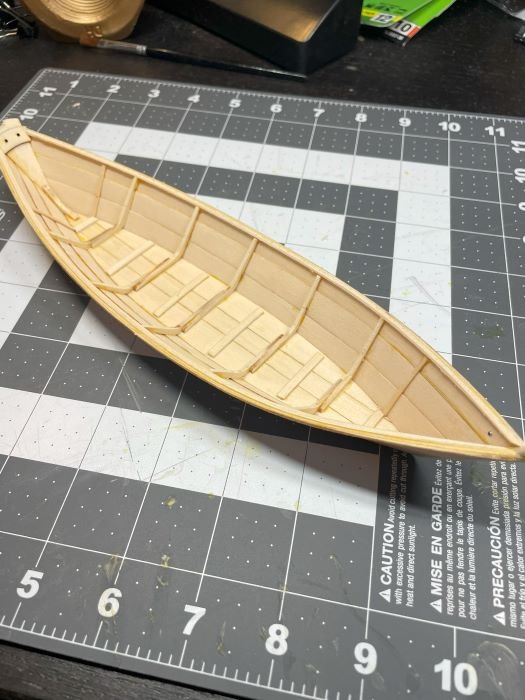
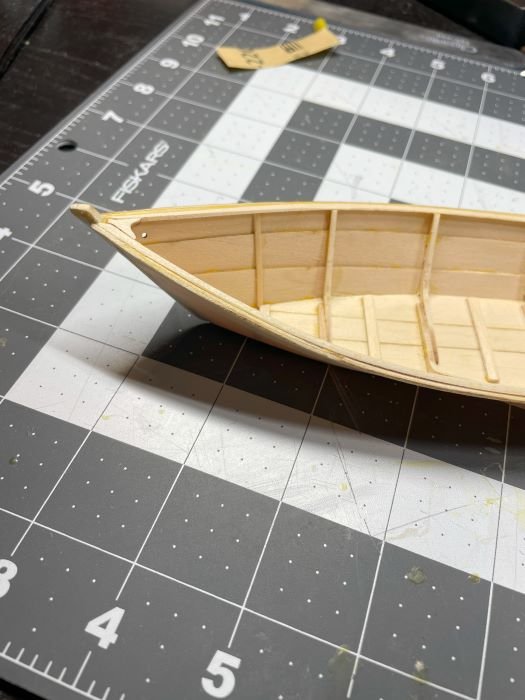
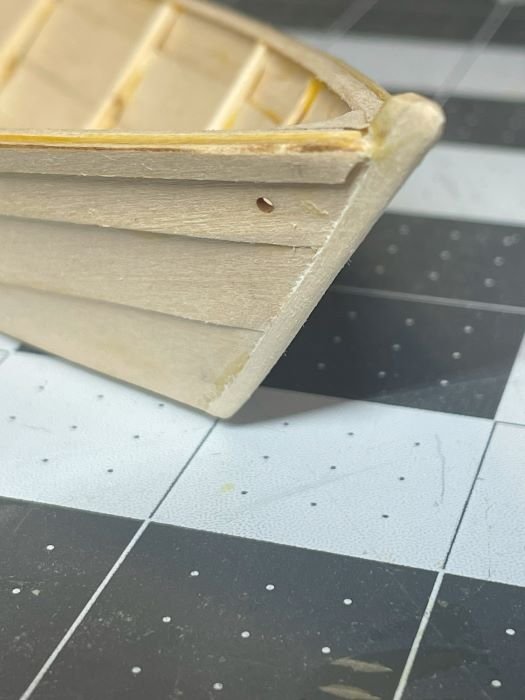
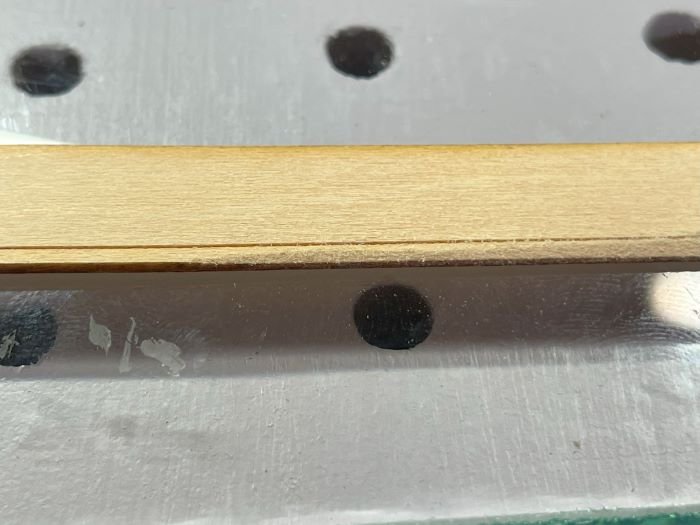
So I replaced the floorboard cleats and replaced them with more appropriate sized wood. I had to trim down the closest I could find at the hobby store. Worked on the dagger board. Installed the thwarts. Those took a lot of trimming to get them to fit well. Started on painting. Trying to really improve this step of my process. So I am open to any help you can offer. I have a couple of other threads going about that... Filled a few ugly spots and such. I think this was just the first coat. Then started working on the inside. That was a chore getting into all the nooks and crannies, but I enjoy painting in general. It's very zen for me. You can still see many brush marks and glue marks. I'm not sure why I think those will just go away.... Here's a closeup of the edge. Is this finish good or at full scale would it look like a 5 year old, a bucket of paint, and a rag? The shine on the bottom corner of the rowlock is reflection. Thanks again for all the kind words! Chris


-
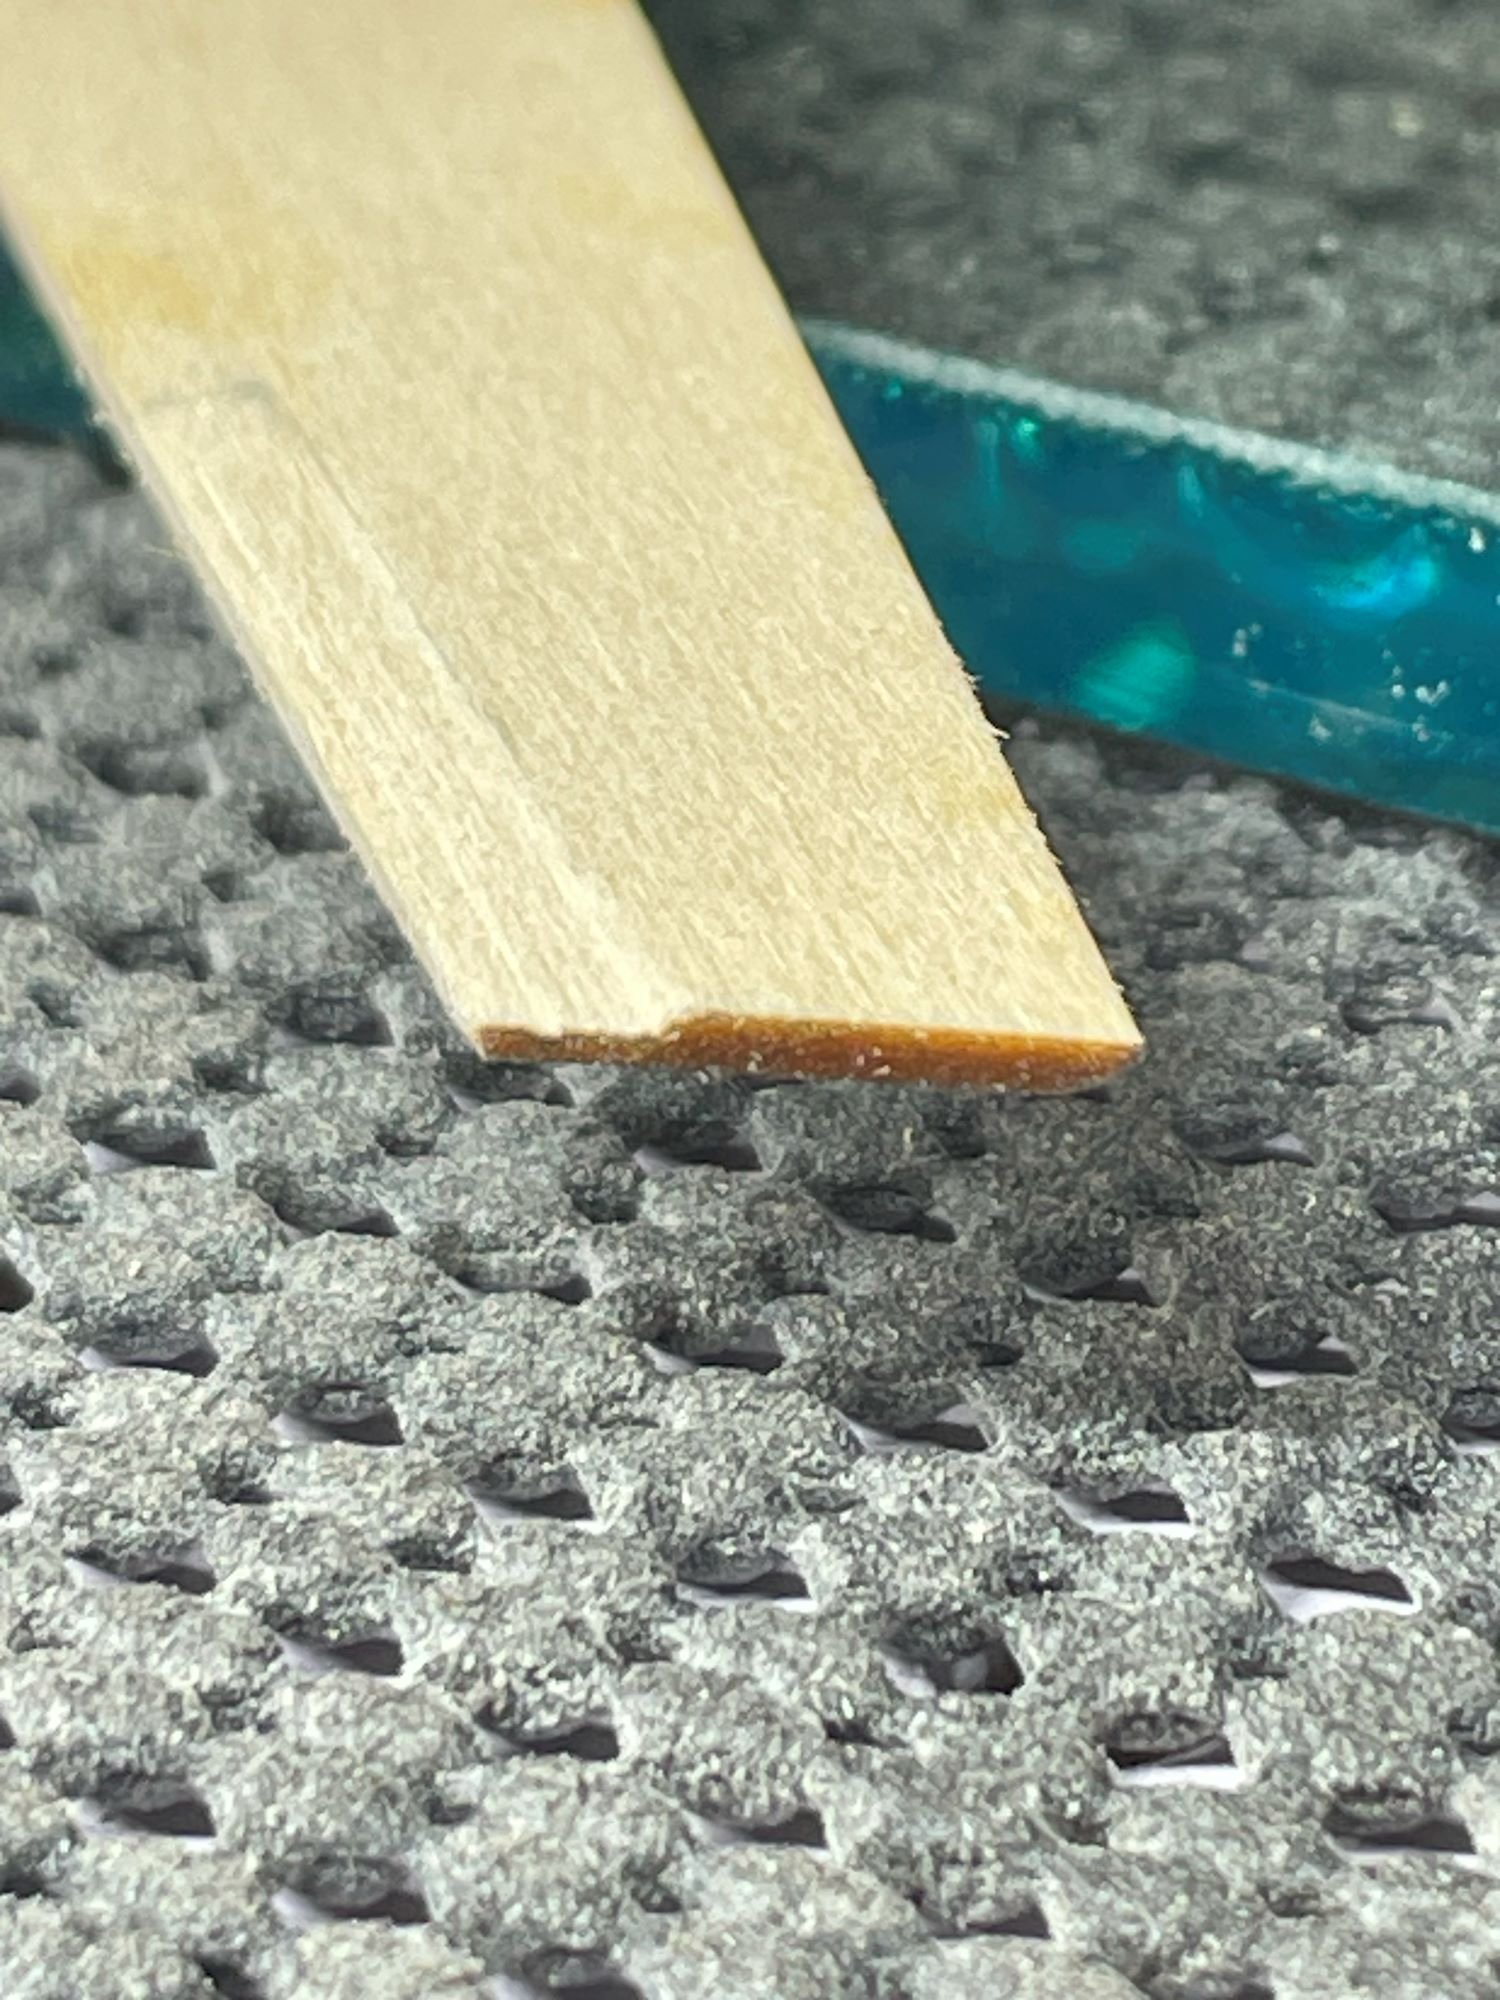
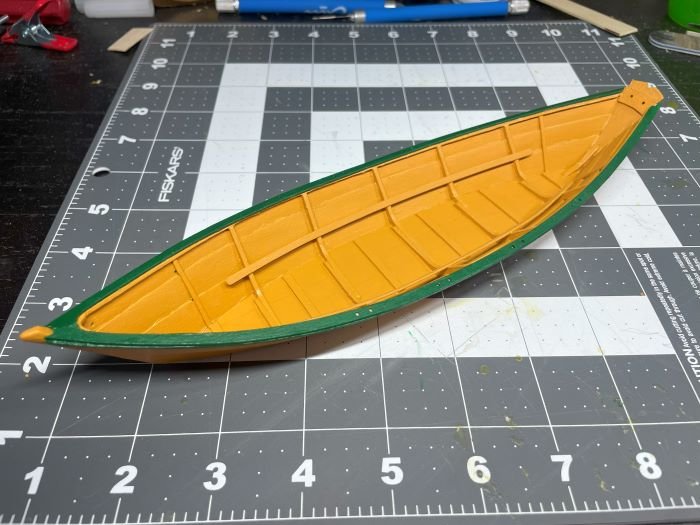
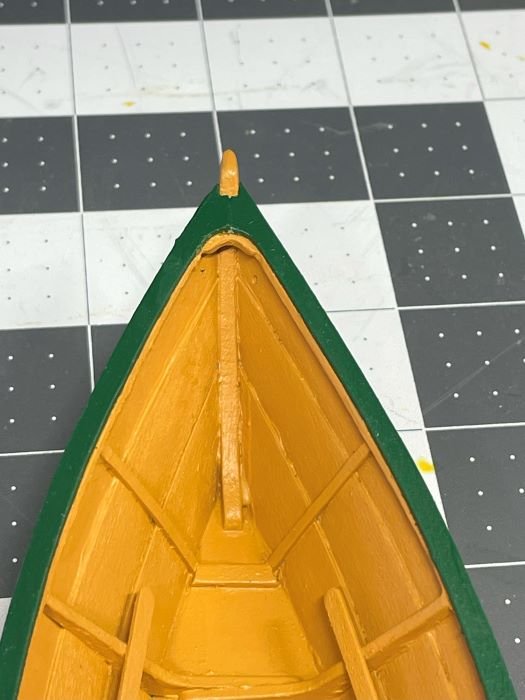
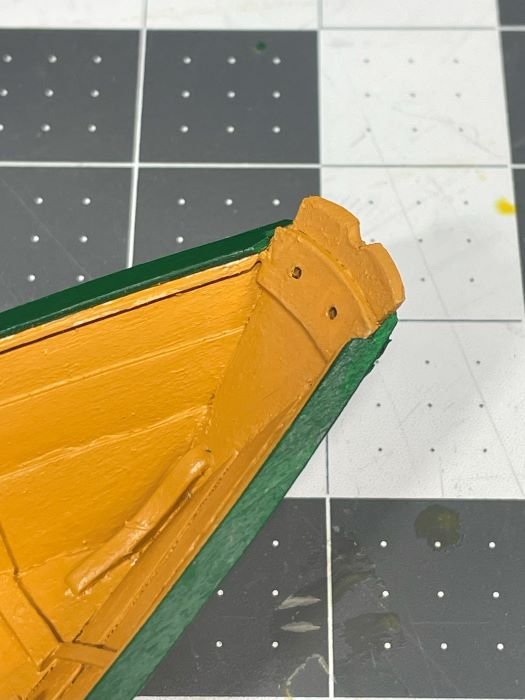
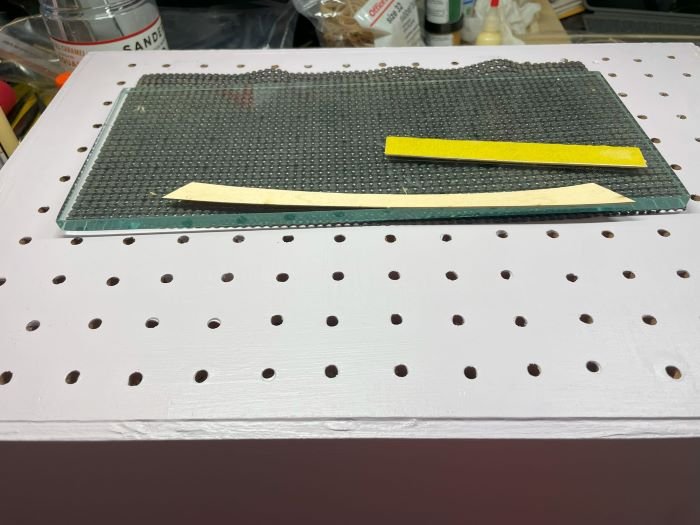
My question has to do with joints mostly. How polished are we trying to make them? I have attached two example photos of the sheer plank, inwales and bump rails on my sailing pram model. On one side you can see I did a more complete job of filling the joints between those three pieces of wood. On the other side, not quite as good a job. Is the more polished one preferred? Does the lesser show the observer that those used to be three separate pieces of wood so it shows our labor better? What would a museum quality sailing pram upper edges look like? I would love to see examples of what is possible.
-
So far I’ve built the model shipways dory and I’m currently painting the sailing pram. I’ve only used the model shipways paint with mediocre brushes. The pram paint job is way better than the dory. I attribute that to prep. Good sanding, filling etc. What would be the next step up, short of an airbrush? Good brushes is handled, I’m more thinking of paint. Does this paint work better thinned? Is it simply not the best quality? What is? Is an airbrush simply the best way to go? I obviously wouldn’t have brush marks any more. Is that what I’m striving for or do the brush marks lend a sense of scale? (I’ve picked through the pinned tips post and will continue reading it.) Thanks for your input! Chris eta. I also don’t really have a lot of comparison information. You don’t see many paint close ups on beginner build logs… Good reference books on finishing?
-
I just realized that the floor boards are connected to the floor cleats. So looks like I’ll be redoing those because they’ll sit too low. No biggie.
-
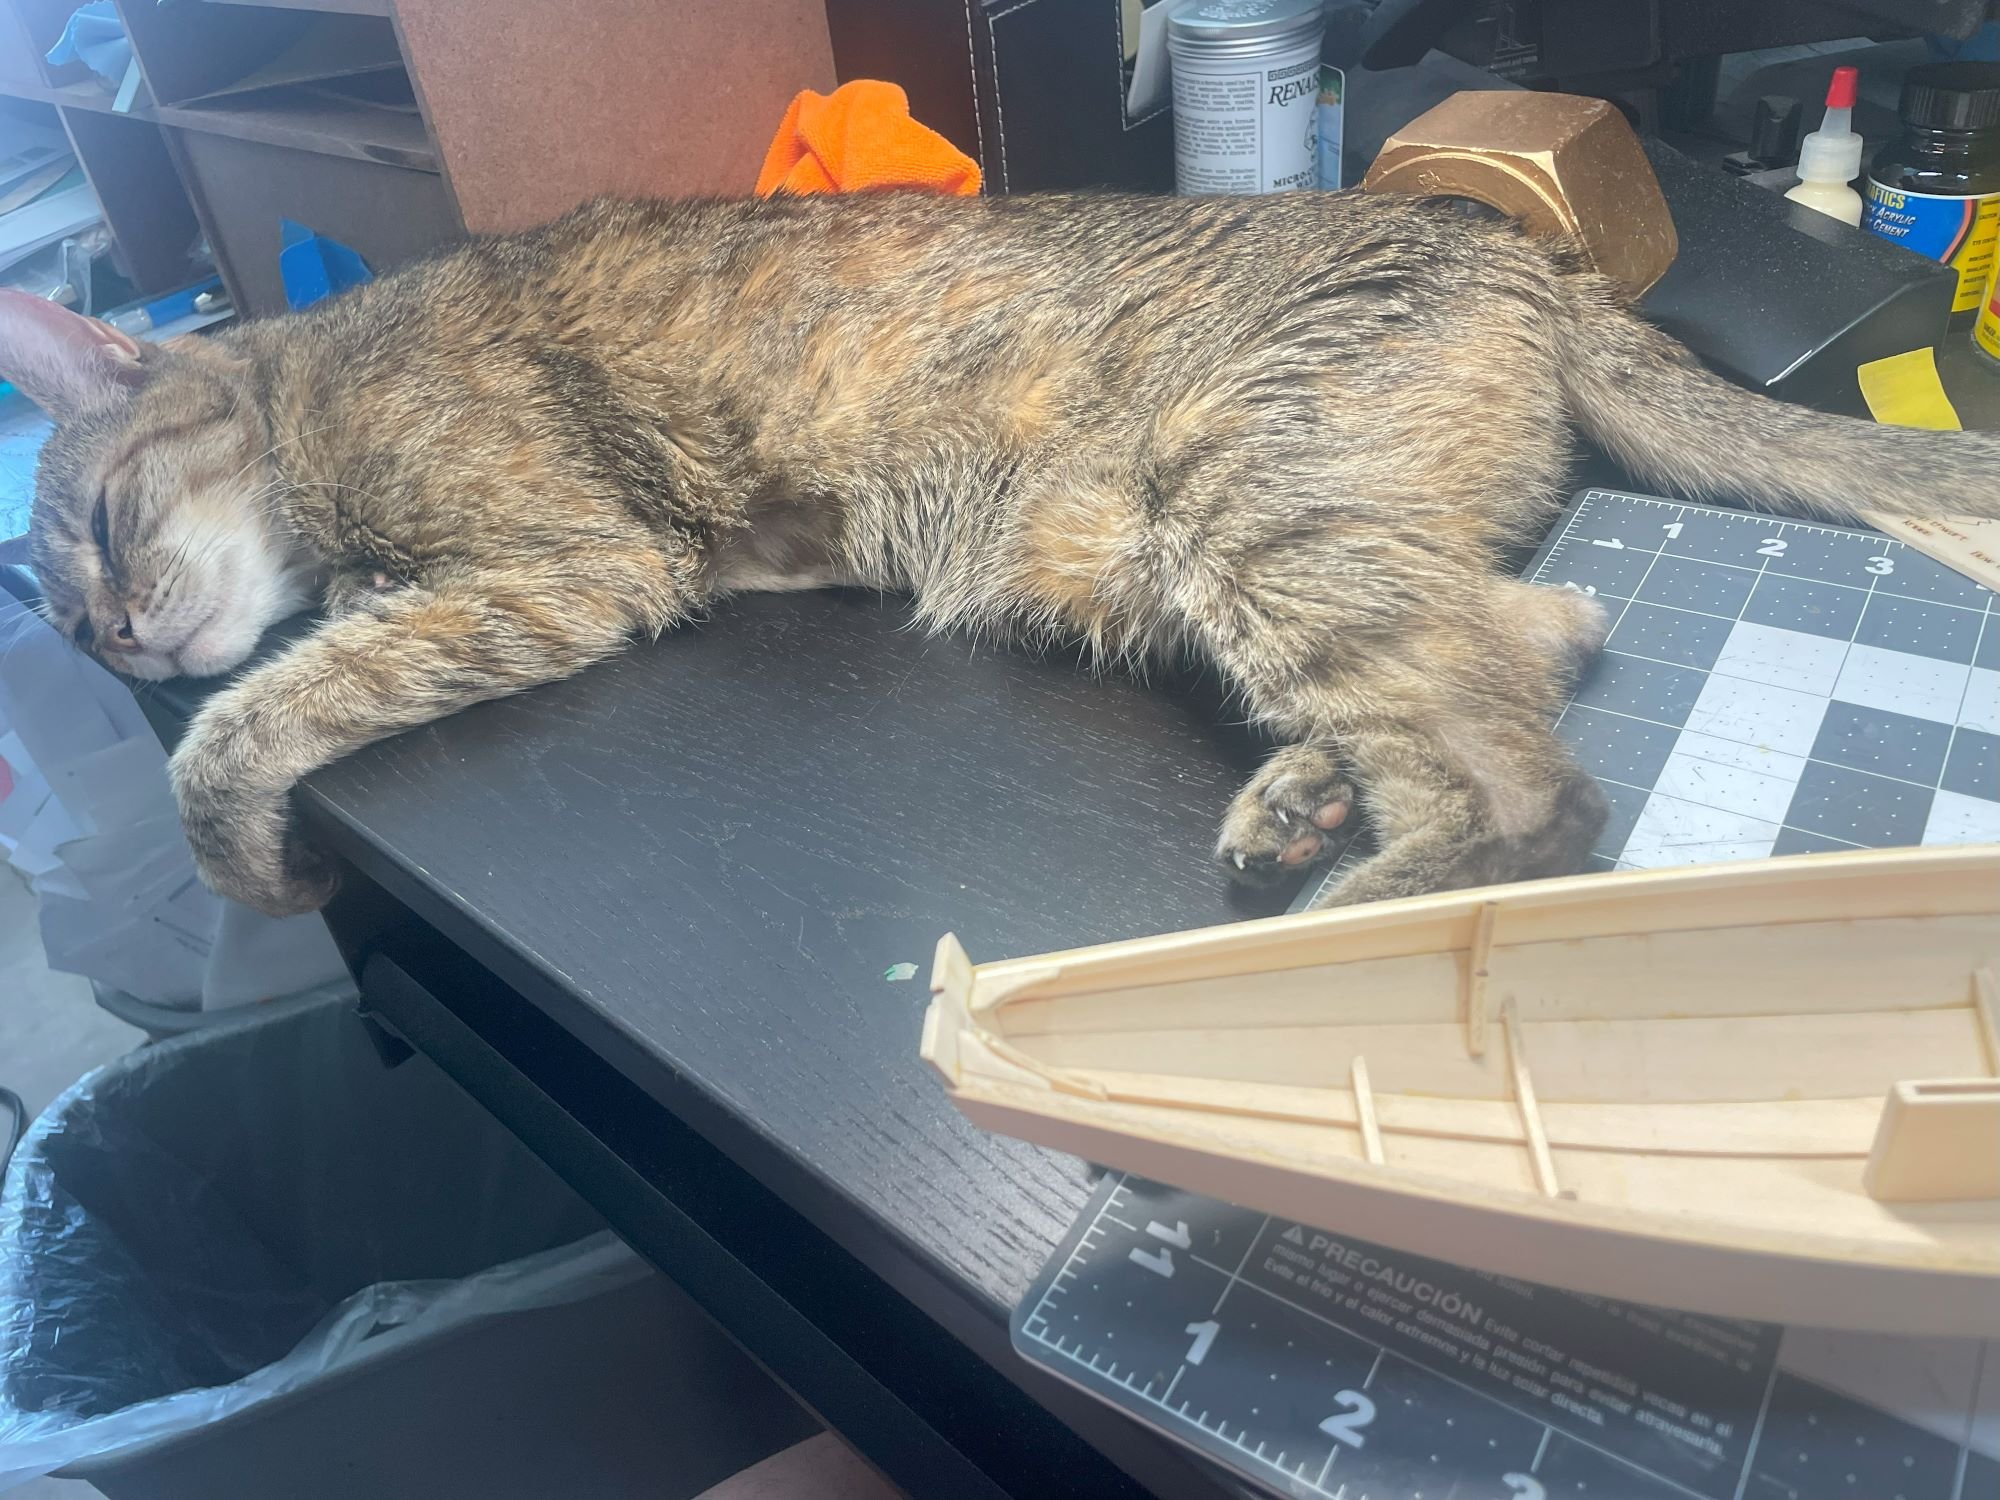
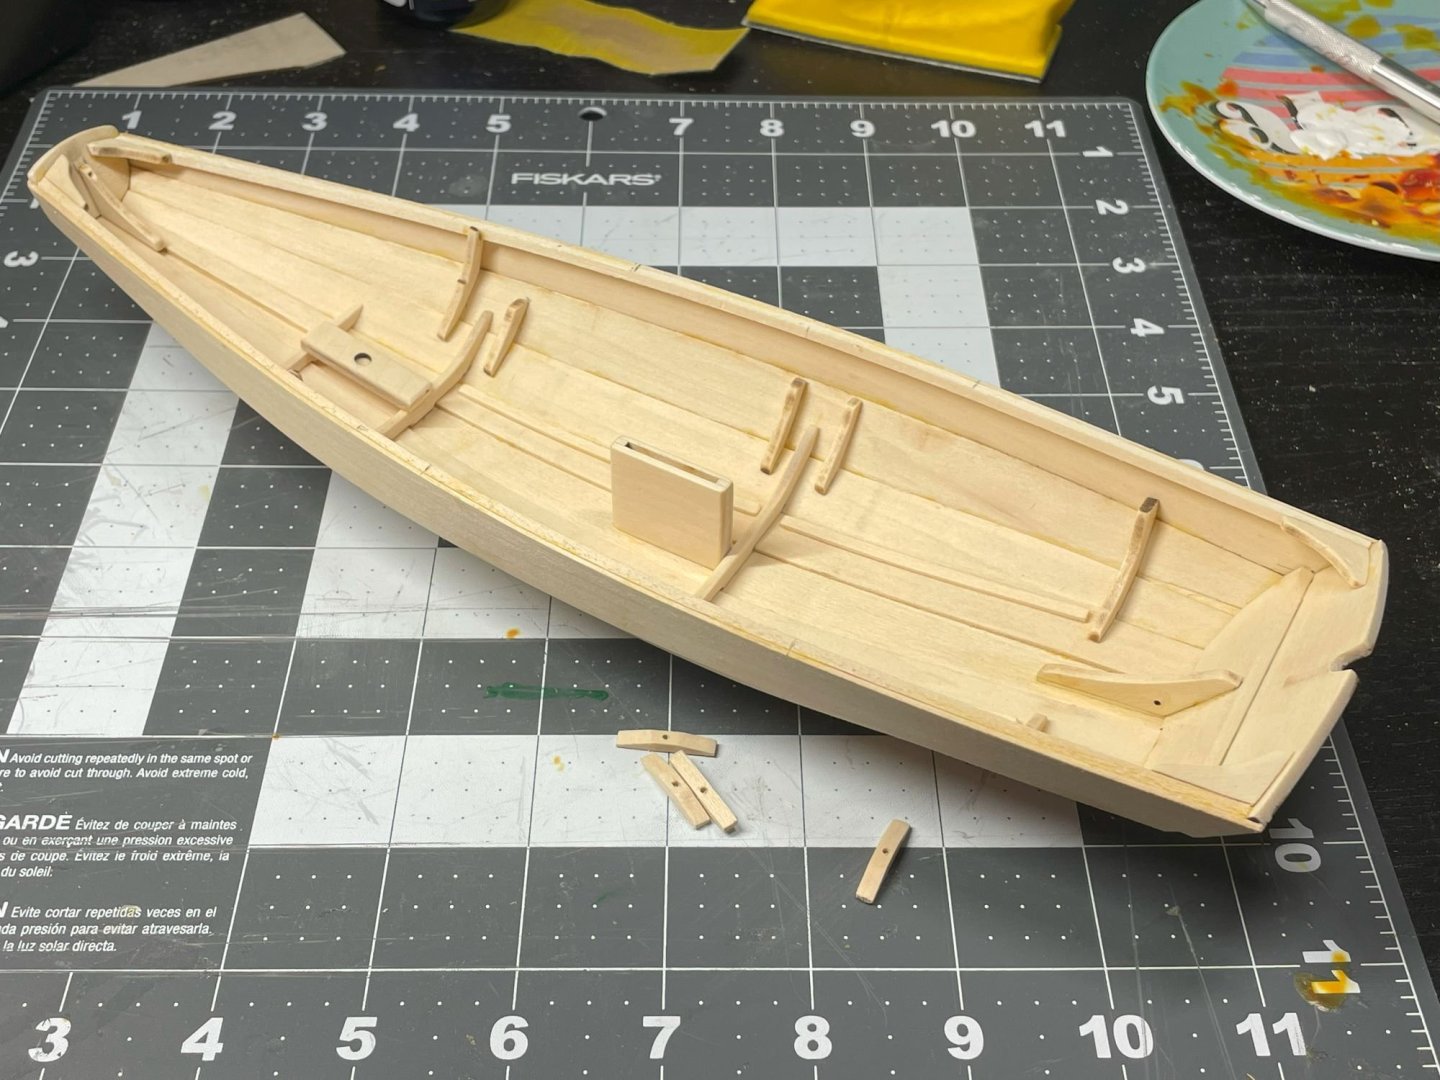
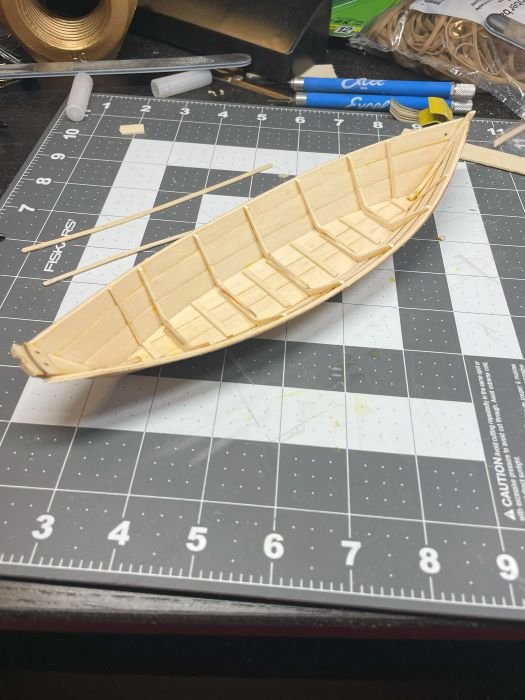
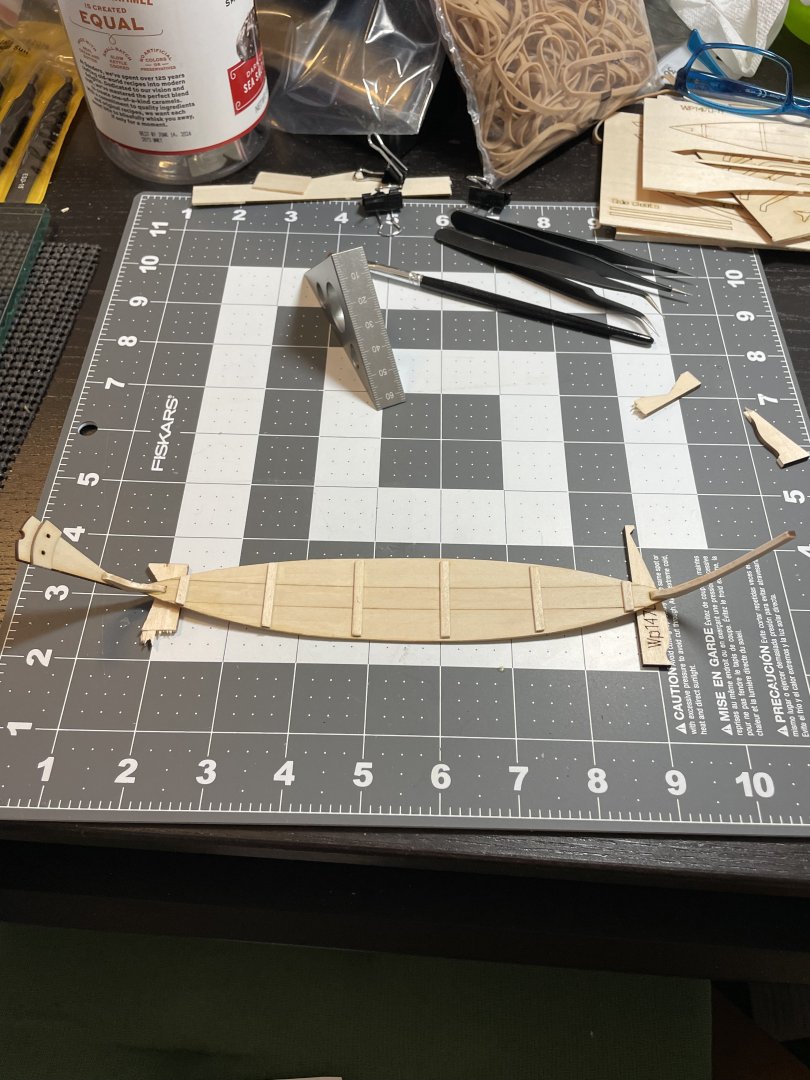
So there's been work being done. I got the interior completed. I used the wrong stock for the floorboard cleats. Figured that out when I went looking for that piece of wood and started going Hmmmm. Looking at the build it seems they get covered so I'm not going to worry about that and just replace the missing stock. An excuse to go to the hobby store with the intention of only spending $1.00, best intentions and all right? I occasionally get supervised by one of our old cats. This is Marilyn, she's 16 and diabetic and doing great, having the best life. Here is the current state. Transoms finished, mast step installed. I've read a lot of concern about the height of the thwarts and I've also read that in the end it really doesn't matter. So there they are. Rowlock pads (shouldn't those be call Oarlock pads?) are next to be glued. Thank you for all the encouraging words! Chris

-
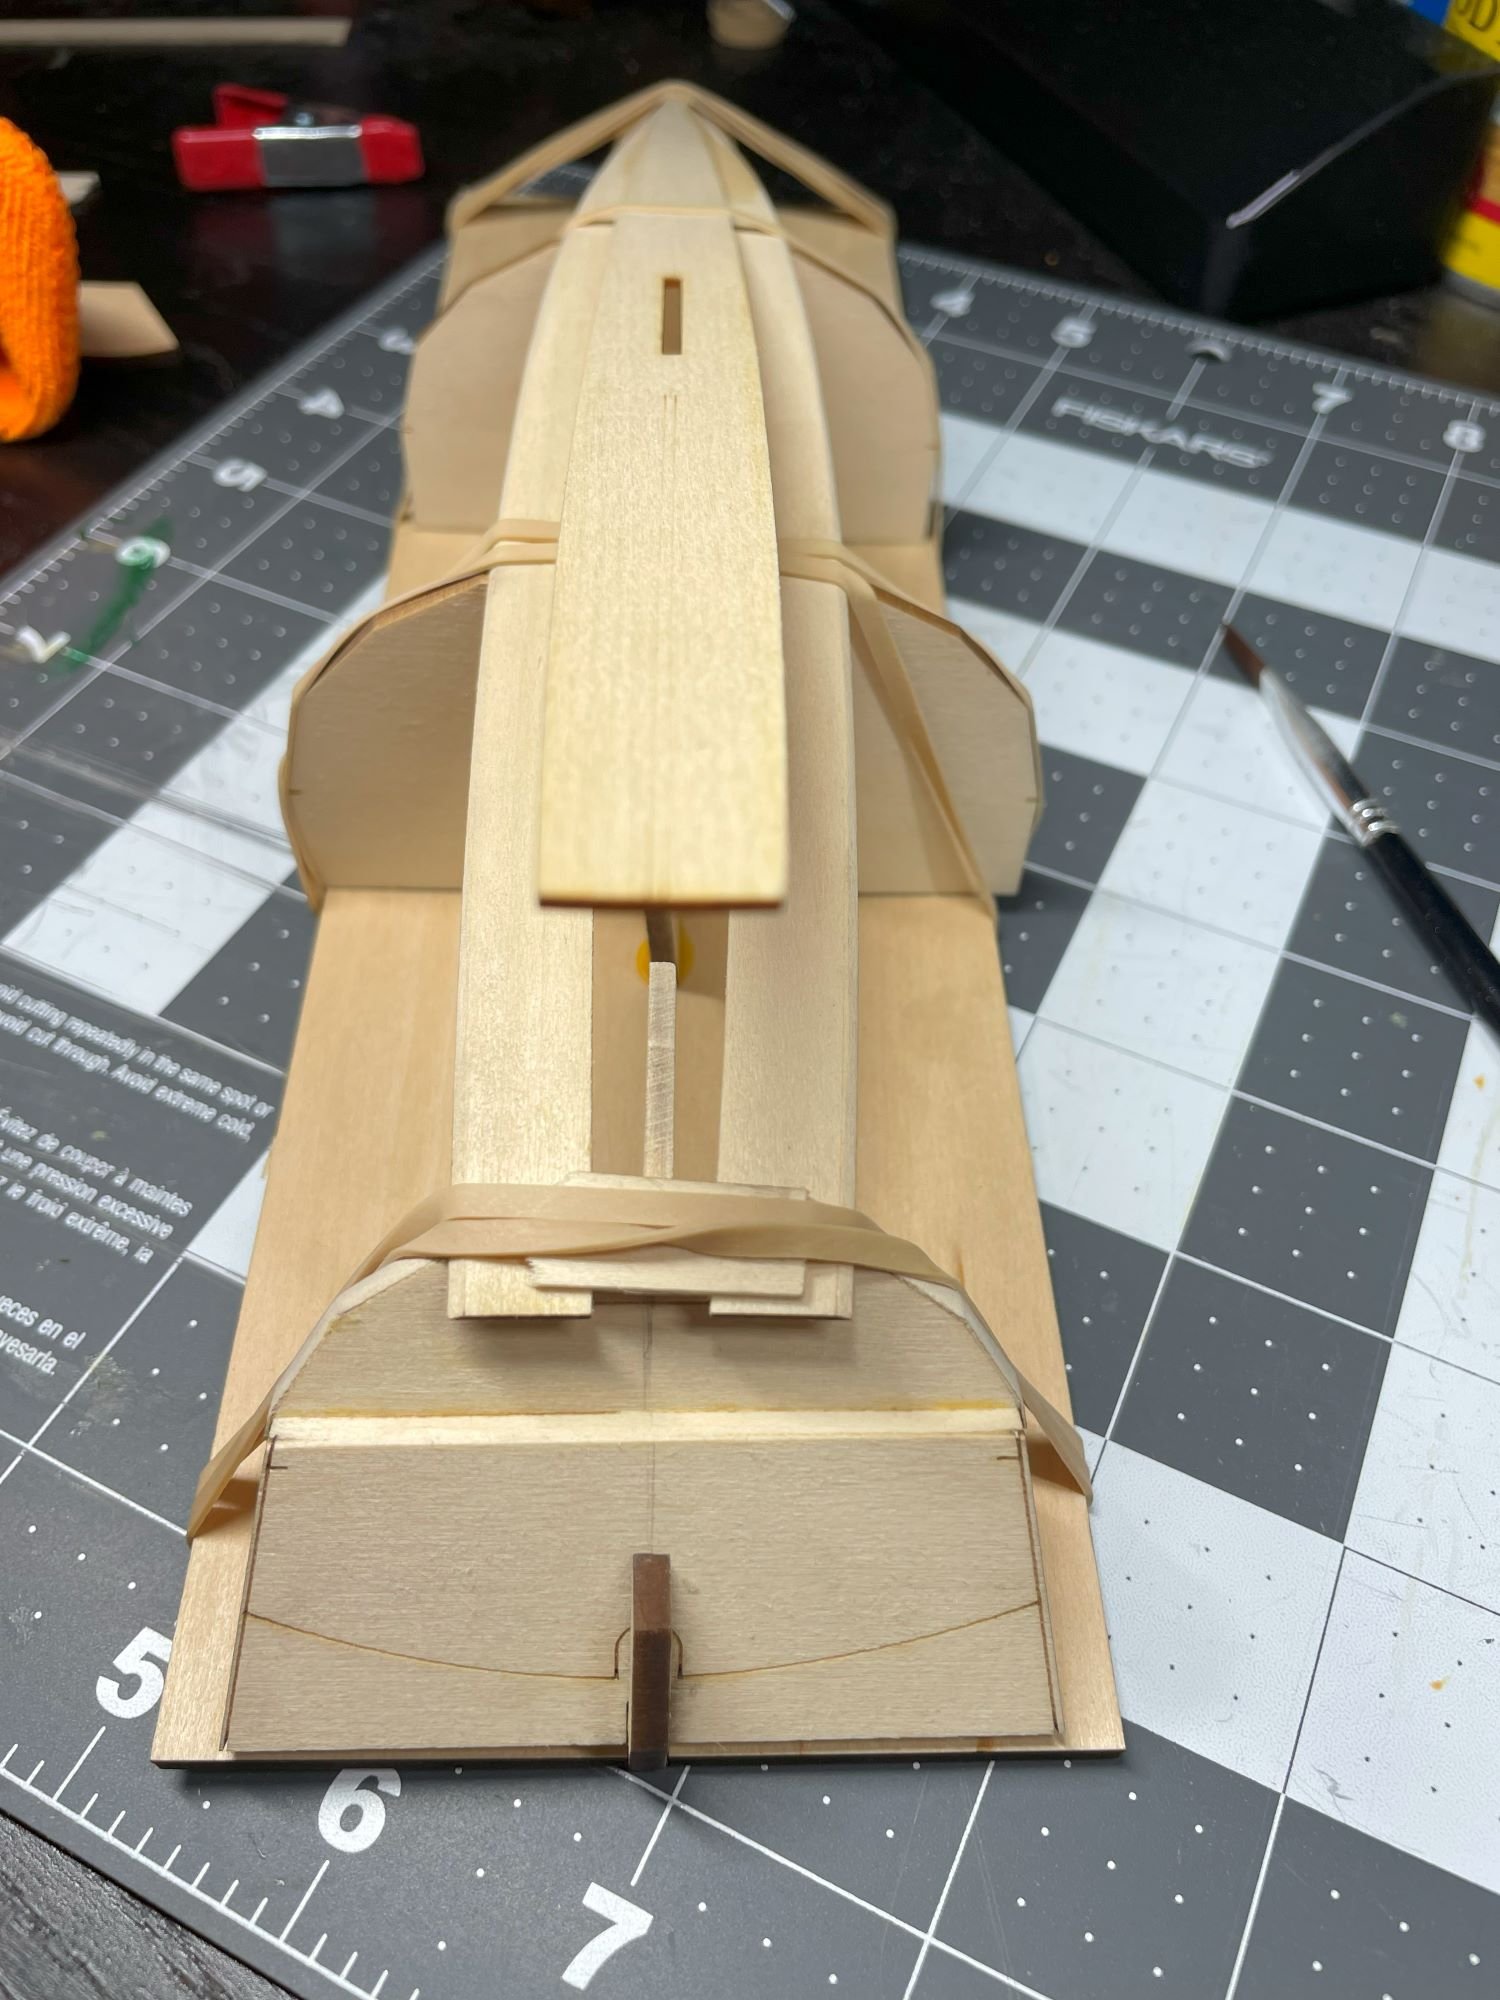
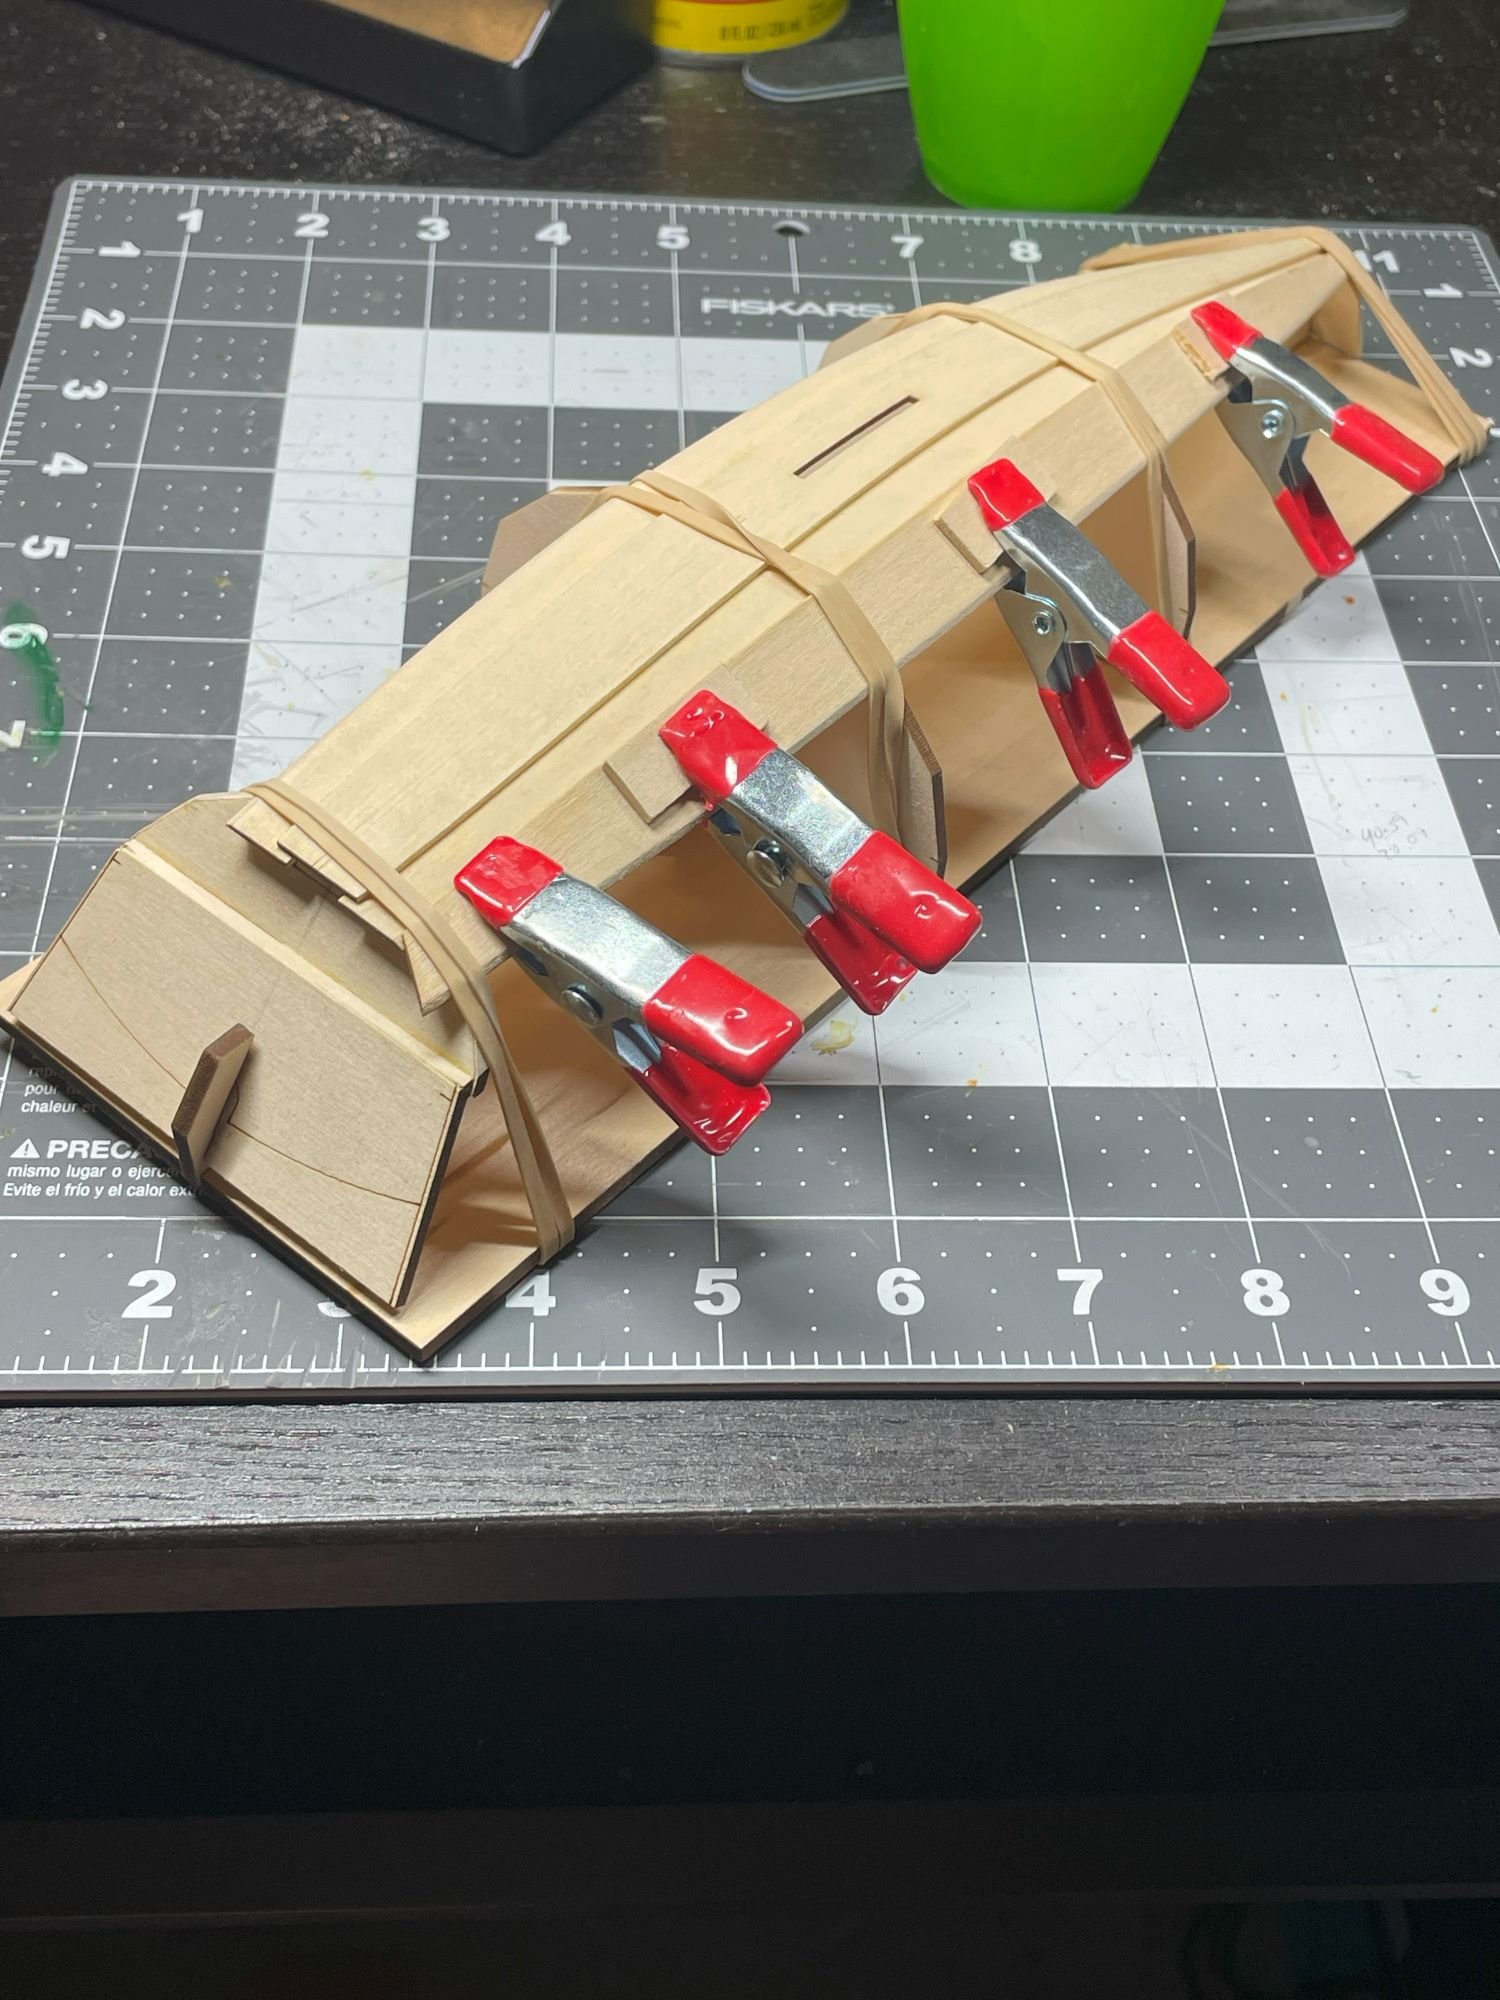
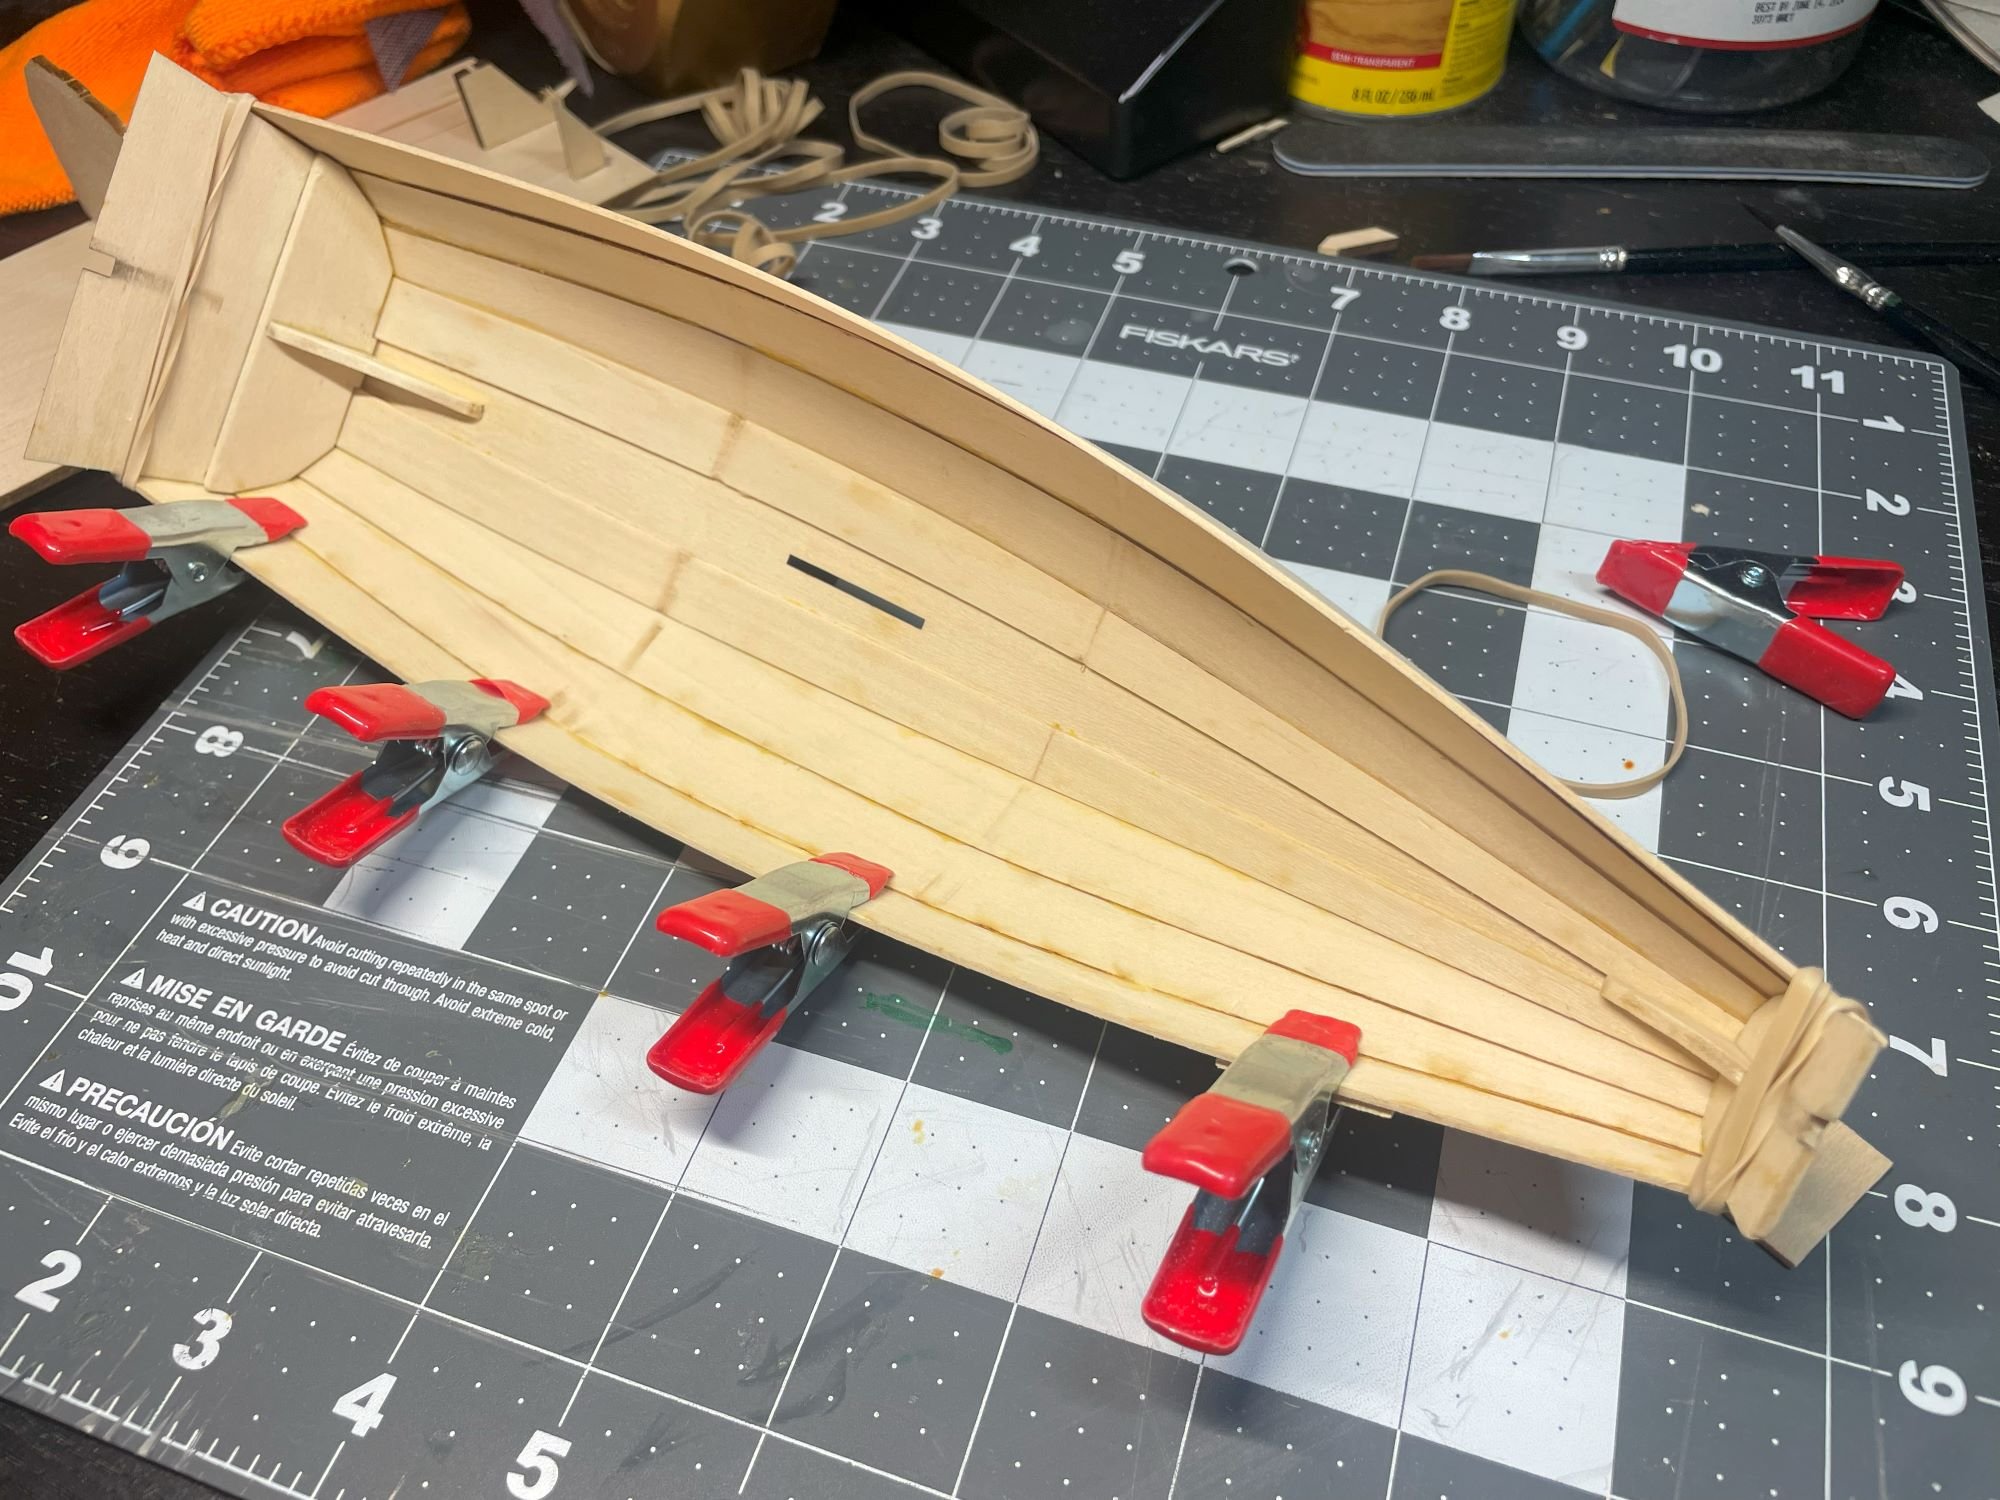
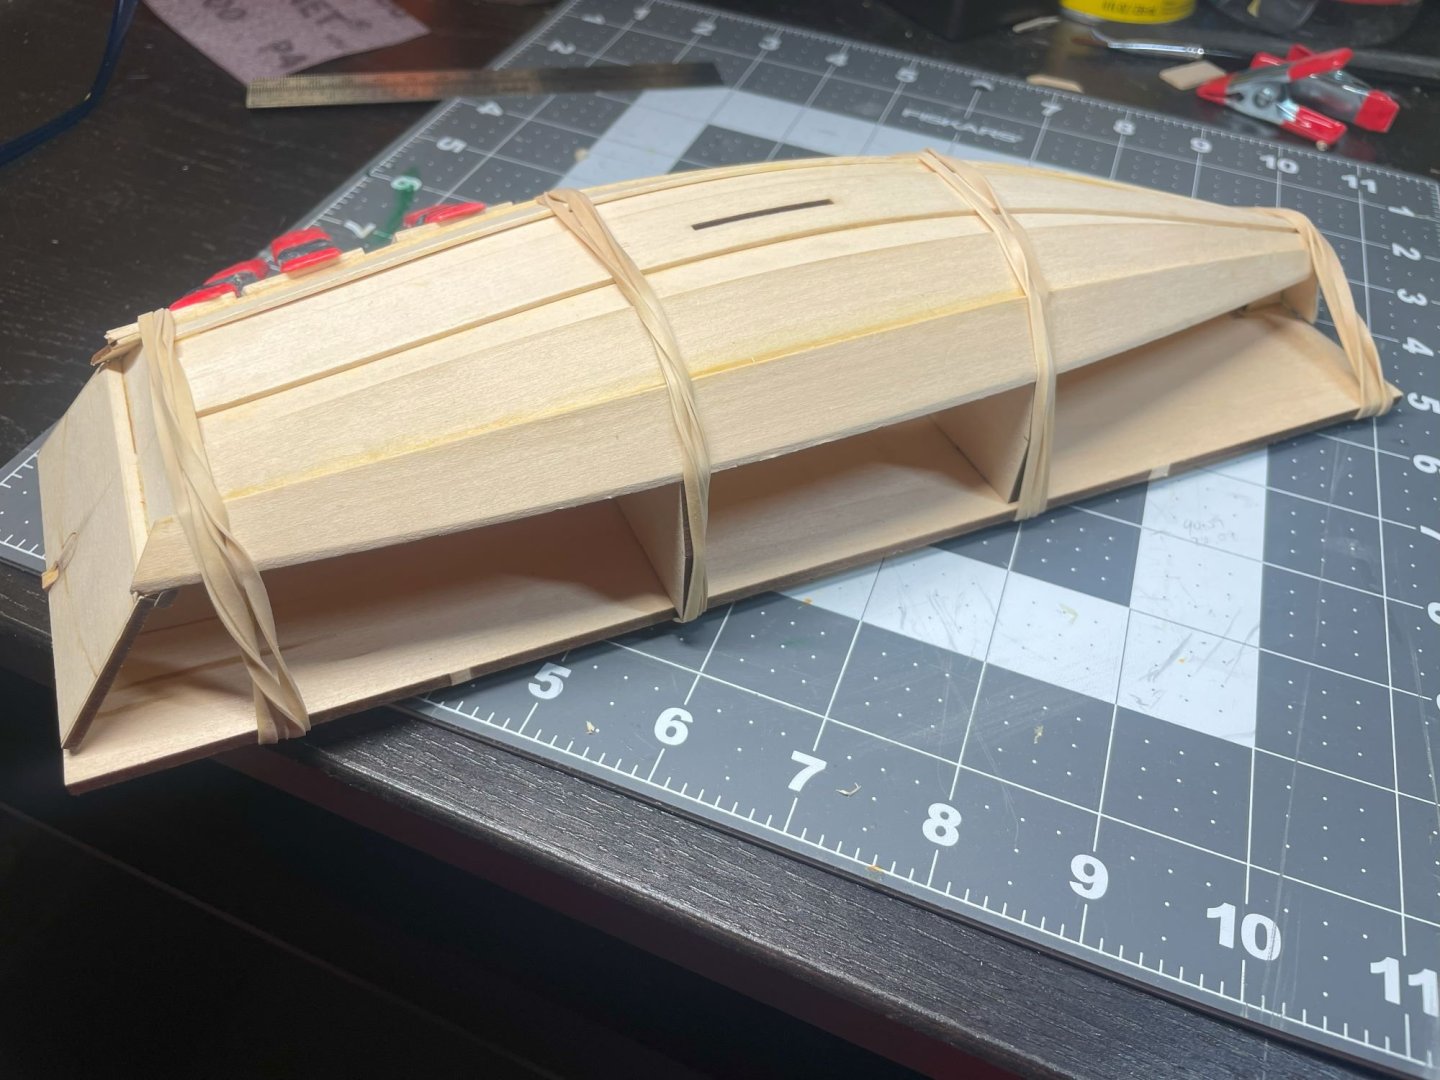
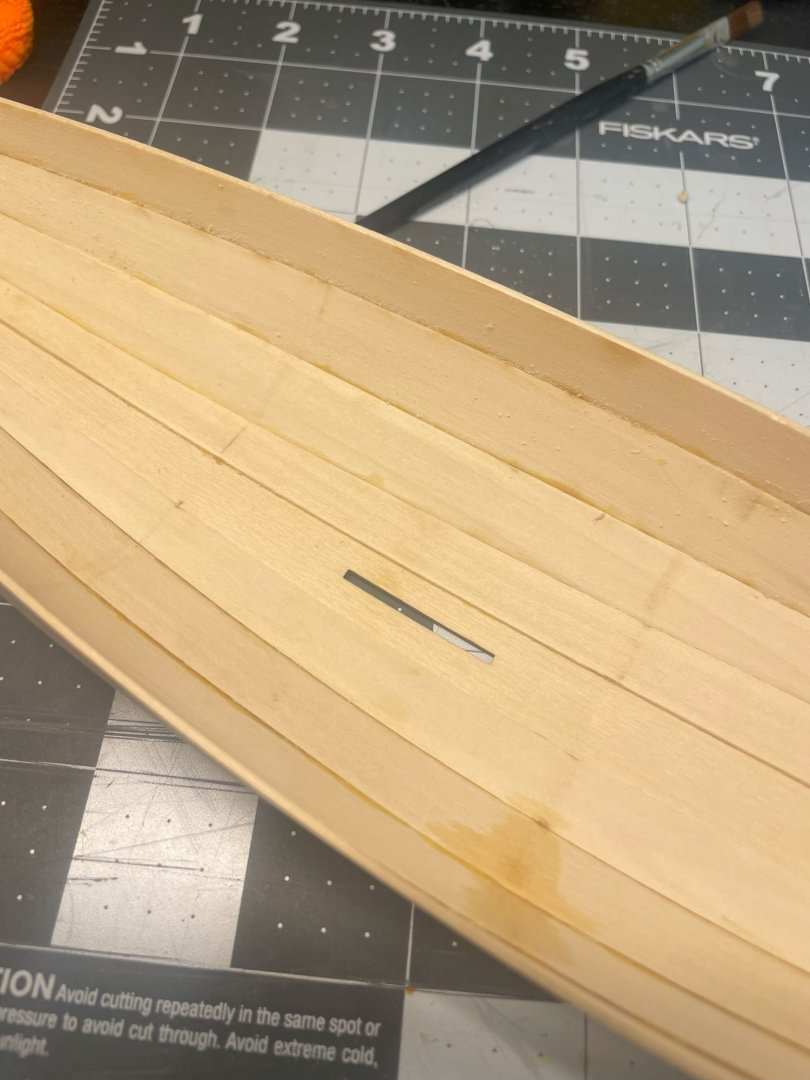
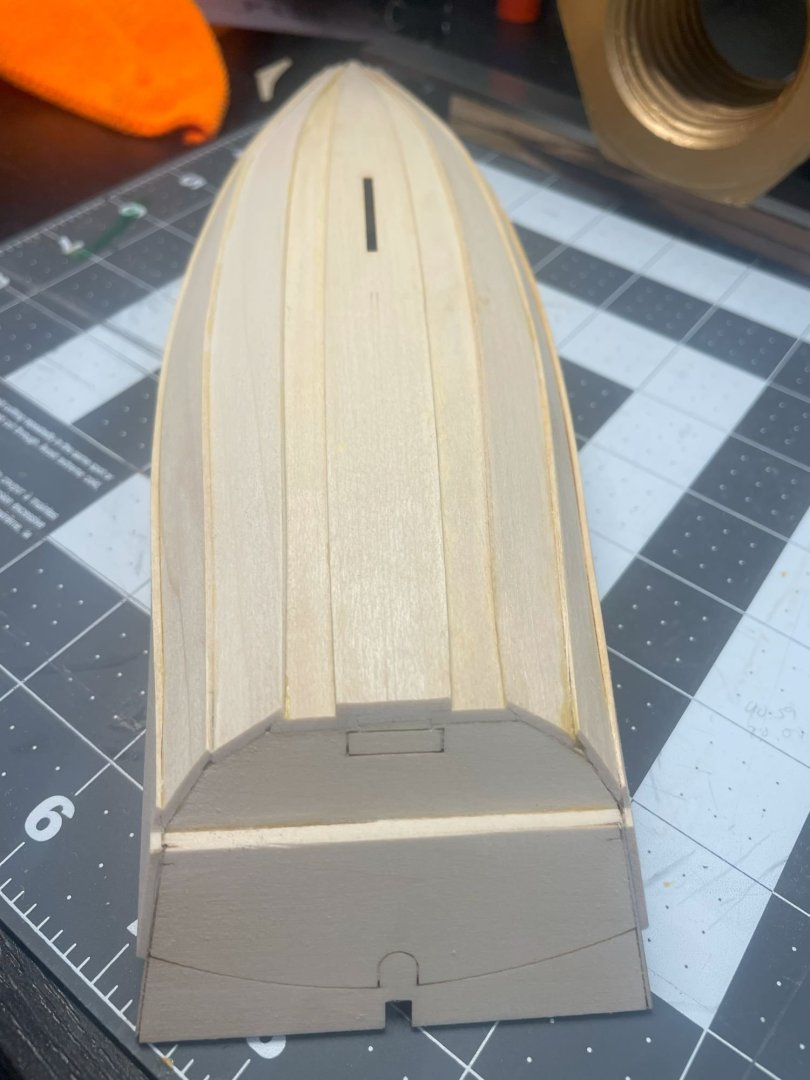
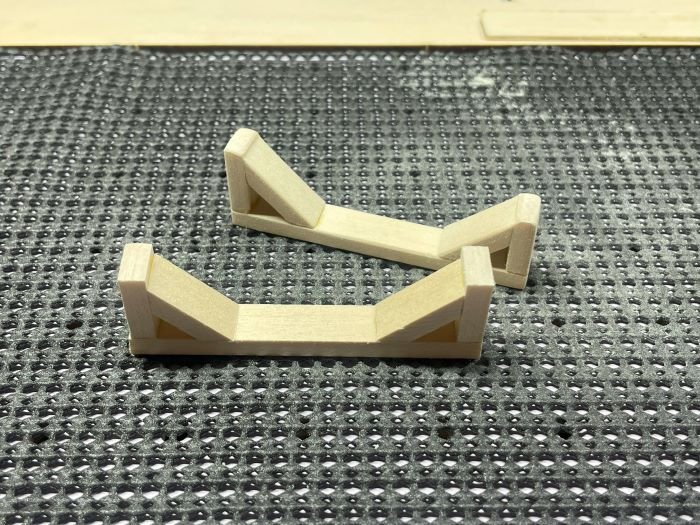
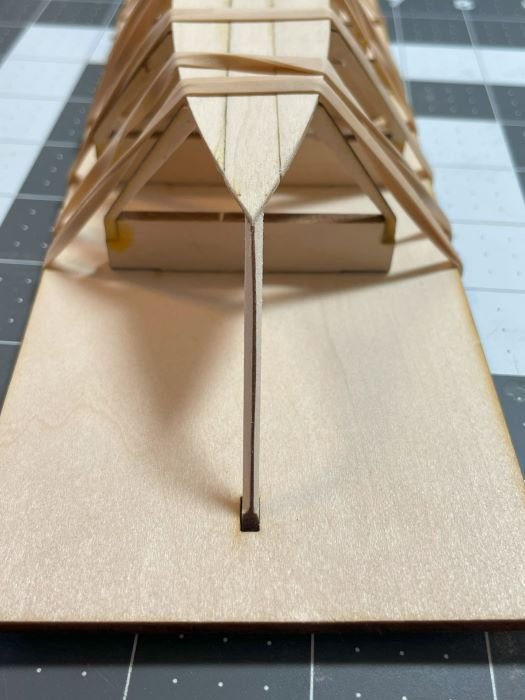
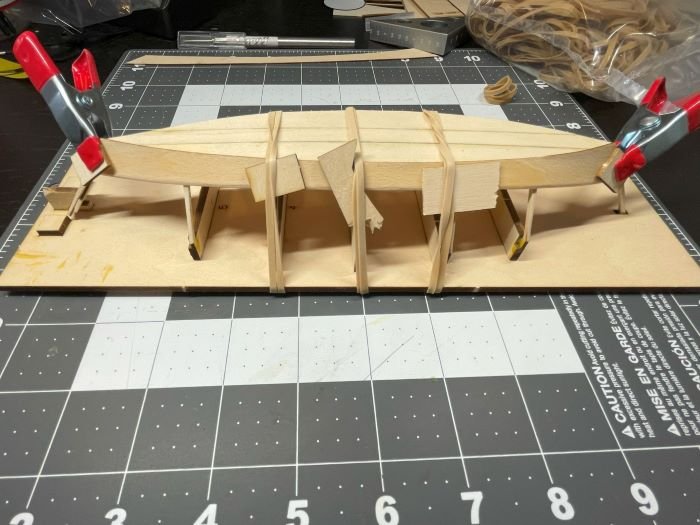
Here we go on the next build the Sailing Pram. This is my second ship build. So far I am up to cleaning up the outside of the hull. I figured it was a good place to get the log started, plus I have some questions. This kit certainly has you up your game. You've got keep a close eye on many things for it to stay true. Let's start with a picture of the transom. I was a little mixed up because the knee on the aft transom reaches higher up than it does in the photos. I checked some build logs and they matched mine so I moved on. Getting everything cleaned up and ready to plank. I didn't have a lot of confidence in the the frames staying square so I added some supports. The transom mount on the base also allowed it to rotate a little so I added the other support you see in the front right of the photo. I don't have a photo of it but drilling the hole in the bow transom knee went well. I started a little smaller and slowly. It came out clean but it's just a tiny bit off center. Darn close though, I'm happy with it. Lining up the center plank. Cutting the sloping rabbet on the back of the plank for the fit at the transom. That was an exercise for sure. Tried many methods, files, sandpaper, finally resorted to more or less "shaving" off the bevel with a sharp #11 blade. And the instructions say 1/3 of the thickness of the board, Hahaha. I went a little deeper because of the overhang, no point in the end being 1/3 deep if it gets trimmed off and farther back it's not quite as deep. That's why it's a little deeper. They did improve the more I did! Somehow when sanding the bevel on the aft transom I lowered the height of the notch at the center so after the center plank was attached the transom knee was hanging in the air. I added a sliver of wood underneath neat after tracing the shape of the spare transom knee they provided. It should look ok after some cleaning up. Planking... My notes on planking. This boat planks up slowly. Getting the planks where they are supposed to go and keeping the hull flat on the forms and the transoms level with the board is a bunch to pay attention to. At least with me, once I've got something clamped up, I'm temped to start bending the other side. DON'T do it. Once you get it set and good. Leave it alone to dry, don't risk twisting it or lowering the joint on the transom etc. The Dory was different from this one as it was getting glued to the forms, so the farther you went, the stronger it got. This hull is only relying on that bevel glued to the next plank to hold together. As you move up it tries to lift off of the frames, keep checking underneath to make sure it's still seated on the forms. So take your time and be patient. Let it dry before removing rubber bands and clamps. That also brings up the point of make sure your bevels make good joints. Dry fit the planks and use a straight edge on the forms to see how well the bevel matches up and clean it up accordingly. Here's a note for anyone starting this build. After I removed the hull from the frame I noticed char on the inside. I was pretty sure I had cleaned up most of the char and then I realized it was transferred from the frames. So sand that char off also just be careful not the change the shape. It will save you the hassle of cleaning it up later. There was also some light dents from holding it on the frames that I'm taking care of with a little water. Here is the outside of the hull getting some sanding. I'm pretty happy with the spacing and true-ness of it all. The joints at the transom are not too bad. I'd love to hear opinions and constructive criticism on how to make things better. Some final questions.-- How should the edges of the planks on the bottom be handled? Should they be left square or rounded over? The instructions mention that sometimes the skeg has a protective brass cover on it. I think that could look nice. Can anyone direct me to on details on that? Thanks for any help and suggestions! Chris


-
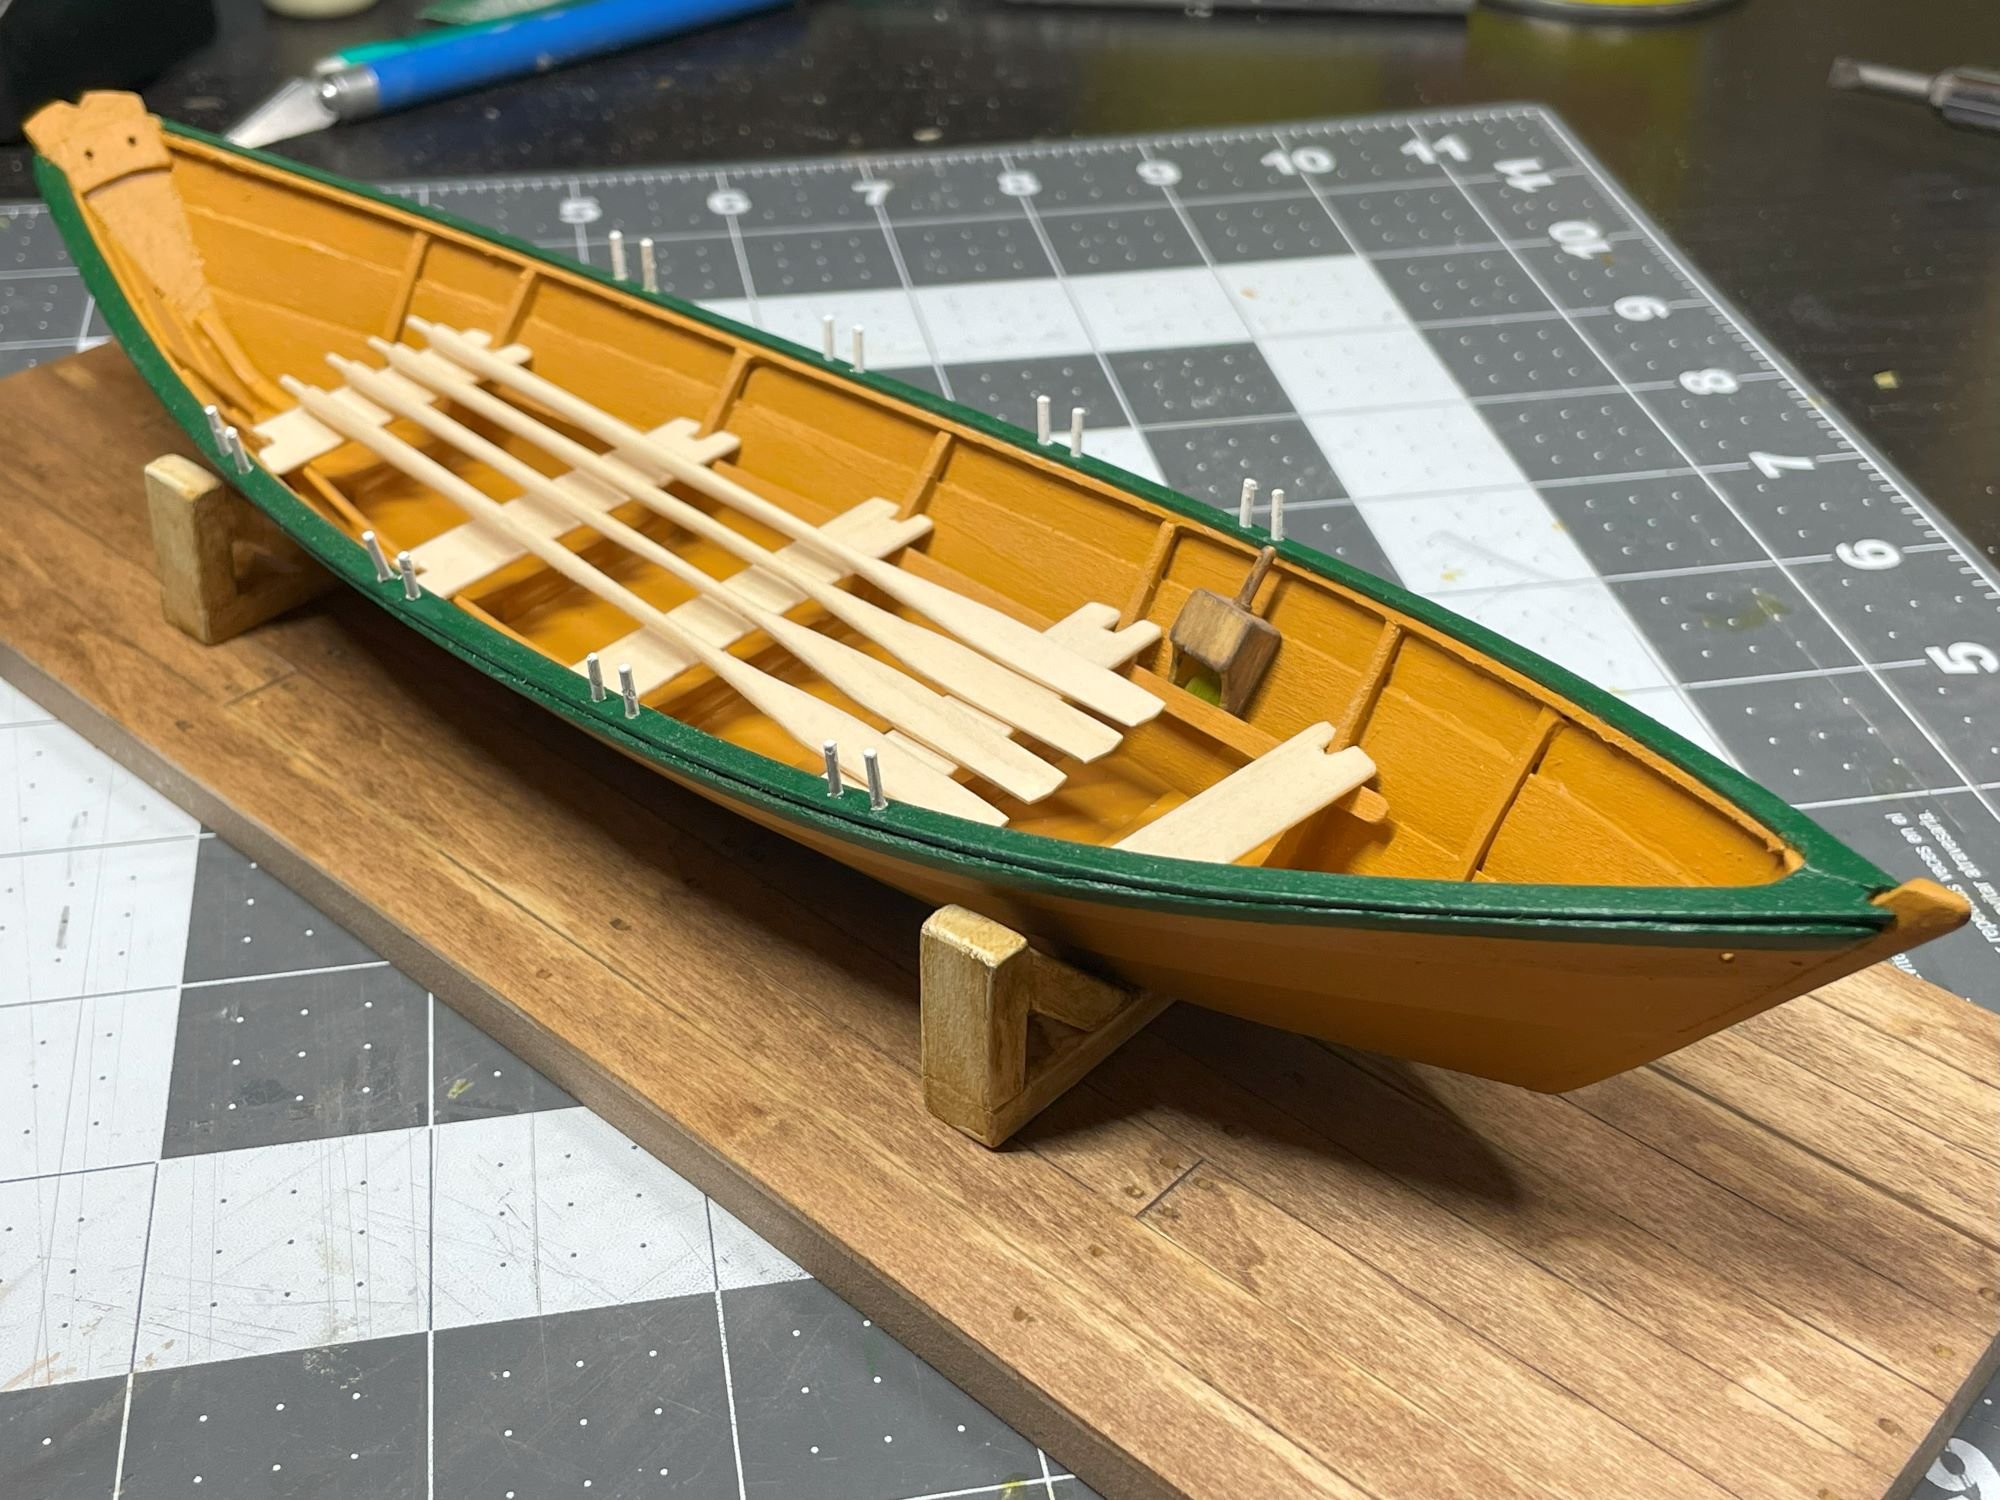
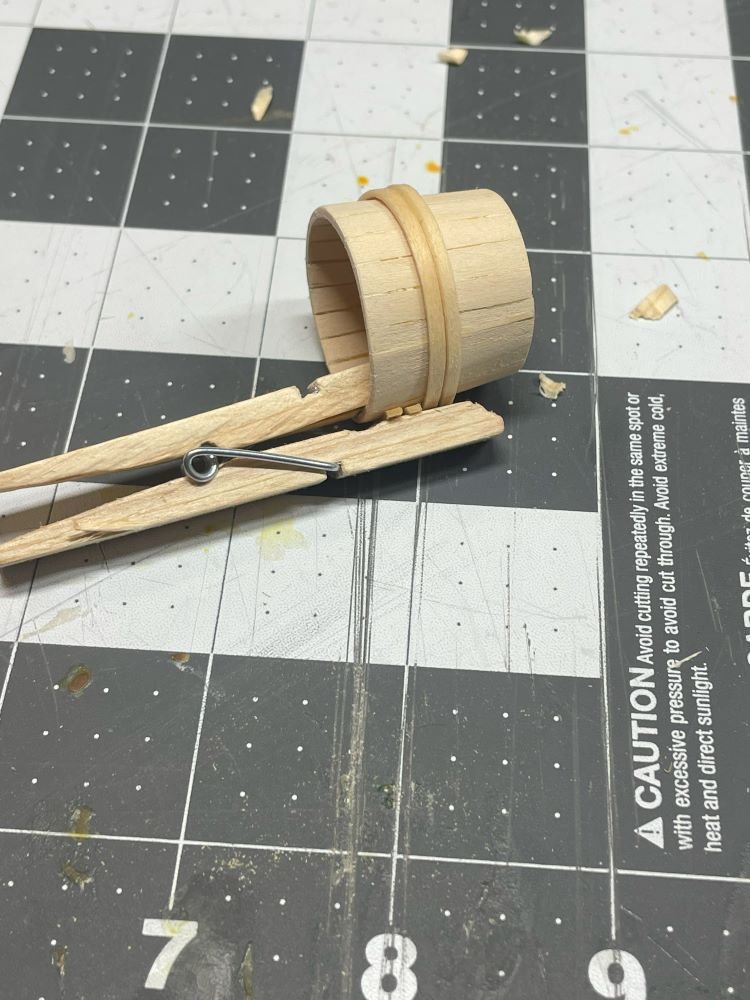
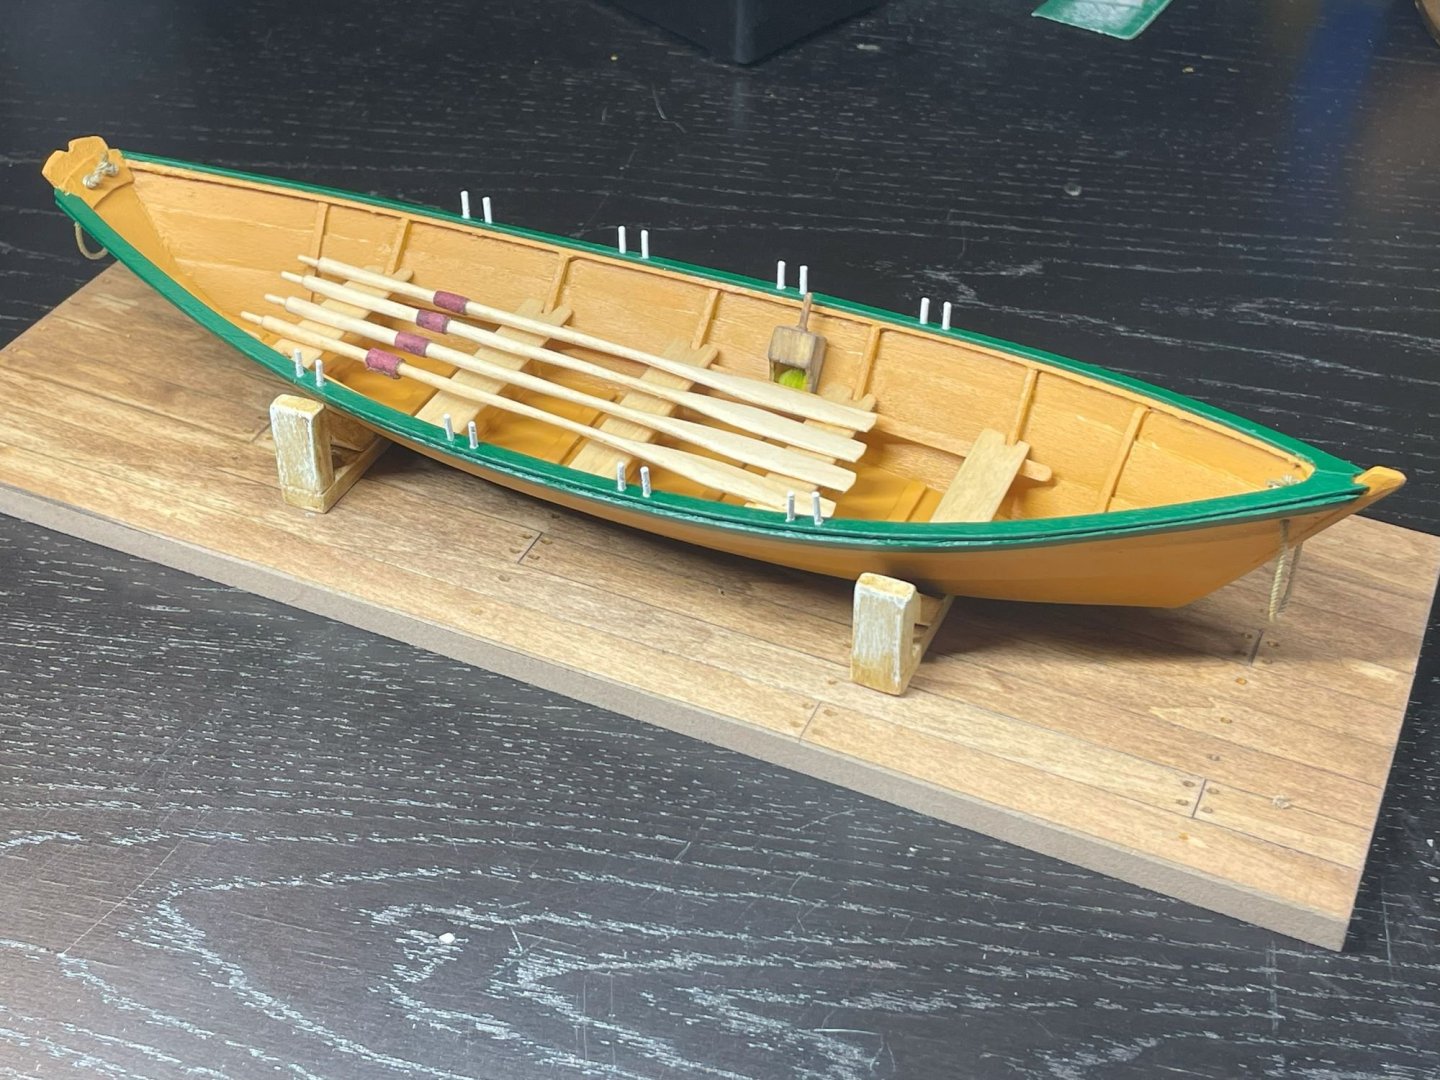
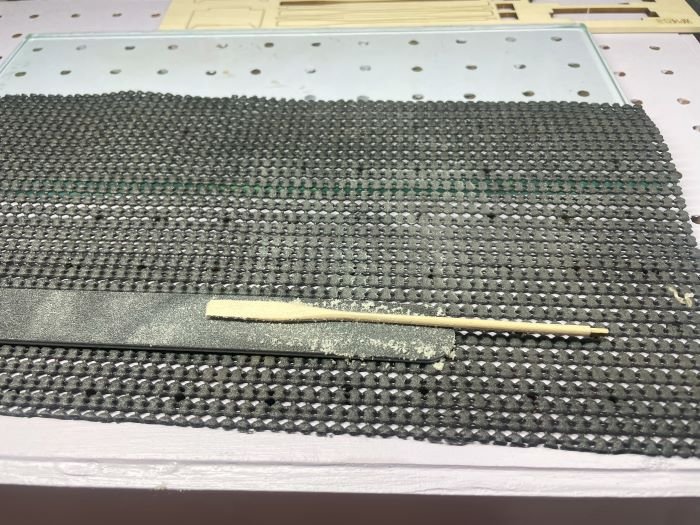
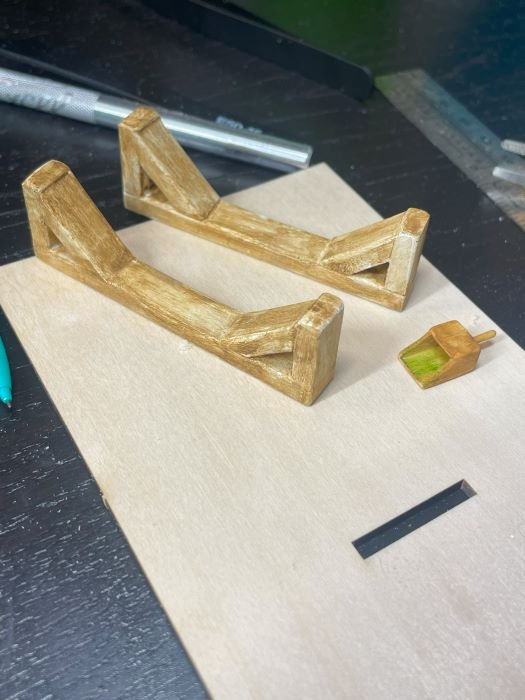
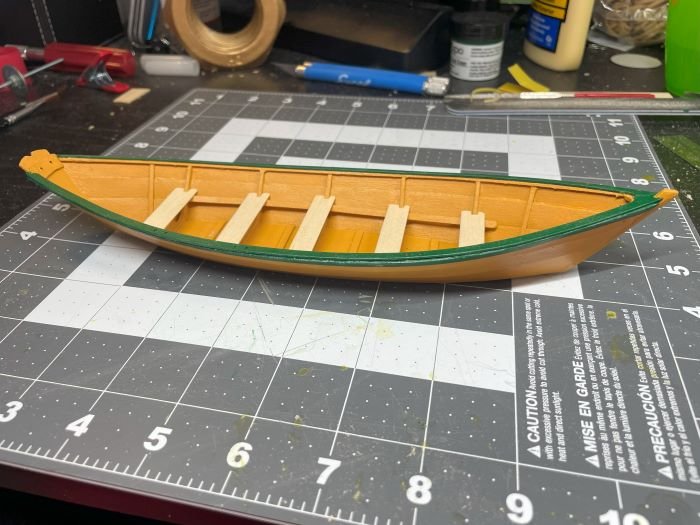
So I made a little tub for the trawl line. I thought the bottom at about 3/4" looked good but after building it became a little larger...I did it all by eye and didn't taper the first few enough so I tapered the next couple a lot to get it back on track. I think it turned out pretty good for my first attempt. Soaked some strips I cut from 1/16" material and wrapped them and allowed to dry. I carved the inside leg of the clothes pin rounded so it didn't put any flattening pressure on the inside of the tub. Pro tip- when gluing the bands on, line the seams up so they can be hidden in the back... ahem... And the star of the show, the Dory. I will call it officially complete, although I will add the tub to the base and make a case for it. I used Minwax Golden Pecan 245 for the oars and the thwarts. This I think gave them just a hint of color. I decorated the oars with a layer of fine Corinthian leather. When installing the leather wraps, my suggestion is to shave the leather thinner than you think it should be. I did the math so you don't have to, about 11 molecules of leather thick is about right. 👍 So get out a sharp blade and your magnifier! I also installed and glue treated the becket ropes. Gave things a light coat of renaissance wax and that is about all there is! This was great fun and I'm looking forward to the next build! Chris

- 30 replies
-
- 12
-

-

-
- Grand Banks Dory
- first build
- (and 2 more)
-
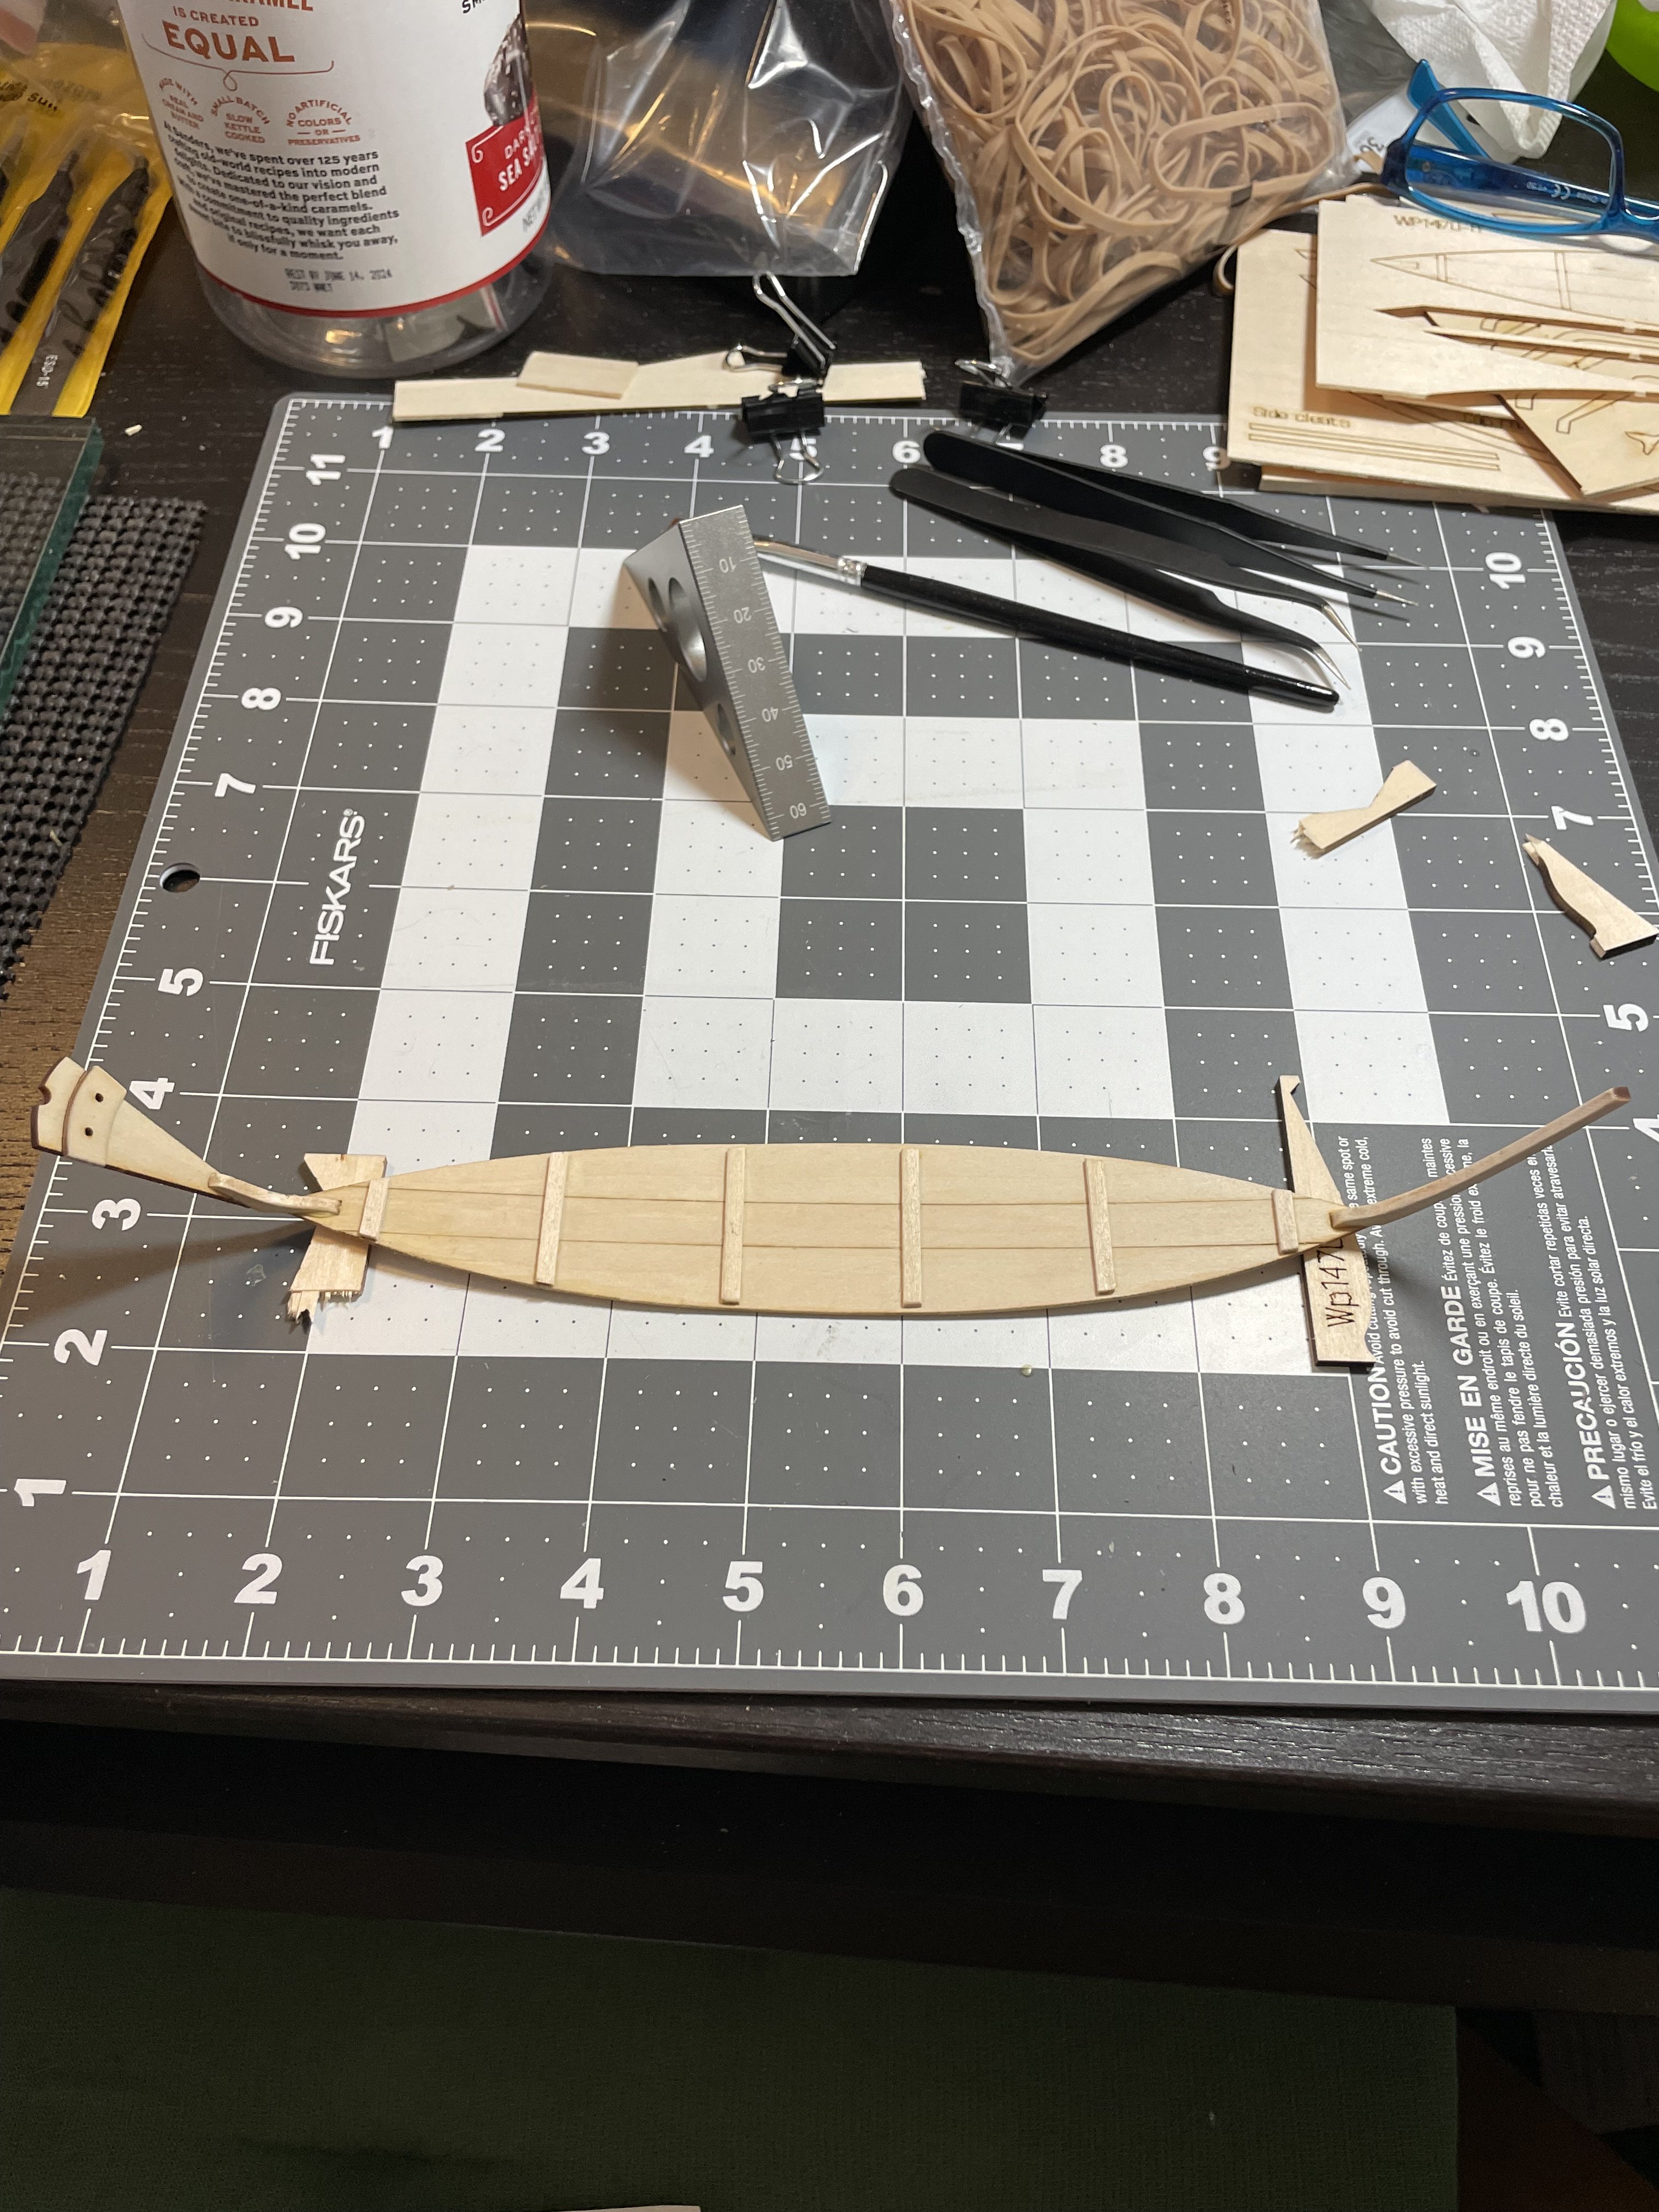
OK got some more work done. Started shaping the oars. After sanding the first one to shape I decided we could speed things up with carving them first. Here are some pics of the process. The carving is not for the feint of heart. It's very easy to carve to far into the oar. ld I made up a cradle to hold it. Saw it on another build. Here one of them is shaped. Then I made a crude attempt at ageing/weathering. Have to admit I have no idea what I'm doing here. Hahaha. These aren't even the colors they stayed by the time I finished the base. I made a base and copied a deck planking pattern I found online. No idea if it's period correct etc. but figured it was good practice. I'll call it mostly done, but I have some smaller rope coming for the beckets and I am still going to try my hand at building a tub to hold trawl line. So a few questions for you that are following. I can't find a suitable color for the thwarts and oars. They are supposed to be ash. I've tried a natural danish oil, essentially no change. I tried a provincial maple stain, too red. I have renaissance wax but would like a color on them first. What method do you use to recreate the trunnels? I simply drilled a small shallow hole and put a dab of glue in it then sanded the area so the glue would grab the dust. After staining they took the color a little darker. You can see I still had some glue squeeze out that I didn't catch when sanding. I cut the deck planks by hand I made them 10 mm across. Also what's your preferred method of cutting planks to length? I used a straight edge and sharp blade. Still tough to get the cut square and vertical. I've seen the "chopper" style of cutter and I've also seen cheap Chinese electric chop saws. Any thoughts on either of those? I don't know if those questions will get lost in this build log. Where is a more appropriate forum for those questions? Thanks for all the comments, the Norwegiansailing pram arrives tomorrow!

- 30 replies
-
- 9
-
-
-
- Grand Banks Dory
- first build
- (and 2 more)
-
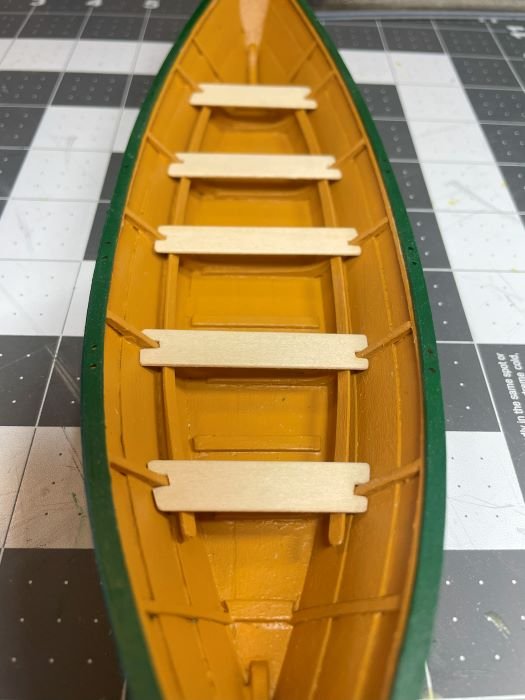
So starting back at it we have the inside painted. After a few rounds of touch up back and forth it's painted. I decided to paint the bands green also. I like it. I'm happy with the detail on the bow and stern. I looked at a lot of pictures and they're all just a little bit different from each other. Haha. Just don't like the heavy looking paint job at this scale. When it came time to fit the thwarts I needed to deepen the slots for the frames. My #16 blade was really helpful here. I guess my dory was a little thinner than most? I had to trim down most of the thwarts but not the middle couple very much. This shows one slot trimmed but not the ends yet. Still need to shape the oars and the thole pins, I'm having a great time with it for sure. More to come... Chris
- 30 replies
-
- 7
-
-
- Grand Banks Dory
- first build
- (and 2 more)
-
Rob, that sounded like excellent advice on the sanding sealer. I’m used to working with hardwood, so this soft stuff is foreign to me. Sure sands and carves easily though! Anyway I sprayed it with Deft sanding sealer then gave it a nice light sand. Seemed like a nice finish for paint. Another lesson learned; I need to pay more attention to glue cleanup during construction. I spent quite a bit of effort cleaning up dry glue on the inside of the hull. Used 91% IPA, worked pretty well. My point though is that you can still see plenty of it after the paint. I’ll be posting some pics here soon and I’d appreciate more opinions and guidance. Thanks! Chris
- 30 replies
-
- 2
-
-
- Grand Banks Dory
- first build
- (and 2 more)
-
So this part isn't easy to document, a lot of sanding and shaping. Question- Did I lose the false stem? I never saw one so I used a piece of scrap and shaped it... Bands on. I notched the frames for the gunwales, but I guess I should have gone farther down. I only cut back 1/16" since that's the size of the wood. Well with the angle of the sides after I sanded them mostly level there isn't a lot of thickness left on the inboard edges of the gunwales. Did I do something wrong? I sanded the faces a little to give them the look of some thickness. Breast hook shaped and glued in. I think I'm going to call this pretty much ready to paint. I may do a little more shaping of the bow after I look at some photos this evening. Need to pick up some sort of primer in the morning so paint will have to wait anyway. Overall I think I'm happy with the planking/beveling and shaping of the bow. A couple of questions for those reading all this. If I make a rope bucket what size of rope do you think will look best? (I did shorten the handle on my water bailer substantially after finding JacquesCousteau's build log. Thanks for that!) Having a great time with this little kit. A few more and better pictures in the instructions would be helpful. Especially regarding the bands, gunwales and bow shape. If it wasn't for all of you that have posted your logs newbies like me would be lost. Thanks!! Chris
- 30 replies
-
- 3
-
-
- Grand Banks Dory
- first build
- (and 2 more)
-
One thing that helped me keep the planks in order was to mark the bow end of the pieces before I remove them from the sheet. There is a hole on the bow end of the garboard plank, so I just made a pencil mark on the bow end of each plank. I'm pretty sure I saw this pointed out in the instructions, but I believe I read a post that this issue was a problem for someone. So I kept an eye out for it.
- 30 replies
-
- 6
-
-
- Grand Banks Dory
- first build
- (and 2 more)
-
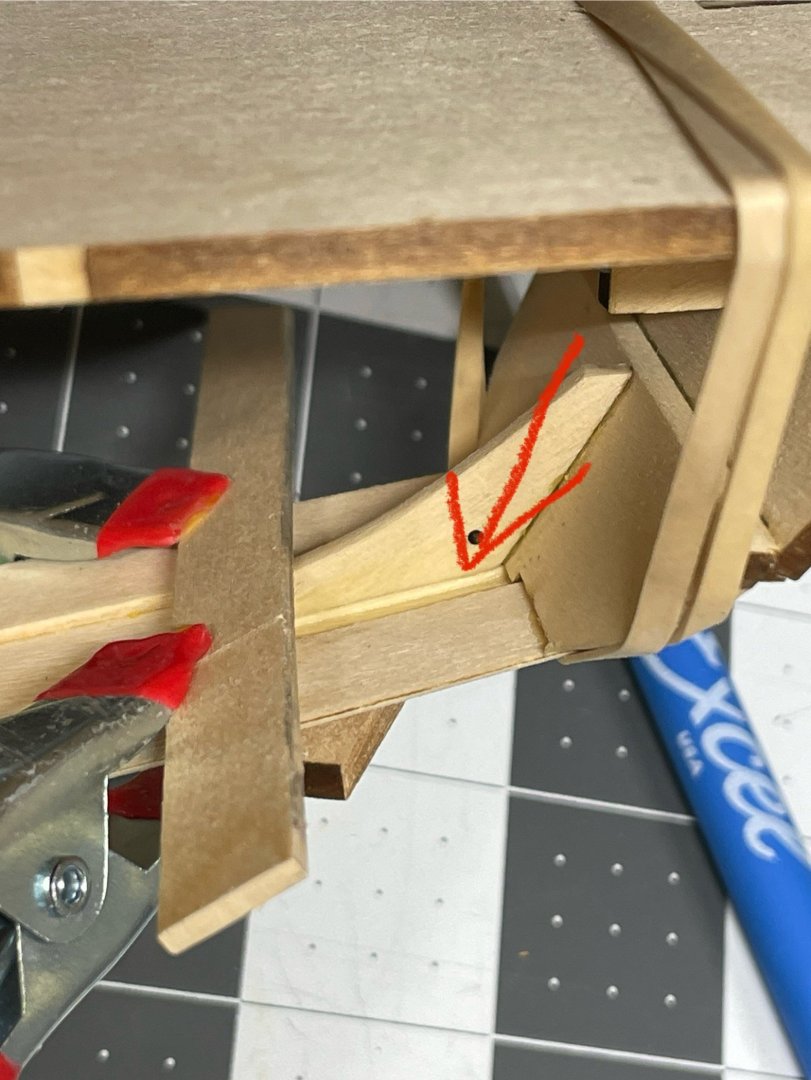
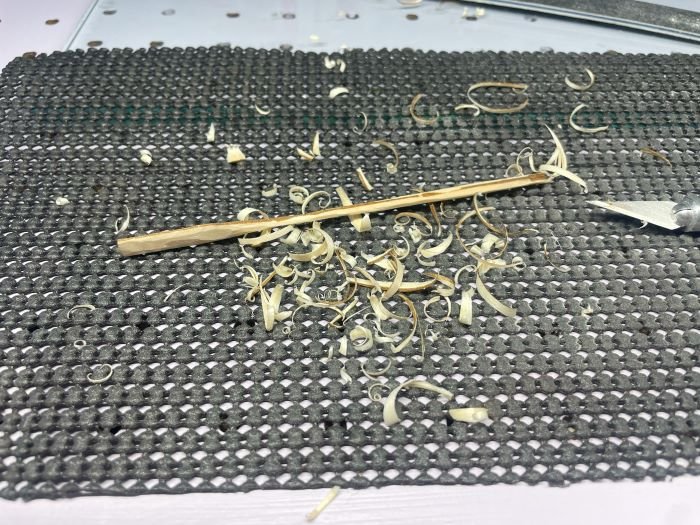
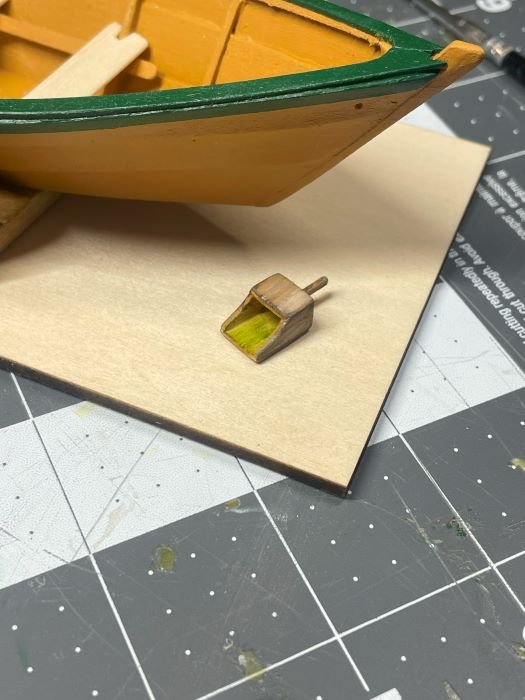
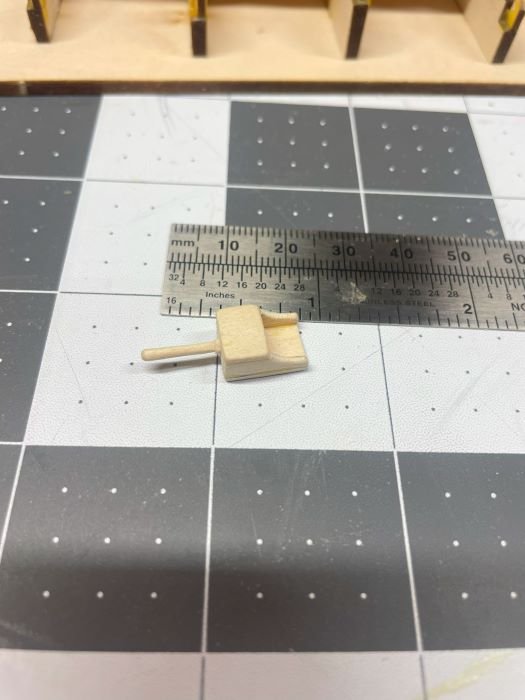
OK time to update the post. Starting off with gluing up the bottom onto the frames. Shaping the bow... Moving on to sanding the bevels. Wow, those are tiny pieces of wood! Patience is the key here that's for sure. I made up a tiny down draft table that I plugged into a shop vac to control the dust. Works great. Pop in the ear plugs, shut the door and off you go. The next step will be to move the shop vac into the garage and just have a hose coming into the craft room... Gluing the garboard plank onto the frames. Broad strake glue up, now the clamping was getting pretty fiddly. You need to be careful not to damage any wood that you have already sanded to shape. I made up these little clamping jigs out of scrap. They worked really well but were not very robust and barely survived all the way to the sheer strake. My big nut makes a great helping hand! It was a perfect angle to hold against the transom. One thing I've learned is you need to be flexible in your planning. First, have more than one plan. For example, gluing the planks onto the forms. One time I would use an awl to apply PVA glue where I needed it, clamp it and wait. Sometimes you're going to need to hold that joint with your fingers, so make sure the other parts are clamped so you can pinch that part again. On one side I had the broad strake soaked and clamped up for shape and it lined up so well that I didn't want to touch it. So after it dried I used watered down glue with a brush and painted the joints from the inside then let those dry. So once I removed the clamps it was right where I wanted it. I guess you just need to do whatever that situation requires. I see some people struggle because they have one method of glue up and it's giving them trouble and they get stuck because they can't clamp this one like they did the other one. While stuff was drying I made a little water scoop from scrap. No idea if the scale is correct I was just following some photos I've seen on the web. Based on my ruler I guess the real size would be about 18" long. Hahahaha Looking forward to hearing your comments! Chris

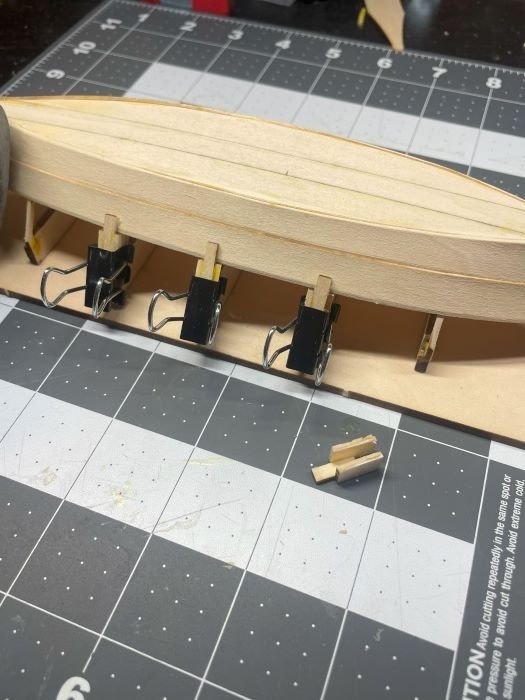
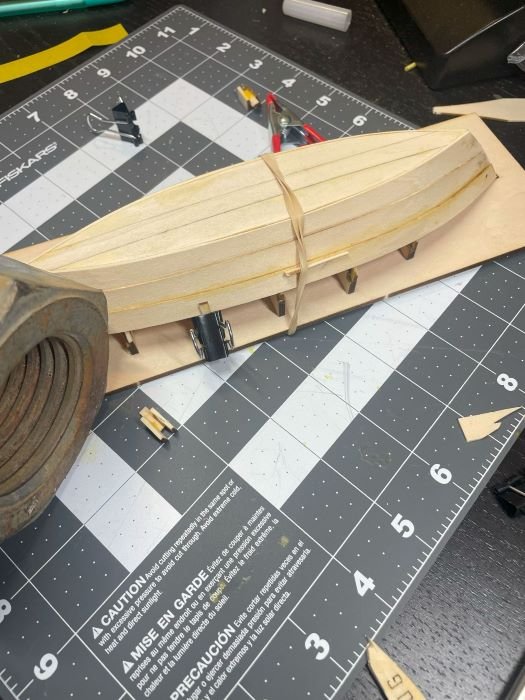
- 30 replies
-
- 5
-
-
- Grand Banks Dory
- first build
- (and 2 more)
-
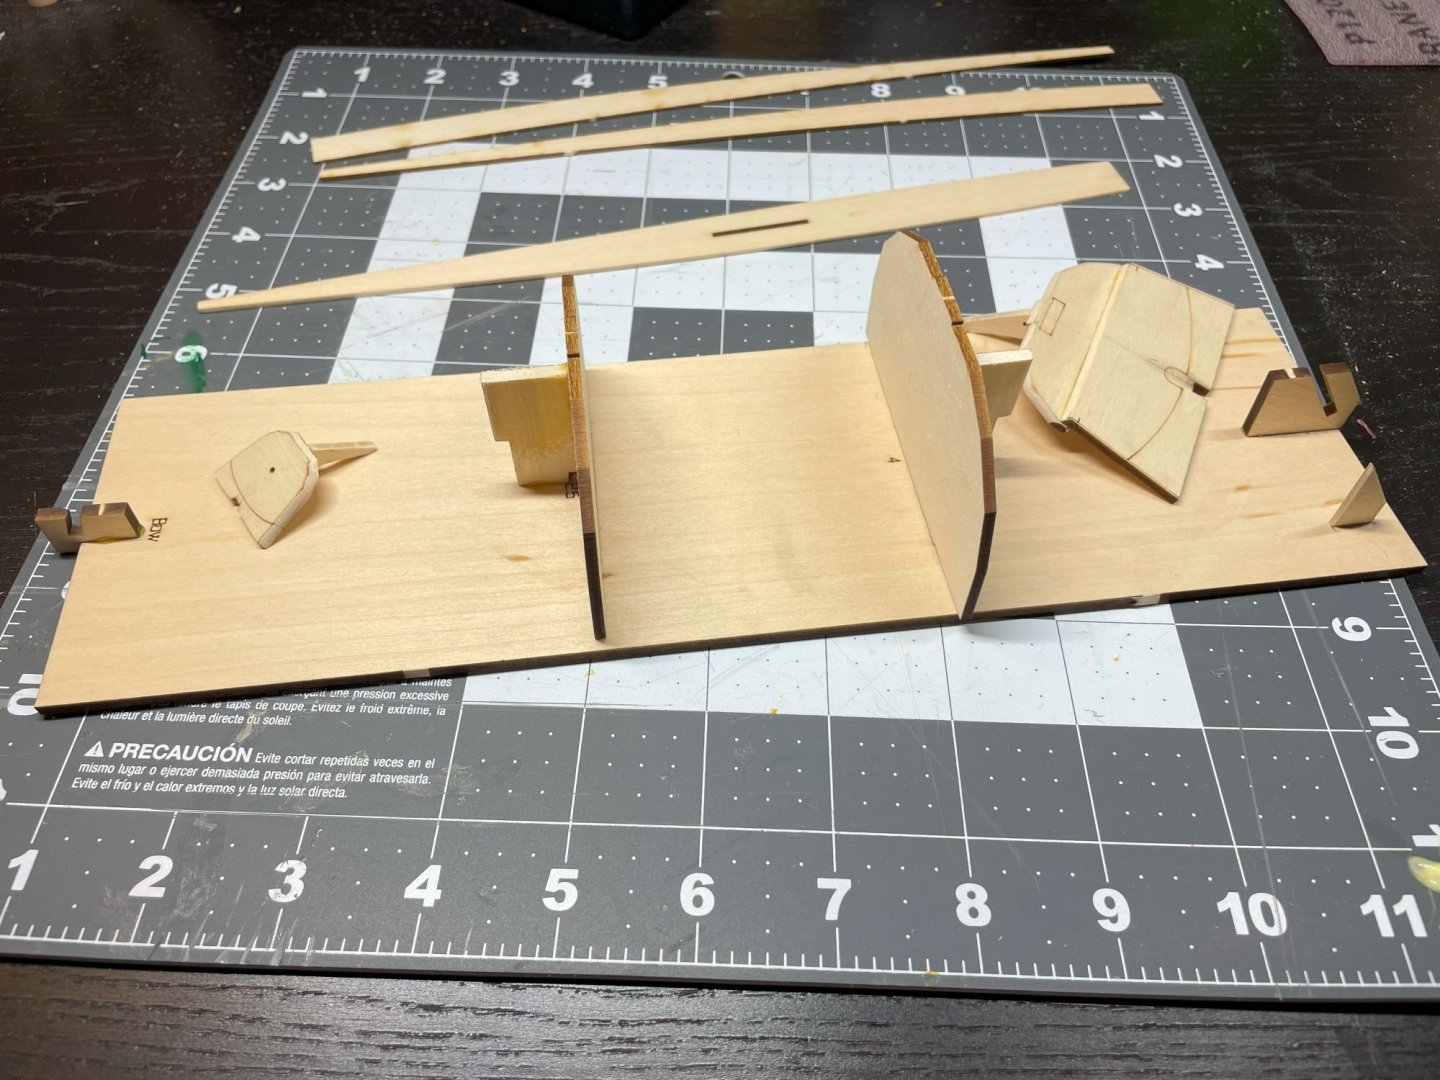
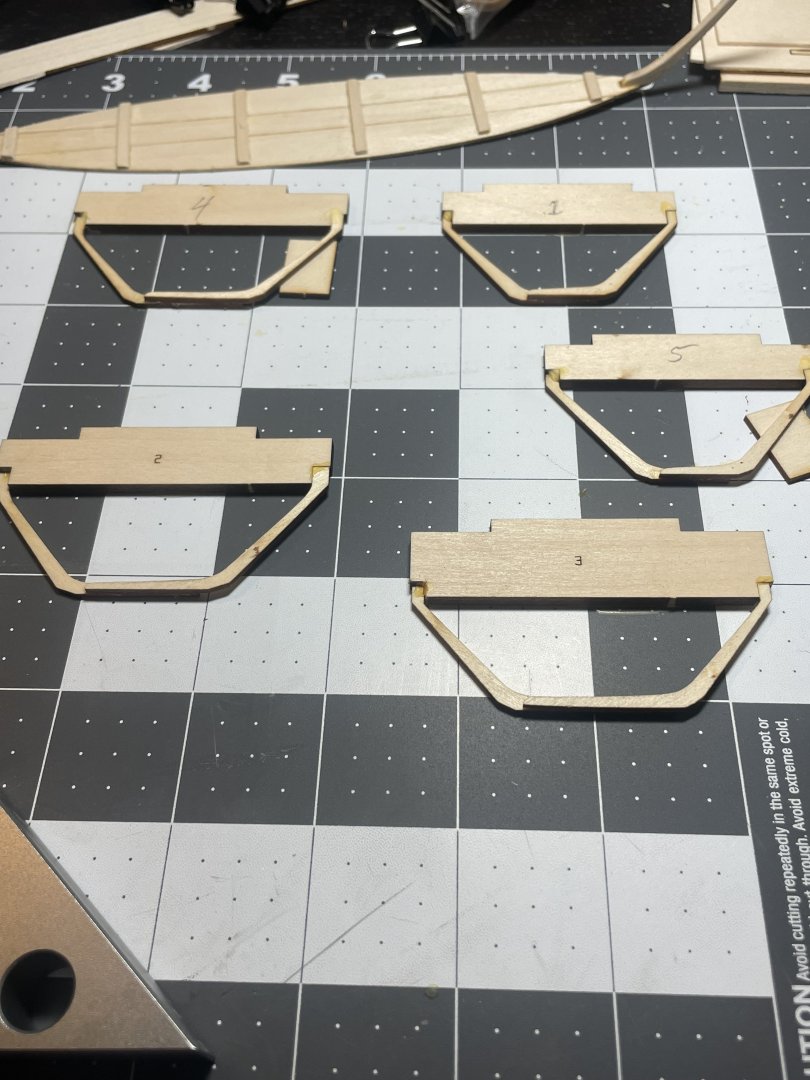
Frames glueing up. A little fiddly getting them all lined up. Did a little sanding on them to knock the hard corners off.
- 30 replies
-
- 7
-
-
- Grand Banks Dory
- first build
- (and 2 more)
-
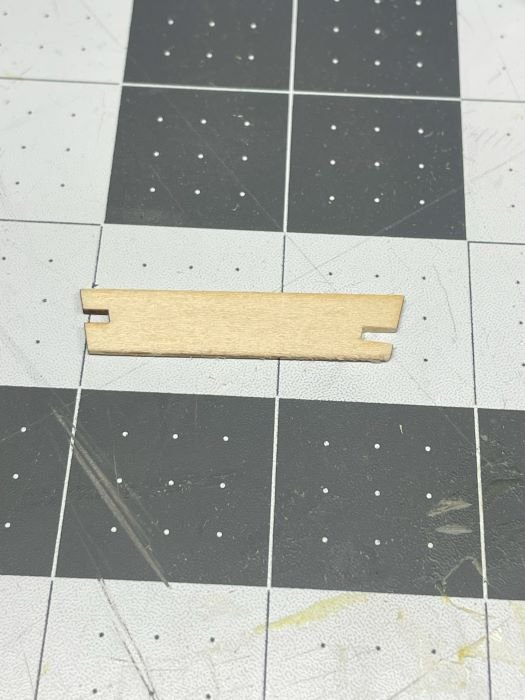
So I’ve compared the #3 frame and crosspiece with the plans in the book and the plans I printed. Well… the crosspiece is slightly larger than the image on the plans in the book and slightly smaller than the “full” size plans I printed. I’m going to proceed by splitting the difference.
- 30 replies
-
- 2
-
-
- Grand Banks Dory
- first build
- (and 2 more)
-
First ship build. Not much to say so far, but here’s a picture. One question though I’ve seen discussion regarding the width of the frames on the plan not being correct. I printed the plans so that the OAL is exactly 10”. So now my frames should be the correct size, correct? 😉 I’ve yet to cut out the frames and compare to the plans. Thanks! Chris
- 30 replies
-
- 9
-
-
- Grand Banks Dory
- first build
- (and 2 more)