NRG Photographic Model Ship Competition - All eligible to enter - Reduced memberhsip fee - JULY 31 ENTRY DEADLINE
×
New Banner Ad Sponsor - Epic Engravers - Great plank bending machine (also bends thin metal sheets) and unique engraved coins to label your model displays!
×


MBerg
-
Posts
132 -
Joined
-
Last visited
Content Type
Profiles
Forums
Gallery
Events
Everything posted by MBerg
-
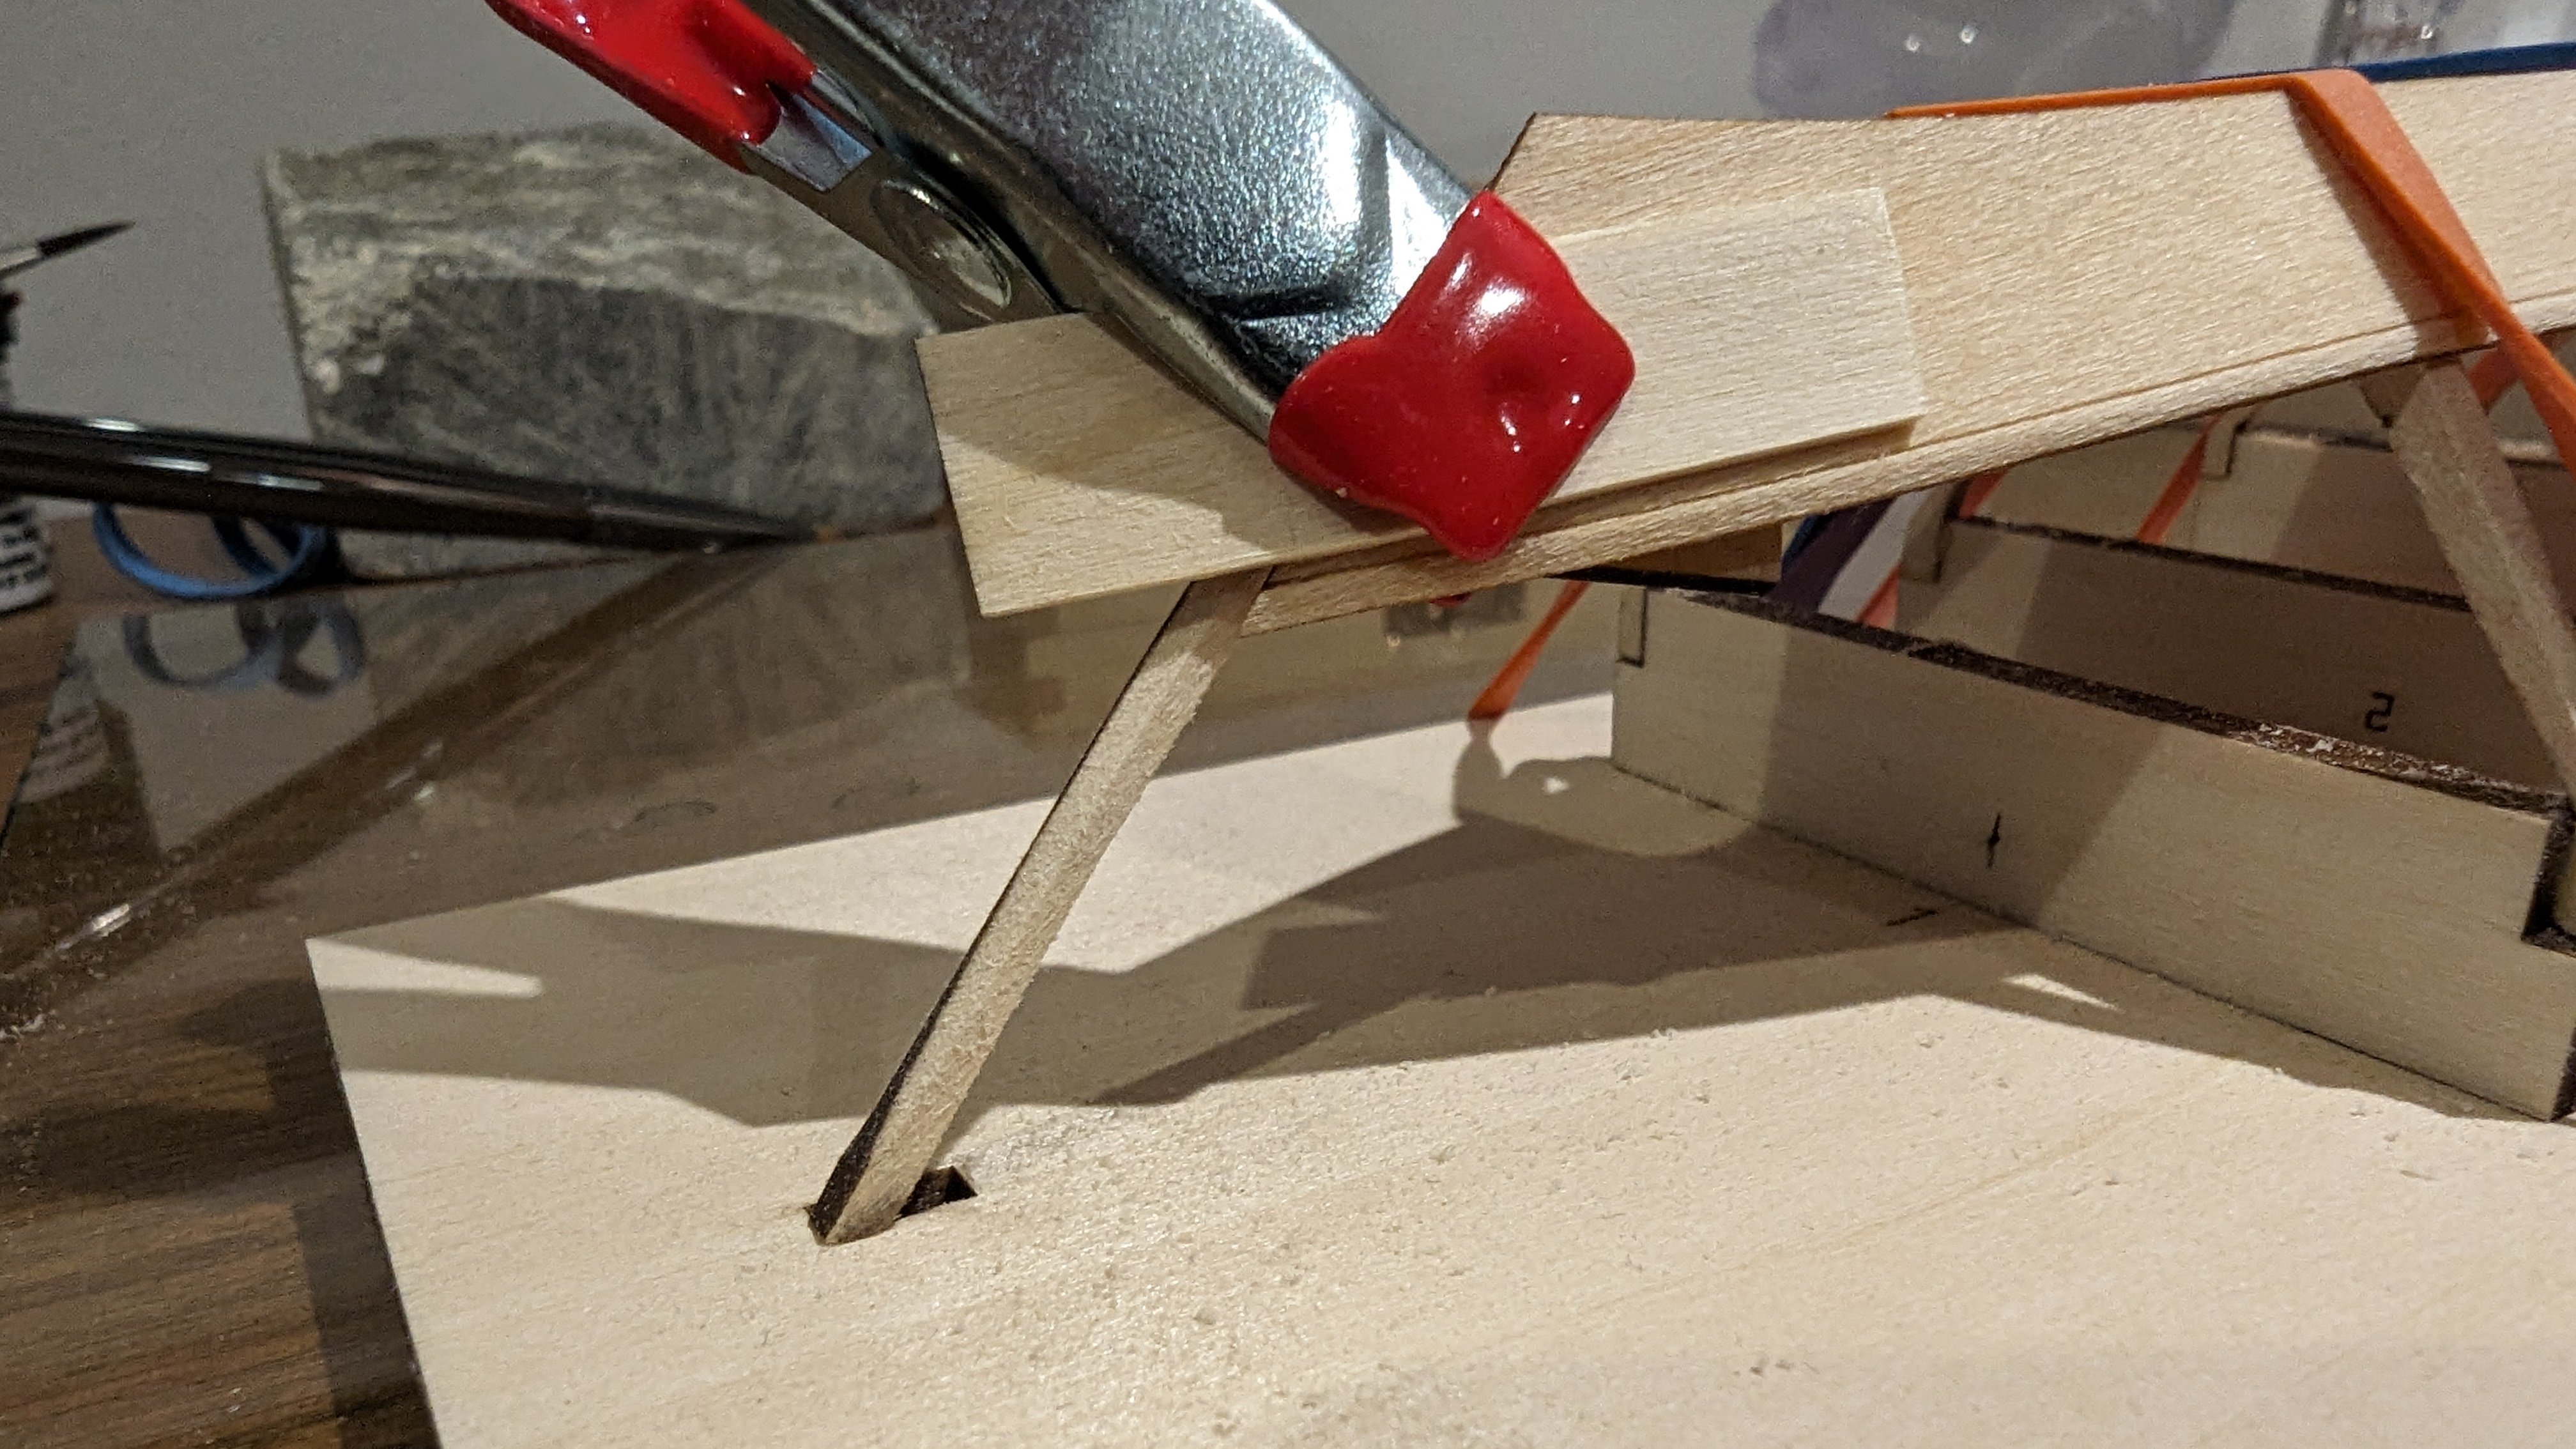
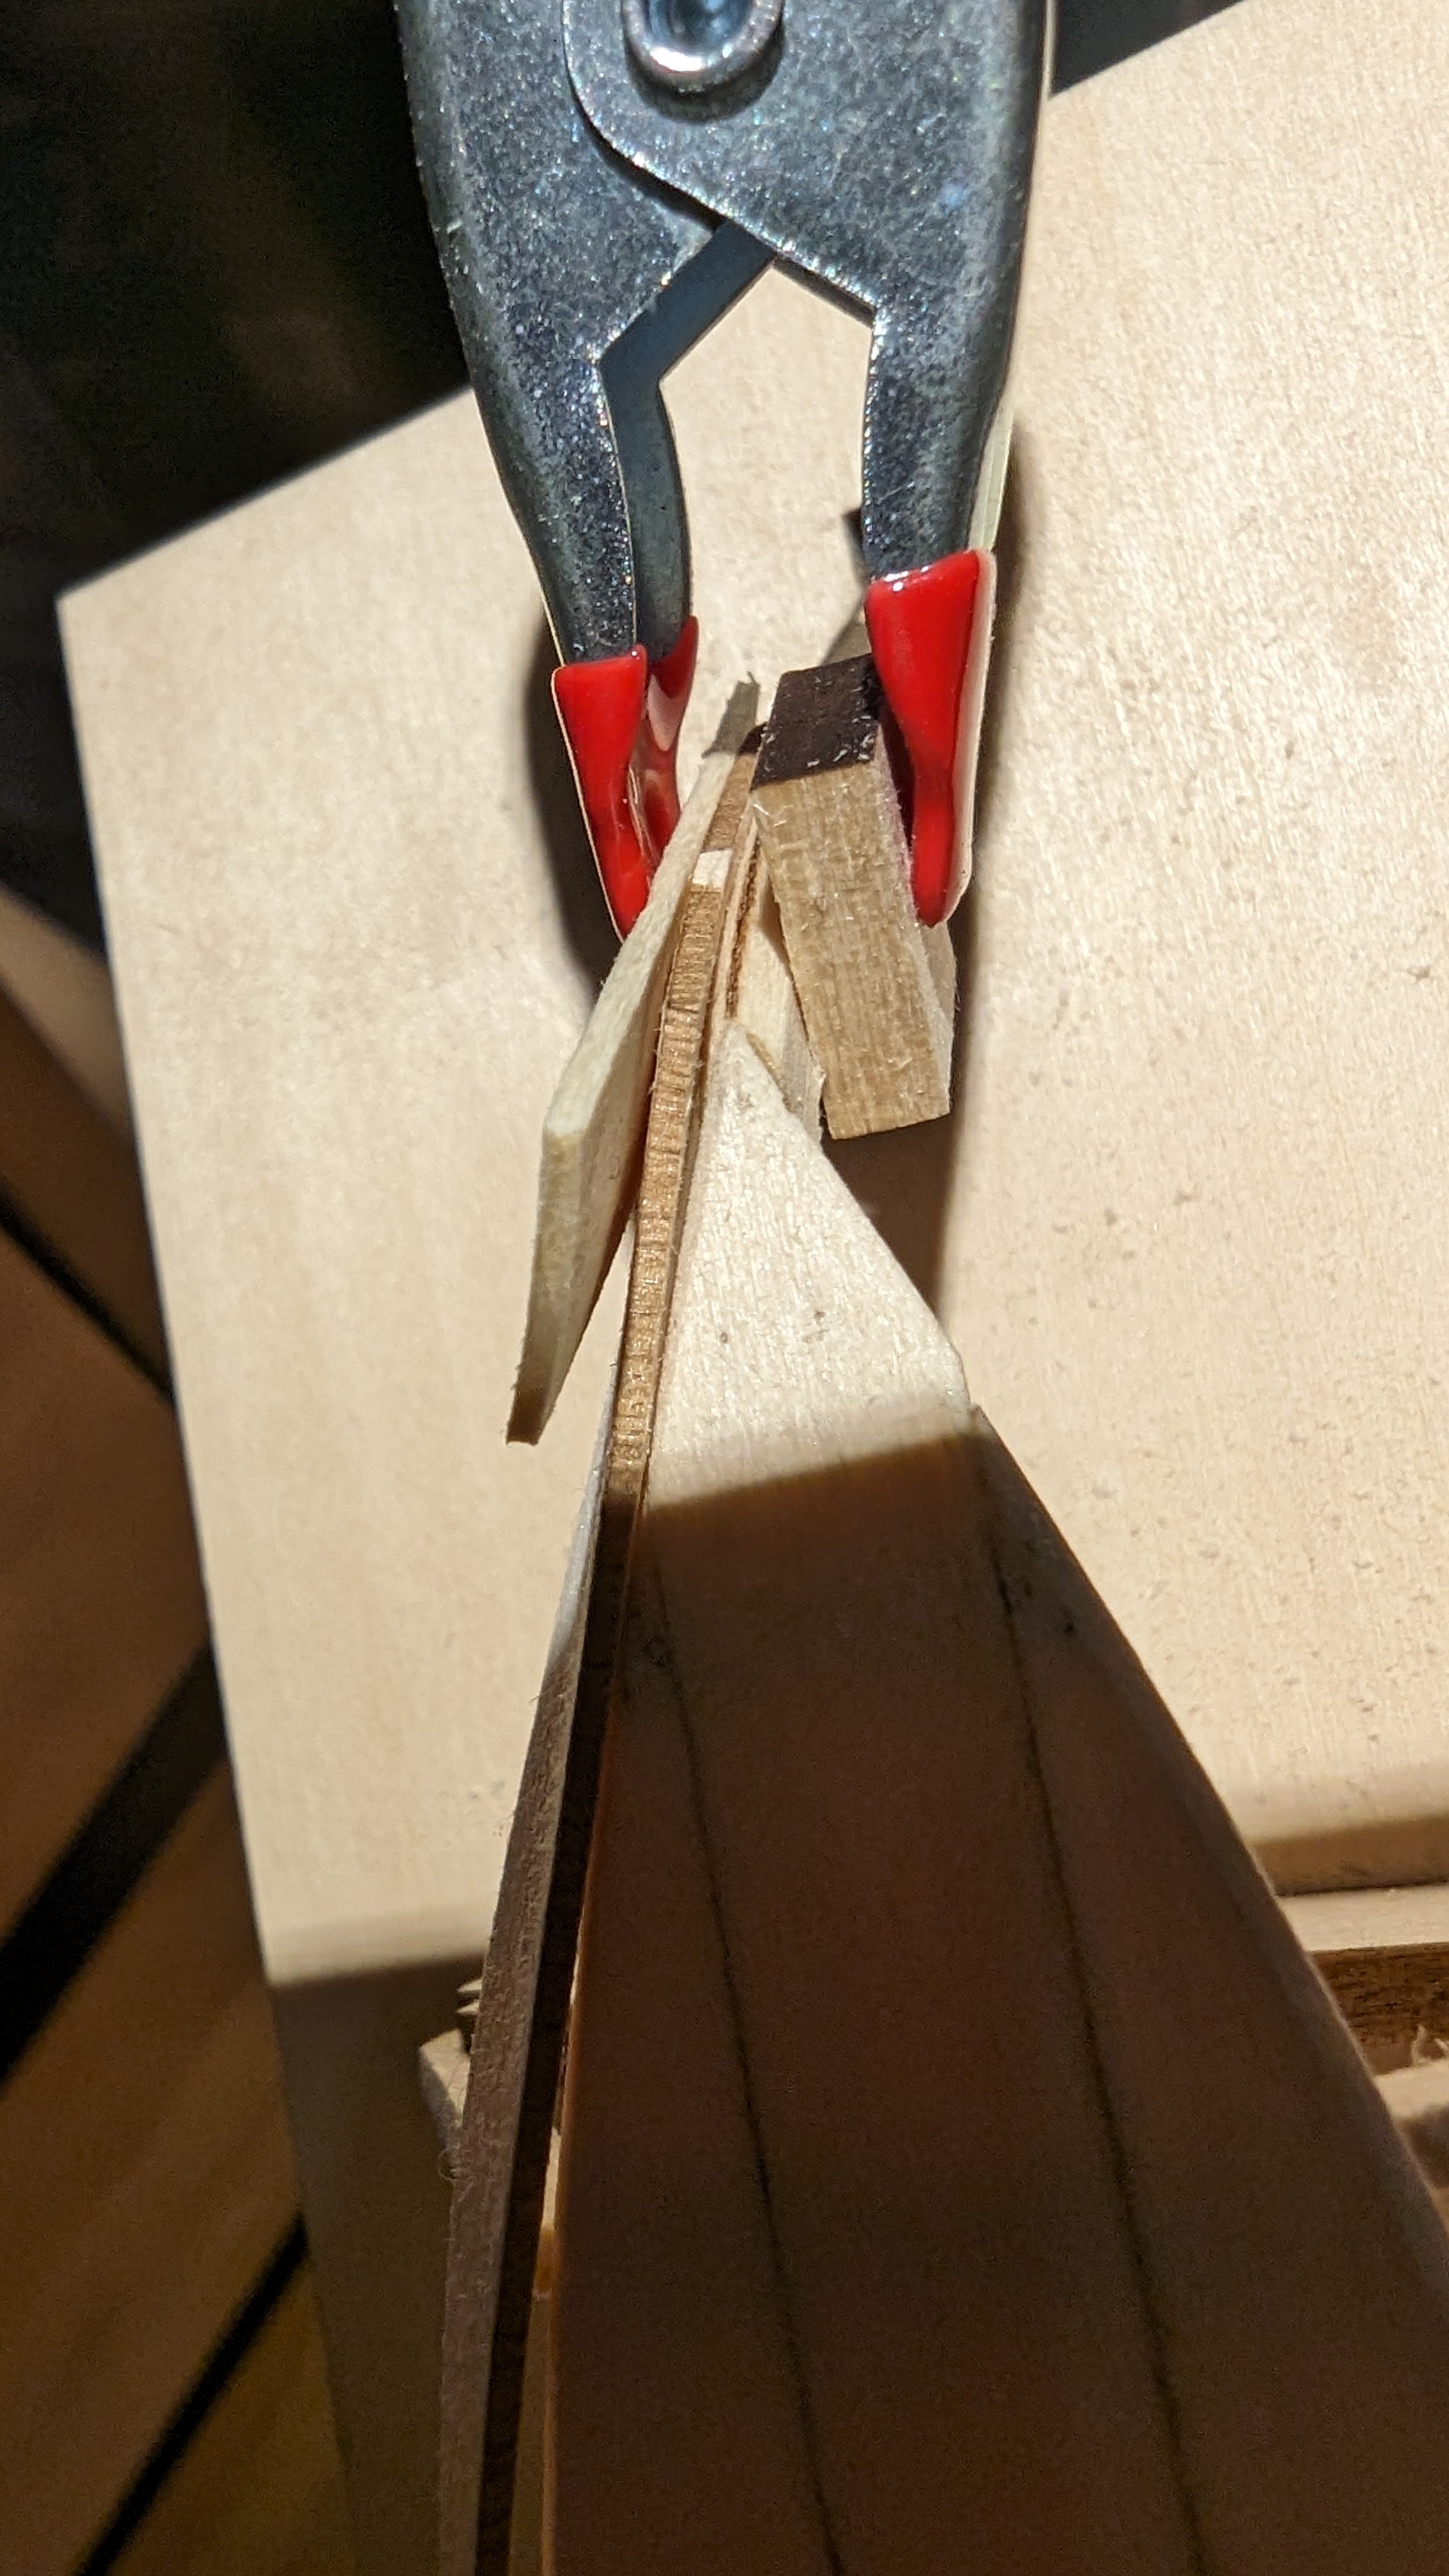
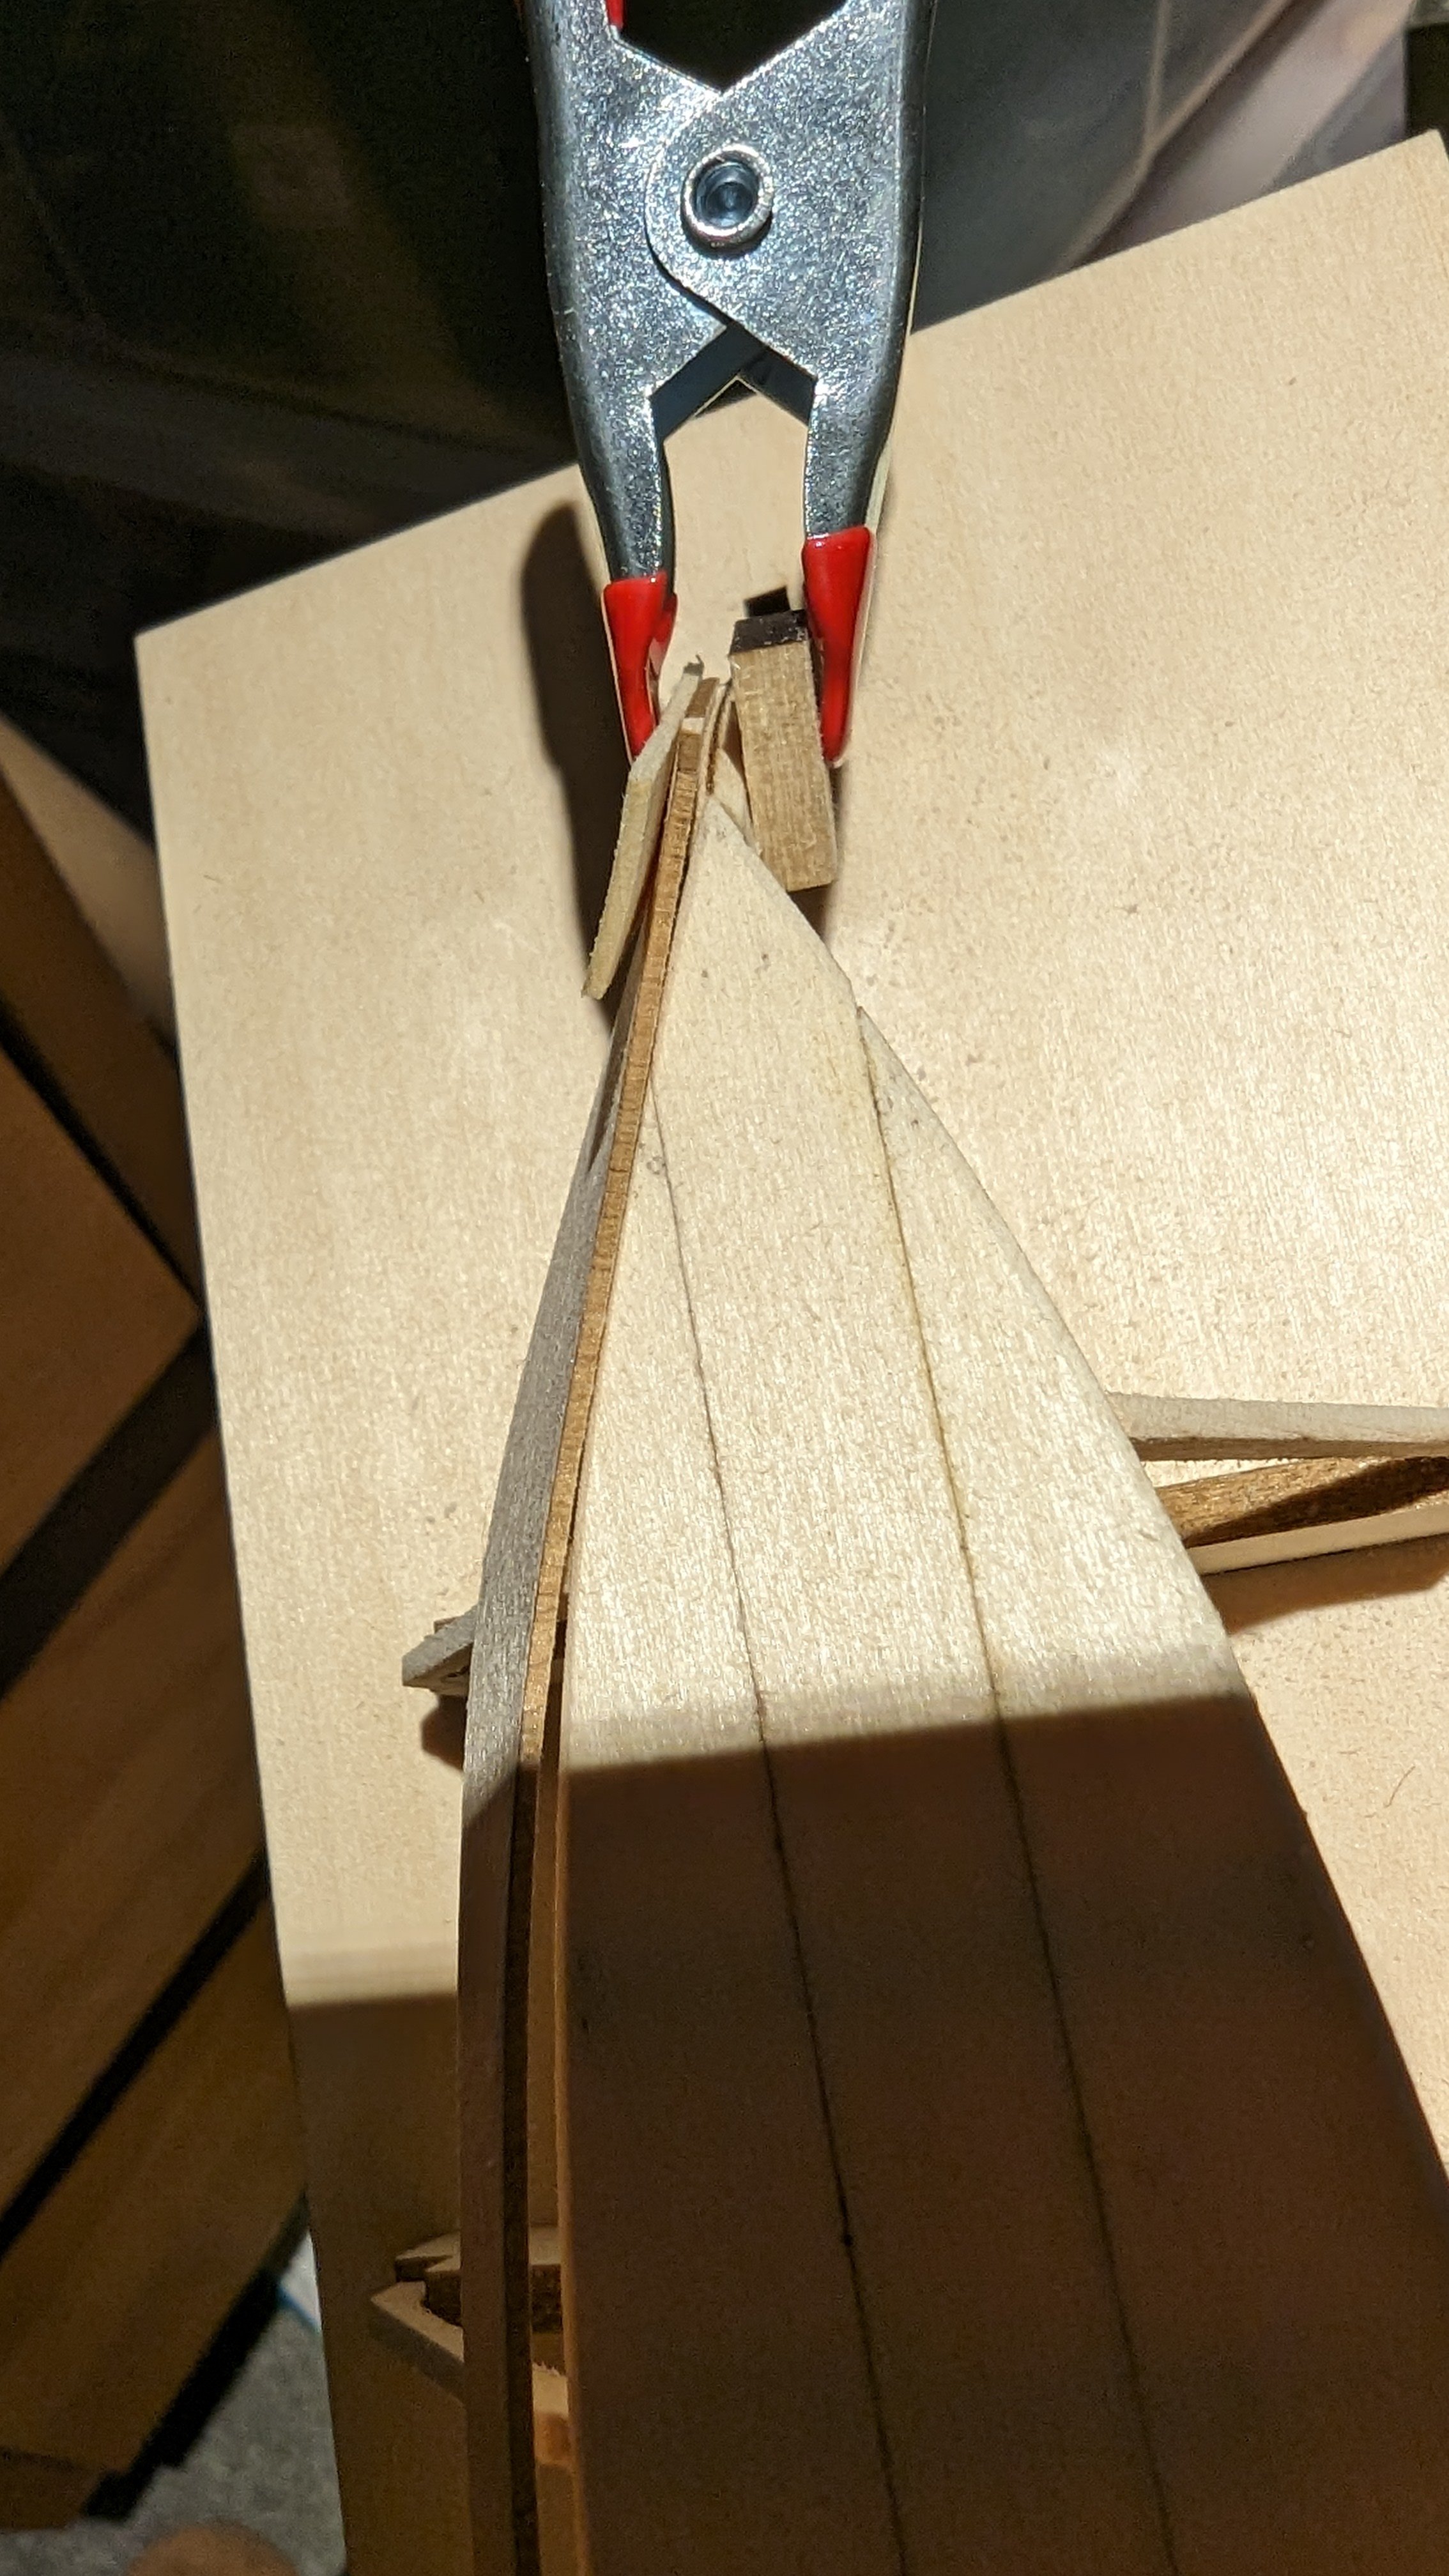
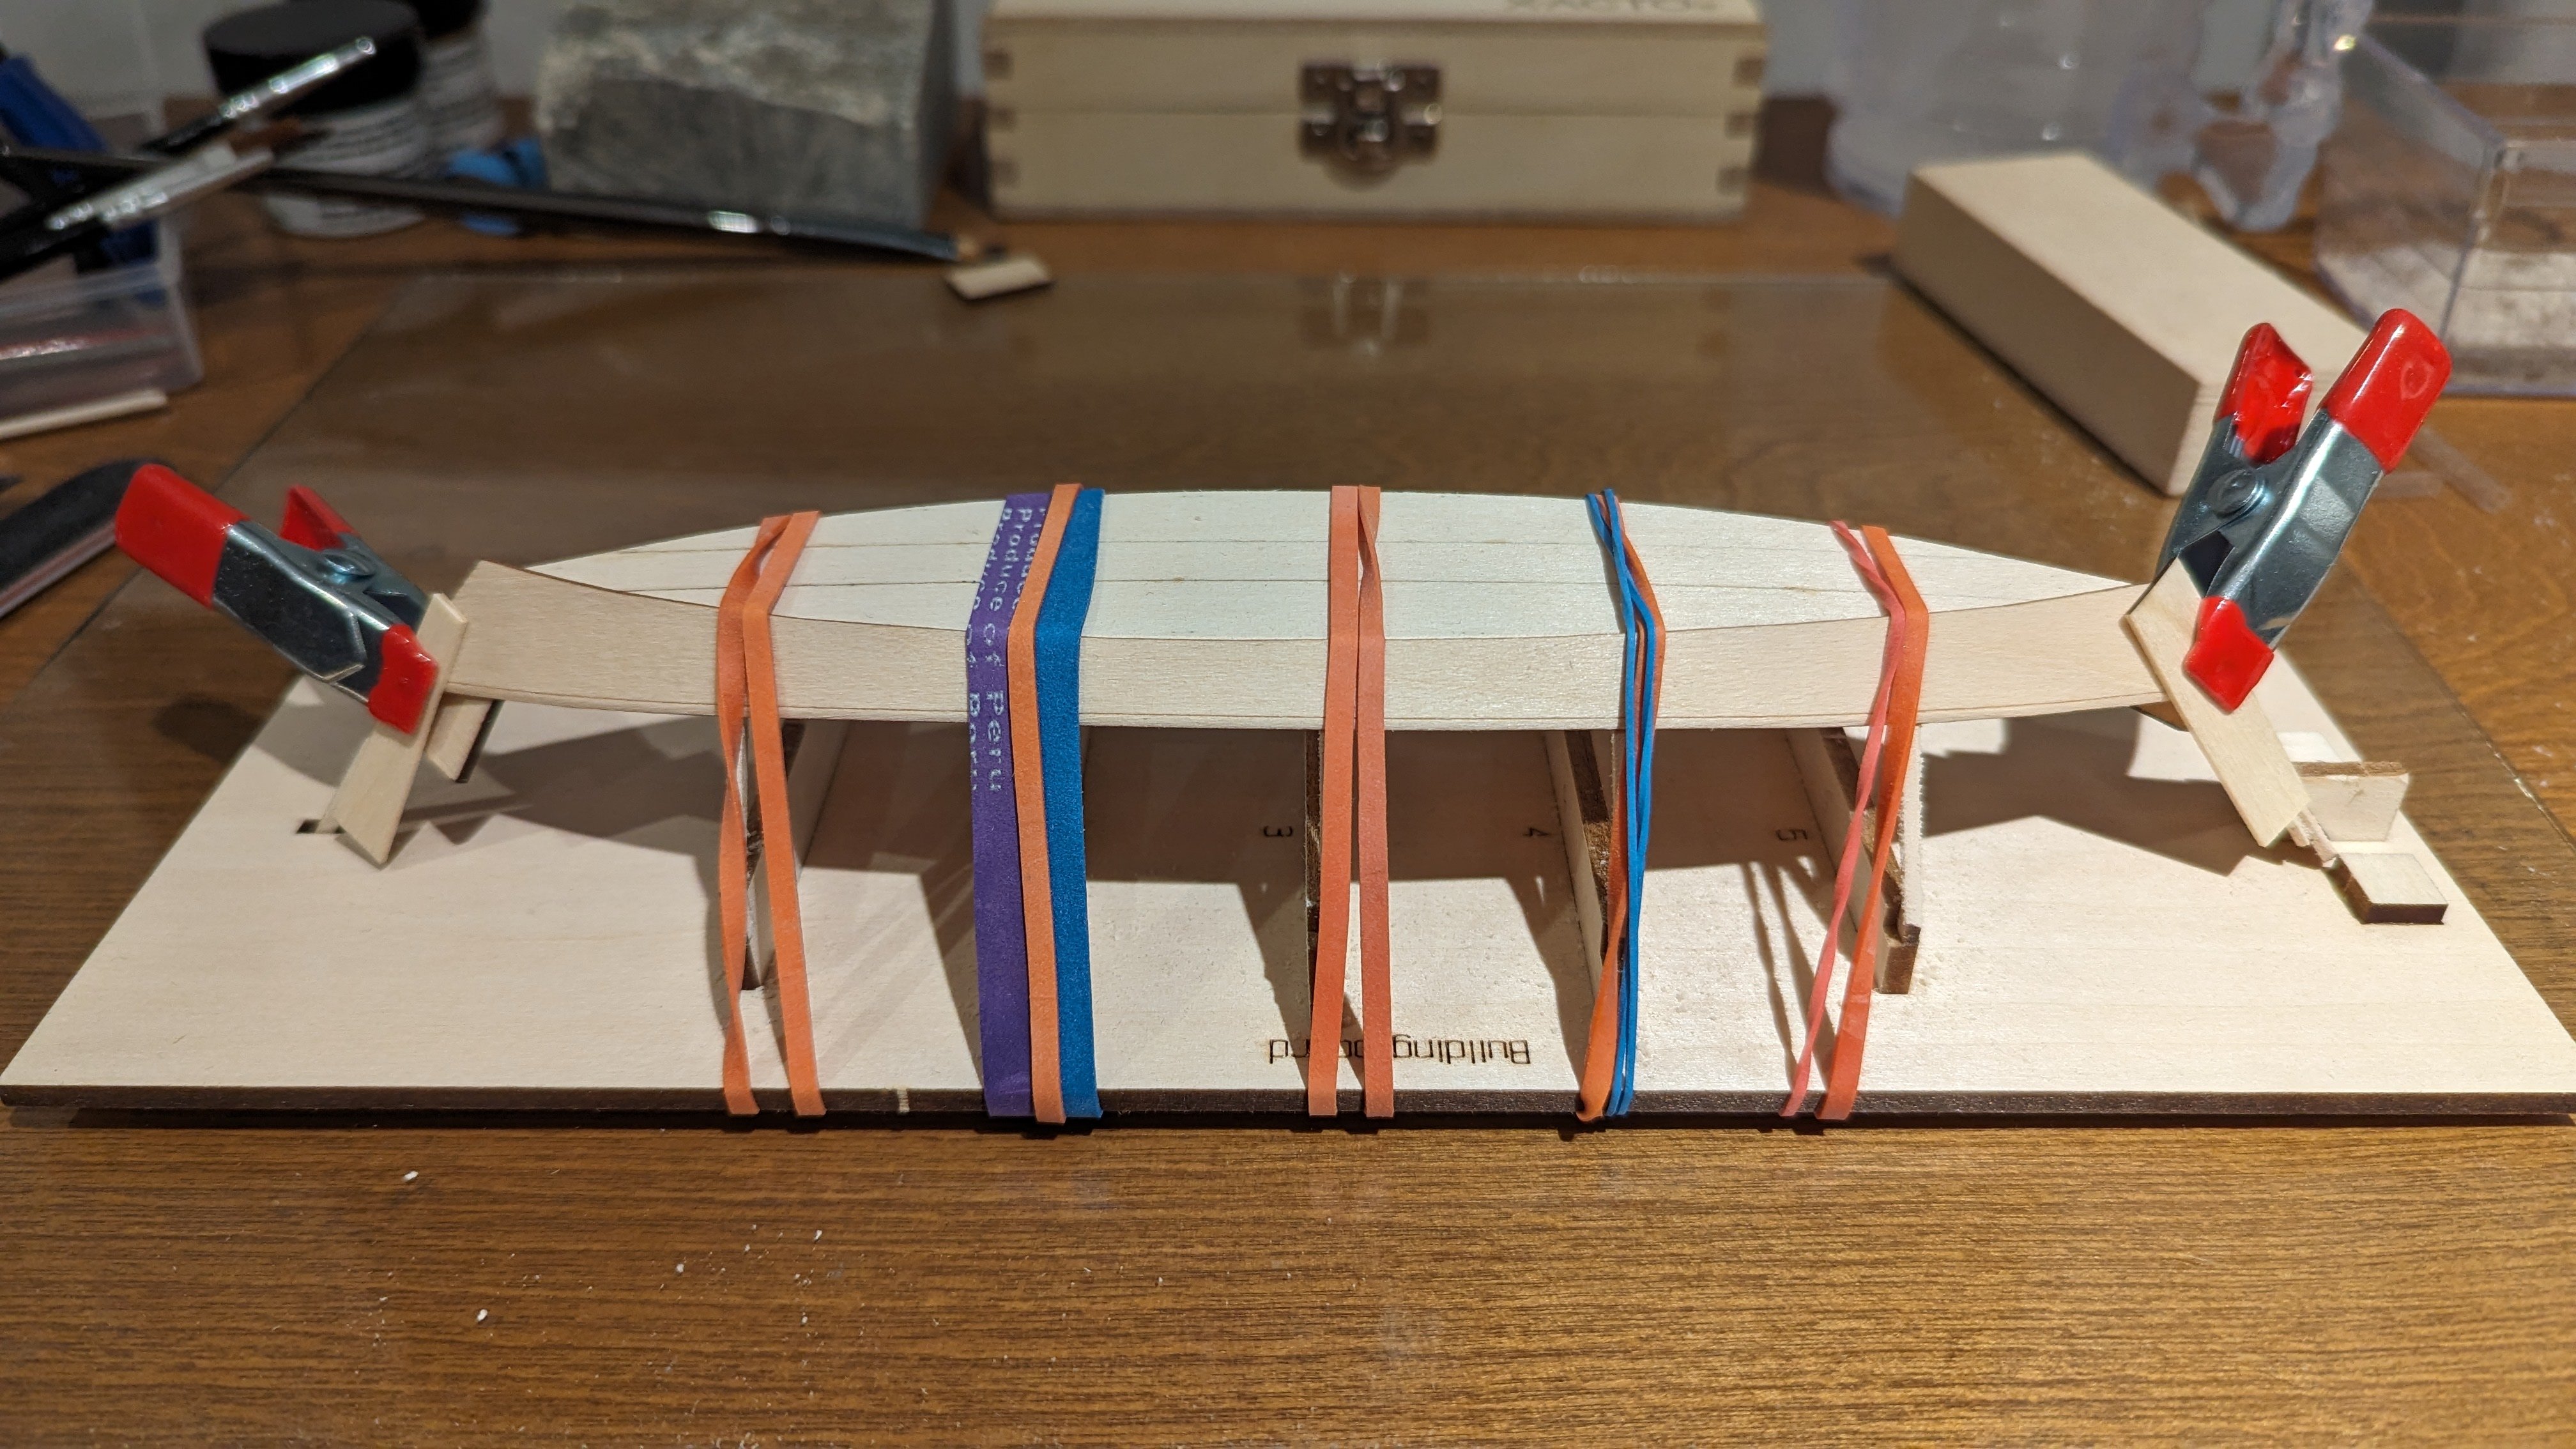
 Will do. Lets see what they say. I figure worst case, most of it will be hidden by the other board on the outside, but it'll be difficult to cover up on the inside. I also have no idea what issues could compound from using these board either. Log #5 I decided to go ahead and start bending the 'good' garboard. I clamped it up, but something didn't seem right - it was too short and the cut angle didn't seem to ride up the stem very straight. I left it for a few minutes but my gut was telling me I needed to deal with this now, not when I'm ready to glue. I took it off and tried fitting it again. This time I overlapped the bottom board quite a bit more and it fit 10x better. I still wanted to make sure everything else appeared right. I noted a bit of a 'pucker' around where it met the stem. It looked like the stem needed more sanding. I removed the board a second time and sanded the stem down more. I also decided to hit the frames a bit more. Then after some finger fumbling with the clamps and elastics it'll sit like this overnight. Whew, into the part that I've been most anticipating as it's the most unfamiliar. Exciting to start the planking. I'm not new to bending wood as I've made a bow before (that's "bow and arrow" bow), but I've never done it with water, or without shaving significant amounts of wood and 'teaching' it to bend over days. We'll see how it goes with Model Expo. I can always work on the paddles, or the OcCre Polaris if it'll be a week or so.
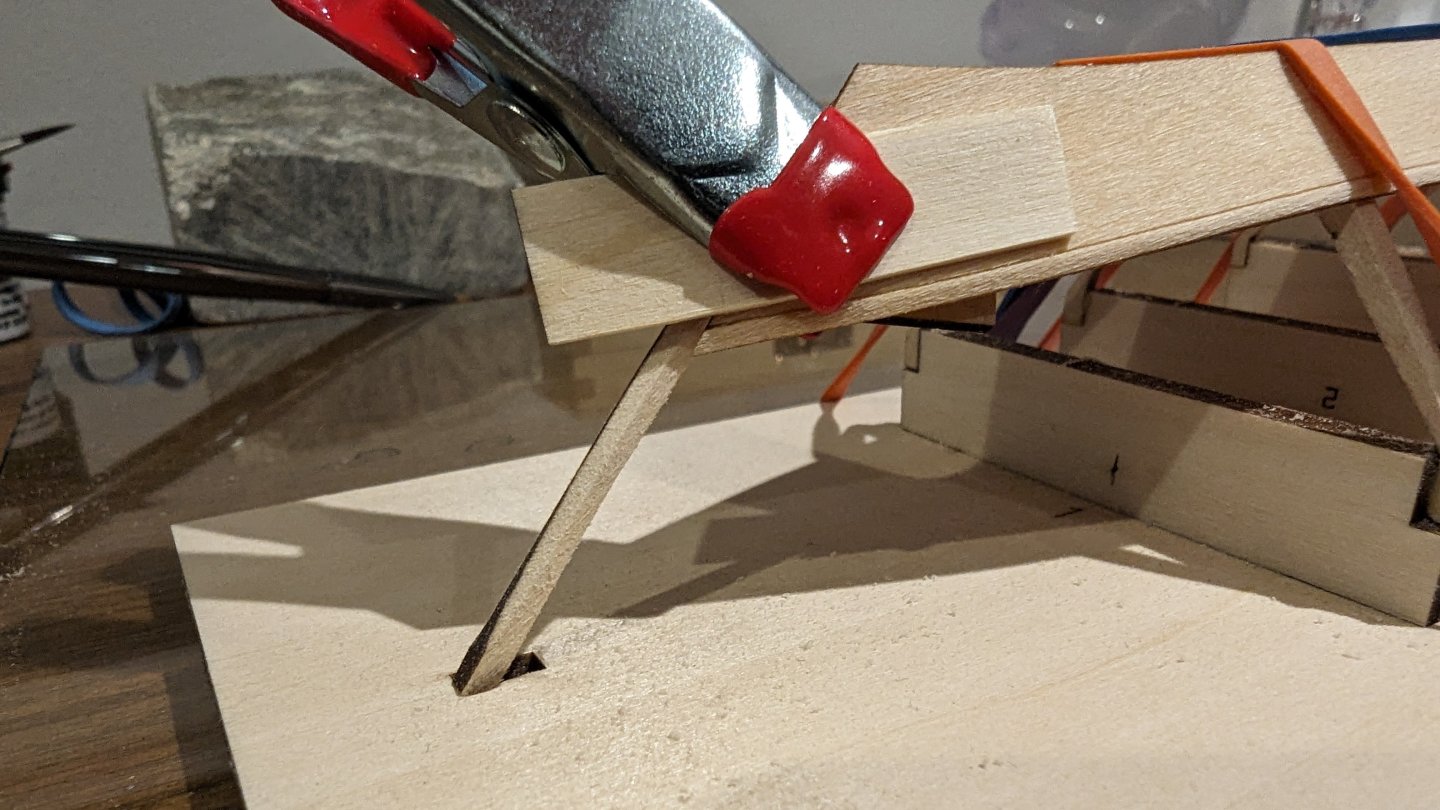


- 69 replies
-
- 9
-

-
- Lowell Grand Banks Dory
- Model Shipways
- (and 2 more)
-
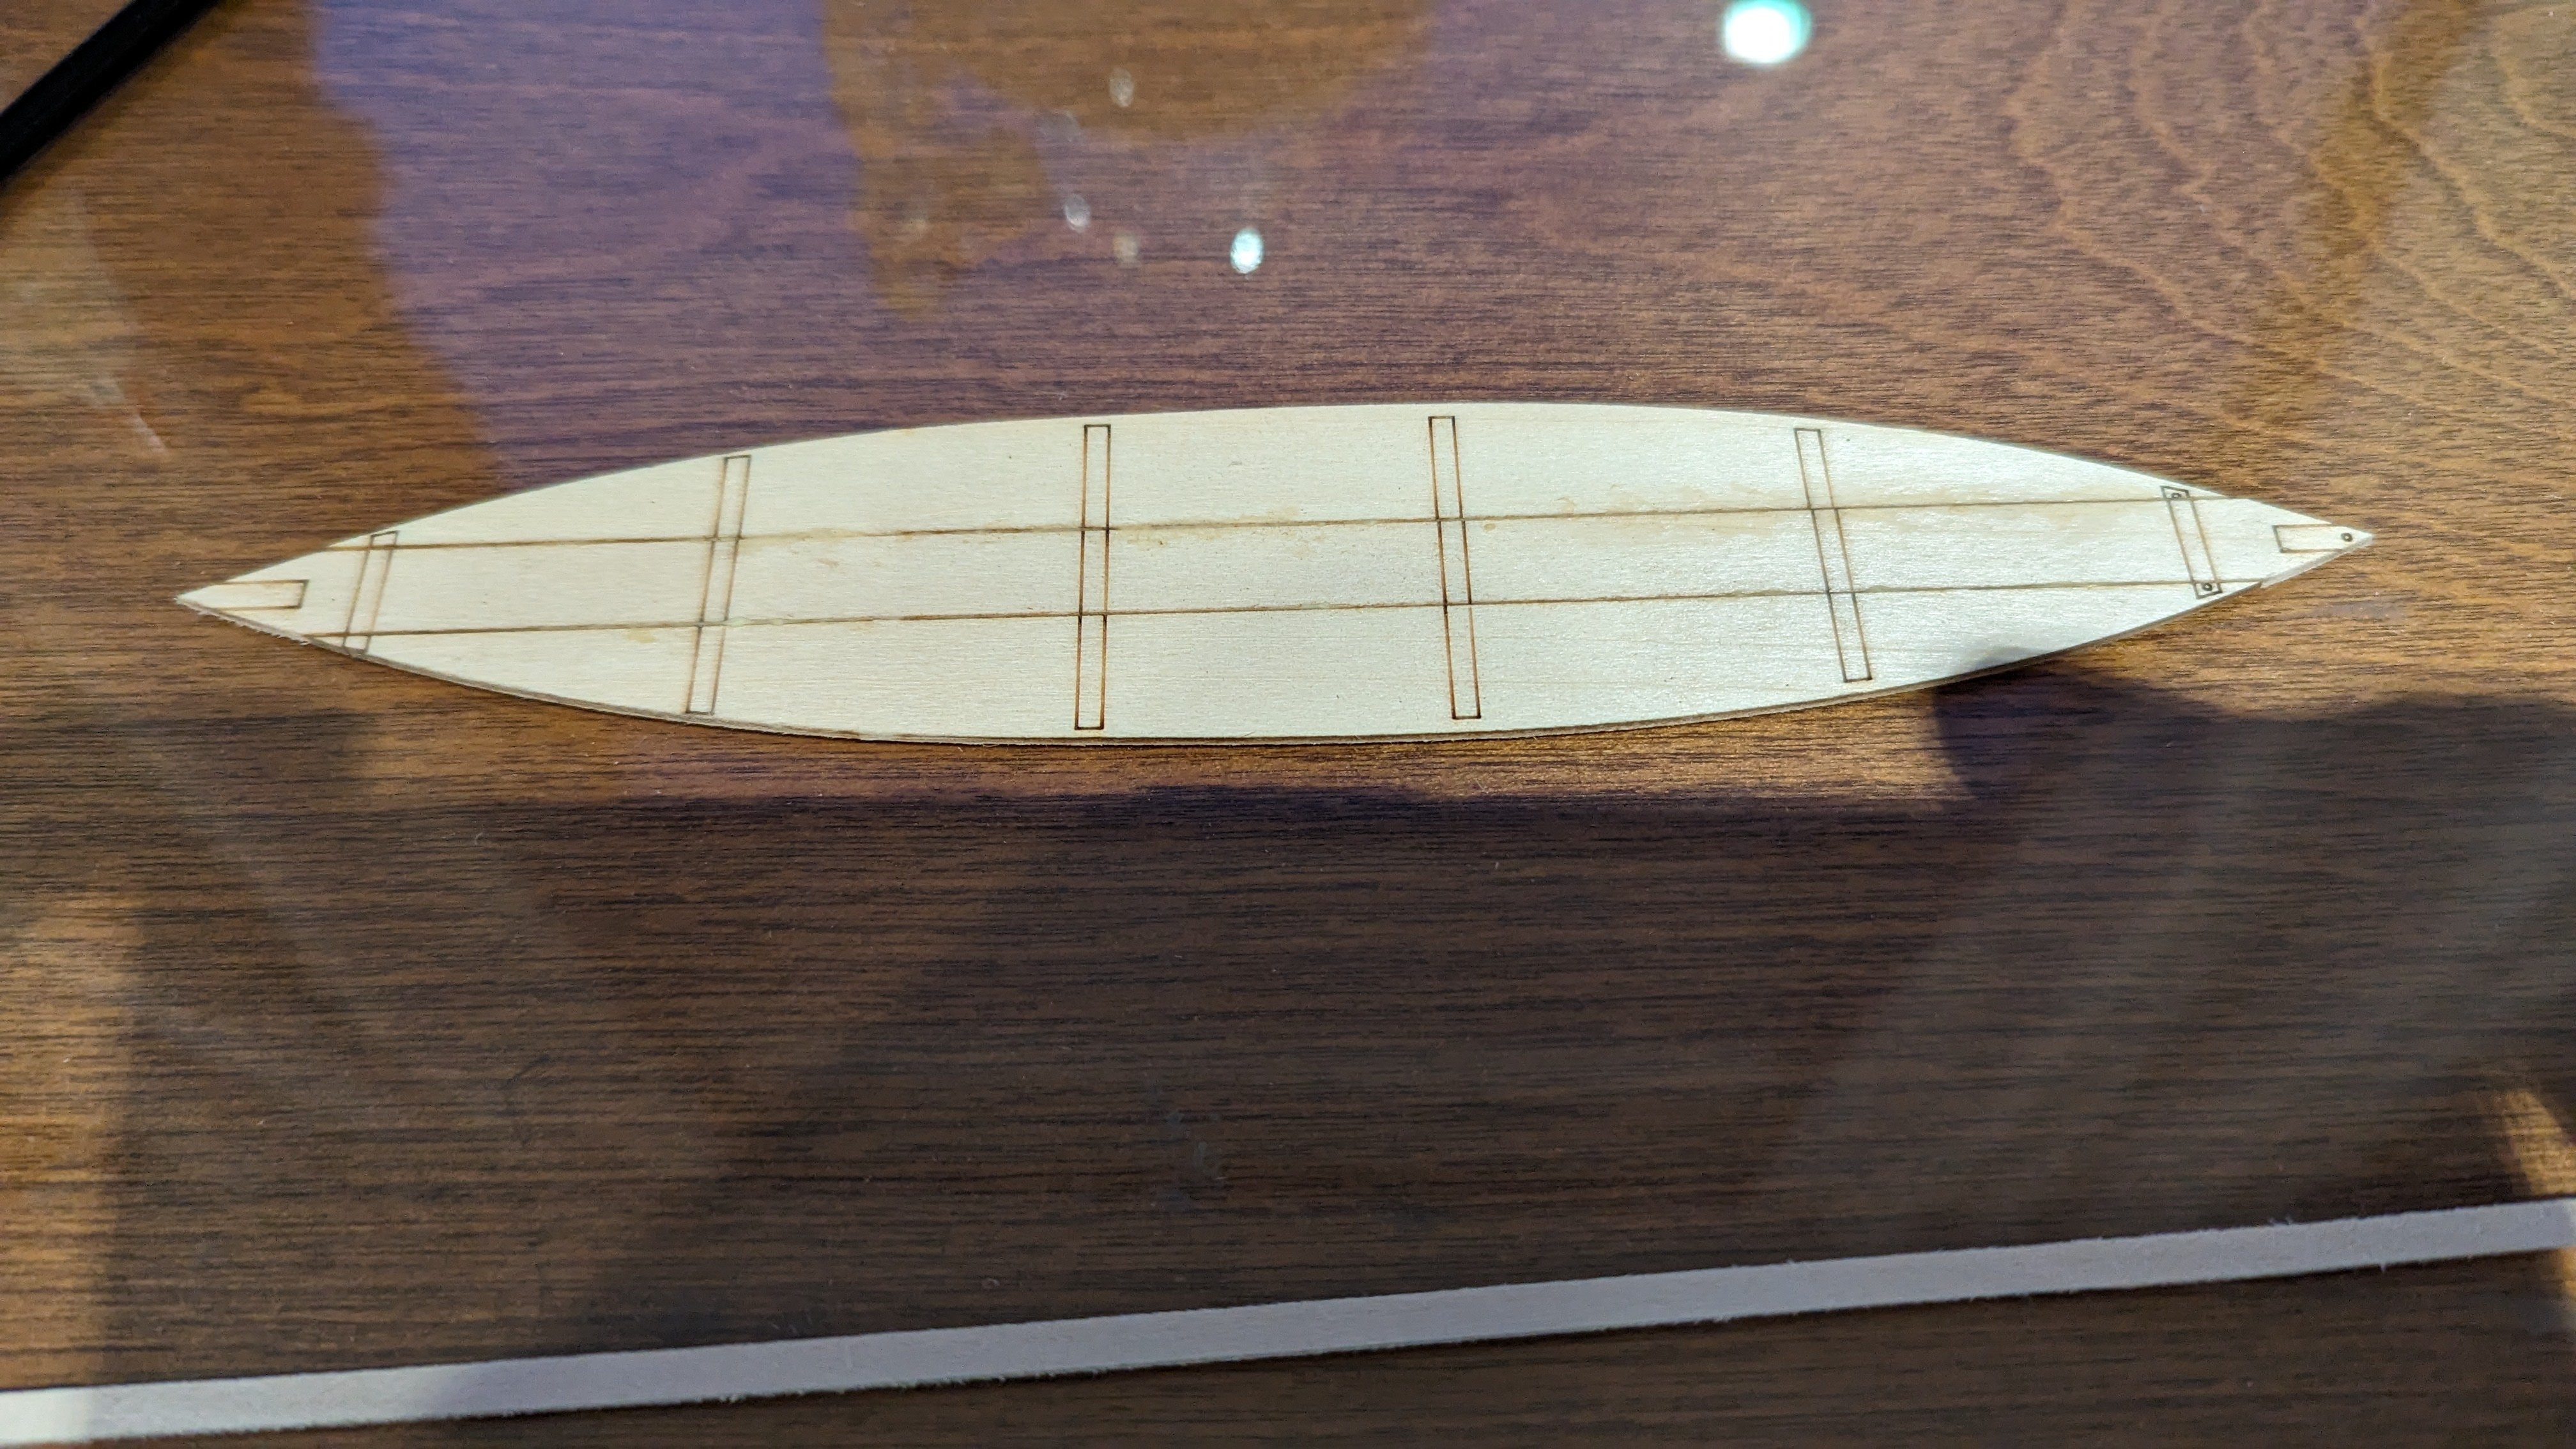
Adding a couple more pictures of the second plank sheet and garboard itself. It's not just the etching that has an issue - the cut lines don't line up on either side of the tab. I tried my best to cut it out as straight as possible. I'll need to think of how I can keep any potential issues to a minimum - might be making use of some wood filler soon if it gets out of hand! I'm now wondering if this entire sheet was a defect since I don't recall seeing this in any other build logs. Any thoughts on how to mitigate would be appreciated.
.thumb.jpg.f782ab5f0457463c31c5f4760046c249.jpg)
.thumb.jpg.a8c20cd6c50a009e2eeea5067fa62b6b.jpg)
- 69 replies
-
- 4
-

-
-
- Lowell Grand Banks Dory
- Model Shipways
- (and 2 more)
-
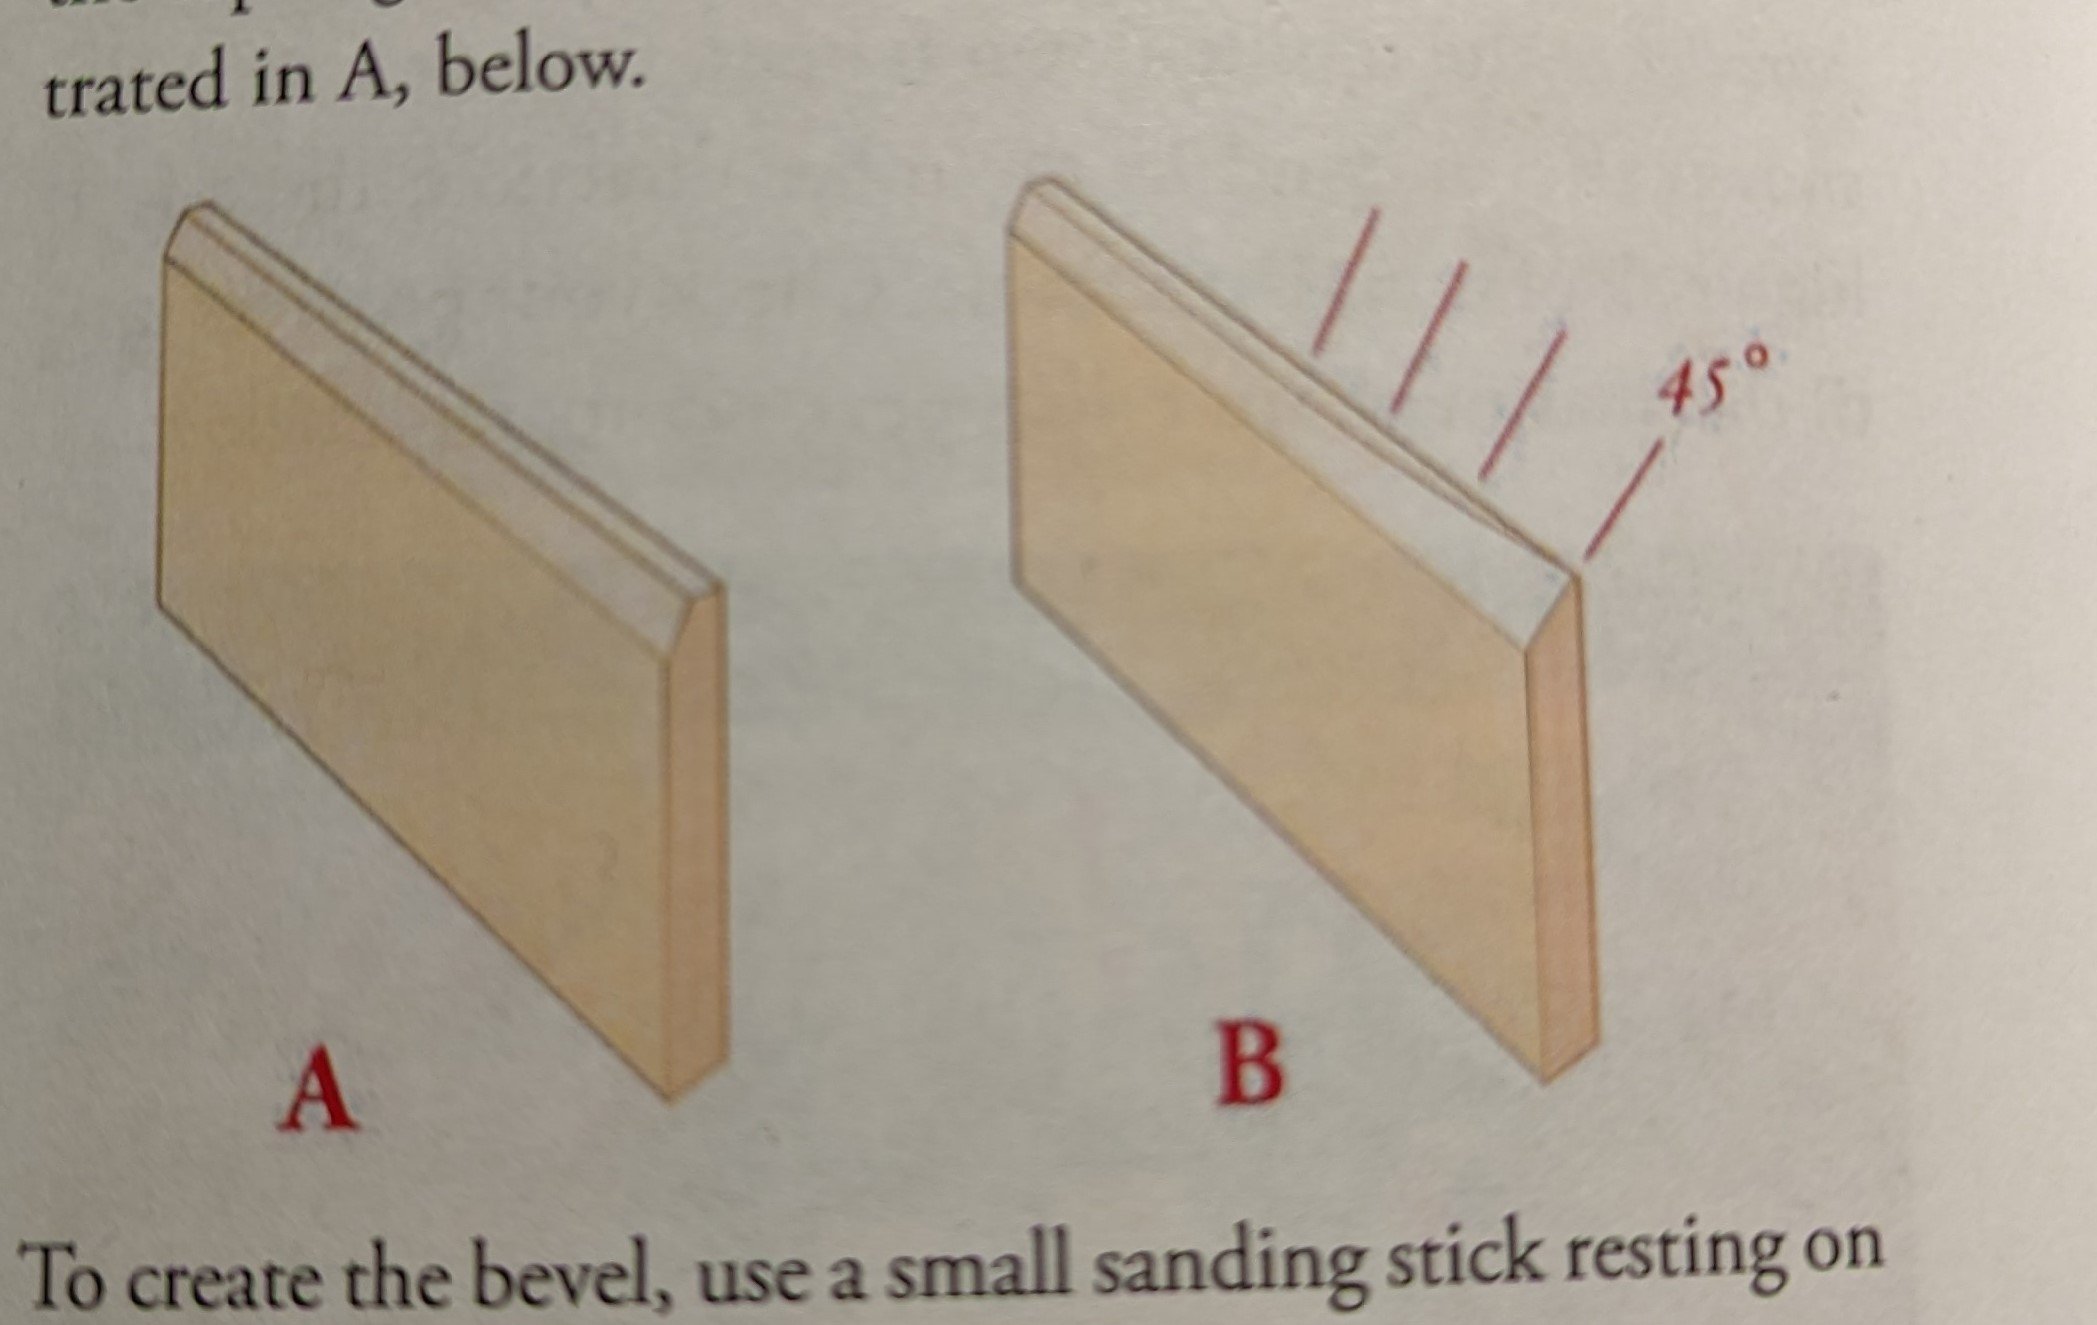
Ah yes, of course, I do know you're right - I maybe just didn't want to admit it! I read this earlier and you made me started to re-think, I know part of my decision factor to not redo was to avoid making something else worse. I just got back to take a second look at the model now - it actually looks quite good and after checking it with a square block that I didn't have before, and looking at it from many angles. I'm starting to really think it's a very slight angle, mixed with a trick of the eye since the port and starboard frames are staggered. Plus all the other curves and bends and being upside down. I now truly think it will look good once it's planked and released from the building board. I do appreciate your comment, I feel much better about my decision after another look. Also, noted on the alcohol to clean up later. As a build related side note for myself or anyone coming across this later: The instructions for the garboard state the rolling bevel should end in a 45 degree angle. First; I didn't notice until now, but the rest of the bevel does not call for a 45 degree (makes sense since it would be impossible to have both middle and ends as a 45 degree since the etch lines are the same depth. Second; between WP1470-E & WP1470-F (AKA, the two basswood sheets that contain all planking) the etching you're supposed to follow to create the bevel across the entire length of the board is much narrower on one set of planks than it is on the other. I'm betting this is contributing to some builds ending up with uneven sheer planks since one side would overlap less than the other. I'll have to keep this in mind as I work through them. Those crazies over at Model Shipways trying to throw some curve-balls at us beginners!

- 69 replies
-
- 4
-
-
- Lowell Grand Banks Dory
- Model Shipways
- (and 2 more)
-
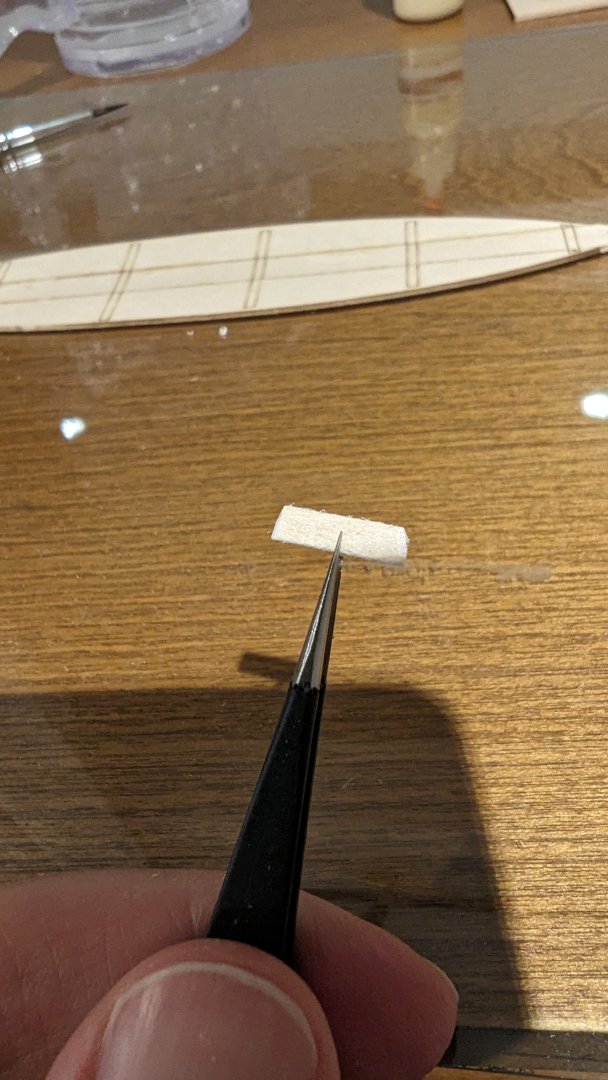
Last night I spent some time practicing the rolling bevel on the garboard plank, sanding the transom and stem. The OcCre kit showed up on Friday and it had a sanding block in it with various angles and curves. There was a little triangular piece that I used for the plank. What a godsend that was. I should've done something like that sooner. Having a better variation of sanding tools will be a huge help. I throughly enjoyed sanding the stem, transom, planks, etc. It was very satisfying smoothing and refining the wood. Since I went into this hobby not knowing if it'll stick, that was a good sign. The wife had to go into town today so I tagged along and we stopped by Michael's. Unfortunately they've revamped, and don't carry any of the wood, or modeling stuff like they used to, but I got my hands on a 50 percent off x-acto kit with multiple different blade types, some #11 replacement blades and some acrylic stain and wash, and a better quality brush, all on clearance for about 70 percent off. I was hoping to get a small square, more sandpaper, some other adhesives, but it was all only online. I was thinking of making a little lobster trap to either go with this boat or the lobster smack when I get to it. Looks like I'll need to get most things online. I've pretty well decided I'm going to leave the frames as is and hope to get to fitting the planks soon.
- 69 replies
-
- 4
-
-
- Lowell Grand Banks Dory
- Model Shipways
- (and 2 more)
-
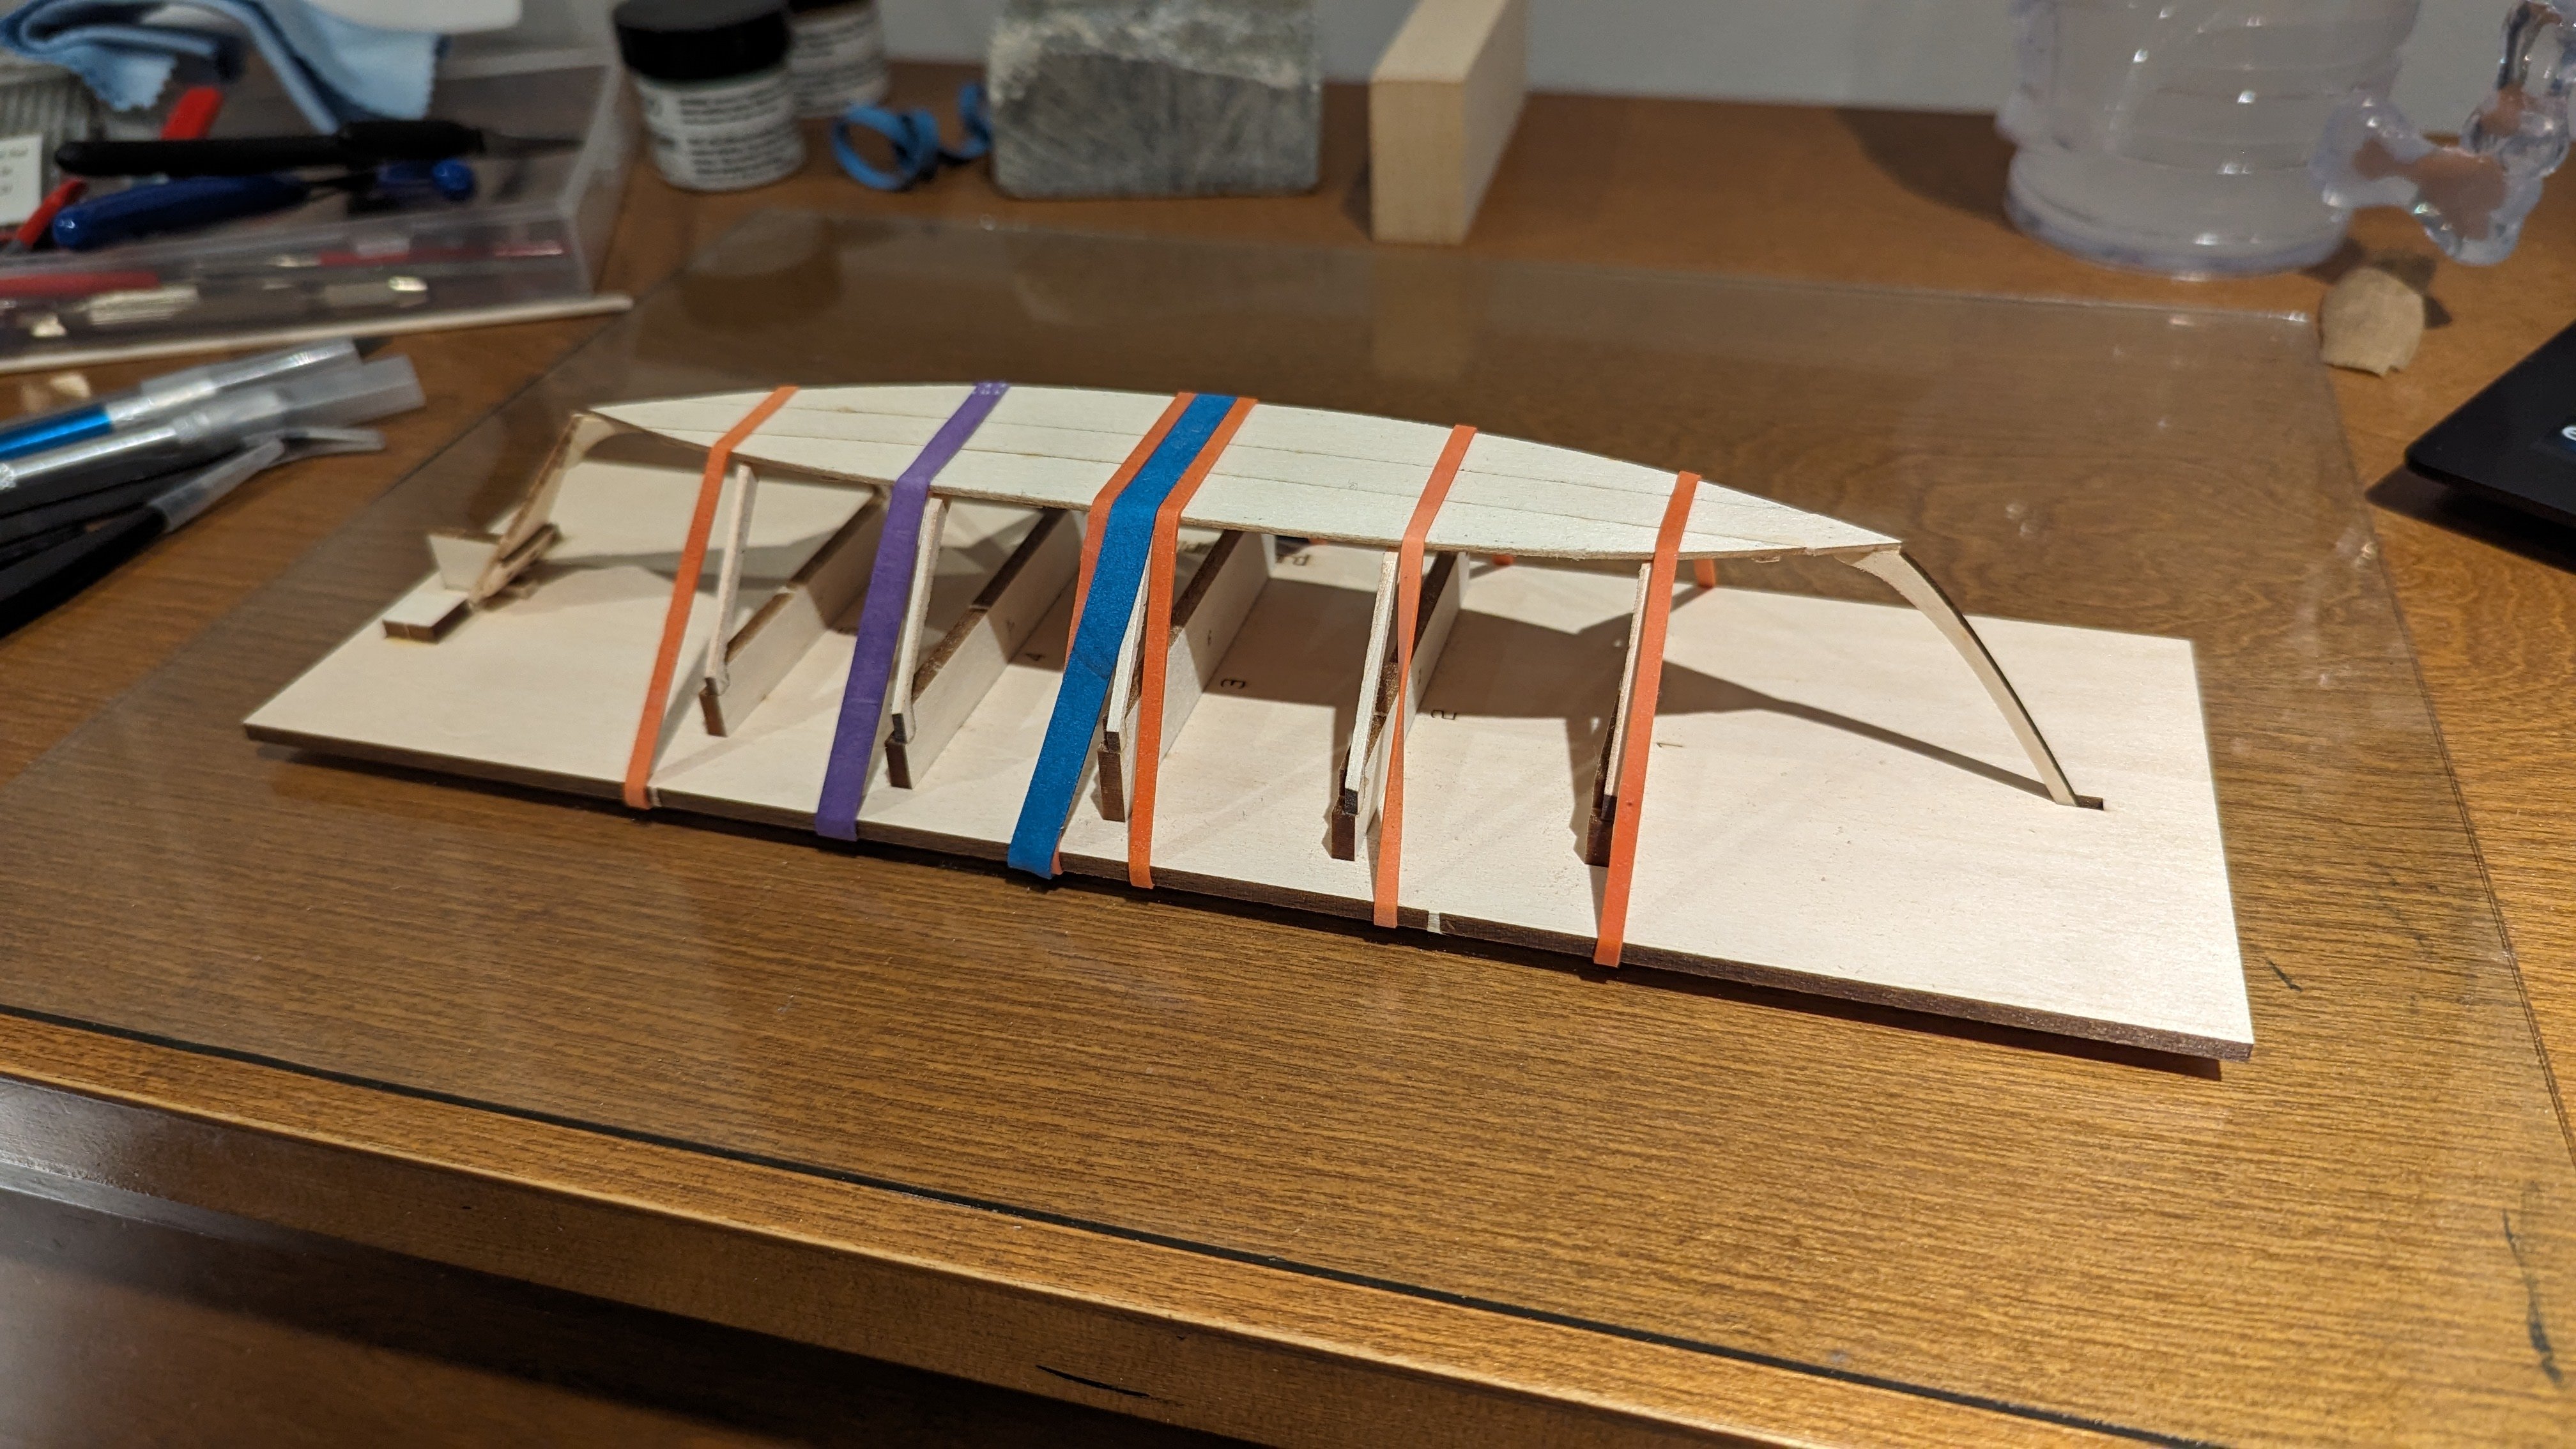
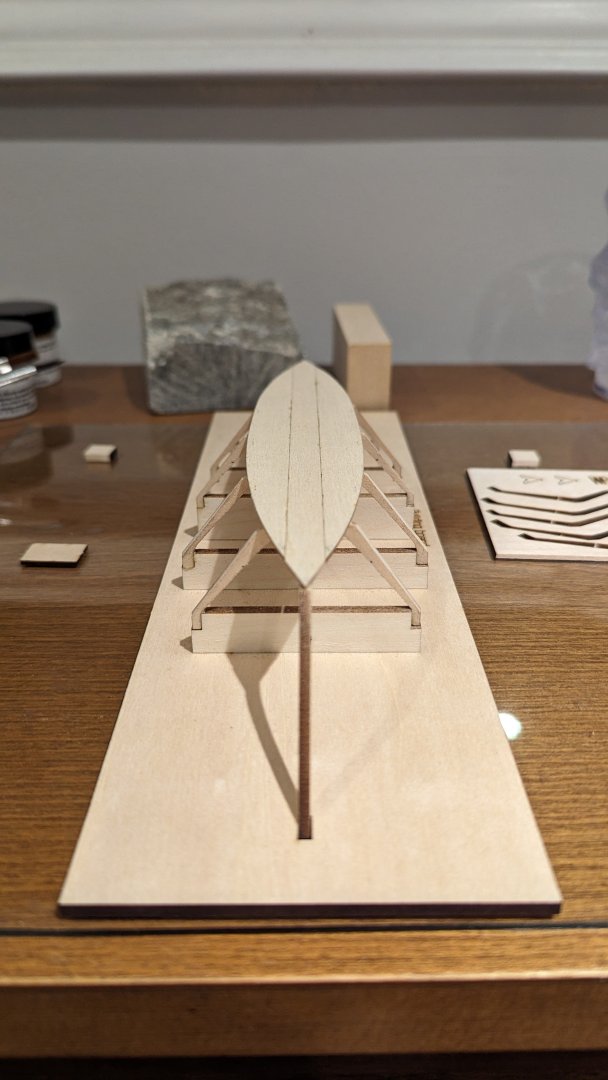
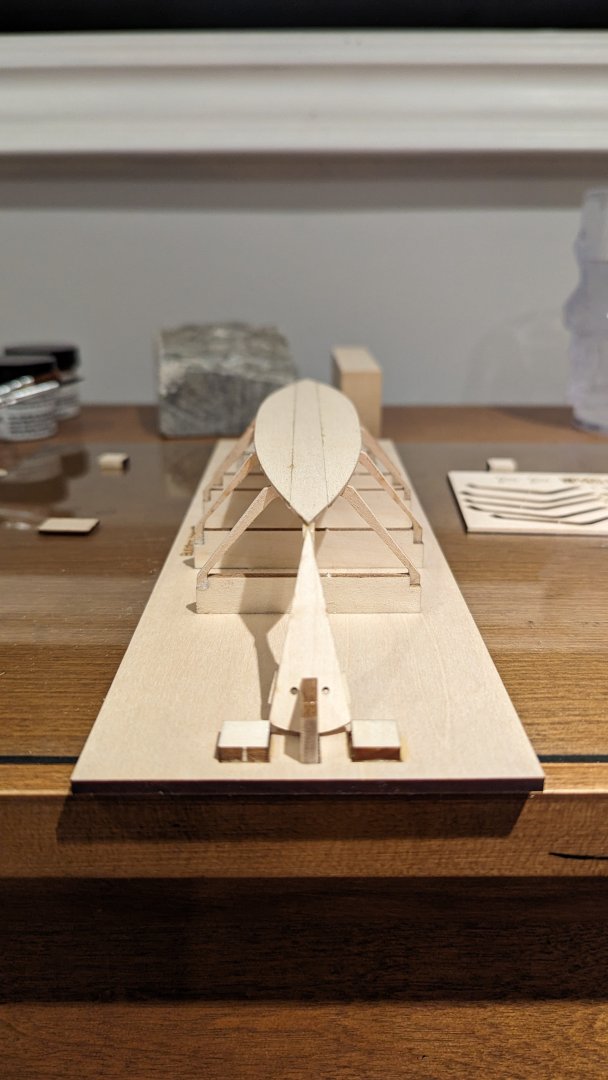
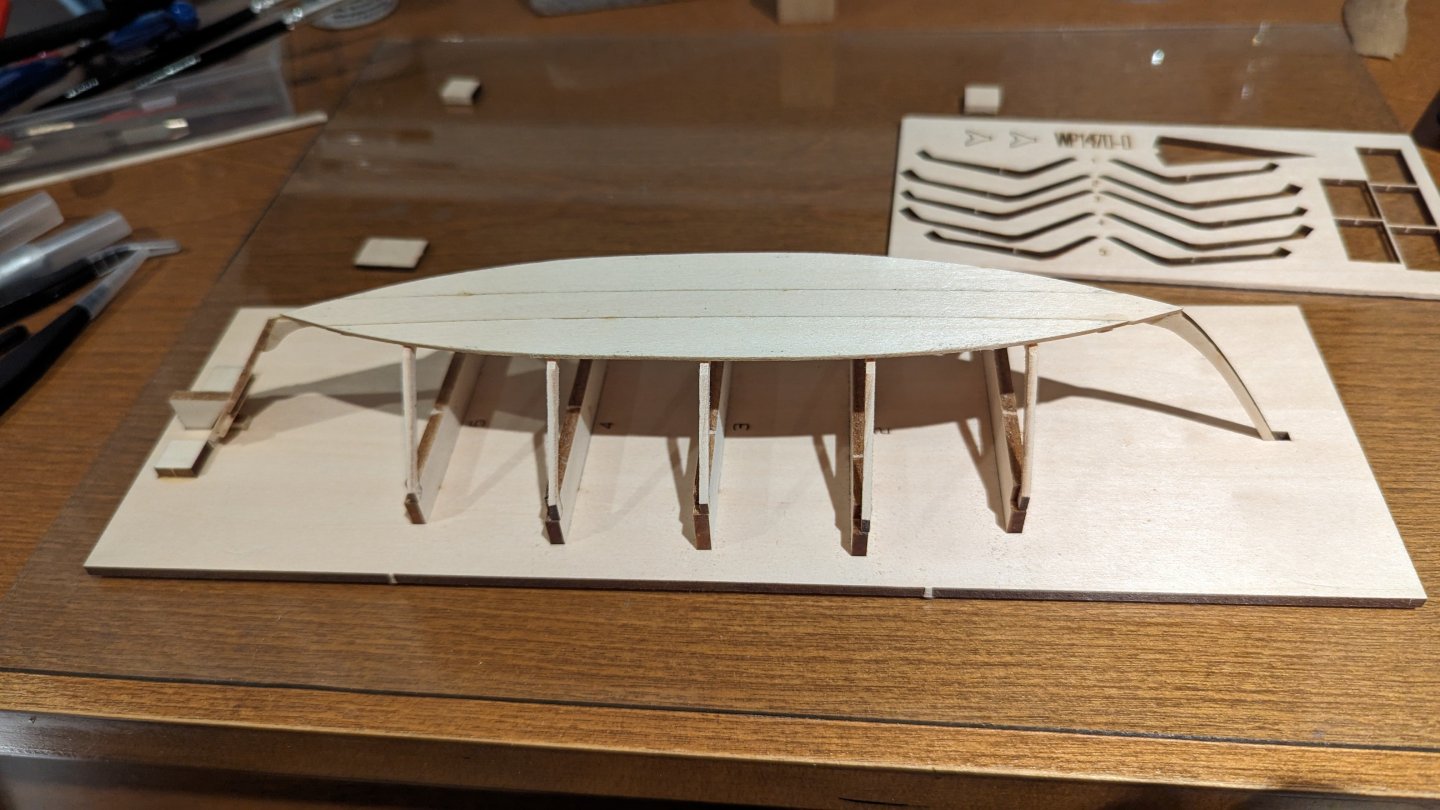
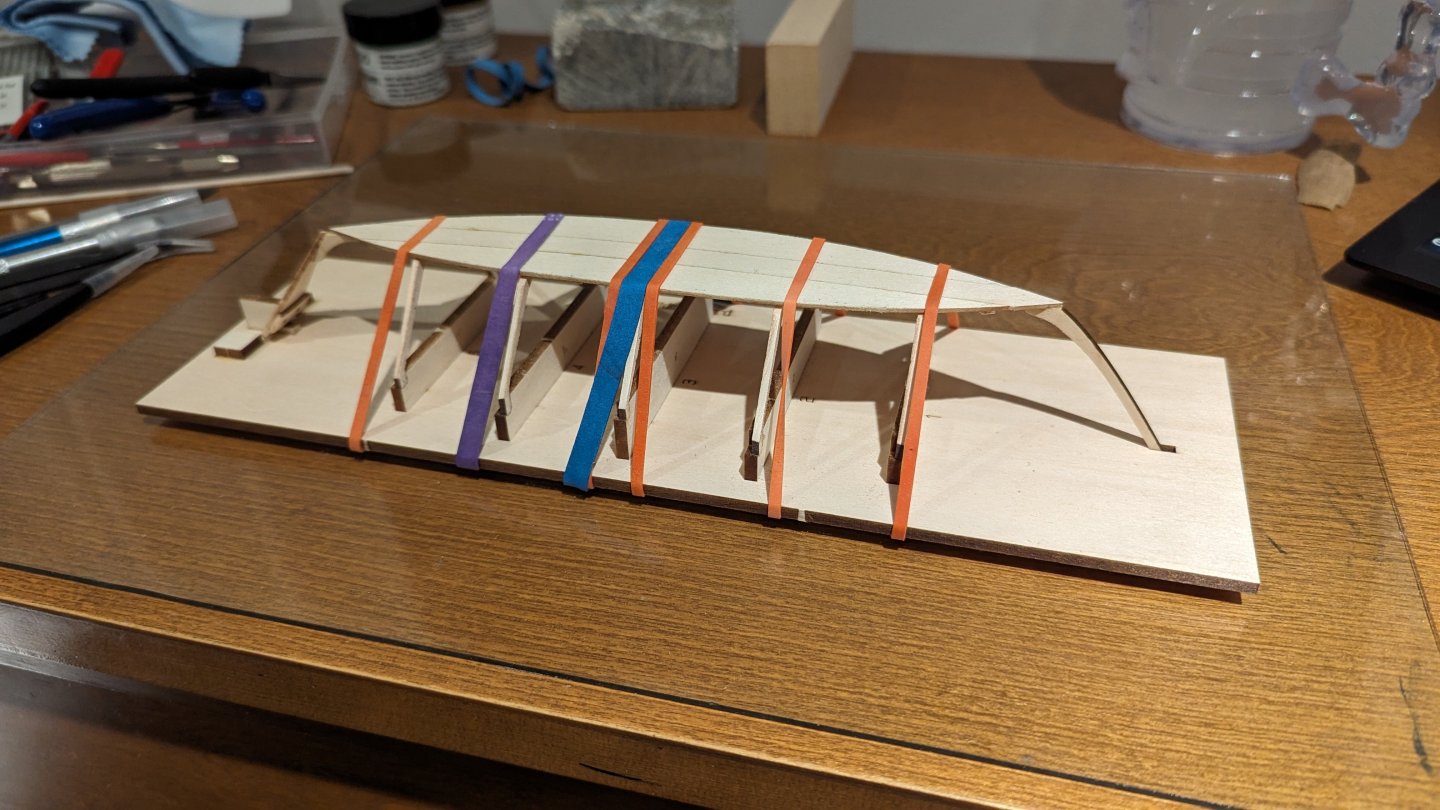
Log #4 Almost perfect. Frames re-glued and set in building board with transom holder. A couple were loose so I brushed a bit of water and they tightened right up. Next steps are to bevel them, three at a time. This took a while and sounded terrible on the top - like squeaking. I imagine it's because that char was gunking up my sanding stick incredibly fast. I ended up cutting some strips of 150 grit and holding them on top of the sanding stick as a temporary renewal. I ended up needing to move this step over to my computer desk since the current work area has drawers that don't allow me to clap the building board down. It took a while, but ended up nicely. I sanded a bit more after the pics and also remembered some comments in other build logs about sawdust and glue as a filler so I decided to start collecting the built up dust from this step. Once I was feeling good about it, I did a dry fit with the bottom board. By the time I slid the transom in tightly and looked over to guide the stem in, it was already seated. Everything went together and lined up perfectly, I was shocked. The whole fit could not have felt better, the time lining everything up, sanding, beveling, re-gluing some frames paid off. I was pretty damn proud of it. I thoroughly inspected the whole thing, made sure the frames were centered, vertical, the transom and or stem didn't have twists in them. I barely had to adjust anything. I've been dealing with some health issues which are making me feel incredibly drained and just a sense of malaise. I was exhausted and ready for bed, but was excited to keep going. I removed the board, glued up the bottom of the frames and reassembled. It went together just as smoothly as the first time. I did a quick once over, and added the elastic bands. I then started cleaning up the glue. This is something I need to get a hang of. I either need to be faster, use more water or be more aggressive, but the glue seems hard to deal with at times - it's also awkward angles on this assembly. I managed to smooth or remove any excess glue. Then... whoops; #2 frame is not perfectly vertical. Actually a couple of them are ever so slightly slanted. The glue must've contacted and shifted a couple while I was seating the transom. I removed some bands and tried to lightly pry #2 up, shift it over and glue again; however, it wouldn't budge. I'm sure I could've forced it off, but it was late, I was feeling rough and didn't want to make things worse by breaking something. Wife's birthday tomorrow - I go to bed. I get back to it now, and am trying to assess whether or not I should attempt to re-glue. After removing the bands, it doesn't look as bad, but still has a slant. I think I will put this decision off for a bit longer and work on beveling the garboard.
- 69 replies
-
- 7
-
-
- Lowell Grand Banks Dory
- Model Shipways
- (and 2 more)
-
Very interesting, thanks for the heads up, I'll be following yours as well. Funny, I'm already thinking about such things - my wife has a craft cutter so I was just asking if it could cut wood. I have a few years experience with both 3D and 2D CAD as well. Might be handy one day. I skimmed a bit of Chucks Speedwell post and will definitely be going back, very impressive. Appreciate it.
- 69 replies
-
- 2
-
-
- Lowell Grand Banks Dory
- Model Shipways
- (and 2 more)
-
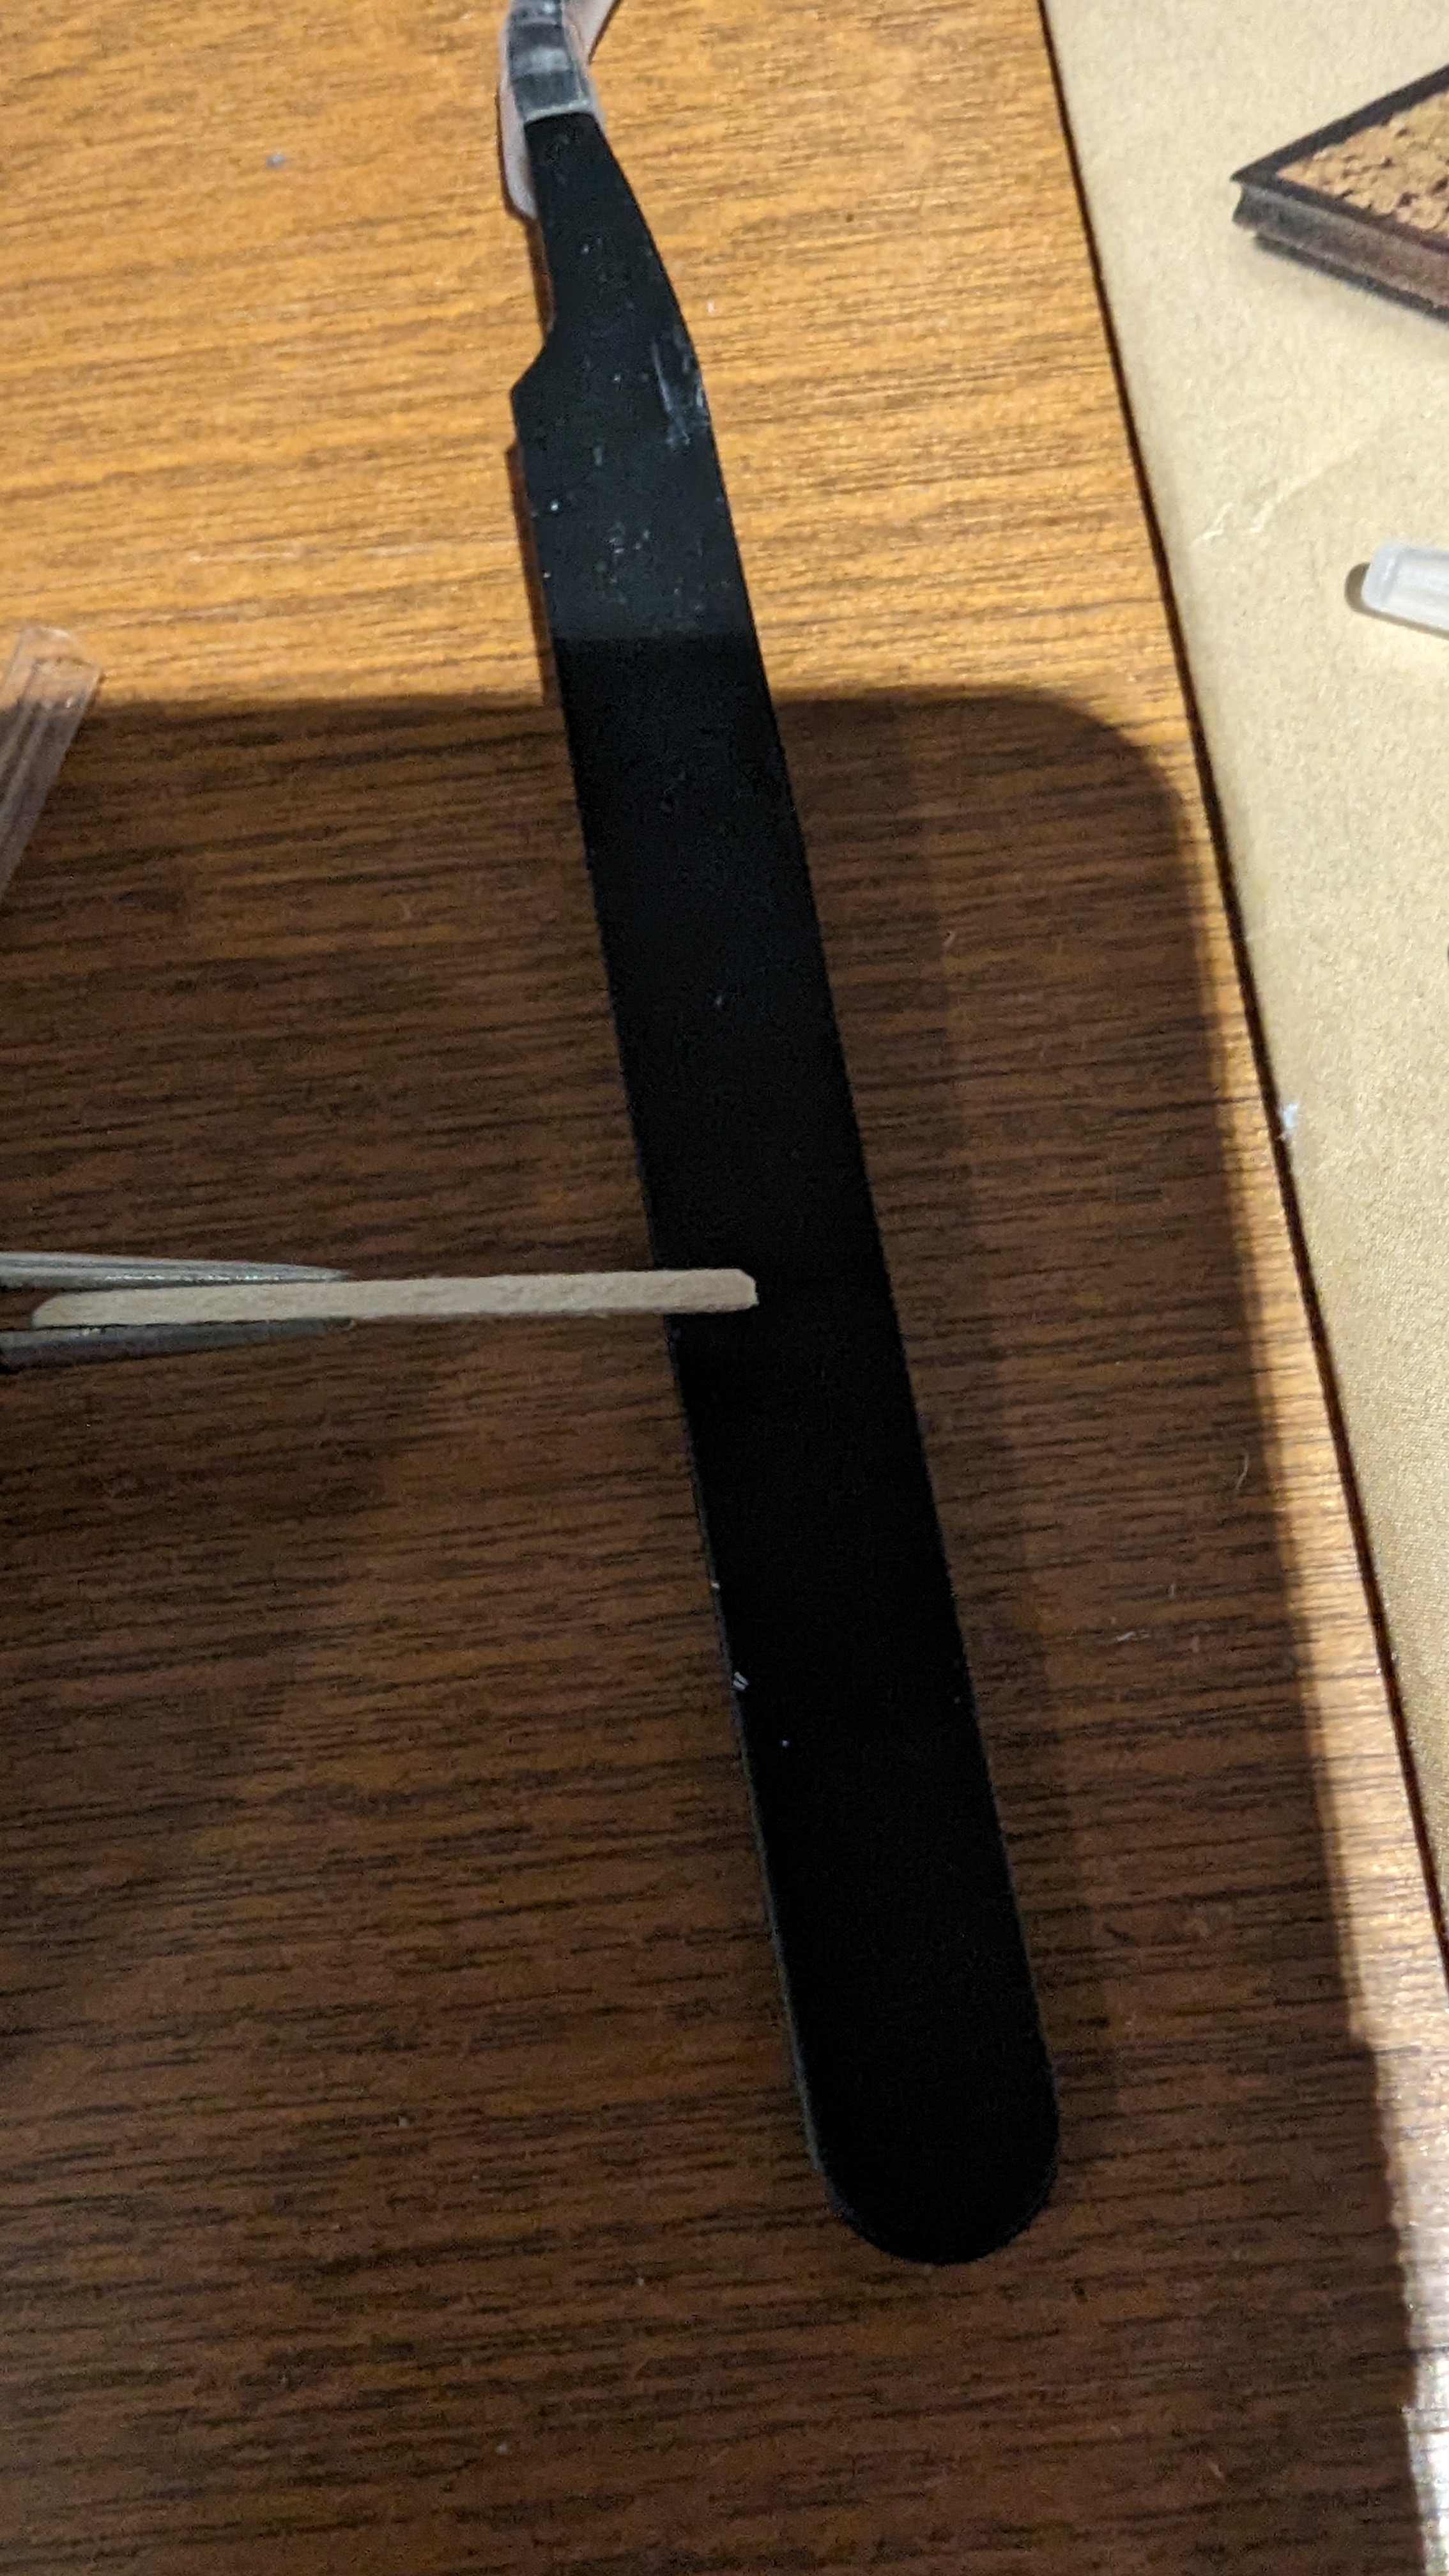
Very brief update: I just took apart and cleaned up the two frames. Having a bit of experience doing this will no doubt help in the future. Soaking them in a closed container with 95% alcohol for an hour then gently wiggling them apart. I used tweeters and a blade to separate the frames. It worked great, and just needed a bit of scraping to get the rubbery glue residue off. 👍
- 69 replies
-
- 4
-
-
- Lowell Grand Banks Dory
- Model Shipways
- (and 2 more)
-
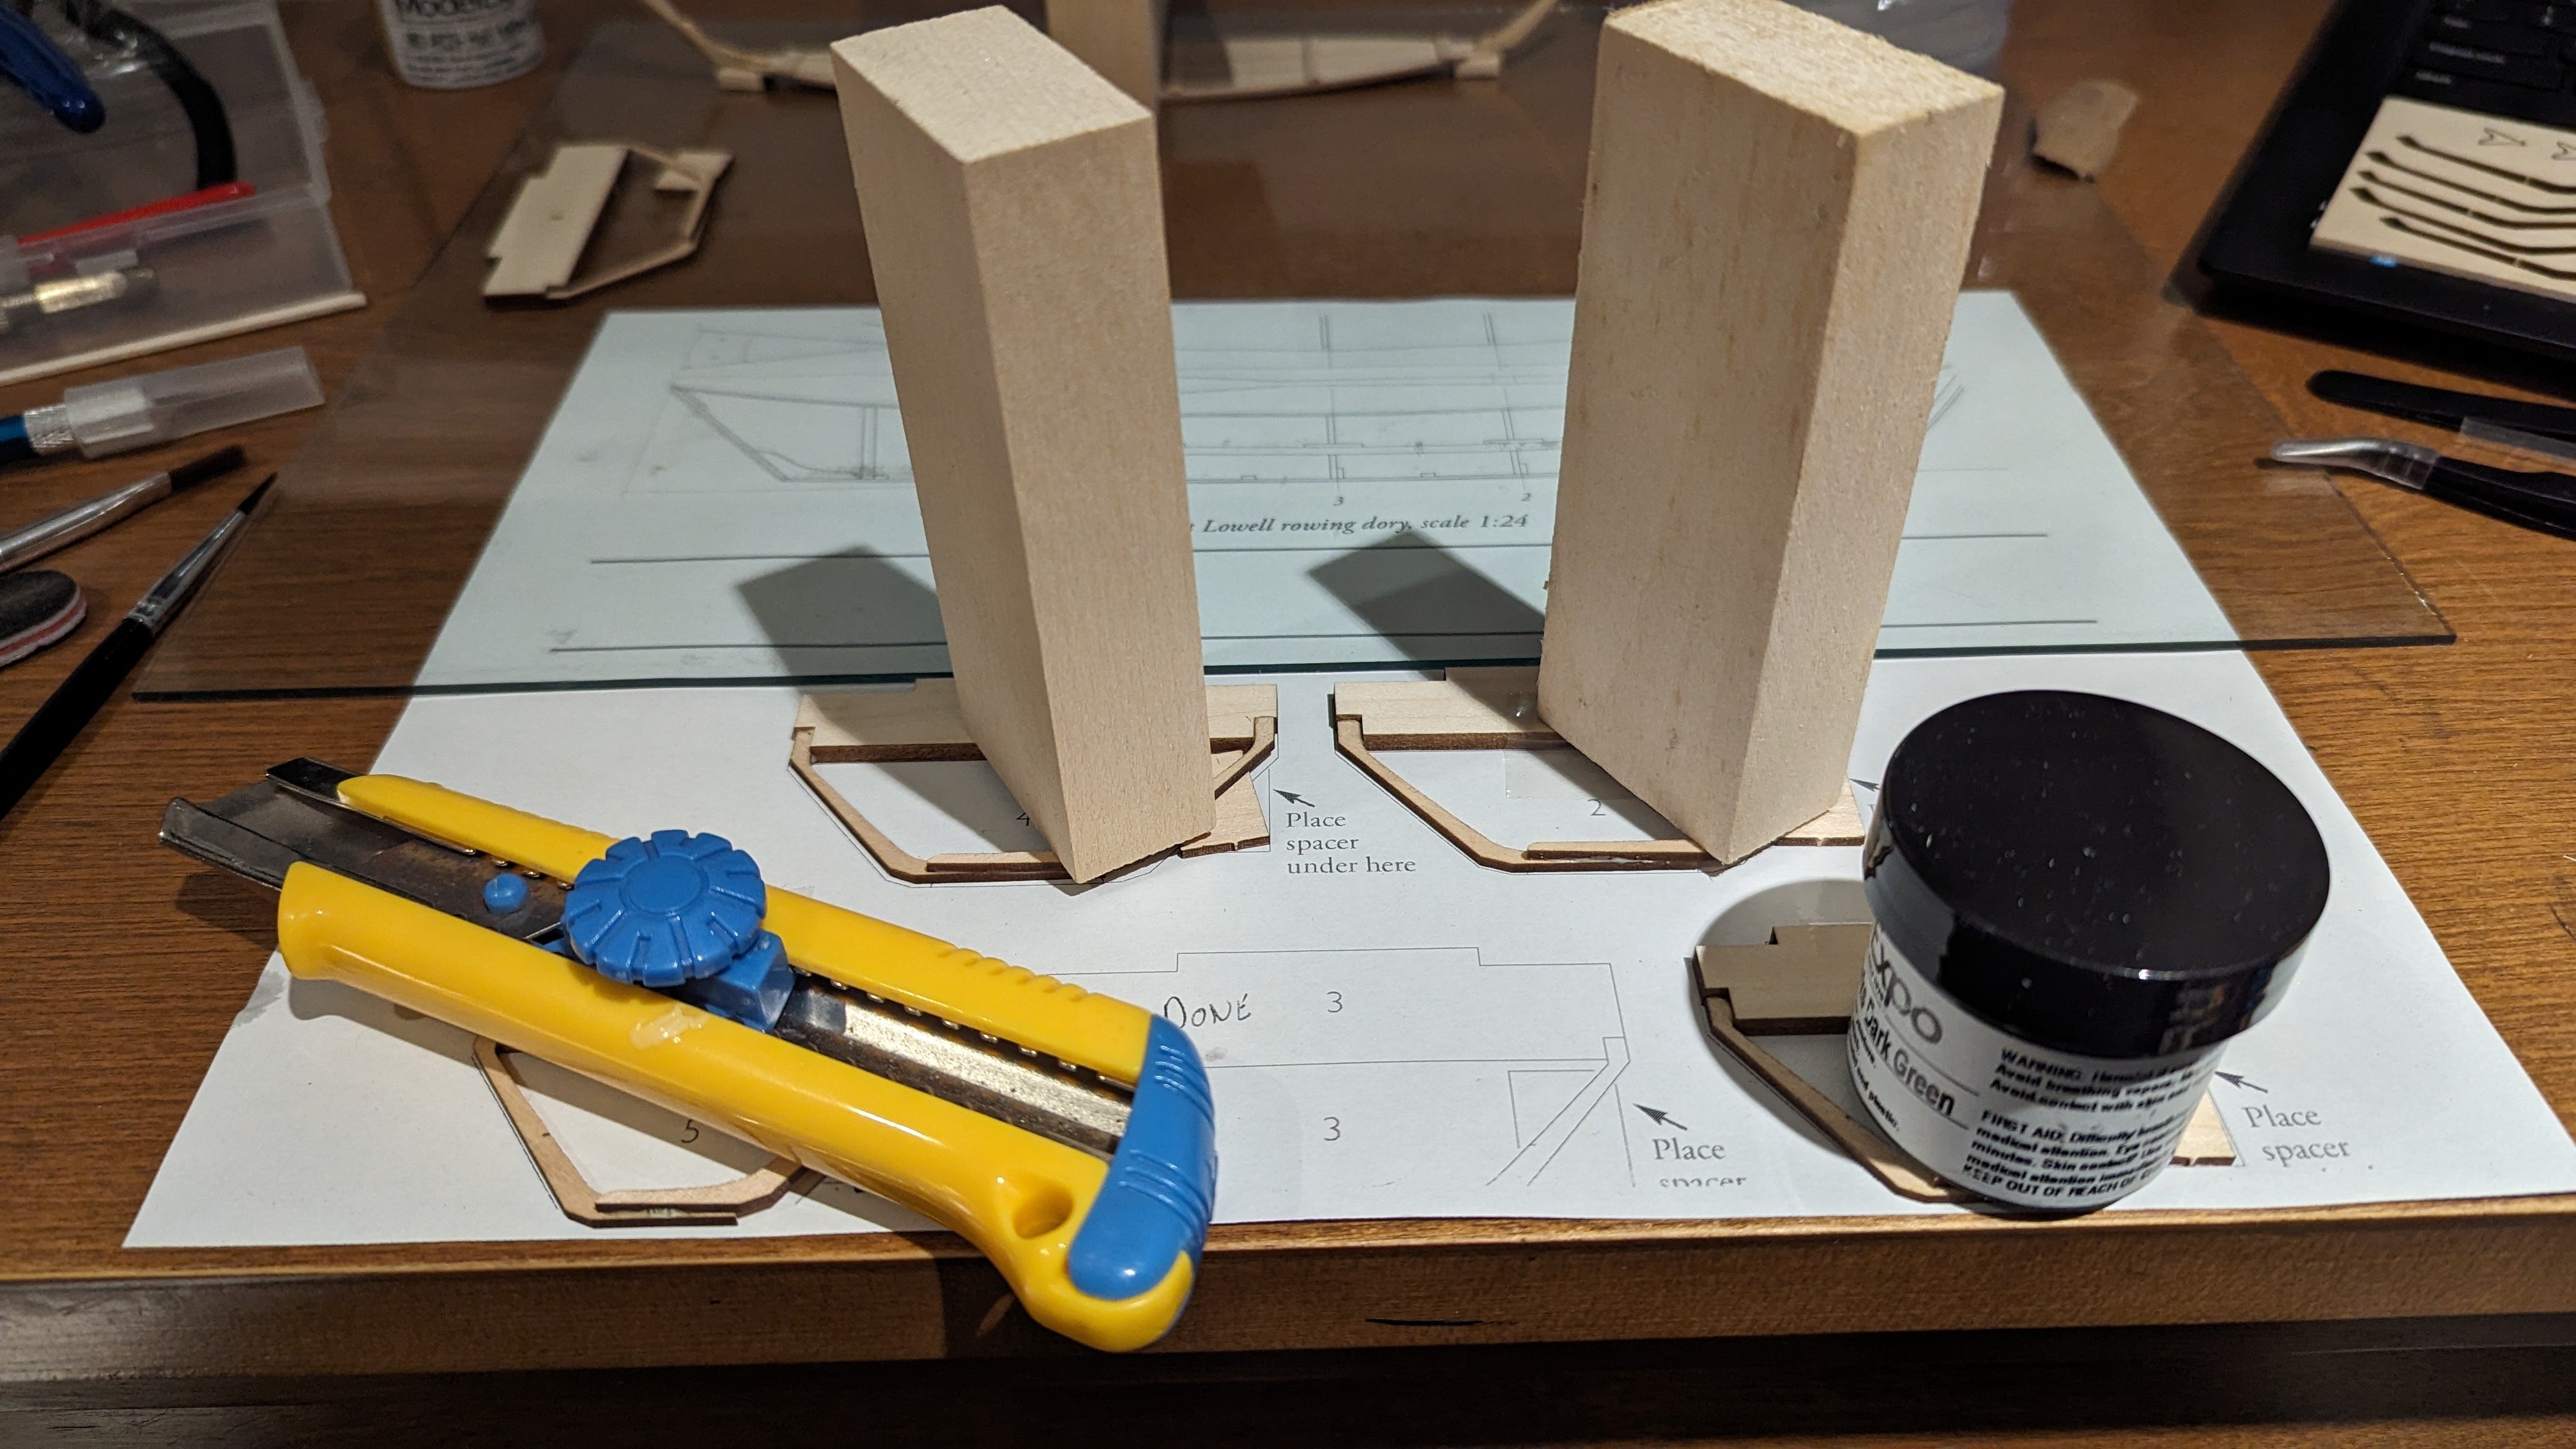
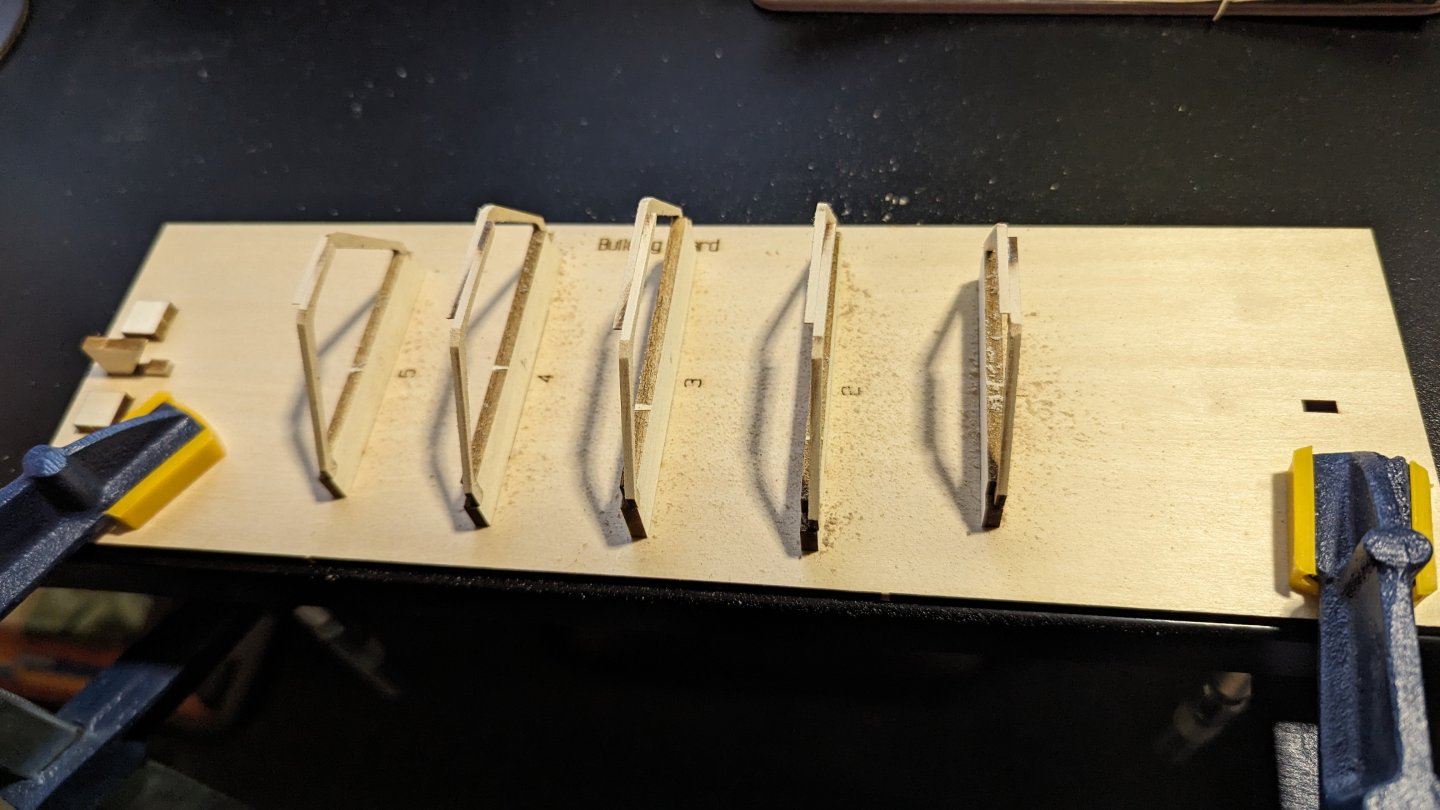
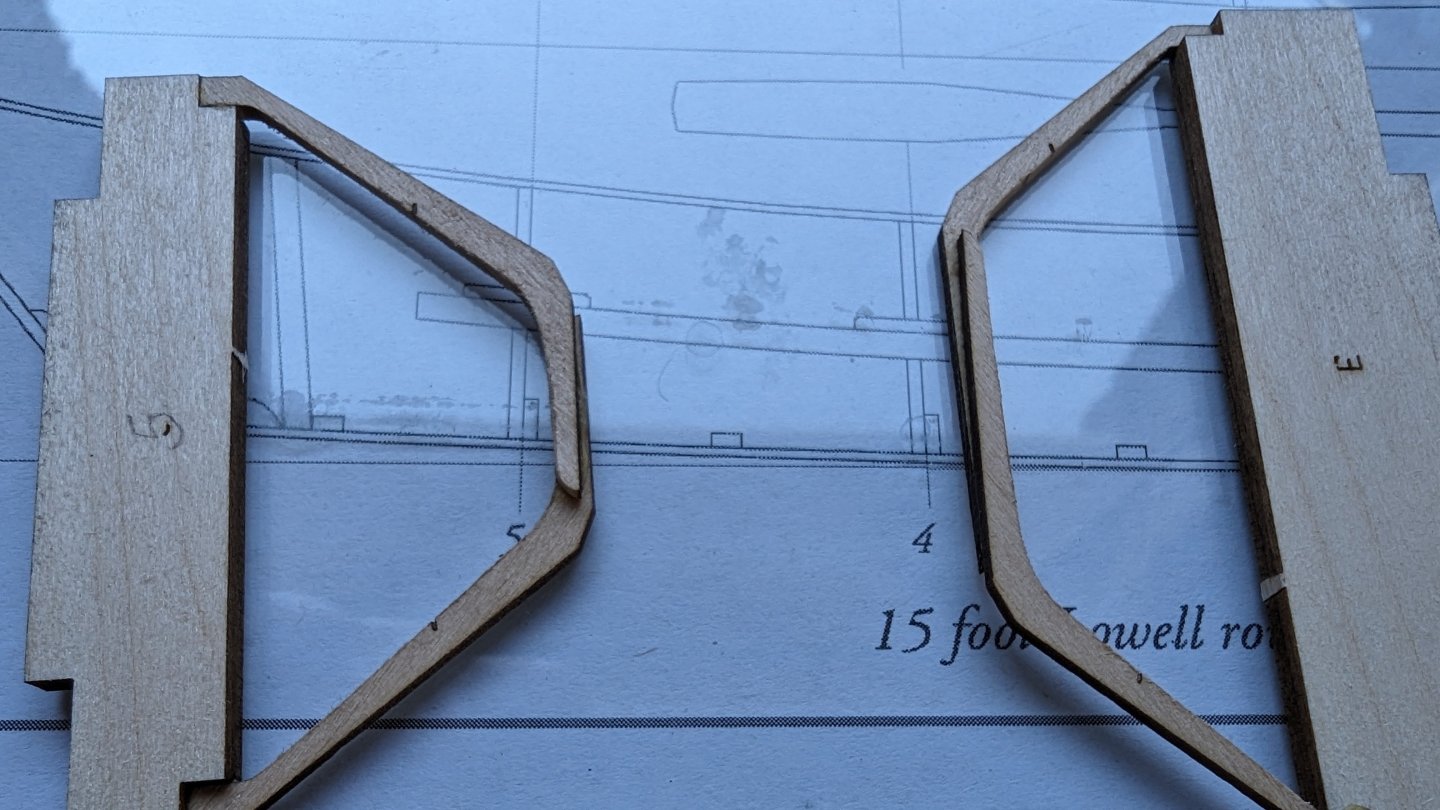
Log #3 Redoing a couple frame assemblies. I noticed, like others, that the instruction book isn't printed to scale so the frame template doesn't quite line up. With that, I downloaded the PDF and printed it out myself. Had I been at the office this week, I would've used our plotter. Since I'm at home, I had to mess with the settings and the best I got was a hybrid between two pages (since the PDF doesn't have the template as its own separate page). It worked, but you can see in the pic the bottoms of 1, 3, 5 are cut off. I left these to dry just before I went to bed. Well, subconsciously I must've really wanted to take something apart. In the morning, I noticed a couple of the frames were glues very cooked. Assemblies 3 and 5 shown below were the worst. I assembled them into the building board and thought about moving ahead, but decided to redo these two frames - they're now soaking in alcohol. In hindsight, Since the template I printed had the bottom cut off, I feel this contributed to me not lining these two frames up right. They were also the first two frames I put together. For whatever reason, I was more focused on the right angles where they meet the building cross piece than I was making sure the two pieces of frame were flush where they meet. Ultimately, my decision to redo was based on: Aside from #3, these are to have bevels sanded on them - having them so uneven will create a pretty sloppy, staggered bevel. The char isn't a great gluing surface and a lot of it wouldn't be removed when beveling which could compromise the strength and lead to unforeseen issues later. Even though the worst part will be hidden when glued to the rest of the boat, the frames wouldn't be at the correct angle and are closer together than they should be. I didn't want to risk this creating excessive gaps and bends when planking. I'm expecting to get the frames reassembled soon, but I'm playing catch-up with work today, and the wife's birthday is tomorrow so I'll have to play the rest of it by ear. Thank you, druxey for the peace of mind. This also led to my decision to err on the side of caution to redo the frames since they'll directly affect the shape of the bottom board.

- 69 replies
-
- 5
-
-
- Lowell Grand Banks Dory
- Model Shipways
- (and 2 more)
-
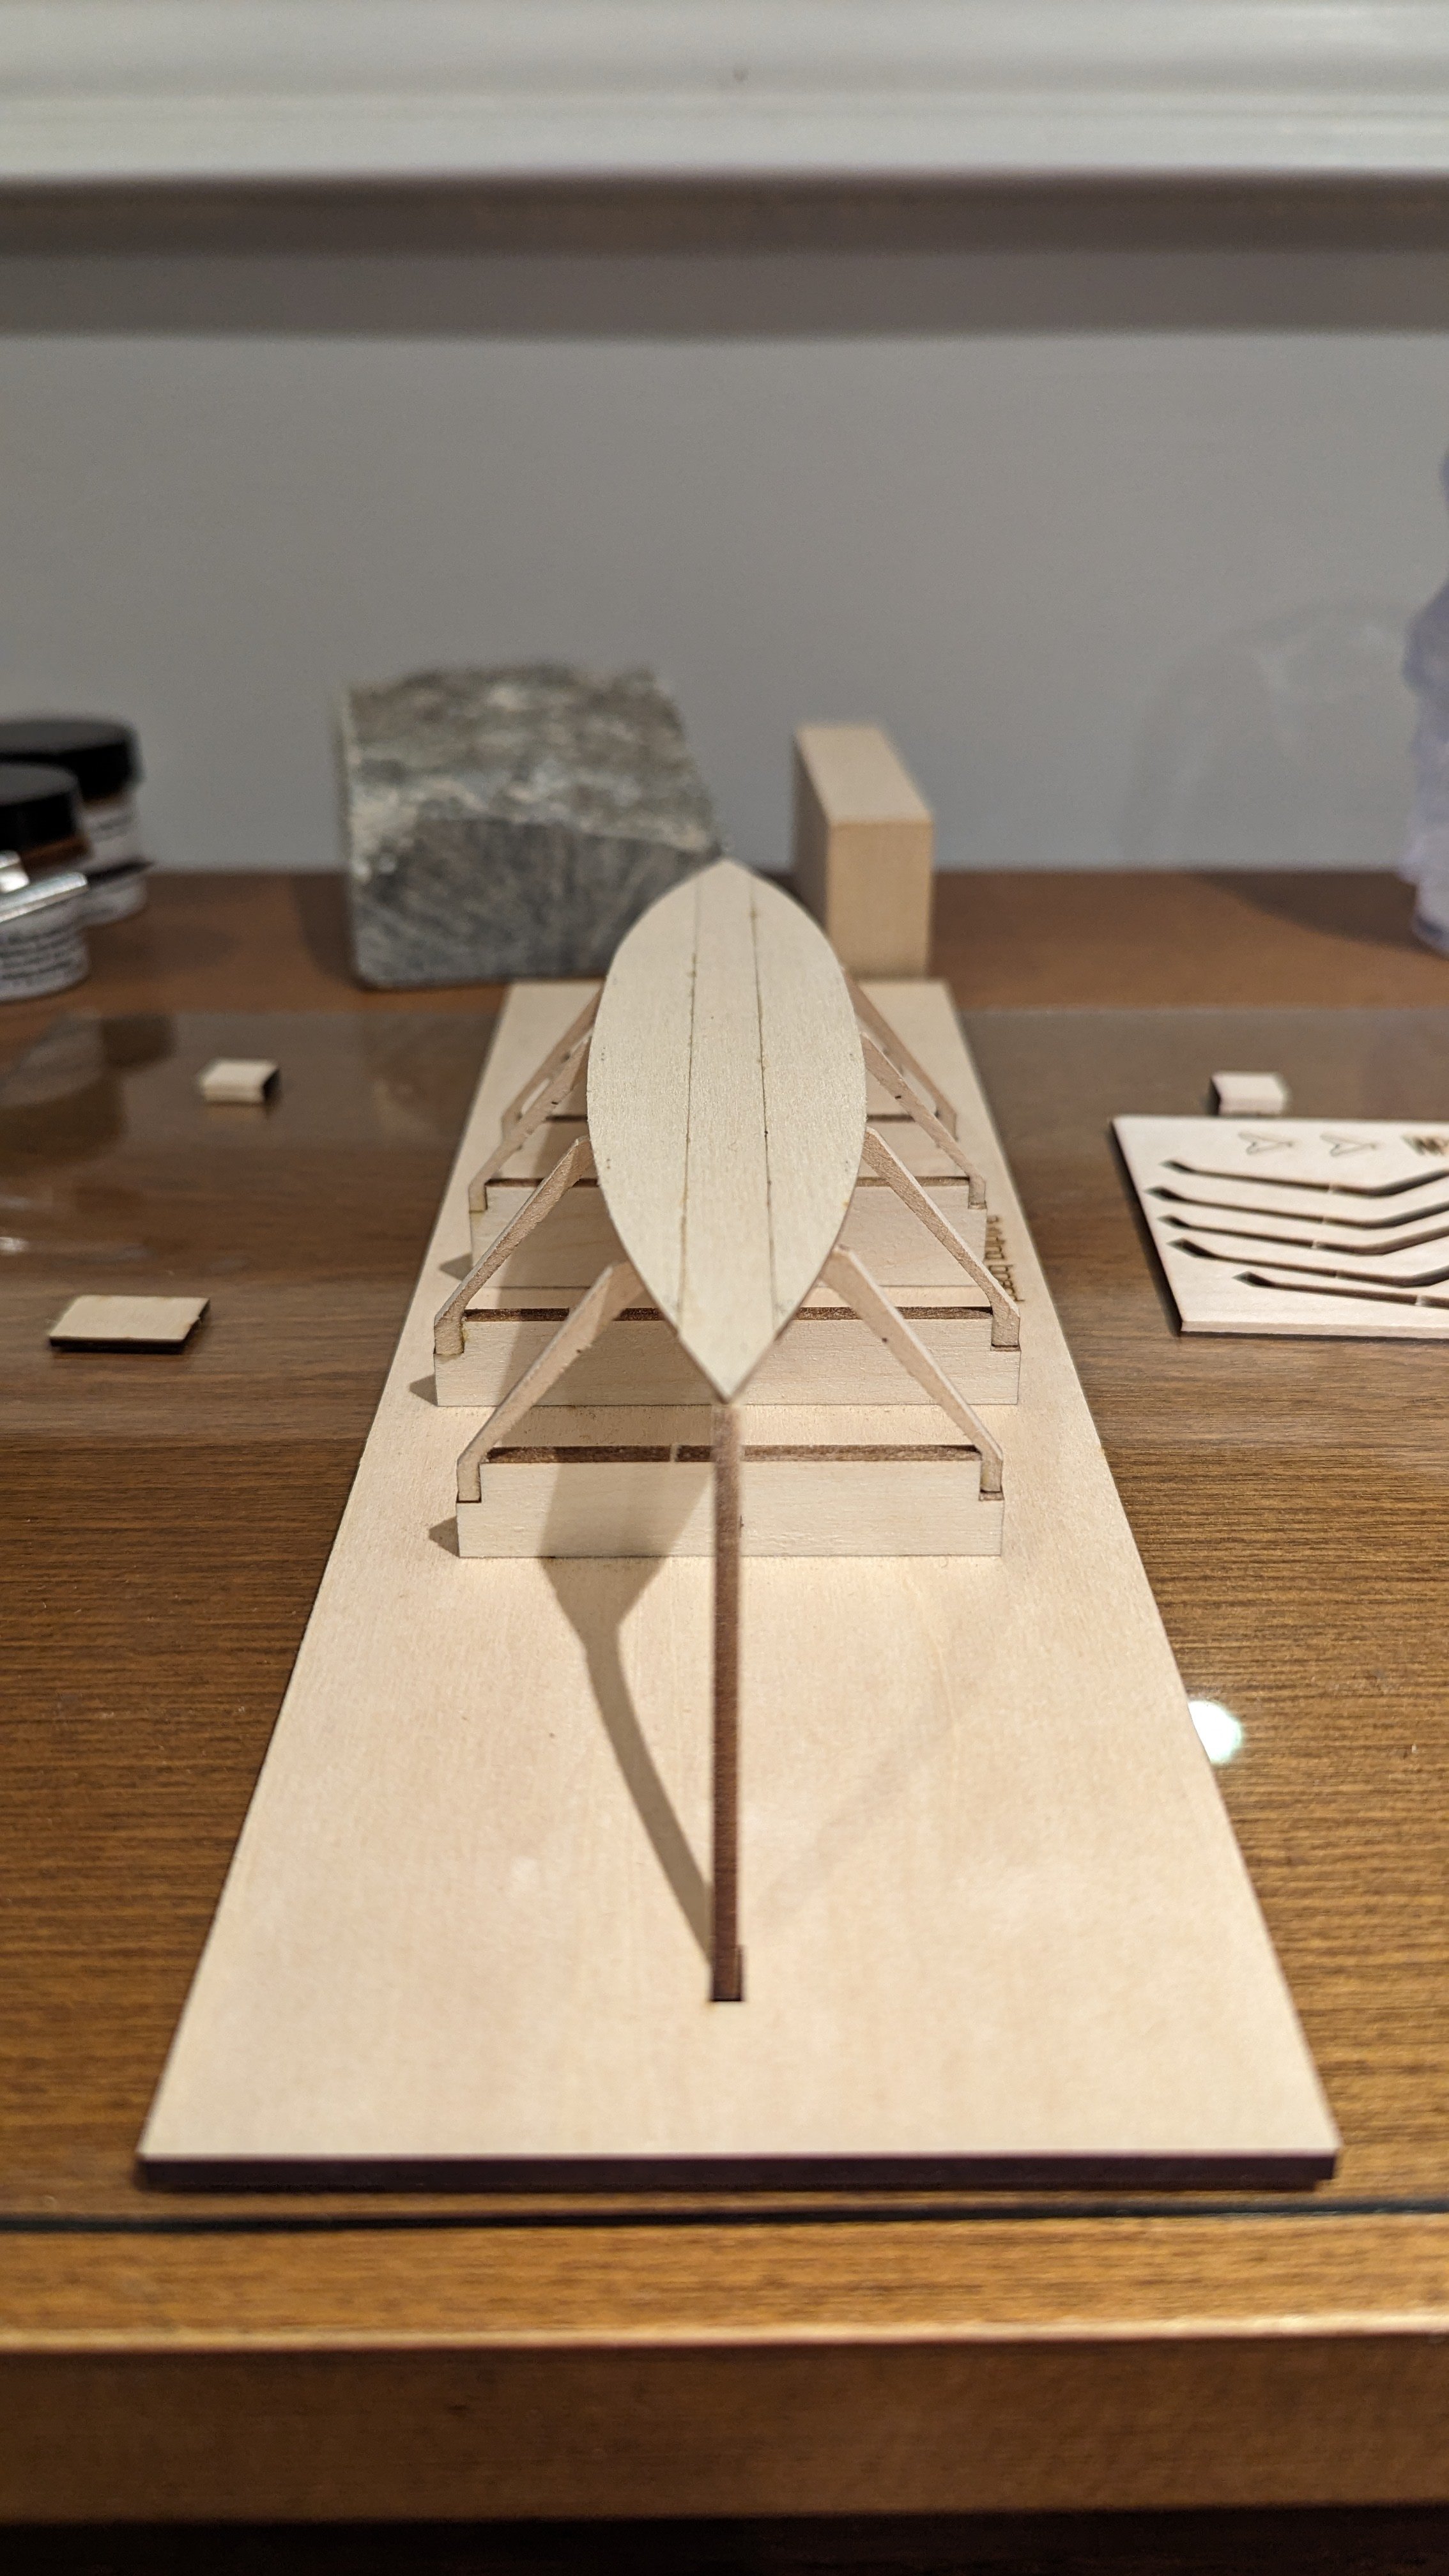
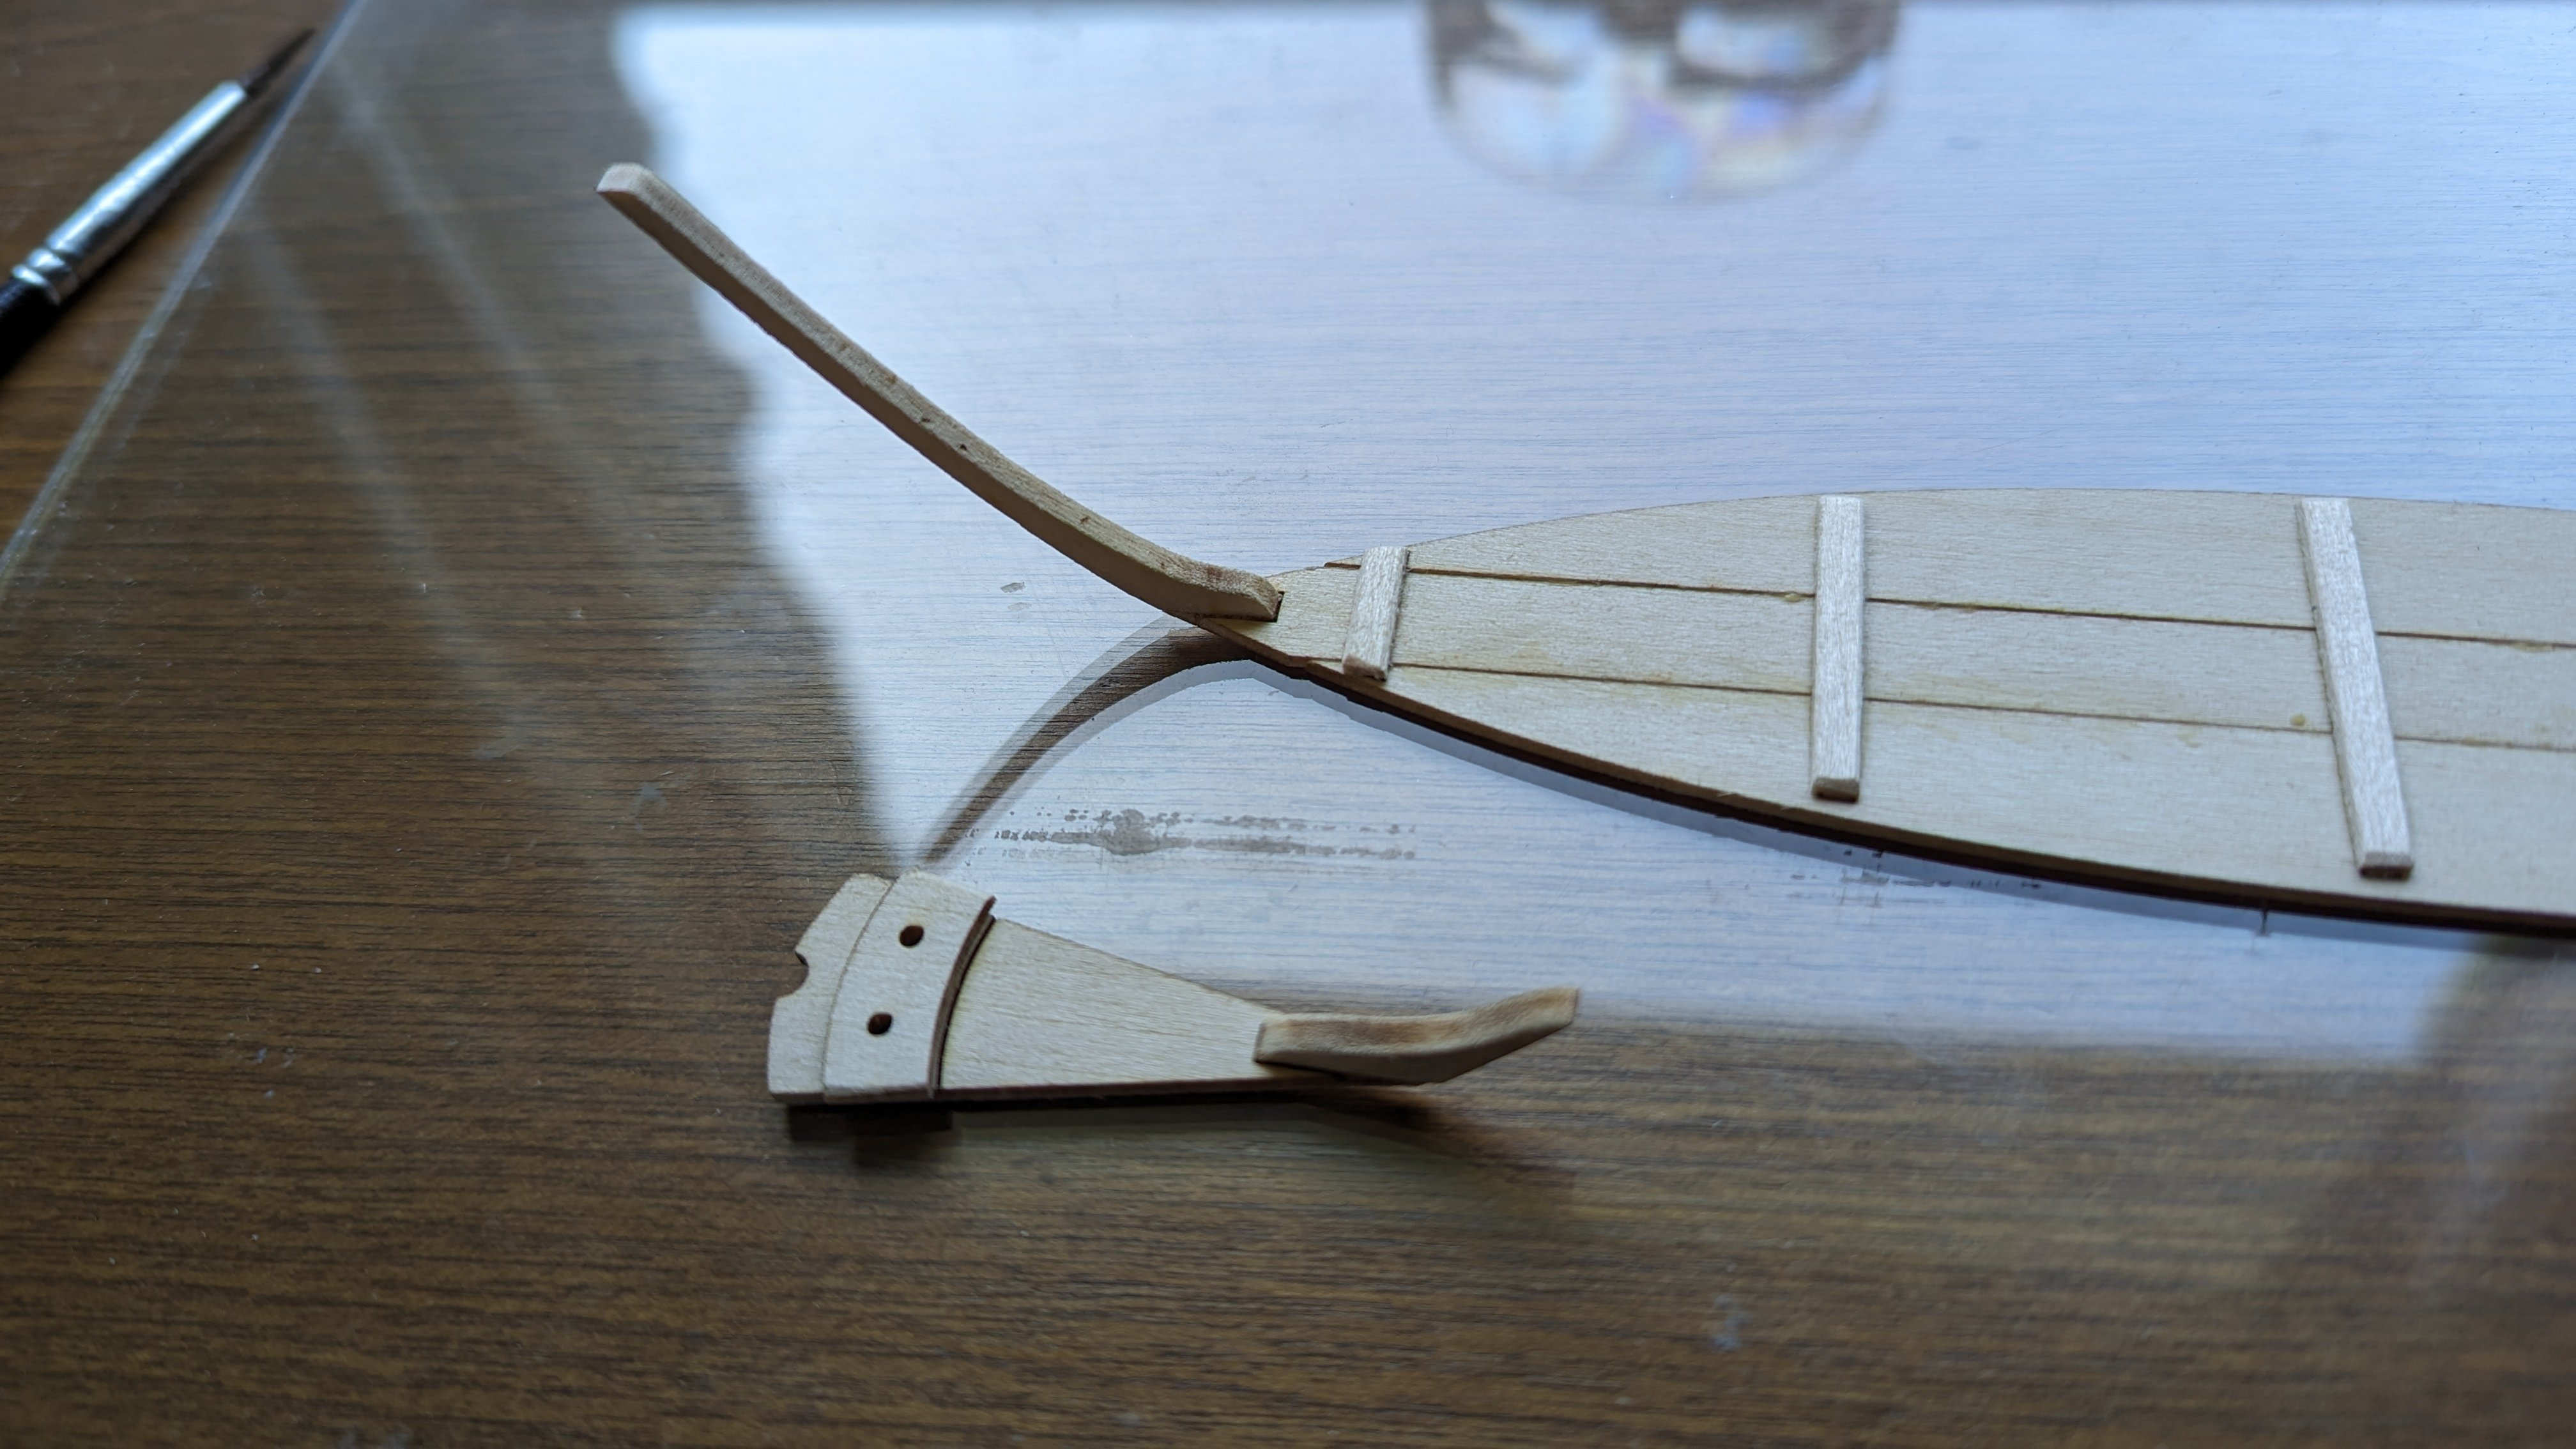
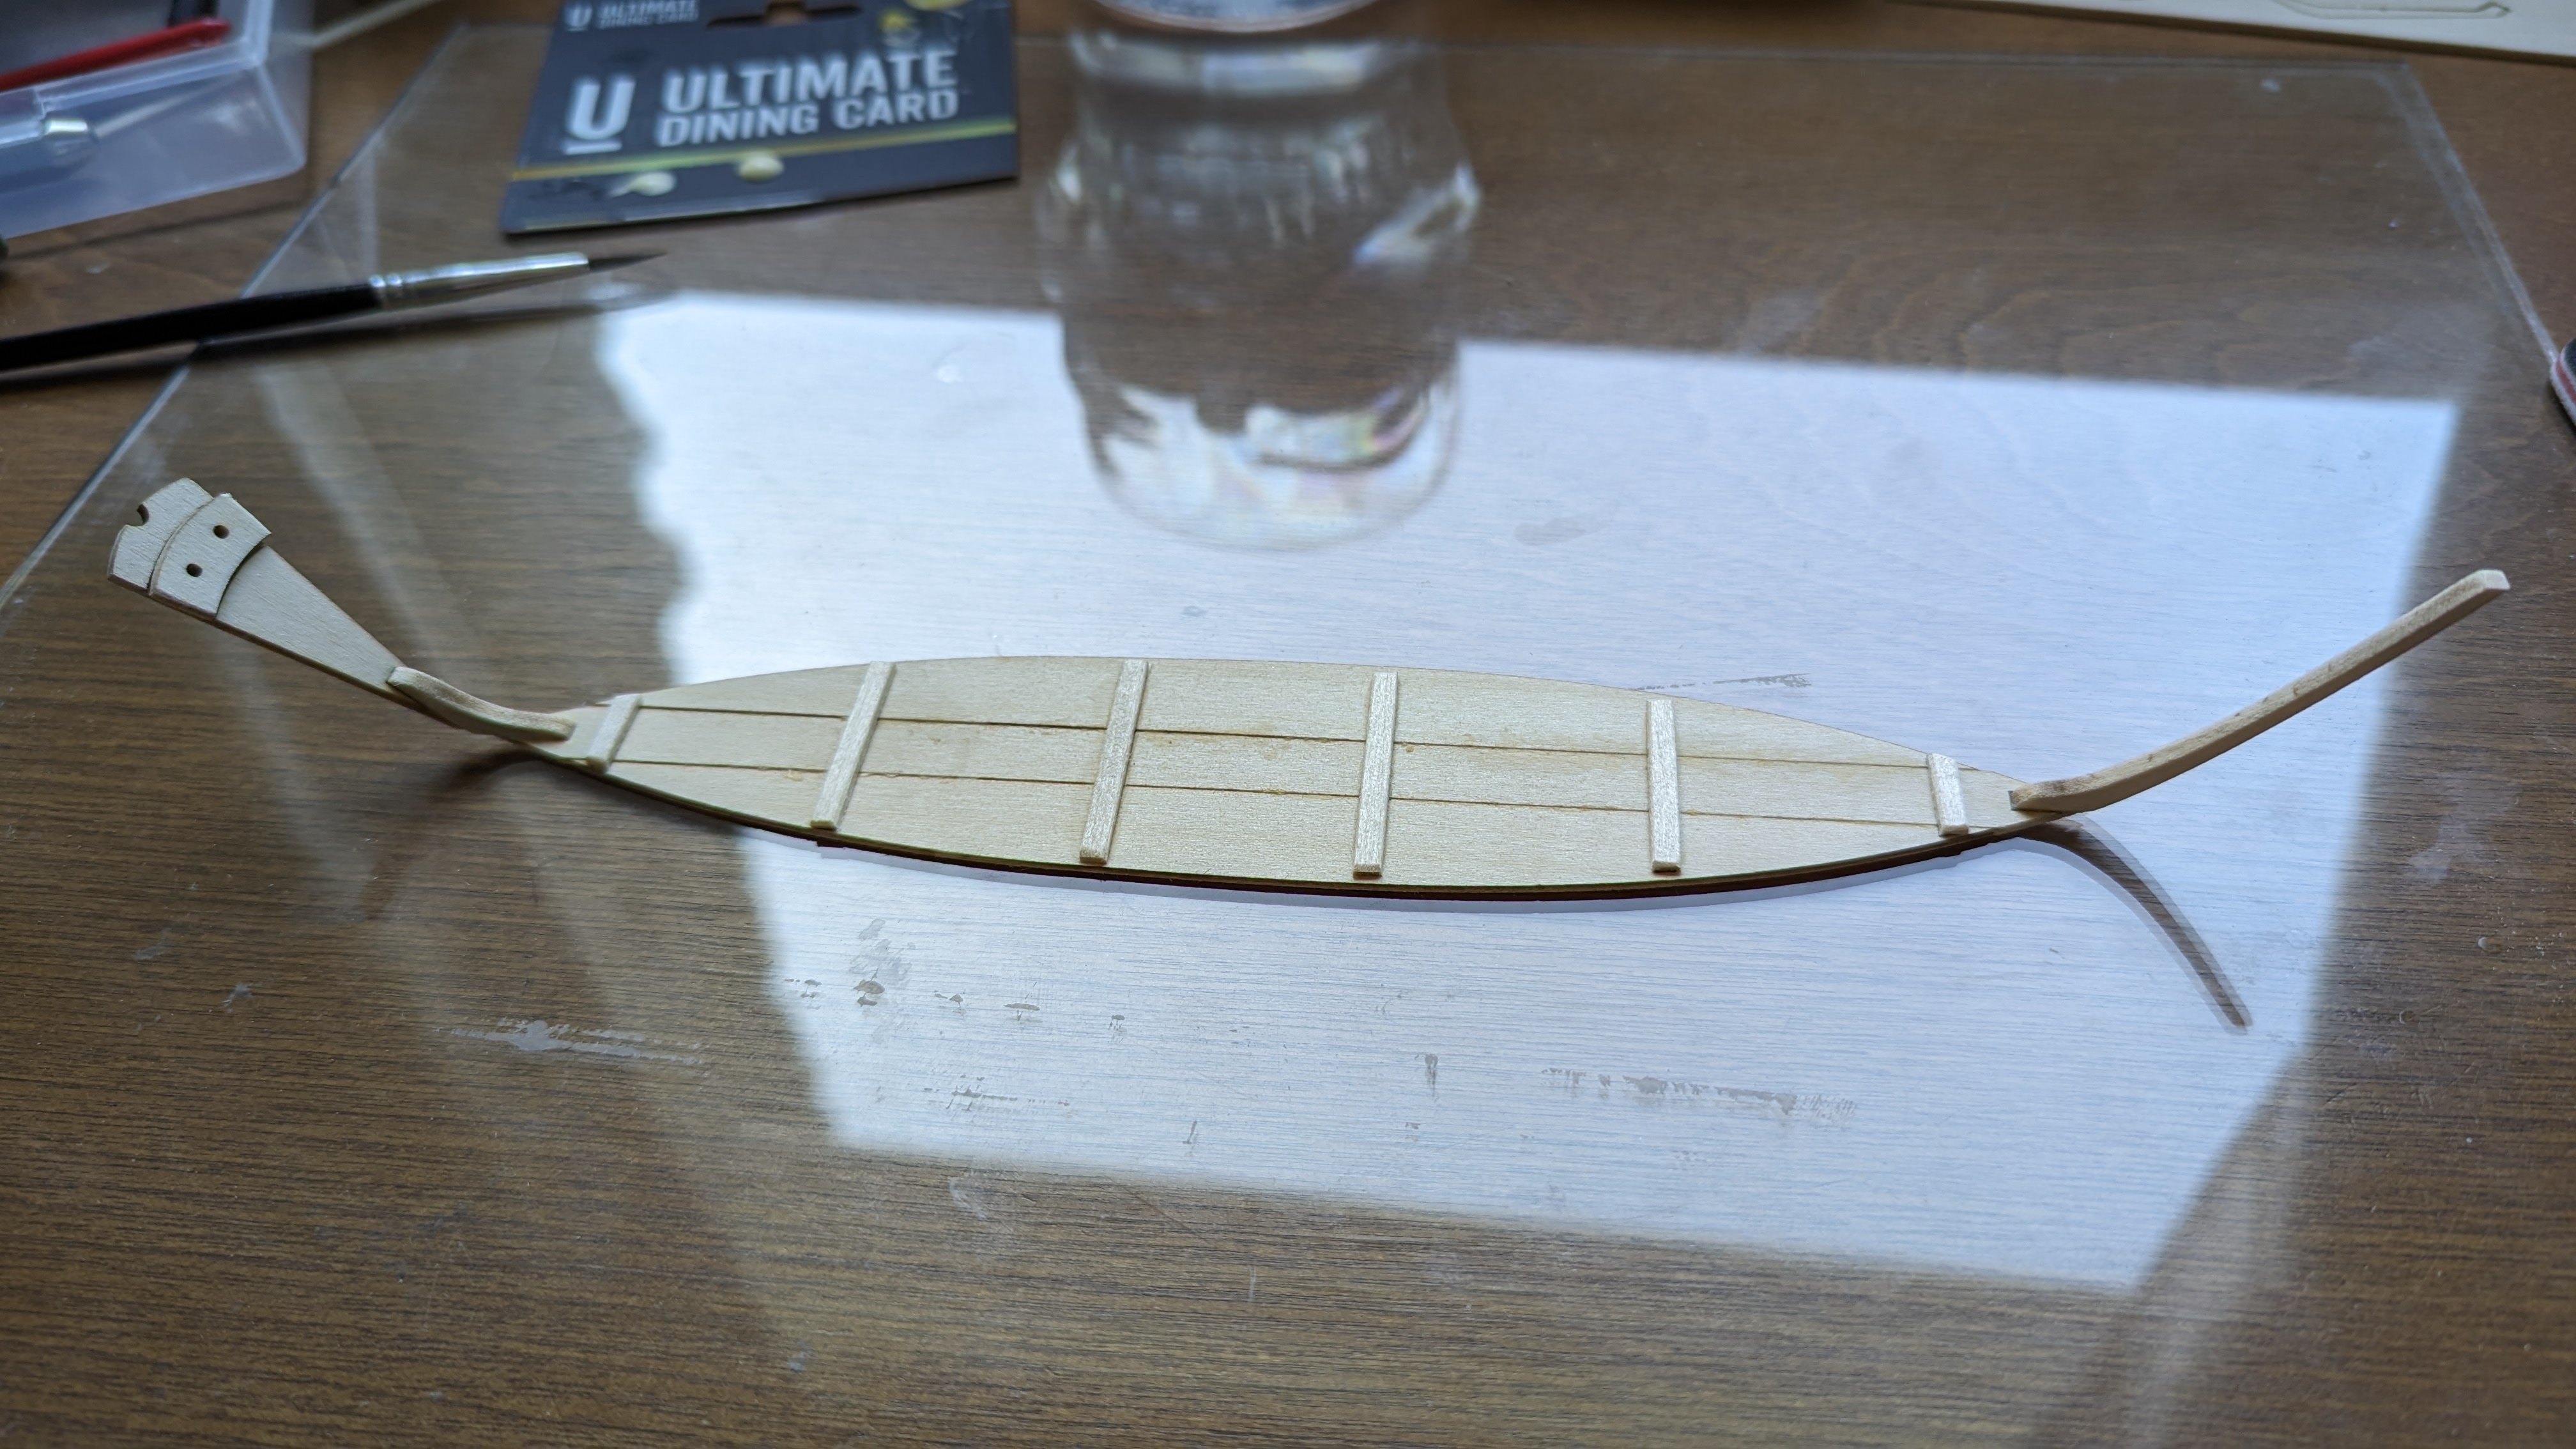
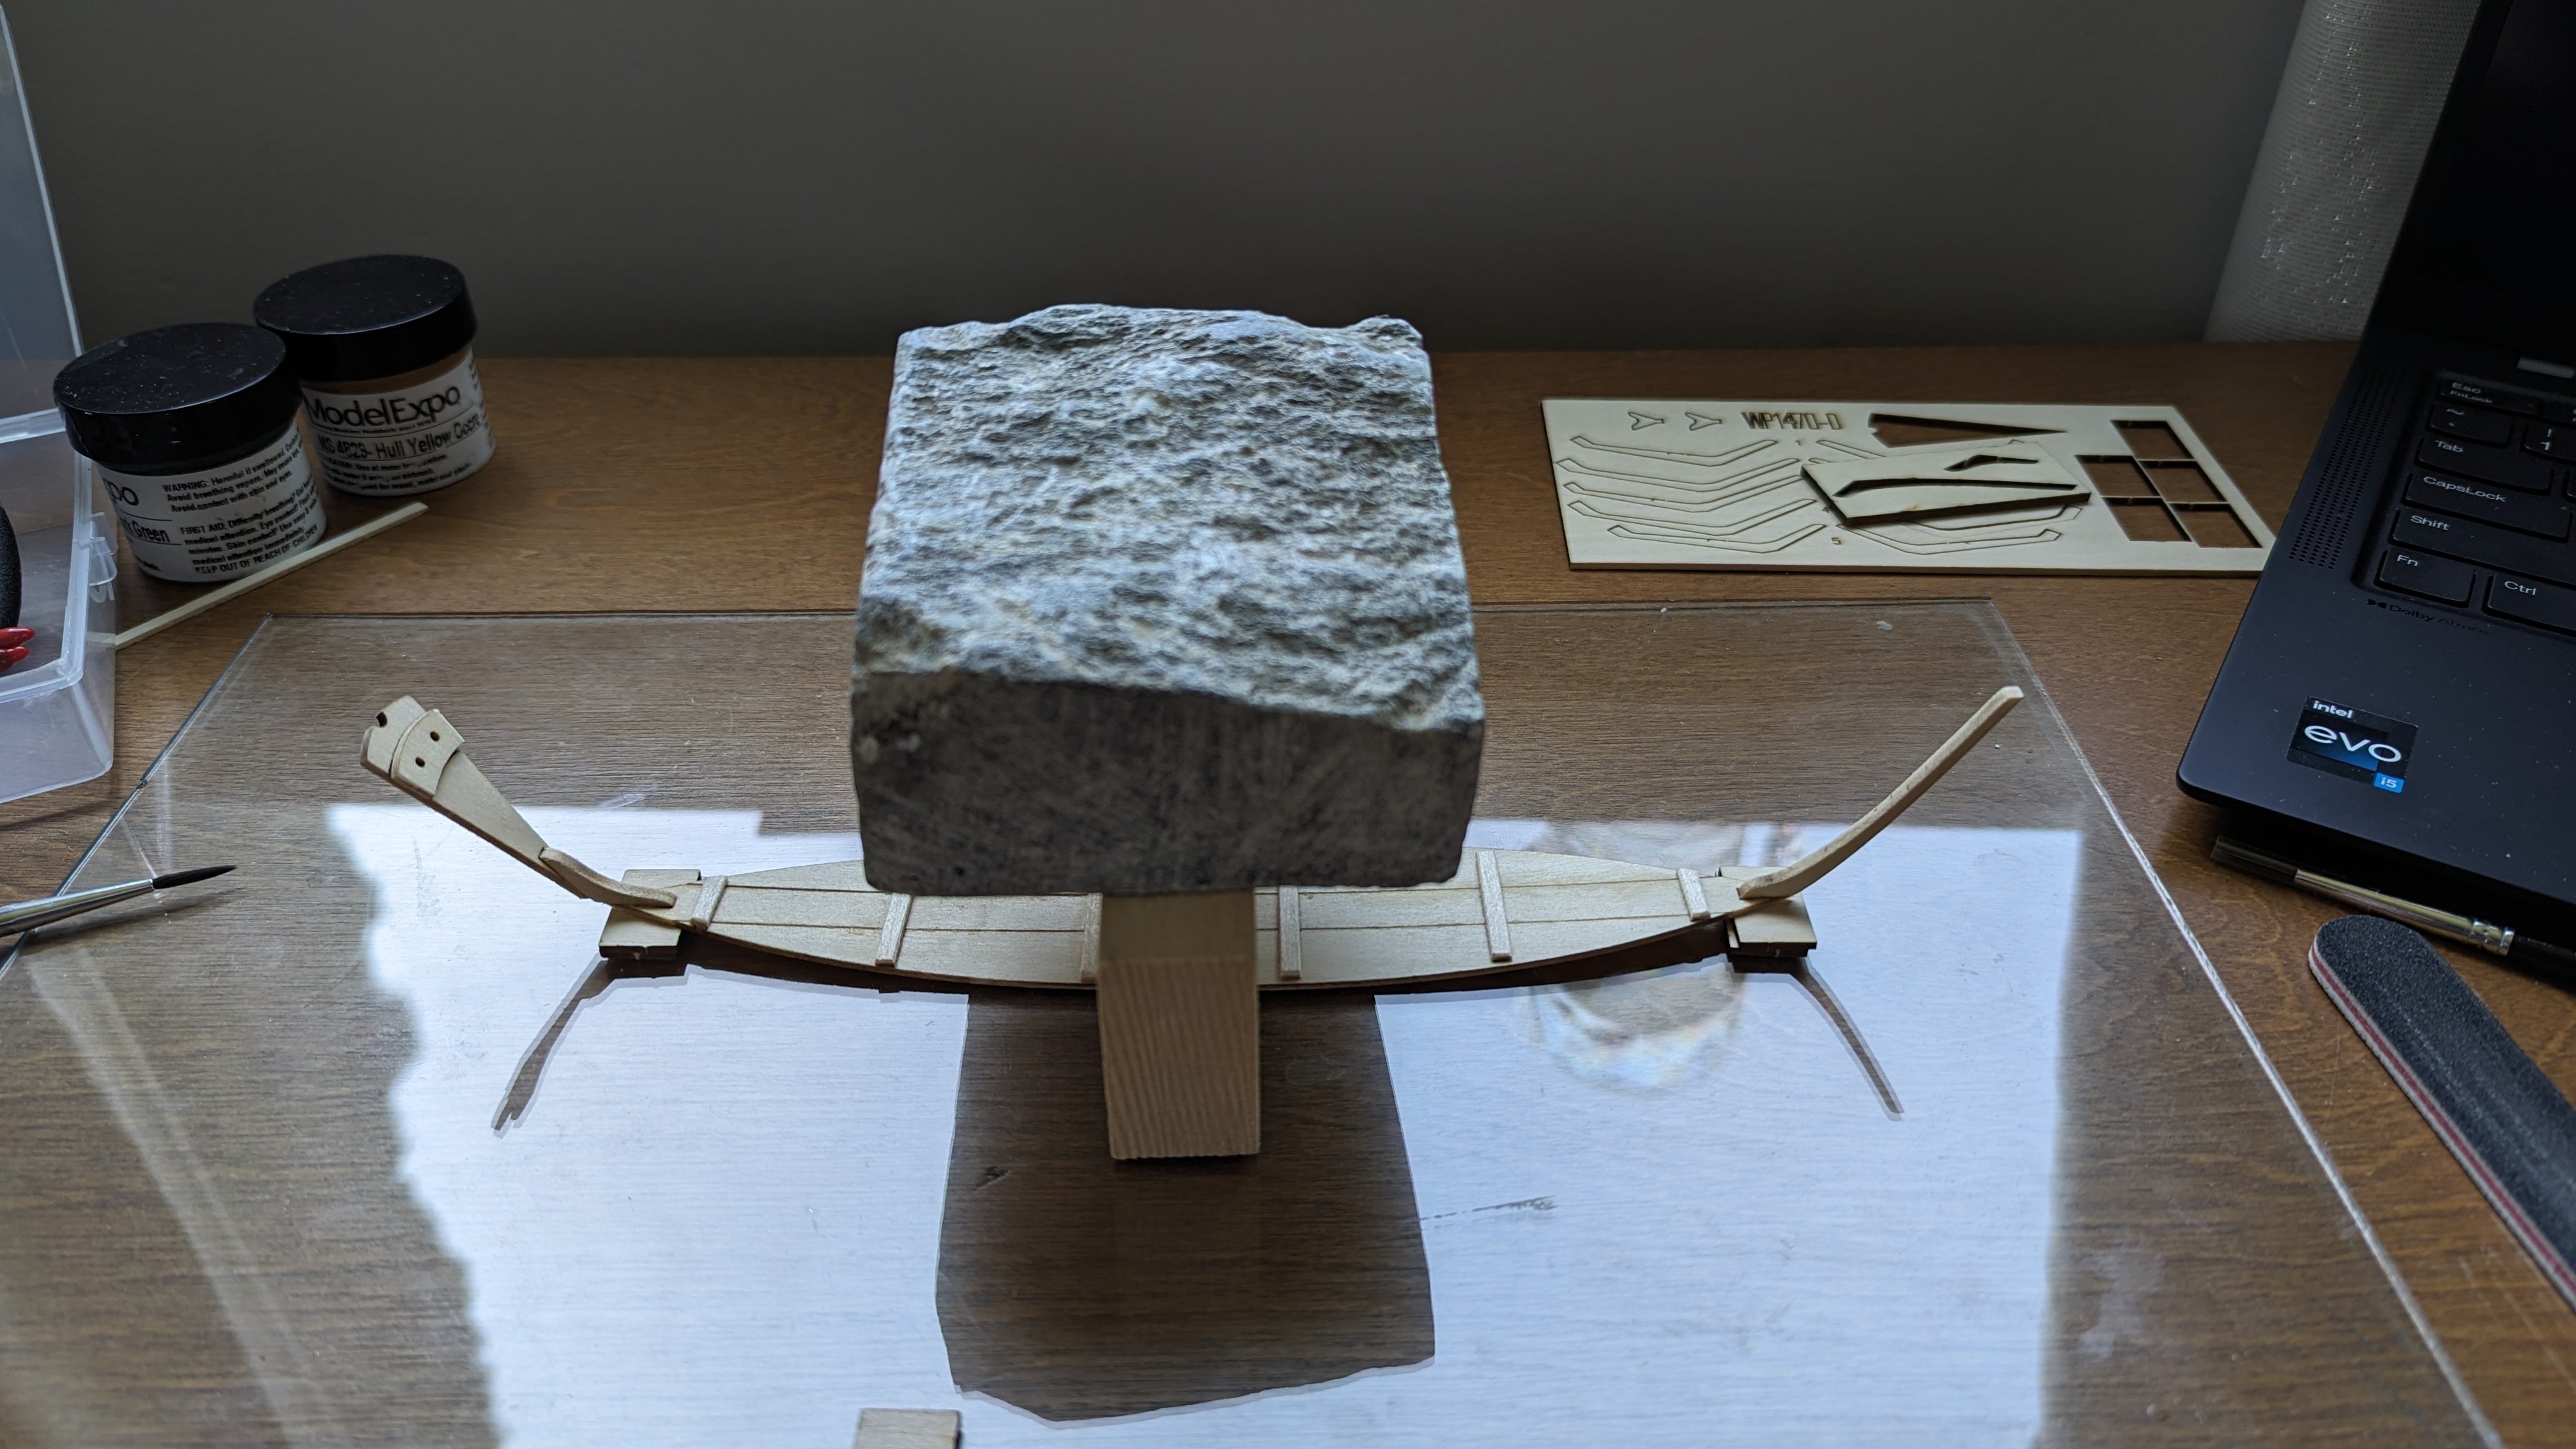
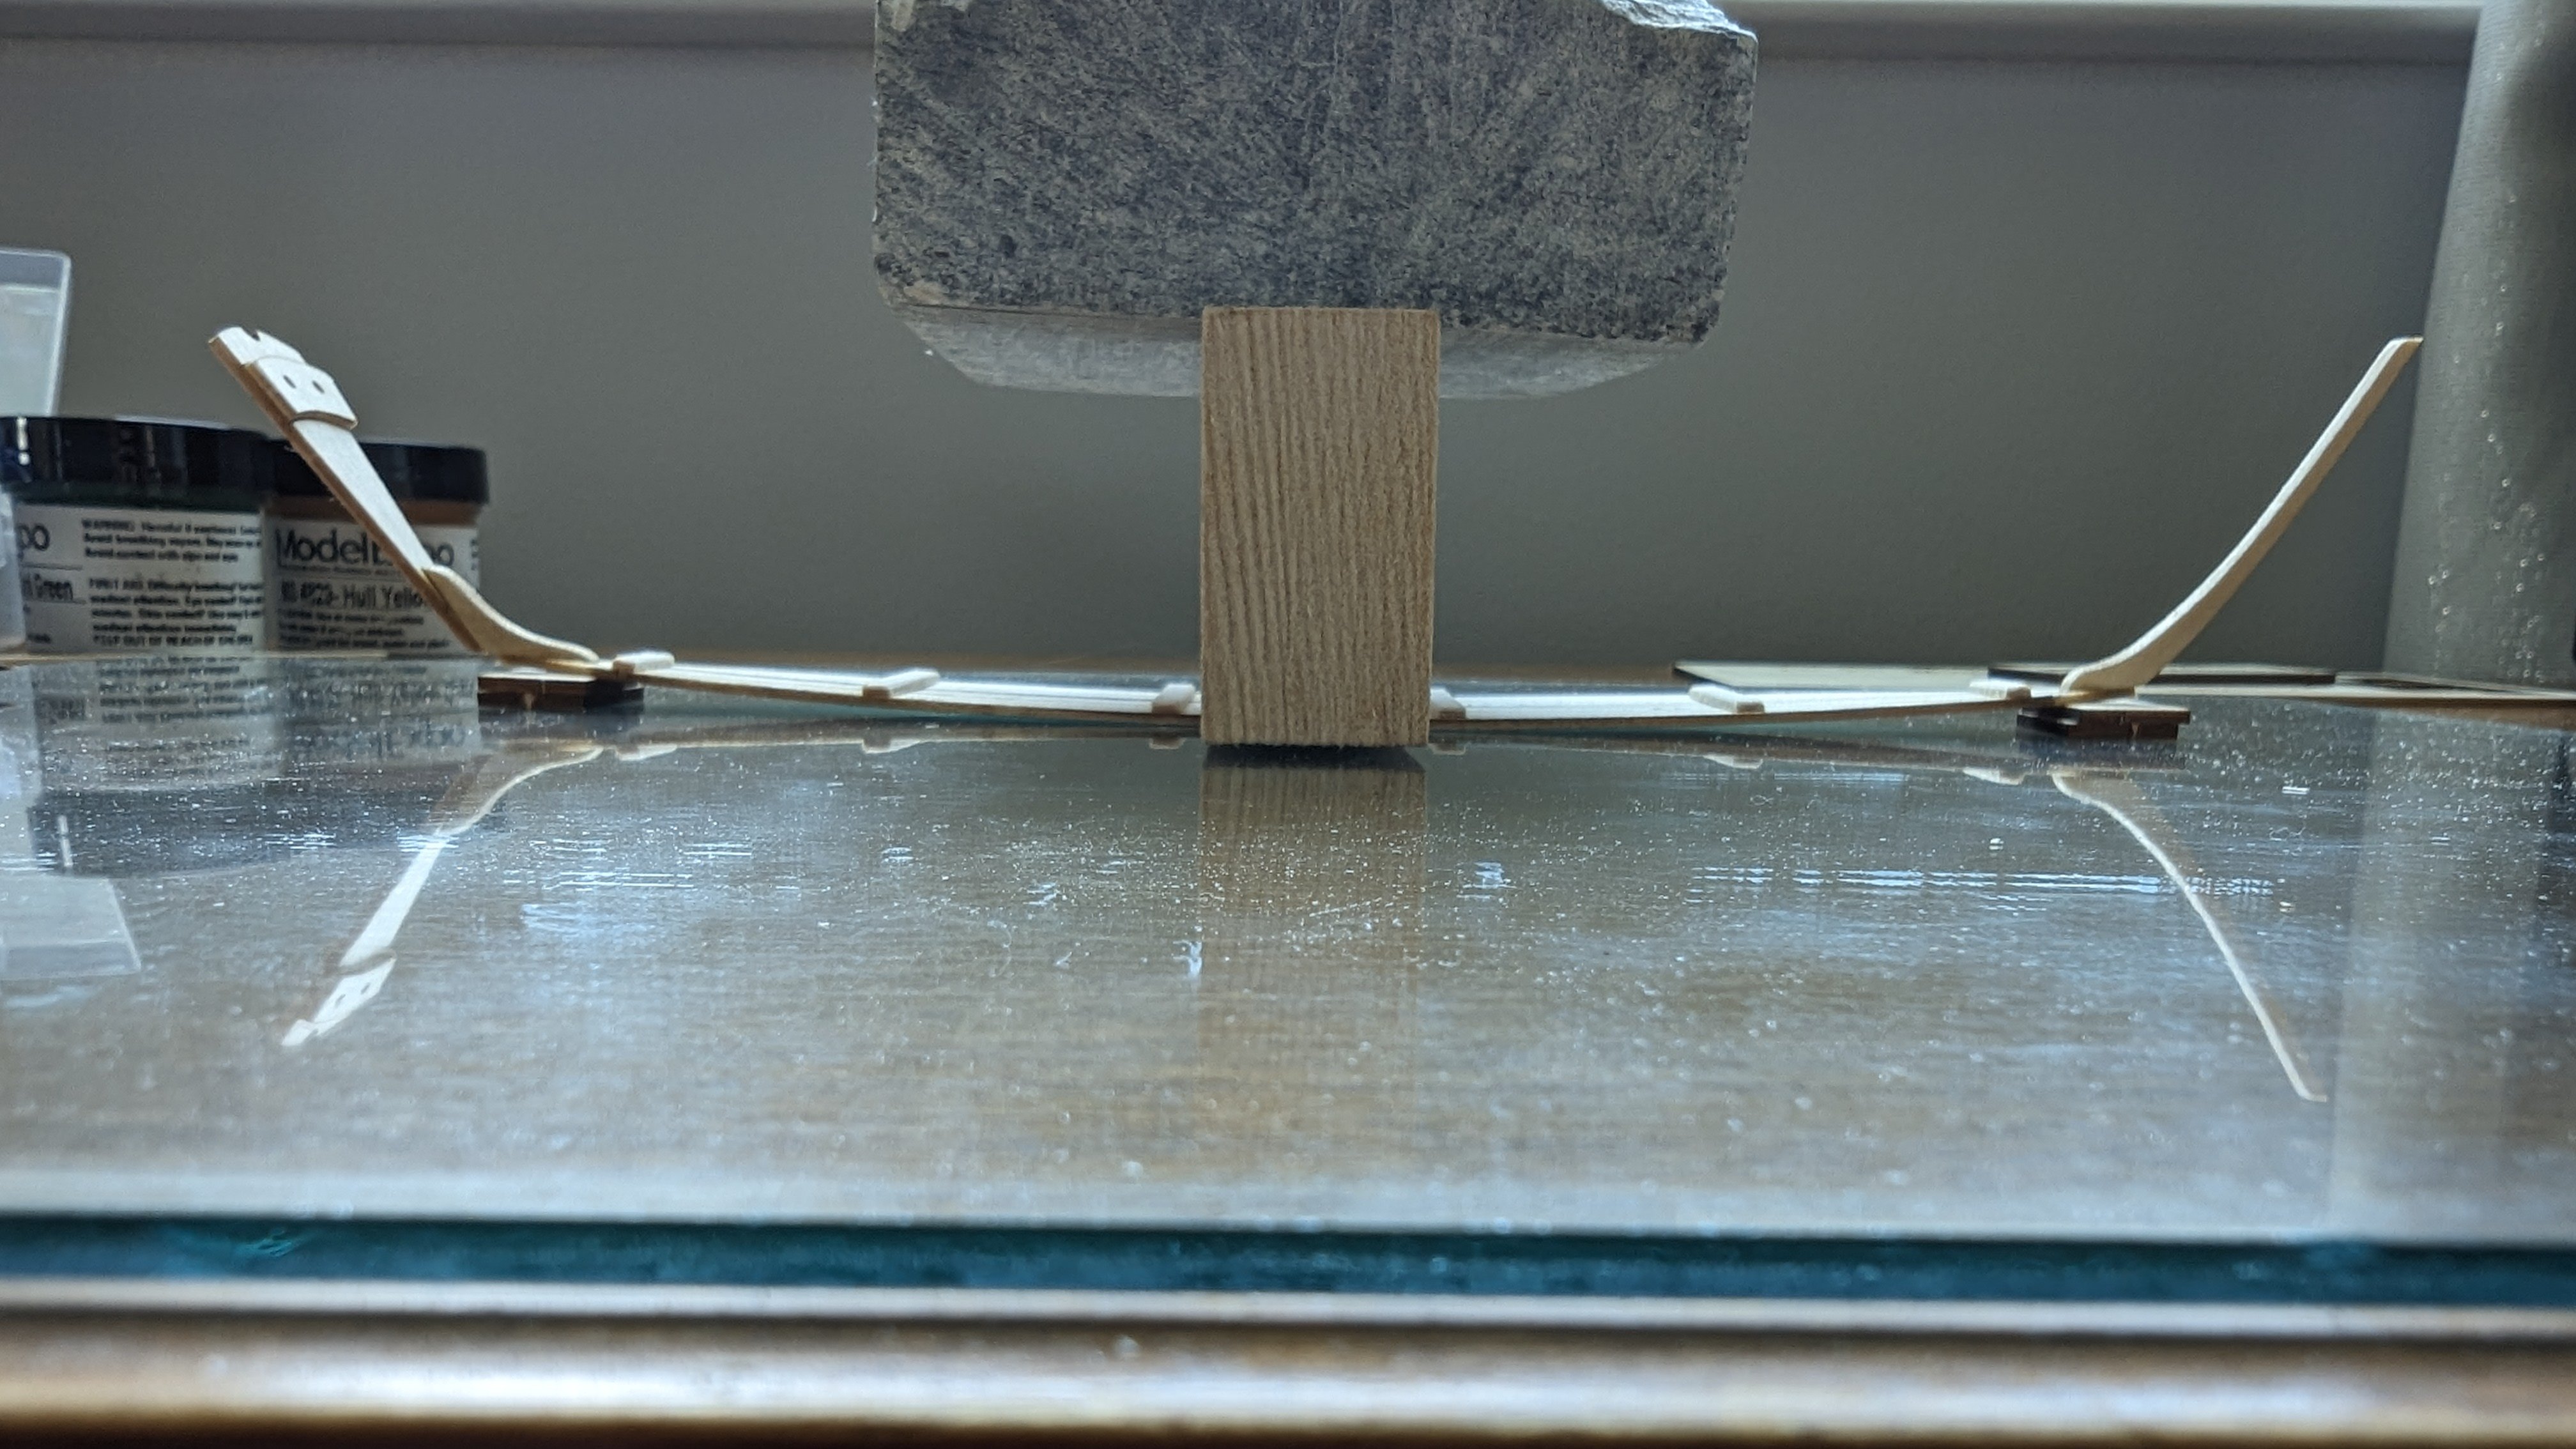
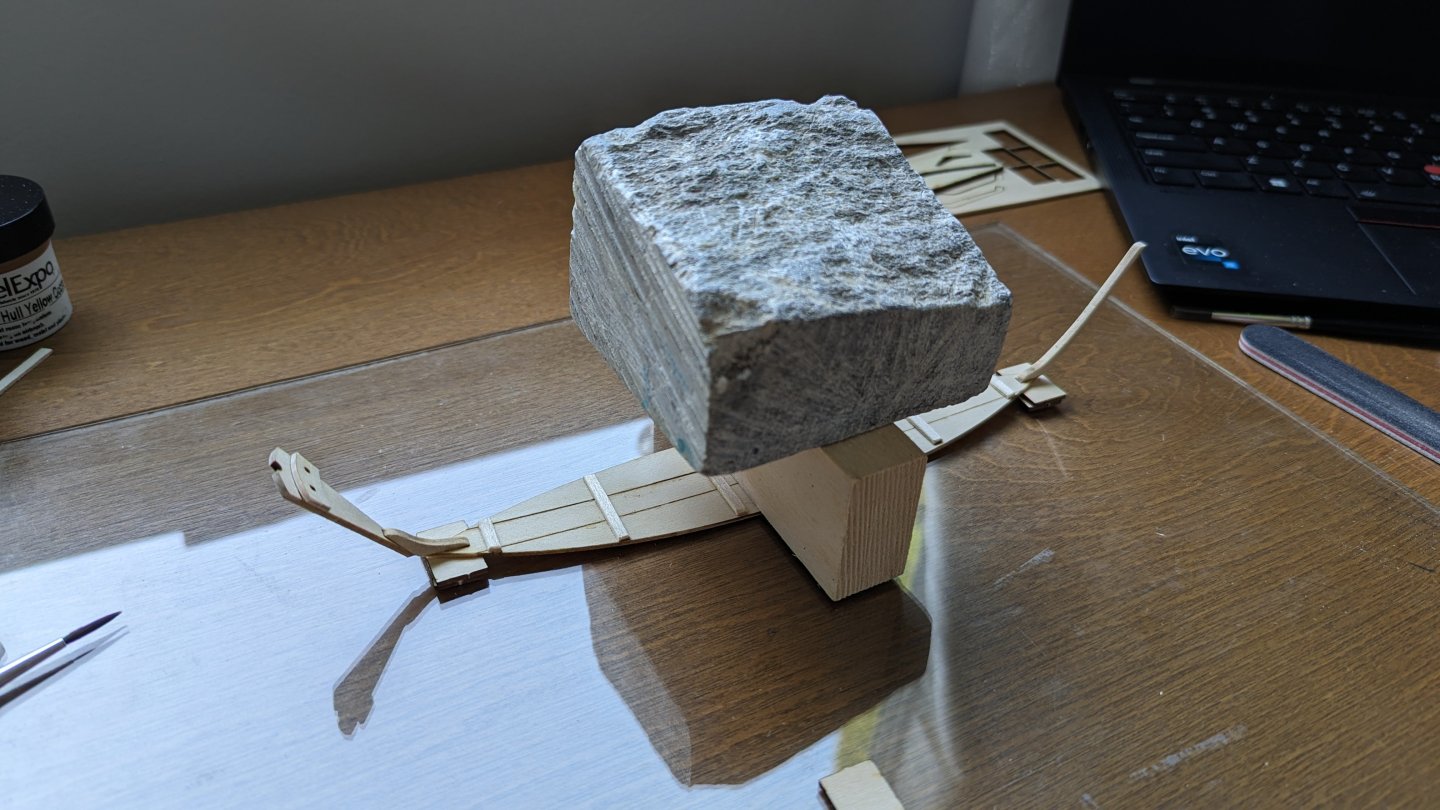
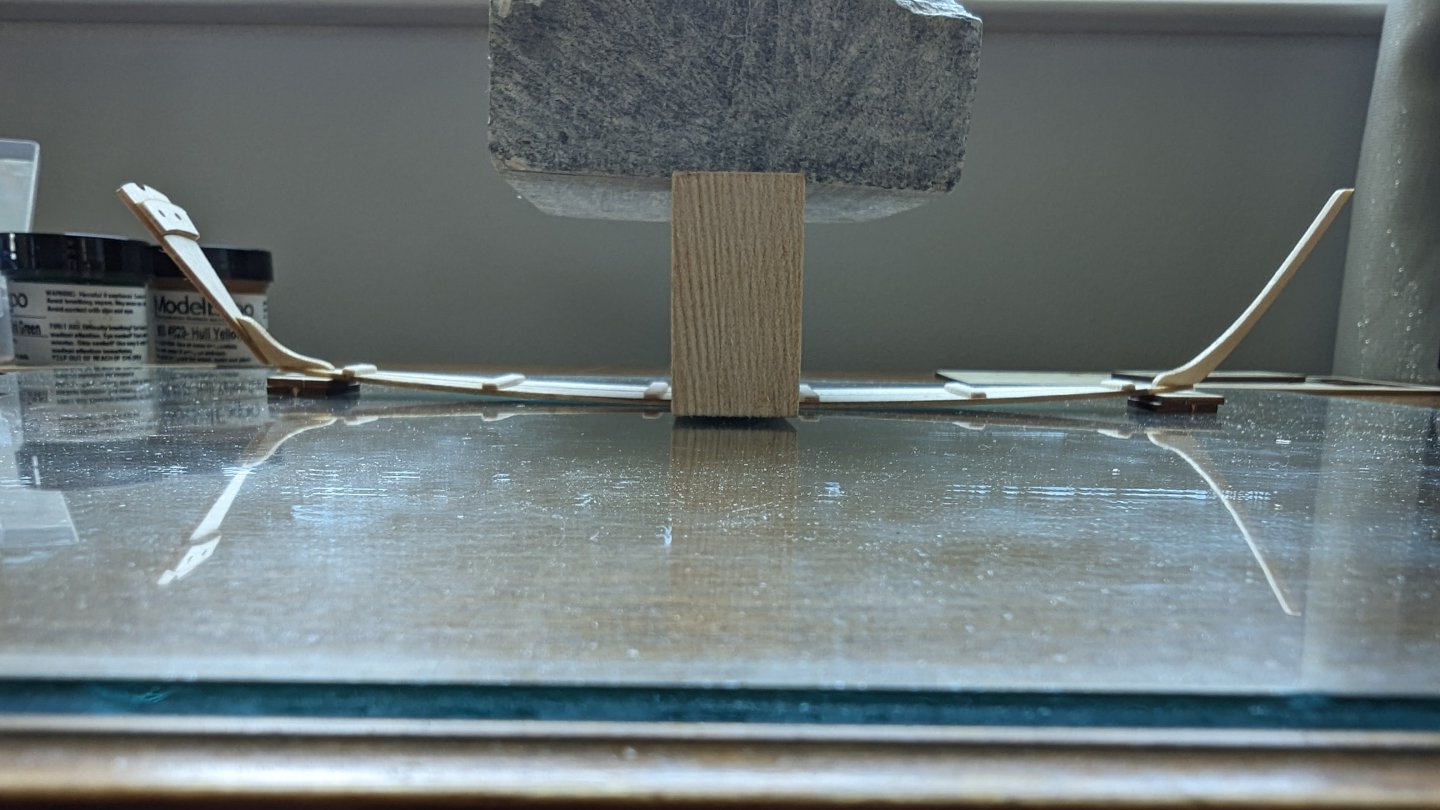
Log #2 Attaching the stem and transom. Things are getting a bit wonky. Side note: I was expecting the shipment from OcCre to show up yesterday with a different set of tools & cutting mat. Seems the goofballs at FedEx sent it to France to sit there for a day and a half, then when it landed on this side of the pond, it ended up in NJ instead of Canada. I figured maybe they'd get it to Canada by morning and deliver today, but seems it sat there for 12 hours then shipped south to Tennessee! I can only imagine it's being loaded onto a flight north - hoping it shows up tomorrow - two days late. I'm a little eager to get the extra tools, but I'm definitely having fun with what I have. I didn't realize how time consuming cleaning up all the tiny parts would be. If I can somehow replicate a 1:24 version of myself it may be a bit easier holding them. I'm sure things will be easier once tools, proper wood stations and a hodgepodge of improvised sanding sticks, blocks and sponges are acquired. For now I'm making do by doing with the sanding stick and some extra sandpaper. I found wrapping it around the X-Acto handle works okay for some of the curves, but I'll definitely need something a little better. The instructions suggested using a square edge or right angled wood block. The square I have didn't quite work so I found an old block in the garage, checked the ensure it was square and went to town. The stem went on fairly smoothly. I don't know what I did with the transom knee, but the transom ended up sitting ridiculously crooked (Good thing I dry fit first!). (EDIT: That is, the bottom of the knee where it meets the board wasn't square when I sanded it. So when placing it on the board it tilted the transom off to the side). I couldn't use the right angle block / sanding stick combo anymore since I already glued the transom to the knee and cleat so I ended up eyeballing it flat. That part freaked me out a bit, but I'm happy with the end result after doing it by hand. On top of that, I also noticed that not only was there a bit of a side to side rock in the bottom as mentioned in Log #1 - there is also a 'twist' to the whole thing. I'm not sure how I didn't realize that yesterday. It's fairly minimal and I decided to keep moving along as it may flatten out a little when putting the rock in the bottom on the next step; Aside from that, I'll do the best I can to keep things straight when framing & planking (fingers crossed). In any case, I now have something getting a little less like a surfboard and slightly more like a boat. I finished up by wetting the bottom, laying spacers under each end and placing a stone weight in the middle. The instructions called for 1/8" spacers. I used the frame spacers (1/16" each) and double stacked them on each end note: do not do this if you plan to assemble the frames while this sits as you'll only have 1 spacer. Now to let it dry. The next steps involve the building board and frames which I may start on later tonight.


- 69 replies
-
- 8
-
-
- Lowell Grand Banks Dory
- Model Shipways
- (and 2 more)
-
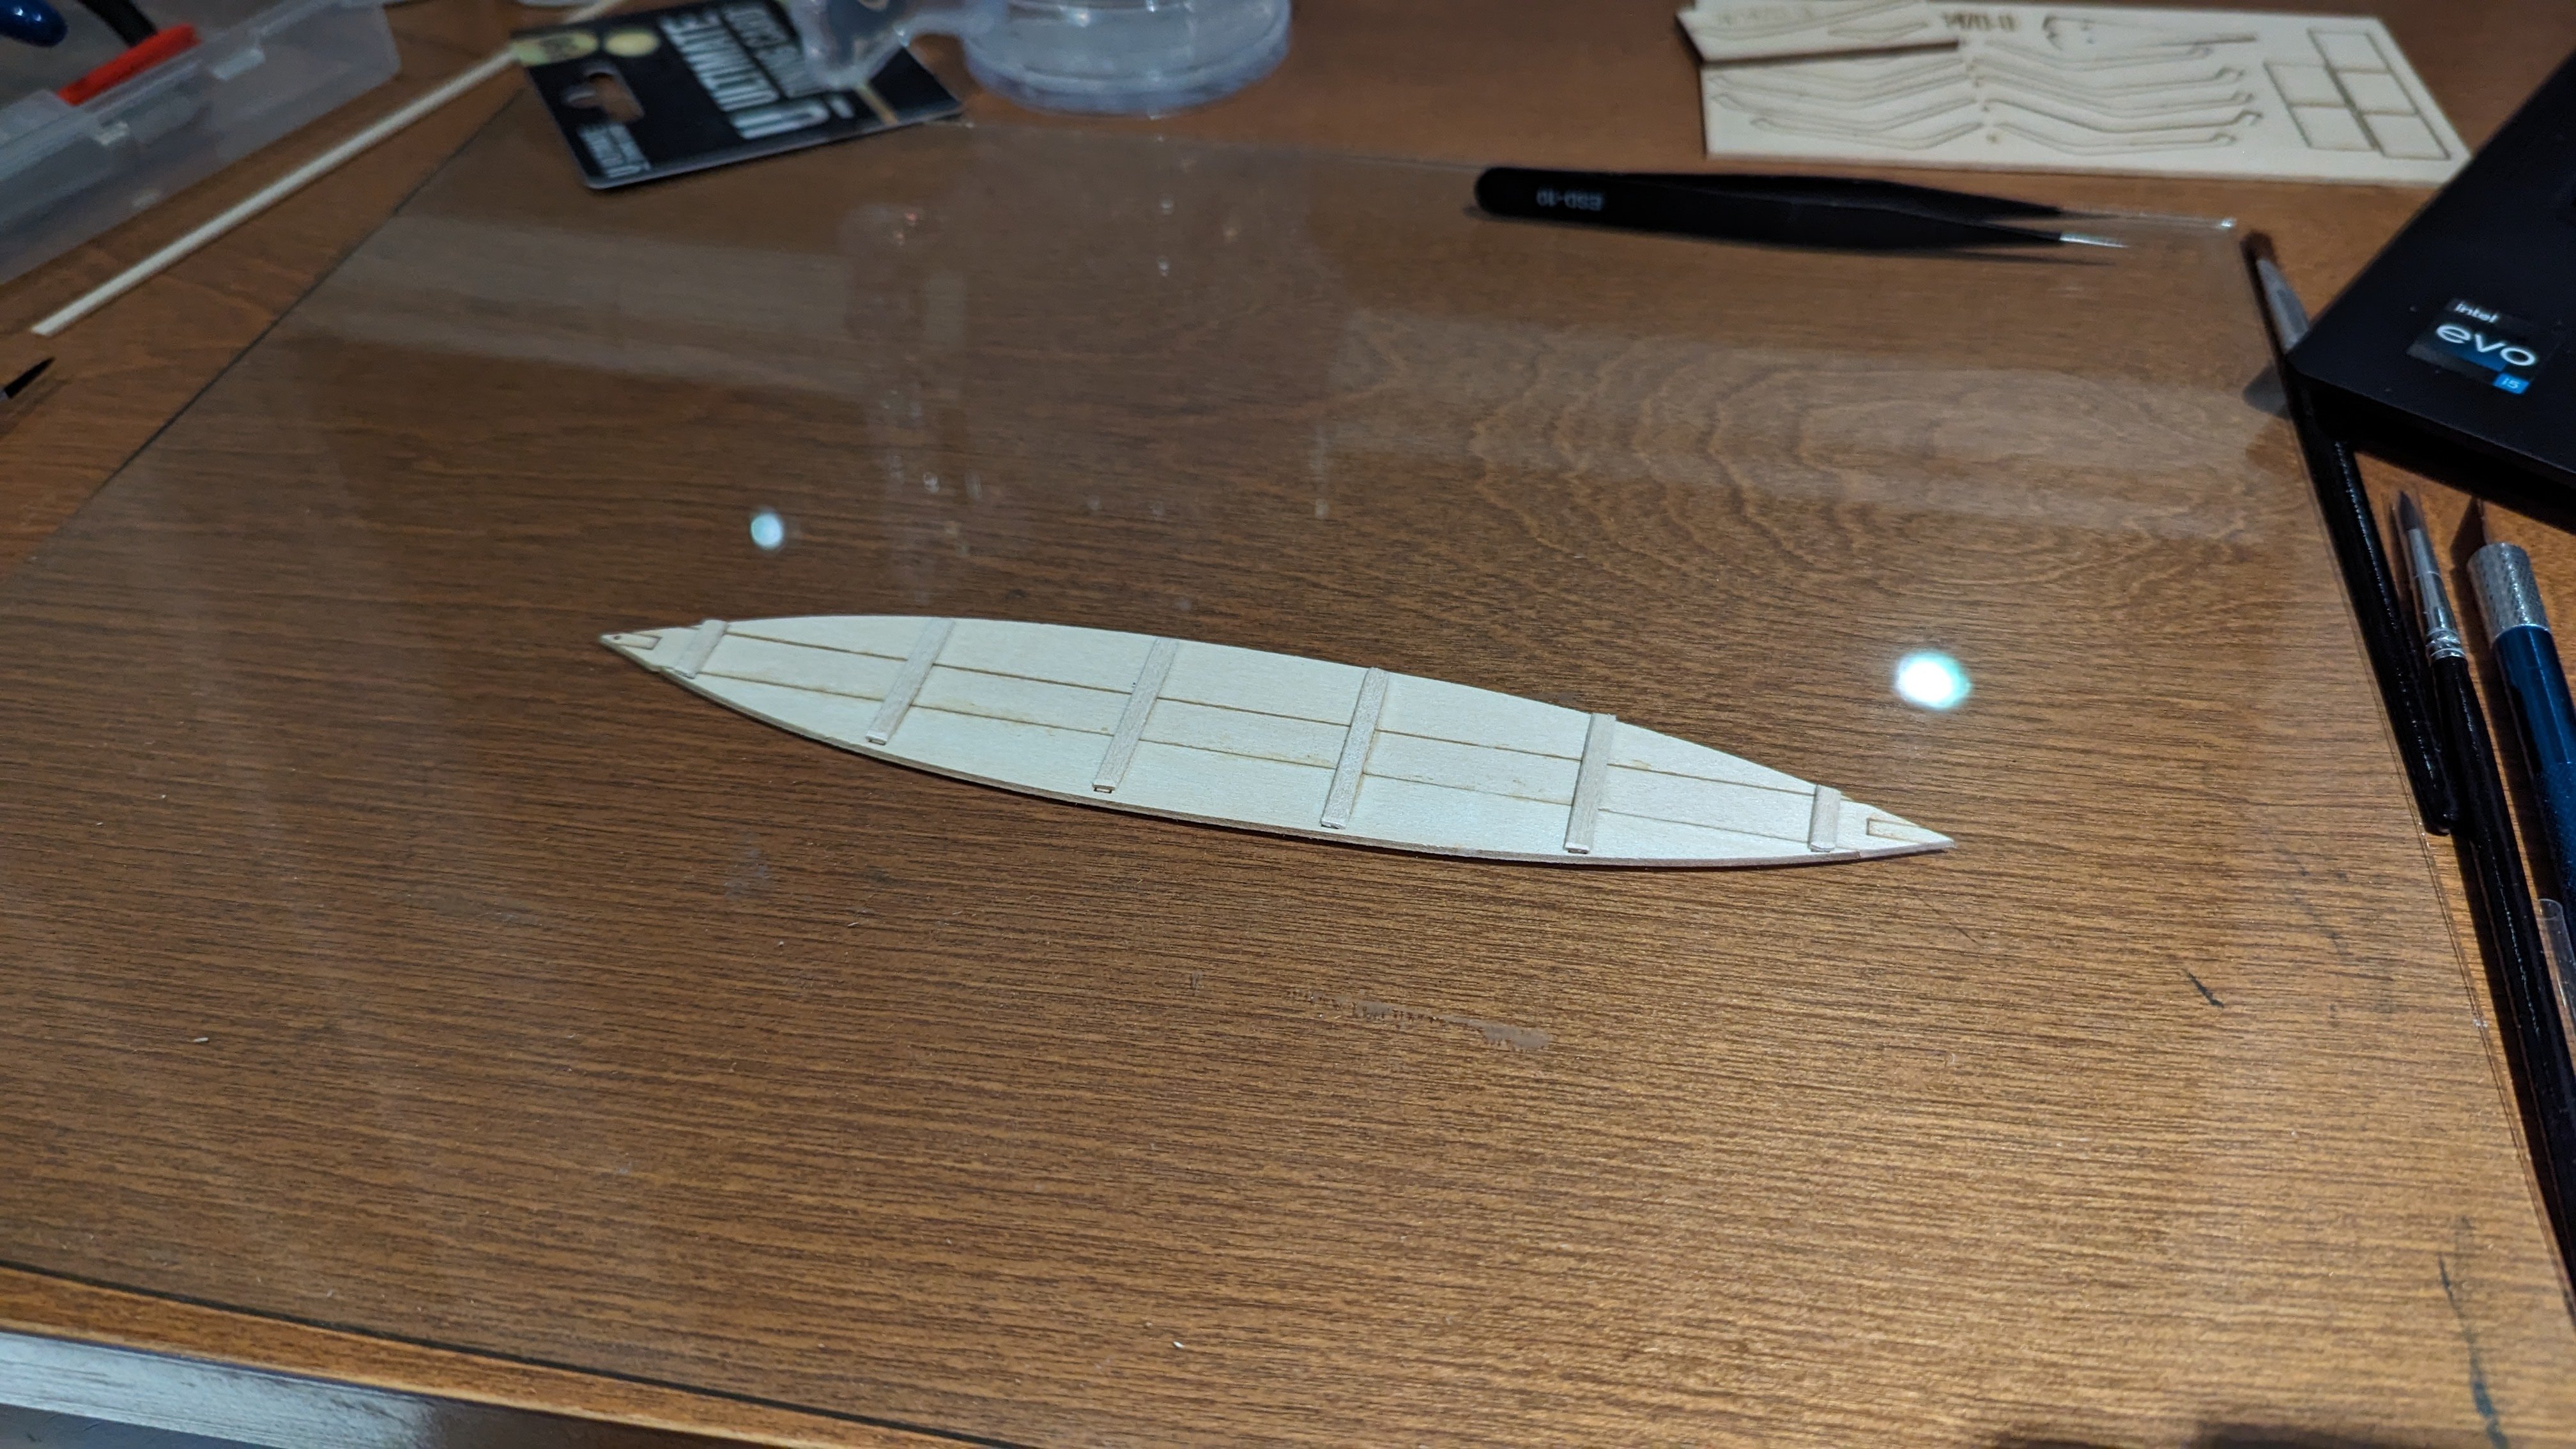
Log #1 I managed to get into it last night and plan to do a bit more today, but I'll start with updating where I left off. Progress is slower than I expected, but I'm taking my time and don't have a real permanent setup yet. I don't have an issue with how long it's taking, I'm just enjoying myself. The wife let me take apart a framed picture (not the wedding photo though) and pull the glass out to use for the build so at least I have some sort of basic cutting surface to get started. I kinda had to get used to cutting the pieces out and was working with a mix between scoring, sawing and putting pressure until they popped. I'm not sure what the typical method is, but at least it worked. I found sanding on the glass a bit tricky as the wood sort of 'stuck' to it, so I ended up holding the wood and moving the sanding stick. They give you a solid bottom to start with or three separate pieces that you can choose to glue together. I opted for the three planks and will save the solid piece as a backup or scrap. After gluing, the bottom didn't end up being perfectly flat, I noticed some of the wood had slight curves while assembling. I tried holding down the parts with my hands for a minute, but at the same time was trying to clean up the glue. It ended up being a little messy between two of the boards as I guess I waited too long and/or didn't use enough water. I probably could've used a wetter brush, but I was concerned about diluting the glue too much so I was pretty conservative. Obviously this will be something that practice will help get a feel for. I had a thought about practicing disassembly and re-gluing, but decided against it, I don't think it will affect the end result too much. Once that dried, I added the cleats. This part took a little while. I had to get used to measuring and cutting the wood with what I had and basically just lined up the wood with the etching on the bottom board, then marked it with a mechanical pencil and worked my way through it with the X-Acto. The instructions/history lesson talked about boats not having 90 degree angles to a void injury, etc. Makes sense, I'm in manufacturing, we do the same thing so I took extra time to chamfer all four top edges of the slats. I also tapered the sides of the first and last to conform to the shape of the hull a little bit as well. It's such a tiny detail, I highly doubt anyone without a magnifying glass will see it, but at least I'll know it's there! As mentioned, I have an extra recovery day today so I should be able to get another post in with some more progress. I'm a little nervous about getting the transom and stem on straight and lining up the planks as these are common issues. Hopefully it goes smoothly, but even if it doesn't you learn more from mistakes and corrections than you do from everything going perfect! Which reminds me of deciding to start with this 'beginner' boat and not thinking much of it, but after reading others logs, and starting it myself, this boat is really growing on me and I'm very excited to continue building it. Thanks for letting me know, I'll definitely be keeping an eye out for your logs @Frank Burroughs Agreed! Had I have started this 10-20 years ago I'd probably be way more worked up about getting every detail just perfect the very first time. Over the years, I've learned to make my perfectionist side take a back seat, it's a lot more calming that way. I know I'll be happy with the end result no matter how it goes - even if it goes terribly, terribly wrong, it's fairly cheap to order a replacement kit. Thanks for the comments and following along.


- 69 replies
-
- 6
-
-
- Lowell Grand Banks Dory
- Model Shipways
- (and 2 more)
-
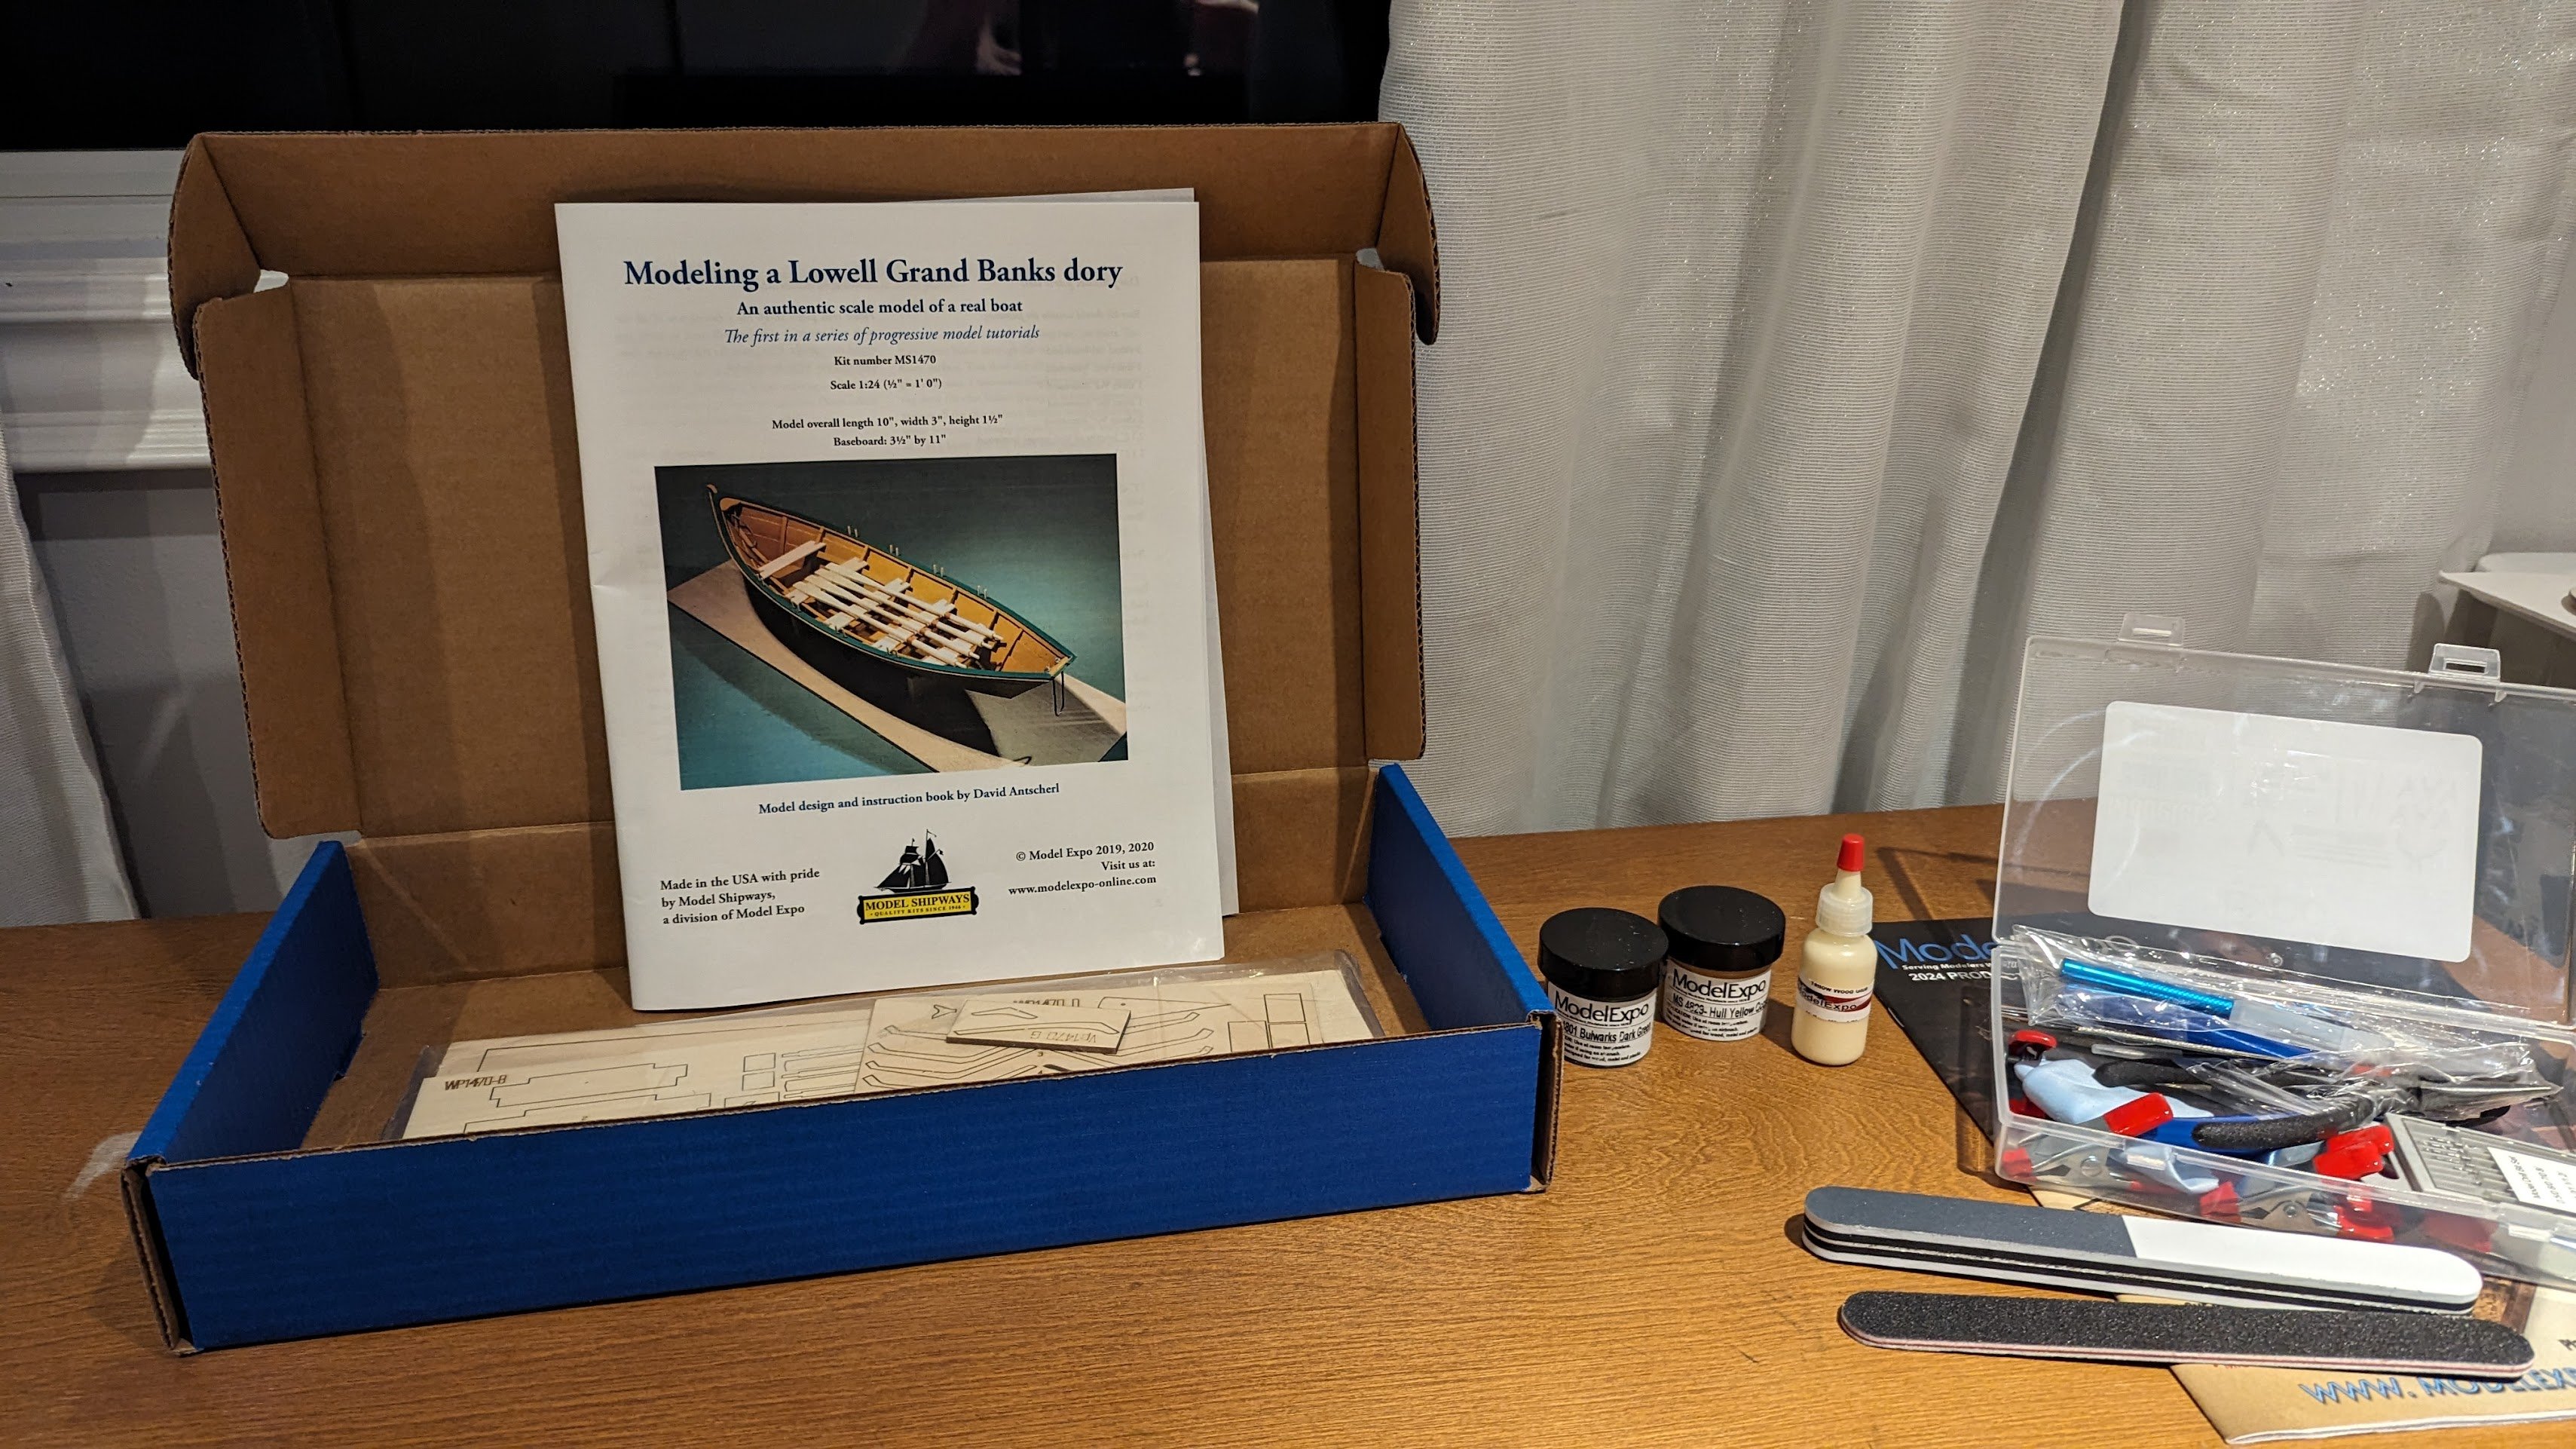
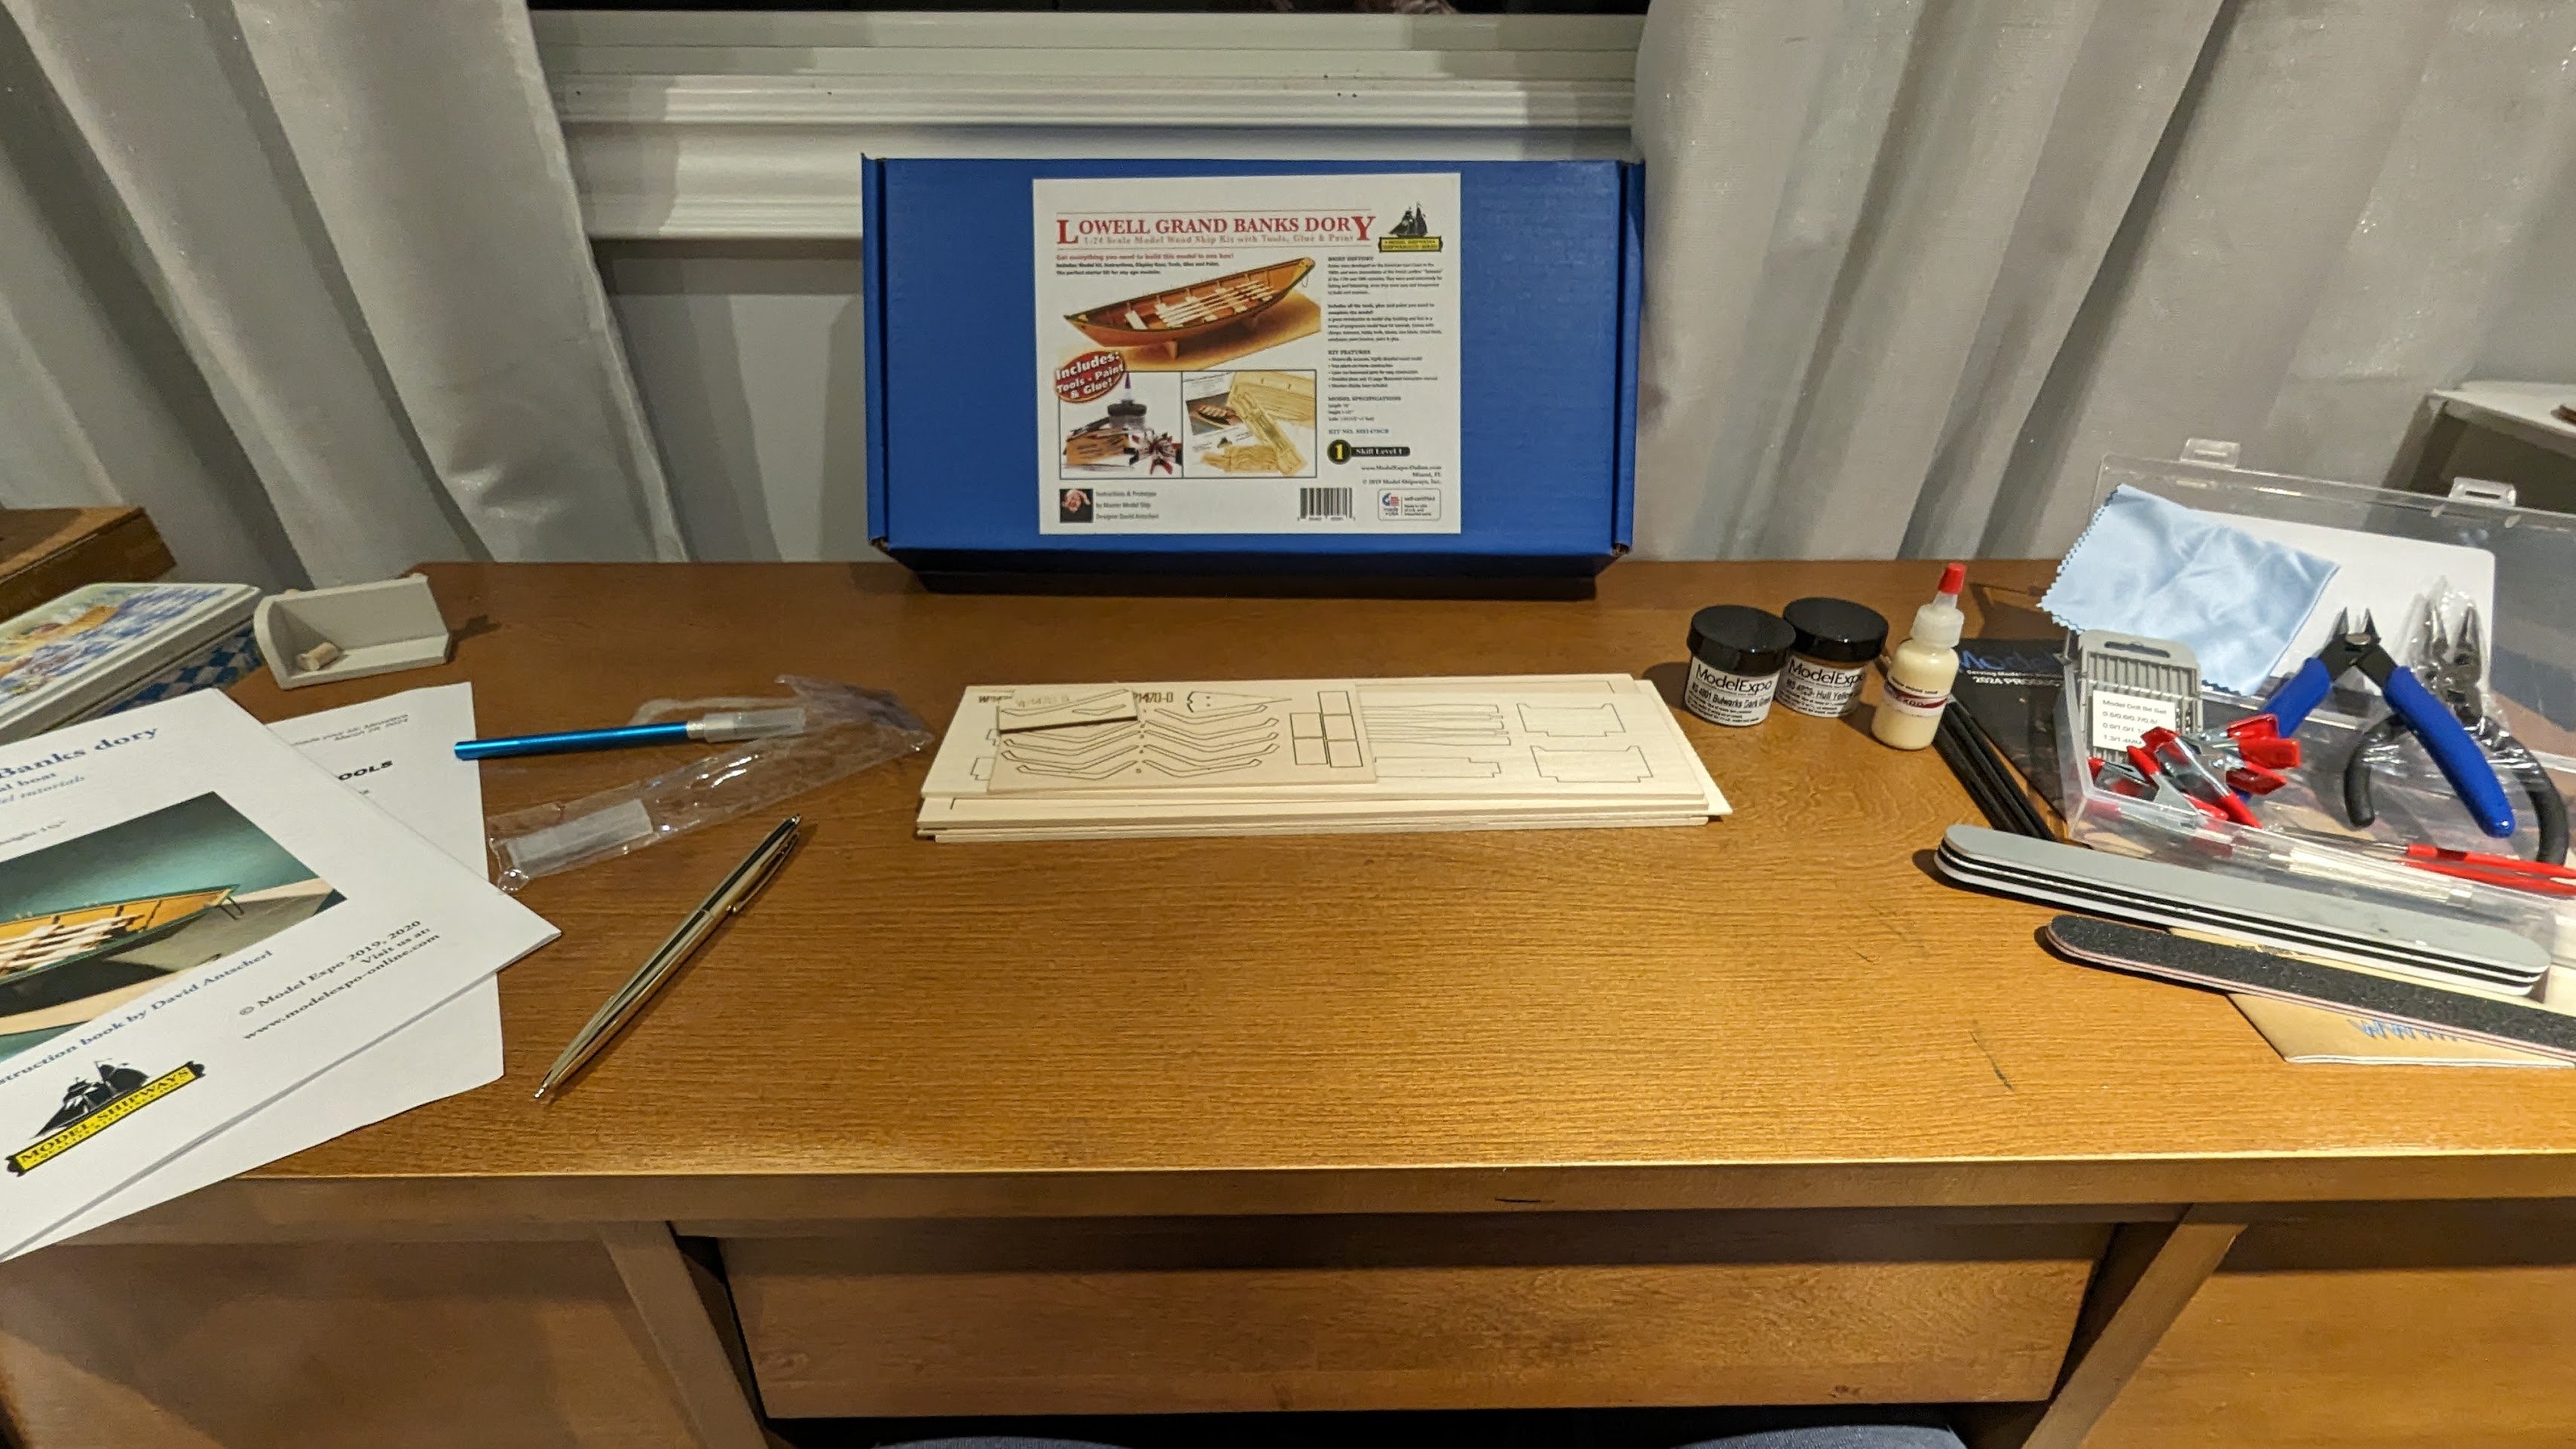
Pre-Log My first kit arrived yesterday. Not the greatest timing since I have a lot going on, but I decided to check things out tonight. I got a little temporary work space set up tonight, and since I have a biopsy early in the morning tomorrow, I didn't get into anything serious. I did open it up and took inventory of all the parts & tools, and started reading into the instruction book. I've been eagerly awaiting this since I ordered it sometime last week. I'll also be getting an OcCre Polaris expecting tomorrow which will come with a cutting board and some other tools this Dory kit didn't come with so I should be in a good spot to start. I'm very excited and a little nervous to get into it, but my mind is a little occupied with my procedure tomorrow. I'll be pretty drugged up; but if it wears off quick enough I may be able to take the first step or two tomorrow evening. If not, I expect to get into it Thursday. I'm not going to list them all, but I appreciate all the other build logs I've read through, they've been incredibly helpful. I may have gotten a little obsessive about going through them and psyched myself out a little bit when it comes to certain steps though! That may not be a terrible thing since I'll be extra aware of common issues. I'm already starting to remind myself that this is my first model and is not going to be perfect, however I still like to take care in what I do.


- 69 replies
-
- 10
-
-
- Lowell Grand Banks Dory
- Model Shipways
- (and 2 more)
-
I have mine in the mail and am browsing builds to learn while I wait. What is CA in this context? some sort of adhesive? Great job on your first build btw!
-
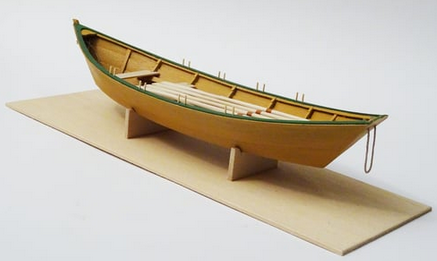
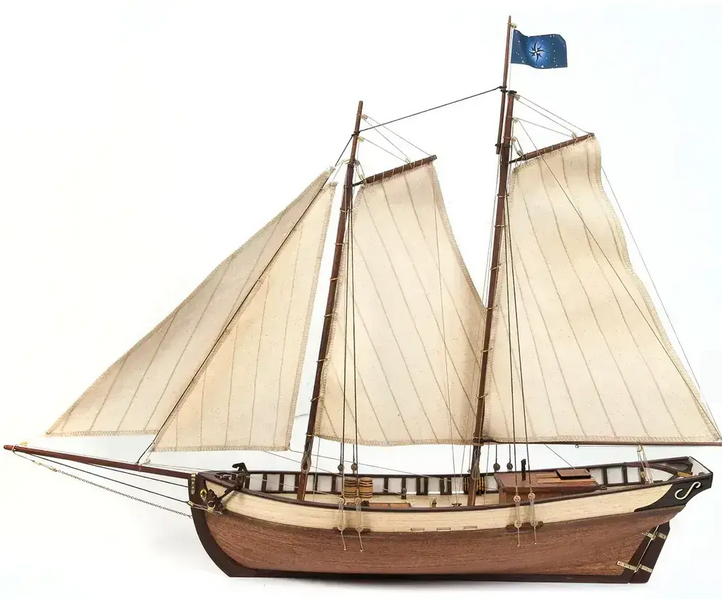
Hello Everyone, I've been thinking of way to keep me off TV, computer, and phone in the evenings and recently decided to try building some models. It's something I've always been fascinated with, but figured I would never have the time or patience to do it until I was retired. I just turned 40 a month ago, and am currently going thorough some medical issues and I think this will be a good escape from that. I live in the countryside with my wife and 3 year old daughter. I have next to no modelling experience, but enjoy building and working with wood. The most interesting thing I've done was make an English long bow style bow and arrows. To start, I was looking at the 3 skill level tiered boats from Model Expo (shipwright series), or the Polaris from OcCre. Both come with tool kits. After a couple indecisive days, I went and ordered both. They seem to have different yet useful tools, so I feel this will be a great start. Even if I end up moving onto other things and not finishing, it won't be a terrible financial loss. My plan is to build the shipwright series dory (top picture), then order the skill II and skill III kits together. I'll either complete both of those before going onto the Polaris (bottom picture) or do the Polaris in between (I noted the OcCre Polaris says it takes 120 hours and after speaking with Model Expo, it seems the dory can be completed "in a few evenings"). Any comments about that are welcome, for now I'll just play it by ear. I read the post about finding a mentor, I'm not sure how to go about that, but I'll ask around should I really get into this. (or feel free to jump in if someones looking for a protege 🙃) I'm looking forward to being here, and very excited for the first models to arrive. I hope this hobby sticks, and strikes a nice balance between challenging enough to keep the boredom away, but I can pick the skills up quick enough to not walk away frustrated.
- 13 replies
-
- 11
-
.jpg.fa1af7813e999fc33dd20c739cedbb8f.jpg)
.jpg.e9a2fe899198af66232acef0bdadac28.jpg)