Frecap
-
Posts
84 -
Joined
-
Last visited
-
 Russ2025 reacted to a post in a topic:
HMS Sphinx 1775 by Ronald-V - Vanguard Models - 1:64
Russ2025 reacted to a post in a topic:
HMS Sphinx 1775 by Ronald-V - Vanguard Models - 1:64
-
Ronald-V reacted to a post in a topic:
HMS Sphinx 1775 by Ronald-V - Vanguard Models - 1:64
-
 Ronald, it's great that you're so meticulous about the little things! Even if it doesn't seem like it, we're doing it for ourselves!
 -
Frecap reacted to a post in a topic:
HMS Sphinx 1775 by Ronald-V - Vanguard Models - 1:64
-
Frecap reacted to a post in a topic:
HMS Sphinx 1775 by Ronald-V - Vanguard Models - 1:64
-
Frecap reacted to a post in a topic:
HMS Sphinx 1775 by Ronald-V - Vanguard Models - 1:64
-
vvvjames reacted to a post in a topic:
HMS Sphinx 1775 by Ronald-V - Vanguard Models - 1:64
-
Ronald-V reacted to a post in a topic:
HMS Sphinx 1775 by Ronald-V - Vanguard Models - 1:64
-
I looked at the photos on the Vanguard Models website, and the trims are not painted. It looks good overall. But you have a very beautiful color for the columns, and I think that with careful painting to avoid damaging the relief, the overall look will be stunning! It's worth trying) Yours sincerely, FriCap
-
 Ronald-V reacted to a post in a topic:
HMS Sphinx 1775 by Ronald-V - Vanguard Models - 1:64
Ronald-V reacted to a post in a topic:
HMS Sphinx 1775 by Ronald-V - Vanguard Models - 1:64
-
I'm sorry, Ronald, but I really misunderstood! Translation costs( And in fact, In my opinion, painted trims on the Brunnels model look more harmonious. Perhaps it depends on the perception of the model as a whole, but also on the fact that they are in the same color scheme with the columns between the windows. Although, on your model, the trims color is different from the Blue Ensign color. If, as you say, you have removed the trims so far, maybe try to paint one strip and attach it, see how it turns out? Yours sincerely, FriCap
-
Ronald-V reacted to a post in a topic:
HMS Sphinx 1775 by Ronald-V - Vanguard Models - 1:64
-
Ronald, Hi! In my opinion, a three-dimensional decor looks much better than an applique. I think that it is unlikely that you will use flat images when building such a magnificent model. Yes, you've talked about it yourself) Yours sincerely, FriCap
-
 Frecap reacted to a post in a topic:
HMS Sphinx 1775 by Ronald-V - Vanguard Models - 1:64
Frecap reacted to a post in a topic:
HMS Sphinx 1775 by Ronald-V - Vanguard Models - 1:64
-
... I visited the Vanguard Models website, looked at their products – it's very cool! There are many excellent models, and most importantly, there is an example – the assembly of HMS Sphinx by Ronald-V. Unfortunately, we do not have any sets from this company for sale!( But time is passing, and I think I will be busy building Bellona for a long time, and maybe something will change for the better... Sincerely yours, FriCap
-
Hi, Nearshore! Thank you for the feedback!) Yes, I went beyond the scope of the Korel kit, although I didn't think about it when I started. The photos of the model from this kit inspired me. However, I faced some challenges, such as not understanding how to lay the planking layers, especially in the stern area, when I first started building the hull. When I visited this forum for the first time, I came across a wealth of information from your build log and the Harlequin build log. Looking at the photos from these topics helped me do my work. Then, when I looked at the photos of the models from the museum, I wanted to do some things differently from the set. This, of course, complicates the design and greatly increases the work time. But we are not bound by any regulations, we are just doing what we love, so there is no rush. Your work continues to inspire me and help me make the right decisions. For example, I am currently working on a head, and you have many excellent photos taken from all possible angles. So, yes, this resource helps us and I hope it will help many others who will build this and other models. I wish you good health, patience, and success in your creative endeavors! Yours sincerely, FriCap
-
Frecap reacted to a post in a topic:
HMS Bellona by Nearshore - Corel - 1:100
-
Nearshore reacted to a post in a topic:
HMS Bellona by Frecap - Corel - 1:100
-
Nearshore reacted to a post in a topic:
HMS Bellona by Nearshore - Corel - 1:100
-
yvesvidal reacted to a post in a topic:
HMS Bellona by Frecap - Corel - 1:100
-
Ronald-V reacted to a post in a topic:
HMS Bellona by Frecap - Corel - 1:100
-
Frecap reacted to a post in a topic:
HMS Bellona by Frecap - Corel - 1:100
-
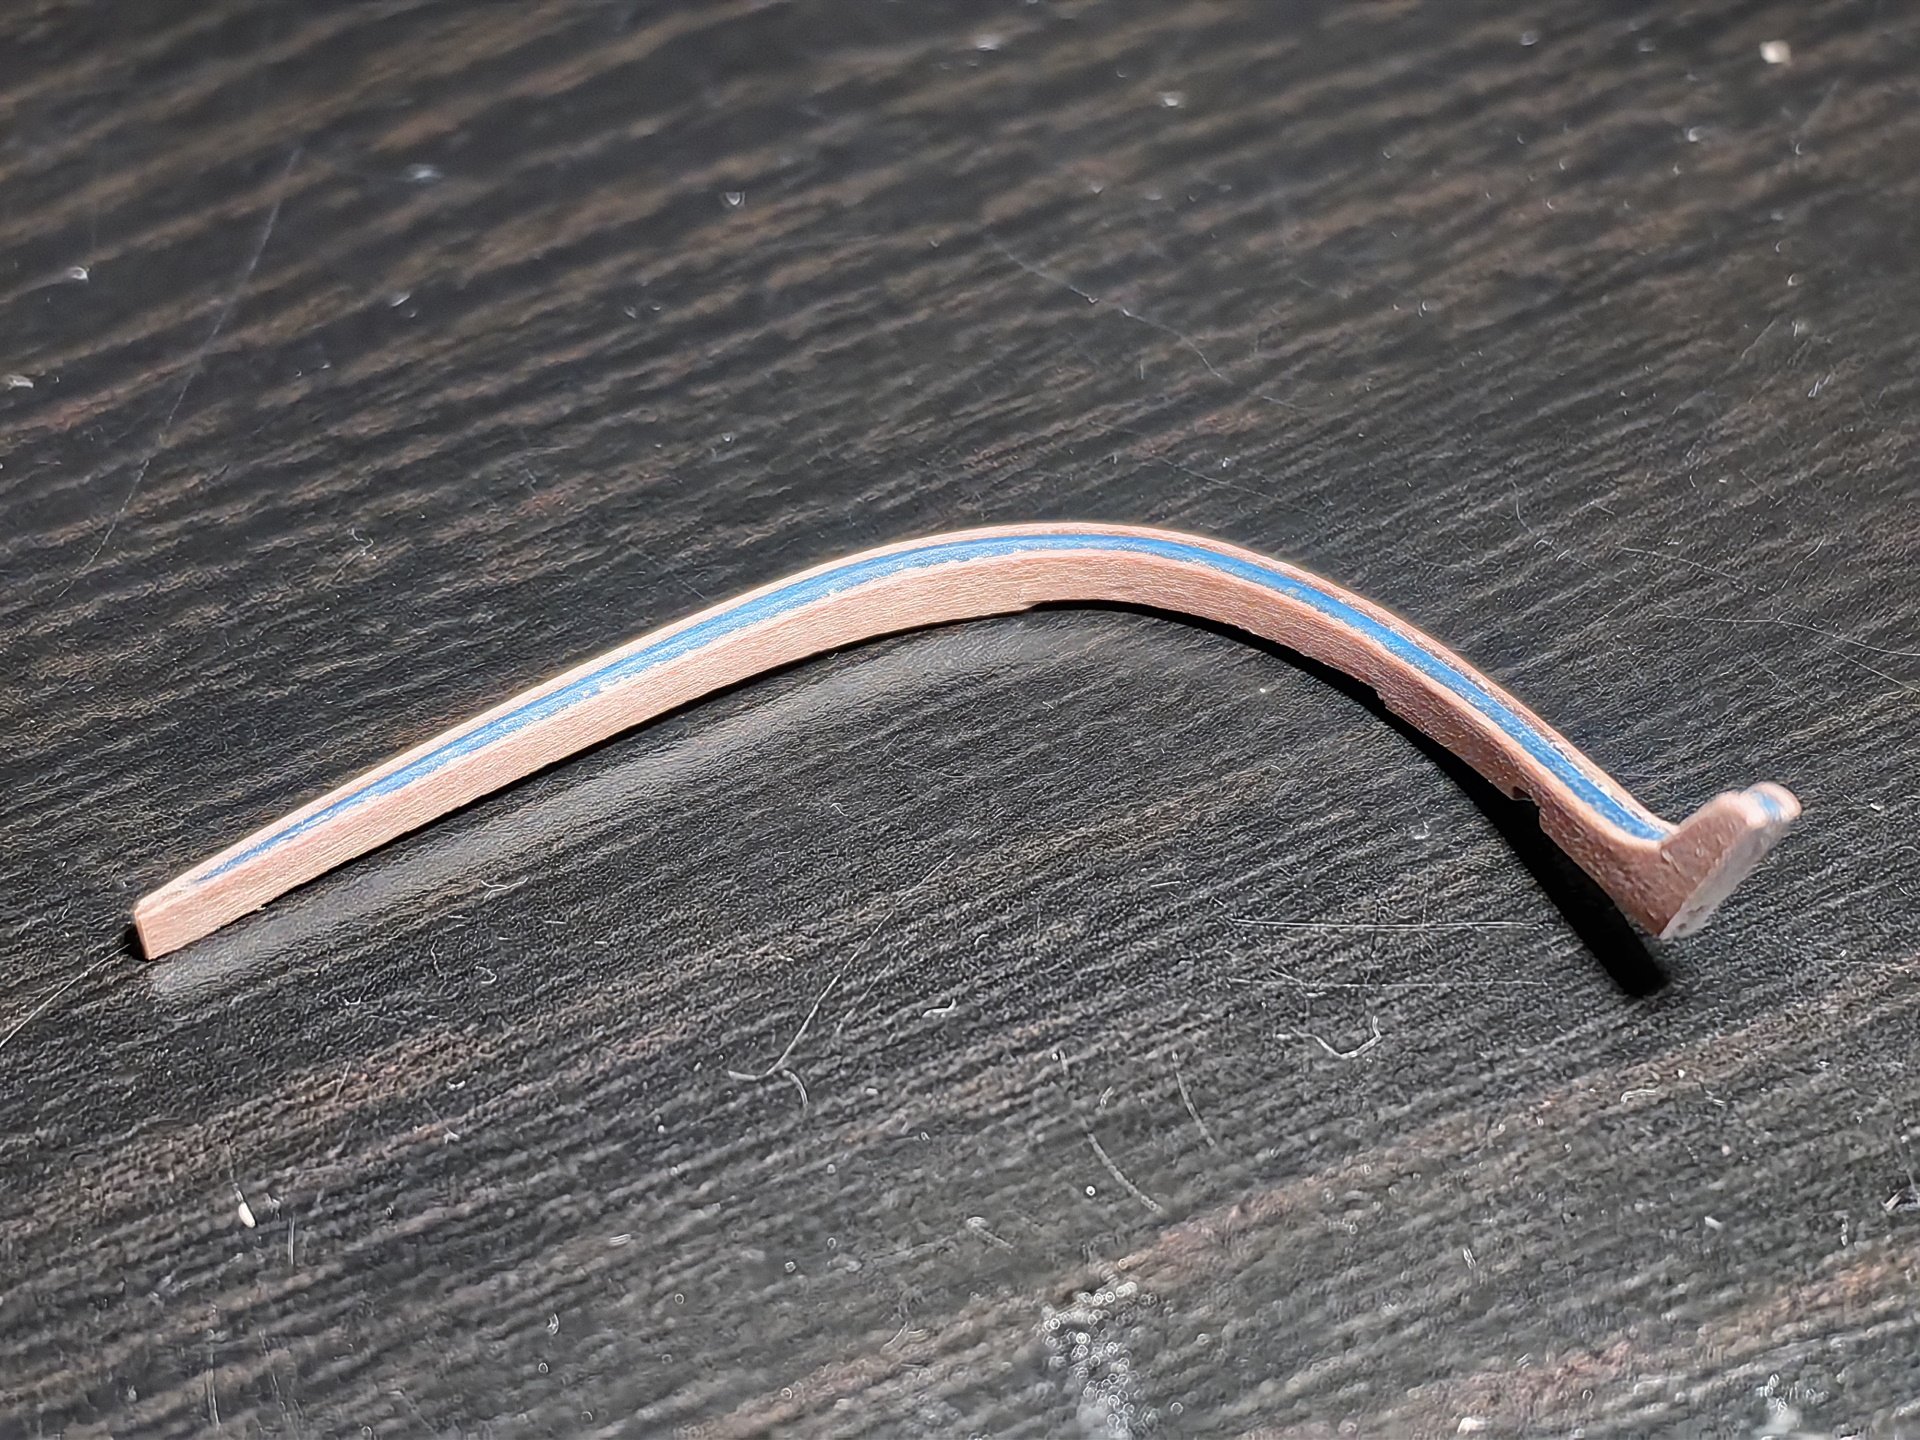
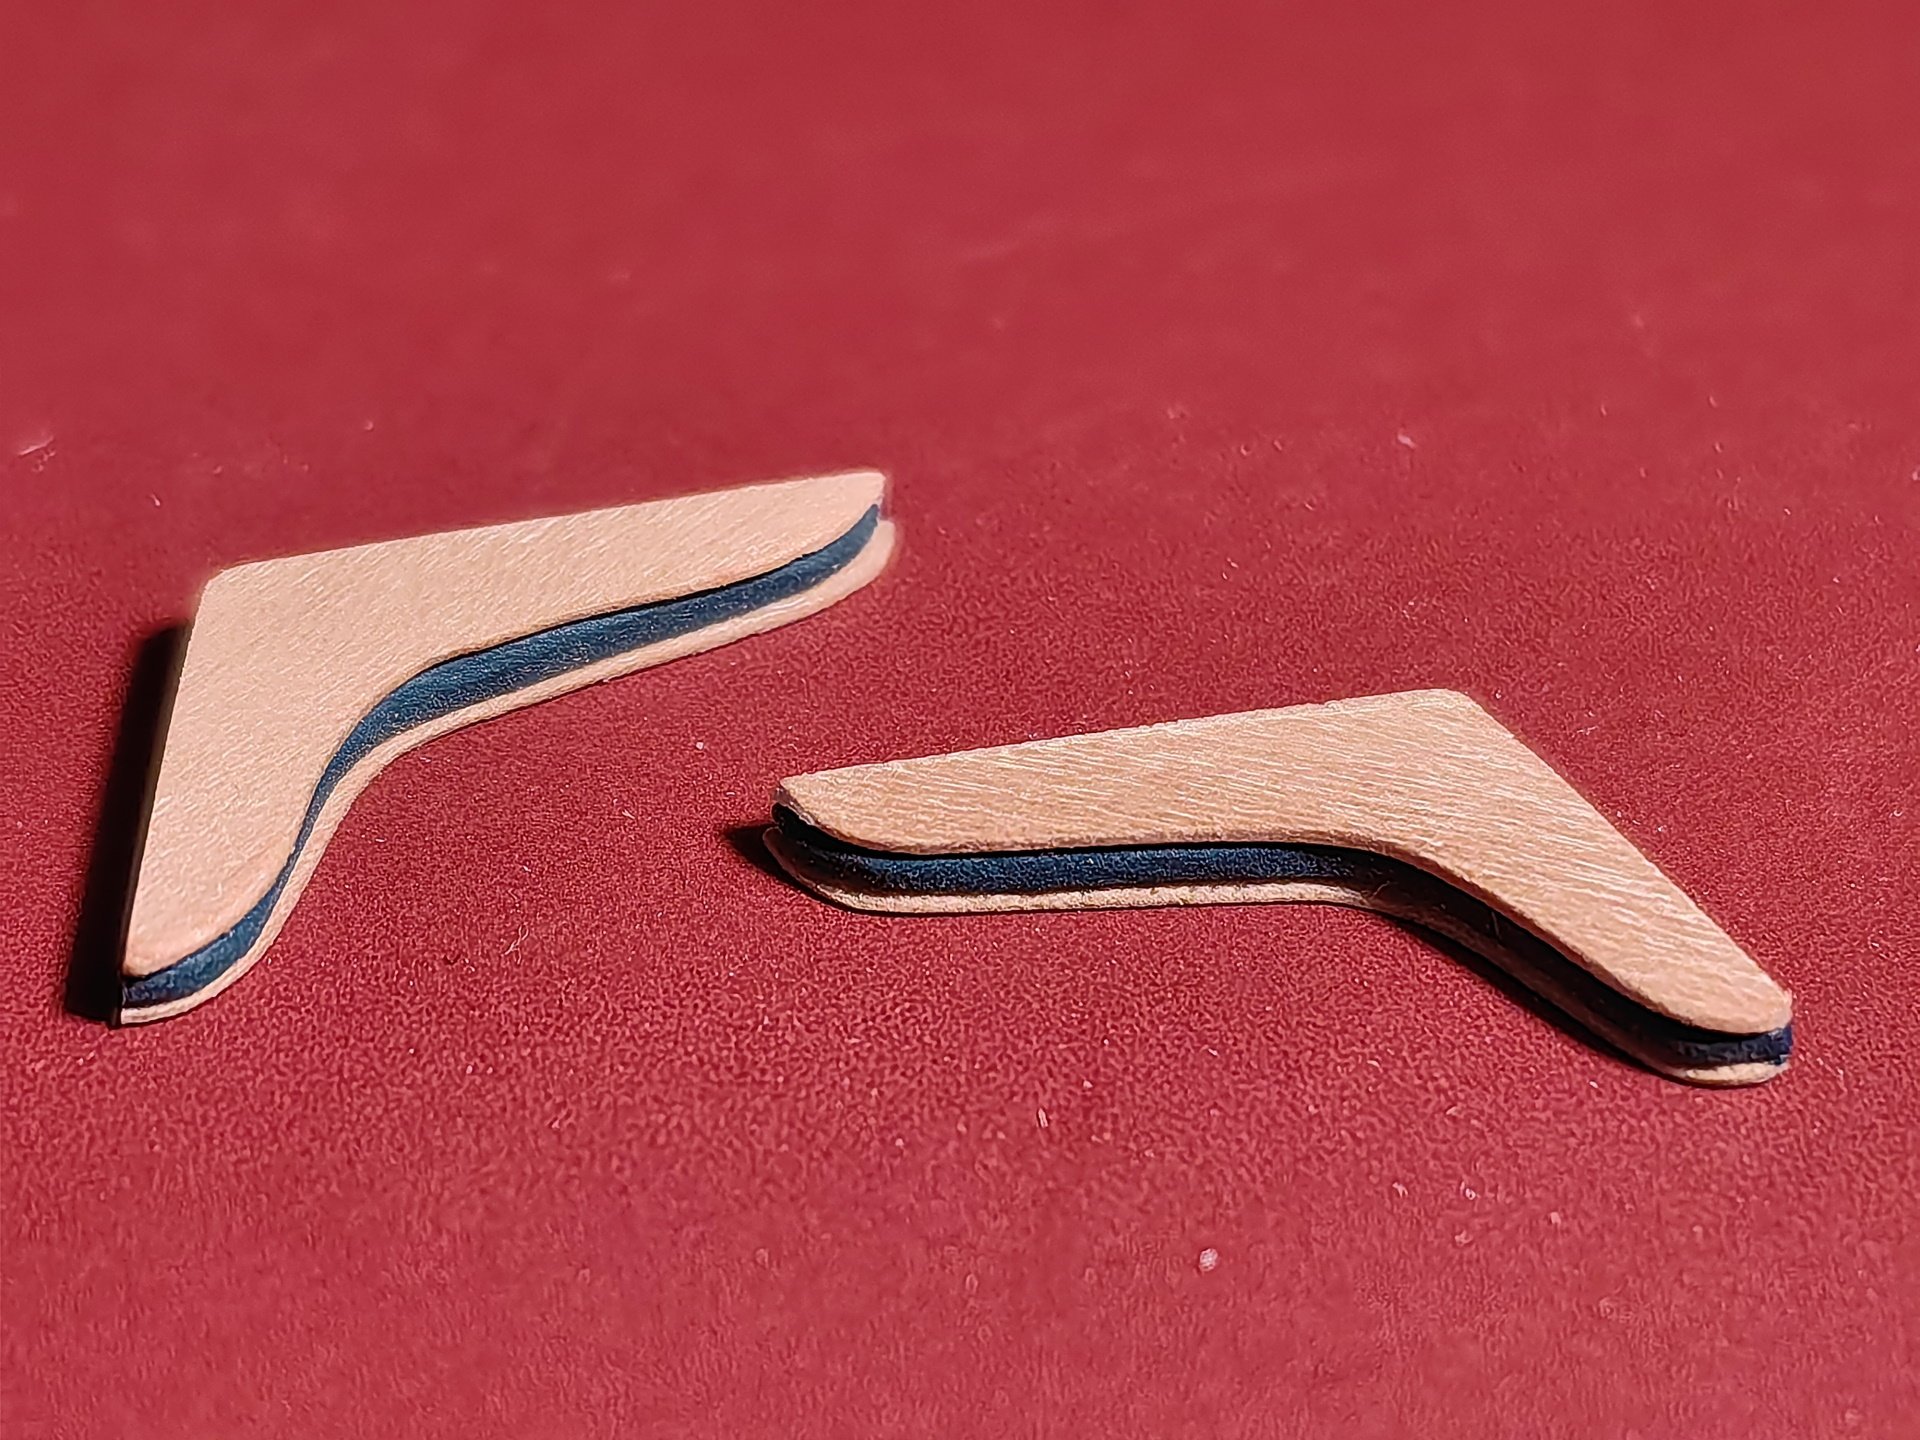
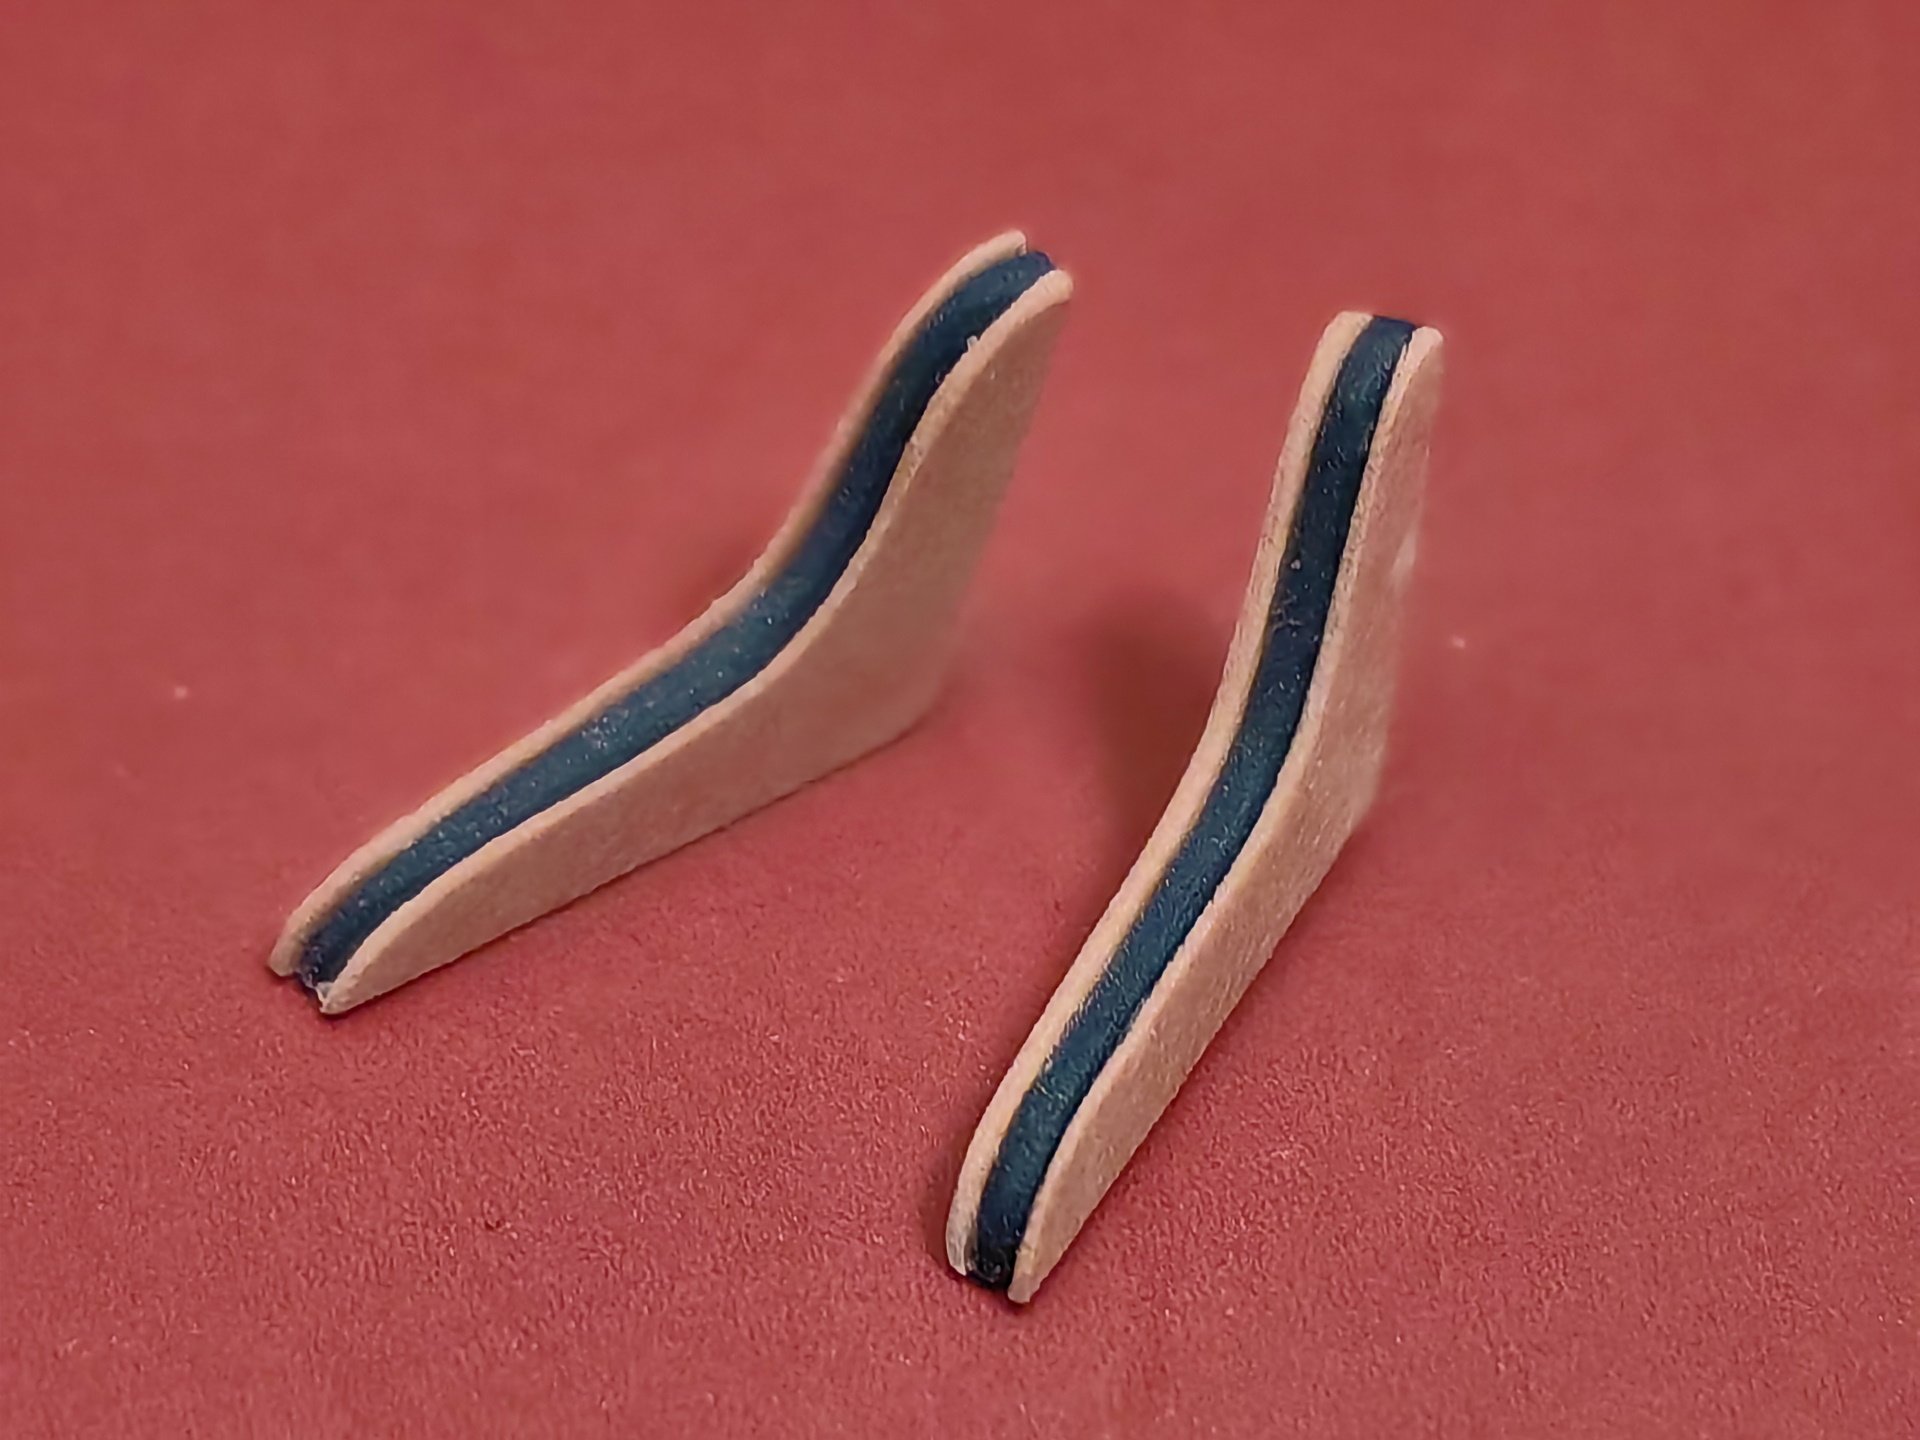
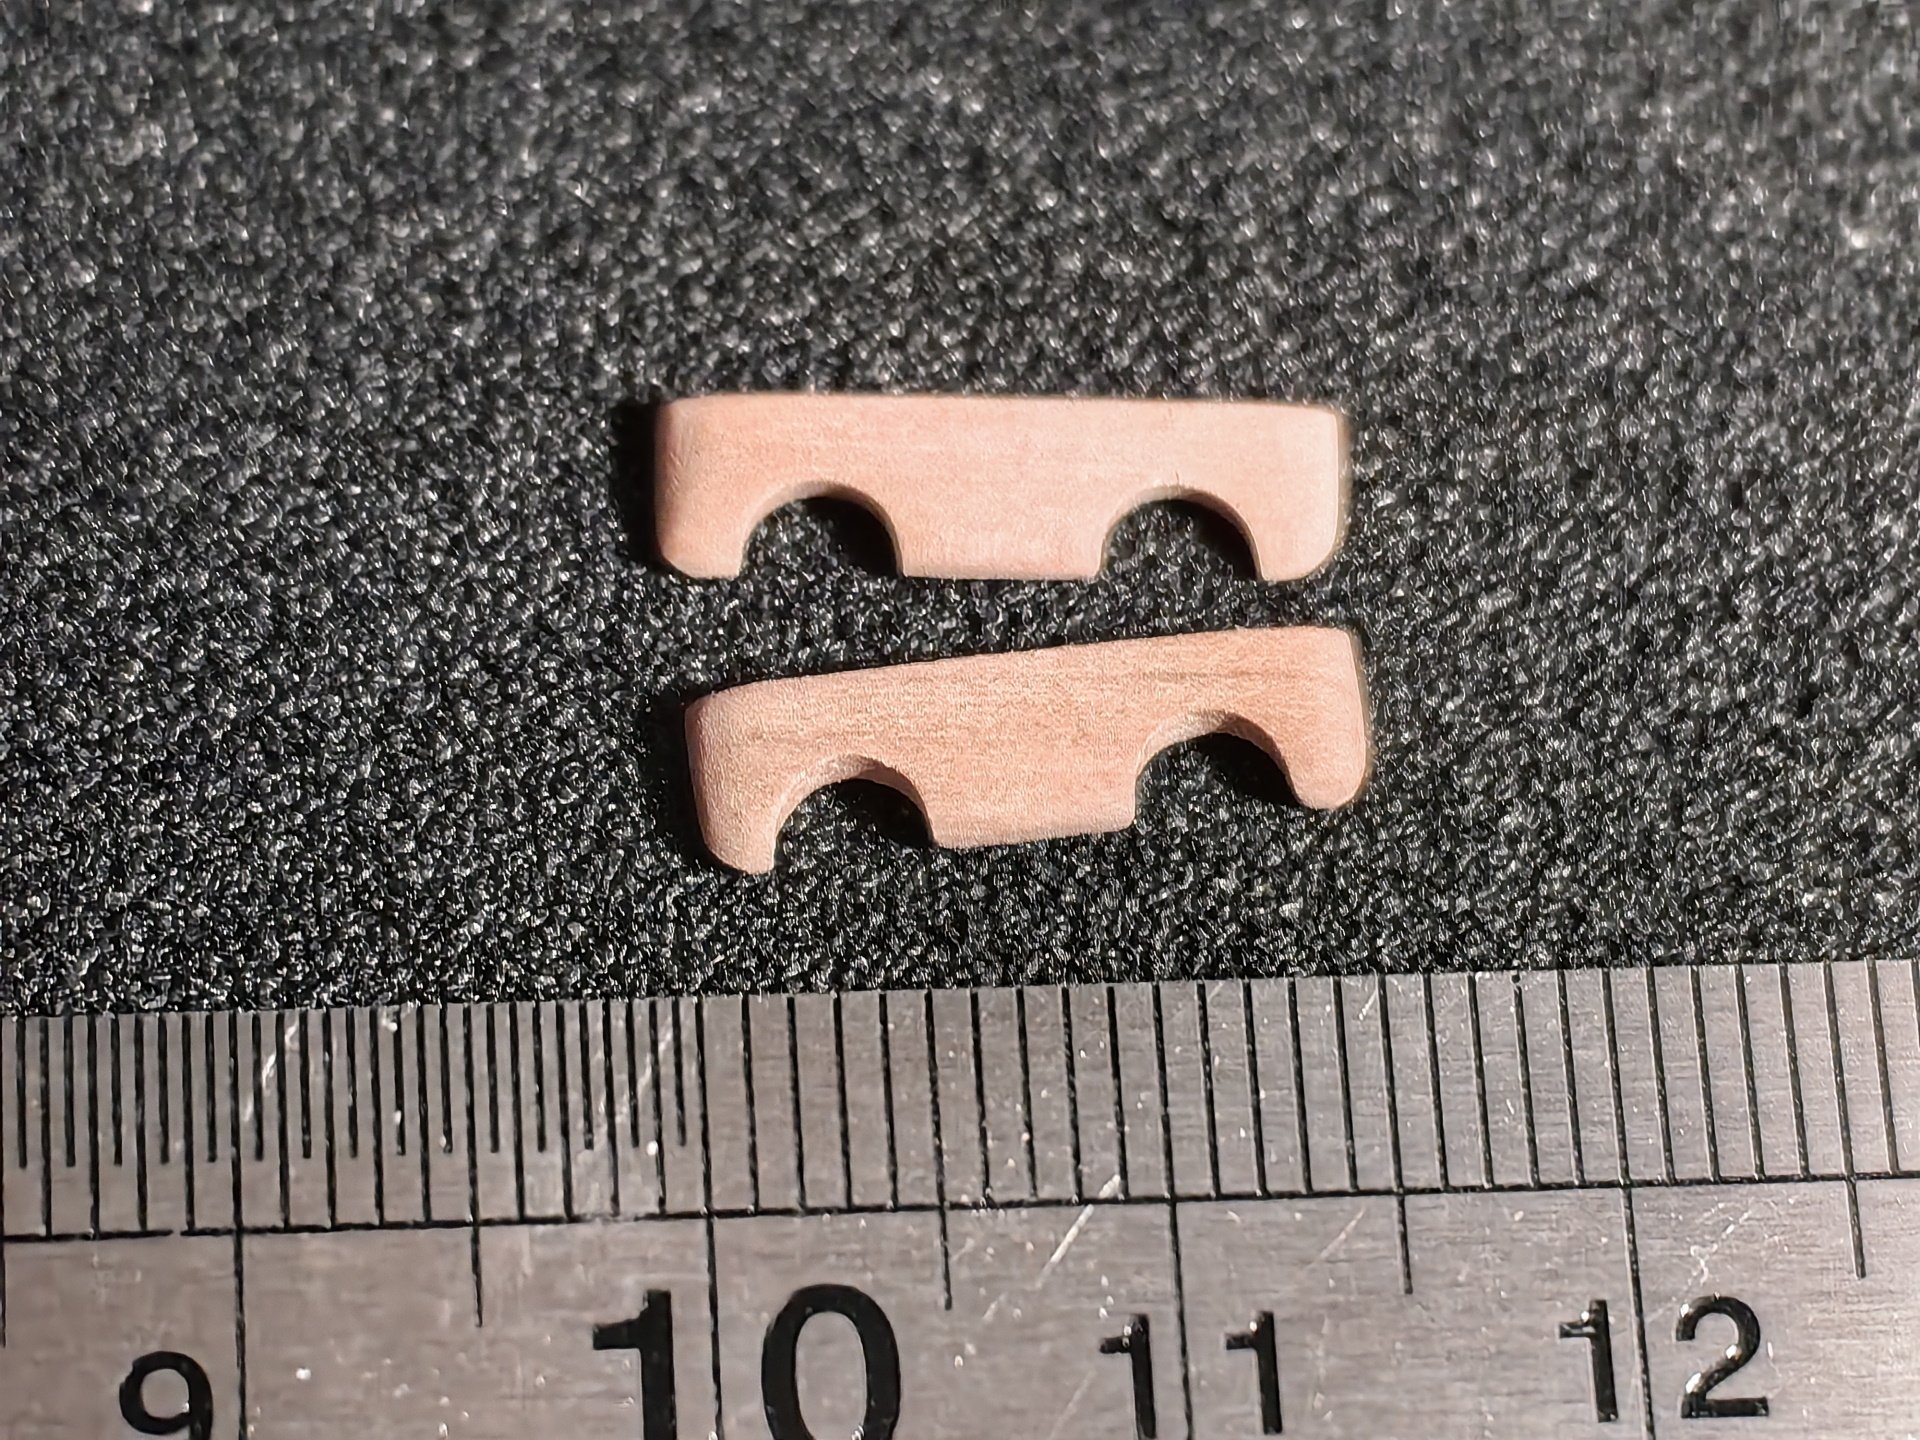
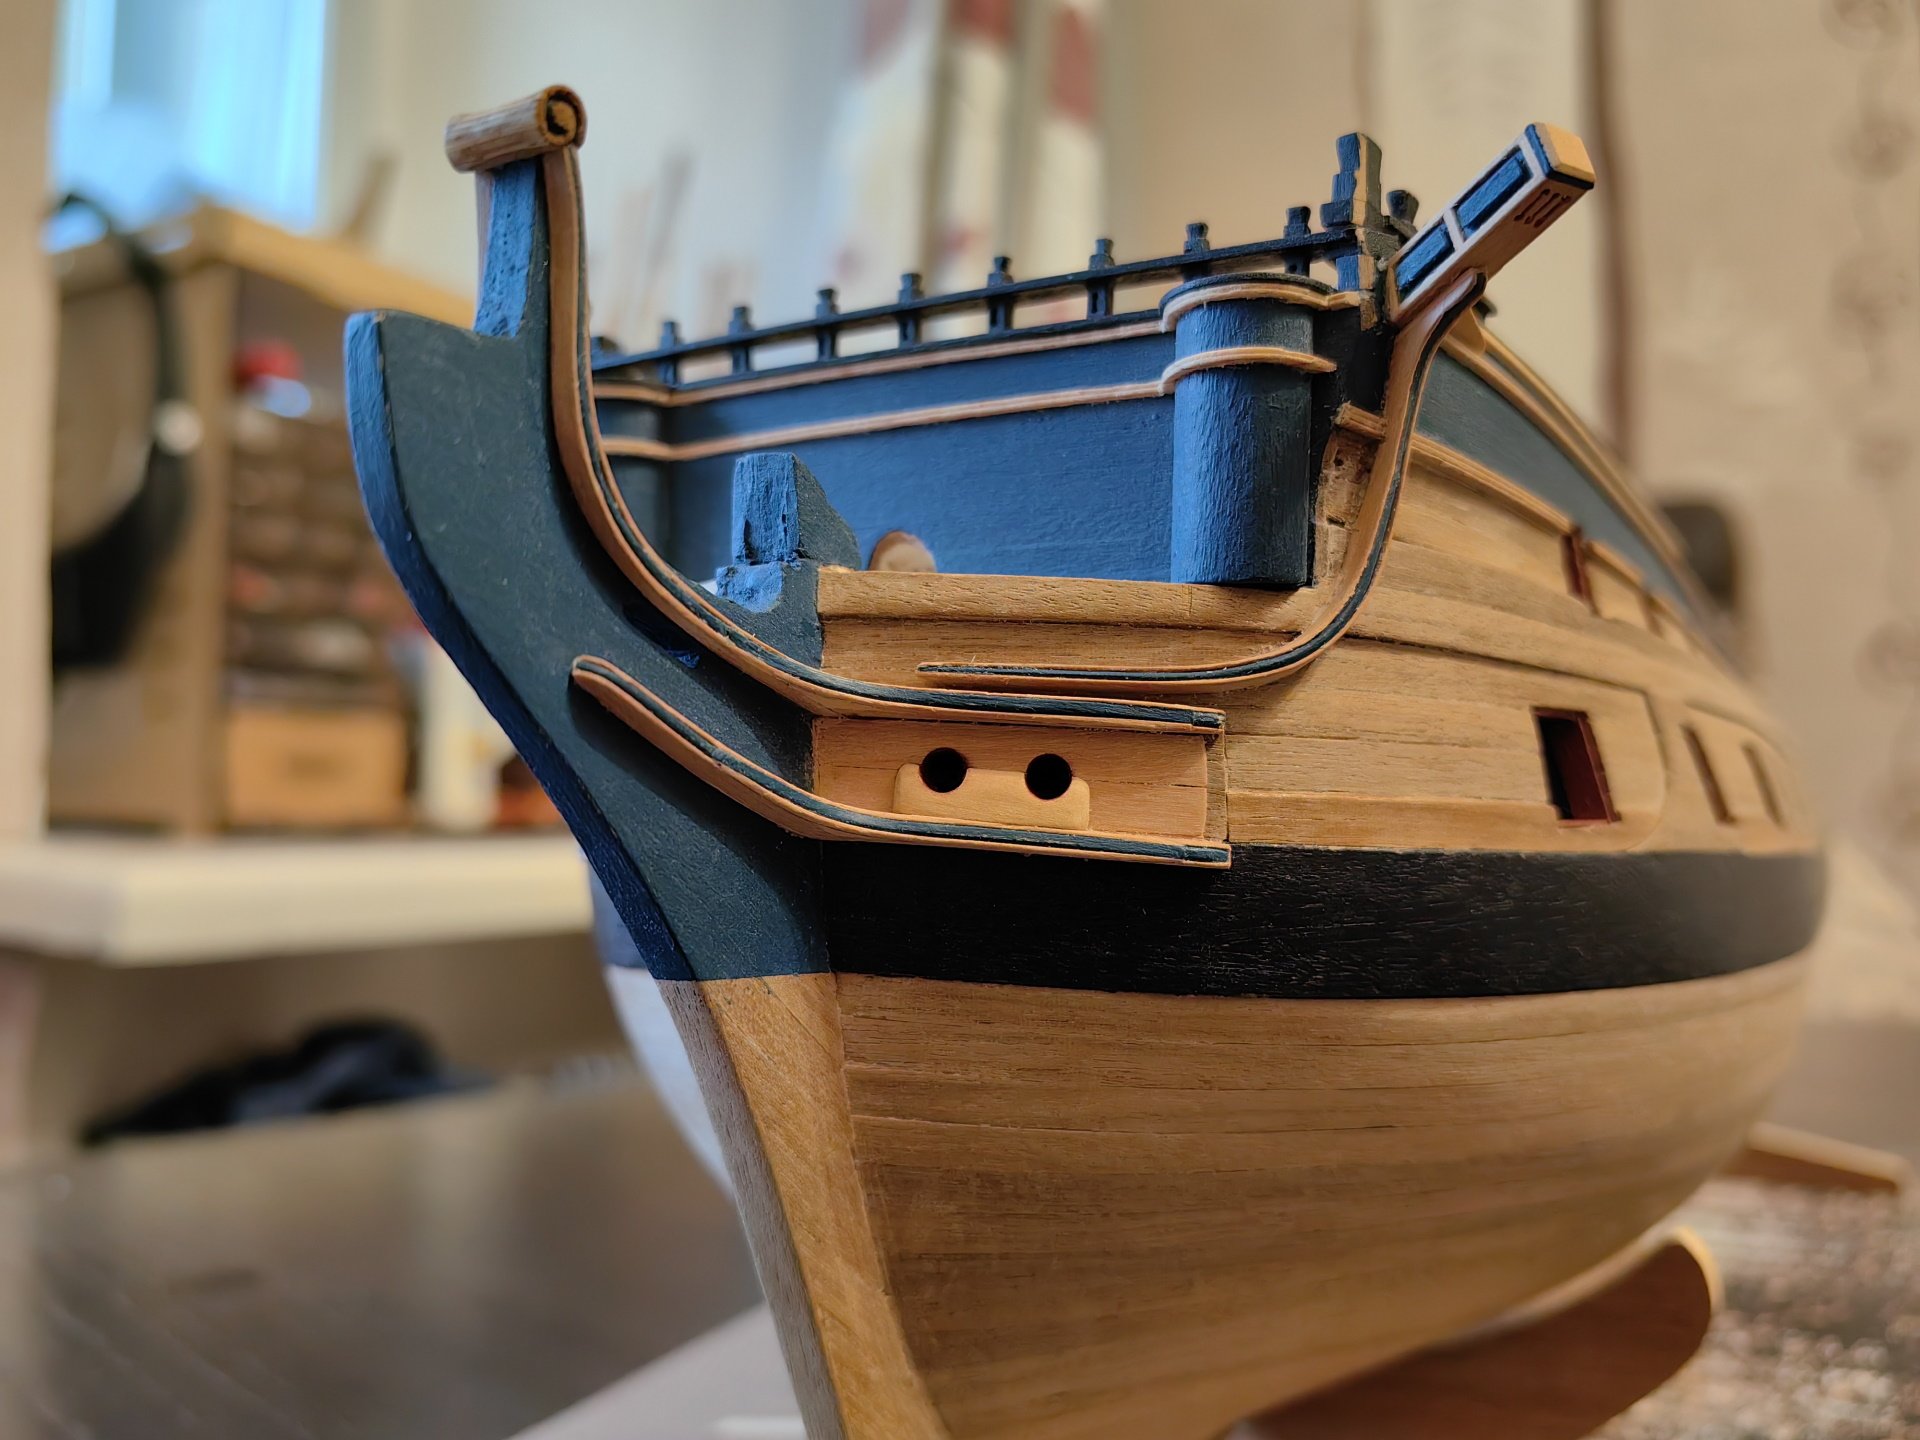
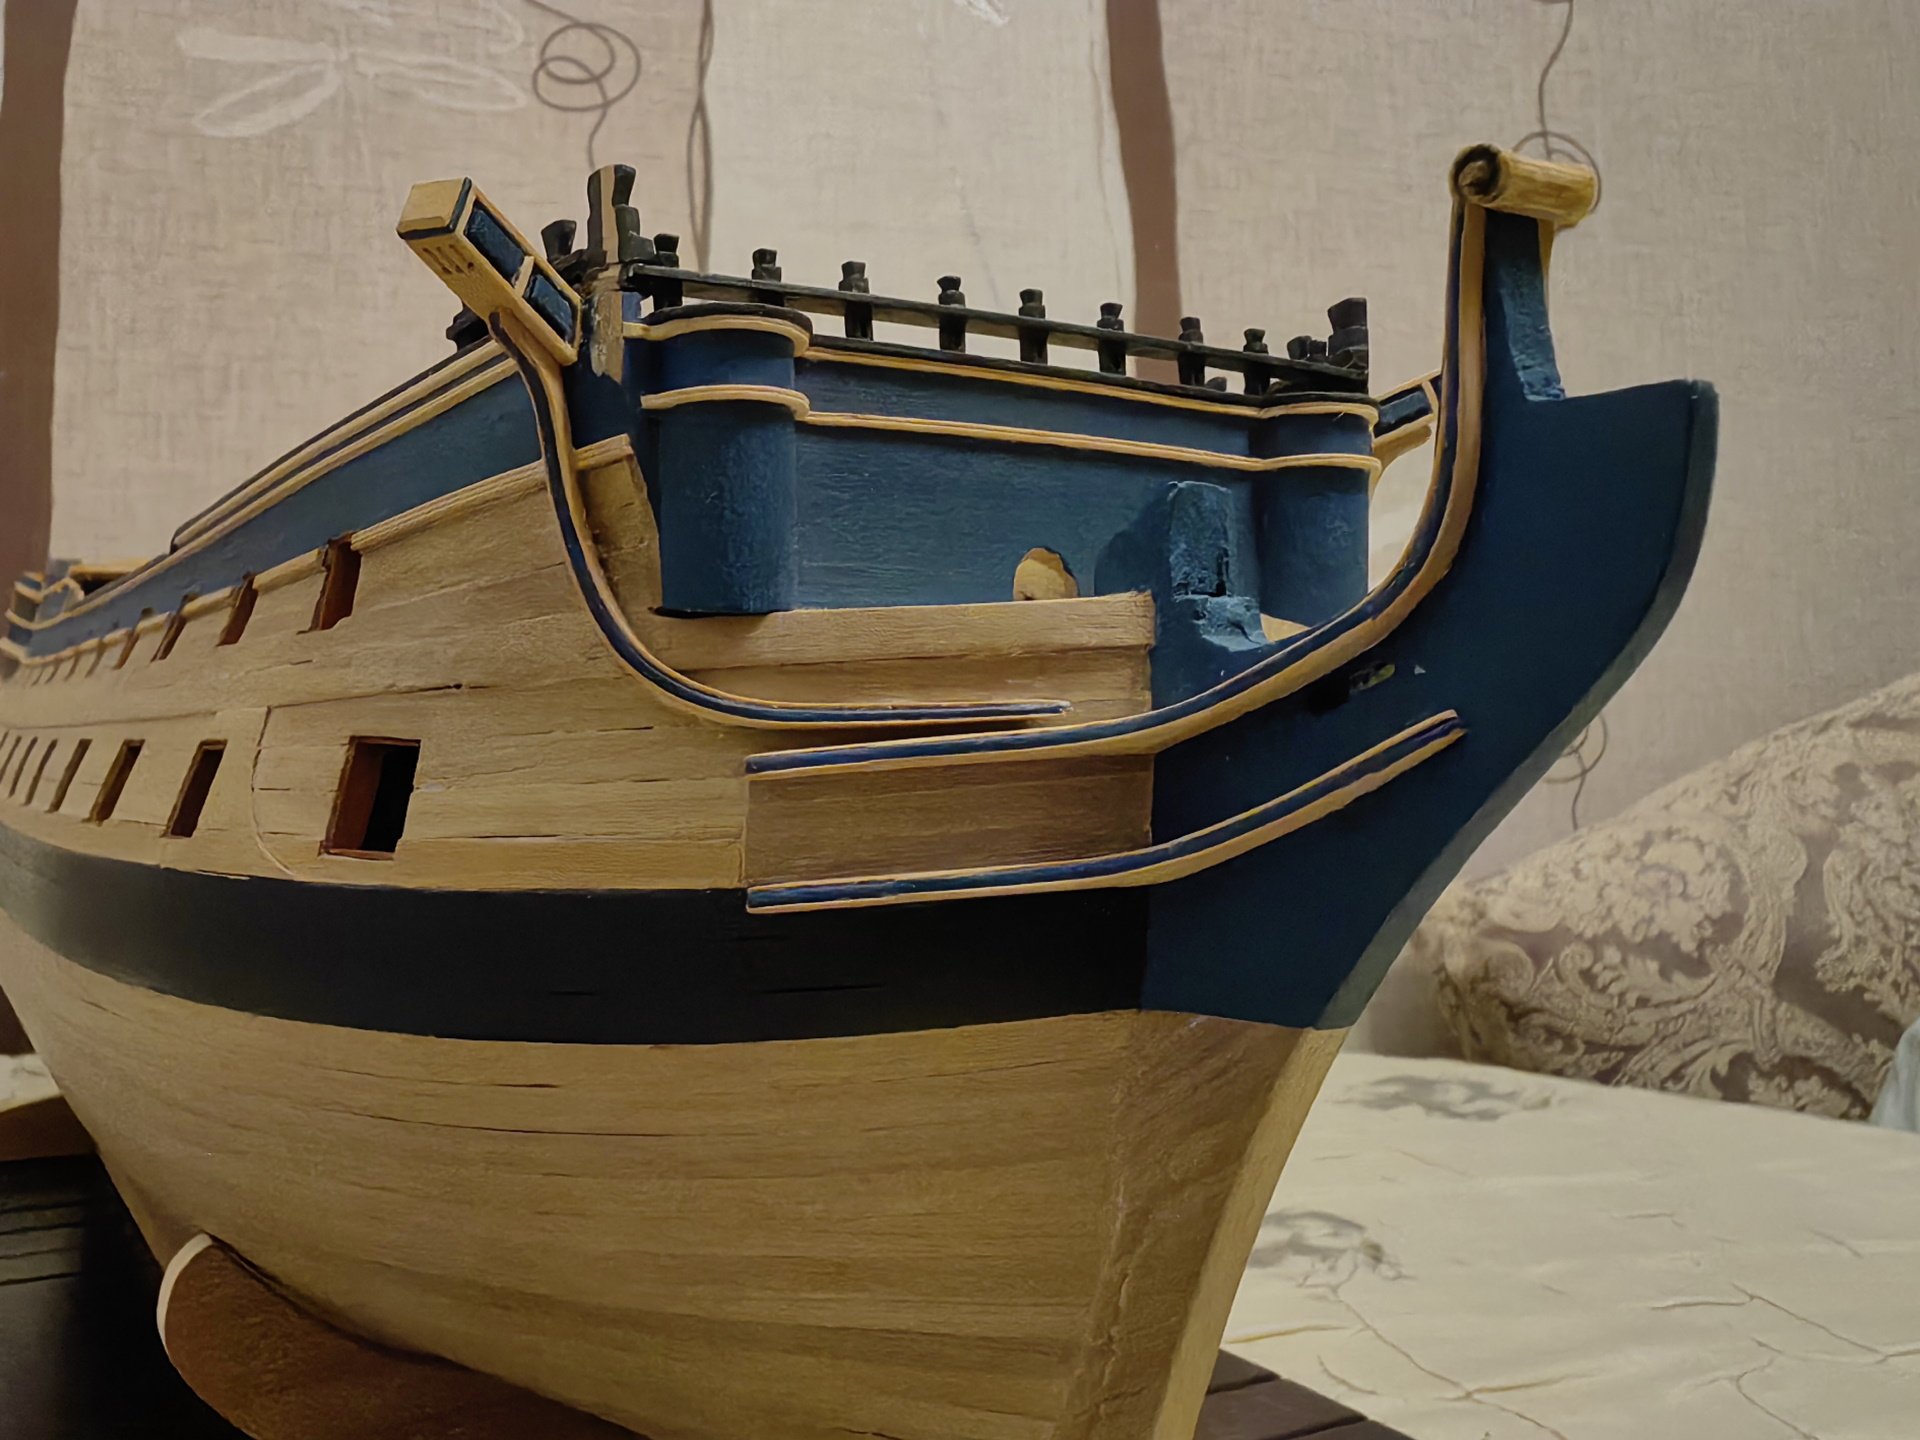
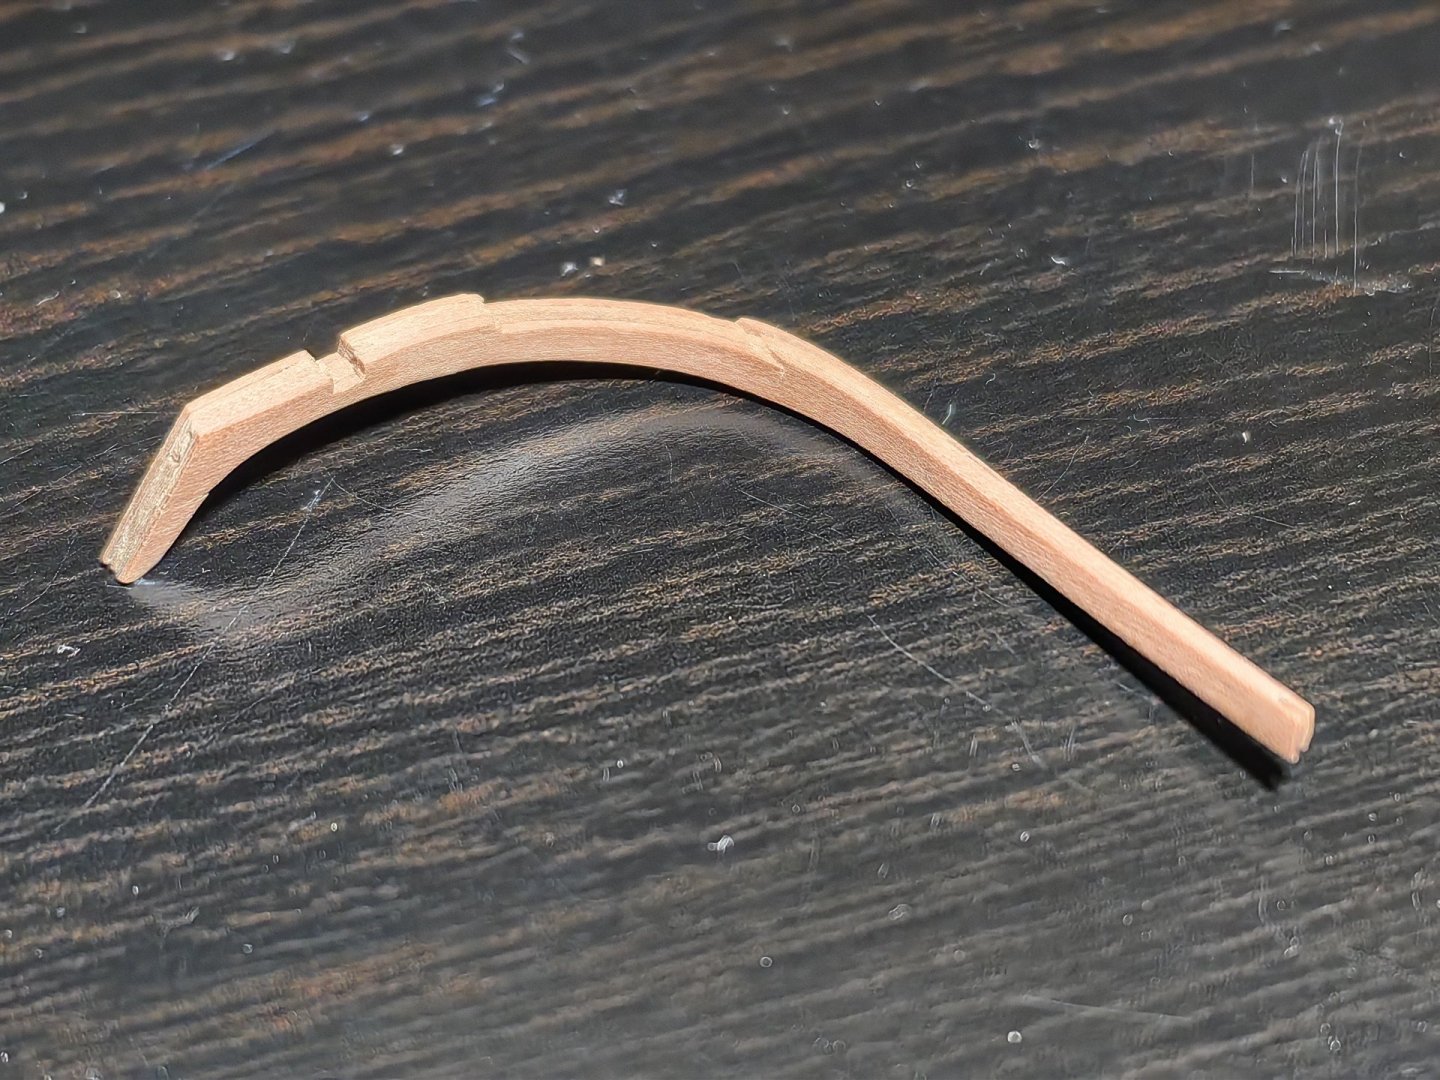
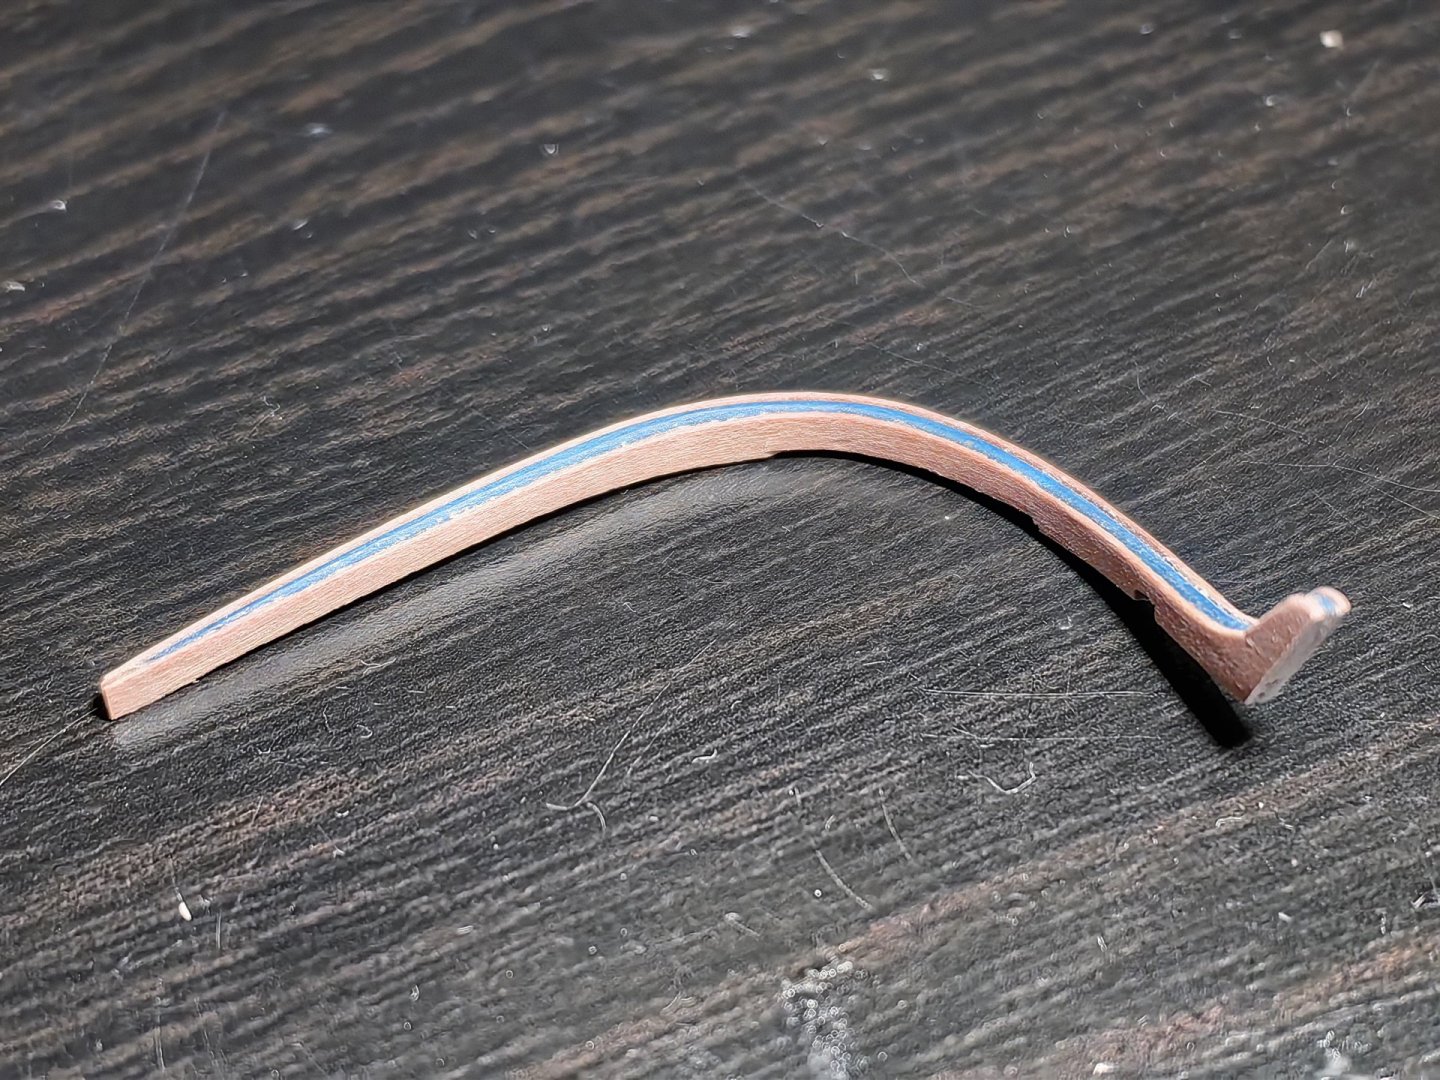
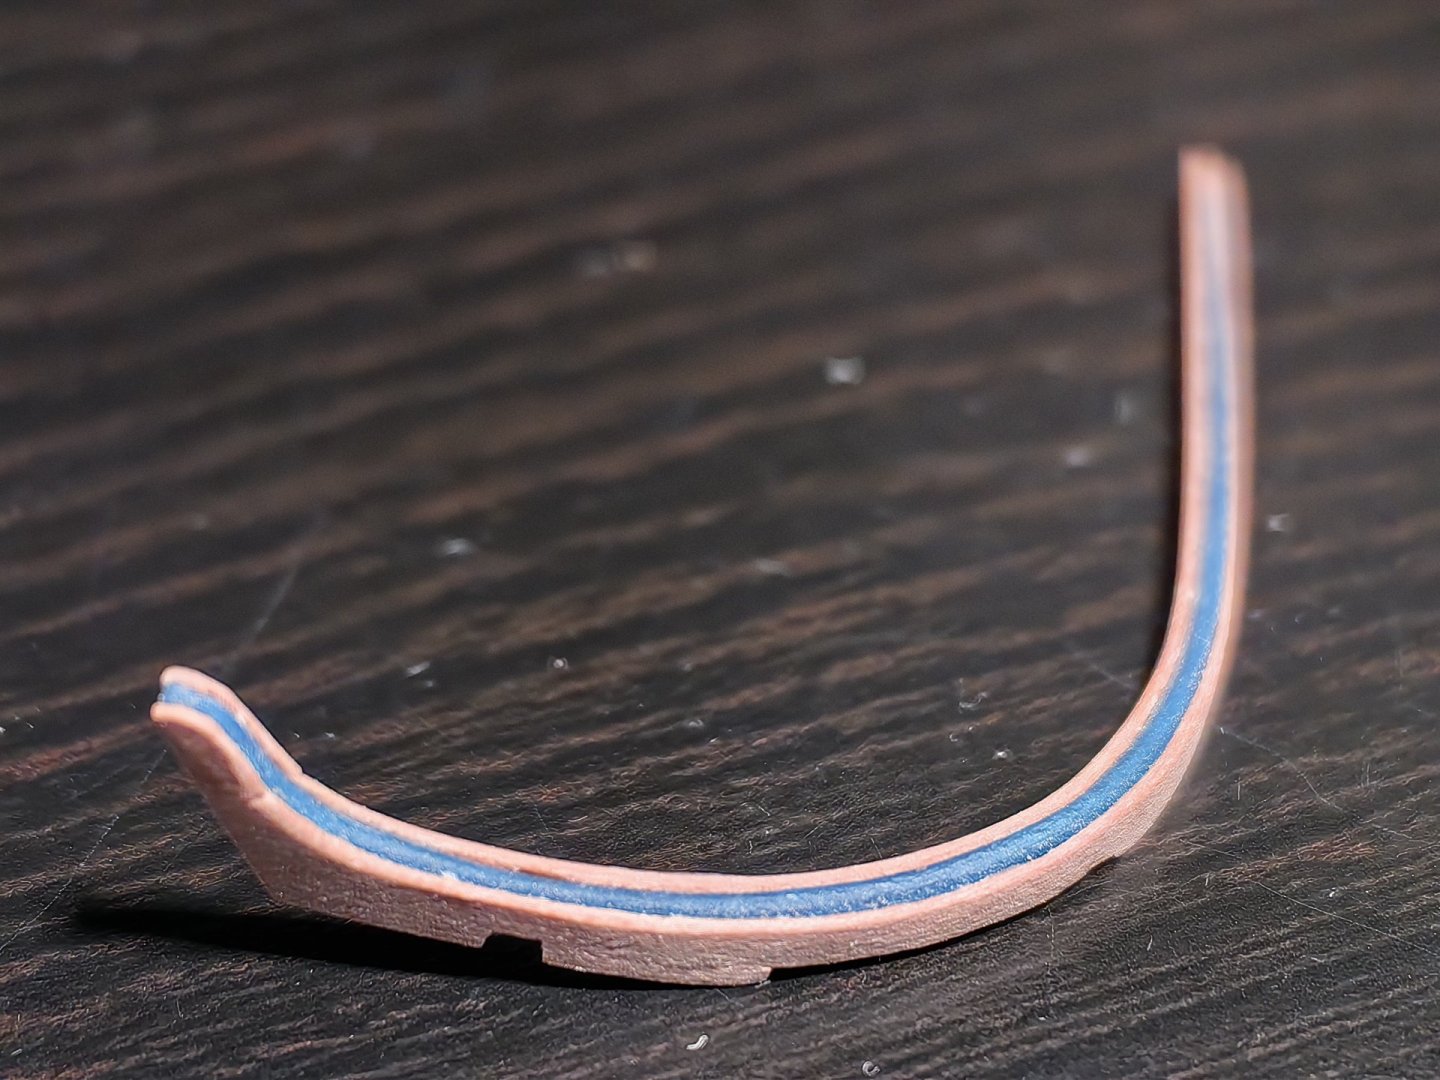
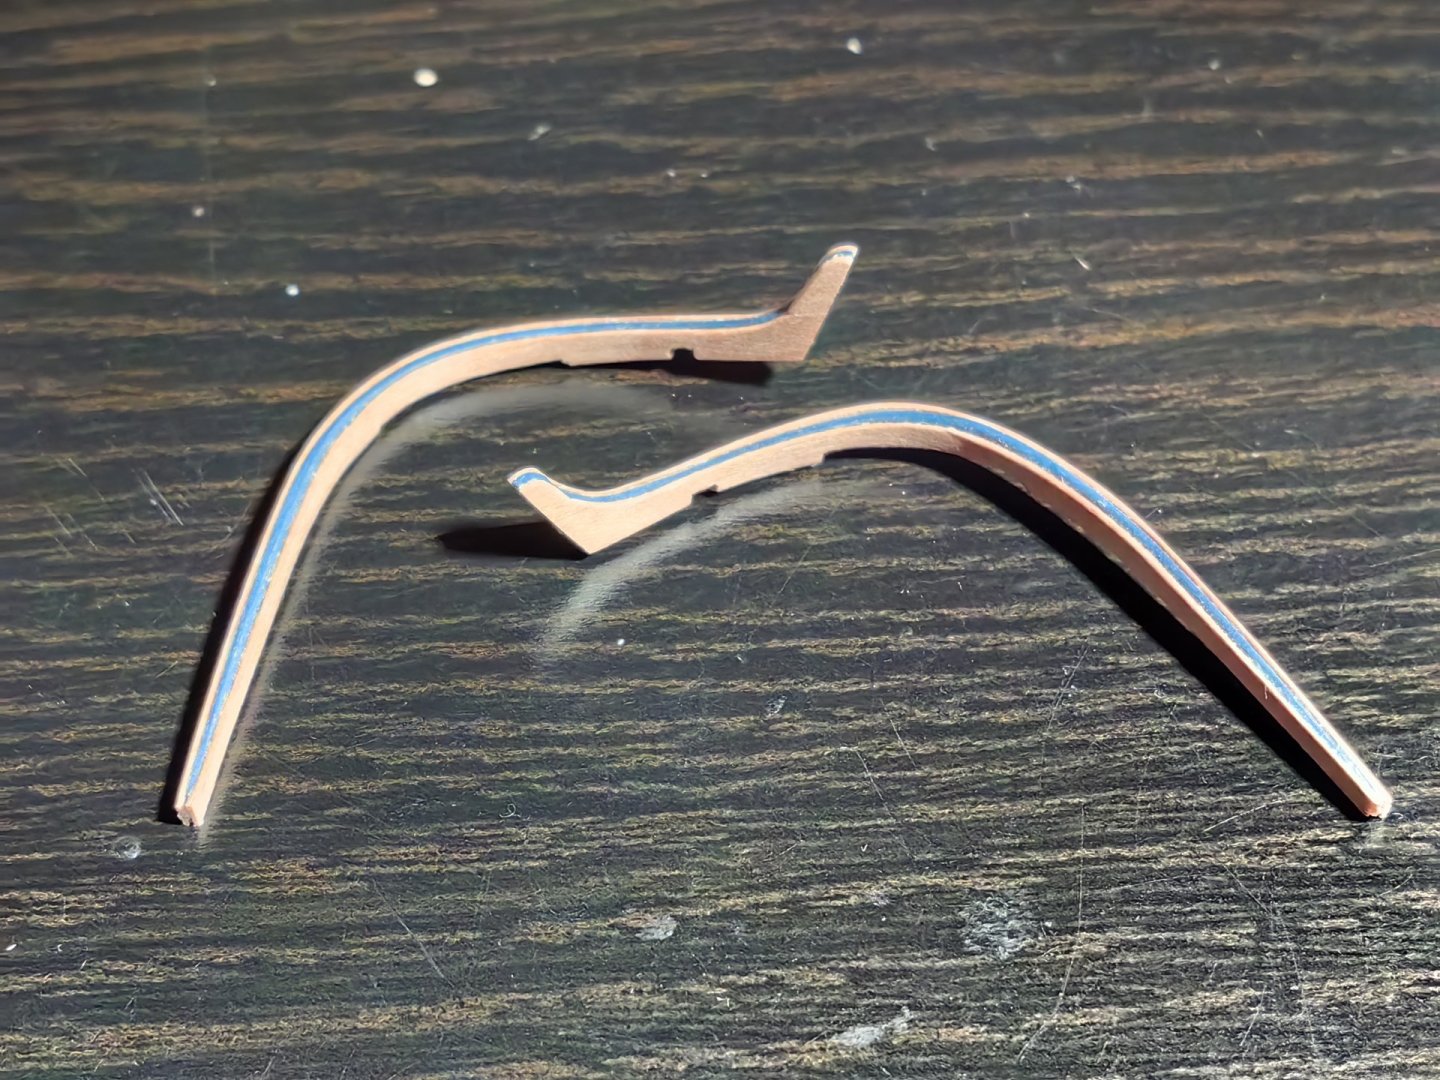
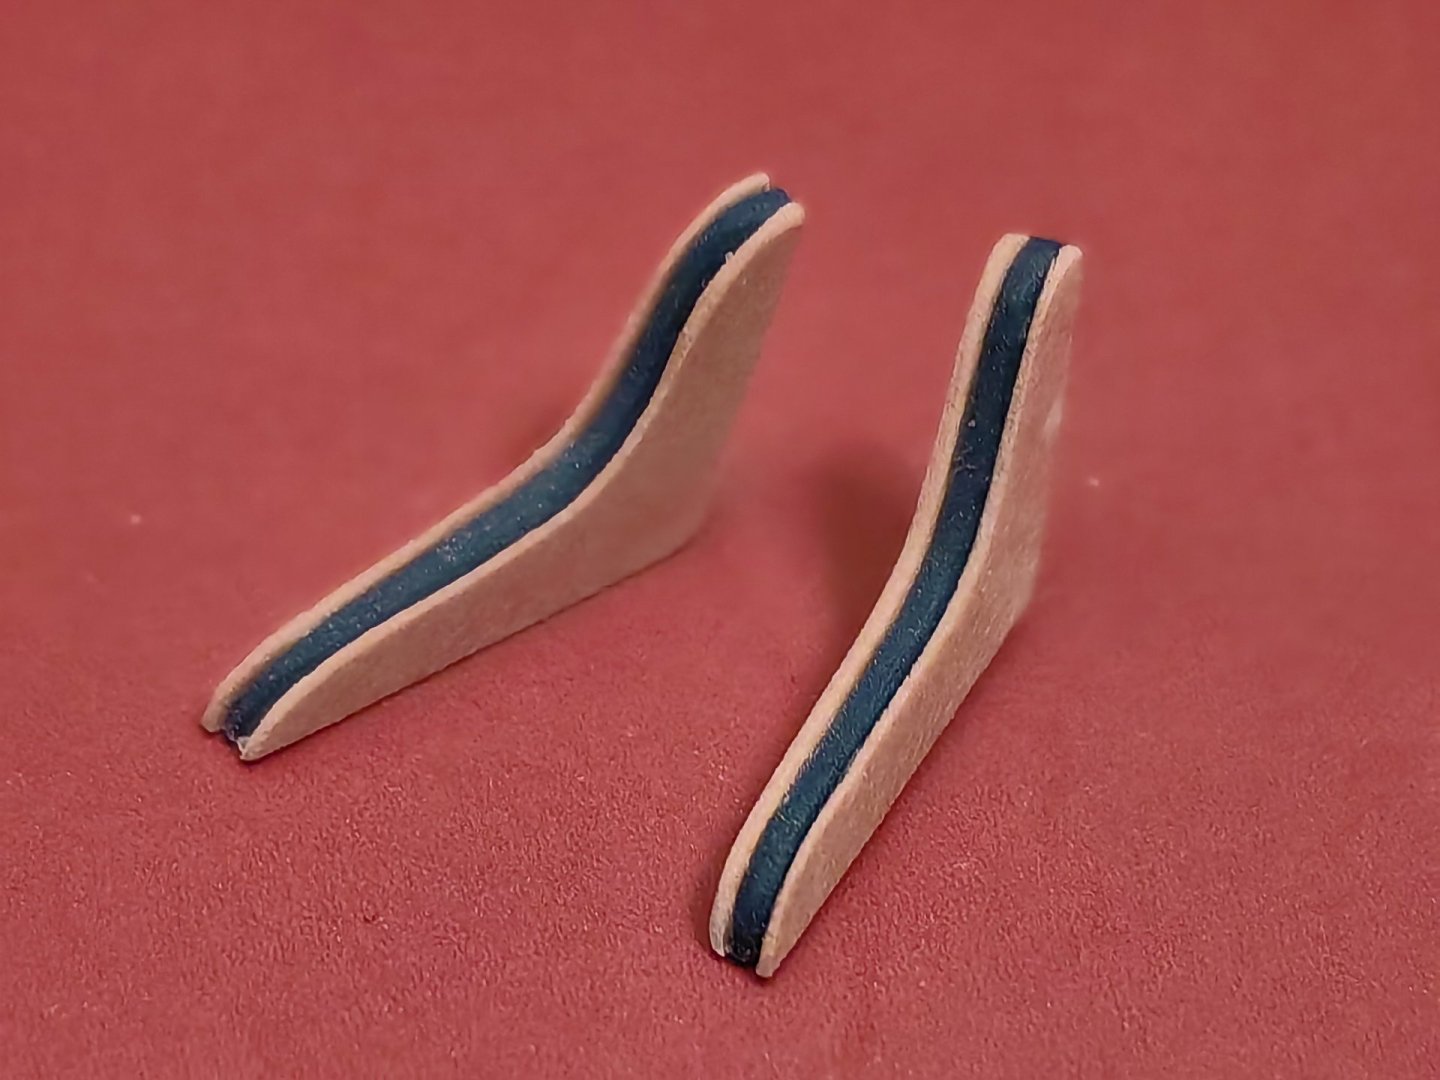
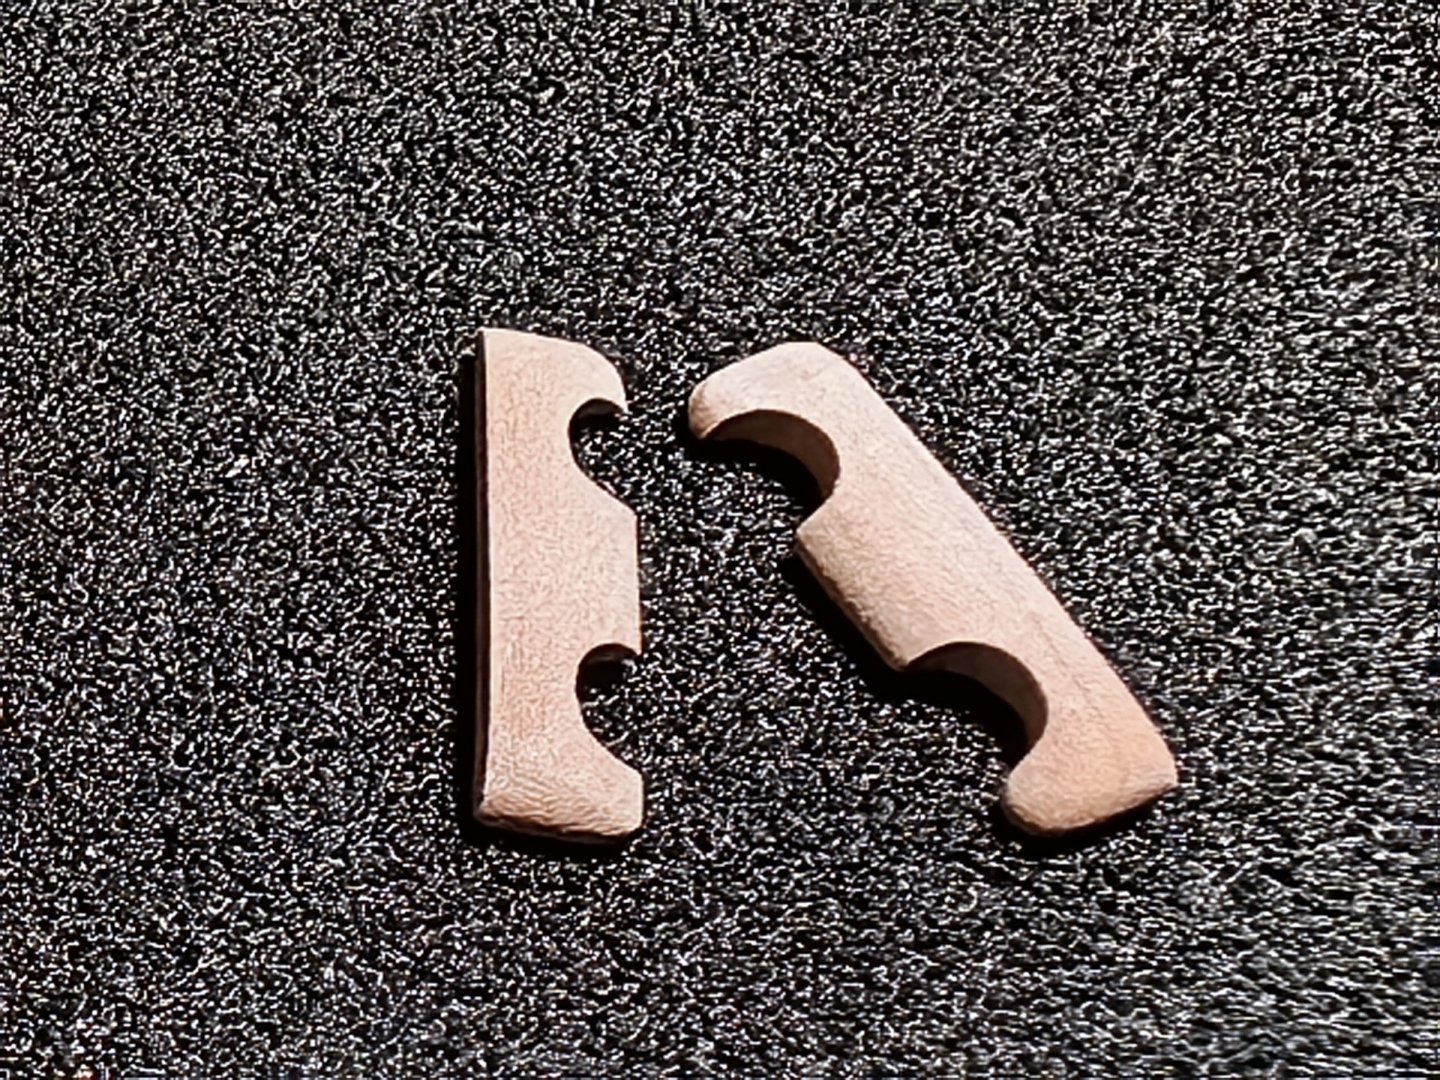
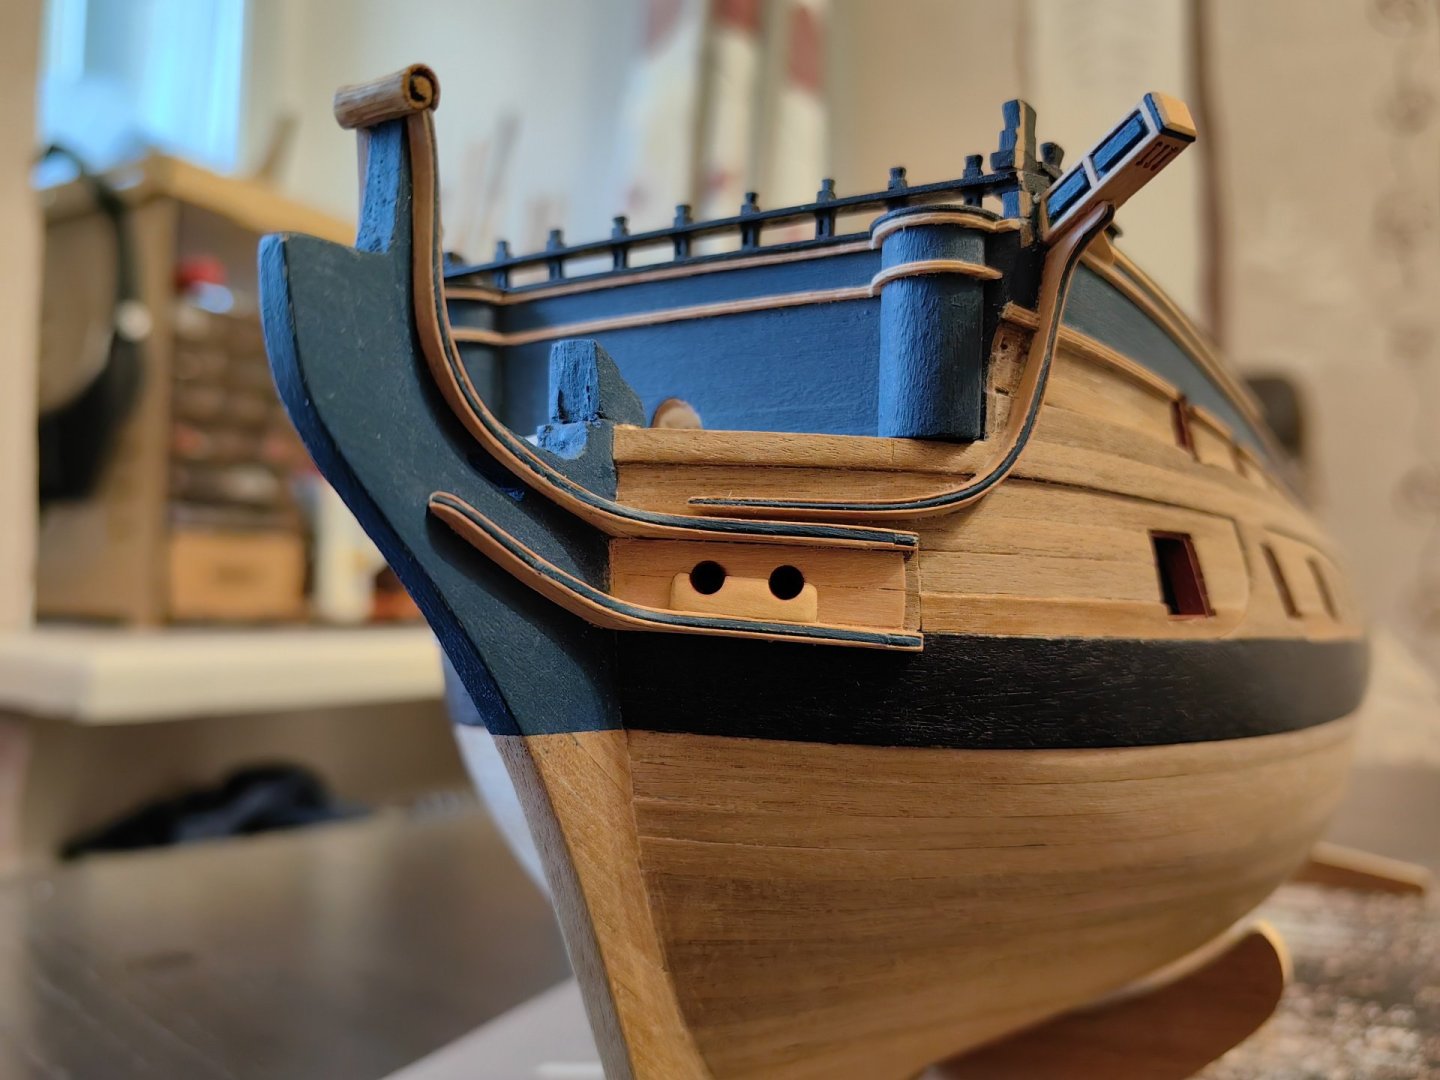
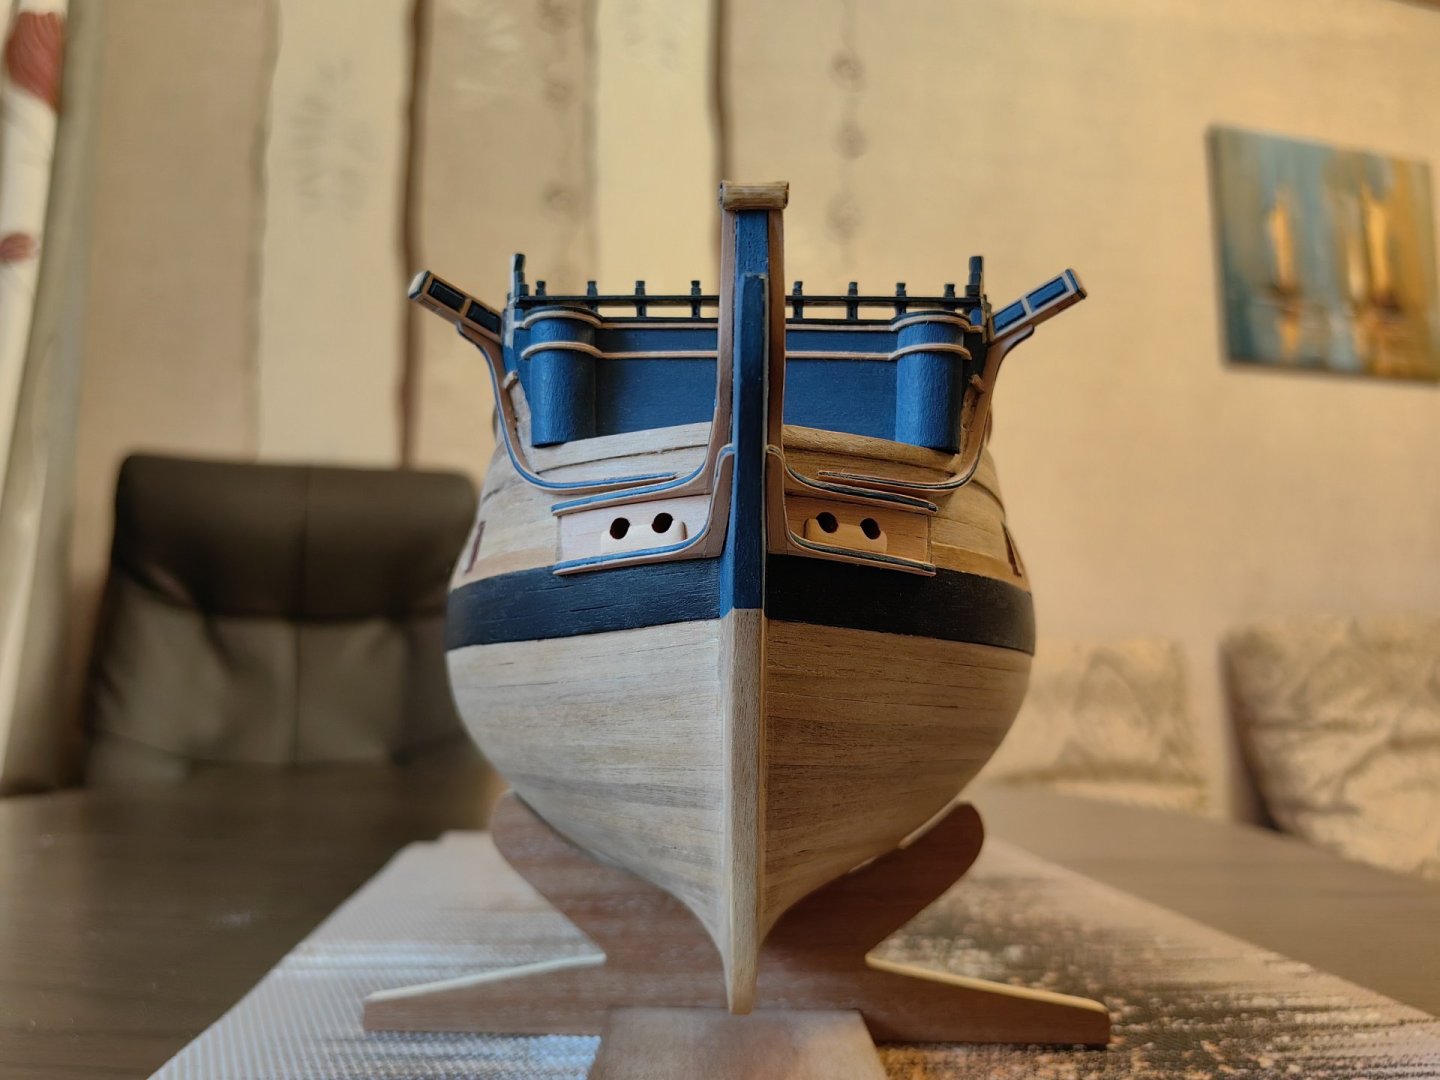
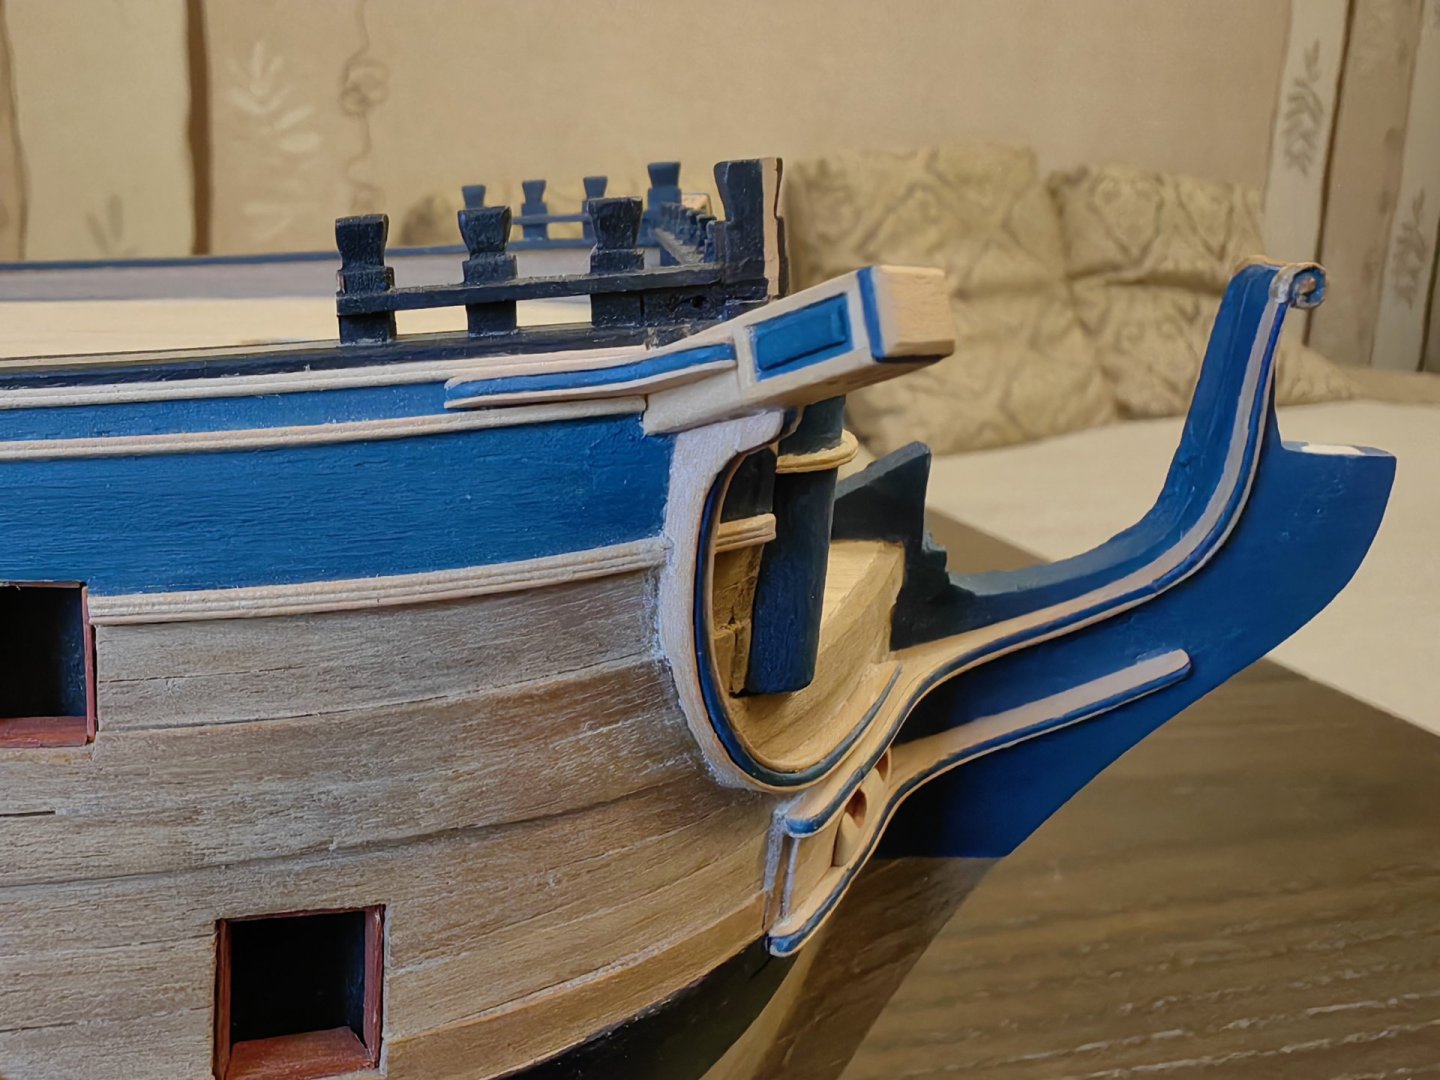
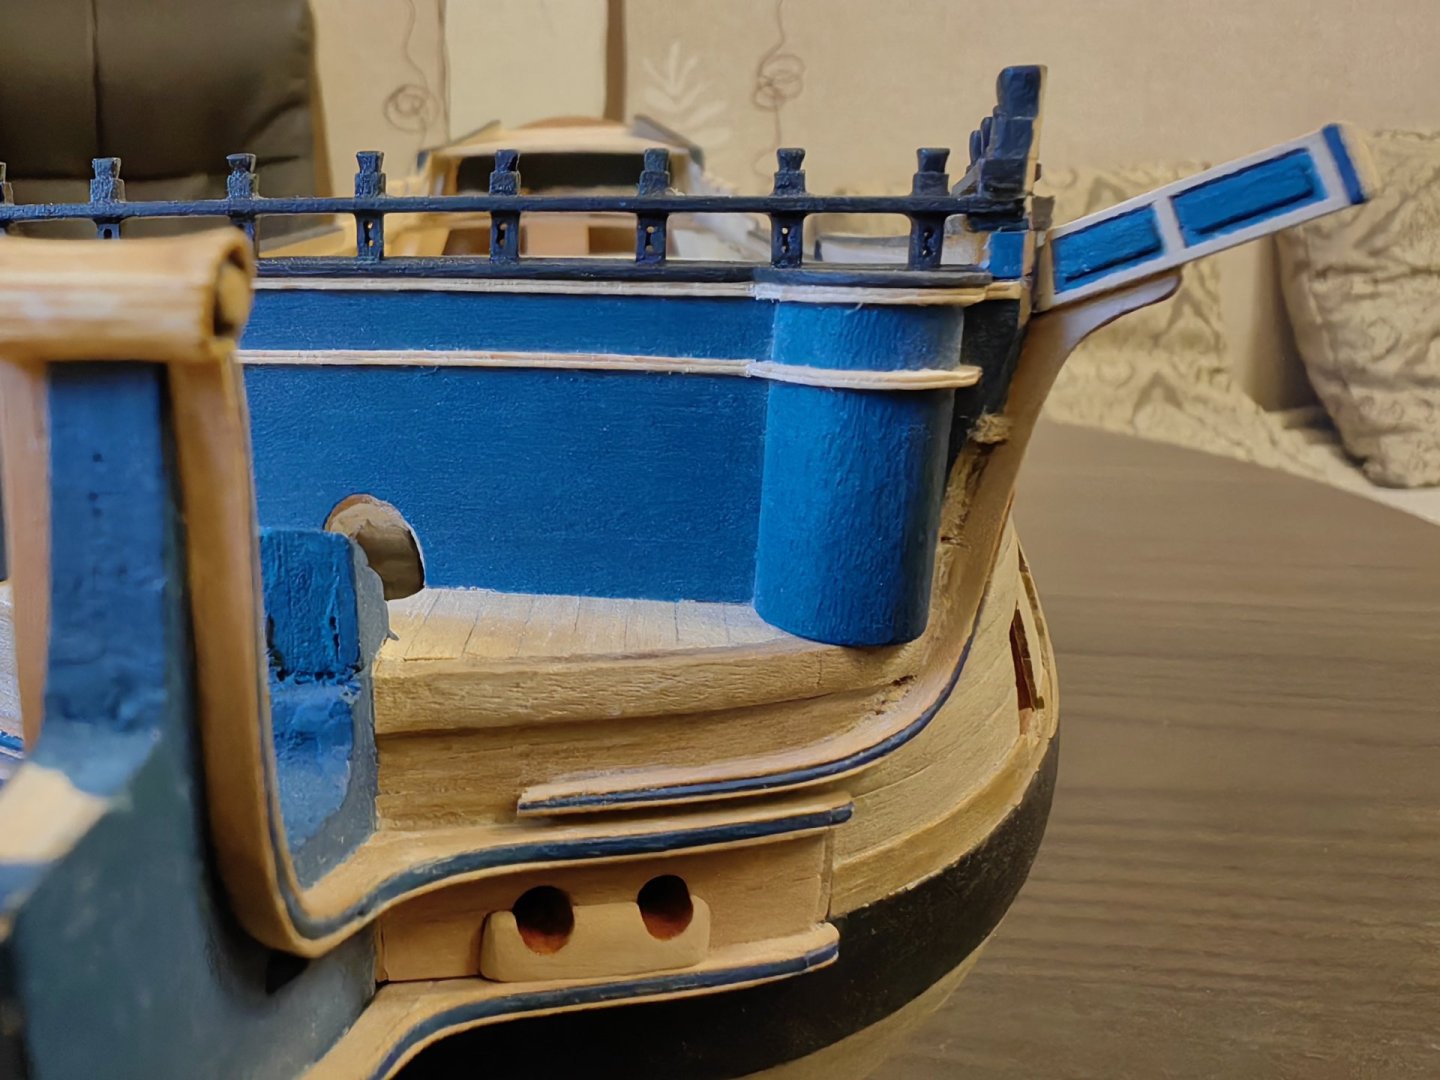
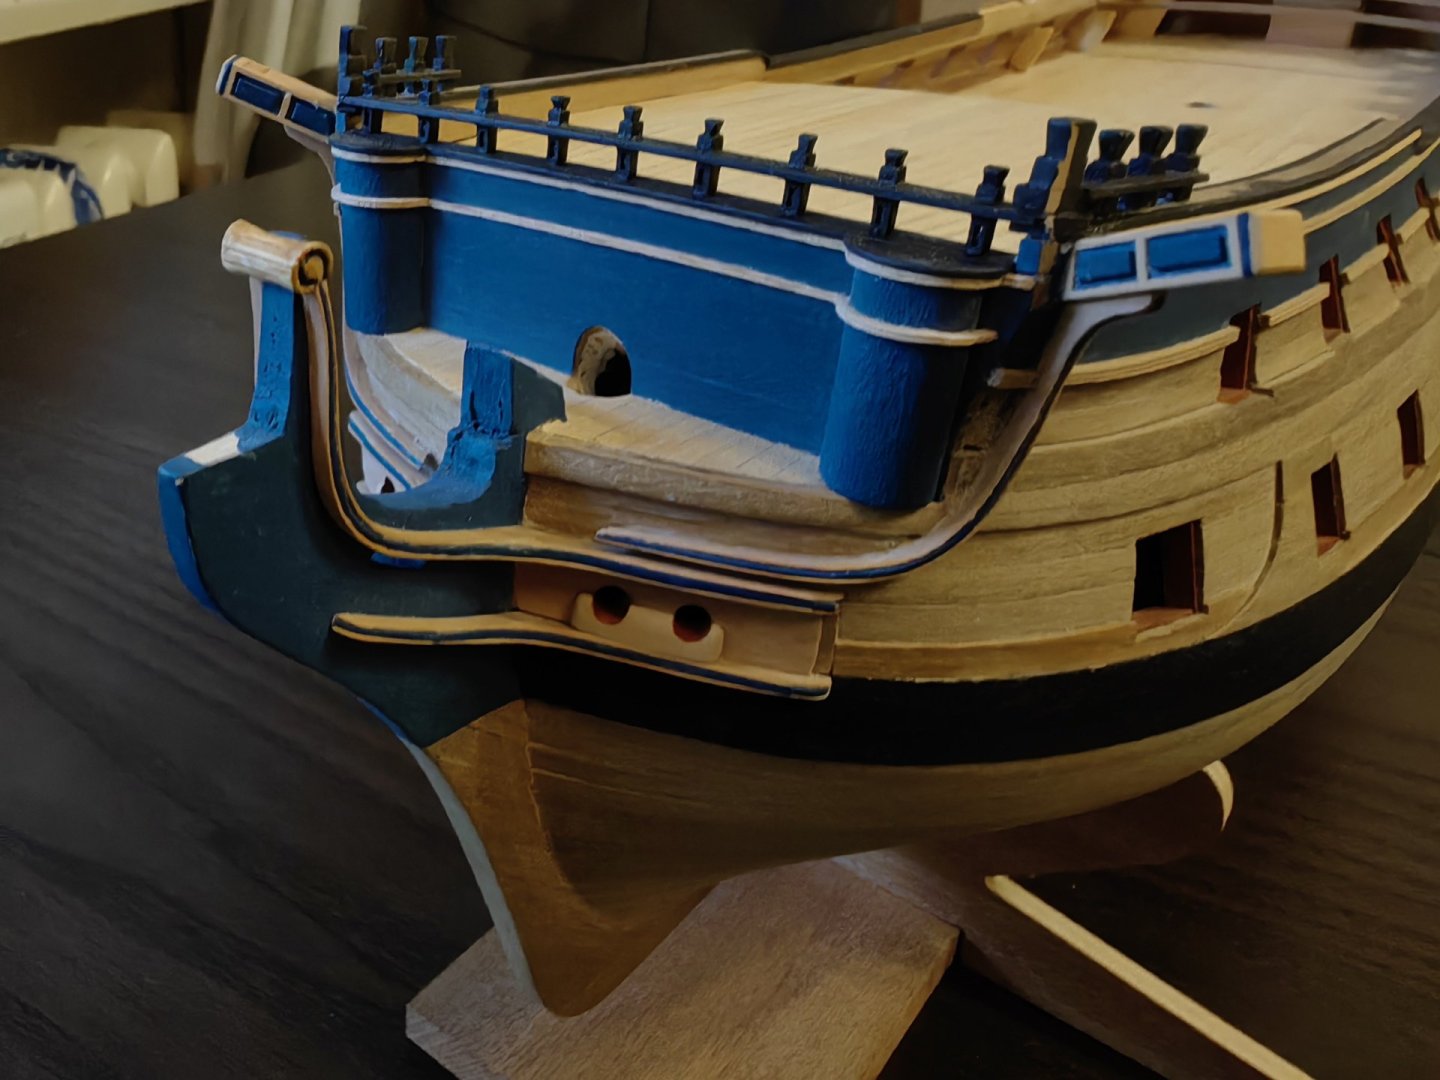
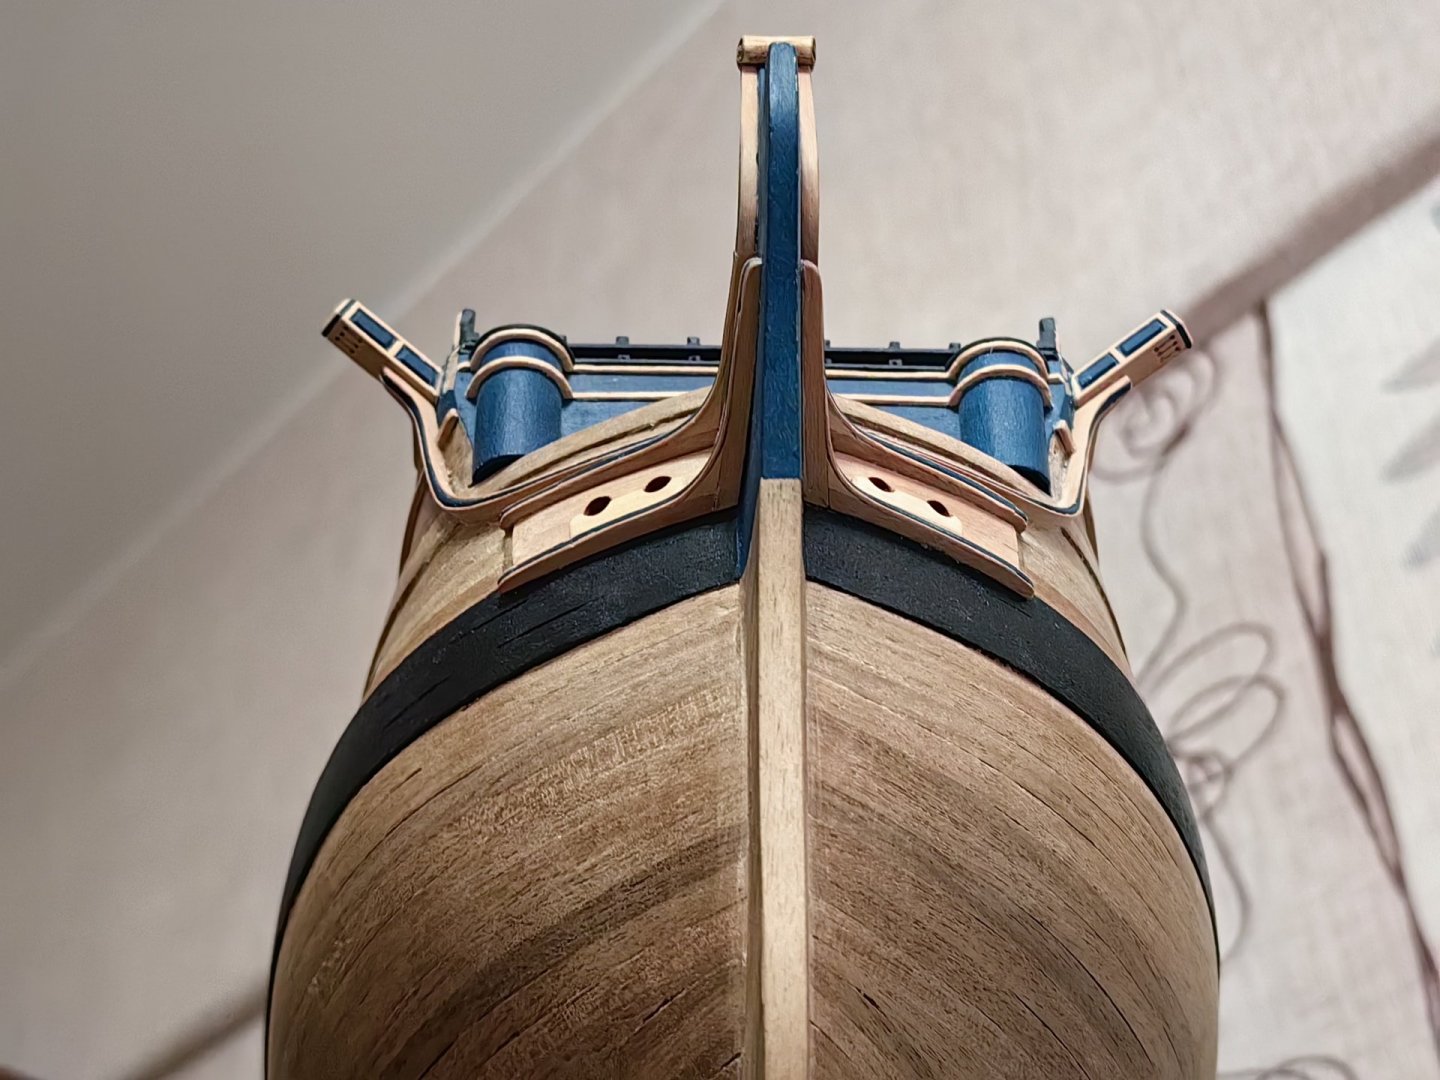
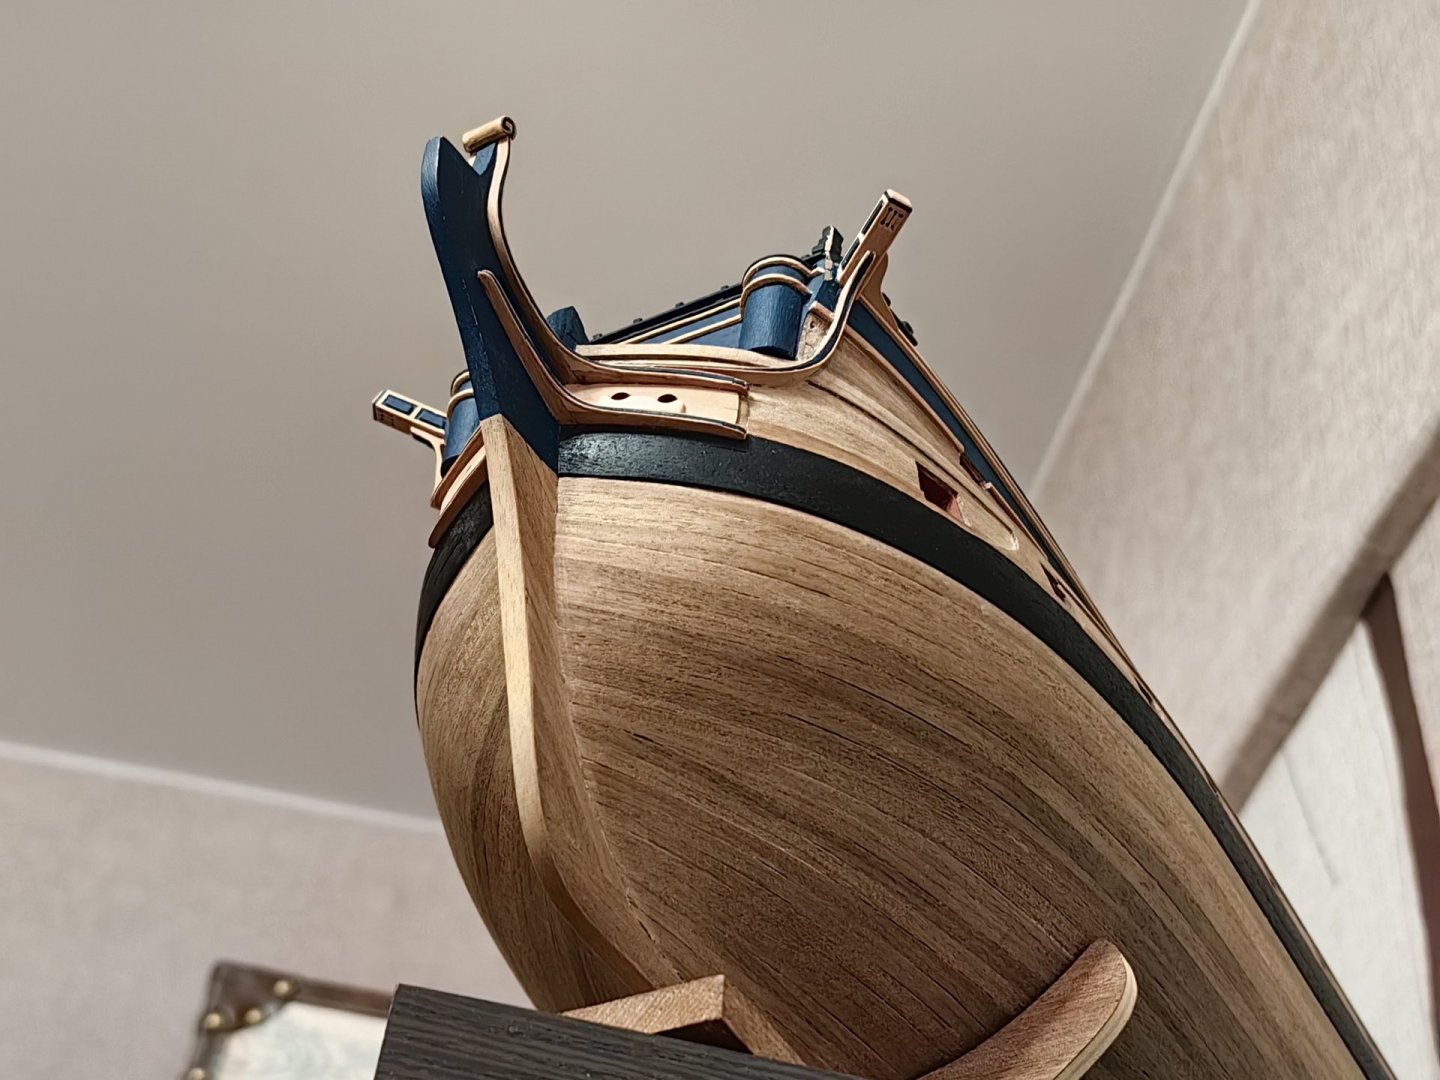
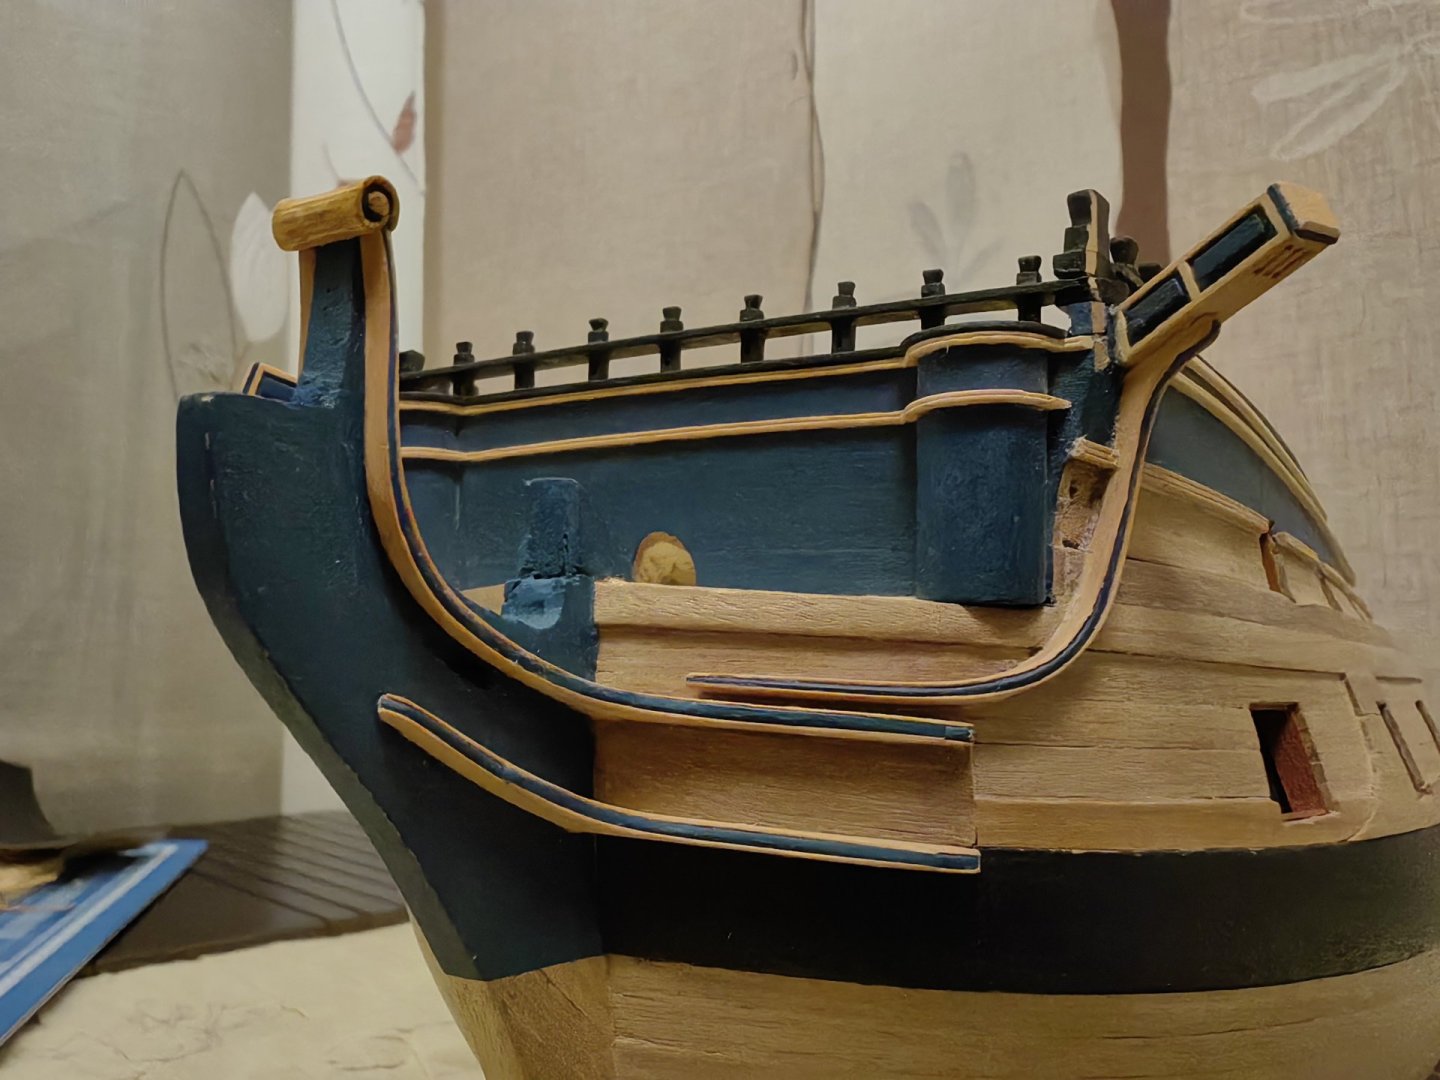
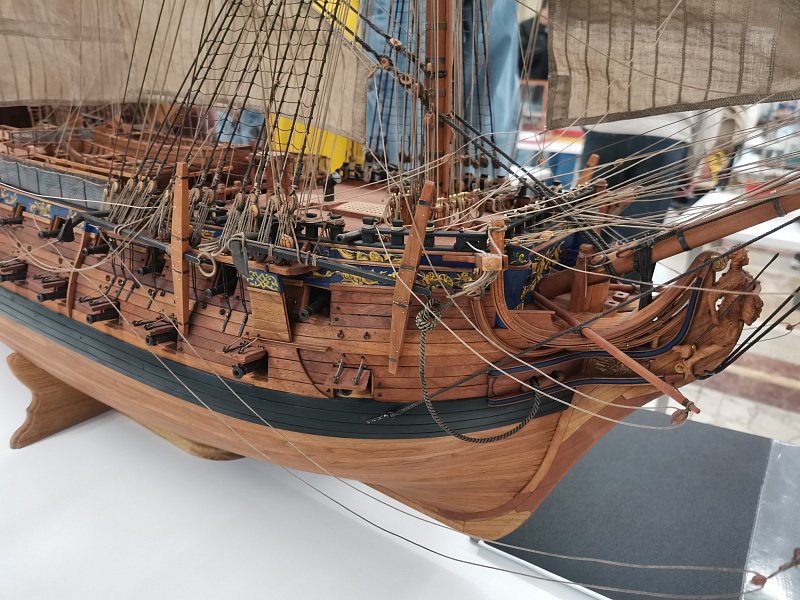
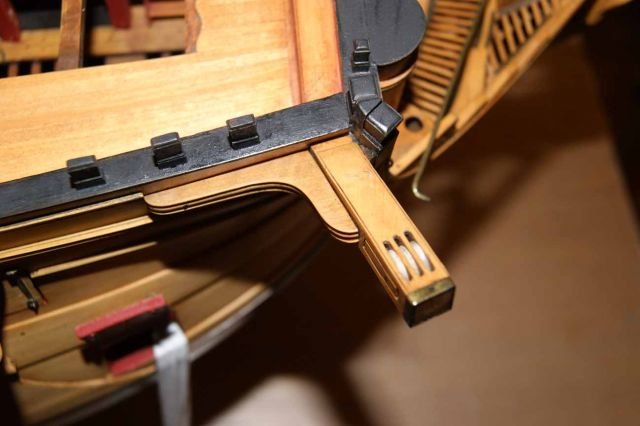
Hello everyone! My work is not progressing as quickly as I would like, but there is some progress) I have decided to make the knees that support the Catheads in a horizontal plane. The detail is not complicated and did not take much time. Much longer had to tinker with the knees Catheads, which smoothly pass into the regels of the head. I decided to make these elements single parts, glued in the same way as the chicks of three rails each. This may have been the wrong decision, as the part needs to be curved in two planes to fit the rounded cheekbone of the ship. Despite my best efforts, I was unable to achieve a perfect fit. I did not have the necessary tools to secure these elements to the hull, so I had to hold them in place with my hands until the glue dried. PVA glue sets quite quickly, but it's not enough to hold the springy ends of the part to the body. Therefore, I had to divide this process into two stages, with a 24-hour break to allow the glue to fully harden. However, in some areas, the parts didn't fit snugly against the body, and I used small pieces of wood to fill in the gaps. I'm not entirely satisfied with the result, as there are still traces of glue visible in the corners of the glued surfaces, which I haven't yet managed to remove. Visually, the knees appears to be more protruding than it should be. But I won't be doing that anymore. I also cut the hawse hole, installed the Navel woods, and installed the hawse hole bolster. That's all for now, and the remaining head regels and head timbers are next in line... Sincerely, FriCap


-
Hello, Nearshore! You've done an excellent job, as always - carefully and with love! Each new detail adds authenticity to the model, and it looks great! It's great to have our loved ones supporting us in our hobby! The organizer your wife made is absolutely amazing! I agree with you about the casting quality of the set. I found a link on the internet to a nose figure of Bellona that someone made for the Shipyard set, but I think it would be suitable for our sets as well. There's not only a nose figure, but also various decorative elements. You may want to use this now or in the future. Here's the link: https://www.thingiverse.com/thing:6776867 You'll need an SLA 3D printer to print this. Just experiment with the scale. Regards, FriCap
-
Frecap reacted to a post in a topic:
HMS Bellona by Nearshore - Corel - 1:100
-
Frecap reacted to a post in a topic:
HMS Sphinx 1775 by Ronald-V - Vanguard Models - 1:64
-
Frecap reacted to a post in a topic:
HMS Sphinx 1775 by Ronald-V - Vanguard Models - 1:64
-
Frecap reacted to a post in a topic:
HMS Sphinx 1775 by Ronald-V - Vanguard Models - 1:64
-
Hi, Ronald! It's clear that the Vanguard Models kit is beautifully crafted, but without the right hands, it's worth nothing!) As always, I am impressed by your work and attention to detail! I can't wait to see how stunning the model will be once you're done. While I rarely use standard photoetching in my work, seeing the results of your painting, I'm considering incorporating this technique. Yours sincerely, FriCap
-
Good afternoon and Merry Christmas to all! Happiness, health, and good luck to you and your loved ones, and new interesting projects!

-
Ronald, hi! I like your well-equipped workspace. Doing what you love becomes even more enjoyable when you do it in a comfortable and cozy environment! I also want to compliment you on your choice of color scheme for your model. The colors all blend well together. I especially like your blue XF-18. By the time I asked you about it, I had already painted the case, otherwise I would have used this particular color. I used Russian-made paint, and I had to mix several colors to achieve a more or less accurate match. But it's what it is. In addition, I have a different material and color for the case. Now I'm also thinking about what color to paint the decor. In my opinion, the color should be somewhere between gold and ivory. The time has not yet come to make a decision, so I will be watching your experiment with interest. I am confident that it will turn out beautifully!) Good luck and happy holidays! Sincerely, FriCap
-
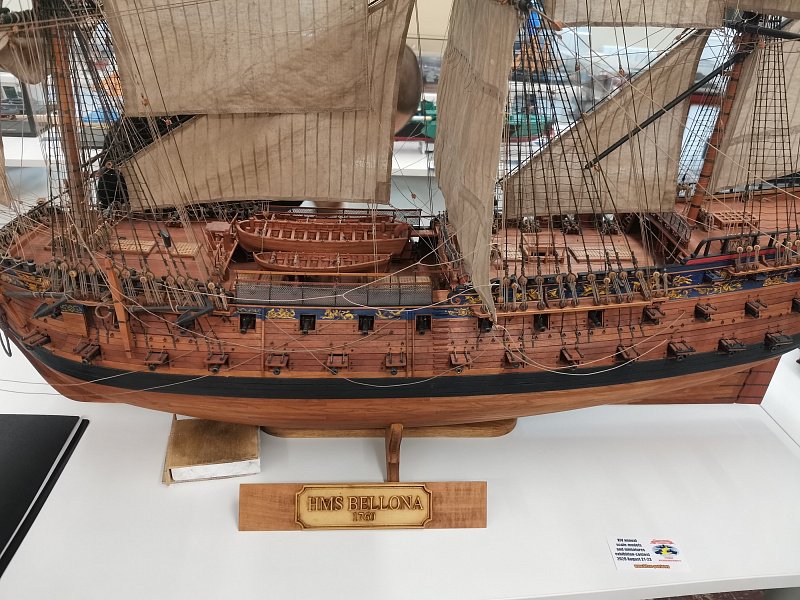
Hello, Nearshore! Thank you for your feedback and evaluation!) But of course, I am not an expert in our field. When I started building Bellona, I had no idea that I would add my own elements to the model. As I studied the photos, I began to think about how to improve the design. Your model has always been an inspiration for me. Even before I registered on this forum, I downloaded photos of your work and studied them countless times, learning about the placement of various elements. You started earlier, and I was in a better position to learn from your excellent work. I also like the colors of natural wood, and I didn't initially plan to paint the model. However, I thought that a touch of blue wouldn't detract from its appearance, and I used the Middleton museum model as a reference. It may seem that there is more blue than should be, but I think that as the hull grows with external structures and subsequently with rigging, it will not be so striking. And the hull will be darker after varnishing ... And of course I am interested in the history of the ship and everything that is associated with it. Everything that I found is on the Internet, in open sources. Of course, everything that I have on this topic, I will be happy to share if you have any questions. Let me wish you good luck and patience, may this wonderful hobby bring you the maximum pleasure! Happy holidays to you and your loved ones! Sincerely, FriCap
-
Yves, hello! I've seen the Bellona made by your hands. It's a great job, done with care and love! You've done an excellent job. It doesn't matter what ship served as the prototype, we're doing what we love, and the main criterion for evaluation is that we enjoy it ourselves. Yes, I've been interested in the history of this ship, but I'm still in the early stages of building the model, and I hope I have the perseverance and patience to see it through! Good luck with your new projects! Sincerely, FriCap
-
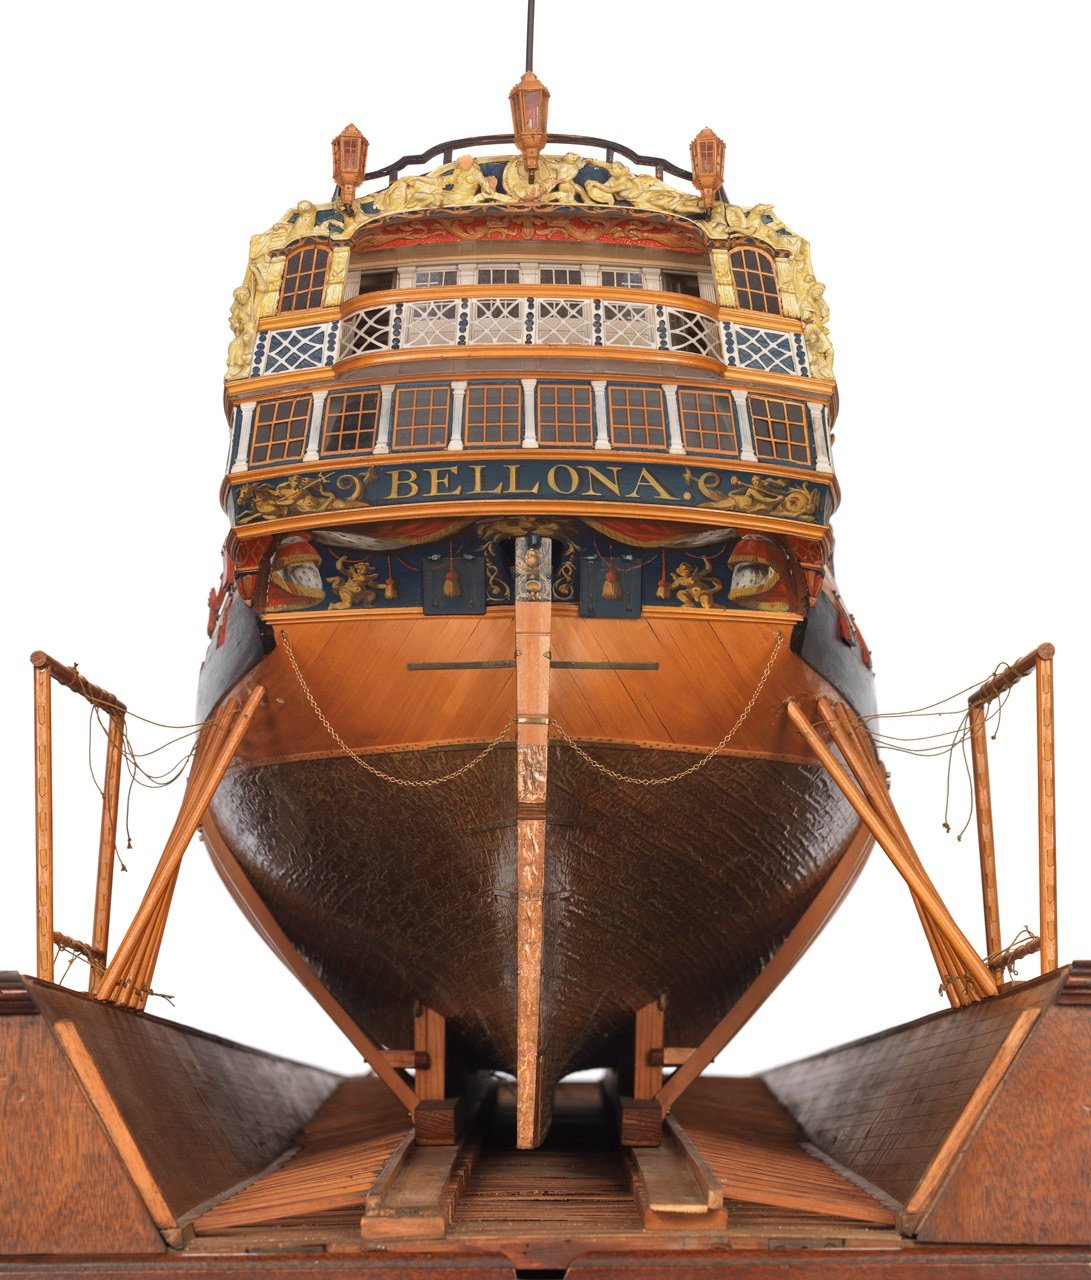
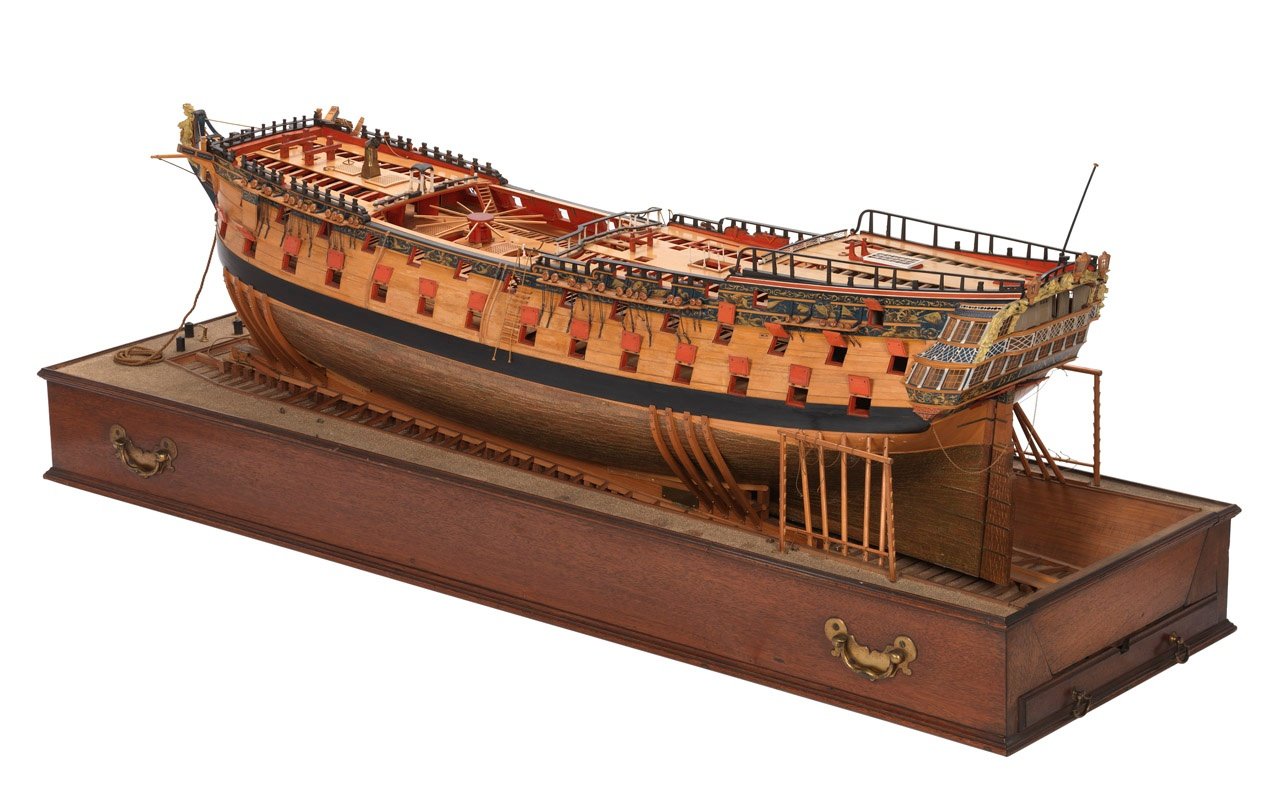
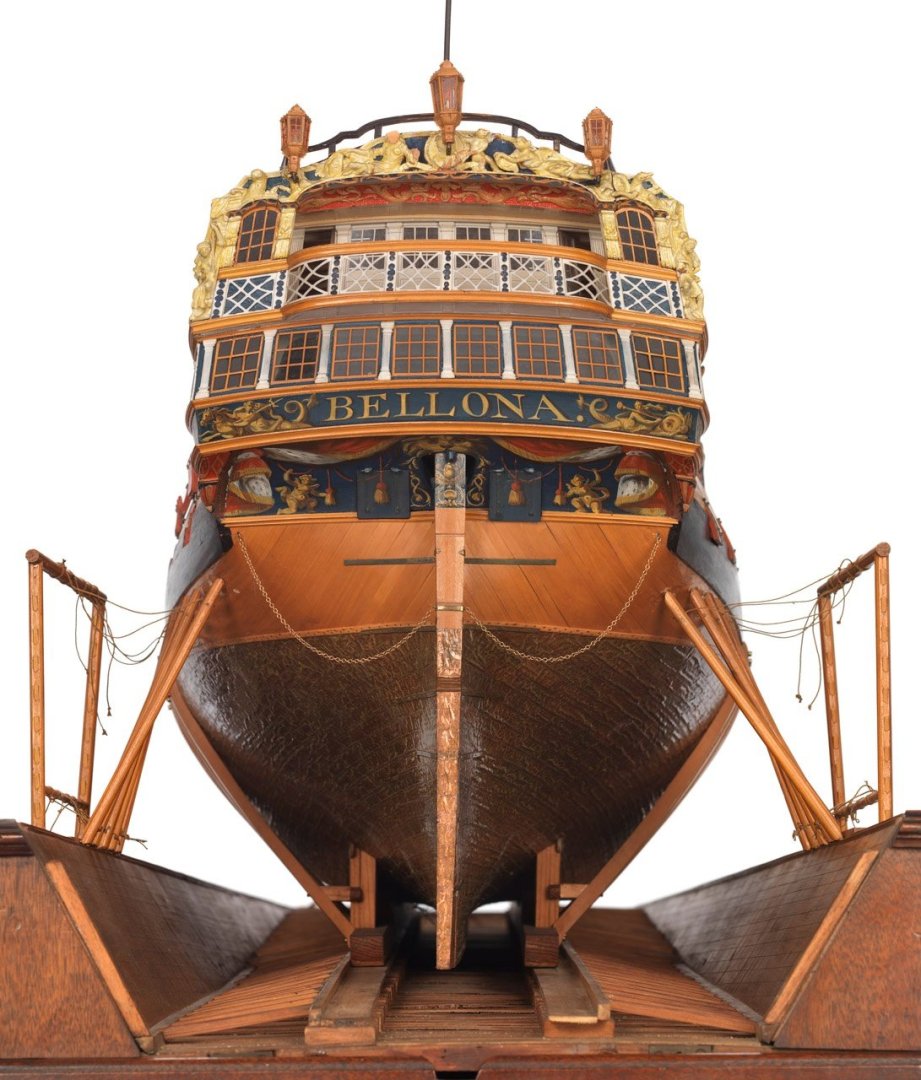
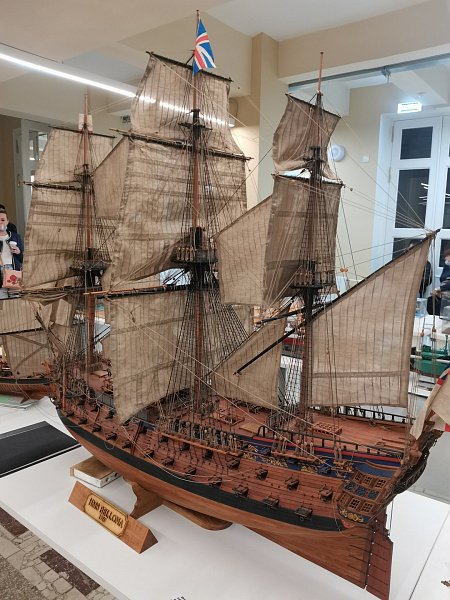
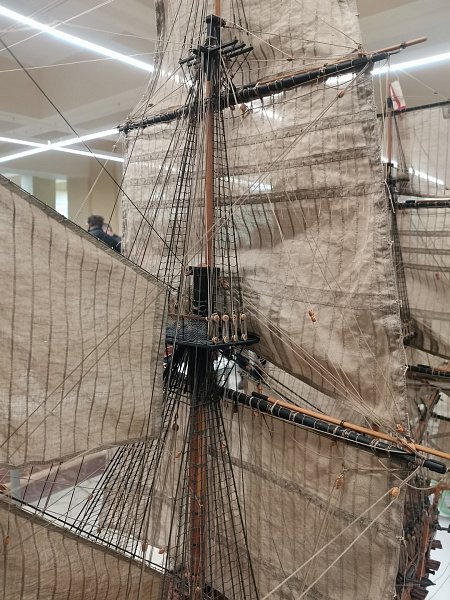
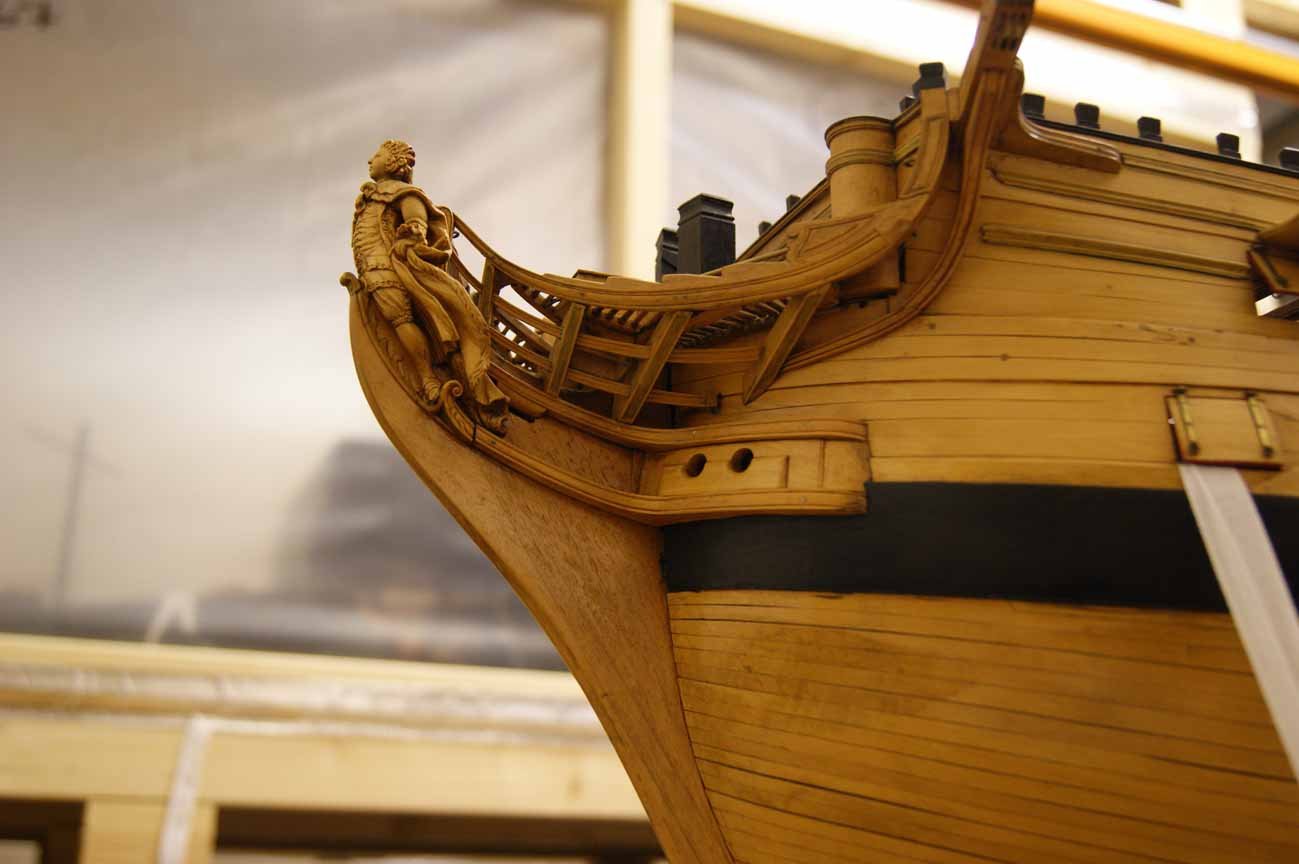
Yves, do you mean the model from the National Maritime Museum in Greenwich? Specifically, this model shows a third-rank battleship of the "Dublin" class, not the "Bellona" class. There is a difference. It's all about the history of the model. This particular model was commissioned by the Surveyor of the Navy, John Williams, as a gift to King George III during a scheduled audience. Williams was pushing for government funding to cover His Majesty's Navy ships with copper sheathing. The plan was to cover the entire fleet with copper, which would have been extremely expensive and required a significant increase in metal production. The protracted fighting in the American War forced the blockade to be conducted in an extremely unfavorable long stay in the waters of the Caribbean, where, after the loss of colonial naval bases, the English fleet suffered losses from the shellfish teredo ("shipworm"). The ship "Bellona", by that time already an old man, was the king's favorite - it was with the launching of "Bellona" that the reign of the long-lived king began, and George treated the ship like a godson. The model was intended to impress the king, and it also served as a demonstration of John Williams's technology, including methods of sheathing, insulating layers, and more. Since there was no time, a model of the first seventy-four guns ship was obviously taken, covered with copper for demonstration, and decorated to look like a Bellona. The ship itself was sailing near India at that time, and apparently there were no drawings for comparison (and they are) at hand. It's funny, but the Greenwich collection contains not only the original drawings of the Bellona, the first ship of the largest series of 74-gun ships, but also a model of the work of the Navy Surveyor Thomas Slade. So the photos show a certain 74-guns ship of the "Dublin" class, with a working stand that simulates the ship's launch (the copper coating was done by tilting the ship, and it was pointless to bring the ship into a dry dock and put it on a launching sled - this is clearly an unsuitable model for explaining the technology, let alone the idea of mass copper coating of the entire Navy!). The audience and demonstration were a success, and the king signed the relevant decrees. For the first time in the world, in less than two years, the entire British Royal Navy was copper-clad at the government's expense, as part of a government program. The first ships to receive copper cladding using Williams's technology were... of course, the Bellona and the Victory. The Middleton model is a great example to follow in many ways. In my work, I try to do many things the way they are done there. The CAF Model kit is most likely based on this model. However, even within this kit, each modeler can do many things in their own way. For example:

-
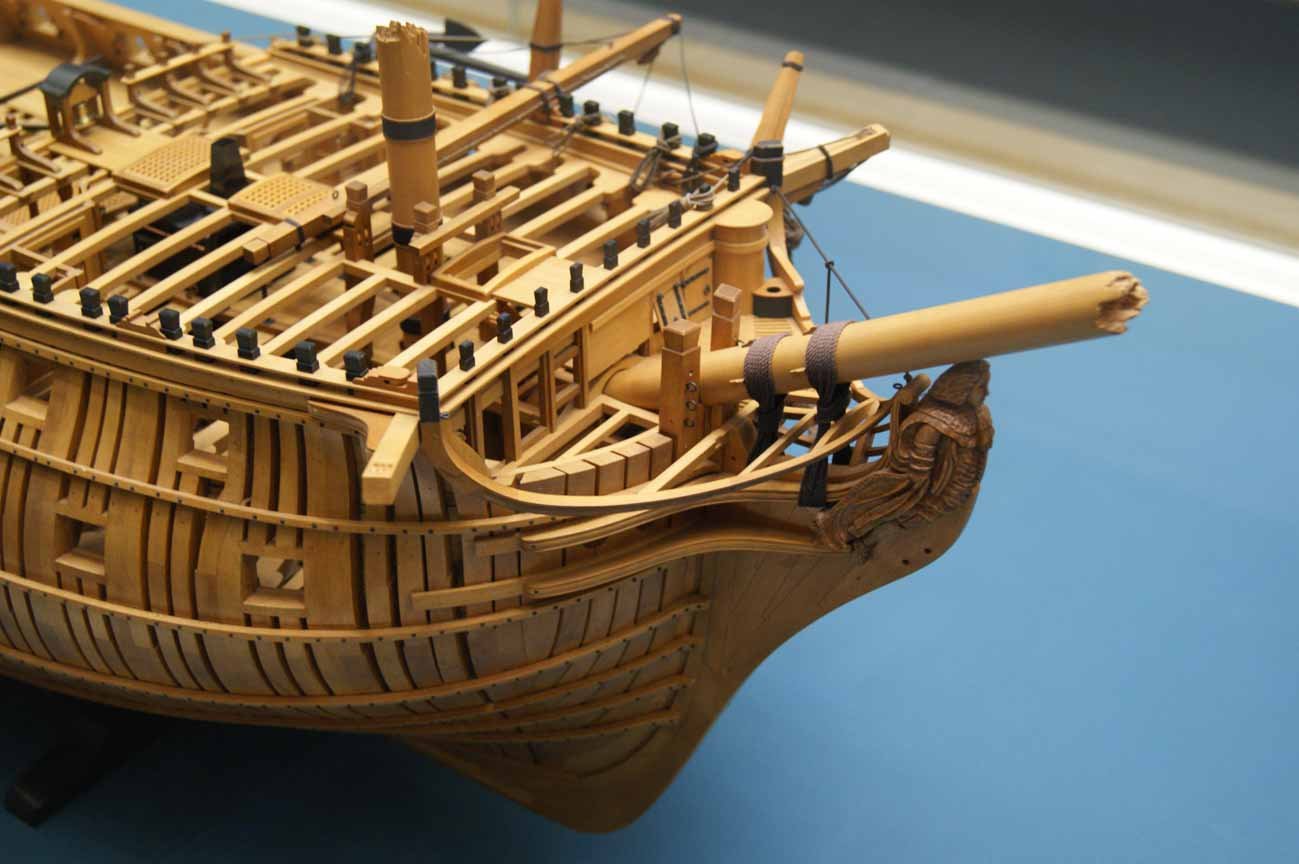
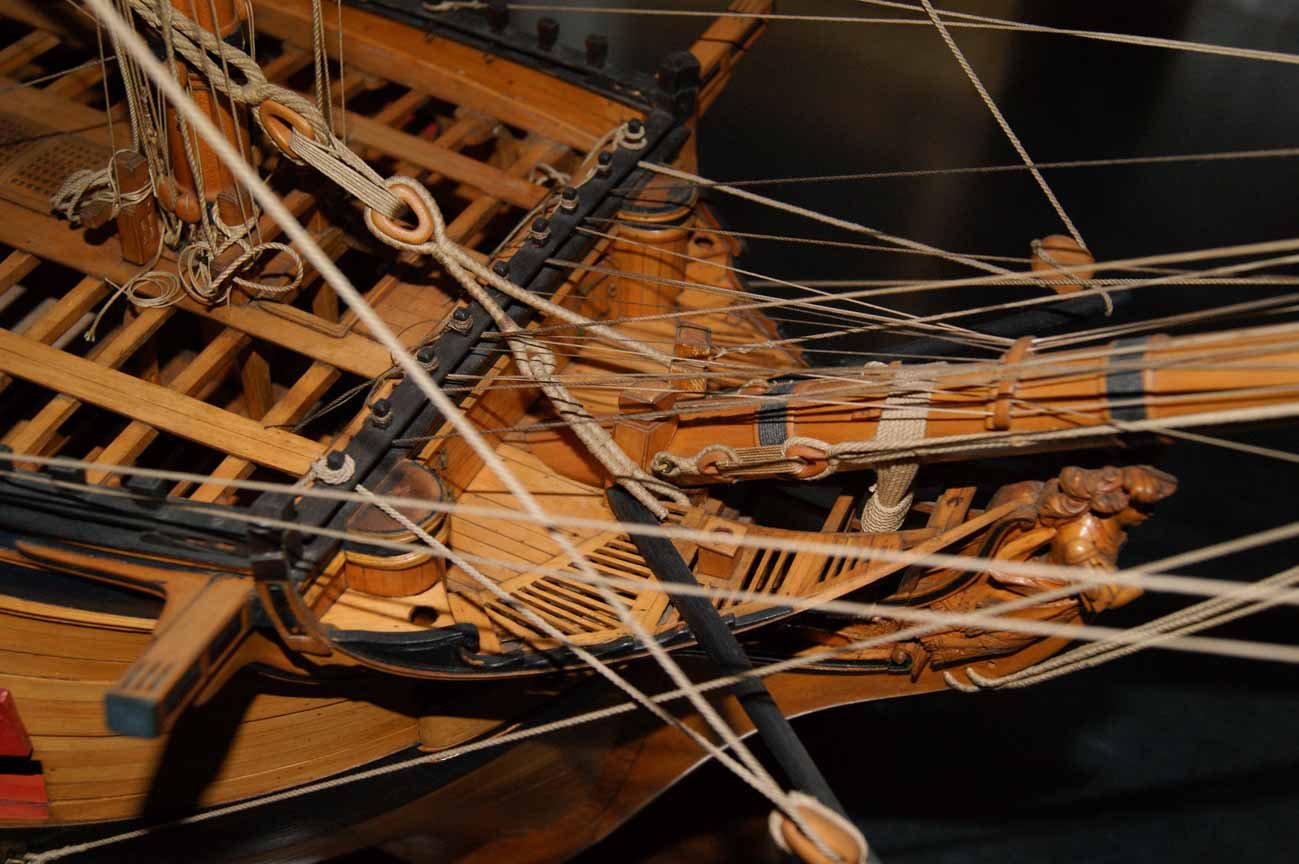
Hello, Yves, thank you for your comment. I haven't decided yet whether I'll make this knees or not... It looks good as it is. However, I would like to disagree with you about the necessity of this knees. The krambol was used to lift a multi-ton anchor and secure it to the side of the ship, bringing it to the stern. It is evident that the krambol had to withstand tremendous loads in two directions, which were compensated by these knees. The models from the Greenwich Museum demonstrate the presence of these knees: Edgar, Egmont, Thunderer, Warrior And the Slade model, unlike the later Middleton model and even more so the modern Lavery anatomy, is the exact prototype on which the ship was built. And the "Installation Party" of the series consisted of not one, but three ships. Bellona, Dragon, Superb. The Dragon model, which also shows this knee, has been preserved in Greenwich. In my opinion, these knees do not spoil the ship's appearance at all. Sincerely, Frecap
.jpg.9aa12b7891f82c8eaf908f549720e6b5.jpg)
.jpg.85c0c8ab7500f0134e062e6e4413c866.jpg)
.jpg.6662025a5fbf8467d63d8ae6594df0ec.jpg)
.jpg.fadf6fc74dd54bec291de8519a55a854.jpg)