Frecap
-
Posts
65 -
Joined
-
Last visited
Content Type
Profiles
Forums
Gallery
Events
Everything posted by Frecap
-
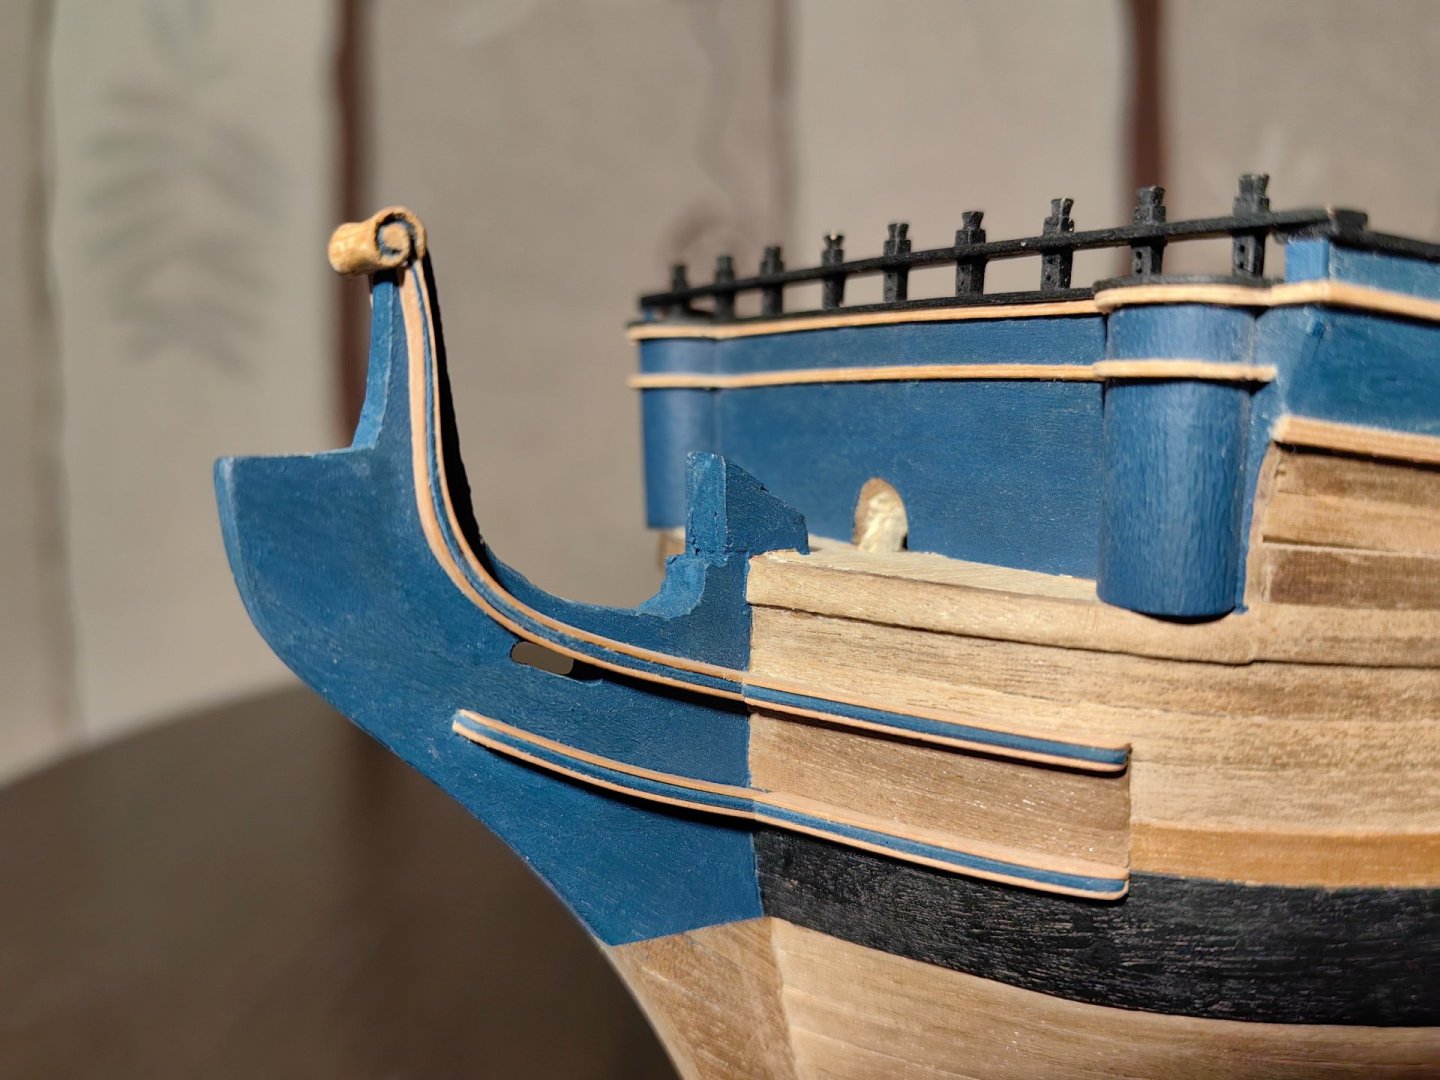
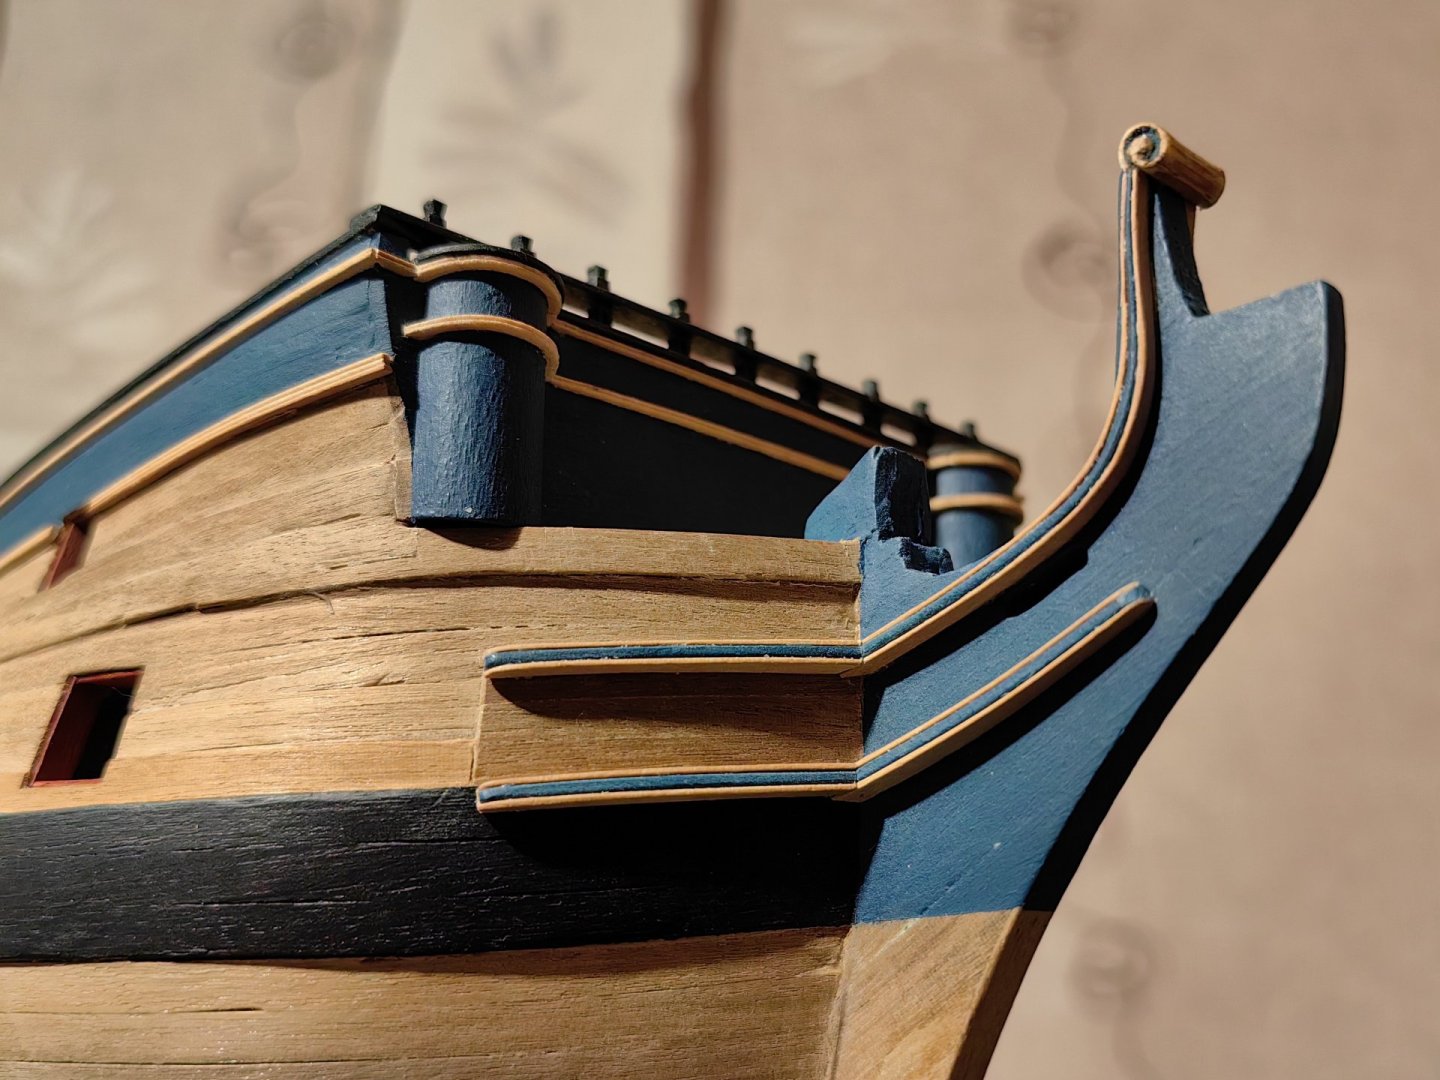
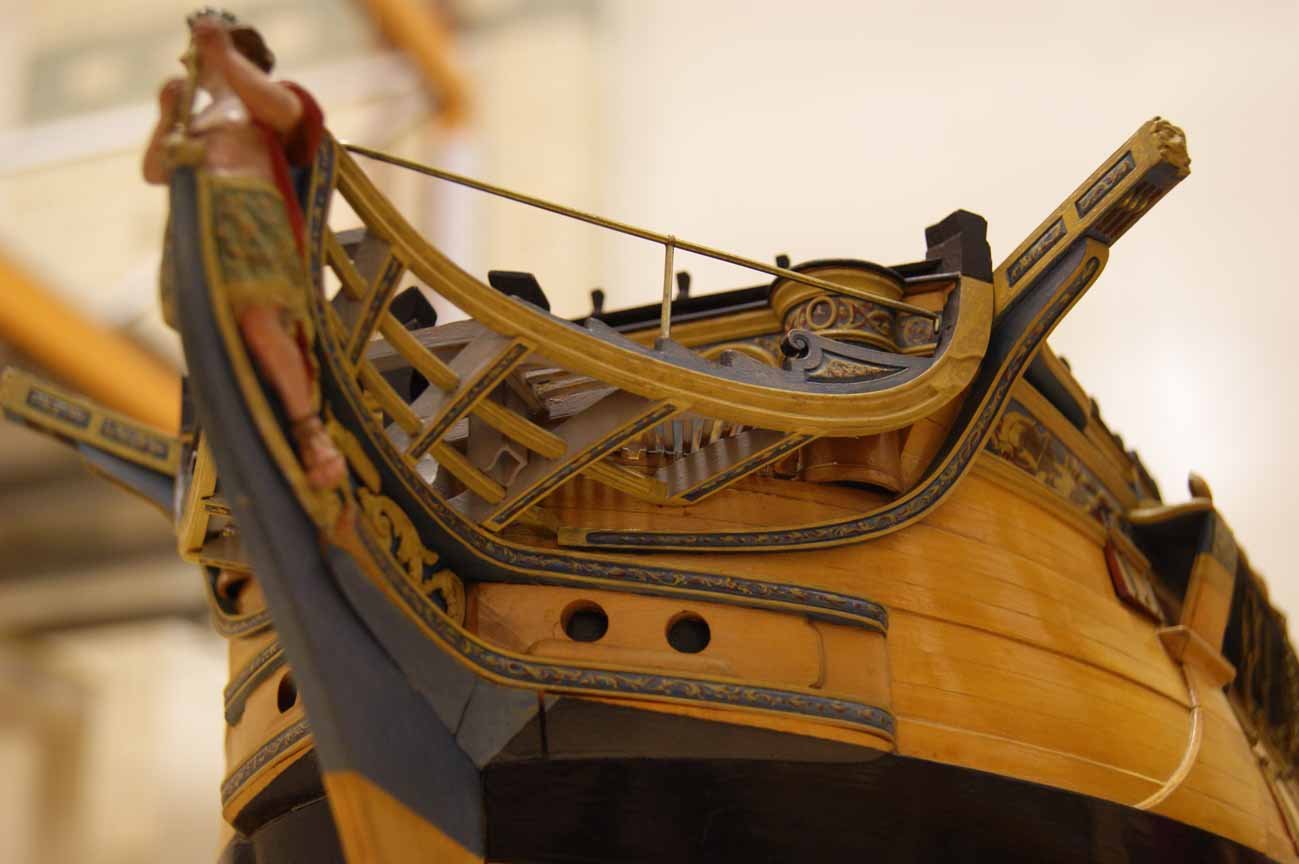
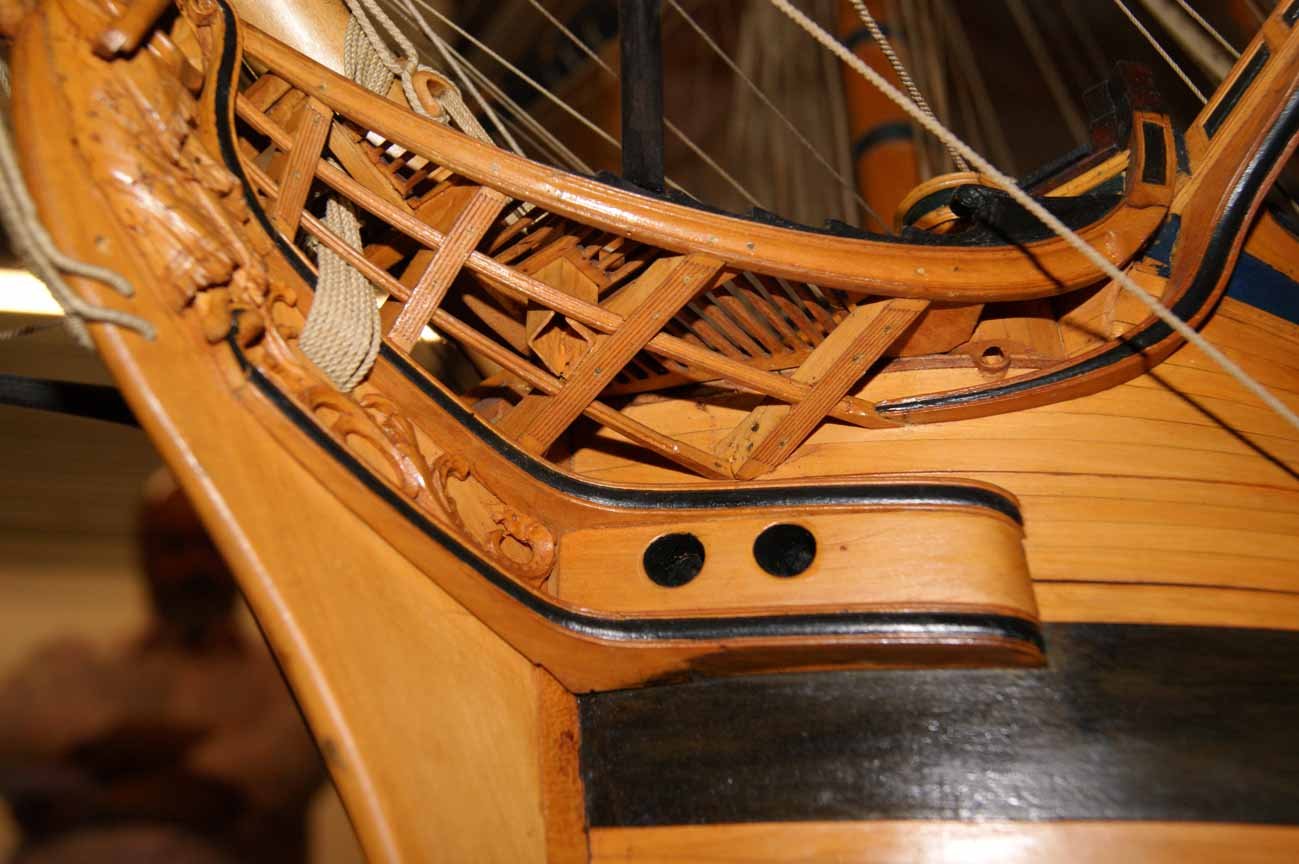
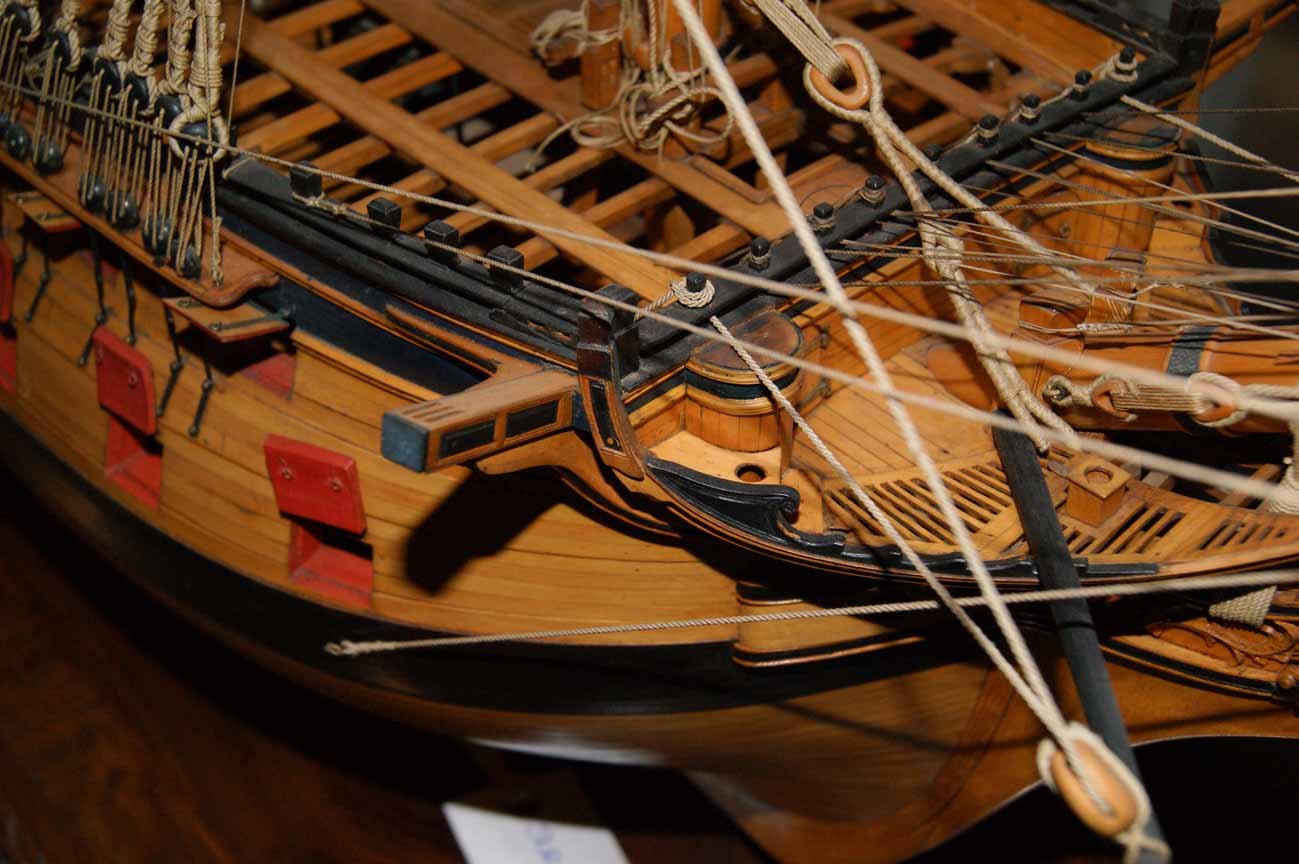
 Hi! The assembly of cheeks from several parts did not take much time. Unexpectedly, a lot of it was spent on fitting and mounting them on the hull. And this is the result. Probably not perfect, but, as I think, no worse than everything else. Here, of course, there will be something to finish. Since on the prototypes, cheeks have a smooth transition from the hull to the head knee, and I just have them docked, I want to make something like knees with an internal radius. There are also some gaps that need to be seal. In general, this process is endless. But the result is satisfying)

-
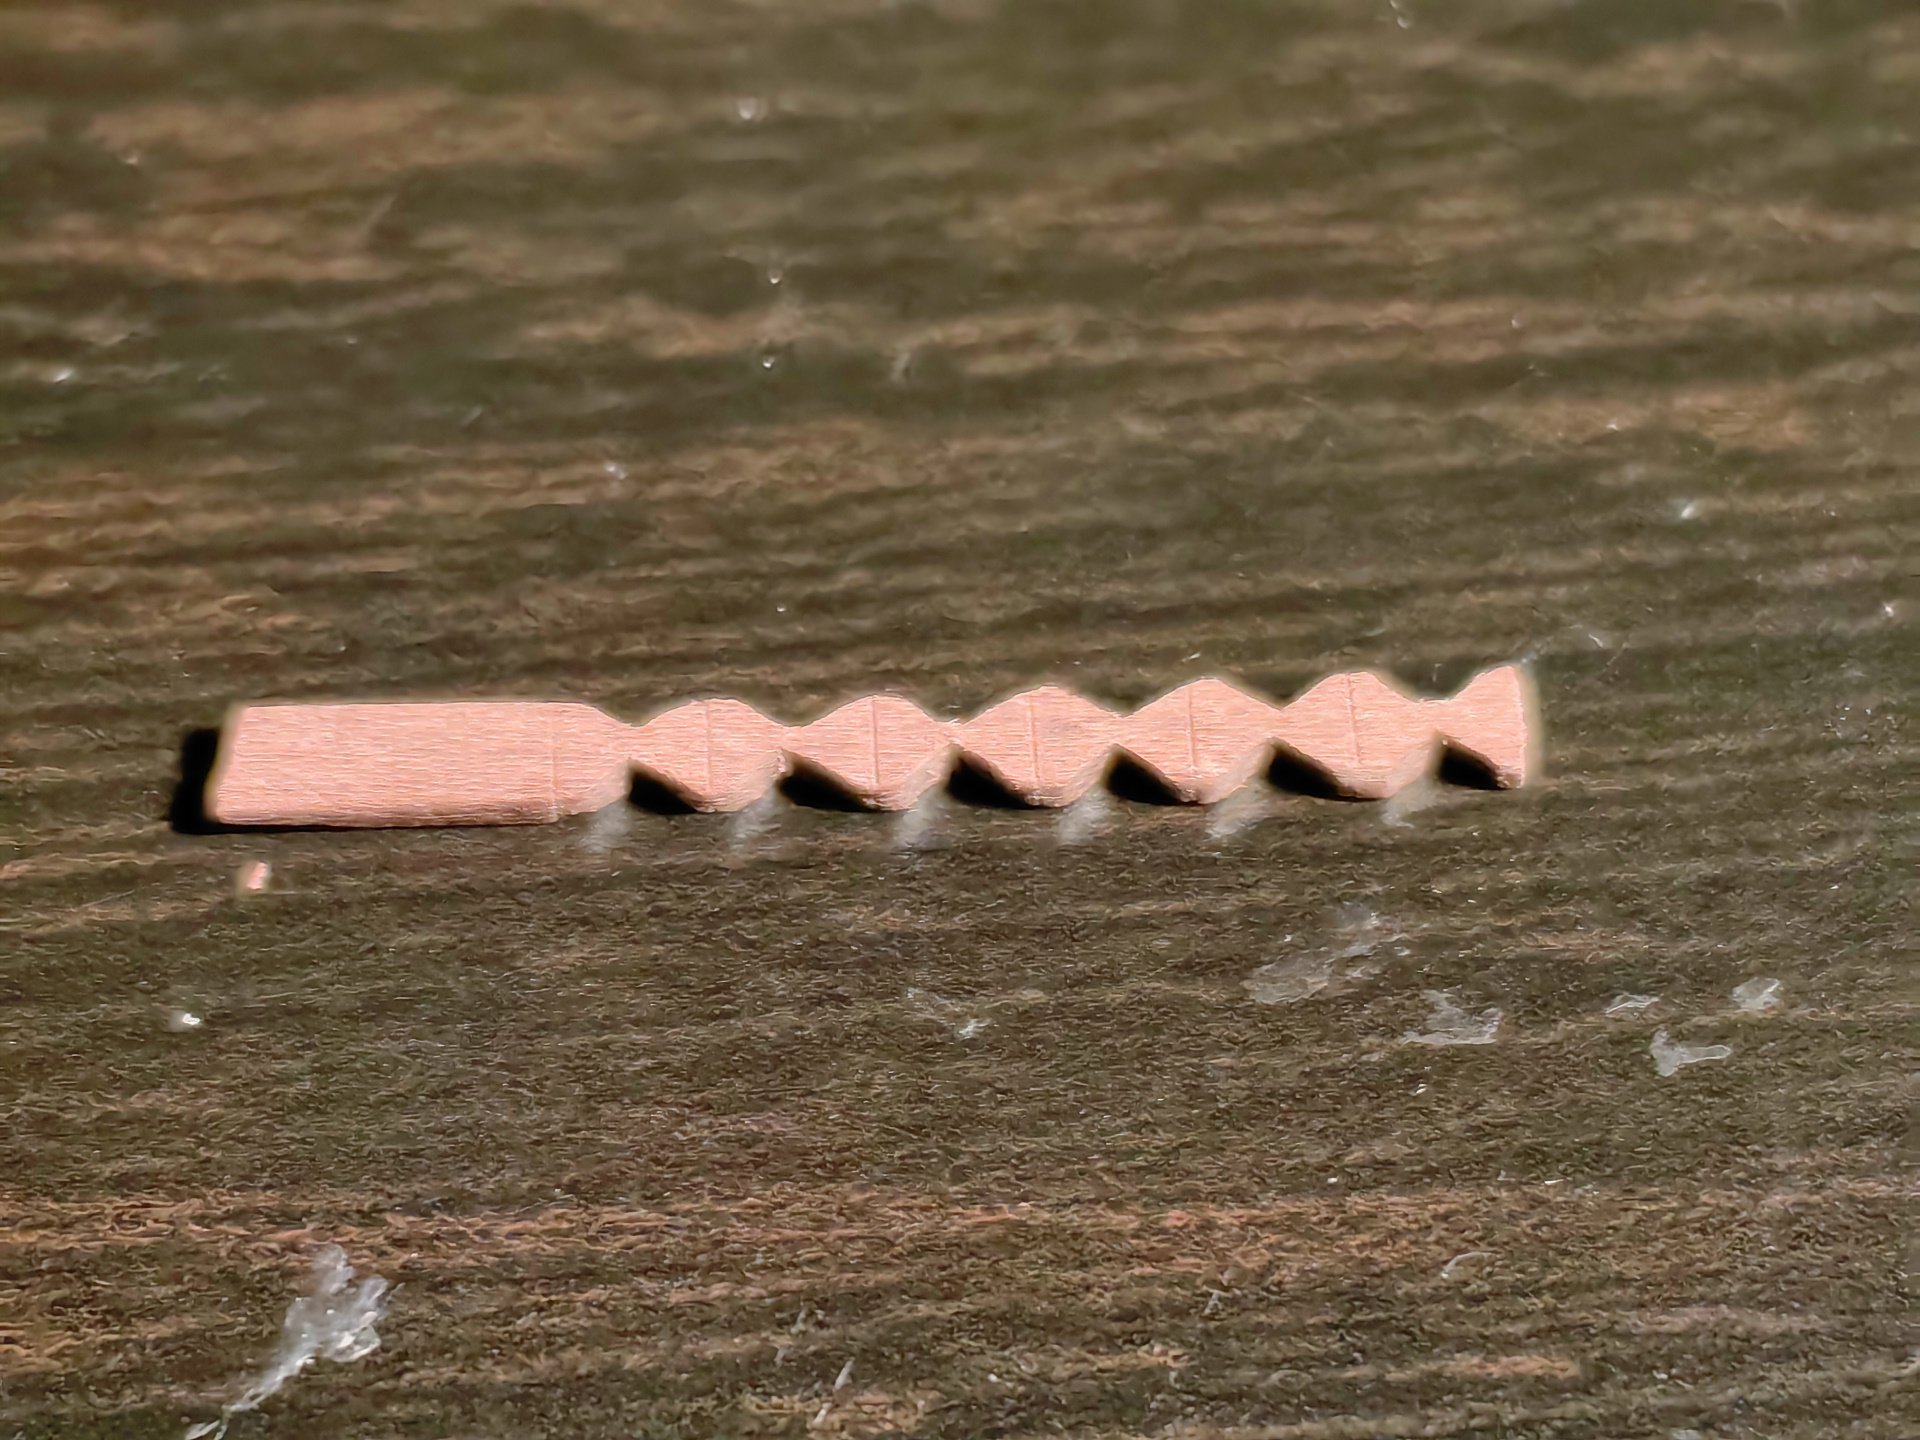
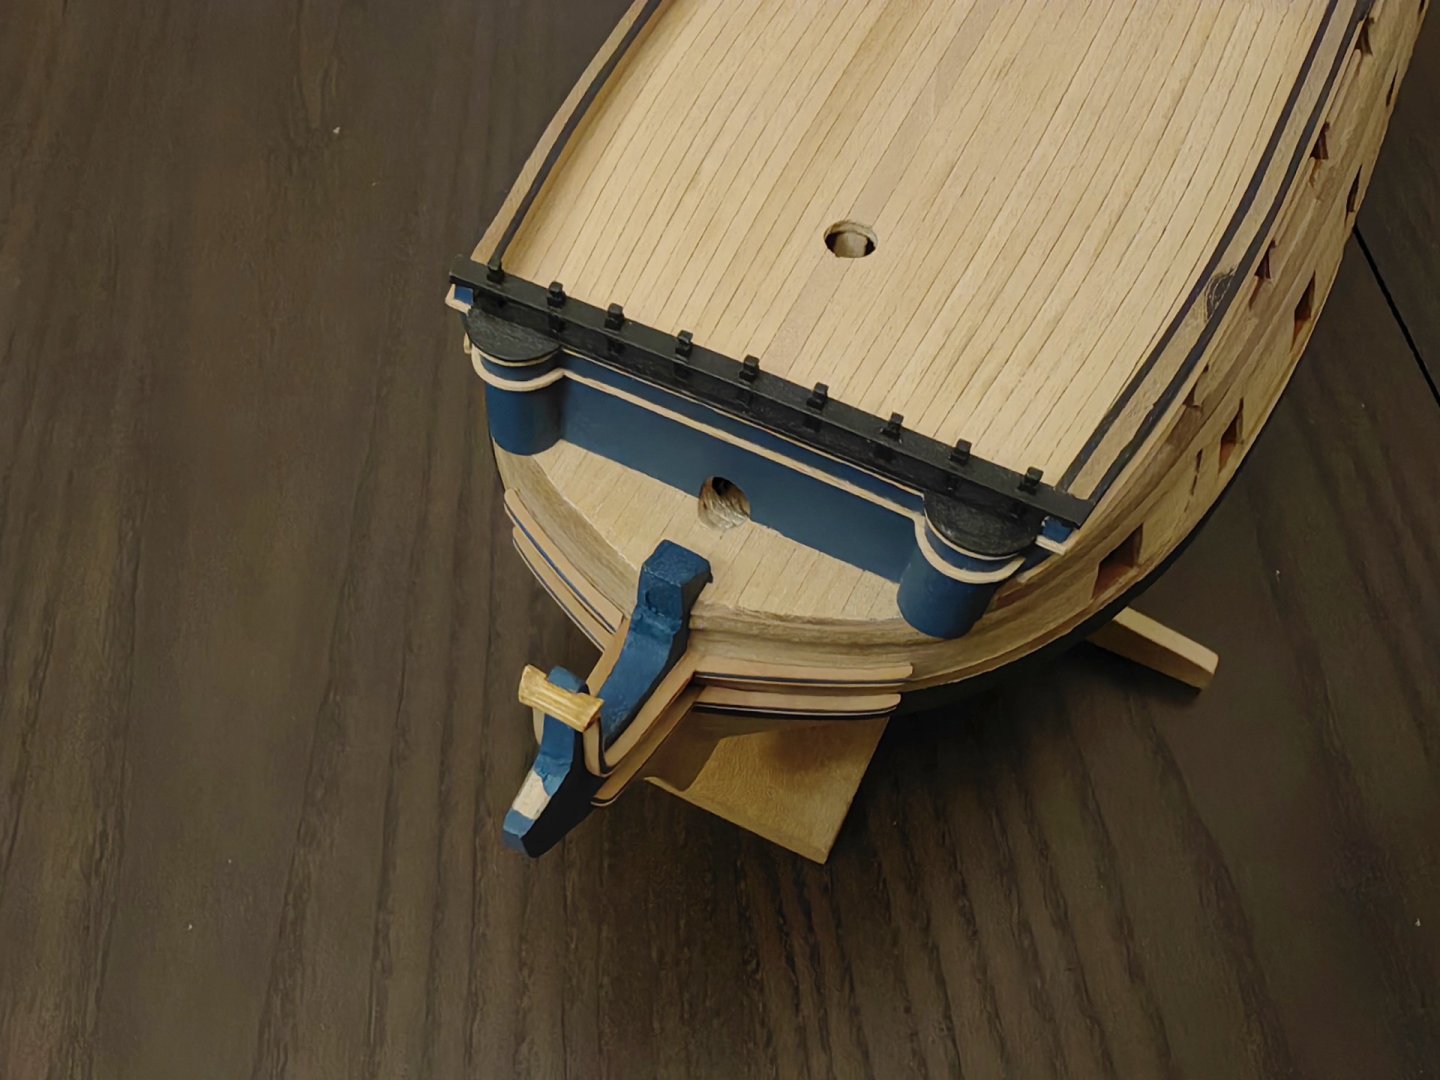
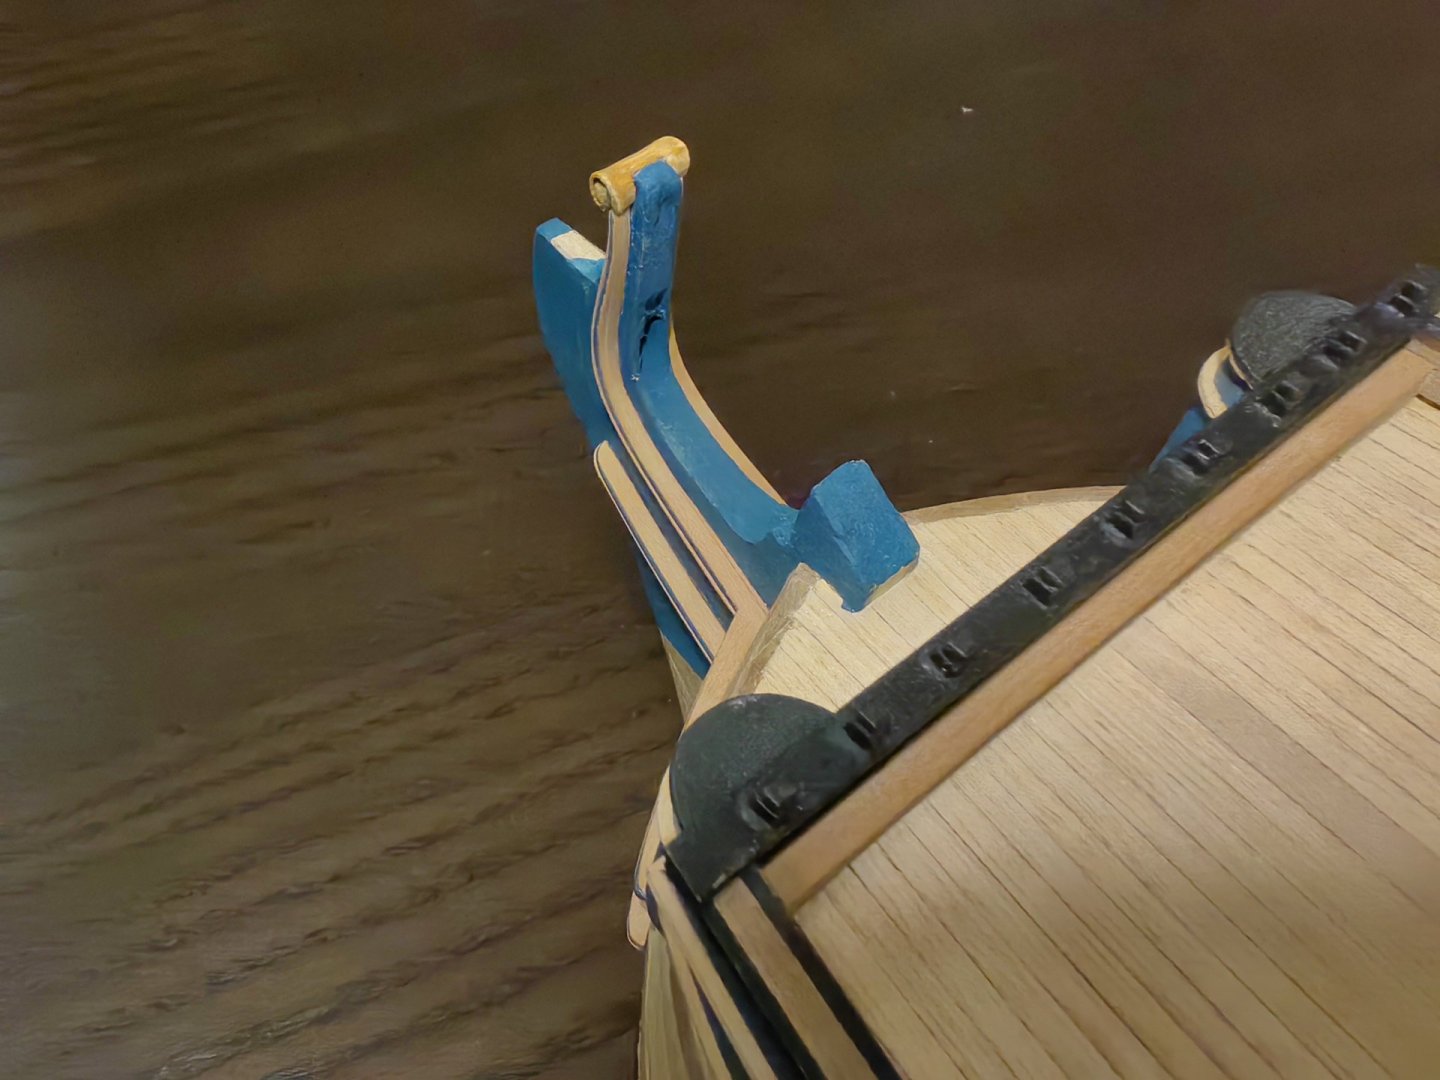
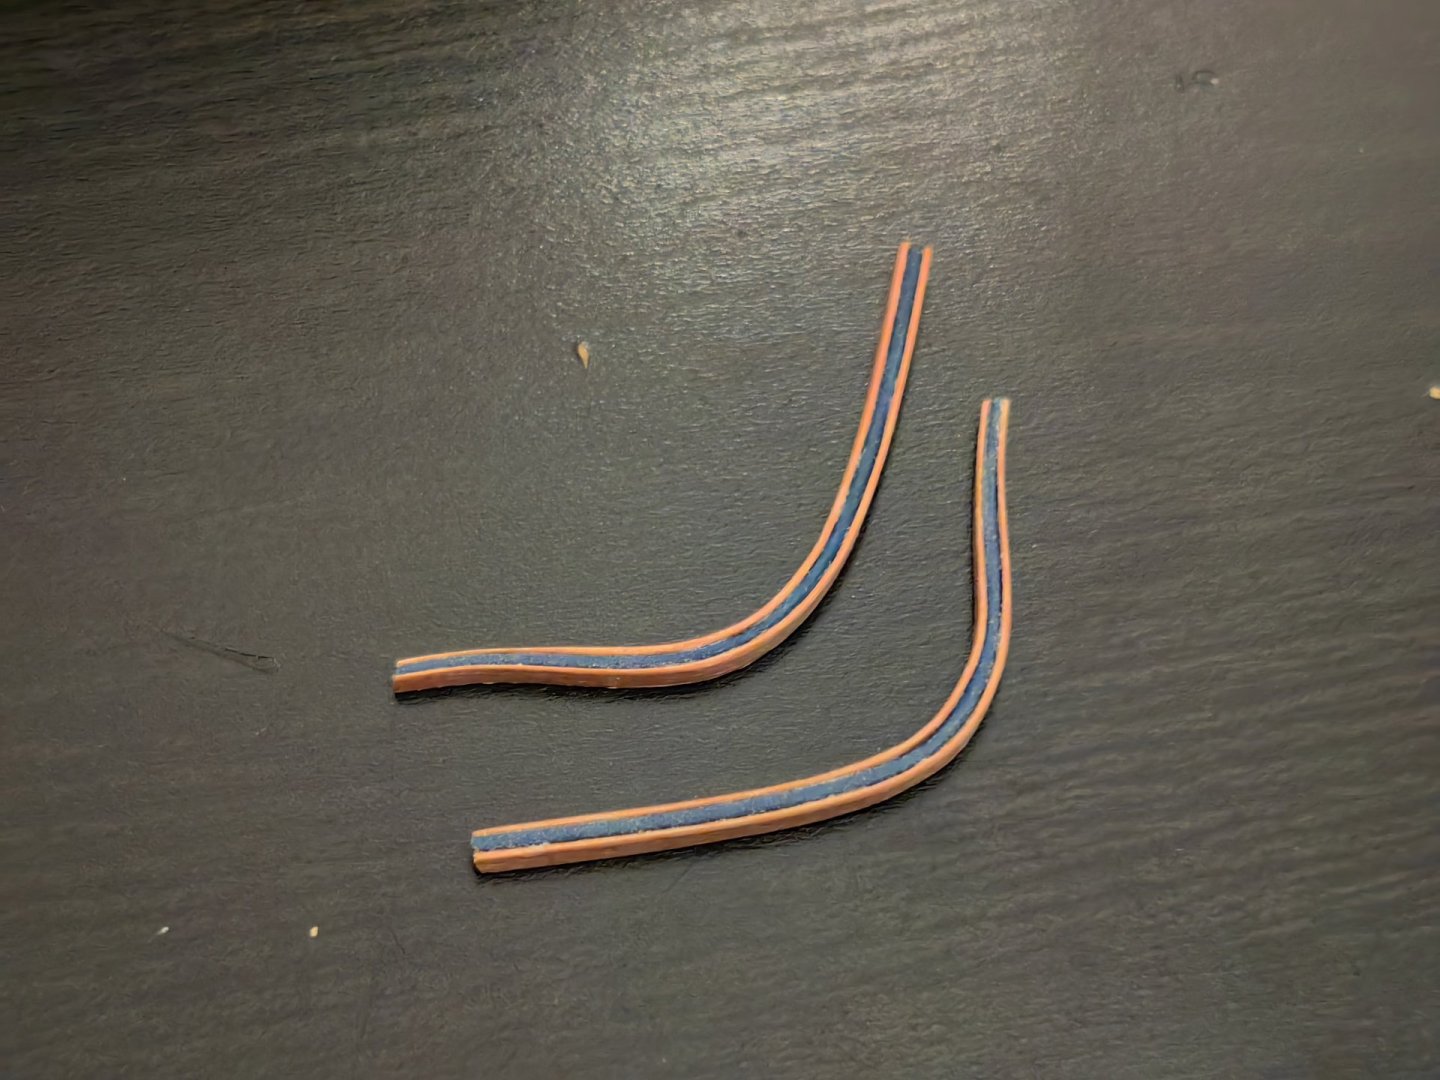
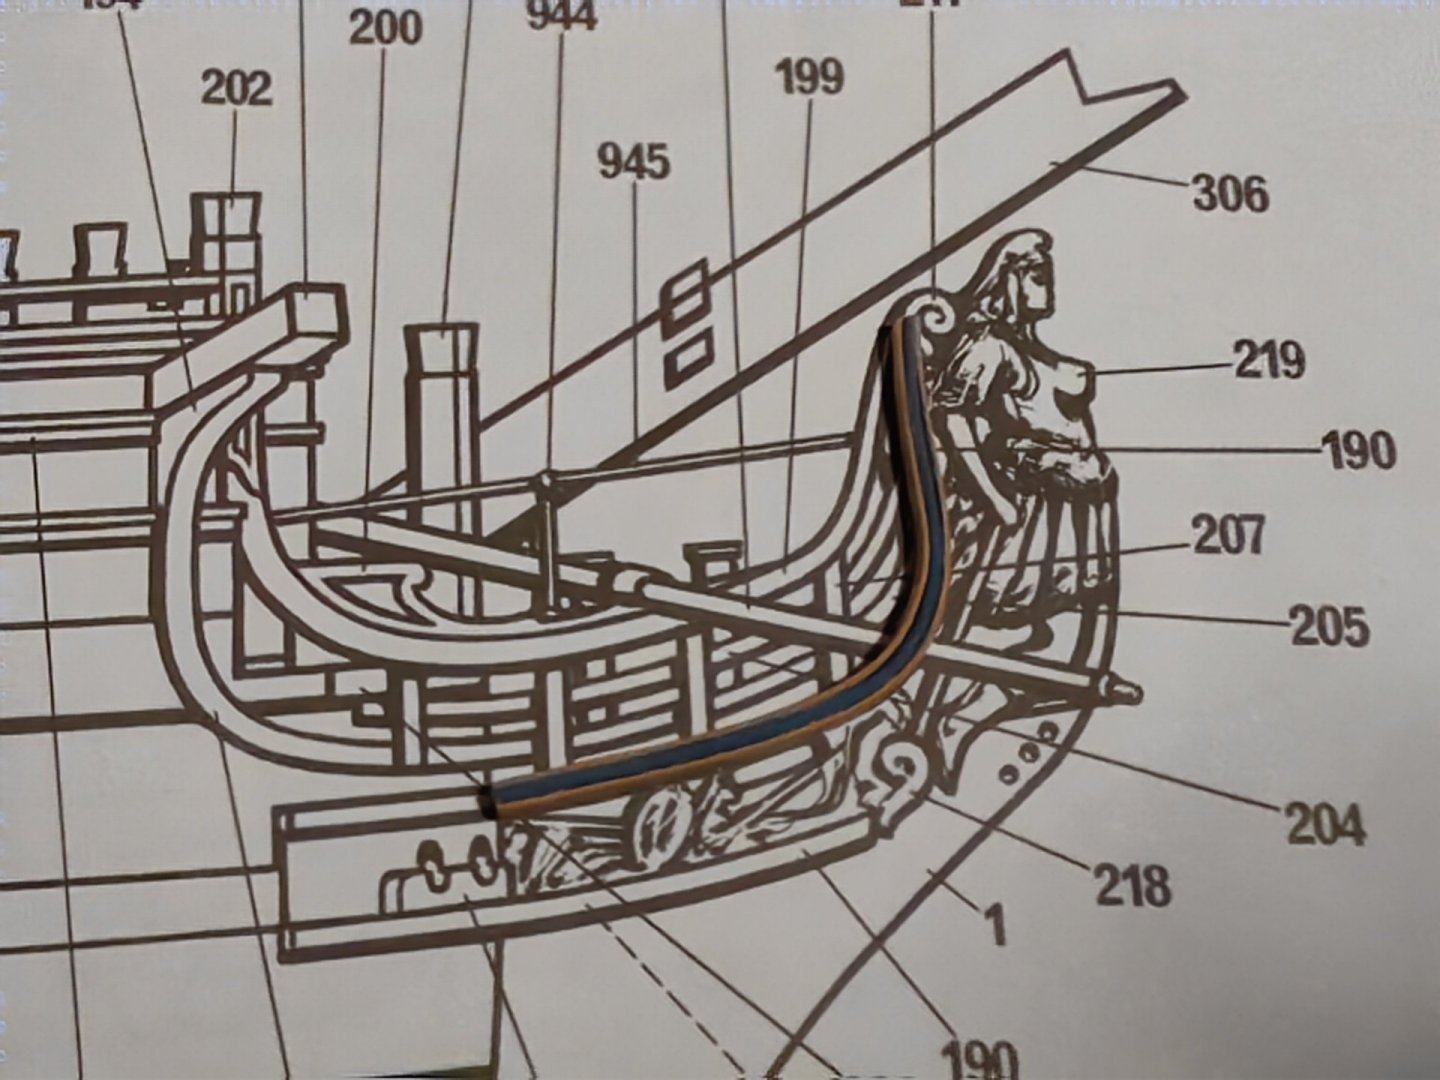
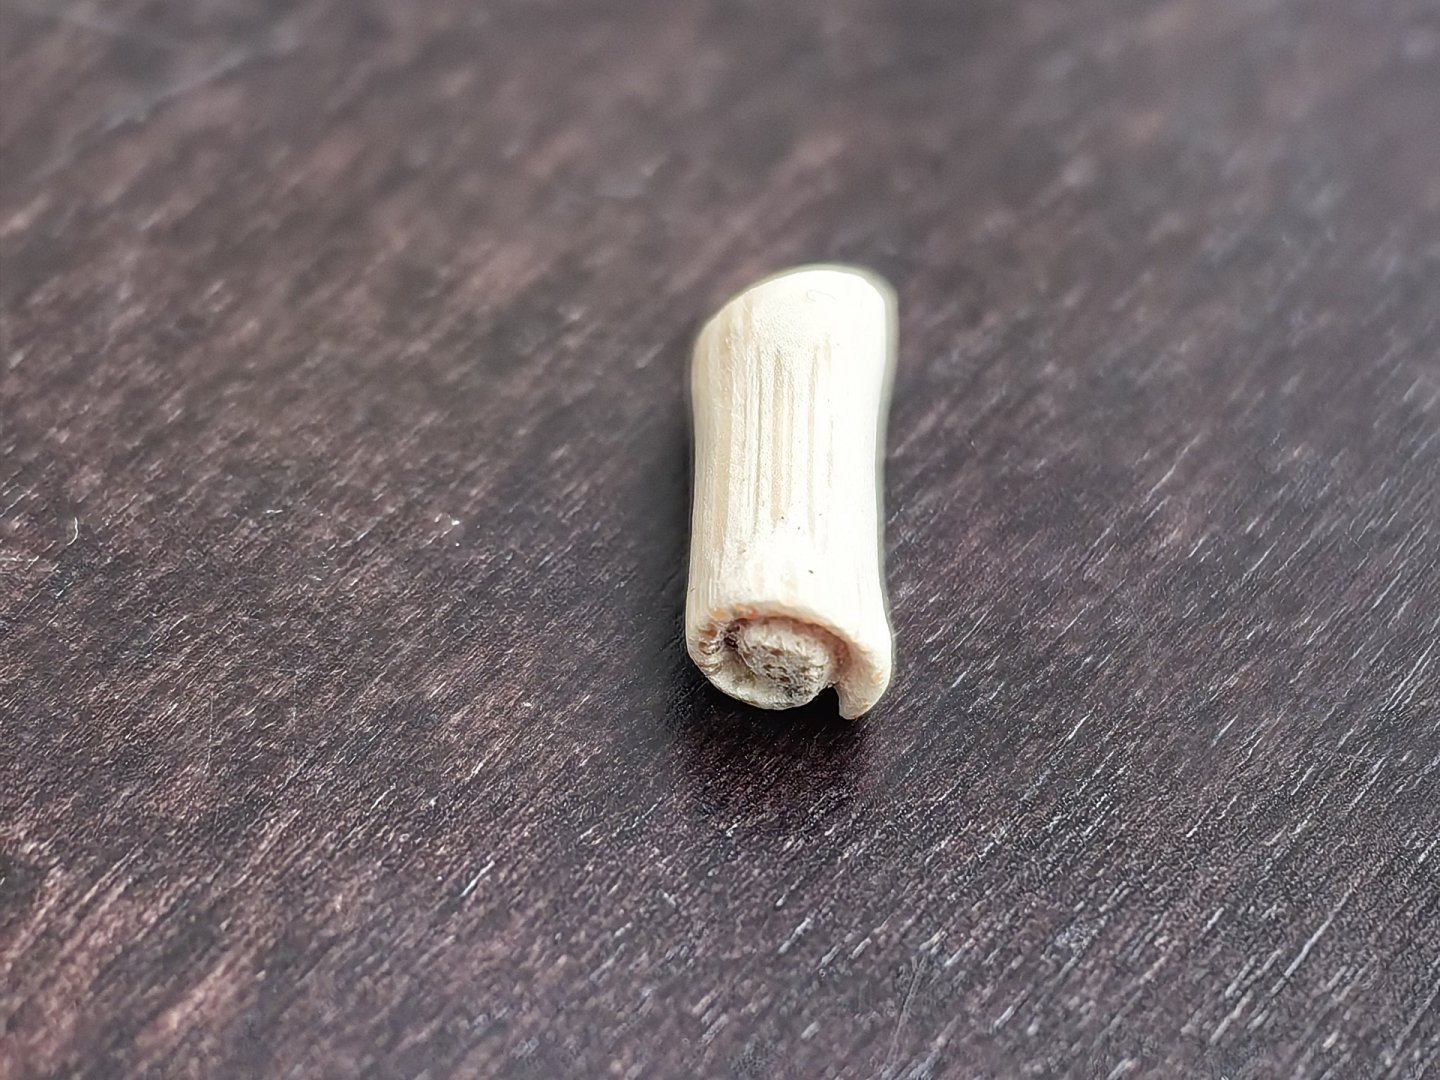
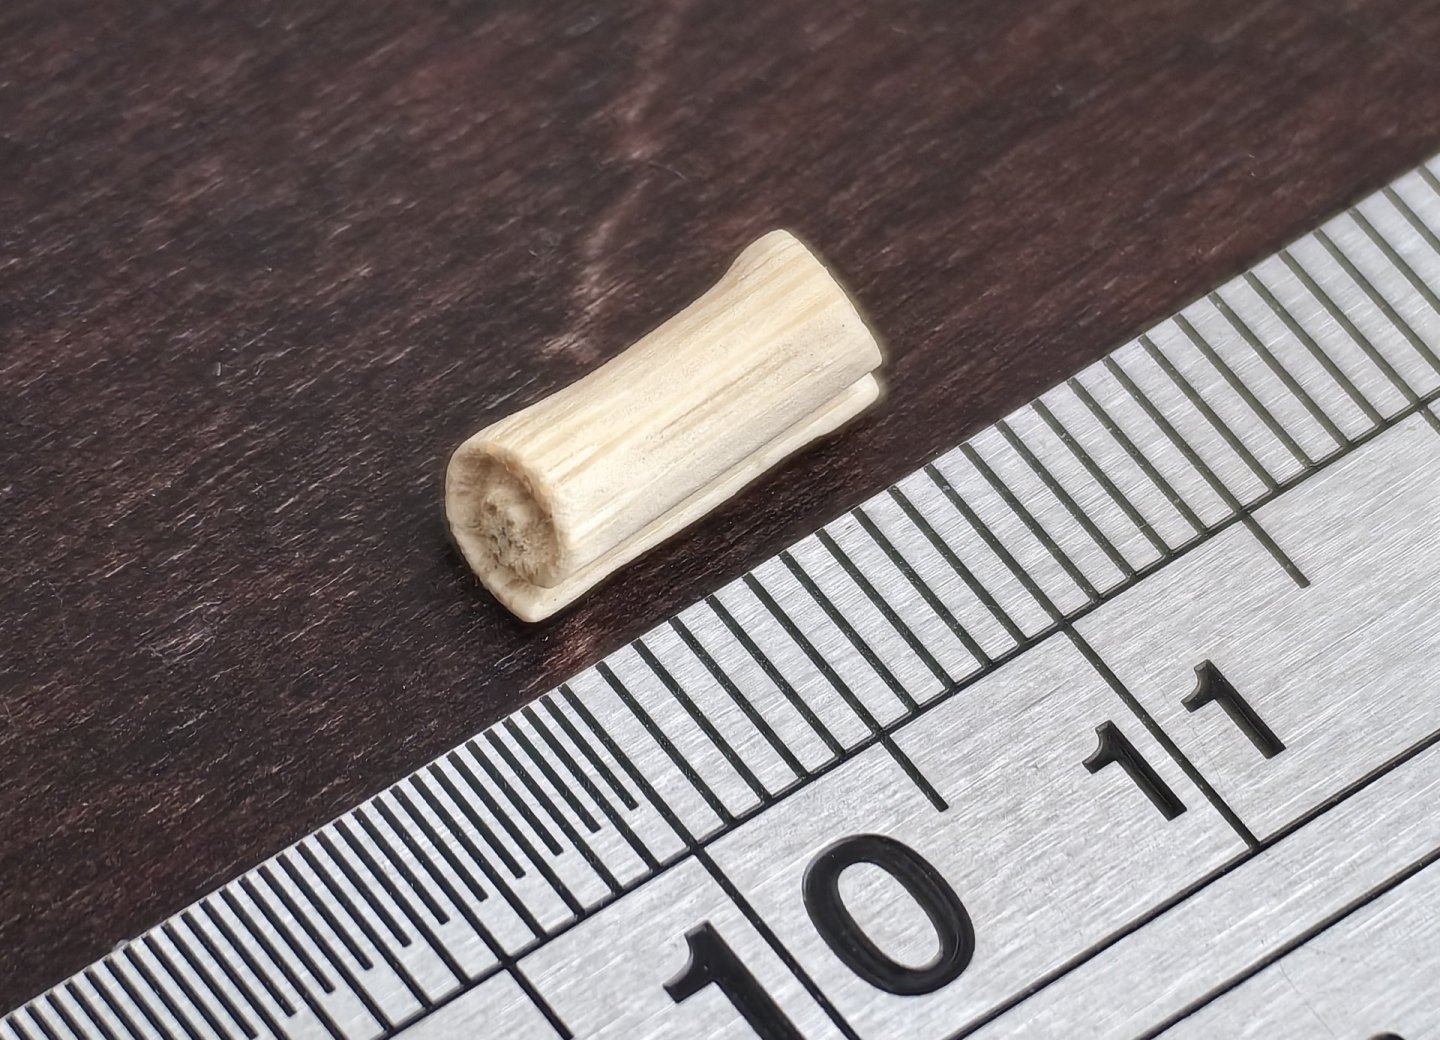
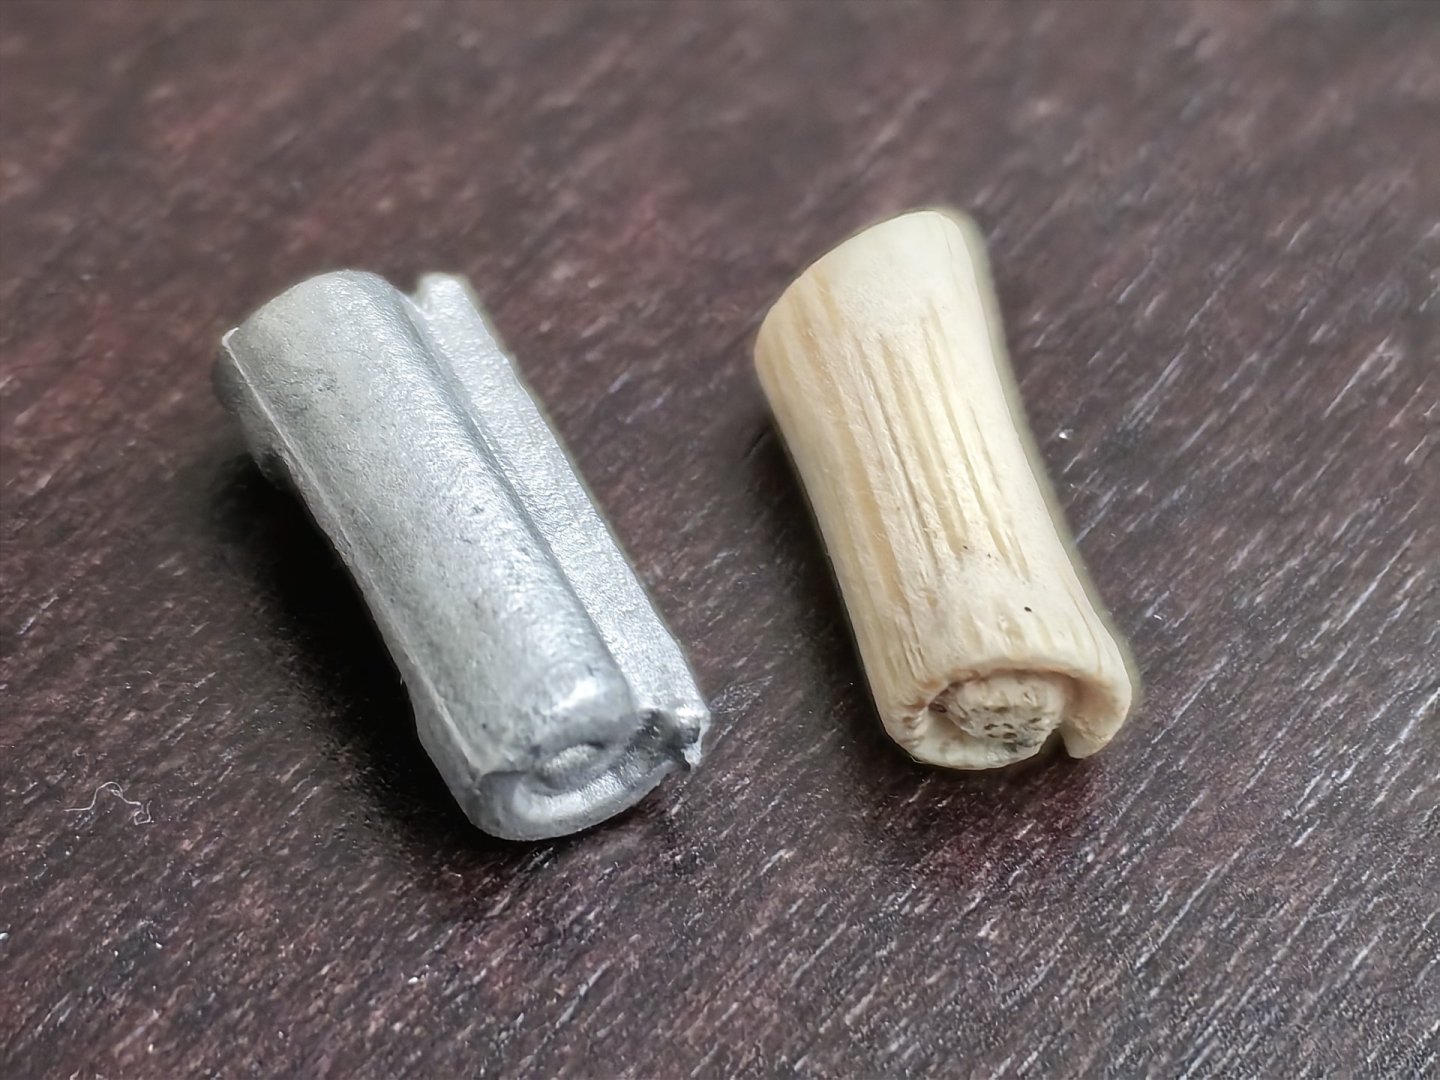
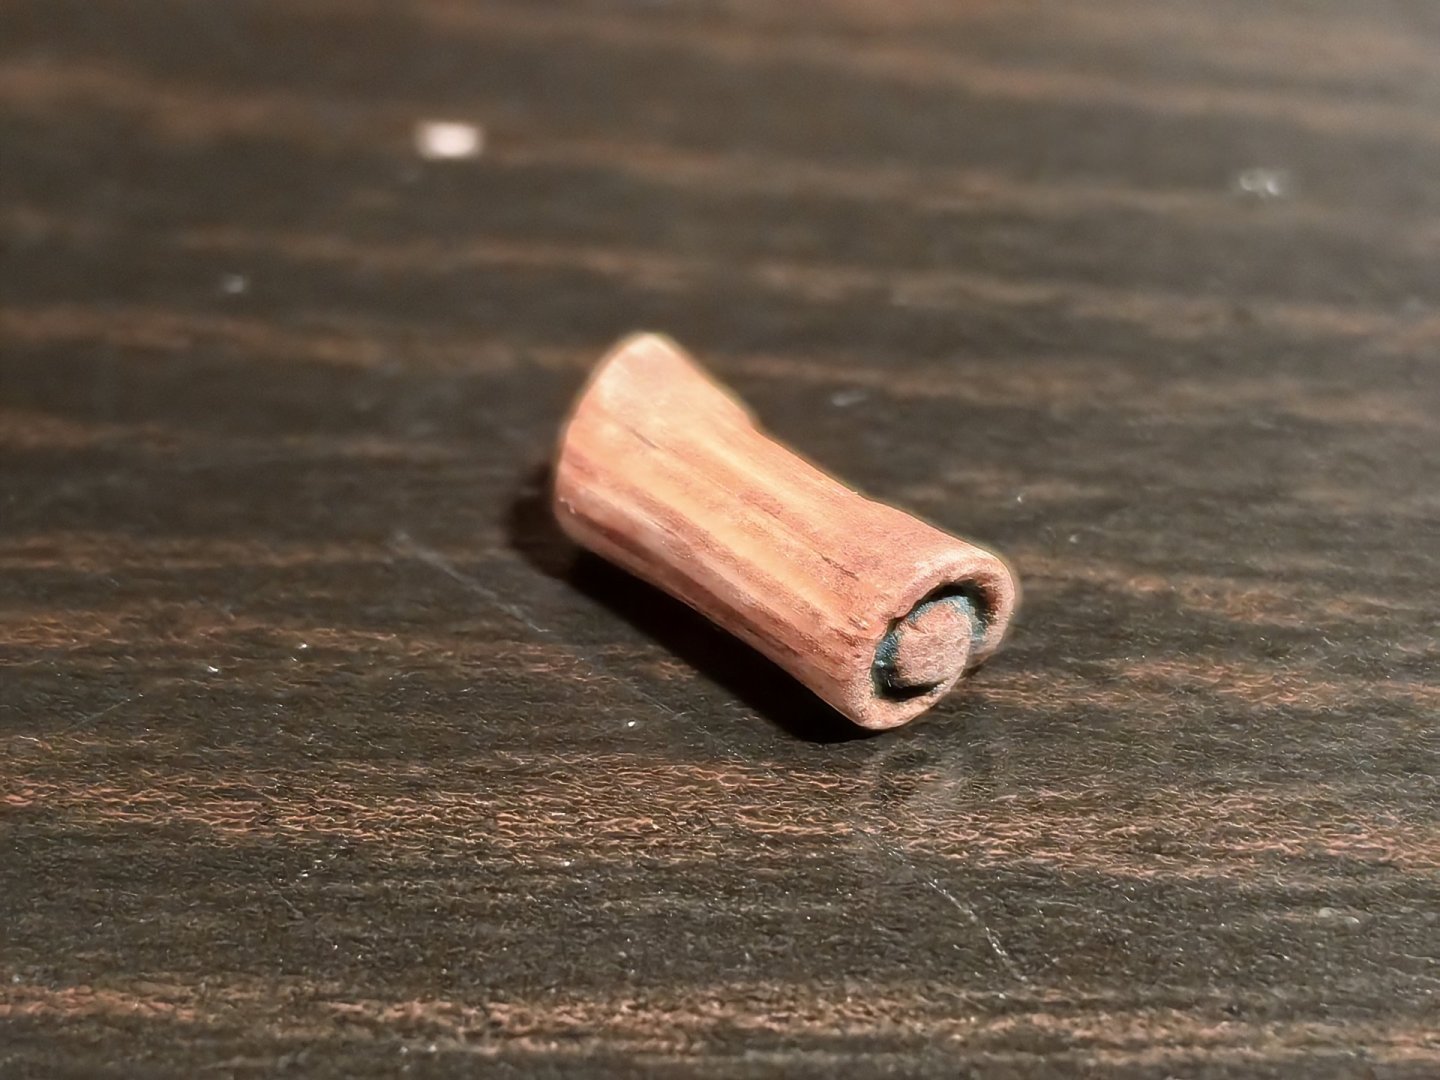
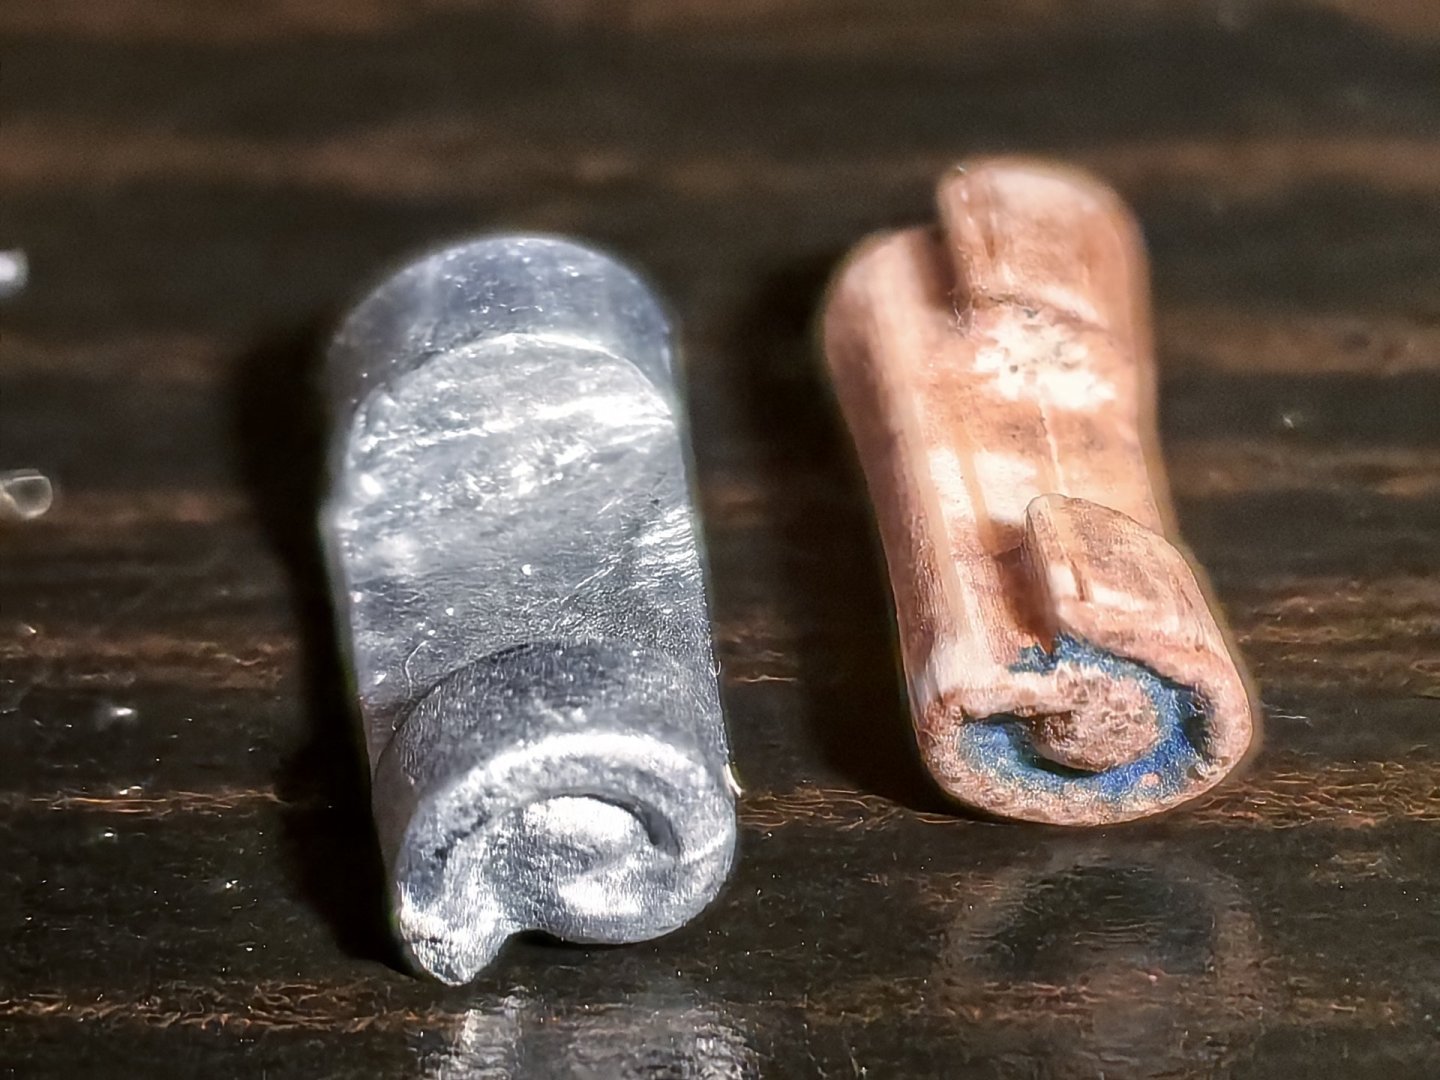
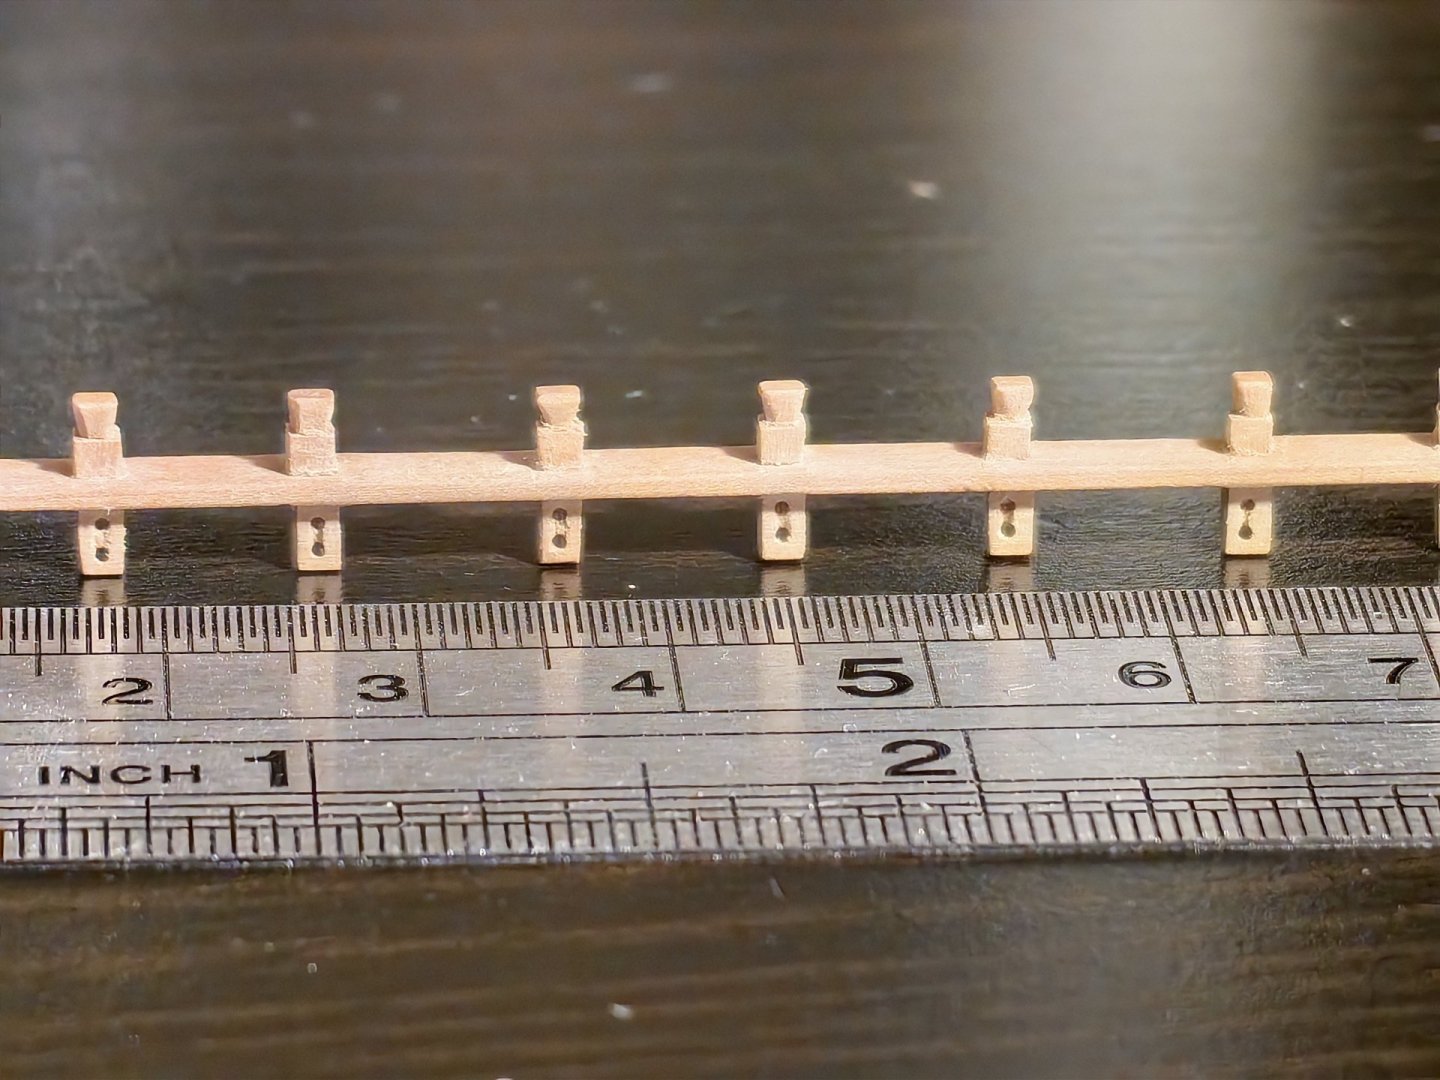
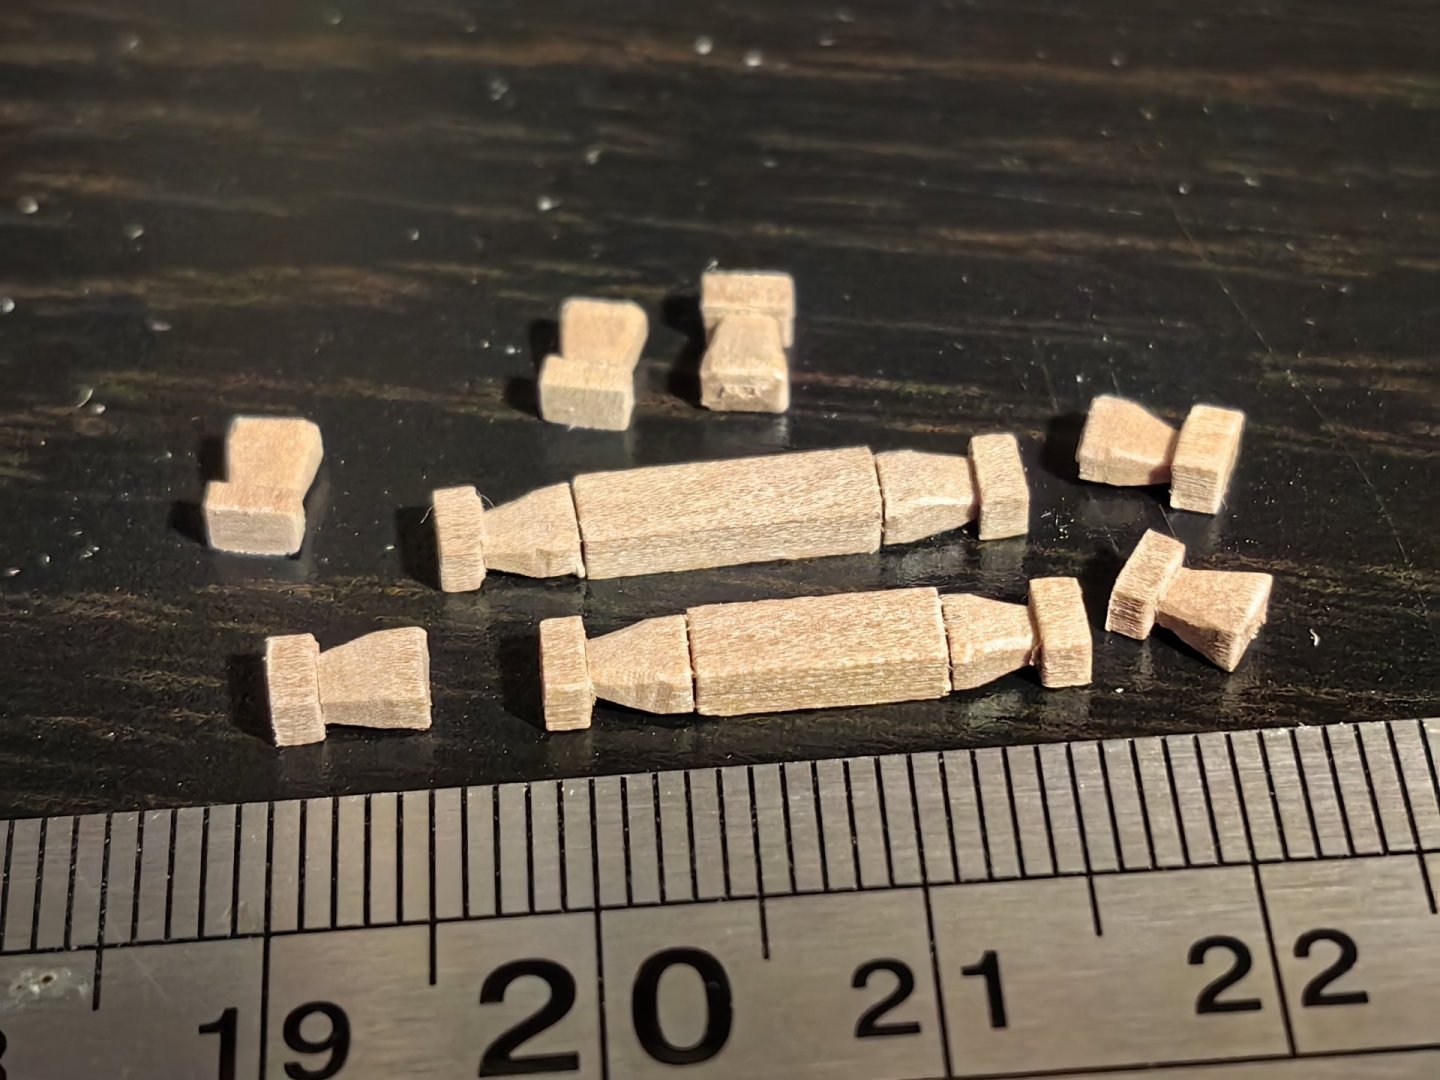
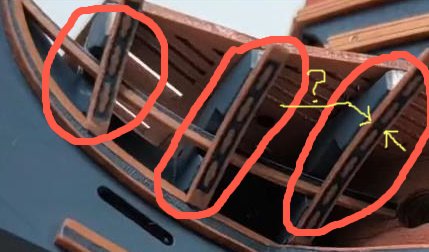
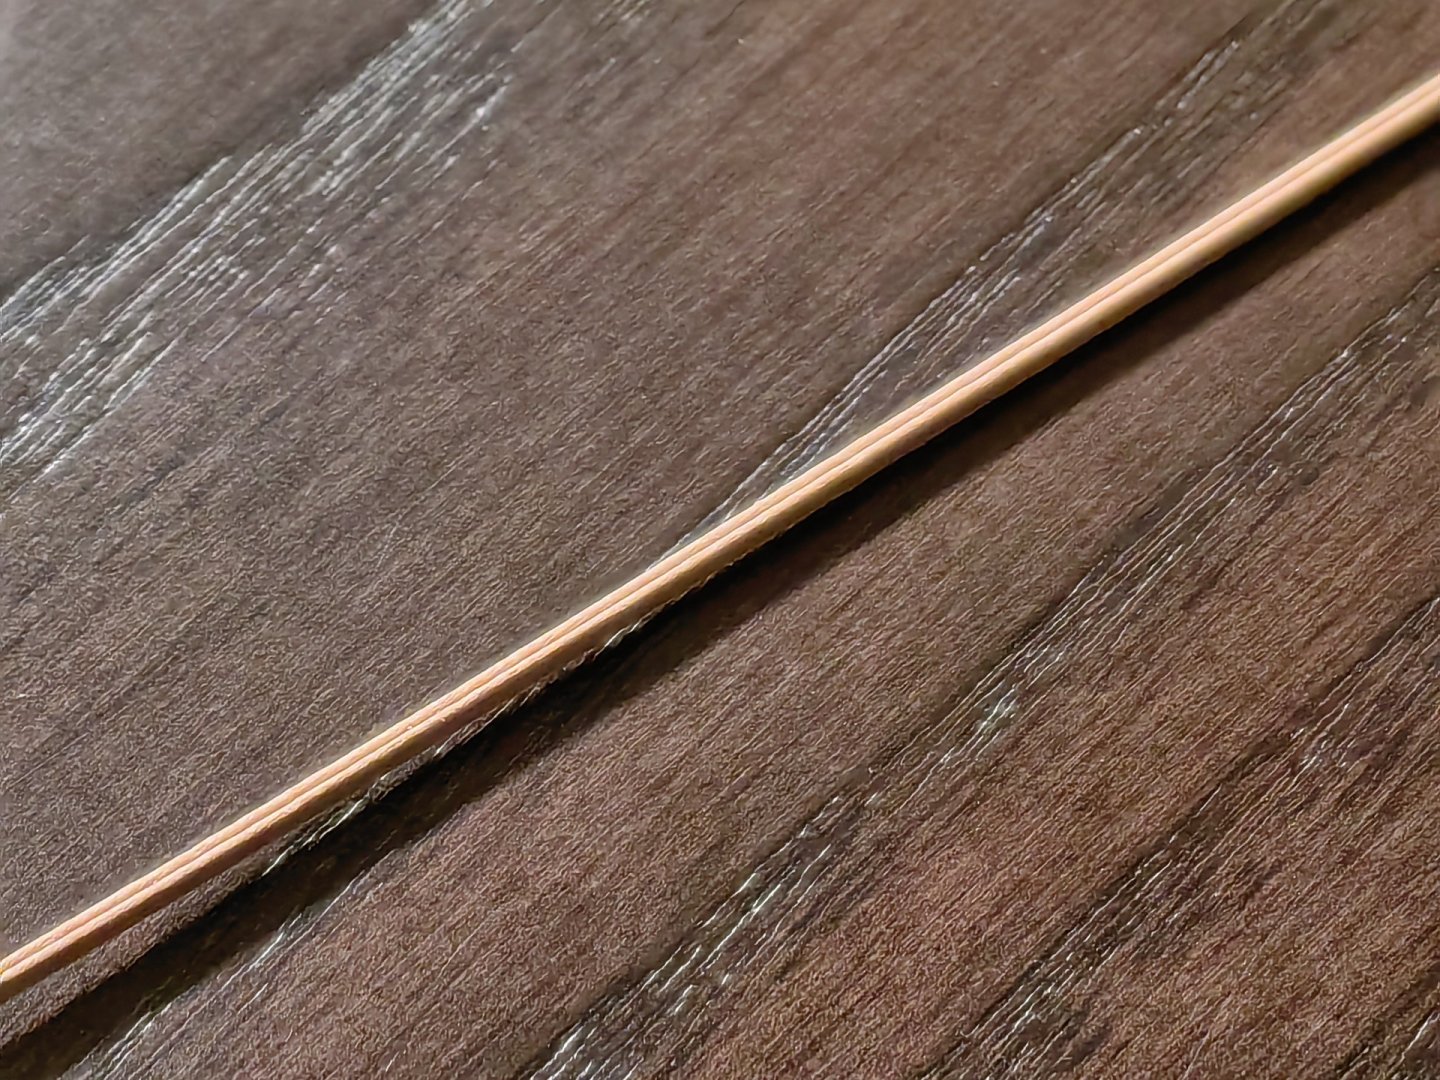
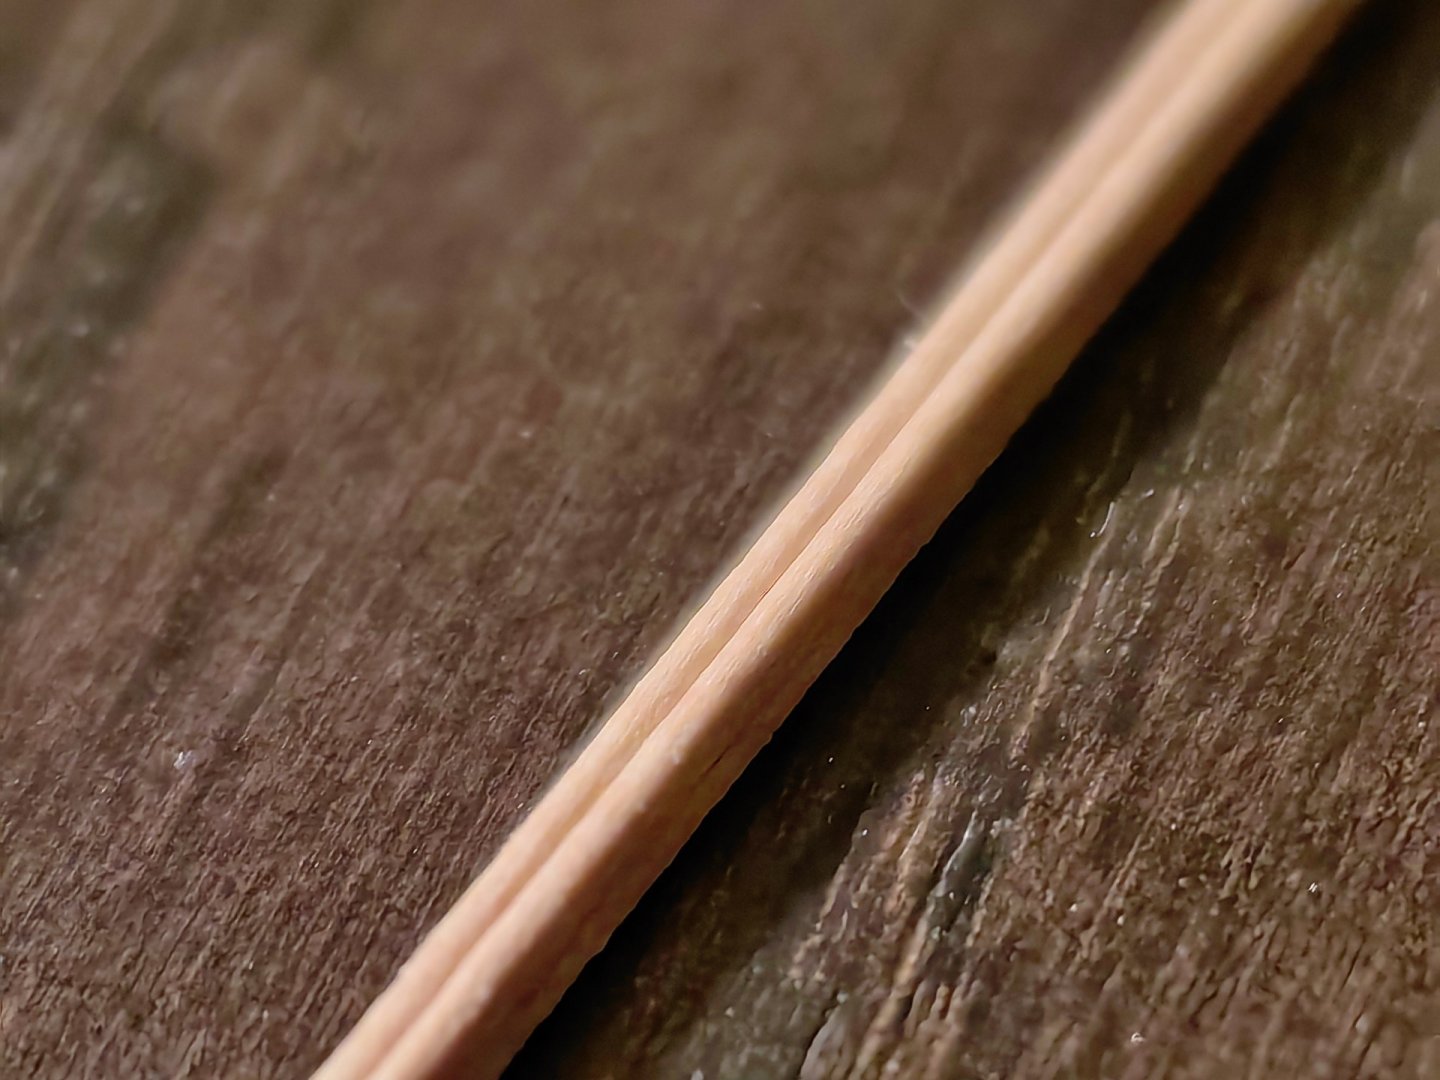
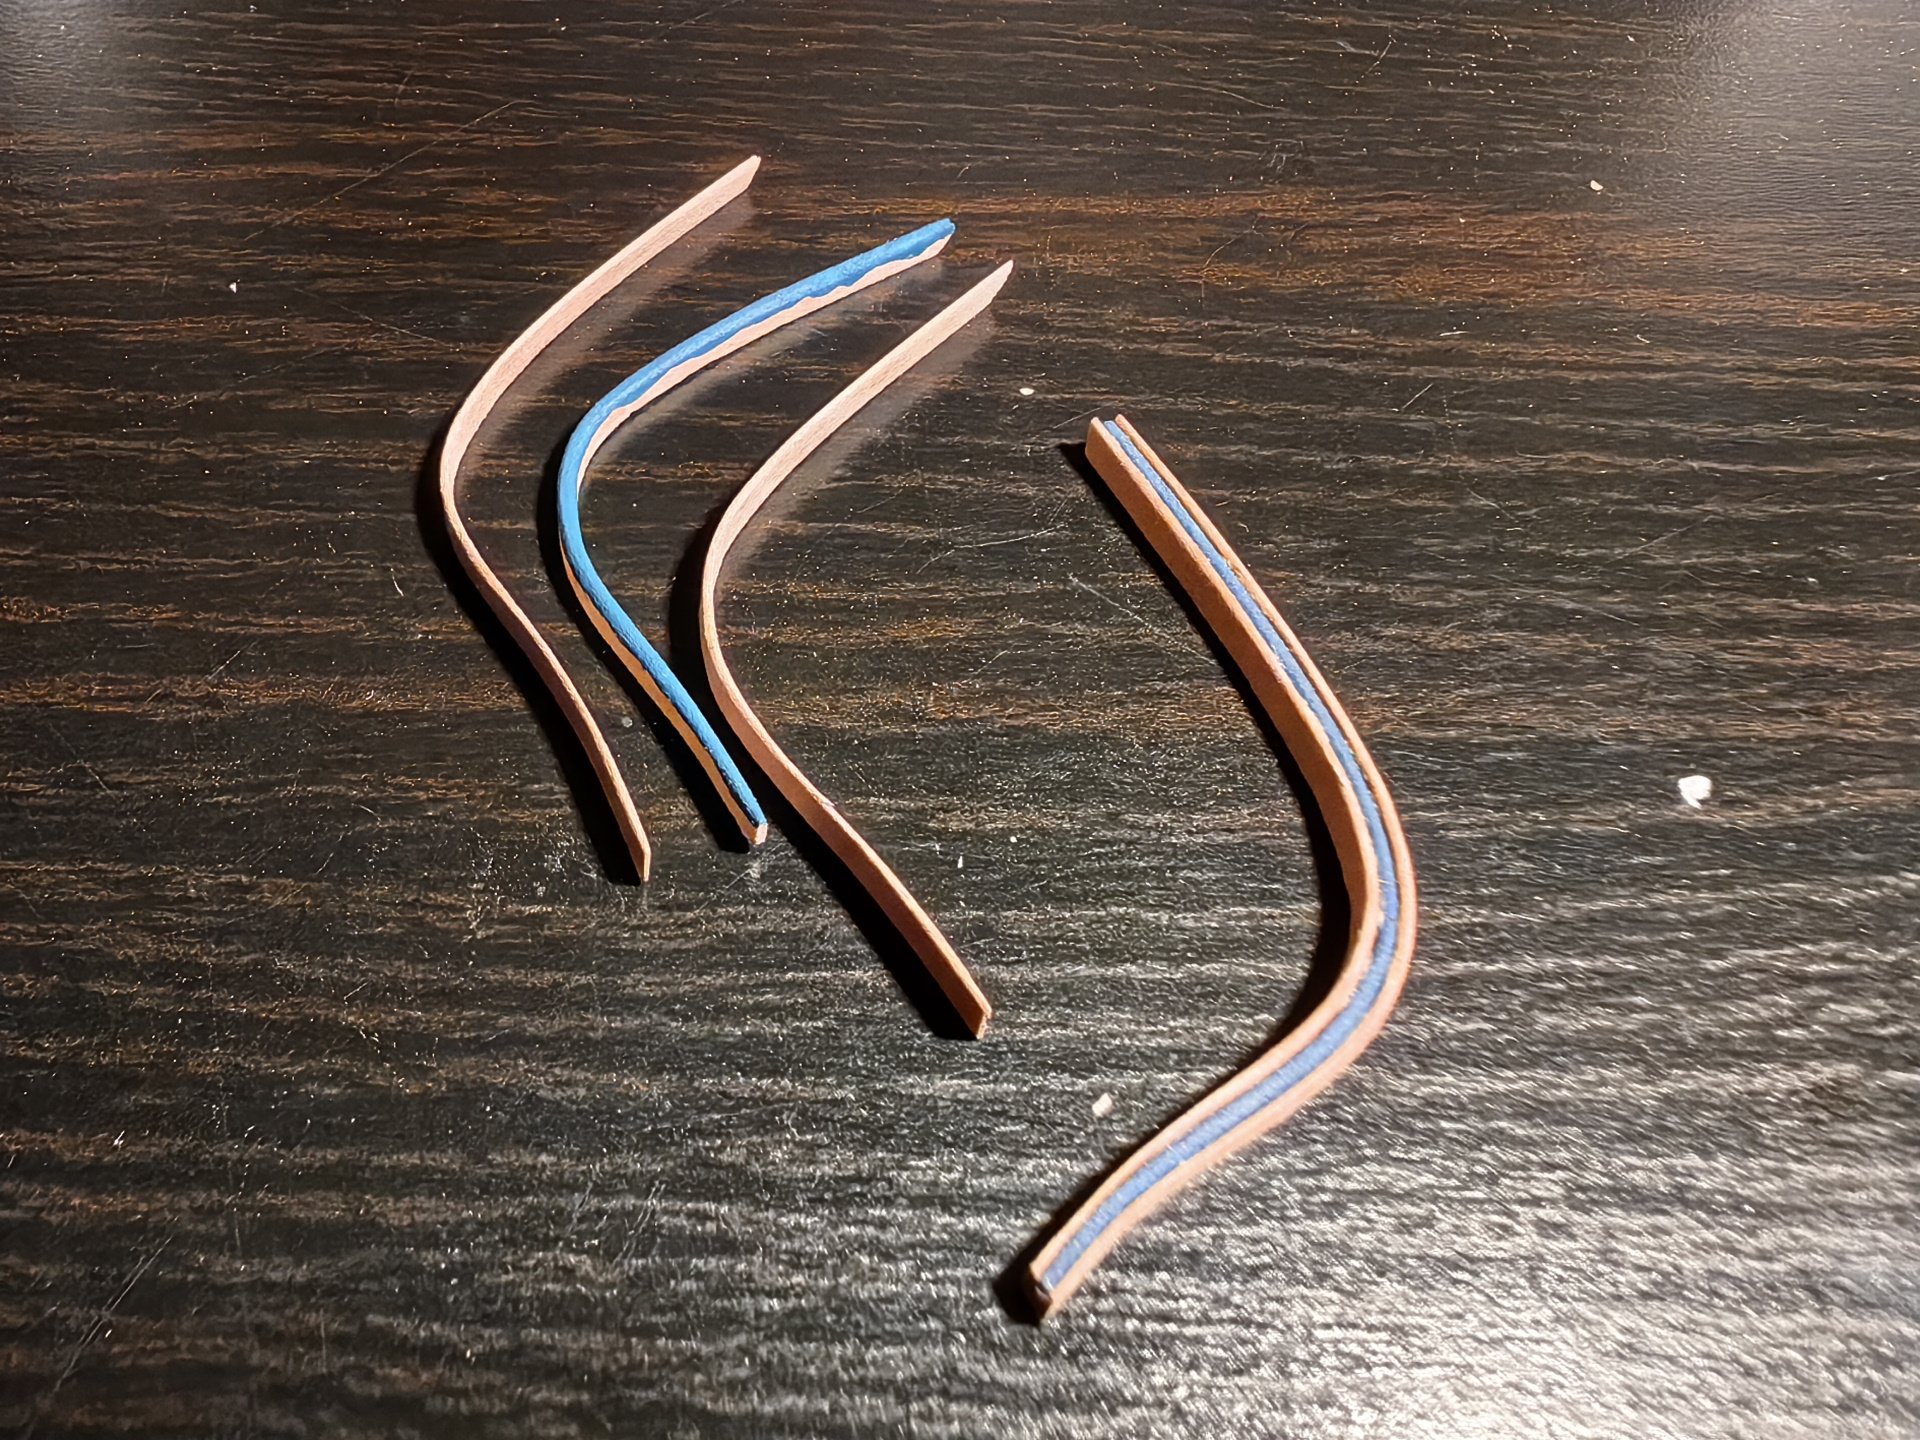
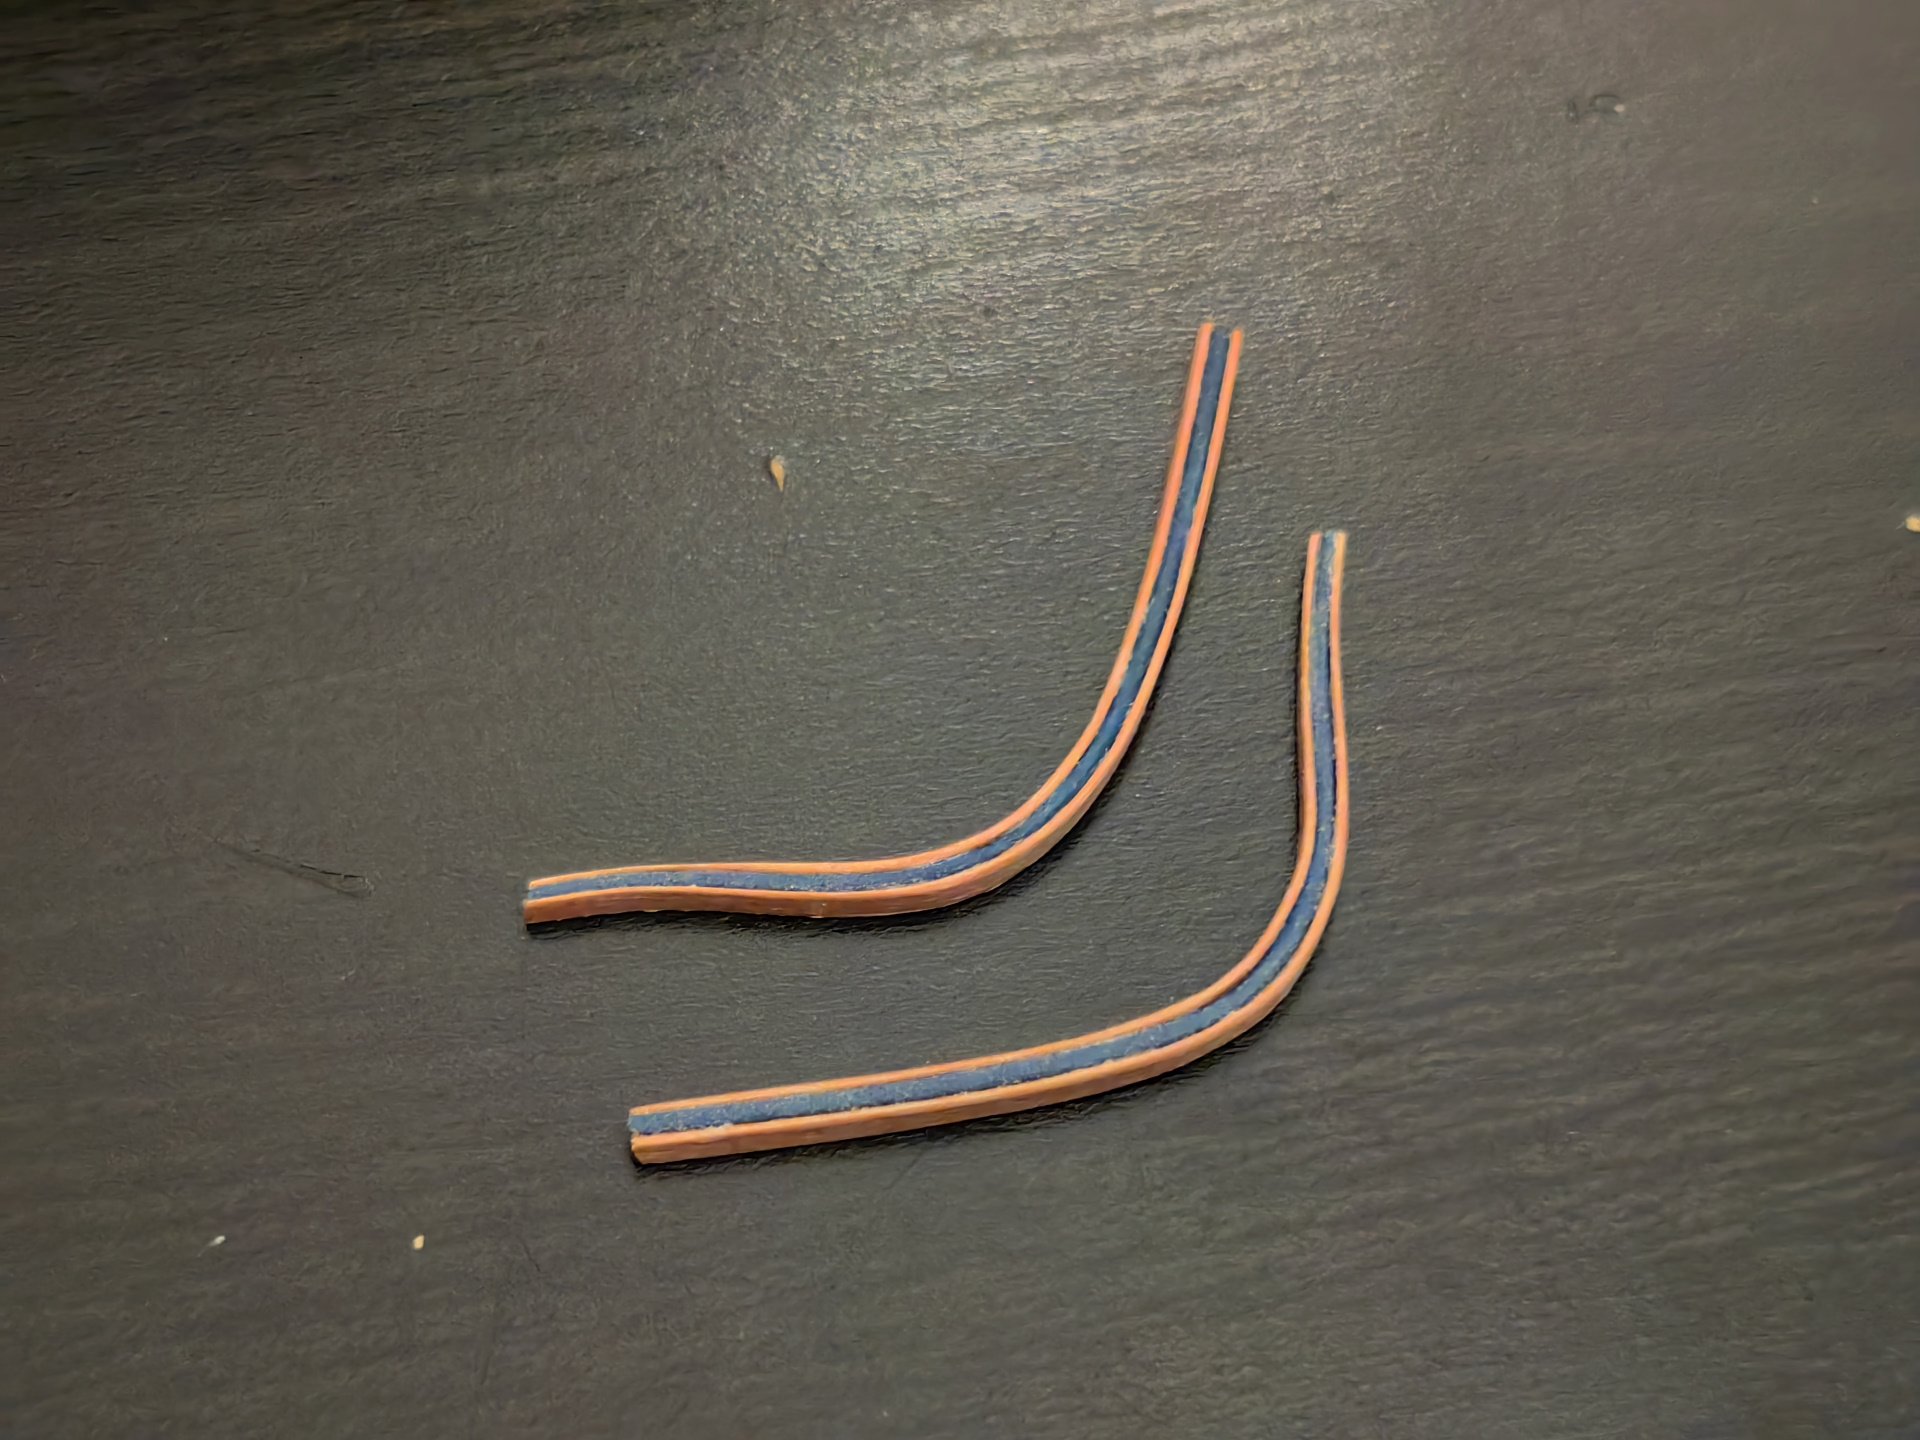
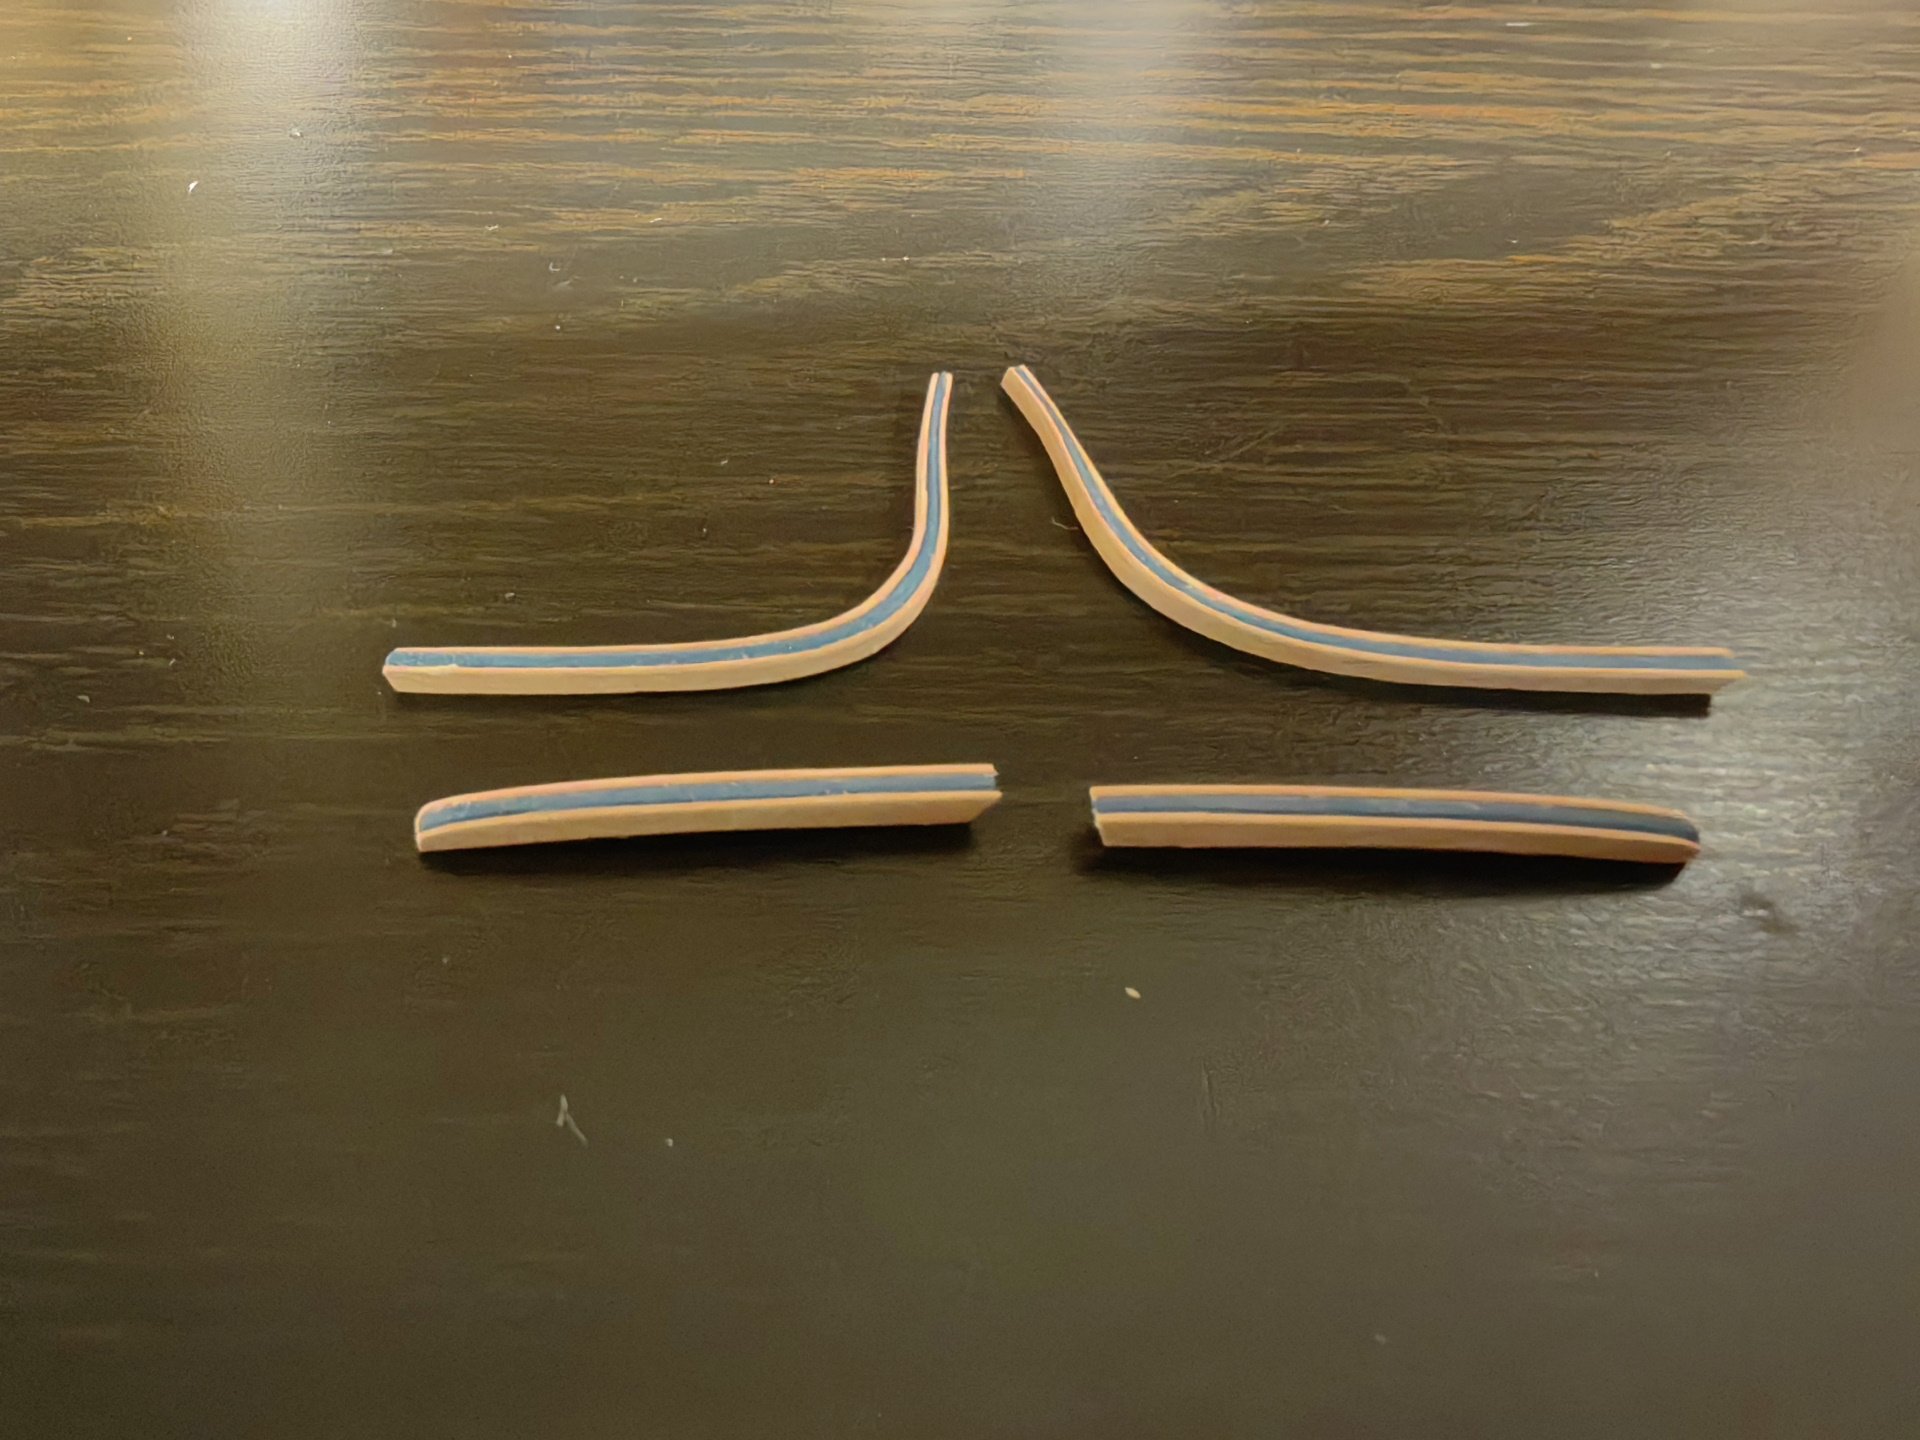
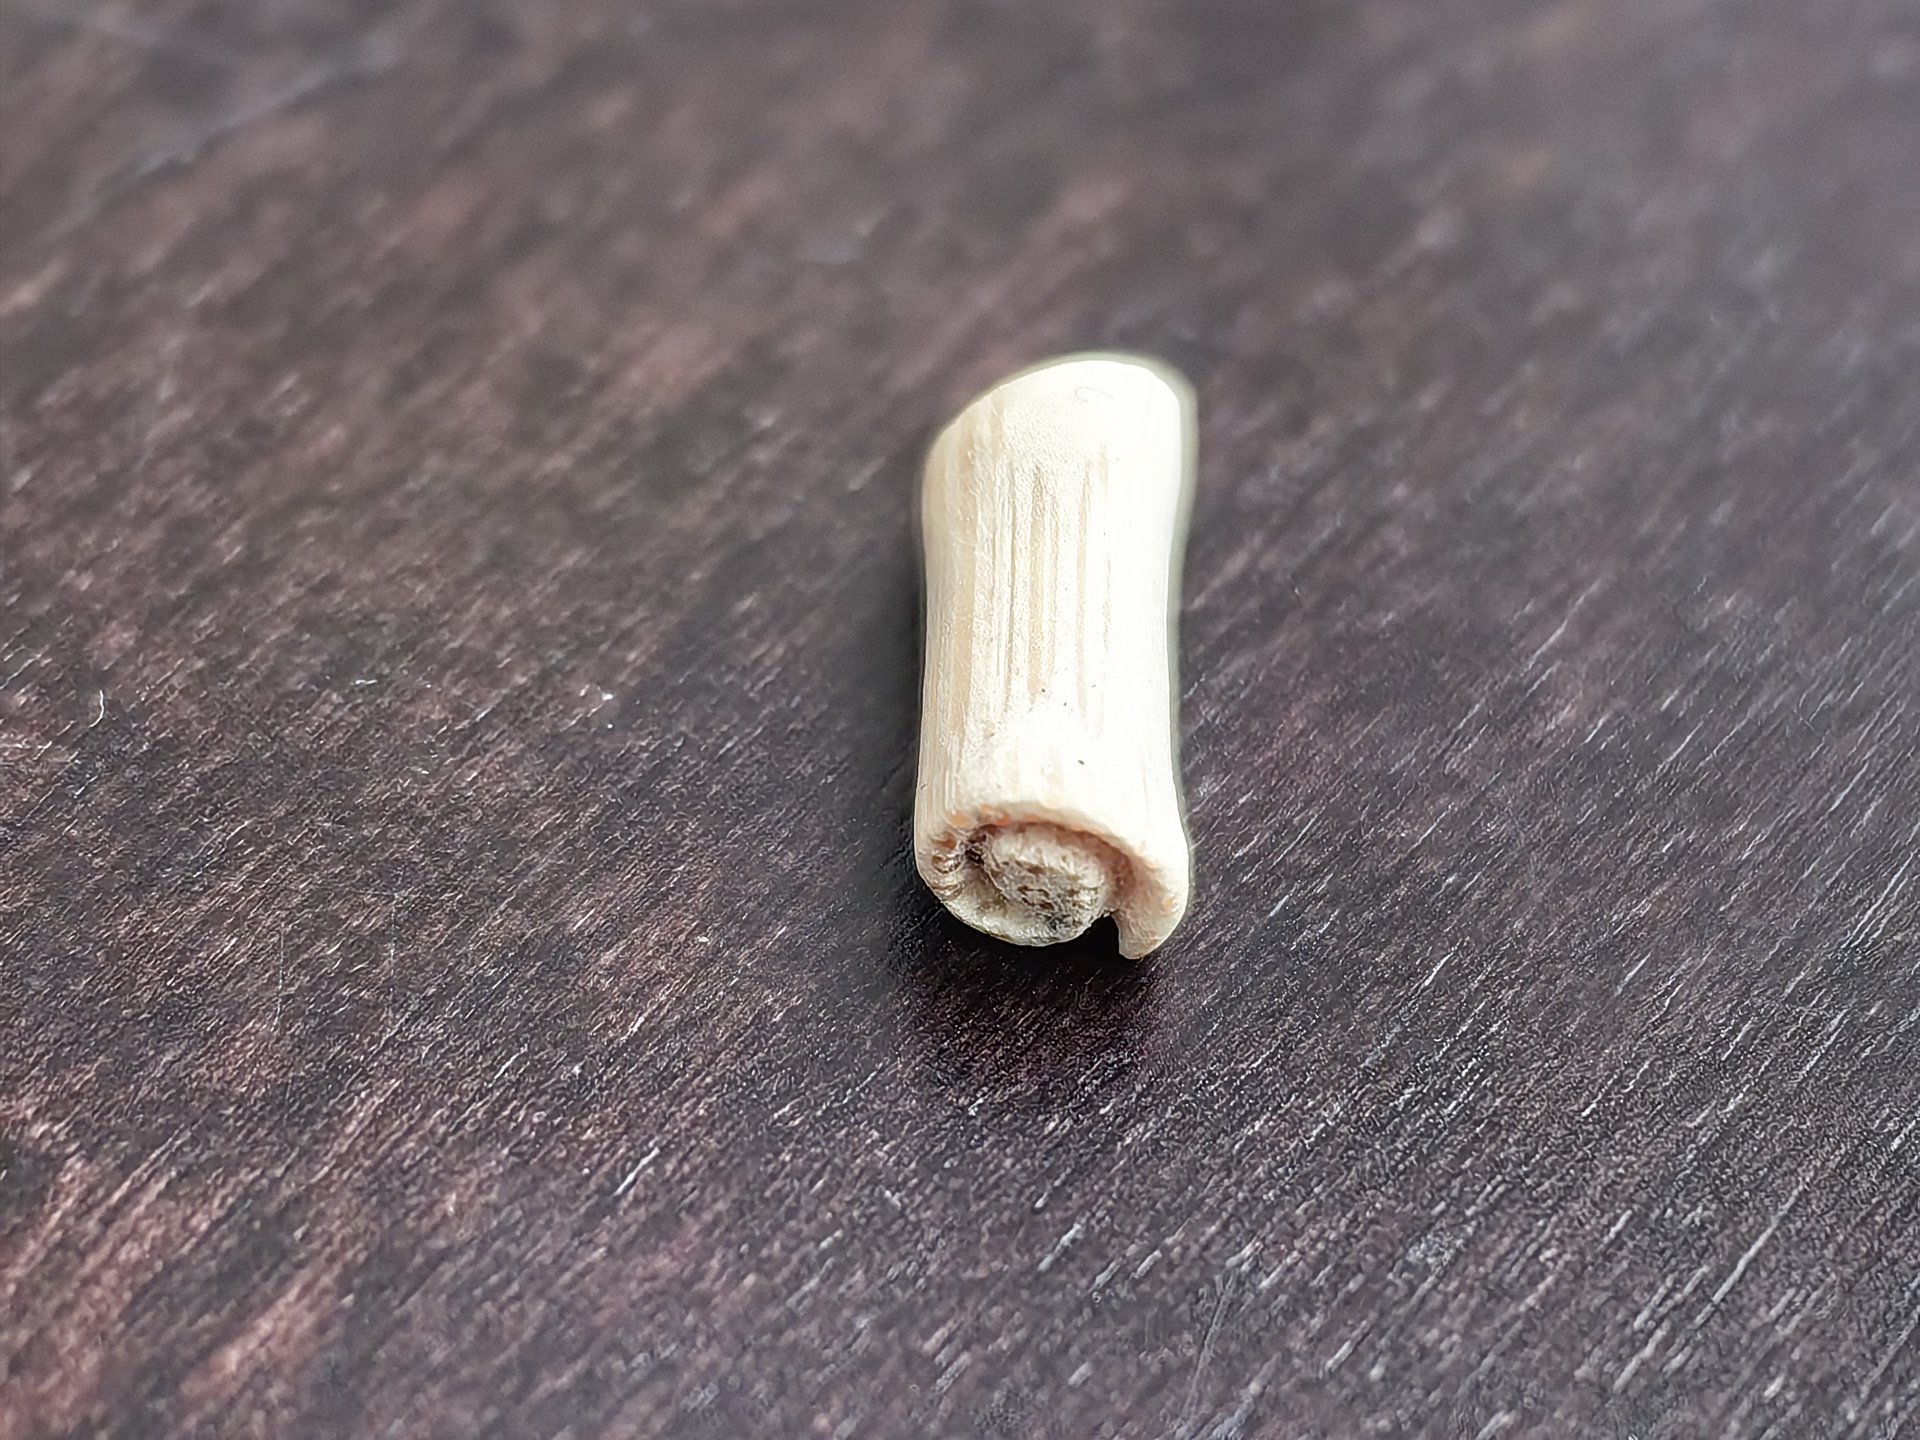
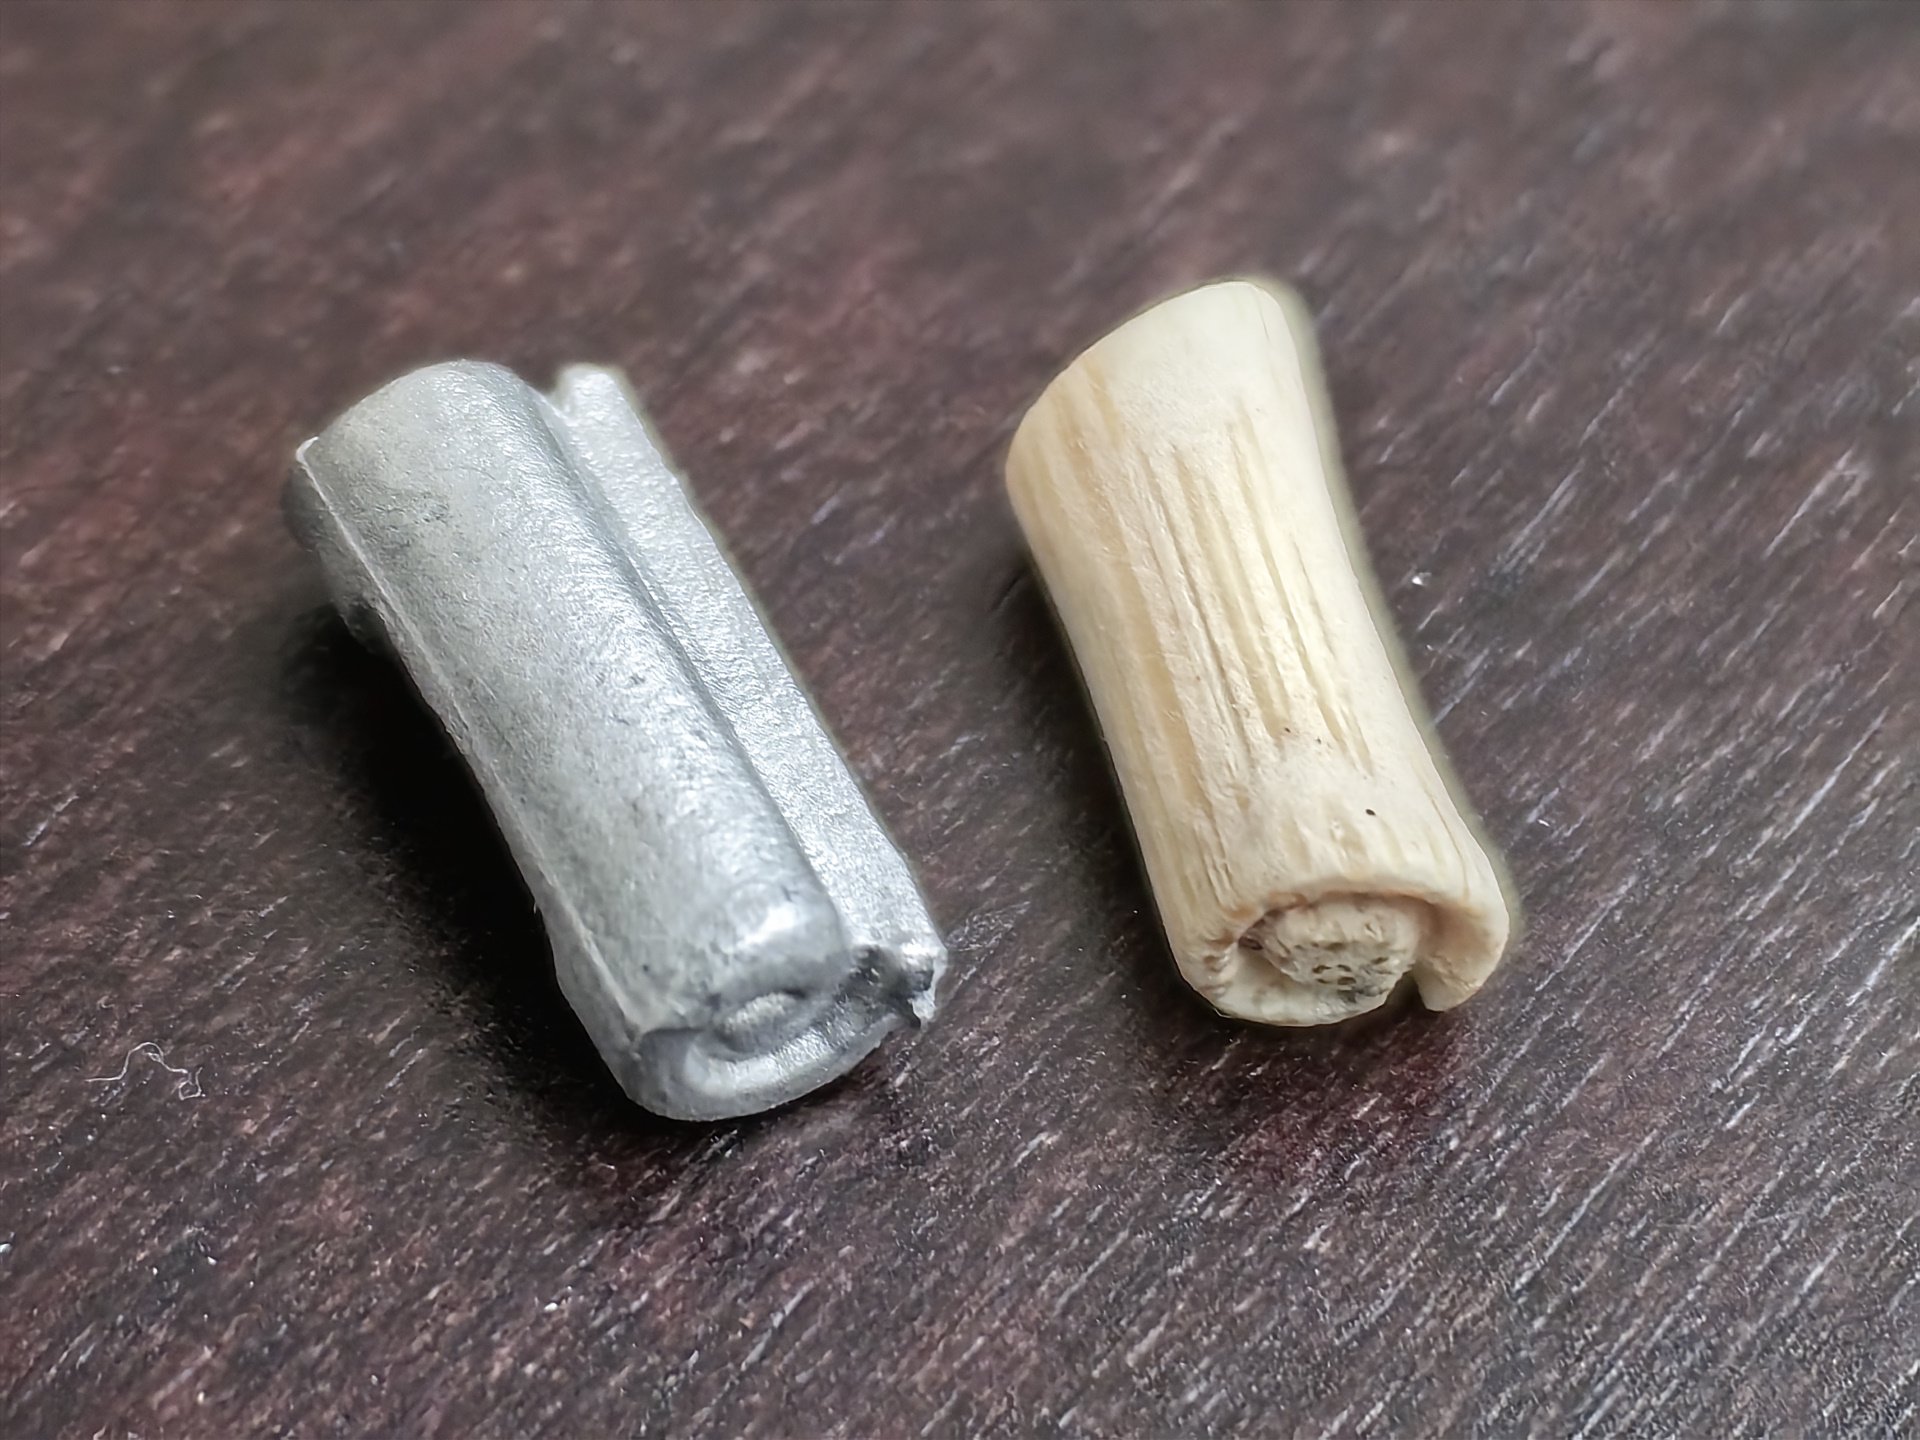
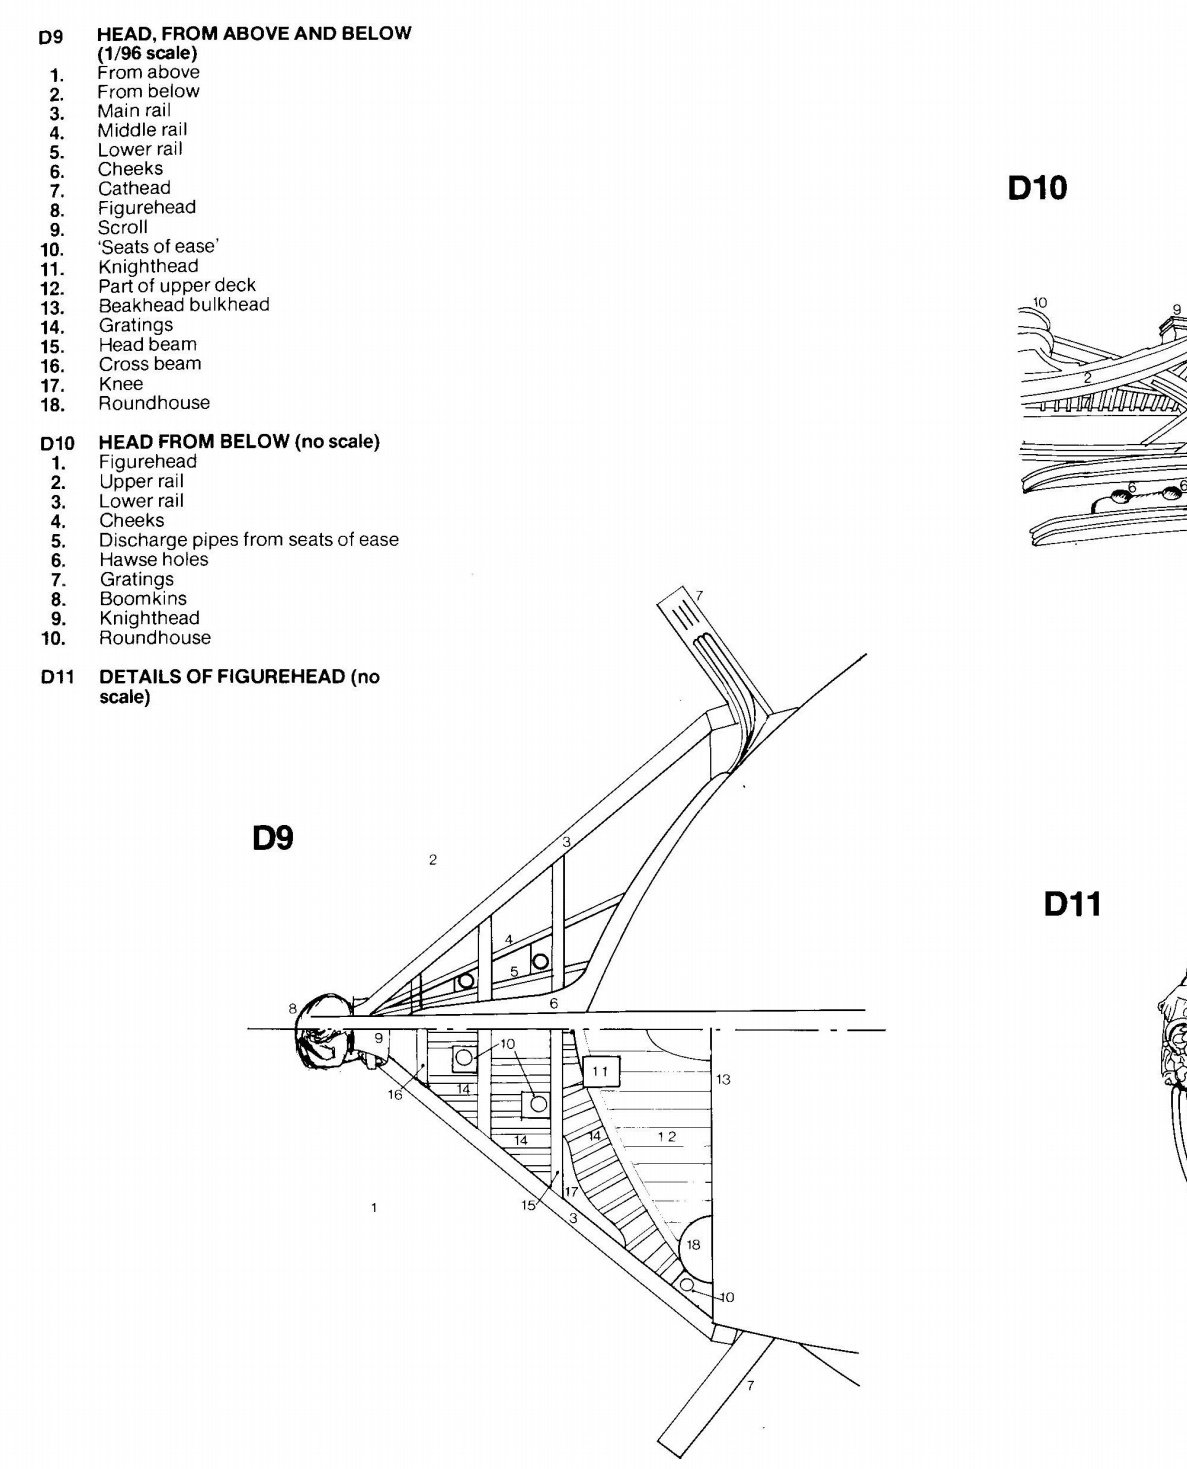
Hi! I'm continuing with the head. I need to make a lot of thin, openwork parts. I started with the chееks. The Corel set doesn't have any laser-cut, ready-made parts, but the chееks need to have a distinct profile and the inside of the profile needs to be painted. While I can still give the rake a profile using a special tool, I won't be able to paint such a small part accurately. Therefore, I'm making the chееks out of three parts. The central part is made of a 1 mm rail, and the side parts are made of a 0.5 mm rail. All the rails are made of pearwood. By the way, it is easier to bend thinner rails. Then I gave the front edges of all the rails a semi-circular profile, painted the front part of the central rail, and glued on the side rails. The long upper cheek should taper towards the end, so I sharpened all three rails. However, when I saw the result, I felt that the taper was not sufficient, so I tore off the glued parts, sharpened the rails again, and then reglued them. The upper cheeks converge at the top and rest against the volute of the herbroket. Corel's volute is made in the form of a cast tin part, which I absolutely do not like, as well as most of the metal decor parts. I decided to make it myself. I did not have a pear rail of the appropriate cross-section, so I used a sushi stick. It is made of bamboo, which is quite hard and perfectly processed with a linography cutter. However, it is lighter than pear and speckled. But a little mordant has more or less evened out the colors, and since the piece is very small, I hope that the specks on the model won't be too noticeable.


-
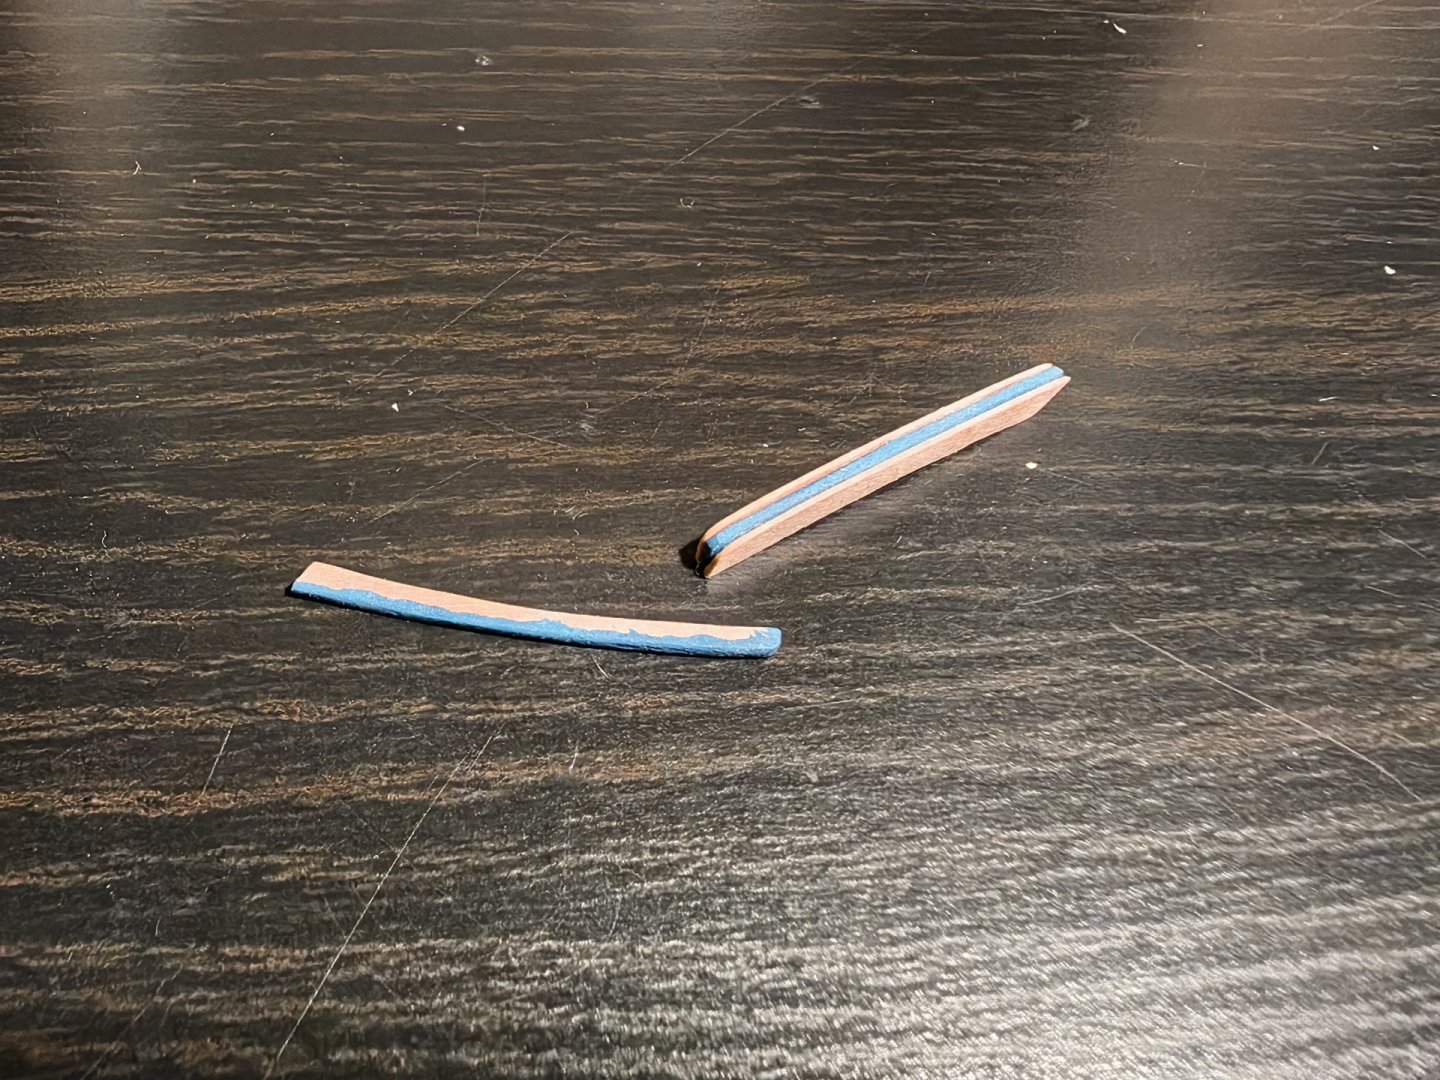
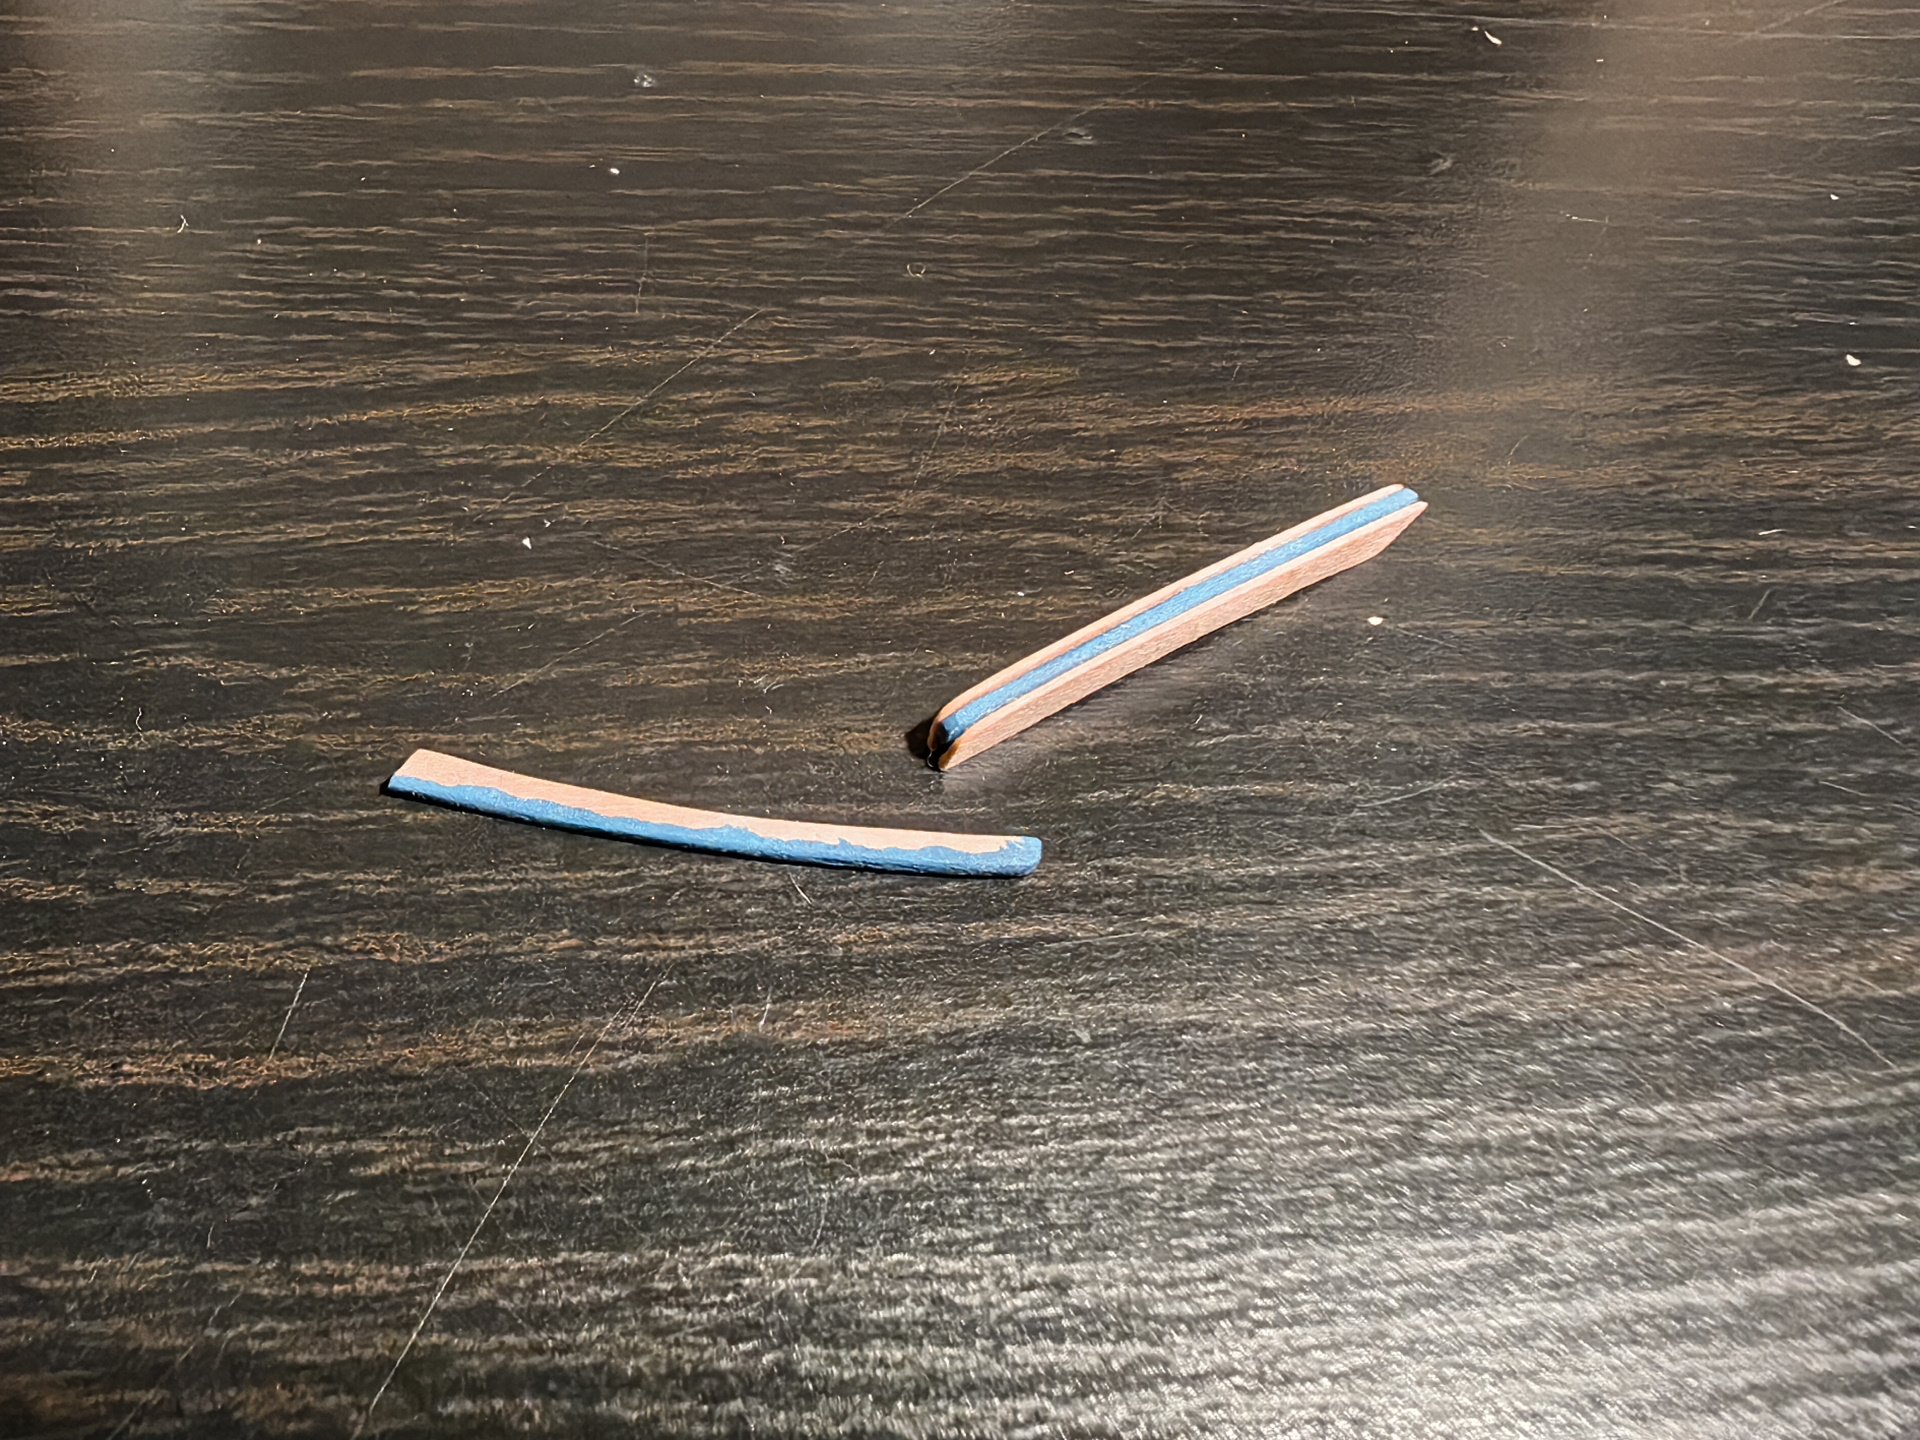
Hi, Nearshore! Thank you for the rating, it's very nice!) I bent the rail by steaming it in hot water and then ironing the tip with an iron, gradually bending the rail. If the radius is slightly larger, it bends normally. However, in this case, the radius is only a few millimeters, and it caused problems. I think it's important to take your time and repeat the steaming and ironing process several times, as there's a chance of the rail breaking. The first bend turned out to be good, but on the second, where the rack rises up, it broke. And on both sides. And I glued the broken parts with PVA glue, for strength, I glued several small pieces of thin rack into the concave part and then, when the glue was dry, I processed it with a round file. So, in fact, you are right, this part is composite, in two parts. Probably, you can not suffer and make it composite at once. In the future, I will probably do it. Yours sincerely, Frecap.
-
Thank you!) The monitor screen may not have very accurate color reproduction. This is not brown, it is black.
-
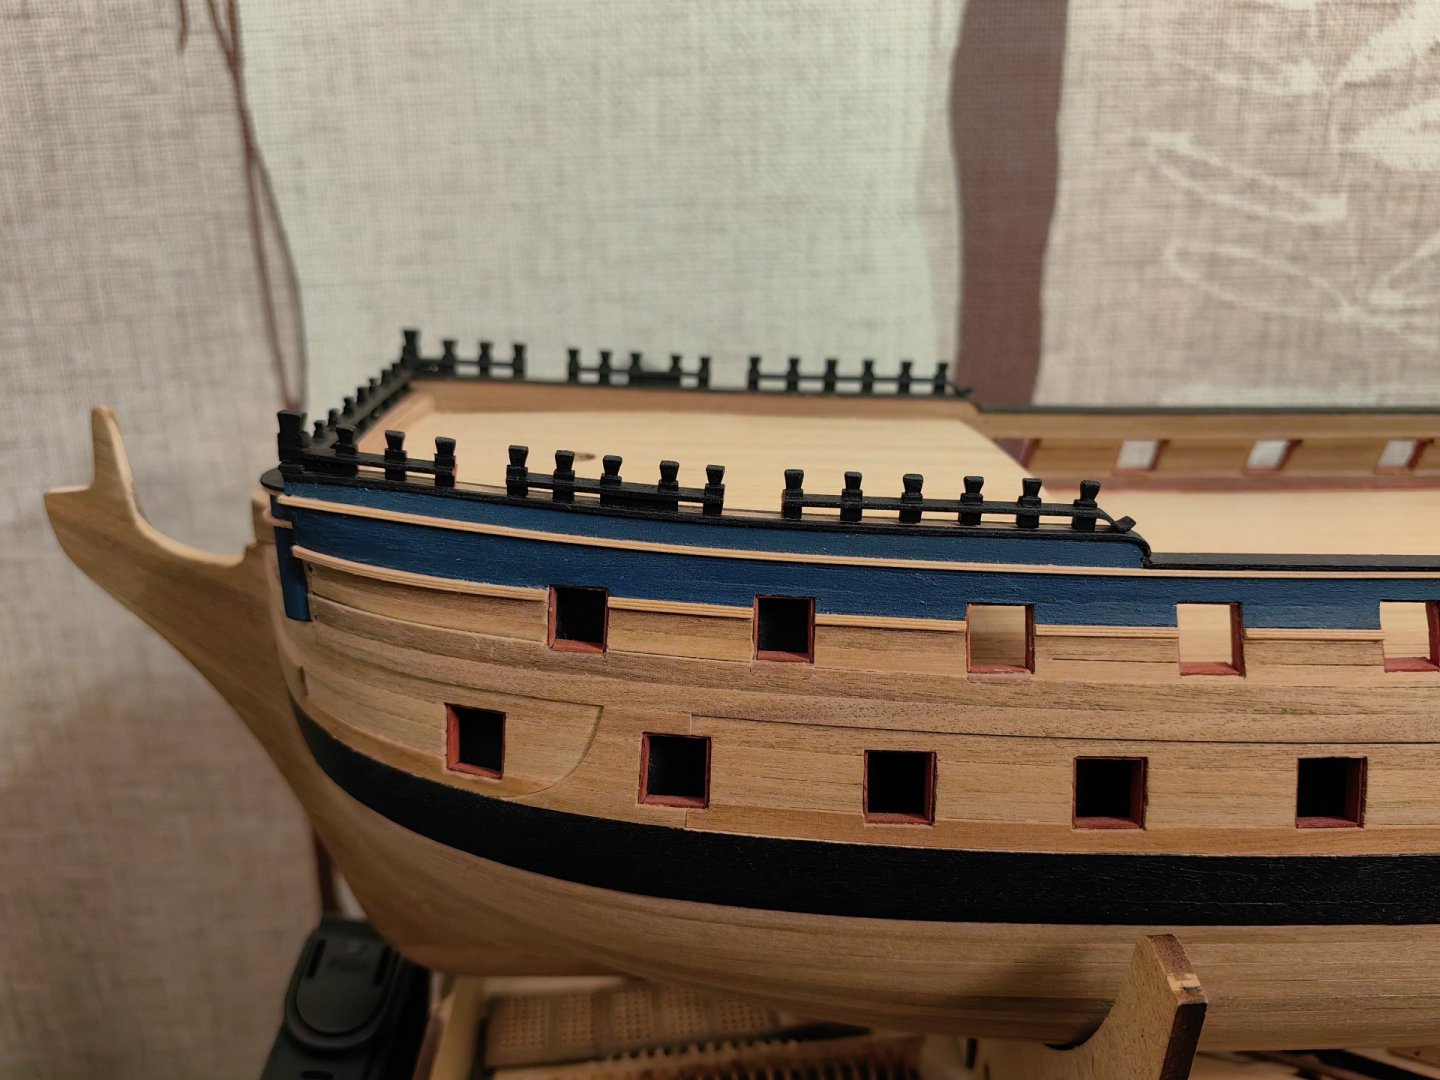
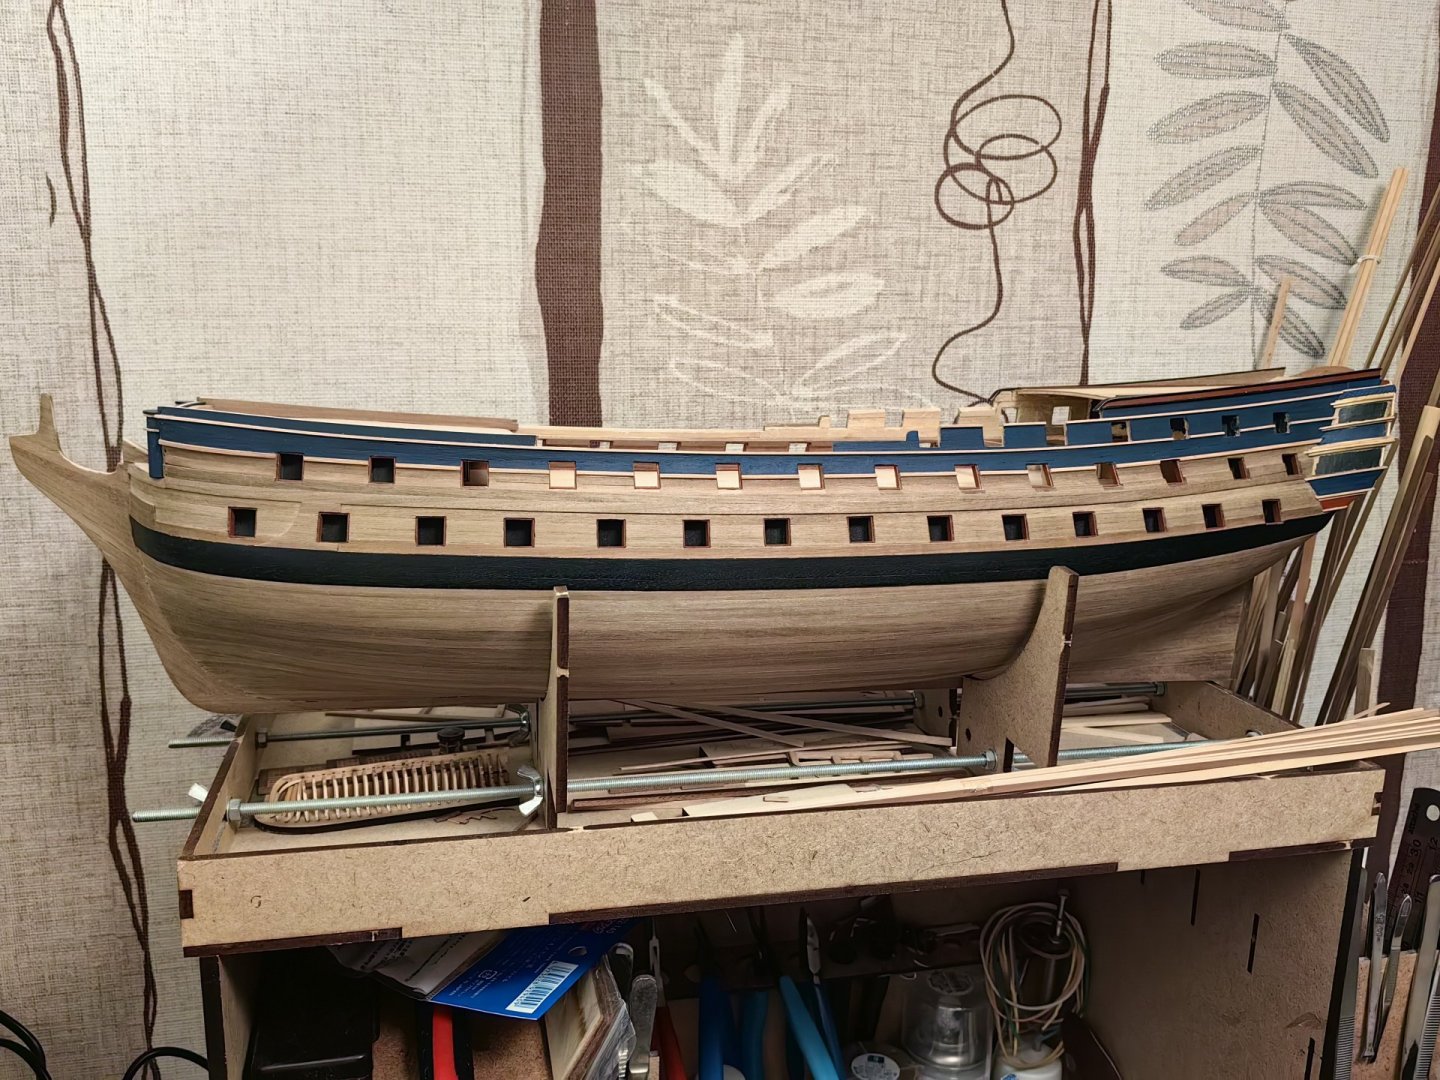
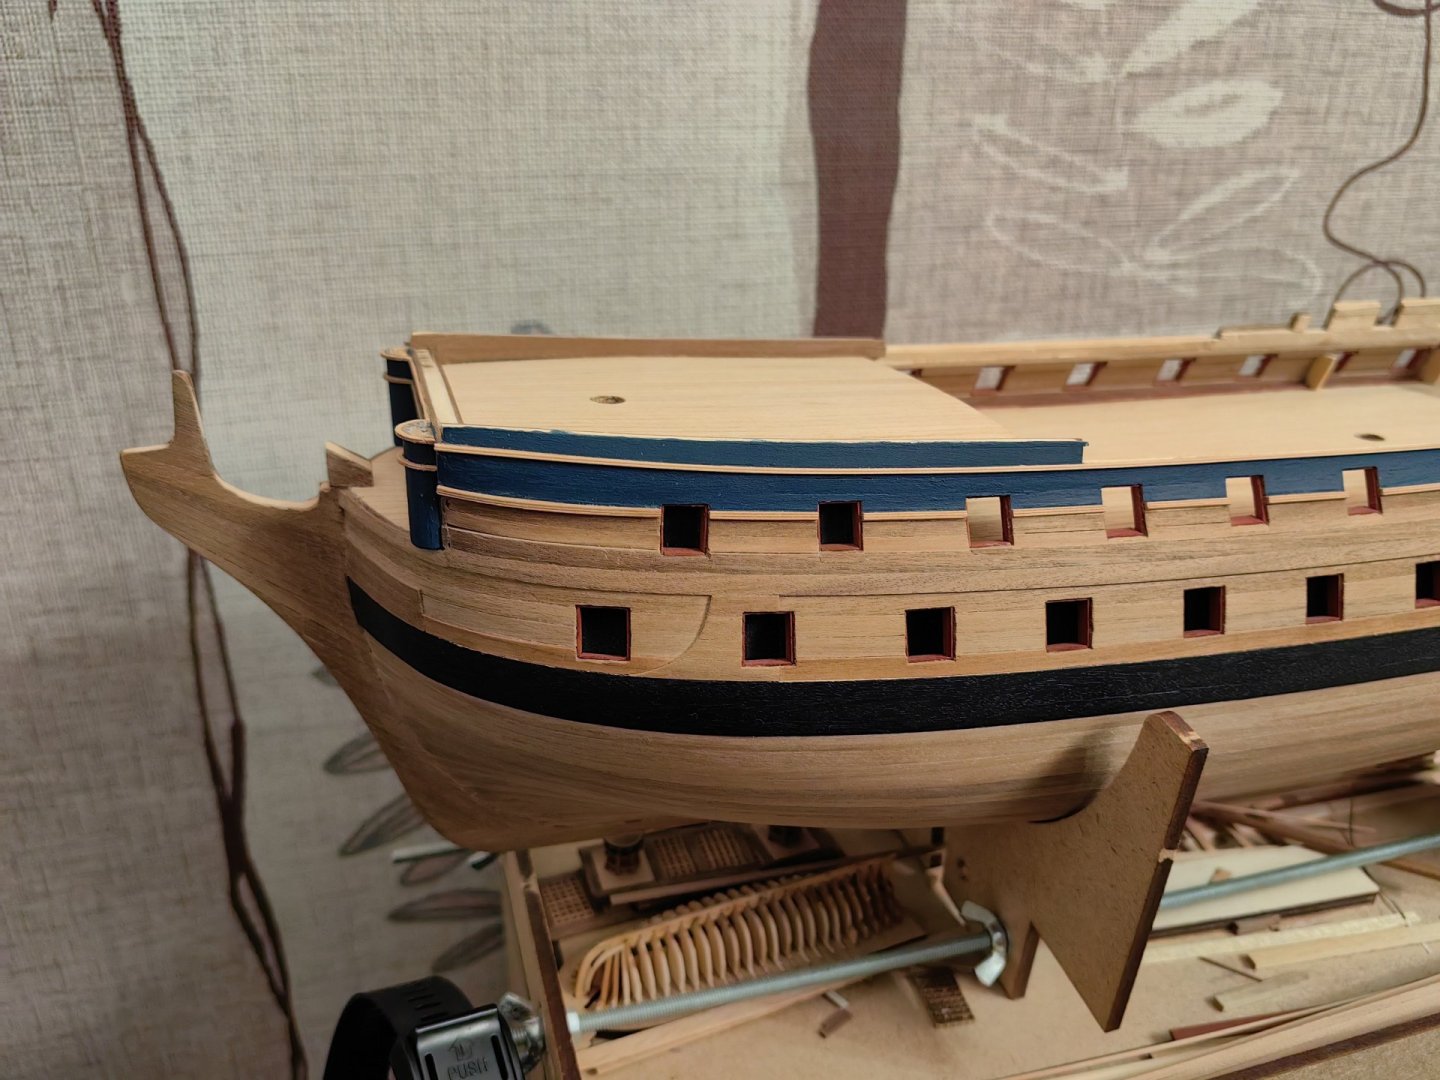
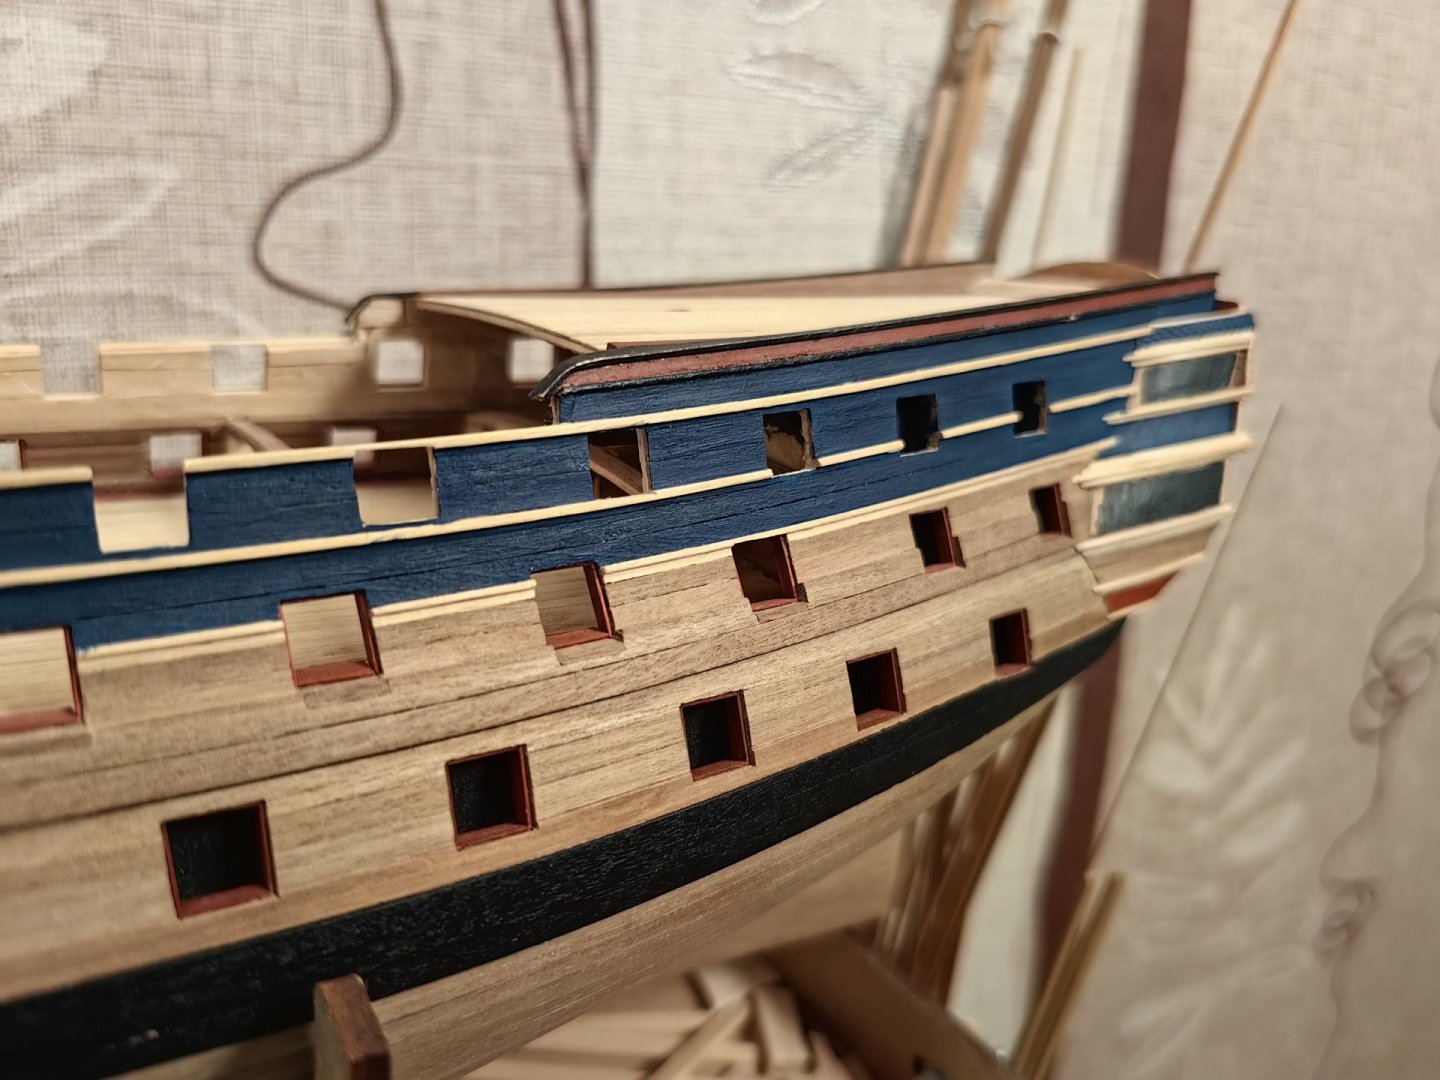
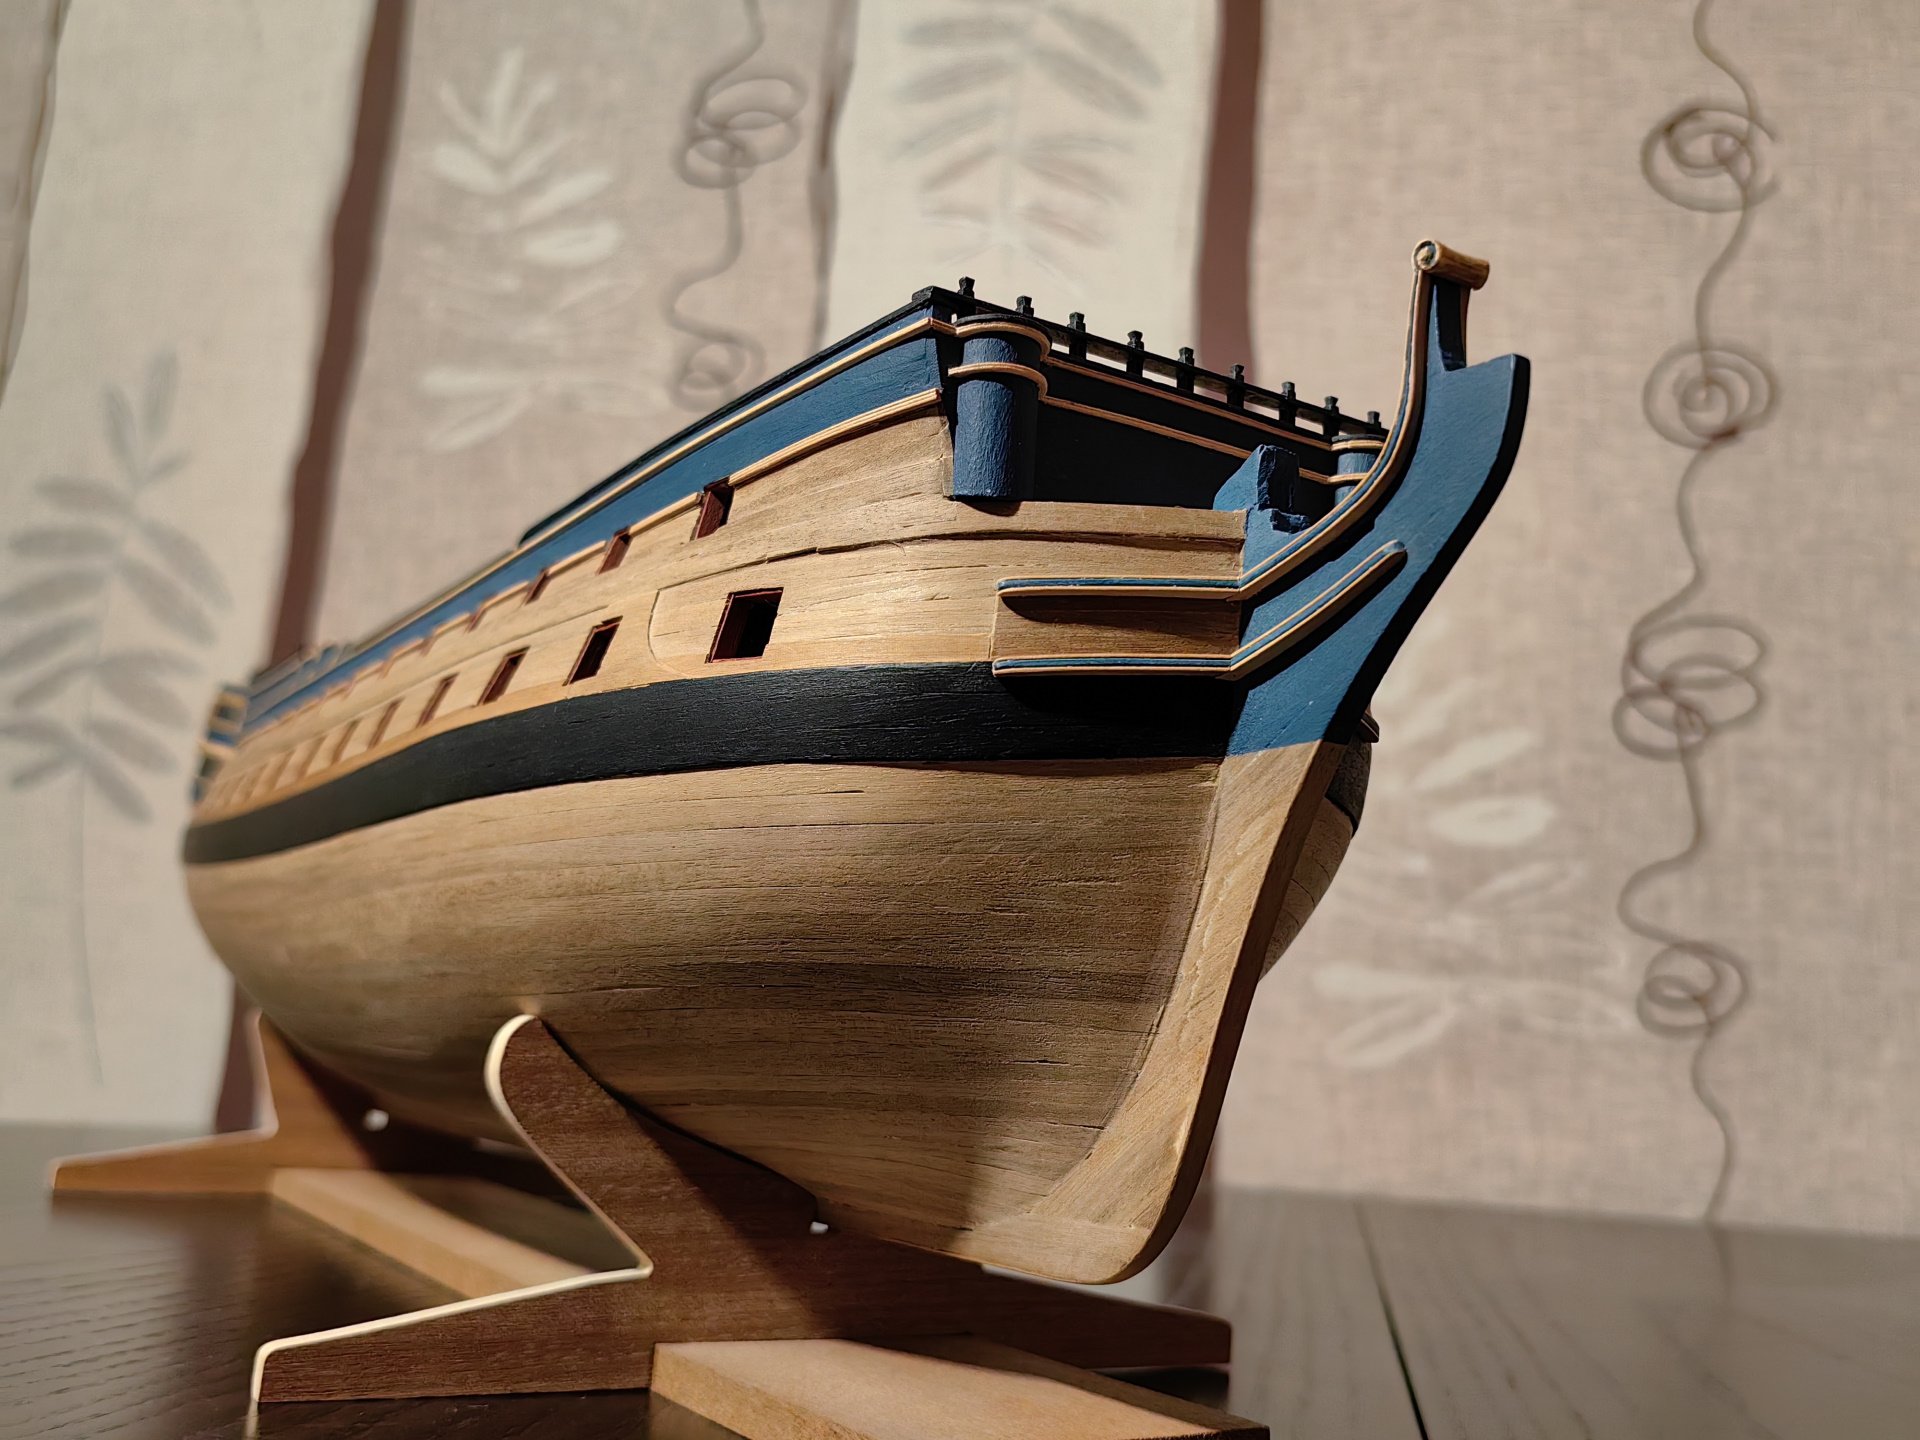
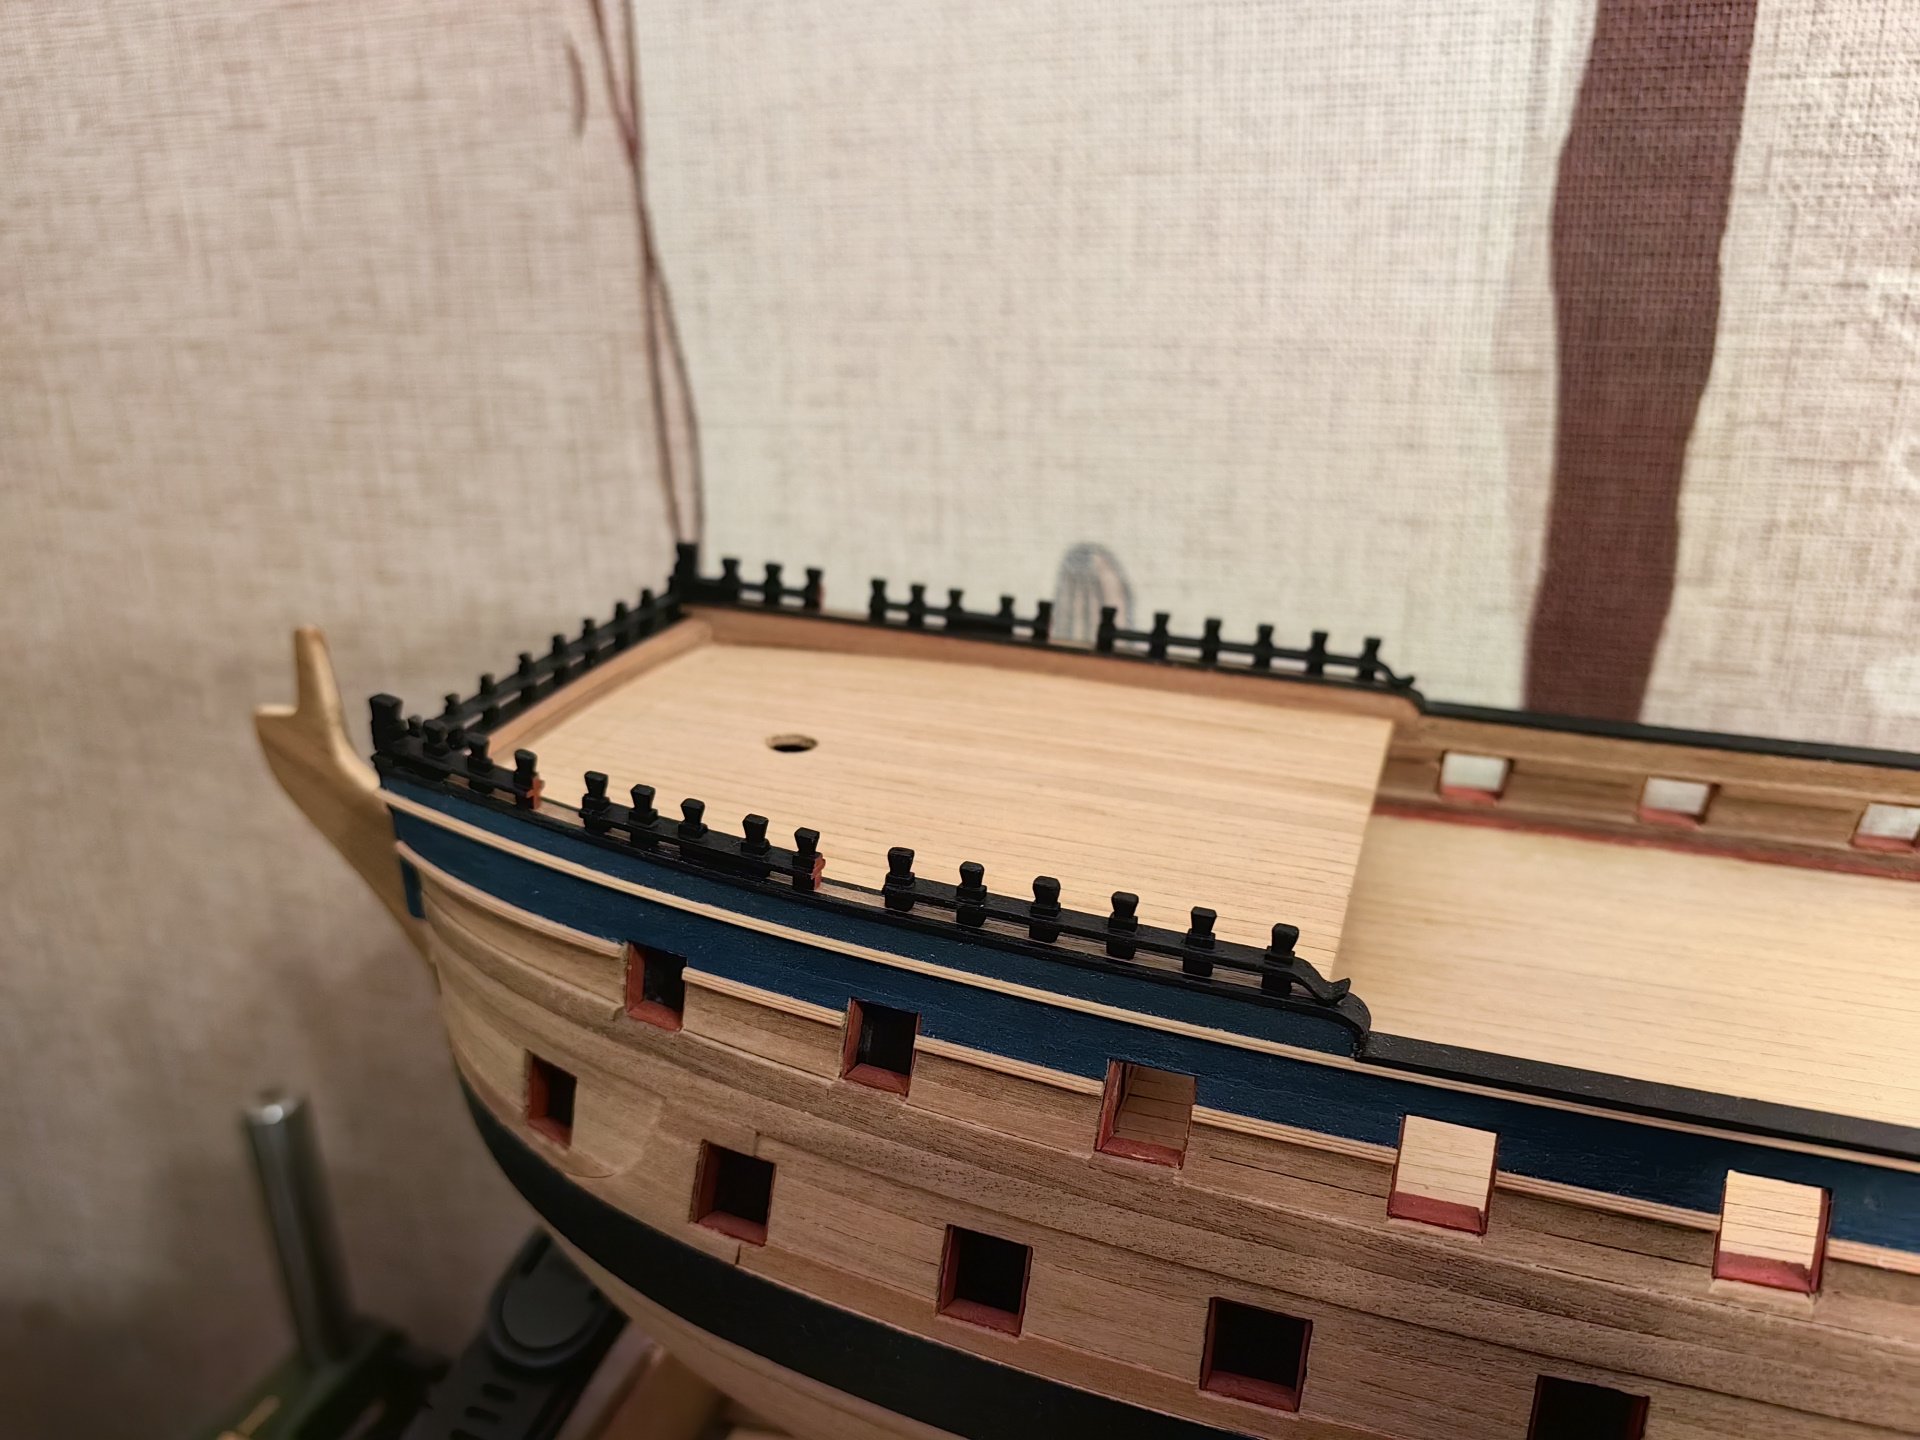
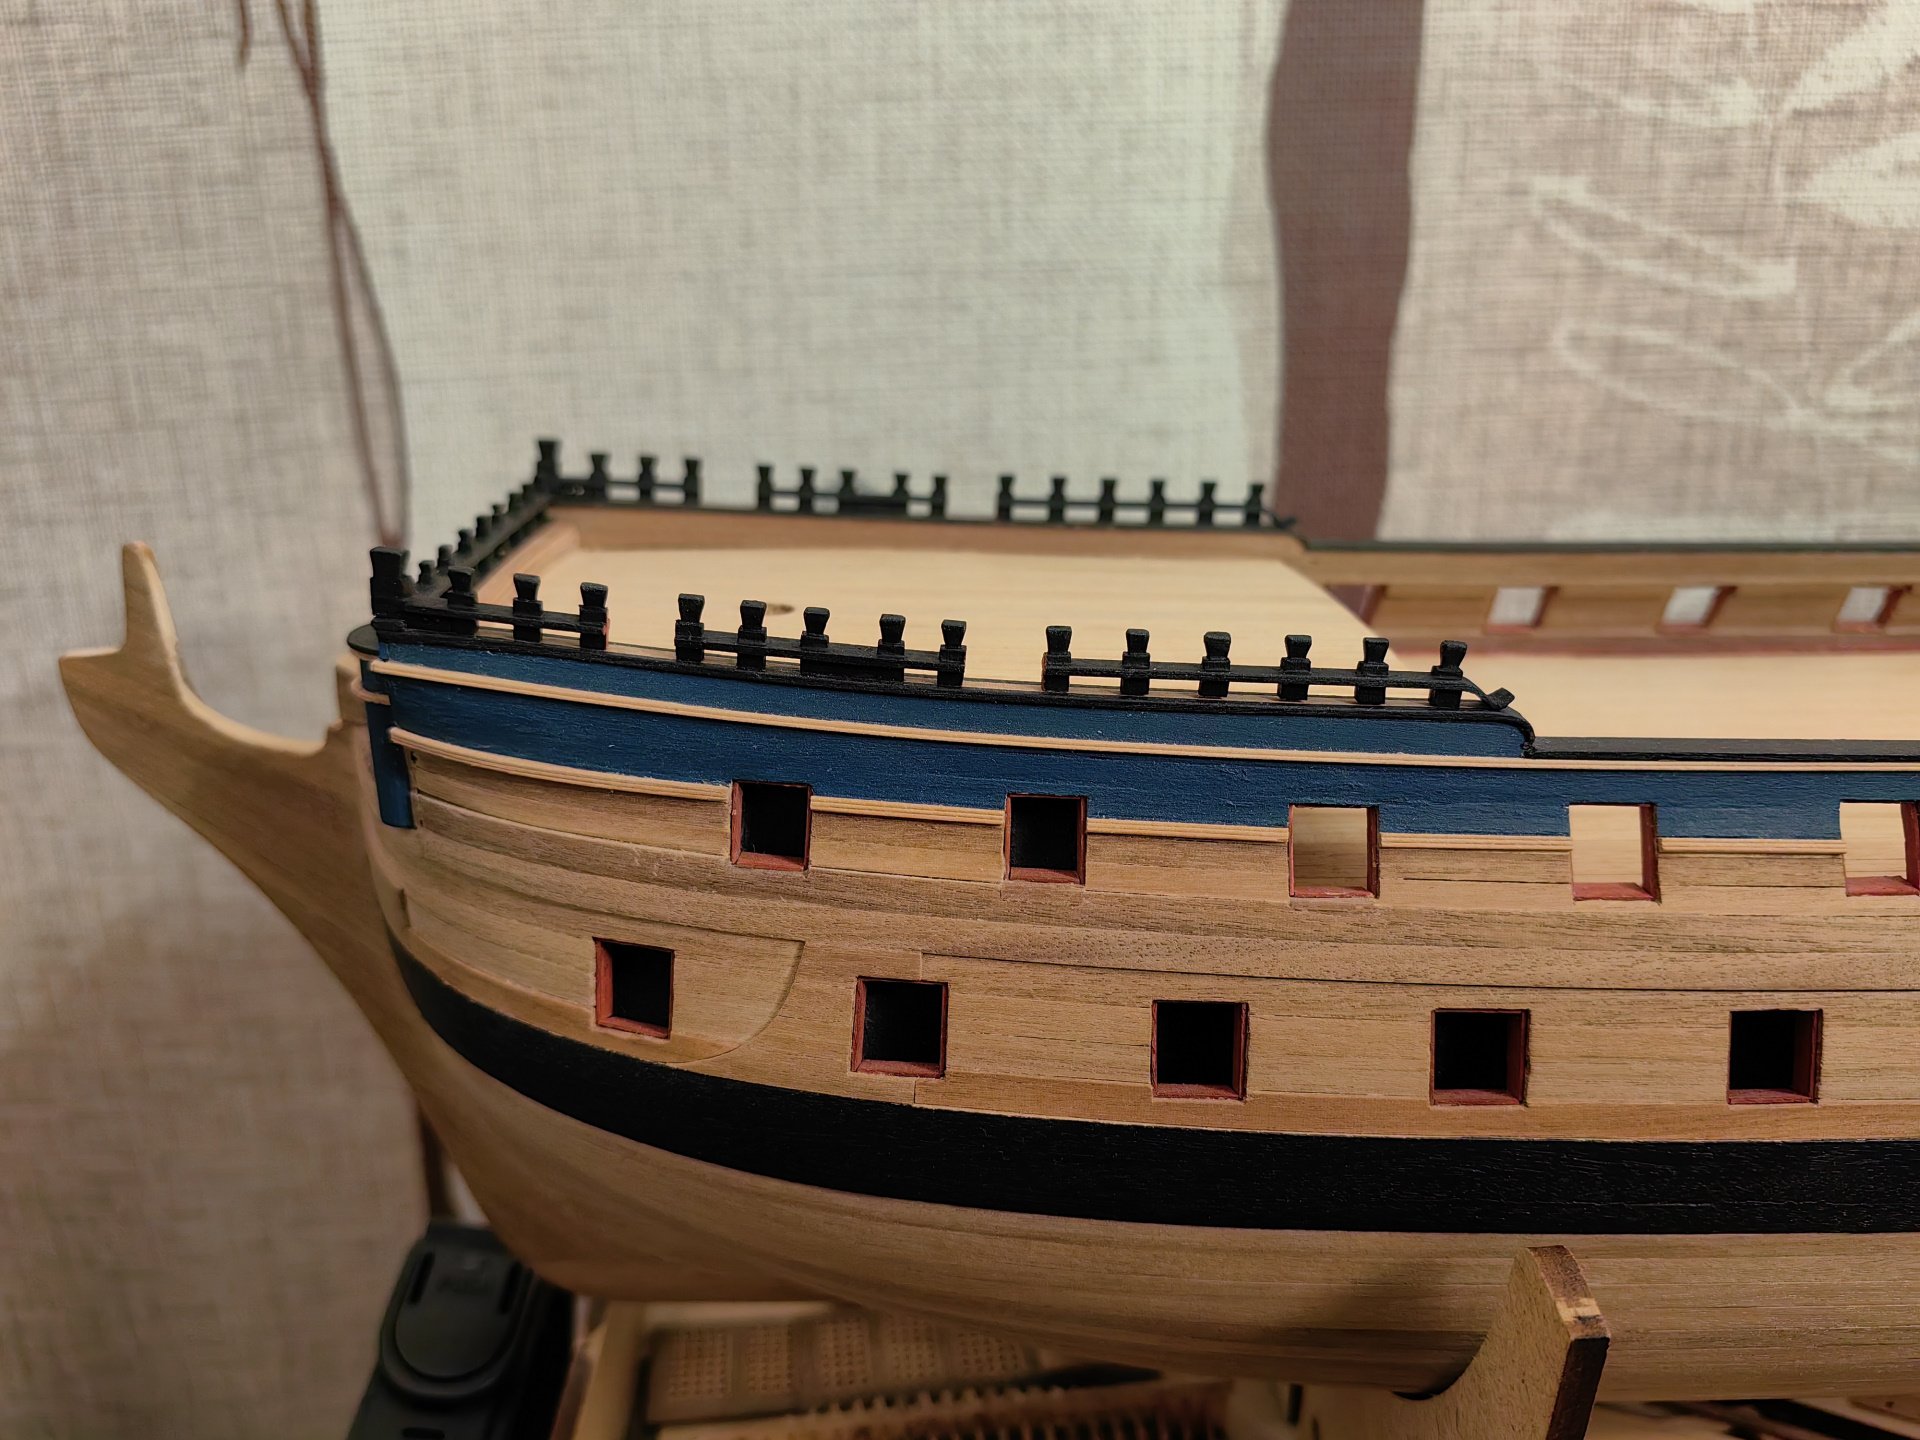
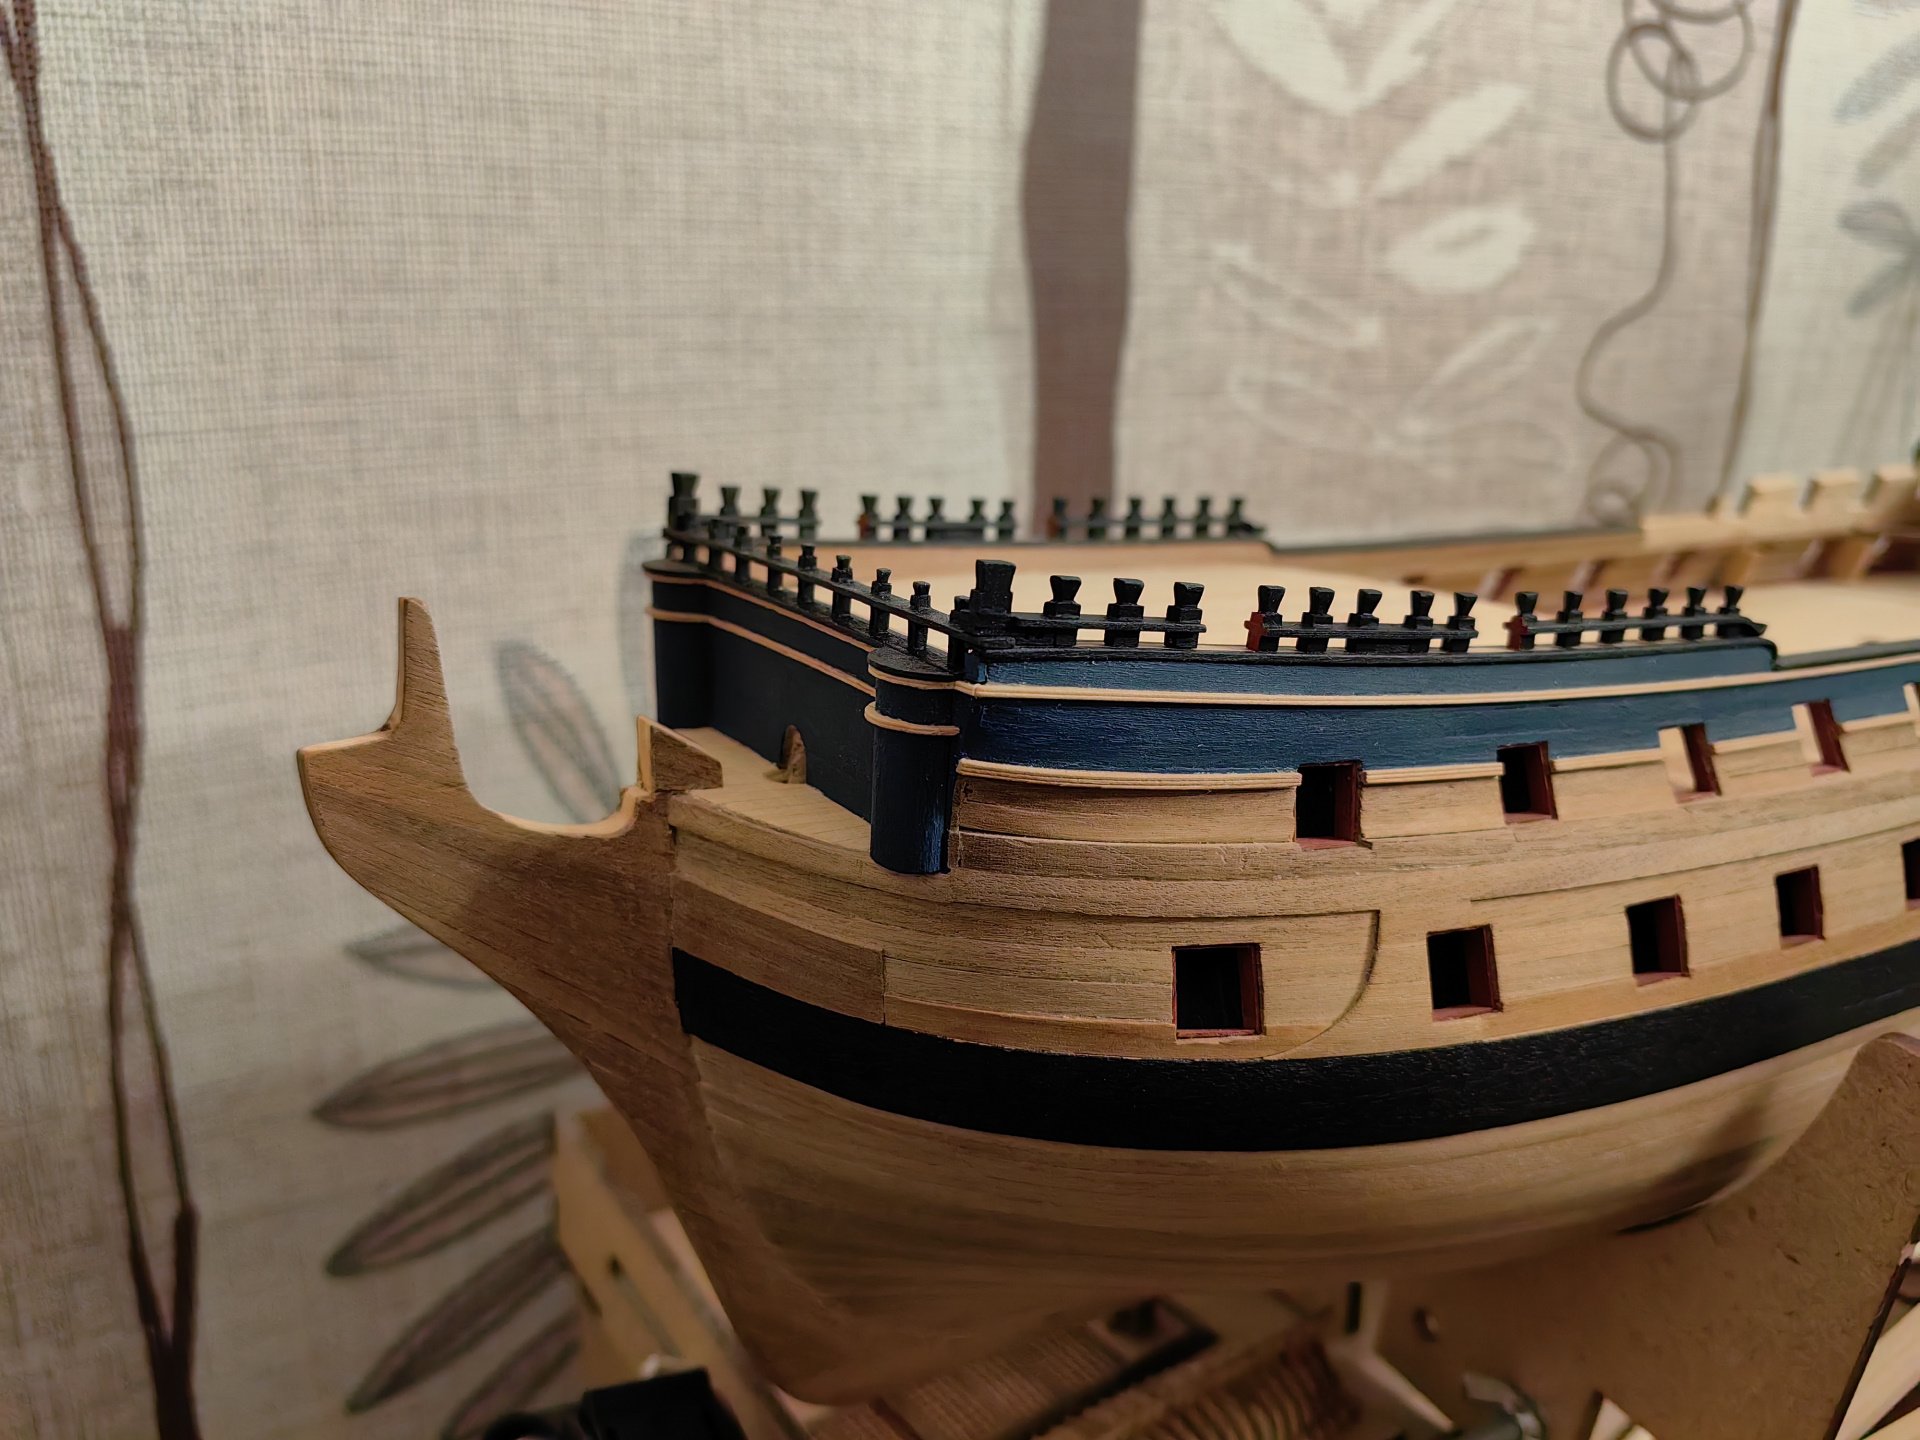
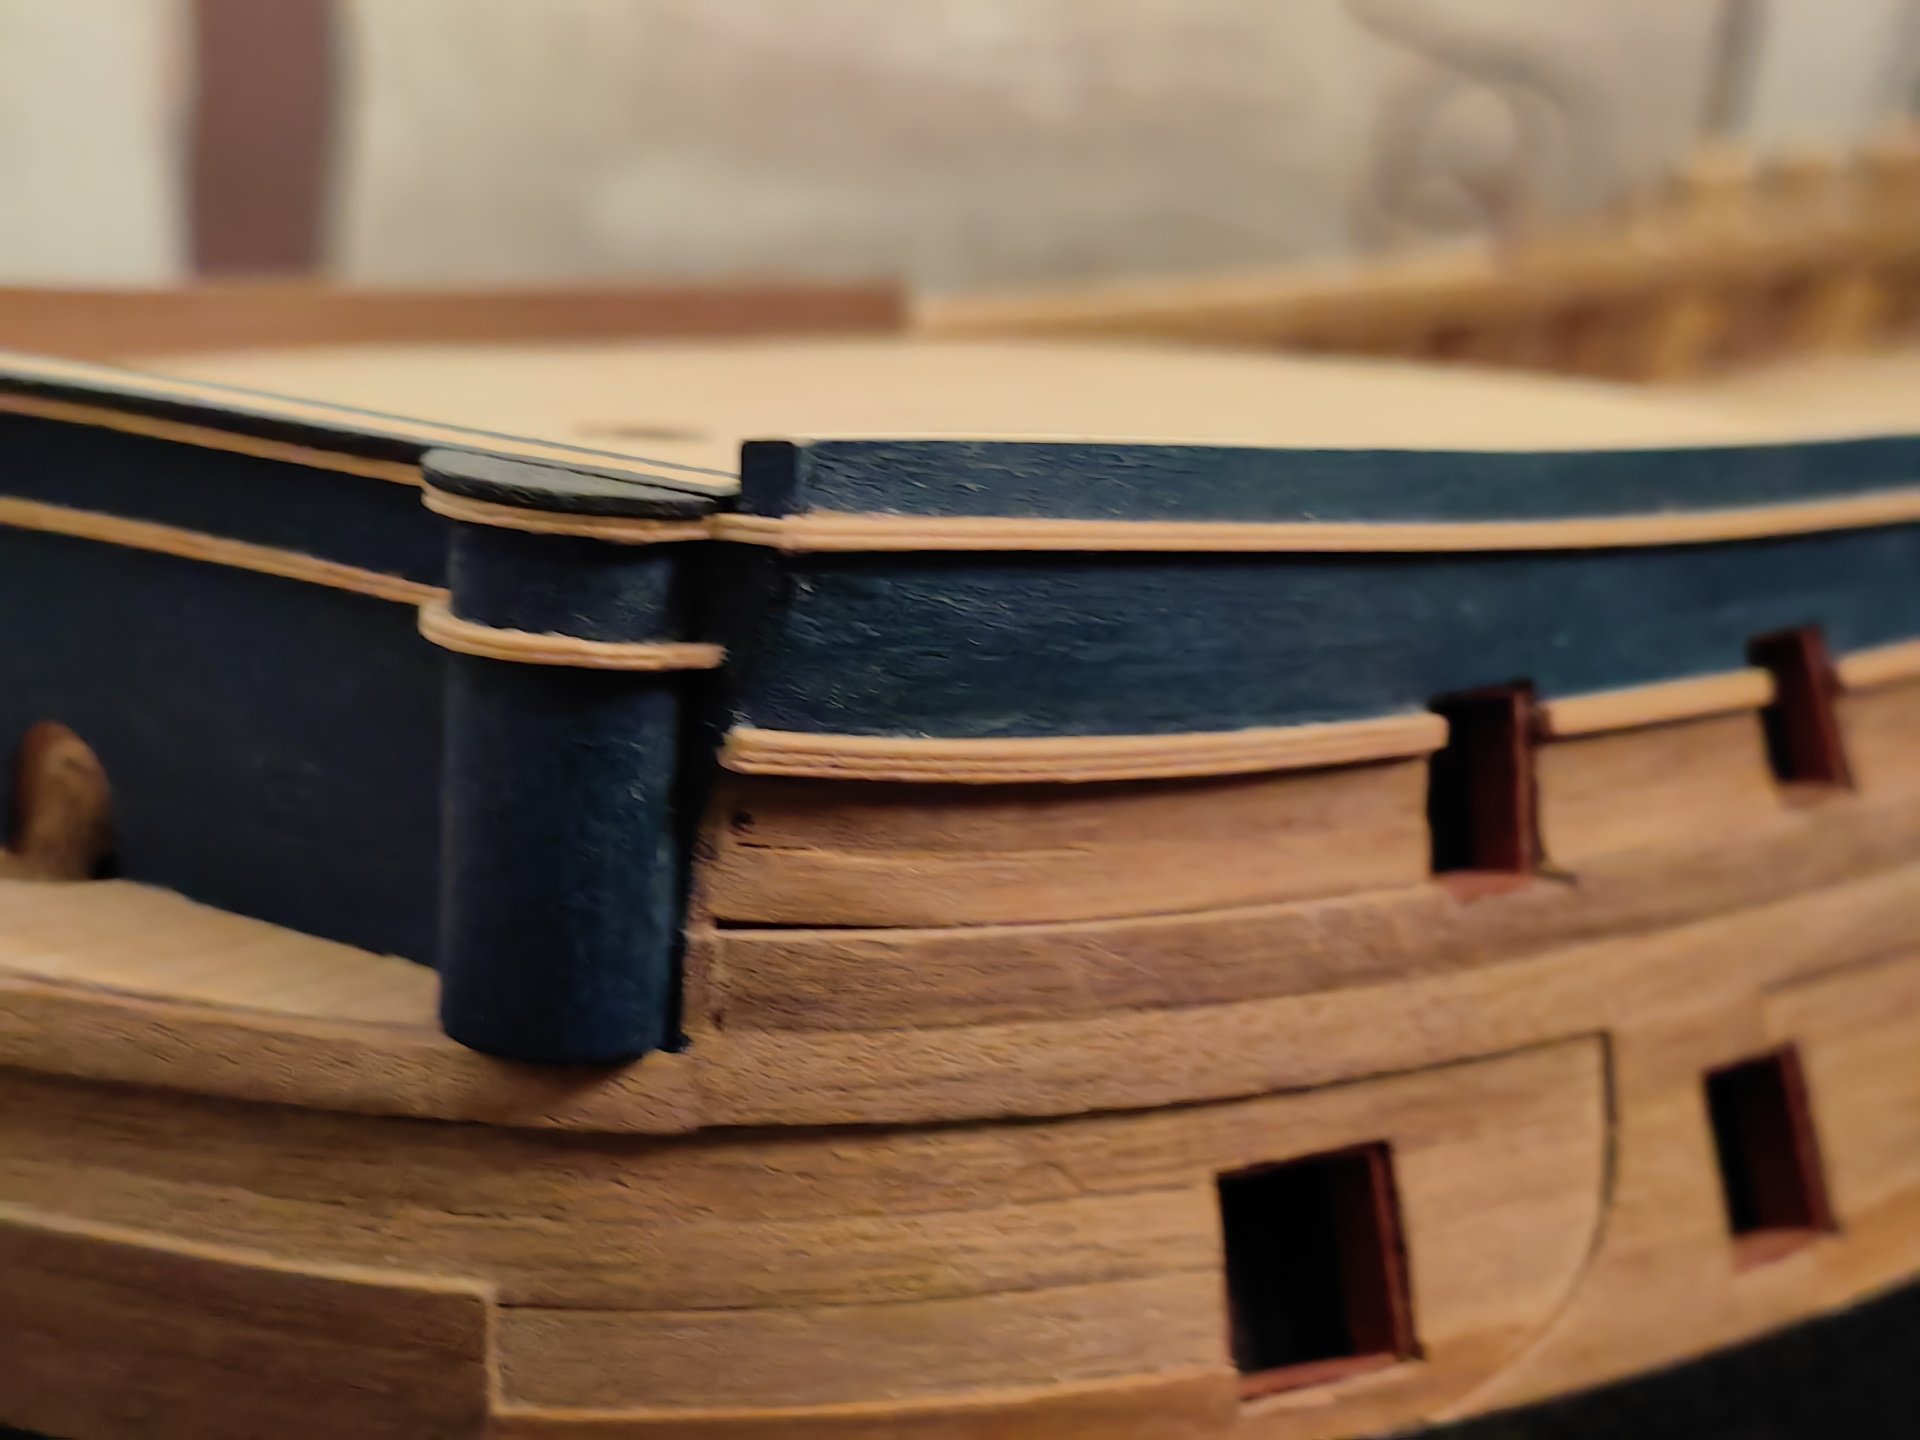
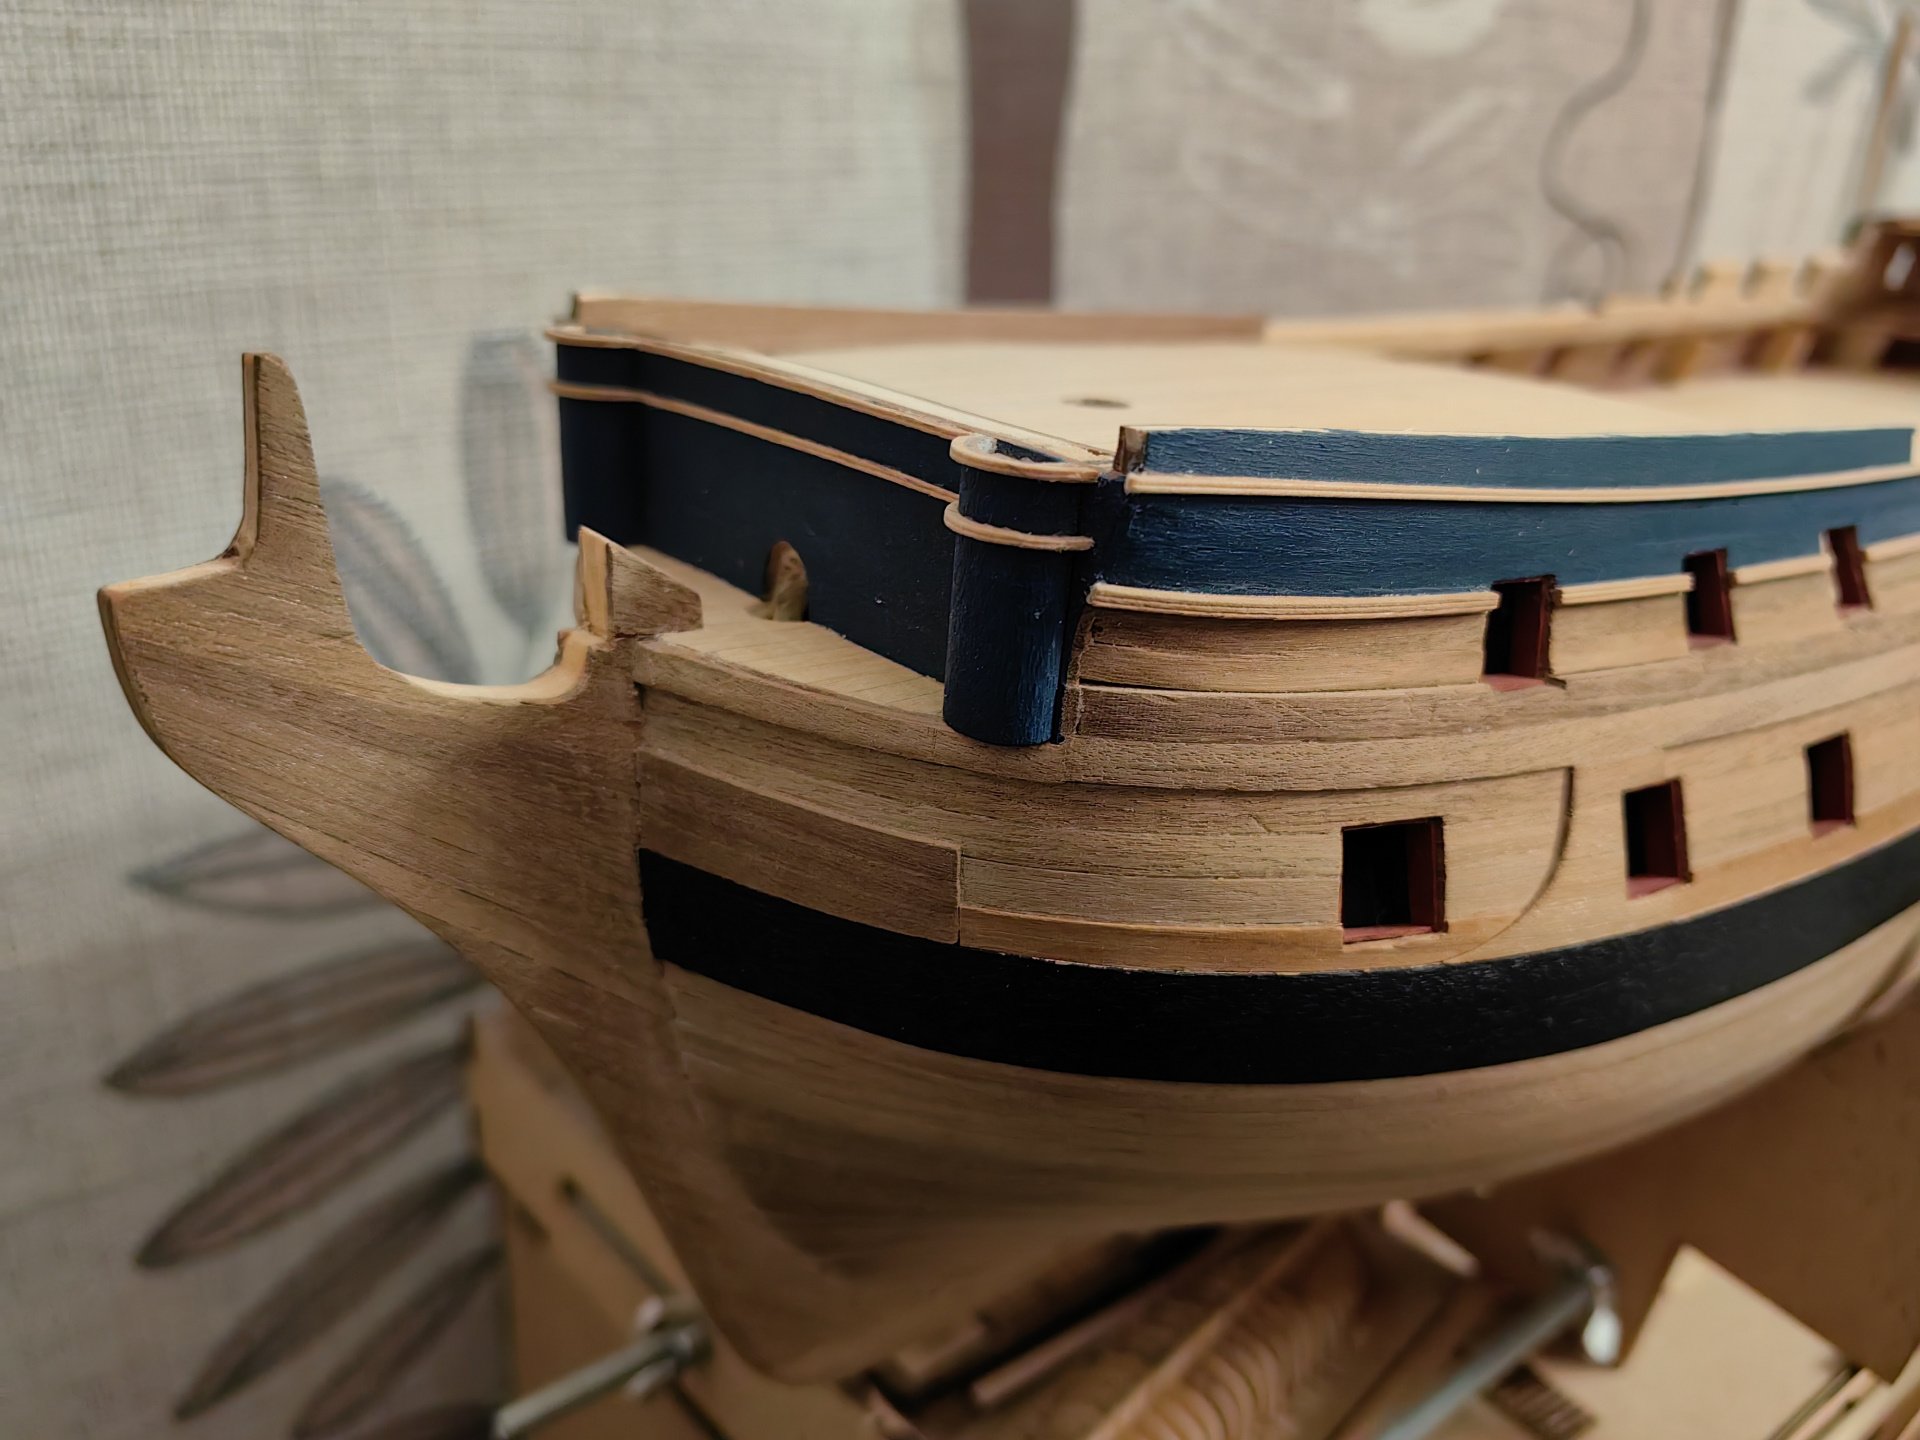
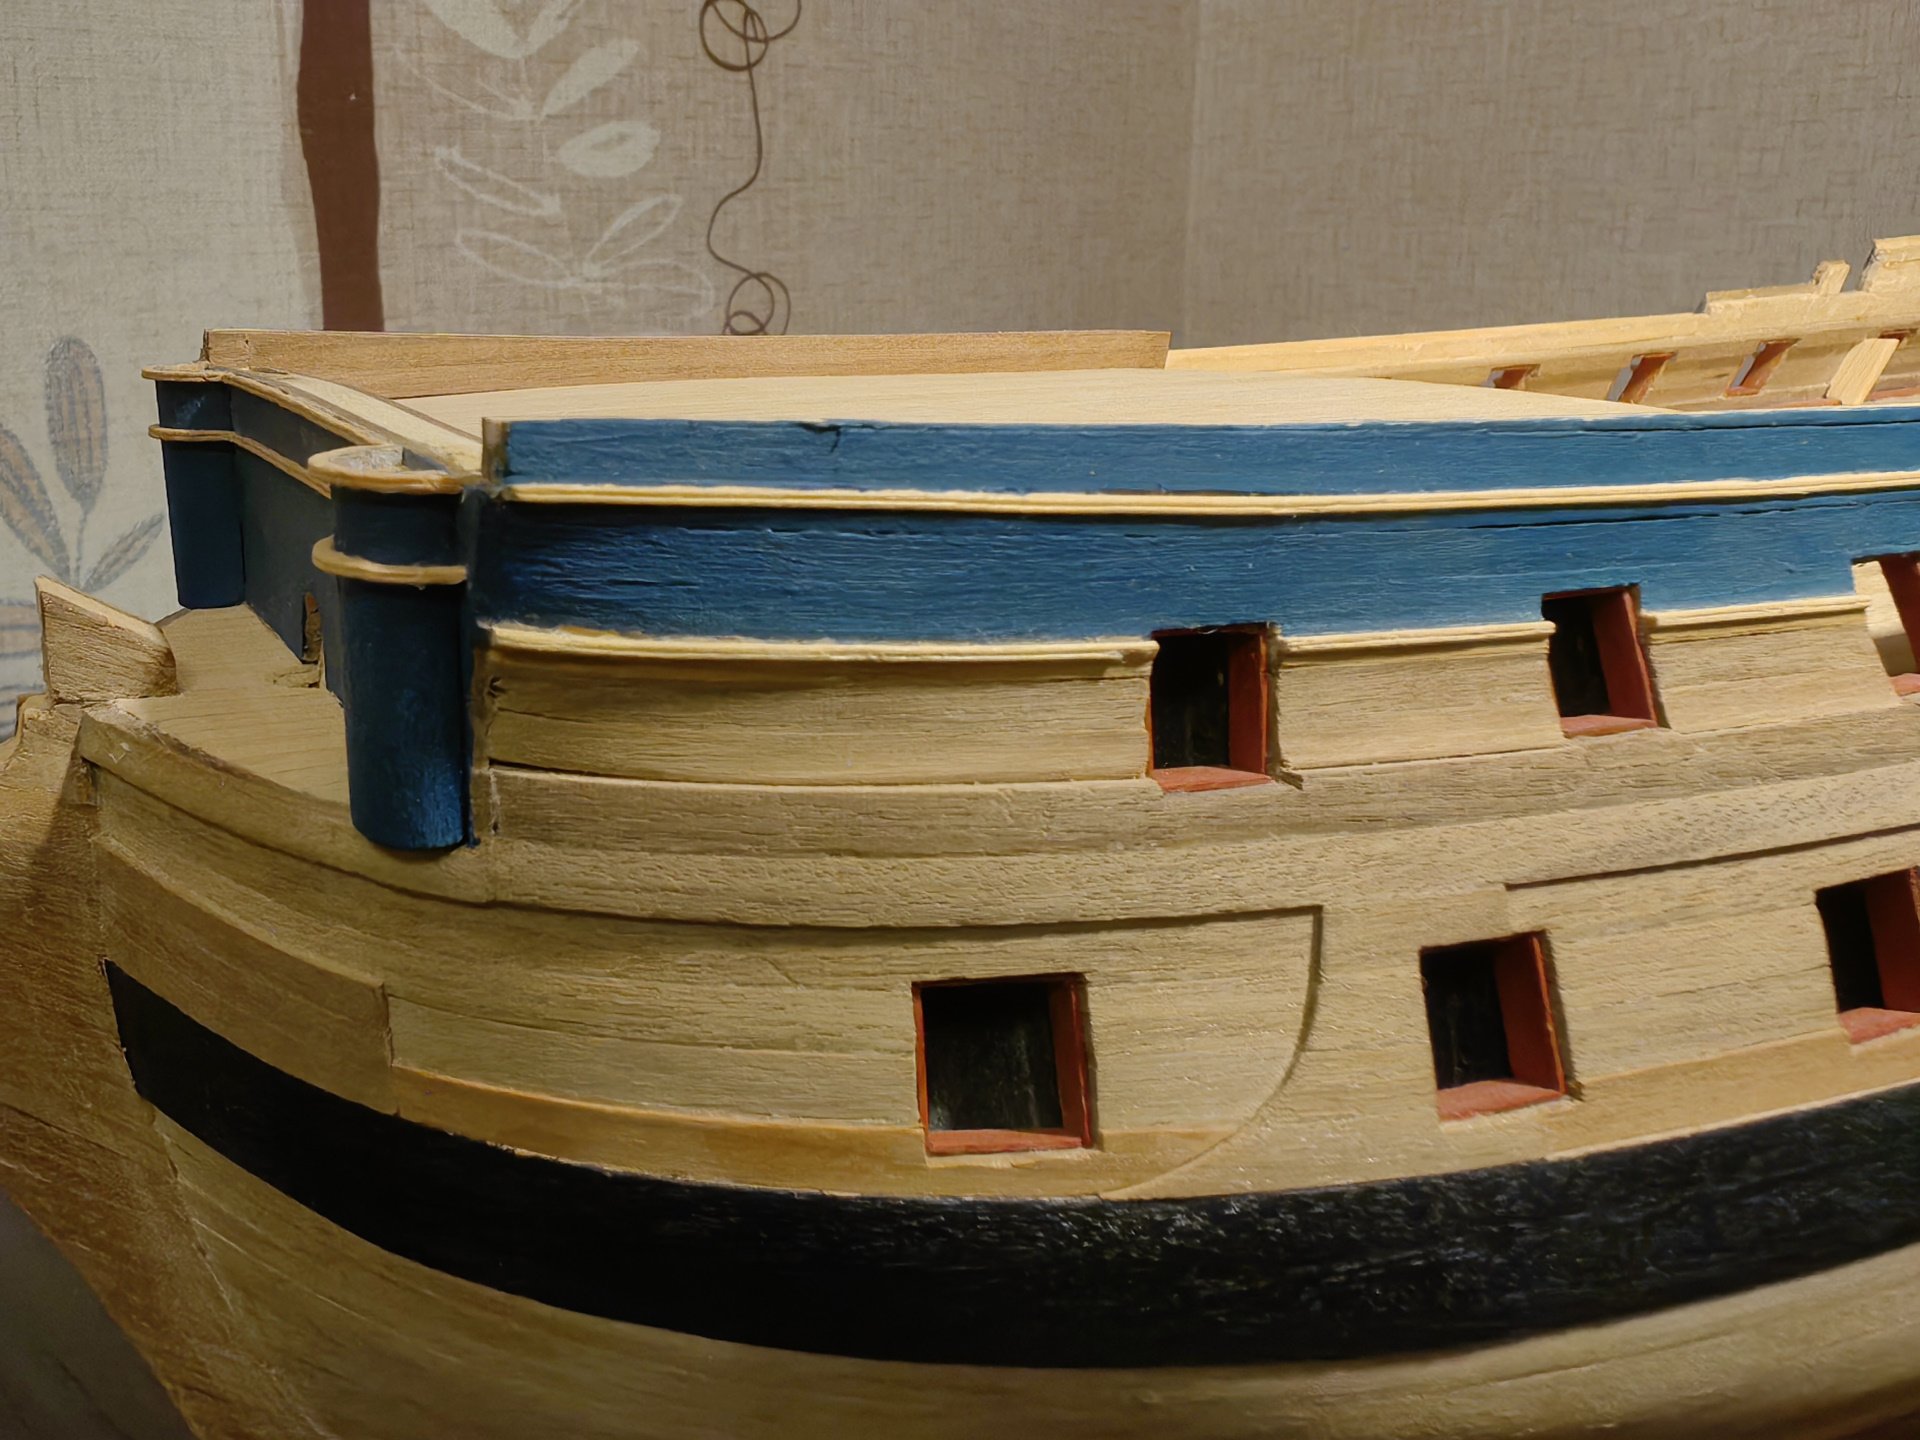
I mounted the gunwale on the bulwarks of the fordeck. I painted it, as well as the rails and toptimbers. I left an unpainted strip on the gunwale for better adhesion when gluing. But I won't glue the toptimbers yet, as there is still a lot of work to do with the case and I don't want to accidentally break the fragile structures. But I couldn't resist and took some photos).


-
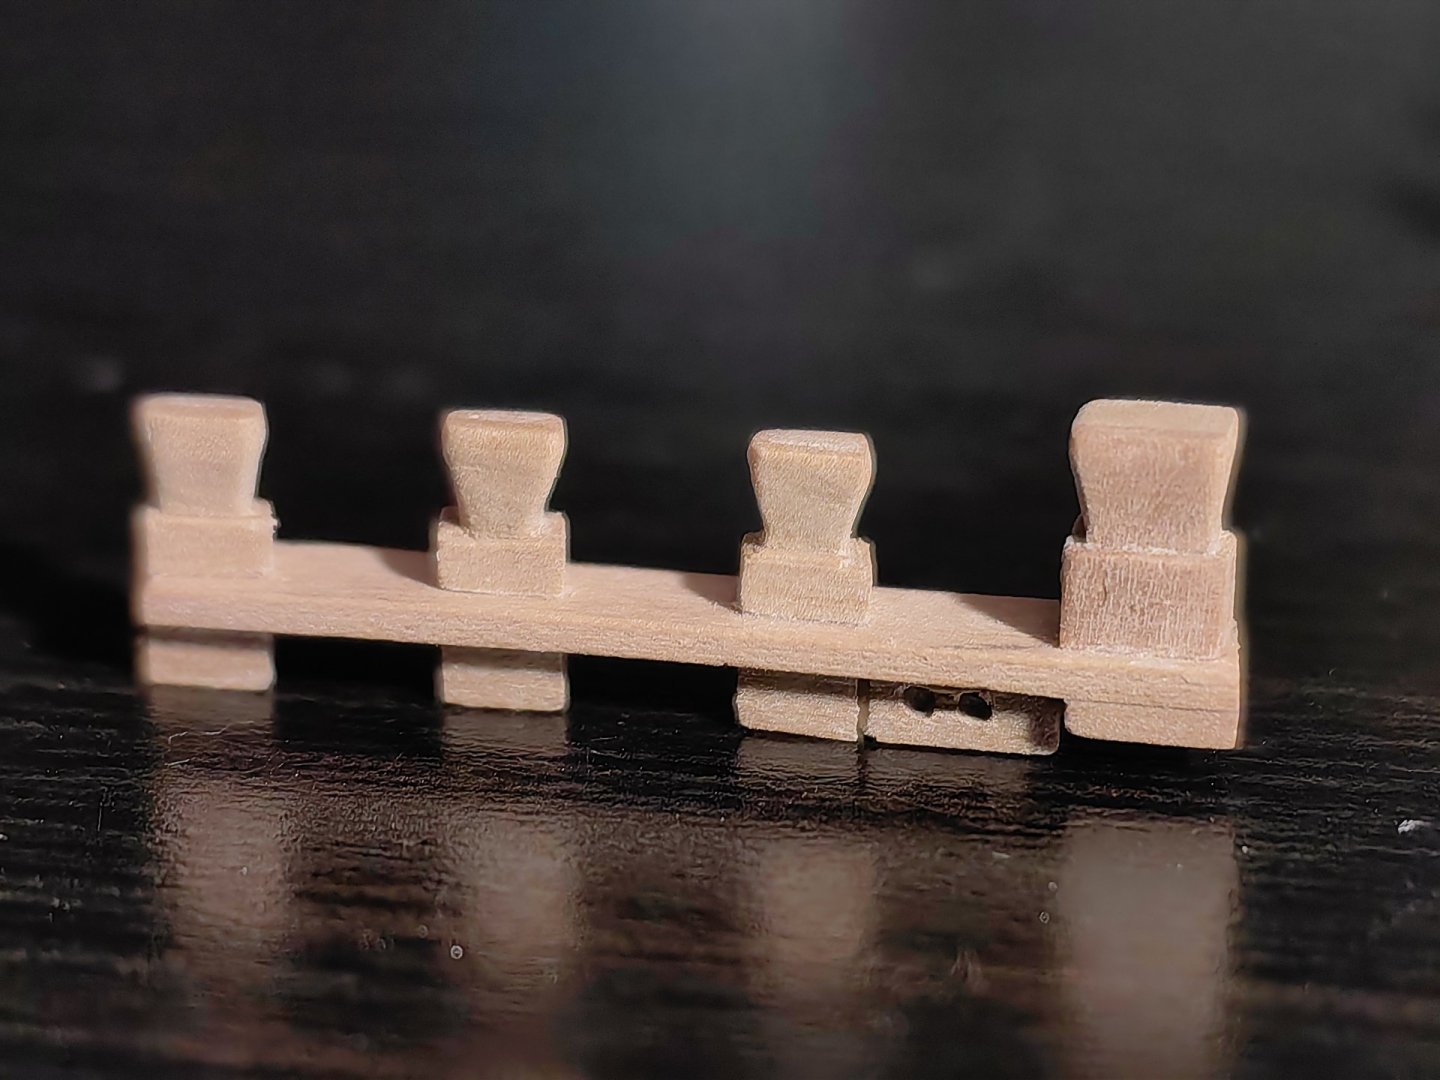
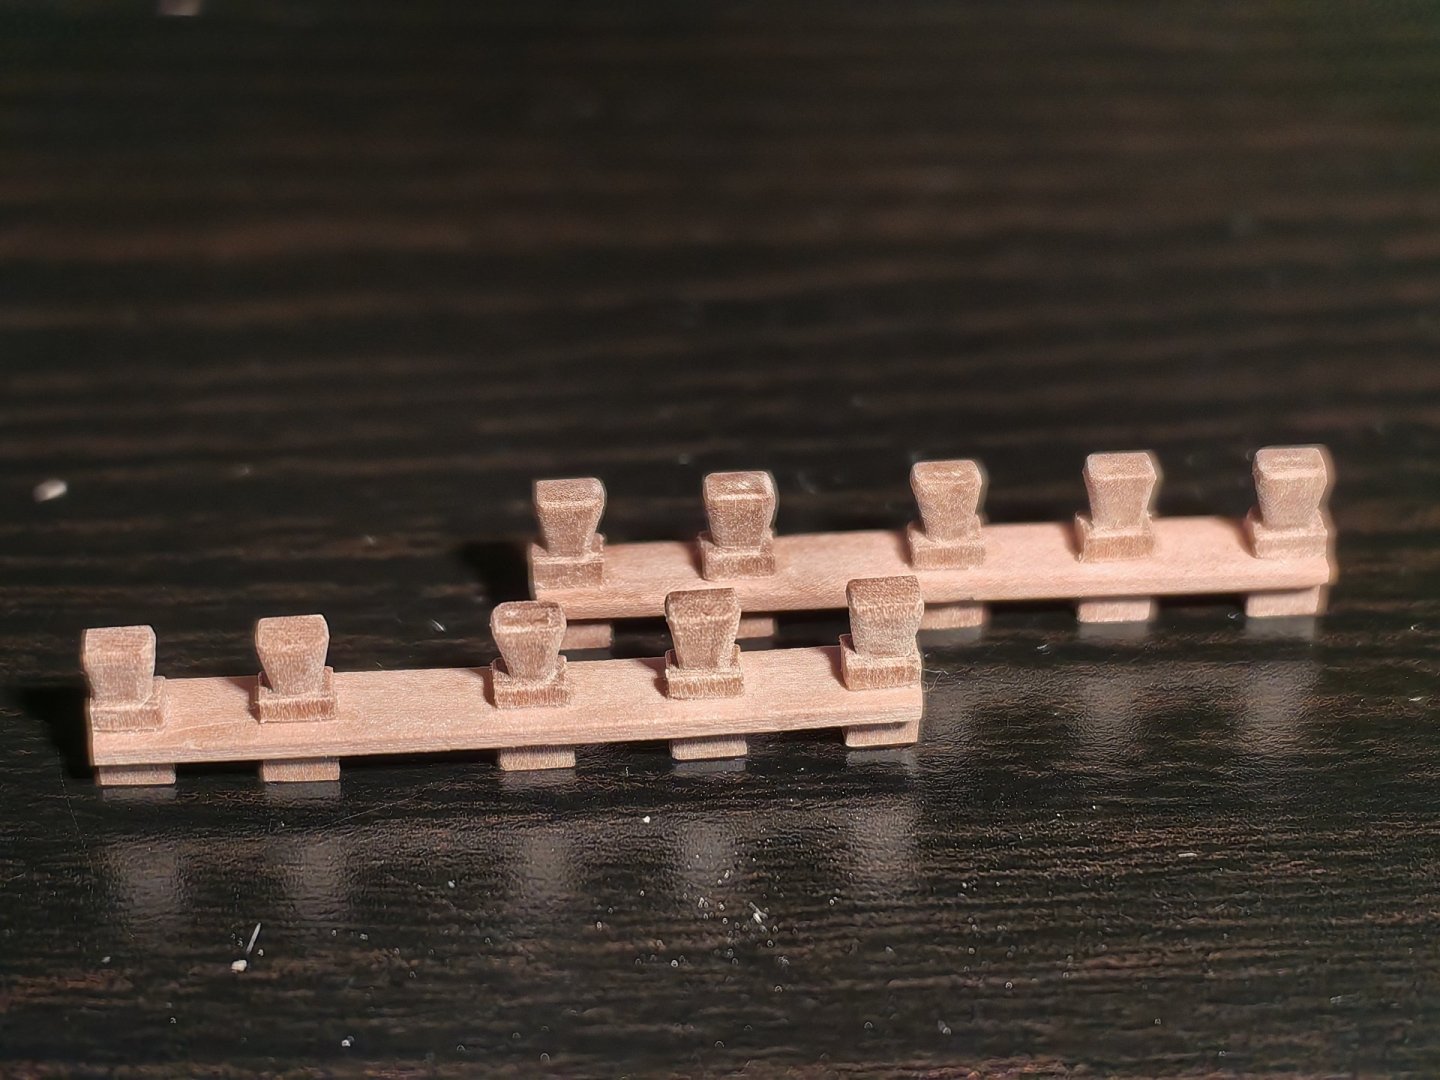
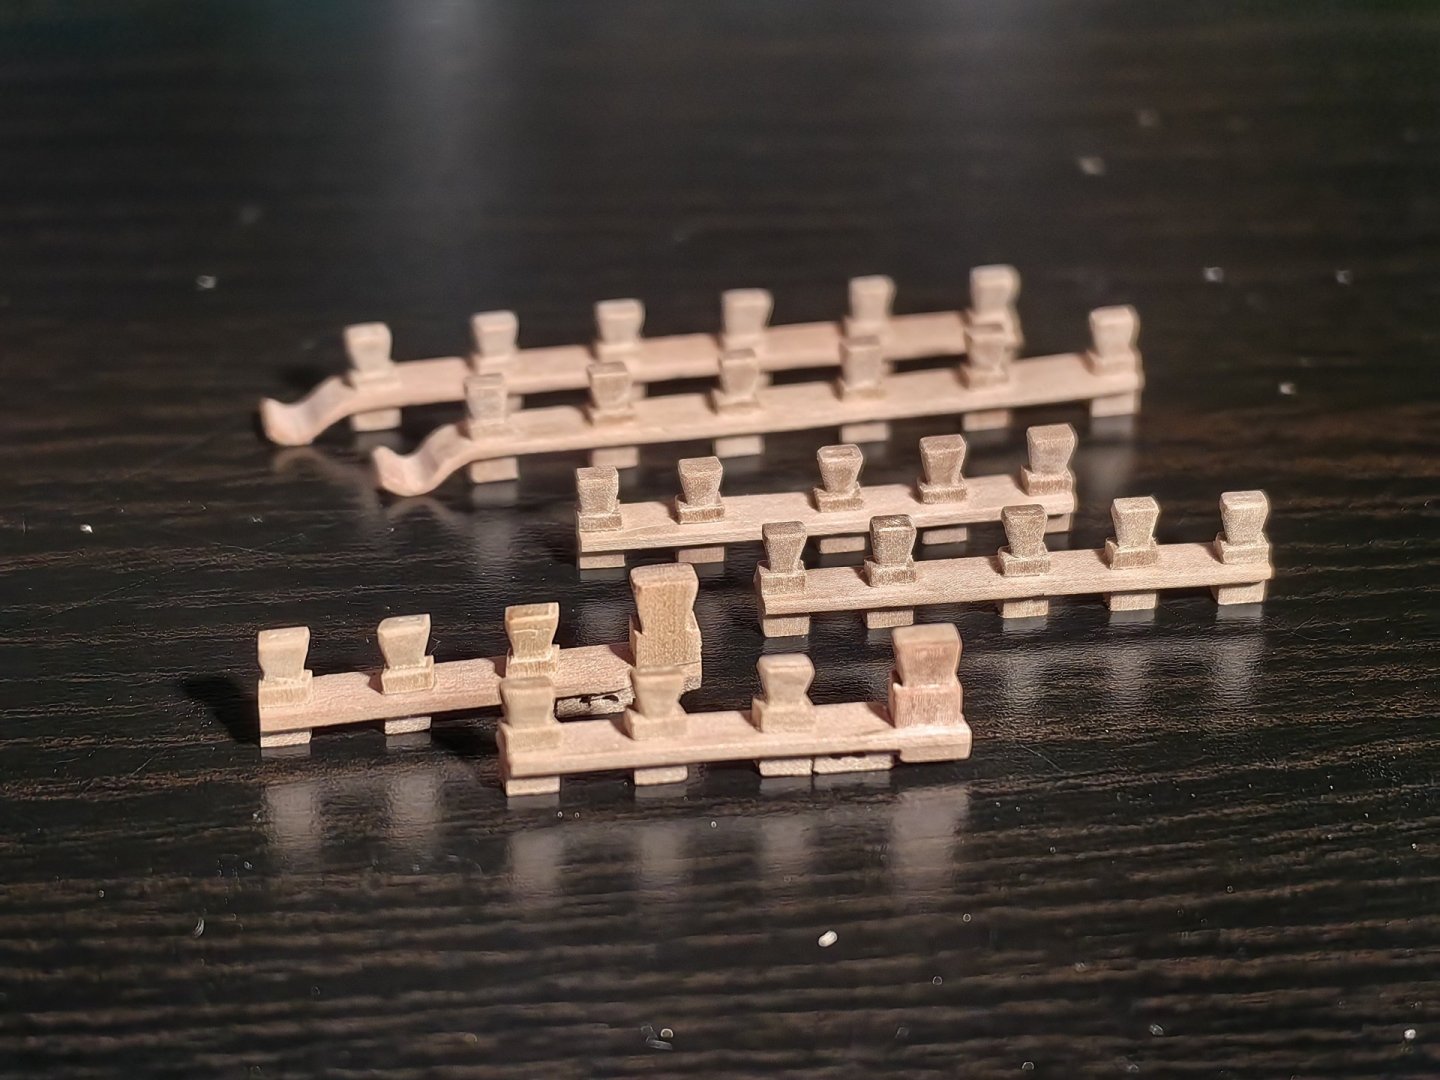
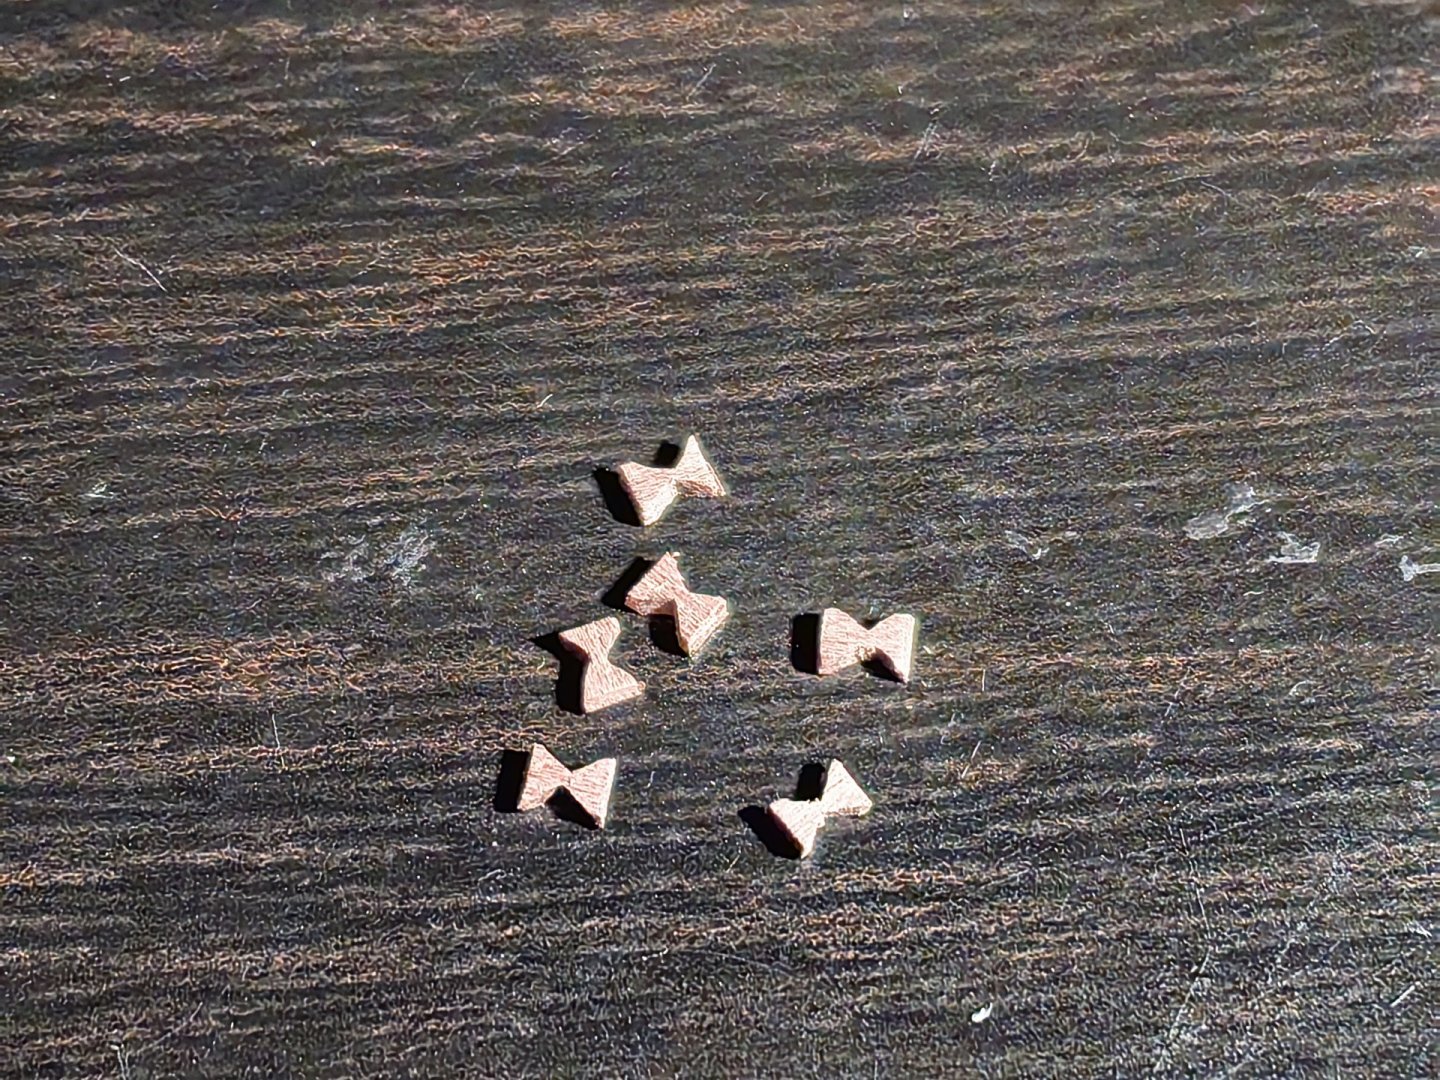
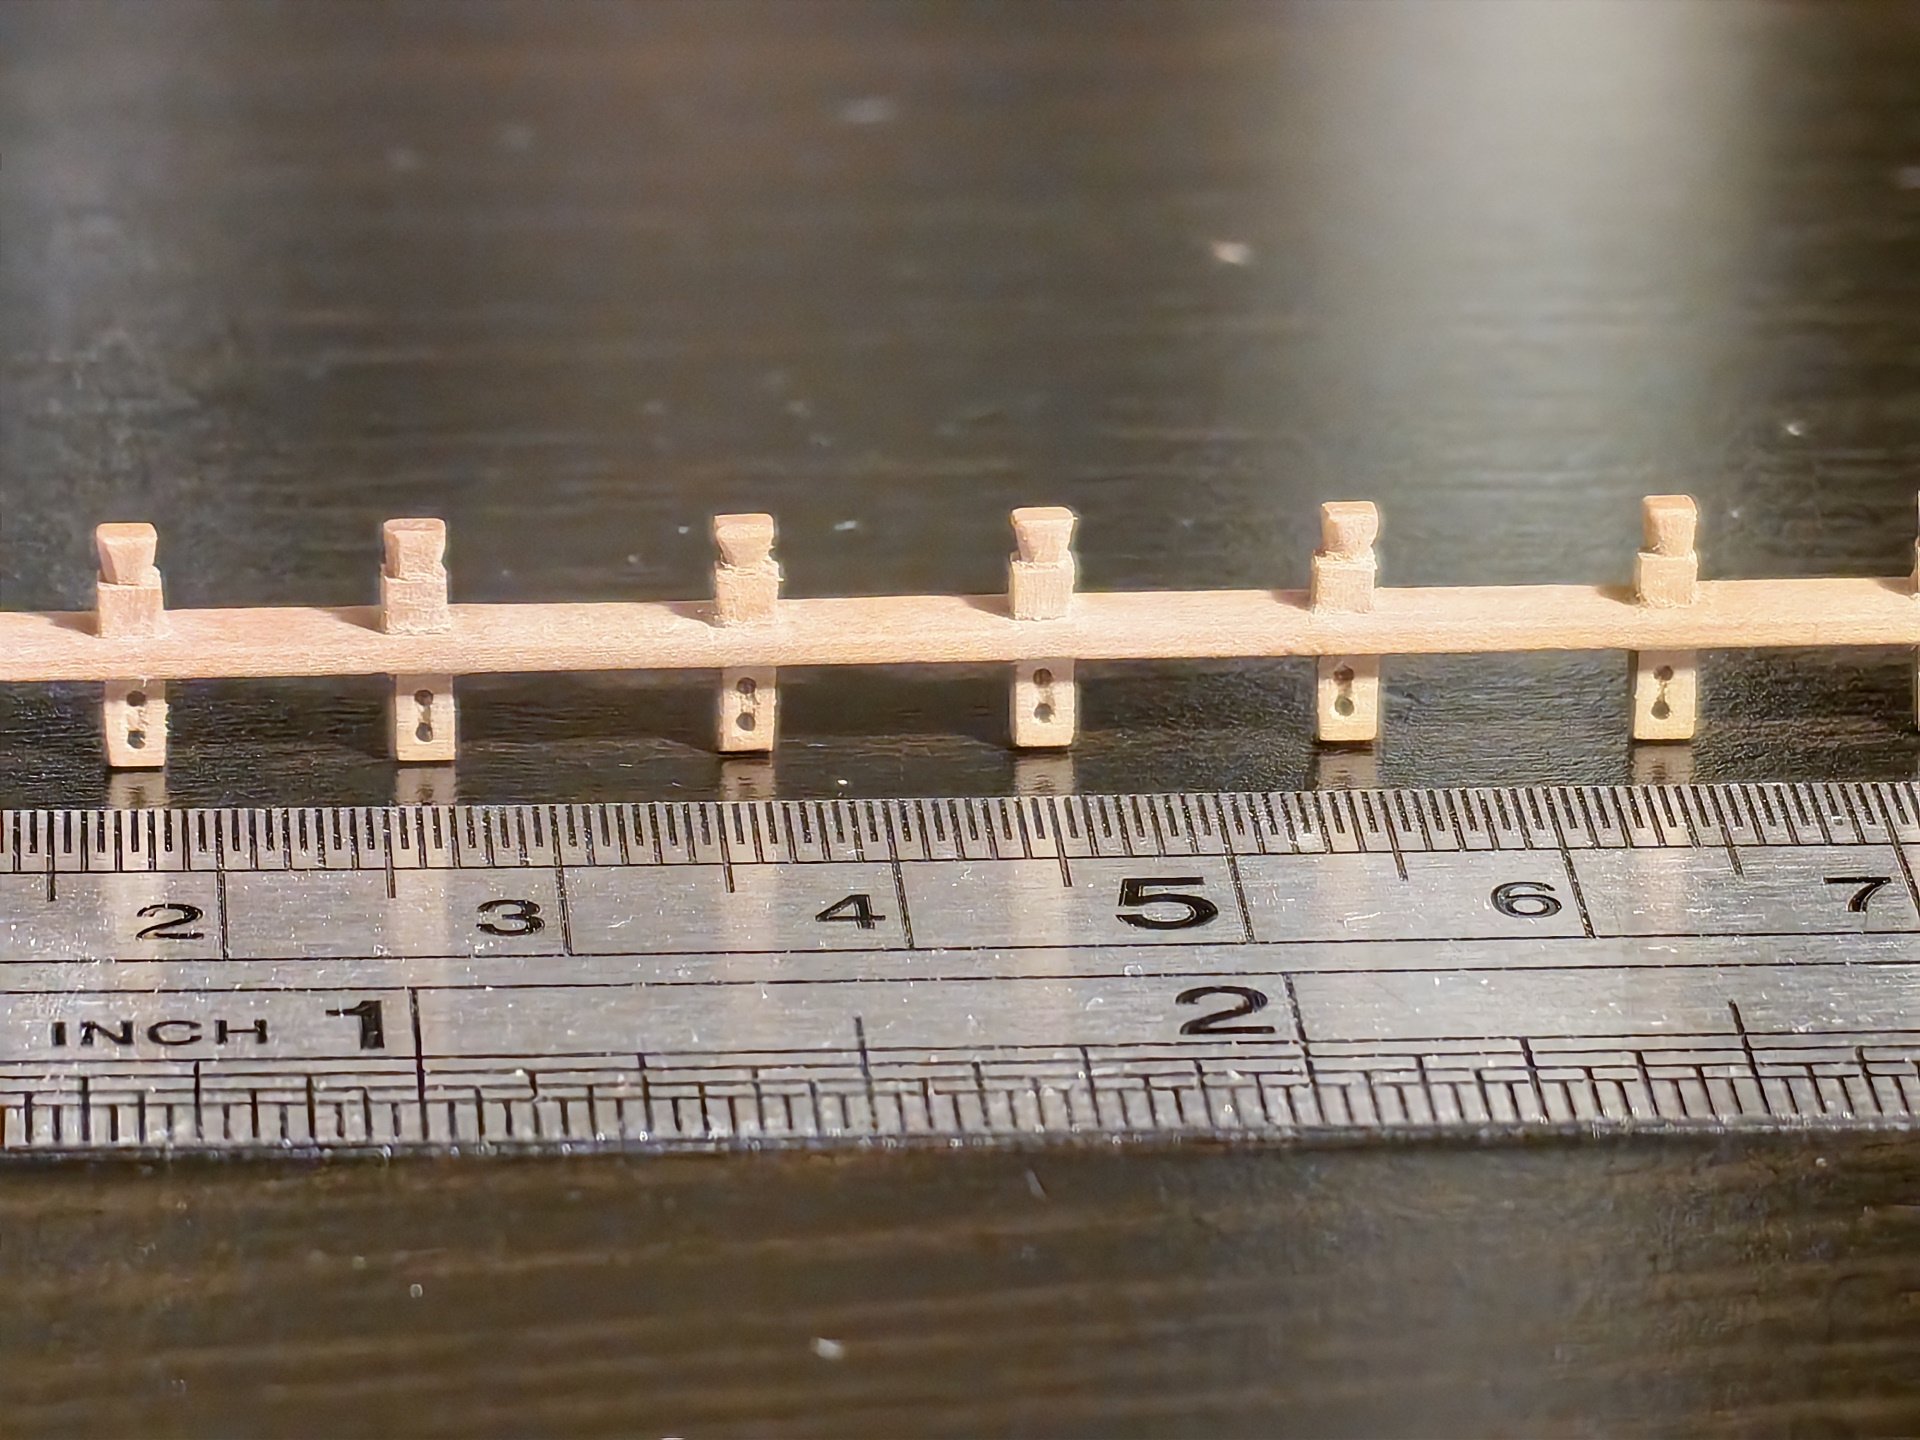
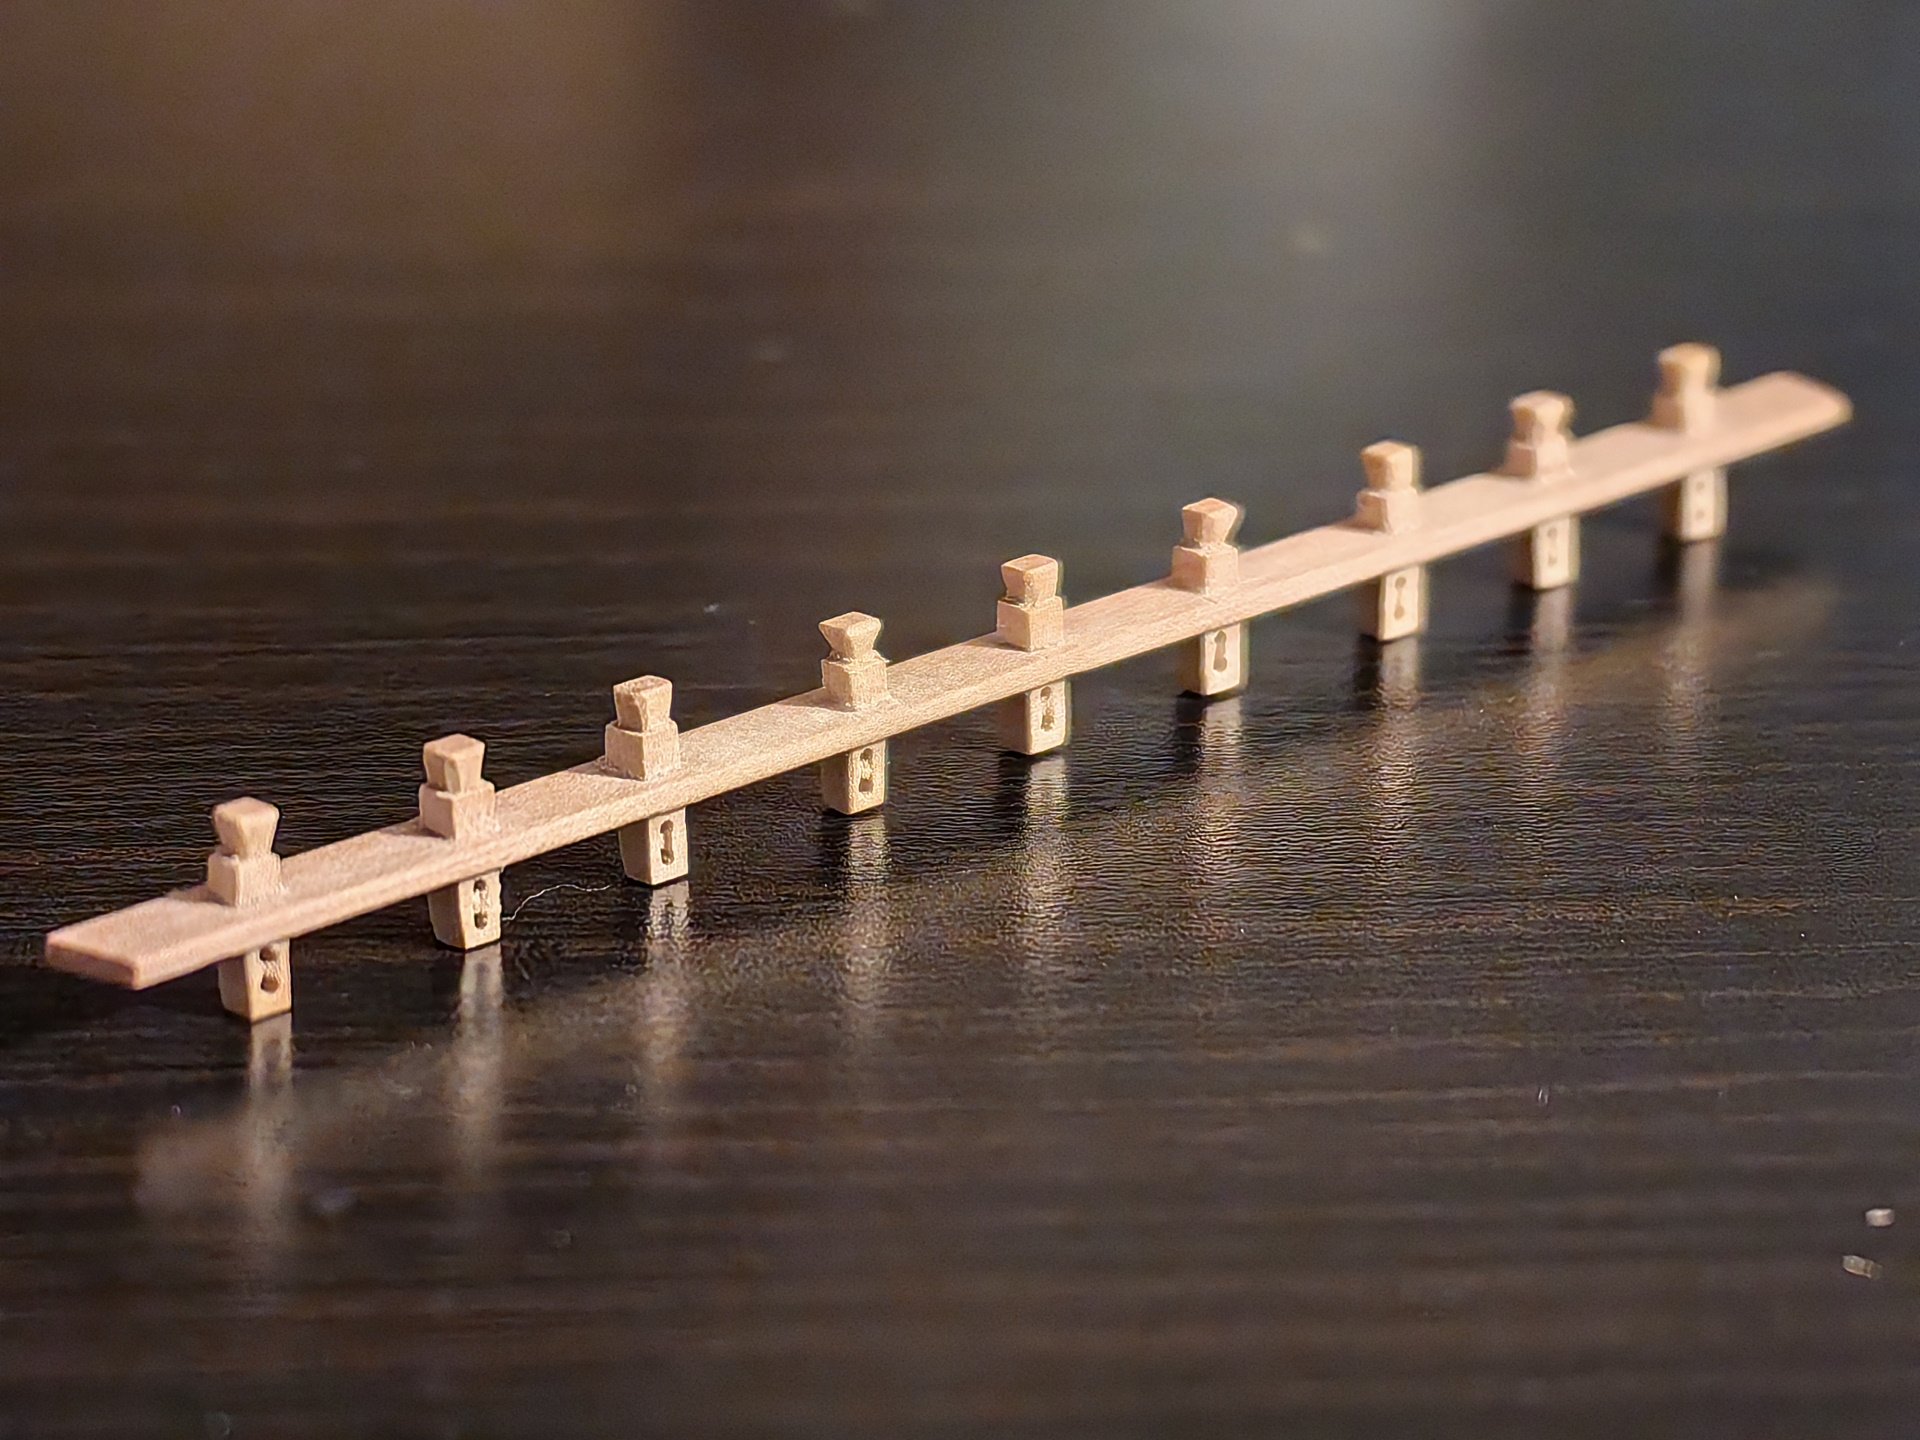
Here are some photos from the process of making the fordeck's railing. I appreciated the benefits of the pear wood and purchased several different sizes of planks and use them whenever possible. The top timbers of the fordeck's bulwarks form the gun ports, and as a result, the fife rail consists of three parts. Since the bulwarks converge strongly towards the bow, the group of bow top timbers has a parallelogram cross-section. This is also shown in Corel's drawings. I didn't bother with the rest and made them rectangular. Many small details have to be made by hand. Of course, it is difficult to achieve their full identity. But all the photos are taken with magnification, in reality the difference is not so noticeable. Especially all this will be painted black.


-
Hi! I've replaced all the rails that were part of the second layer of the model's sheathing, installed the planksheer on the beakhead, and the roof of the roundhouses. I'm currently working on the rails and top timbers of the foredeck and beakhead.

-
Thank you for the information, Ronald! I'm not much of an painter...) But this is about relief. I'll try to give the details at least longitudinal relief using scribe plates)
-
Ronald, I was referring to these bars. Are they also laser-cut? What is their width? I'm asking because I'm currently in the process of assembling a head. Corel doesn't have any laser-cut pieces, and I want to add texture to these parts. However, they are very small on my scale.
-
Ronald, is the ornament on the slats that cover the head timbers just painted, or is it embossed? Did you use a brush or a stencil? How wide are the slats?
-
Ronald, hello! Great job! High-quality materials plus skilled hands and attention to detail work wonders! Thank you for your publications, they help me see the work of a true master and learn from him!)
-
I use a transparent glue, Titebond. In some cases, when the surfaces are already painted, I clean off some of the paint with a sharp knife
-
Hello, Ronald! I join in all the enthusiastic compliments!This level of skill is something worth striving for!) You write that you glue the PVA directly onto the painted surface. I tried it too, but I couldn't get a solid connection (Maybe it's the paint... Now I leave unpainted the part of the surface on which I'm going to glue something. Yours sincerely, Frecap
-
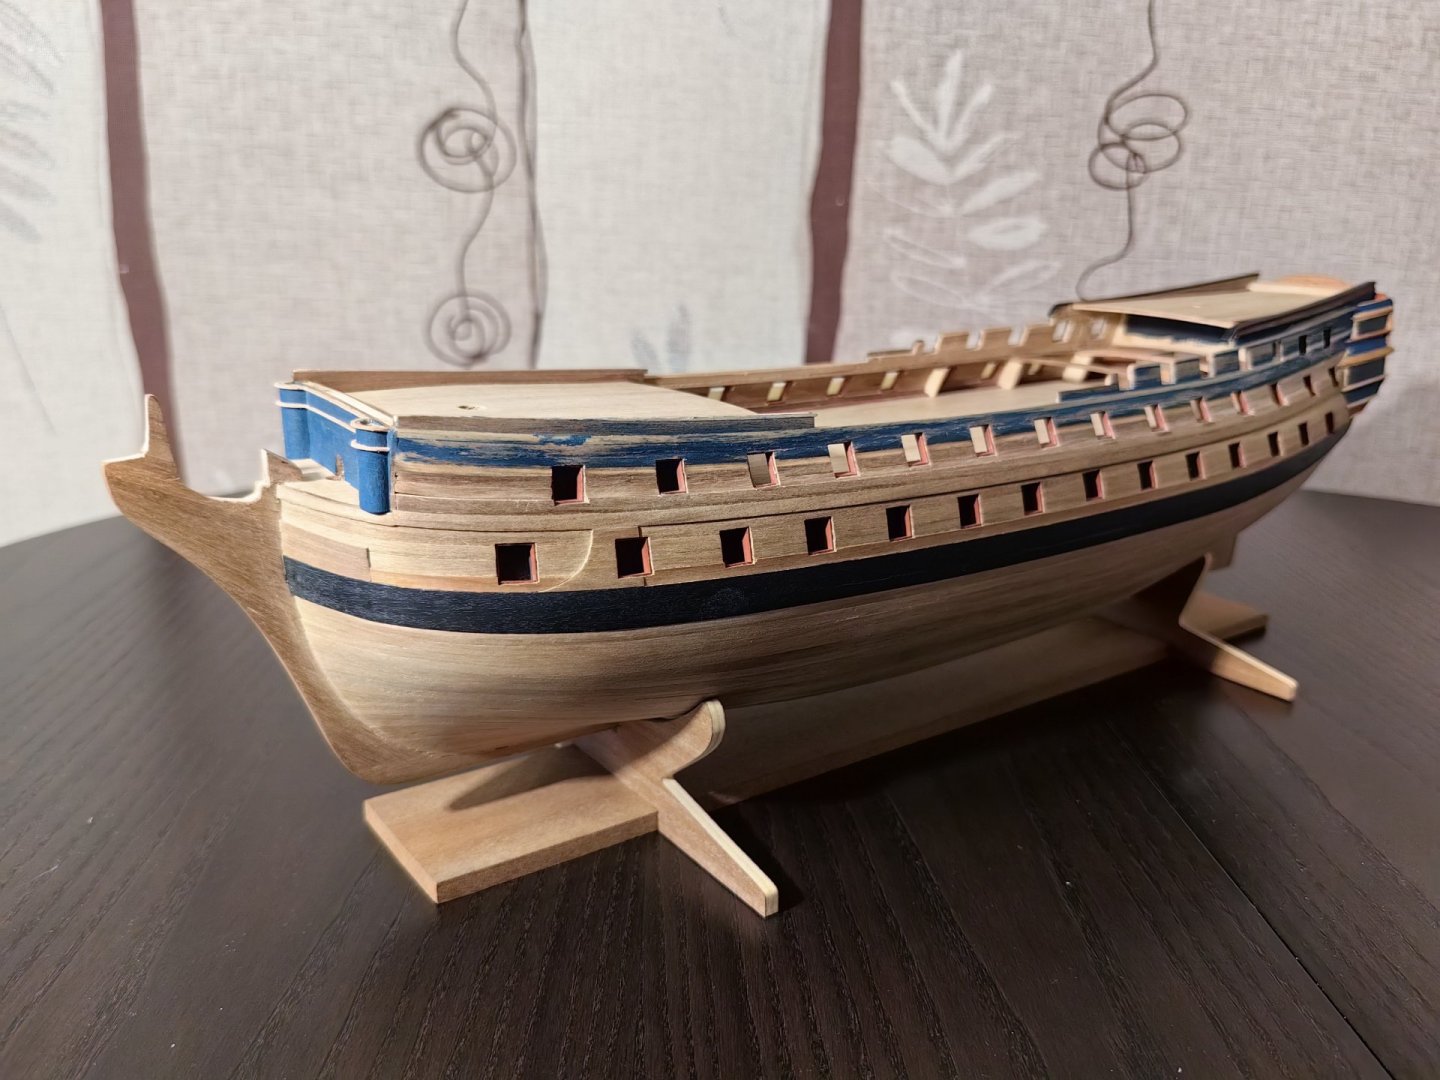
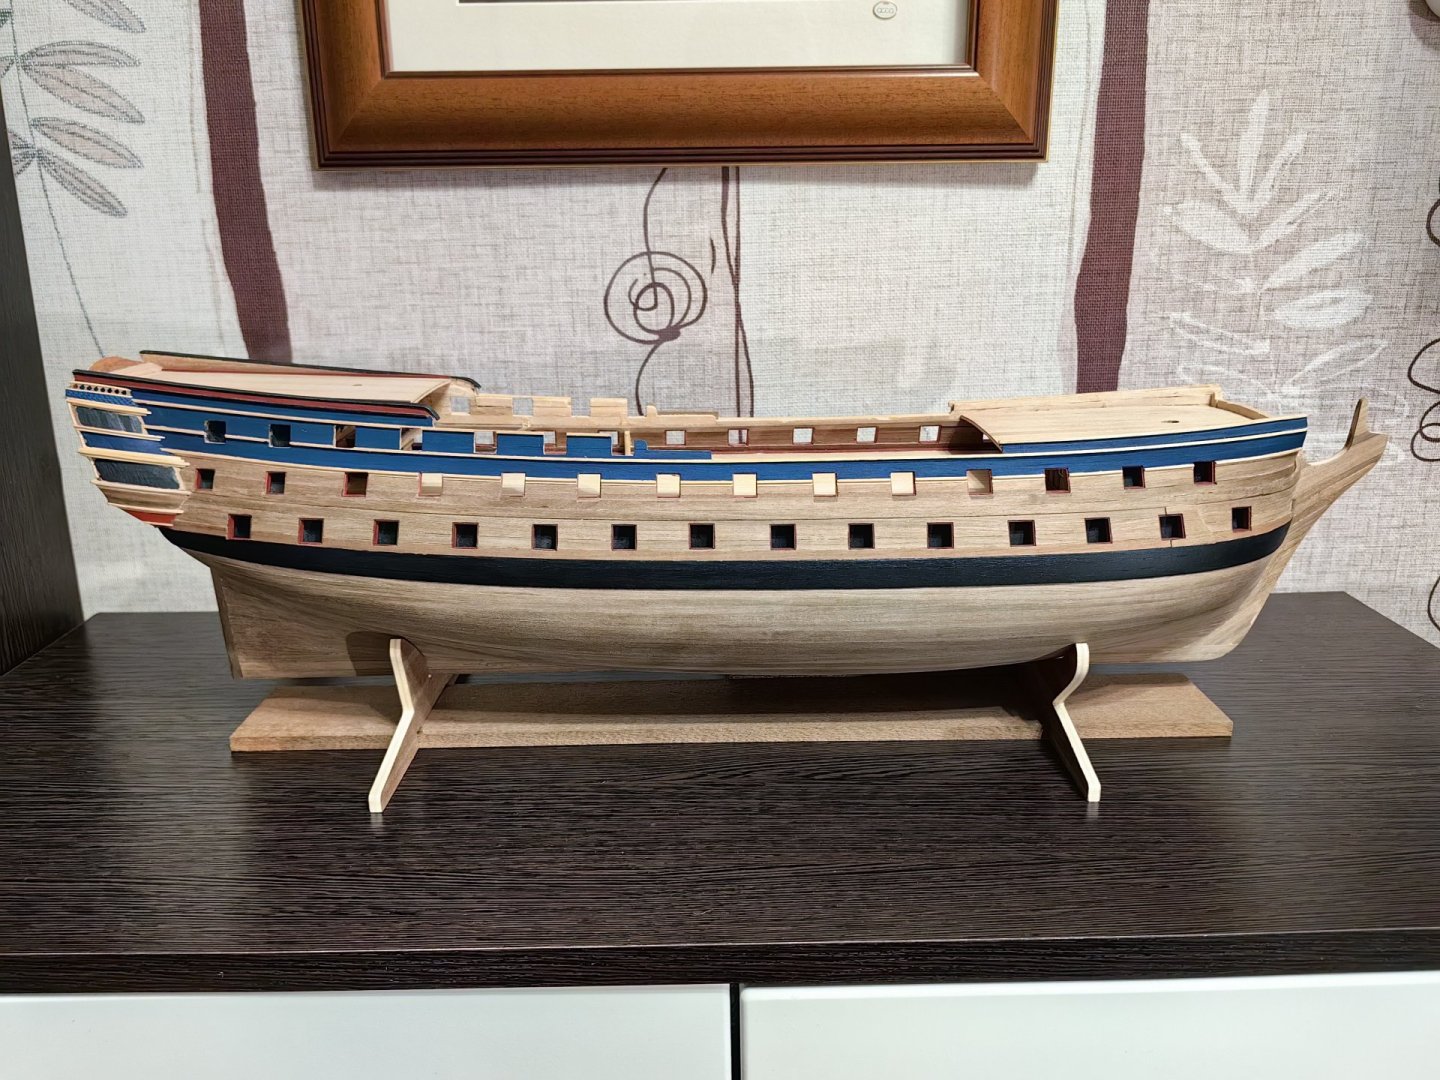
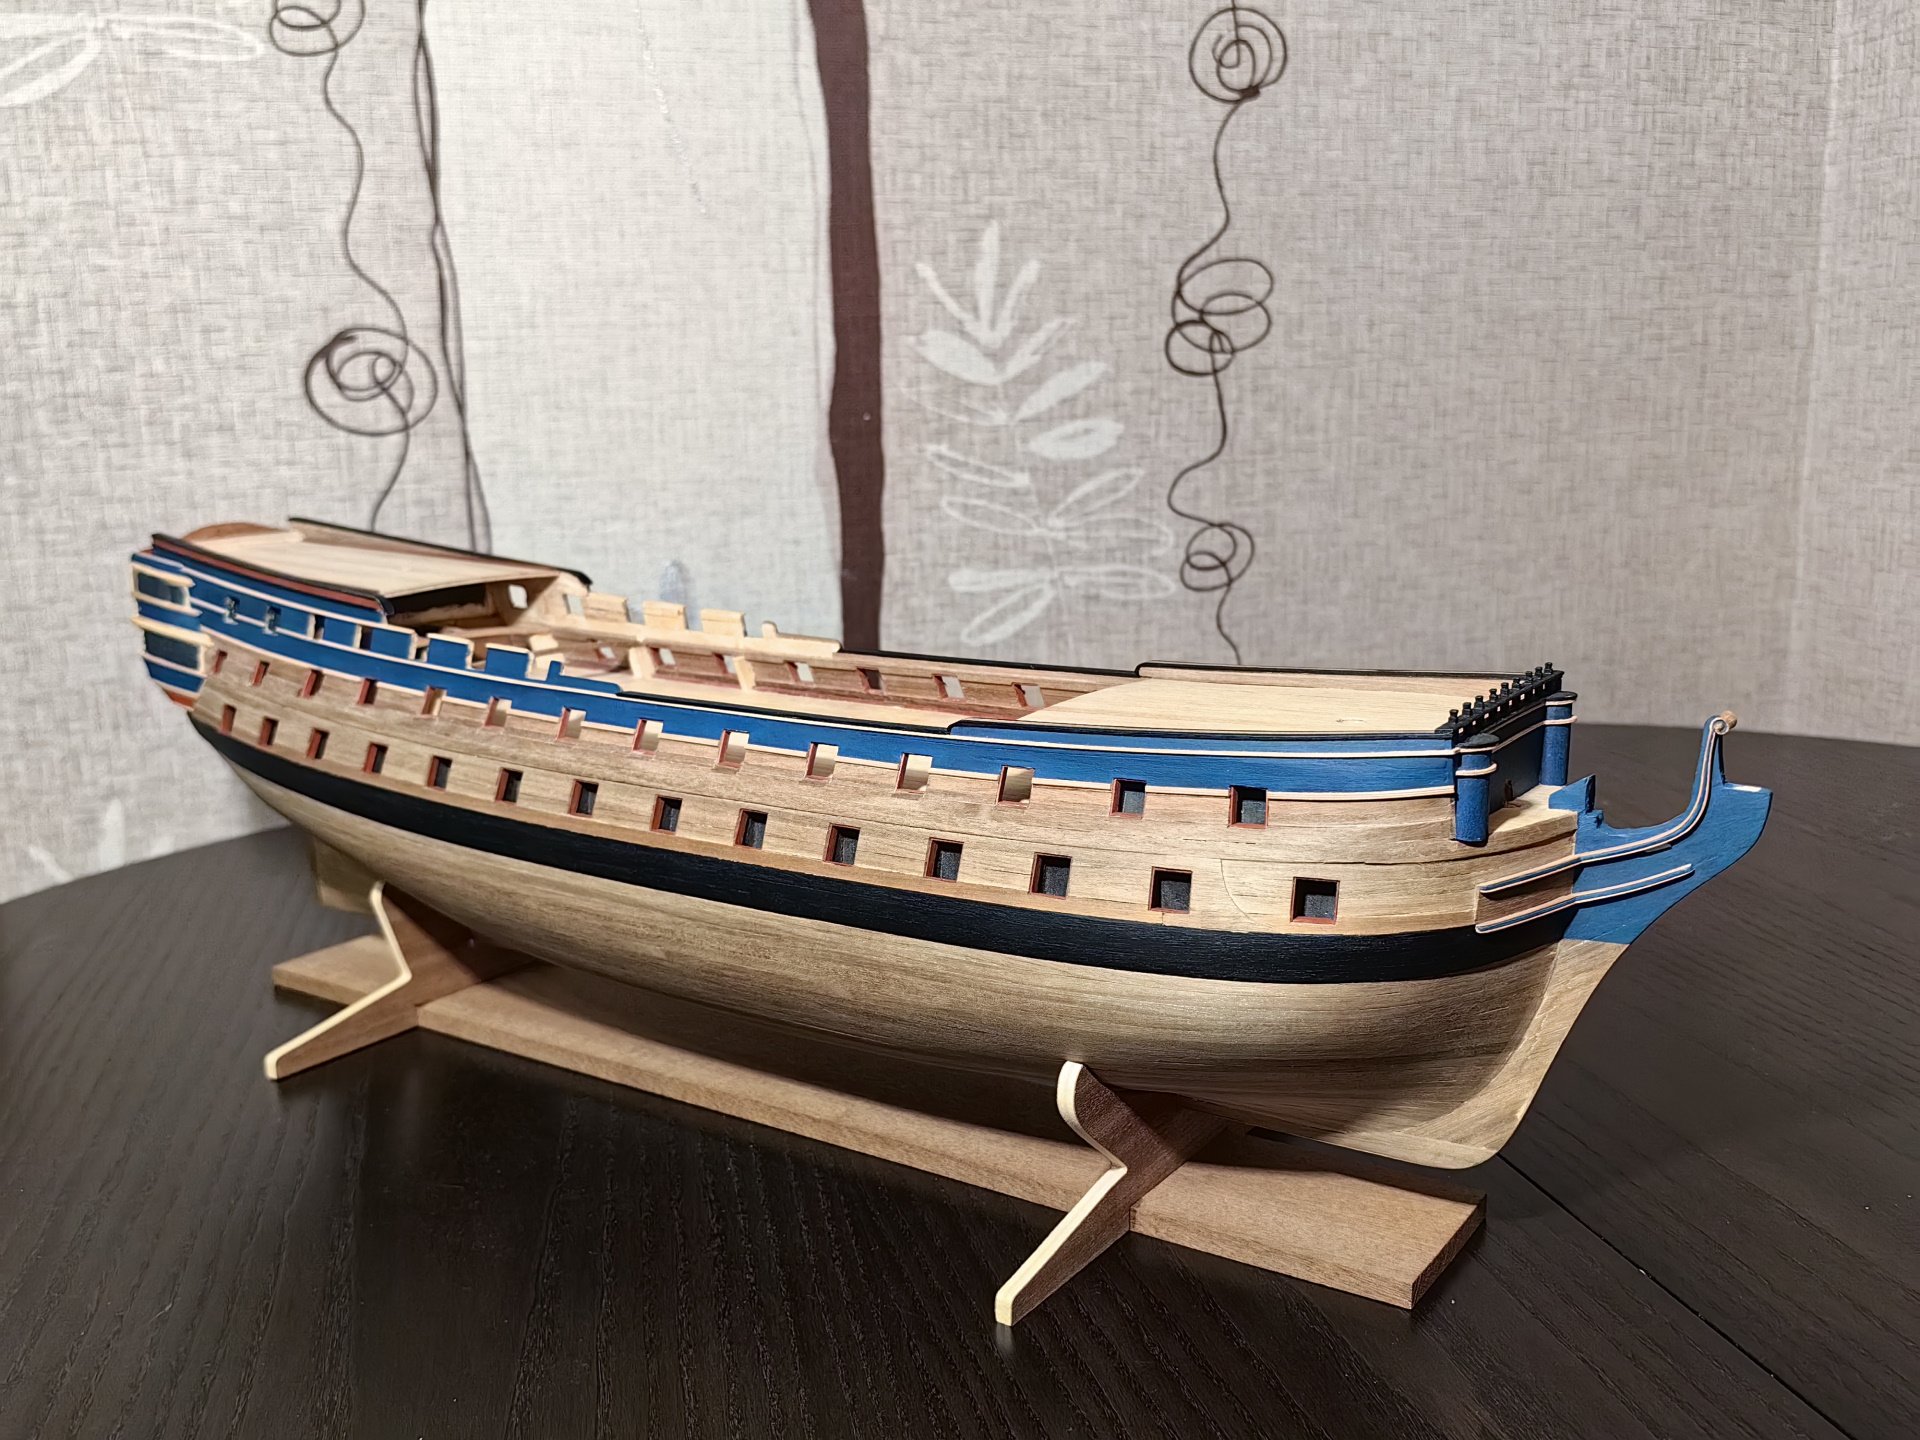
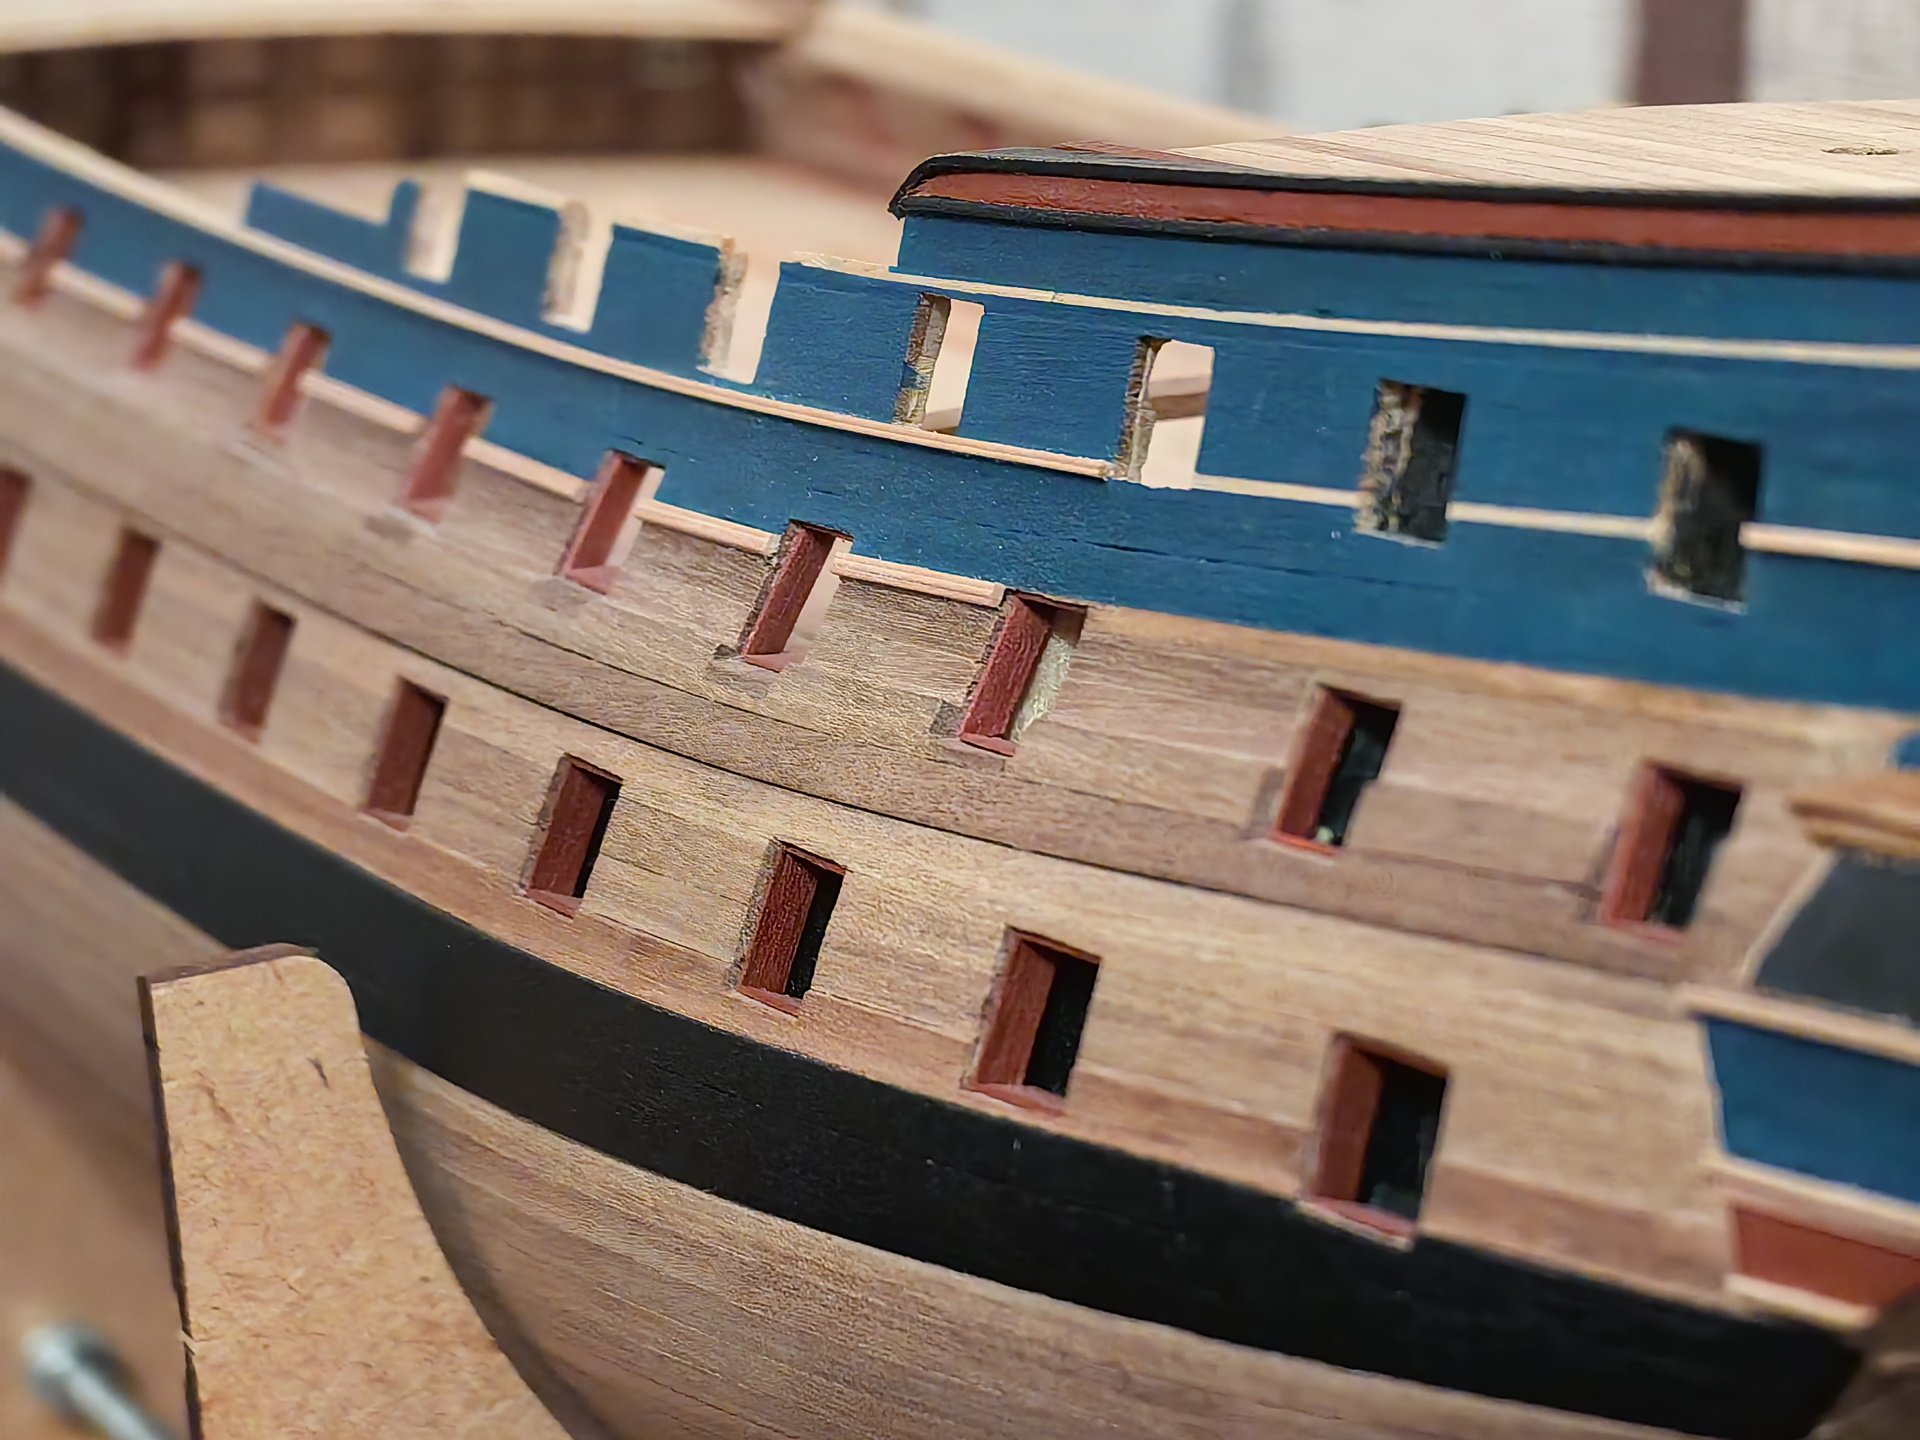
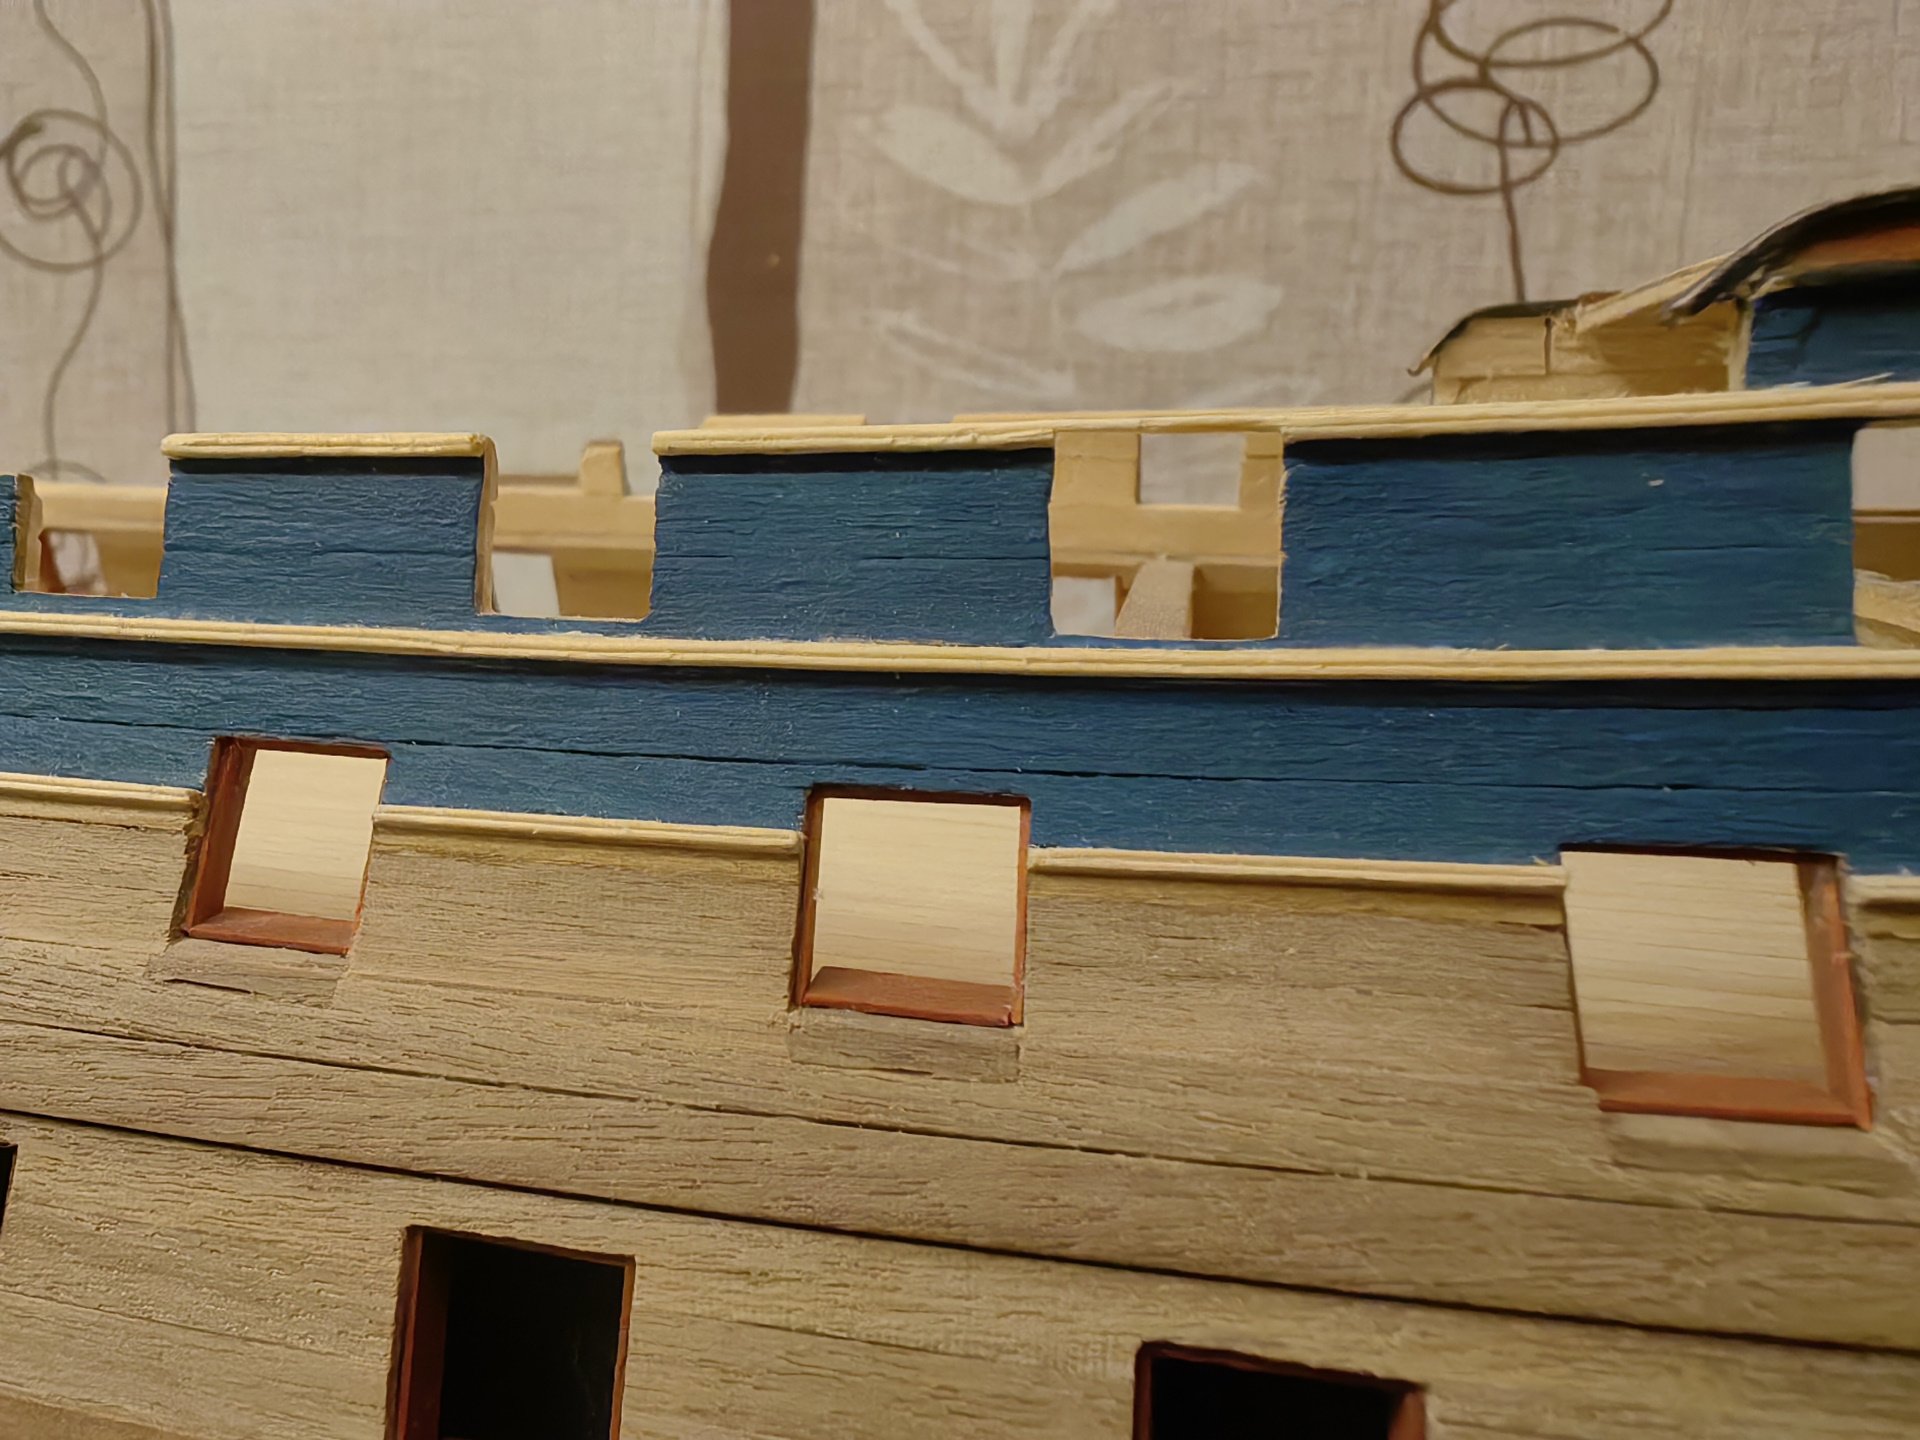
Hello everyone! Finally, the model has taken the same appearance as it did before the upgrade! New rails have been installed. They are made of a pear-shaped slat with a 1x1 mm cross-section, which has been pre-shaped. When I looked at numerous photos of museum models, I noticed that in many cases, the waist rail was wider than the others, so I decided to do the same. I didn't have a 1x1.5 mm rail, so I glued another 0.5 mm rail to the existing one, rounding its edge first. Since the waist rail runs along the main deck, interrupted by the gun ports, I glued it in short sections.


-
Hi! After holding the already painted body in my hands, it is not very pleasant to see it with peeled-off sides. I'm in a hurry to return the model to its former appearance, correcting mistakes along the way. Painted again, using masking tape as a separator. Since PVA glue does not adhere well to acrylic paint, I left unpainted strips for the rails to be glued.


-
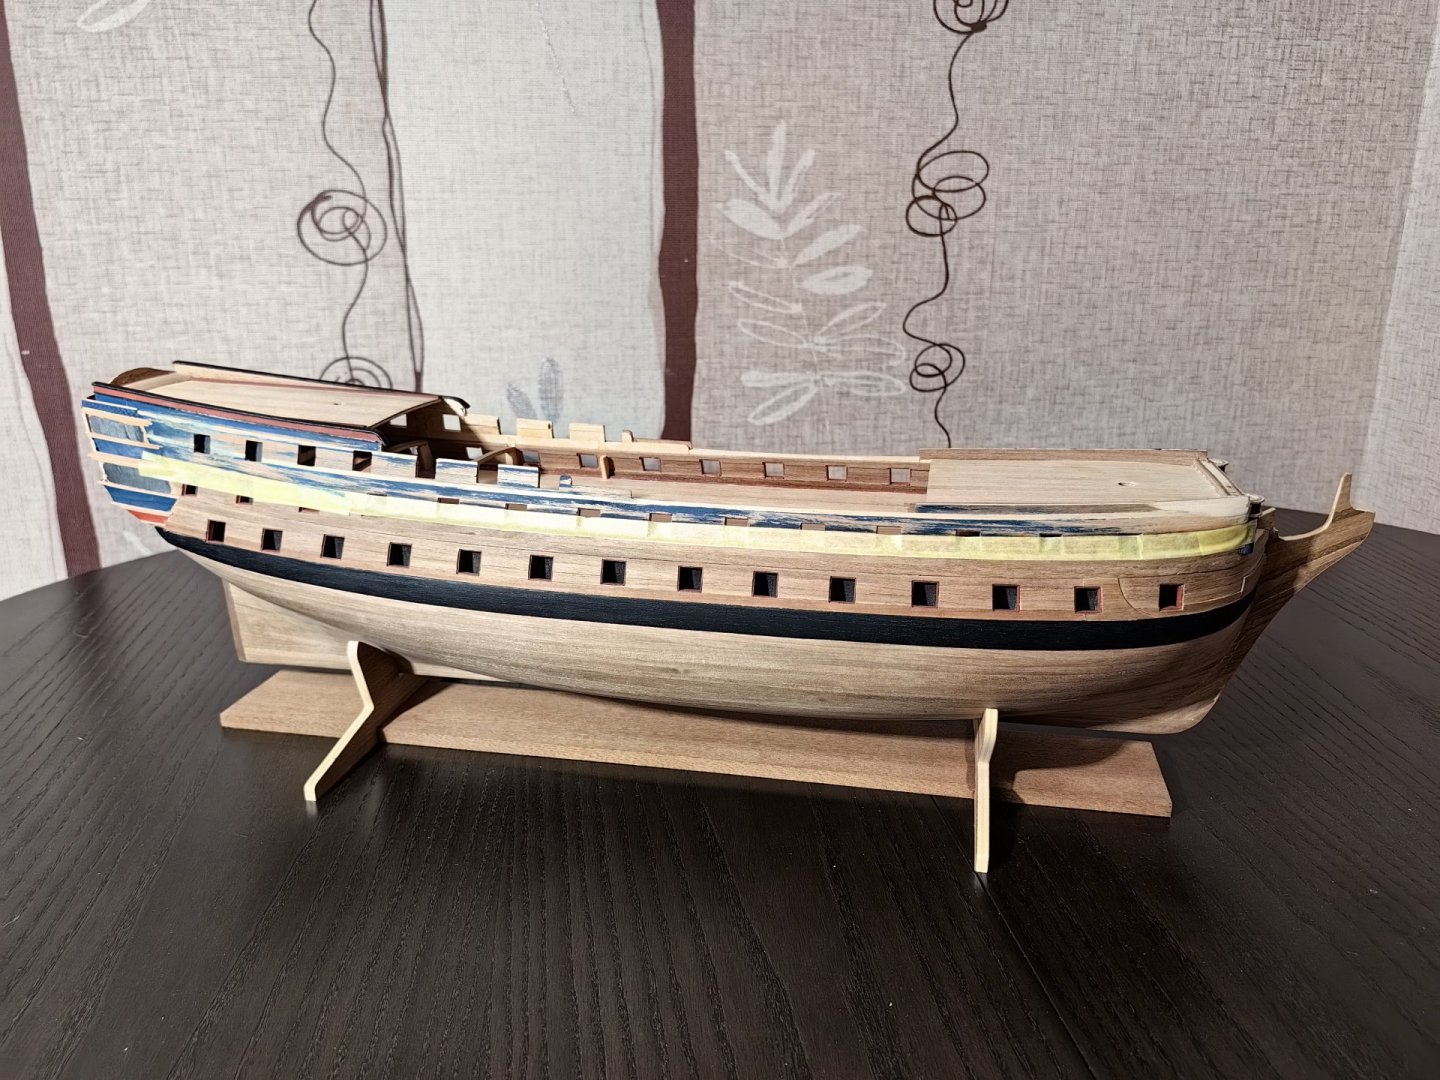
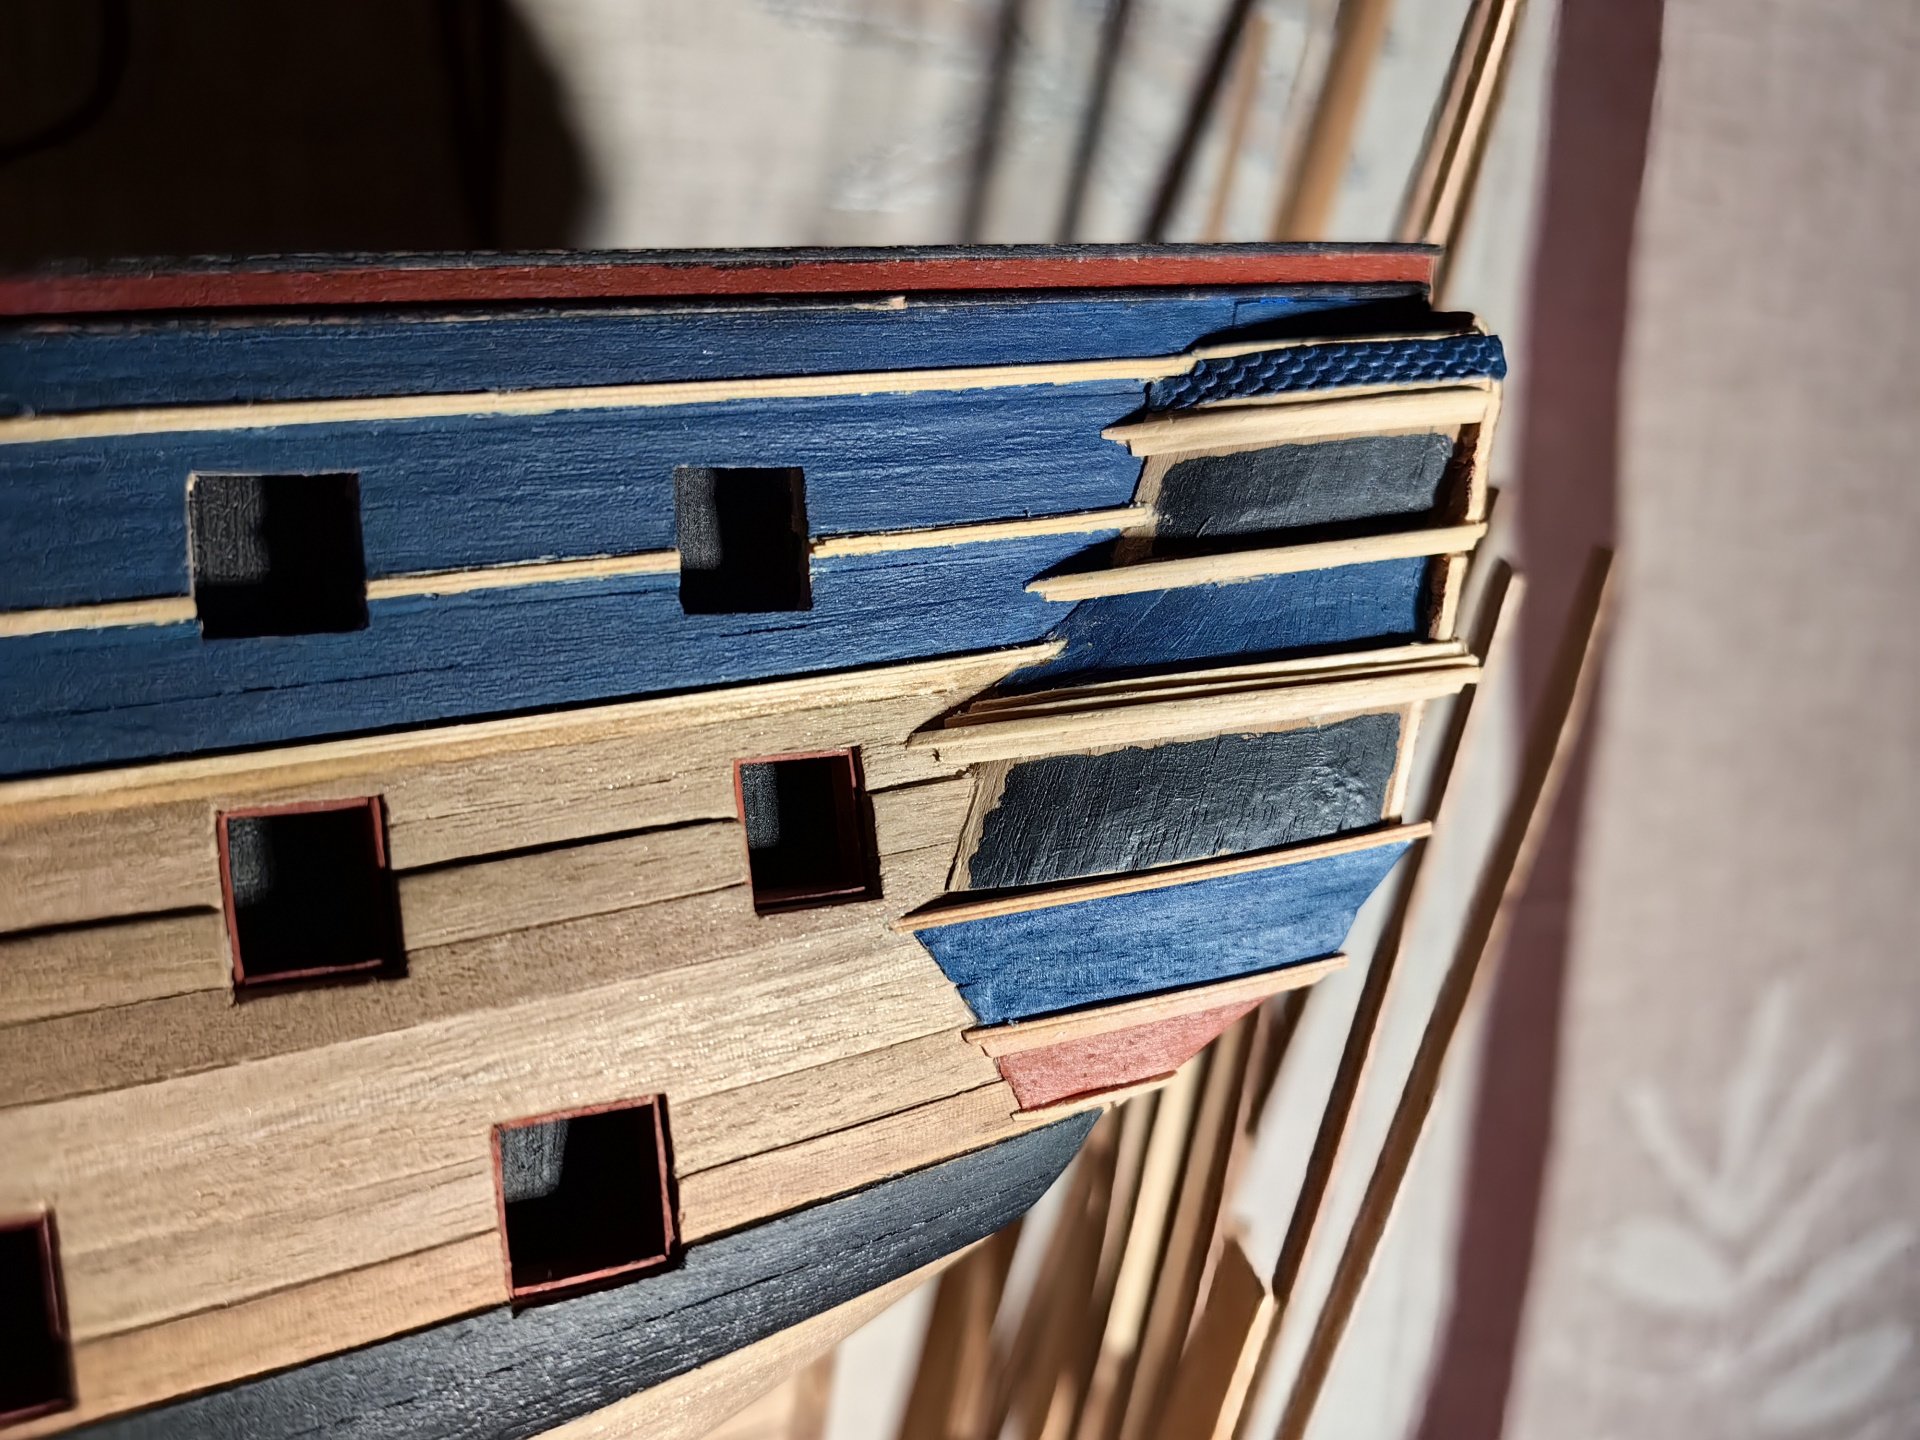
Hi! As we say: Eyes are afraid, but hands do! It's not very pleasant to do the dirty work on the already painted hull, but it didn't really take much time. Just a weekend) I cut off all the rails on the sides and stern. Only on the stern galleries I left everything as it was. Put in order the right upper part of the bulwark. Now the beakhead looks symmetrical. The partially scraped paint doesn't look very nice, but I think the new paint will be of better quality, as it's easier to apply masking tape to a smooth surface.


-
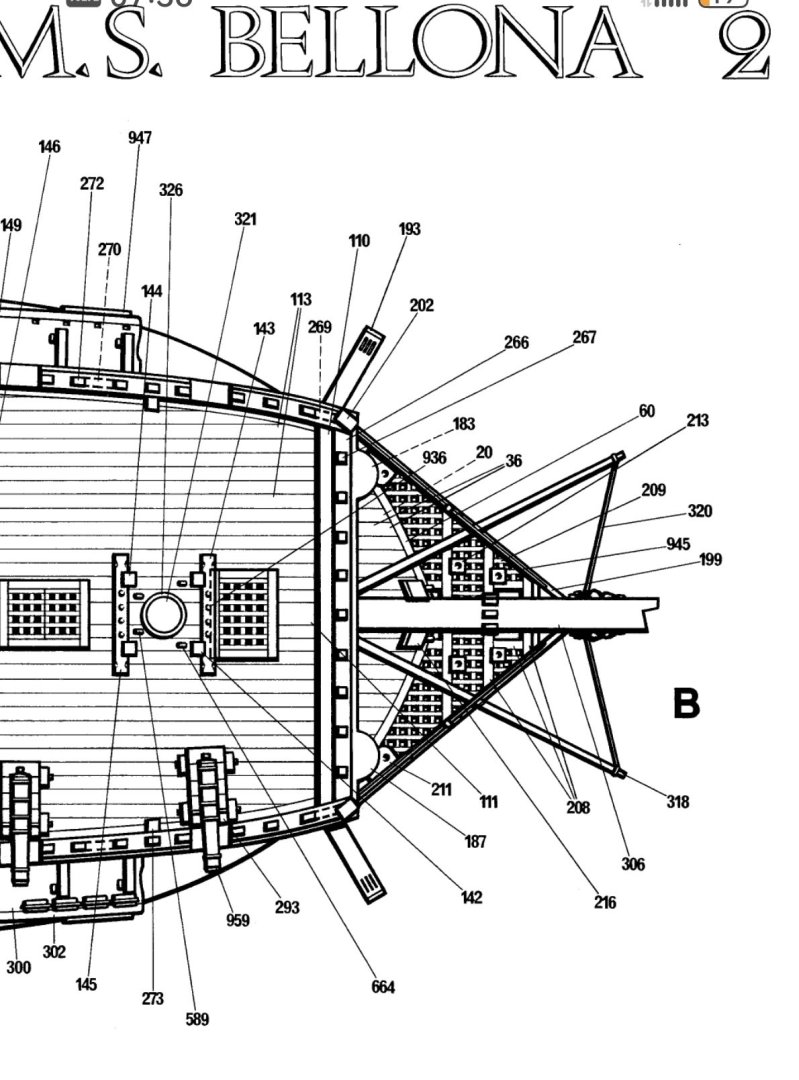
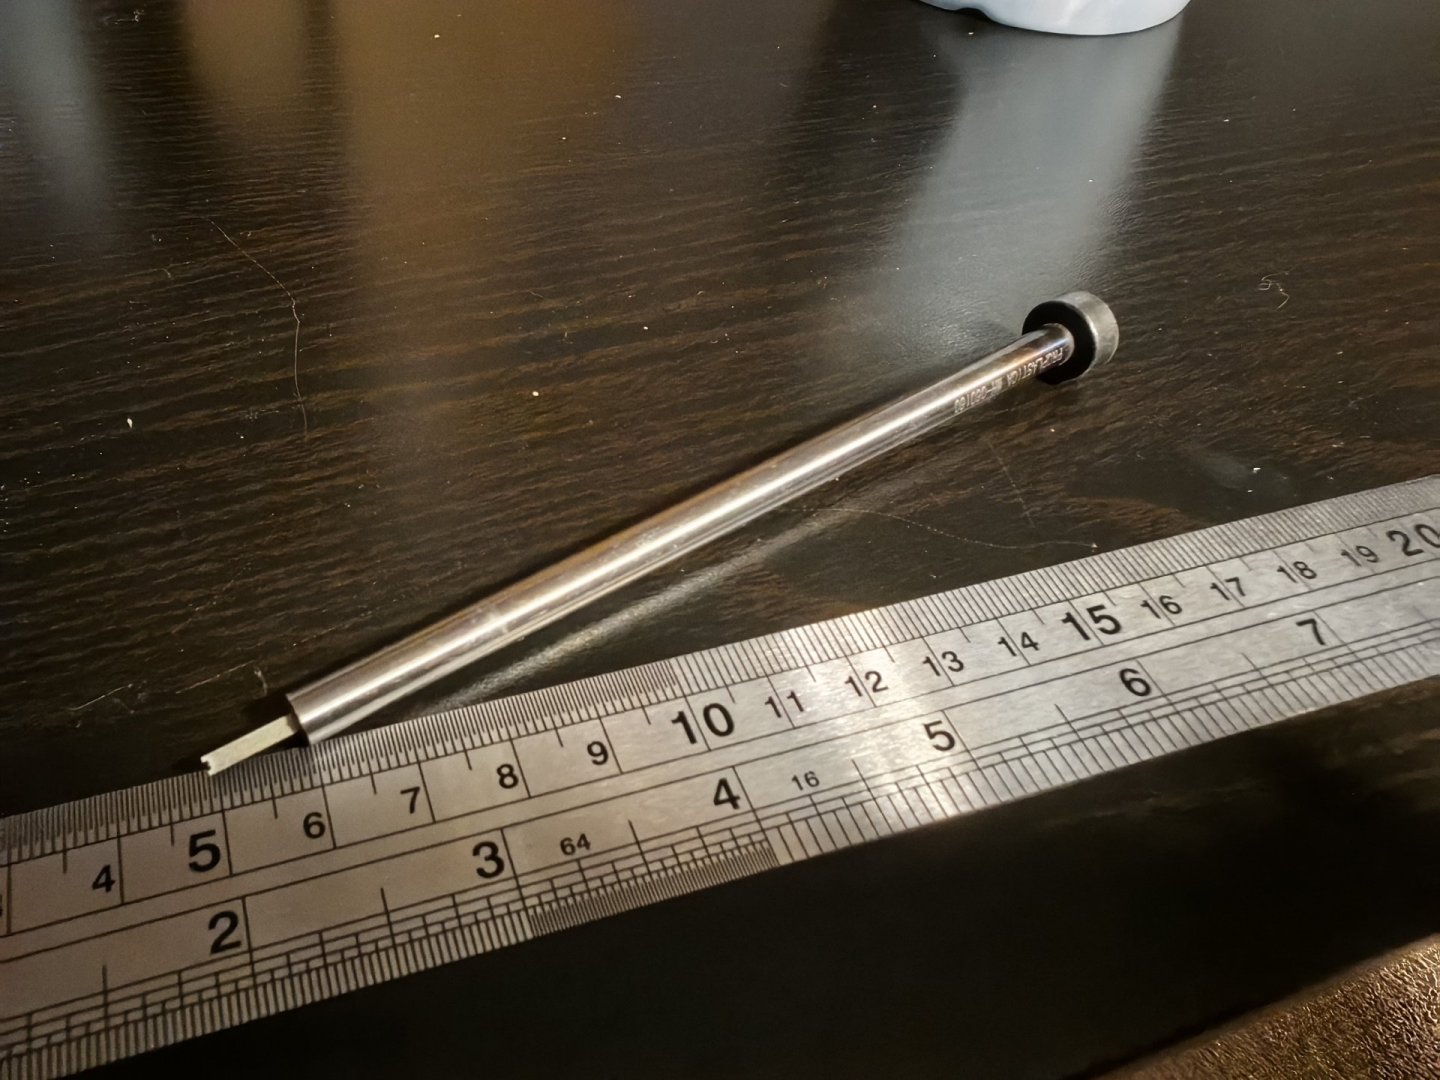
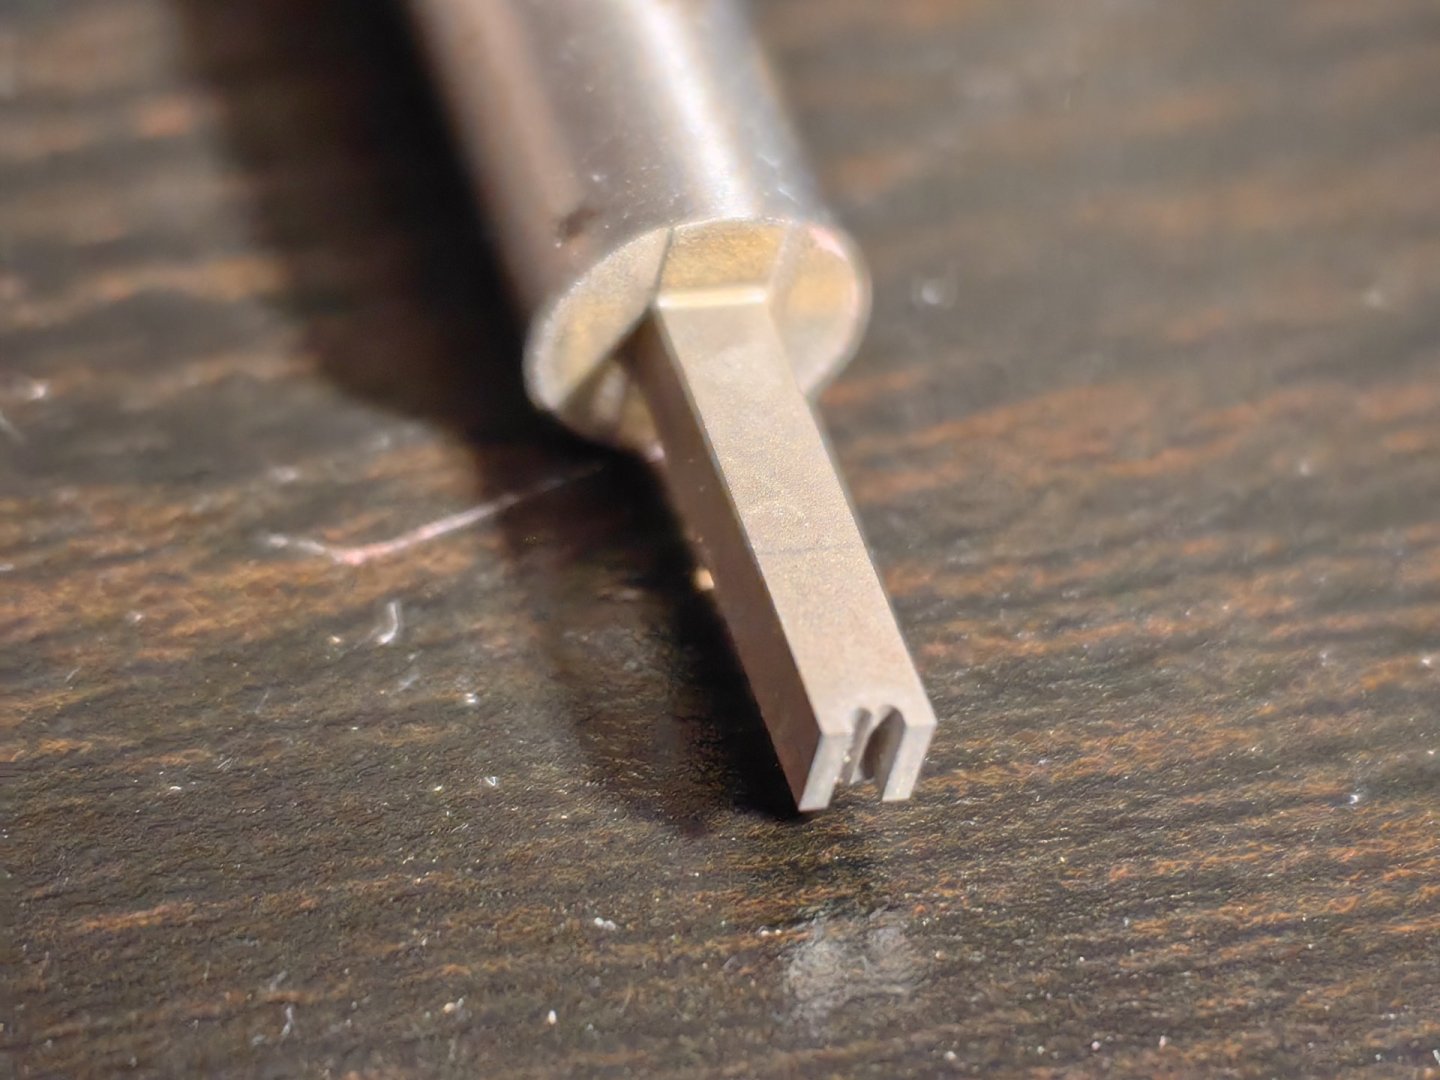
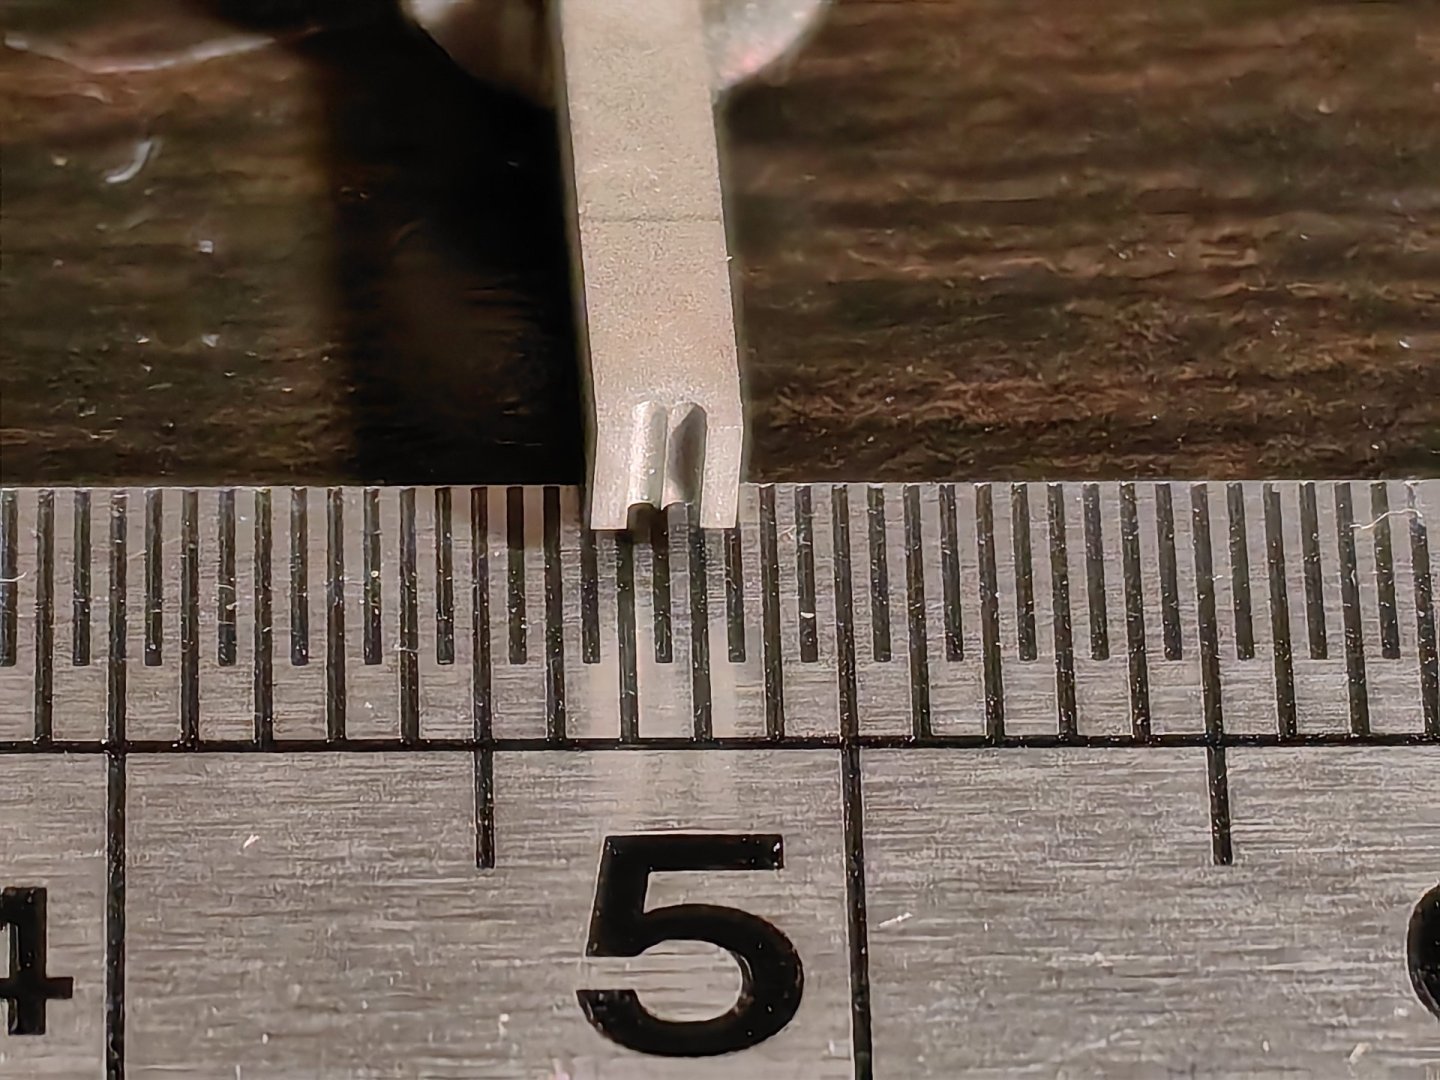
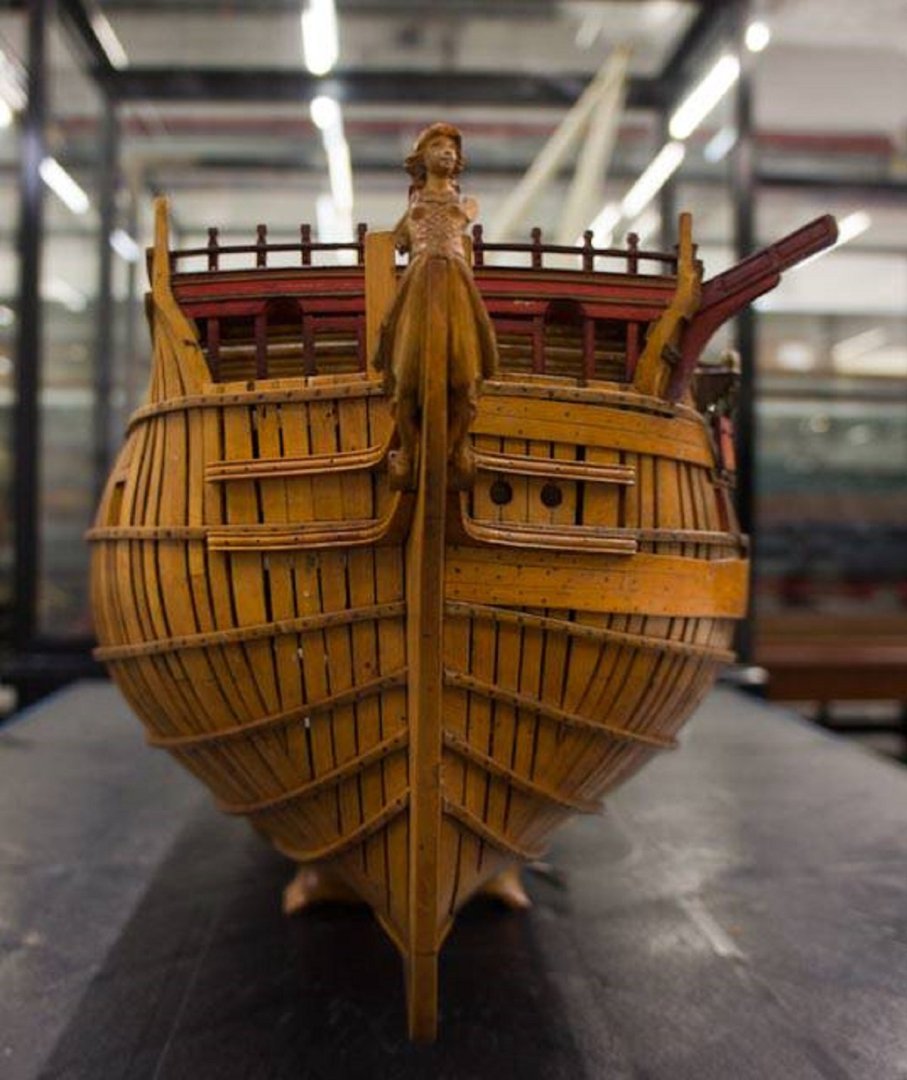
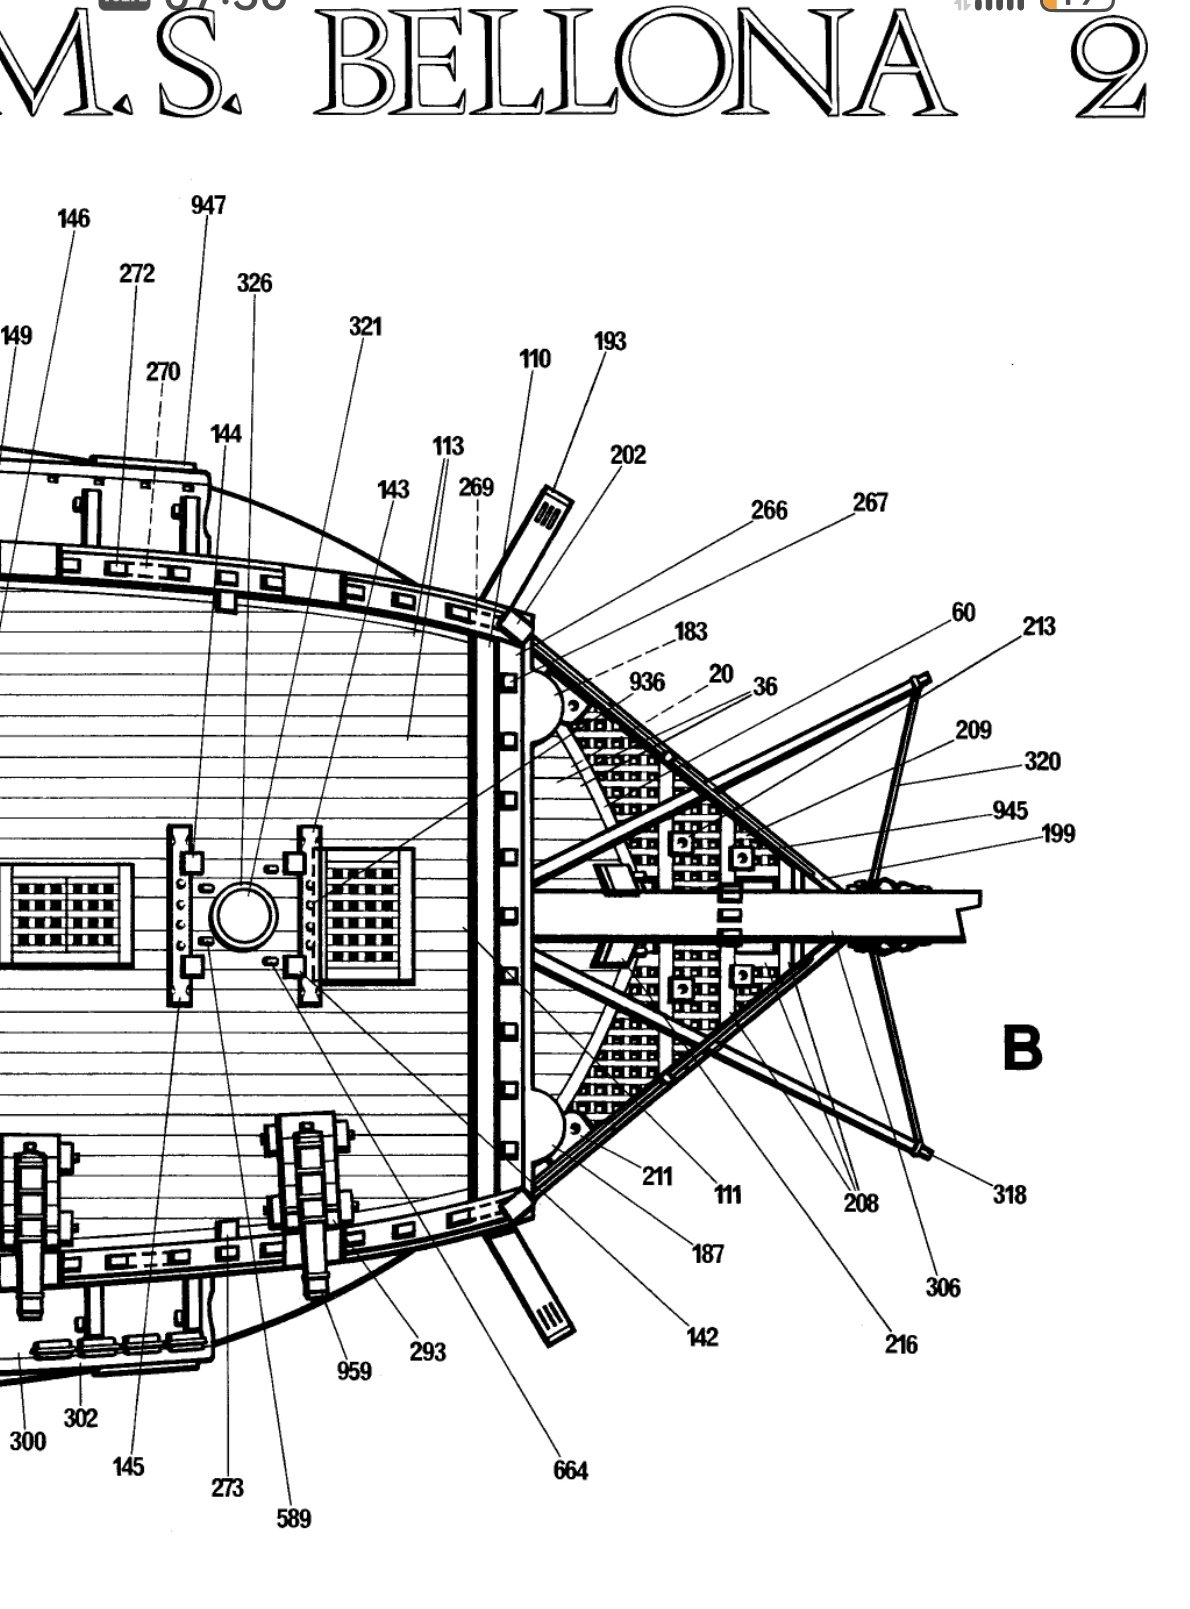
Hi, Nearshore! Thank you for the feedback! Actually, I would have made the tool with a groove of 1.2-1.3 mm. It doesn't seem like a significant difference, but the 1 mm wide rail looks thinner than I would have preferred. However, I won't be making any changes now. Regarding the placement of the roundhouses, I intentionally chose this location. These structures were used on ships as latrines for junior officers. It was necessary to provide a place for removal of feces. Therefore, on English ships of the 18th century, they were often placed in this way. This can be seen on museum models from that time. For example, here is one of Bellona's Sistership. Аnd this is Victory. By the way, despite the fact that the Corel company does not always follow historical accuracy, in this case, their drawing shows that the roundhouses protrude slightly beyond the edge of the beakhead. But this was not always the case, sometimes roundhouses were installed within the framework of a beakhead. In such cases, the feces were excreted by the scuppers. In the Anatomy of Brian Lavery's Ship, the drawing shows exactly that. Unfortunately, there are no rownhouses on Thomas Slade's model, so we can only guess what it was like on BellonaI think. Every modeler can do what he thinks is right. By the way, the round houses also housed observers in case of bad weather. They had round windows for this purpose. They were also used to punish misbehaving sailors. Roundhouses protruding beyond the edge of the beakhead should not interfere with the head structure. Main head reil should be attached to the outside of the side. By the way, this is how it is done on your model. You can see that there is enough space between the beam and the beakhead. I think I can do it right too. Sincerely, Frecap.

-
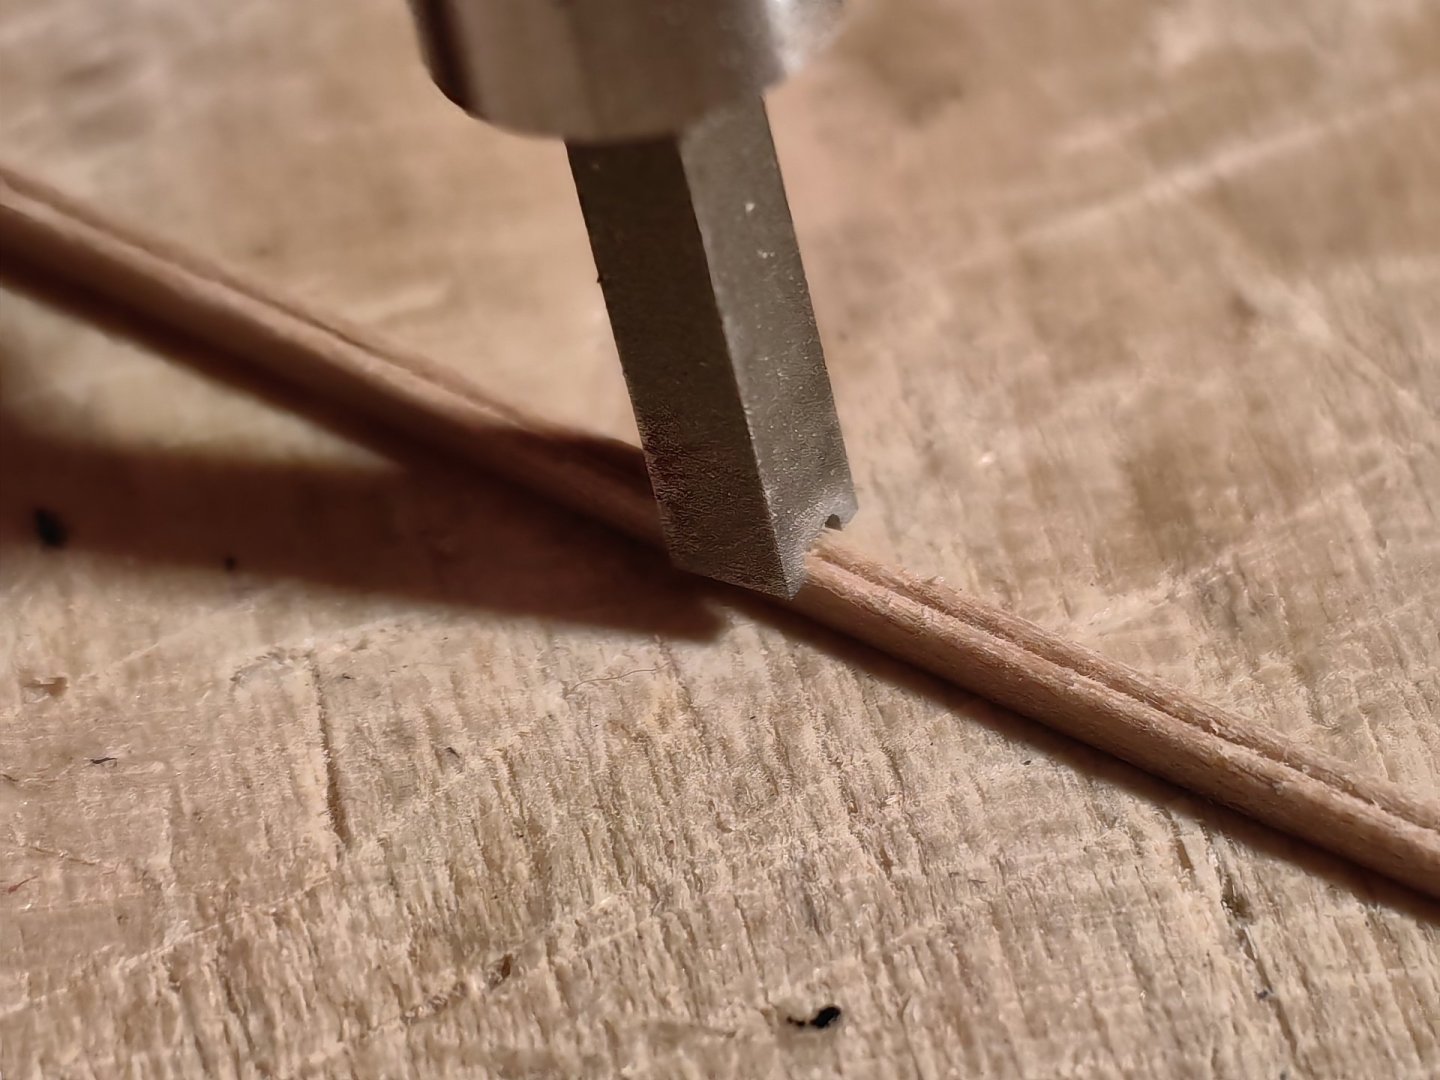
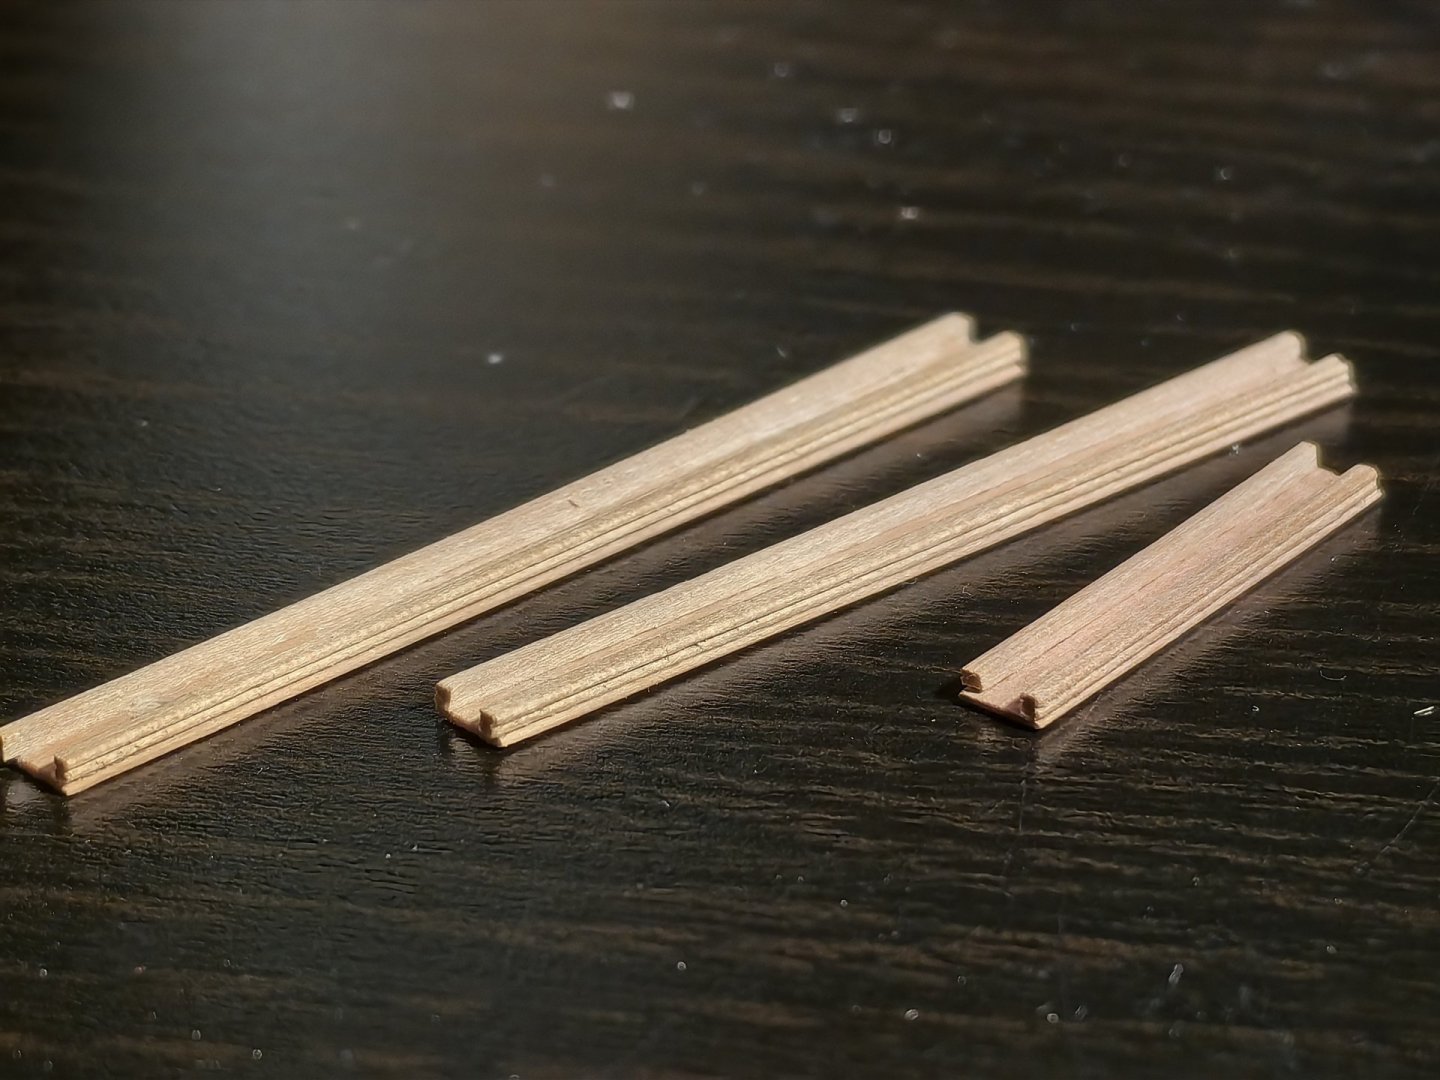
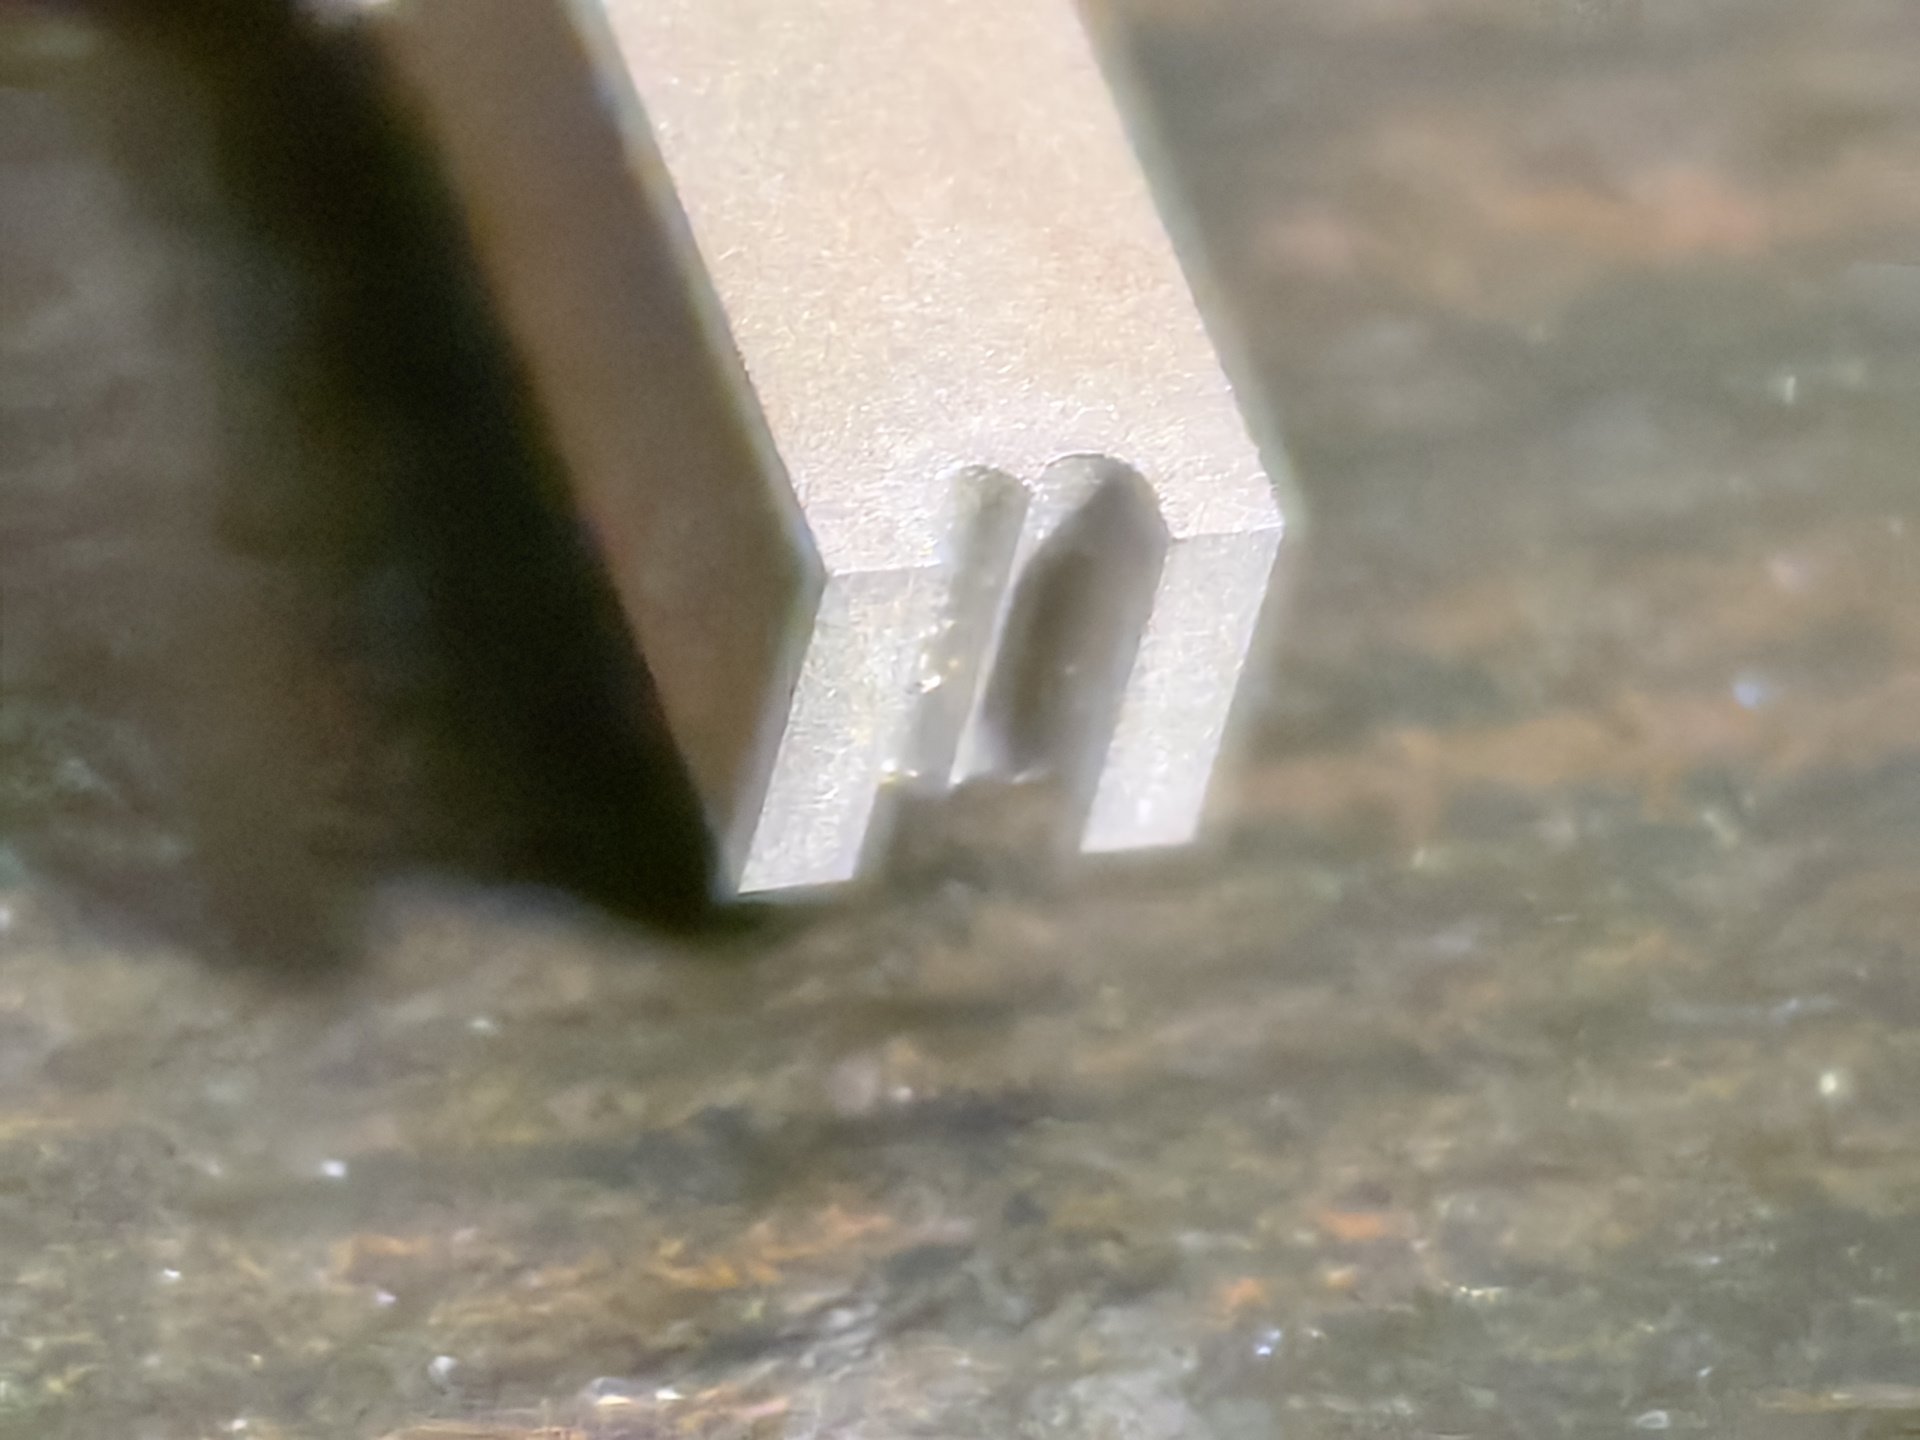
After analyzing the results of the painting, I realized that there were some nuances in my work that I didn't like. During the installation of the final trim, I encountered a problem where the L-shaped rails for the rails were difficult to bend, and in many places, they broke, causing chips and a less-than-ideal result. Although subsequent sanding improved the appearance, the rails still had a non-square cross-section. I don't have extensive experience in such tasks. I wouldn't use L-shaped rails now. I would simply stick a square rail on top of the skin and use a pear rail. On prototypes, rails almost always have a non-square, but a figured profile of various shapes. In a hundredth scale, this can certainly be neglected, but as I think, small details always decorate the model. I decided to make a profile on the rails. To do this, from an old valve from the engine, I made an appropriate tool with a profile groove 1 mm wide. By using this tool to cut a rail along its length, i can create a corresponding profile. This can be done on the model, but it's much better to do it in advance and glue the finished profile. The rail from the COREL kit is quite loose, crumbles, and the profile is of poor quality. Since I still need to fix the bulwark on the beak-head, I decided to replace all the rails on the sides and stern. I will have to cut off all the old rails and glue new ones in their place. To do this, I purchased 1x1 mm pear rails. They are perfectly profiled by my tool, and their color is more suitable to the overall color scheme of the model. In addition, I hope that this will allow for a more accurate distinction between painted and unpainted surfaces. I have already replaced some of the rails on the aft gallery and on the stern. I'll try it on the sides.


-
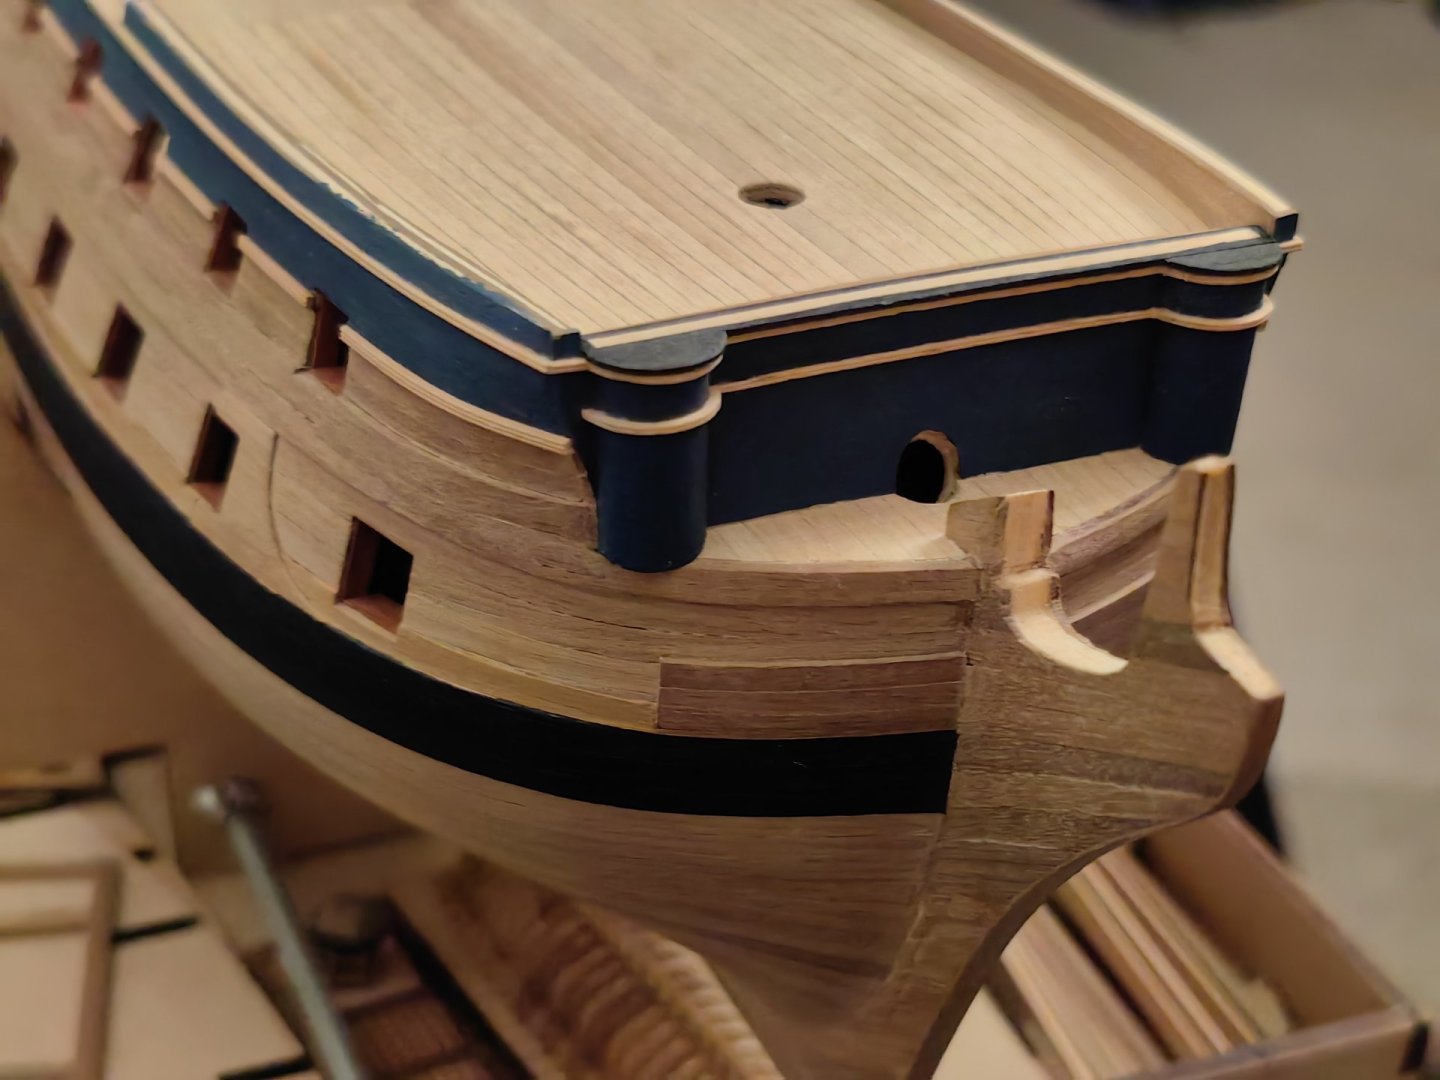
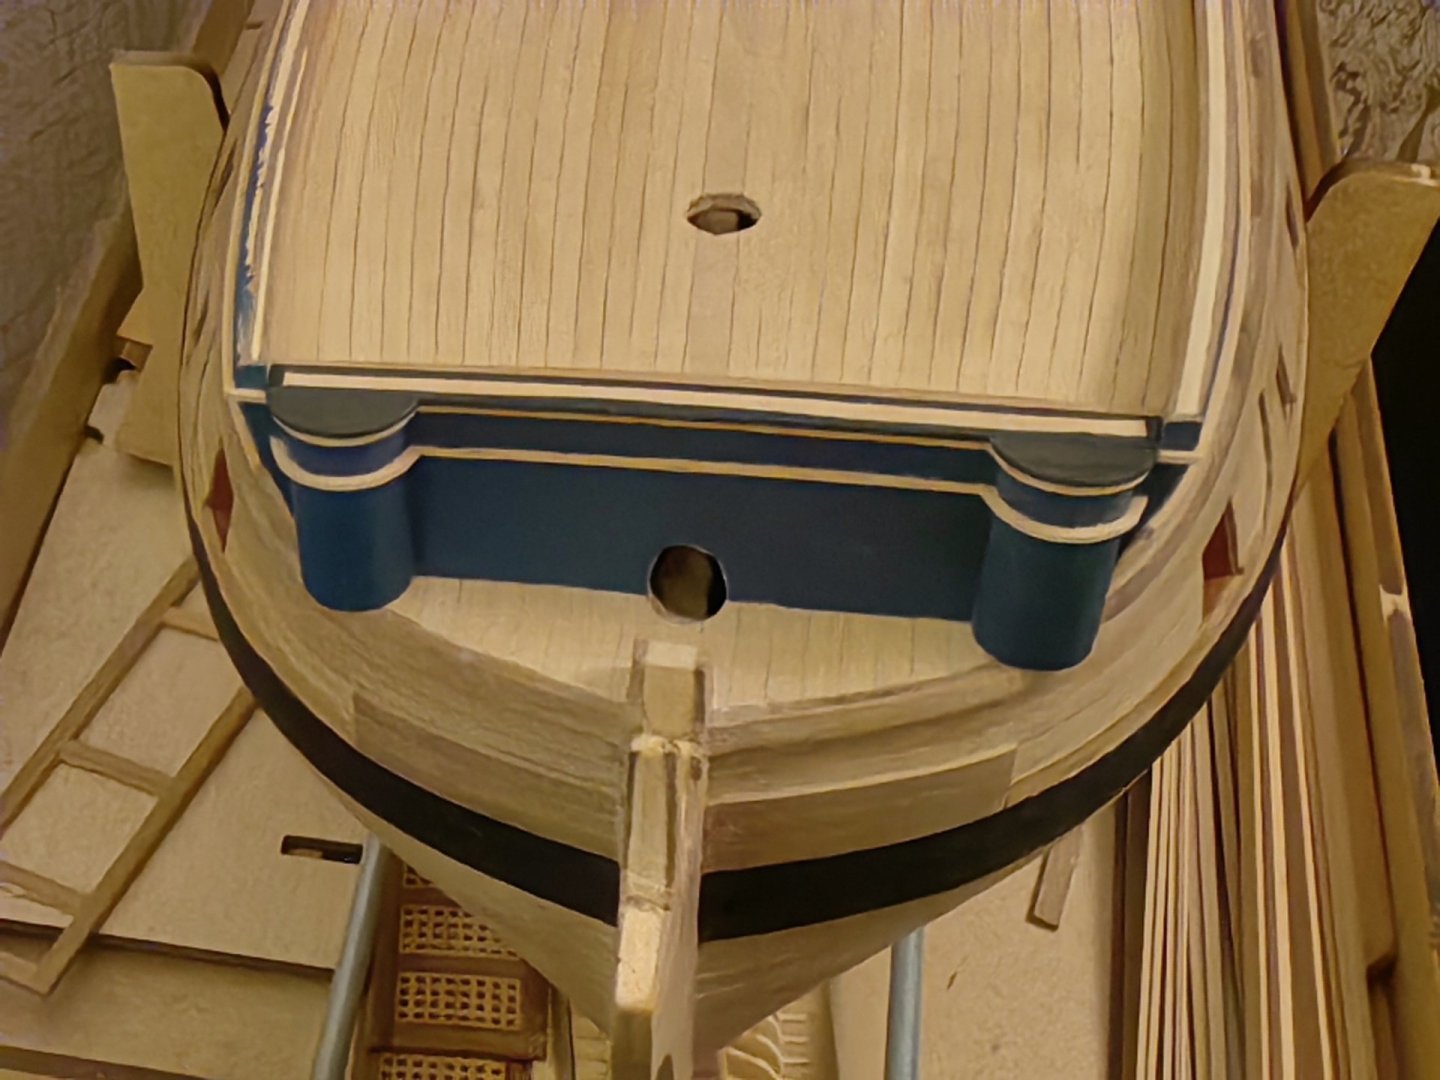
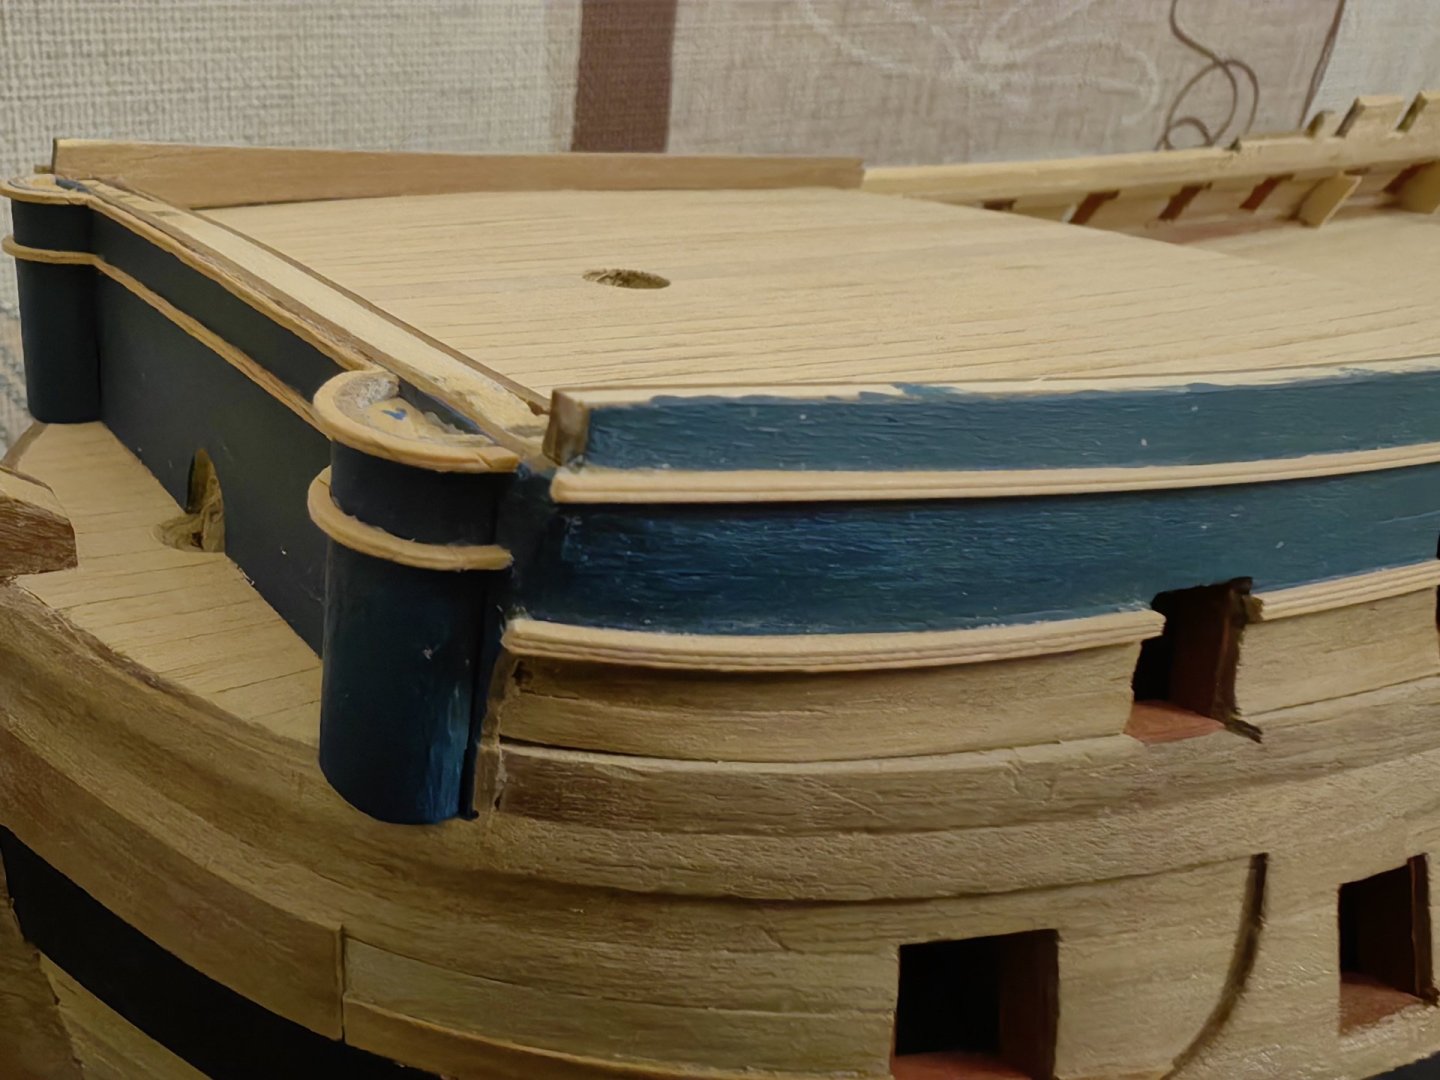
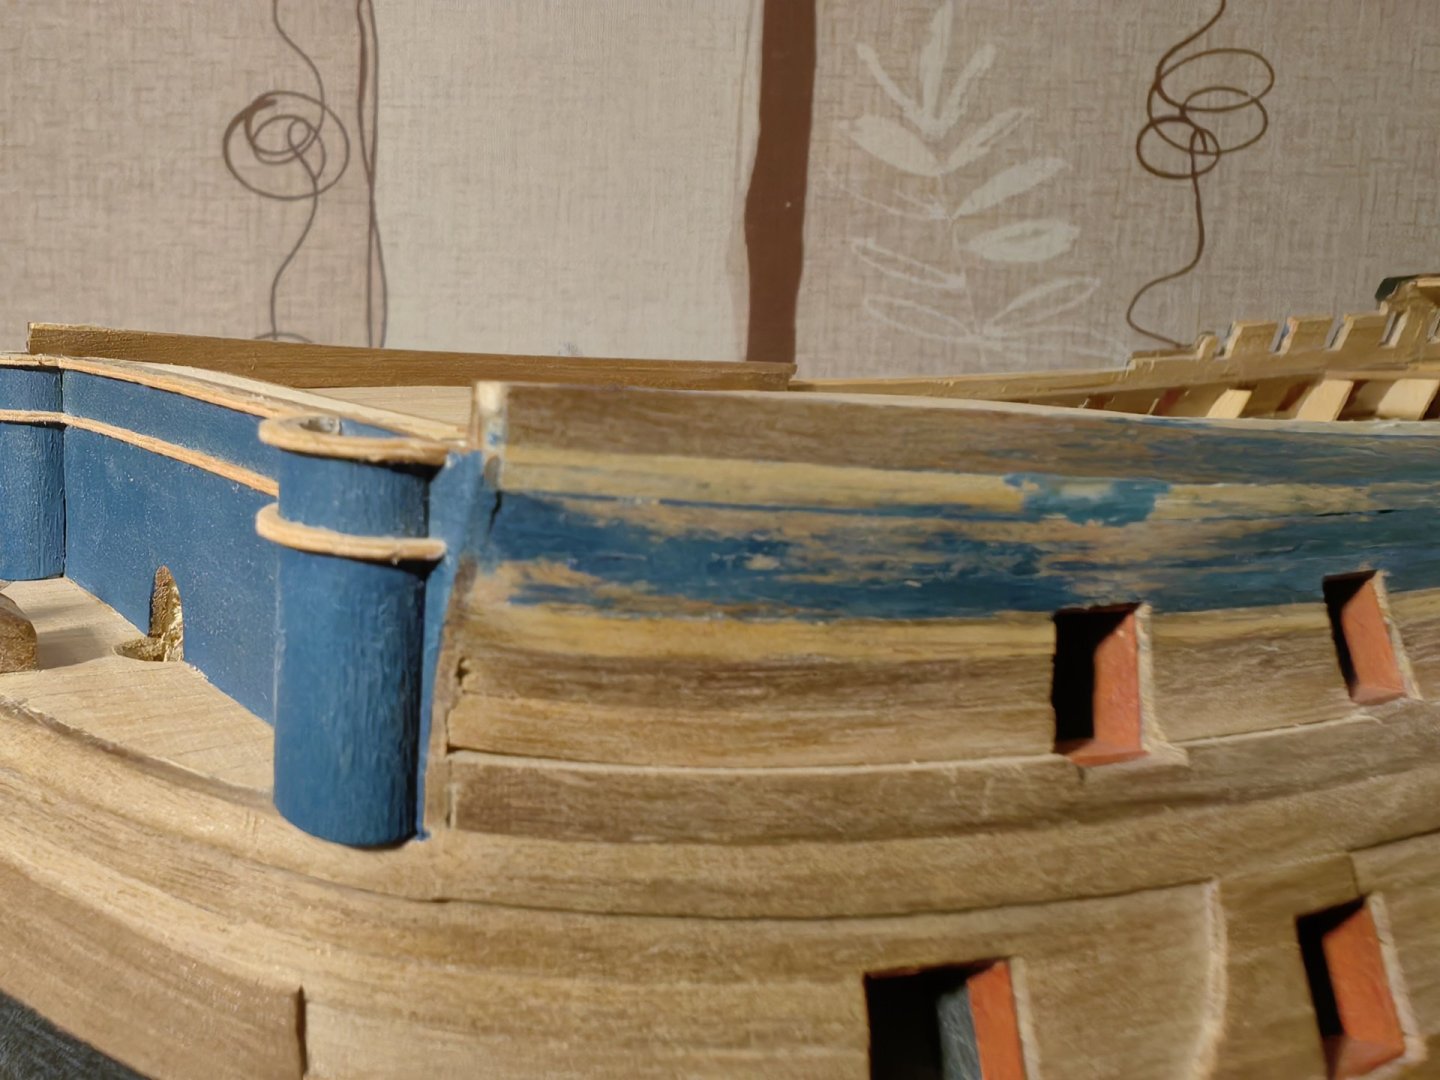
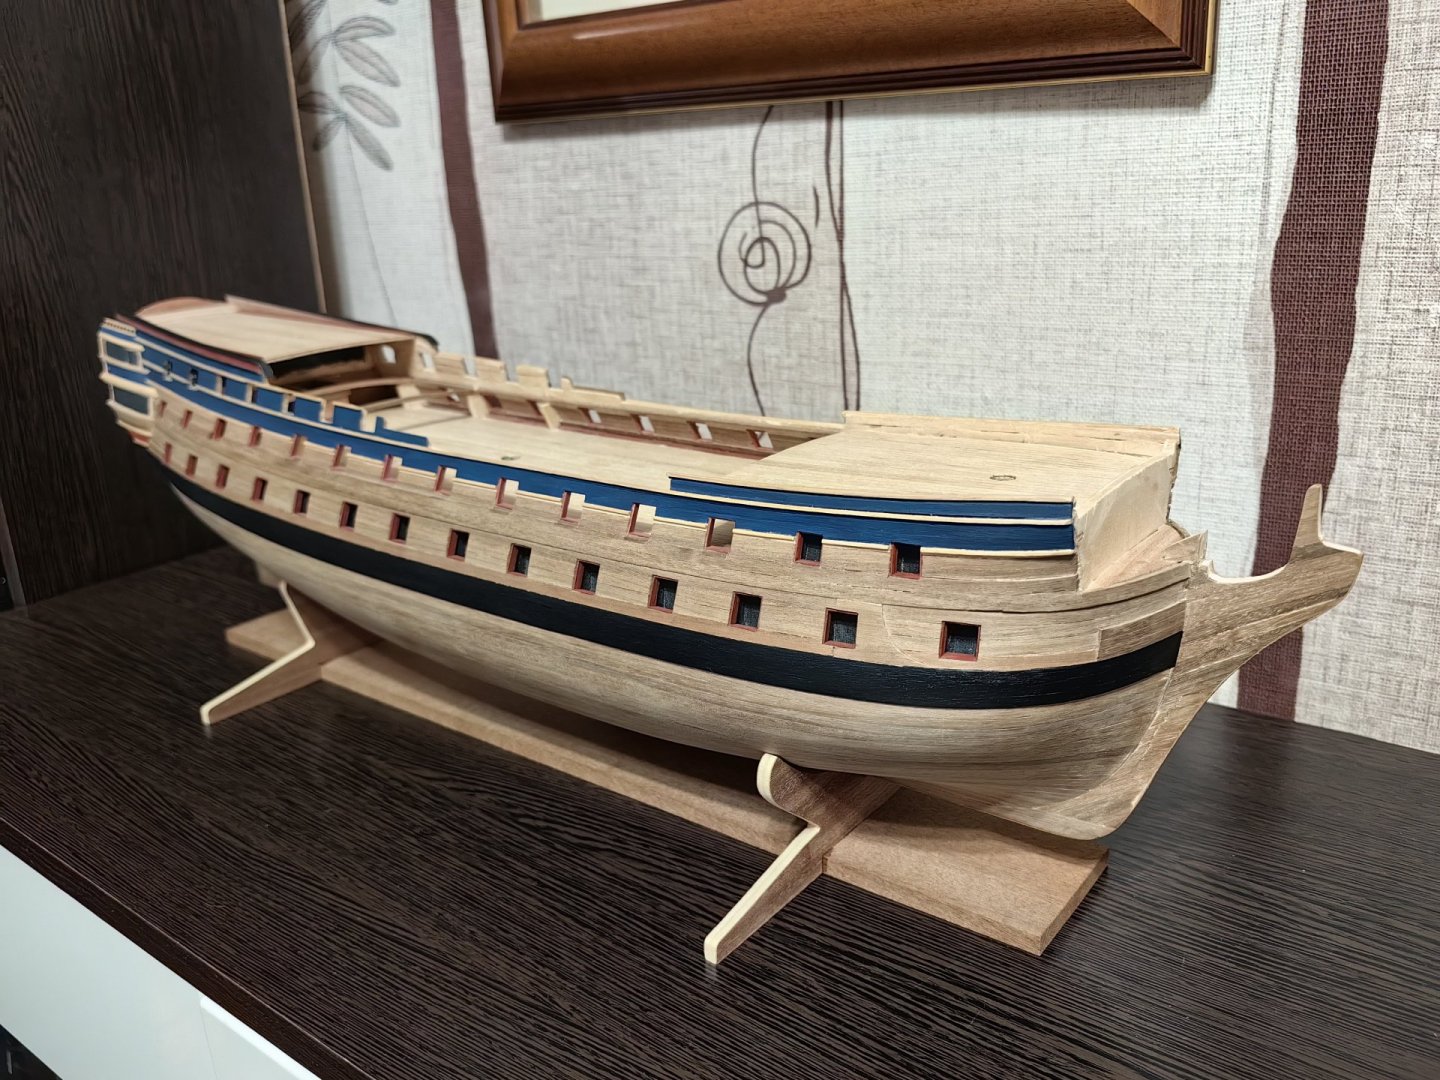
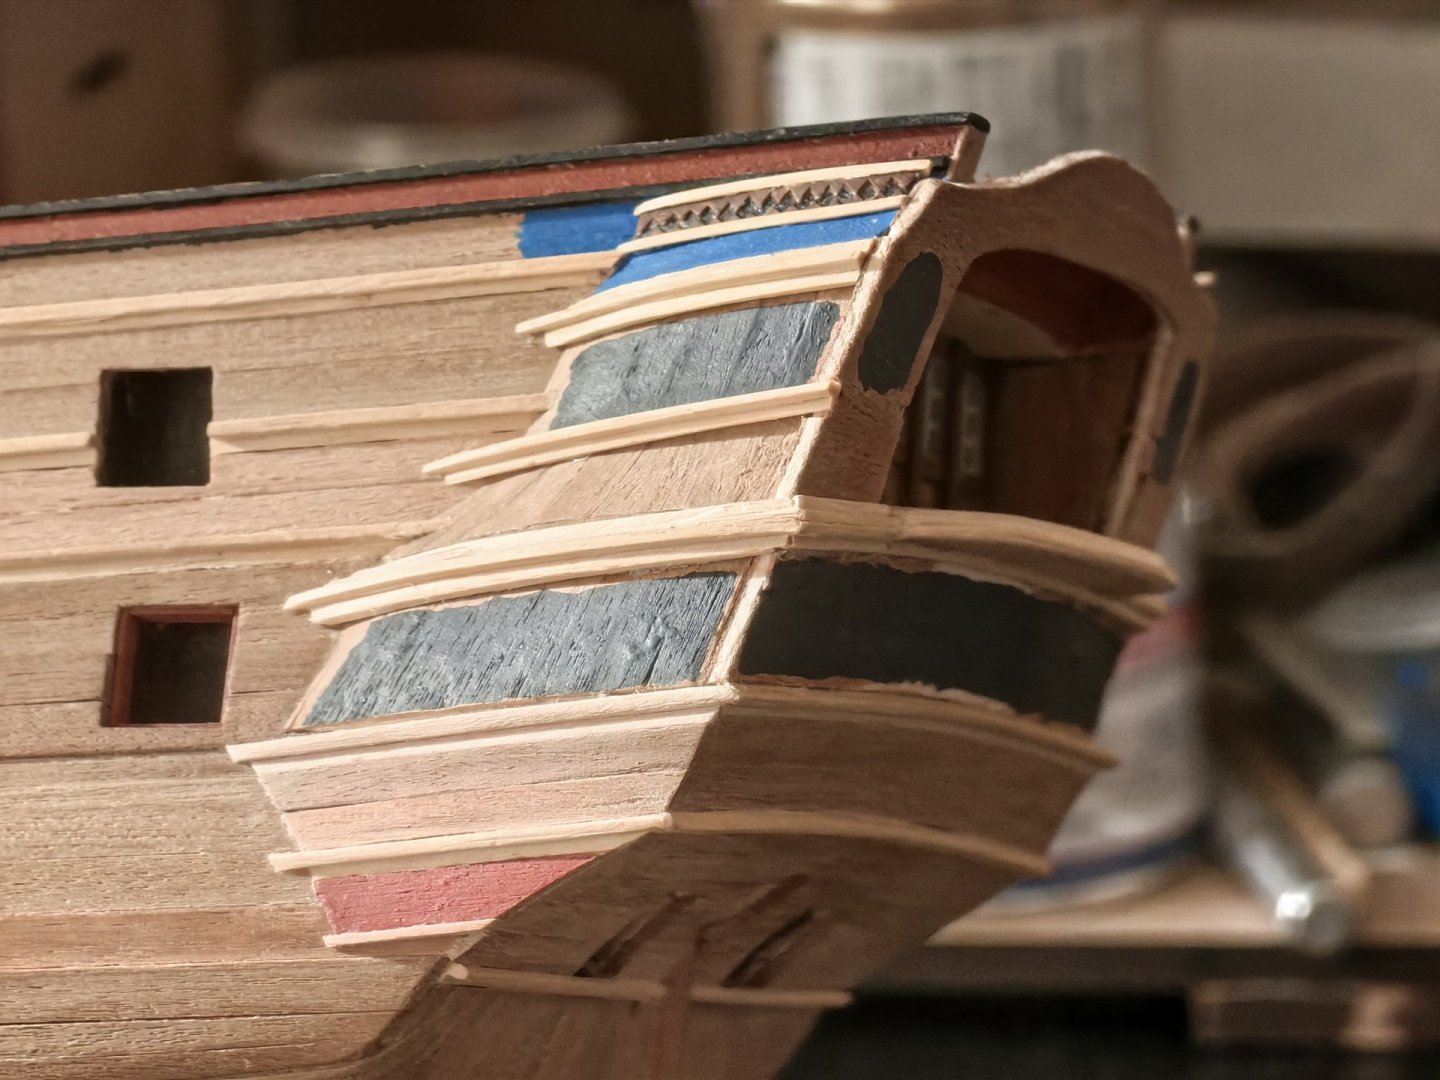
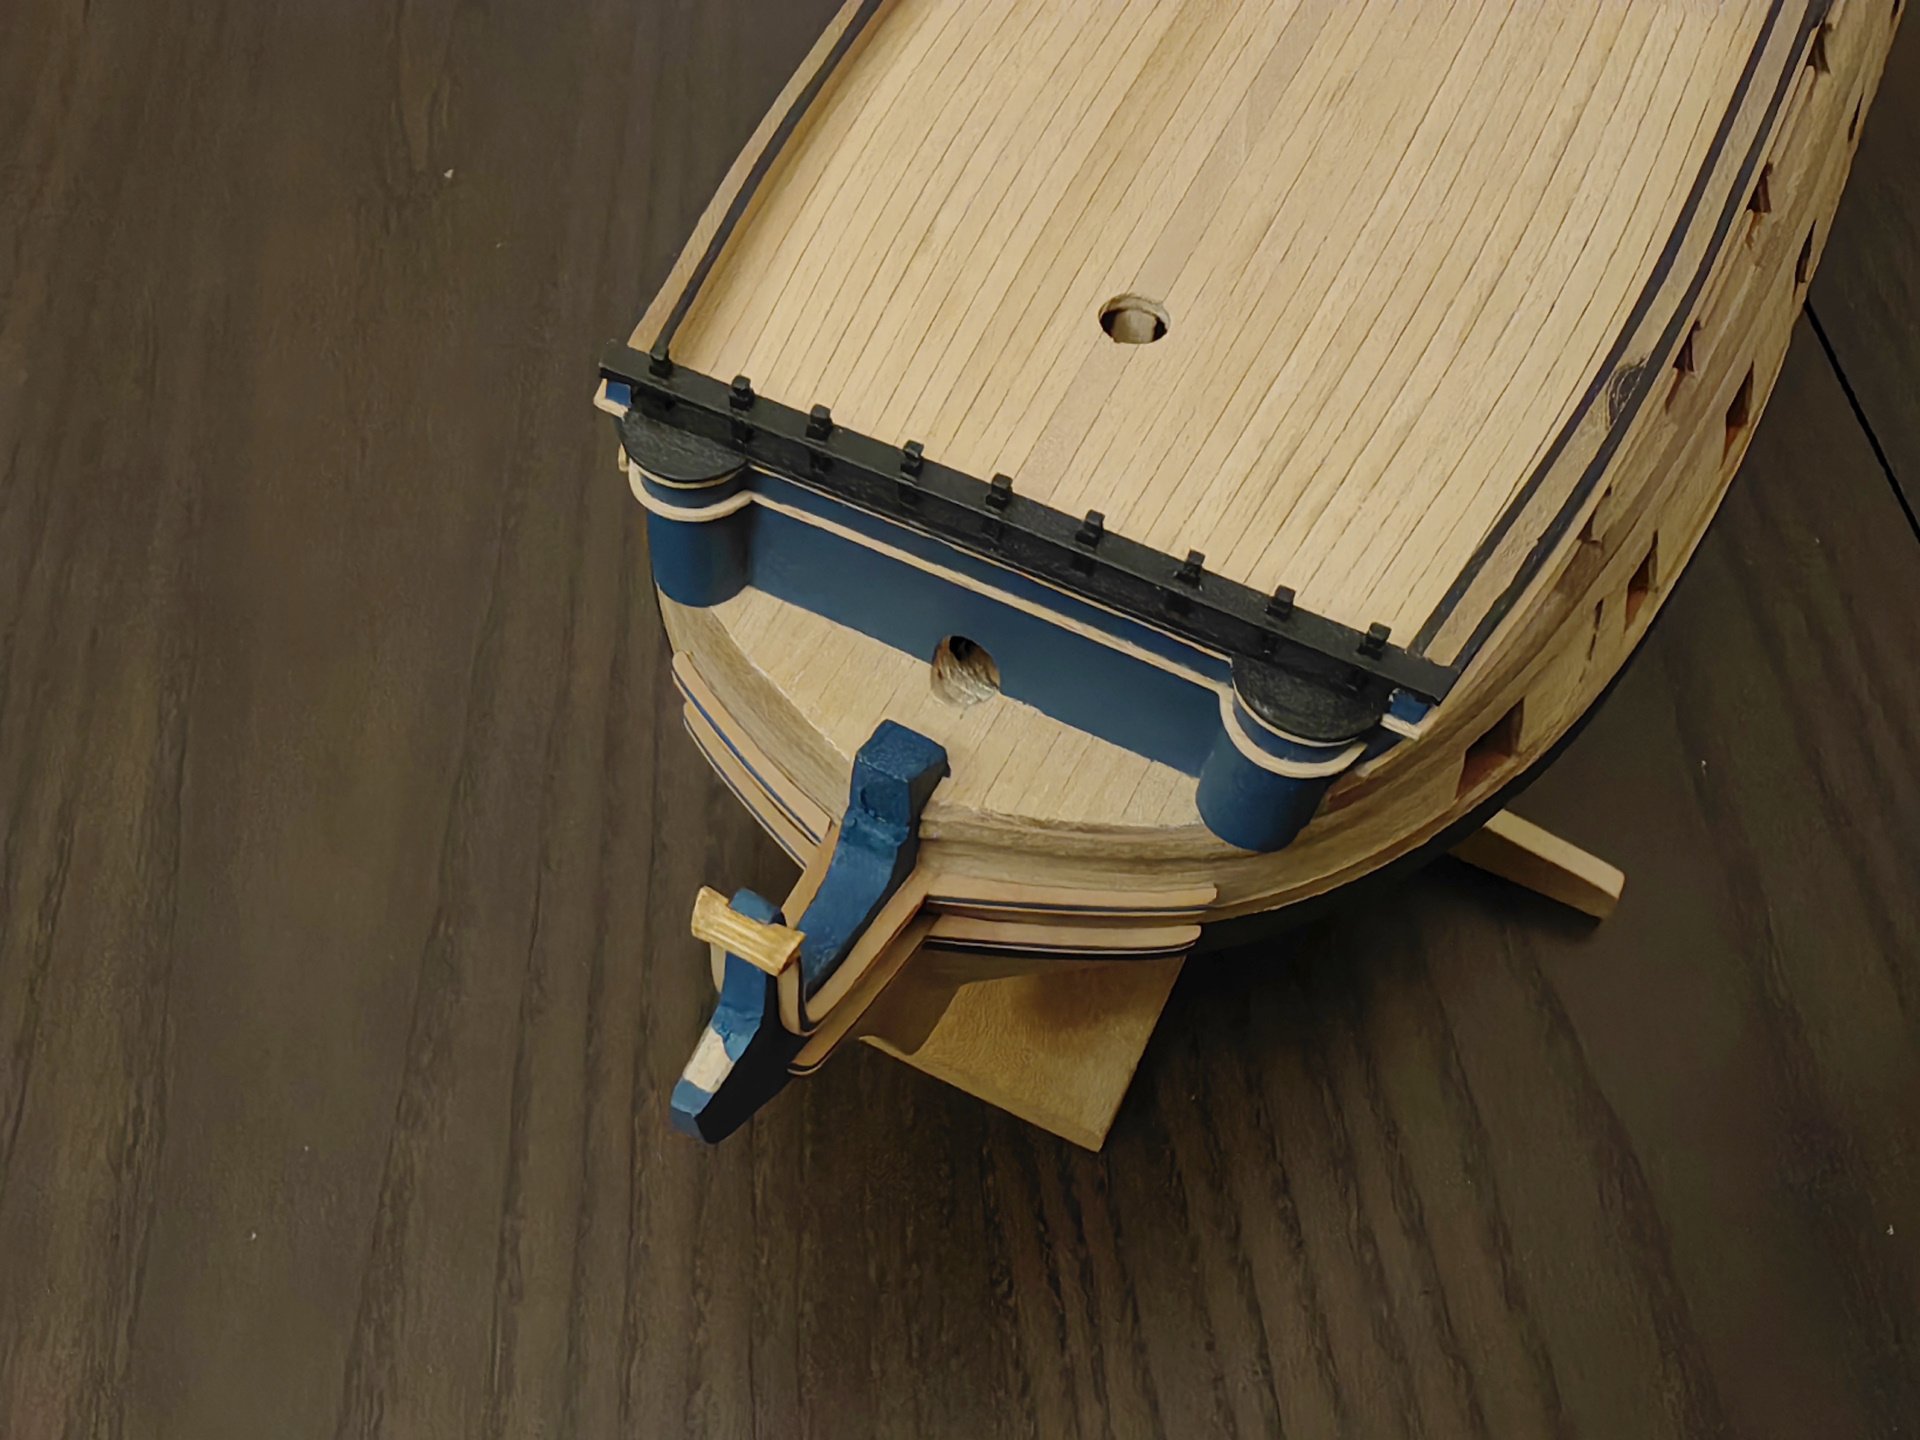
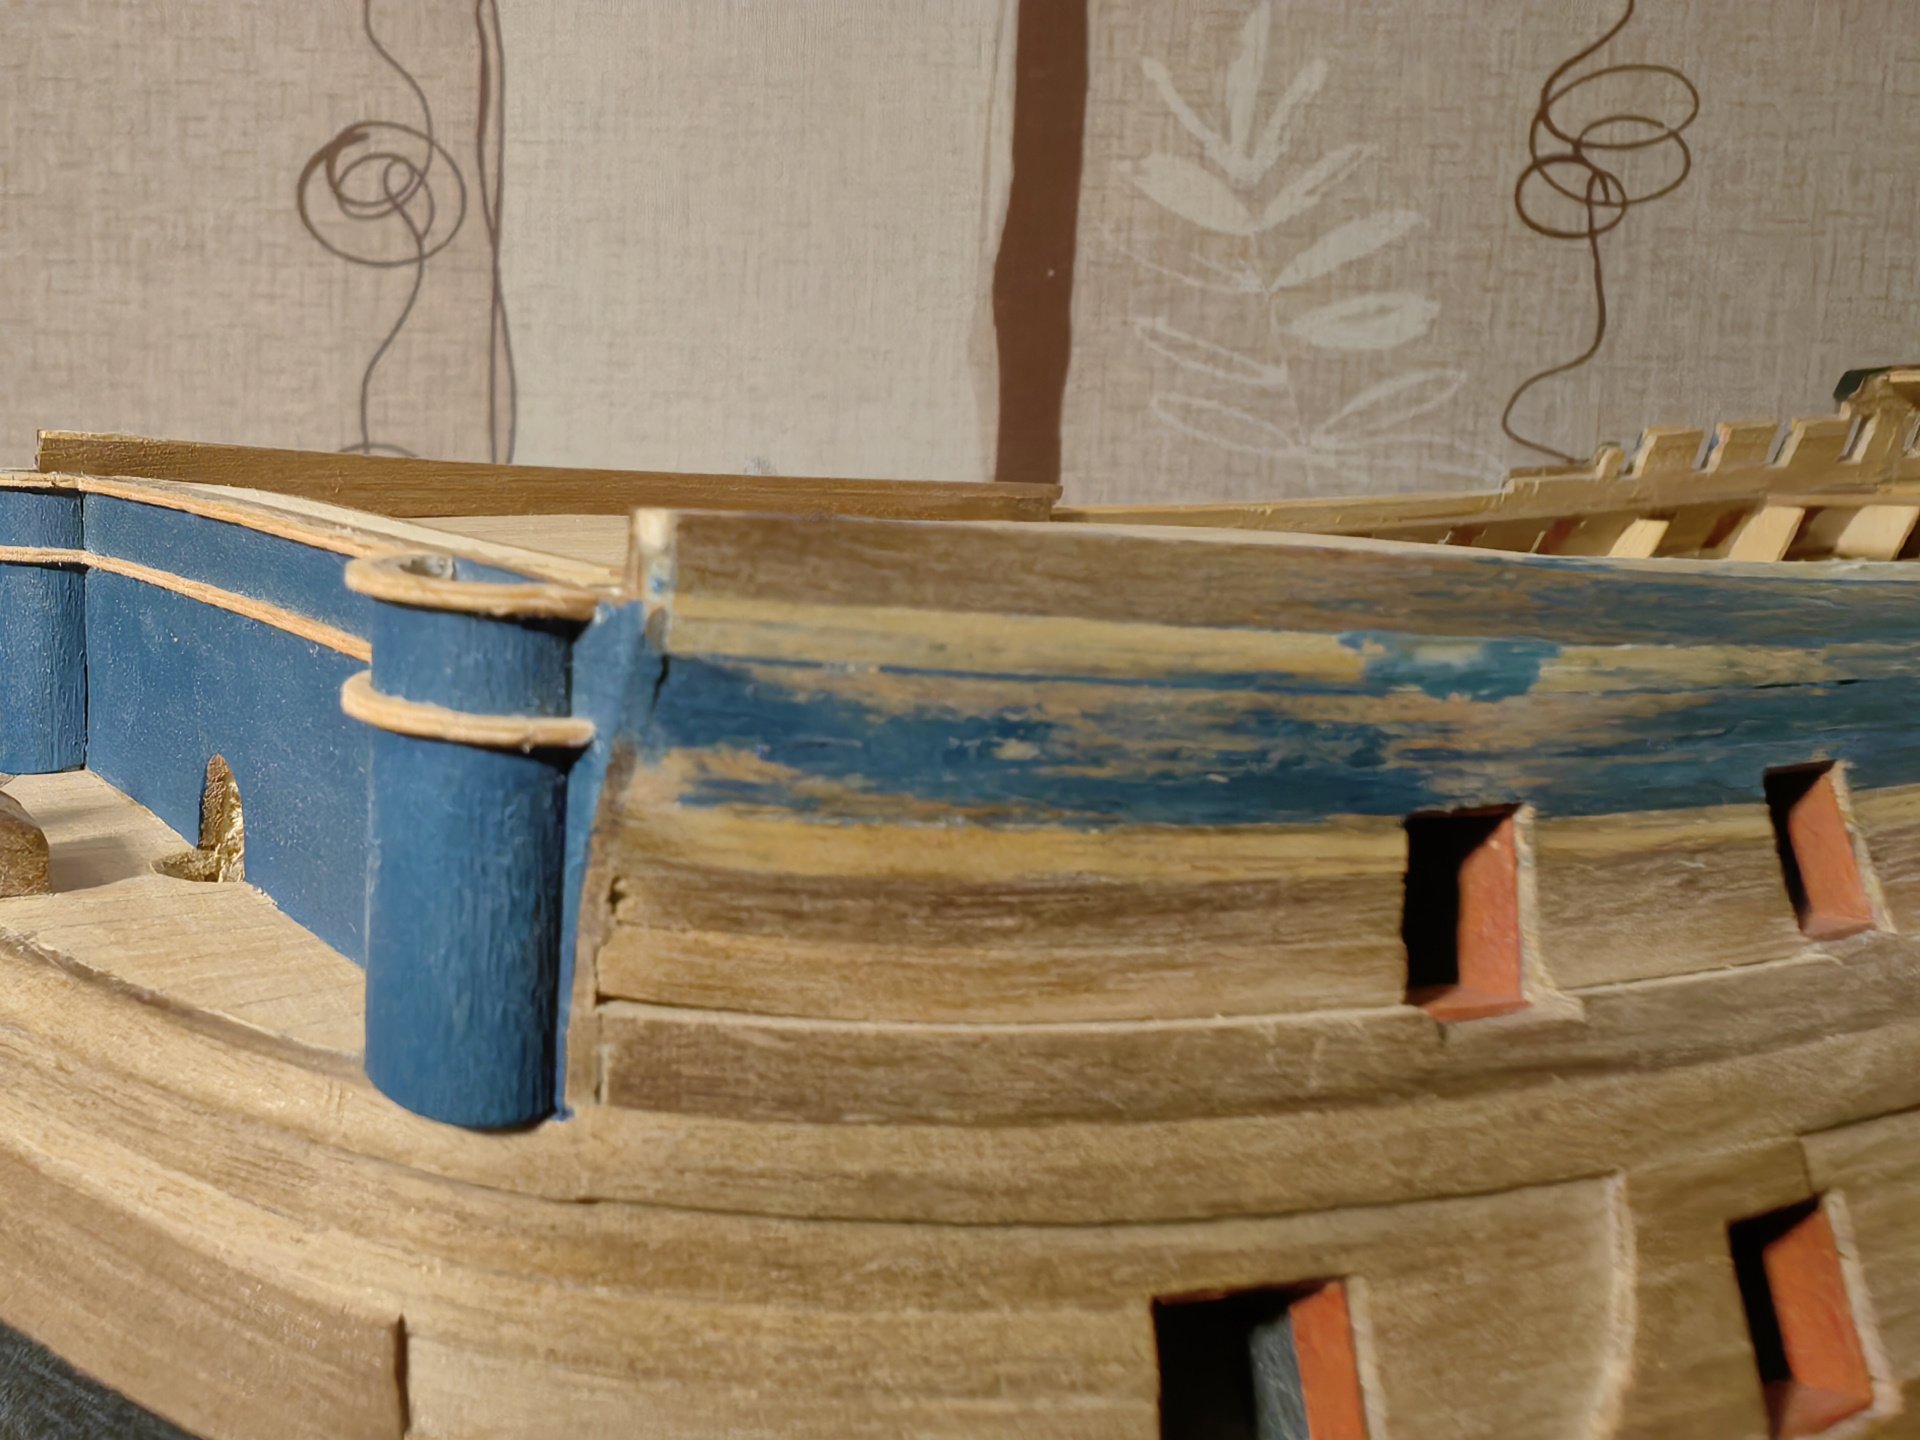
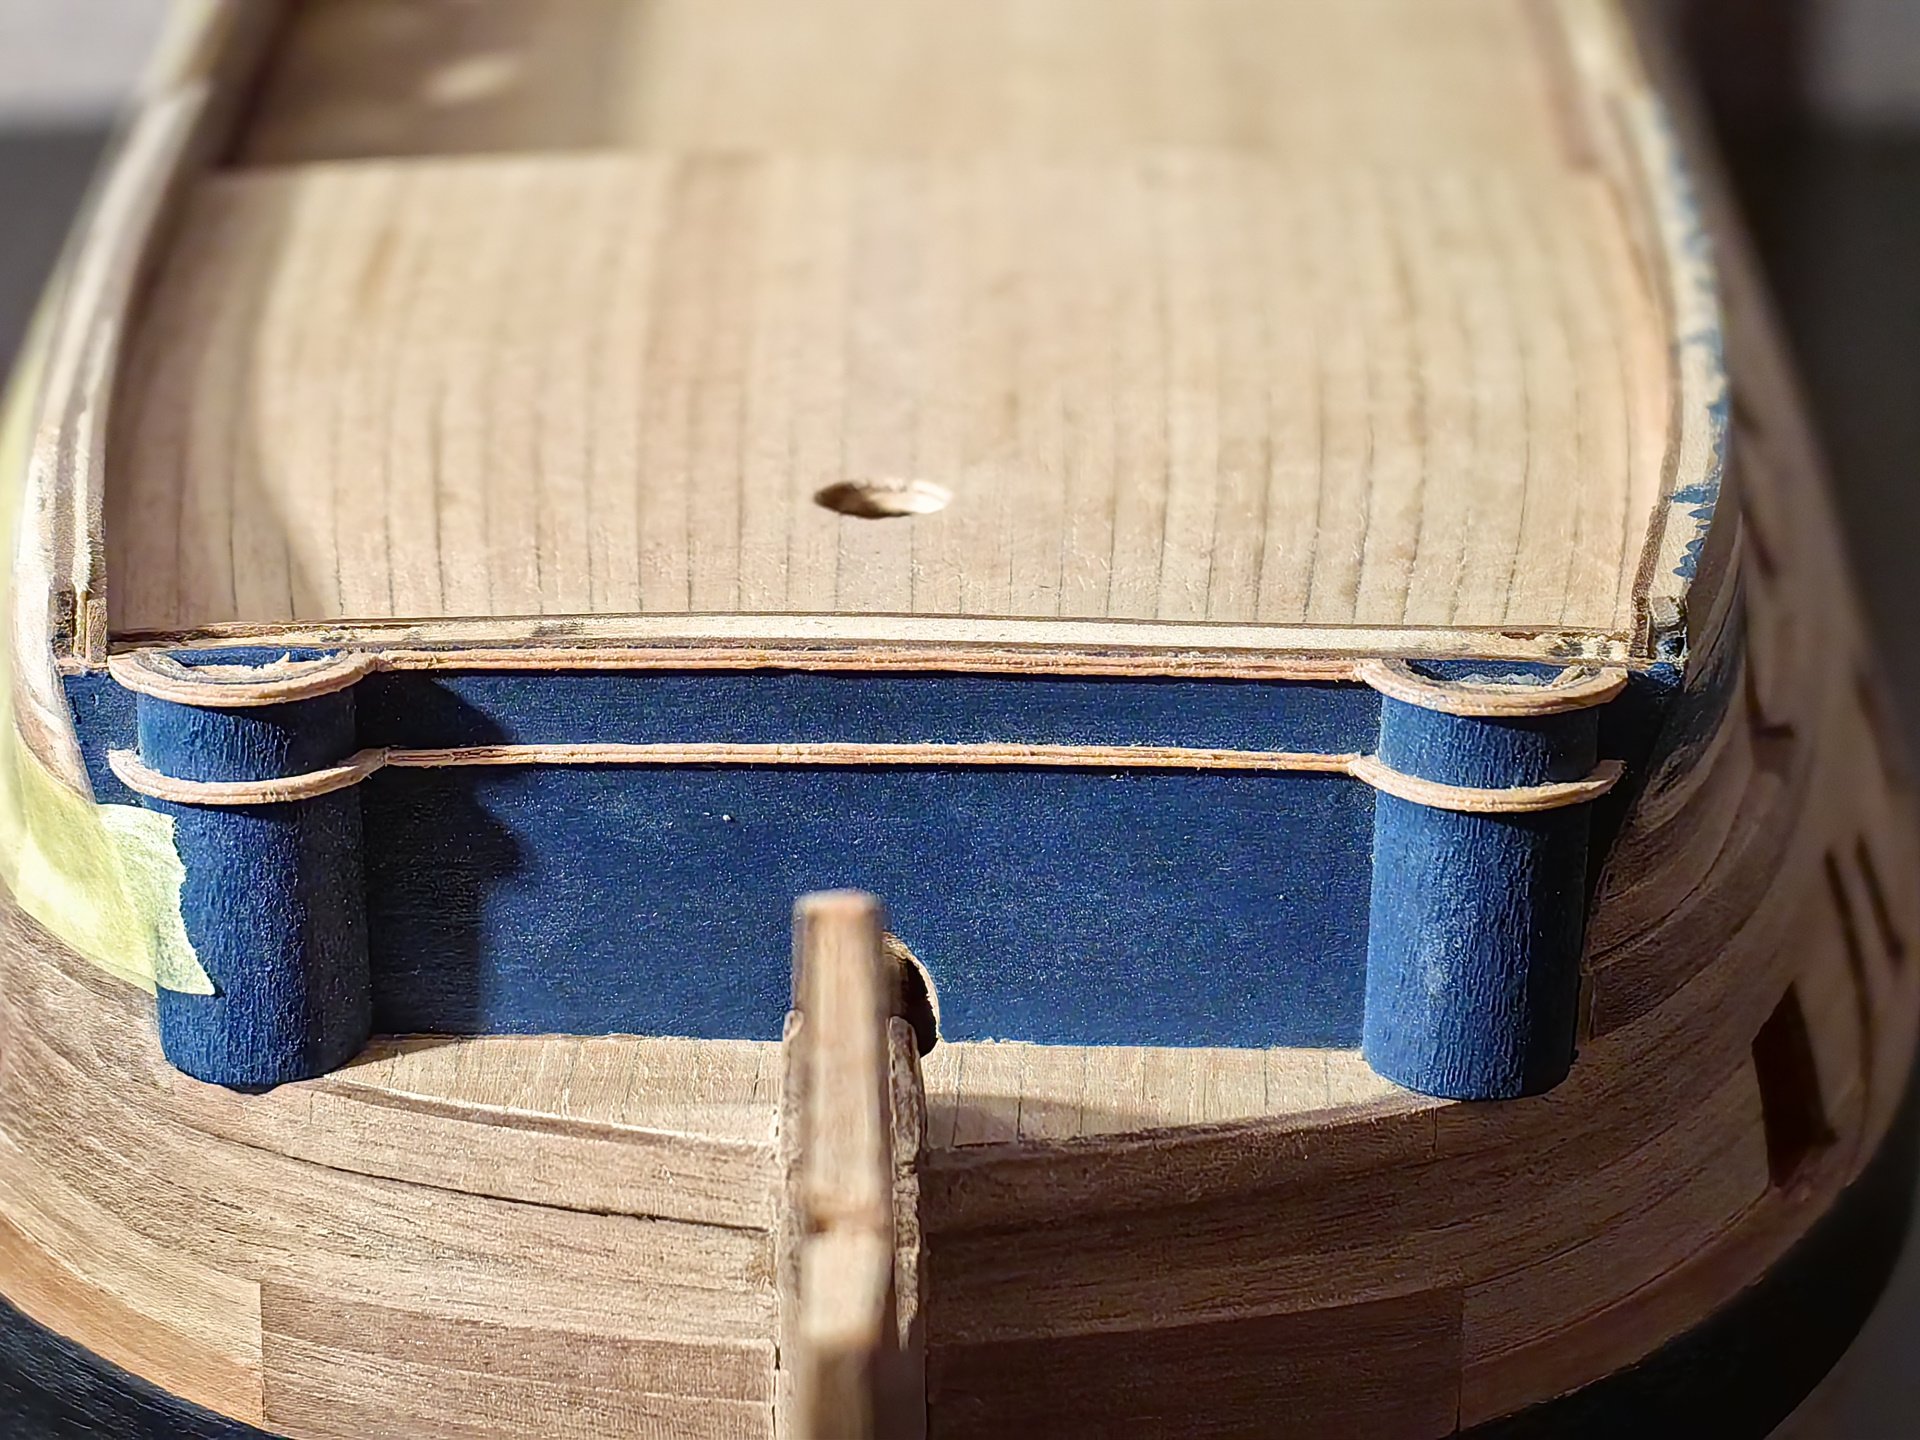
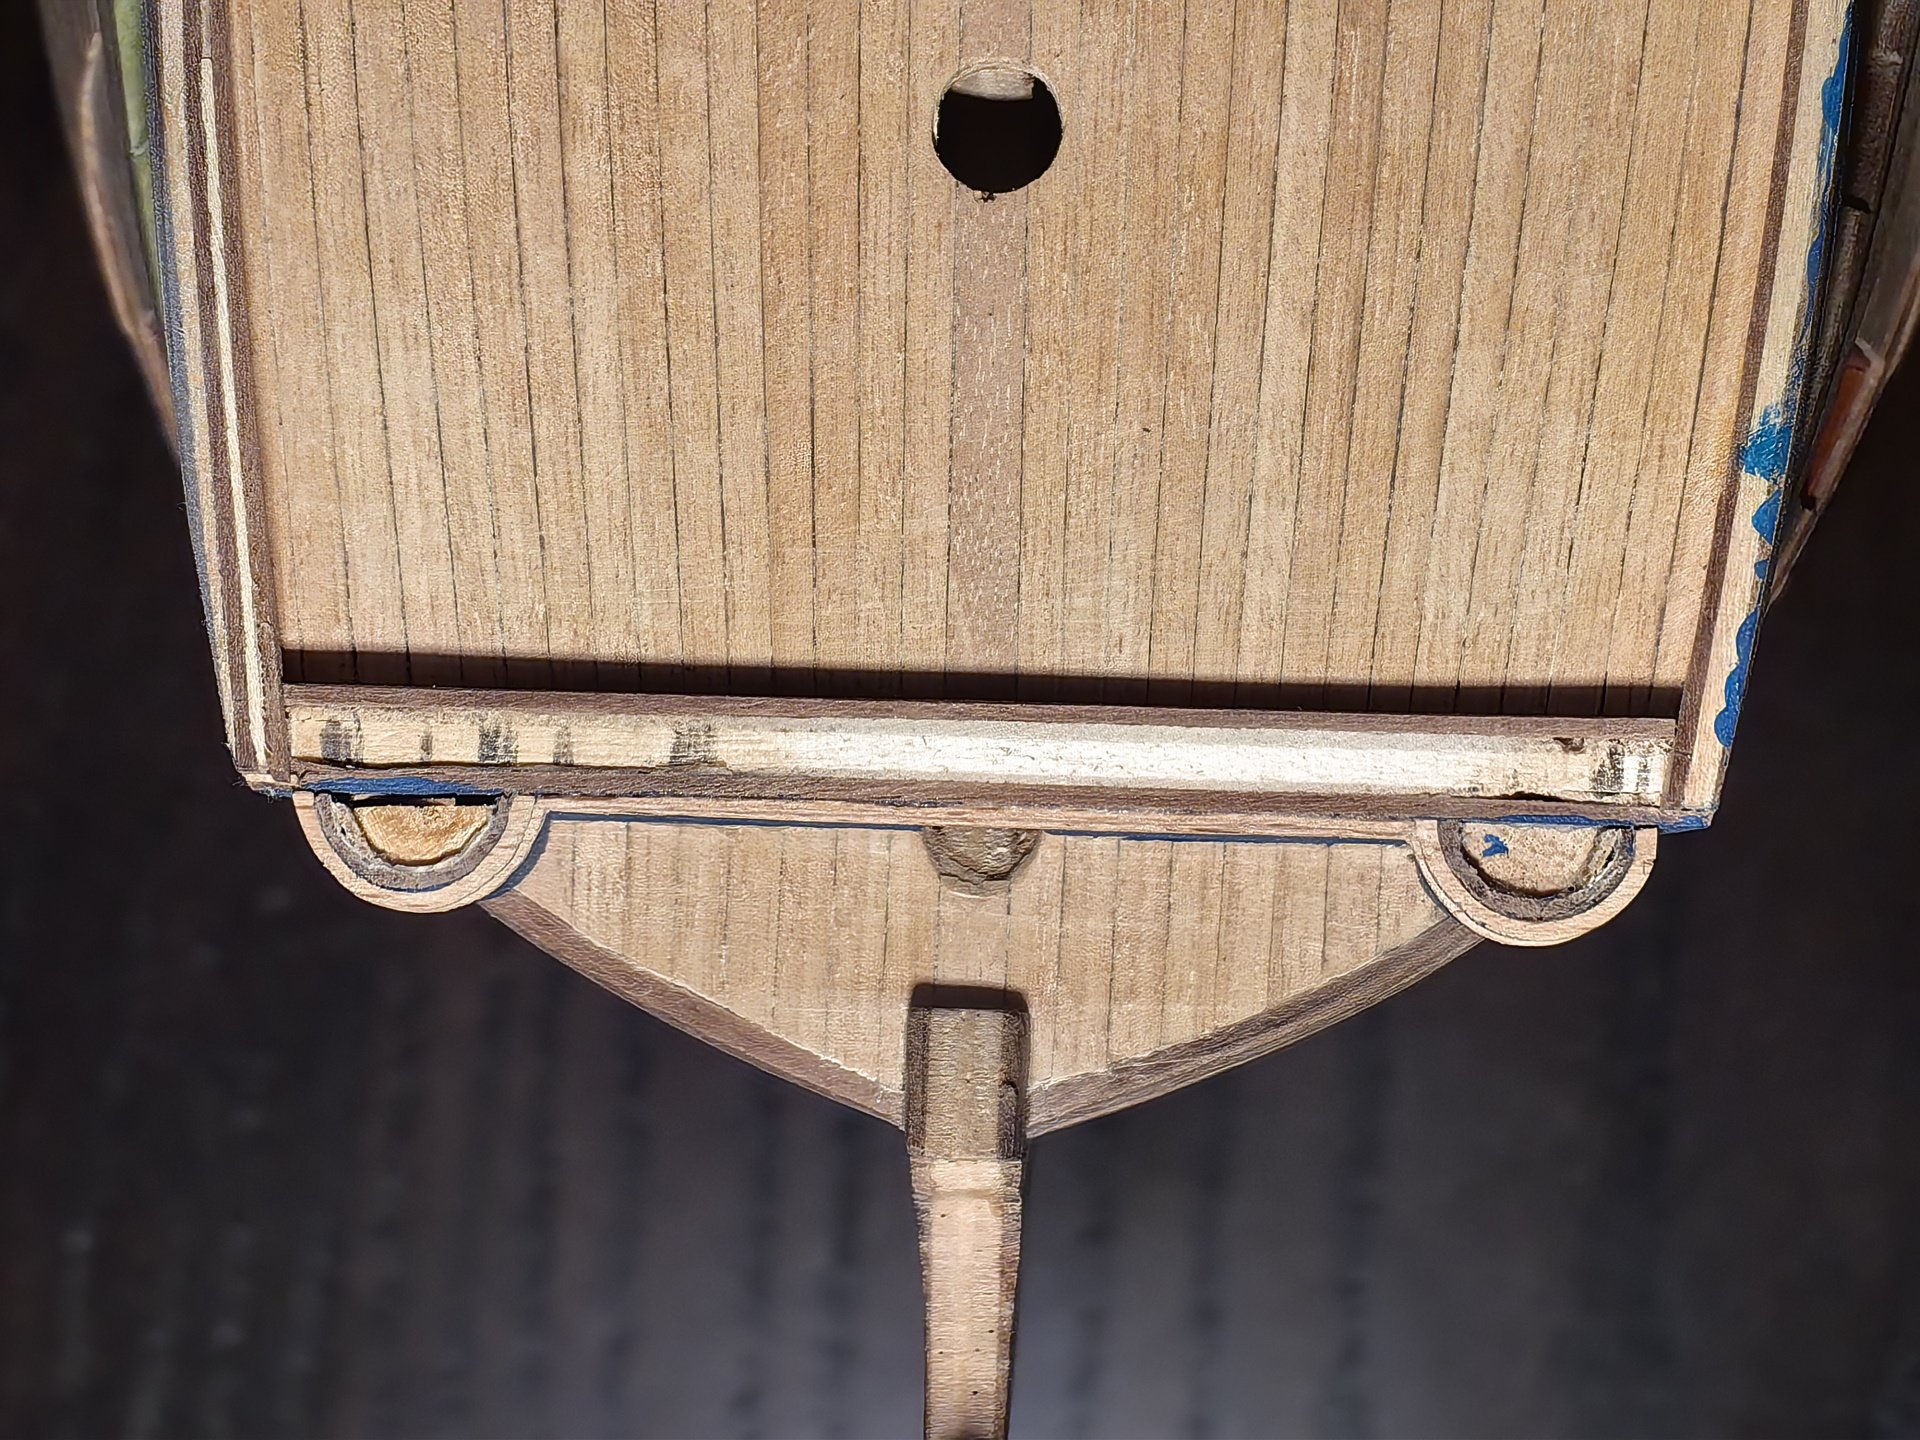
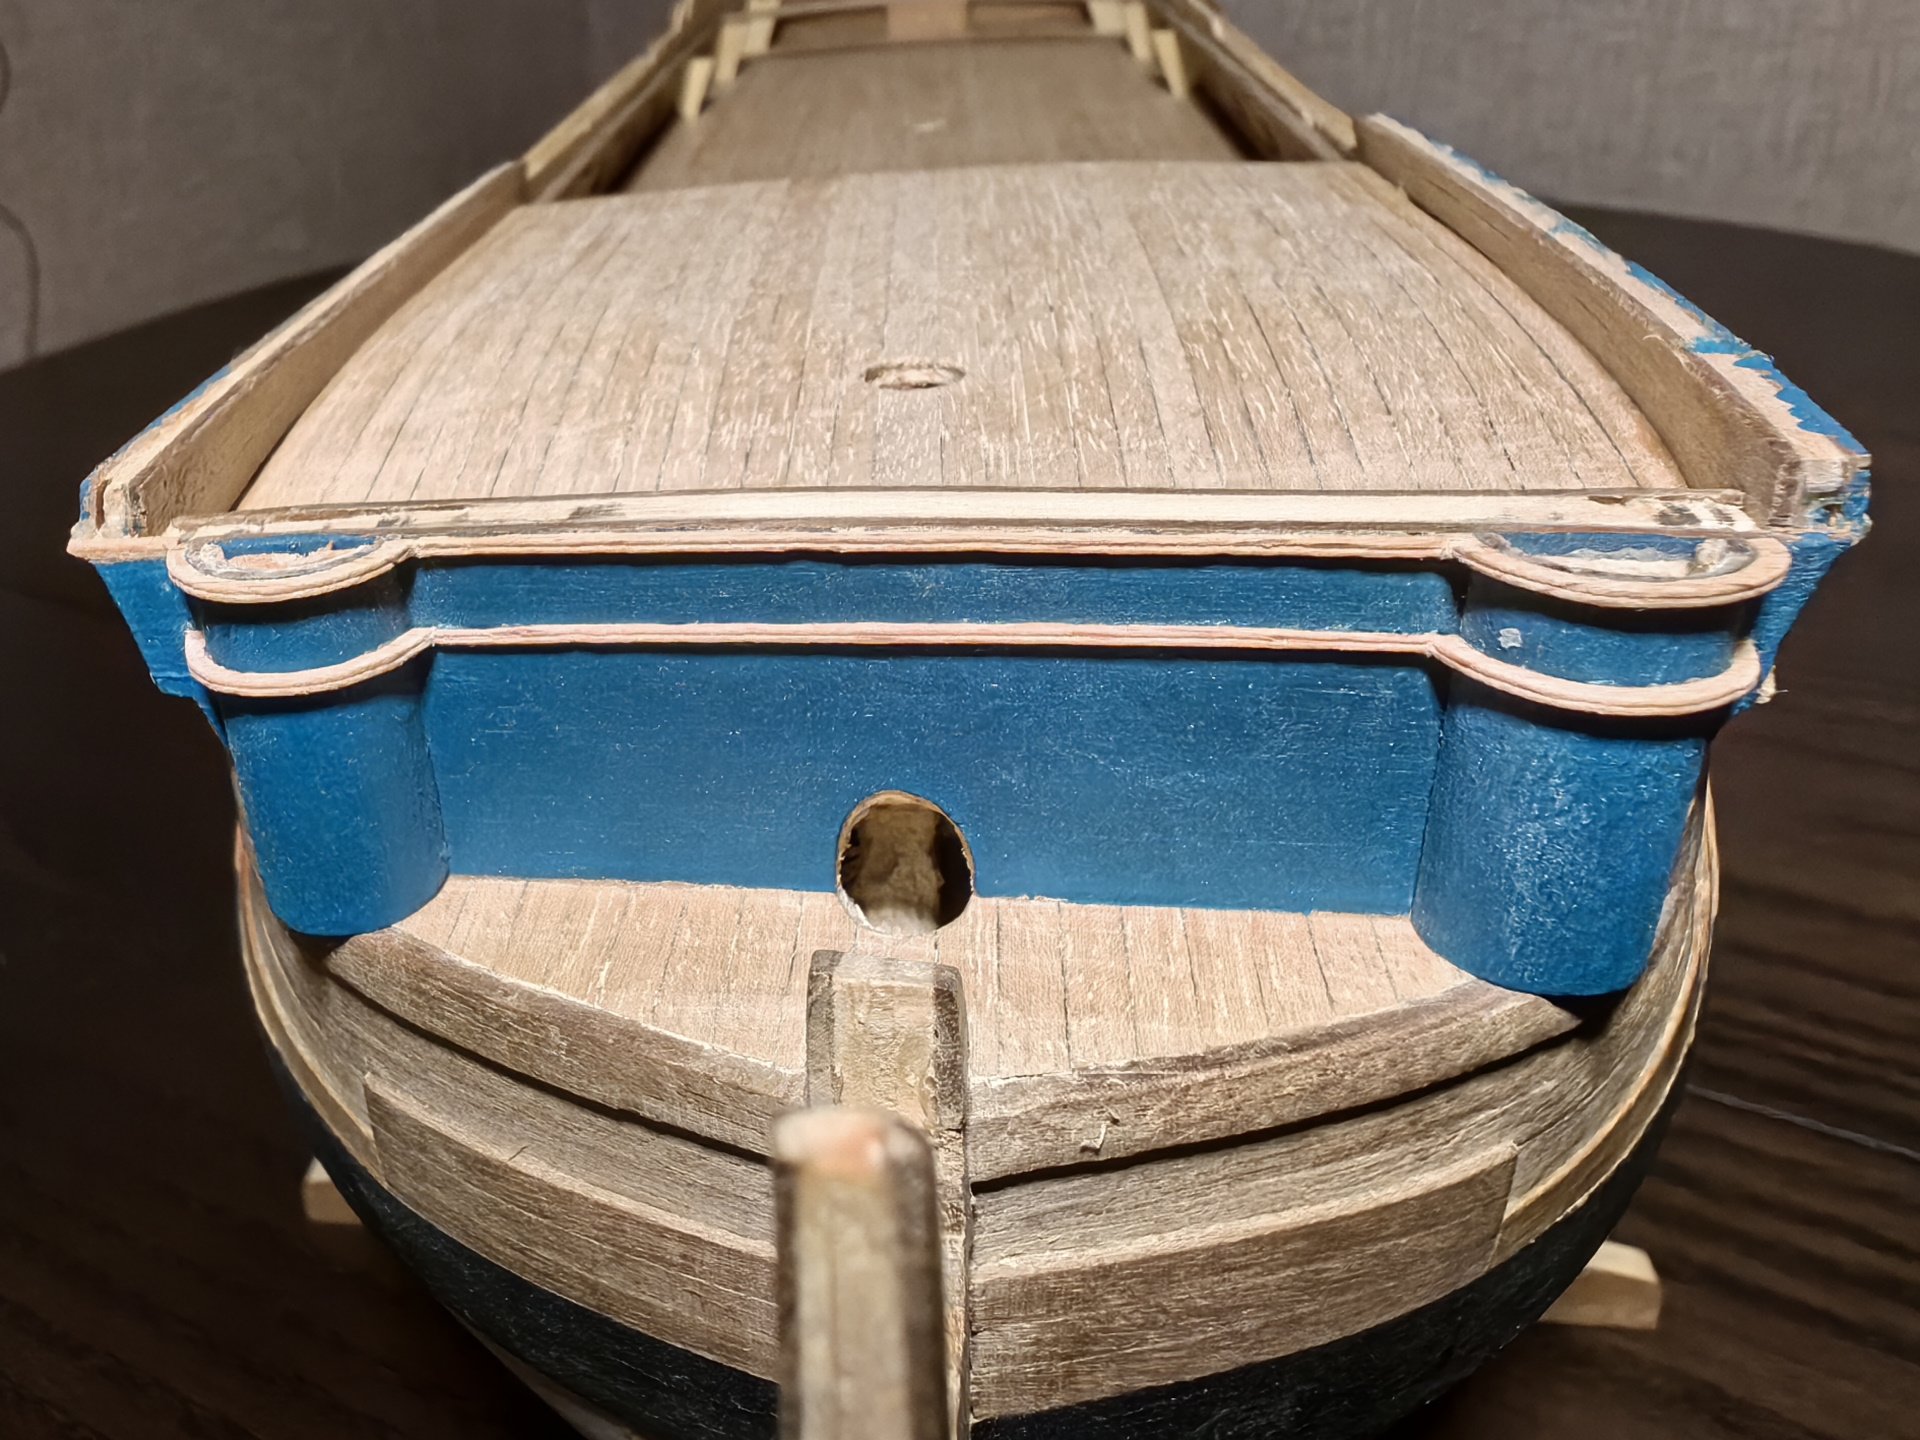
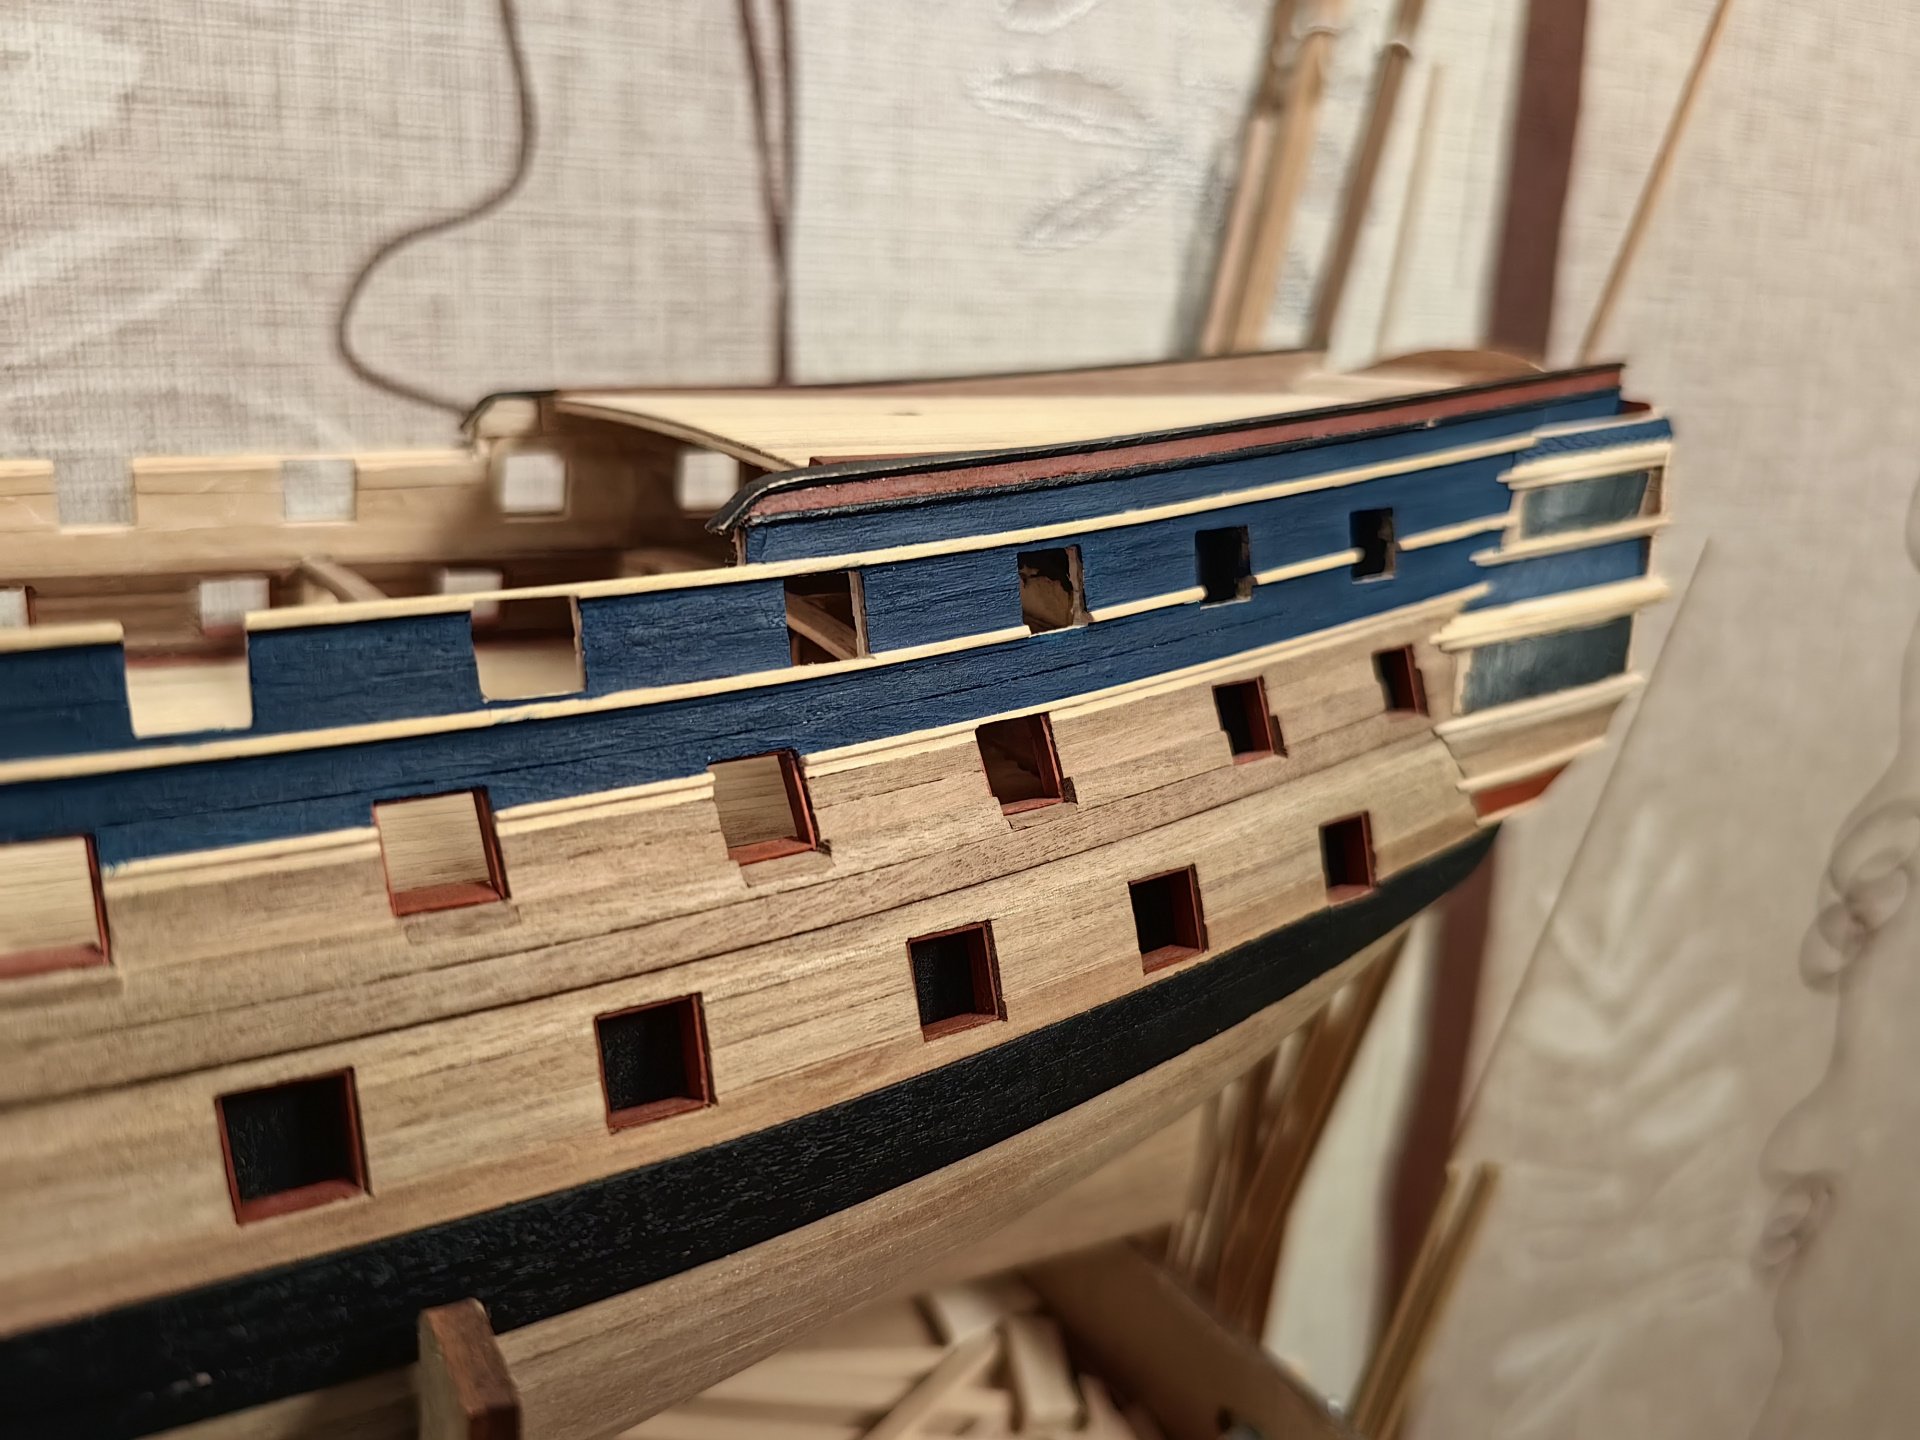
Hello everyone! When painting the model, in addition to the sides, the bulkhead of the Beak-head should also be painted blue. Therefore, I focused on this part of the model. I laid the deck and installed the roundhouse cabins, decorating them with rails. However, after assembling the Beak-head, I noticed a serious issue. In previous steps, I had made a mistake during the assembly process. As you can see in the photos, the upper part of the right bulwark has shifted significantly to the right. This definitely needs to be fixed while it's still possible. I'm thinking about the best way to do this. It might involve cutting off a portion of the bulwark from the outside and adding to it from the inside. It will take some time, but I hope the result is worth it!

-
It's very neat and looks great! Congratulations, great job!
-
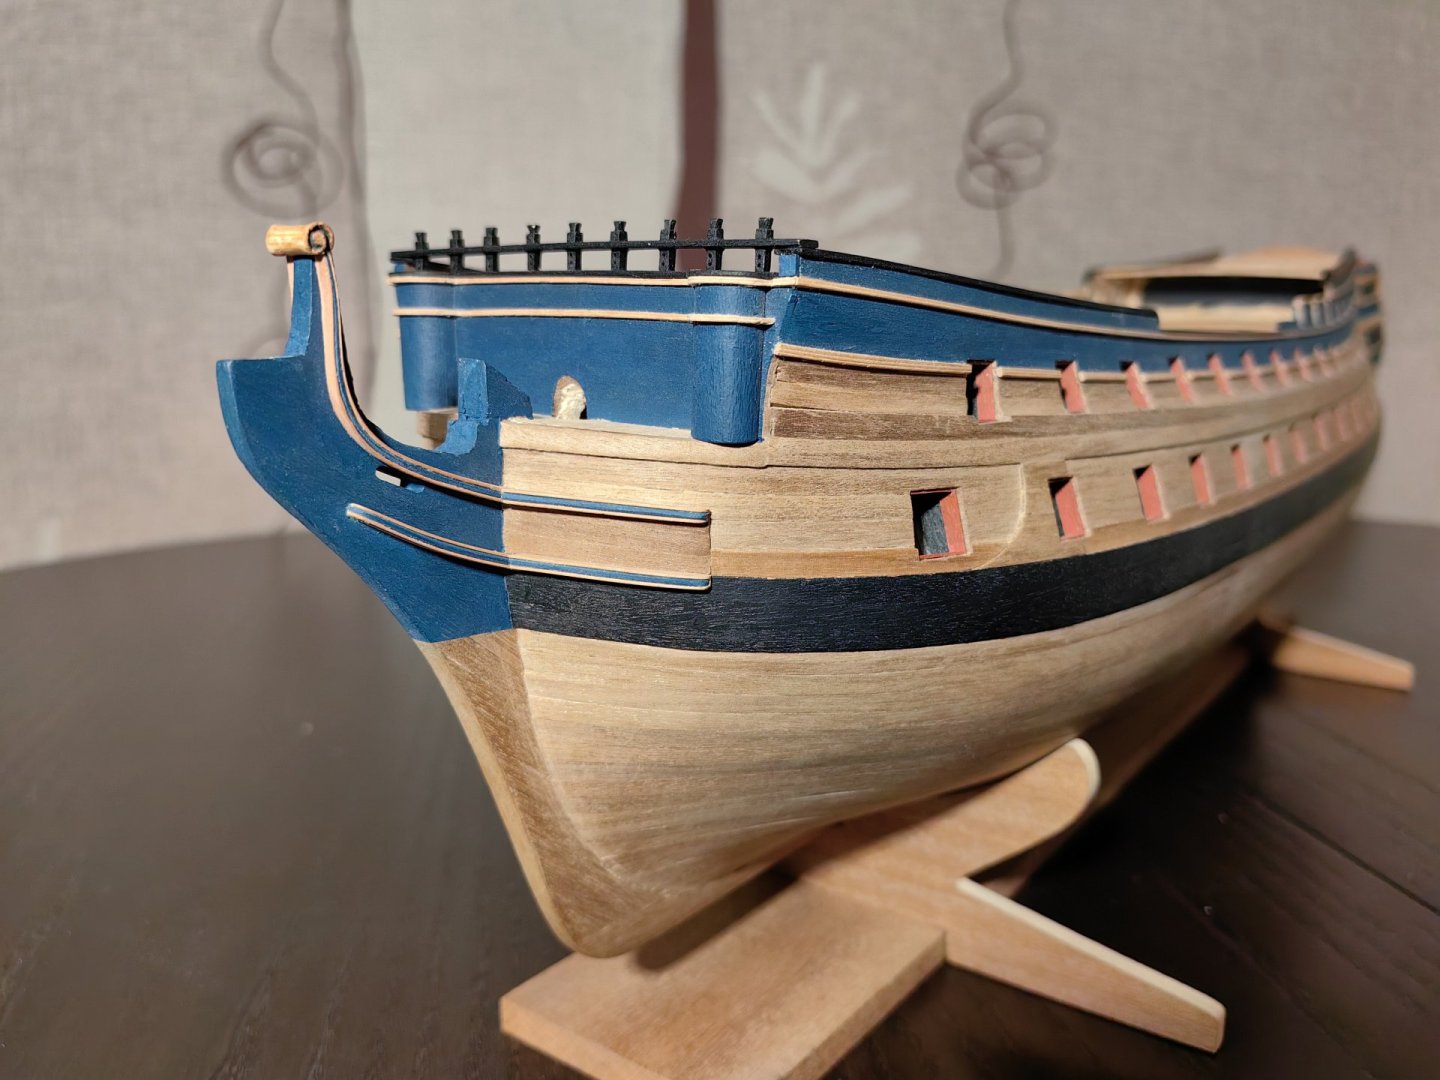
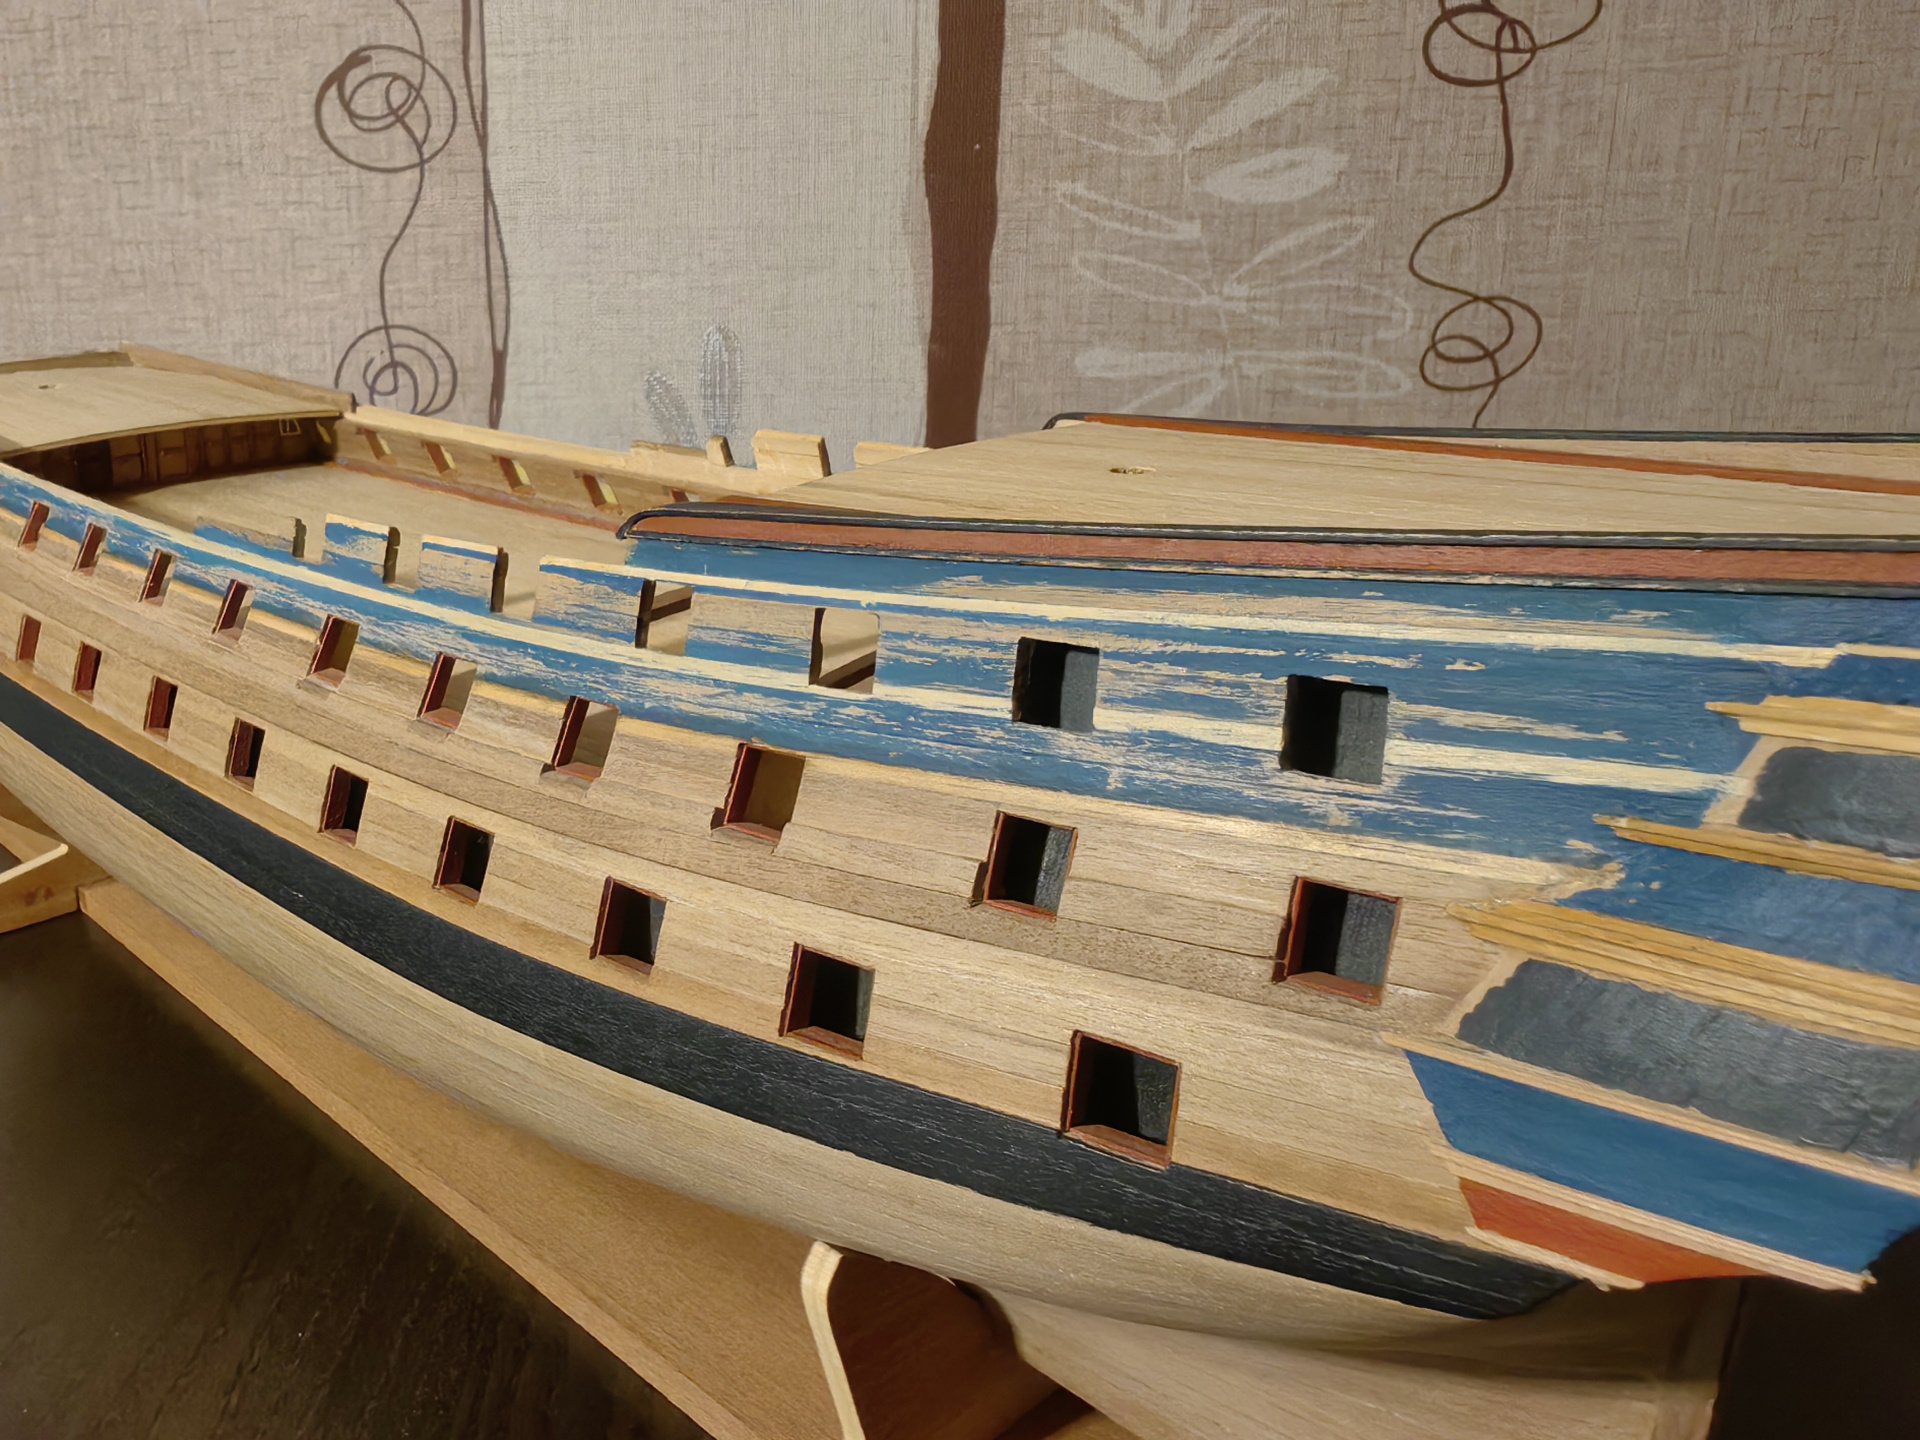
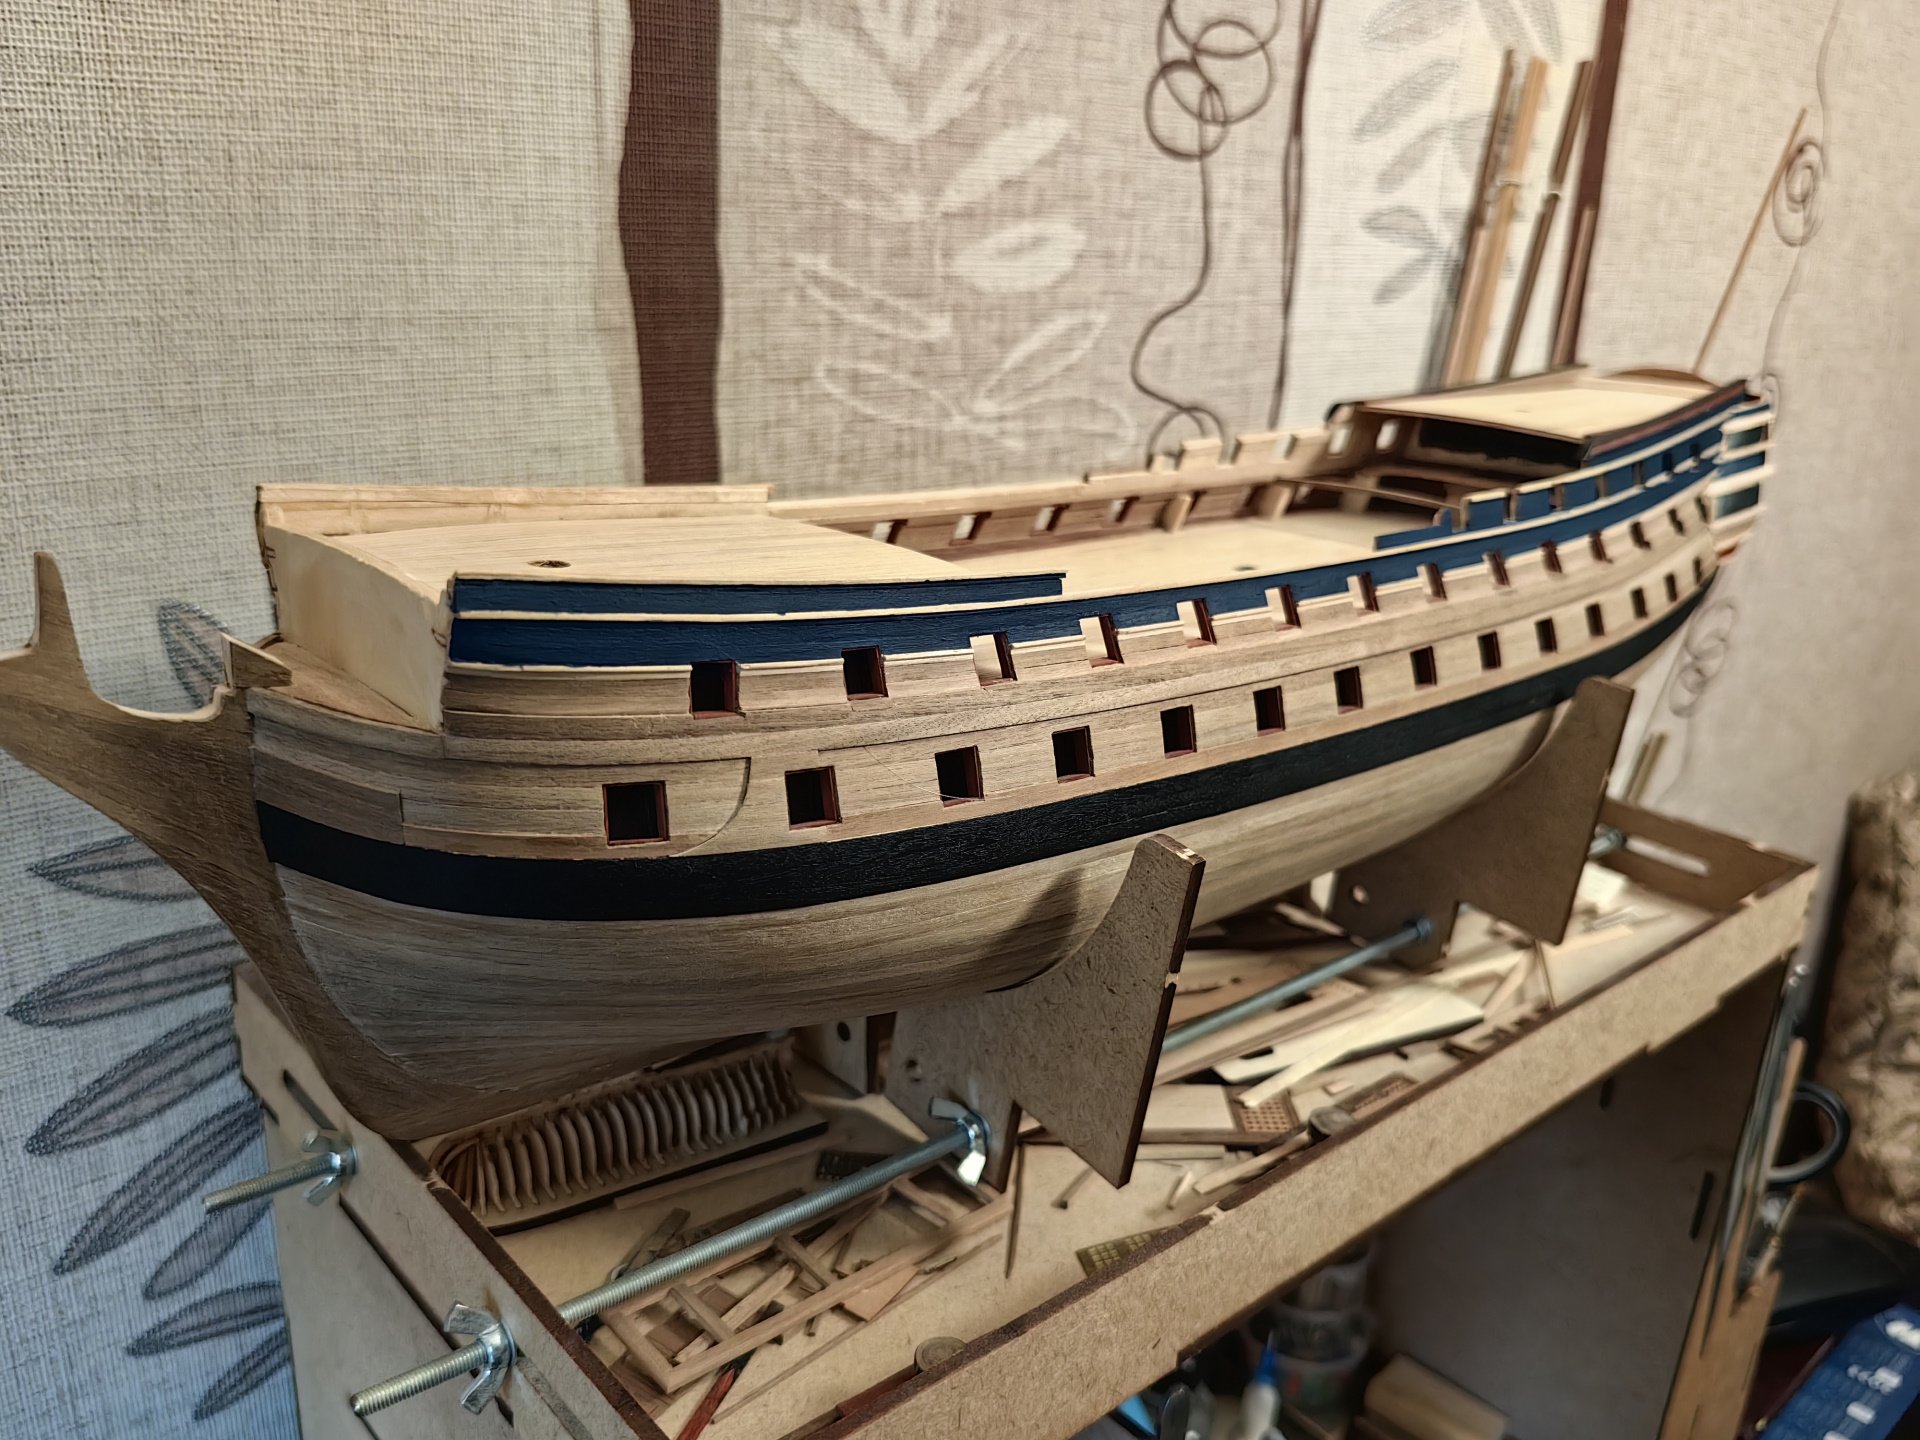
Hello everyone! Bellona had a long sailboat-like life. Apparently, she went through a number of repairs during this time. The original painted bottom was covered with copper sheathing, and the pattern on the sides changed several times... Although Charles Middleton's model is not a Bellona-class model, it provides us with an idea of one of the possible paint schemes. I believe that each modeler has the freedom to determine how their ship will look. I would like to follow historical accuracy, but at the same time I want to do what I like personally. And the color scheme of the Middleton model is not very satisfied. In addition, the material that I got in the set of Corel is completely inconsistent with this model. But I want to observe some points. Such as the black color of the barhout and the blue background with ornamentation on the bulwarks, stern and fore. I don't know if I'll be able to draw an ornament on a blue background, but I've decided to create the background itself. This is the point where I have to make a decision about the sequence of further work... Until the quarterdeck deck is installed, I can't accurately calculate the location of the gun ports on it. In turn, it's better to paint the outer side when the gun ports are in place. And the main deck guns should be installed after the painting. It's a vicious cycle. Therefore, I've decided to paint the sides first and make adjustments later. So far it has turned out like this…


-
Hi Ronald! Your work is an example of how to do things neatly and beautifully! What kind of paint did you use? Was it ready-made, or did you choose the color?
-
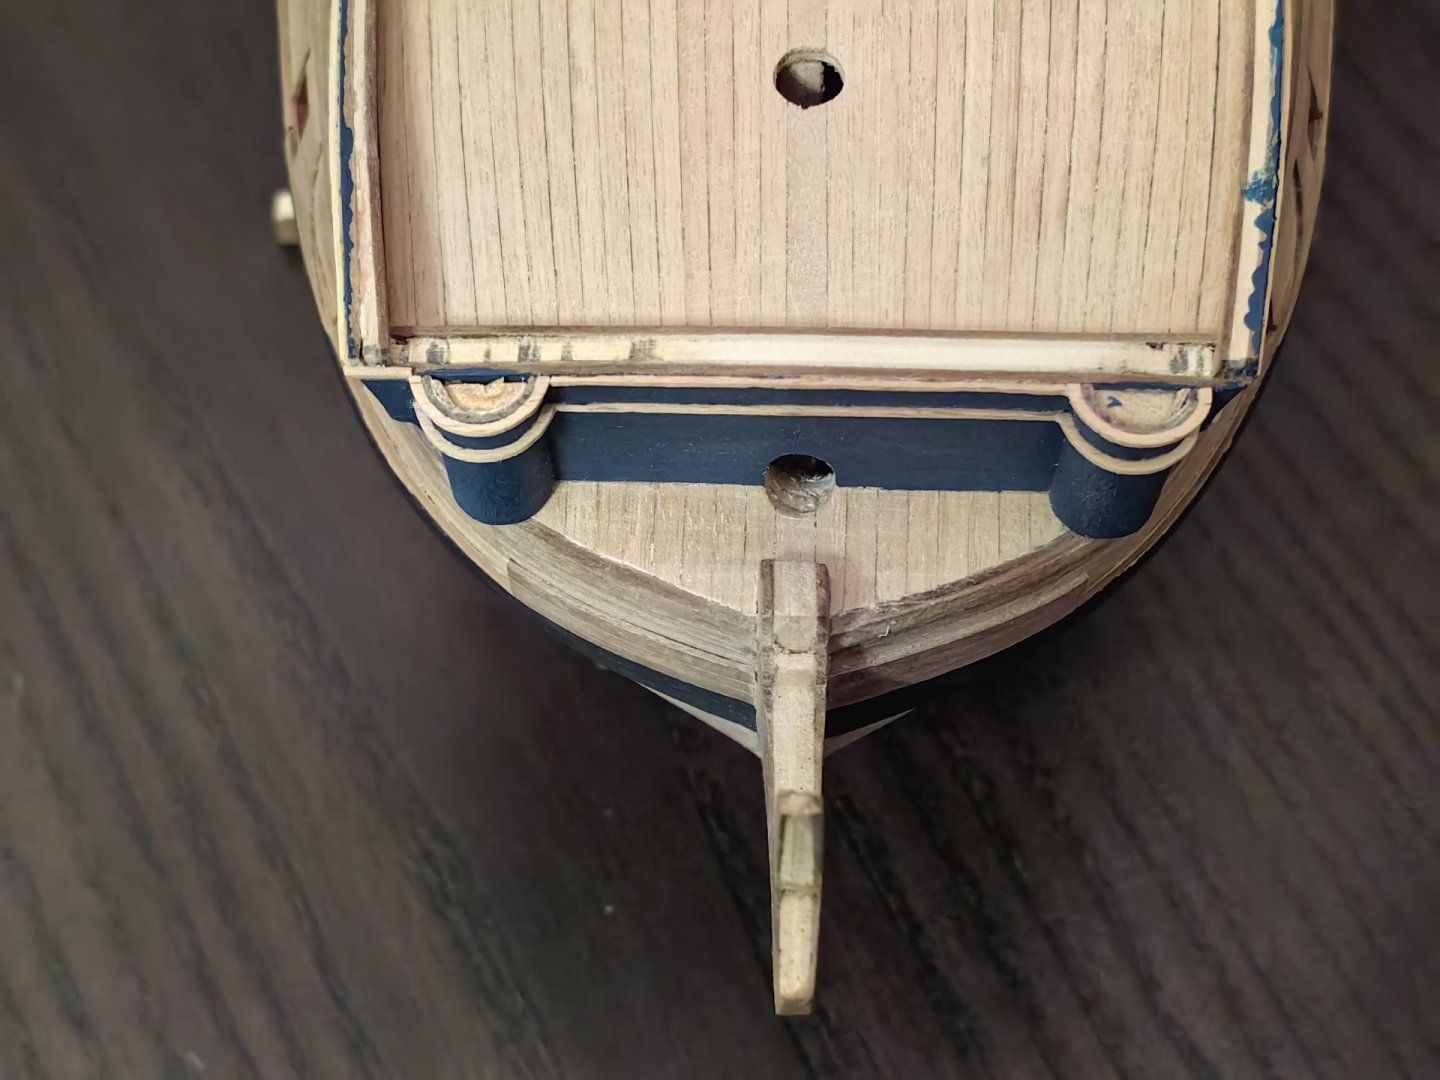
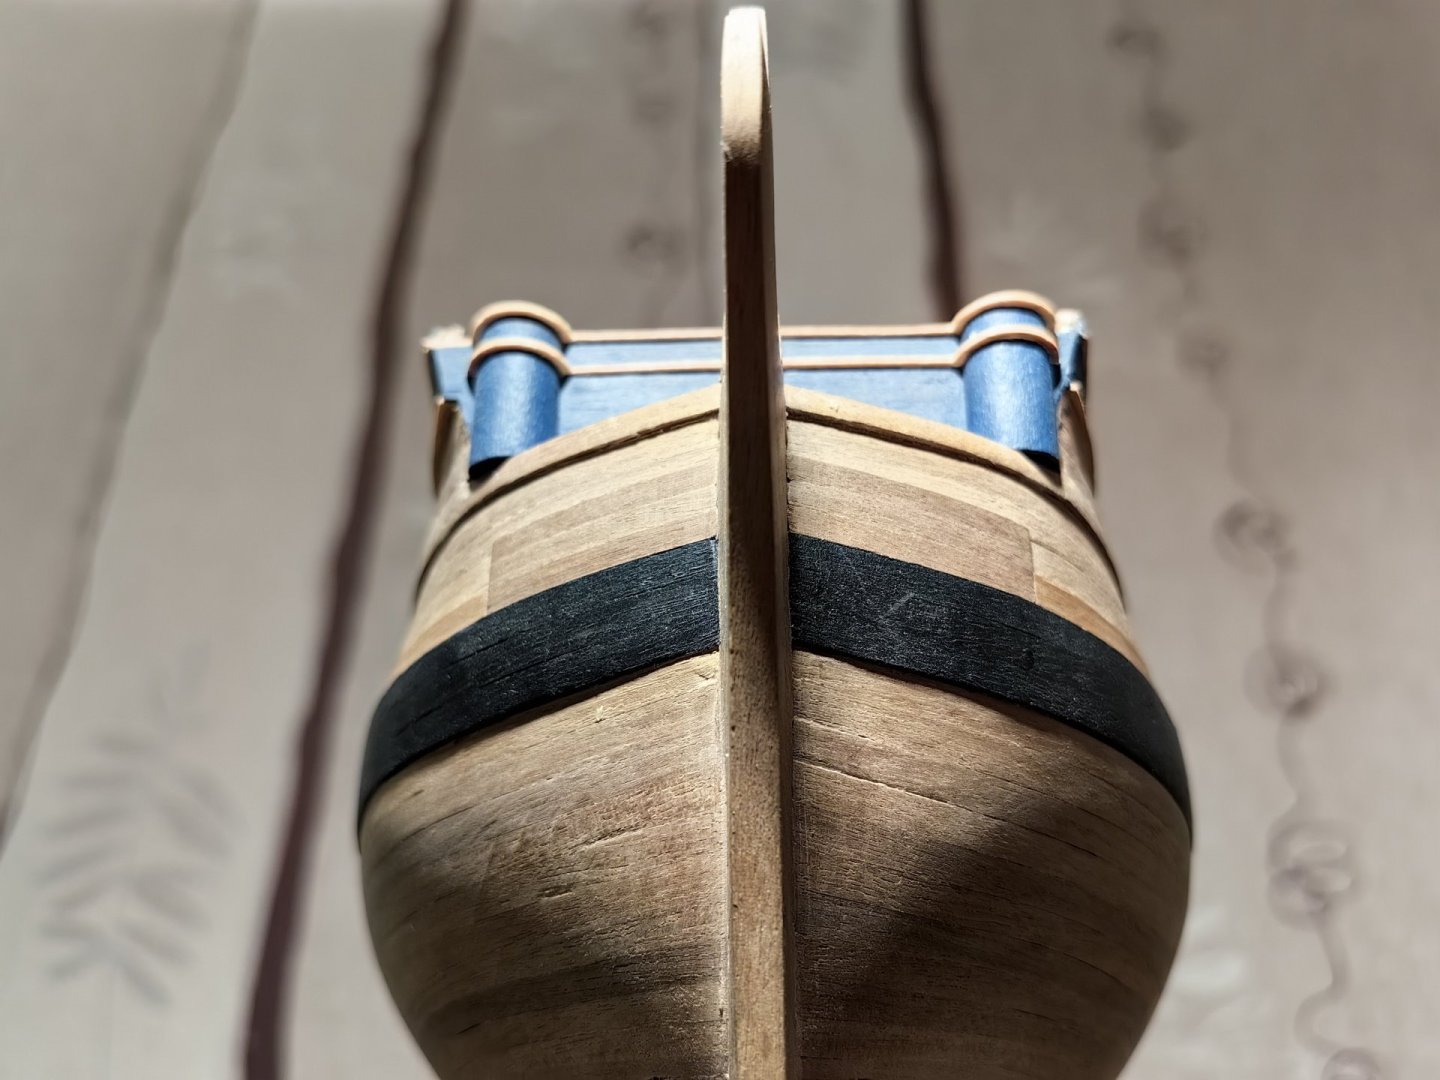
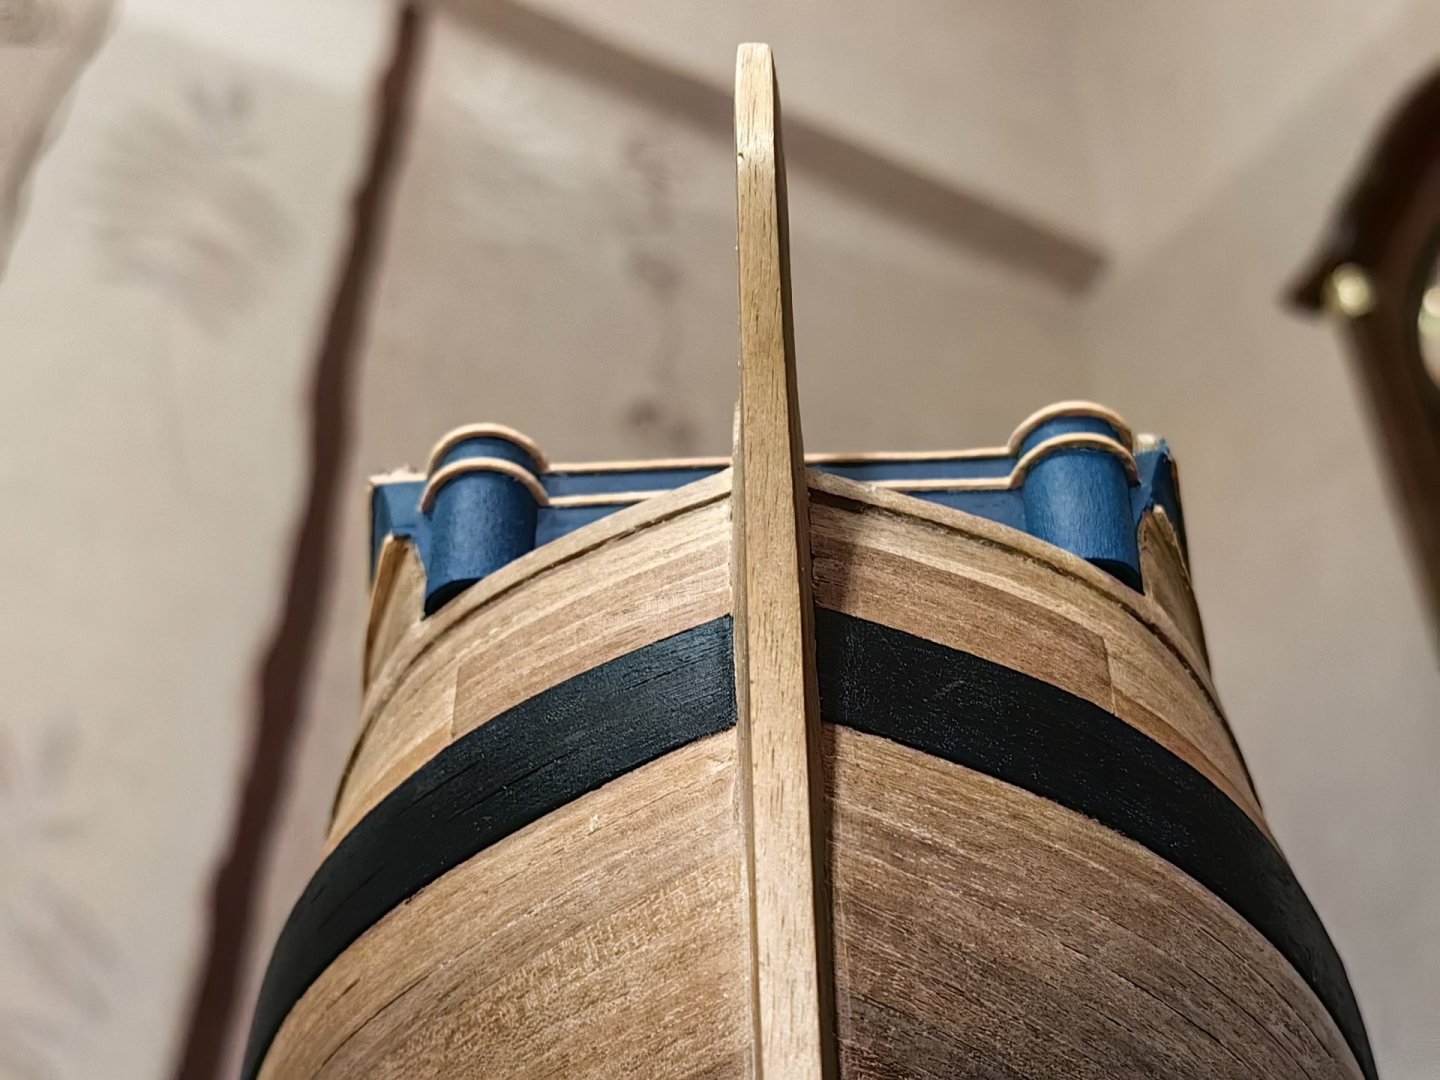
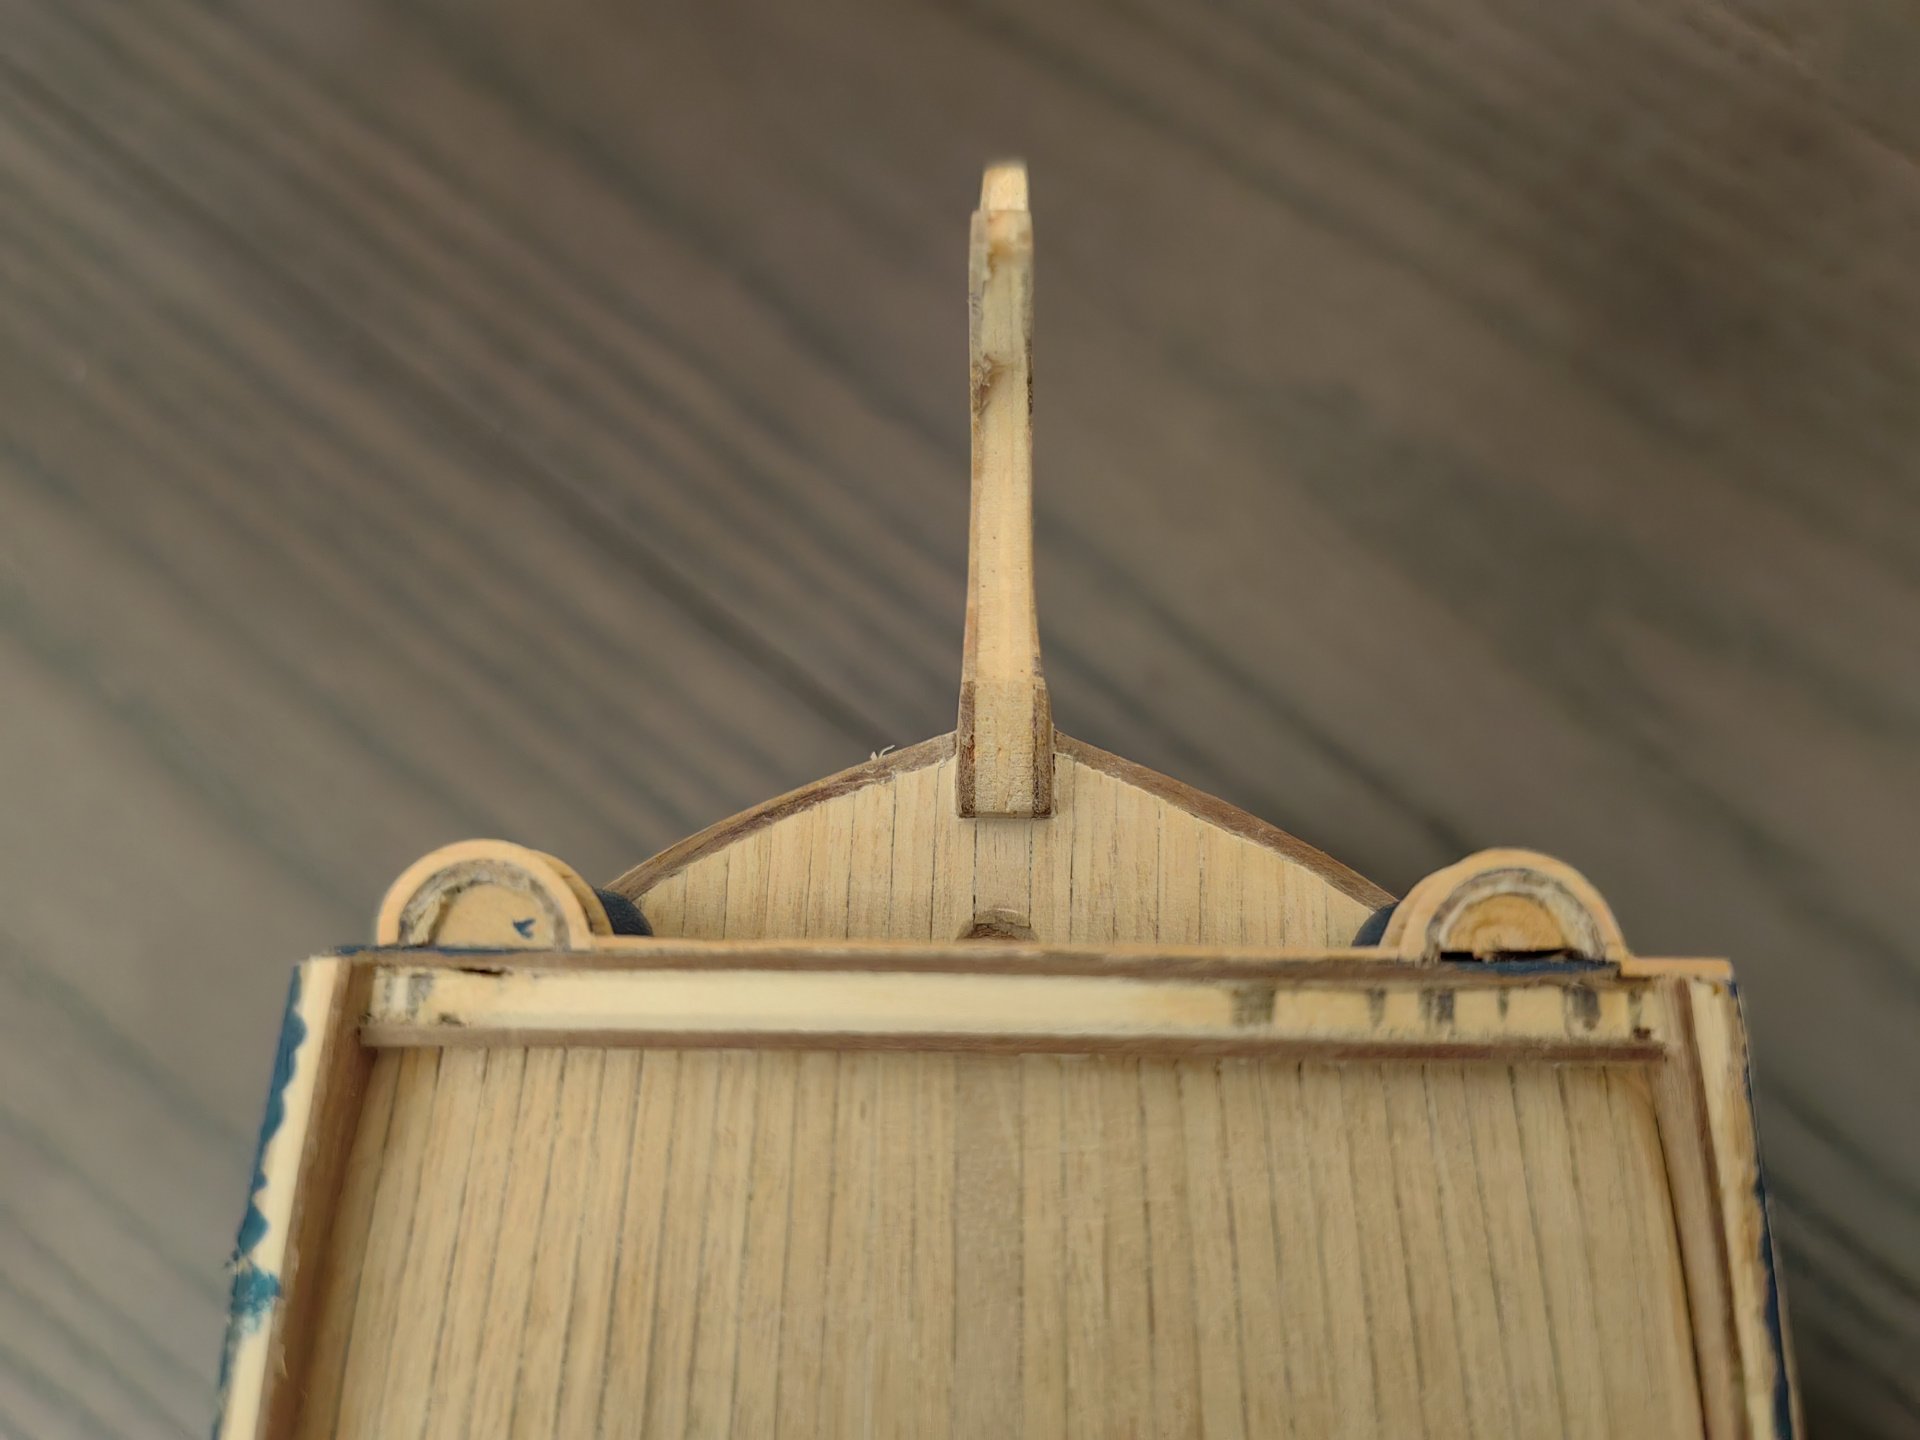
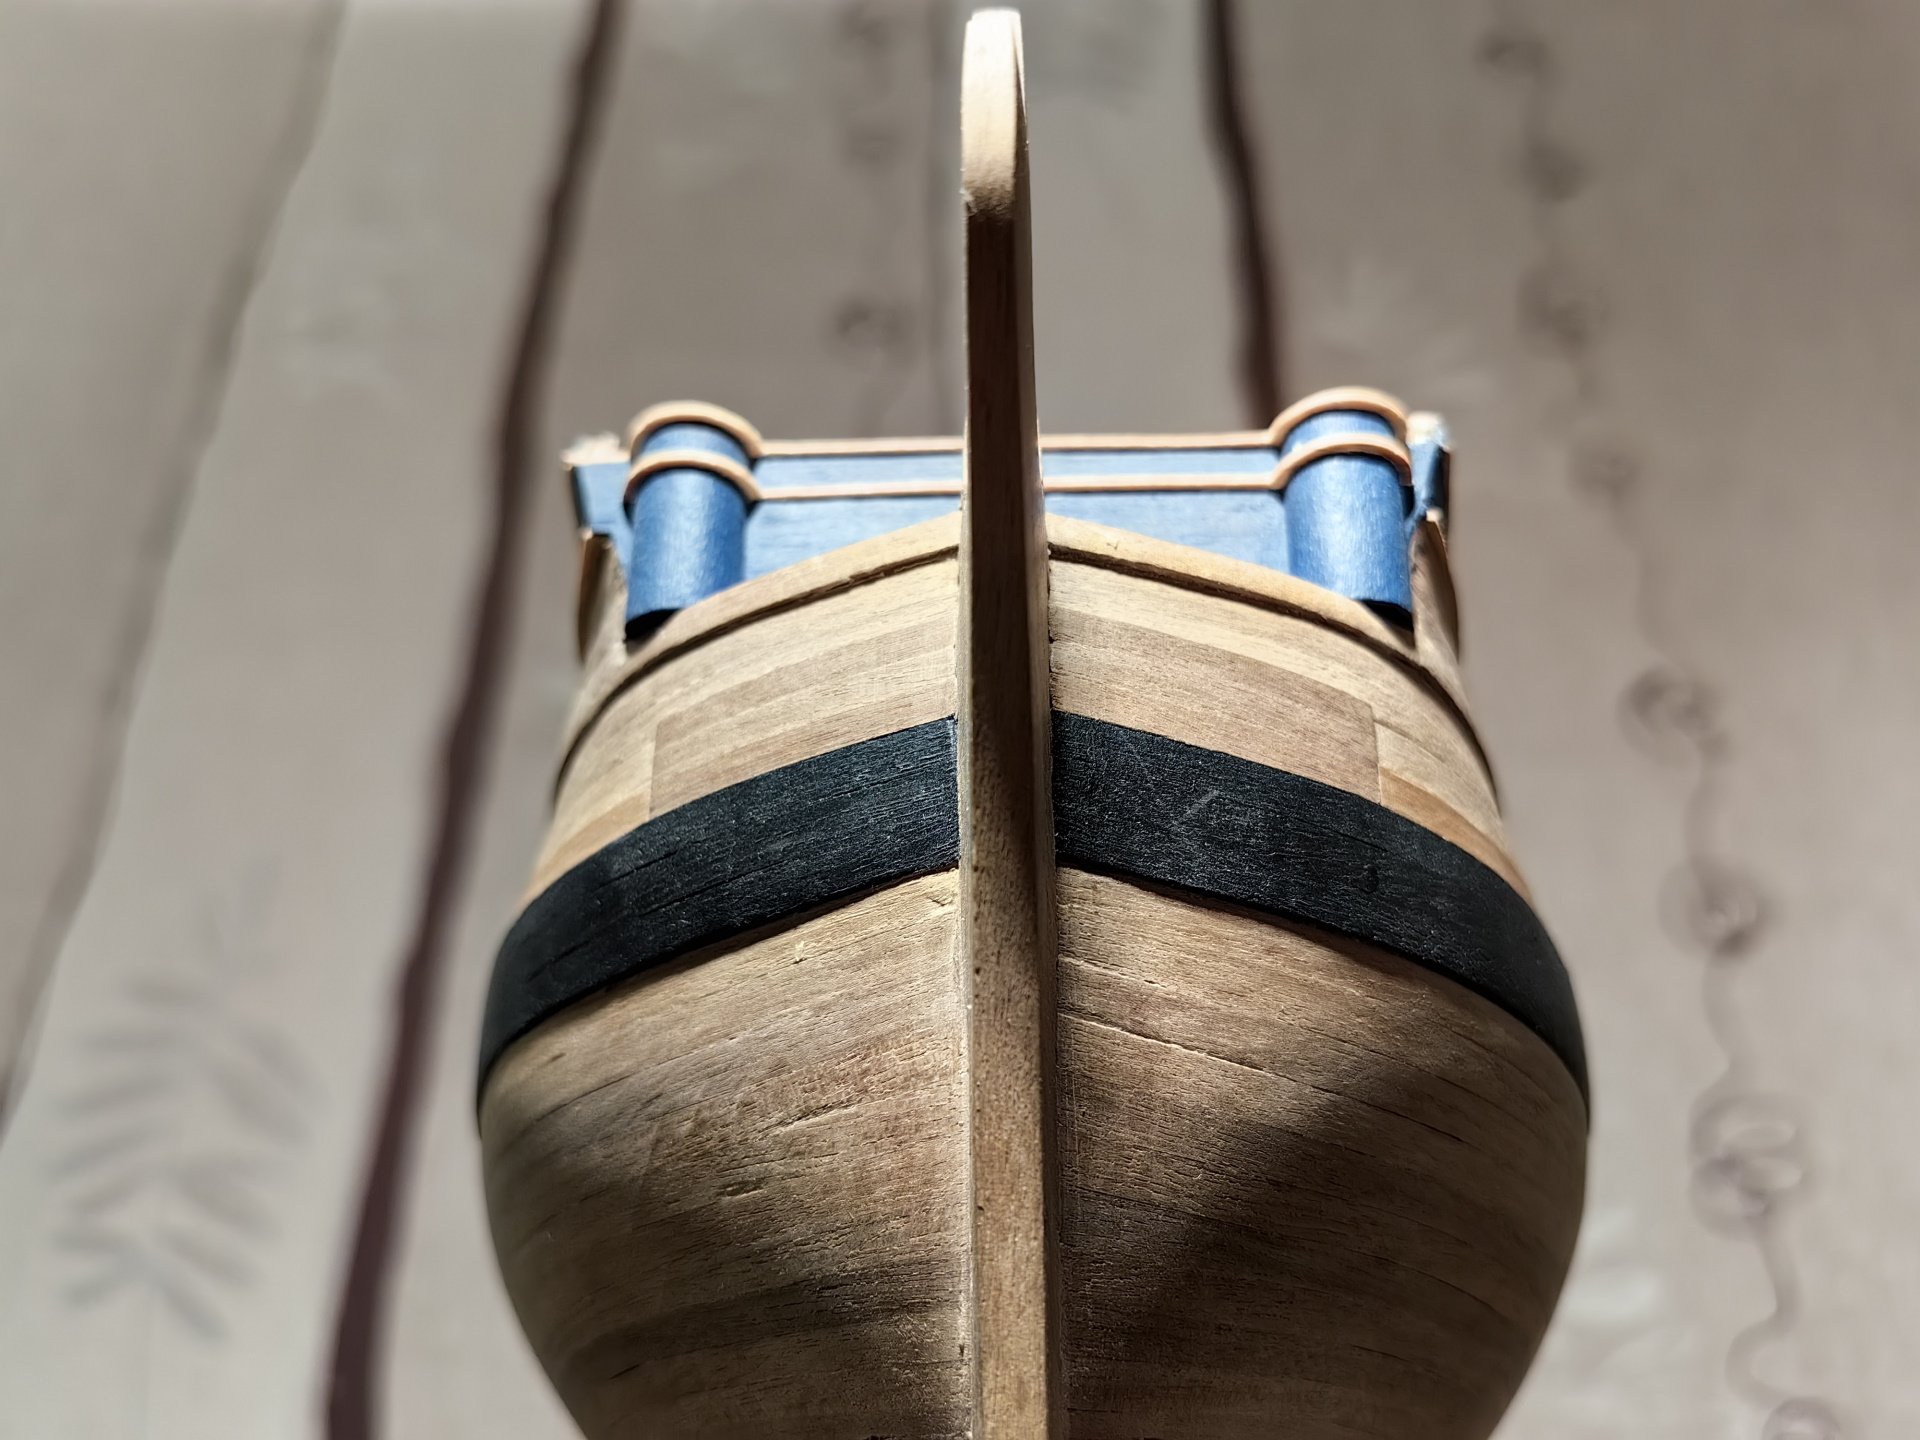
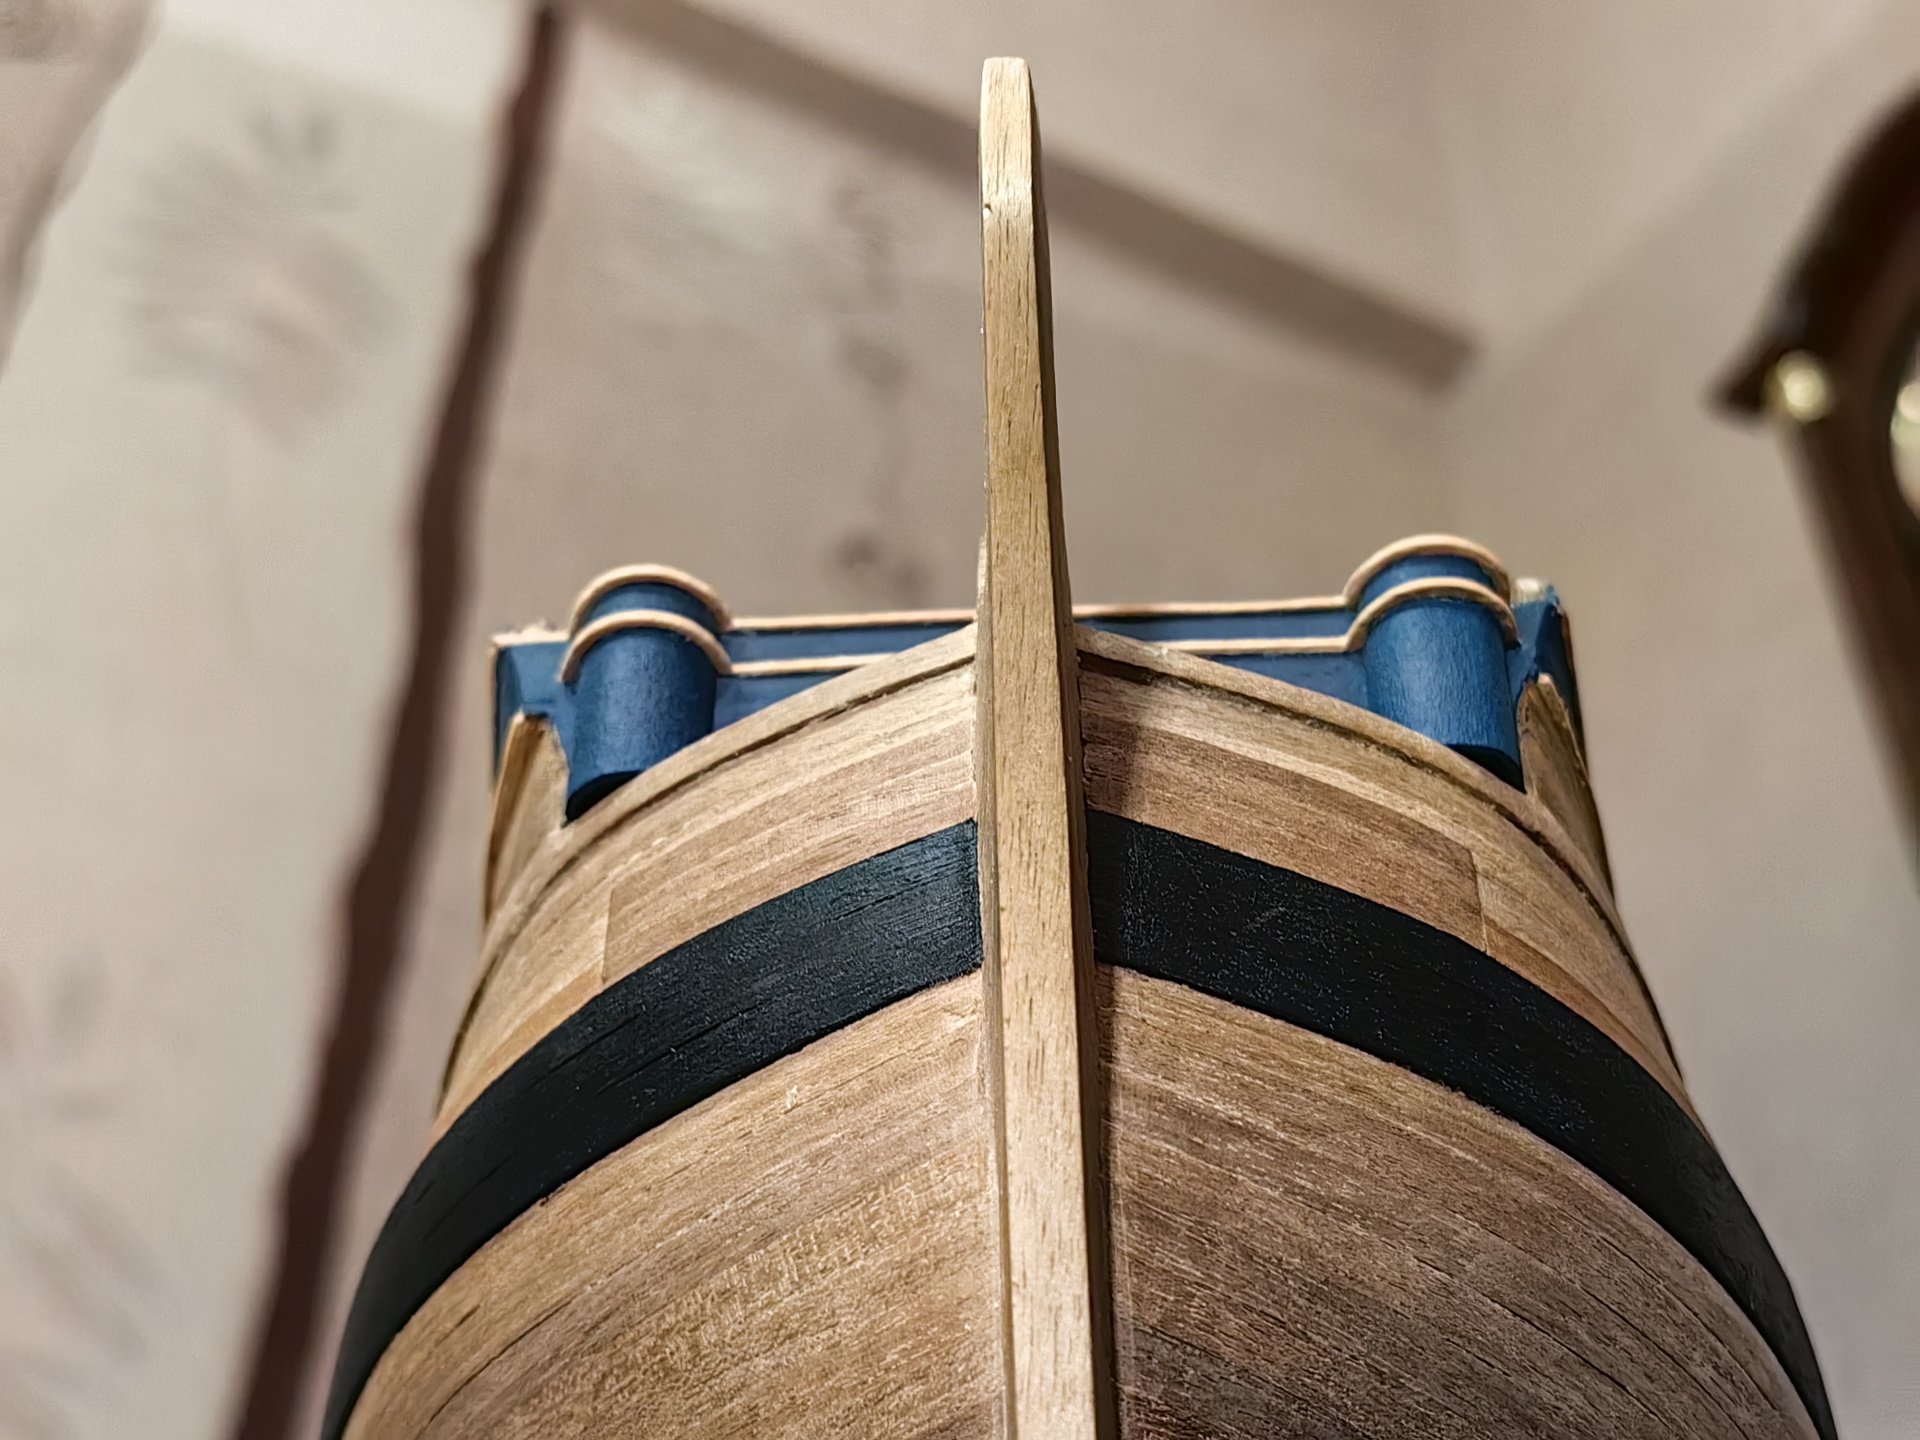
Hi Andy! There are many things to be done to the Corel model, but even if some things are left and it will not be noticeable, the thick sternpost and knyavdiged look rough compared to the graceful watercuts of the prototypes. The knyavdiged narrows from the stem to the nasal figure both in the top view and in the front view. Similarly, the sternpost narrows from top to bottom. If you are thinking about further work, you can still make these corrections at this stage by planing these elements. Then you can lay the stern planking all the way to the sternpost.
.thumb.jpg.3b5842f6fdbb835de6800f77b208f53c.jpg)


-
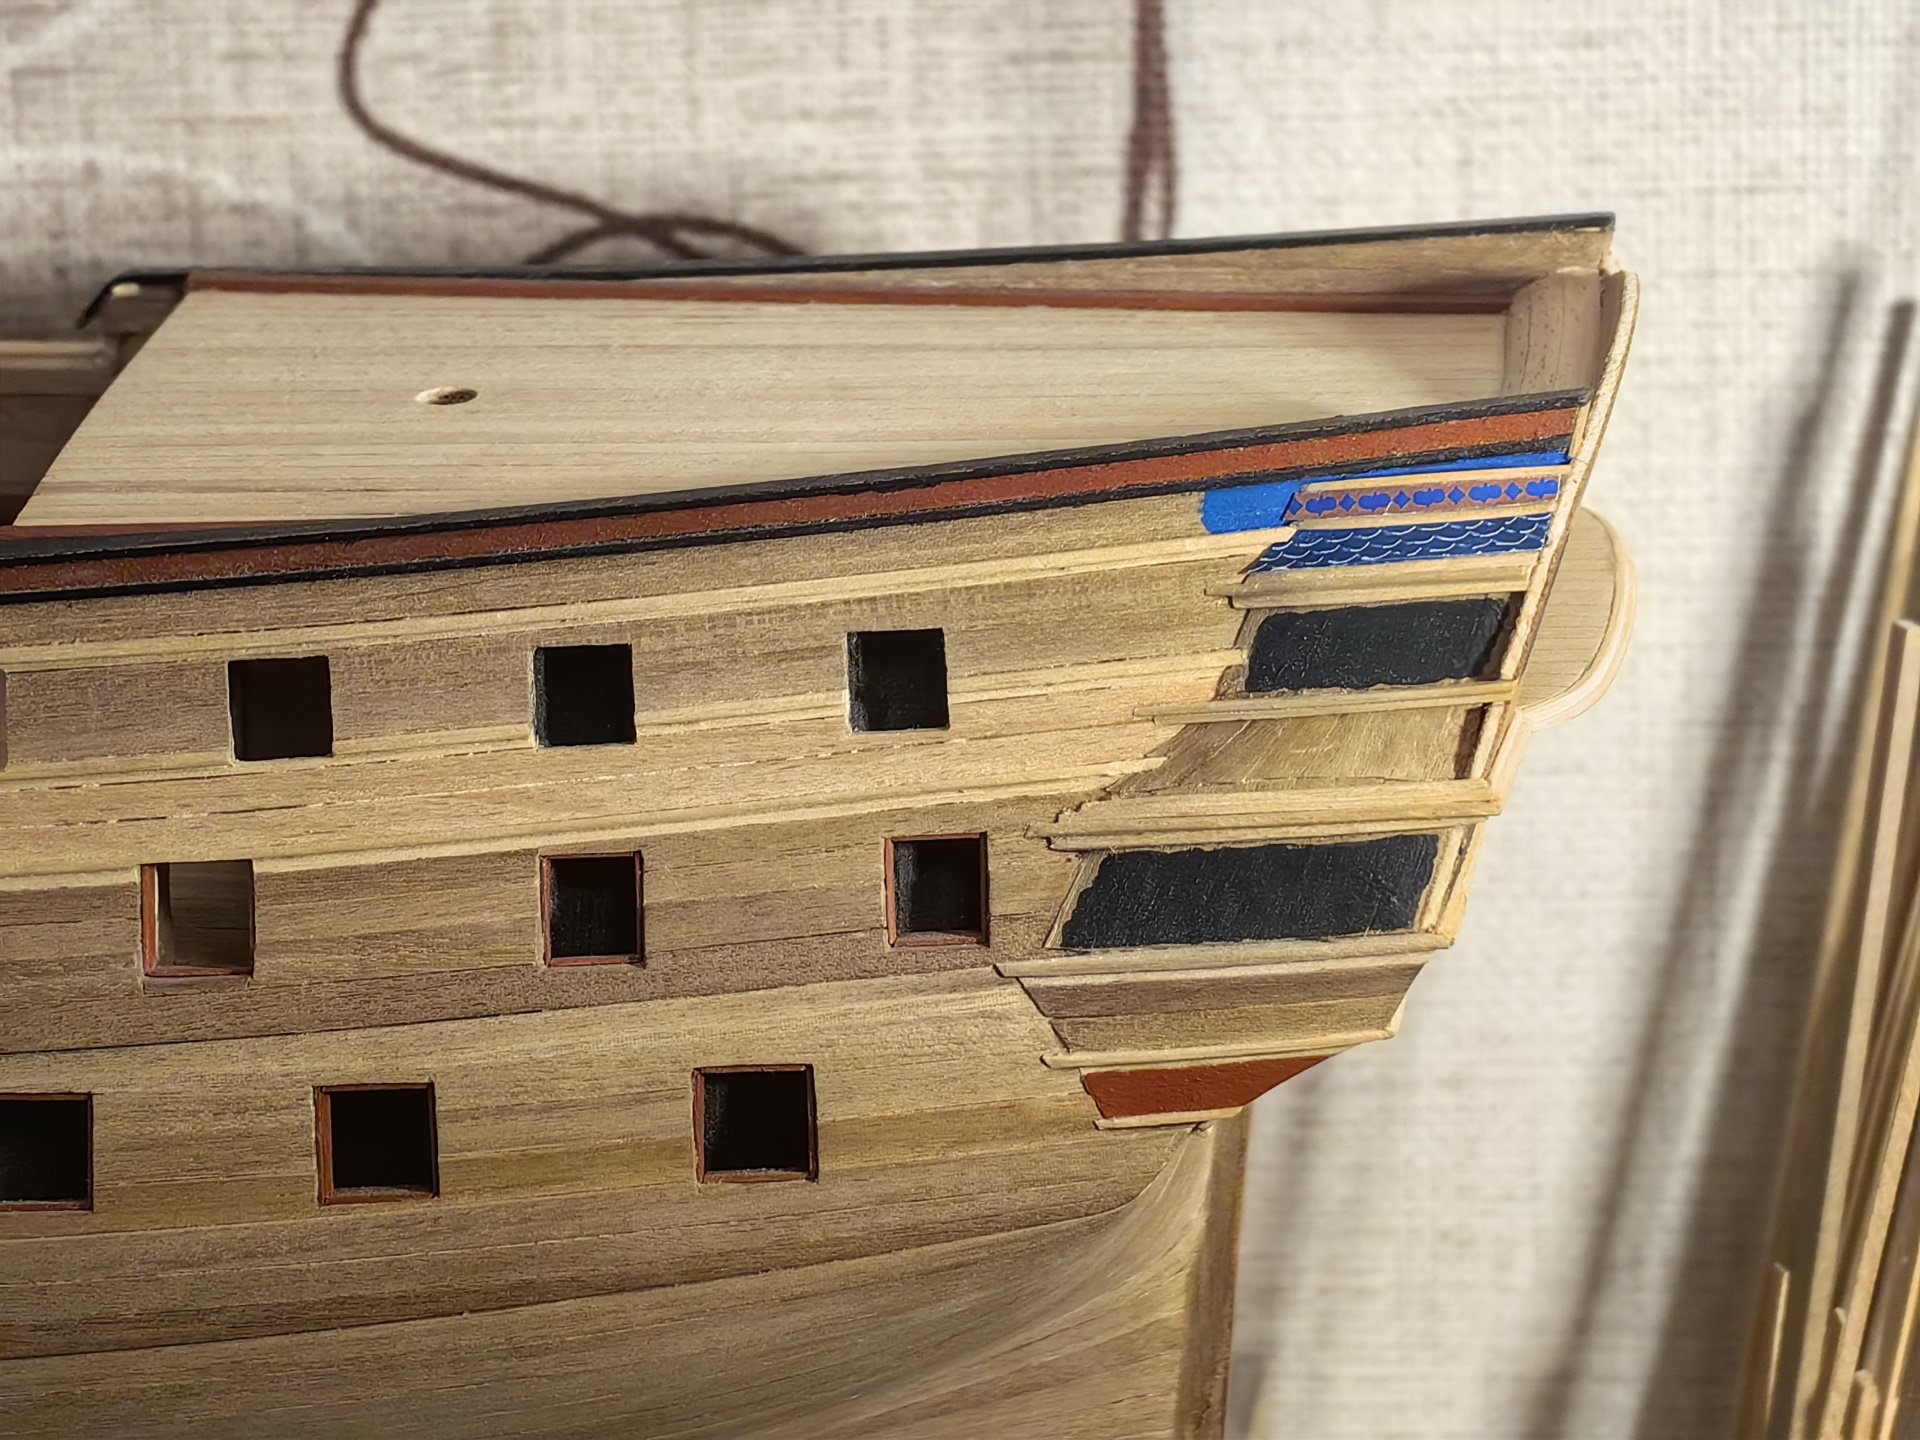
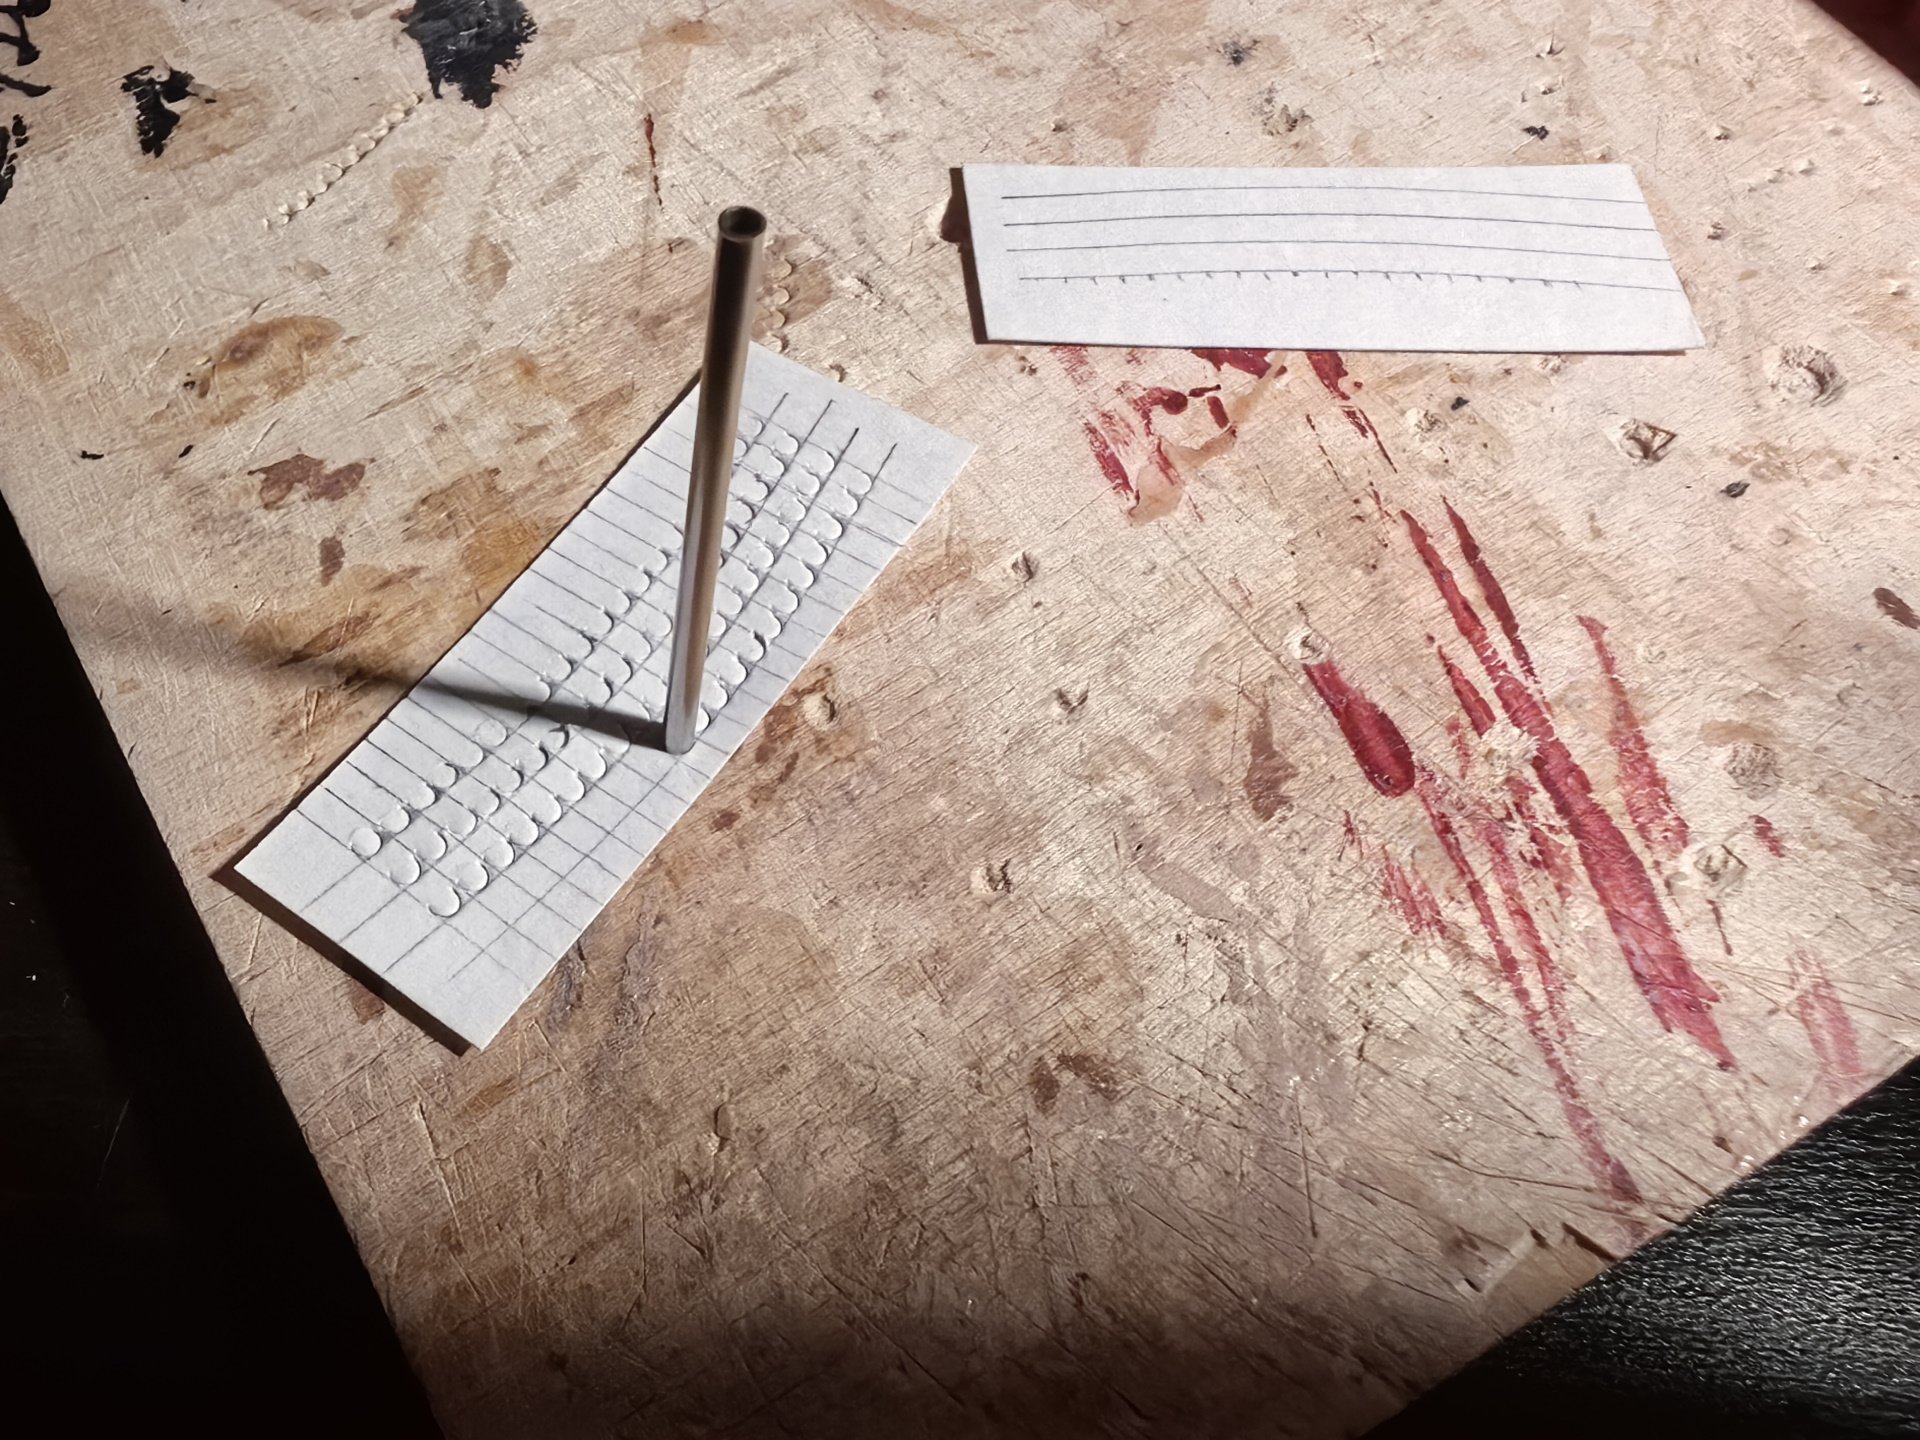
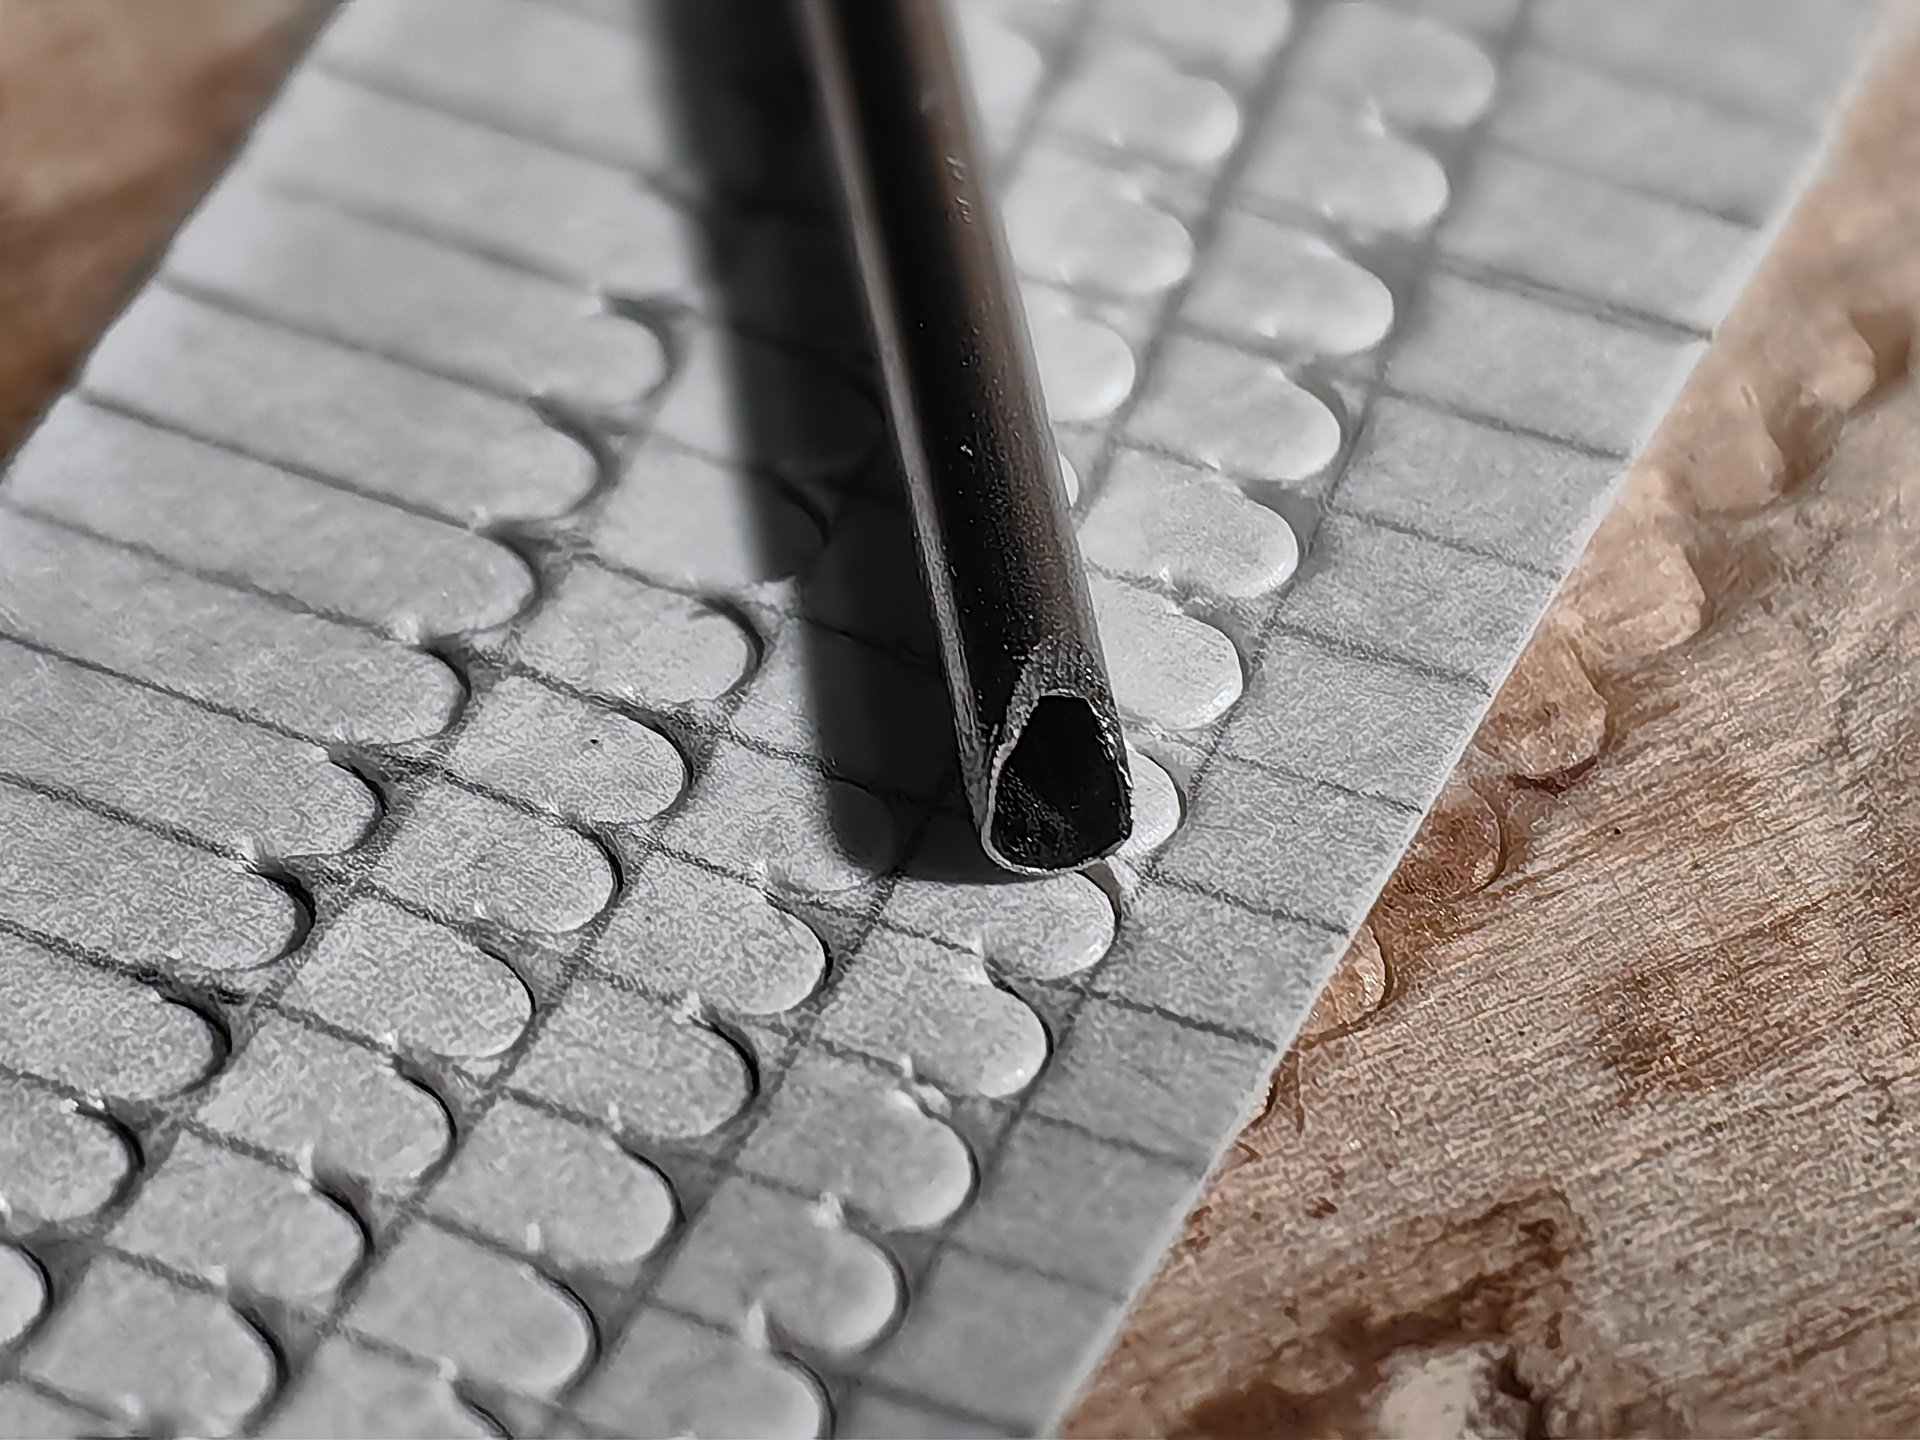
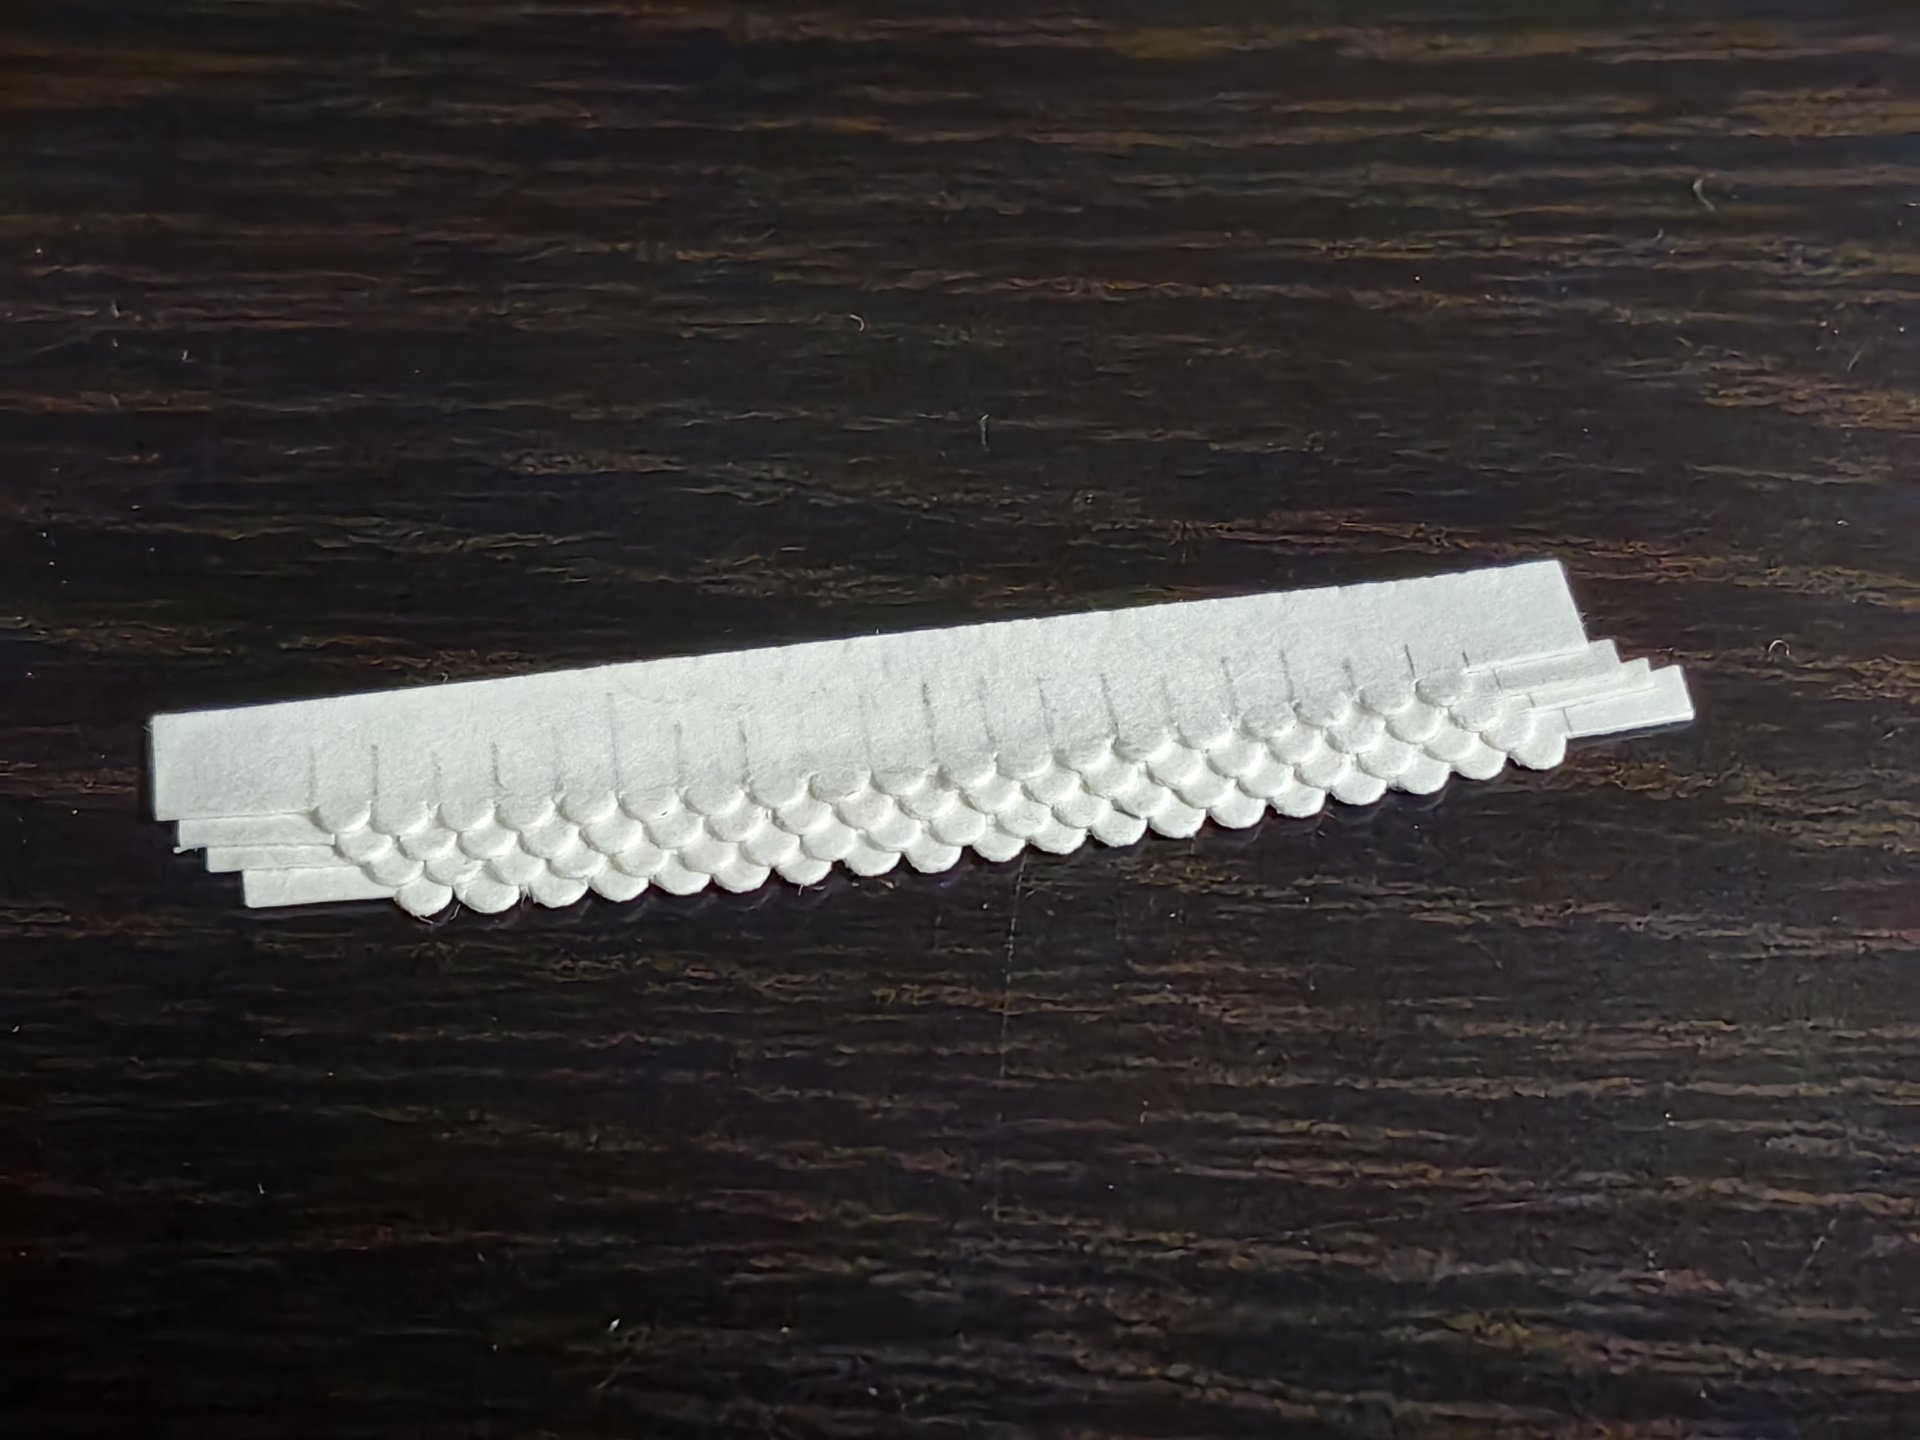
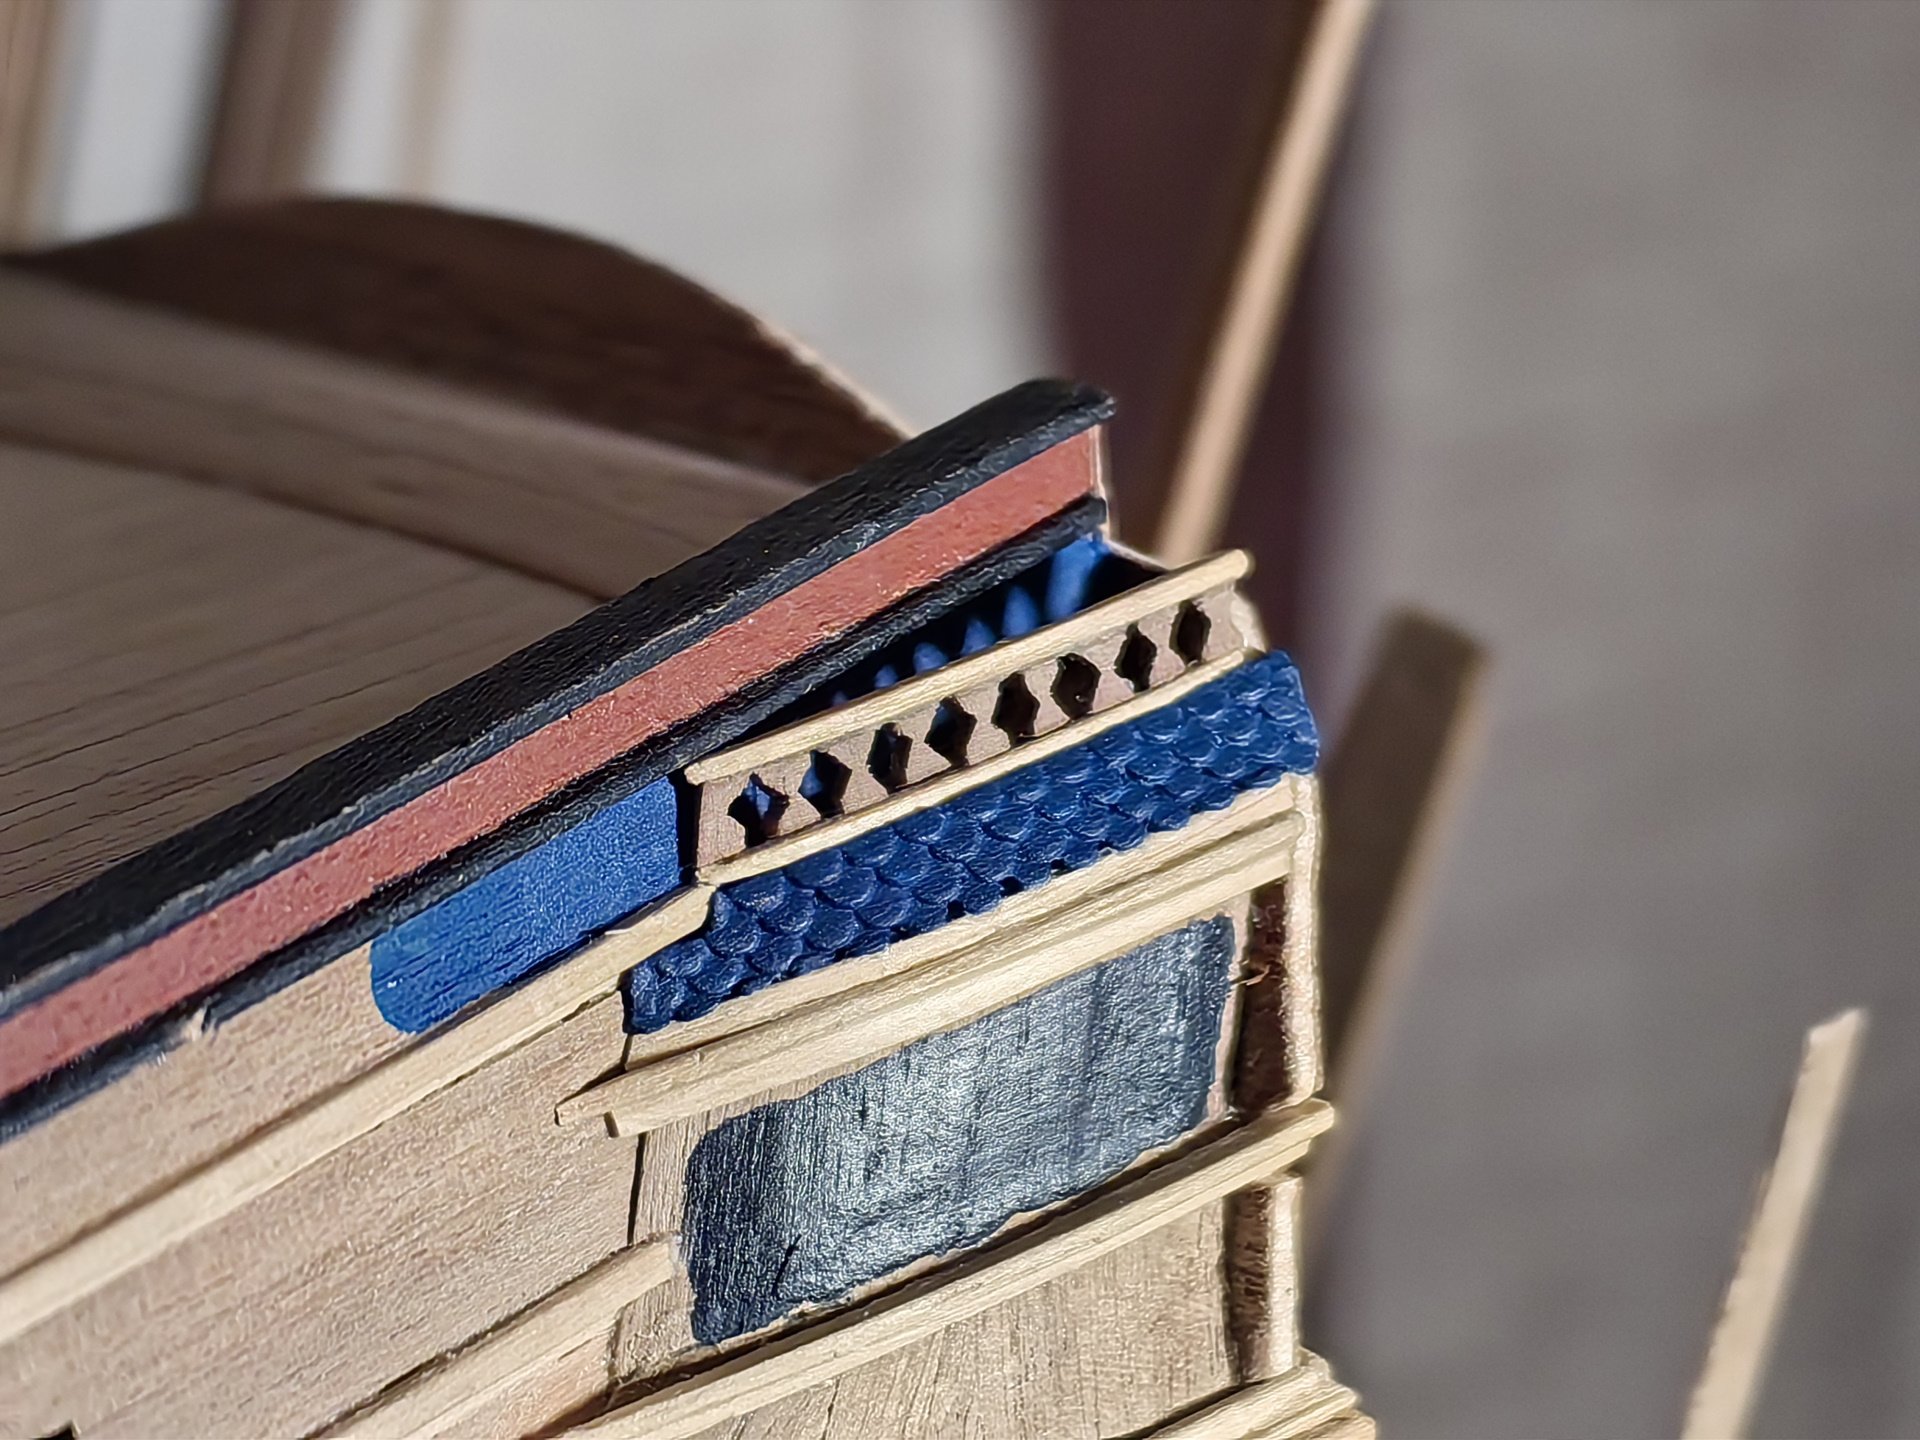
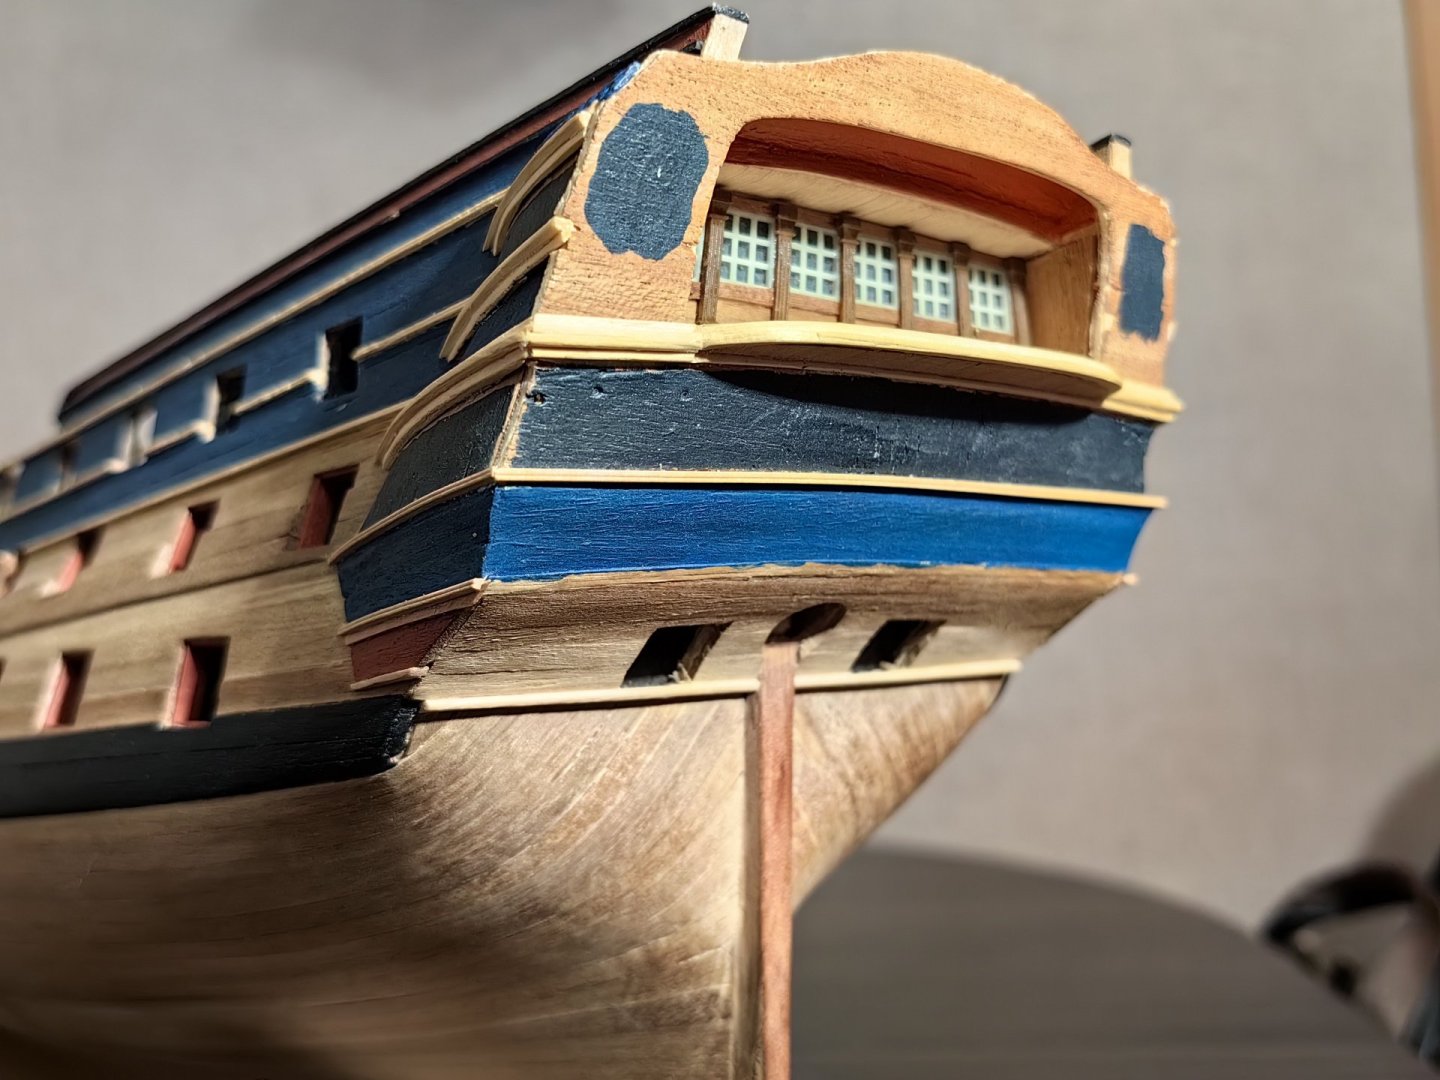
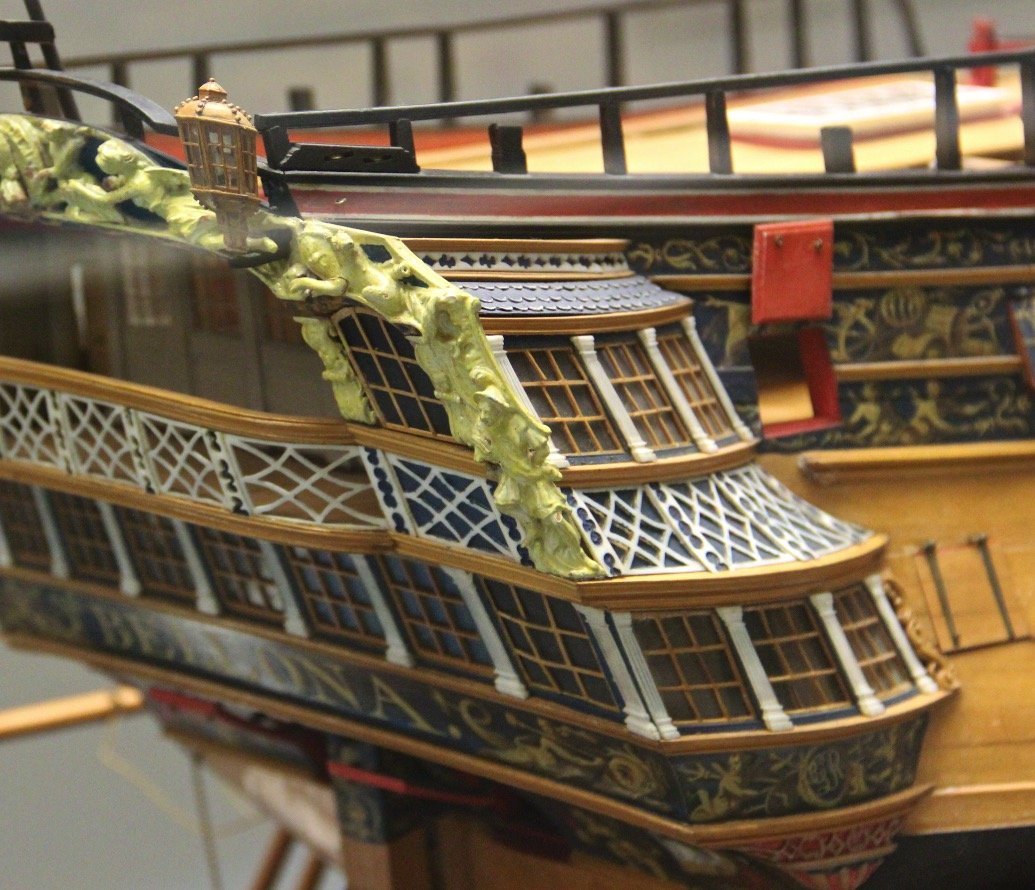
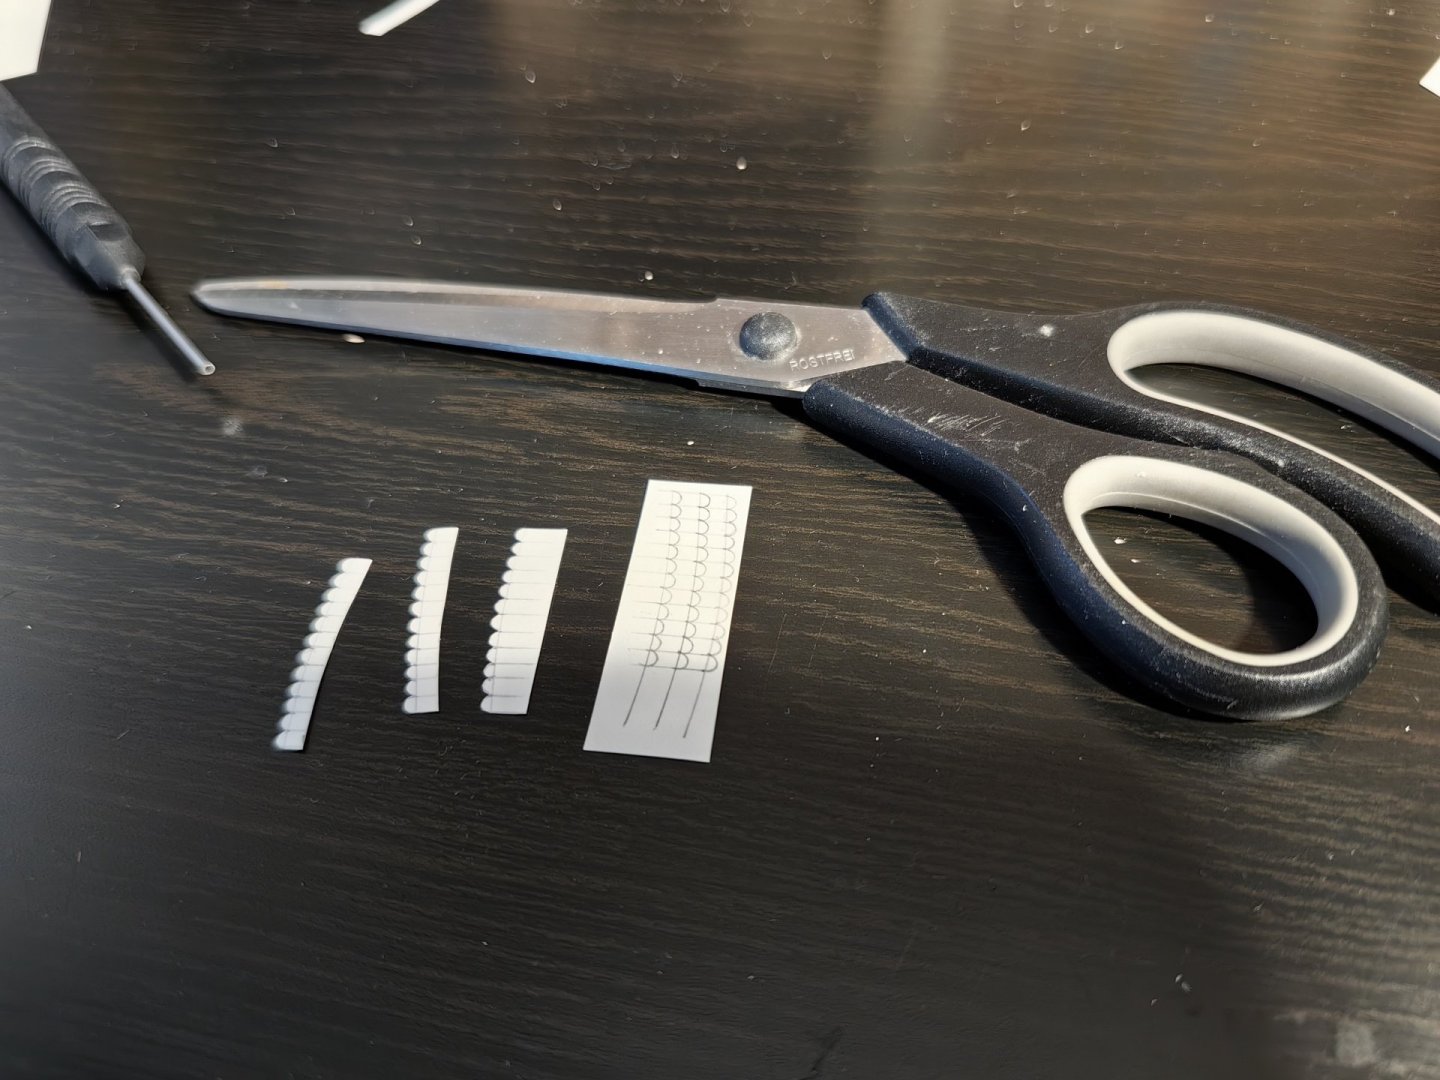
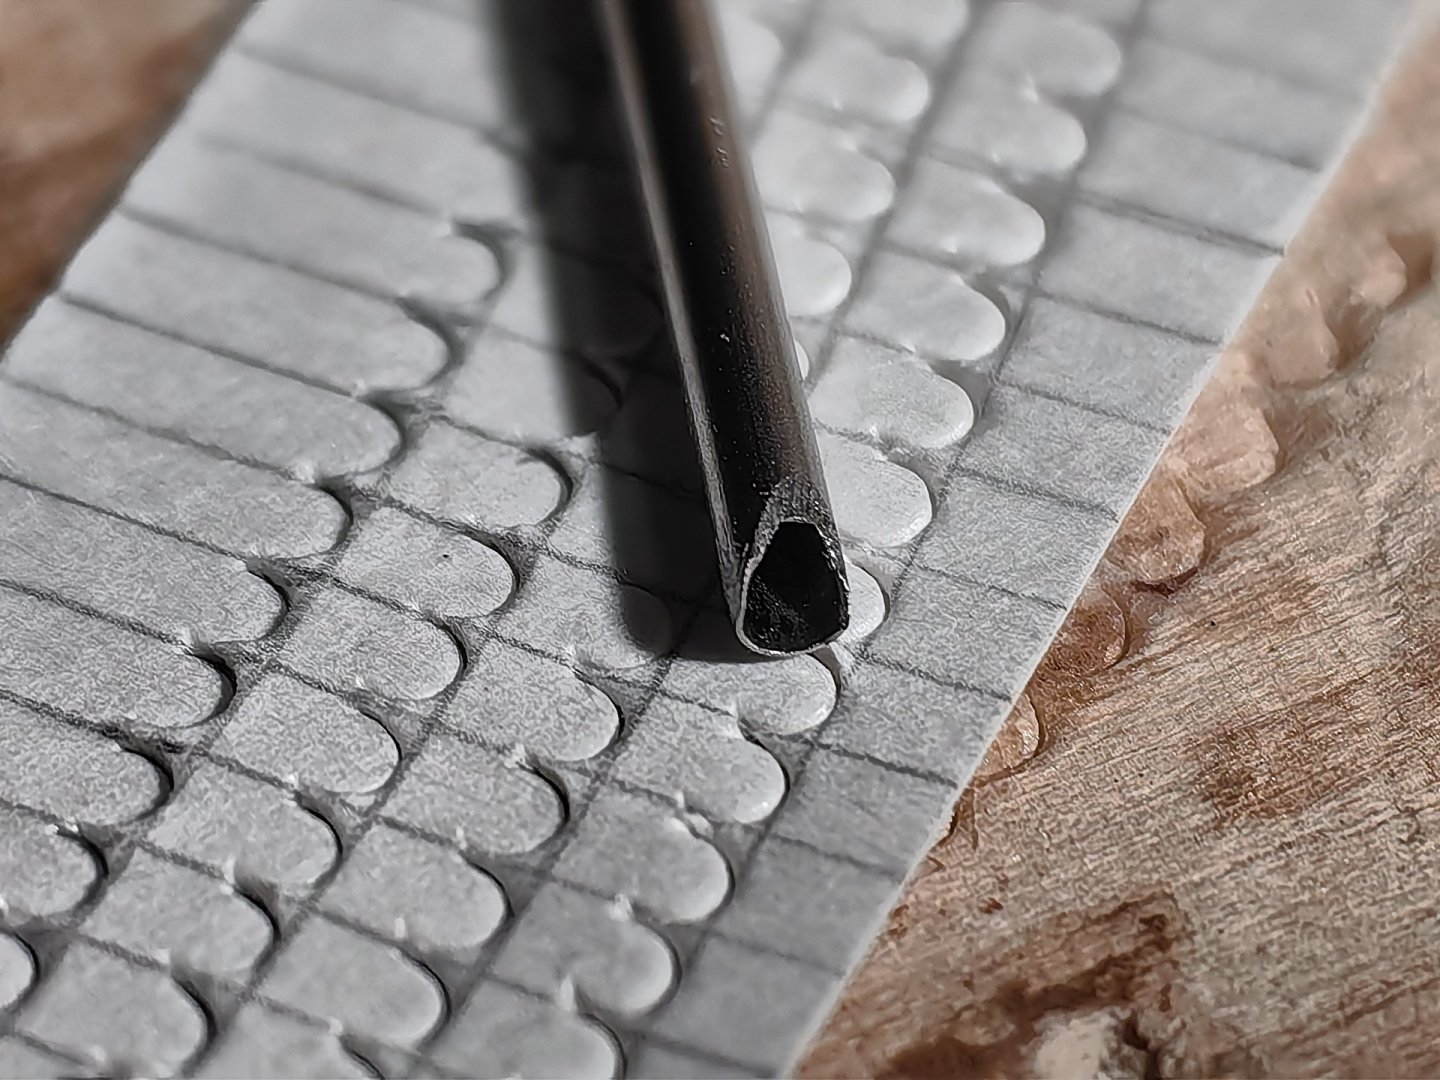
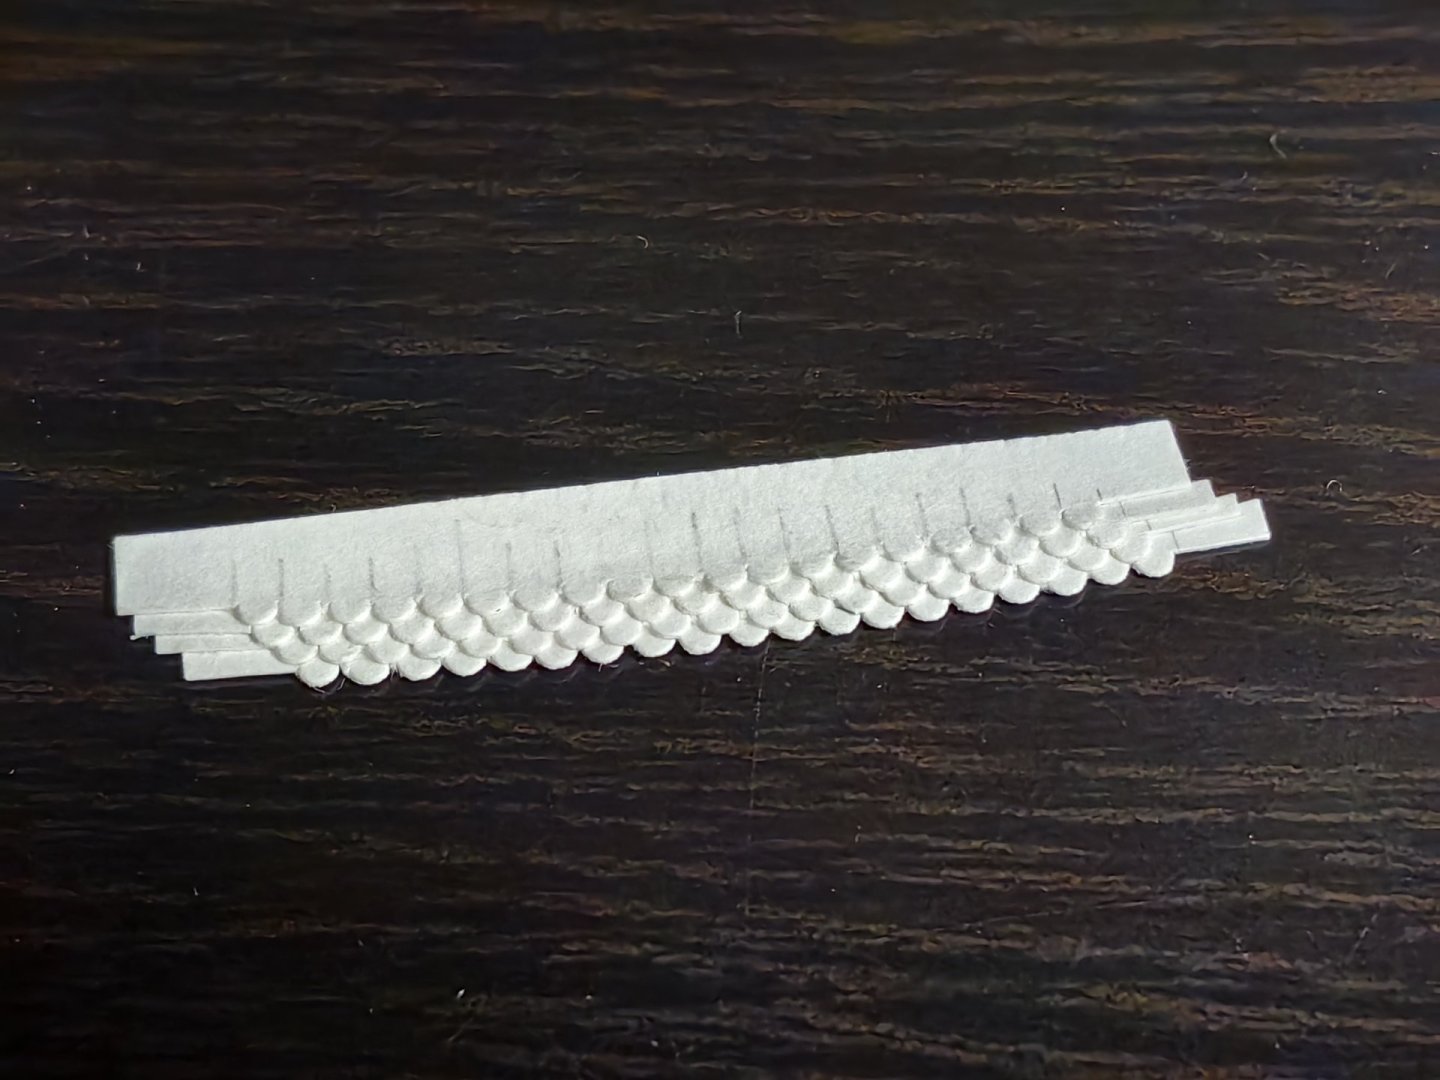
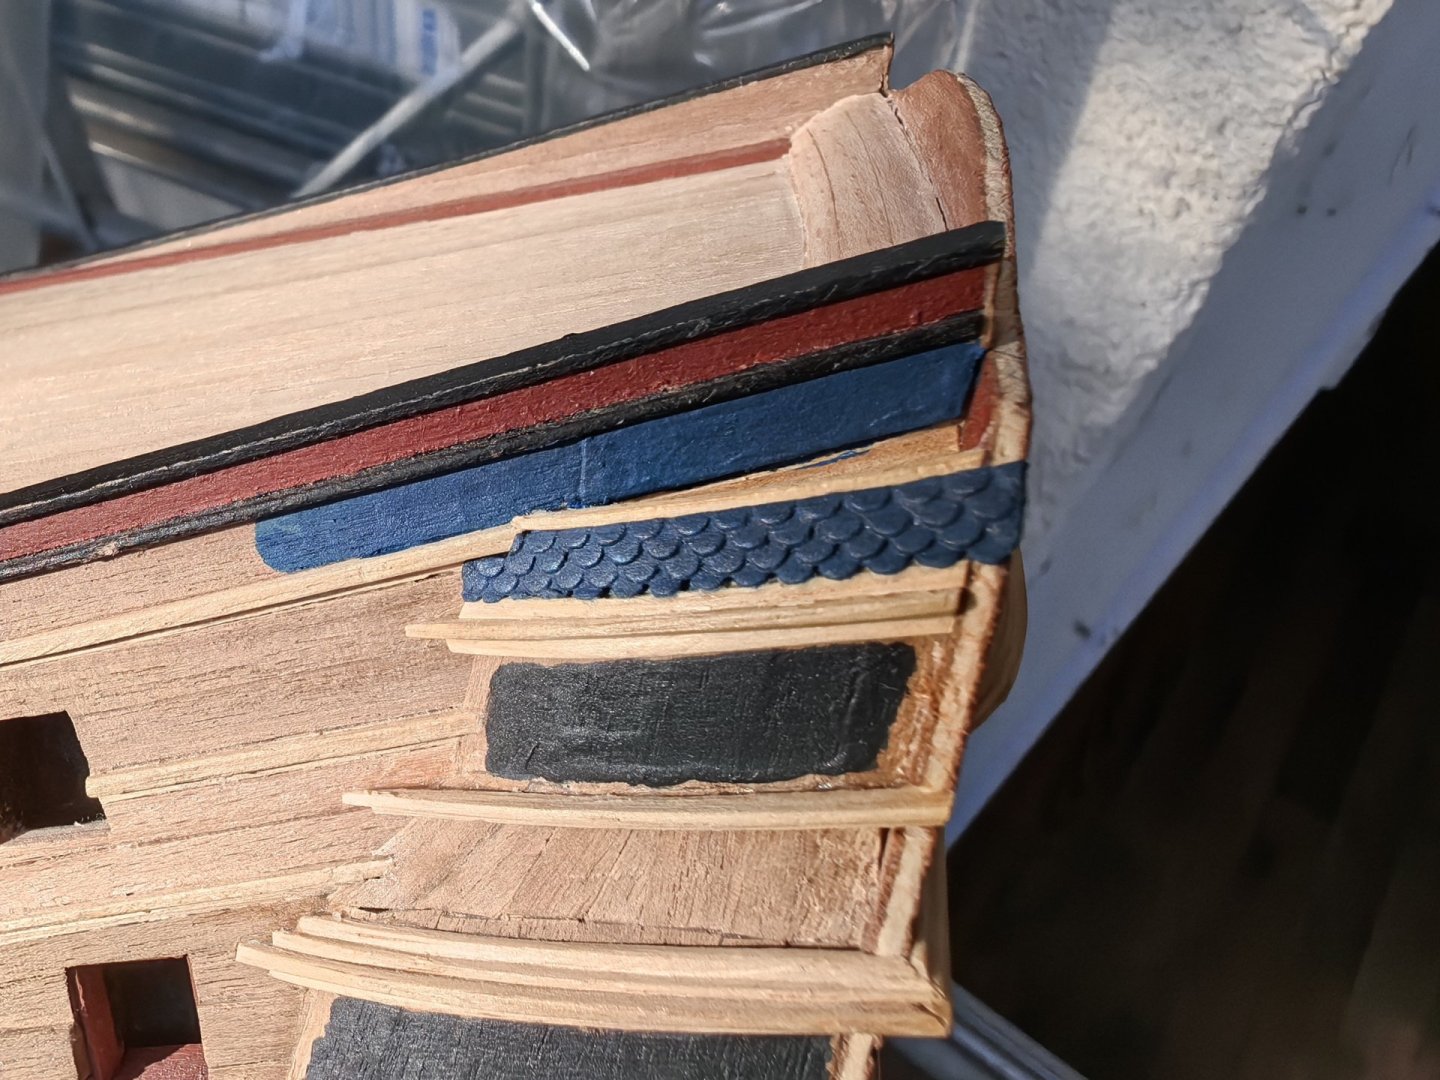
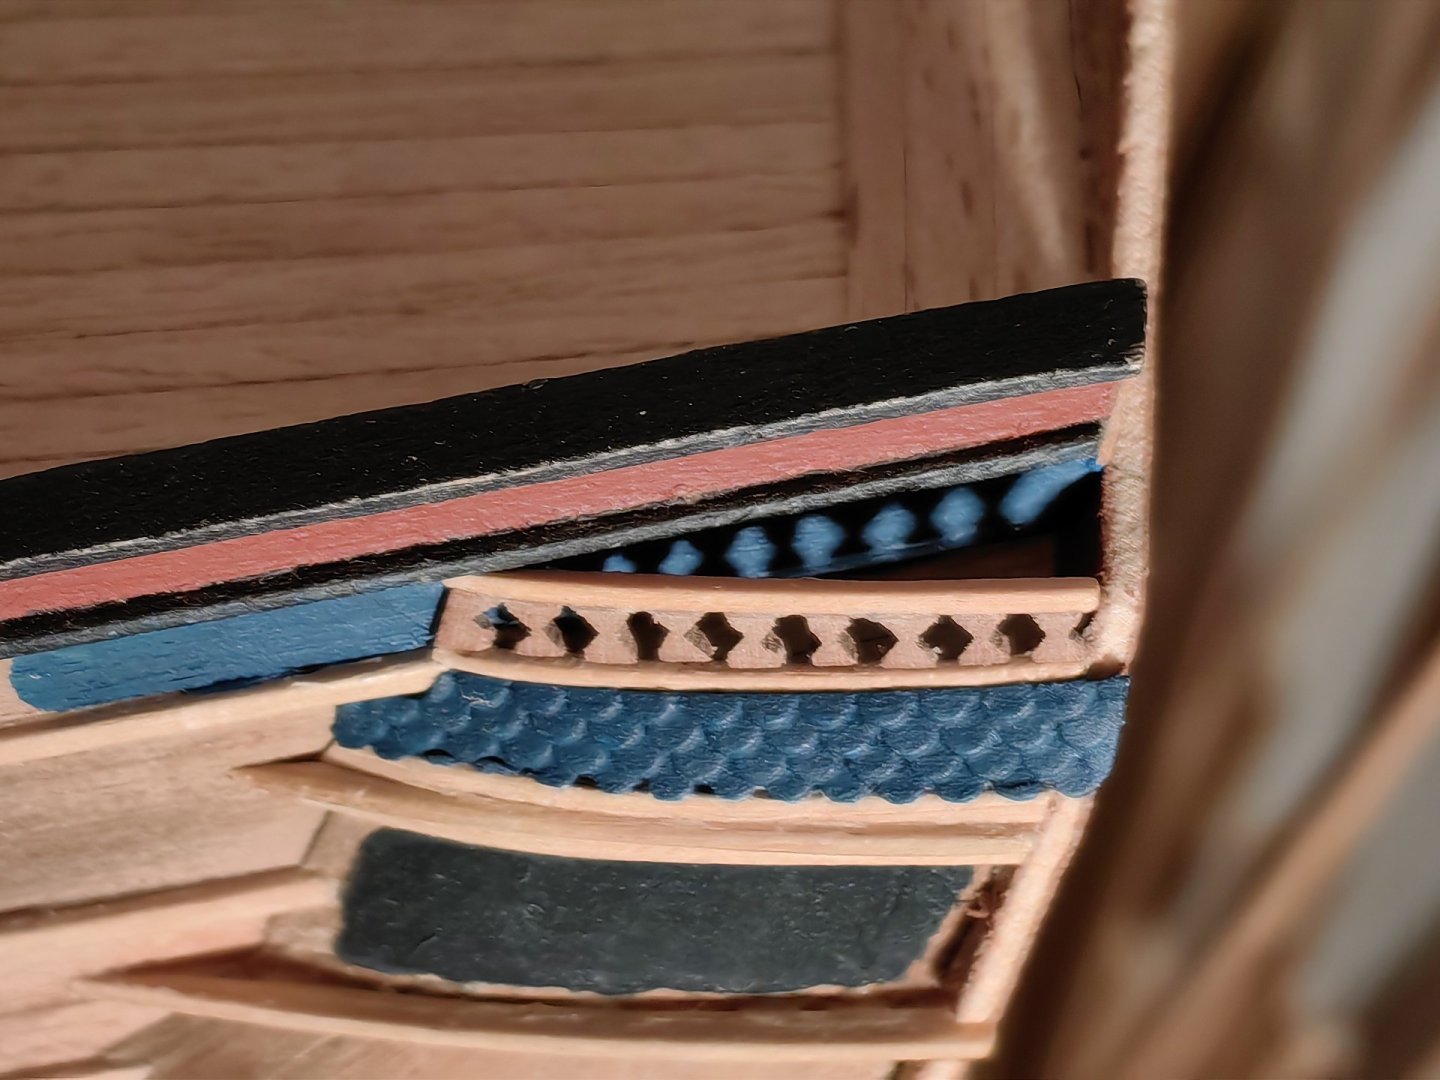
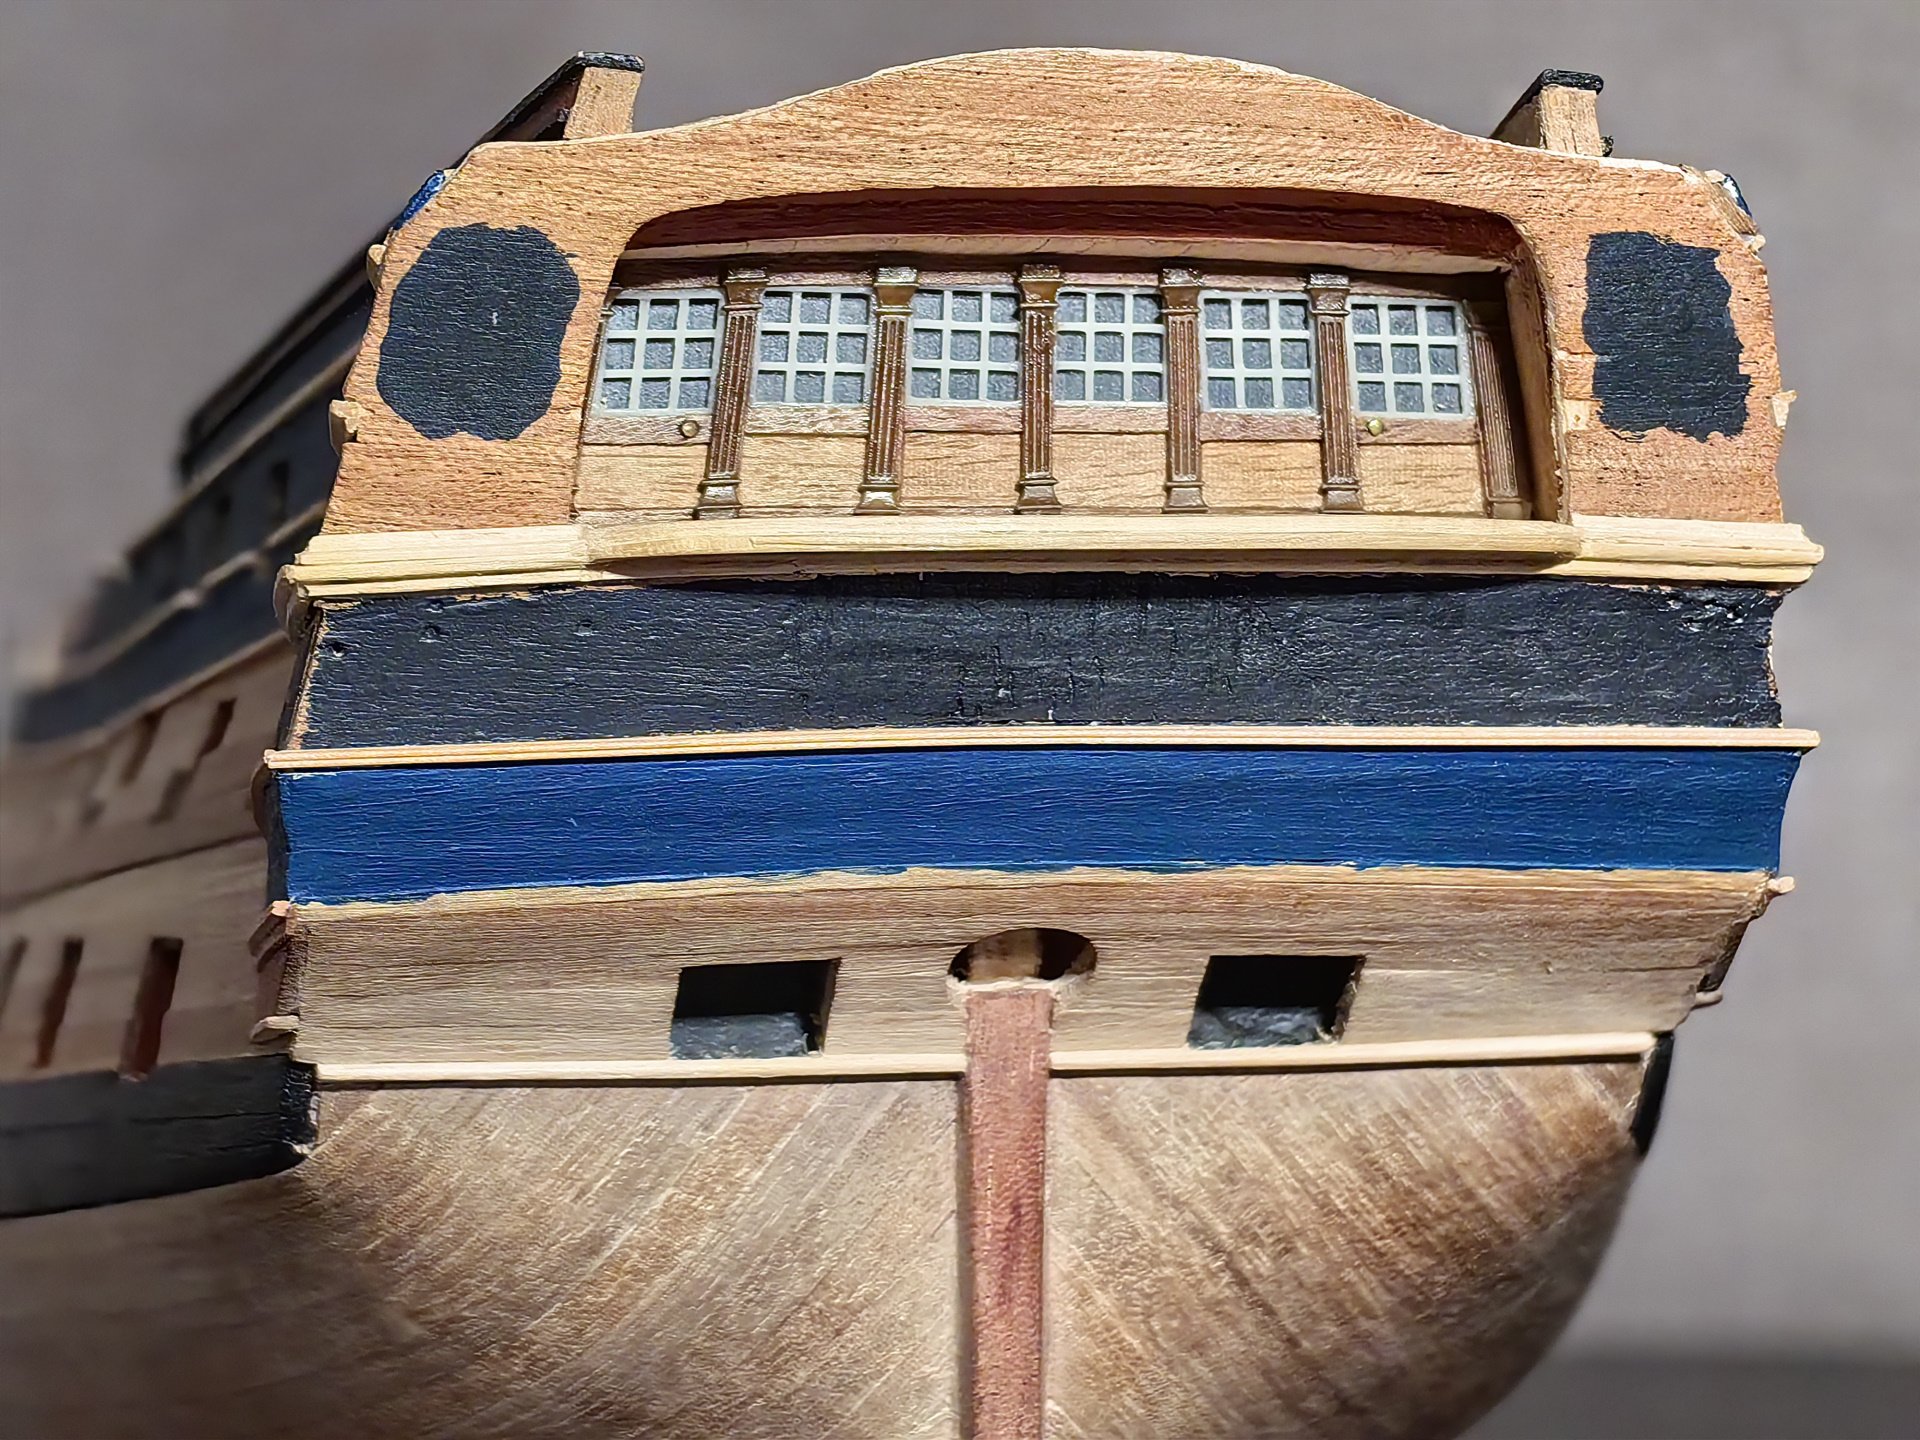
Hello everyone! I want to work on the stern gallery, install the windows, columns, decor, and fences. However, the many small and fragile details that make up this structure can be easily damaged during subsequent work. Therefore, I am postponing it for now. However, the decorative roof above the upper tier of the side balconies does not protrude much, and it can be completed now. Thomas Slade's model doesn't have these elements, but Charles Middleton's model, which is also referenced by Brian Lavery in his ship anatomy, and other similar models, features this element as if it were made from potsherds with semi-circular edges, but at a scale of 1:100, these curves are so small that I couldn't figure out how to create them. I tried to add a drawn element, but it looked poor. I need to create it in three dimensions. From the very beginning, I decided to use paper. It's quite thick, like for watercolors. To draw this image, I used a 2 mm steel tube, which I traced with a pencil and then cut out with scissors. However, I wasn't satisfied with the result. The image was too large, and it looked unnatural on the model. In the end, I simply ground the tube on a sandstone at an angle, like a syringe needle, and used it to cut out the desired ornament from the paper. This small detail included four layers of paper, which provided the necessary size and volume. After painting and installing it in place, I got what I needed. The upper railing of the side sinks on the Charles Middleton model is also decorated with openwork. Initially, I also made an imitation of it, then tried a drawing, but it was terrible, so I decided to make this railing out of wooden slats. It wasn't perfect, but it was definitely better than what it was. I will install it later, along with the rest of the stern gallery elements.


-
Hi, Nearshore! When I read the posts of fellow modelers, I always try to imagine this or that master sitting at a table doing his favorite hobby. What does he do, what instrument does he use, what kind of surroundings are around… Therefore, the description of your workplace with the history of its development is very interesting, and the photos allow you to see it firsthand. You have a very cozy place and everything you need is always at hand, which is great. It is very interesting for me to observe the process of building your model, and I constantly refer to photographs of various components and details that I also have to make. One of the latter, the one that was made from the quarterdeck towards the forecastle with rows of standing guns, gave a sense of presence on a real ship. It's a very pleasant feeling. Since I've only been building my model for about a year, and even less on this forum, I haven't read all your posts in detail, but I've looked at all the photos. The work is neat and beautiful! I want to wish you good luck and progress in this interesting business! Yours sincerely, Frecap


.jpg.0d60c504a15a1f9c599e17bcaa9fd189.jpg)