Nelsons Dockyard
-
Posts
30 -
Joined
-
Last visited
Recent Profile Visitors
299 profile views


-
Answer to lack of planks. The instructions don't say what size planks to useso I can only assume other builders used 5mm planks and not 7mm. Thinking about it, this would give a more gradual curve around the knees.
-
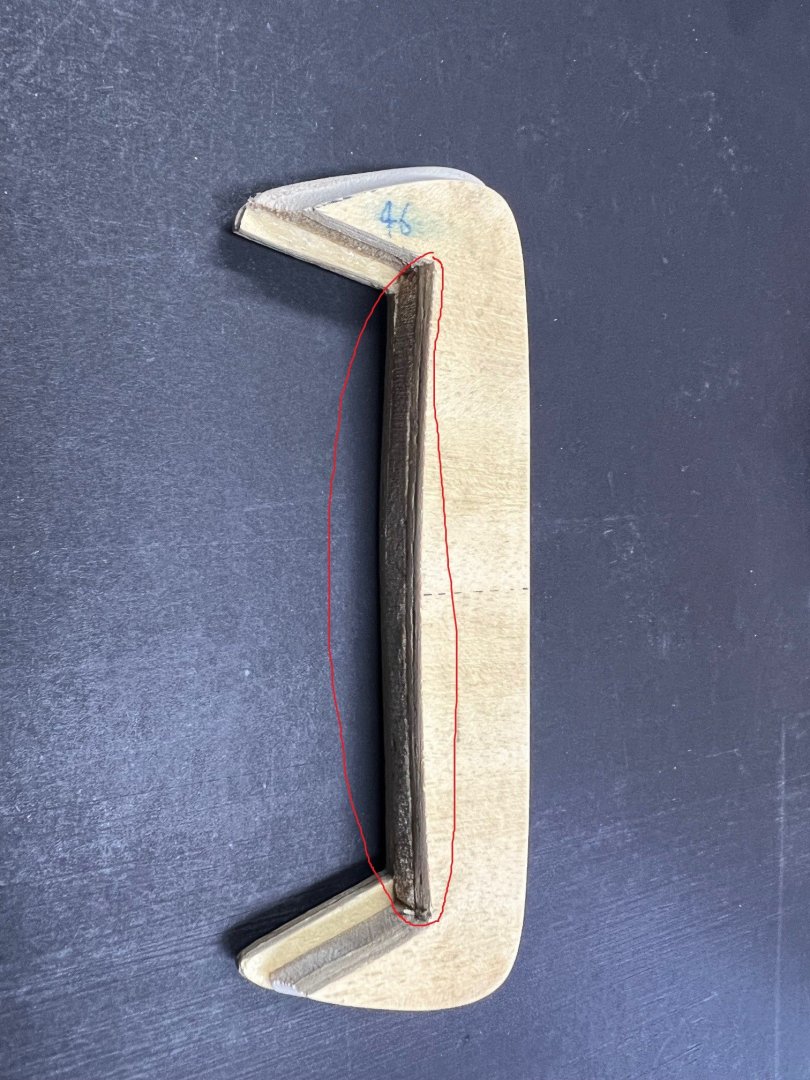
I have also made an error in fitting the balsa centre #47 and top #48 flush to the back of #46. The frame #2 is angled, therefore these parts need to be offset to retain that angle. Will have to remove the whole section, take it apart and rebuild. Obvious now but damn these instructions. Before I continue and try to see where it went wrong, I will carry on with planking the hull.
-
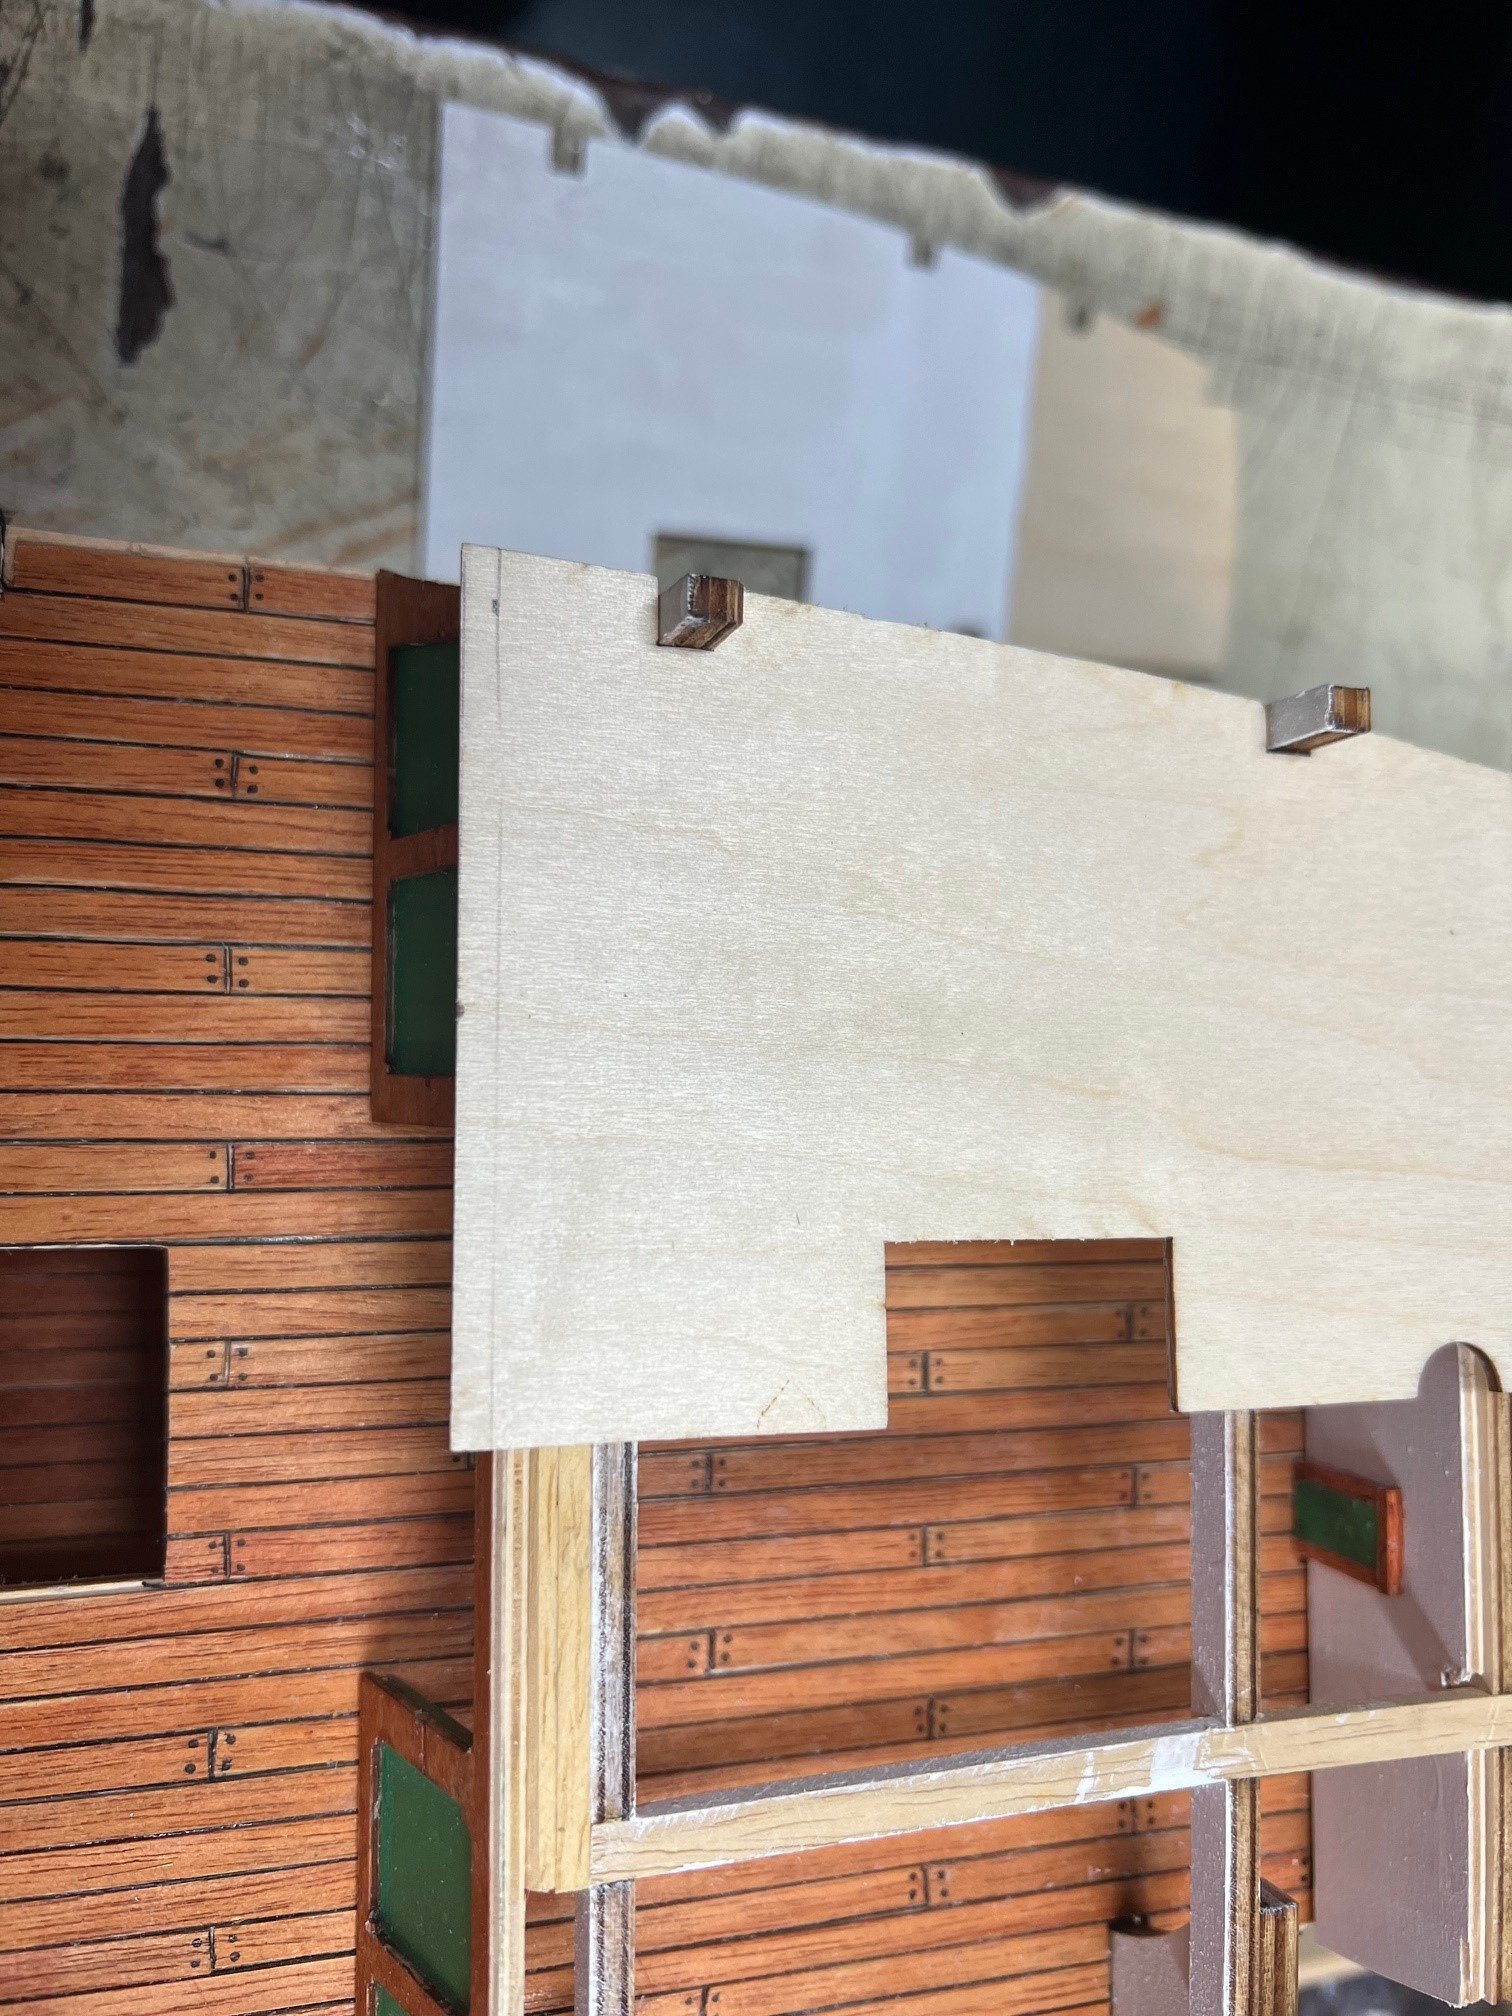
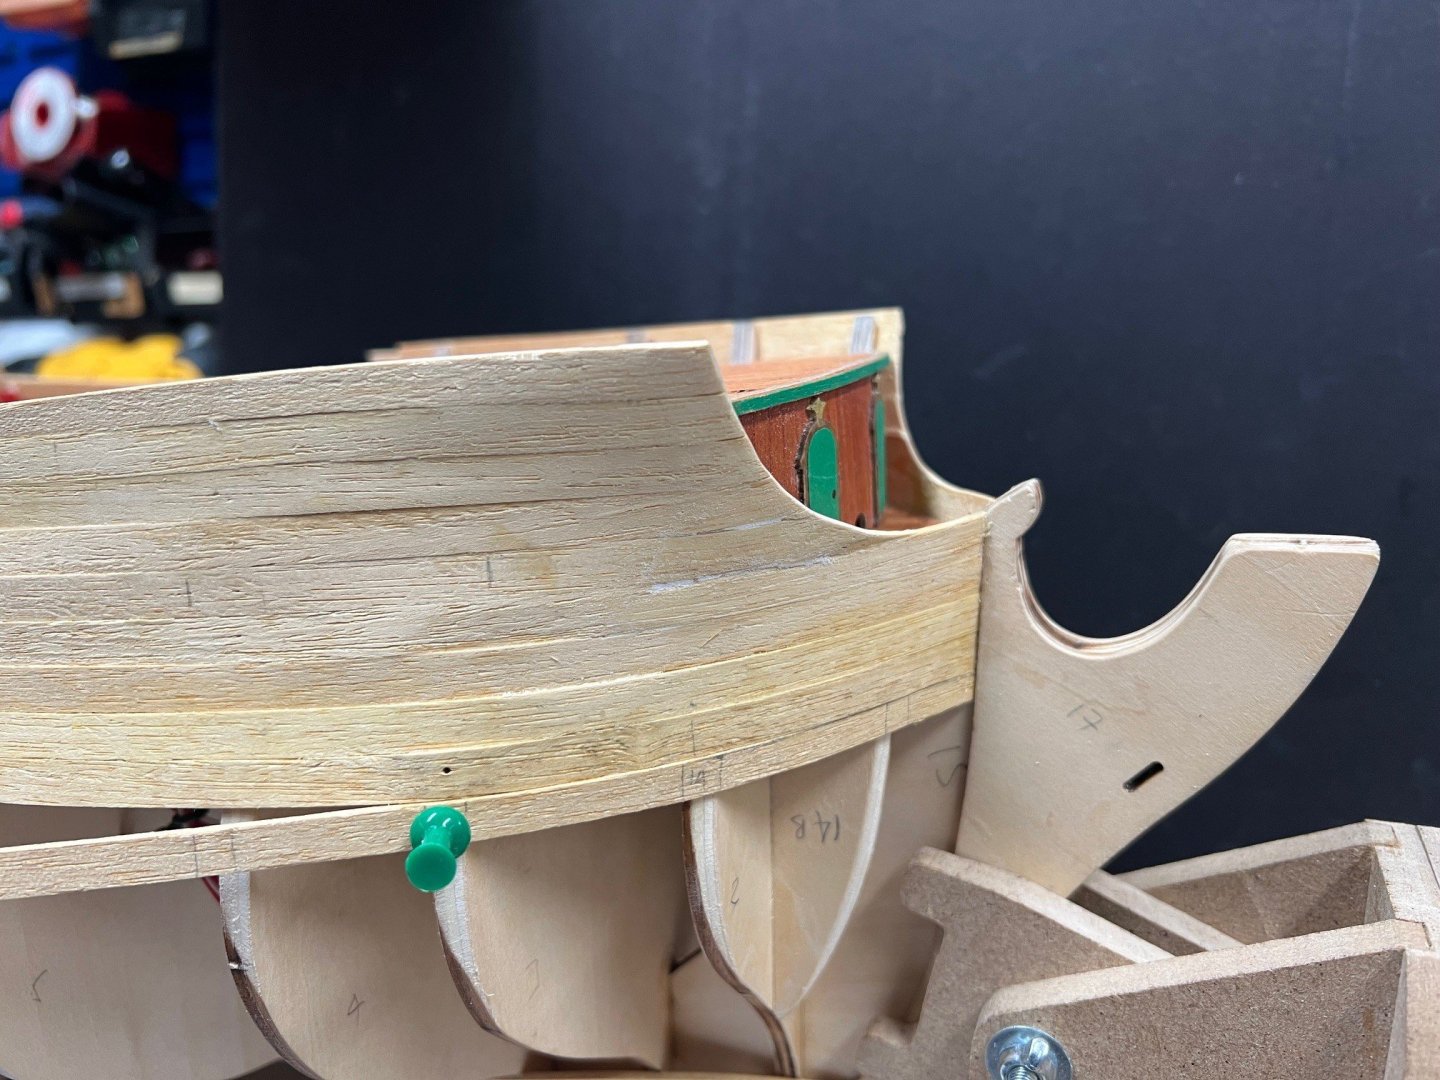
Have hit a problem. The planking should meet the galley board on the edge, not 1/3rd down. By leaving it like this, I am guessing it will make fitting the window frames impossible. Looking at other build logs, there are 6 full planks and the part plank filler have been used. I only have 4 and a filler. Without starting the planking lower (which is wrong as the knees give you the start point) or adding more to the top beyond the knee edges (which will raise the board too high and make fitting the rest of the rear galley impossible), I can’t see how this can be achieved.
-
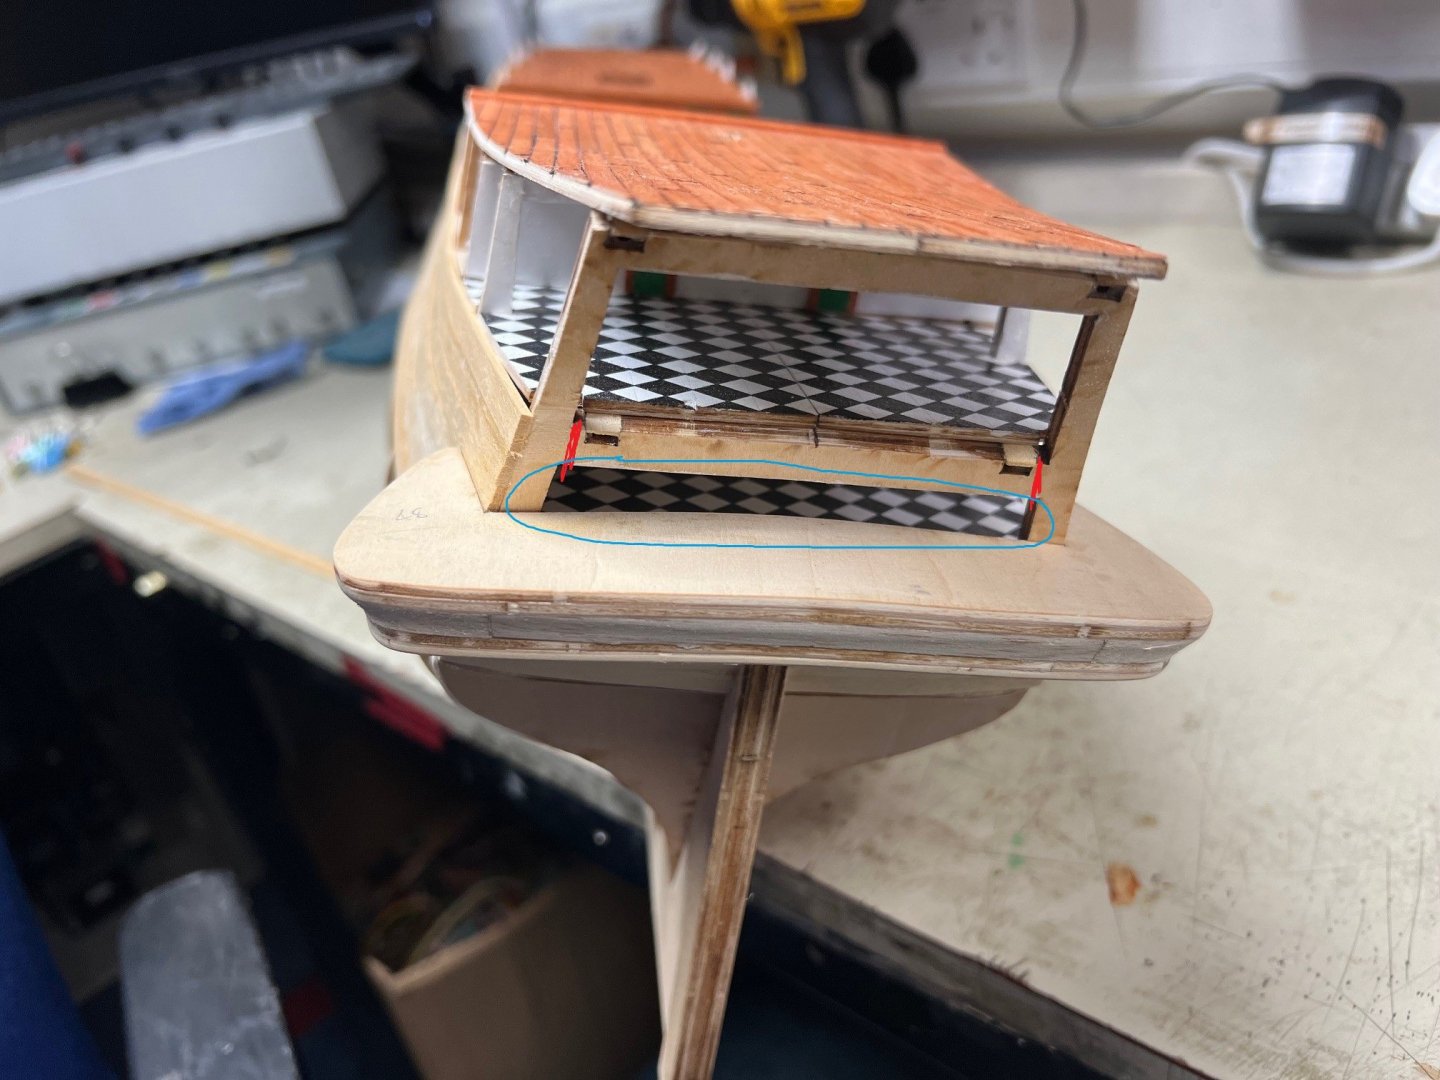
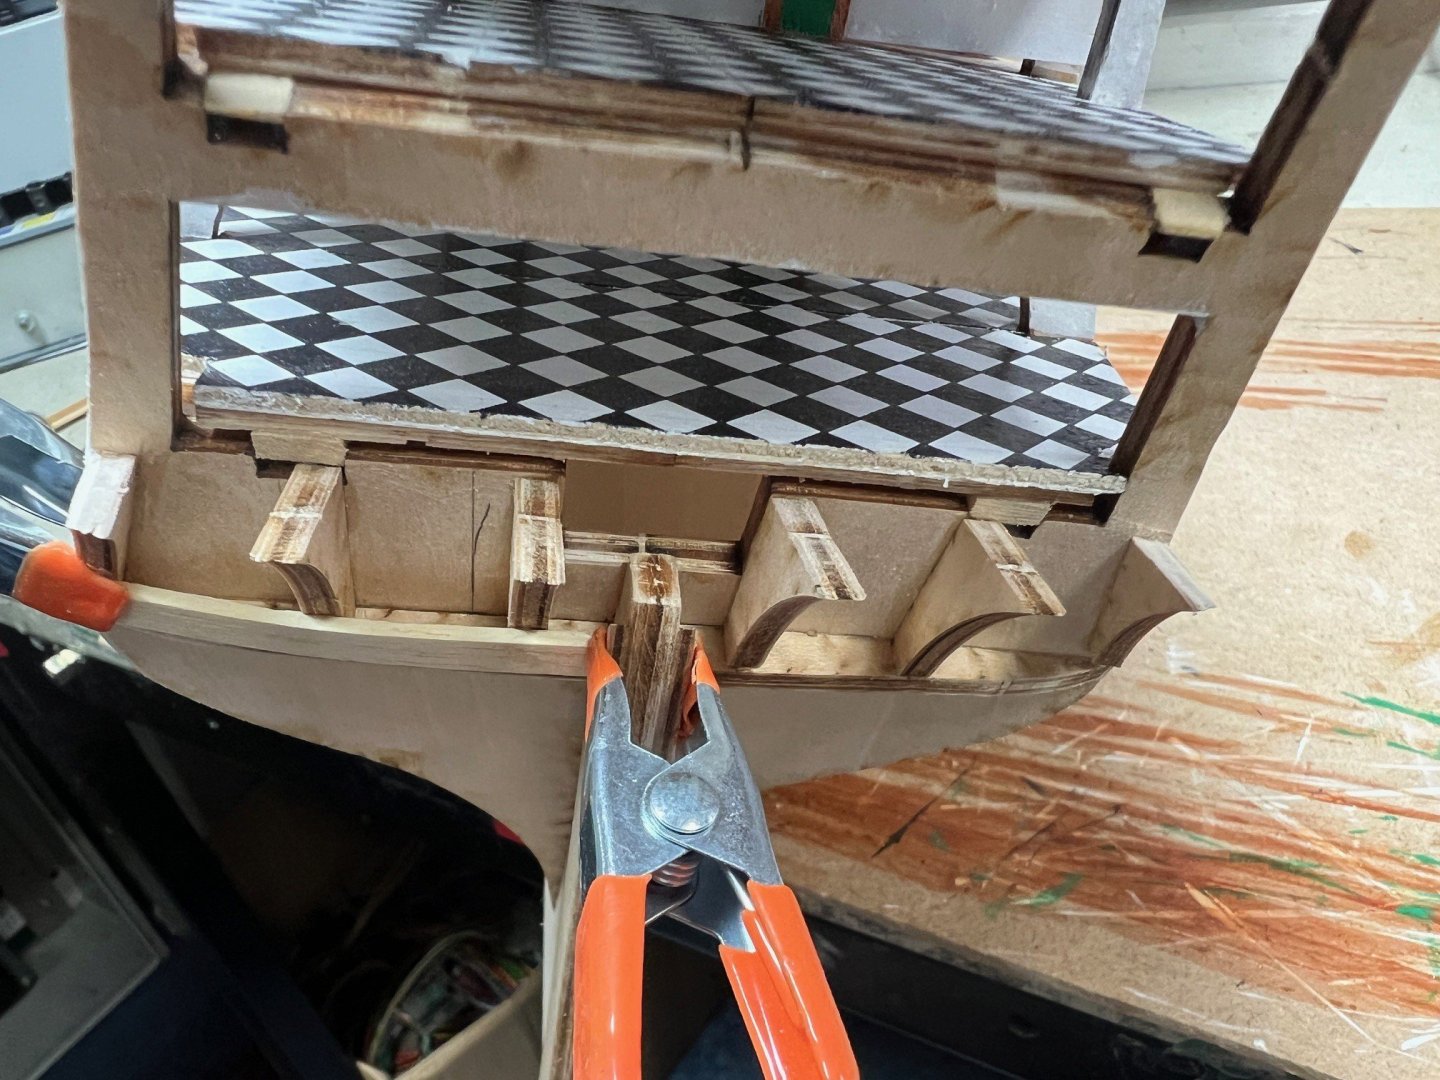
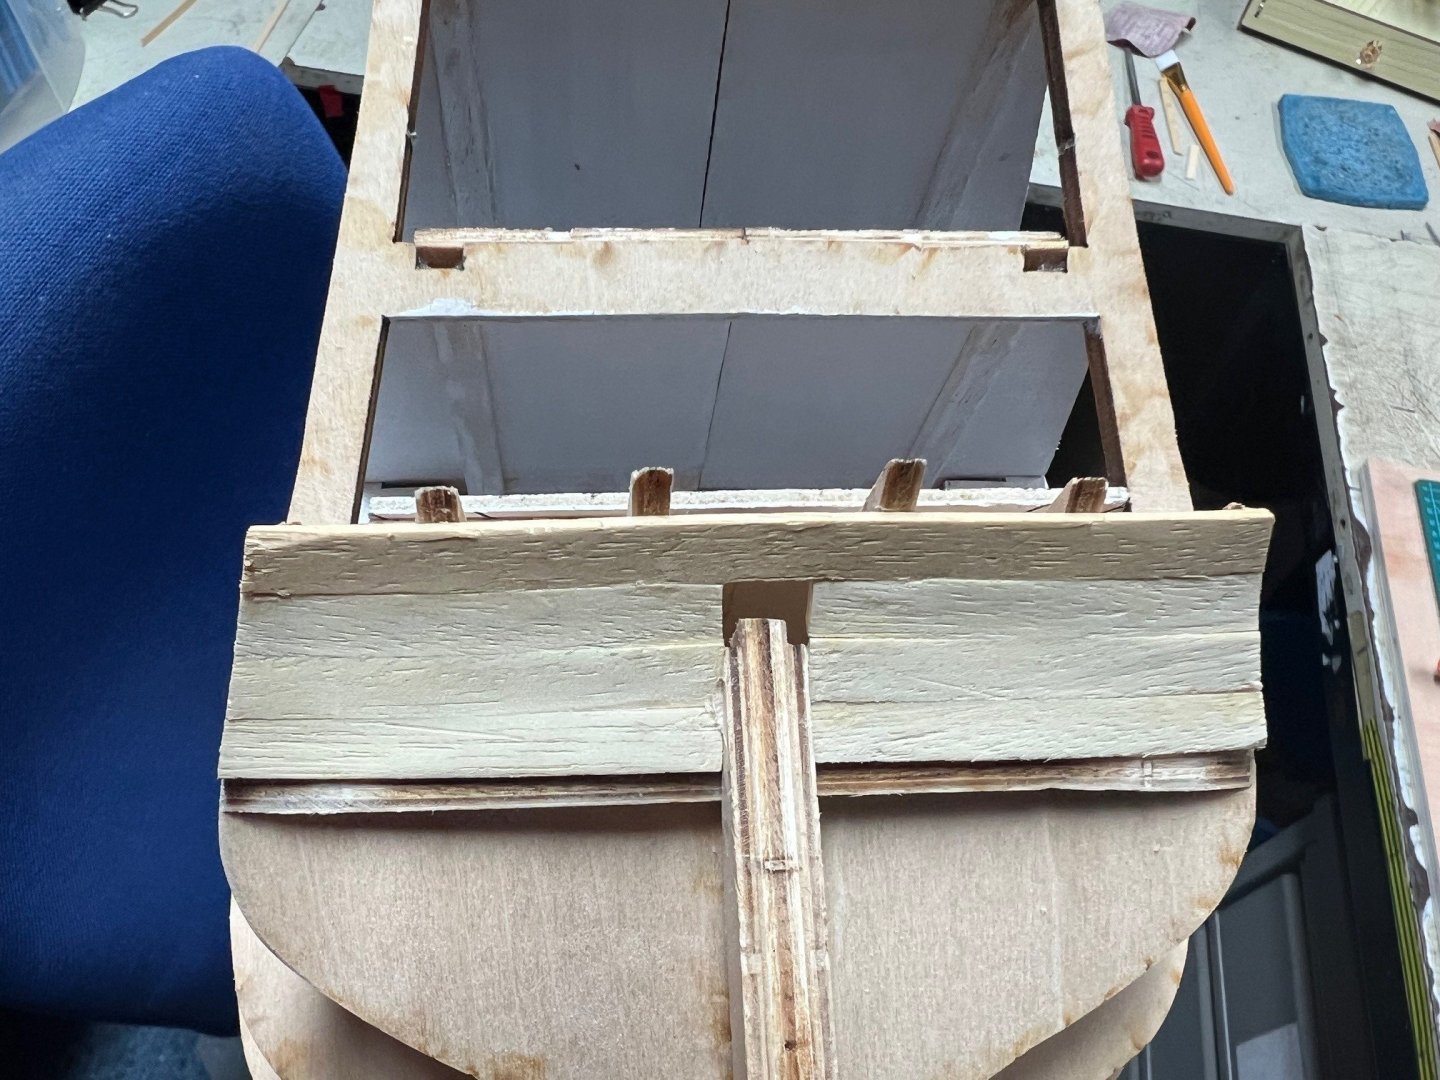
Fitted the galley board to the rear and completed the planking. Shaped the last plank to meet the Galley board. Not brilliant, but should be ok with some filler and a bit of sanding. The gap through to the lower cabin is very small and as I want to light this cabin up, I may need to remove the support between the red mark. Will use a small metal rod to keep some support there.

-
 ccoyle reacted to a post in a topic:
Norske Love by Nelsons Dockyard - Billing Boats - 1:75
ccoyle reacted to a post in a topic:
Norske Love by Nelsons Dockyard - Billing Boats - 1:75
-
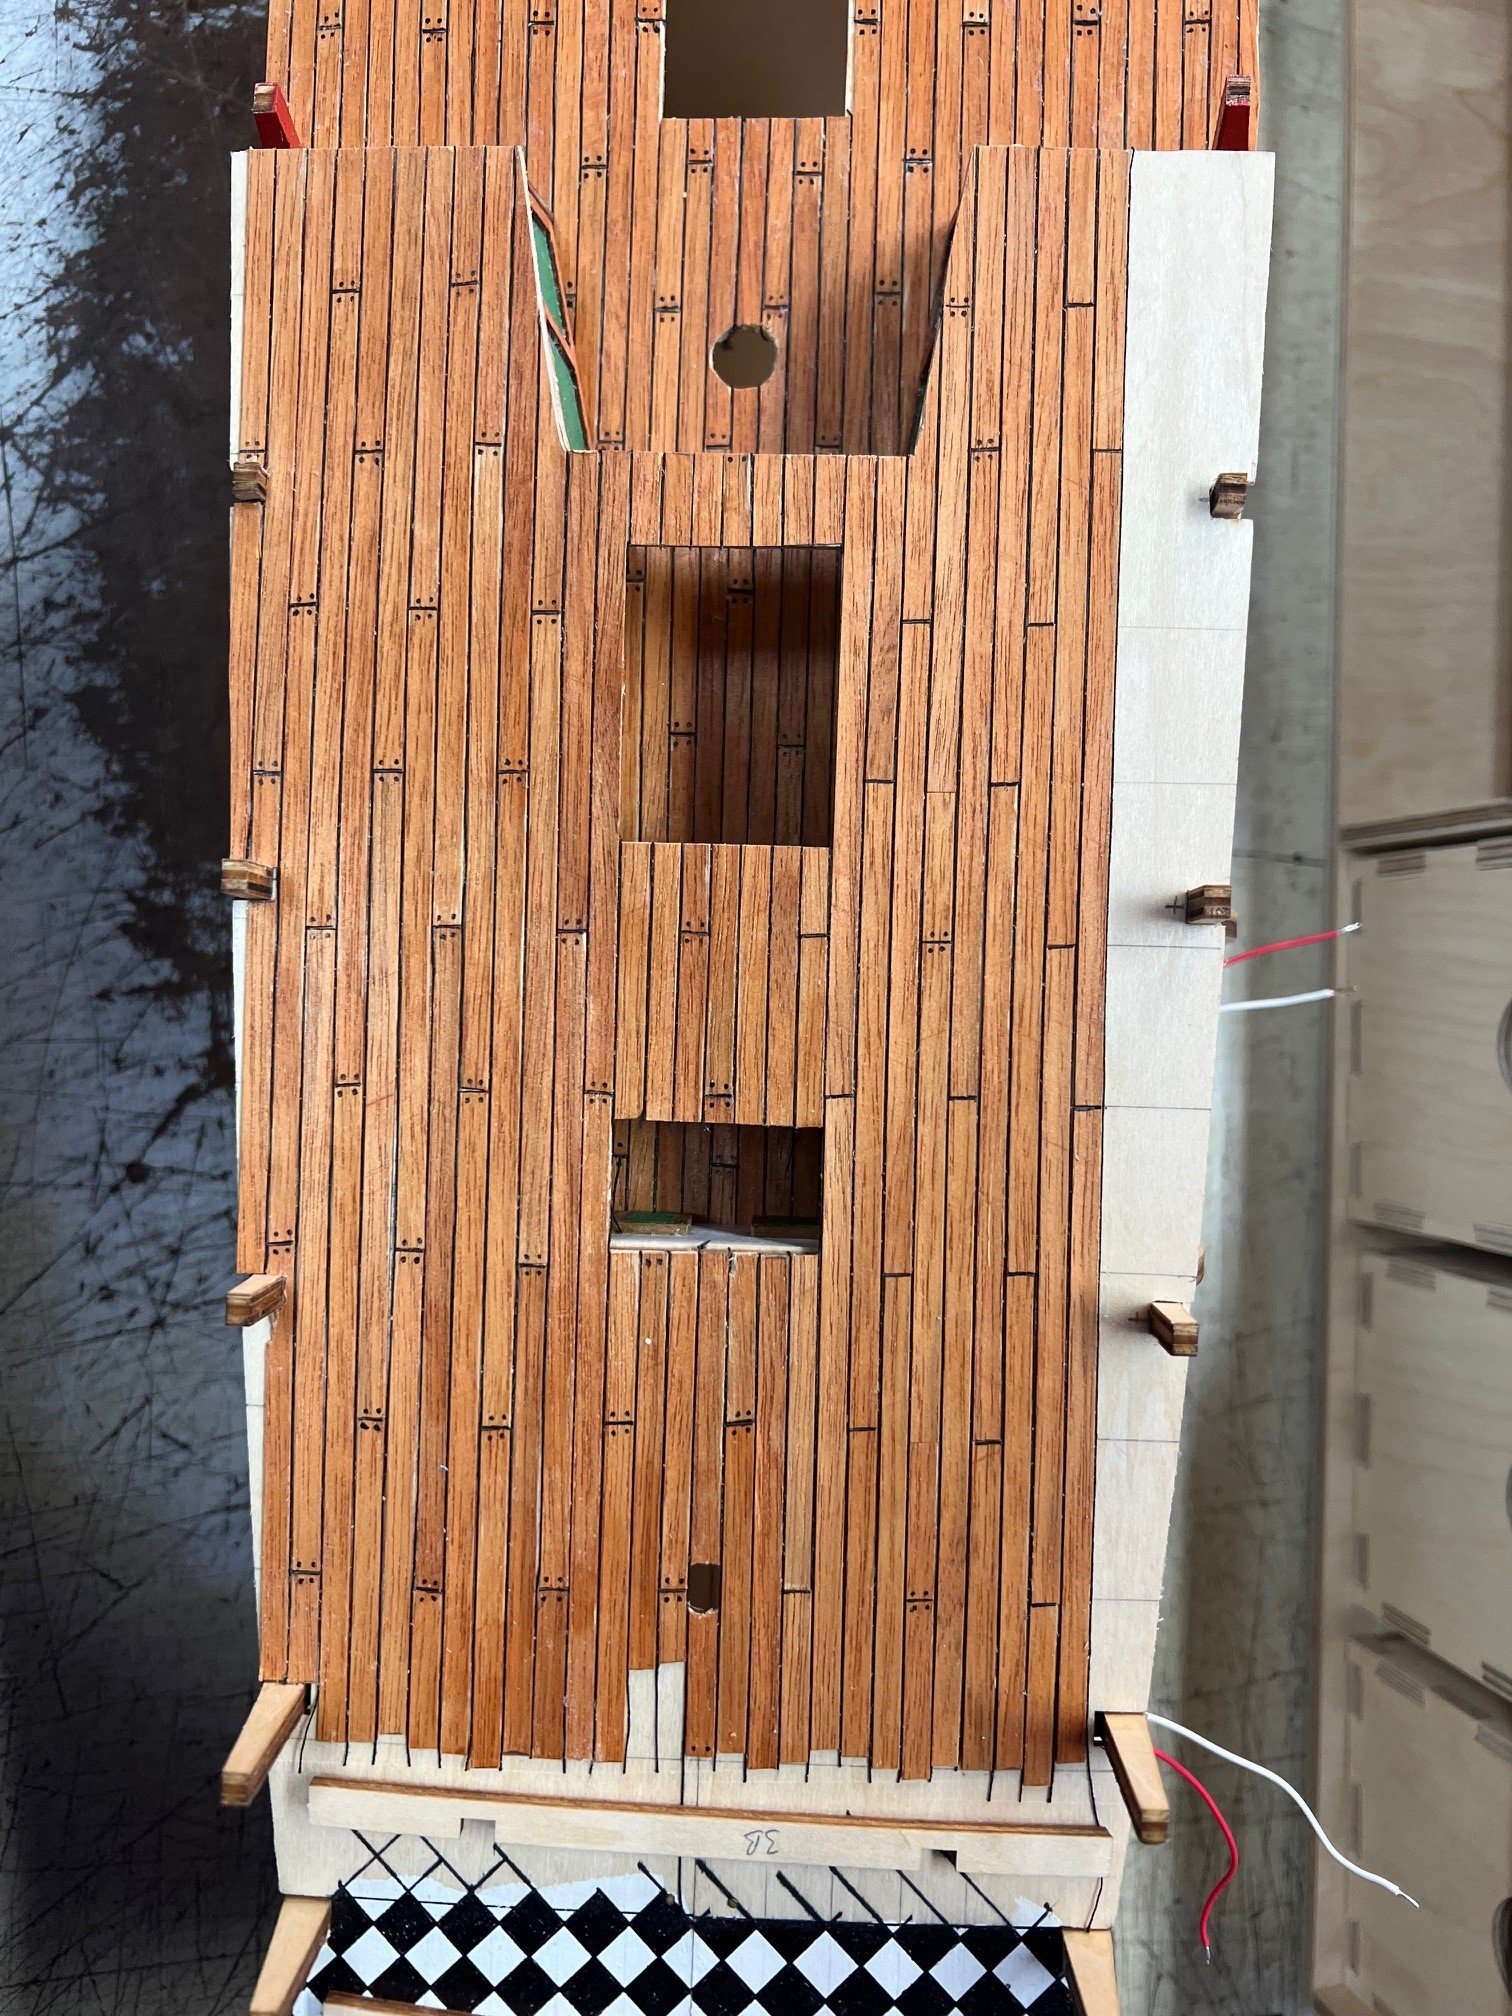
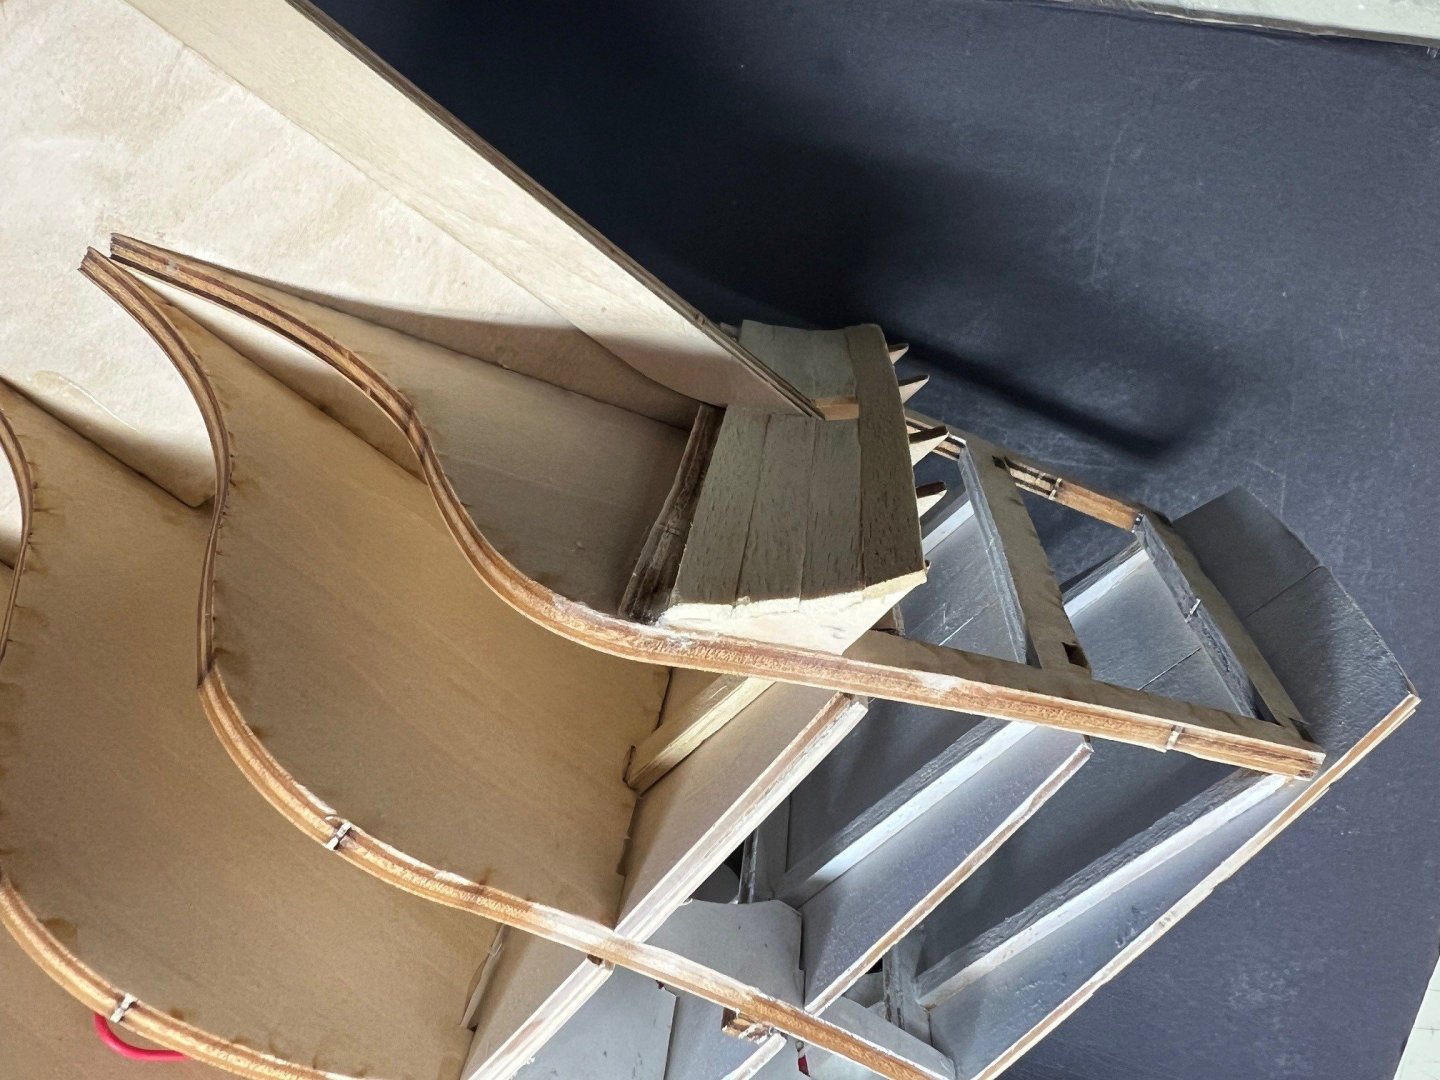
Moving on to planking the hull from the lower deck upwards. Fairly straightforward but needed to bend the front section in multiple directions. Didn’t quite get it right so used a small fillet rather than over bend. Shaped the front using the template supplied in the drawings.


-
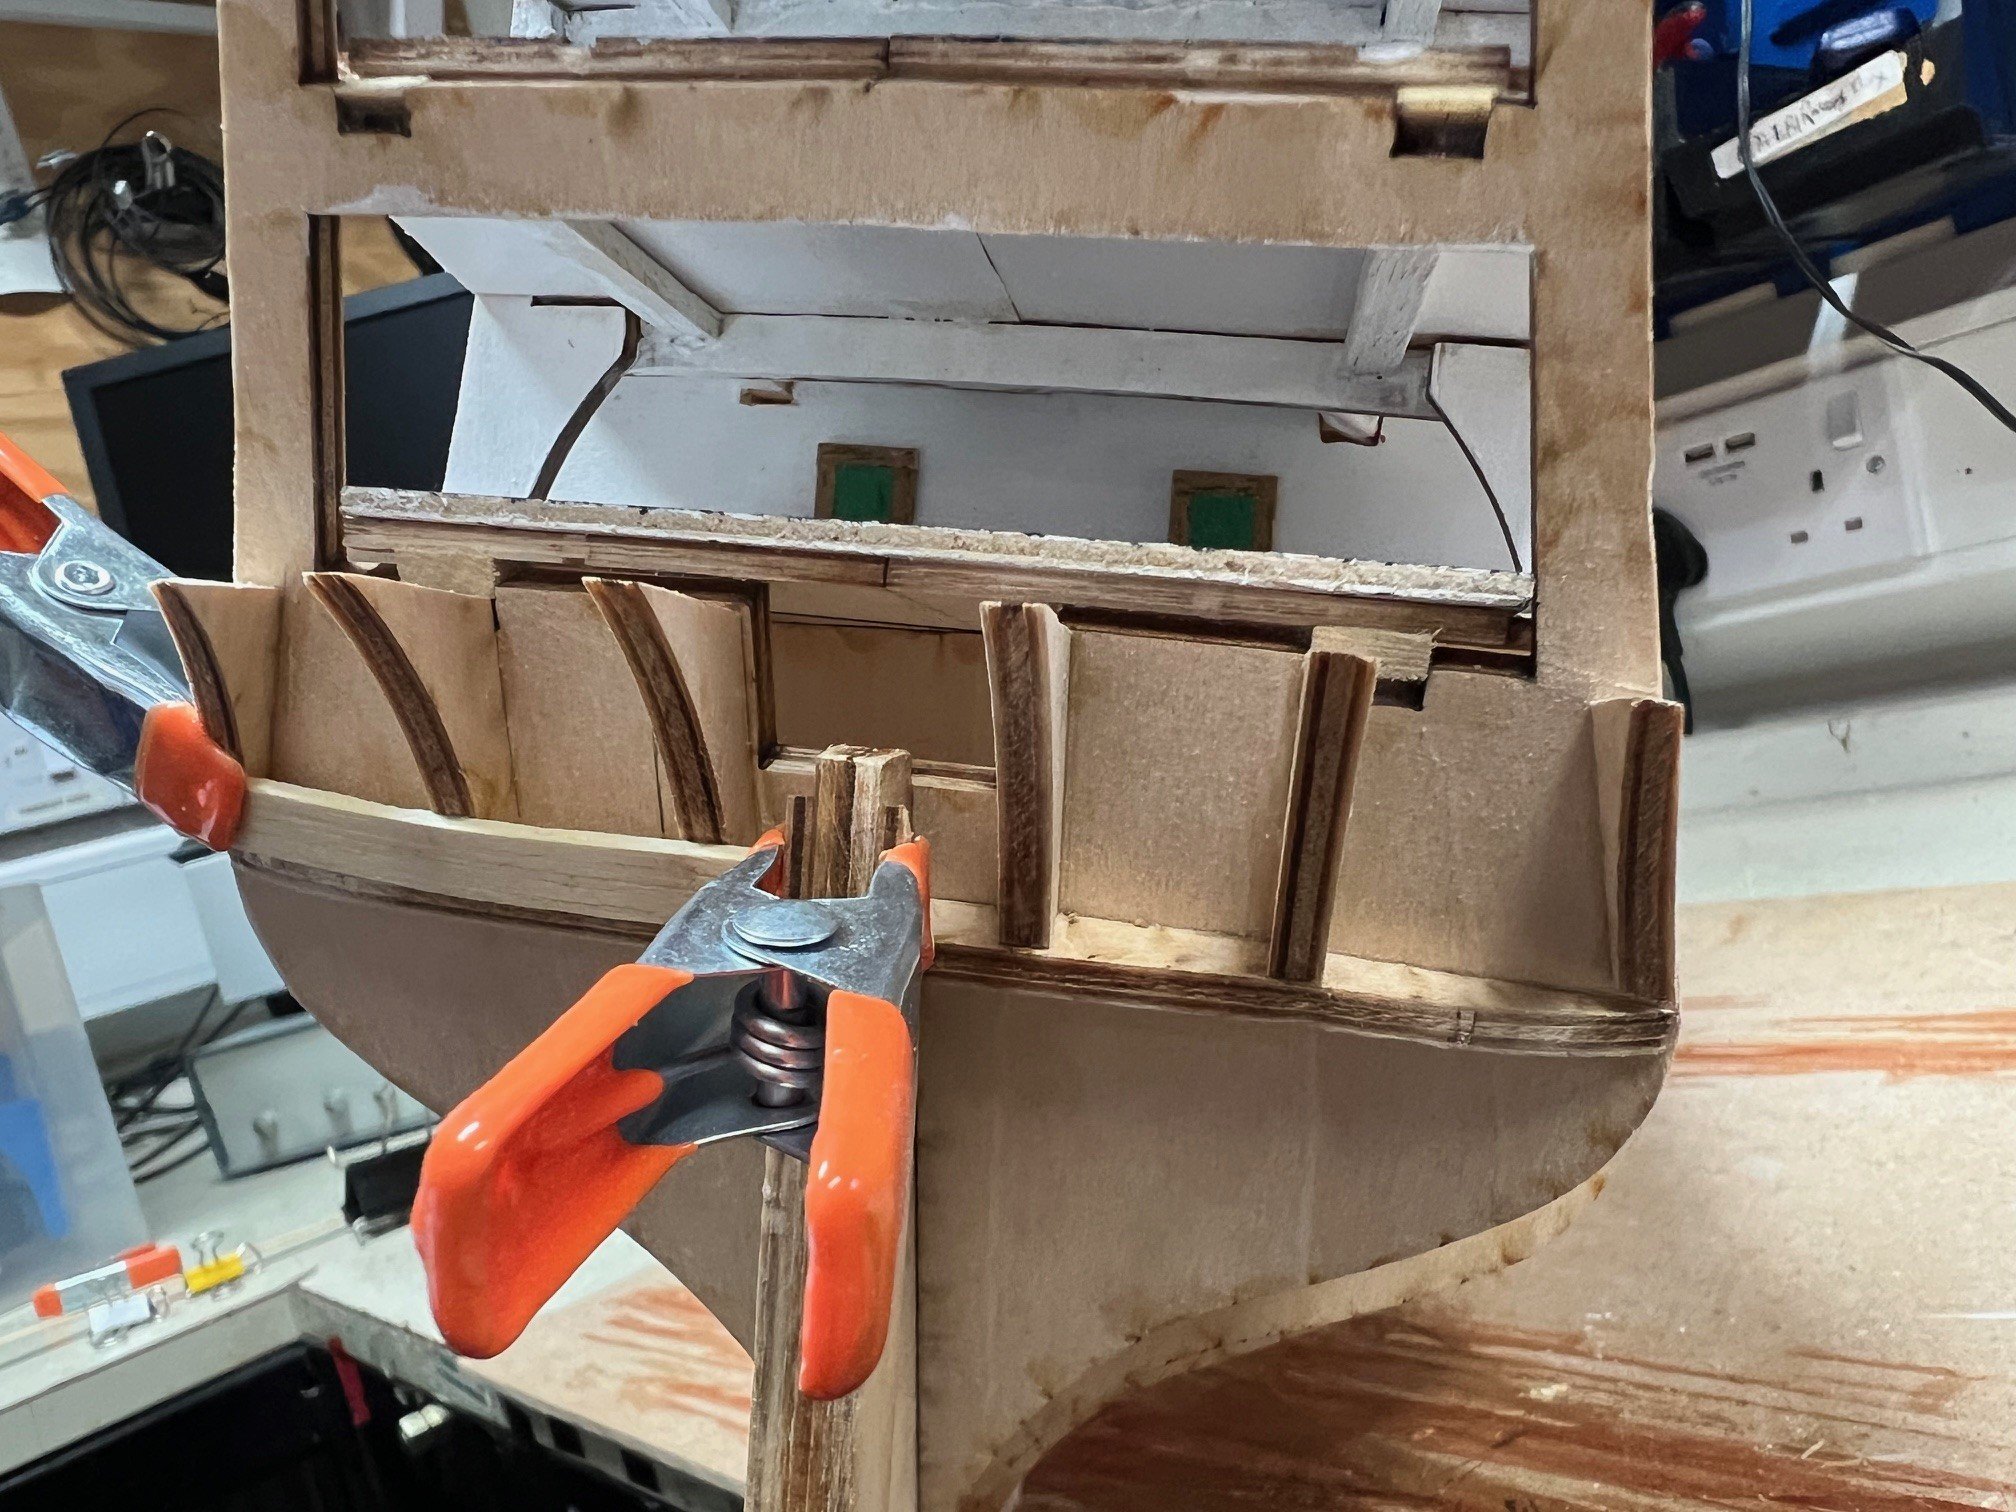
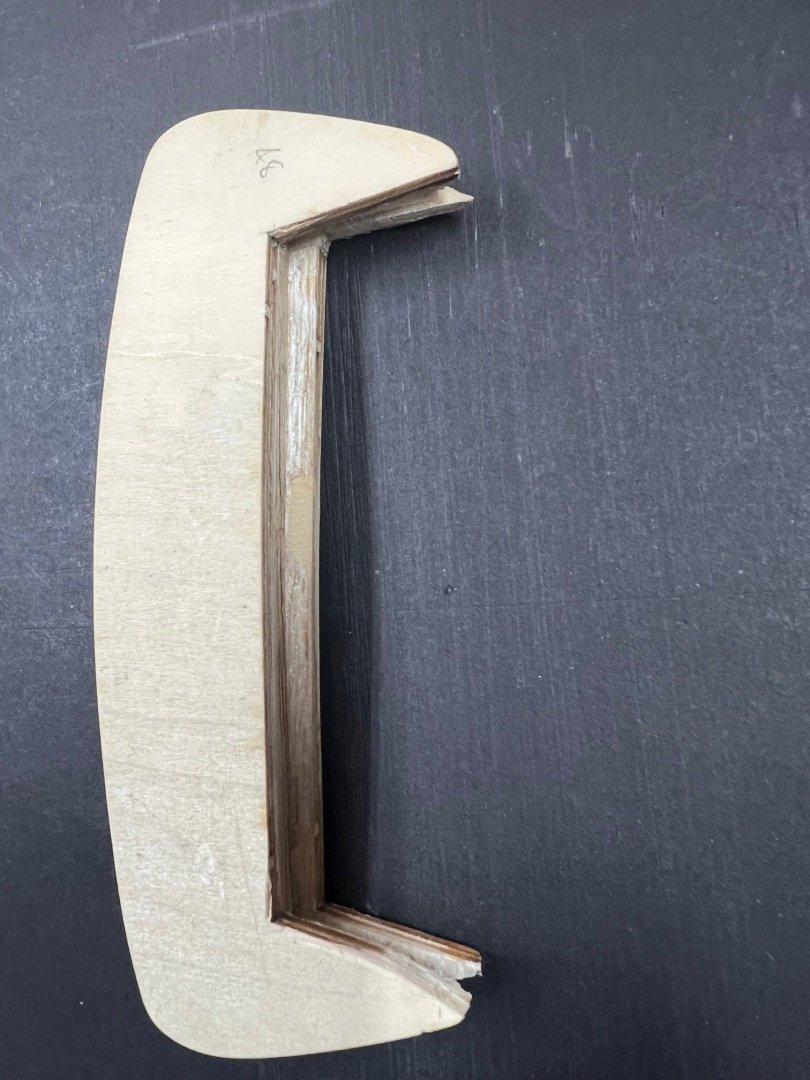
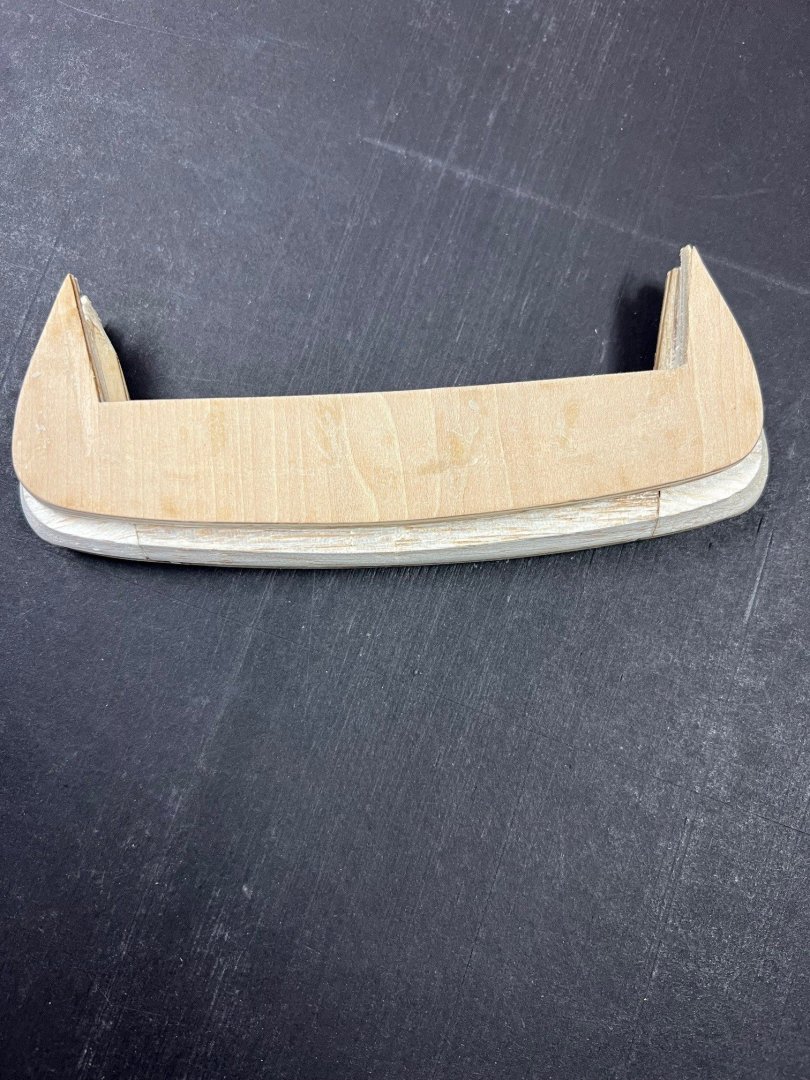
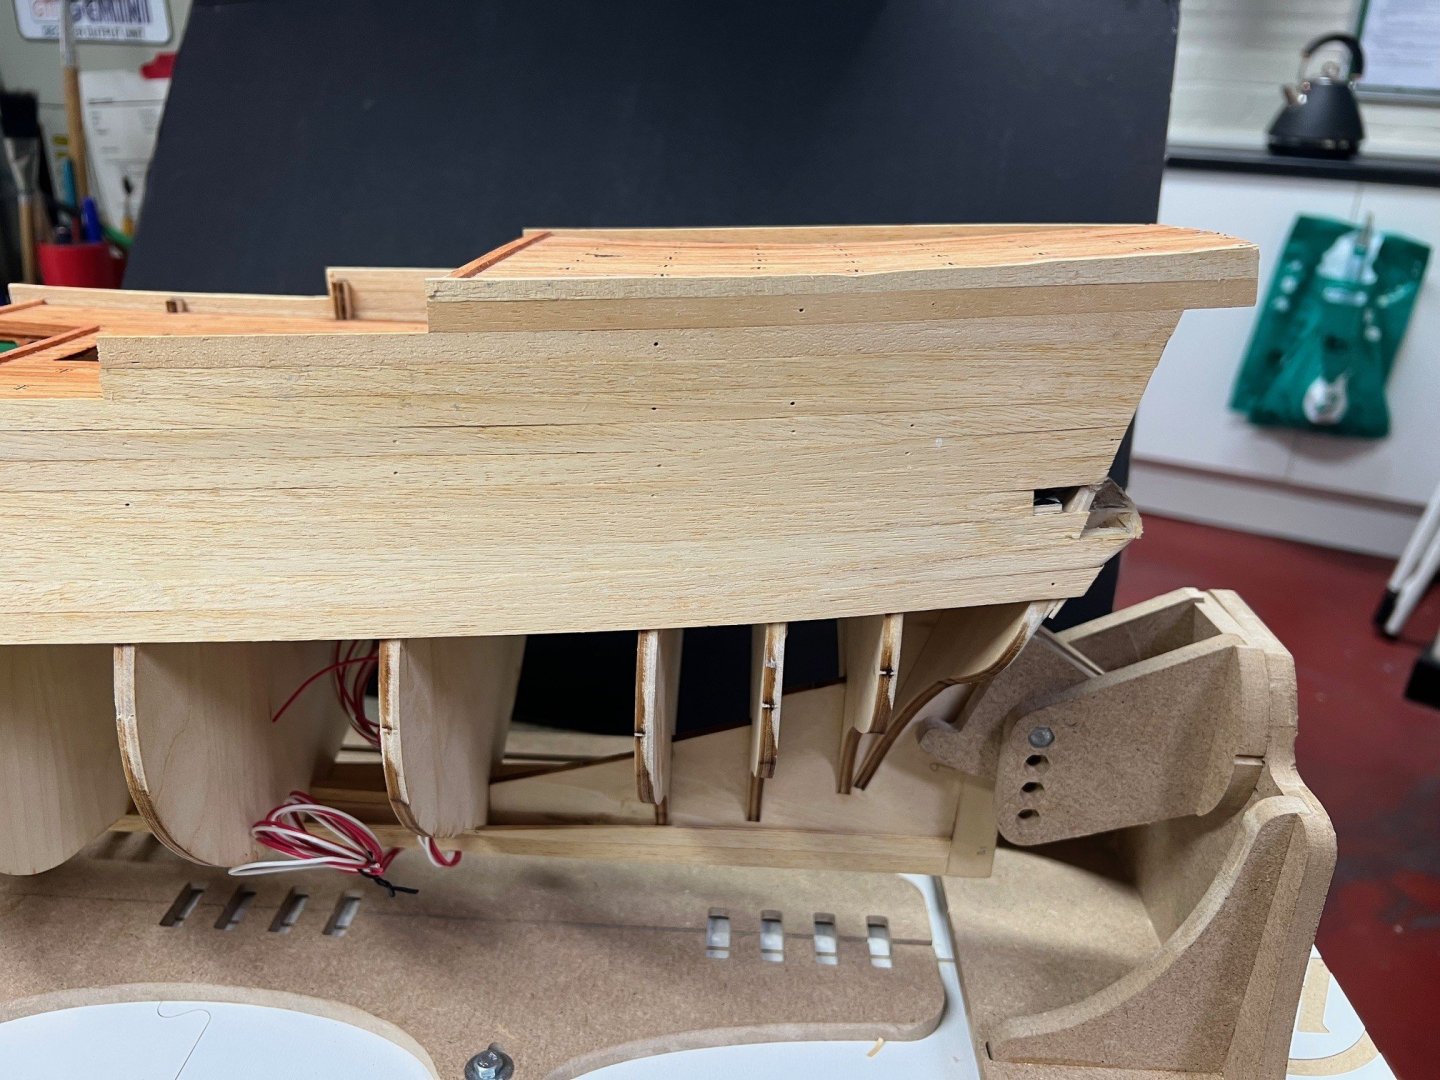
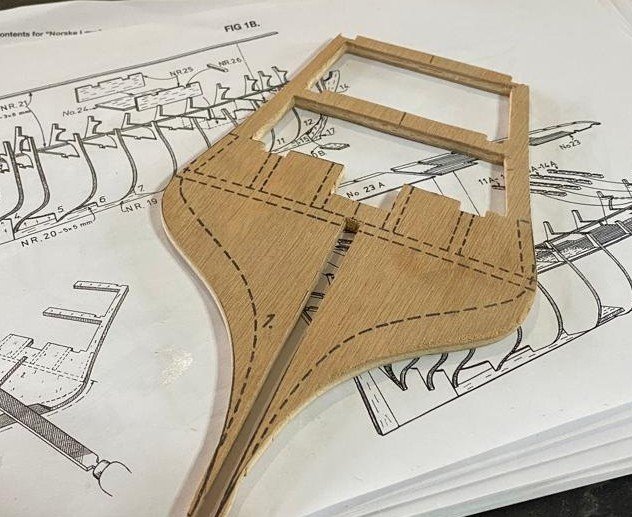
I decided to build the bottom galley board first, #46, 47 and 48 so I could achieve the correct shape for this and the knees. I used the parts from the original kit just in case I made an error. Once happy with the angles, added the back planking except for the last top piece. This needs to be shaped so it meets with the underside of the gallery board so will wait until I am ready to fix these parts permanently.
-
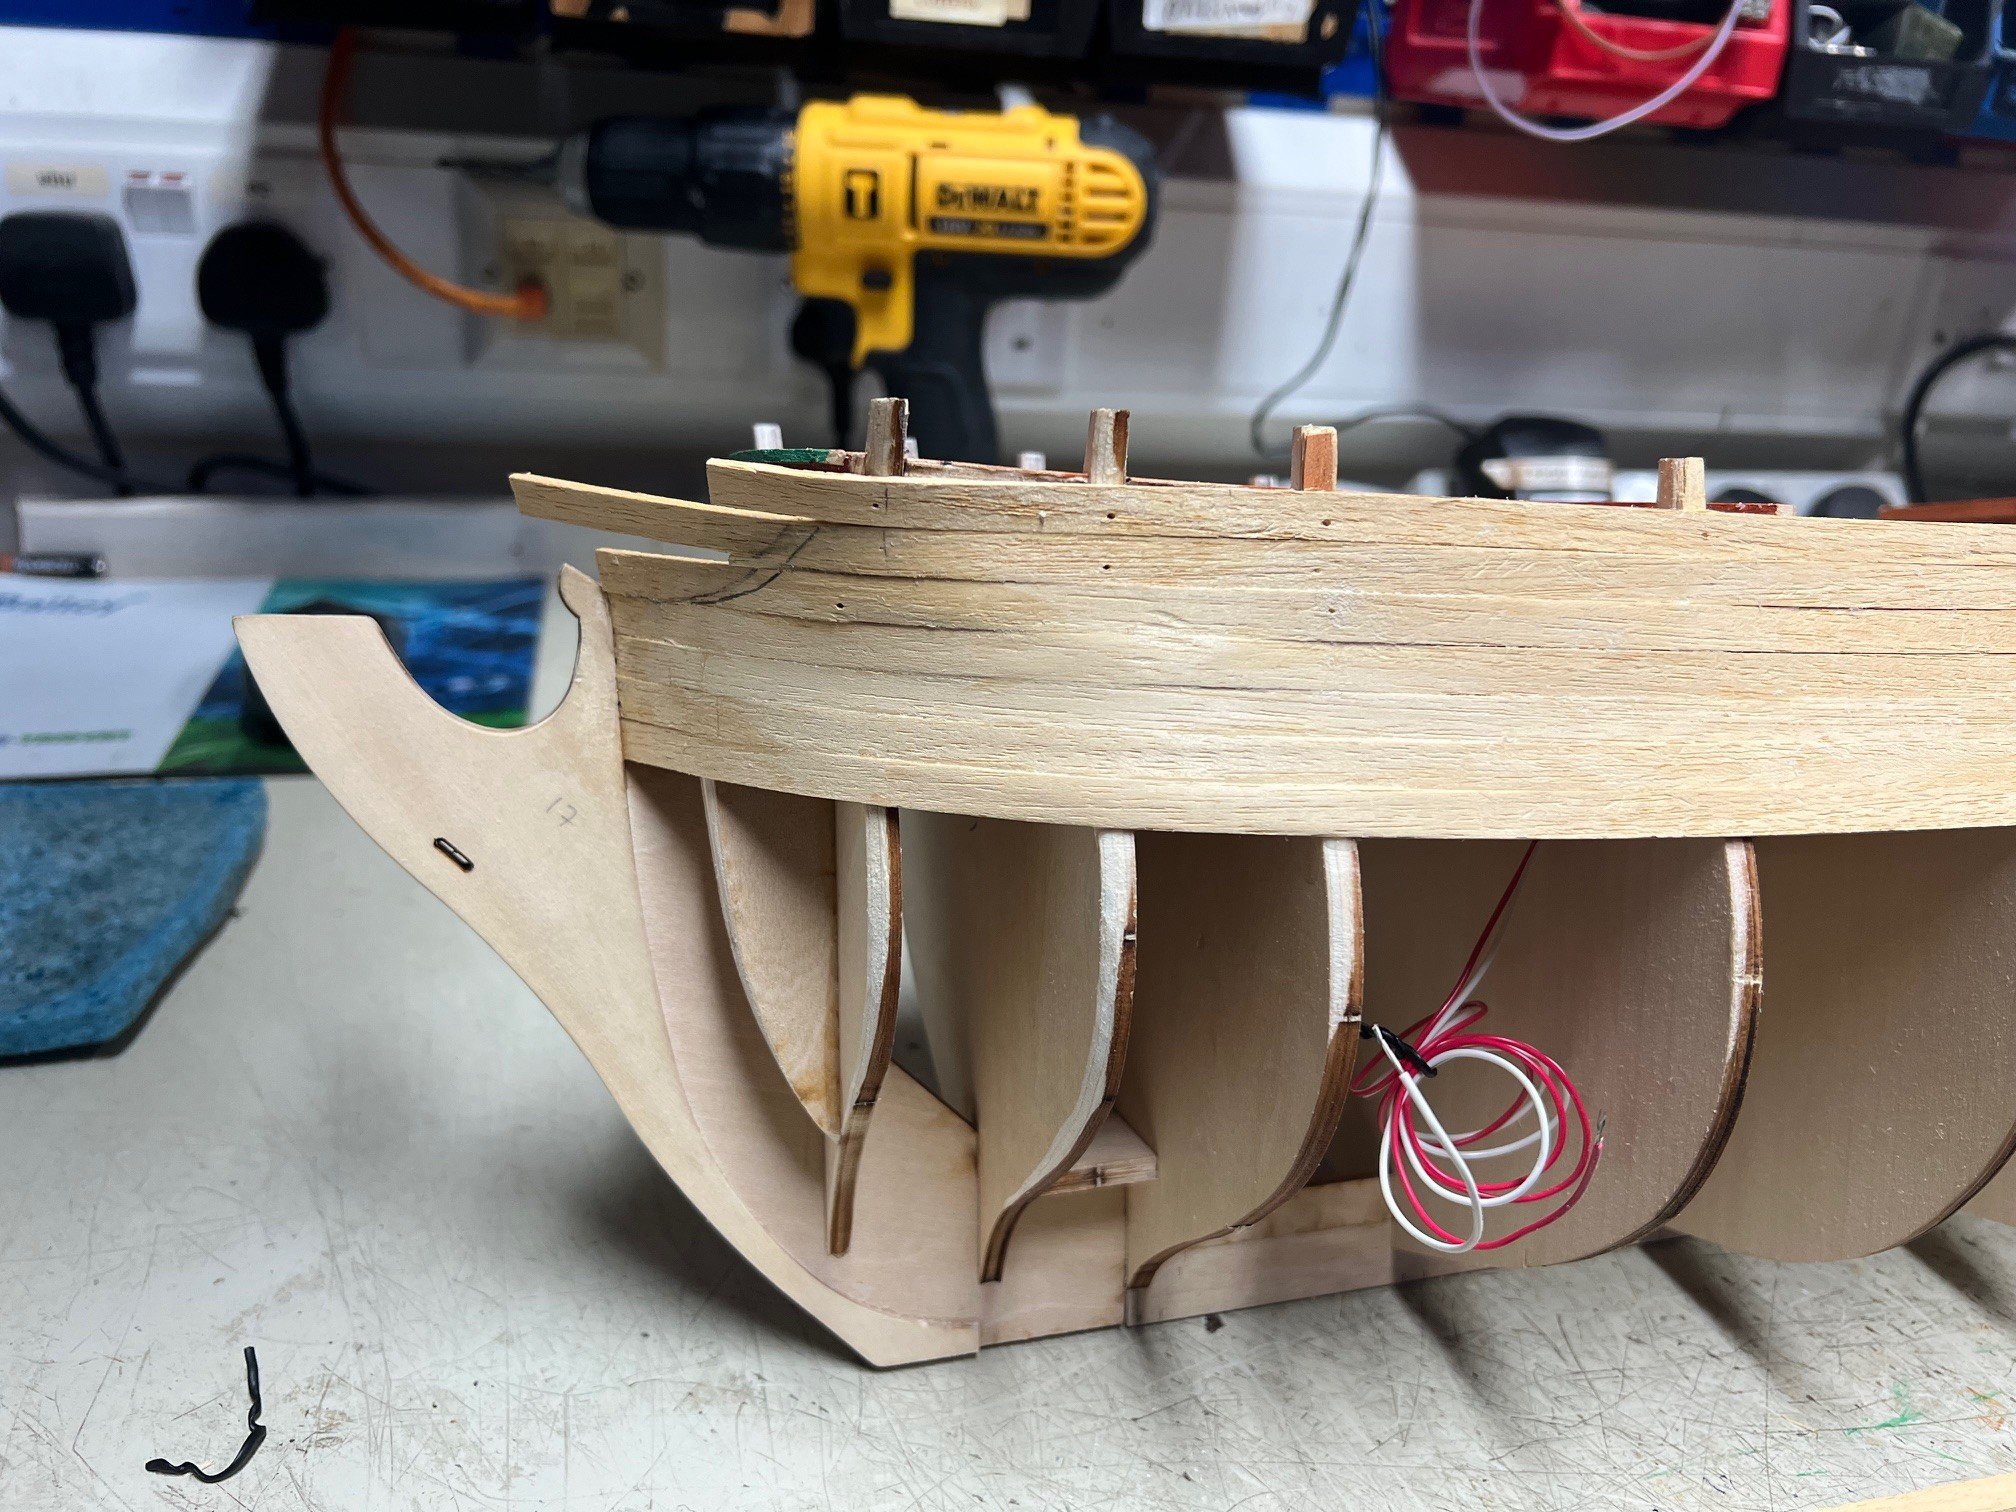
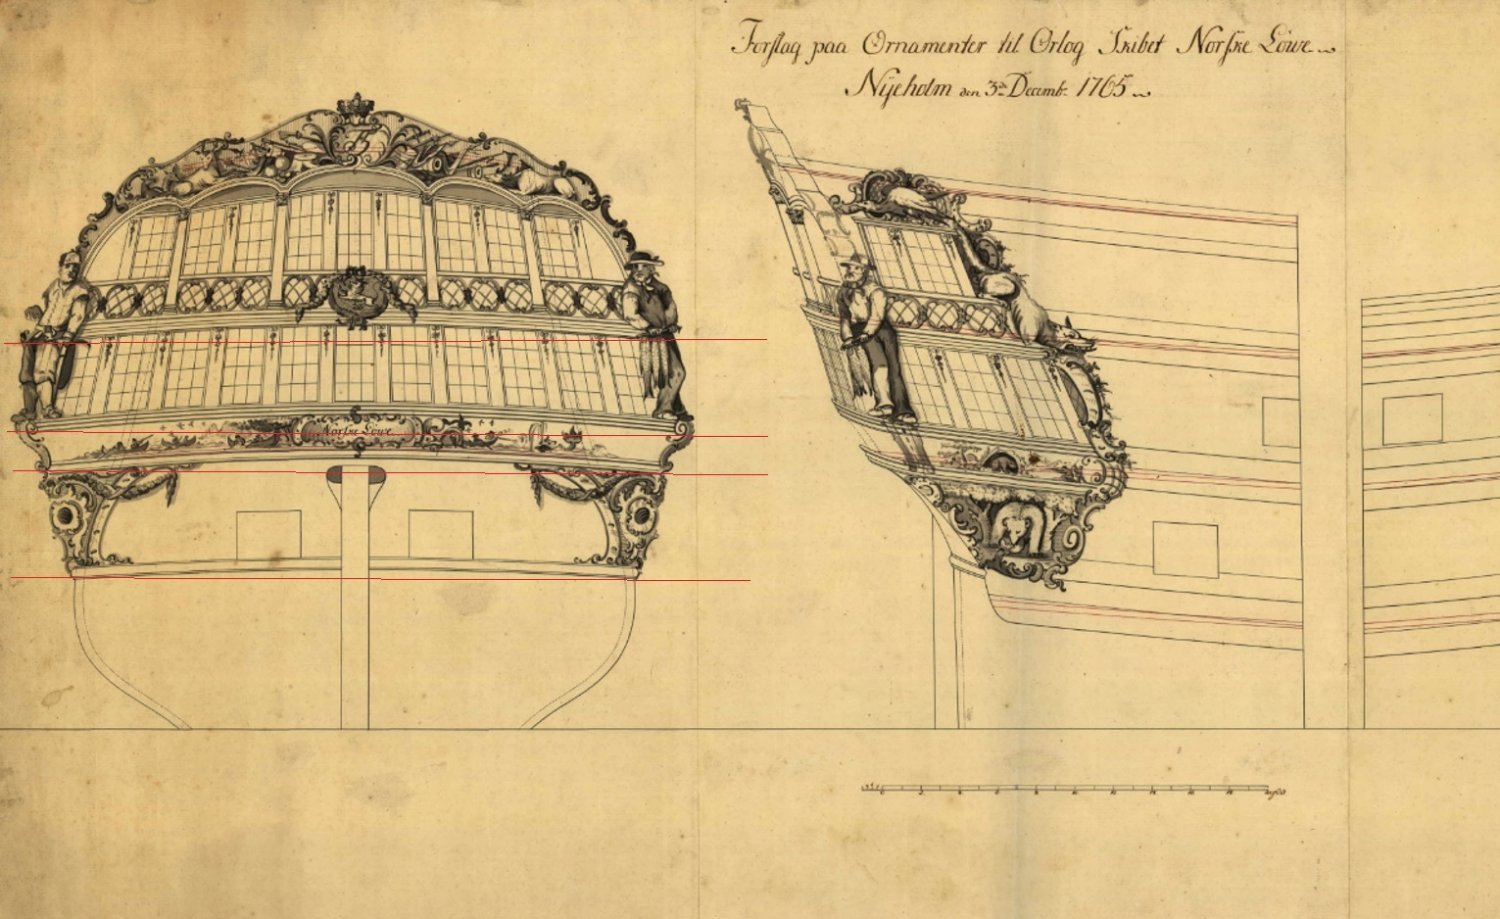
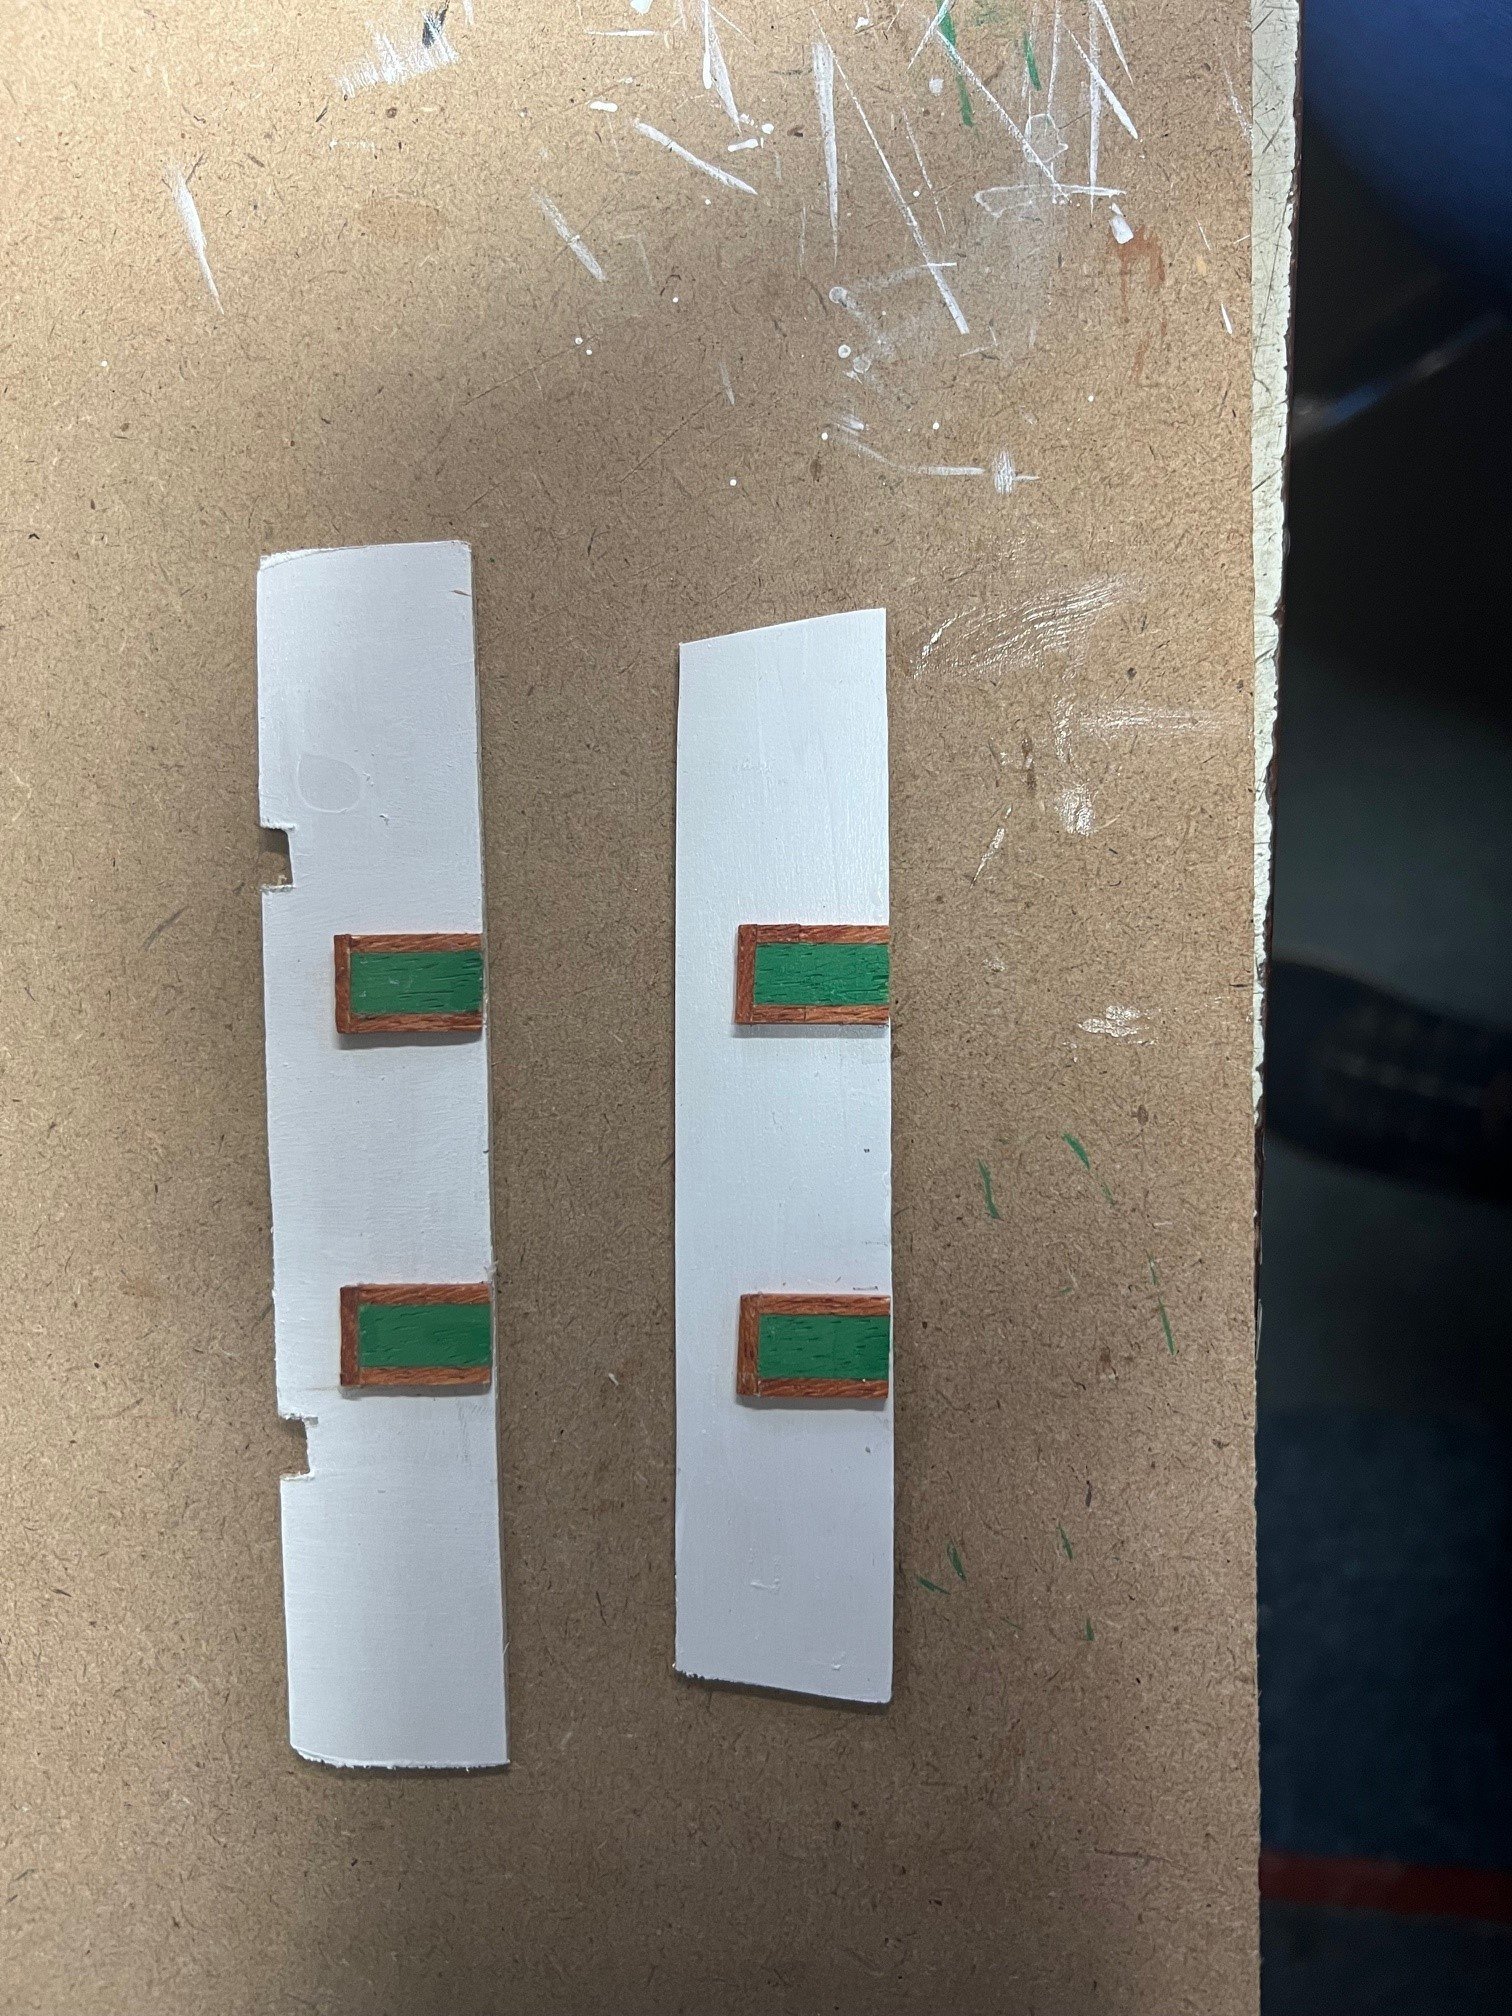
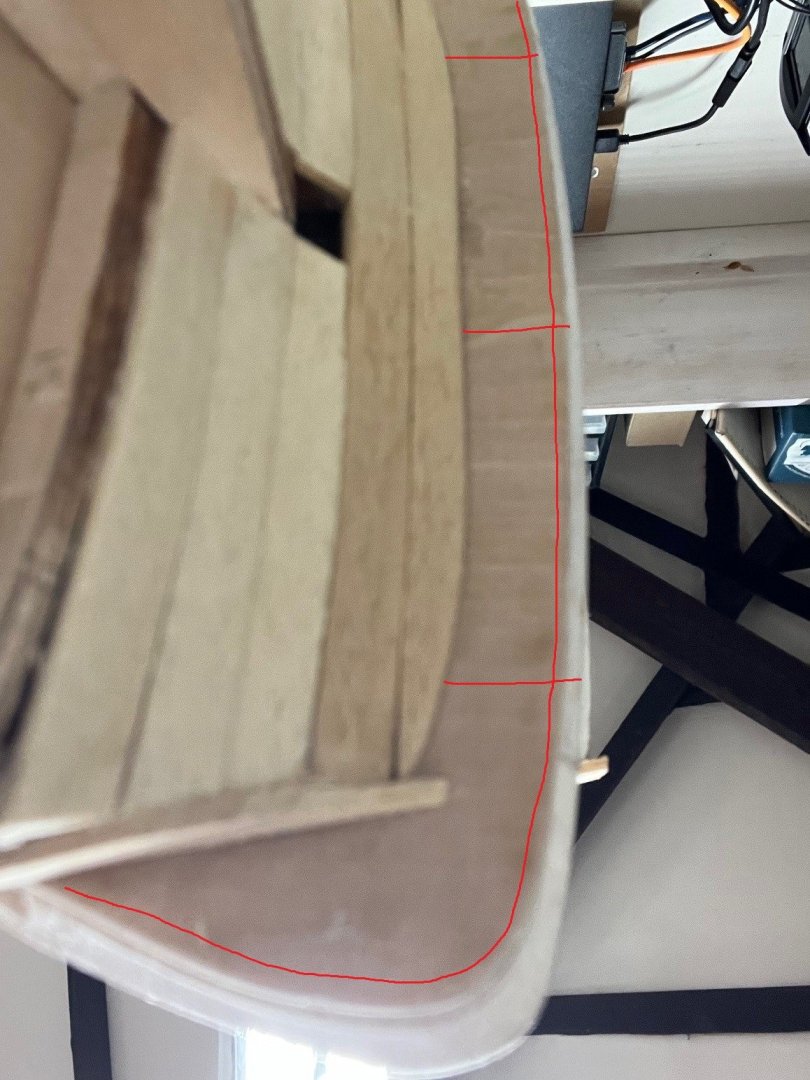
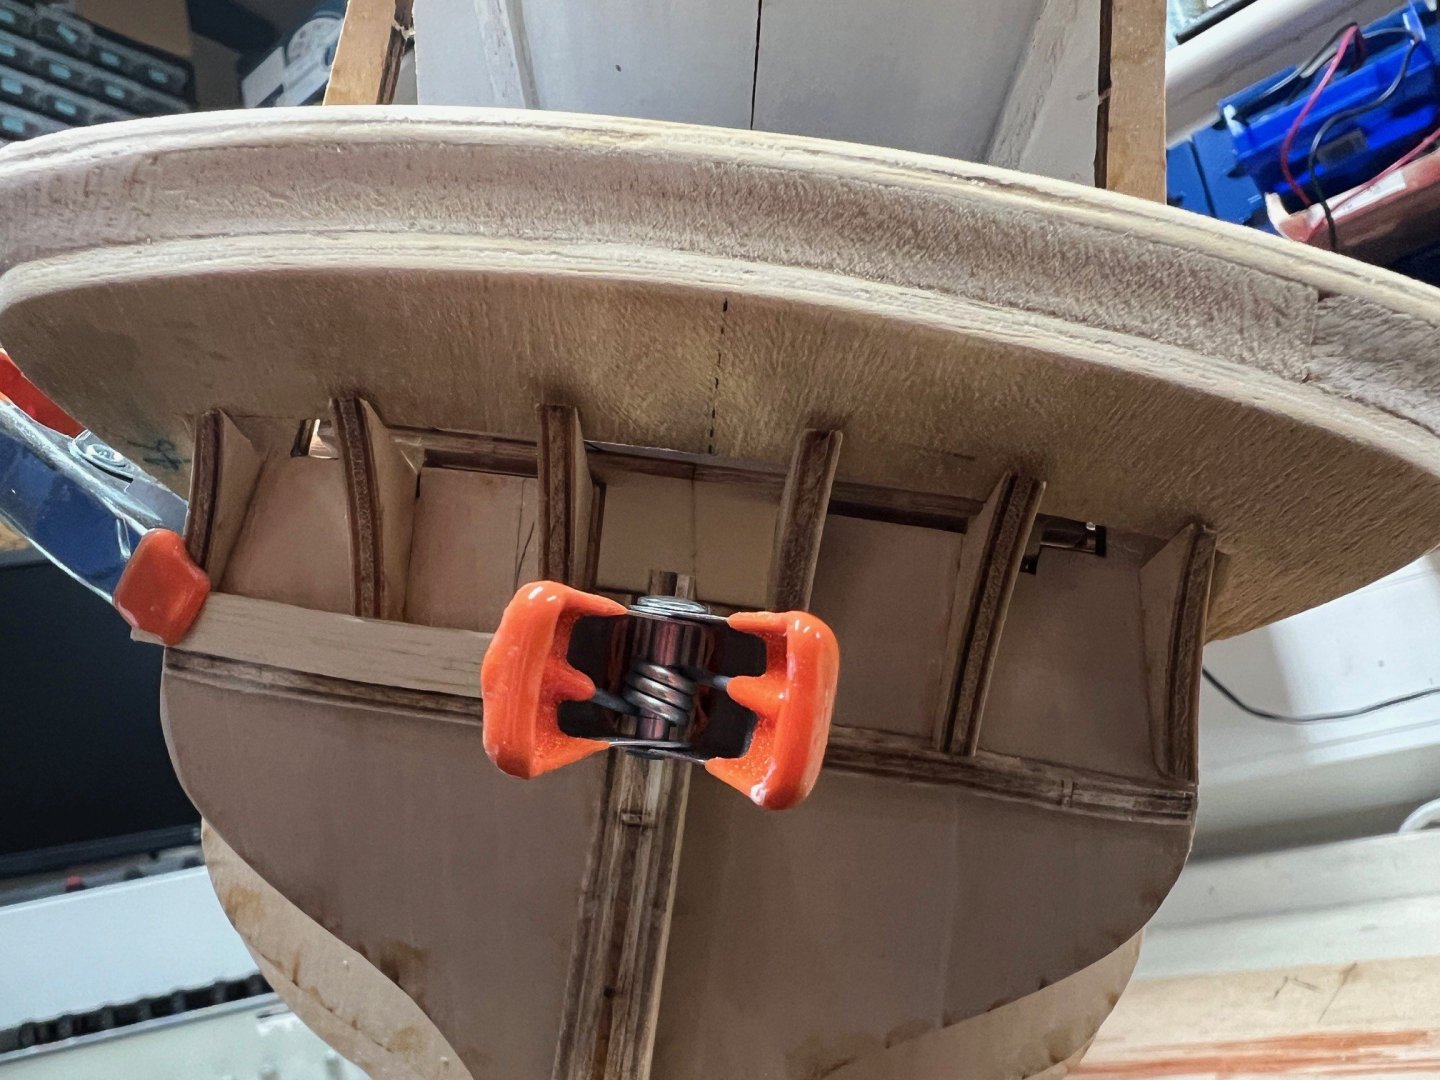
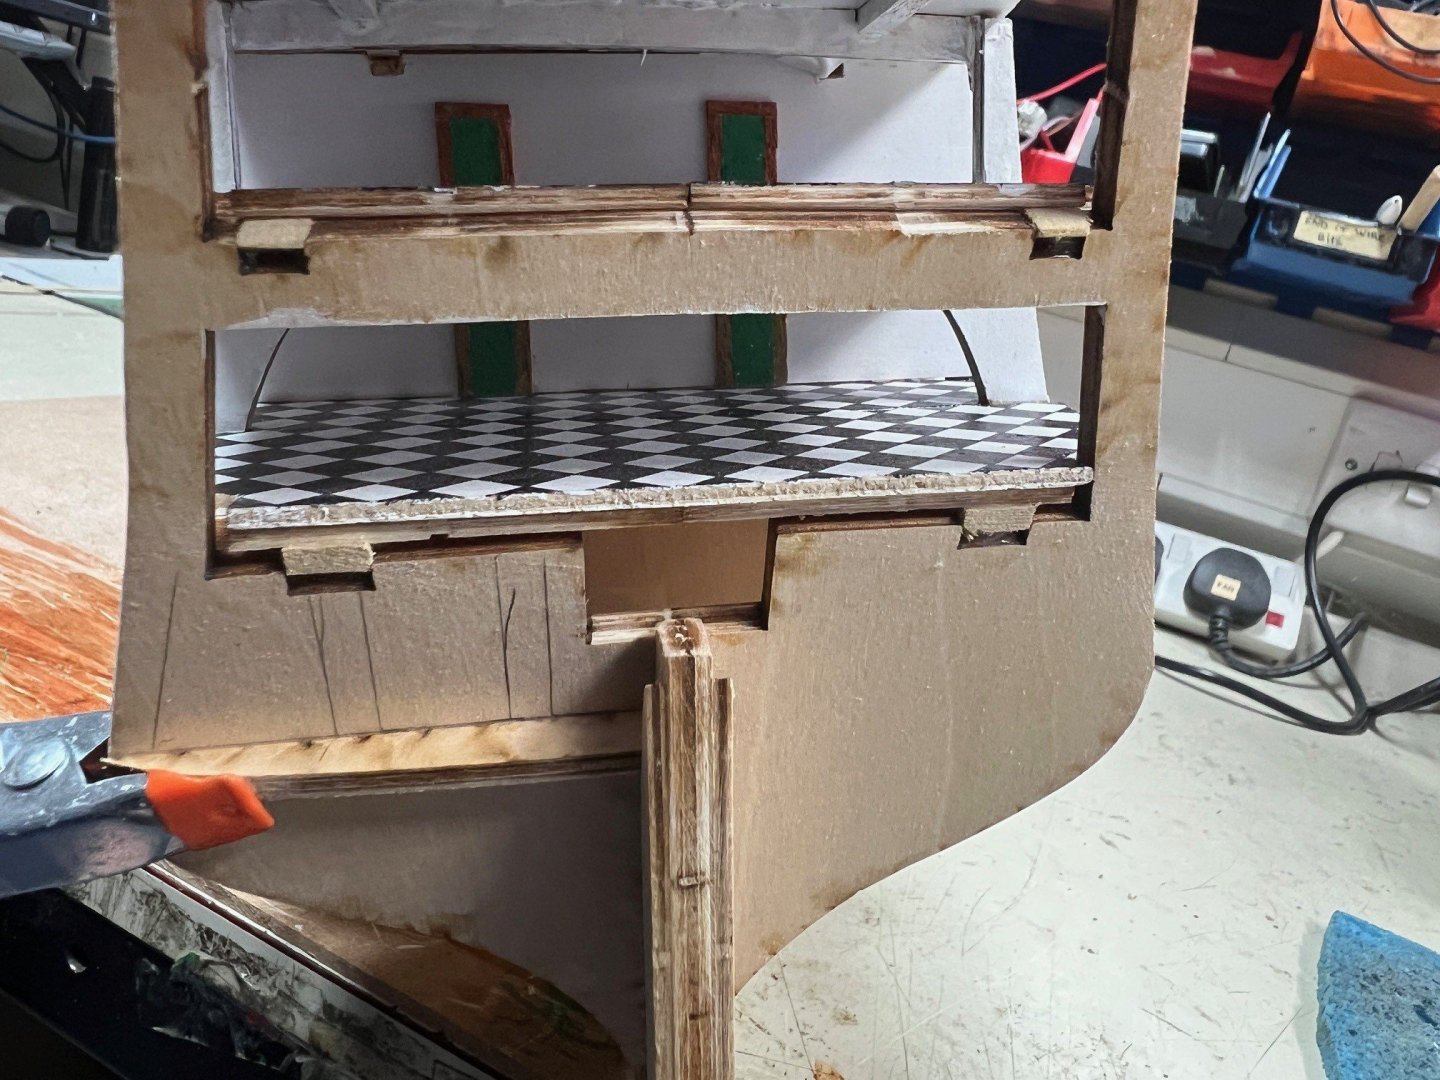
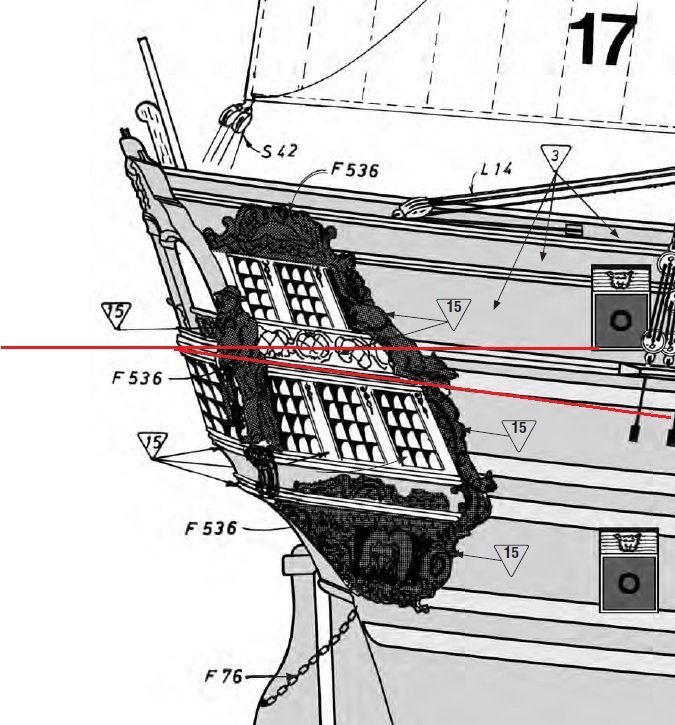
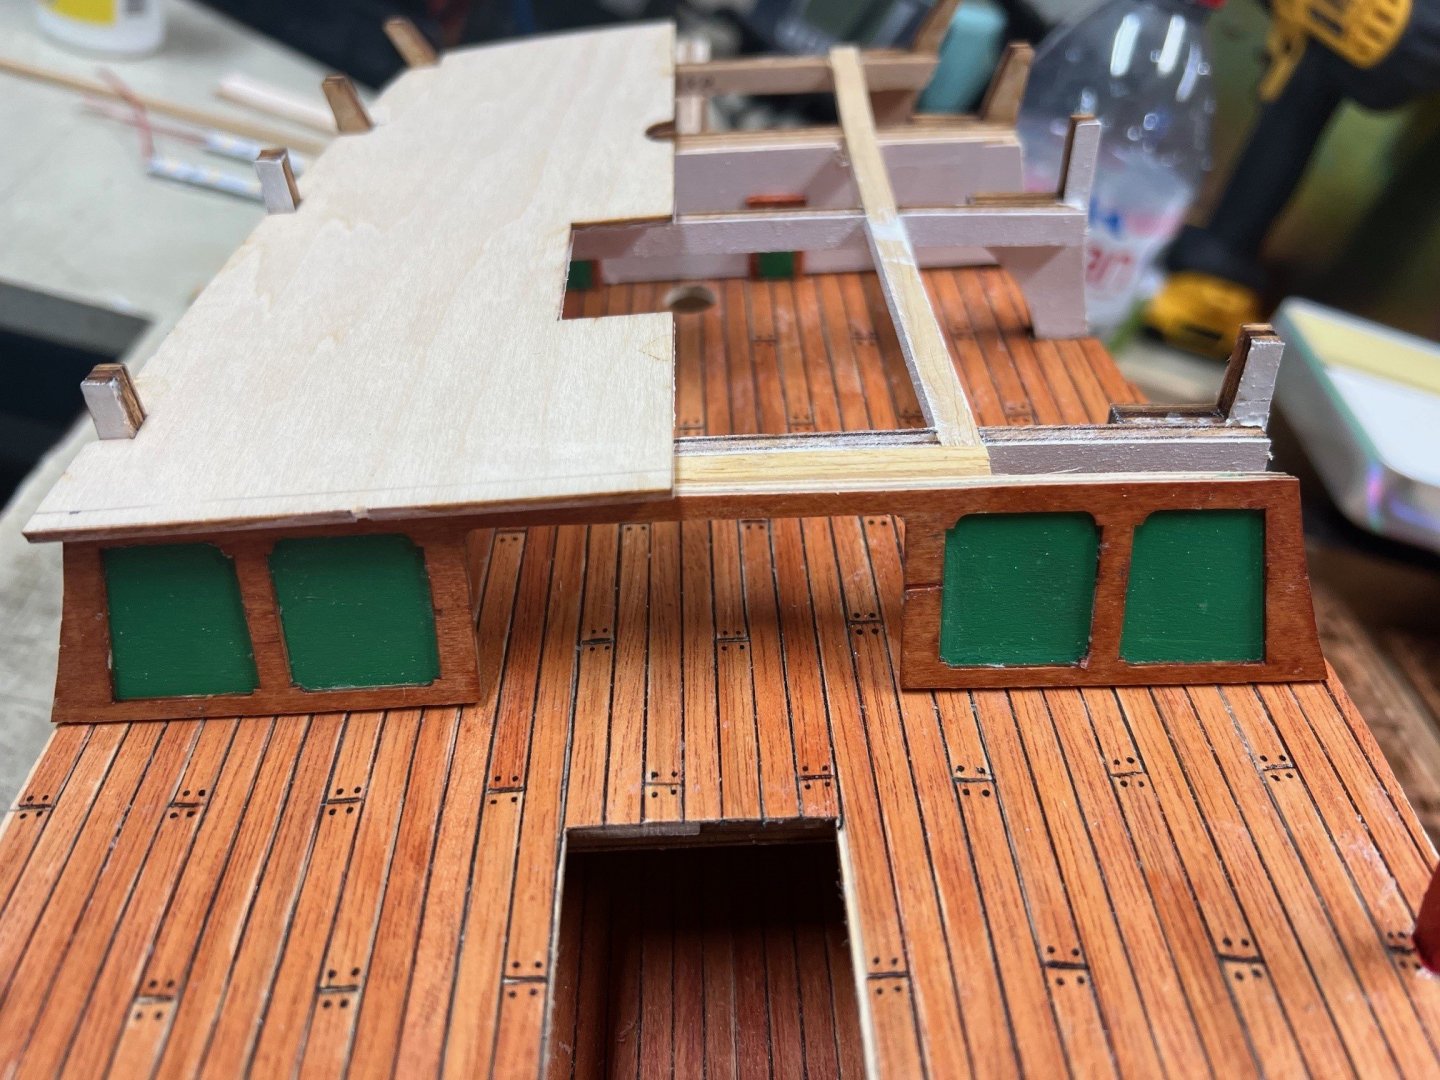
Rear Gallery. This is highlighting my inexperience with these type of kits but in my defence, the supplied instructions are sadly lacking any real detail. This part seems to have caused others problems in the past so I am going to go into a little more detail with this to assist others who follow. Apologies if this is too deep for a build log and should be shown / discussed elsewhere on the site. Referring to EdS build and PeteB’s help, the gallery is not flat but curved (window frames #54 and 56 give you the correct curves required). Not only does this apply to the gallery boards and windows, but seems it also applies to #31 the support former. See picture 028b, the lowest red line. Courtesy of PeteB. Rather than try to bend and shape this, it’s 4mm thick, I plan to put a curve on #114 to achieve a visual bend. But…..on the earlier kit I have, there are dotted lines on former #1 indicating where the knees are fixed. This intimates that #31 is straight and not bent. See picture 028d. If this is the case, parts 27, 28 and 29 do not give the correct upward curve. In fact they give you downward curve. As a result, you need to shape and adjust these parts to give you the required upward curve. I also fixed #27 to the far edge of the former which will give solid fix for the hull and gallery planks at this meeting point.


-
Ronald-V reacted to a post in a topic:
Norske Love by Nelsons Dockyard - Billing Boats - 1:75
-
Keep your build going. I am at a similar stage with my build and enjoy seeing your progress along with methods and kit changes you have made. Adam
-
ccoyle reacted to a post in a topic:
Norske Love by Nelsons Dockyard - Billing Boats - 1:75
-
ccoyle reacted to a post in a topic:
Norske Love by Nelsons Dockyard - Billing Boats - 1:75
-
Not sure what’s-up next. Different builds have taken different approaches and noted various pitfalls along the way. 1). Do I start the hull planking. If yes, where do I start from. Top to bottom, bottom to top, lower deck line and go up and down? 2). Do I fix the rear knees #27, 28, 29, 31 and then plank that section first. As noted in EdS build log, that makes clamping easier and gives a reference point for the hull planks to finish. If anyone wants to wade in with help or advice, it would be most welcome. While thinking it through, I will face all the gallery windows with the kit supplied mahogany 0.7 x 2mm strip.

-
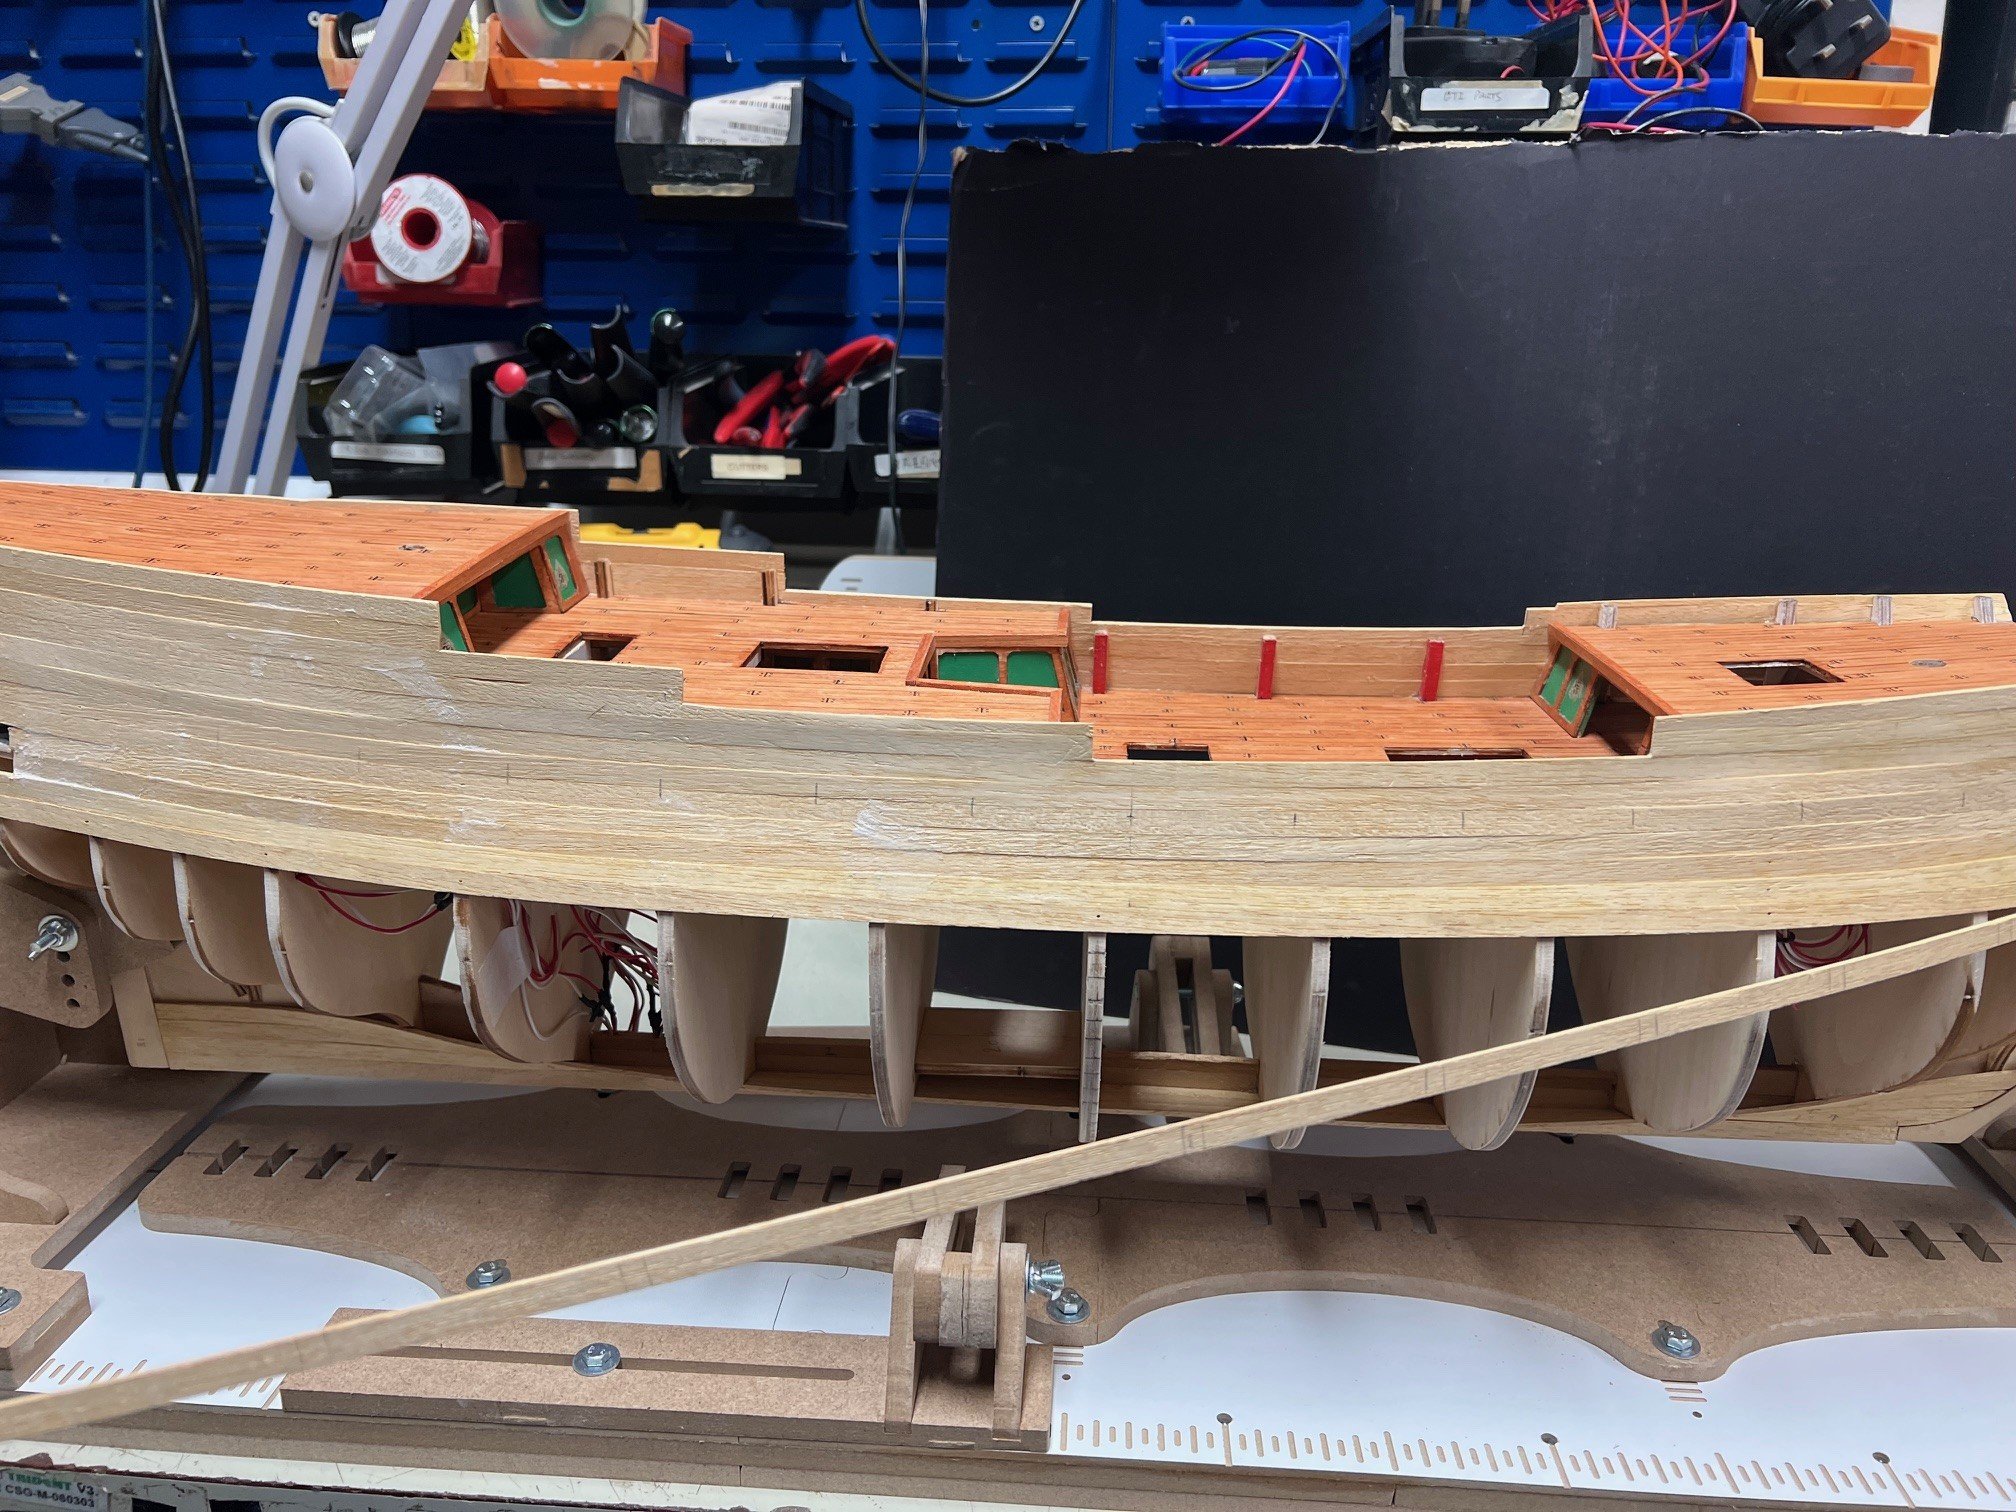
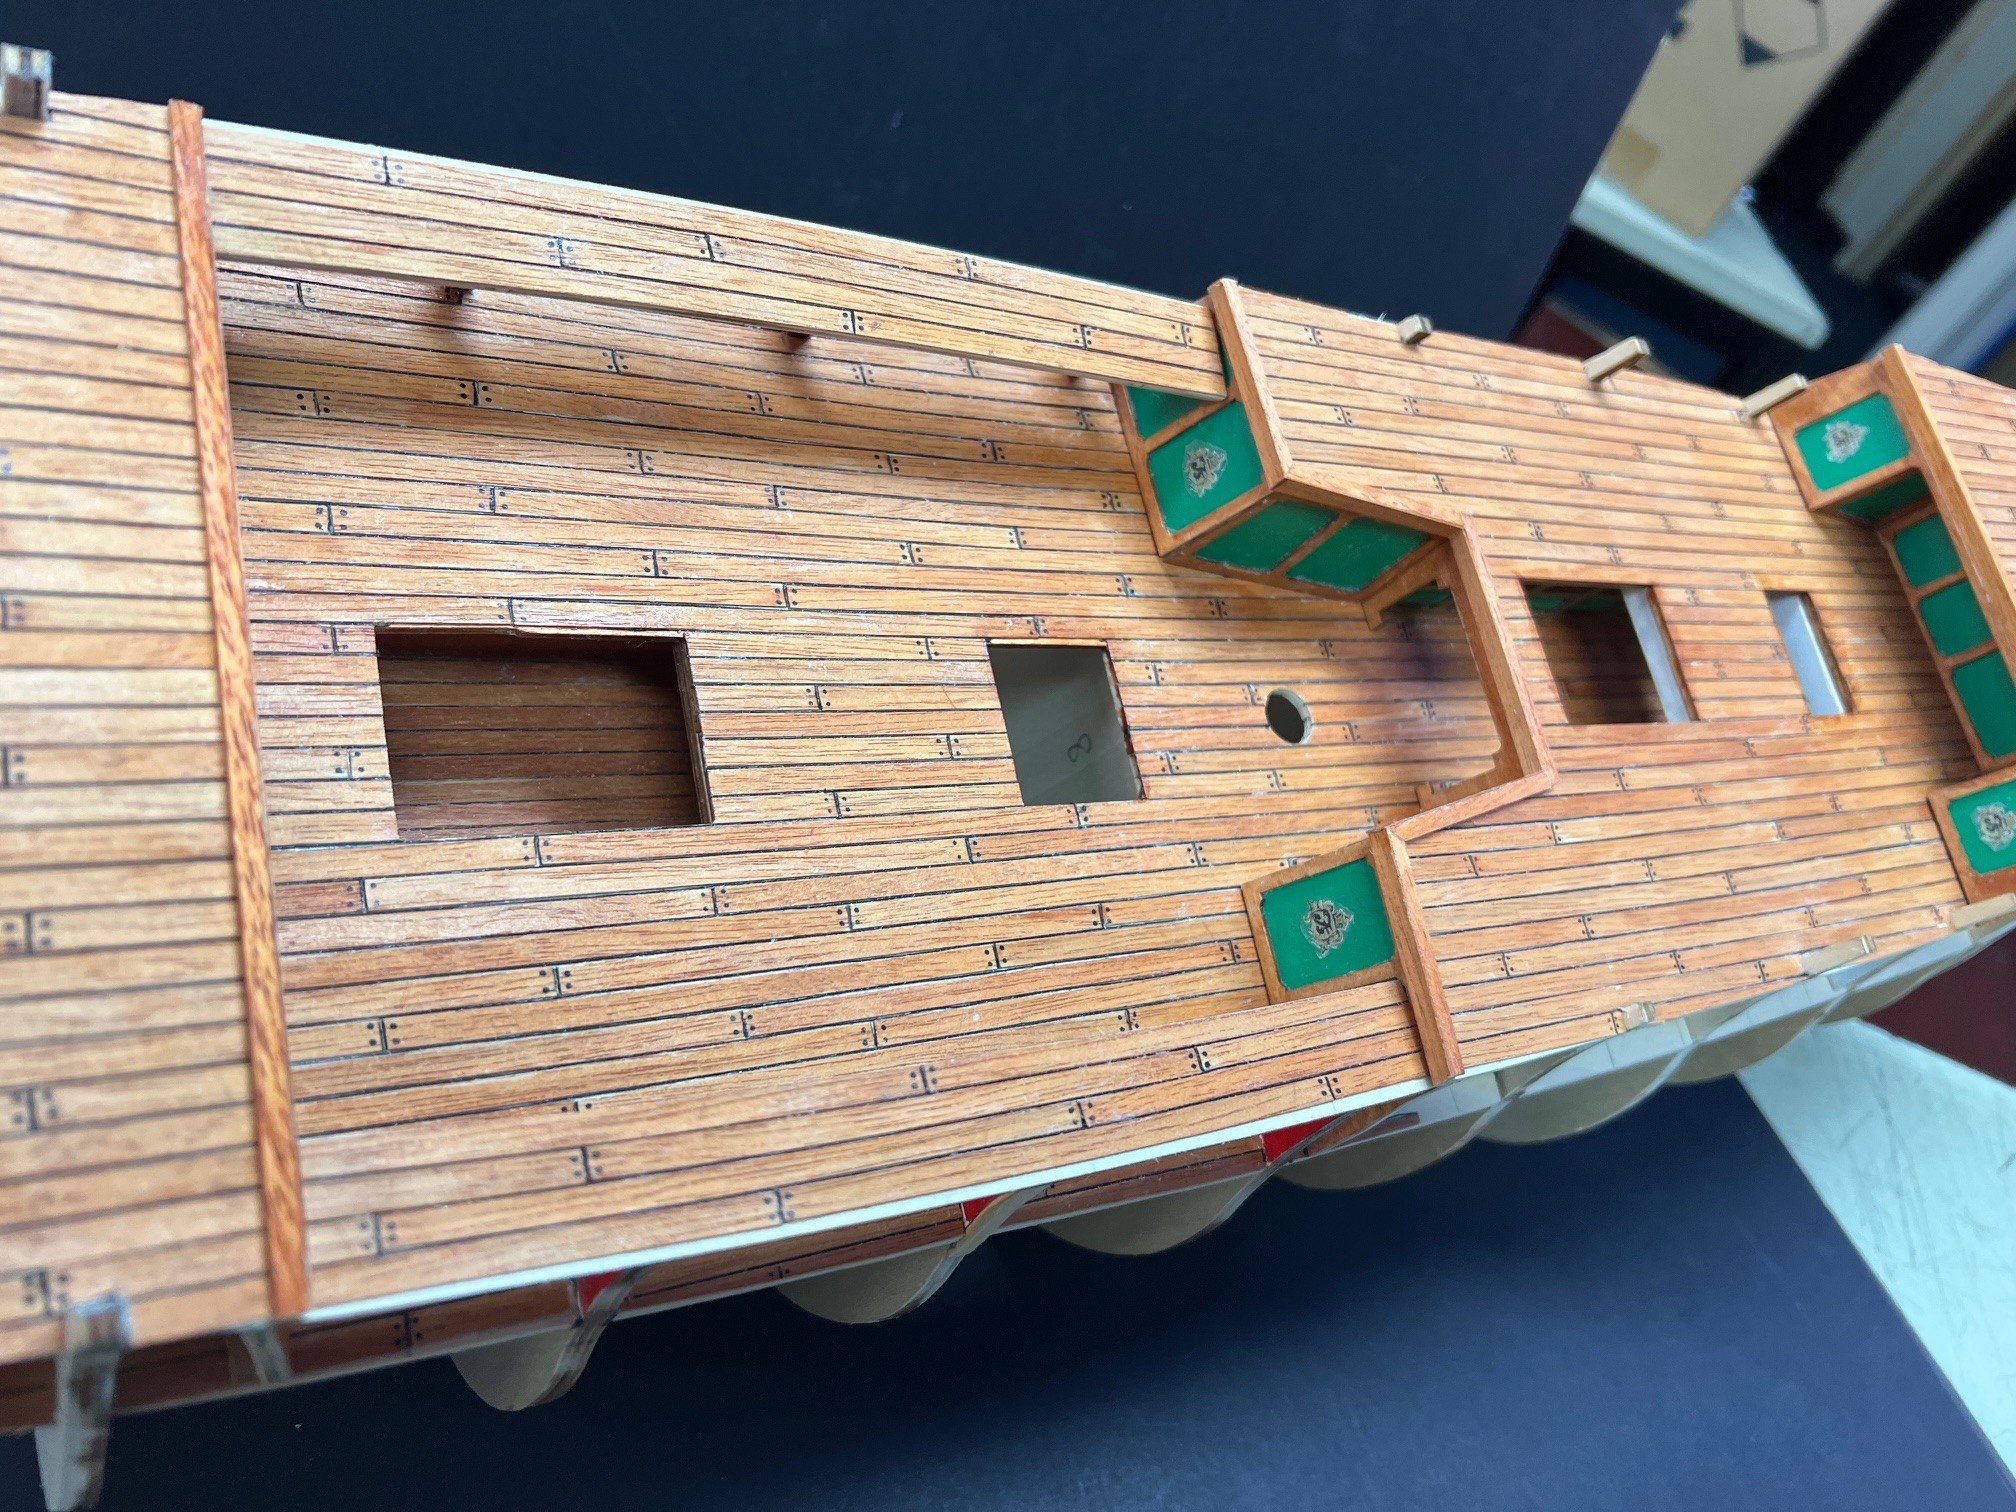
All planking now complete along with both gangways #45 (placed but not yet attached). Also completed deck edges which have been faced using the same deck plank strips.


-
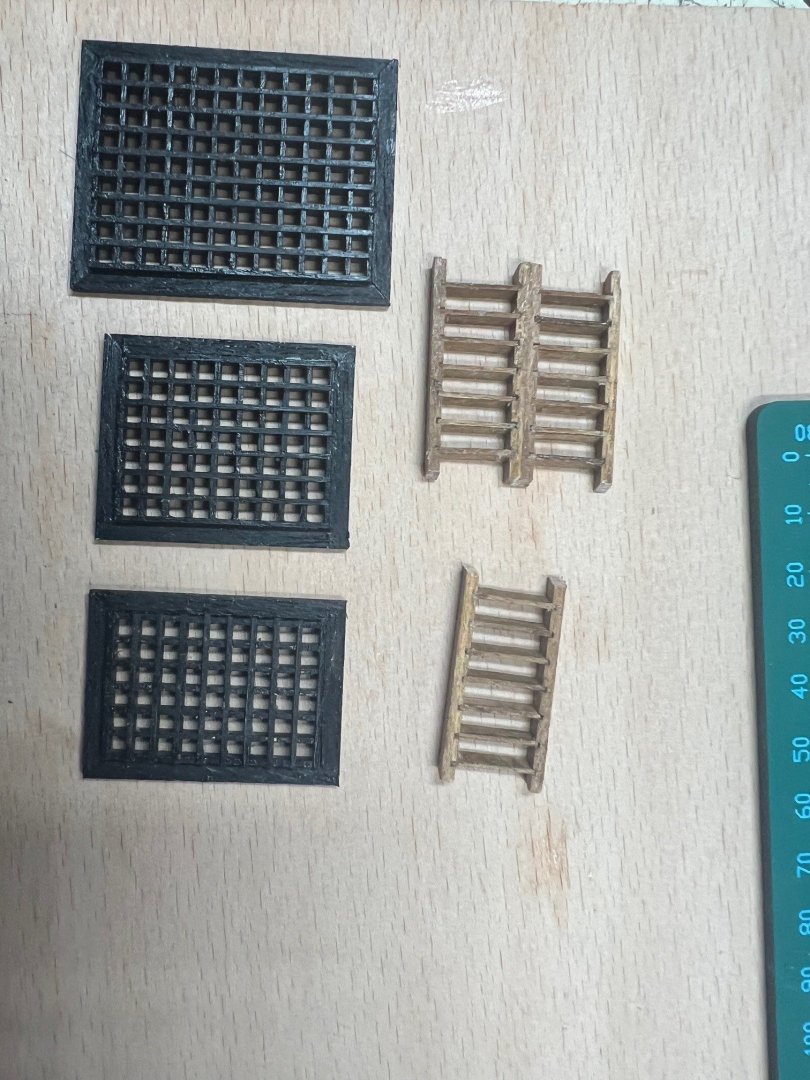
Also built the hatch covers and a couple of ladders. Used large 3mm hole hatches as that will allow better viewing and light from the LED’s. Went for black to give a bit of contrast to the mahogany deck. Made a little jig for the ladders to keep them straight and stained them dark oak.

-
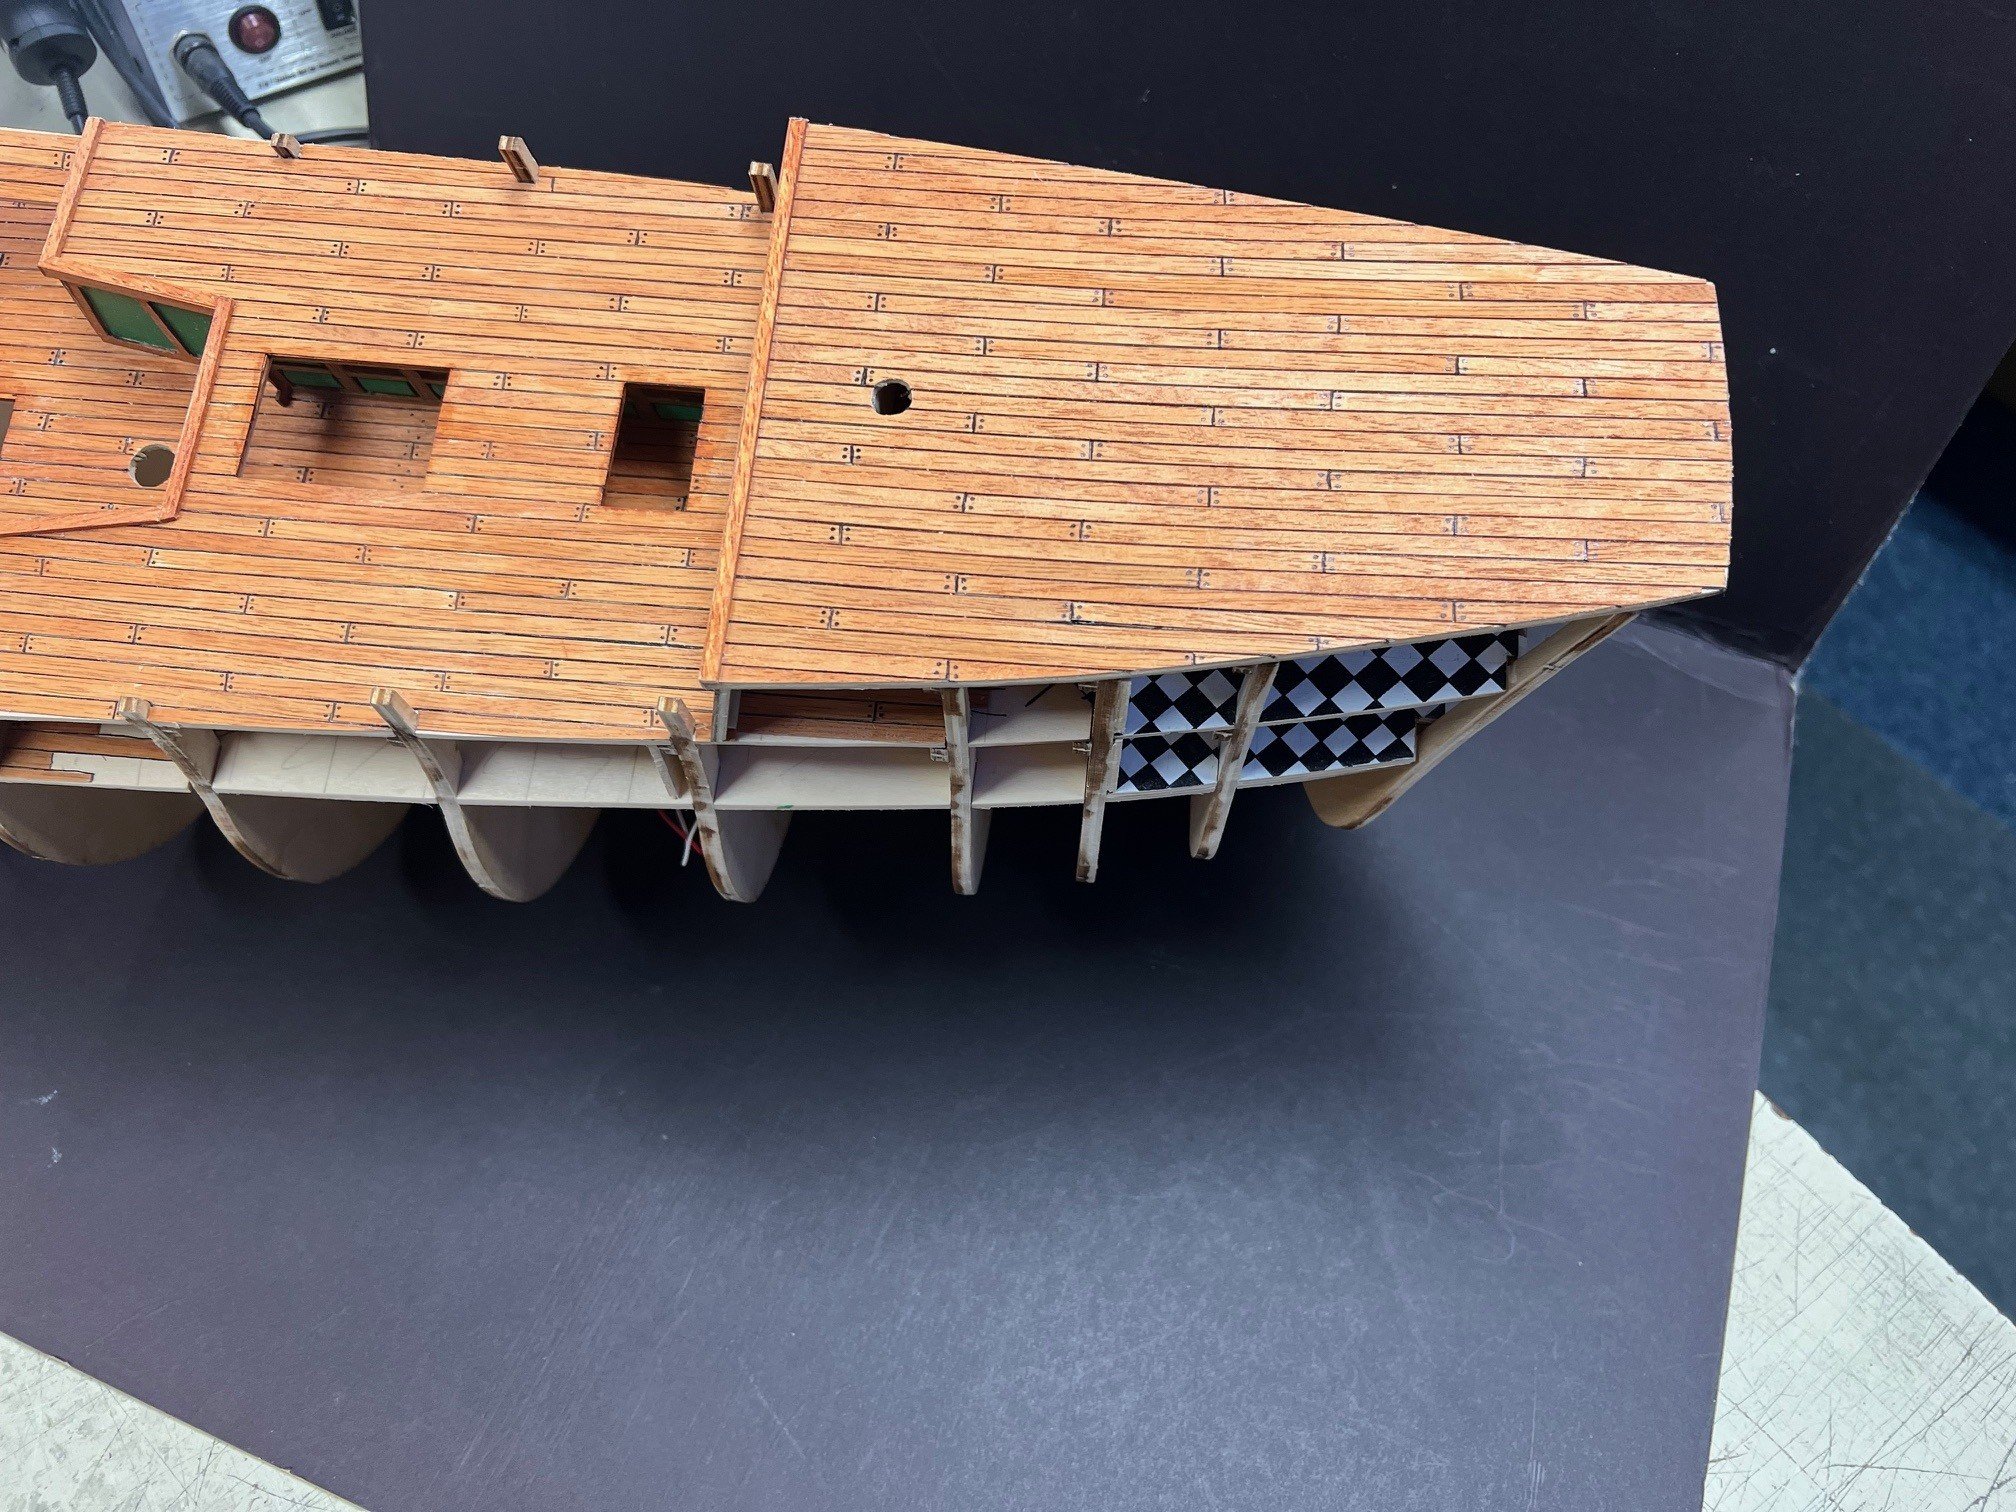
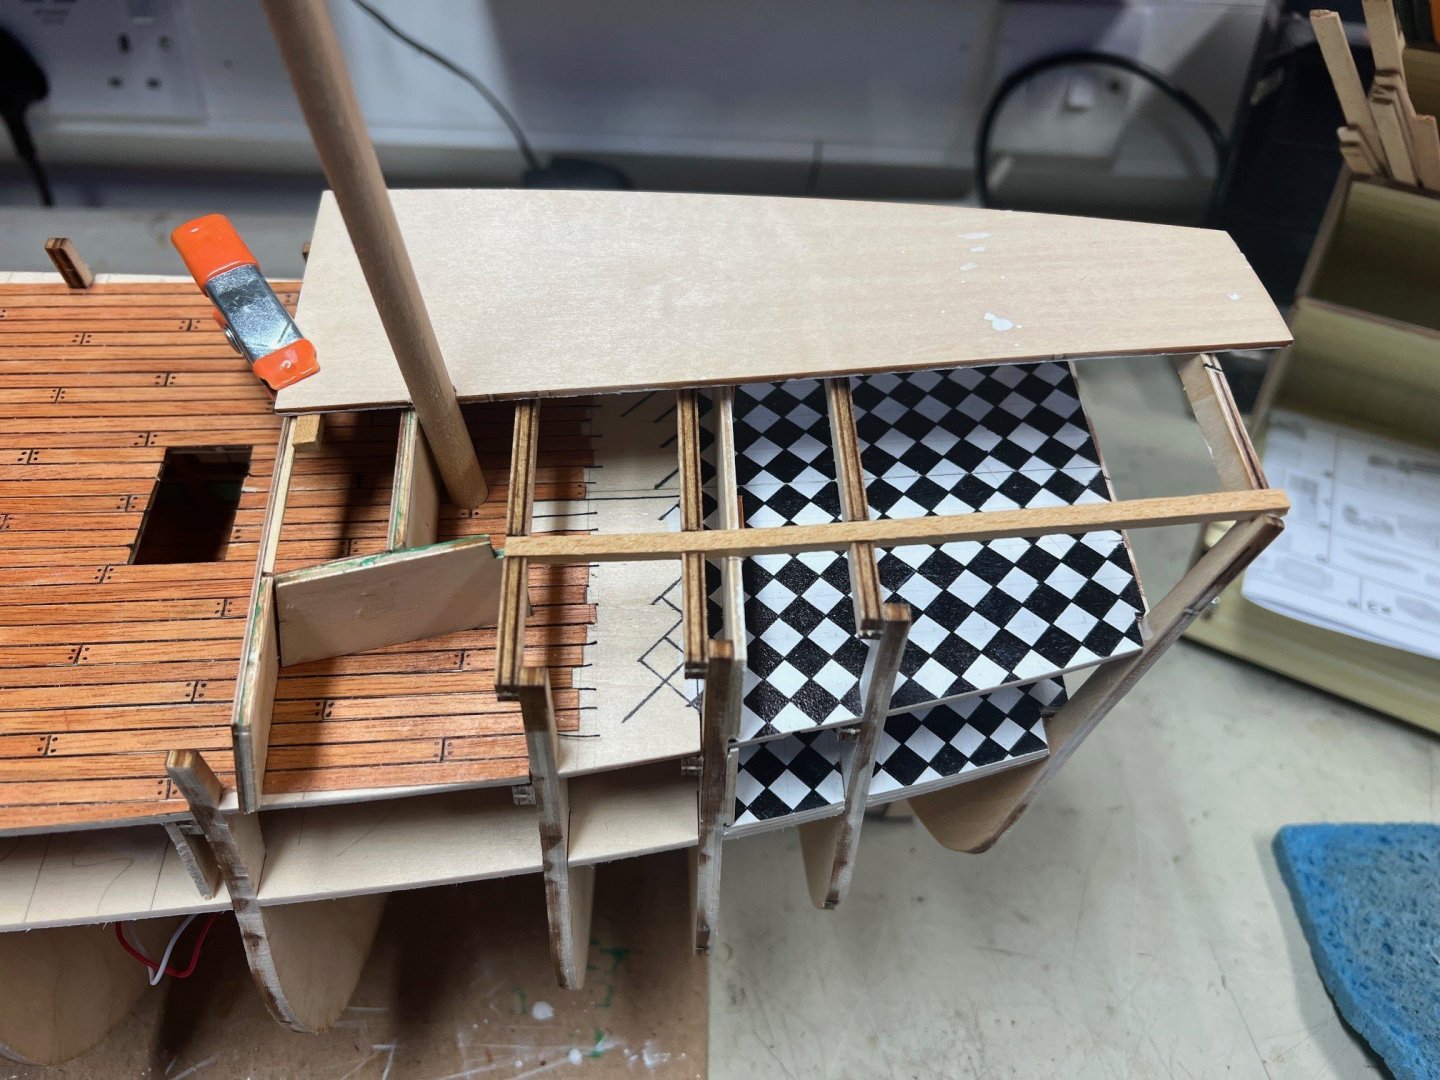
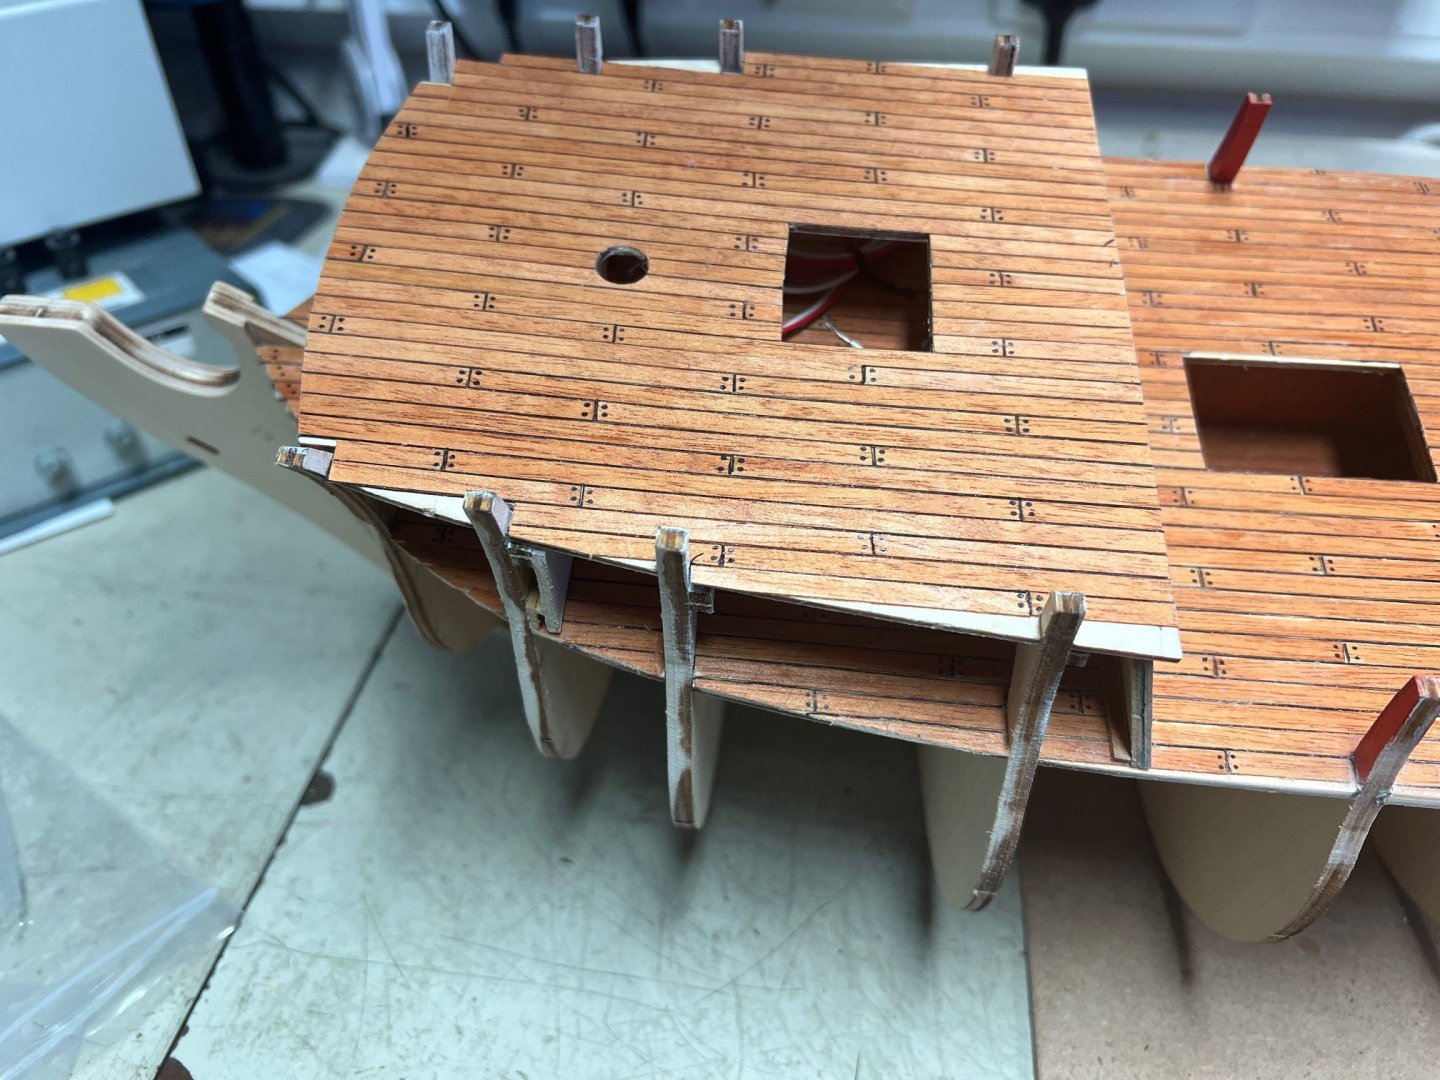
Onto the rear upper deck. Assembled and fitted the last bulkhead which is very tight to the rear mast so check and double check before permanently fixing. The centre of the bulkhead seemed very thin and had a slight bend so added an extra piece of wood to strengthen it. Also added another piece in the centre to give the deck something to bind to and take out any remaining bend in the bulkhead. Deck went on without any dramas and now on to planking.
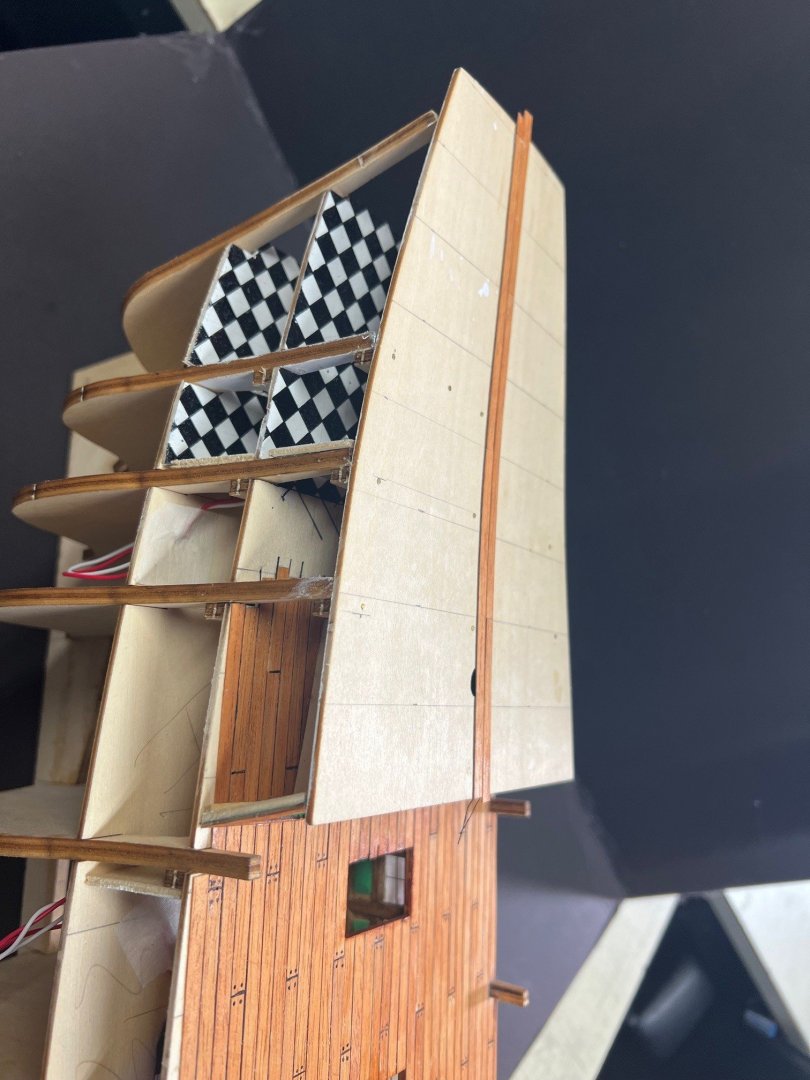
-
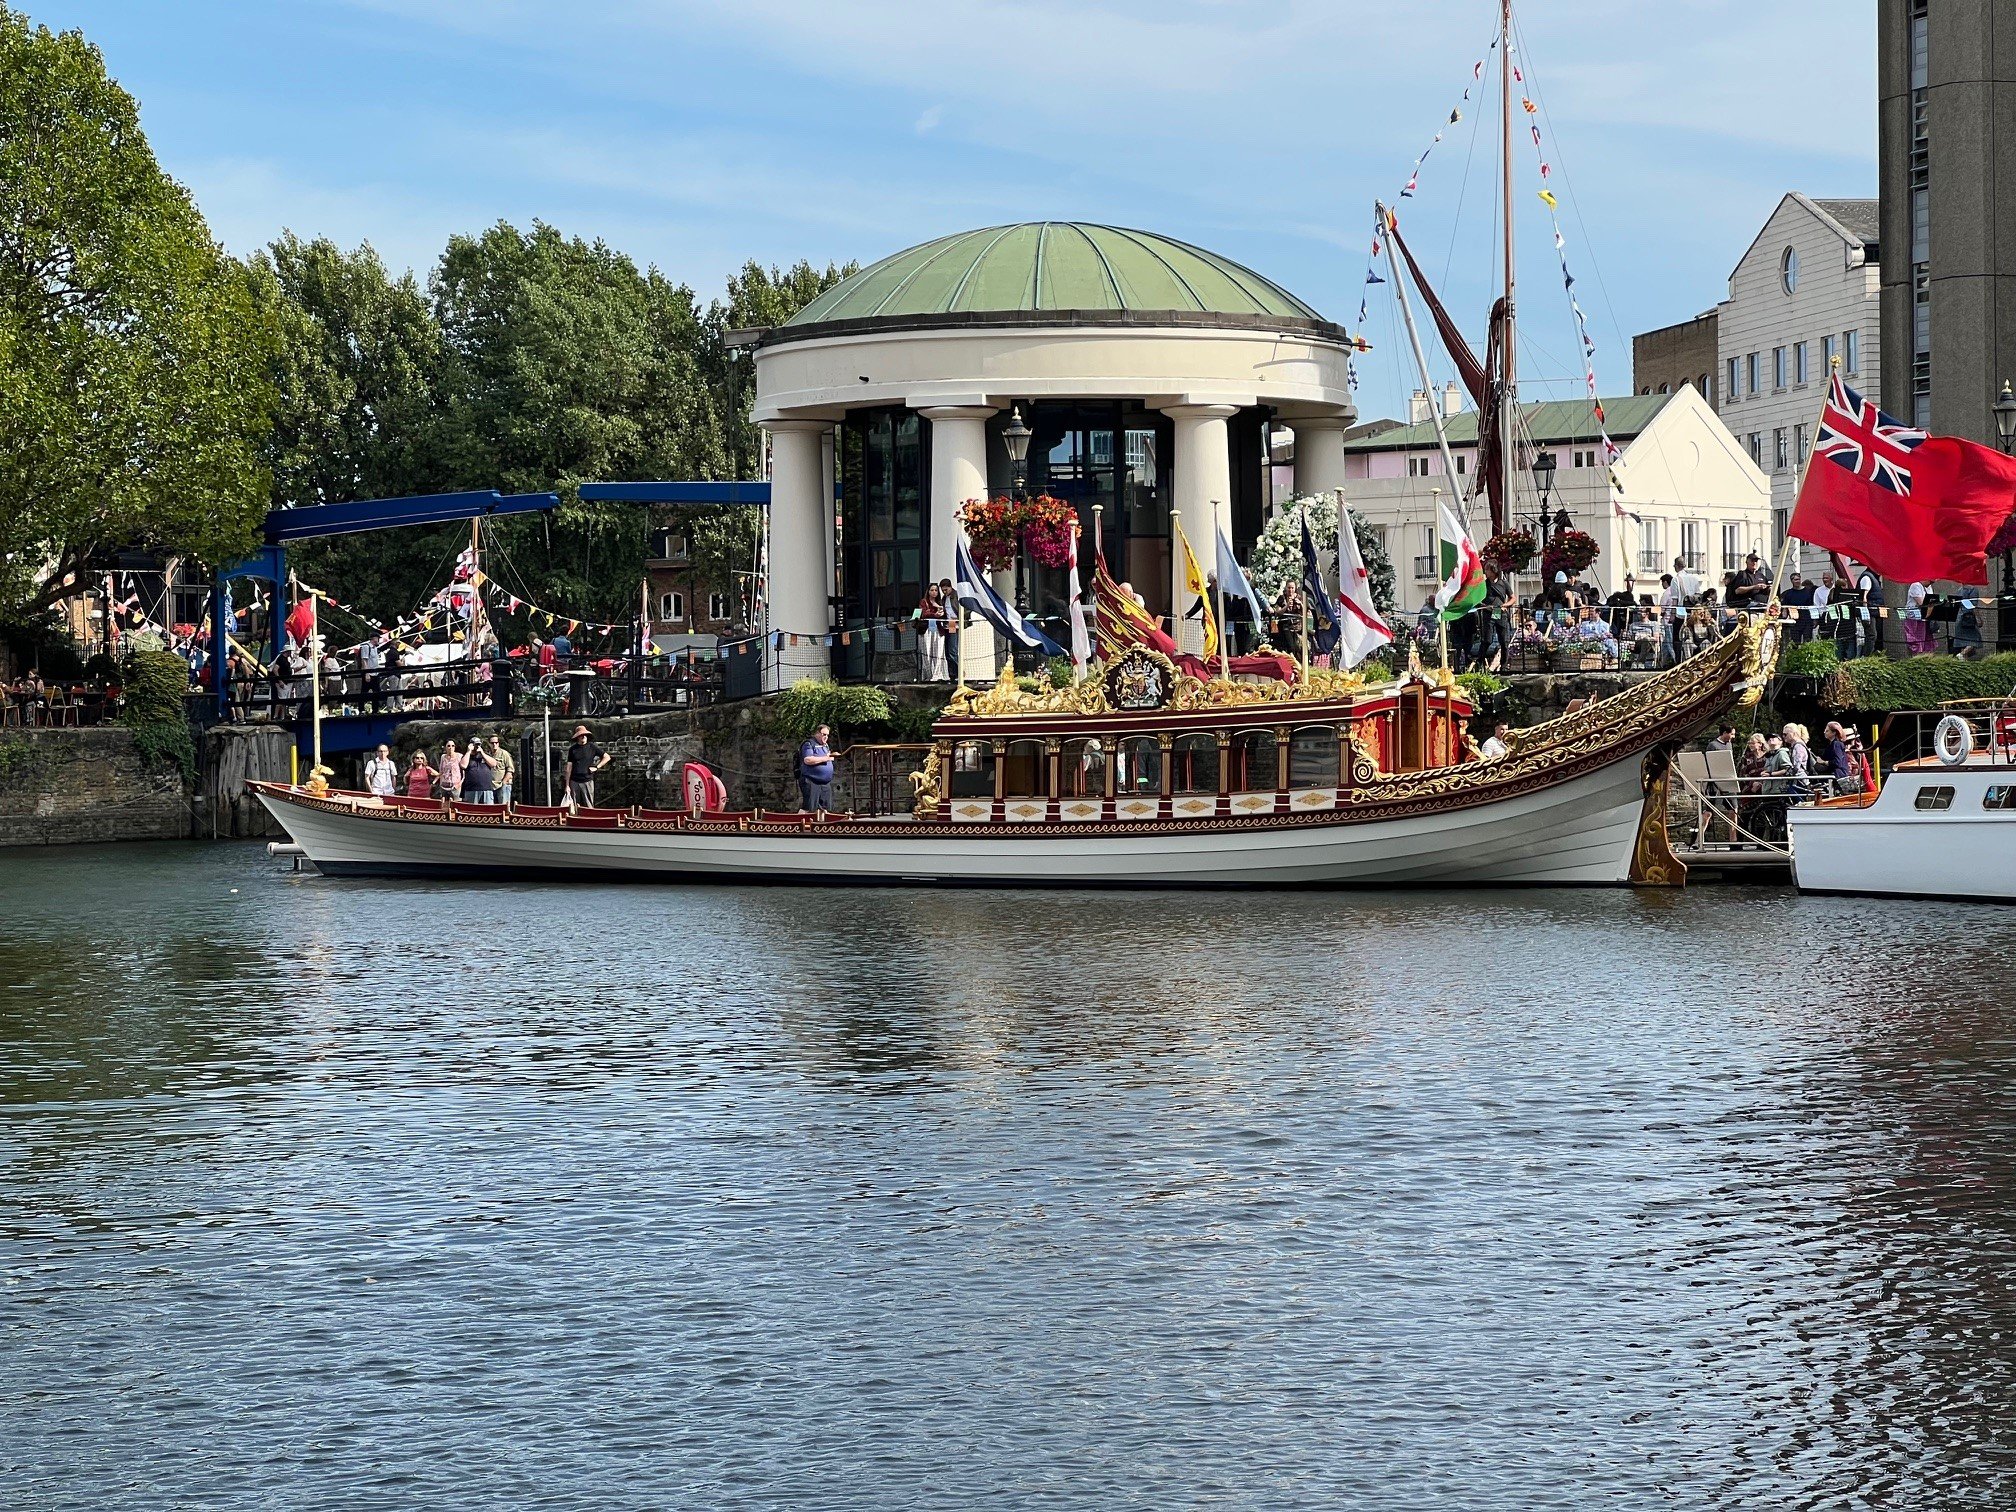
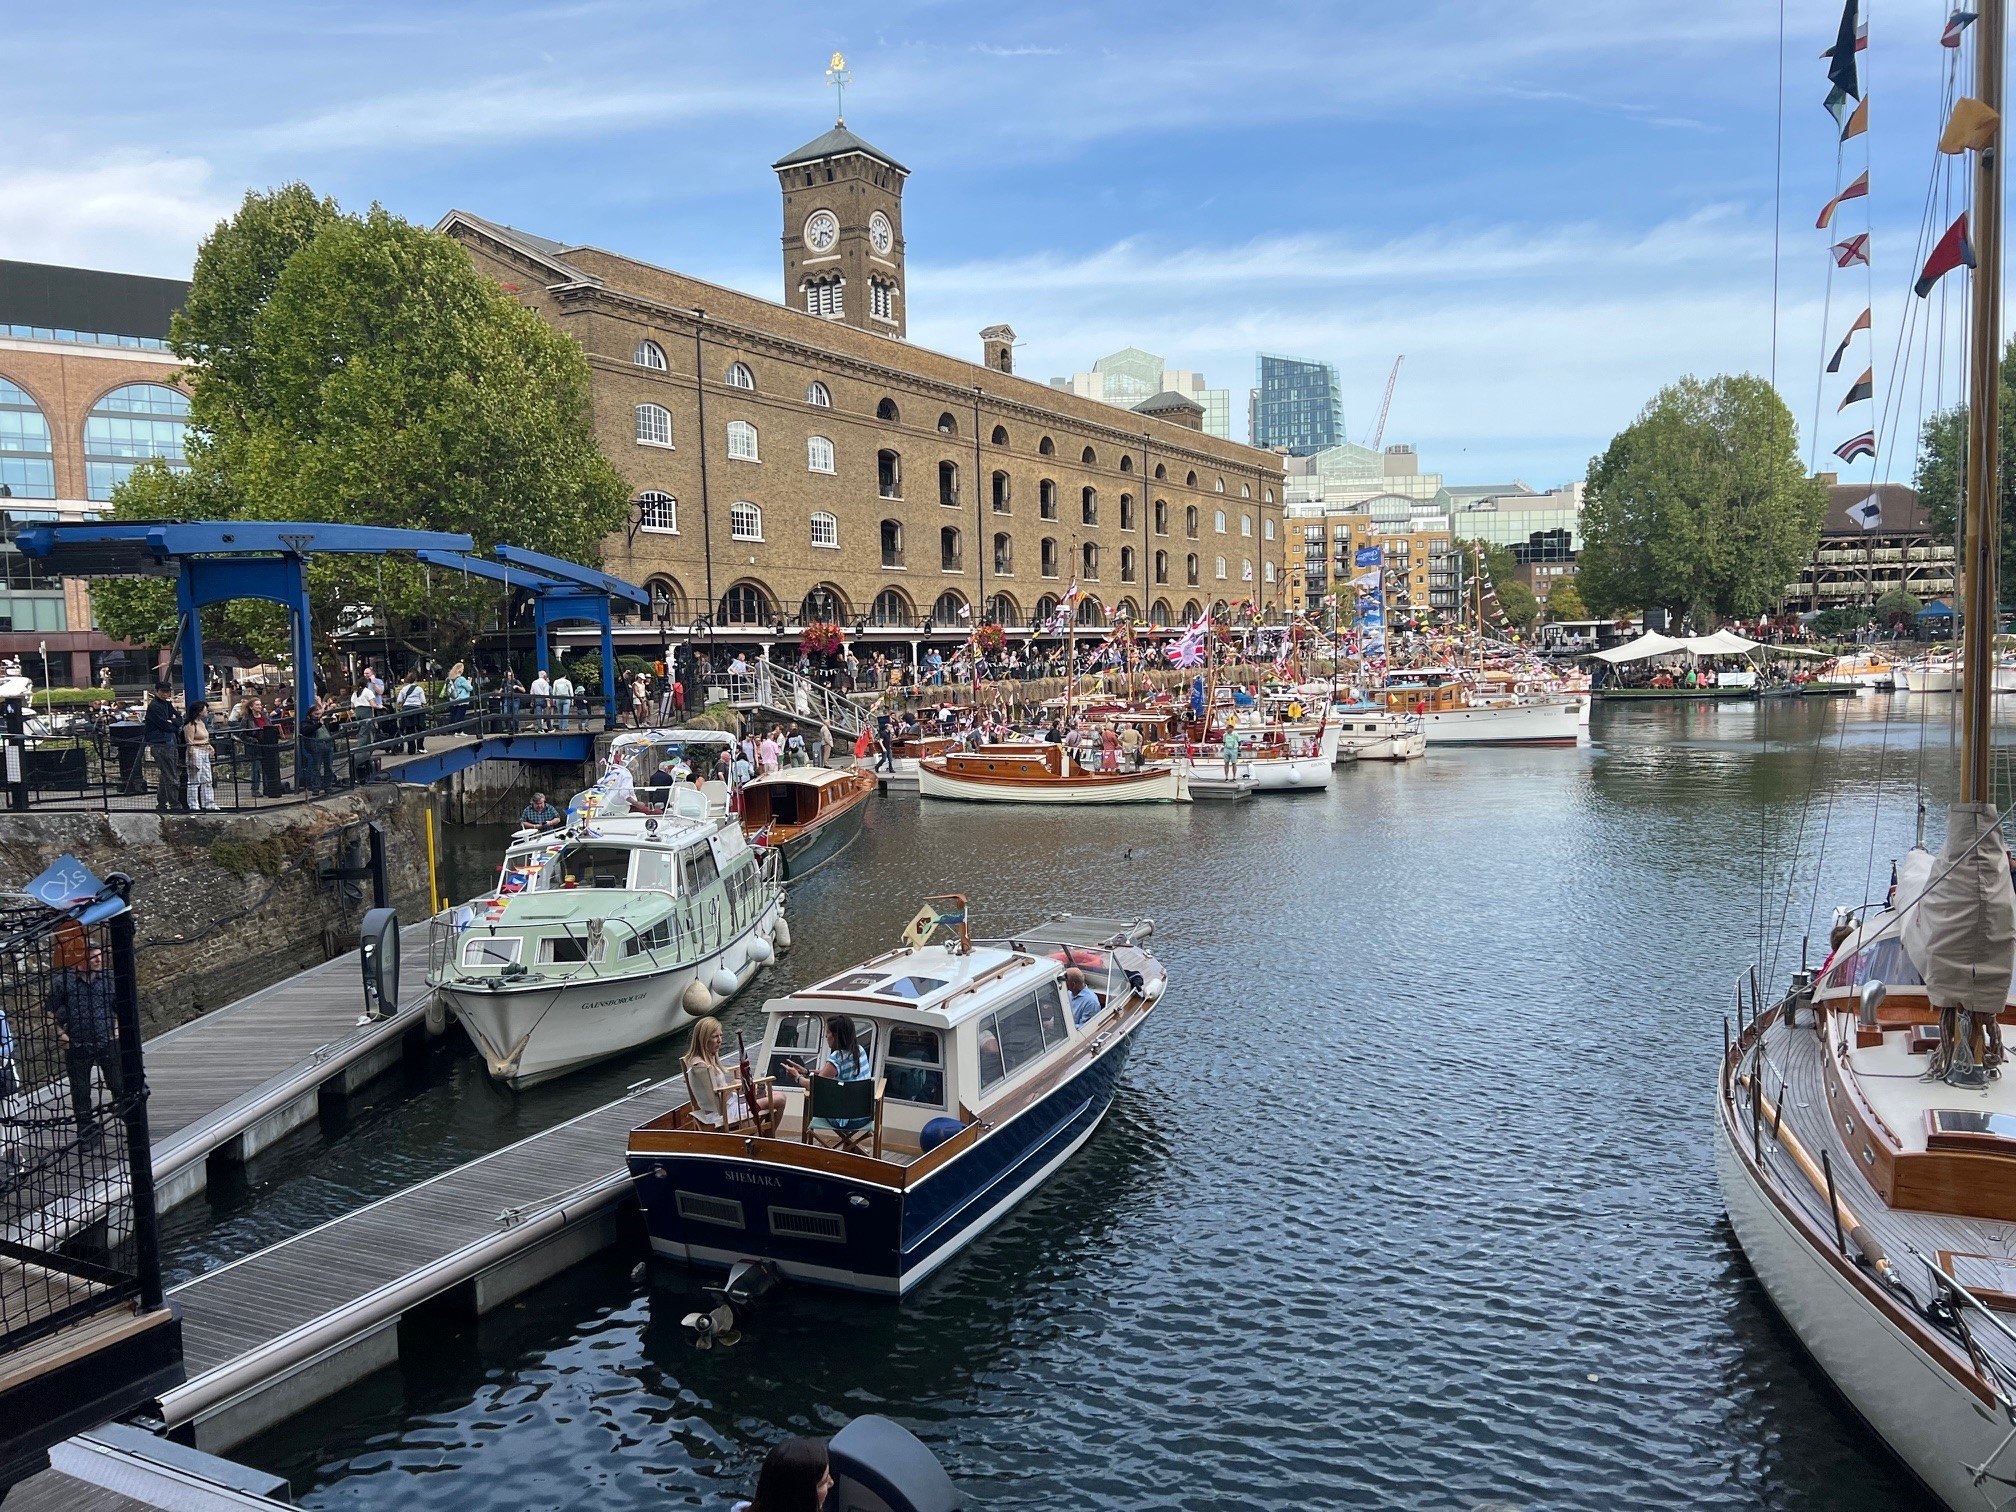
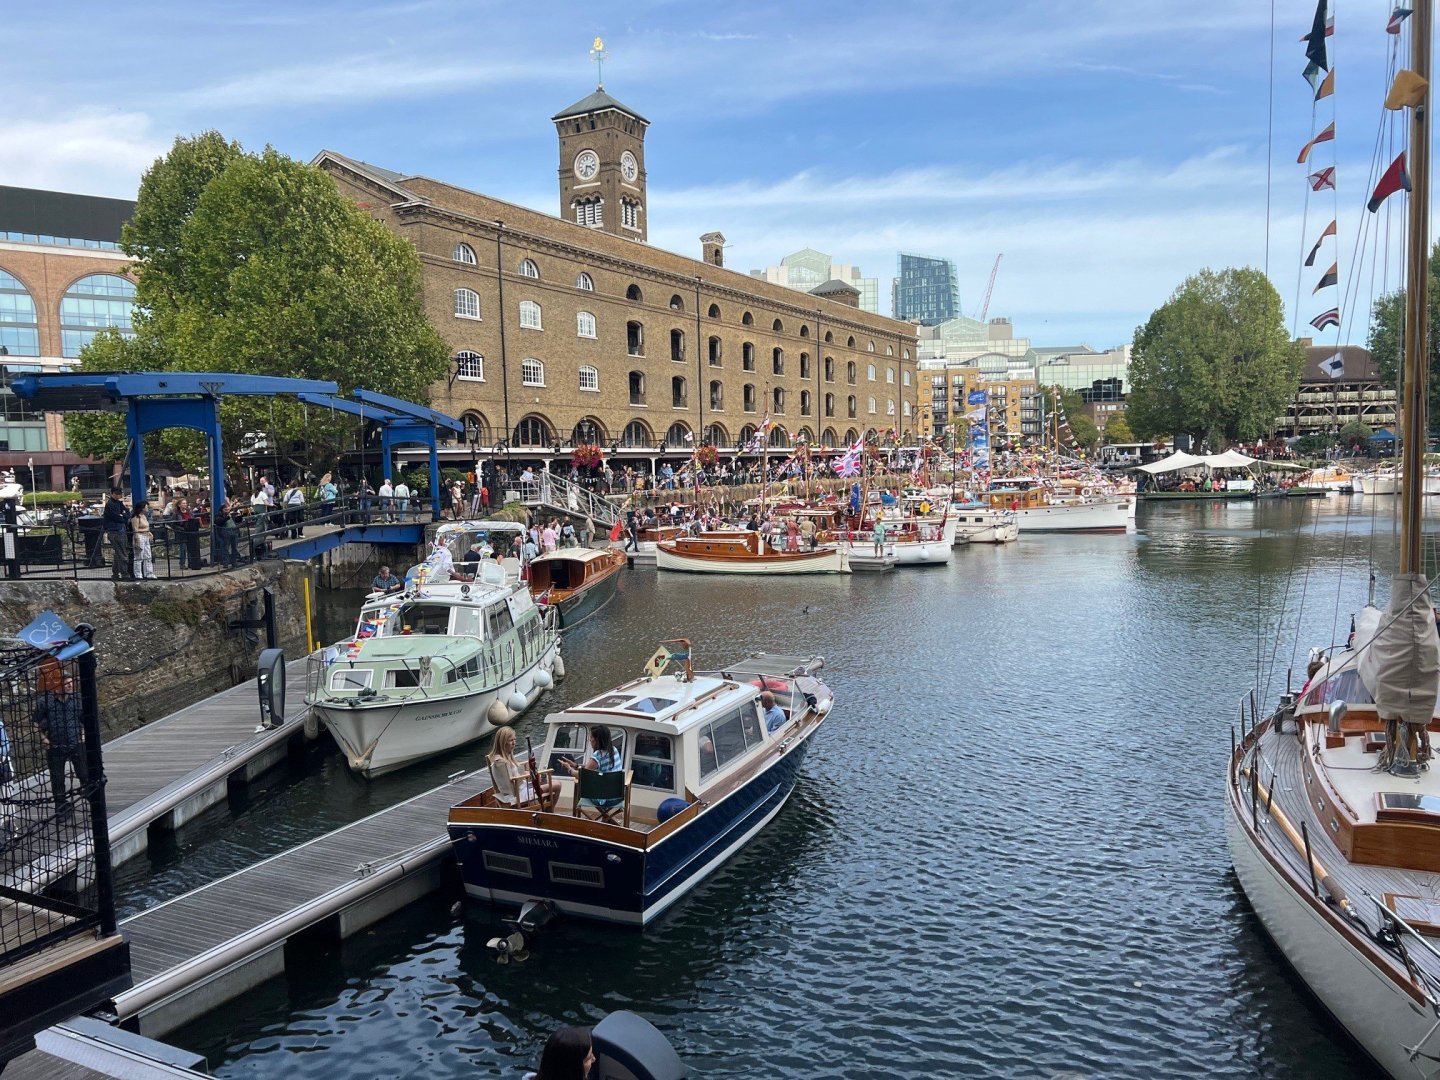
Planking completed except the edges. Need to shape the formers prior to fitting the last edge planks. Lovely trip to St Katherines dock, London last weekend. Annual festival of the Dunkirk small boats along with the Royal Barge Gloriana. Also went on board the Viking replica ship which just completed its 2 year voyage from Norway.

-
Front deck back bulkhead fitted. Used a spacer to stop it falling backwards. Front bulkhead also fitted again with a spacer to stop it falling backwards and to give a stop point. Marked the deck with a fitting line to get the correct angle. Note: If following this example, make sure the mast fits before fitting the back bulkhead and that the mast hole on the lower deck is filed out before fitting the deck.

-
Ronald-V reacted to a post in a topic:
Norske Love by Nelsons Dockyard - Billing Boats - 1:75
-
Ronald-V reacted to a post in a topic:
Norske Love by Nelsons Dockyard - Billing Boats - 1:75
-
Ronald-V reacted to a post in a topic:
Norske Love by Nelsons Dockyard - Billing Boats - 1:75
-
Ronald-V reacted to a post in a topic:
Norske Love by Nelsons Dockyard - Billing Boats - 1:75
-
Ronald-V reacted to a post in a topic:
Norske Love by Nelsons Dockyard - Billing Boats - 1:75
-
Ronald-V reacted to a post in a topic:
Norske Love by Nelsons Dockyard - Billing Boats - 1:75
-
Planking well under way but need to order some more supplies. Made up two more bulkheads. 1 for the Quarterdeck cabin and one to go under front deck. Not sure how far back this will go and if I want side bulkheads. Hoping to add another LED and open 3 cannon ports but on checking the plans, 2 of the ports protrude into the frames. Not sure moving the ports is going to work as they will be out of line with the others and look like a dogs dinner. Back to the original build to see what can be done. Will also see if I can open up the rear cabins in anyway by removing some planking behind the stern gallery.