Taken Aback
-
Posts
33 -
Joined
-
Last visited
About Taken Aback

-
 Taken Aback reacted to a post in a topic:
Muscongus Bay Lobster Smack by Stubby - Model Shipways - 1:24 Scale
Taken Aback reacted to a post in a topic:
Muscongus Bay Lobster Smack by Stubby - Model Shipways - 1:24 Scale
-
Taken Aback reacted to a post in a topic:
Muscongus Bay Lobster Smack by Stubby - Model Shipways - 1:24 Scale
-
Taken Aback reacted to a post in a topic:
Muscongus Bay Lobster Smack by Stubby - Model Shipways - 1:24 Scale
-
Taken Aback reacted to a post in a topic:
Muscongus Bay Lobster Smack by Stubby - Model Shipways - 1:24 Scale
-
Taken Aback reacted to a post in a topic:
Muscongus Bay Lobster Smack by Stubby - Model Shipways - 1:24 Scale
-
Taken Aback reacted to a post in a topic:
Norwegian sailing pram by Kenchington– FINISHED – Model Shipways – 1:12
-
Taken Aback reacted to a post in a topic:
Potential 1/48 Higgins PT kit
-
Taken Aback reacted to a post in a topic:
Norwegian sailing pram by Kenchington– FINISHED – Model Shipways – 1:12
-
Taken Aback reacted to a post in a topic:
Norwegian sailing pram by Kenchington– FINISHED – Model Shipways – 1:12
-
Taken Aback reacted to a post in a topic:
Norwegian sailing pram by Kenchington– FINISHED – Model Shipways – 1:12
-
Bryan Woods reacted to a post in a topic:
Norwegian Sailing Pram by Taken Aback - Model Shipways - 1:12
-
robert952 reacted to a post in a topic:
Norwegian Sailing Pram by Taken Aback - Model Shipways - 1:12
-
Ryland Craze reacted to a post in a topic:
Norwegian Sailing Pram by Taken Aback - Model Shipways - 1:12
-
JacquesCousteau reacted to a post in a topic:
Norwegian Sailing Pram by Taken Aback - Model Shipways - 1:12
-
Kenchington reacted to a post in a topic:
Norwegian Sailing Pram by Taken Aback - Model Shipways - 1:12
-
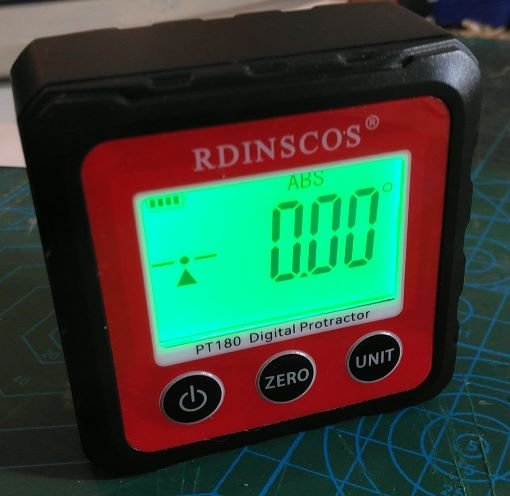
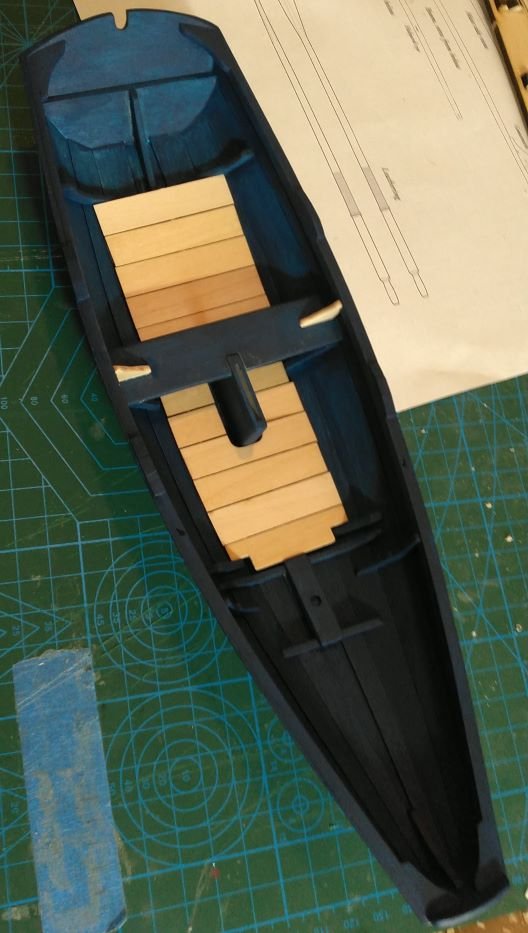
After a week or so out of town for family holiday visits, I made it home, and after a brief sugar detox/recuperation period I resumed work on the pram. I did, however, pick up a few handy tools as presents from my father, including a Veritas mini-shoulder plane and this little gem: It is, as you can plainly read, a digital protractor which I think will prove handy at times, not to mention, it is also another block to use for squaring up bulkheads, etc. Slick. As far as work on the vessel, I finished painting the hull, and have glued in the floorboards. The paint colors are warm white and Model Colors Prussian Blue, which looks almost black in the photo, but is a deep navy blue in reality. The floorboards I finished with one of my favorite wood finishes, Odie's Oil. I'm happy with the real life paint appearance, and will give it a coat of clear sealer when the last of the thwarts are fitted in place. Then to hanging the rudder, crutches and the stays. I have begun shaping the mast with my new Veritas plane, and it is a wonderful tool! I can't recommend it highly enough. Pops did well this year.
-
Bryan Woods reacted to a post in a topic:
Norwegian Sailing Pram by Taken Aback - Model Shipways - 1:12
-
robert952 reacted to a post in a topic:
Norwegian Sailing Pram by Taken Aback - Model Shipways - 1:12
-
Ryland Craze reacted to a post in a topic:
Norwegian Sailing Pram by Taken Aback - Model Shipways - 1:12
-
druxey reacted to a post in a topic:
Norwegian Sailing Pram by Taken Aback - Model Shipways - 1:12
-
Kenchington reacted to a post in a topic:
Norwegian Sailing Pram by Taken Aback - Model Shipways - 1:12
-
I recently purchased their Chamfer Cutting tool from Amazon. I haven't used it yet, just assembled it as it comes as a kit with laser cut wood parts. Clever design, but I didn't get any instructions and had to find a video in order to assemble it. The laser cut parts were well done, though, quite accurately sized.
-
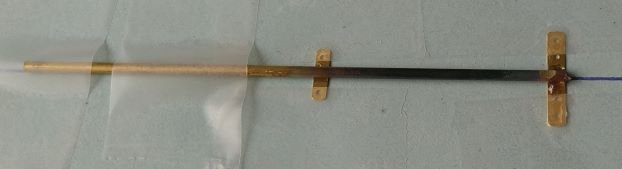
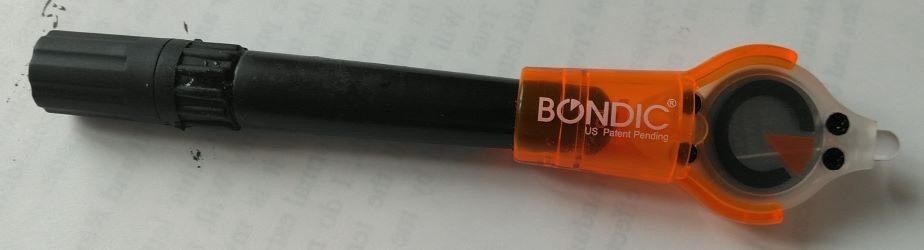
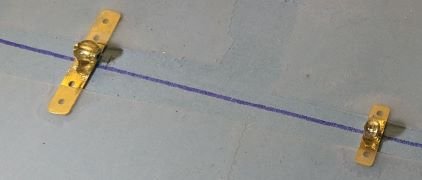
Outer hull painting is in progress; I have decided on warm white for the exterior and a Prussian Blue (AK) for the interior, rudder & dagger board. I first applied two coats of Minwax Sanding Sealer, with some light sanding and buffing after each coat. I like this stuff! Sands easily, seems to fill well, and a quart should last me a lifetime of models. Two coats of white have been brushed on, and I am now shopping for an airbrush. I have been using my wet palette which keeps the acrylic ready to go and a bit thinned. Also in the works are some of the metal rudder fittings. I first annealed the tubing, per instructions, but, as others have found to their woe, it becomes far too soft and malleable to work with. I made up a quick centerline to work over, and taped my flat pieces down. After annealing I then used Bondic to adhere the tubing to the flat piece, then tried to cut it off. This did not work as the heat from cutting released the Bondic and the tubing bent and smashed. By the way, my first notion was to use JB Weld, as it is very controllable and strong, but I found that I was out of one part. Next trip to the store will fix that, and I suspect it would work beautifully on this little application. Bondic is a liquid plastic, which you squeeze from the black handle tube, then harden using the UV light at the other end. Ten seconds sets the plastic up hard, but clear and workable. These little gems are quite handy for a variety of uses. The plastic remains a viscous liquid, nearly a paste, until you use the UV light on it. Almost infinite working time. It doesn't make for the strongest joint, but as a filler it is fabulous. For this application, I think the strength will be sufficient. I next changed gears and used a razor saw to cut off appropriately sized lengths of unannealed tubing, then held them in place on my straps using the rod inserted in the tubing, and hit with the Bondic. This went very well. You can see the clear bead in this shot, but from any distance it is invisible. Lastly, I bent the rudder straps and will attach the tubing bits and pintles to the outside of the bends, after attaching the straps to the rudder, again using the rod through both pintle mounts to keep things lined up. That is the plan, in any case.
-
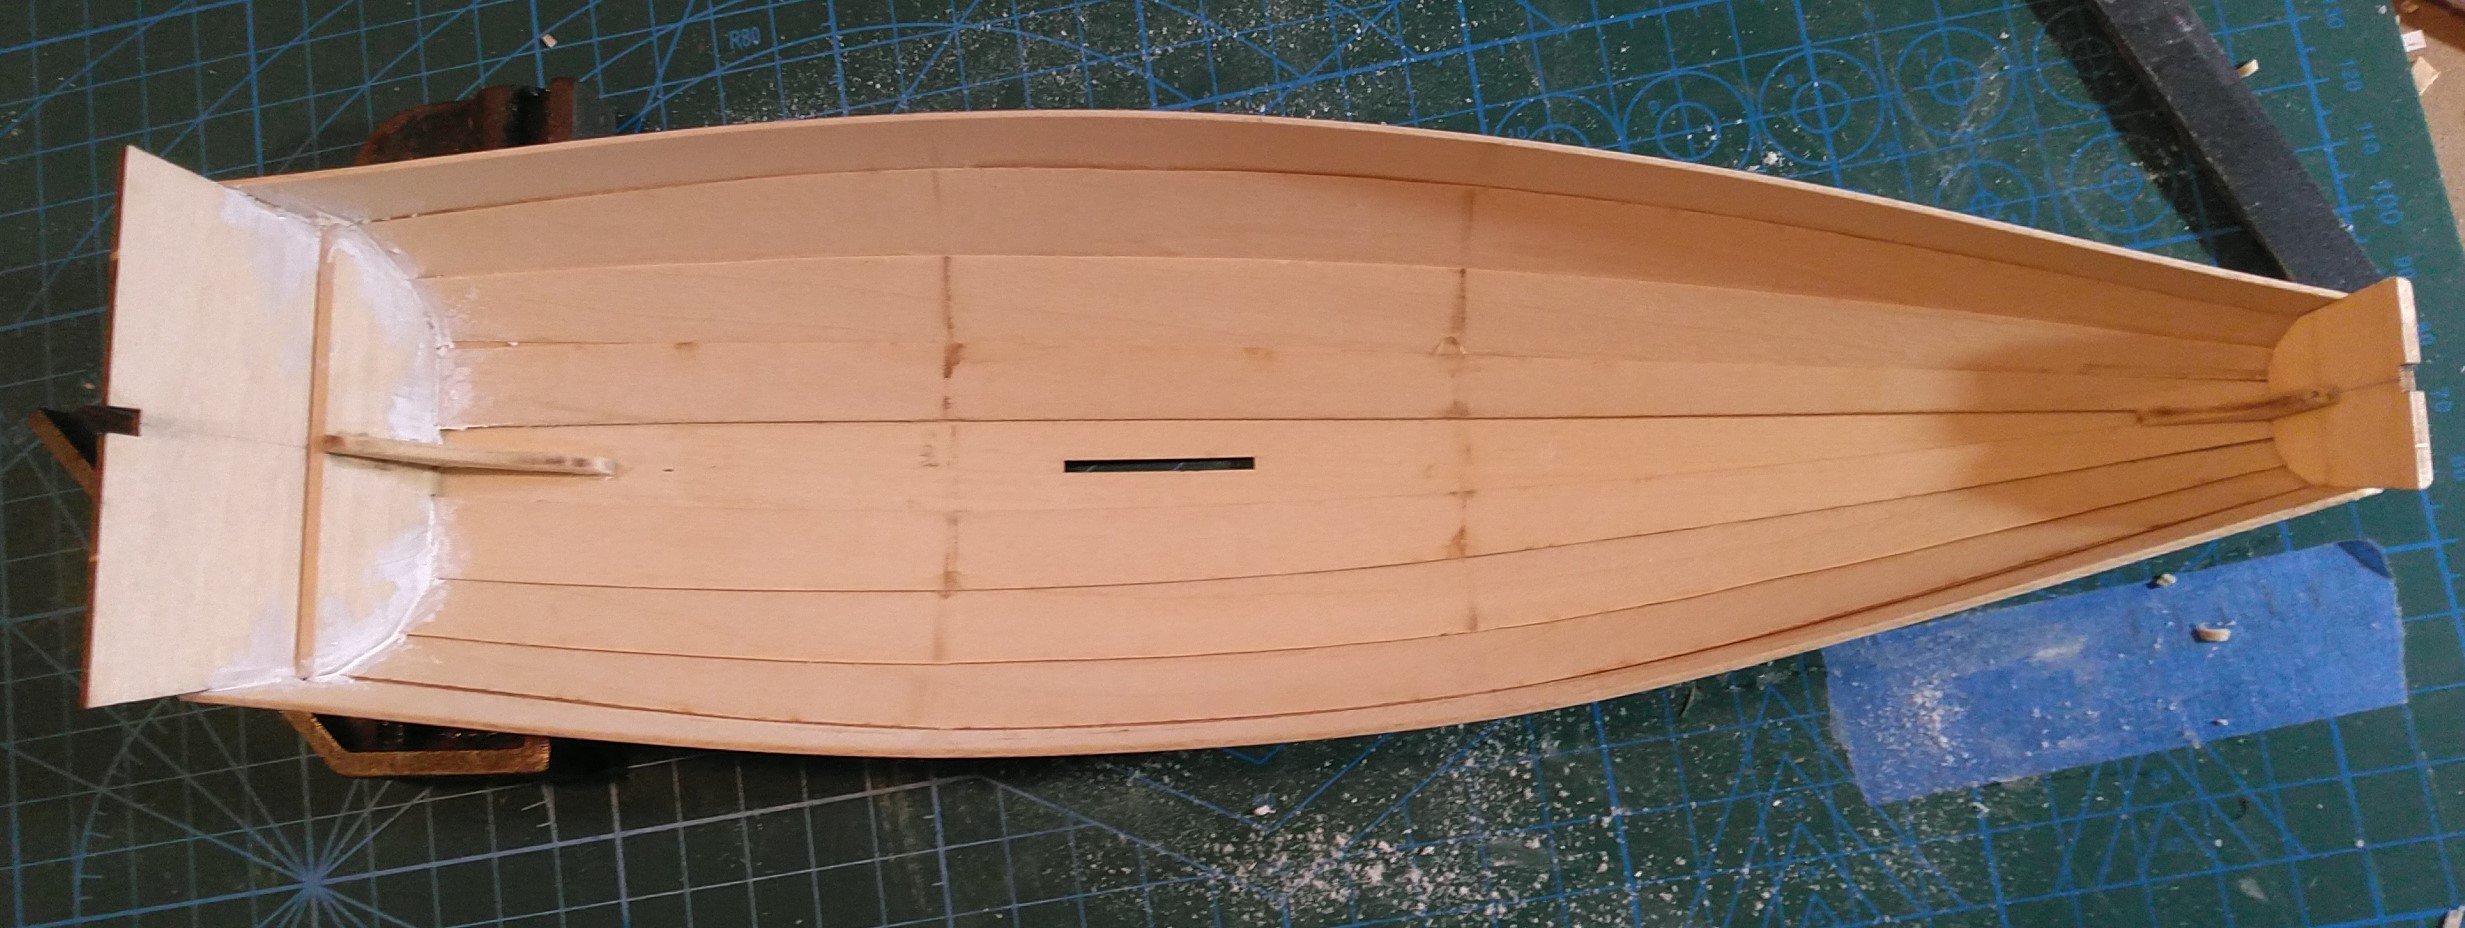
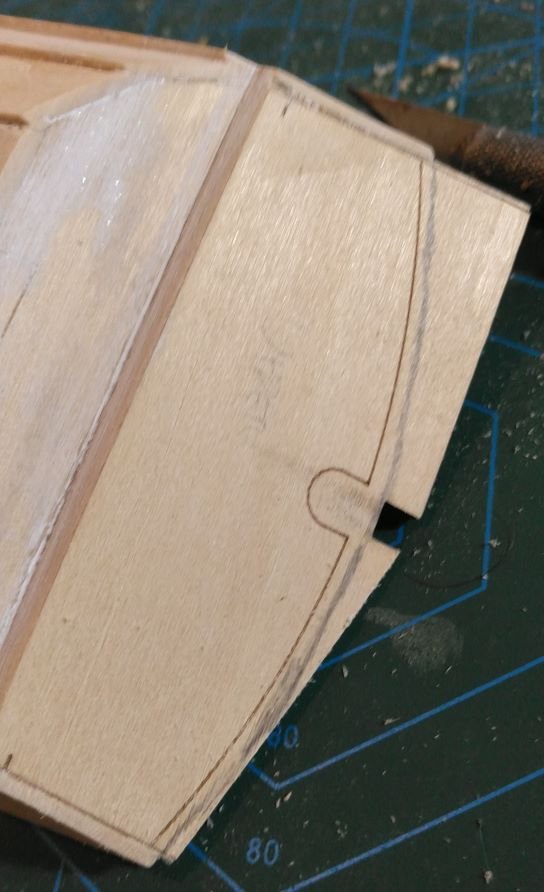
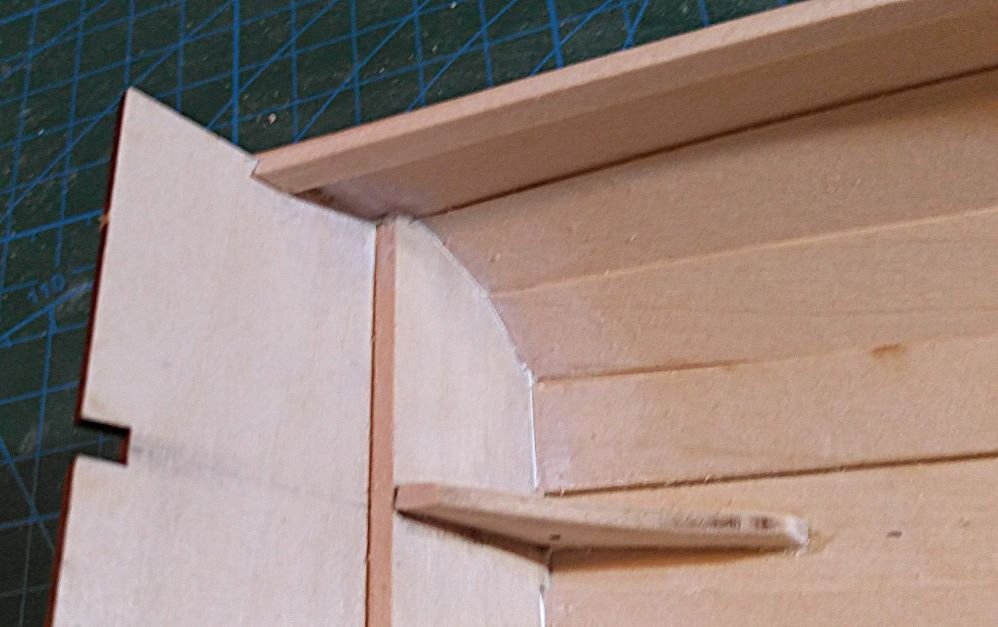
It was time to shape the transoms, so out came the razor saw and sandpaper. The bow wasn't too difficult, but at the stern my sheer planks were a bit high compared to the laser etched template line. Instead of cutting down the sheer, I elected to reshape the transom a bit higher, which turned out well. The hull with transoms shaped and thwarts set in place, not glued yet. The floor cleats bent quite easily with the hair iron, and this is now a go-to method for me for shaping shorter bits and tighter bends. Since this pic was taken I have drilled the holes in the gunwales for the chains, but not yet cut the slots. Quite happy with the overall appearance of the build, at this point. I edited this post to show a slightly less crappy picture, with the rub rails now glued and faired in. Almost ready for some paint, after I get the oar lock pads made and glued on, and finish cutting the chain slot.
-
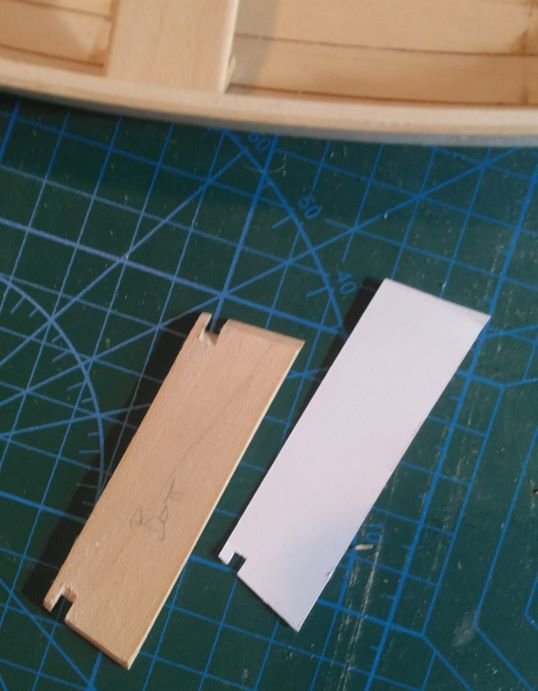
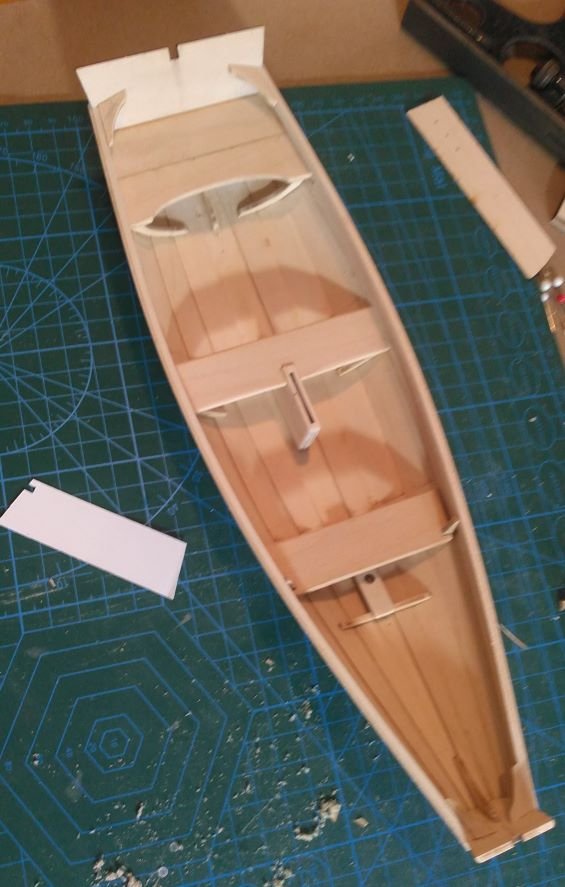
Currently the floor cleats are drying after a soak in boiling water, but I am pretty sure I will have to rebend them as bending them over the hull isn't working well, due to their short length. I think I will soak them then run them thru one of my new plank benders, aka my wife's hair straightener. Other progress was finishing fitting the seat supports and thwarts, and stern sheets. I glued a cleat to the underside of the two stern pieces, and got the dagger board thwart fitting quite well. The fore thwart required so much trimming that I made a template from light card stock. Even after using that to trim the thwart to length I found I had to aggressively relieve the underside of the notches for the thwart to nestle into place correctly. This is where I am now, with the thwarts temporarily in place. Next steps are installing the floor cleats and test fitting the floor boards, fitting and gluing the rub rails, and trimming/shaping the transoms. I did have to break out the isopropyl to detach the starboard bow transom knee as the angle was off and did not line up with the port knee. This got a bit fiddly and I think I will need some filler after the sanding is complete. But having knock knees on the bow looked dreadful. This outcome is acceptable.
-
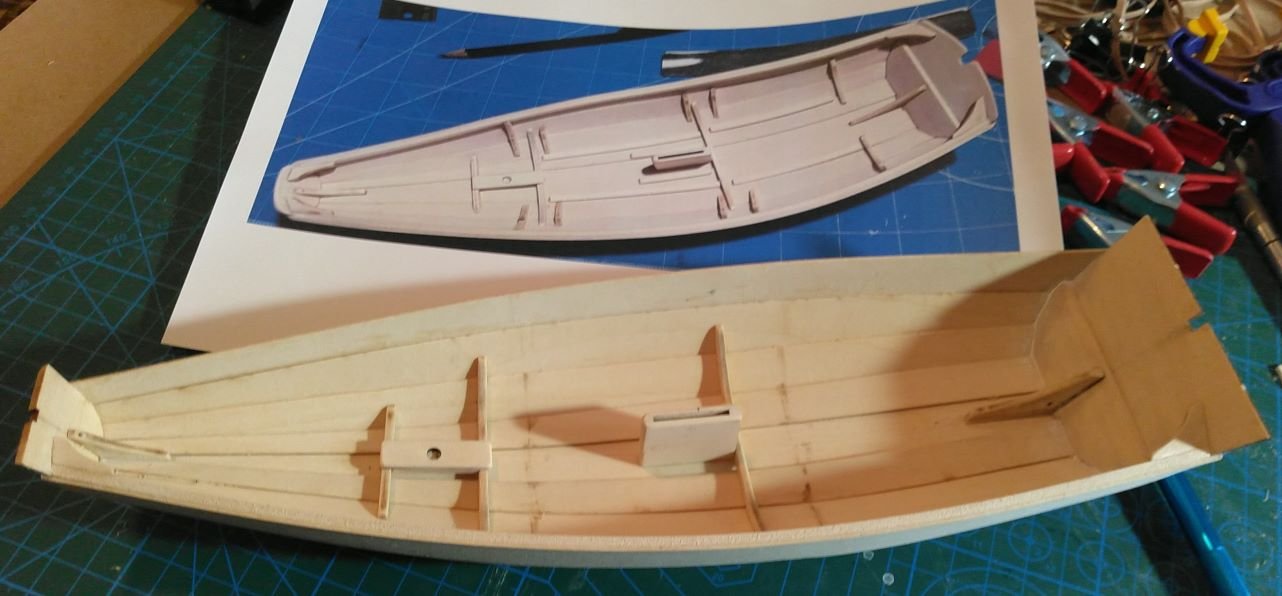
Thanks! I agree, they tested my skills and patience to get them placed. Having a clear picture of where things were placed helped quite a bit, and since my shop is on the second floor and my computer is in the basement, I opted to print out the pic.
-
I have decided to work one side of the boat at a time for easier access to the interior. So, I now have all the seat supports and fittings glued in place on the port side, including the inwale and knees. As part of my process, I printed out a picture from Kenchington's build log to aid in the placement of the tiny little seat supports, as I found the photos in the manual difficult to decipher. Once I got those bits sanded, and trial fit, including placing the thwart to test the fit, they glued in place fairly easily, if not perfectly aligned. The seat support under the front of the "stern sheets" was the most off from fitting my hull and will require some filler under the upper part. My hull stayed very well in place on the molds during the planking, so I'm a bit baffled as to why the angles seem so far off. I have noticed a difference in plank heights from port to starboard as I test fit the thwarts, so it is likely that. Not huge, but noticeable, to me. In any event, the inside of the hull is halfway there, with the inwale drying in place after a good hot tub session. I think the starboard side will progress more quickly, as I made some pencil marks indicating the placement of the supports. I also made a card stock thwart template for the forward thwart, as the kit thwart was far too wide to fit in place. I had to trim about an 1/8" off the width, and recut the notch for the frame, but it went well and didn't take very long.
-
Thanks, Trevor! Your build log is helping me with this build, very much.
-
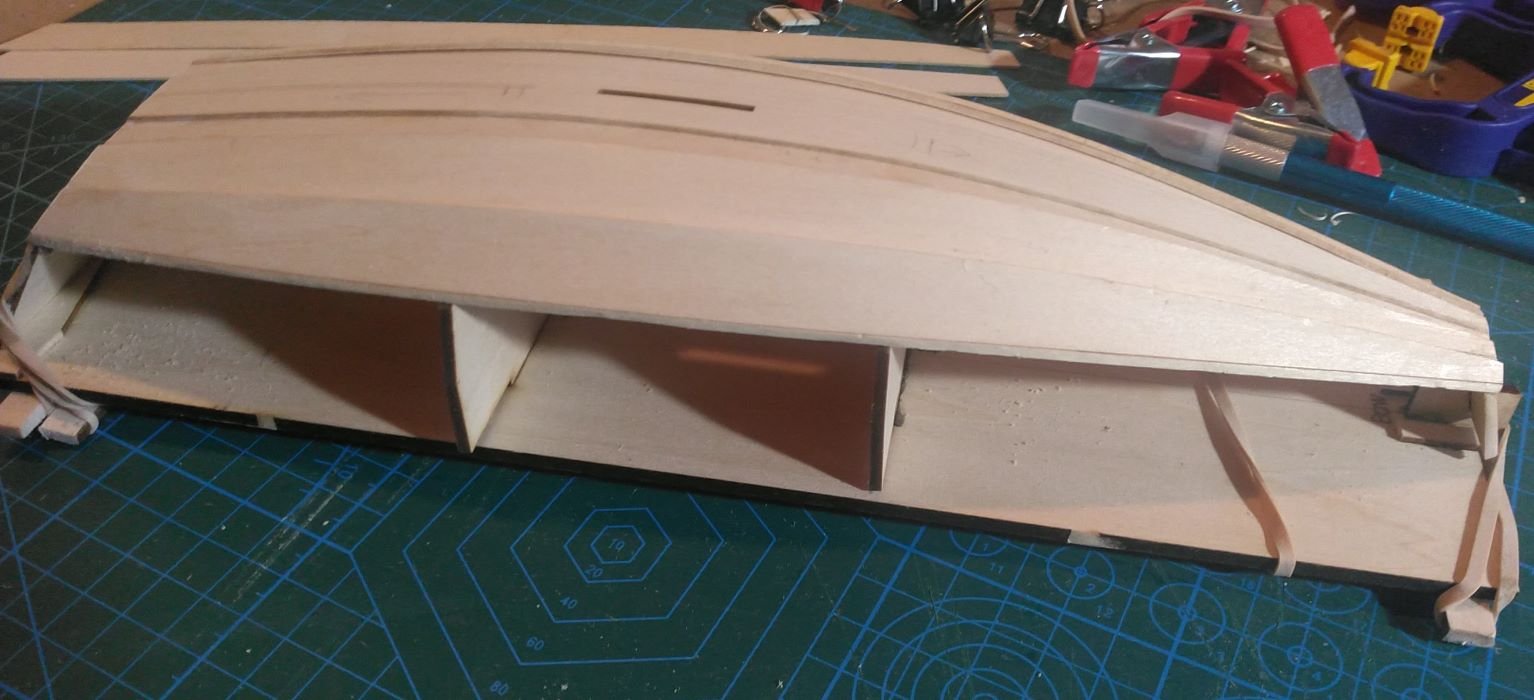
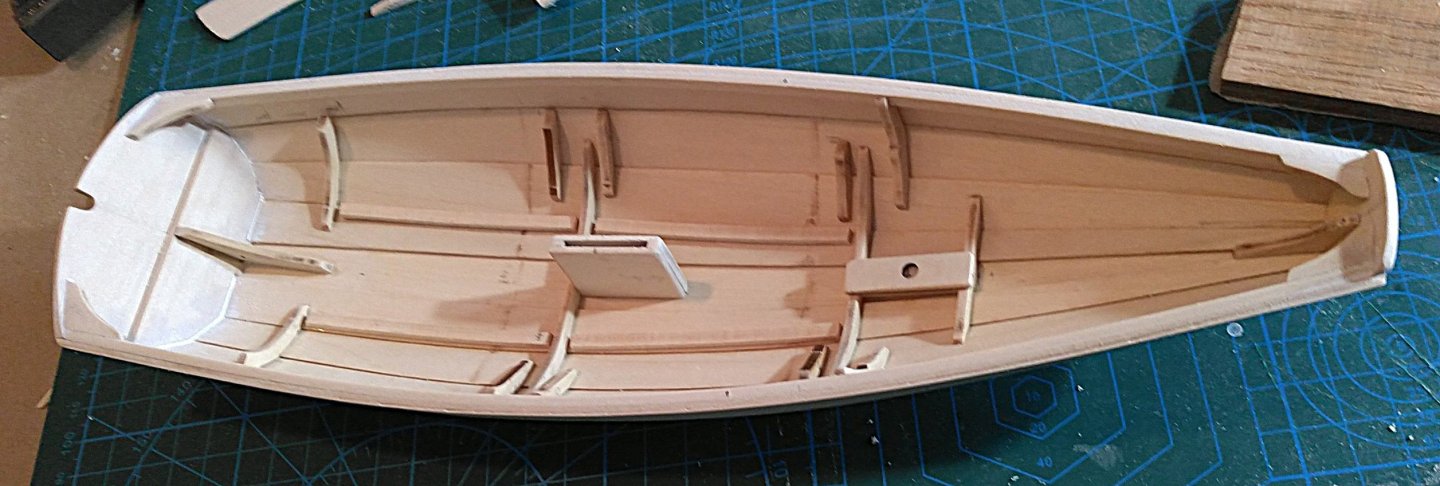
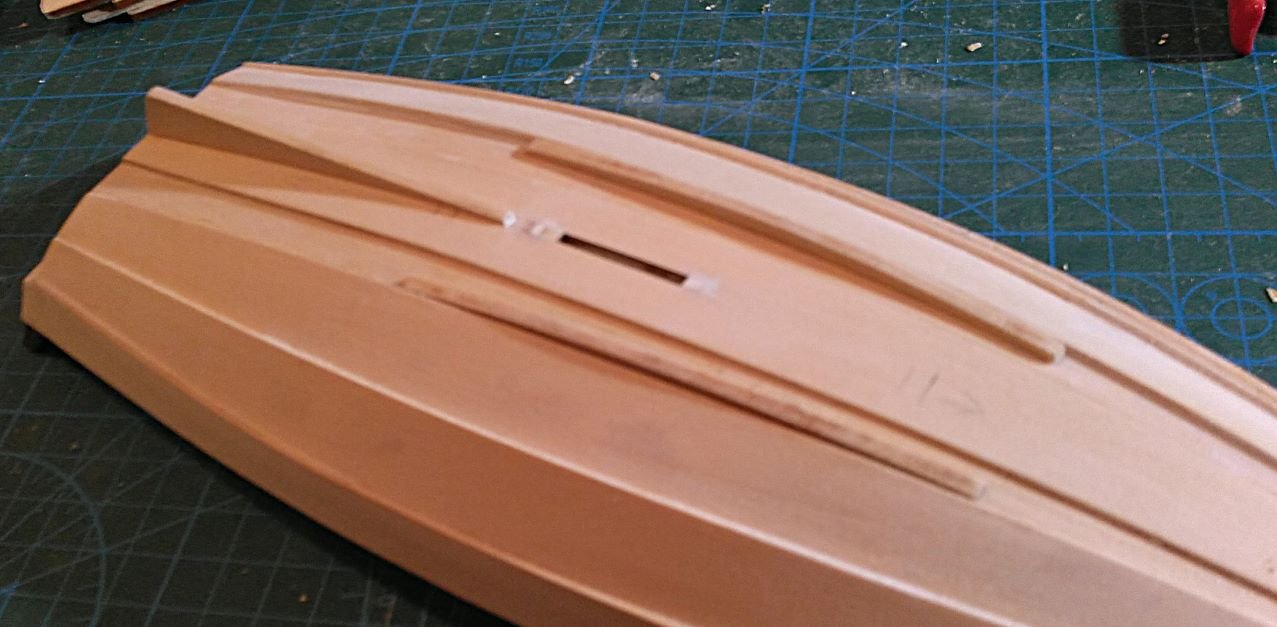
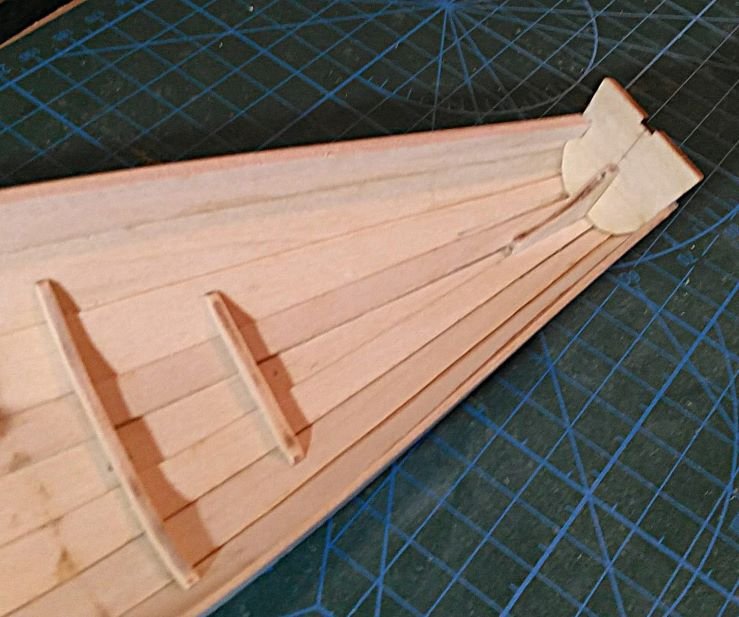
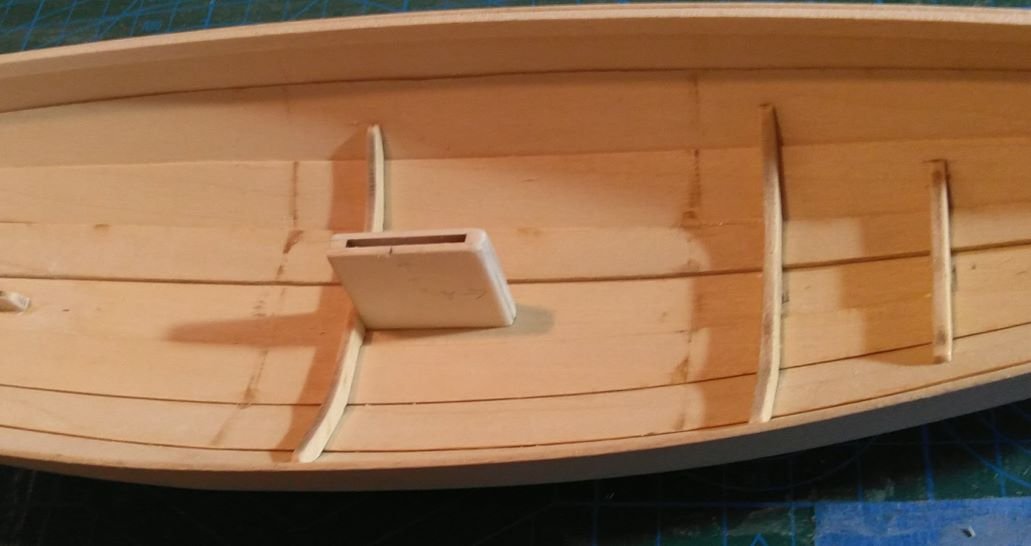
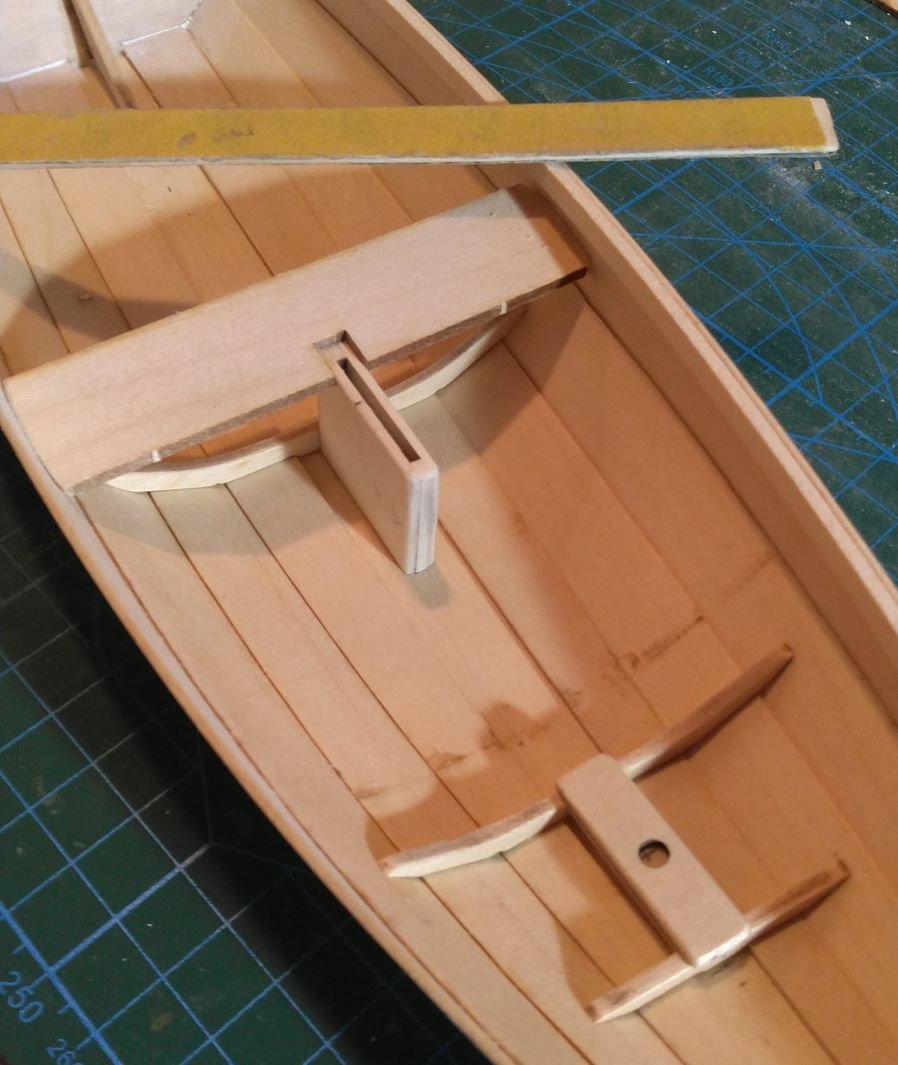
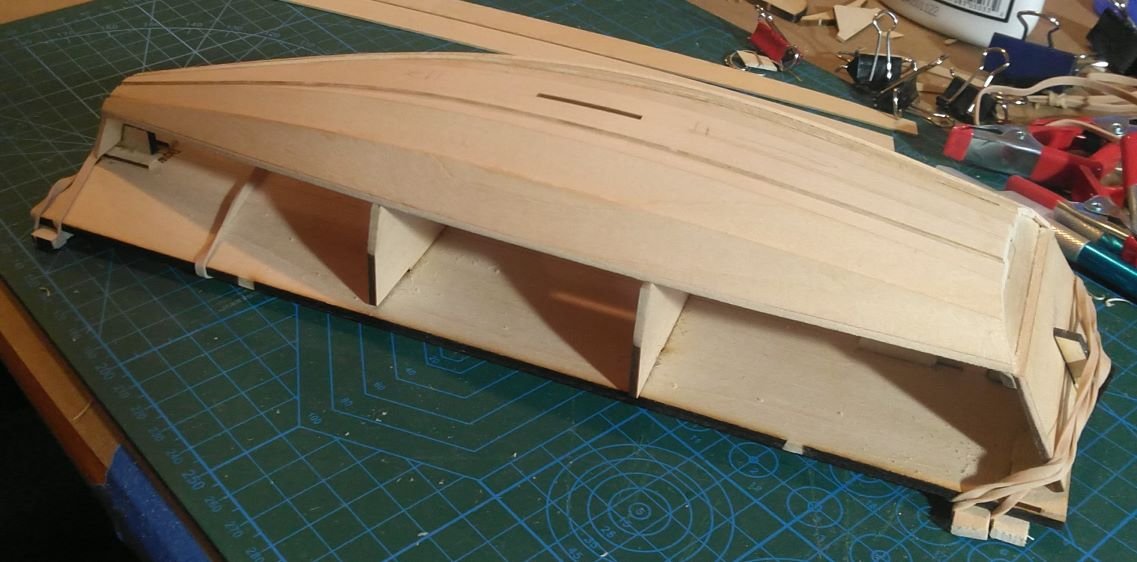
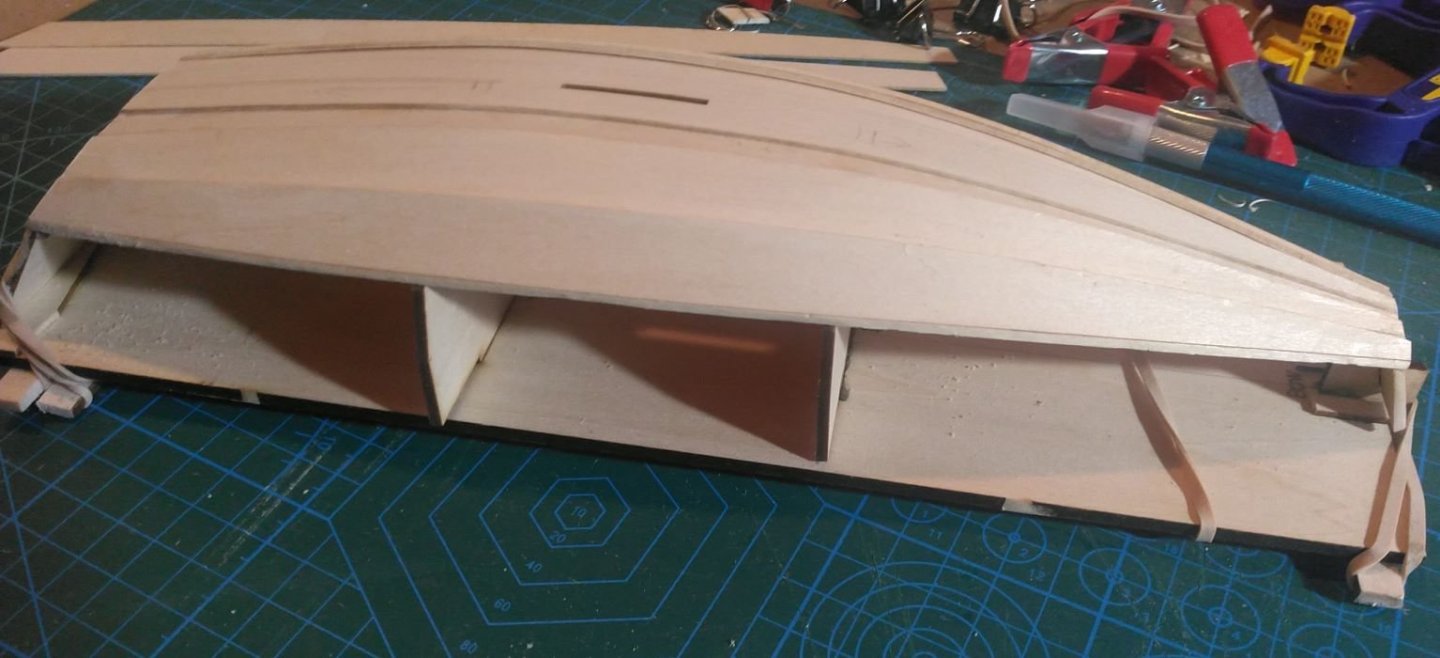
More progress has been made: the skegs have been added, as has the dagger board case and the 3 inner frames, and one inwale is now glued in place. The skeg fitting was easy and quite enjoyable using the sandpaper on the hull method for shaping the mating surface. I added a centerline to the hull just aft of the dagger board slot for keeping the bow end of the skeg in line. The other two skegs also went on without trouble, giving the model a nice flat platform when upright. I built the dagger board case by first clamping the two sides together, then sanding the bottom against sand paper placed over the slot in the hull, which quickly shaped them to the hull. Then I glued the case together in a few stages, first gluing one end piece to one side, using a square to keep the edges tightly aligned. After that set up, I repeated the process with the other end piece, then finally glued on the other side, which was trickier, as I had material protruding out of both the top and bottom. I should have trued the top edge before gluing, as the bottom has to have the end pieces protruding thru the slot, but it went together well and glued in place easily. The inner frames were more challenging, both in placement and fitment. Getting those pesky frames square transversely and vertically inside a hull which has virtually no vertical or horizontal surfaces is a bit of a chore. I think I did ok, although frame 2 might not be perfectly vertical. After reading some other build logs, I decided to check the fit of the mast step prior to gluing in frame 1, and I'm glad I did. I ended up moving my placement for frame 1 back a bit in order for the upper mast step piece to fit correctly. I'm currently working to fit the thwart to the hull before adding the supports, as other build logs have mentioned that getting it in place after both inwales were installed can be a challenge. Nearly there, sanding each end and fitting until it nestles in place. The inwale was straightforward in bending, and fitting, very similar to the dory model. After several fit attempts, with associated trimming and sanding I had a very nicely fitting inwale. My apologies for the less than crisp pics.
-
Thank you and thanks for the tip! I will give that Tamiya White Putty a go.
-
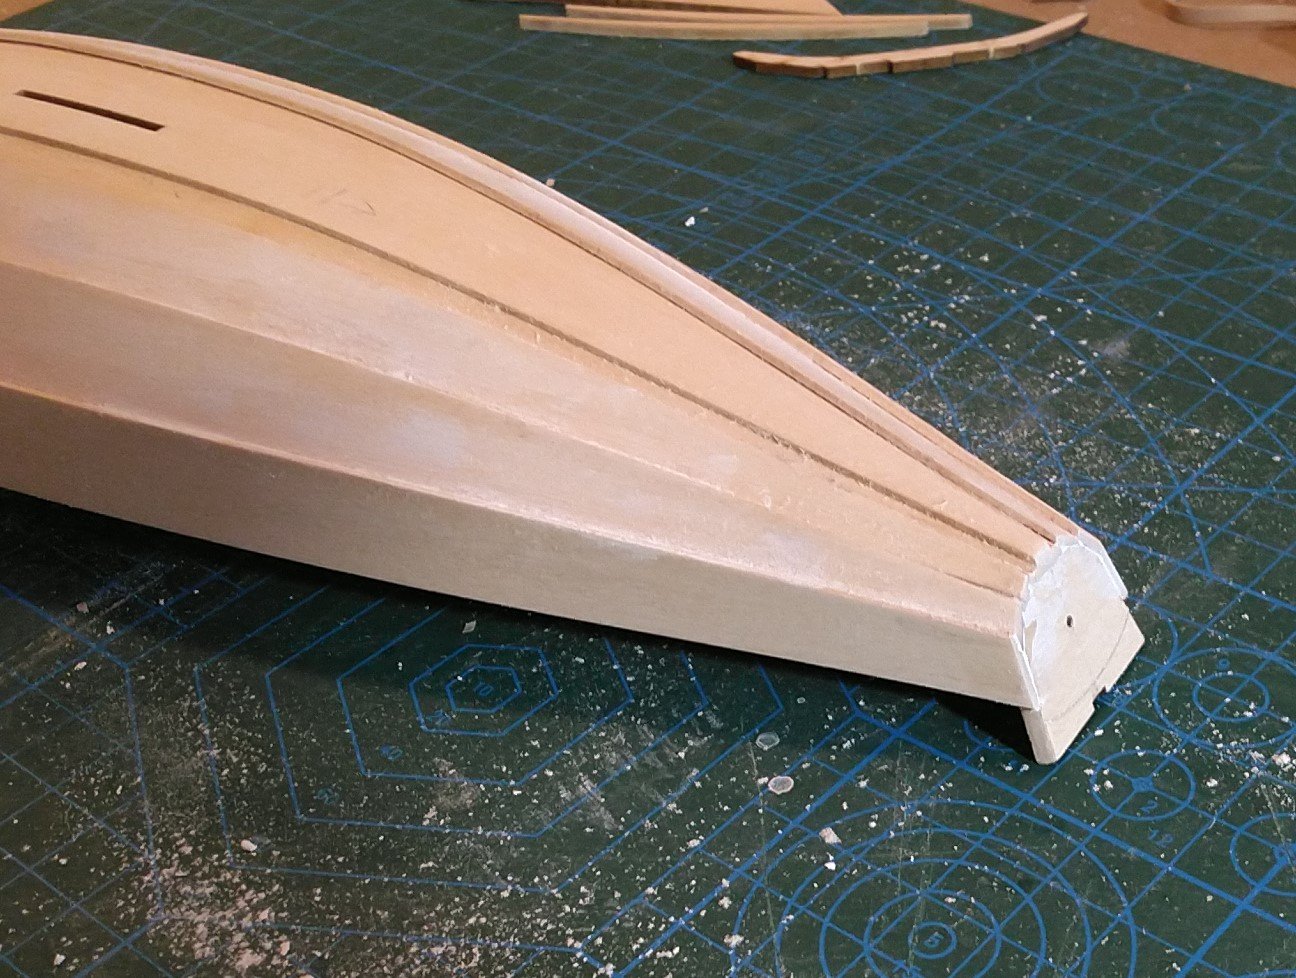
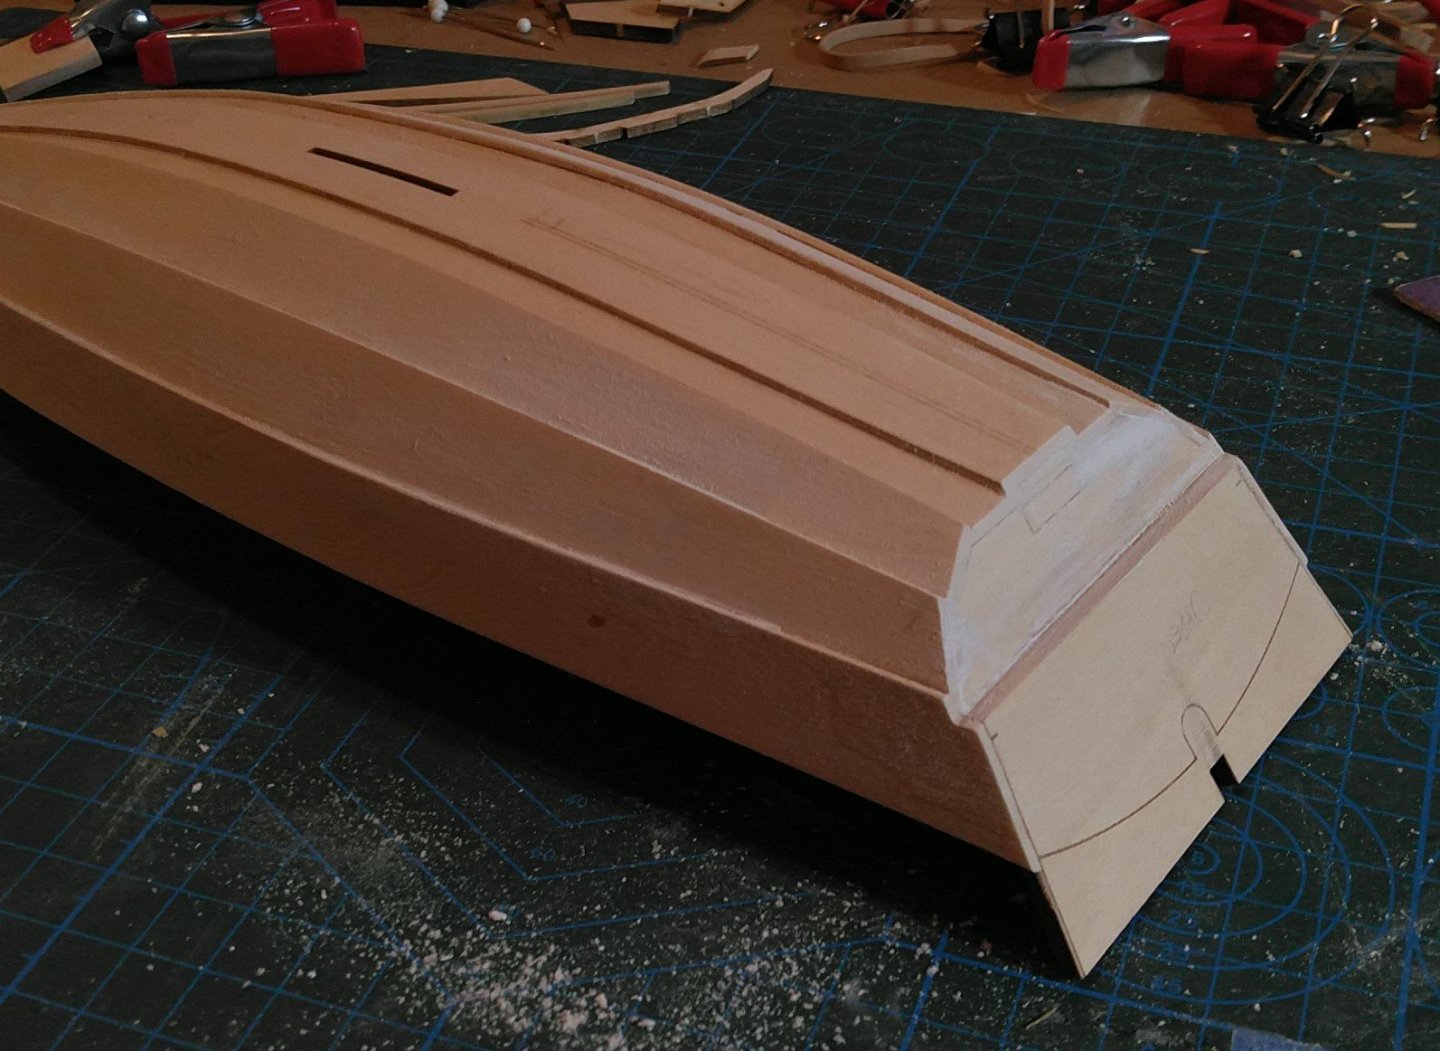
The build got delayed a bit by a rather nasty cut I inflicted on myself, not in the workshop but the kitchen. My wife had purchased a mandolin, which is French for: "mangler of the unwary". While slicing some potatoes I removed an alarming large piece of skin from the side of my right thumb, which required more than just a bandaid, or sticking plaster, or what have you. Eventually, I ended up with a large gauze pad taped around my thumb, which made working on a model rather difficult. Now, I'm able to get by with a simple bandaid, so back to work with safer tools such as scalpels and #11 blades. As of now, the pram is fully planked and off the build board, with filling and sanding in progress. I'm trying various methods during this build to see what suits my abilities and preferences, so for filling small gaps I've tried mixing sawdust with glue and water, drywall spackle and Gorilla wood filler. The sawdust & glue method isn't my favorite as it leaves a lumpy surface which, while sandable, isn't as sandable as the spackle. Also, the spackle dries very quickly and is easy to control, seems to stay put in the gap where I want it. I have also tried Gorilla wood filler which is very gritty and dry. This is for larger home repairs, methinks. For me, for small repairs to surfaces which will be painted, I prefer spackle. There really are only a few quite small gaps between planks and not much at all at each transom, other than one at the bow from when I didn't have the alignment quite right and overcut a rabbet. That one I mostly filled with a piece of wood. I think after sanding and painting the hull will look quite good. Next up will be the skegs then internal frames, daggerboard box, etc. For now, I plan on making some tiny sanding sticks to get into the small spaces between planks and spending a bit of time smoothing everything out, to at least 400 grit.

-
Thanks! I wasn't even aware of this model until I saw the banner for the Ship Modeler's Handbook, and I browsed a bit. I believe I will slot this halfhull kit in after the smack, as I have never built a model with the plank on bulkhead method. And, it makes an attractive decoration. Or has the potential to...
- 84 replies
-
- 2
-
-
- half hull planking project
- NRG
- (and 2 more)
-
I hope it isn't too late to reply to this, but for all who have completed this kit, is it worthwhile as a learning experience, after completing the lobster smack by Model Shipways?
-
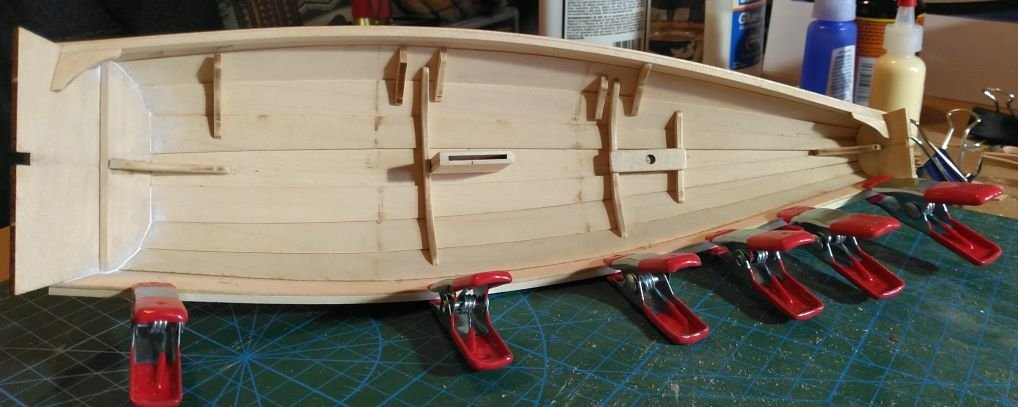
Thank you all for the likes and suggestions! Progress has been made. I did manage to get the bow transom trued and glued up, as well as bent and attached the garboards and second strakes on each side. I've been experimenting with various methods of gluing the planks on, and found that applying heat with an iron to more quickly activate the Titebond Original glue works best for me. I put glue on all surfaces to be glued, (the temptation each time is to glue the strakes to the molds and must be resisted) start at the bow, apply heat for about 20 seconds, then move my way along the plank. I use bands & clamps to hold each glued section as I move along, but so far I haven't really needed them. Nevertheless, I put them on. Using this method I can get a properly shaped and prepared plank glued up in a few minutes, with much less fumbling about trying to get a clamp on just so before the glue has lost its mojo or just been absorbed into the wood. Also, I don't have to attempt the "lift the plank gently without breaking free the part I just spent five minutes gluing so I can dab glue into the tiny gap then quickly press the plank into place, and hold for an eternity, lather rinse repeat" method. I did try out the electric hair straightener iron as suggested above, and I can see it working pretty well at times, great tip! By the way, I asked the wife if she had an old one she could spare, and she granted me two of them. One has flat jaws, one has a transverse curve across the face, which might be handy for a tight bend. Score. Here is how the pram sits at the moment, waiting for the latest glue to cure before I apply the sheer strakes to bend and dry in place.
-
I took a look last night, and wasn't happy to see that the planks weren't centered on the bow transom. So, this morning I unstuck the bow transom from the planks and the knee, breaking off a sliver at the very bottom of the transom. Good thing Model Shipways knows me, as a spare is included. I spent quite a bit of time truing up the knee and the new transom, and will glue it on later today, once I figure out how to get it jigged securely in the building board. I am tempted to glue the transom in with one drop of glue to hold it in place until the planks are set, then use my dear friend, isopropyl to remove the glue.