mhaas2
-
Posts
73 -
Joined
-
Last visited
Content Type
Profiles
Forums
Gallery
Events
Everything posted by mhaas2
-
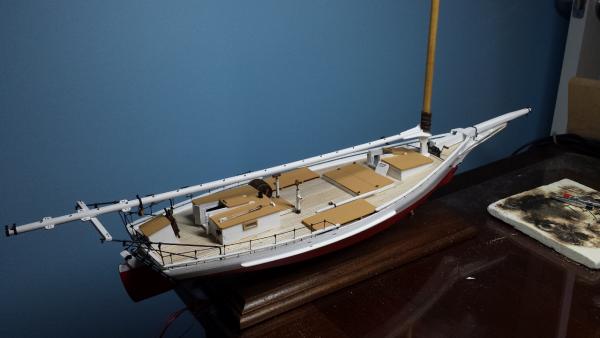
I had run out of small brass strip. So a small delay while I waited for it. Completed the rollers! Next up are the dreaded dredges! An overview!
- 113 replies
-
- 7
-

-
- model shipways
- willie l bennett
- (and 1 more)
-
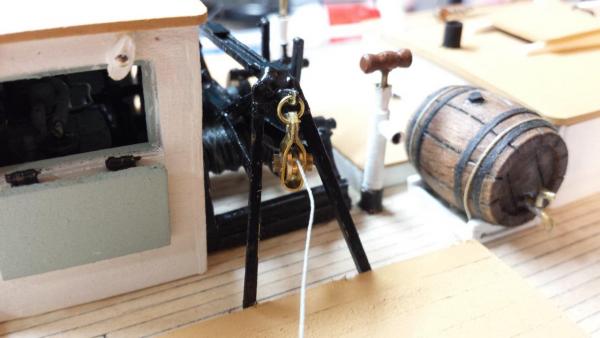
A-Frame is done. I used a mixture of brass and plasti-strut, them made up the 2 blocks using the metal sheaves from the kit and some brass strip and bits I found in my parts box. Next up is the rollers.
- 113 replies
-
- 6
-
-
- model shipways
- willie l bennett
- (and 1 more)
-
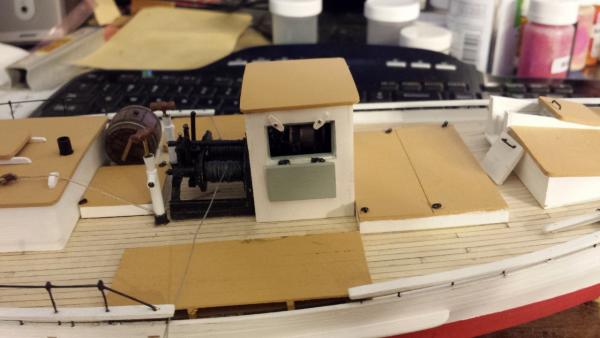
Finished the wider and its deck house. Next up is the gantry!!
- 113 replies
-
- 6
-
-
- model shipways
- willie l bennett
- (and 1 more)
-
Looking good! You are very correct about all of the different techniques. That is the reason I chose this model was to learn and hone some new skills before the next one.
-
Don, you are most welcome. I figured that you could use them.
-
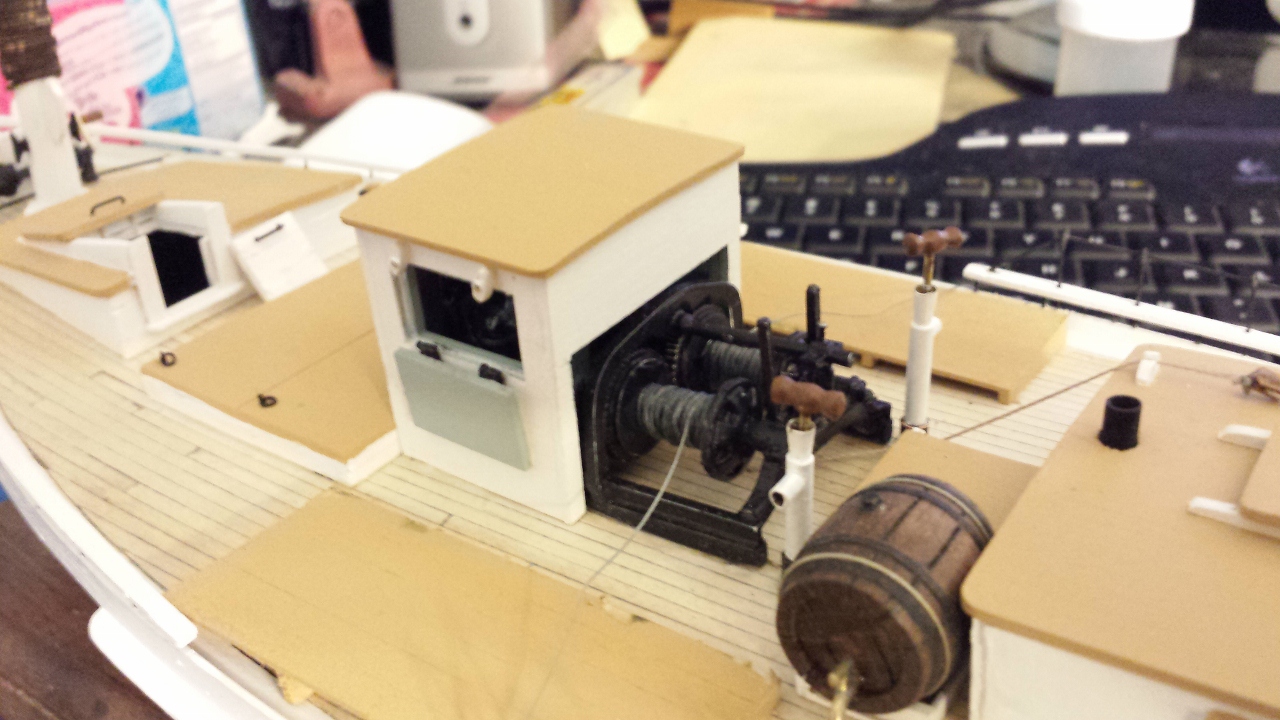
Hey! Just a little hint to anyone building this kit. Paint the winder drums and wind on the rigging BEFORE you assemble the winder. Took me the entire football game to do it last night after the entire assembly was complete. Probably would have been 10 minutes before assembling it! LOL! Live and learn. At least there is no deadline with this hobby!
-
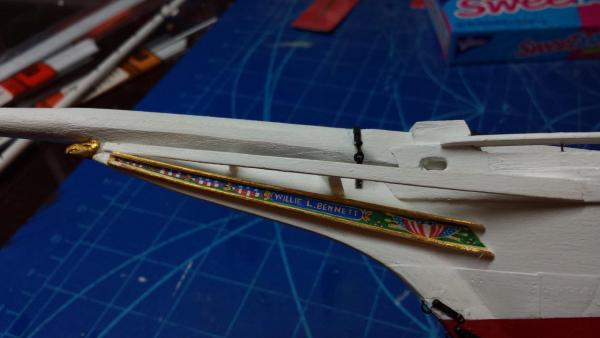
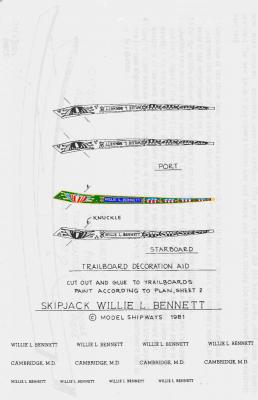
I was not happy with my trail board artwork. The instructions suggest coloring the image that they provided and attaching it. I was not happy with the results, so I scanned their image and went to work in Paint.net. After coloring their image and cleaning it up I was much happier. Here is the .jpg of the colored page; Hers are the port and starboard sides: D Don, and anyone else. Feel free to download the images and resize to your model!


- 113 replies
-
- 4
-
-
- model shipways
- willie l bennett
- (and 1 more)
-
Looks good! I am not looking forward to the dredges at all. I do have some real fine black netting left over from a HMS Victory that I tried to do before I was able to do that should work out really well for my dredges.
-
Thanks!! The gear guard is shown on the plans, so not my idea, but add it!
-
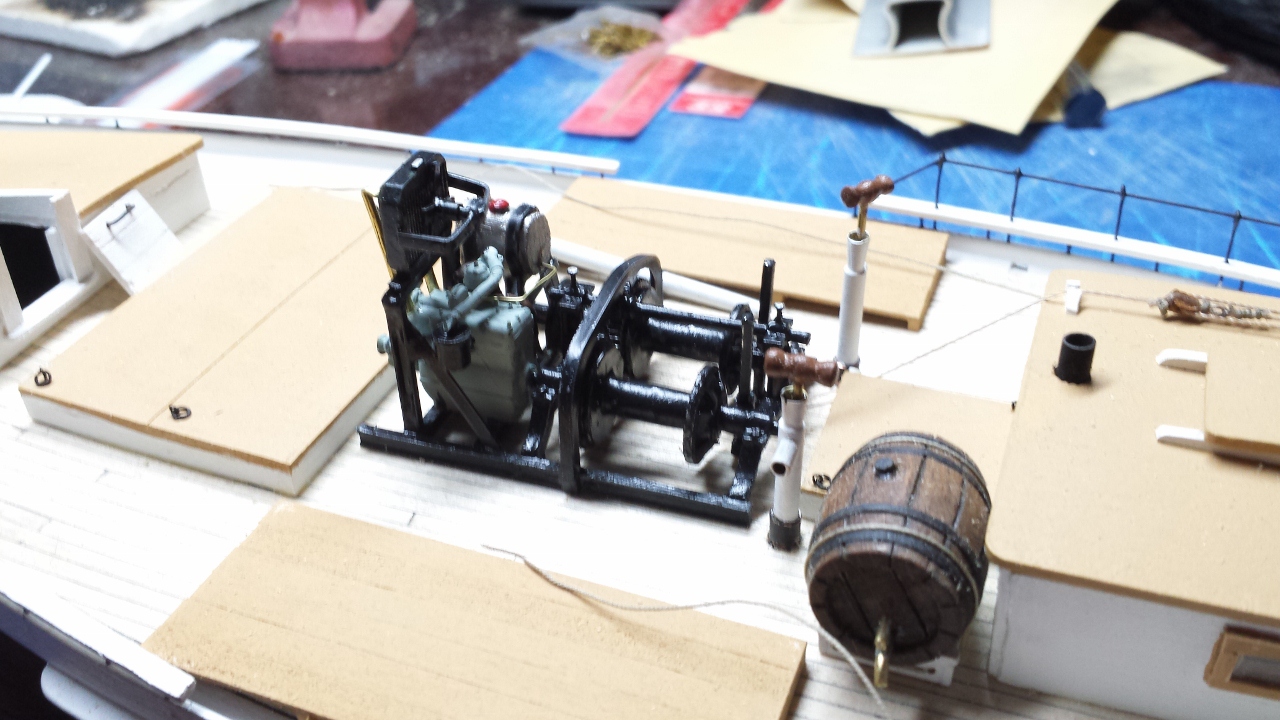
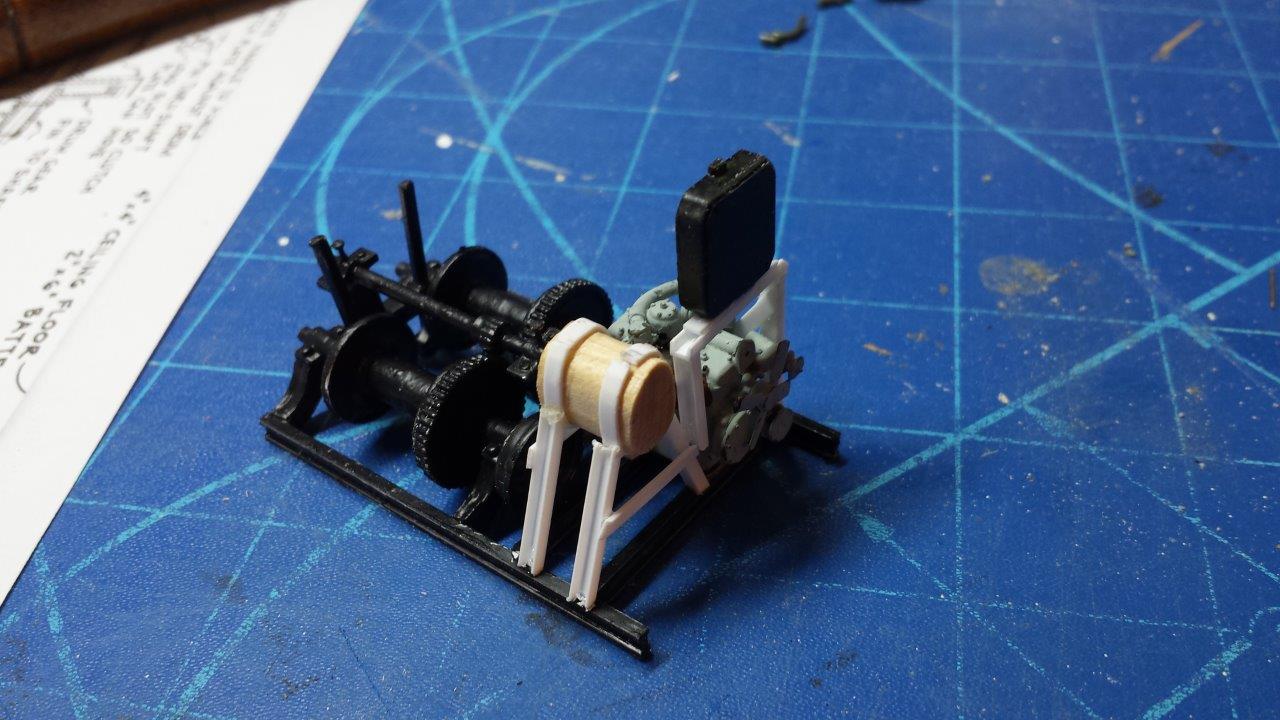
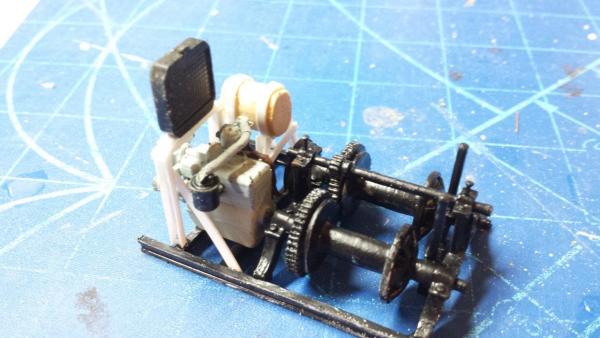
Made the gear guard out of brass and plastic strip Added a fan and motor to the radiator Did some more painting and added a fuel line, water pipes, and fuel fill. Ready for rigging line, The leveling platform and final pint touch up. I am pretty happy with this, as I have never done this kind of work before.


- 113 replies
-
- 7
-
-
- model shipways
- willie l bennett
- (and 1 more)
-
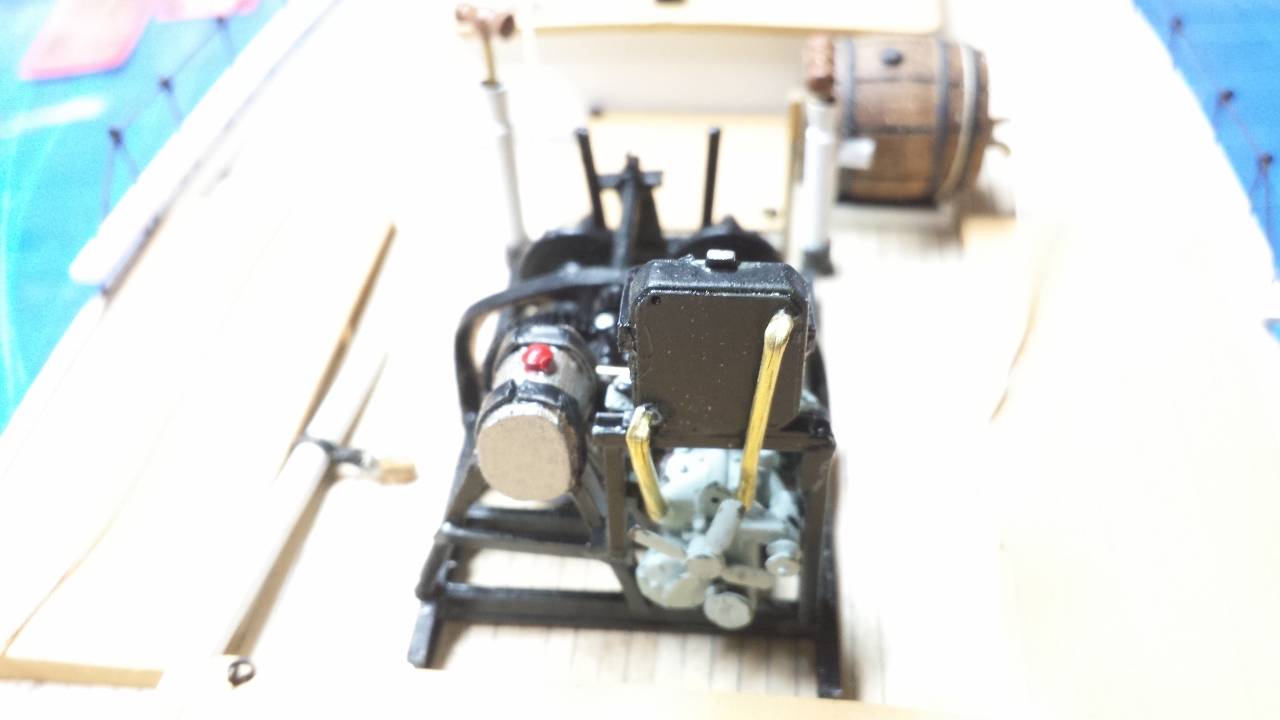
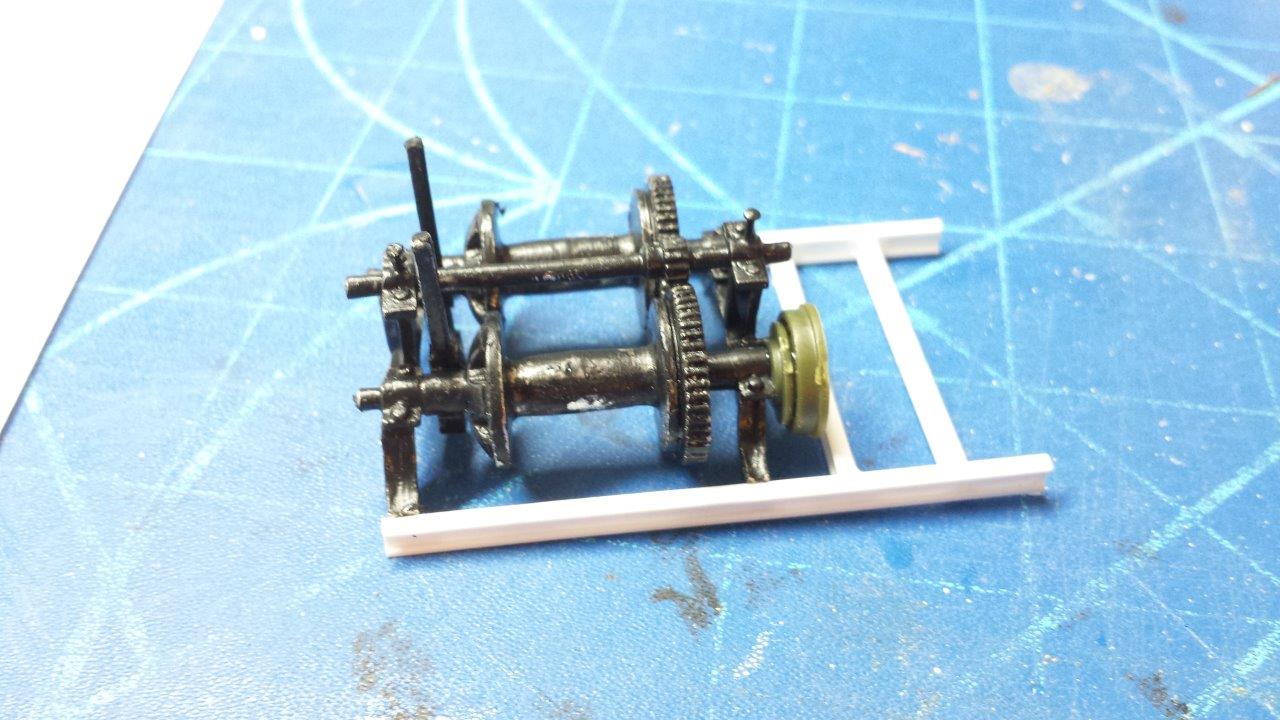
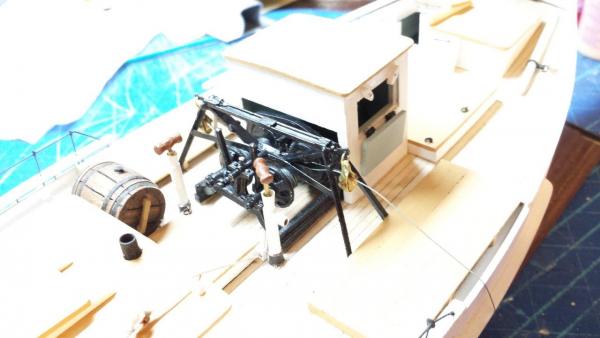
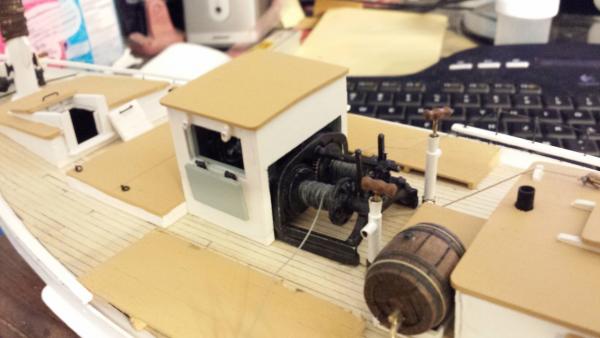
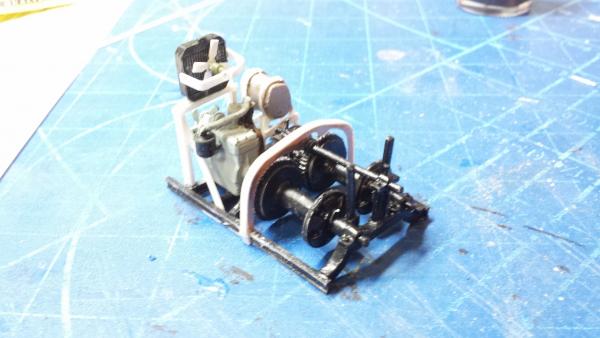
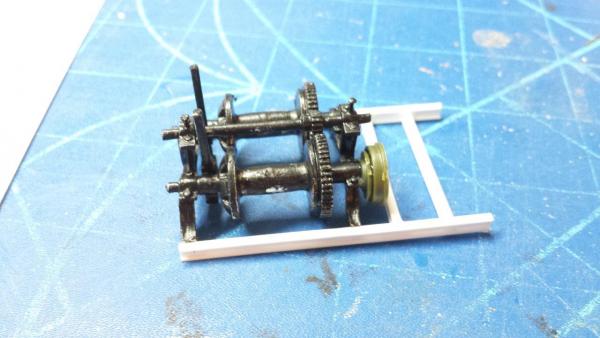
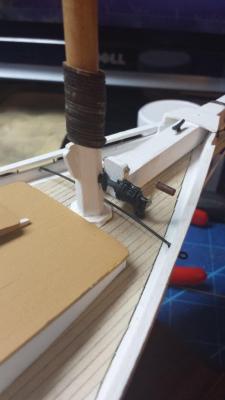
So, the winder assembly is the next part of the project. I started by cleaning up the metal parts and the gluing them. I added the grease caps with a couple of nail heads and gave it a little black paint. After all the work I have put into this, I have decided to add the details that are semi-hidden by the winder cabin. To that end I made a frame from plasti-strut I beams a piece from a 1/35th armor kit as a pulley. You can be pretty creative with the portion of the winder, i.e. engine, fuel tank, as you want. It will only have limited viewing, so impressions are as good as going nuts. I used the engine out of a WWII jeep kit, a fuel tank out of wood, and brackets and braces out of plasti-strut. After I paint all of this I will add a fuel line, some rad hoses and an exhaust stack. Should look real good thru the side hatches on the winder house.

- 113 replies
-
- 5
-
-
- model shipways
- willie l bennett
- (and 1 more)
-
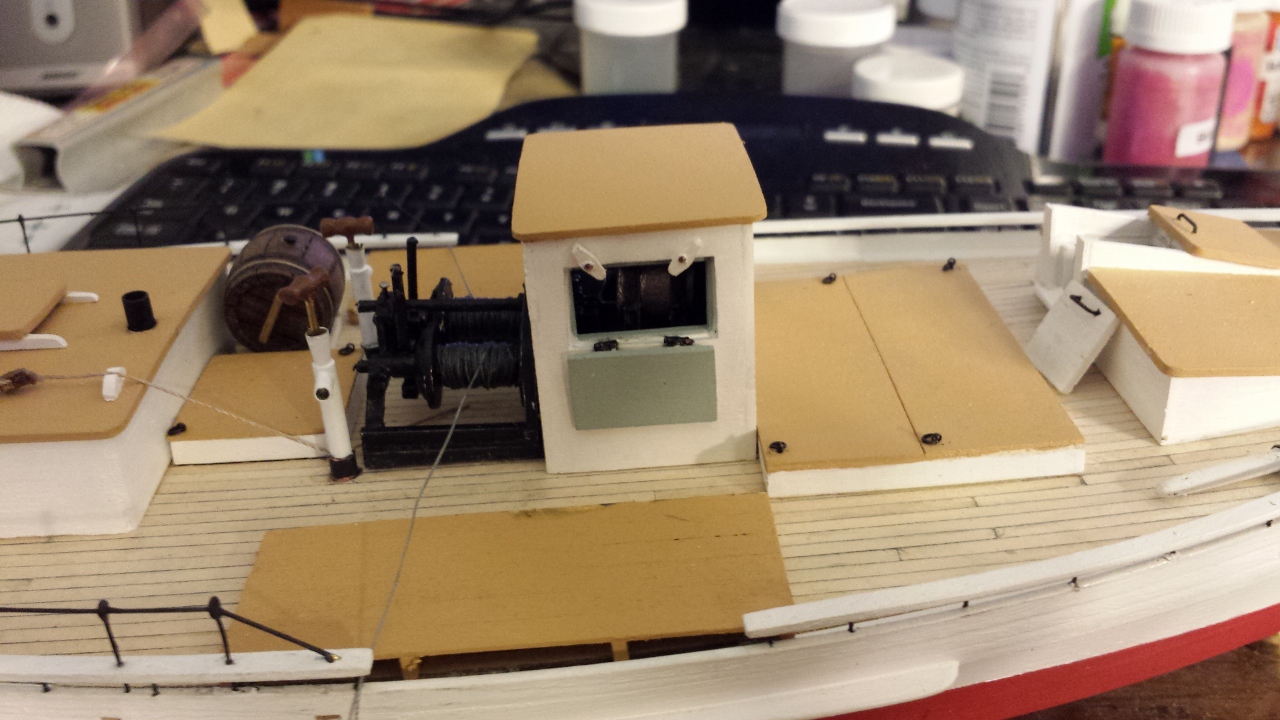
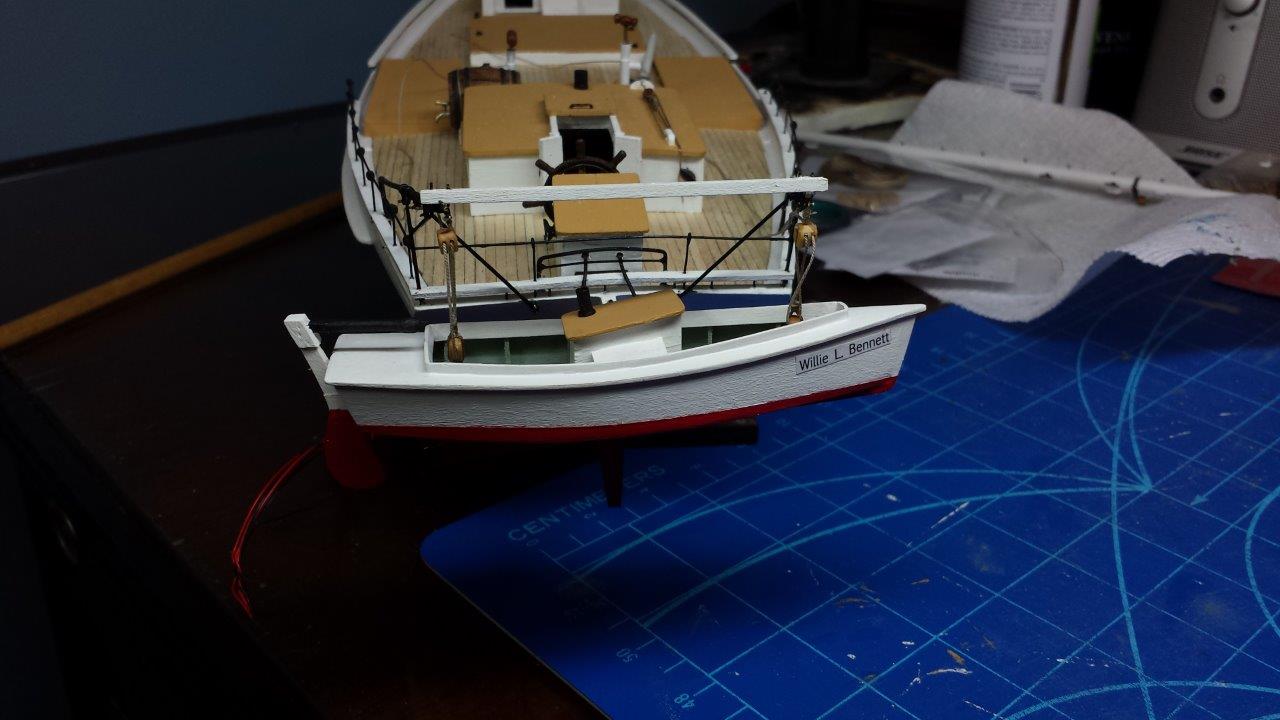
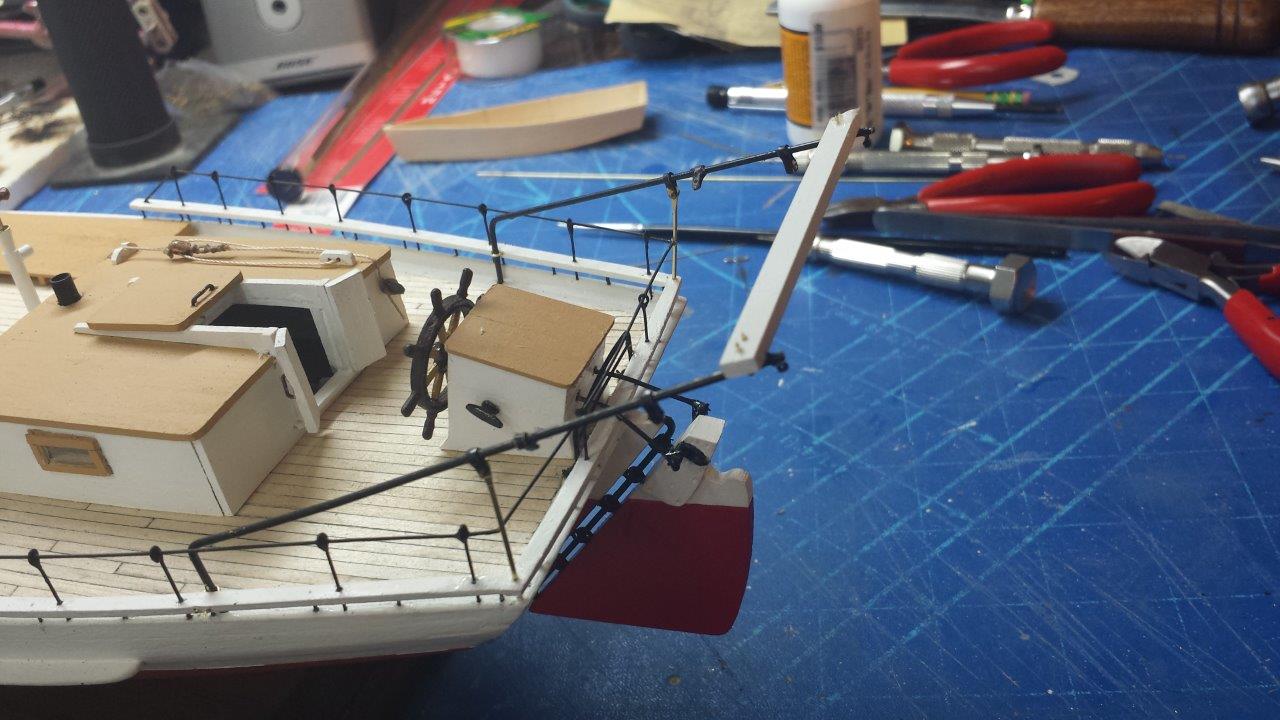
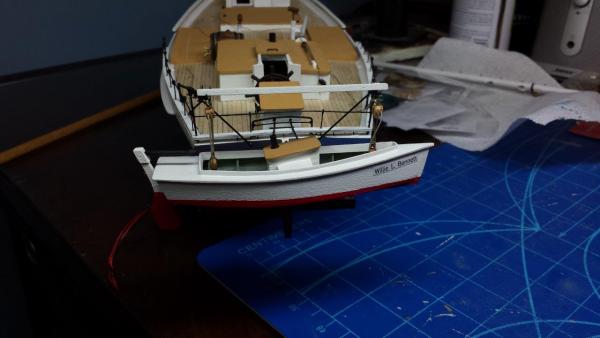
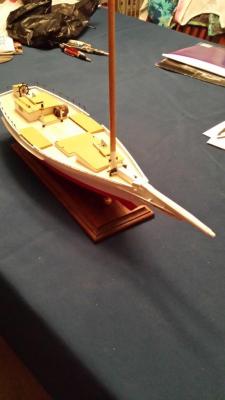
Push Boat is done. Rigging is not yet pulled tight as I am waiting for more cleats to get here. The kit has only 6. Needs about 16.But they give you 2 water barrels when you only need 1.
- 113 replies
-
- 7
-
-
- model shipways
- willie l bennett
- (and 1 more)
-
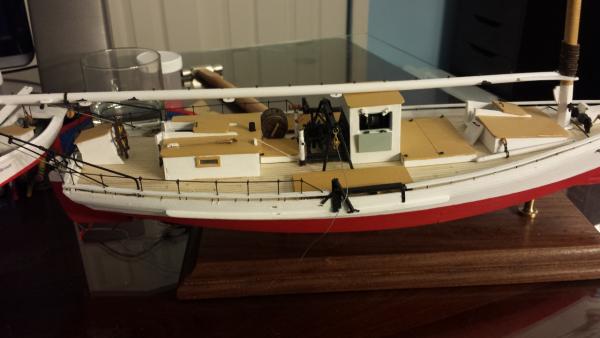
Getting there with the push boat and just because, an overview of the whole thing!

- 113 replies
-
- 8
-
-
- model shipways
- willie l bennett
- (and 1 more)
-
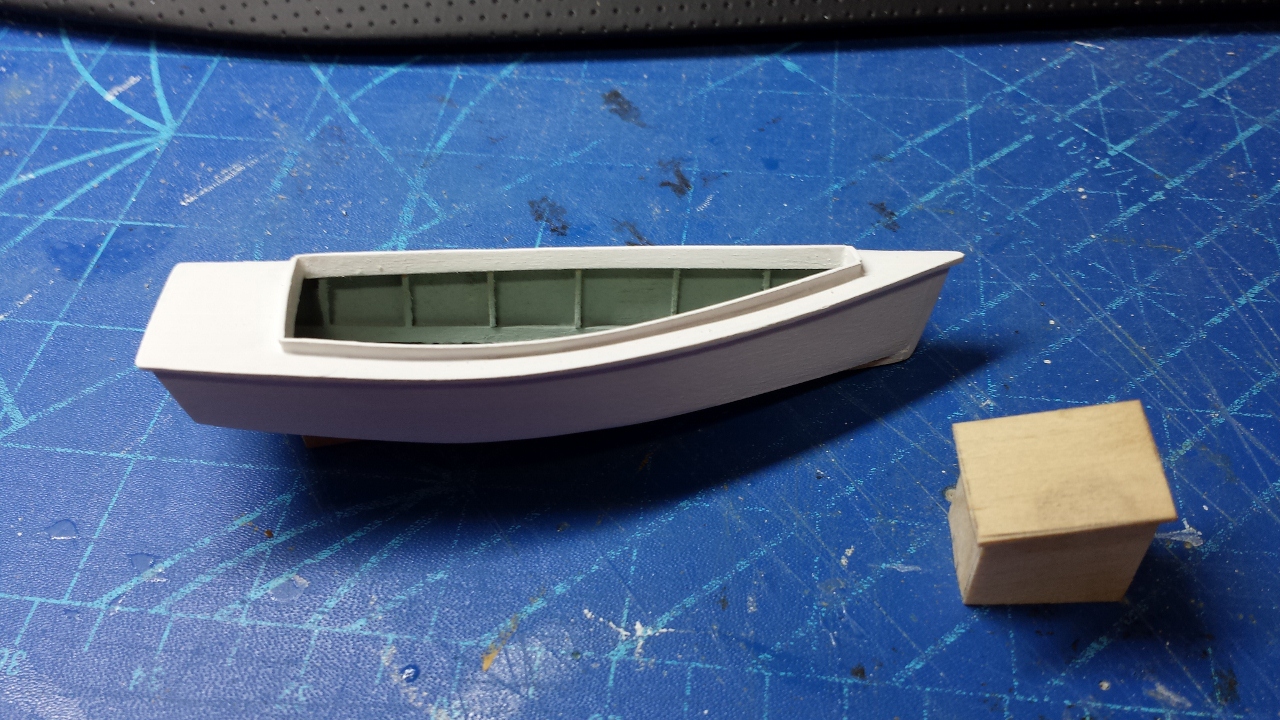
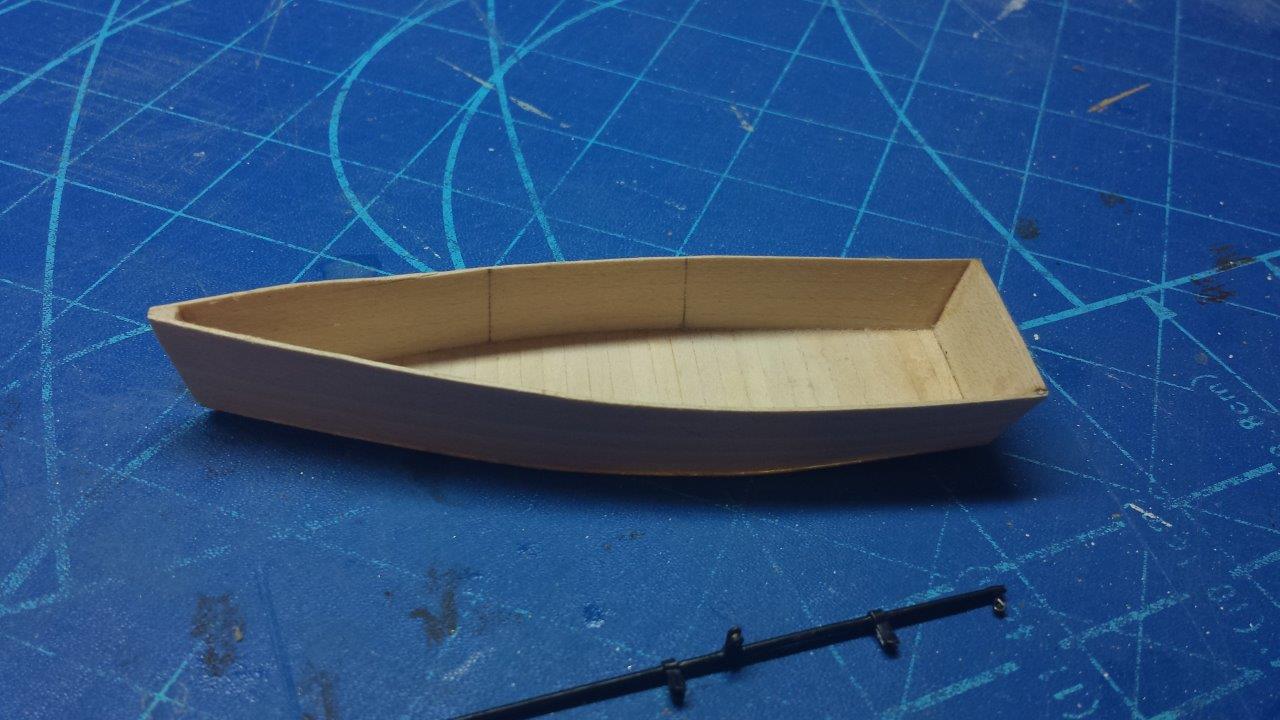
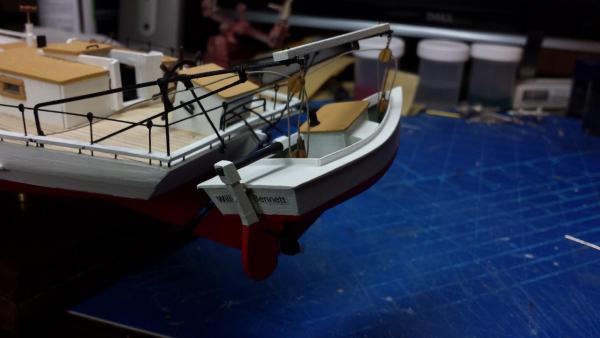
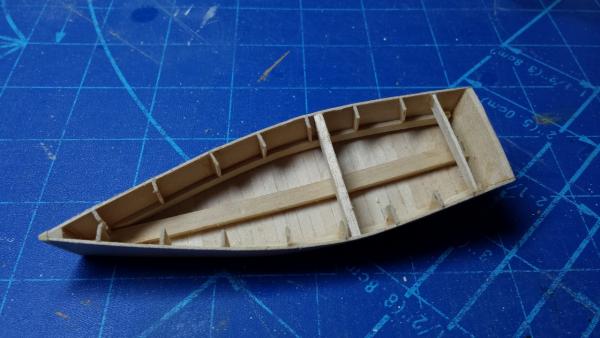
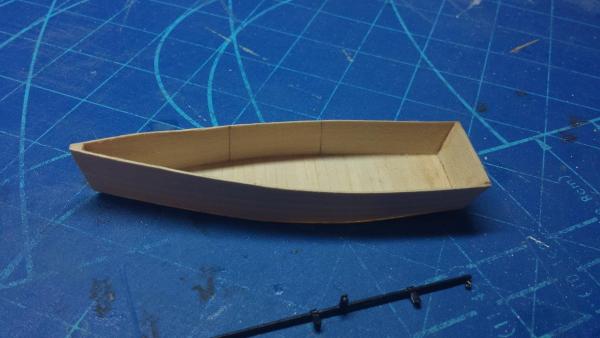
Push boat is starting to look like a boat;
- 113 replies
-
- 2
-
-
- model shipways
- willie l bennett
- (and 1 more)
-
Thanks, Gerty! I intend to finish the Charles Morgan as a tribute to Kelly. We visited Mystic about a year before the cancer hit. This model and a couple more I have scheduled to do before finishing the Morgan, I am doing to learn the skills I need to do a great job on it an do her proud!!
-
Thanks!! Put some aligator clips near your joint to act as a heat sink. Also you can use different temp solder, so the high trmp won't melt if you use a low temp near ir.
-
You are building fast! Looks good!
-
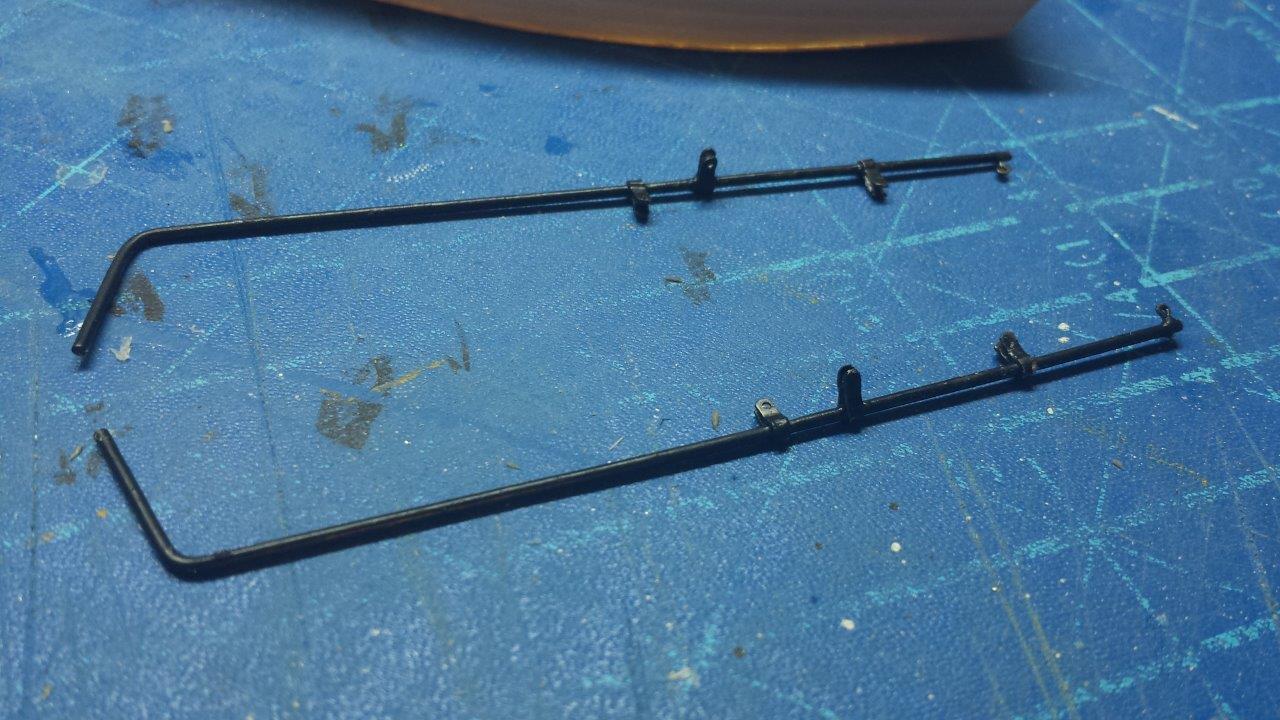
davit built! Need to paint and rig. Really surprisingly strong assy.

- 113 replies
-
- 7
-
-
- model shipways
- willie l bennett
- (and 1 more)
-
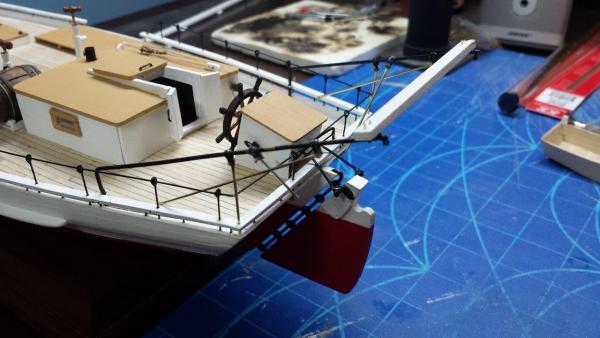
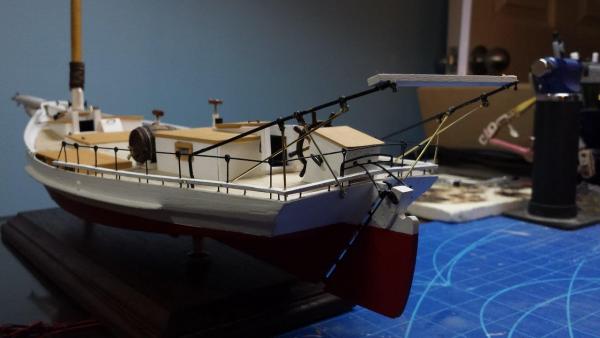
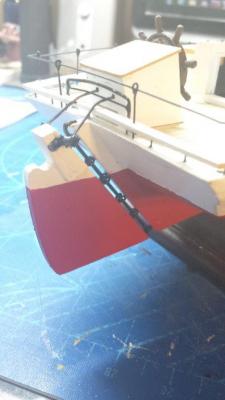
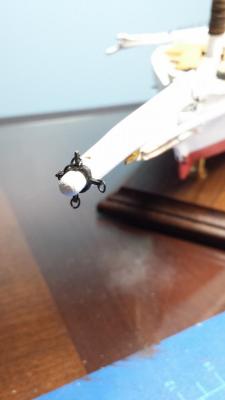
Completed the rudder and the boom travelers. I am getting better at silver soldering. Practice does improve you. and the jib club traveler The next big project is the davits and push boat. I have the main davits done. I am ready to install them and then add the braces. Another new skill is flattening the end of the brace so they can ship into the brackets on the davits and then use a small wire to pin them to the bracket. Simulates a bolt and nut. and the beginnings of the push boat.

- 113 replies
-
- 2
-
-
- model shipways
- willie l bennett
- (and 1 more)
-
We approached the construction in 2 different ways. I went with scale planks and built it up. but your way looks nice also.
-
Russ, I spent a year in Pasagoula back in 81-82. I was in the Navy. I imagine Biloxi looks nothing like that now! I heard all of the beautiful old antebellum houses along the coast are gone and were replaced with casino's.
-
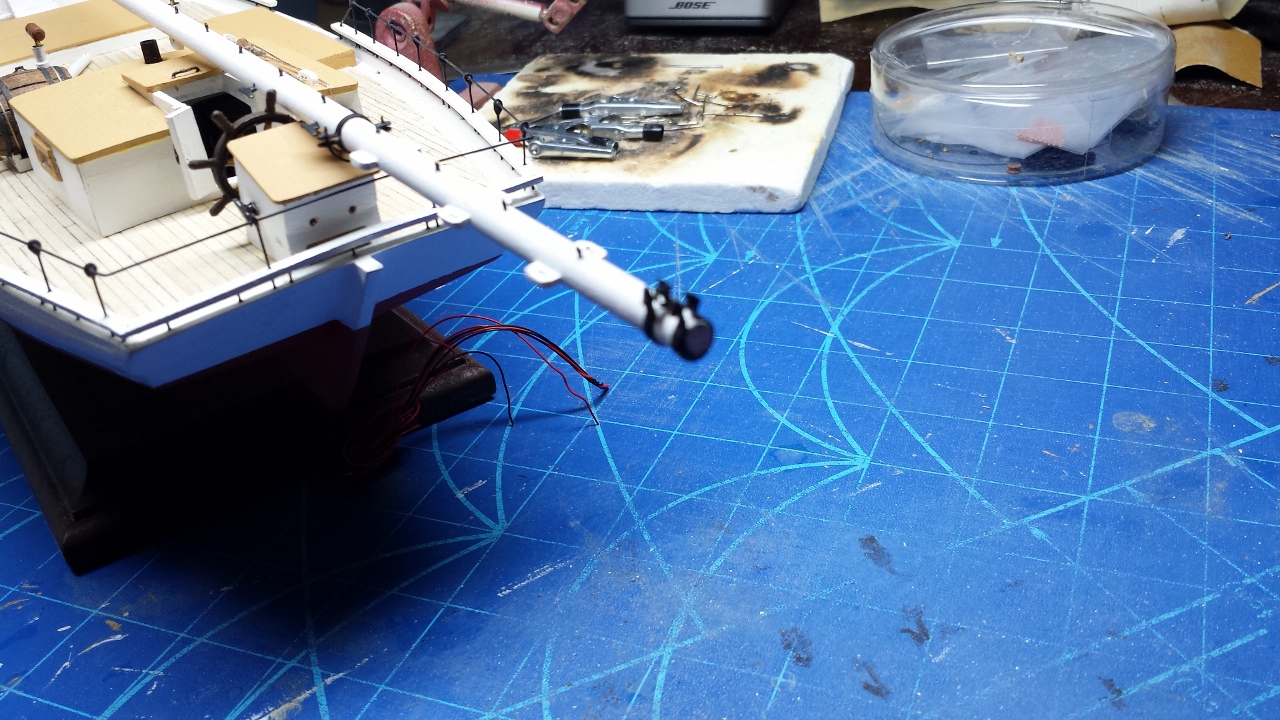
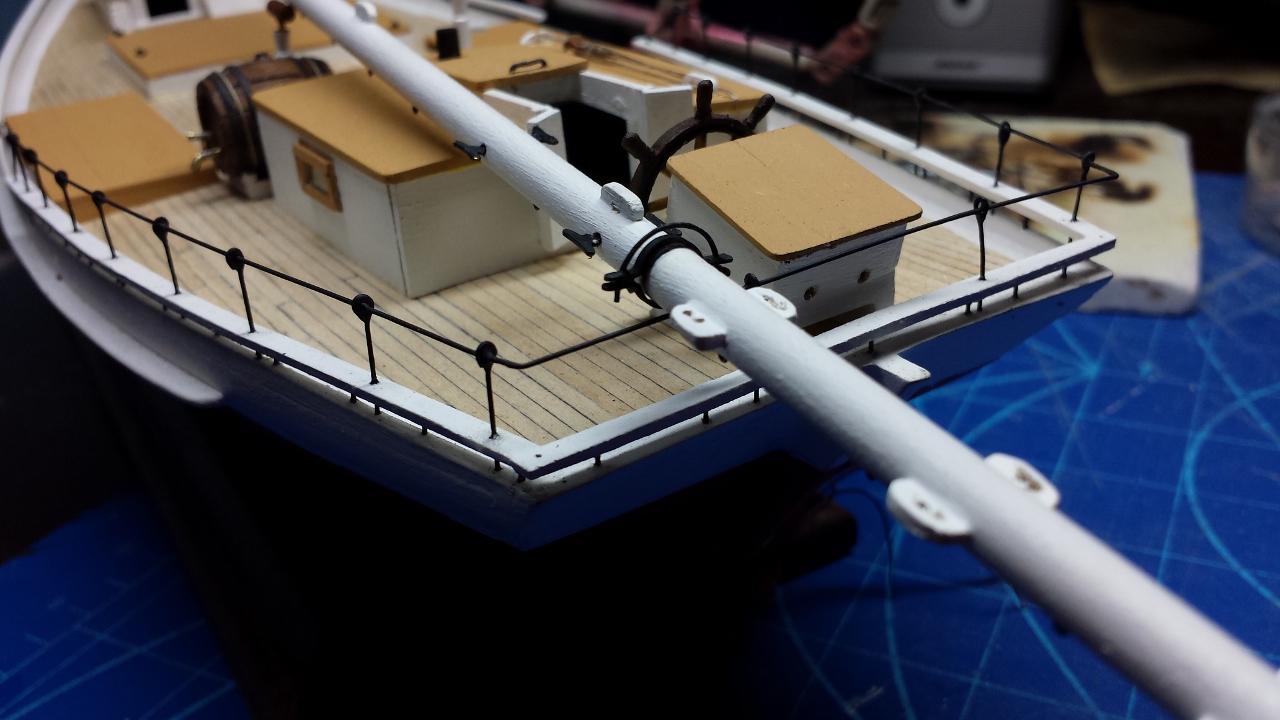
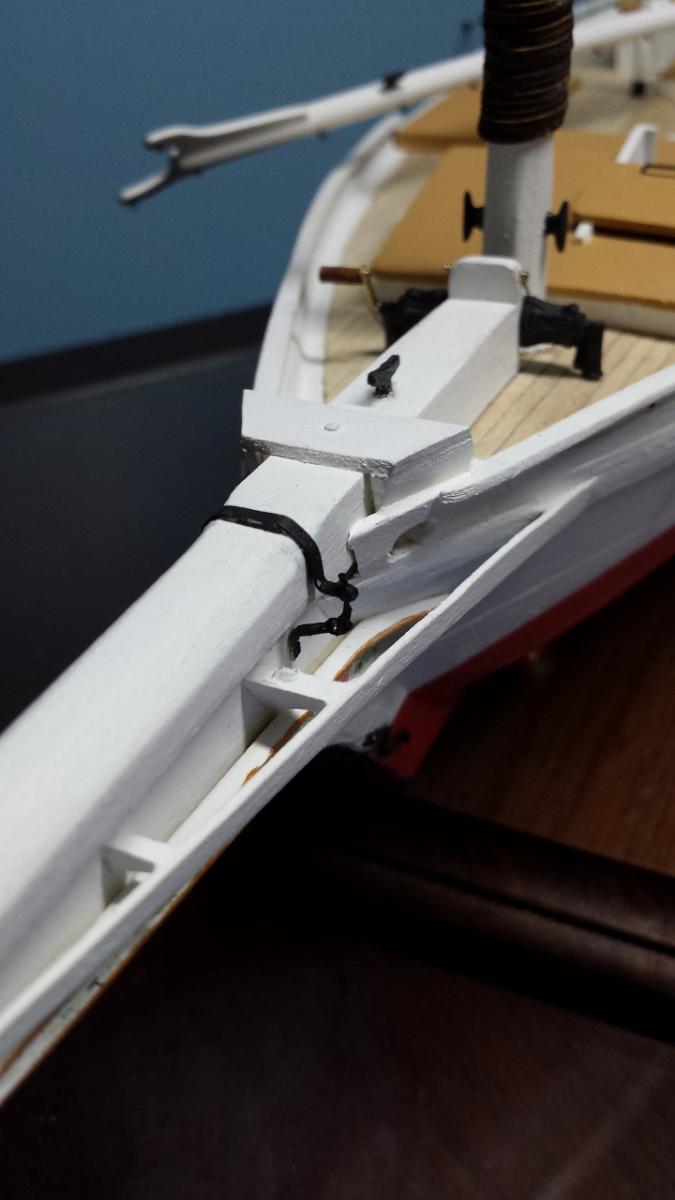
Metal work, metalwork, and more metal work. I sure went thru a bunch of brass stock ans I screwed up a bunch of times, but after some serious trial and error I have had success. One of the hardest thing for me was drilling holes. Final solution was my Dremal mounted in the drill press attachment and using cut lube for every hole. Still had to be careful not to make so much heat the joint came apart. main boom details main mast details. I have managed to strop 1 block. BTW I ordered replacement blocks from Chuck (Syren Ship Models) they are amazing. Same with his rope. I highly recomend them!! and the bowsprit detals. I have also done the jib club. Ready to strop a bunch of blocks and then on the pushboat davits!


- 113 replies
-
- 5
-
-
- model shipways
- willie l bennett
- (and 1 more)
-
I second the natural, but that should not suprise you! For scraping I used the short edge of a 6" metal rule.
-
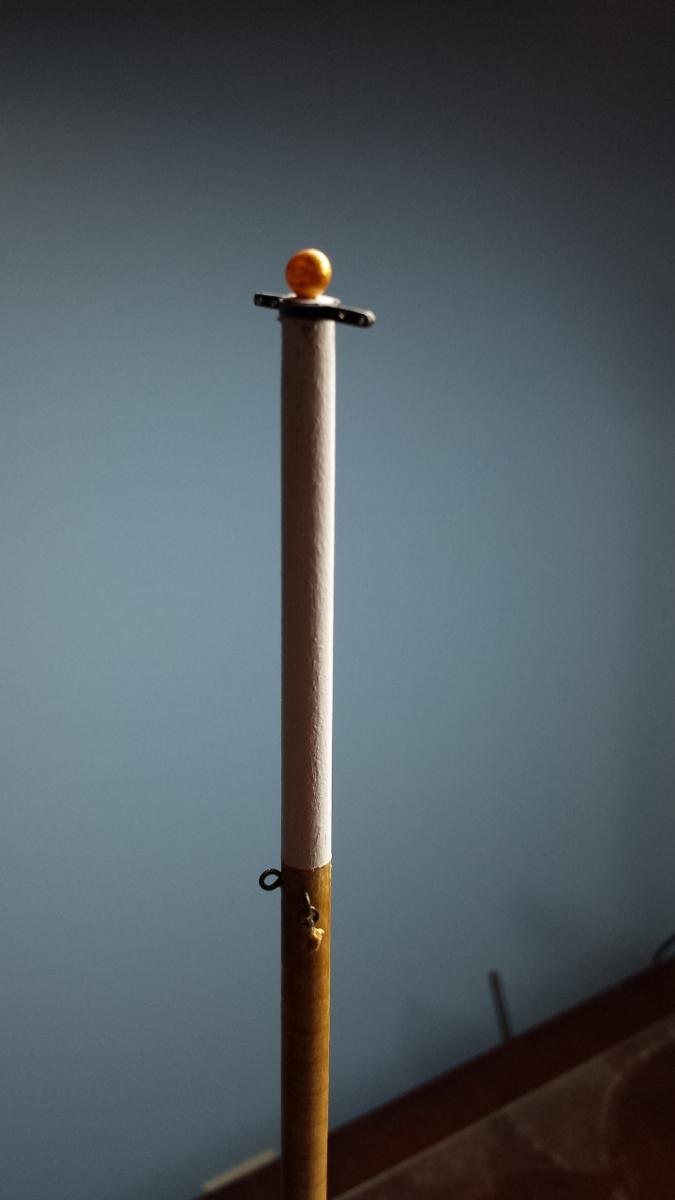
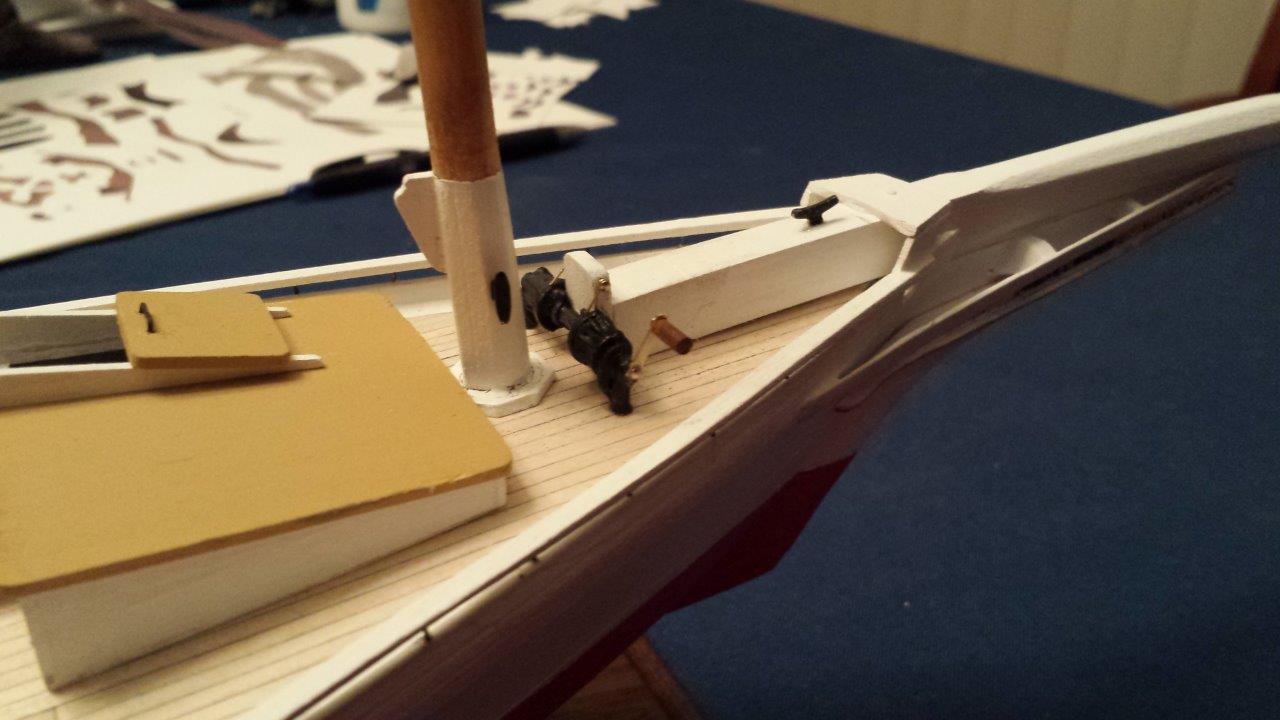
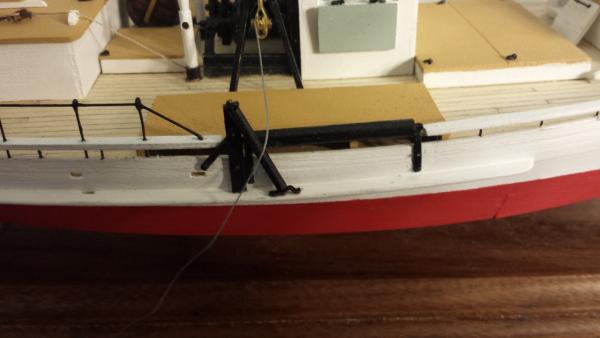
Don, I used the kit supplied wood. I have finished making the mast, boom and bowsprit. Installed, painted and ready for the ironwork. The directions sugested installing the anchor windless at this time also. So I did, and then added the pawls and a handle so it did not look just like a lump of metal painted black!

- 113 replies
-
- 4
-
-
- model shipways
- willie l bennett
- (and 1 more)