.jpg.9661a2c9e16913814c19c3c5f3400b8e.jpg)
ronkamin
-
Posts
100 -
Joined
-
Last visited
Content Type
Profiles
Forums
Gallery
Events
Everything posted by ronkamin
-
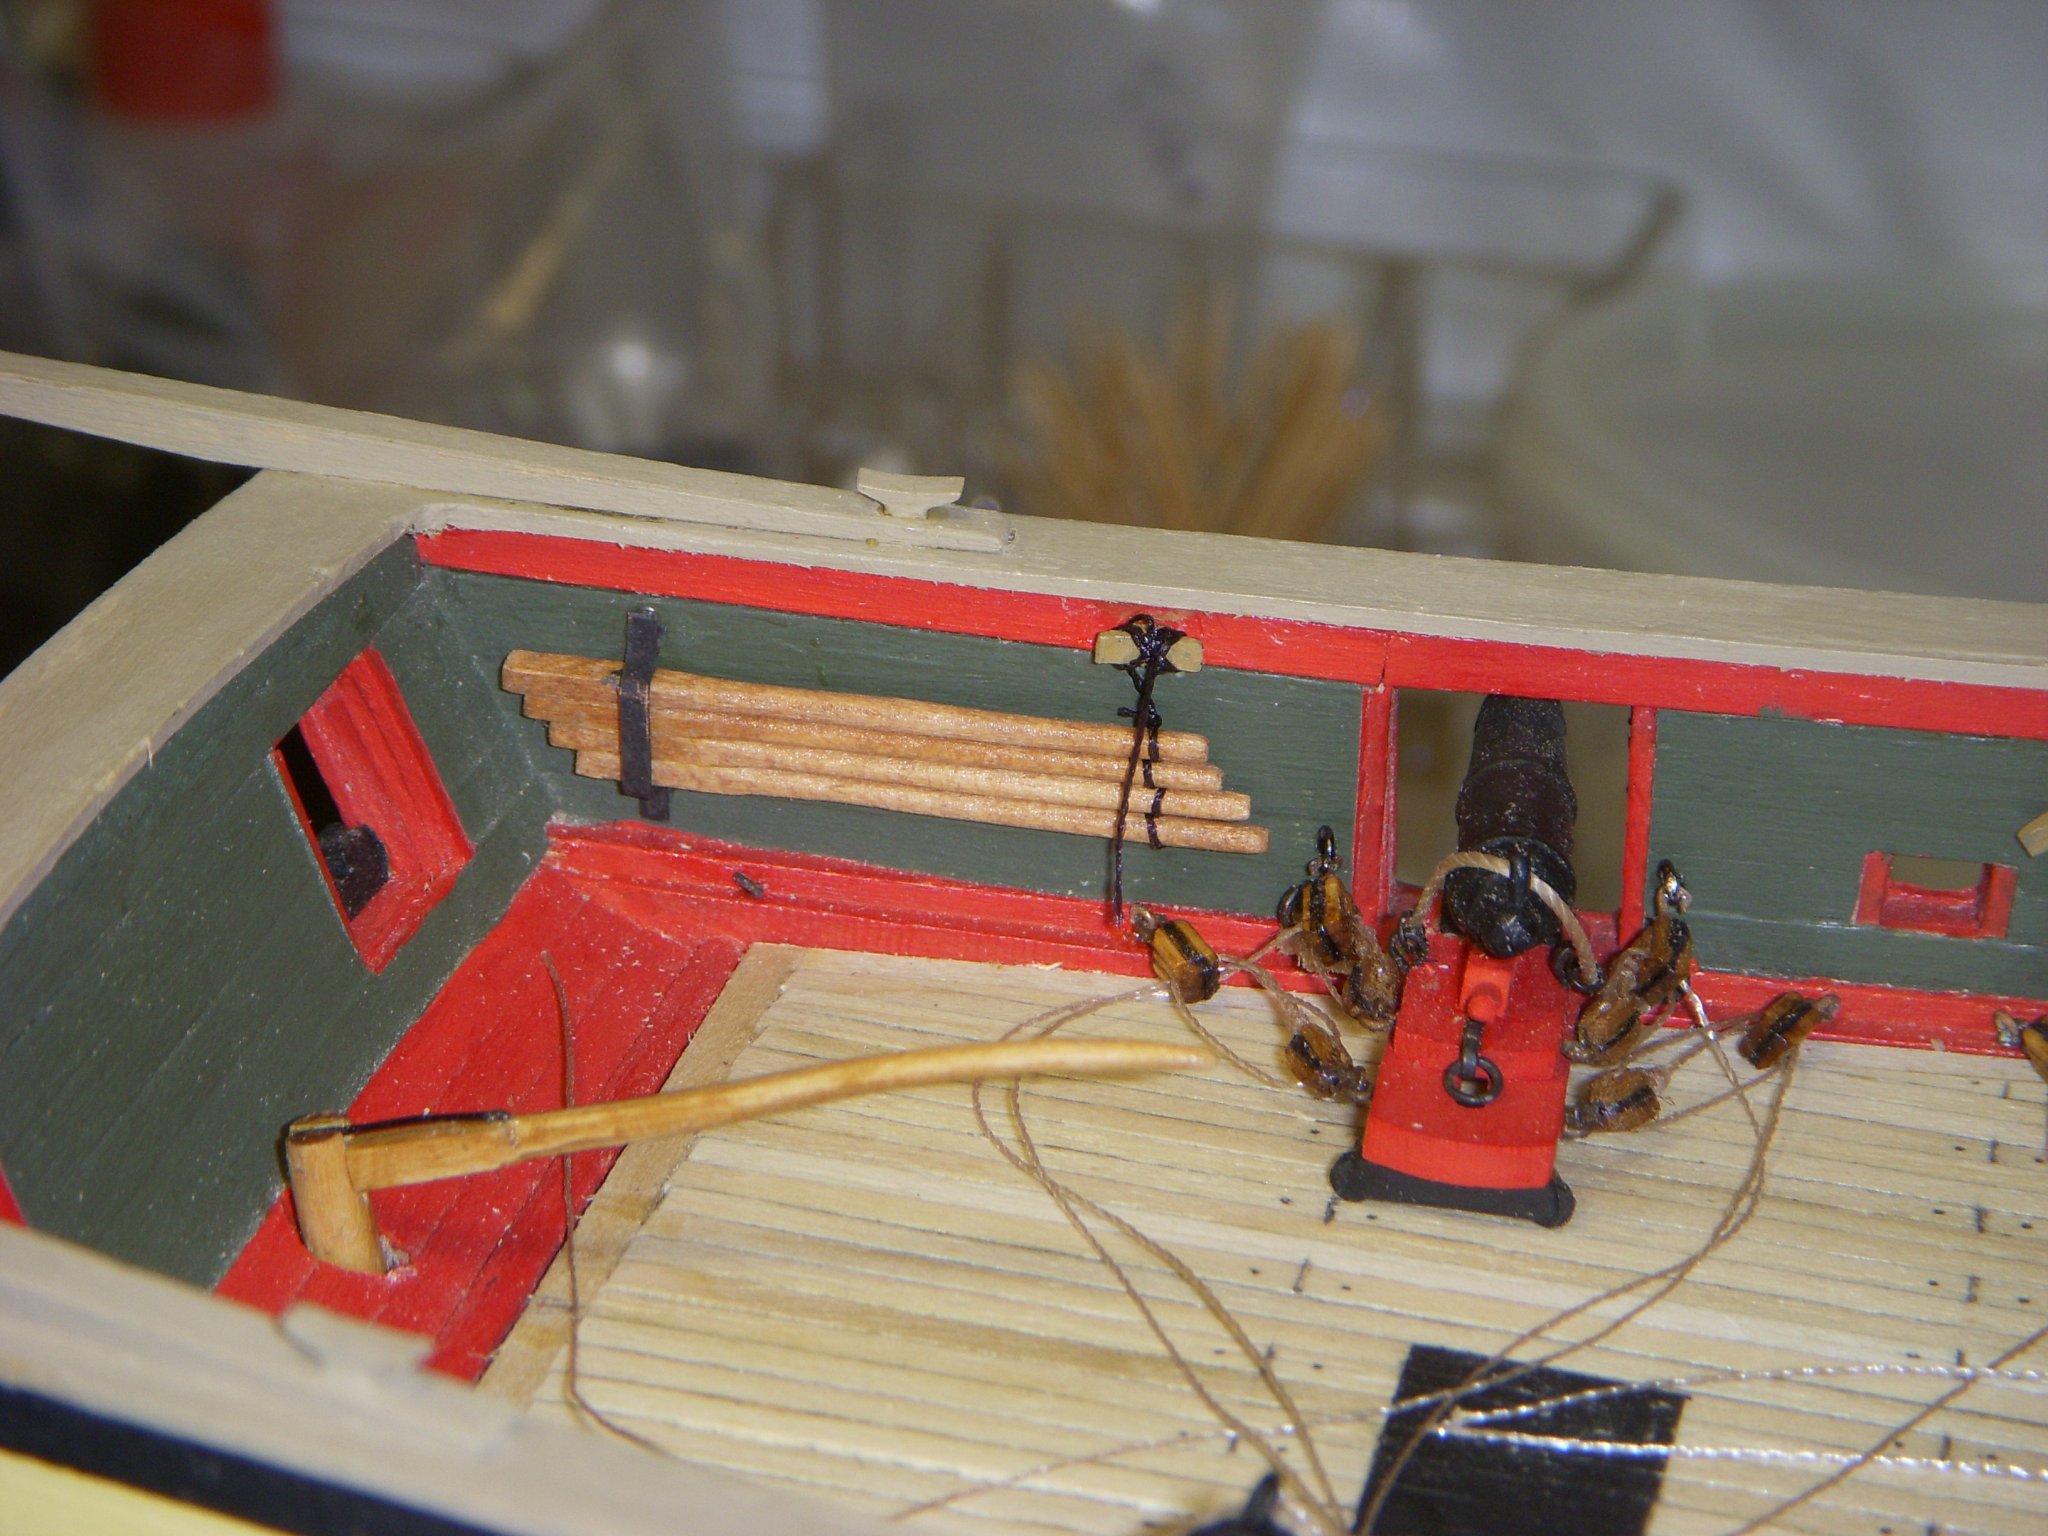
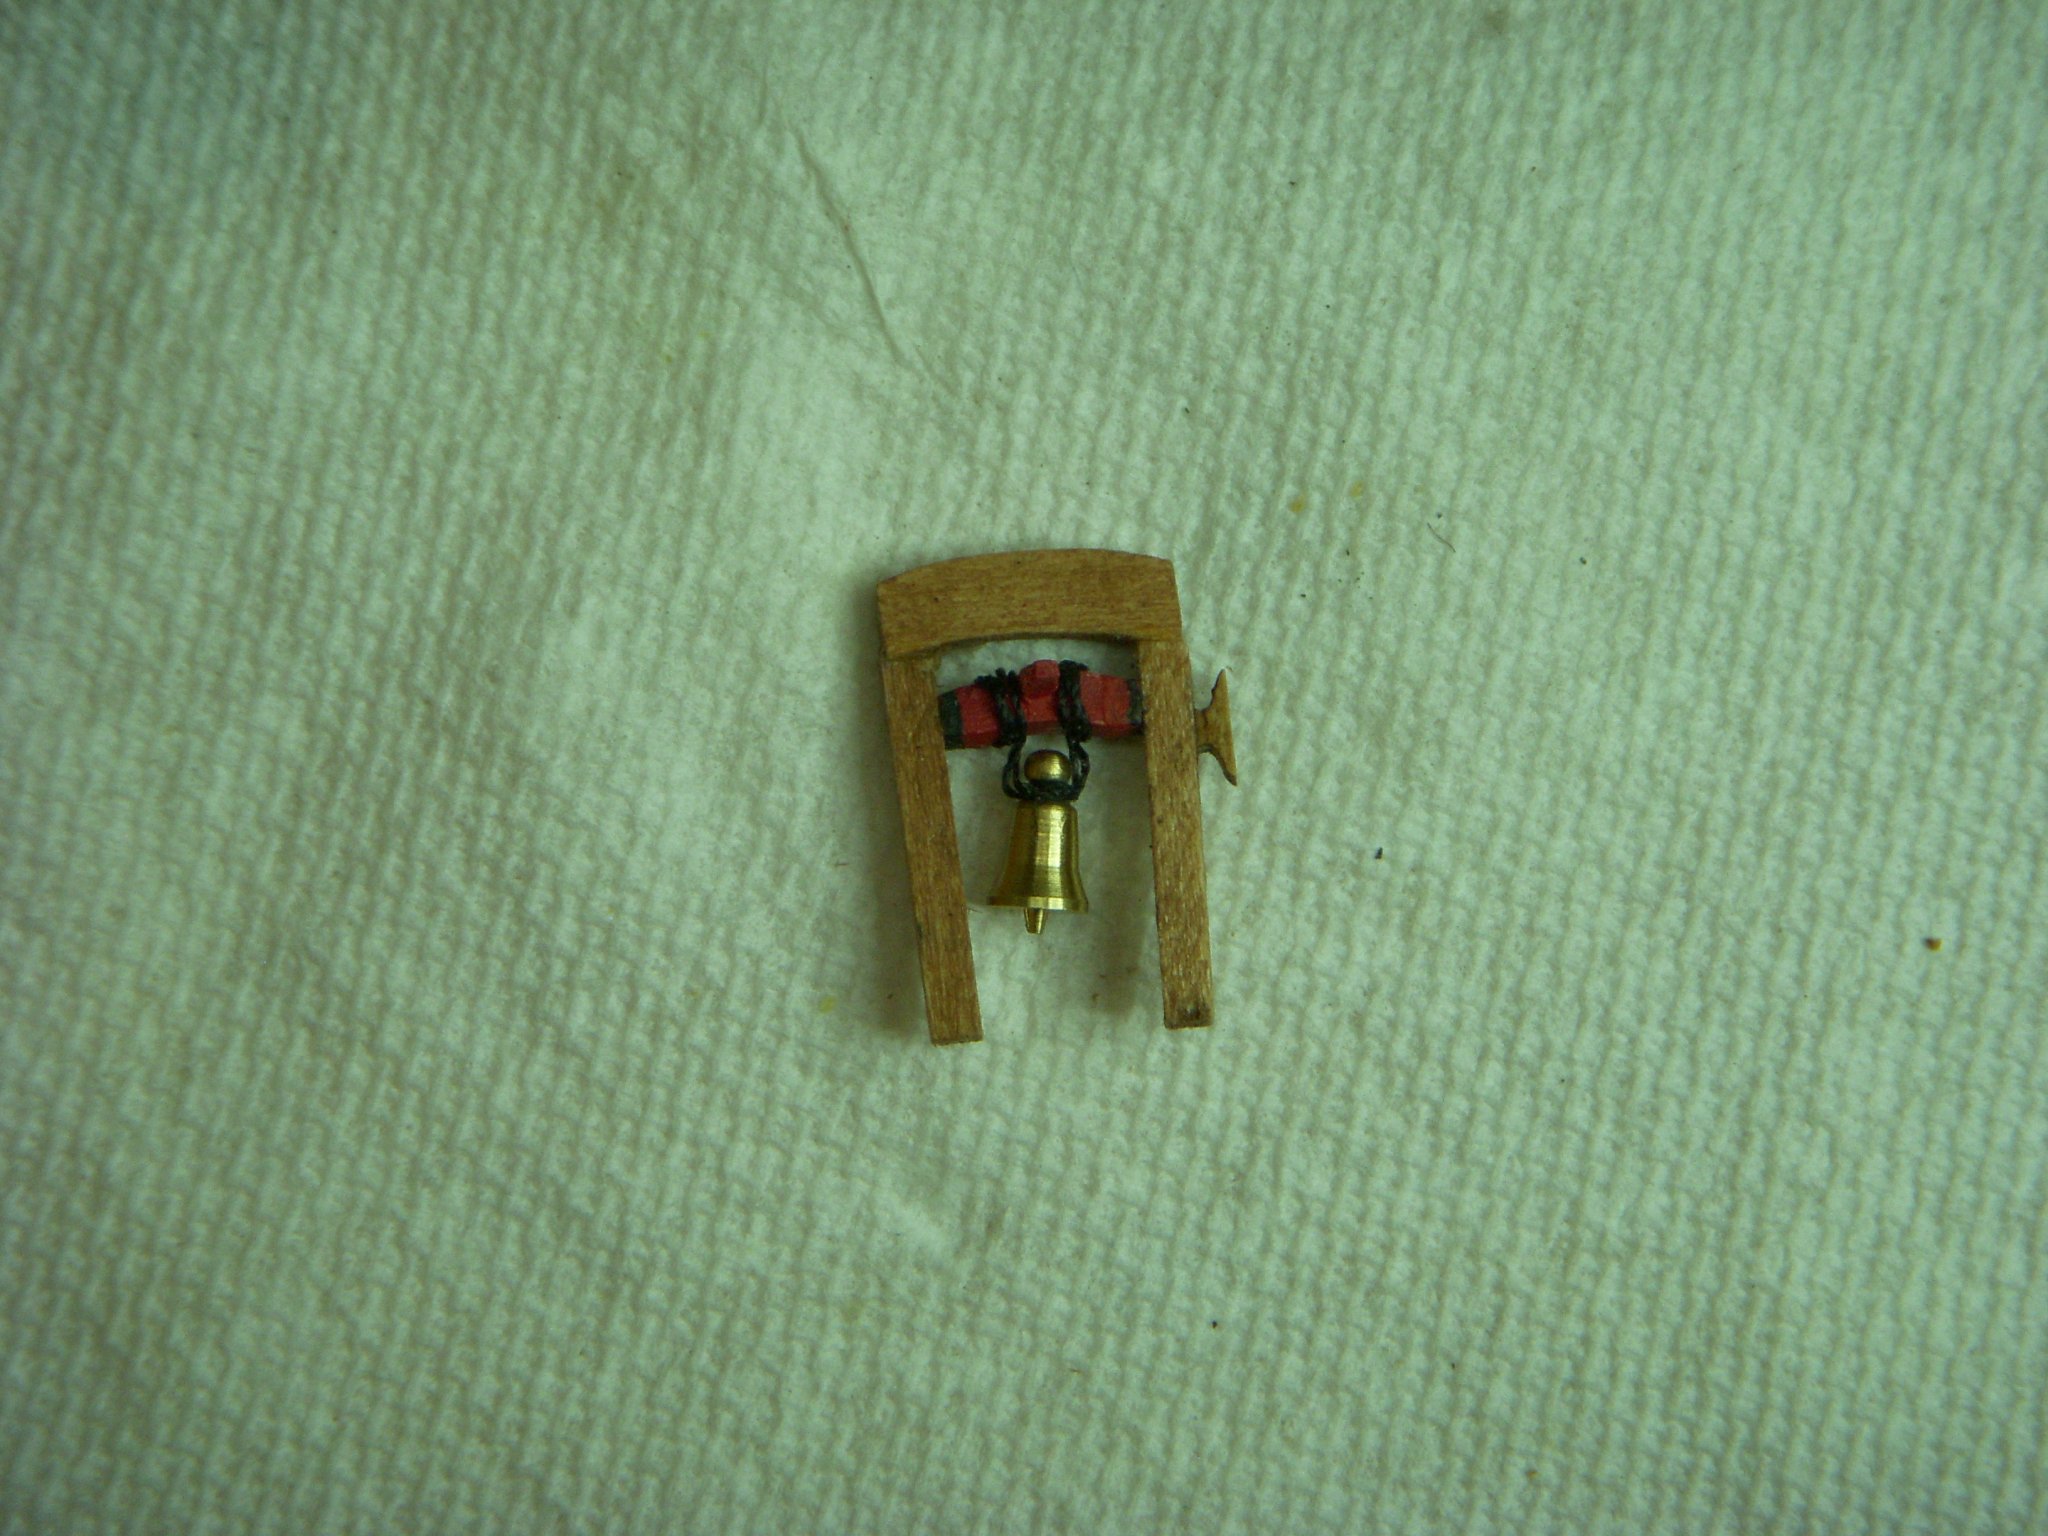
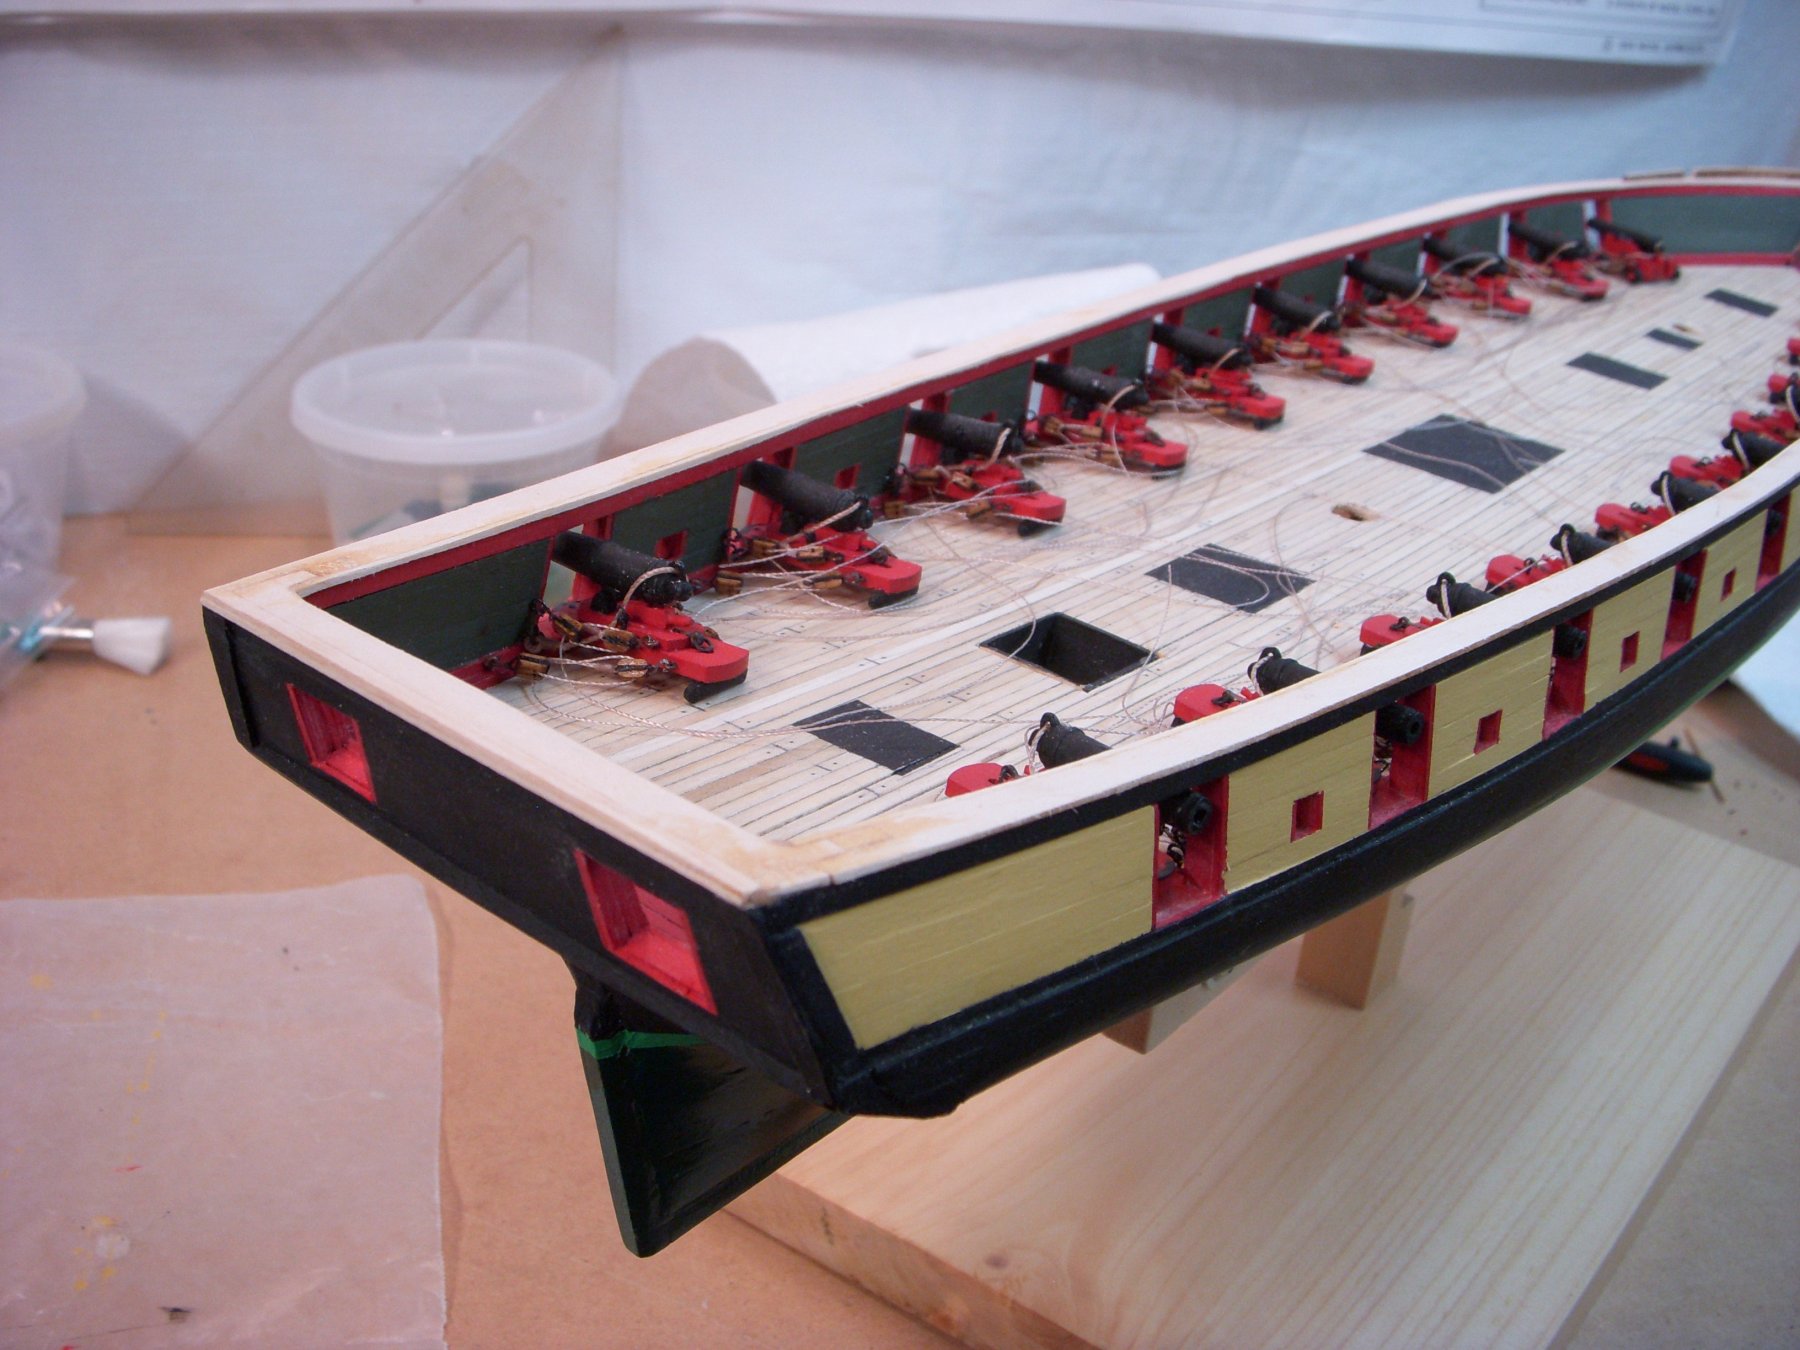
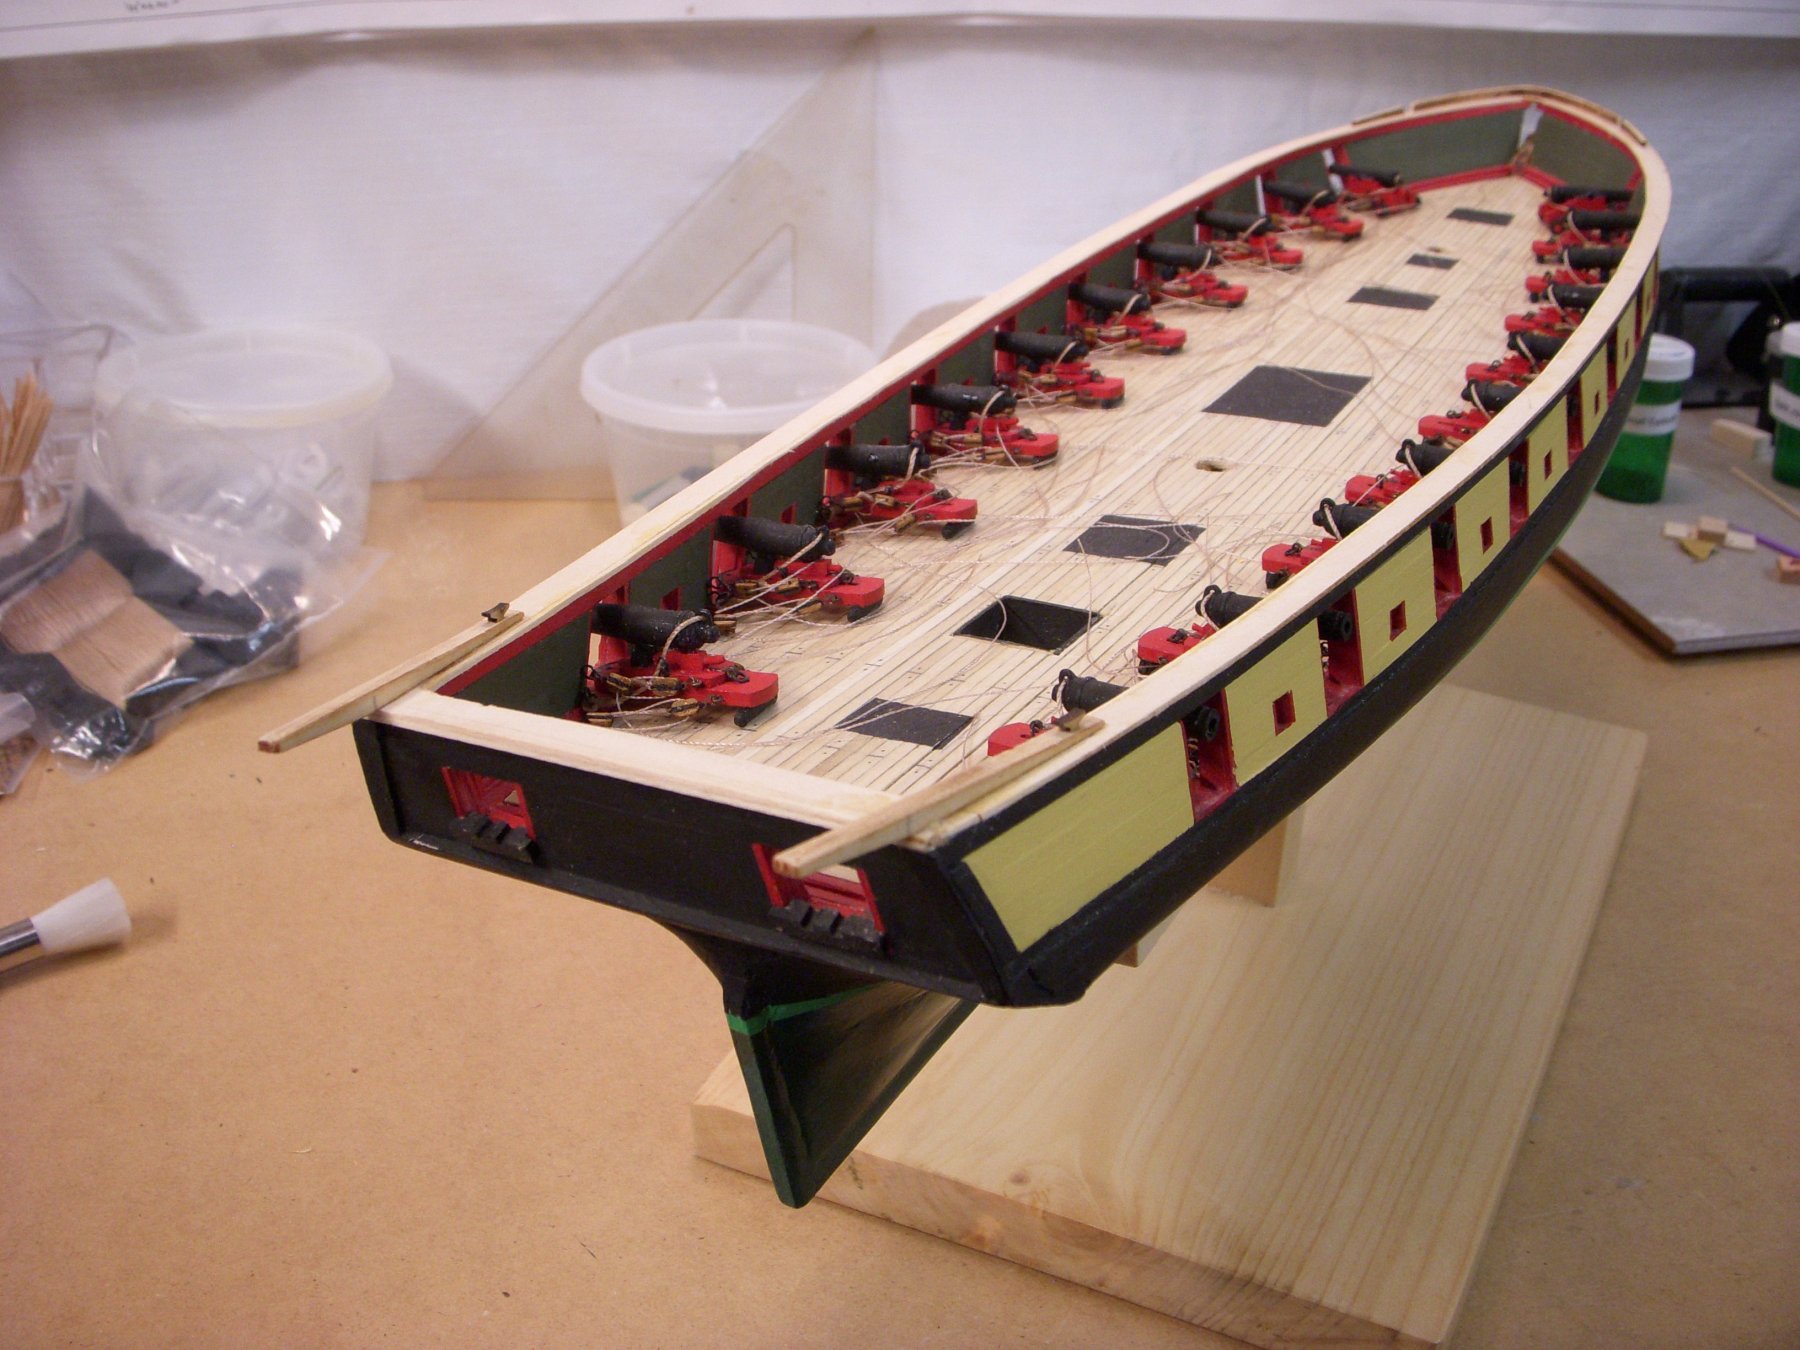
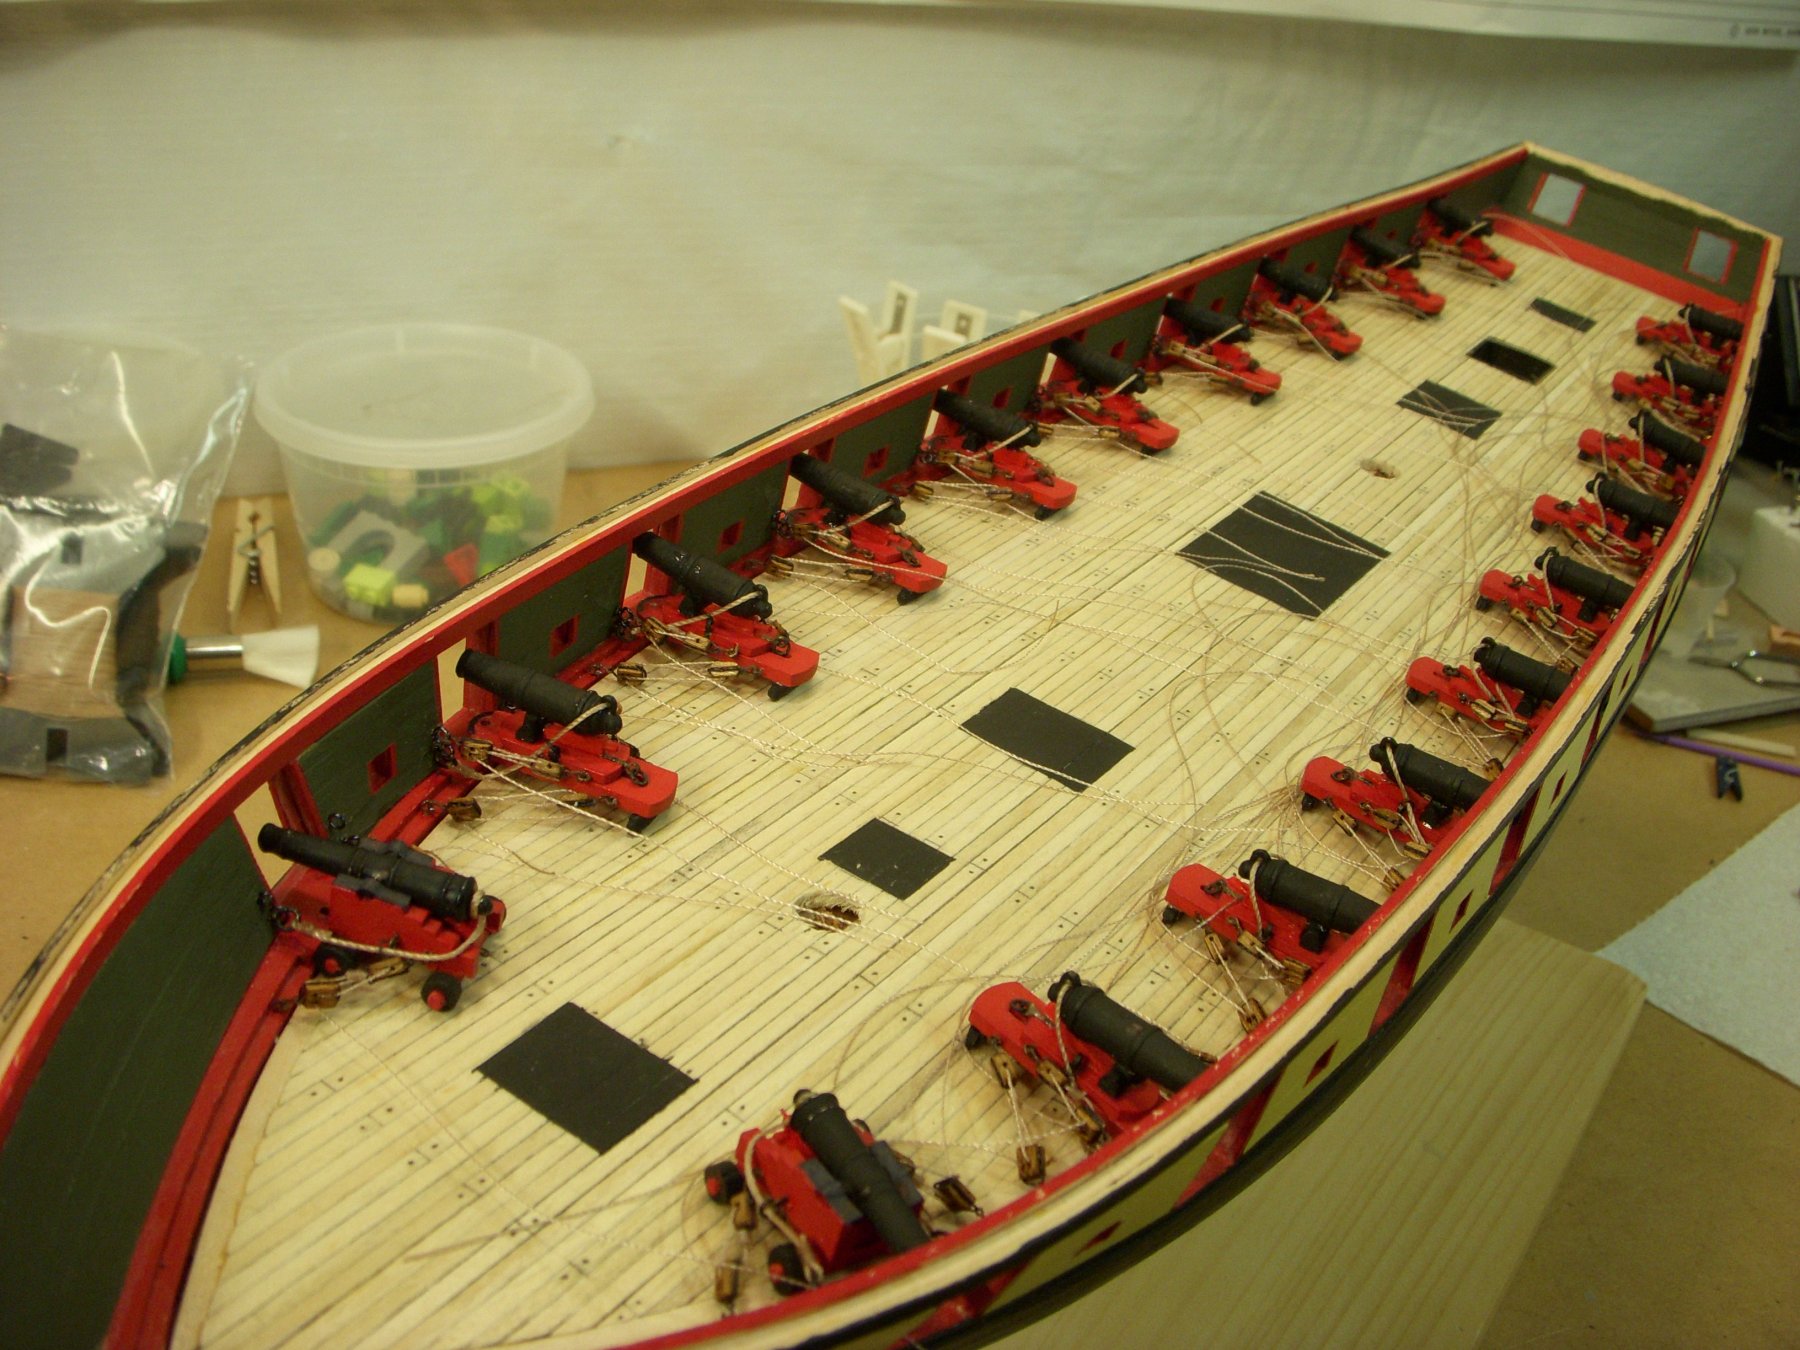
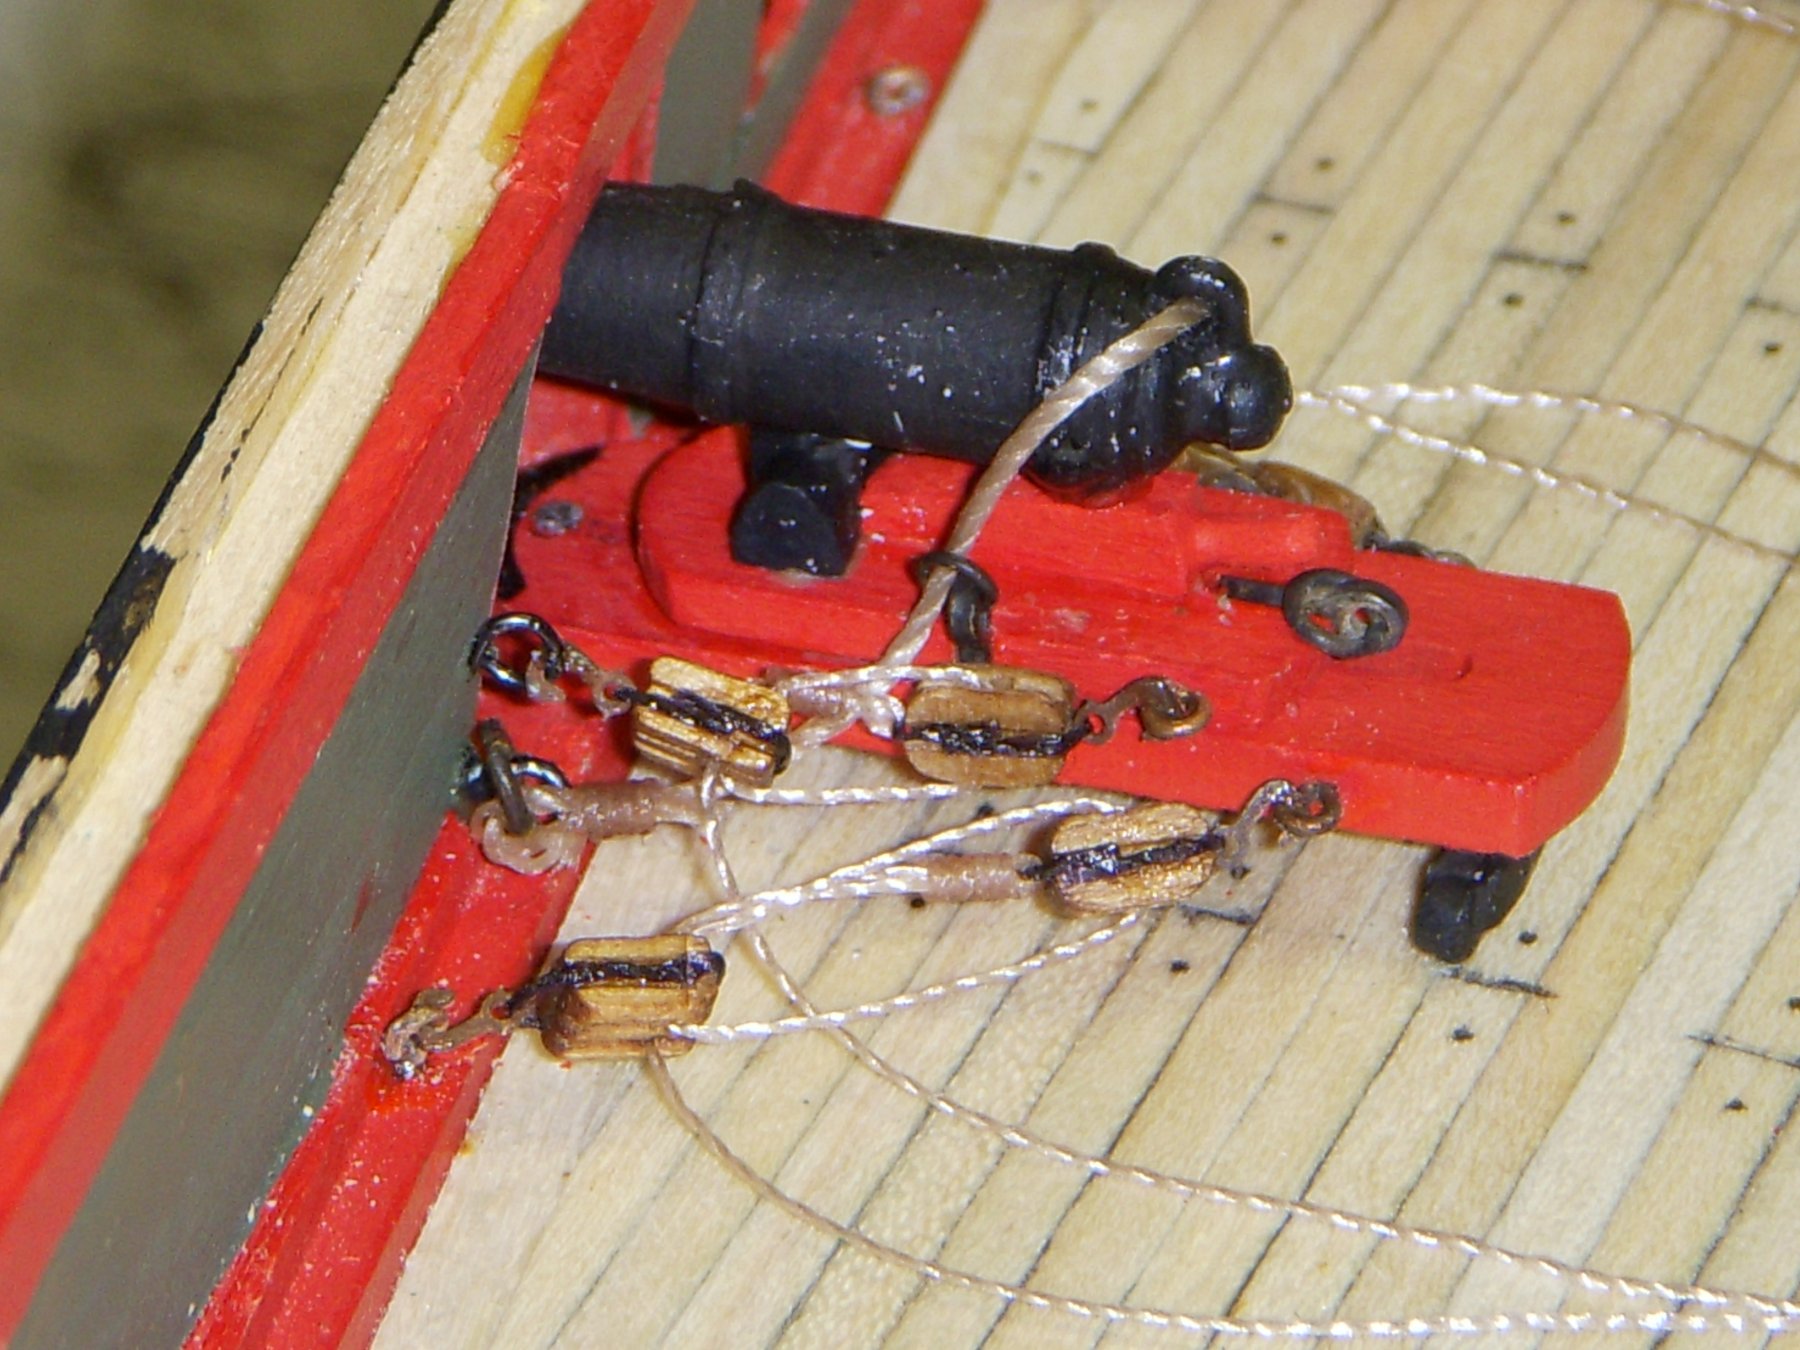
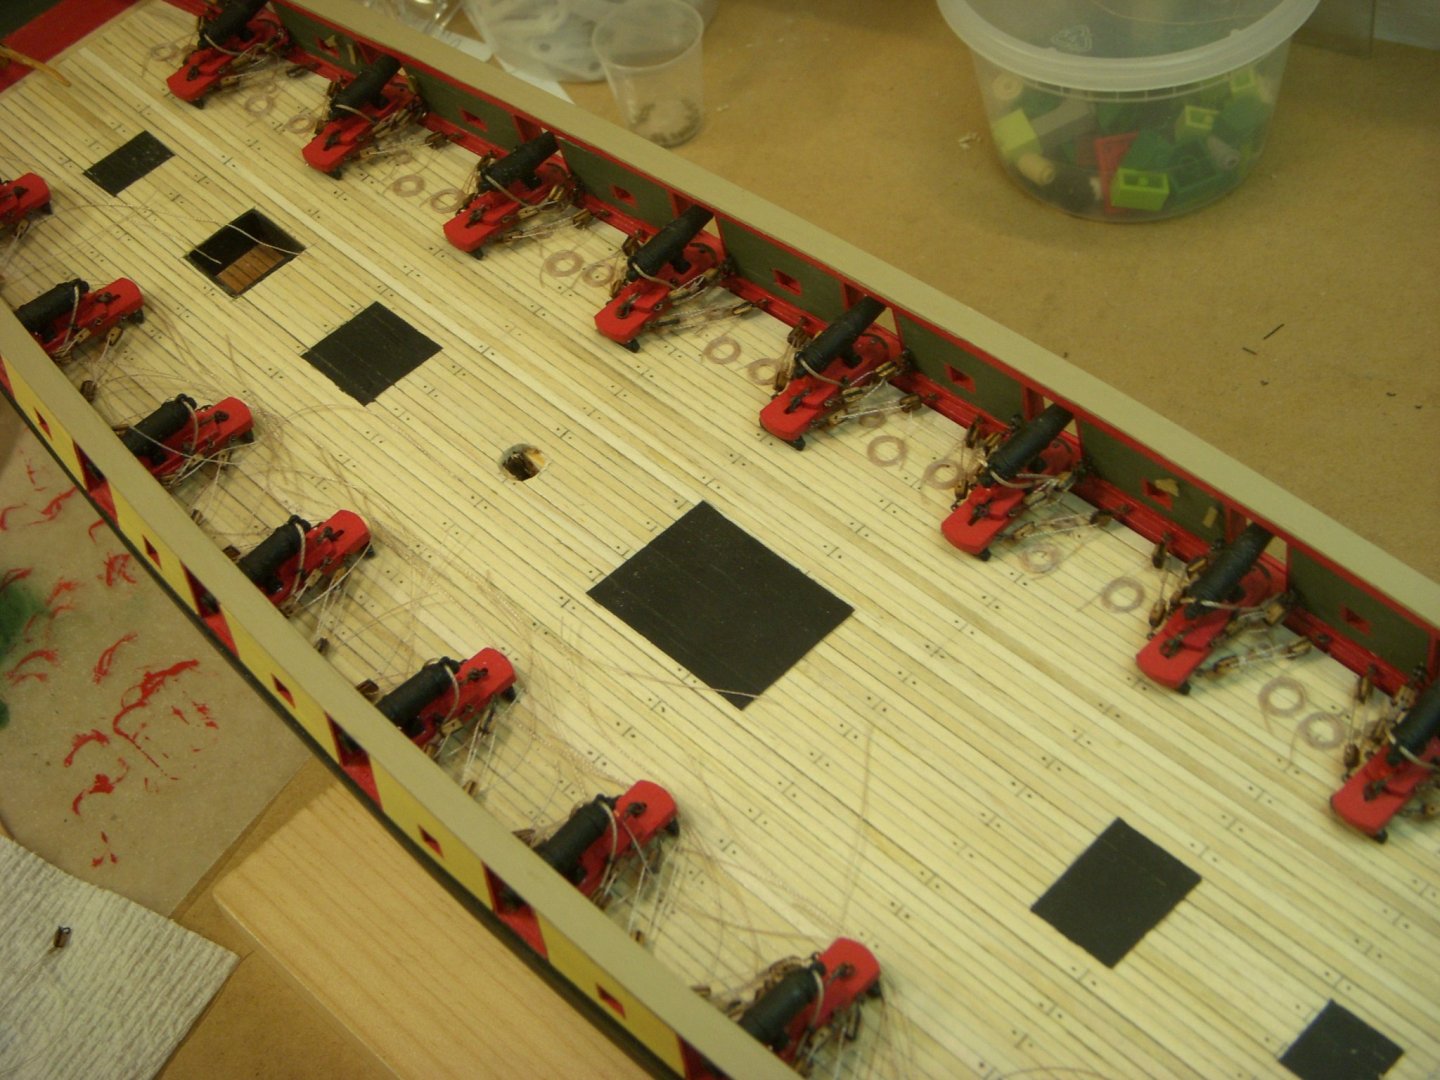
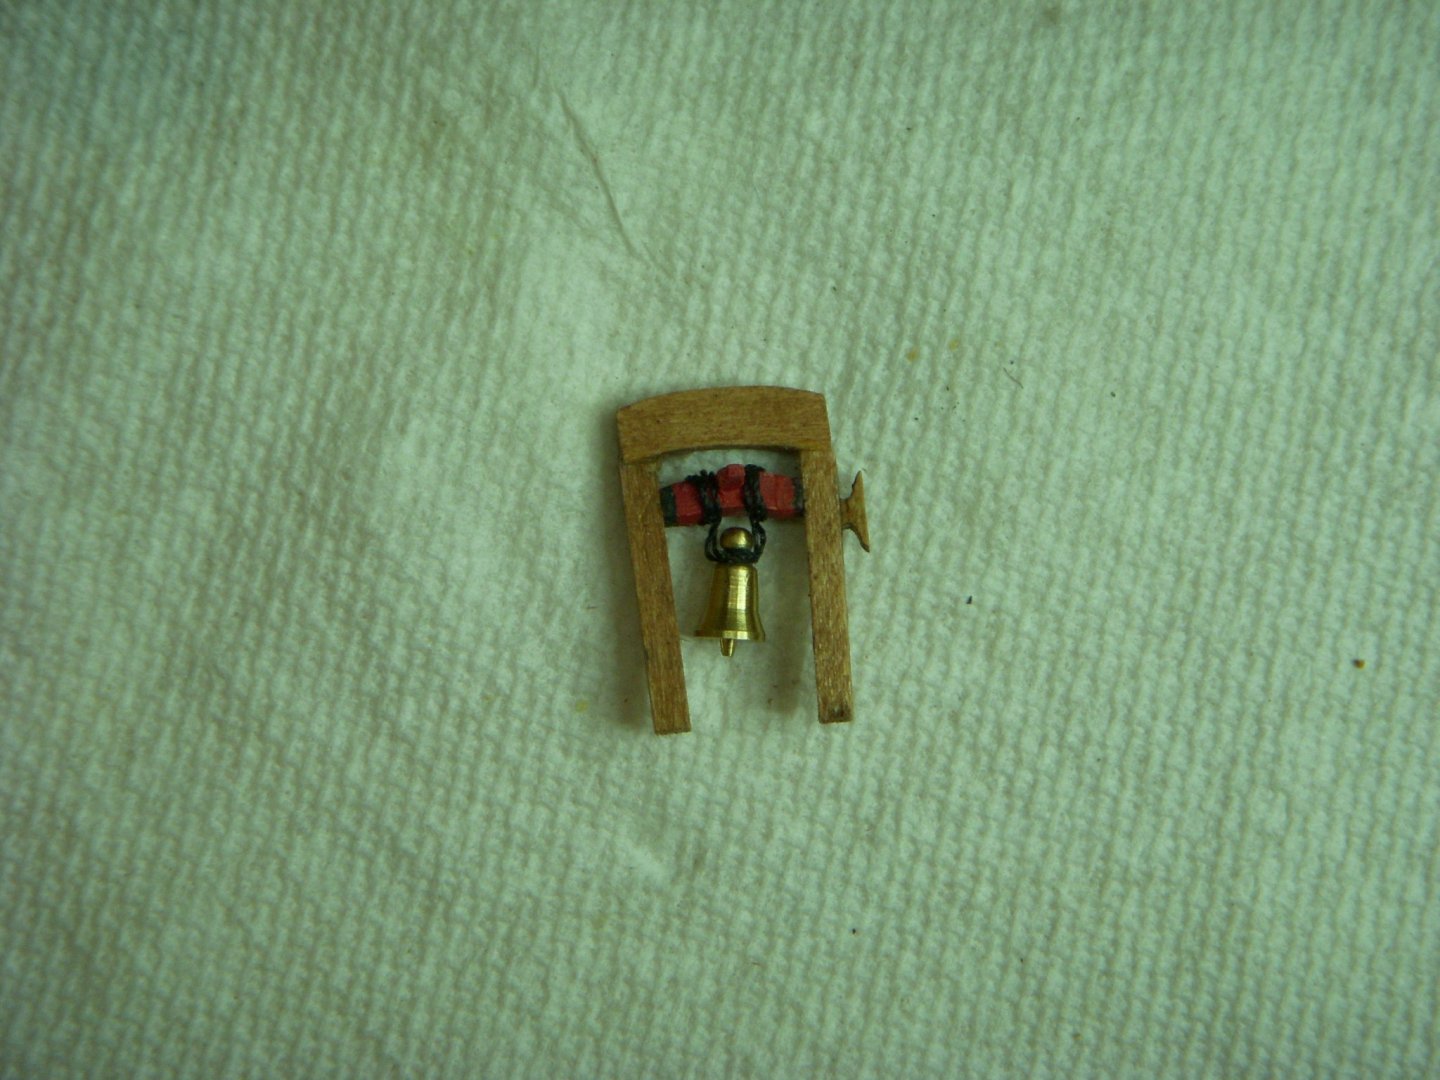
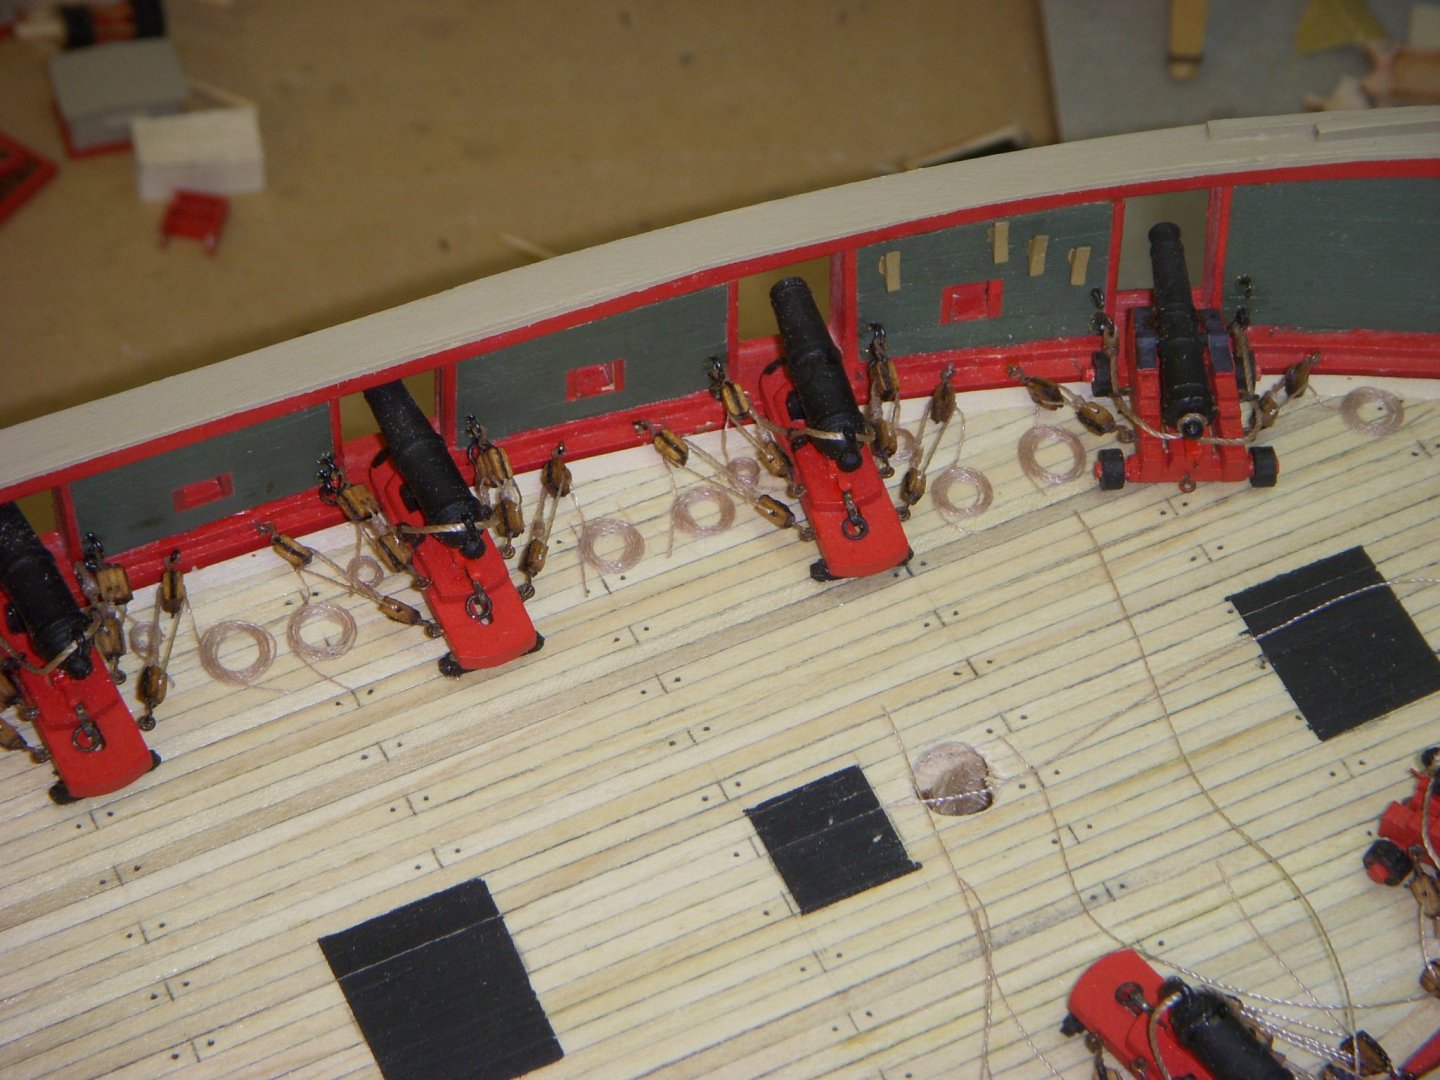
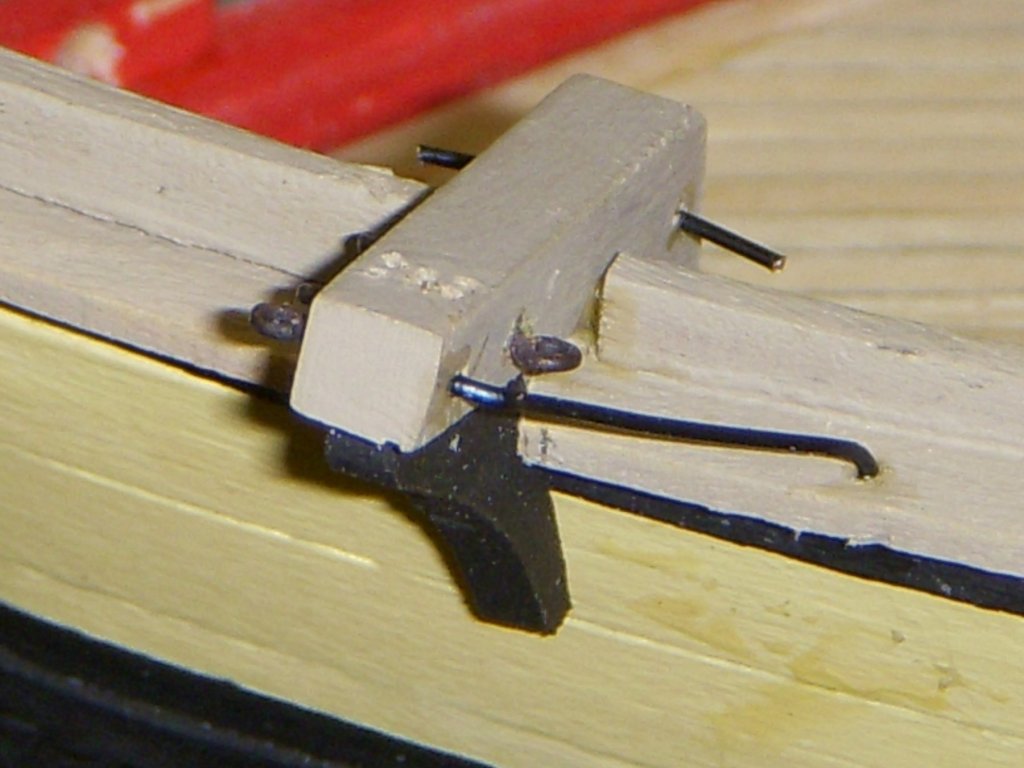
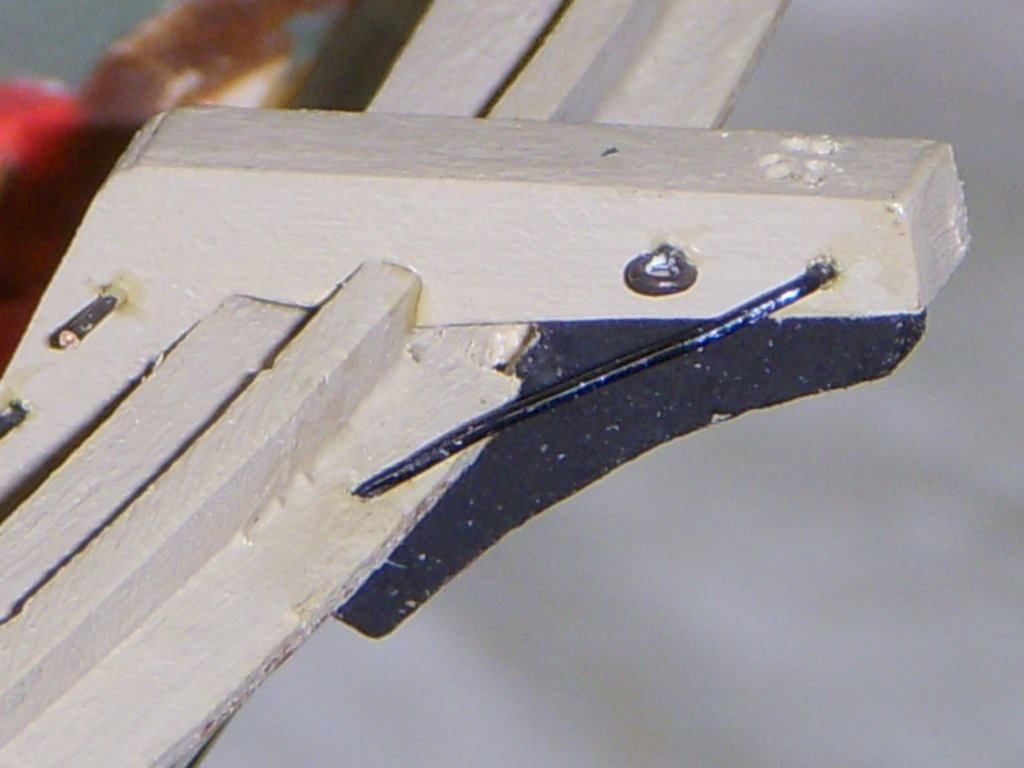
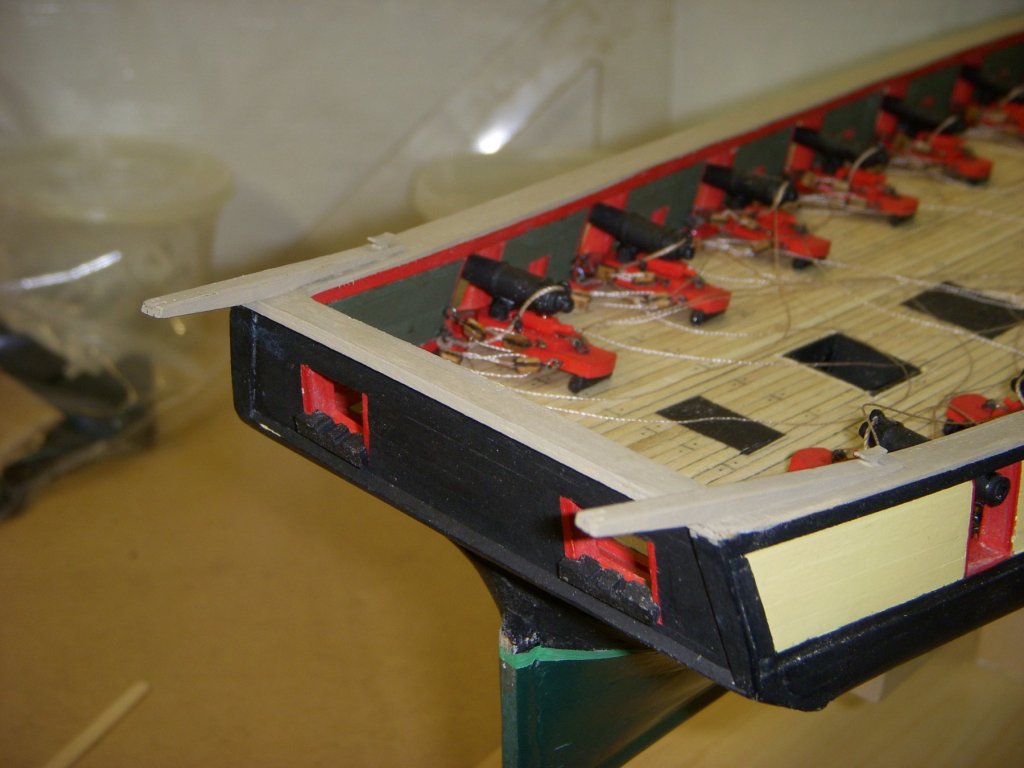
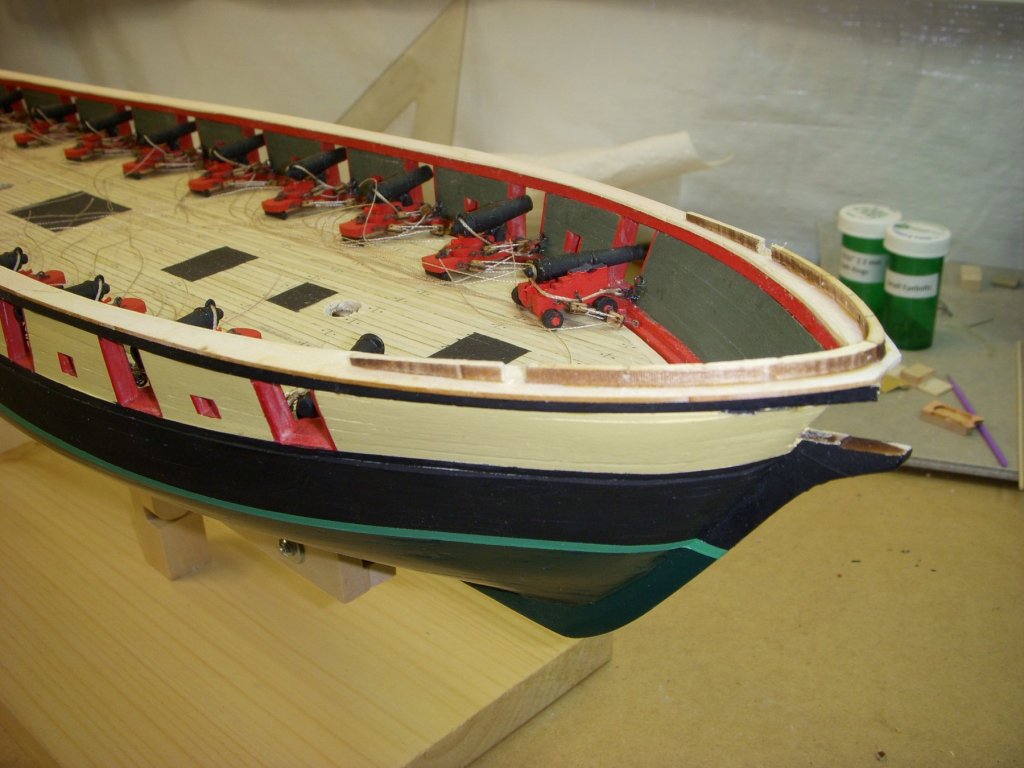
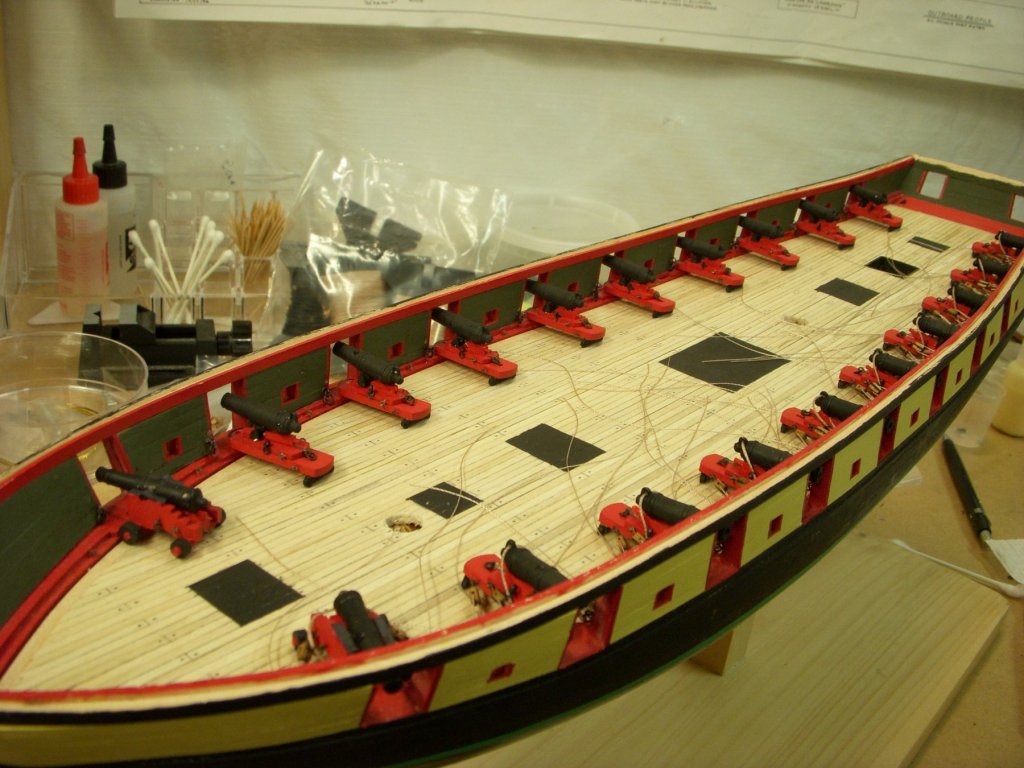
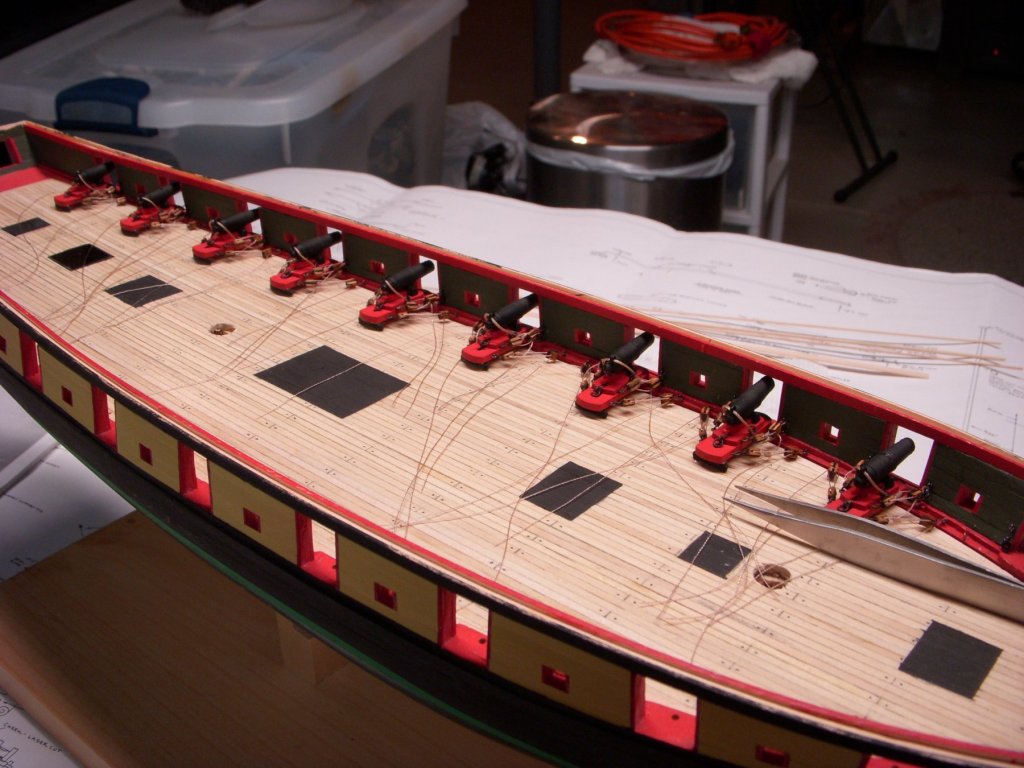
.thumb.jpg.1da981e493a7fe8bed83bce0fbcfa3c4.jpg) I have been pretty lax with my work on the ship, weather has been pretty good so I have been spending my time outside. But it has started to turn a little cooler so back to the project. I built and mounted capstan bars. The Bowsprit bits and Bow Pin rail were also mounted. The ships bell has been assembled but not yet mounted. I have spent a lot of time trying to decide what to do with the breech line and gun tackle. The formal way would be to have a neat flat coil on the deck. When I visited the Niagara this Summer they just piled the extra rope on the deck next to the cannons. I decided to do a semi-formal design, a loose coil on the deck. Mounting the coils after the cannons are installed takes a bit of time getting everything in place without gluing all the lines together. I finished the port side and will be working on the starboard shortly. Ron
I have been pretty lax with my work on the ship, weather has been pretty good so I have been spending my time outside. But it has started to turn a little cooler so back to the project. I built and mounted capstan bars. The Bowsprit bits and Bow Pin rail were also mounted. The ships bell has been assembled but not yet mounted. I have spent a lot of time trying to decide what to do with the breech line and gun tackle. The formal way would be to have a neat flat coil on the deck. When I visited the Niagara this Summer they just piled the extra rope on the deck next to the cannons. I decided to do a semi-formal design, a loose coil on the deck. Mounting the coils after the cannons are installed takes a bit of time getting everything in place without gluing all the lines together. I finished the port side and will be working on the starboard shortly. Ron
-
Sorry, my mistake. I'll move them over today.
-
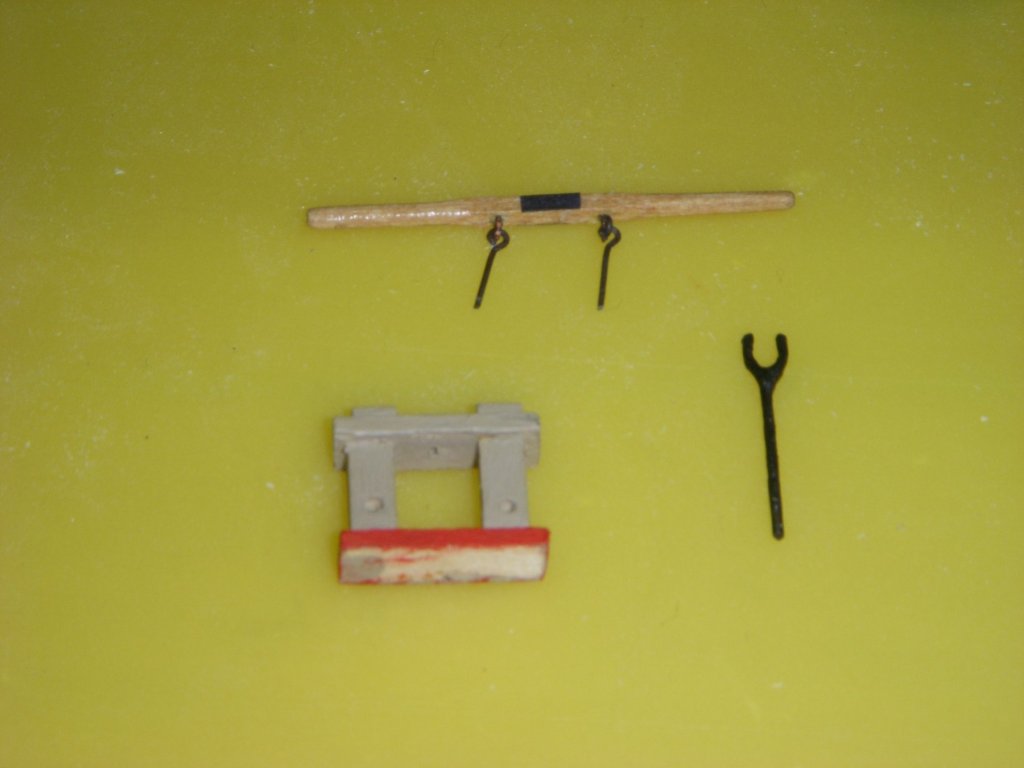
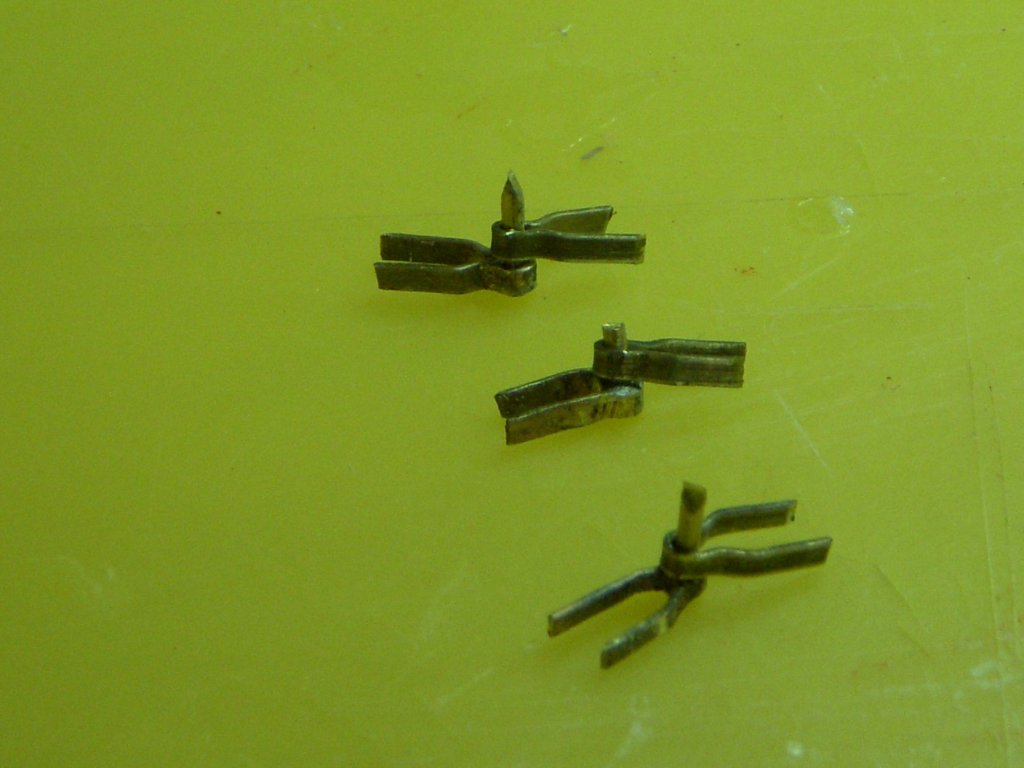
I would like to thank Ondras71 for his suggestion to try Hismodel.com for my required hooks. They had reasonable prices and quick delivery. 8 days for international mail delivery. Ron
-
Thank you for the link, this is exactly what I was looking for. Ron
-
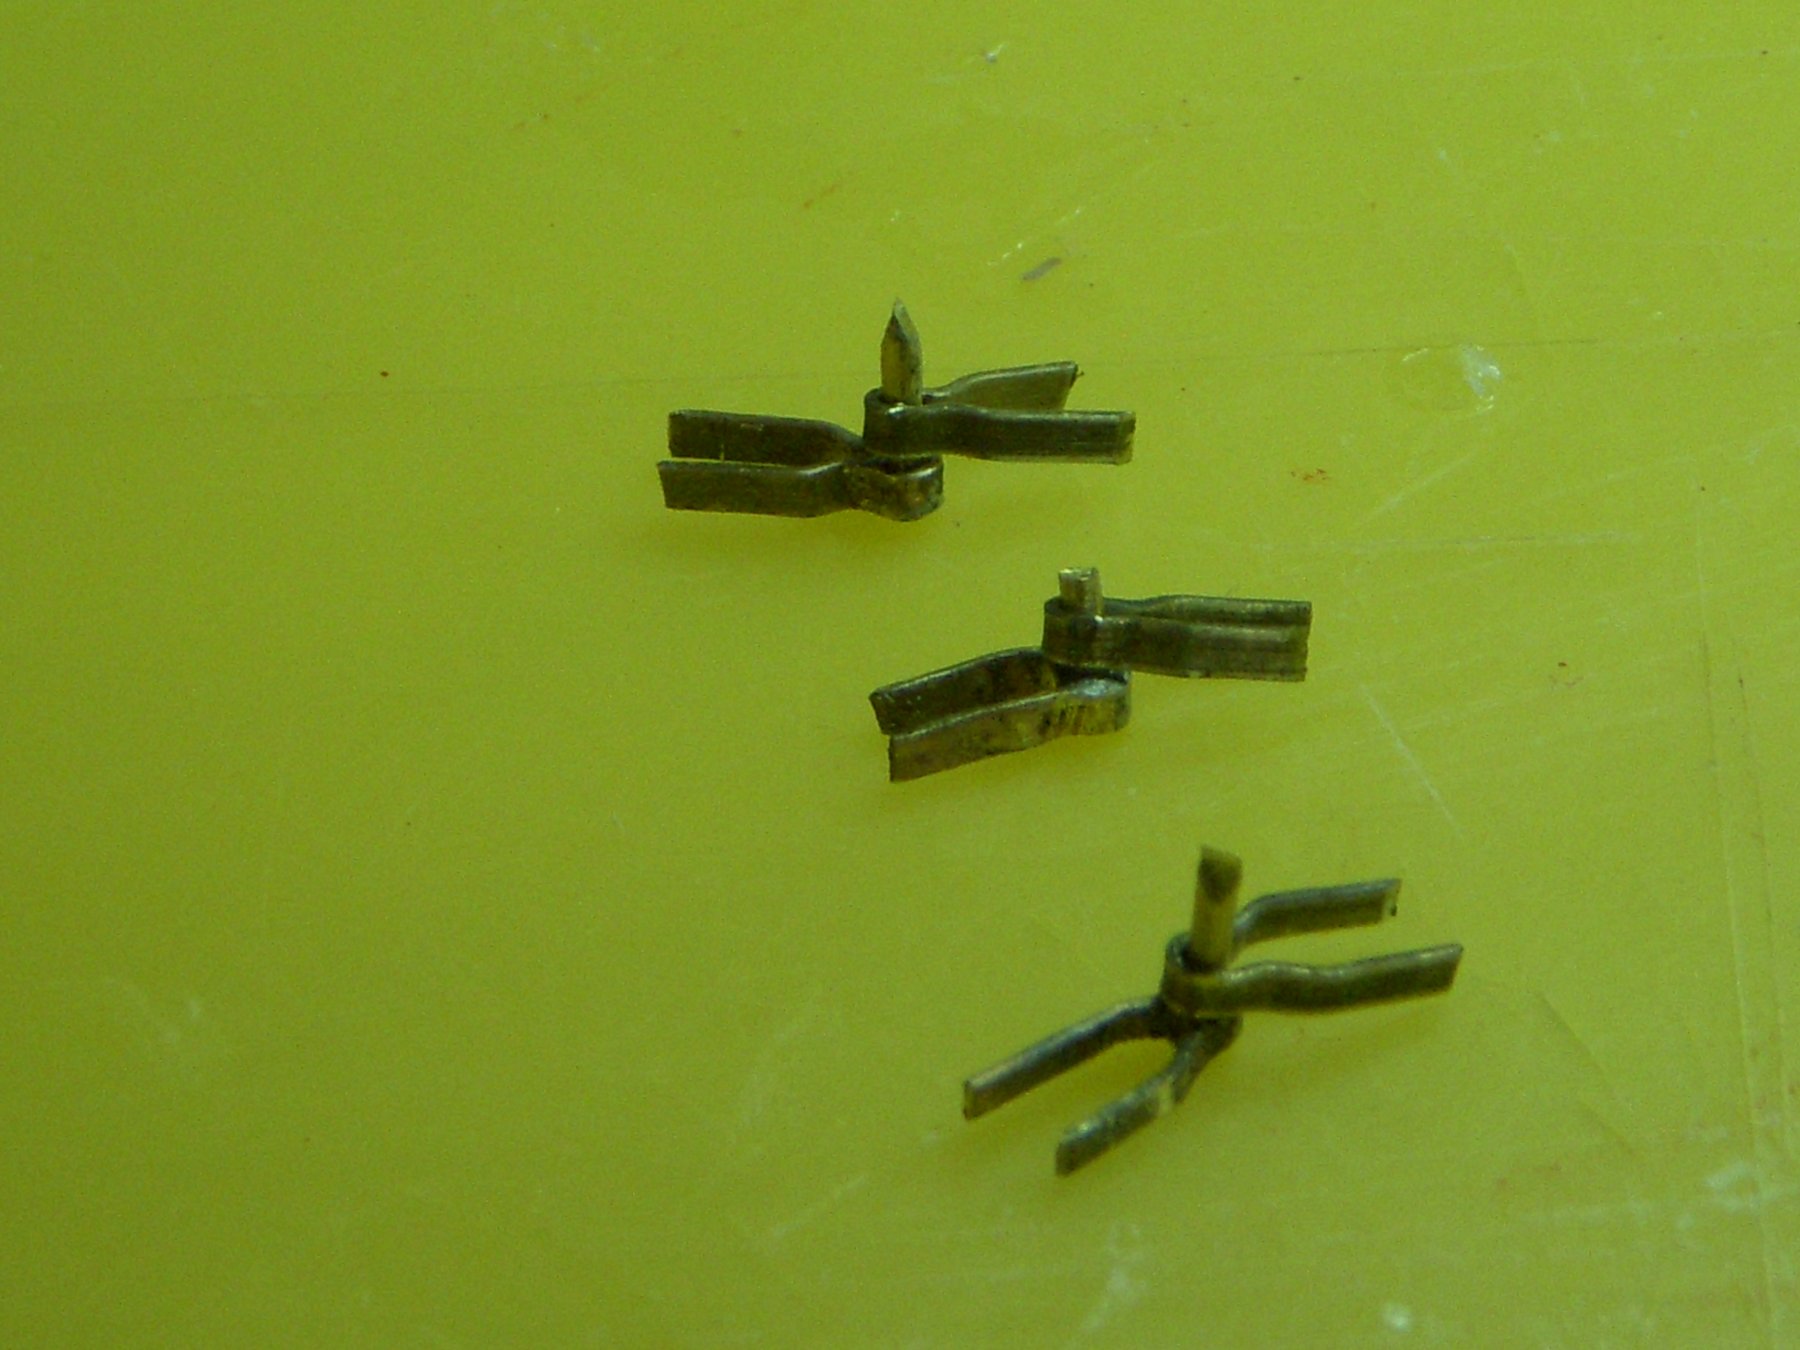
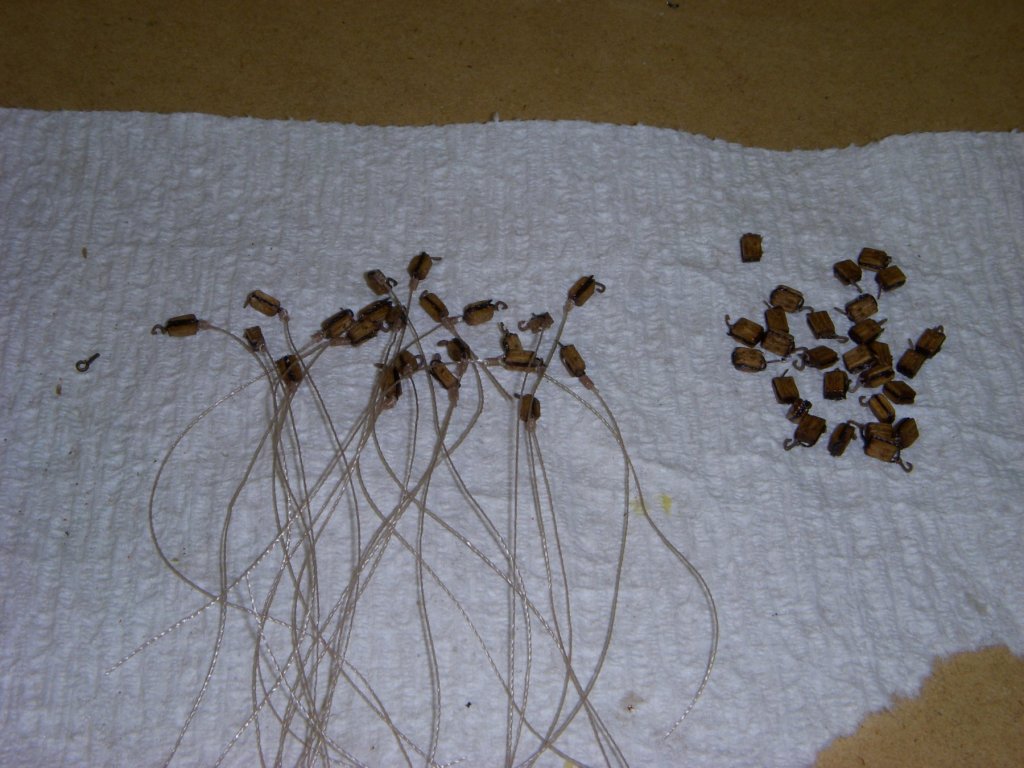
I looked at all the suggestions, Age of Sail has the 3mm hooks, but it also includes the deadeye strops at a small quatity (10). The Dafinismus.de web site has a large sheet of hooks with many sizes that I do not need. In fact it does not look like any of them are the correct size. I need about 75 to 100 hooks depending on how many go flying into the lost parts hole. Thanks everyone.
-
Thanks for the Quick reply, I will check out both.
-
I am in the process of building the Brig Niagara, I purchased hooks for my blocks from Syren, and I did not purchase enough. I have contacted them and they no longer carry these parts. I have searched the several different suppliers but have no been able to find and alternate supplier. Does anyone know where I could obtain additional quantities. In the past I tried making my own with brass wire but was not happy with the results. Thanks
-
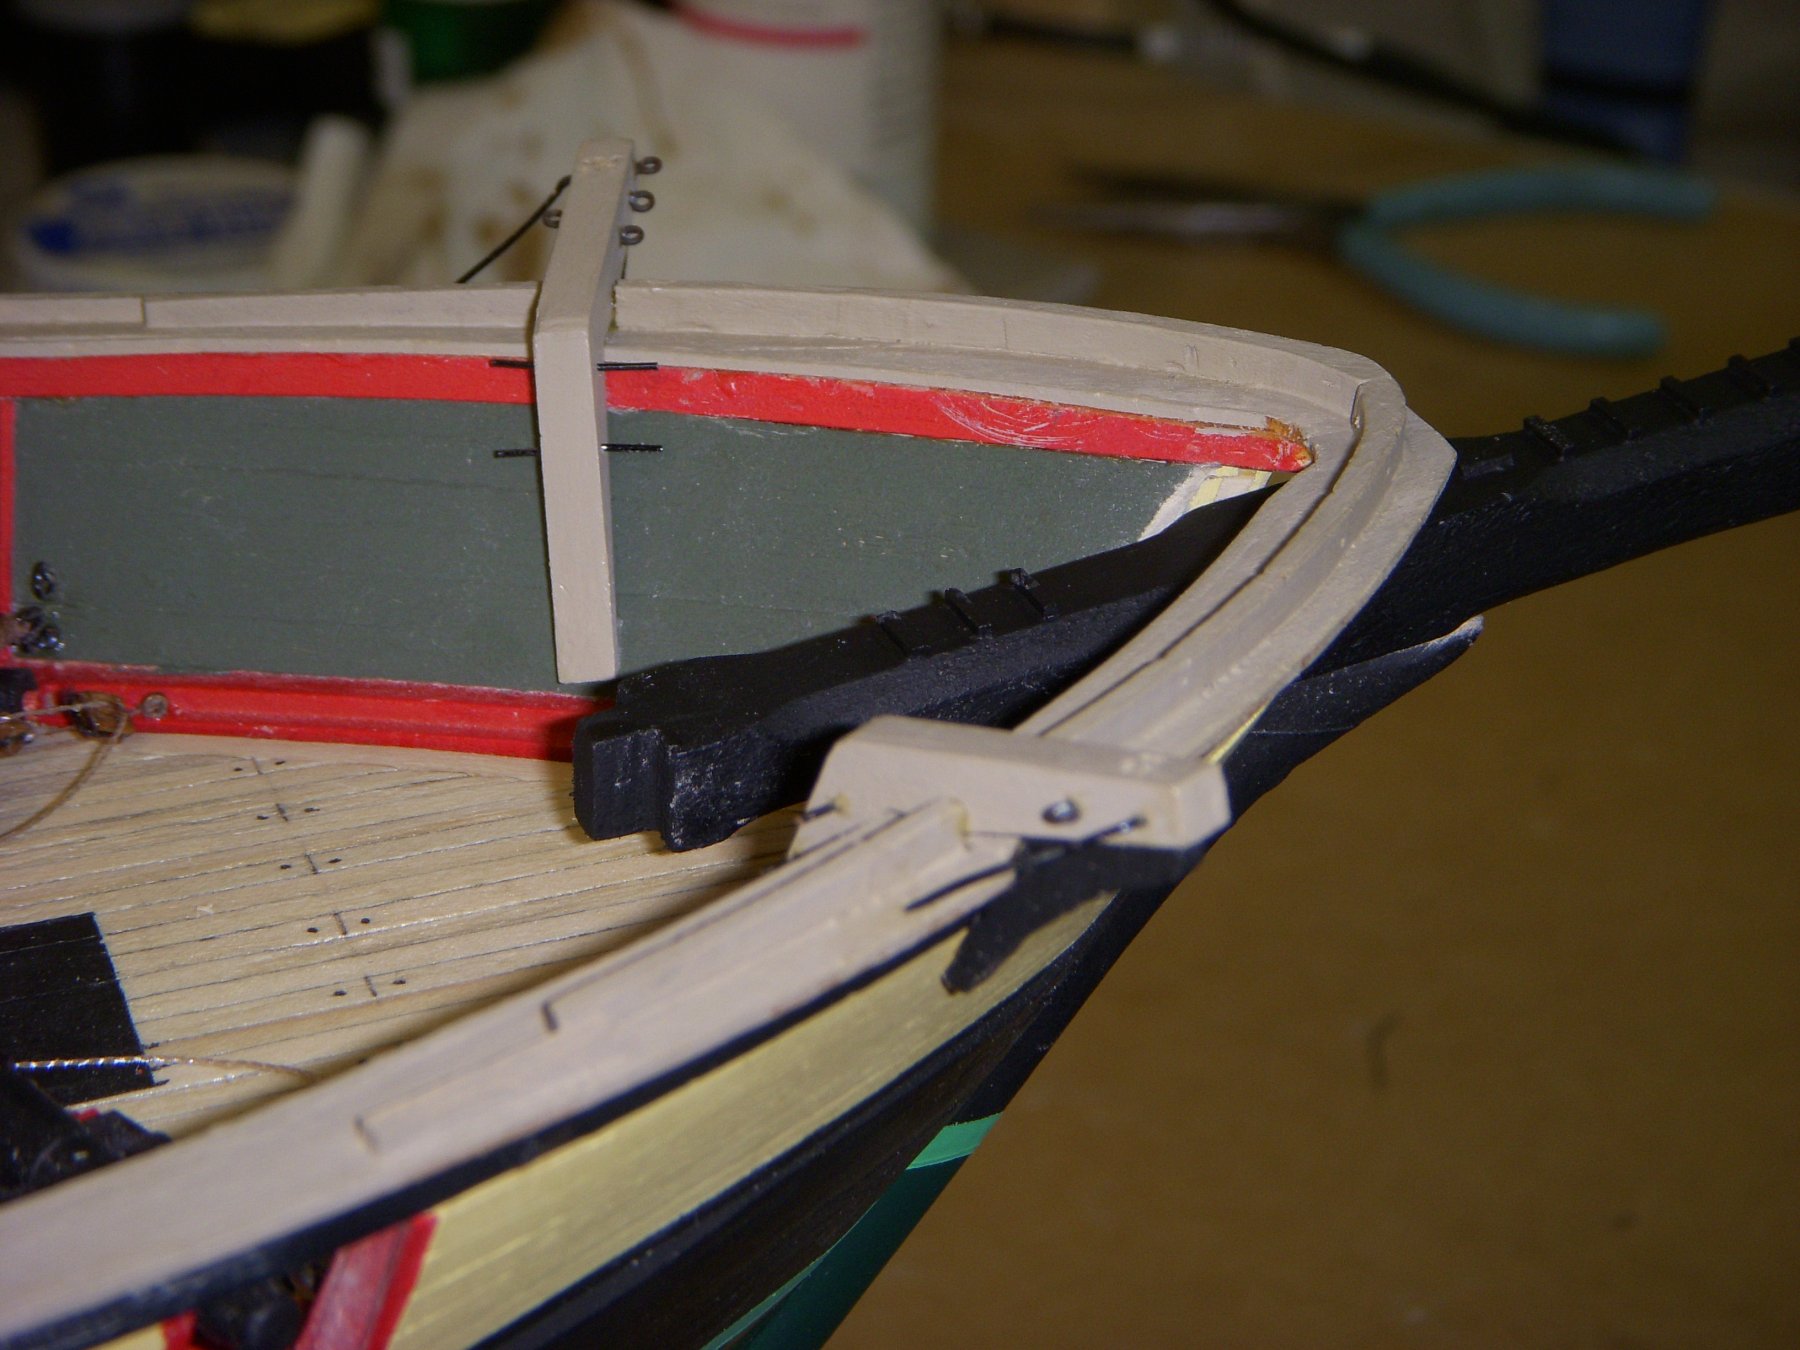
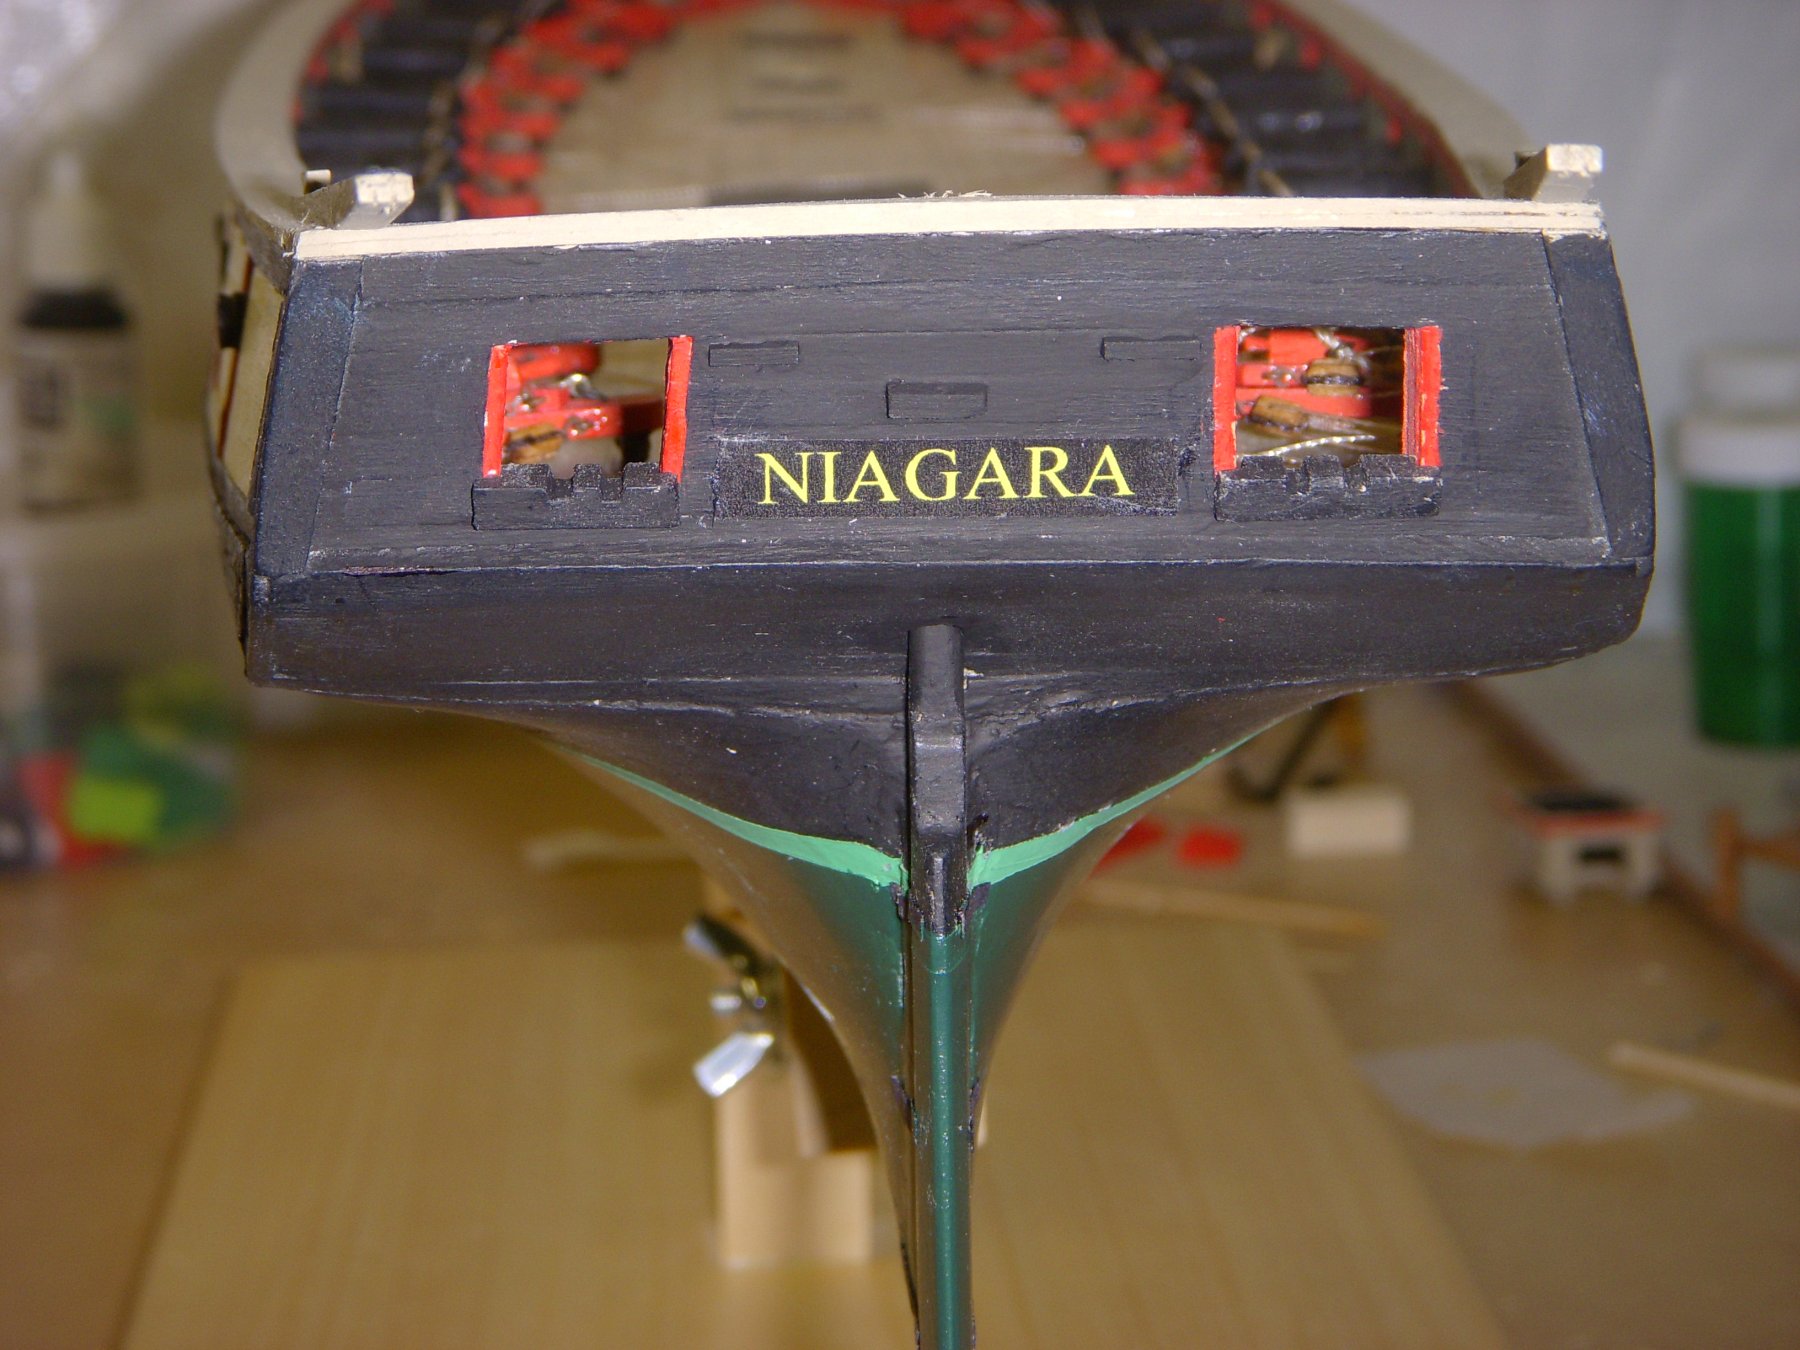
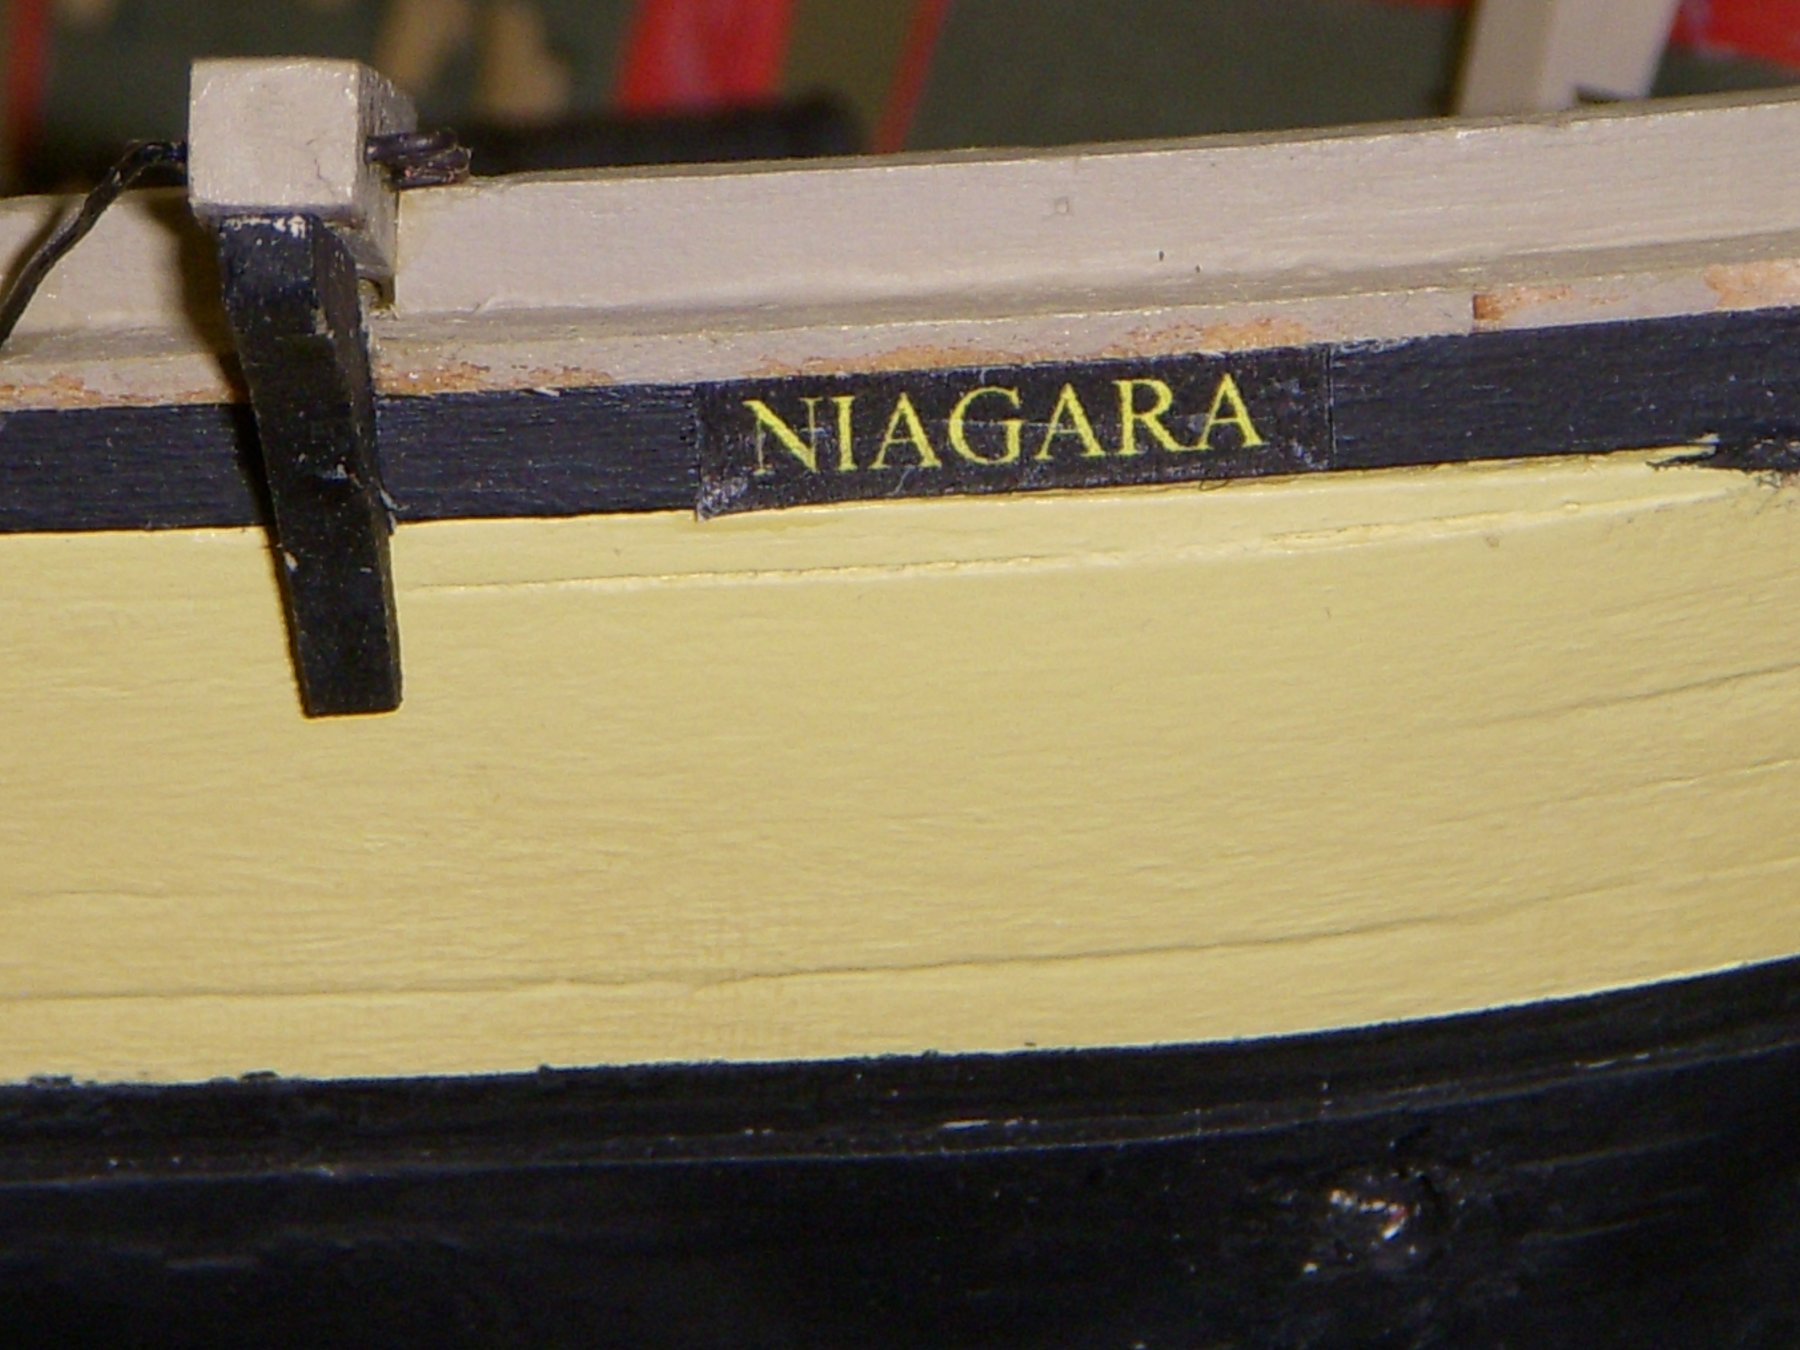
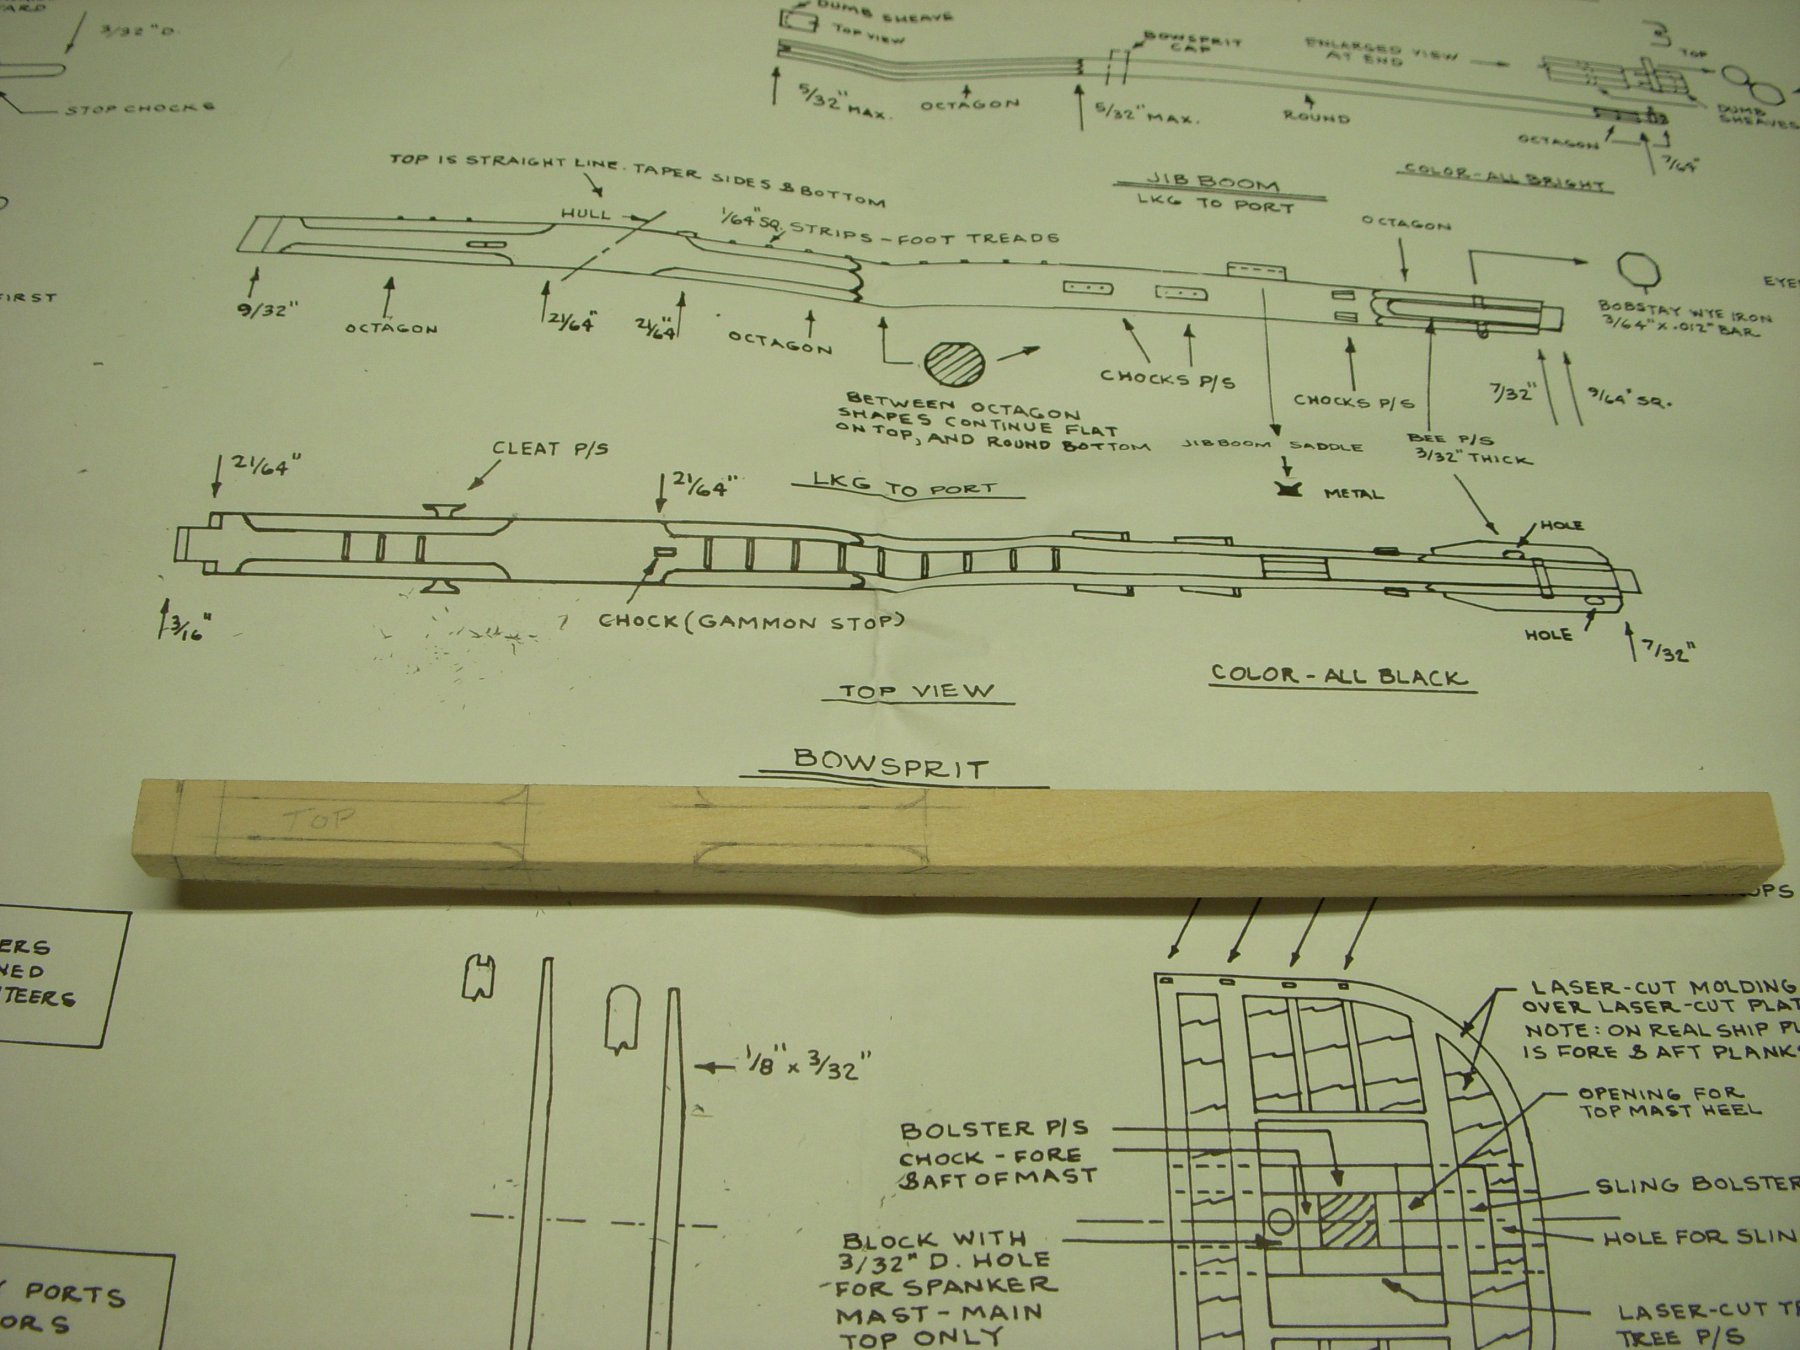
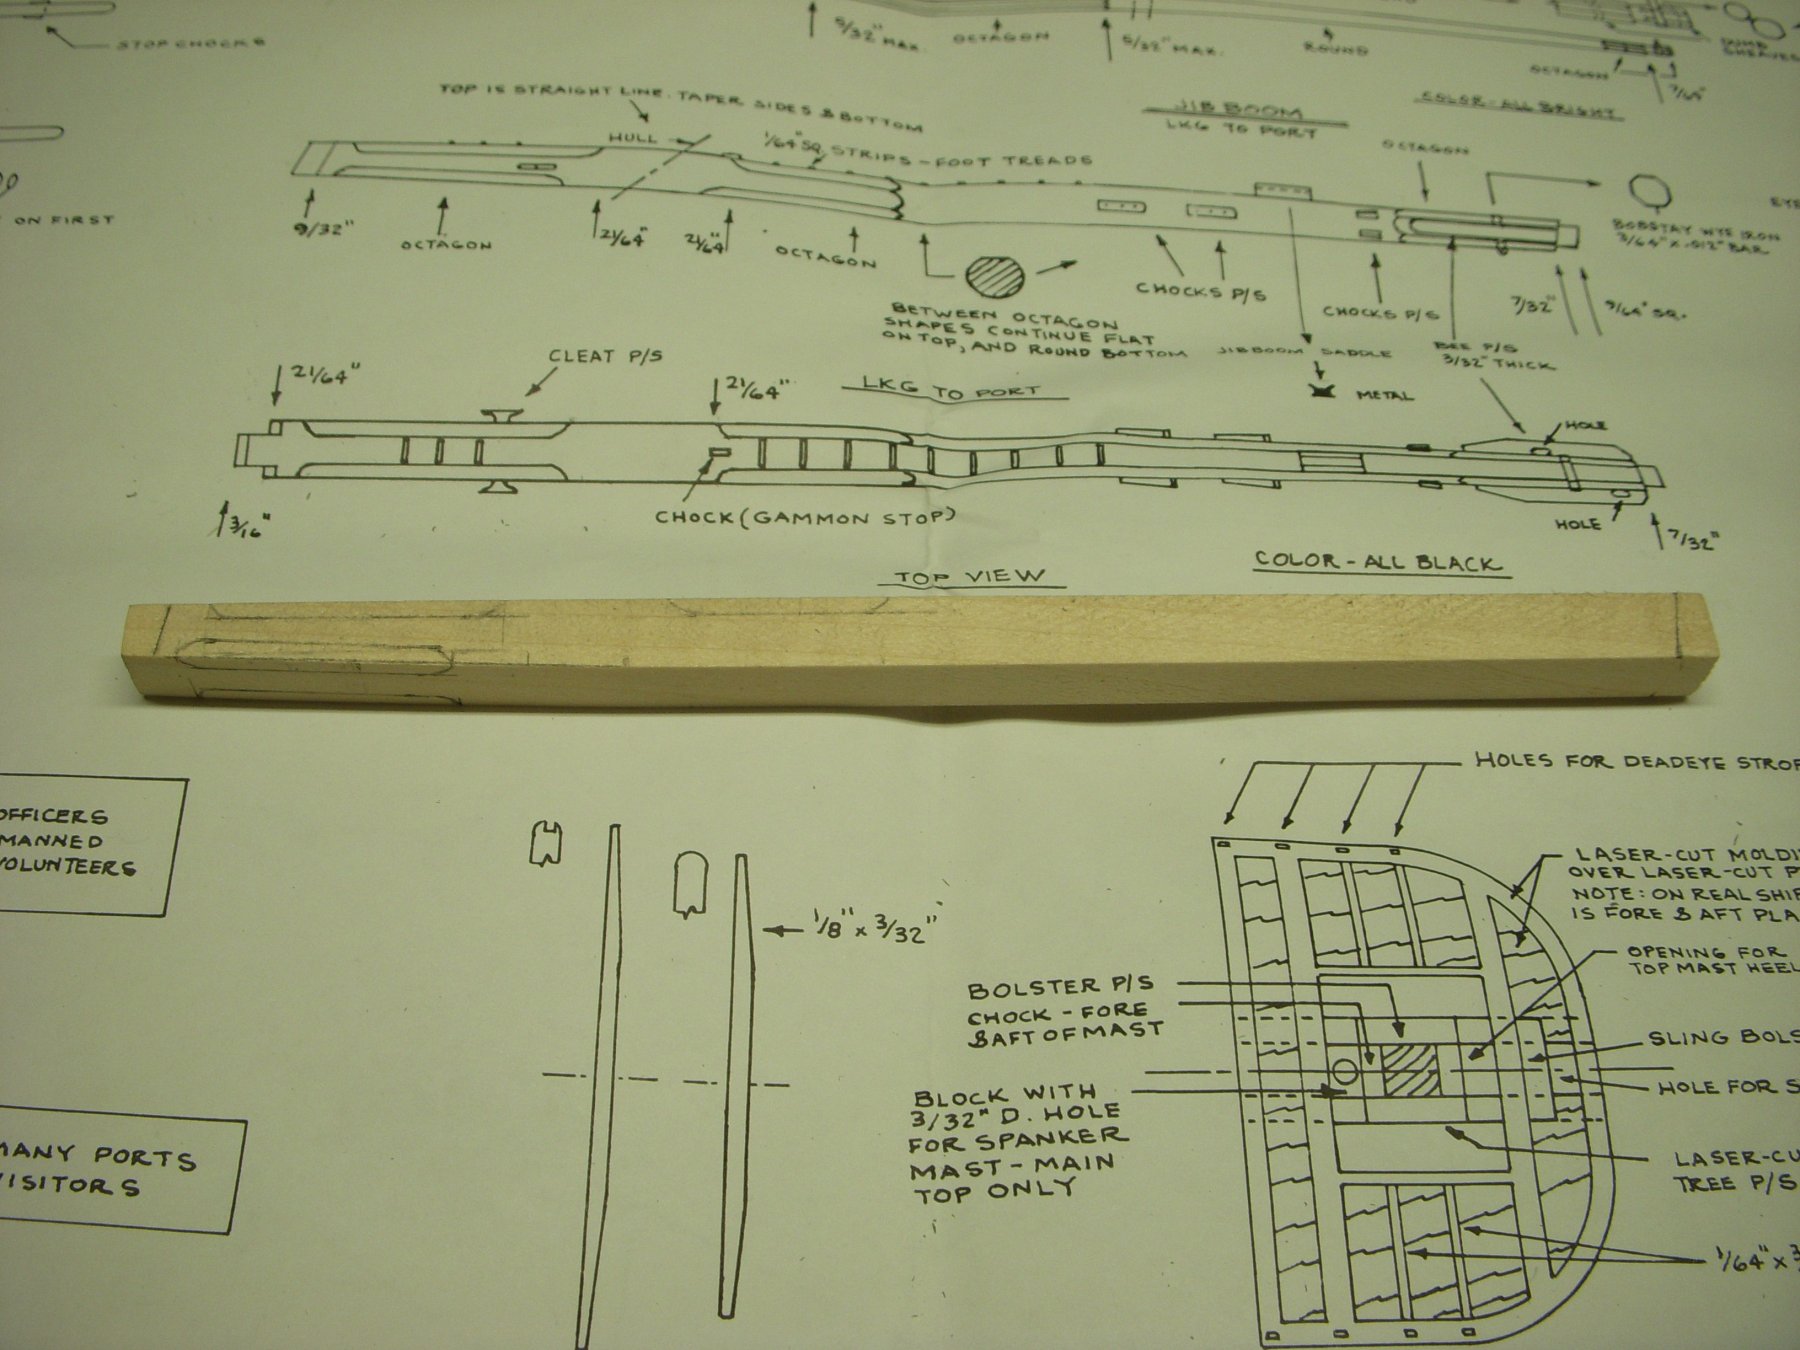
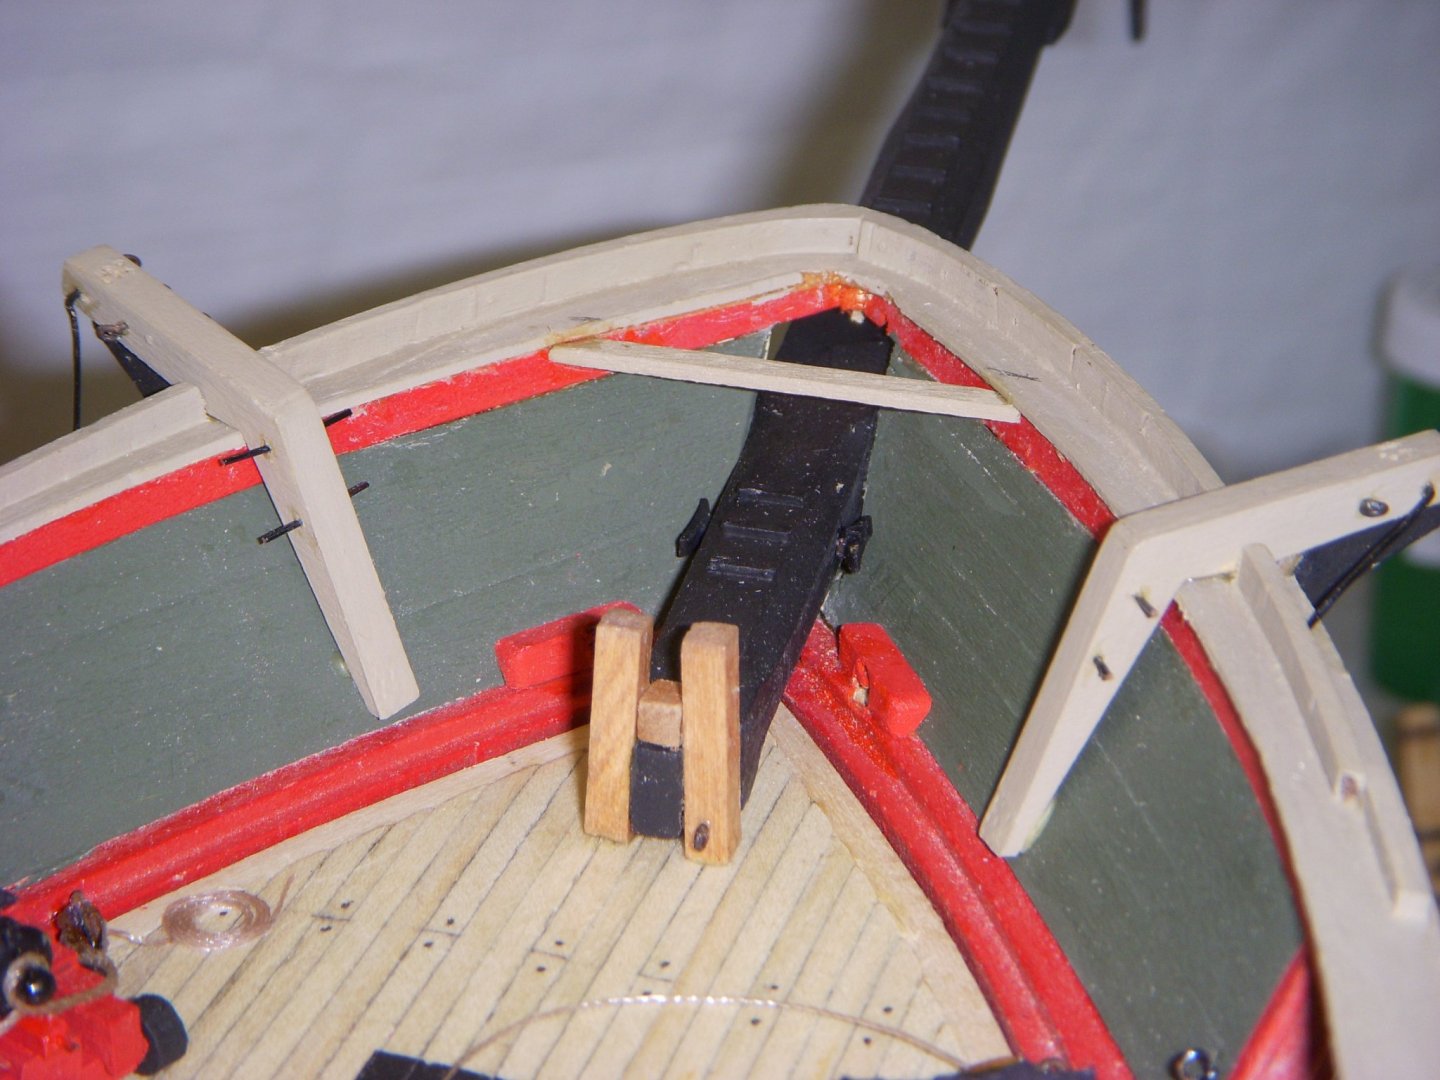
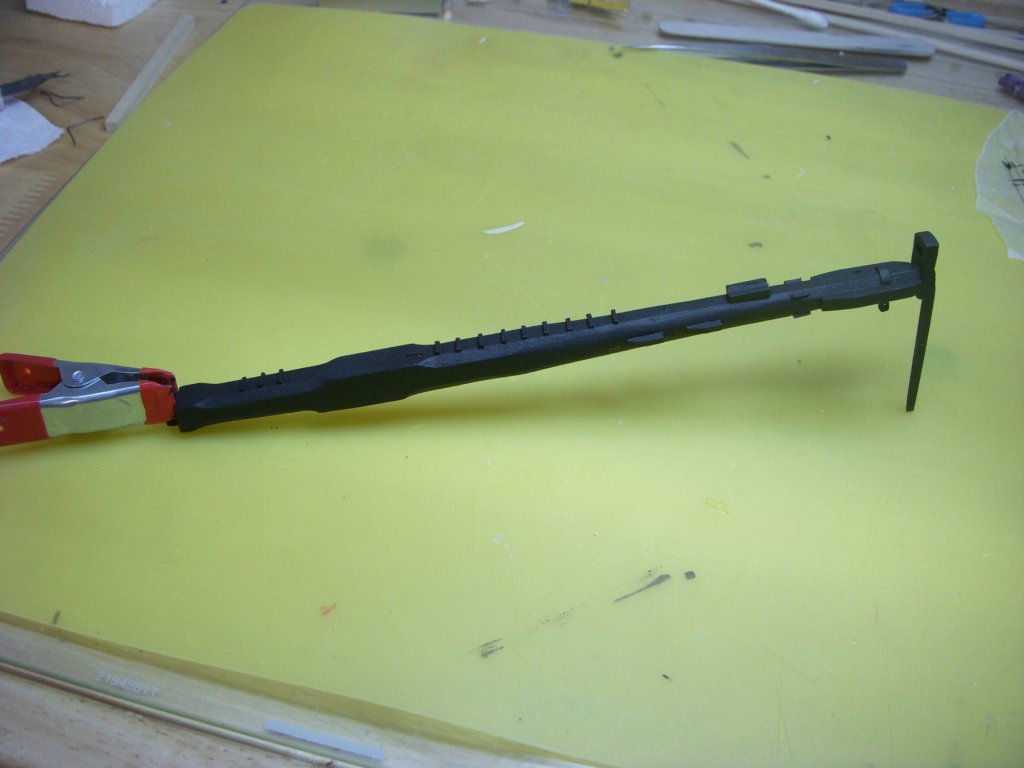
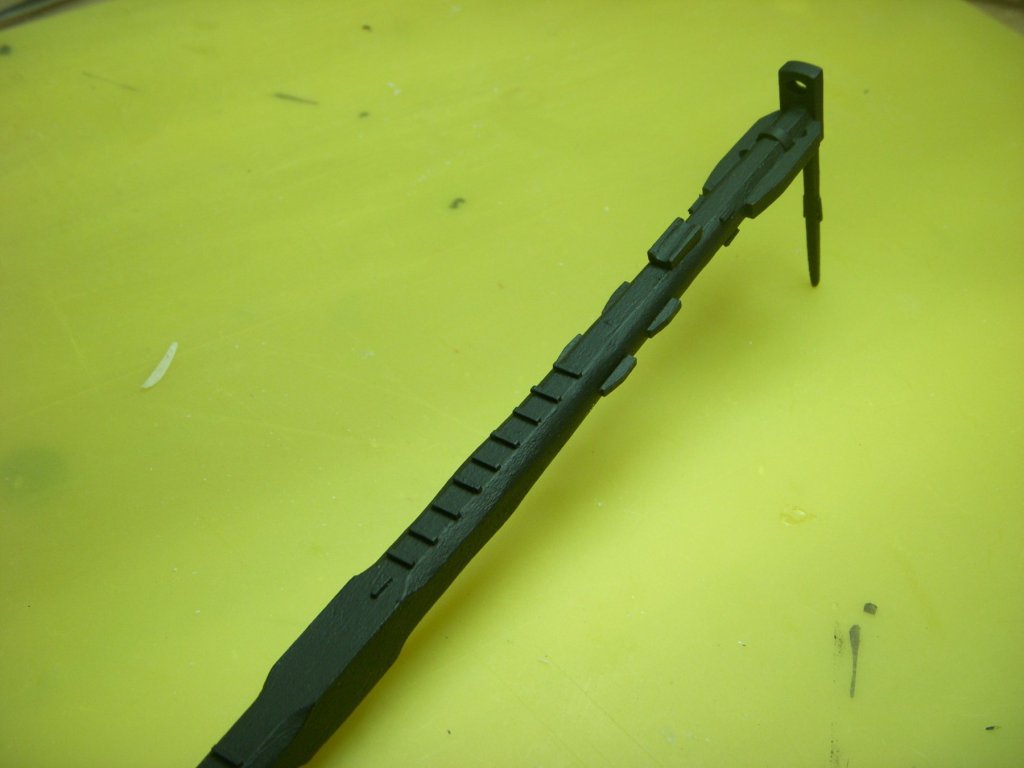
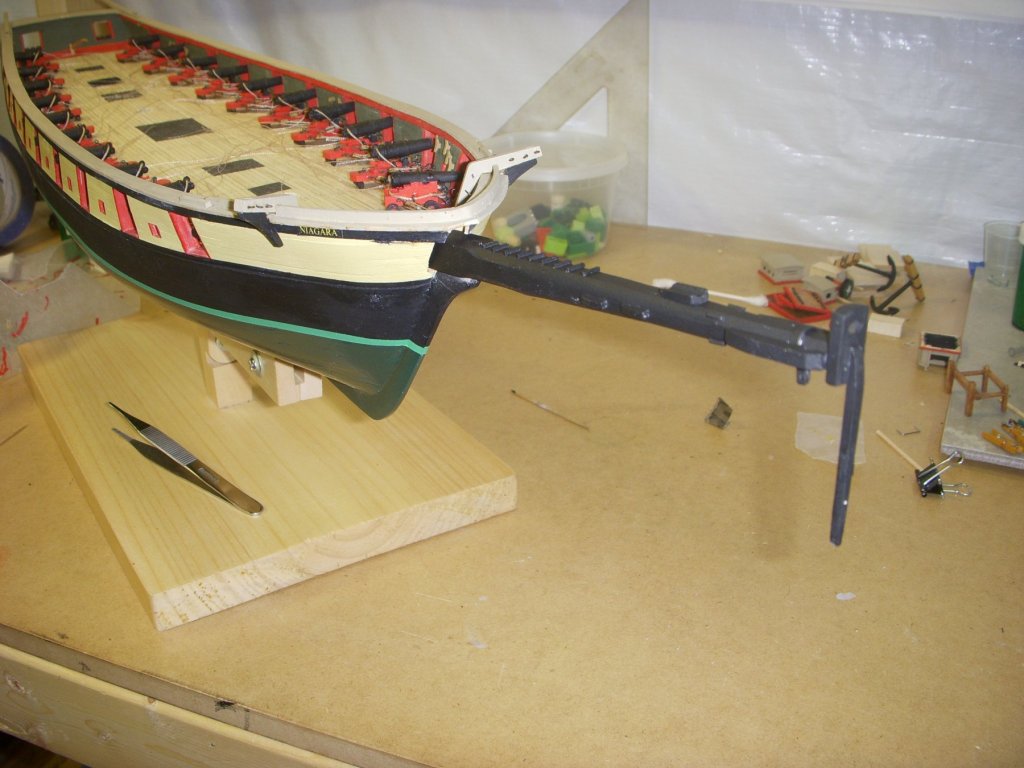
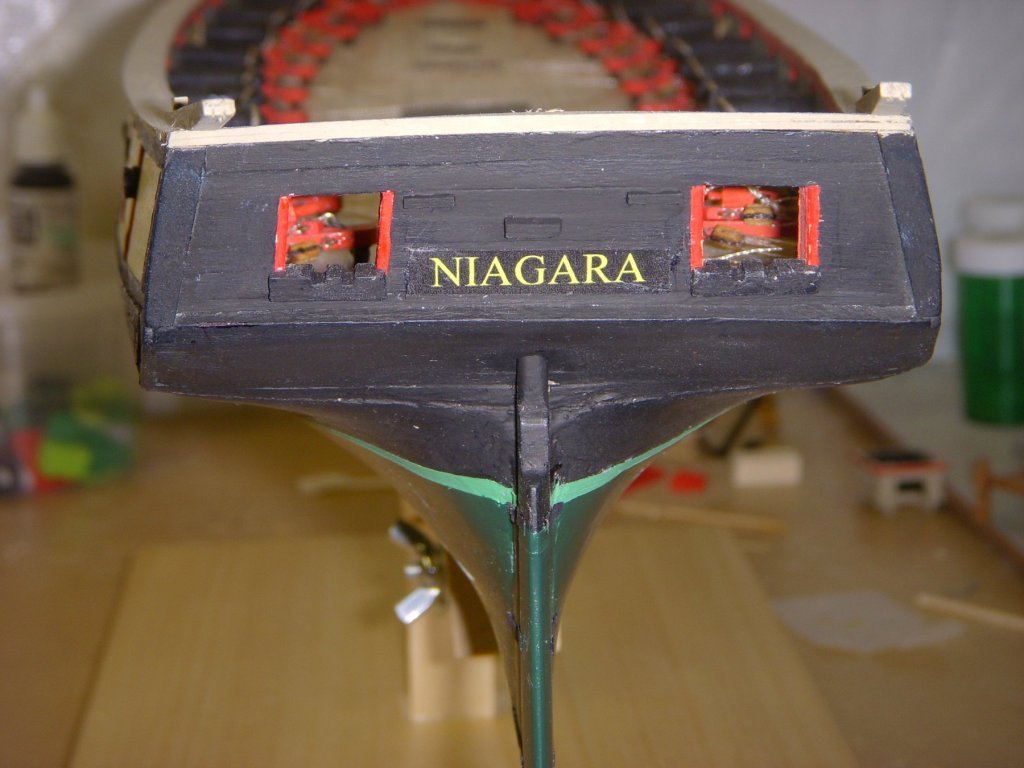
Bowsprit has been completed and is ready for installation. Bowsprit cap and Dolphin Striker have been formed and installed. I tried a rough fit and found out I needed to remove some material from the Bulwark to get it to fit properly. I still need to add the staples holding the Dolphin striker. I plan on using some 26 gauge wire. I decided to add the Niagara name plates at this time. When I built the Baltimore I waited to the end and it was a real pain installing the name. Not going to make that mistake again. I will need to clean them up a bit, but am happy with the outcome so far. Ron


-
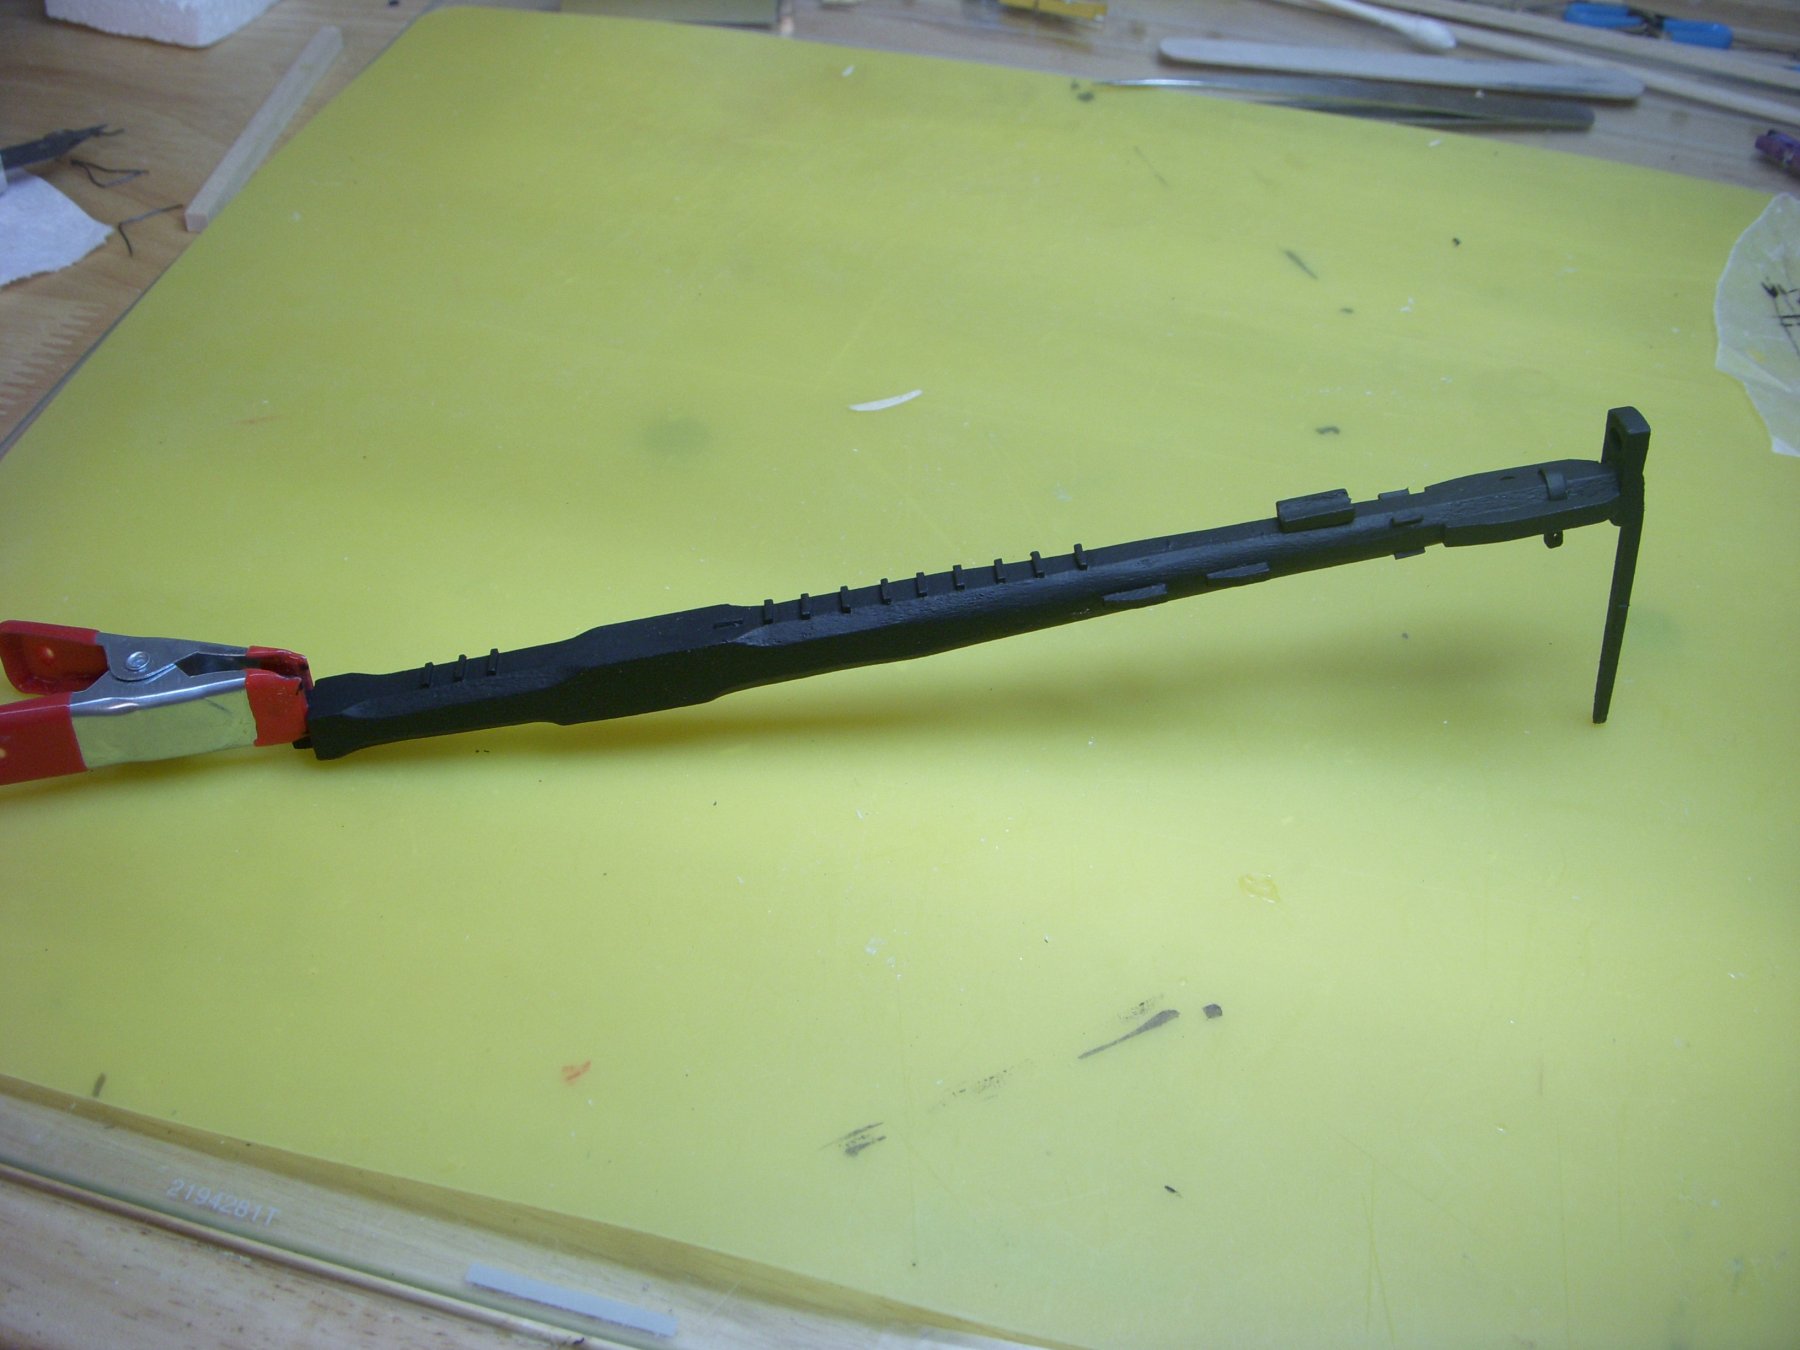
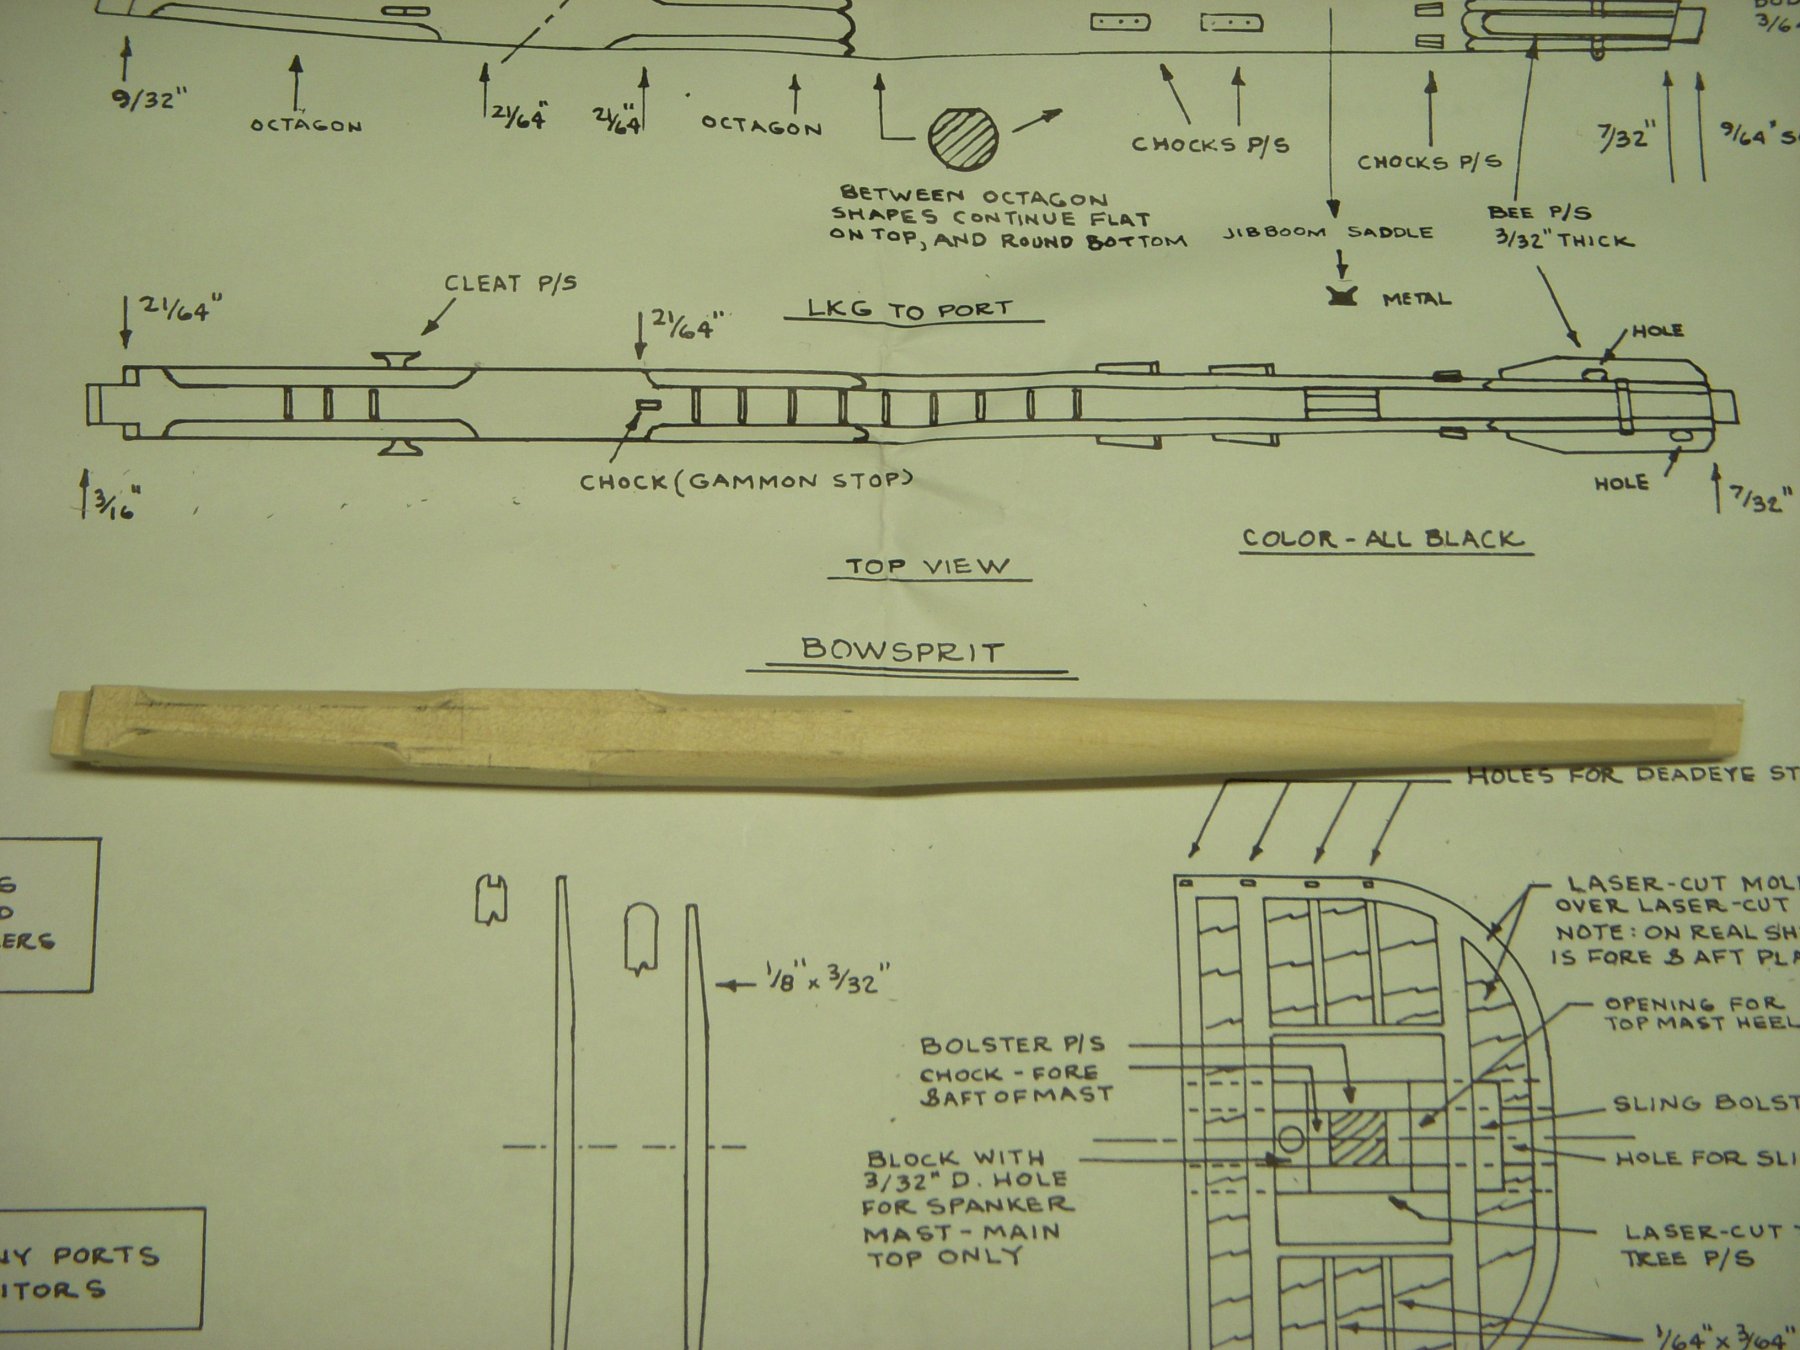
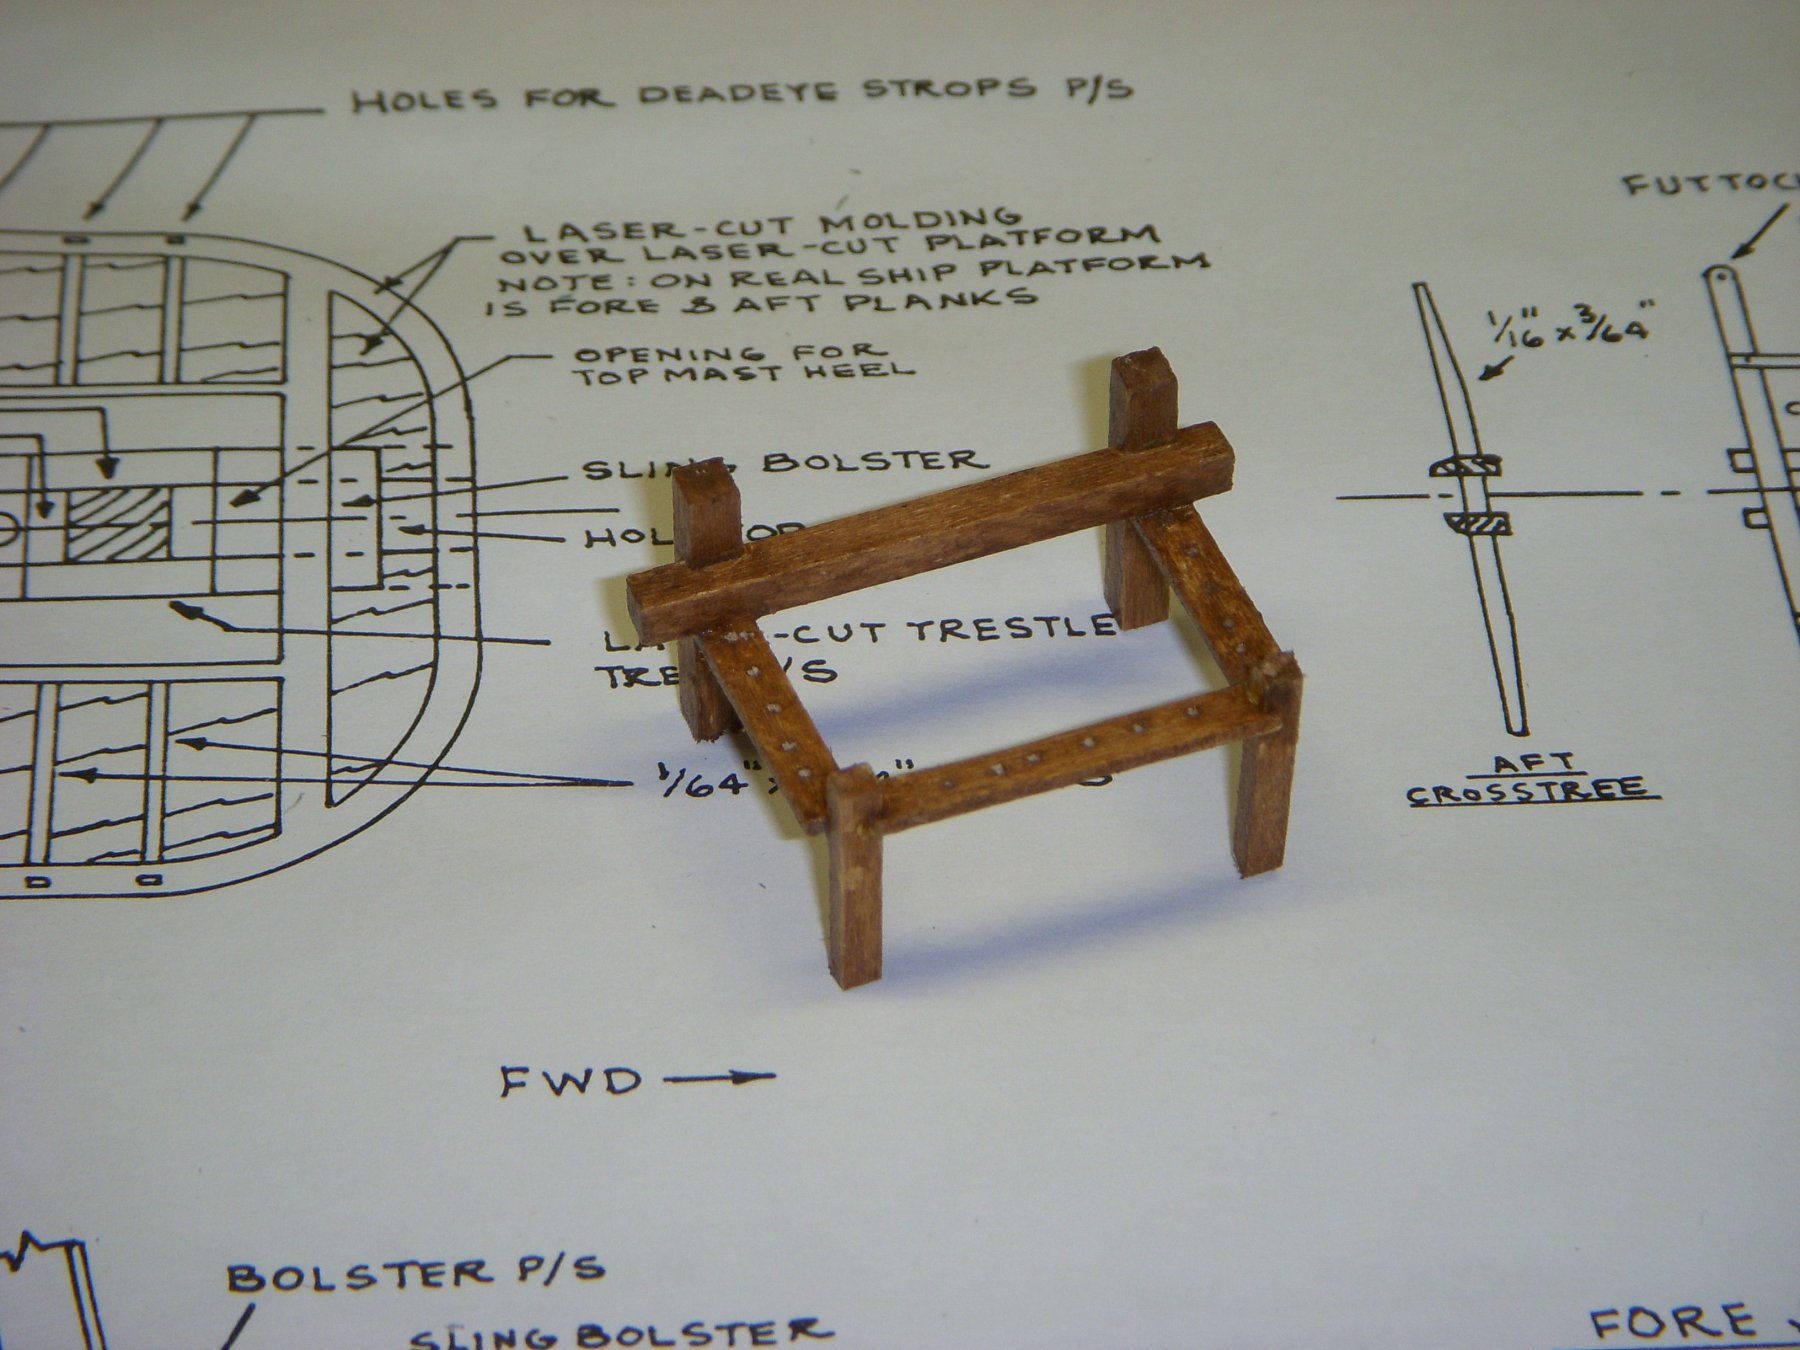
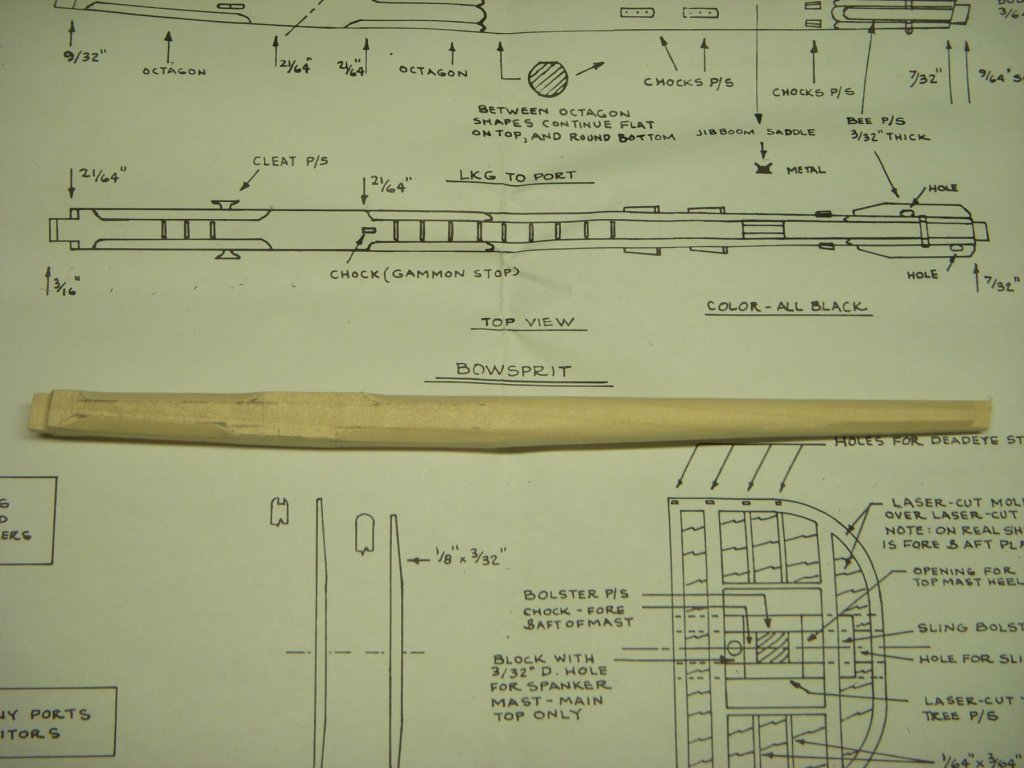
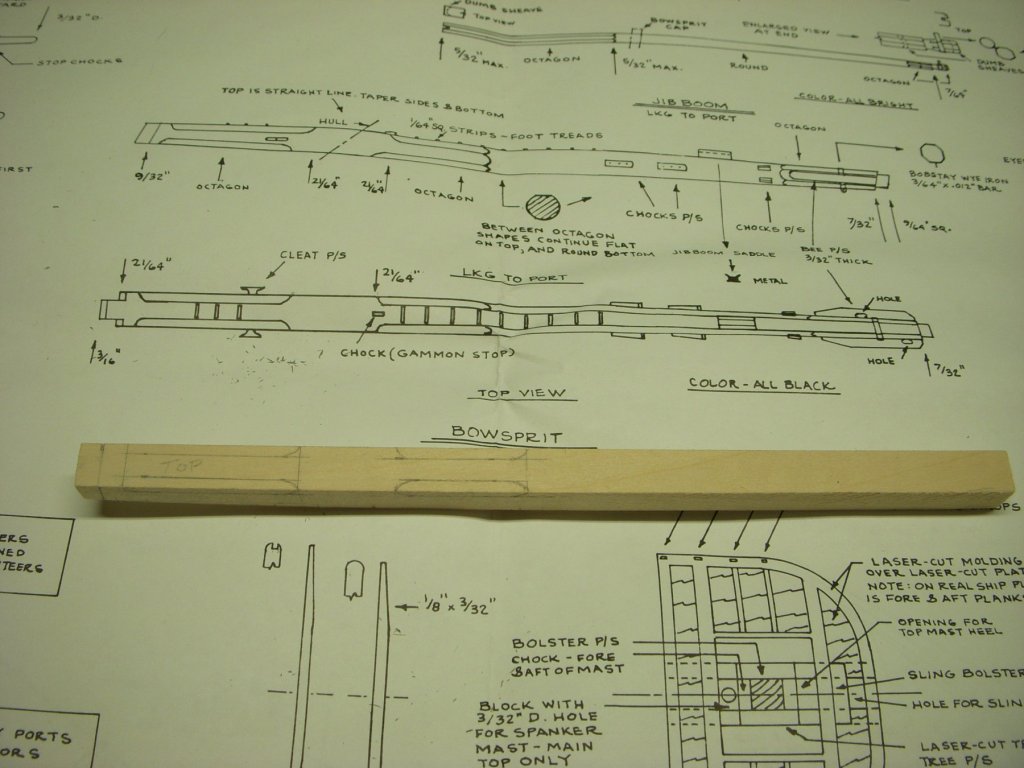
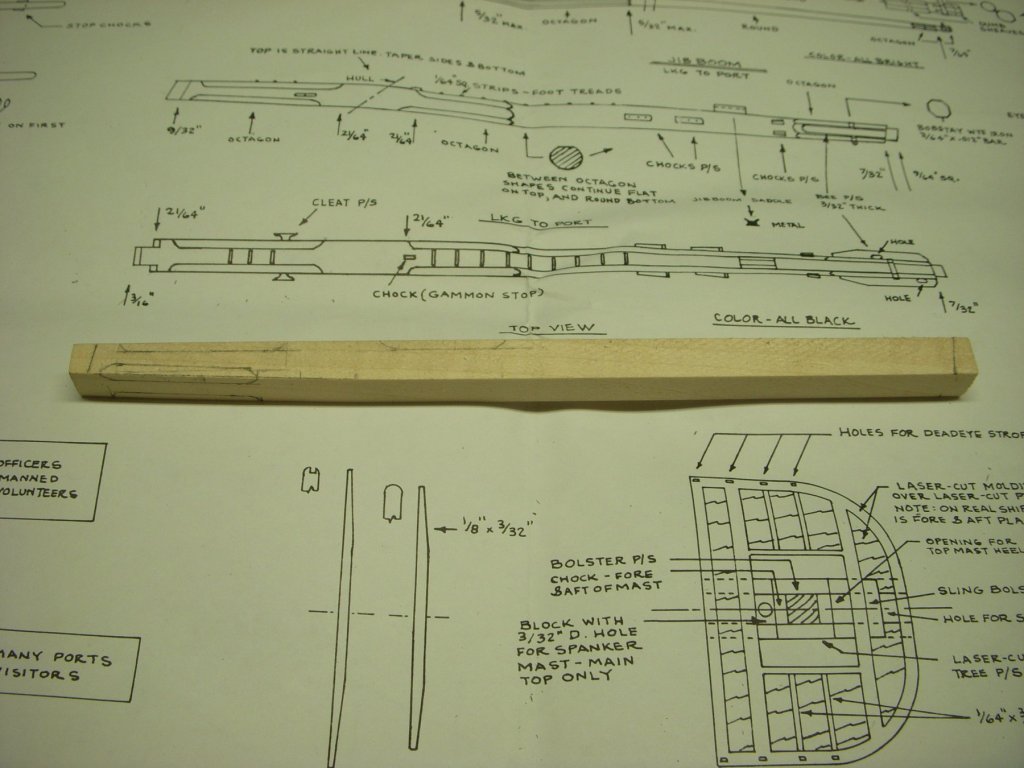
I went and strengthened the forward Fife rail. I used .29 mm wire. Took a little patience to be sure I got the holes drilled properly. It’s a little hard to see in the pic but I put a wire in each of the joints. I also have been working on the Bowsprit, It has been laid out and material removed to match the drawing. Now to start adding the cleats, foot treads and chocks. Ron

-
Srodbro: I was concerned while building the Fife Rail that it might be a little flimsy. I was thinking of adding some bracing to the joints but was afraid it would detract from the original design. I like your idea of using brass wire to strengthen the joints. I have several gauges available to use. Ron
-
Bilge pump has been completed. Fife rail has been started with one coat of stain. I will put a couple of coats of finish before I paint the Knees black. At the same time, I am cleaning up the belaying pins that have been supplied with the kit. Giving them a couple of wood colored paint to look more realistic. During paint drying time I have started laying out the cuts for the Bowsprit. This will take some time to complete the layout and shaping. Ron

-
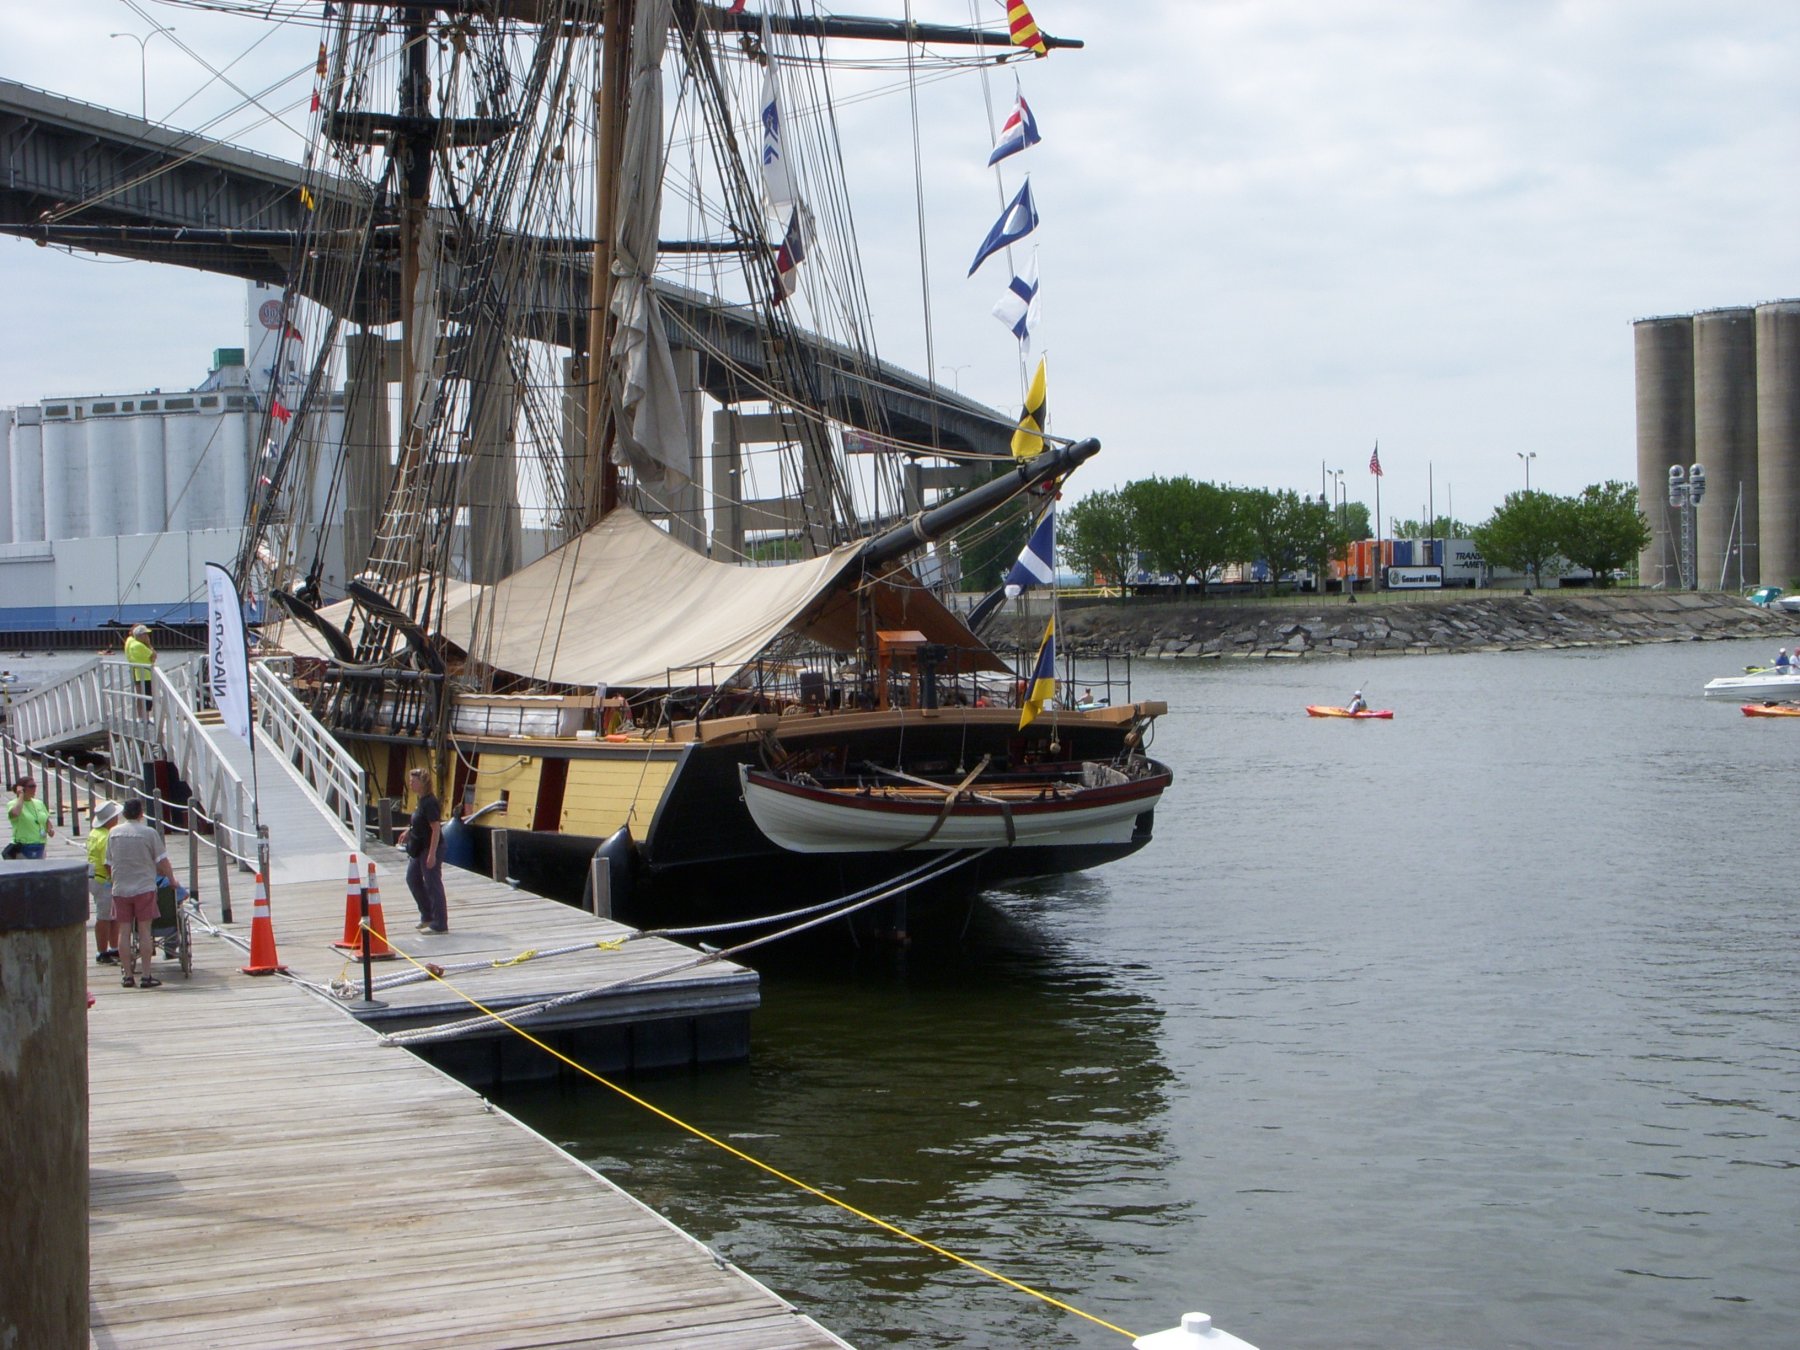
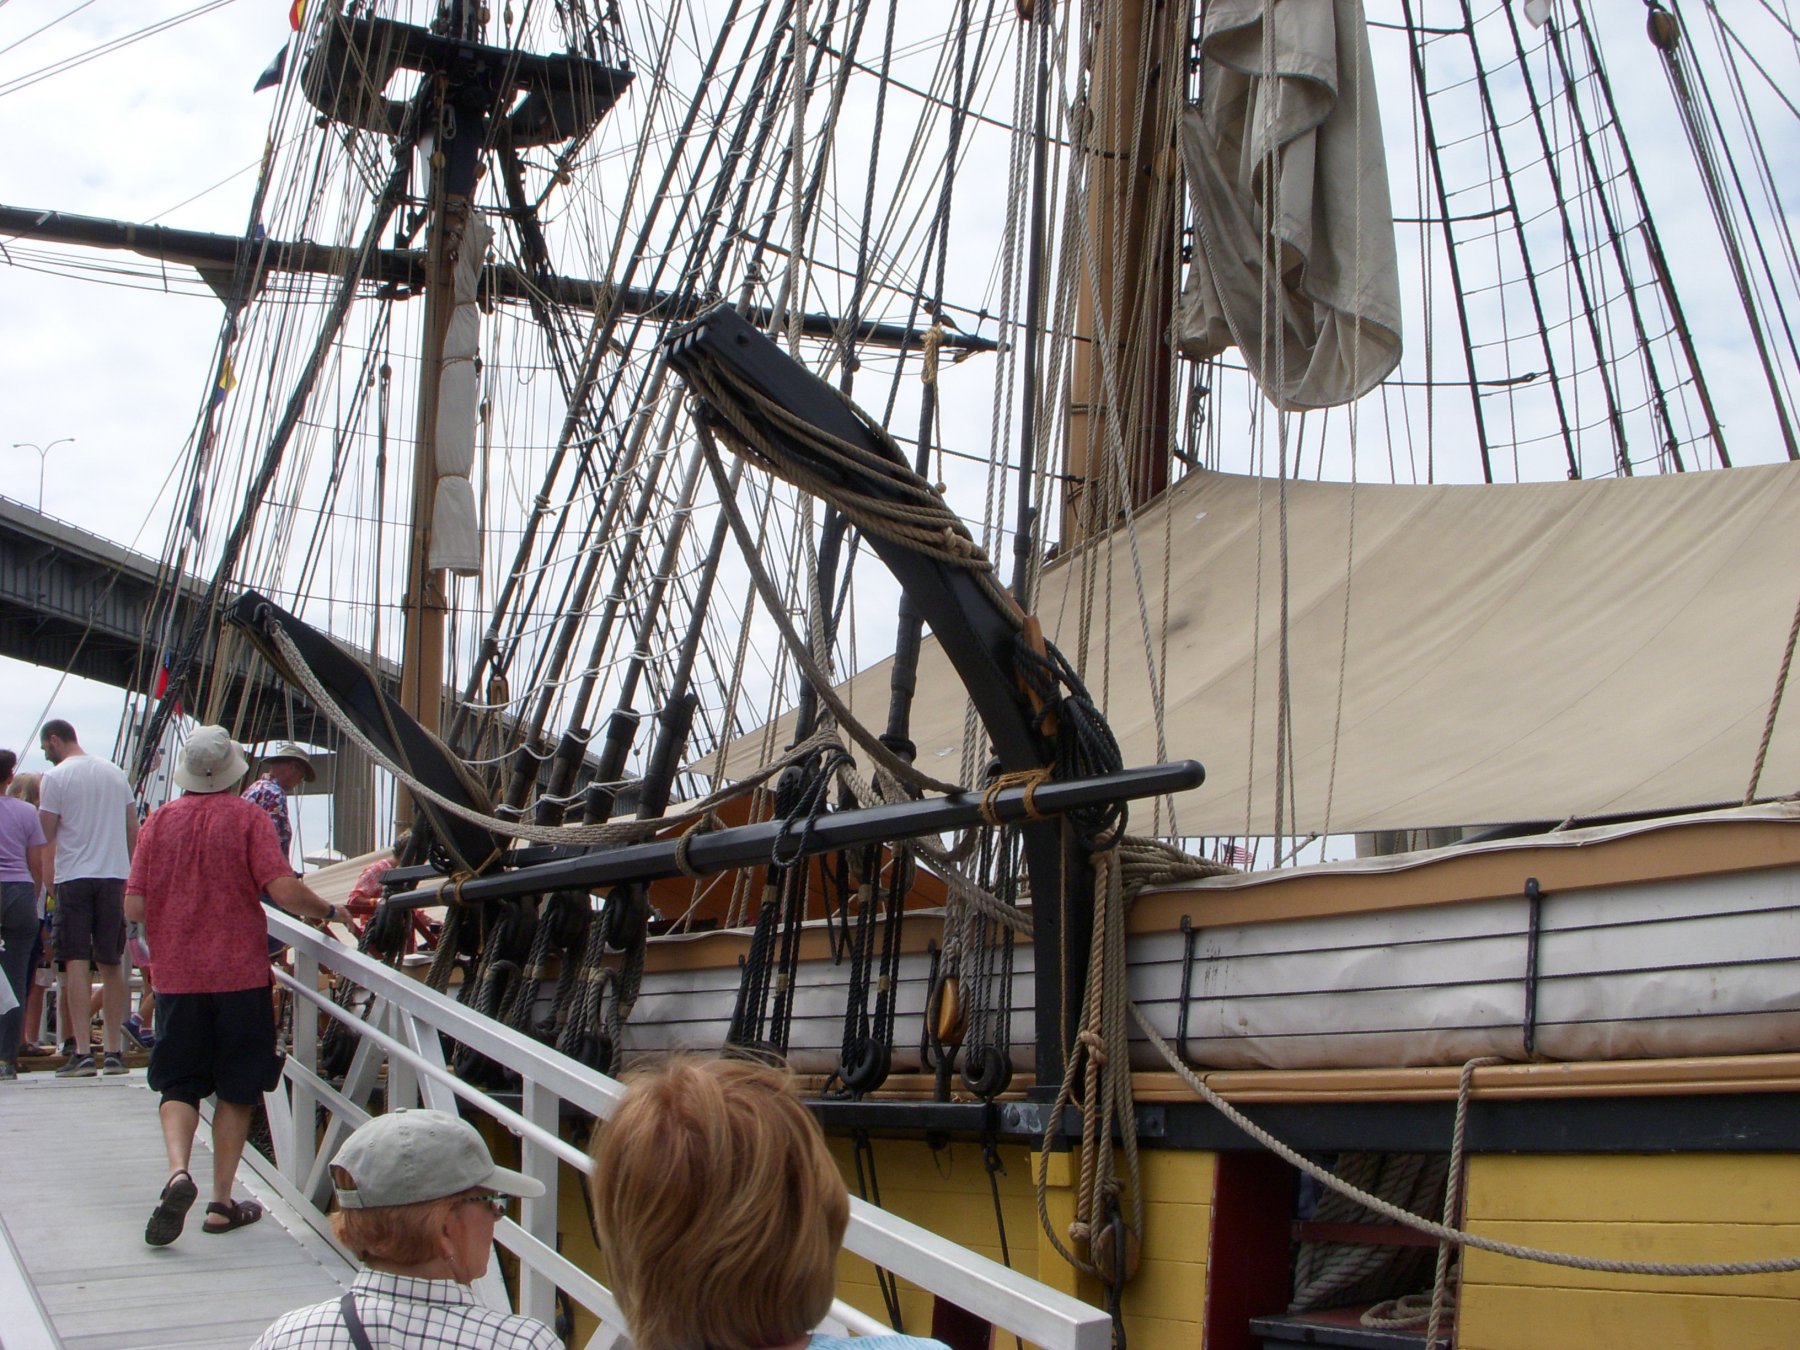
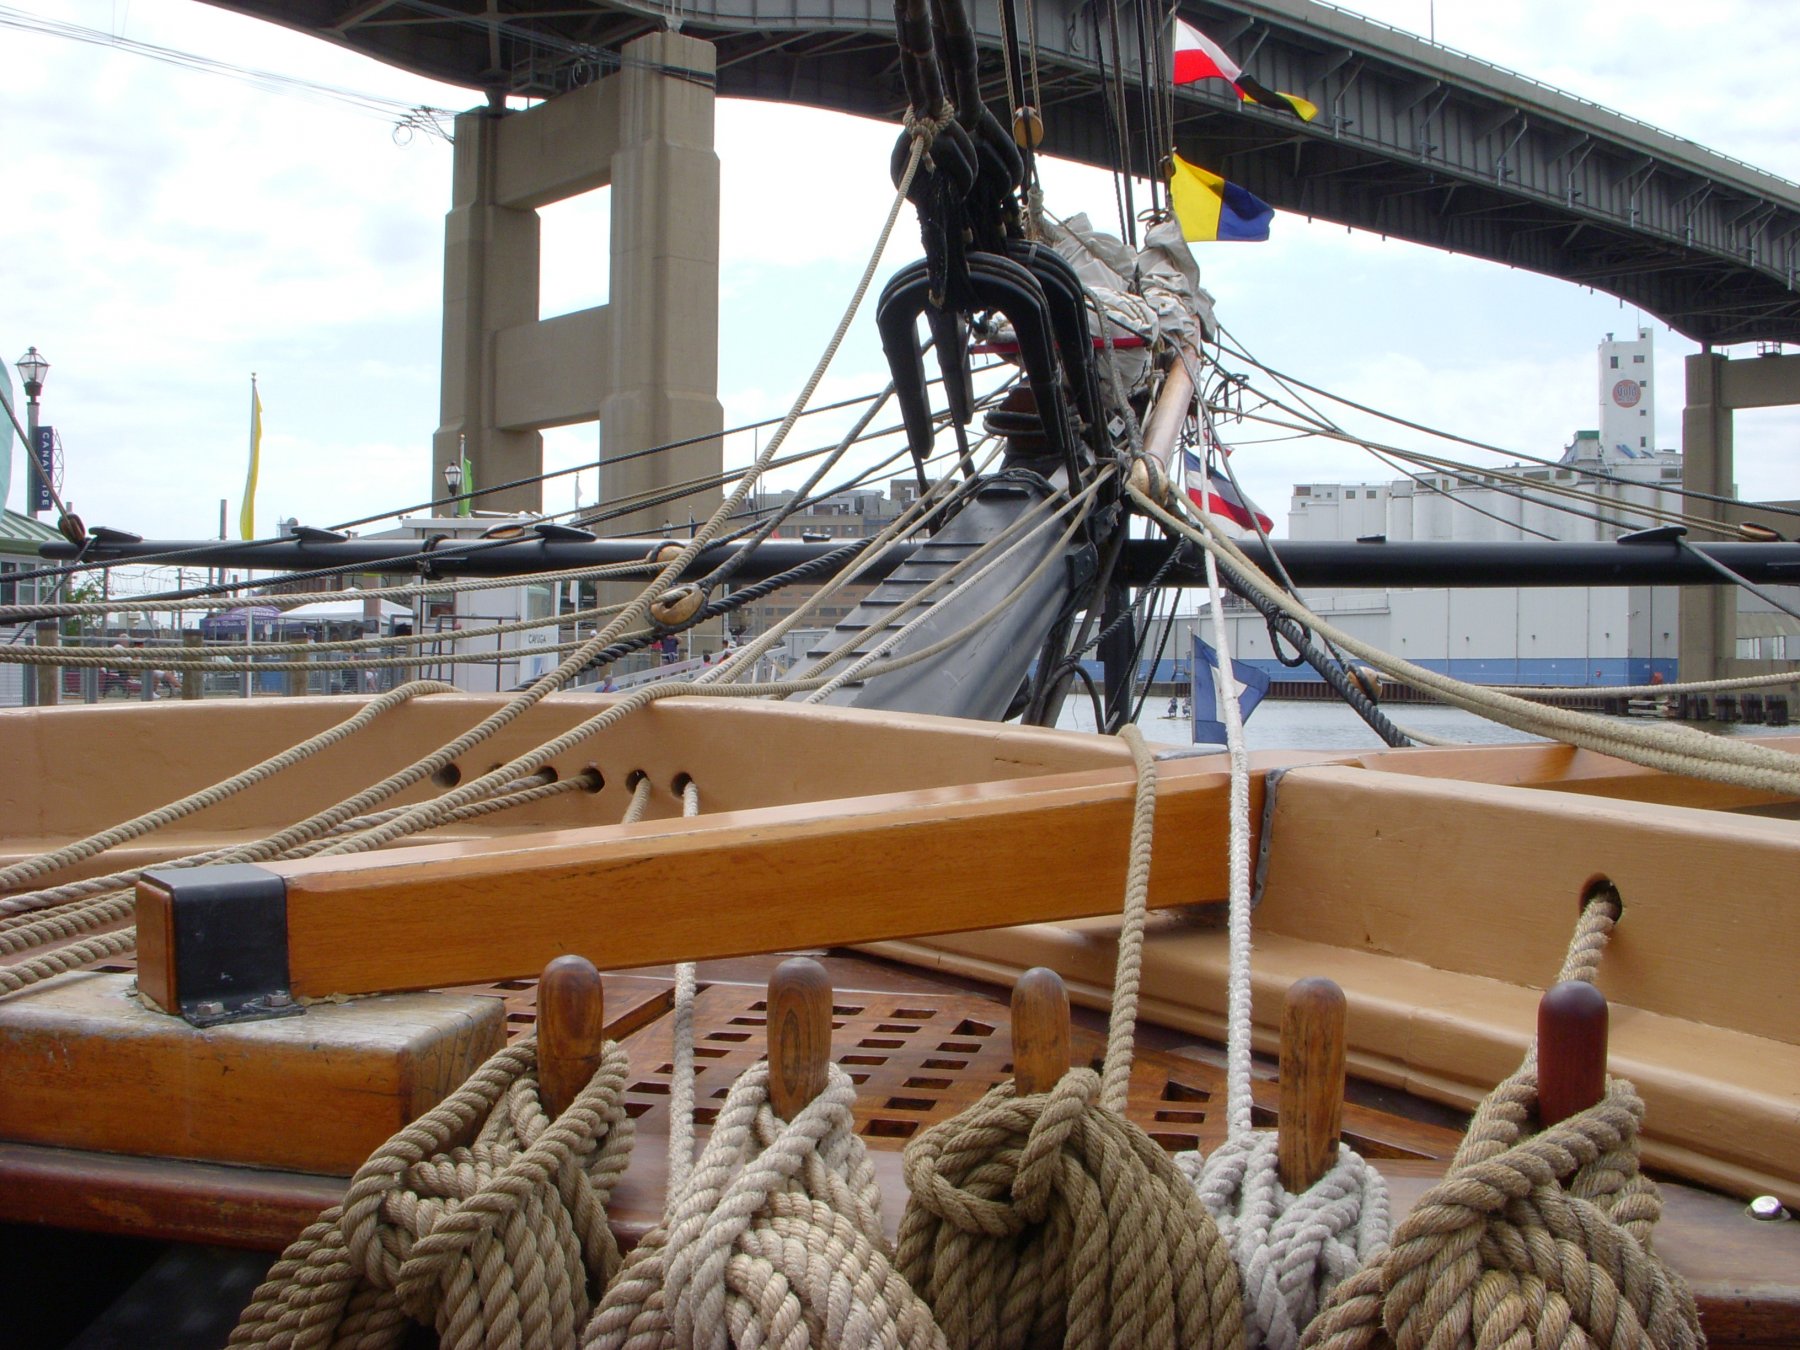
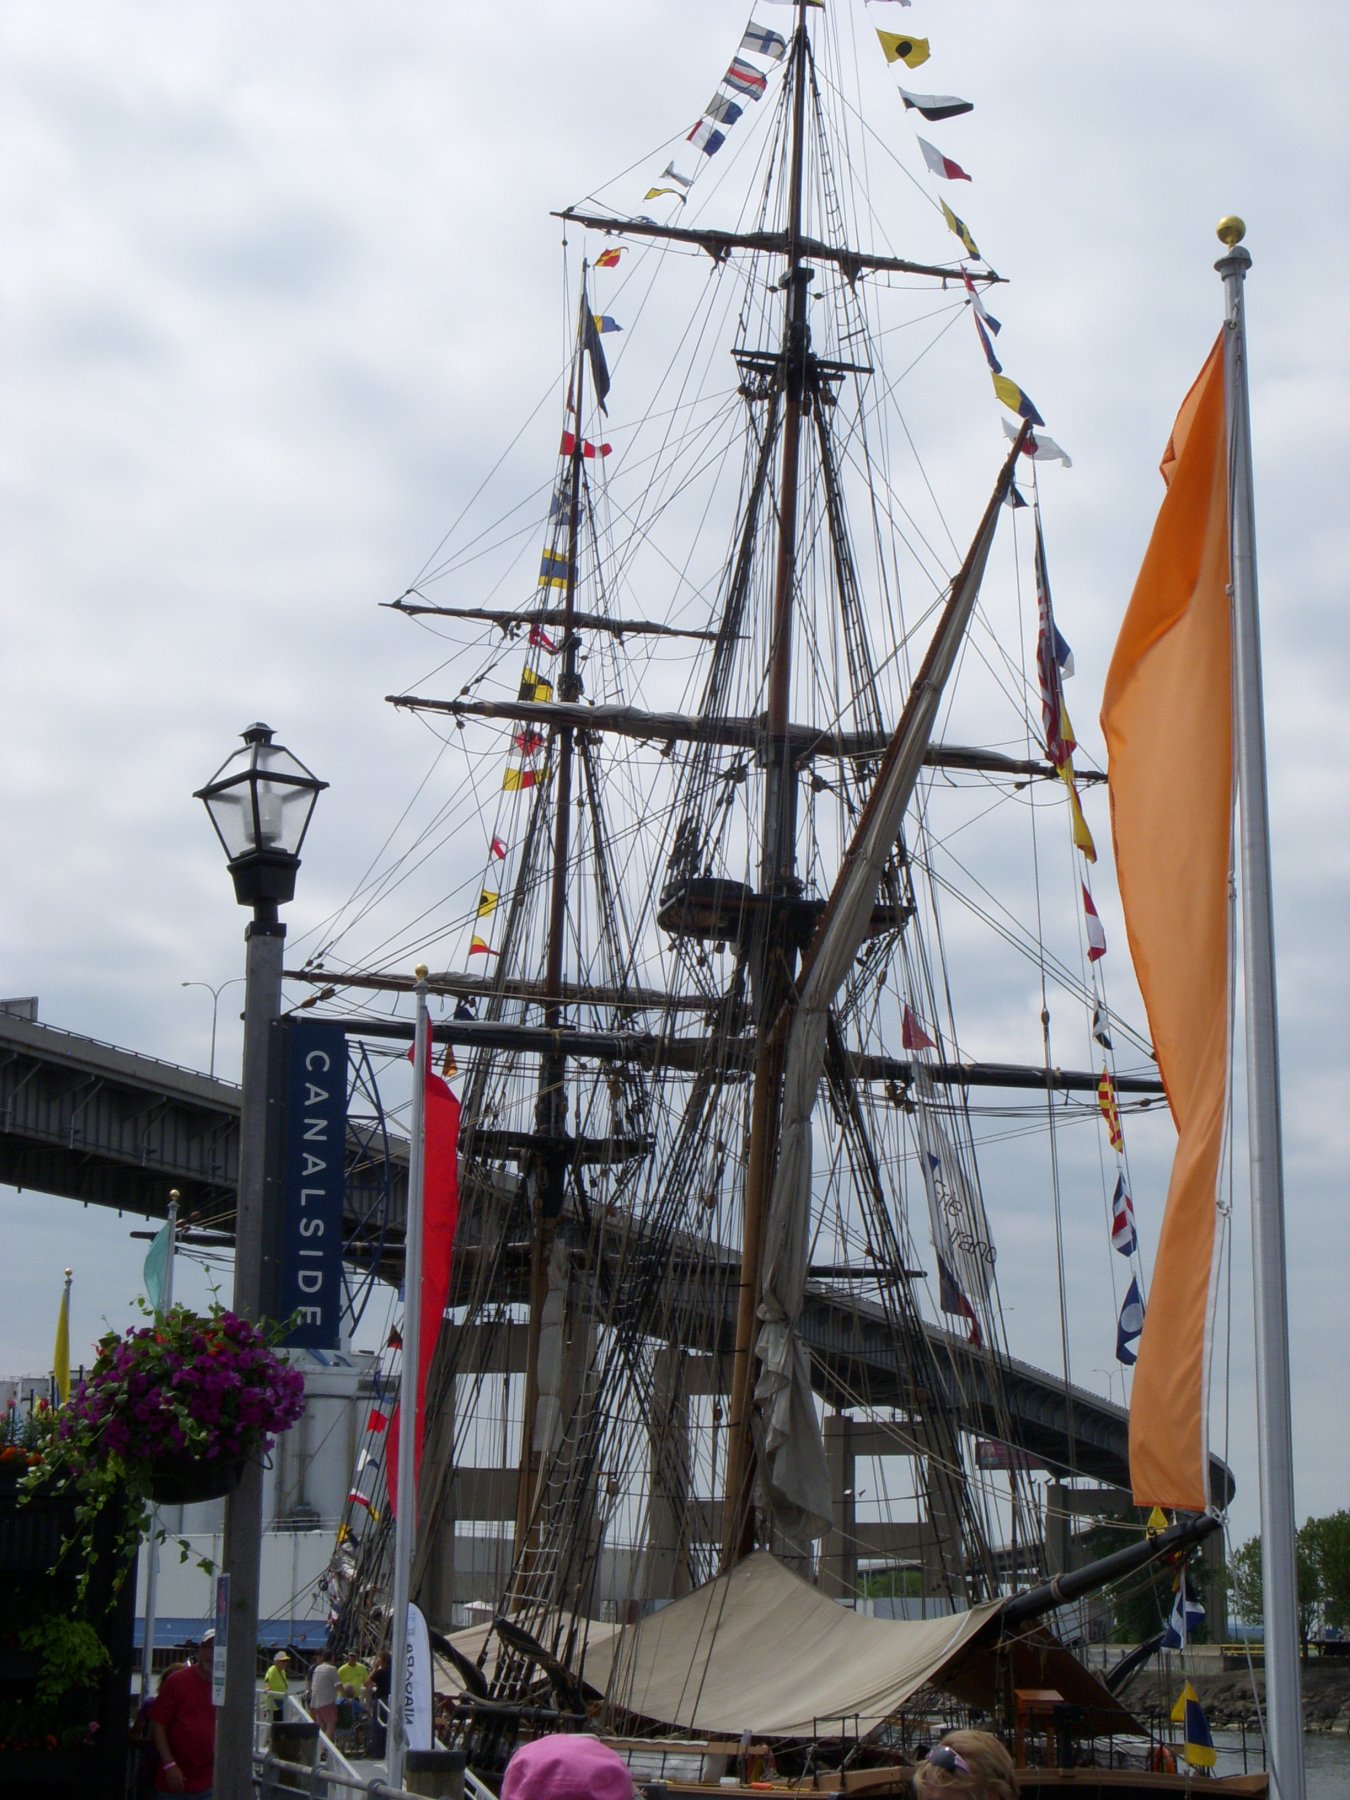
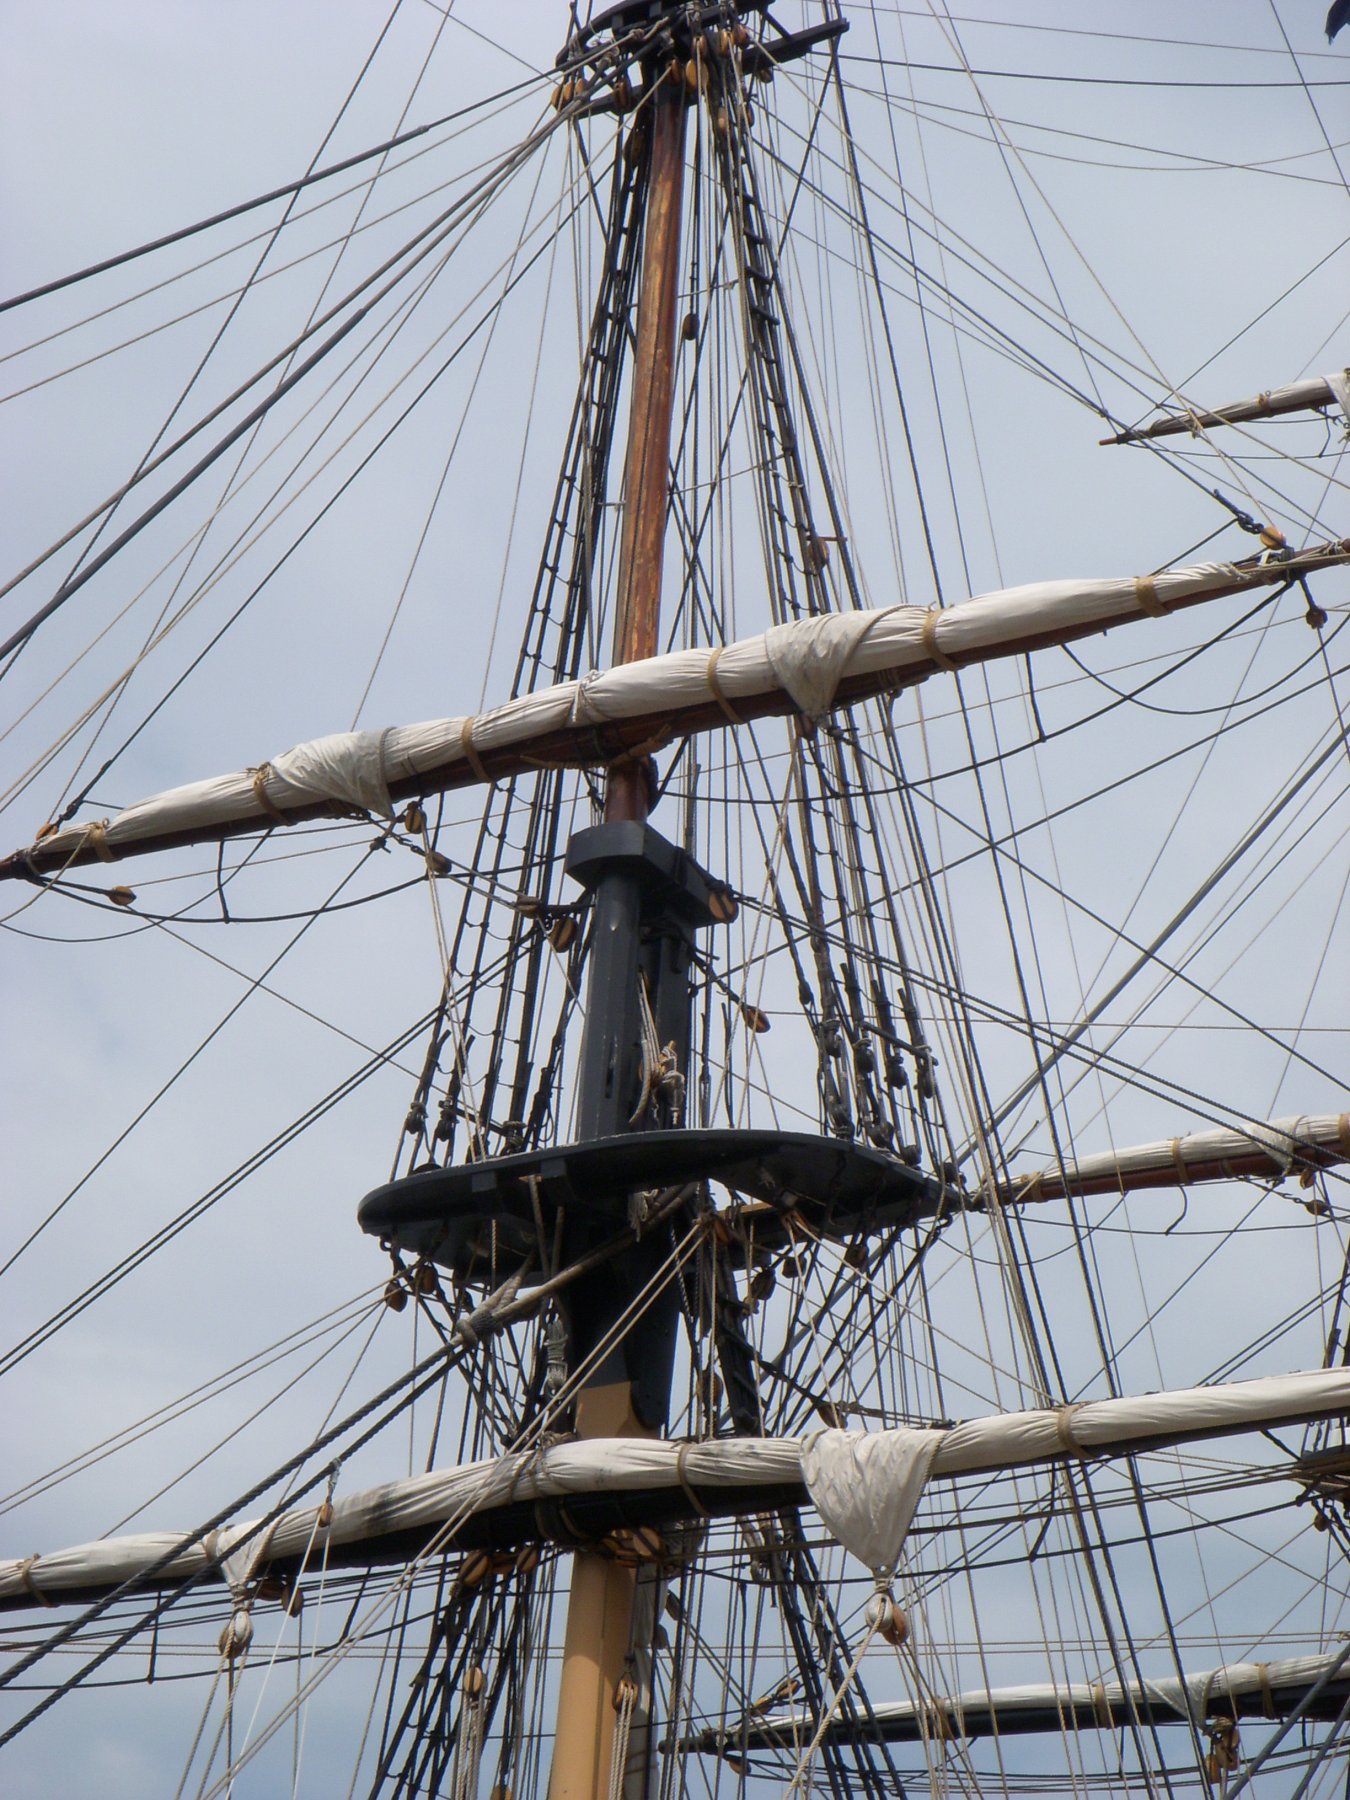
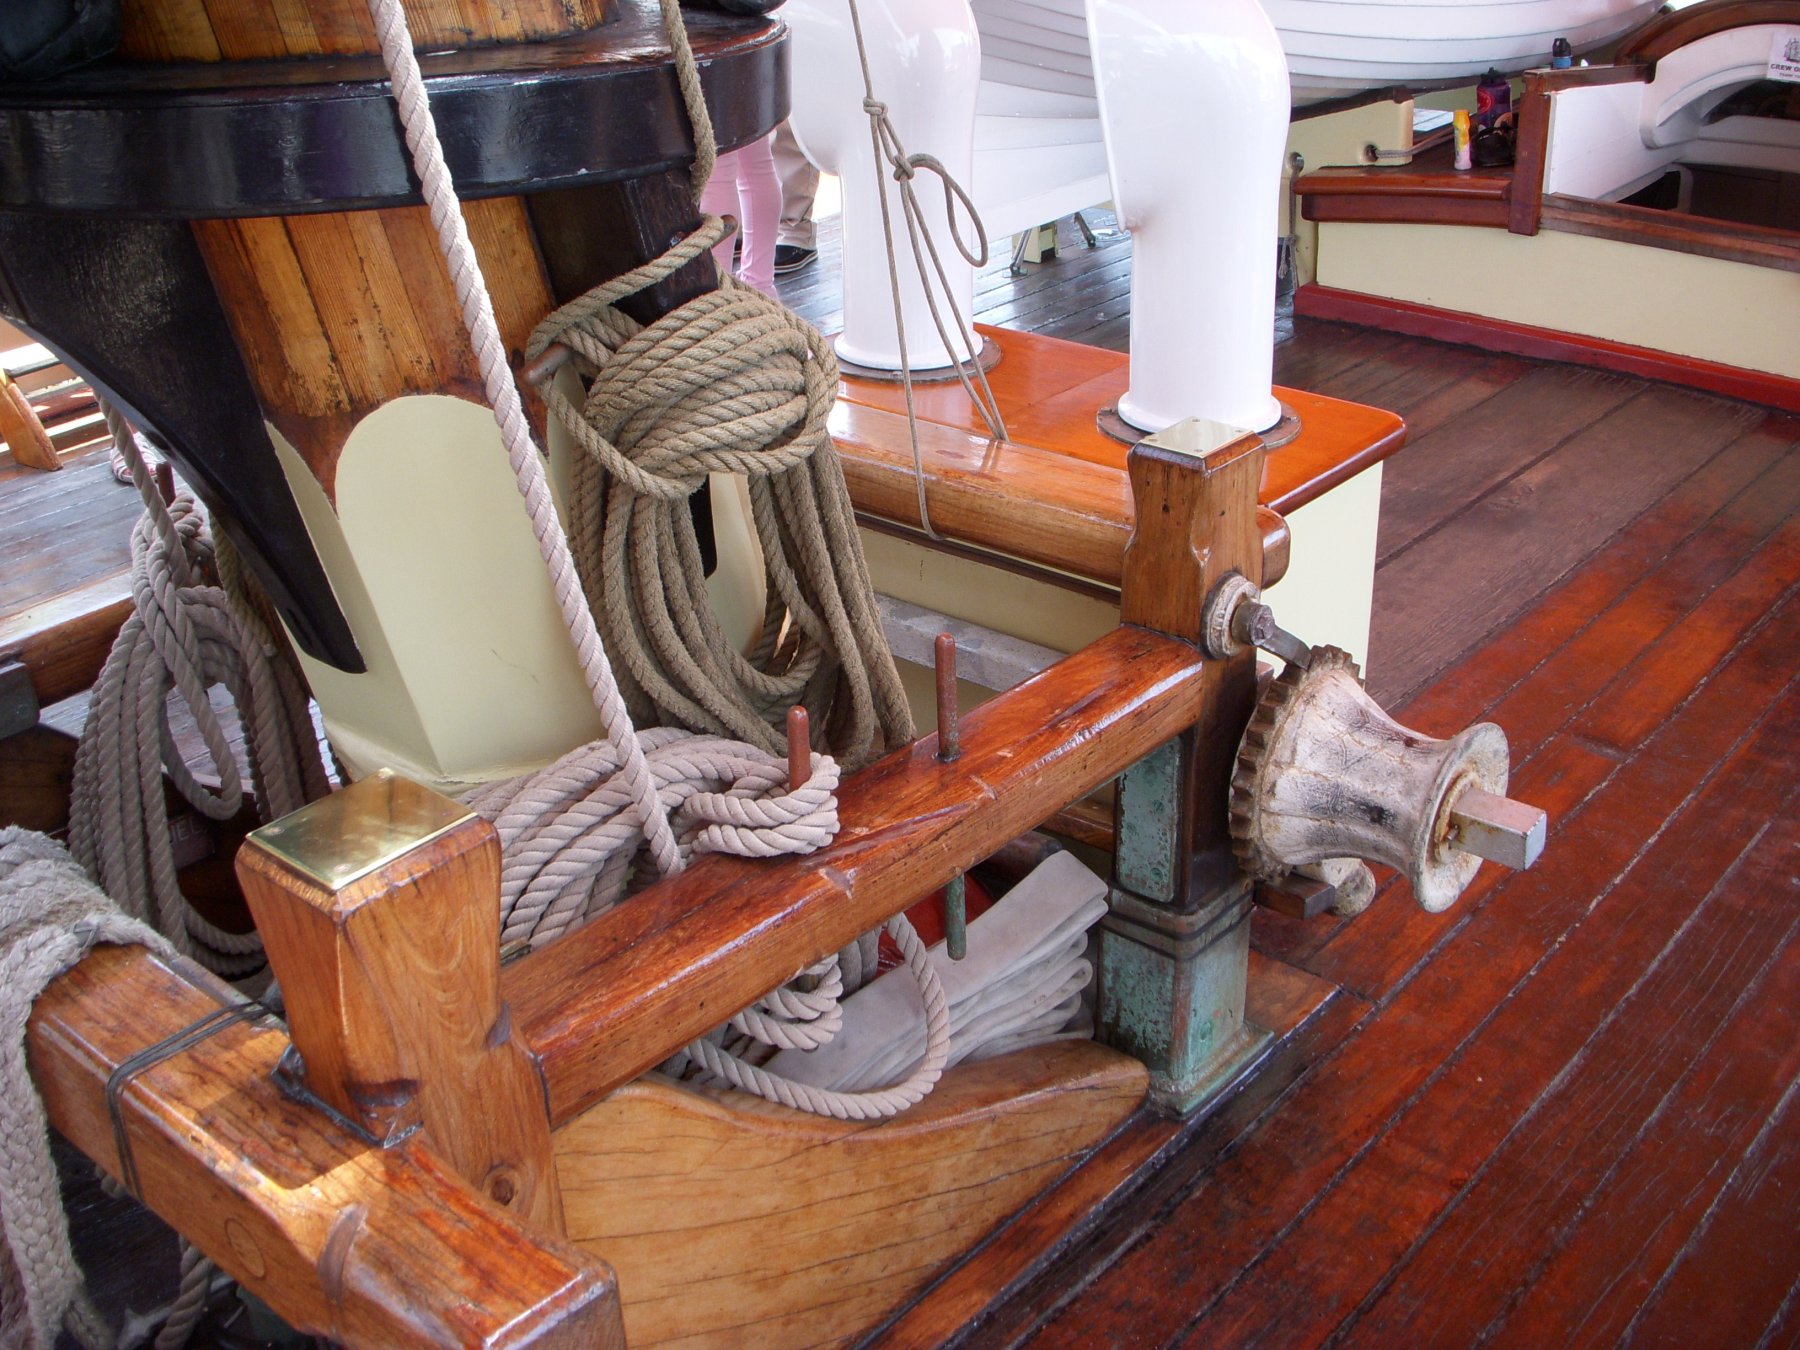
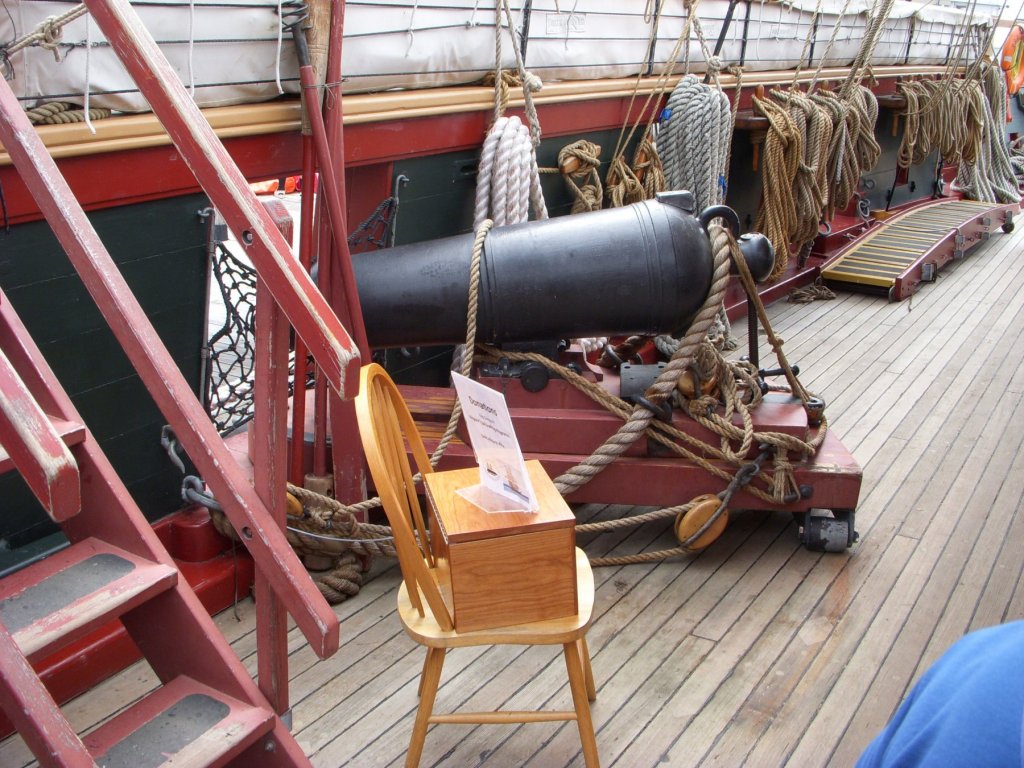
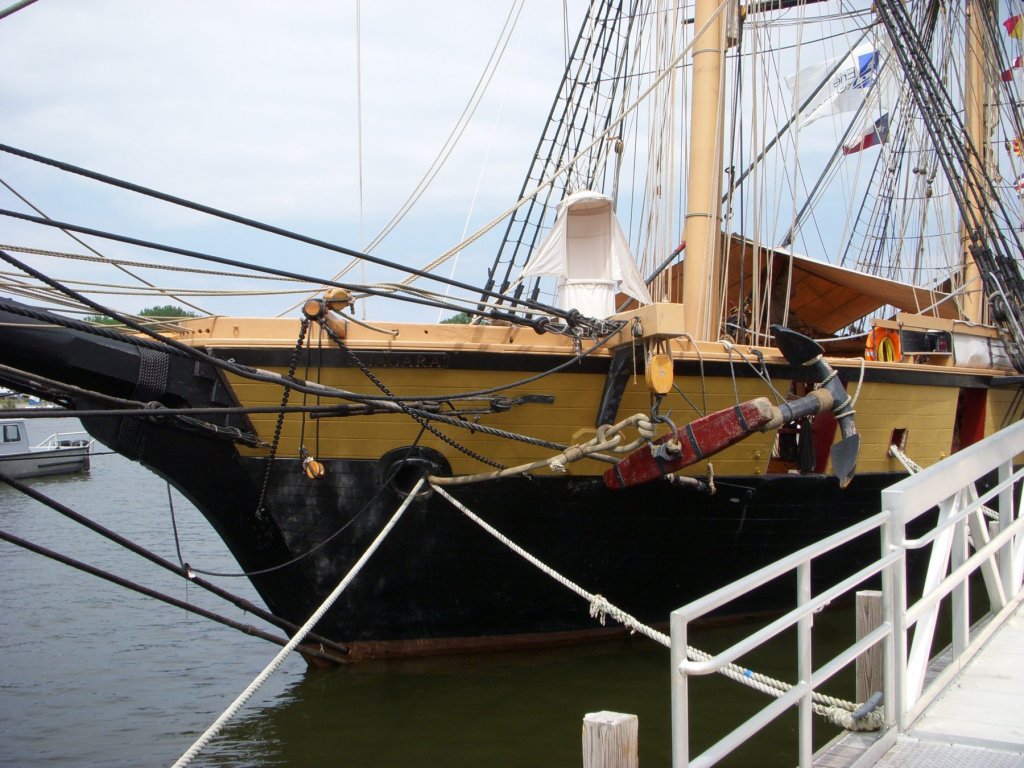
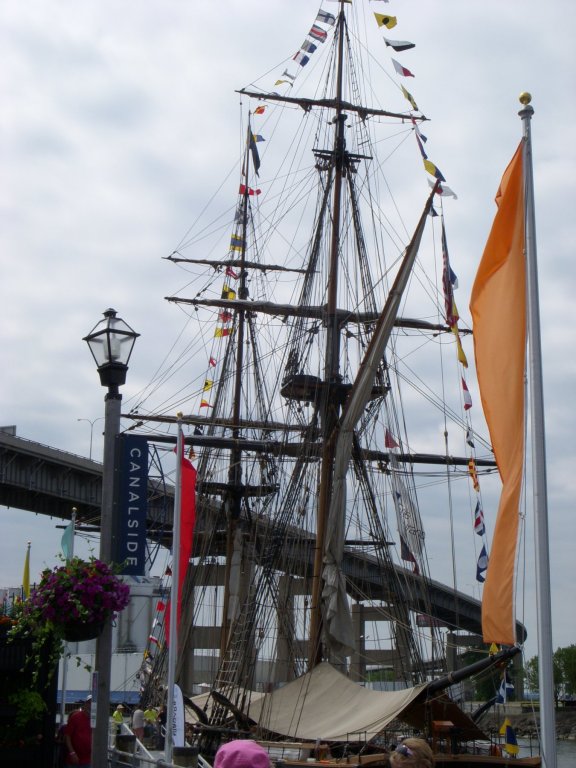
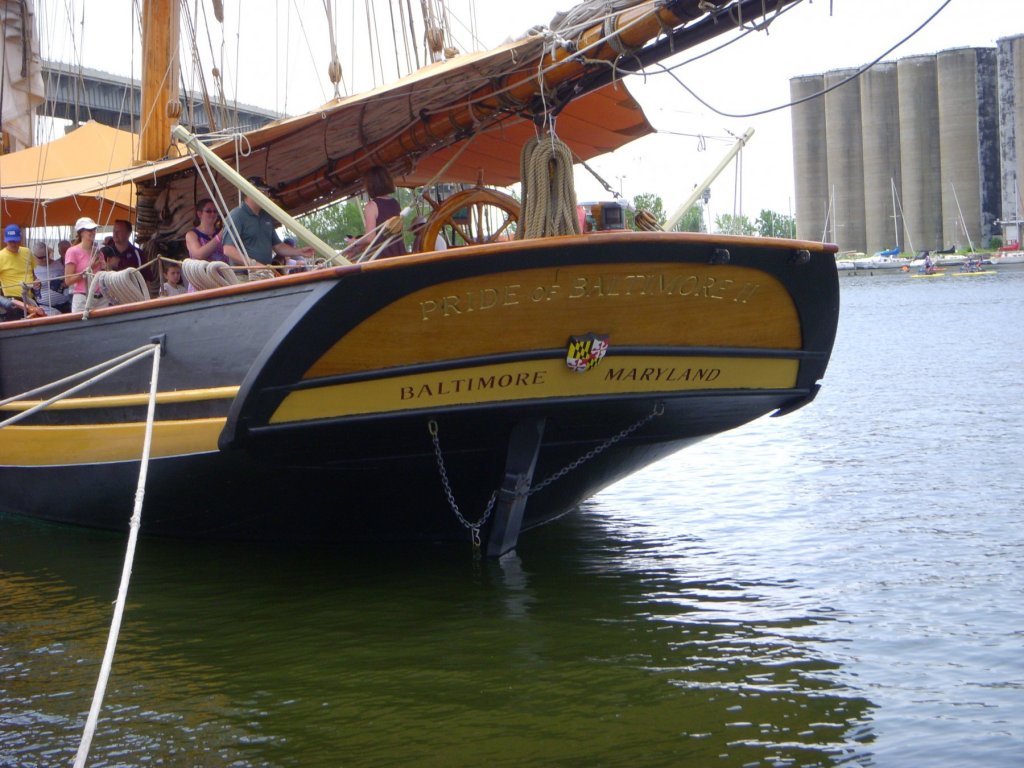
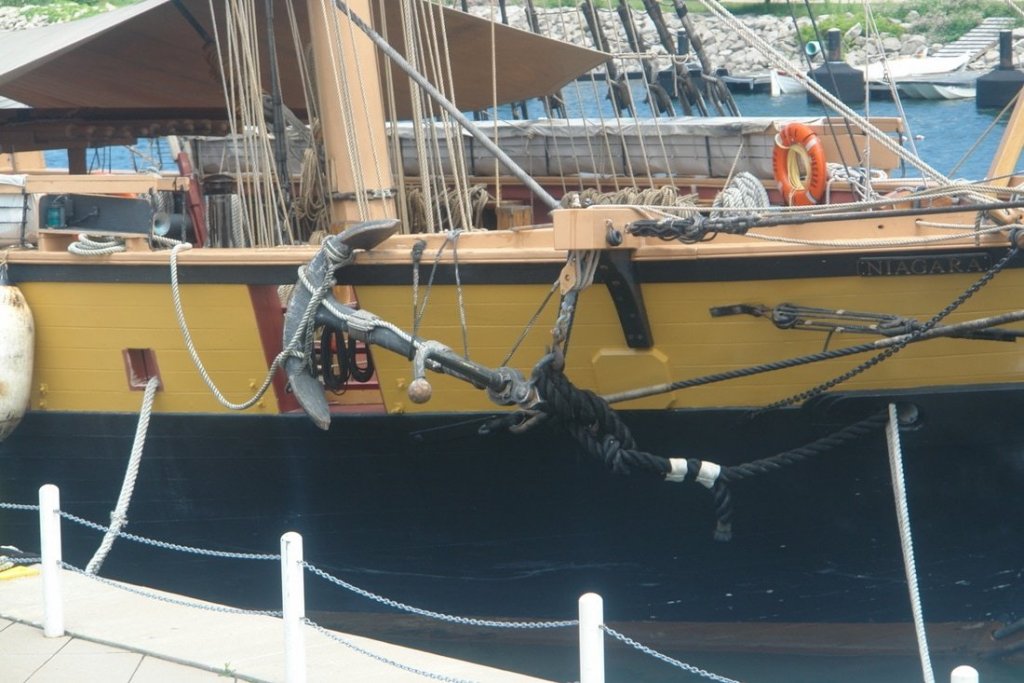
I spent the weekend volunteering at the Tall Ships Event here at the Buffalo waterfront. I finally got a chance to board a couple of ships on Sunday. Here are a few shots I took of the Niagara and the Pride of Baltimore. Ron


-
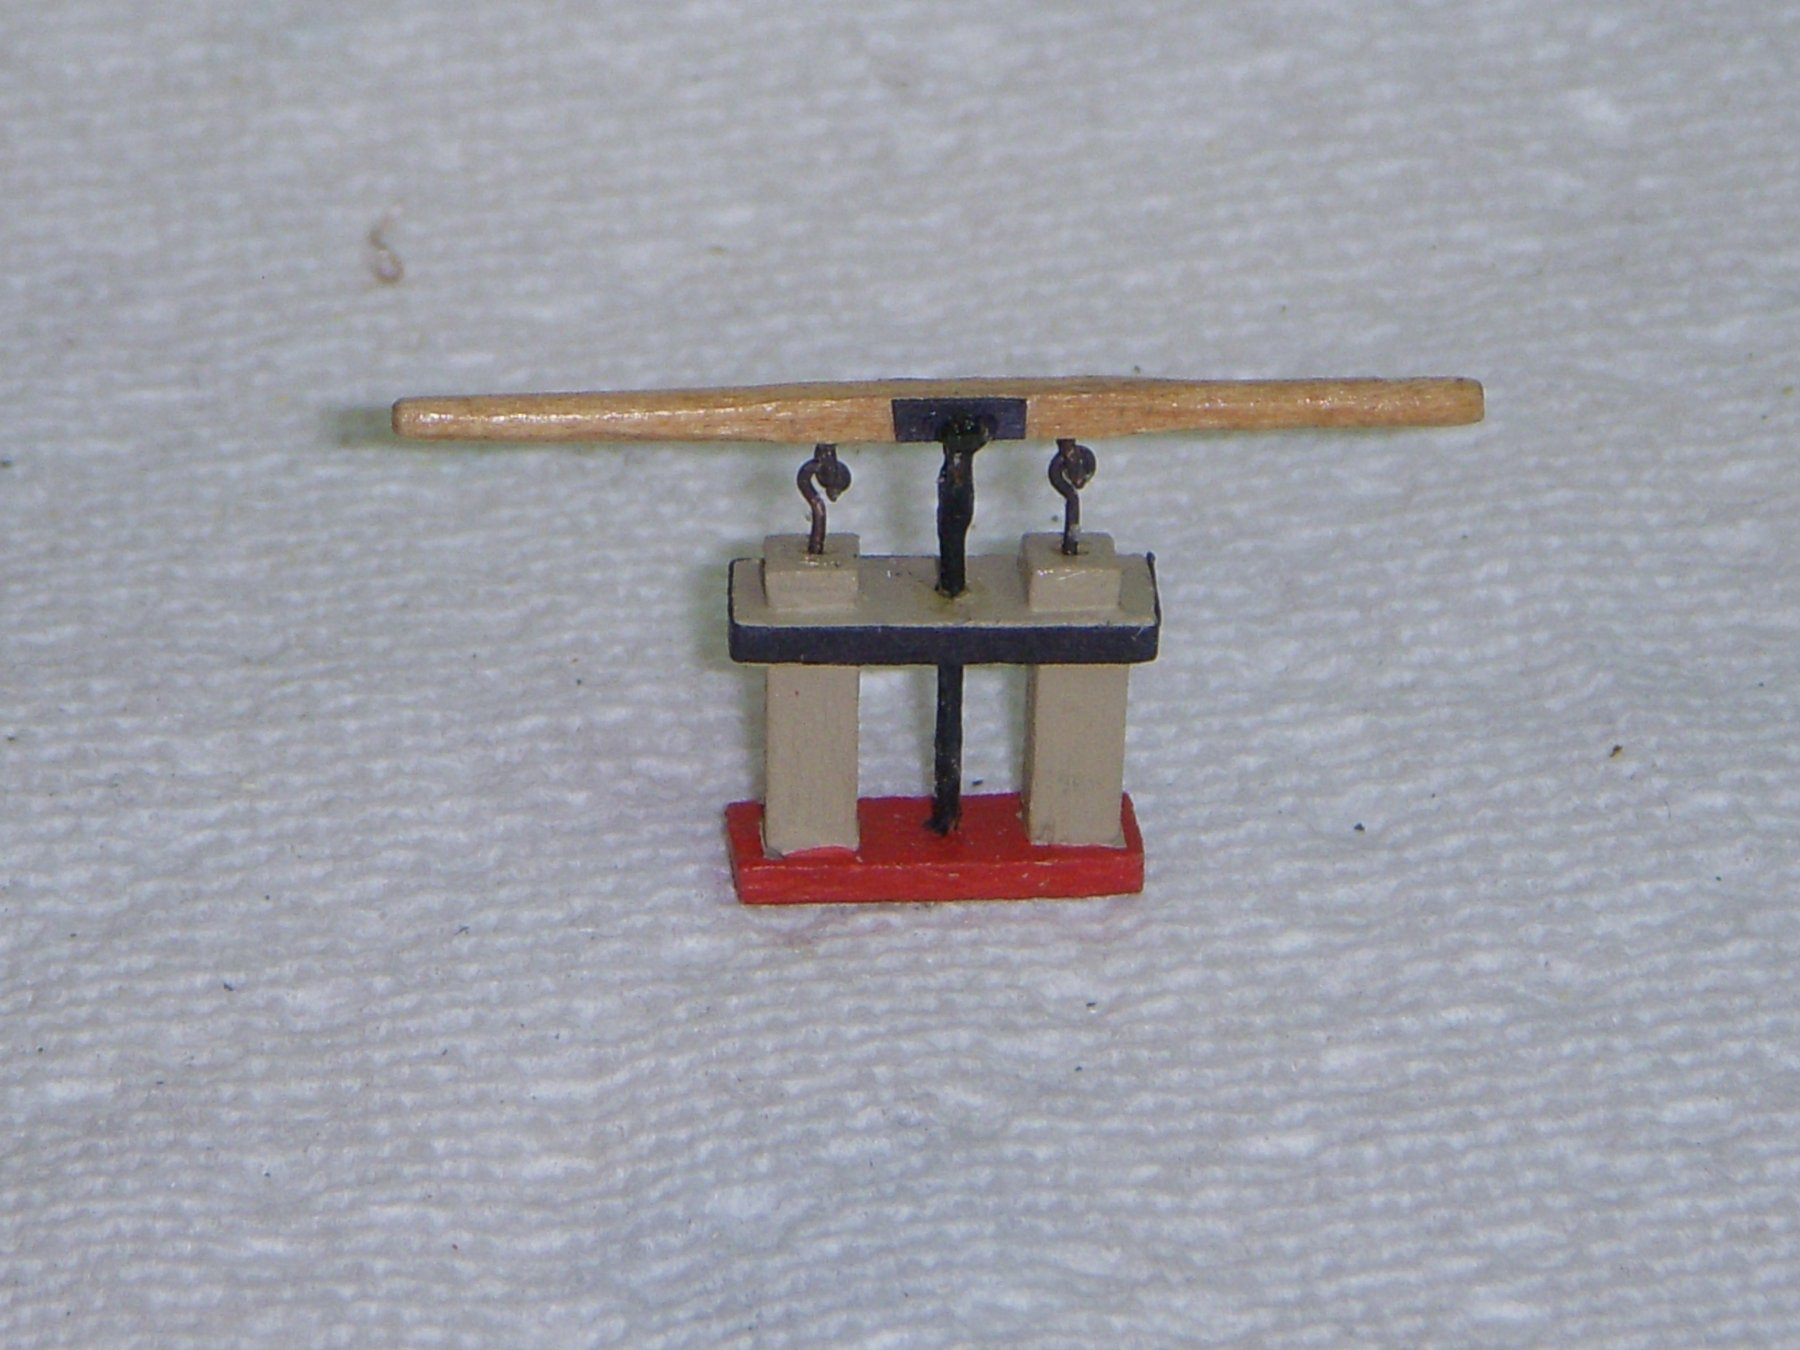
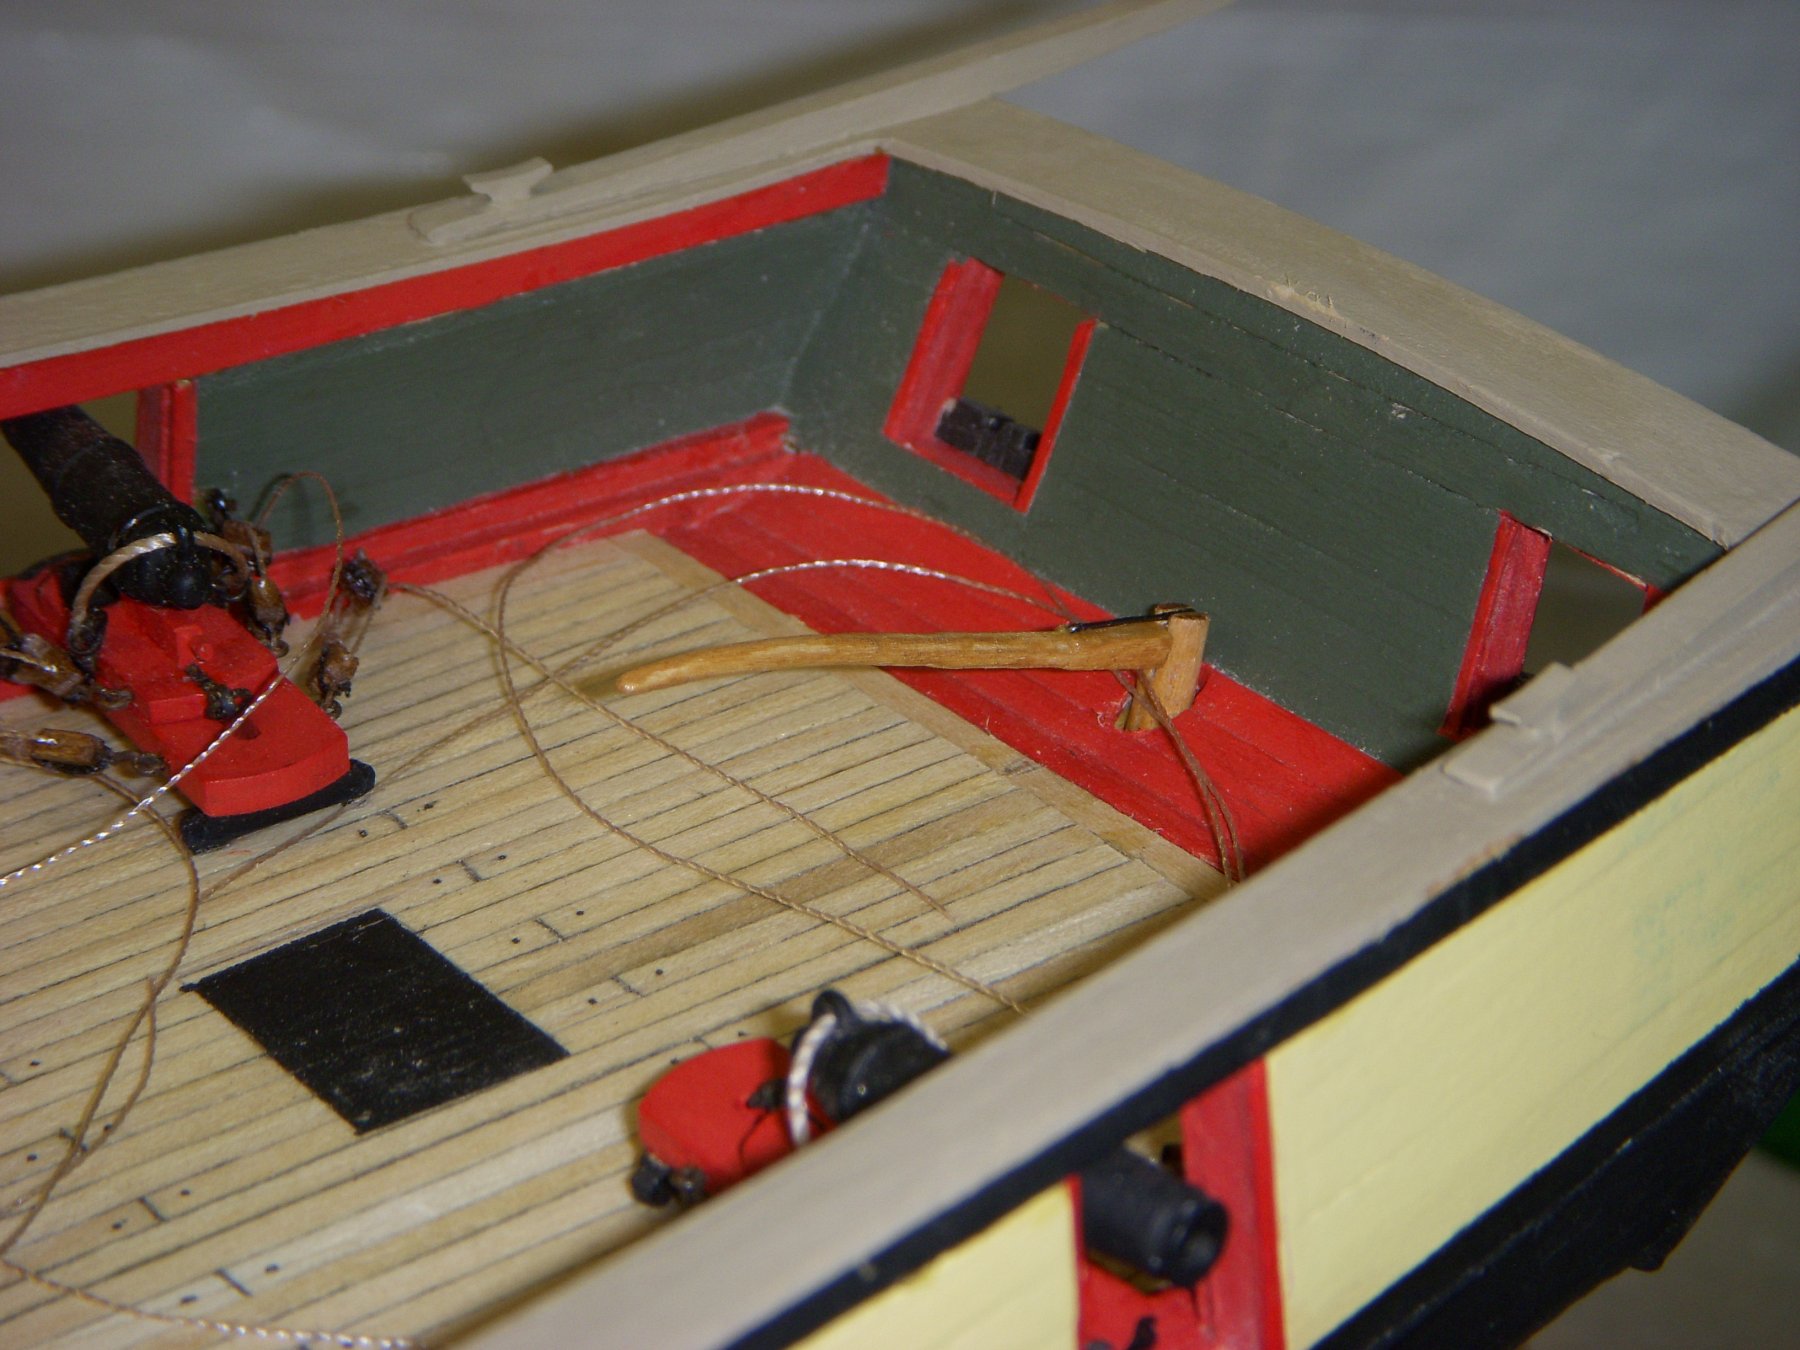
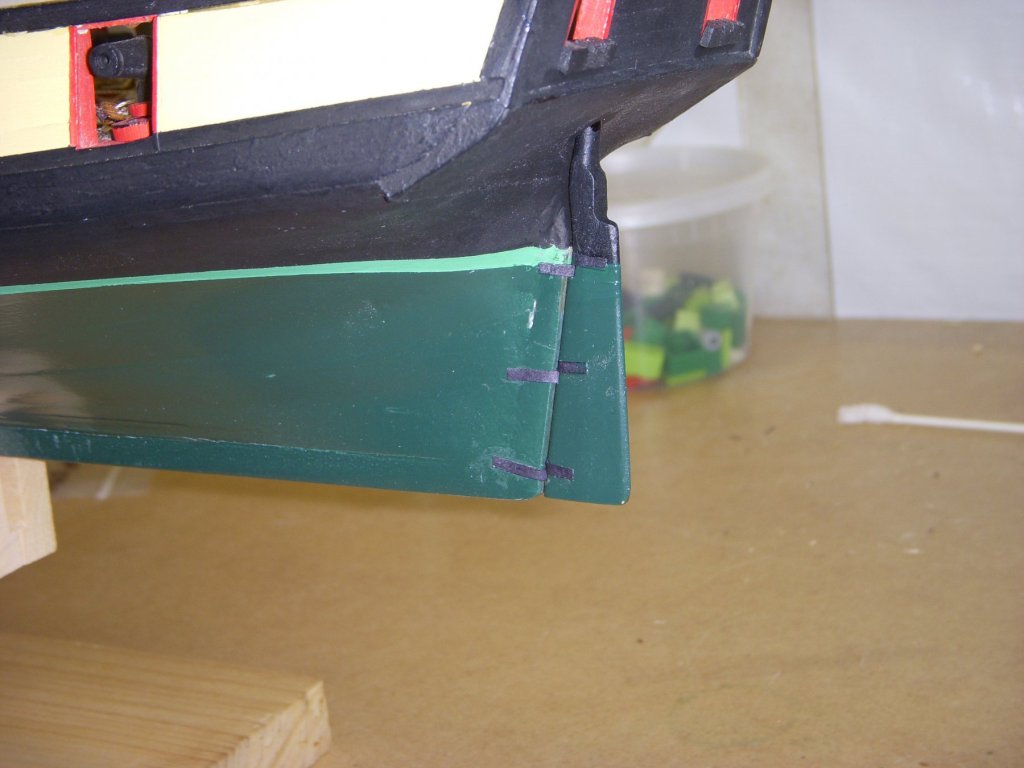
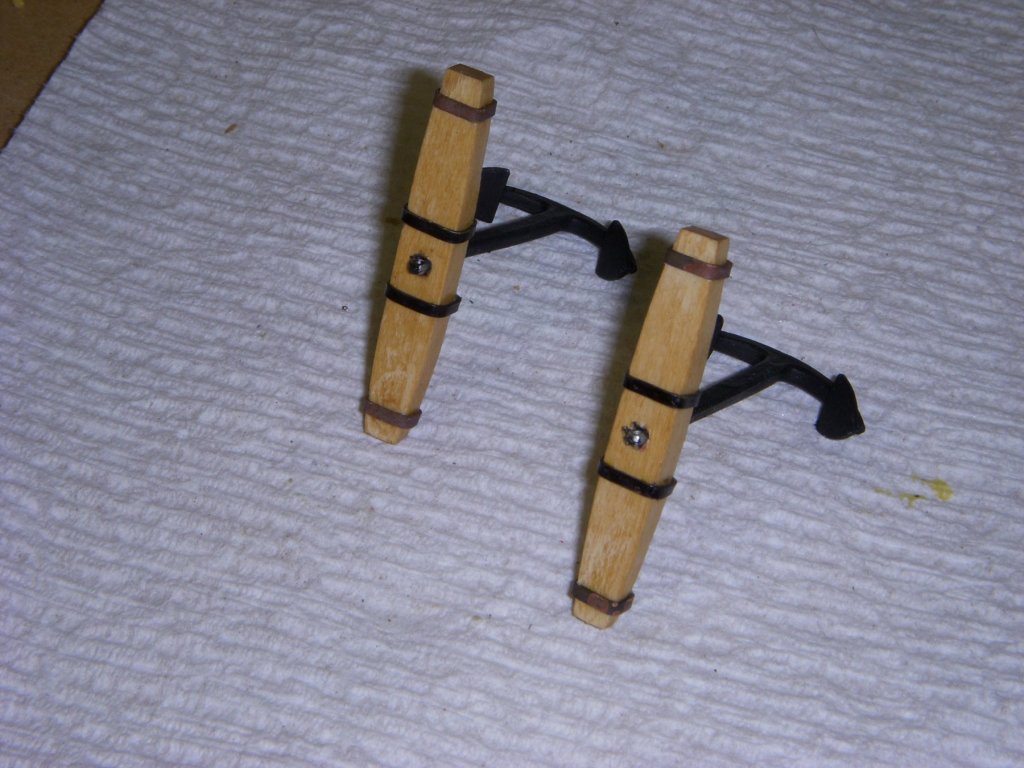
Added the brackets and braces to the catheads. Worked on the rudder. Originally had it painted it to match the hull, but realized adding the Pintles and Gudgeons hid the boot topping, so I eliminated it. After spending hours trying to install the Brass Pintles and Gudgeons, I gave up and made them from heavy paper and pins. I am happy with the way it turned out This is what it looks like after installation. Installed the Tiller. I am now working in assembling the Bilge Pump. Slow going but getting there. The Tall Ships are coming to town this Fourth of July. The Niagara and Pride of Baltimore will be there, as well as six other ships. I volunteered to work at the event and hope to get some time to board the ships. I will post any pictures I can get. Ron

-
Mike I want to confirm, here is a shot of the Niagara in Erie Pa. Are you talking about the extra piece just under the Cathead. On your model it looks like you have a extra material just forward of the most forward gun port. one other question, whats an anchor puddin, I have done searches in all my books and have not found that term. Thanks Ron
-
Mike Thanks for the tip, I'll check it out. Ron
-
John Sorry to here about your diabetes. I have a mild case of arthritis so I have good days when I can spend hours working on the ship, then there are others, well you know. The Niagara will be here in town for the 4th, and I am planning on spending a lot of time checking her out as well as taking a lot of pictures. I am now trying to figure out how to finish the rudder, the plans do not give any details. Looking at some build logs I have seen it done natural wood, as well as black, I am leaning toward making it green like the hull. Ron Kaminski
-
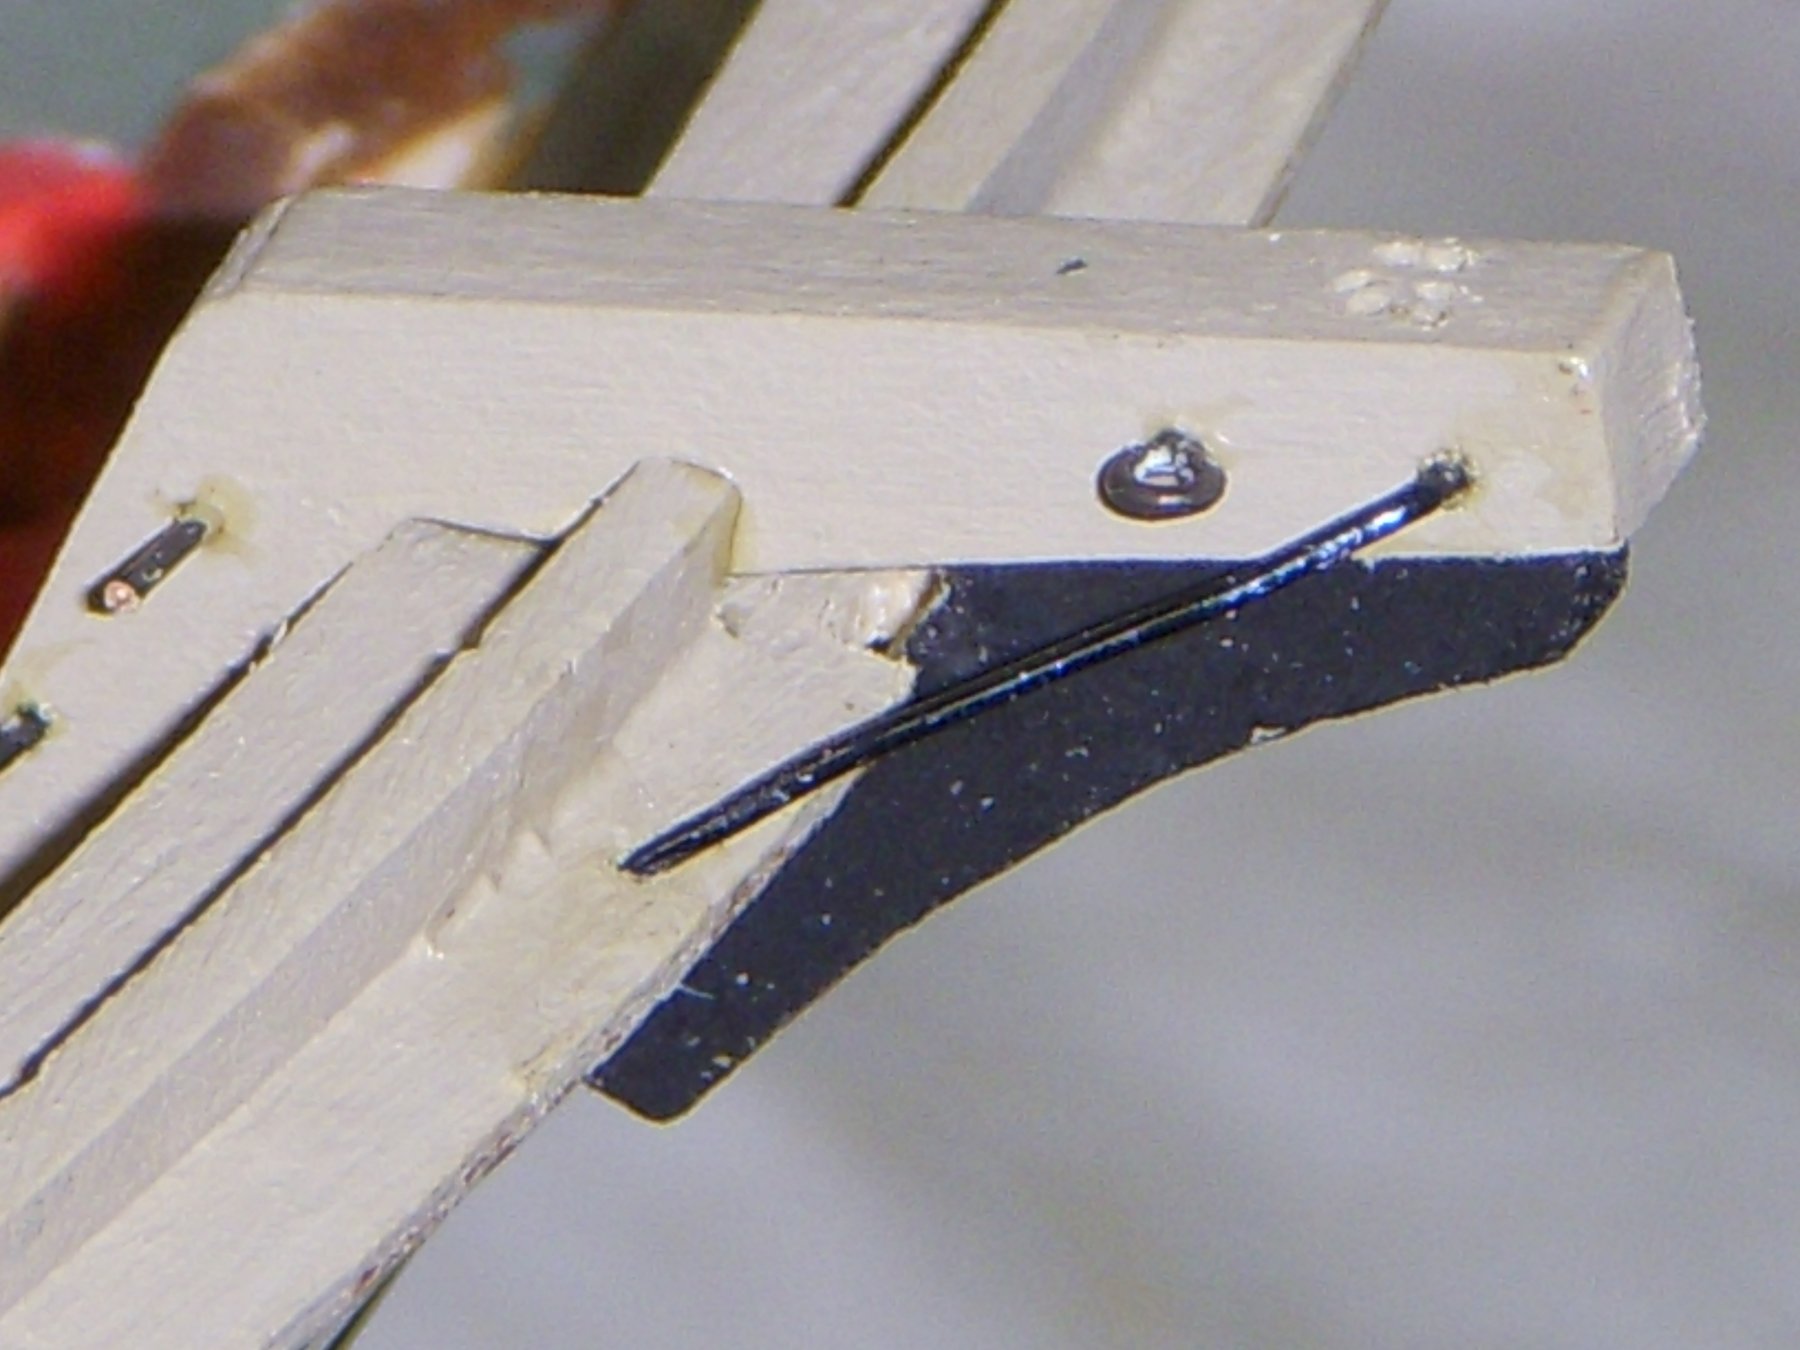
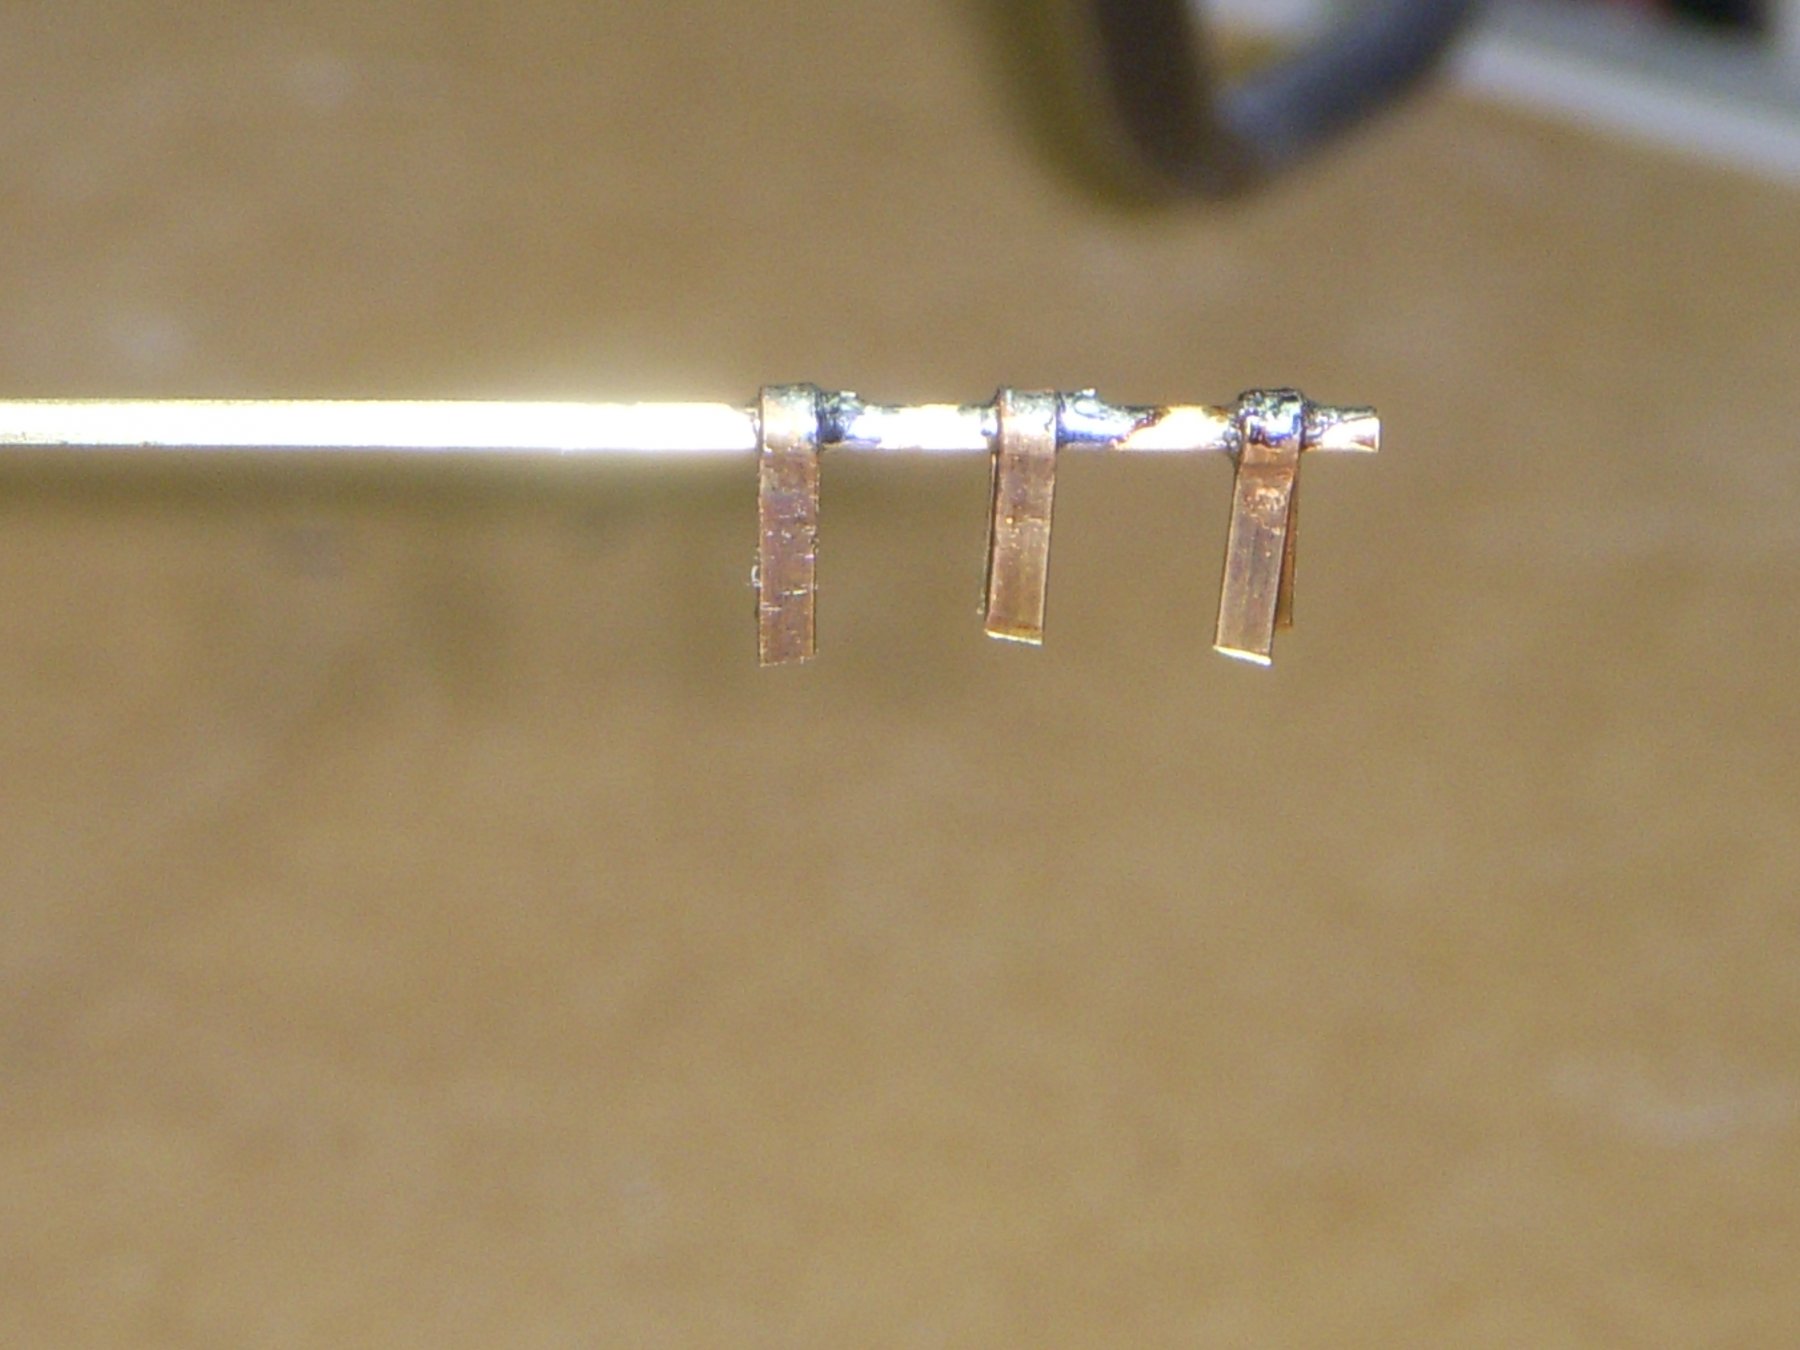
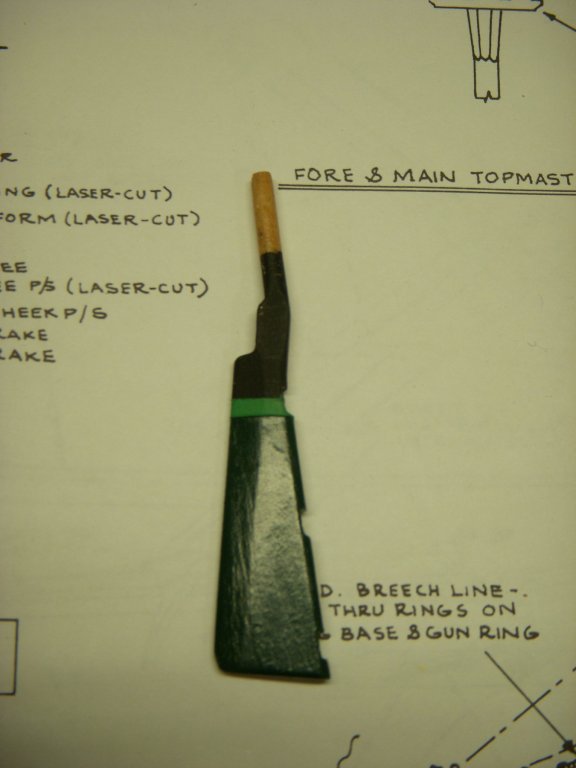
Catheads have been installed and the rails have received a couple coats of paint. Started working on the rudder, drilled out the hole through to the deck. And sanded the udder into shape. Next project was making the hinges for the rudder. I used 1/64 by 1/16” flat brass for the pintles and gudgeons, and used a 3/64’ brass rod for the pin. Tried using standard solder to attach the pint to the pintle, but when I tried to form it the solder connection broke. So I soldered the connection using silver solder. This held much better. Here is the almost finished product, needs a little more trim work. A little clean up and ready for blackening.. Ron

-
I started installing the main rails. Everything went well until I was ready to install the rear rail, there was a gap. The side rails were not long enough. I needed to make up some filler pieces, no big deal it worked out well. Here is shot of the ship with rails and the chock rail installed. One point, I installed the chock rails then made the cutouts for the catheads. I then installed the stern boat davits. The cleats on the plans looked really small and I don’t believe my skills are that good so I went out and bought a bunch of 5 mm cleats. Ready to install the catheads and give the rail a couple coats of paint. Ron


-
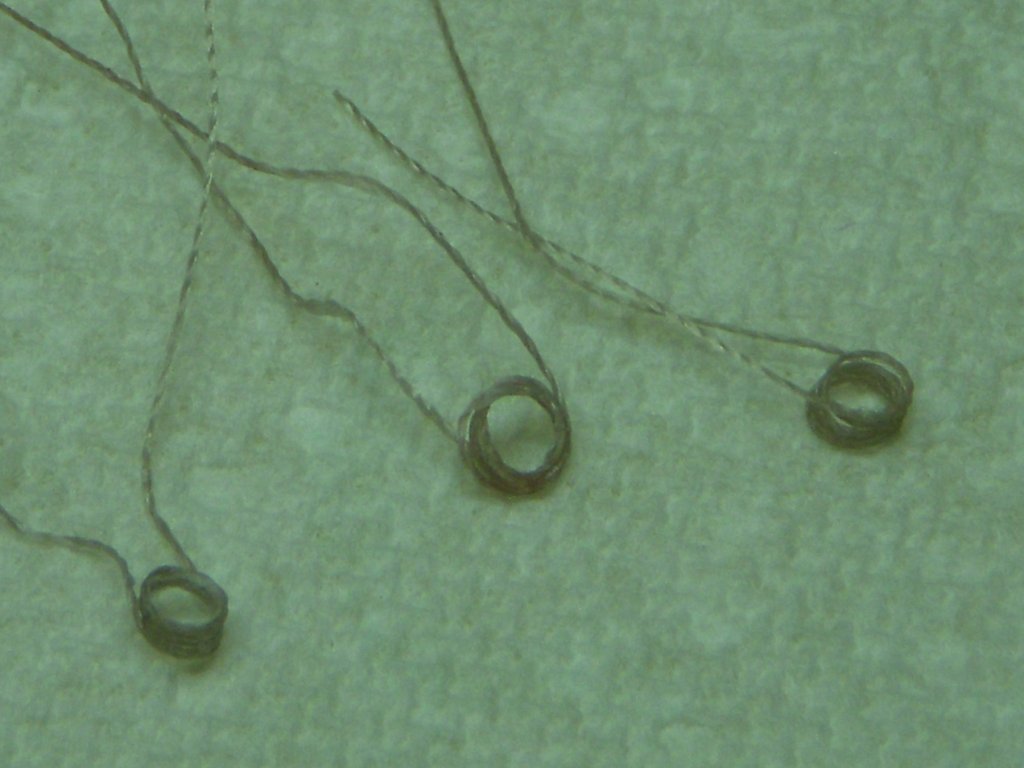
Well after a few weeks of vacation on am back to working on the model. The blocks have taken longer than expected, I am still not complete, I still need to make more for the Train tackles. I believe I will install them once I get the deck furniture installed. That way I can insure they are placed in the proper positions. I now need to trim all the line to the proper length and create the coils to put onto the deck. I plan on creating casual style, loose coil versus the formal style shown on some models. Making this coils is a little more challenging then thought. I am soaking the line in 50% white PVA then creating the coil, waiting for it to dry then they should be ready to install. Ron

-
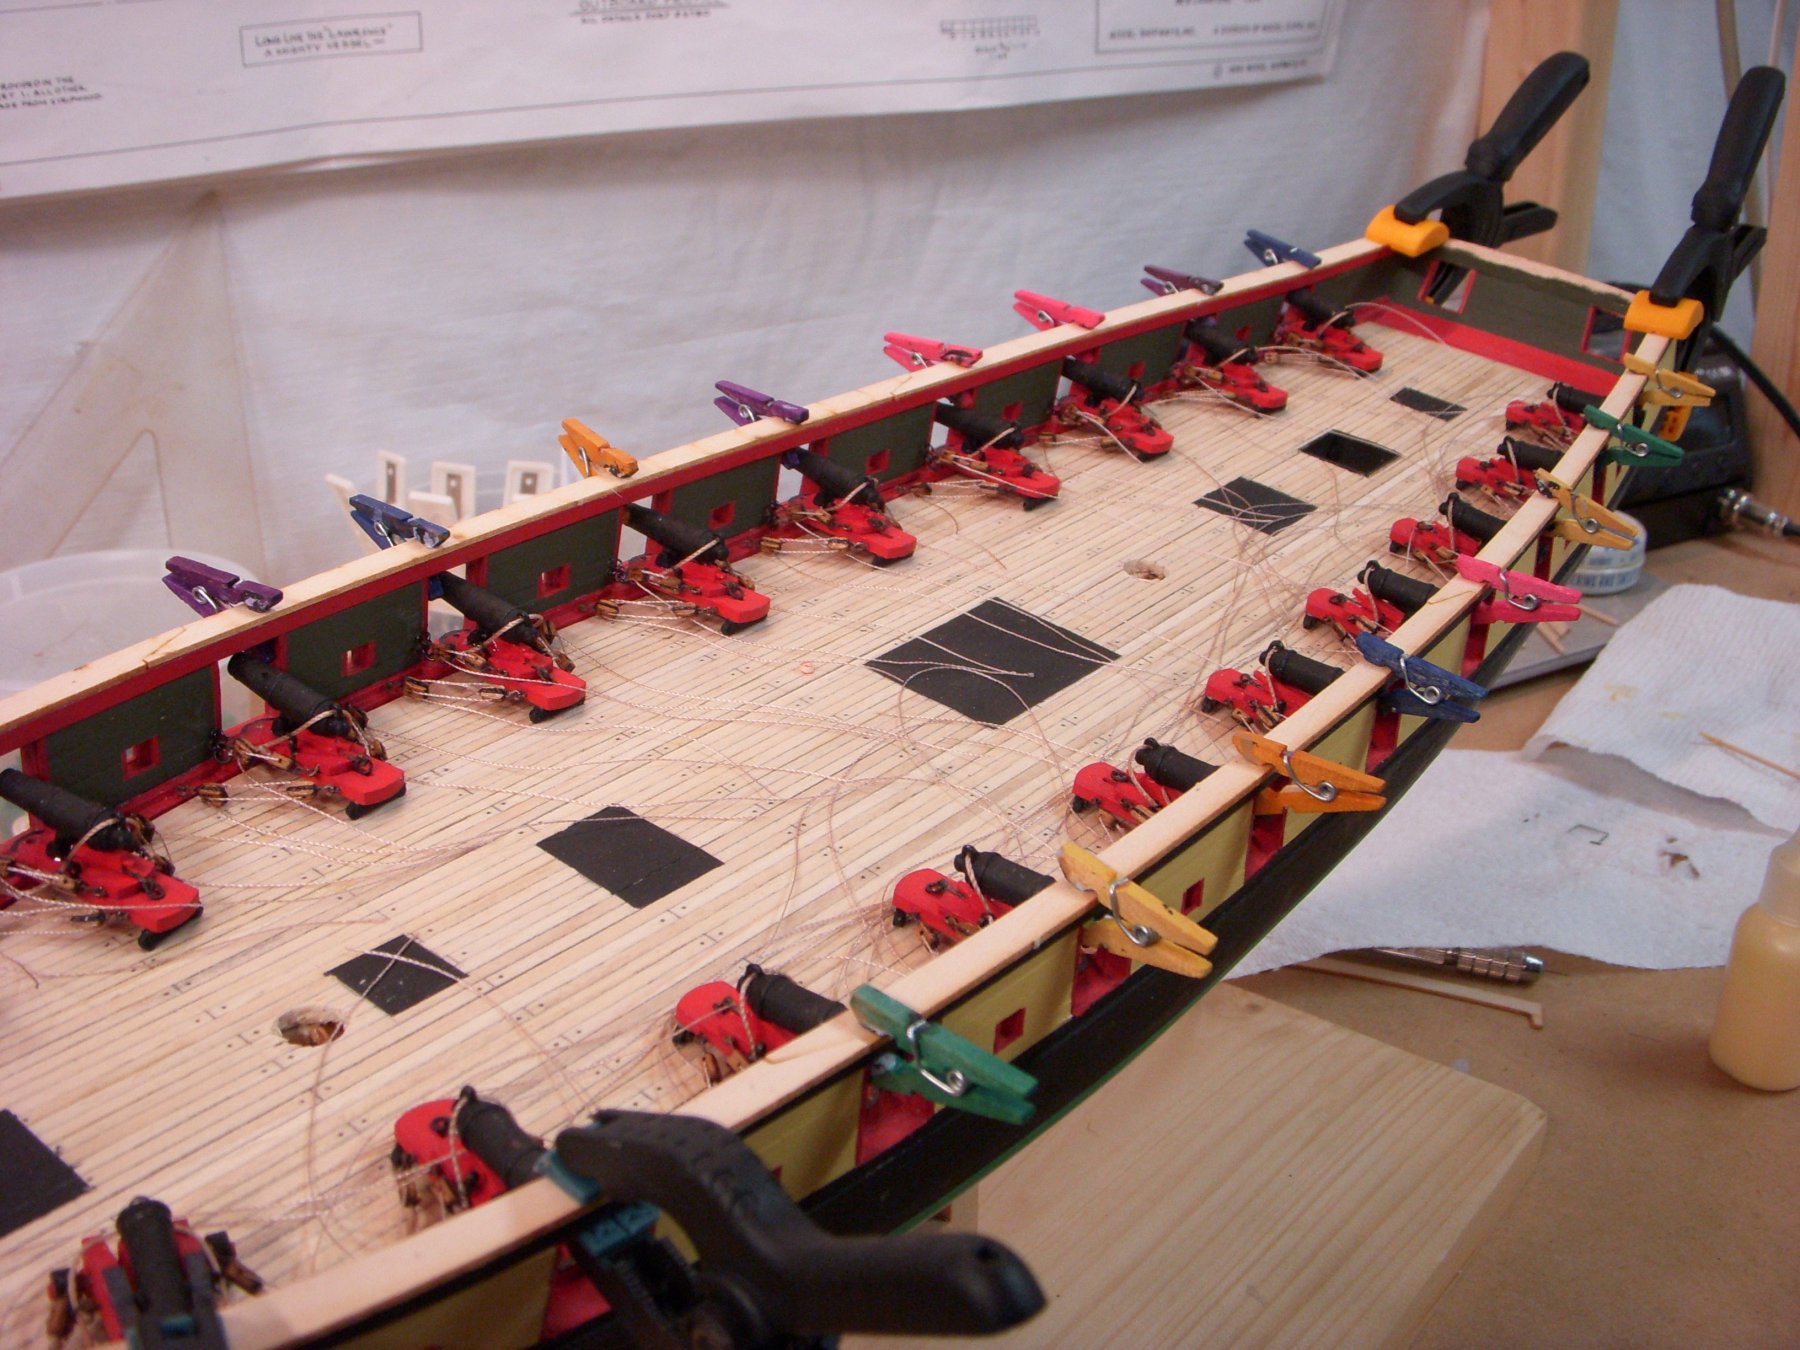
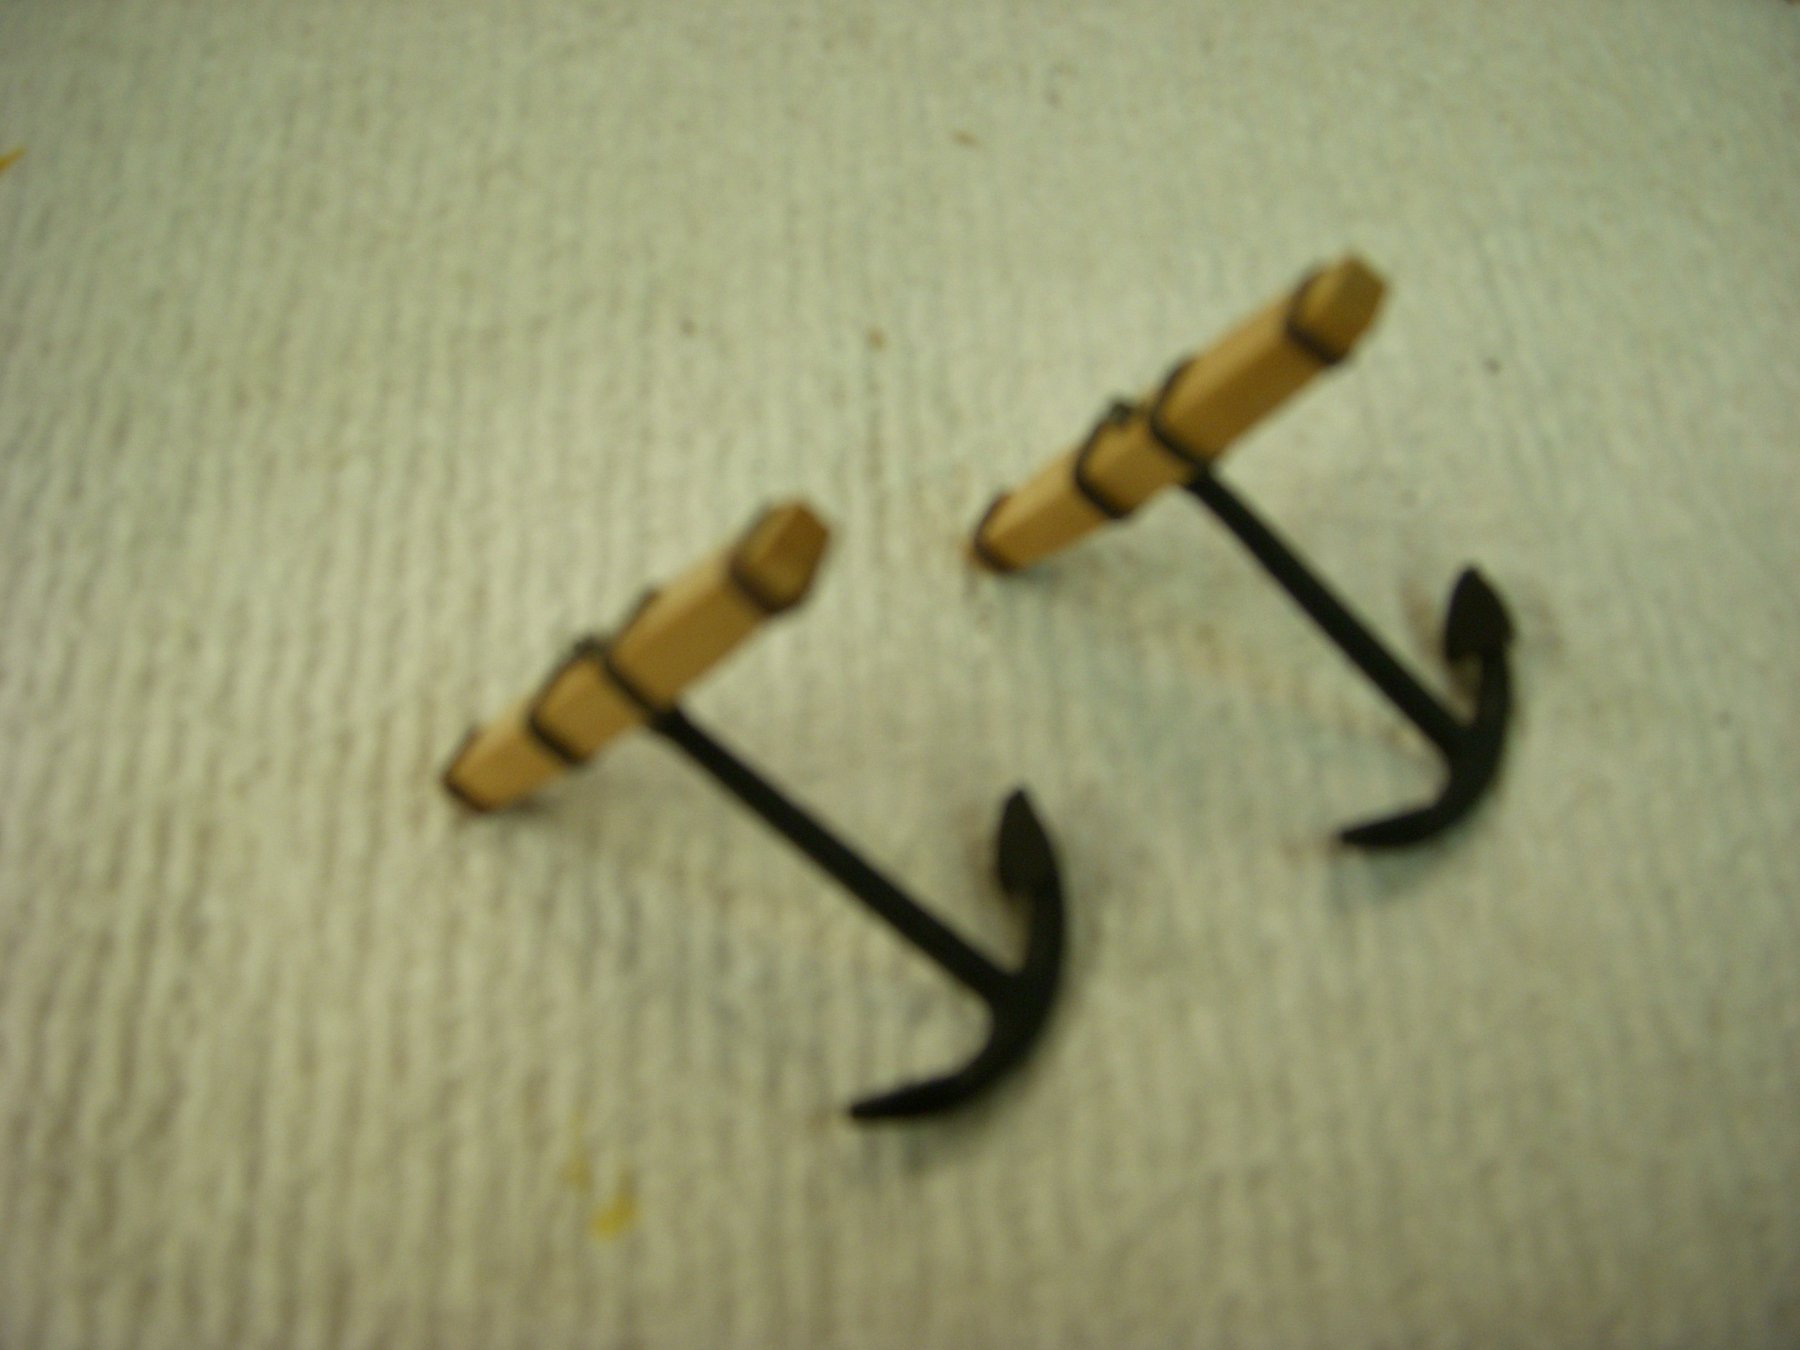
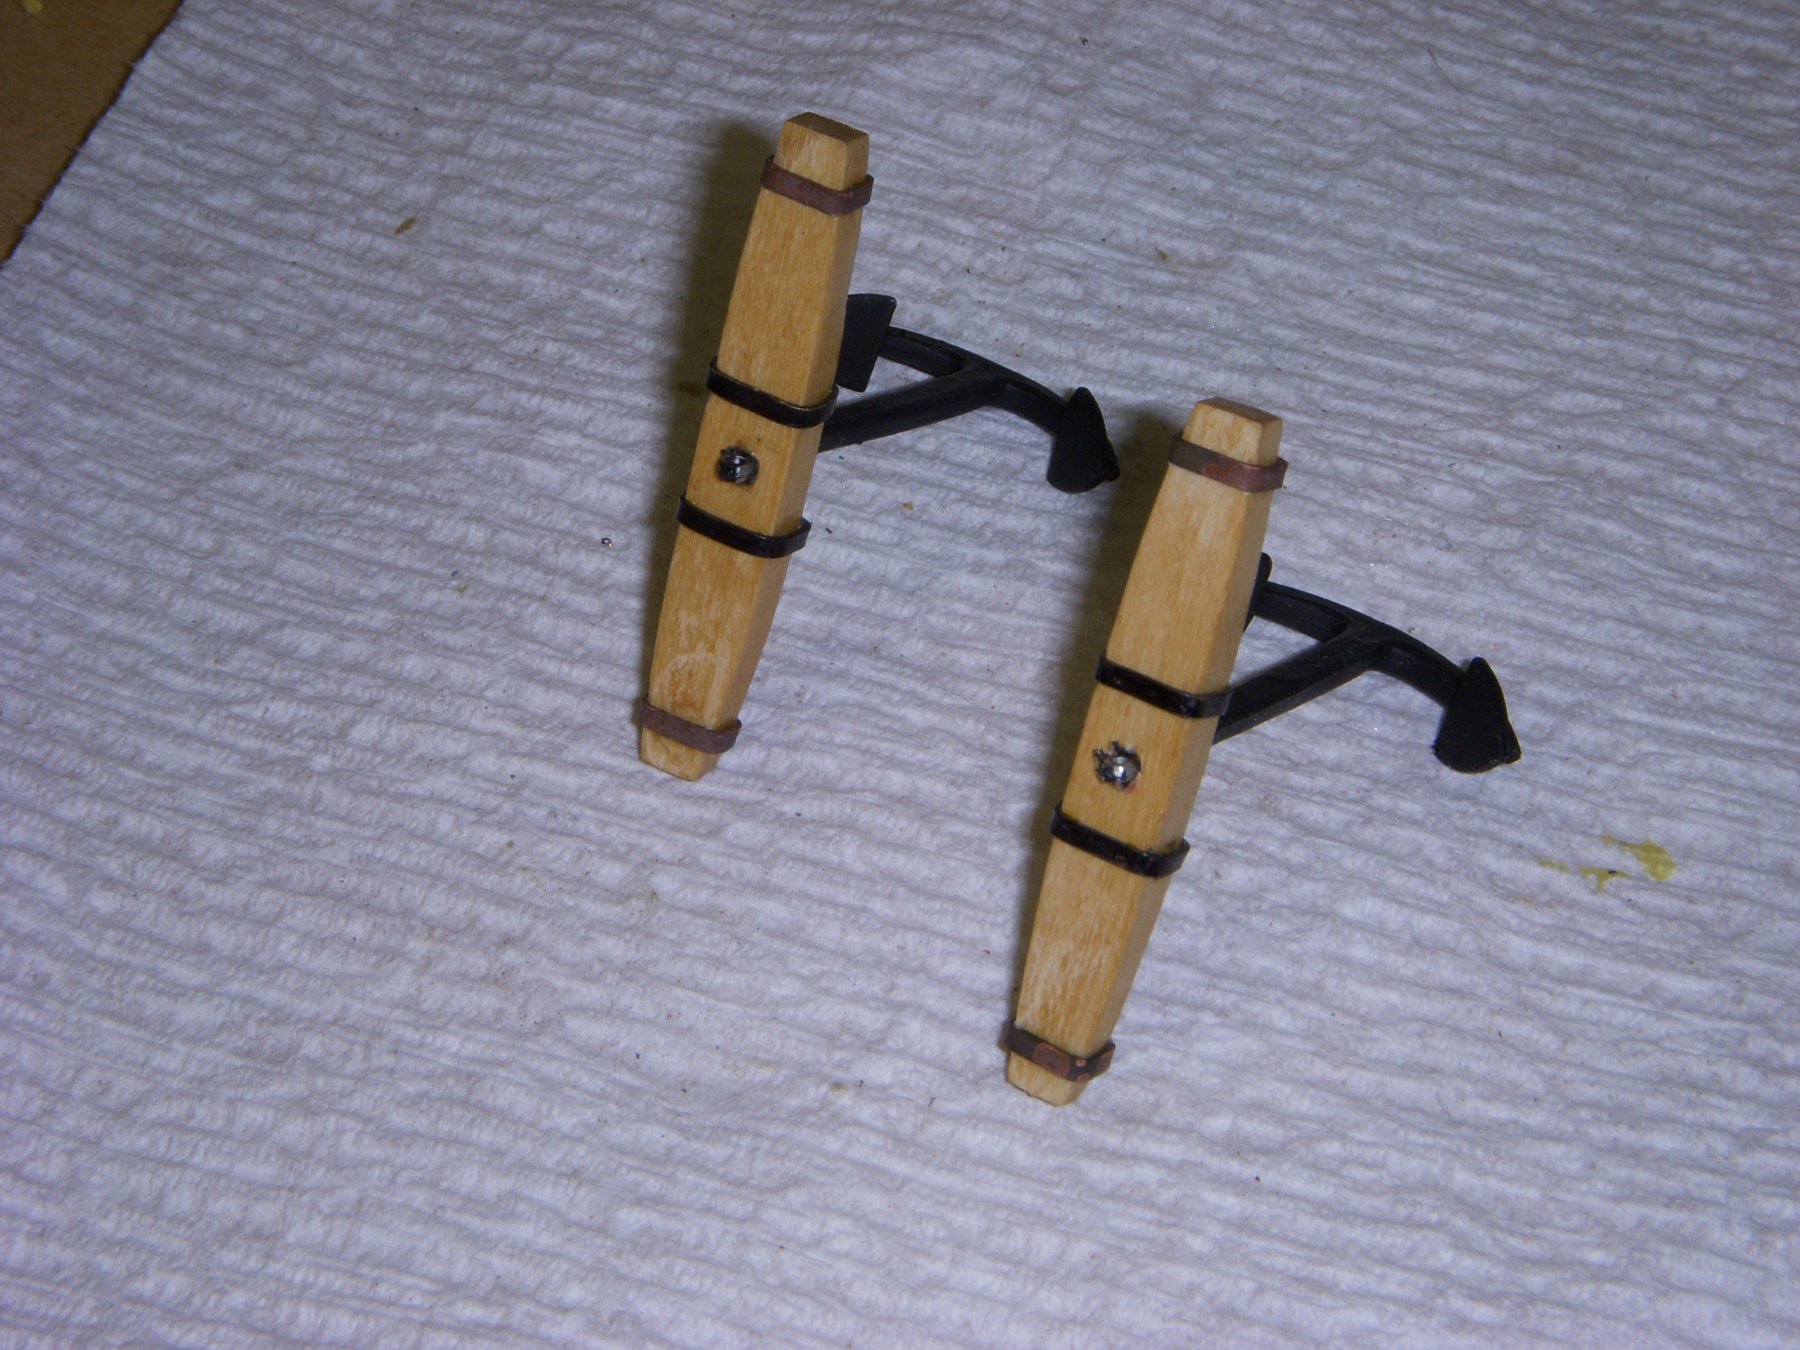
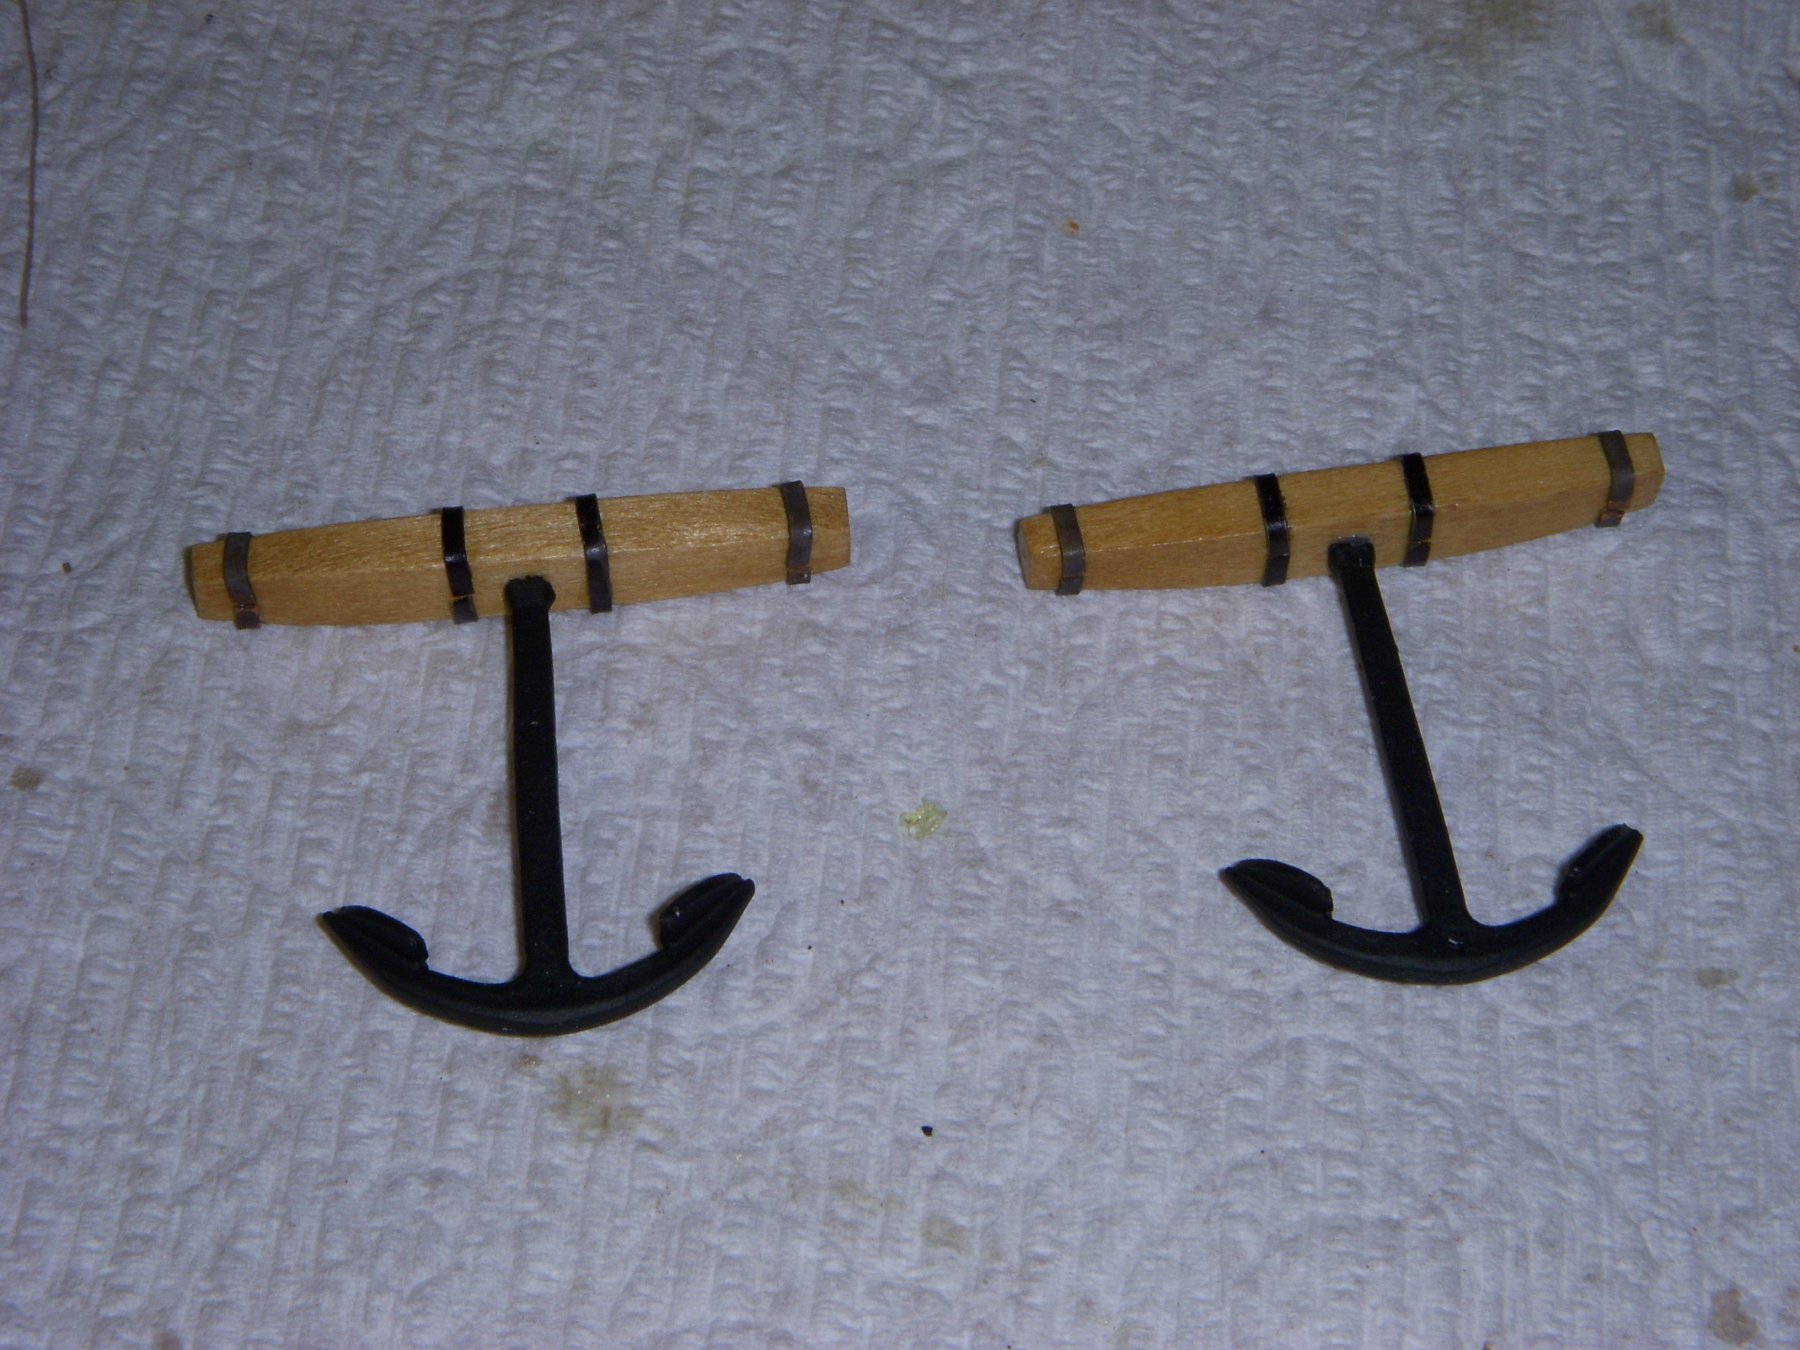
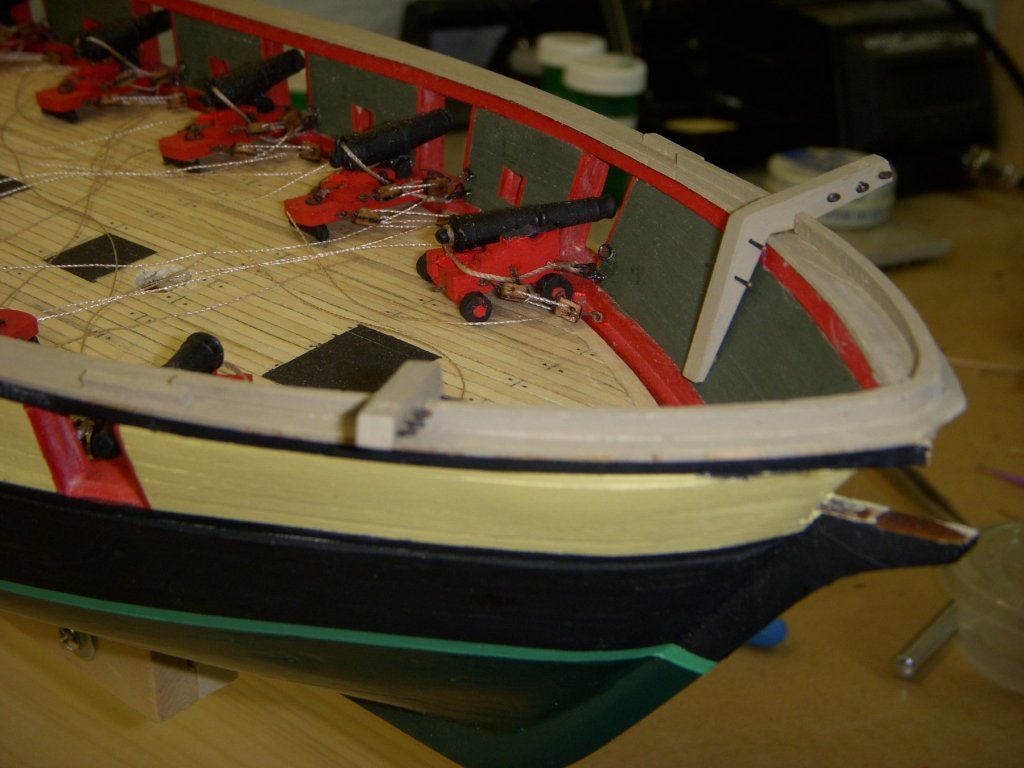
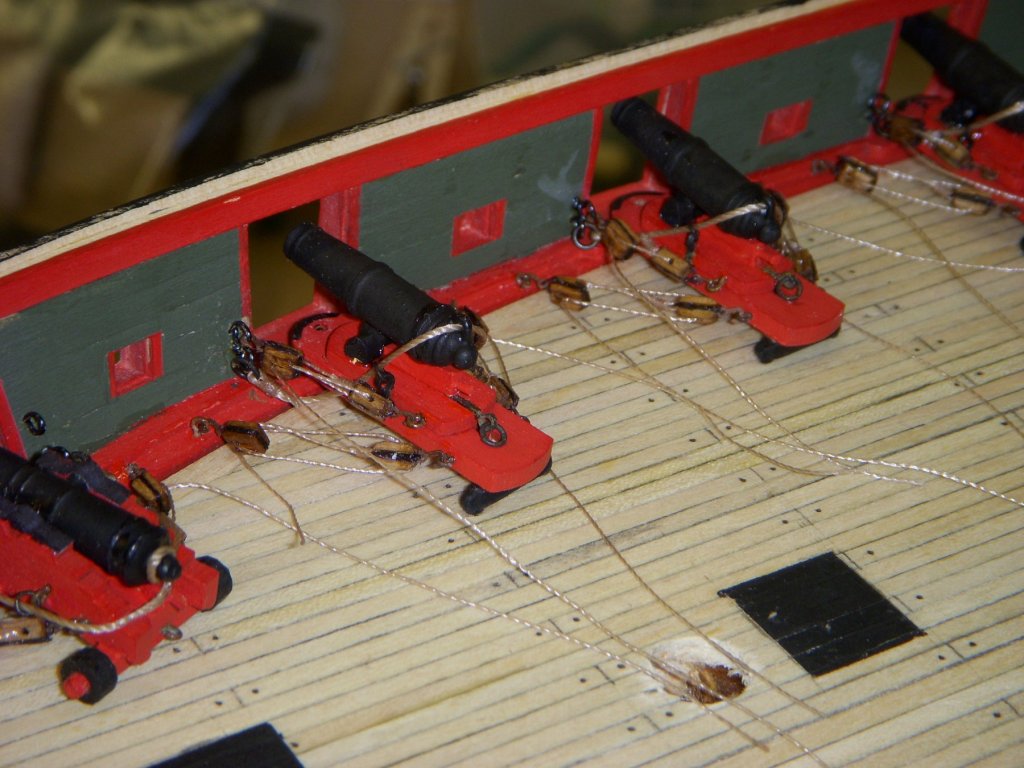
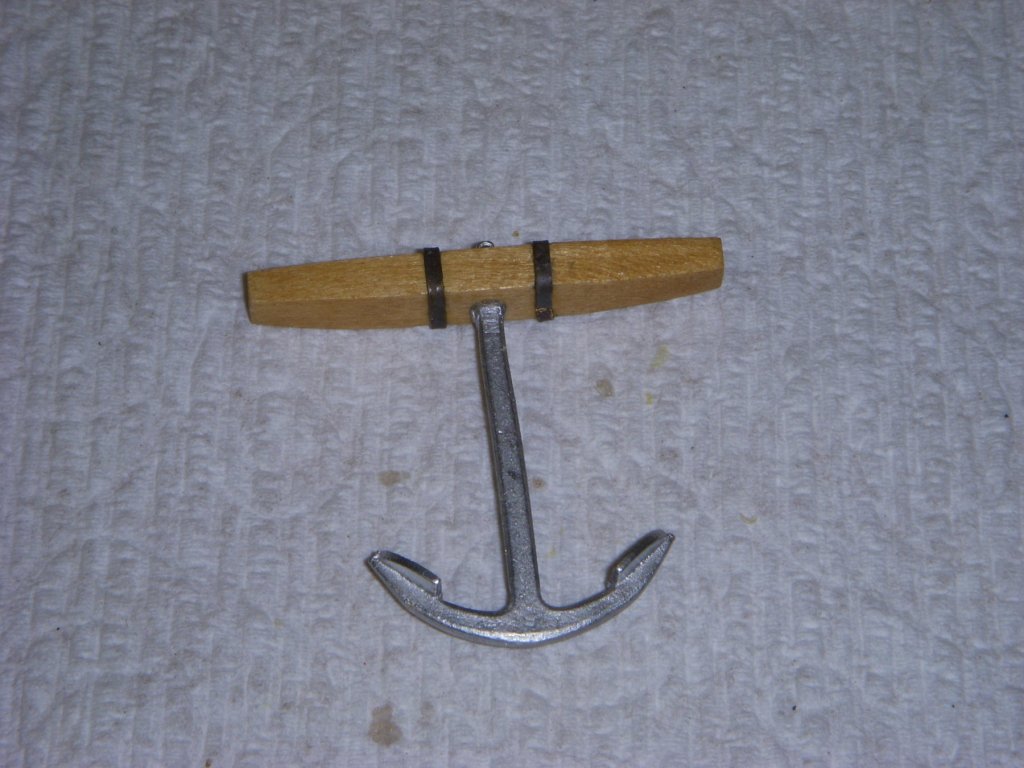
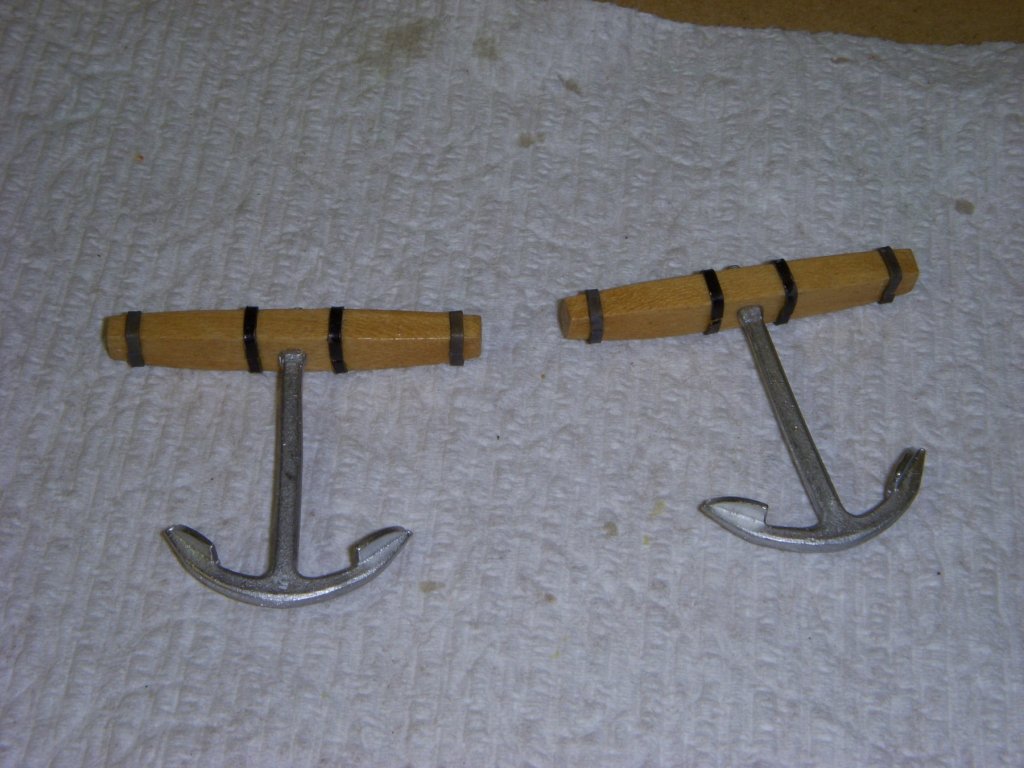
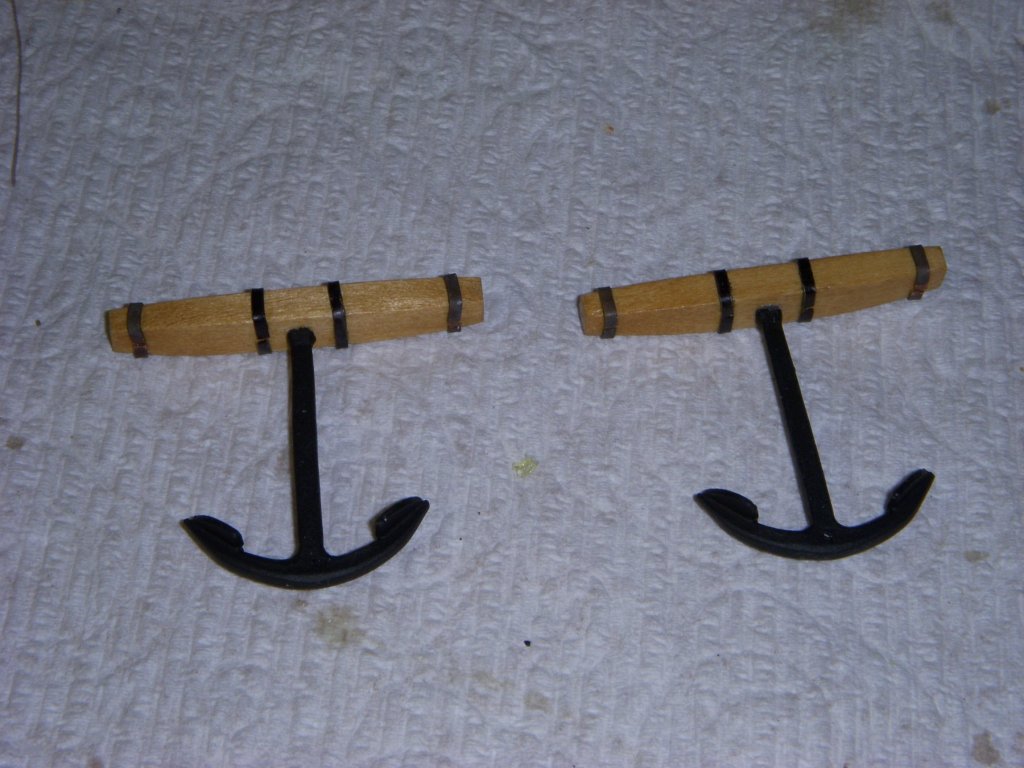
After MikieK pointed out that I assembled the anchor incorrectly I corrected my mistake, looks a lot better when assembled correctly. I spent a couple days assembling the blocks for the train and gun tackles, I may need to make a few more. Guns are mounted on the starboard side ready to add the tackle Now back to making the blocks for the starboard side of the ship. Ron

-
Thanks, I was not sure when I looked at the plans. Easy to fix since I did not glue it yet. Ron
-
Well I took a couple of weeks off from the build. Putting together the train and gun tackles was getting a little monotonous. I finally complete one side and it looks pretty good. The holidays are over and I have renewed interest in the build. Below is a pic of how far I got. To overcome the monotony of block assembly I started spending some time modifying the anchors. I made wooden stocks and blackened brass straps. Now back to making the blocks for the starboard side of the ship. Ron
-
I double checked with another supplier and the blocks were the same size, I guess I will have to live with it. Mike I will check you log to see how you handled it. Thanks for the tip. Ron
-
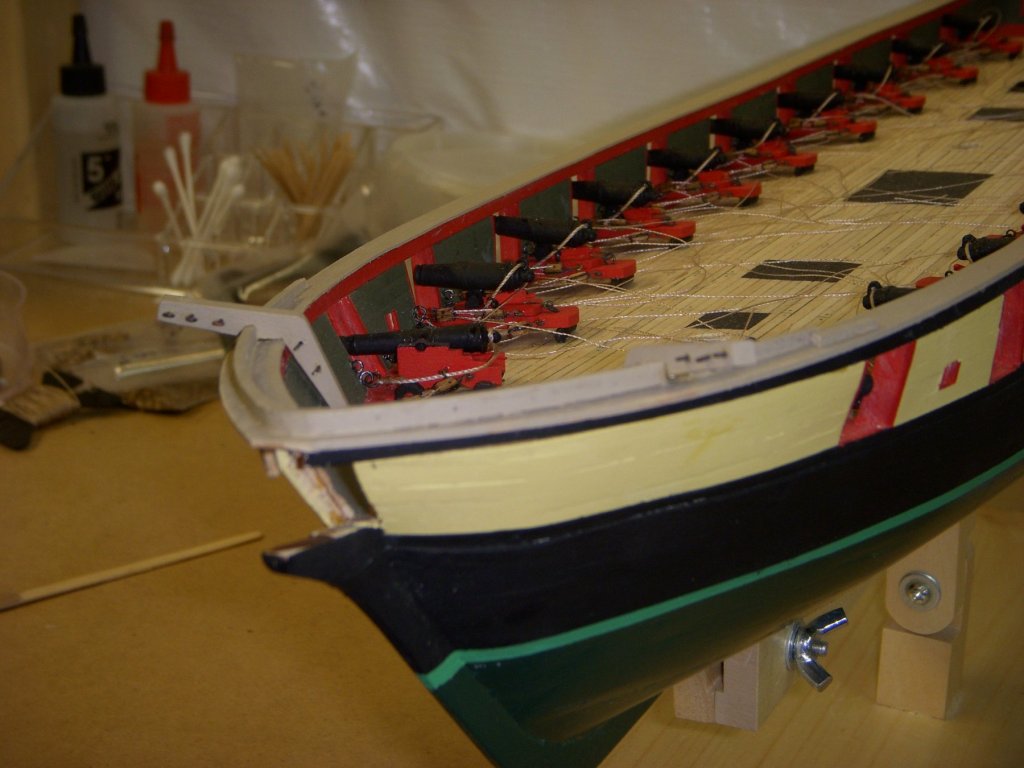
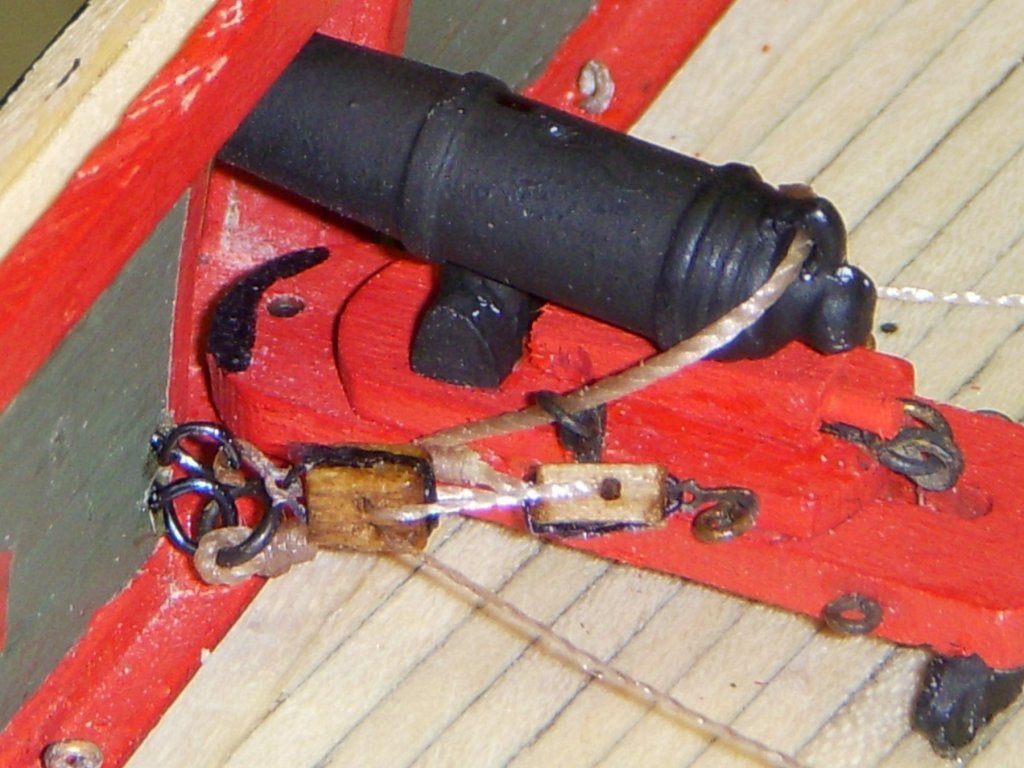
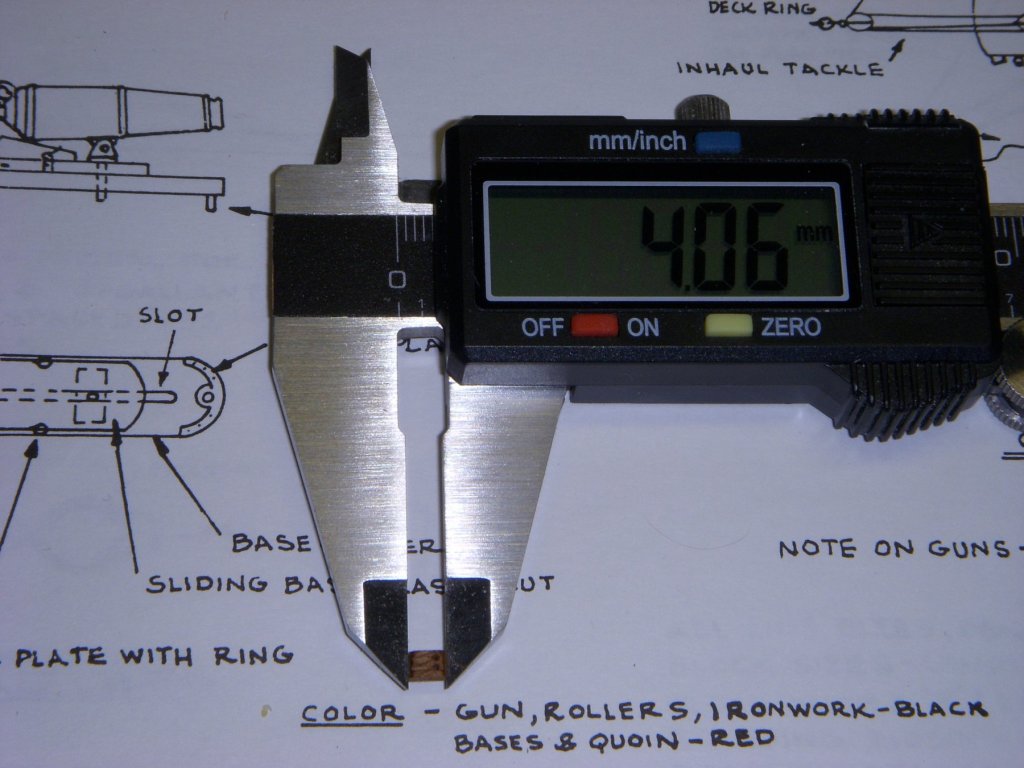
I need some input here. I started installing the buns o the deck and installing the Gun Tackle and Breech Line and everything seems a bit crowded. I double checked and I am using the 1/8” 3mm blocks and .008 line. The plans call for .012 line but that seemed a bit thick. See below. I measured the blocks and they measure 4mm. I am not sure if the kit came with wrong size blocks or am I too critical. Ron

-
Mike Thanks for the info, I was planning on having the excess rope coiled up on the deck. I know the formal look would be a flat coil on the deck, but I was thinking of an informal coil set on the deck. I will soak the line in 50% white glue, make the coil, wait for it to dry then mount. The line will be a two piece application, one that goes thru the blocks, then add the coil hiding the cut length. I have tried doing this in the past with a one piece of line and either my fingers are too big, or my dexterity is not that good making the coil, but the final product never looked right. Ron